Welcome to a new Subscribers’ Gallery – for non-military vehicles
Each submission has a ‘gallery’ of thumbnails which you can click on to see an enlarged image along with some short text describing the model – enjoy!
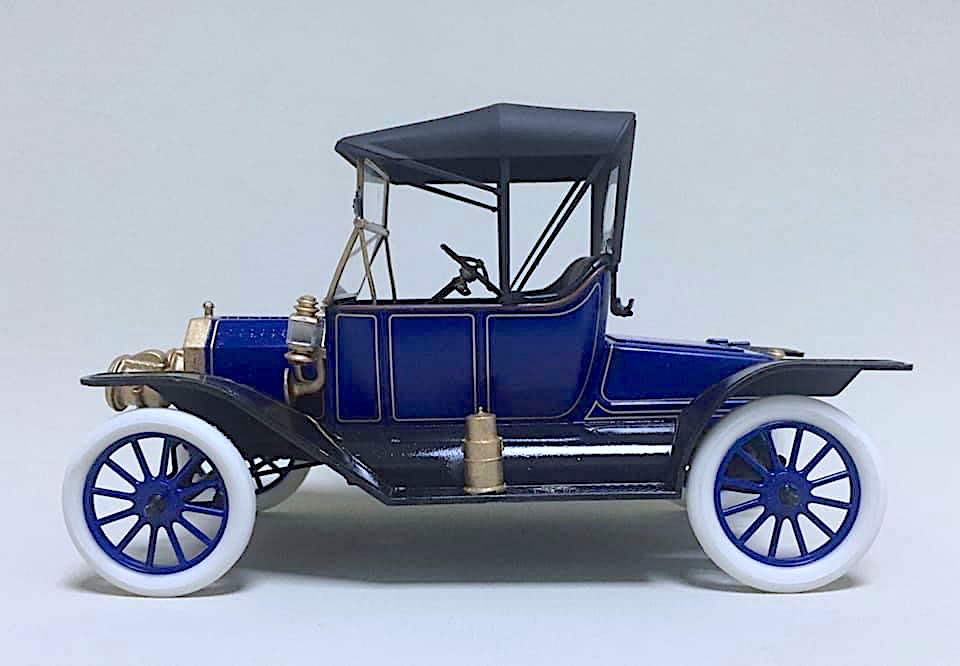
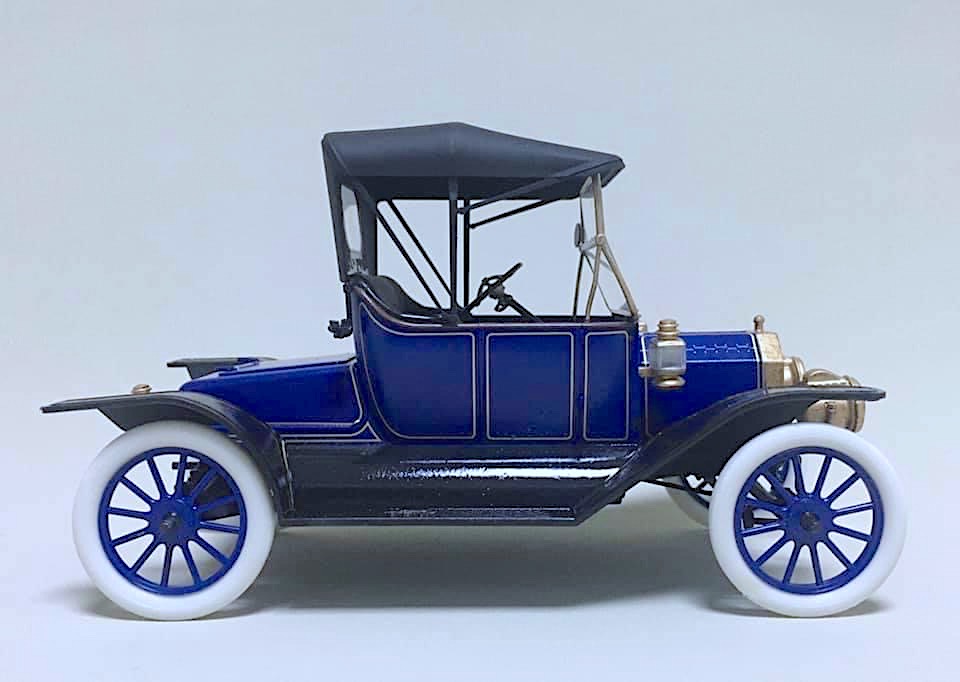


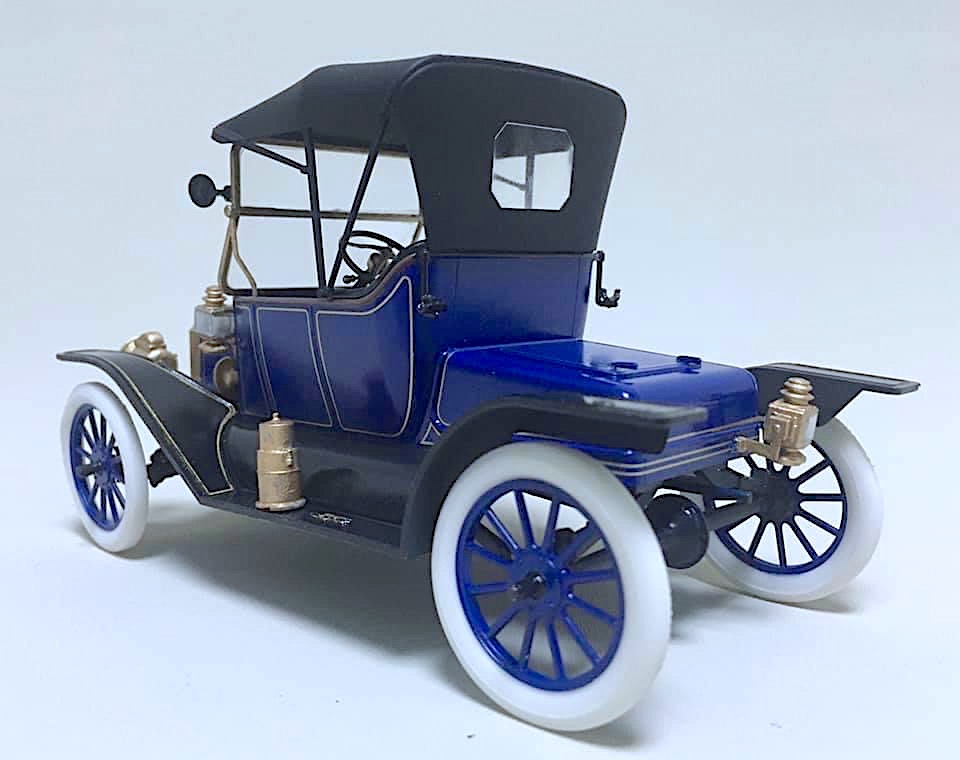
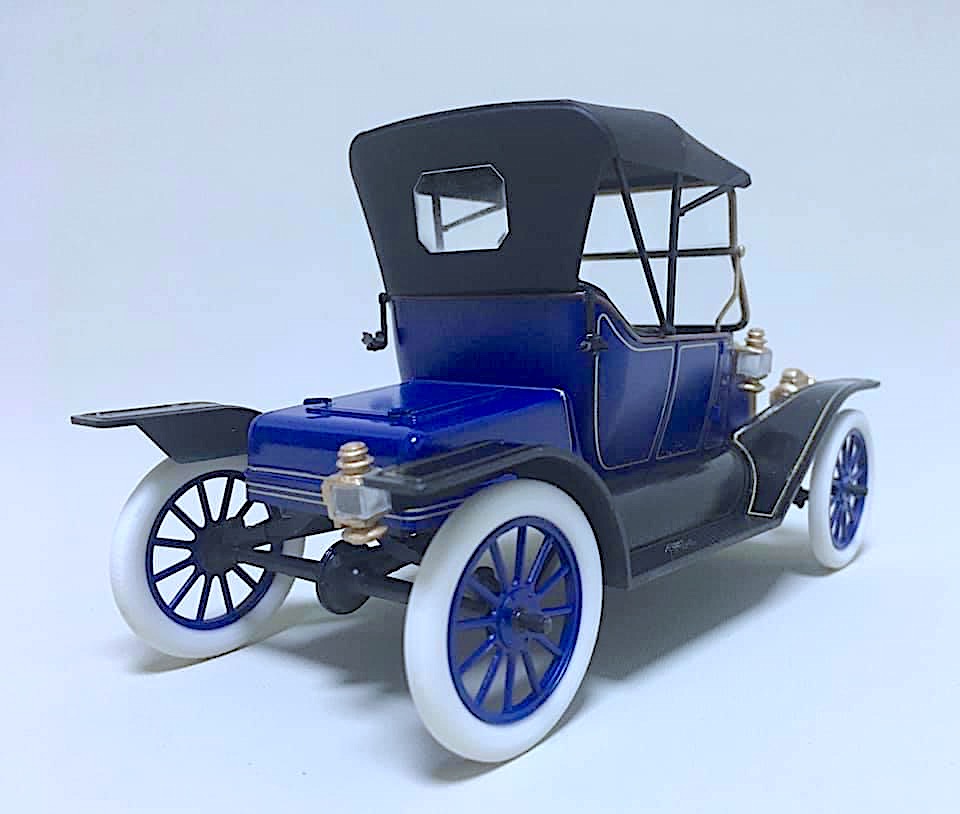
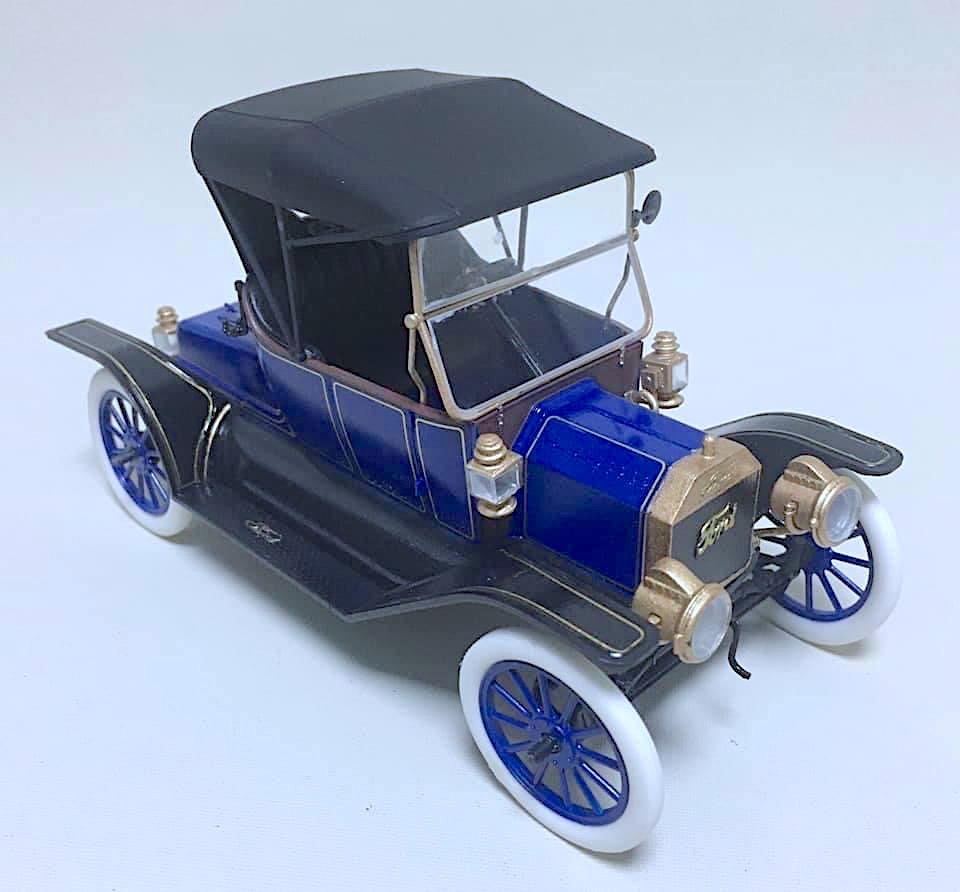
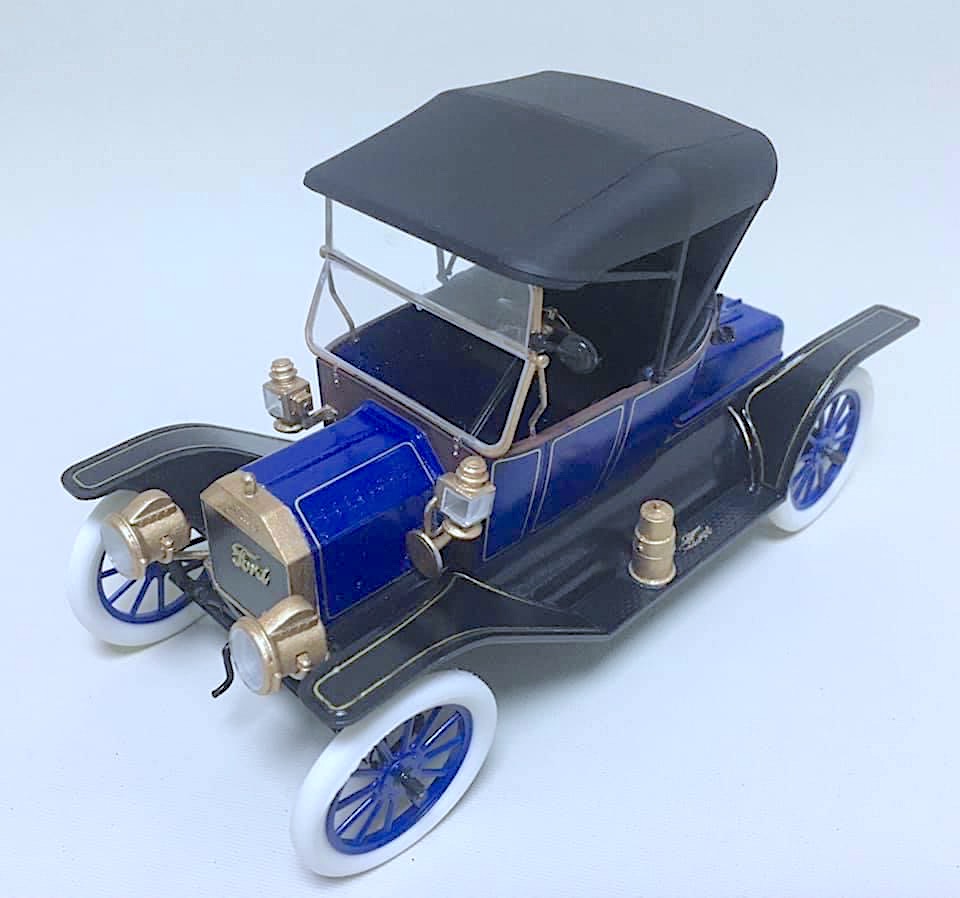

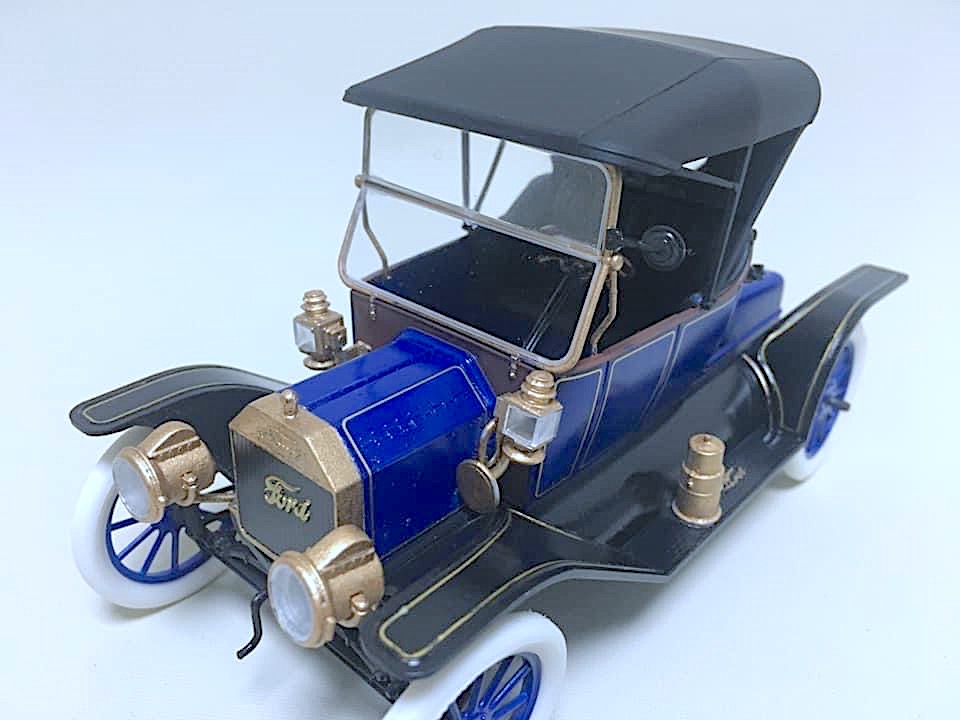
The best way to go! Firma:Revell
Scale:1:24
Model:1913 Ford T Roadster
Don’t look at the level of difficulty in the box, anyone can do it. Very nice, nice model. Notice the decals in the muddy fields… There are lines on the outside detail, I painted them. But these decals remain in the lines. My efforts wasted in vain….
Izzet C.
Neil P.


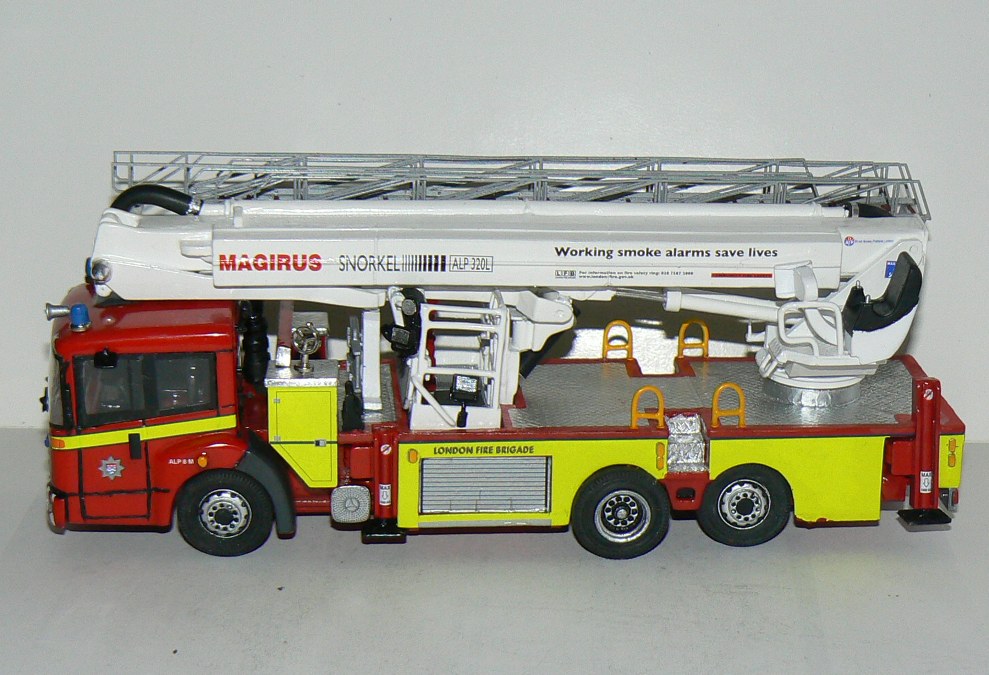
There are many parts to it.That is a resin body and jib ,aluminium ladders ,chromed accessories, jewelled lights, rubber tyres and pipes,brass etch and white metal parts.
And with a full livery decal sheets.Not really for novices as it does test your abilities throughout the build.
It took me about a year to make as I didn’t rush it. But a journey not without many mishaps
Can be a little fragile but very satisfying to actually reach the end of the build.


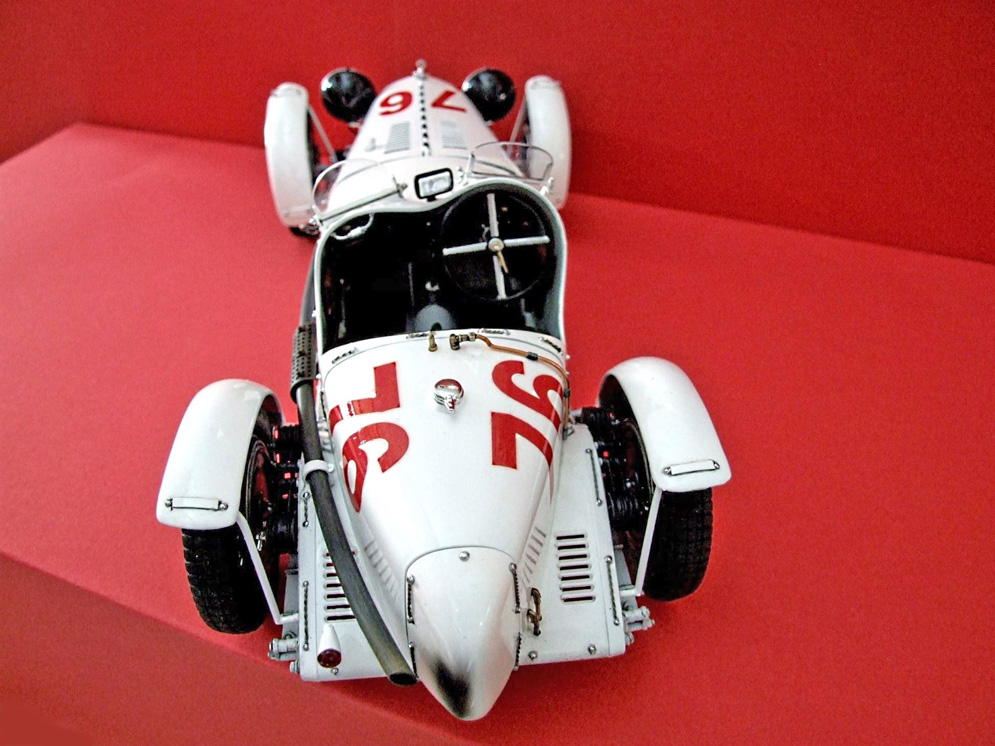
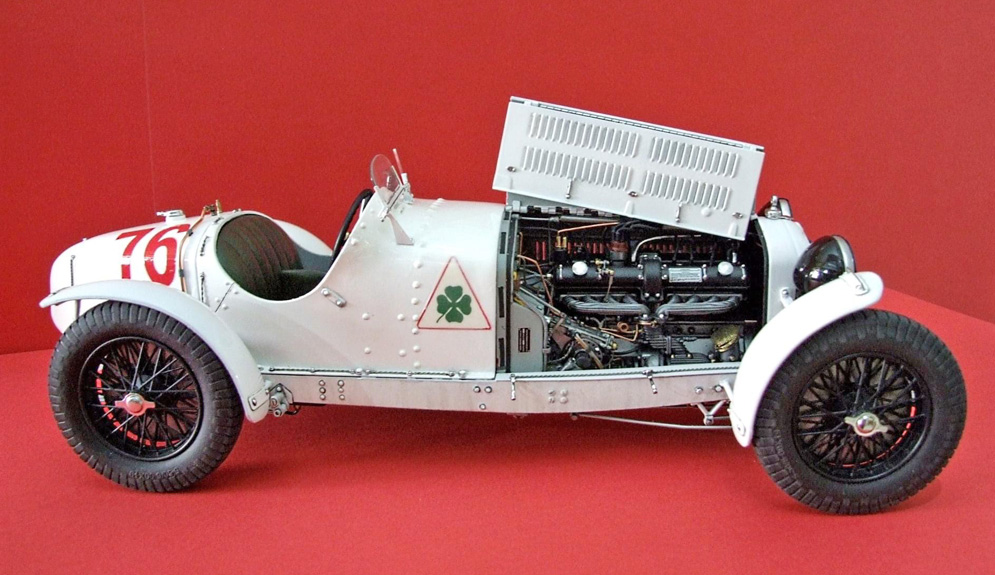
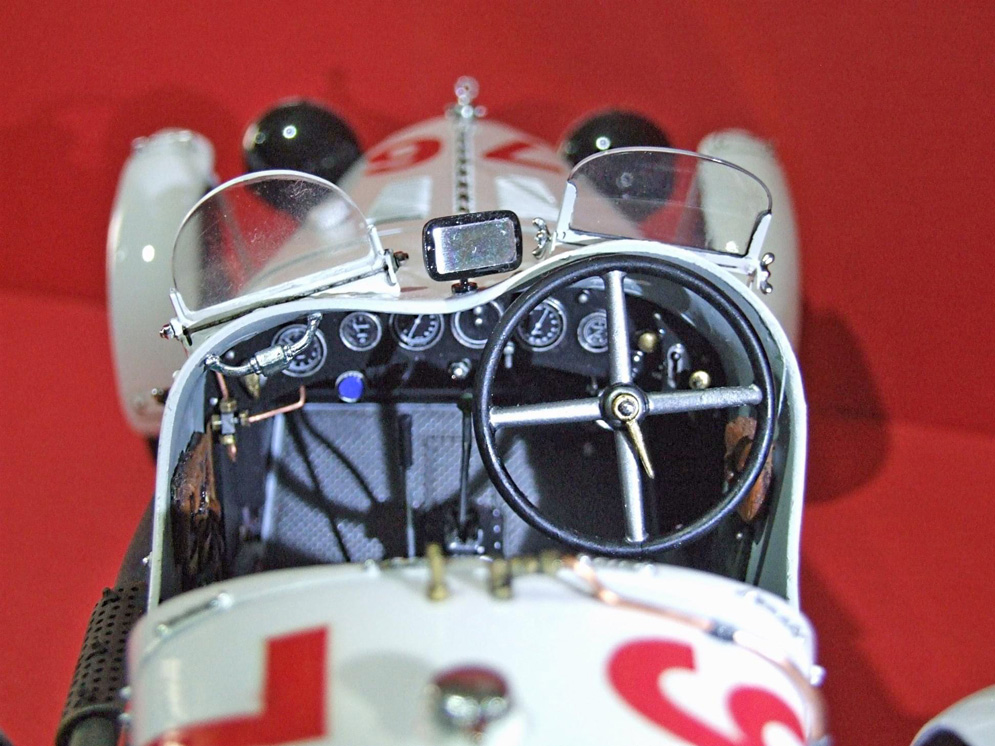
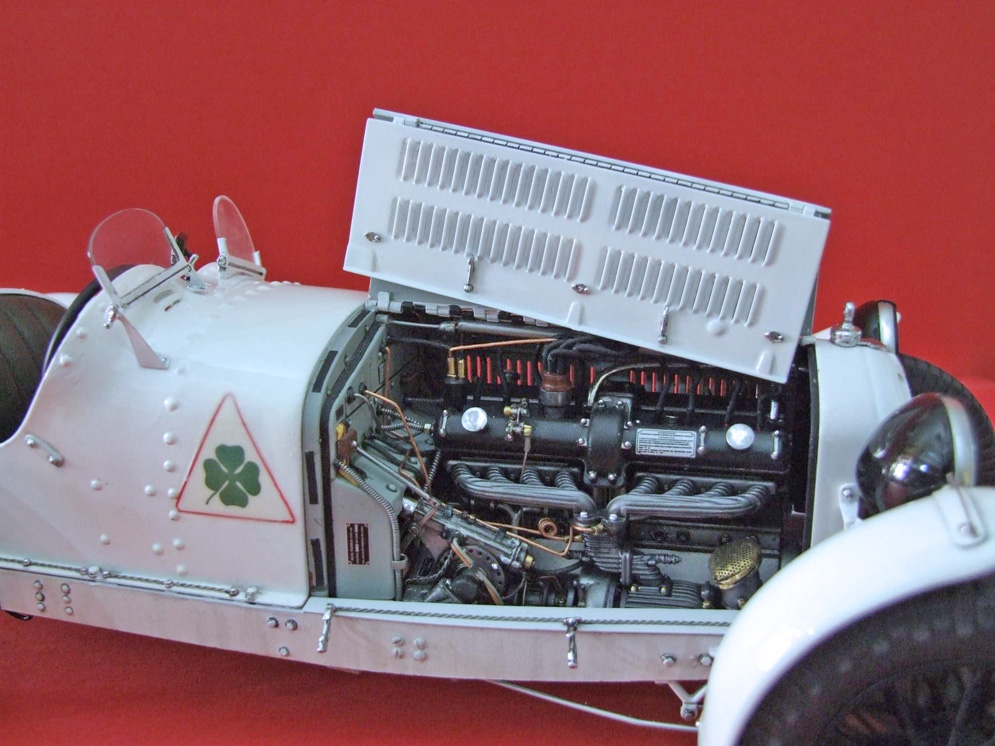
Just finished this model, the Alfa Romeo 6C Mille Miglia 1930. Made from the Airfix 1:24 scale kit – hope you like it?
Best wishes, Lou C.

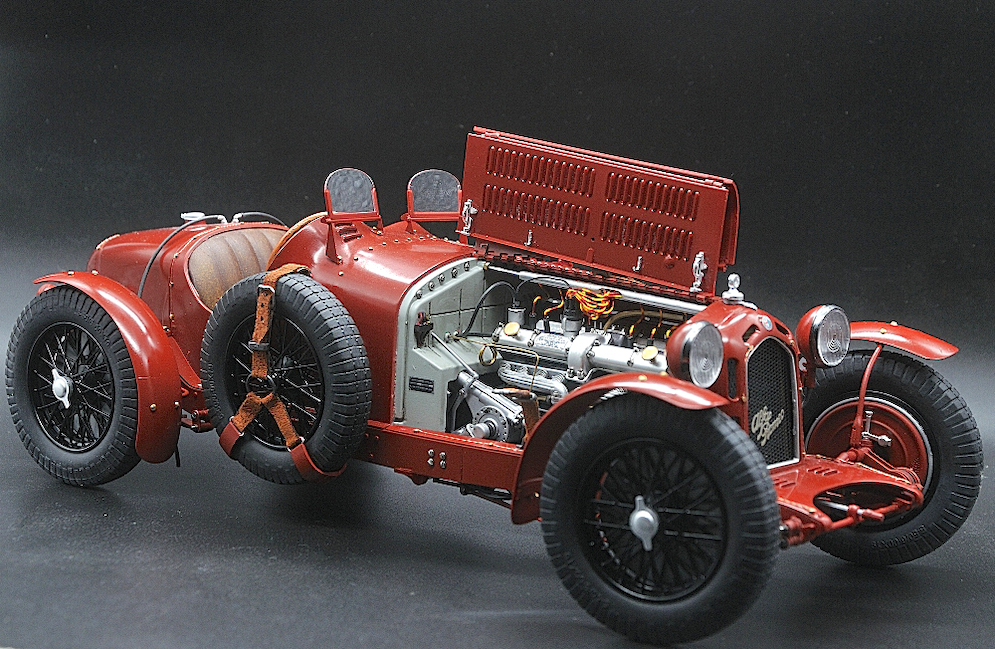


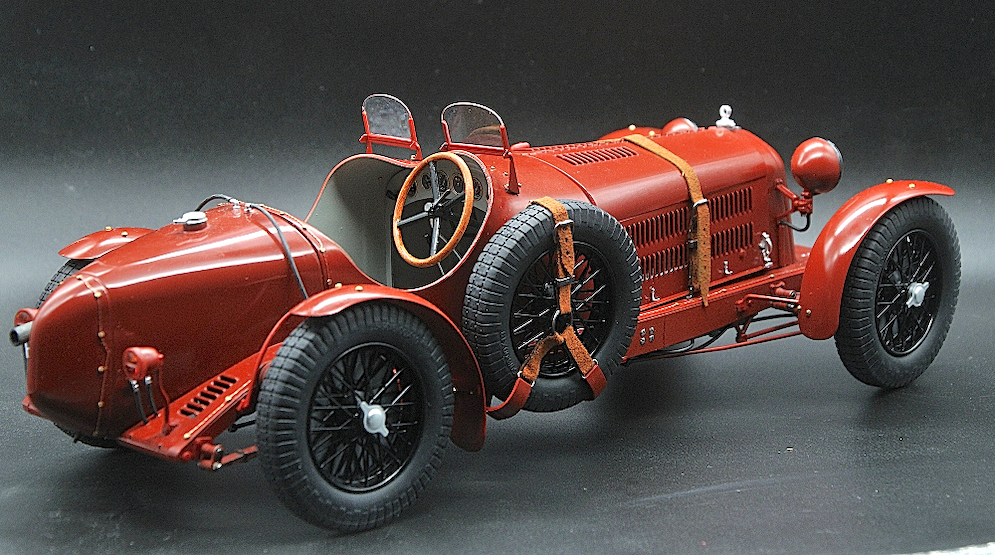

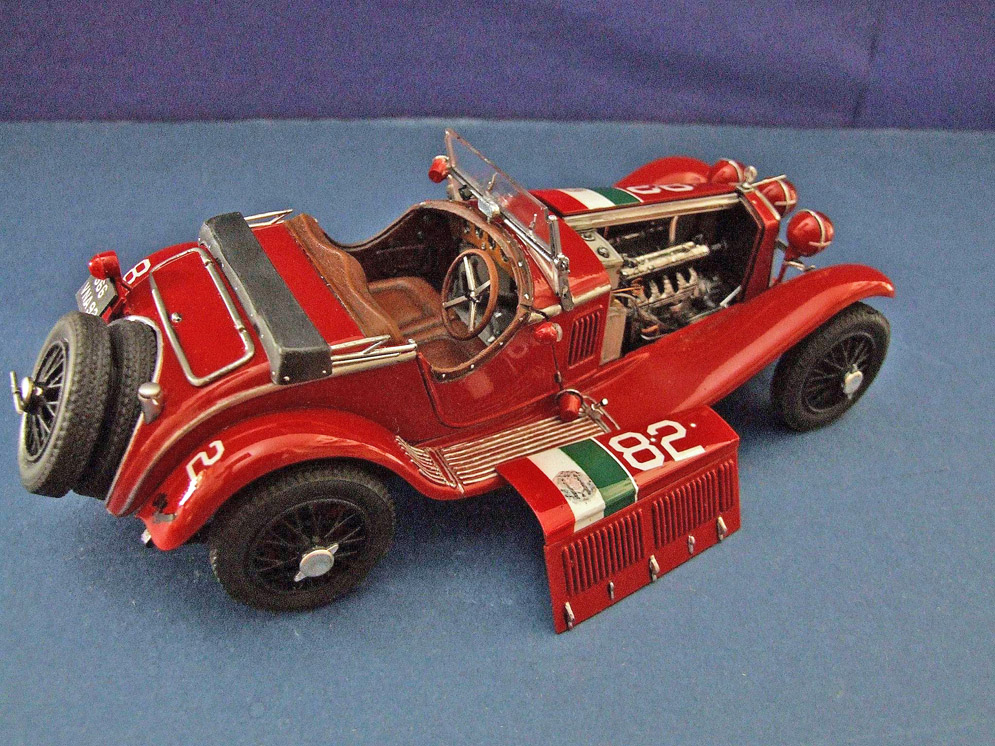
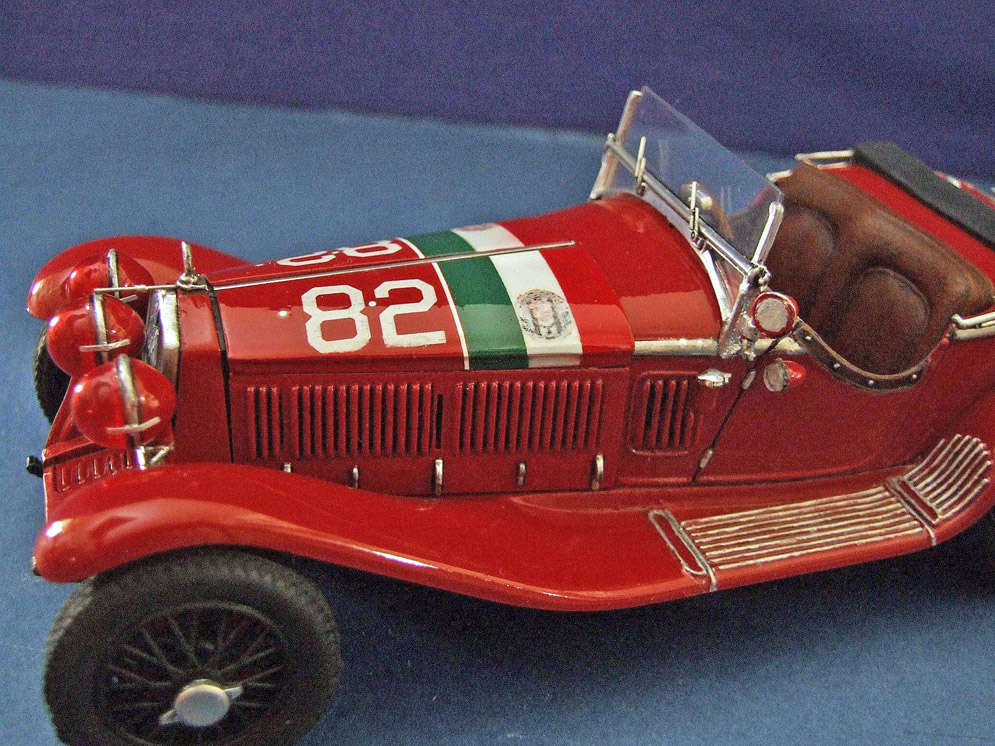
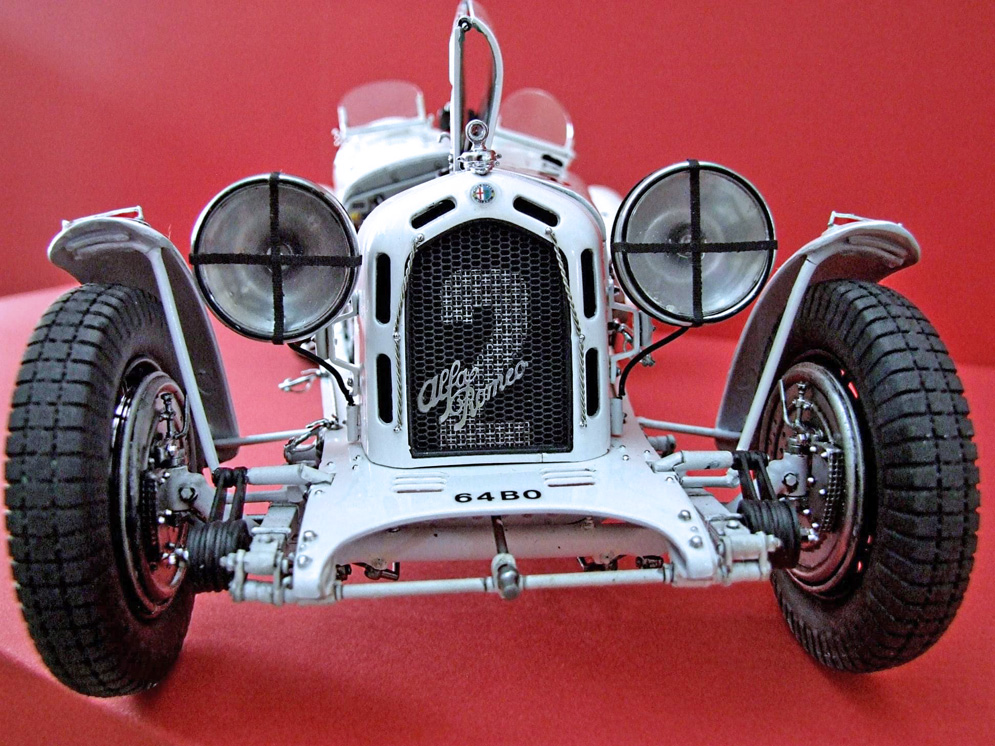
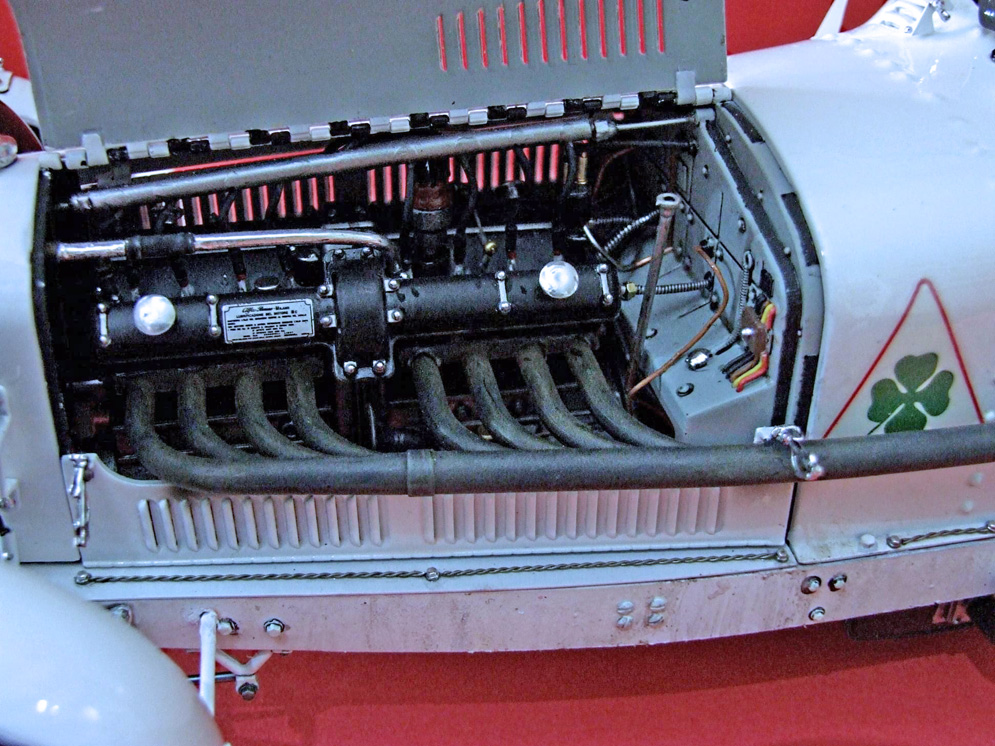
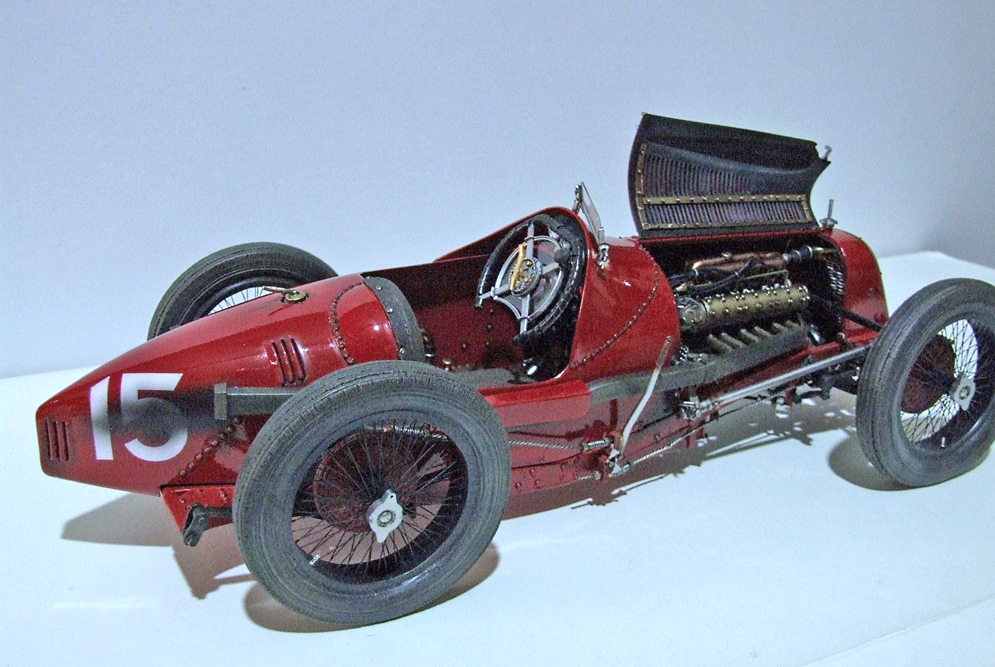
Kit: Italeri 1:12 scale
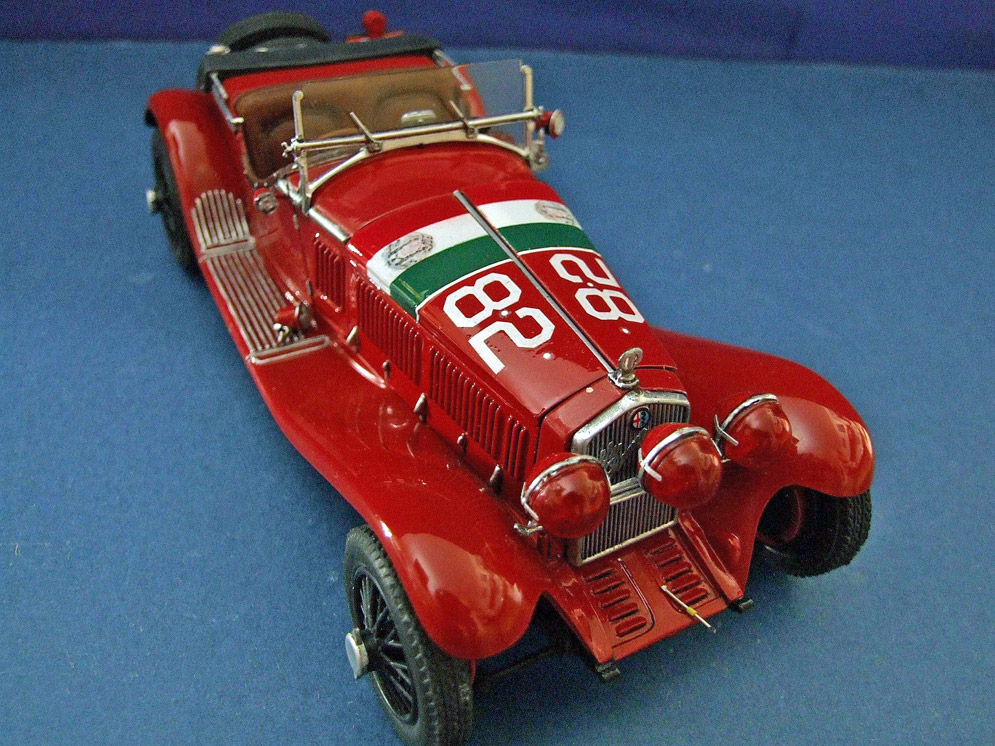
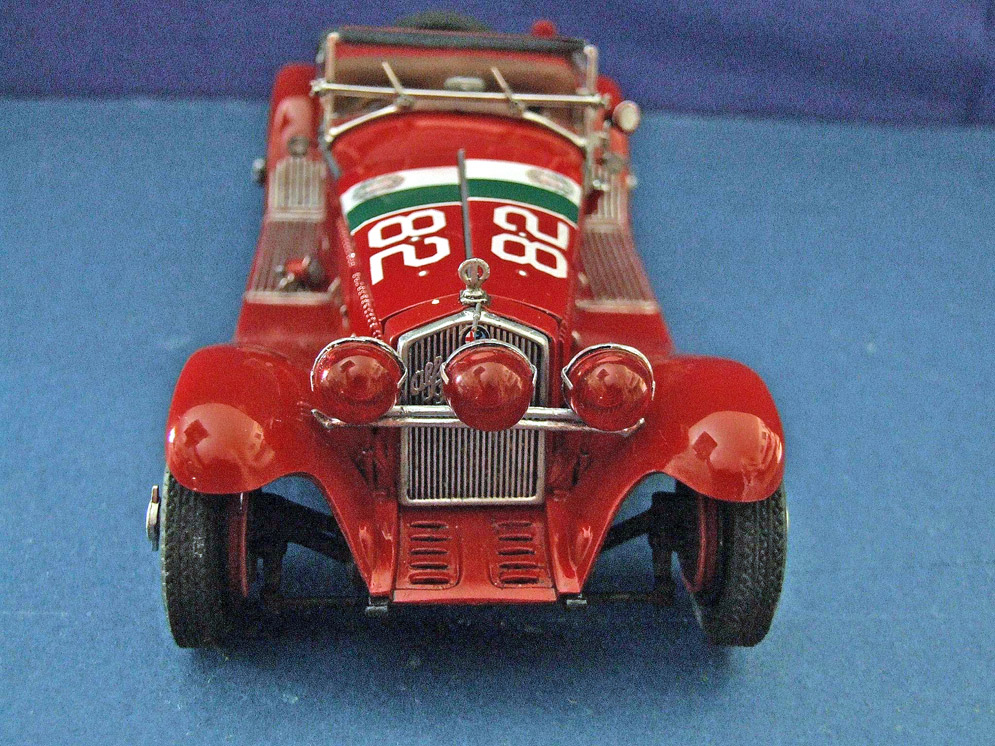
This is my build/interpretation of the Italeri Alfa 8C
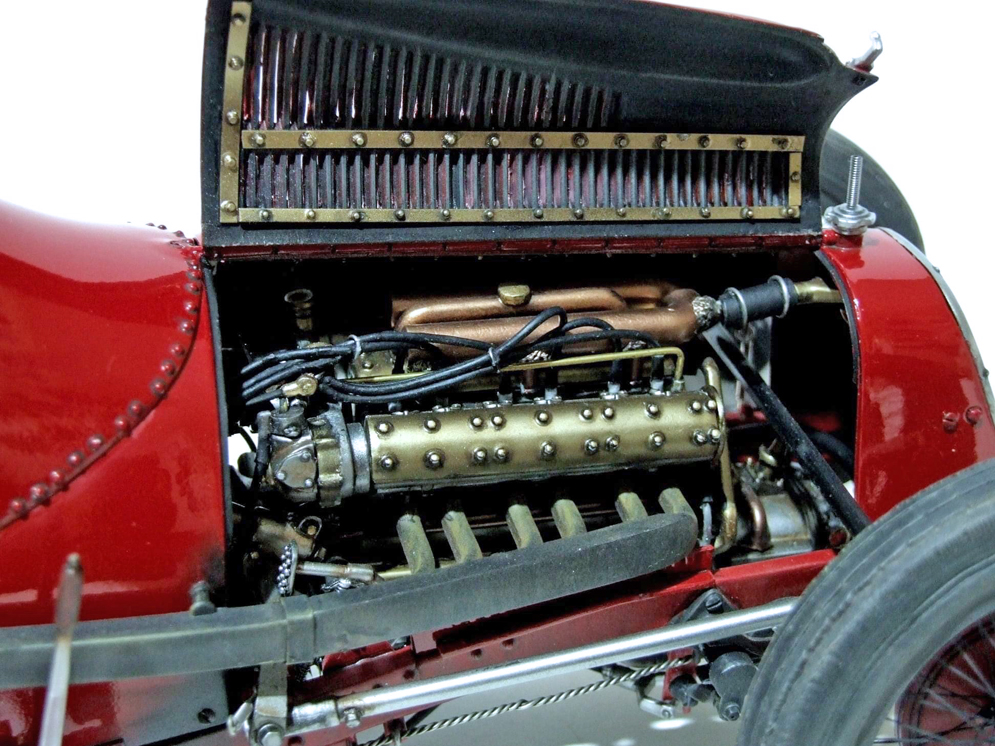
I couldn’t find any colour pictures of the real thing and survivors are all different colours so in order to create an authentic ‘looking’ colour I went with Matt Tamiya Hull red and gave it a coat of their Semi-Gloss.
I added some screws and cloth plug leads but unlike the other Italeri old series cars this is not a plastic version from the old Protar moulds and is a lot better for it.
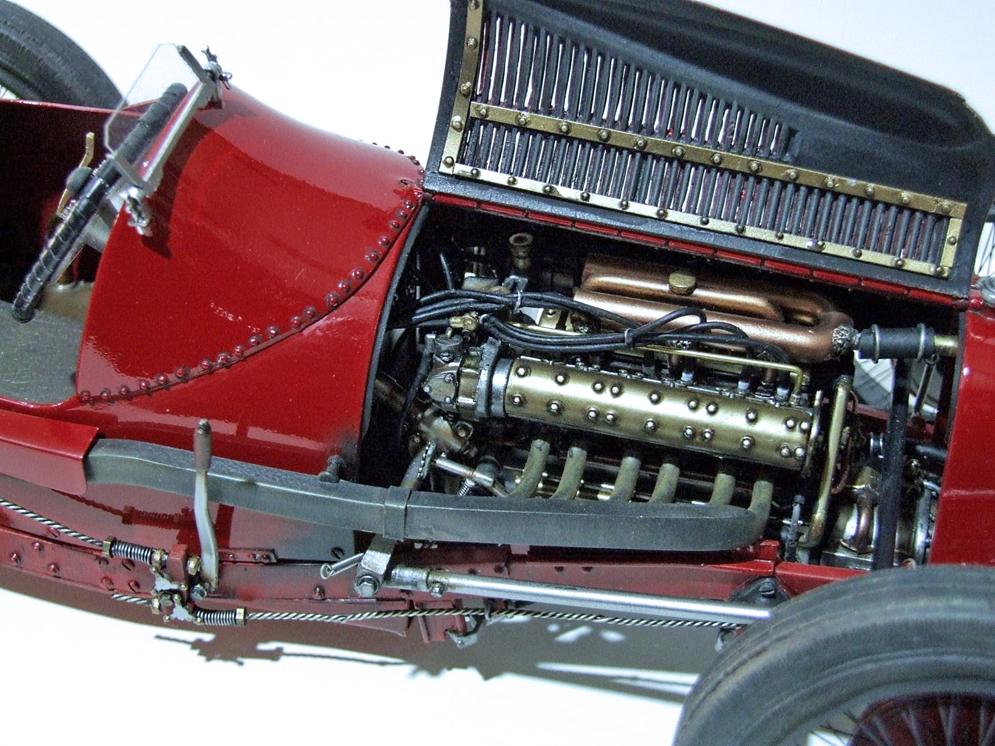
Most tricky part (but not necessary) was removing the moulded in screws round the panels. On the originals these were all lock-wired and the small kit protrusions were inadequate. I have seen other builds where people have 3D printed replacements, but I live in the 1970s still, so I used 16BA cheese head screws and flighted the slots, laid the lock-wire in the slot then added a drop of Super glue before painting. That seemed to do the trick.
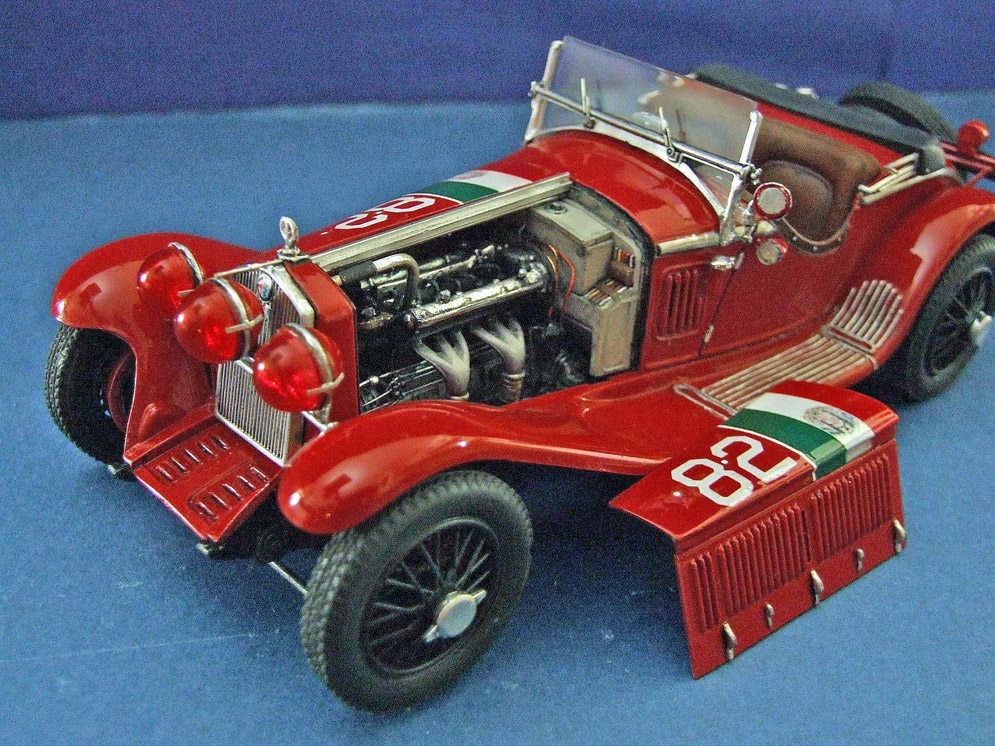
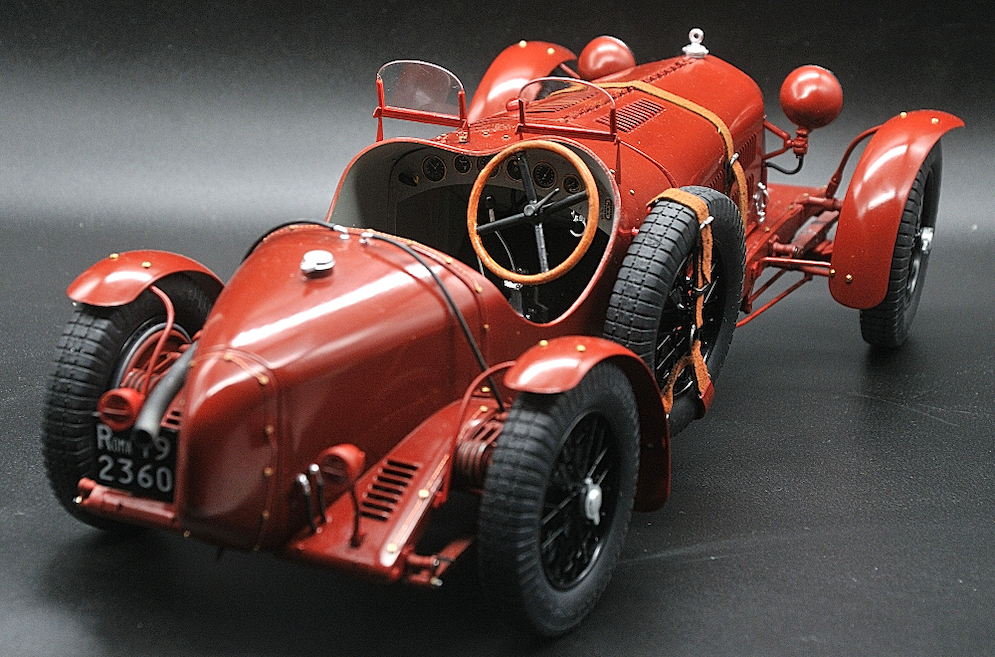
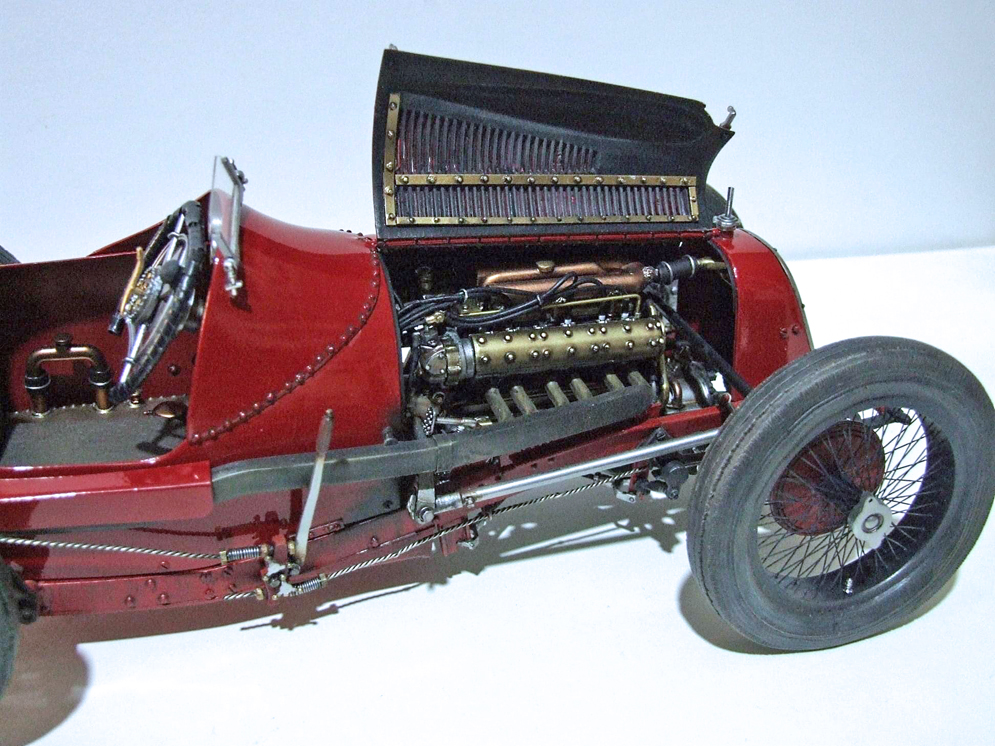
Italeri use screws to fix most of this model together. Normally I can see why, for instance their Fiat 820 is a direct copy of the metal Protar model (Italeri bought Protar) and the plastic mouldings replicate the same faults as could be found in their metal equivalents. Obviously, the same part in plastic however parts that were strong enough to screw together in Metal are not always strong enough to do so in plastic. Even worse I found that if you did screw the parts together, even with minimum tightness if you then used a wash that was white Spirit based like MIG the plastic would go hard them shatter a few days later. Parts like the steering mechanism are designed to work in metal and probably did but in plastic the steering column will just twist down its length long before anything else moves.
The answer is to buy some plastic dowel in the size of the screws and use that as a replacement and glue as you would any other model. The added bonus here is you wouldn’t then have a load of over size slot head screws on display as well 😊 As for why on a model as a new mould, 2019 I think, they still went for screws I have no idea.
I tried my best, but I couldn’t get the bonnet to fit. That said as I will pose it open, it doesn’t really matter.
Paddy B.
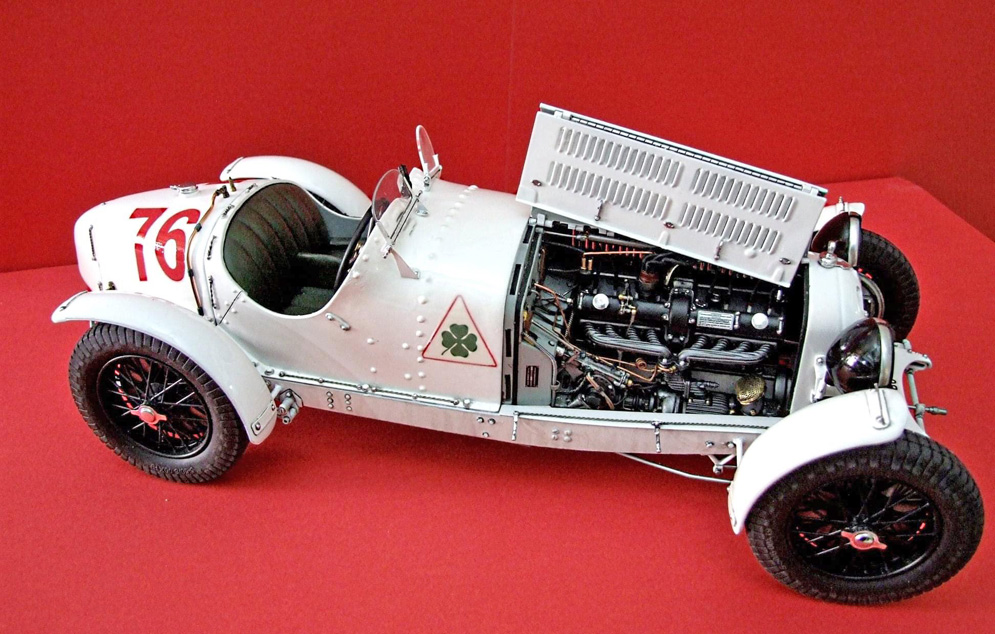
Just finished this beast finally – Alfa Romeo 8C 2300
Italeri 1:12 scale conversion from racer to roadster. The model is about 12 inches long and took 5 months to complete.
The fenders and headlamps and housing are added, modified from The Bentley Airfix kit. It also has a scrtatch-built dash and cockpit interior details. The engine is detailed and rebuilt, having a modified firewall. The radiator is mostly scratch-built with exhaust modified and tail light added.
Decals courtesy of my very good friend Christopher Ellul ….On to the next one …This blasted Covid is keeping me busy ;)
Lou C.
As you can see it required a “rebuild”.
All the best, Ian R.


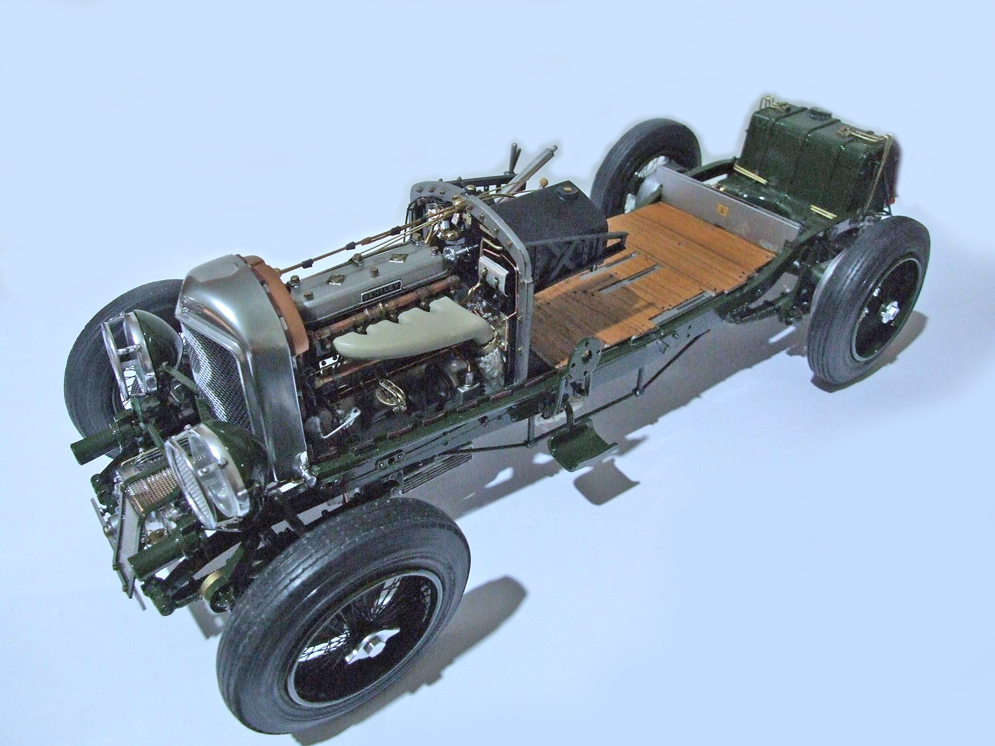
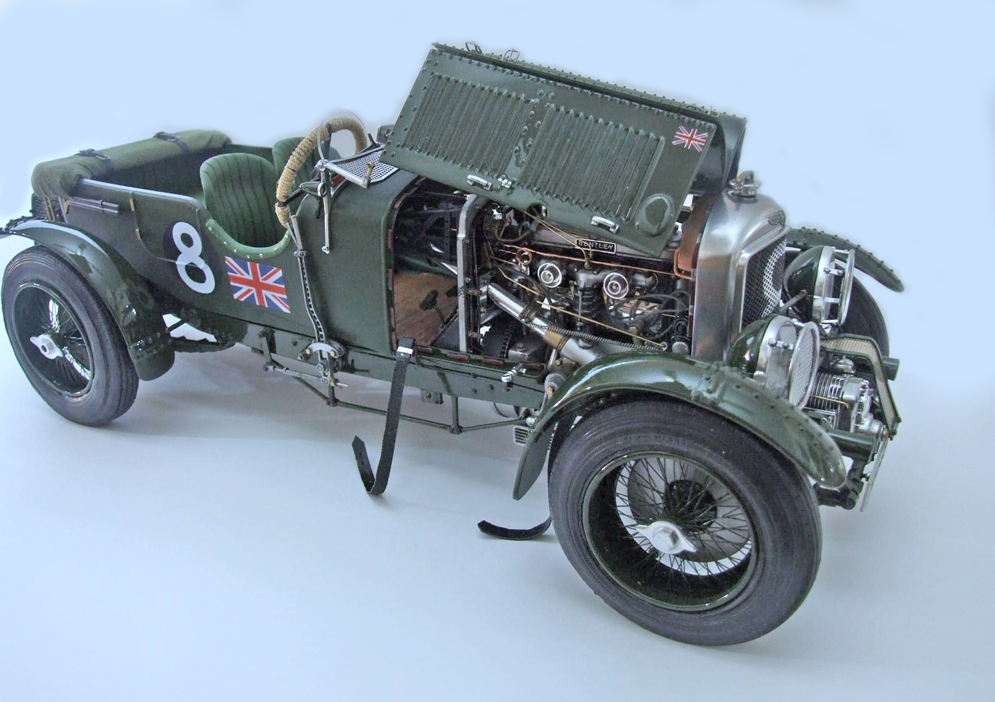
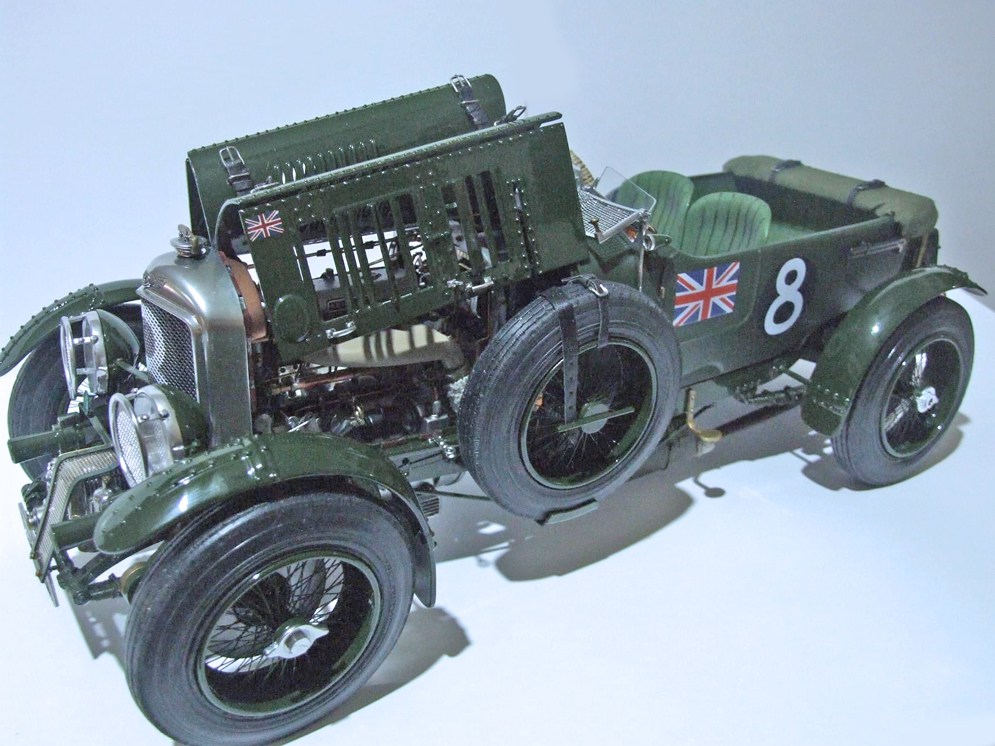
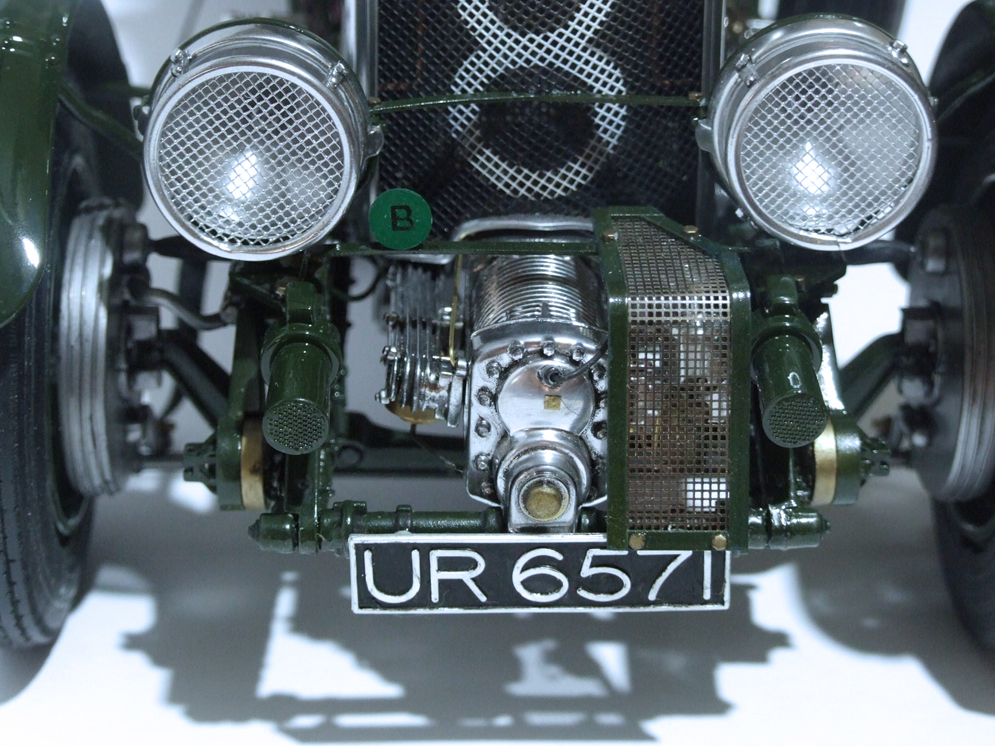
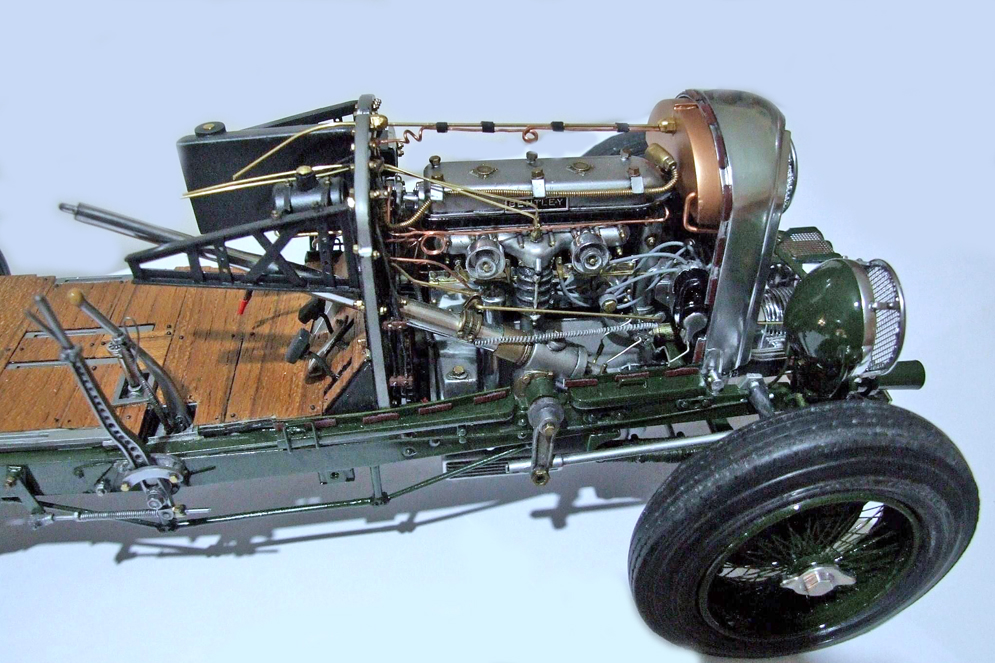
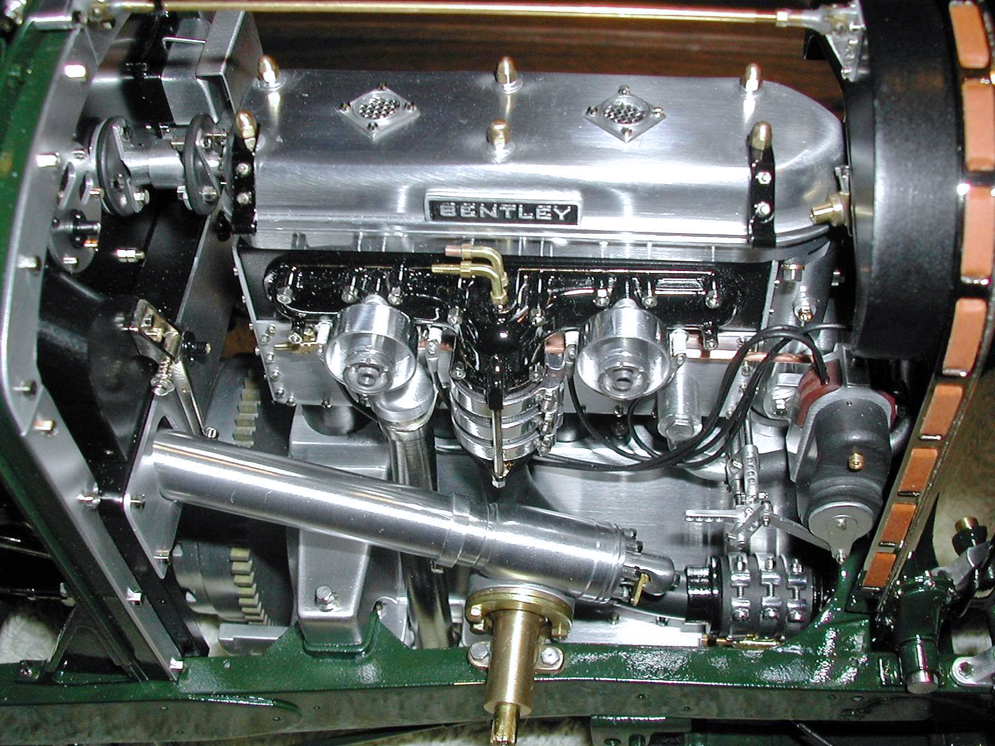
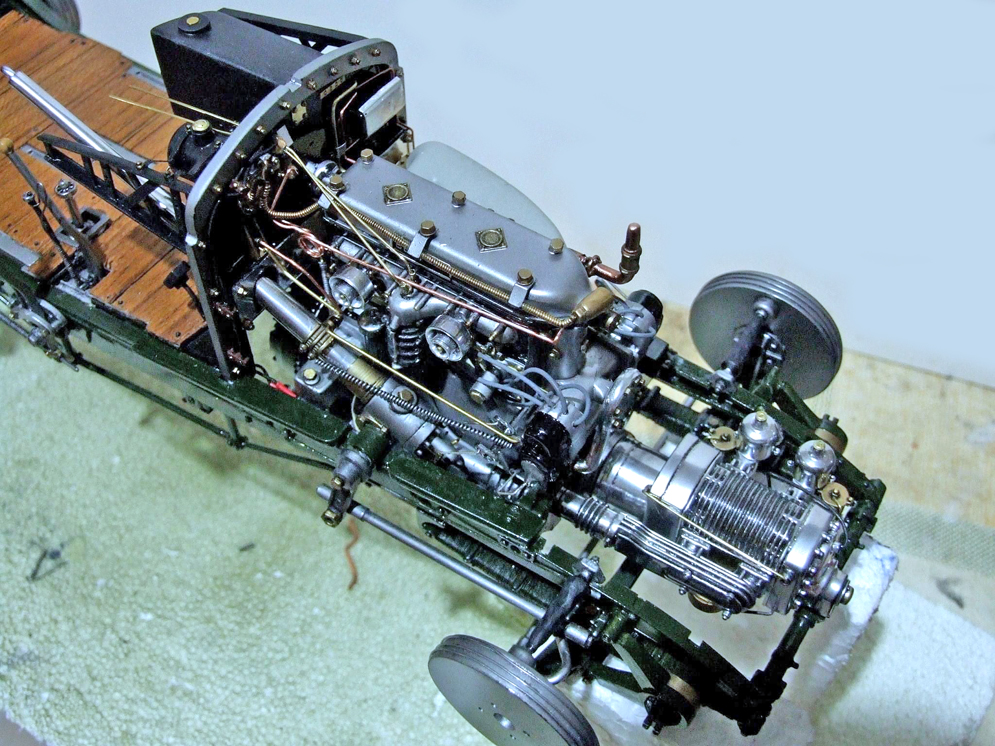
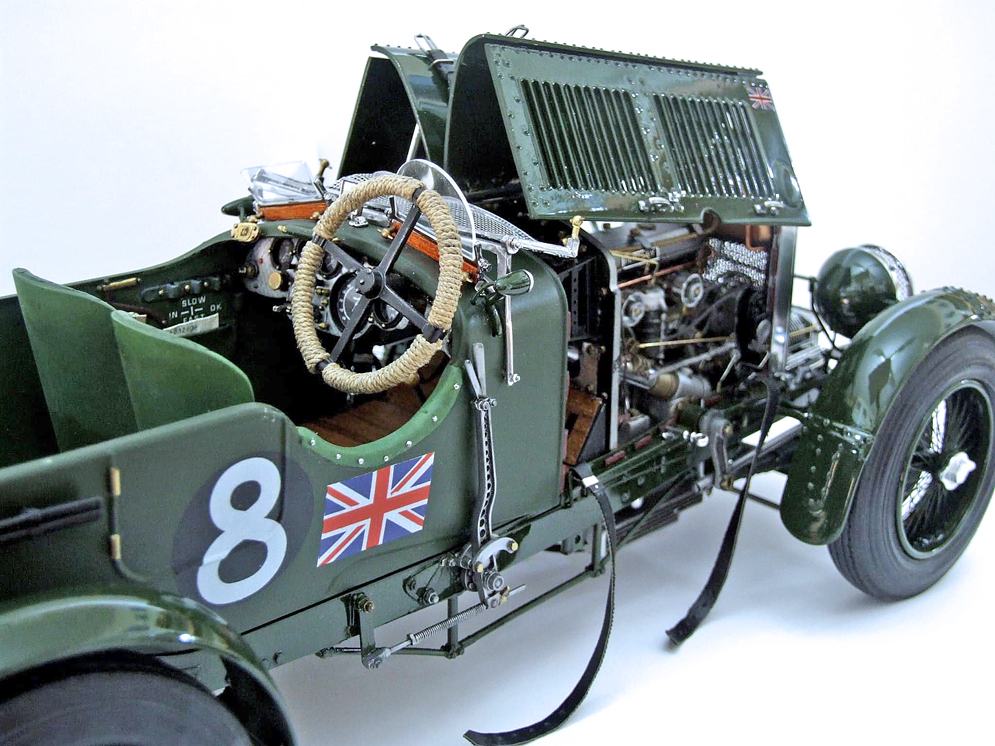
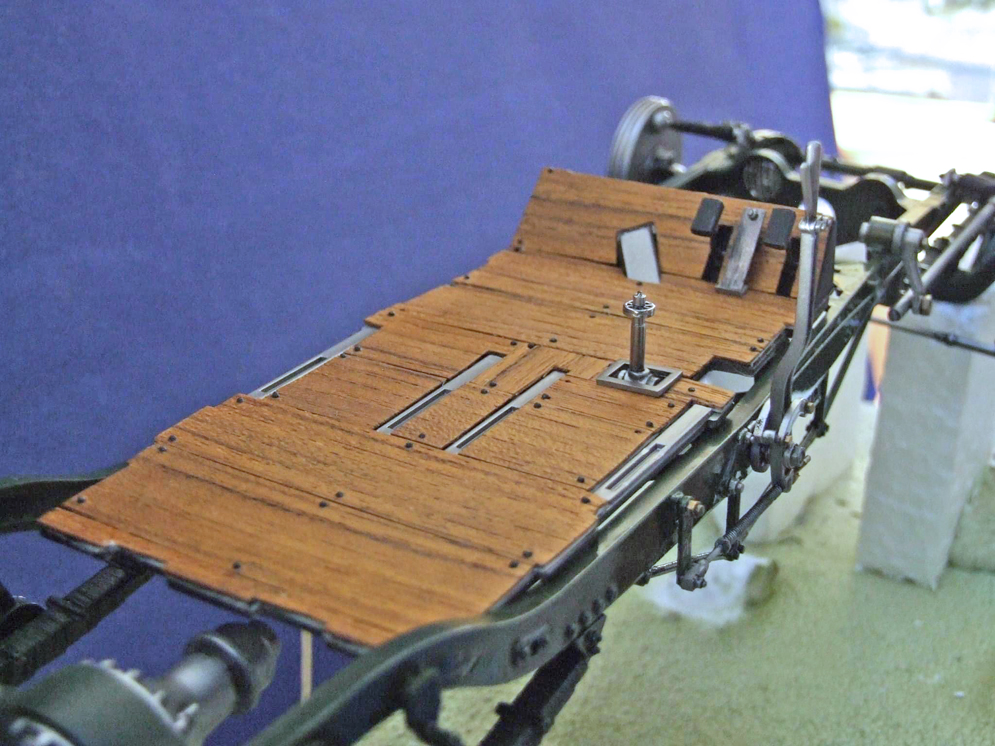
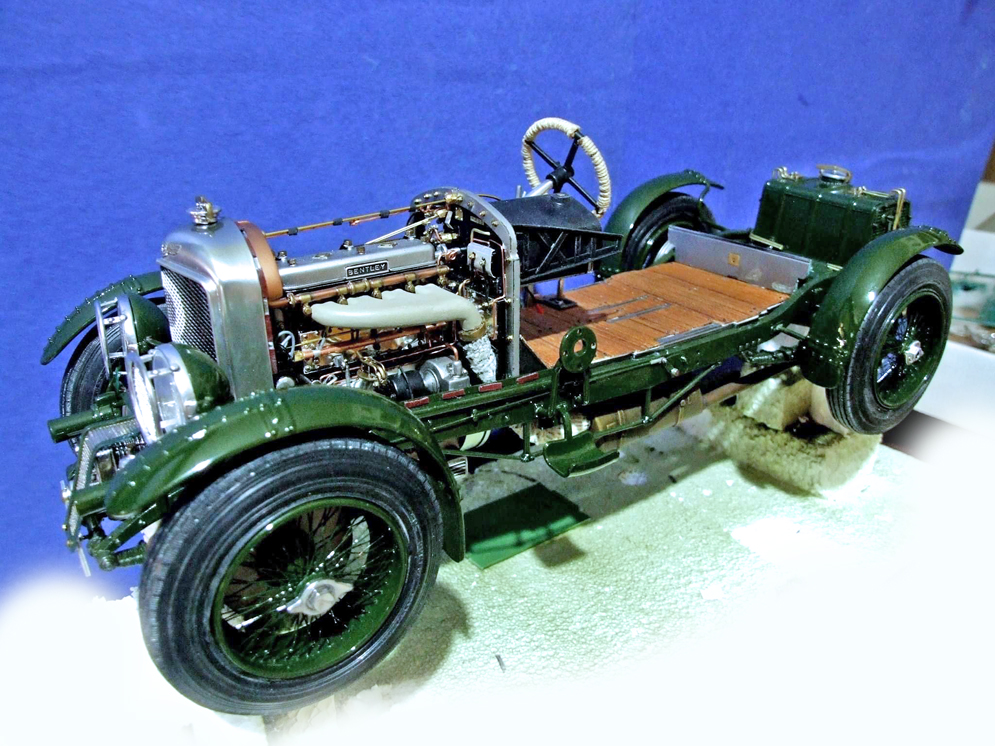
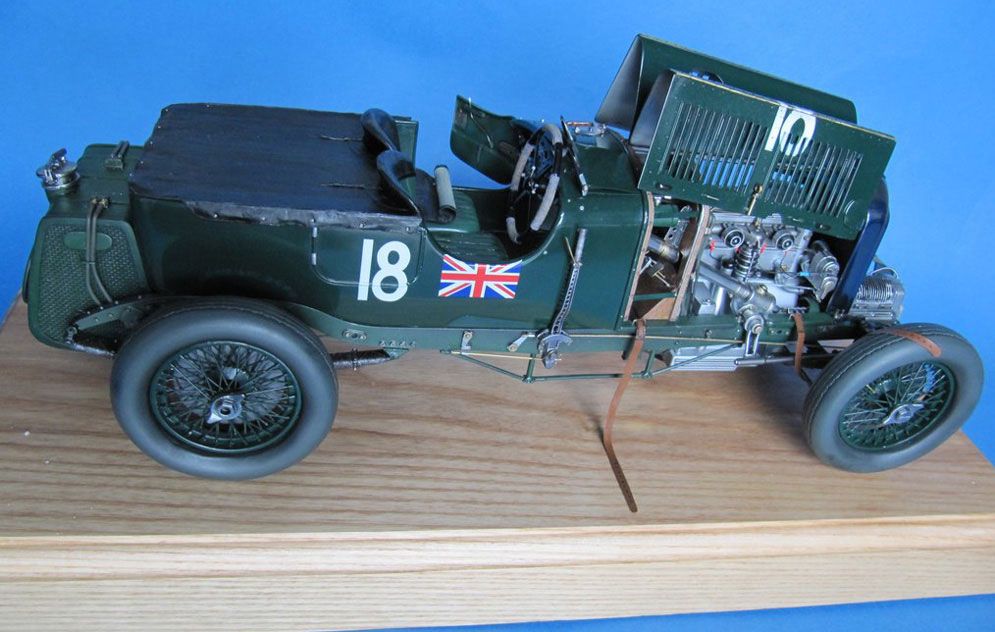
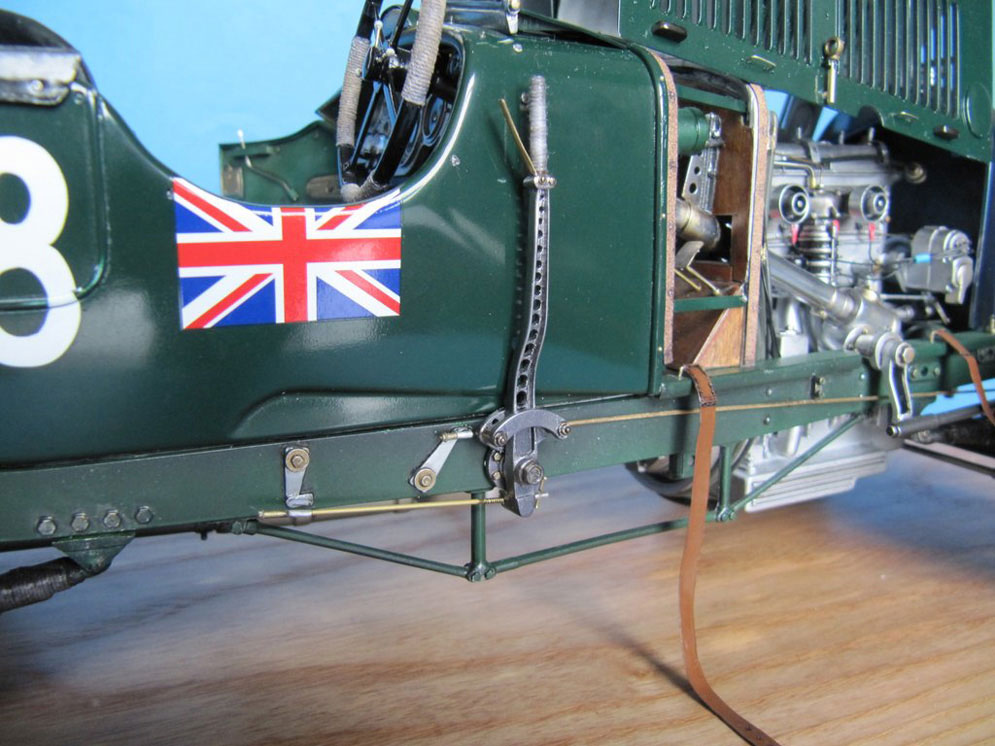
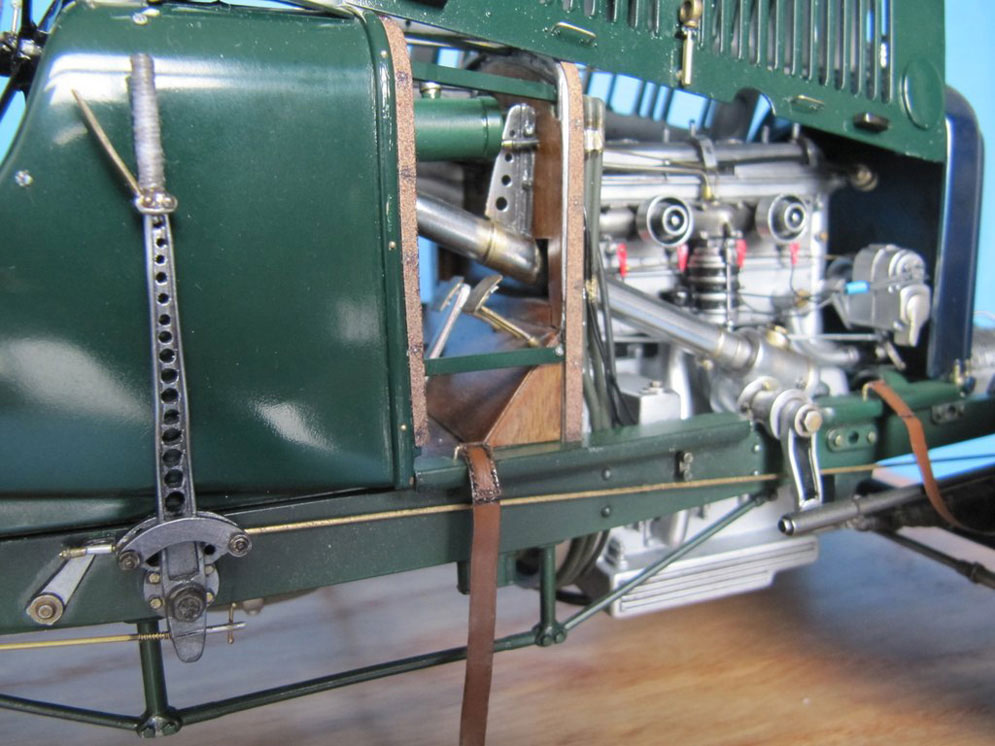
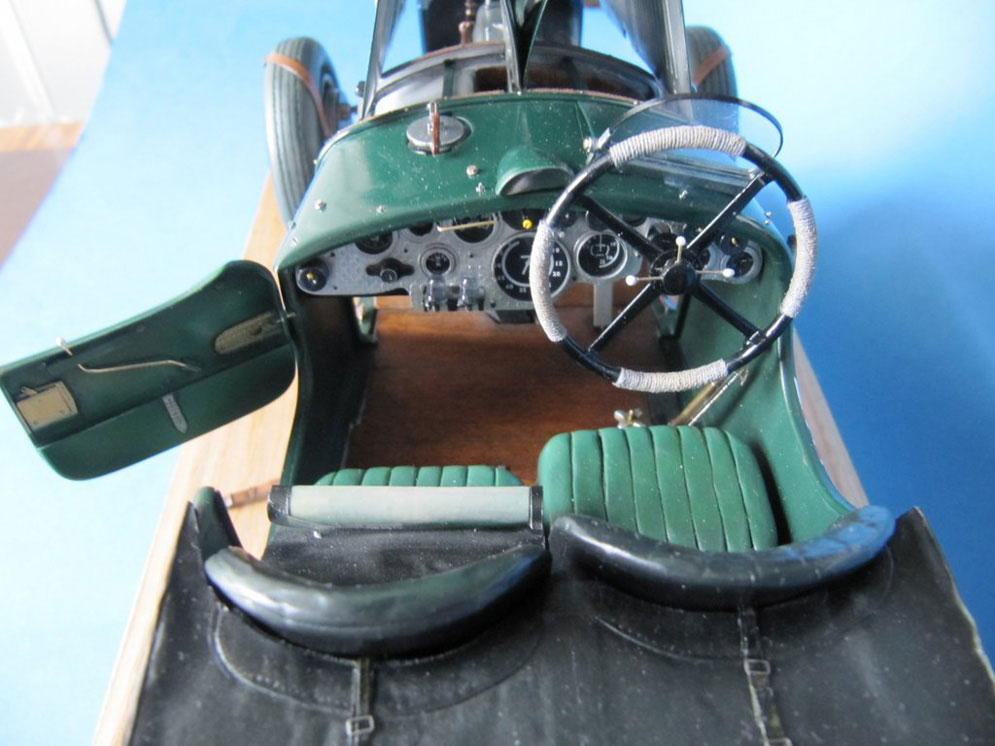
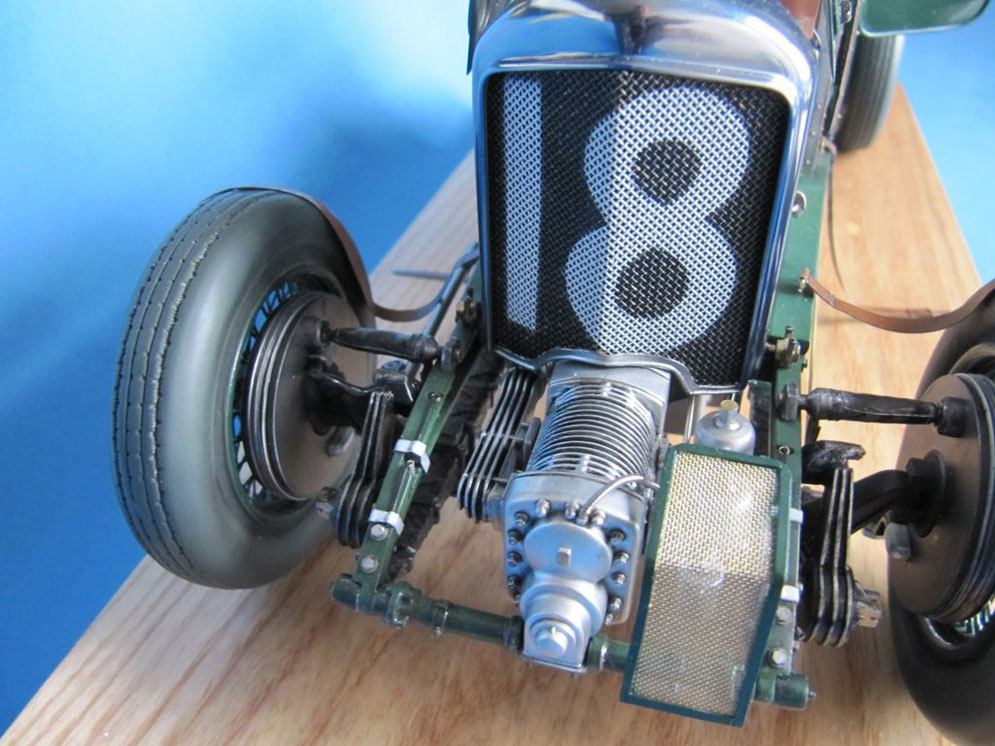
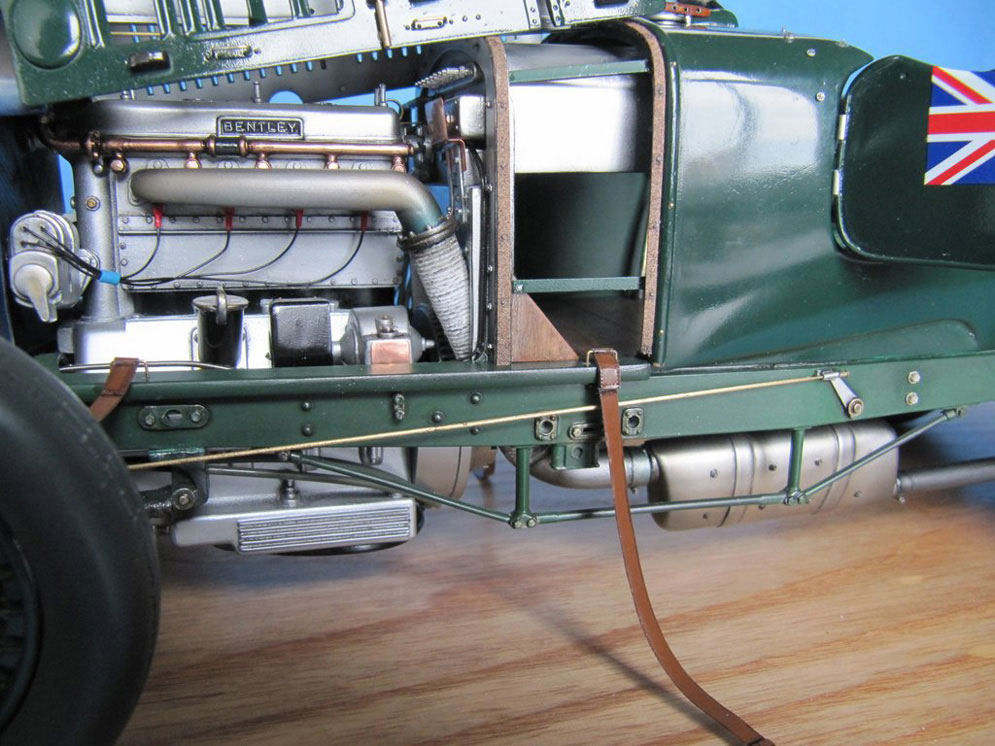
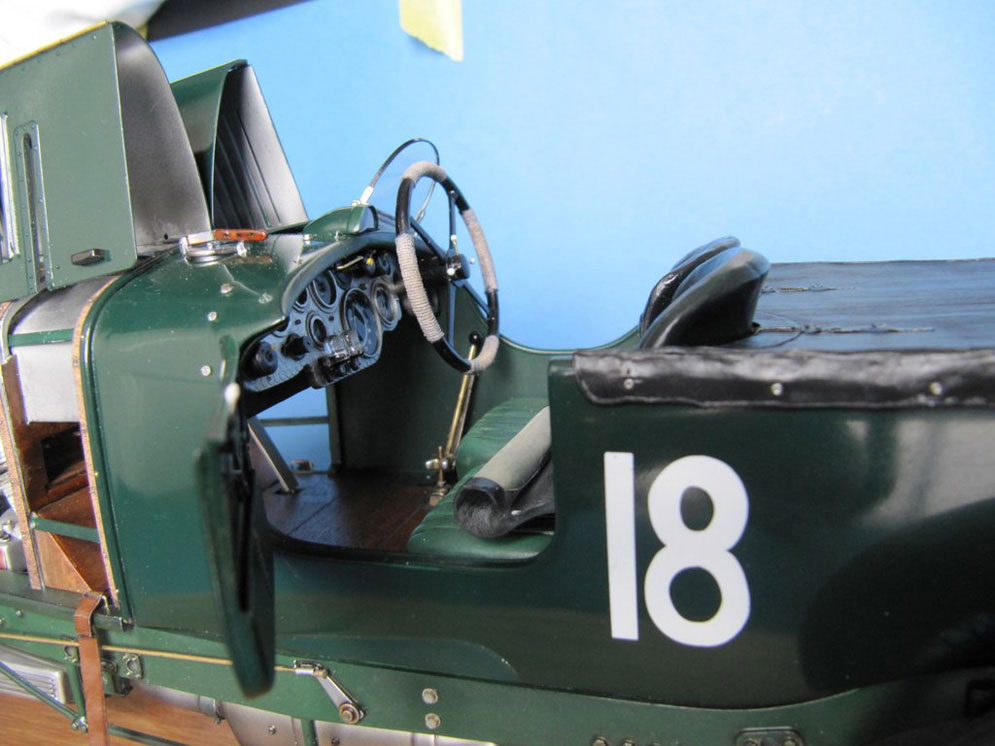
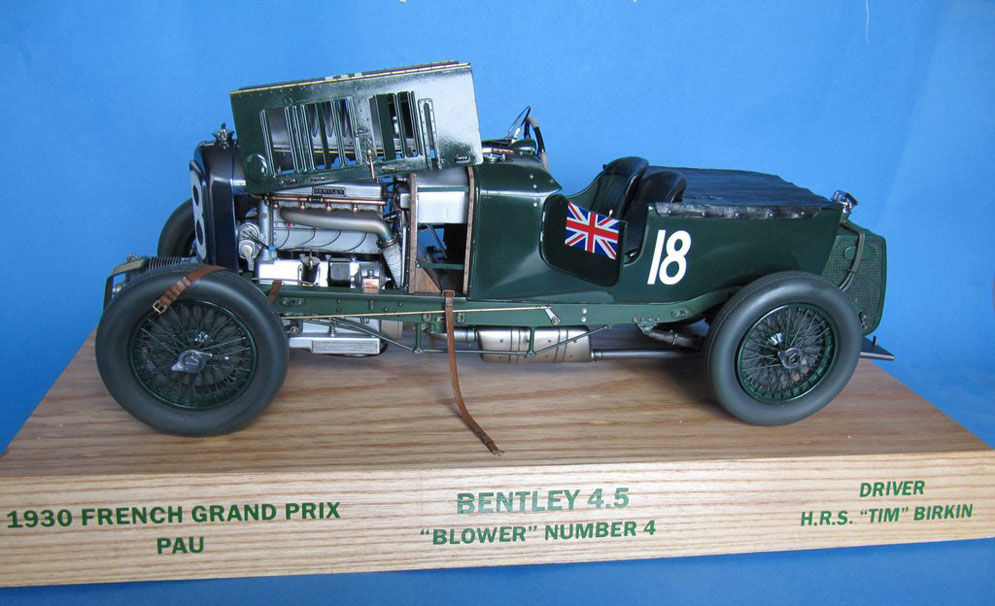
This is my Bentley Blower in 1:12 scale made from the old Airfix kit.
I have added a lot of scratchbuilding and modifications to get the end result you see here – hope you like it.
Lou C.
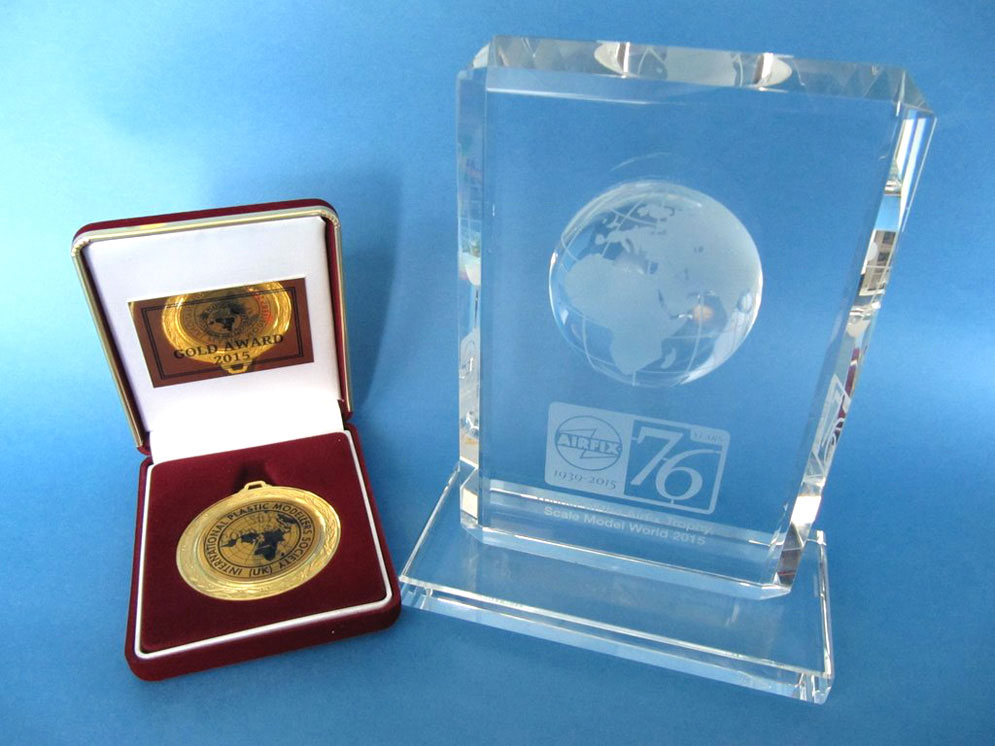
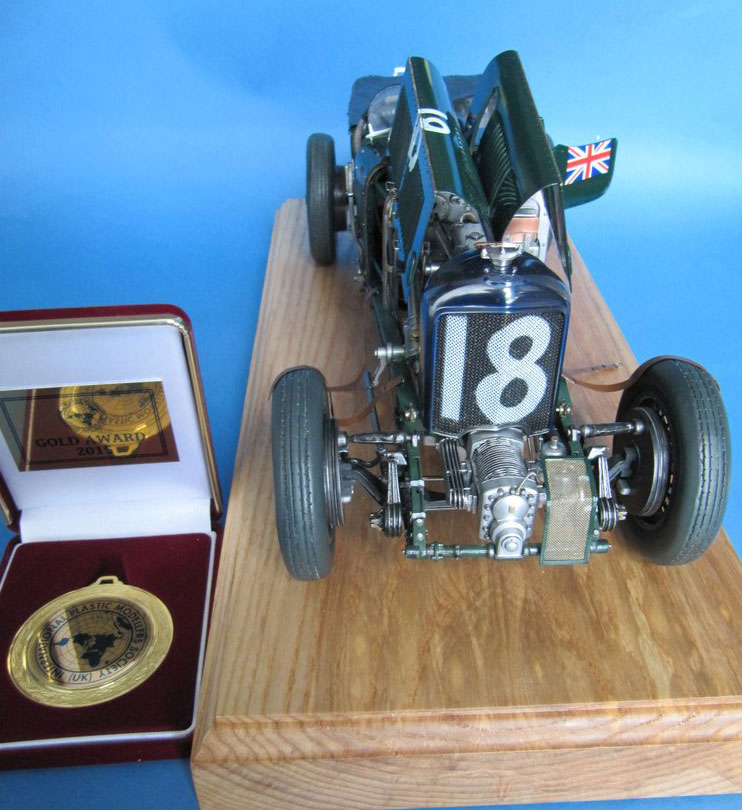
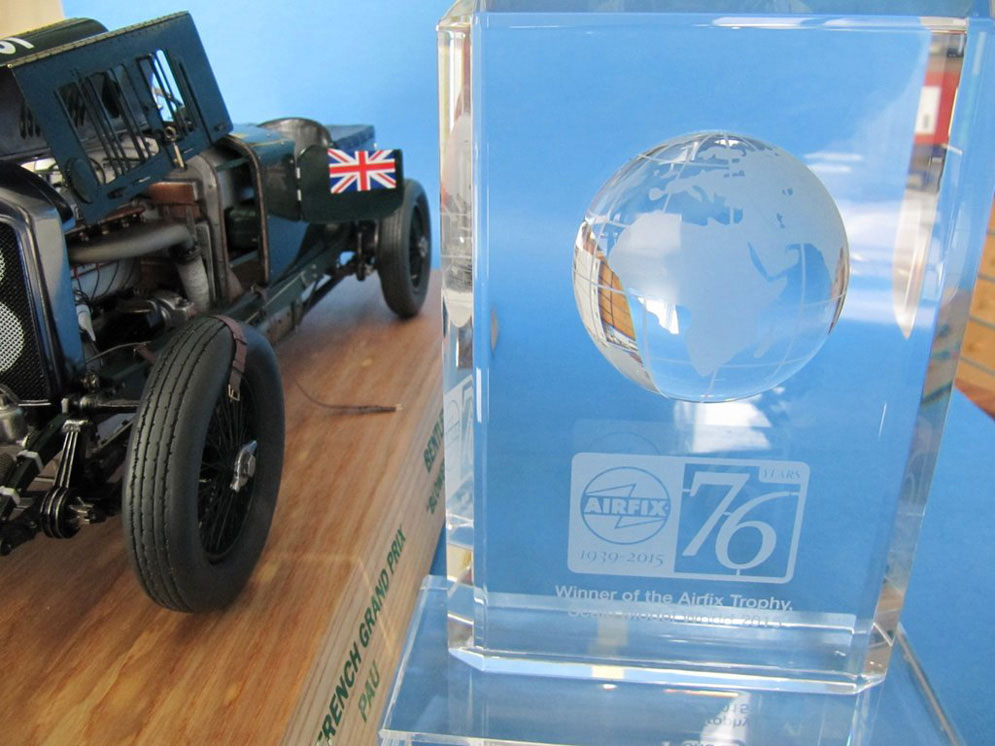
Blower No.2 had been seriously damaged a couple of weeks earlier in the Ulster Grand Prix and attempts to repair it failed to meet the French Grand Prix deadline. Blower No. 4 was hastily stripped and prepared for the race. The second myth that came to light was that Tim Birkin was the only driver – ever – to have used the horn in a ‘Formula 1’ while overtaking another driver. Close examination of the reference pics show that the horns had been stripped from the car prior to the race along with the headlamps and the wiring taped to the chassis which I have reproduced.
I started the kit two years ago and finished it three days prior to SMW 2015. There is no aftermarket available for this kit which resulted in over 60 scratch built parts and conversions, the major ones being lead sheet used for the tonneau cover, re-spoked wheels, brass sheet passenger door, re-upholstered seats with Milliput, home mastered resin tyres and a wooden veneer floor. Paints used were Zero and Alclad2 with Miracle Masks used for the numbering.
Peter B.

I also knocked up a base so its easier to handle as these Italeri vintage car models are extremely fragile.
Paints are all MRP, Cobbles are slate from a dolls house company, and no I don’t spend a lot of time hanging round the dolls house fraternity 😊
Anyway its basically OTB with a few bits of brass and copper tube added.
The model is slightly relevant at the moment as Italeri have just released a road going version of this car, basically the same with lights etc.
Paddy Barratt
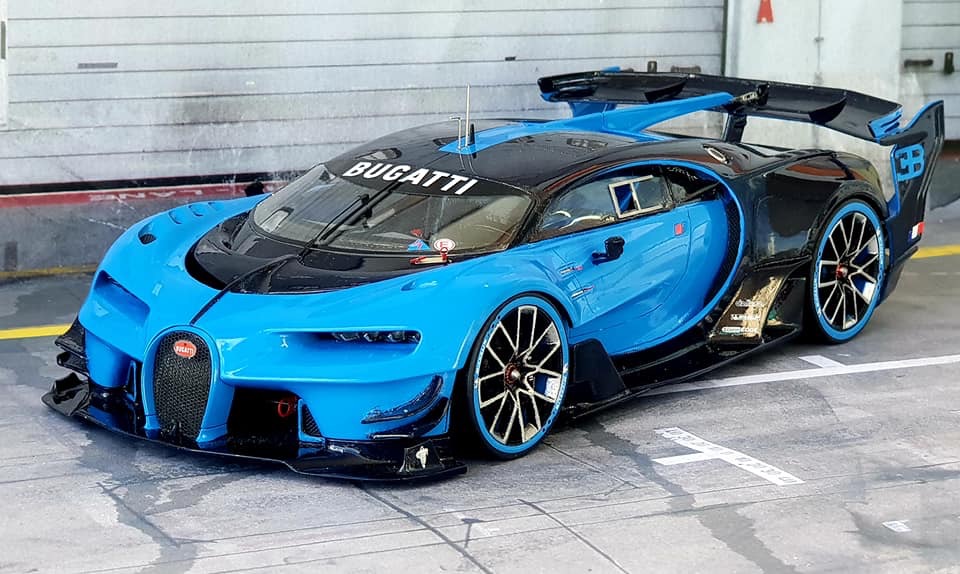

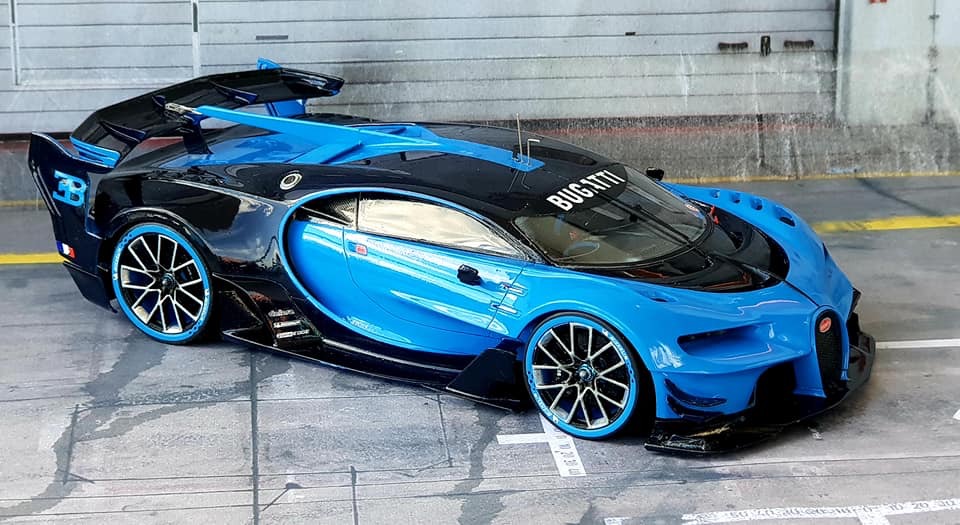
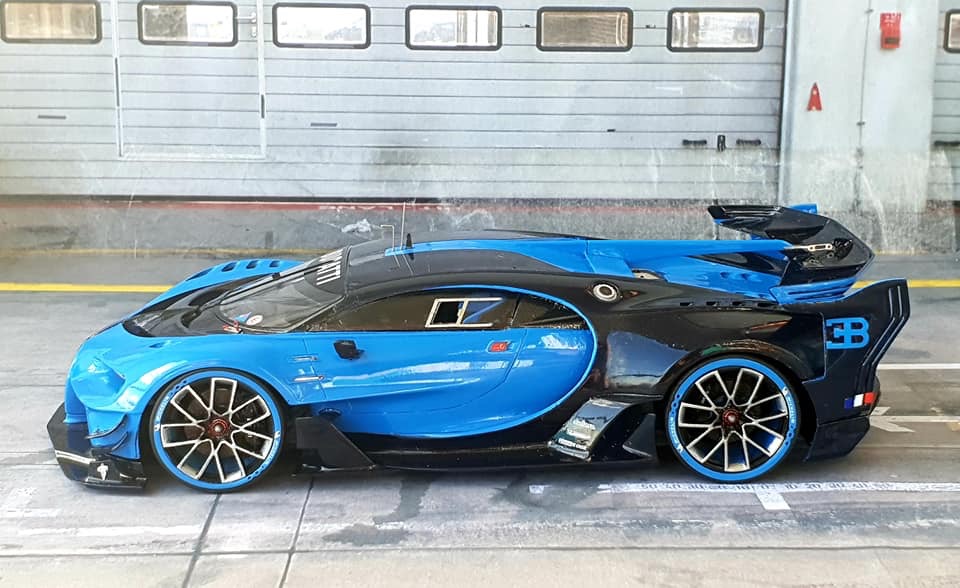
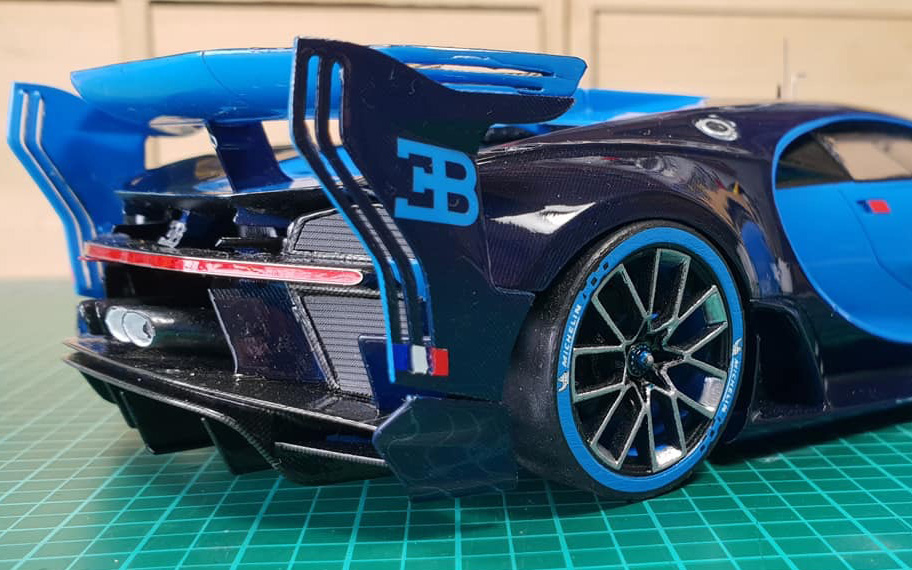
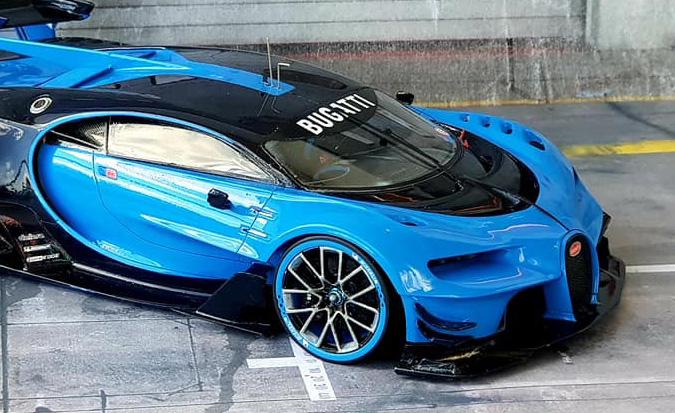
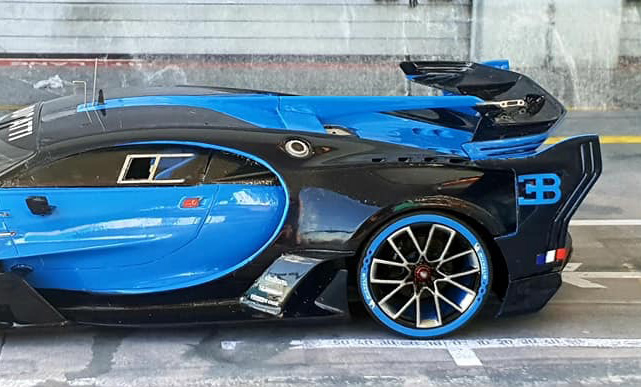
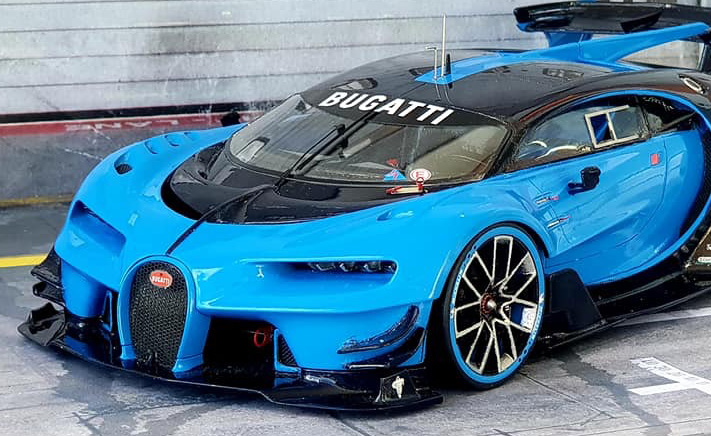
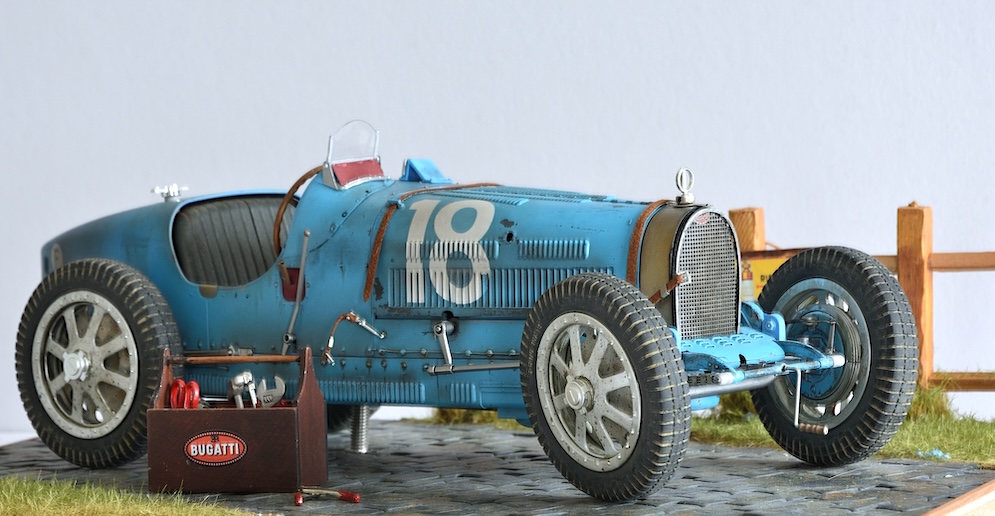
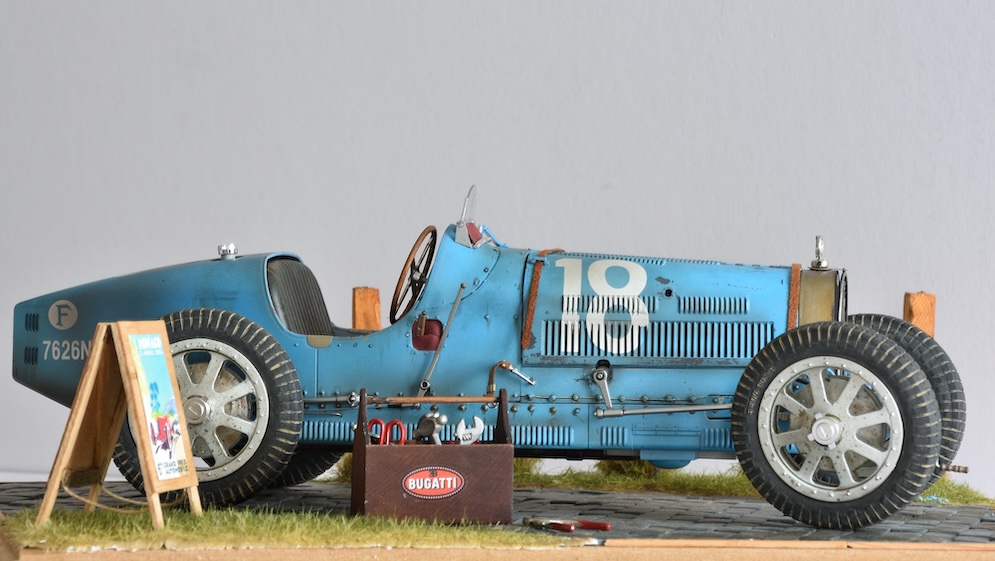
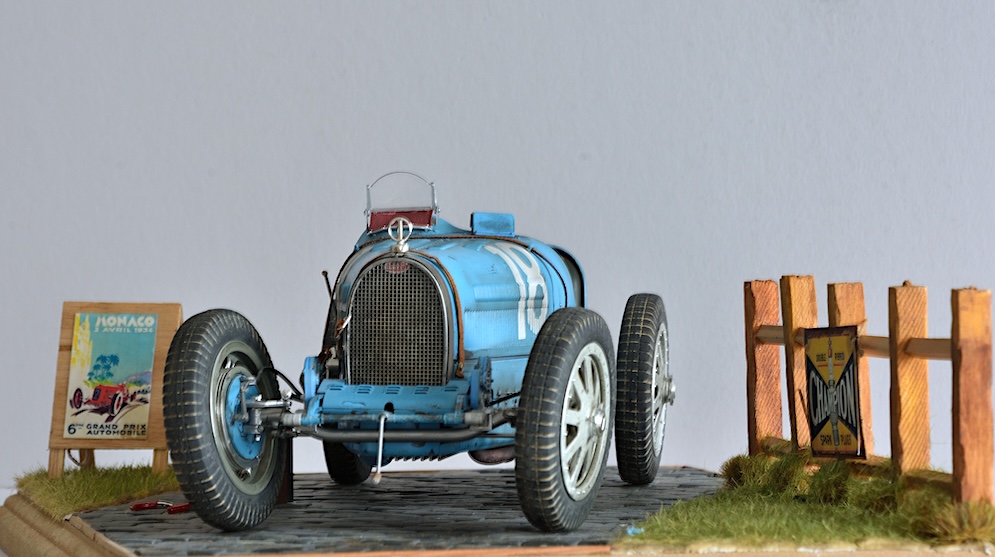
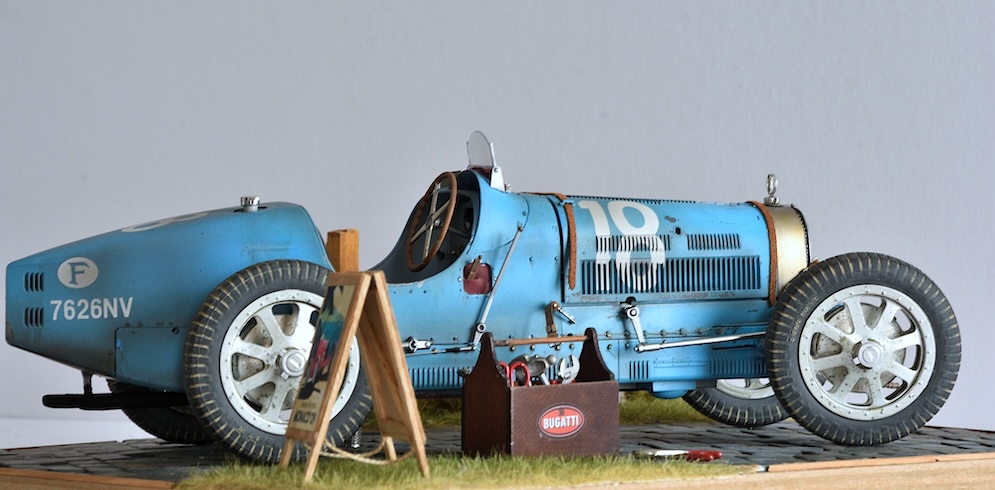
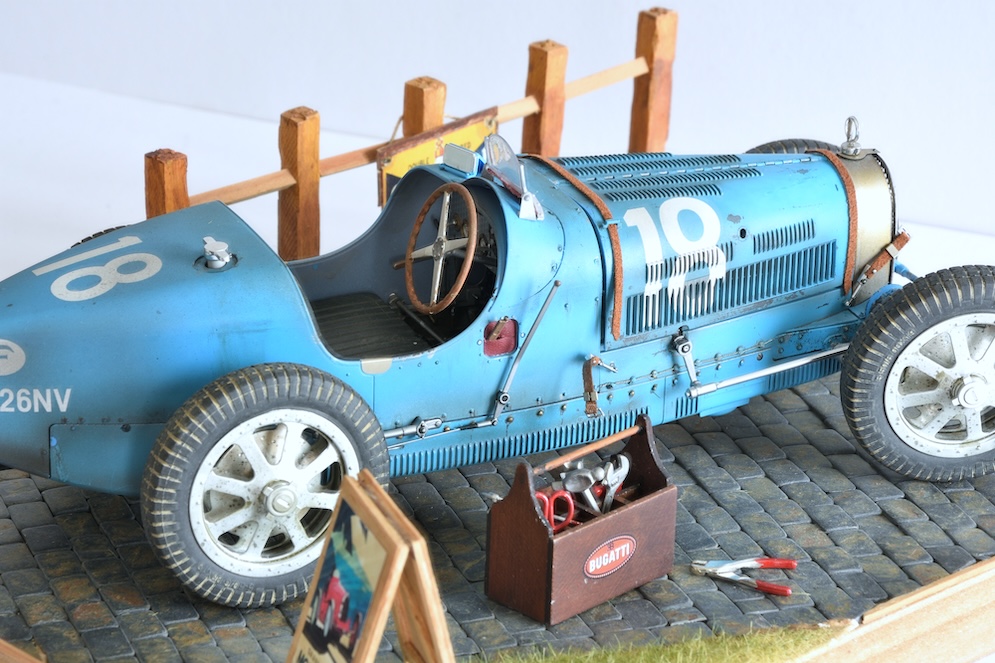
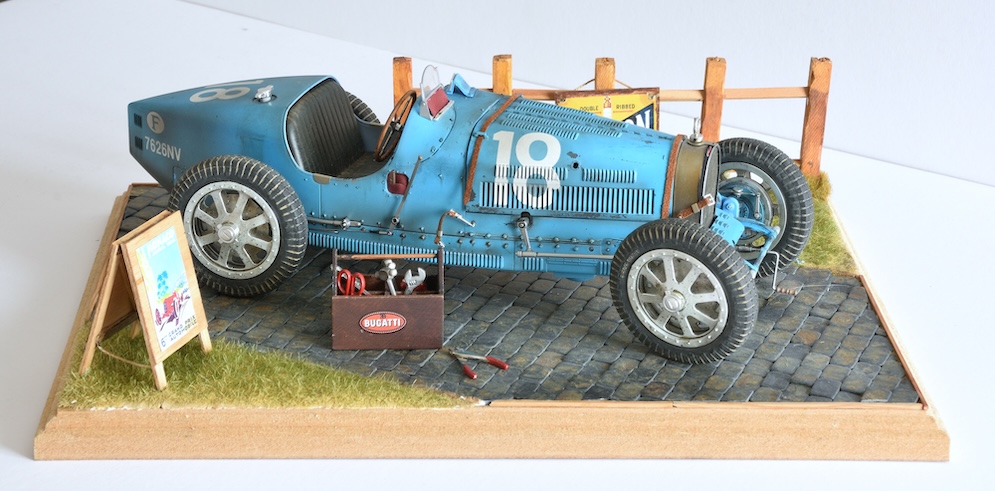
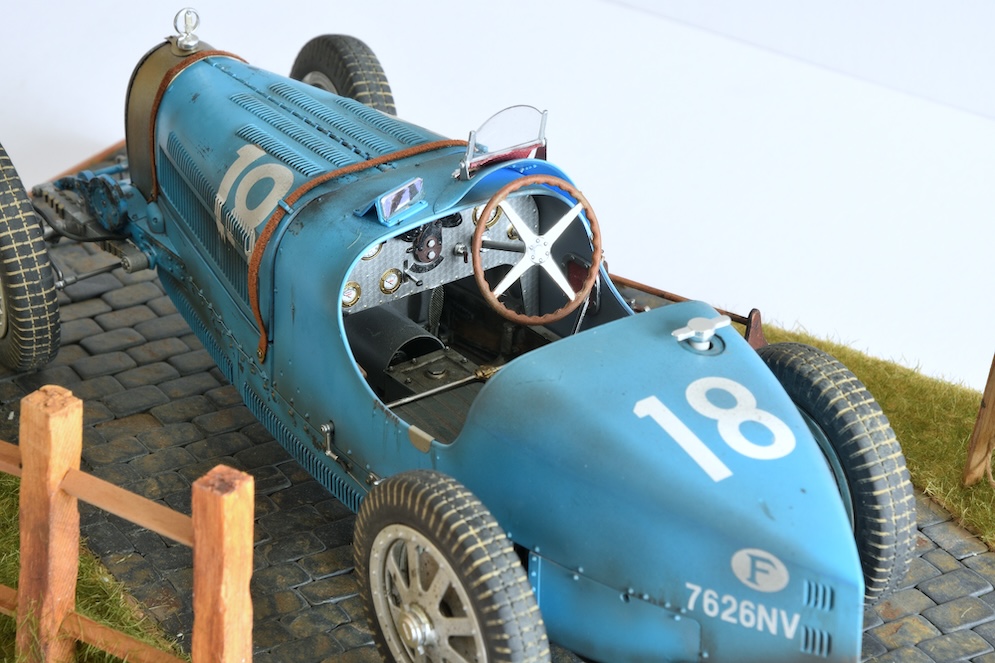
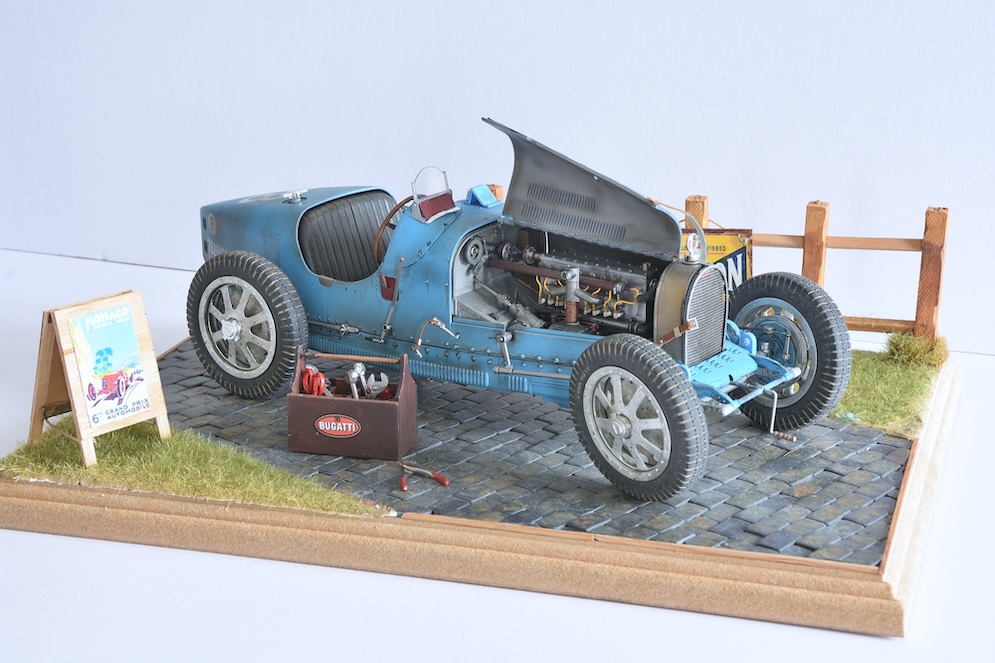
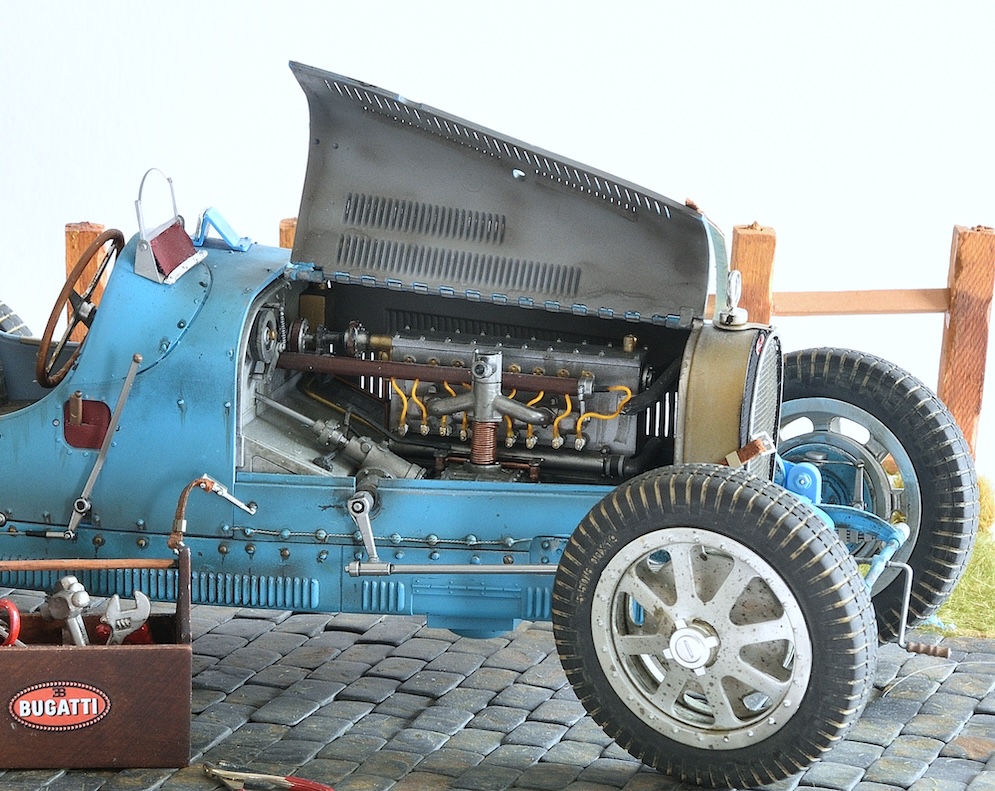
1:24 Bugatti VGT full resin kit.
More detail pictures for Blue colour version. See more at Alpha Model.
Alpha M.
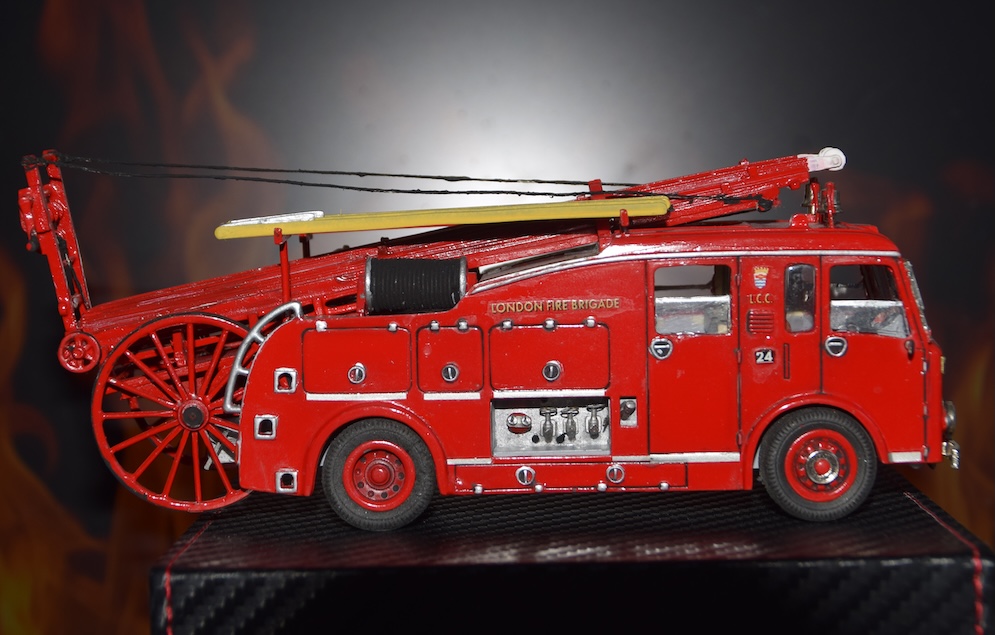
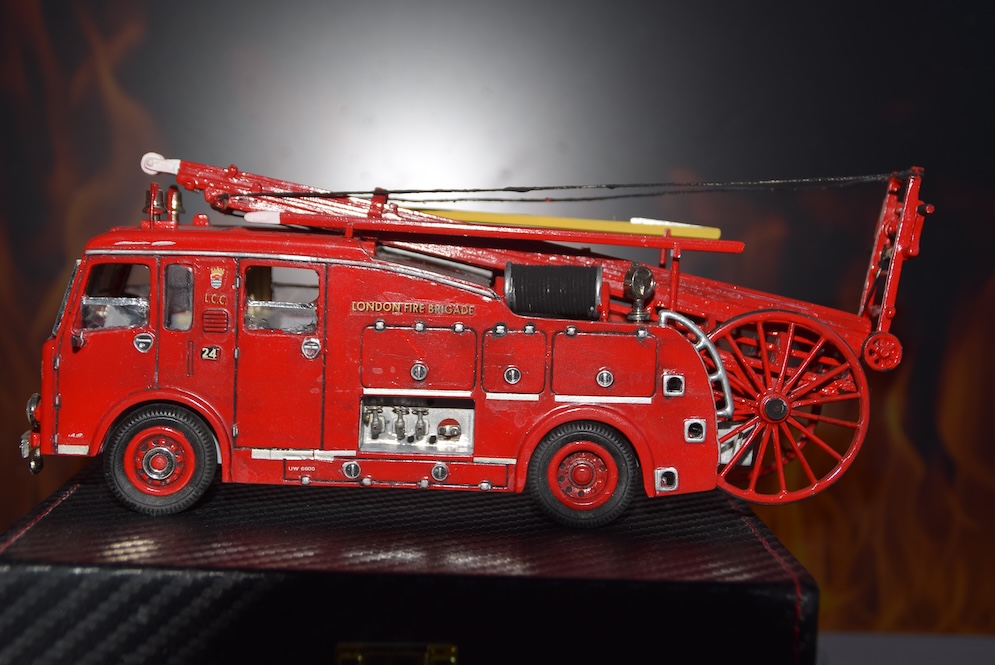
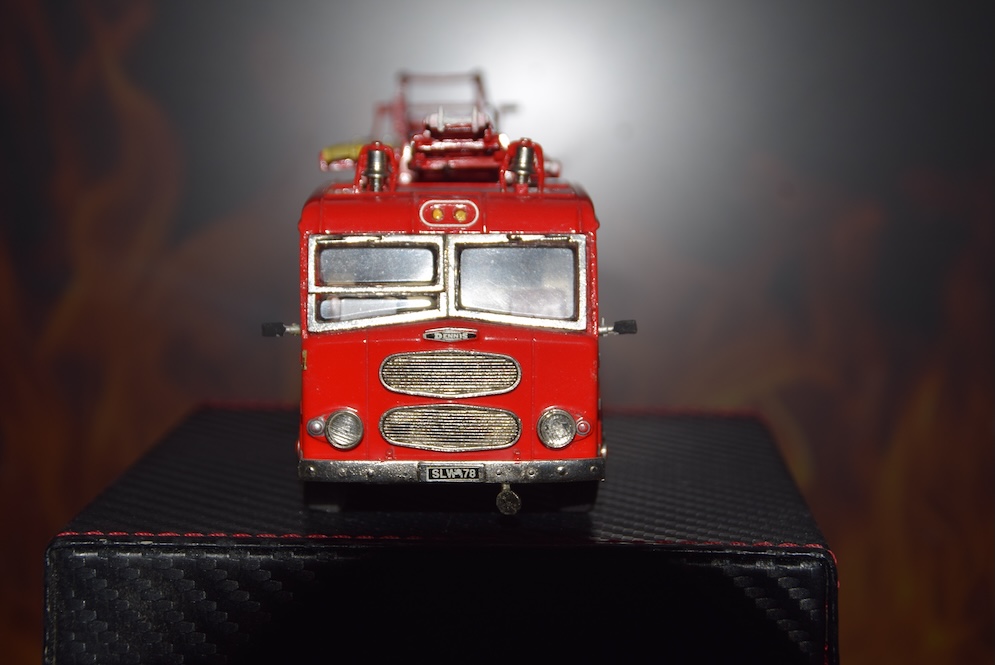
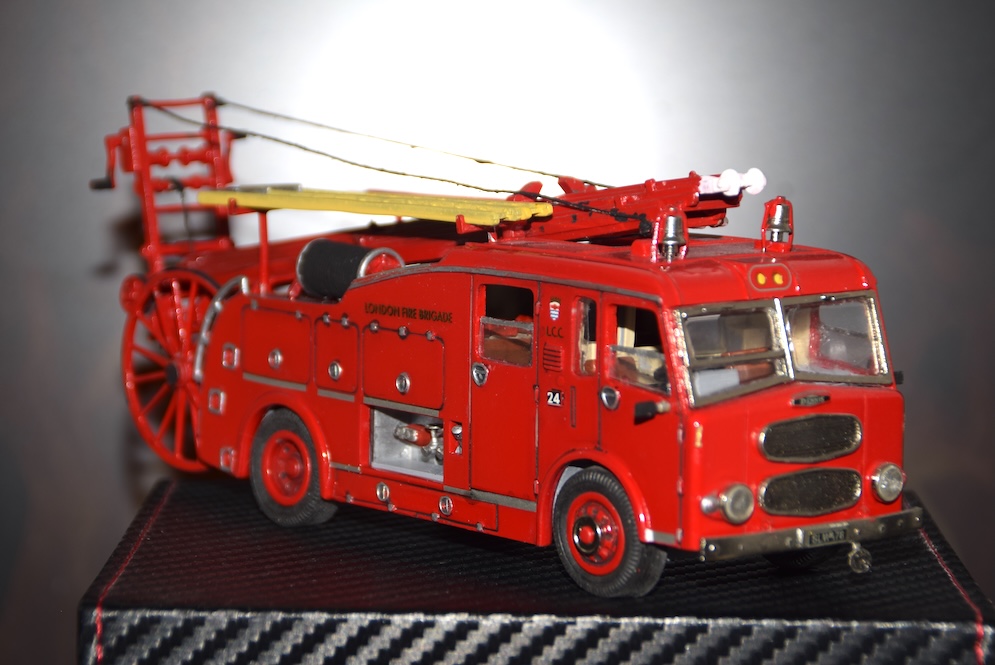
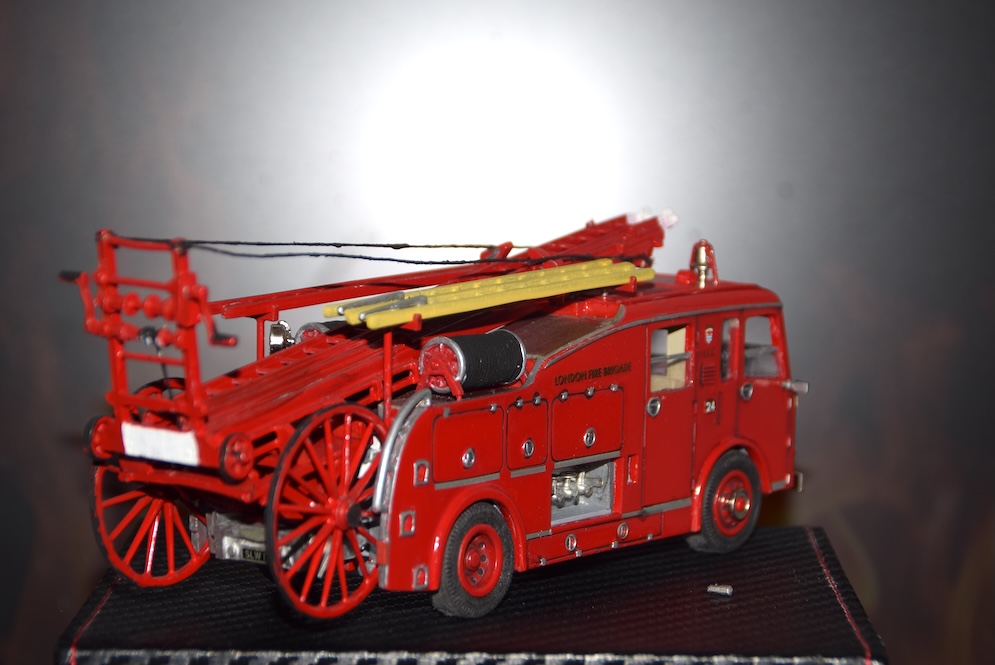

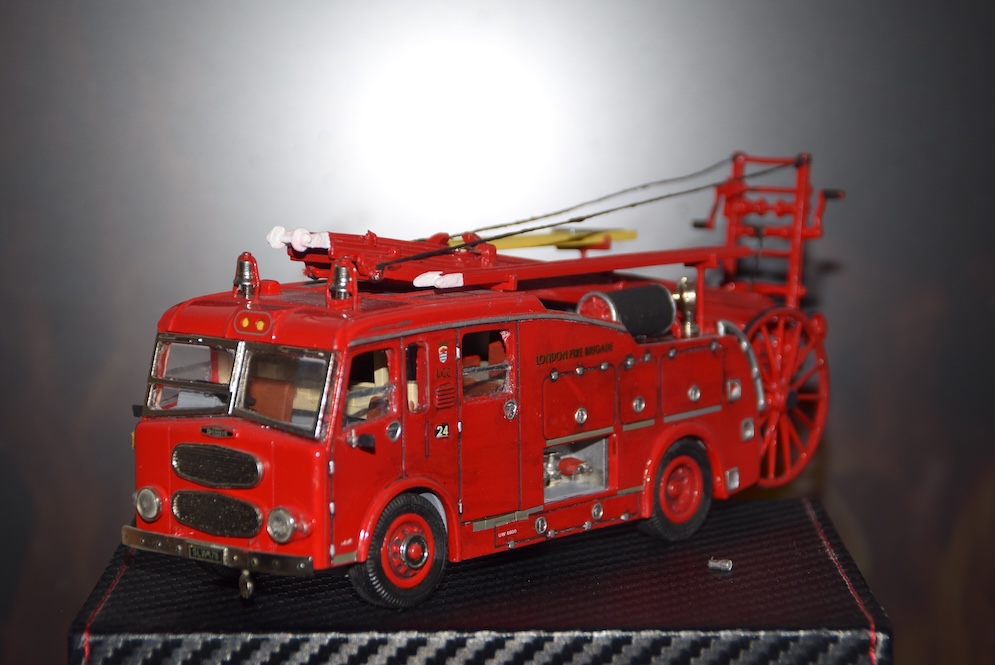

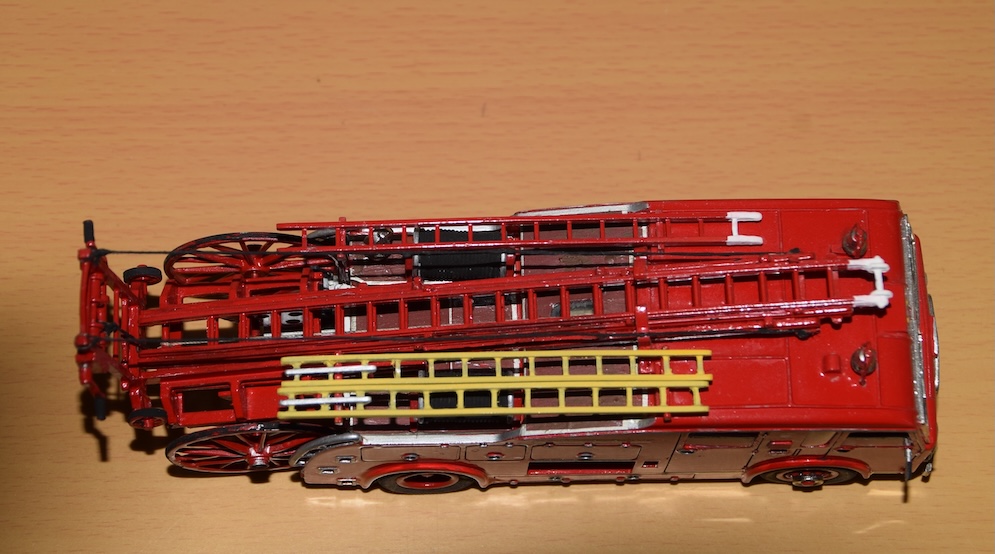
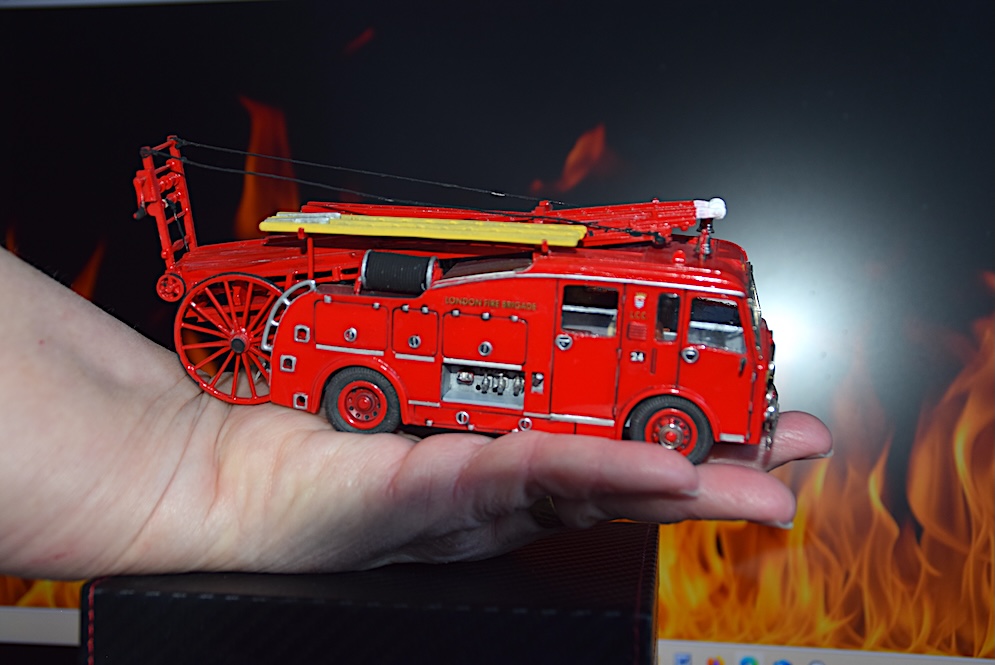
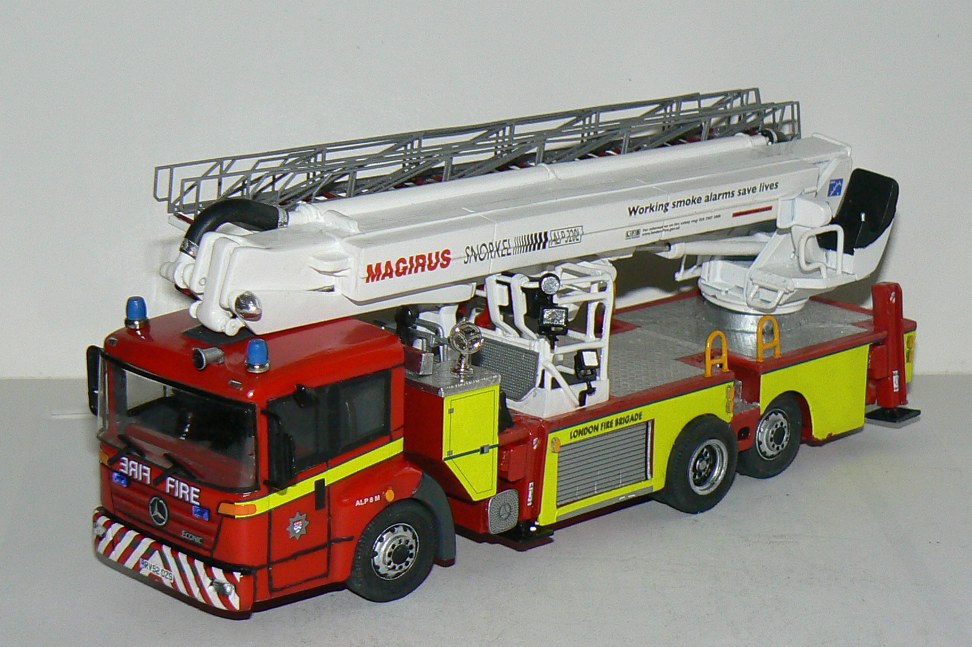
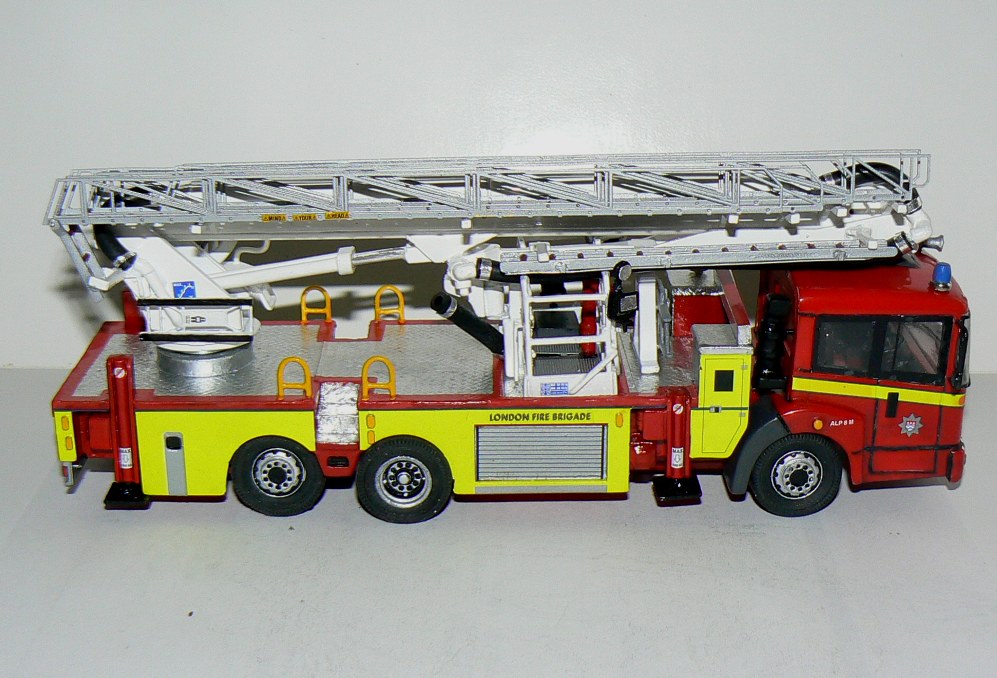
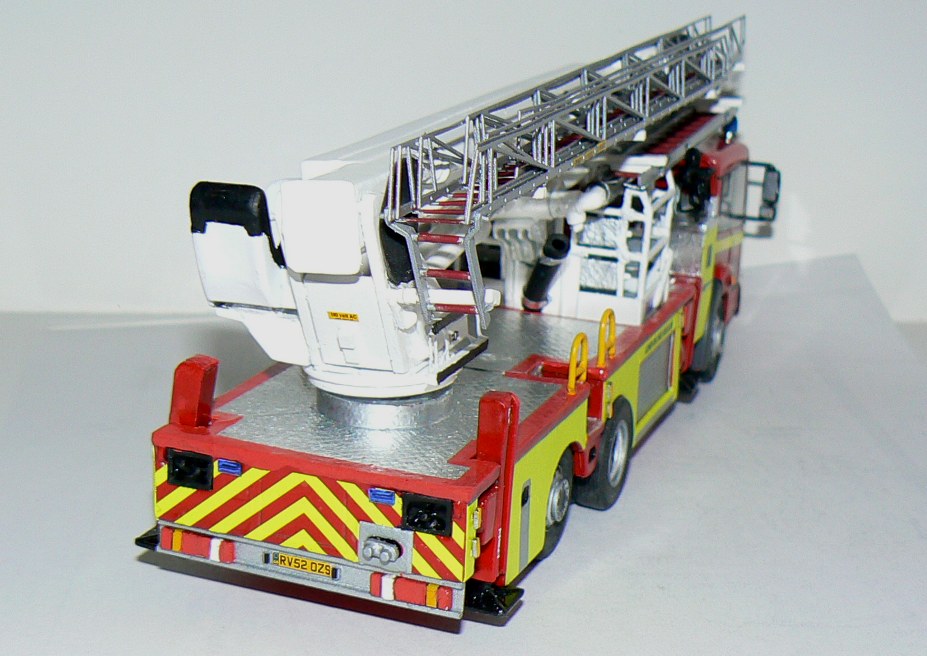
The price for these can be anything from £150 to £500 either already made or in kit form from Fire Brigade Models.
A multimedia kit comprising mostly of die-cast metal, chromed metal parts, decals and rubber tyres. The parts are very small and fiddly and need a fair amount of trimming and fitting ,holes have to be drilled out, flash has to be removed.
Painting is applied by auto spray cans. This one is the first one that I applied black pin wash to the door shuts. For me a thoroughly enjoyable journey to build them and another one for the display case with a mind to be extremely careful on the way.
Chris A.
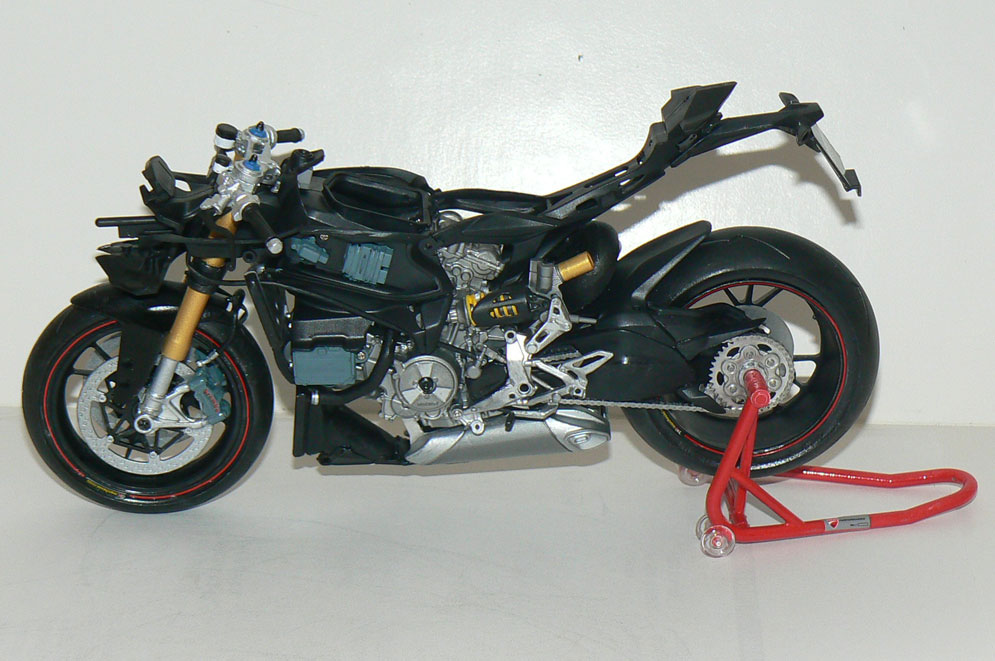
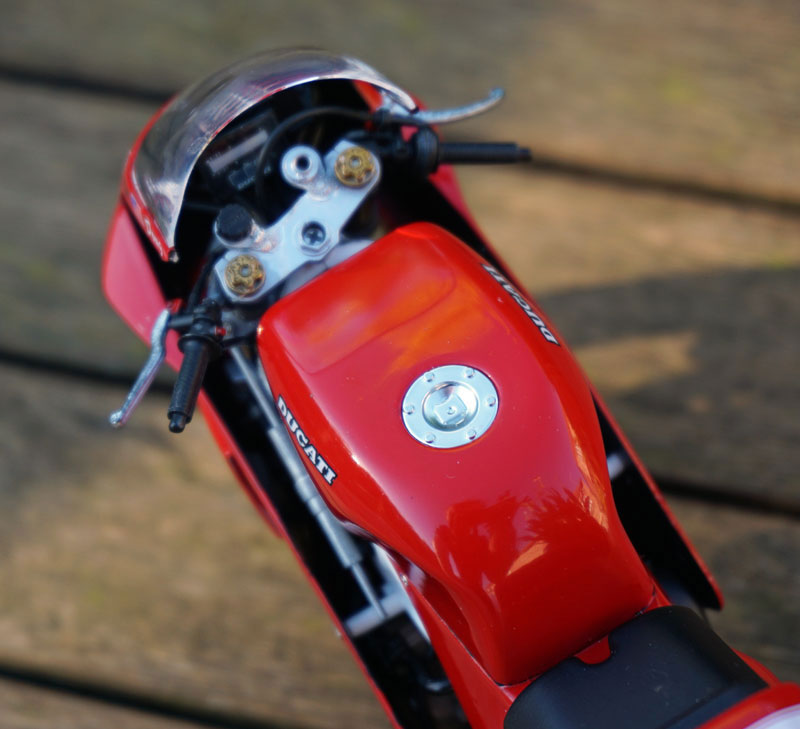
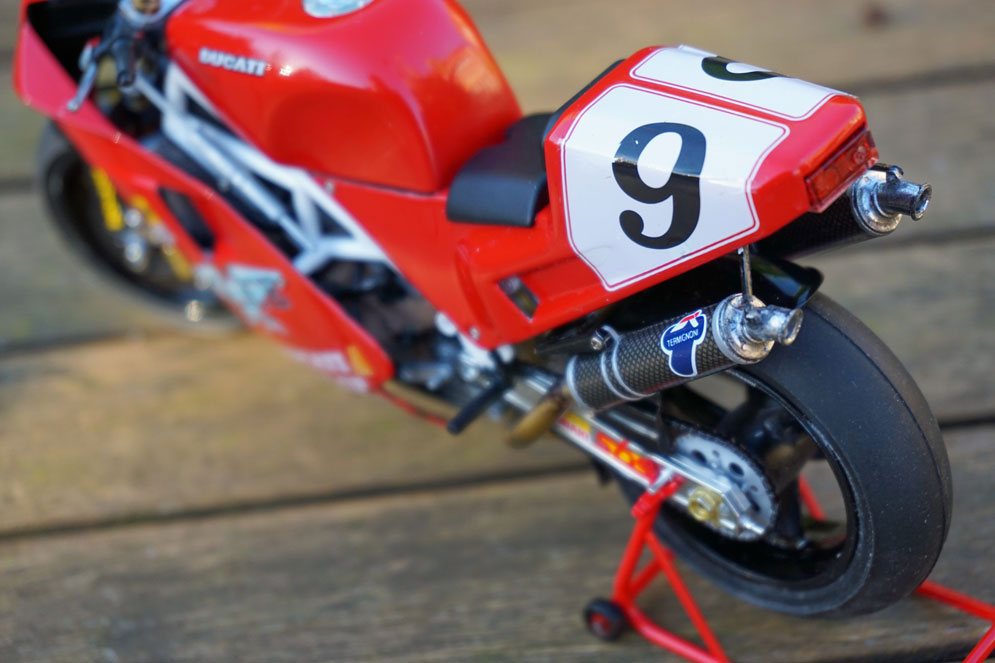
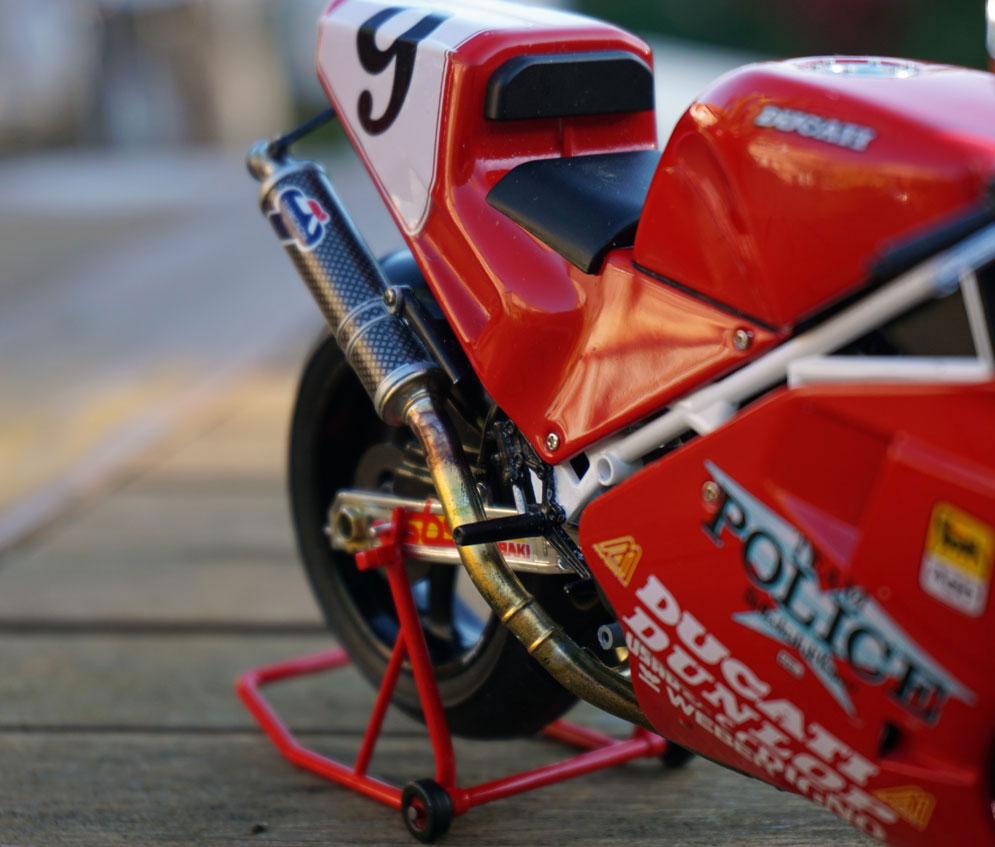
Pipe lines, screws, decals, clear parts and a lot of sprue parts and even a real spring; the quality and state of the art manufacture is noticeable in this kit. The front screen is just held in by a click – no need for glue. The only mod I made was to drill out all the holes in the brake discs.
I thoroughly enjoyed making this kit and can say it’s one of the best kits I’ve made in a long time.
Chris Addis
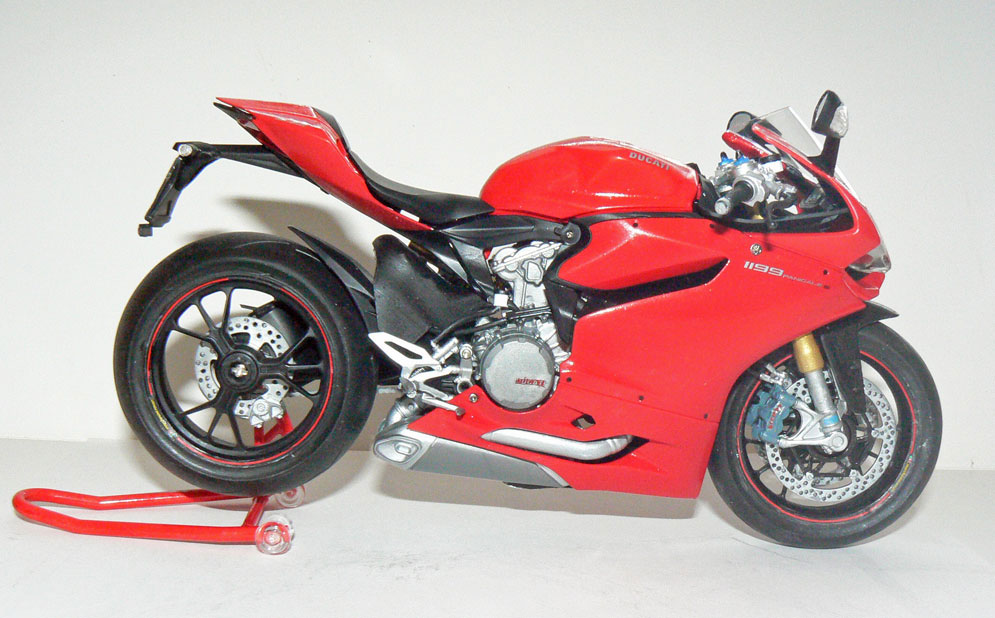
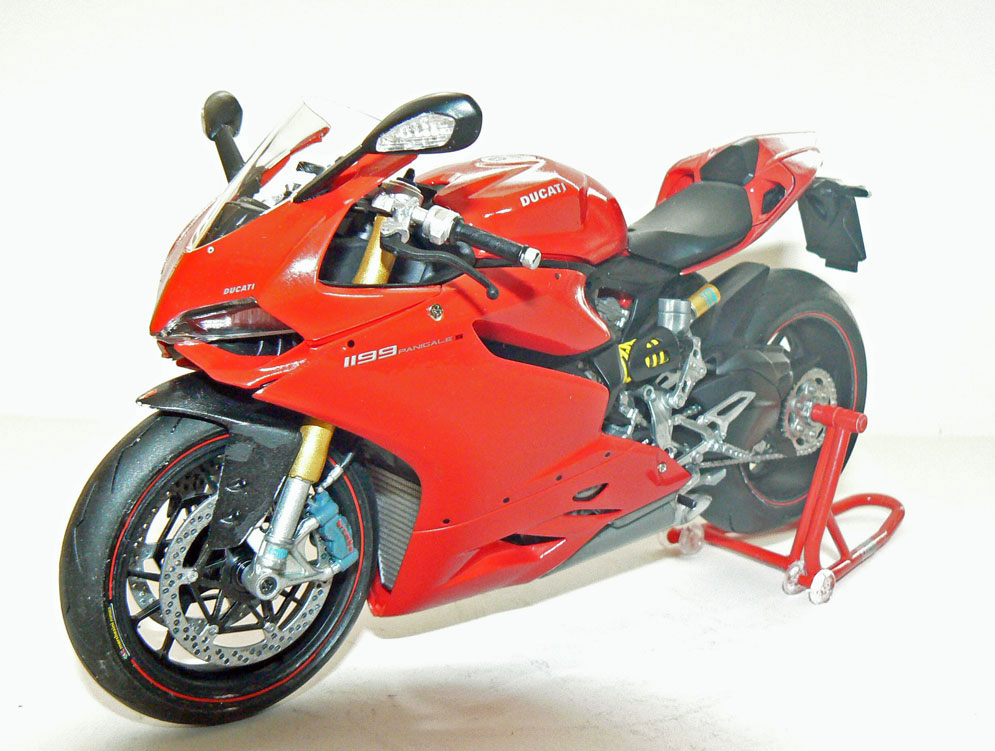
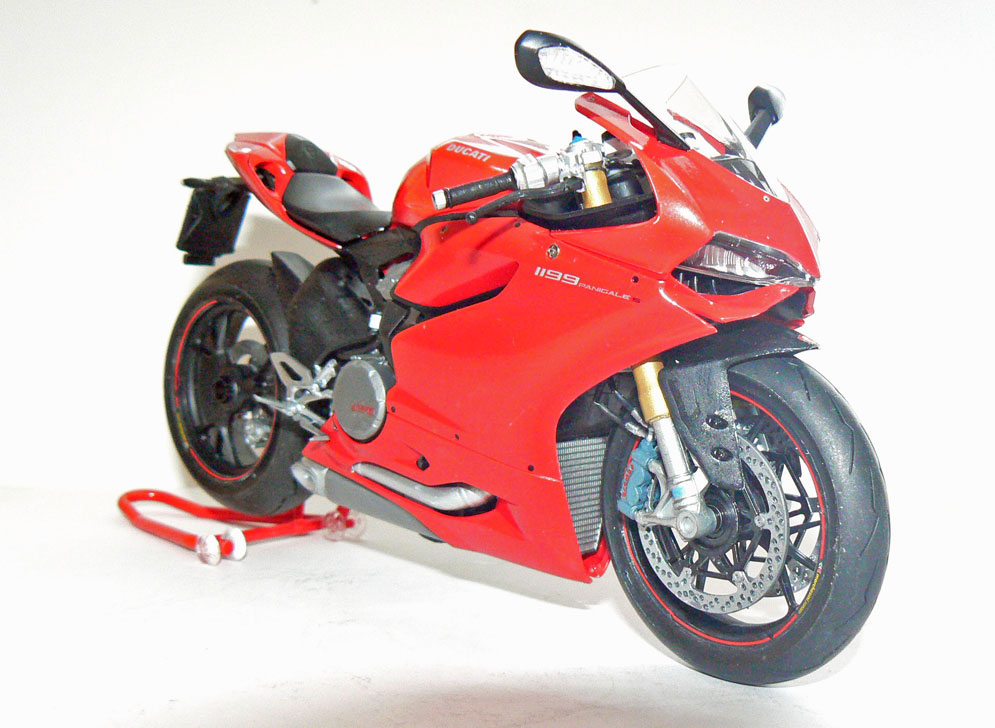
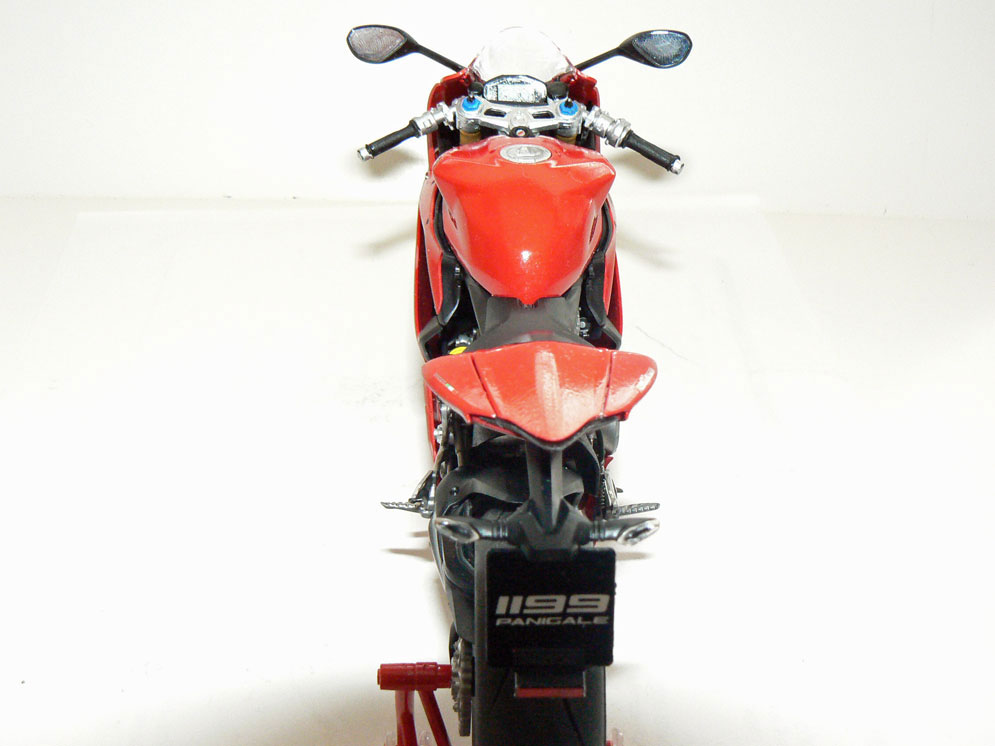
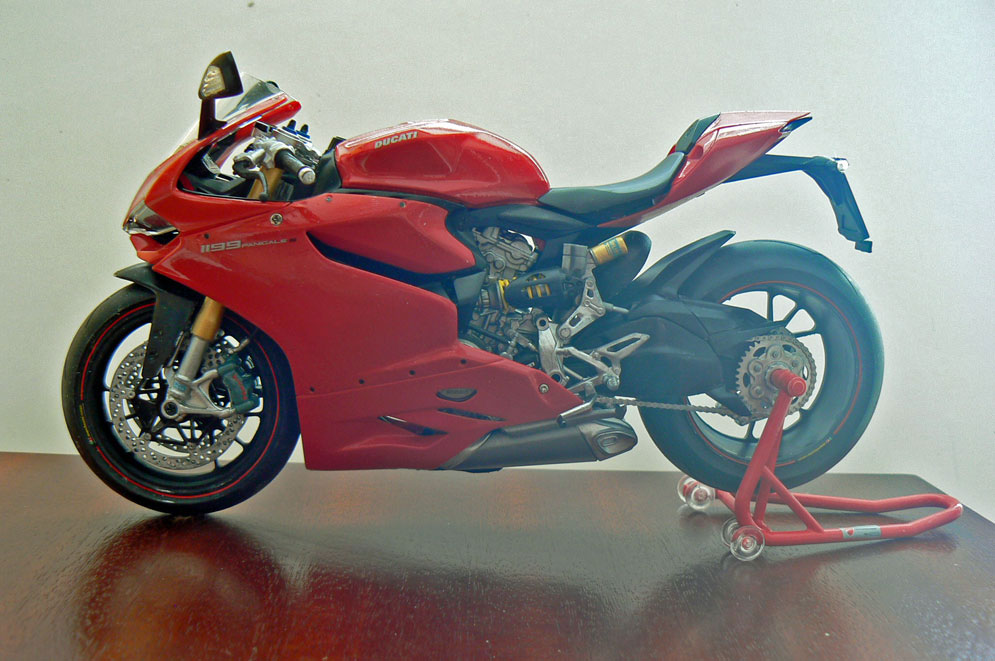

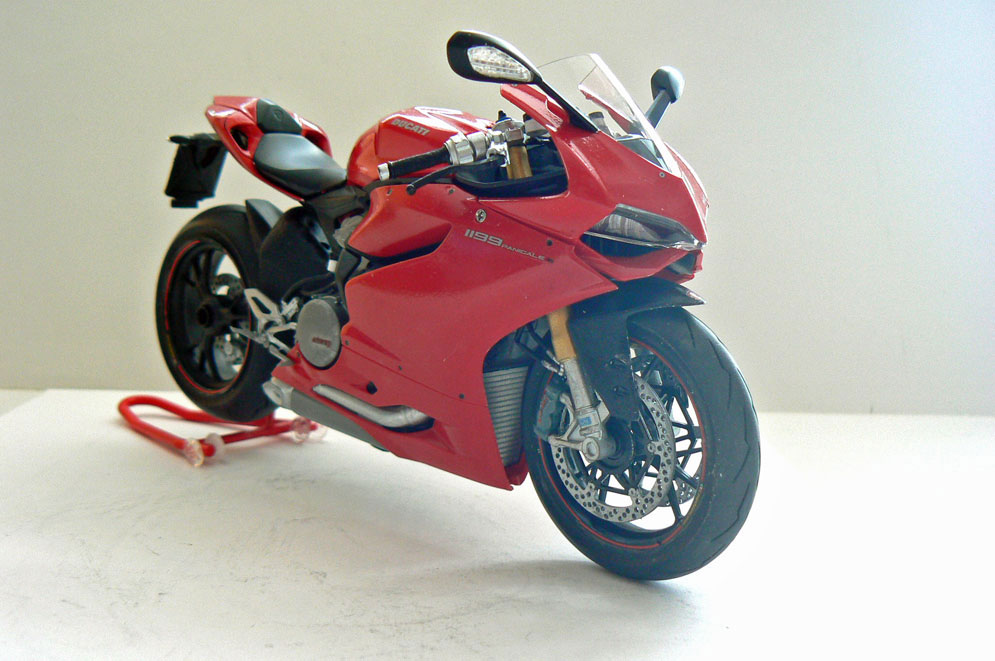
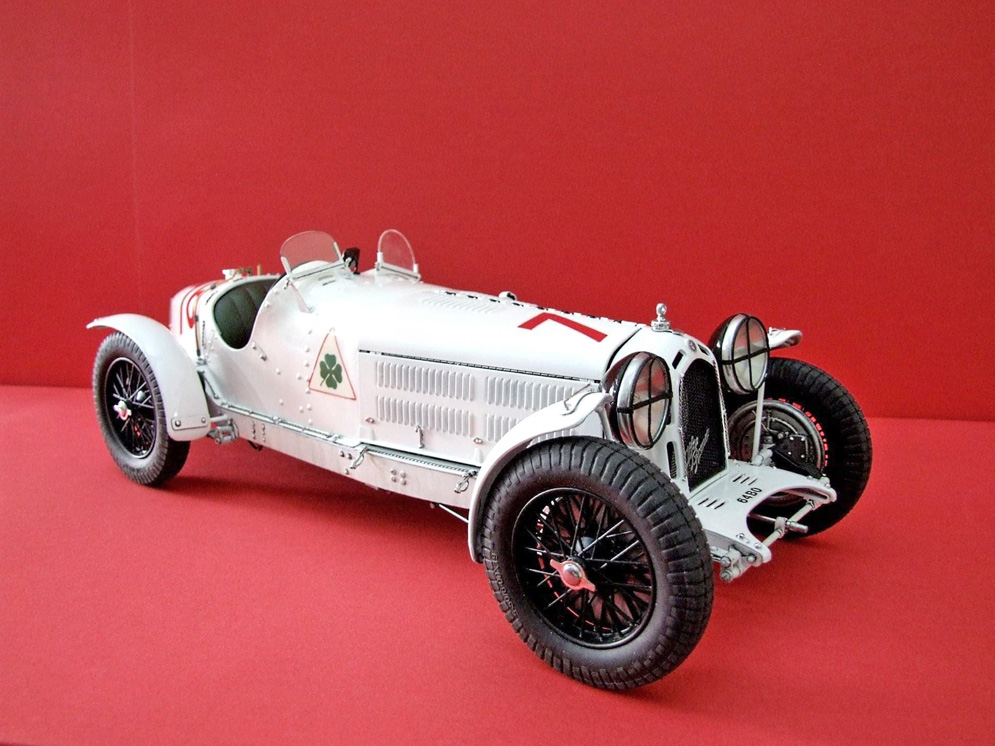
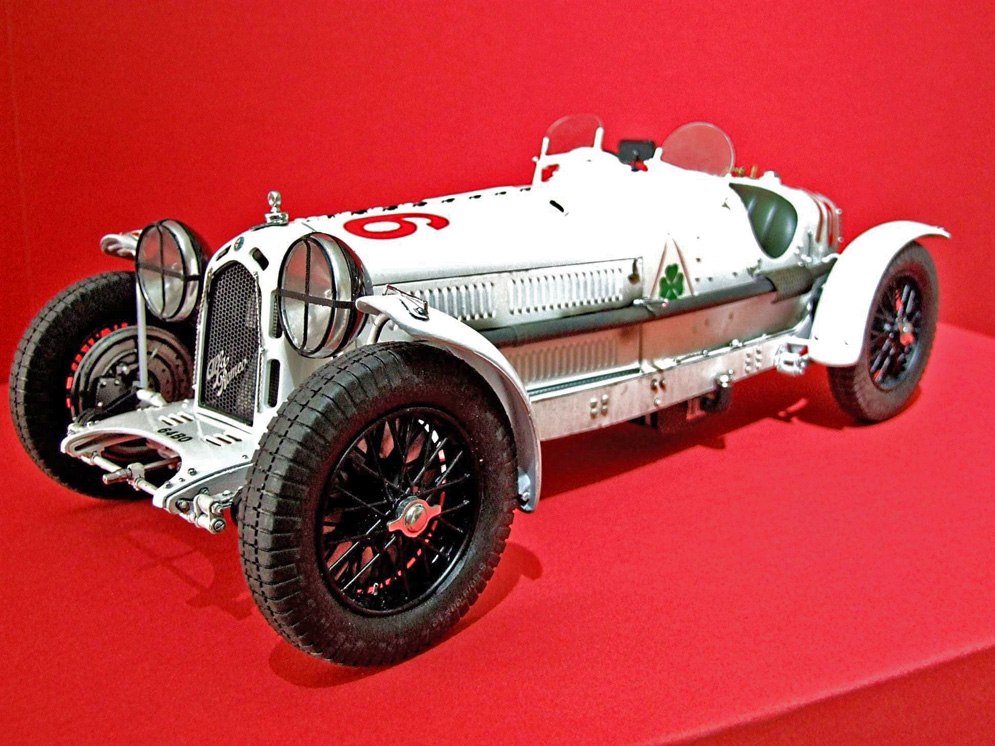
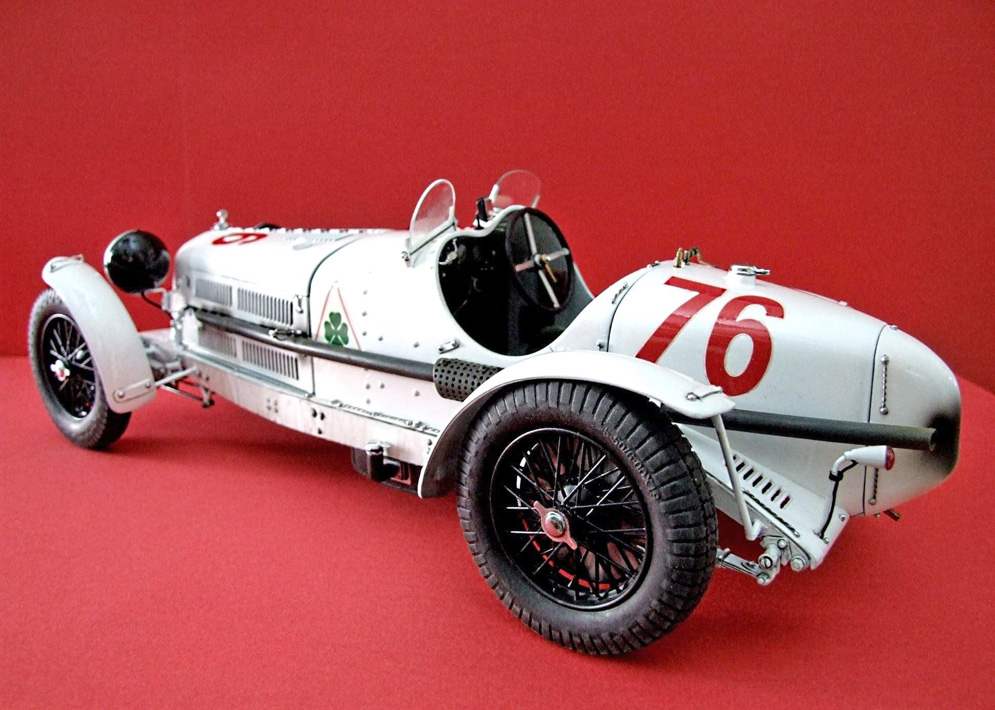
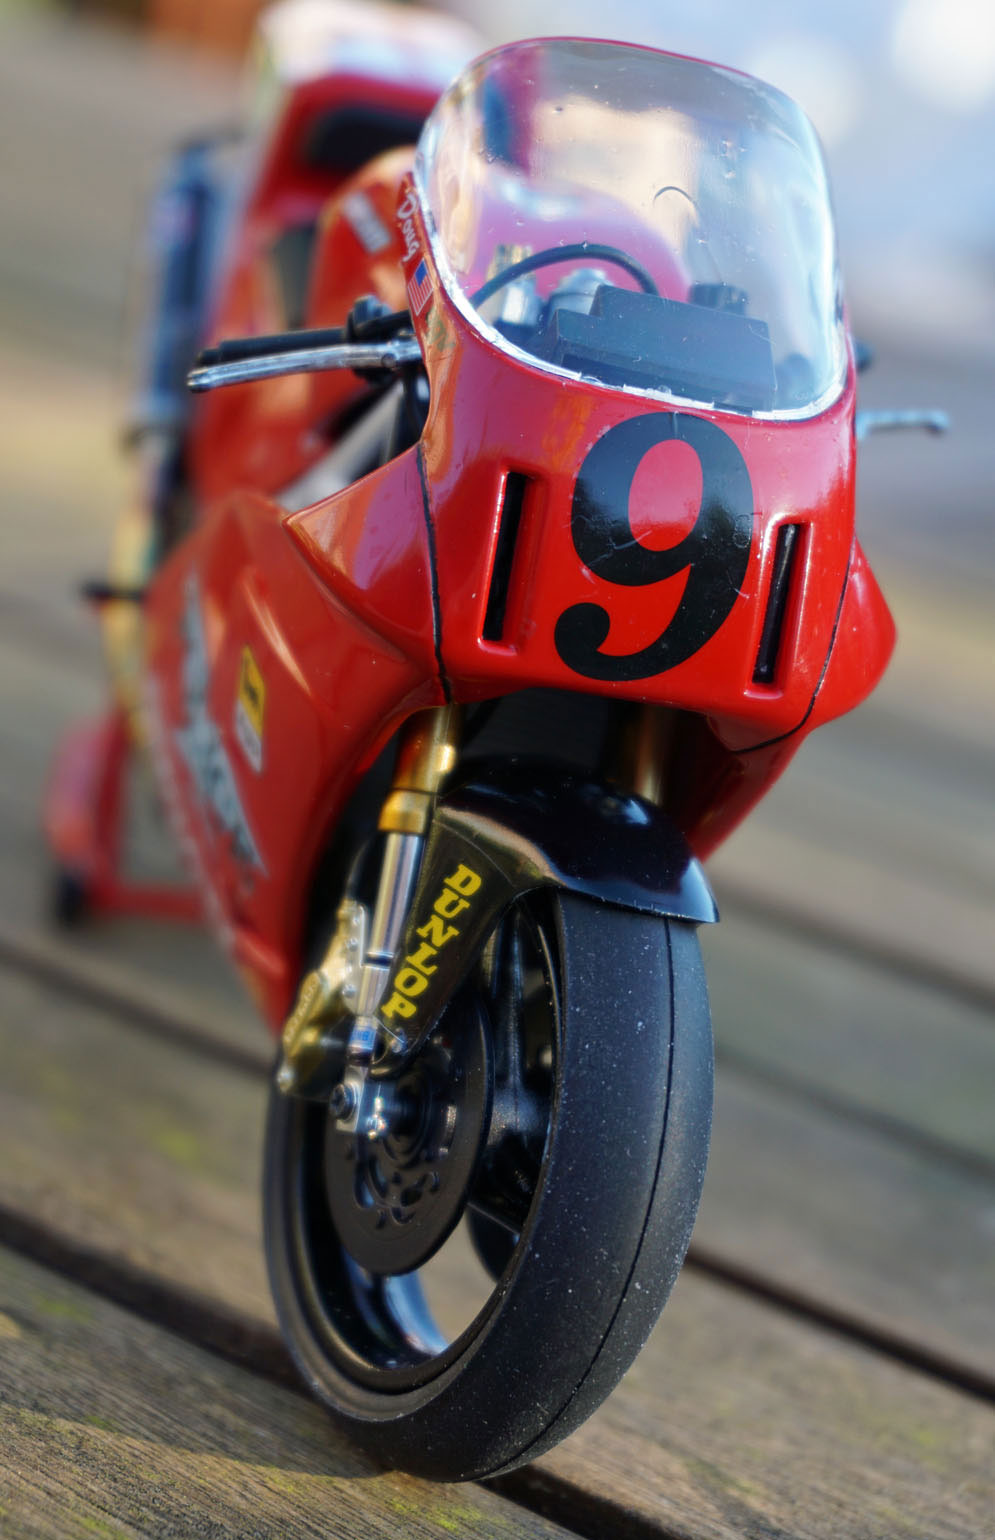
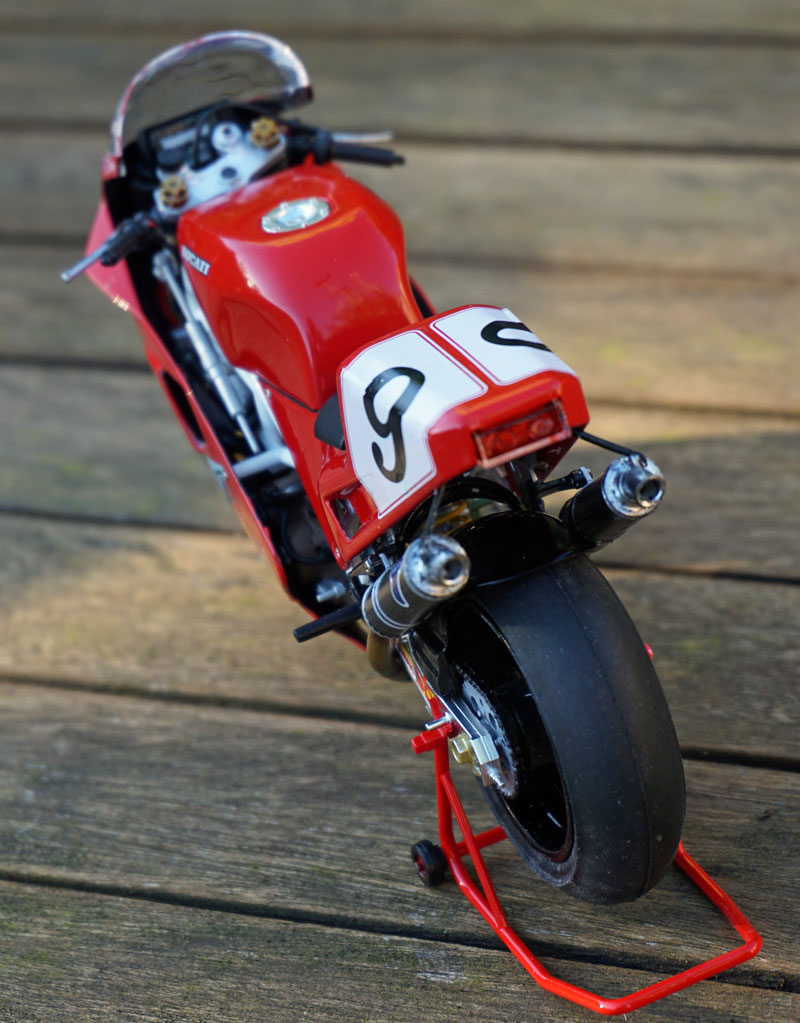
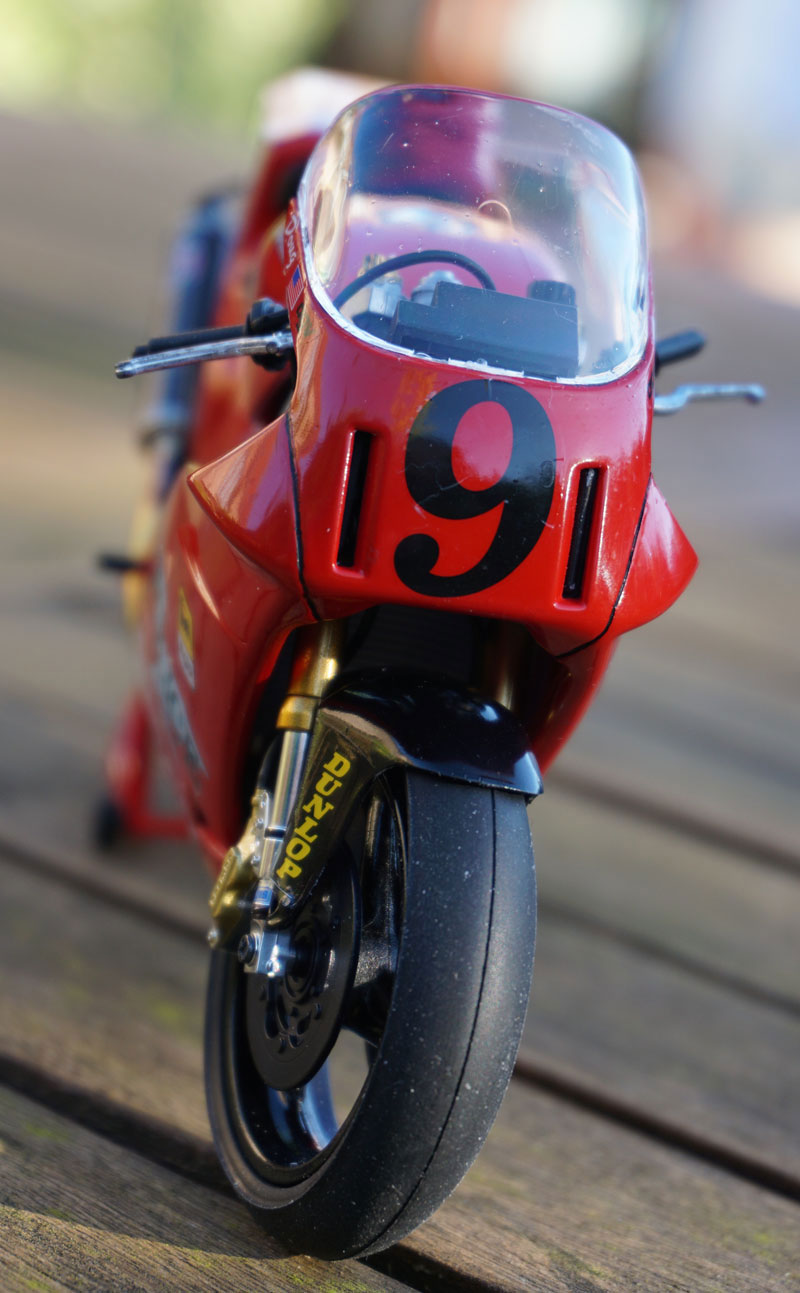
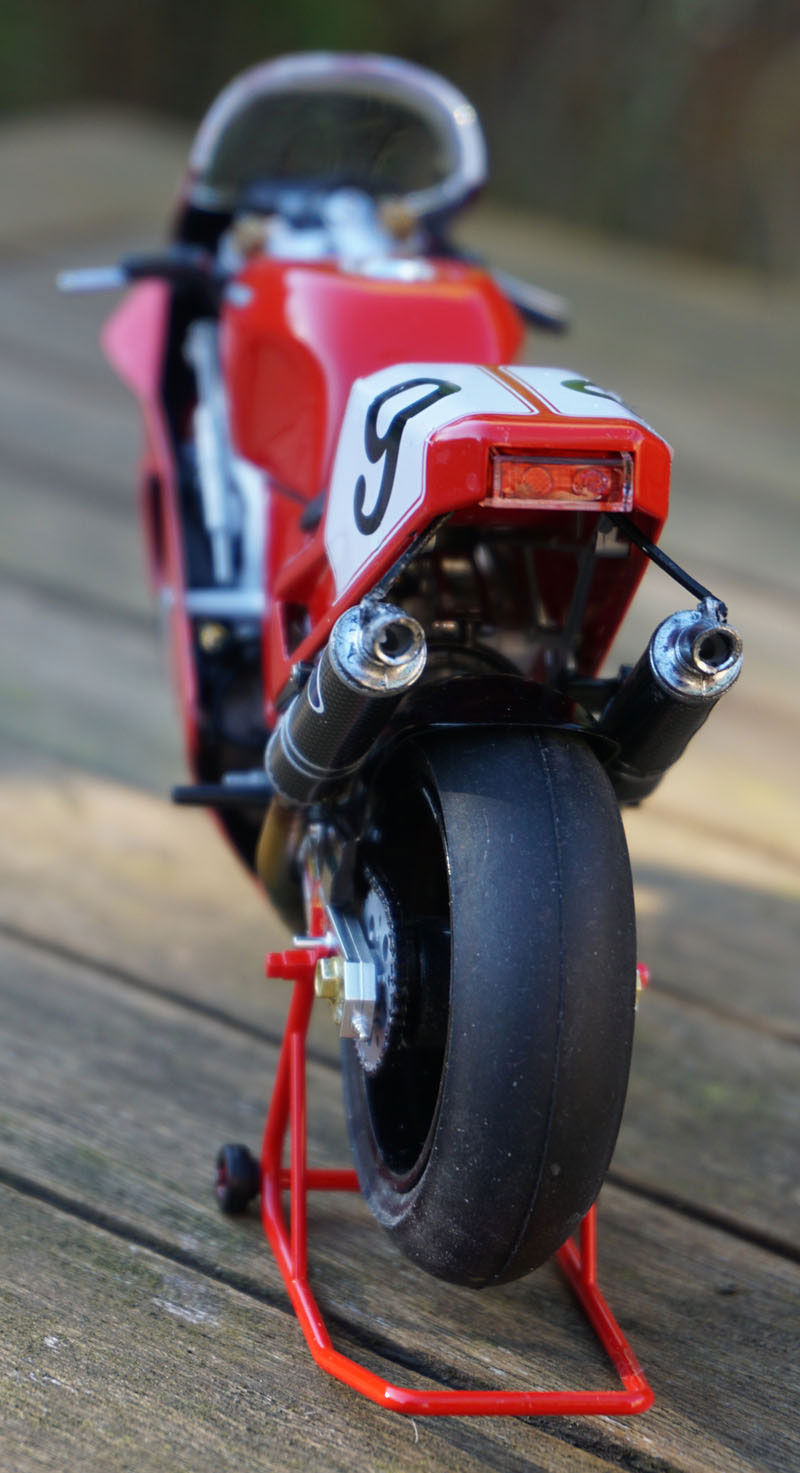
Used Zero Italian Red with two part clear, and polished.
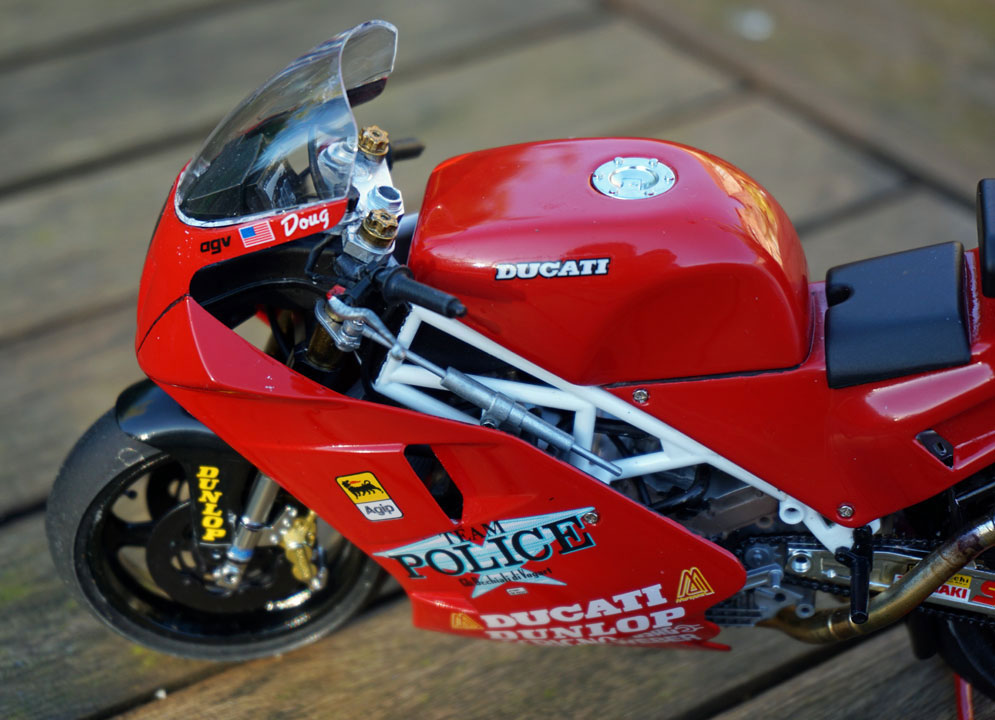
Fun build, no issues with fit, although regrettably some parts lost, despite trying to ensure when cut from the sprue they didn`t fly across the room.
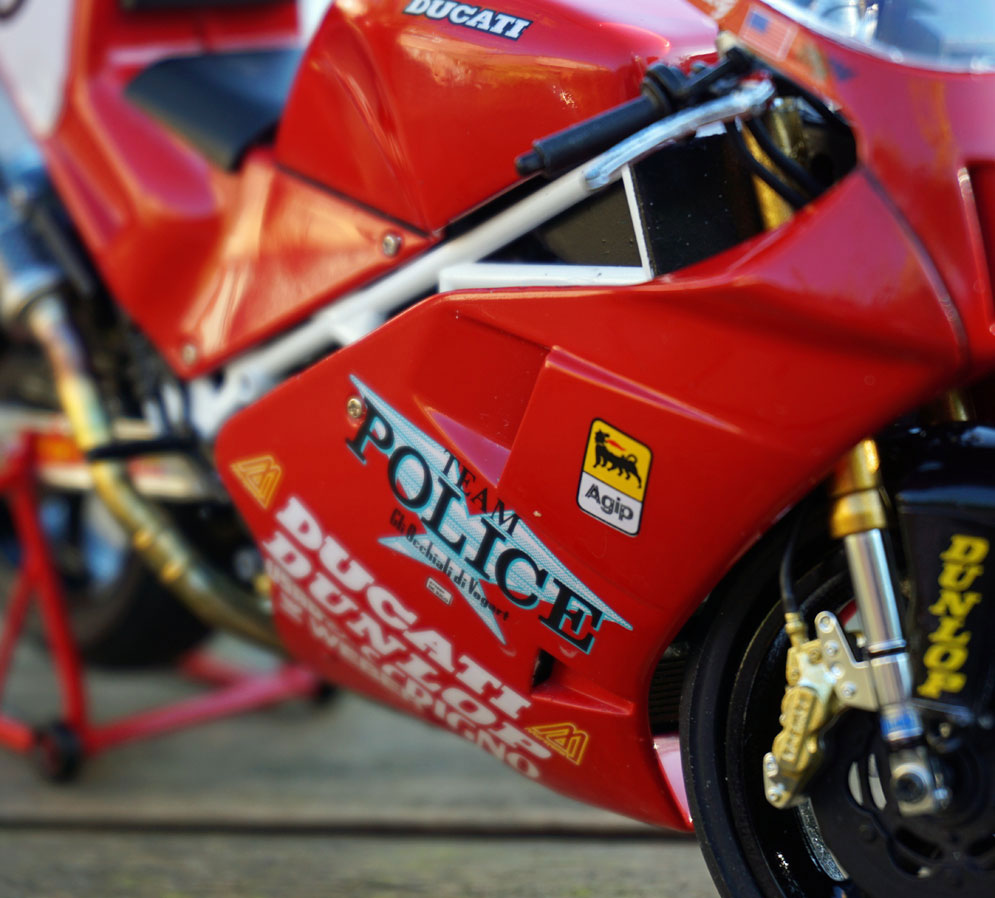
Used Zero White for frame and mainly Alclad 2 paints for engine etc.
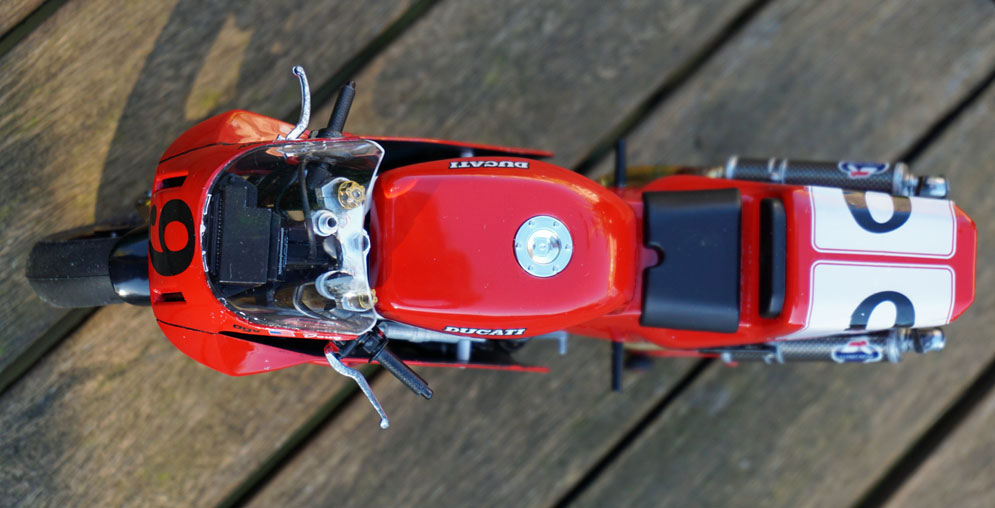
One issue with front white decal, despite cutting and use of Micro Set and Sol decal softening solutions, I just couldn`t get it to sit properly, so gave up and simply used the number 9.
Also first time used carbon fibre decals, on next use need to avoid overlap, less forgiving than kit decals.
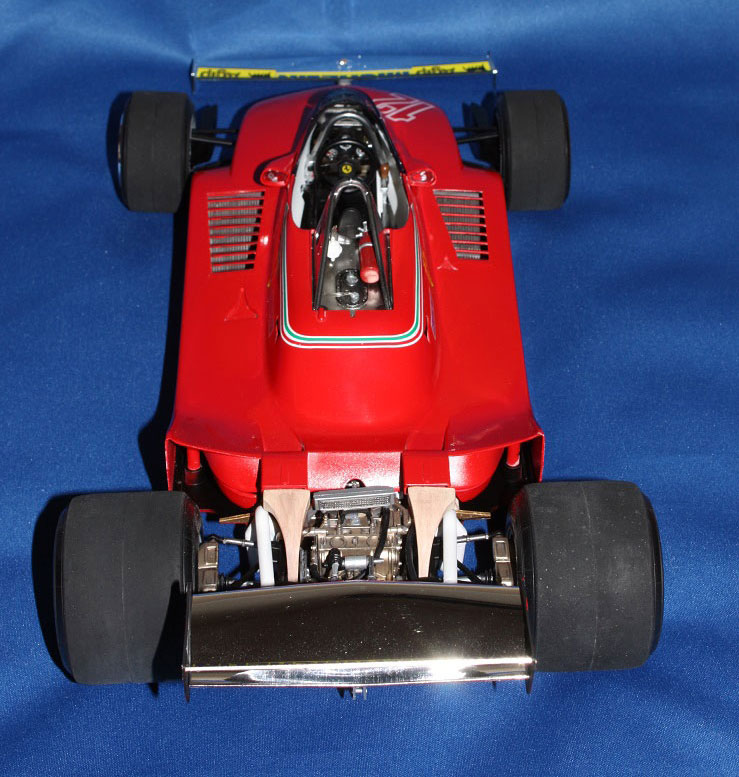
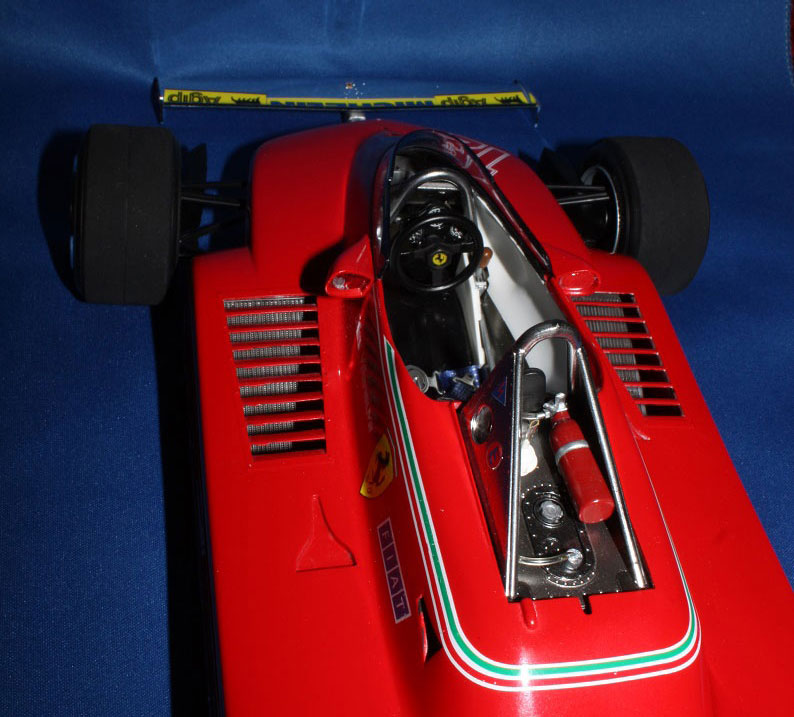
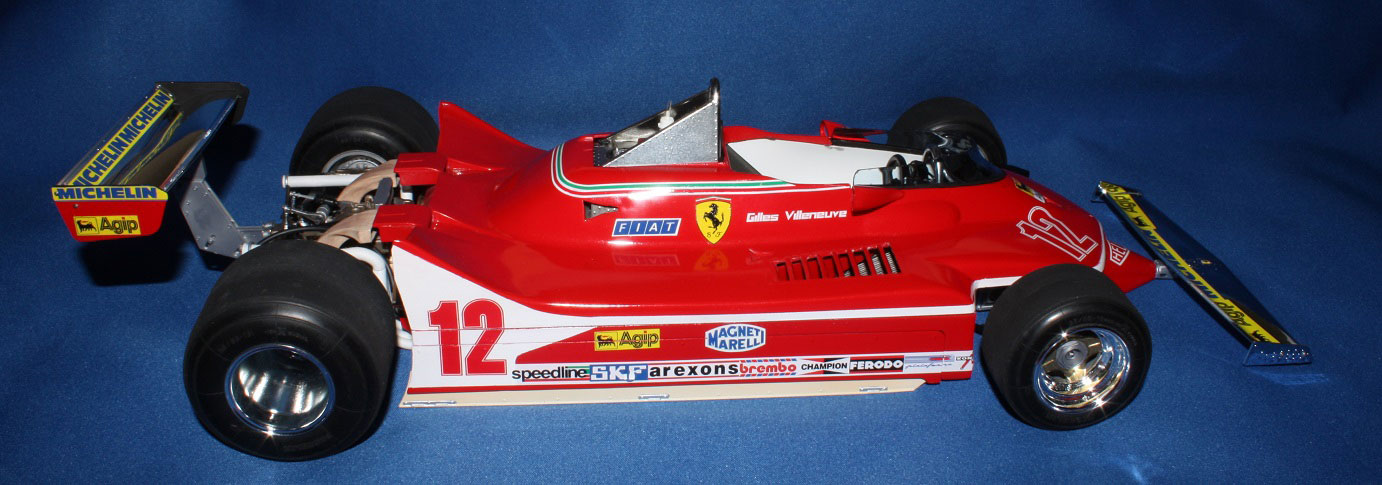
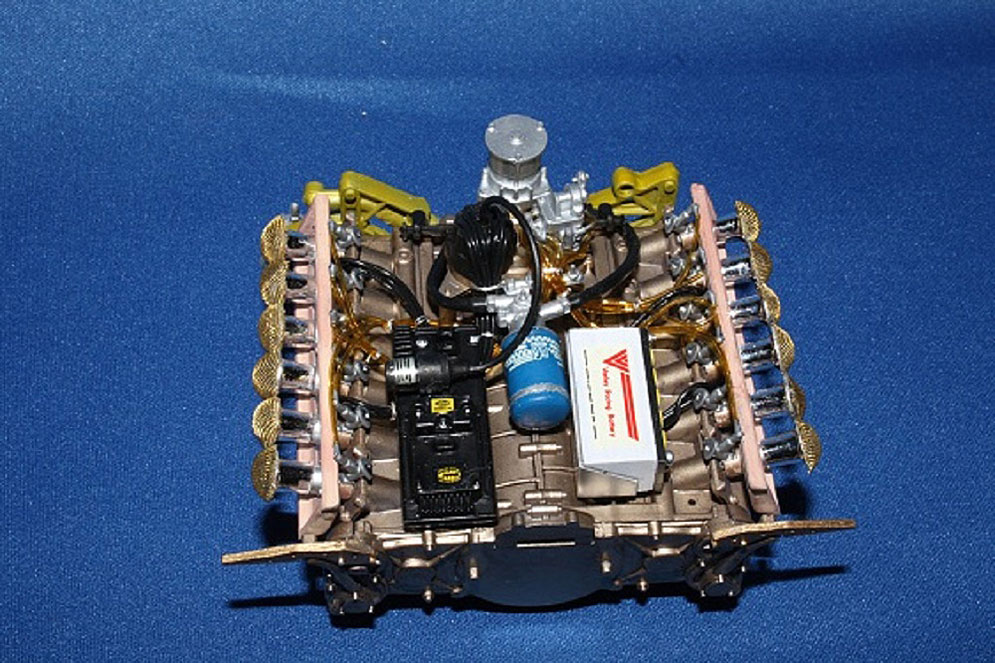
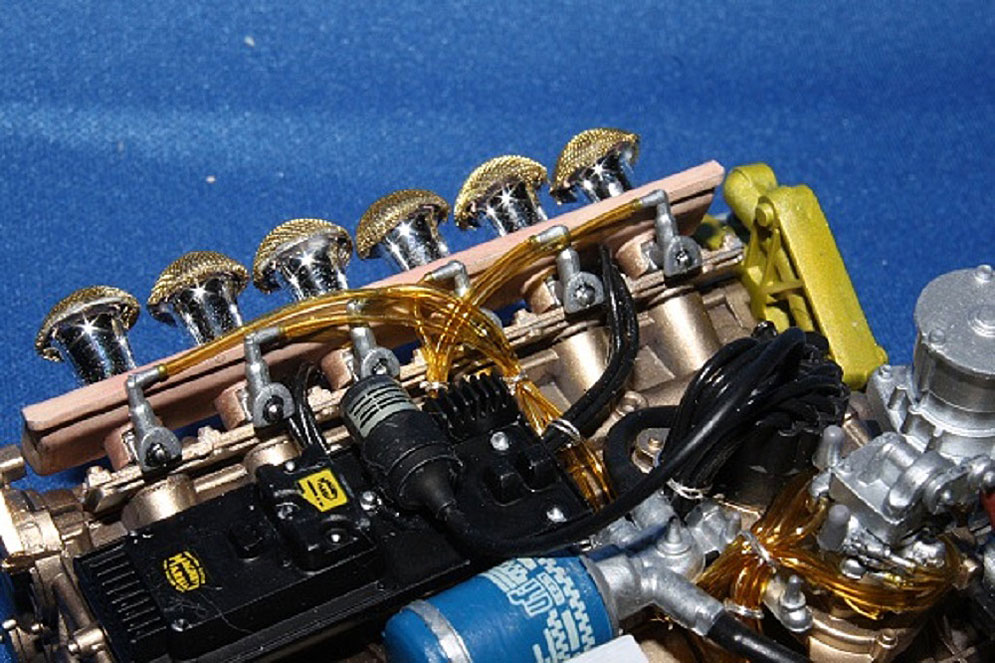
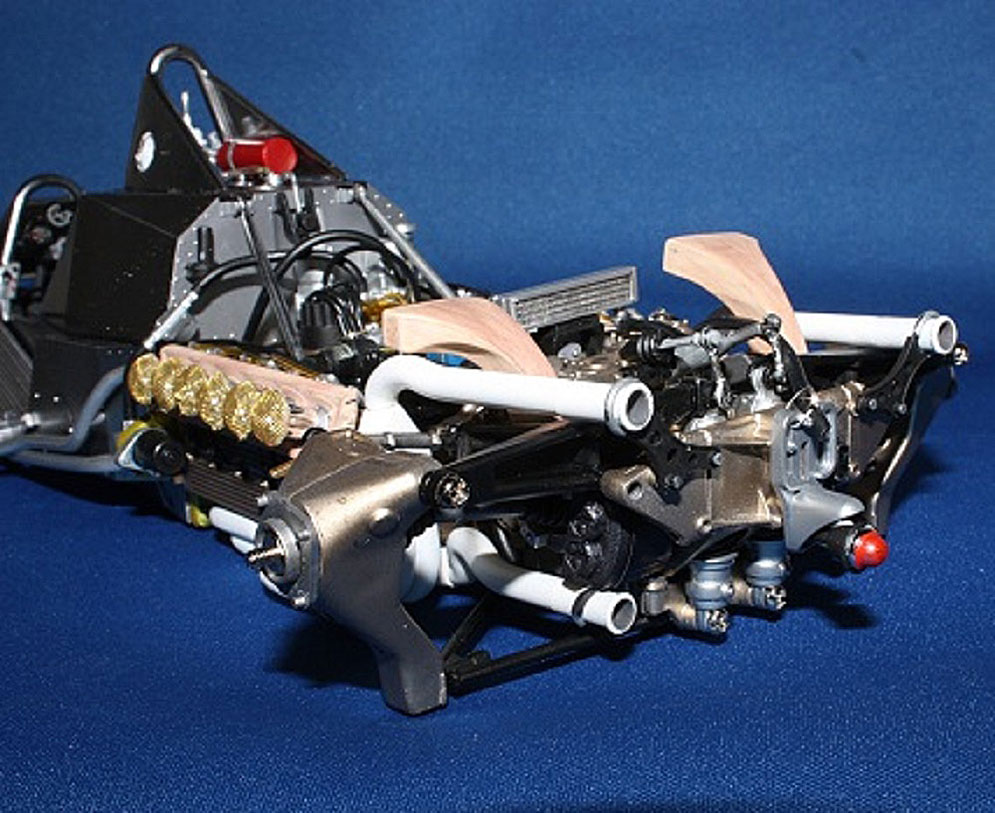
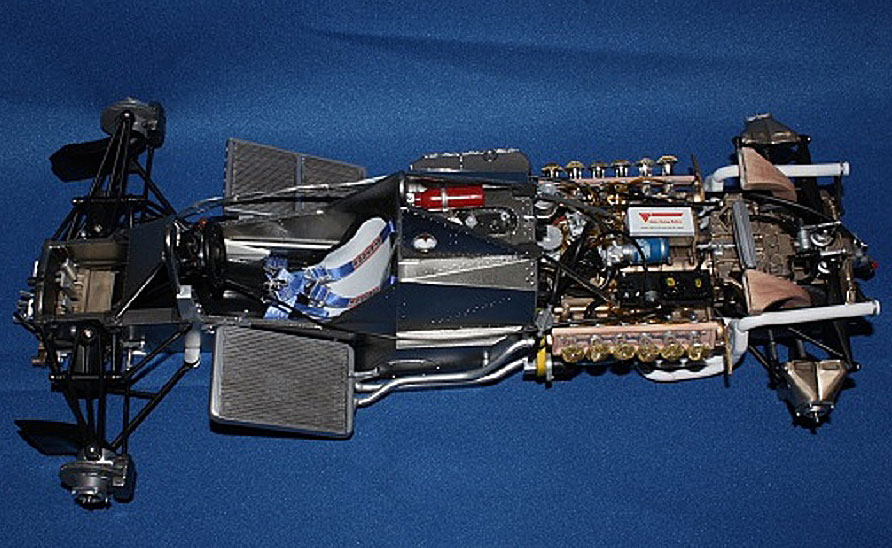
The kit is an original 1980s release so now well over 30 years old but in true Tamiya style still holds its own. At 380mm long it’s an impressive build and with full engine, gearbox and cockpit detail it builds into a fantastic replica straight out of the box. The only aftermarket parts used were yellow tube to replace the clear fuel lines provided in the kit and a set of new decals due to the age of those in the box.
Painting was done using Alclad II paints for the engine block and chassis with Zero paints 1980s Ferrari Red for the bodywork and Zero Clearcoat to seal in the decals. The wing elements are the kit chrome parts with a coat of Zero clear.
Decaled up as the No.12 car driven by Gilles Villeneuve the 312T4 is one of Tamiya’s best big scale F1 cars full of detail and a joy to build.
Cheers,Warren M.


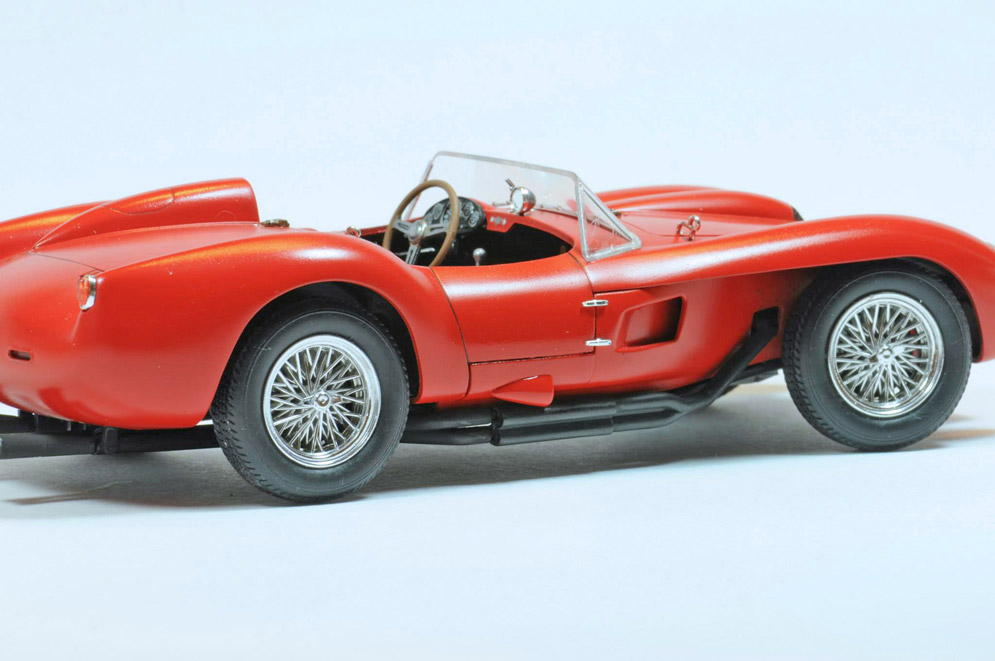
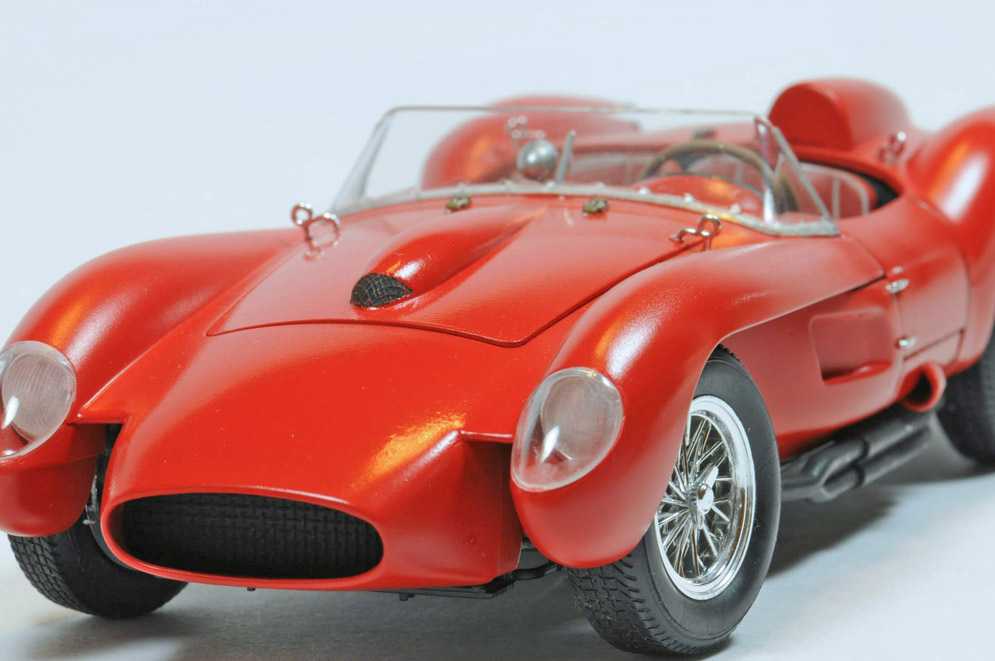

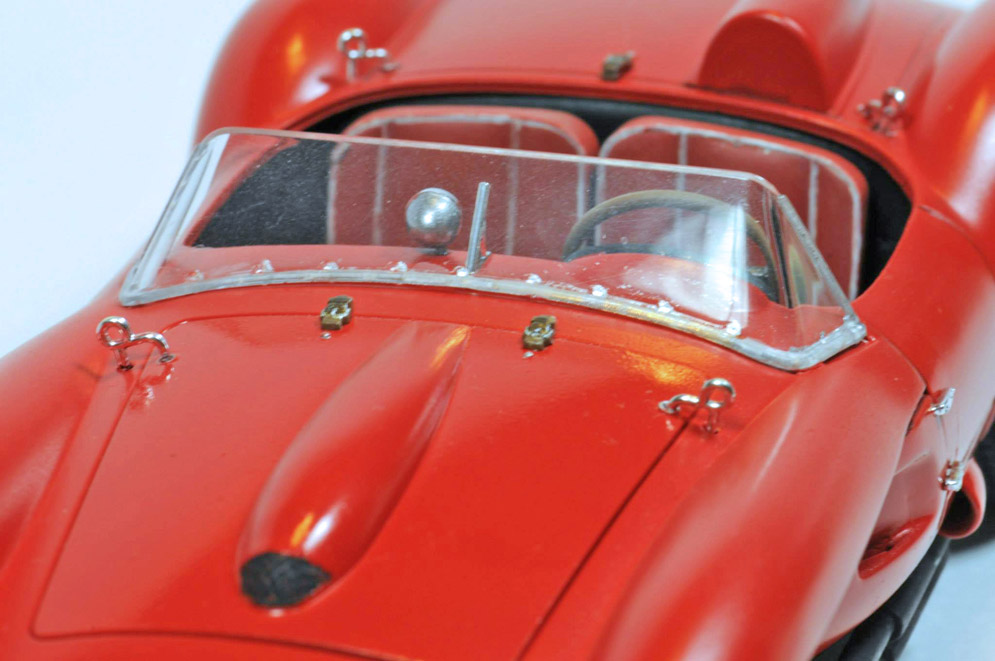
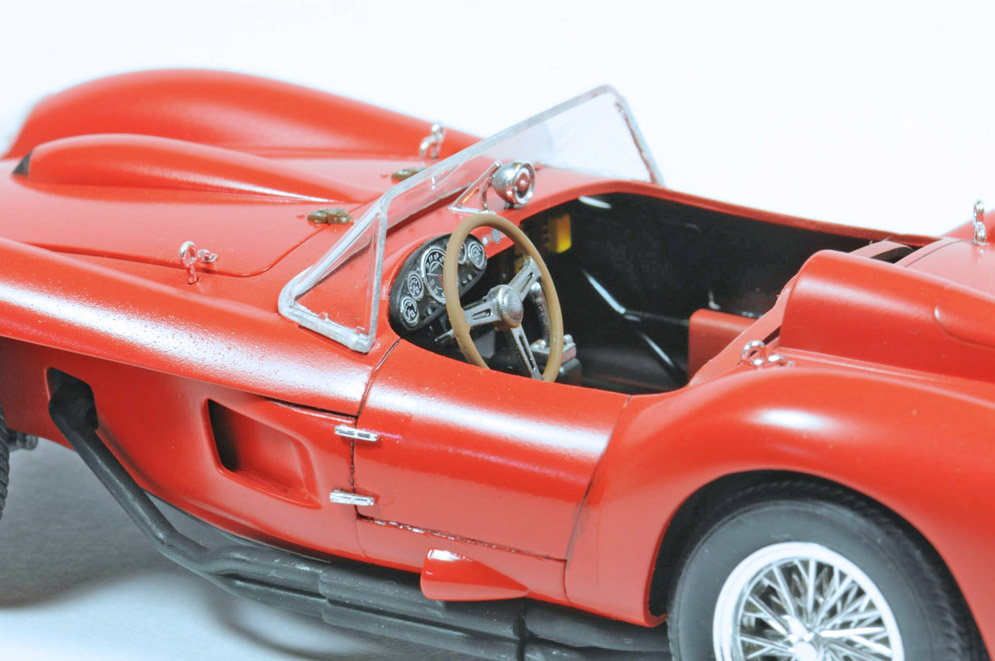
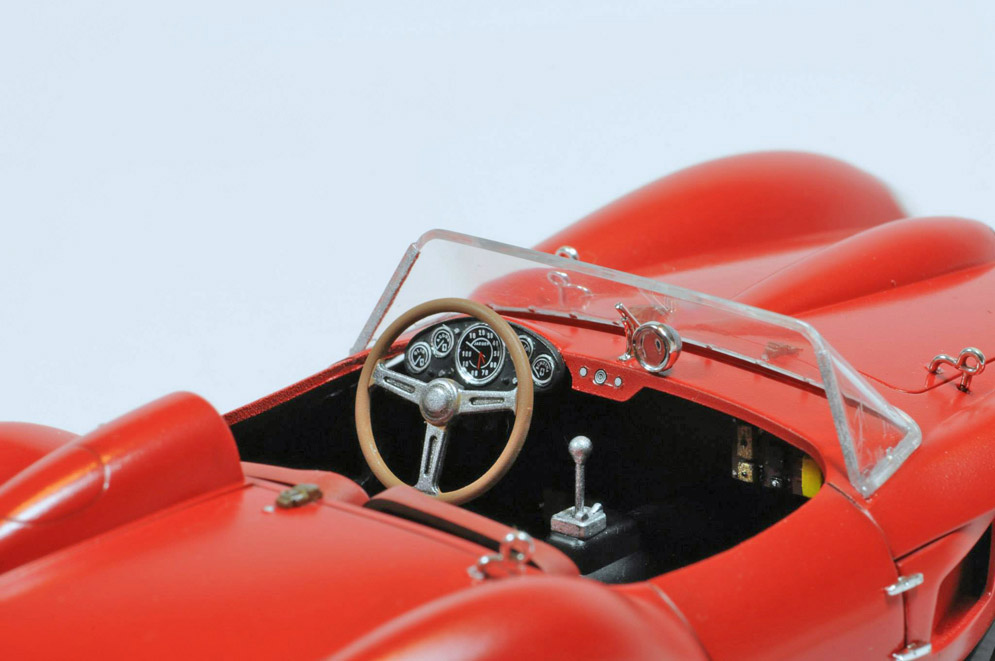
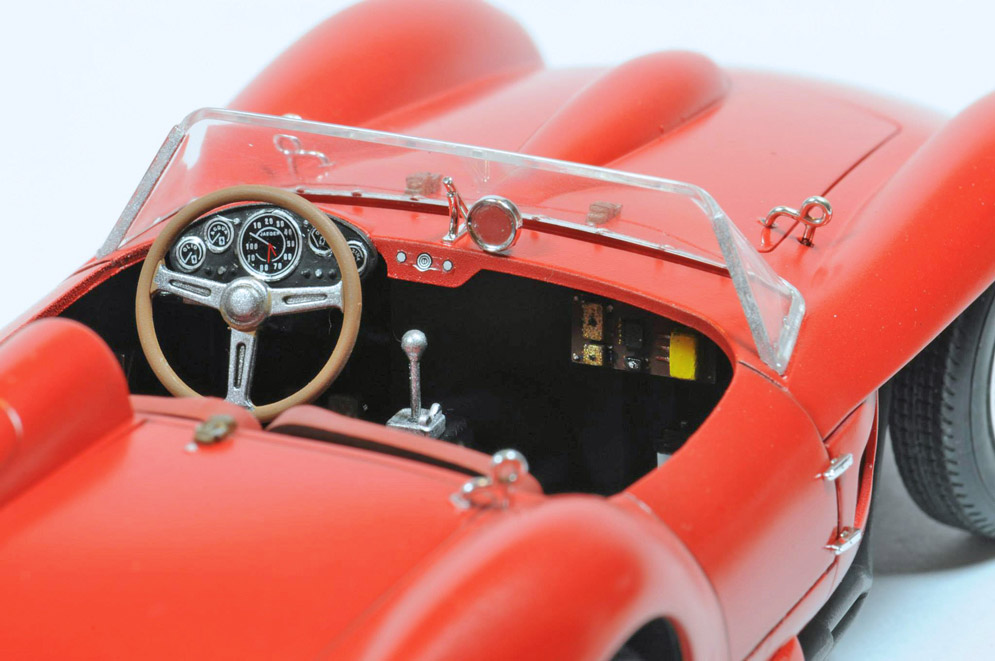
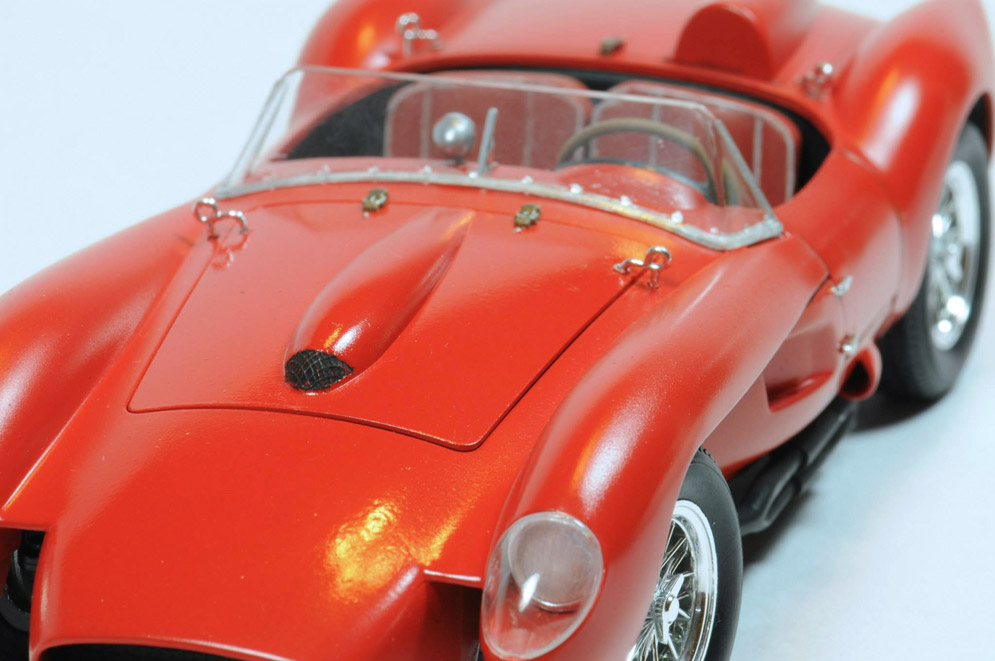
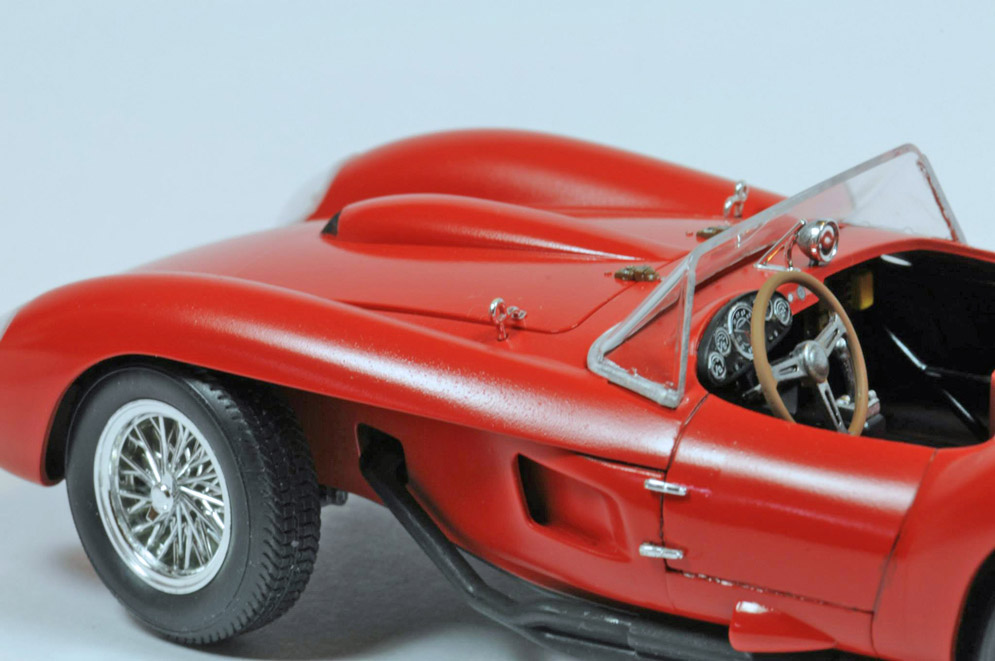
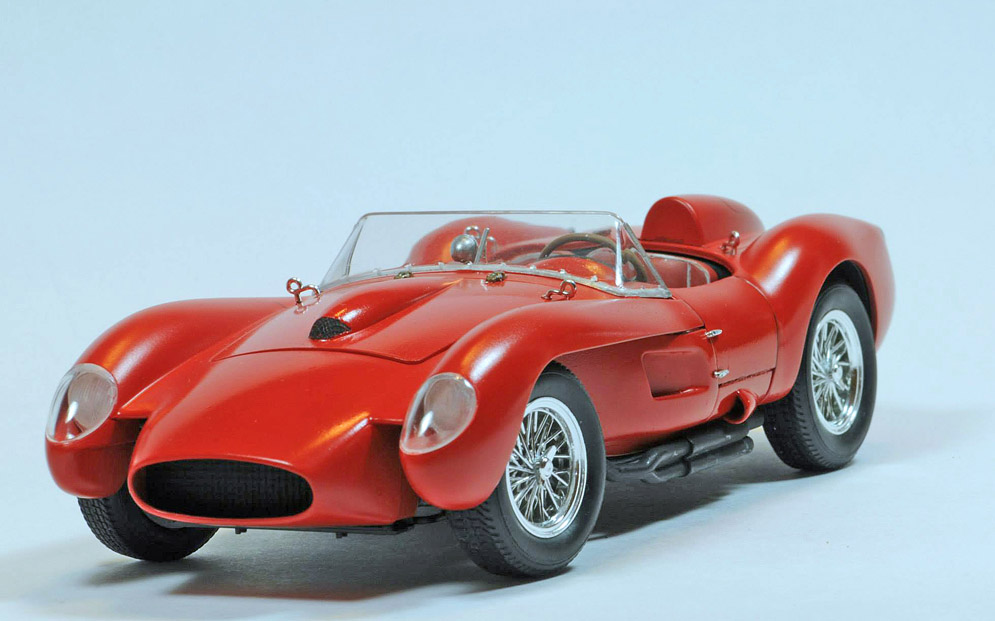
Here is my Ferrari 250 Testa Rossa in 1:24 scale and made from the Hasegawa kit.
Hope you like it!
Antonio F.
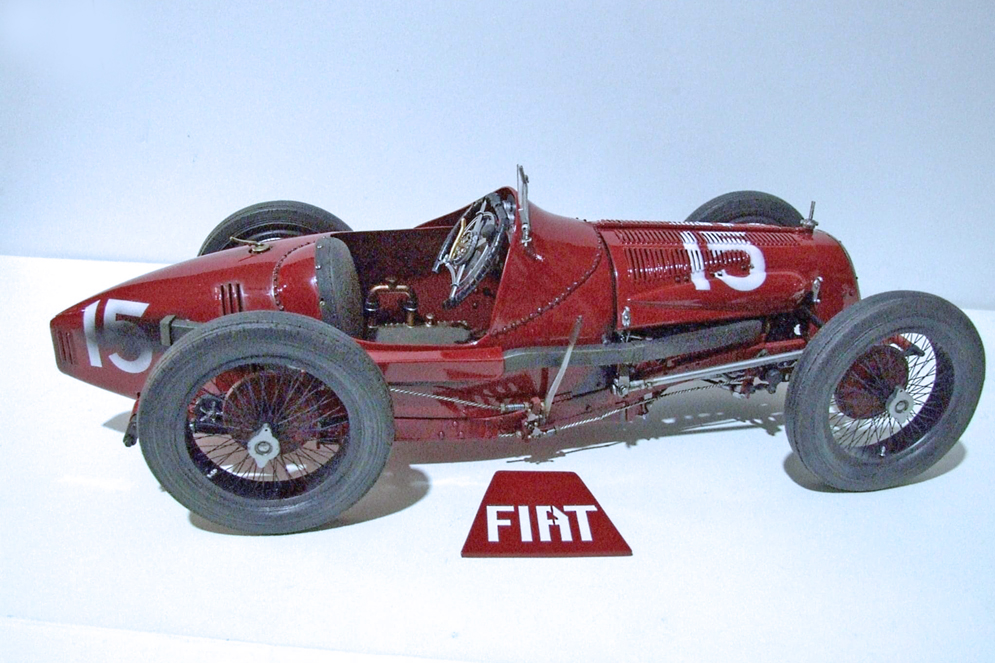

This is my Fiat 806 Grand Prix made from the 1:16 scale Italeri kit.
Hope you like it!
Lou C.
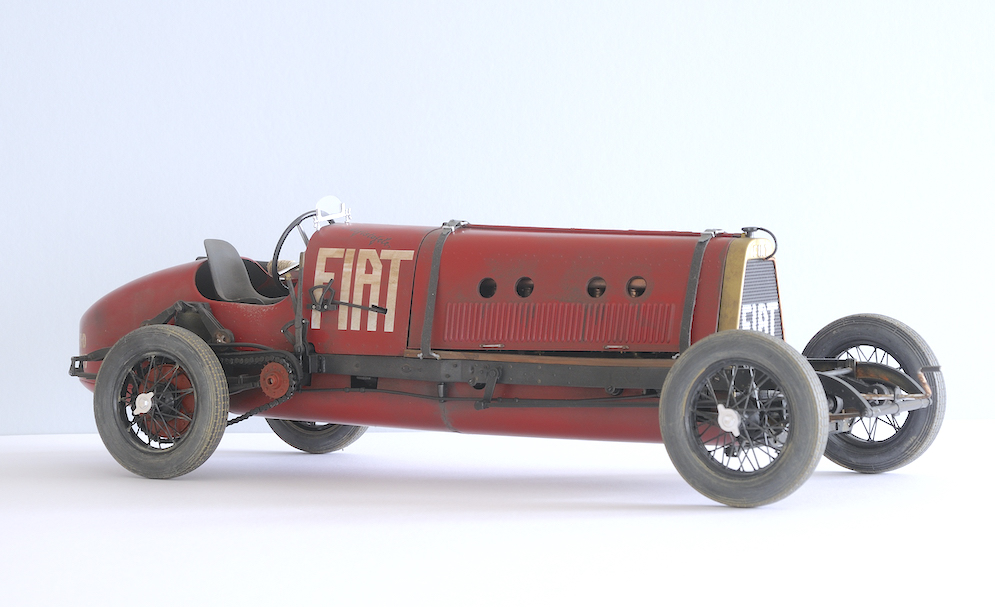
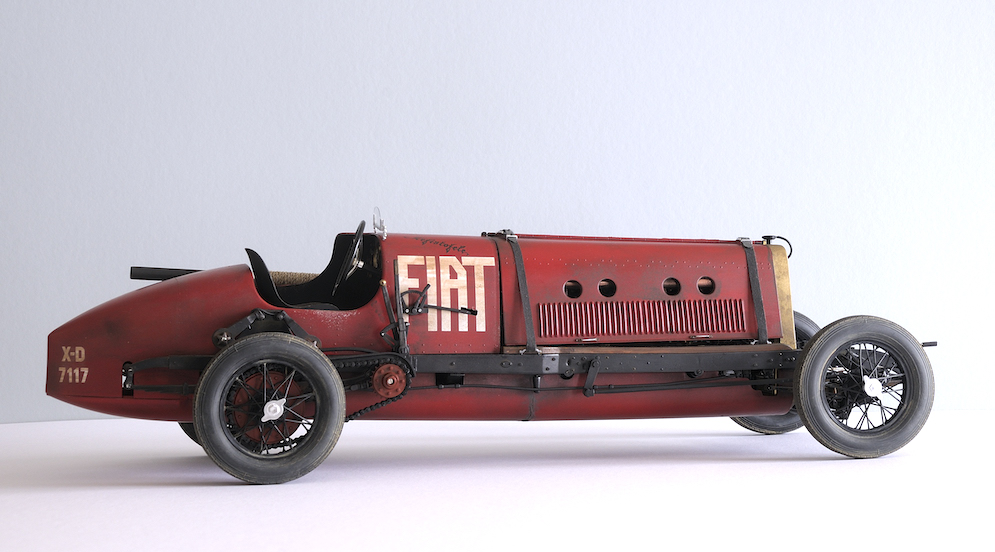
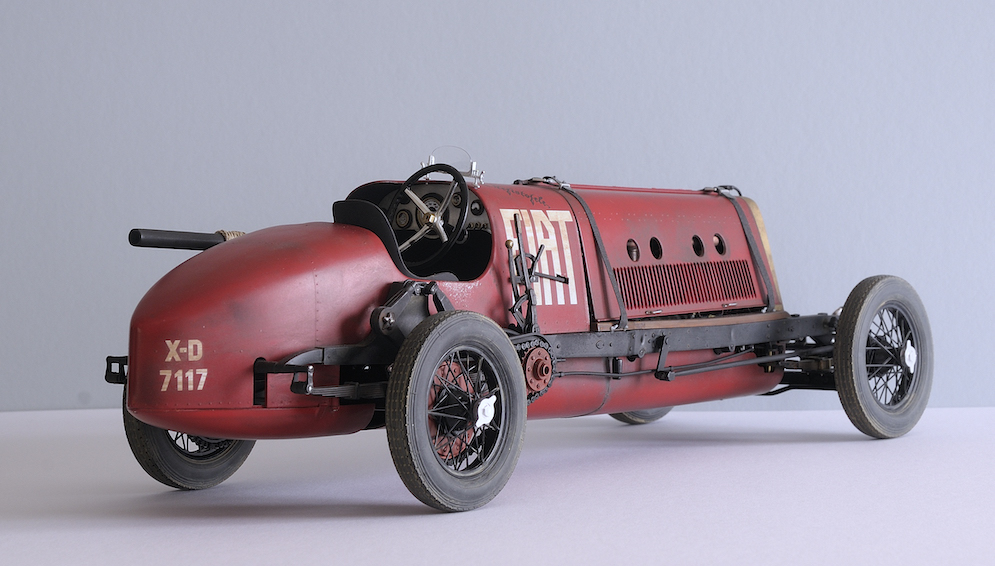
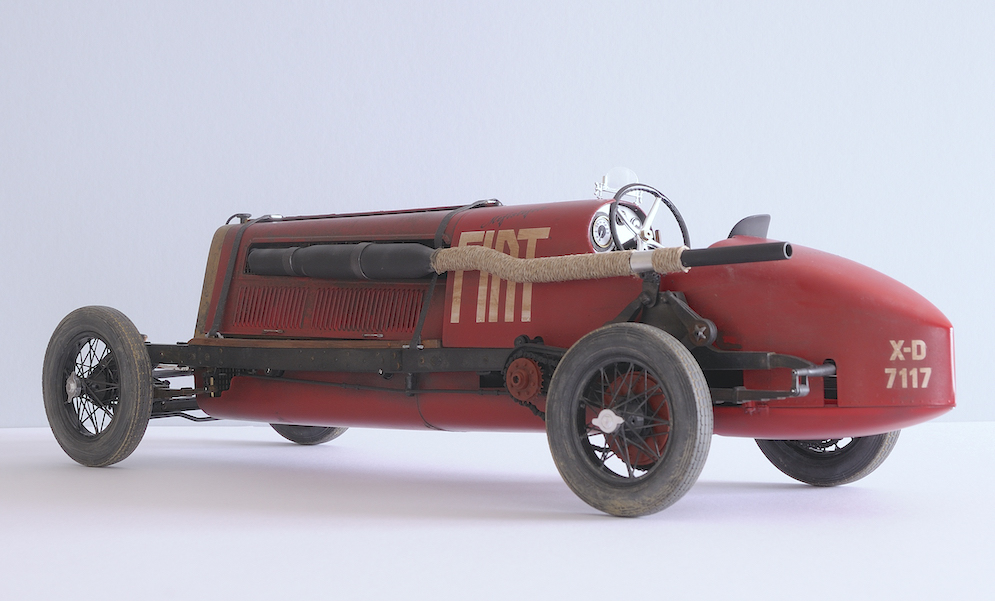
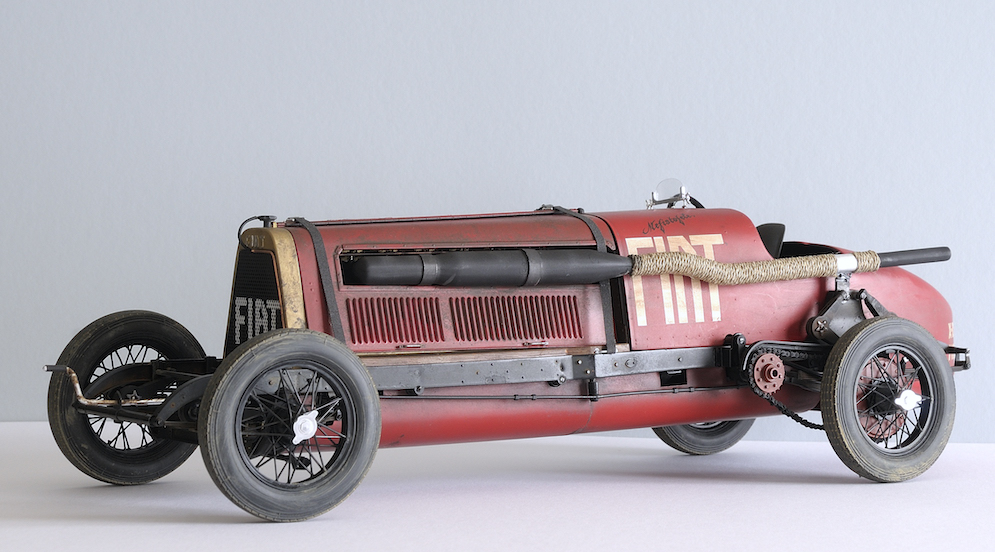
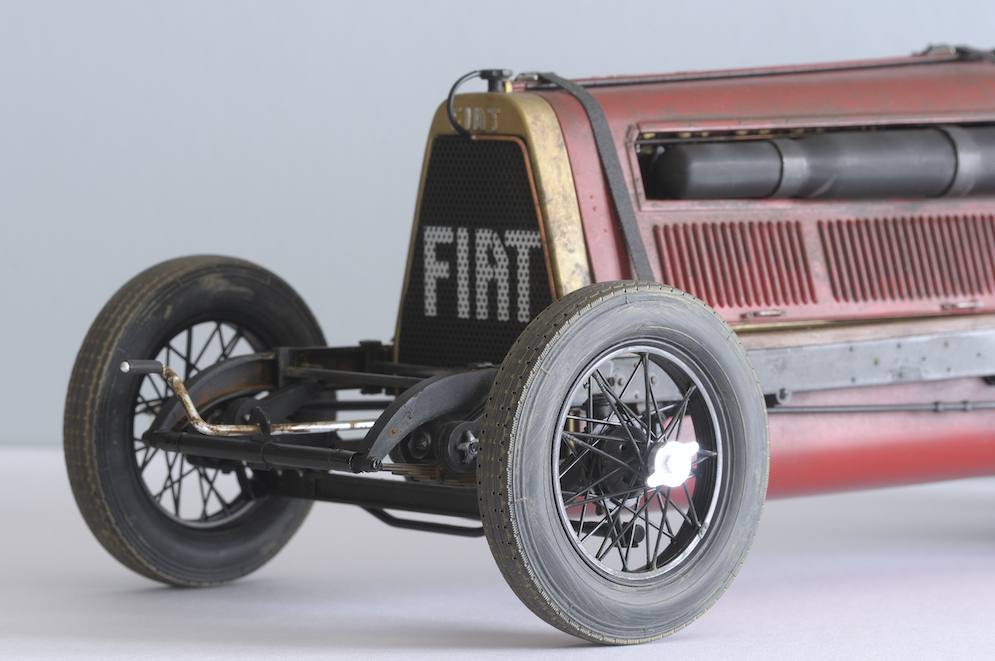
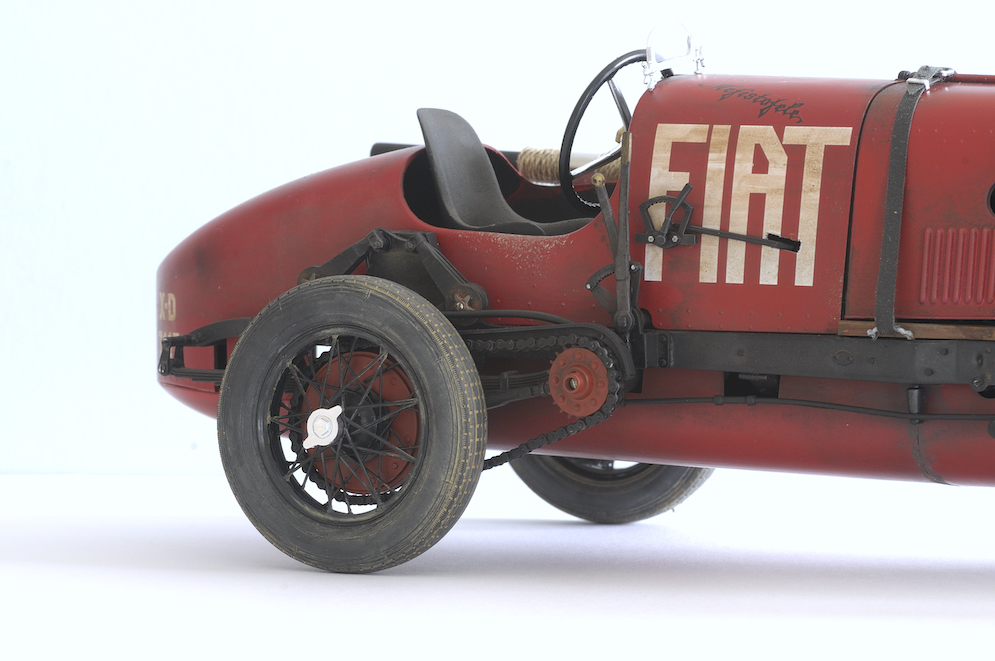
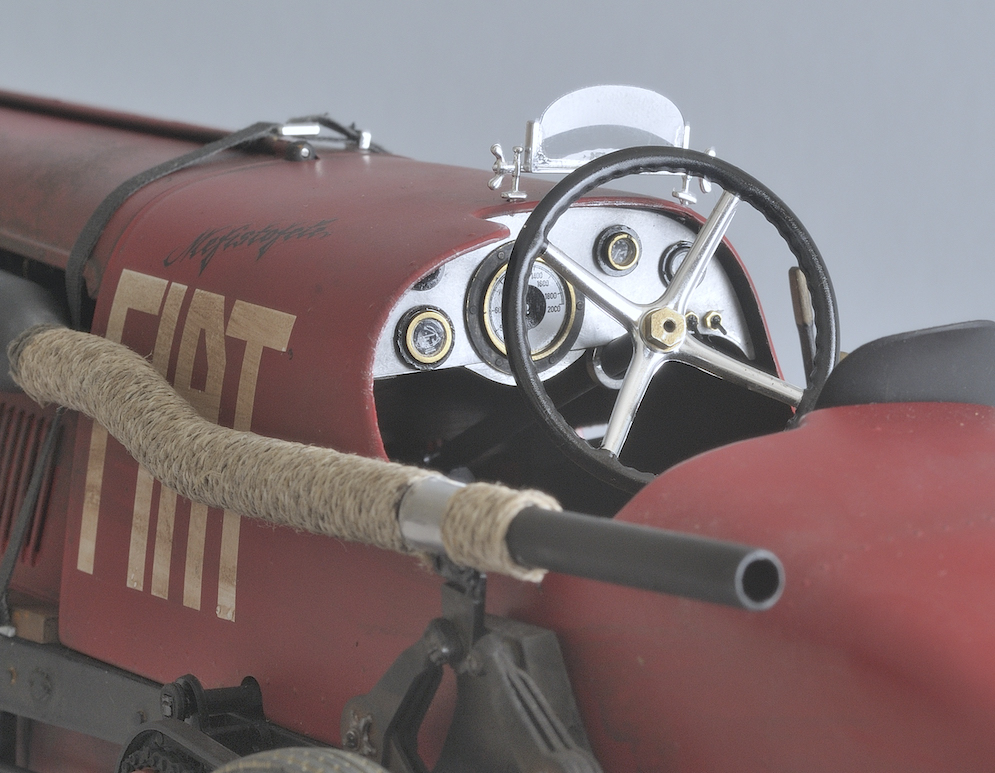

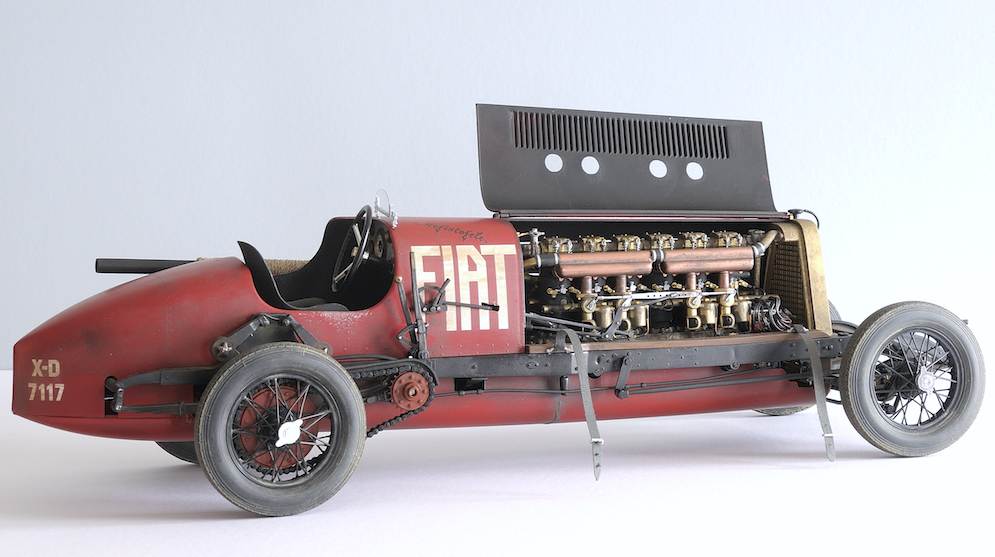
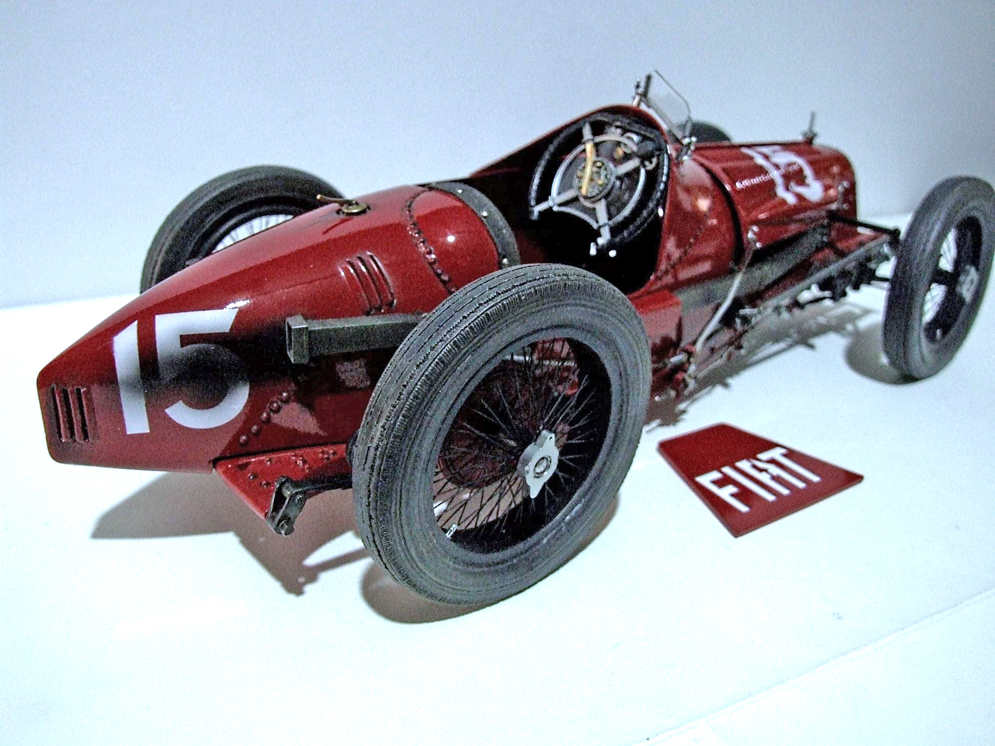
This Italeri’s 1:12 Fiat Mefistofele.
Its an old kit with massive attachment points and brittle plastic, very much of the 1970’s but with care it can still make a fine model.
Massively overpriced for what it is as a kit but worth the money as a finish model on the shelf.
It’s pretty much OTB except for the balsa wood floor in the cockpit and I substituted the kit drive chain for a Tamiya detail up item for 1:6 motorcycles. (1:12 is too small).
Lots of Alclad copper and brass required and I also made a new dashboard out of alloy sheet as the kit one is not up to much.
Sits very well along side my Airfix 1:12 Bentley and Italeri’s 1:12 Alfa2300
Hope you like.
Kind Regards
Paddy B.
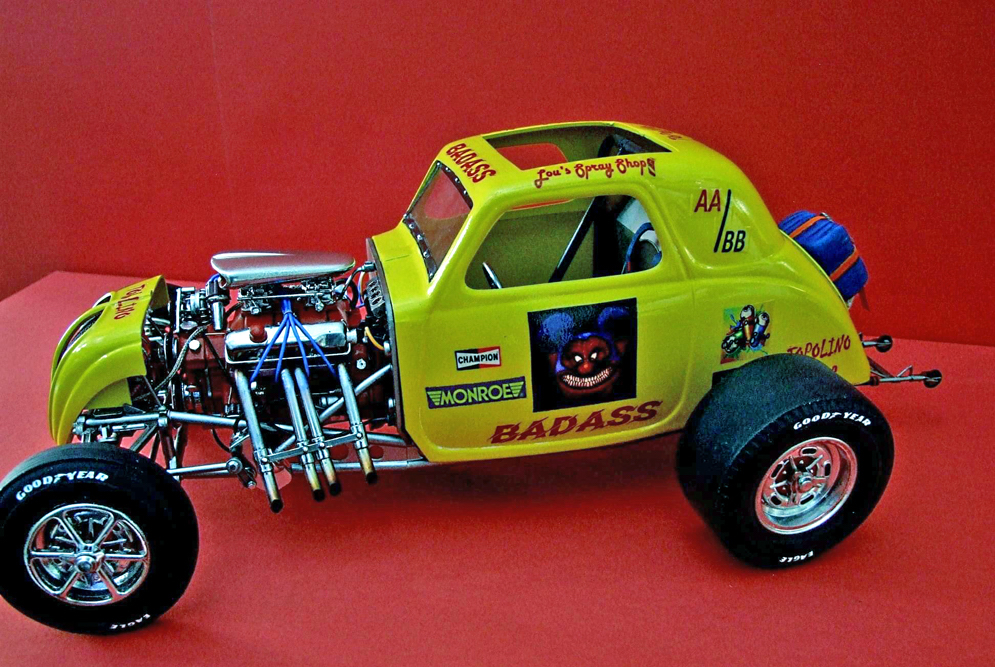
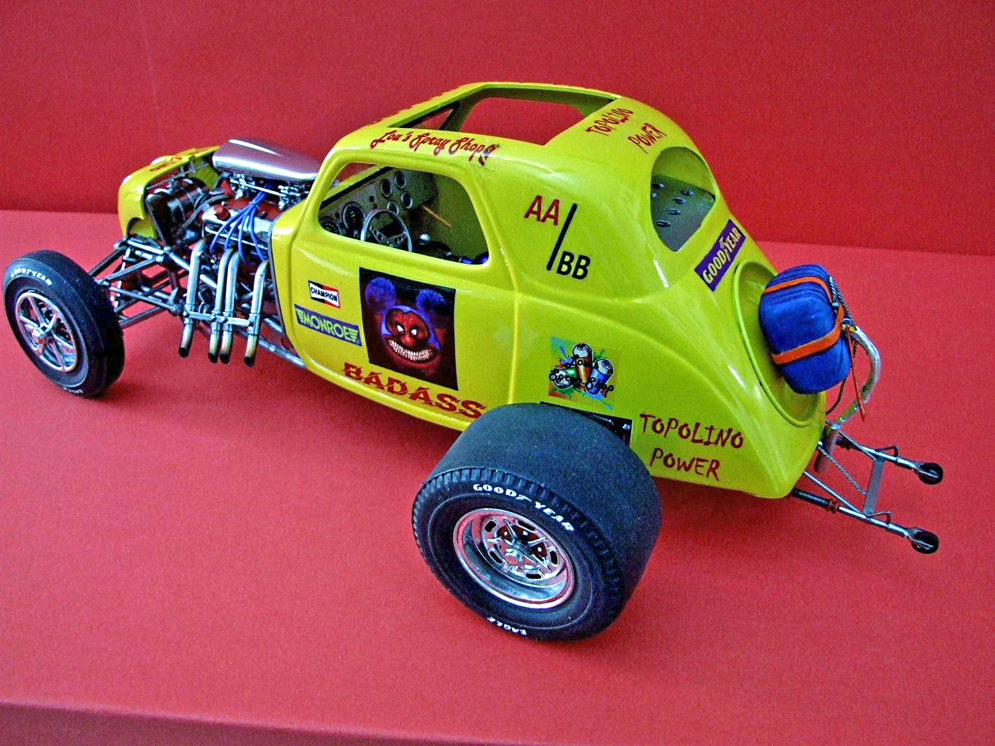
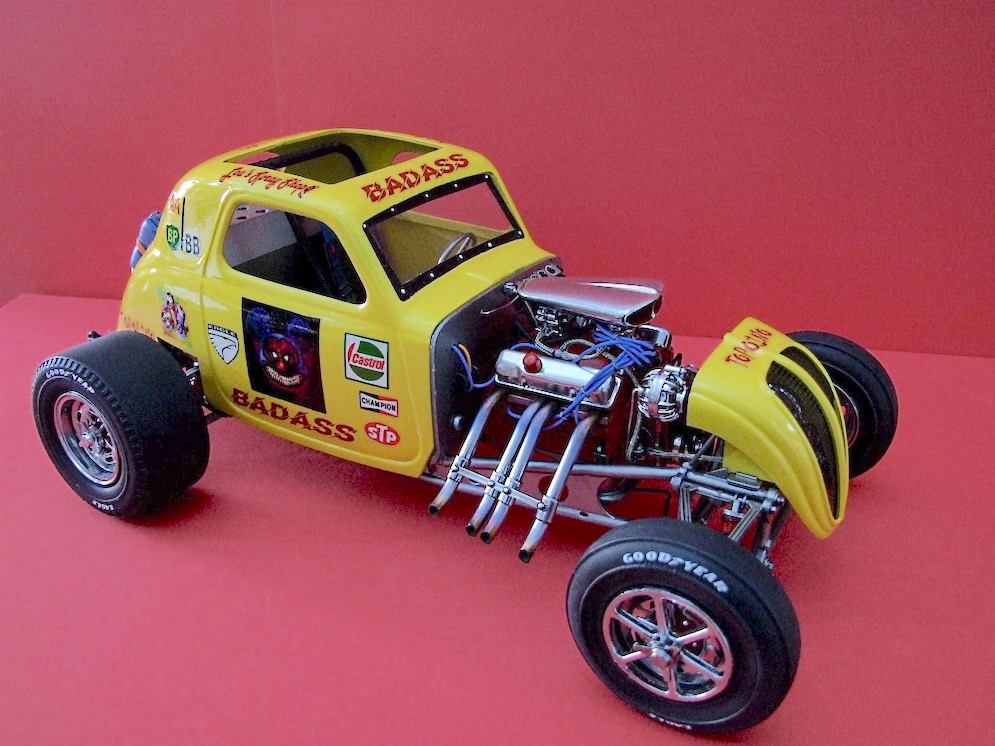
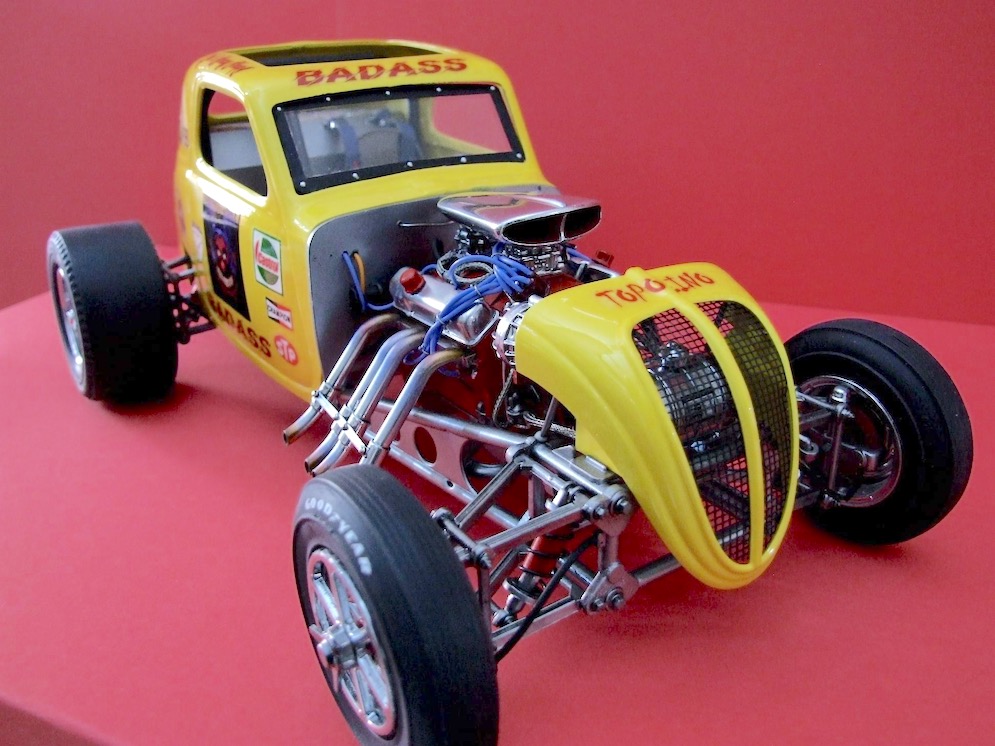
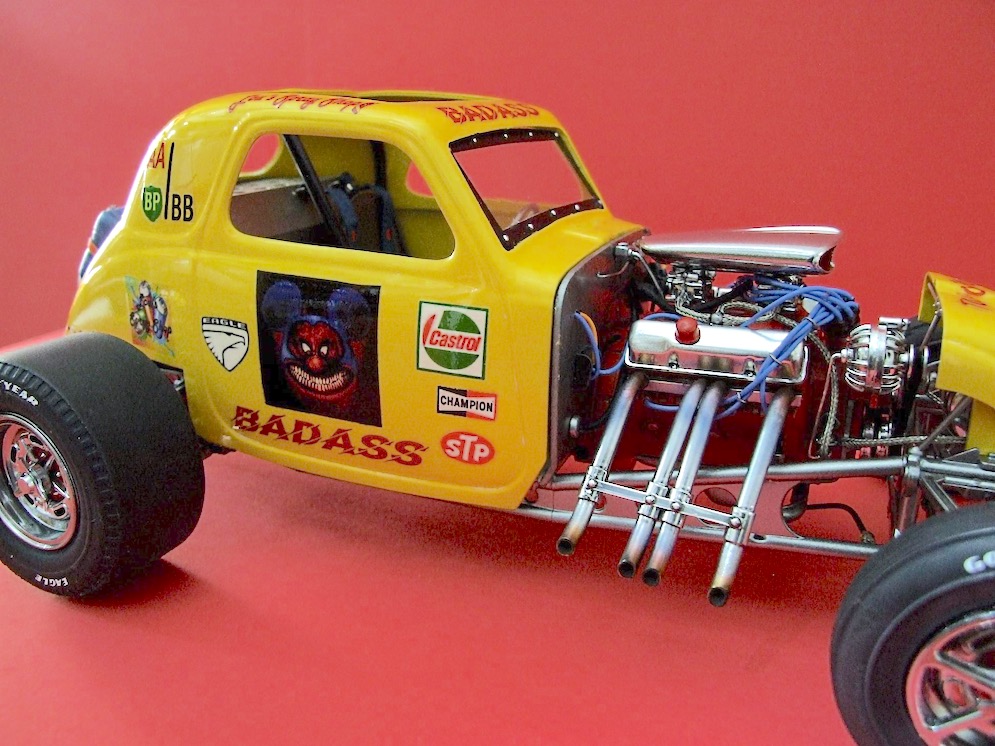
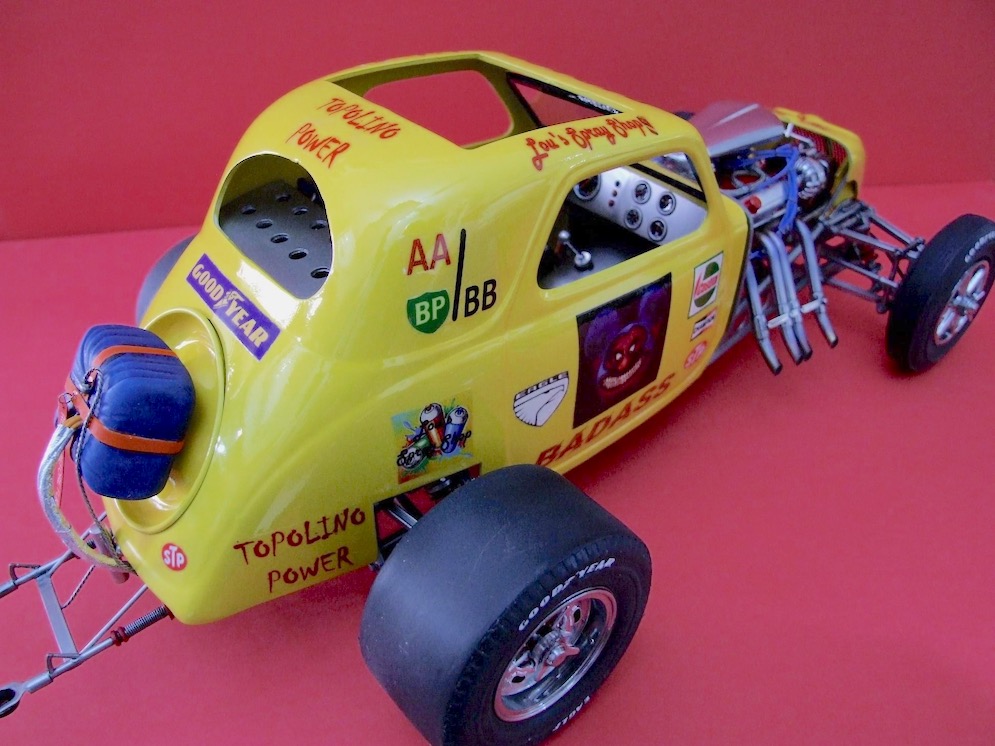
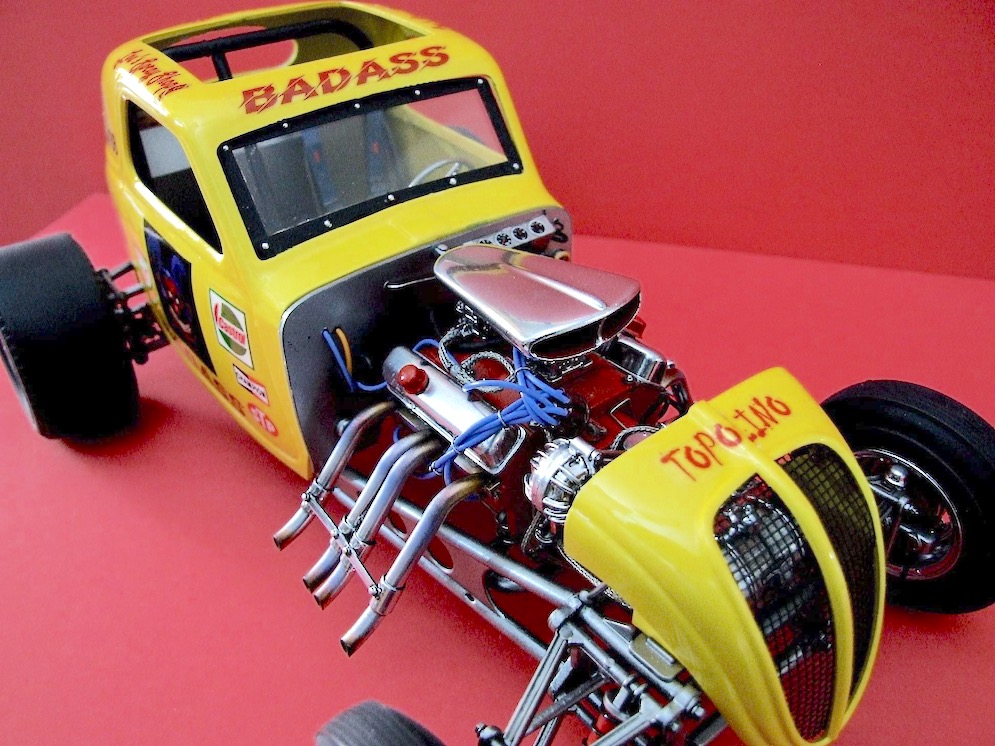
And I can say the little beast is ready…
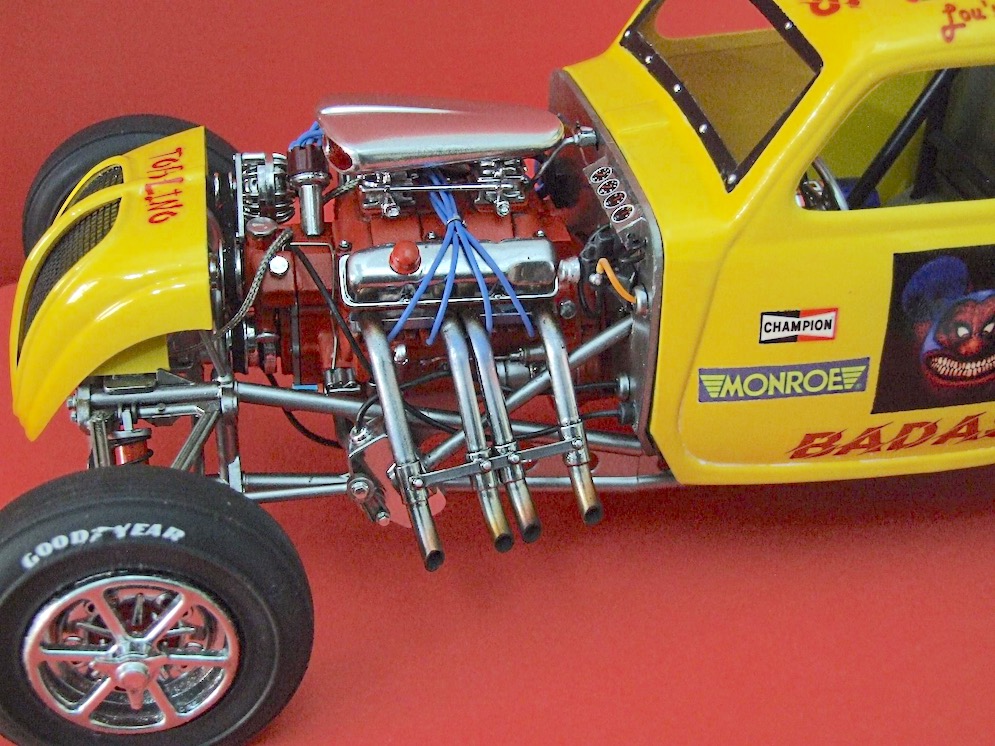
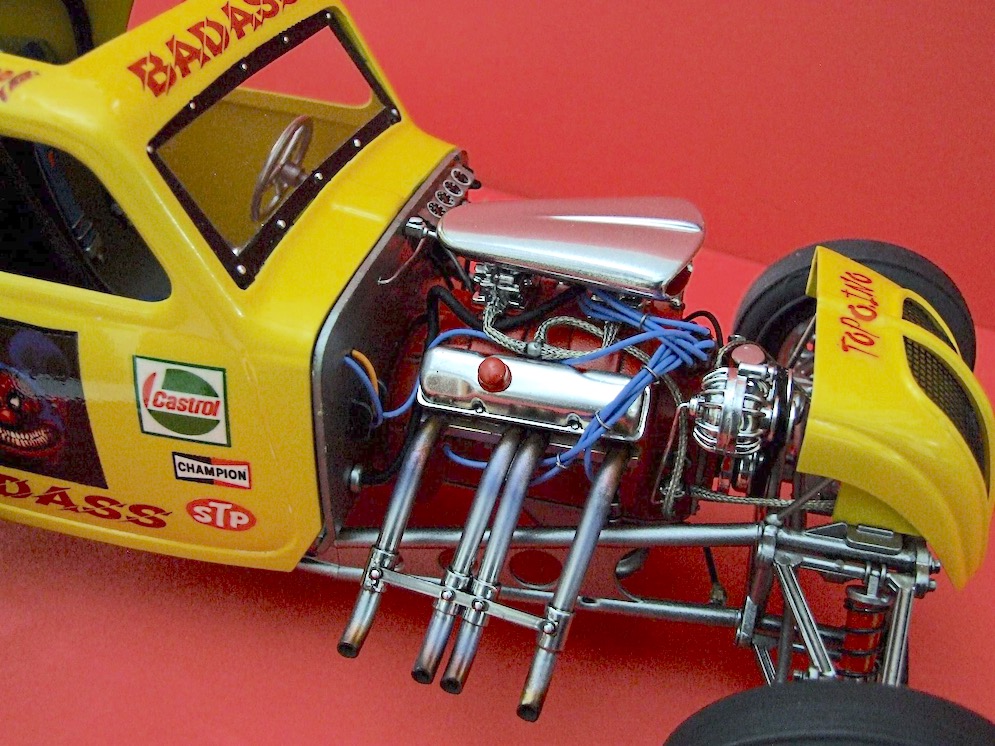
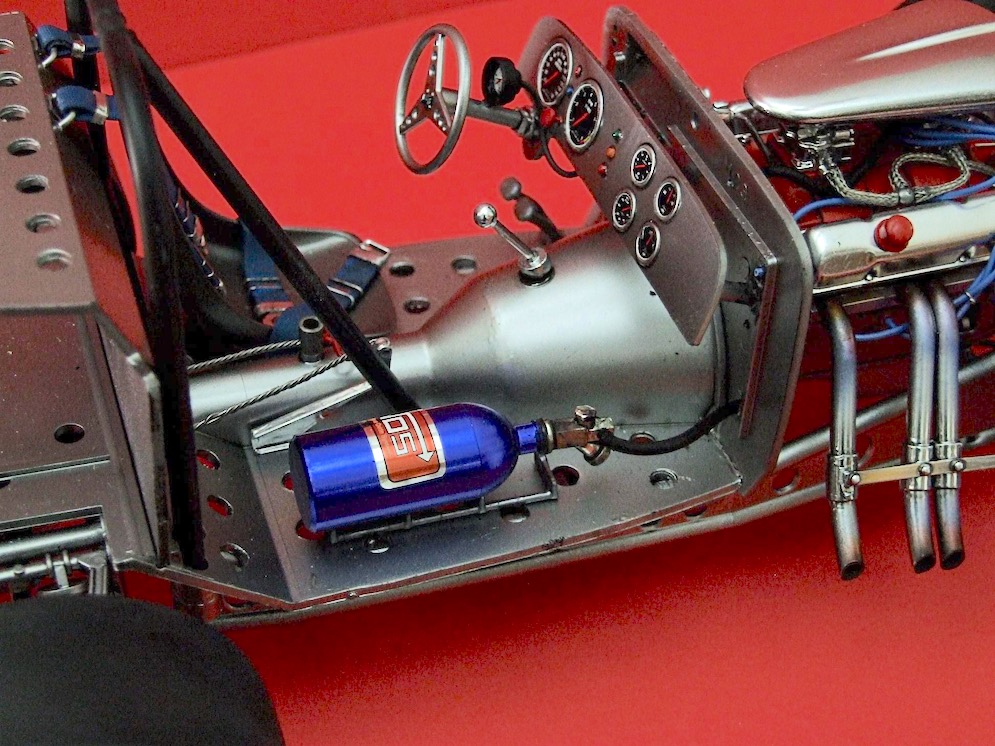
This is my Lindberg 1:12 scale Fiat Topolino 1962 dragster with many modifications.
This is my last build of 2020 – what a year for us all! Thanks to COVID.
I built it in 2 months flat. Decals courtesy Mr Chris Ellul – thanks buddy :)
Lou C.
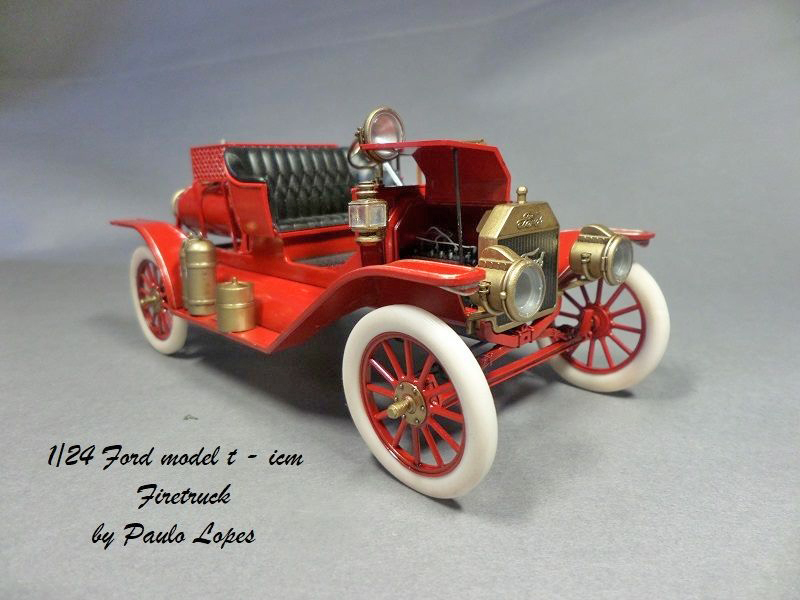
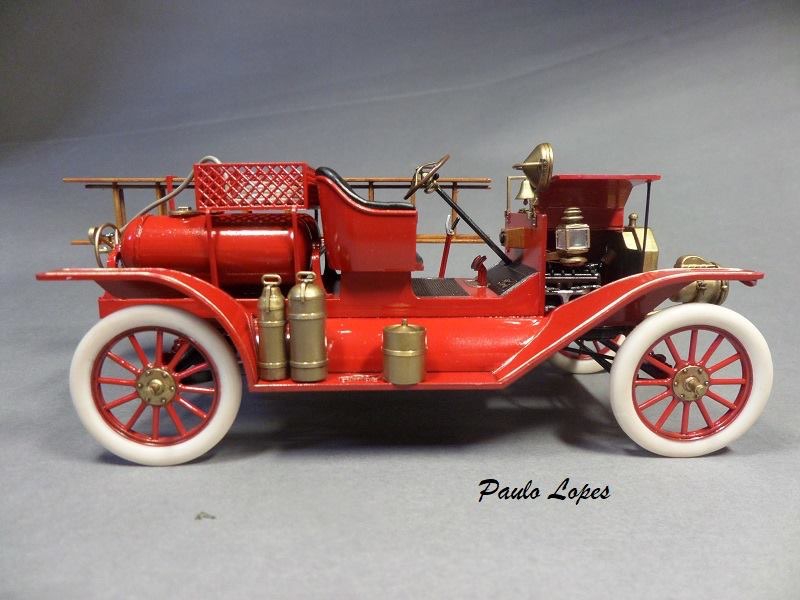
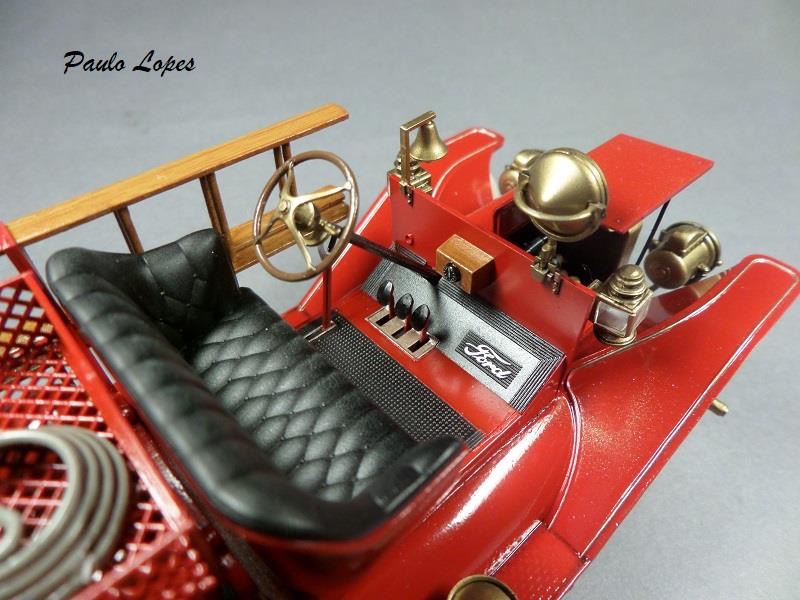
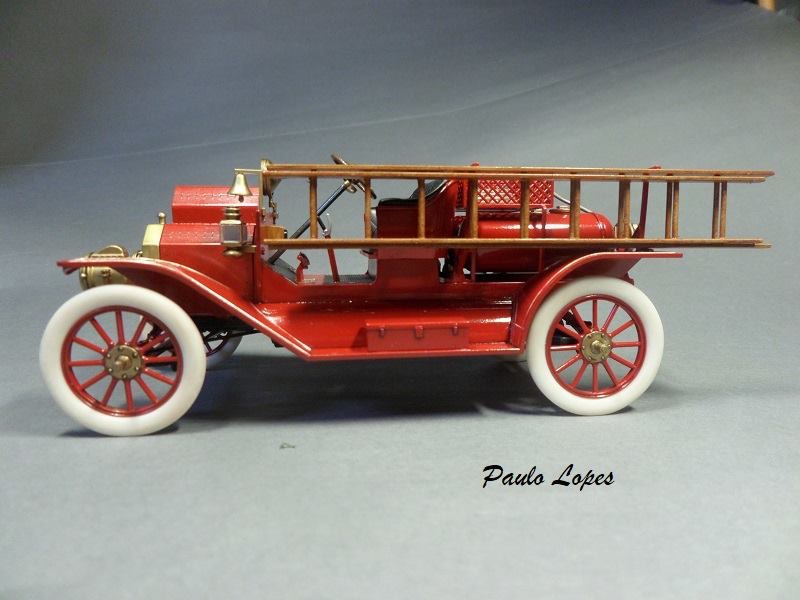
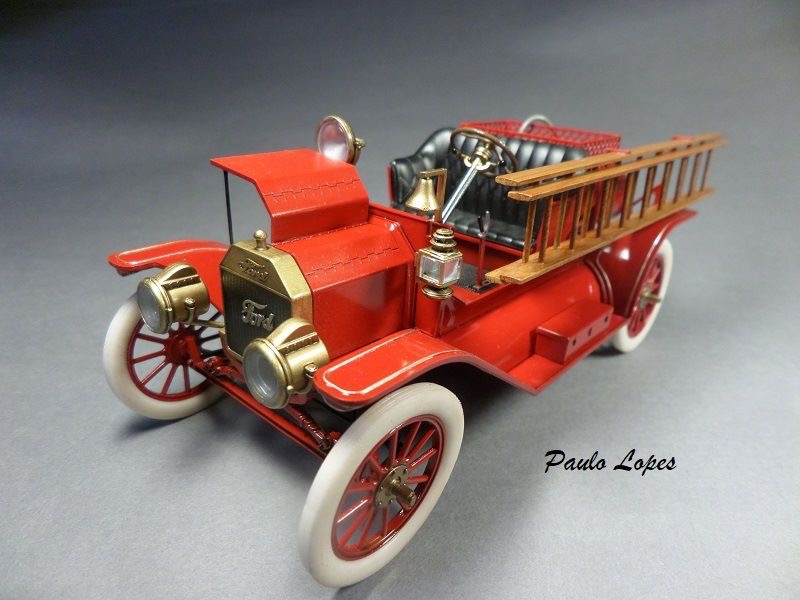
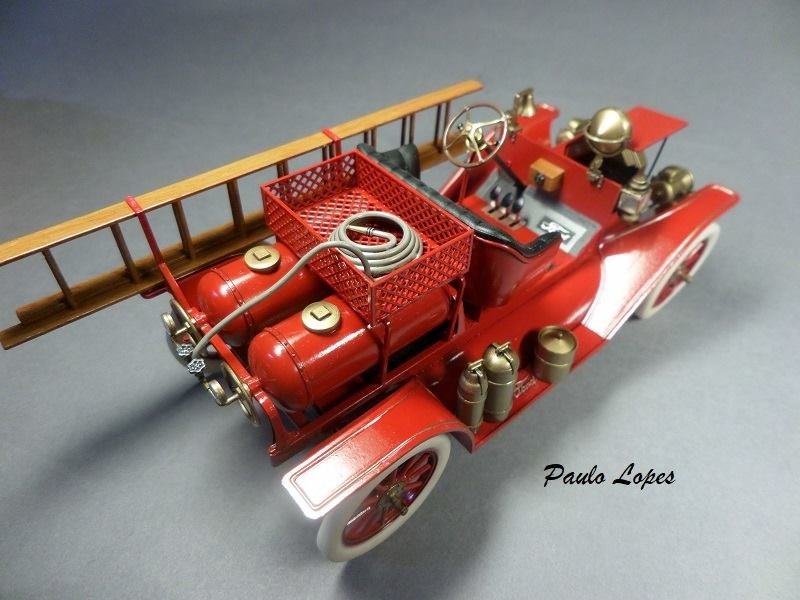
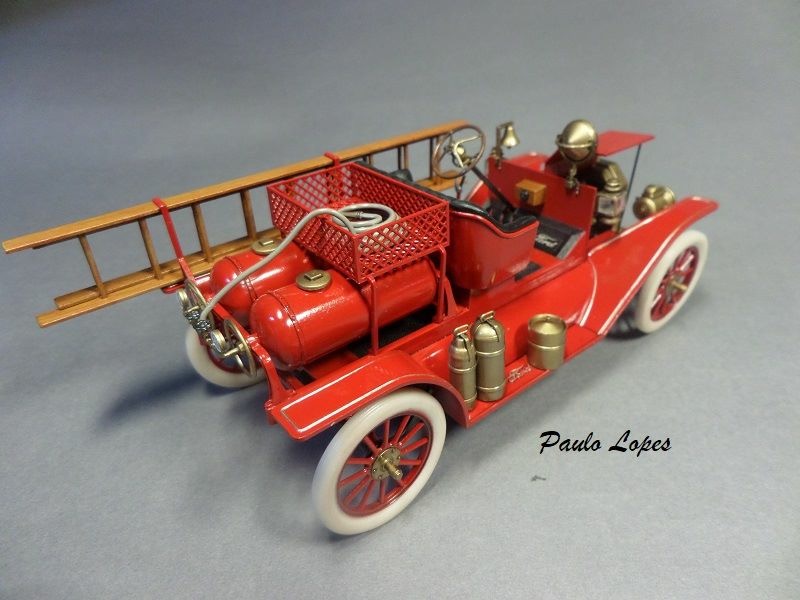

Only a timorous incursion into car modelling: 1:24 Ford model T – “Firetruck”, ICM kit.
I really enjoyed making this model. Hope you like it too.
Paulo Lopes.
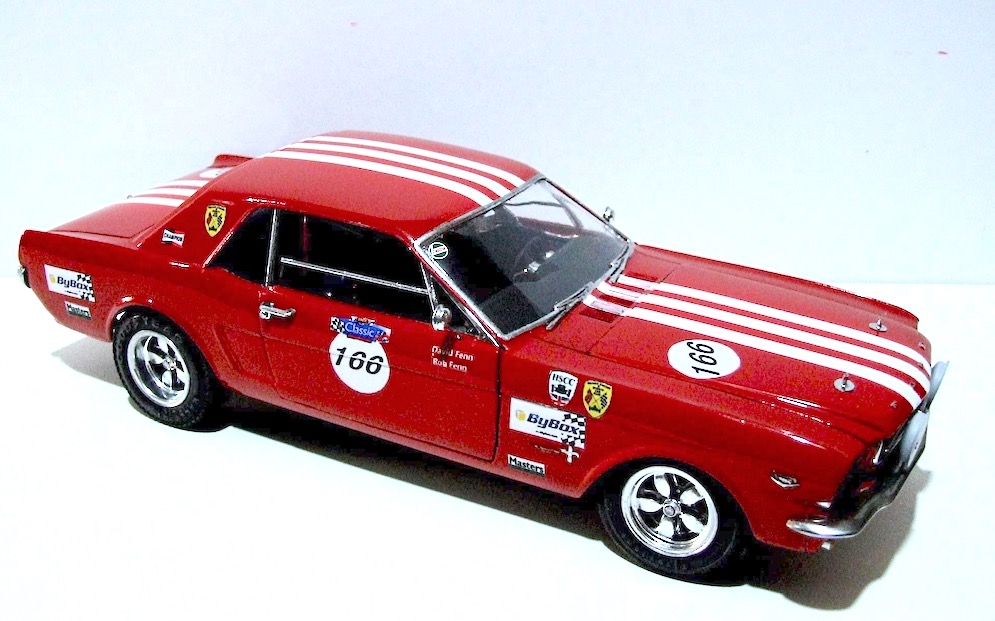
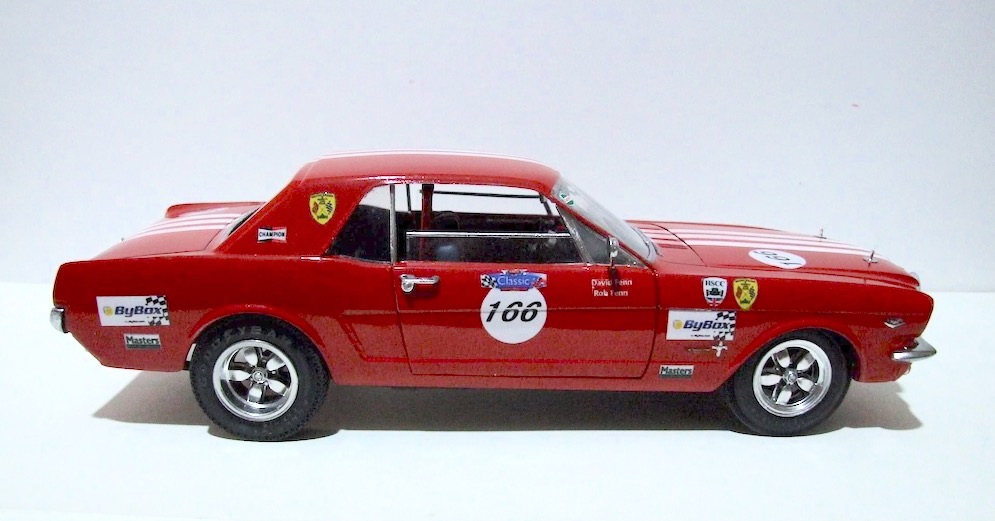
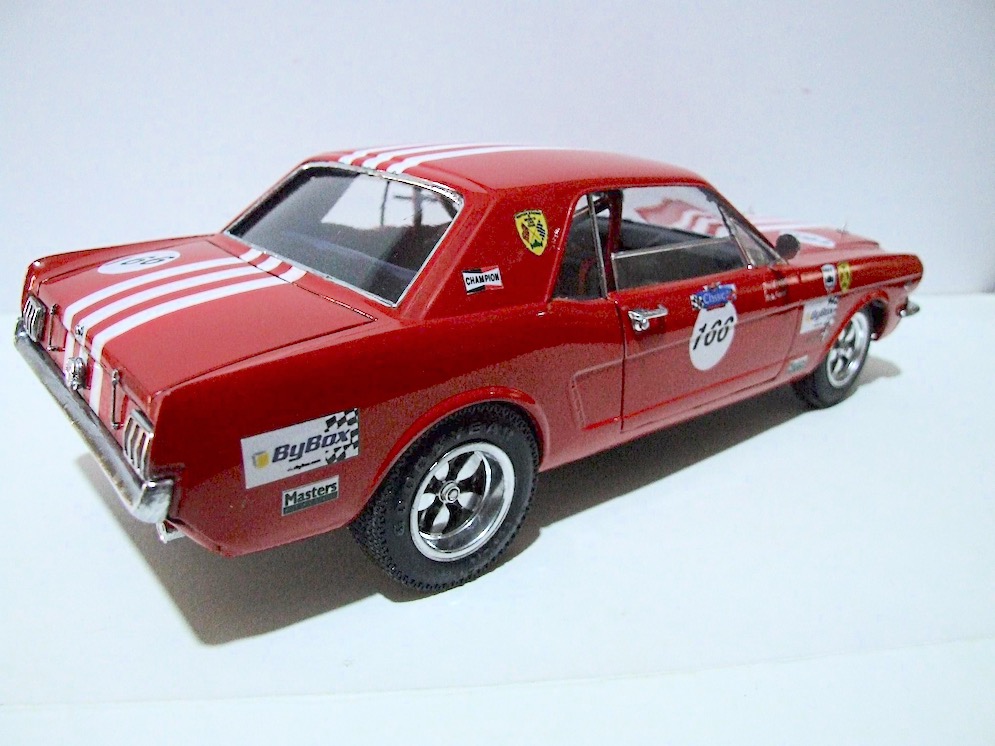
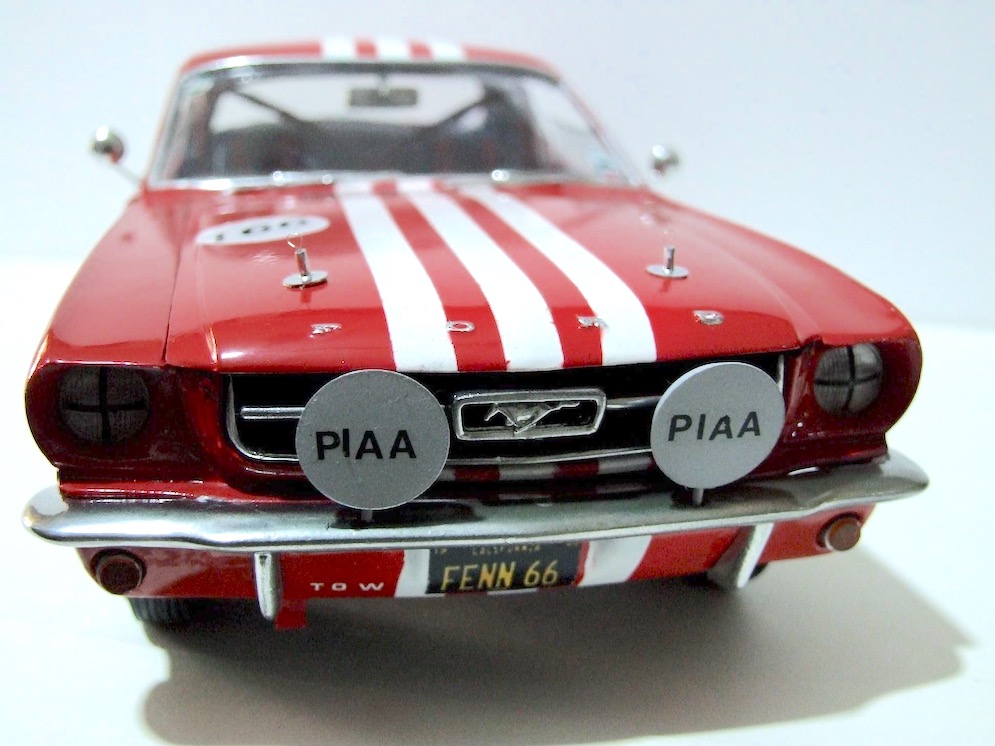
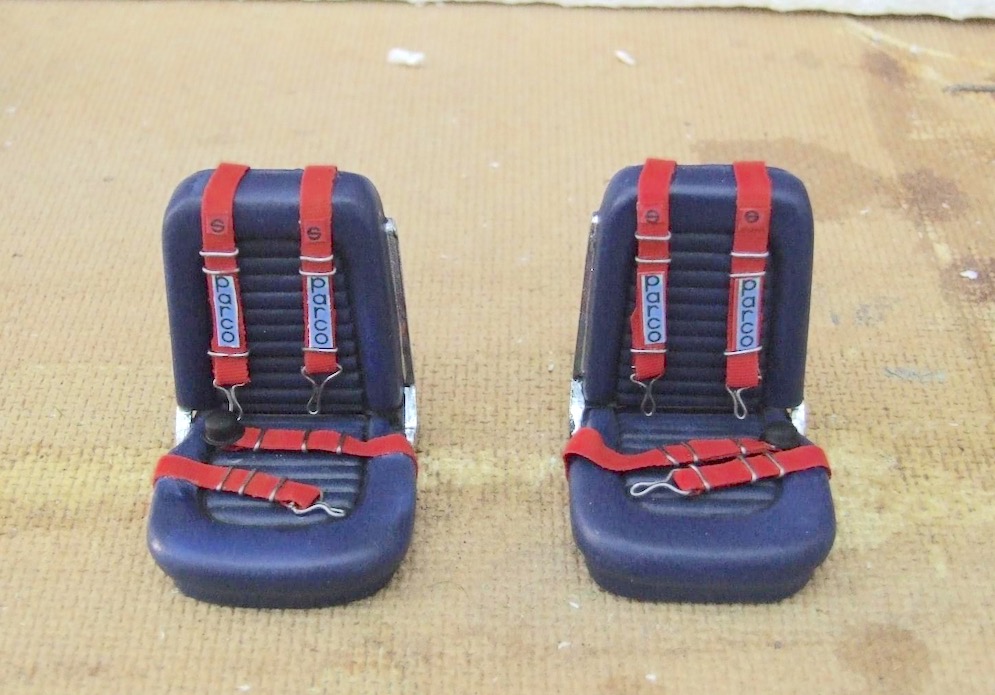
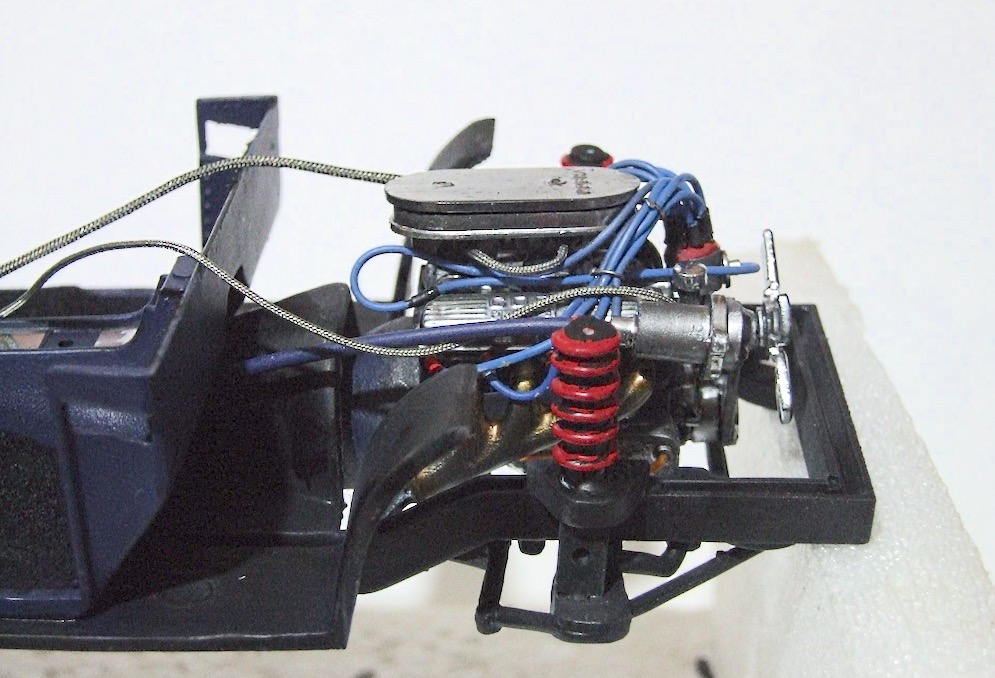
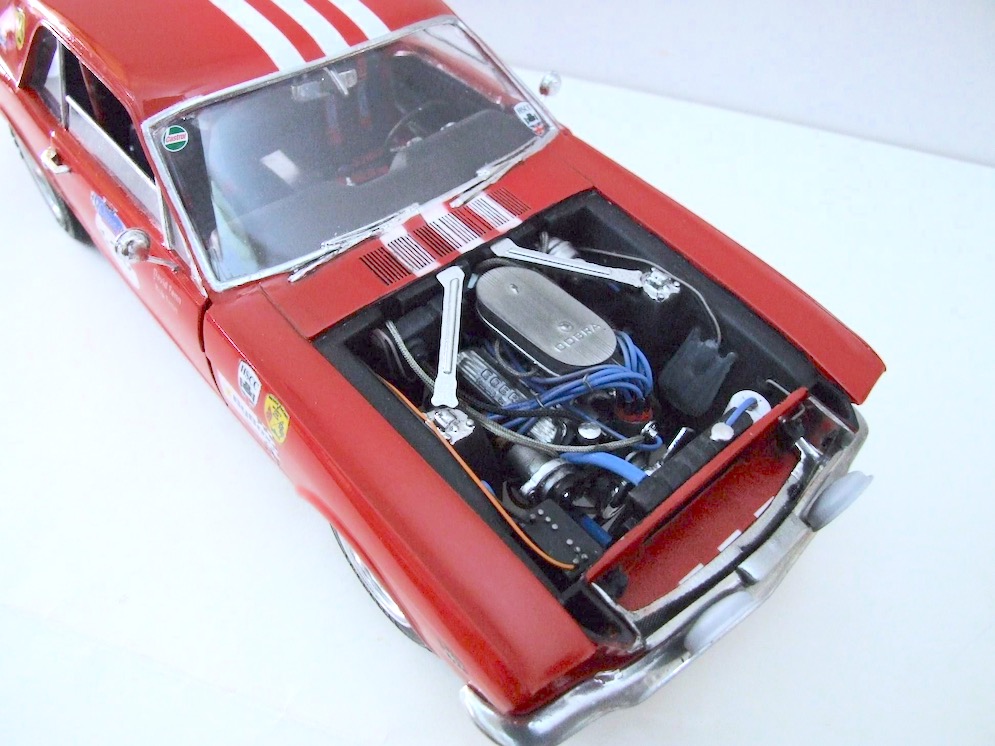
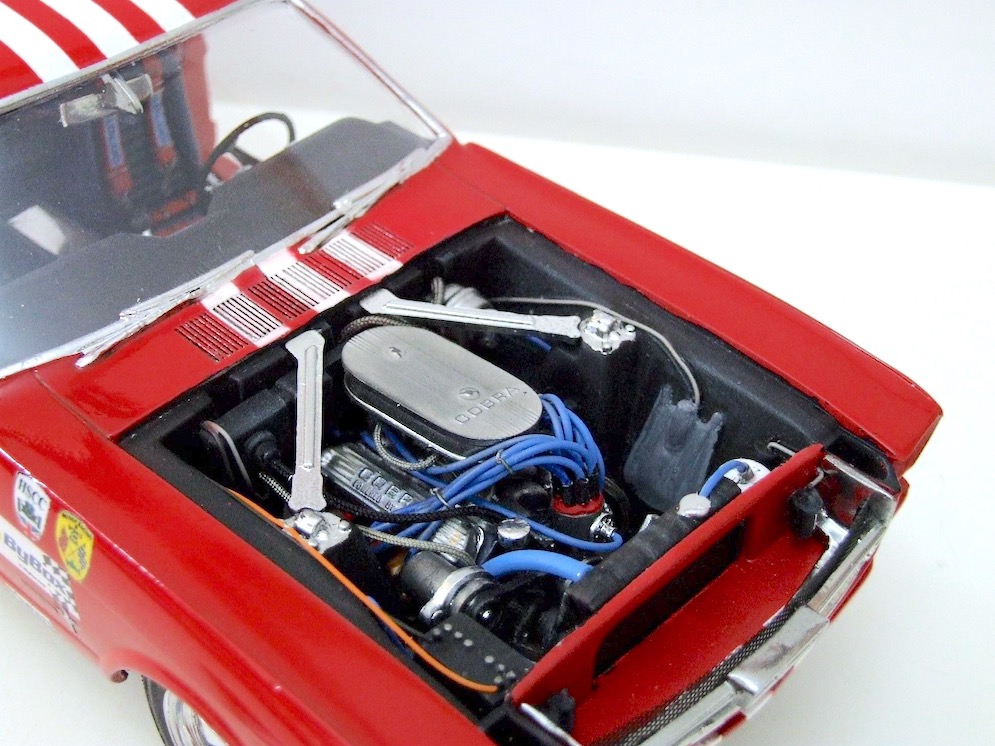
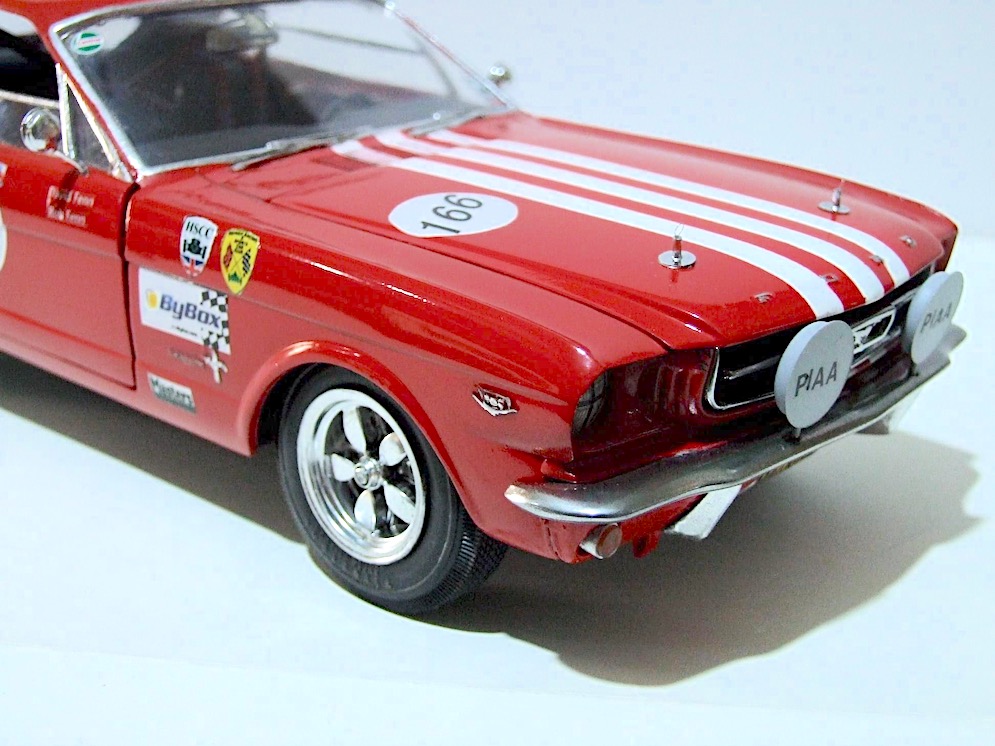
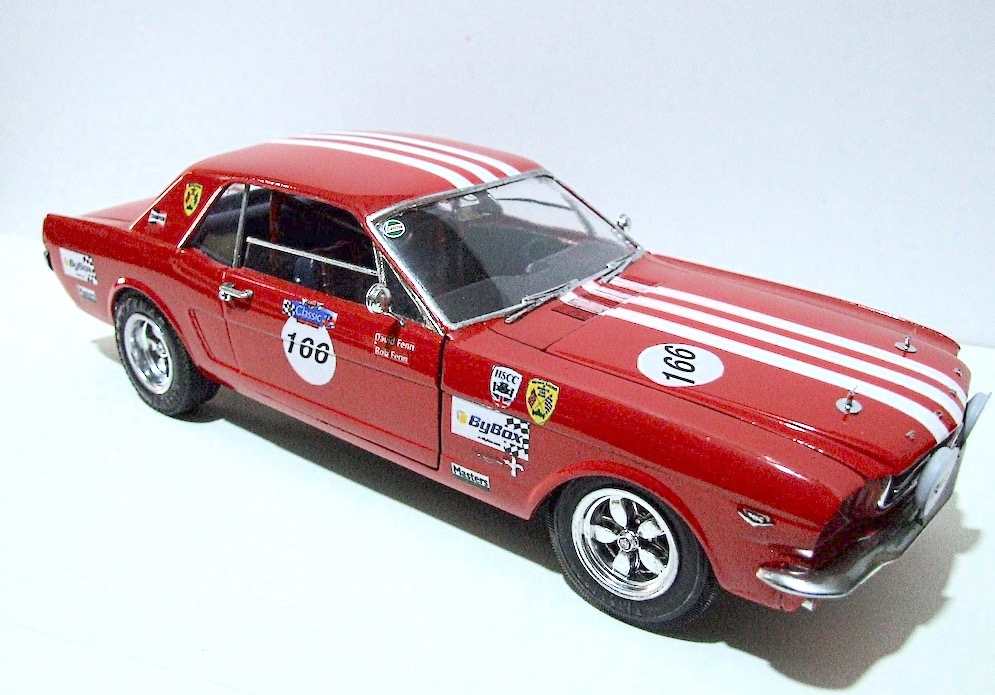
Mustang 1965 made from the AMT kit and is 1:16 scale
This model depicts David and Rob Fenn’s mount during a classic sports car race.
Decals custom made by my good friend Chris Ellu
Loads of modifications…scratch-building and detailing done to this model.
Hope you like it friends?
Lou C.
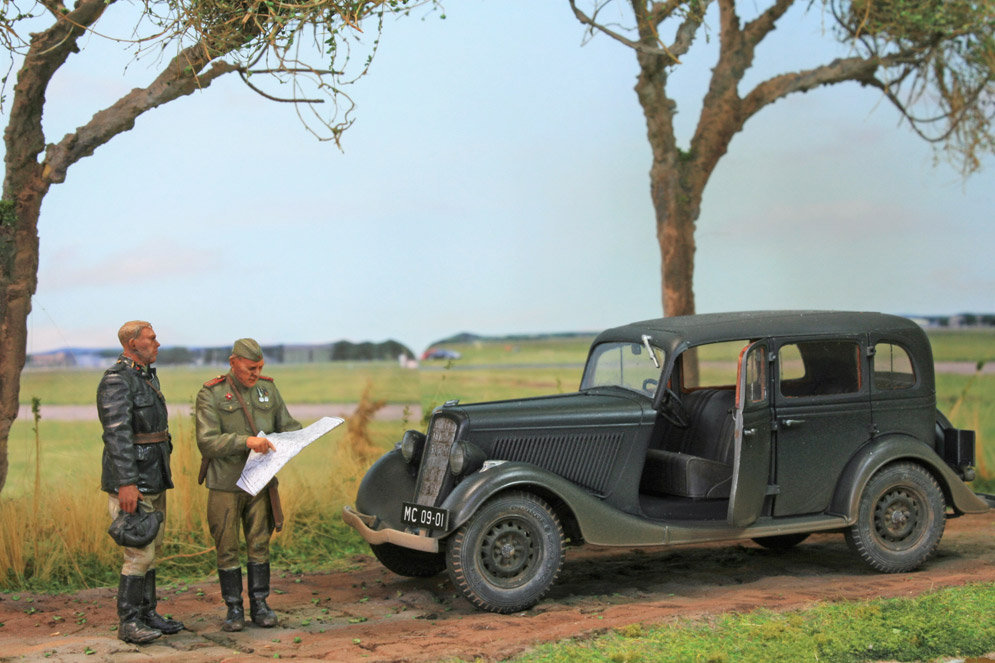
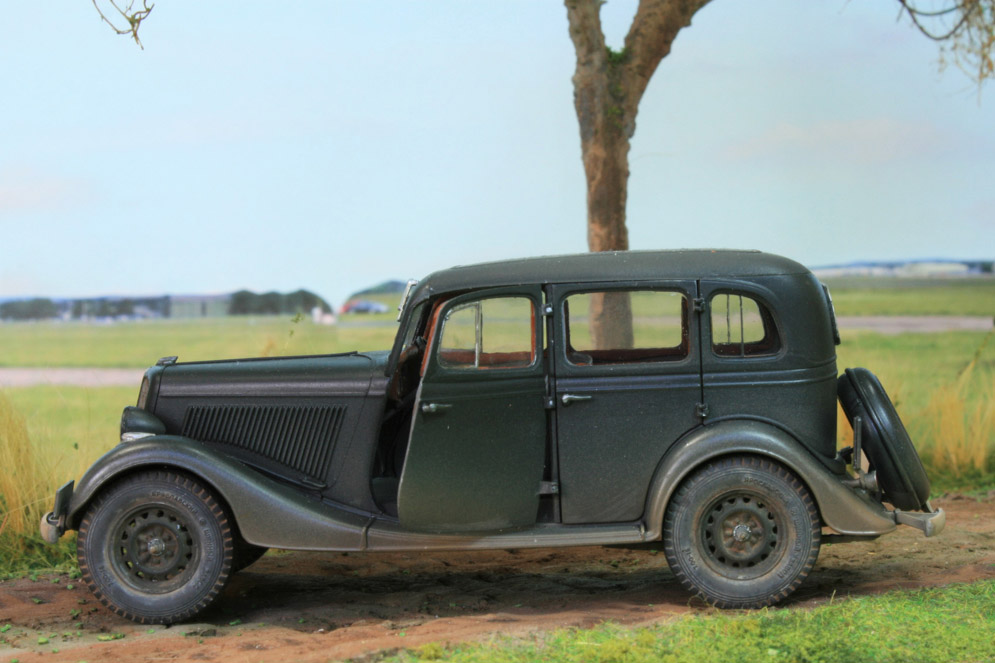
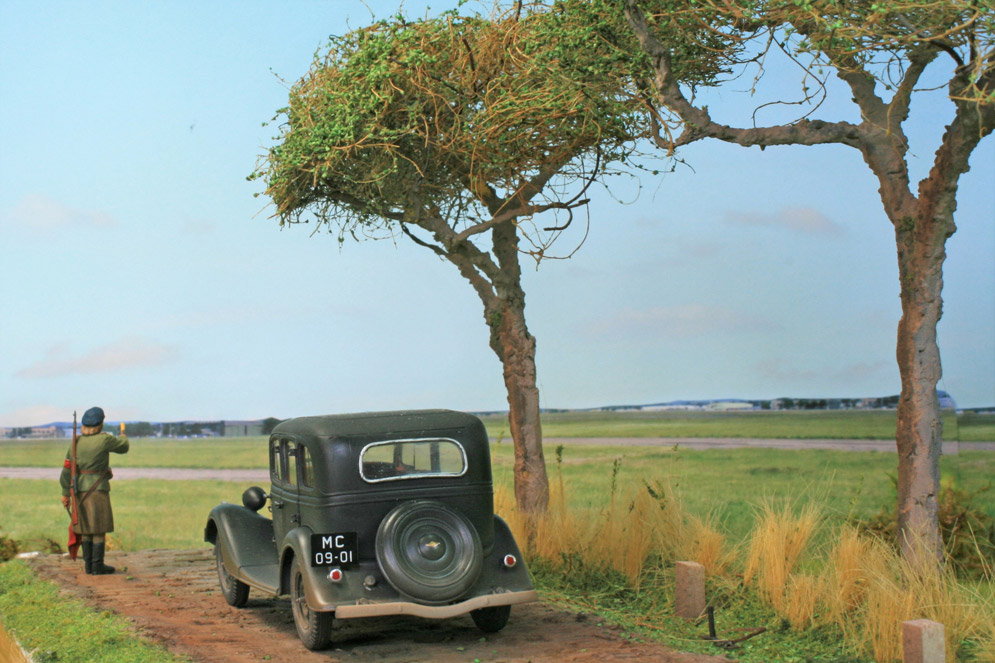
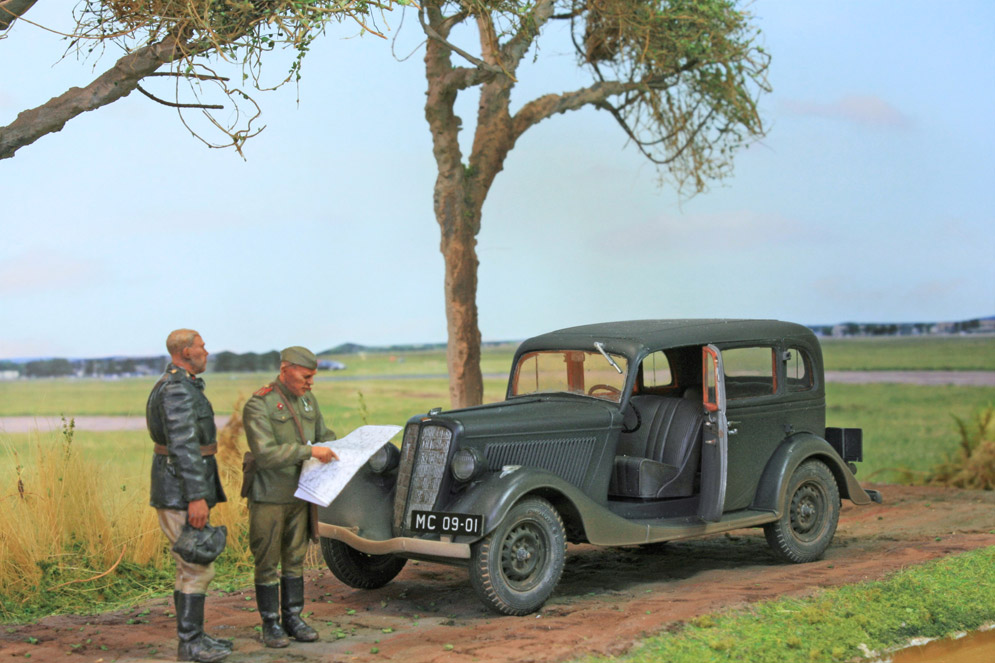
Here is the Zvezda GAZ M1 ‘Emka’ which I completed a month or so ago. I have to say this is the best soft-skin kit I can remember building in a long time! They got the balance of detail and buildability spot on. The wheels are resin from Minor.
The Gaz M1 car was a licence built version of the 1934 Ford Model B car. Powered by a 49 HP 3.3 4 cylinder engine. The Russians upgraded the vehicle with stronger suspension and wheels to cope with ‘Stalin’s asphalt’. Private motorists did not exist in the Russia of that time so they were for the use of officials, the military and the notorious NKVD.
Regards
Andrew J.

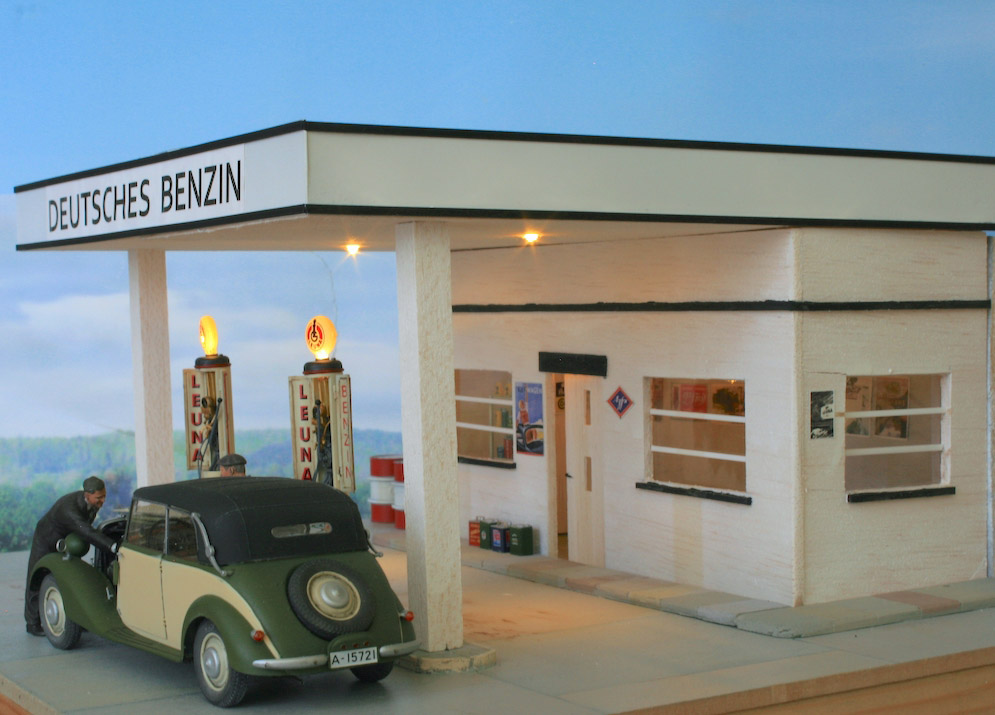
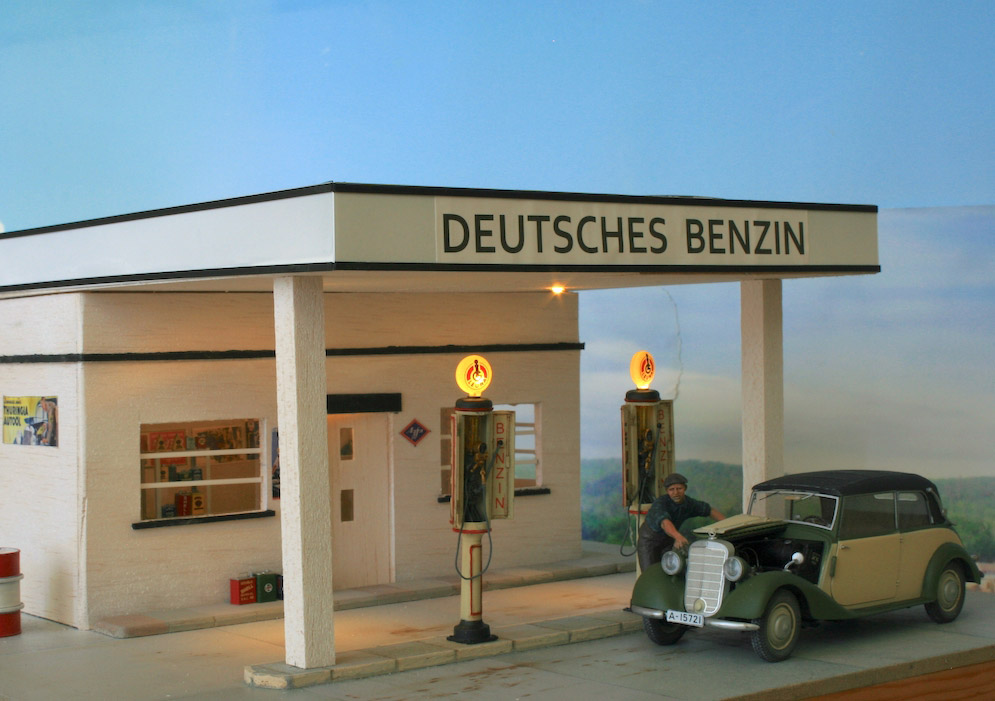
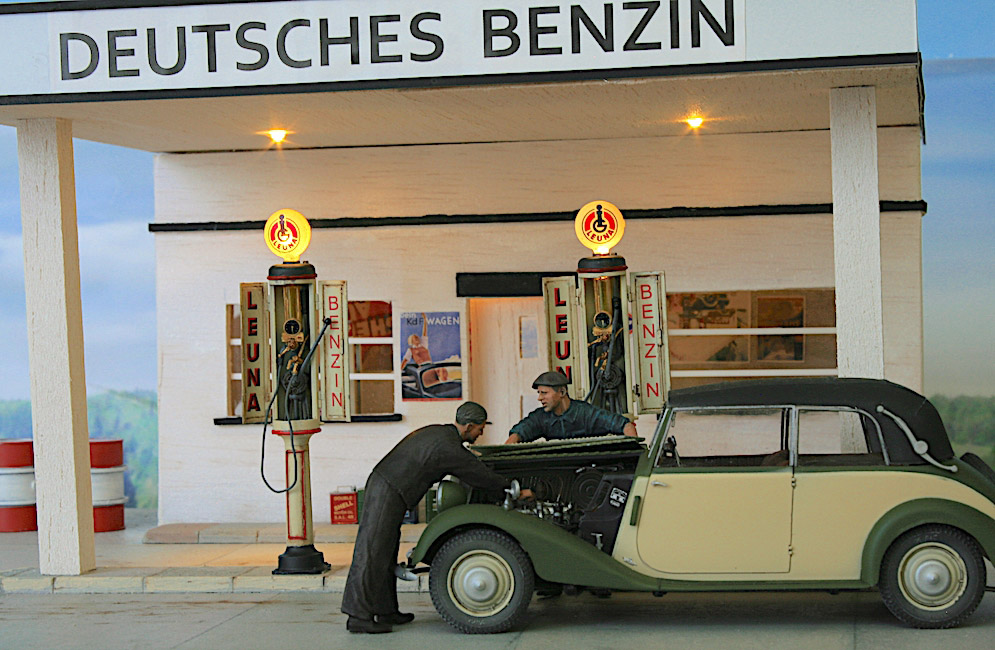
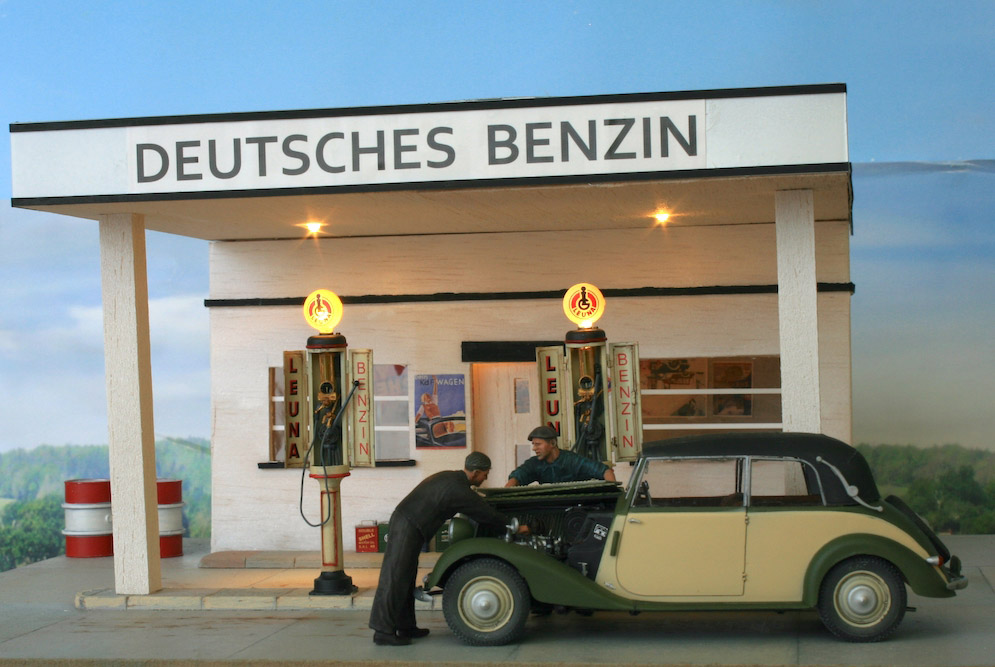
This is the 1:35 MiniArt petrol pump set and a scratch built 1930’s scale petrol station made from wood, balsa and plastic. It has been wired to allow it to be fully illuminated, ask me to switch it on! Leuna benzin was a petrol produced synthetically from coal by I.G. Farben. The production was subsidised by the Weimar Republic to reduce the costs associated with oil imports. Production began in 1927 at the Leunawerke refinery. Sales were carried out by the I.G. subsidiary Gasolin, which in 1939 had around 4000 filling stations throughout Germany.
I wanted to have a suitable base for the charming MiniArt Mercedes 170V. This took a bit longer than anticipated! When building you have to do it in stages to help with the wiring, starting with the pump lighting, the roof lighting and finally that of the station building interior. I wish I could say I found soldering easy, but thankfully you can’t see my sorry work! I studied many videos of amazing railway modellers and their lighted buildings who all made it seem so easy soldering the resistor to the LED lamp.
I found many photos of petrol stations of the era and made my best efforts to mimic a common style. I like to think I was inspired a little by the American artist Edward Hopper with his famous lonely night-scapes such as ‘nighthawks’
Hope you like it?
Regards
Andrew J.
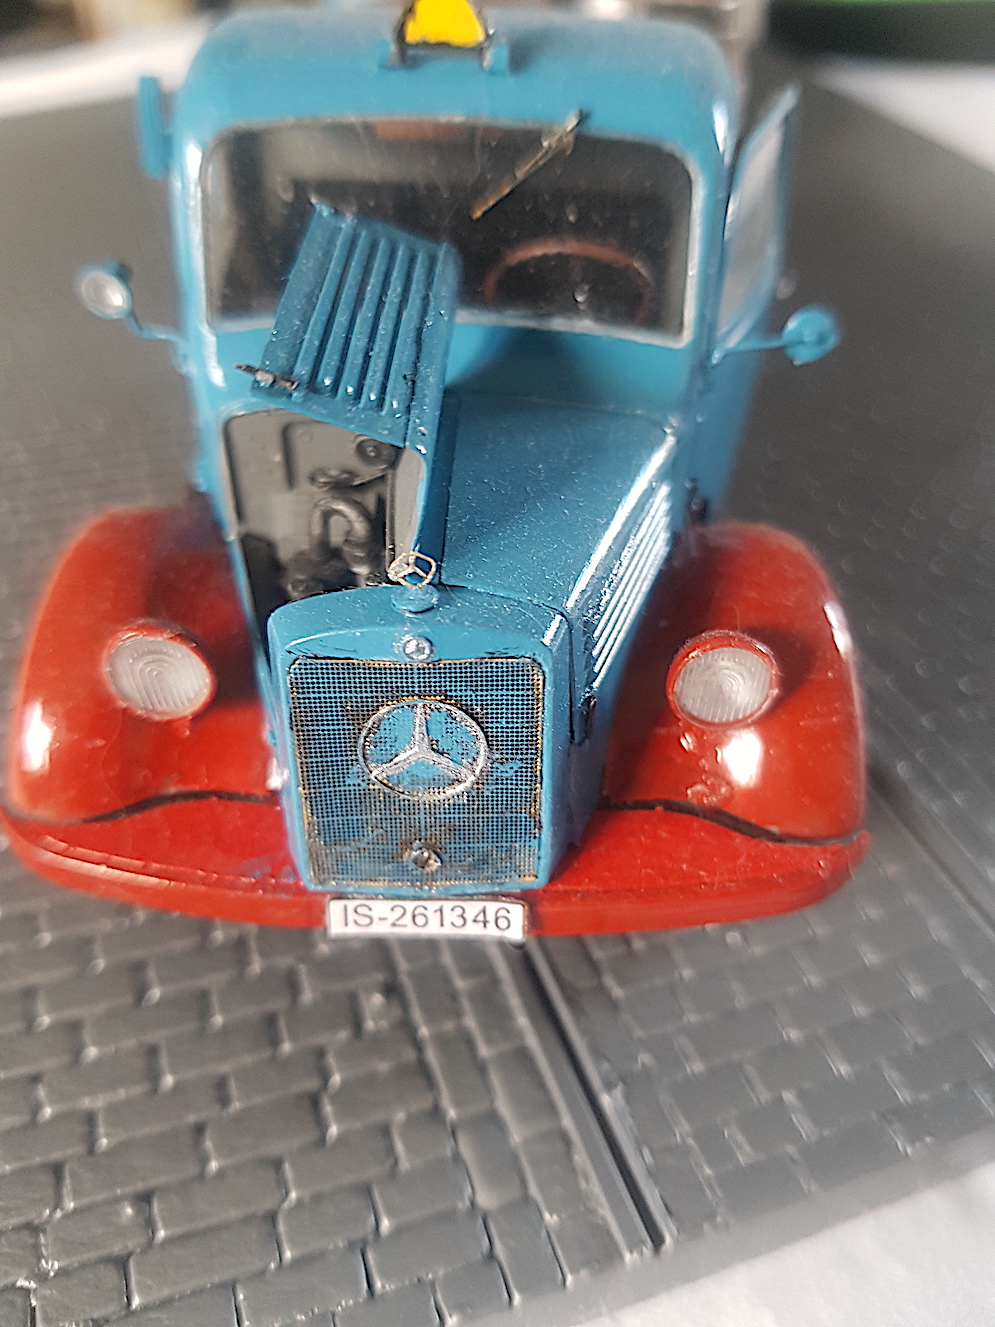
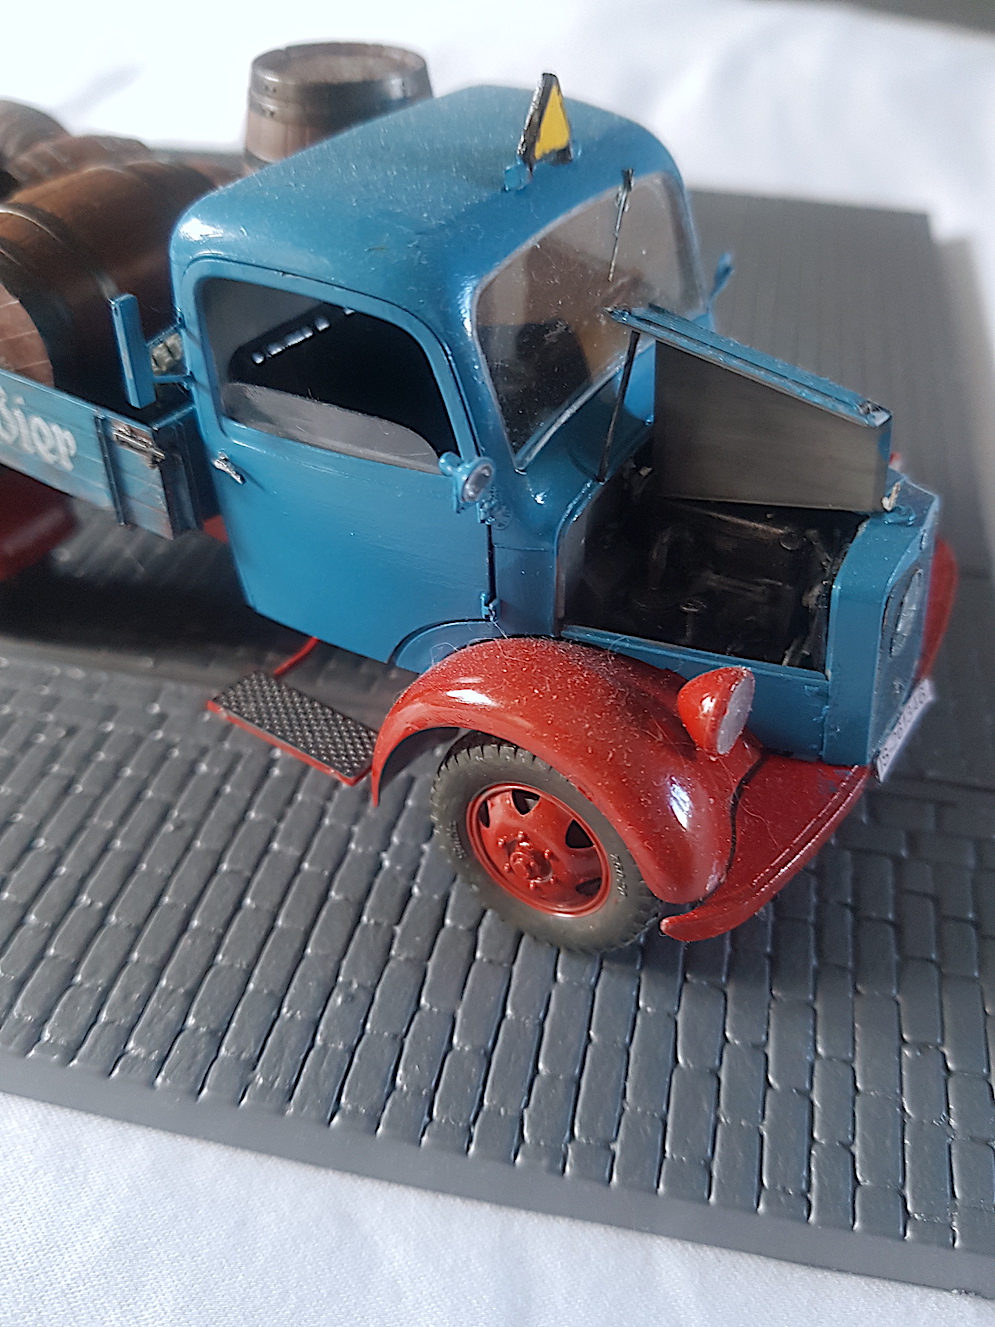
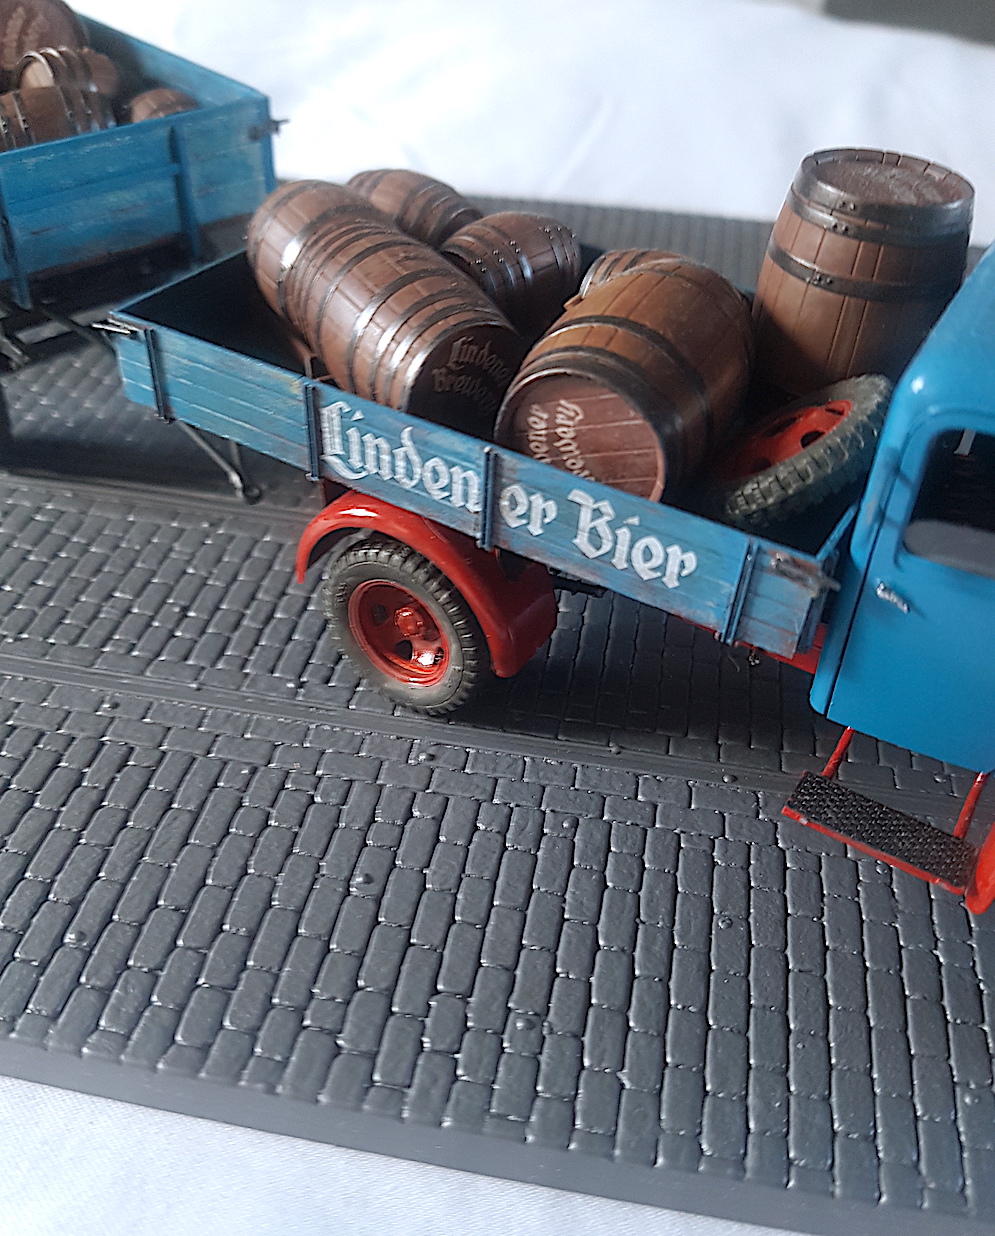
MiniArt 38023 German Truck L1500s with cargo trailer
A typical MiniArt kit. A box full of sprues and lots of really fine detail – some too fine and difficult to remove from the sprues. This is usual for MiniArt, when for most kits 2 or 3 parts will do in these you may have 10+ including separate wing nuts etc.
Instructions are generally clear and easy to follow with good painting information.
Crucially you must make sure the chassis is all square otherwise problems will follow!!! A fully detailed engine is included with the options of having the engine cowlings open. The real issue with the engine is ensuring it sits correctly on the chassis as it only has two very small mounting points at the front only. The cab and rear deck build well and fit nicely. The wheels are an issue, the front pair do not have an axle stub to fit onto but butt joint onto a small area.
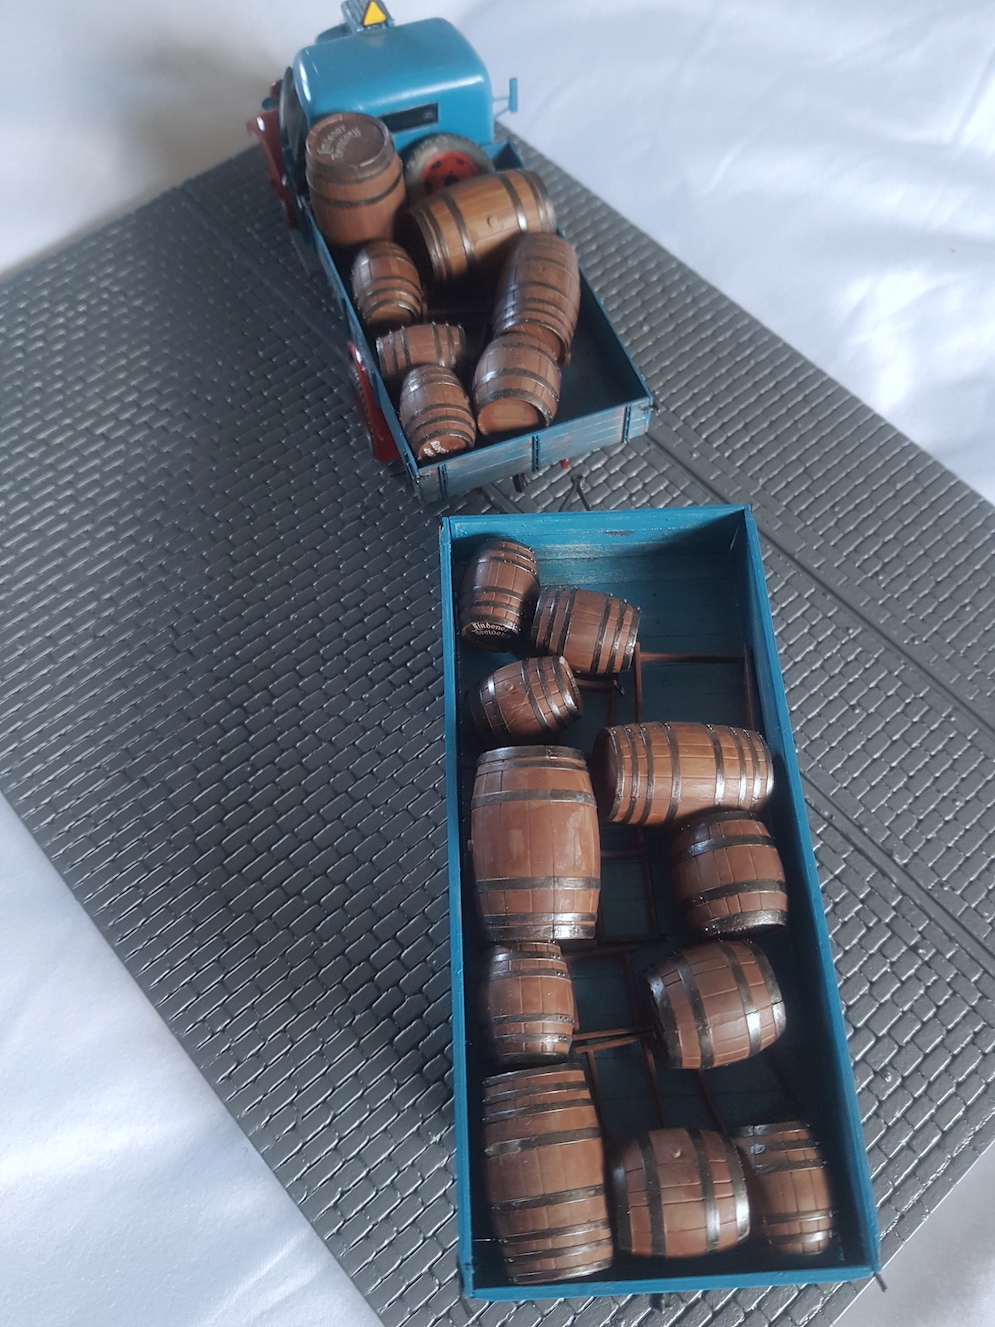
The trailer is a relatively easy build other than the wheels which are built up from separate tread sections, a typical feature of MiniArt. The load is a number of beer barrels of various sizes which build well and have options for barrel ends and spouts.
Usually I airbrush but in this instance I had to use a brush as my airbrush was misbehaving. The paints were Airfix enamels with several diluted coats to build up the finish. I weathered the wood sections by firstly painting the wood sections in a wood finish, then the top coat was brushed over some areas and others had a dry-brushed coat to show wear and tear.
Stephen B.