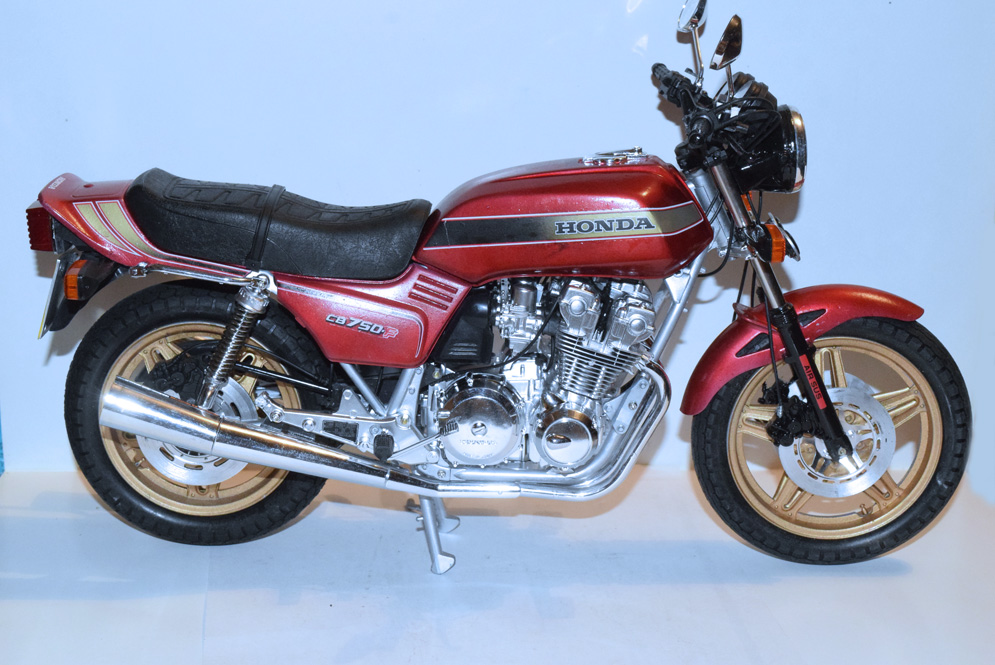
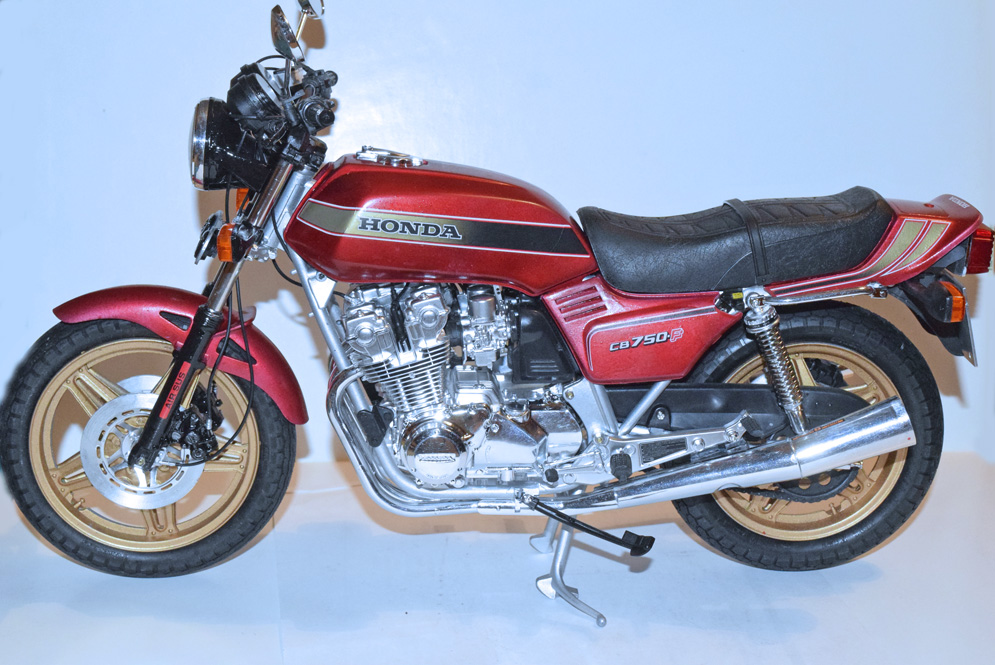

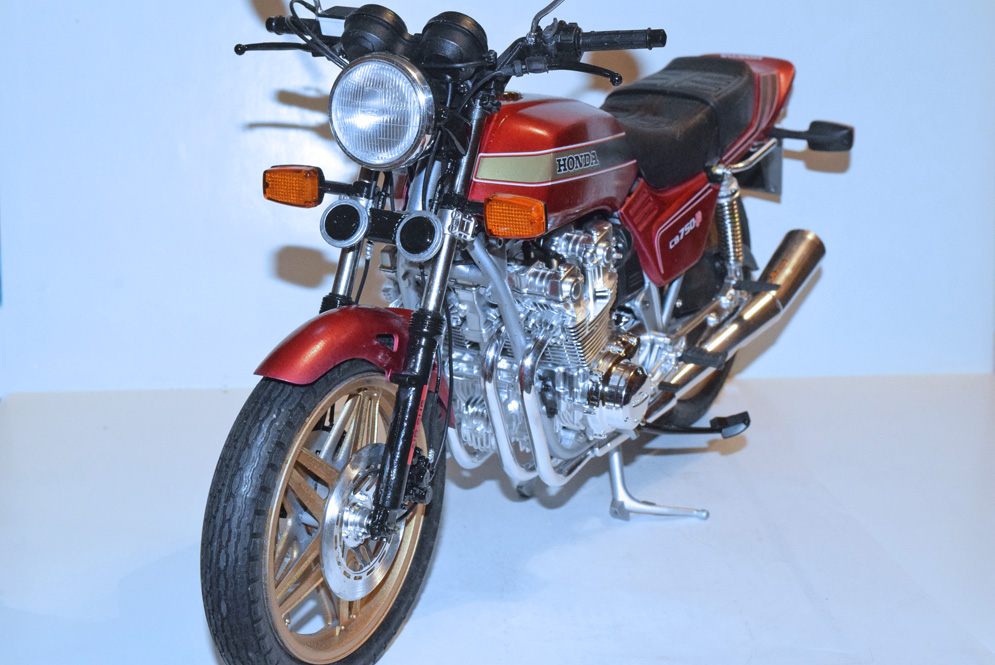
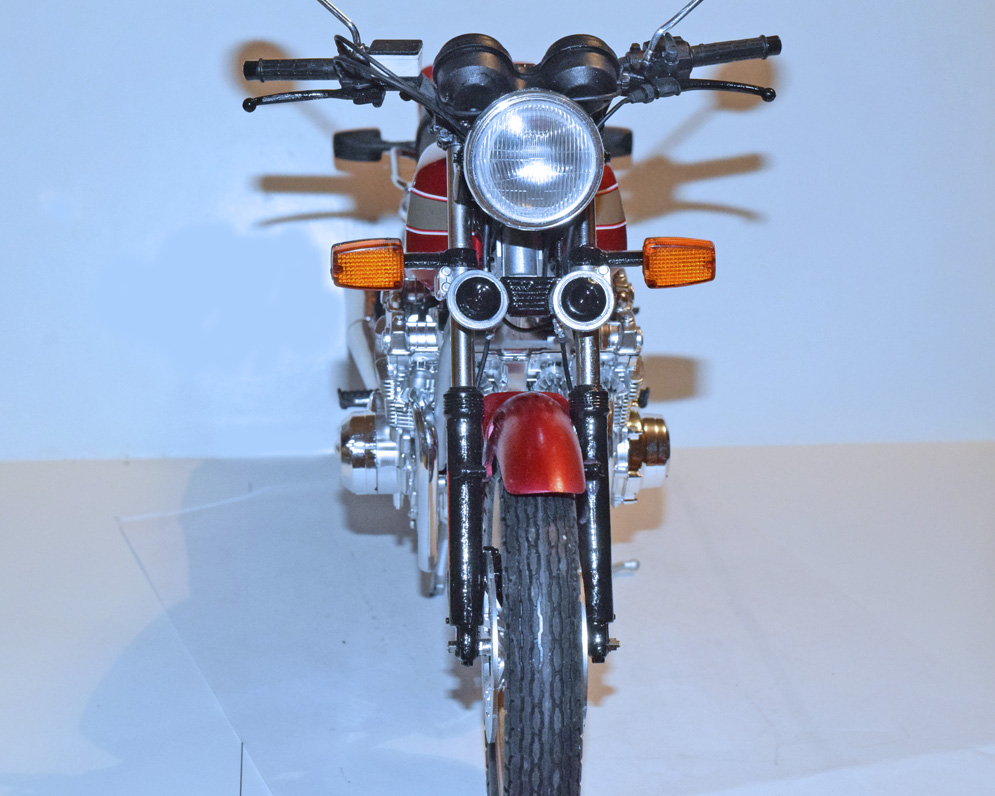
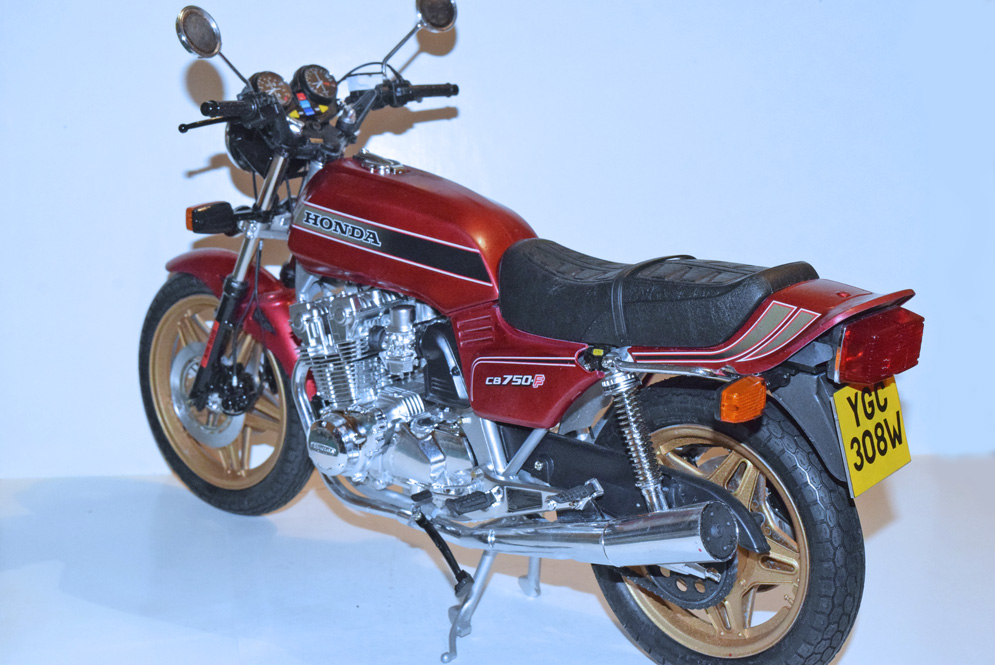
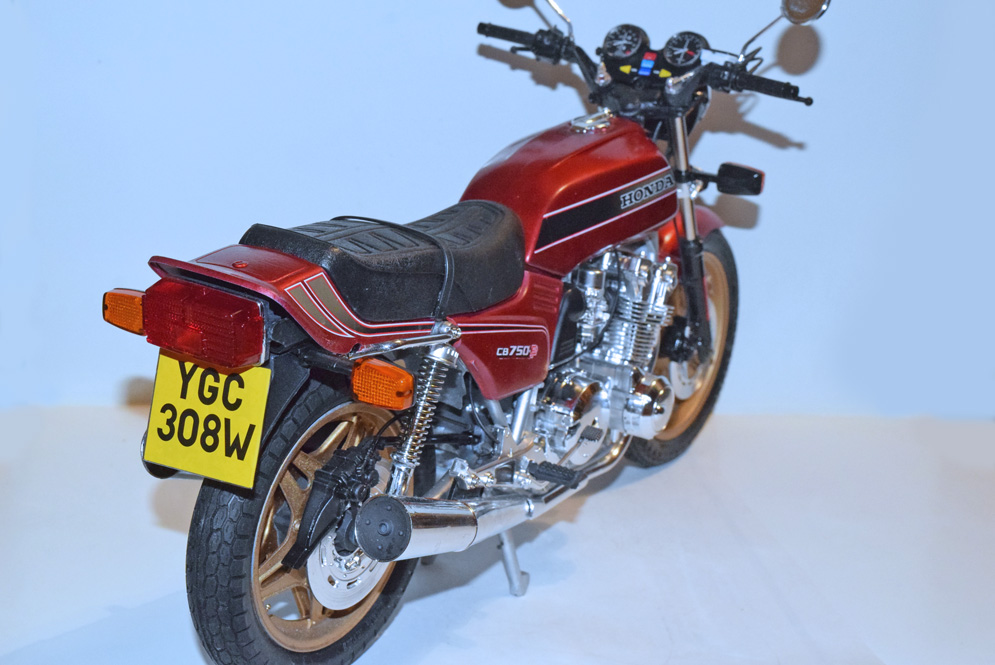
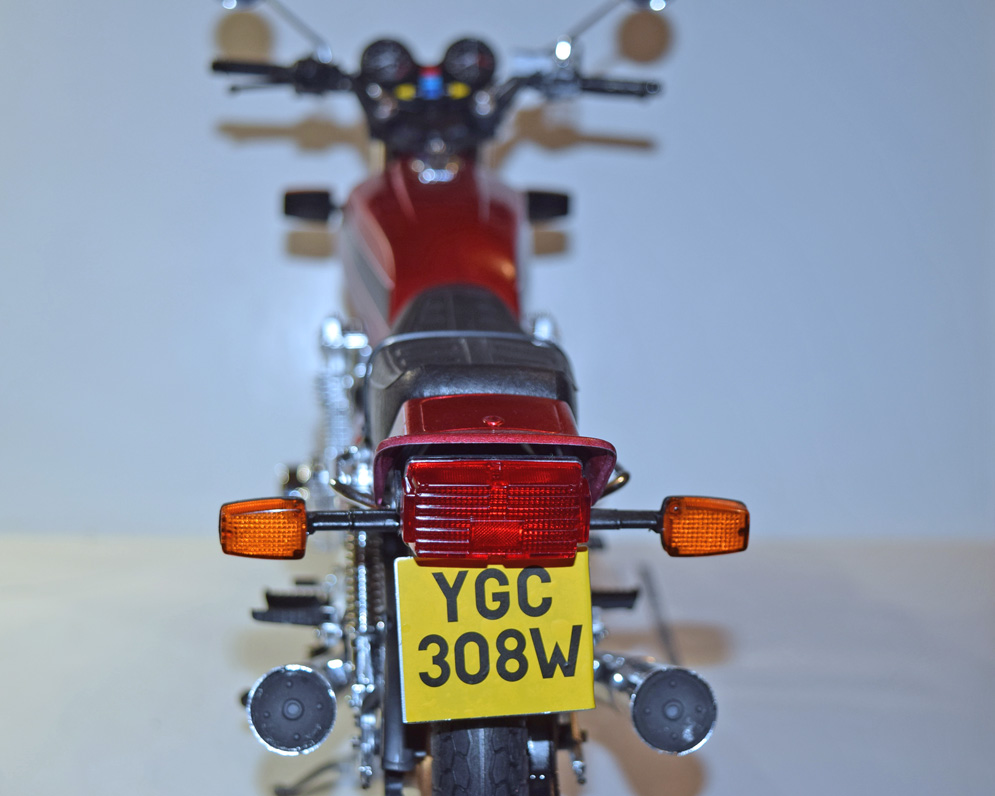
Been nailing a 1:5 scale Tamiya Honda CB 750 together. I always wanted a Hesketh, so I adopted the same colour scheme.
I also tried my hand at Alclad2 metallic lacquers – I still need more practice!
Chris A.
A sublime kit built from the box. Like all bike kits, needs care, and can be tricky in places. It needs to be planned, especially the painting, decal and polishing stages. I’ve not got it right yet but it’s fun to learn.
Les V.
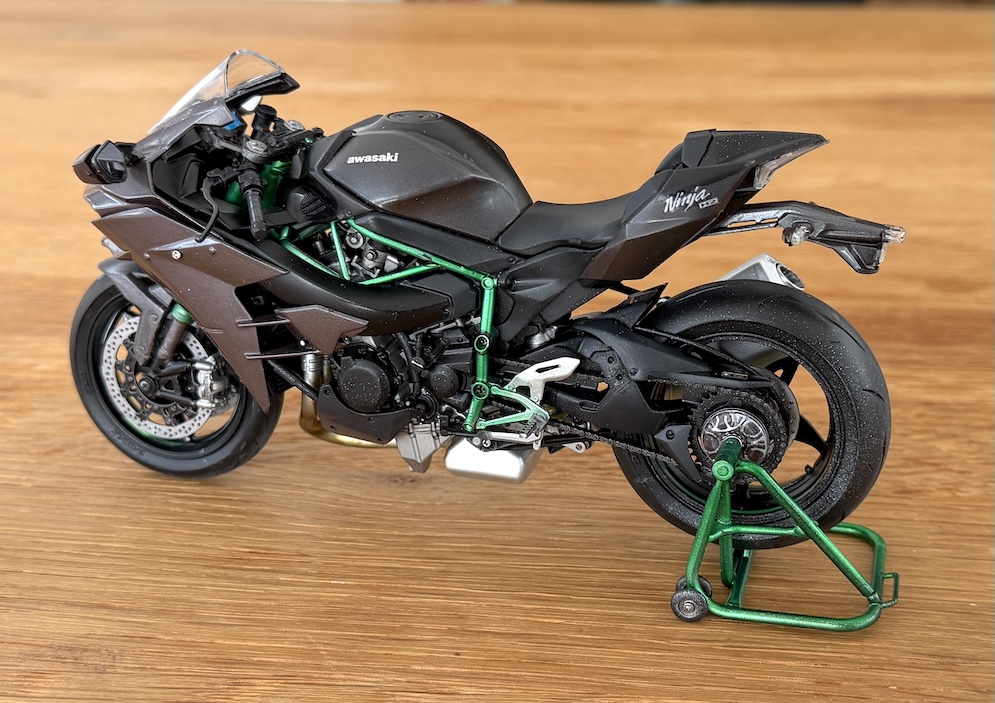

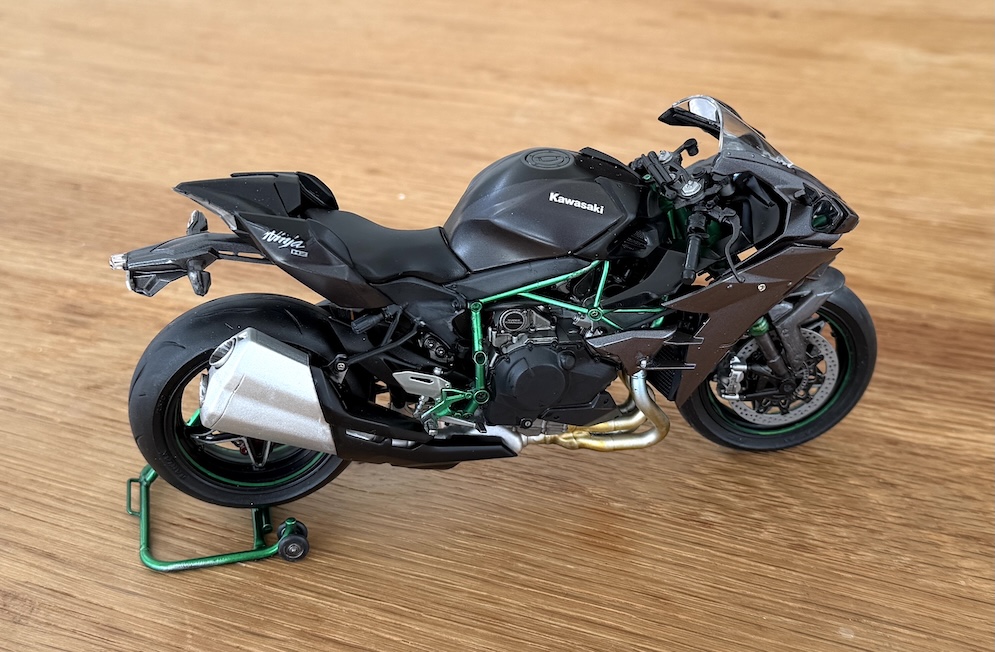
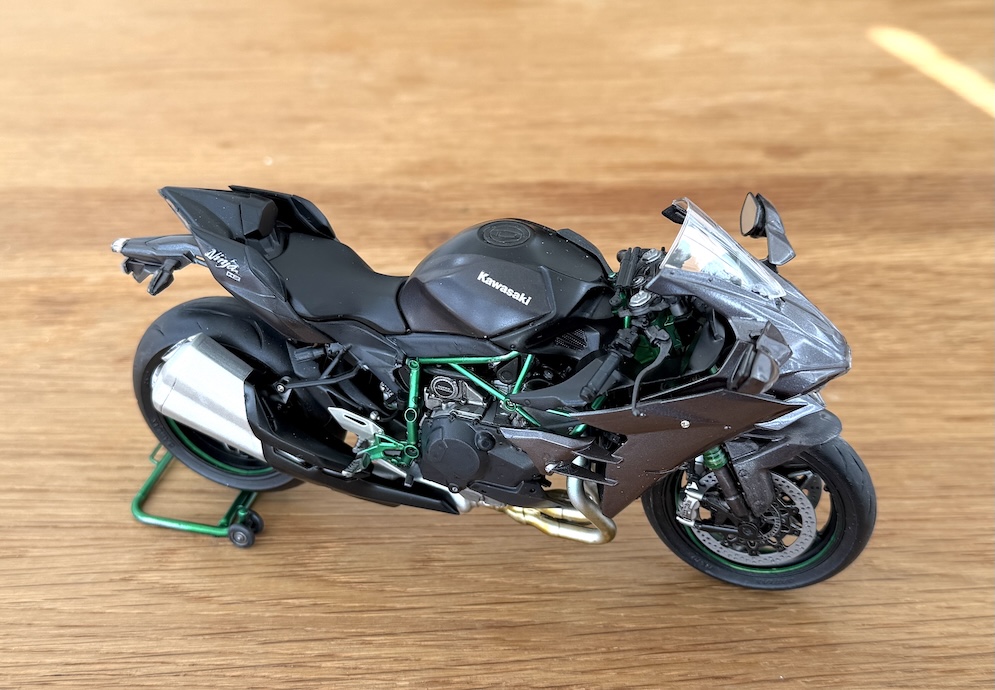
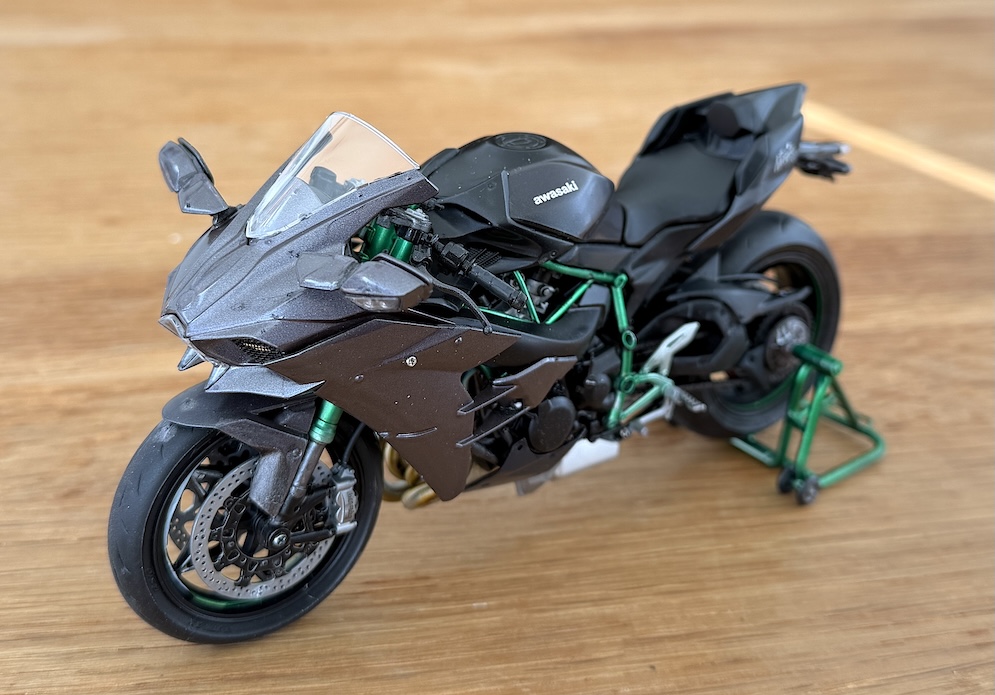
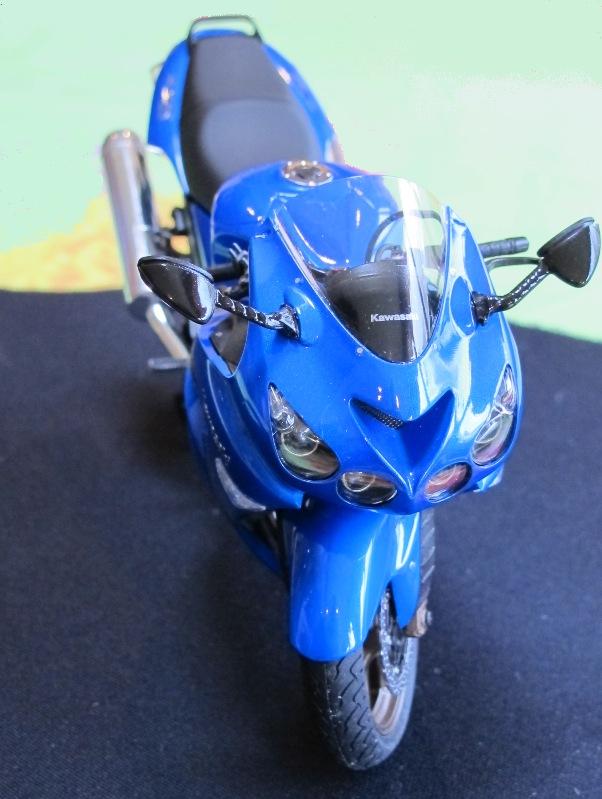
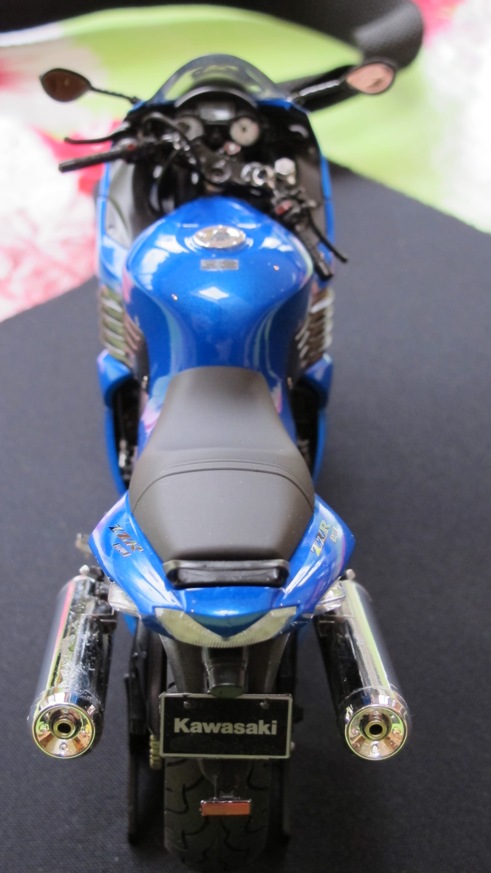
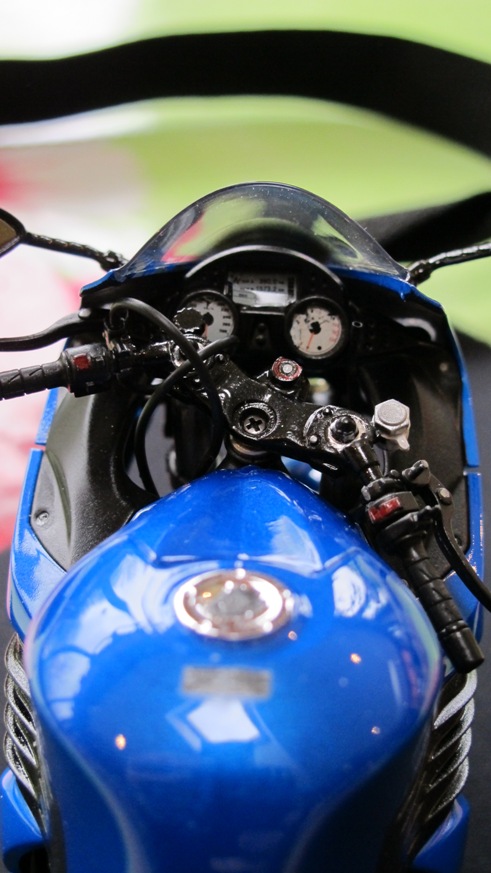
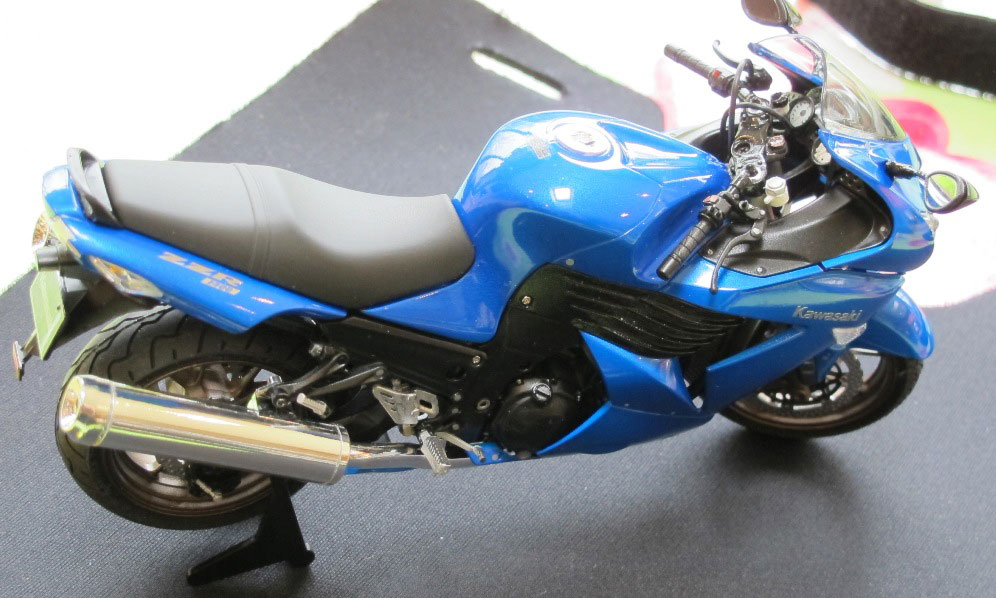
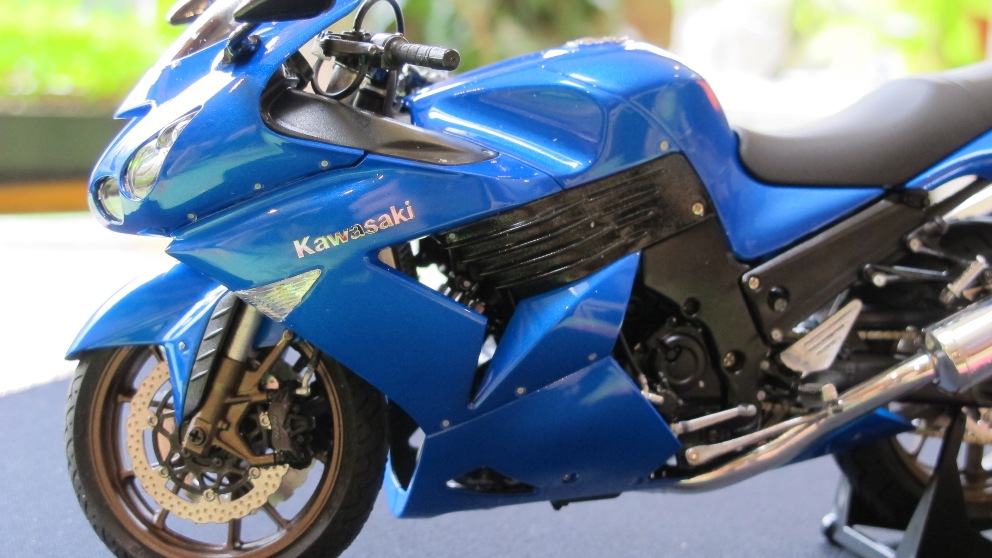
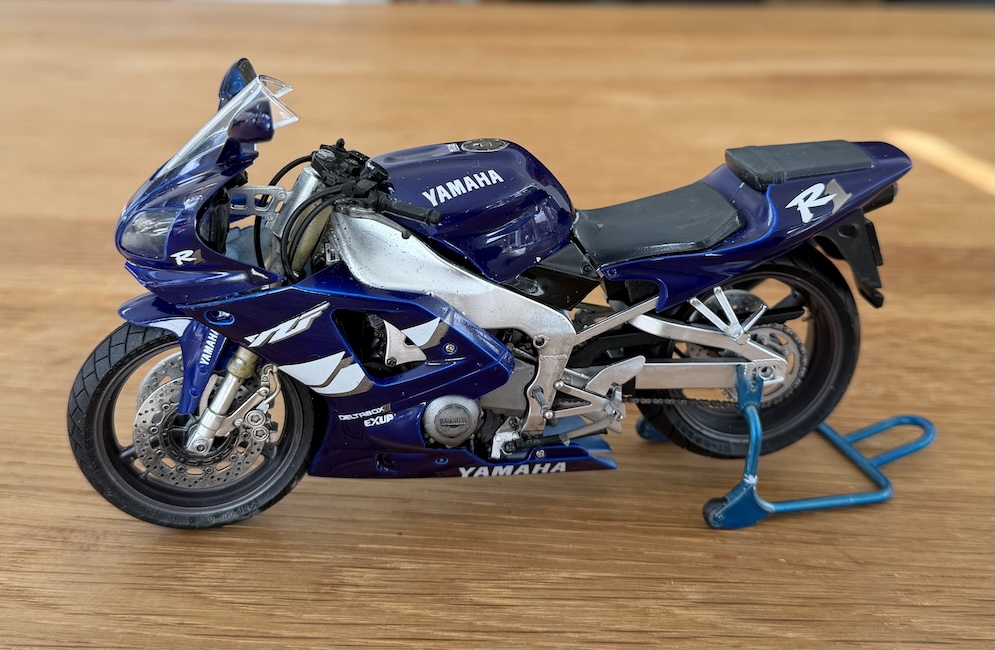
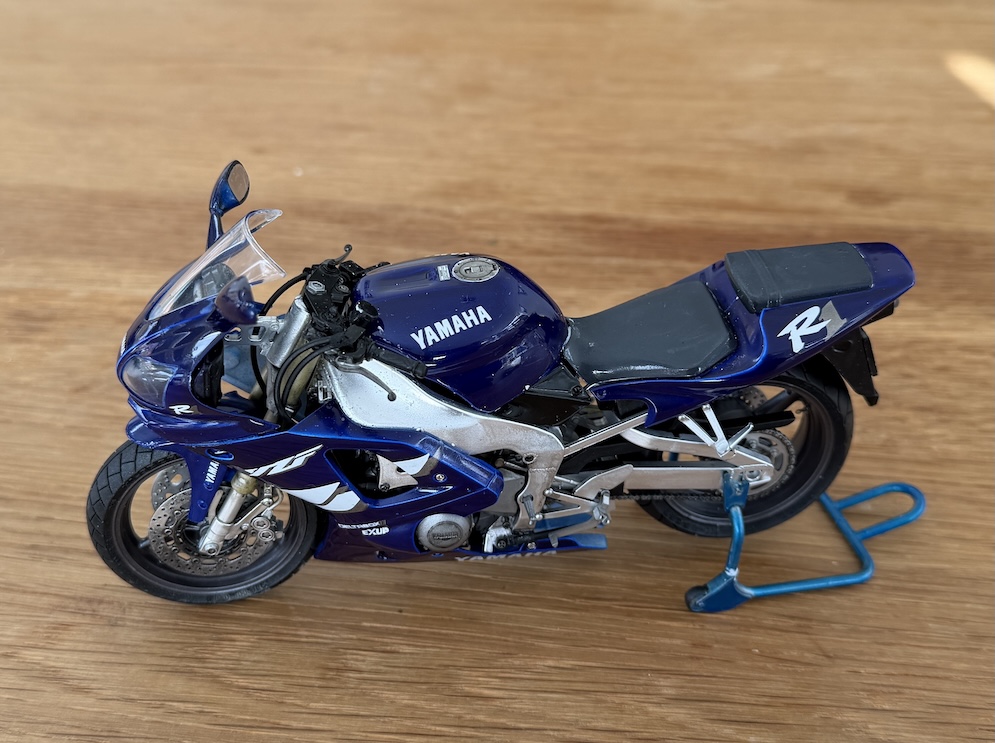
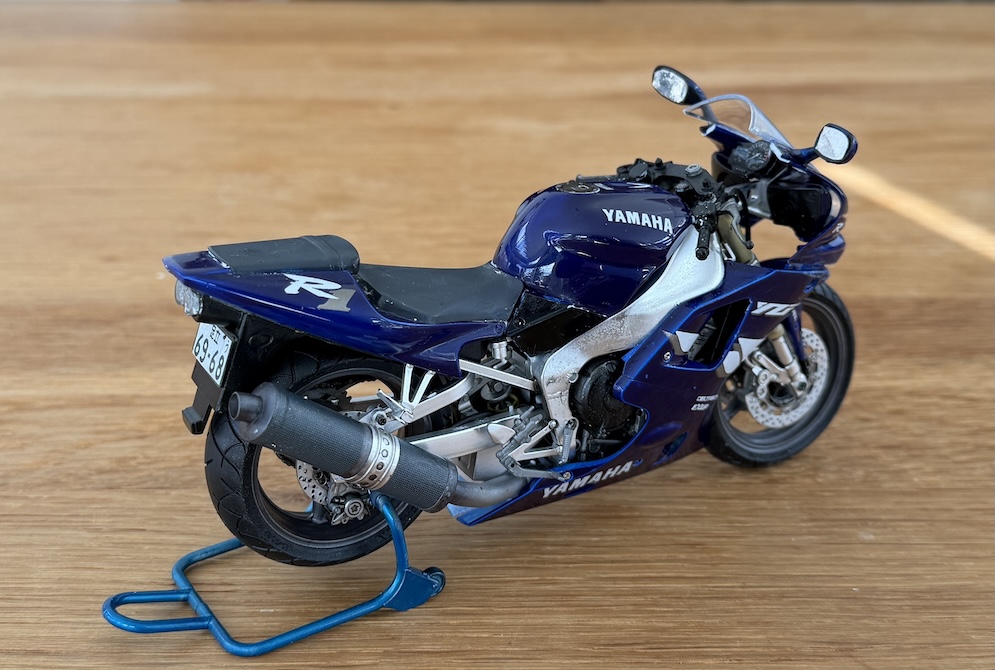
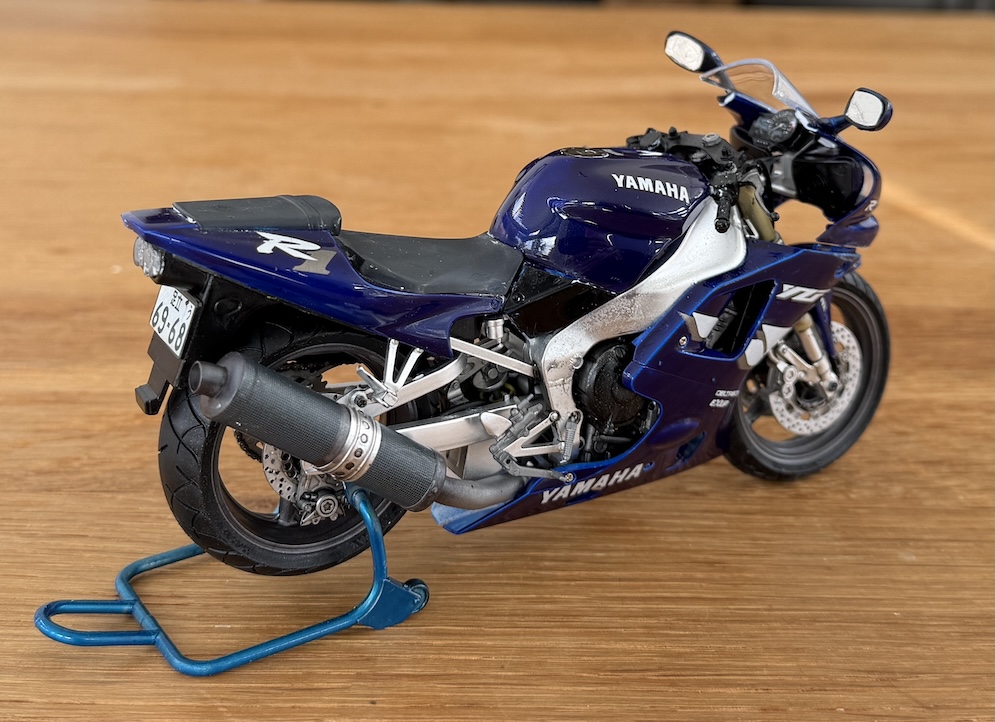
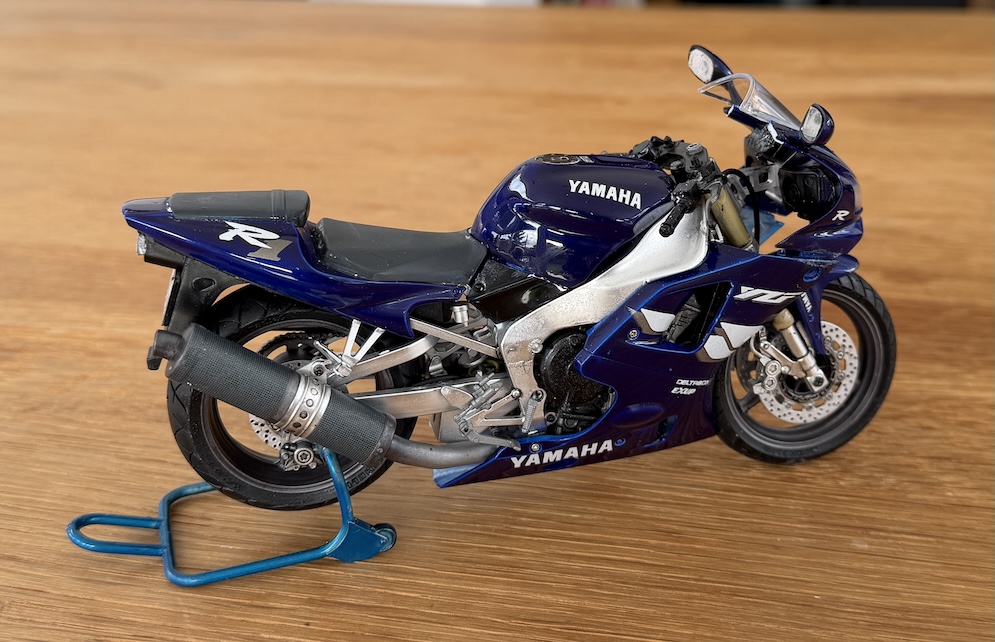
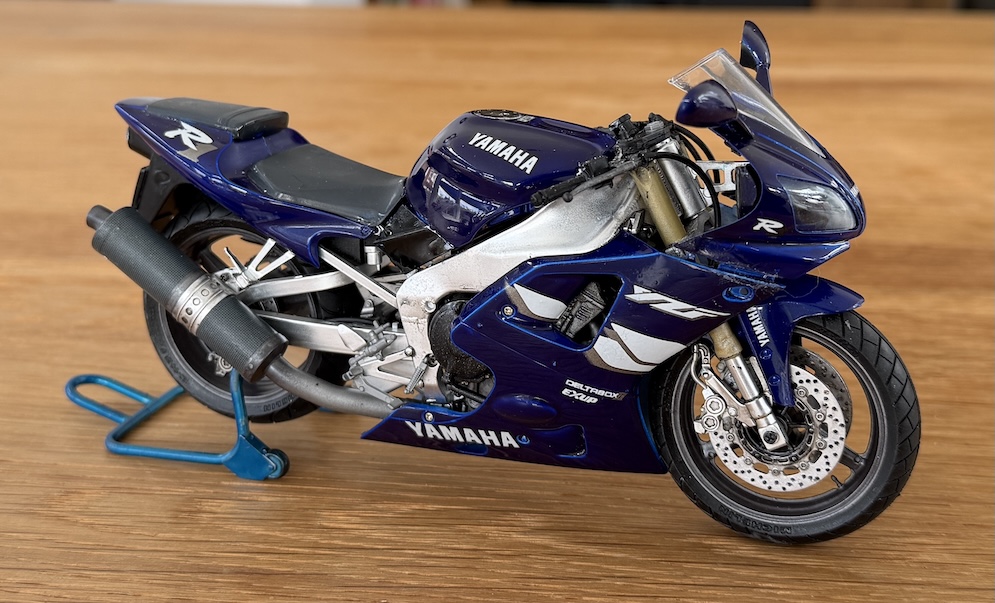
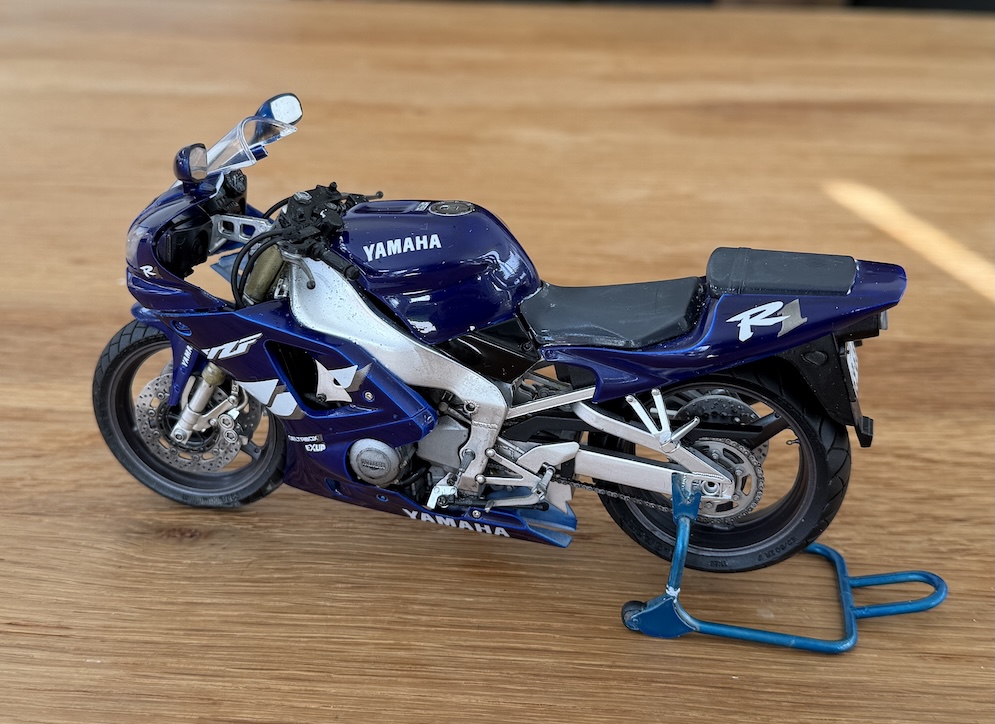
This bike was completed with some small changes to the kit to suit what I liked but otherwise from the box.
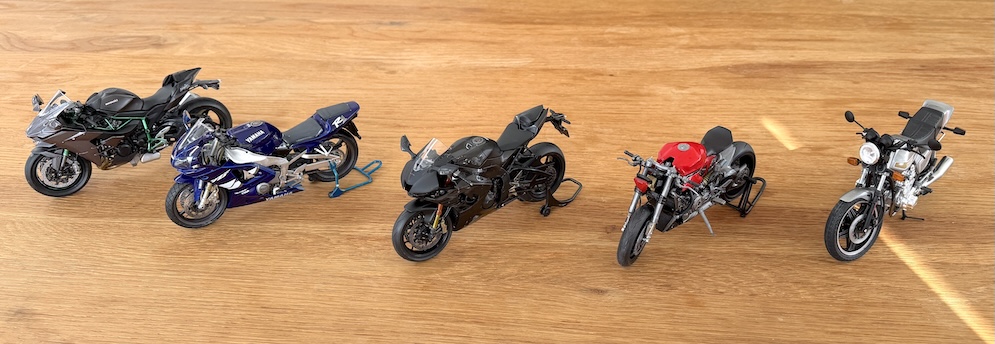
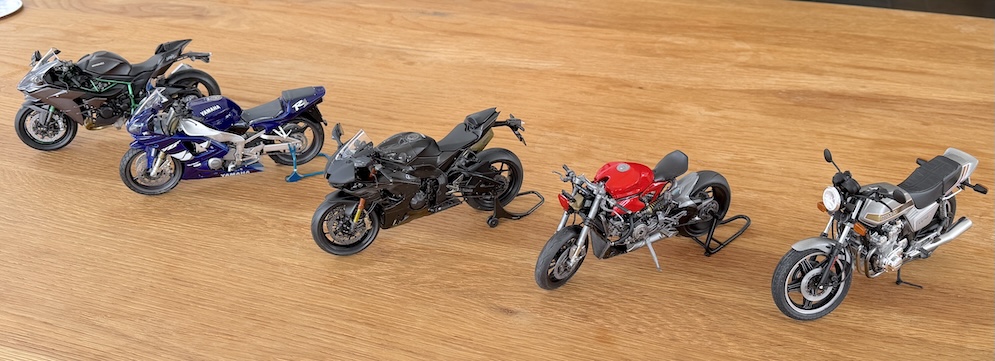
You will see one photo of all my recent bike models and one too from Geoff C – his Honda CB 750F – his first motorcycle kit build!
Les V.
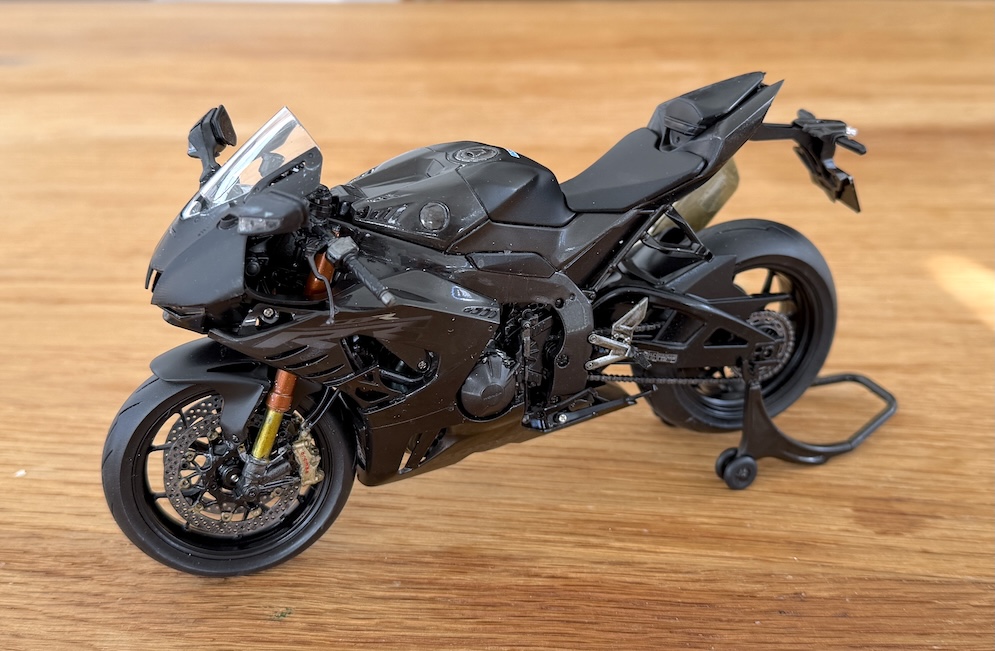
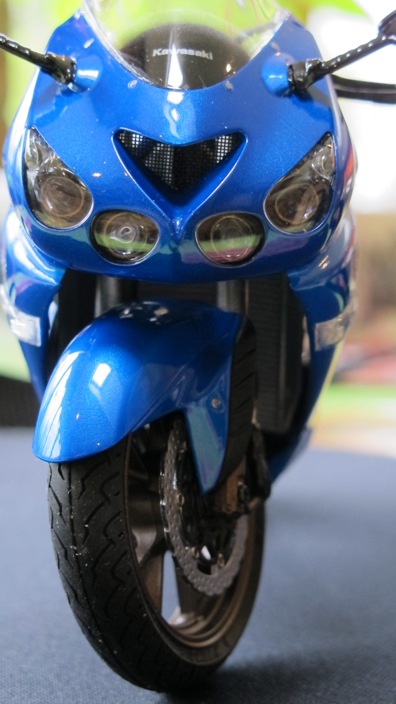
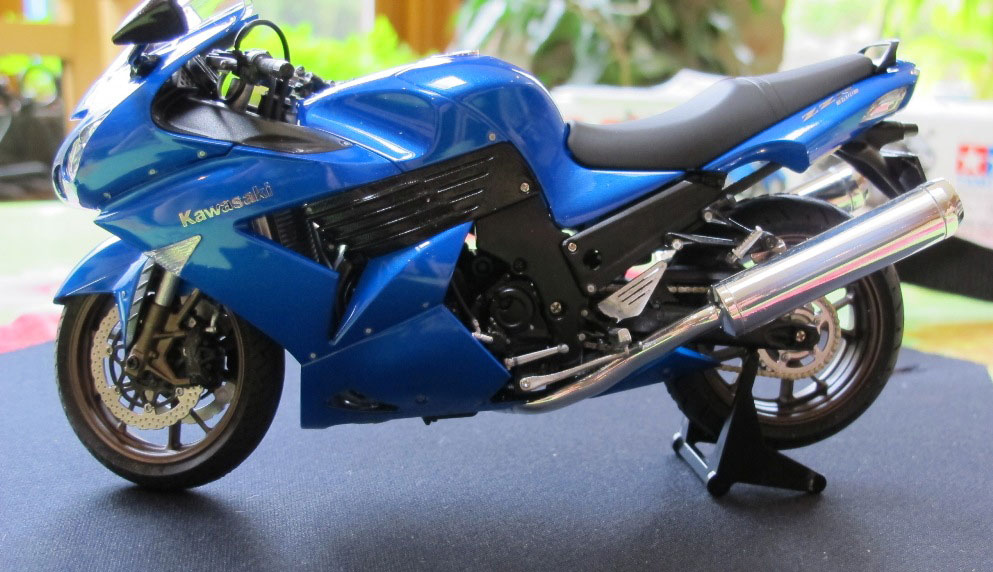
I used Zero Mica blue and Clear; polished with polishing kit and Tamiya compounds; no after parts, straight box kit.
Last time I completed a motorcycle was probably 30 years ago!!
Cheers, David


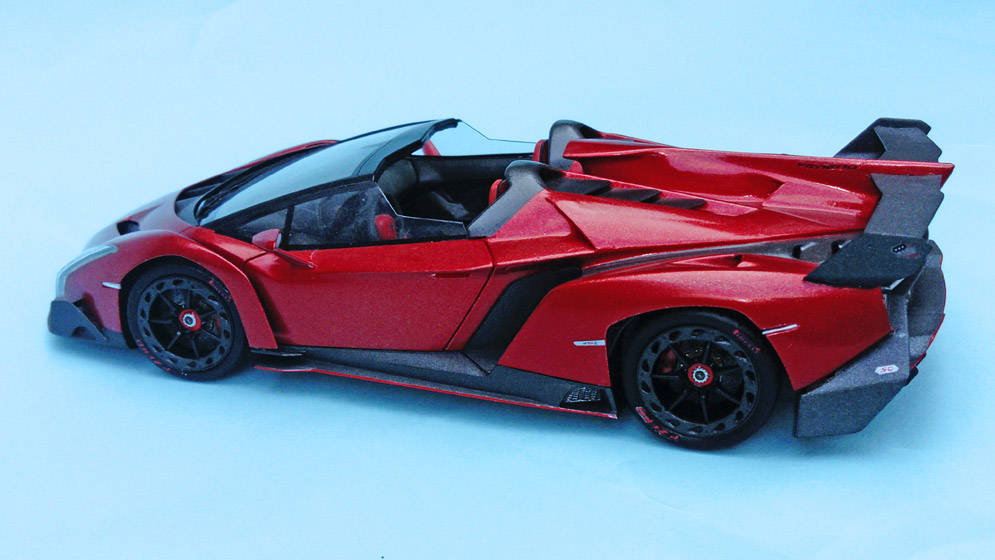
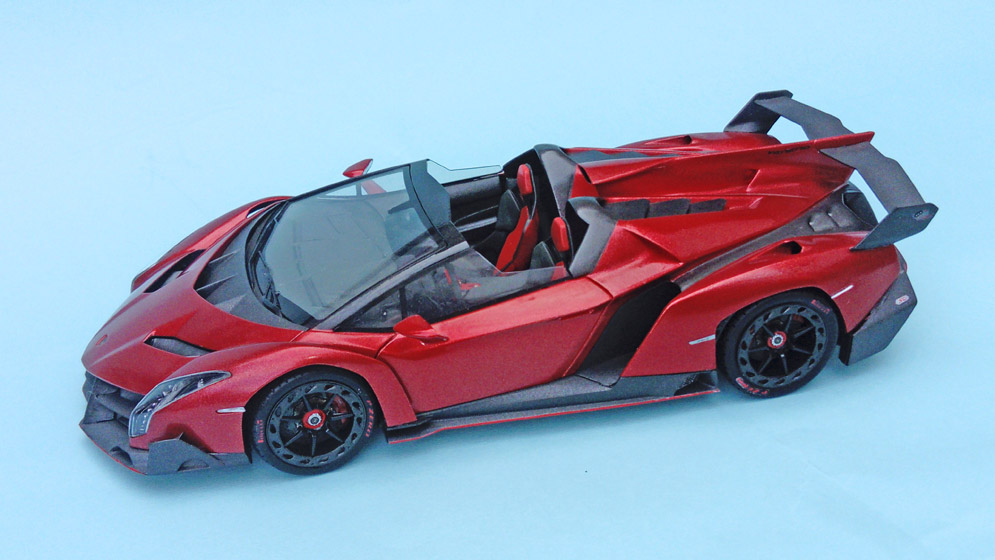
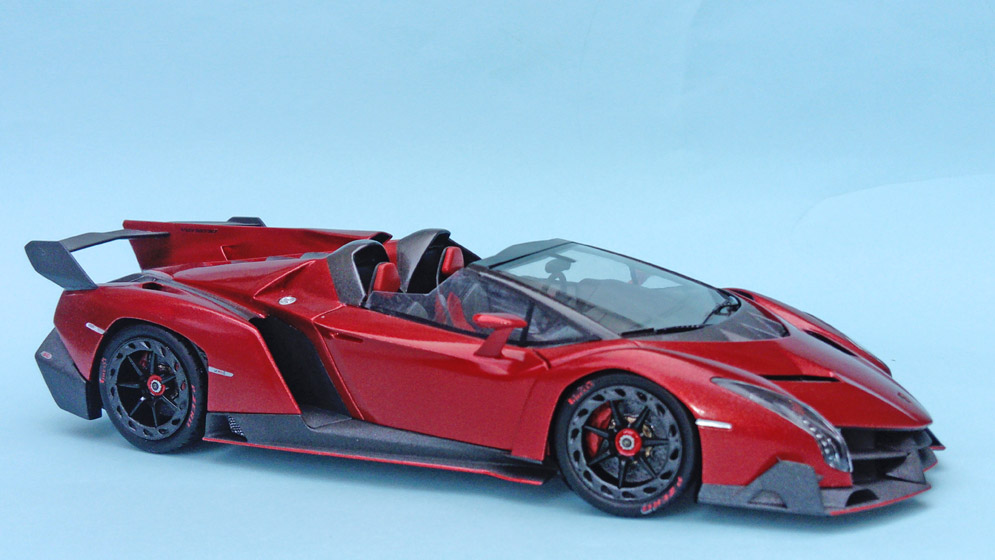
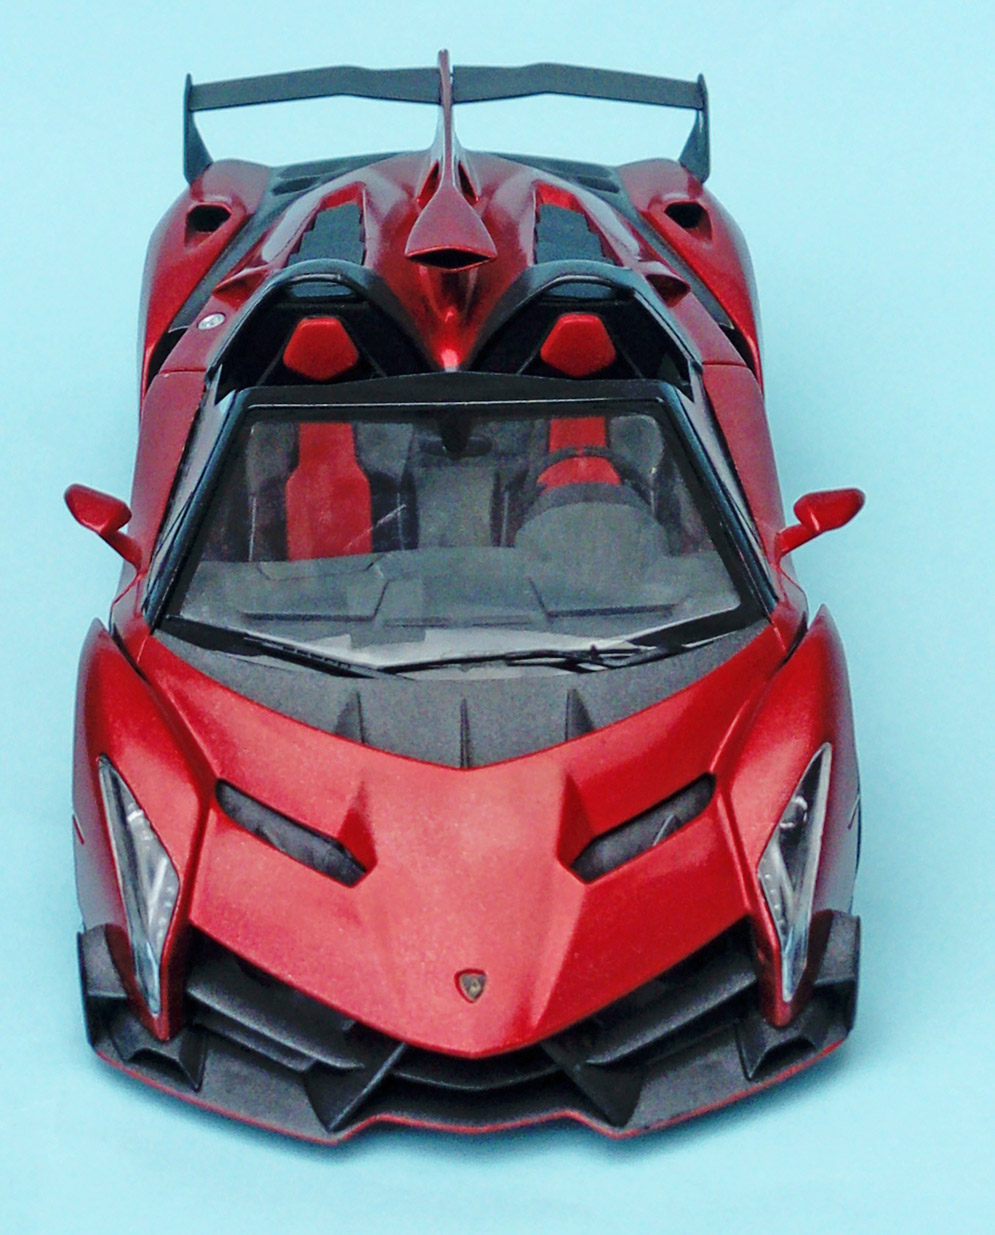
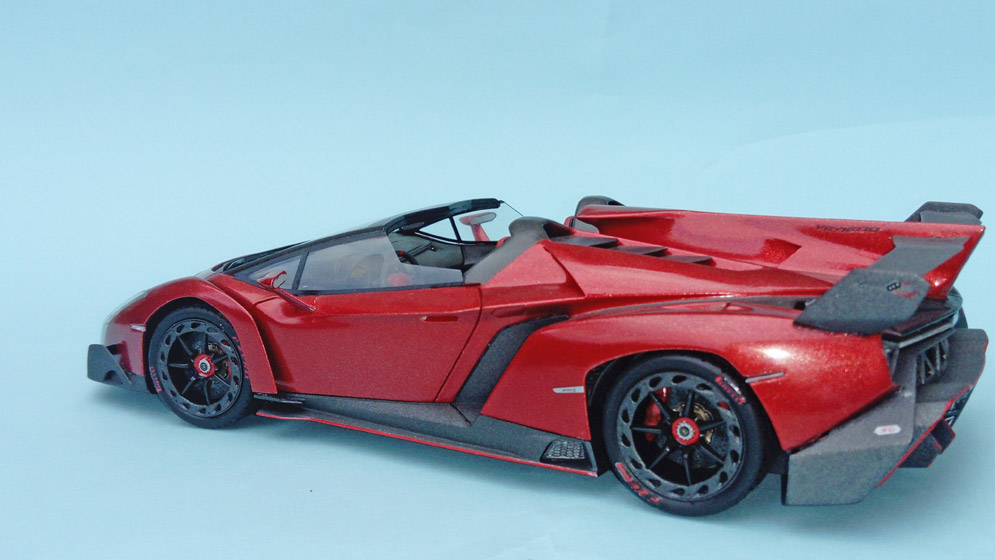
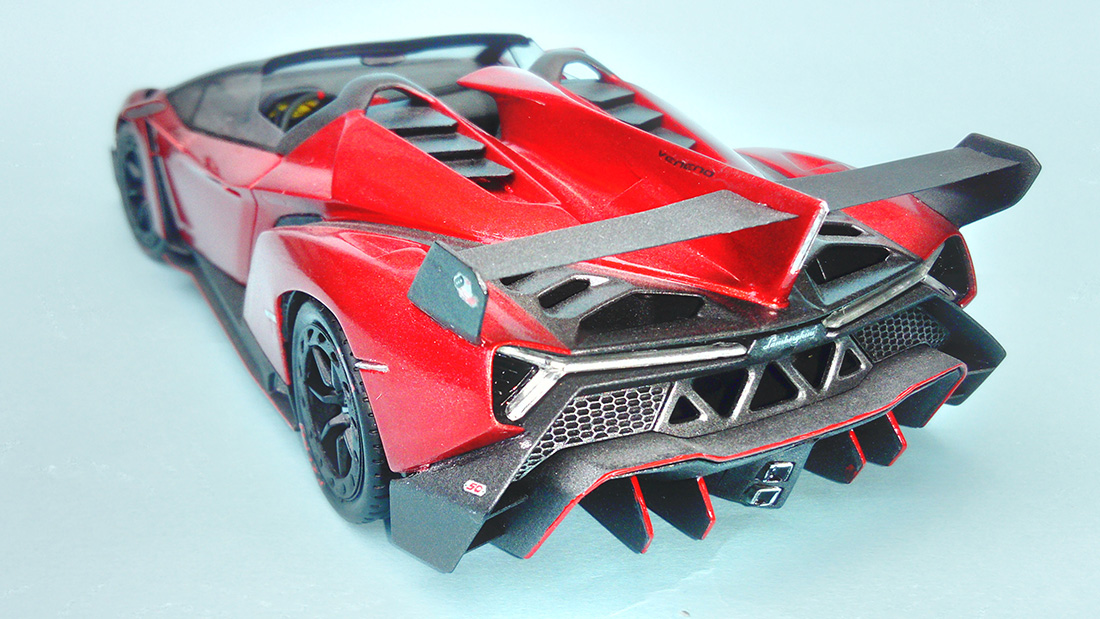
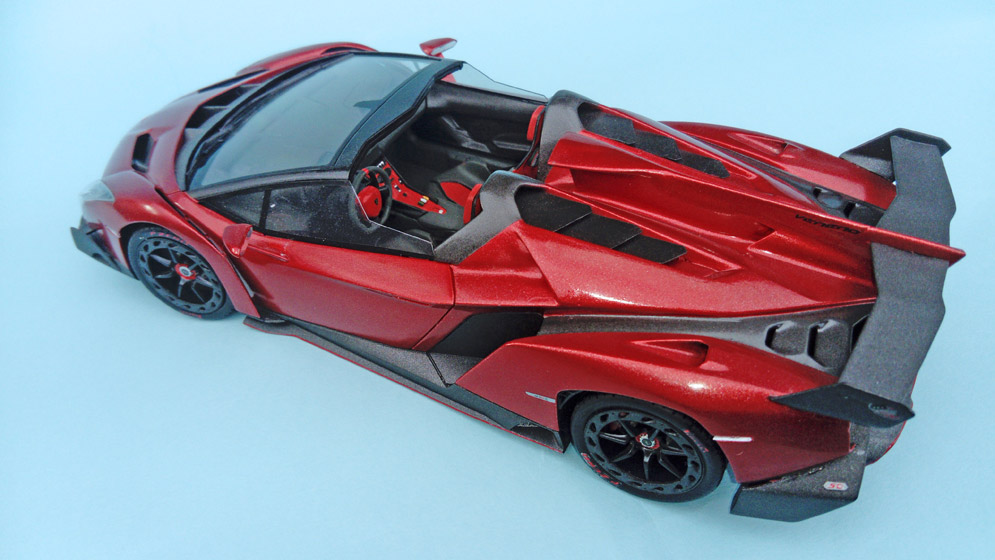
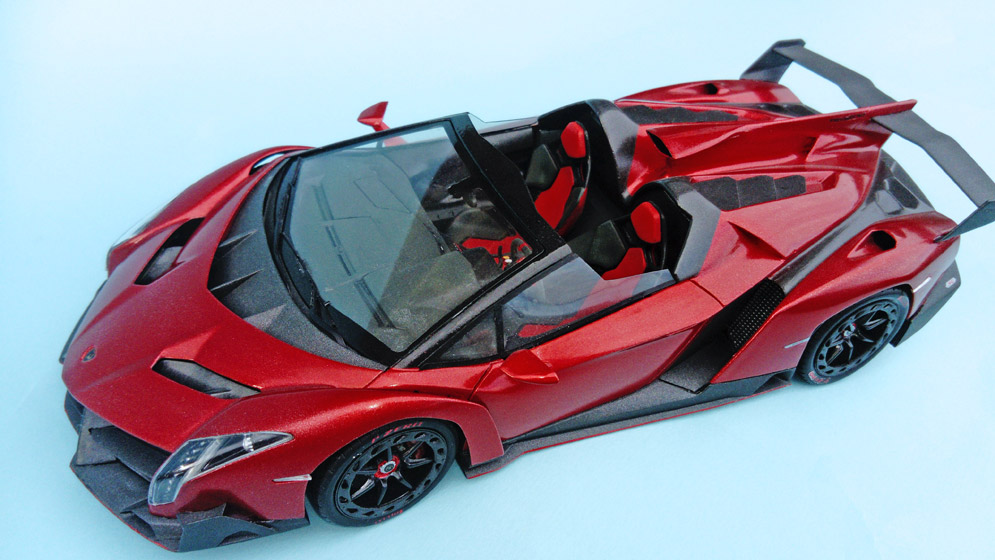
The first time that l ever saw the Veneno was only about two years ago and l was surprised to discover it had been built in 2013. Depending on which references you read either 5 or 9 were built, at a price of around 4.5 million dollars! The model shown here is produced by Fujimi and retailed at around £30.
As is obvious by the images, the finished car is the Roadster version whereas the kit is of the roofed version and this meant that a fair amount of scratch building was required. Luckily the kit came with a fair representation of the 6.5 litre V12 engine and the complete rear engine as a separate part.
The first task was to cut the roof off of the main body, this part became very weak and flexible due to the fact that only the sills under the non-existent doors held it together. From here, the kit was built virtually straight from the box; details and colours being found on numerous web sites and You Tube.
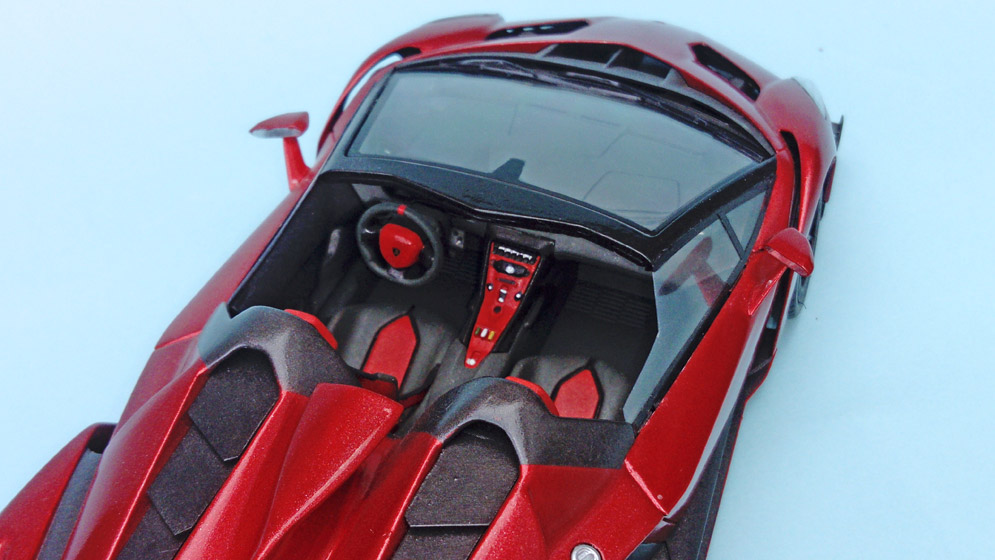
Construction of the new lowered engine deck was by using various thicknesses of plastic card and Milliput. The most challenging part was building the twin roll over structures that wrap around the seats. At no time were any sketches or plans drawn, the whole build being done by eye until it looked correct. The central fin and airbox was made in the same way and blended in with filler until smooth.
Many of the You Tube videos show a Veneno in a metallic red colour, so thats what l went for, Tamiya TS-18 as it’s virtually an exact match. The body was spayed outdoors in warm sunshine straight from the can until a smooth finish was achieved. after leaving a week to fully harden, the finished body and doors were attached to the chassis. The final parts to add were the door glazings that meet the windscreen at the A pillars.
This project lasted around 3 months and was the most involved car conversion I have done and I’m pleased with the way it turned out and a thoroughly enjoyable project.
Steve W.


Hi all…
Today it’s time for something different: a Formula 1 car.
This is the 1:20 scale Tamiya Leyton House from the early nineties. The kit was mostly built straight from the box with some extra detailing in the engine compartment.
All black parts are Alclad primer and the exhaust Alclad metal paints. The body colour was painted with a spray can from Tamiya, which is really great stuff. The green and white areas and thin black lines were masked and airbrushed.
Hope you like it! René VDH.
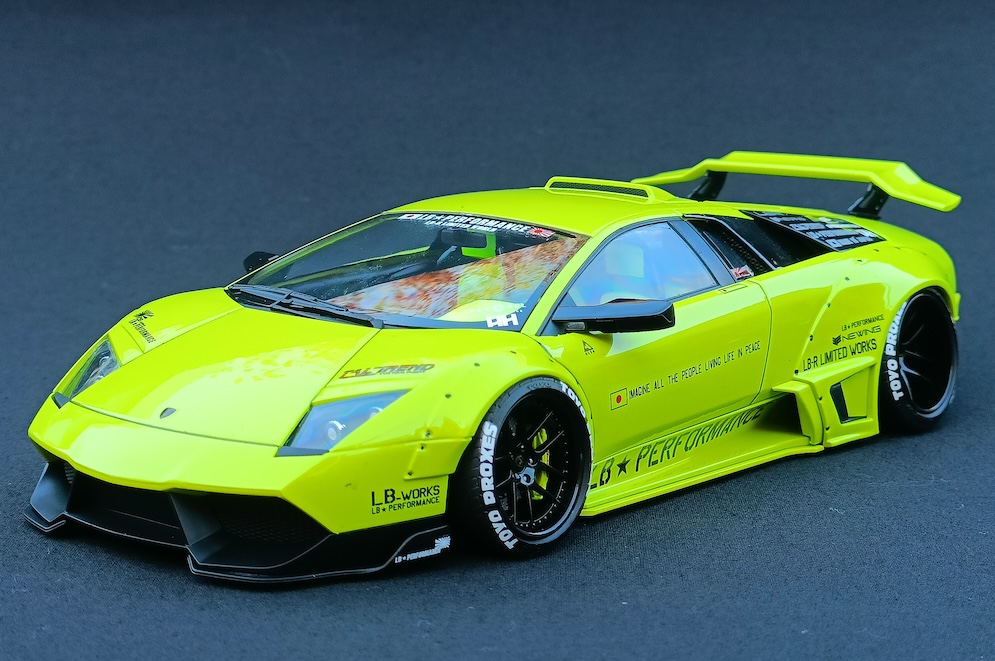
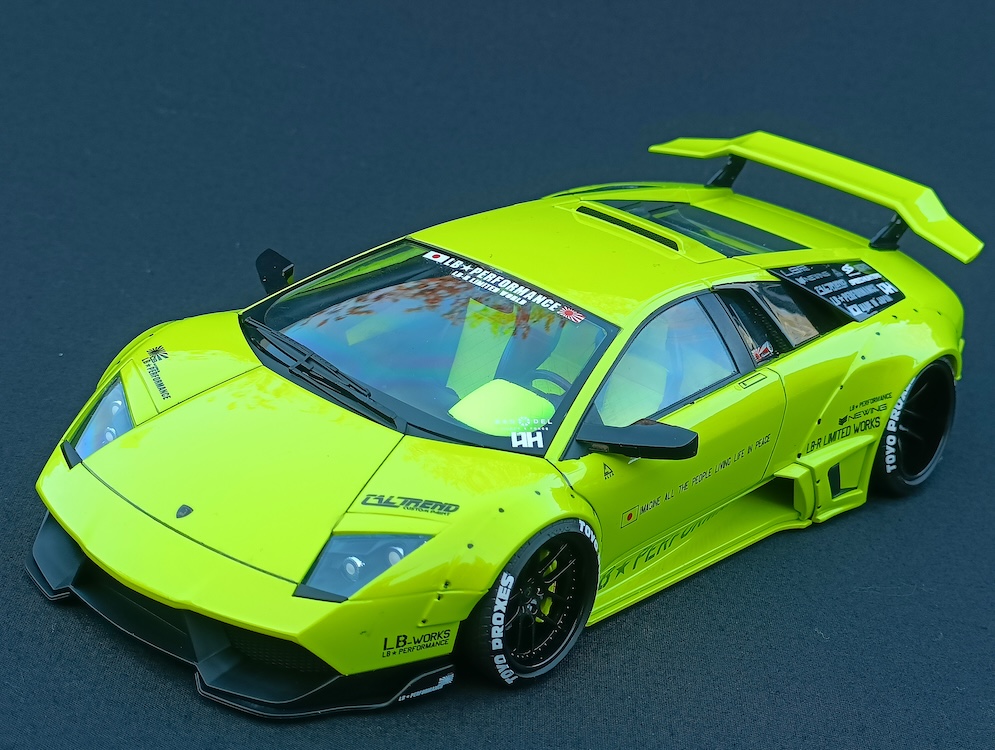
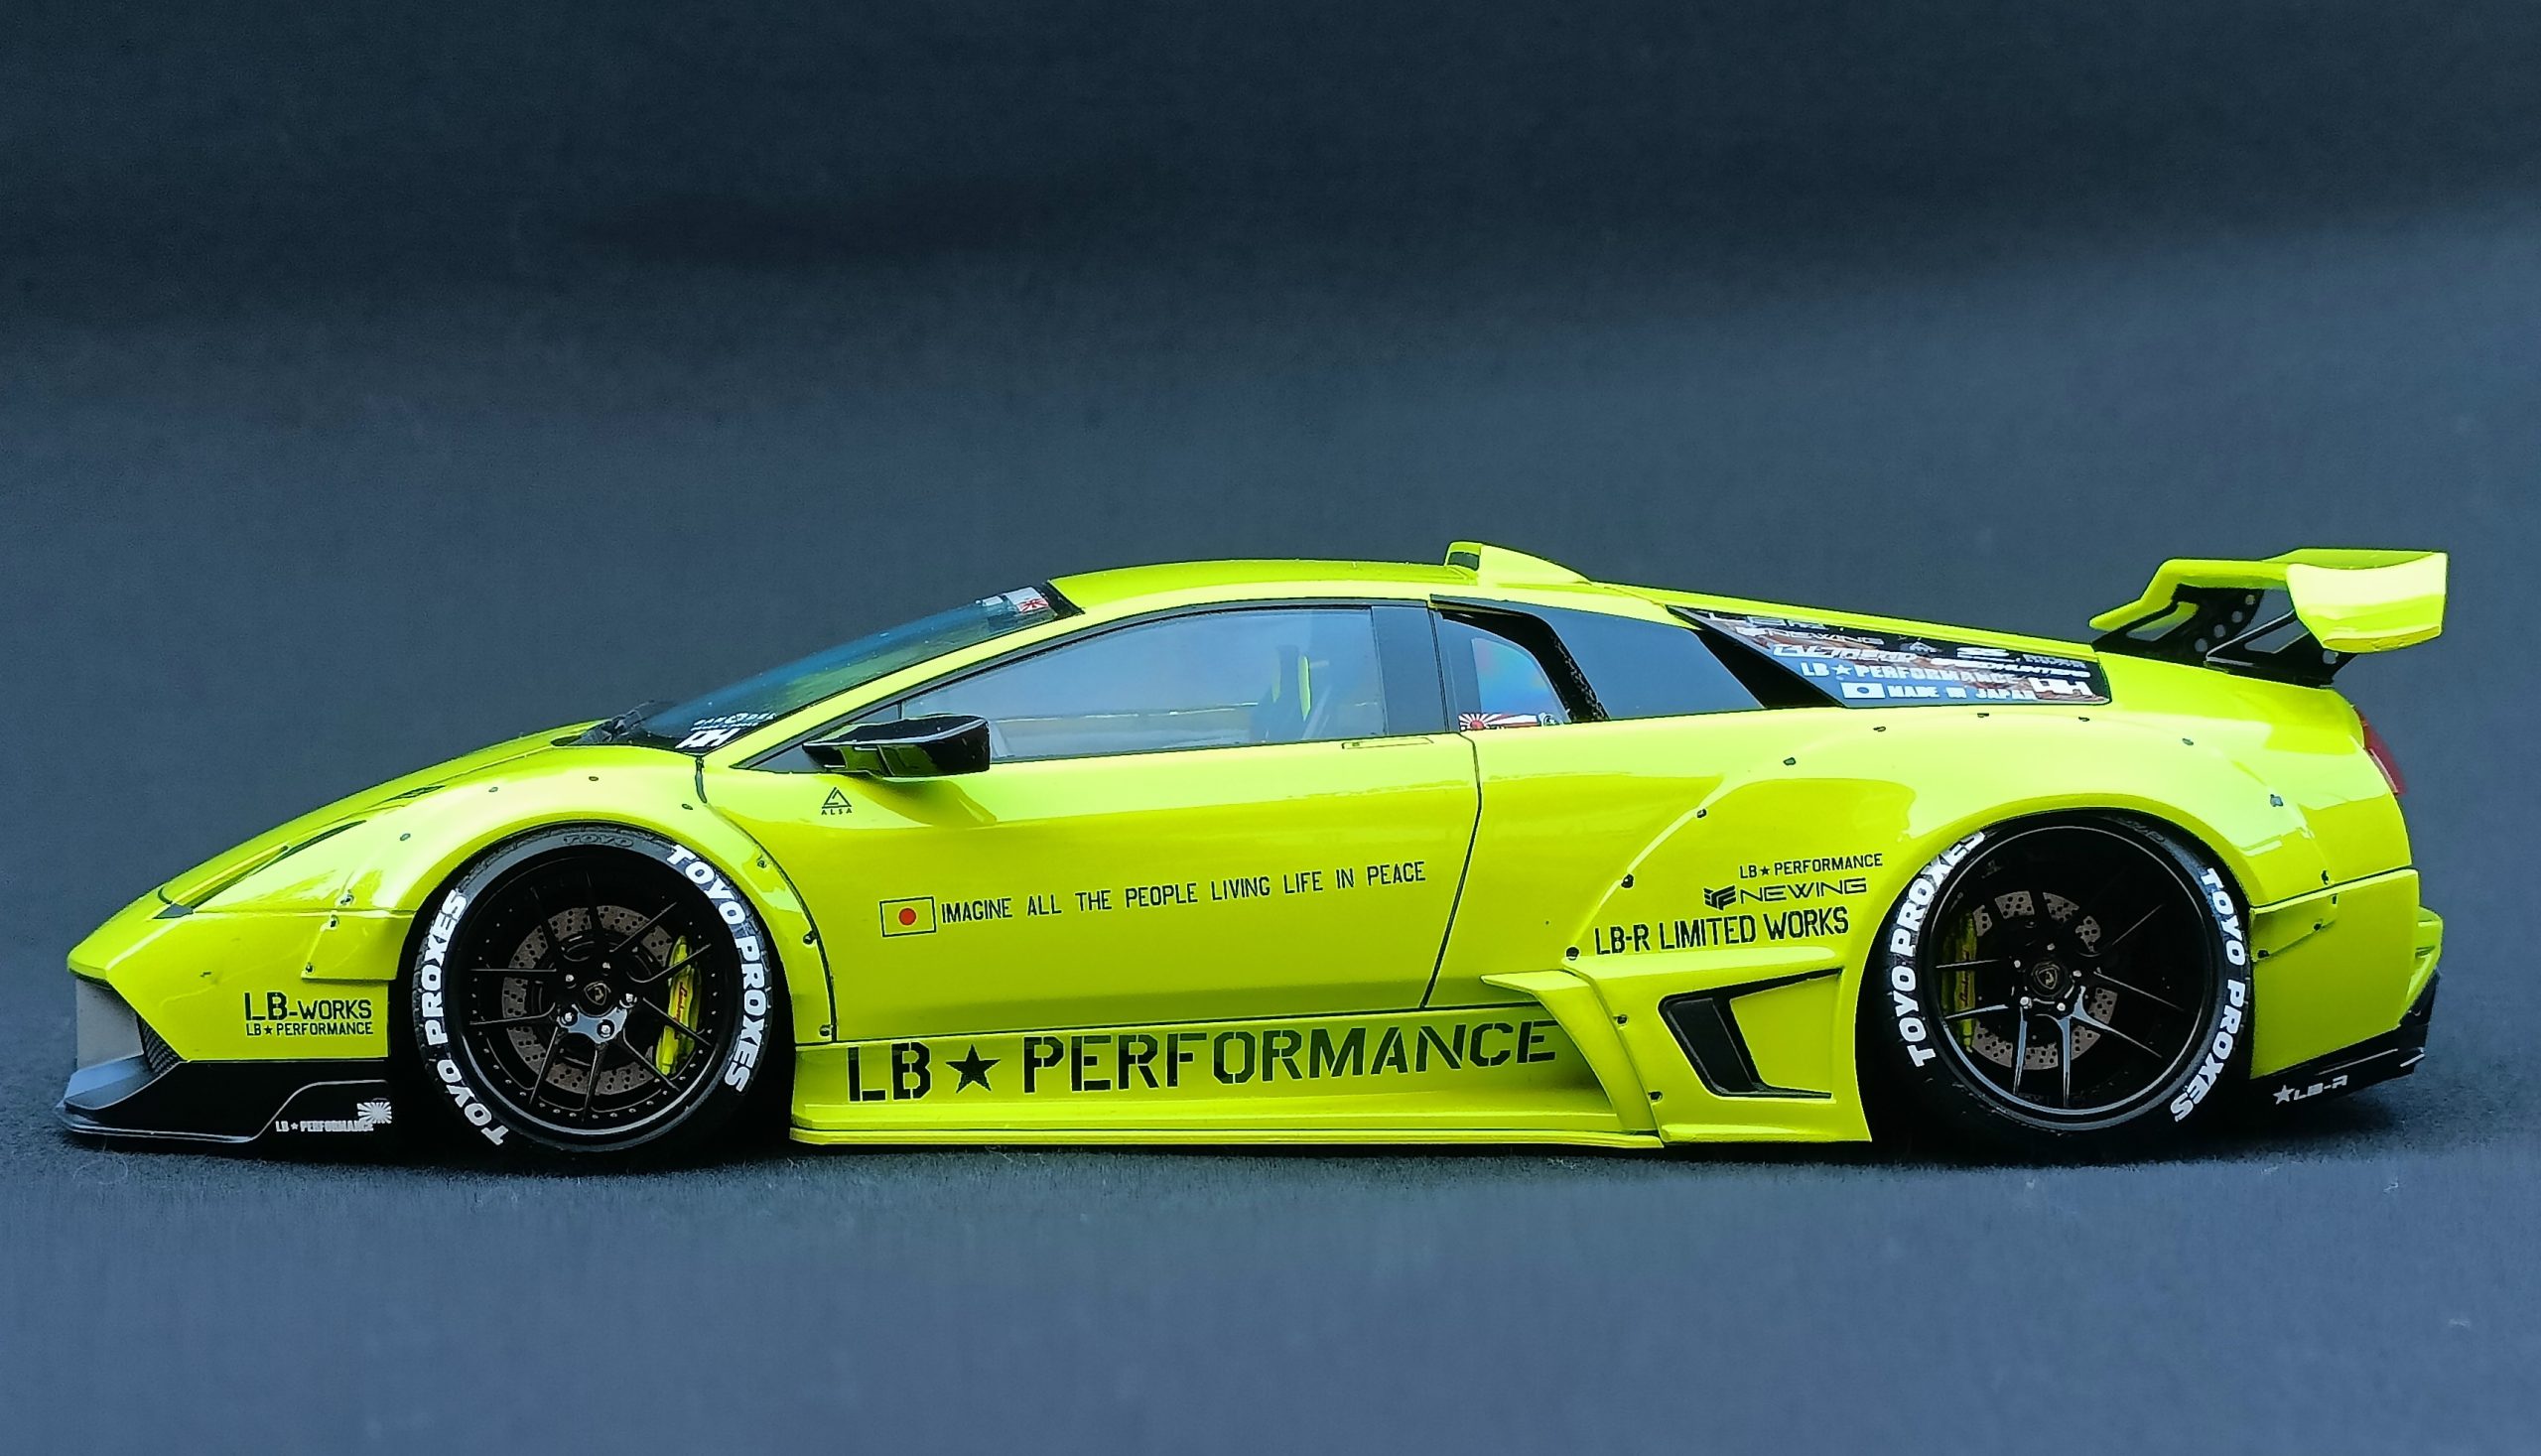
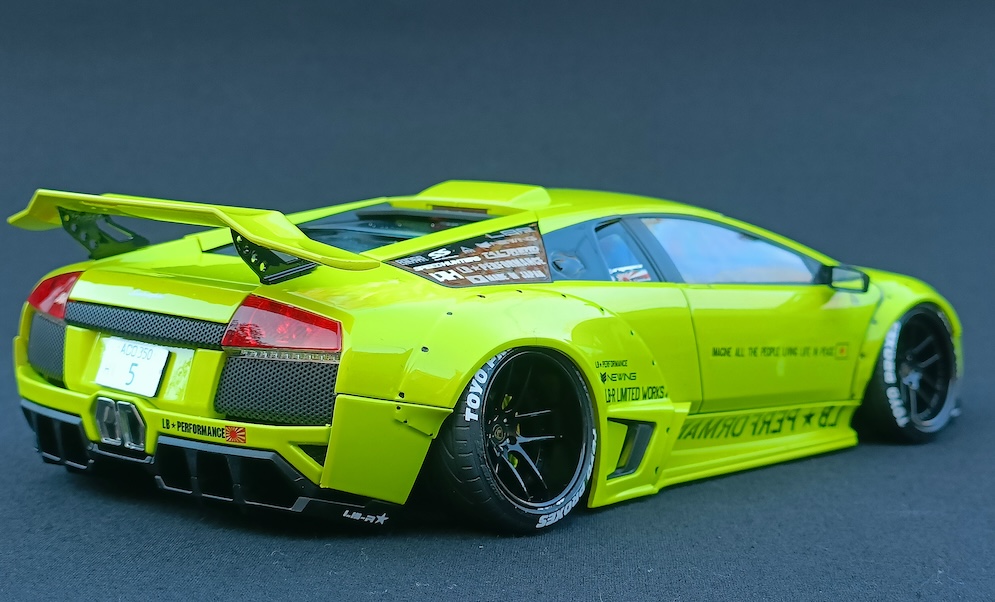
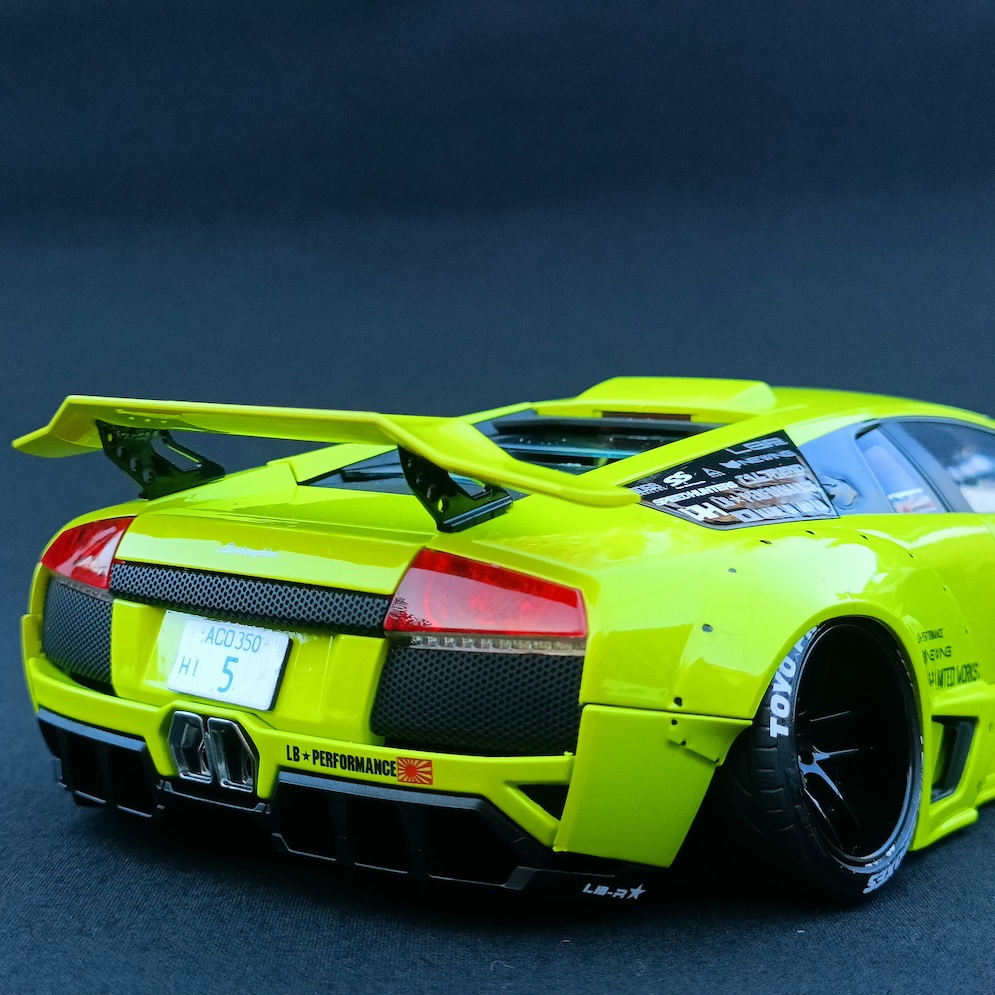
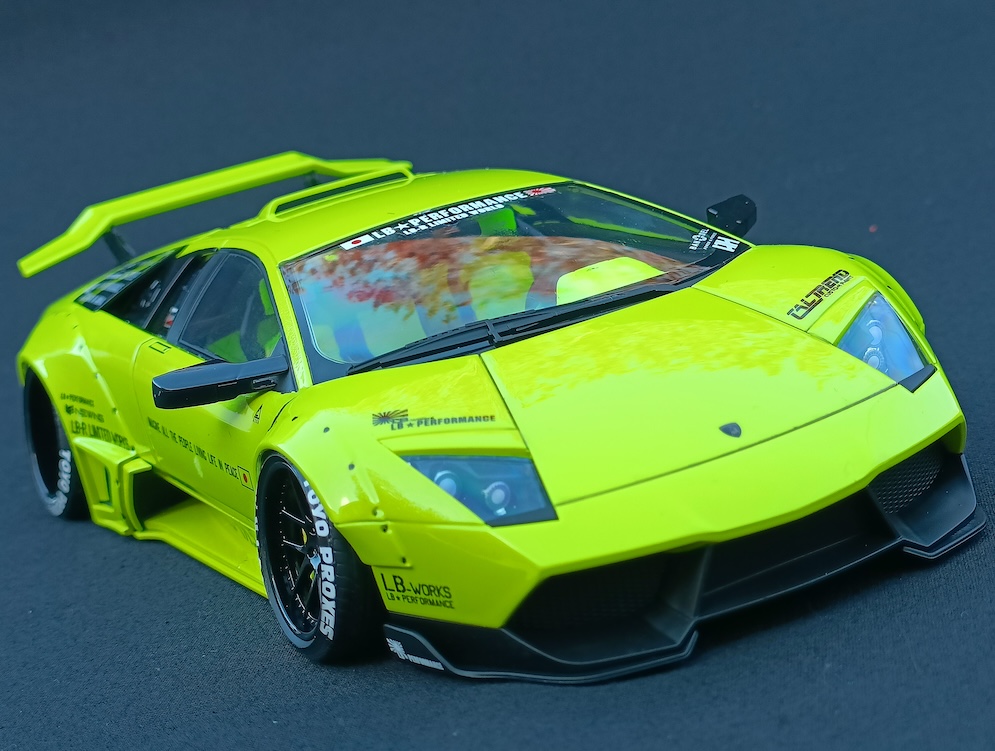

Aoshima Liberty Walk Murcielago 1/24 scale.
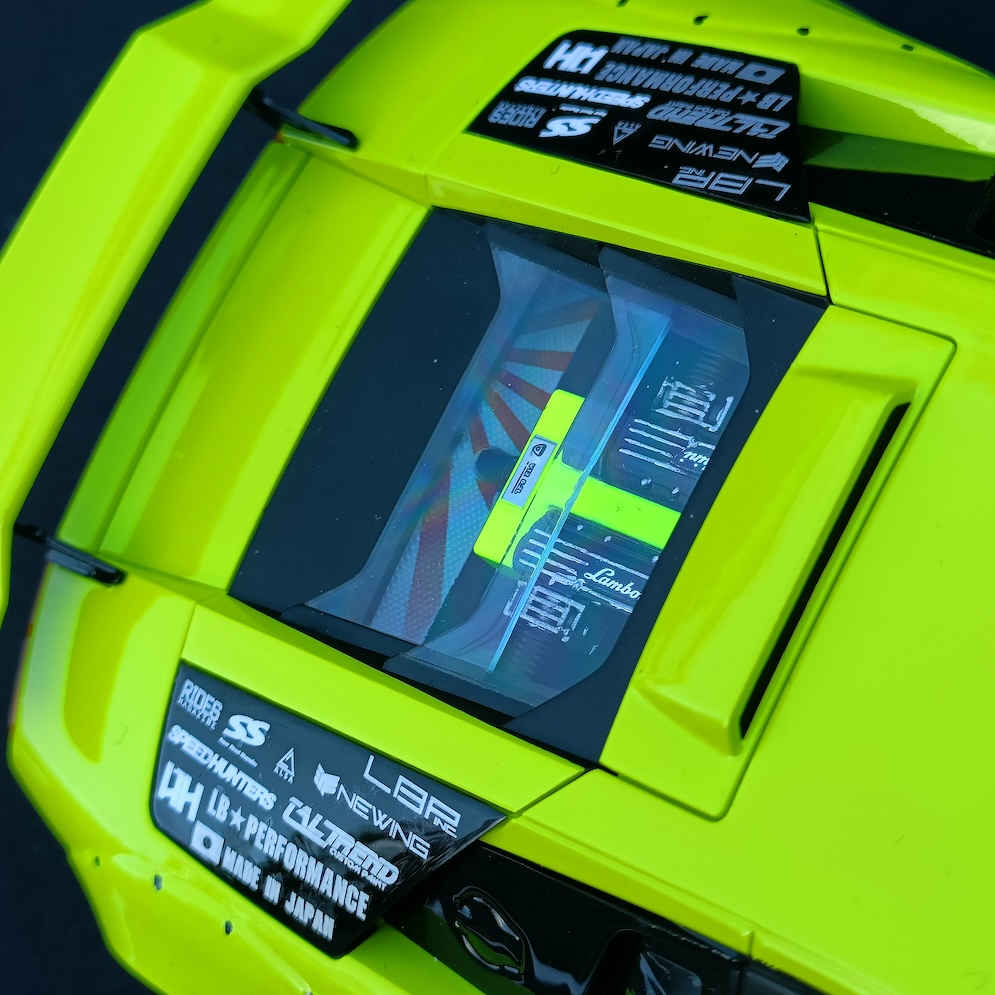
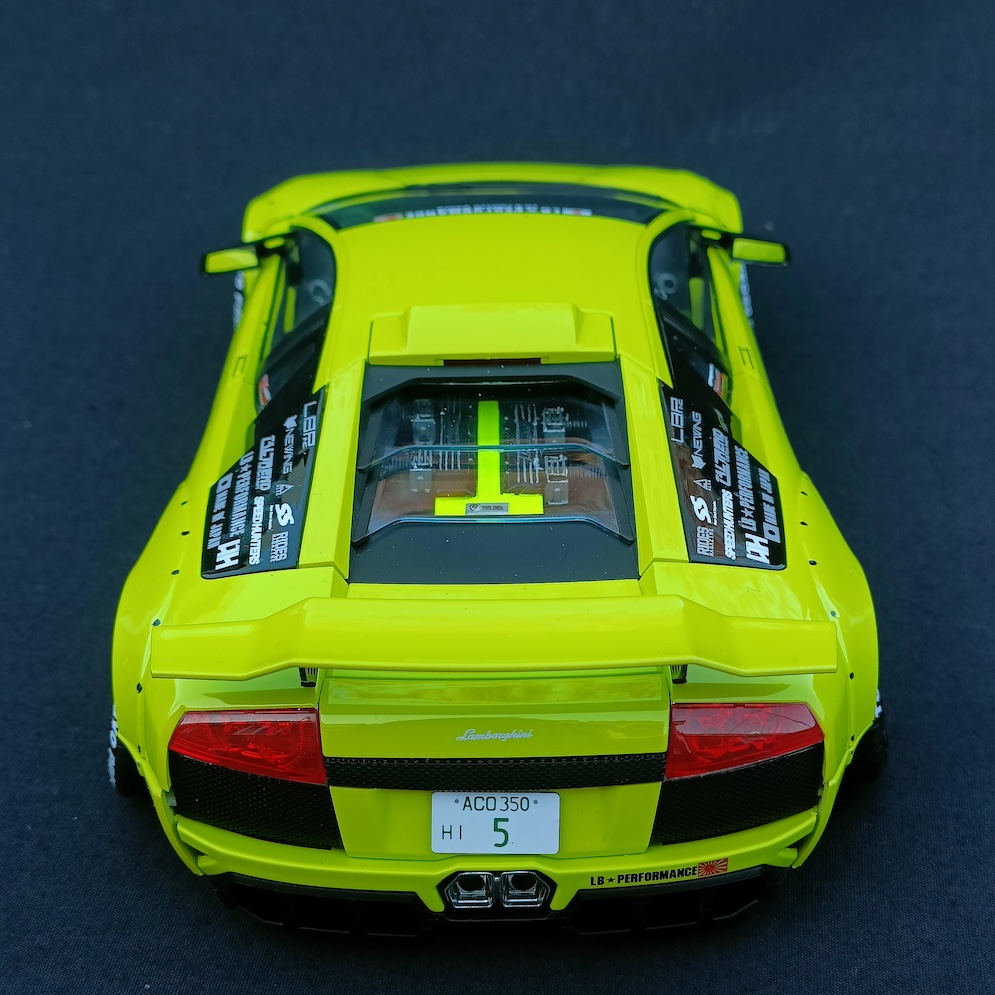
A brand new kit for 2024, Aoshima were kind enough to send this out to me to work on. I have previously worked on the Liberty Walk Huracan and the Liberty Walk Aventador kits, and they are some of the best kits I’ve ever worked on! This Murcielago was no exception, easily the best kit I’ve ever had the pleasure of working on.
Painted in a Porsche Acid Green, and clear coated with a 2k gloss clear coat system, this really gives the loud bodywork a loud paint job to match.
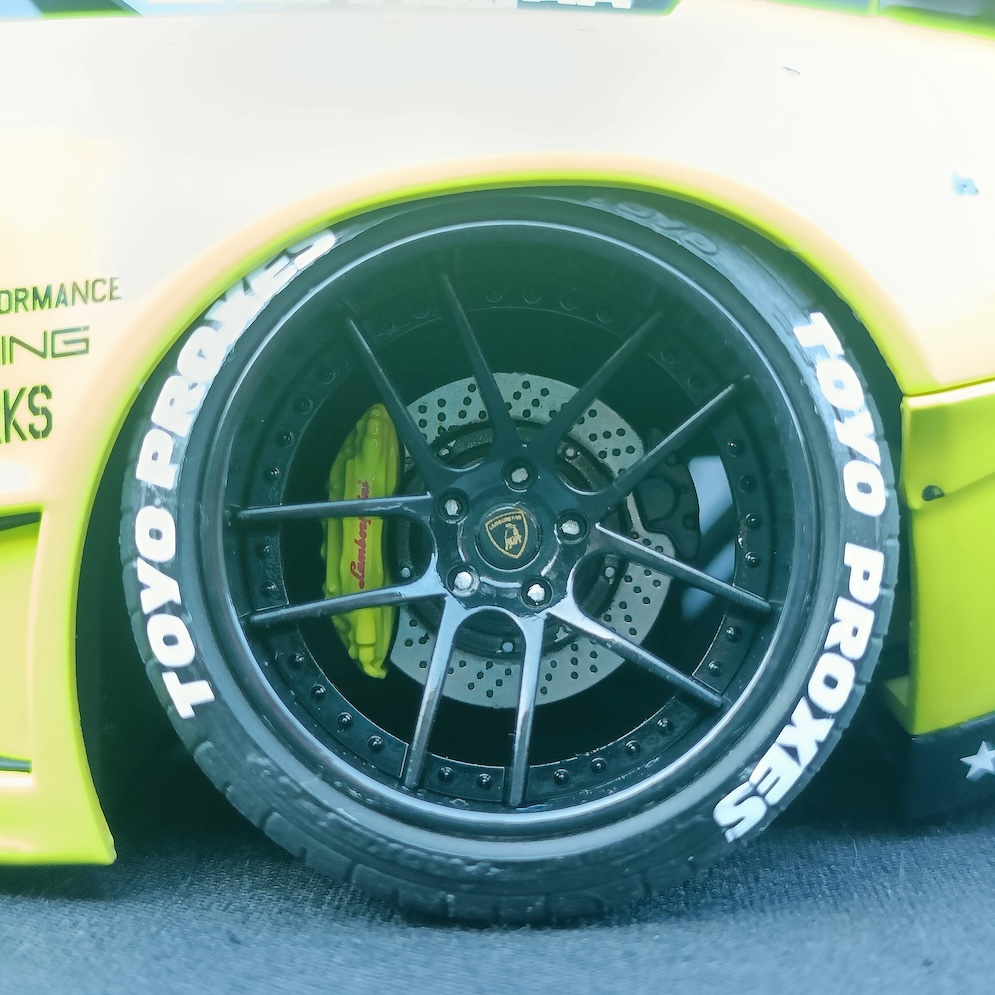
These liberty walk Lamborghini kits from Aoshima are absolutely fantastic, they are, in my opinion, a great kit for beginners or the more experienced builder. They come with stickers and waterslide decals, including interior coloured stickers and window trim stickers for those who are looking for an easier build, plus the moulded plastics come in nice colours. The wheels and brake discs also come painted, to which I didn’t need to paint them on this, only detail them up.
The liberty walk Lamborghini kits also have less of a need for gluing parts in, as some parts almost ‘snap’ into place like a snap kit, the side windows for example on this were not glued in, just snapped into place. Plus the uniqueness of the adjustable ride height and camber adjustment, even after fully assembled, is a great little feature I’ve never seen in another kit before.
Would highly recommend for anyone of any skillset!
Christian W.
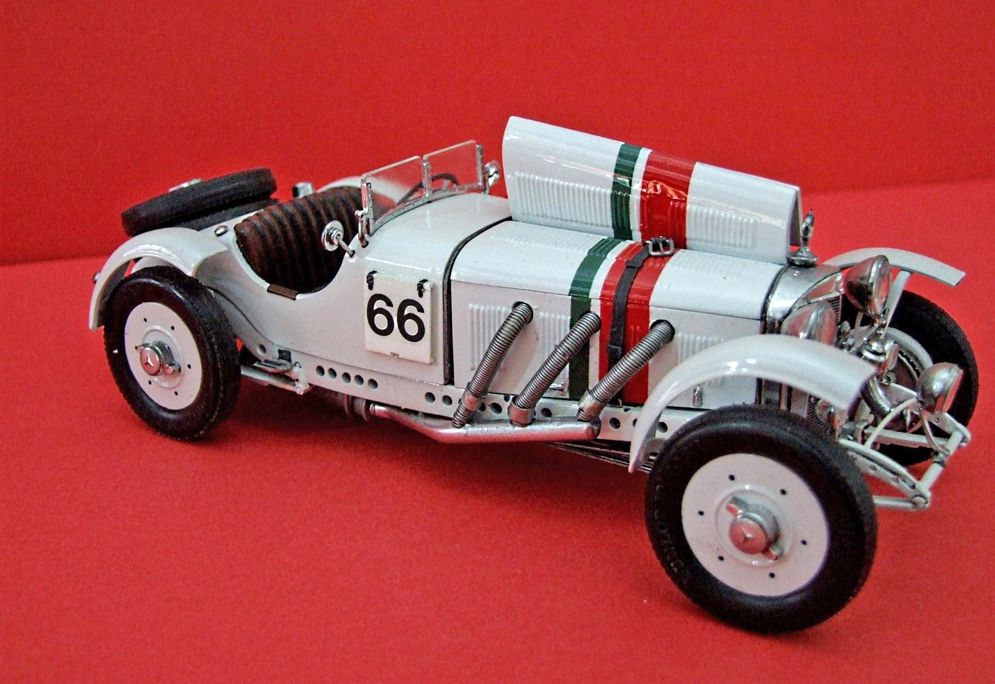

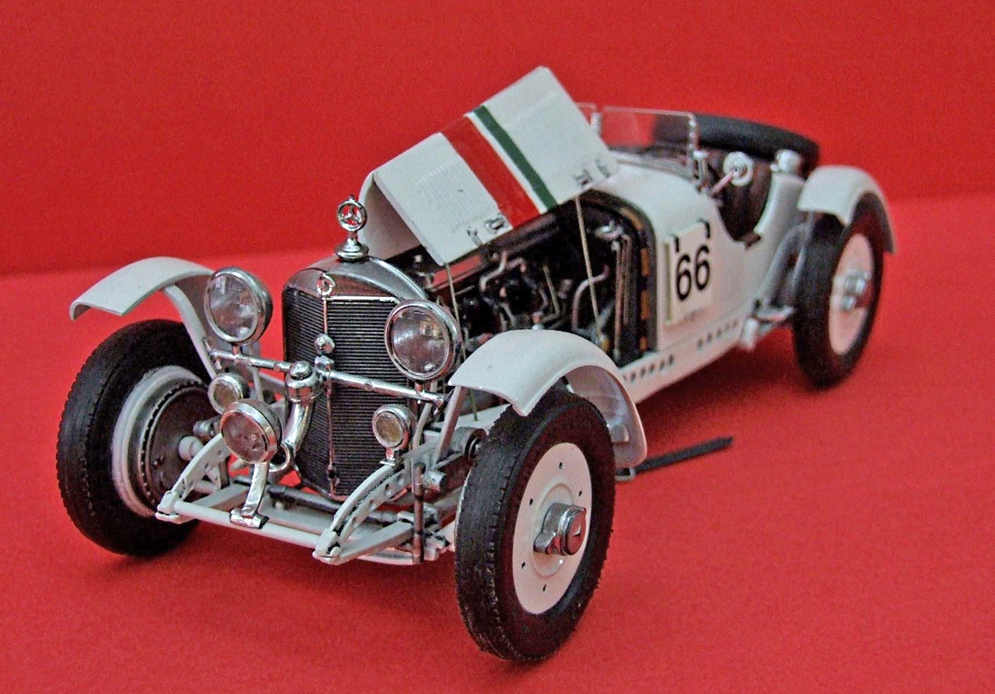
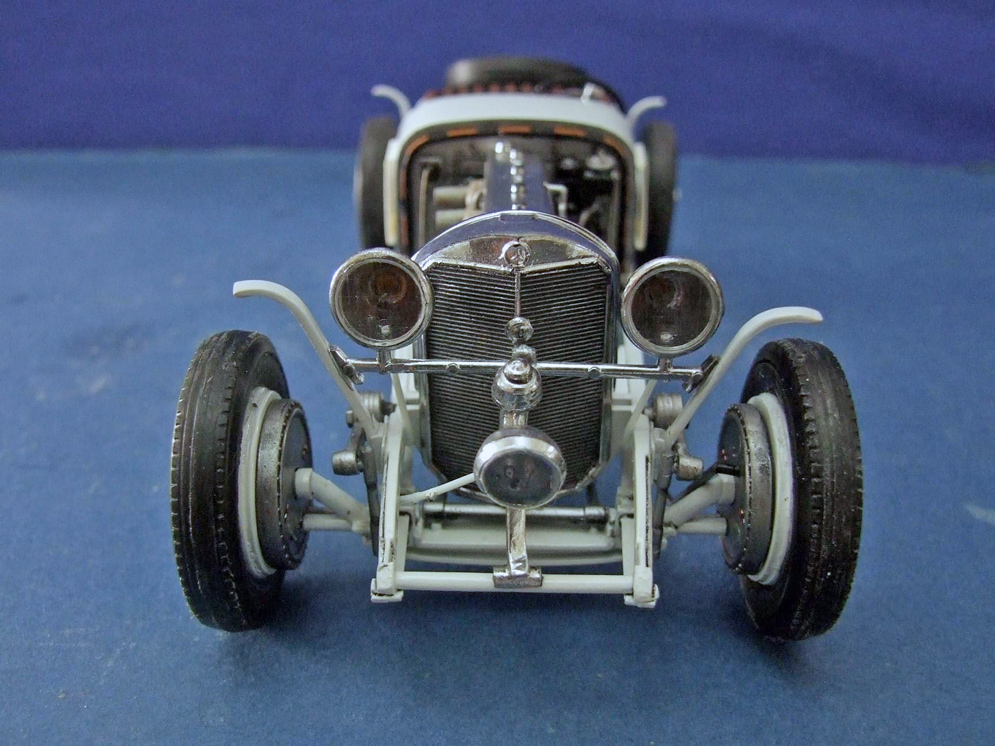
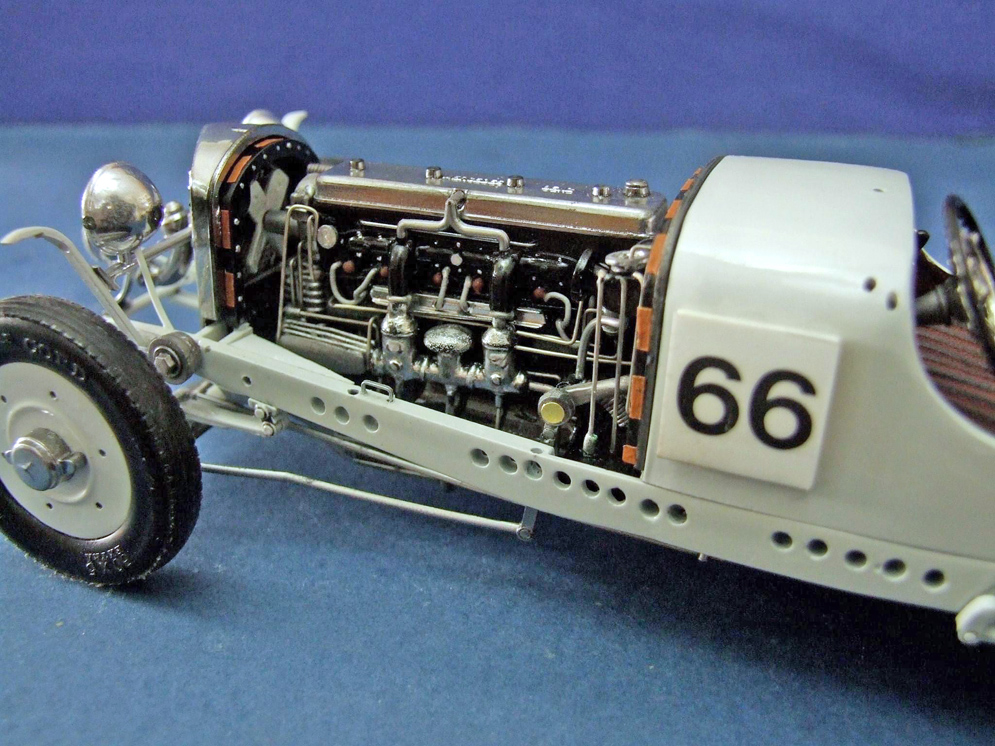
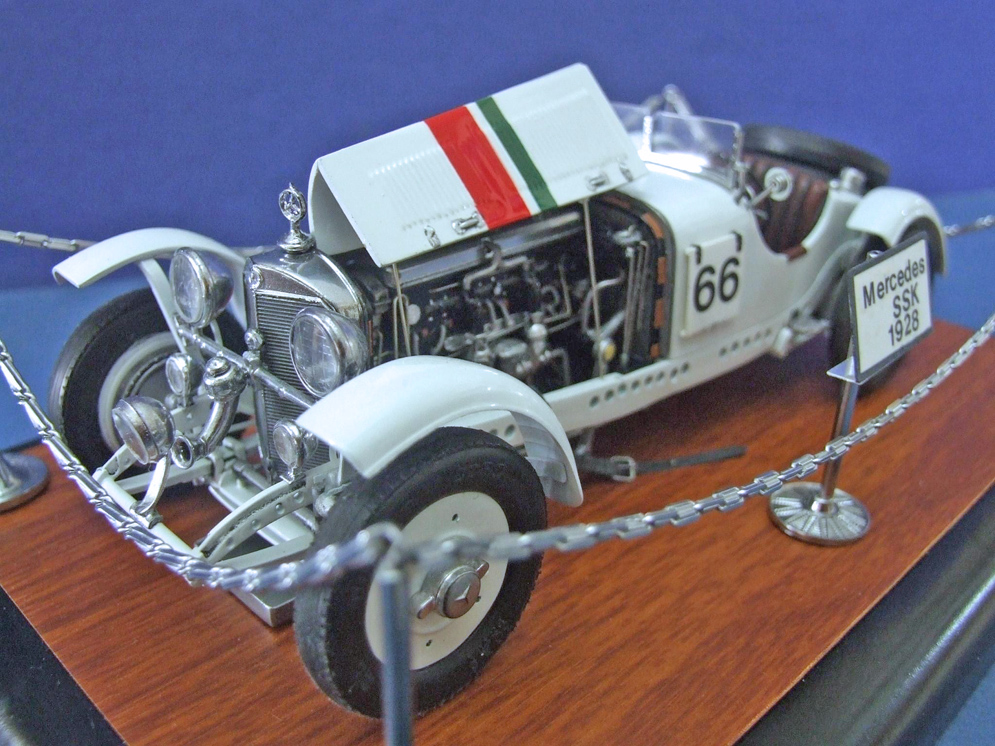
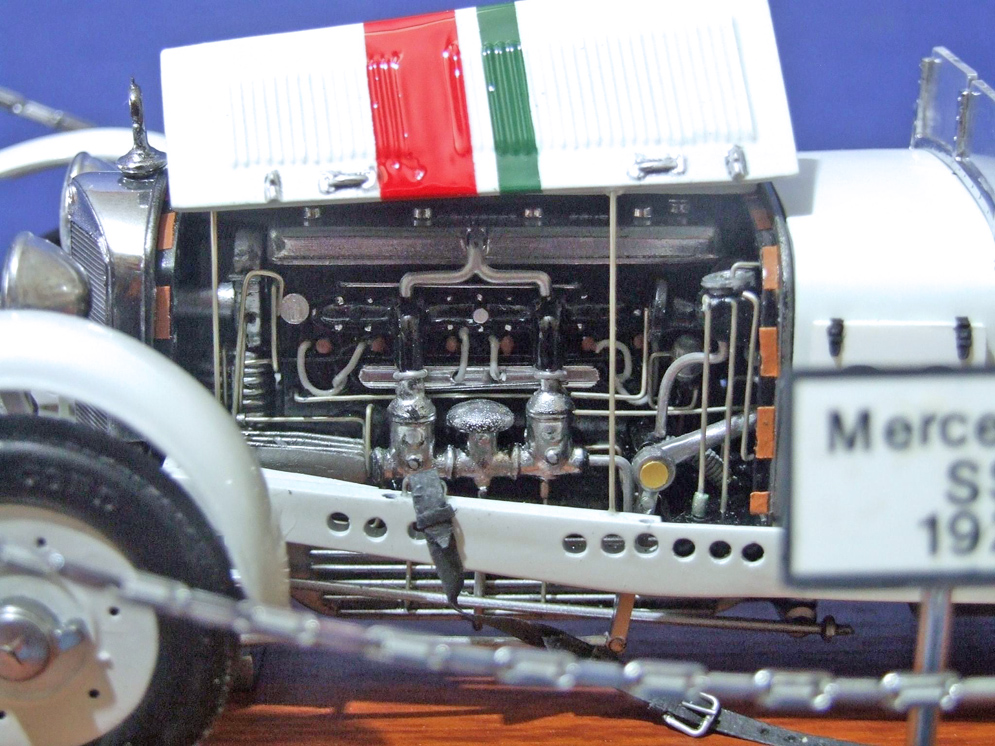
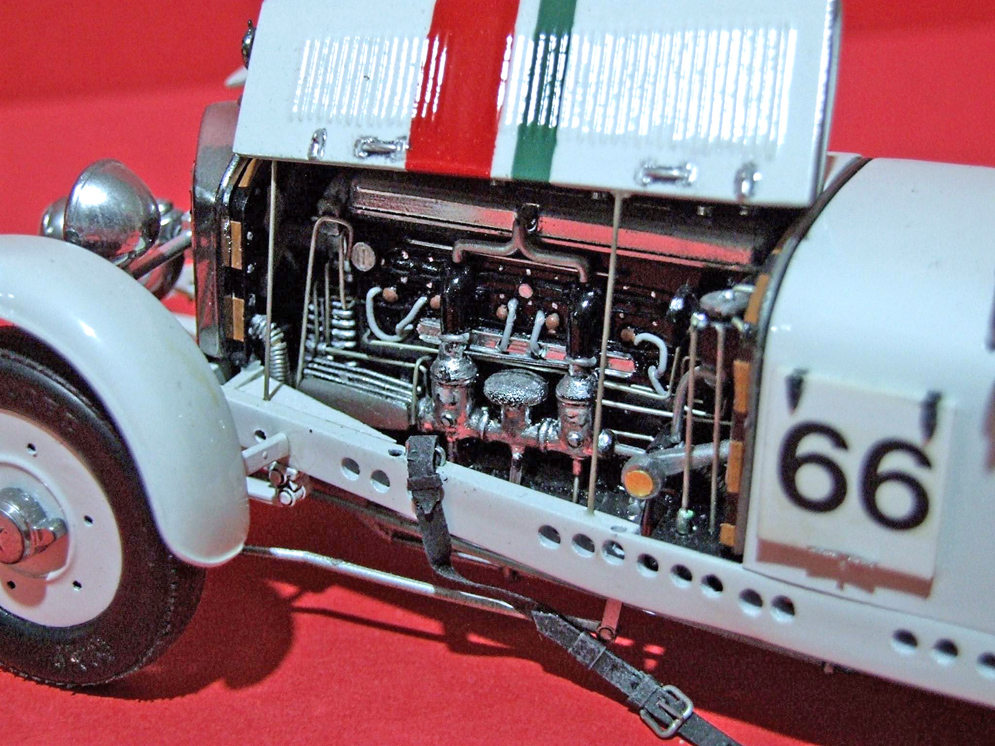
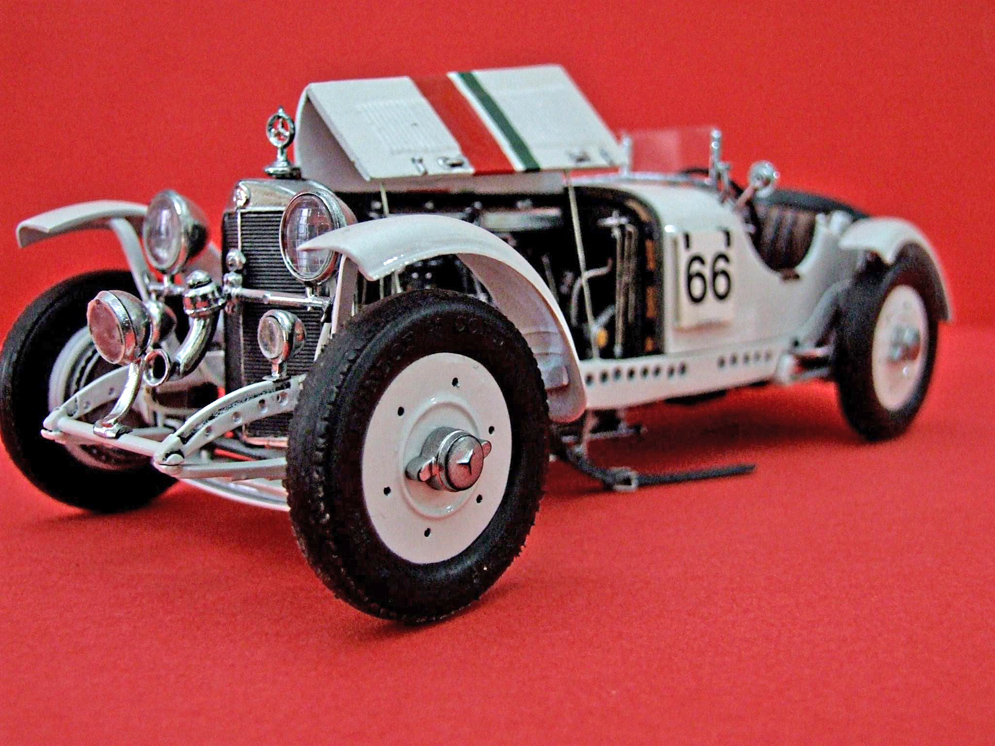
This is my Mercedes SSK 1928 built from the Revell 1:24 scale kit and converted from Roadster to Racer.
Lou C.
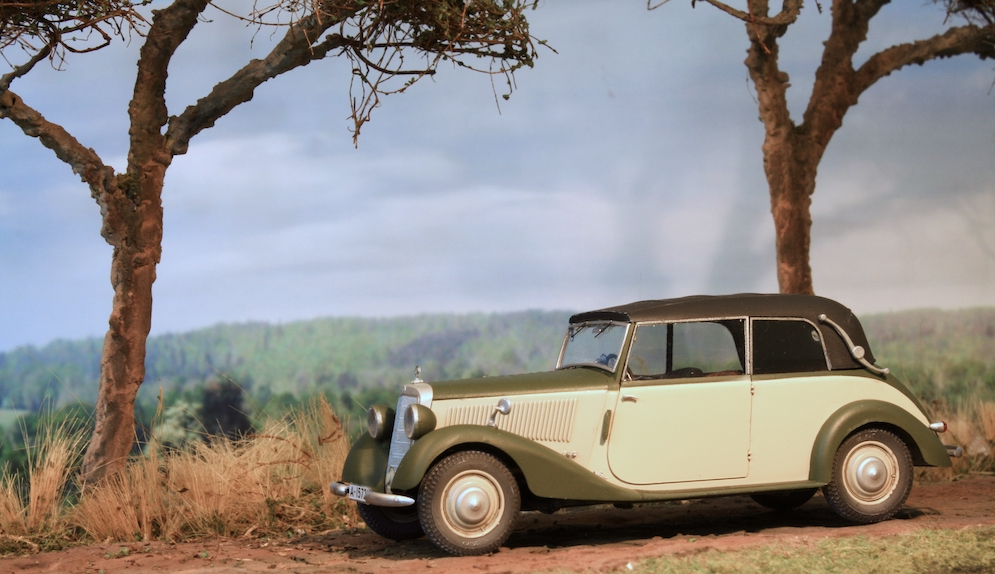
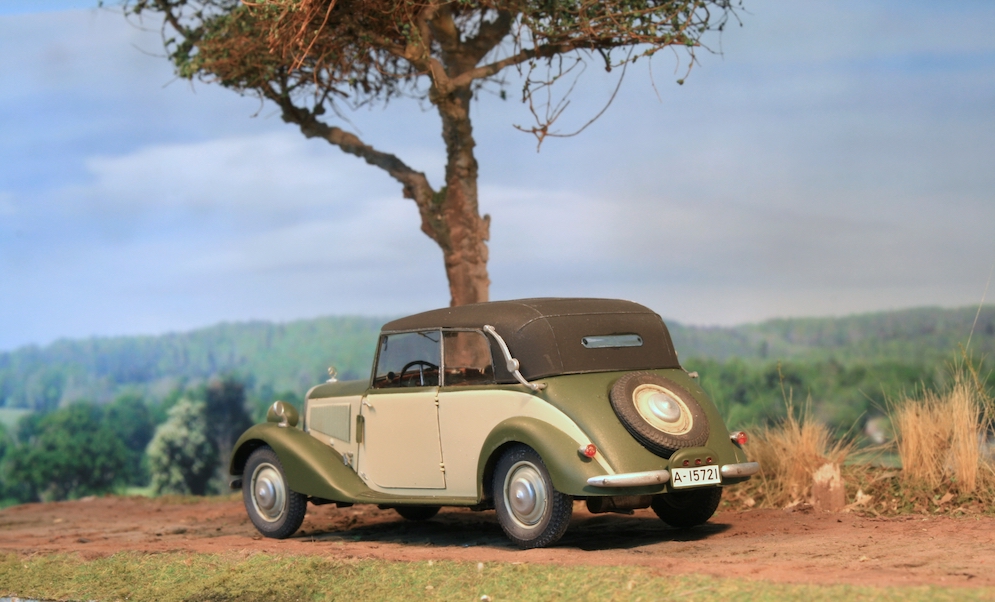
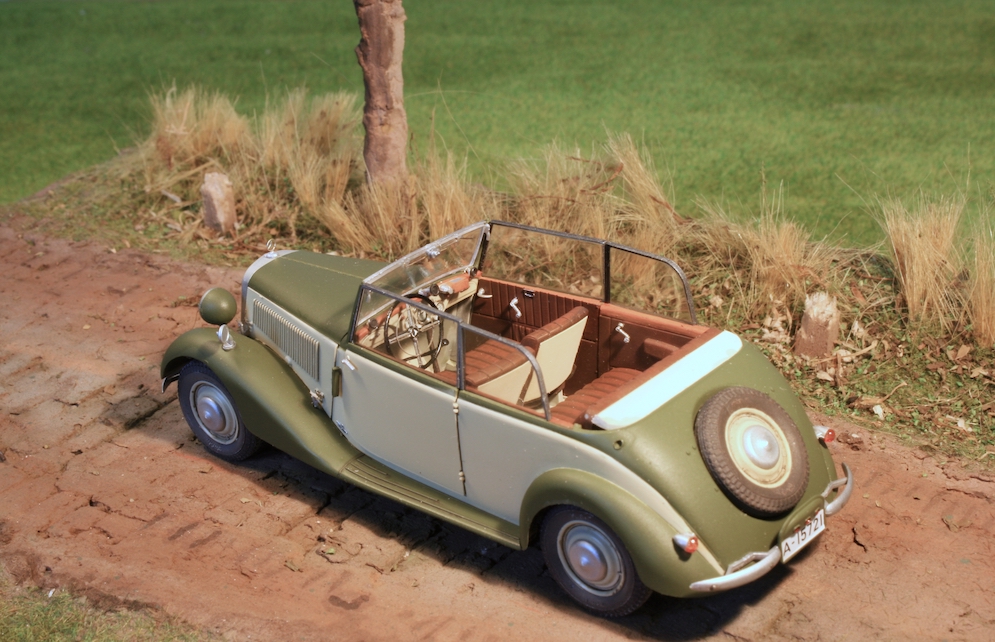

I am grateful to our friends at MiniArt for the charming 170V cabriolet in civilian markings. In this case I believe a pre-war Anhalt registration.
I used the old Archer instrument decals (plus Mercedes symbol on the steering wheel horn). Using photos on the internet I tried to get the engine wiring correct.
Recently I read the 170V was innovative with its light weight but strong chassis frame, live rear and front axles and a ‘floating engine mounting’ with only two main connections to the main chassis bars.
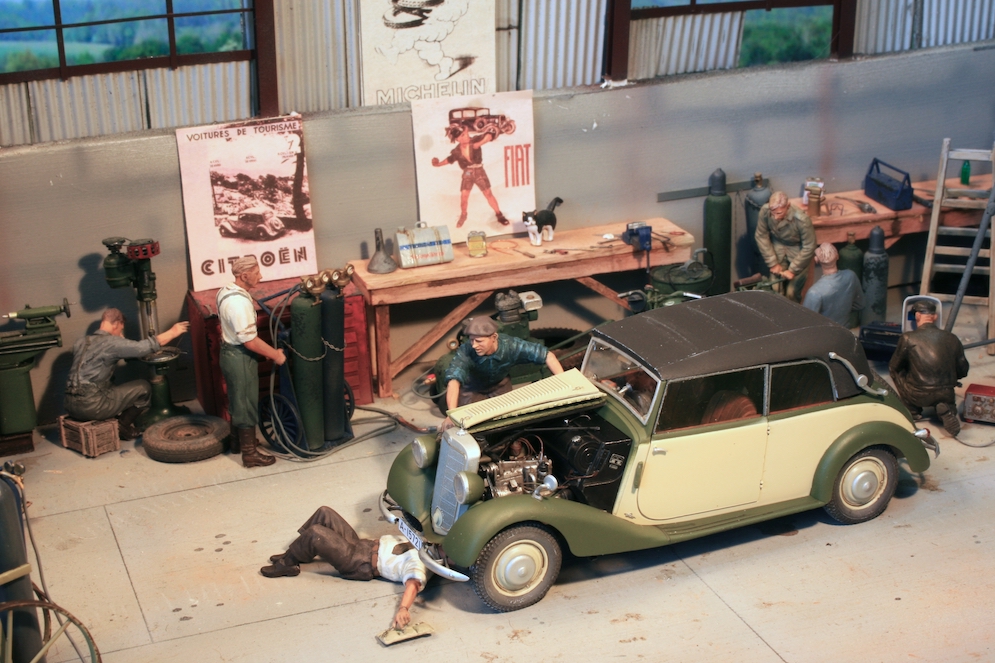
The proud owner is having his engine tuned up in the garage with largely MiniArt figures.
Hope you like it?
Andrew J.
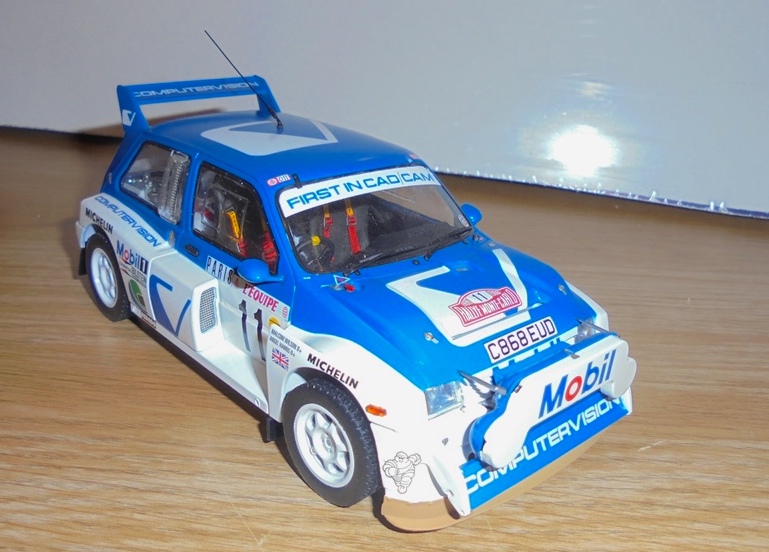
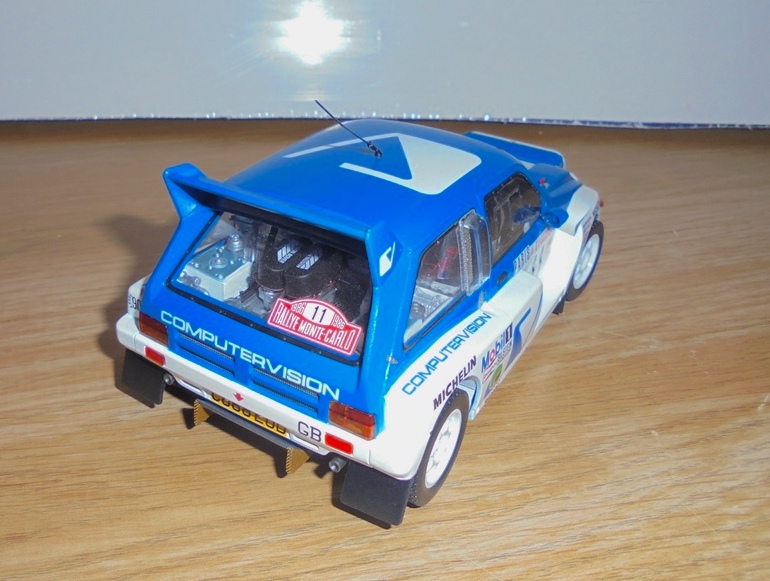
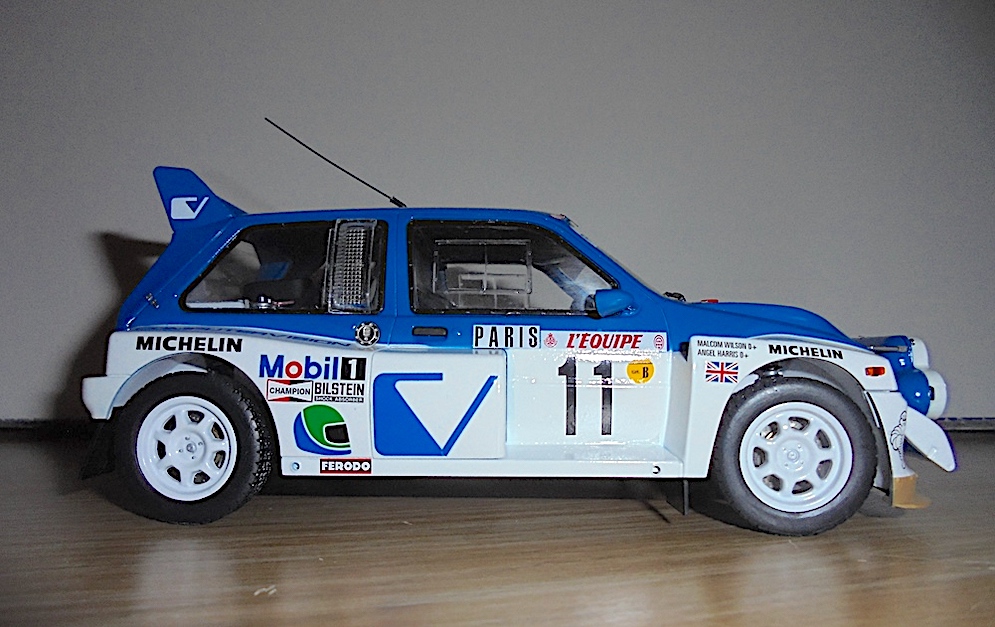
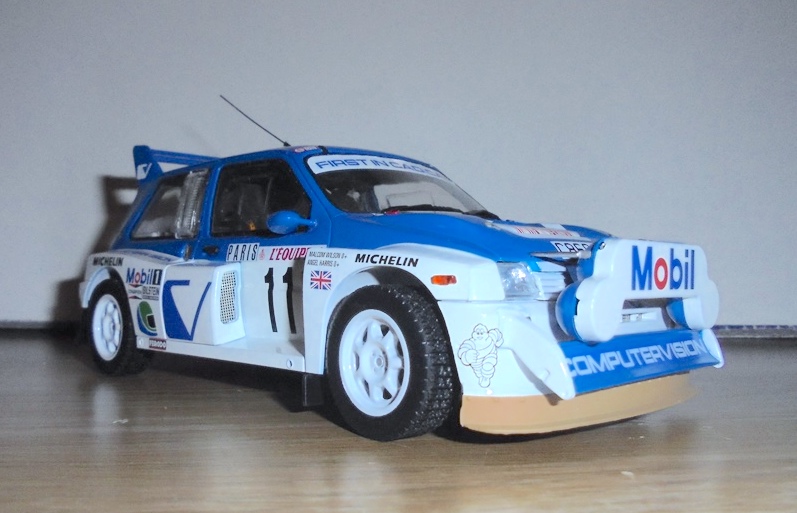
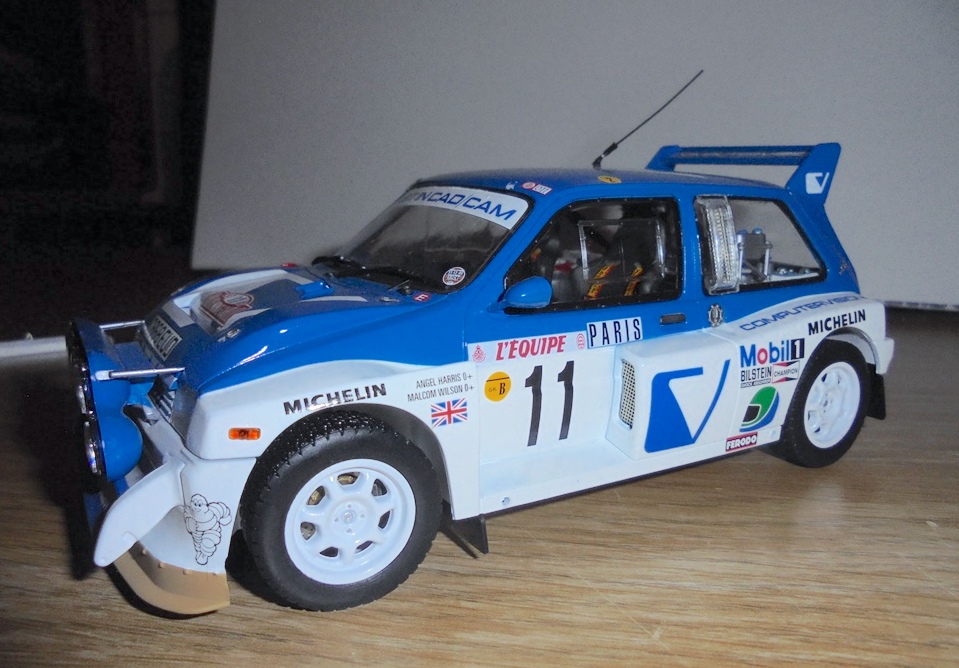

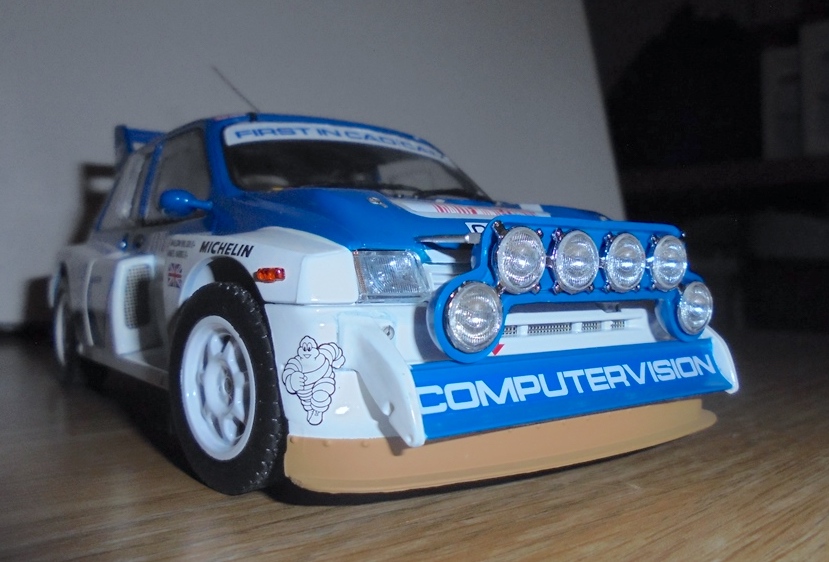
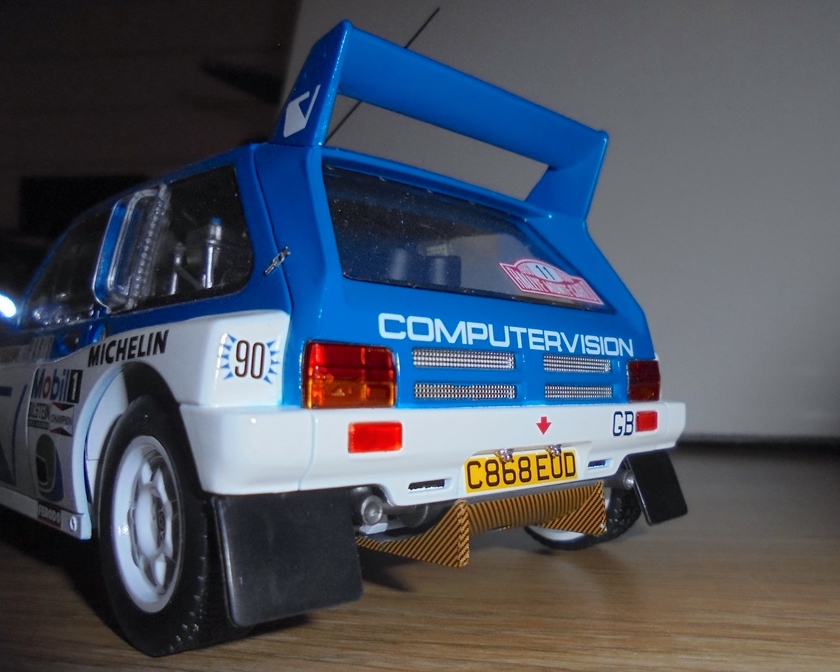
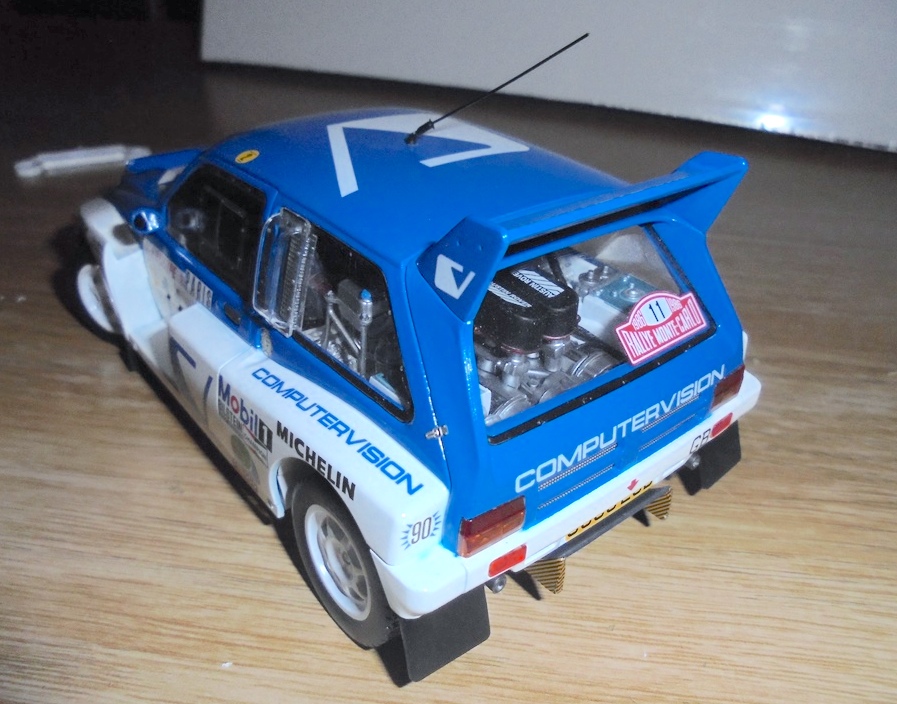
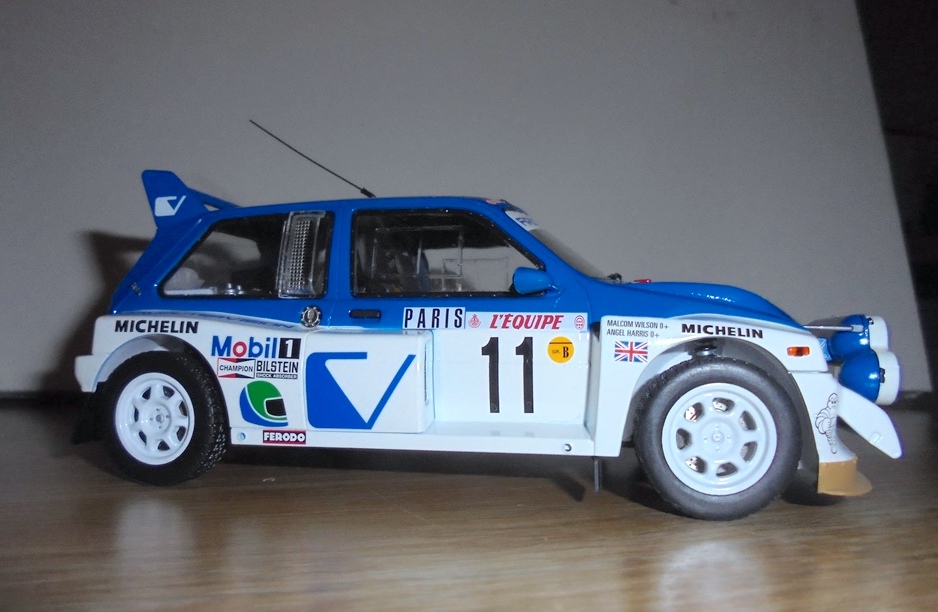
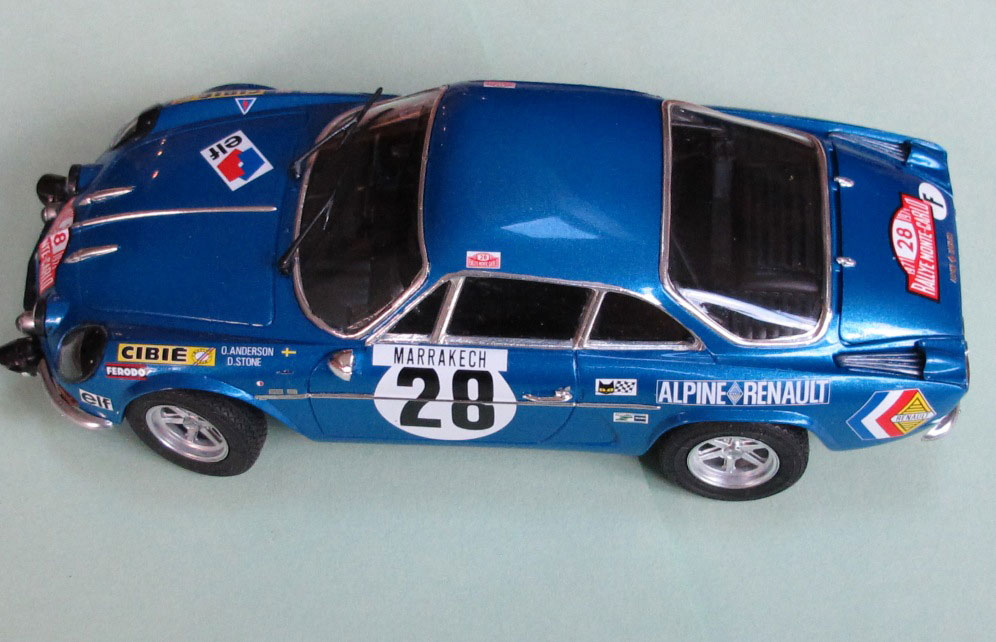
Some shots of my latest project – the Belkits Metro 6R4 in 1:24th scale.
The kit is built straight out of the box with just the addition of Zero Paints matched Computer-vision blue and white.
I was very impressed with the quality of the kit the only shame is it doesn’t have opening doors as there is a lot of details (i.e. seatbelts etc.) that can’t be seen very well, however overall a very satisfying build, hope you enjoy it.
Chris C.
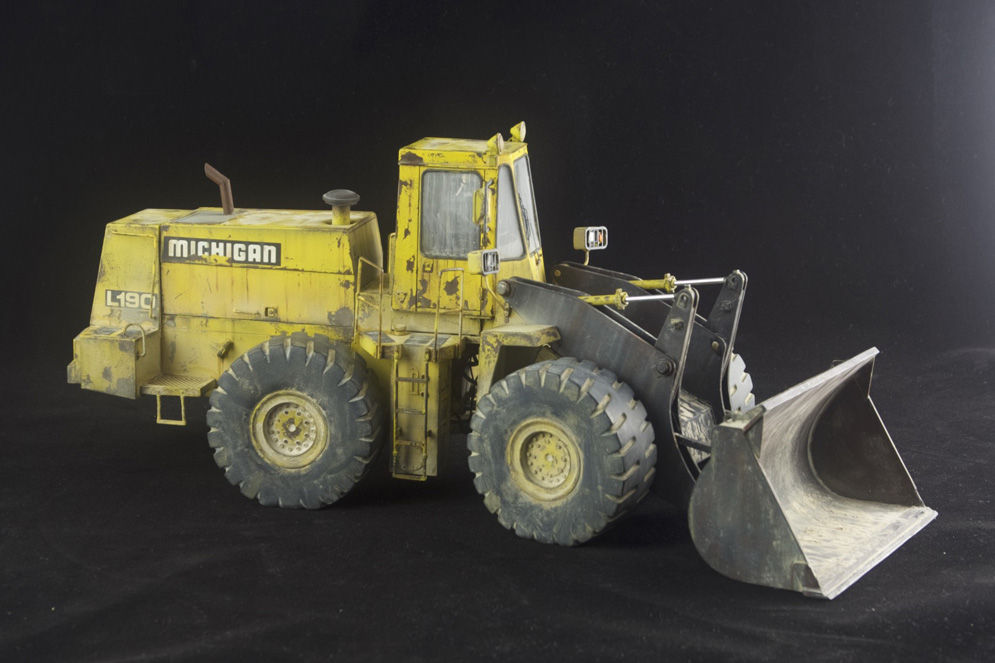
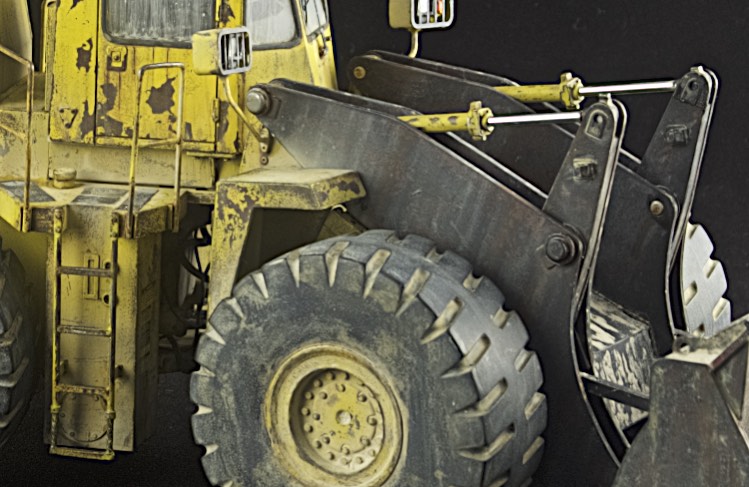
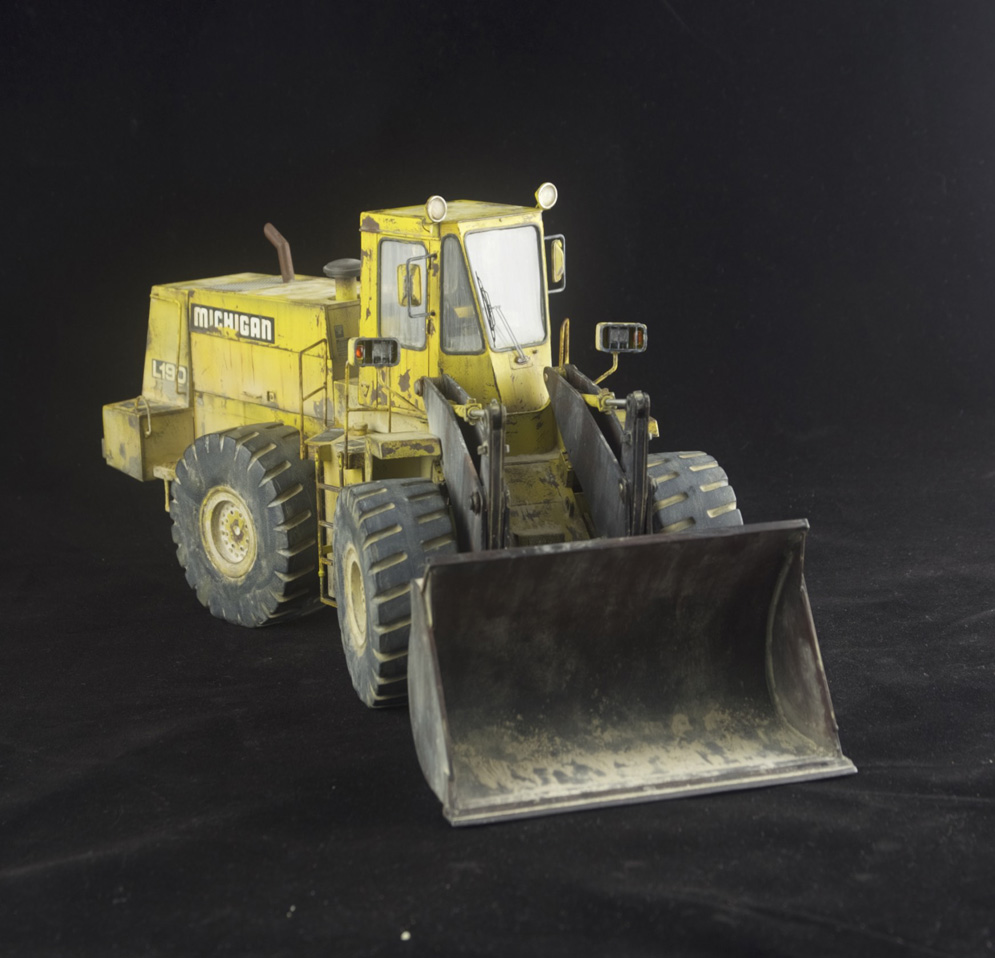
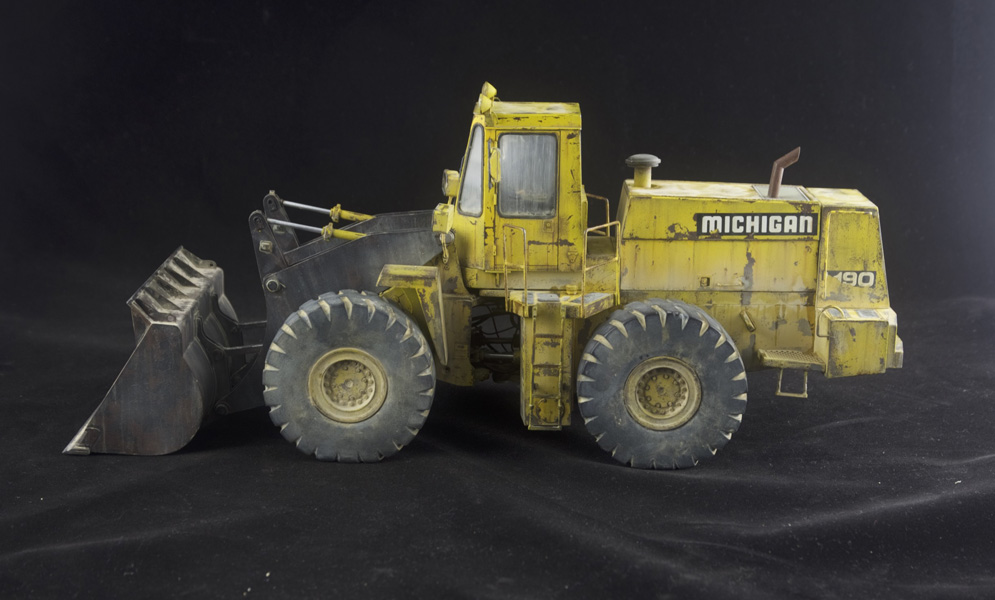

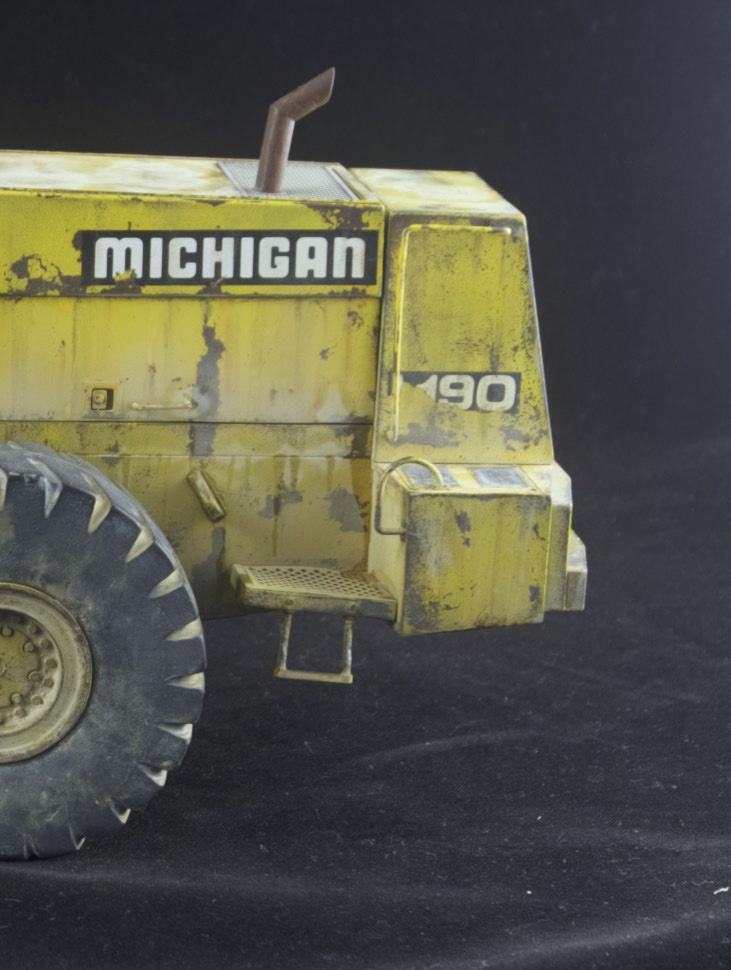
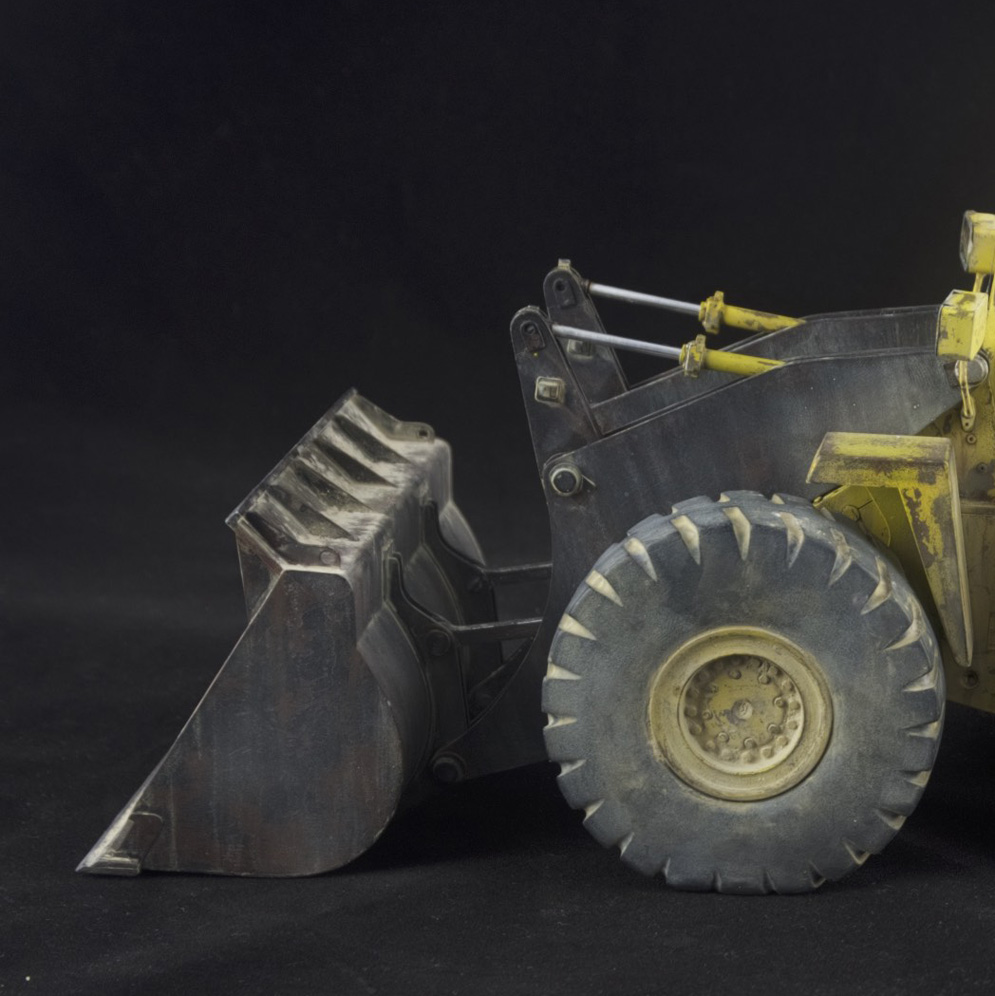
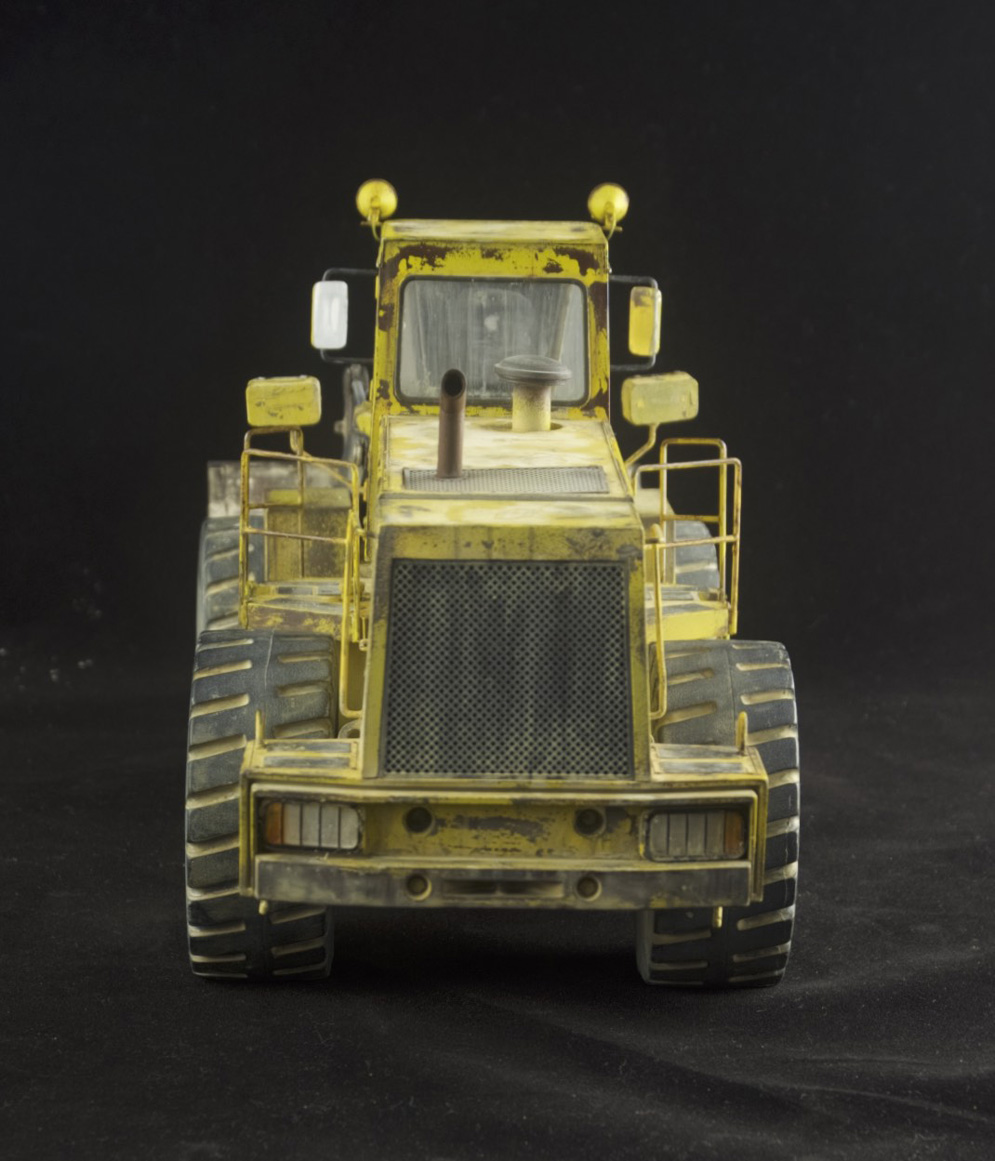
This is the Kit Form Services 1:24 resin kit of the Michigan L190 Shovel Loader built out of the box (although there are scratched elements the materials are supplied).
My intention was to build, paint and weather as a vehicle that had spent its entire working life outside at one location (quarry or such like); serviceable but little regard for cosmetics. (plenty of online references showing vehicles in that state).
Primed and under coated with True Earth rust primer given a couple of coats of AK’s worn effects (I prefer this one because it allows you to wear through the paint colour without knocking off too many large lumps).
Yellow was MR Color acrylic yellow and overall weathering using weathering products and pigments from both AK and Ammo.
Tony T.
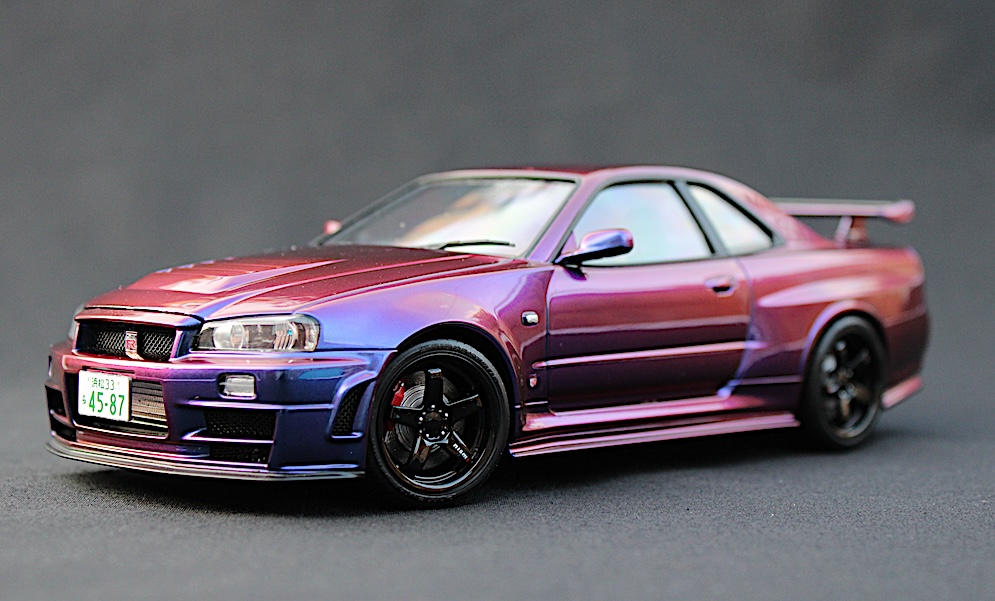
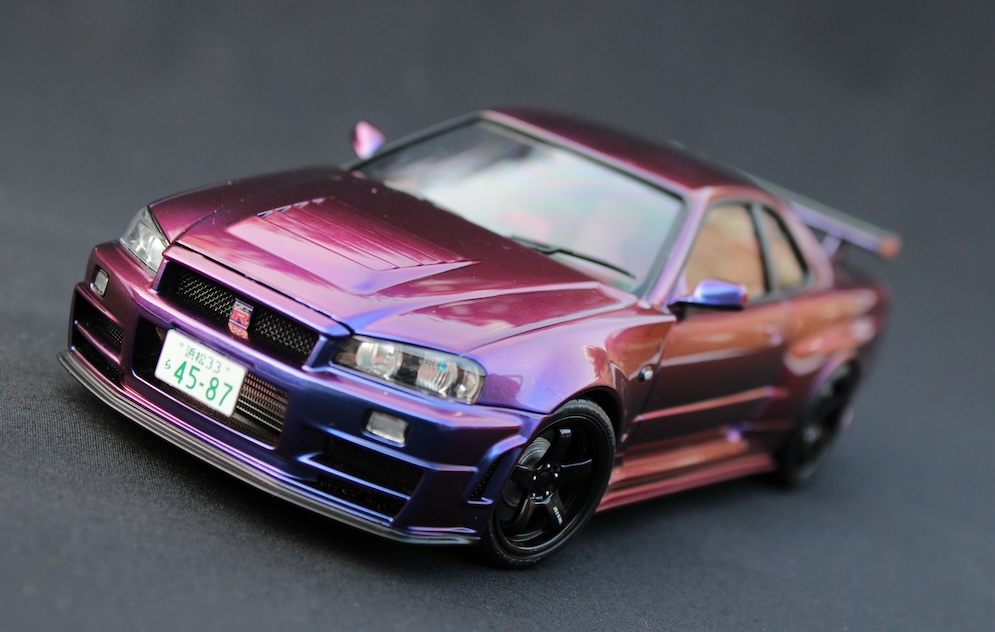
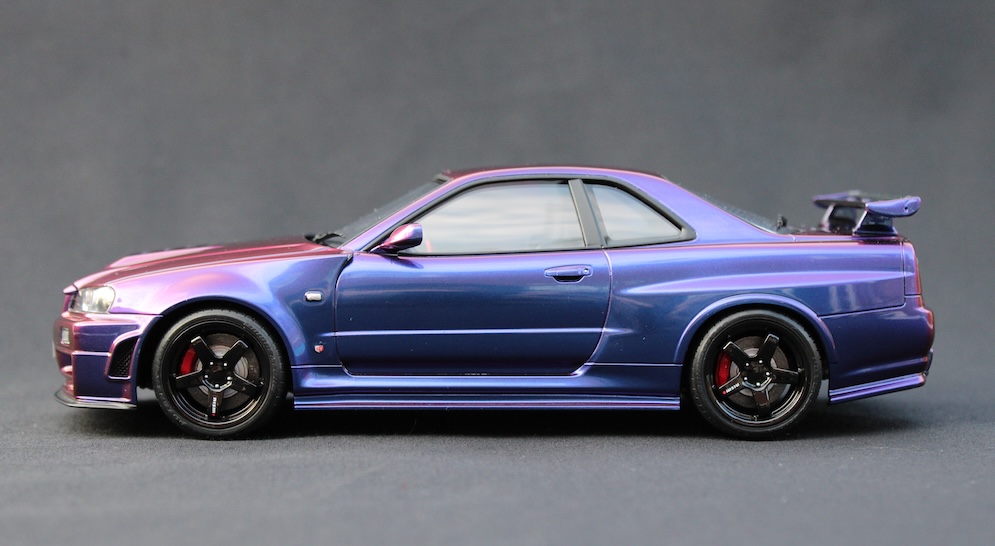
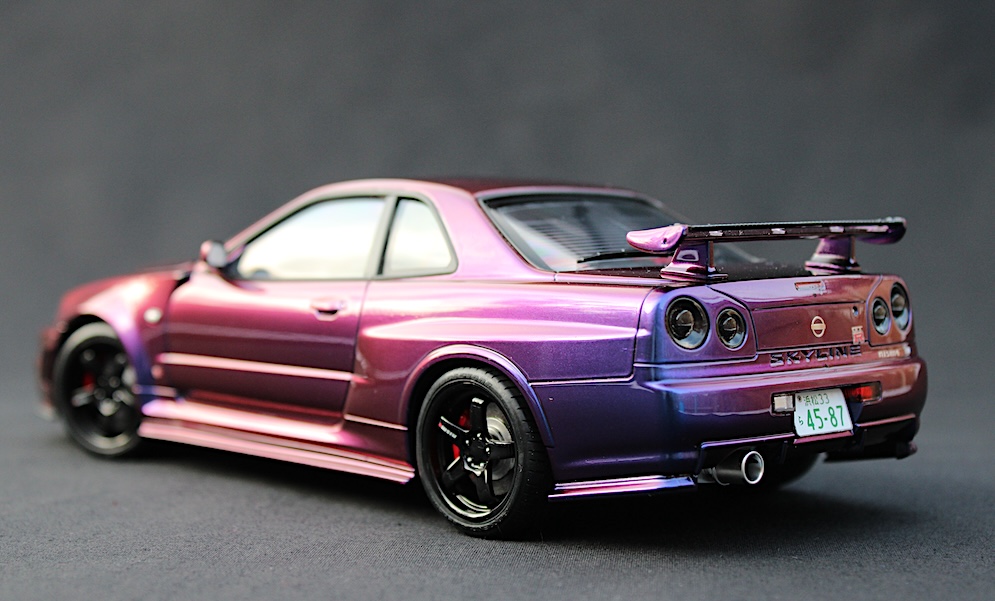
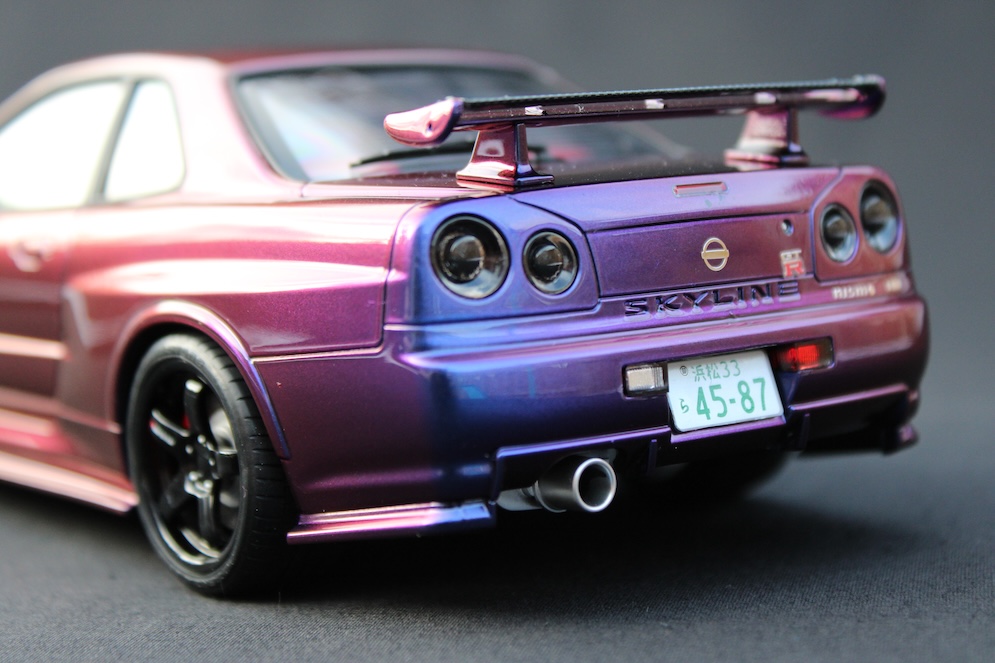
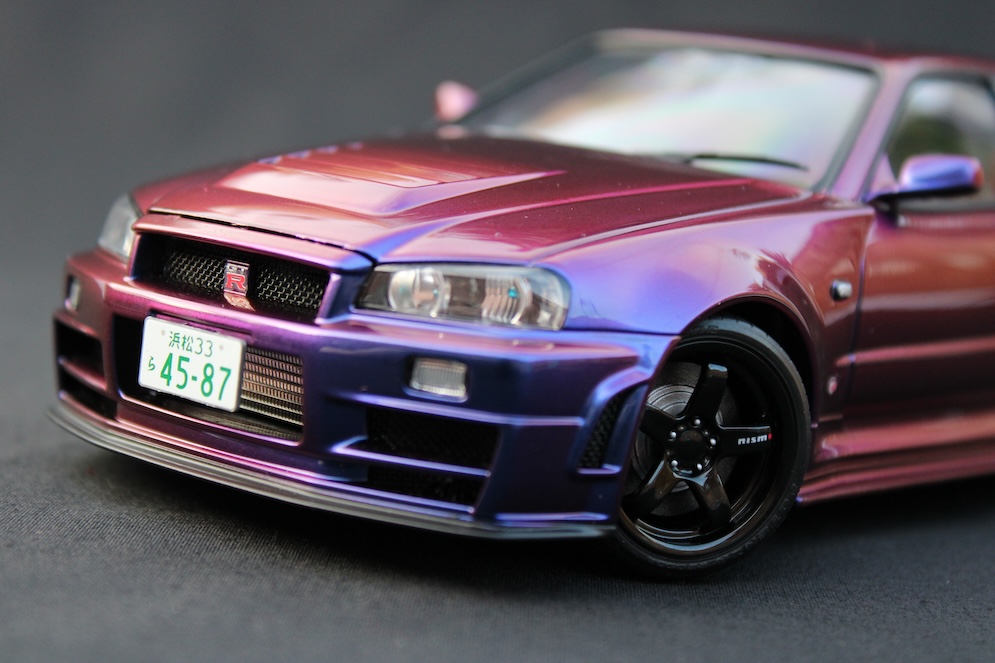
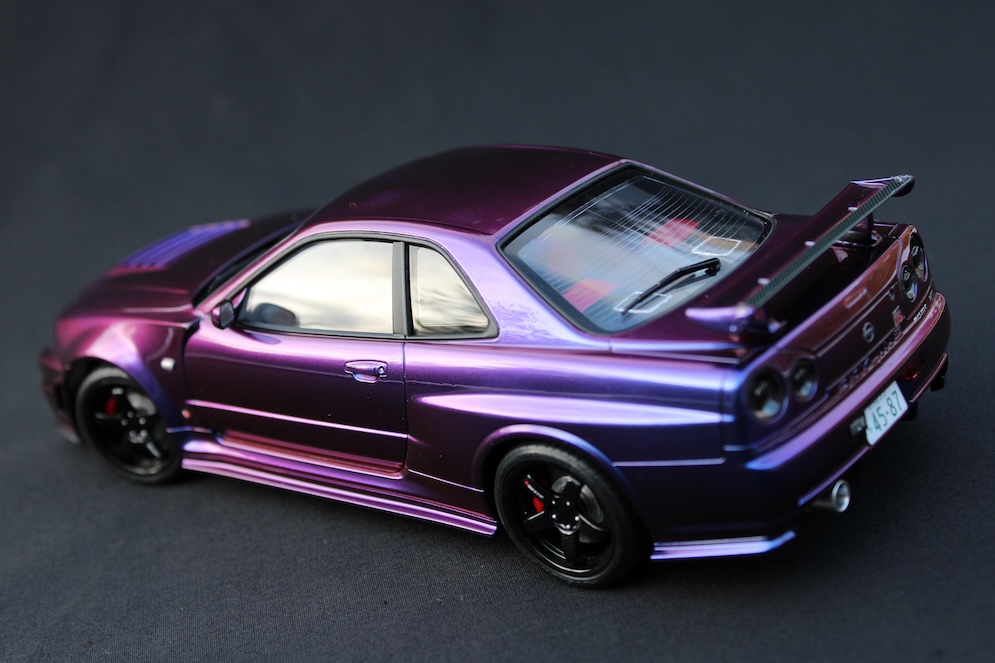
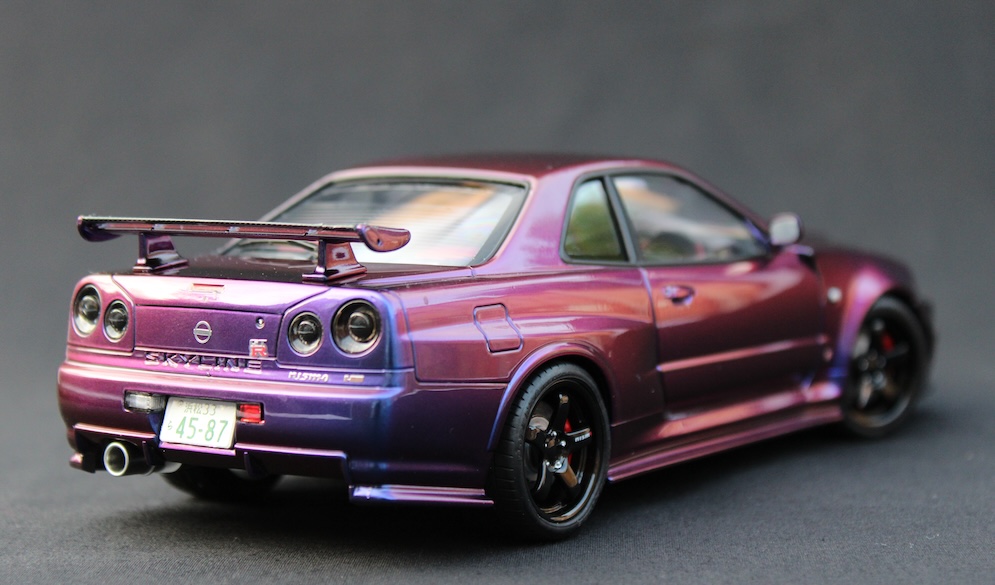

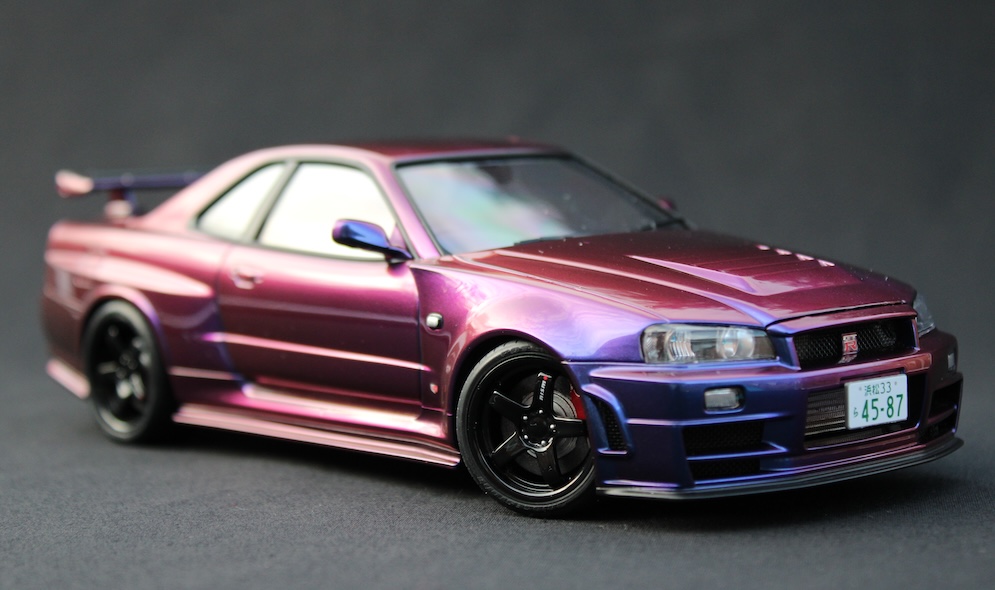
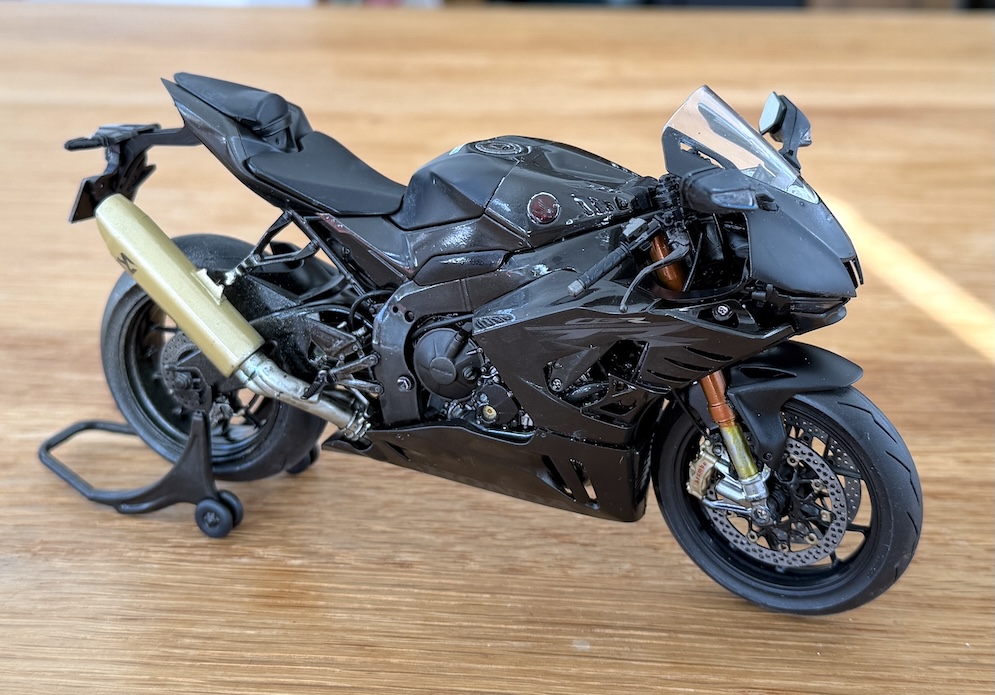
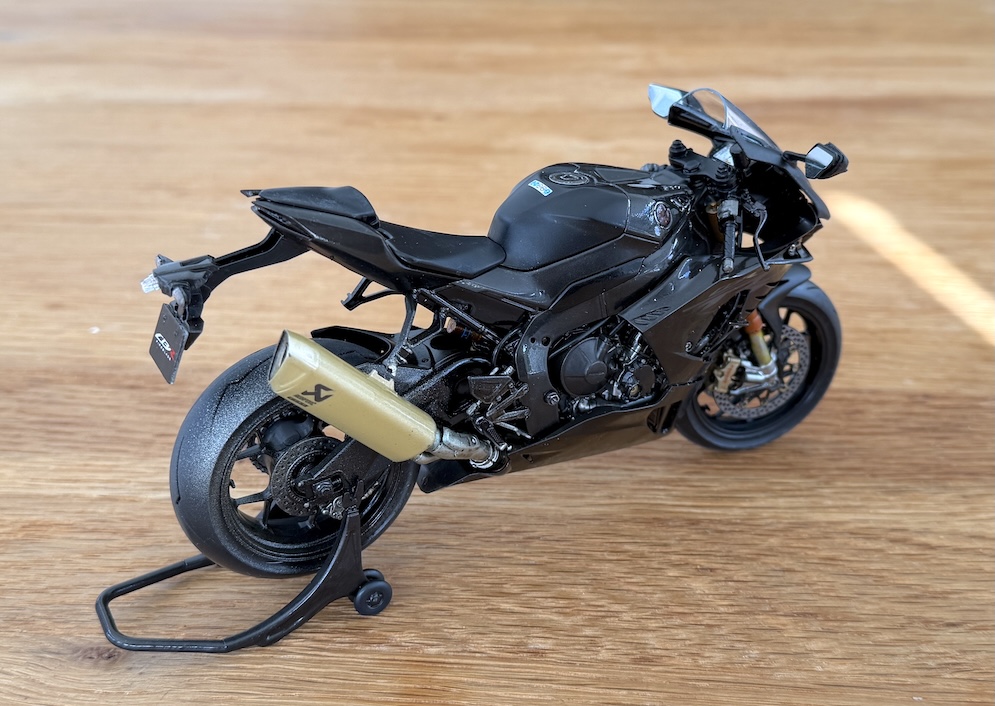
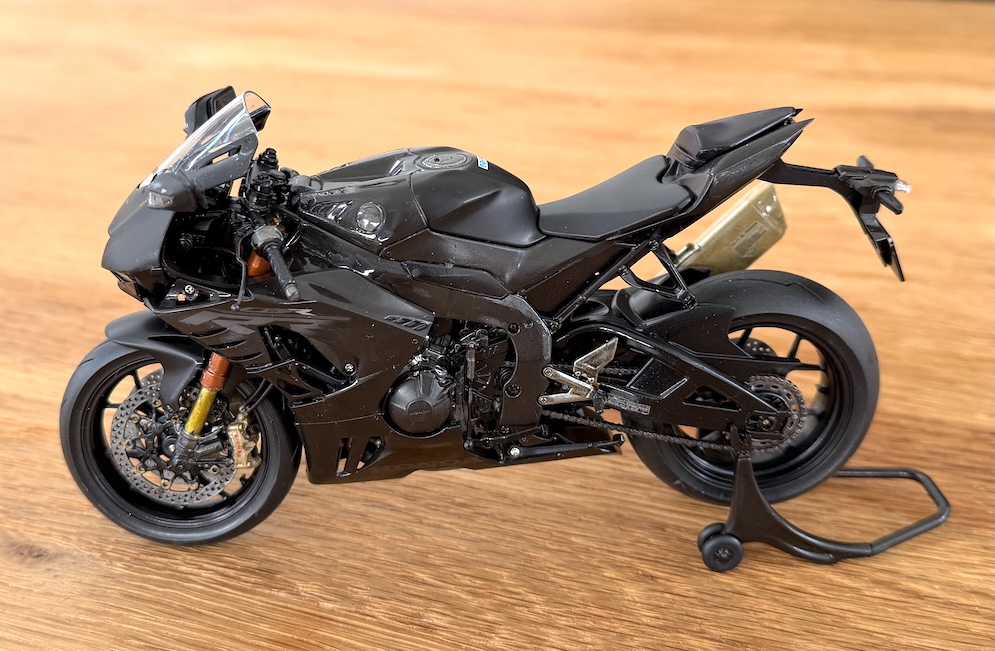
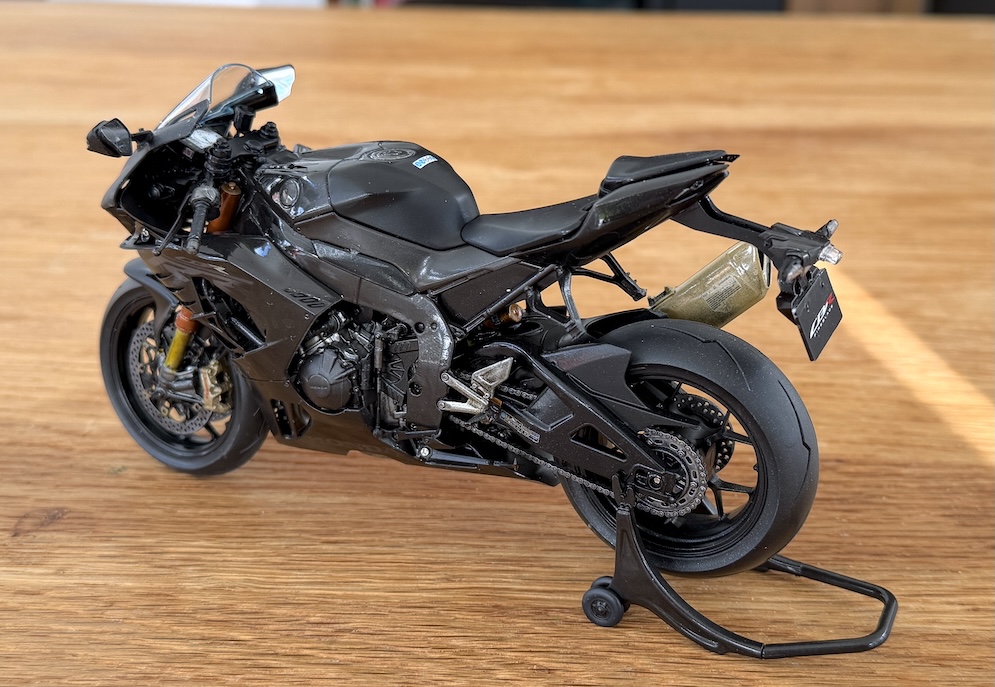
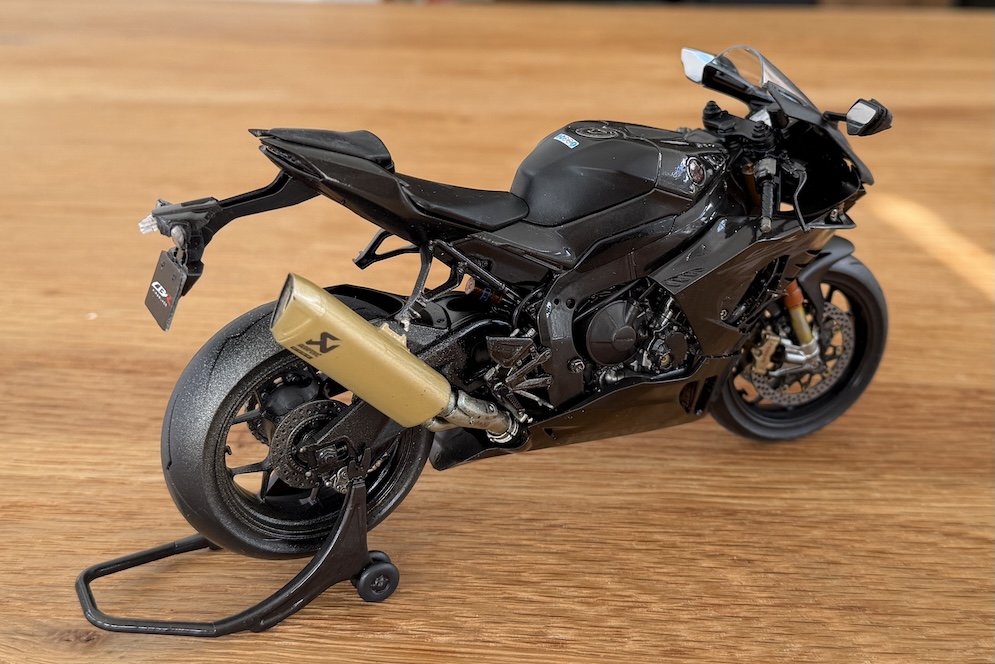
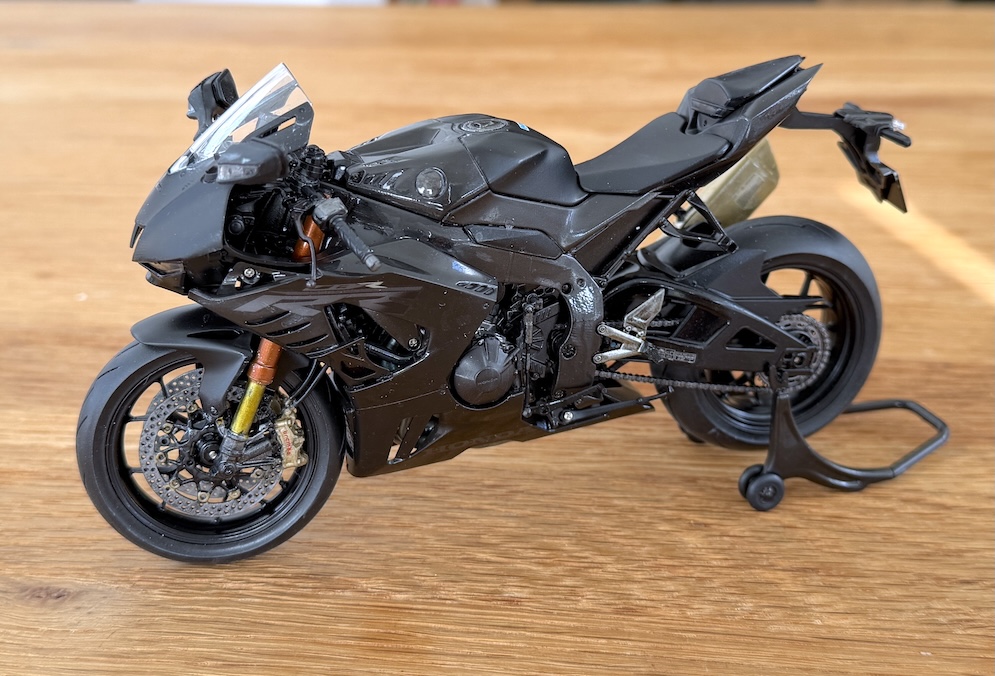
A little about the build: A great kit, comes with metal badges, everything’s completely box stock, and it is the third time I’ve built one of these kits. It goes together like an absolute dream! For those who haven’t built it, and want a great quality kit, with plenty of detail at a reasonable price, this is one for you. This was painted with Mr surfacer 1500 grey primer, then I laid down a gloss black base, a nice shiny surface ready for the colour and to help the colours magic come to life. The colour is from SMS paints, and it is called ‘Black Hole’ from their colour shift extreme paint range. Turns out it’s not too dissimilar to the actual ‘Midnight purple III’ which is a well known and very much loved colour some of the R34 GT-R’s come in. The colours go from deep blues and purples, through to oranges and reds dependant on viewing angles and lighting.
Christian W.

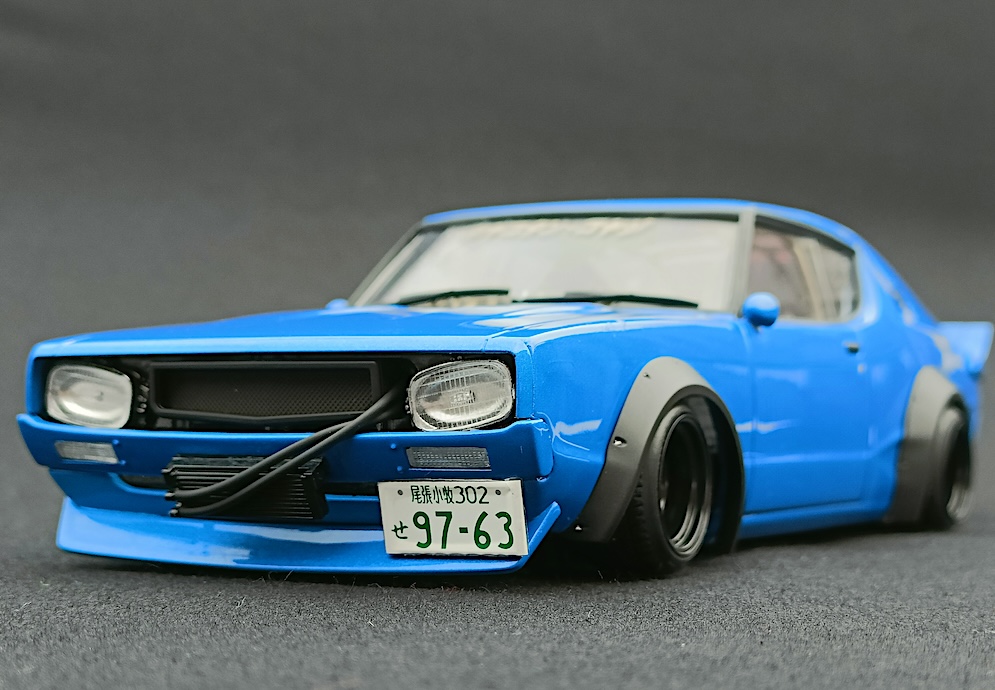
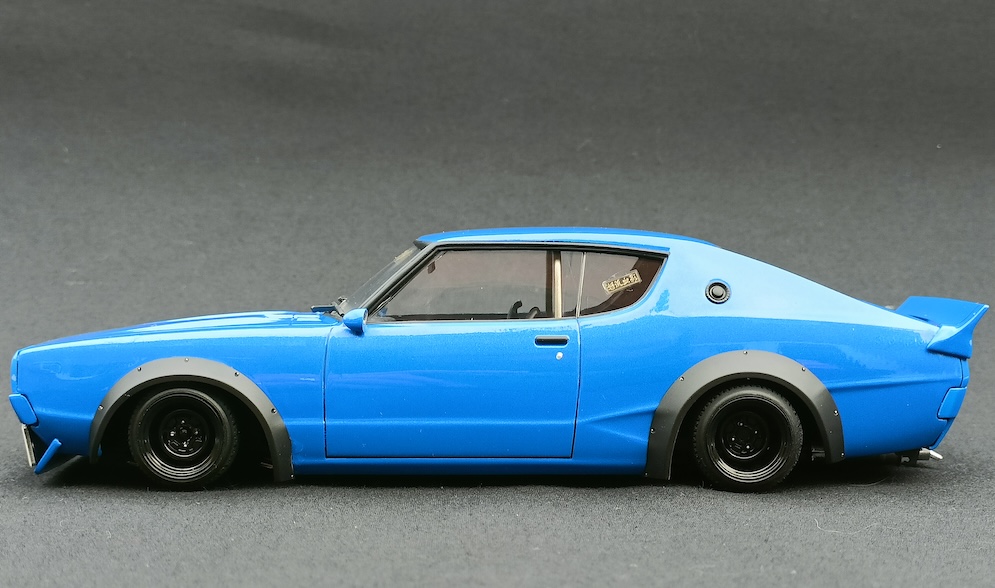
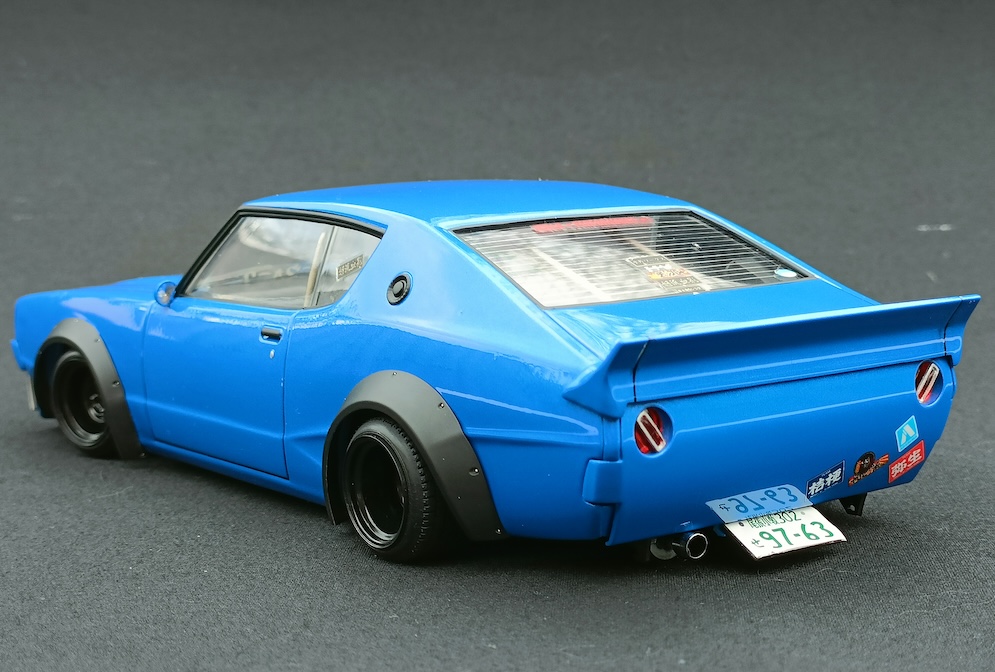

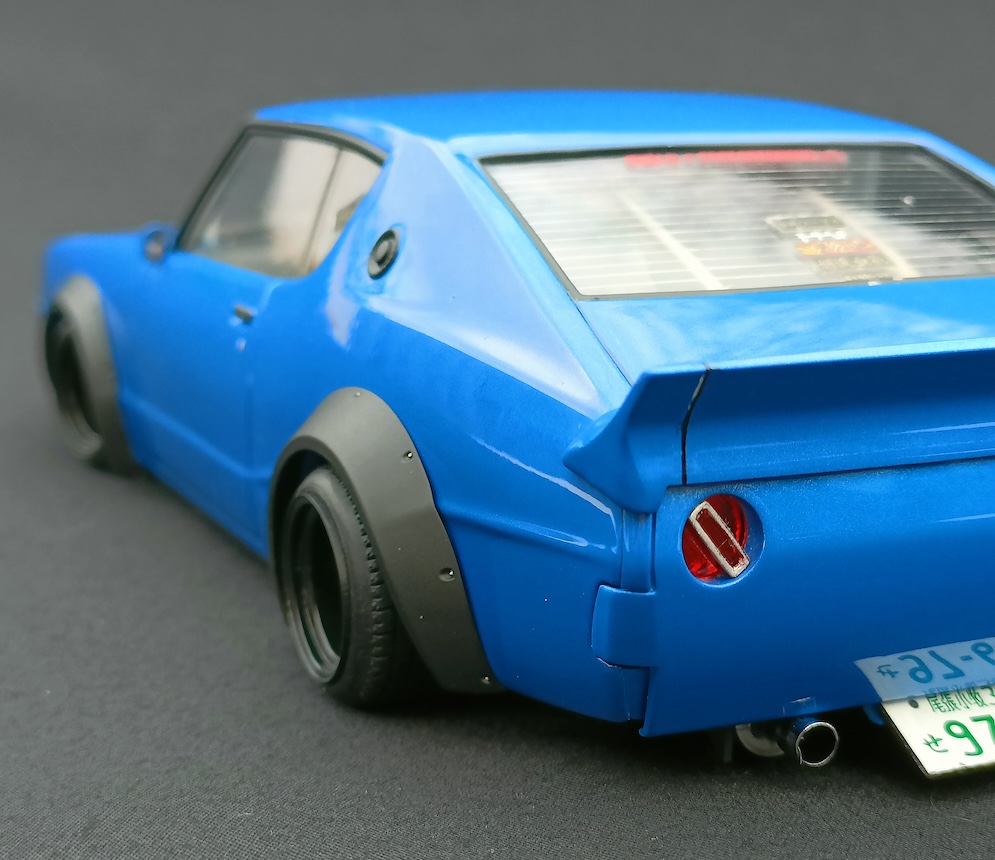
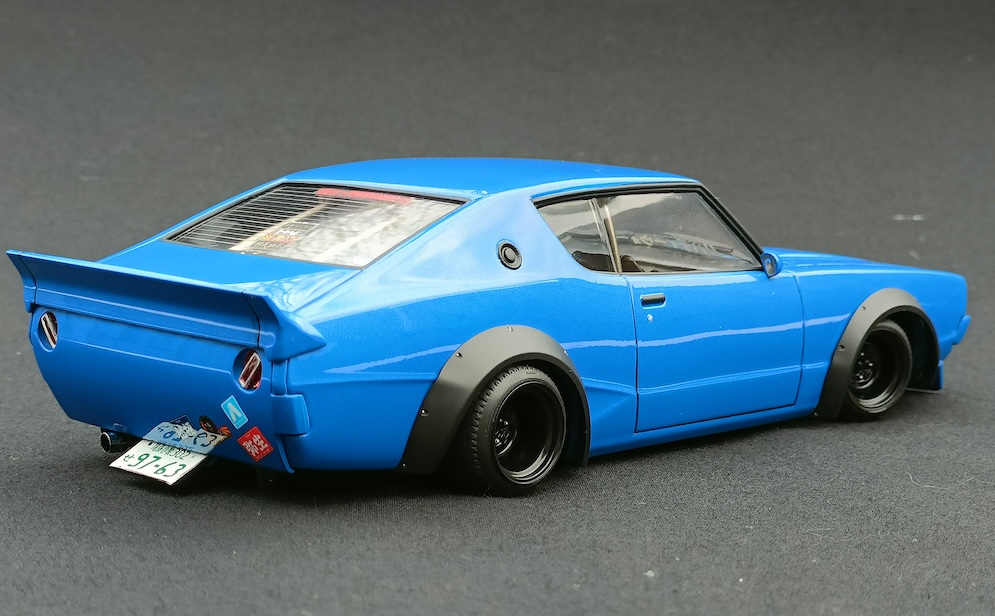
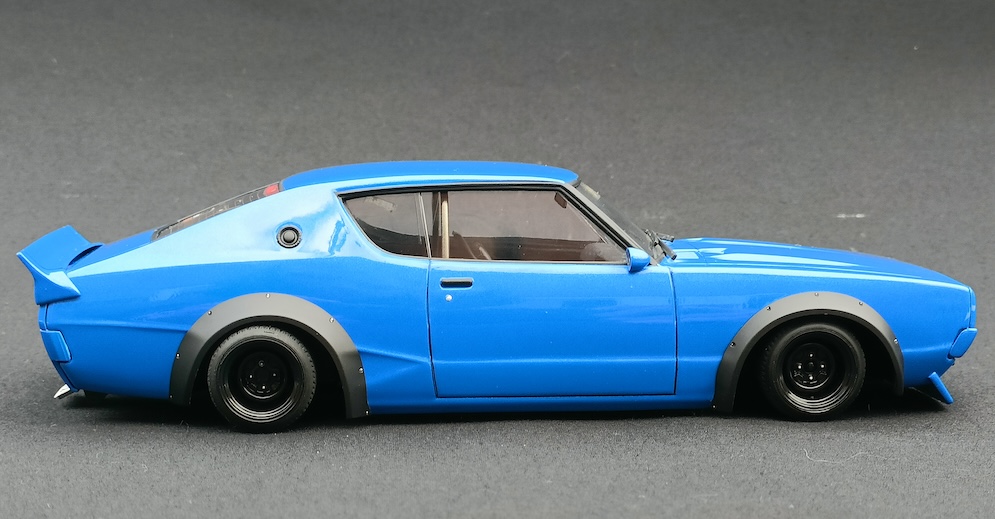
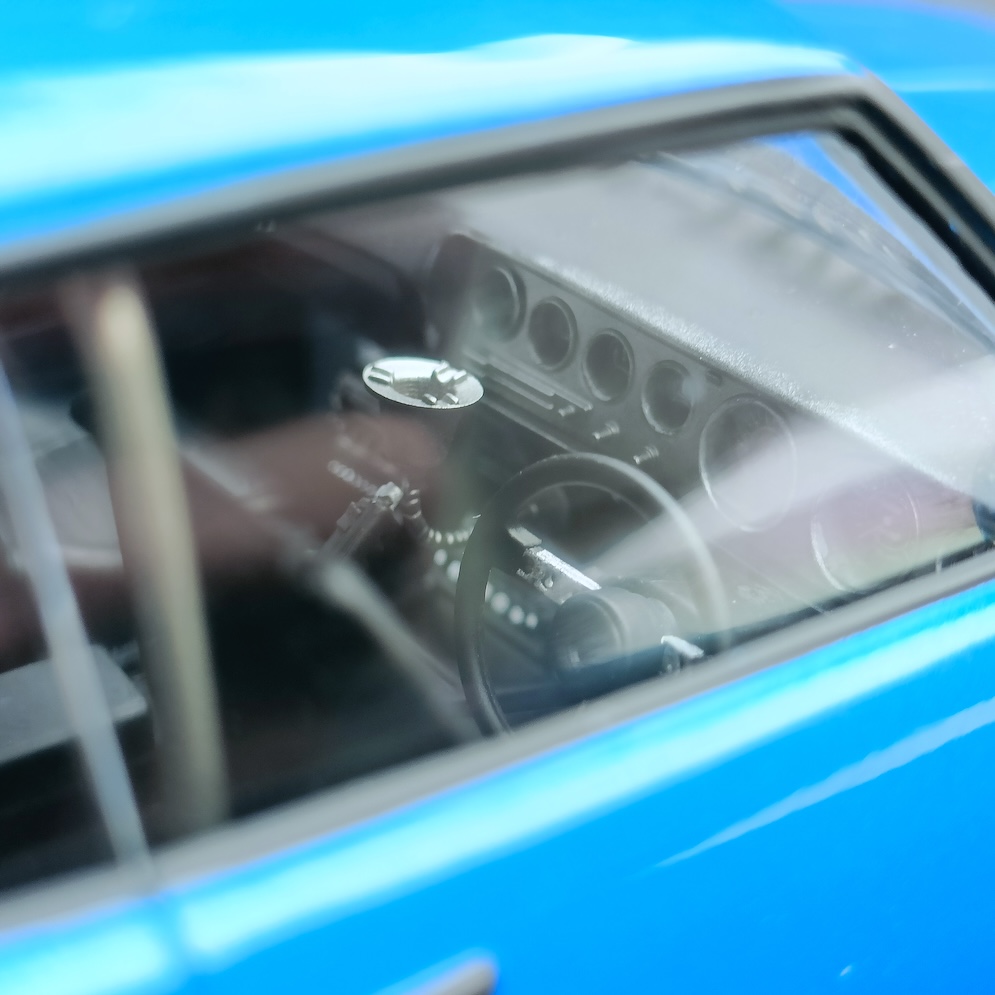
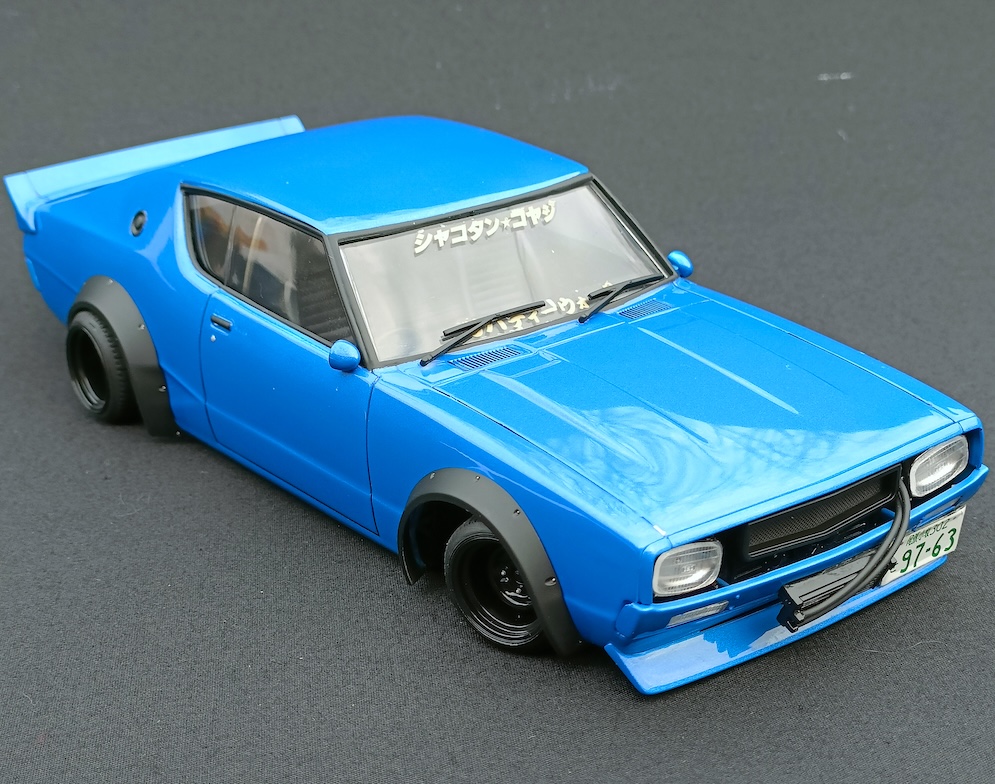
An old mould kit from Aoshima, that at one point was battery powered and motorized by the looks of the battery compartment that comes in the kit, but with many iterations and versions of this particular body shell, this particular version was released in 2014 (although no need for batteries or a motor) it comes with plenty of spare parts, front end and rear panels. This is styled on the Shakotan style of Japanese car culture.
As for the build, it was primed using Streetblisters light grey 1k primer, the blue was Refraction Blue also from Streetblisters and then covered in a 2k gloss clear coat system, also from Streetblisters, all through an airbrush with a 0.5 needle at roughly 30psi.
The black trim/arches was all Mr Surfacer black 1500.
This, bar the metal exhaust tips from Streetblisters, was an out of box build, a very enjoyable build, one I would happily build again.
Christian W.

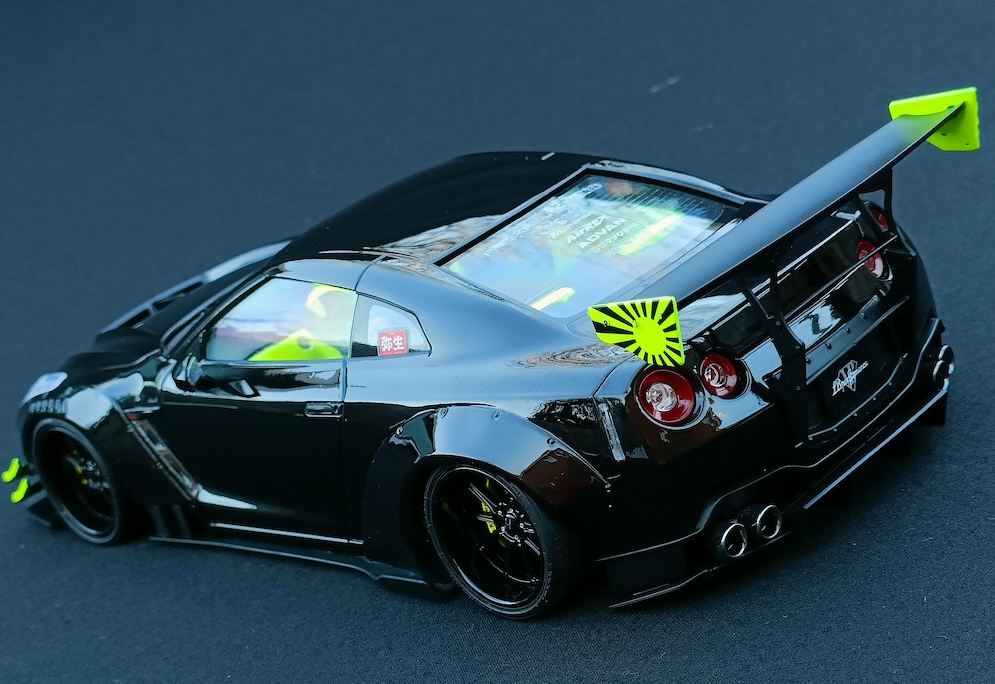
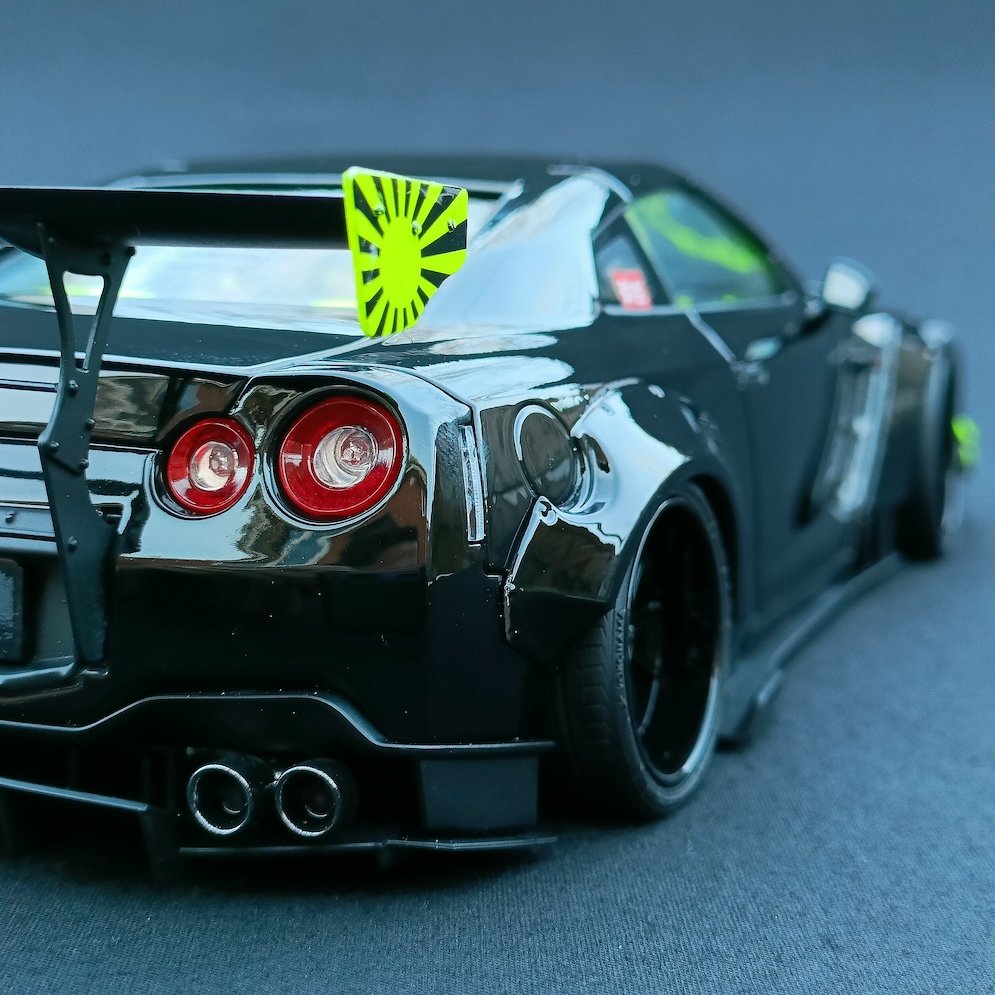
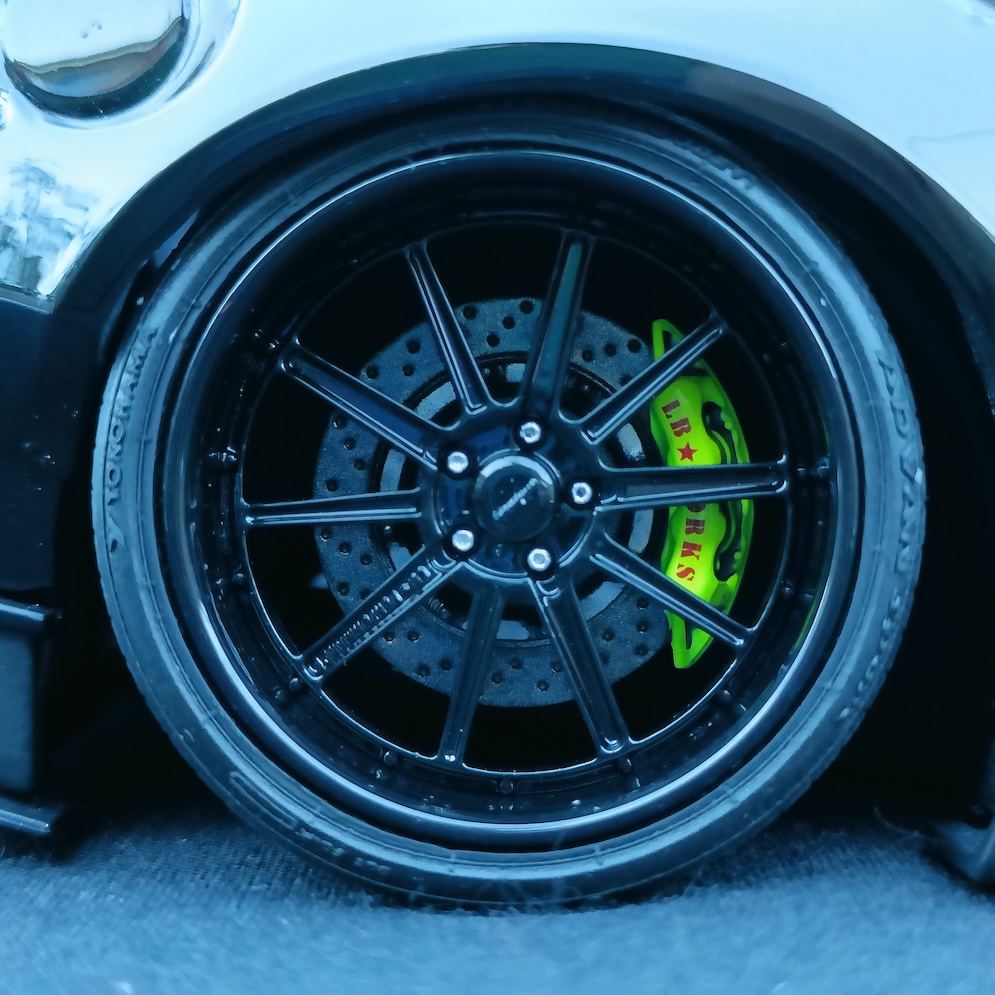
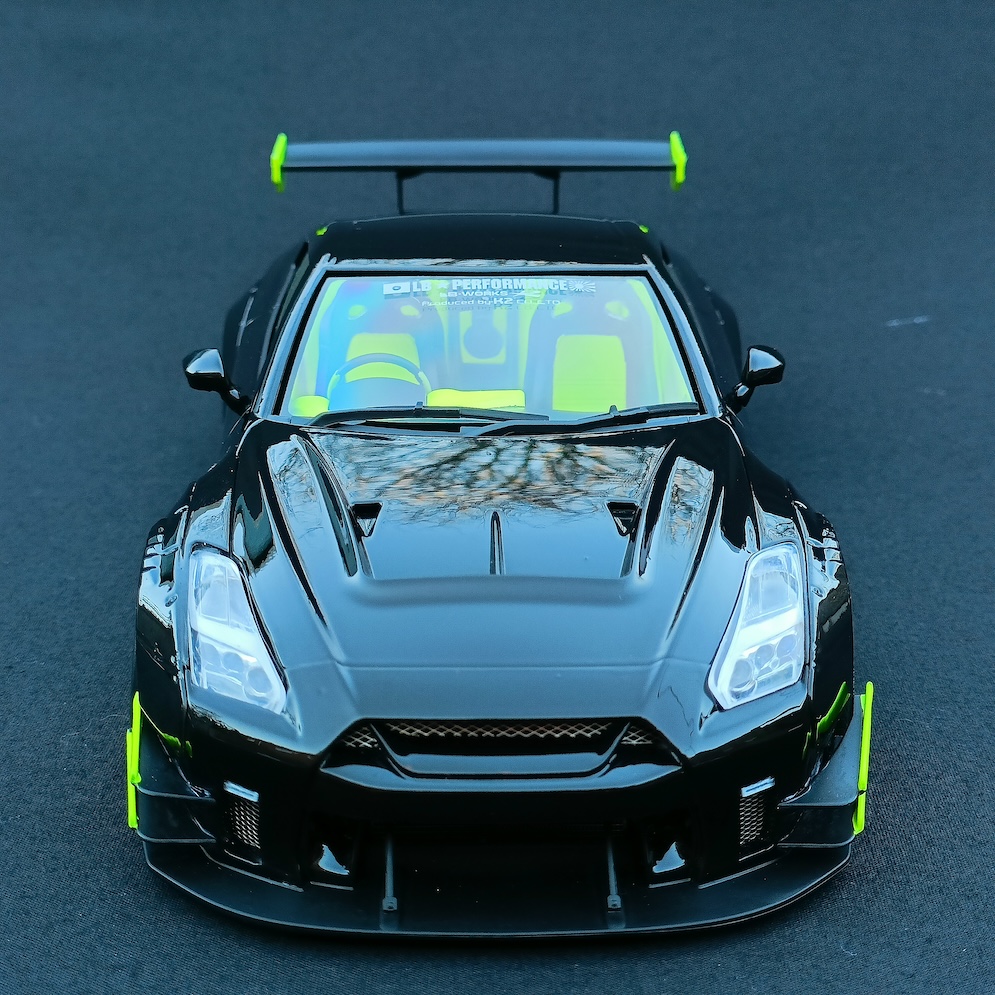
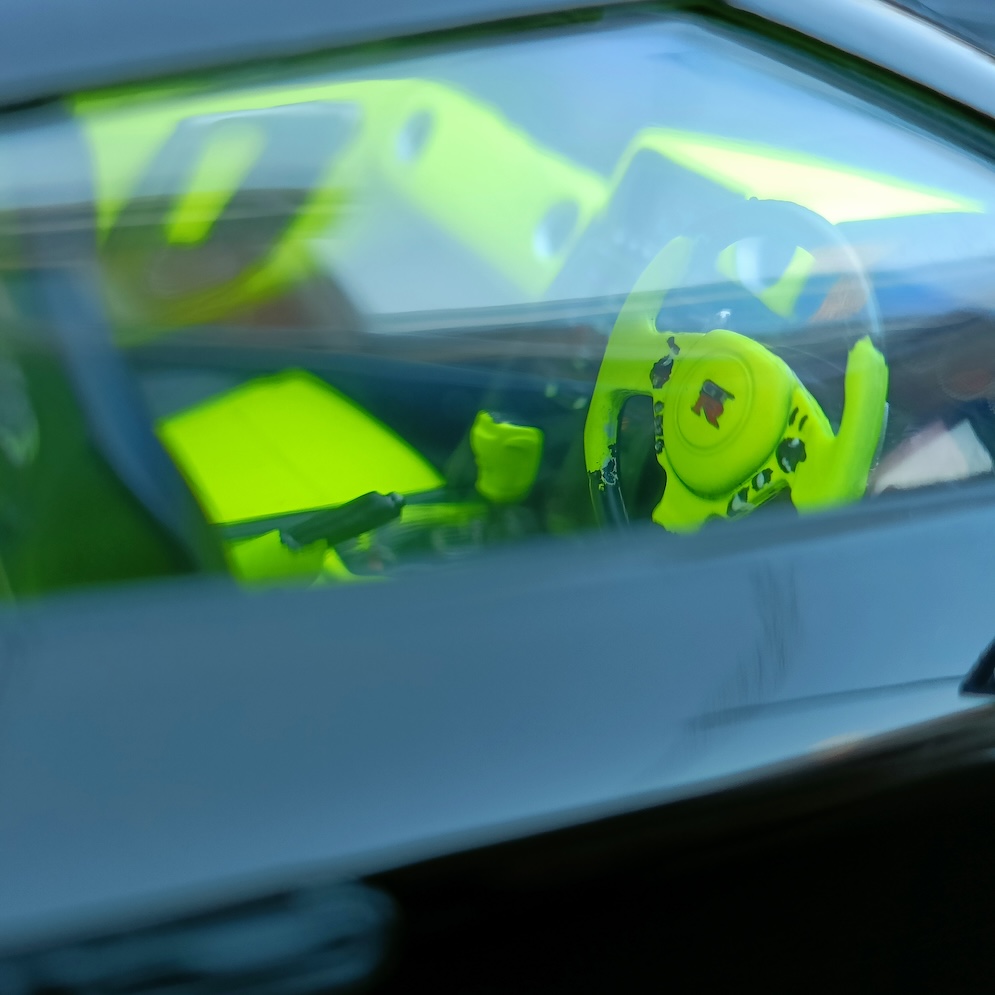
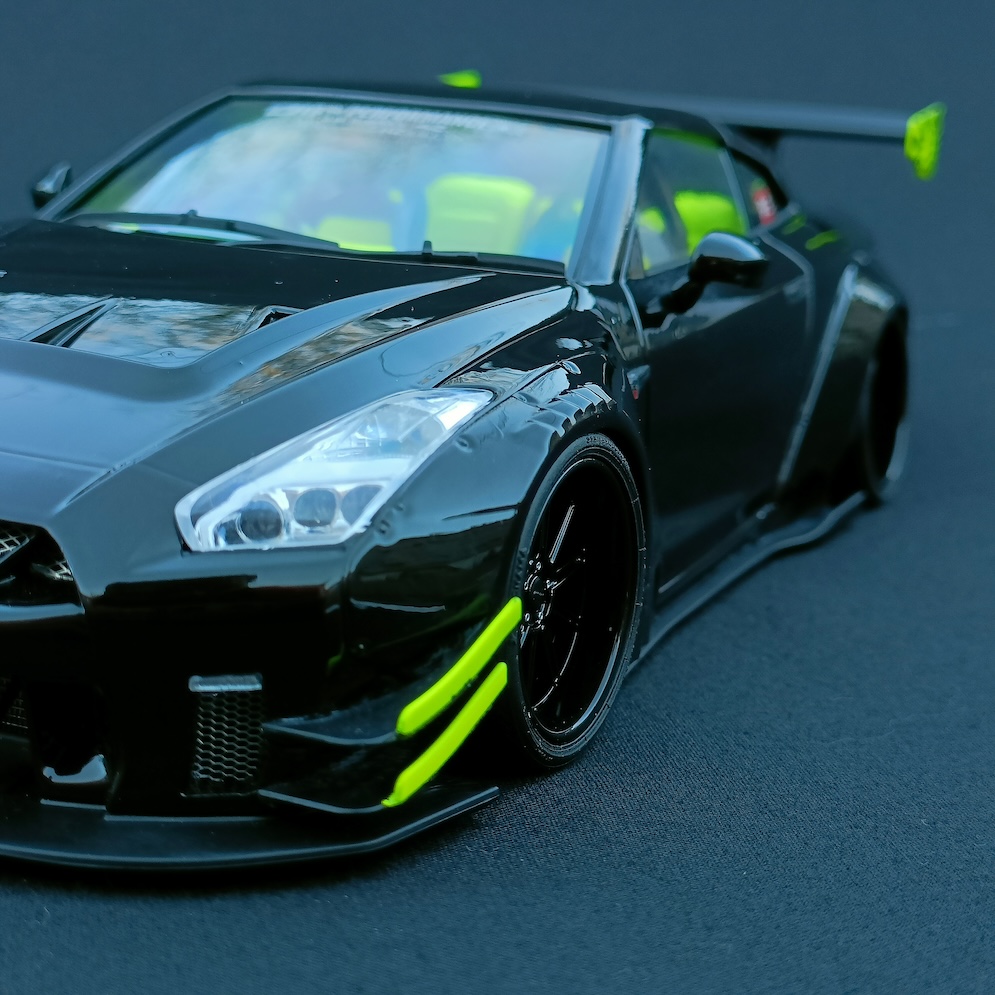

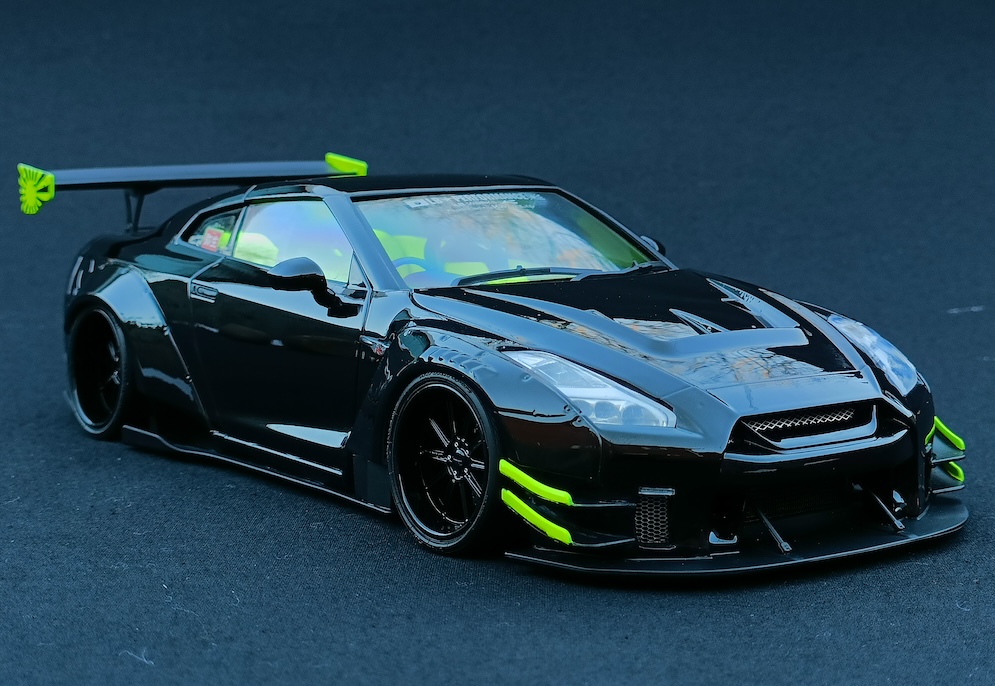
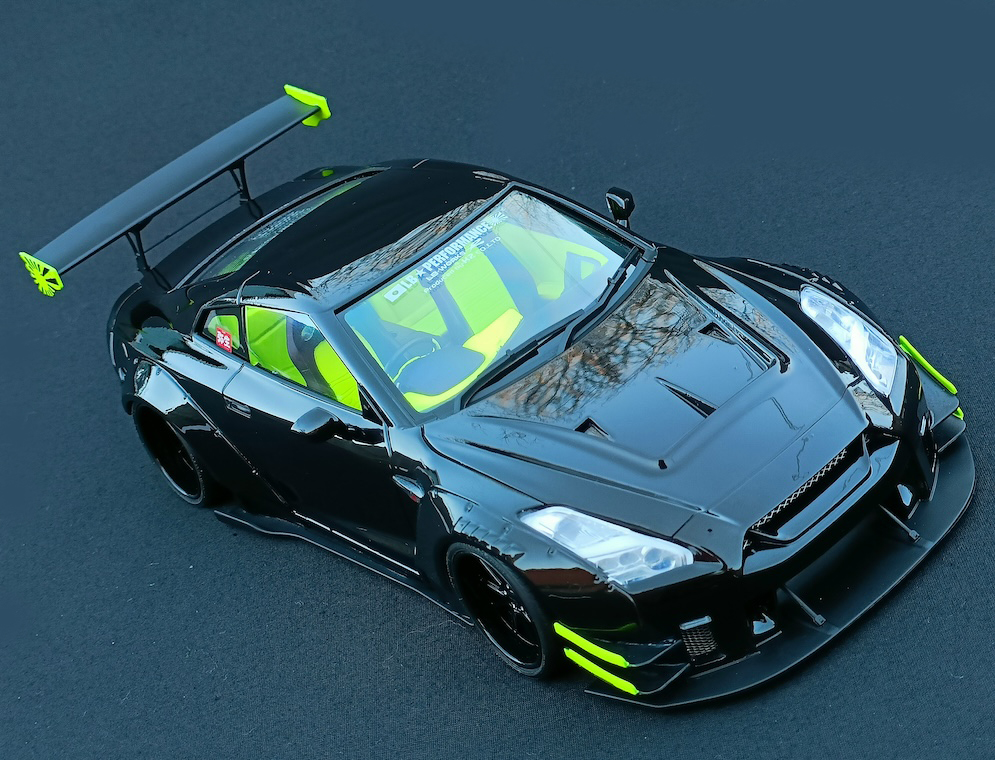
This is a fantastic, well designed, well engineered kit from Aoshima, that I have now built two of this particular kit and one of the type 2 ver 1 (bod art has a bronze painted version, wheels and decals supplied are different to this ver 2 kit).
Although there is no engine detail, there is an opening bonnet and space allowing to install an engine bay and detail, as this kit uses the base r35 GT-R body shell which in the standard kit, comes with full engine detail.
The instructions are very well laid out, with a full size scale cutting template as to where to cut the arches on the shell to apply the wide aftermarket Liberty Walk arches, to house the big 20″ wheels.
A nice little detail about this kit, the calipers and discs are separate from each other as the caliper attaches to the hub and the disc is allowed to roll freely with the wheel, adding to the realism and extra details.
The paints used for the body, primed in Streetblisters light grey 1k primer, with one coat of jet black and one top coat of Granada Black from Streetblisters, and then coated with the 2k gloss clear coat system also from Streetblisters, all used through an airbrush using a 0.5 needle sprayed at roughly 30psi
The fluorescent yellow was Mr color, painted over Mr surfacer white 1500, using a 0.5 needle at roughly 15psi.
Would happily build a 4th!
Christian W.
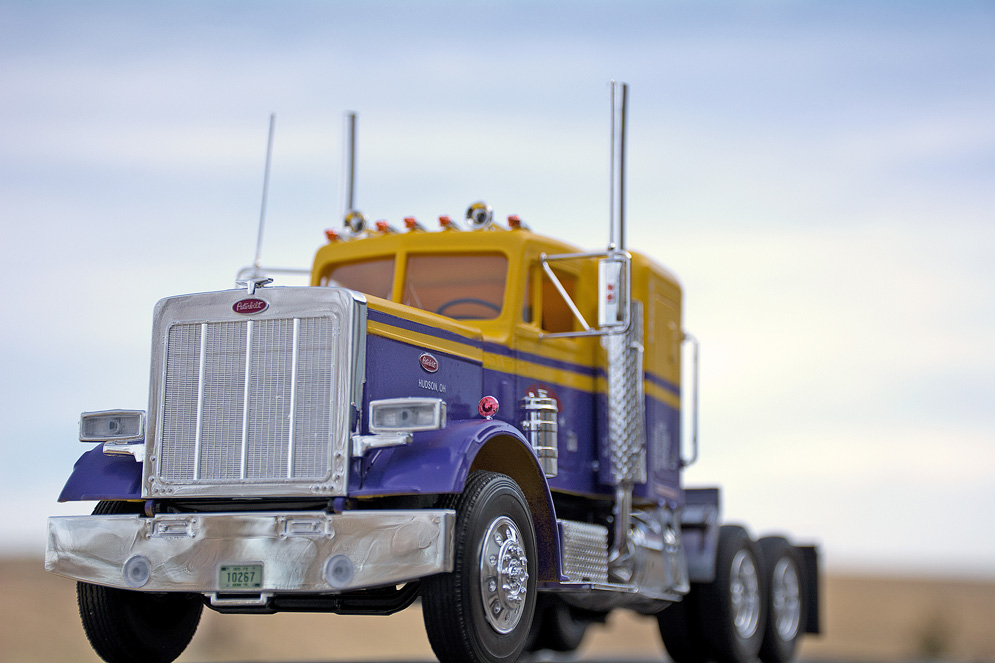
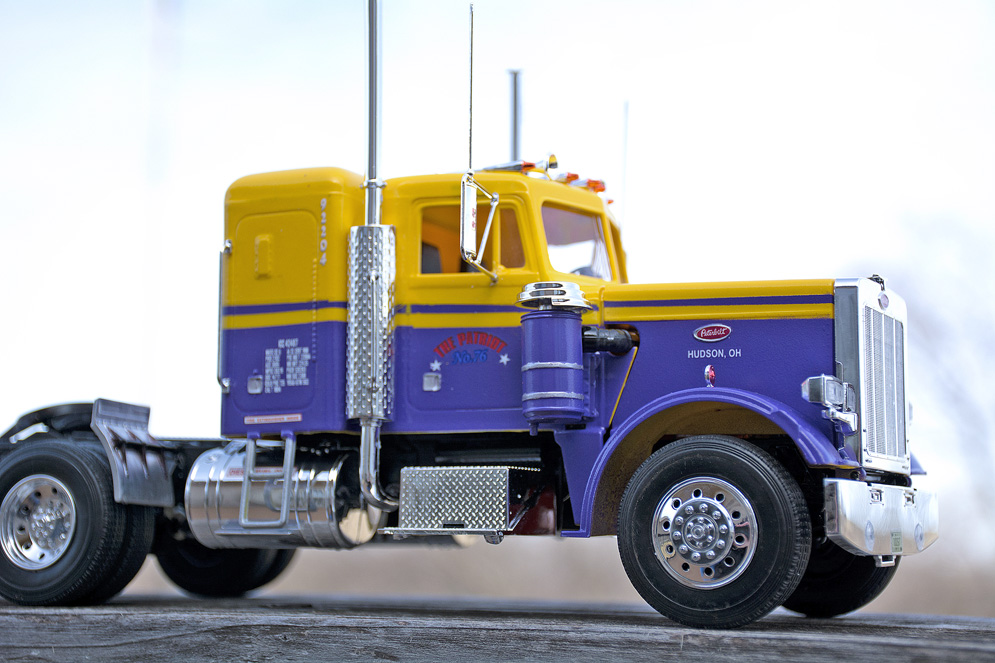
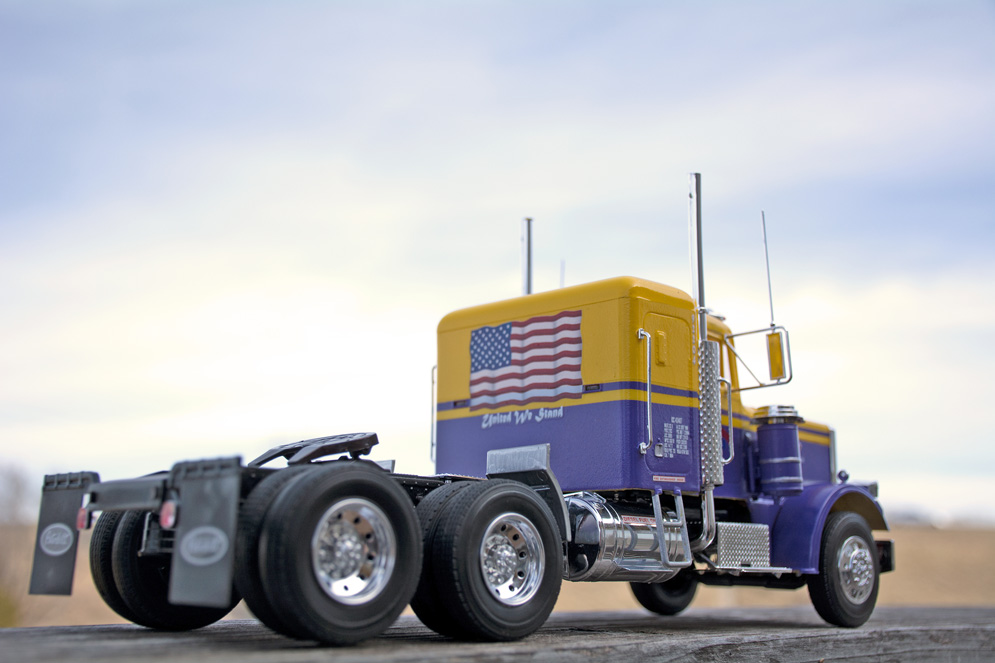
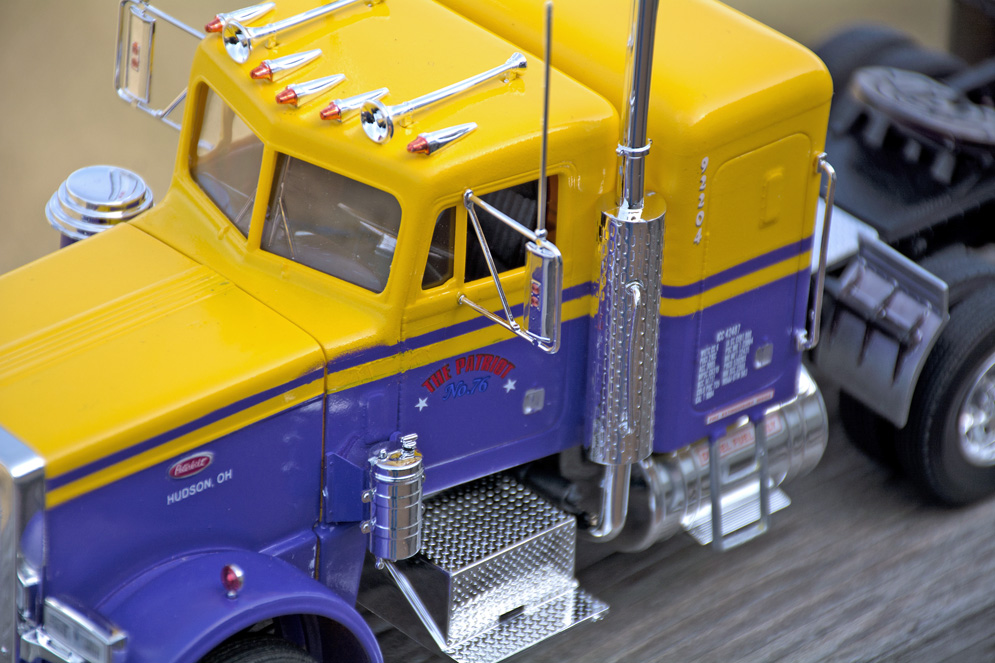
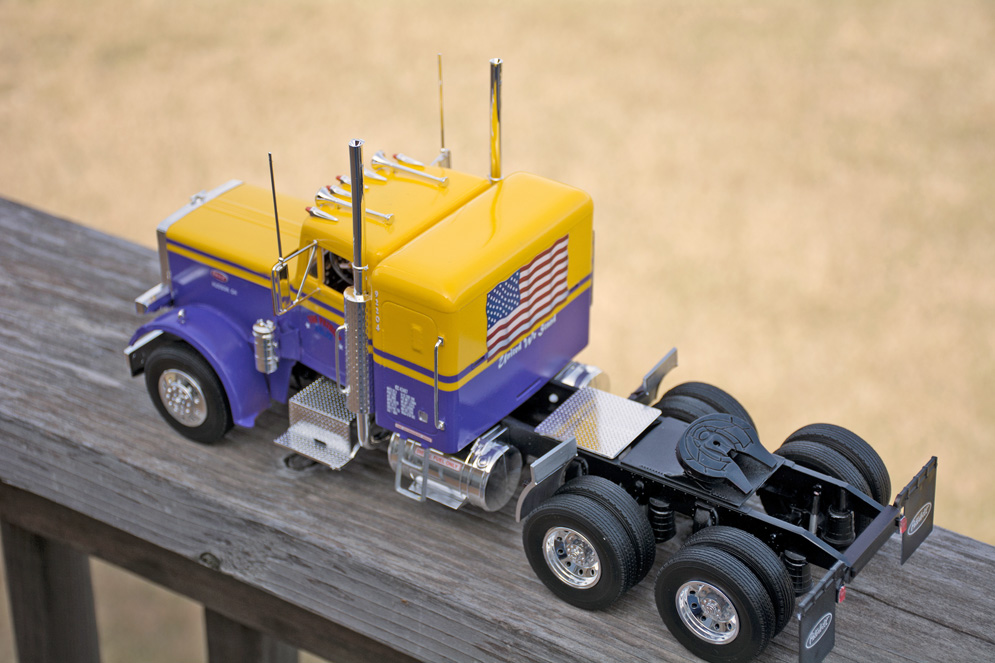
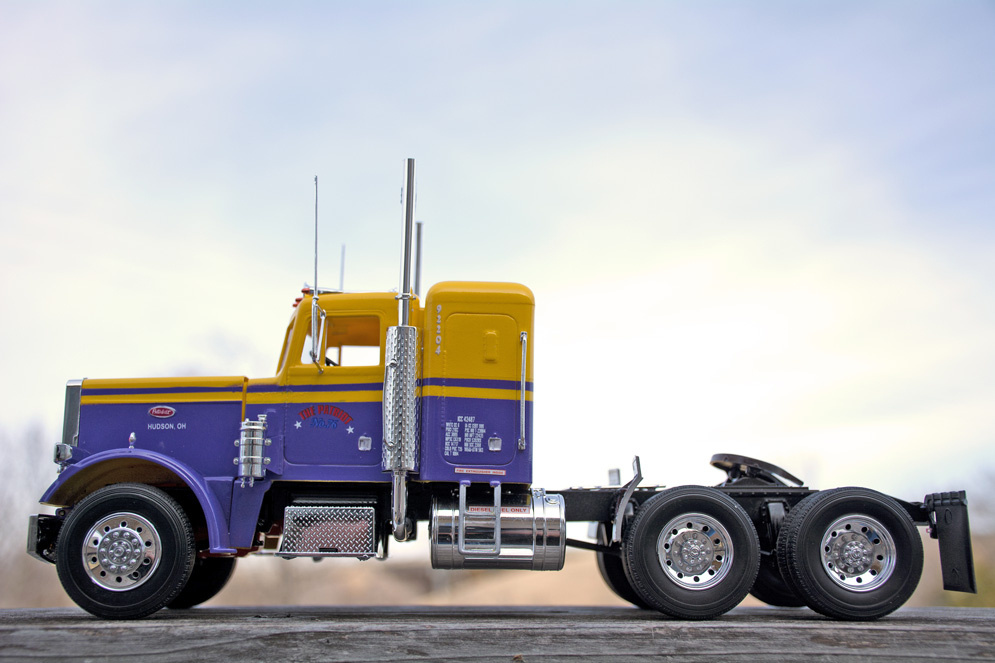
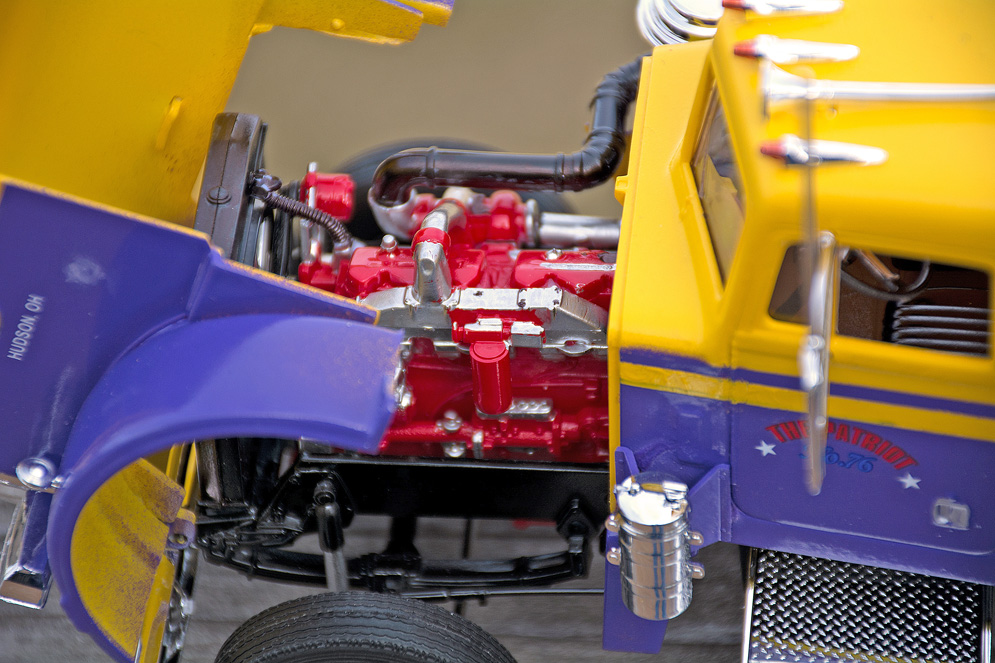
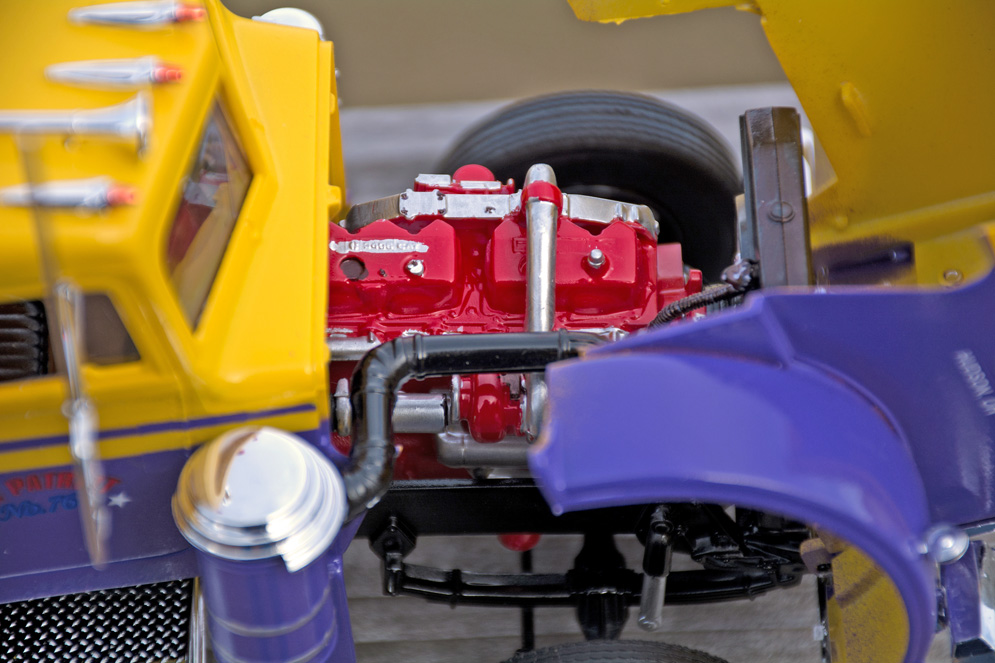
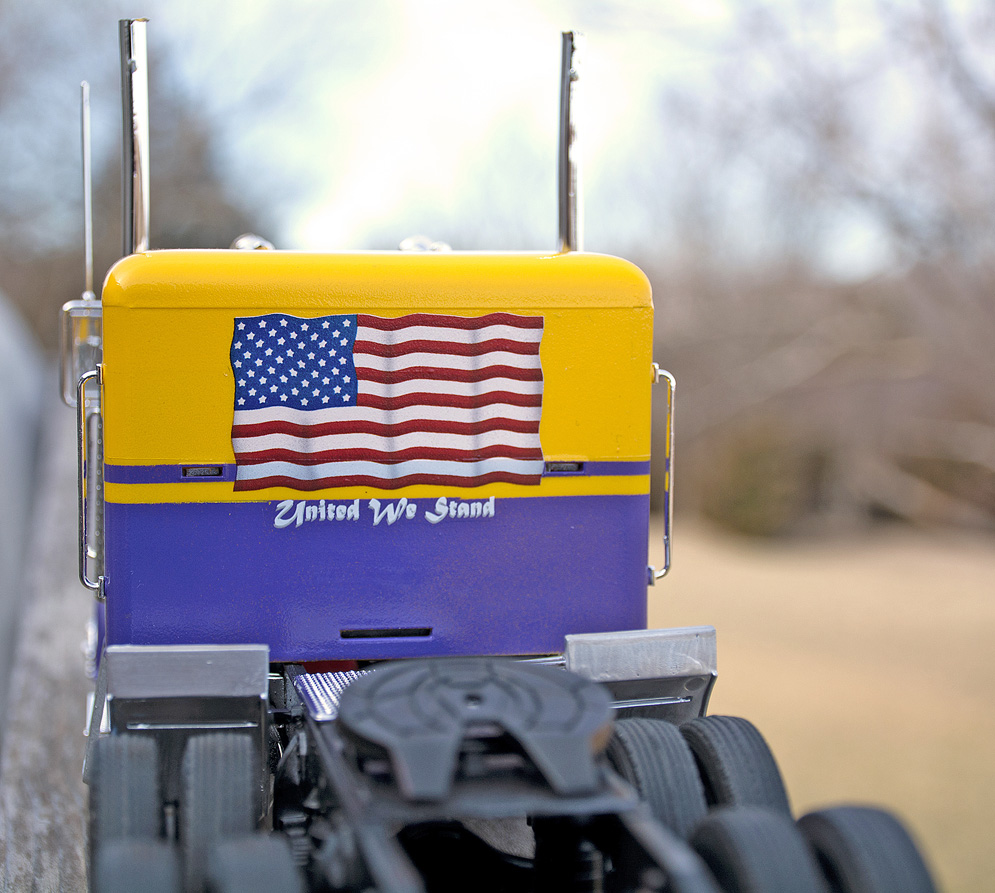
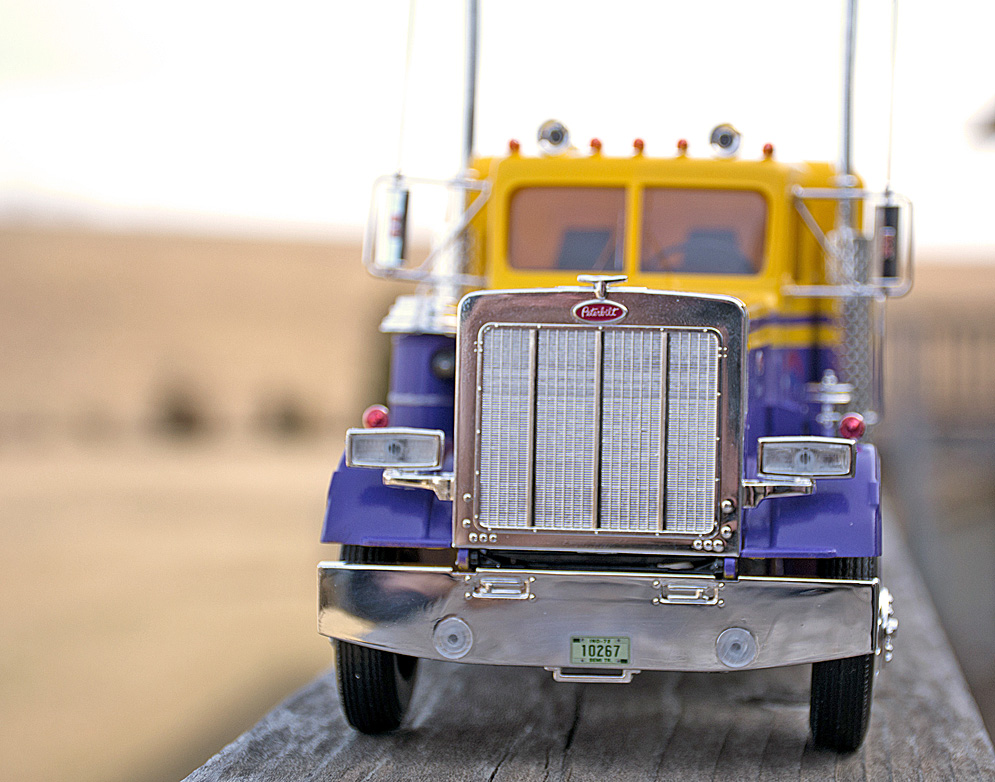
Some of its parts are snap parts, but nonetheless this model is a great model to have and it’s my second Peterbilt 359 model.
I used Krylon spray-paints for model kits, as well as Testors enamel paints and marker pens. Some decals came from other truck model kits, mainly from AMT’s Peterbilt 352 Pacemaker model kit. The model was shot in natural lighting with a Nikon D7100 DSLR camera. The interior of the cab is tan, the seats are gloss black and the silver parts were painted using Sharpie’s silver pen.
Hope you all like it?
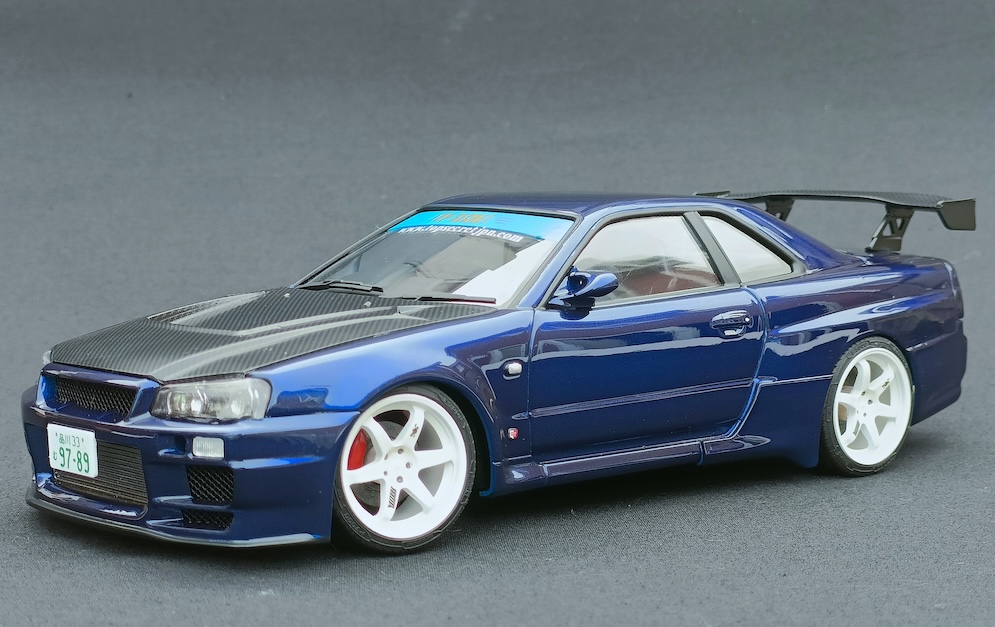
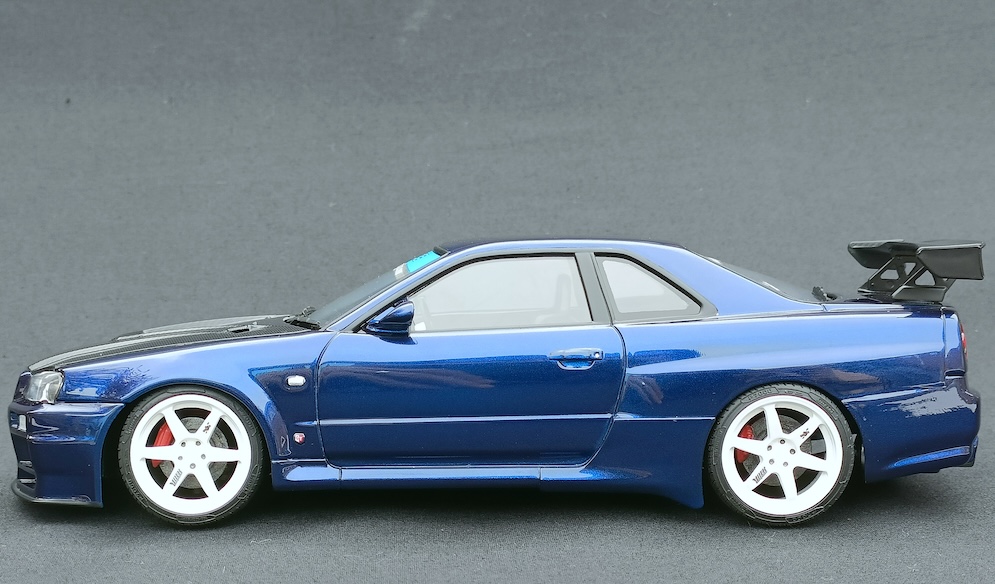


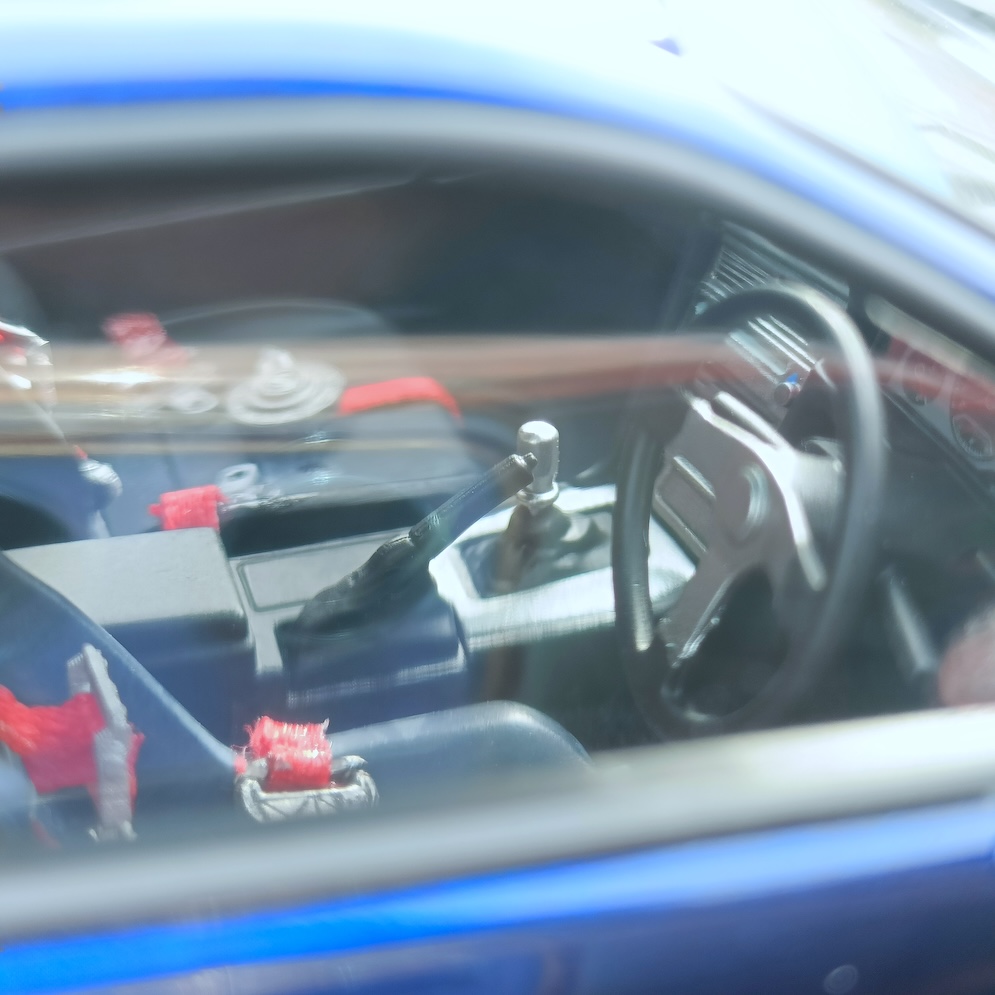
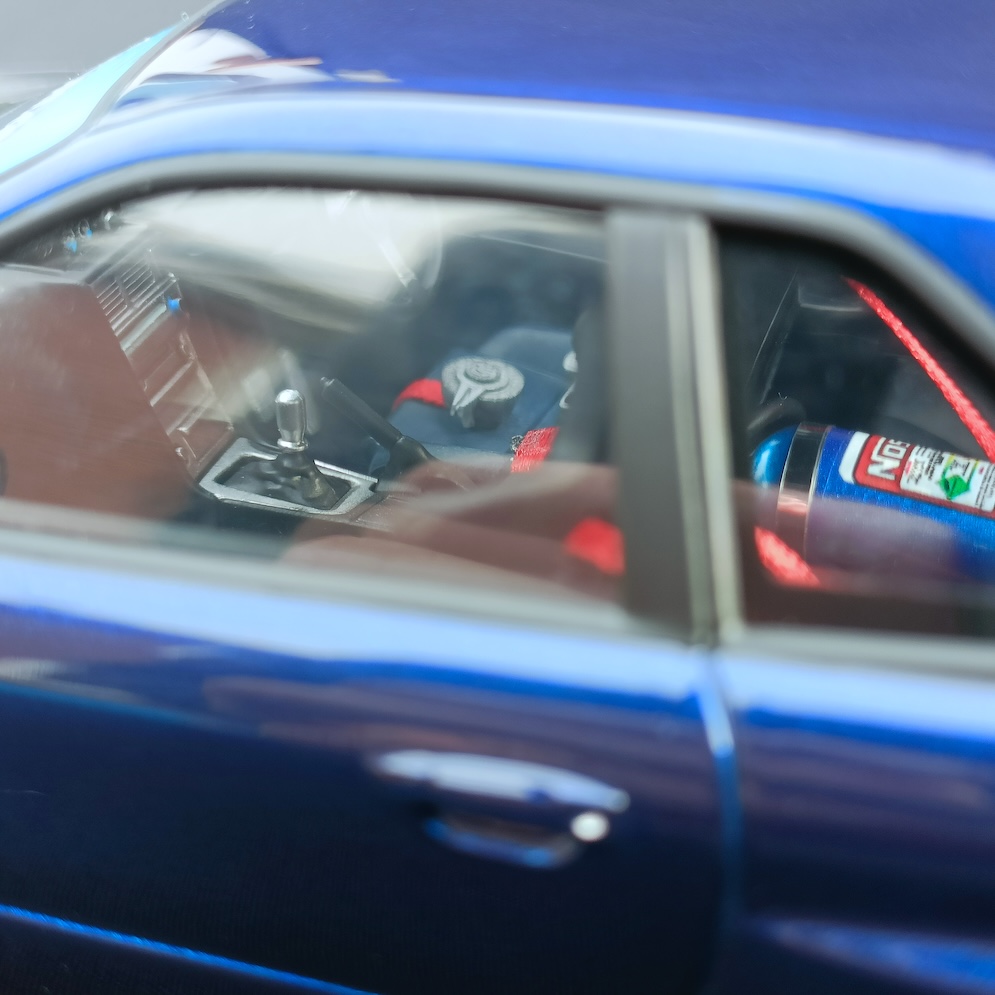
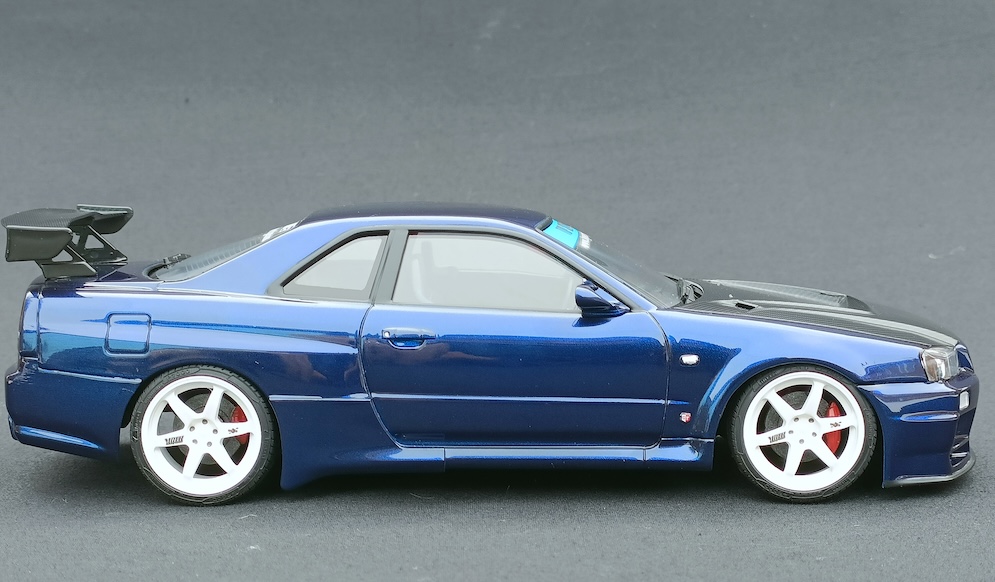
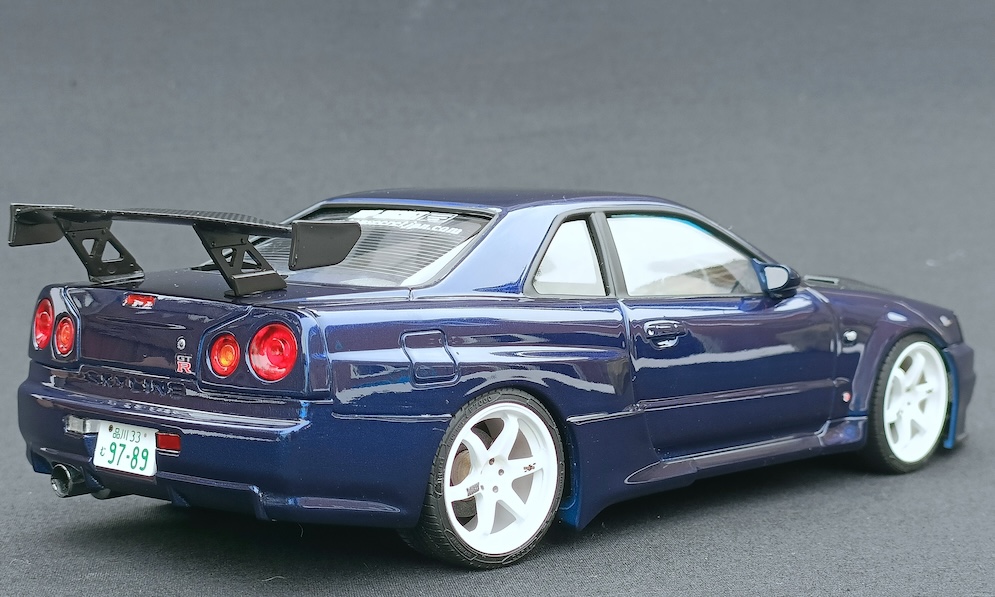
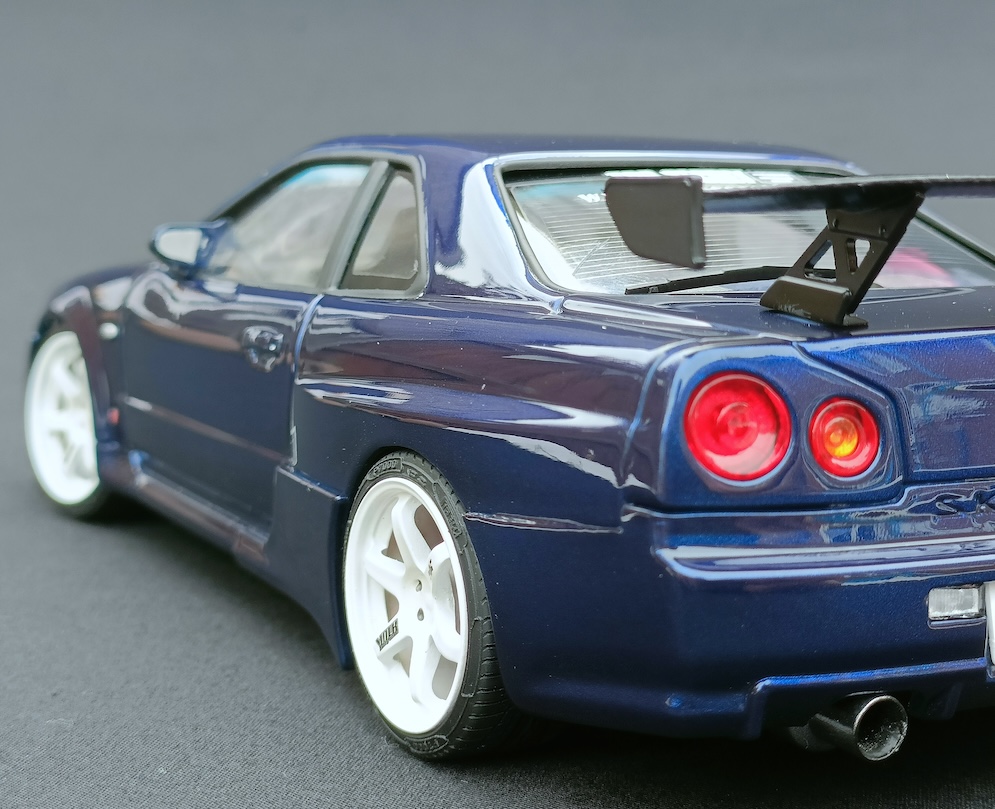
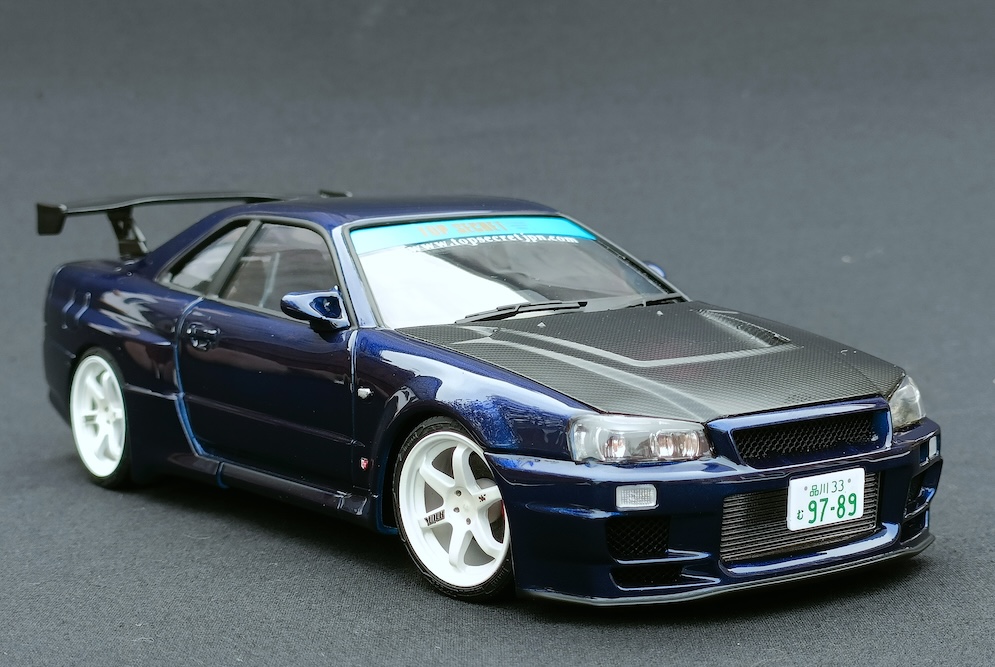
This build was the second time I have built this kit, I wanted something to work on, something easy and something quick and having built many variations of the Aoshima R34 skylines, I knew this ticked all the boxes.
This build took a week, with not much documentation, just focusing on the enjoyment factor, whilst also refreshing myself on a few techniques I’ve not applied in a while, such as the carbon fibre decals.
Unfortunately had a tear in the bonnet carbon fibre decal, managed to line it up, but after applying Micro Sol and leaving overnight, had moved and made the tear more visible. But not to worry, nothing to lose sleep over, and we’re all only human right haha!
Added a 3d printed nos tank on the back seat plus printed harness buckles and red seat belt material to make 5-point harnesses.
Painted in Alfa Romeo ‘Blu Montecarlo’ with a 2k gloss clear coat, I also cleared over the carbon with a semi gloss clear coat, to help make it stand out from the glossy bodywork.
An enjoyable build, happy with the results!
Christian W.
Video
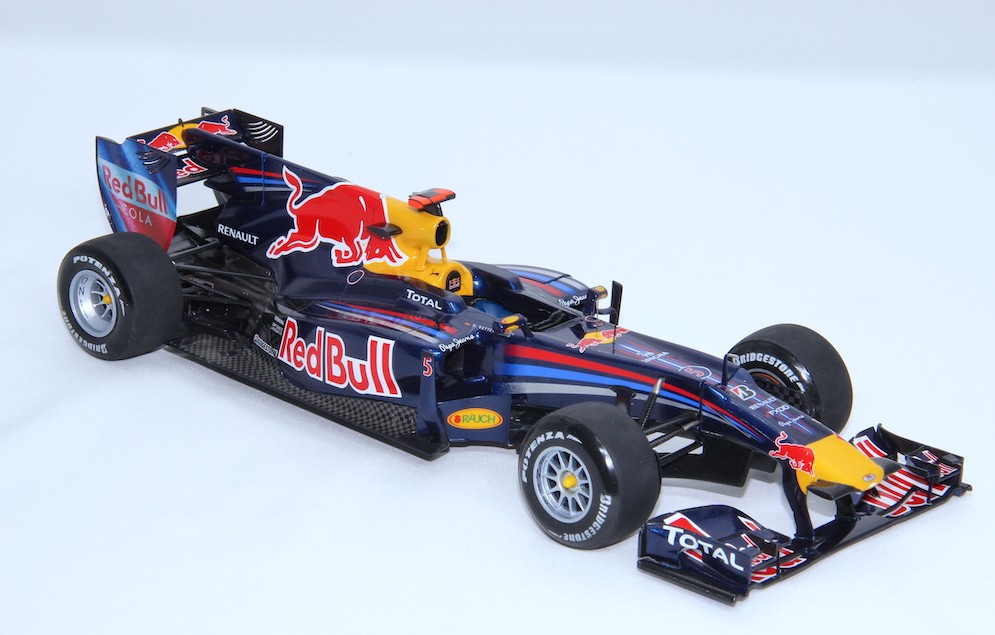
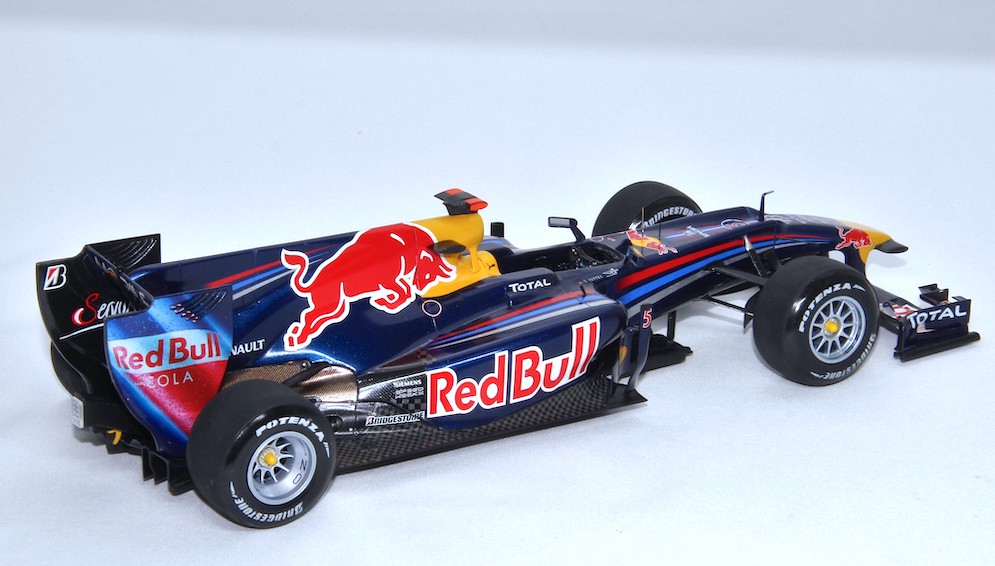
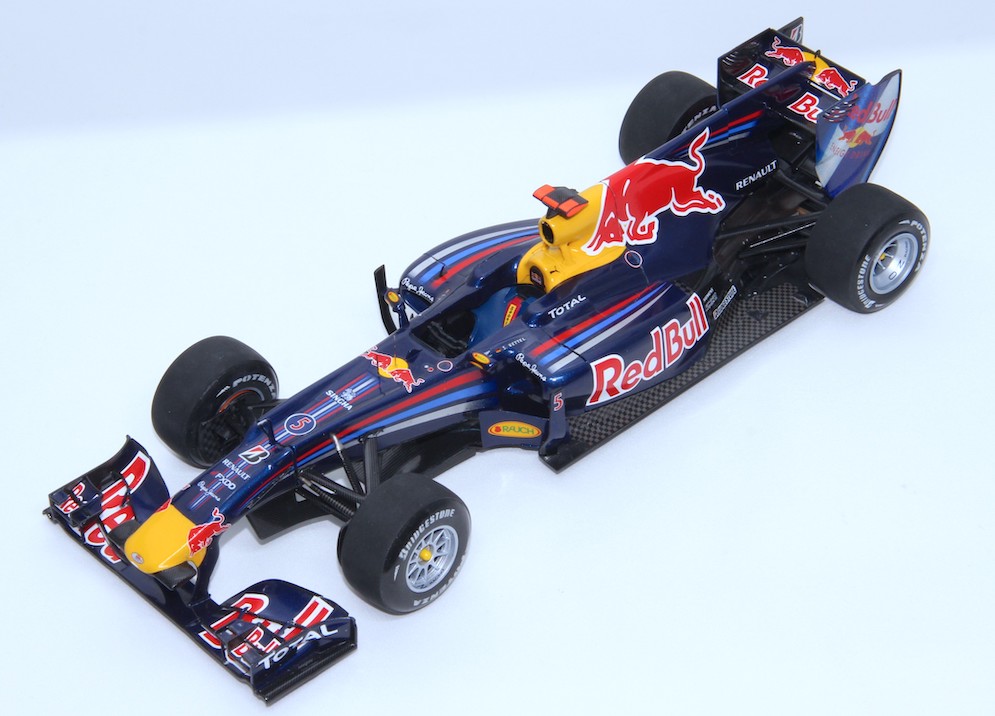
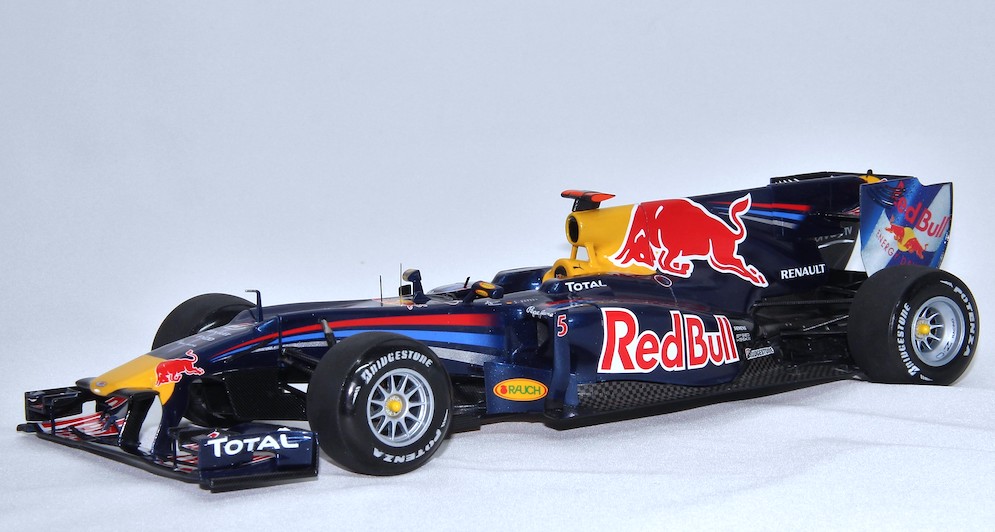
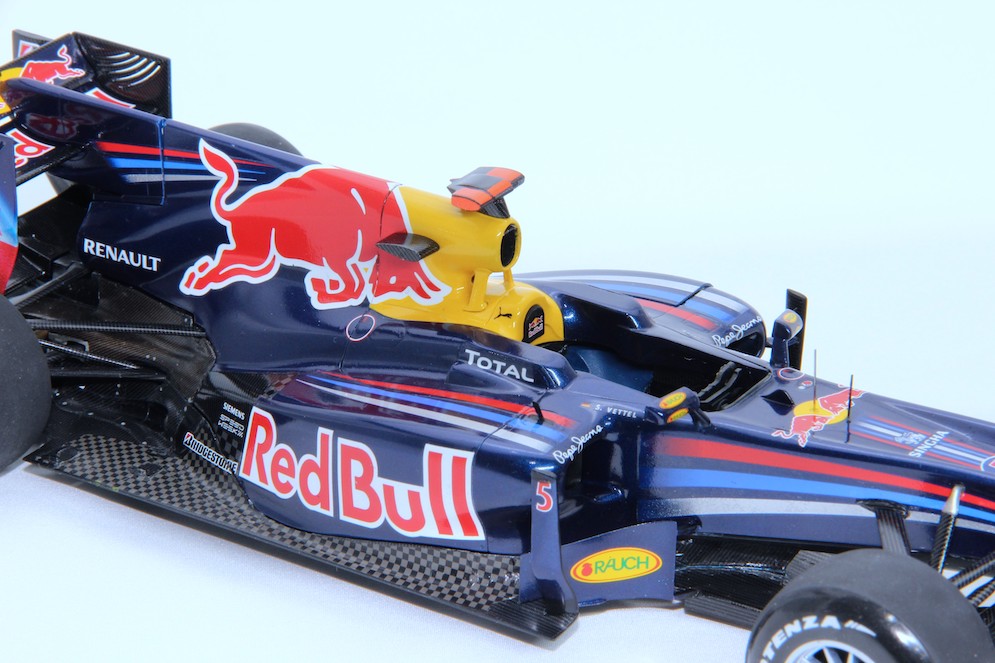

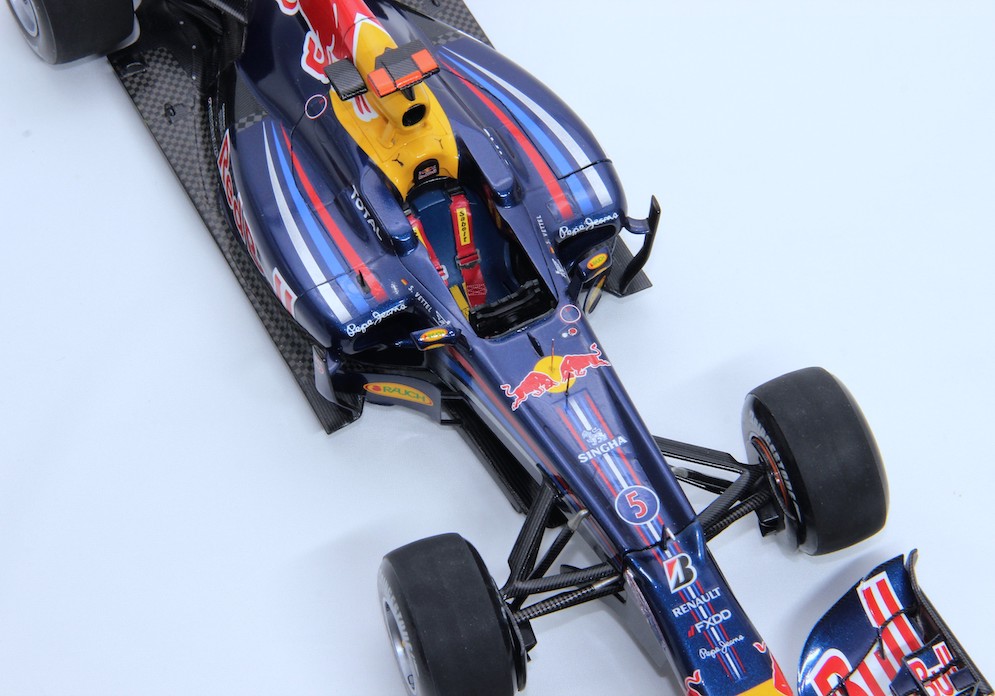
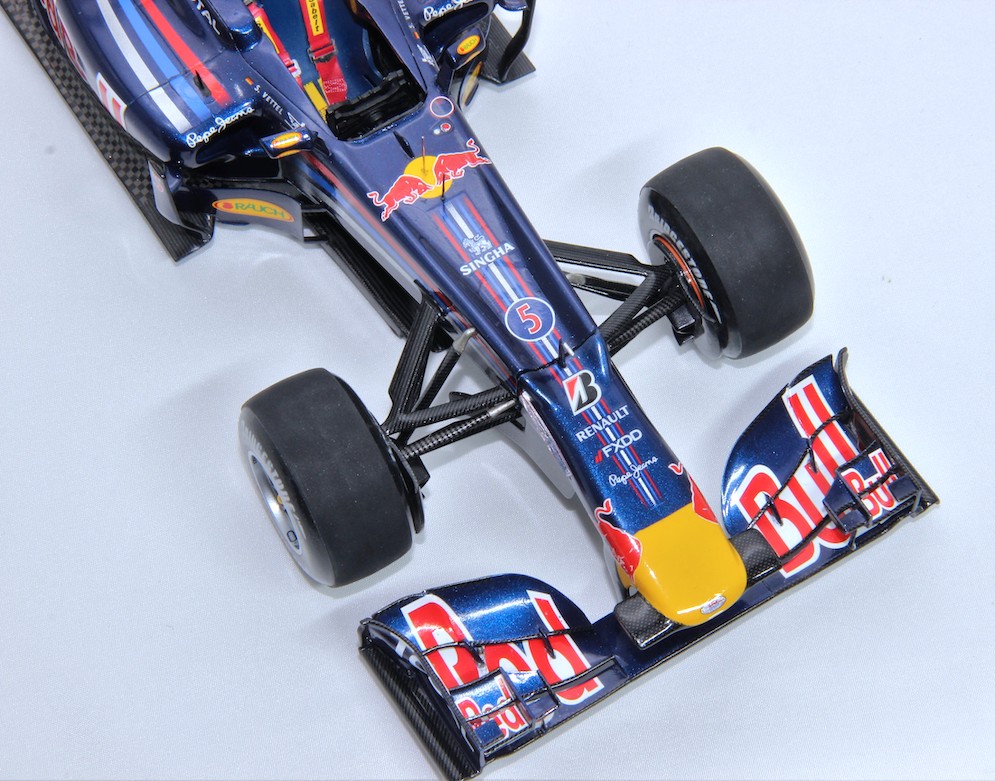
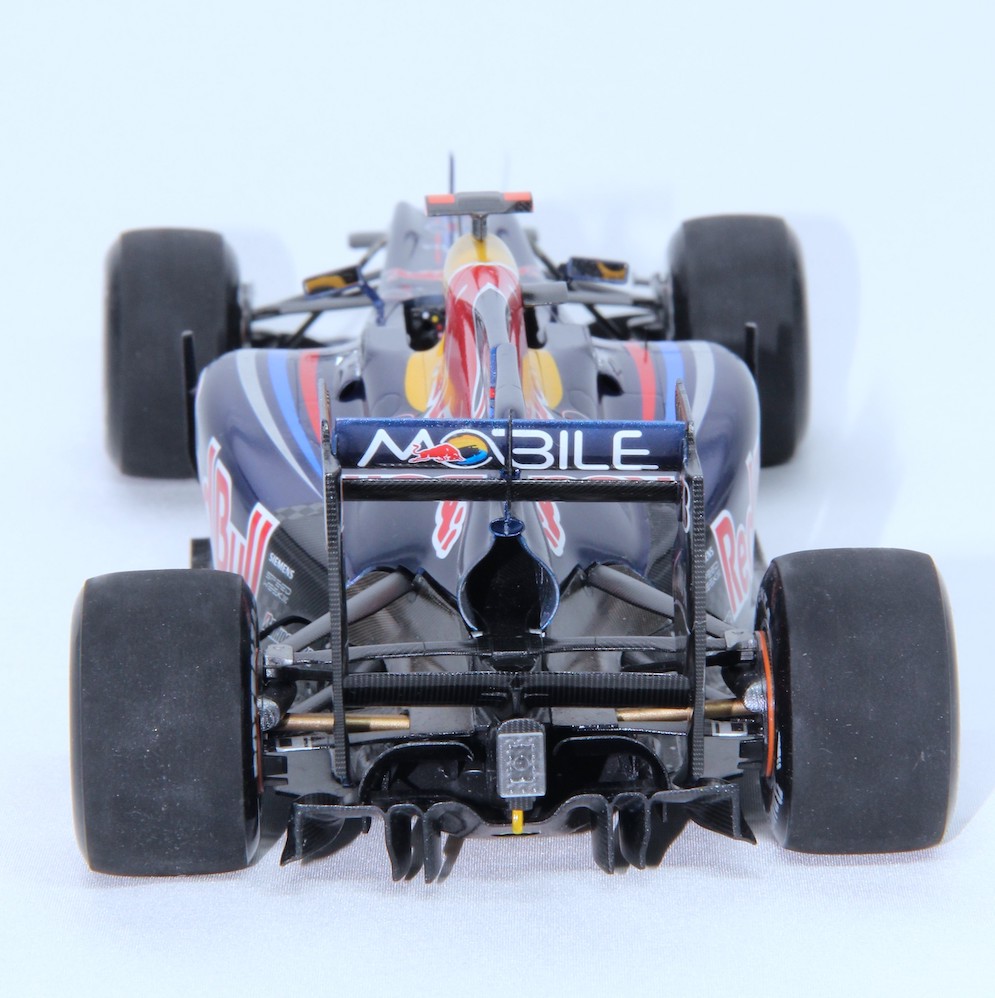
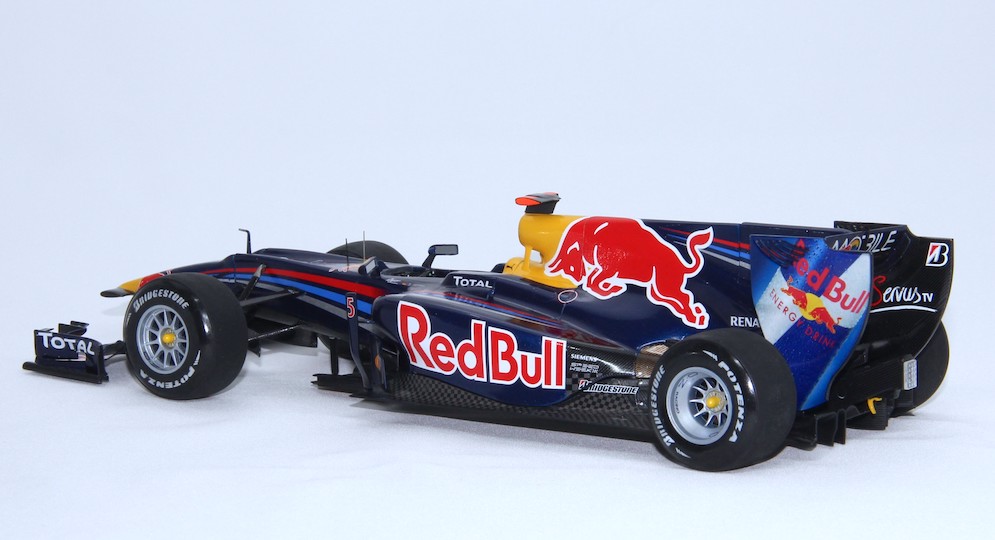
This is my Tamiya 1:20 scale model of Sebastian Vettel’s 2010 championship winning Renault RB6. At that time, Vettel became the youngest Formula 1 champion ever, overtaking McLaren’s Lewis Hamilton. The car was designed by the genius that is Adrian Newey and among the most notable features and innovations of this car was its blown, or exhaust driven diffuser. This device directed high-speed gasses from the low mounted exhaust to pass above the stepped diffuser to help generate a greater amount of downforce.
This kit was obtained in 2012 and then sat languishing in my loft until late last year when the retirement of Seb Vettel made me go and dig it out and have an attempt to build it as a tribute to the great German driver.
Being primarily an armour and aircraft builder this project was a bit of a challenge – more so by attempting to take it to another level using Studio 27’s carbon fibre decals. Also used were Zero’s colour matched paints.
The kit took about 5 months to complete with most of the time spent applying the 239 individual carbon fibre decals and in addition, the kits further 111 decals! The body paint work was clear- coated with 4 individual applications of Mr Color UV cut gloss thinned with their levelling thinner in a 60 : 40 ratio of levelling thinner to gloss varnish. This was then rubbed down with sanding pads and water starting with 400 grade, then 600, 800 and then finally 1200. A shine was then achieved using Tamiya’s Polishing Course, Fine and Finish compounds, applied with their own rubber applicators. A final application of Tamiya’s modelling wax applied with a soft cloth helped to both enhance and protect the shiny gloss finish.
Mark R.
Fun build!
Cheers


1:16 scale
The model is about a foot long!
Lou C.
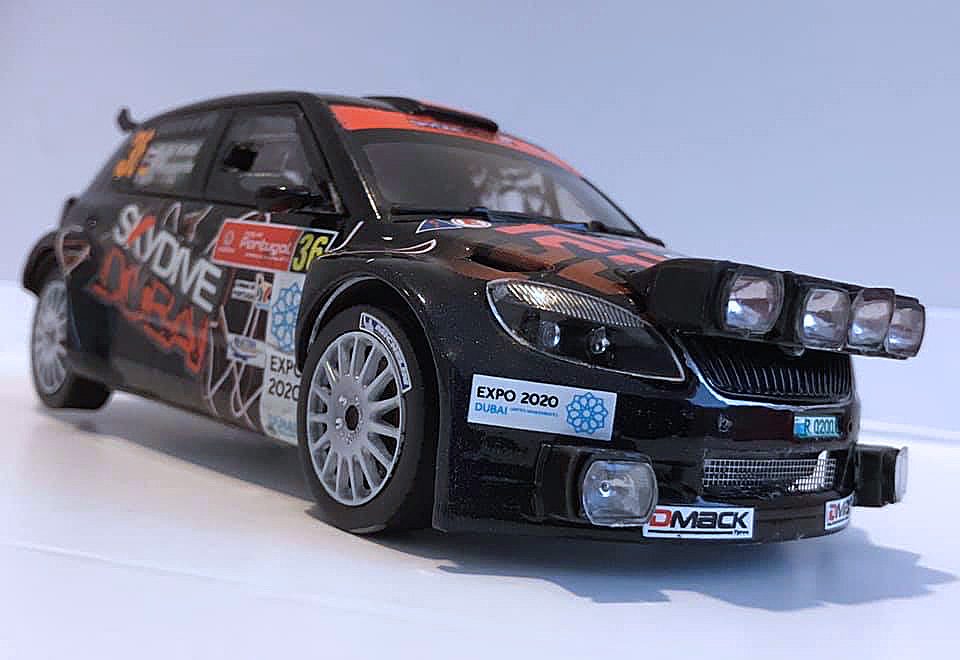
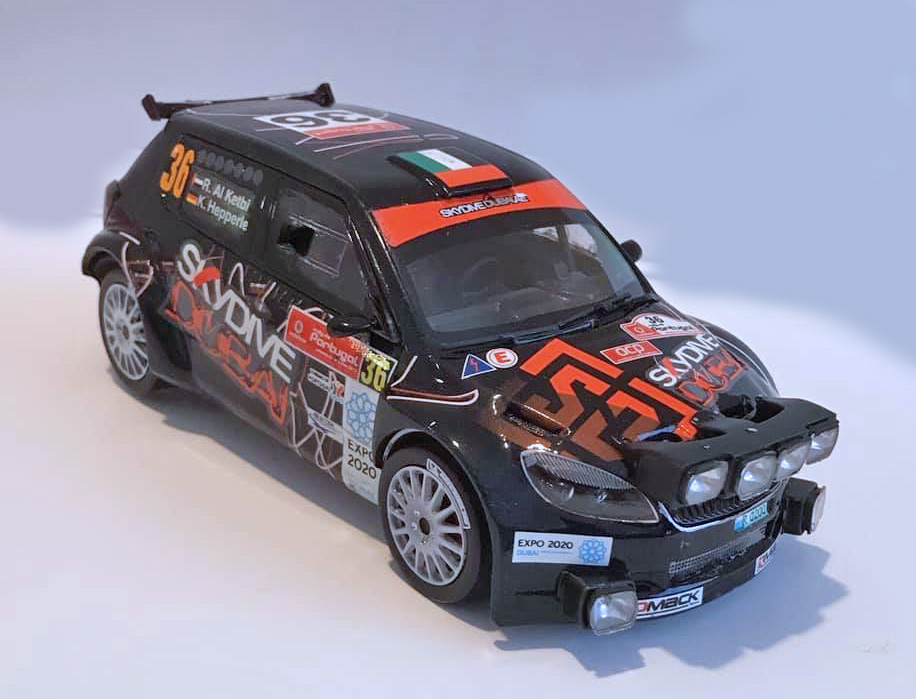
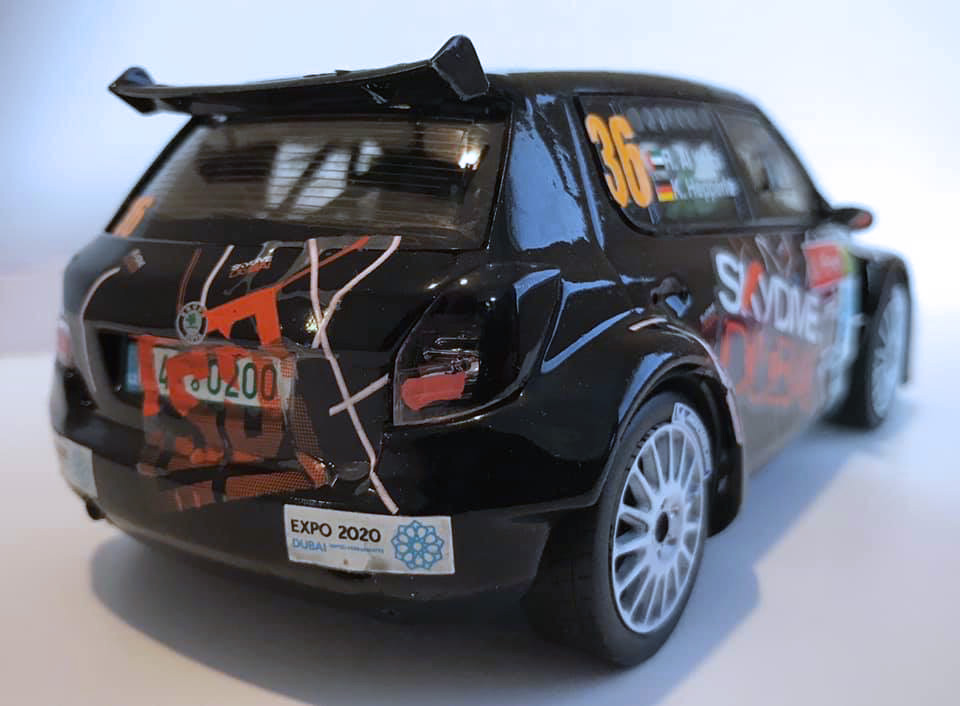
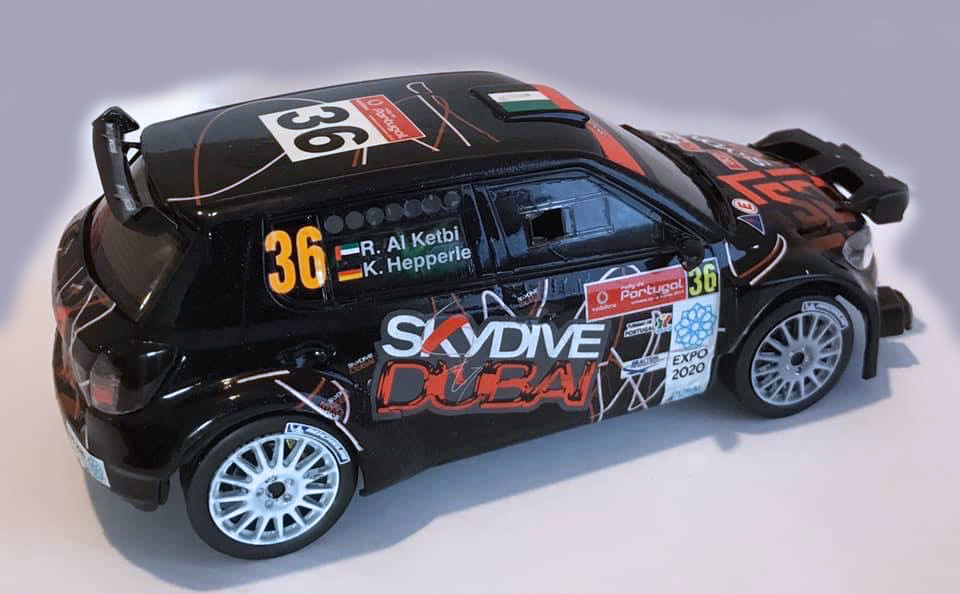
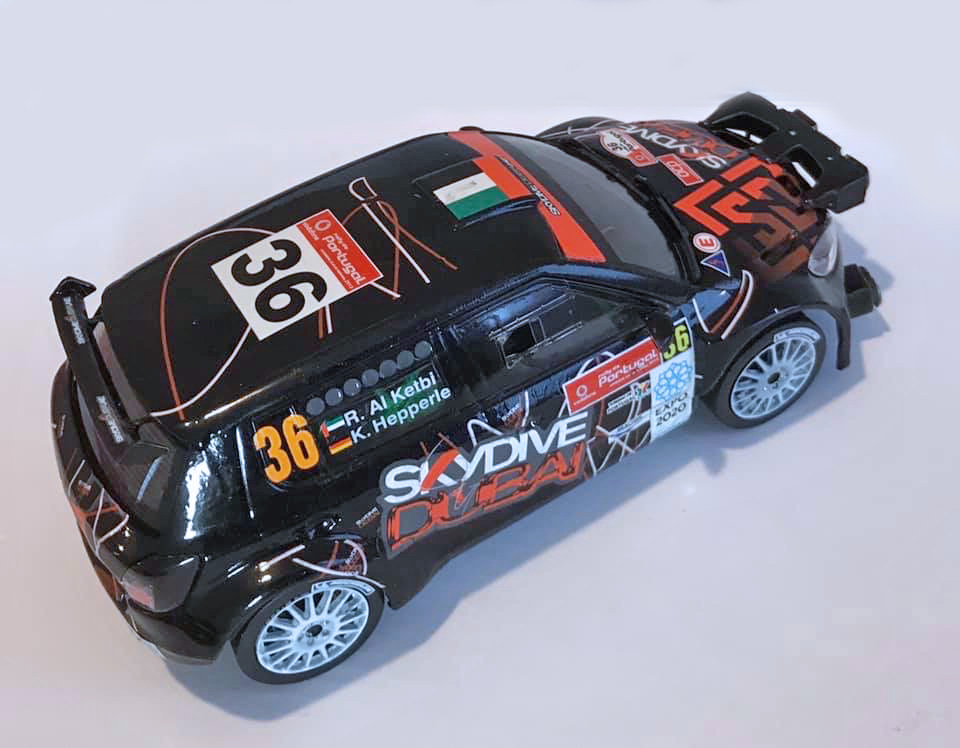
This is my first ever car kit. Belkits 1:24 Skoda Fabia S2000. All painted with Bartsharp 186 airbrush.
Les V.
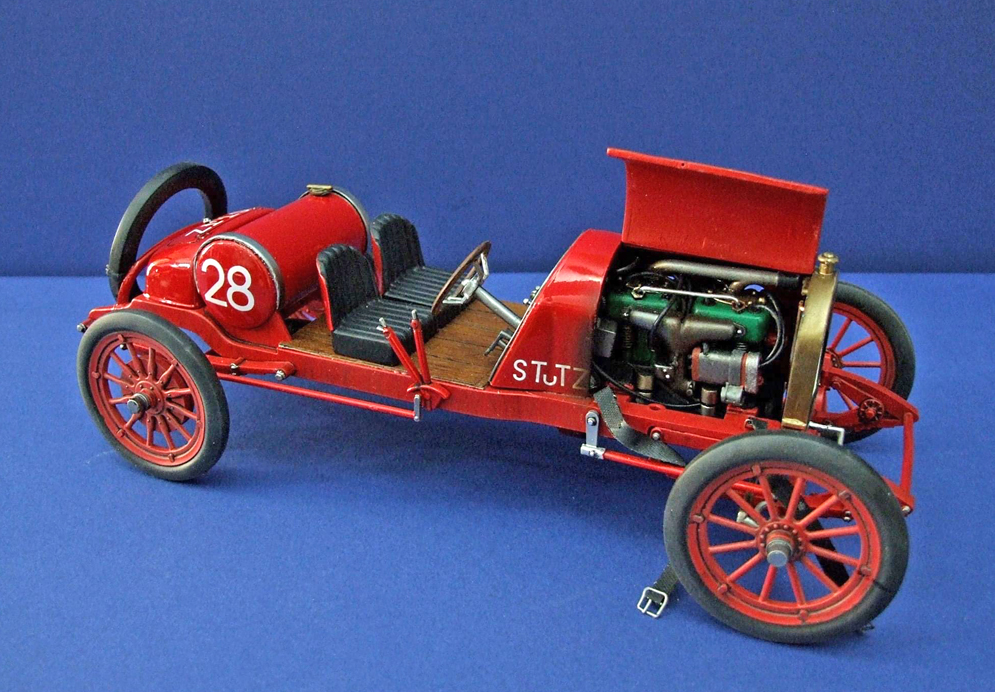

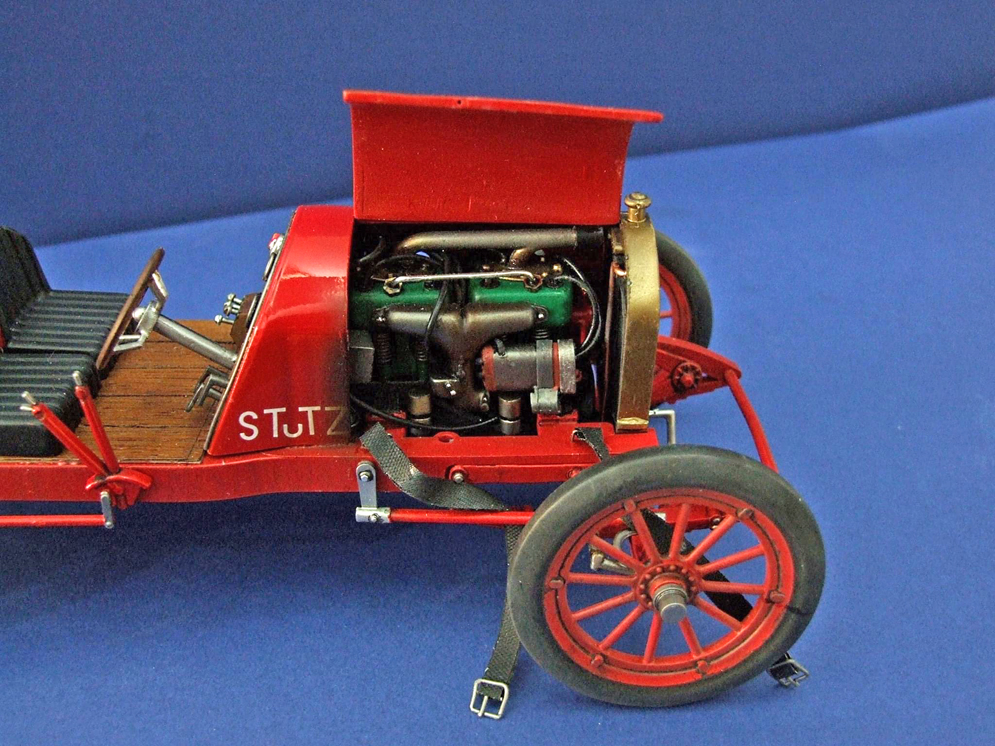
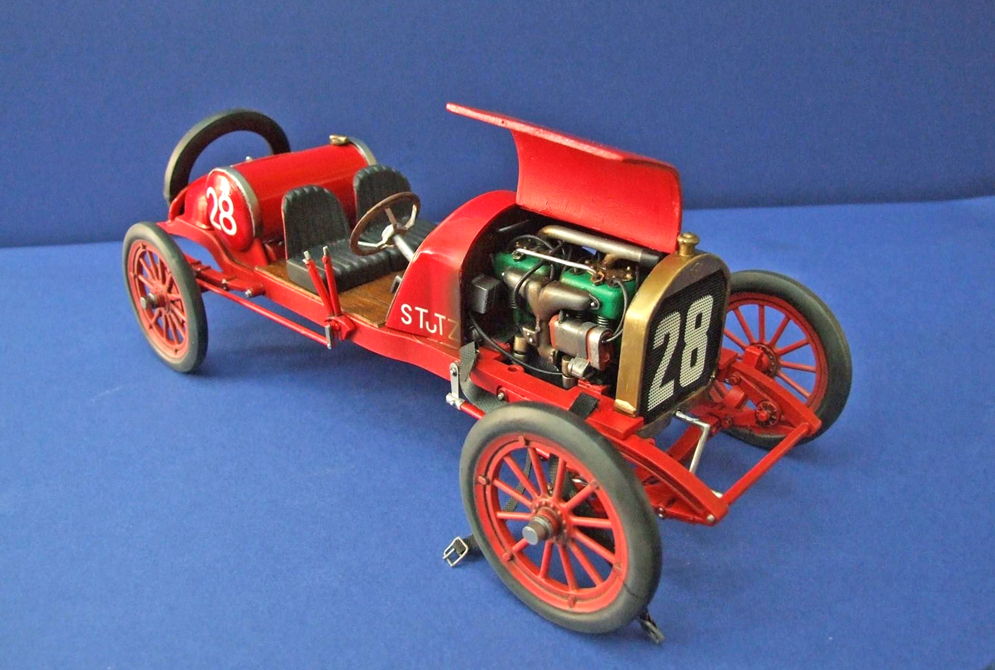

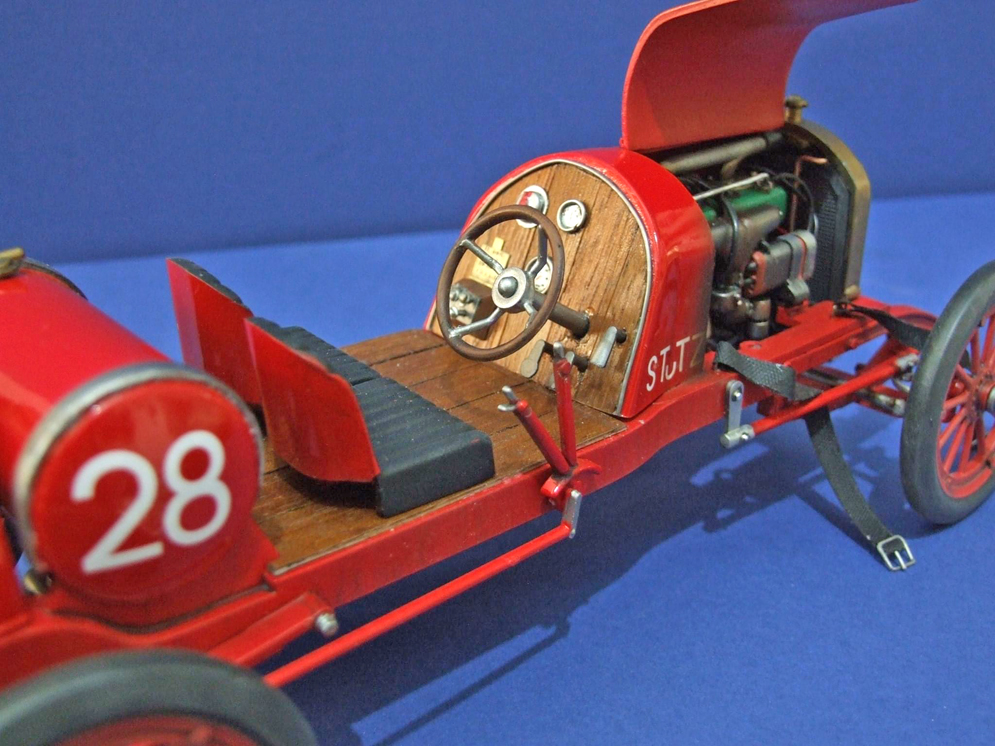
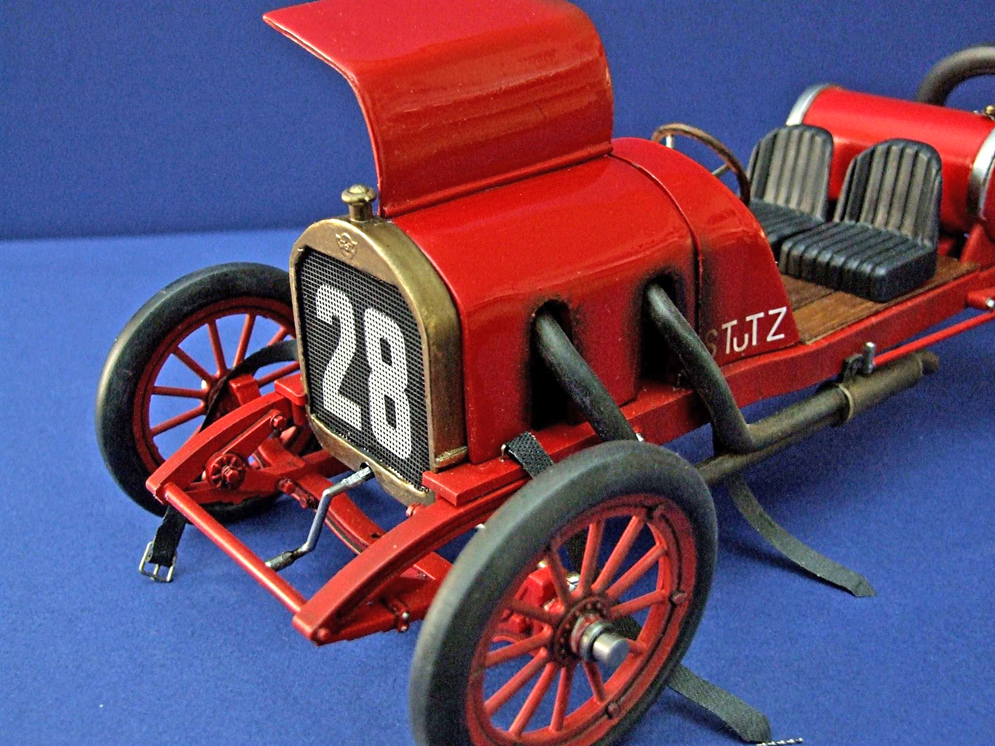
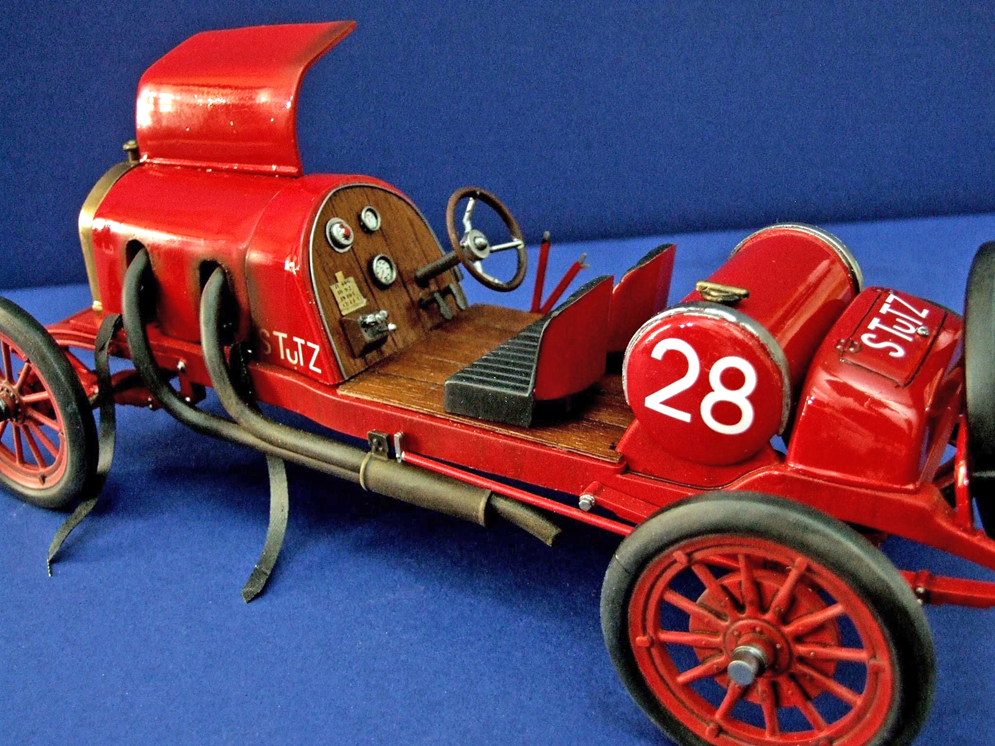
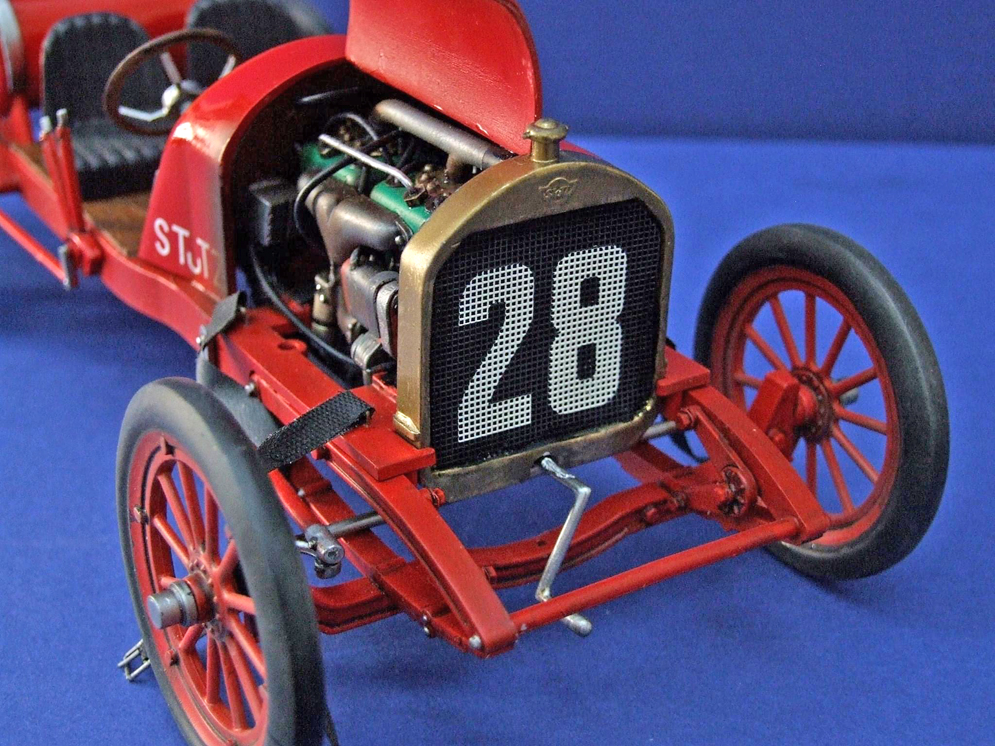
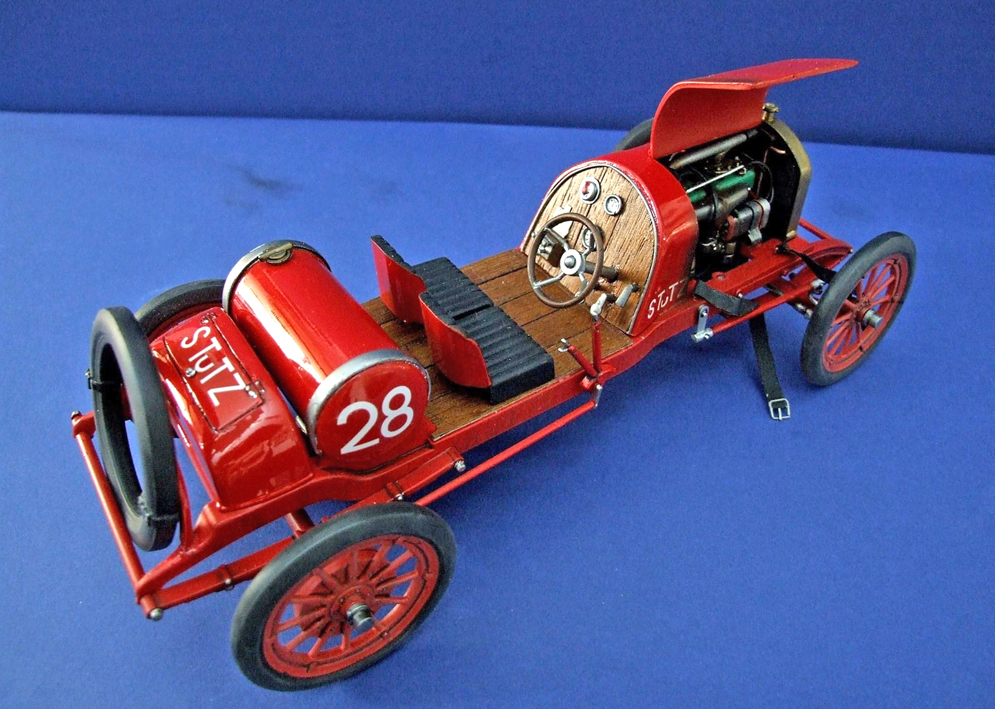
I have just finished this model of a Stutz 1914.
It is about 10 inches long and is in scale 1:16.
Lou C.
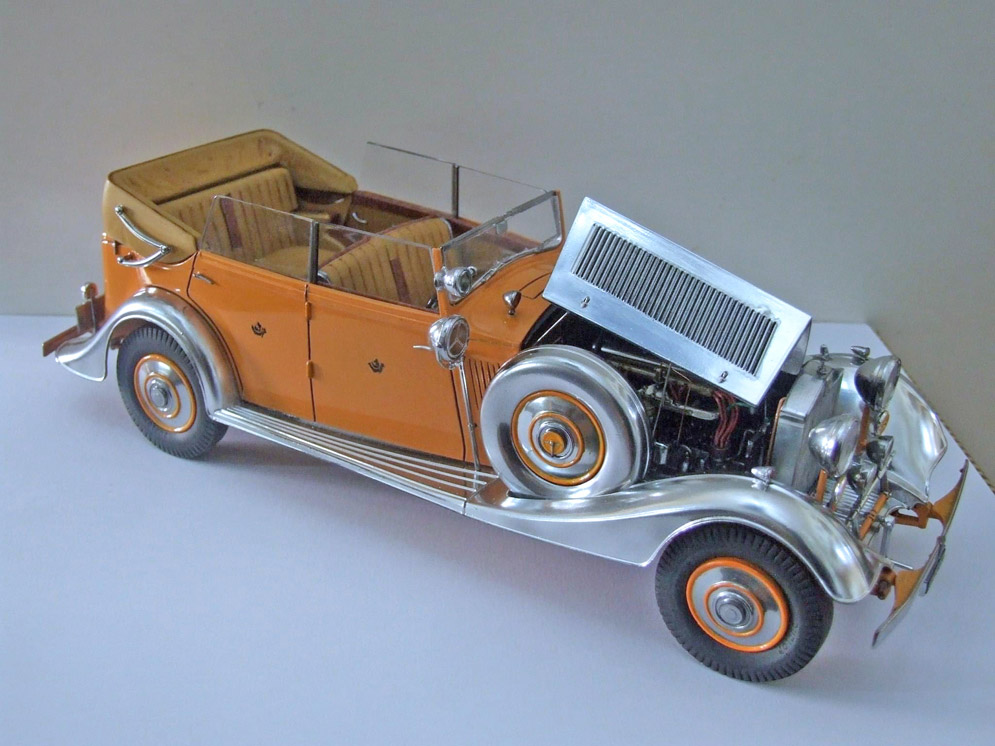
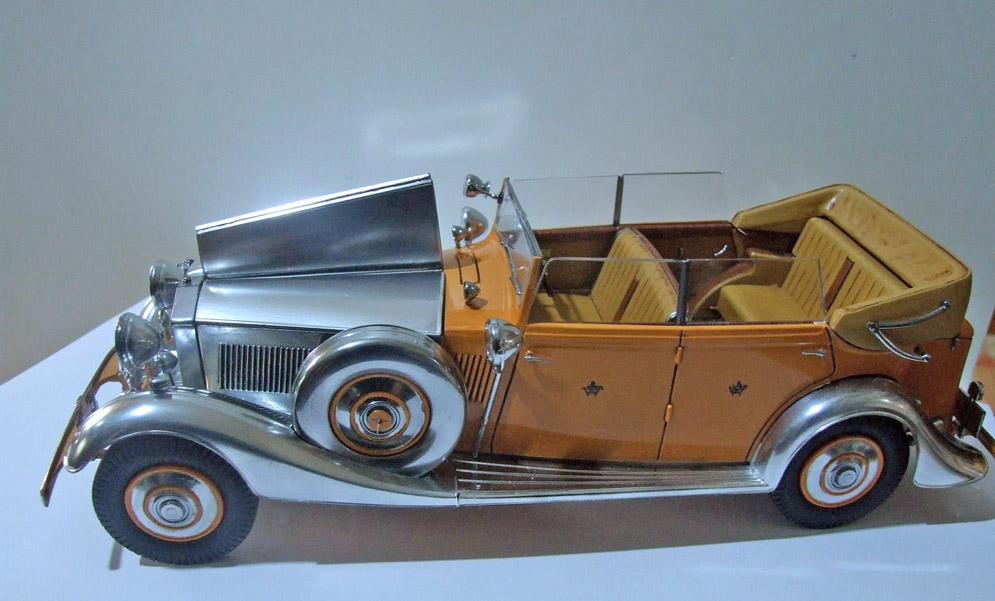
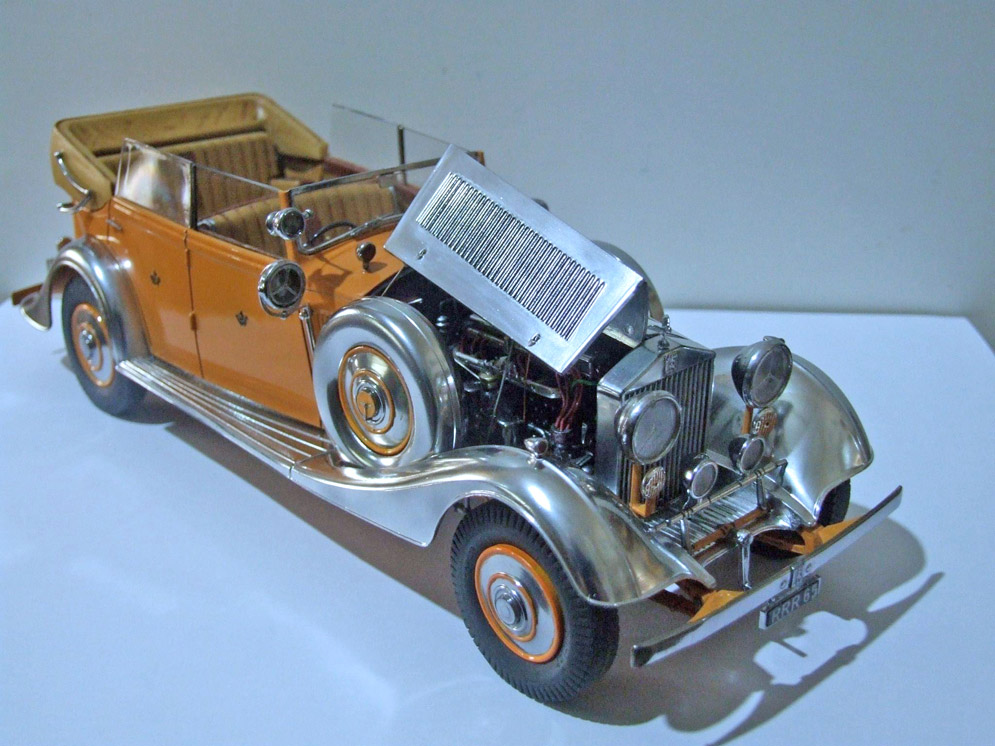
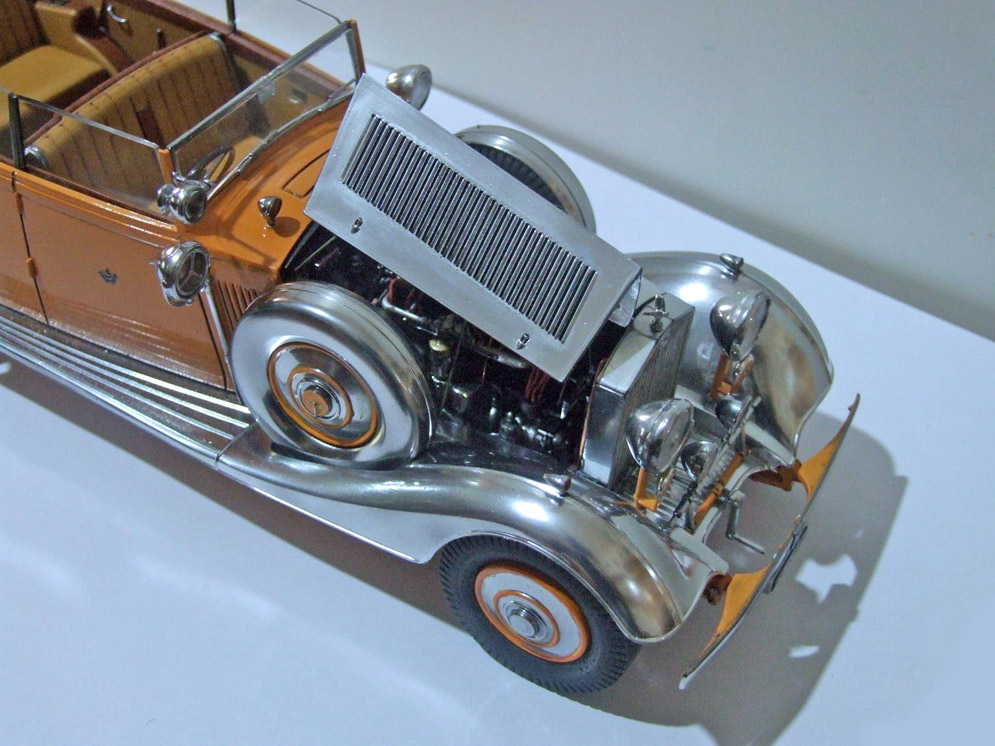
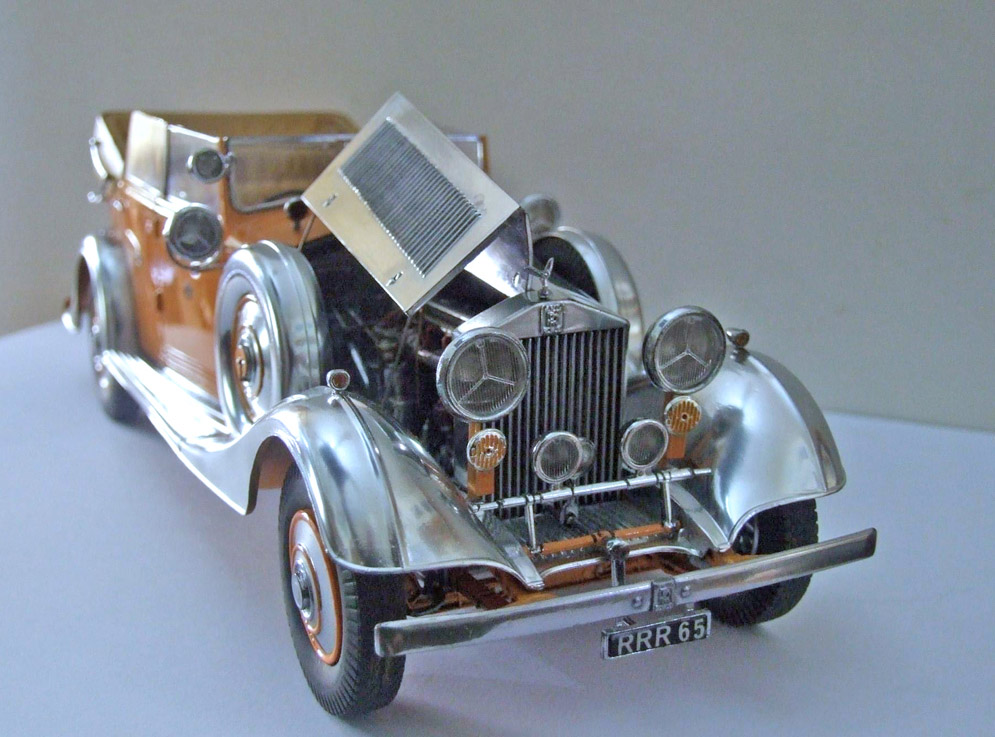
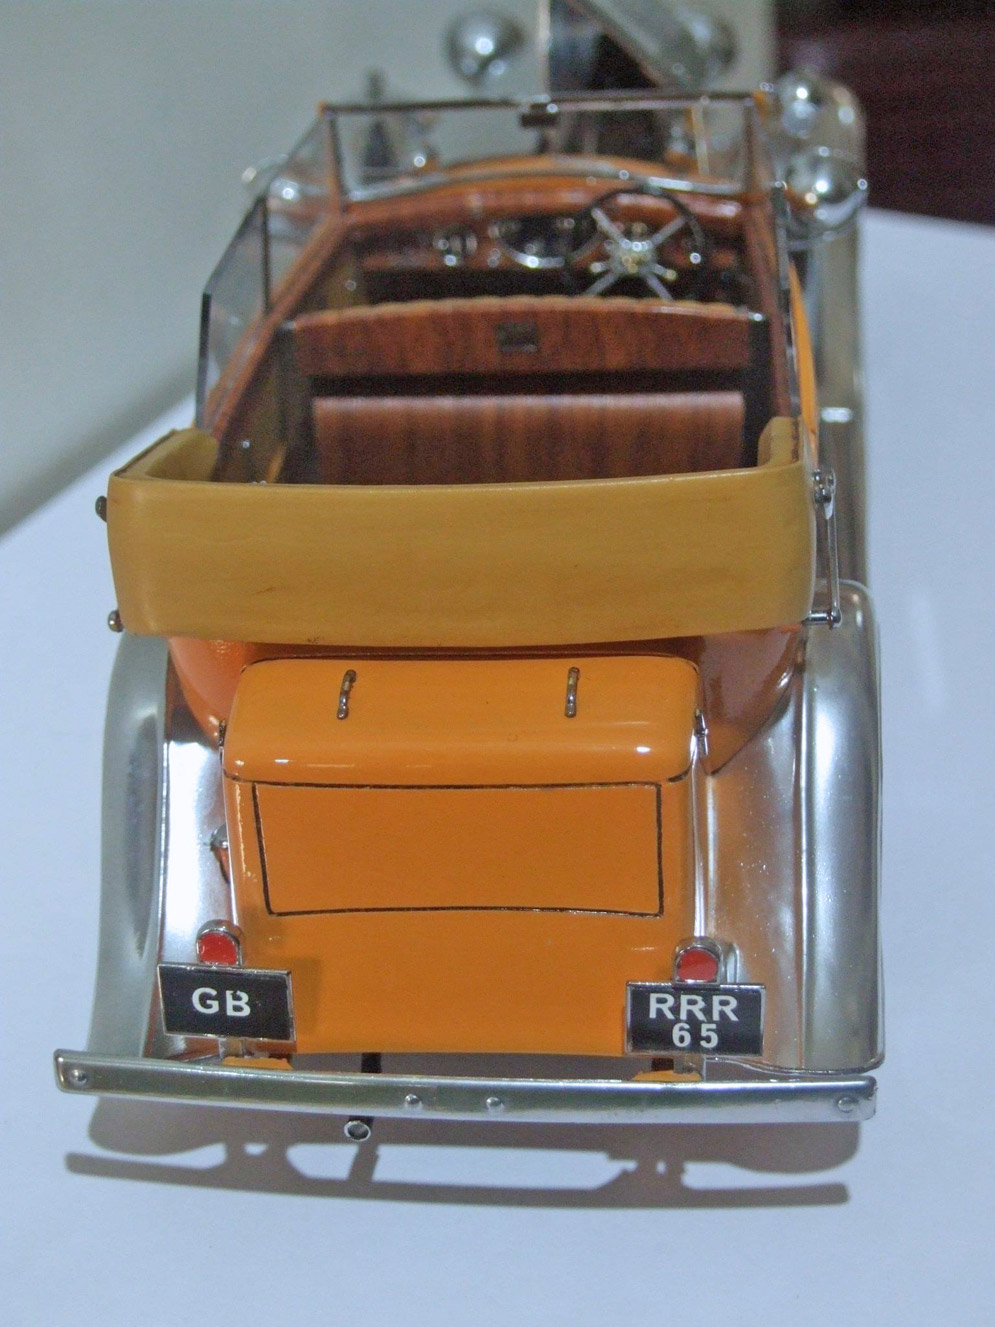
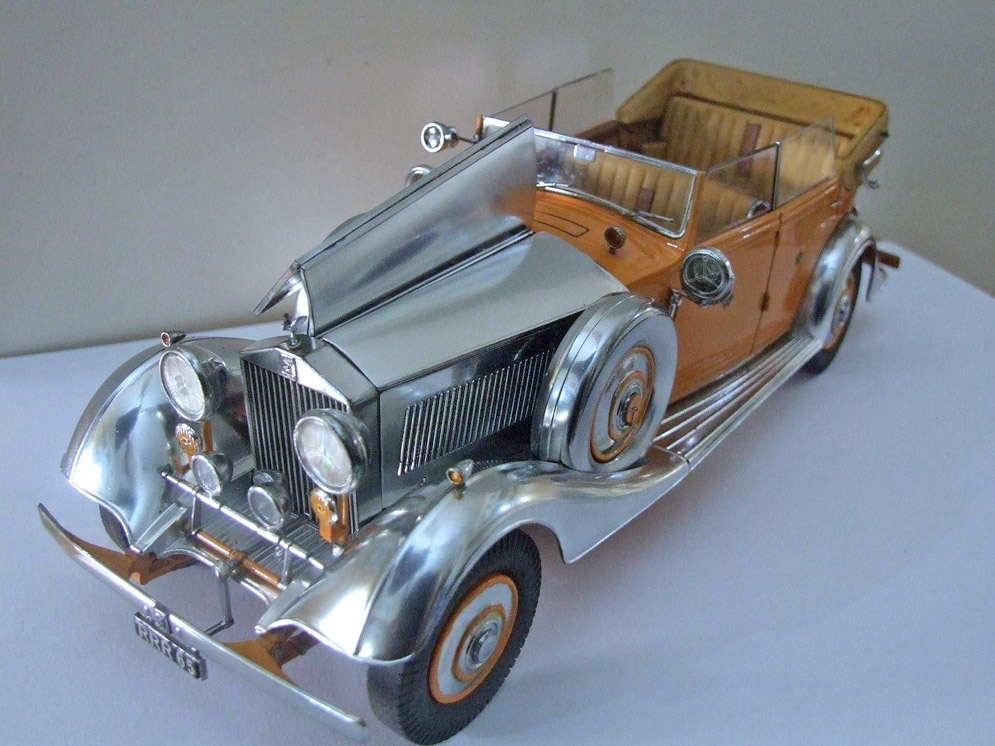
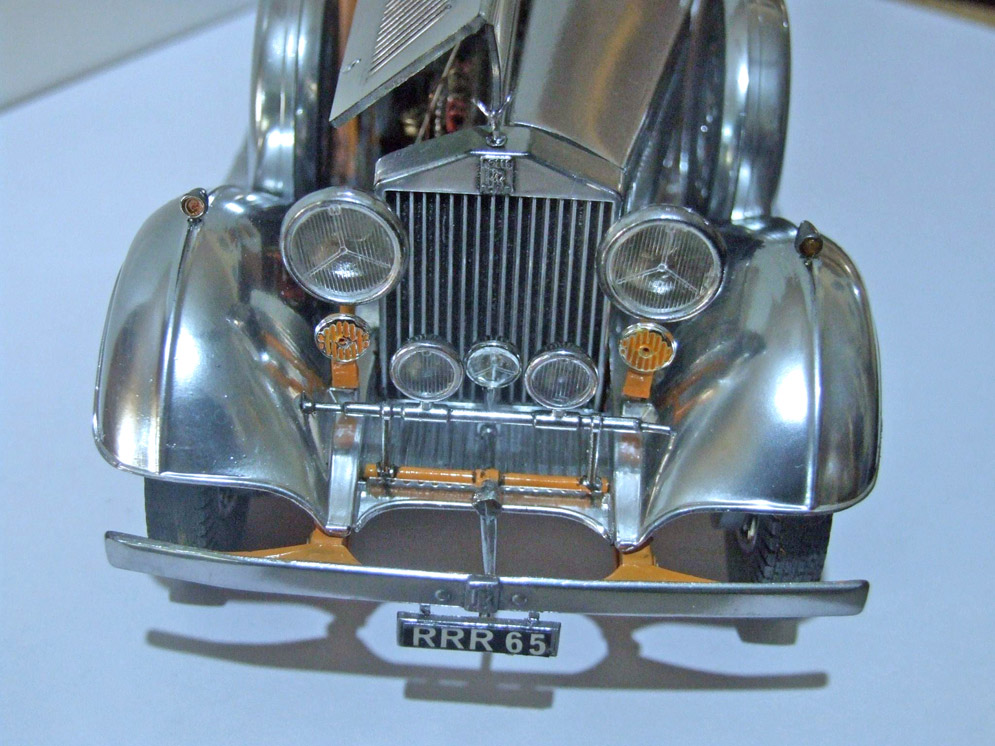
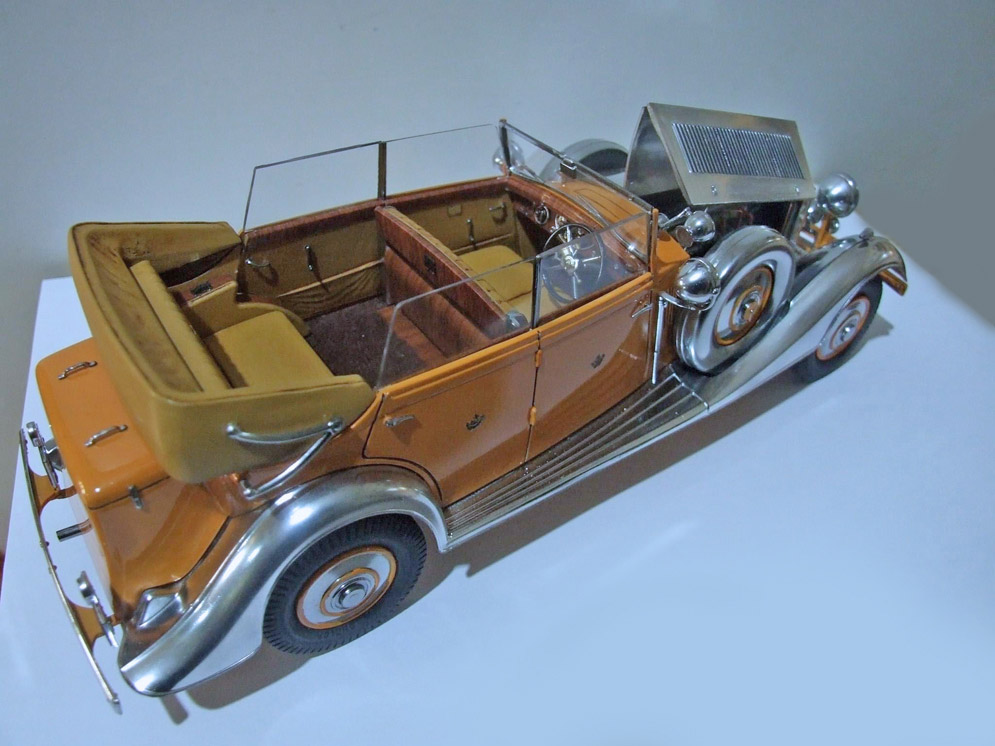

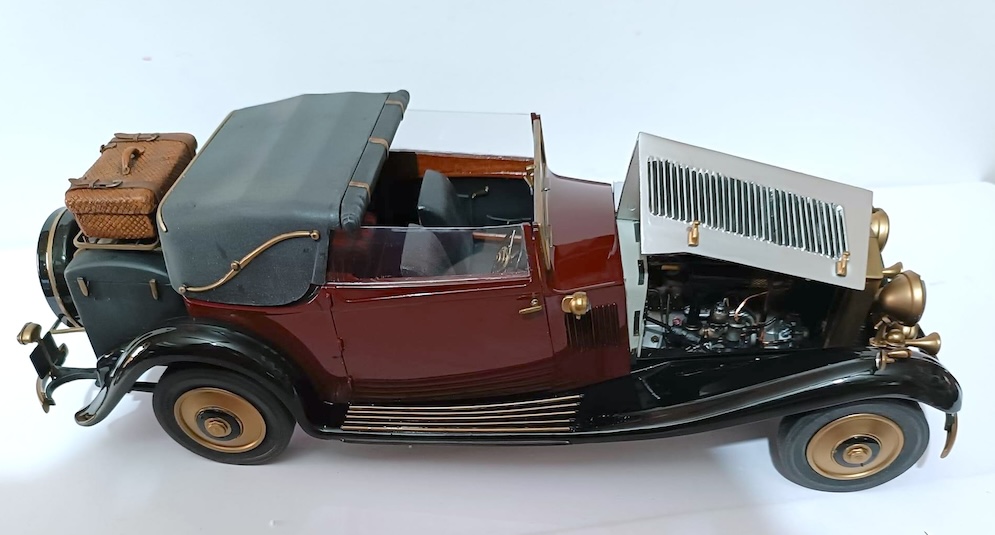
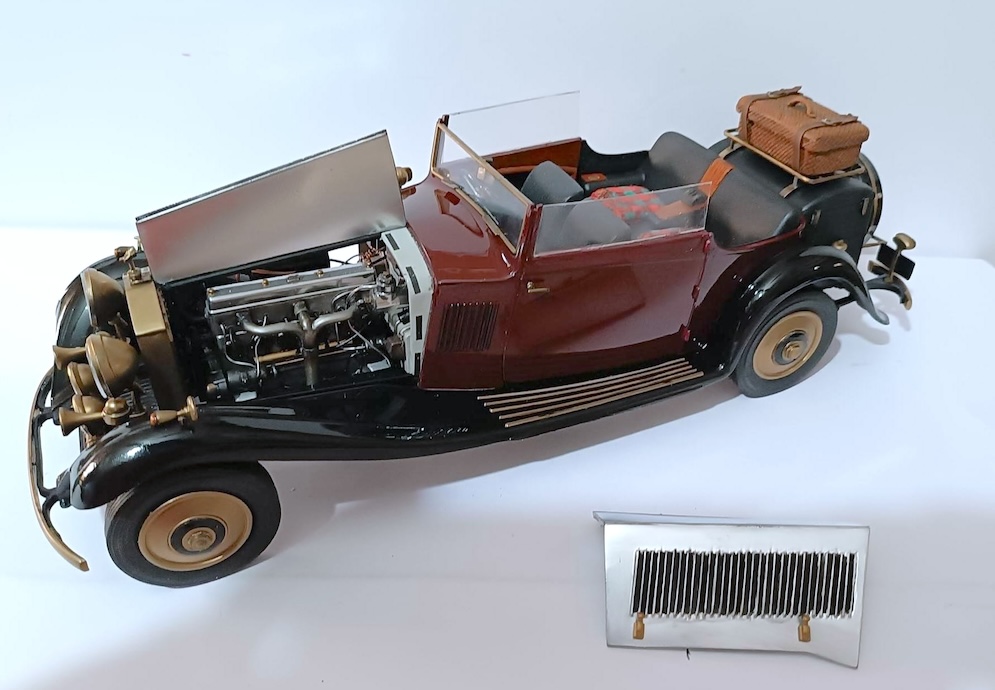
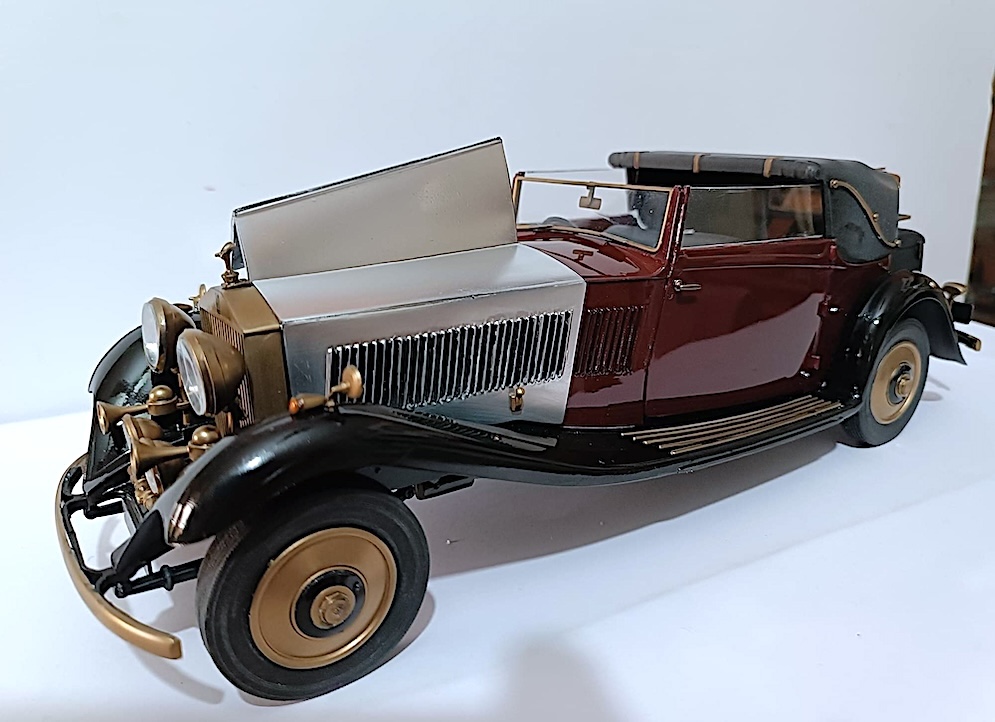
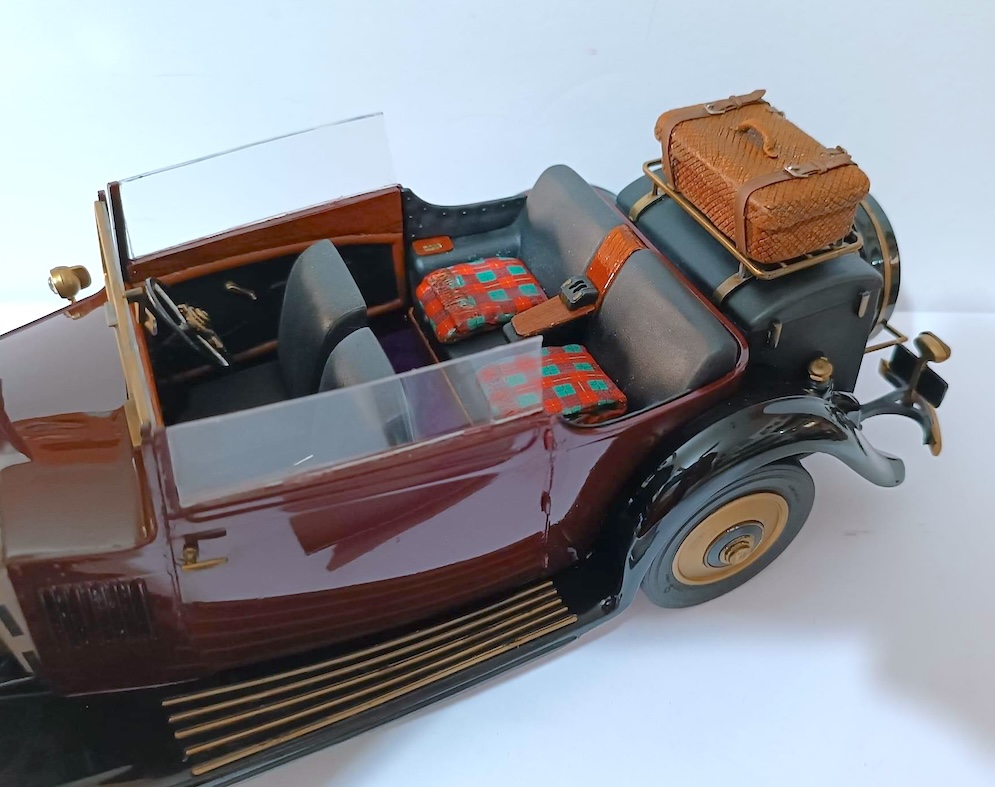
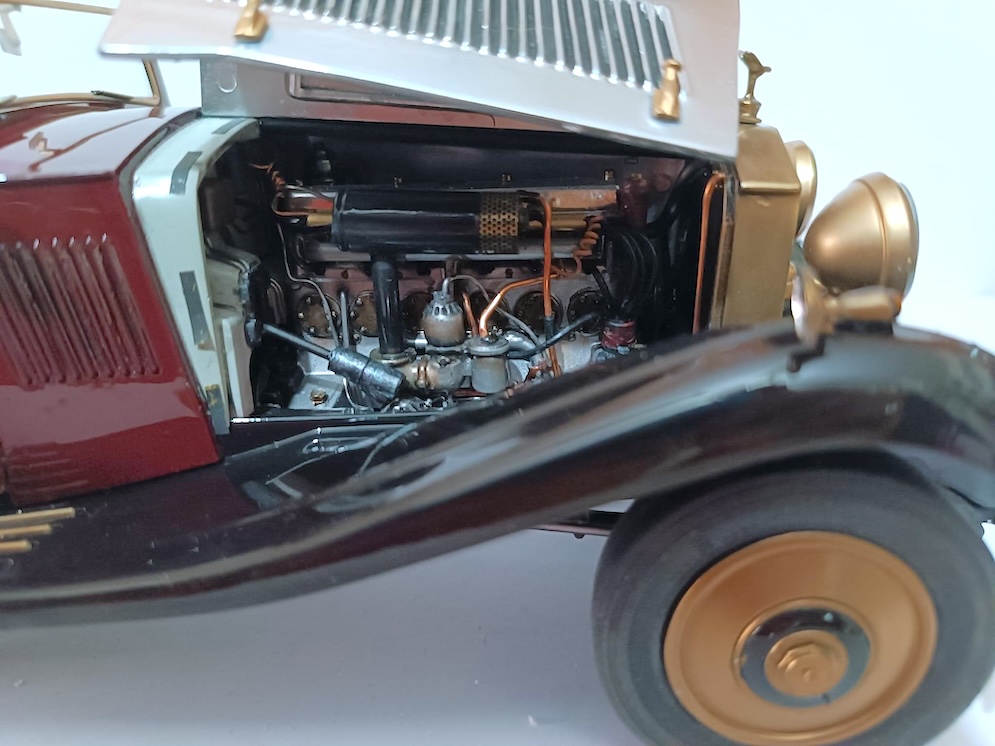
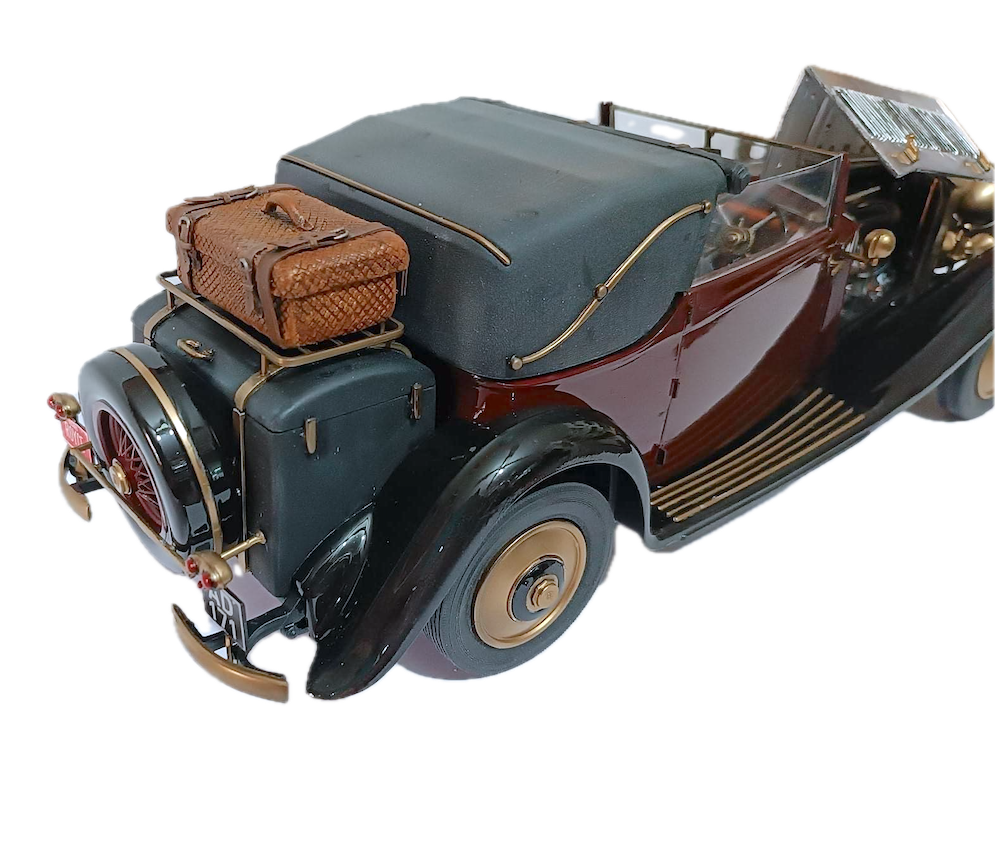
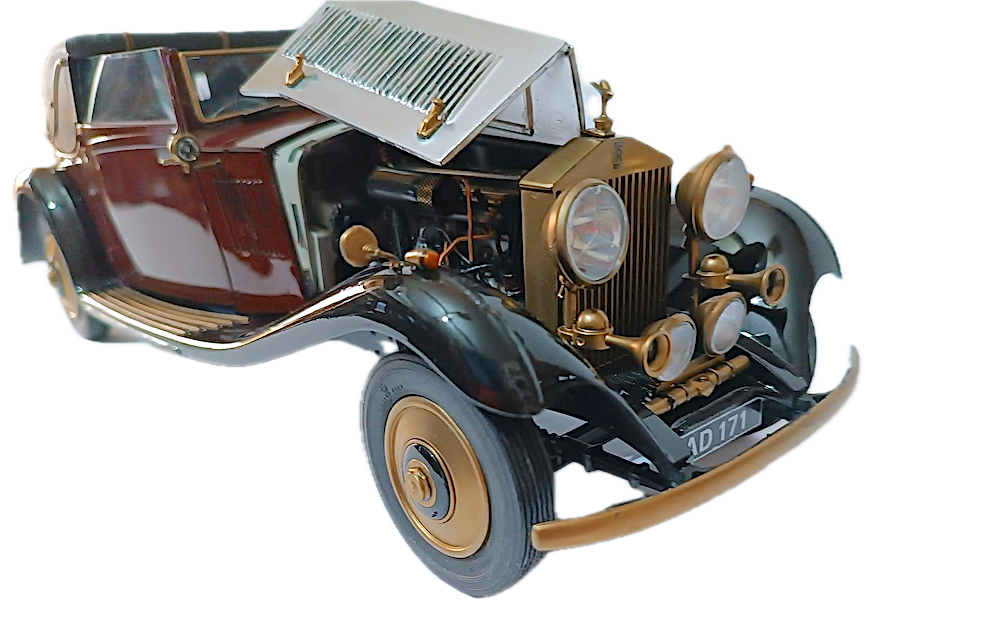
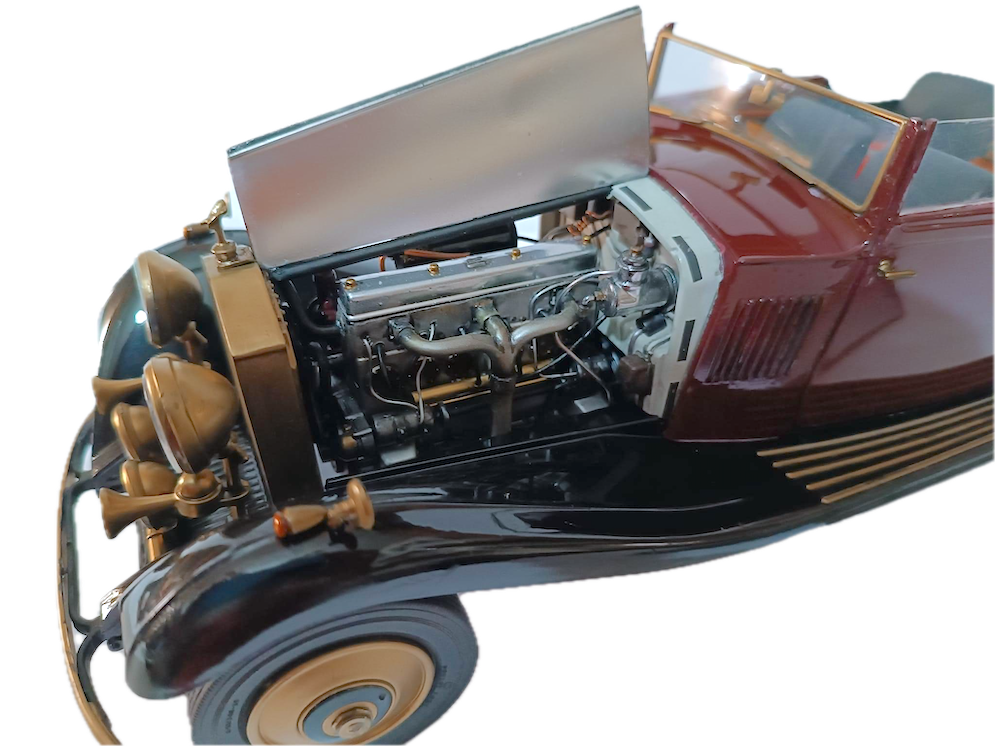
And here’s another model I just finished in time for our Expo… “The Star of India” Rolls Royce Phantom II .1934
The model is 1:24 Scale – about 8 inches long. To get the metallic areas: Black undercoat …polished aluminium metallics and hand polishing…which took ages.
Lou C.
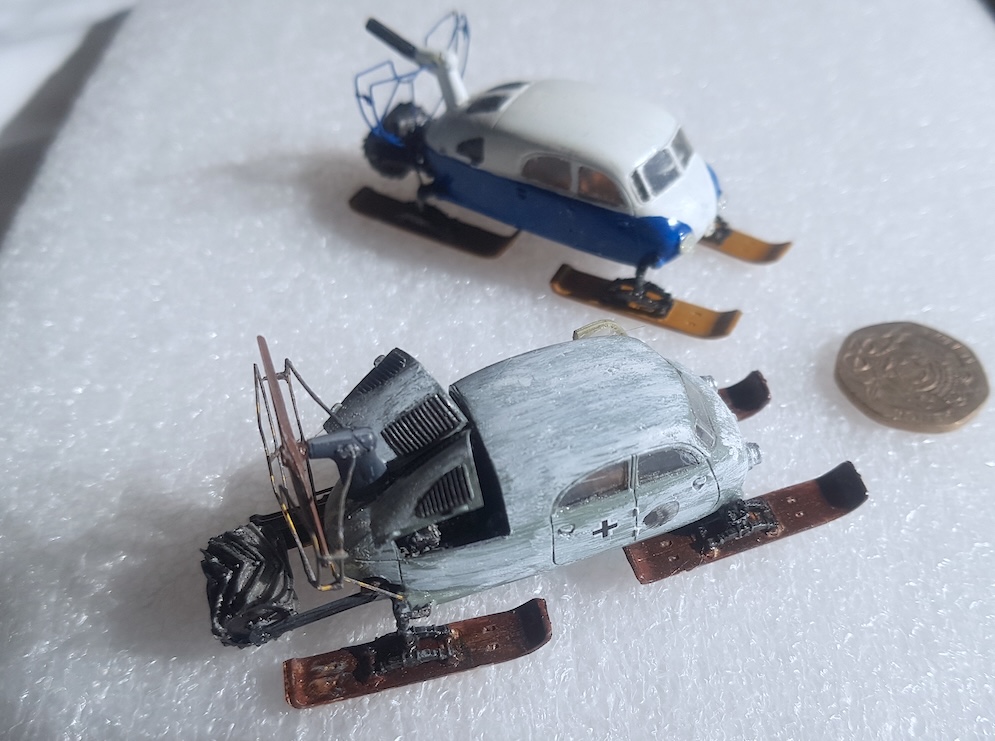
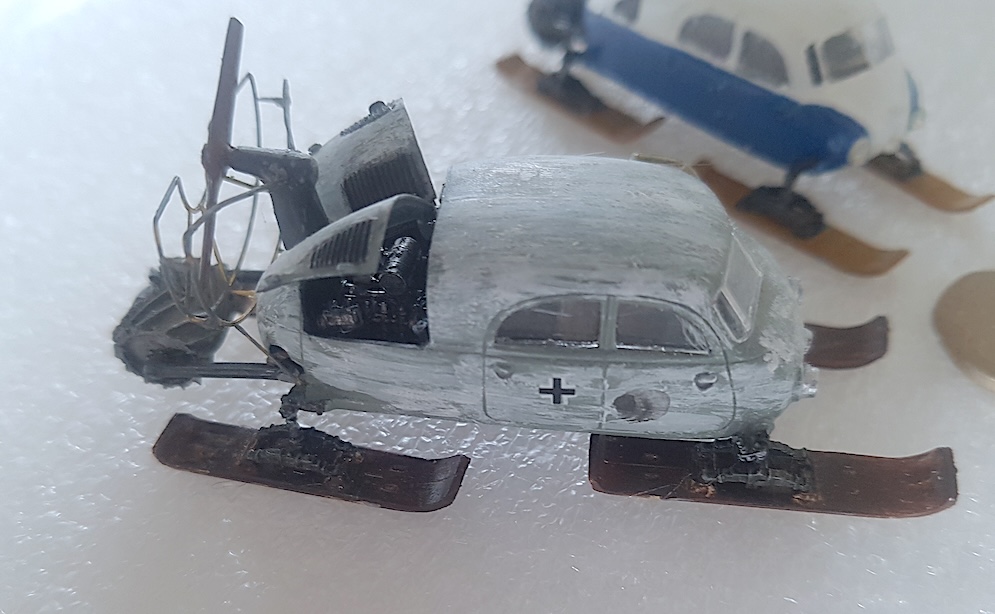

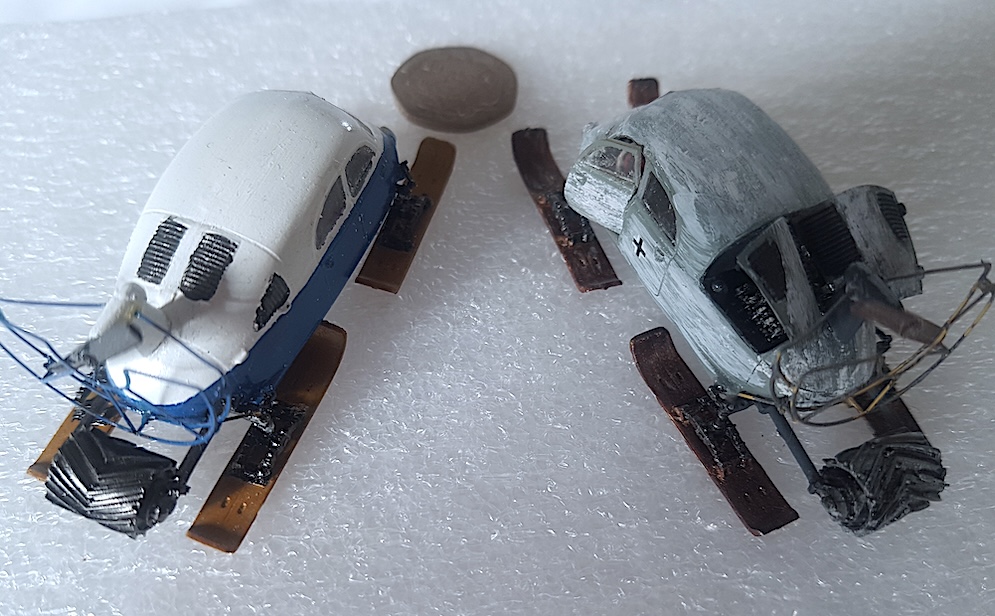
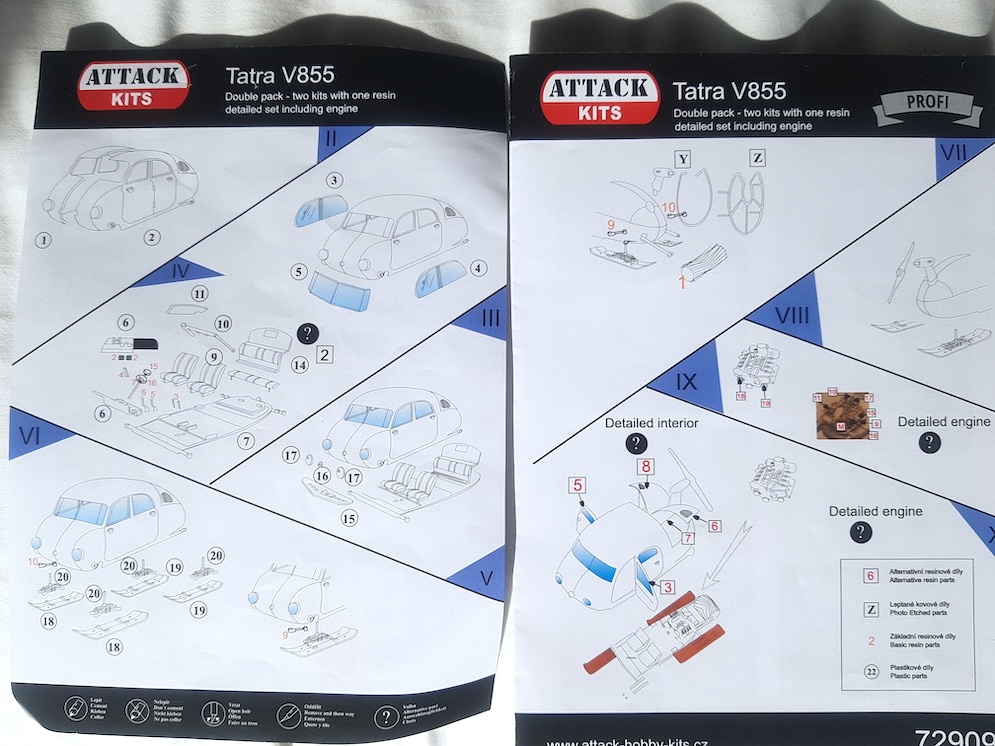
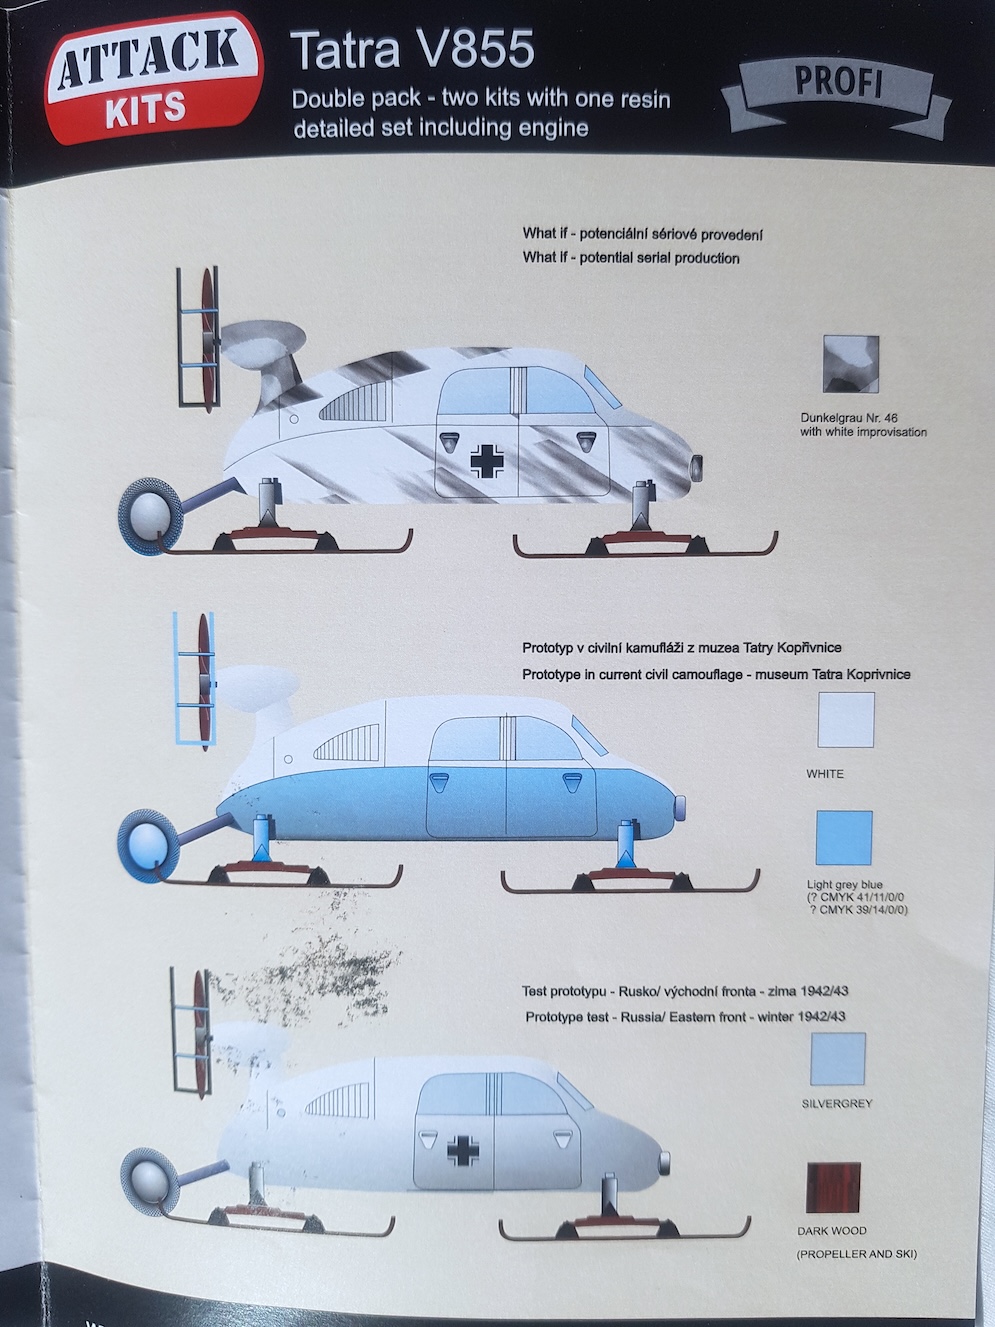
Kit bought as an impulse buy at SMW 2019 for £10. Kit contains 2 complete kits with photo etch for both kits and a set of resin parts for one including detailed engine, doors, interior etc.
This is a limited run kit; the plastic is thick and required care in mating sections. The instructions were very vague, just exploded diagrams so lots of testing of parts was required. However, they build up into really nice models. Etched parts make up the propeller protections and are quite hard brass so need annealing. The interior is detailed for both, the resin just adds some detail to this. If you have the doors open using the resin parts, then care has to be taken in cutting out the sections from the body. The engine is excellent but needs a lot of fettling to fit and puzzling over where parts fit and then once the engine doors are fitted you cannot see much anyway! The skis were painted using wood painting technique for biplanes, acrylic base with oils on top. The real difficulty is the join of the ski to the body is so small so lots of patience is needed.
Overall though an enjoyable build of a very unusual vehicle, and yes they are very small kits.
Only one V885 was completed, it still exists in a museum in Prague and a working replica has been made in the USA. The v855 used the body of a Tatra car and its engine. Steering was by the skis and breaking by the front skis toeing in and the rear drum, which was also used for traction. Top speed was around 50mph and in theory could go sideways!
Stephen B.
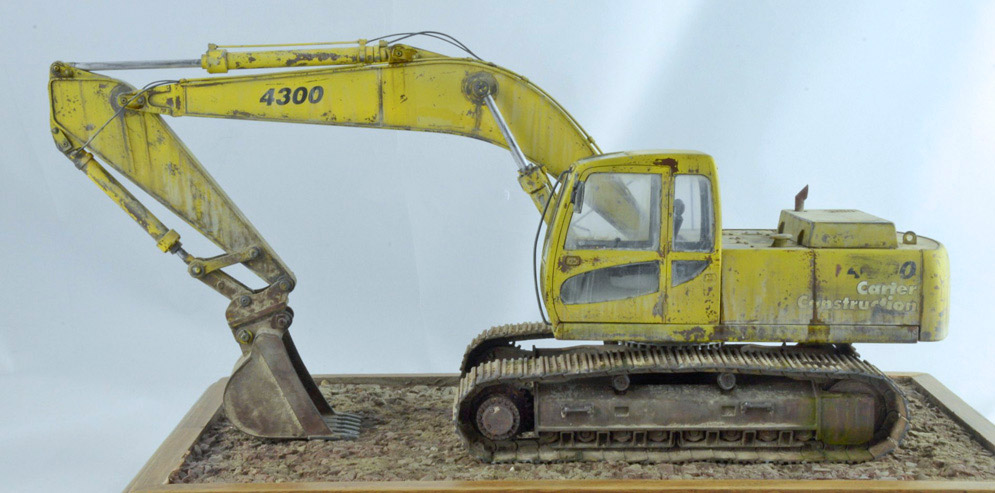

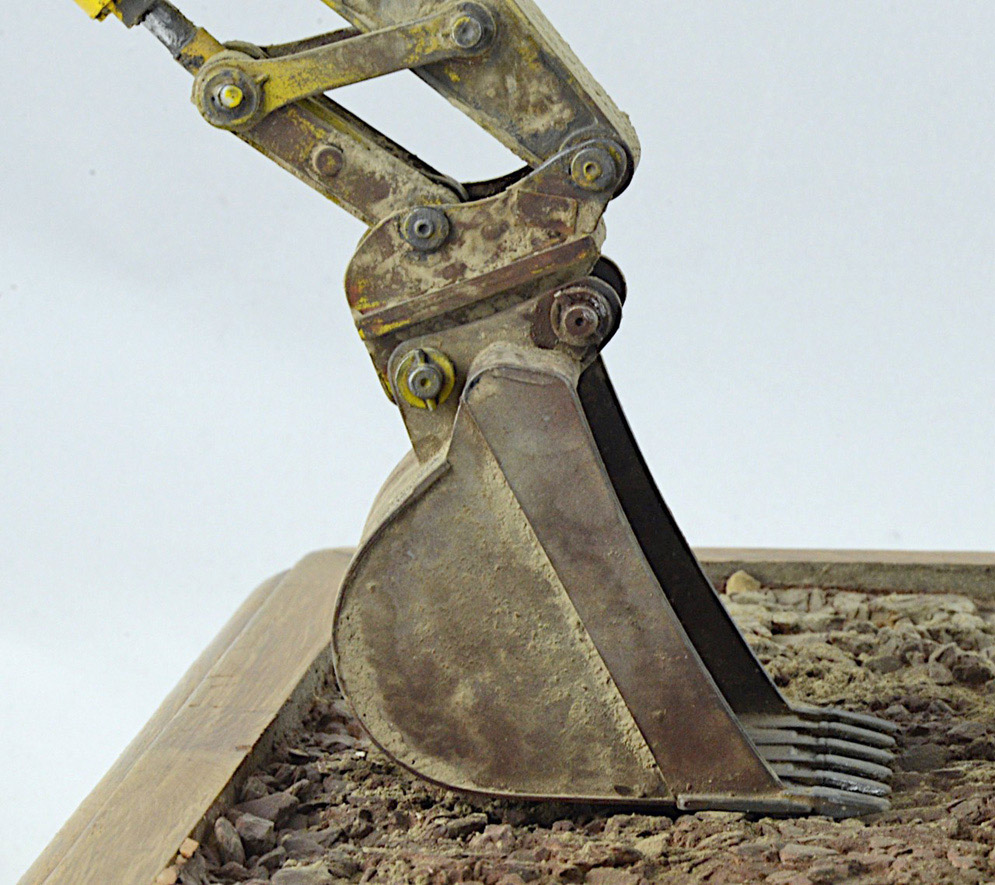

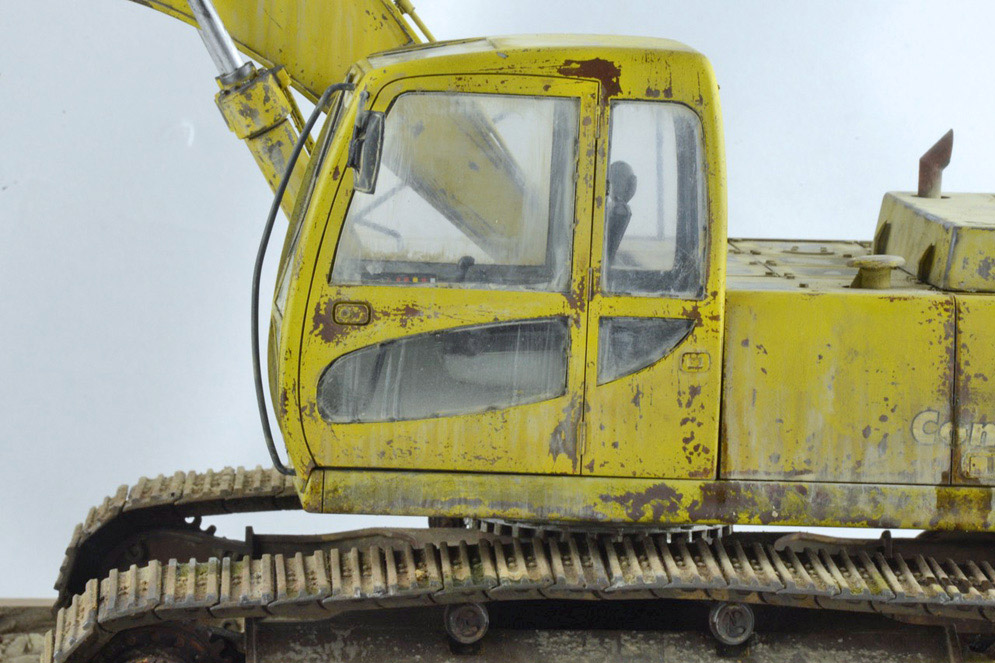
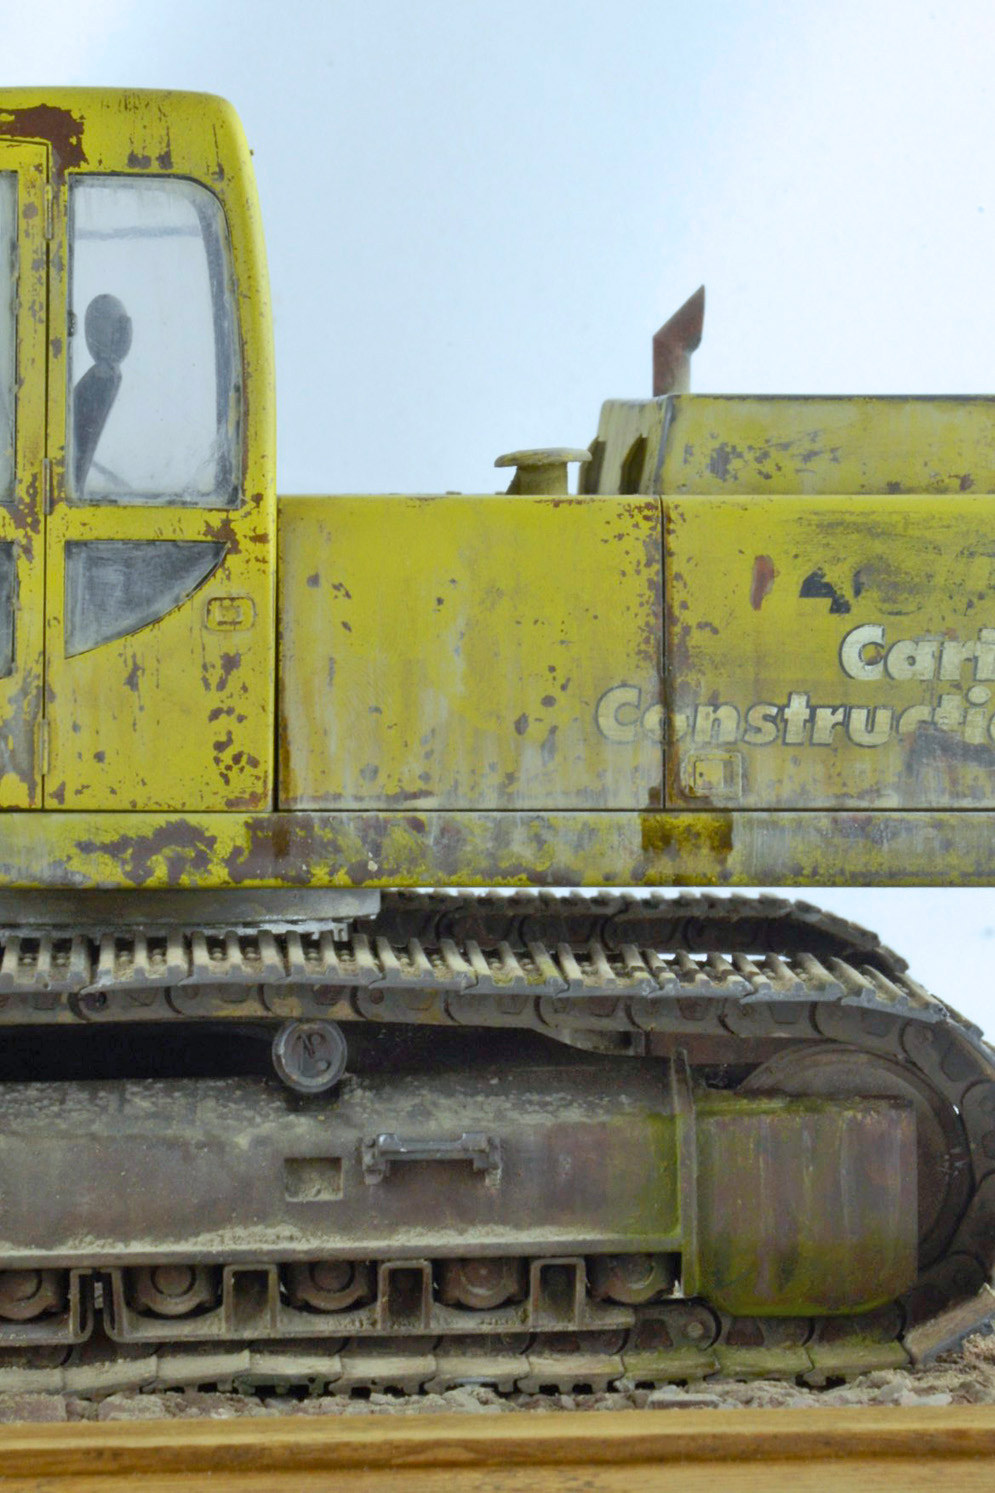
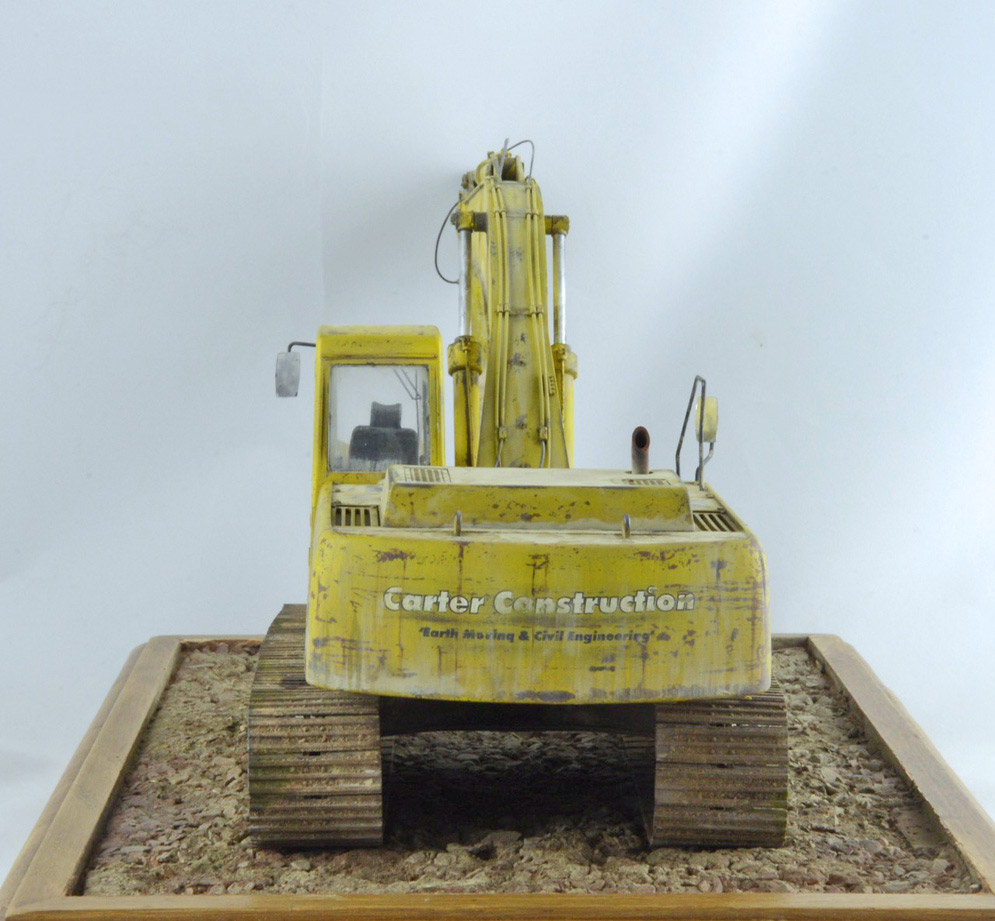
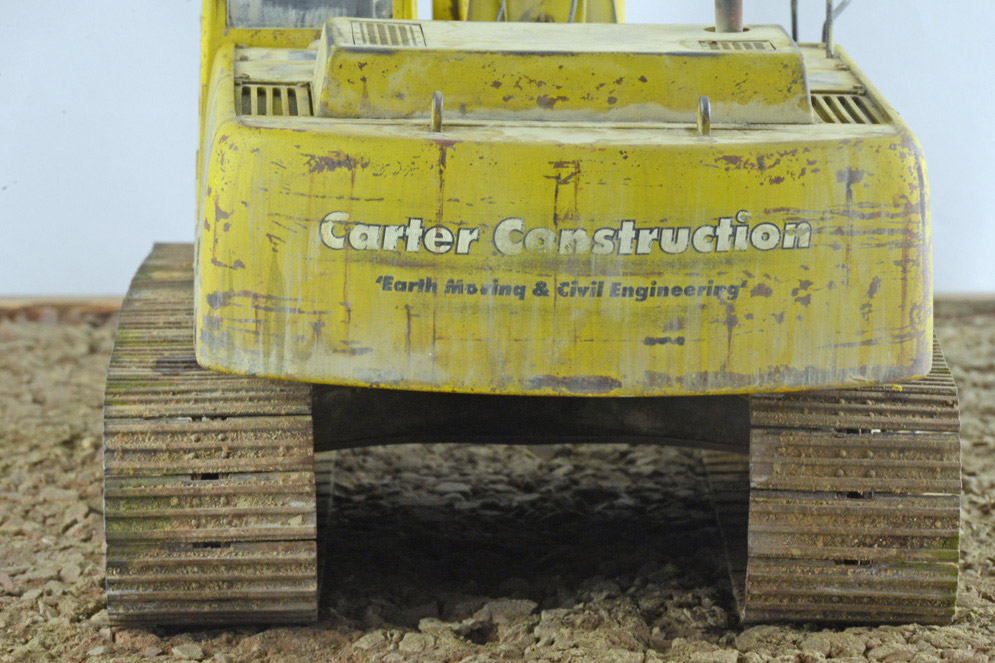

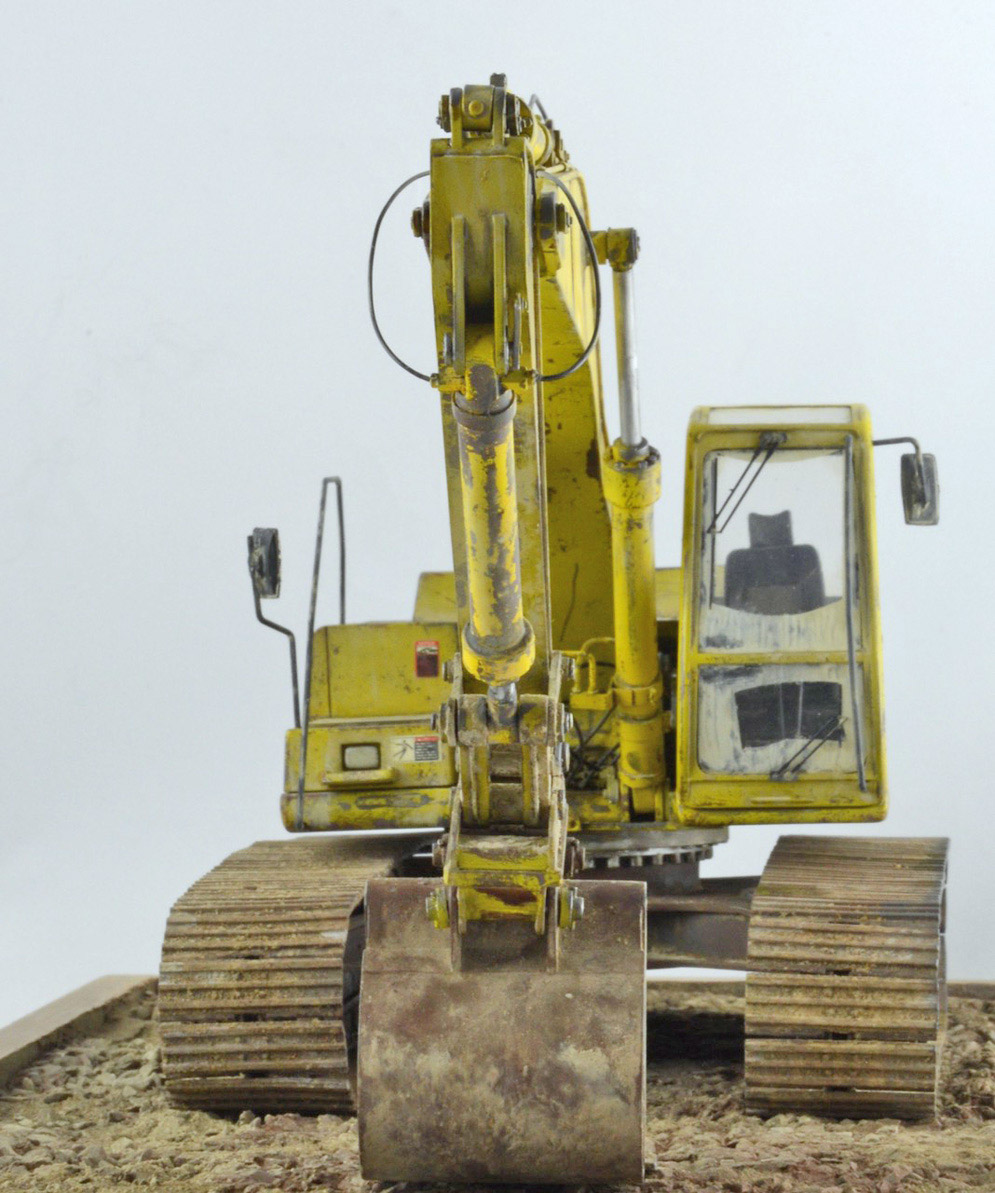
“USED and ABUSED”
This is the Kit Form Services 1:24 resin kit of Tracked Excavator; it is a generic vehicle very similar to a Caterpillar Excavator but different enough to not contravene copyright!
It is a very comprehensive kit, which I built out of the box (although there are scratched elements the materials are supplied).
My intention was to build, paint and weather it as a vehicle nearing the end of its working life but still operational; serviceable but little regard for cosmetics. (plenty of online references showing vehicles in that state).
Primed and under coated with True Earth rust primer and given a couple of coats of AK’s worn effects (I prefer this one because it allows you to wear through the paint colour without knocking off too many large lumps).
Yellow was MR Color acrylic yellow and overall weathering using weathering products and pigments from both AK and Ammo.
Tony T.
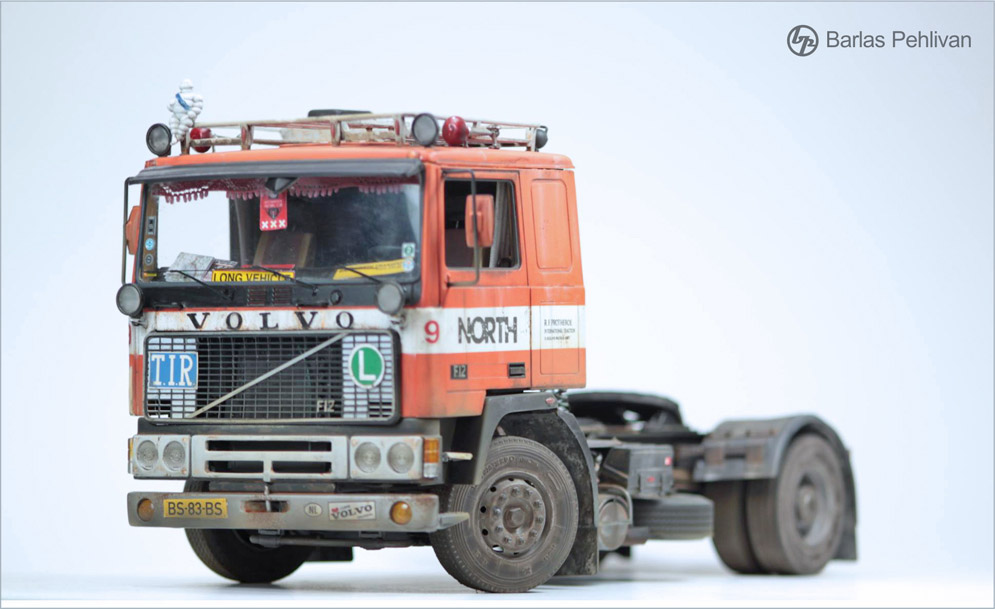
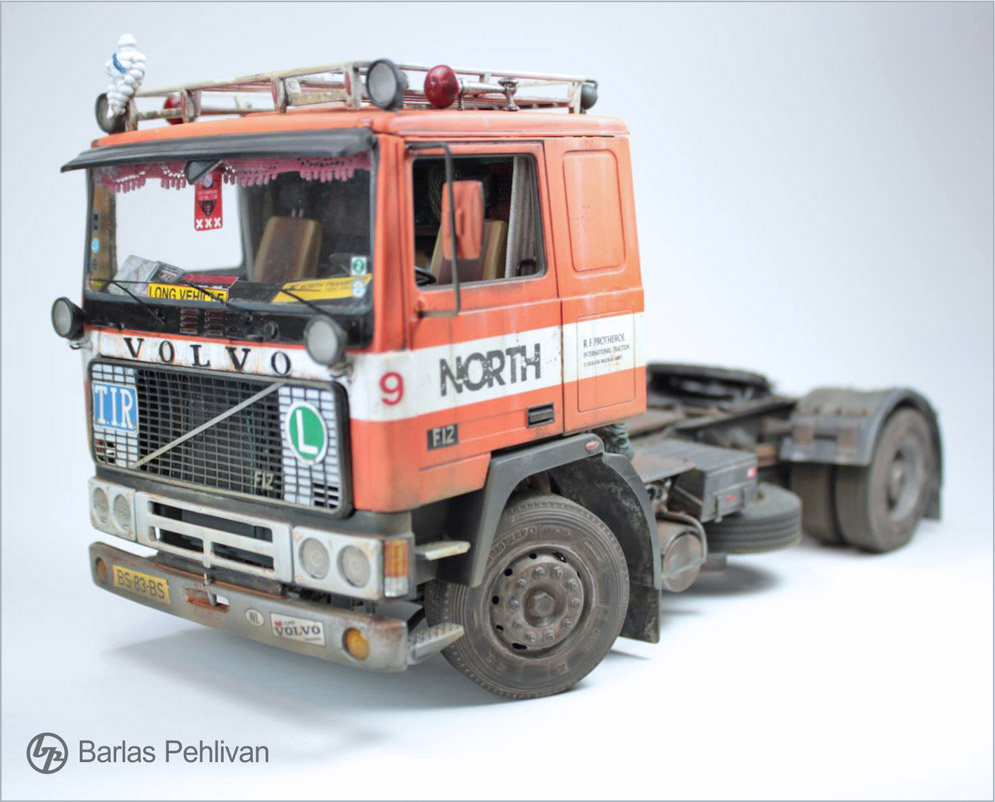

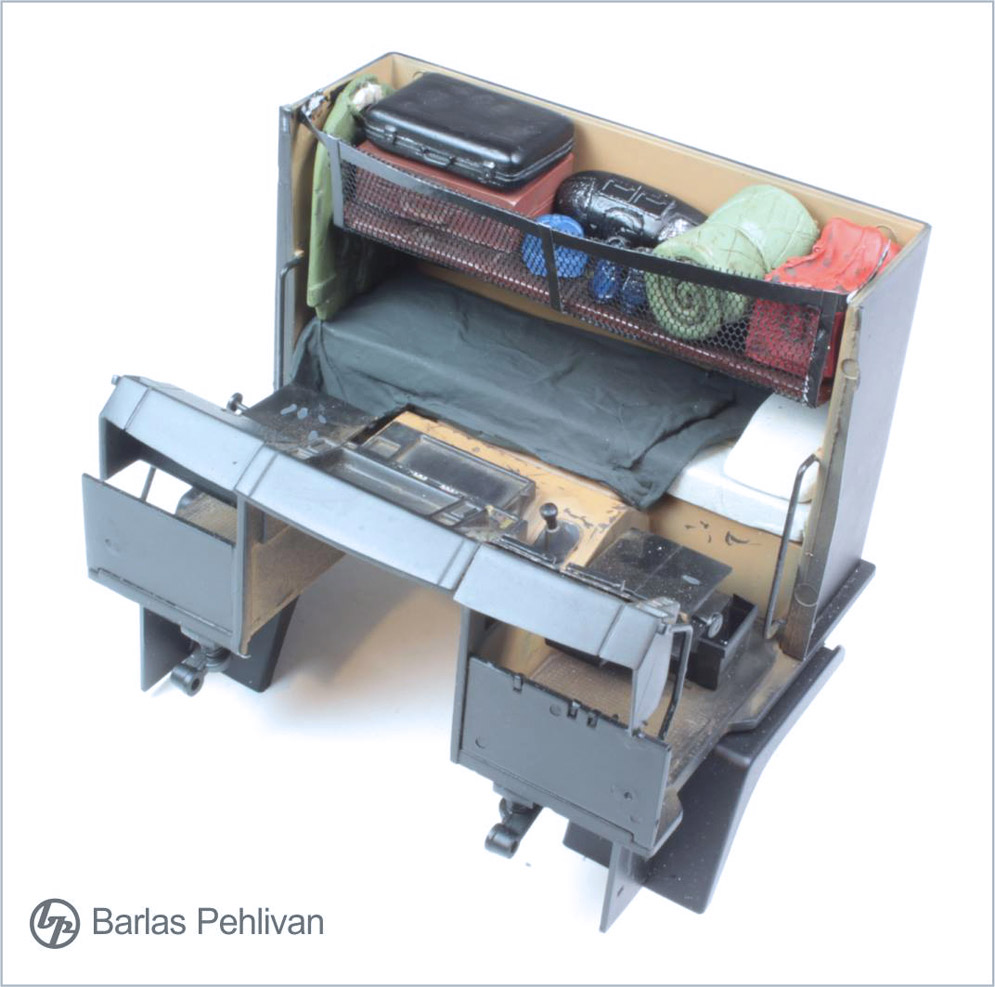
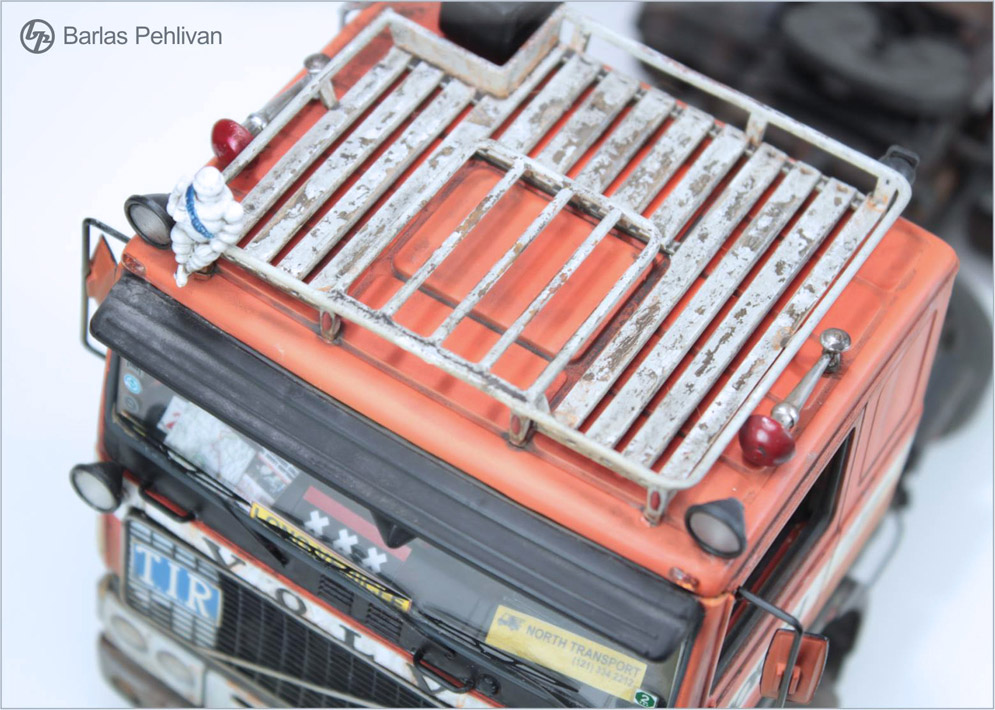
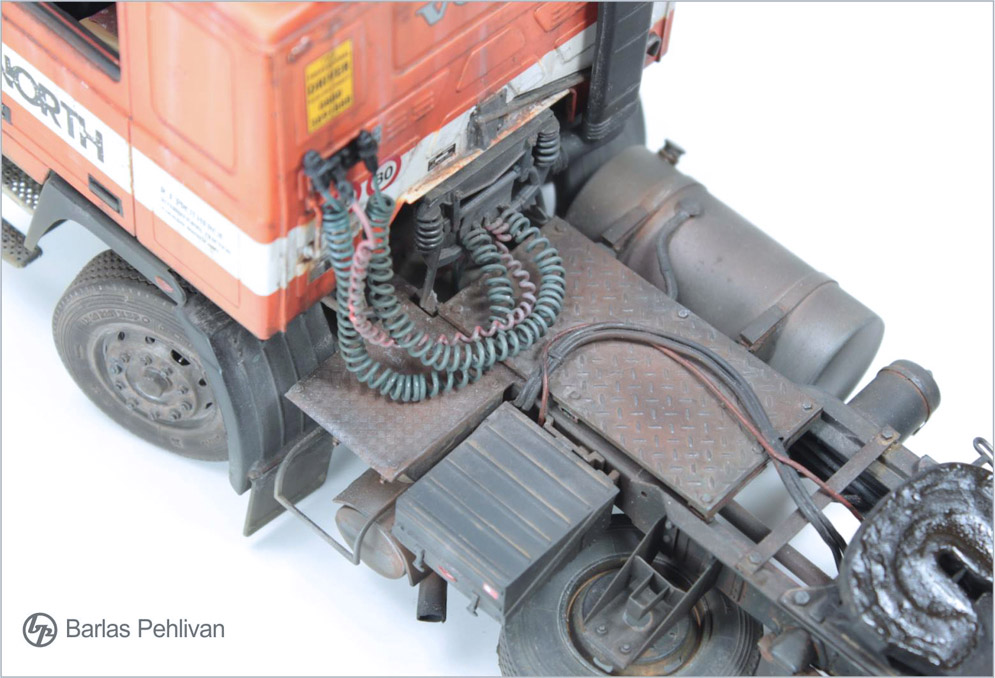

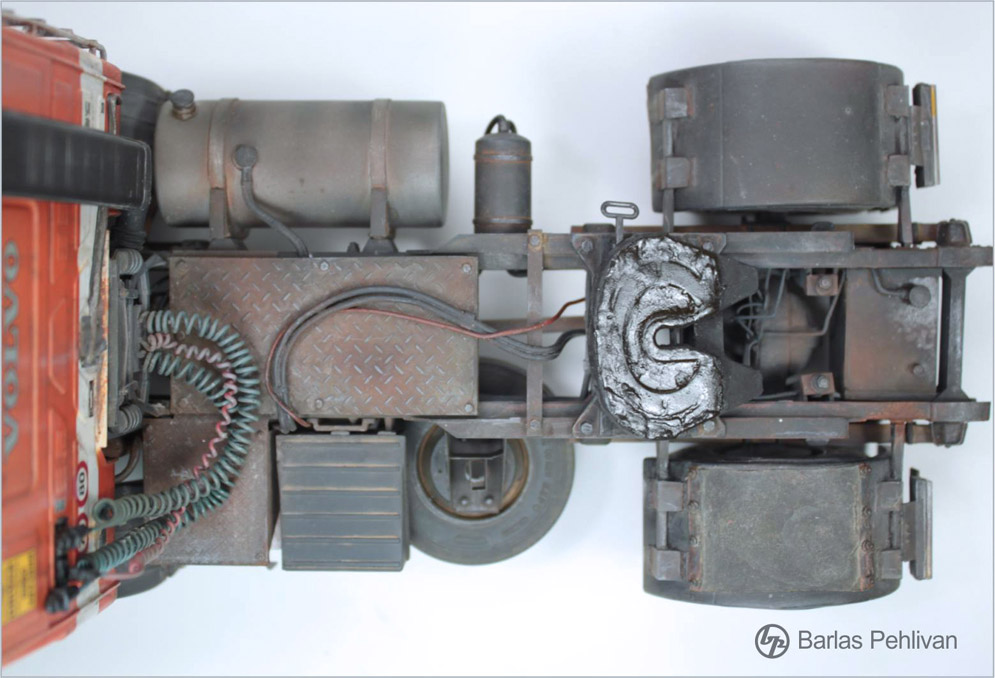

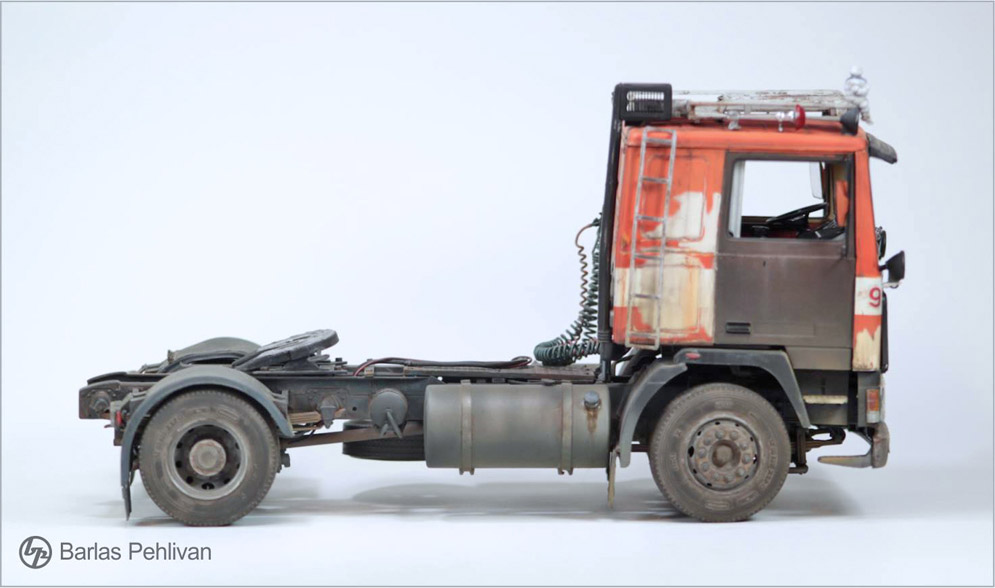
Here’s my model of the Volvo F12 in 1:24 scale made from the Italeri kit.
Hope you like it.
Barlas P.
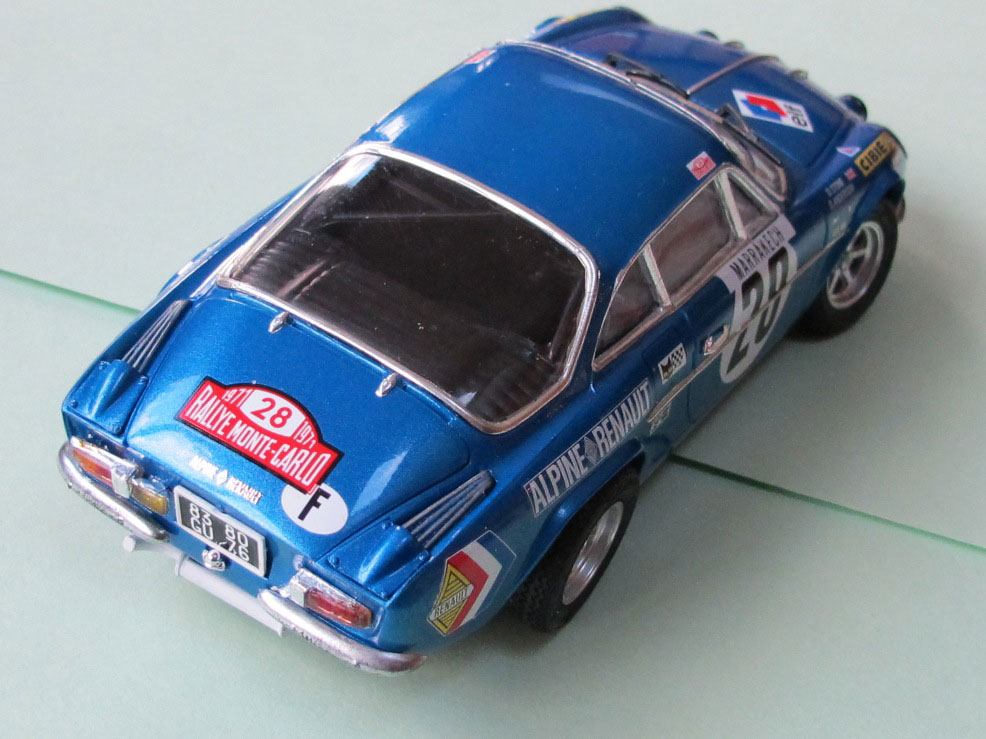
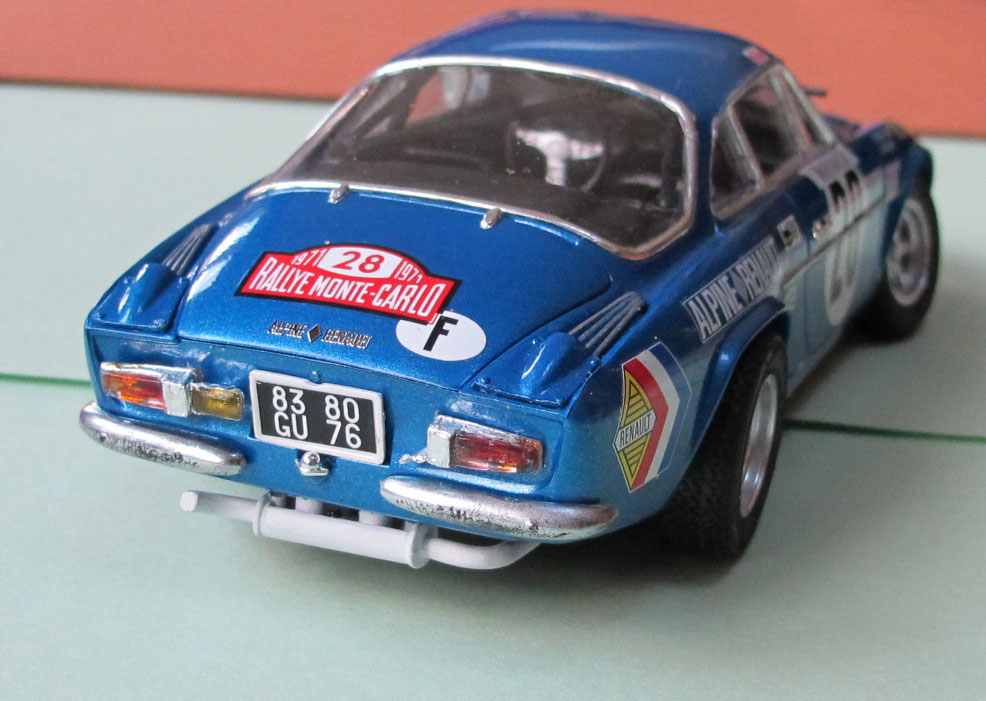
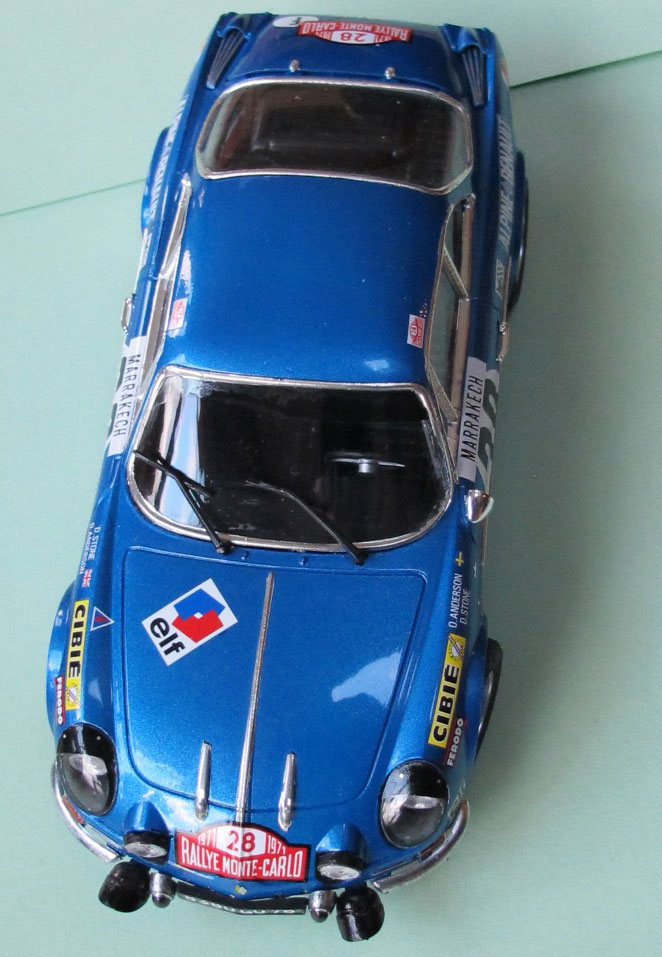
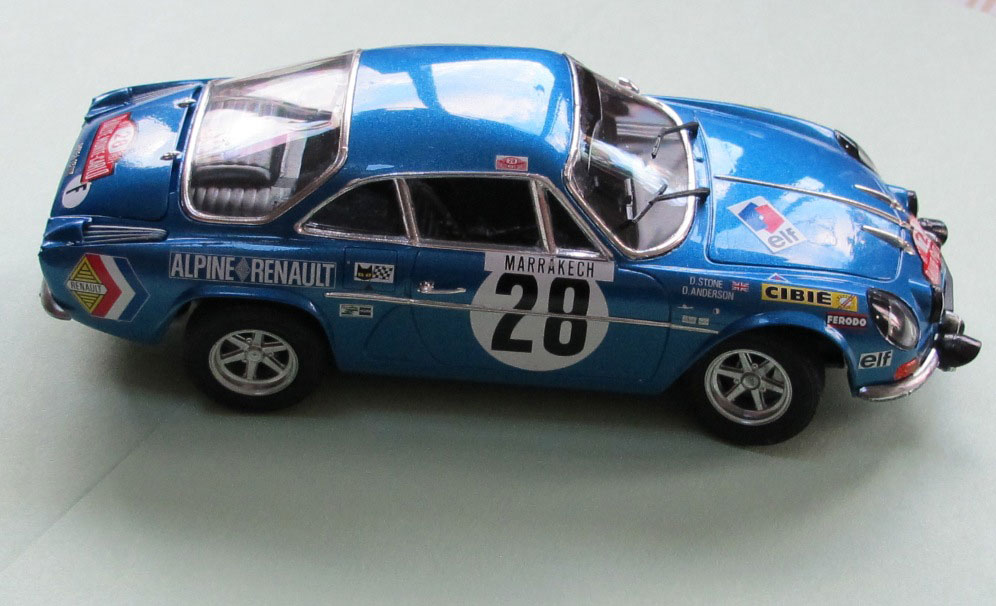
The variations in the blue colour were achieved by spraying raw Mr Colour SLT over the the finished paint work before it had dried completely.
Les V.
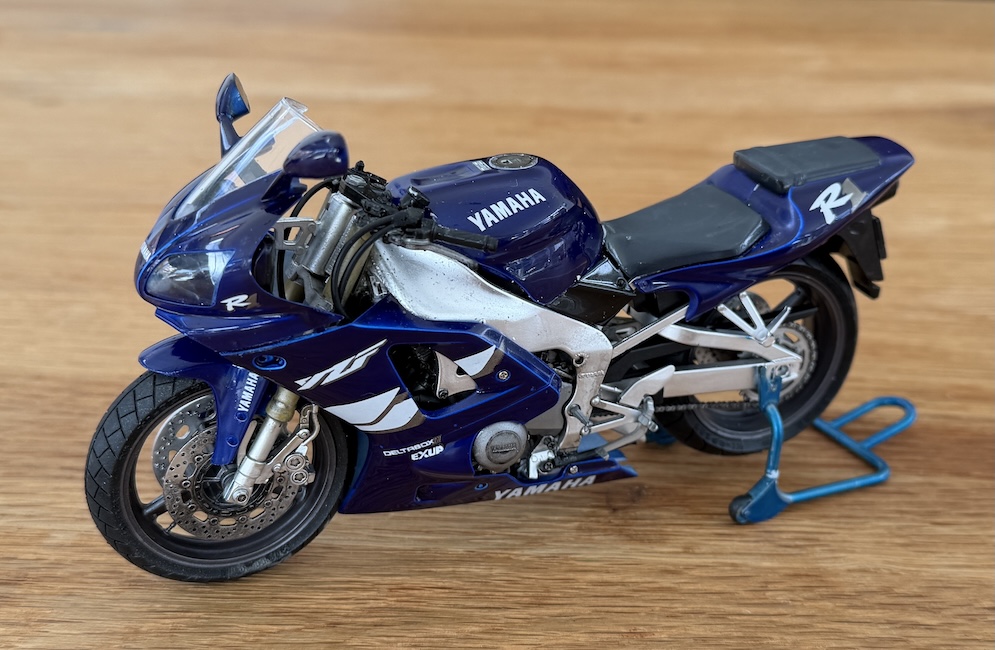
The paints used for the tank and other panels are Tamiya Silver then sprayed over with Tamiya Clear Orange and Clear Yellow.
The figure is from the Legend range and painted in oils and Humbrol paints.
Neil P.


