Feature Article by Manuel Magrinho
Kit Ref: YMYH1827
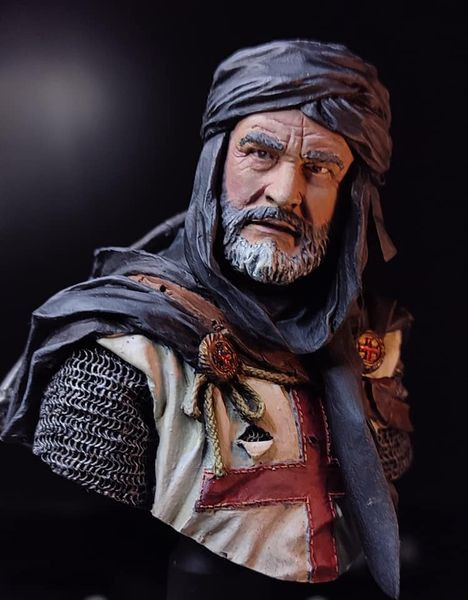
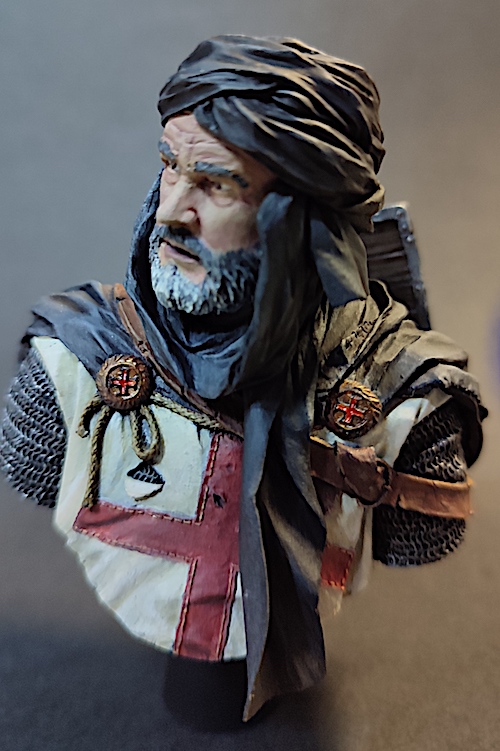
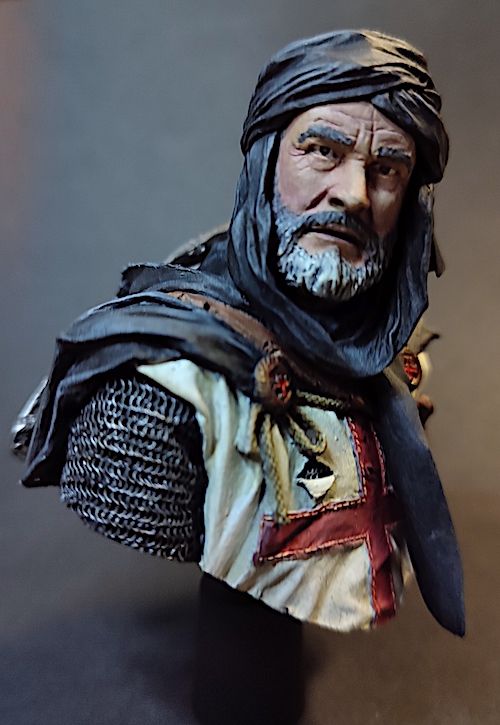
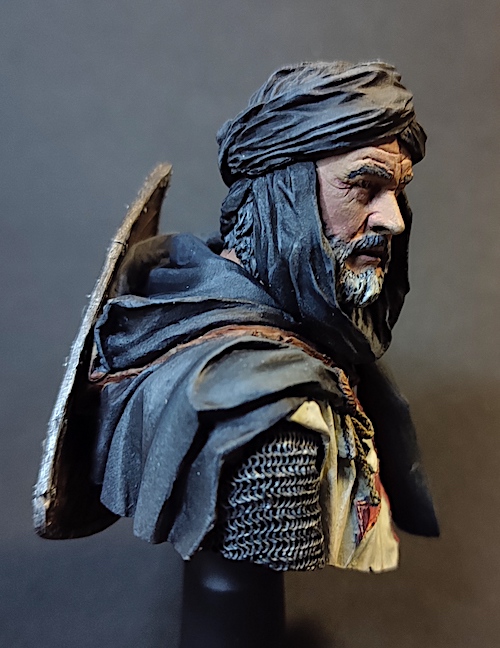
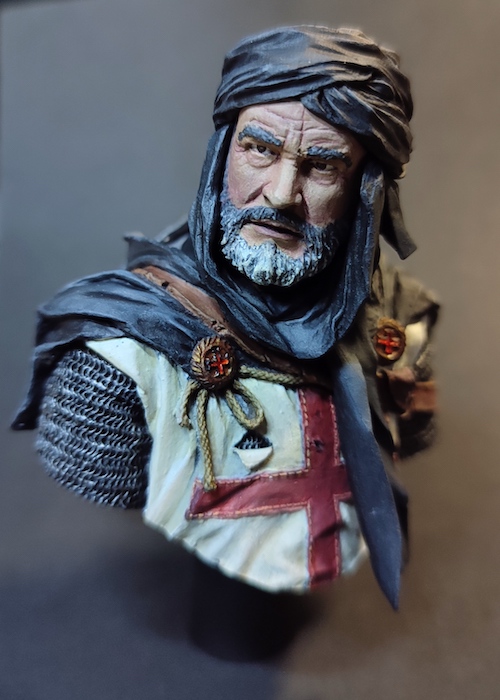
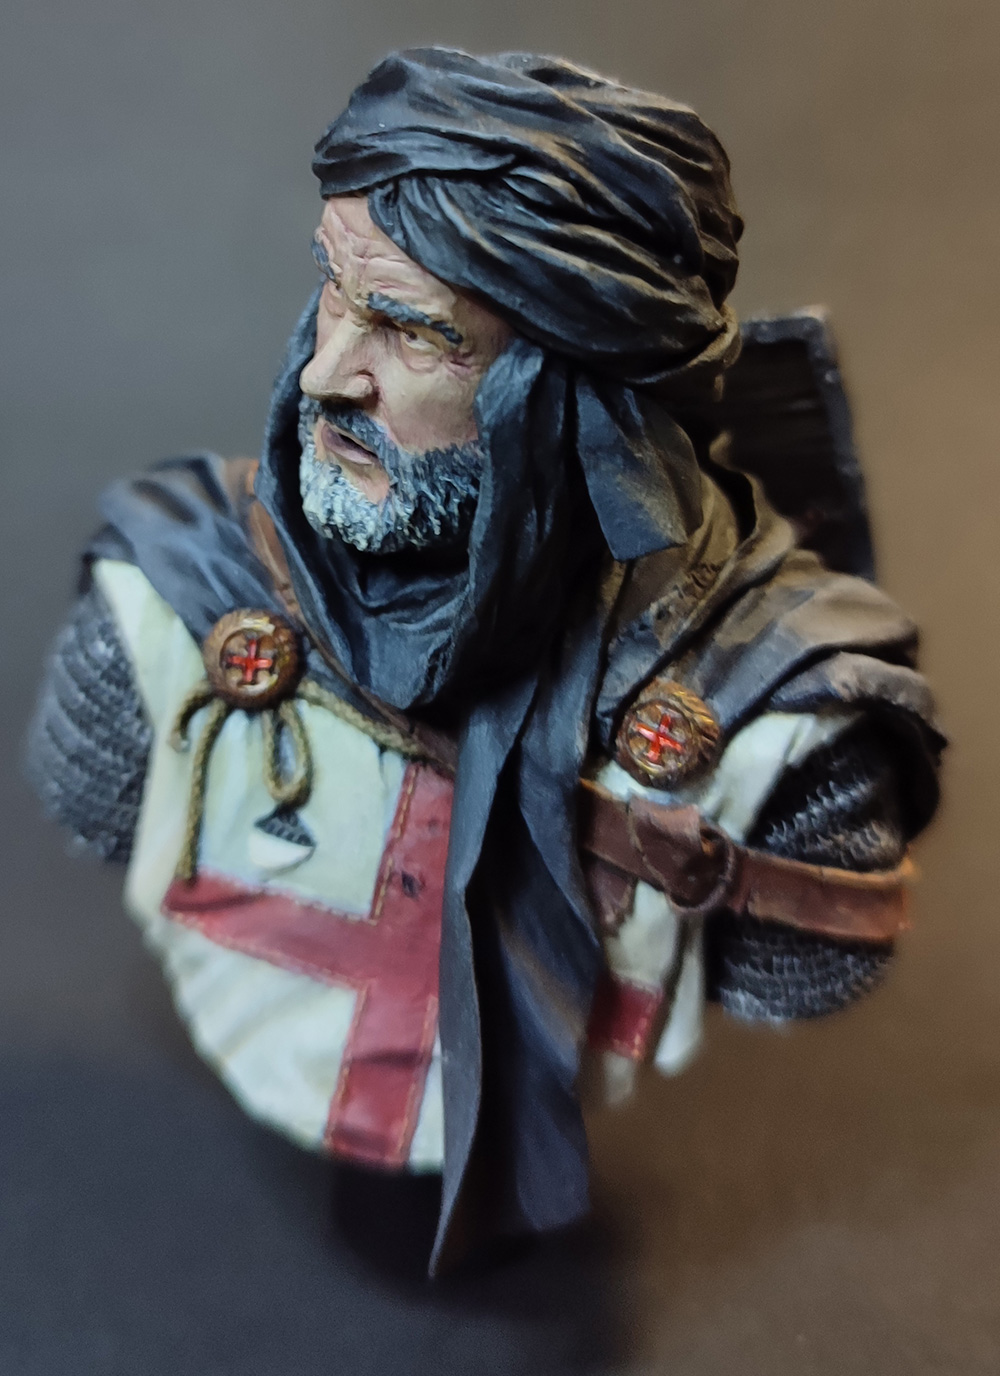
“TEMPLAR KNIGHT IN JERUSALEM”
For those who like historical busts, the “Young Miniatures” brand offers some interesting references, some of them with an unusual particularity: the physiognomy of a well-known actor and/or who played a role in a film associated with the character in question (such as Brad Pitt in the role of Don ‘Wardaddy’ Collier in the movie ‘Fury’, Sean Connery in the role of Major General Roy Urquhart in ‘A Bridge Too Far’ or even Russell Crowe as Maximus in ‘Gladiator’, among others).
In addition to this cinematographic peculiarity, the pieces stand alone: in resin, of an impressive quality and presented in a luxury packaging.
In the case of this Knight Templar, the box contains 7 pieces that can be painted separately (thus making painting easier) and glued only at the end, not noticing any fit, such is the quality of the set and the engineering of the model that allows this to happen. I did.
It should be noted that, like any resin piece, there are supports that must be cut and sanded in the respective cut areas before painting.
To ensure the best adhesion of the paint, I chose to carefully clean the pieces after preparation and apply a primer (Mr.Finishing Surfacer 1500 by Mr. Hobby).
The painting was done with Vallejo-type acrylics, but not only that, a little to the taste of the ‘artist’ and mixing tones as I thought was more correct according to the image I had in mind.
As the model is presented in several pieces, I painted them separately, thus allowing drying times without the need for a lot of use of a dryer, since I work, essentially, during the night. Still, I focused essentially on four parts: shield, face, turban, and cape and torso.
Painting in black and white is much funnier than it may seem at first, as the colors that are less used are precisely these, the end result being a ‘deception-of-the-eye’ as a respected Portuguese modeller says.
In the end, it all boils down to playing with the dilutions and ‘blending’ the tones in order to guarantee smooth transitions.
The model is so good that practically all you have to do is let the brush run and enjoy (a lot) the moments provided by this hobby. I recommend.

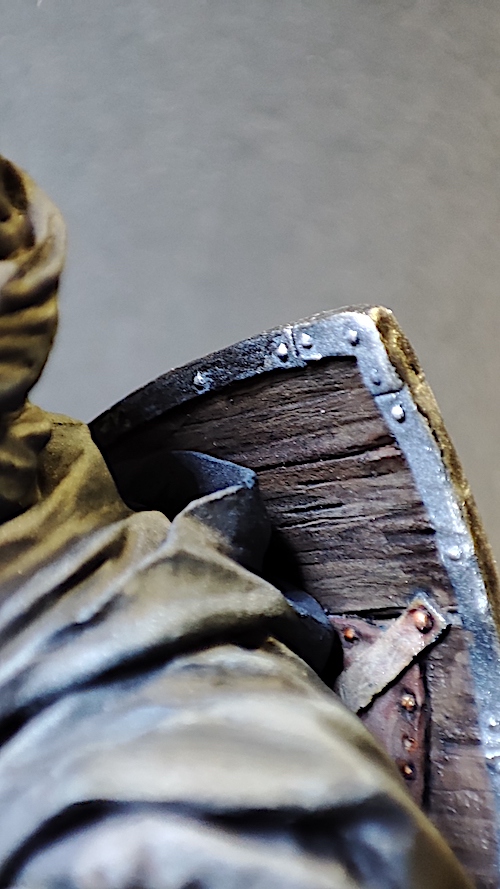
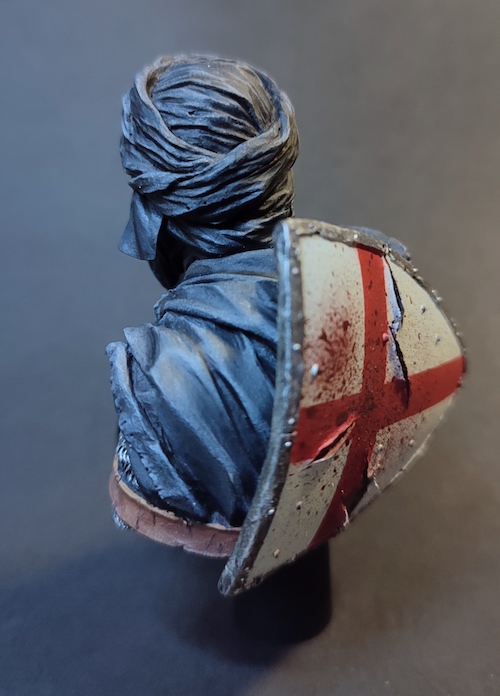
Detail of the shield still during painting. The leather cushion to protect the hand is finished, the wood, the metal edge and the matt varnish still need to be finished.
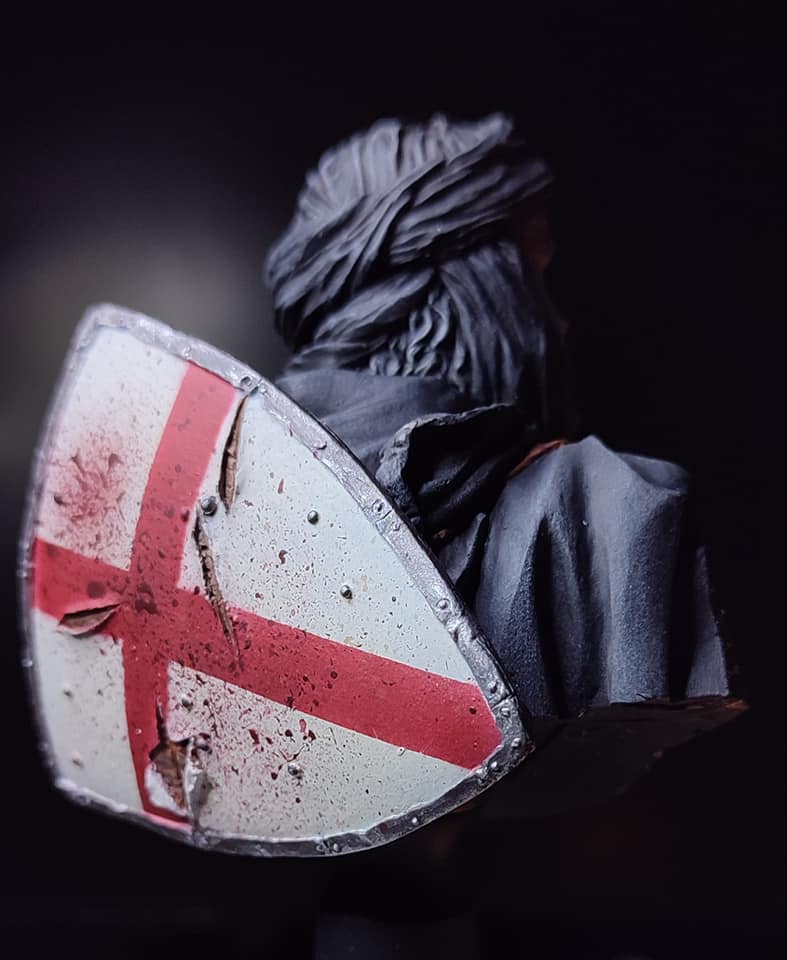
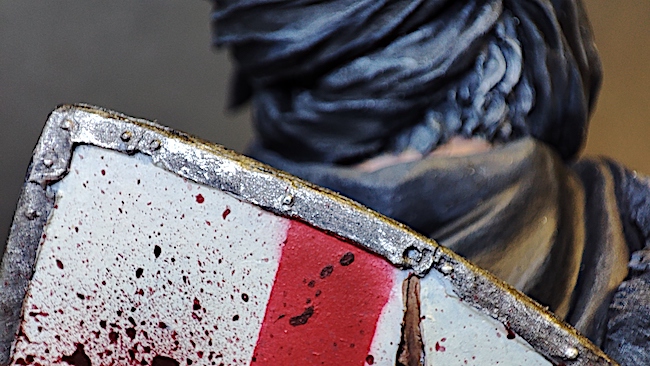
Shield placement test. The painting of the tears in the shield cover as well as the blood spatter is finished.
Still needing to finish the metallic edge, some dirt and matt varnish.
Hope you like it…
Manuel M.
Gallery Images

Ask a question or add feedback:
You must be logged in to post a comment.