• Skip to primary navigation
  • Skip to main content
  • Skip to primary sidebar

Scale Modelling Now

Scale Modelling Techniques

  • HOME
  • CONTENTS
    • What’s New
    • Techniques Bank
    • Aircraft
    • Armour
    • Classic Kit Builds
    • Civilian Aircraft Builds
    • Vehicles
    • Sci-Fi, Fantasy, Space
    • Maritime
    • Figures
    • Book Reviews
    • Dioramas
    • Gift Certificate
    • Modelling Workshops
    • Podcasts
  • WHAT WE OFFER
  • AREAS
    • Techniques Bank
    • Aircraft
    • Civilian Aircraft Builds
    • Armour
    • Vehicles
    • Sci-Fi, Fantasy, Space
    • Maritime
    • Dioramas
    • Figures
  • FREE SAMPLES
  • EVENTS
  • NEWS
  • ABOUT
    • ABOUT US
    • TRADERS
  • LOGIN
  • CONTACT
Pages: Page 1 Page 2 Page 3

Master Box Shots Fired, The Heist Series

July 7, 2020 By Francis Porter Leave a Comment

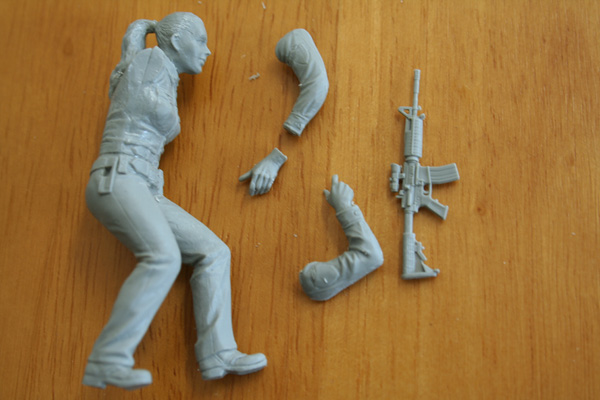
The two figures are made up of a total of 32 parts of injection moulded plastic on a single sprue. The parts carry a good level of detail with fine mould lines that are relatively easy to remove. While most are minor, a prominent mould line runs across the top of the head from ear to ear on each figure. To remove the line, it was necessary to rework the hair on each head to bring back some of the detail lost when cleaning up the seam.

Prior to assembly, access for painting was considered. Except for the M4 carbine being treated as a separate item, both figures were able to be fully assembled as there was no issue in getting access with a paint brush.

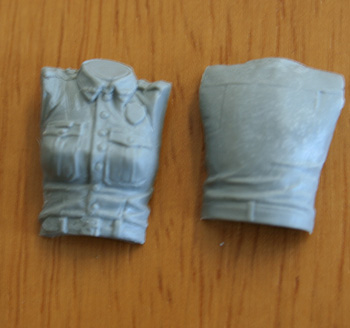
The build was uncomplicated and followed normal practices in the assembly. This began by joining the separate legs/lower torso together. This gave a strong structure to build the rest of the figure on. This was followed by joining the upper torso, which comes in two halves, to the legs. Contours at the joint between the torso and arm are well designed allowing the parts to slide together easily without leaving a gap. This helps greatly in aligning the arms.

Each figure has one hand which is separate, useful in lining up the weapon held by each officer. The final stage of assembly was the addition of Items of equipment to be found on the officer’s belt.

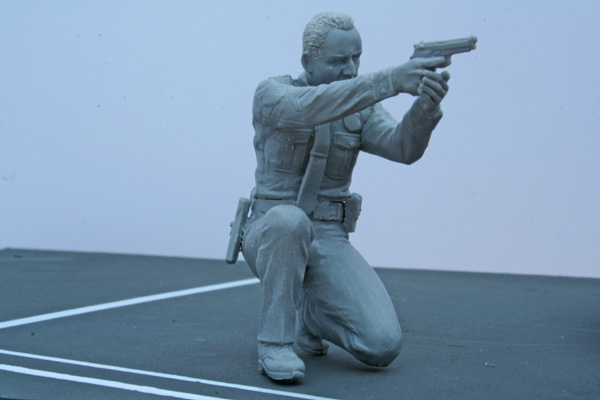
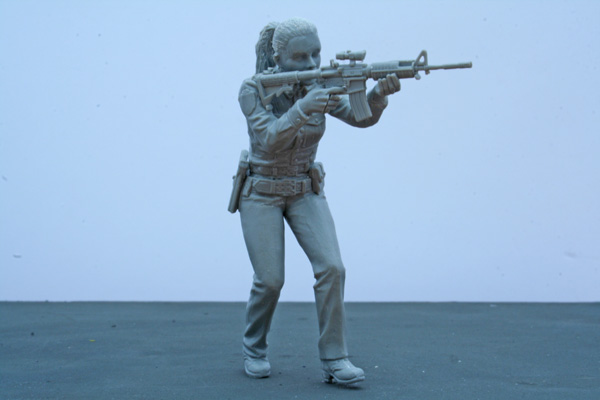
Having completed the assembly, the uniform and equipment worn was painted in acrylics using Tamiya paints. Hands and faces used Vallejo flesh tones.

One drawback in the kit is the lack a decal sheet. Given the complexity of the shoulder patches this would have been a welcome addition. It is possible to print to scale a copy of the shoulder flash to paper then work it onto the figure using PVA glue.

For purposes of showing a potential setting for the figures, a low cost option was chosen. Purchasing a 1:24 scale Mercedes car made by Braha and costing under £6, the vehicle provided the backdrop for the figures, mimicking the box art.

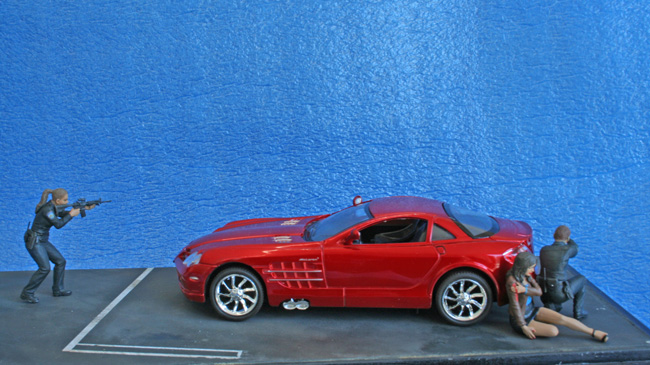
The groundwork was kept simple with a sheet of vac-formed paving slabs used as a road surface and a wall section from a railway parapet used as a low wall. To detail the setting an aluminium off cut was used to create a sign for the nearby bank. The figures were then placed in the act of protecting the wounded female civilian.

Read on…

Pages: Page 1 Page 2 Page 3

Reader Interactions

Ask a question or add feedback:

You must be logged in to post a comment.

Primary Sidebar

LOGIN/LOGOUT

Lost your Password?


gallery-figures

BACK TO FIGURES MAIN PAGE


Send Us Your Images

If you have some pictures or two of your best, favourite or most recently completed scale models, then this is your opportunity to celebrate your work and show them to a worldwide audience...

Just a few pointers to help you though:

  1. Images need to be digital and sent via e-mail or you can Drop Box them to me at: geoff.coughlin@btinternet.com
  2. Images should be sent in a ‘medium’ size, JPEG format. If you are using Microsoft Windows, simply right-click on the image in ‘My Pictures’ or wherever it is stored and you should be prompted with the option to ‘send to’ and select ‘mail-recipient. A box opens asking what size you want to send the image. ‘Medium’ is fine (approx: 1024 X 768)
  3. I might not publish your pics if the image quality isn’t there or for any other given reason
  4. Please also include a few words with your pics to explain a little about: what your model is; kit; scale; any extras added; painting, weathering and finishing your model – maybe around 100-200 words will be fine. Thanks Geoff

So... please do send in your images. Contact-us now

Copyright © 2025 · Scale Modelling Now · Online Scale Modelling Magazine · Scale Modelling Techniques and Tips · Privacy Policy

ar Arabicbn Bengalibg Bulgarianzh-CN Chinese (Simplified)zh-TW Chinese (Traditional)cs Czechda Danishnl Dutchen Englishfi Finnishfr Frenchde Germanel Greekhi Hindihu Hungarianid Indonesianit Italianja Japanesemt Malteseno Norwegianpl Polishpt Portuguesepa Punjabiru Russianes Spanishsv Swedishth Thaitr Turkishuk Ukrainiancy Welshyi Yiddish
en English