Painting prep.
With all that filler underneath the fuselage it’s essential that we apply an undercoat and pretty much any light grey will do the trick – I used one of the acrylic Tamiya light grey paints (any will do) here. After a few hours the surface is buffed with a cloth duster and some small areas rectified with Humbrol filler – thankfully there were really only a very few; I can’t take too much more filling on this one!
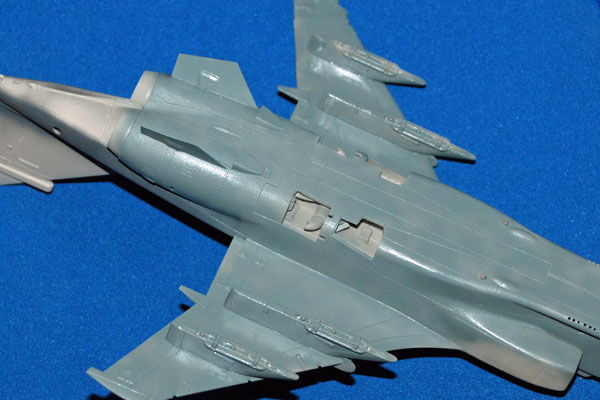
Camo greys – light and dark
For this Jaguar you need two slightly different grey tones and whatever the ‘official’ colours may be I chose two from the enamel Xtracolor range: X-6 RAF Ocean Grey (lighter grey) and X-4 RAF Dark Sea Grey (darker grey). Enamel is great because it does spray very well when thinned with cellulose thinners and the latter helps reduce drying time greatly. Here are a few pics showing the rough demarcation between the greys – careful study of the decal instruction sheet will help you to get the demarcation in the right locations.
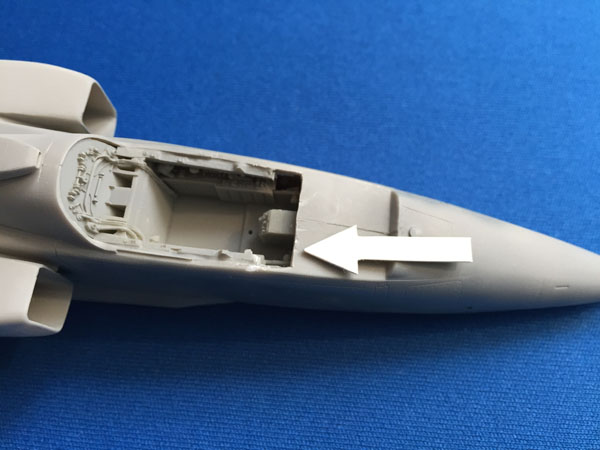
Cockpit prep before painting
I don’t want to go mad adding all the extra bits and bobs at this stage, I just want to create the basic cockpit painting (Tamiya Rubber Black XF-85) and initial light grey dry-brush to enhance some of the detail – I plan to do more on this later but getting the basics done will help reduce handling later and I hope save some time. Notice that a good 2-3mm has been removed from the front of the kit cockpit beneath where the instrument shroud will go. This is necessary to get the Aires resin replacement instrument panel and shroud to fit properly. I’m still not completely convinced that the Aires replacement won’t sit too far forward but a dry run (several in fact) suggests that it will be ok.