Full Review with Max Williams
I have written an inbox review of the Airscale Hawker Typhoon, so now it’s time to delve into the alluring box and its contents in more detail and to make a start on the build.
Already a subscriber? Jump ahead to the main article.It’s important to note from the outset that this is a pre-production kit, one of four produced at the end of the year. Of particular significance in this context are the injection moulded parts comprising the fuselage halves, the upper and lower wing halves, the horizontal stabilisers and the clear parts which include optional canopies, navigation and landing light covers, the gunsight and a lower ID light cover. It has to be accepted that these test shots are exactly that; test shots which may not be perfect. However, all of that is for later.
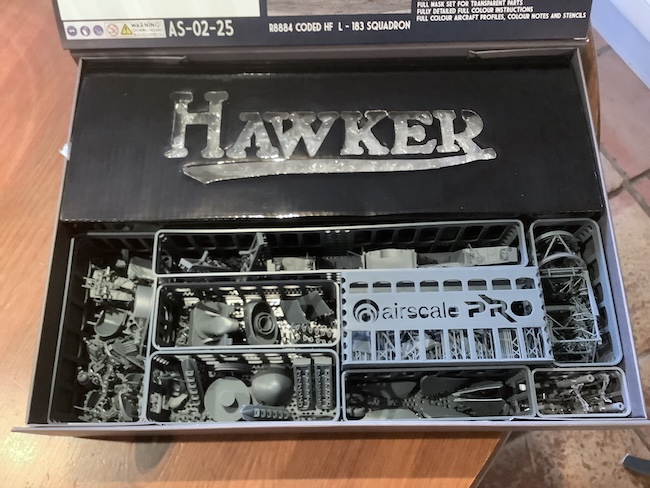
The sturdy box comprises two sections; in the front half are all the superb “Castle-produced” 3D printed parts, the section under the Hawker cover contains the IM parts as described above.
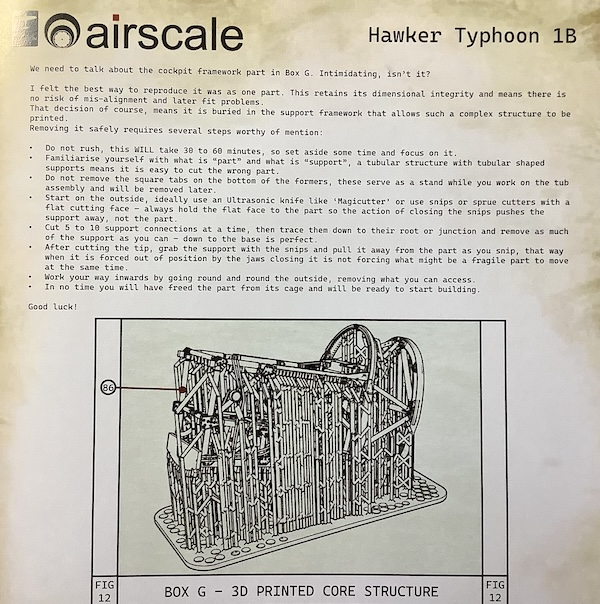
It’s a refreshing change to have some instructions which are written rather than often vague ambiguous drawings only. Peter offers sound words of advice about starting the kit with the cockpit which is Box G. The main structure of the cockpit framework is printed in one piece but it is “buried deep in a support framework”. Each support to be removed must be done carefully to ensure that they are indeed supports and not part of the cockpit; side cutters and ideally an ultrasonic knife are the best tools for this operation.
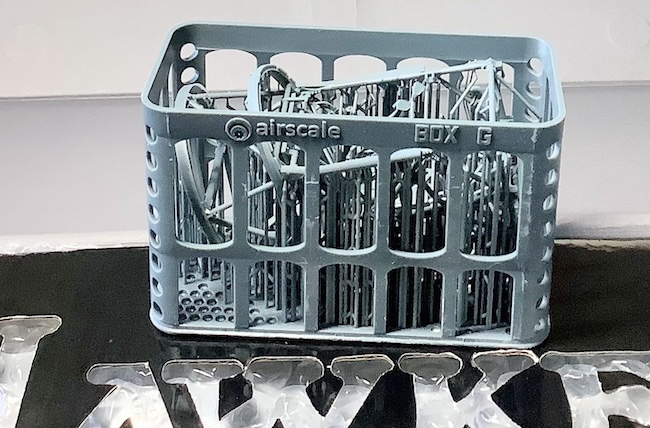
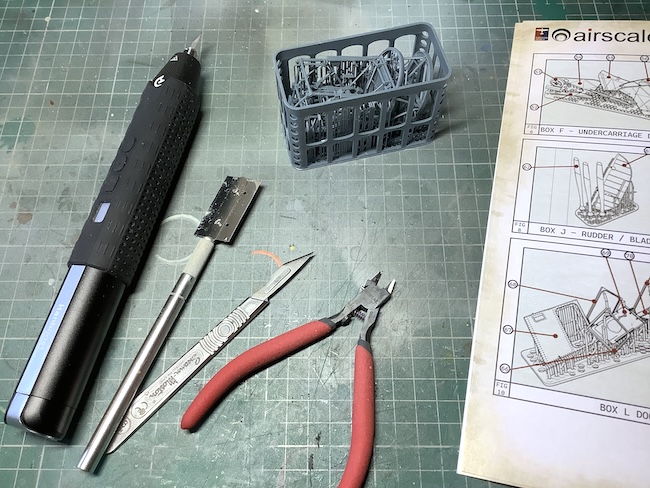
This is not a quick job, but I decided to time just how long should be allowed for it, working at a steady pace with a short break for a cuppa and chocolate biscuit!

The outer cage is quickly removed with a pair of stout snips, serious work started at 13.50. Just over an hour later and the framework was emerging…..break time.
Read on…
Join the SMN Modelling Community Today
For just £1.50/month (£18/year), you’ll get:
✅ Unlimited access to 4,500+ in-depth build reviews
✅ Exclusive videos and how-to masterclasses
✅ New content added every week
✅ Cancel anytime
(That’s less than the cost of one paint pot per month!)