Now where was I??
Yes, I had just finished painting the figures supplied by Coastal Craft. I am a little at a loss as to where to place them as there are a disproportionately large number of officers. I guess that I will have to strip them of rank!
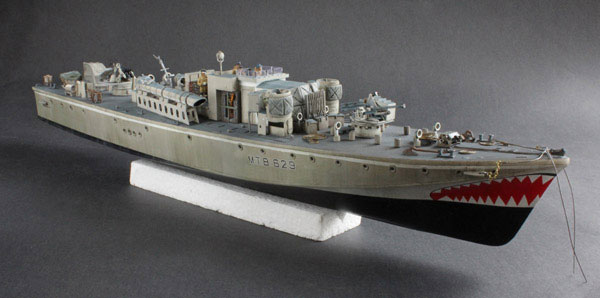

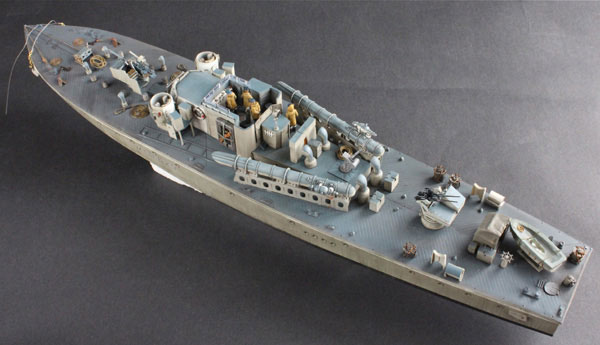
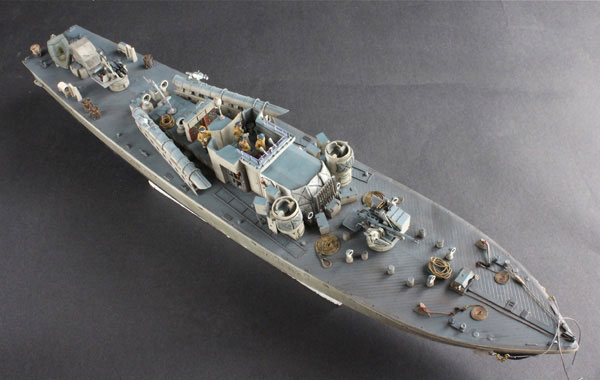
Fitting more of the parts and weapons onto the deck. The torpedo mounts were not quite the right size for the base marked on the deck (probably the way I constructed them) so I laid a bed of Epoxy on the deck and when it had become tacky I fixed the mounts in place. Fortunately none oozed out onto the deck.
Ropes
These are all made from lead wire supplied, very efficiently, by Little Cars. I straightened them out and then rolled them under a flat file to give a rope like texture (what a great little idea Julian – G). It is hardly visible, unless you stick your nose onto the deck. But the rating on the foredeck knows!
Because the wire is soft it can be draped realistically anywhere.
I finished painting the crew and put them in place.

The mast
This was a real problem. It is supplied as a resin fitting and arrives protected by a resin “frame”
It is very delicate and releasing it from this is a slow job; despite all my precautions it broke off at the top end. There was an air bubble in this, the thinnest part. I superglued it together and it broke off another three times.
Trying to rig the signal flag halyards in the super delicate cross rig was testing to say the least. A more robust fitting would be desirable. The “halyards” were fed through Bob’s Buckles.
The stanchions
The only reference to the stanchions is on the colour plans from John Lambert. The illustration in my instructions was not particularly relevant to the craft I was building, but that was not the problem. The instructions say that the base plate may have to be drilled out to fit the stanchions. Why couldn’t that have been done during the manufacture? They are so tiny and so many that they are way worse than tank tracks! I found it almost impossible to fix them sufficiently – to drill them without the base plate turning with the drill. In the end I discarded them and drilled straight into the deck.