Welcome to the Subscribers’ Figures Gallery.
Each submission has a ‘gallery’ of thumbnails which you can click on to see an enlarged image and read the short text describing the model – enjoy!
Oils
Lace in acrylic
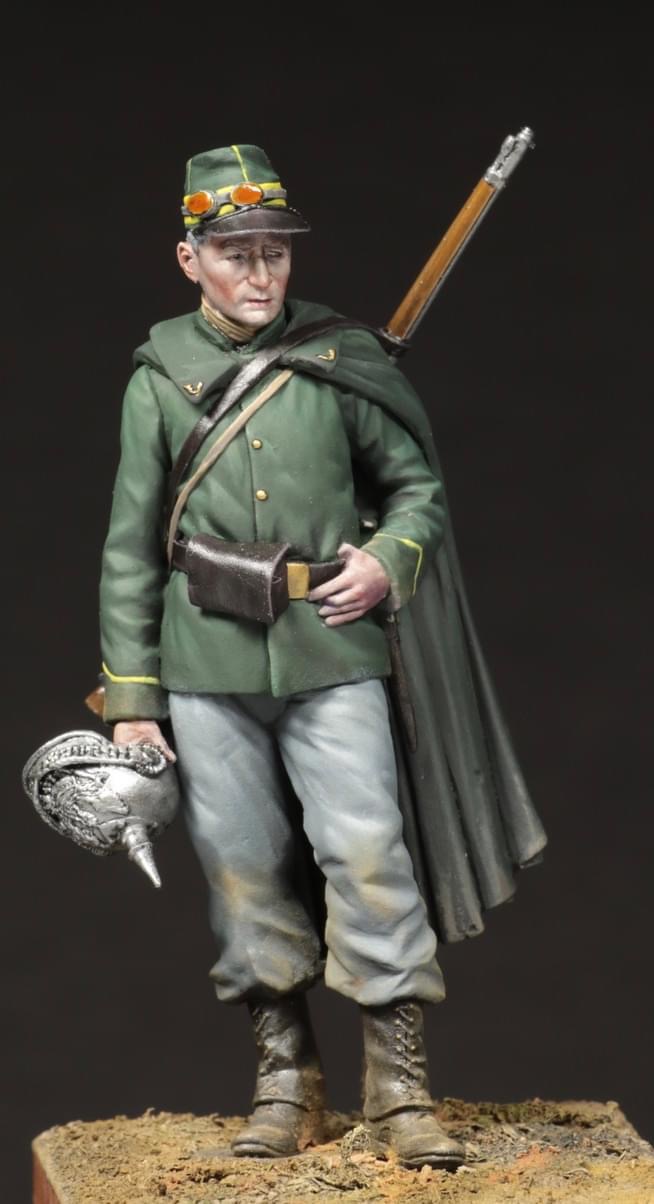
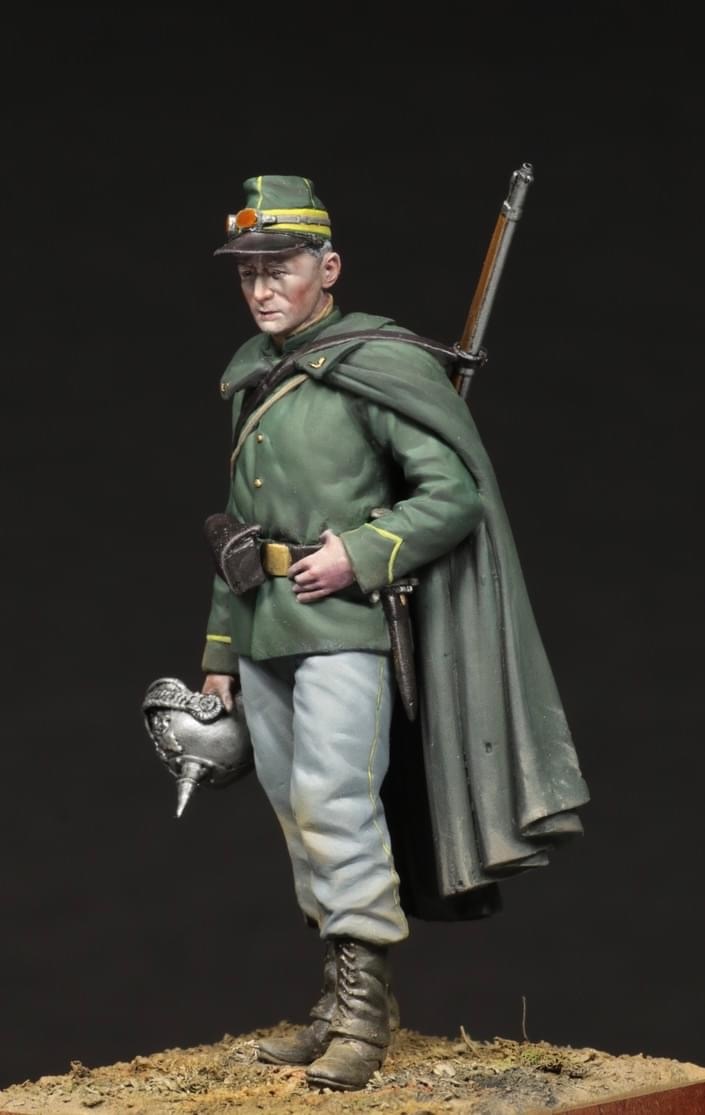
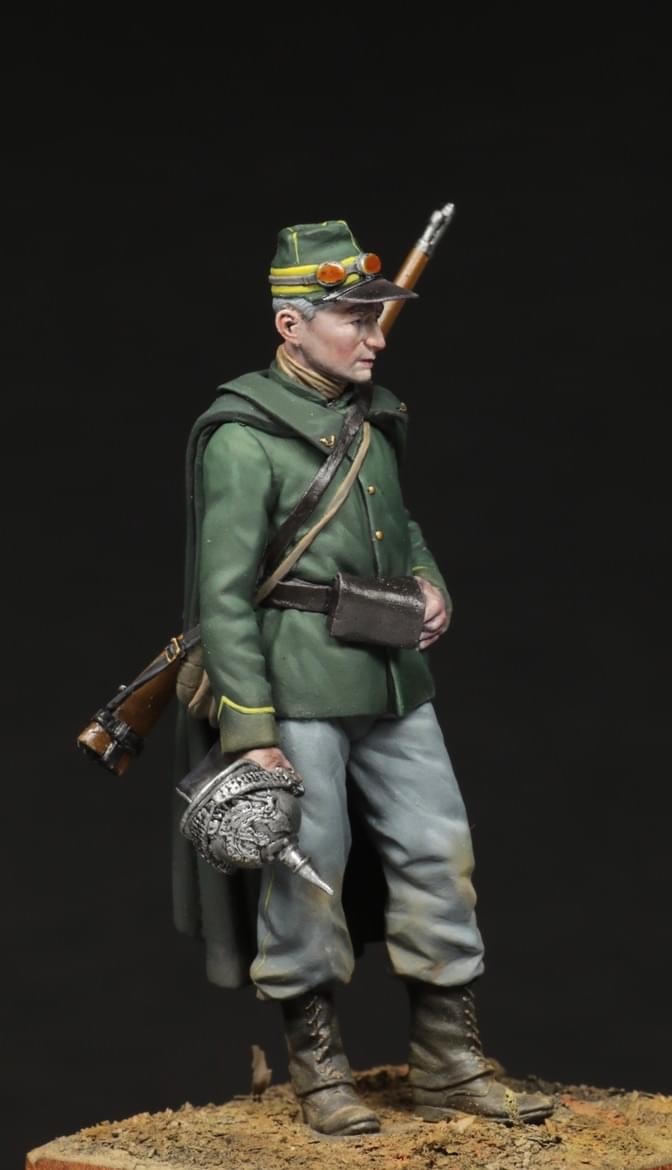
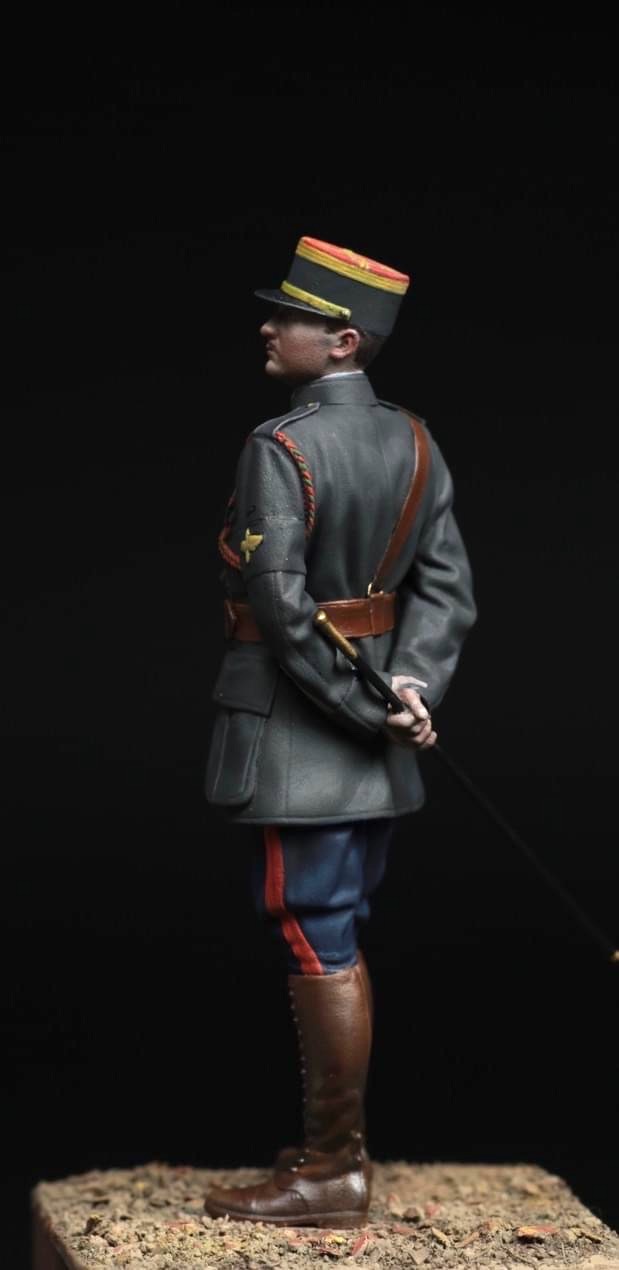
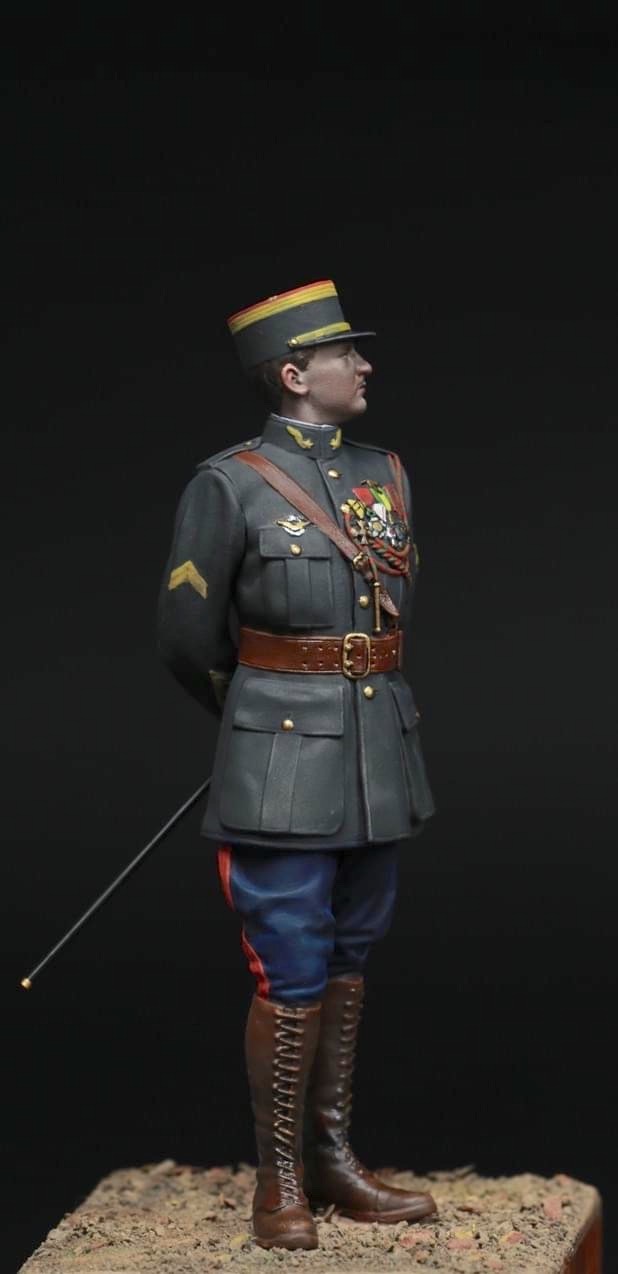
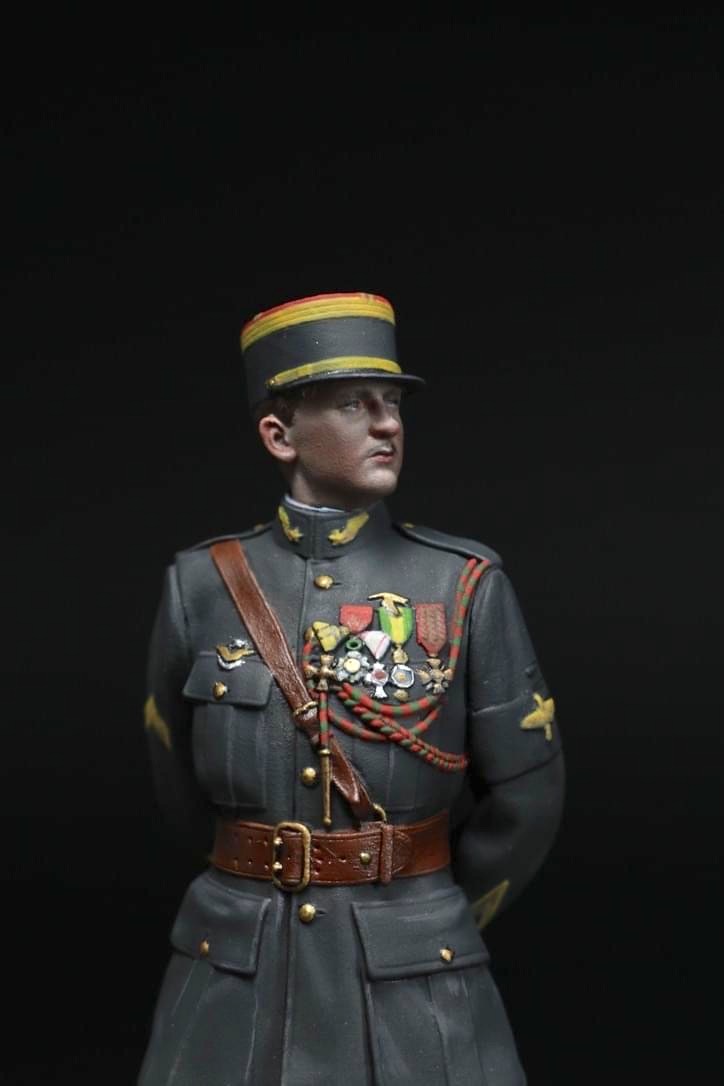
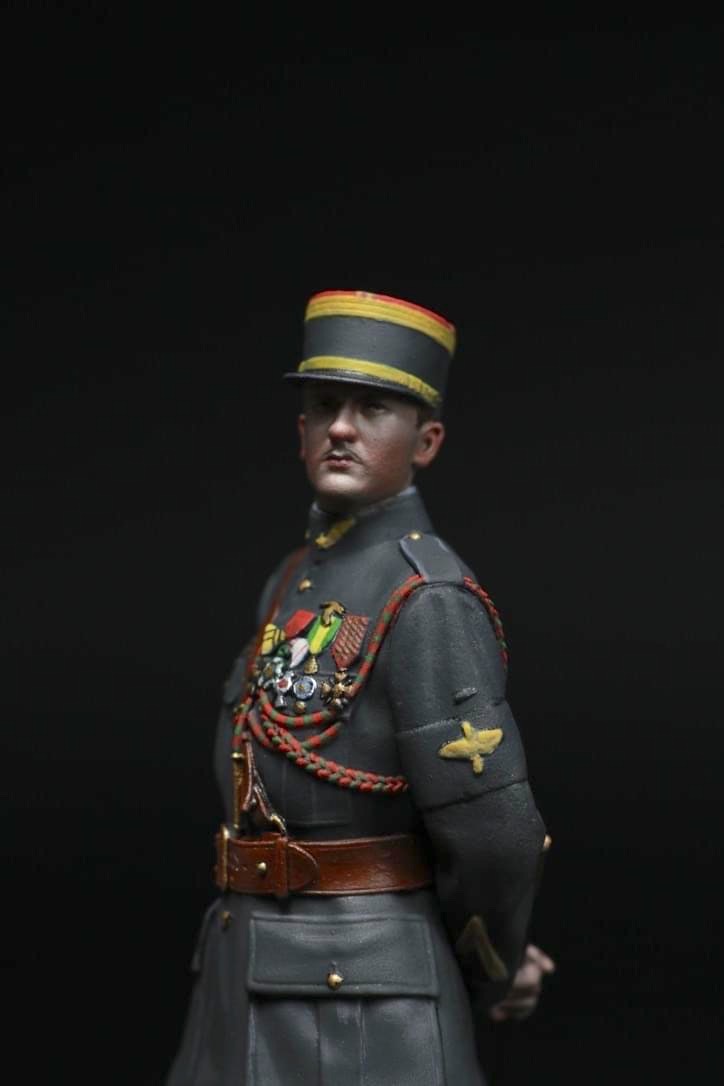
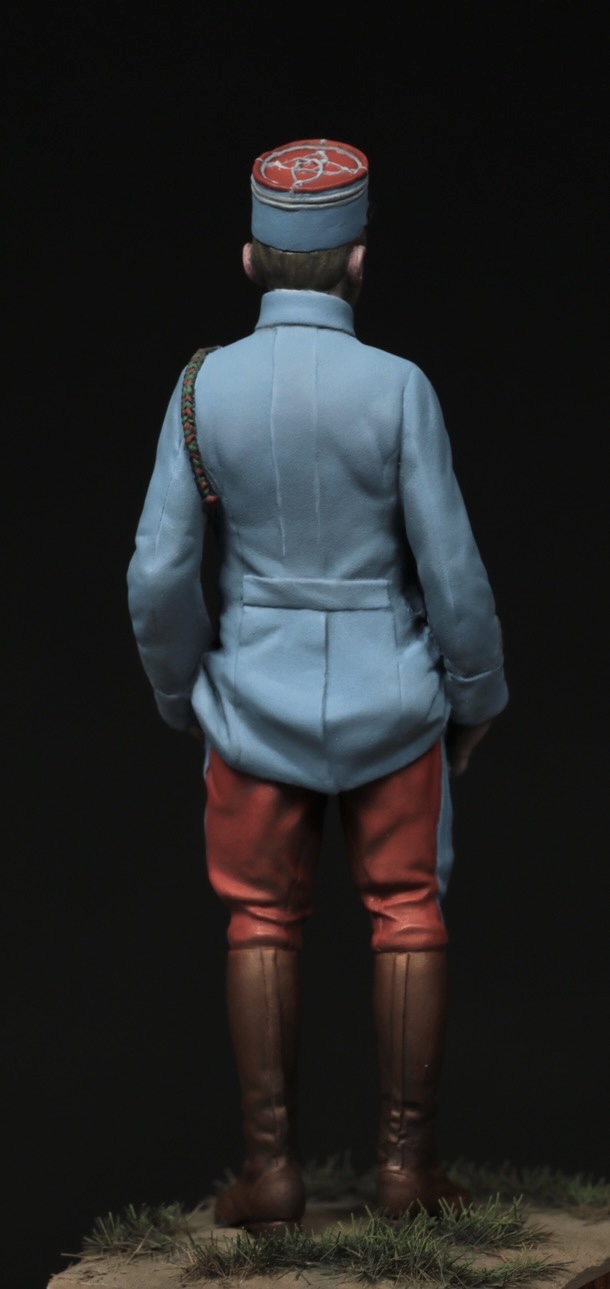
Didn’t like the heavy groove put into the rear of the jacket and arms representing a fine lace. Way over scale. Filled in with Magic Sculpt and painted on with acrylic
No detail on regimental facings given with the kit. Had to scour the internet and fortunately had good reference books from Verlag Militara to look up original garments.
David L.
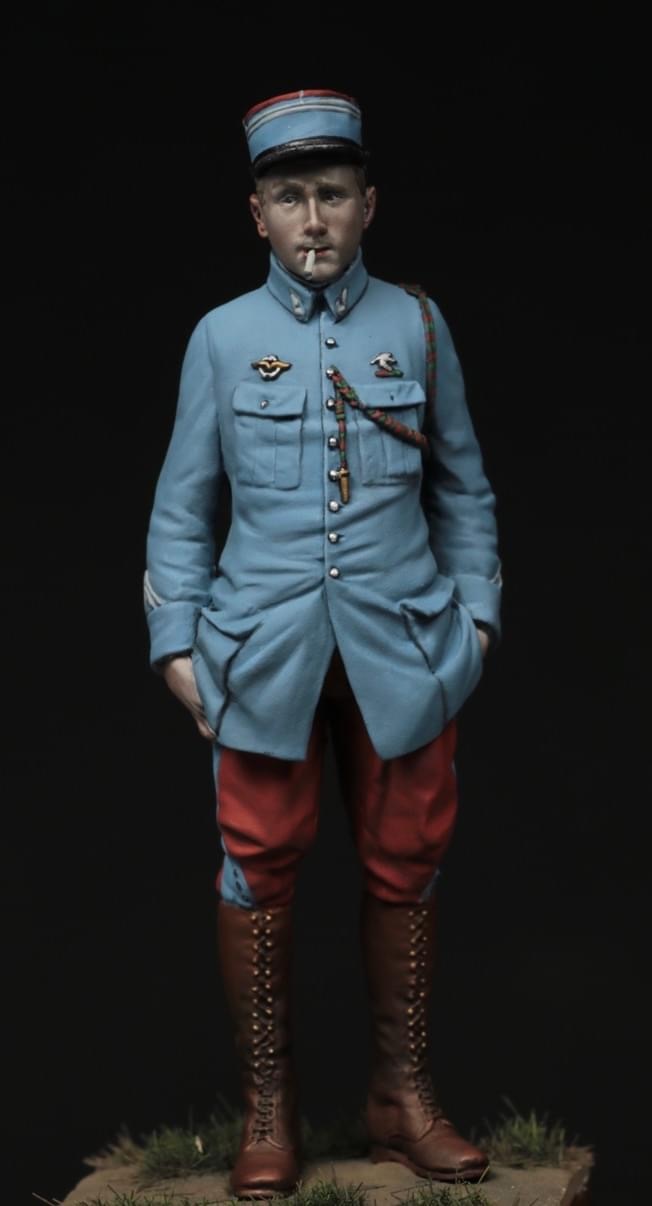
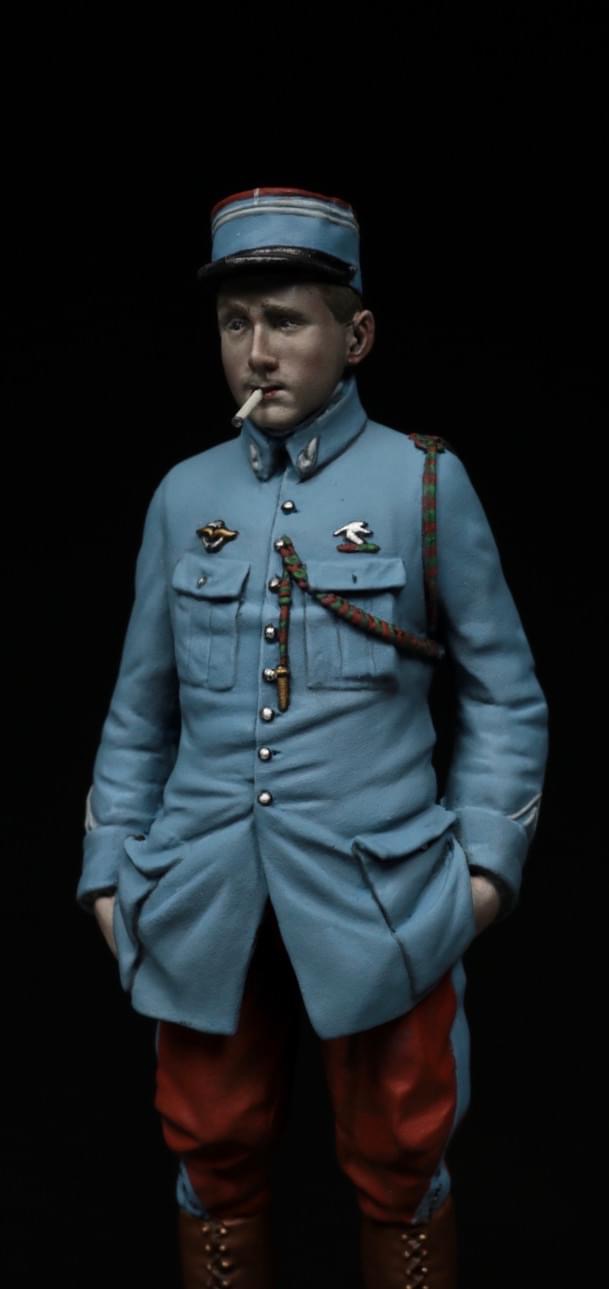
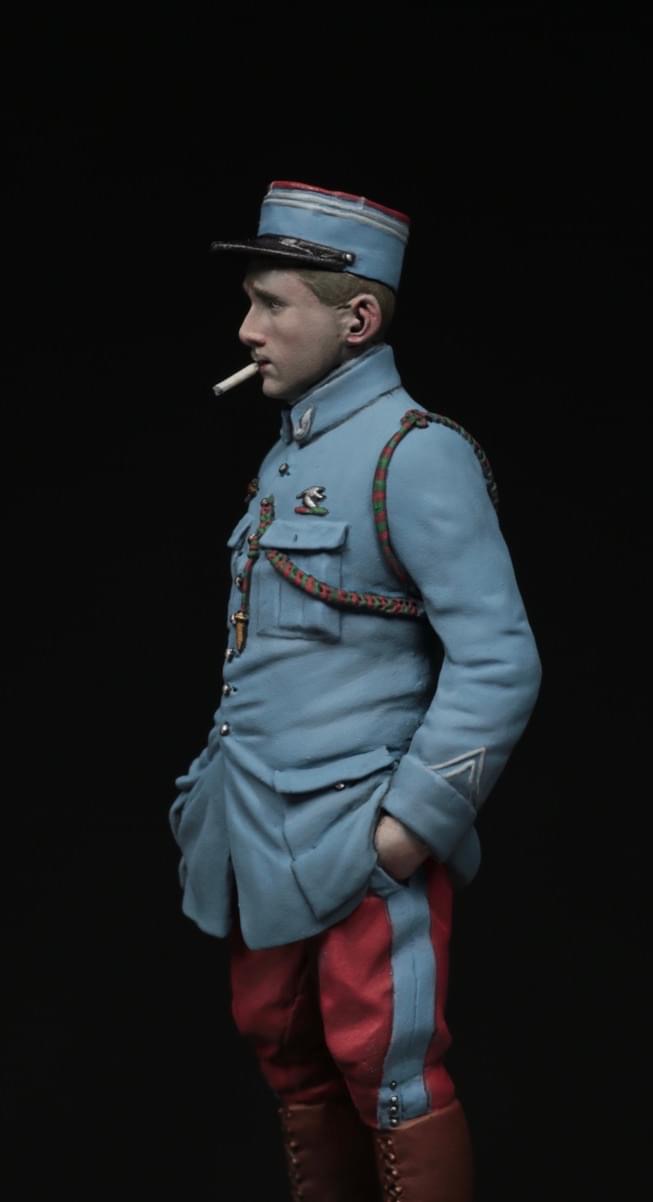
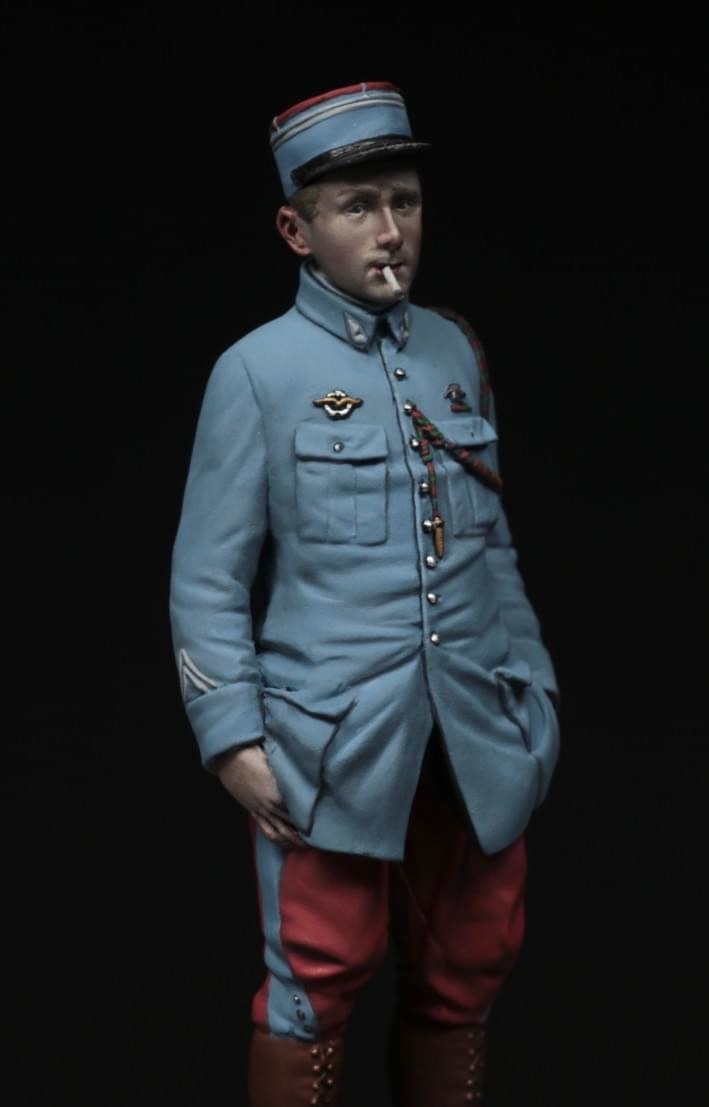
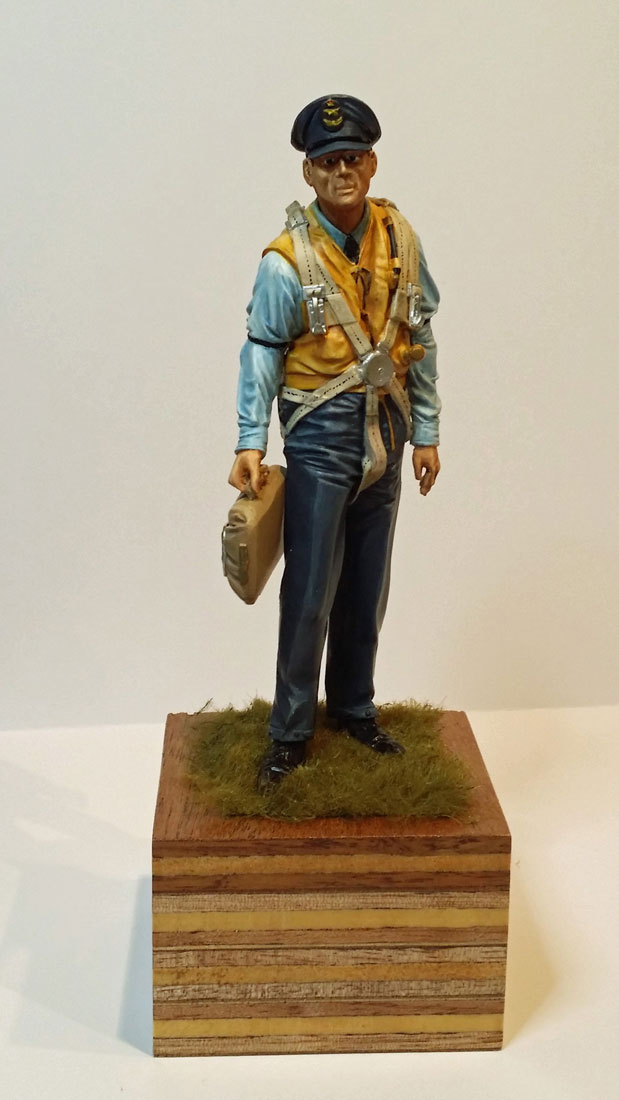
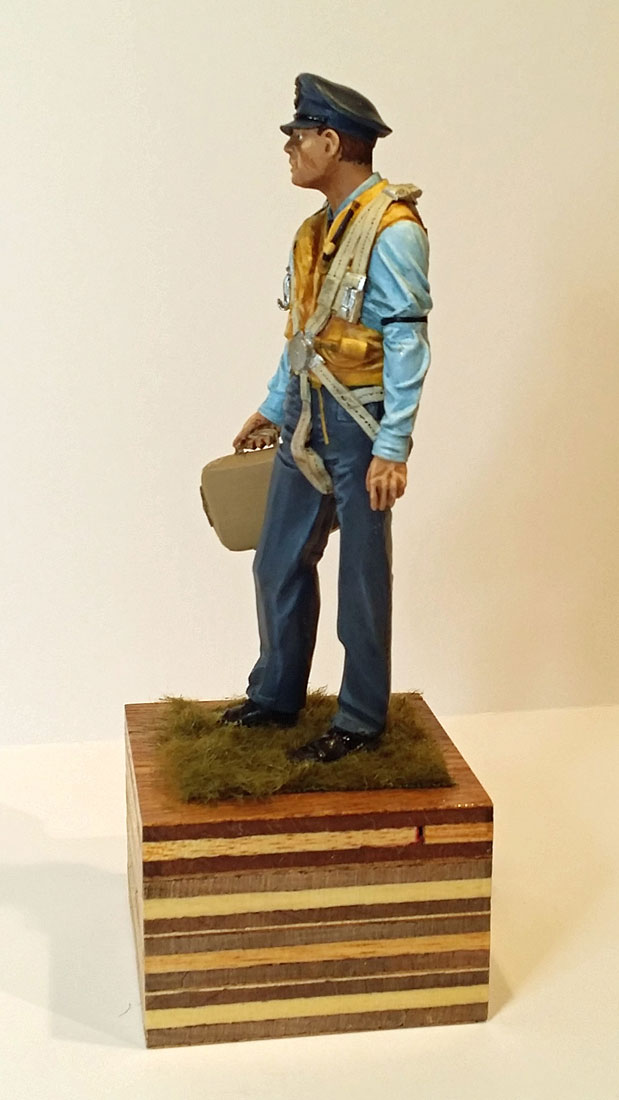
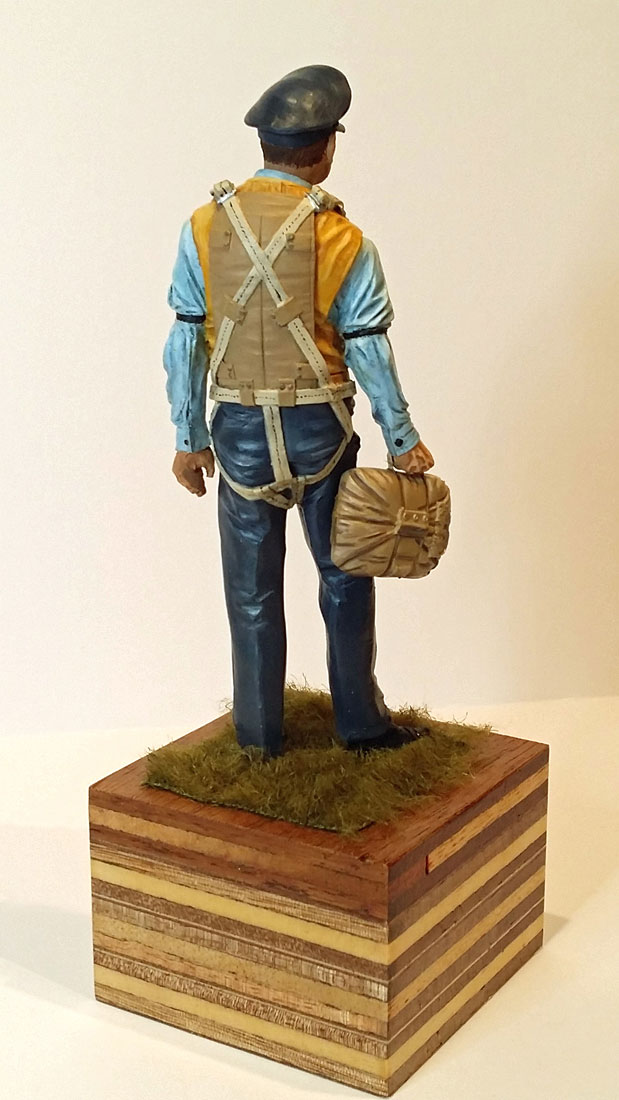
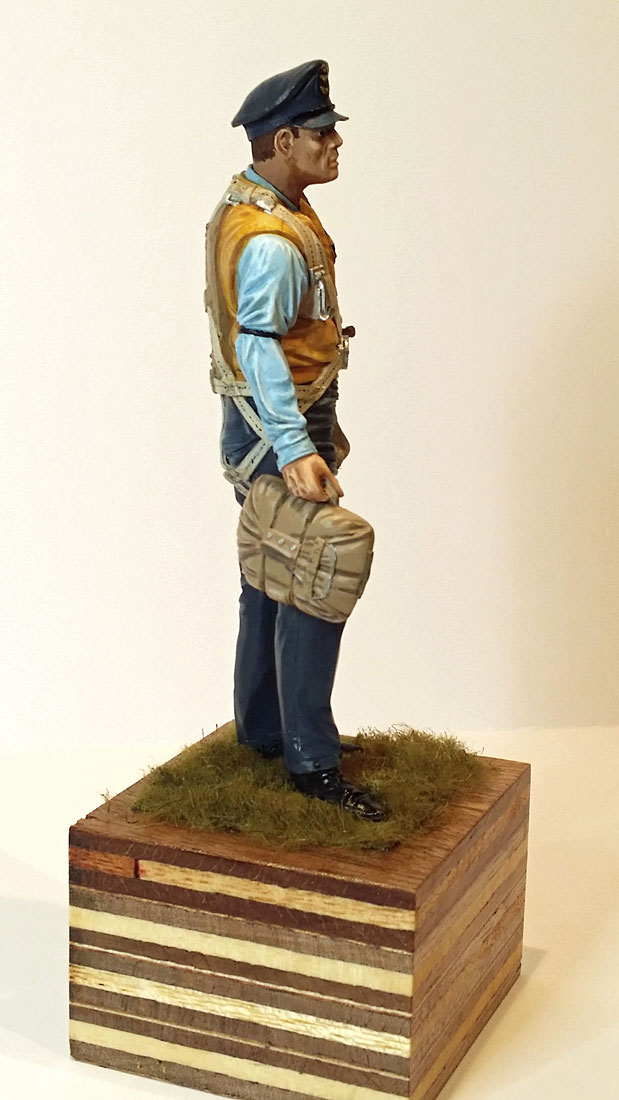
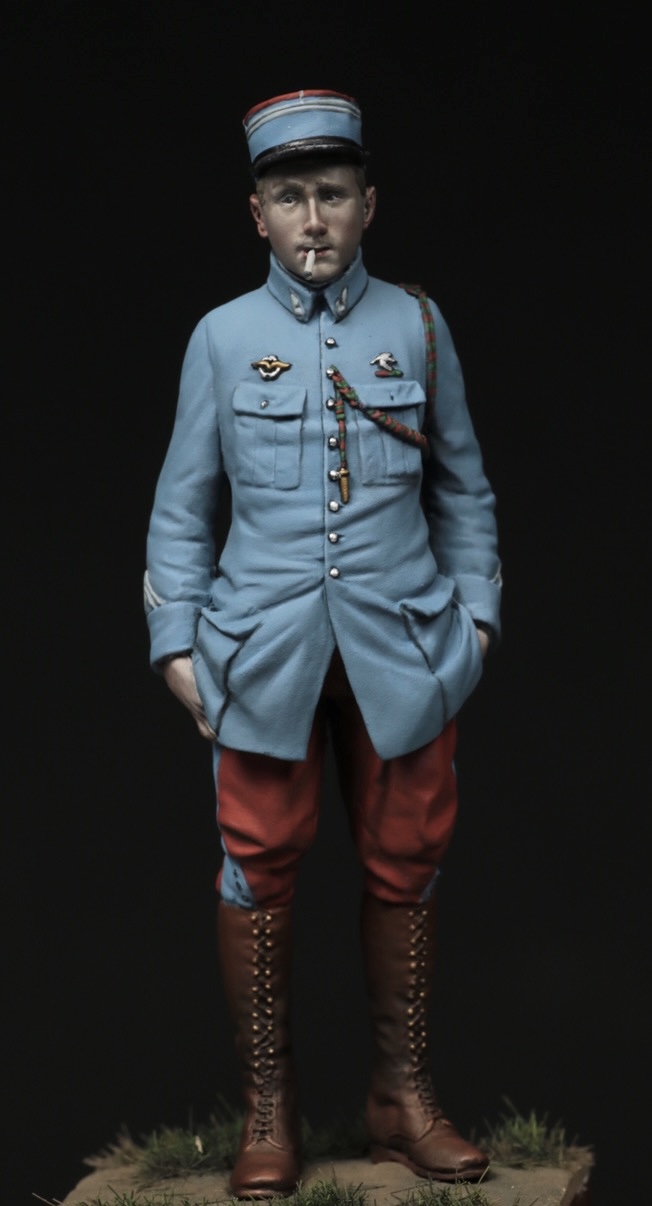
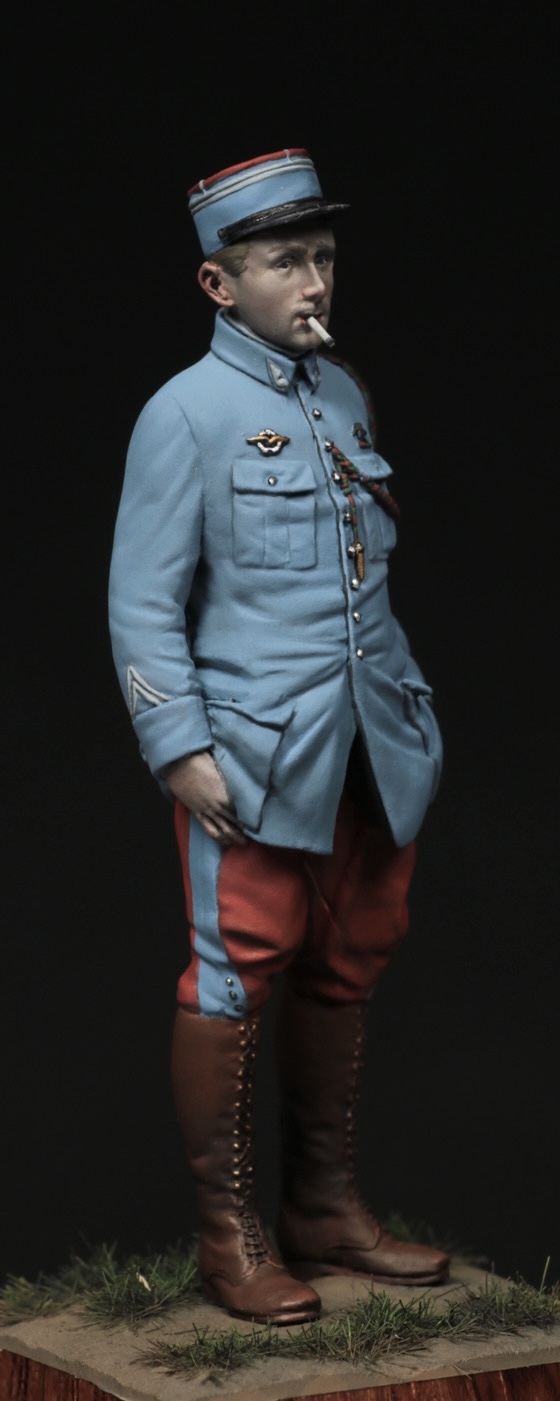
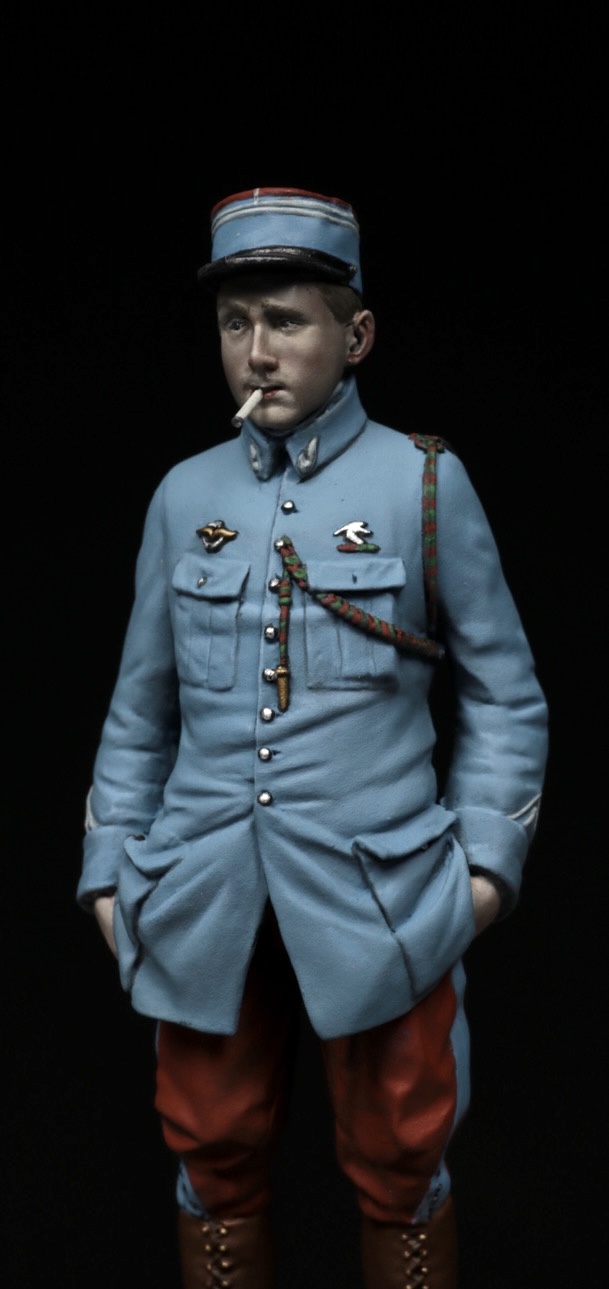
The painting is done in my preferred acrylics, painted in Vallejo and Citadel Colour and a base coat of Humbrol matt pale grey. Once I had identified any flaws and sorted them I started with the colours, with the trousers and boots. To get the blue grey I used a Citadel grey paint that was the almost the correct colour, this was then highlighted and blended using lighter shades of the base coat. The muddy look to the knees was blended into the paint as I went along (Vallejo Khaki Grey and leather brown). I base-coated the jacket straps with a mixture of White, Khaki, Black and Neutral Grey- this is an off-white colour, a tip I picked up from Raul Garcia Lattore. I then started to lay down the red for the tunic this was painted with Blood Red, and Scorched Brown, and black, (I love the names of some of the Citadel paints). I painted the musket using Scorched Brown and Vallejo’s Black Brown as the base coat and then highlighted using less Vallejo, and adding German Camo Beige, and a smidge of white.
The metal work was base coated with matt black and, then given a dry brush of Oily Steel and Dark Prussian Blue, and then the worn edge was painted with Natural Steel. The jacket was then attacked again highlighting and shadowing the red tunic. I started by painting the jacket with less black and brown in and more red, this came to a red that looks right; to shadow this I added Black and Brown Violet to the colour. This was applied in very thin washes to give the hint of a shadow and not make it too stark a contrast.
The skin tones look very pale on this piece, it was because of the colours I used, bleached bone with Sunny Skin tone and a little Scorched Brown, this was lightened up, using the same technique a before, applying, lighter tones in washes, and picking out the high lights, such as the nose, cheekbones and chin.
The base is made up of Milliput for the ground work and balsa wood for the fence.
Dave B.


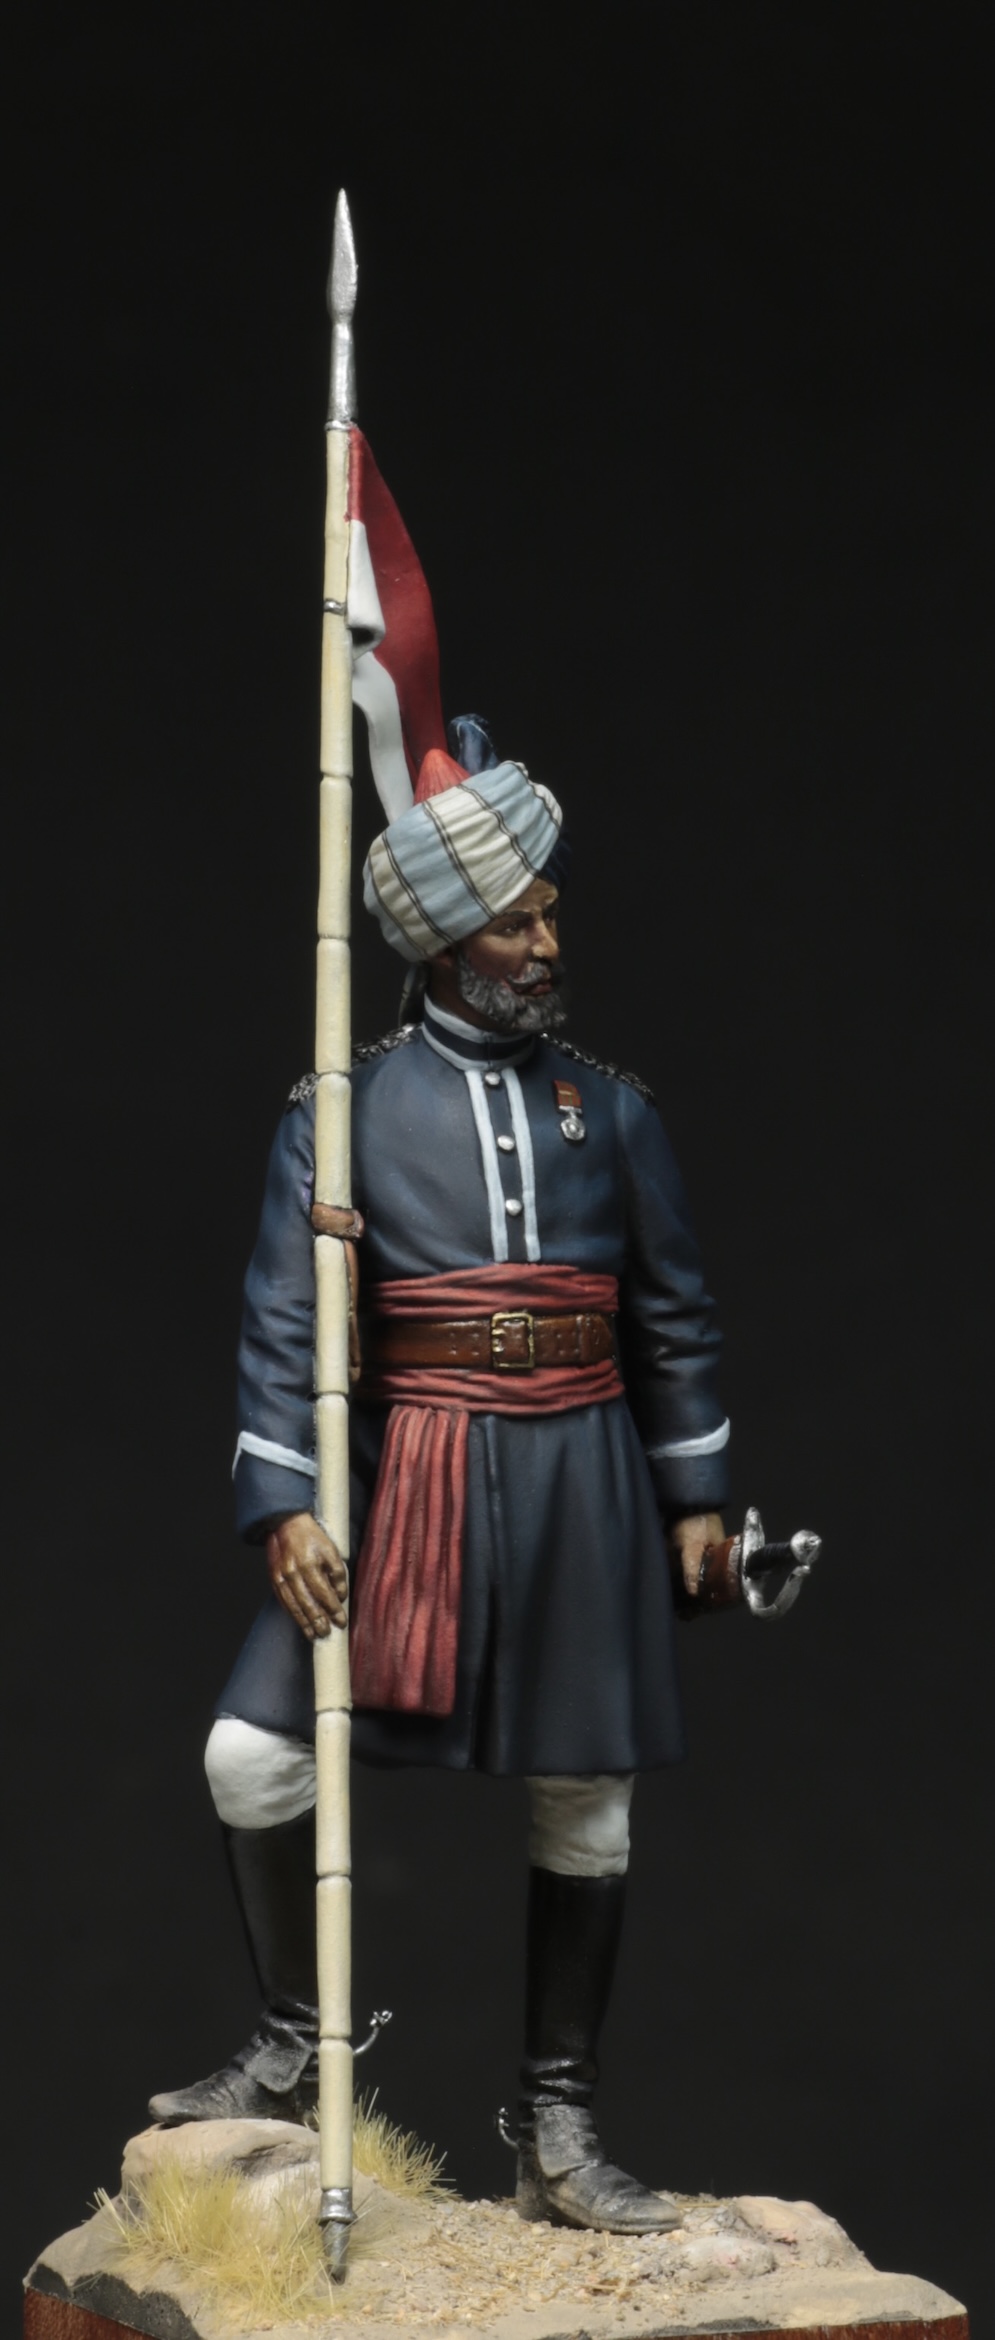
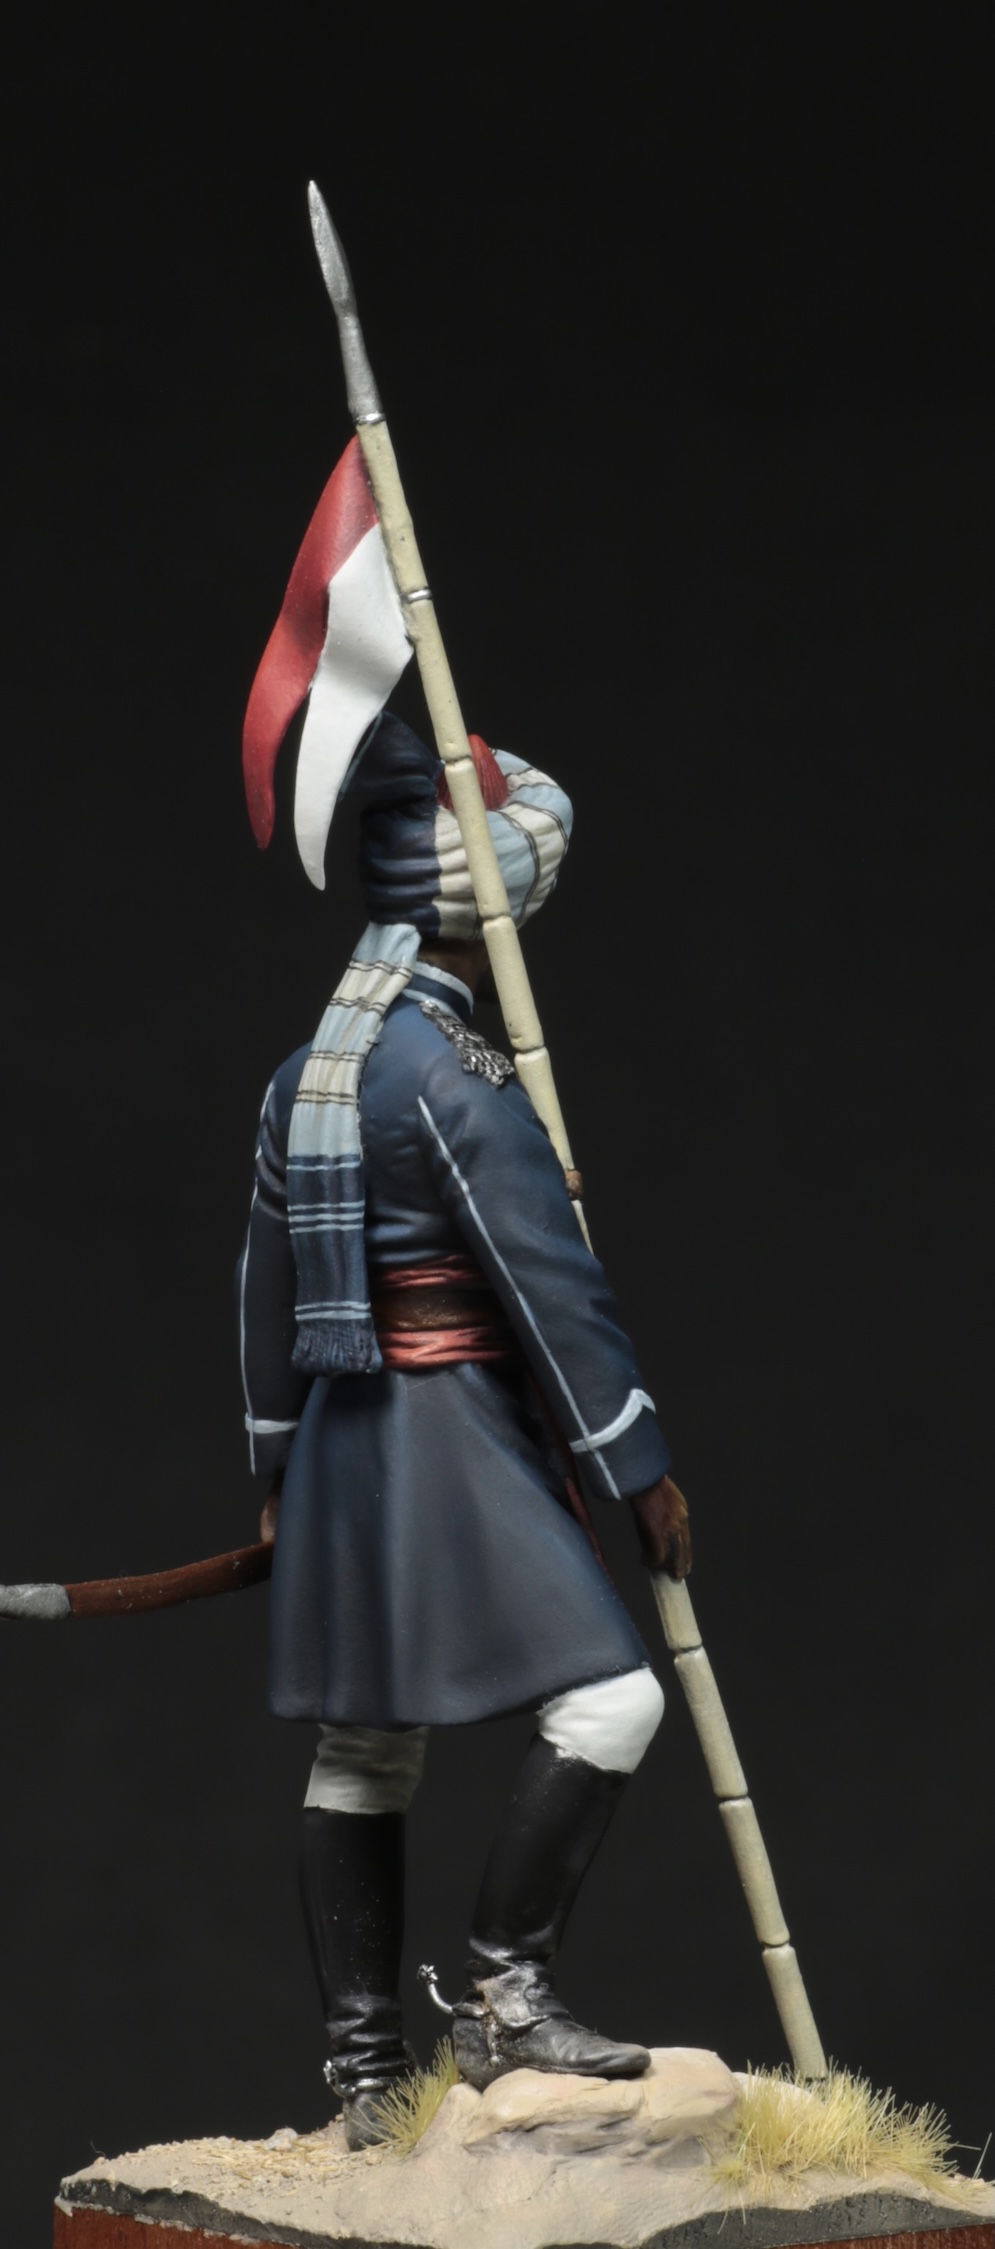
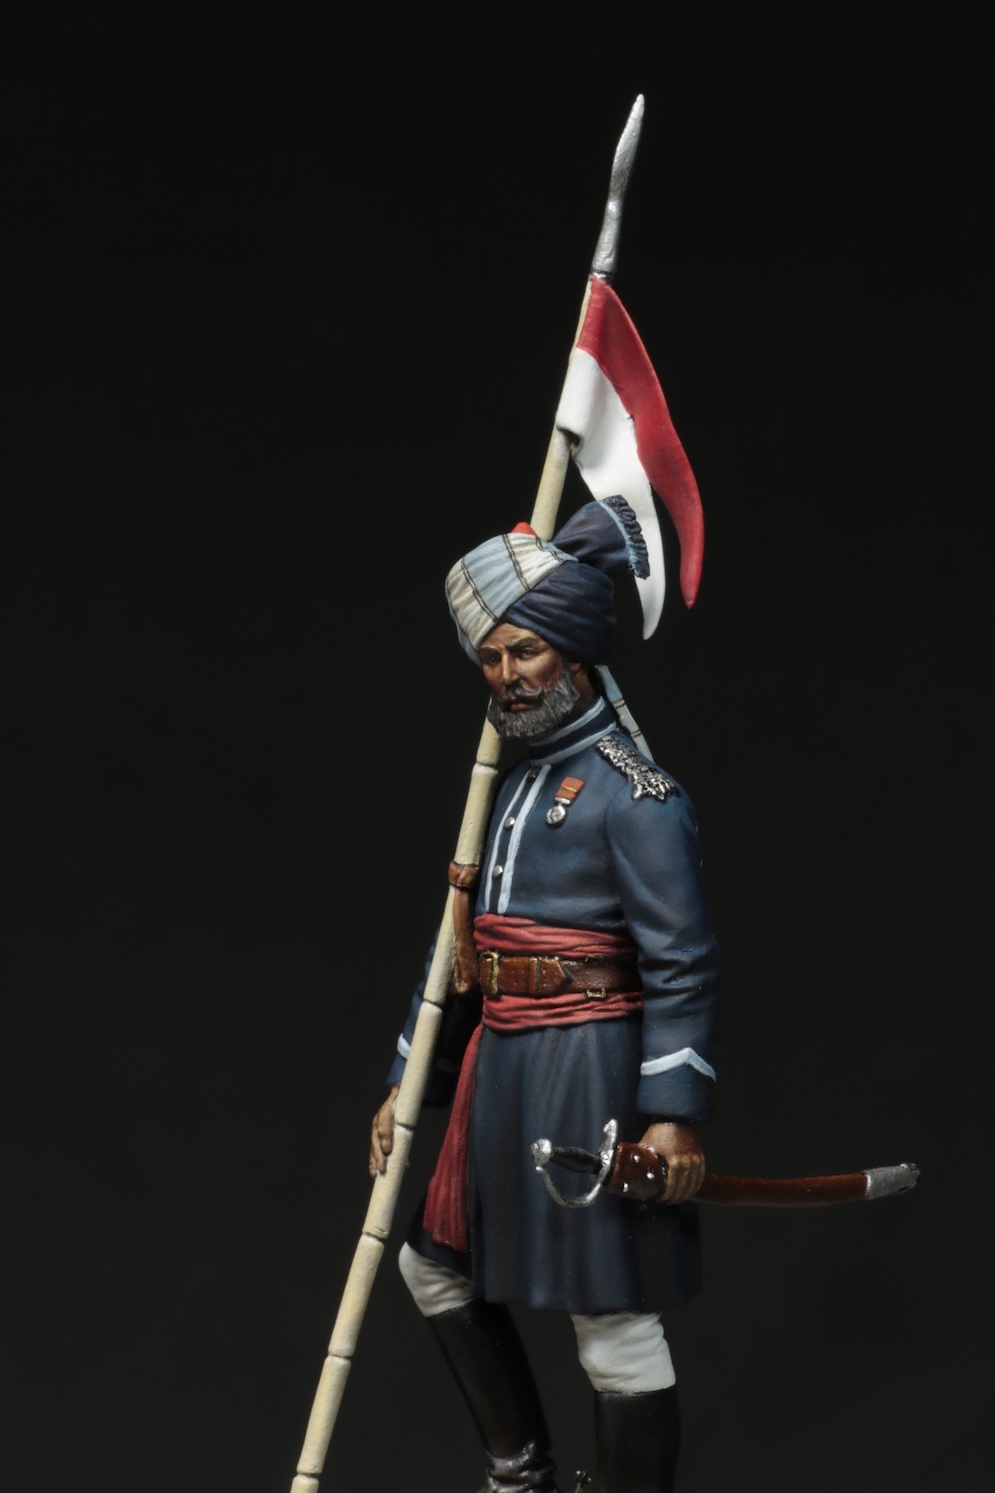
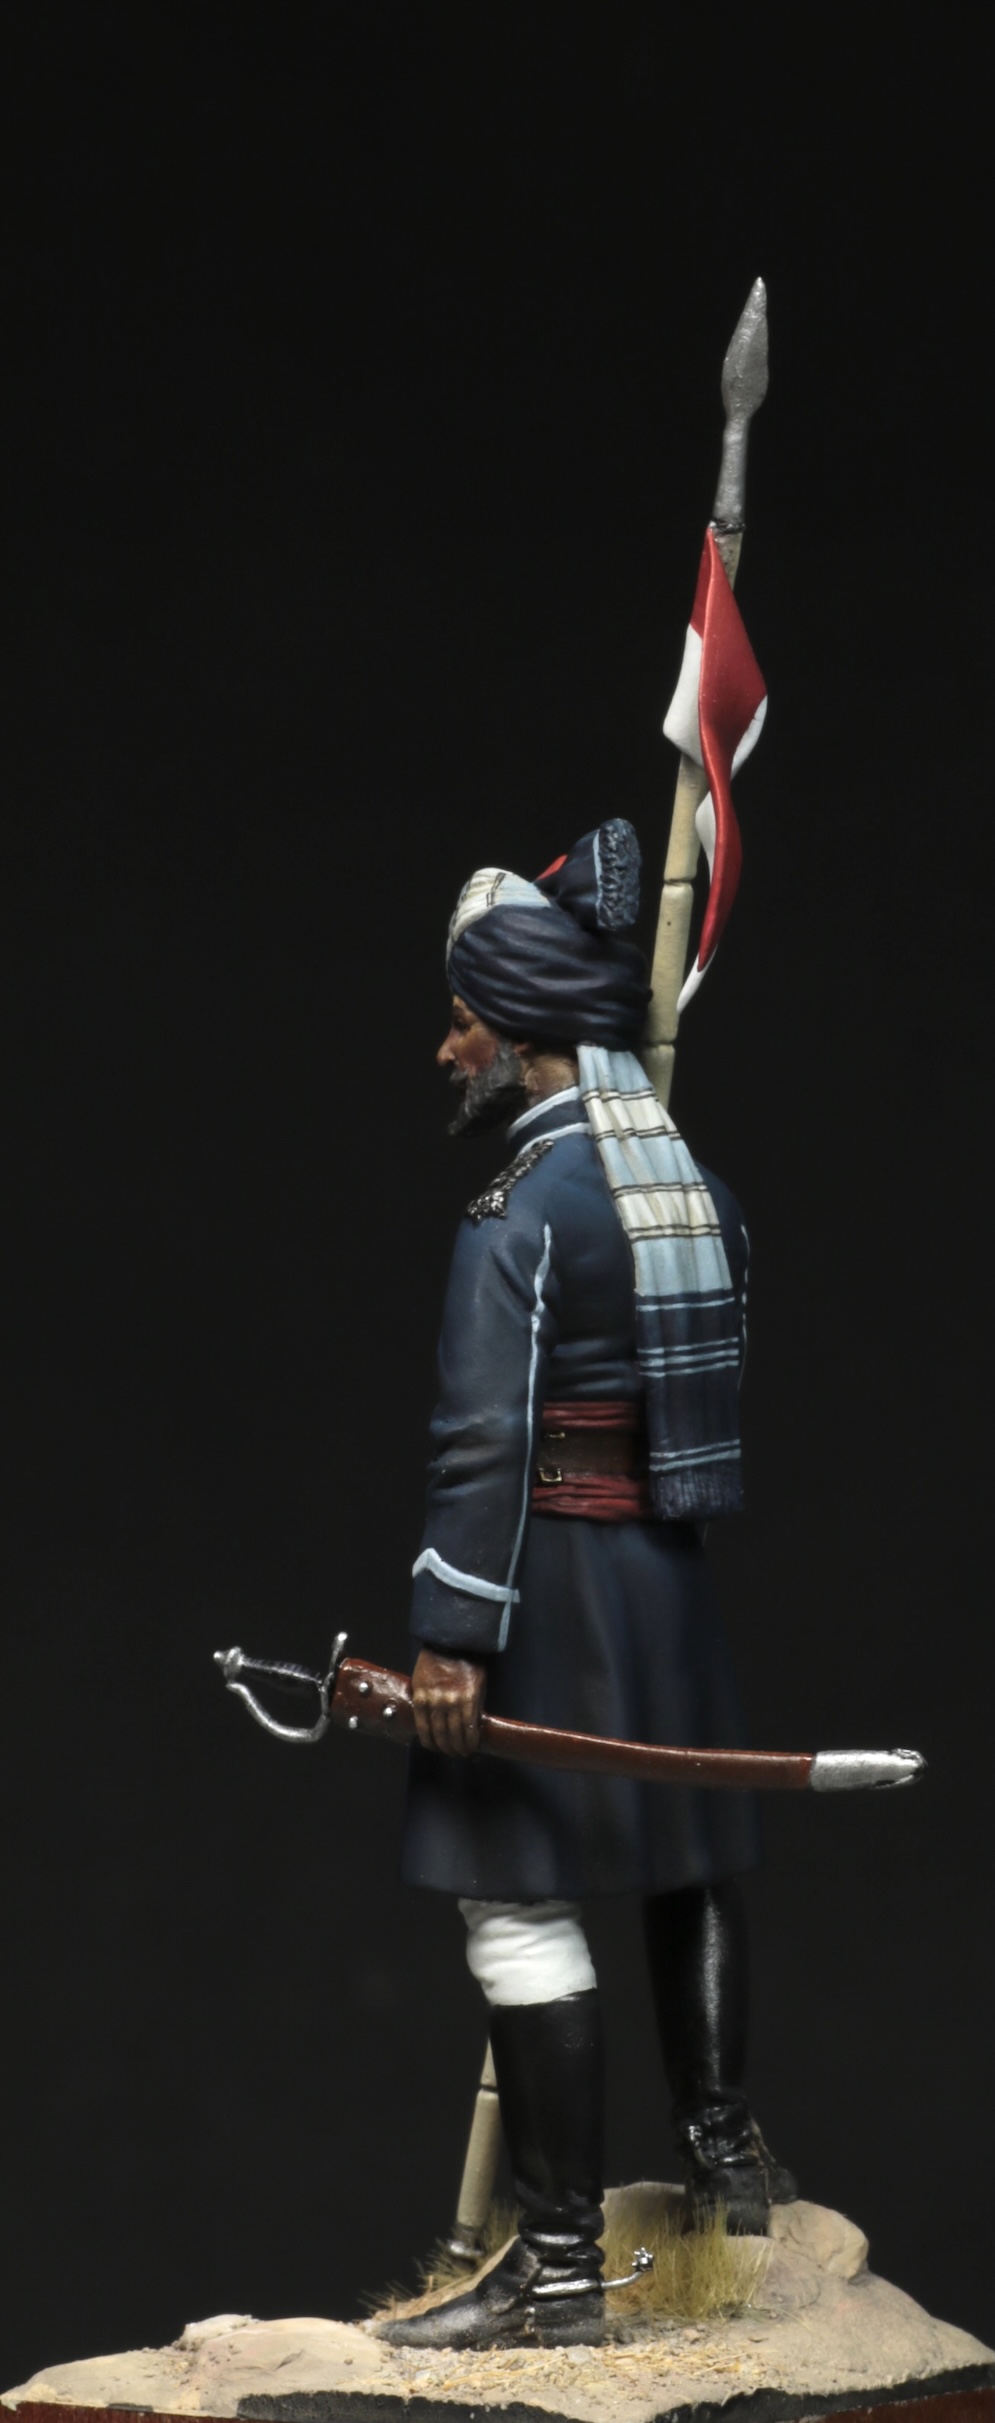
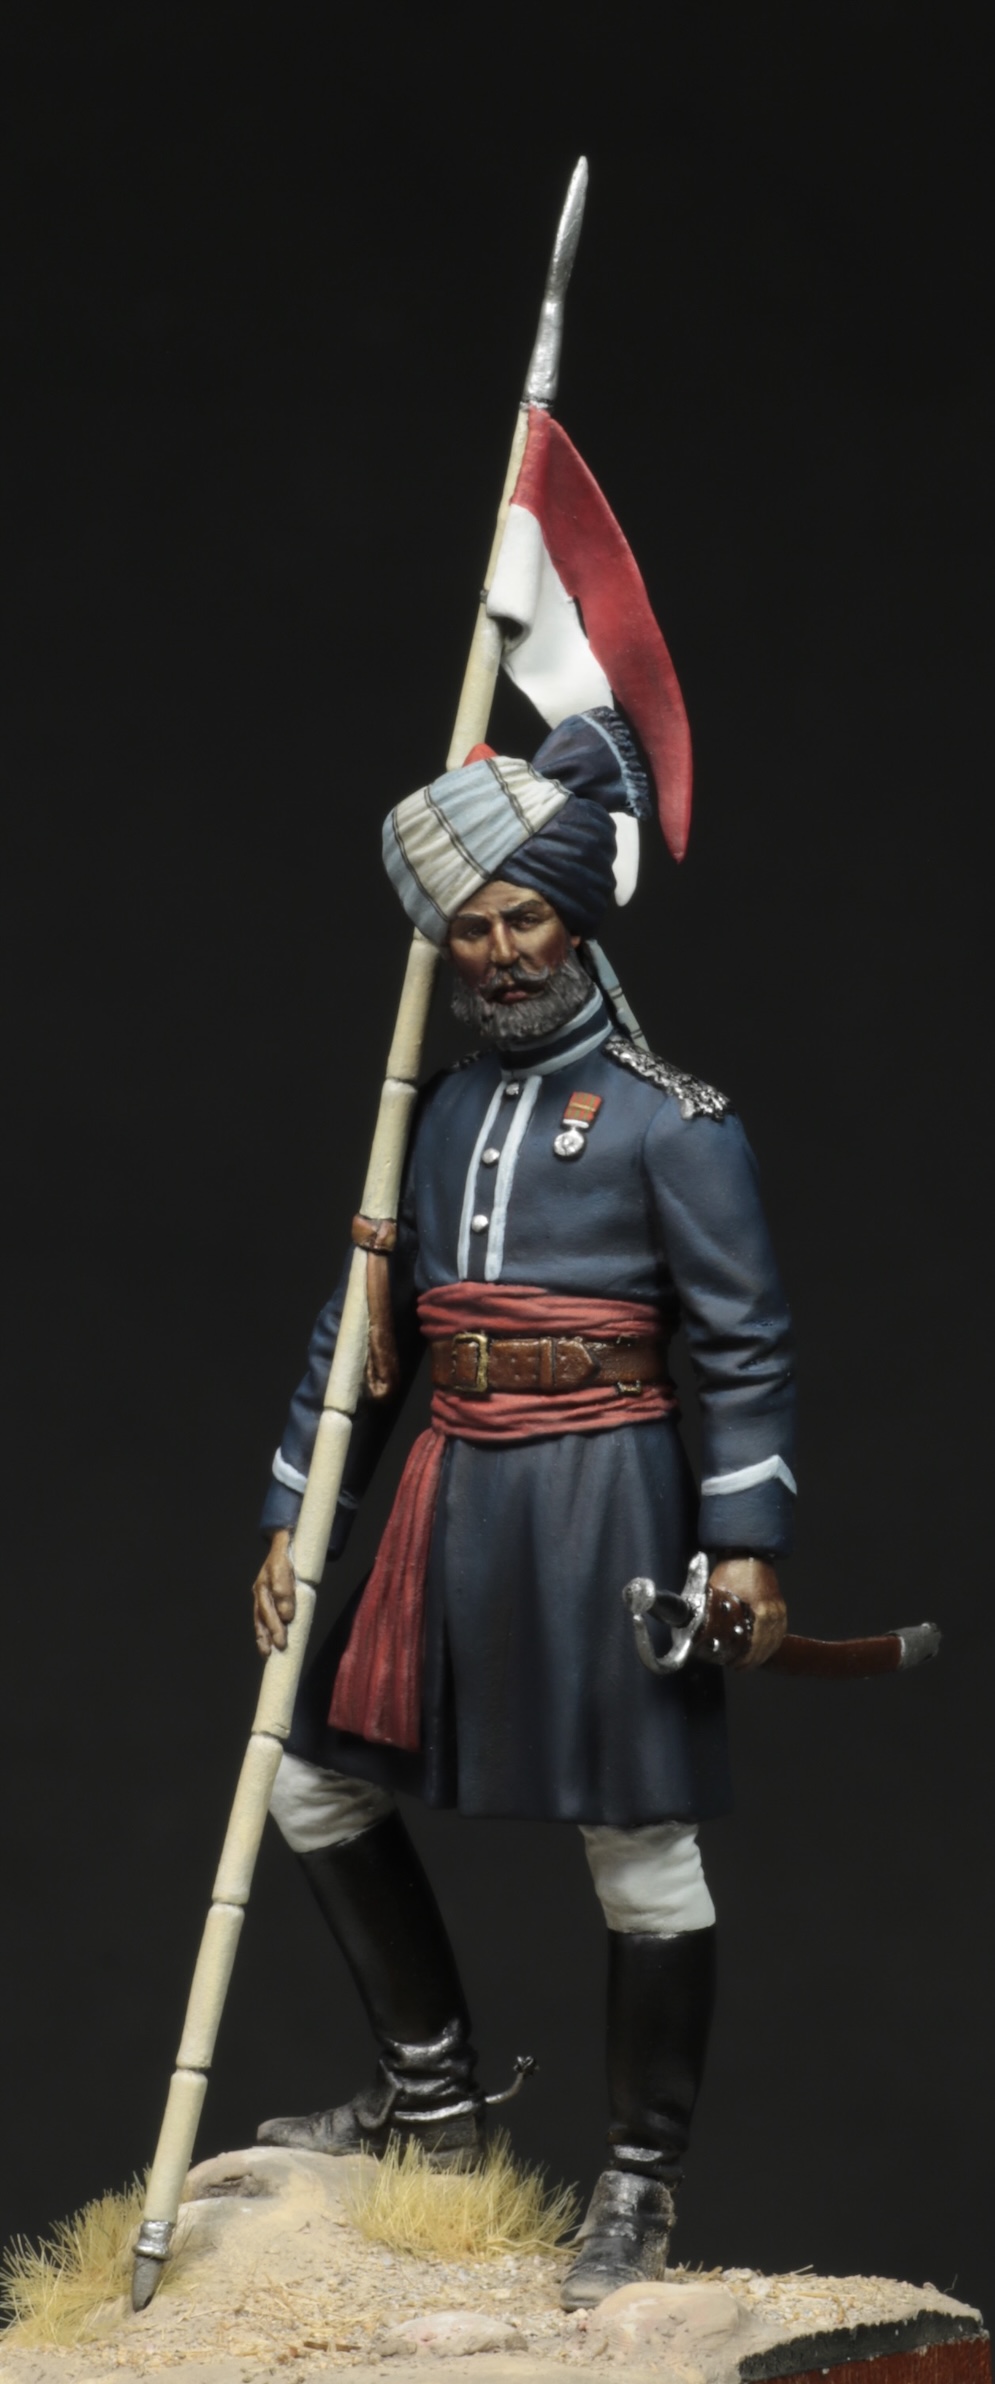
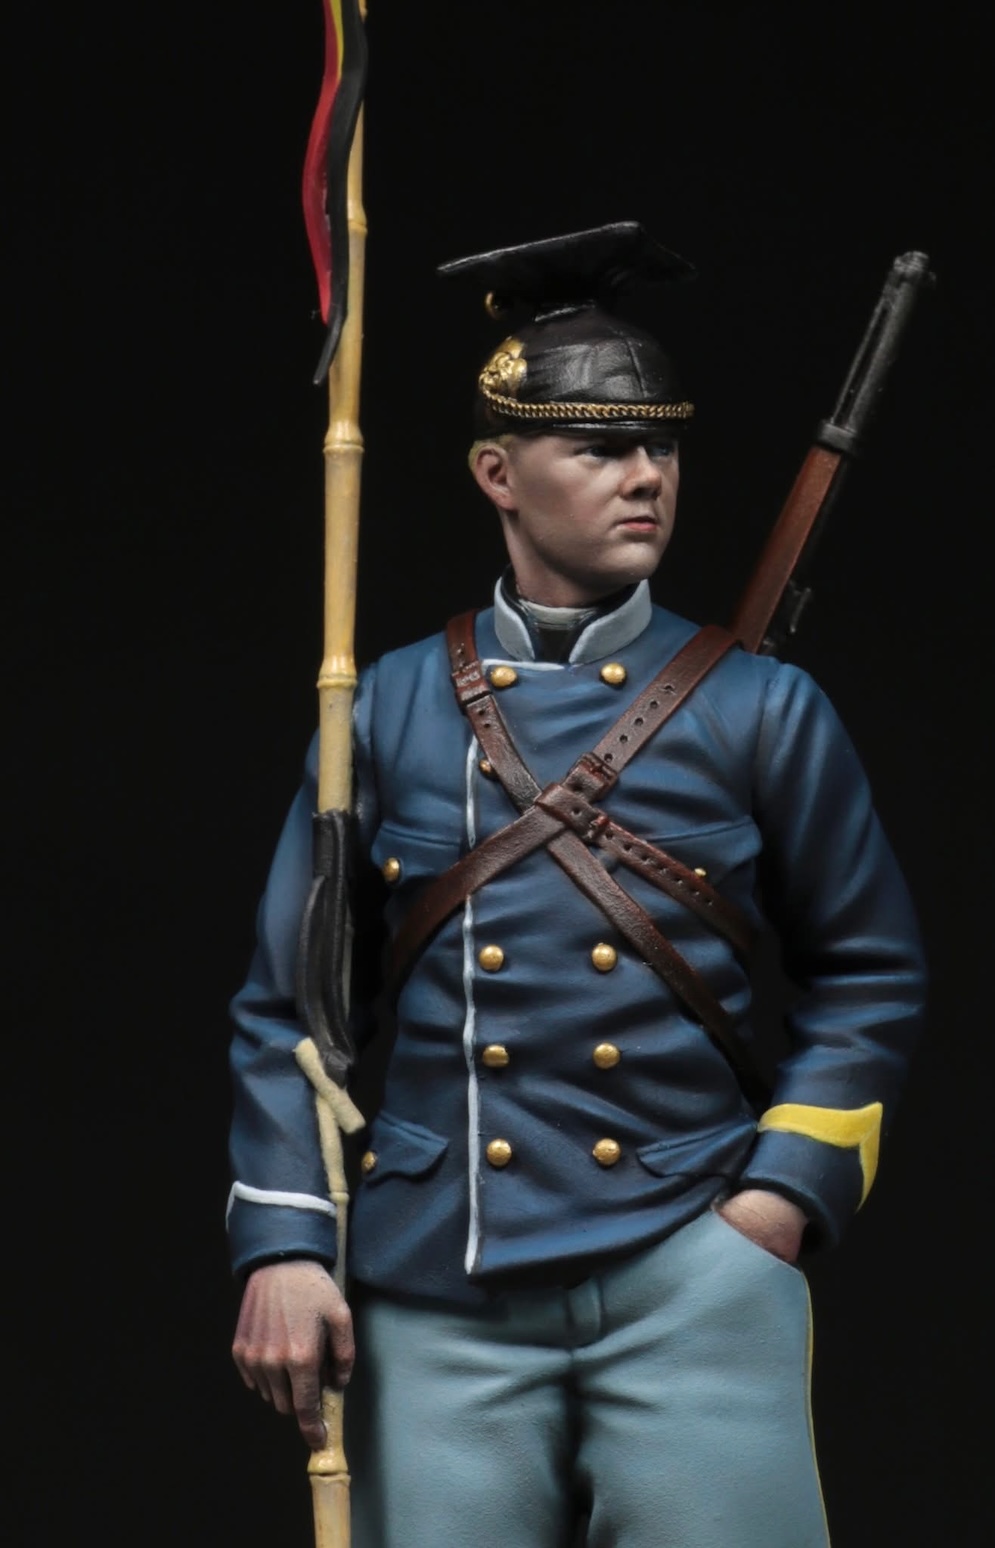
Researched the uniform as best as possible. Dark blue frock coat and not azure as art work provided. Turban is best guess based on art work by A C Lovett.
*Soft, buttery, awful, pitted metal casting. Slipped moulds, chunky casting lines across details (hands, shoulder scales, arms, body, legs, etc, etc)
I’ve checked the other 4 purchases…..all the same
David L.
Oils
Lace in acrylics
David L.
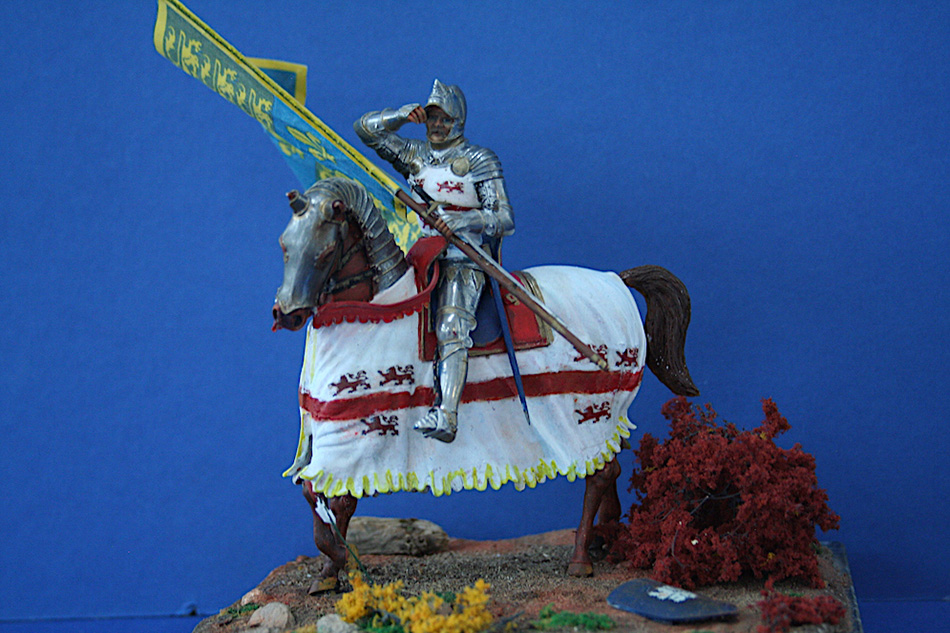
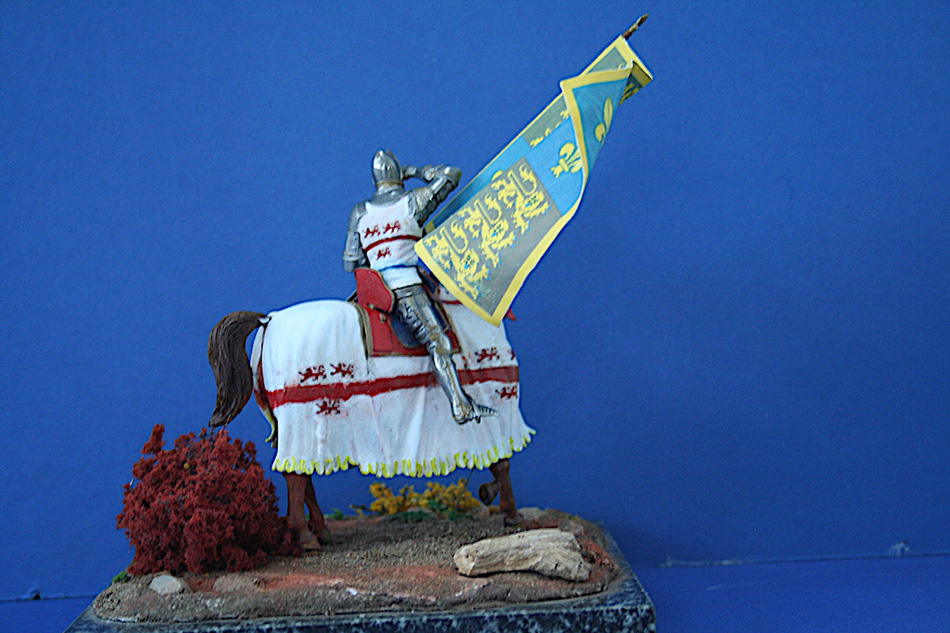
To block the escape and destroy the invader, the French king sent a vast army of well armoured Men at Arms both mounted and on foot supported by crossbowmen and archers. With a force estimated at between 15,000 to 20,000 men, and a significant proportion being cavalry, it seemed the French could not fail to succeed.
With only 8,500 men of which the main element in Henry’s army was English and Welsh bowmen, the two armies engaged in an area freshly ploughed and muddy. The French were forced to push through the mud to attack in close packed ranks.
The archers in the English army launched barrage of arrows that rained down on the French forces killing horses, dismounting and disabling riders. Foot soldiers, exhausted on reaching the English lines, were at a disadvantage against the lightly armoured English. Joined in hand-to-hand combat, by the end of the battle, the English had lost around 600 men while the devastated French army had lost over 6,000 including the bulk of its nobility.
This action was immortalised later by Shakespeare and in the films, centuries later, based on his works. The battle has been a popular inspiration for model makers with the figure of Henry’s standard bearer, Sir John Codrington, being a popular subject.
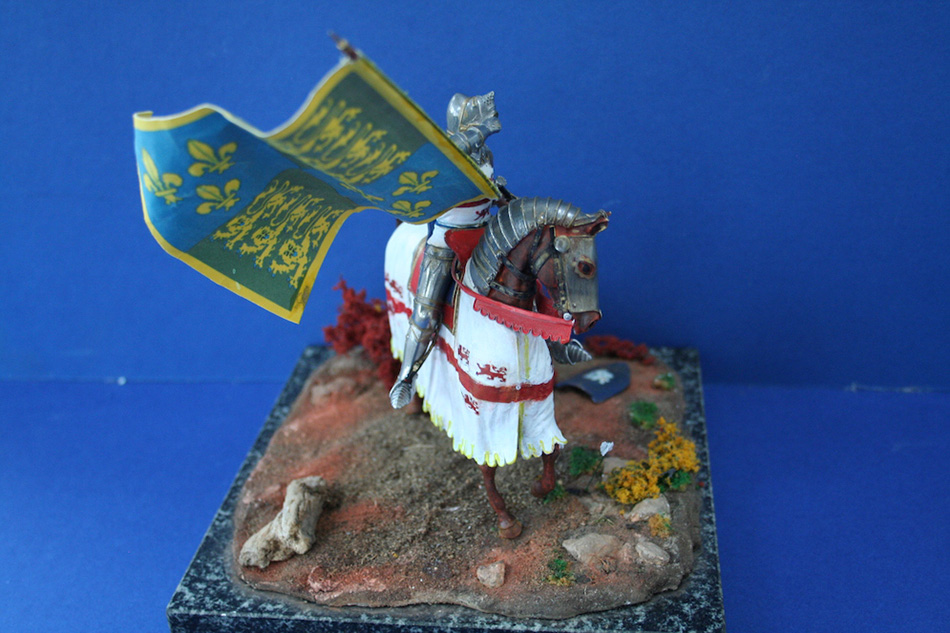
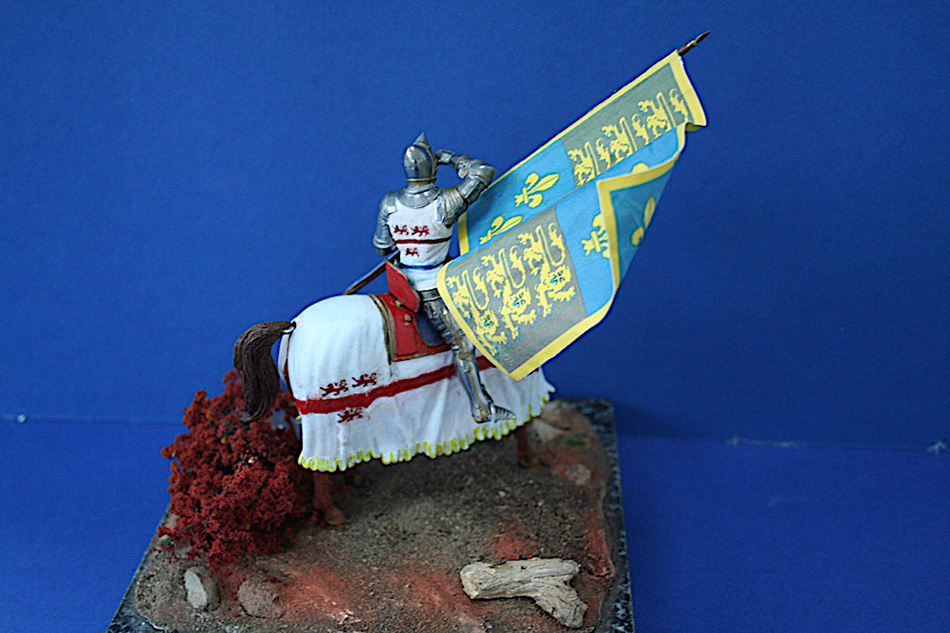
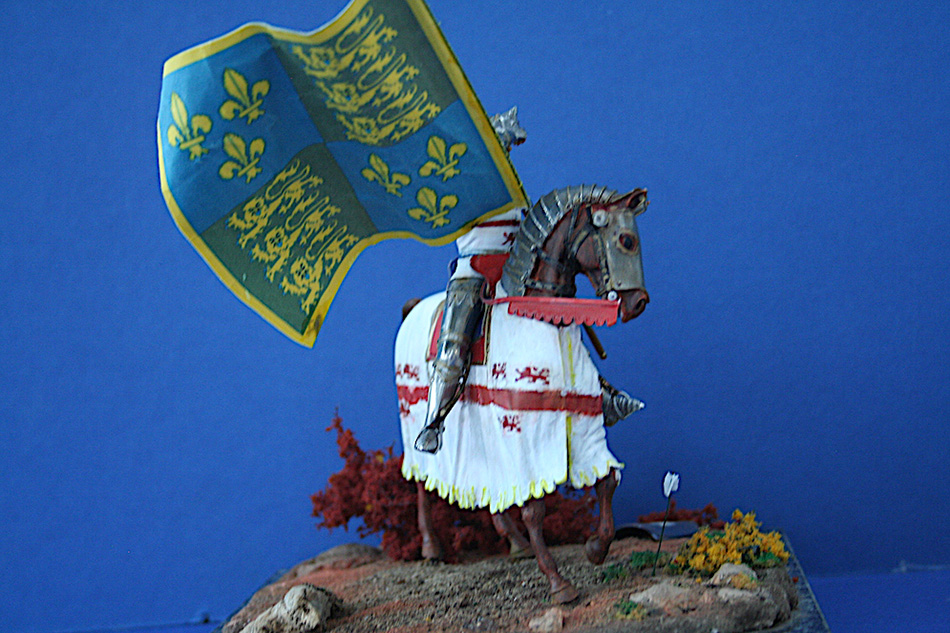
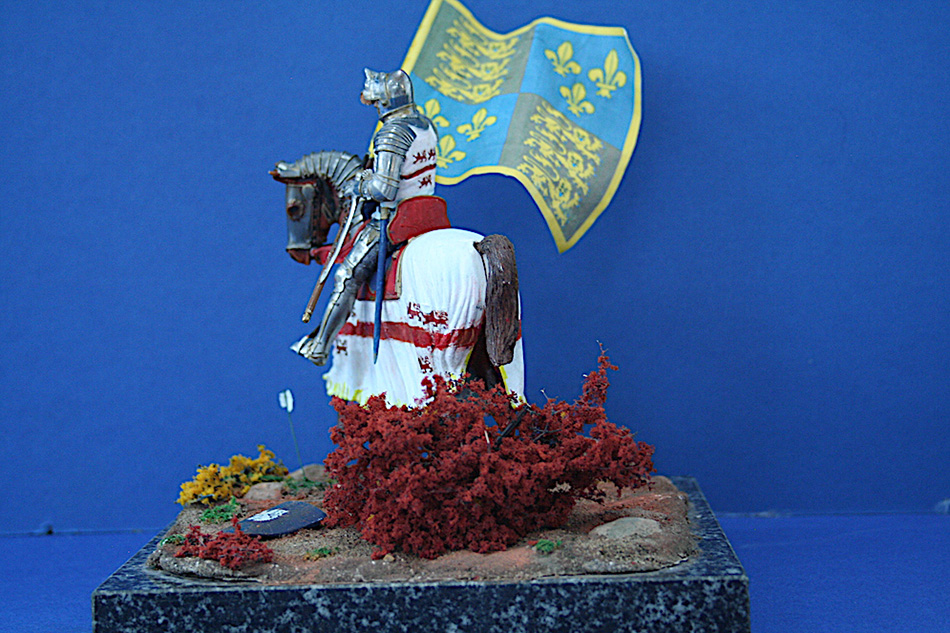
A 90mm mounted figure, produced by Barton Miniatures, is perhaps one of the best representations. Made in white metal, the figure comes in easily assembled kit form with a thin brass sheet to represent Henry ‘s standard. The standard was made up of the three lions of England and the French Fleur de Lis in quarters reportedly aimed to represent Henry’s claim to both crowns.
Rather than use the brass sheet, the standard was made from a copy of the flag and its image, printed onto thin paper, glued and folded over. Having shaped the folds in the flag, to keep its structure, it was coated with several layers of matt varnish.
The lions on the surcoat and horse’s coat were copied form an image on the internet, reduced in size and printed onto decal paper, sealed with fixing solution and applied in the normal manner to the model. Groundwork was prepared on the granite slab used for the base.
By Steve N

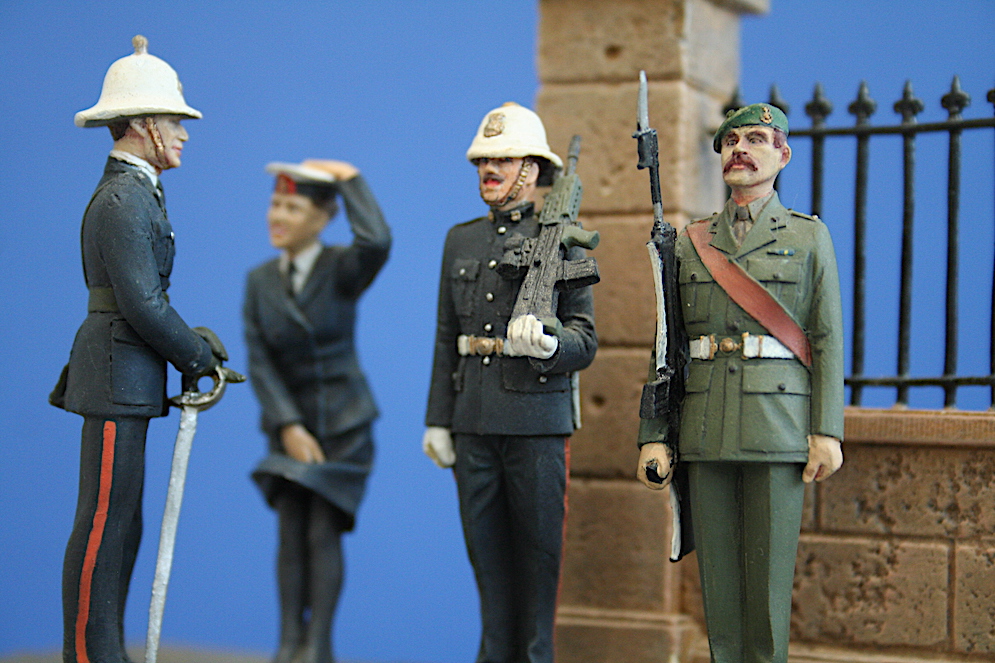
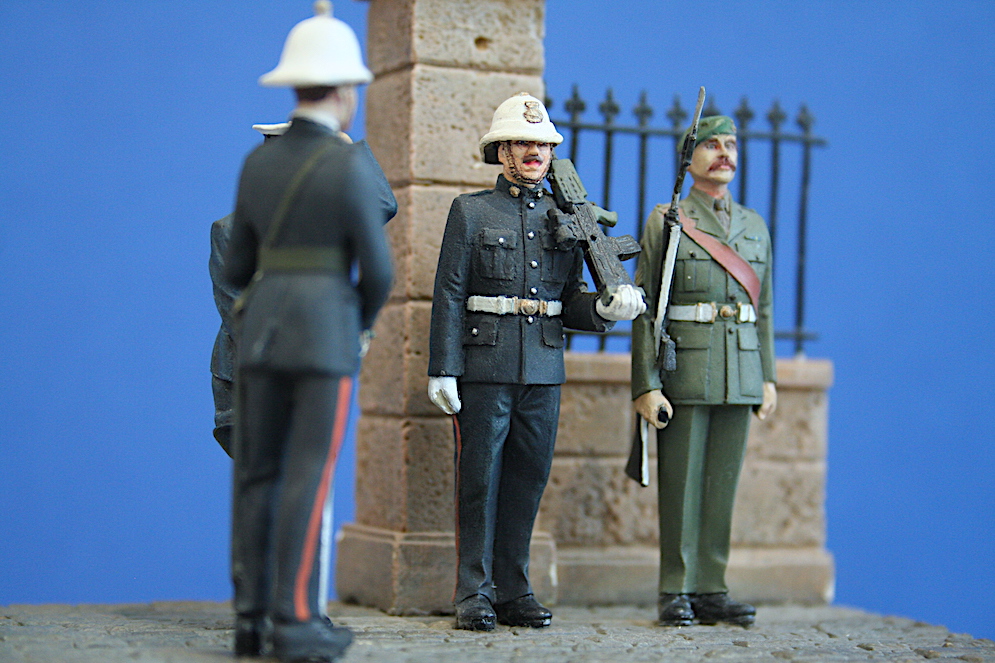
General meaning: A state of confusion, uncertainty, disarray
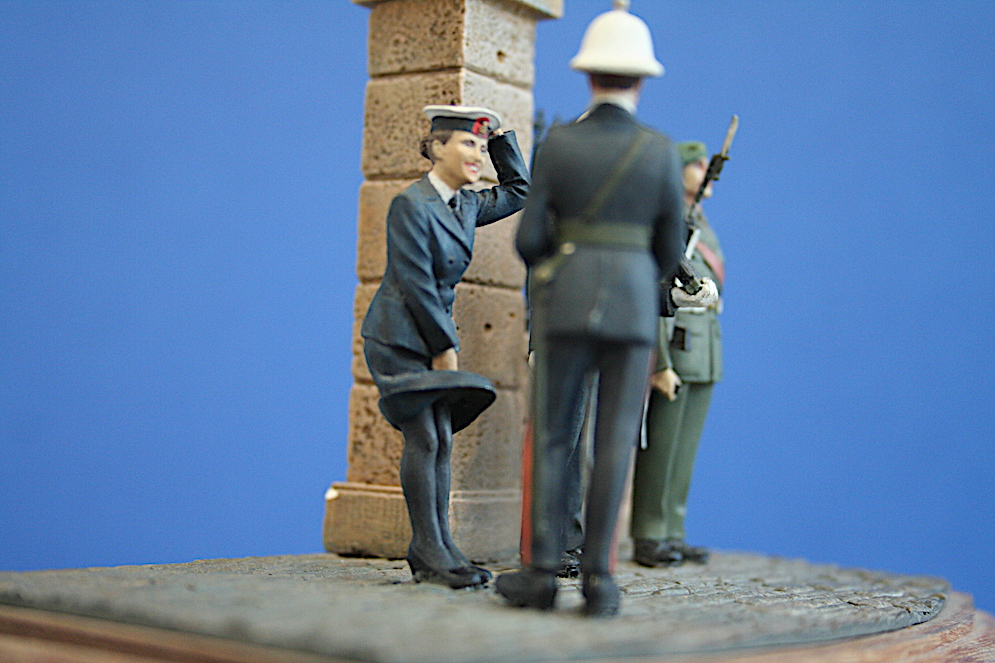
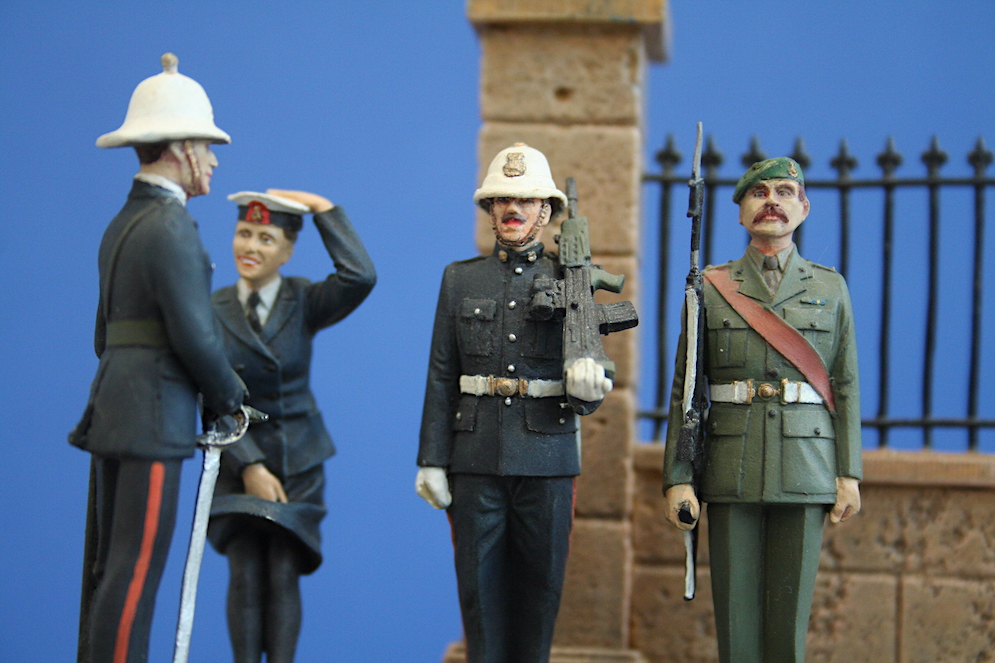
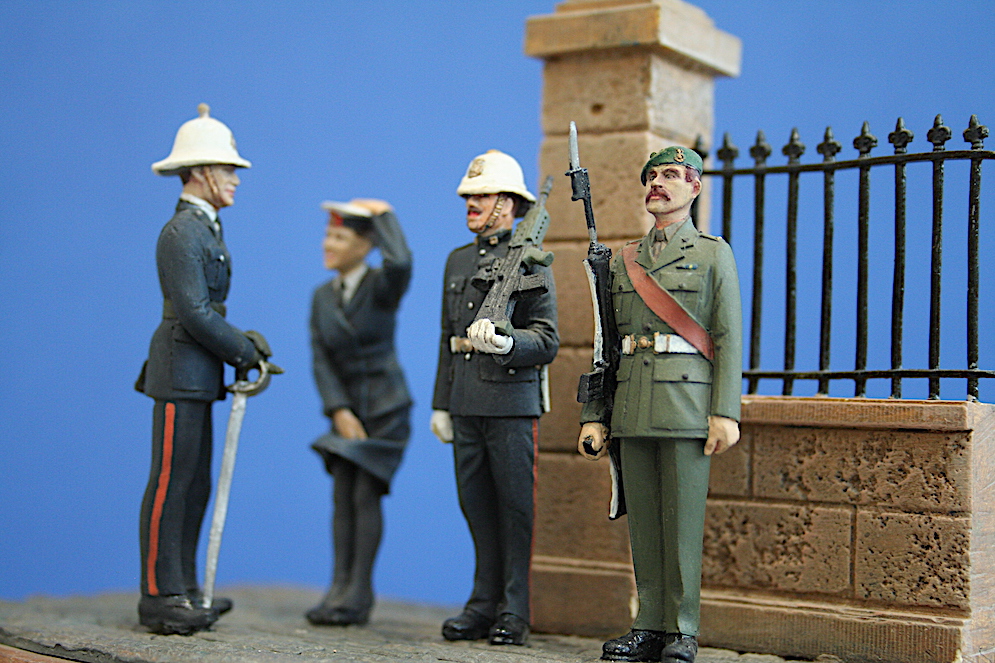
Set in the mid 1980’s, a marine officer observes and compares ceremonial drill duties between a marine using the new SA80 rifle and a colour sergeant with the older and soon to be retired self-loading L1A1 rifle. While a major advance in technology, the drill book had to be rewritten for the new weapon that was considered ungainly for ceremonial duties.
The vignette also displays the style of uniforms worn by the Royal Marines (No.1 and No.2 dress) and Women’s Royal Naval Service (WRNS – now integrated fully into the Navy). A gust of wind threatens to leave the Wren’s uniform in disarray and has caught her “All at Sea”. The three males look away with a steady gaze into the distance as she tries to gain control of the situation.
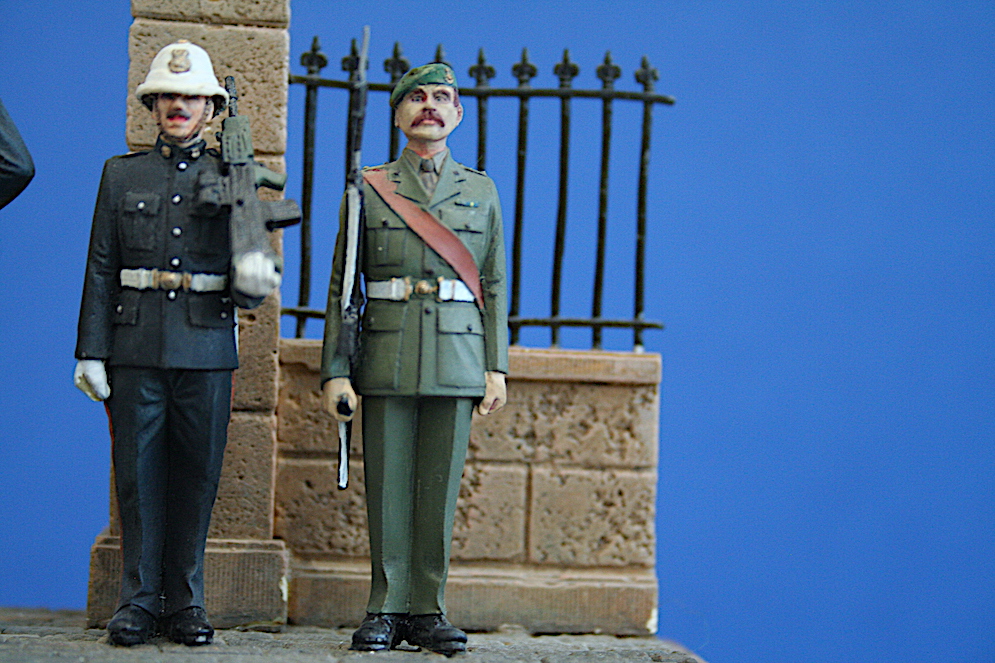
The marine officer is a Rose Miniatures figure built as a stock item. Wearing a Sam Brown belt attached to the sword scabbard, he rests the sword on the ground.
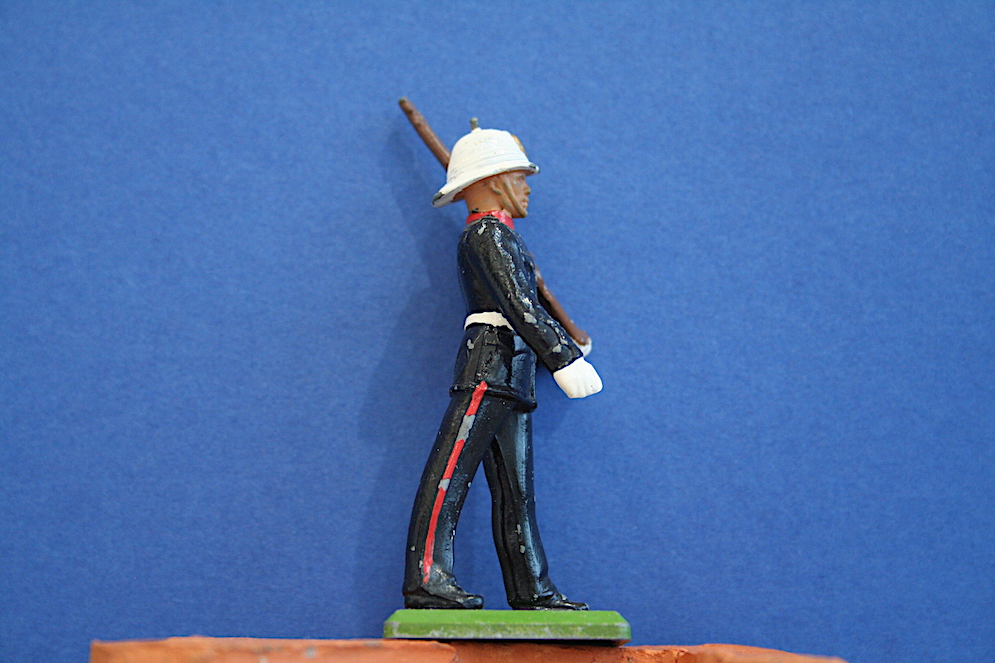
The colour sergeant is a stock figure from the old Chota Sahib range along with the Wren modelled by Roger Saunders for Chota Sahib. All are still available on internet sales sites.
The marine with the SA80 was a conversion of Chota Sahib line infantryman 1902. Dressed in a plain tunic with standing collar, pockets were added using thin plastic card. The 1902 helmet was carefully cut off and the remnants filed off. To get the distinctive helmet for the marine, a Britains’ figure was used as the donor. Once removed, the helmet was shaped to fit the head.
The SA80 rifle came from a set produced by Cheshire Volunteers replacing the Lee Enfield SMLE of the 1902 period. Part of the set is shown here with an SA90 from another source for size and shape comparison. As a fighting weapon the SA90 may be well suited but for ceremonial duties being nearly one third shorter than its forerunners and lacking the sleekness of a stock, it is not ideal.
By Steve N
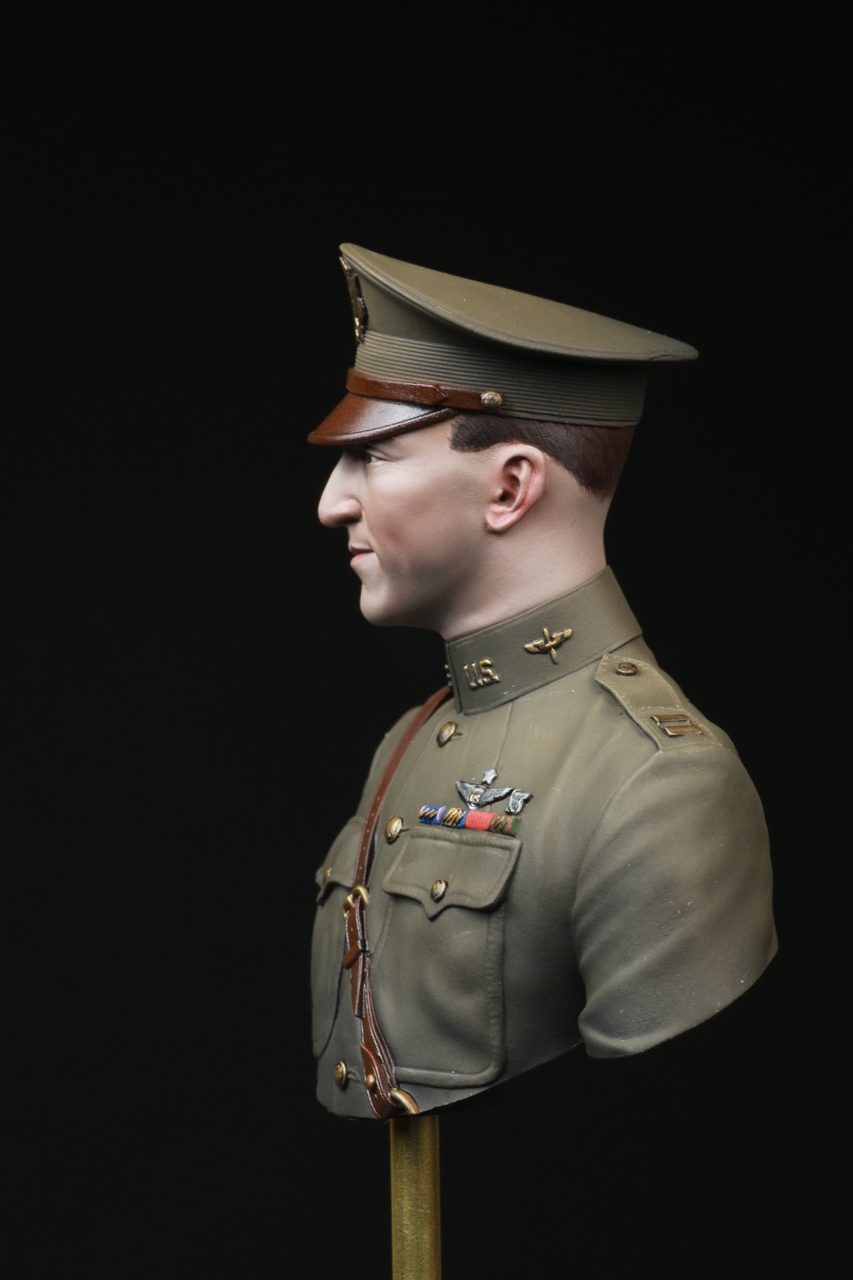
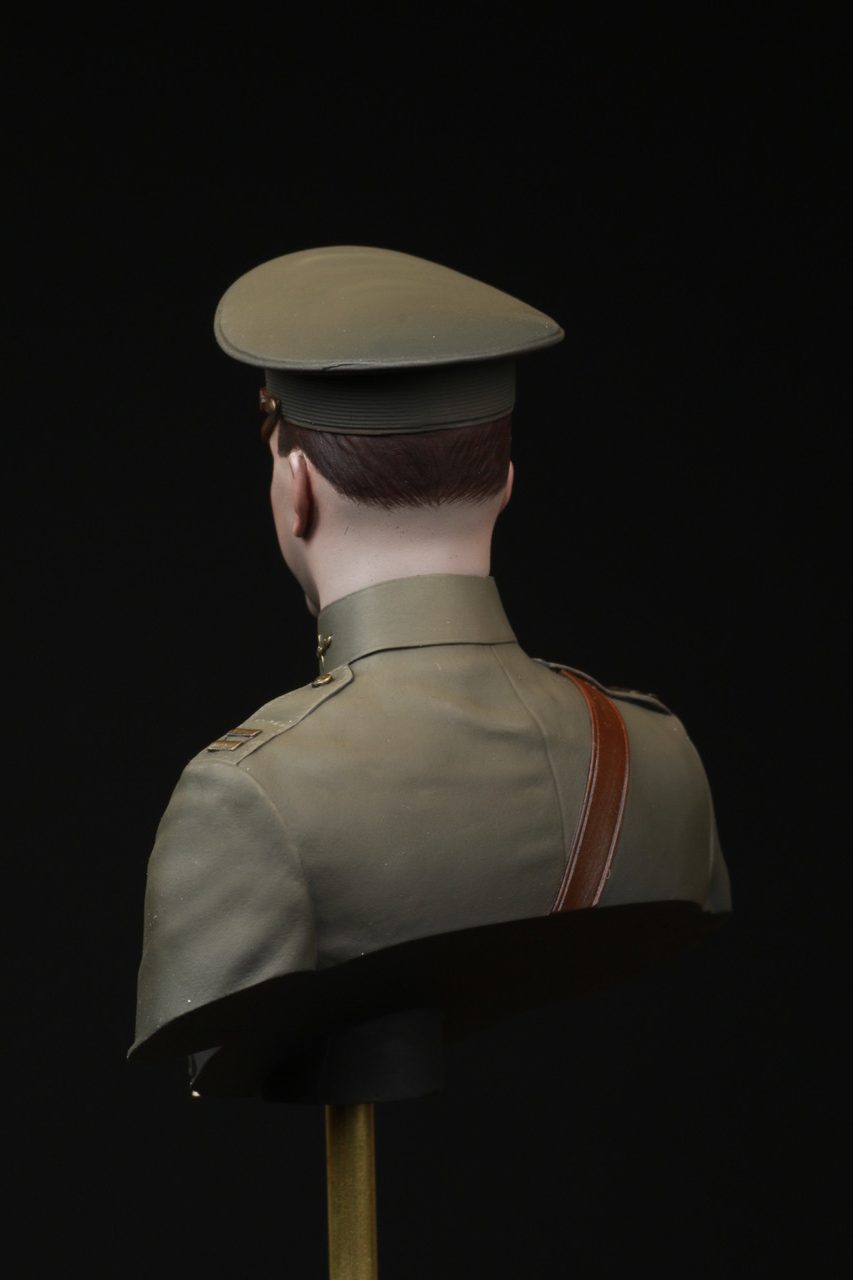
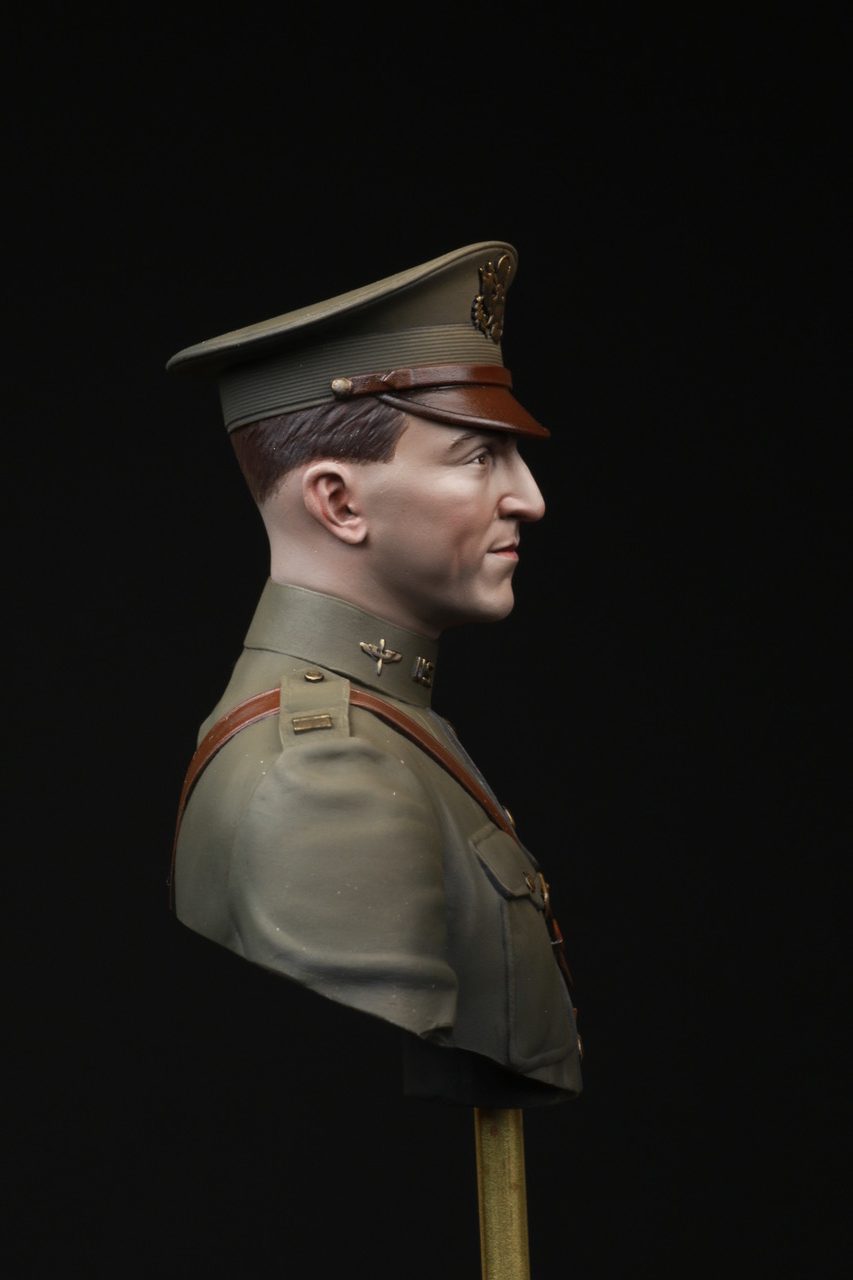
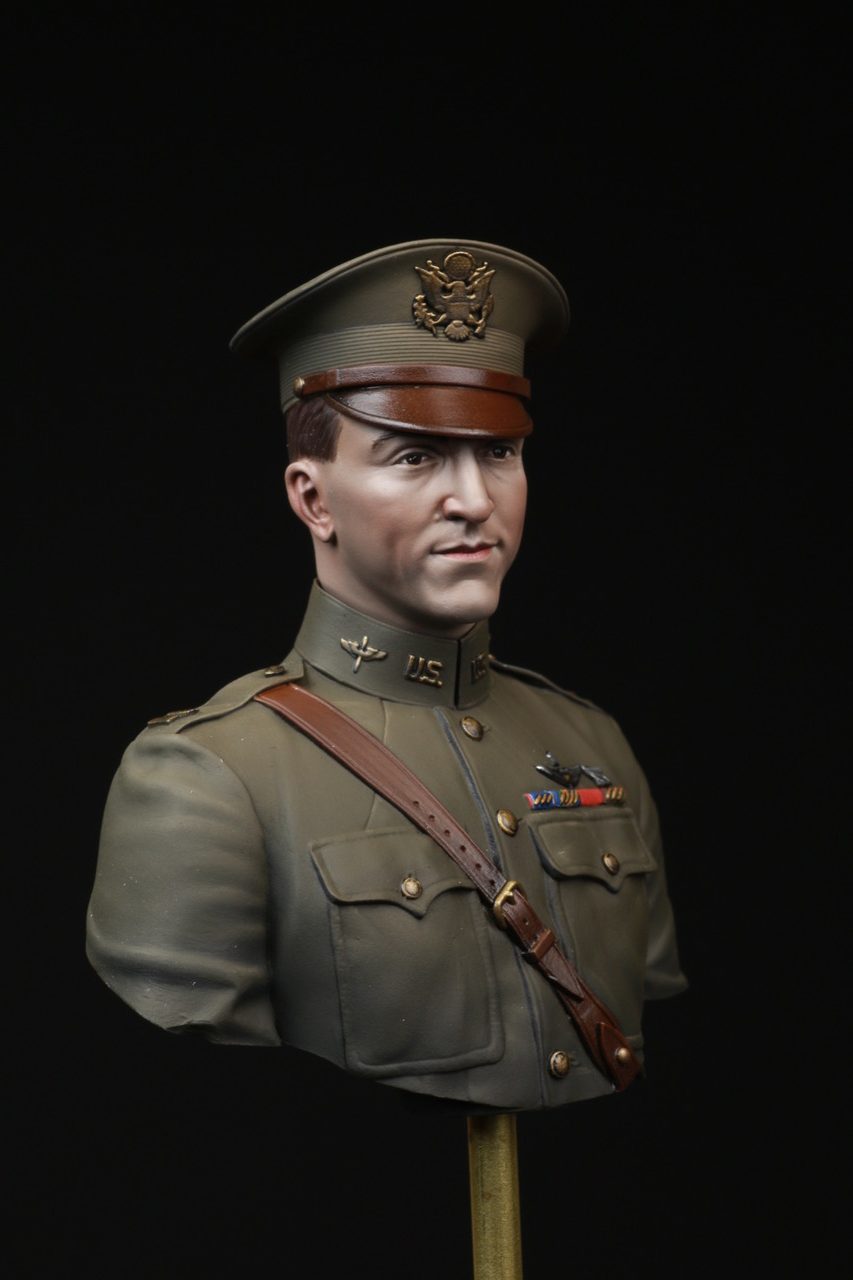
Apache 120mm figure from Verlinden


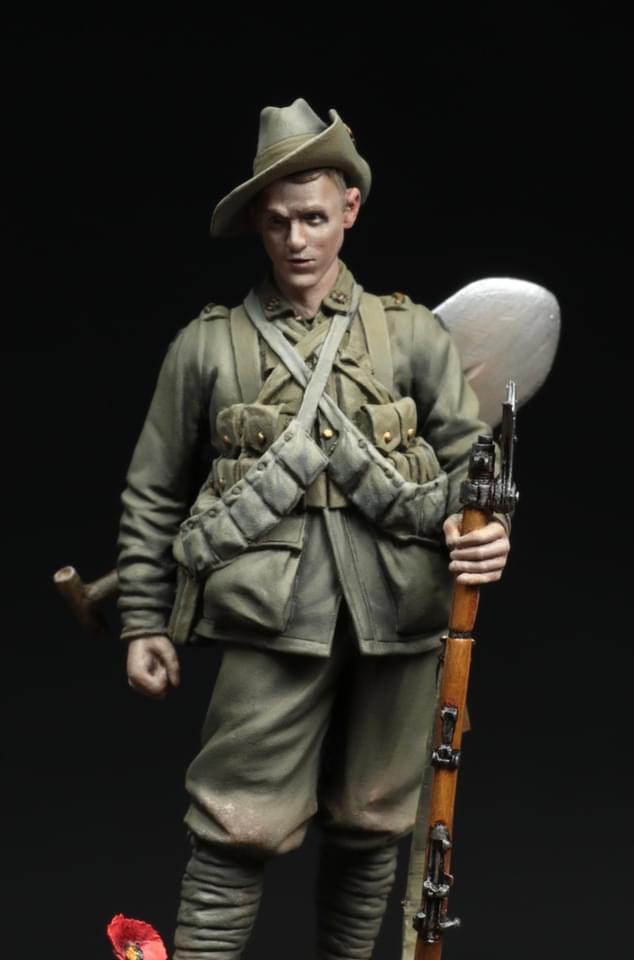
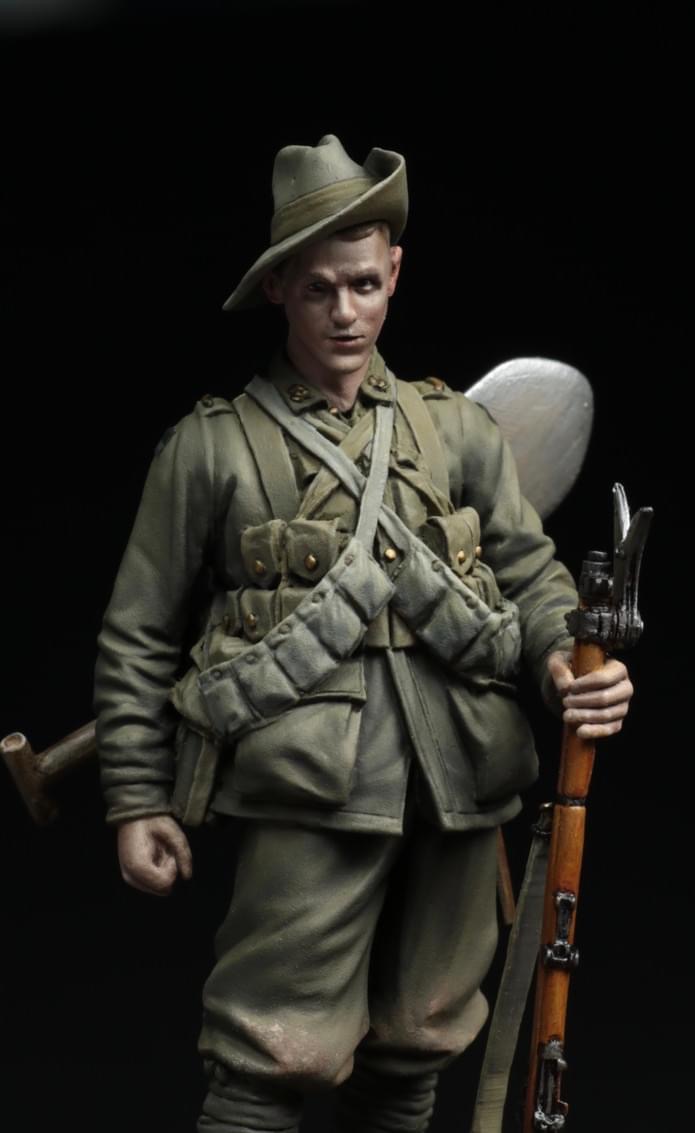
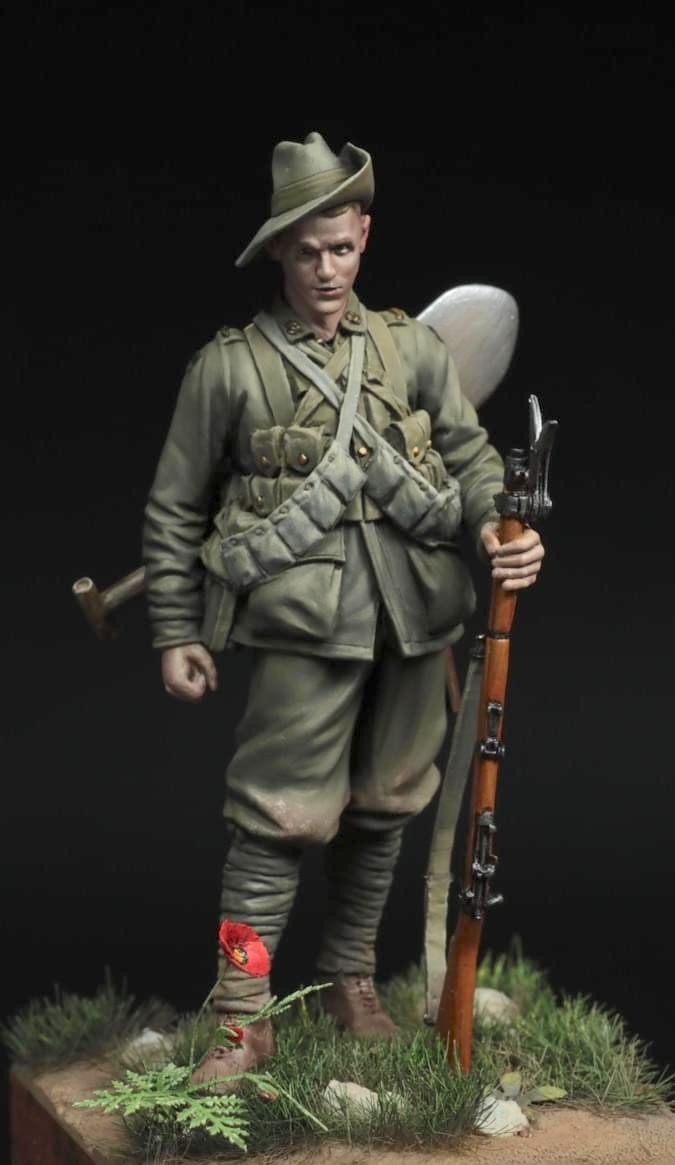


War and Peaces Miniatures
Sculptor Benoit Cauchies
Oils, with acrylic webbing
Tricky taking pics of the face under the wide brim of the hat.
David L.
Oils: lace in acrylics
David L.
1:10 Model Victoria
Nice casting and Superb positive fit
Oils
Tricky getting a shot under the helmet rim, too much uplight and it looks weird!!
David L.


Wars and Peace’s Miniatures 70mm
Oils
David L.


assembled while researching its identity. Assembly was straightforward with
the parts cast in resin. Research found an illustration matching the figure and
described as above.
The resin and its colour suggested the manufacturer might
be Verlinden.
The figure was finished in a simple colour scheme, typical of the period.
Steve N.
Our thanks to Carlos for giving us his kind permission to use his images here.


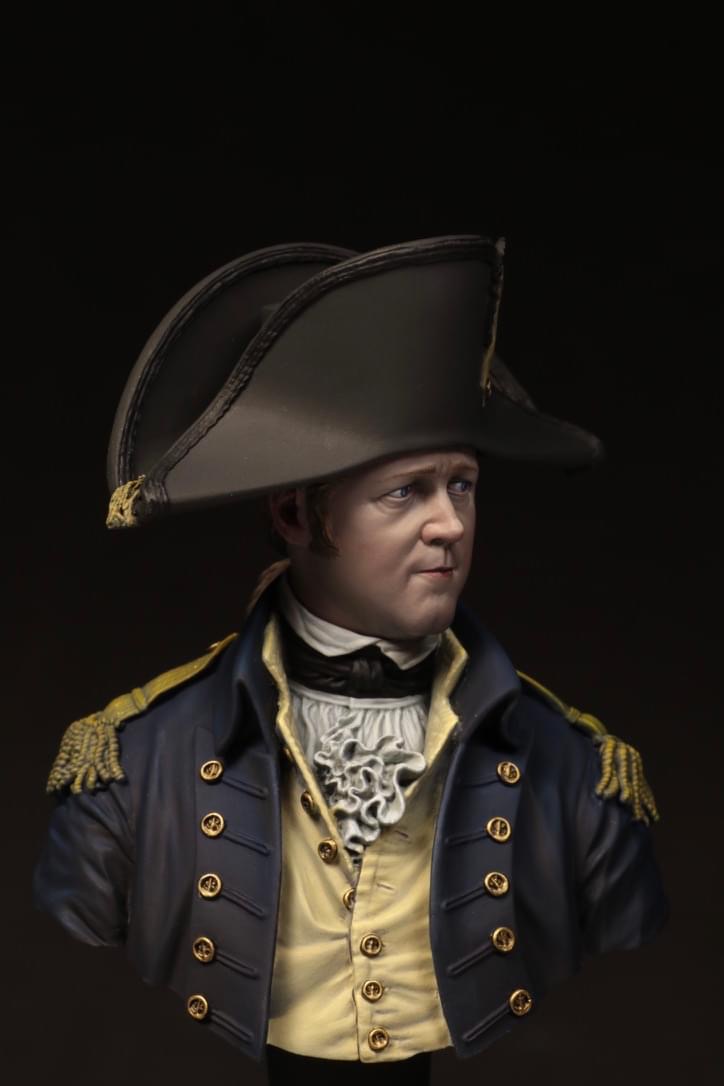
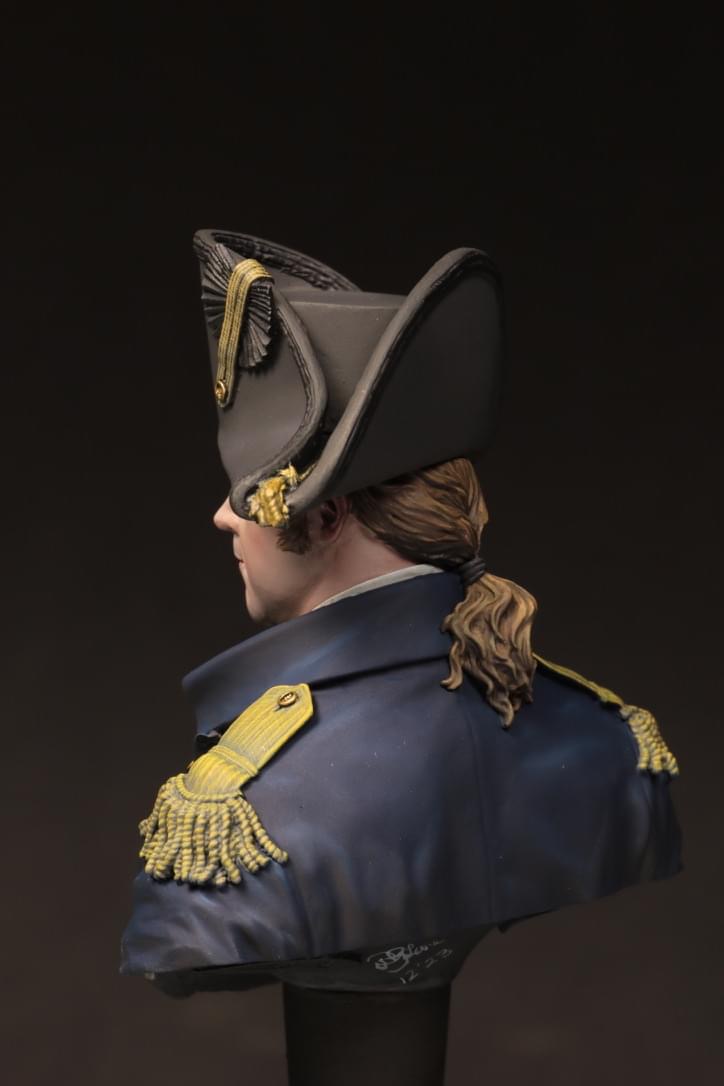
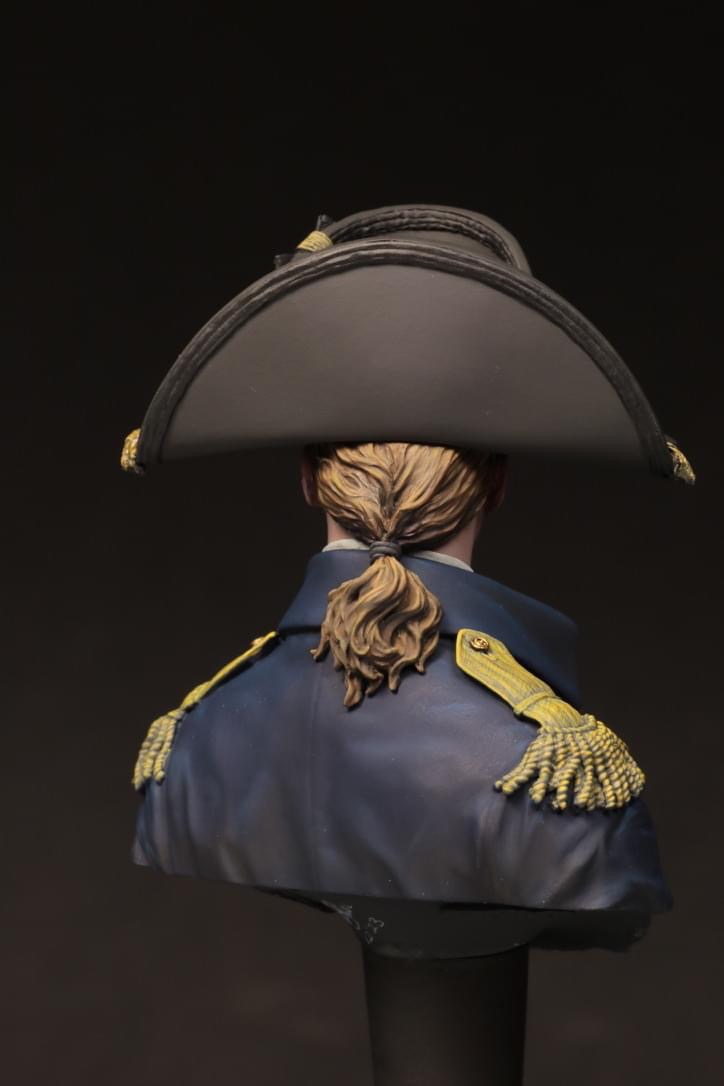
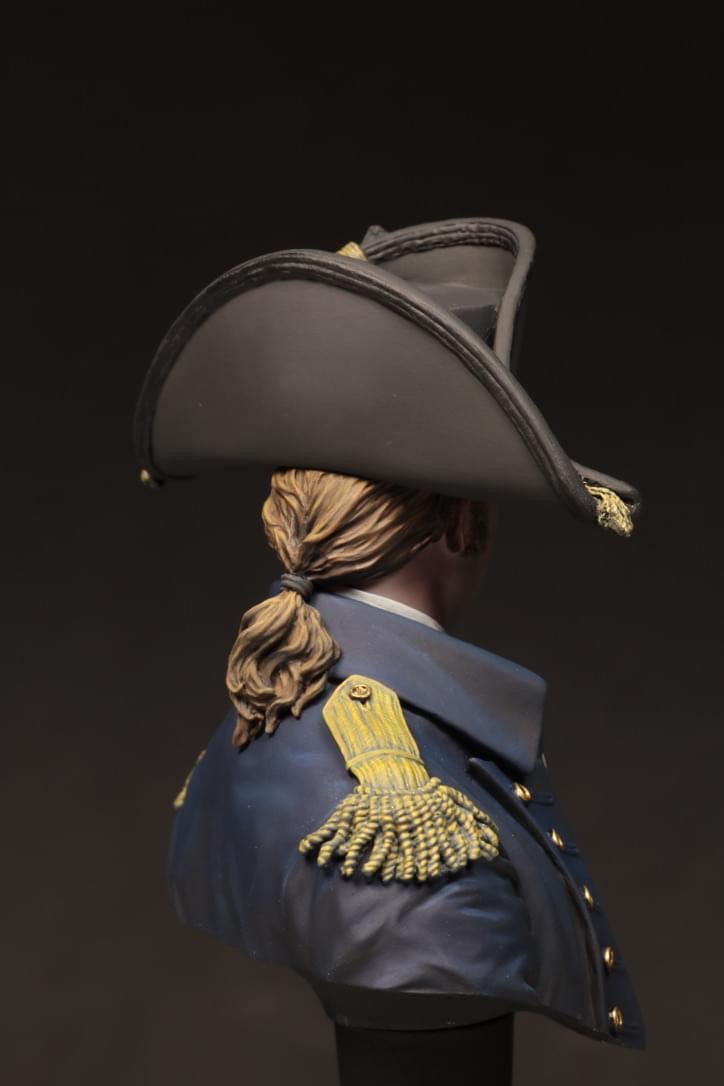
Young Miniatures
Oils
David L.
wars-and-peaces-miniatures.fr
Oils
David L.

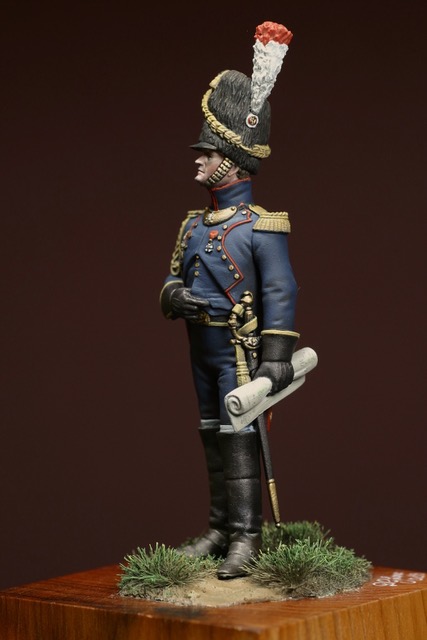

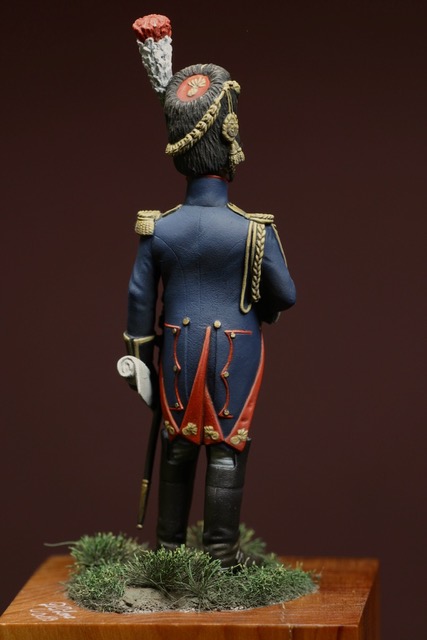
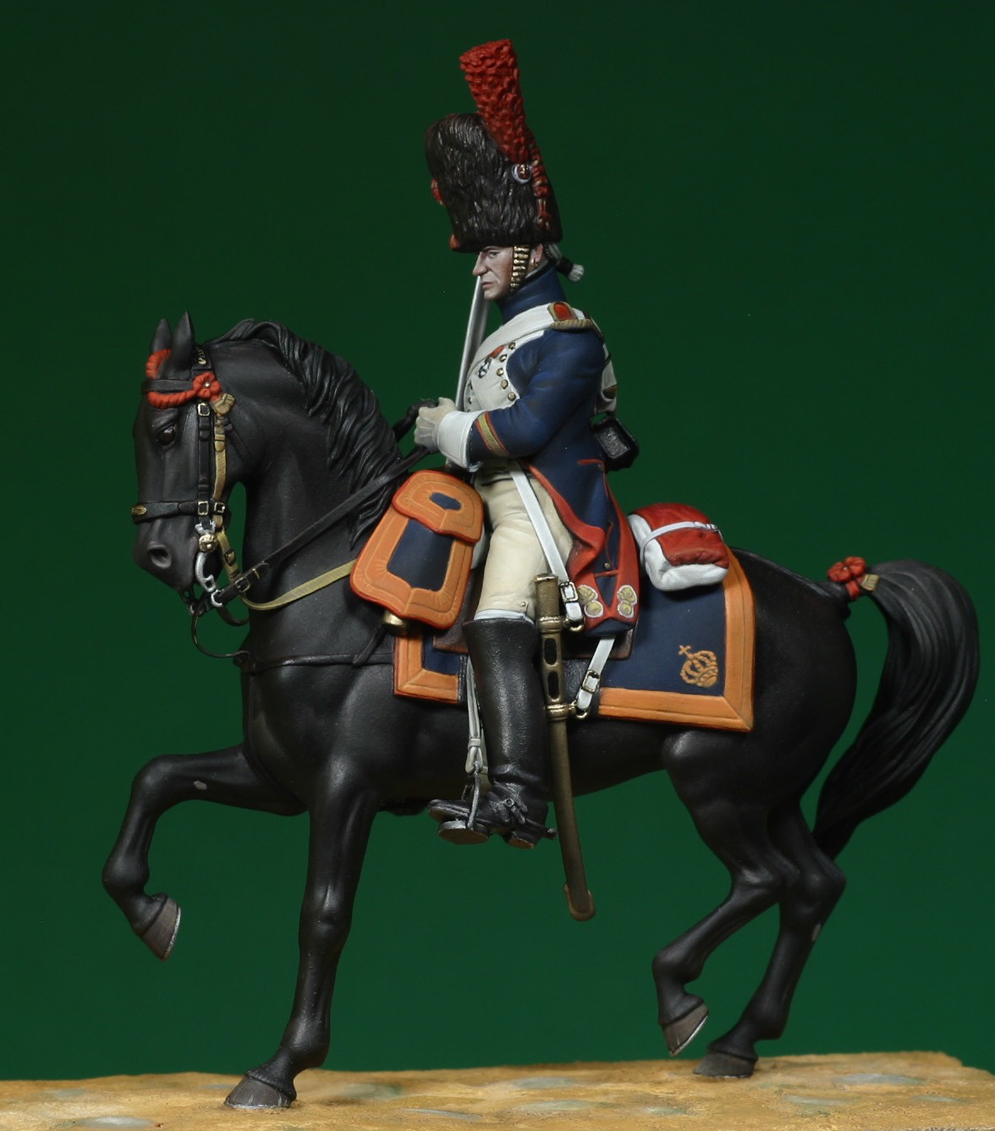
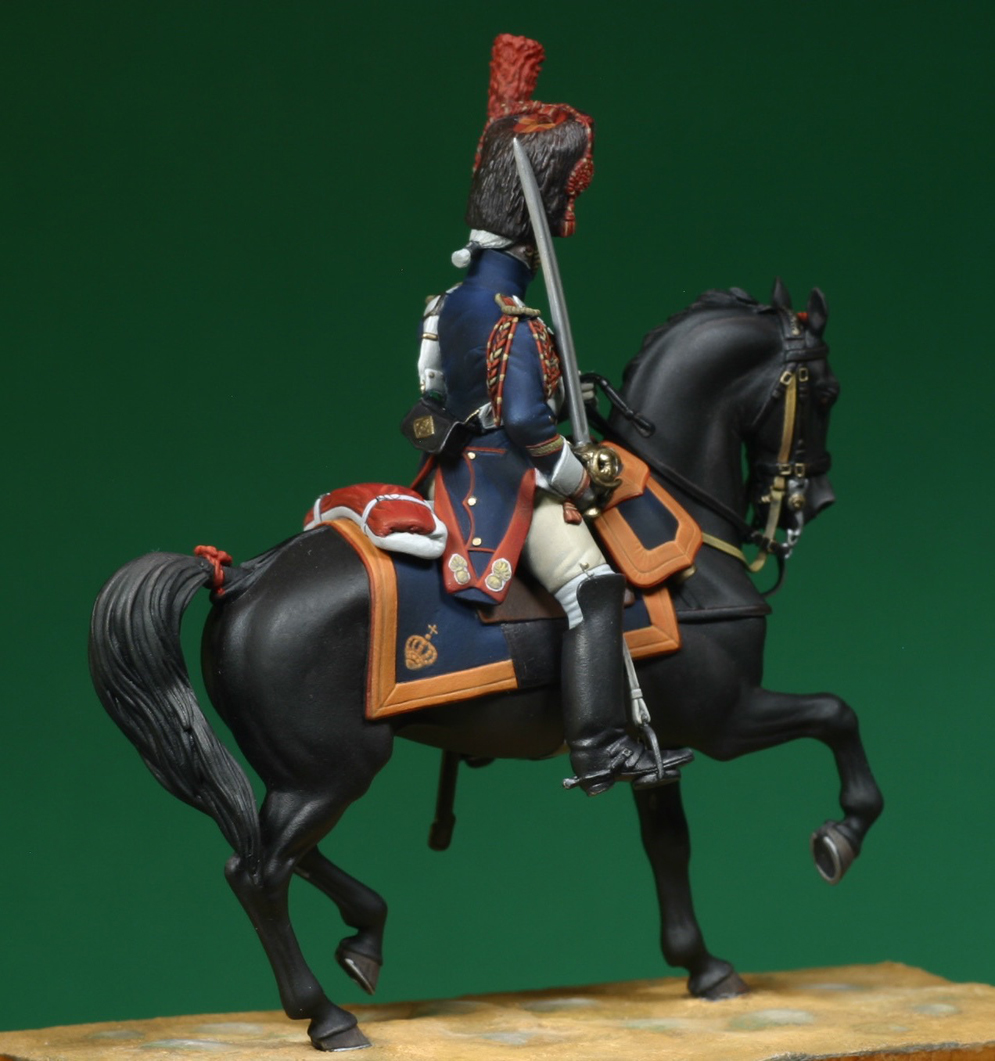
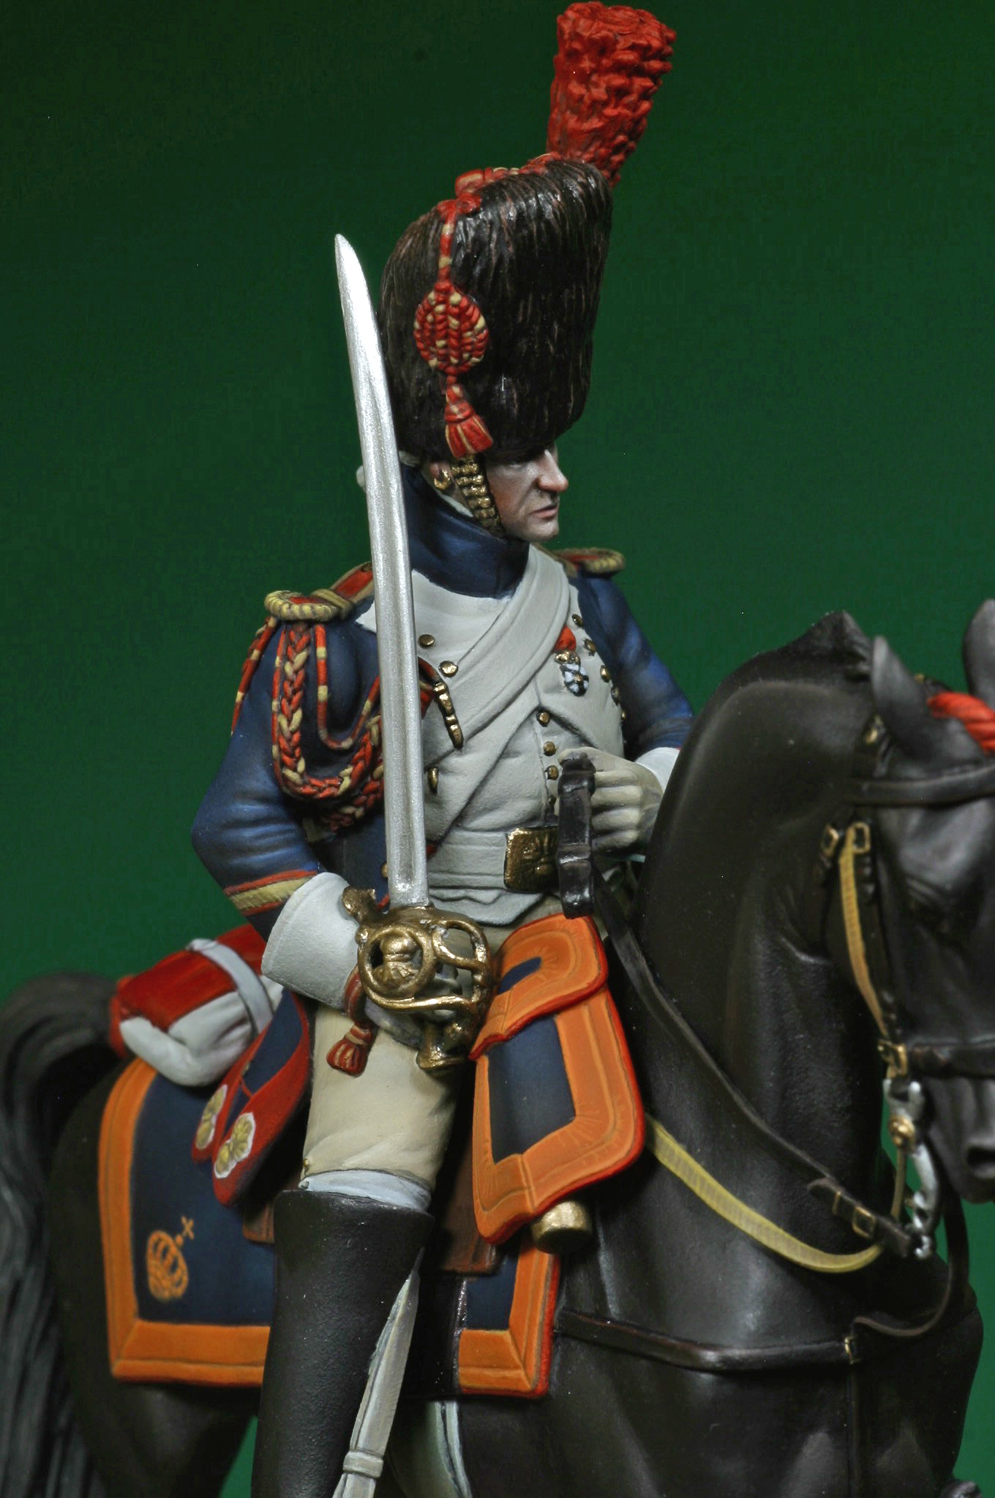
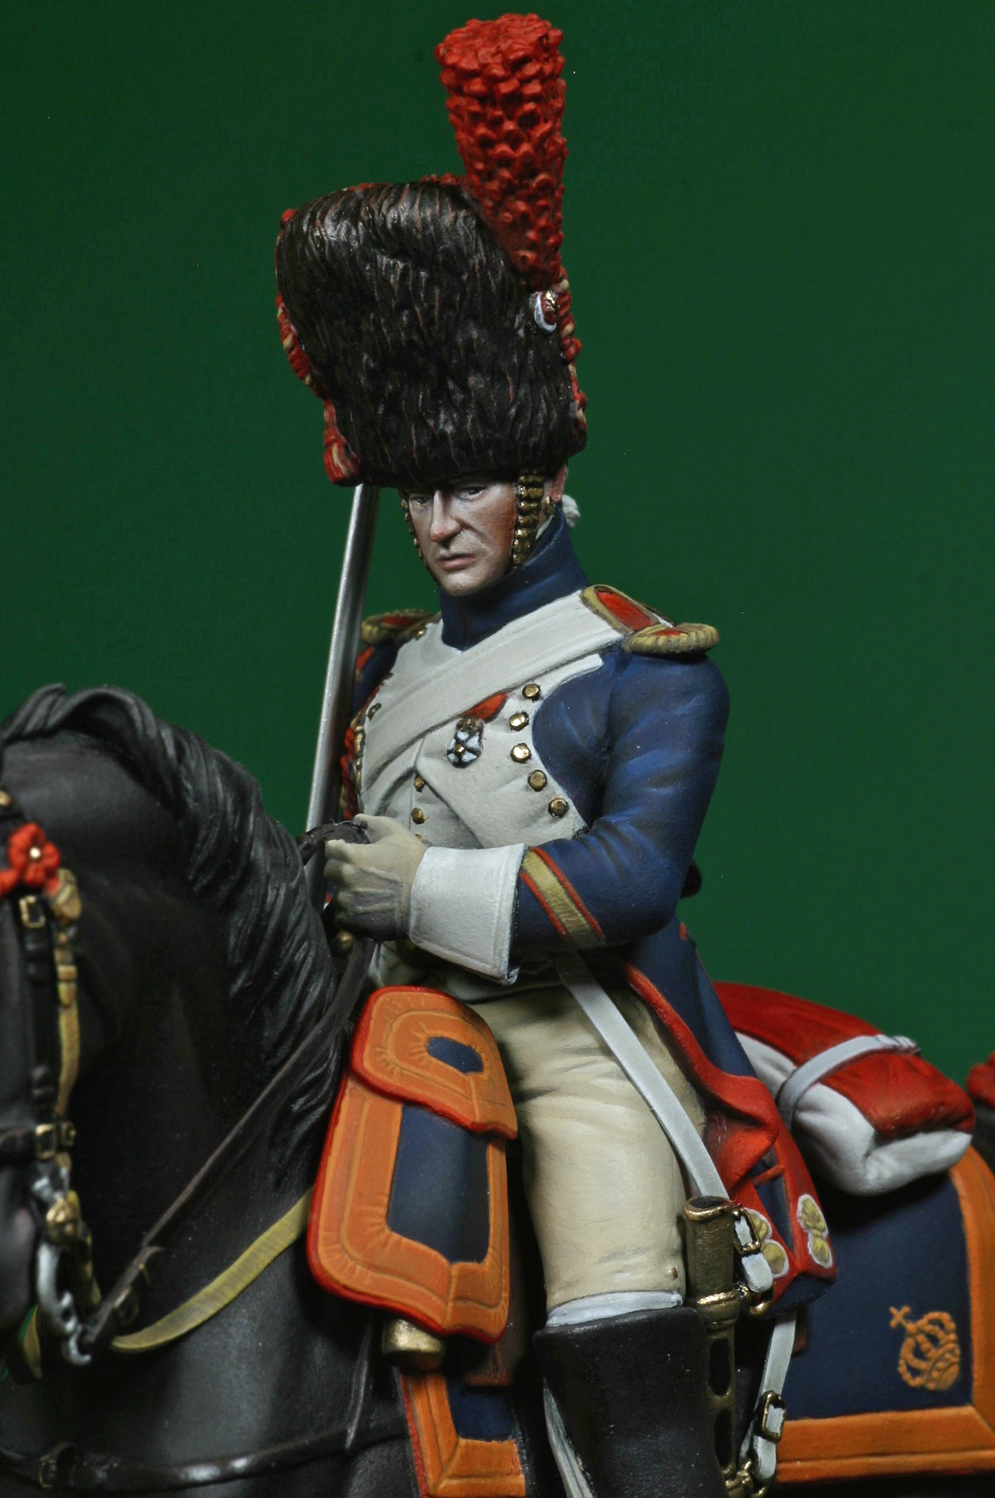

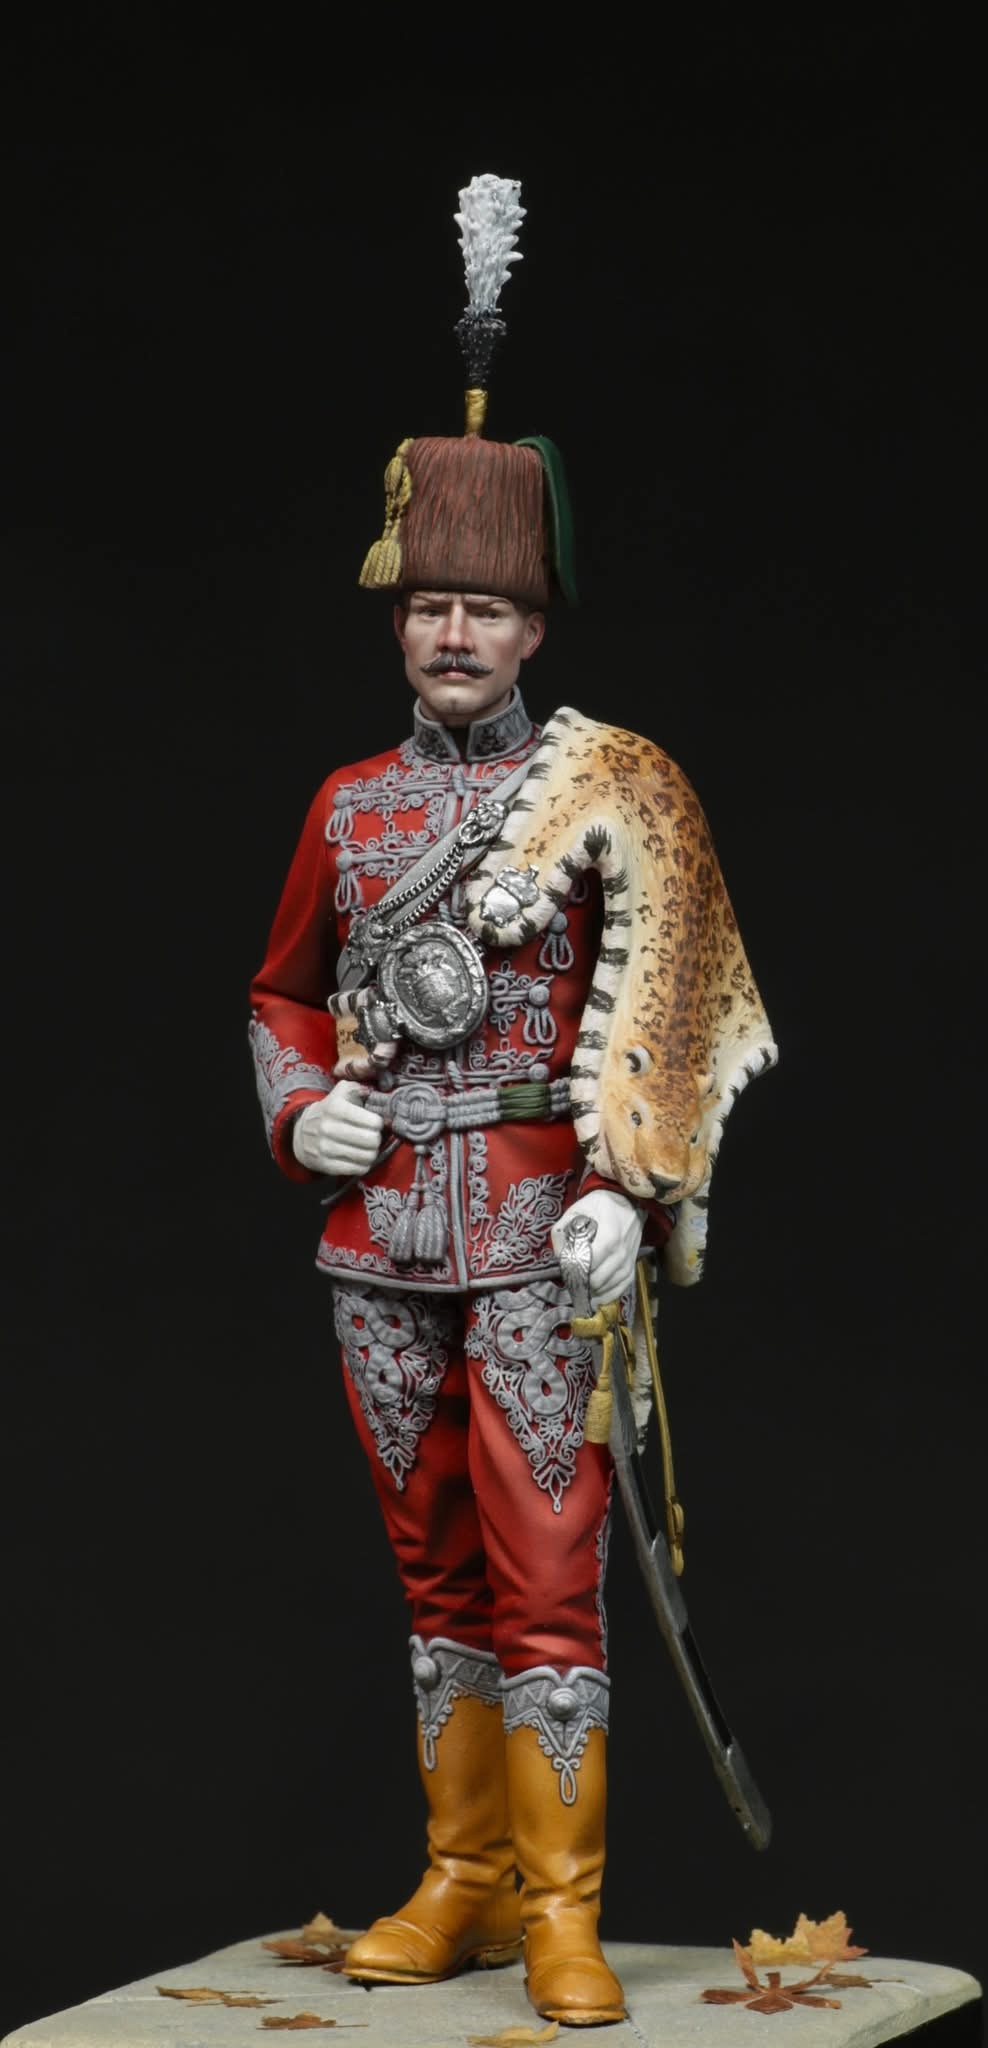
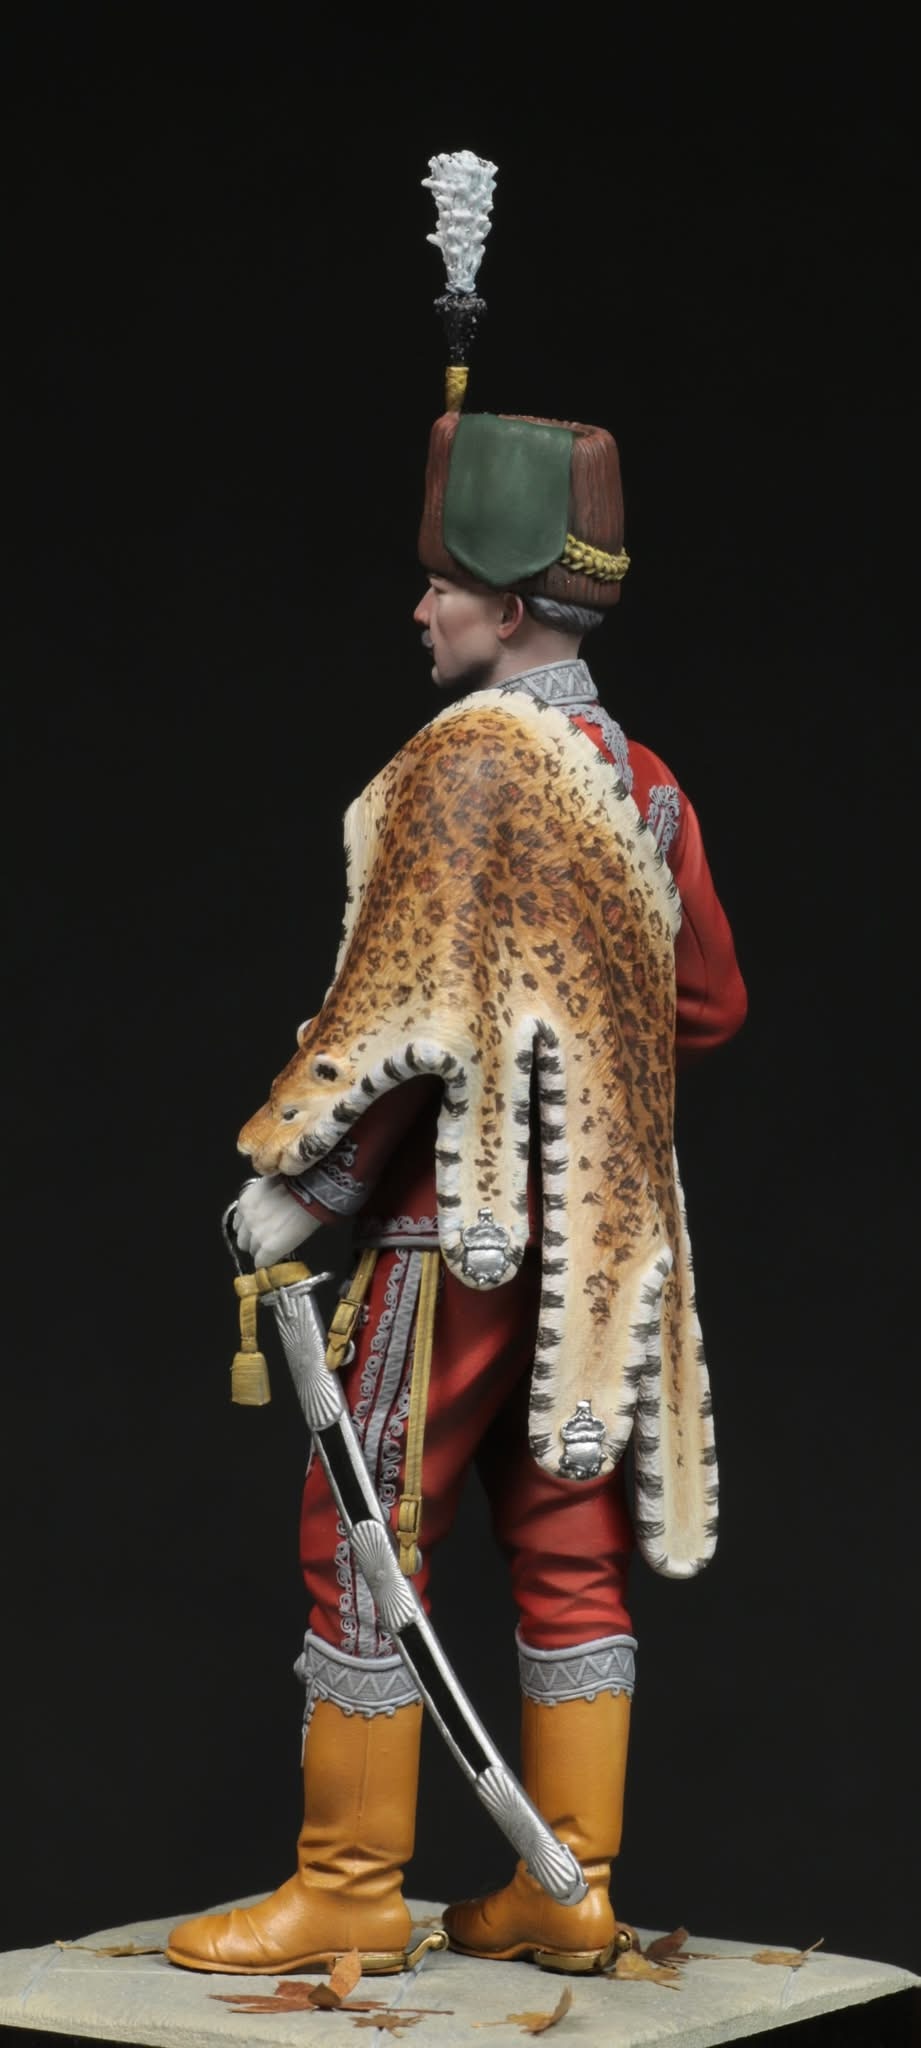
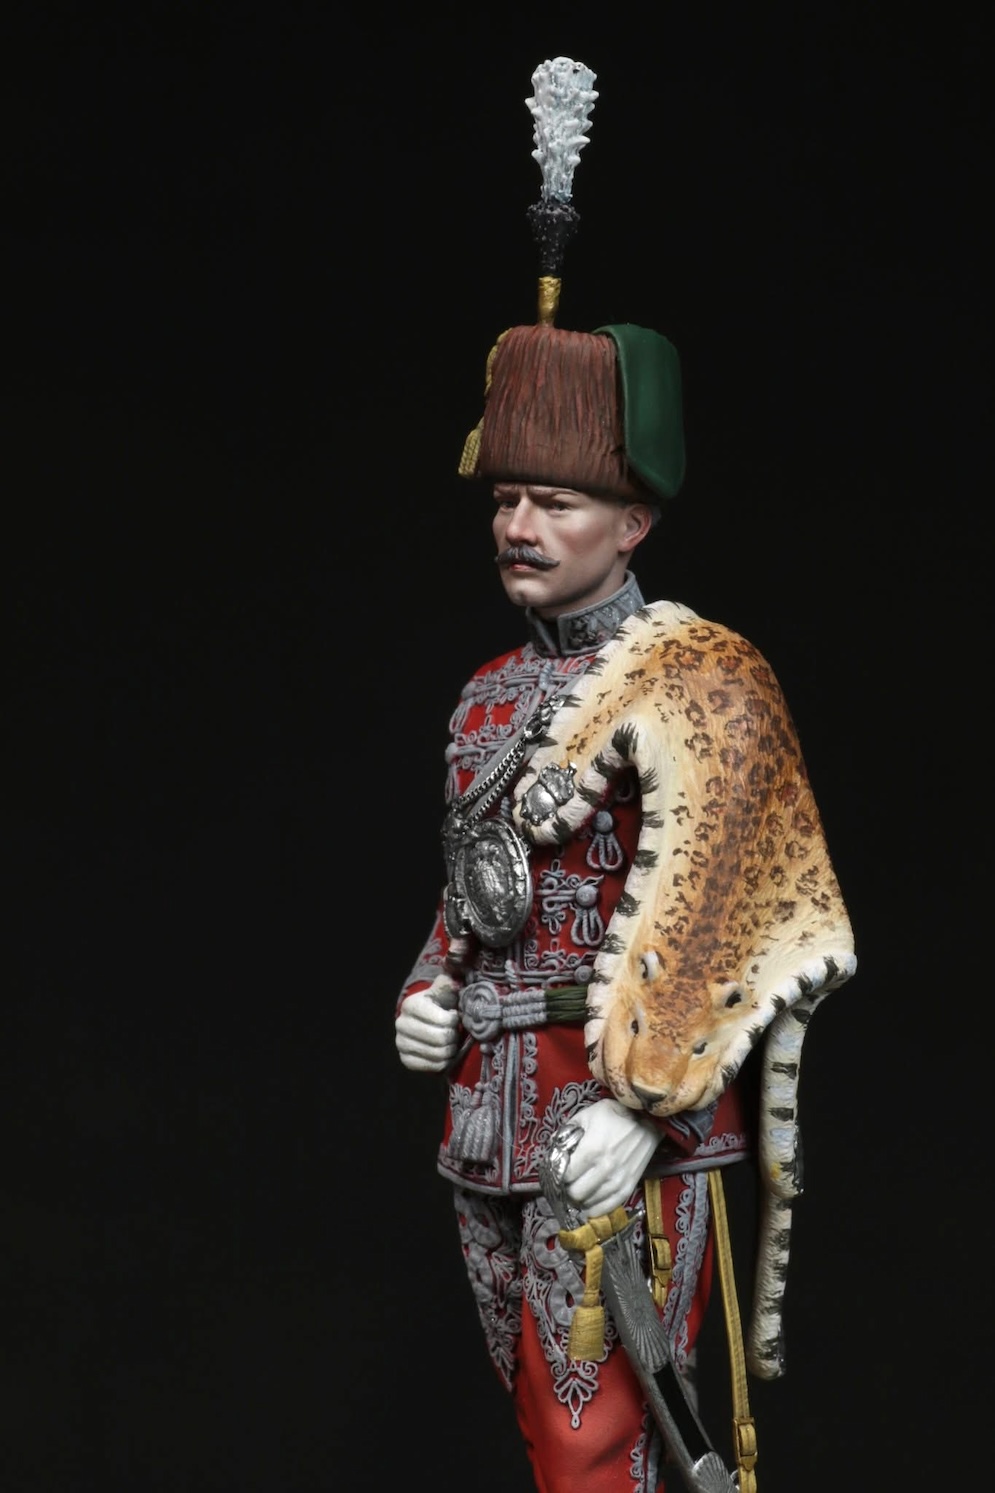
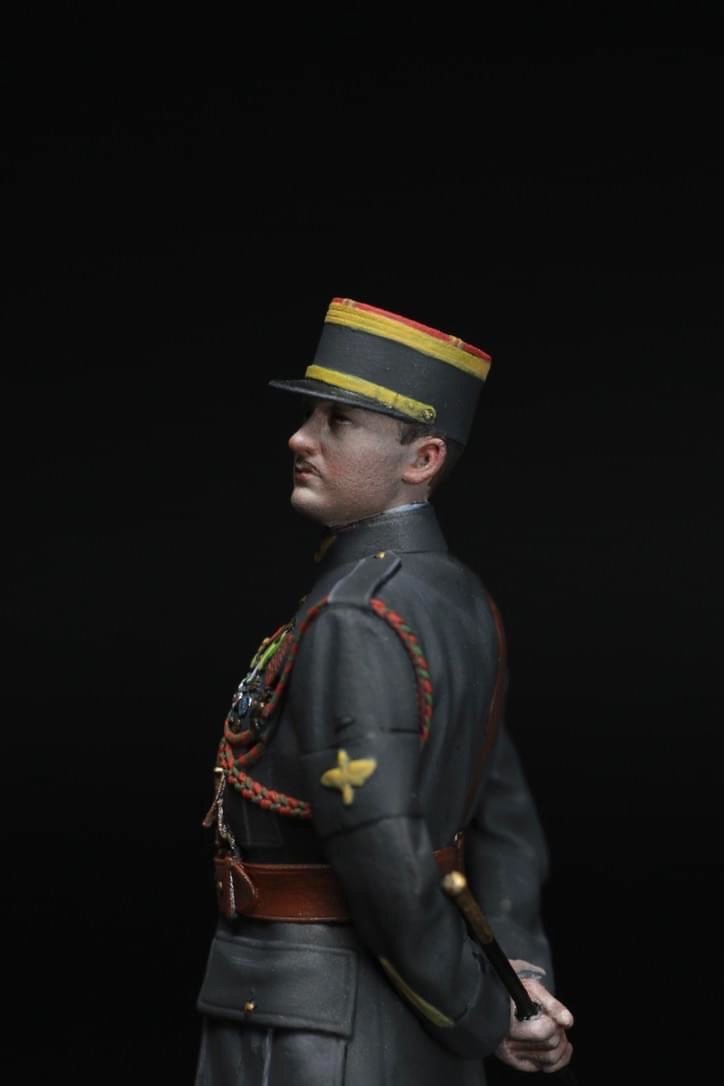
Chasseur de Cheval de la Garde 54mm (soldier on horseback)
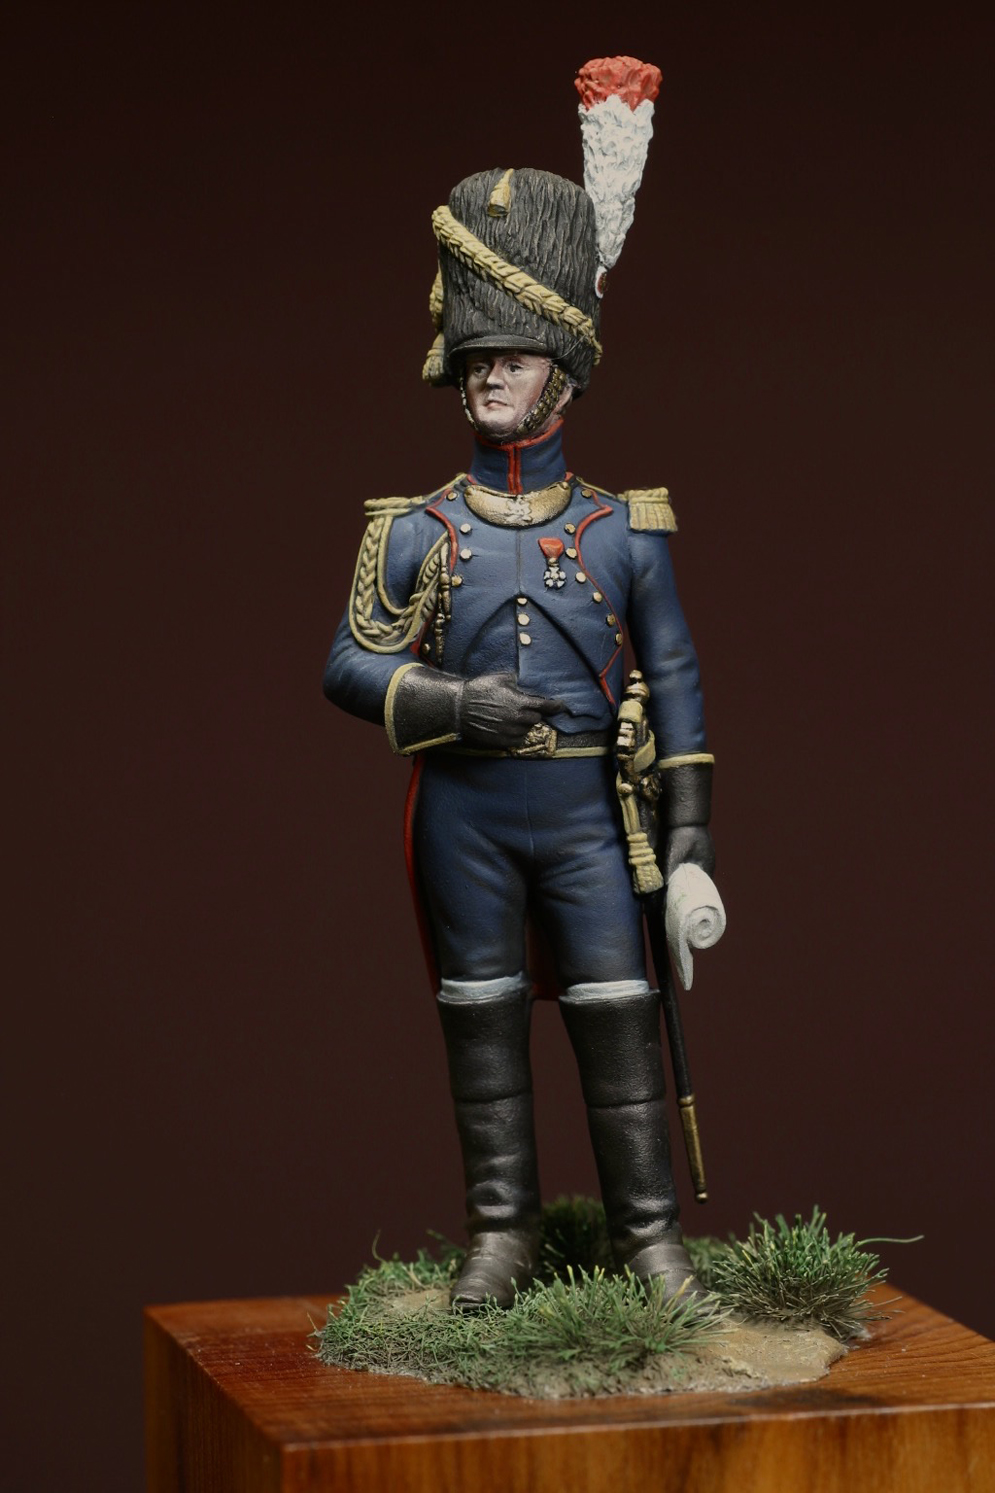
Chasseur a Cheval and the Officer of Artillery of the Guard are the superb Metal Models sculpted by Bruno Leibovitz. 54mm
Primed with Halfords car primer and blemishes polished out with wet’n dry and repeated until smooth enough to paint but much less sanding than other pieces as these are superb smooth castings. Humbrol base coats.
Dark blues are painted with Windsor and Newton Indigo as the base and highlighted with a tiny bit of white and orange, the latter to kill the value of the blue.
Vallejo green-brown was the base for the cords. The cords and small details were finished in acrylics. Metals were printing inks.
The horse has a little more linseed oil added to keep a slight gloss to its coat.
David G. L
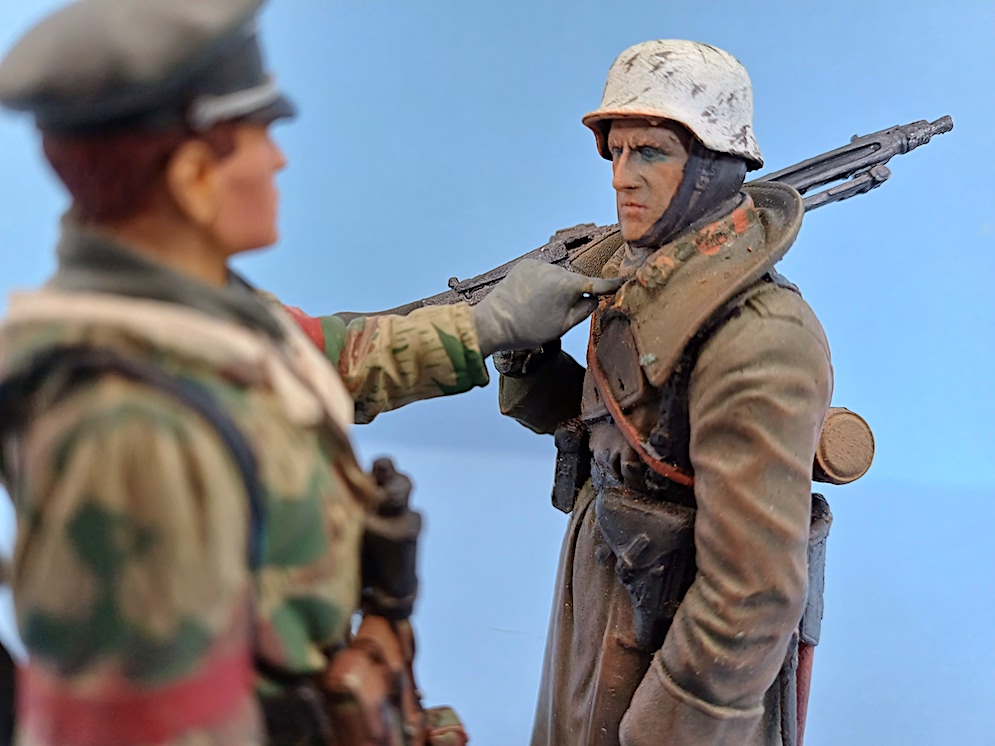
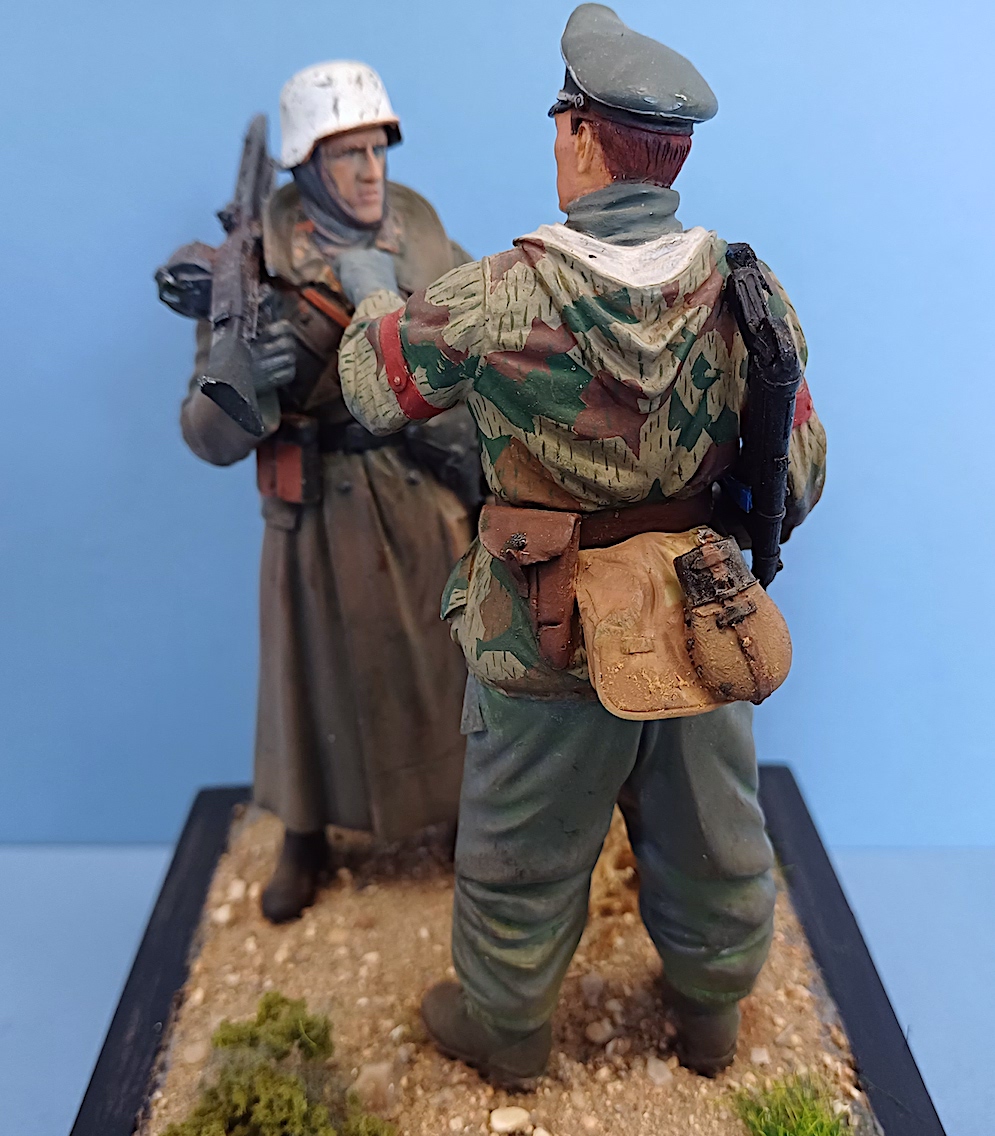
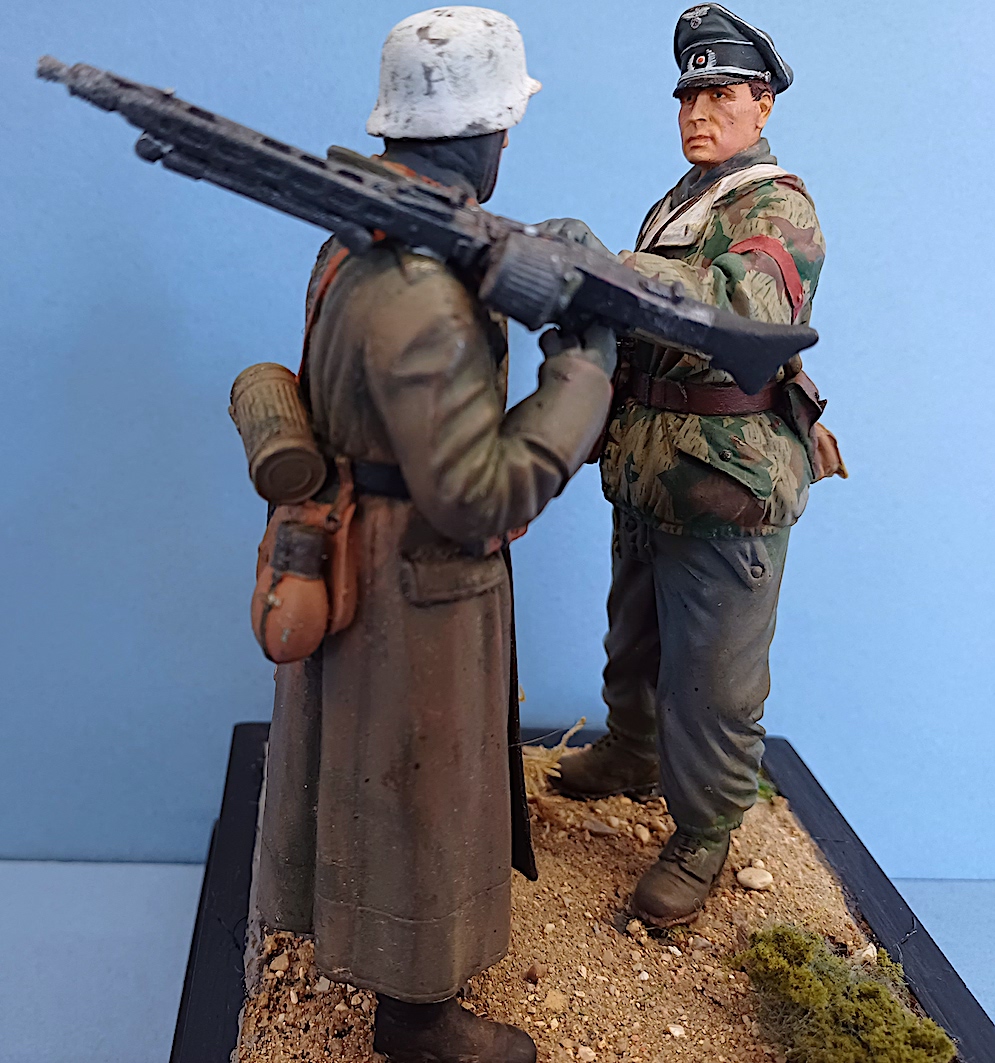

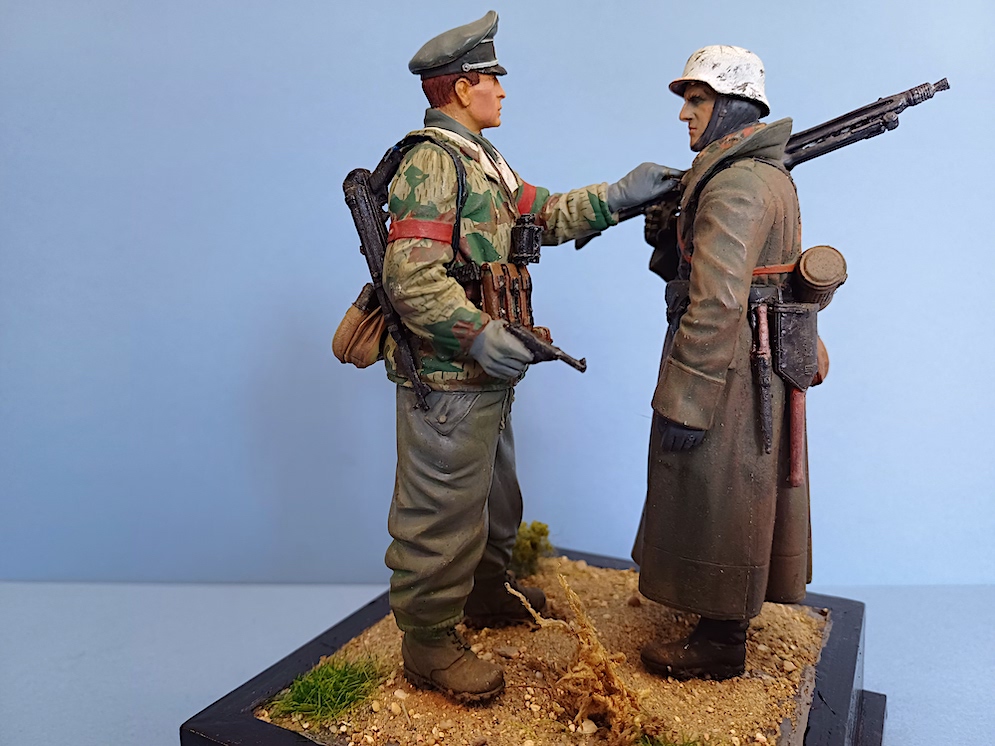
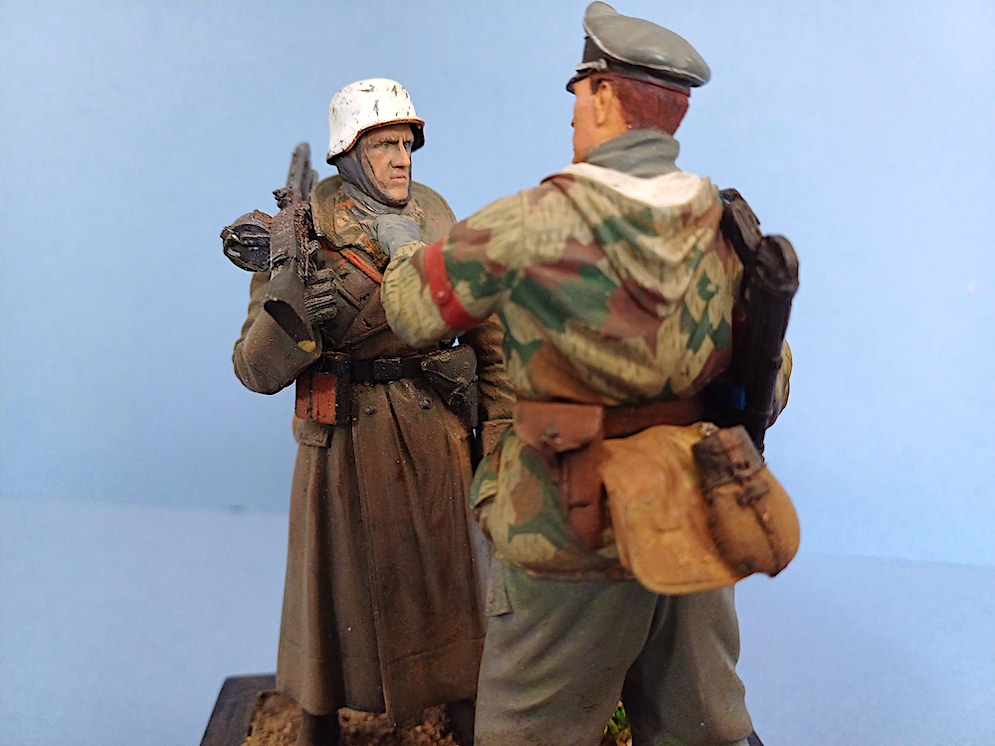
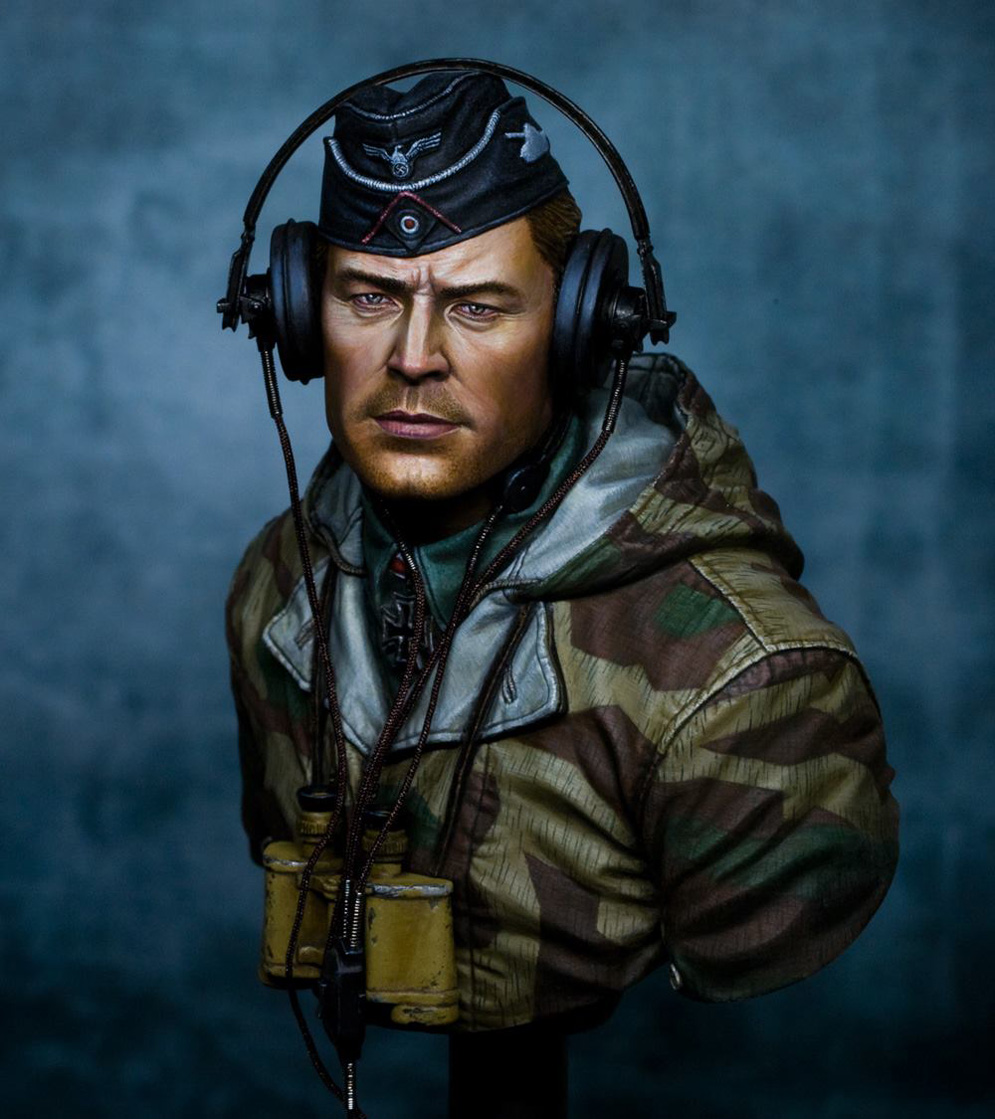
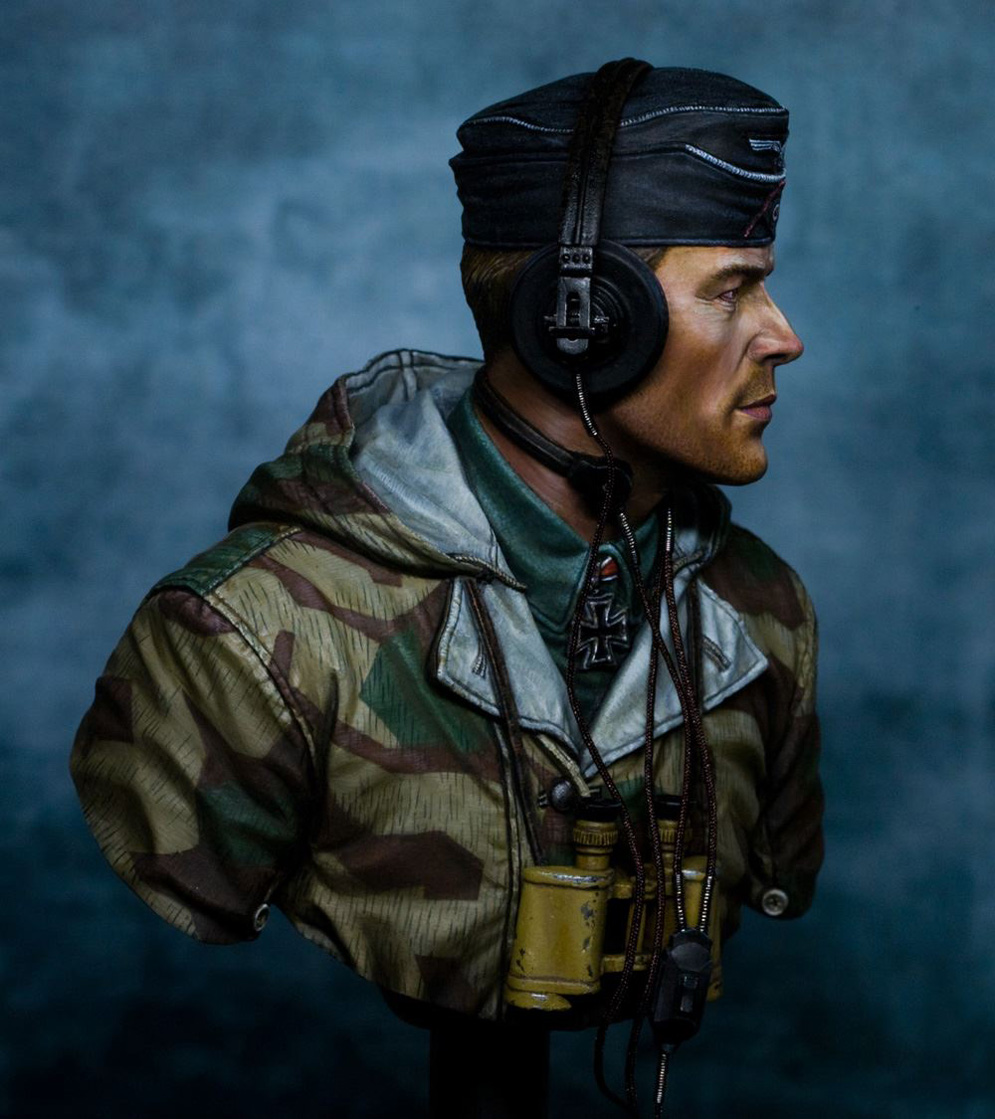
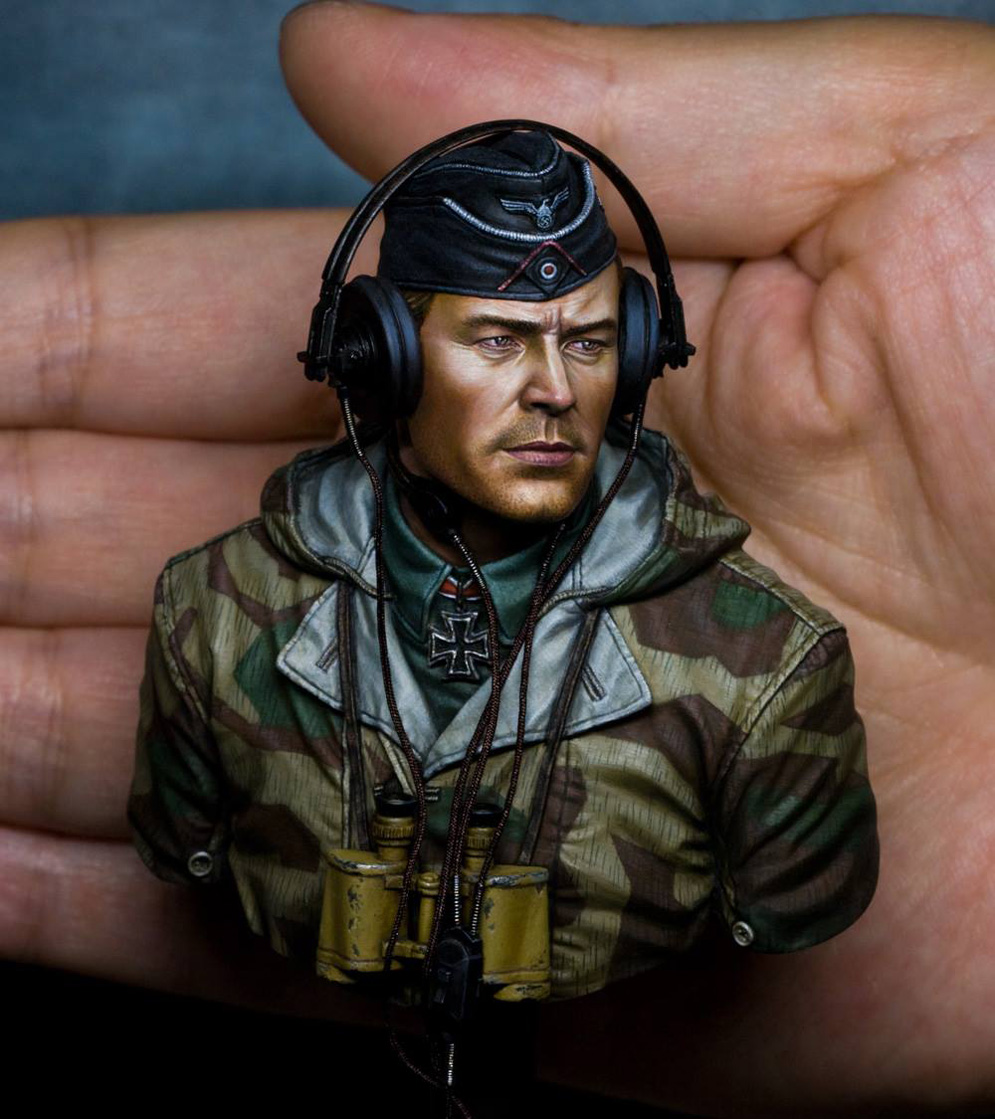
As the Second World War progressed, the gap in ethics between the Wehrmacht and the SS widened and on occasion could result in open conflict. To convey this animosity the following vignette was produced.
The Verlinden Wehrmacht officer was designed to be pointing into the distance wearing the minimal equipment consisting of a pistol and holster. From the Verlinden accessory set, an MP40 machine pistol with ammunition pouches, bread bag and canteen were added to equip him with a more realistic combat kit.
The second figure, a Tamiya machine gunner, was built straight from the box. The face having a hard look was ideal for what was planned. The figures had already been painted for another project that had not got off the ground. Used as a pair, in many cases, they would have been positioned looking into the distance.
Instead, they were turned inwards to face one another with the happy coincidence that with his pistol drawn, the pointing finger of the officer was poking the SS gunner just below the collarbone, setting a scene with notable tension. The cause of the tension is not shown but the indignation of the officer is clear.
Steve N.
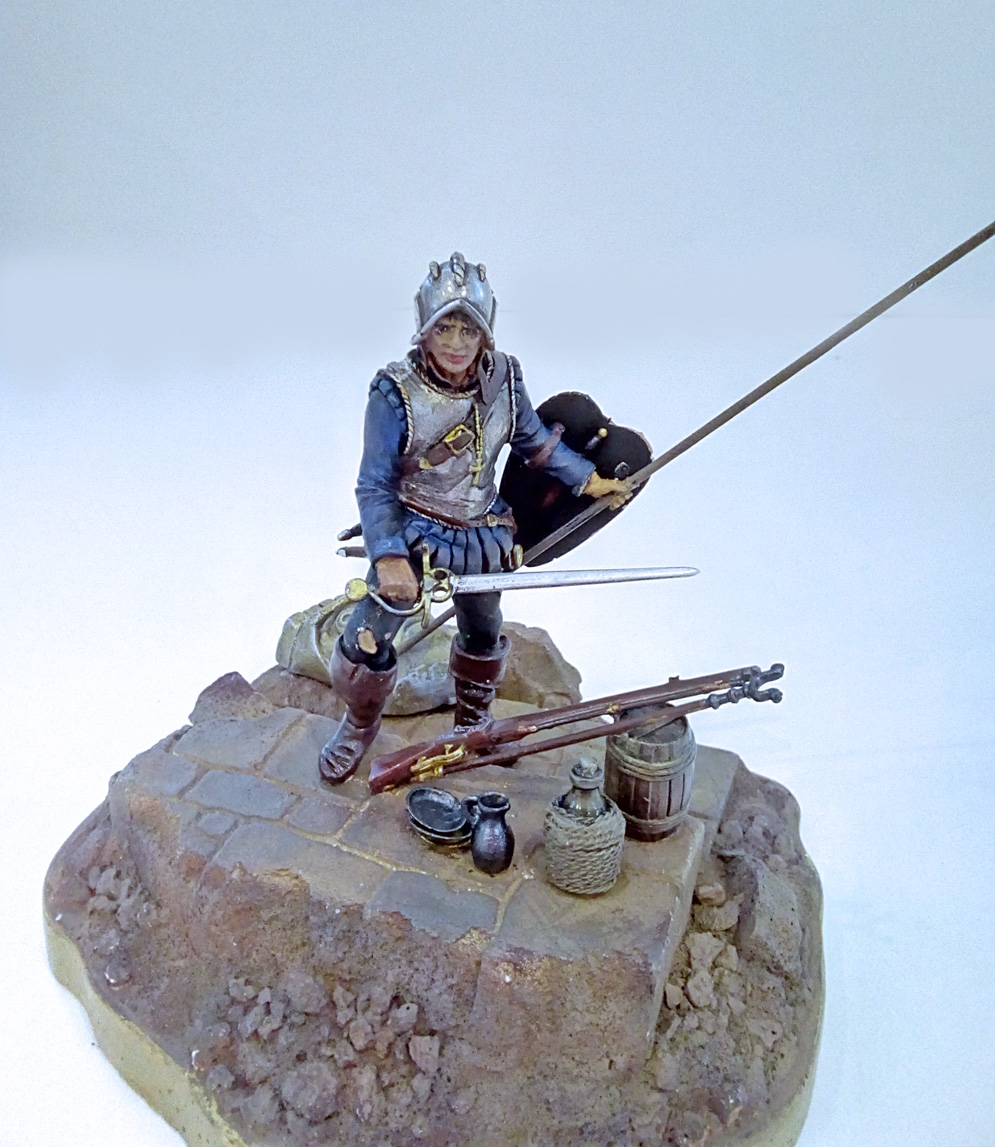

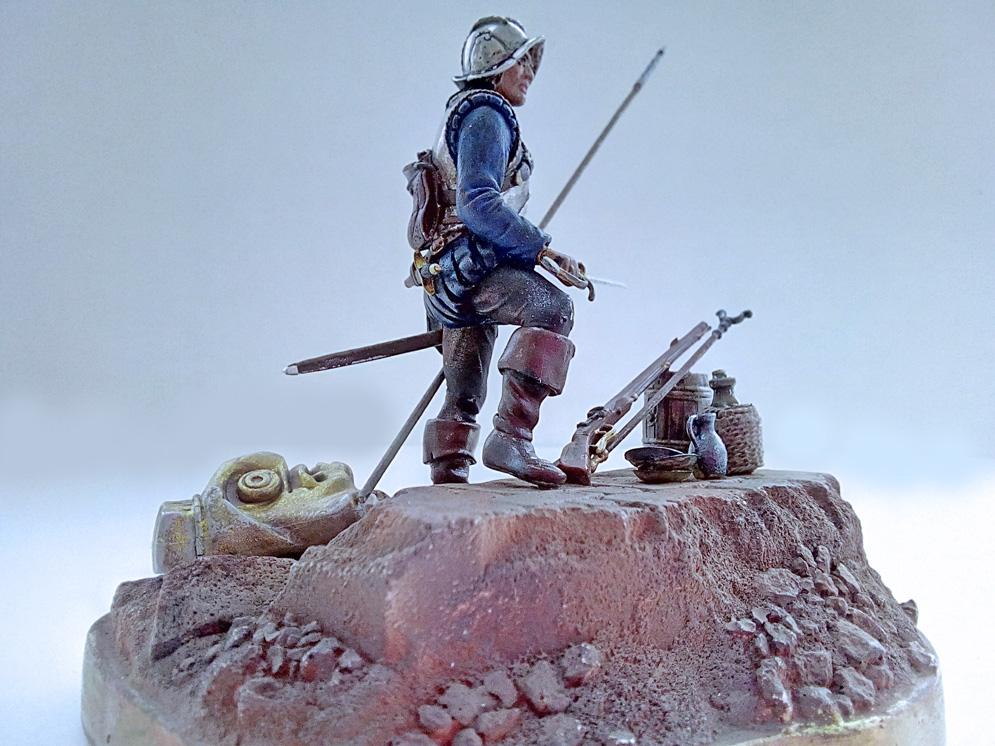
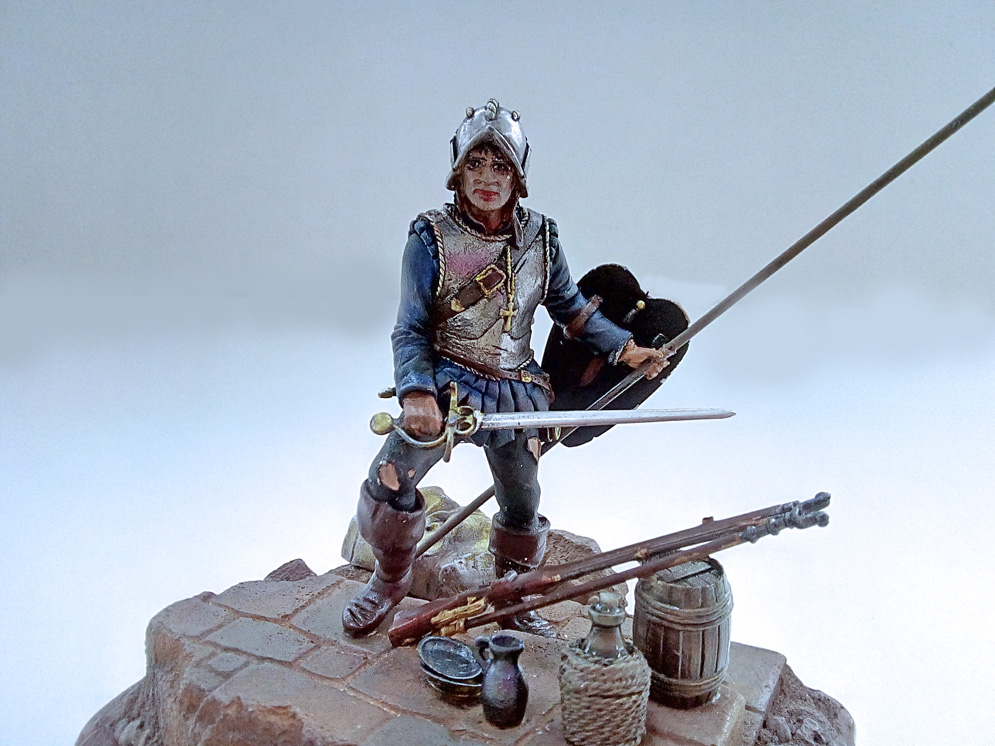
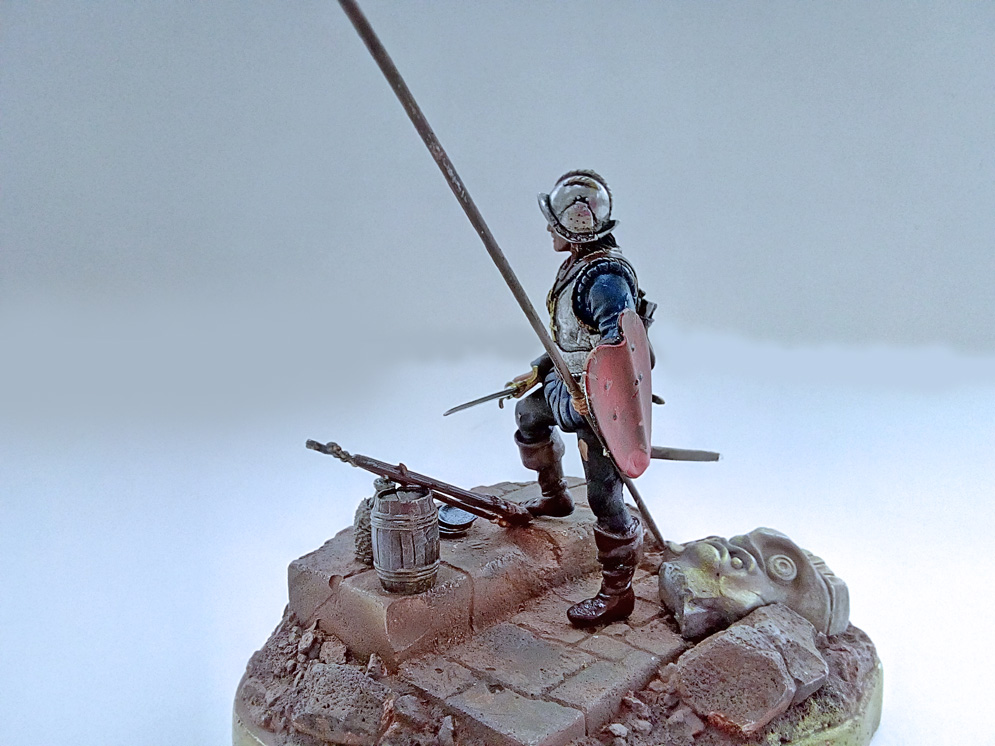
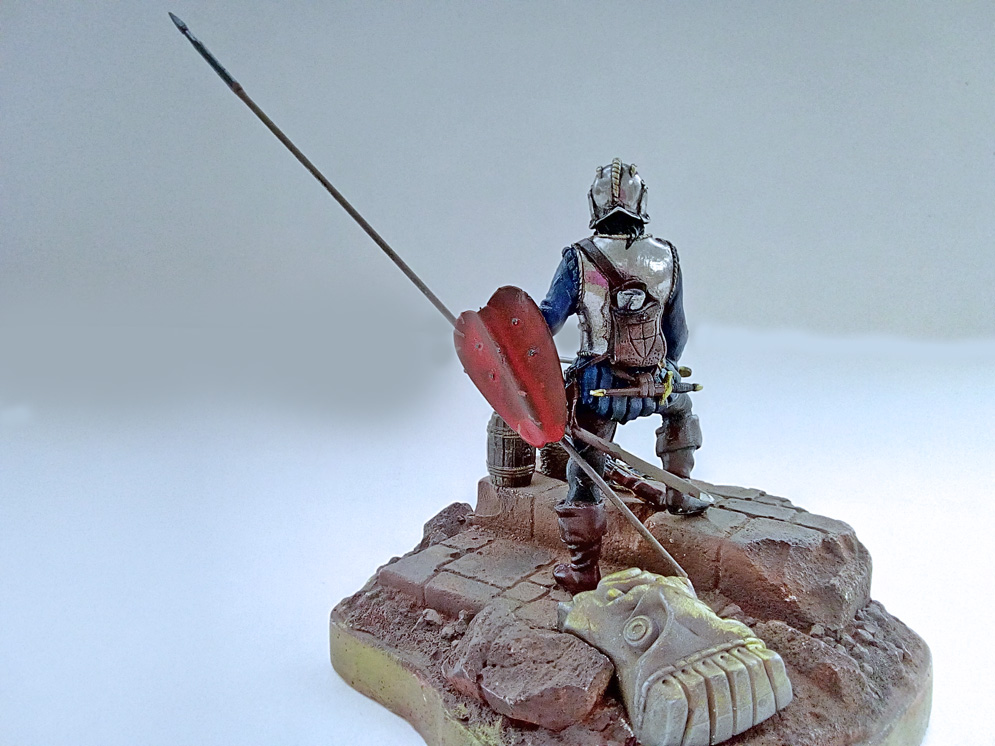
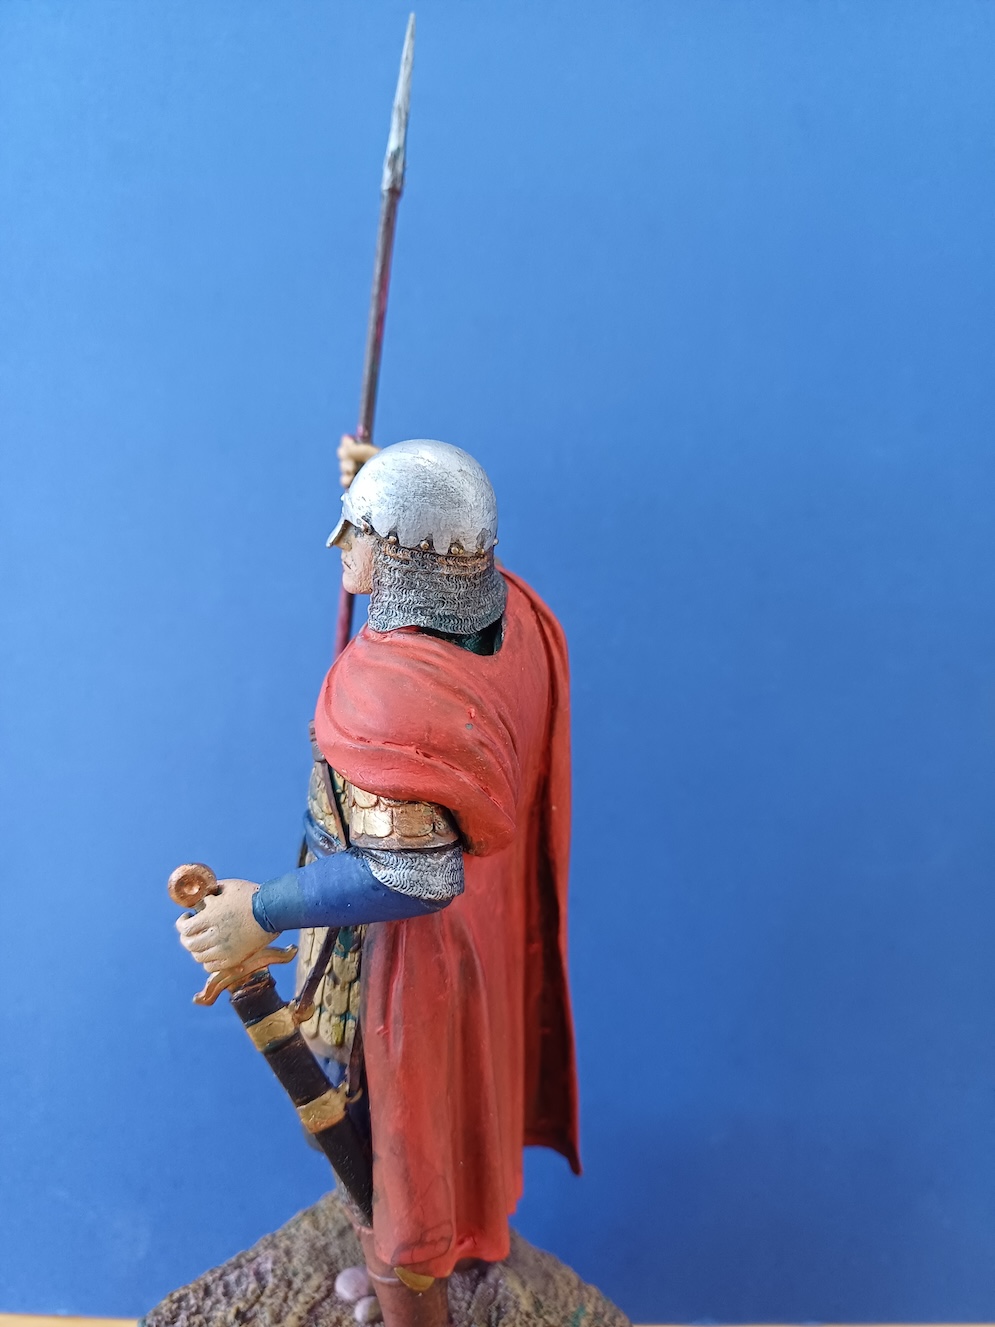
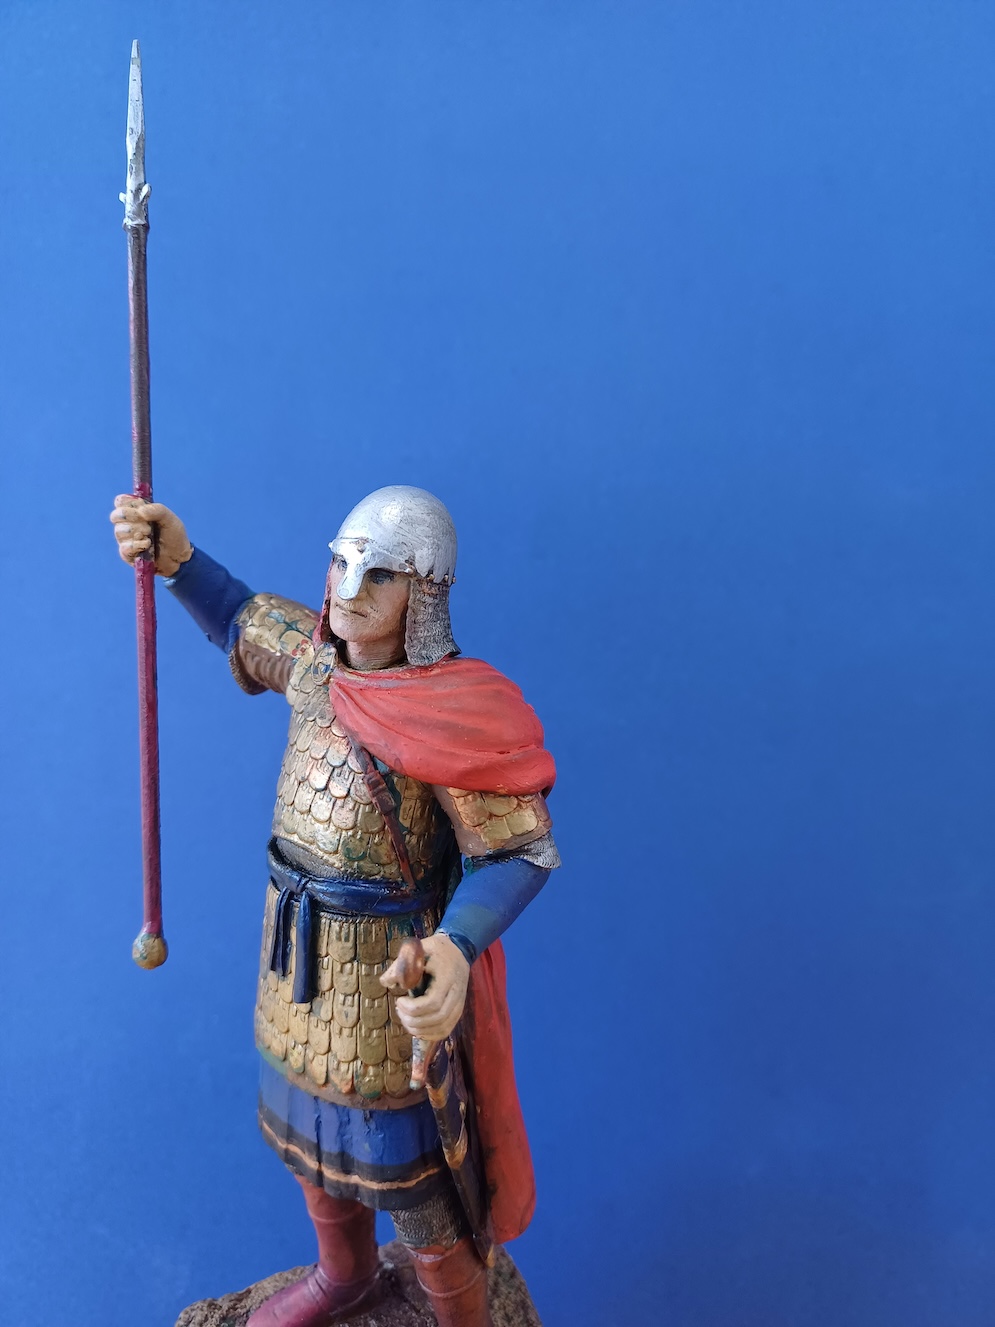
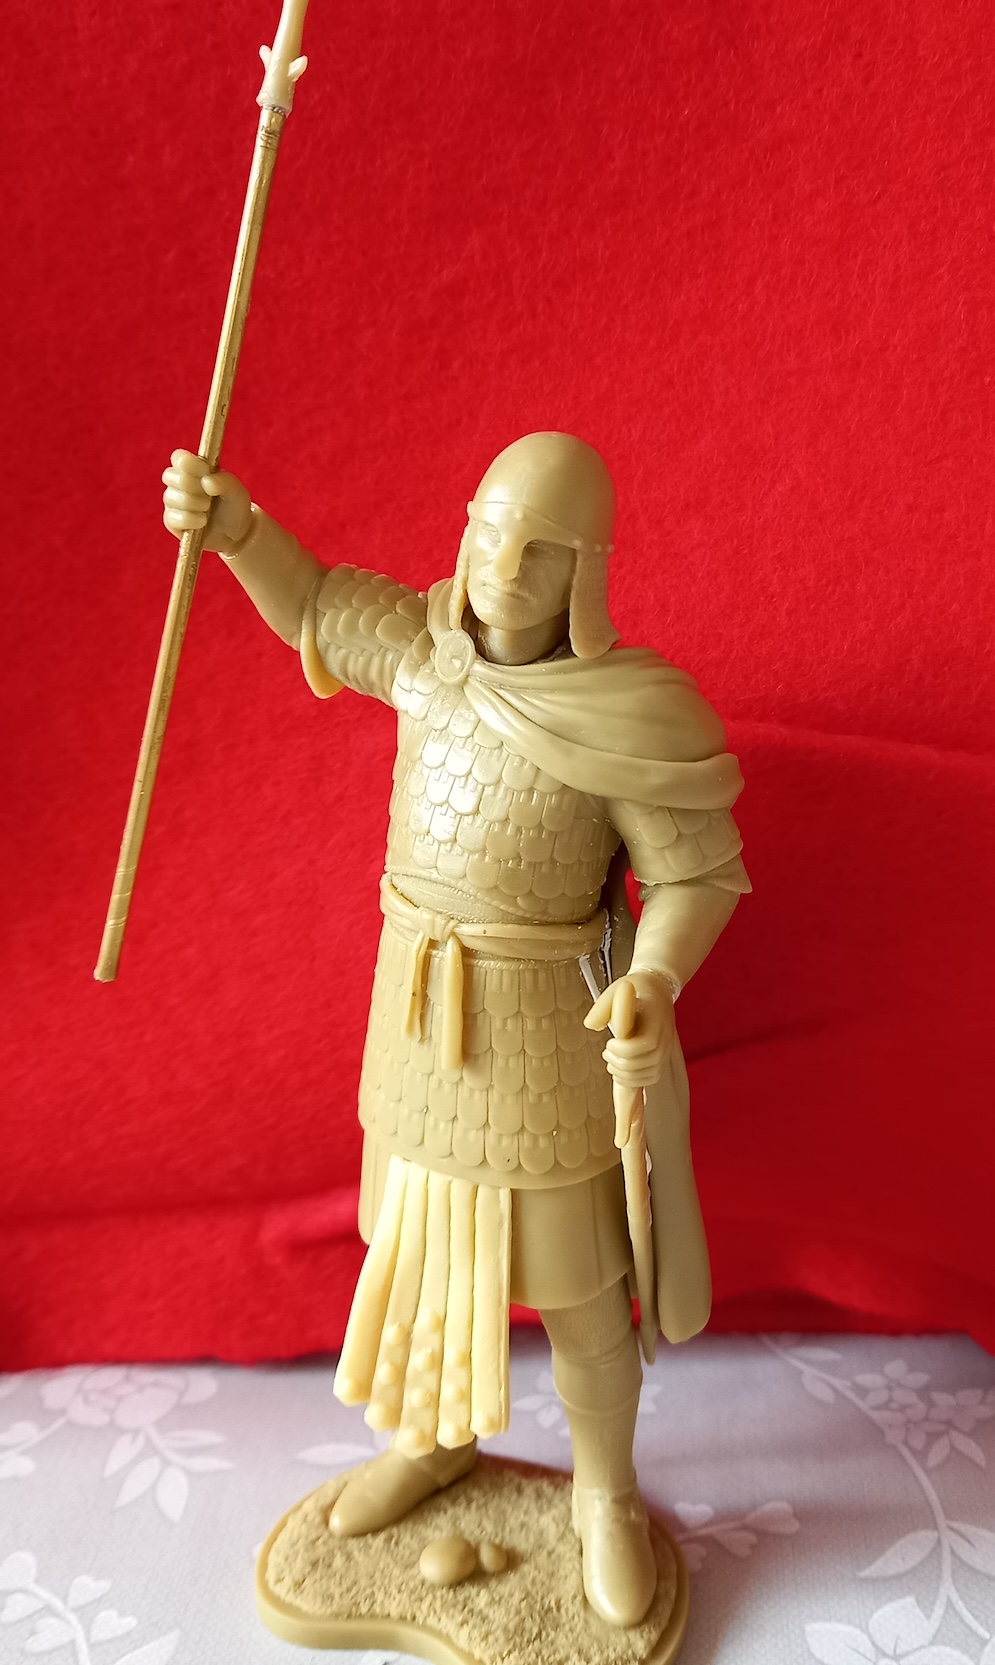
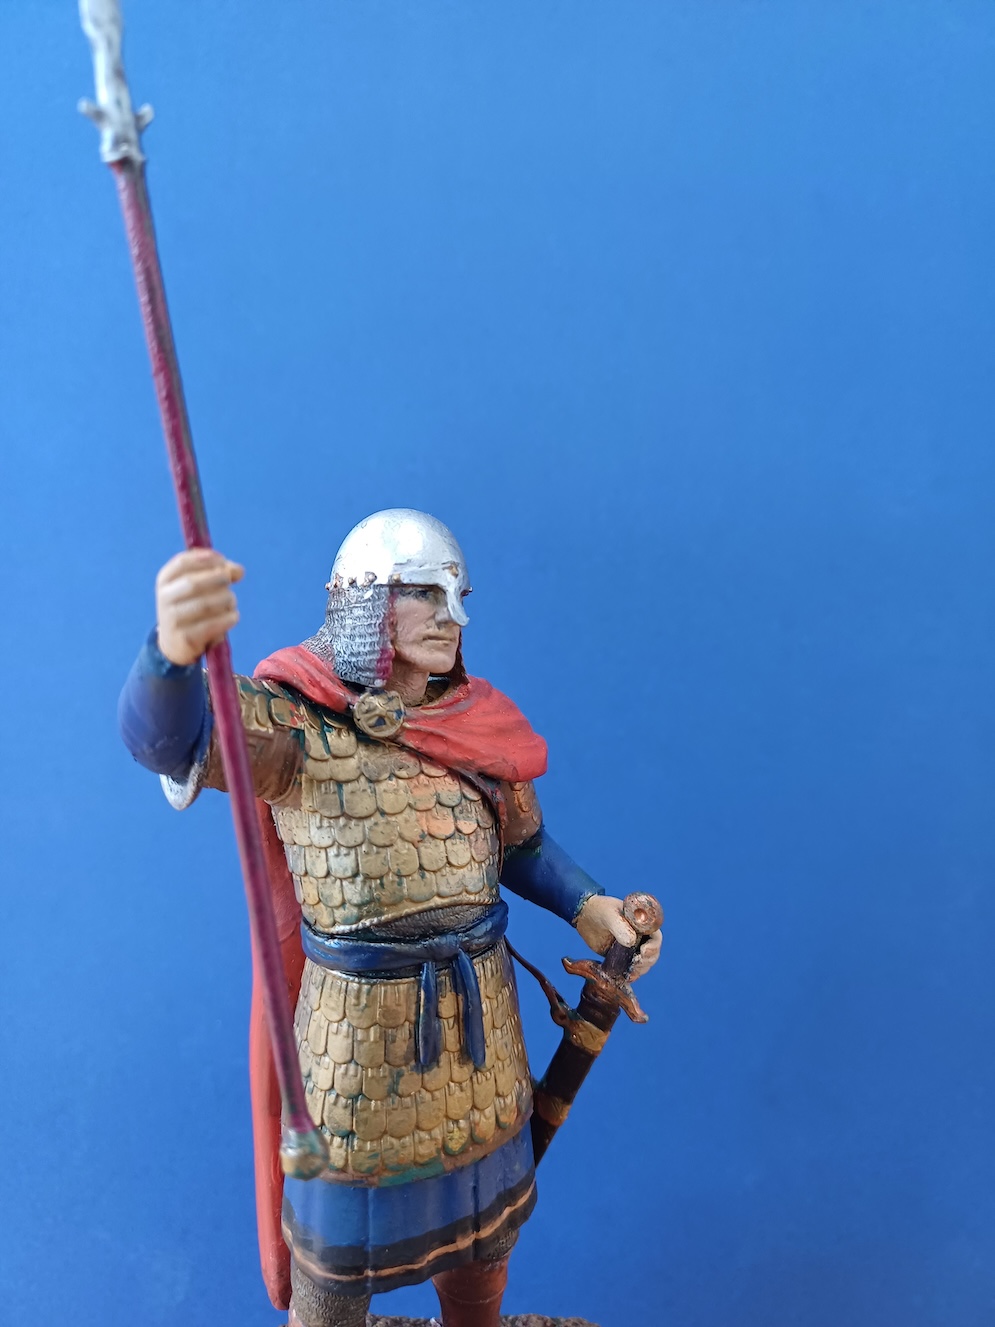
One weakness in the model was that the spear grasped in the figure’s hand was made of a soft white metal that bent easily and it was difficult to retain it’s shape. To remedy this, a pike from the Airfix historic collection was cut down in size and a new hand fitted to replace the casting.
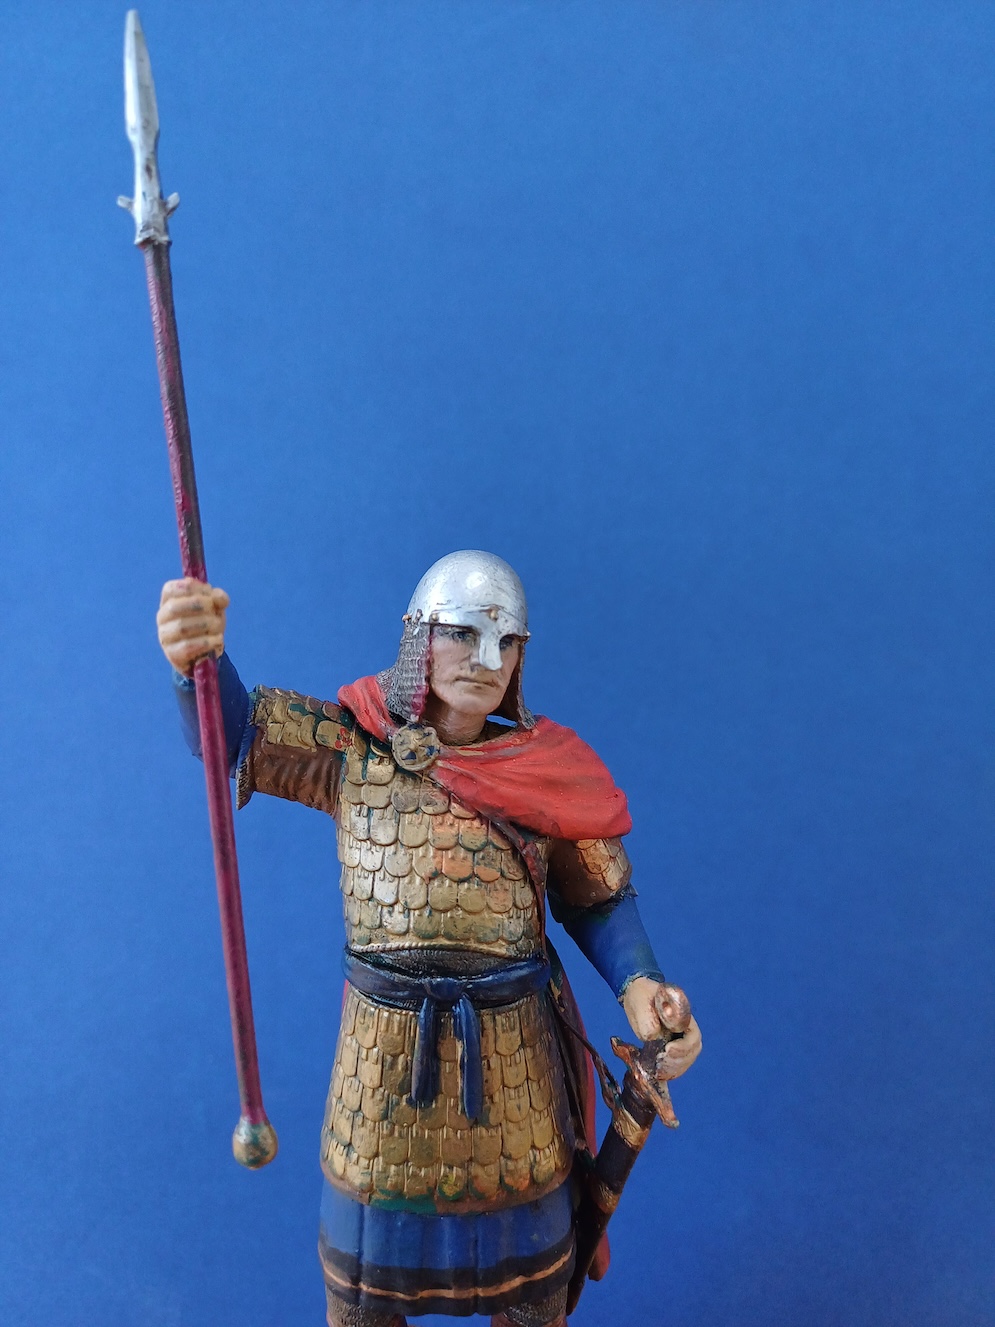
The figure had been purchased with the view to try a technique used to represent polished armour. The flat edge of a needle was gently rubbed over the surface of the armour to burnish the armour and bring it to a high sheen. To avoid wear and causing any flat points, the direction the needle was rubbed was changed regularly. Four dilute washes of black paint were applied to the armour to bring out its detail.
The base used was from a Verlinden figure of a Viking and was a more suitable size. The Inca headstone was added to this and given a dry-brush of gold paint. The scene is set out in the following set of photographs.
Steve N.
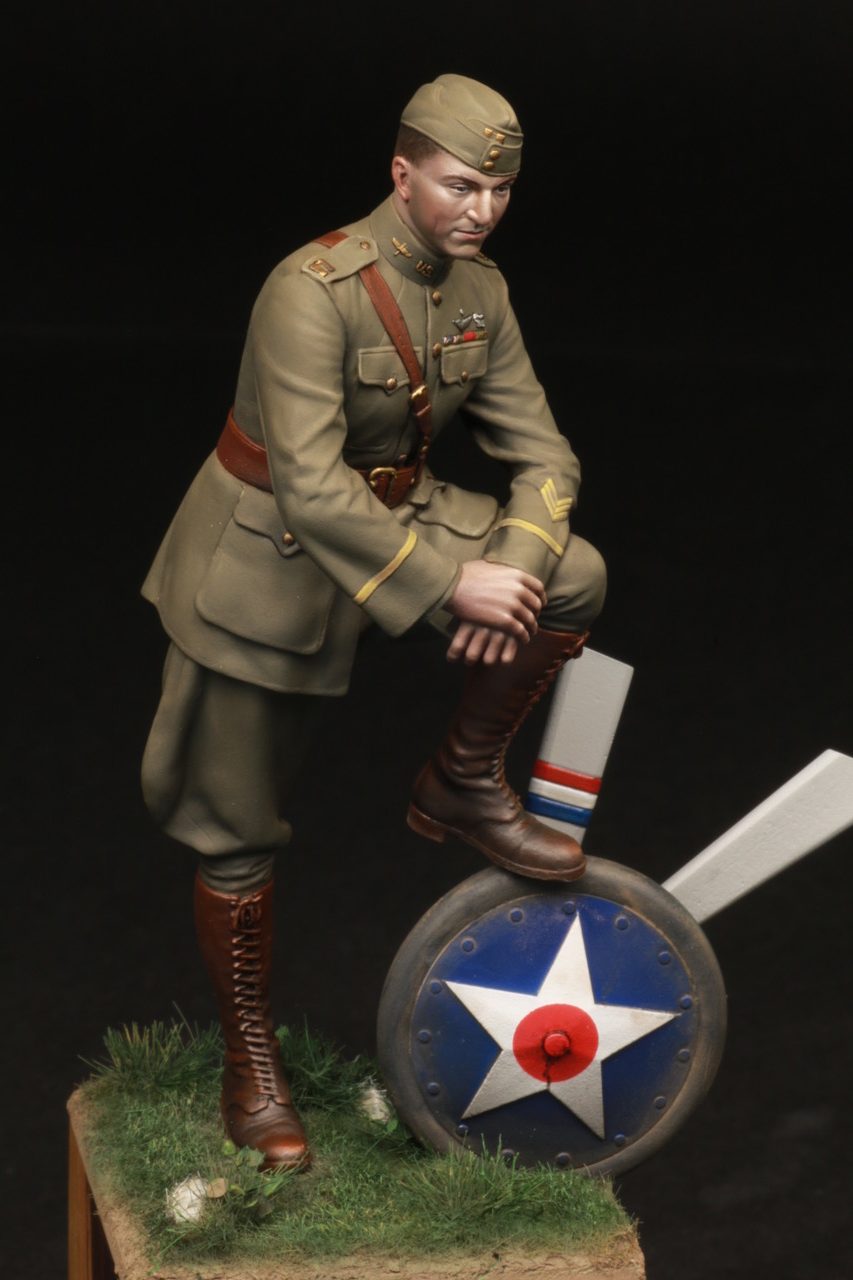
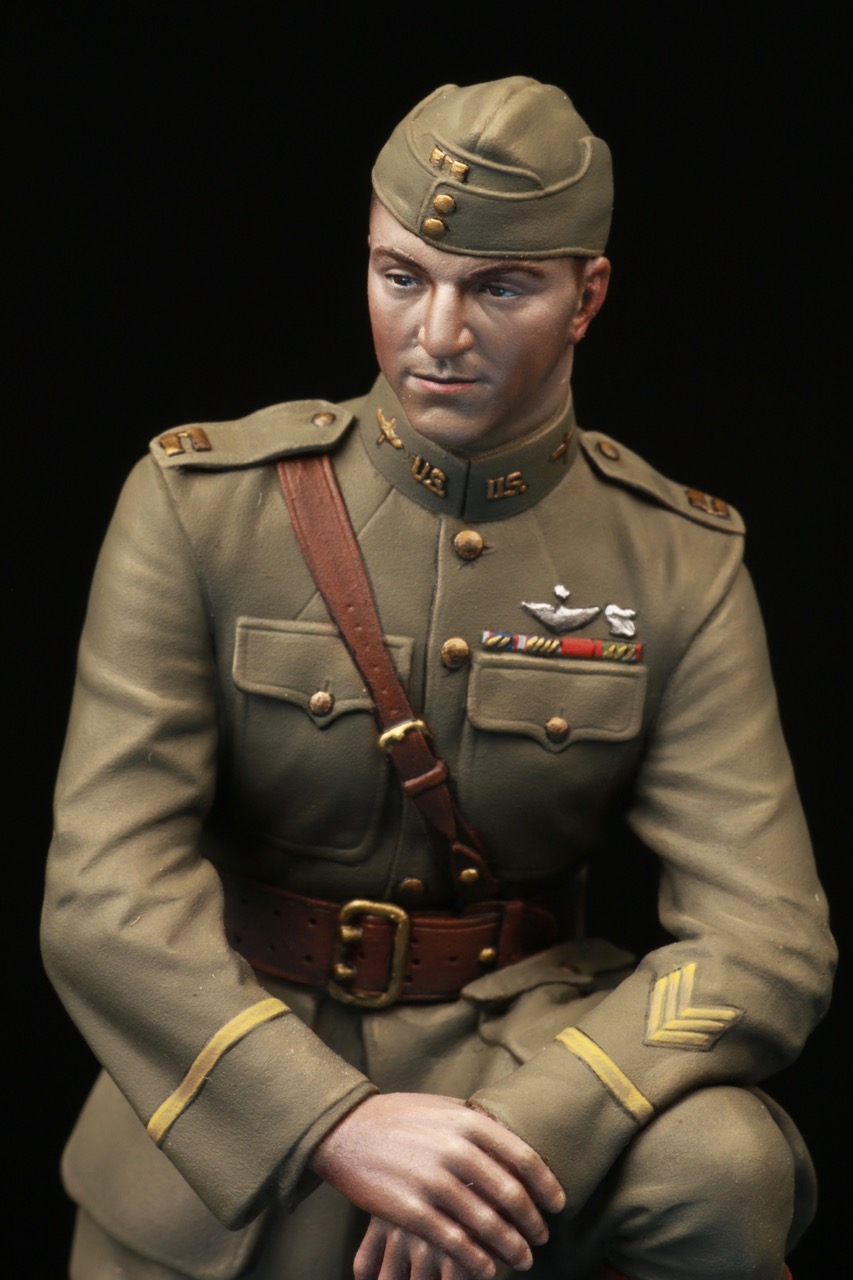
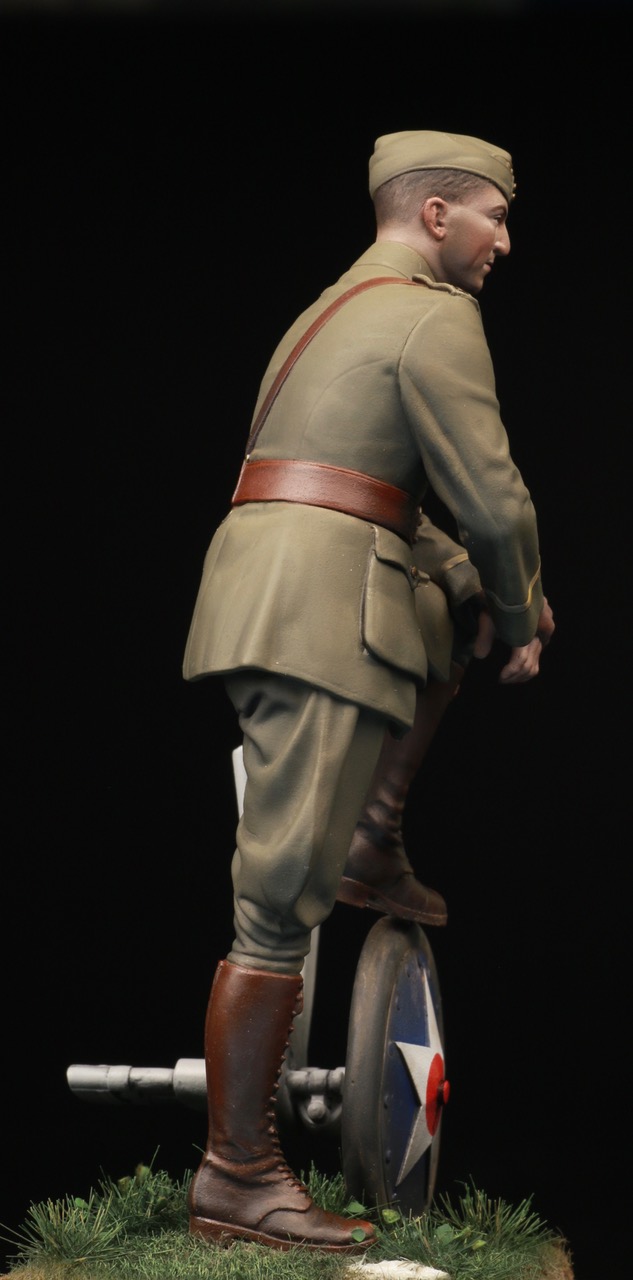
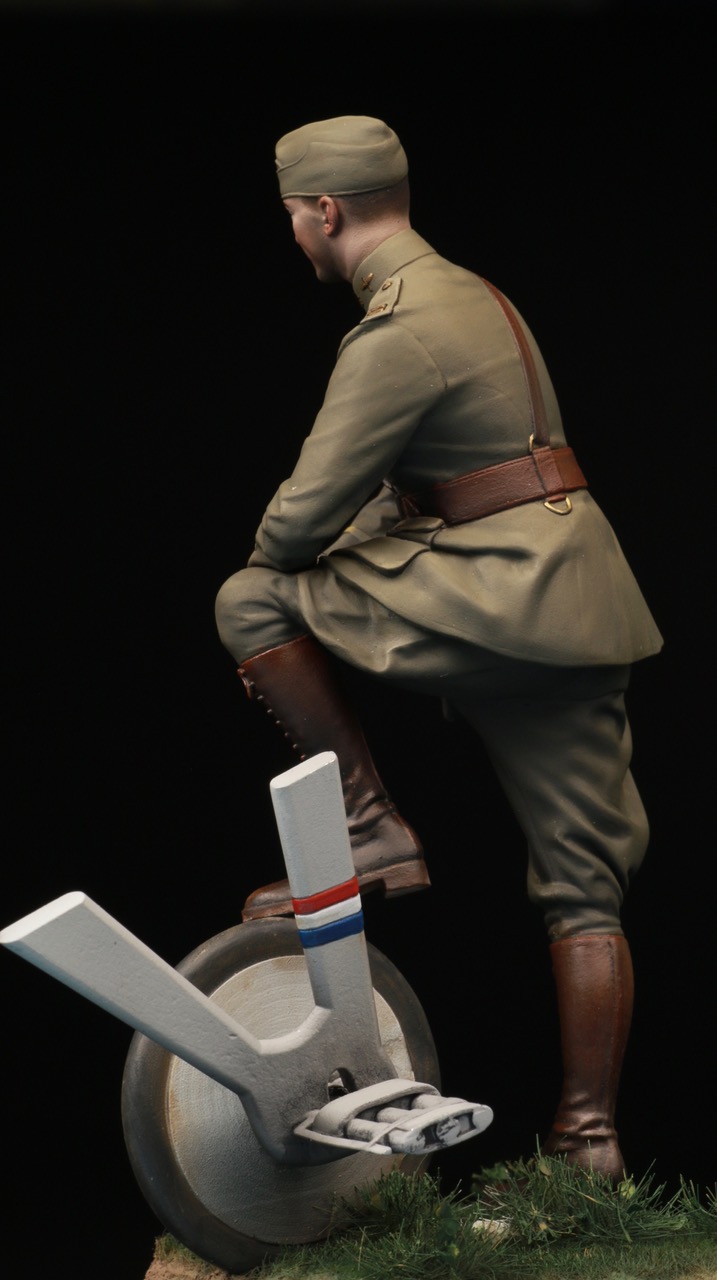

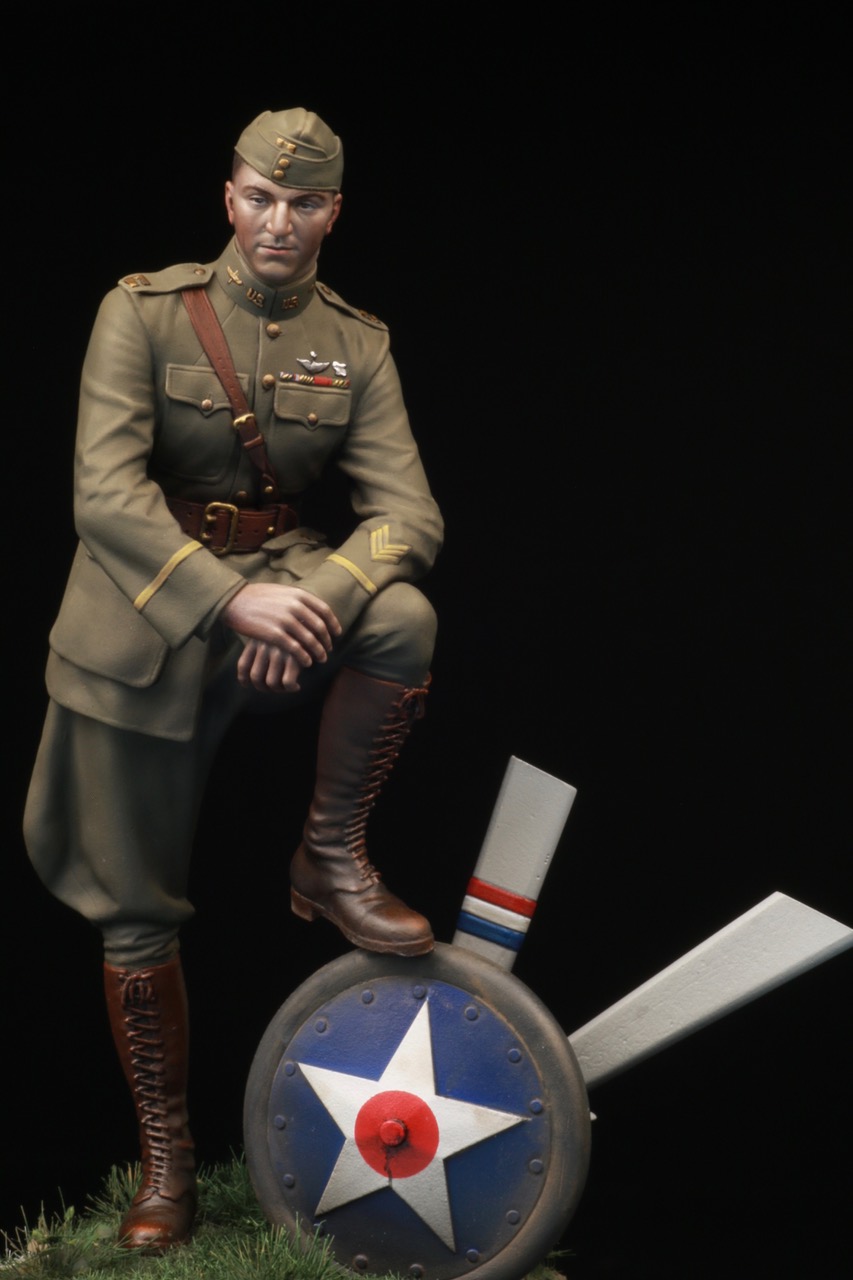
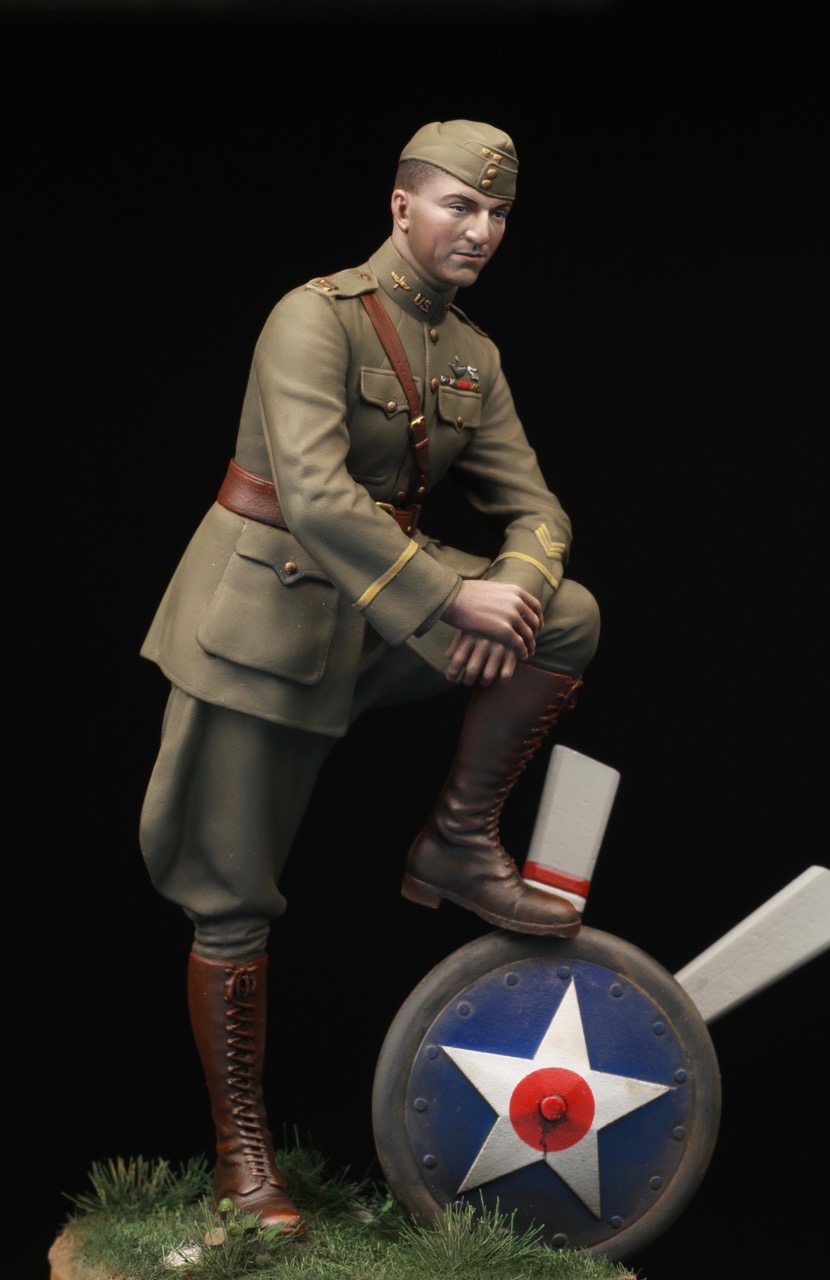
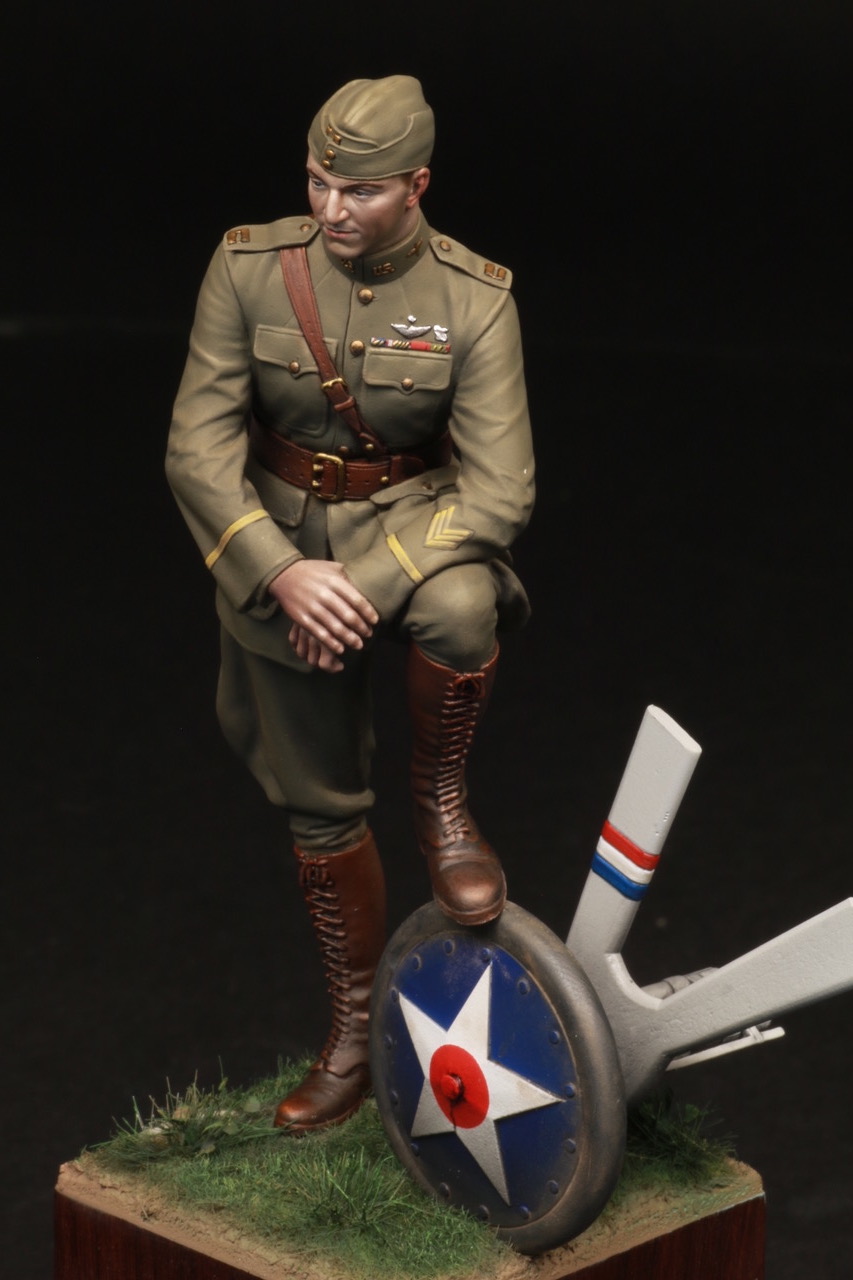
The figure is in oils the wheel and undercarriage Tamiya paints.
David G Lane
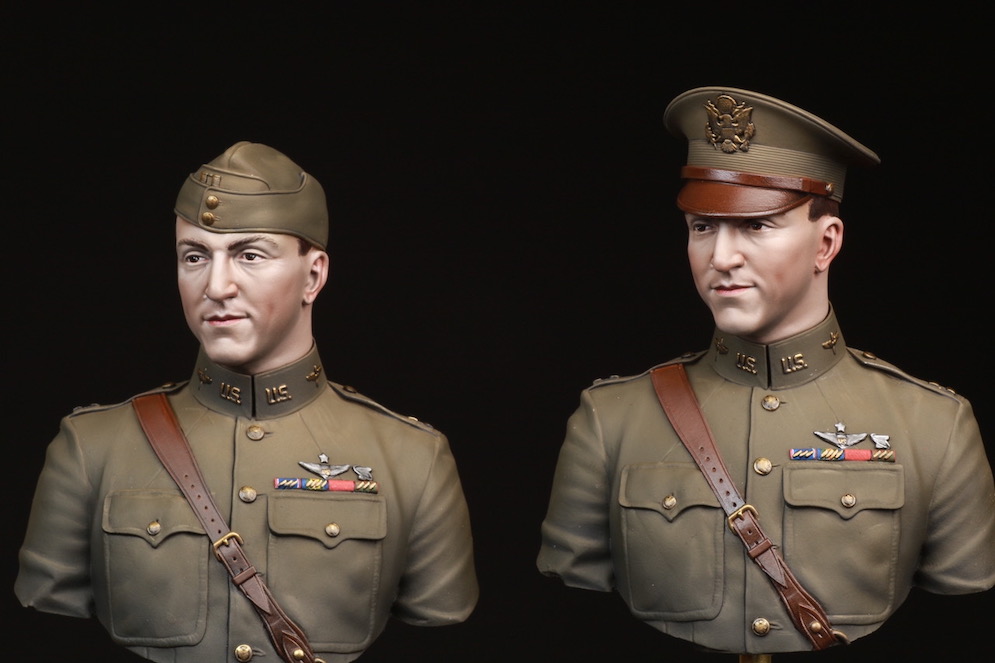
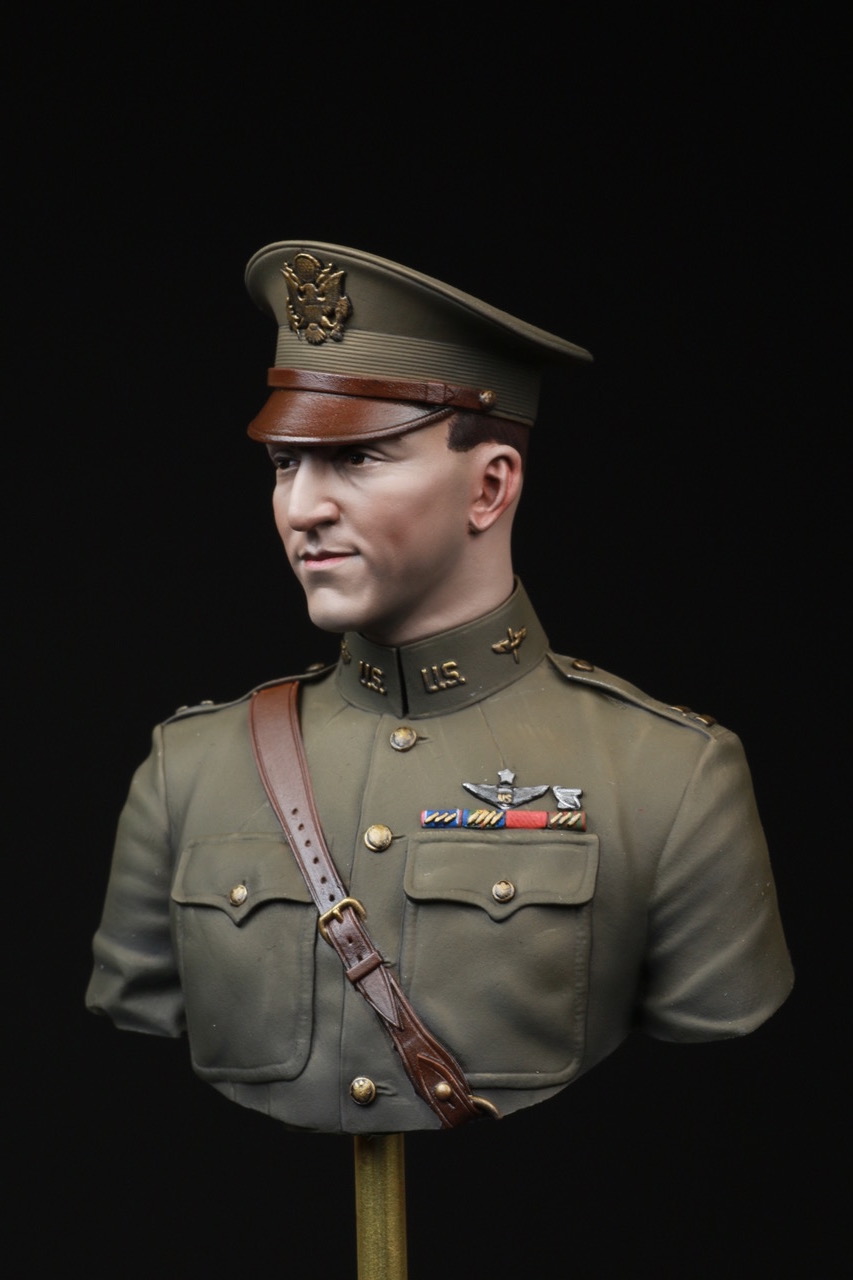
Approx 1:10 scale
David G L.
This is a 90mm piece and I hope that you like it? I have been collecting these figures for many years and with the co-operation of my friends now have quite a collection.
Kotaka Yoichi


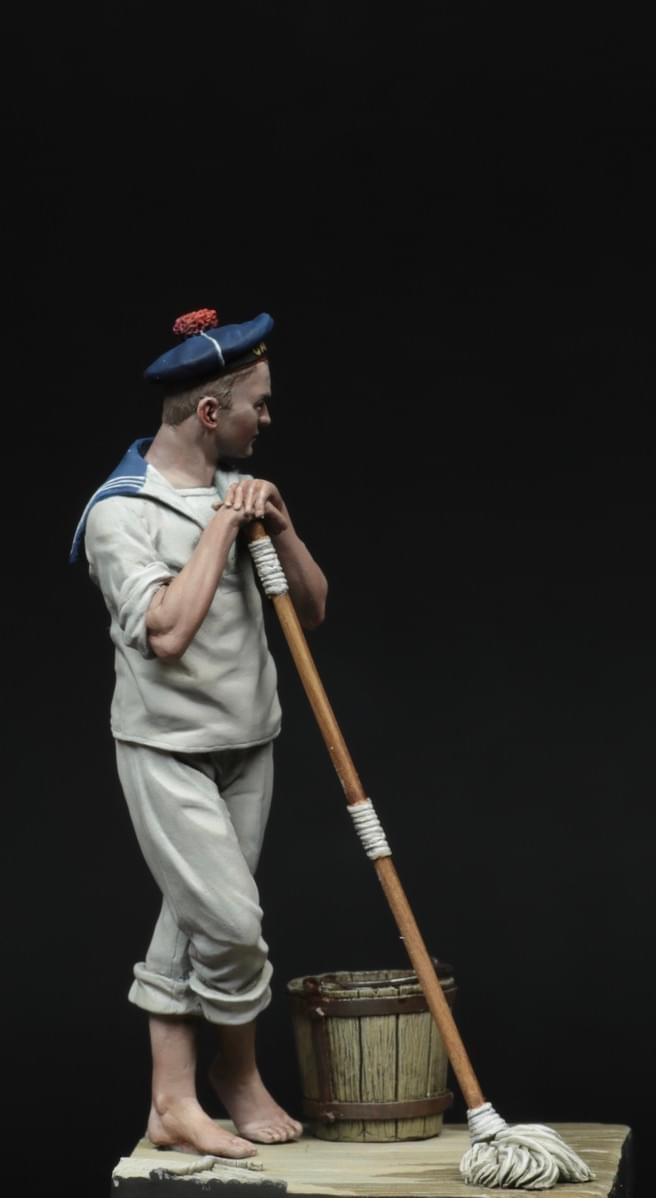
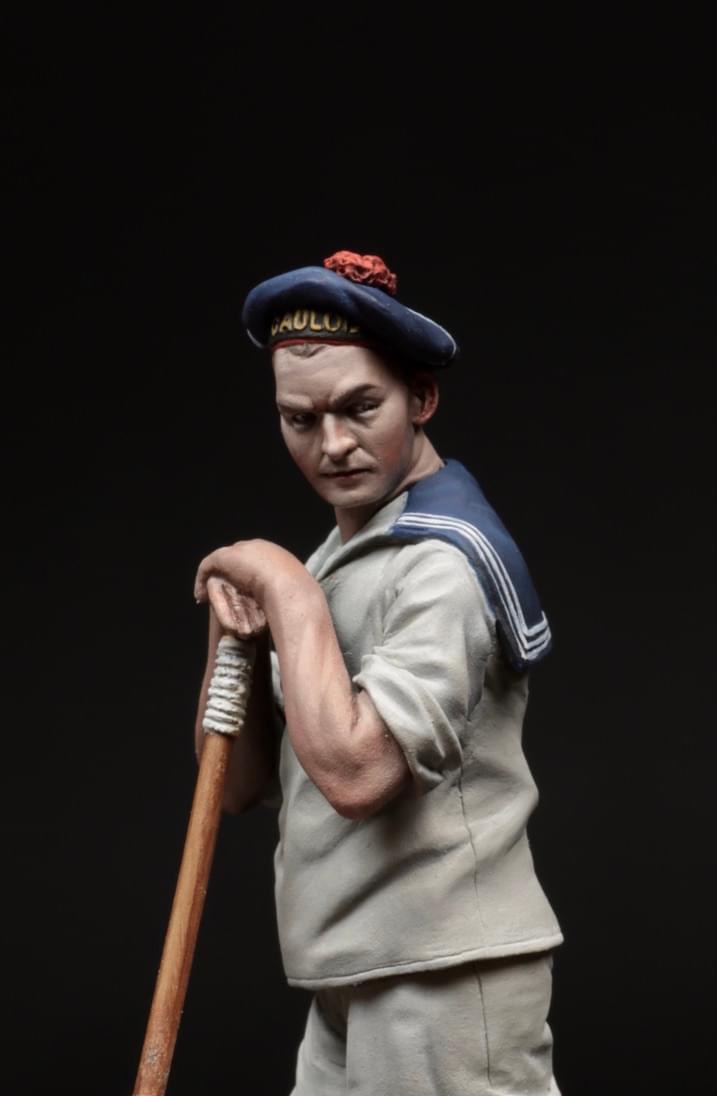
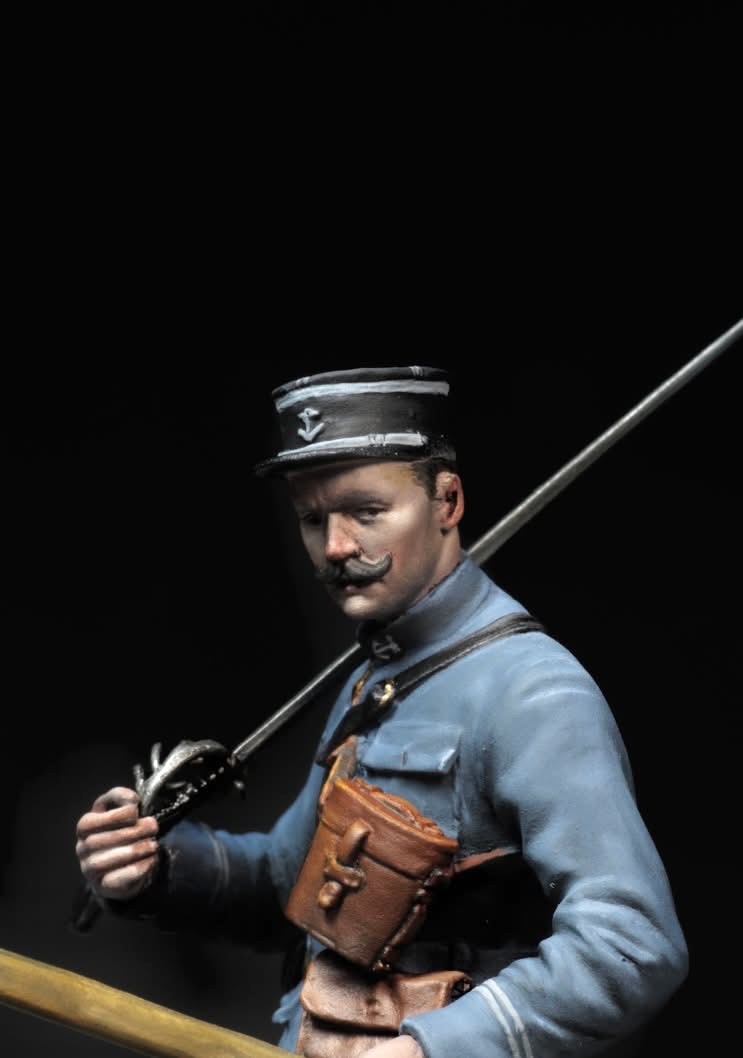
65mm Resin
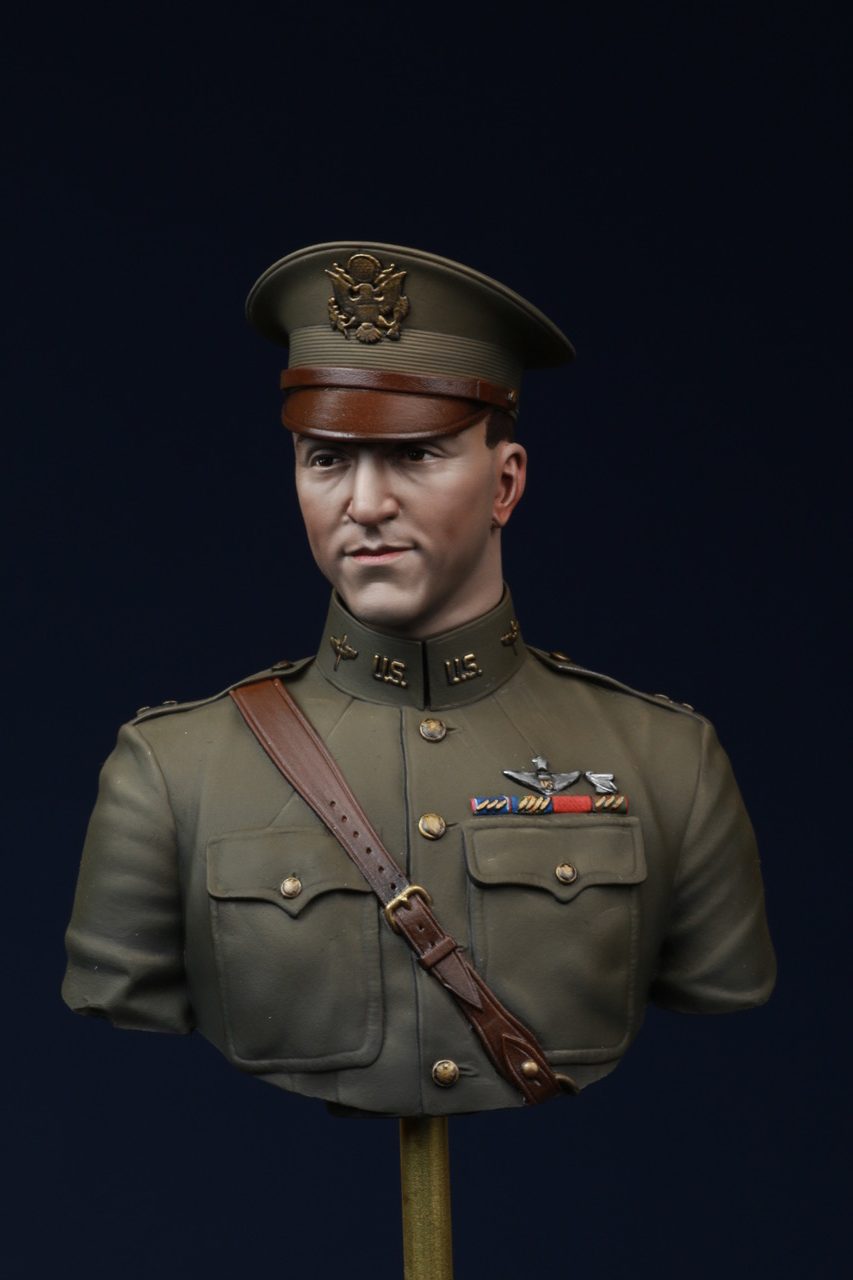
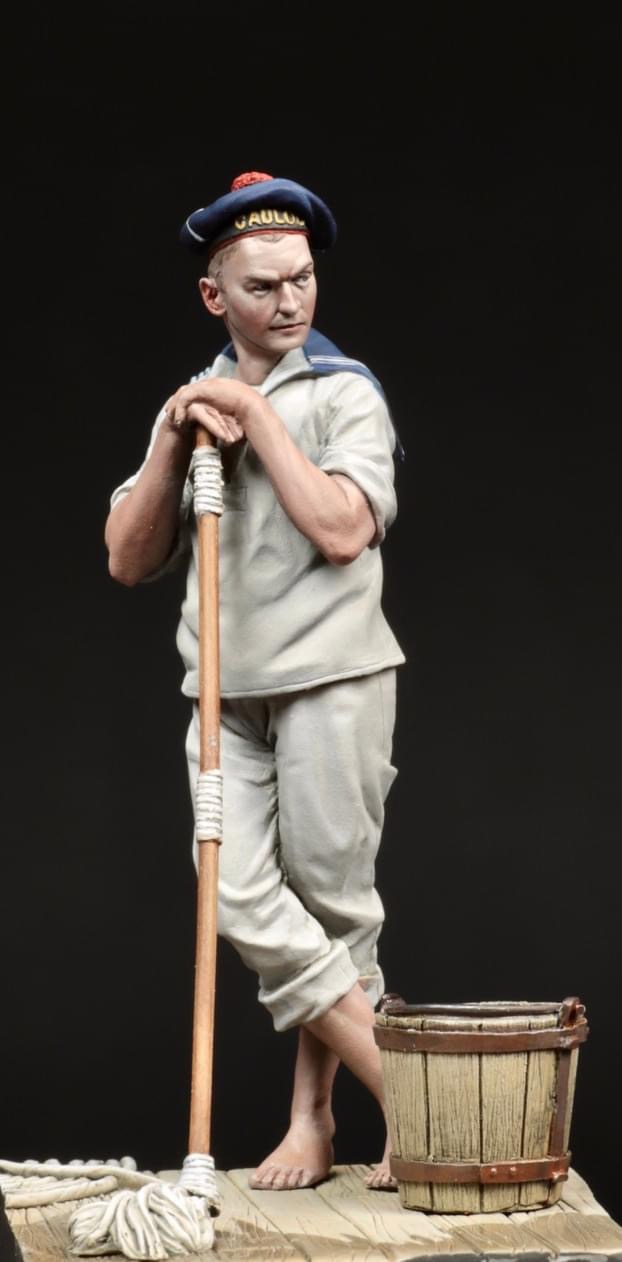
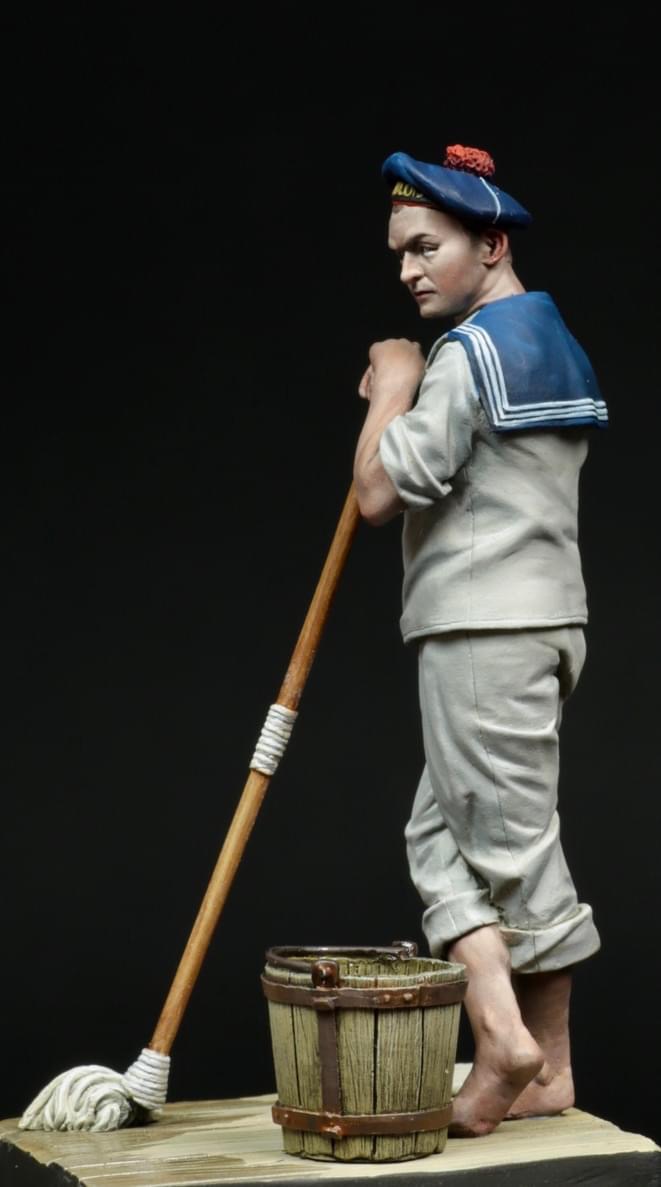
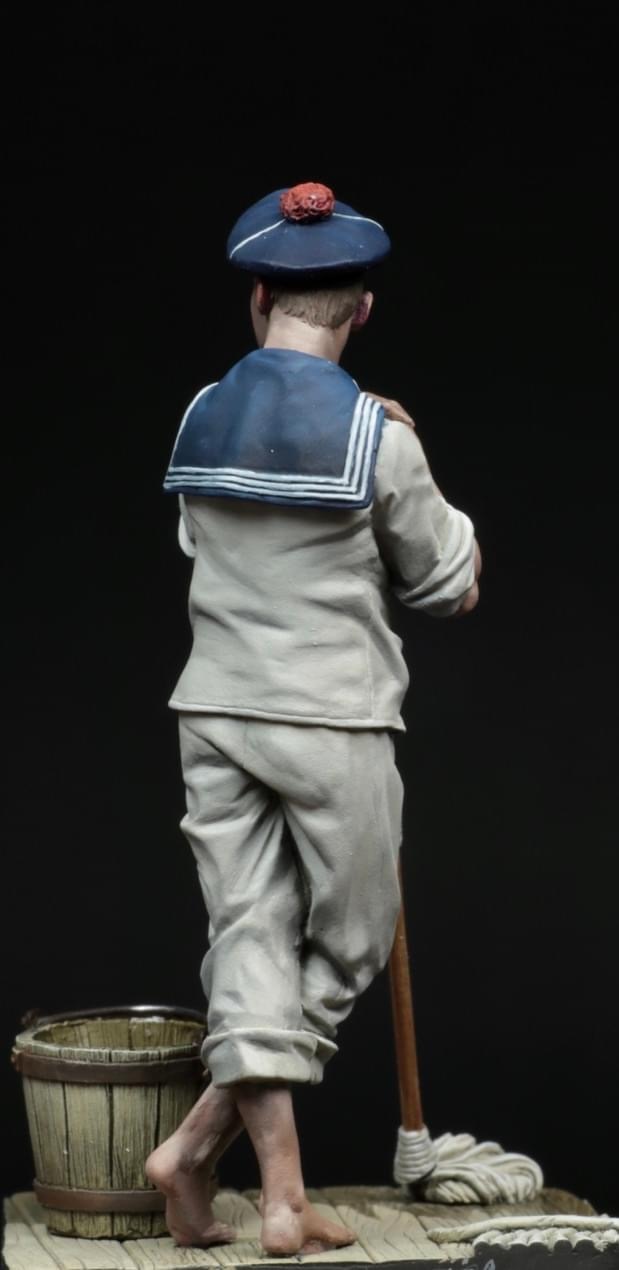
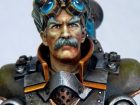
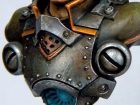
Marin des Equipage de La Flotte en tenue de corvee, Pre-Dreadnought Gaulois, Dardanelles 1915
Oils
David L.


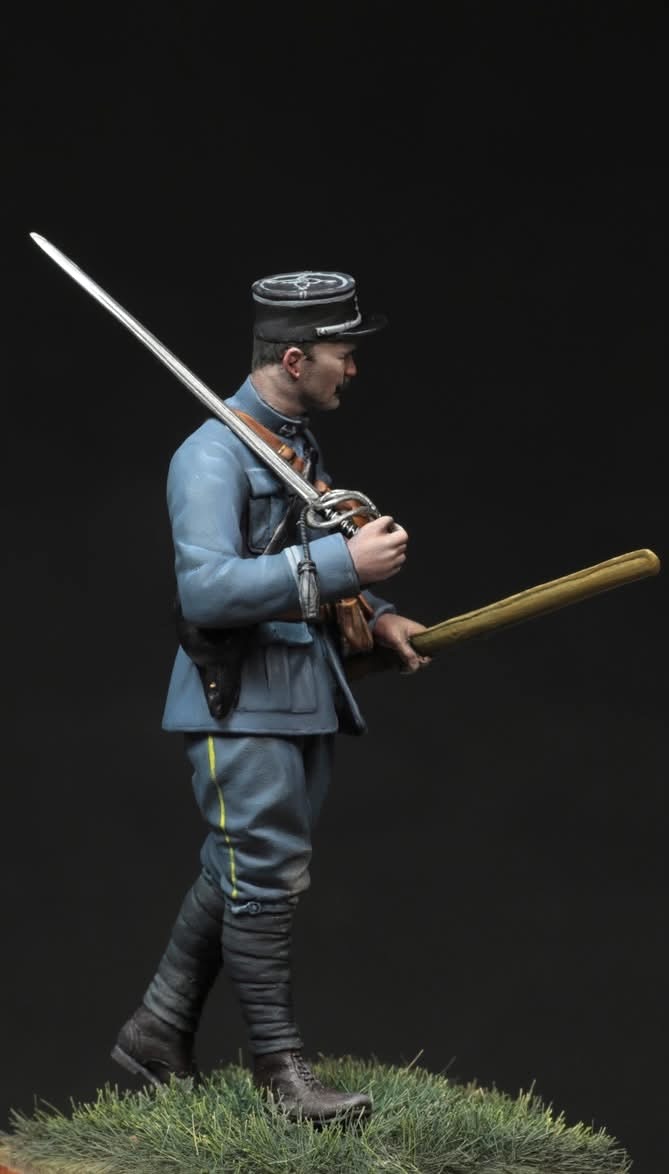
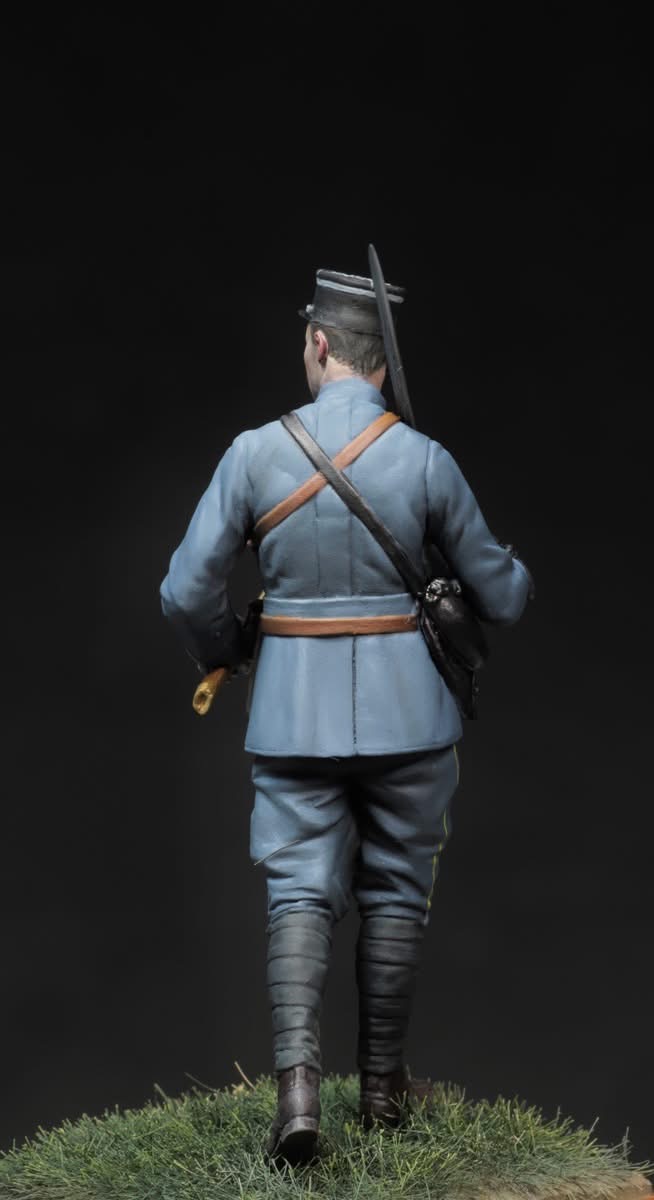
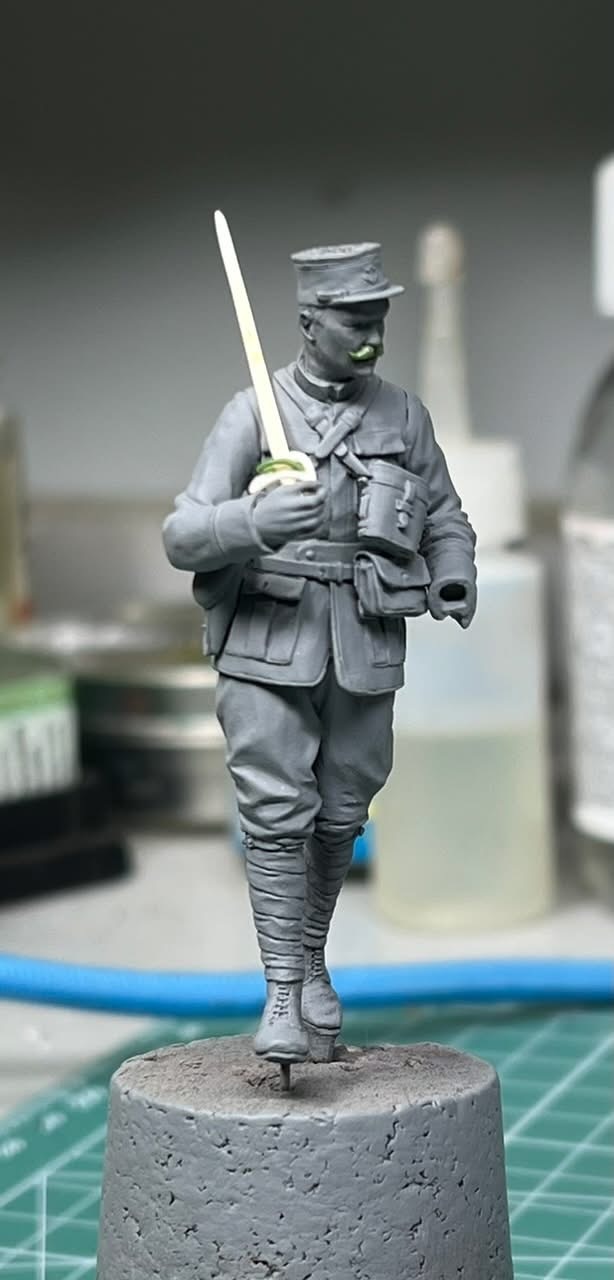
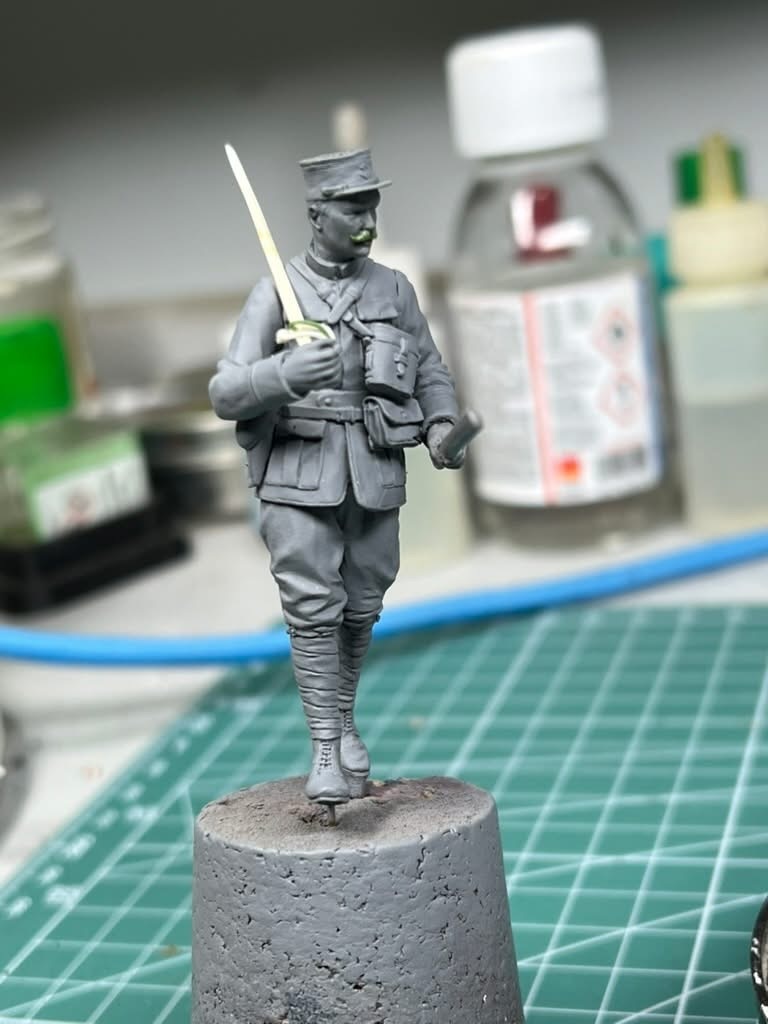
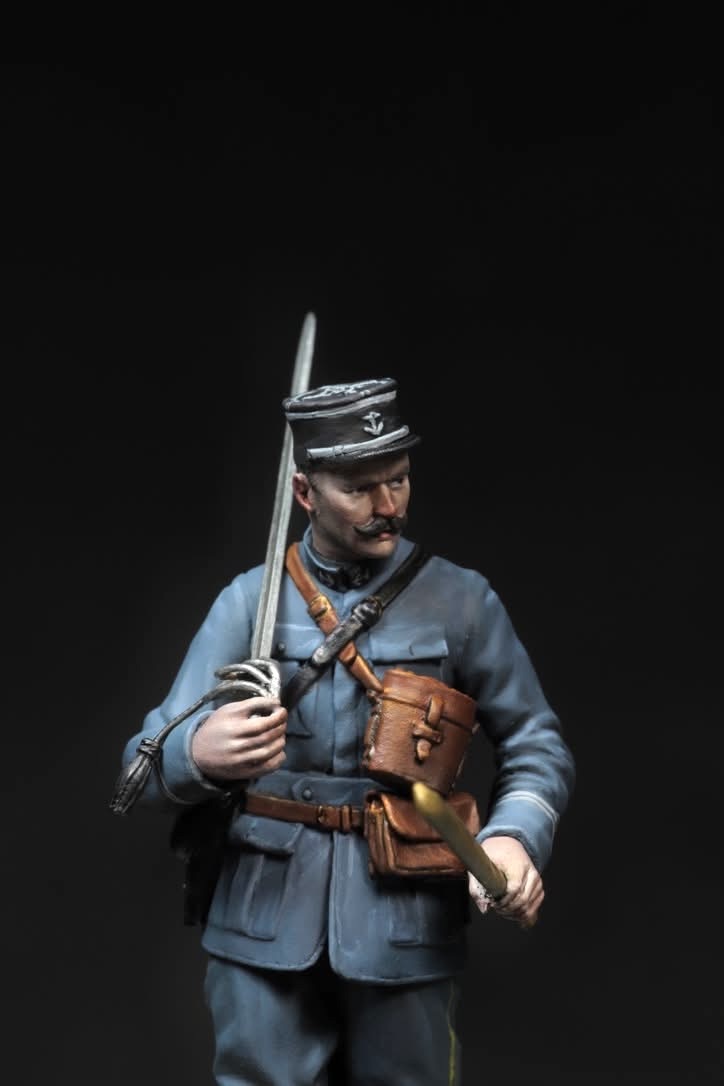
65mm
Oils
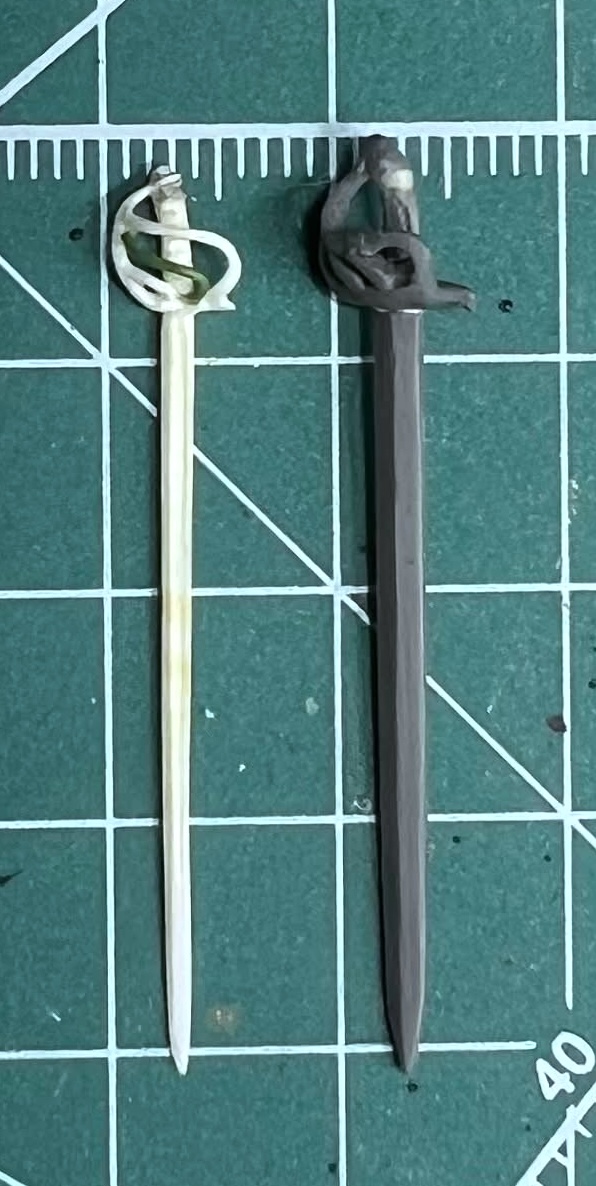
Added moustache. Filled in hollow cheeks, refined the eyes, replaced the sword with a finer Historex part with a partial Duo hilt and sword knot cord.😉
David L.

Best wishes, Andrey D.
Cheers, Ian R.


Oils and acrylics
David L.
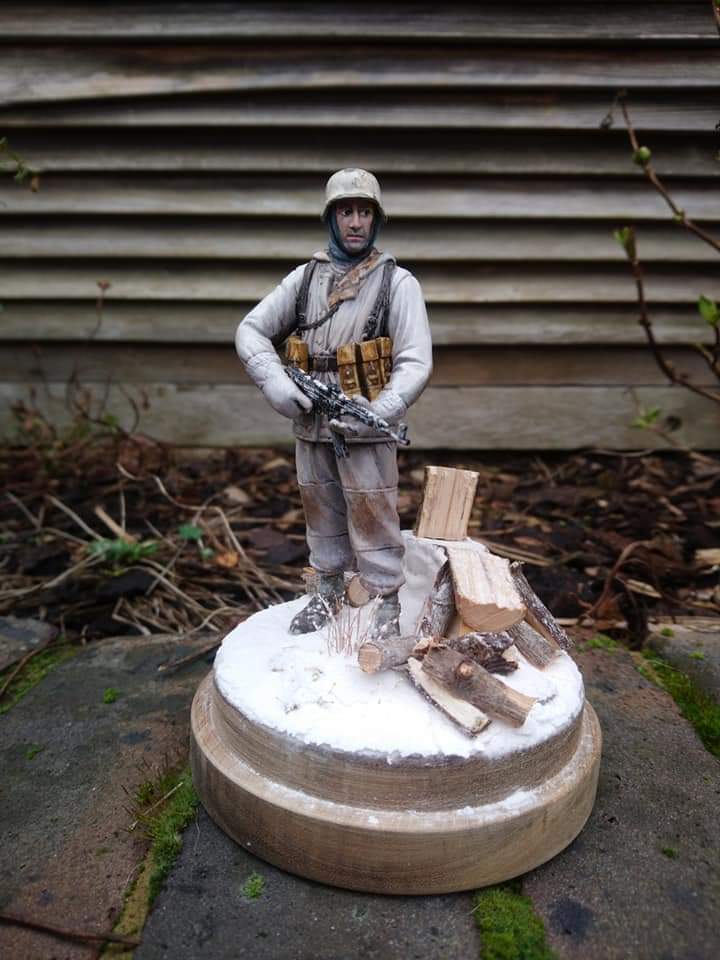

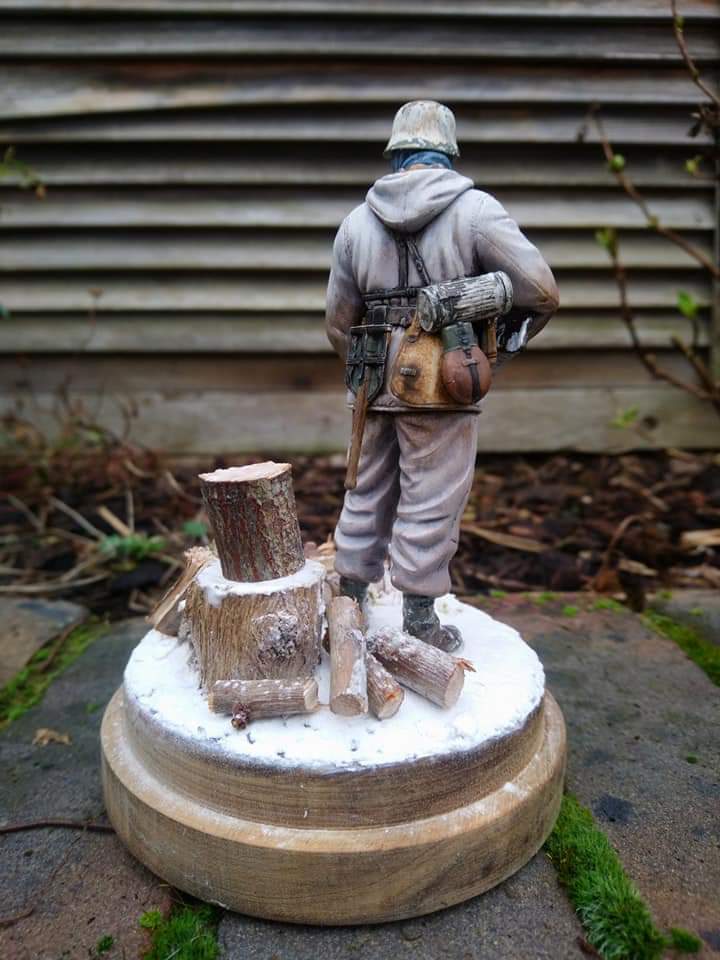
Here are a few notes:
• Painted with acrylics and oils.
• Water is EZ water stirred with a soldering iron to create ripples. The water coming out of the pipe was poured down a piece of clear stretched sprue
• The planks are scrap wood stained with a vinegar and wire wool mixture
• The metal is plastic and thick foil painted with enamel mixed with baking powder
• The logs are sticks cut and split
• Reeds are cheap paintbrush bristles
• Snow from Krycell.
I tried to reflect the weather in the colouring of the faces. They are not perfect but as good as I can achieve with my abilities.
Hope you like them!
Stuart H.


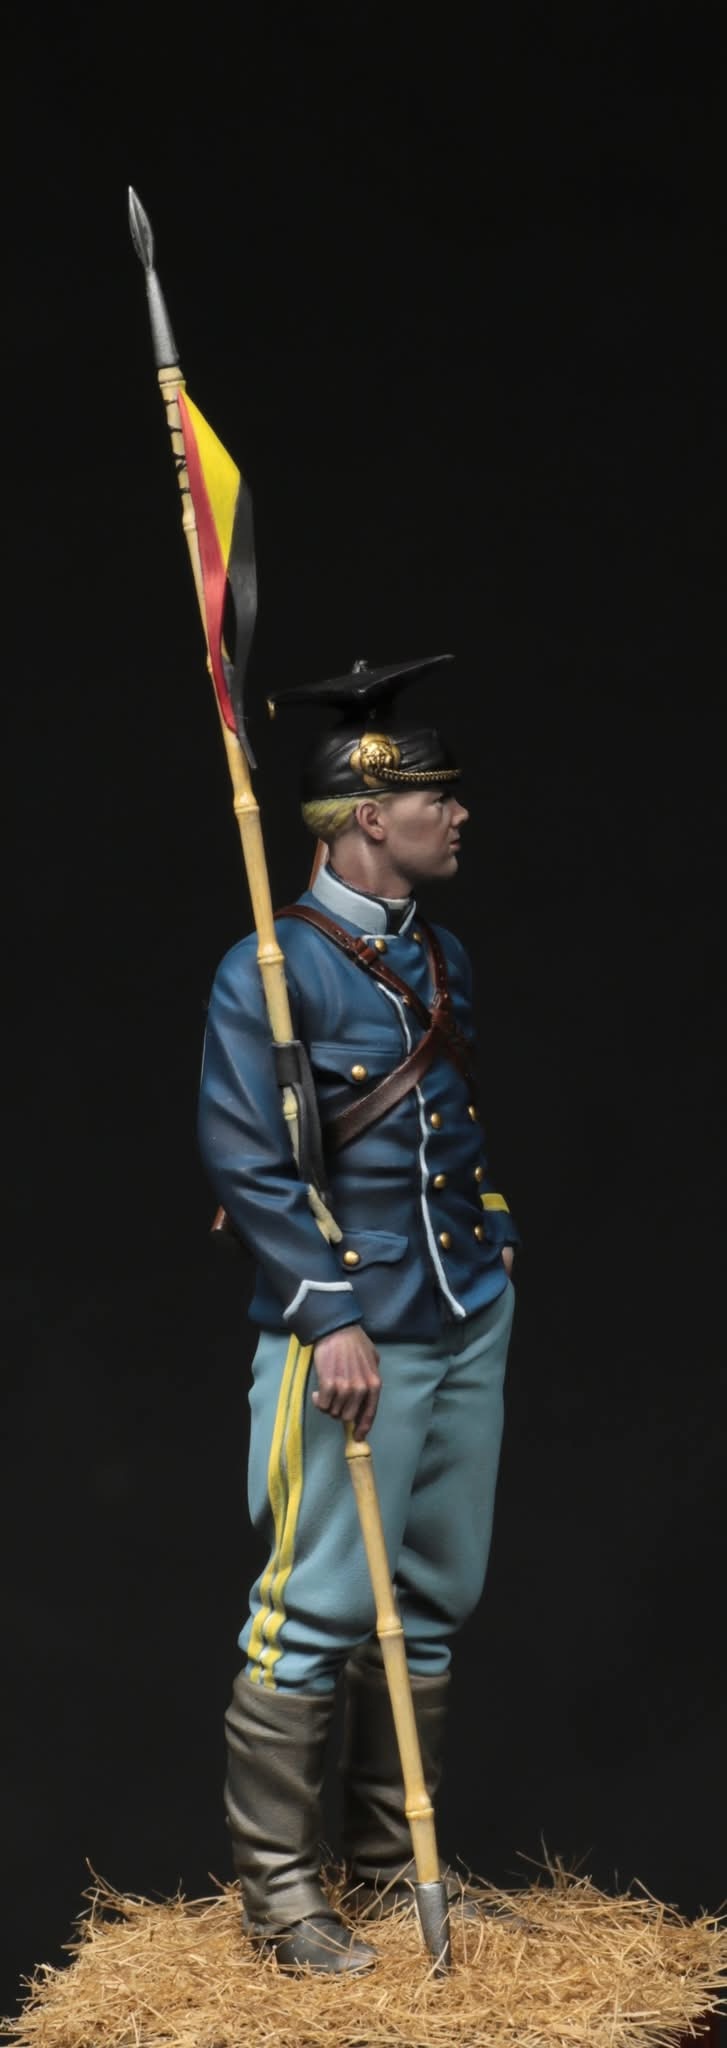
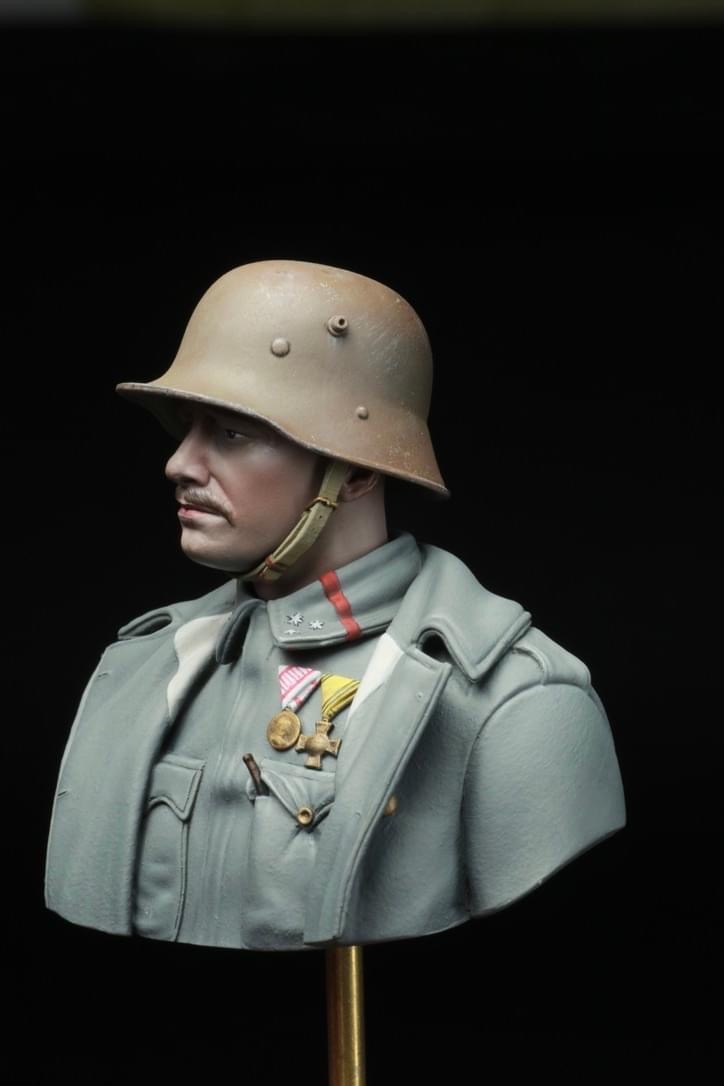
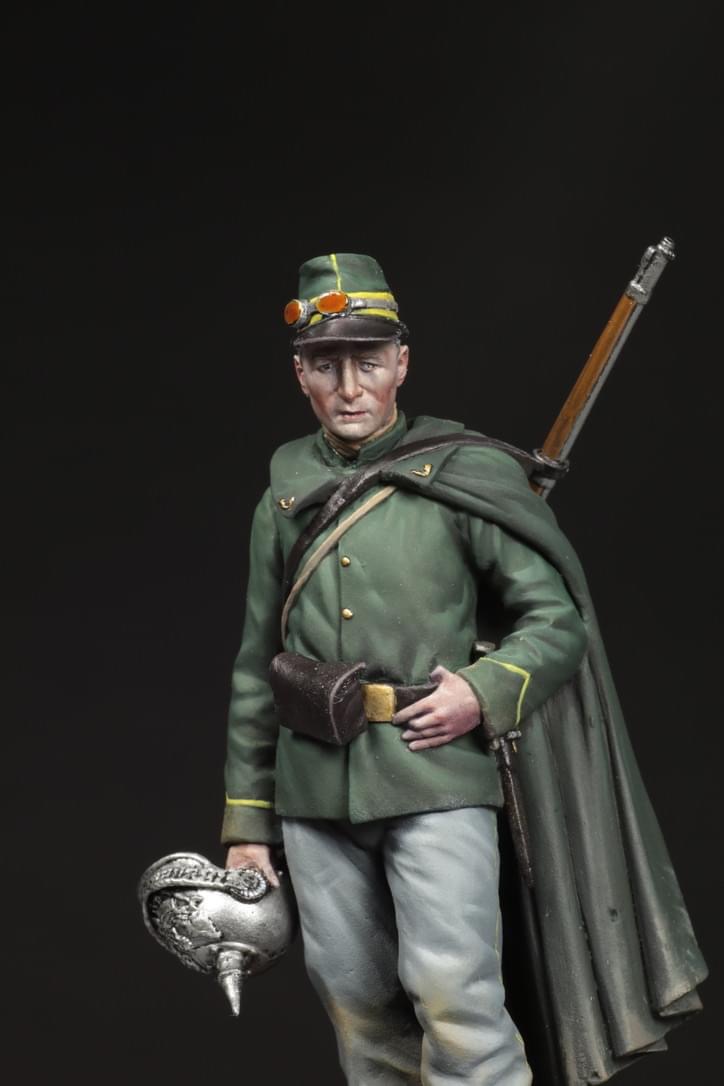
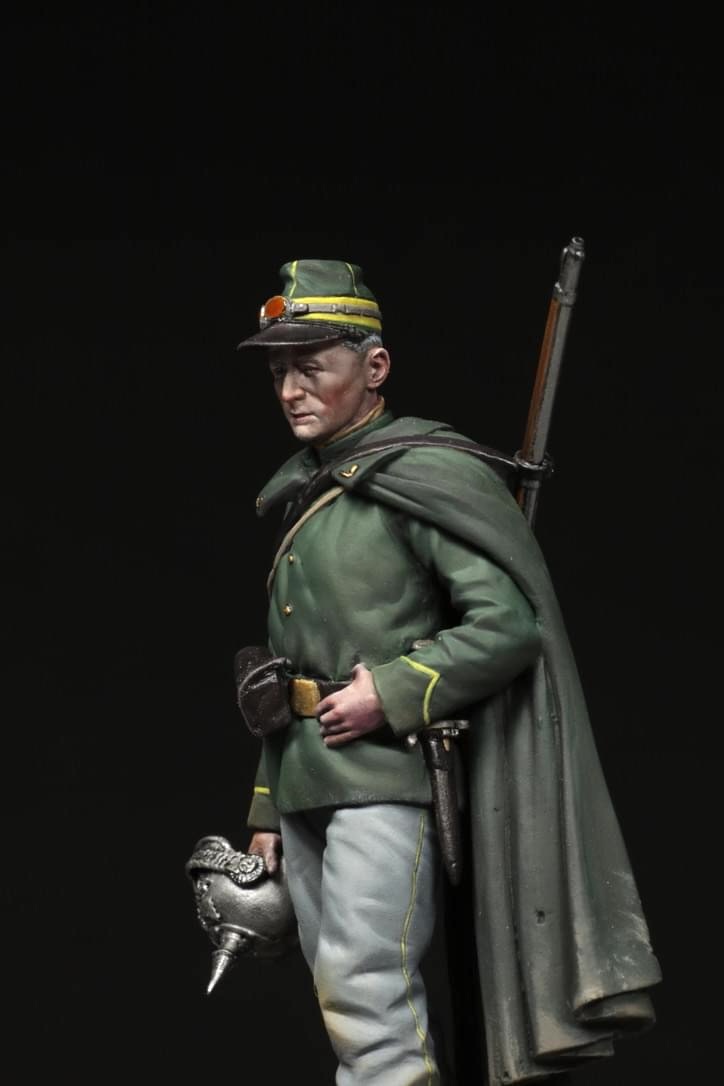
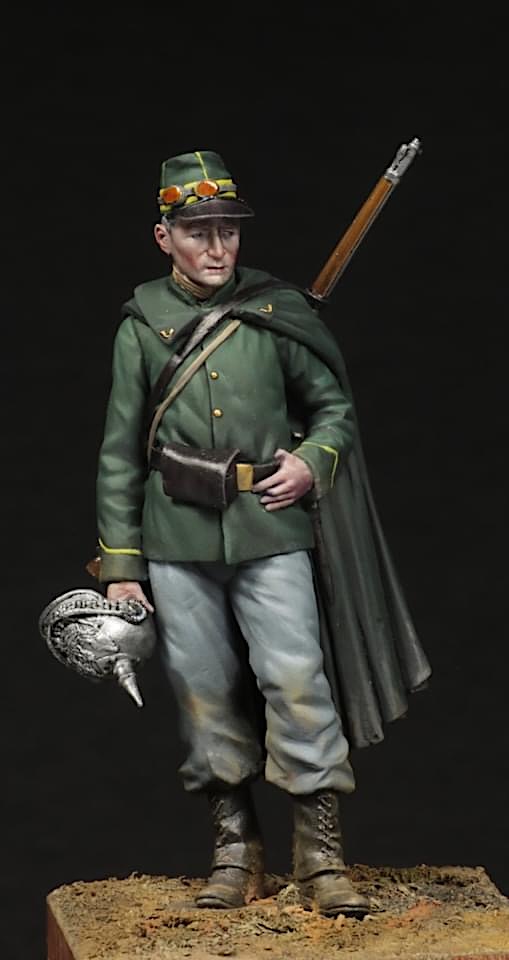
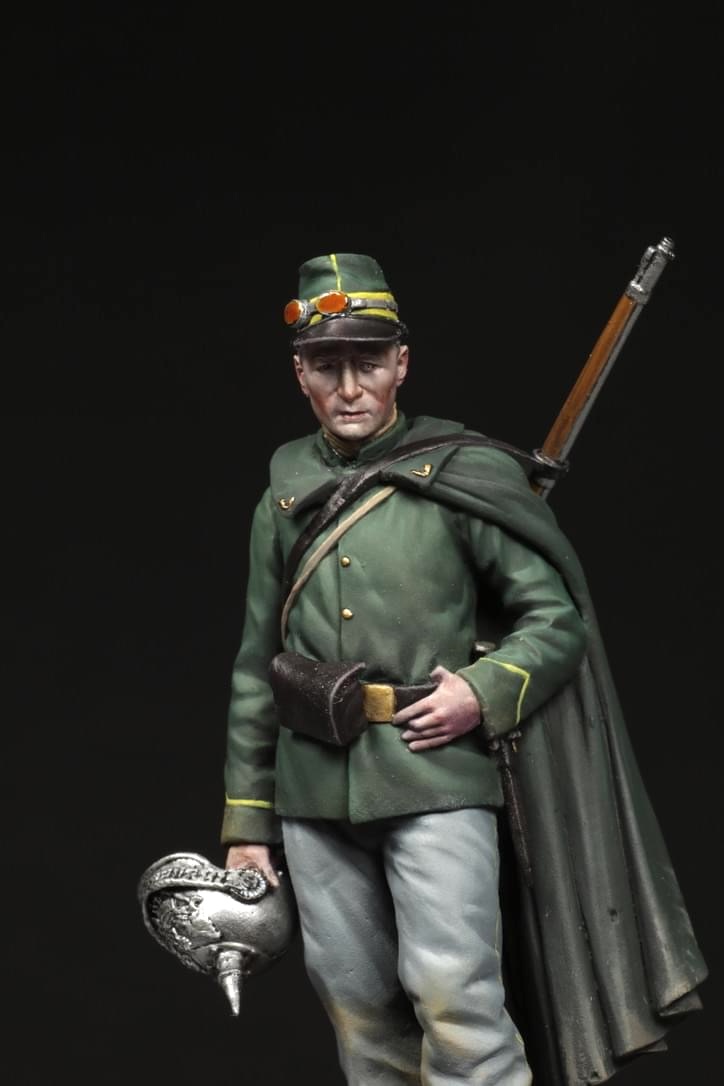
I’m starting this little vignette from research about German WW I cavalry (lancers). I’m looking for uniforms, equipment and reference colours. I want to achieve a dirty muddy look of the ground with no plants only wet mud and puddles.
Perfect kit to complete this mission will be M Model German Lancer Ref: 35127.
It’s a resin kit with nice details. I glued parts together right away and prepare it with using IPA – pure alcohol 99%, it’s better than dish soap. After its dried I prime all with Ammo One shot Gray colour. It’s the best colour to check and find any imperfections that are hard to see with the naked eye.
Ok lets start to paint – First the horse…
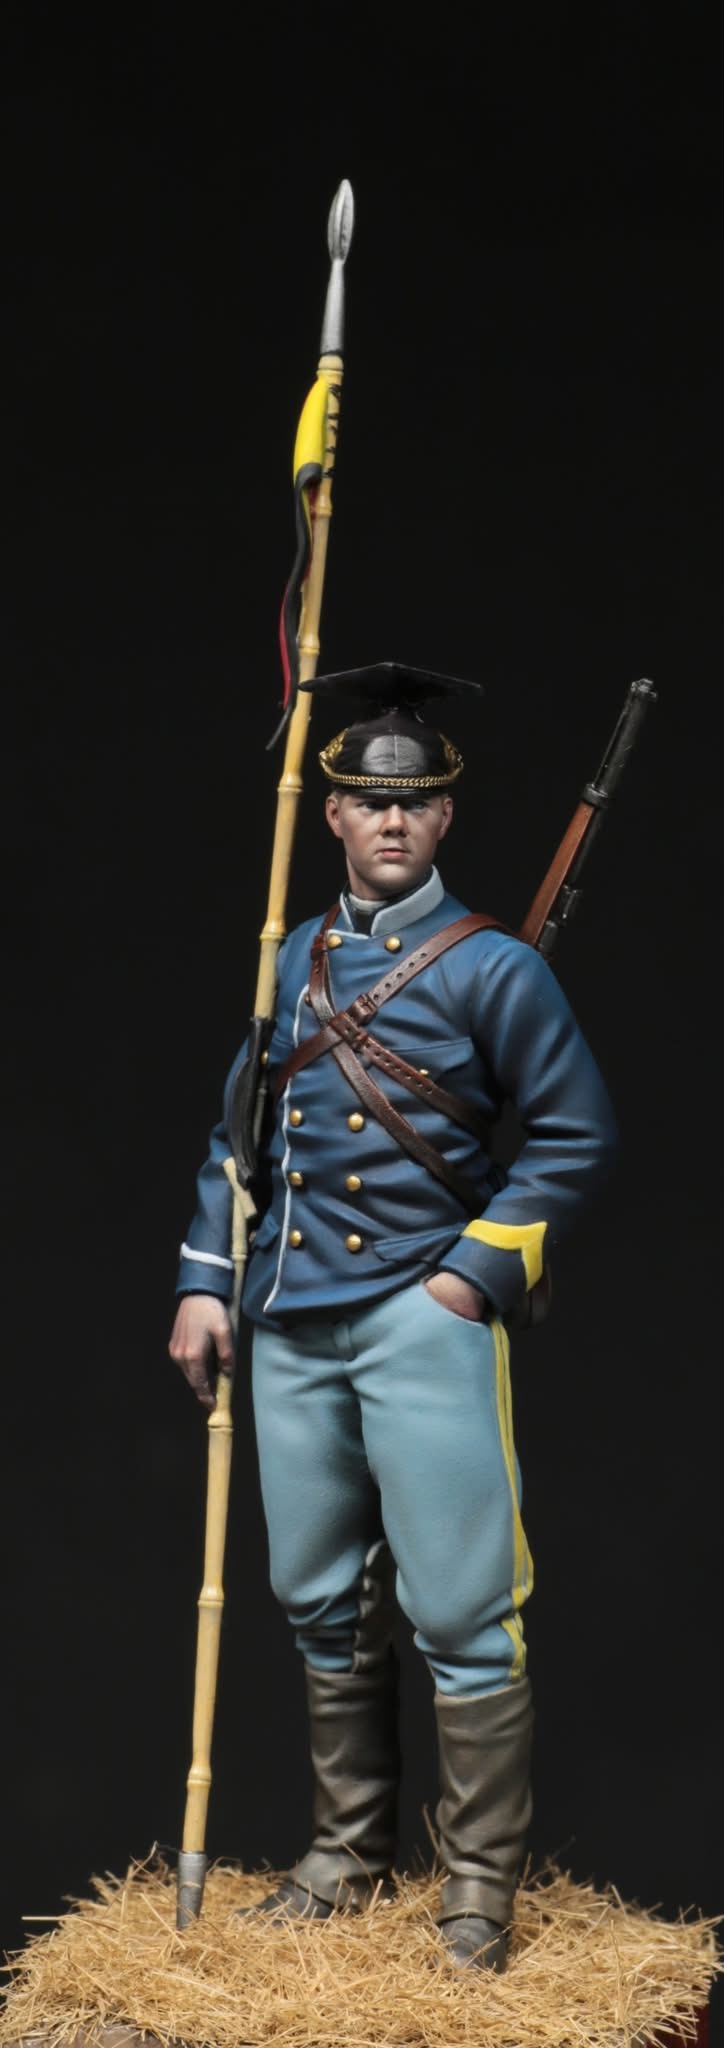
Base colour is Vallejo model colour – Off white (820) I sprayed it with a airbrush and fine smooth two coats. Shadows – base Off White (820) with drop of black (950) – consistency (glazing) I called it dirty water :). Shadows must be added layer after layer to achieved smooth transition from black to white. Just about 7 layers.
Saddle – mixture of white (820) and filed blue (964), and the same technique.
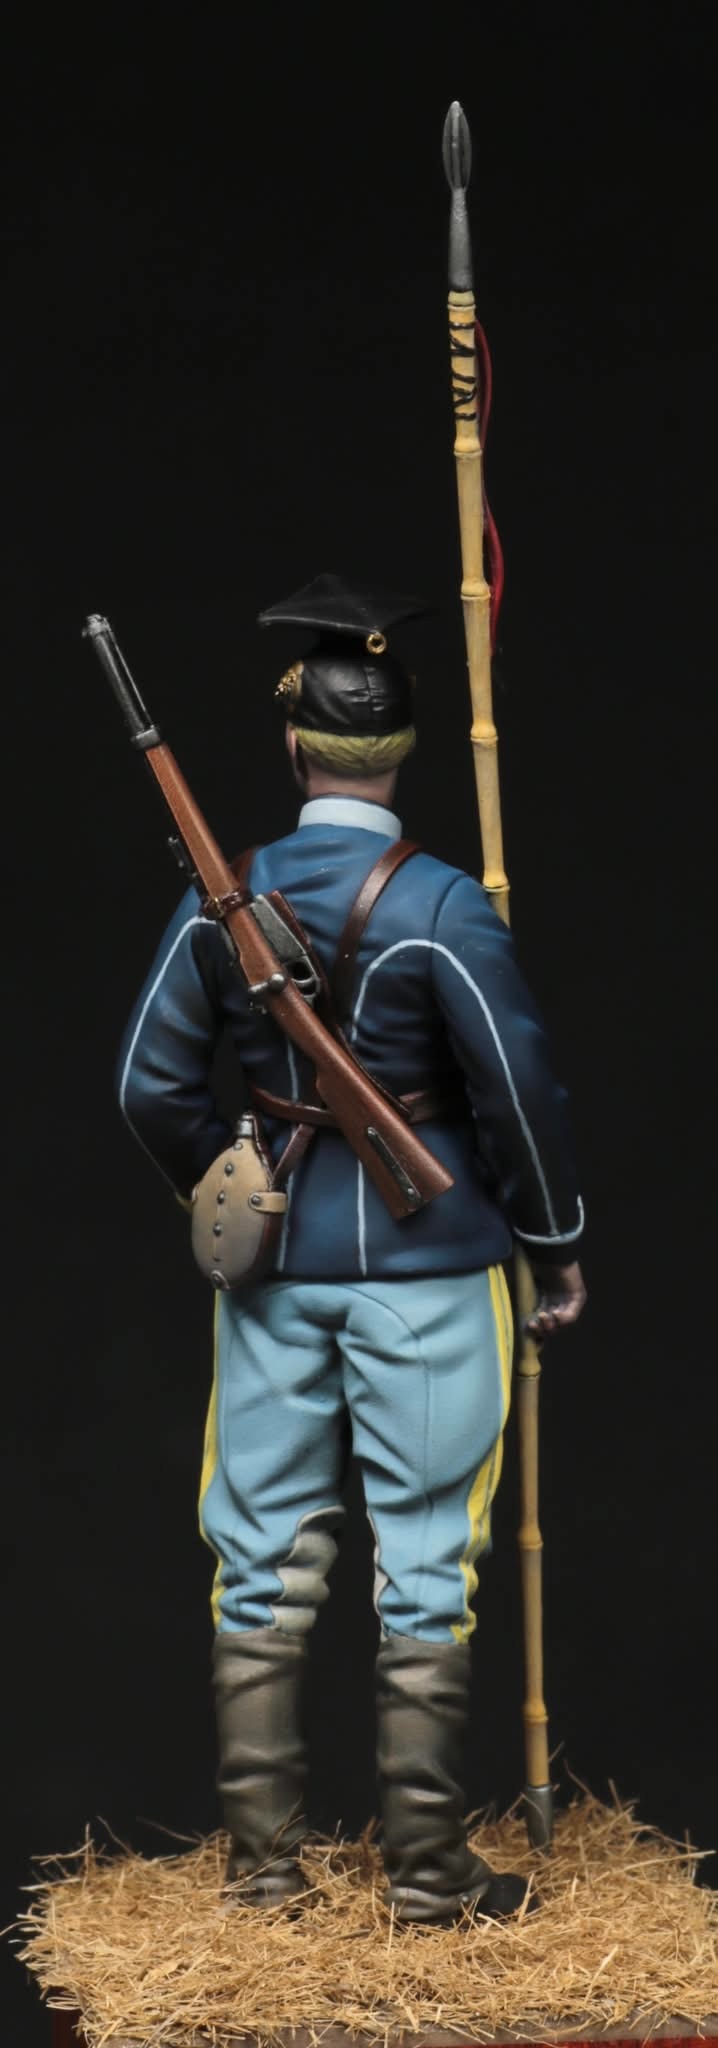
Base> highlight>shadow (blending). For horse hairs I make a wash from black (950) and dry brush it with white (820). I’m adding the harness made from copper plate that bends and is glued with cyanoacrylate glue.
Now its time to figure…
Mainly German lancers (Uhlan) used uniforms in steel blue colour, or light green and I decided to use steel blue. For base I use Luftwaffe unif. WWII (816) and I’m adding drop of white (820). Next step is to highlight all folds and most highlighted areas like shoulders, back, knees etc. To achieve this I’m adding white (920) to my base mixture and you must have consistency – like milk. Usually I add 3-5 tones of highlight. After that I’m doing shadows and you know the way > base + black or very dark blue. Edges of the uniform are painted in Dark red (946).
Skin – mixture of base – Brown sand (876). Highlight adding basic skin tone (815) and for shadows I add burnt cad. red (814). For gas masks visors I use Ammo Mig Crystal Smoke (095). And its done :)
By Konrad Łapiński


My thanks to Hwadong for his kind permission to let us use these inspirational images. Geoff


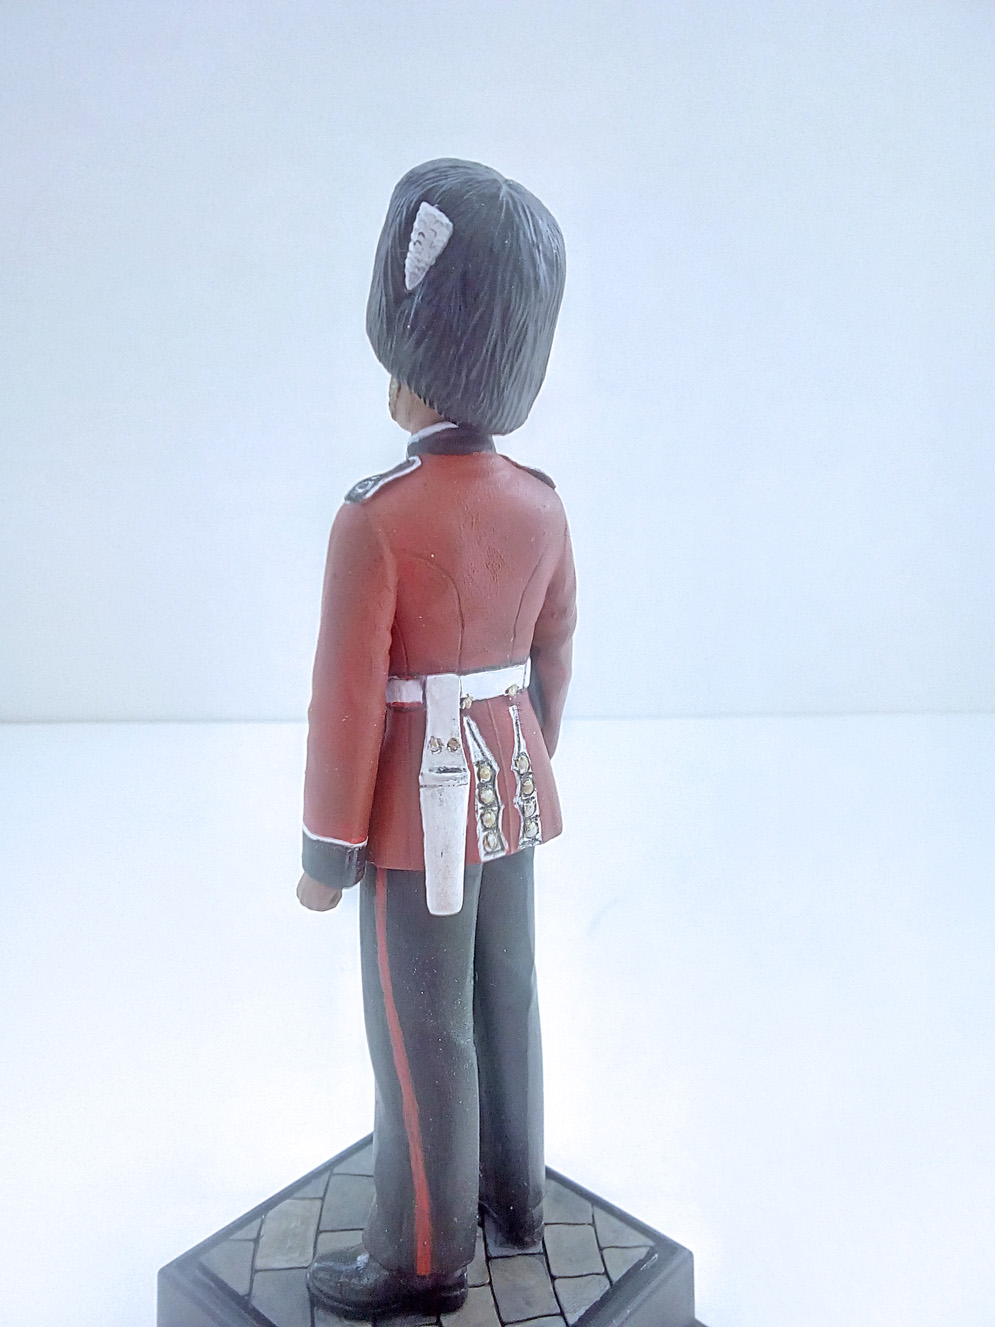
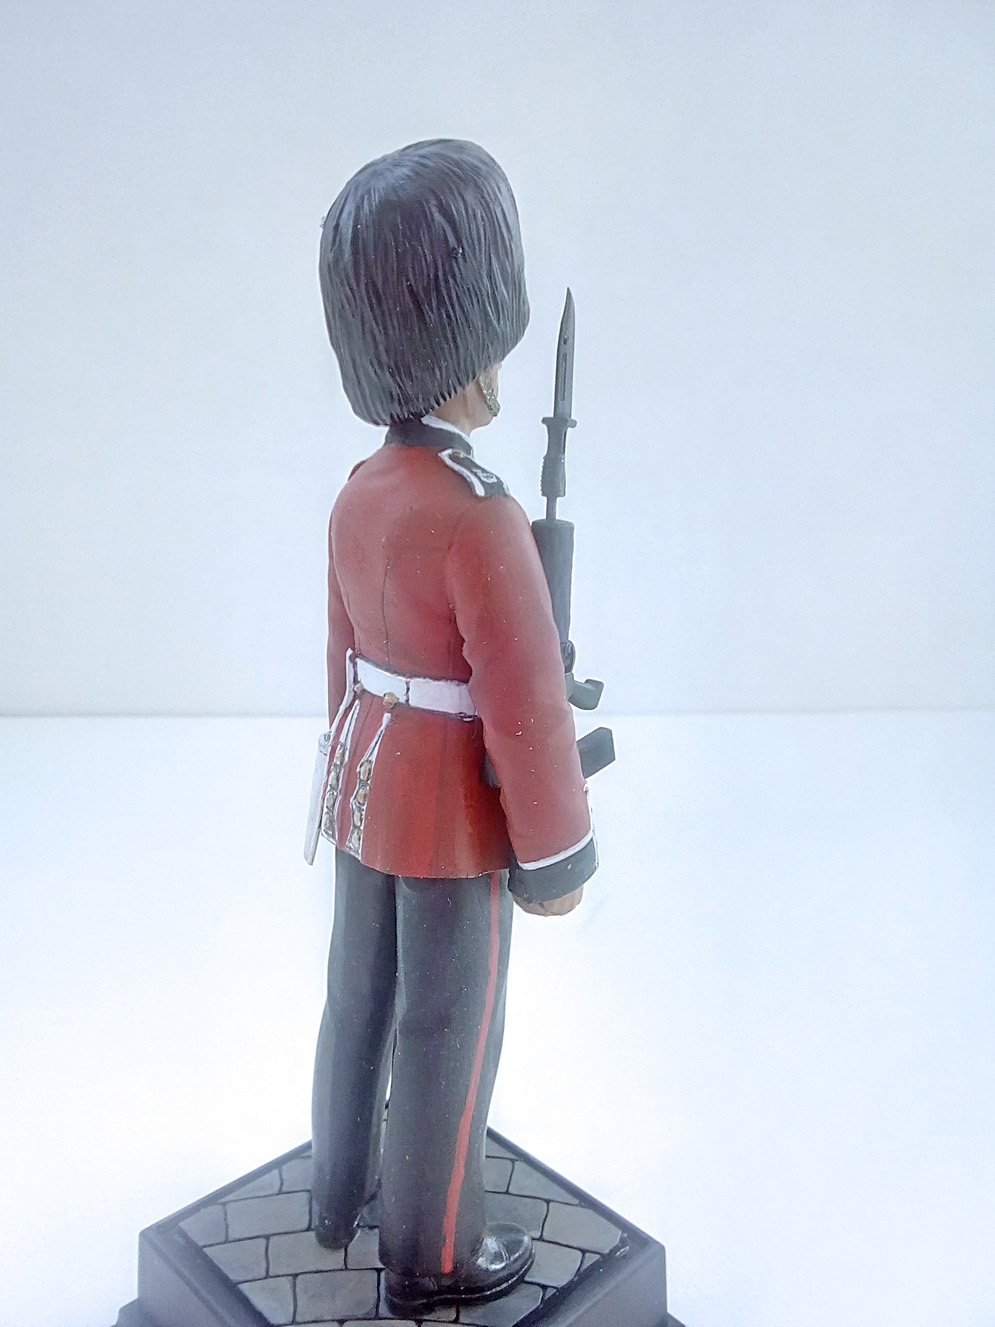
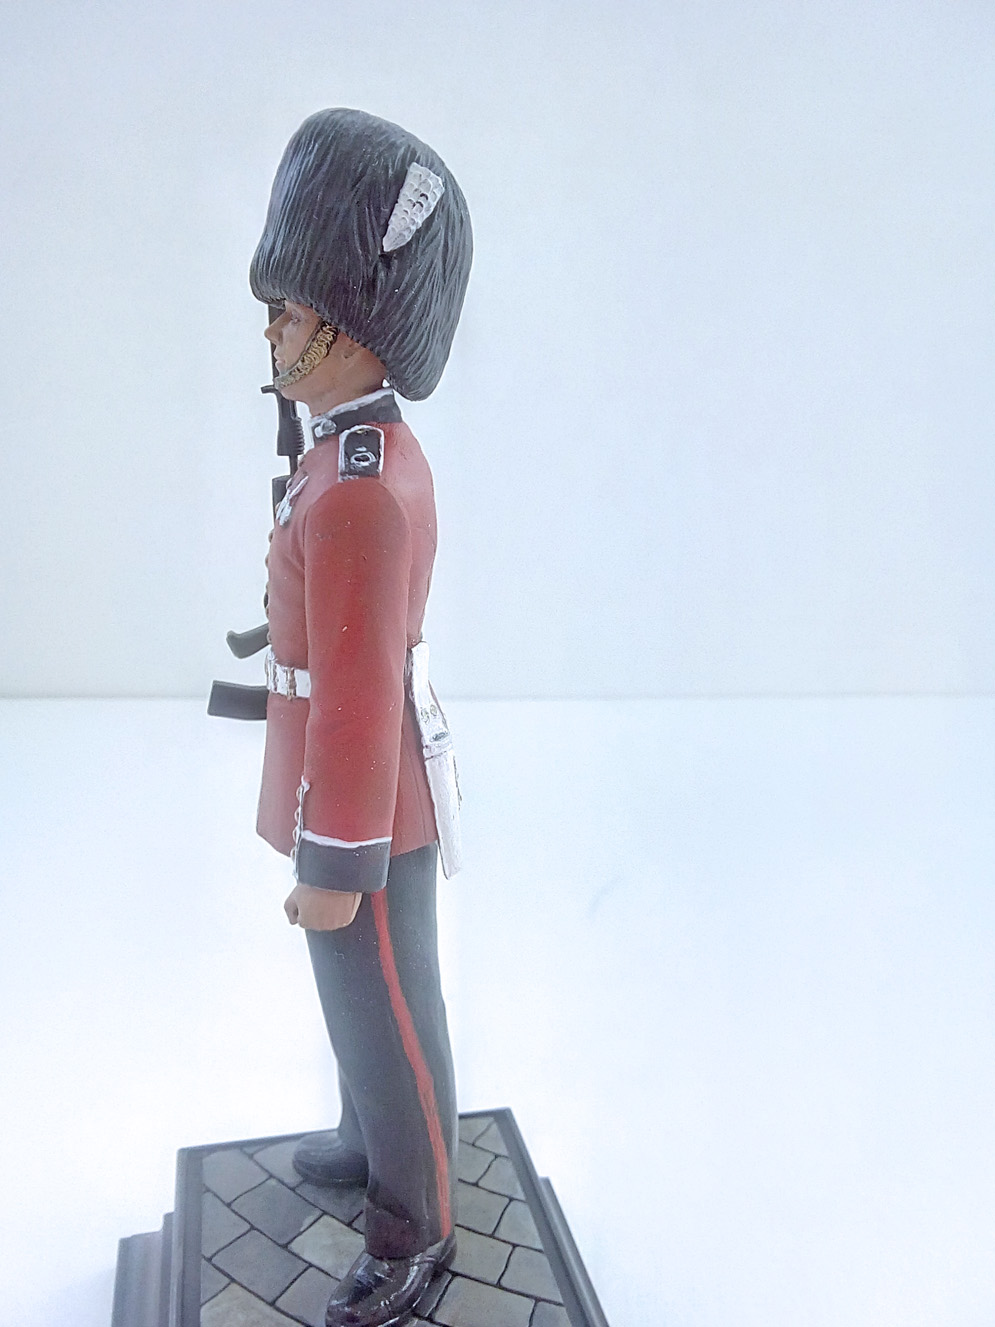
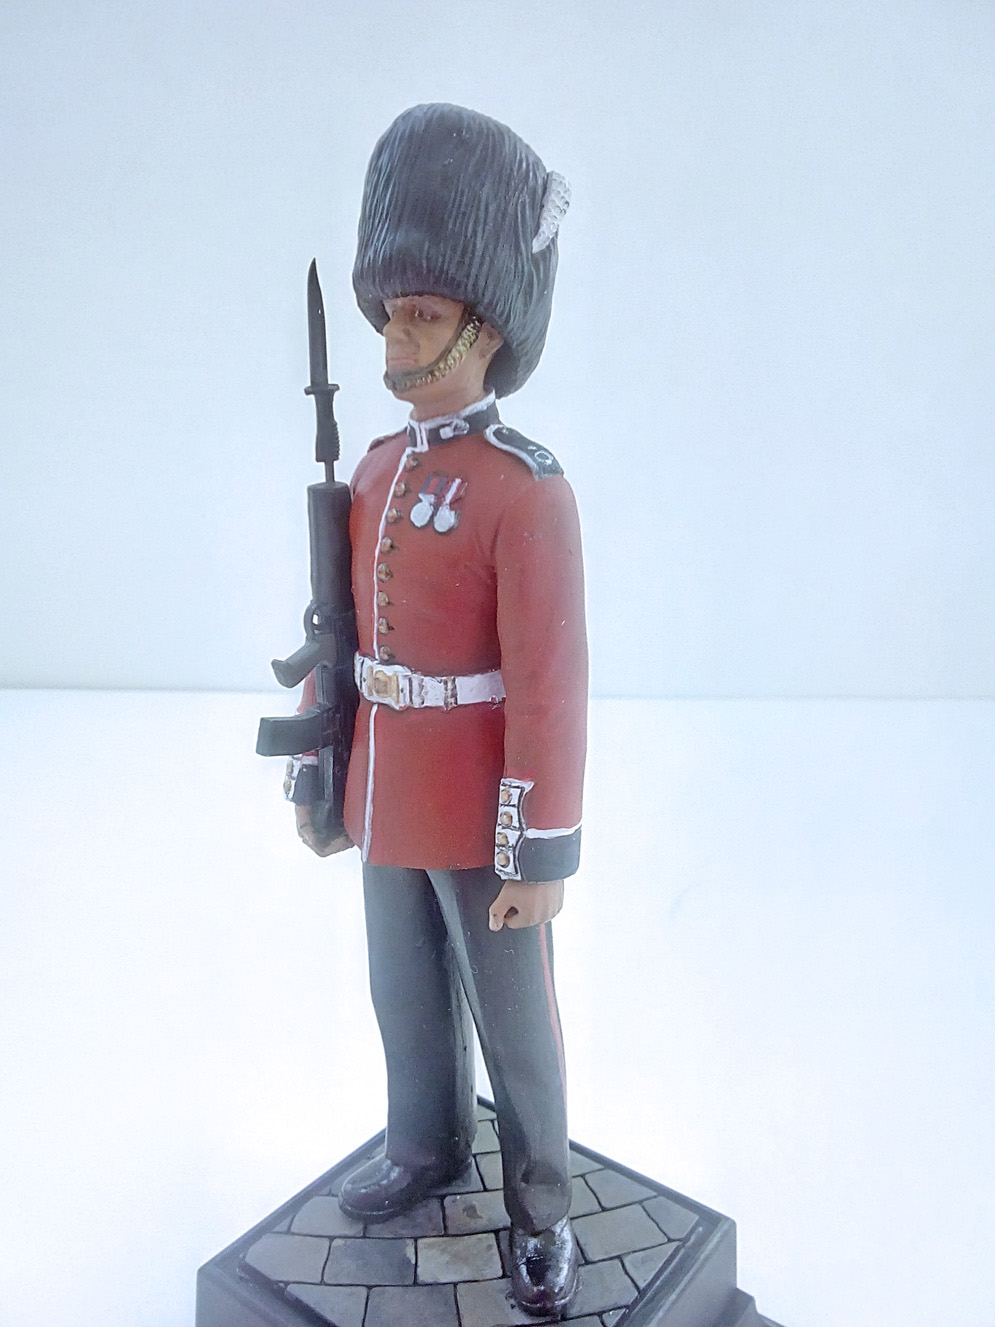
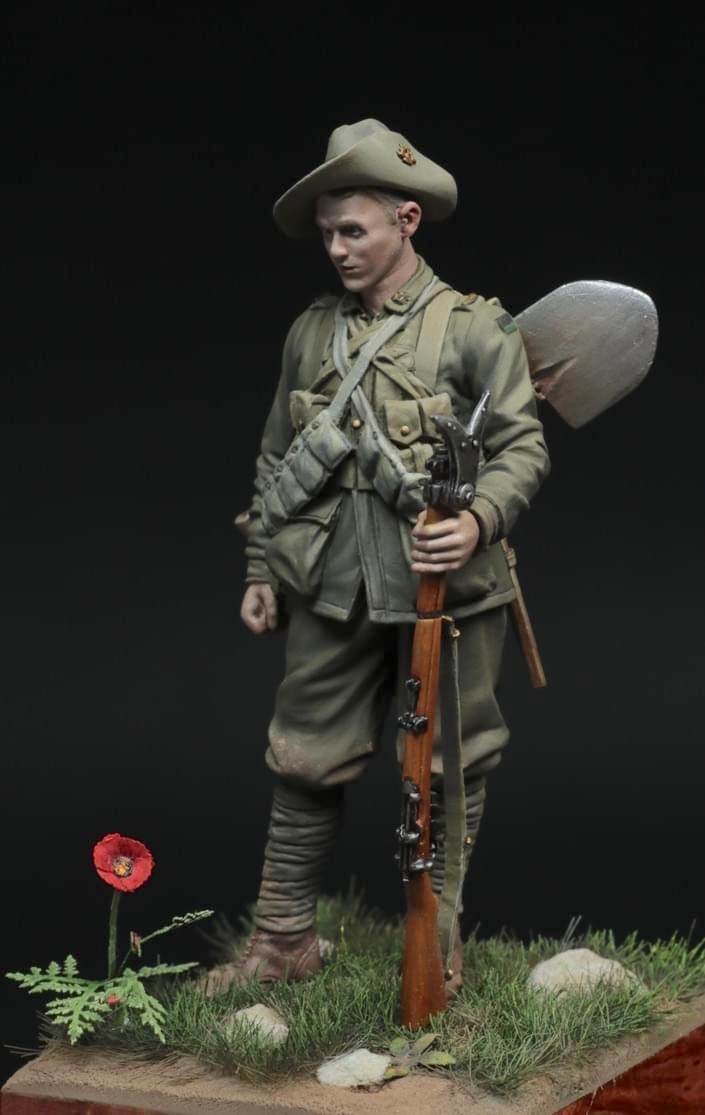
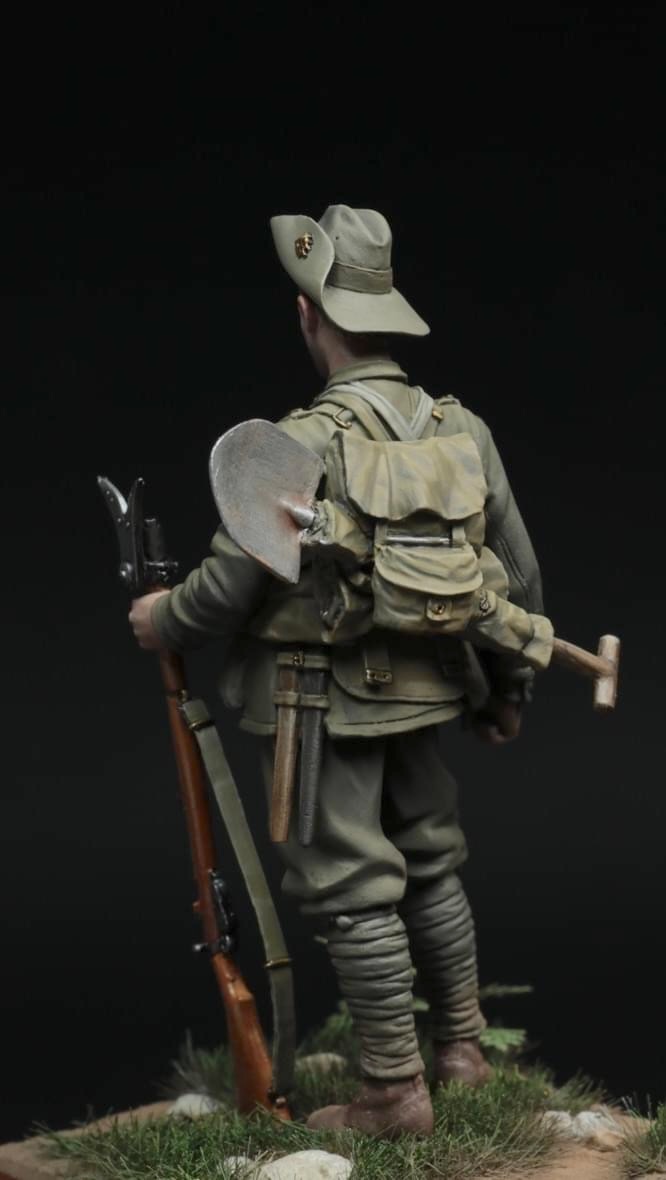
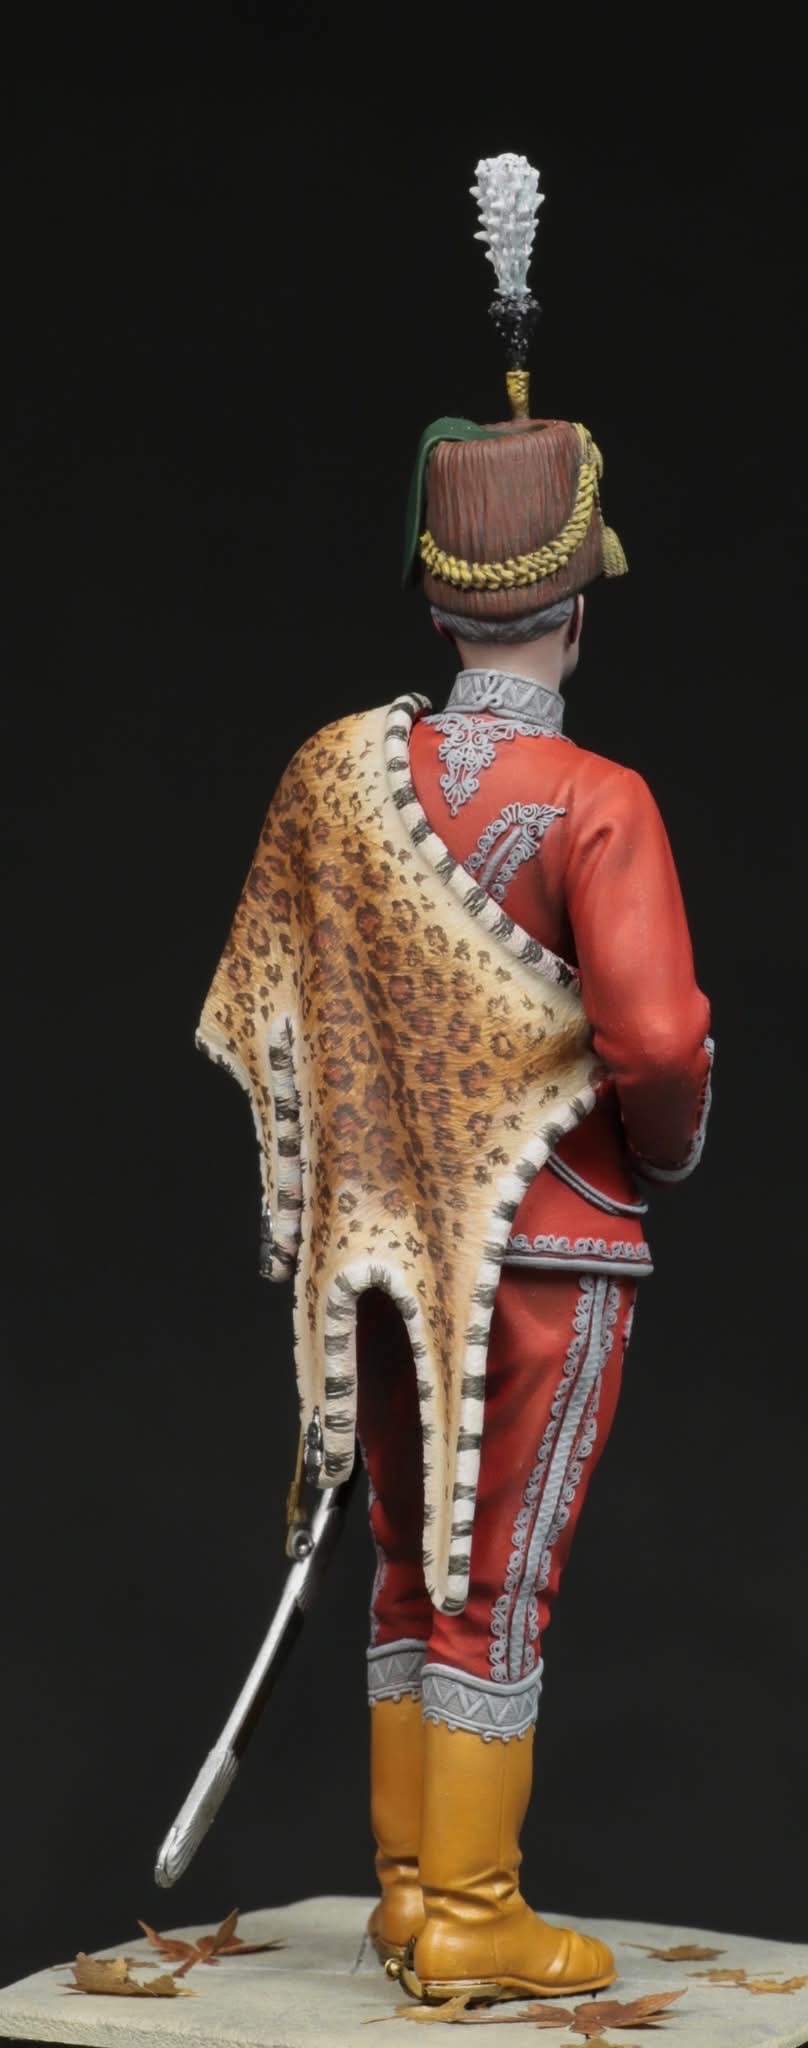
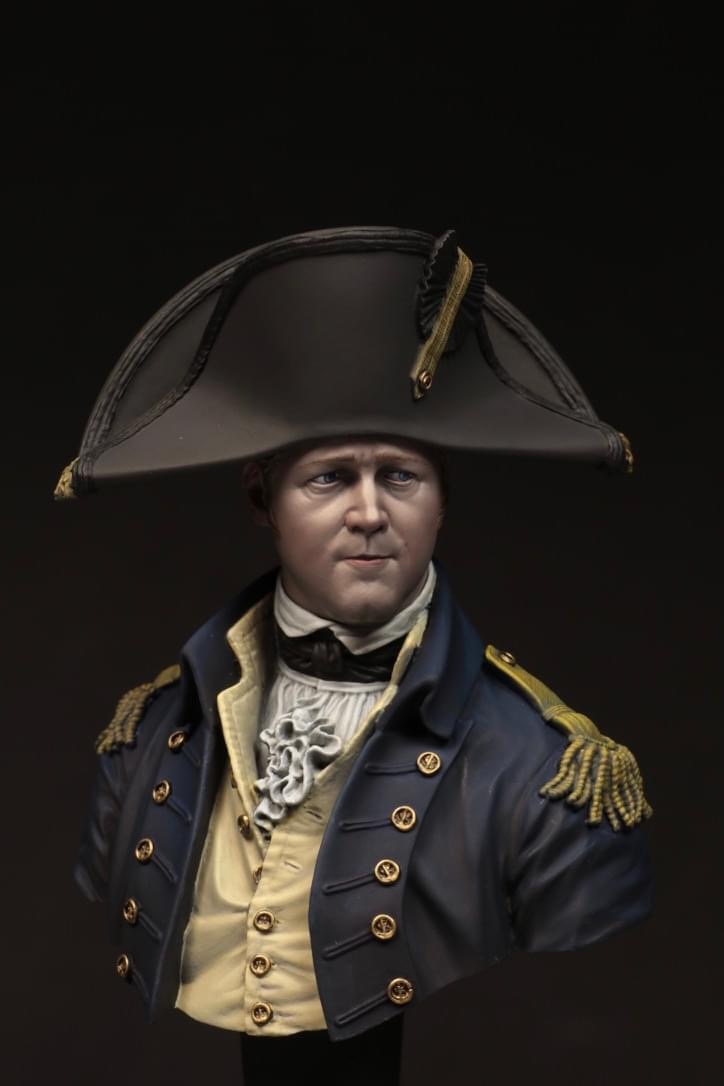
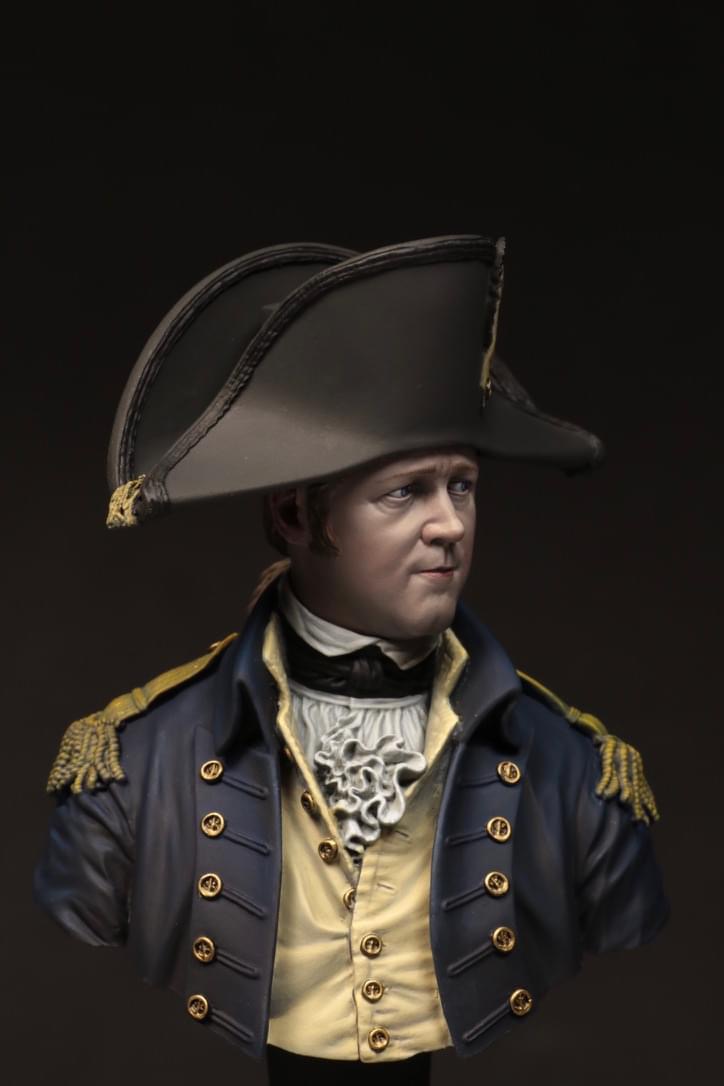
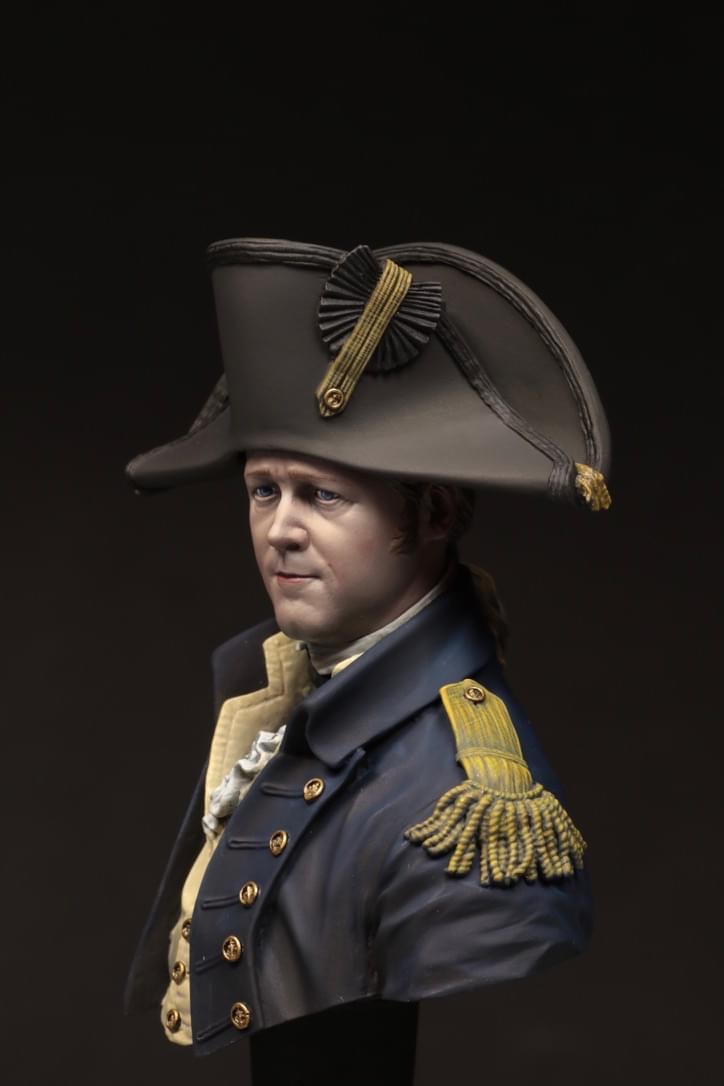
The assembly of the figure was broken down into sub-assemblies. These were: the legs, torso and arms, head with bearskin and the rifle separate. The plinth has a choice of four groundwork surfaces to chose from that fit into the raised square section.
The legs and torso are assembled from front and rear halves and require the minimum of filling and sanding. The arms are solid pieces with a section of the cuff detached allowing a recess into which the hand neatly fits. The fingers of the hand holding the rifle are separate providing a good fit around the rifle butt. The torso body is completed by attaching epaulettes, belt buckle and bayonet frog separately to aid detail. Boots are attached separately to the legs.
The folds in the jacket sleeve are moulded so that the rifle fits snugly in position. The cocking bolt of the rifle protrudes into the sleeve acting as if a locating pin. Consideration needs to be given as to when the rifle is fitted into place along with the arm holding it. Assembling the torso, both arms were attached. The cocking bolt was removed allowing the rifle to be slipped into place after painting. The bearskin was assembled from six parts and the head three parts requiring no filling. Each subassembly was painted then the figure assembled. Uniform detail was hand painted rather than using the decals producing the figure below.
Steve N.
Many thanks Chris corbishley
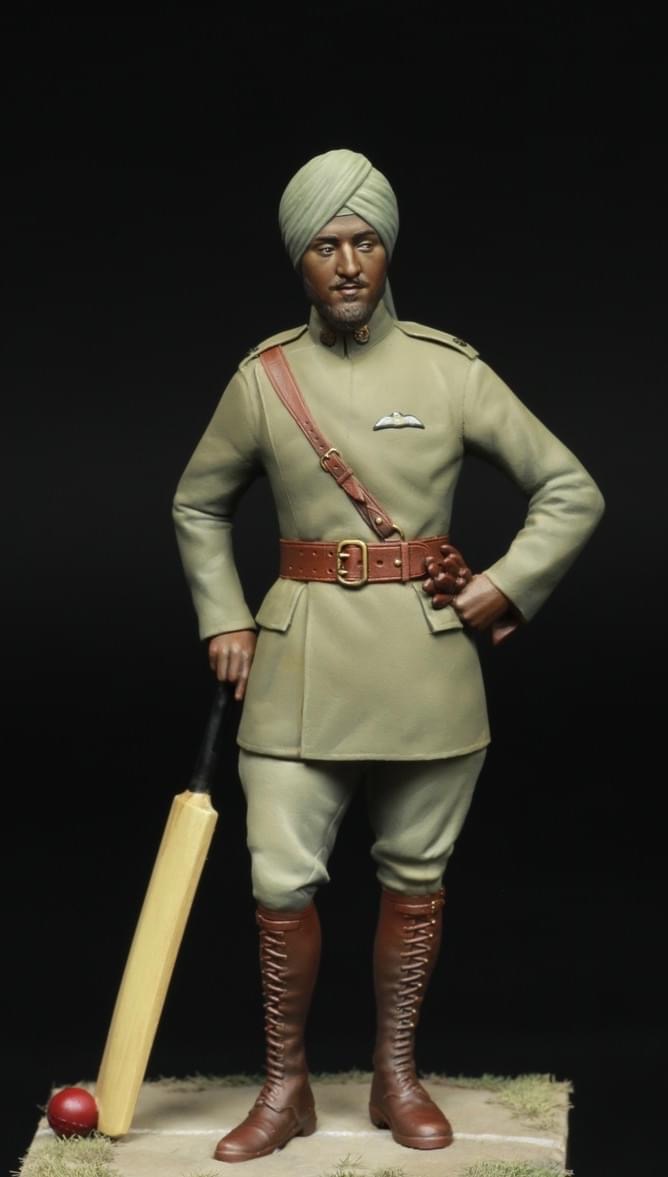
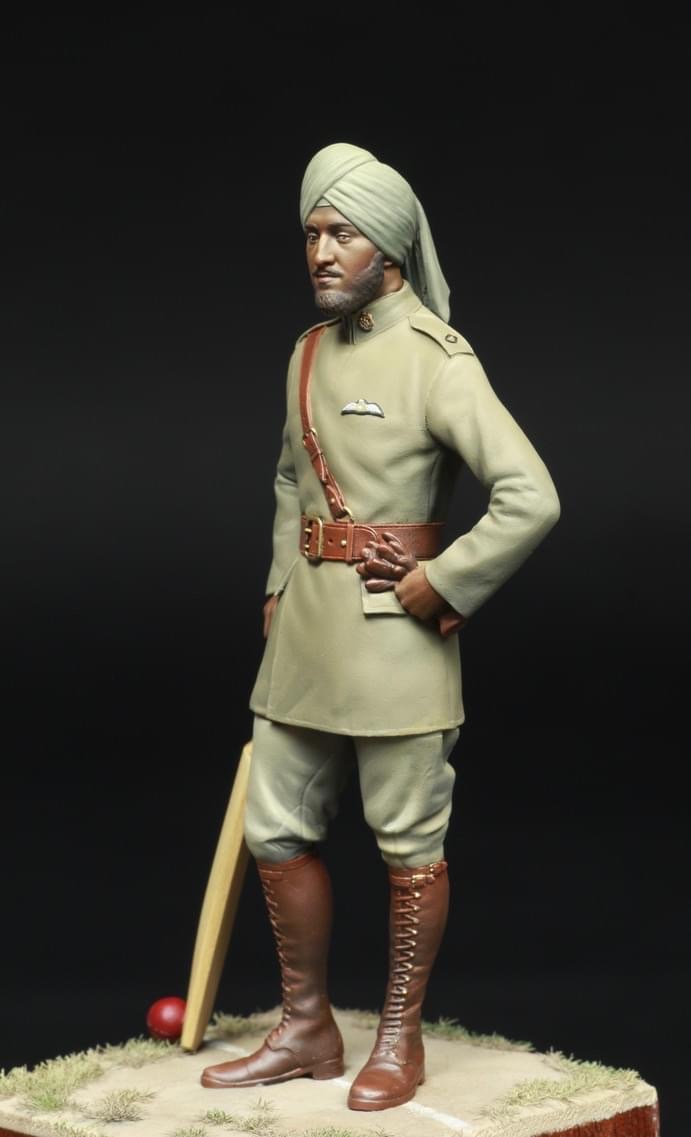
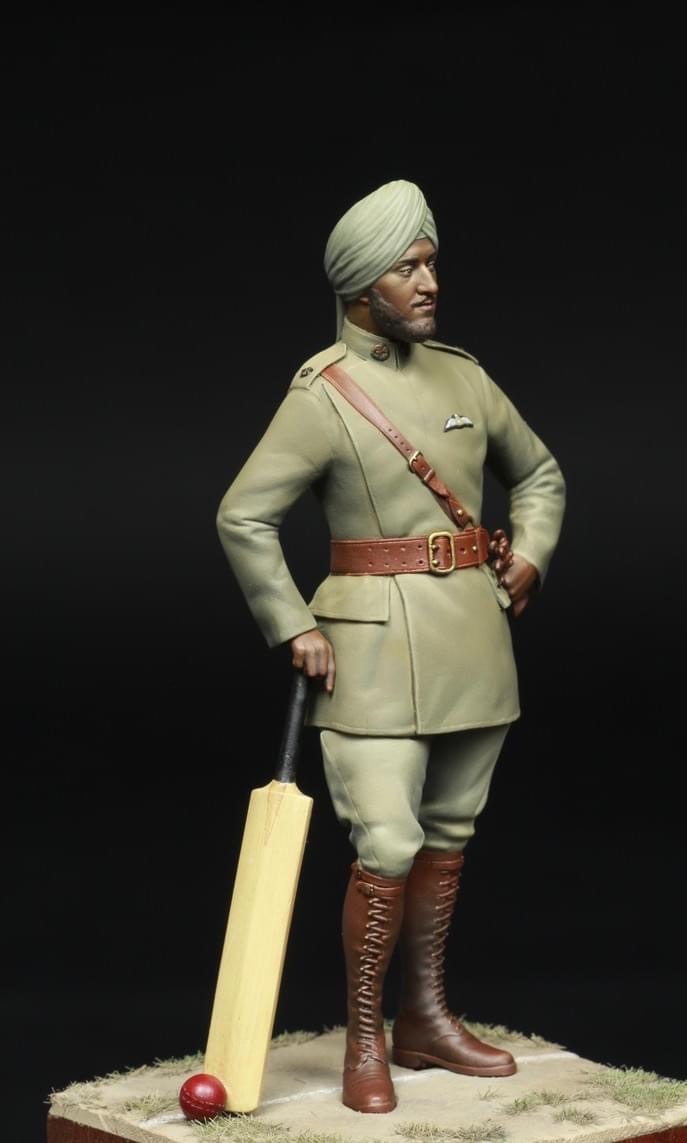
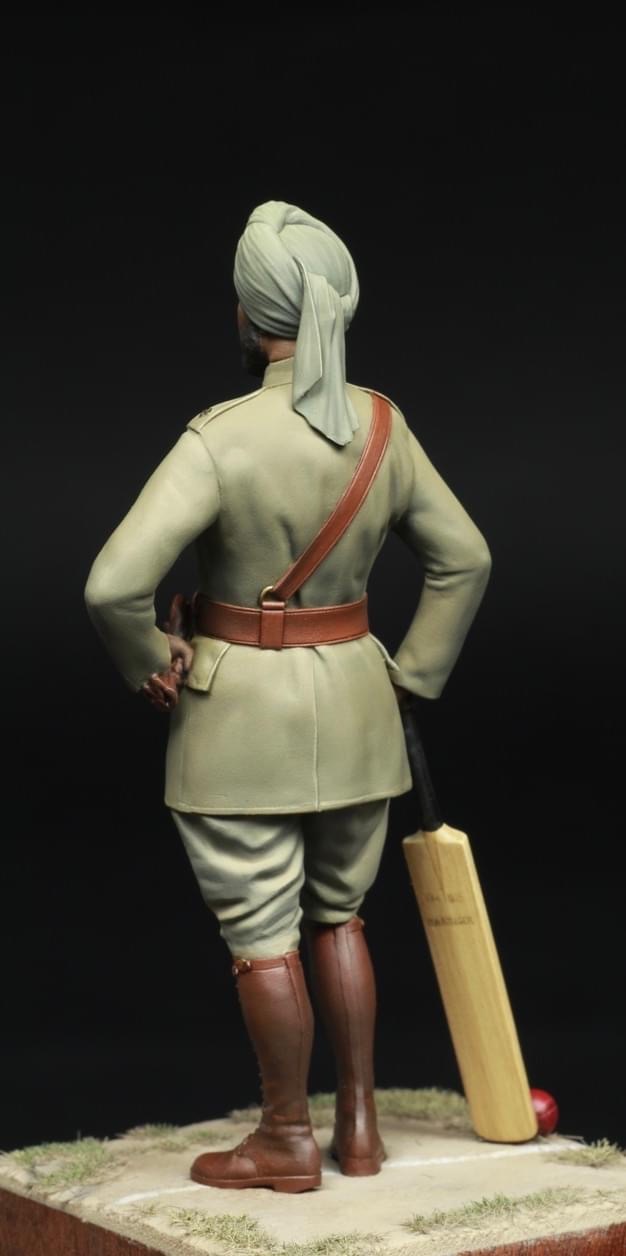
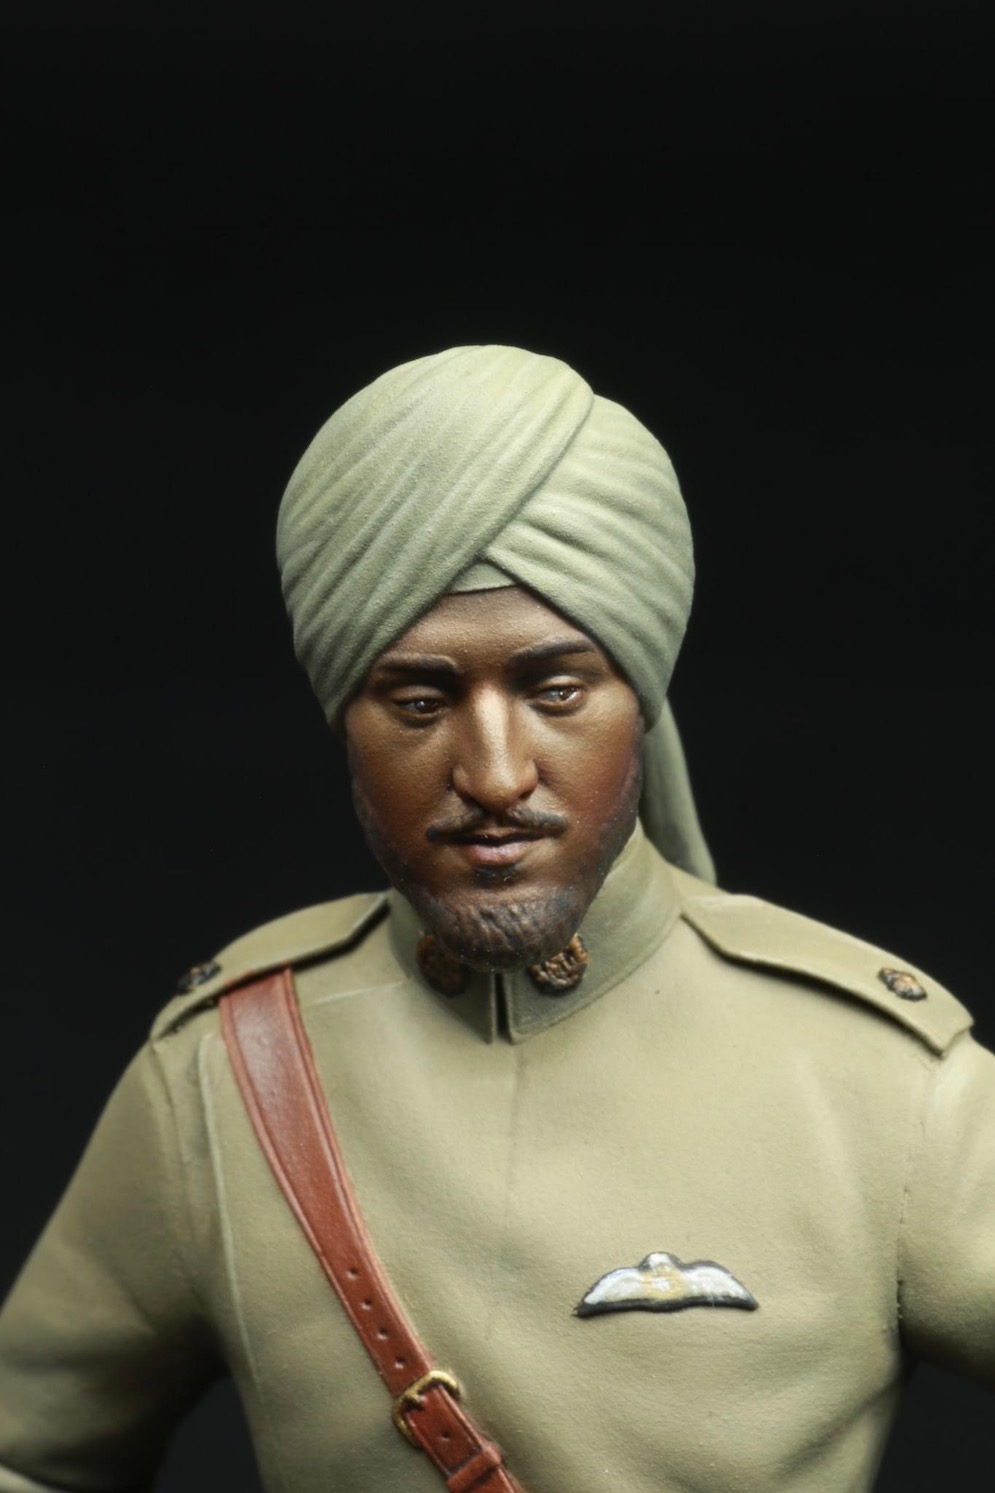
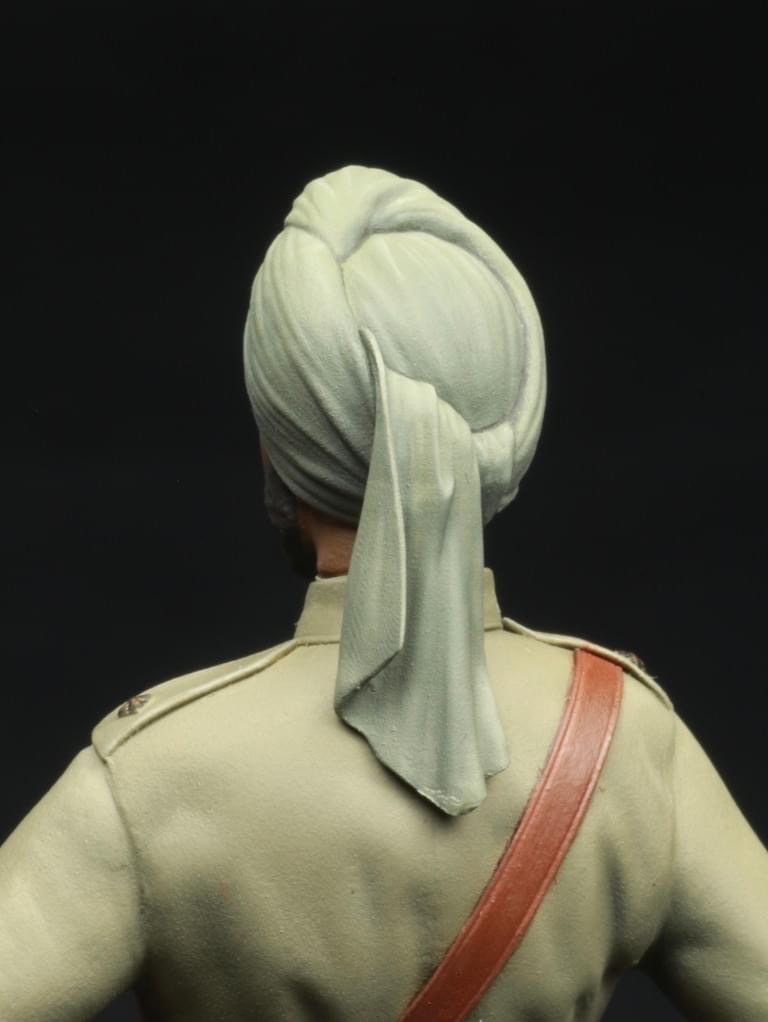
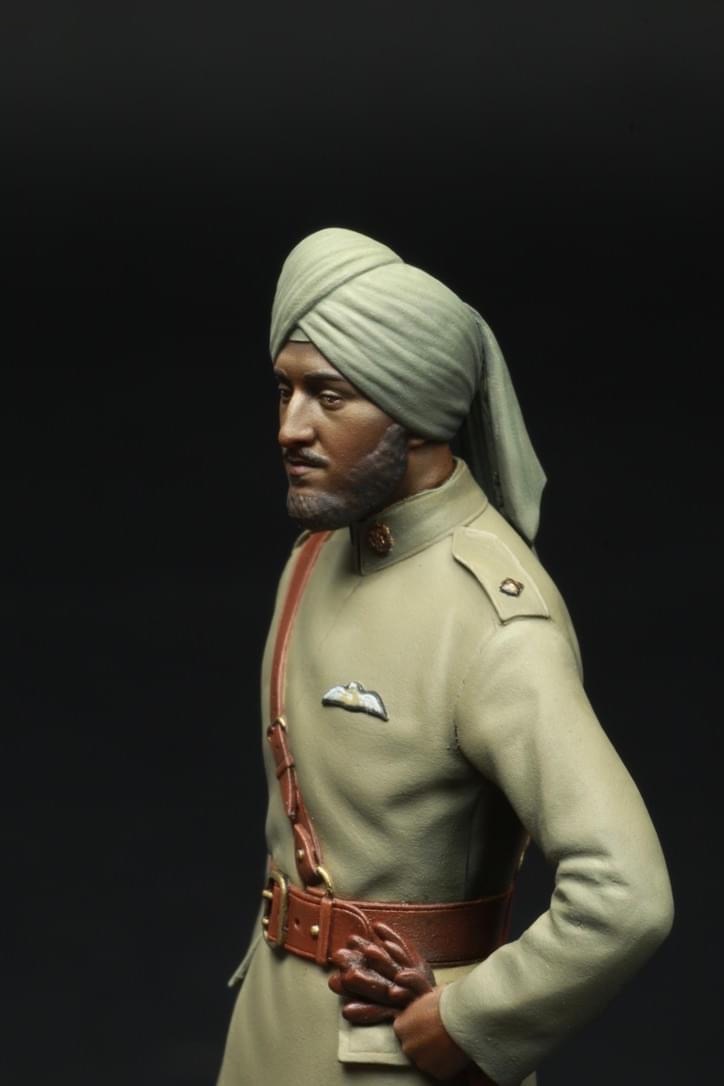
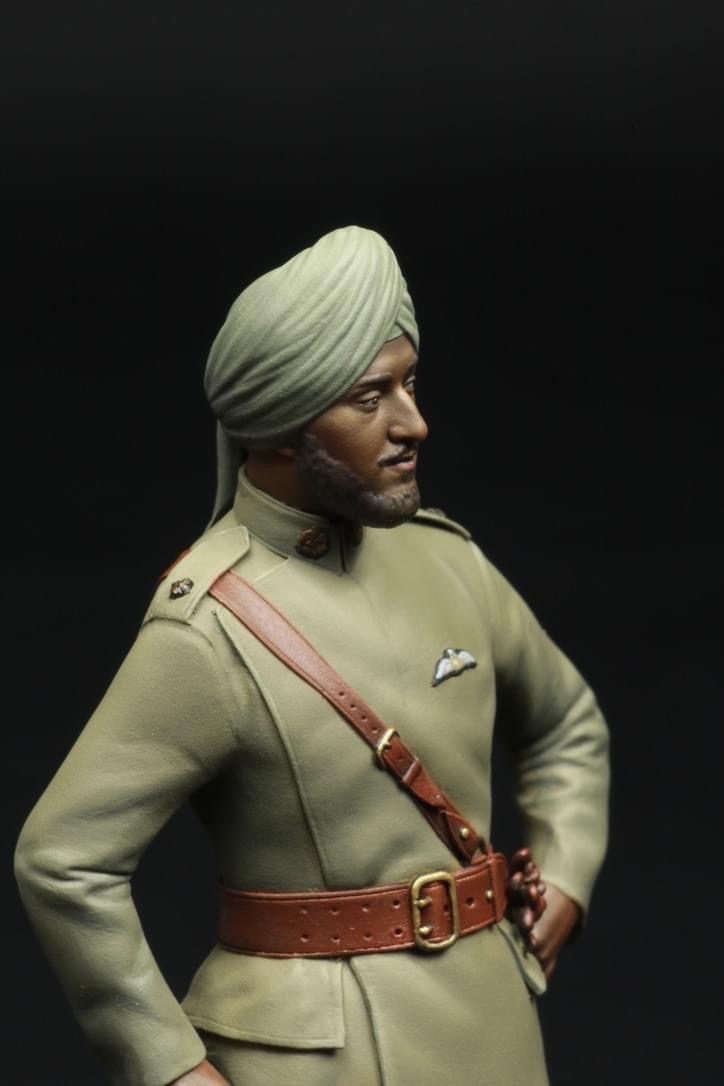
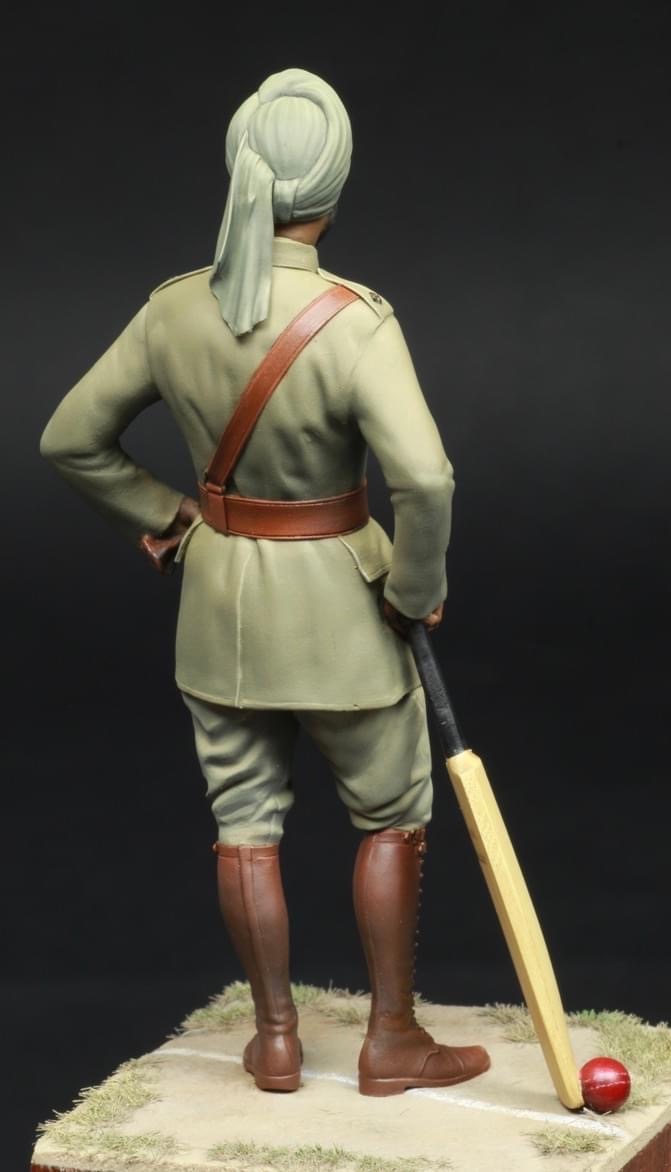
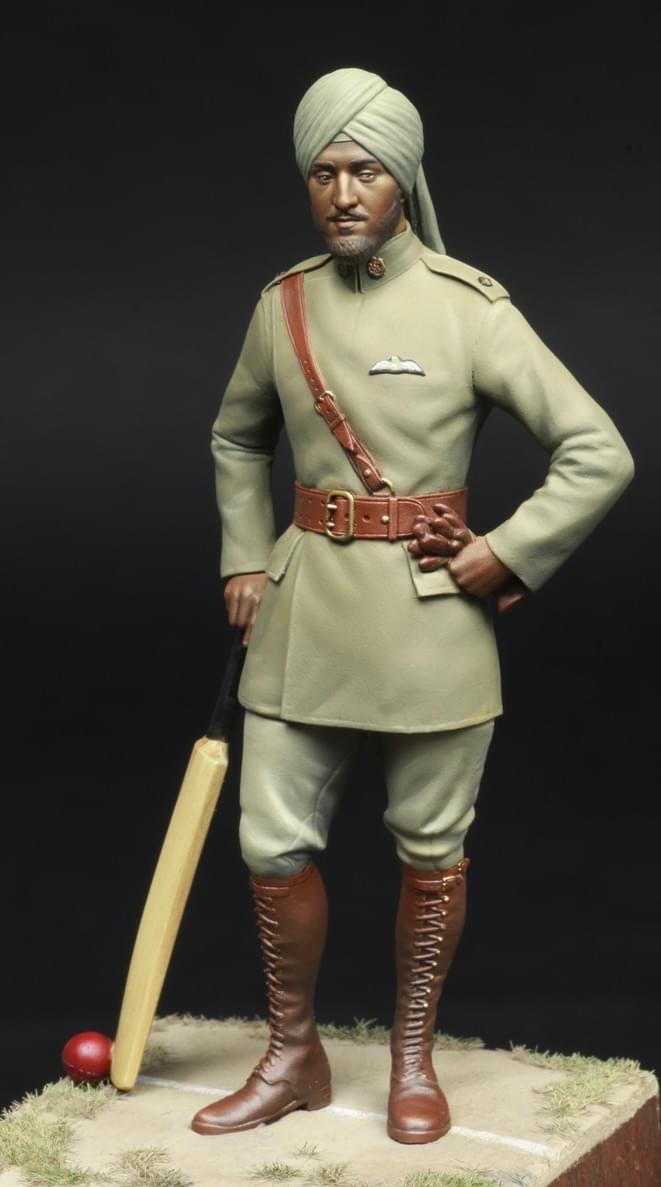
90mm Dolman Miniatures
Oils
First Indian to enter RFC service (2 victories)
18 first class matches for Sussex before and after WW1
David L.
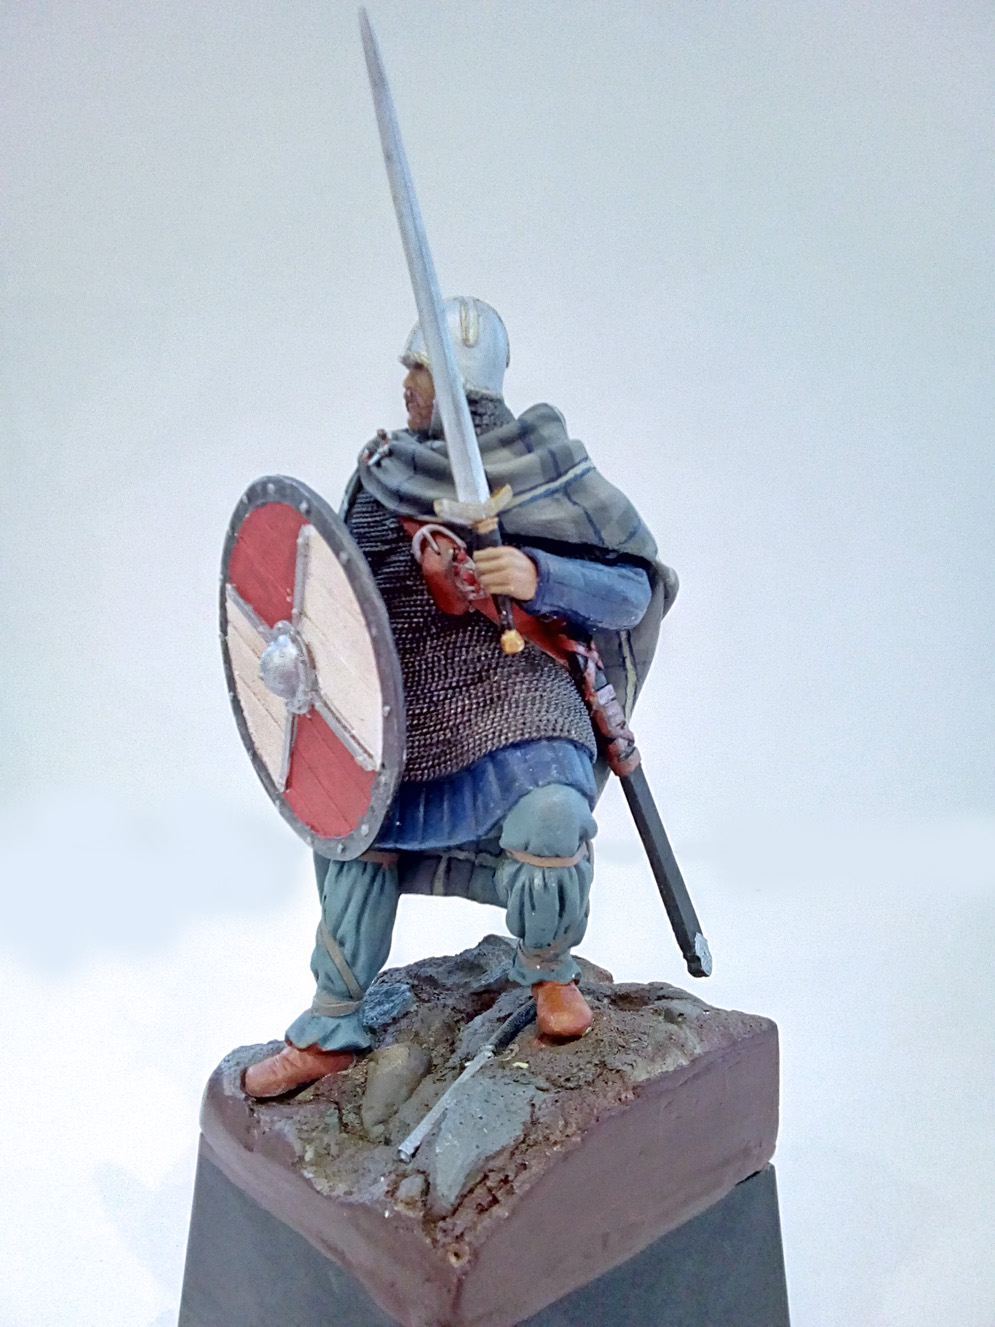
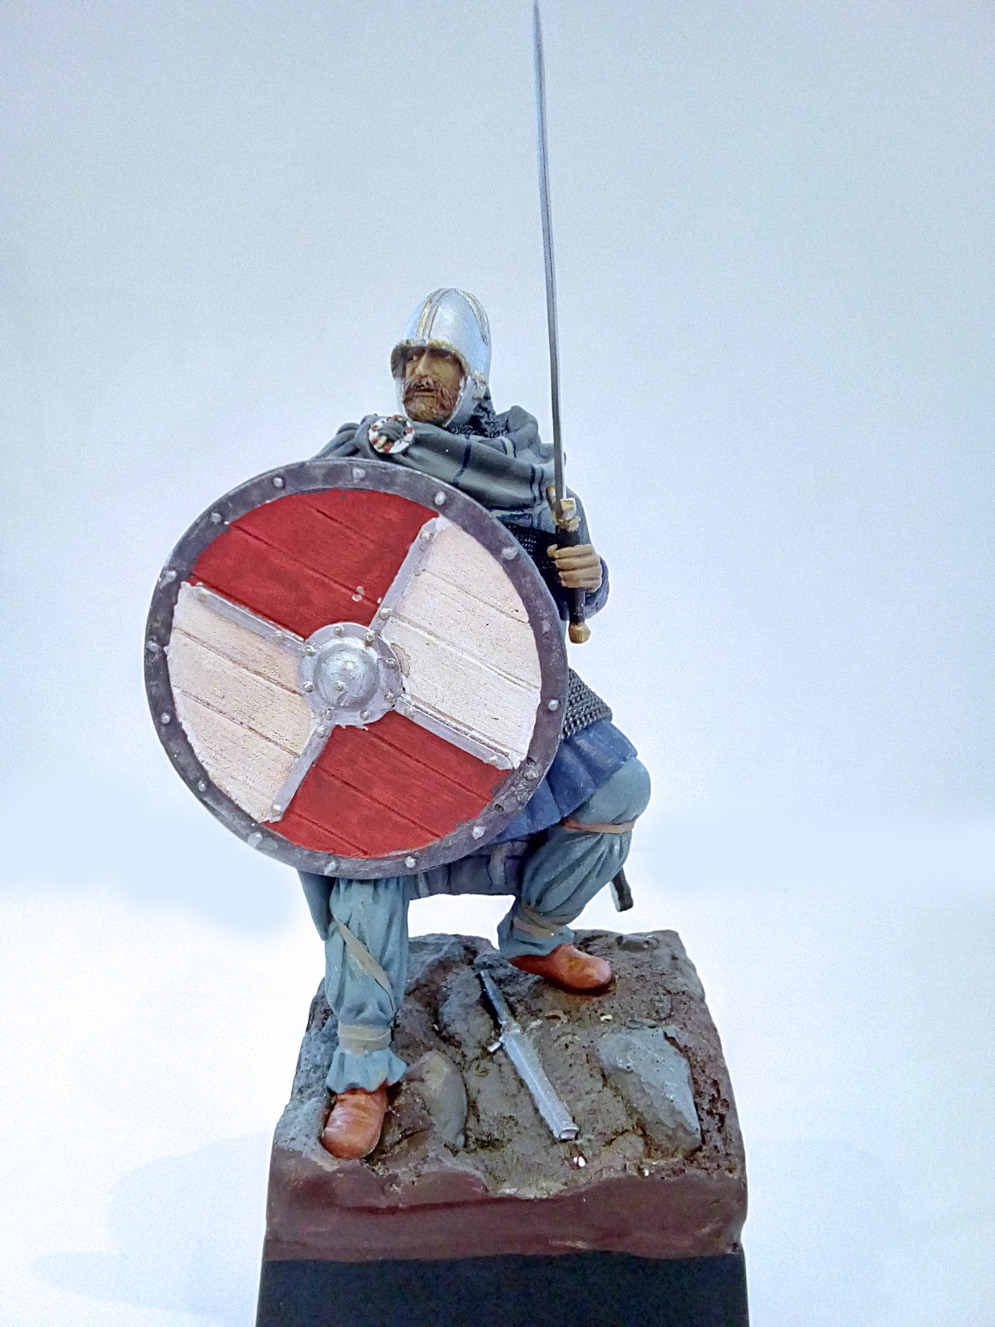
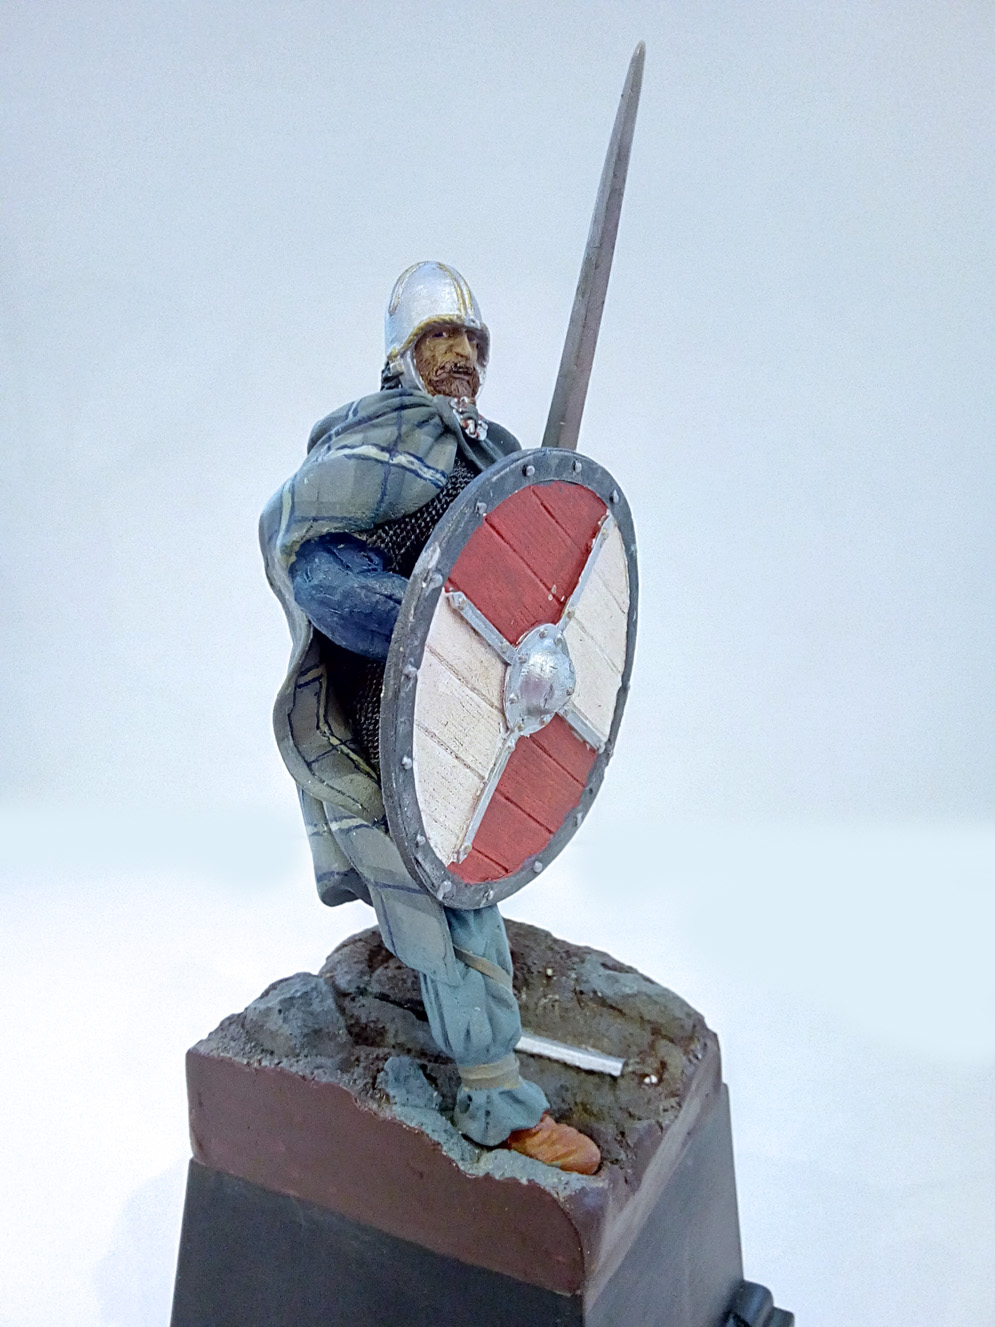

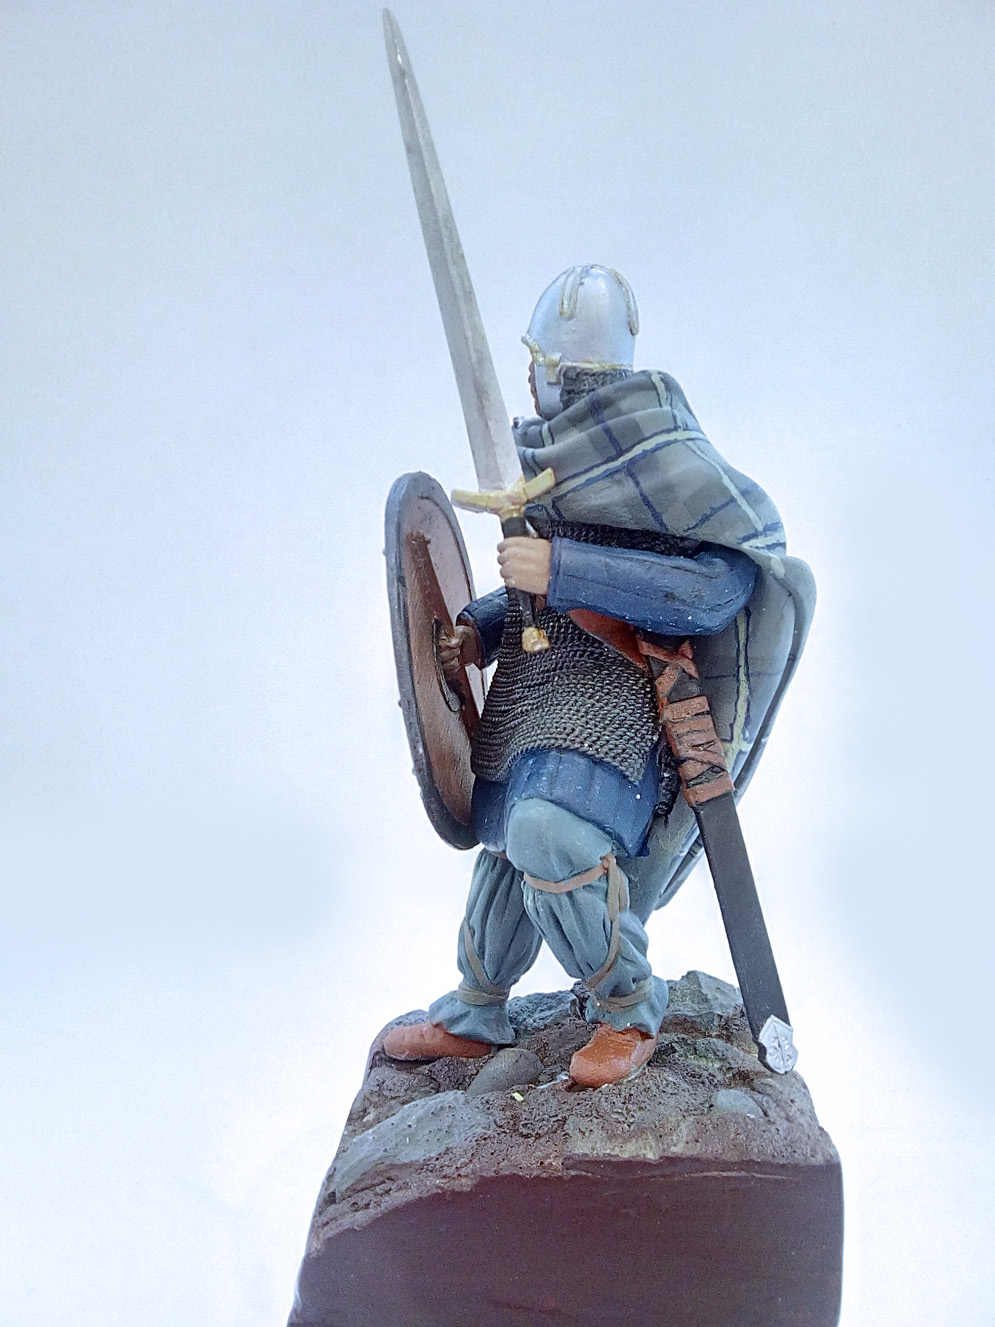
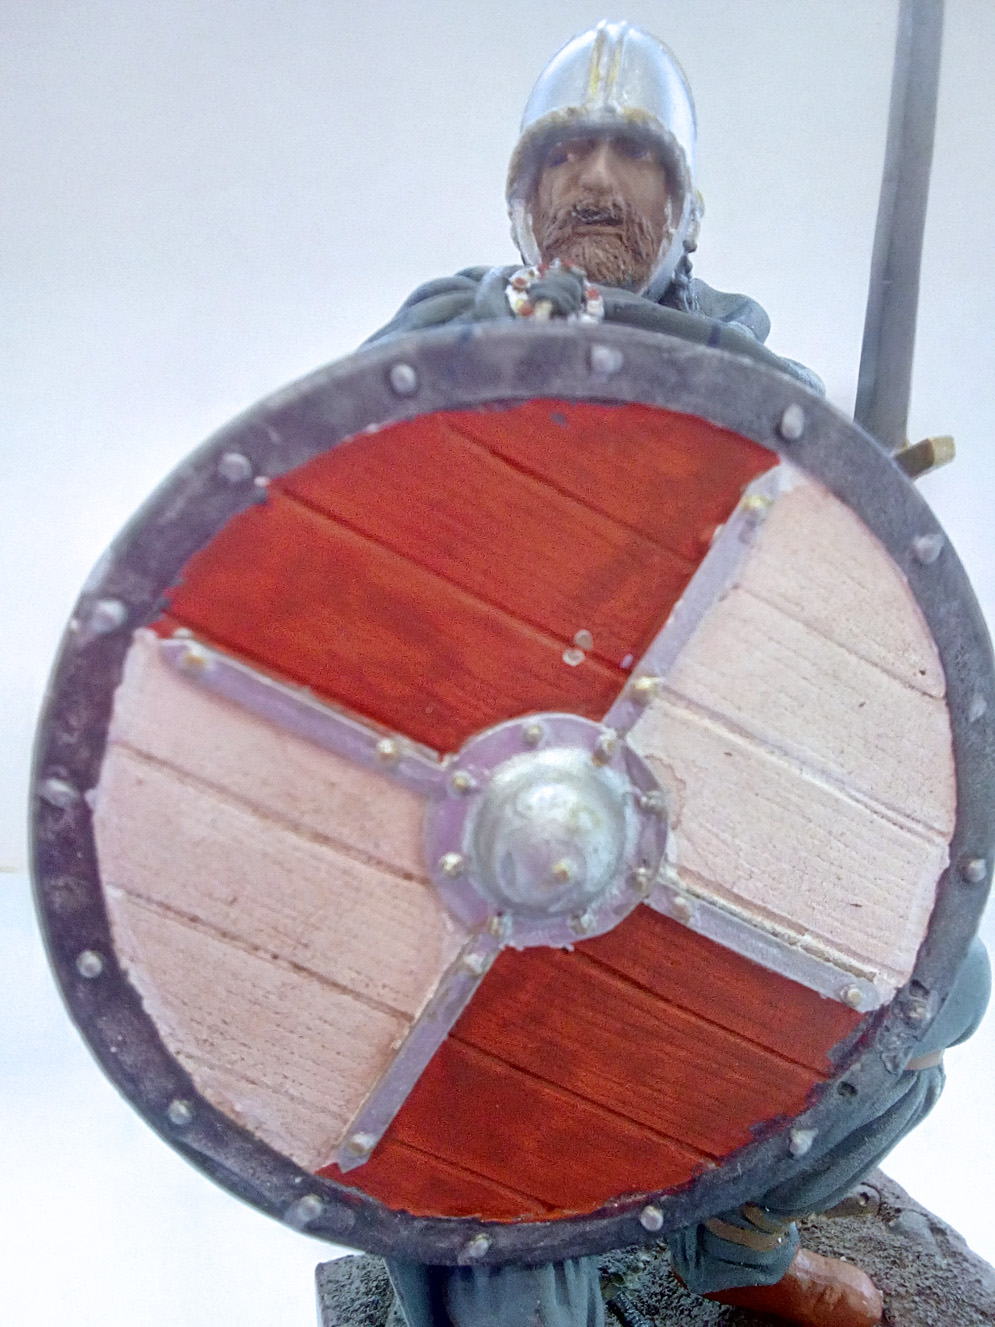
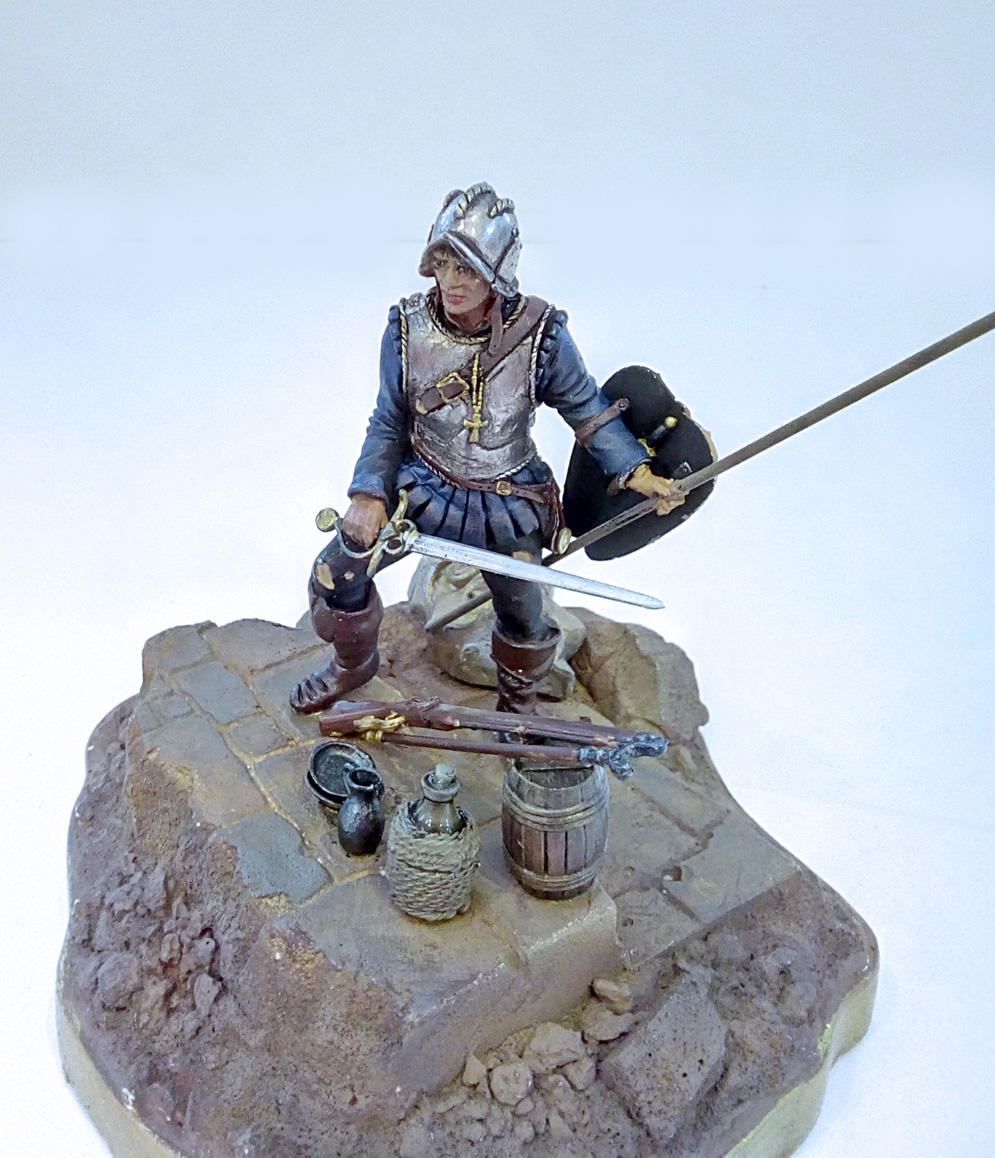
The figure comes for assembly as a mix of white metal and resin parts. Posed on a substantial base provided, the figure is posed fighting his way down a hillside.
The model is largely a one-piece casting consisting of the head enclosed by a helmet, body in chainmail with a plaid cloak for warmth and legs covered by leggings and footwear. To this, the arms were added separately along with the sword and scabbard (in white metal) and a resin shield.
The shield on initial inspection did not look substantial enough and was pitted with air bubbles. Once these were filled and a coat of primer applied, the look of the shield was noticeably improved.
The shield was an area where the modeller could have gone to town with an elaborate design but the one used was kept to two colours in quarters. The cloak design was also kept simple unlike the tartan designs that would come in later centuries. Colours were kept muted as strong dyes were not available.
Steve N.
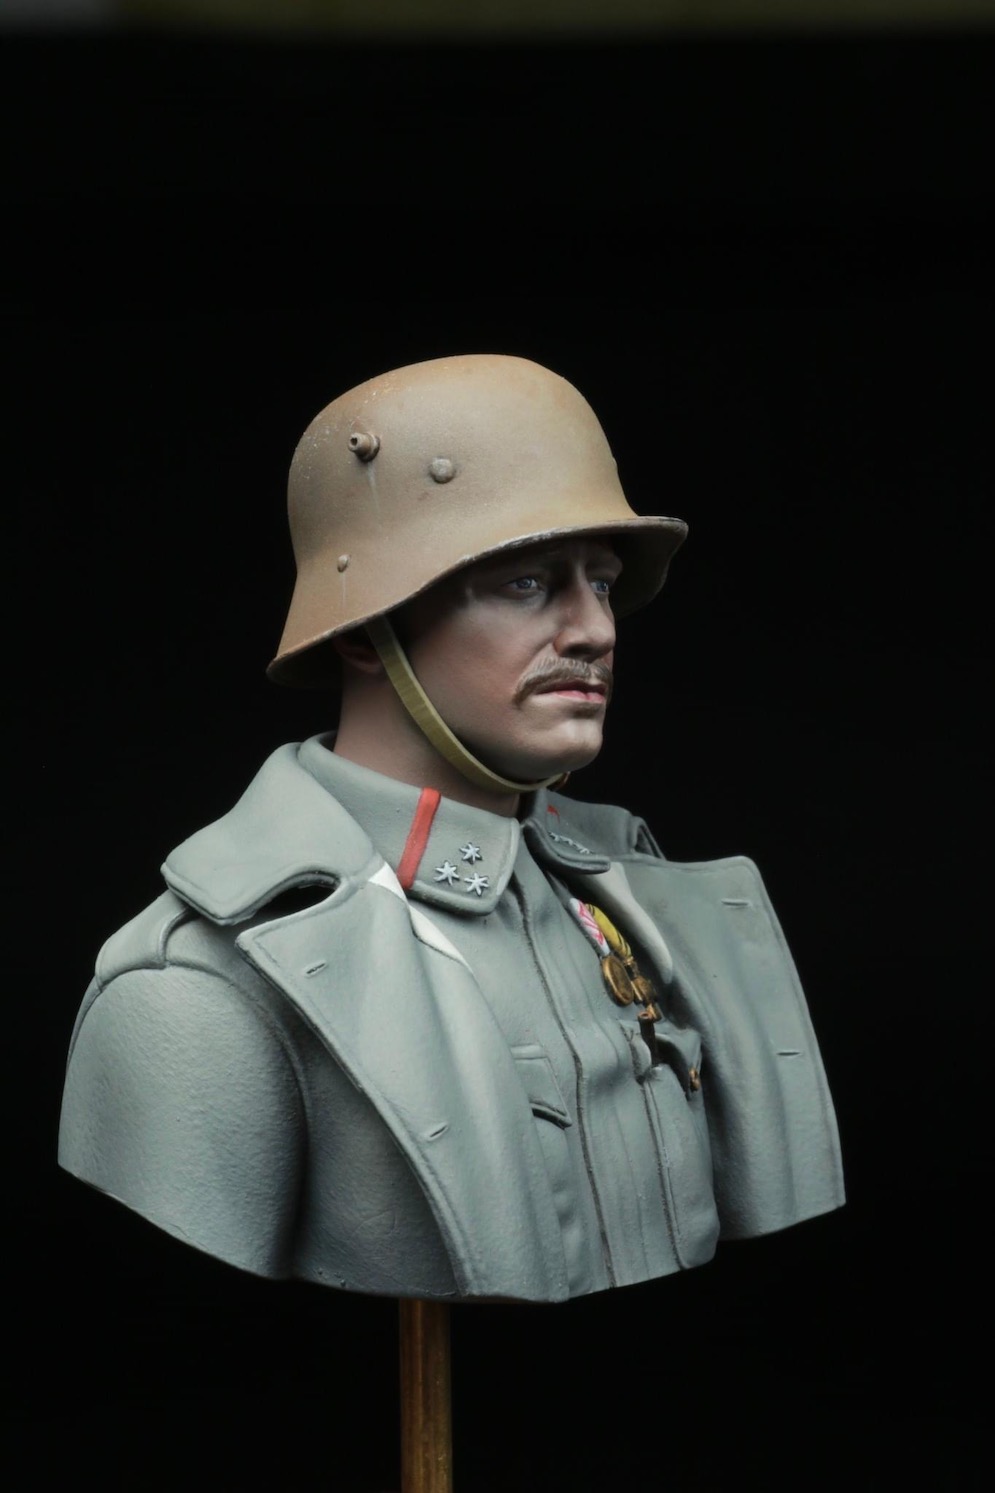
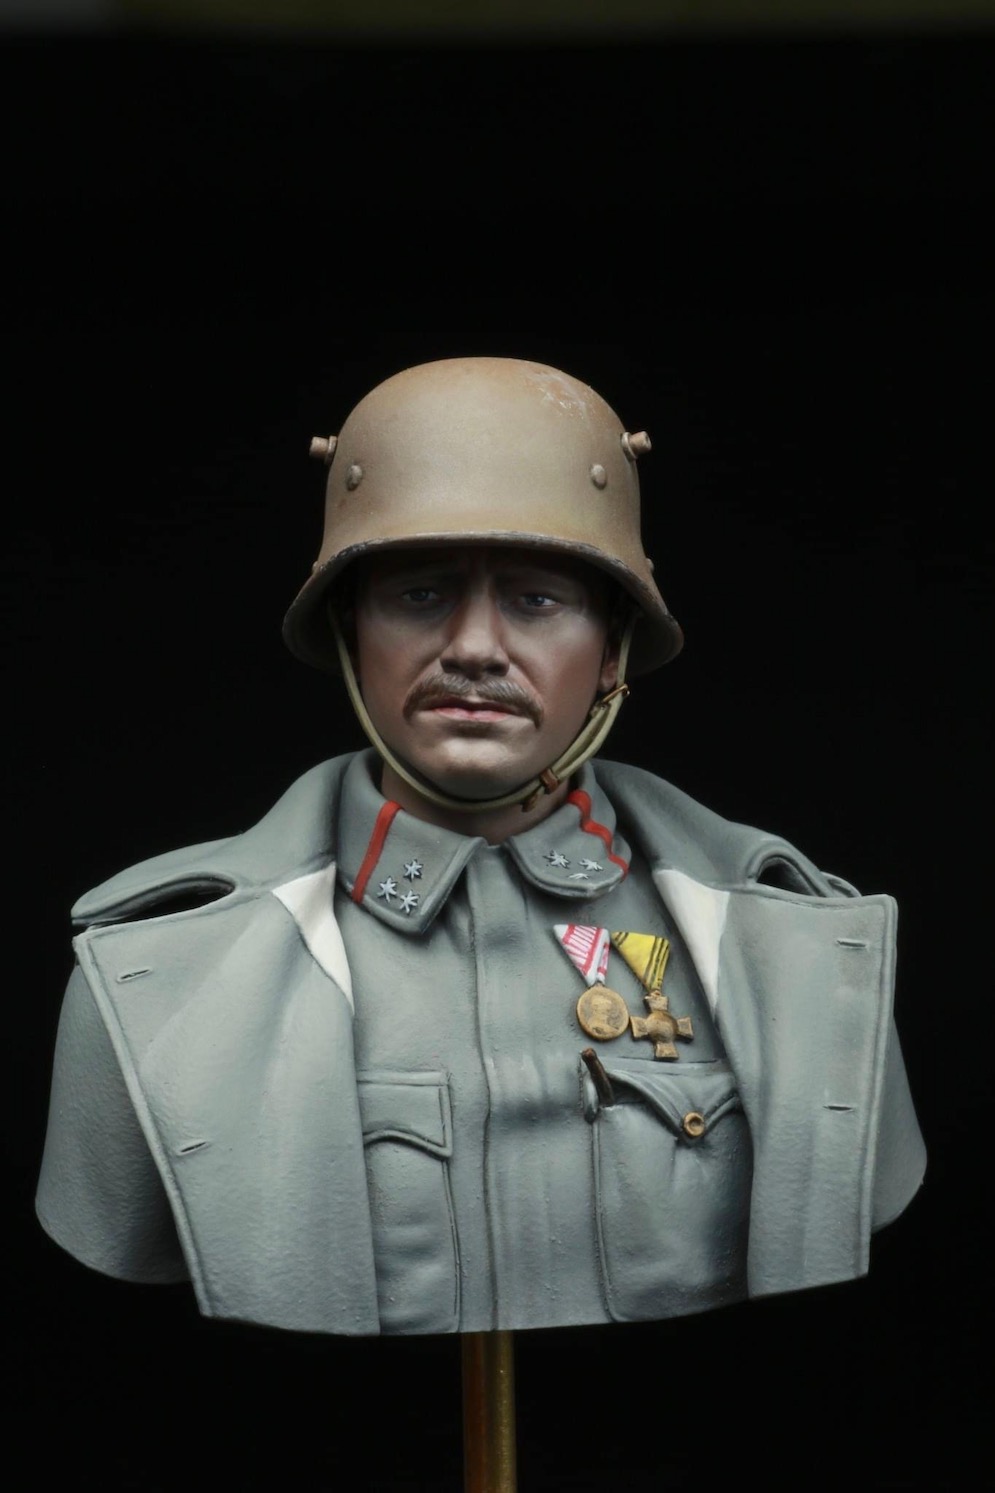
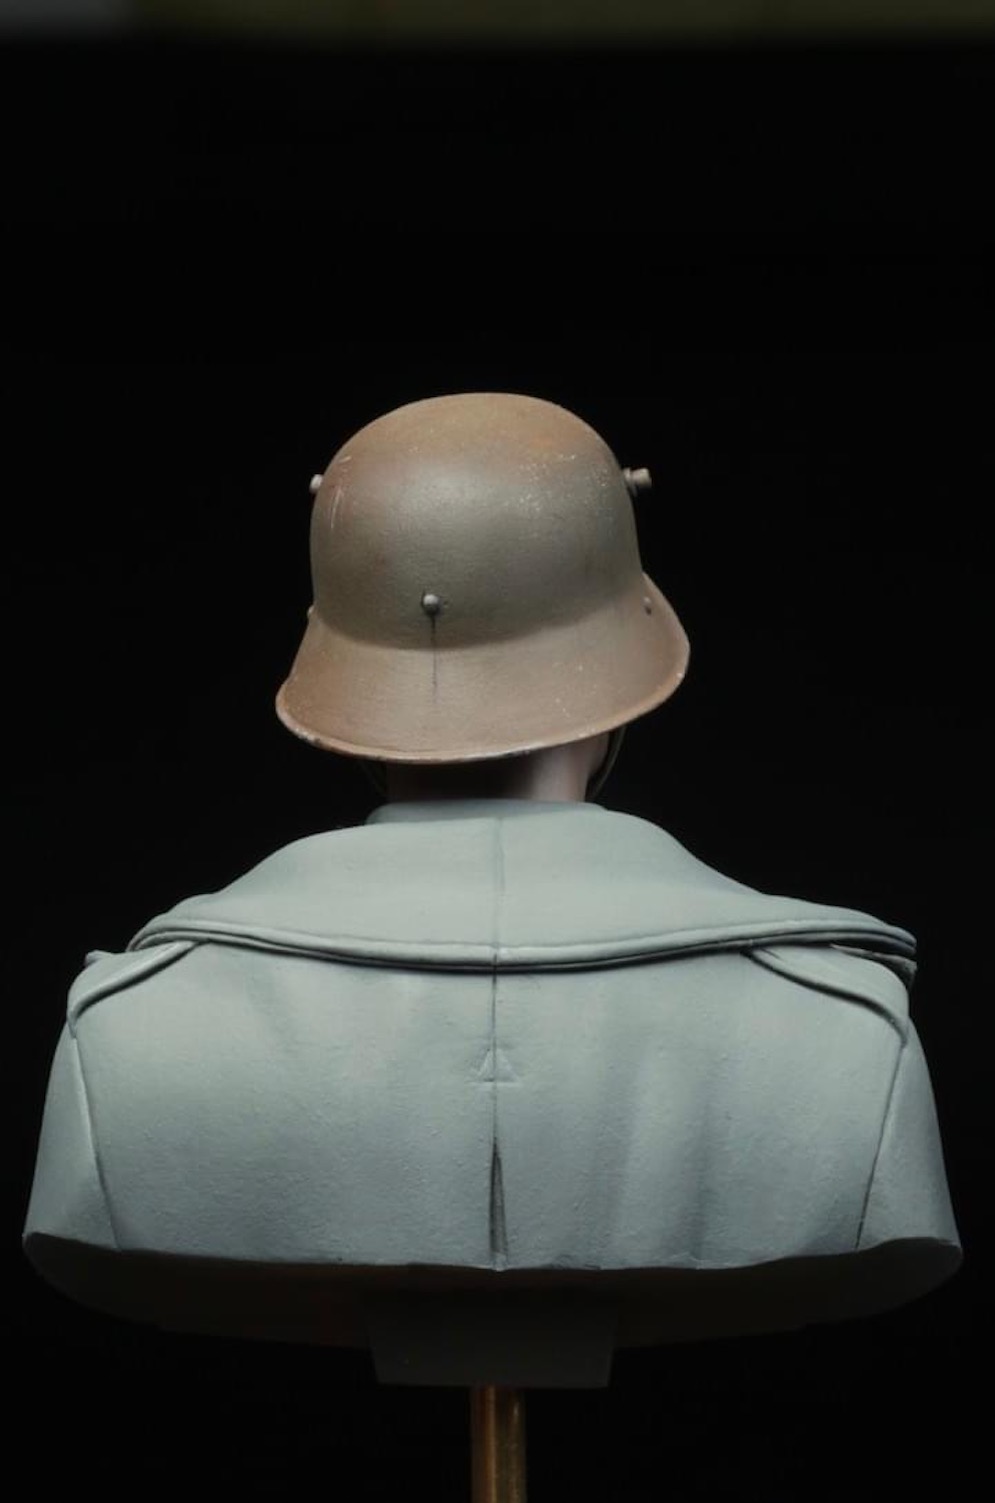
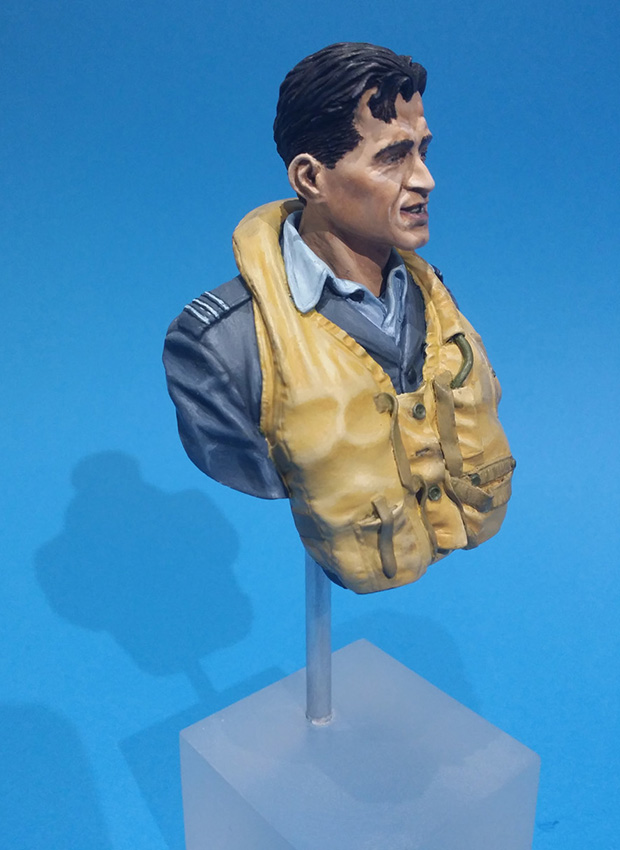
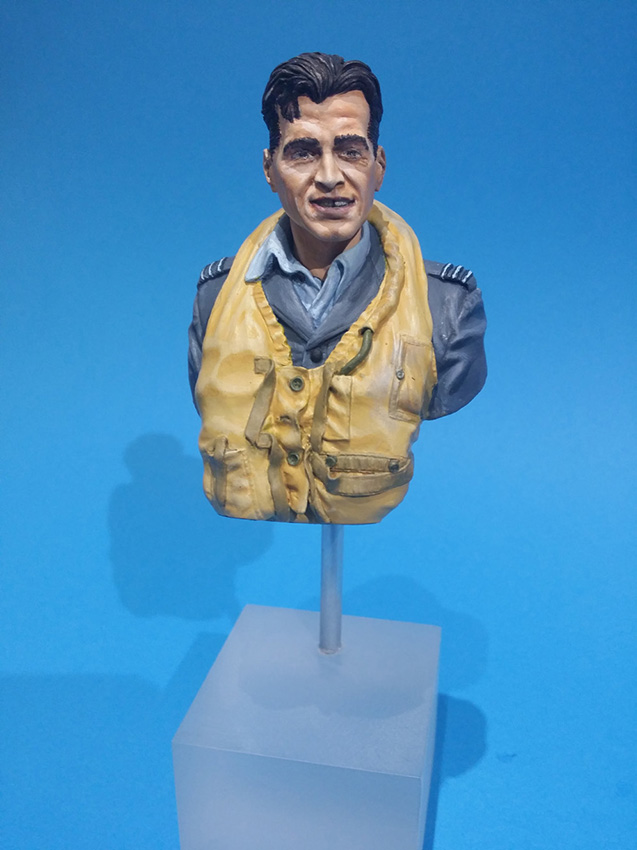
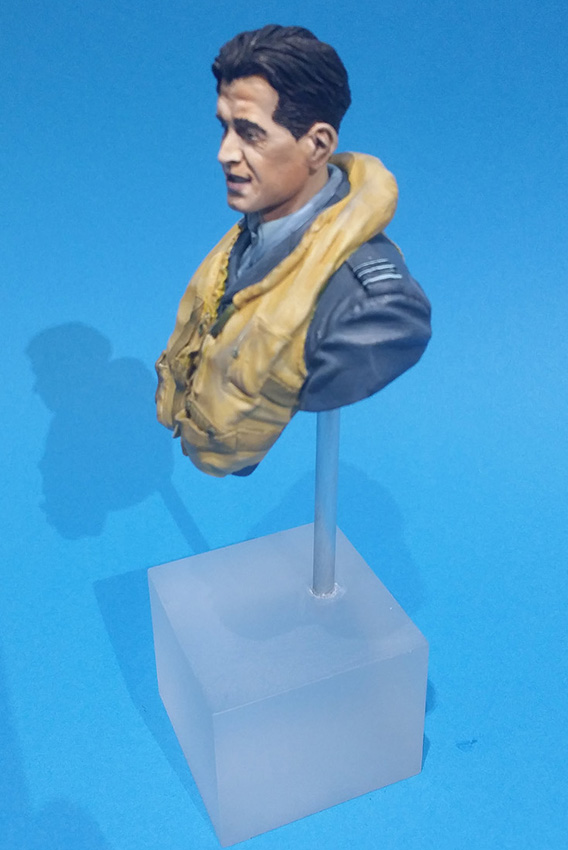
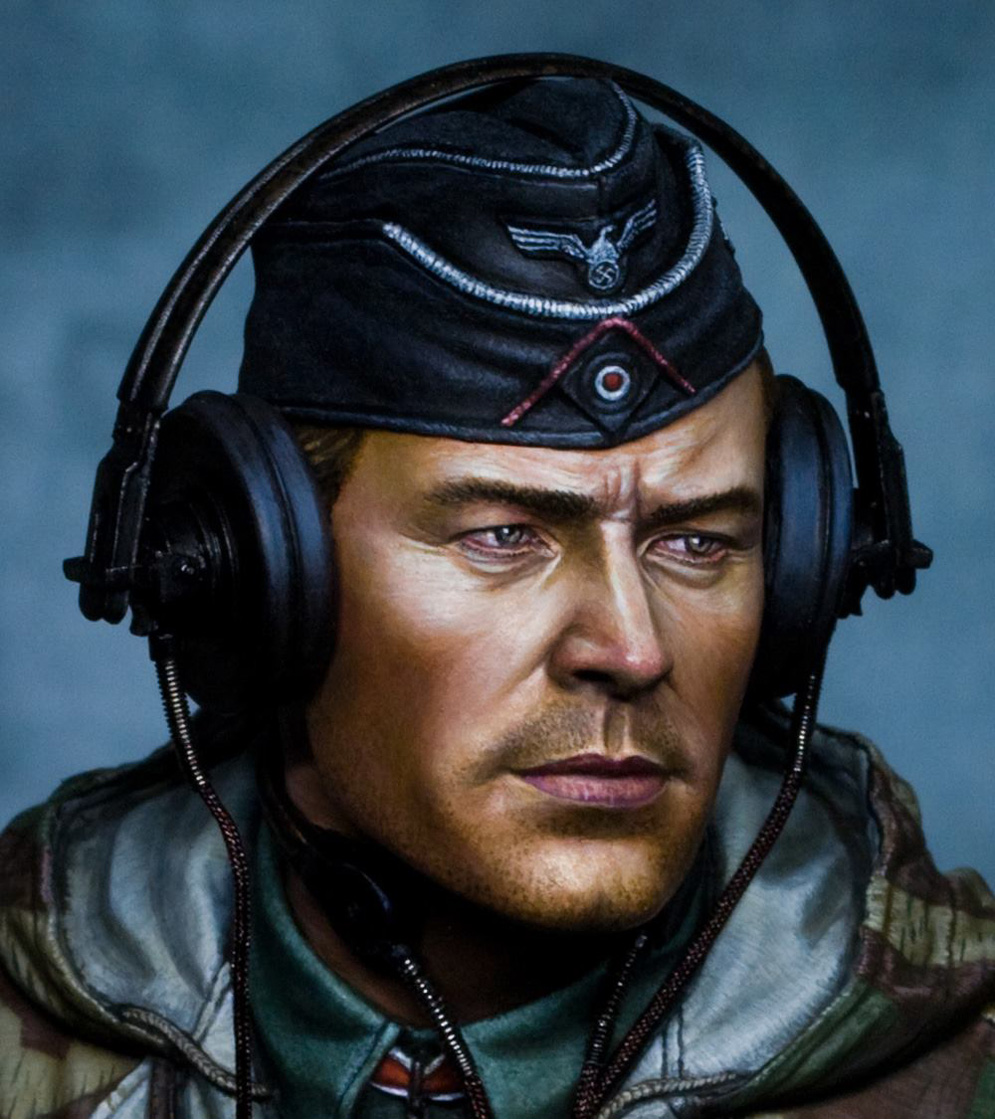
Here I have used Vallejo acrylics mounted onto a block of frosted acrylic. Really enjoyed doing this my first 200mm bust I have learnt a lot.
Chris C.

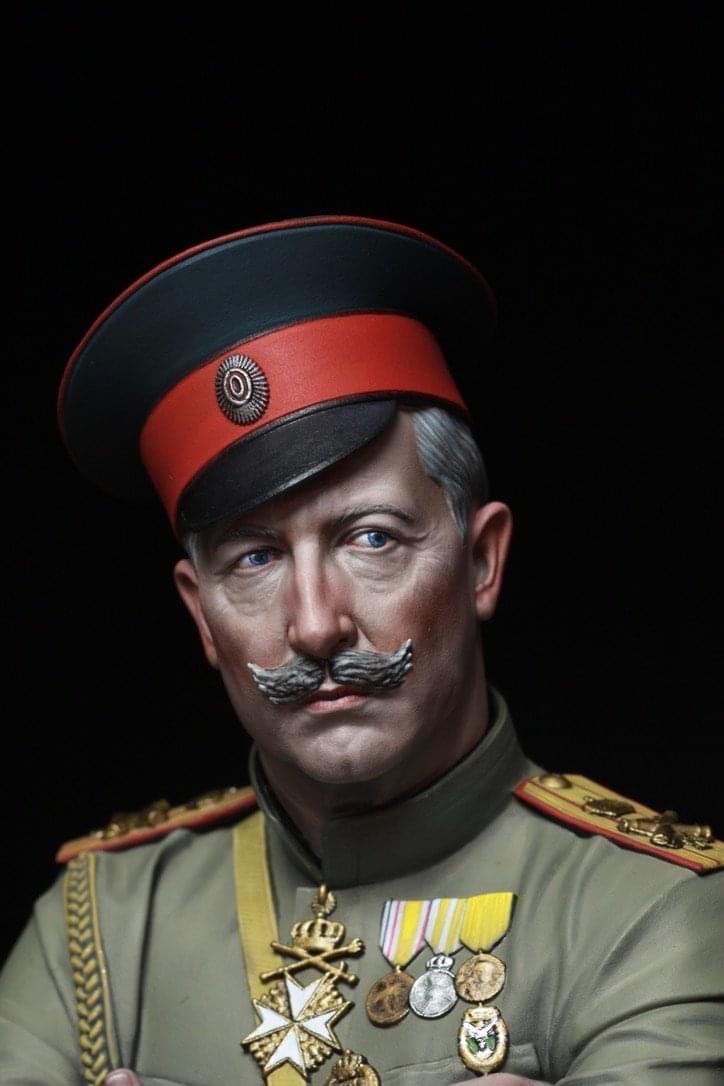
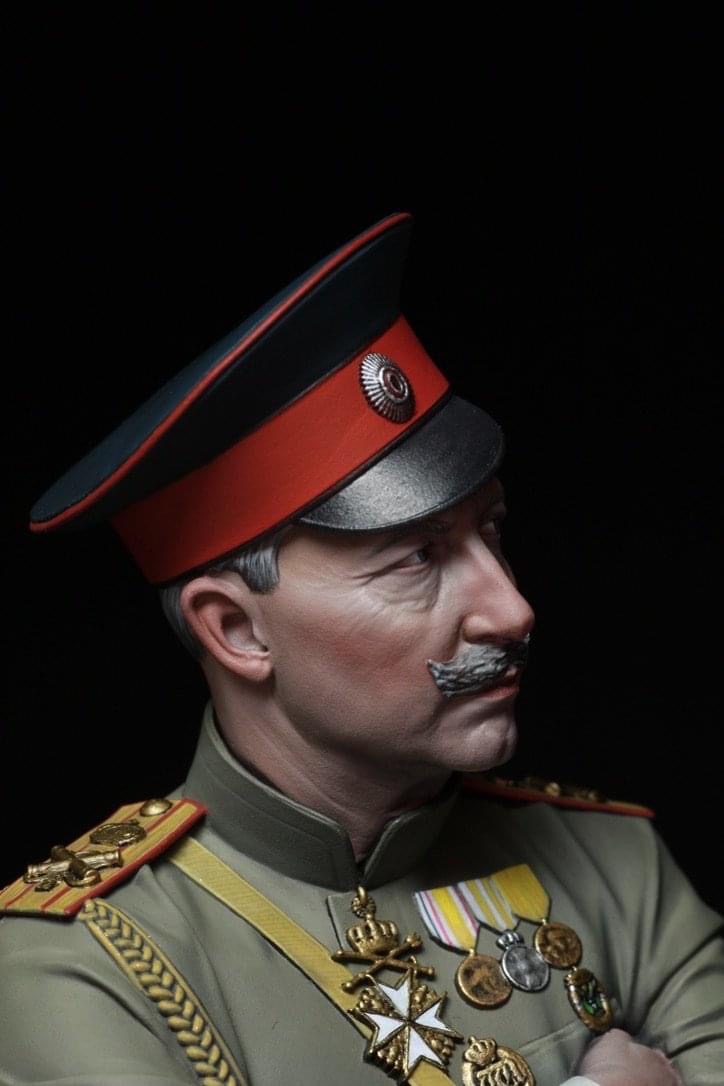
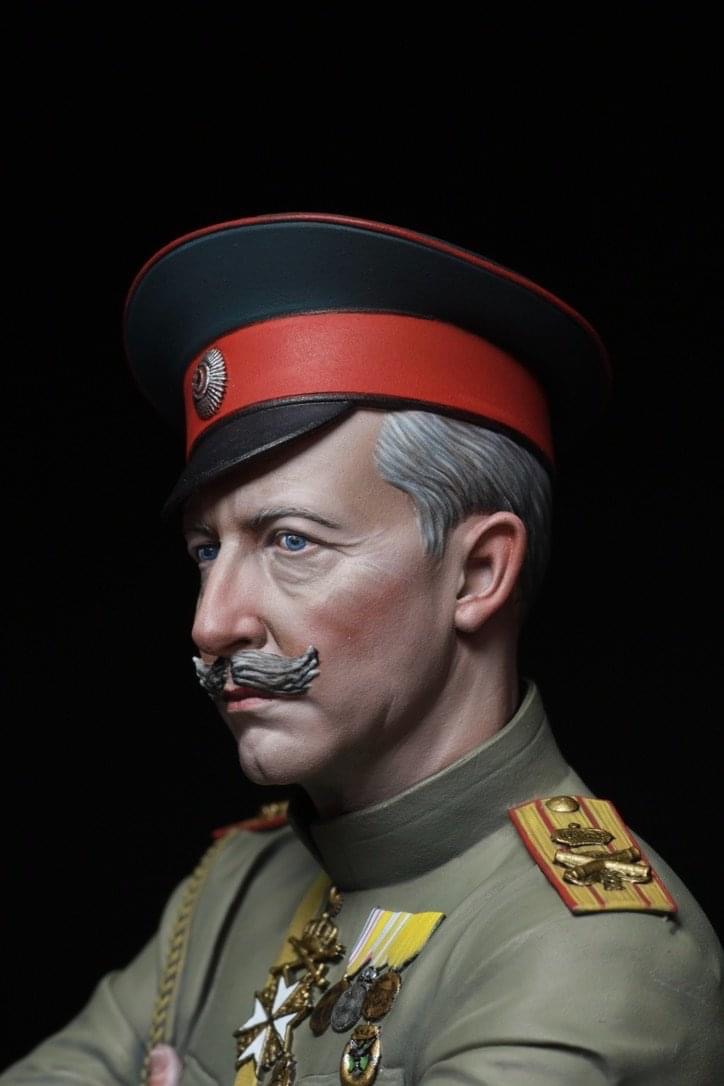

These are from my display for which I was fortunate to receive a Gold Medal for the whole display.
The Kaiser Wilhelm II went down very well!
David G Lane
Hope you like it? Jason Z.


Having for umpteen years built model aeroplanes of various types (flying, static – usually; wooden, metal or plastic), I decided it was time for a change so I built a figure. The next one was an improvement. Gradually they began to look less like Picasso paintings and more like small versions of the real thing.
Then I saw an advert for a 90mm metal knight on foot and another of the same scale but on horseback. Sending the wife and kids out to work and visiting friends so we got free meals I saved enough to purchase same.
Building those models was sheer pleasure if only for the fact that no-one was leaning over my shoulder saying ” That’s the wrong green” or “That rivet is 1/2 mm too far left”. I could splash paint and polish metal to my heart’s content.
After building them and getting some quite flattering comments such as: “At least it’s better than your last effort”, I decided to try my hand at diorama. (Wow!) Langley Miniatures have a set of figures for St. George and the Dragon. Being a Royalist and frightfully patriotic I sent for it. Mostly it was a “curate’s egg”. The right arm would only hold the lance vertical, so changes had to be made. i.e. break the lance and draw the sword. It all glued together with very little need for filler. However, the base seemed incomplete. Here’s the ghoulish bit. Border Miniatures do SKULLS among their accessories.
So just imagine me – sitting in my little room, miles from anywhere, moving dragons, knights, skulls etc., chuckling to myself, while I revel in the world of Merlin, King Arthur, St. George and Co.
At least no-one can say “That is the wrong colour”, because they are all figments of my imagination.
Yours from the nether world…
Jim


65mm
Sculptor Benoit Cauchies
Oils
David L.


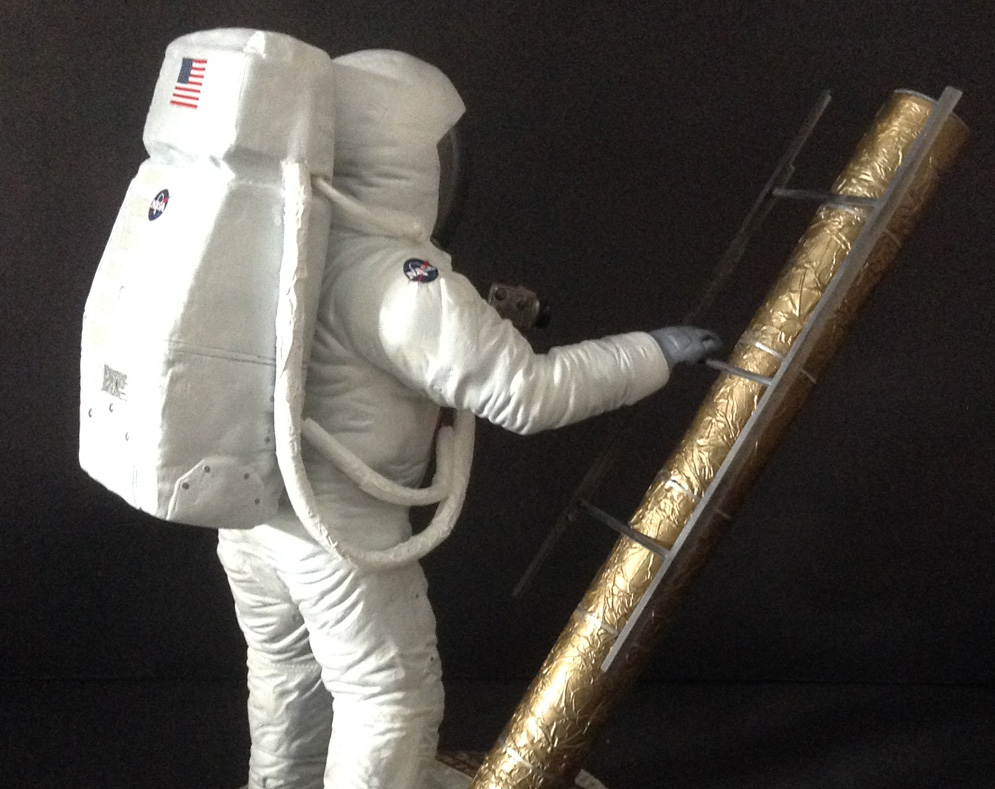
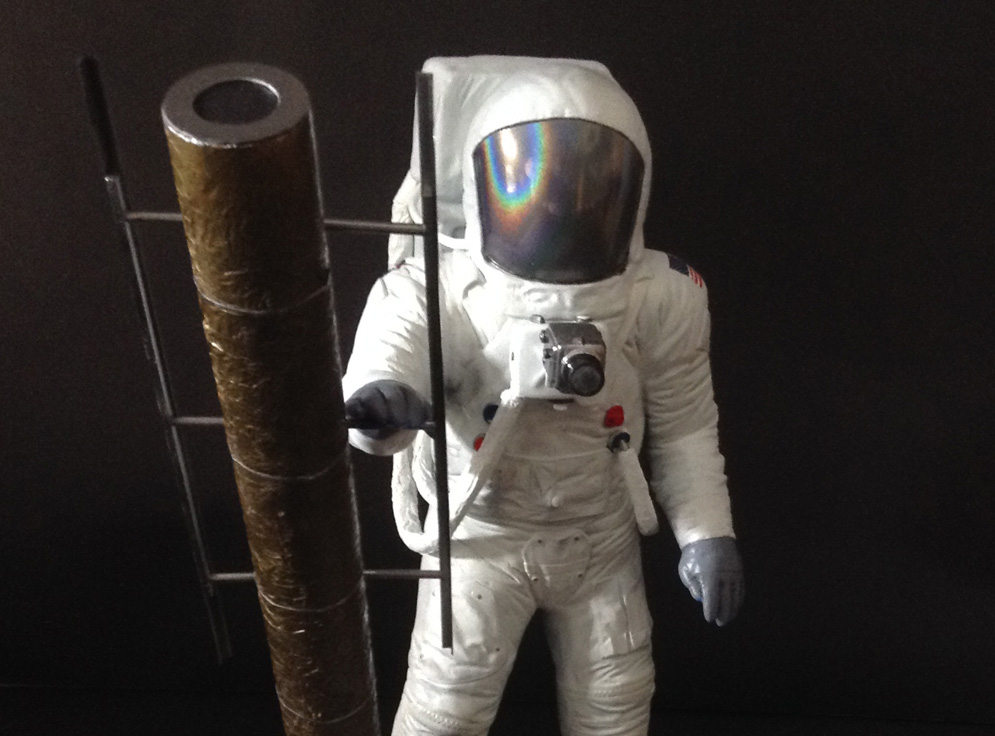
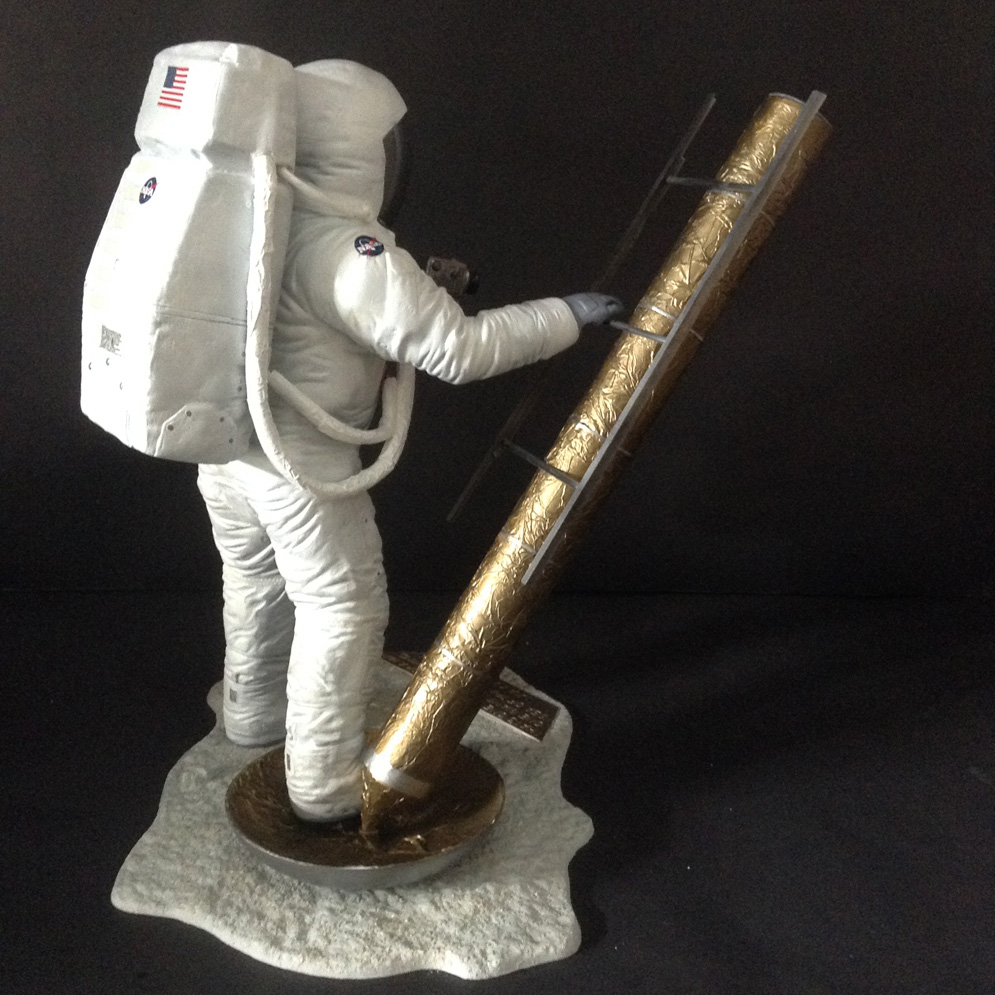
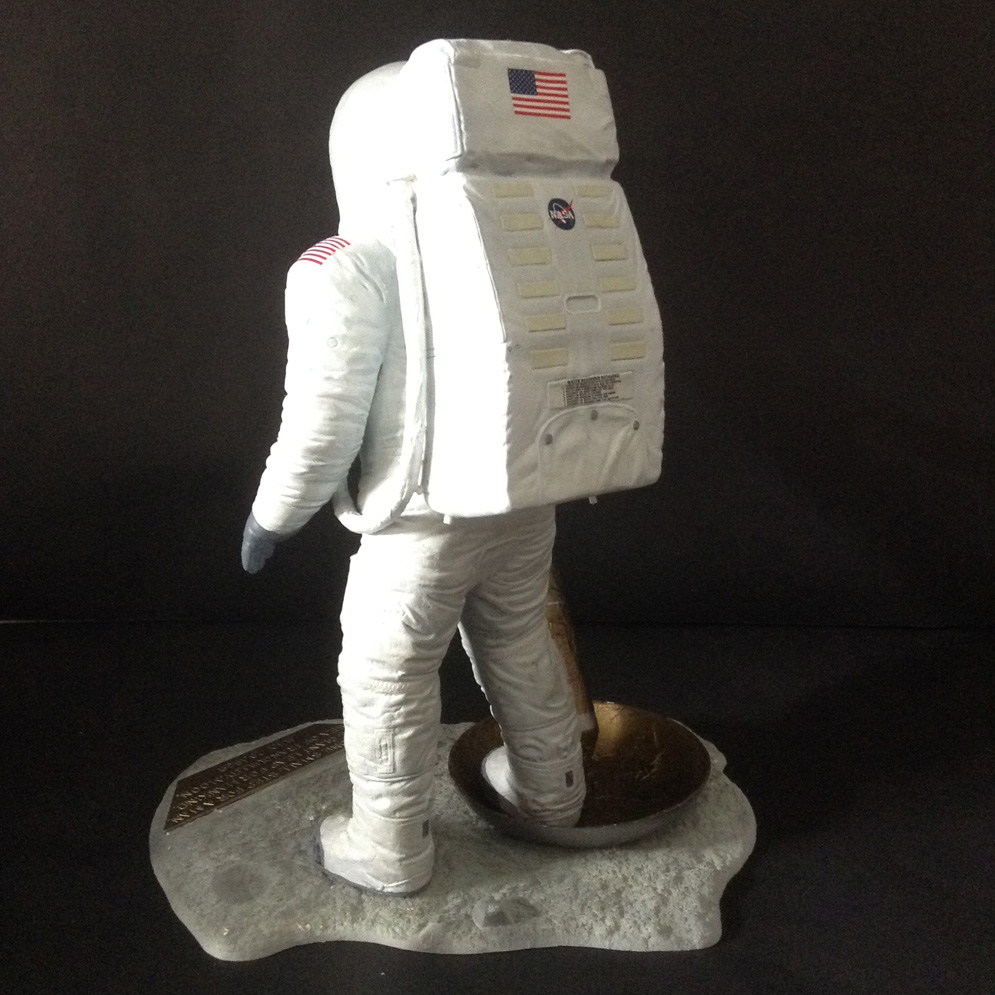
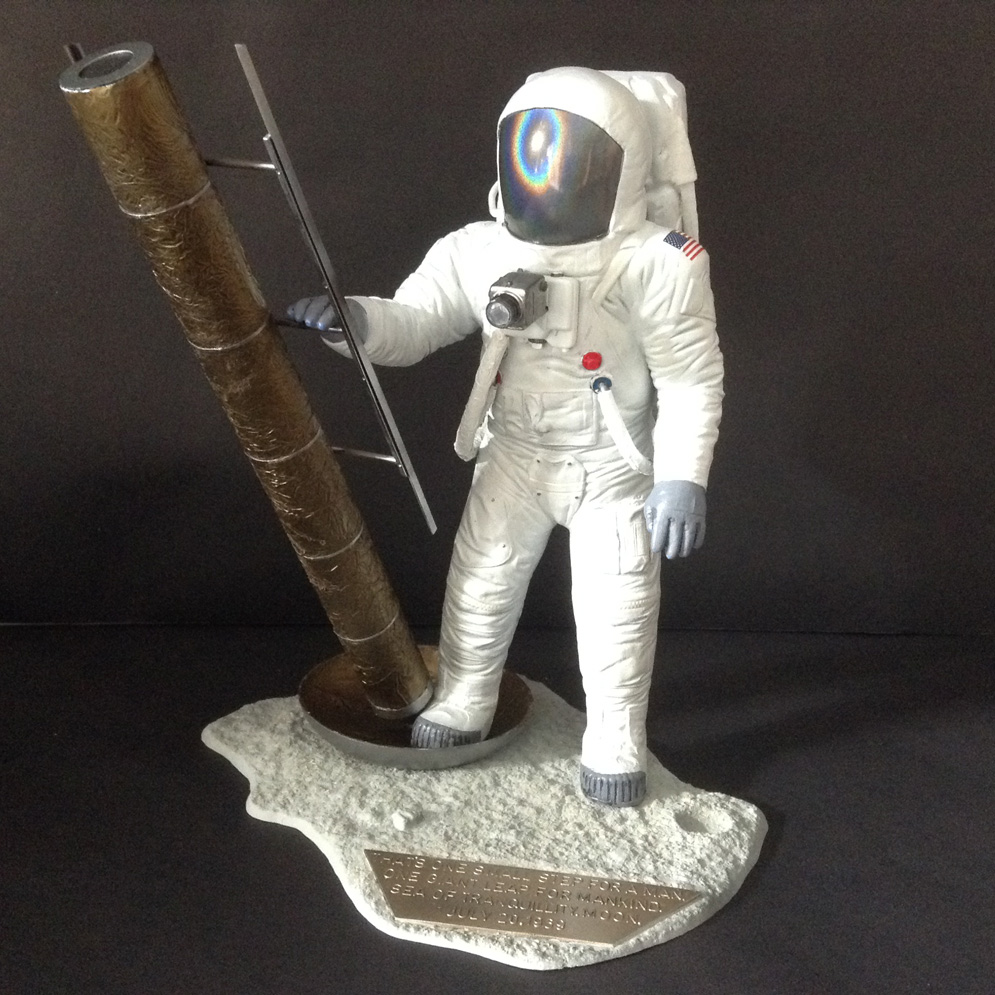
Pre-shading and drybrush highlights enhance the spacesuit and the visor is coated in Alclad Holographic Chrome. Some small scratch building of the hoses and connections just detail up what is a very basic model.
The section of Lunar Lander leg is covered in tinfoil prior to painting and adding retaining straps. The base was coated in watered down PVA glue before a liberal sprinkling of Baby Powder to give a more fine dust appearance, before various shades of gray are sprayed at random over the surface.
Enjoyable in the end, Mick S.