• Skip to primary navigation
  • Skip to main content
  • Skip to primary sidebar

Scale Modelling Now

Scale Modelling Techniques

  • HOME
  • CONTENTS
    • What’s New
    • Techniques Bank
    • Aircraft
    • Armour
    • Classic Kit Builds
    • Vehicles
    • Sci-Fi, Fantasy, Space
    • Maritime
    • Figures
    • Book Reviews
    • Dioramas
    • Gift Certificate
    • Modelling Workshops
    • Podcasts
  • WHAT WE OFFER
  • AREAS
    • Techniques Bank
    • Aircraft
    • Armour
    • Vehicles
    • Sci-Fi, Fantasy, Space
    • Maritime
    • Dioramas
    • Figures
  • FREE SAMPLES
  • EVENTS
  • NEWS
  • ABOUT
    • ABOUT US
    • TRADERS
  • LOGIN
  • CONTACT

Kit review of Bronco Versuchsflakwagen 8.8cm Flak 41 auf Sonderfahrgestell (Pz.Sfl.IVc) 1:35

December 13, 2013 By

00 BN Ar Bronco Versuchsflakwagen 8.8cm Flak 41 etc Pt1
Kit Ref: CB35062
Feature article by Bill Curtis

Not a quick-build!

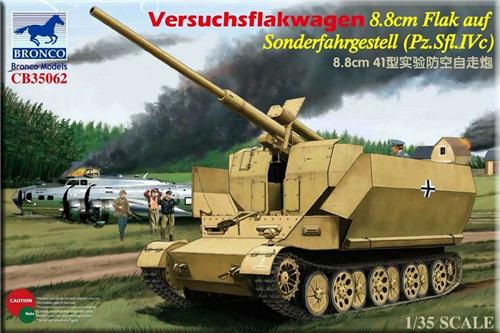
Looking at the plans and the number of individual components one realises that the Bronco Versuchsflakwagen 8.8cm Flak 41 auf Sonderfahrgestell (Pz.Sfl.IVc) 1:35 will be no quick build. In fact one could consider this, two kits in one, the tracked vehicle and the flak on top. It pays to study the drawing to get familiar with the various components and layout. One thing you may find useful is to copy the parts list page so you don’t have to keep turning the booklet back to find where the parts are located.

Substructure first

So forward with the build, this starts with the substructure, which comes as a single tub. I always like these as it gives a good starting point to the vehicle negating the need to ensure those that come as separate flat parts to be checked and rechecked for being square. My first job was to cut off the torsion bars from the sprues and give them a cursory sand before fixing into place.

I decided to leave off some of the smaller parts such as the towing pins and retaining chain from the front units and put them on at a later time.

Engine housing

Parts 12 & 13 are two rectangular plates on the engine housing front and to get these items square I drew a pencil line on each fender using the upright parts as my datum points. This would enable me to get these parts dead square. I glued them in place and when I came to dry fit the top of the hull found they fouled the openings in this part. If I was to build this model again I would add these after the top had been fitted, putting a small piece of plastic on the fender top to stop any chance of it going in too far.

Read the full build review of Bronco Versuchsflakwagen 8.8cm Flak 41

Primary Sidebar


LOGIN/LOGOUT

Lost your Password?


All the completed Armour builds.

Click on a Manufacturer below for all SMN's completed builds of their kits.

BACK TO ARMOUR MAIN PAGE

SEARCH THE WEBSITE

More results...

Generic filters
Exact matches only
Search in title
Search in content
Search in excerpt

Finished Now Armour

Academy
Accurate Armour
AFV Club
Airfix
Amusing Hobby
Azimut Productions
Border Models
Bronco
CMK
Copper State Models (CSM)
Cyber Hobby
Das Werk
Dragon
Eduard
Field of Armor
First Fight
Great Wall Hobby
HobbyBoss
ICM
Italeri
Master Box
Meng
MiniArt
Mirage Hobby
ModelCollect
Resicast
Revell
RFM
Riich Models
Roden
Ryefield Model
Sovereign
Specials
Takom
Tamiya
Tiger Model
Tristar
Trumpeter
Ultracast
Zvezda

Armour Areas

Armour Home
Build Now
Finished Now
Photo Reference Library
Subscriber Gallery
Here Now
Book Reviews

Copyright © 2025 · Scale Modelling Now · Online Scale Modelling Magazine · Scale Modelling Techniques and Tips · Privacy Policy

ar Arabicbn Bengalibg Bulgarianzh-CN Chinese (Simplified)zh-TW Chinese (Traditional)cs Czechda Danishnl Dutchen Englishfi Finnishfr Frenchde Germanel Greekhi Hindihu Hungarianid Indonesianit Italianja Japanesemt Malteseno Norwegianpl Polishpt Portuguesepa Punjabiru Russianes Spanishsv Swedishth Thaitr Turkishuk Ukrainiancy Welshyi Yiddish
en English