Full Review with Dai Williams
Just before we get started, here’s a look at how it all turned out…
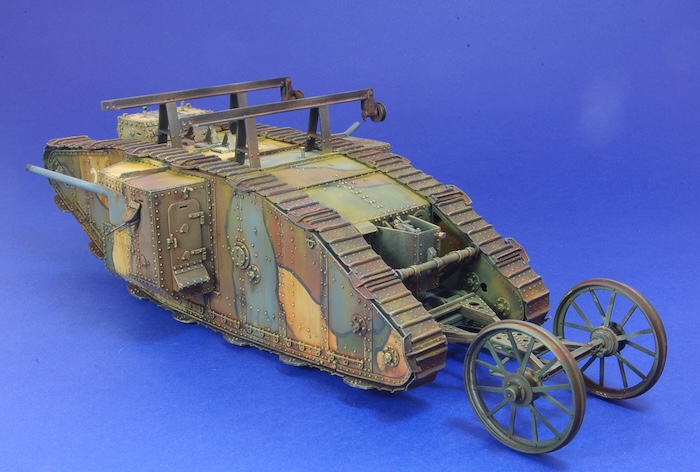
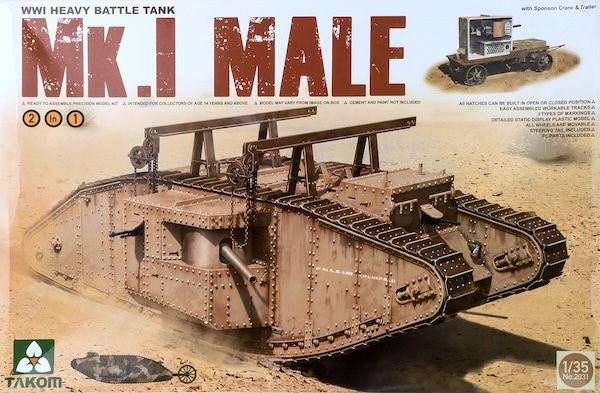
The subject of this project was the Takom Mk. I (Male) in 1:35th scale.
This kit was first released in 2015 with the machine gun armed (Female) version being released shortly afterwards.
I have previously built both Takom’s ‘Female’ version of the kit and the similar ‘Tadpole’ version and brief write-ups for these may be found in Scale Modelling Now at :-
Takom Mk1 Female Tank 1:35 – Scale Modelling Now
and …….
Takom Mark.IV Tadpole WWI Heavy Tank 1:35 – build review – Scale Modelling Now
These two kits are very similar to the ‘Male’ version of the kit and most of the points made in those build articles will also apply to this kit.
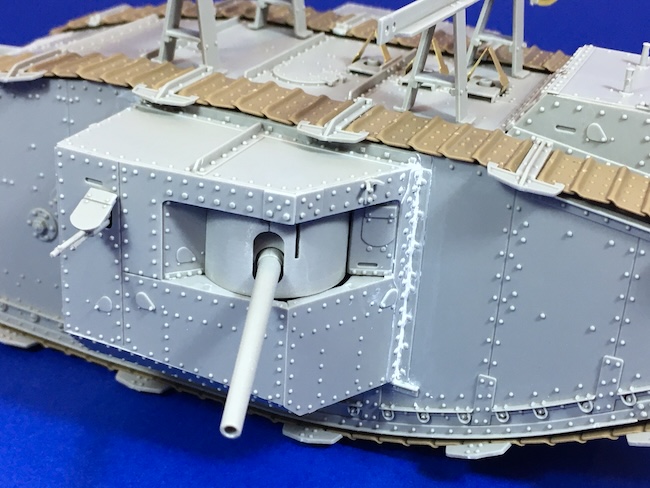
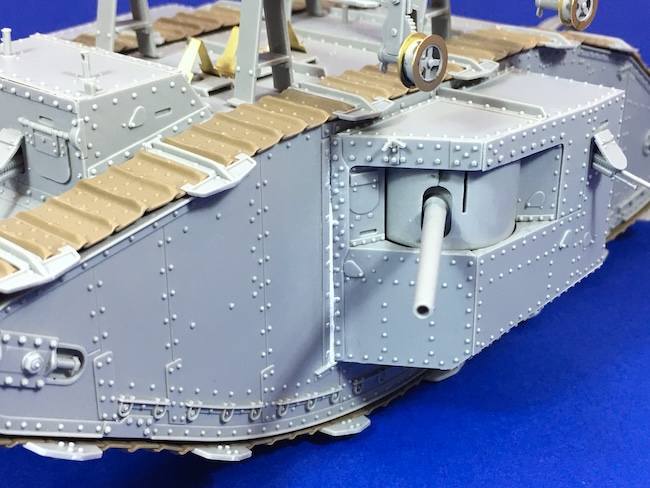
The kit fits together well, but as with the others, I deviated from the instructions to get the larger structural elements together first before the smaller detail parts were added. With both the other kits I encountered issues when fitting the sponsons. Gaps were present where the front of the sponson met the hull side and I encountered the same problems here.
To get around the fit issues I would suggest the following construction sequence.
- Assemble the sponsons along with their guns. I left out some of the detail parts from the gun breeches. I did not intend to leave the access doors on the sponsons open so the rear of the guns would never be seen.
- Attach the sponsons to the outer hull halves. As expected, there were gaps around the front of the sponsons.
- Place strips of card on the inside of the gaps. These will provide support for the filler needed to seal the gaps.
- Fill the gaps from the outside. I used Milliput two-part putty which was forced into the gaps with a toothpick. The excess was then wiped away before the Milliput had set using a pointed cotton bud soaked in water. It is important to clean up any excess before the Milliput sets. Any sanding that once it has dried will inevitably ruin the rivet detail on both the hull and the sponsons.