With the masking removed, chipping was applied to the interior of the model using Vallejo German Camouflage Black – Brown. General dirt, staining and dust were added using pastel chalks. According to the Copper State instructions, the driver’s seat appears to have been made of wood which was replicated by painting the part in white and then scrubbing raw umber oil paint over it. Most of the oil paint was then removed with an old stiff oil painting brush to represent the wood grain. I’m not actually convinced that wood grain would be visible in this scale, but replicating it seems to be ‘the thing to do’ these days and so there it is! The leather cushions were painted in a similar way, but using burnt sienna oil paint to replicate worn leather. This time the oil paint was removed using a piece of sponge.
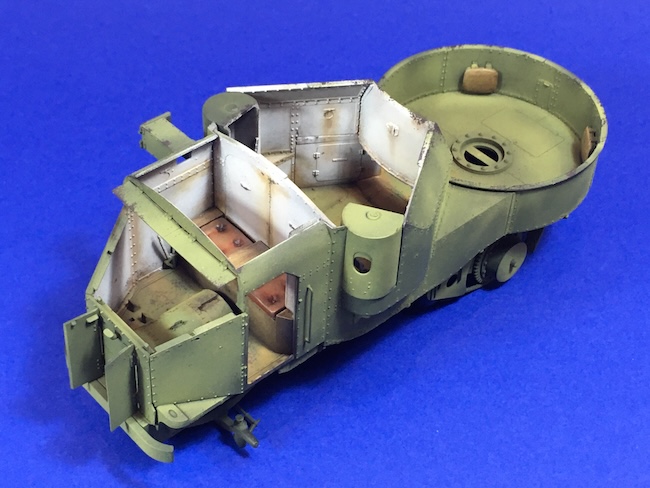
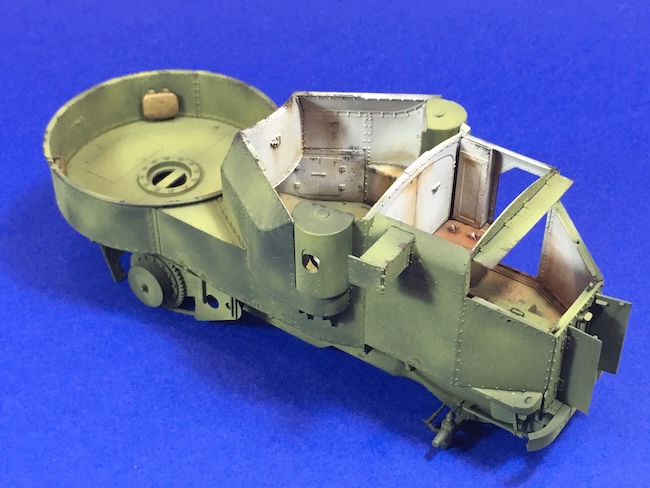
The fighting compartment roof along with the driver’s visor, the bonnet and the roof of the driver’s compartment were added next. I find that the process of gluing pre-painted parts together is often less neat than as assembling unpainted parts might be and unfortunately this was the case here. I ended up with a few gaps which needed to be filled with white glue diluted with water. This left a few unsightly stains which were covered over with some respraying using the same colours as were used on the interior.
The areas where transfers were to be applied were sprayed with two coats of Mr. Hobby Gloss Varnish thinned with their Self Levelling Thinner. The transfers performed very well and were thin and glossy. They were treated with Micro Set and Micro Sol to settle them down over any raised detail. Any air, excess water and setting solutions under the transfers were removed by rolling a cotton bud gently across the surface working from the centre to the edge. This eliminated any silvering of the transfer film completely.
There is a great video feature on how to apply transfers in the Scale Modelling Now techniques bank and I must admit that after seeing this it has proved to be a life saver as the silvering of transfer film has been the bane of my modelling life!!
How to Apply Decals on Scale Models Tutorial – Scale Modelling Now
Another couple of thinned coats of gloss varnish were applied to seal the transfers and to disguise the raised edges of the transfer film.
The glossed areas were then sprayed with Mr. Hobby Matt Varnish once again thinned with Self Levelling Thinner. For some reason this dried with an alarming-looking milky finish. This was cleared up by over-spraying with neat thinner. I have no idea why this happens sometimes, but whenever it does, a quick overspray of thinner usually cures the problem.
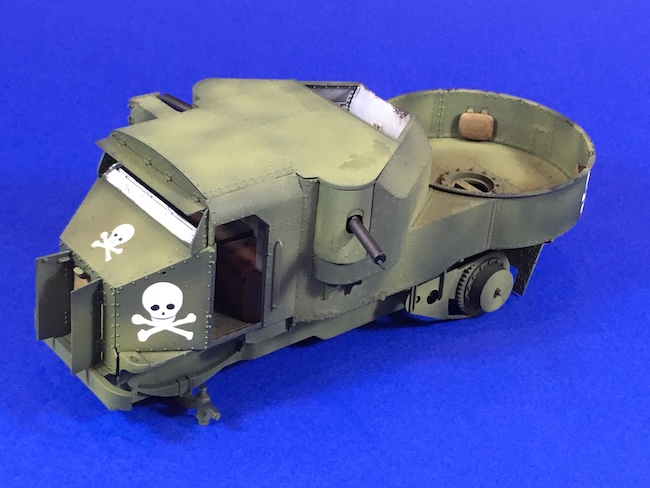

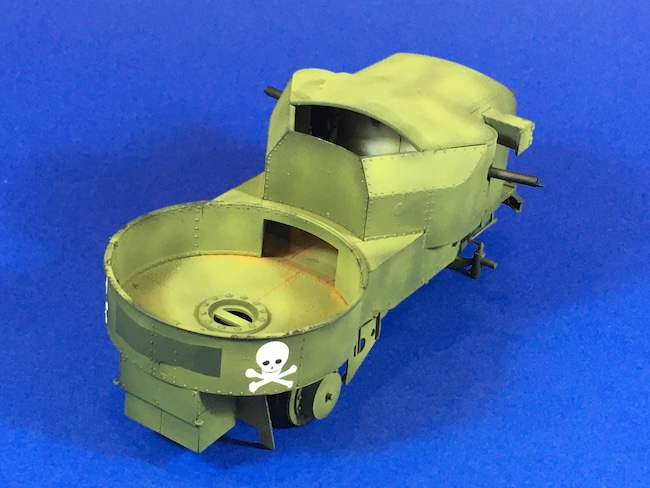
Note that there is a dark green patch on the rear of the vehicle. This is supposed to be there. I believe that this was where the previous vehicle name / slogan was roughly painted out before the skull and crossbones insignia were applied.
Chipping was applied to the exterior of the model using Vallejo German Camouflage Black – Brown applied with a piece of torn sponge and a fine brush. This was concentrated in areas where the paint would be most likely to be damaged such as the front bumper and places where the crew would have been moving around the vehicle.
The model was then dry-brushed using a light green enamel to highlight some of the edges and raised detail. The same colour was used to outline some of the previously applied chips to give them a more three-dimensional appearance.
The model was weathered using pastels from the Pan Pastels range using three or four shades of brown working from light to dark. This was concentrated on the lower areas of the model and places where dust would have accumulated. The last colour to be applied called ‘Burnt Umber Shade’ was used as a post shading coat to represent artificial shadows.
The lights were sprayed using Mr. Metal Brass to provide some contrast with the rest of the model. I suppose that in practice they were probably painted green along with the rest of the vehicle, so this was a little poetic license on my part.
Ask a question or add feedback:
You must be logged in to post a comment.