Sandbagged…
An area vulnerable to bombing was the fuel tanks. Placed in the sponsons directly behind the turret, sandbags placed over the filling caps and the top of the sponsons was an effective way of dispersing a blast.
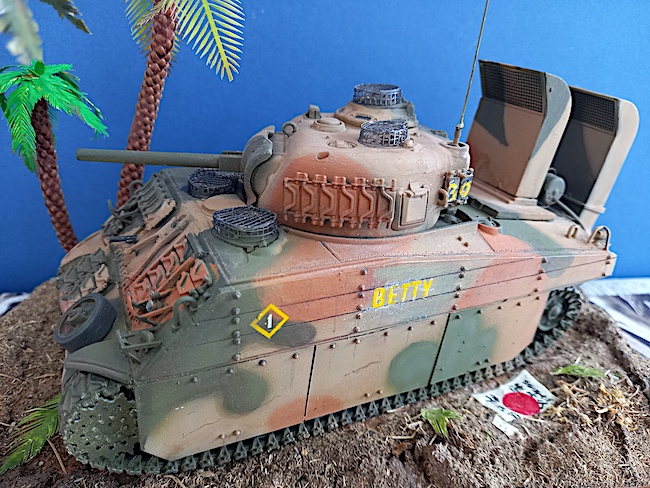
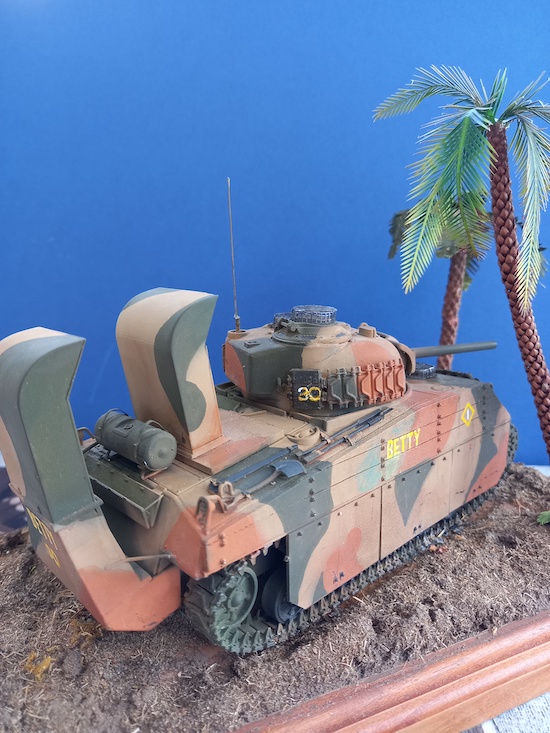
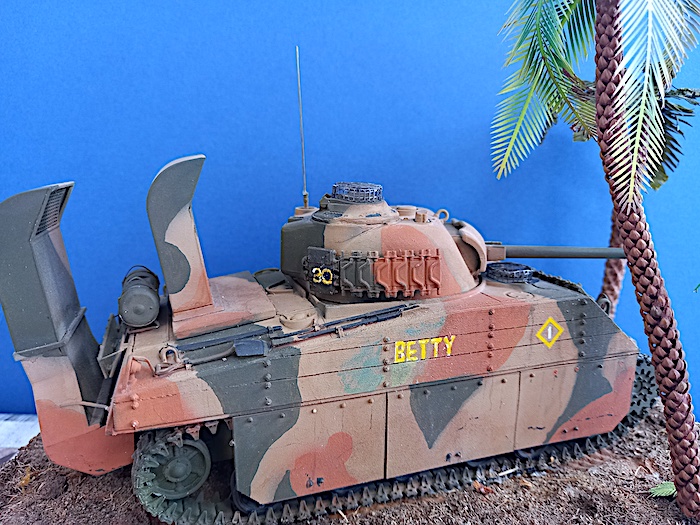
The Marines developed a specific method to protect the sides of the tank. Adopted on a widespread basis, three rows of one inch oak planks were bolted to a support frame onto the hull. Leaving one inch between the hull, the gap was filled with concrete providing a form of composite armour.
When the Japanese did get an anti-tank gun capable of penetrating the M4’s side armour, this additional armour would provide greater protection giving the tank a chance to survive a hit.
As hull protection improved, suicide attacks focused on damaging the track, suspension, and other weak spots such as the crew hatches. Some tank battalions extended the planking and added a further two rows of planks across the suspension arms to protect the running gear.
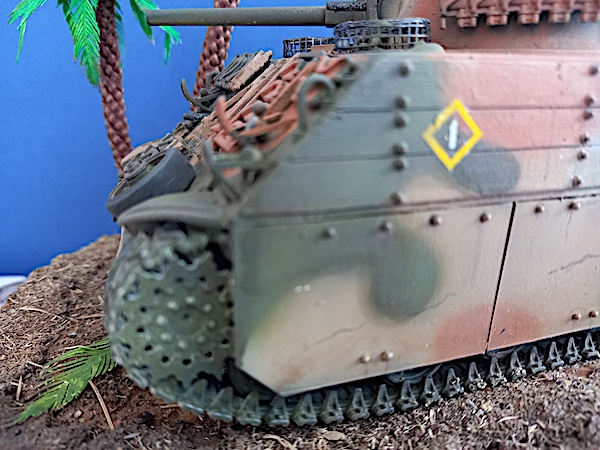
An alternative to this was the method shown above. Scrap armour from landing craft or LVTs, cut into plates was bolted to the hull and suspension or suspended from a rail running along the hull.
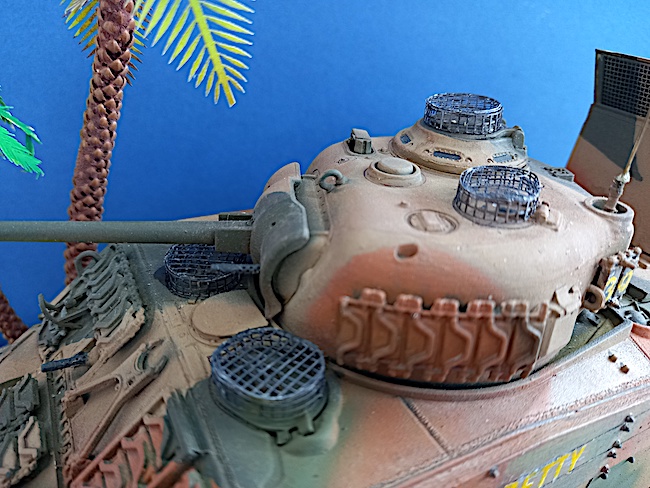
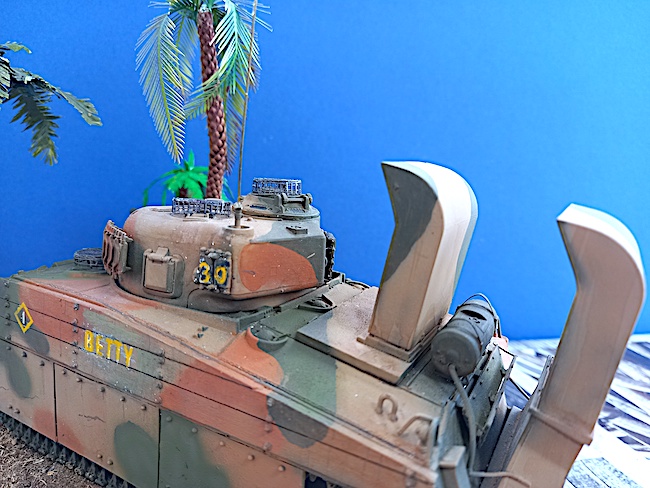
In the case of crew hatches, the 5th tank battalion adopted welding 3 inch nails to cover the hatches preventing attachment of bombs and limiting access to force the hatch open. This earned tanks protected in this way the nickname “Hedgehogs” due to their close similarity. Shown above is an alternative method of providing stand-off protection to the hatches. By attaching a strong wire cage made from airstrip matting this was nicknamed the “bird cage”.
Despite the hardware solutions the most effective protection was the policy of close cooperation. This attached a squad of Marines to each tank to engage infantry attacks while the tank provided firepower and acted as a shield when approaching enemy positions.
The addition of the squad meant that there were other factors to consider. This included the supply of drinking water for the Marines. This was resolved by removing redundant drop fuel drums from scrapped light tanks and fitting them after cleansing to the rear of the M4 medium tanks. Acting as water bowsers they were accessed by the ground troops through a flexible and tap.
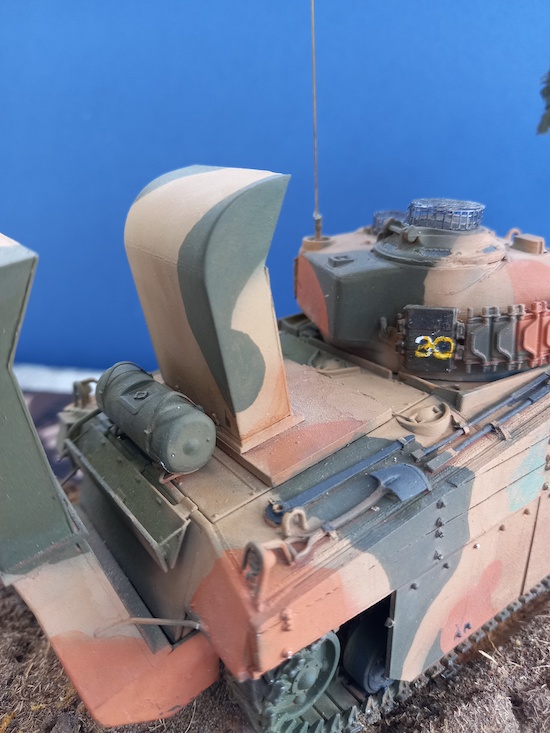
Going into combat with the tank closed up for action, the tank commander had a limited view but had the accompanying squad as his eyes and ears. An internal telephone system was added with a handset outside the tank stored in a box on the left-hand side of the rear plate. As a result, the squad could communicate directly with the tank crew.
The Model…
The model used as a base kit the Italeri kit of the M4A3 Pacific Sherman. Eduard etched metal bird cages were taken from kit 461 along with parts from the spares box. The planking from the kit was replaced with a more refined resin version while the suspension armour was cut from plastic card and bolt detail added from Verlinden sets.
The model does not represent a specific vehicle but incorporates features used across the 4th, 5th and 6th tank battalions. Crossover of ideas did occur between battalions and this configuration is likely to have existed. “Betty”, a tank belonging to the 4th battalion had many of the features discussed with the possible exception of the suspension armour.
Camouflage varied according to the battalion standards and also what paint was available. This ranged from plain greens to a 4-tone scheme, some quite complex.
Steve N.

Ask a question or add feedback:
You must be logged in to post a comment.