• Skip to primary navigation
  • Skip to main content
  • Skip to primary sidebar

Scale Modelling Now

Scale Modelling Techniques

  • HOME
  • CONTENTS
    • What’s New
    • Techniques Bank
    • Aircraft
    • Armour
    • Classic Kit Builds
    • Vehicles
    • Sci-Fi, Fantasy, Space
    • Maritime
    • Figures
    • Book Reviews
    • Dioramas
    • Gift Certificate
    • Modelling Workshops
    • Podcasts
  • WHAT WE OFFER
  • AREAS
    • Techniques Bank
    • Aircraft
    • Armour
    • Vehicles
    • Sci-Fi, Fantasy, Space
    • Maritime
    • Dioramas
    • Figures
  • FREE SAMPLES
  • EVENTS
  • NEWS
  • ABOUT
    • ABOUT US
    • TRADERS
  • LOGIN
  • CONTACT
Pages: Page 1 Page 2 Page 3 Page 4 Page 5

Meng British R-R Armoured Car, 1914-1920 1:35

February 14, 2025 By Francis Porter Leave a Comment


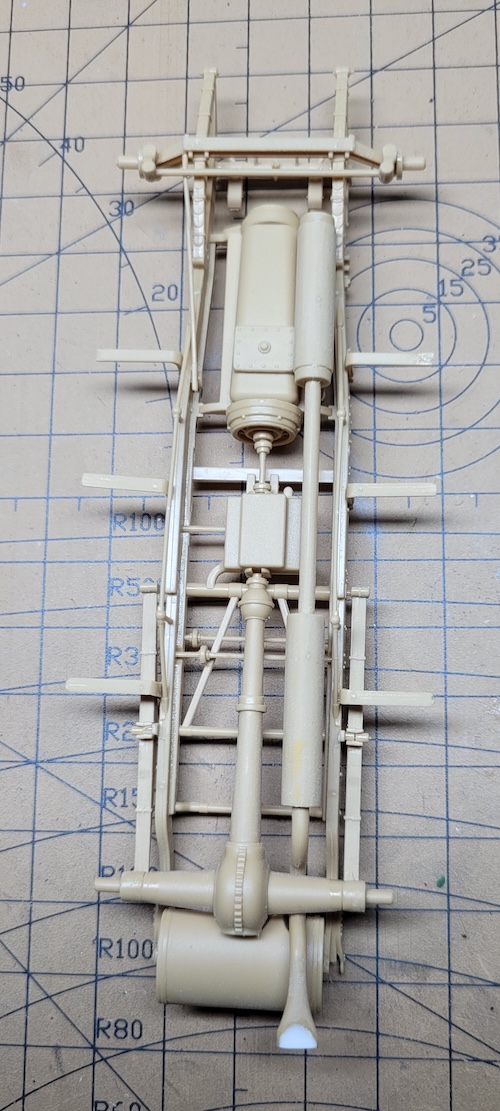
The chassis is replicated very well, but care must be taken in its construction as some parts are quite fragile. Also – as with my previous build – I’ve improved the ‘solid’ fishtail exhaust with plastic card.


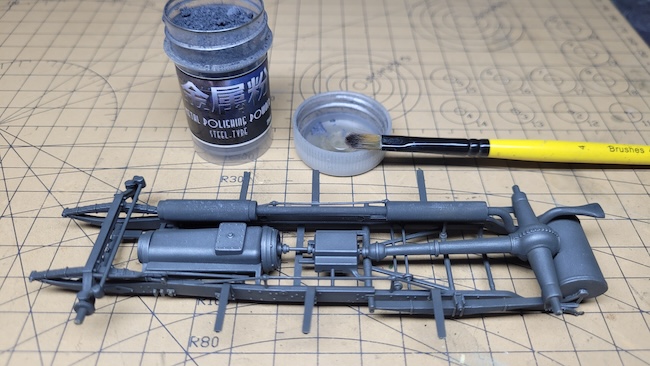
After an overall blast of Tamiya XF-69 NATO Black through the airbrush, Uschi Van Der Rosten Steel Polishing Powder was applied to the prop shaft, fuel tank and engine sump. The chassis ladder frame was treated to a light dusting of pencil graphite.


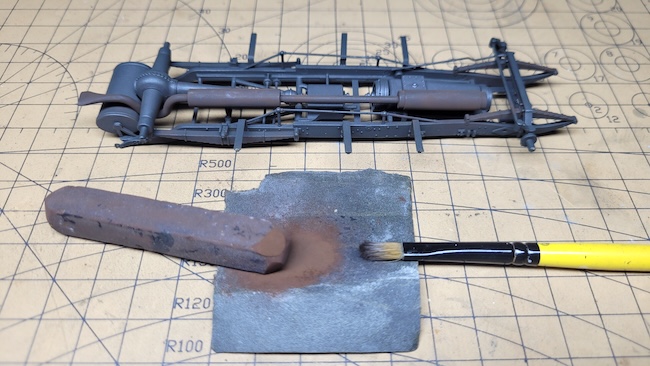
Weathering of the exhaust was done with a rust coloured artist pastel stick,


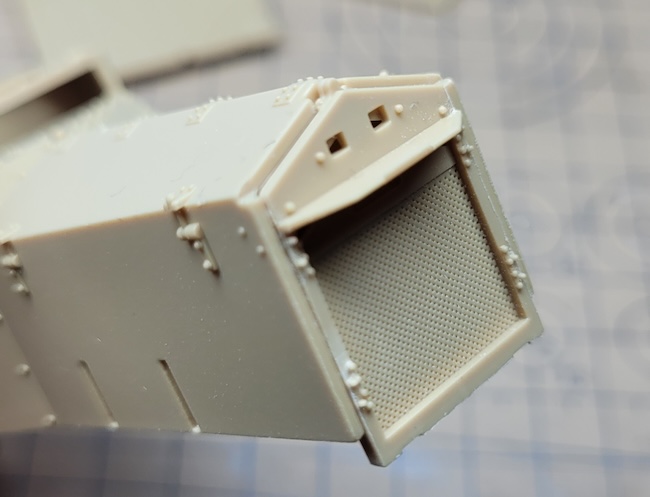
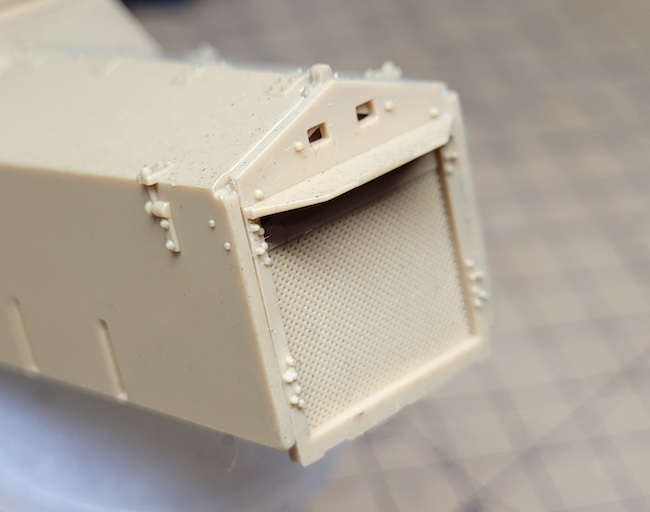
The main body is provided as a one piece item onto which the radiator is attached. Unfortunately, (due to a lack of concentration), I glued the radiator a little low on the front of the bonnet! Luckily, I did a test-fit of the body to the chassis and this highlighted the problem. Luckily, the glue had not set completely and I was able to remove and refit the radiator in its correct position.


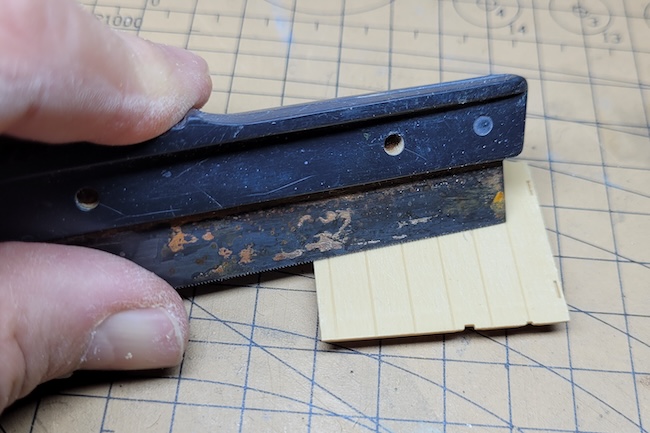
Attached to the rear of the main body are the parts representing the wooden panels of the flat bed and mudguards. The teeth of a saw dragged across these panels gave a more realistic wood grain effect to this area.


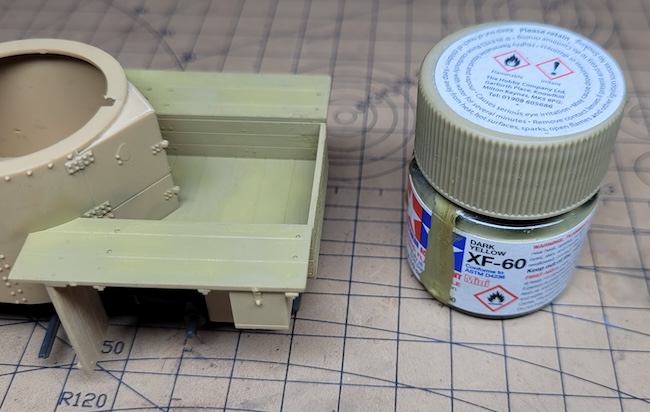
Tamiya XF-60 Dark Yellow was used for the base colour of the wood.


This was followed by a covering of Burnt Umber oil paint. I’ve also carried out a test-fit of the base of the turret onto the body.


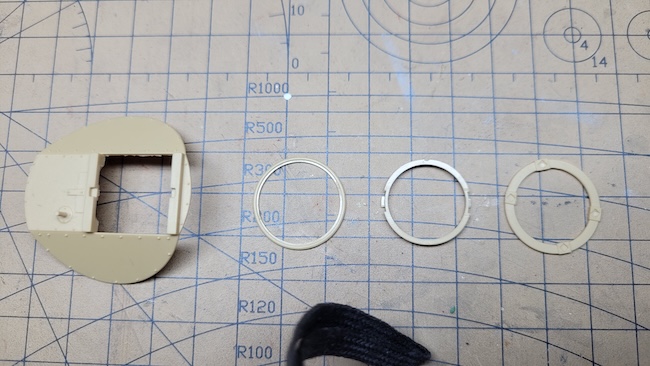
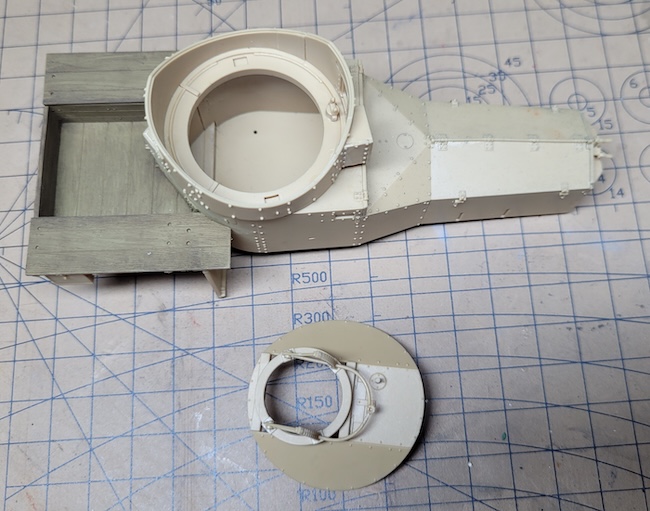
Meng supply a separate turret roof onto which a carefully constructed scarf type mounting for the Lewis gun will allow rotation of the mount.


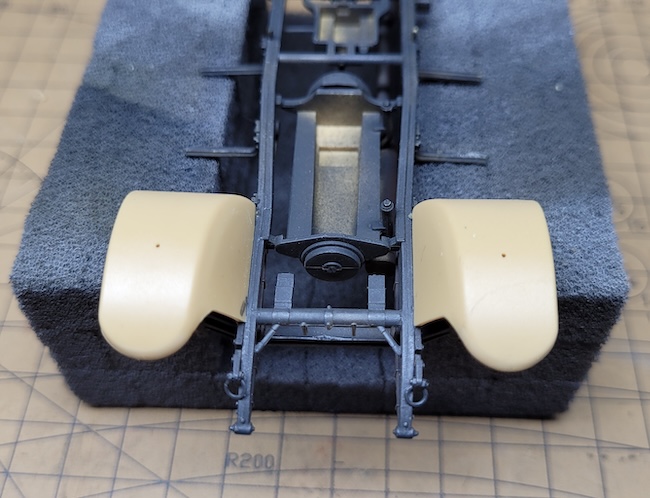
The front mudguards are attached to the chassis.


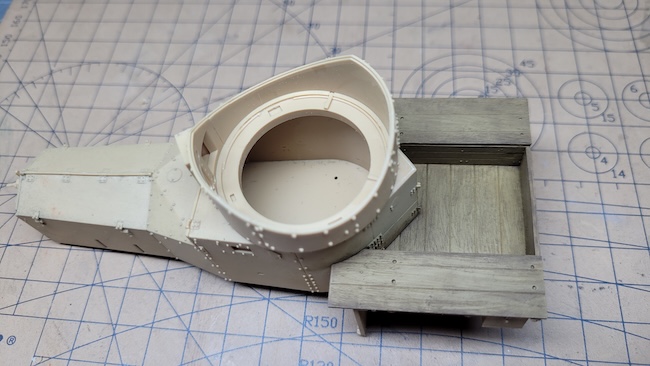
The turret roof is temporarily attached to its turret base and sealed with masking fluid and tape.

Read on…

Pages: Page 1 Page 2 Page 3 Page 4 Page 5

Reader Interactions

Ask a question or add feedback:

You must be logged in to post a comment.

Primary Sidebar


LOGIN/LOGOUT

Lost your Password?


All the completed Armour builds.

Click on a Manufacturer below for all SMN's completed builds of their kits.

BACK TO ARMOUR MAIN PAGE

SEARCH THE WEBSITE

More results...

Generic filters
Exact matches only
Search in title
Search in content
Search in excerpt

Finished Now Armour

Academy
Accurate Armour
AFV Club
Airfix
Amusing Hobby
Azimut Productions
Border Models
Bronco
CMK
Copper State Models (CSM)
Cyber Hobby
Das Werk
Dragon
Eduard
Field of Armor
First Fight
Great Wall Hobby
HobbyBoss
ICM
Italeri
Master Box
Meng
MiniArt
Mirage Hobby
ModelCollect
Resicast
Revell
RFM
Riich Models
Roden
Ryefield Model
Sovereign
Specials
Takom
Tamiya
Tiger Model
Tristar
Trumpeter
Ultracast
Zvezda

Armour Areas

Armour Home
Build Now
Finished Now
Photo Reference Library
Subscriber Gallery
Here Now
Book Reviews

Copyright © 2025 · Scale Modelling Now · Online Scale Modelling Magazine · Scale Modelling Techniques and Tips · Privacy Policy

ar Arabicbn Bengalibg Bulgarianzh-CN Chinese (Simplified)zh-TW Chinese (Traditional)cs Czechda Danishnl Dutchen Englishfi Finnishfr Frenchde Germanel Greekhi Hindihu Hungarianid Indonesianit Italianja Japanesemt Malteseno Norwegianpl Polishpt Portuguesepa Punjabiru Russianes Spanishsv Swedishth Thaitr Turkishuk Ukrainiancy Welshyi Yiddish
en English