As might be expected of a Tamiya kit, it was very easy to build and the fit of the parts was perfect.
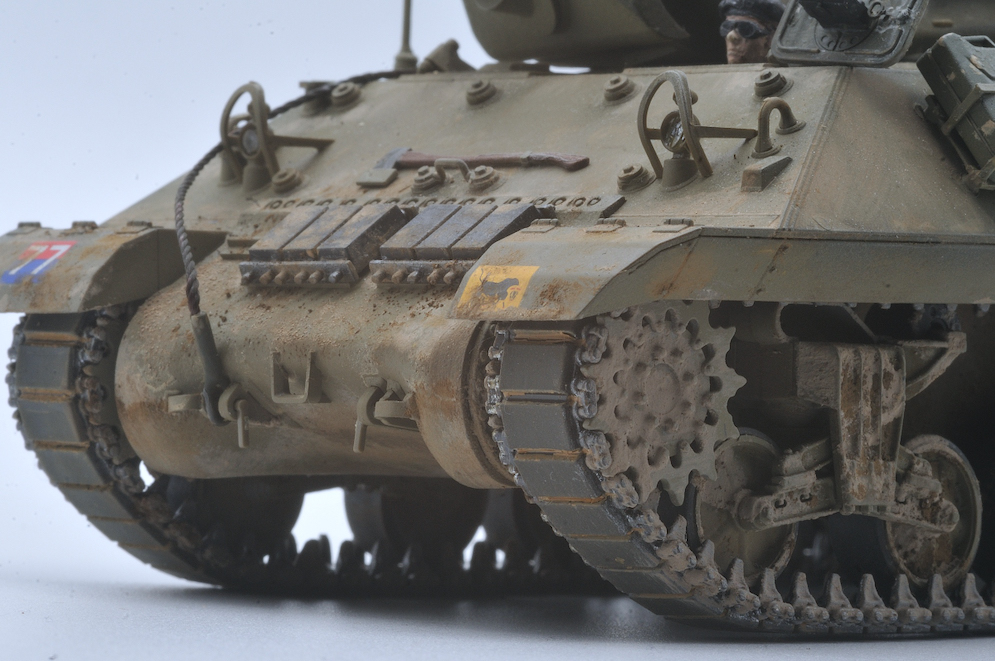
I was initially a little sceptical about the flexible one-piece tracks provided in the kit However, as after-market replacements would have cost more than the original kit, I decided to use them. As it turned out I needn’t have worried as they worked very well. The two ends of the track can be joined securely with Tamiya’s own Extra Thin Cement, and unlike the vinyl material used for tracks and wheels in some other kits they take paint very well.
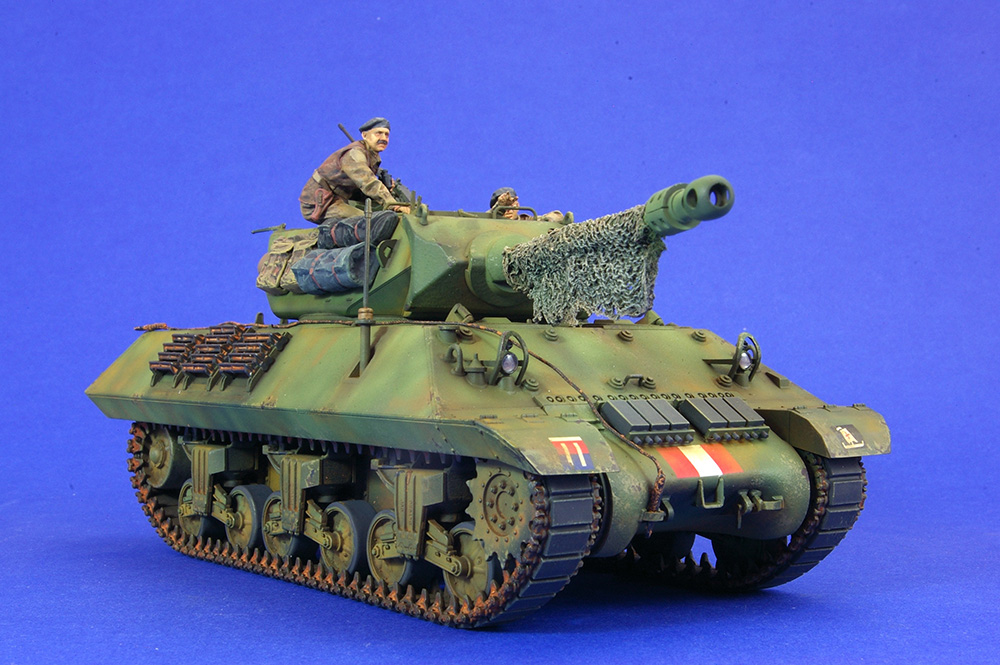
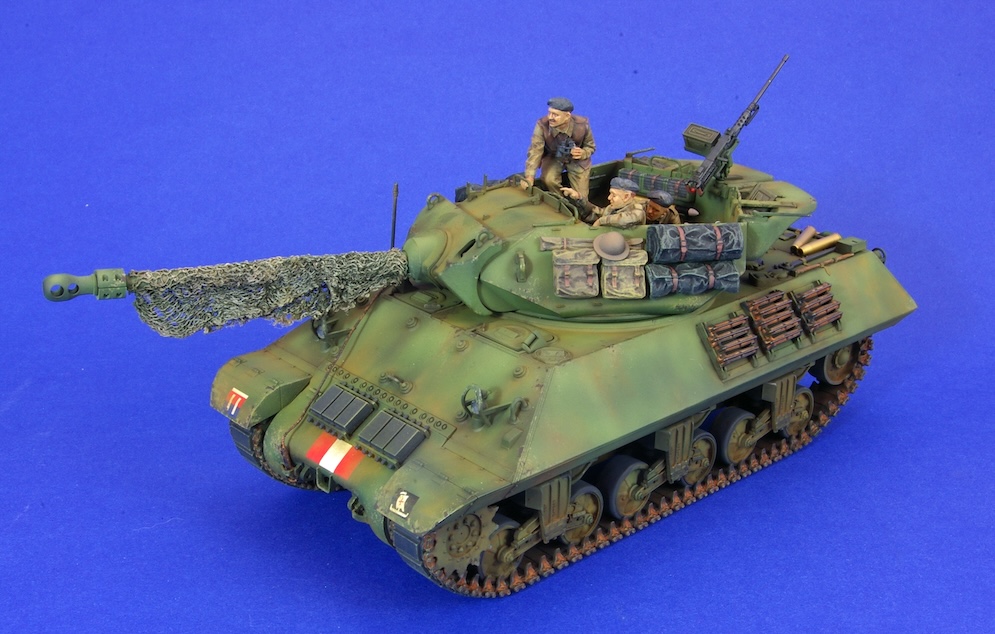
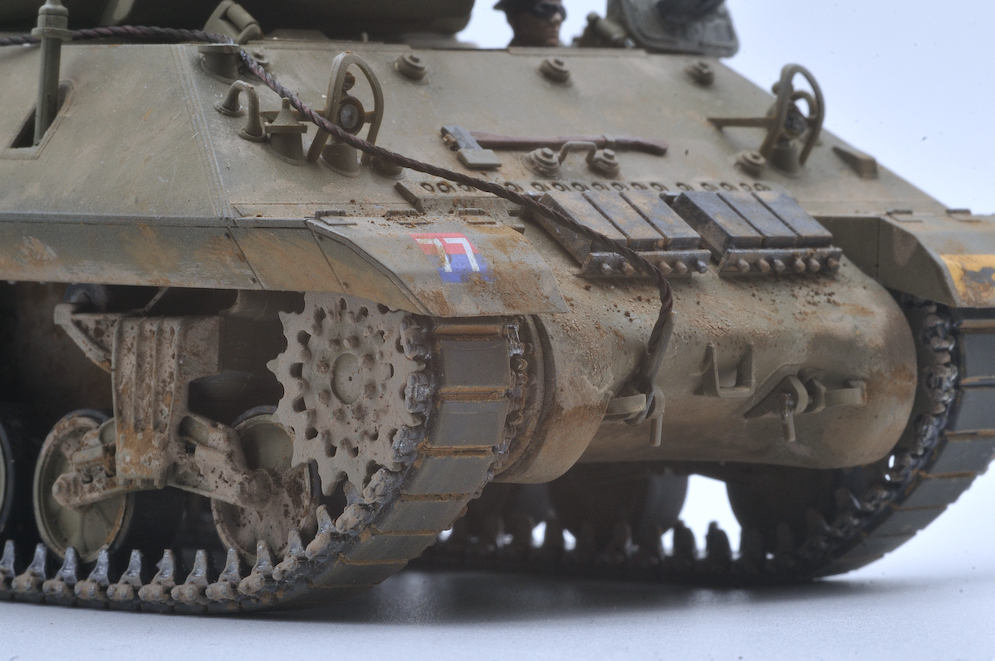
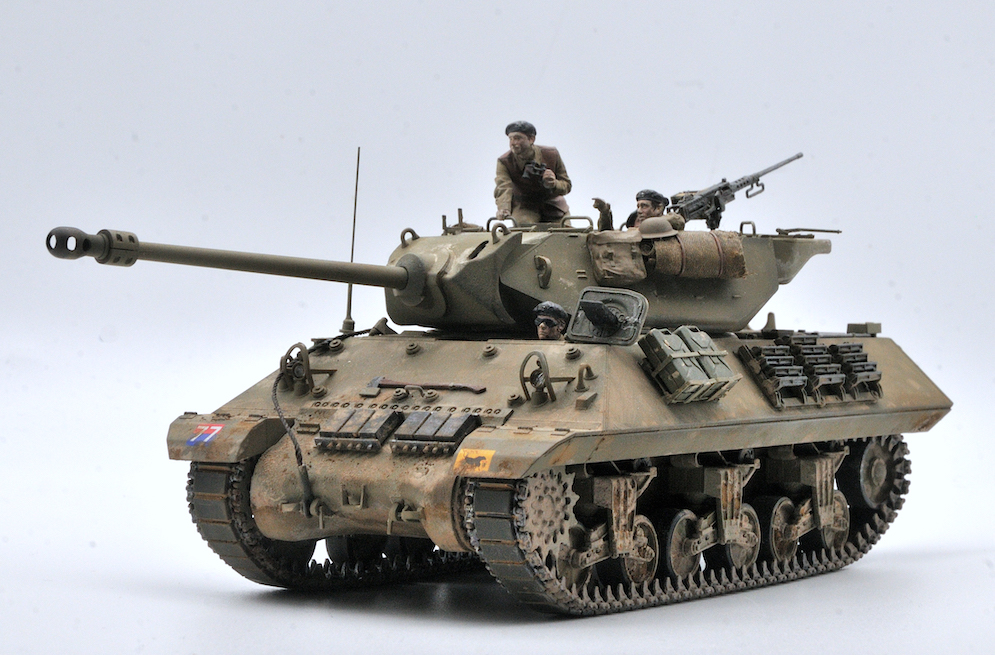
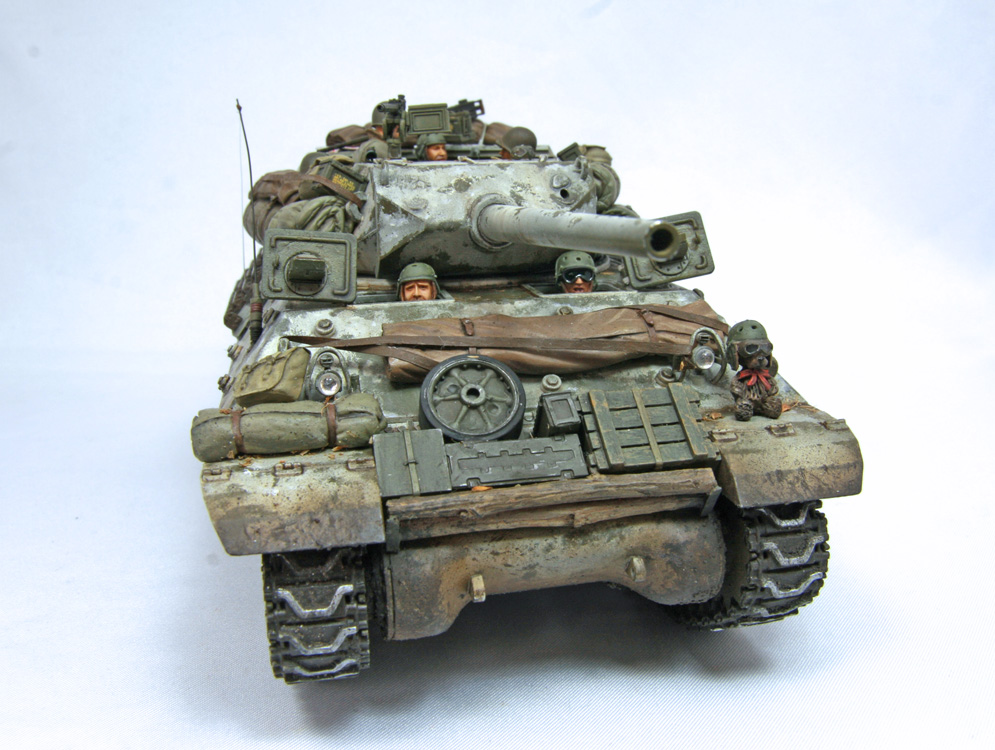
These vehicles were converted from American M10 tank destroyers to fit the British 17 pdr. gun. When converted they were apparently repainted in a British camouflage colour known as SSC15 Green. There seems to be a lot of discussion on the internet about how to correctly represent this colour. Rather than use one of the (several) suggested paint mixes to get the ‘exact’ colour, I used several layered shades of green Tamiya acrylics working from dark to light until the colour looked about right to me. I usually layer the colours on my armour models rather than just using a single ‘exact’ colour for a more three-dimensional appearance.
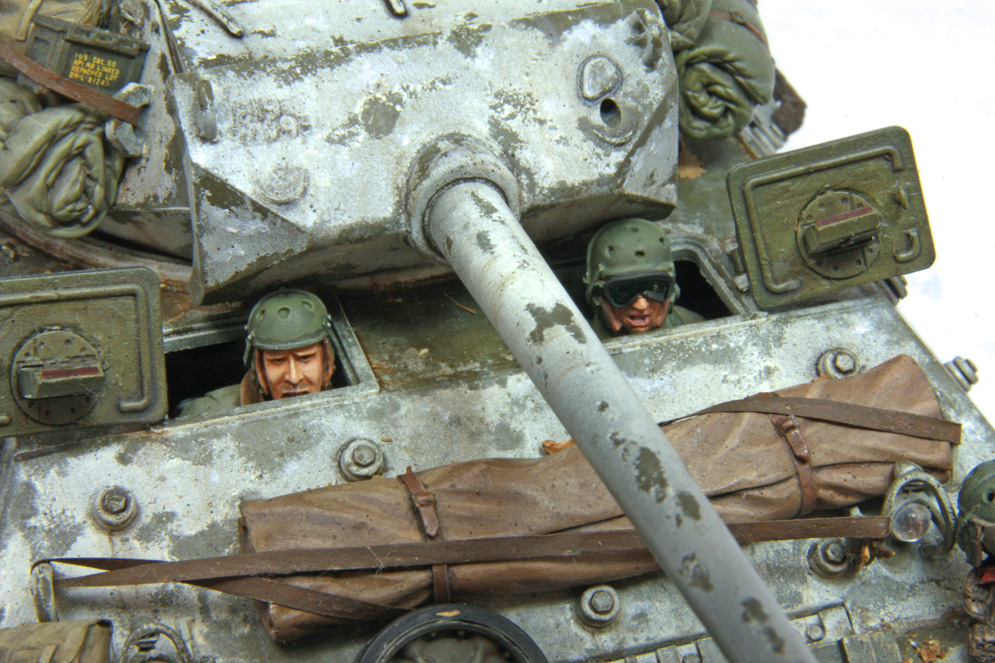
A camouflage net over the gun was made from a piece of muslin soaked in a mixture of white glue and water. These nets seemed to be a common feature in wartime photos. The only other things added to the model were some straps for the tools made from masking tape which were fixed in place with a careful application of thin superglue.
Weathering was done, as usual, with pastel chalks to represent a light coating of dust and dirt in what I thought were the appropriate places.
In a departure from my usual practice, I added the kit supplied figures to the model and having given them a long critical look, I have to say I’m very sorry and I won’t do it again – probably.
Dai W.
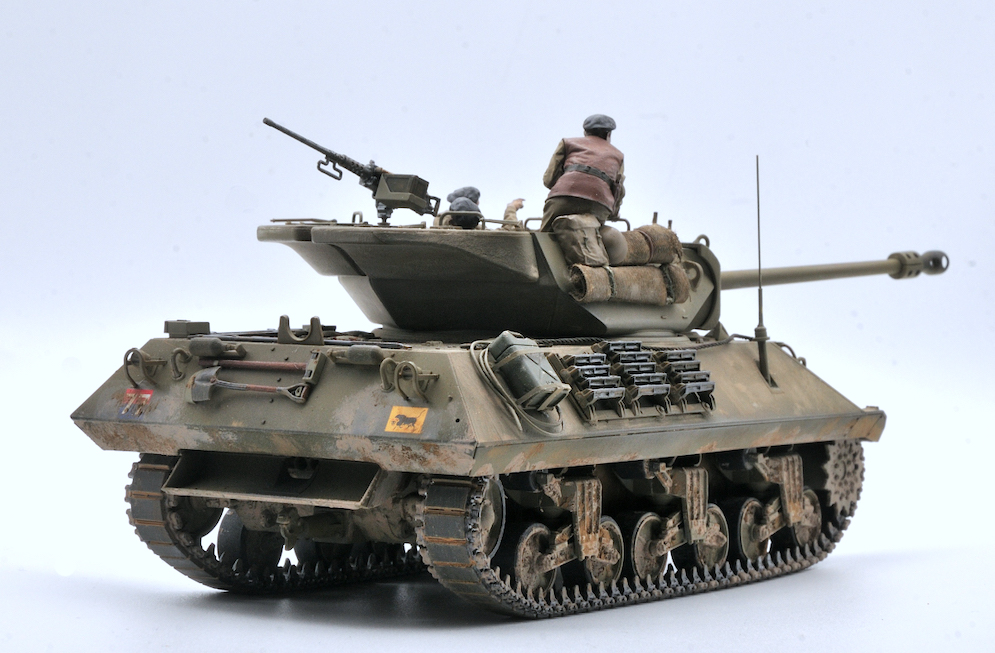
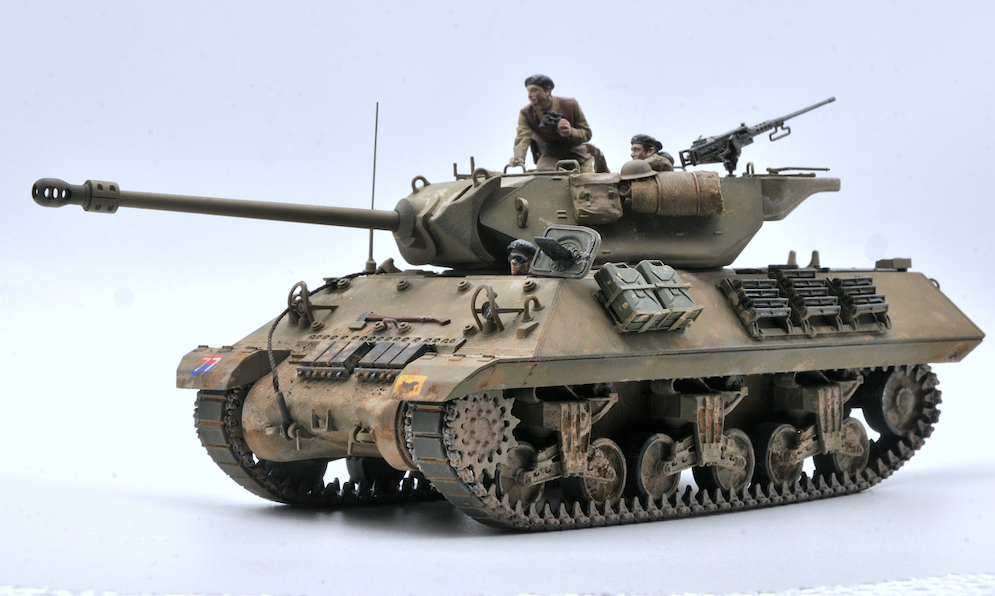
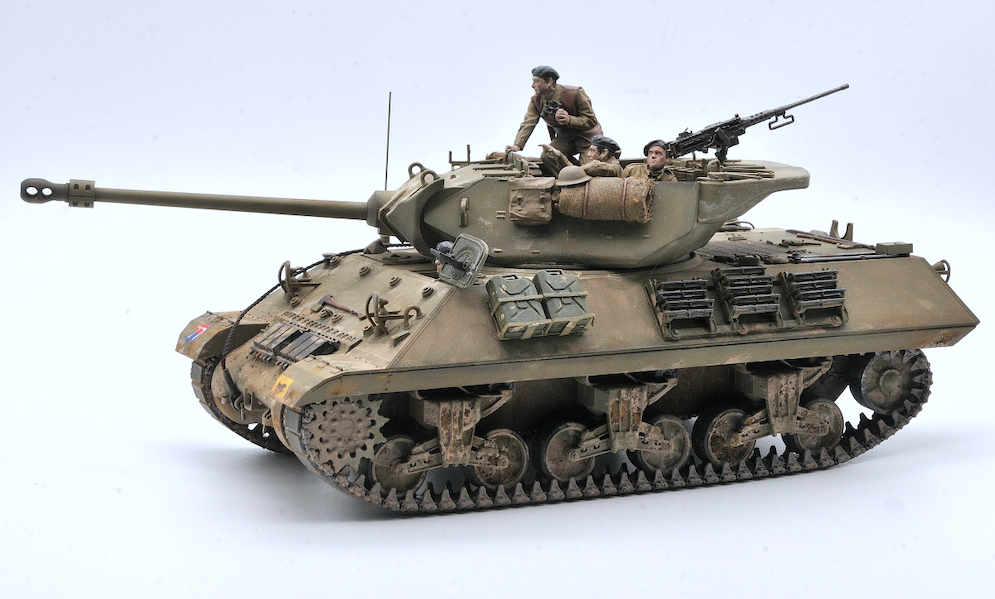

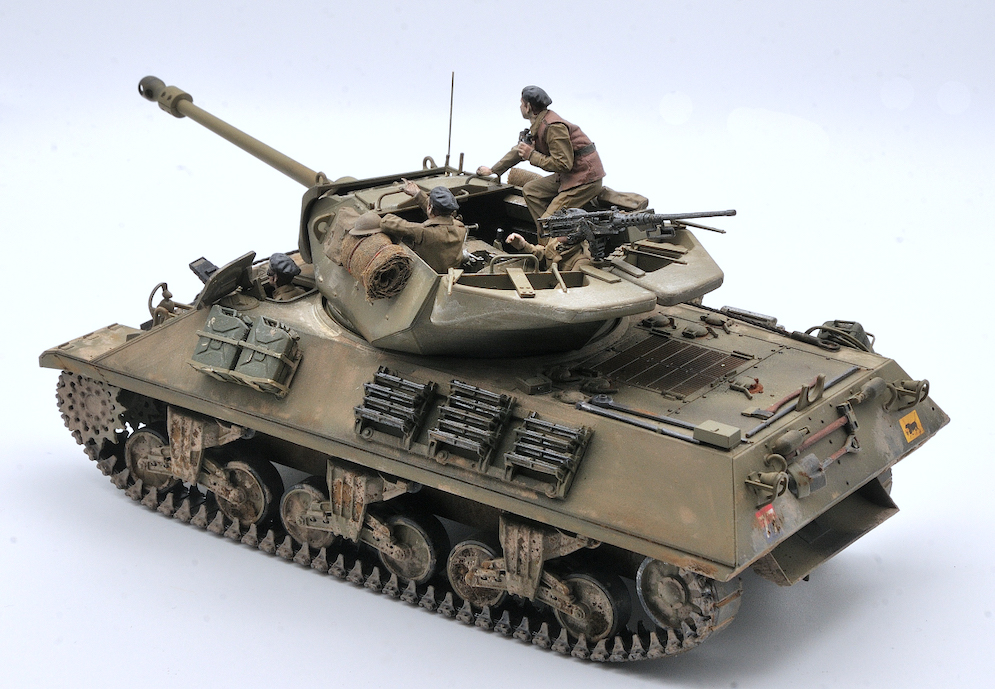
From Wiki “The 17 pdr SP Achilles was basically a modified M10, the principal difference being the gun. The main armament of the Achilles was the Ordnance QF 17-pounder, a substantially more powerful gun than the 3 in (76.2 mm) M7 mounted on the standard M10. The single top-mounted .50 inch (12.7 mm) M2 Browning heavy machine gun was retained”.
To sum up, a modified Sherman “cabriolet” developed from the M10 with a very powerful British gun
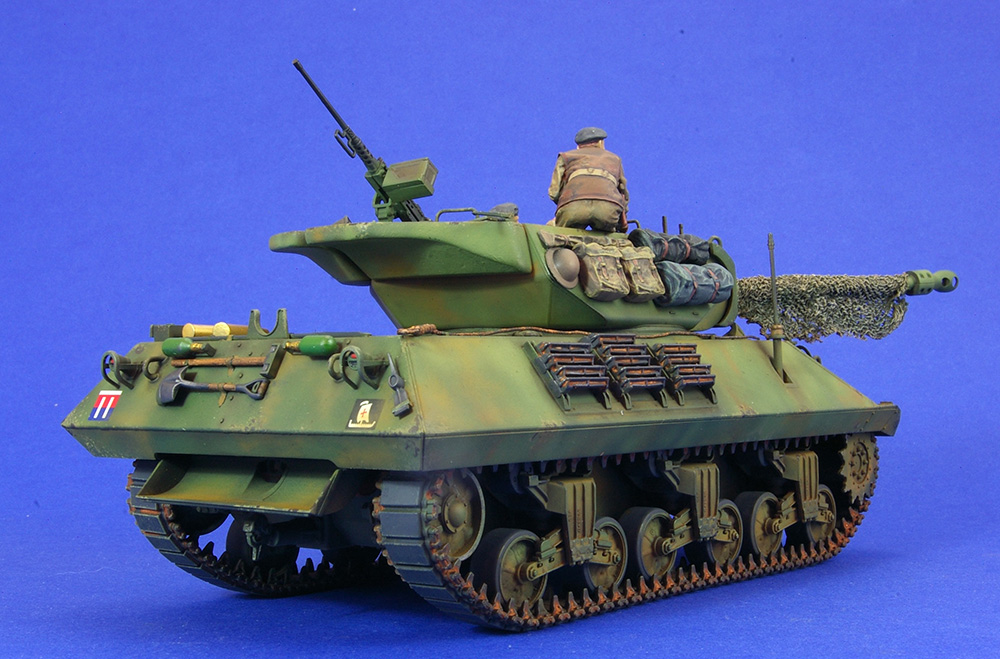
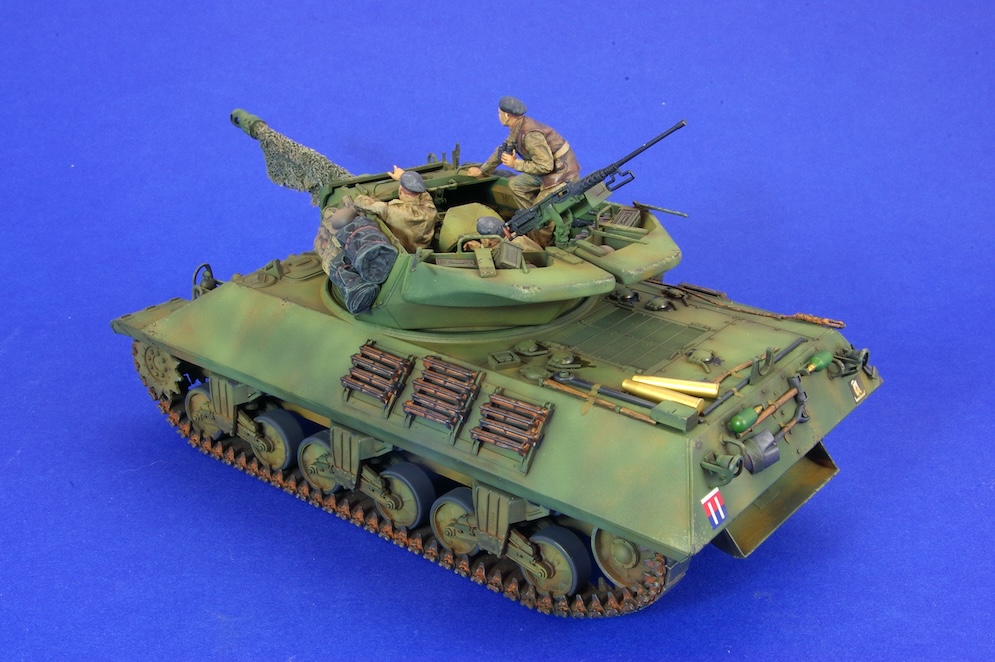
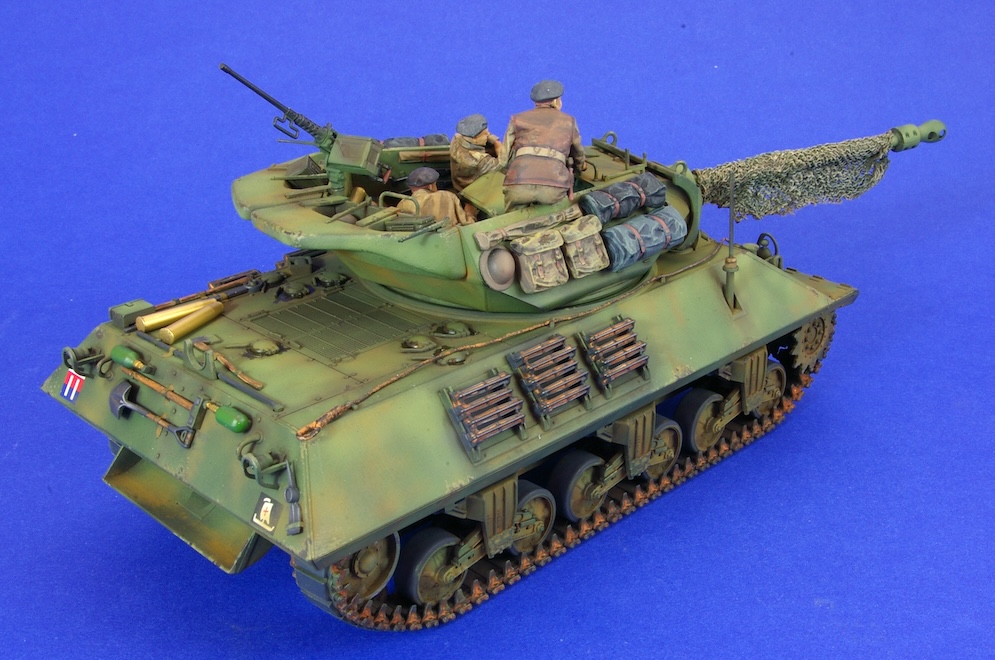
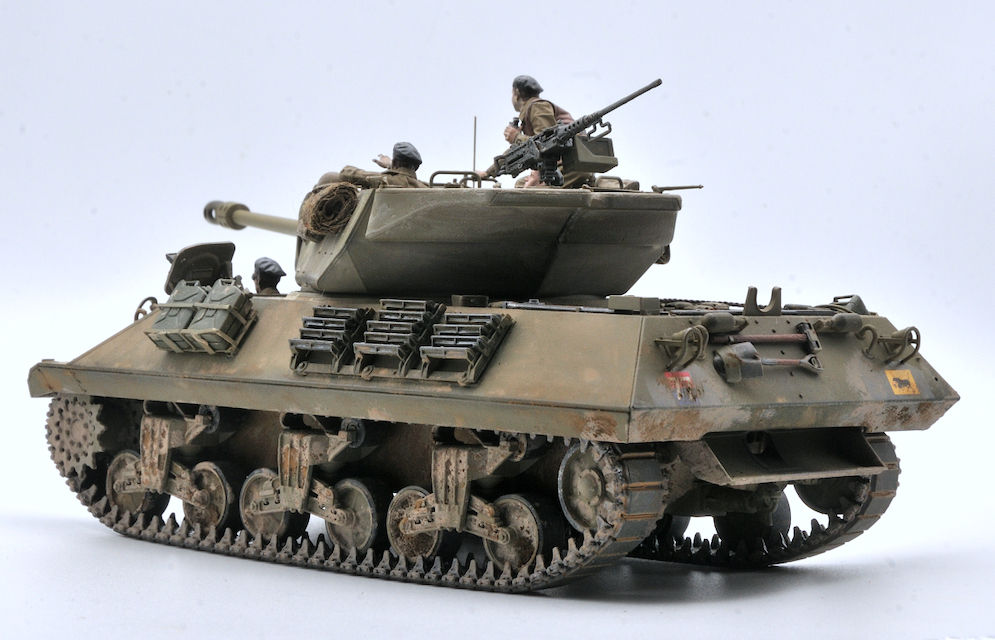
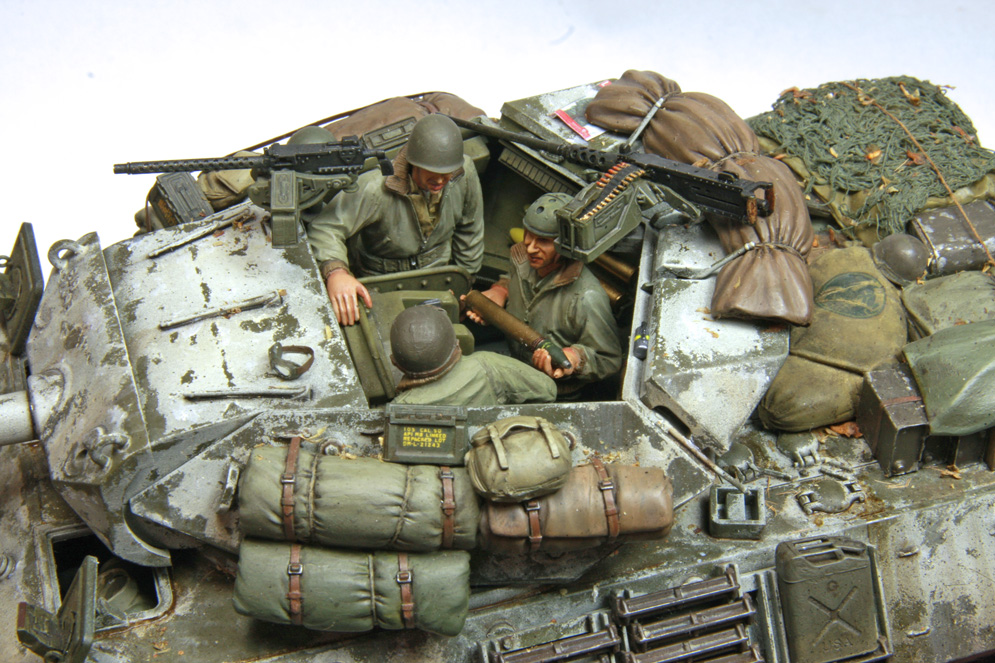
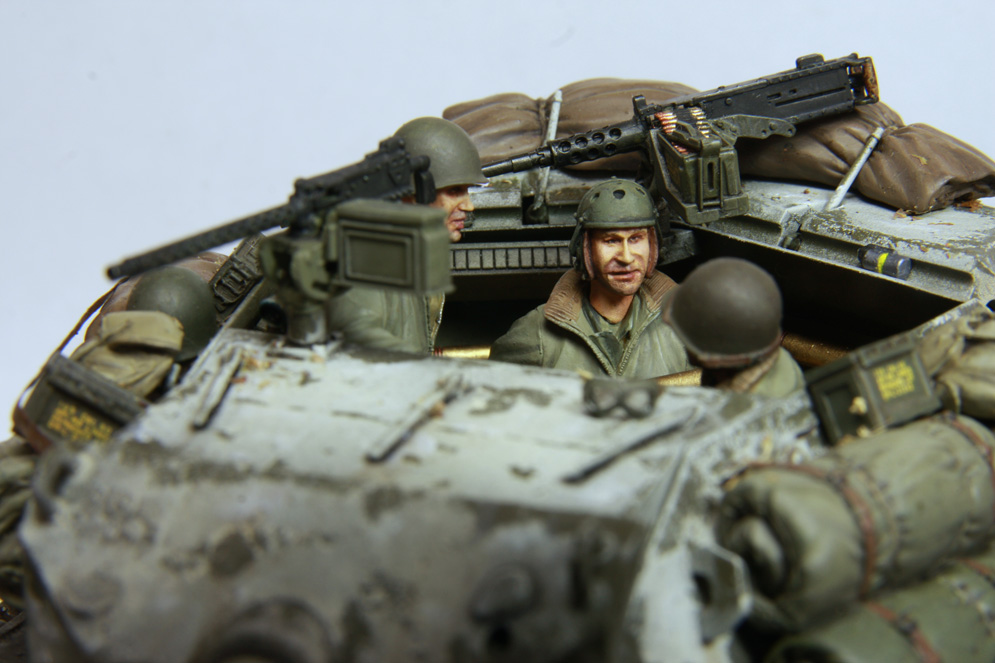
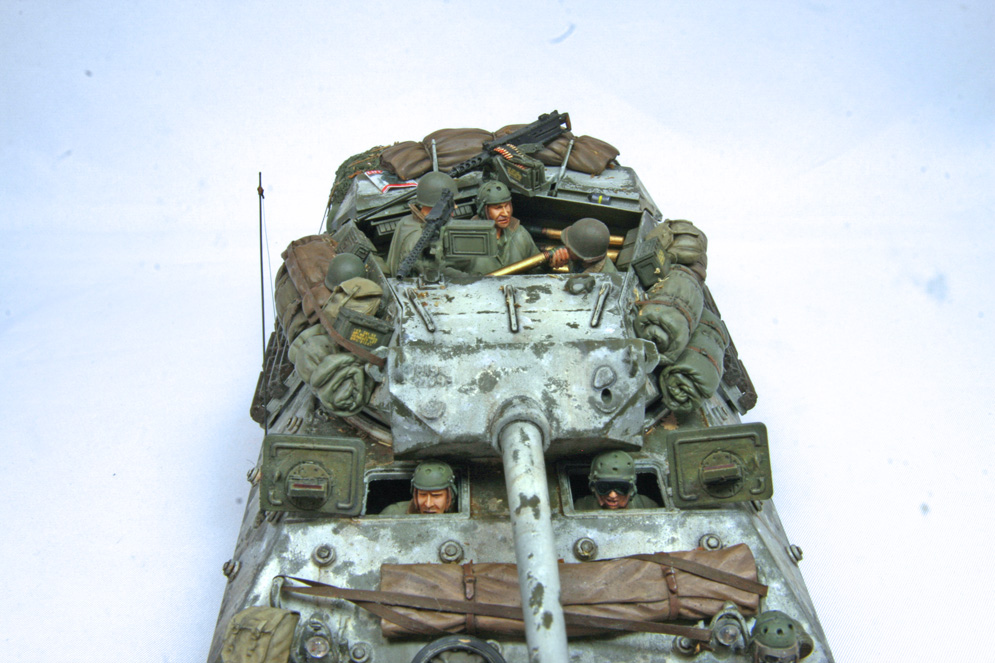
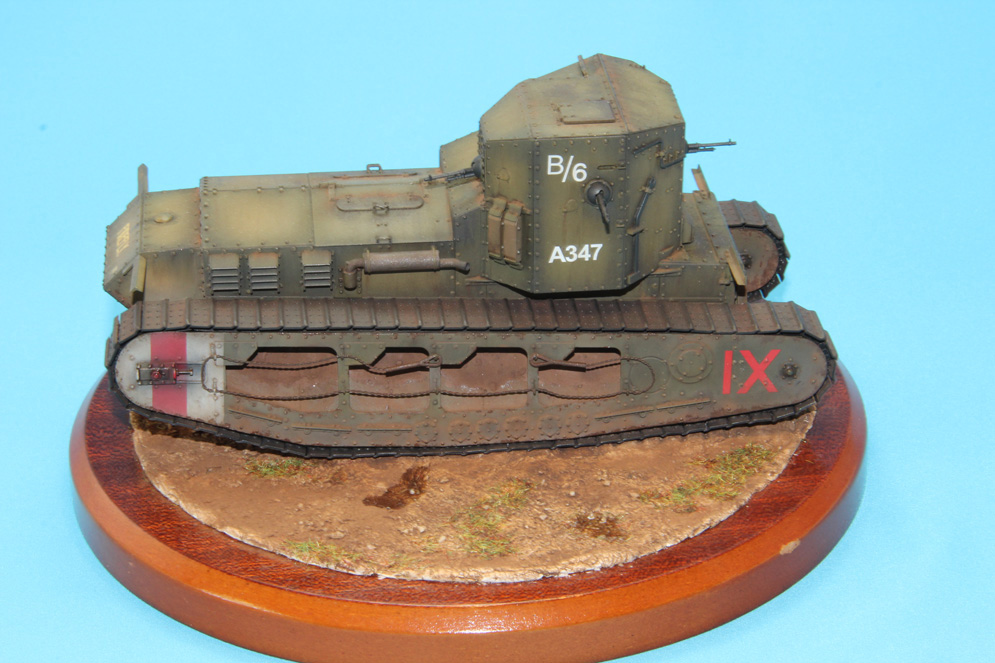
I am new to armour; this is only my 2nd attempt so for me this was quite a complicated build, but I chose it because it has some interior detail as its obviously open top. Also, as its relatively new for Tamiya armour so I figured it would go together without too many problems.
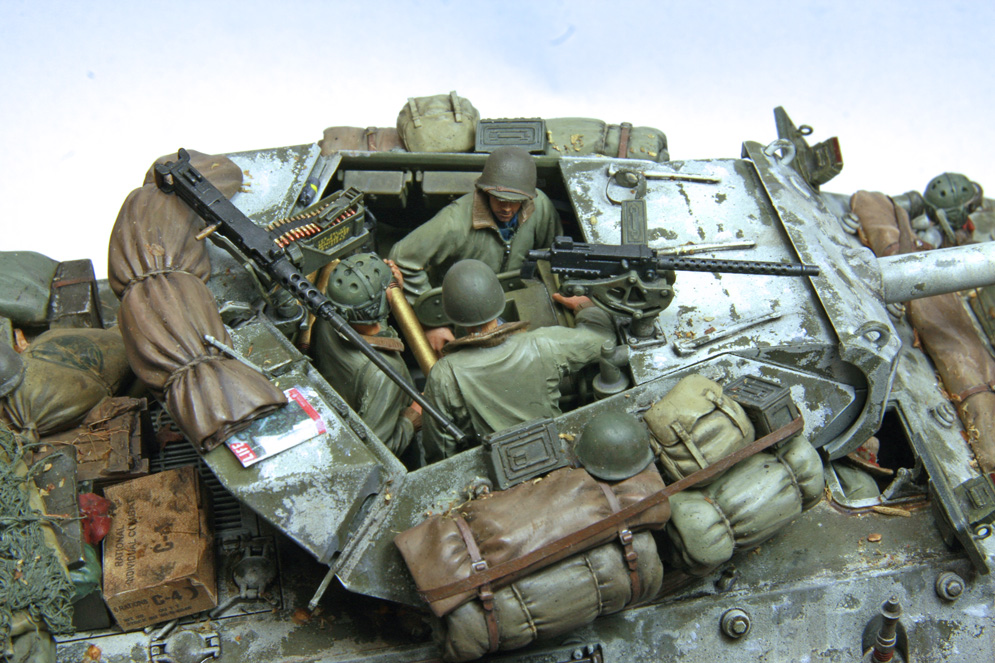
I did use the Eduard PE set as there is detail in the turret that will be seen.
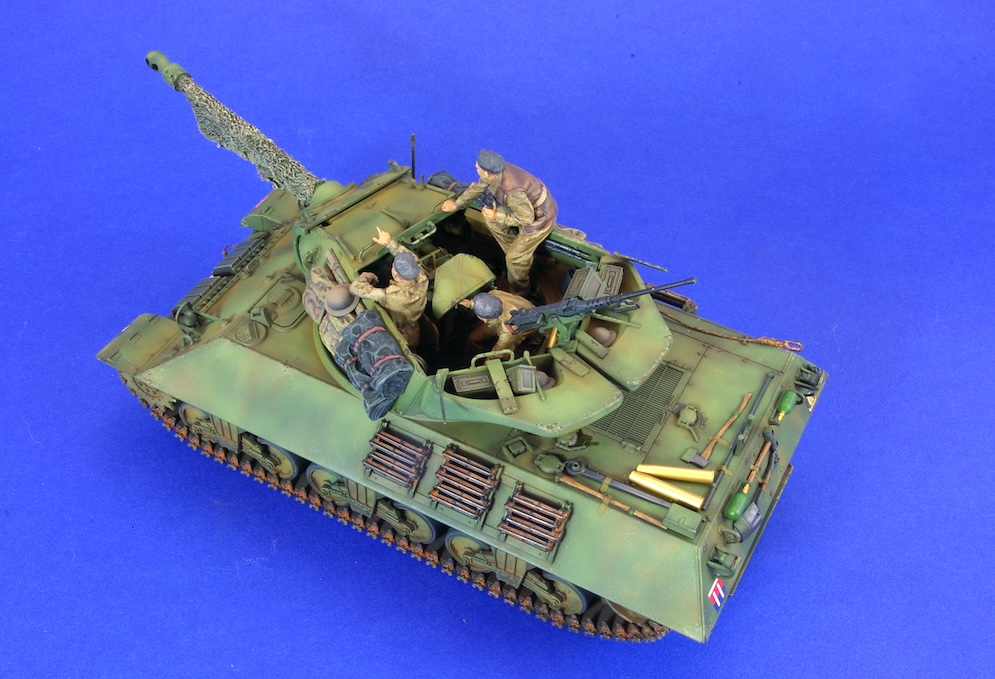
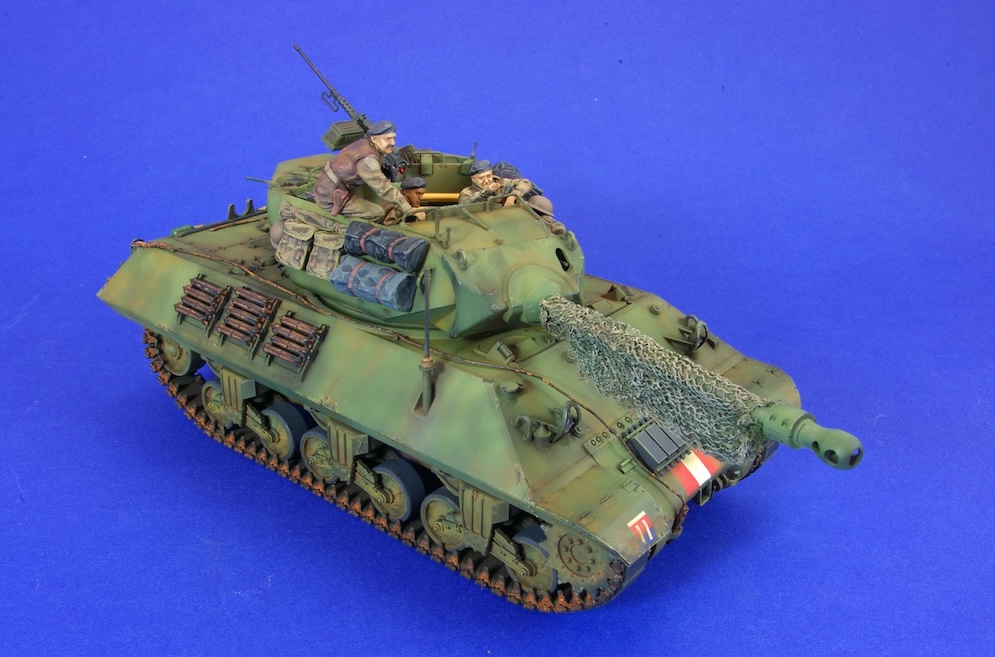
It looked a little plain from the box, so I added the Jerry cans and their baskets made from evergreen plastic lengths. I also added the canvas rolls made from rolled up lens cloth (because it’s a very tight weave) and painted Khaki. Paints are just Tamiya std colours and weathering is Tamiya weathering sticks. The guys in the turret are included in the kit.
Anyone with even limited experience could make a pretty good job of this model which speaks volumes for Tamiya’s fit of parts and ease of construction.
Hope you like it.
Paddy B.
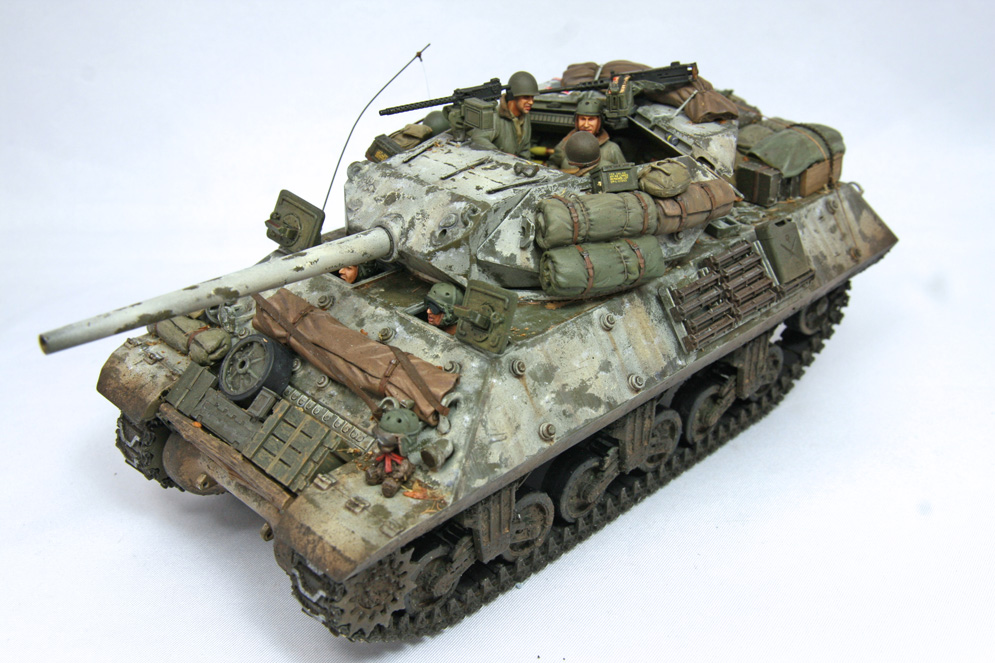
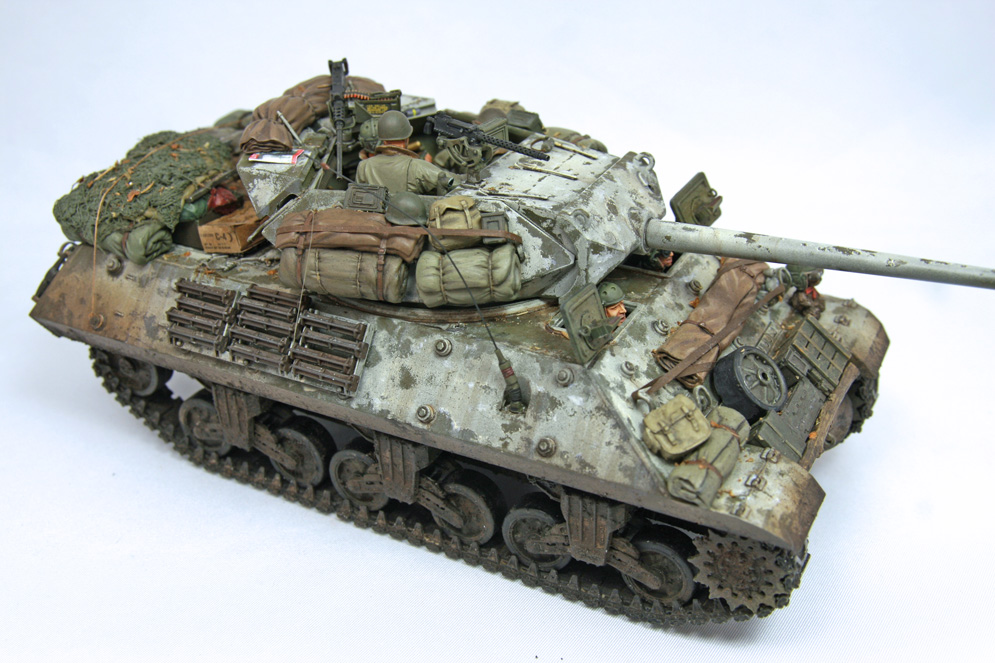
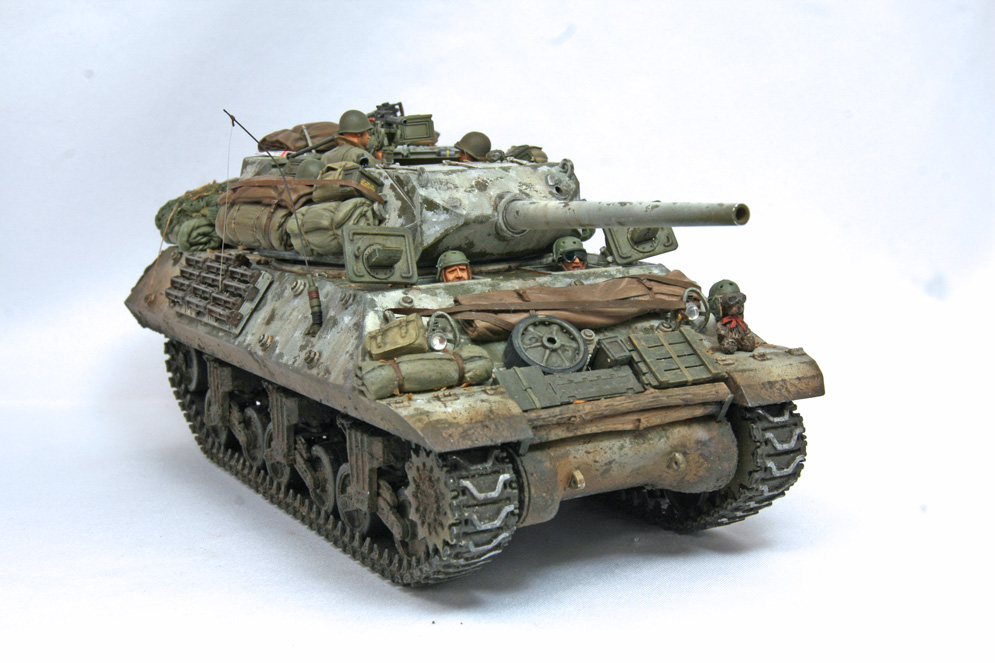
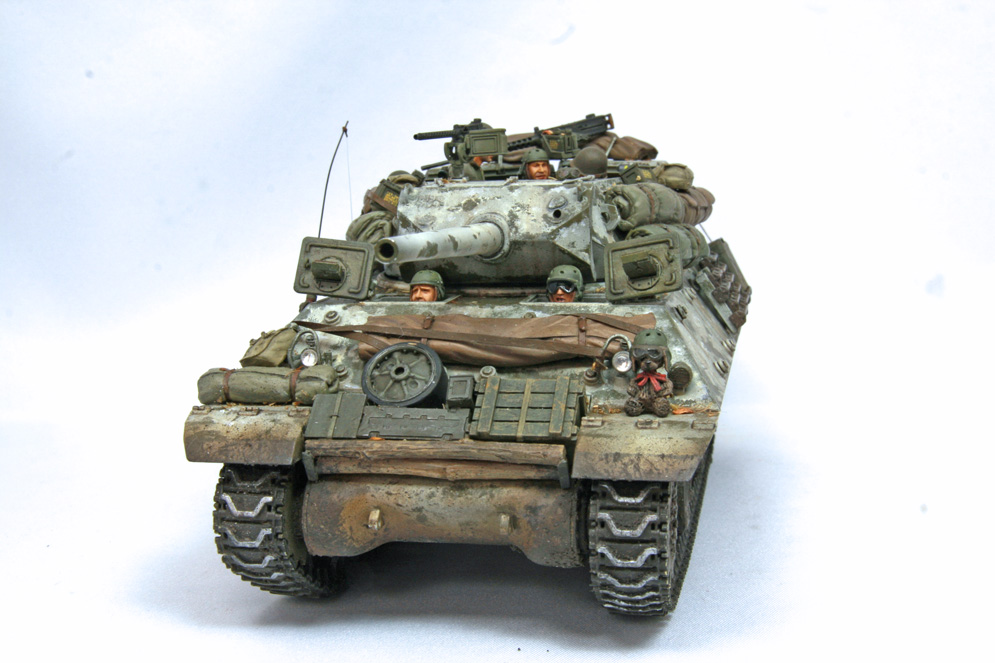
This model has been made using the ABER barrel, Legend stowage and Hobbyfan figures. The stowage was designed for the academy but it fitted the AFV club fine. The resin figures are great and gives life to the model.
I have always liked the M10. The old Tamiya was one of the first model kits I built.
This time I went for a whitewash as in the Ardennes 1945.
Paint: Tamiya
Weathering: oils


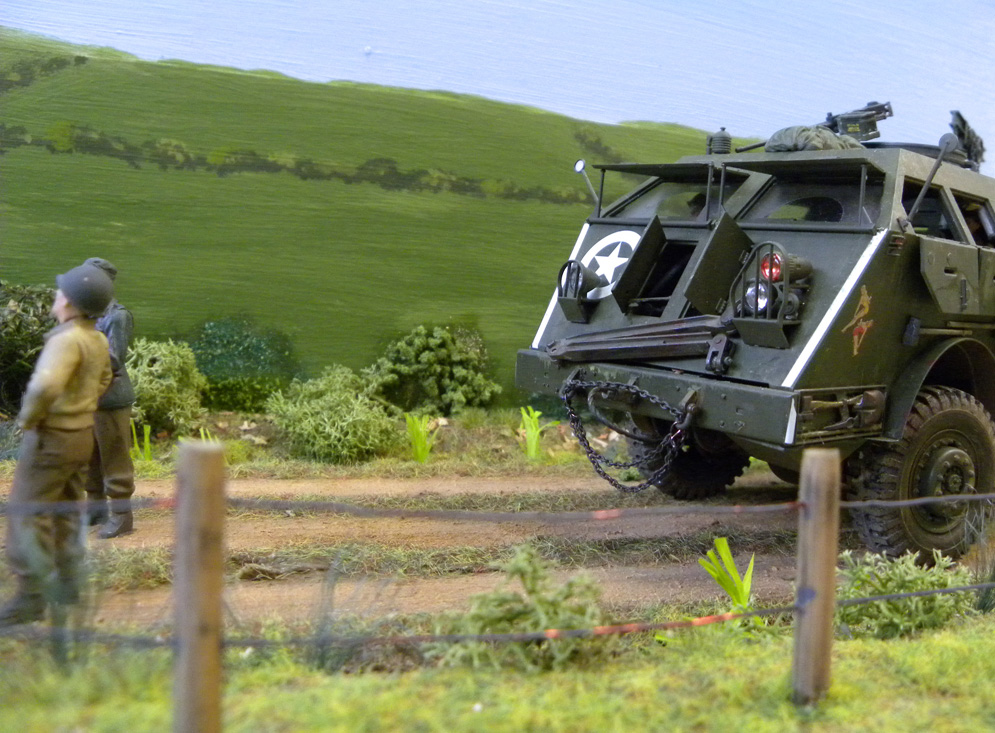
- The etched brush guards around the front and rear lights look much more like the welded steel guards on the full size tank
- I also scratch built a Cullin hedgerow cutter from plasticard
- One complete front track guard was cut off and the hinged part of the other, I also used an etched hinge plate
- I assembled all of the tank with the exception of the tracks and stores
- I used Xtracolor Faded Olive drab to spray an overall coat. Some white was mixed in to the faded olive drab and was applied in a random pattern to fade the paint some more
- The decals were then applied went down ok with some Micro Sol
- A coat of Klear was sprayed overall to seal off the enamel paint ready for an oil paint wash
- I used burnt umber and burnt sienna thinned with white spirit
- The pre-formed tracks were sprayed while still on the sprue with Humbrol dark earth and then dry brushed up with aluminium around the teeth and matt black over the rubber track blocks. The tracks were then assembled around the wheels and sprockets with superglue
- The entire tank was then given a coat of Humbrol Matt Cote and the stores were then added and tied down with fine thread
- A couple of spare wheels with welded bolts and plates were added to the front armour.
These 1:48 kits are not as detailed as their bigger 1:35 counterparts but they do go well with 1:48 aircraft and are well supported with other kits and aftermarket parts.
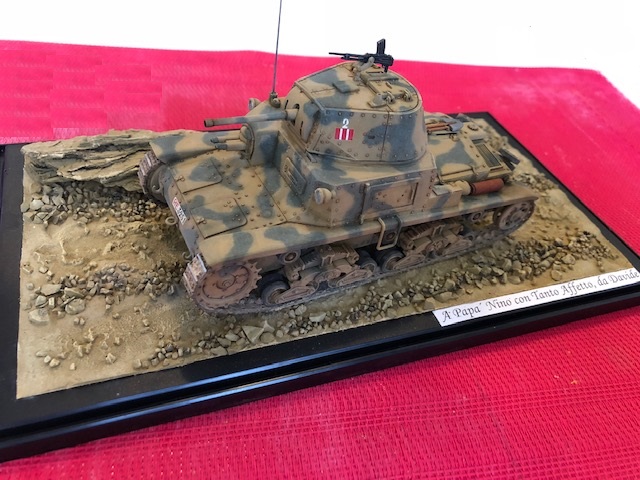
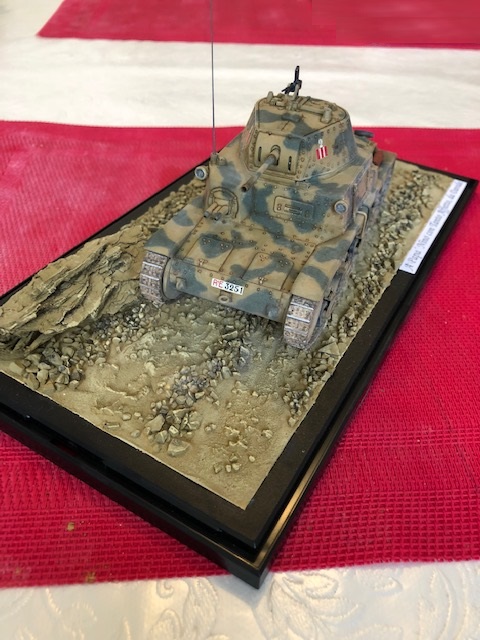
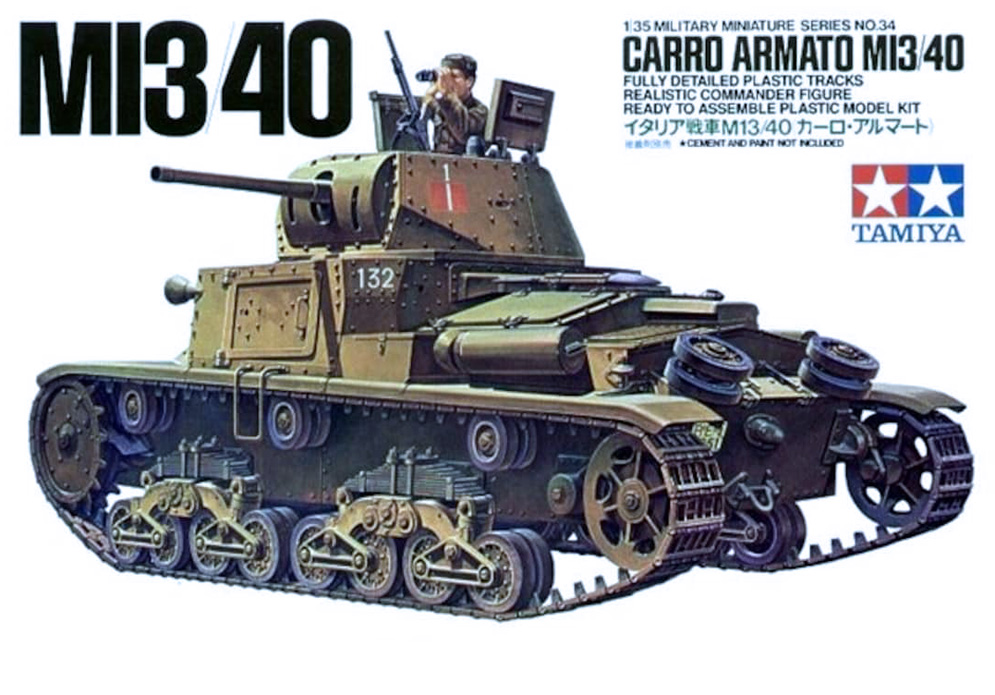

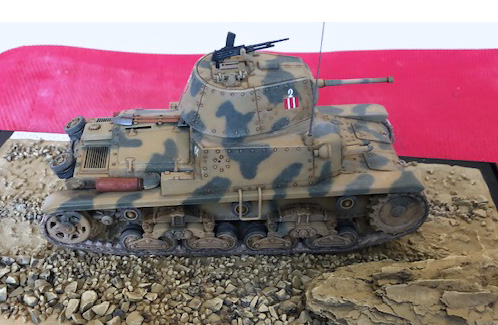
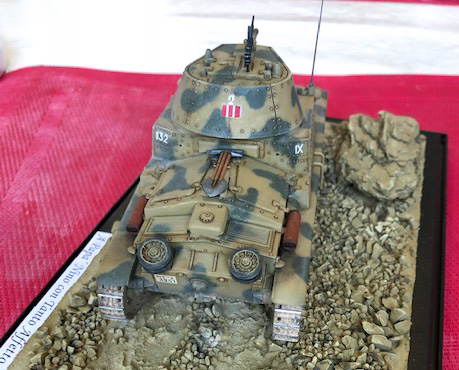
After having seen an extensive number of videos ..but also my stash building up to dangerous levels, I decided to get on with it and tried to build something. I therefore picked this kit in its original 1974 version and to go with a straight out of the box build.
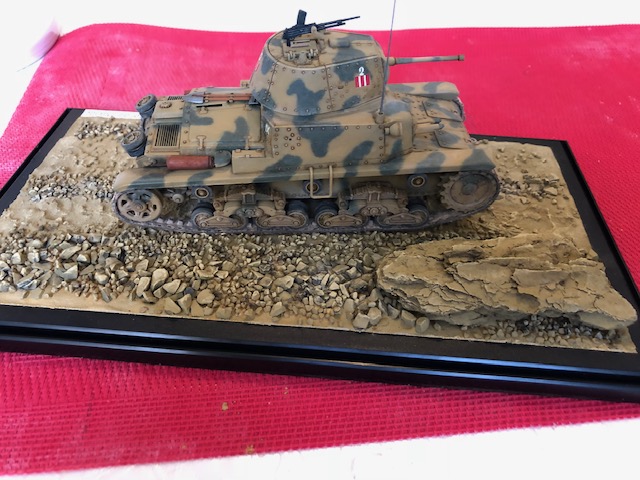
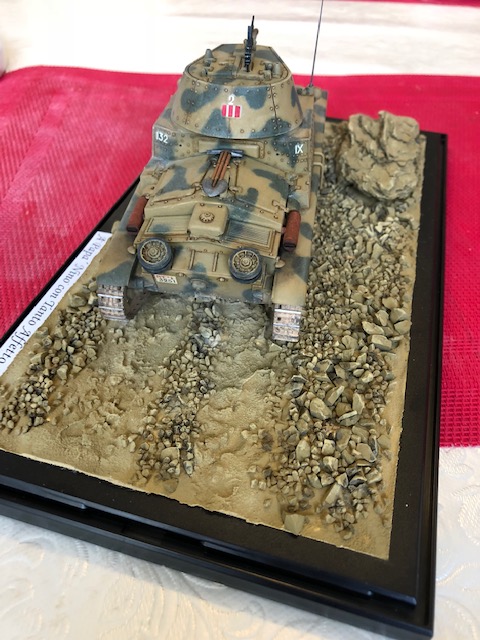
Being really the first model, I tried all techniques for the first time… pre-shading, using black base colour with white highlighting of the panels both from Tamiya acrylic range. Then I applied the base colour (Dark Yellow XF-60 from Tamiya) and for the camo pattern a mixture of Dark Green and Field Grey still from Tamiya.
The camo was particularly challenging since it took me a lot of time to set my Harder and Steenbeck Ultra to the right parameters and did experience a number of splattering episodes, which had to be corrected afterwards with the XF-60. I then went on applying filters from AK, to make that camo pattern better blend-in and then went on with pin washes and pigment applications from both AK and MIG.
Tracks are of the vinyl type which were also painted with NATO Black from Tamiya and subsequently weathered with washes and pigments, prior to a coat of Semi-gloss varnish from Mr. Hobby.
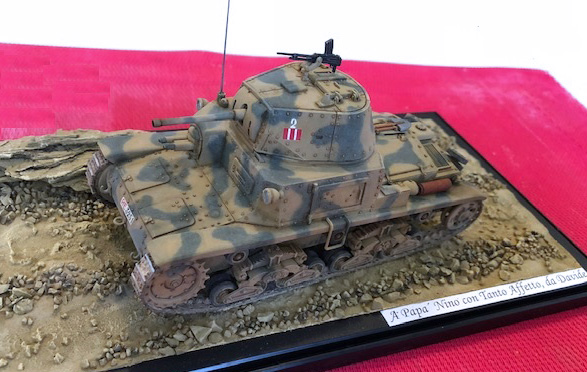
The diorama was made using the desert sand mixture from AK, with gravel from model railways and the rock is a converted piece of cork taken out from my back garden.
Stretched sprue was used for the antenna.
Davide M.
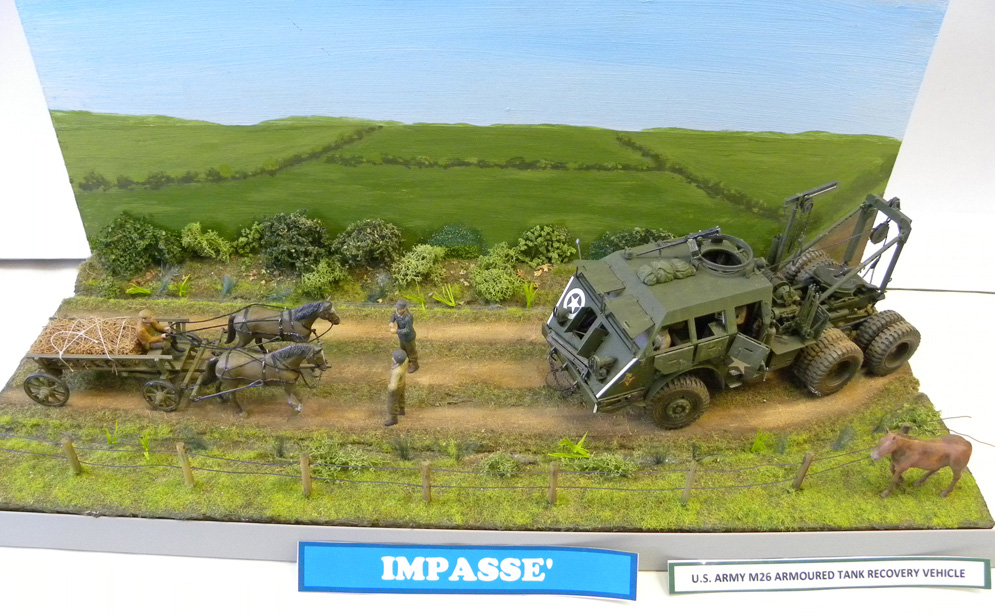
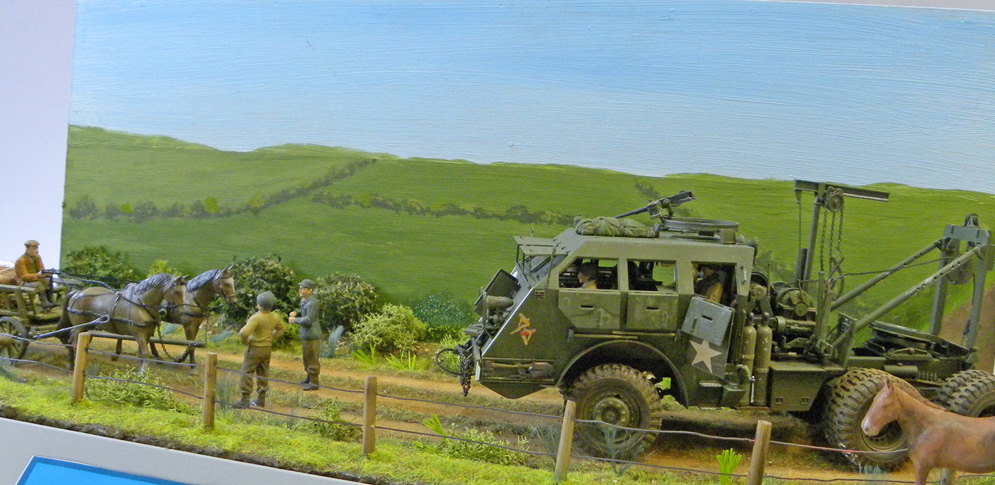
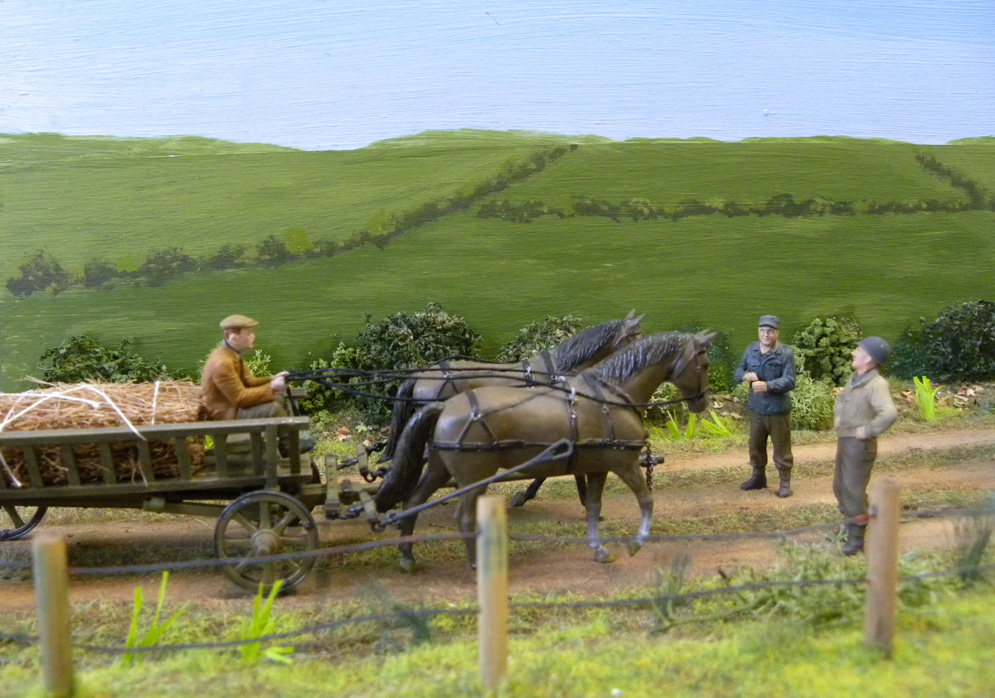
The horses and cart are from Master Box.
Hope you like it…
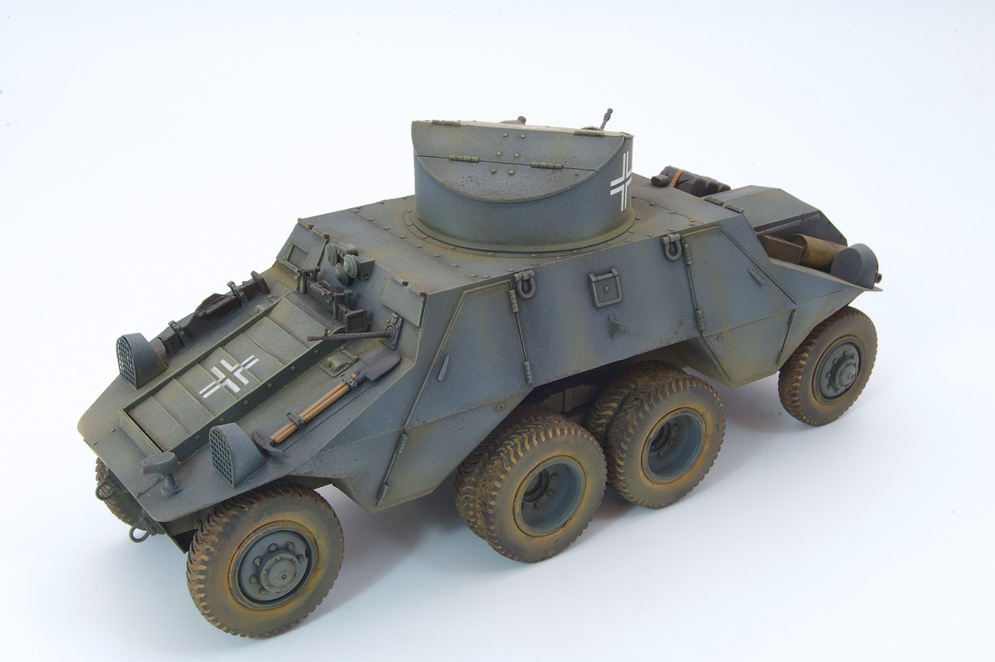
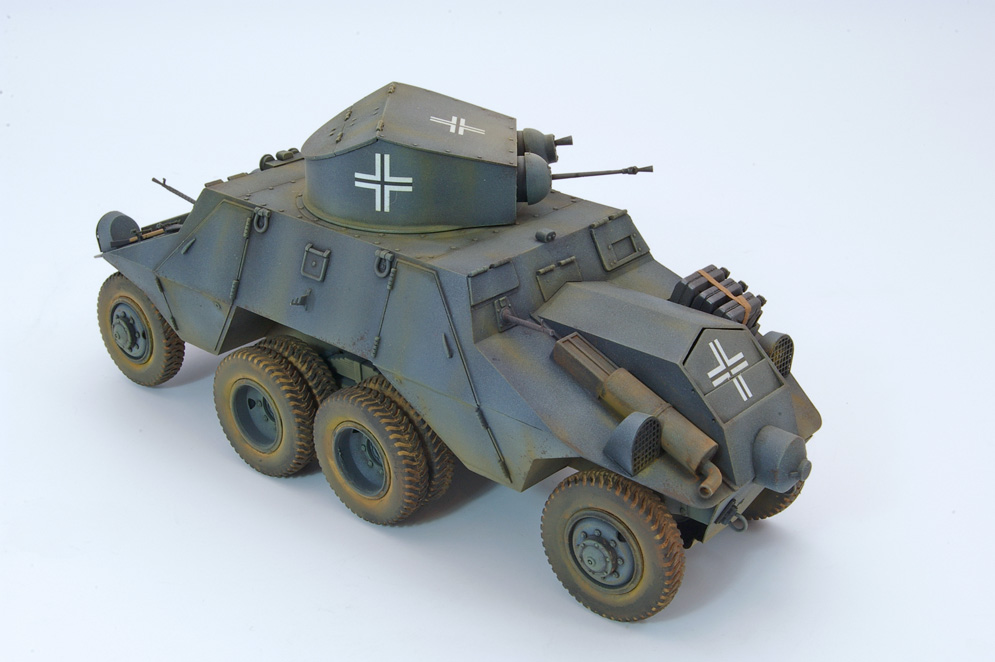
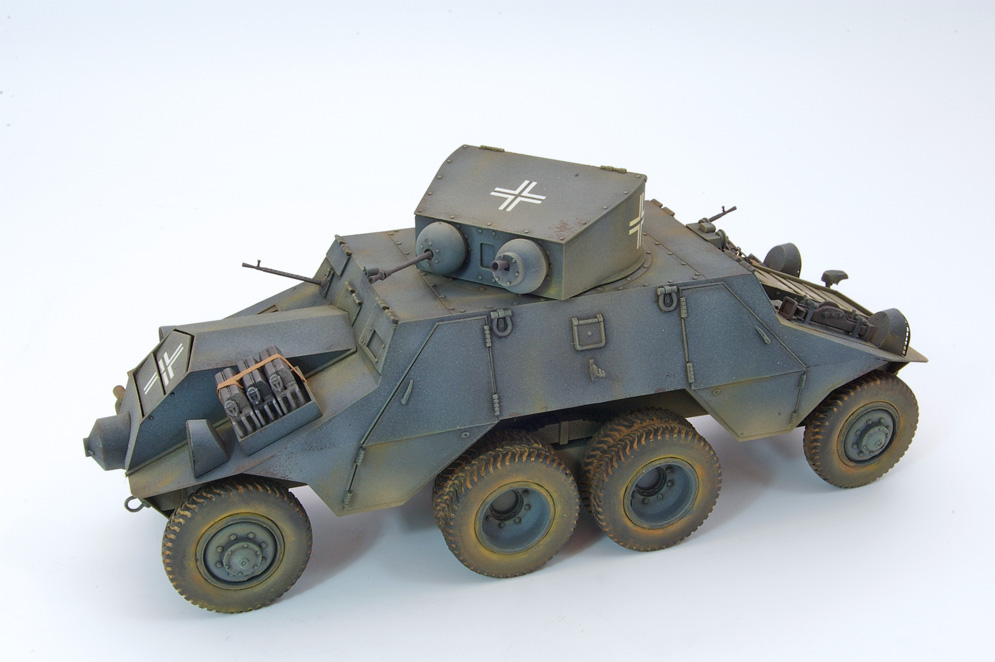

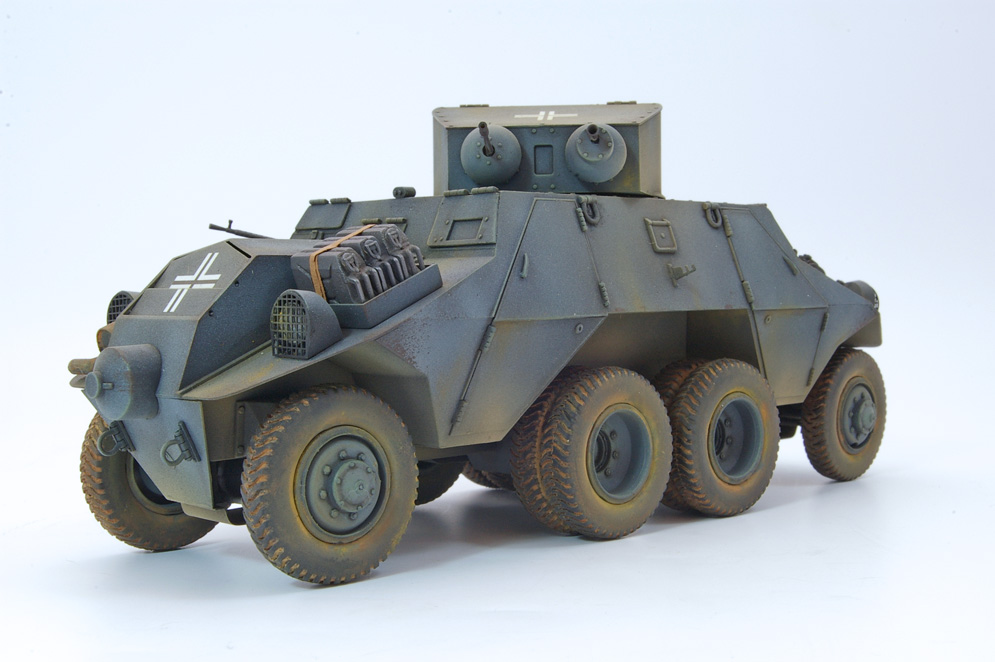
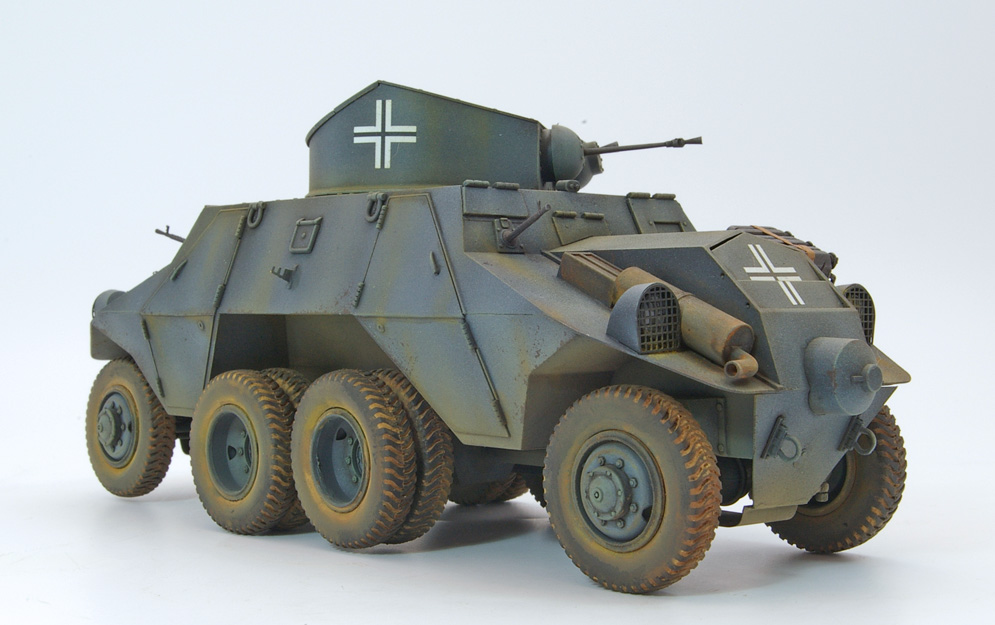
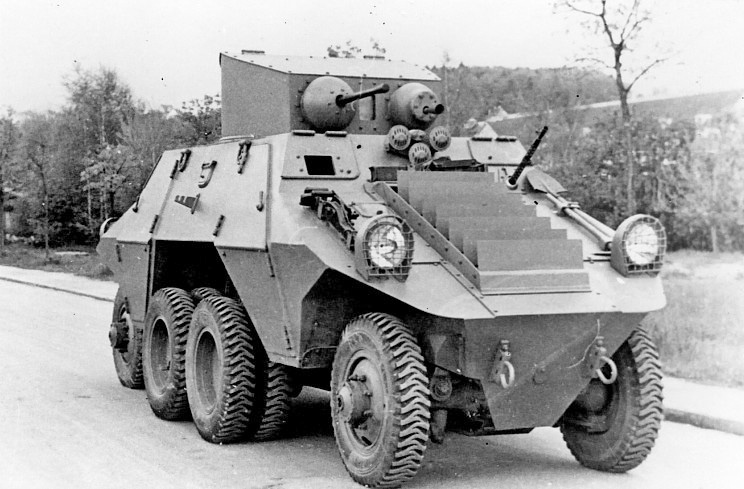
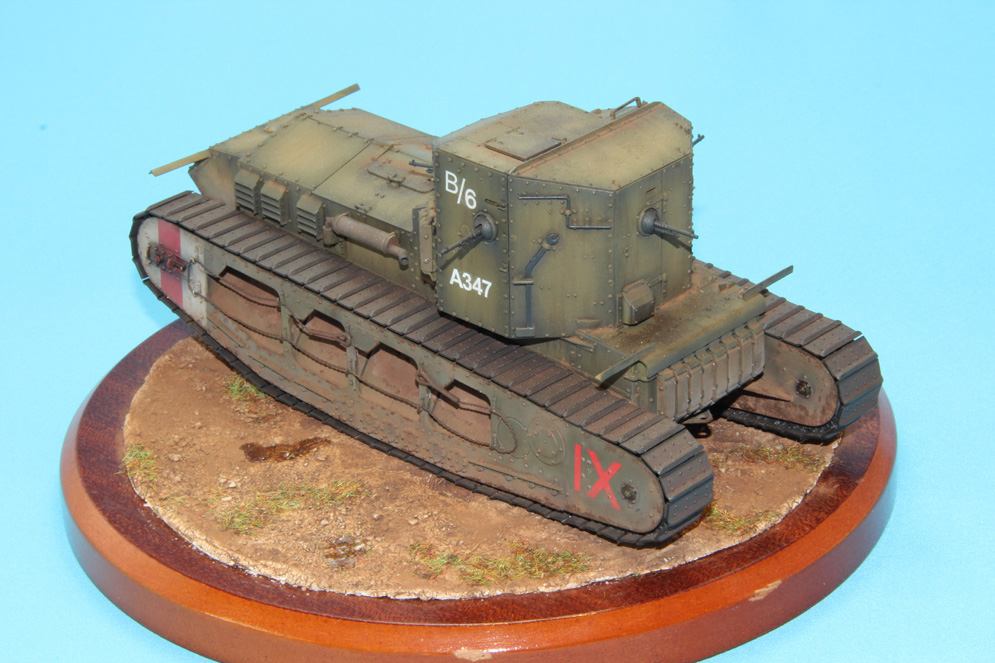
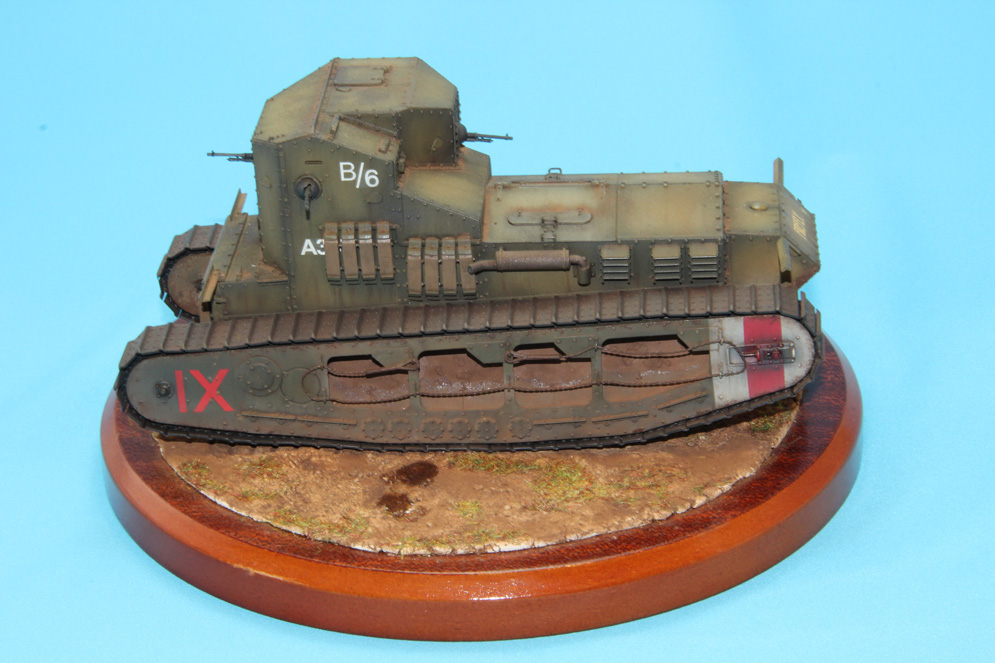
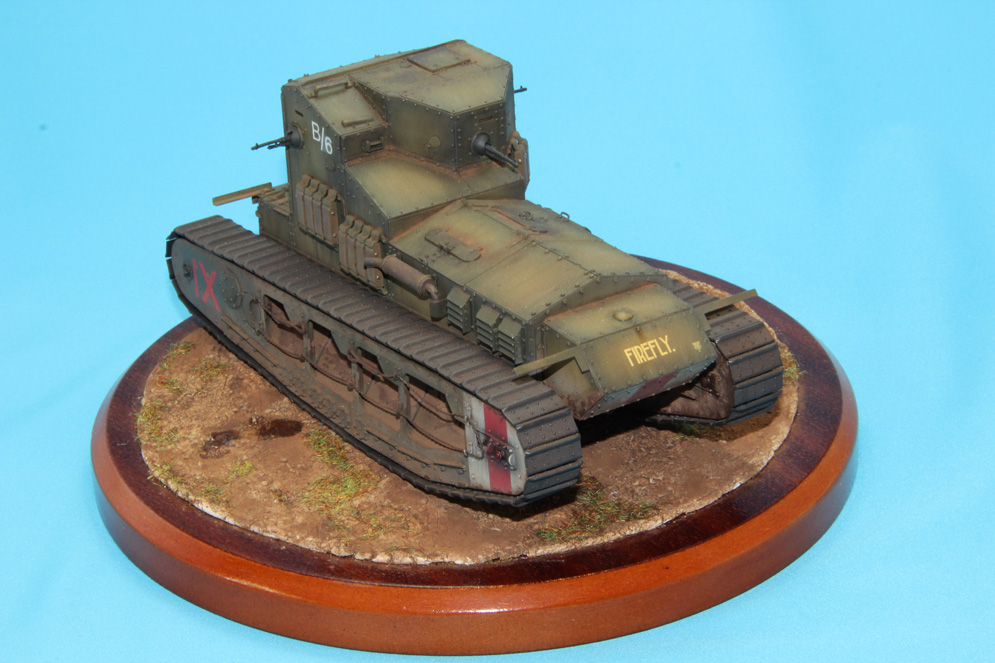
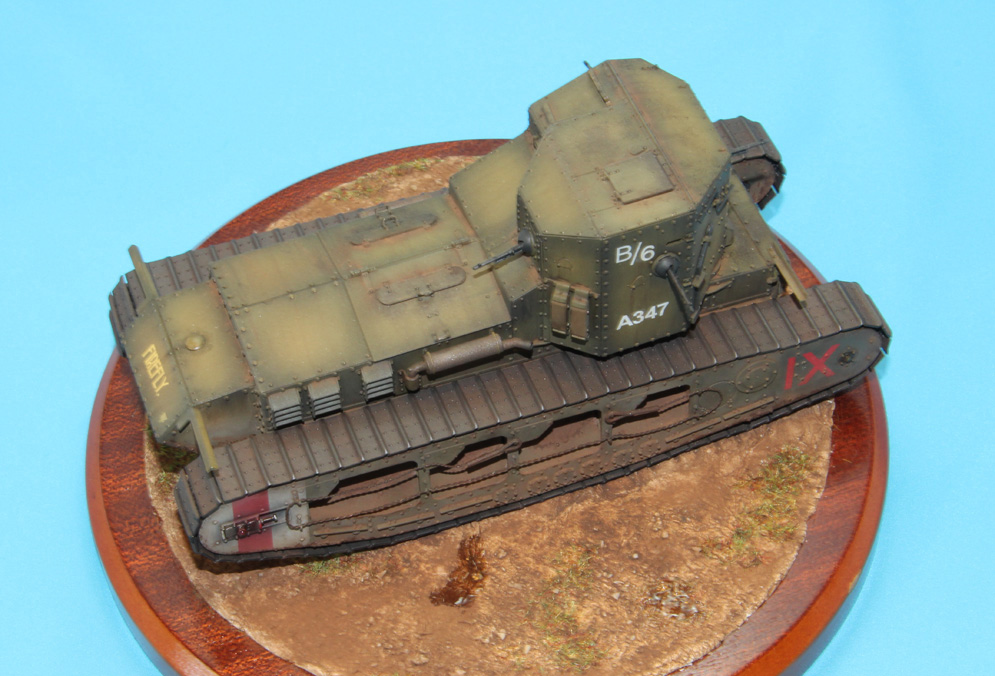
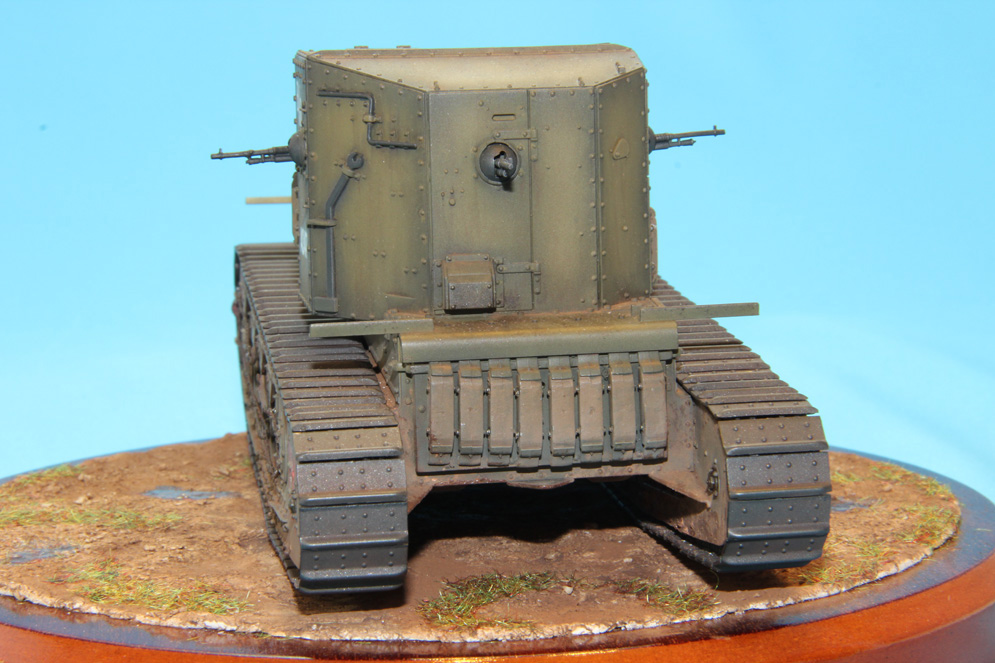
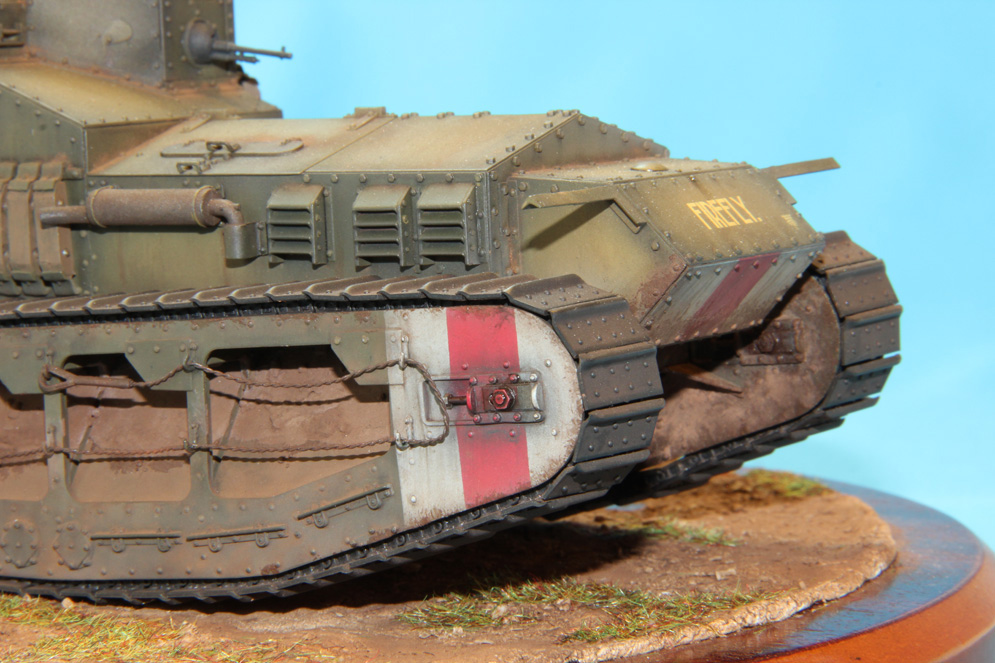
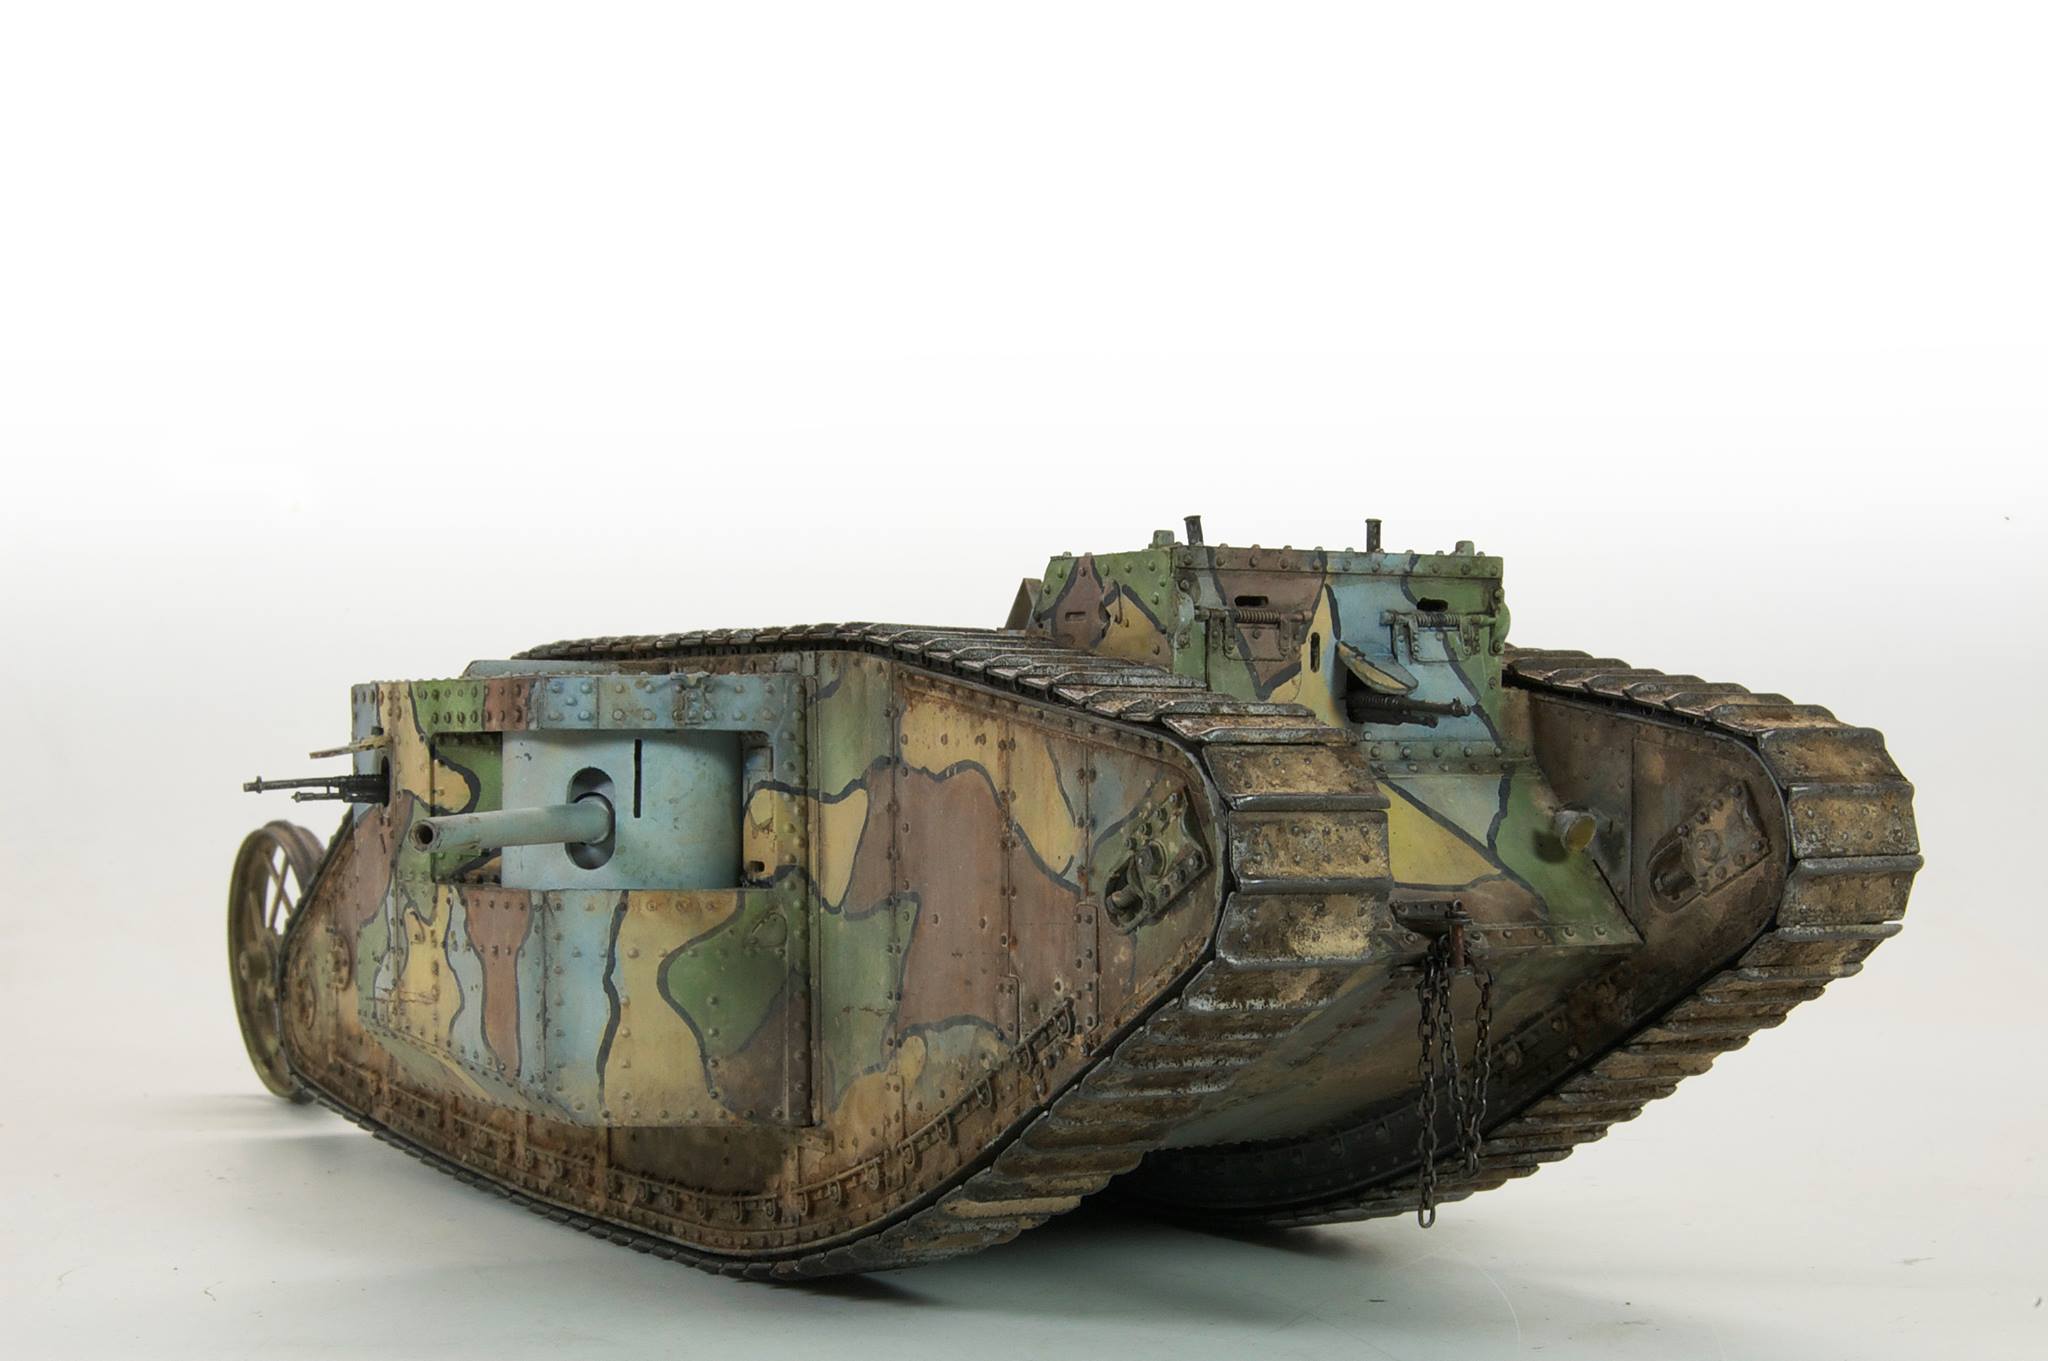
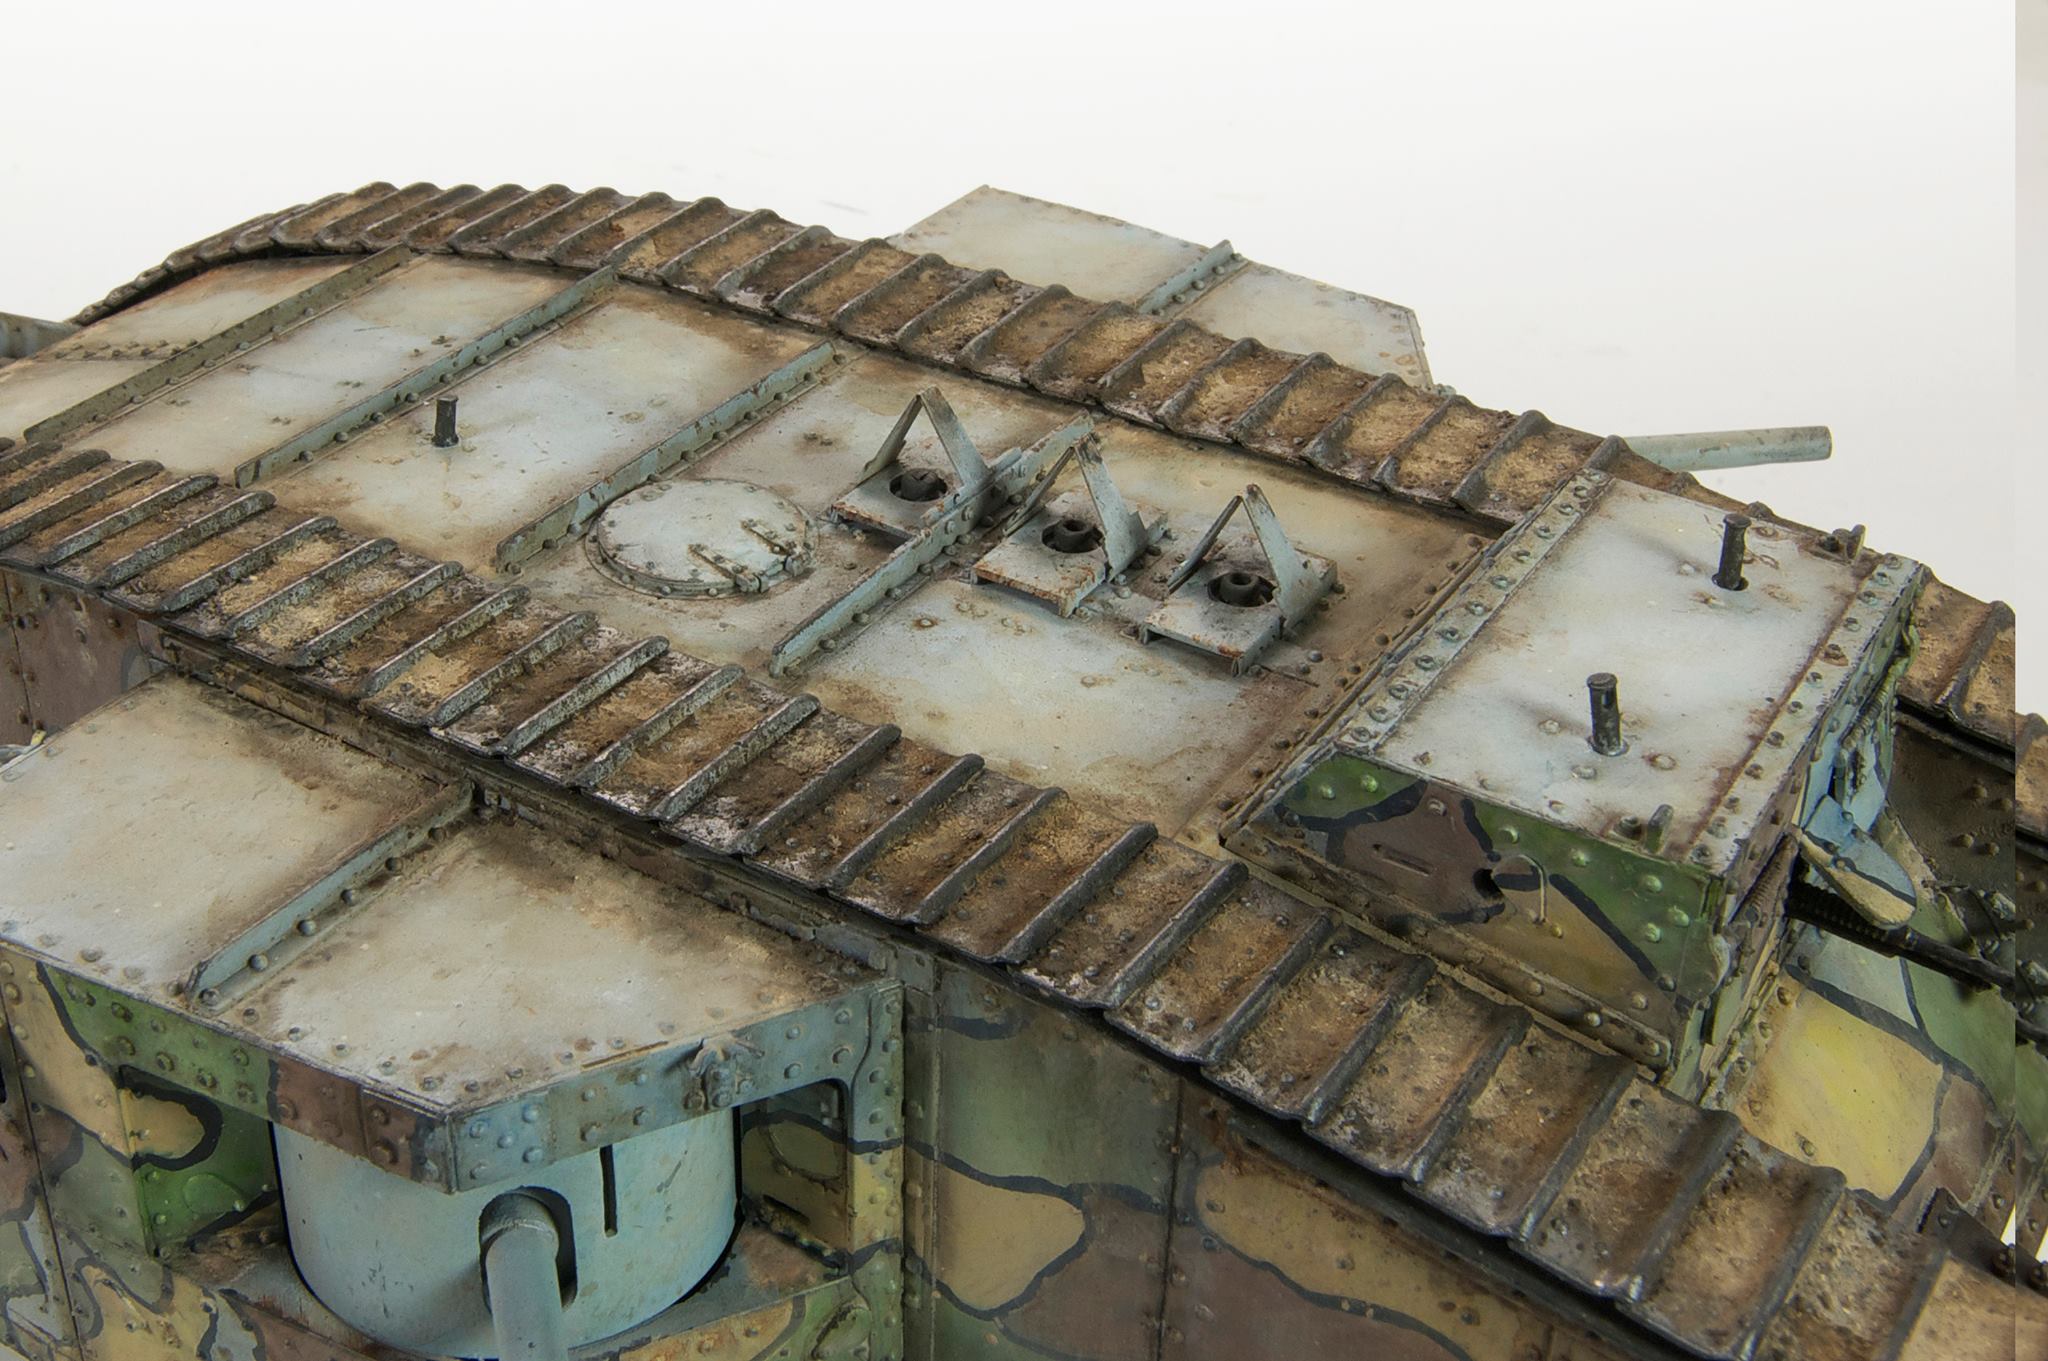
The kit offers the modeller the option of opening the access doors, the turret hatches and ventilation louvres. No interior parts are included though and if any of these items are open the empty spaces in the interior will be very obvious
The kit provides ten vinyl tyres. I find that the problem with vinyl is that it does not take paint well and it can sometimes flake off. Here I used Alclad’s Black Primer as a base coat which seems to have stayed where I put it – for now.
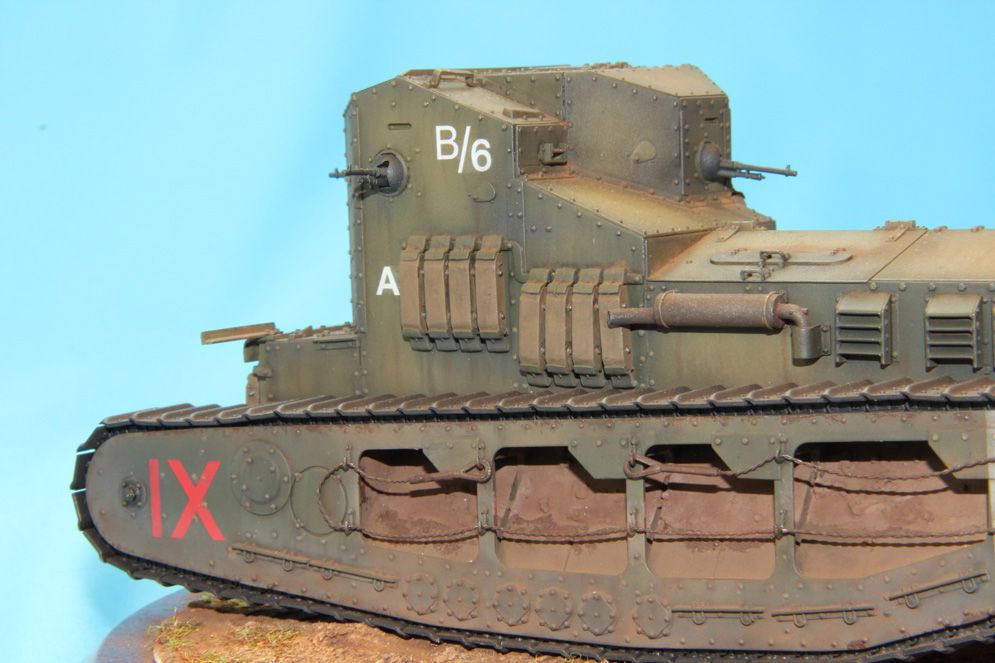
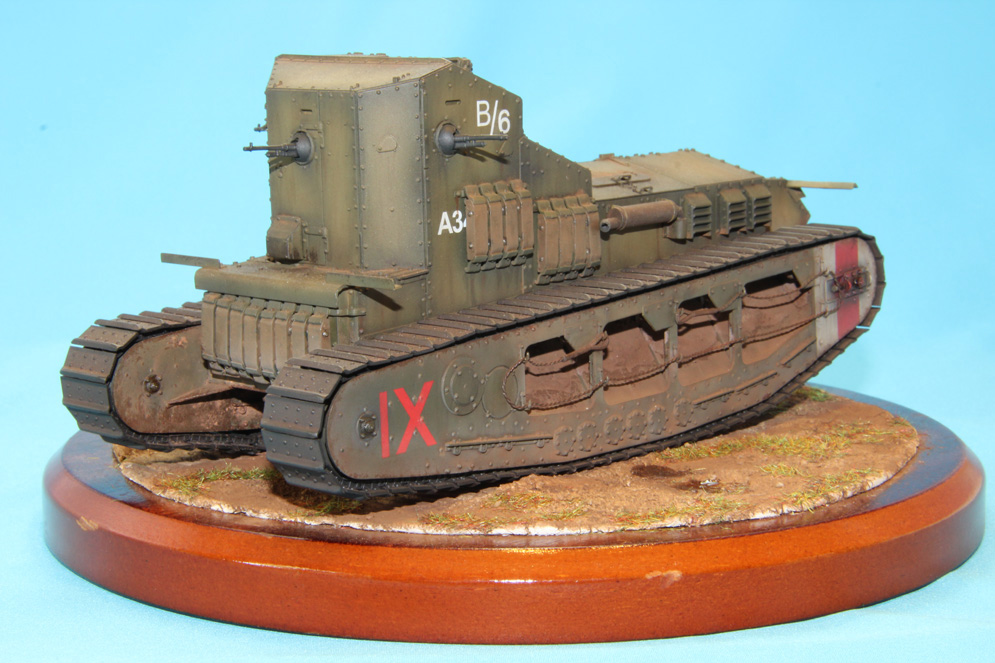
There are two options for painting. One is overall early-war dark grey and the other is the same colour with a camouflage pattern of red / brown. I chose the former scheme. Tamiya Nato Black (XF69) was used as a base coat with patchy over-sprays of progressively lighter greys on top of this. I started with Dark Sea Grey (XF54) adding a little dark blue and ending with Medium Sea Grey (XF83).
I did not use the kit transfers, replacing them with some old dry-rub transfers to avoid having to apply a gloss varnish.
The weathering was limited to a little chipping using Vallejo German Camouflage Black Brown applied with a piece of torn sponge. Some dust was applied using pastels from the Pan Pastels range augmented with some light over-sprays of Flat Earth (XF52) and Buff (XF55) on the lower half of the model.


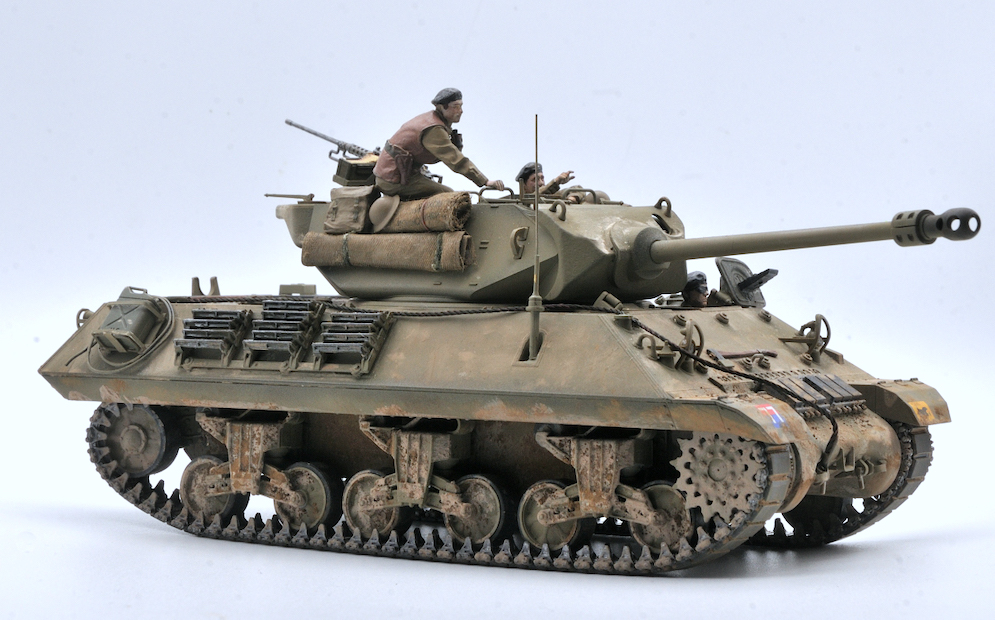
- This M-36 was built from the box, with the addition of stores from Tamiya, a couple of spare wheels and a scratch built Jerry can rack
- Just for a change I used the kit brush guards, but thinned them out a touch
- The model was painted using Xtracolor Olive drab as an overall coat, with Faded Olive Drab and faded olive drab faded a bit more, applied in a random pattern. Kit decals were used
- The model was then given a coat of Klear to protect the paint finish from the subsequent burnt umber oil paint wash
- When the wash was dry the model was sprayed overall with Humbrol Matt Cote.
The M-36 was developed to replace the M-10 tank destroyer which was becoming obsolete as its 3-inch gun had difficulty engaging Panthers and Tigers. The new turret with its 90mm gun was mounted on the M-10 chassis and designated Motor Gun Carriage M36.
These tank destroyers took part in the Battle of the Bulge during the winter of 1945.
All the very best,
Roger B.
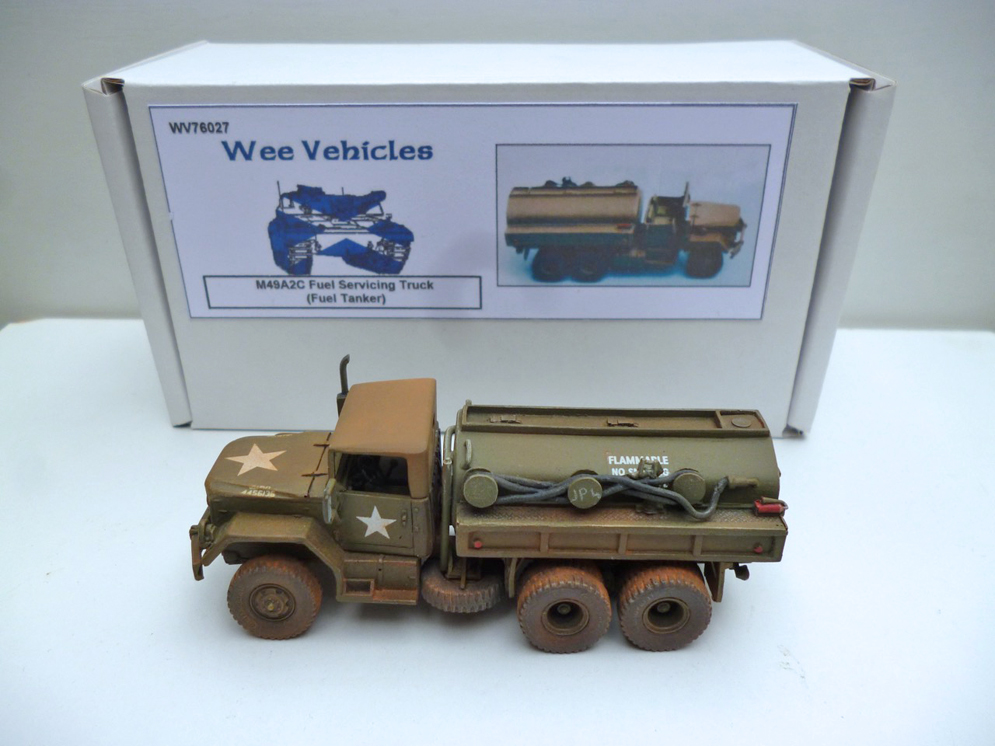
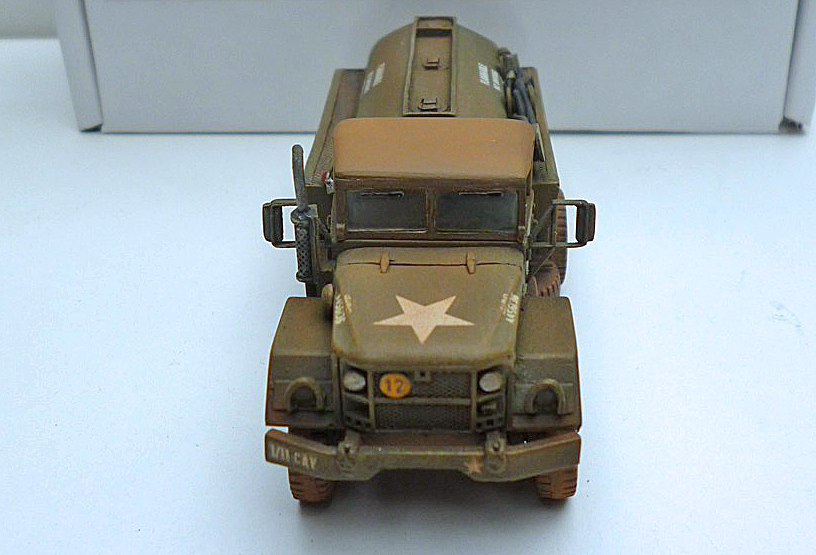
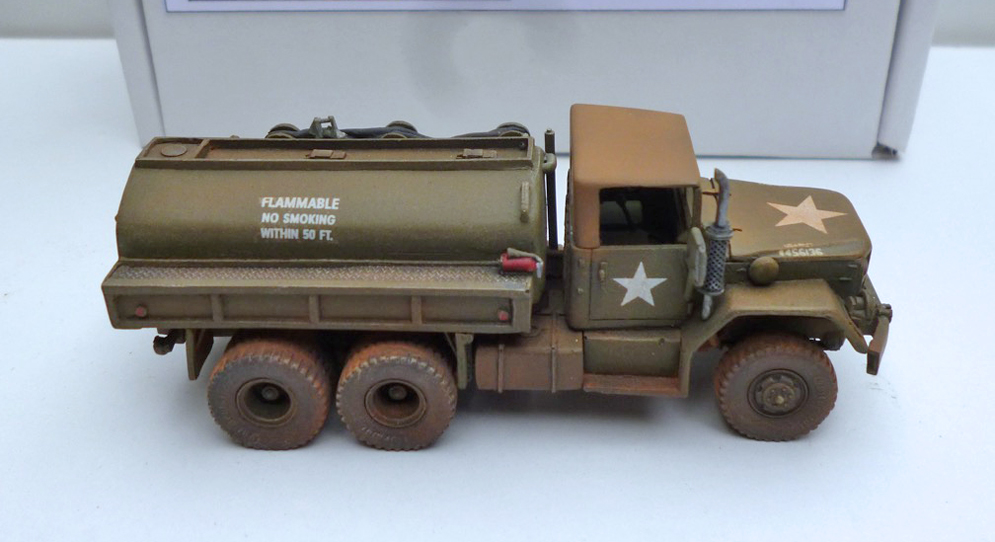


This was a model a little bit with crude parts of resin and white metal, but you can make something of it.
I painted it with Vallejo Vietnam Olive Drab and the weathering with pastels. Decals came from the spare box – in the kit there are no decals.
Regards, Gerhard La Crois
Kit: Dragon M-51 Premium Scale: 1:35
Extras: Stretched sprue antennas, Searchlight and stowage taken from Academy M-51 kit,
Tarpaulin made from tissue.
Paint: Lifecolor
Weathering: Tamiya
Great site and a great price.
Thanks Mish Michelle Edwards


This is my third model. We have limited equipment in my country; for example we haven`t any materials for weathering models. I made this model during about 10 days. I am still an amateur. This model is 1:35 scale. I made one side muddy and the other side clean.
In my country is lack of buying facility results in boycott. The boycott is unfair because that causes hurt to all people not to government. (Specially artists)
Thank you. Mohammad A. Email address: sm_adl@yahoo.com


Ian Ruscoe


The model was finished with Revell’s Olive Brown thinned with water. Highlights were achieved by adding a touch of Tamiya Flat flesh to the base colour. Weathering was a combination of Abteilung modelling oil colours used as overall and pin washes with Mig pigments for dust and mud. AK Interactive streaking enamel colours were also used. Finally, Pencil Graphite was applied to the edge of all “Angles”. As an Aircraft modeller, I like now and again to build armour and let the imagination flow in respect to weathering, (like an artist with a blank canvas!)
Mark Rooks


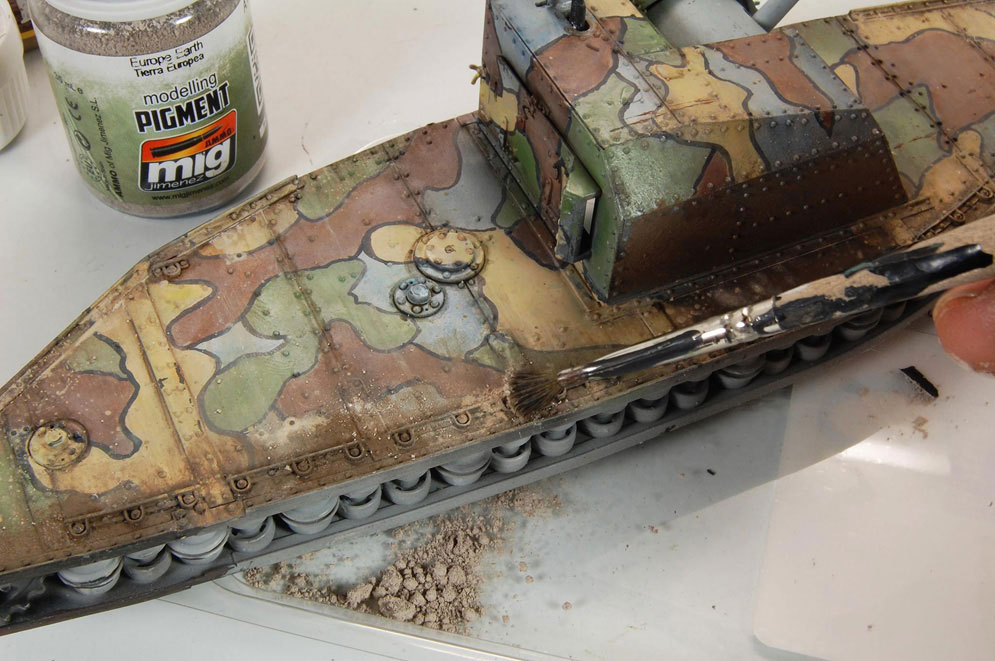
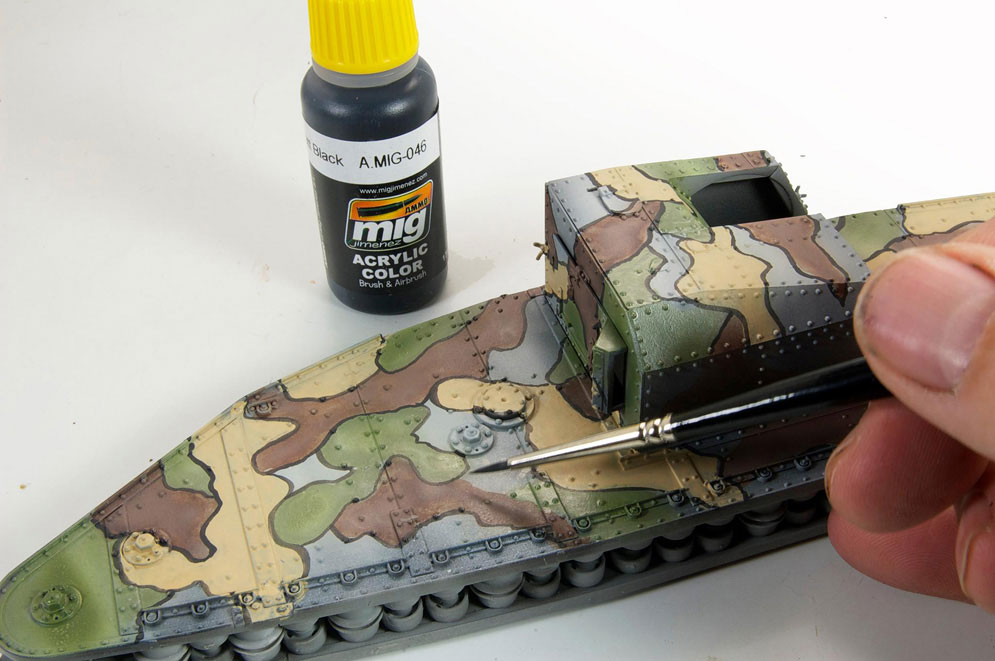
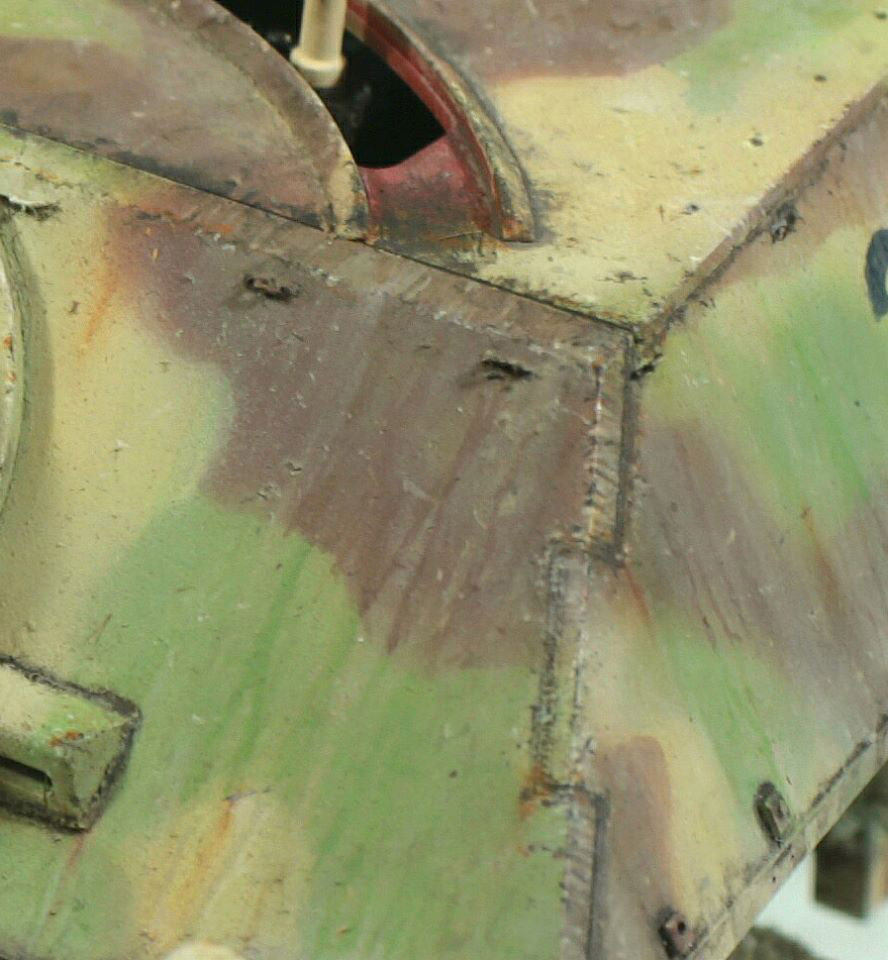
AMMO paints, thinned are used to paint the blotches – the hand painted blotches are lightly filled and unified using the airbrush. The coverage is not uniformed as I want to maintain the “hand-painted” feeling.
Just like as was done on the real tanks, the disruptive outlines are hand painted.
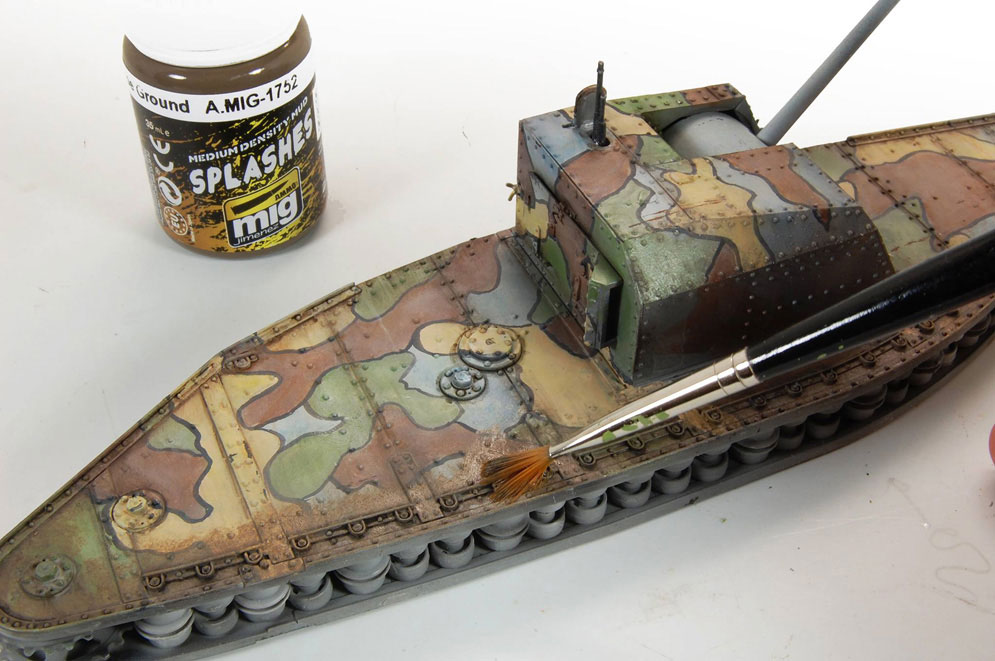
These new AMMO Splashes Effects are pretty incredible. Great color choices (looks like real dirt to me!!!) and very versatile.
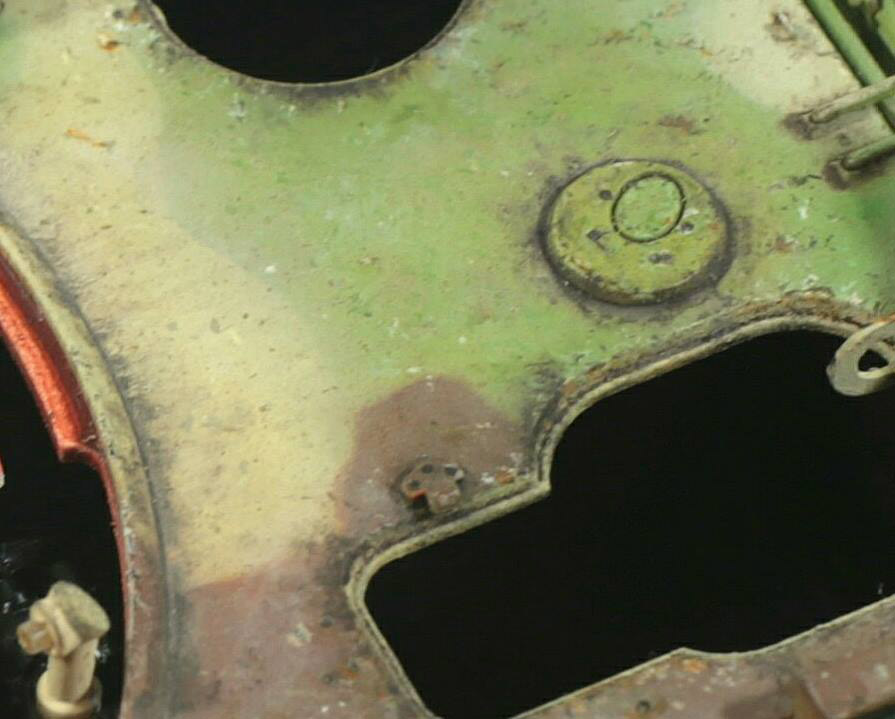
Pigments are dabbed into the moist surfaces. The combination of dry pigments and wet enamel effects create excellent and natural looking results.
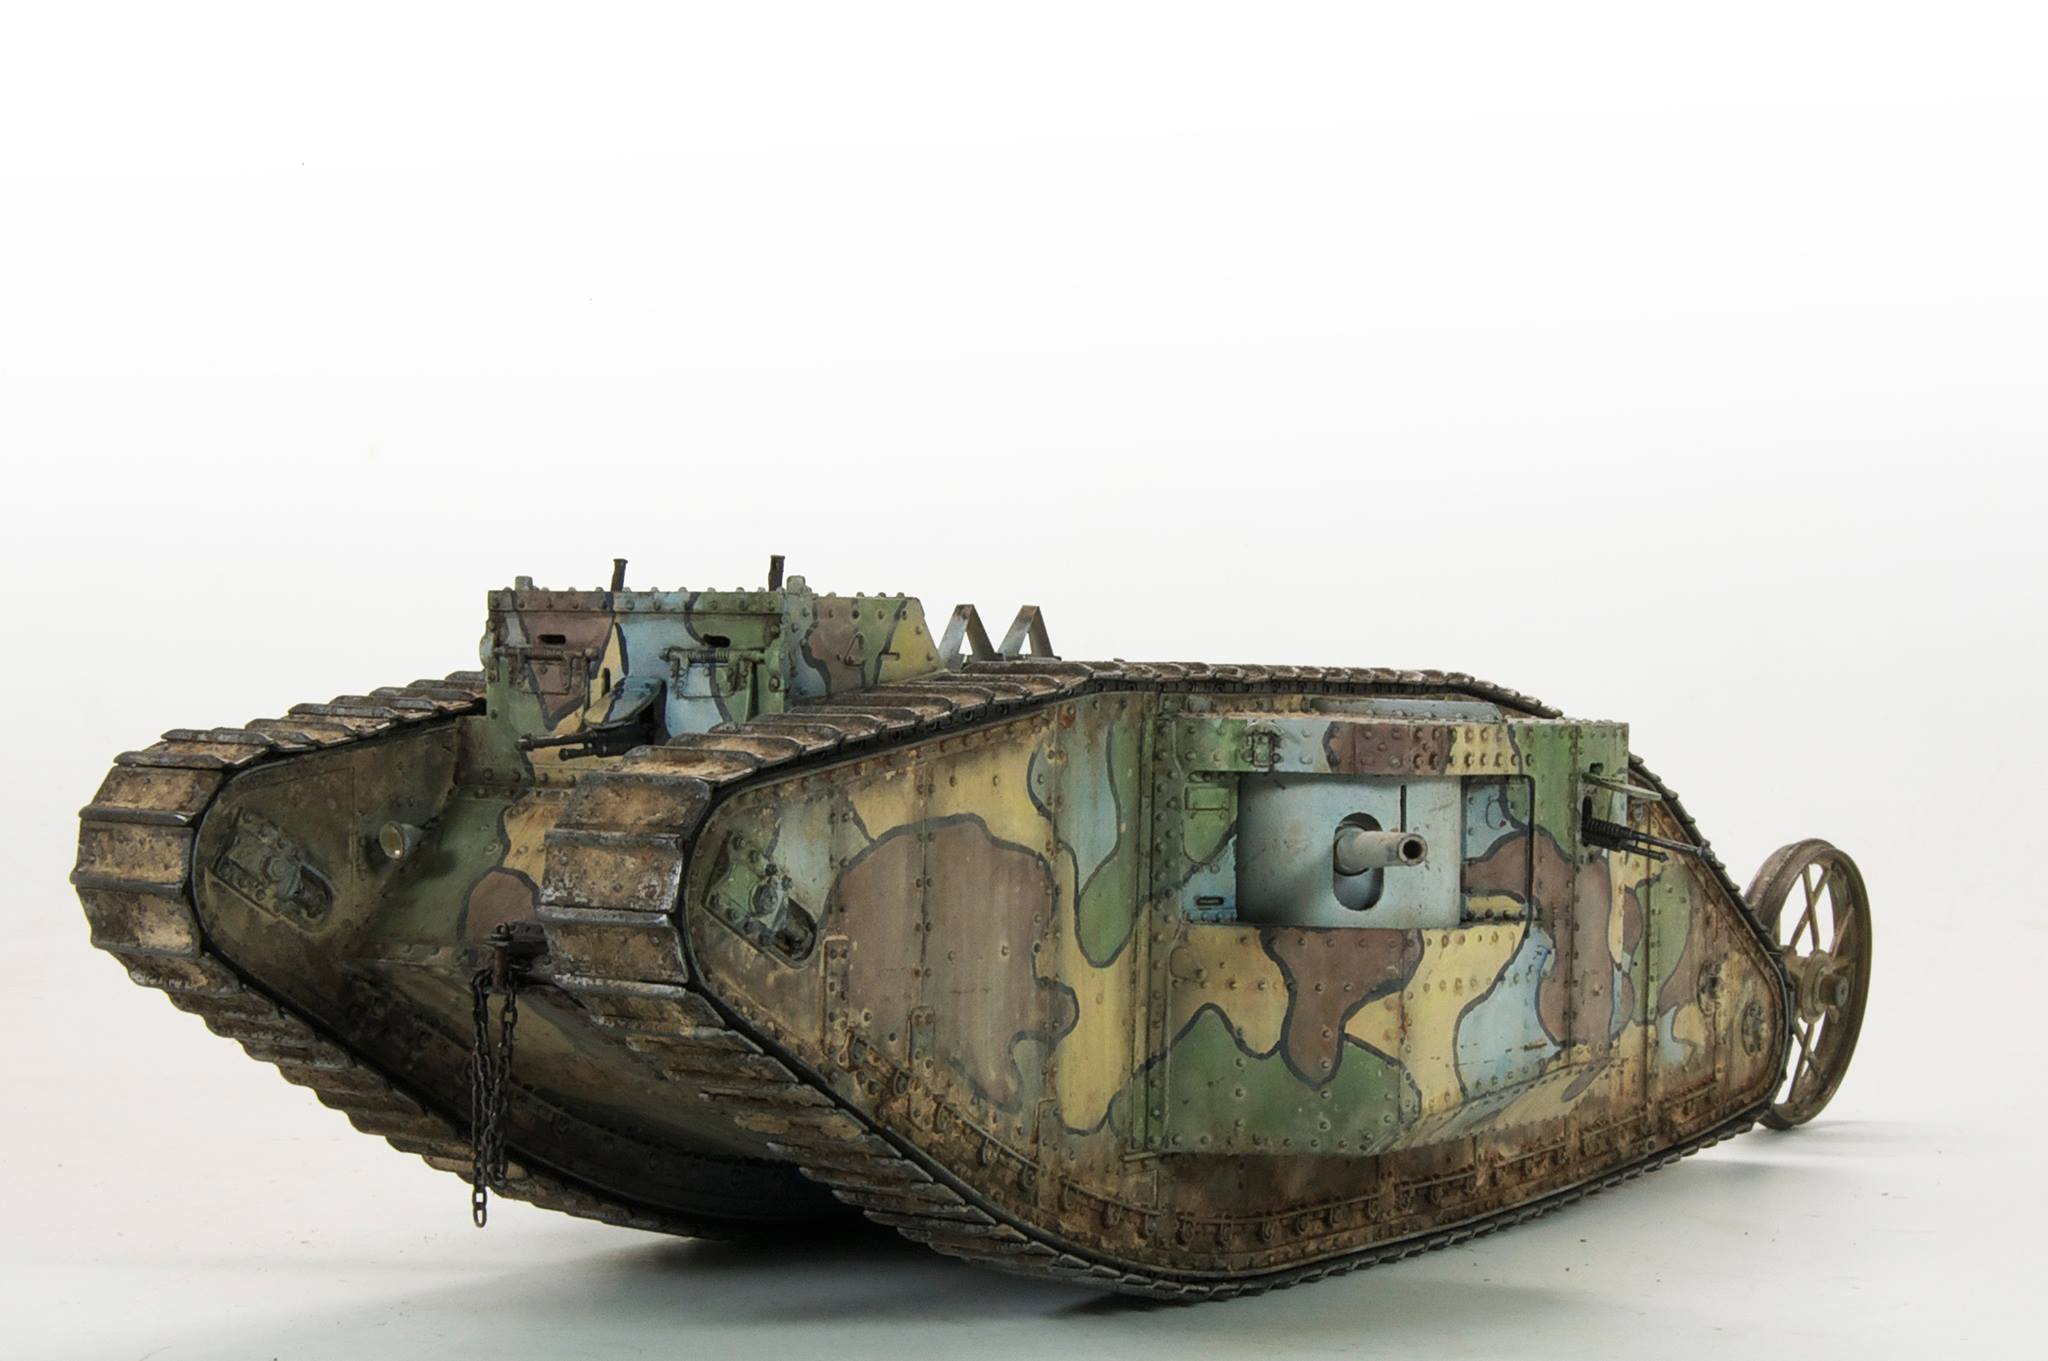
Rick L.


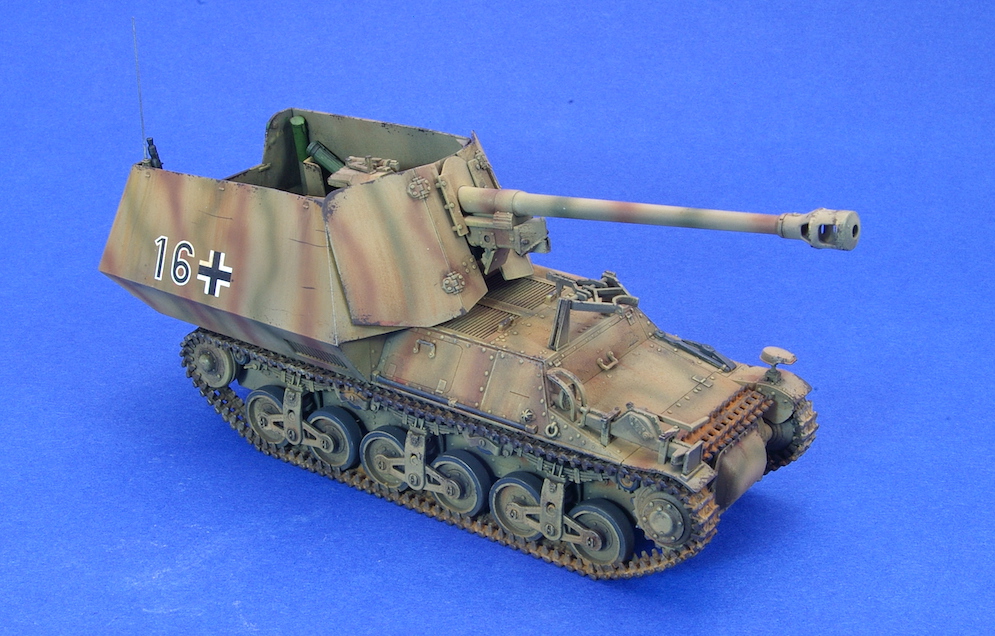
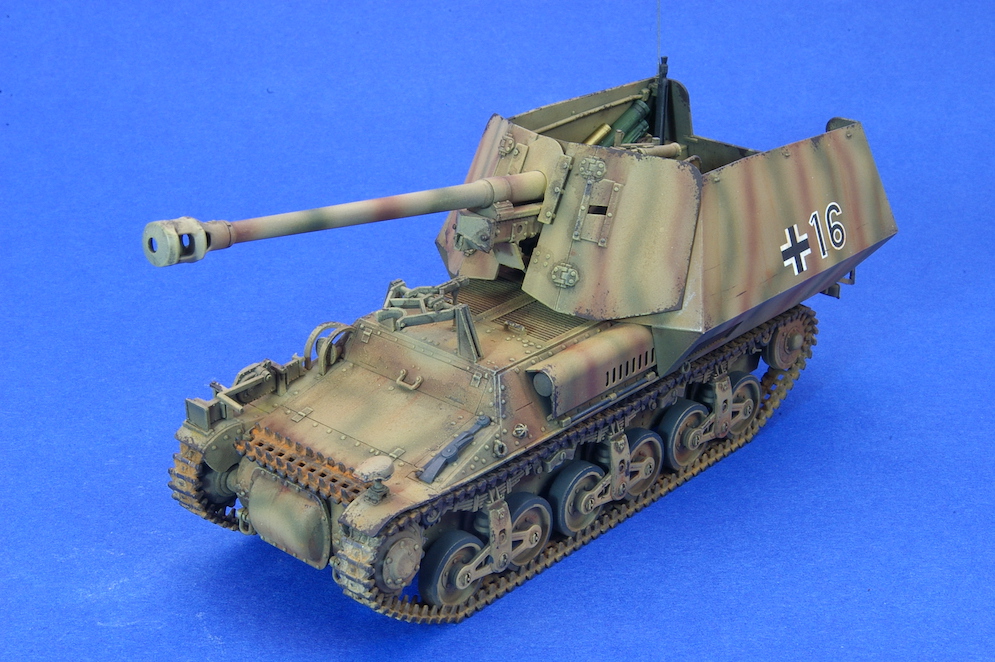
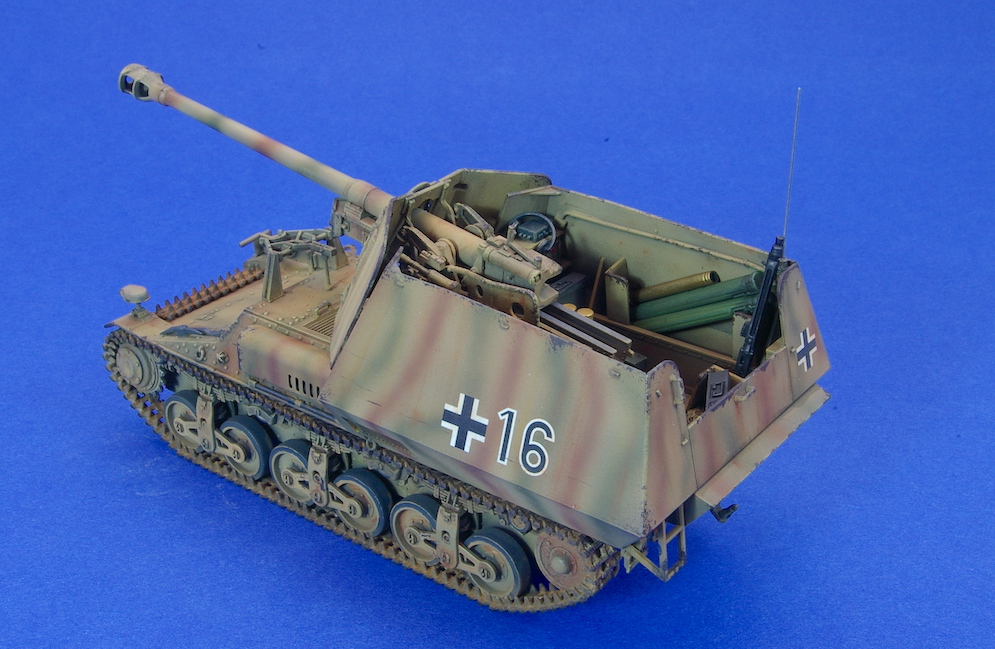
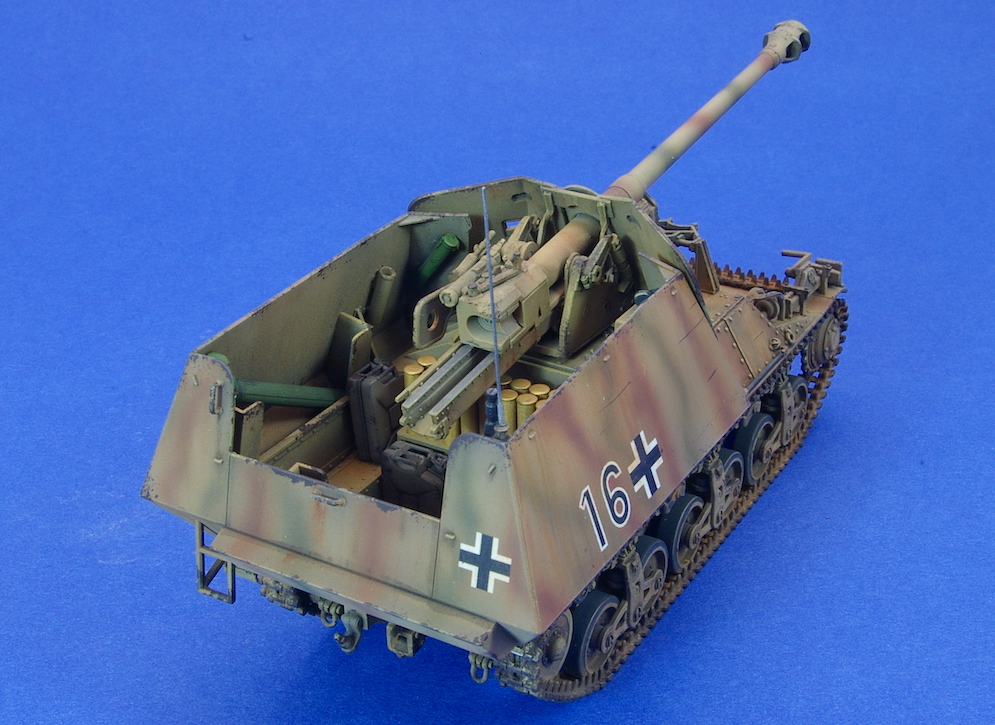
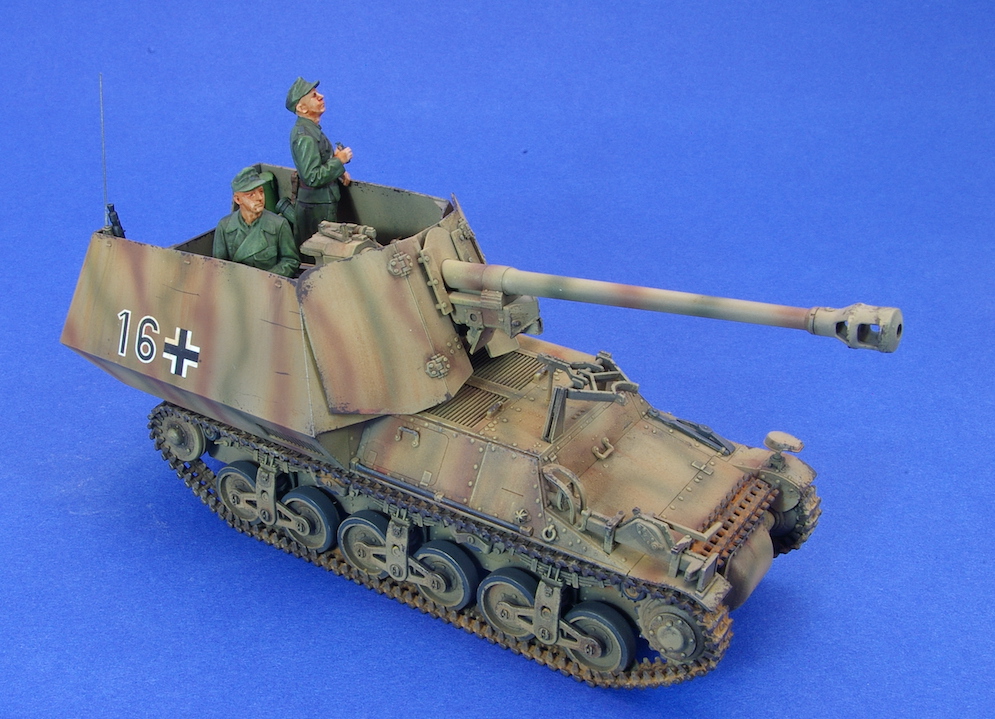
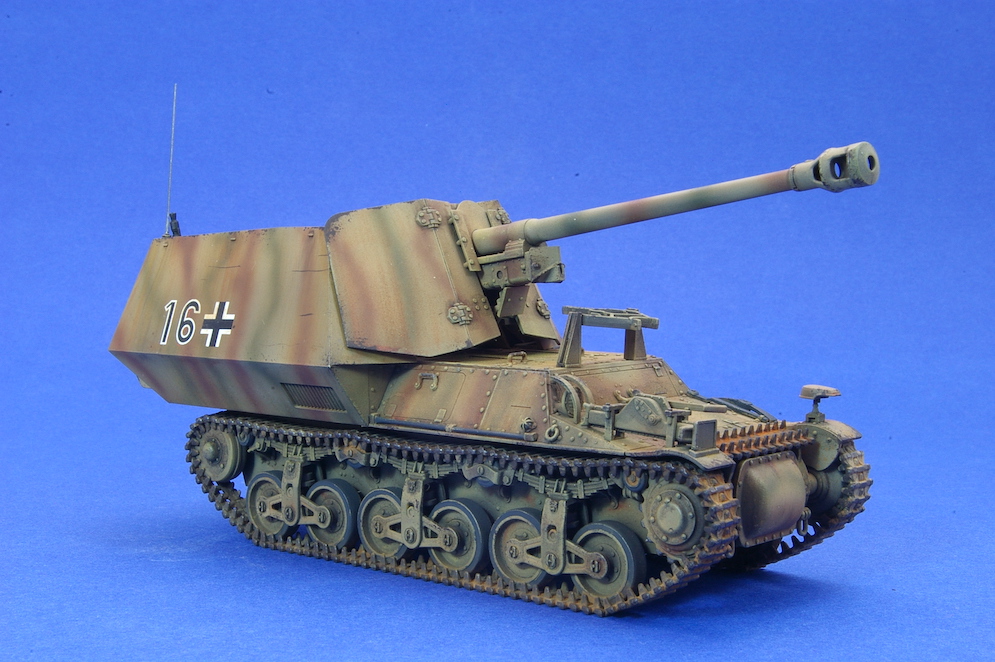
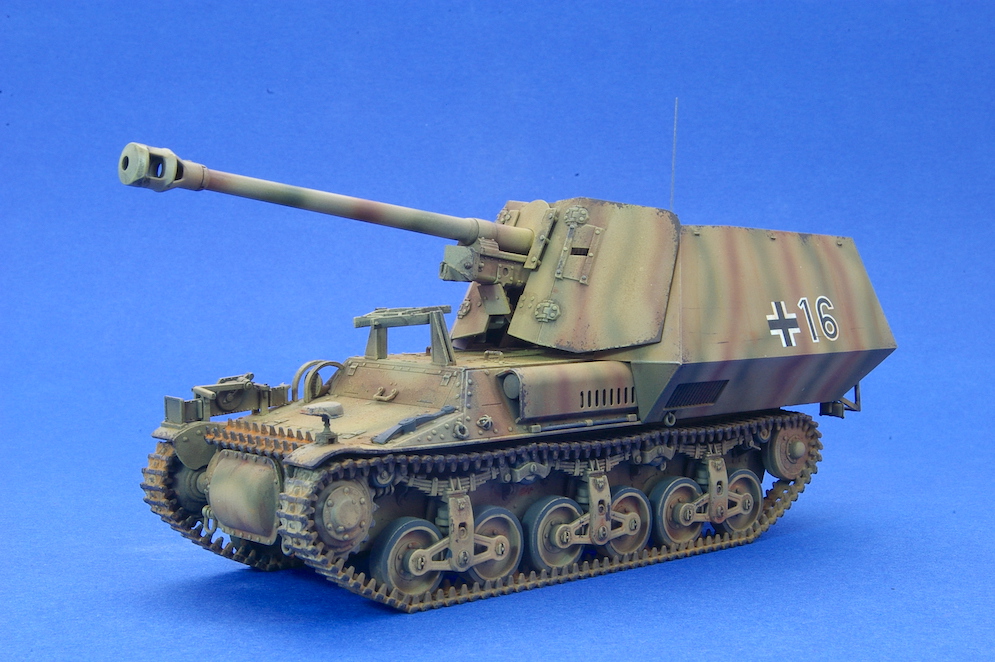
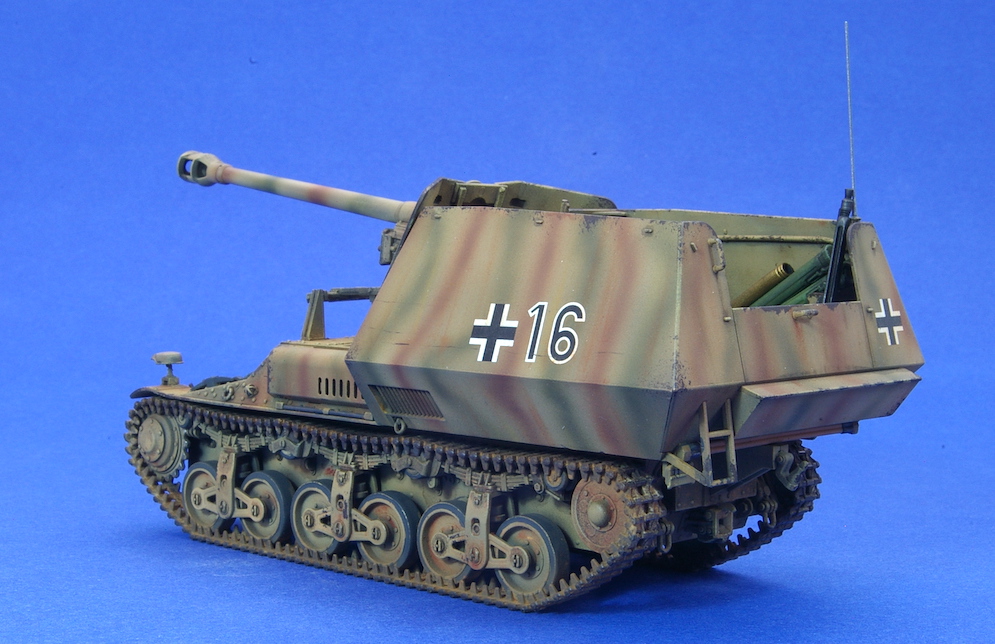
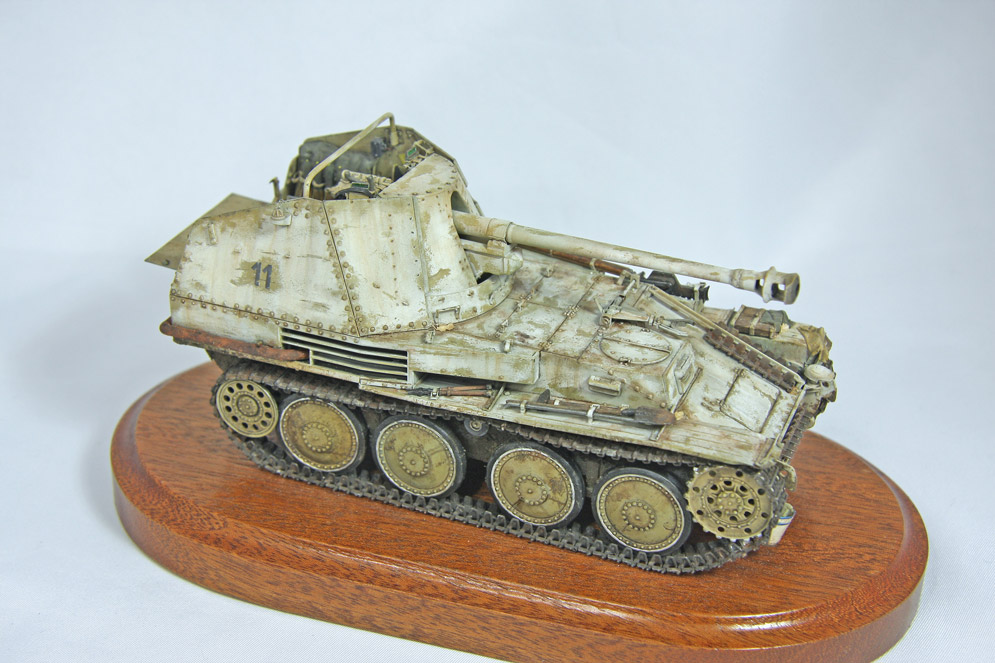
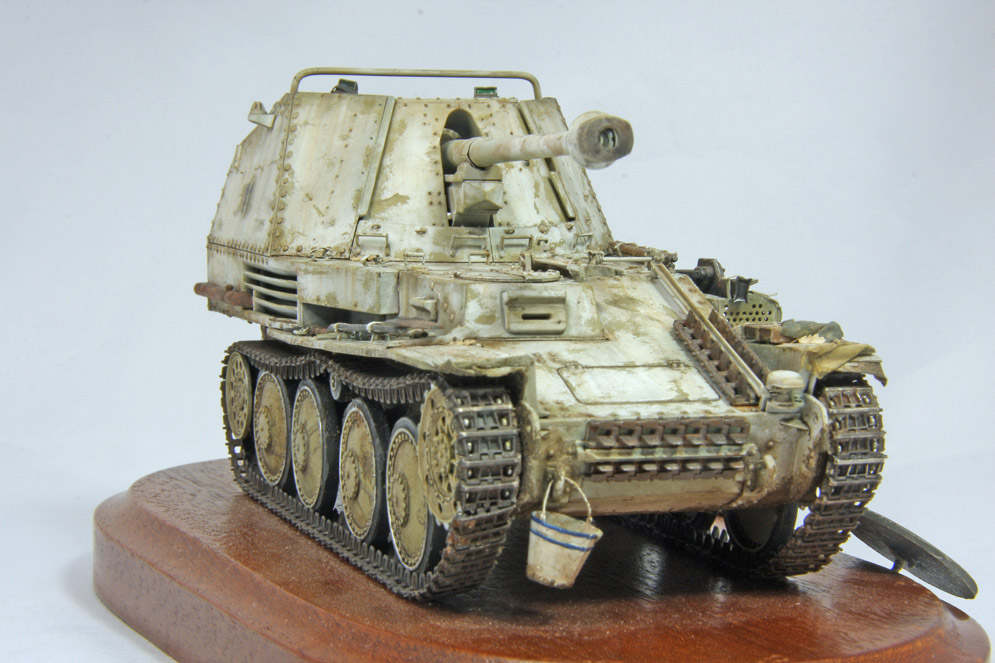
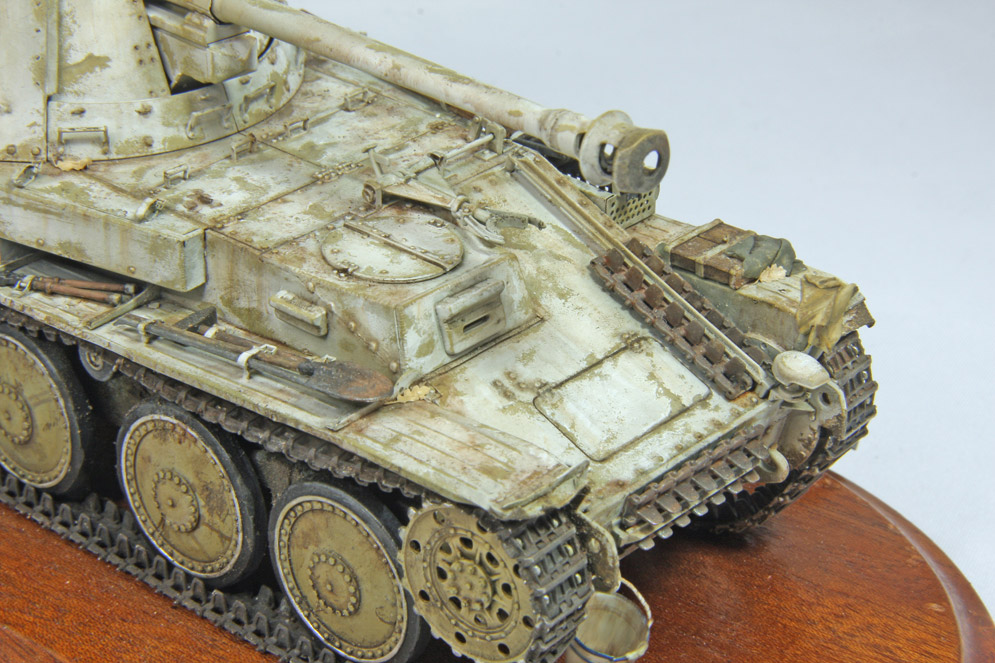
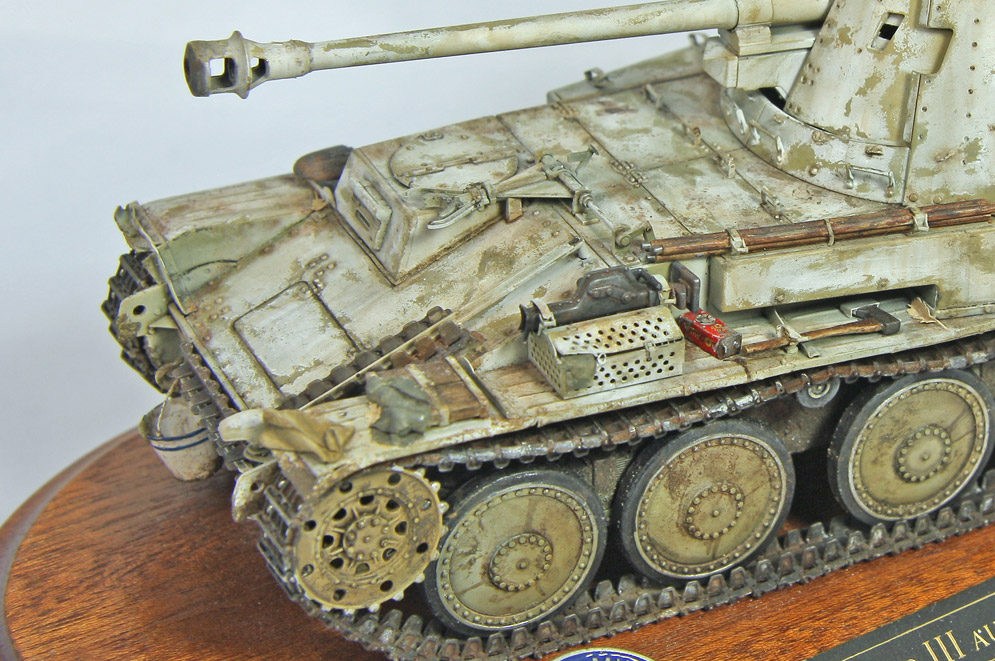
The vehicle was based around the French Lorraine tractor chassis. It had an open topped fighting compartment which provided the crew with some protection from small arms fire and shell splinters. The vehicles were deployed on the Eastern Front and were used until 1944.
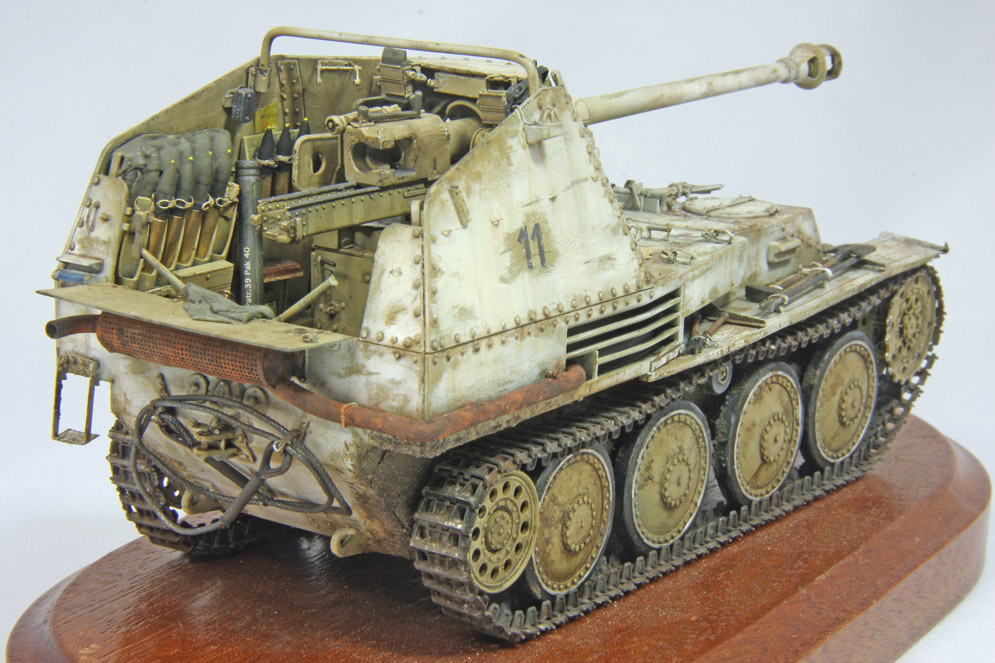
The kit is a typical high quality Tamiya product with the parts fitting perfectly. There are link and length tracks provided, and an interesting feature of the kit is that the entire front portion of the suspension complete with springs is moulded as a single piece. This made assembly of this potentially complex area very easy indeed.
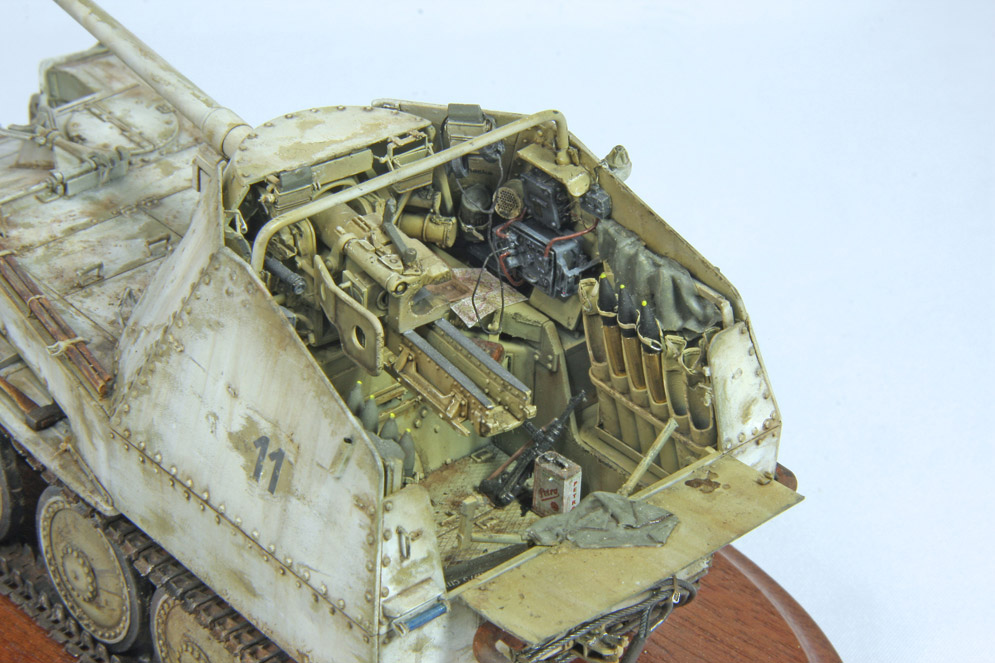
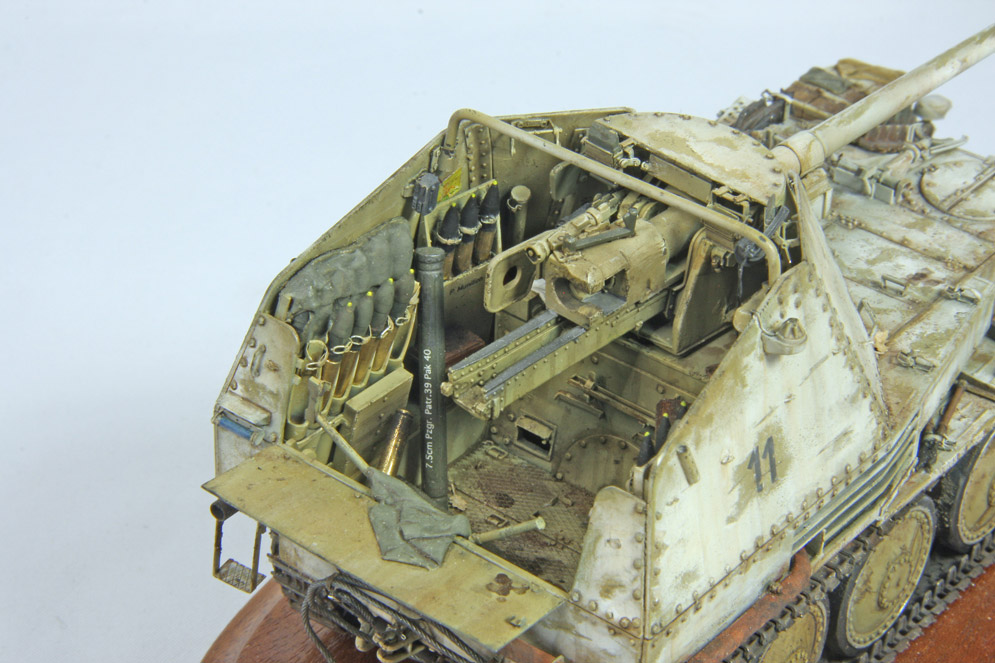
There are shells provided in the kit for the ammunition rack in the interior of the vehicle. As the vehicle was so small, there was rather limited space for ammunition stowage and wartime photos often show the Marder towing an ammunition trailer which, if you decided to include one, would have to be obtained from another source.
Two figures are provided, and I thought that these were rather good – though as ever my questionable figure painting skills failed to do them justice!
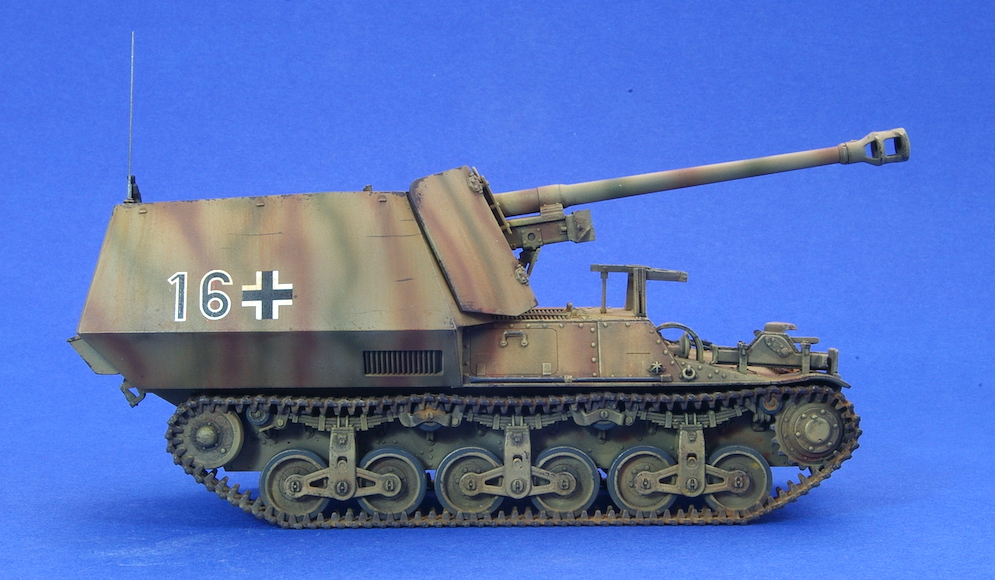
The model was finished using Tamiya paints. After a coat of acrylic gloss varnish, I applied some markings from an Archer’s Dry-Rub sheet. The transfers provided in the kit look very good and include an interesting variant of the usual black and white German national marking. However, I decided that using dry-rub transfers would remove any chance of the dreaded silvering of the backing film associated with waterslide transfers that often causes me headaches.
The weathering was done with oil paints rather than my usual pastels as I feared that using pastels around the multitude of rivets on the kit would darken the finish too much. I think that open topped vehicles benefit from a little clutter and so I filled the interior with some likely looking items from my spares box.
All in all I think that this is a great kit and I enjoyed building it.
…… I just wish I had the remotest, tiniest, weeniest idea how to paint figures without them looking as if they belonged in a zombie movie.
Dai W.
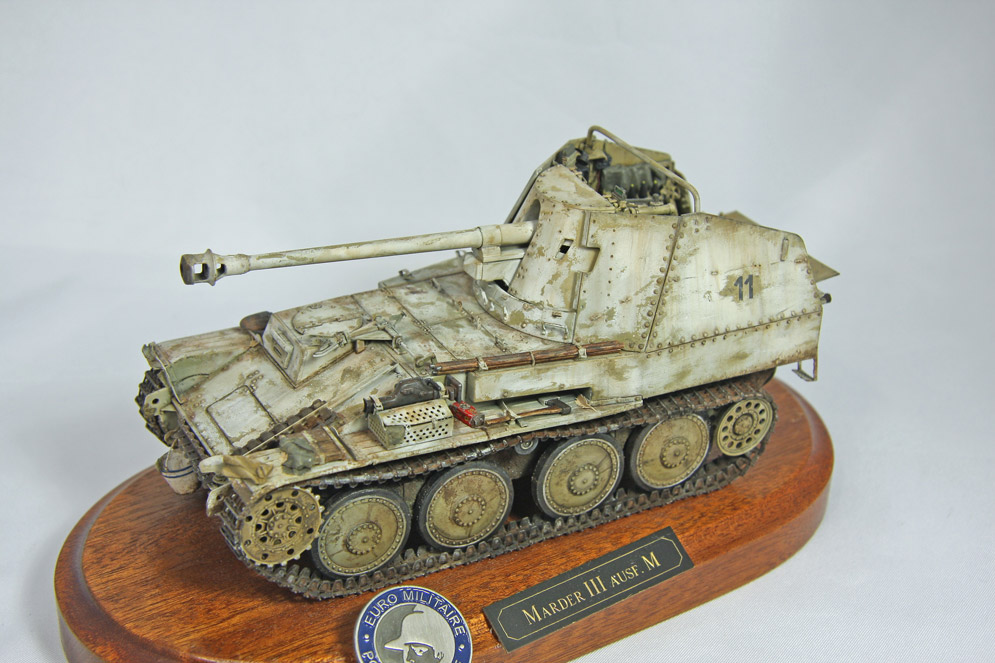
I used: ABER PE (2 sets), ABER barrel, Friul tracks, resin radio.
The open vehicles are always challenging. But it came out great. I love all the details.
Martin V.


Ian R.


In my country there is a lack of buying facility as a result of the boycott. The boycott is unfair because that causes hurt to all people not to government (especially artists).
Thank you, Mohammad Adl from Iran 2013 | e-mail: sm_adl@yahoo.com
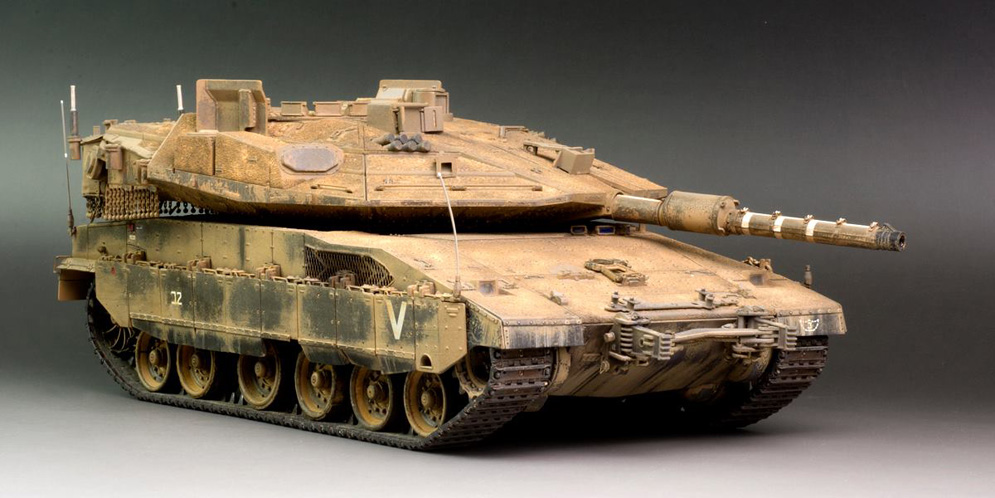
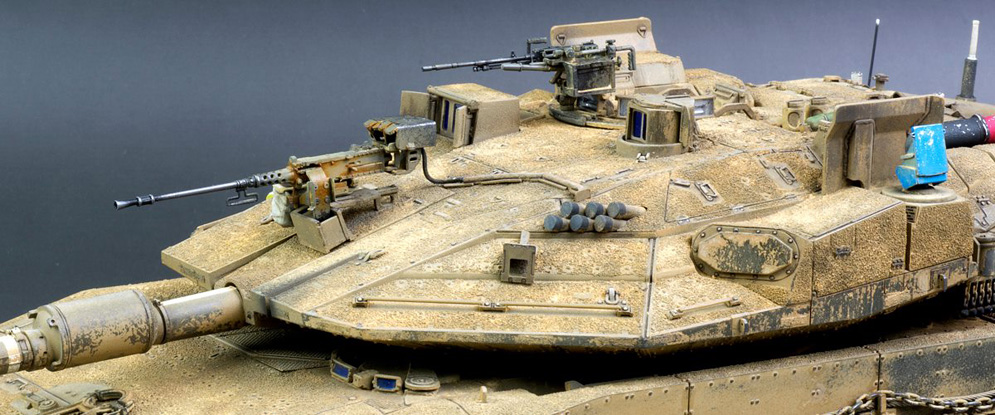
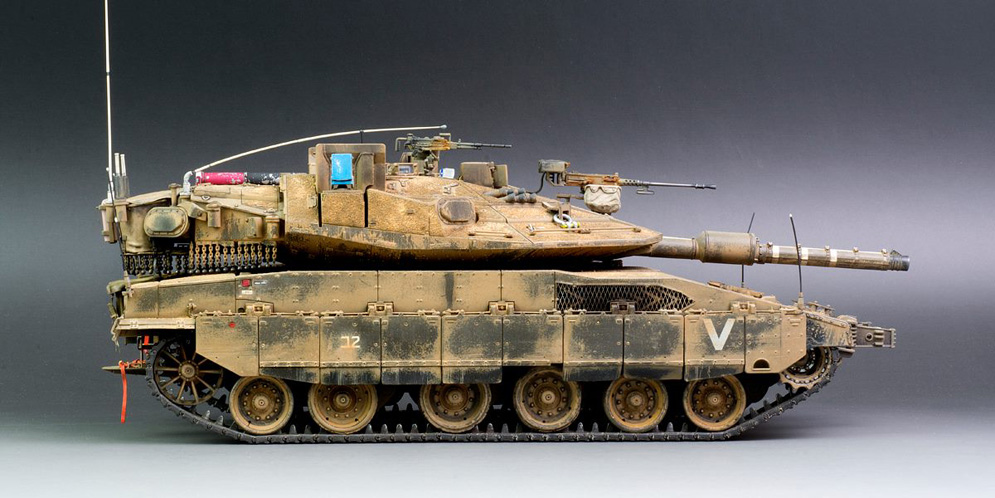
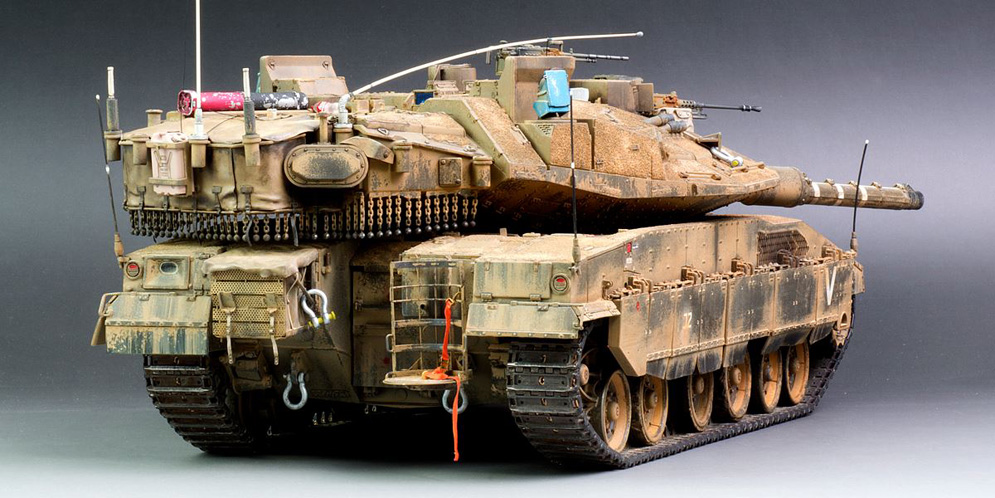
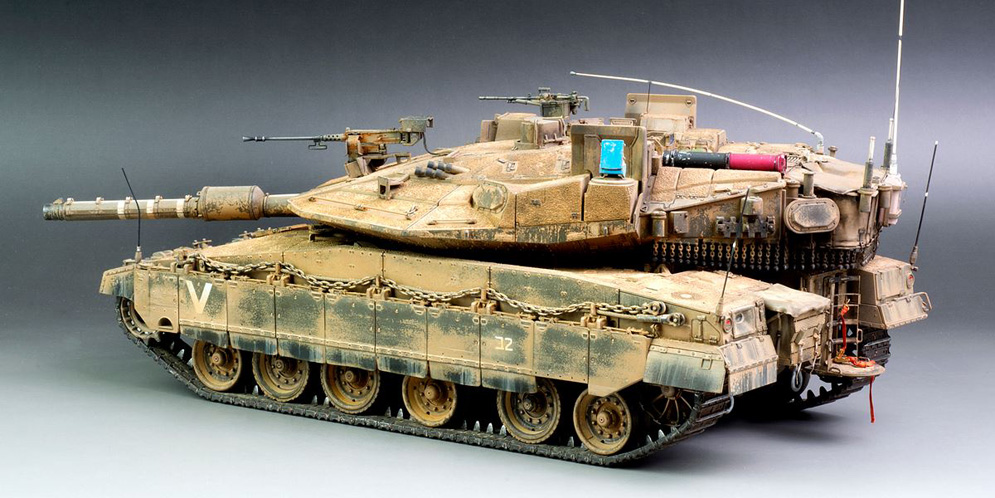
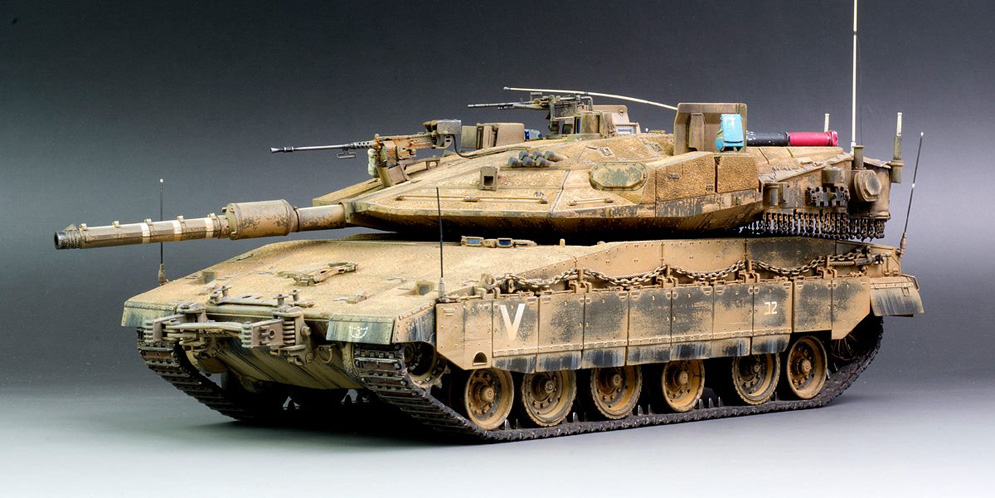
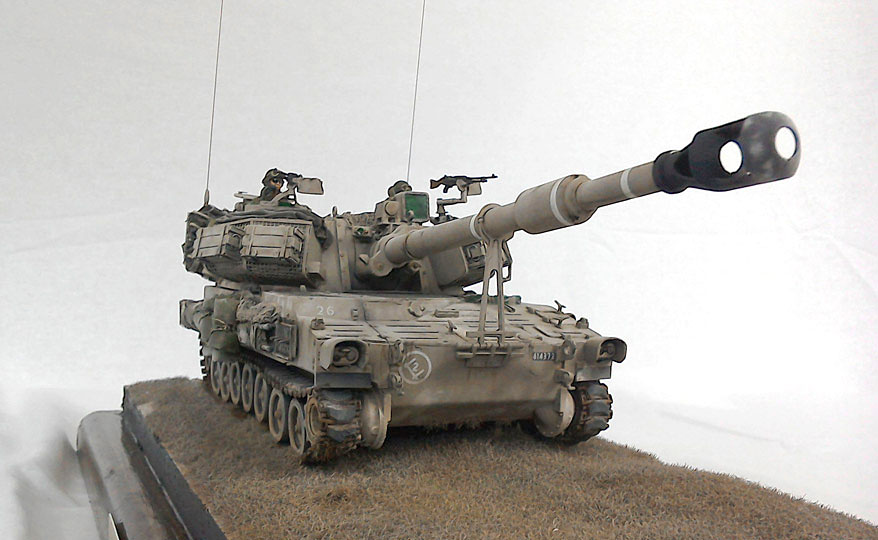
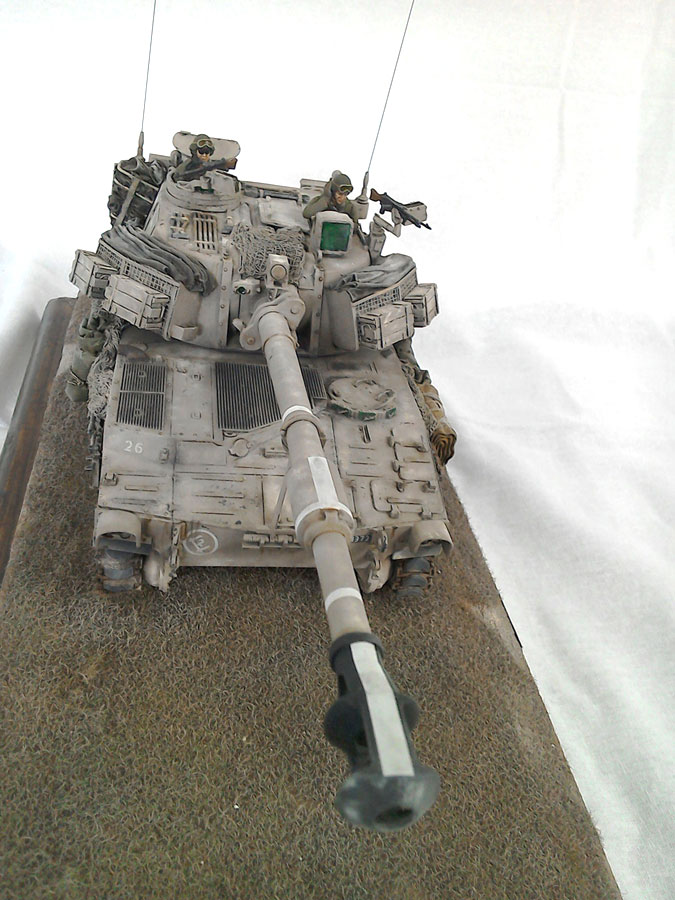
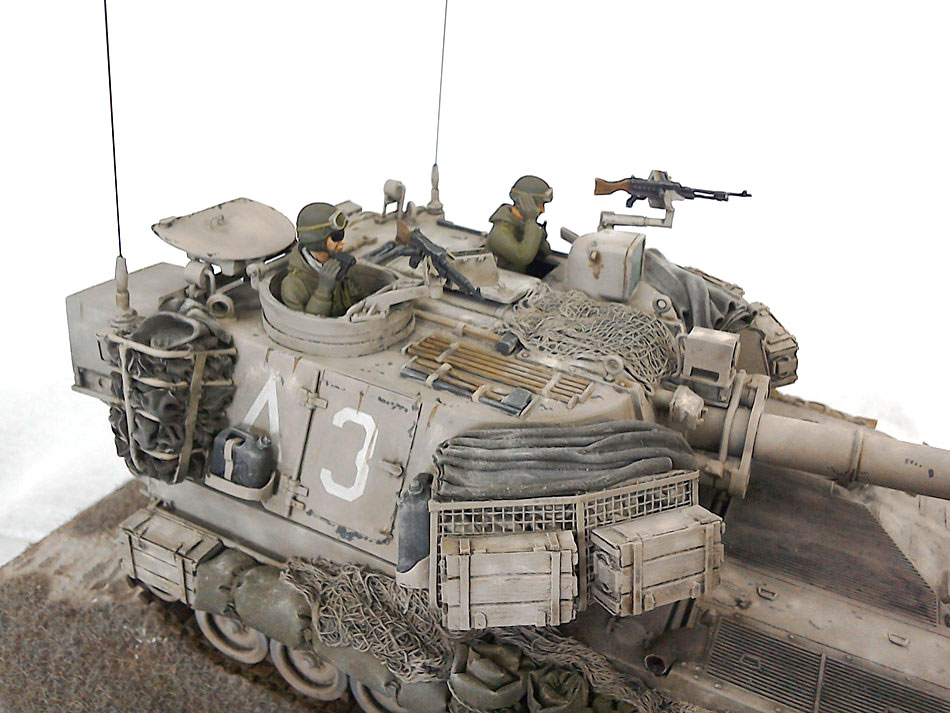
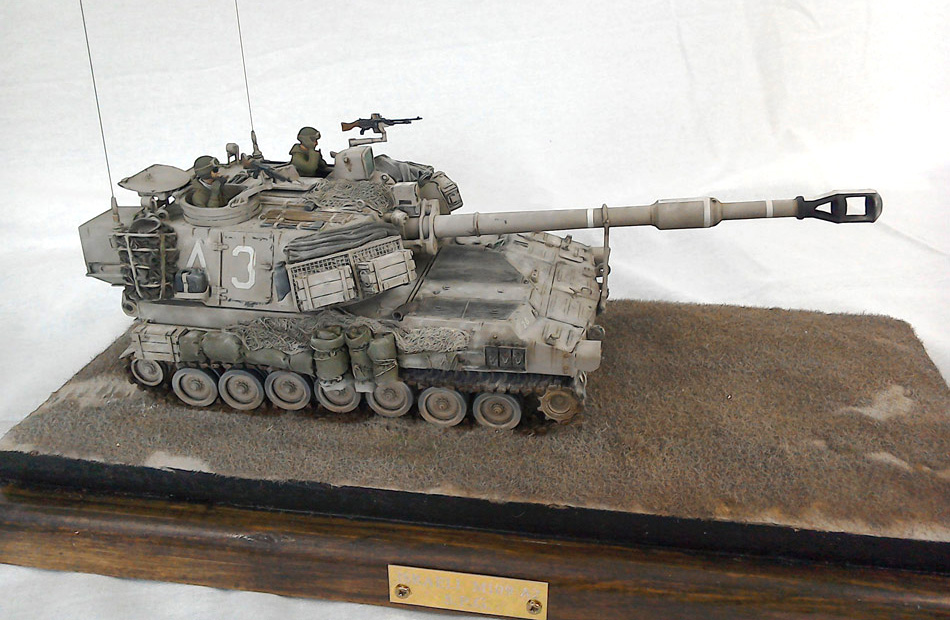
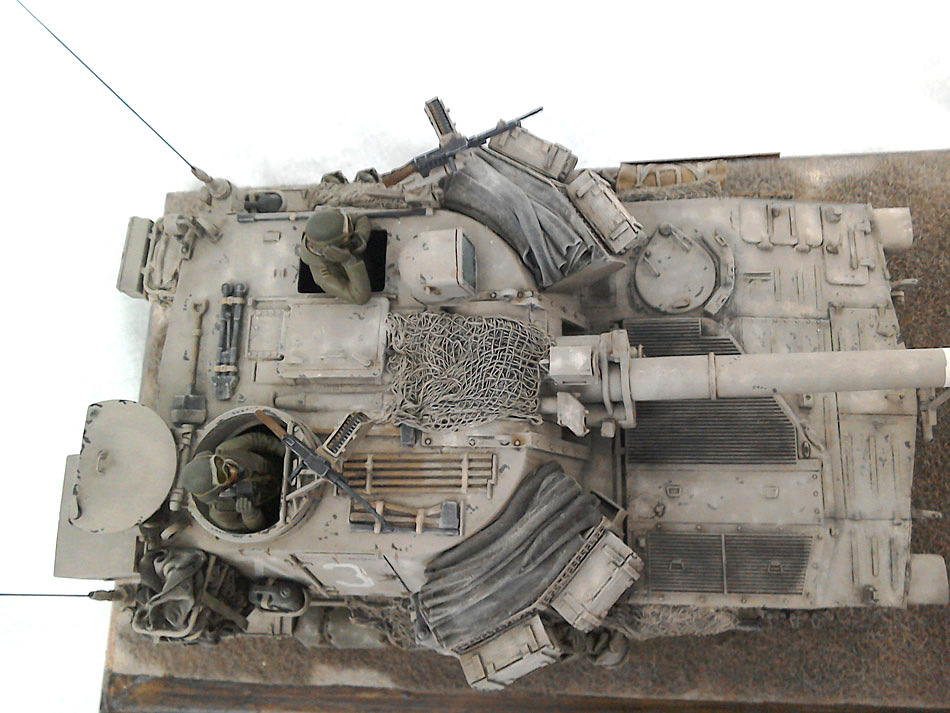
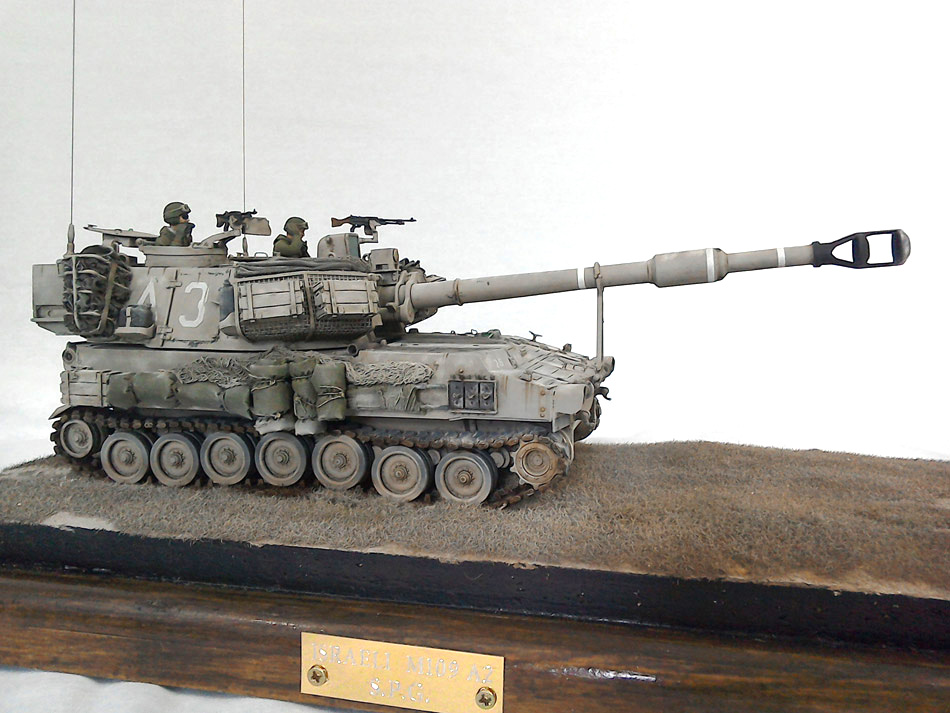
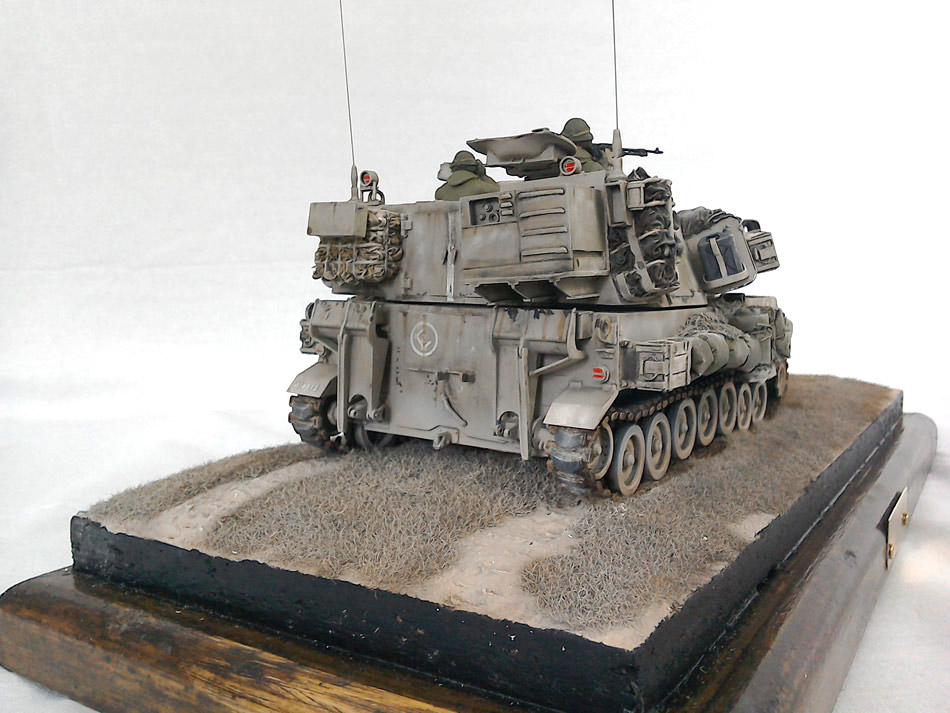
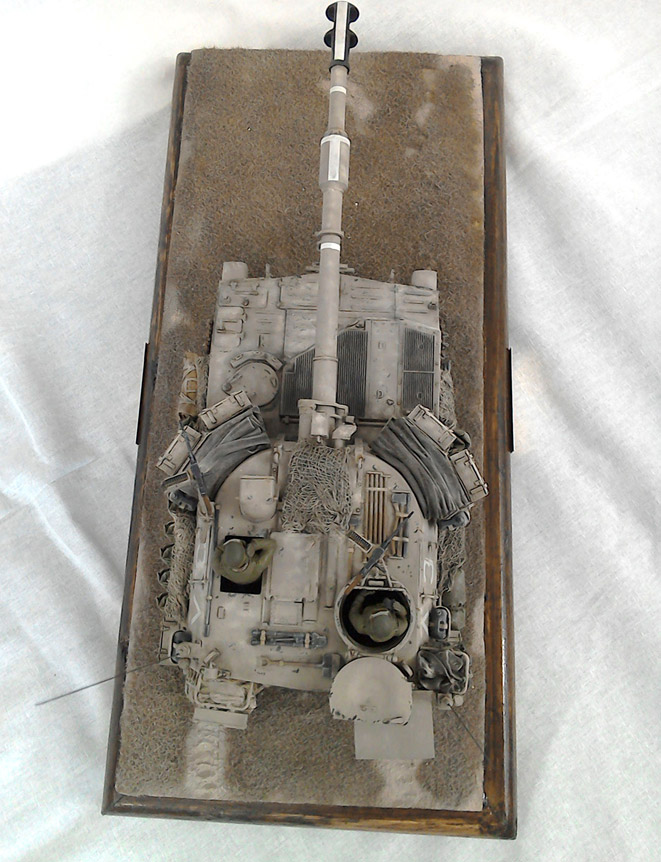
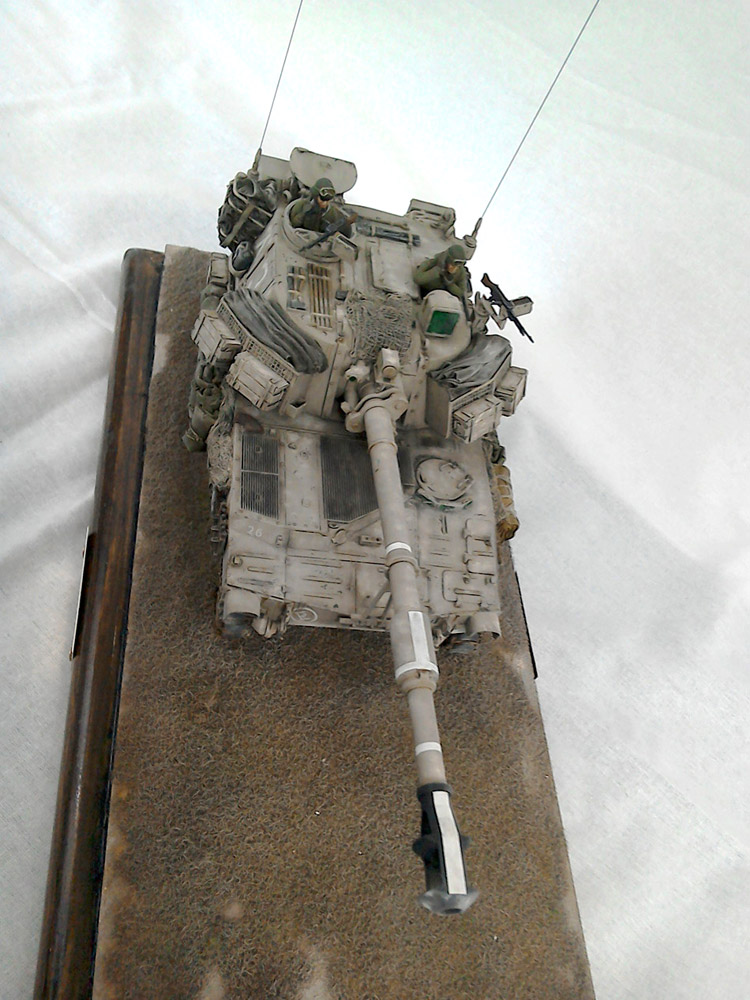
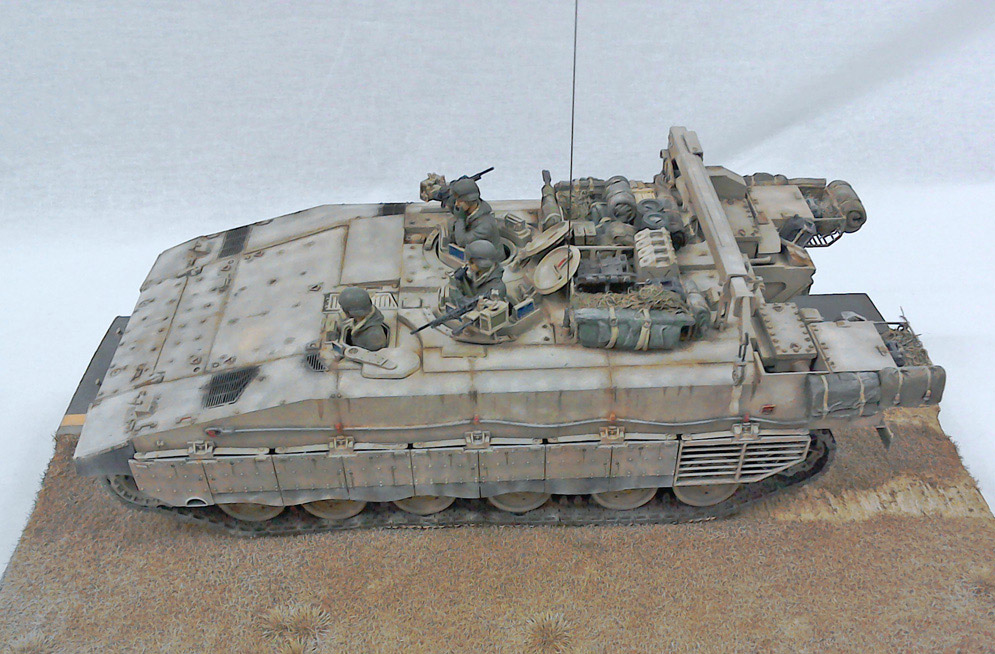
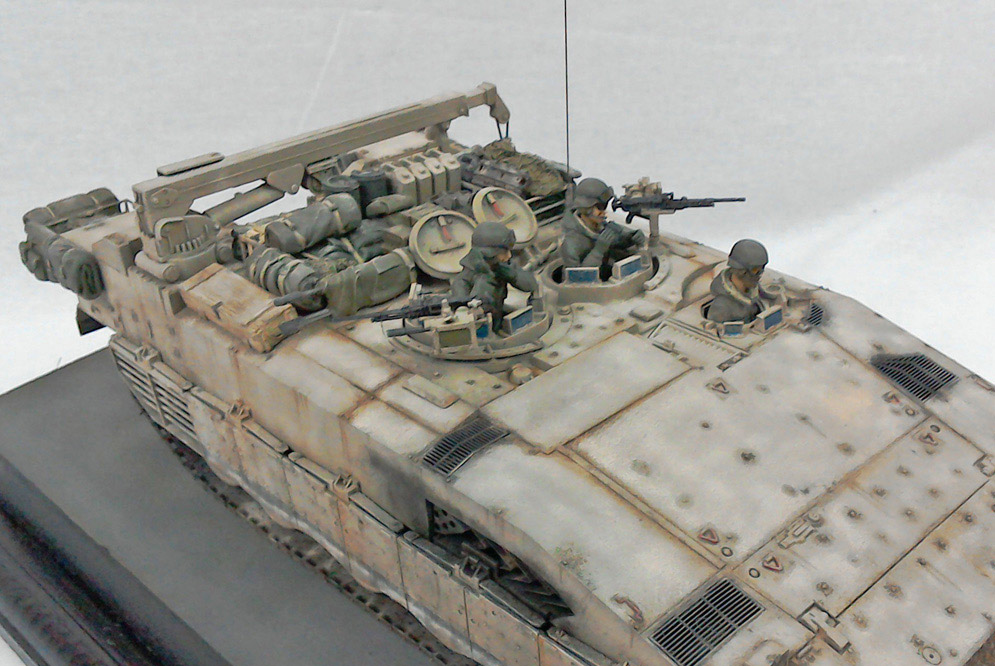
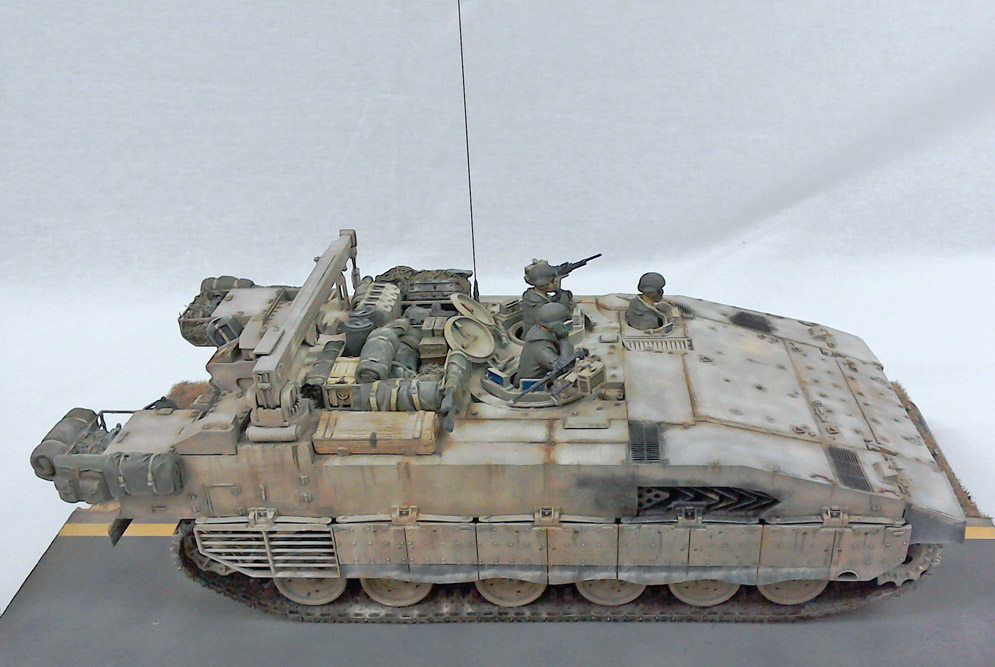
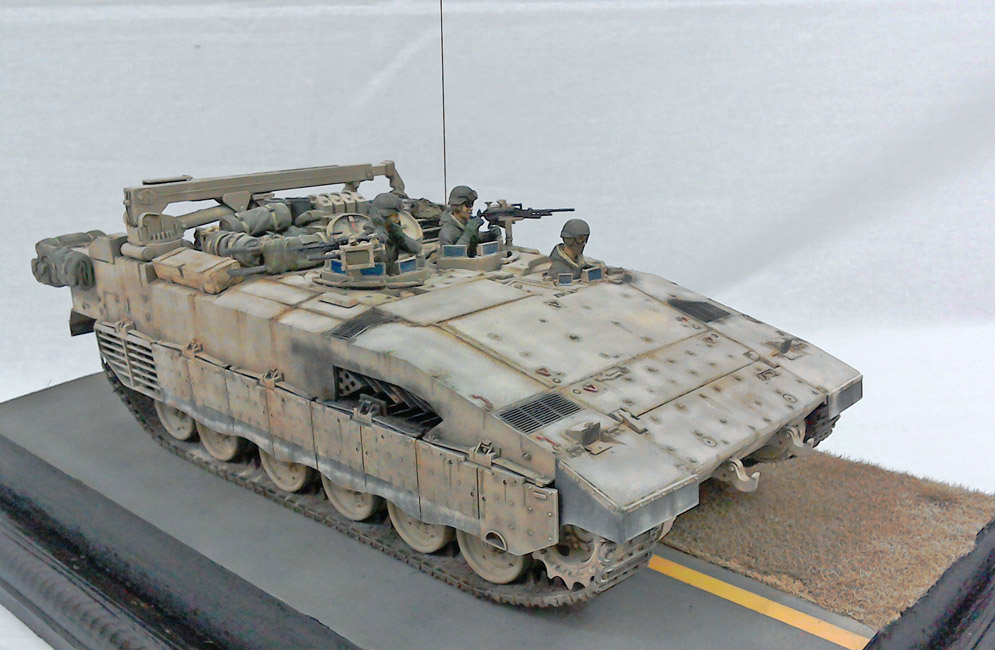
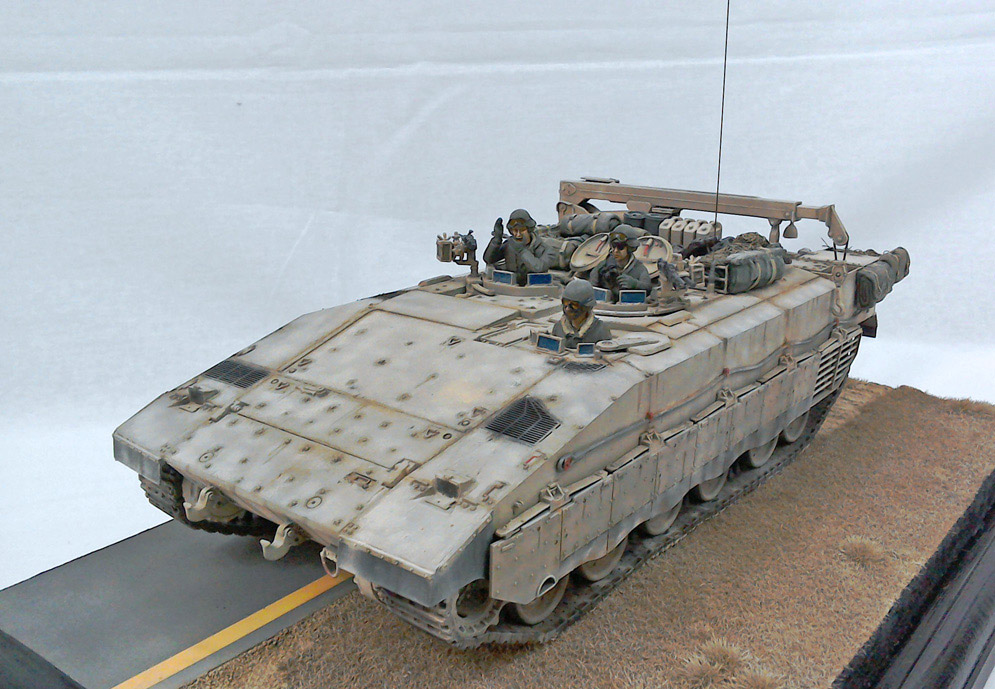
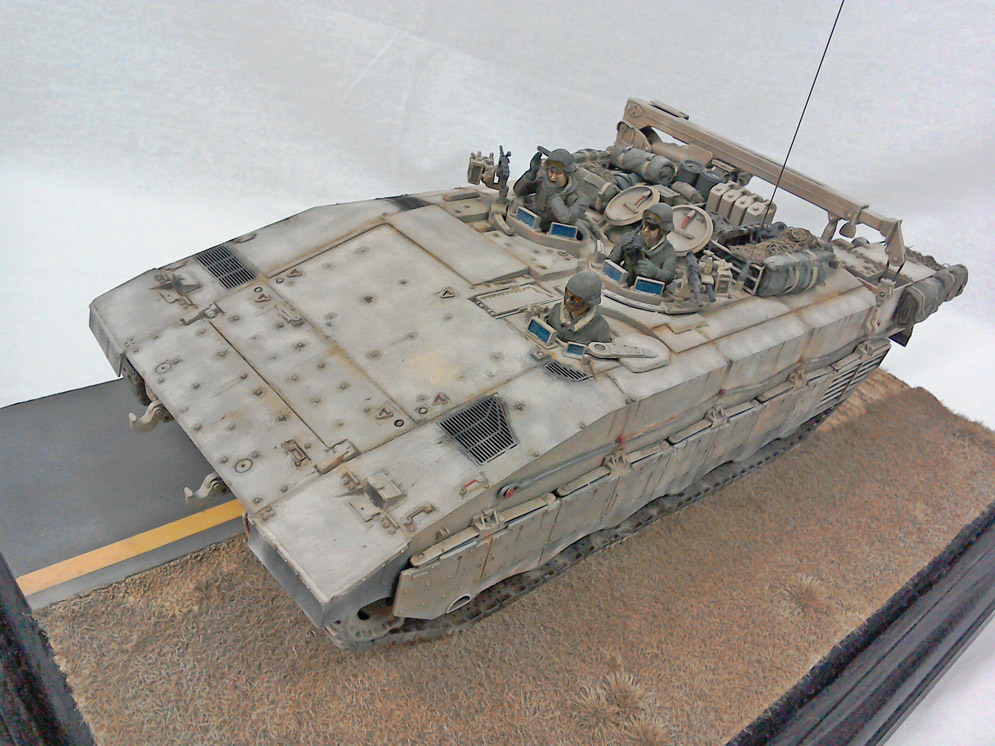
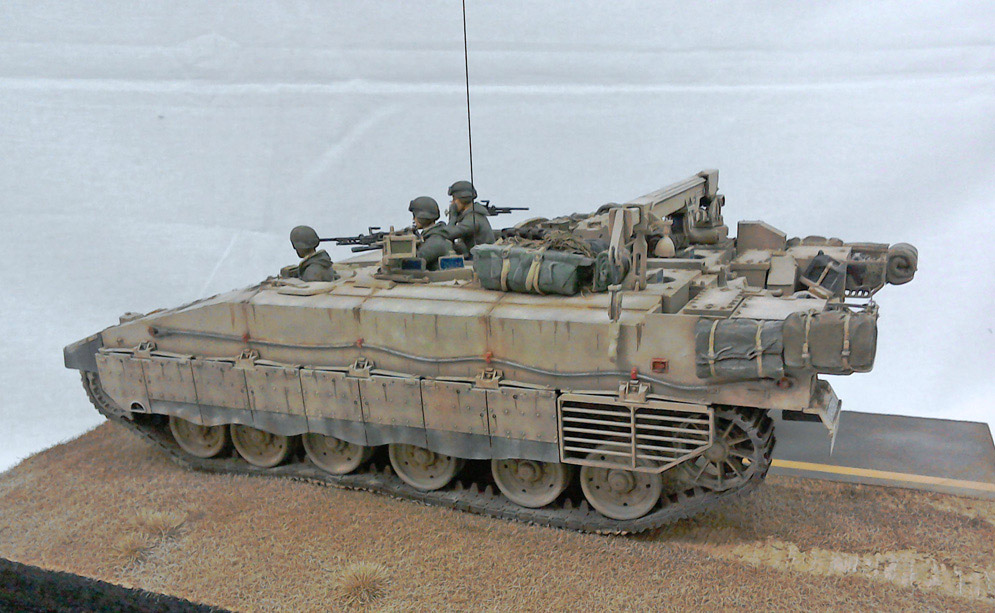
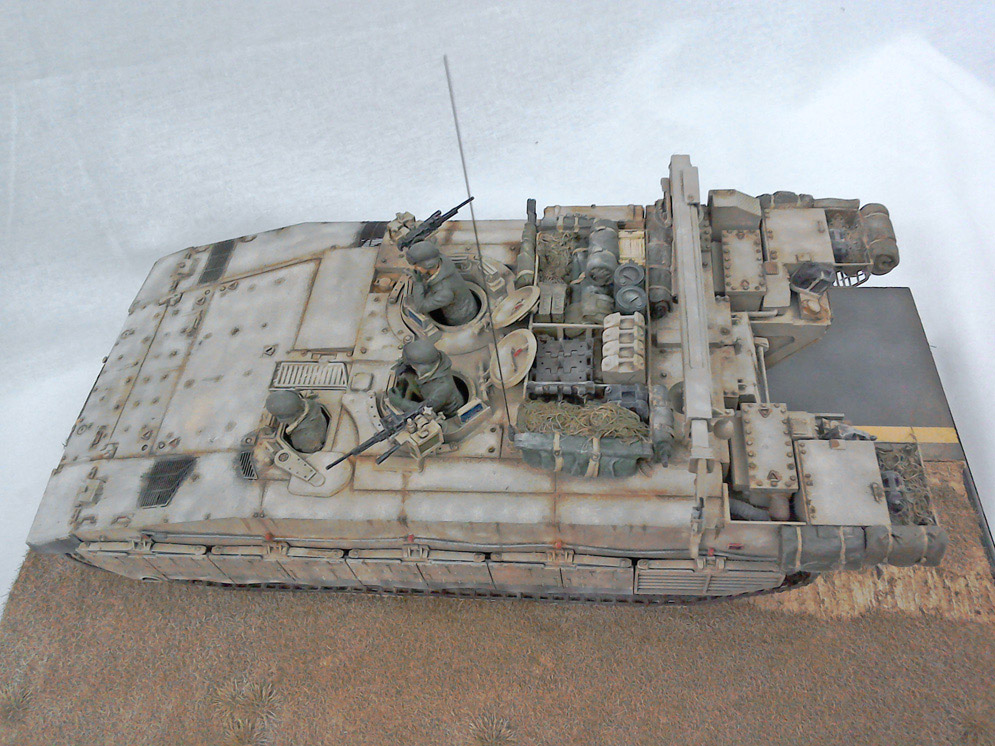
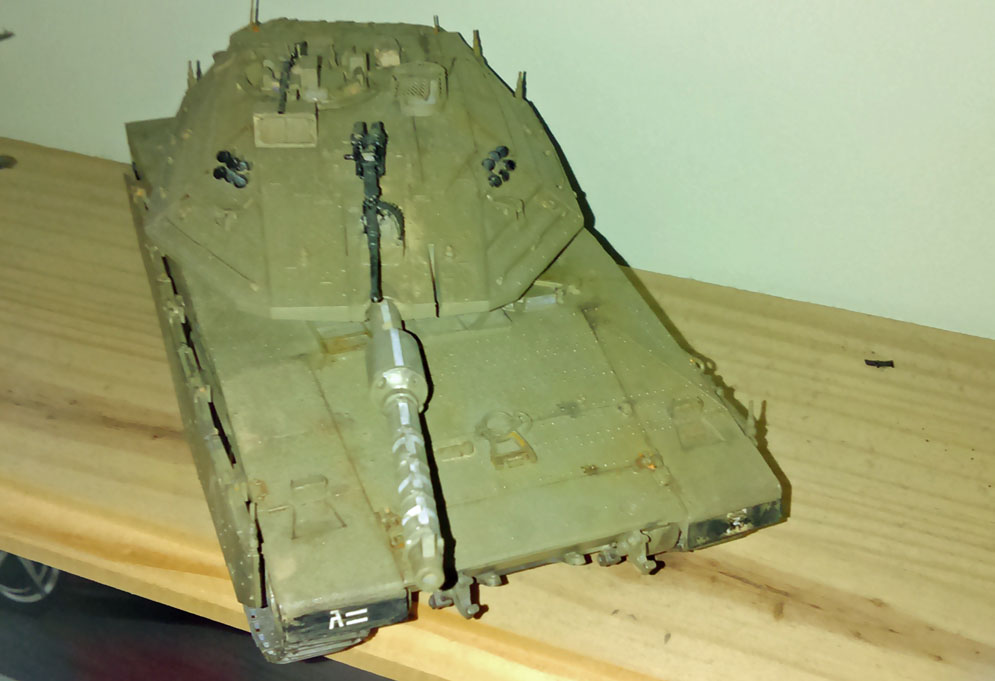
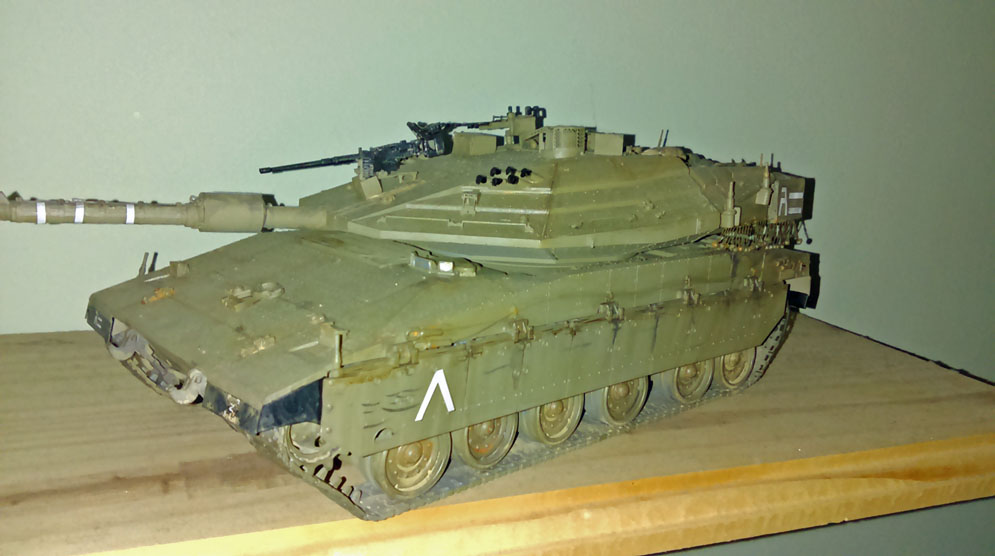
Desert Eagle Productions Battering Ram for Merkava 4 Desert Eagle Productions Fuel Barrel and Mount Friulmodel tracks for Merkava 4
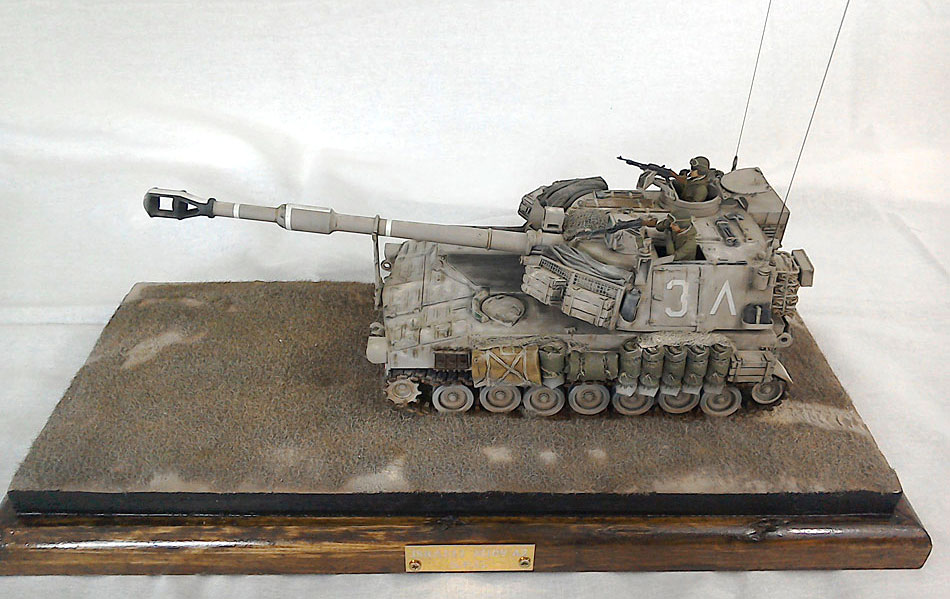
Construction was a time-consuming endeavour as the base kit, tracks and all additional accessories added up to a monster parts count. The Meng kit is a gem and goes together “Tamiya” like. The DEP additions were astounding in their detail, and engineered beautifully, though a steady hand and magnification was needed to solder the fuel barrel mounting rack together. The final challenge during the construction phase was forming the turret basket covers. This was done with aluminium foil.
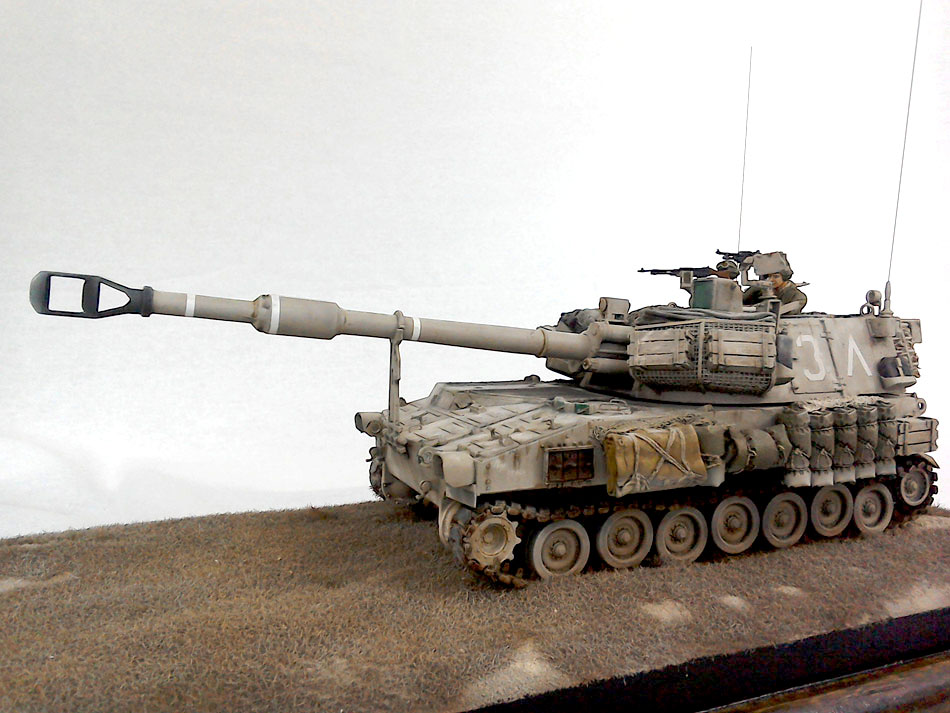
Painting consisted of a Mr.Surfacer 1500 grey primer coat. The base colour was a mixture of several IDF sand grey tones, both lighter and darker to achieve a modulated finish. Over this I sprayed 2 light coats of hairspray for later chipping duties. The sand colour top coat (Tamiya Desert Yellow XF-59) was sprayed all over the model in several very light coats, then chipped, more hairspray, more top colour, more chipping….and so on.
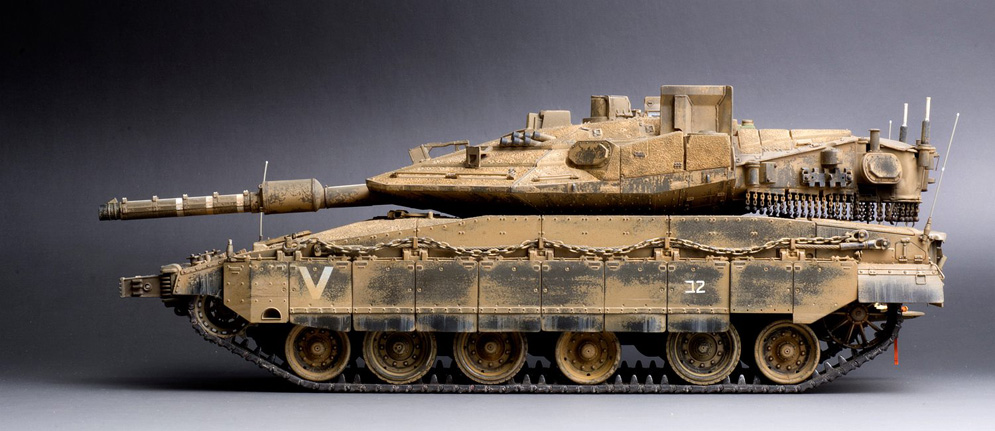
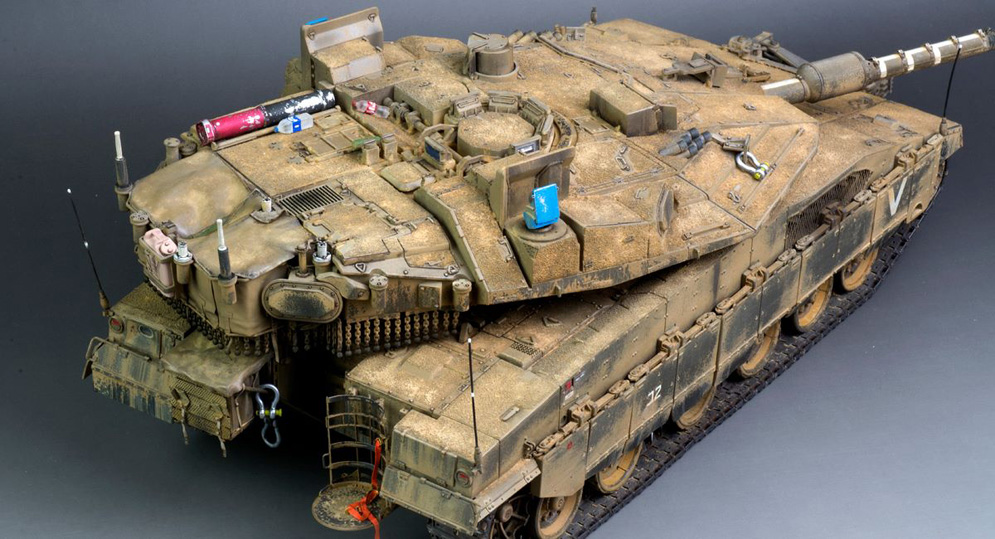
Several light pigment coats of various shades to match XF59 were added to the upper surfaces of the model, primarily over the anti-slip coating, this was sealed with an enamel pigment fixer.
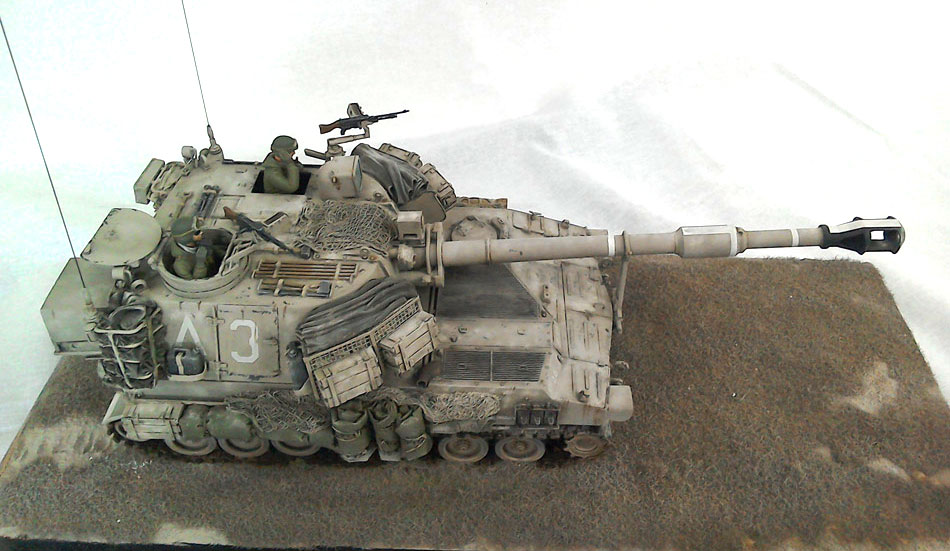
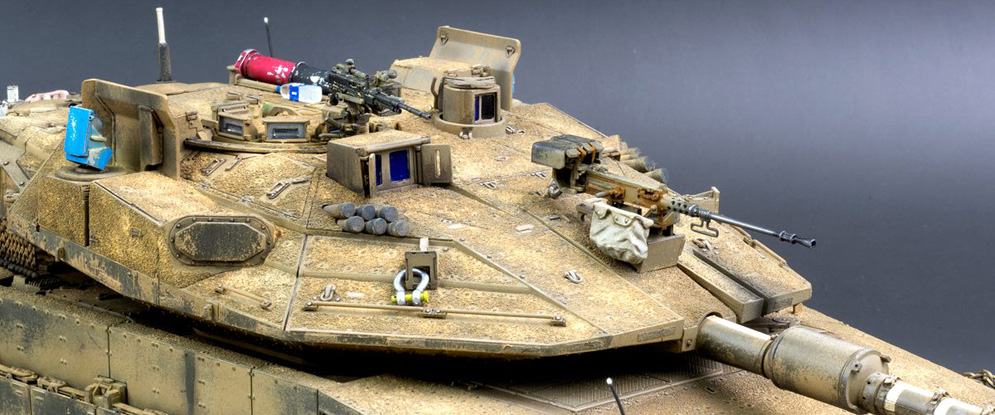
All of the smaller details such as the turret mounted machine guns, tow cables, trophy sensors etc. were painted in the same manner as the main hull and turret.
Final detail painting was done primarily with AMMO’s Oilbrushers, fuel and grease stains, along with additional sand tones.
Adam O’Brien
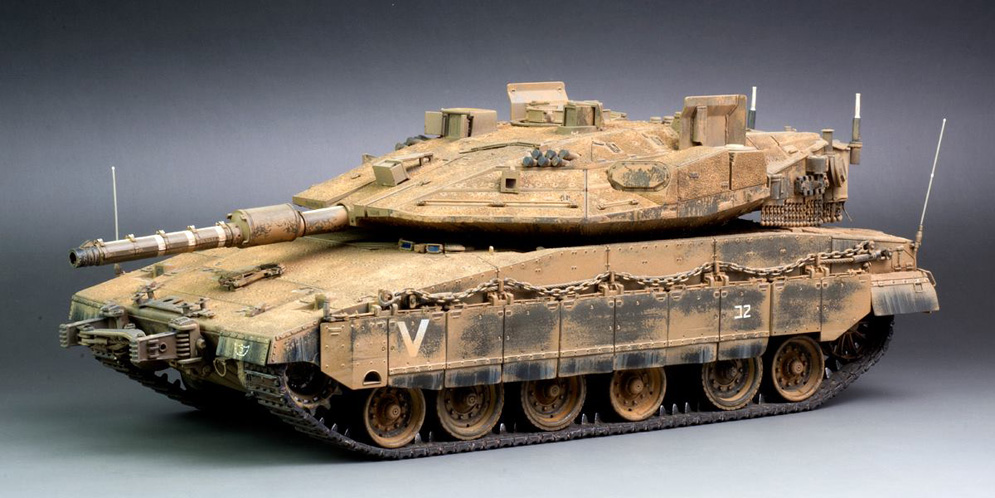
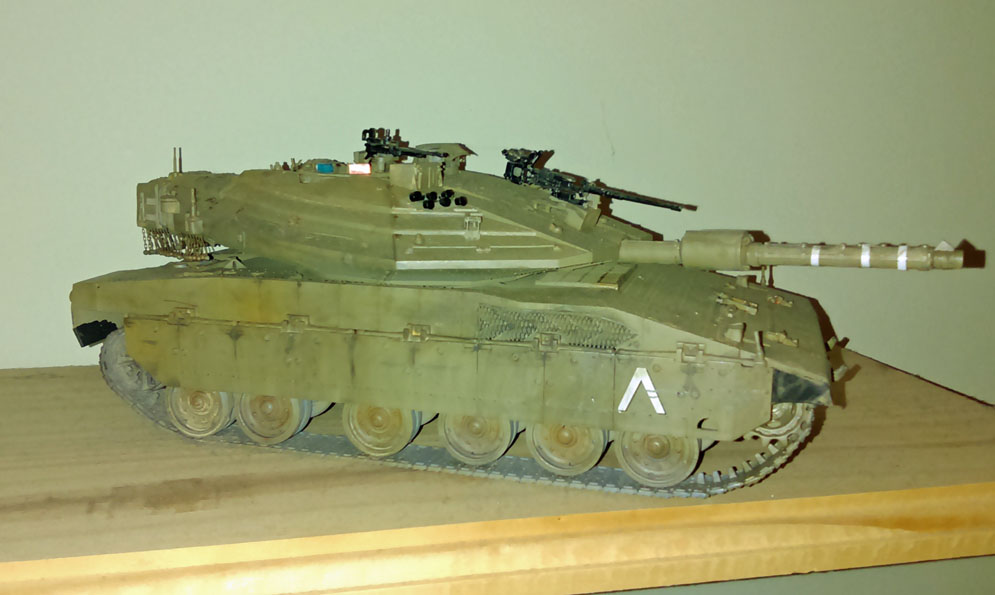
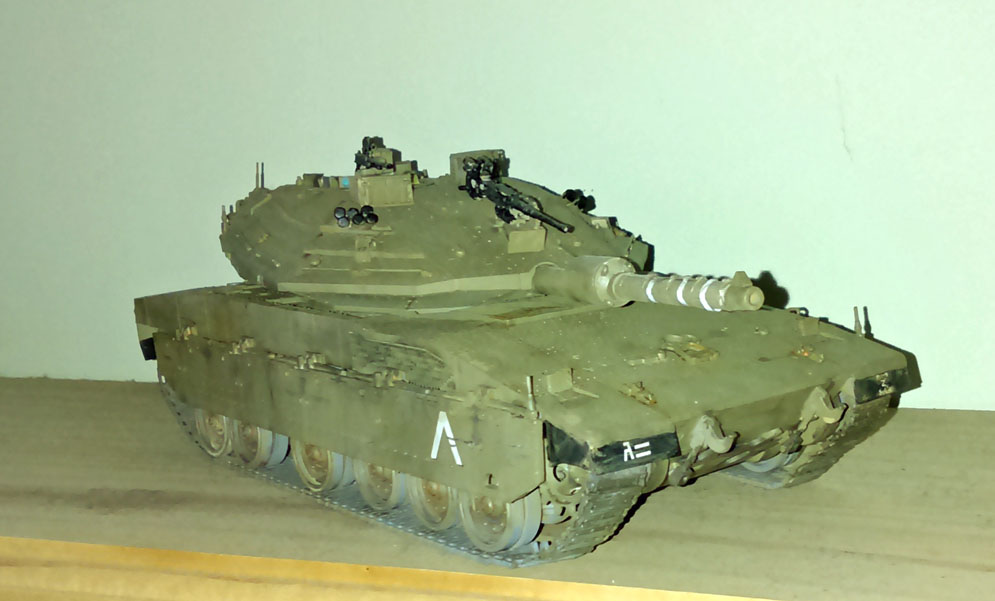
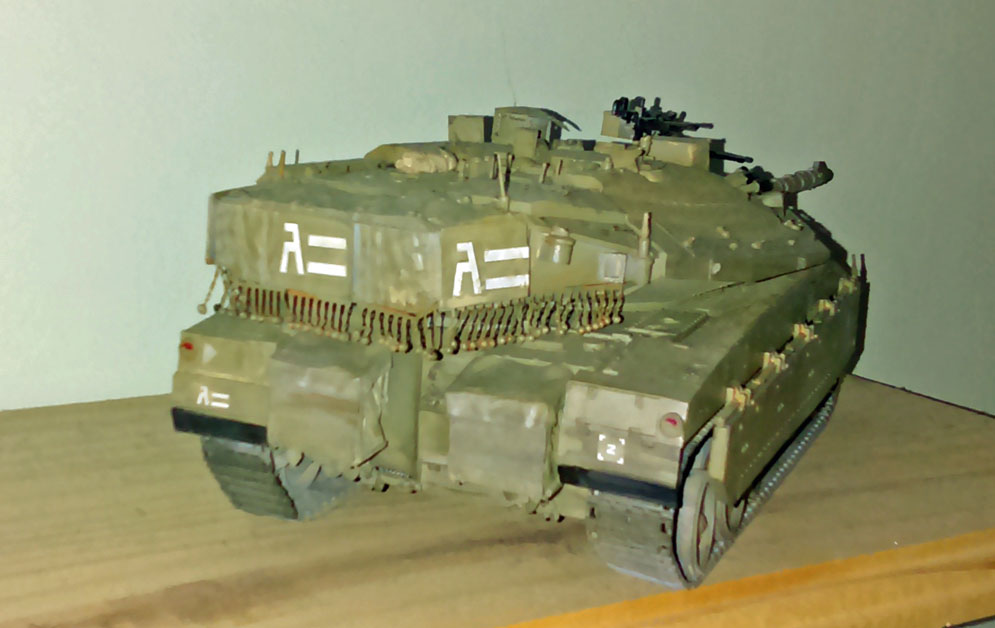
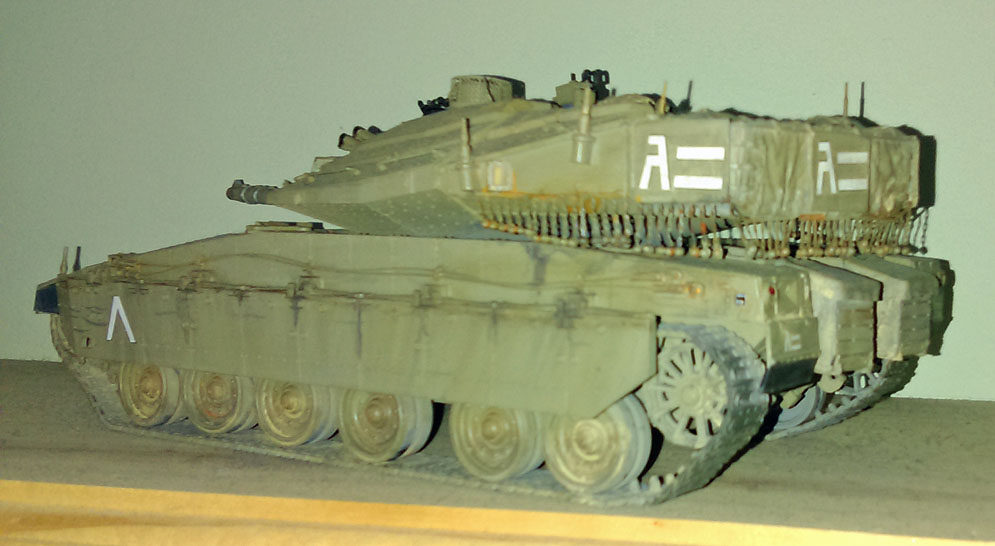
This is my model made from the Academy 1:35 Merkava Mk.IV lic with some Eduard photo etch and Legend basket conversion set.
Weathering is mainly done using AK Interactive weathering products and True Life Middle East Dust wash. With the AK Interactive products I just applied a little to each area I wanted to cover, waited 10 minutes and then lightly brushed off with white spirit.
Regards, Mark


Items used:
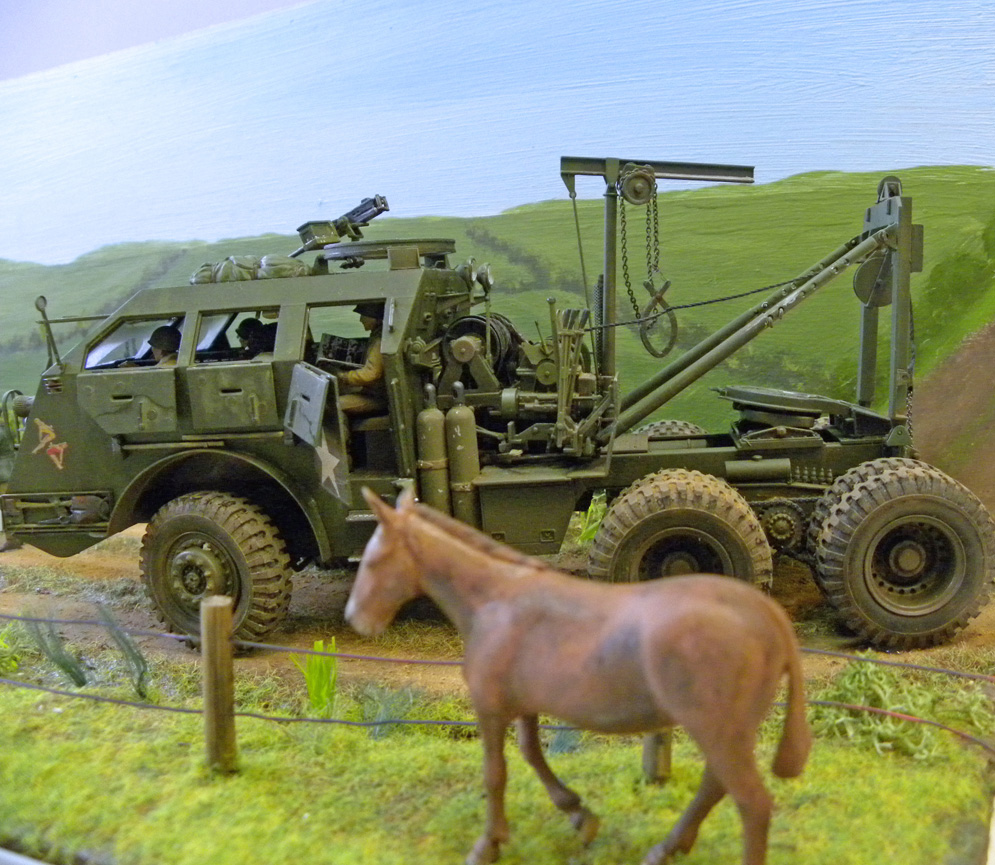
Tamayi Field kitchen
ESCI stores wagon
MK35 civilian figure
Just Bases pre varnished base
Vacform Building from Poland
Balsa wood, household filler, commercial tin foil container, plastic strip, rigging strip
Why this subject?
I started out wanting to try out the vacform building and the base was part ready from another project that I had decided to use a larger base. I also wanted to do something small using horses as I had planned another diorama using with lots of horses. Originally I was only going to use the Tamayi kit but after positioning the field kitchen, I decided to add another vehicle then the figure was added as it was left over from the previous project an already painted.
Download the full details of Phillip’s diorama.


The dog is from a spares box and the walking soldier is from Andrea. The soldier clambering down is a Tommie’s War figure. You know war in the trenches was not all hell and fury. A lot of the time it was very quiet and that is what I have tried to show. The name ‘Mud and Khaki’ is actually the name of a book I read when I was 7 or 8yrs. old. It is the story of an artilleryman, and is set in 1915. It is an autobiography written of his time in the trenches. The words in the title are worth a mention. Mud of course refers to the condition of the trenches, but Khaki is in memory of his dog which attached itself to him and they had, and survived, many adventures together. That story has stayed in my head ever since I read it as a schoolboy.
Jim B.

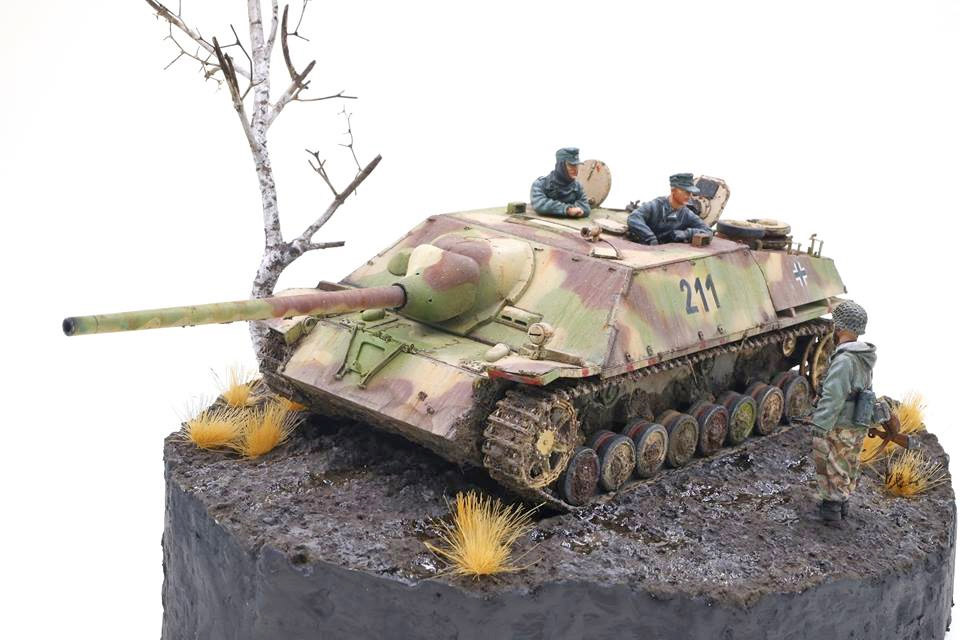
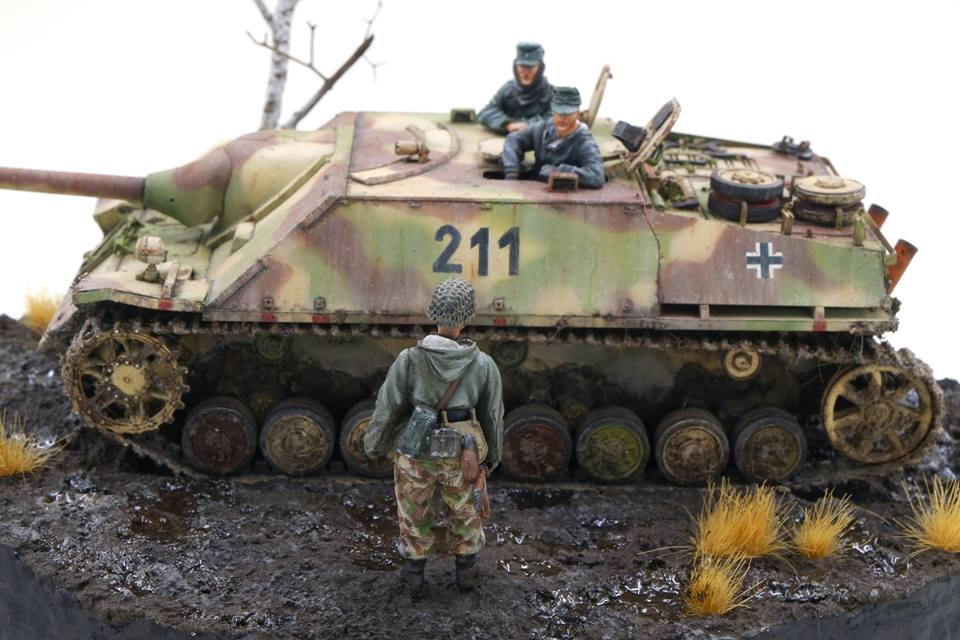
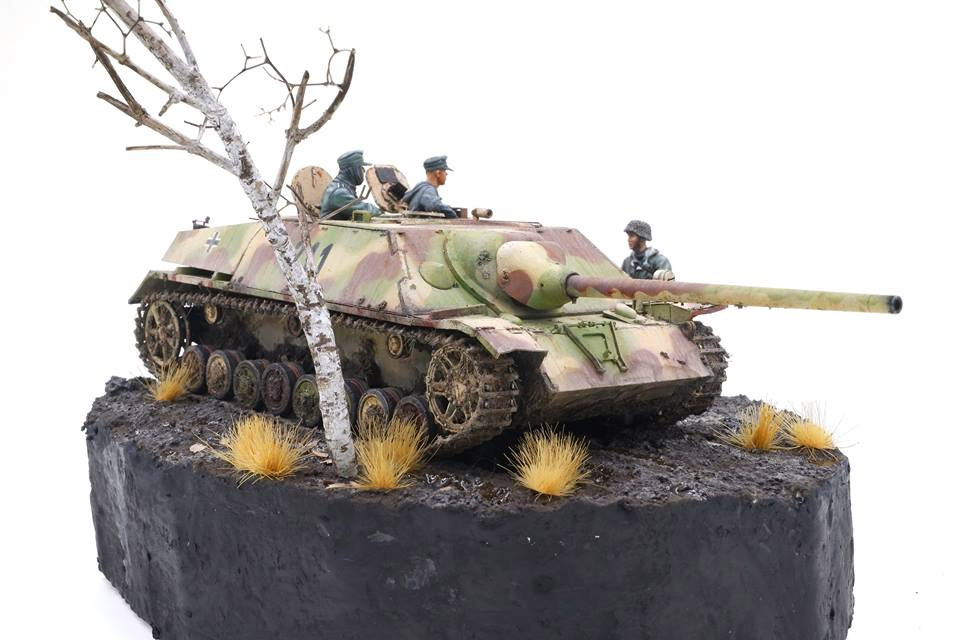
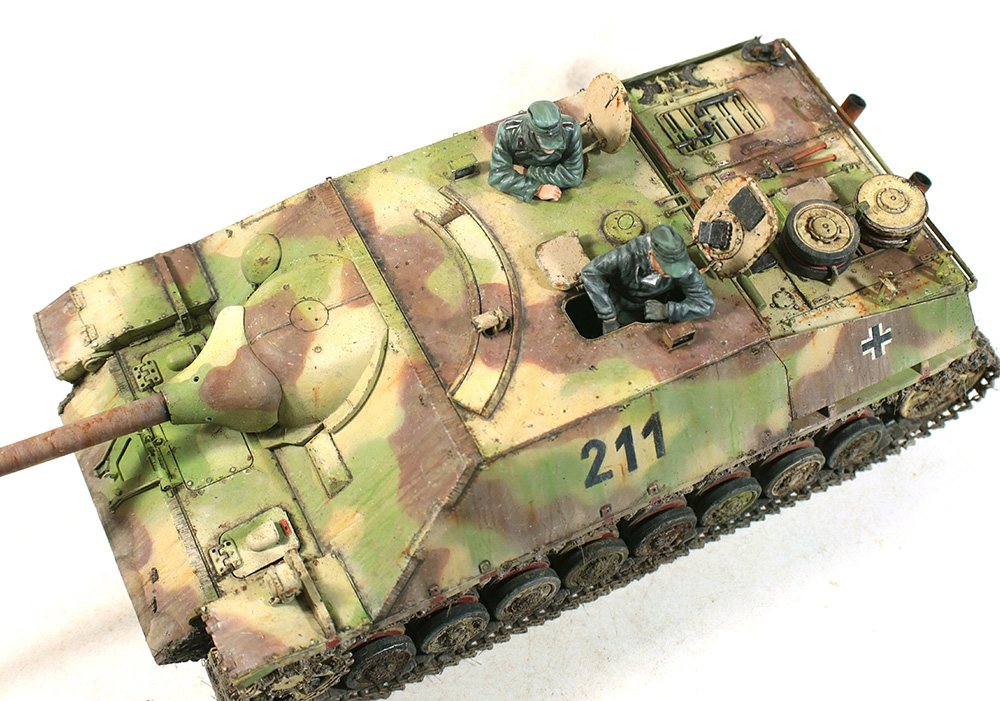
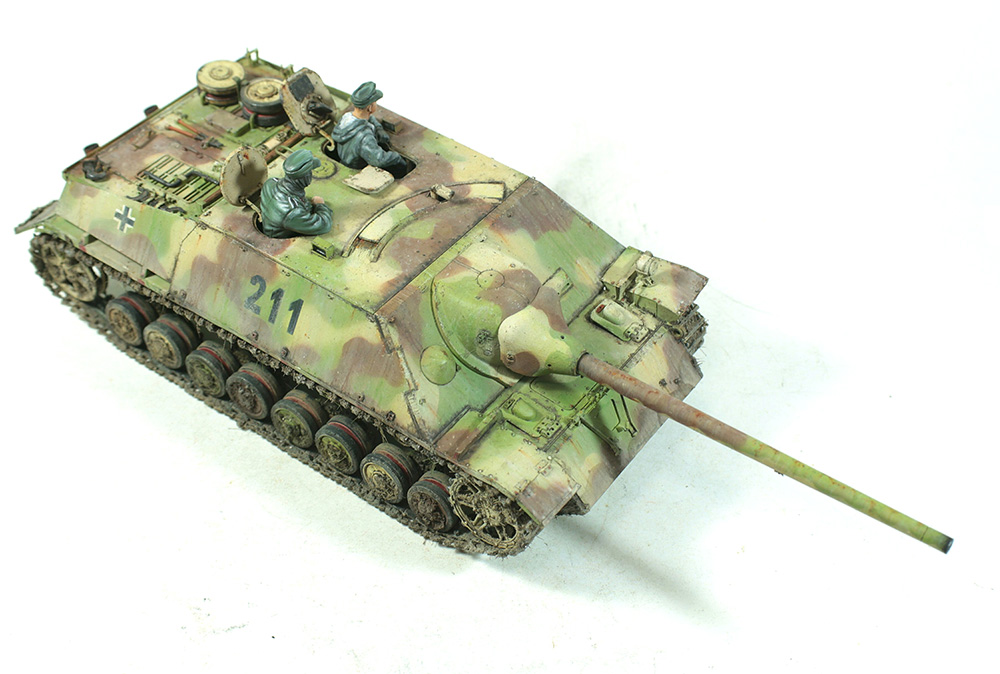
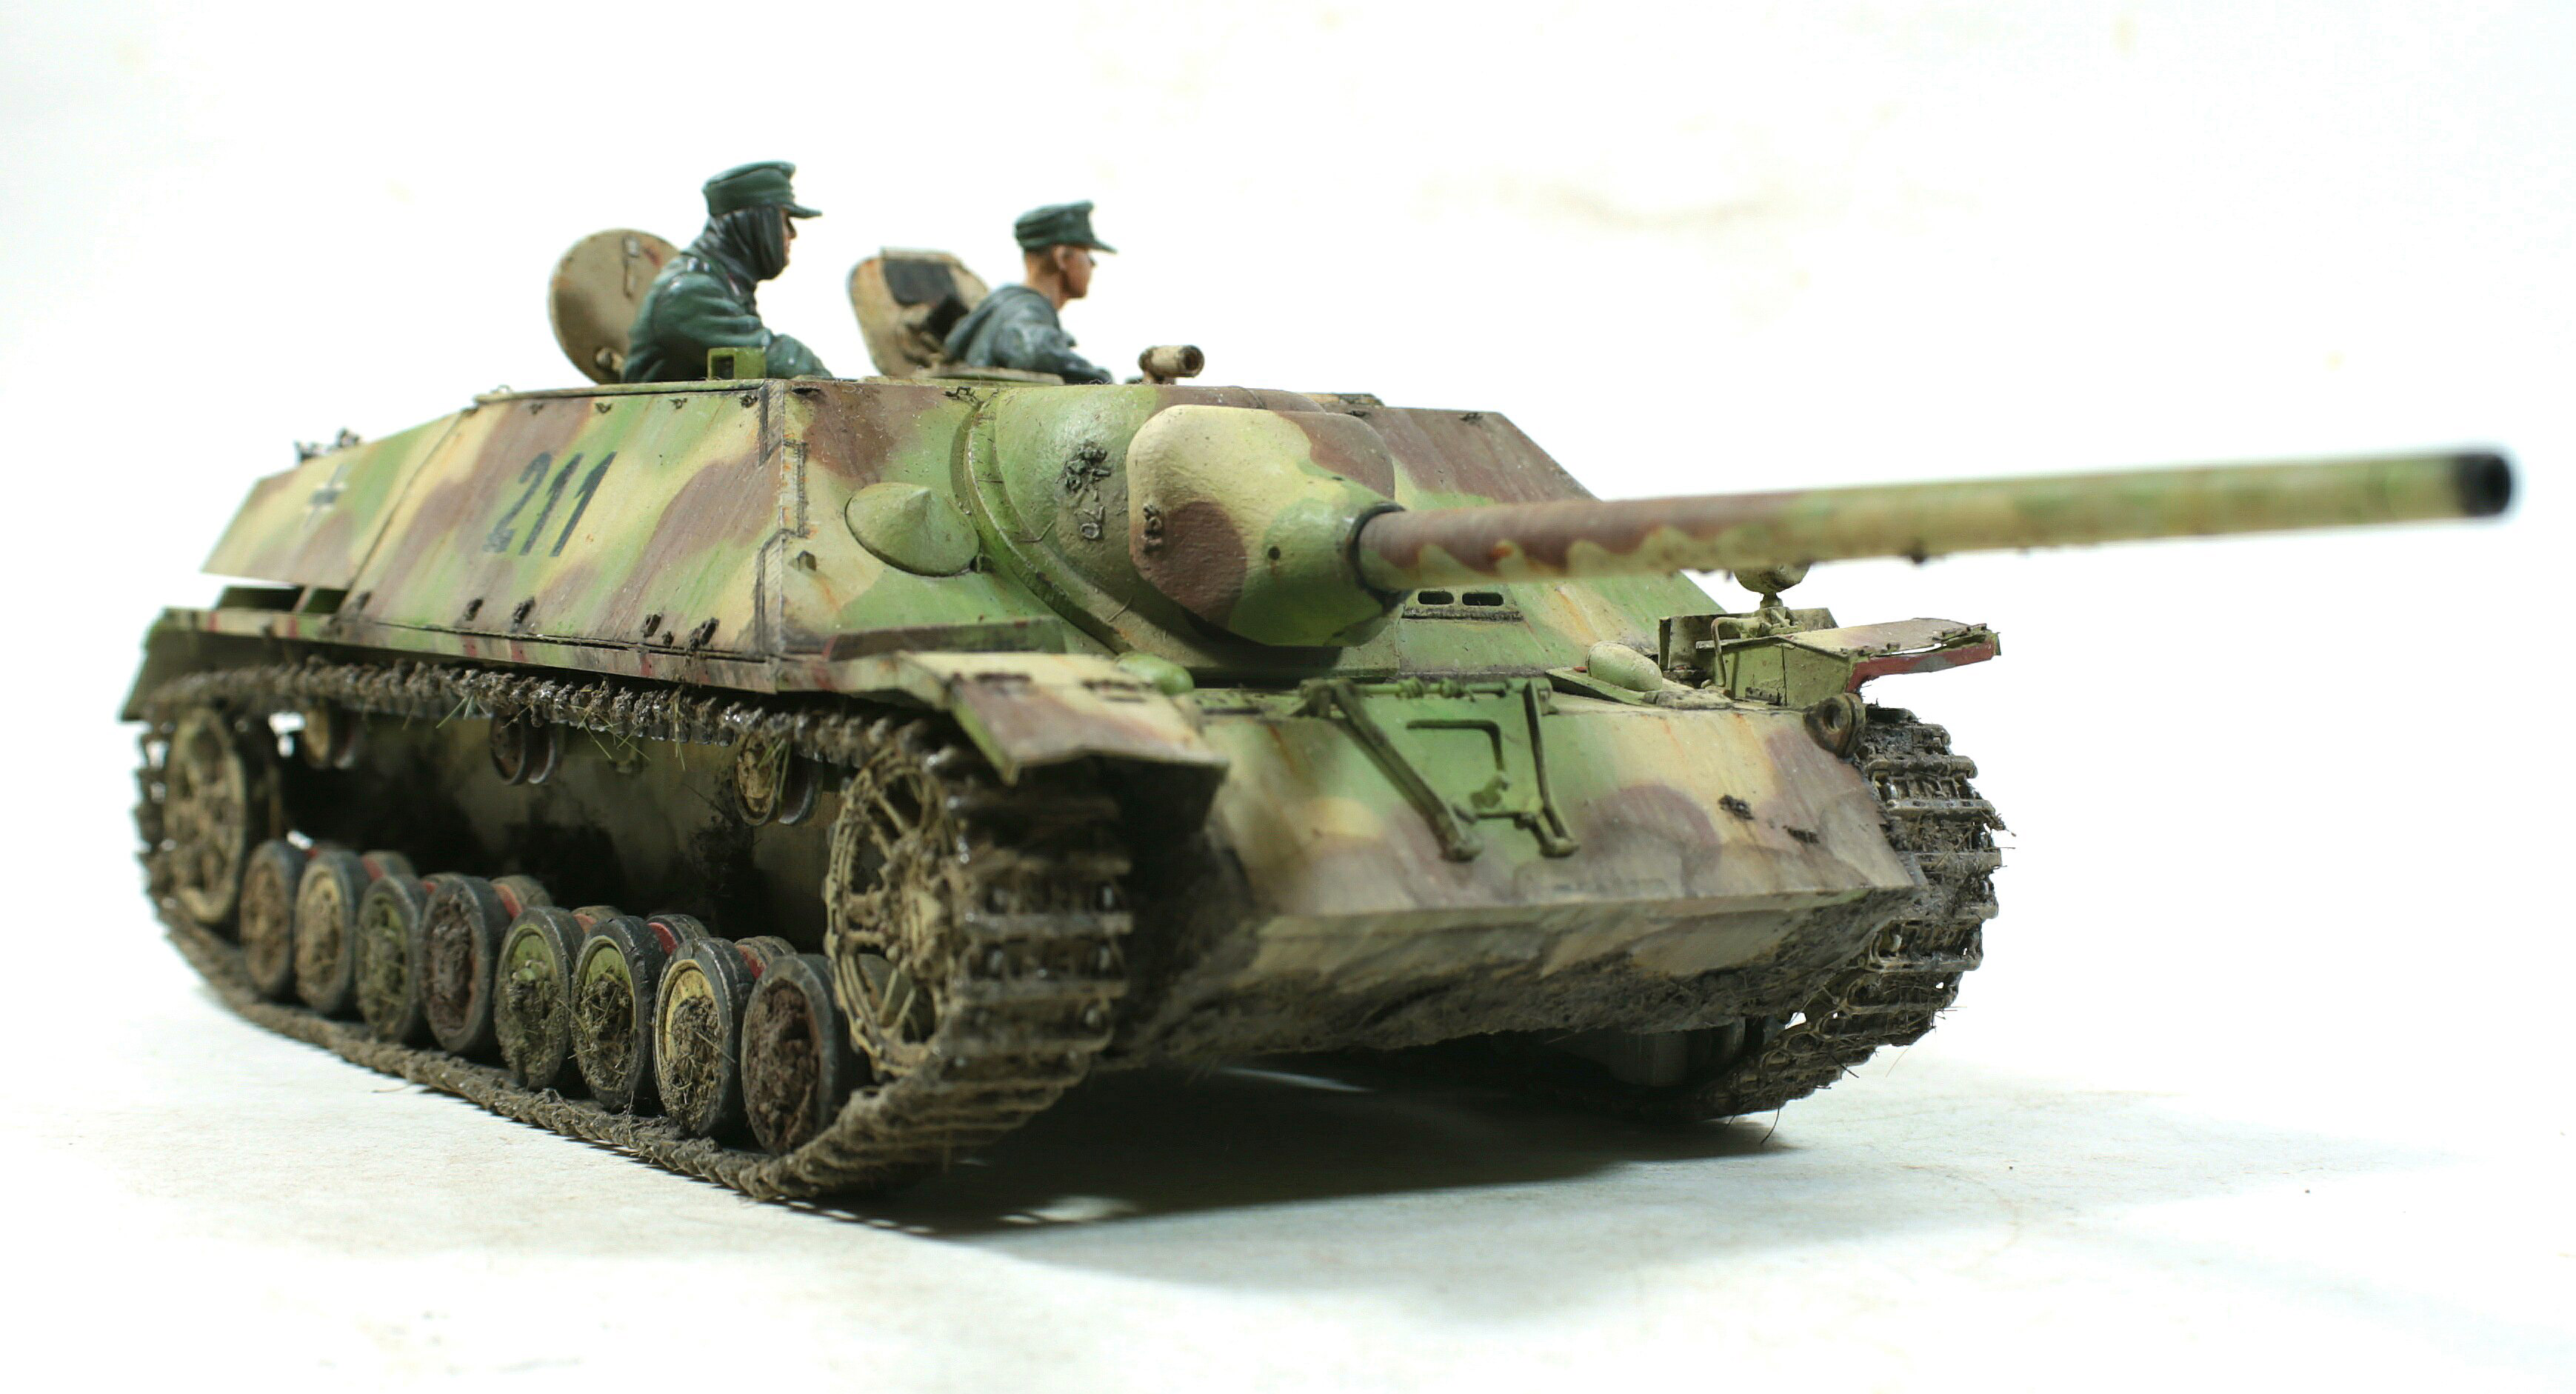
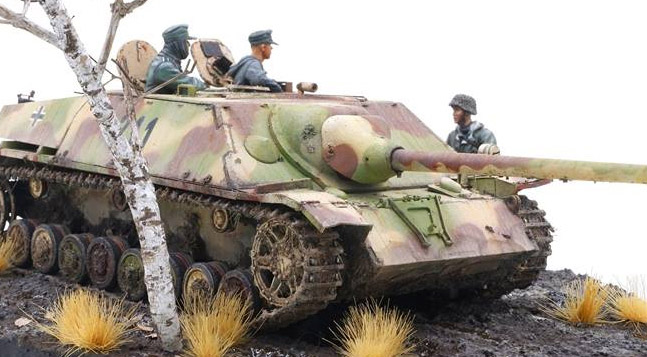
Also one of my latest vignette, 2/Pz Jg Abt3, 3rd Pz Gdr Div. South of Cologne, Germany. Early March 1945
Hope you like it!
Gary K.
Galleries: A | B | C-I | J-L | M |N-P | R-S | T-Z
