Welcome to the Subscribers’ Armour Gallery T
Each submission has a ‘gallery’ of thumbnails which you can click on to see an enlarged image along with some short text describing the model – enjoy!
Galleries: A | B | C-I | J-L | M | N-P | R-S | T | U-Z
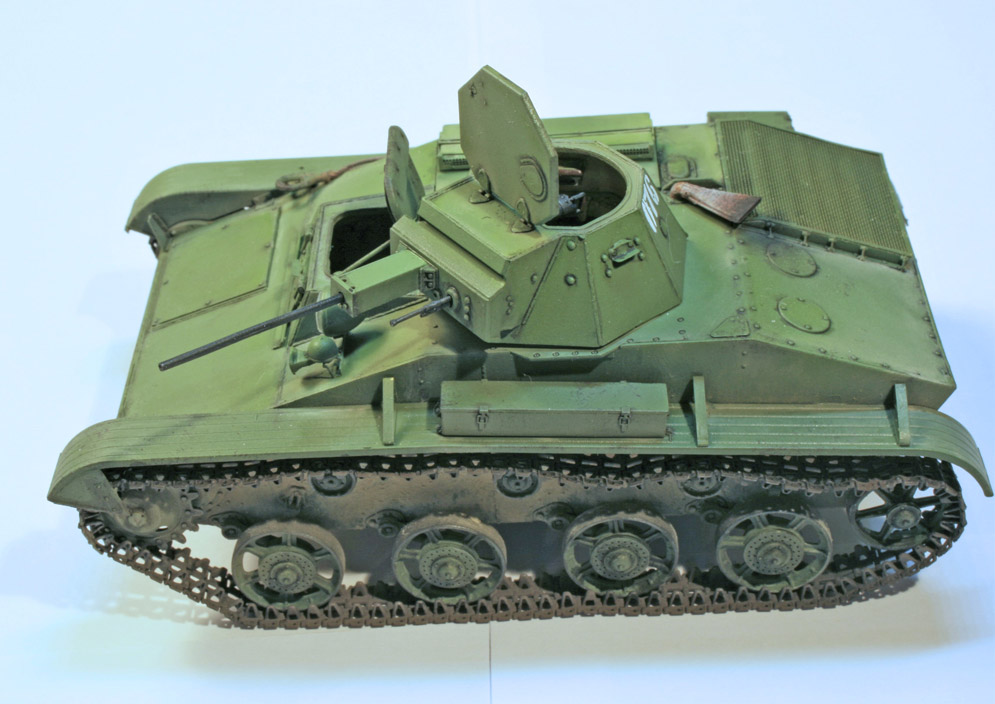
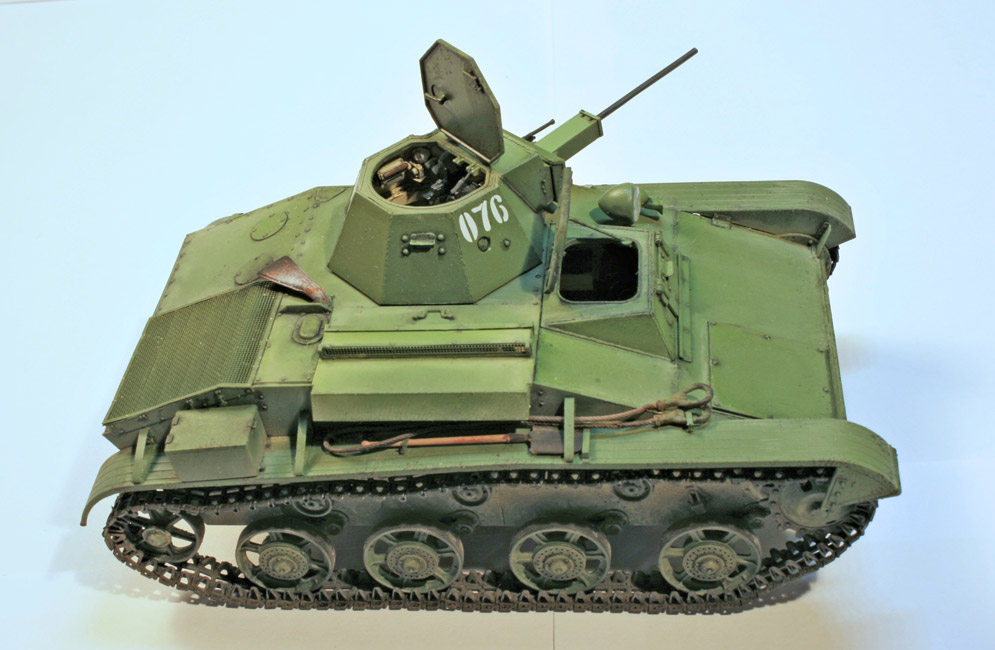
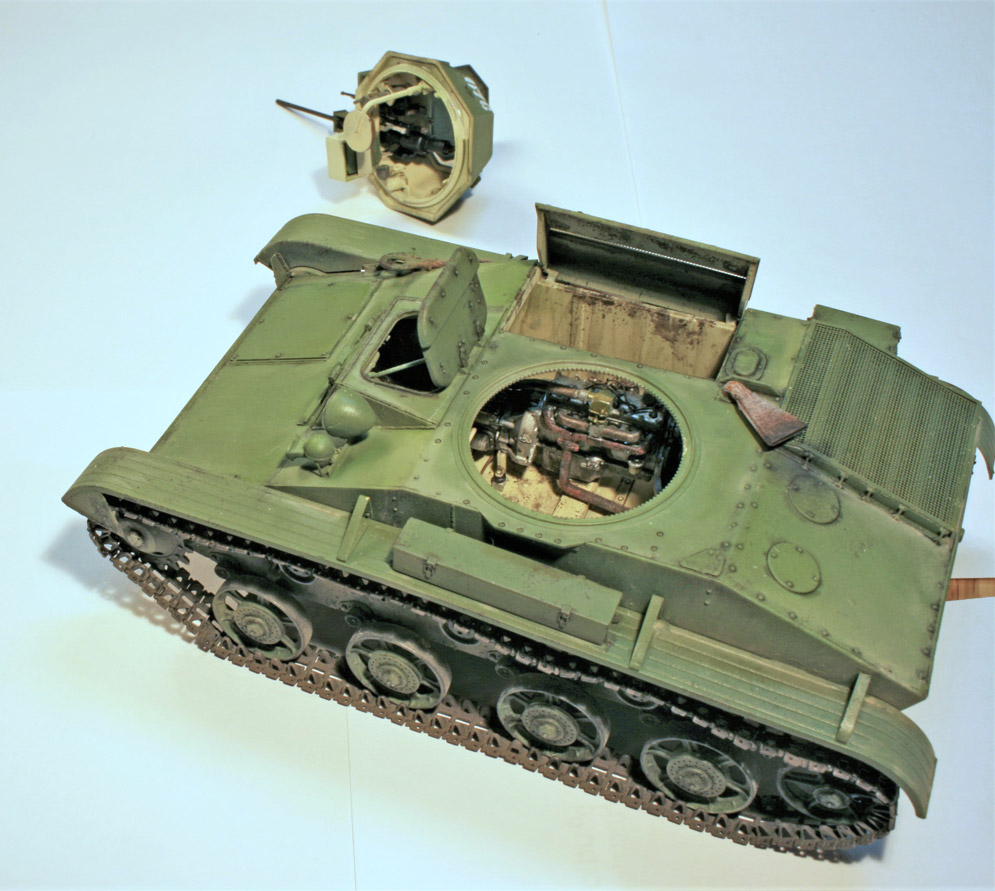
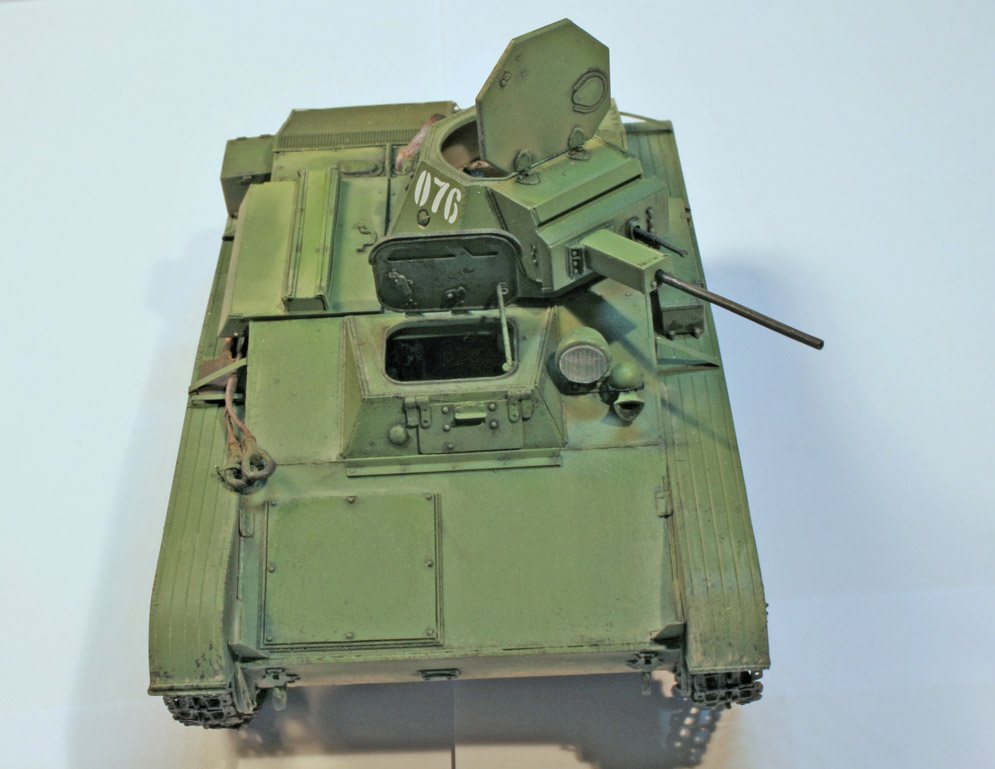
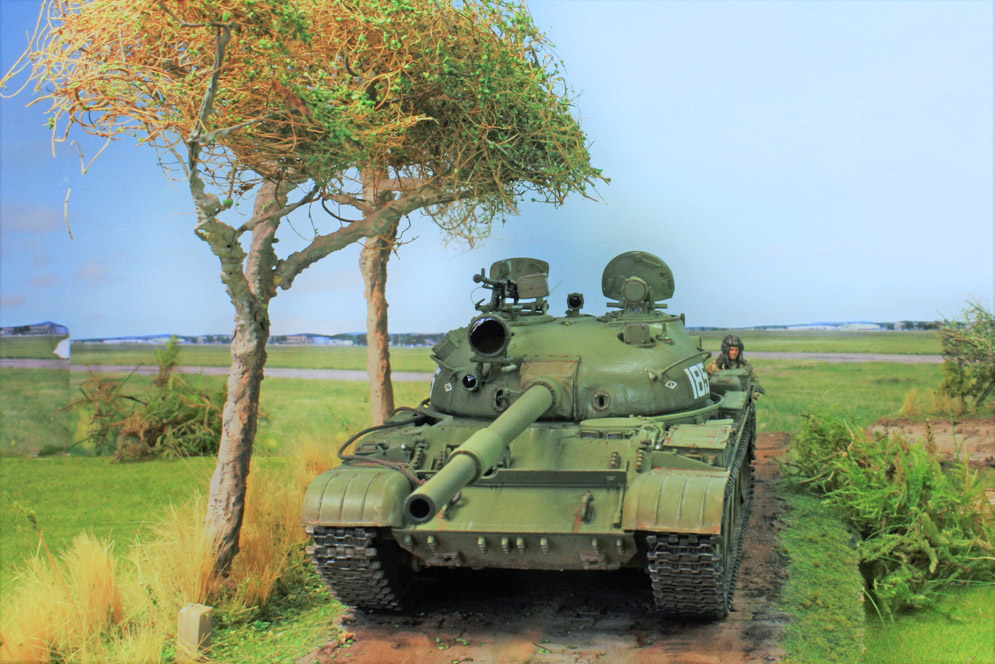
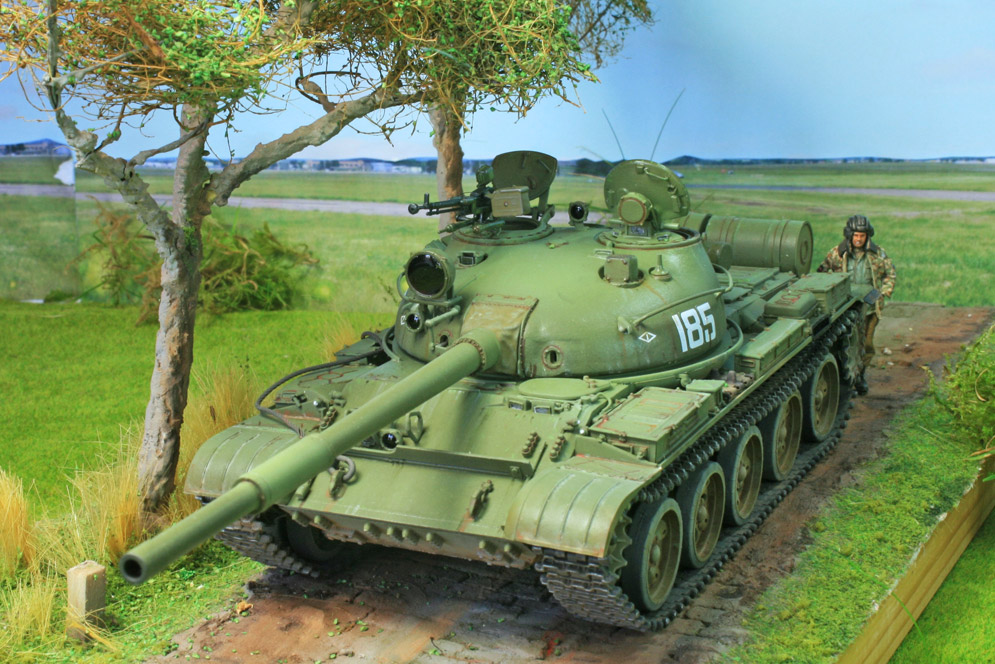
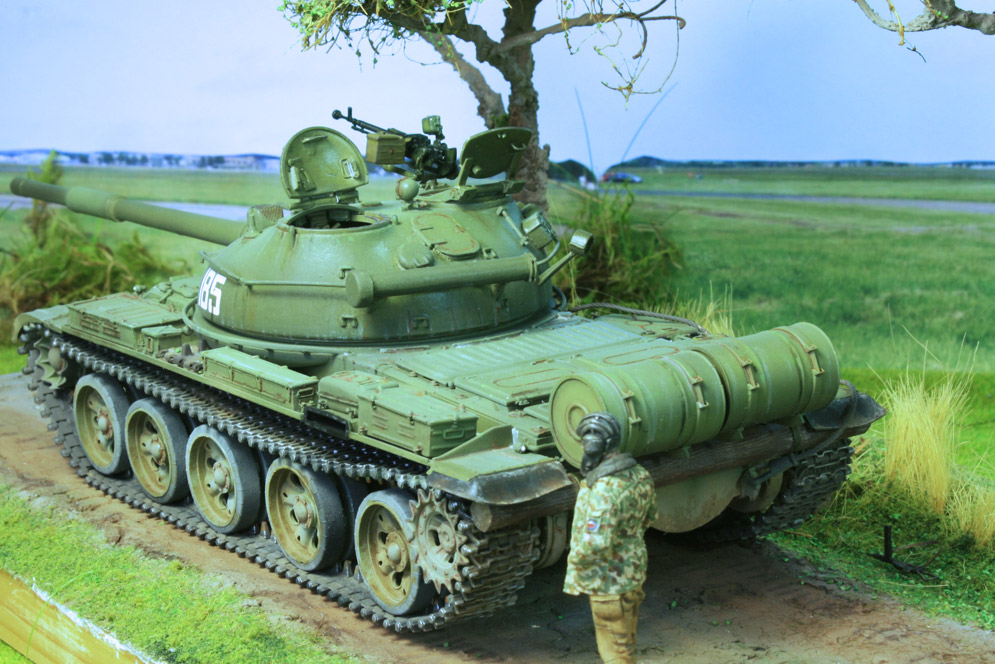
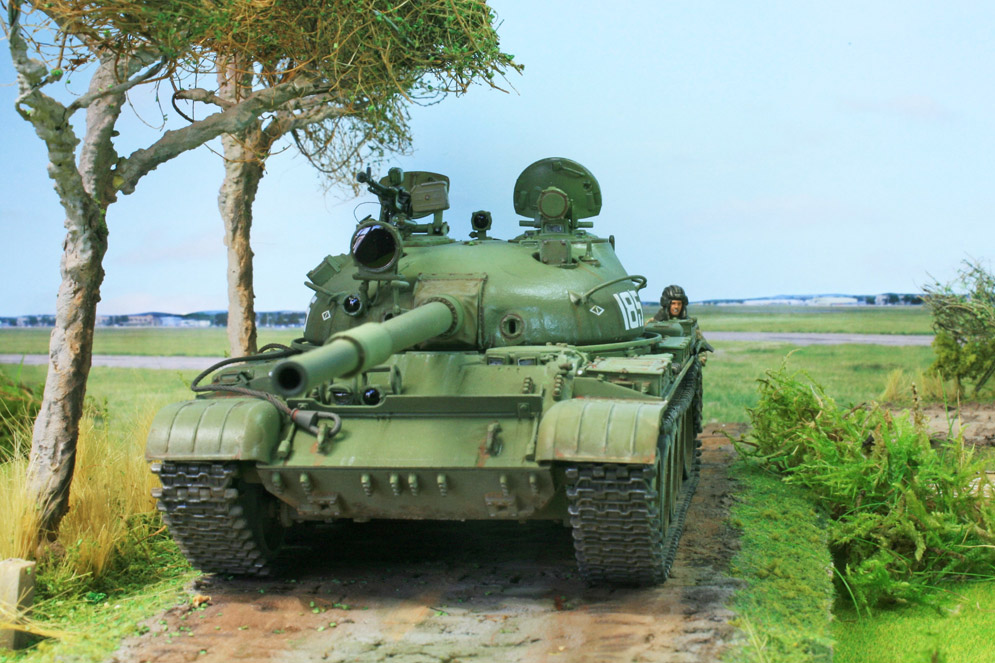
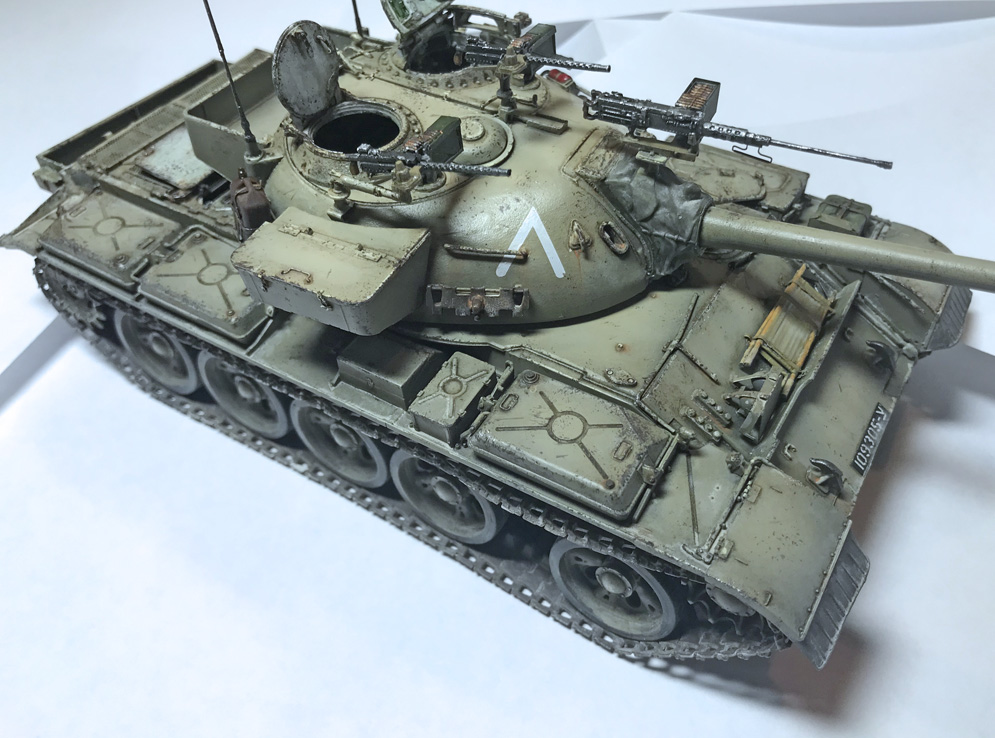
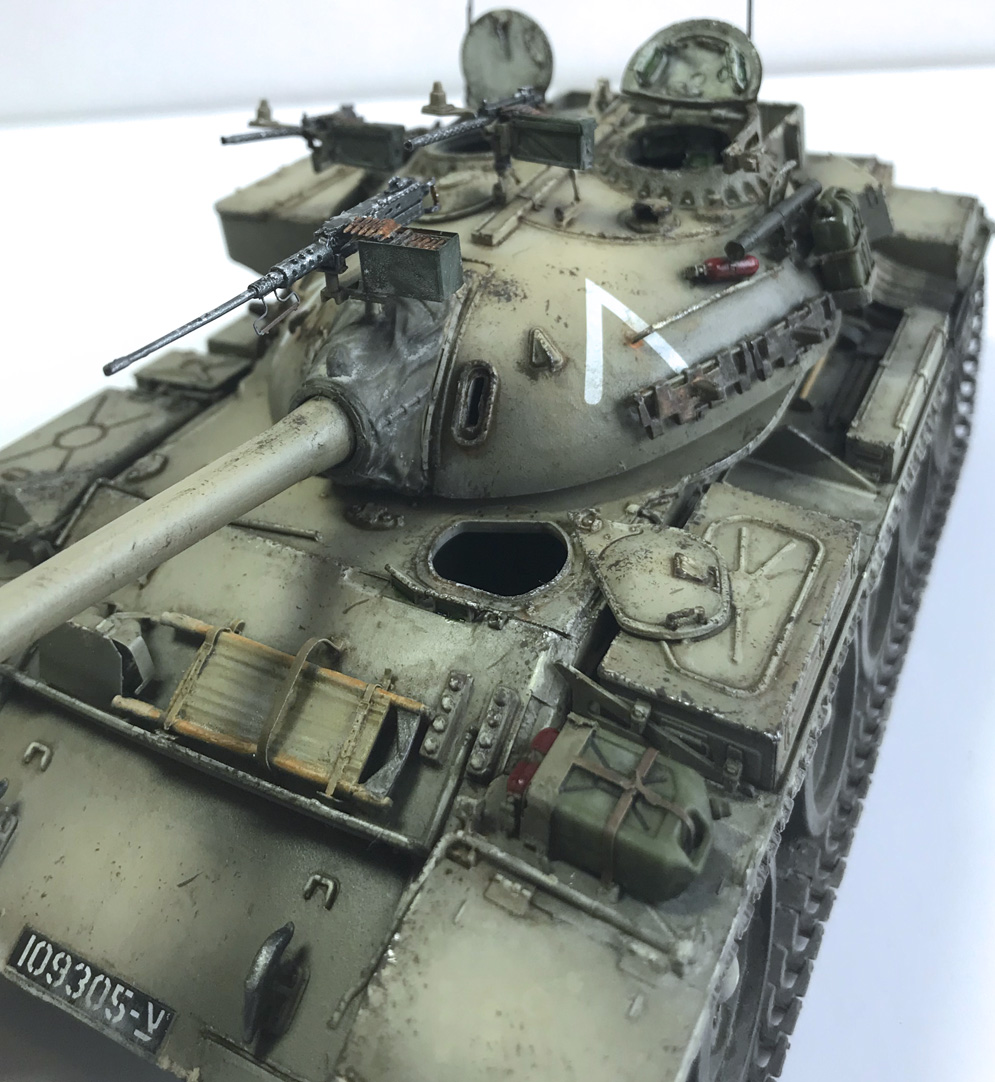
The model was built out of the box and went together without problems apart from the fact that the etched grille at the rear of the hull was slightly too large and so some plastic had to be removed from the insides of the hull using a small grinding bit in an electric drill to make it fit.
The painting was done with Tamiya acrylics over Mr. Hobby’s Black Primer. I used a base coat of Dark Green (XF-27) over which a patchy coat of NATO Green (XF-67) was applied. I light coat of the same colour lightened with Yellow Green (XF-4) over this concentrating on the centres of panels.
This produced a very garish looking high-contrast finish, but this was toned down with later weathering using pastel chalks and I thought that the use of several layers of contrasting greens resulted in a more three-dimensional appearance than would a single overall colour.
Dai W.
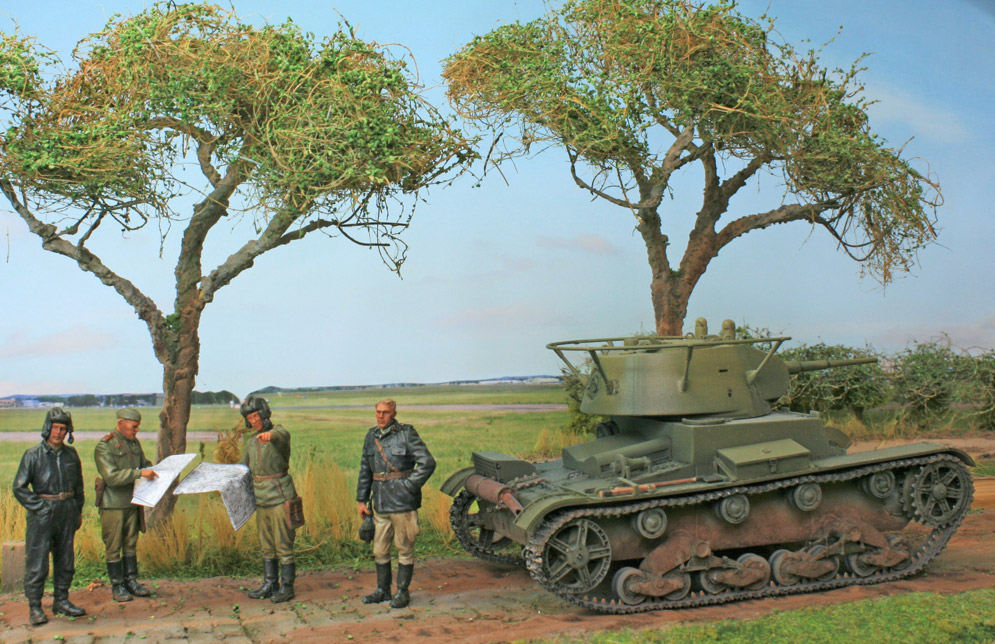
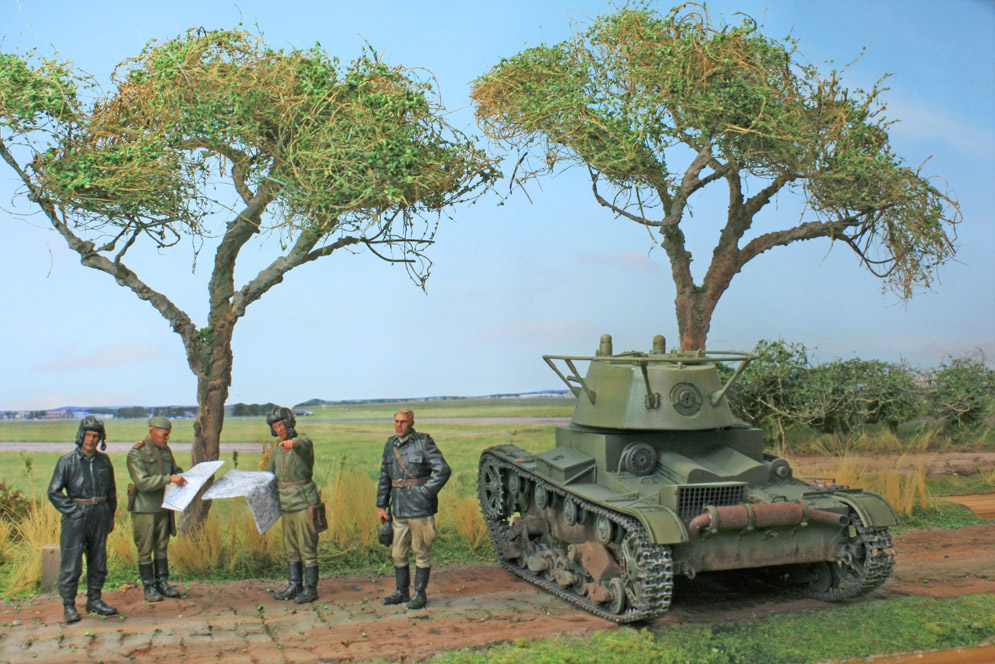
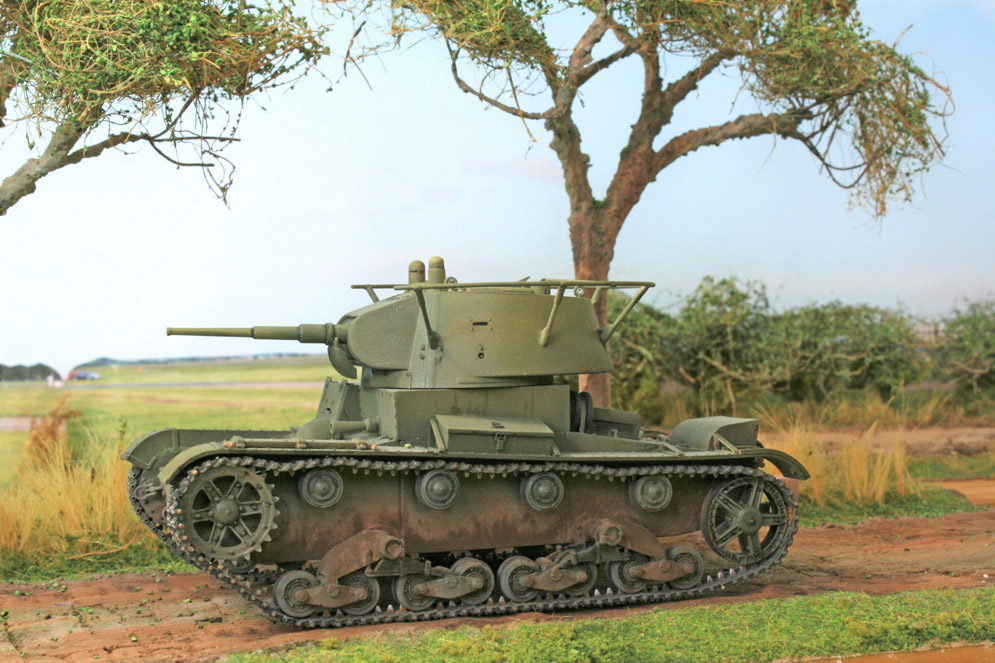
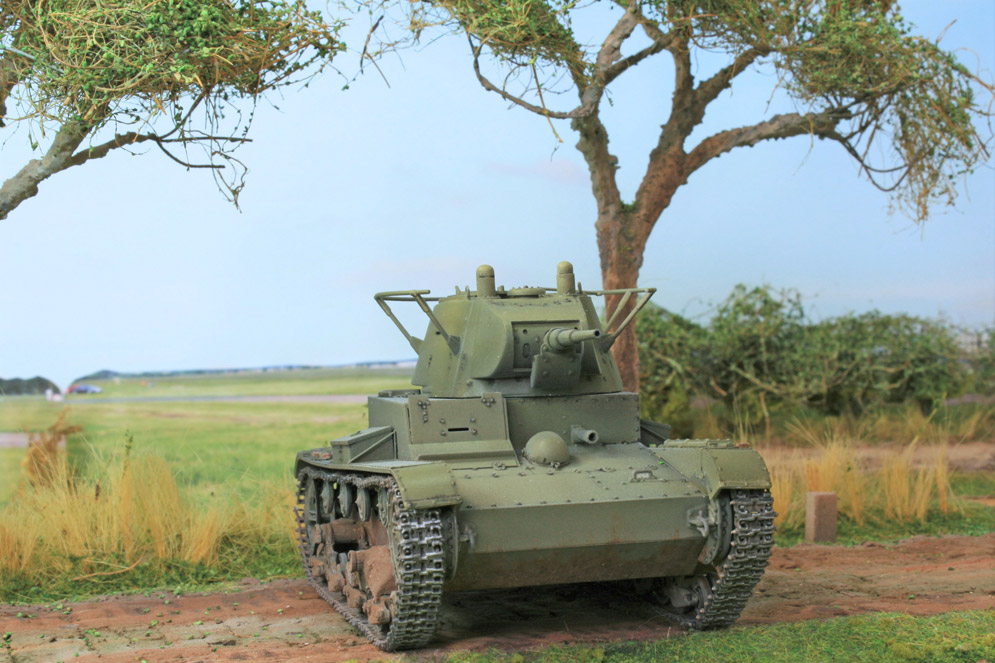
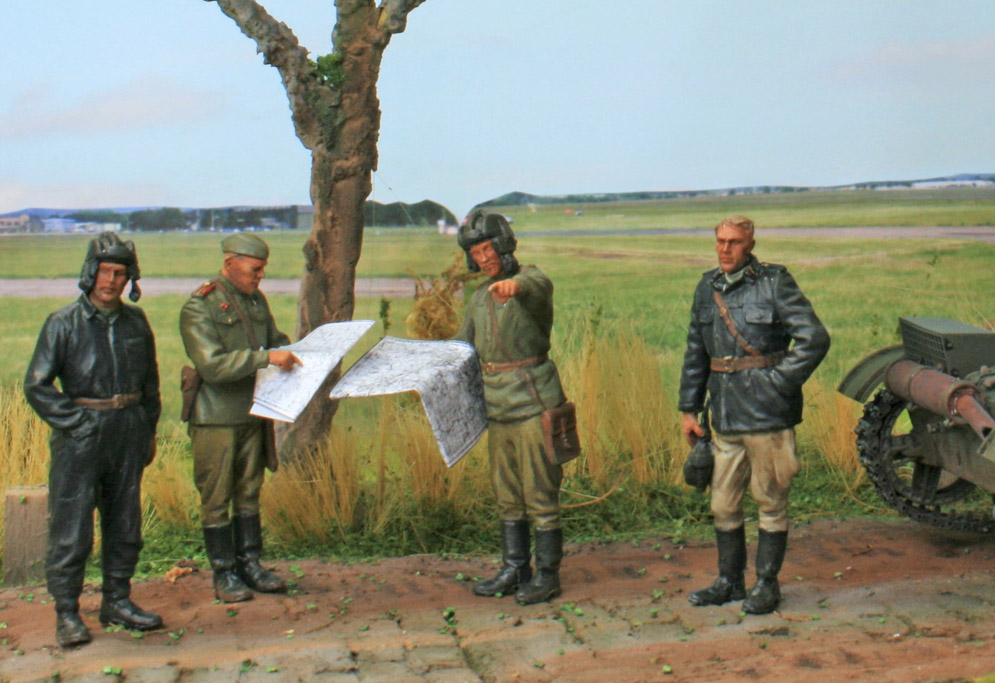
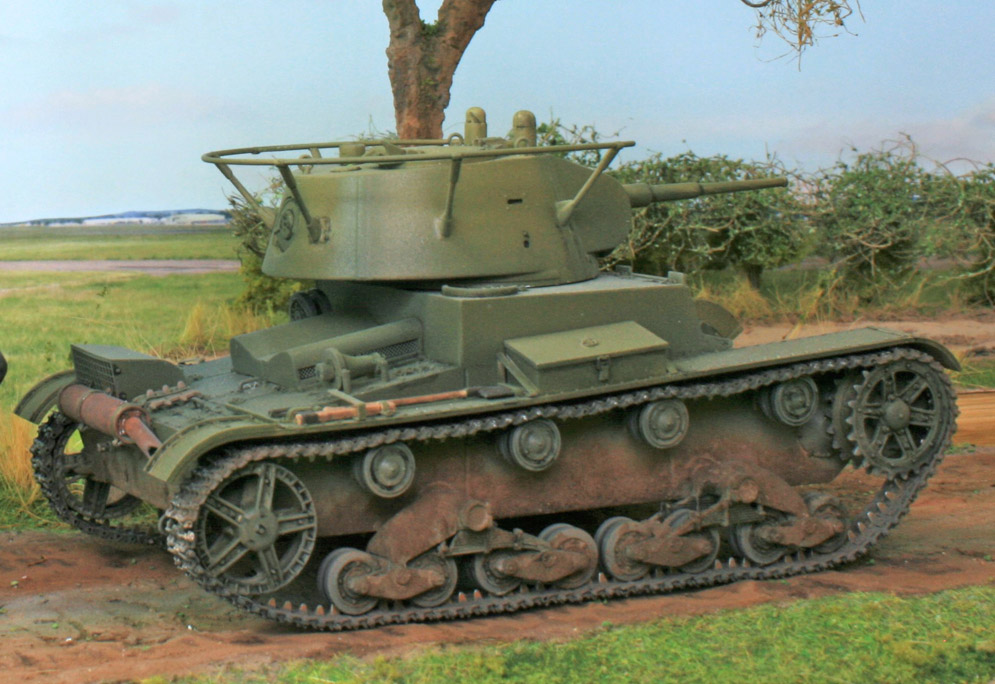
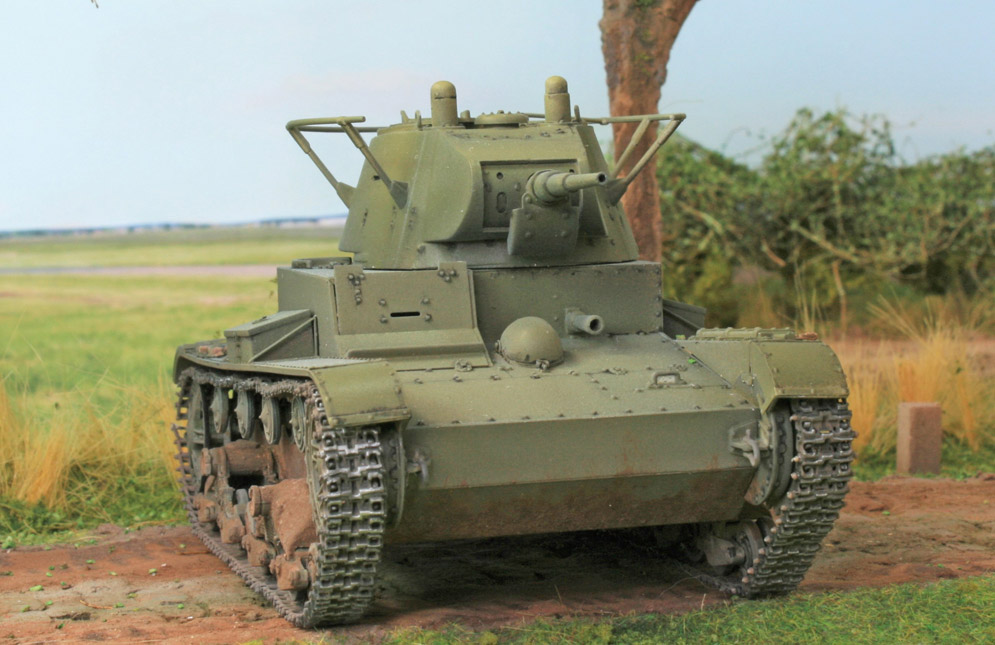
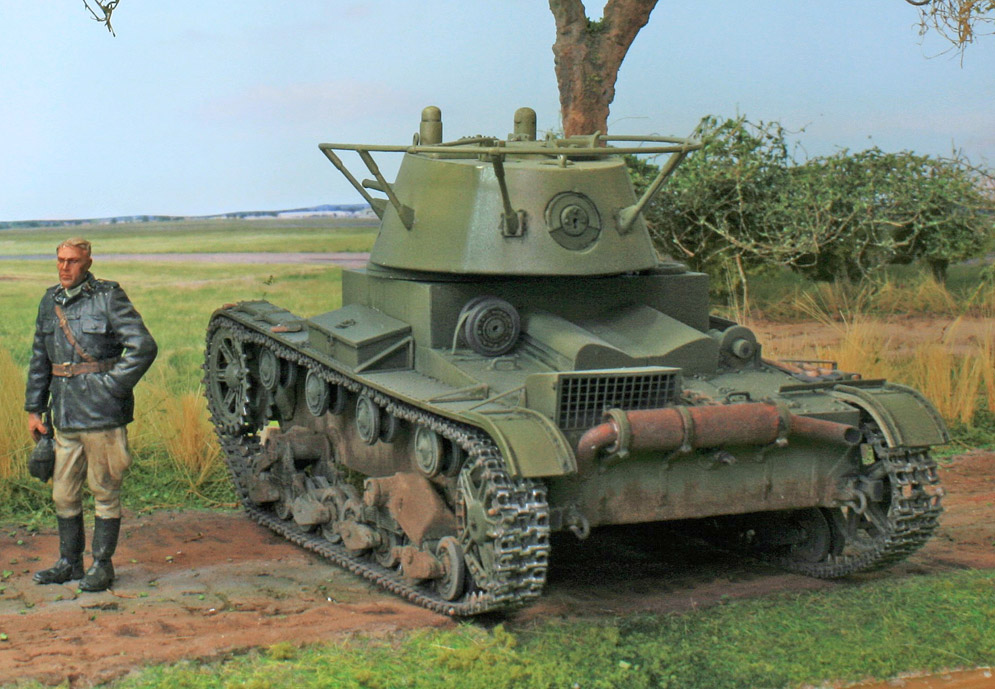
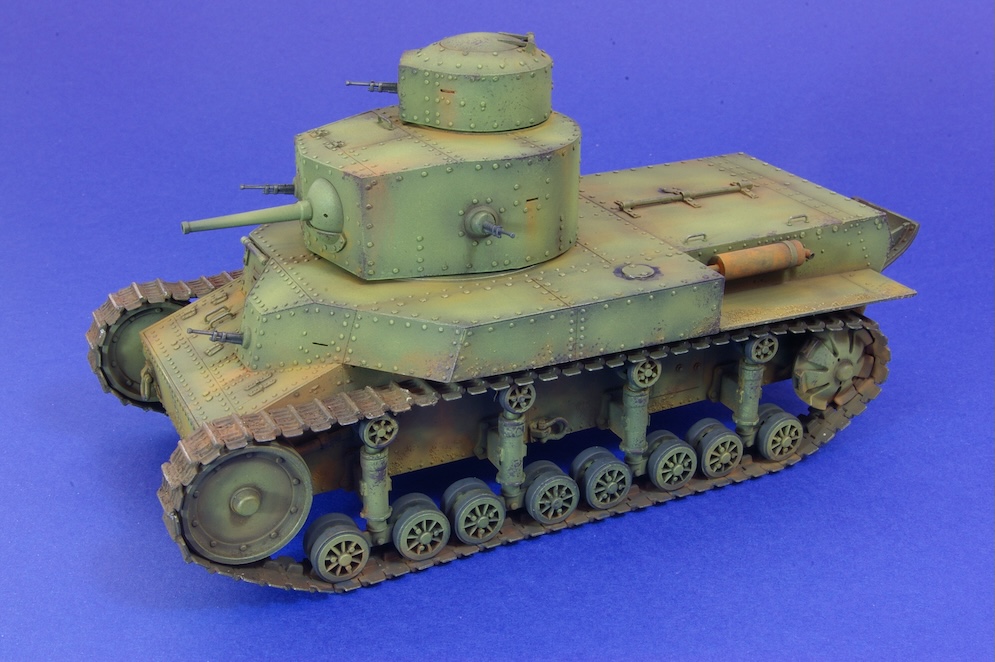
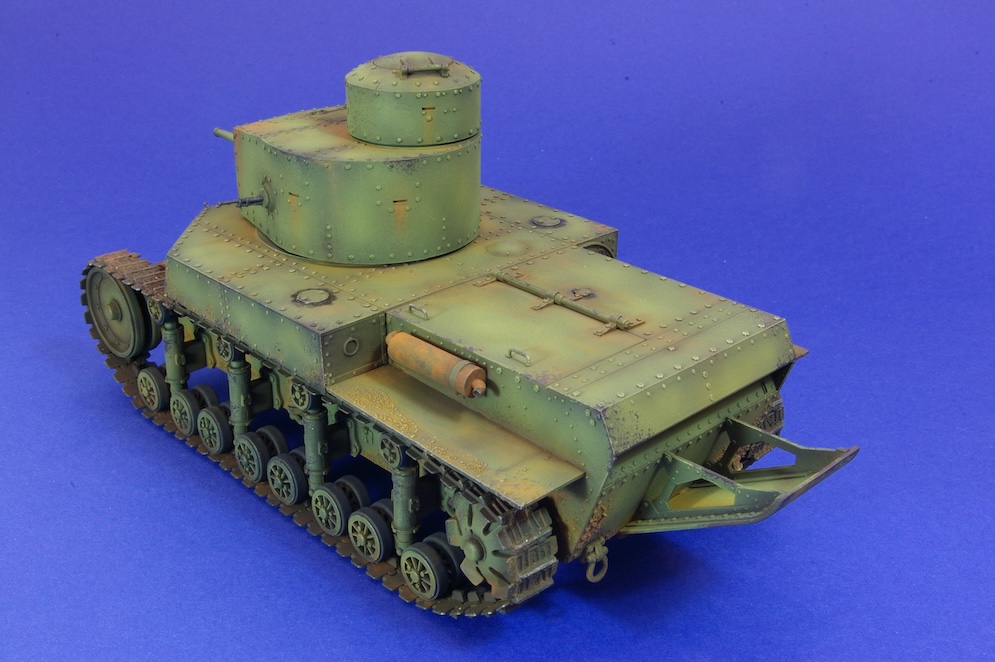
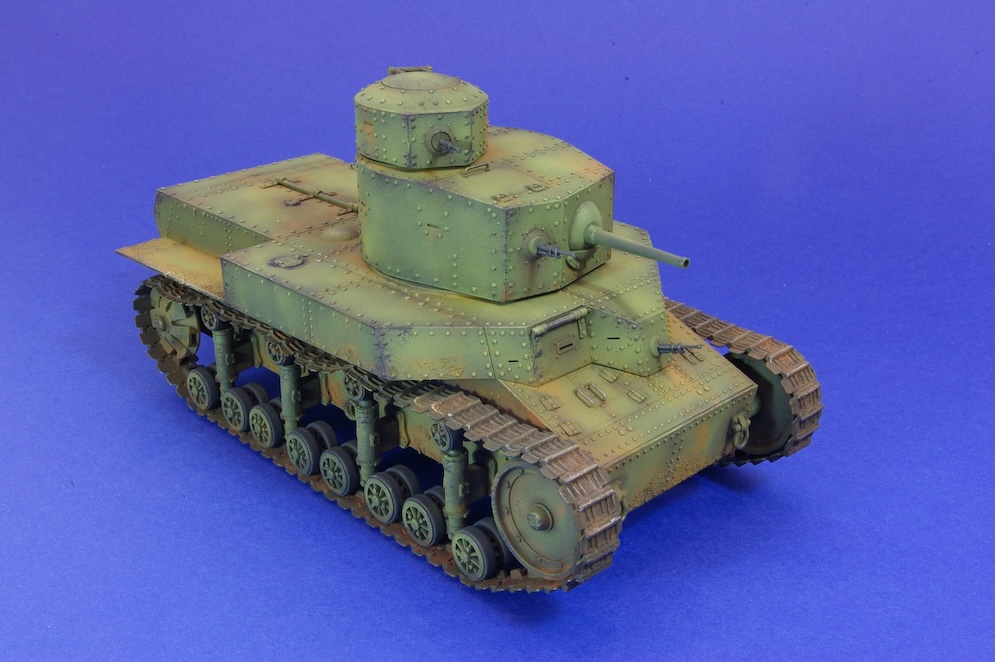
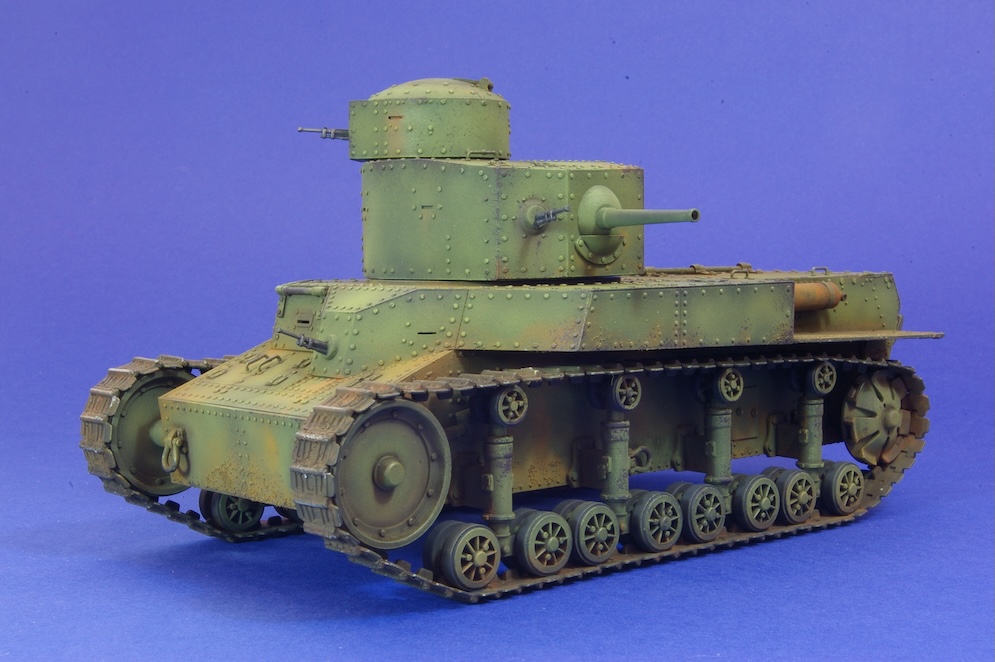
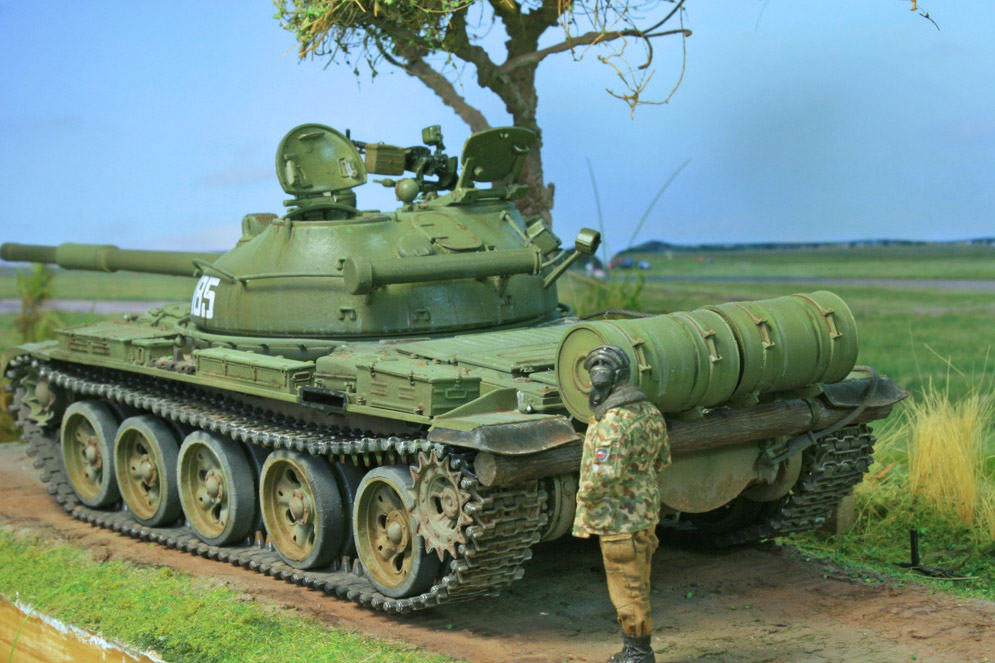
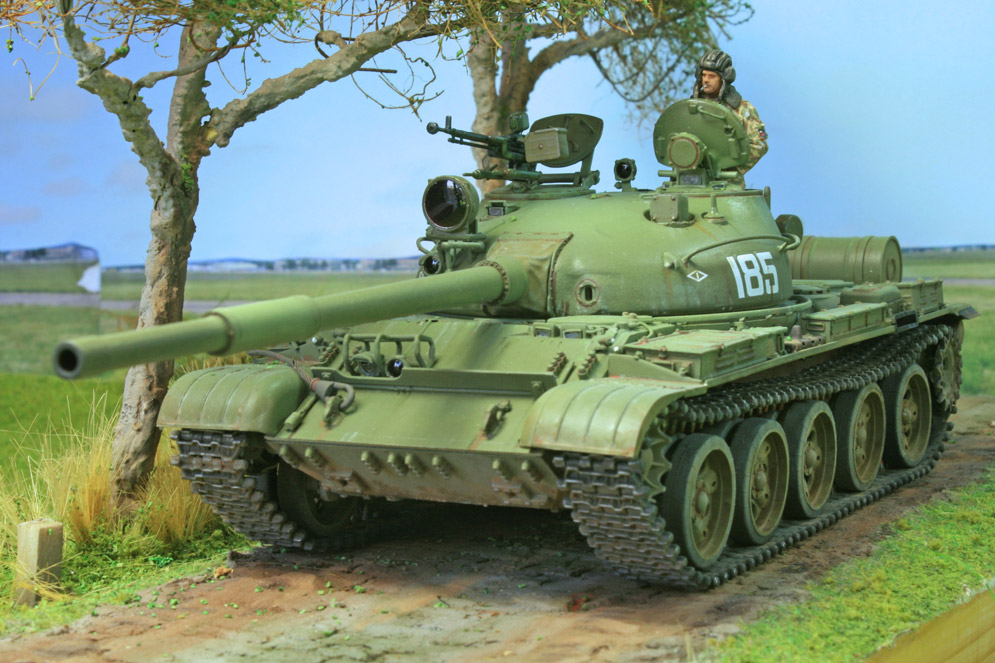
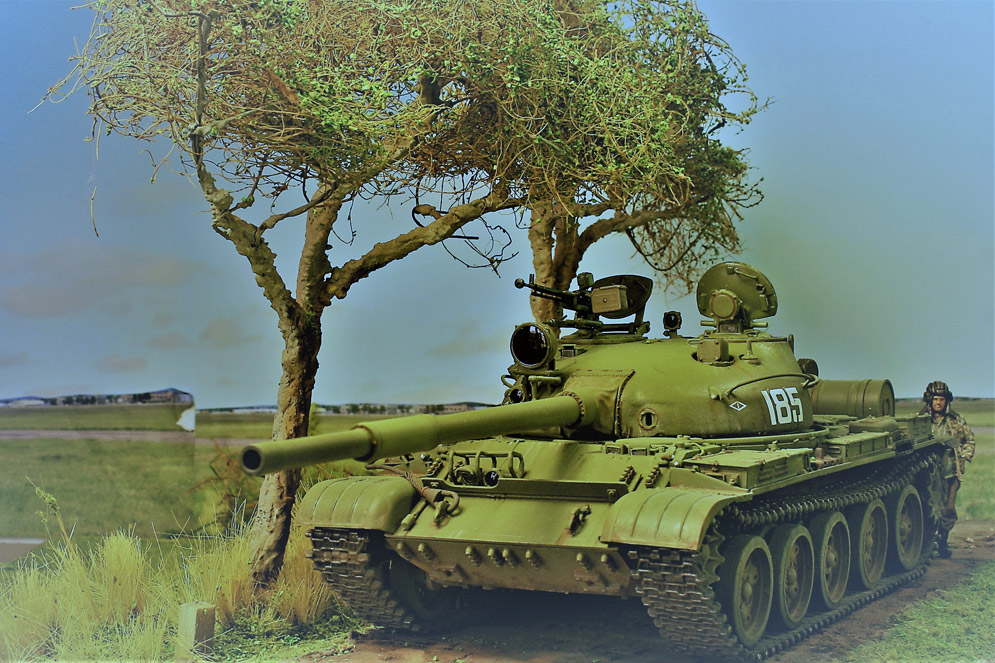
Right up until the late 1930s the Soviets had the biggest and arguably the best tank fleet in the world. The T-26 had its moment of fame in the Spanish Civil War. Tank engines were relatively weak so little armour could be carried. However the 45 mm gun was excellent for its time, so the T-26 was not a bad balance. However, it was becoming apparent that 15 mm of armour was not strong enough to cope with anti-tank guns which were becoming more common. The T-26 model 1938 had a rather hopeful upgrade to a more sloped turret, nevertheless it was an obsolete vehicle in 1941. Radios were something of a luxury to the Soviet way of thinking so only command tanks had them, such as this one.
The HobbyBoss kit is a simple and solid build. The only issue is the tracks and the miniature track pins -aaargh!
Regards, Andrew
1:48 scale
“Built from the box except for: Replaced all kit grab handles with scratch made wire handles and thinned out edges of rear fenders and inside of exhaust pipes. Added bolt detail to spare track links. Hollowed out kit headlamp and added MV clear lens. Drilled out muzzle of hull M.G. and Stowed logs are dried twigs razor sawn at the ends and plastic Tarpaulins are from the Tamiya 1/48th Jerry can set.
Tamiya paints airbrushed using pre-shade and highlights method and dry-brushed highlights and detail painting of tools etc all using Humbrol enamels. Shadow, rust and dirt pin washes + stains etc done using artists oils. Paint chips, scuffs and wood grain effect on tool boxes painted with Citadel acrylics (available for Games Workshop gaming stores). Mud and dust applied using Mig pigments. Exposed metal effects done with HB pencil.
Base – cheap photo frame sealed around the glass with bath sealant and frame varnished. Ground is Polyfilla mixed with PVA glue and dark brown poster paint with fine sand obtained from the roadside and crushed cat litter sprinkled on top + model railway grass matting. The old tree is a bit of old stick with fine foam foliage used as moss growth. Painted, shadow washed and dry-brushed using enamels.”


The project is set in the Czech Republic in the 1950’s
Joaquin Garcia Gazquez


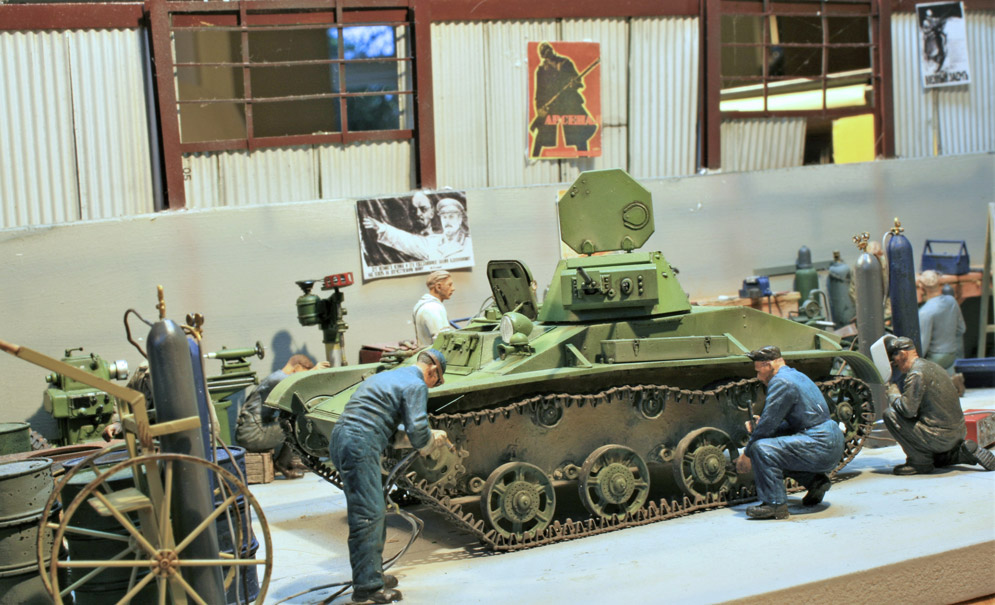
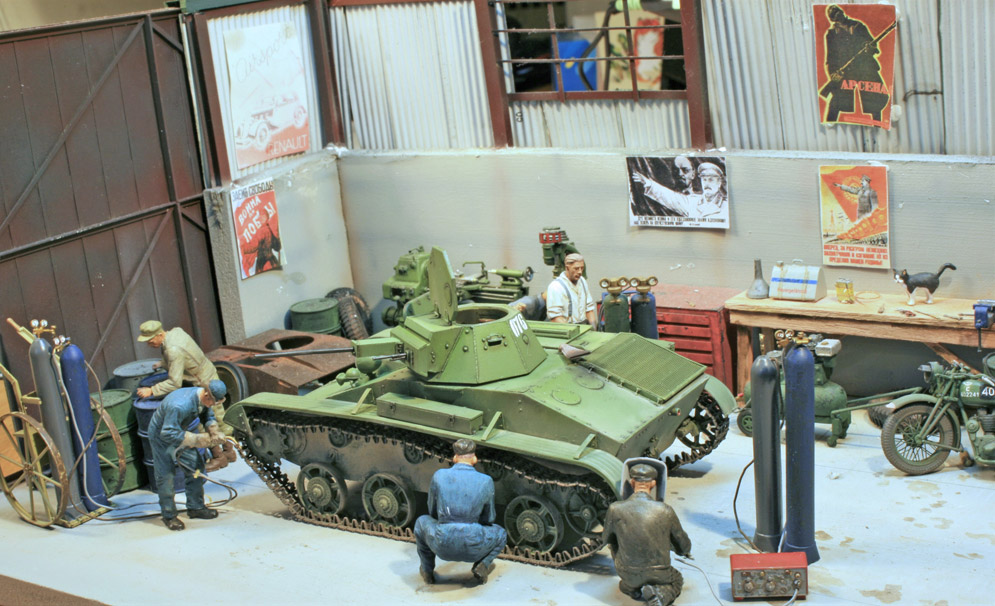
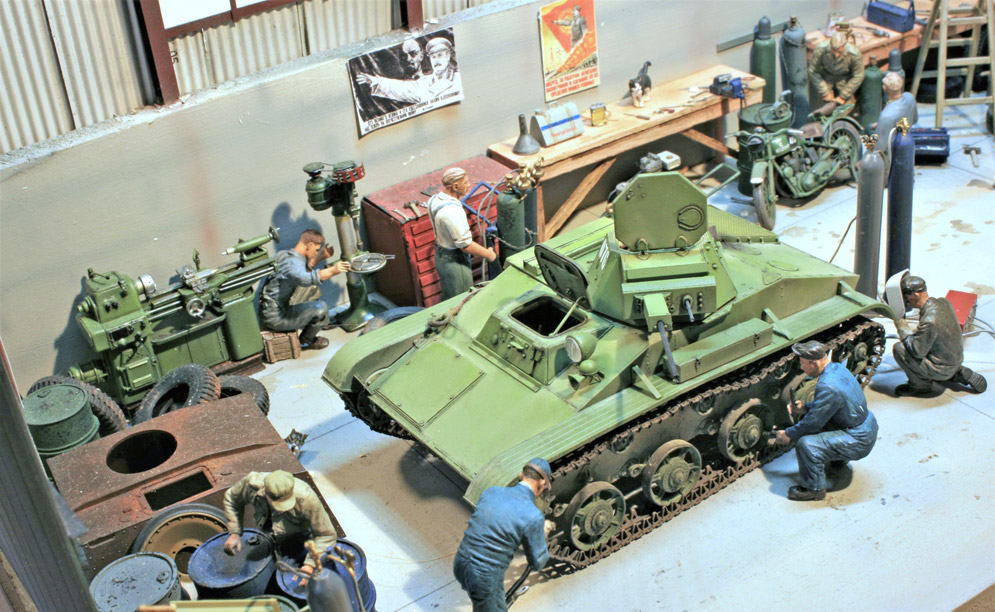
To my mind it is their most successful interior kit to date. It has the right balance of number of parts and fit to make it a really enjoyable build. Factory 264 was based in Stalingrad so production came to an abrupt end in September 1942. This factory pioneered the use of steel wheels due to the rubber shortage. Yes, the machinery and tracks lasted much less but then they did not expect a tank to last more than a day or so of combat at the front. Very different outlook to German manufacturers and their armoured vehicles. Nevertheless, the angling of the armour plates on the bow and turret makes this in some way more advanced than many other light tanks.
The presence of the engine in the fighting compartment was not very sympathetic to the crew’s health and happiness, but then the vehicle was built in a period of extreme emergency for the USSR. Possibly the vehicle’s finest hour was in January 1943 during Operation Spark, where its ability to cross terrain in the marshy and woody Leningrad area, unlike the heavier tanks, gave Soviet troops some fire power advantages as they forced a corridor through to the beleaguered city.
I enclose also some pictures of ‘its manufacture’!
Best regards, Andrew J.
I added the Legend fuel tank set to replace that from the kit and used lead wire to fashion the fuel lines, the tow cables are from XXL.
Regards
Andrew J
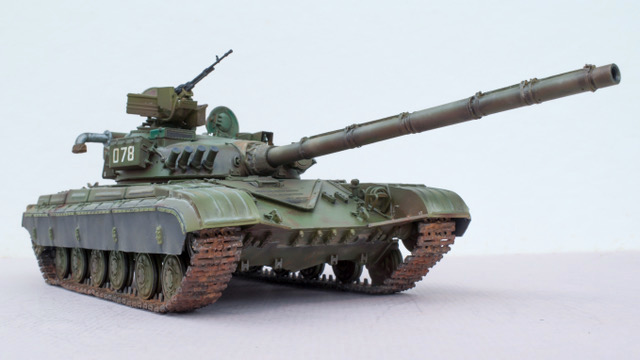
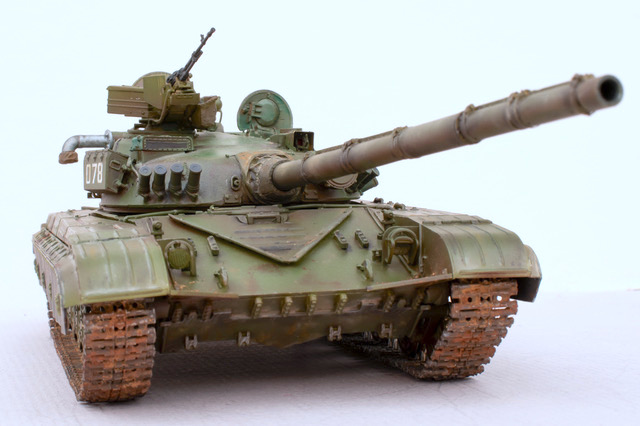
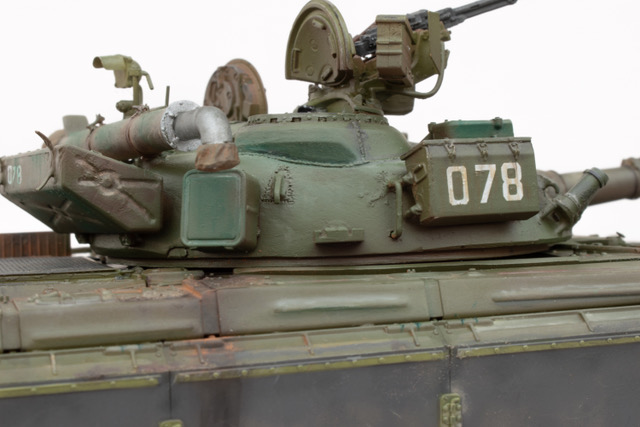
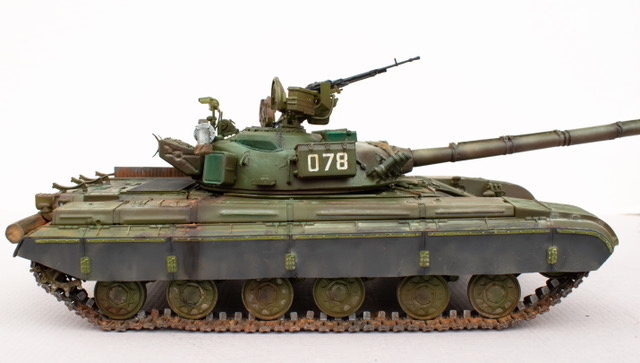
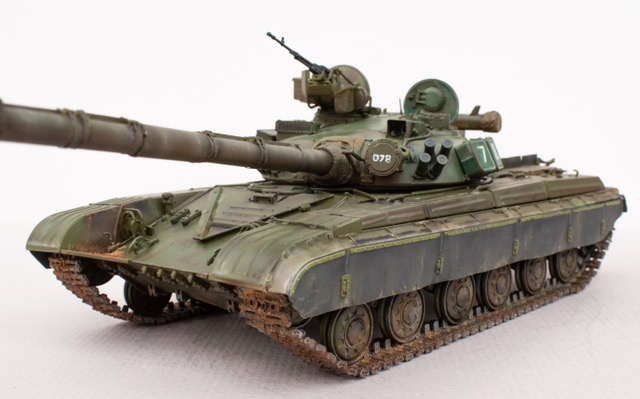
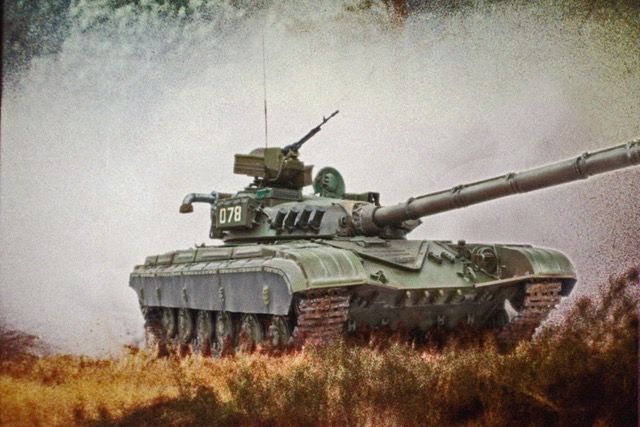
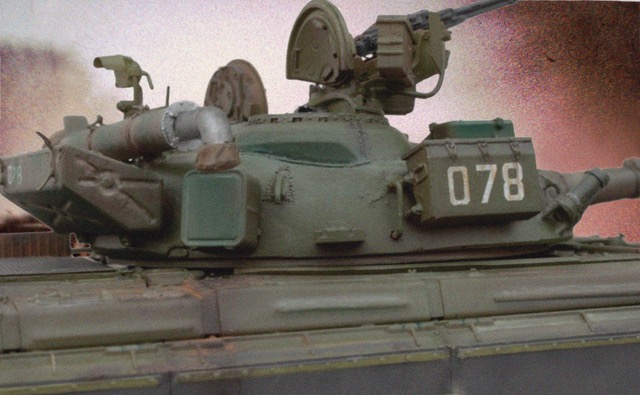
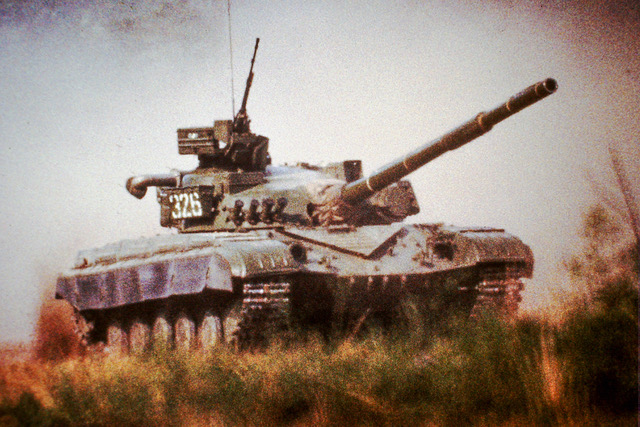
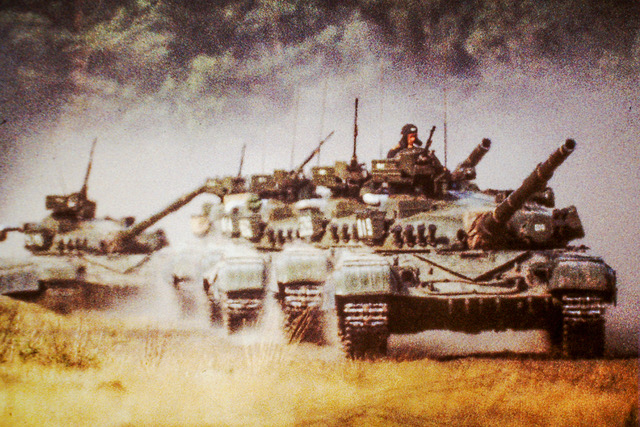
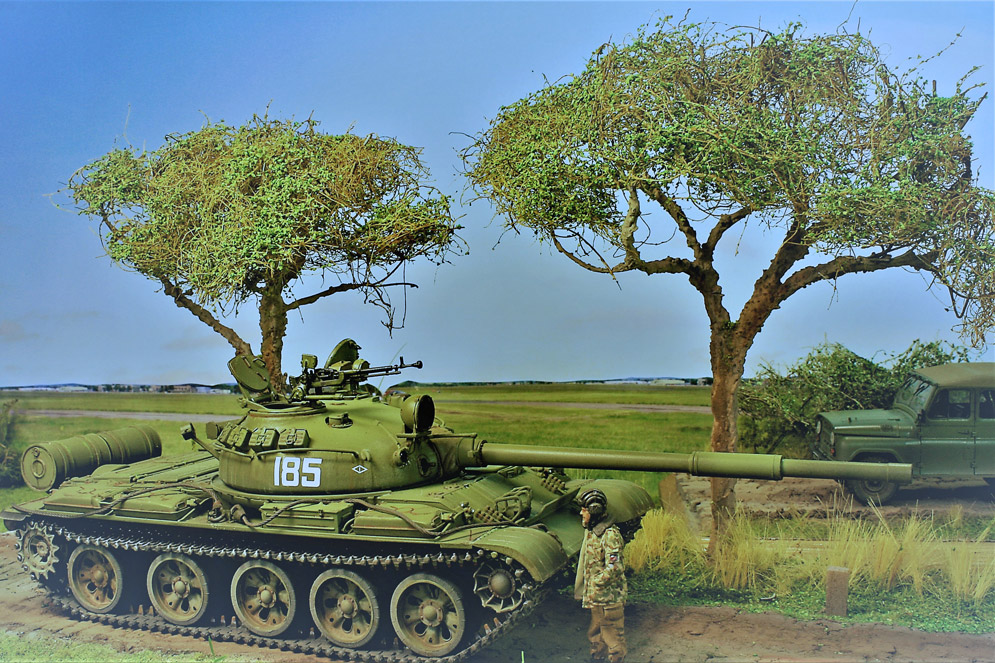
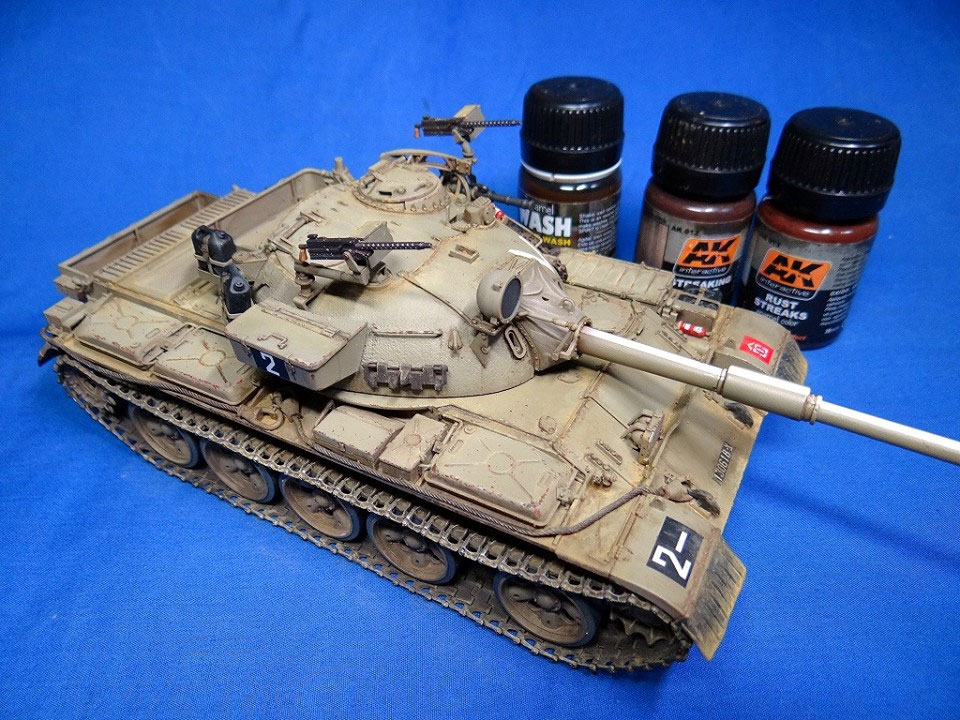
My military service included a tour which involved work in East Germany in the early Eighties and I had occasion to photograph one of the first T-64B’s seen by the Allies in the Group of Soviet Forces in Germany.
The model represents Bort Number 078 at Jaenersdorf tank range as seen at the time. The T-64B was modified in service and this particular example sits somewhere between what Trumpeter call the Mod 1975 and the Mod 1984. I’ve also attached a couple of “Photoshop” images of the model at Jaenersdorf. It was painted using Mr Paint colours and weathered exclusively with oils, which I find far more flexible and subtle than acrylics or enamels.
Stephen W.


I have had this lovely kit in my stash for some time now but had no real need for either of the above schemes. I then came across an article in a magazine where the Tilly had been painted up as a ‘Desert Rat’ and my mind was made up.
I also have on the back burner a trio of 1:35 LRDG and SAS WWII desert vehicles but I struggle with painting the sand colours, I tend to end up with just a yellow block, not good.
The Tilly then was a great one to build with an idea of trying out a bit of airbrush shading as a test bed for the big three to come. The kit is a dream to build and fits perfectly everywhere. My only concern was the clear canvas back which I find a bit odd to see it moulded in clear as it is very nicely textures but my main concern was that it was split along the roof line, front to rear. A really odd place to have a long seam but the fit is good and required only a sanding to sort out.
Once built, the whole thing was primed and painted using various ‘sand colours’ from Xtracrylix to get a shaded look, the highlights are German Tank interior Ivory! I then used various washes to dirty it up a bit, I didn’t want to make it battle damaged and battered, and it is not a front line vehicle.
I then used a compass cutter to cut arcs of masking tape for where the windscreen wipers are and used Maskol to roughly mask the side windows before a dusting of matt varnish to ‘dirty’ the windows. So, it was a first for me to shade in this way and for a first time, I am very happy with the outcome.


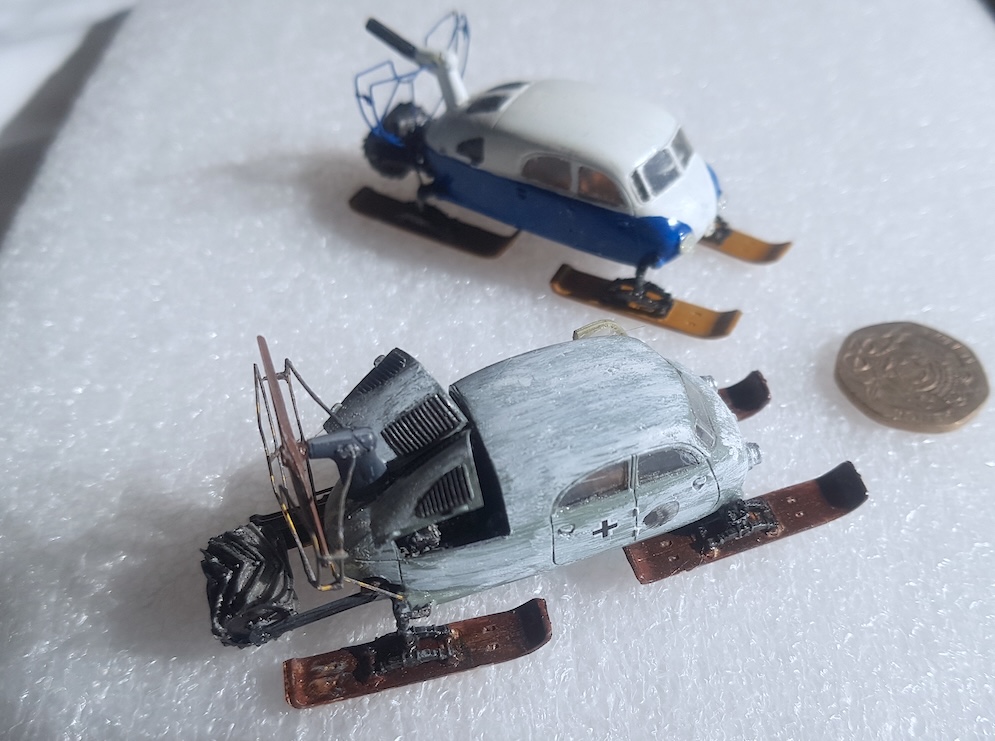
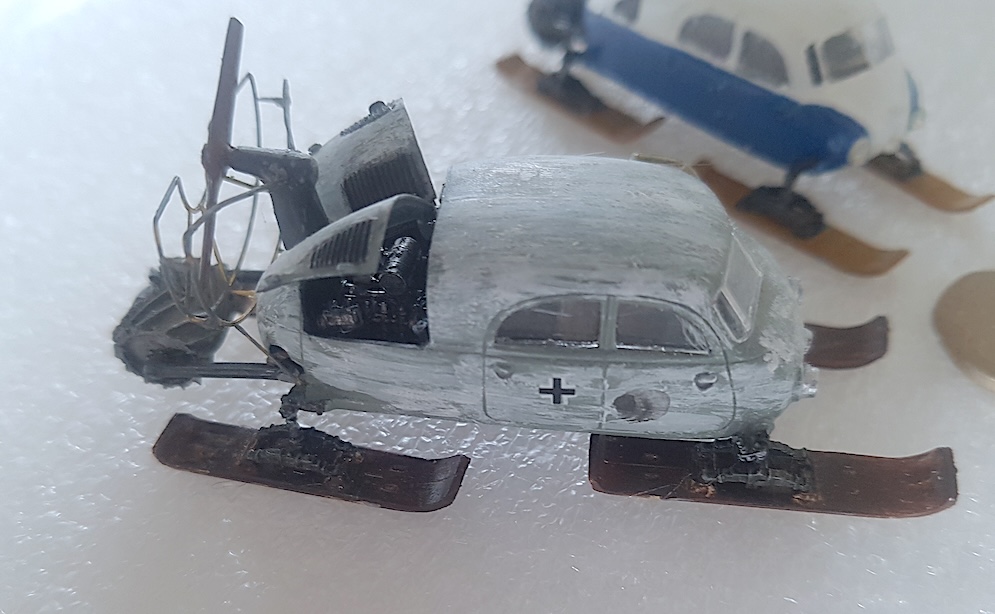

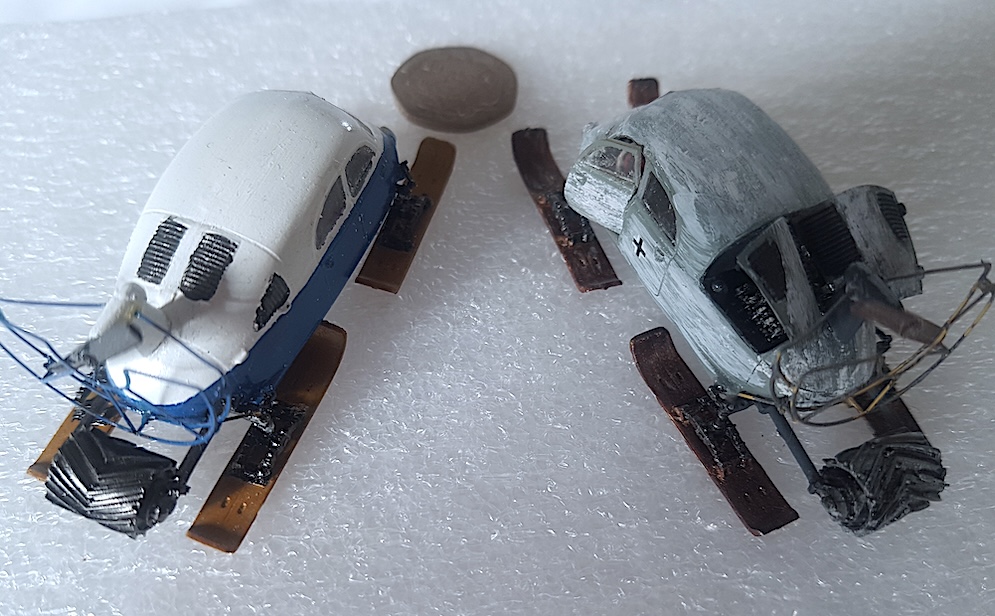
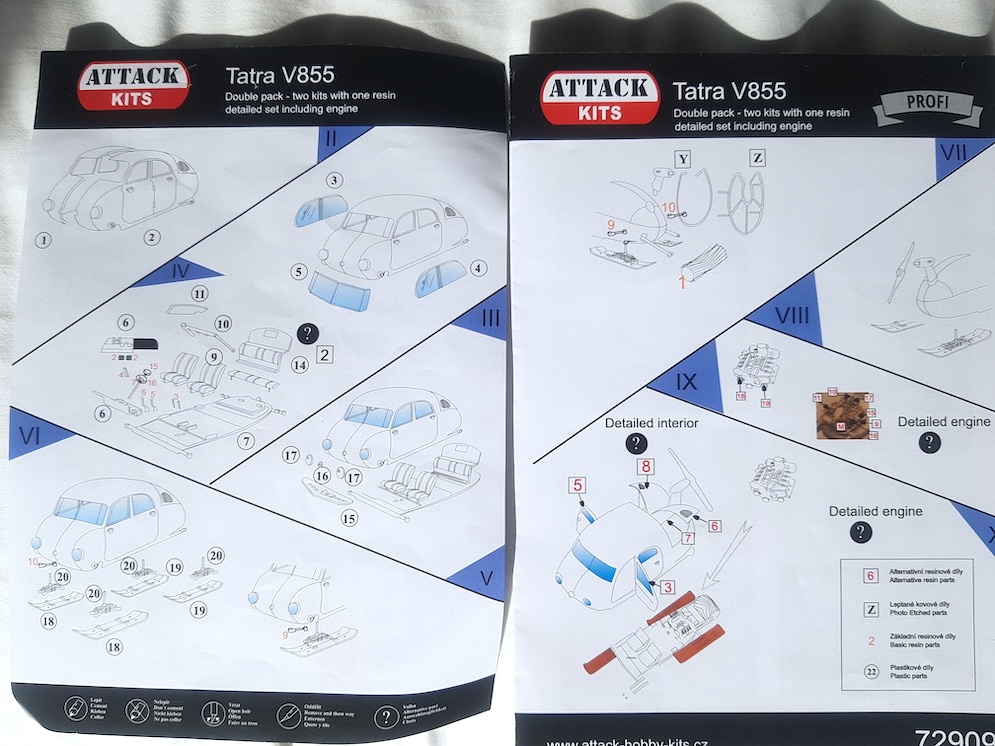
Kit bought as an impulse buy at SMW 2019 for £10. Kit contains 2 complete kits with photo etch for both kits and a set of resin parts for one including detailed engine, doors, interior etc.
This is a limited run kit; the plastic is thick and required care in mating sections. The instructions were very vague, just exploded diagrams so lots of testing of parts was required. However, they build up into really nice models. Etched parts make up the propeller protections and are quite hard brass so need annealing. The interior is detailed for both, the resin just adds some detail to this. If you have the doors open using the resin parts, then care has to be taken in cutting out the sections from the body. The engine is excellent but needs a lot of fettling to fit and puzzling over where parts fit and then once the engine doors are fitted you cannot see much anyway! The skis were painted using wood painting technique for biplanes, acrylic base with oils on top. The real difficulty is the join of the ski to the body is so small so lots of patience is needed.
Overall though an enjoyable build of a very unusual vehicle, and yes they are very small kits.
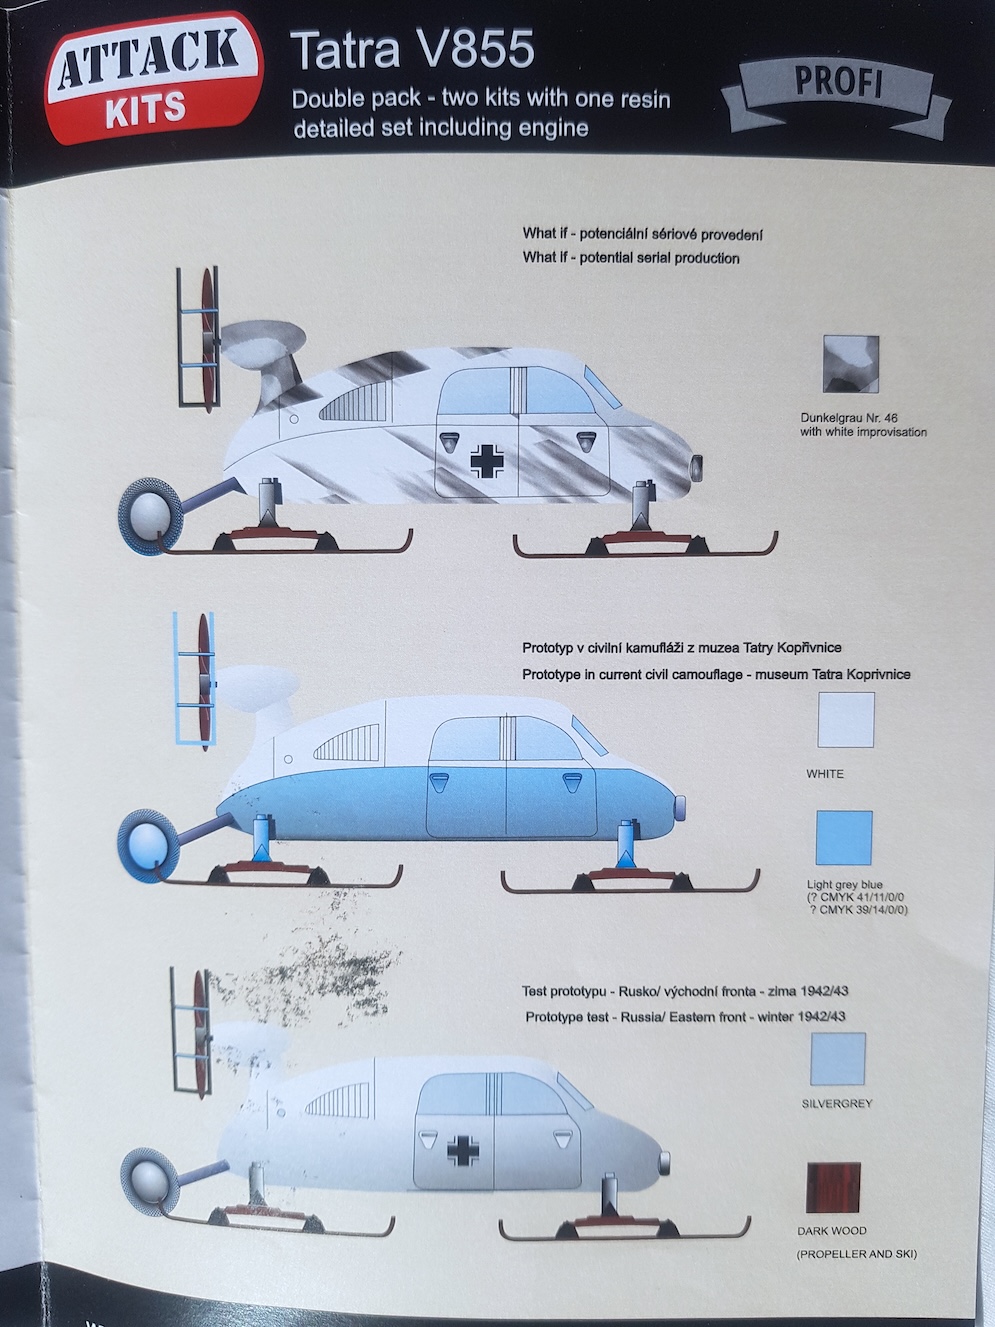
Only one V885 was completed, it still exists in a museum in Prague and a working replica has been made in the USA. The v855 used the body of a Tatra car and its engine. Steering was by the skis and breaking by the front skis toeing in and the rear drum, which was also used for traction. Top speed was around 50mph and in theory could go sideways!
Stephen B.
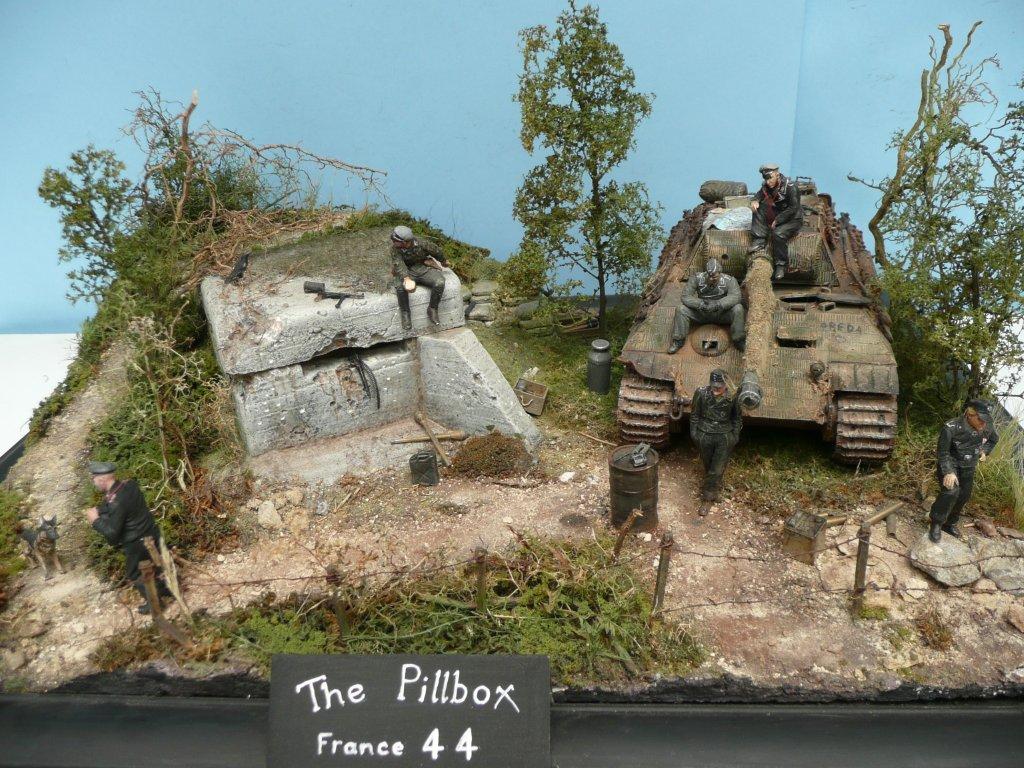
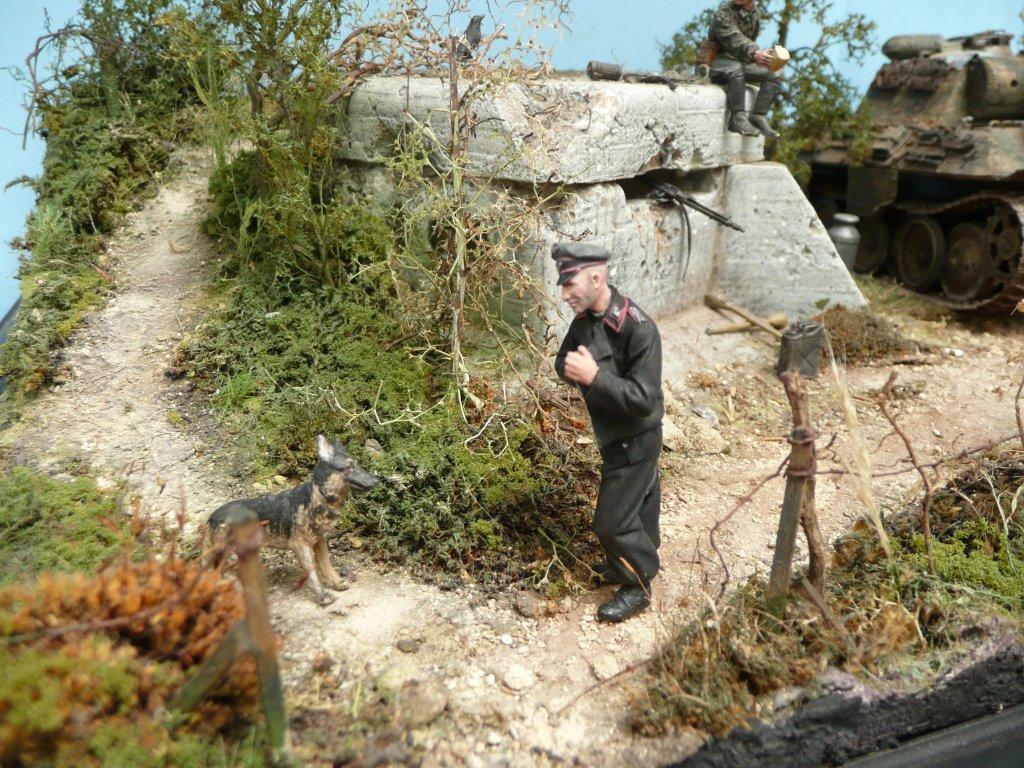
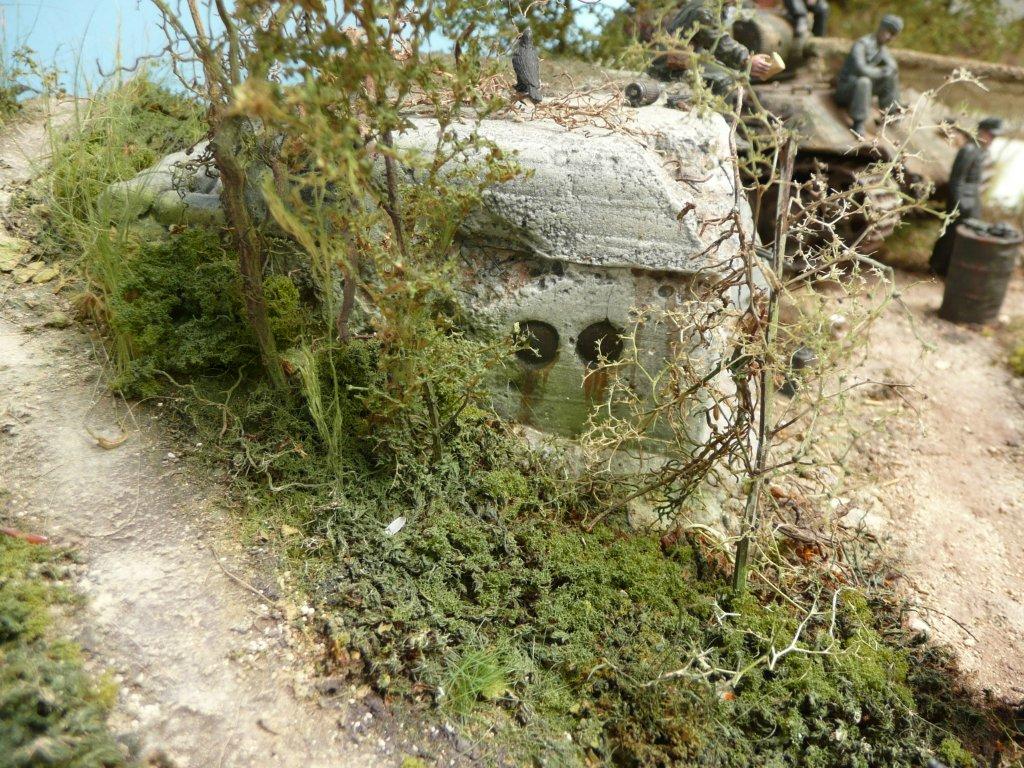
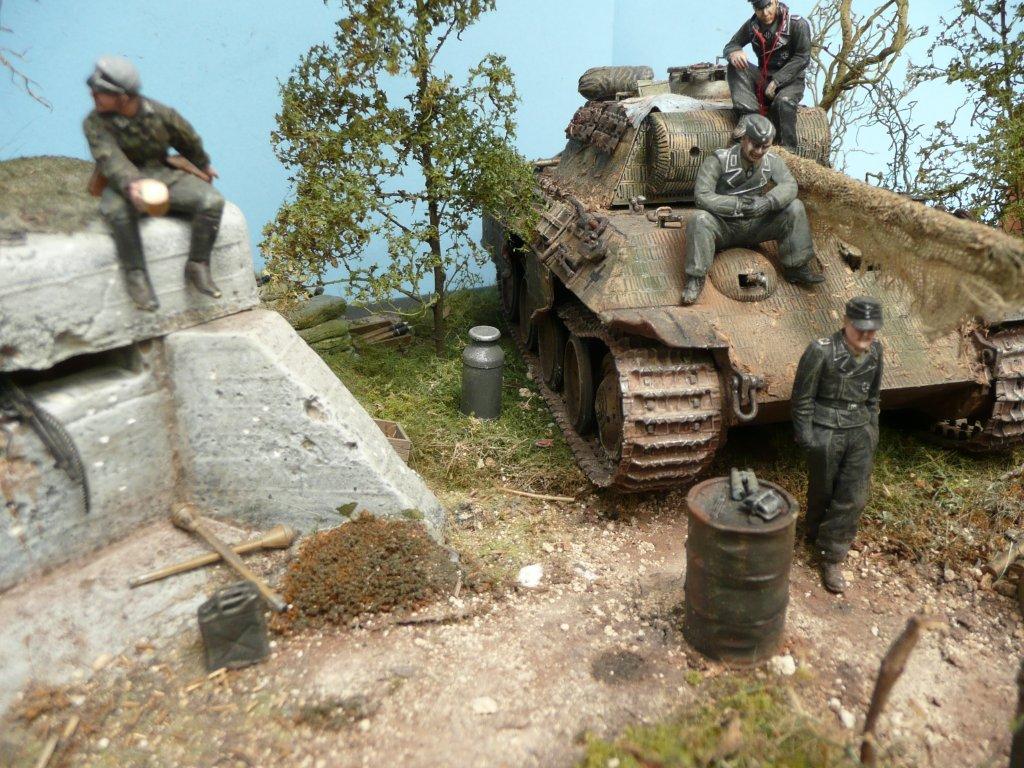
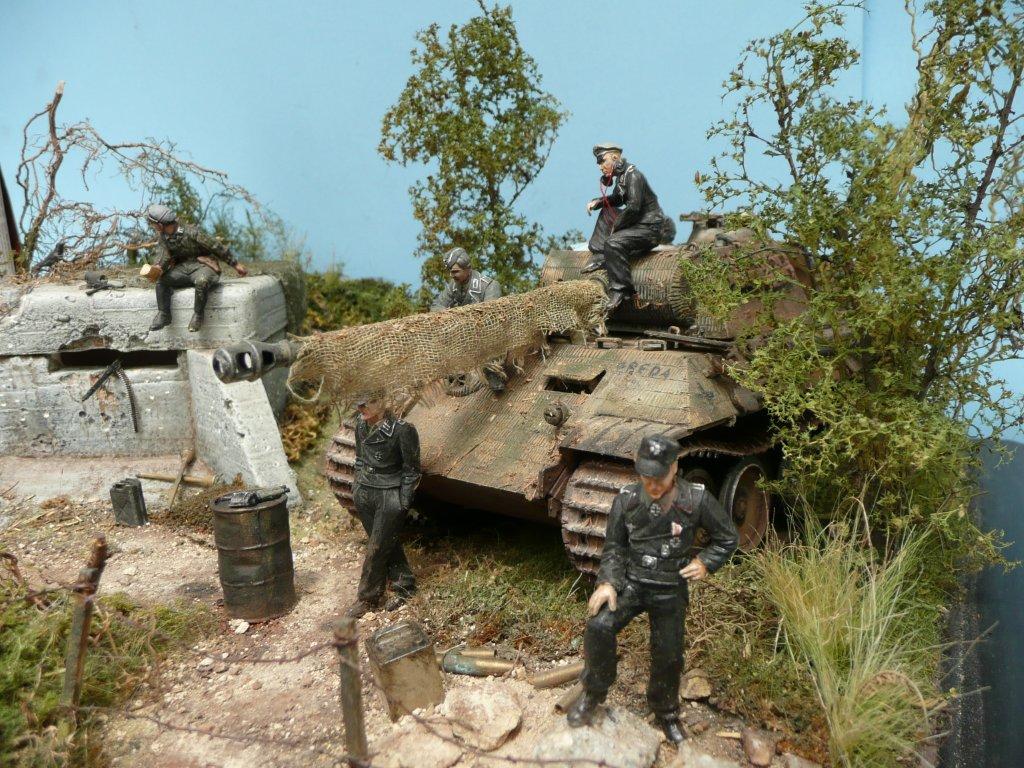
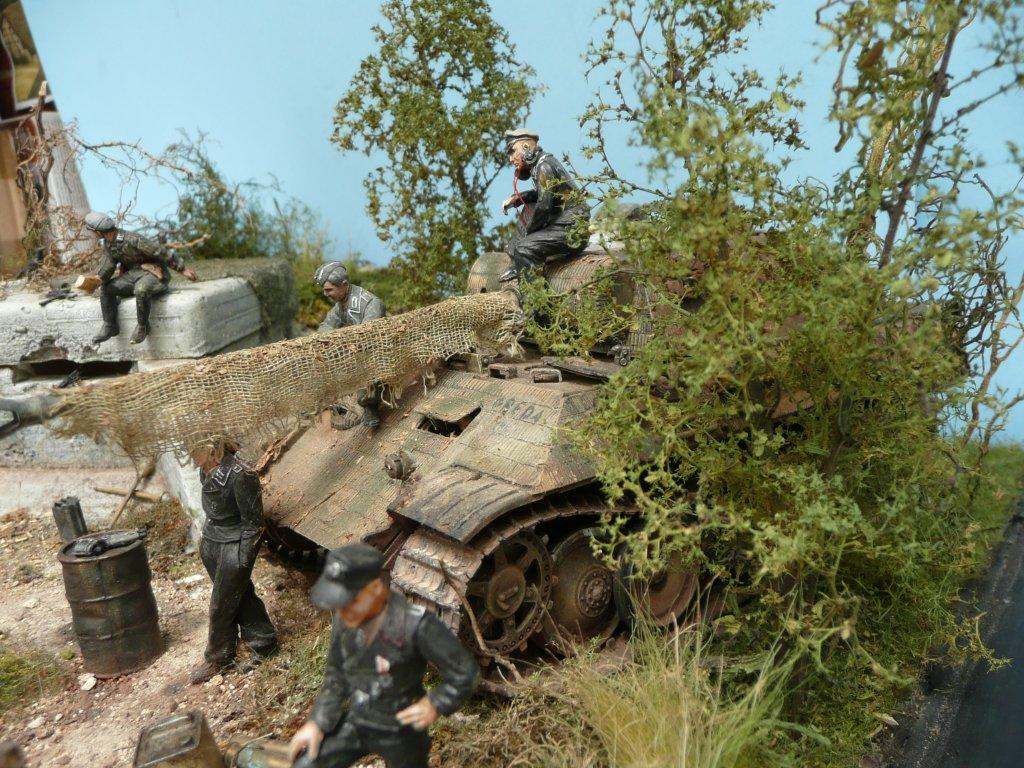
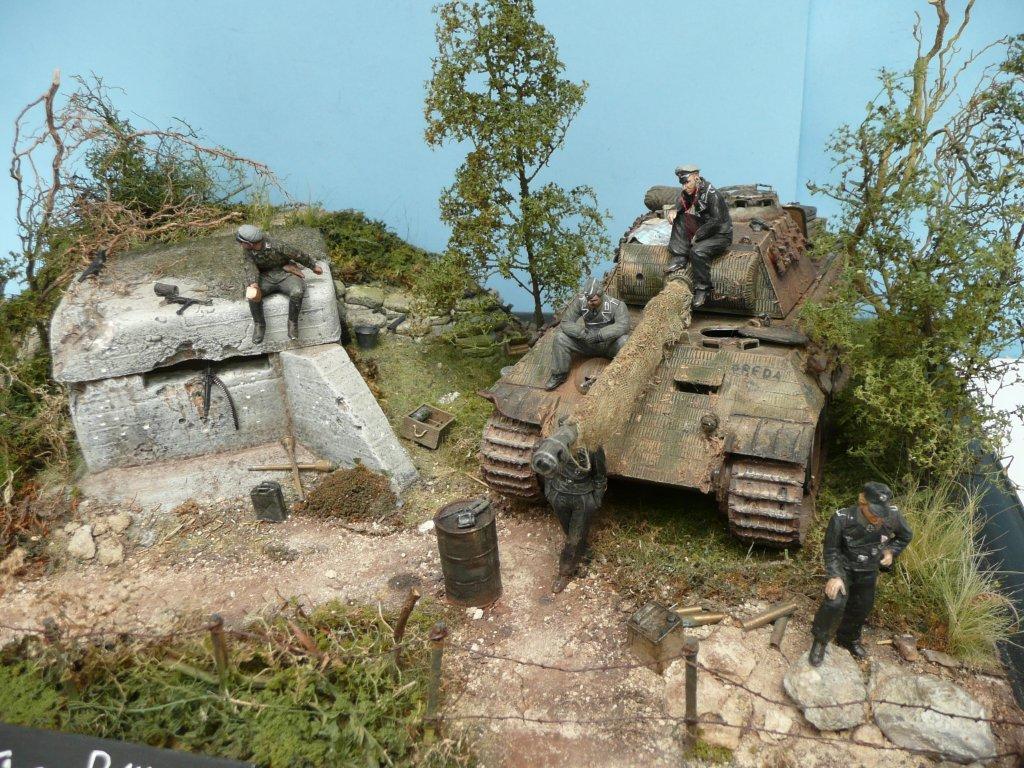
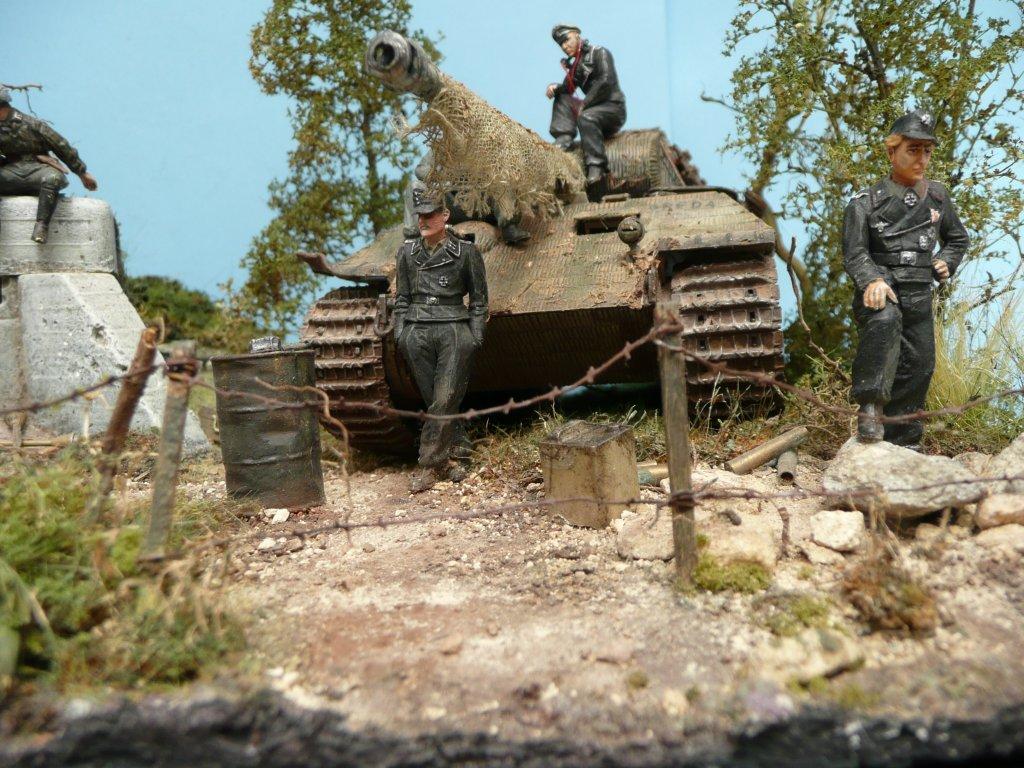
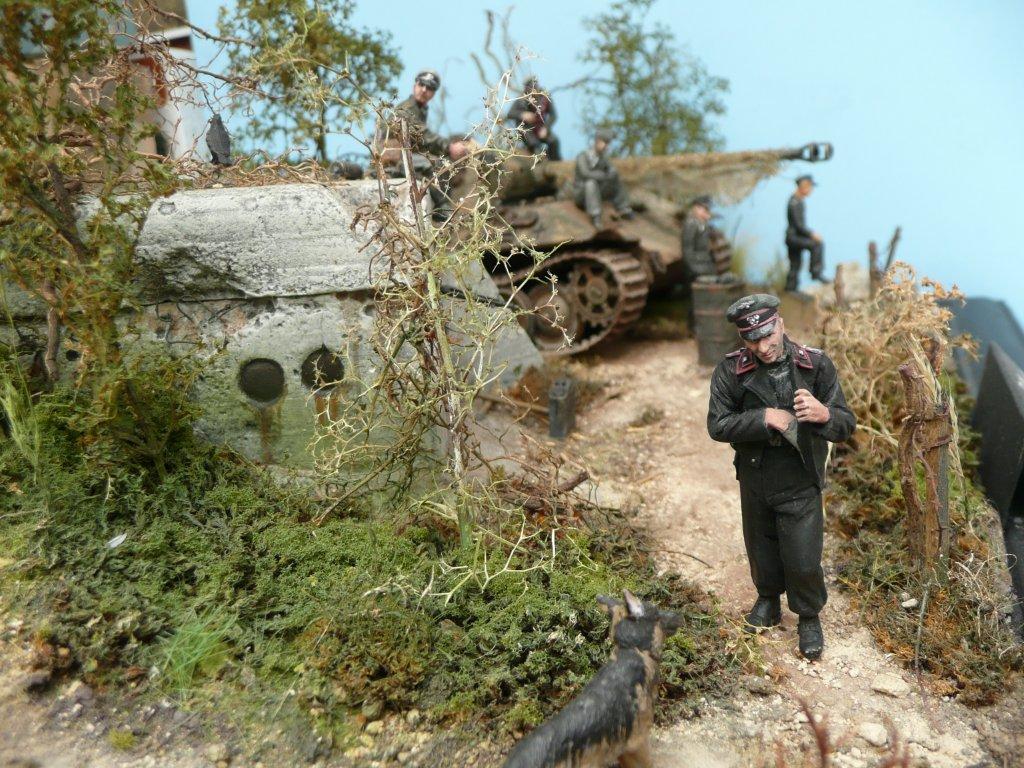
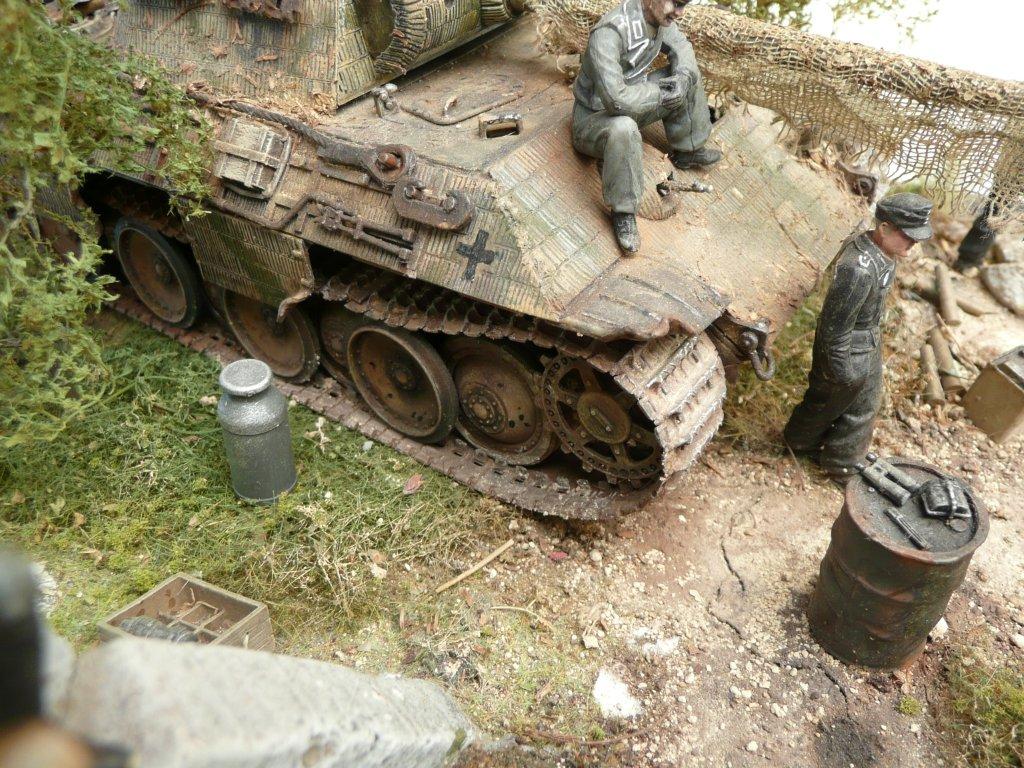
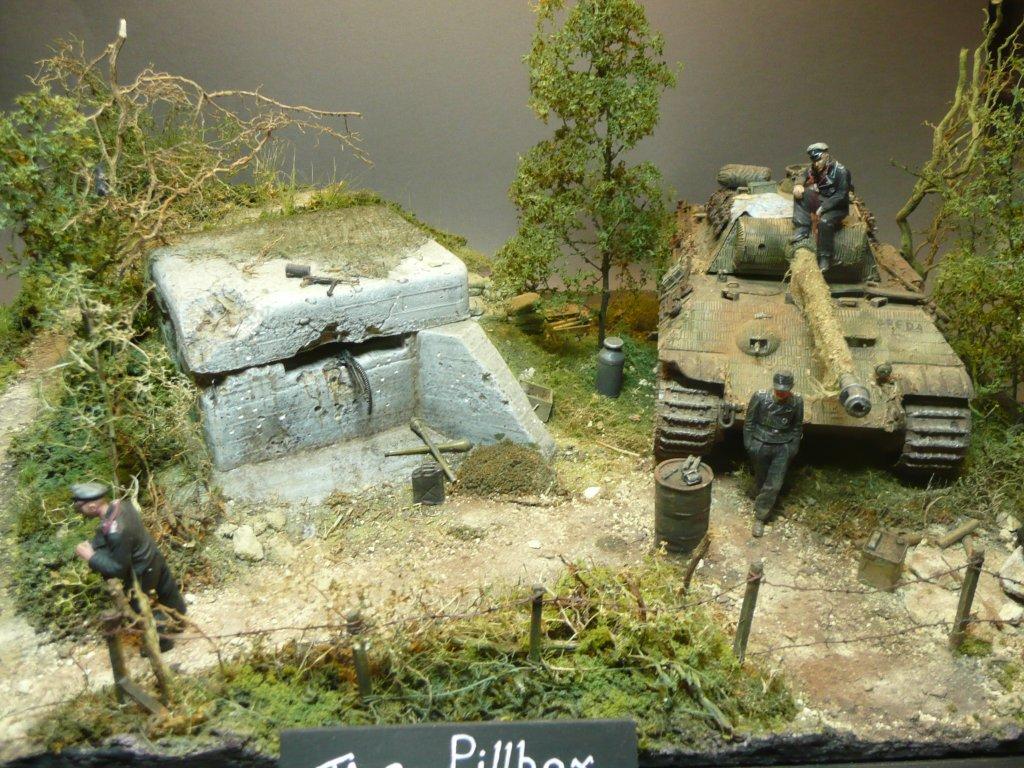
The story
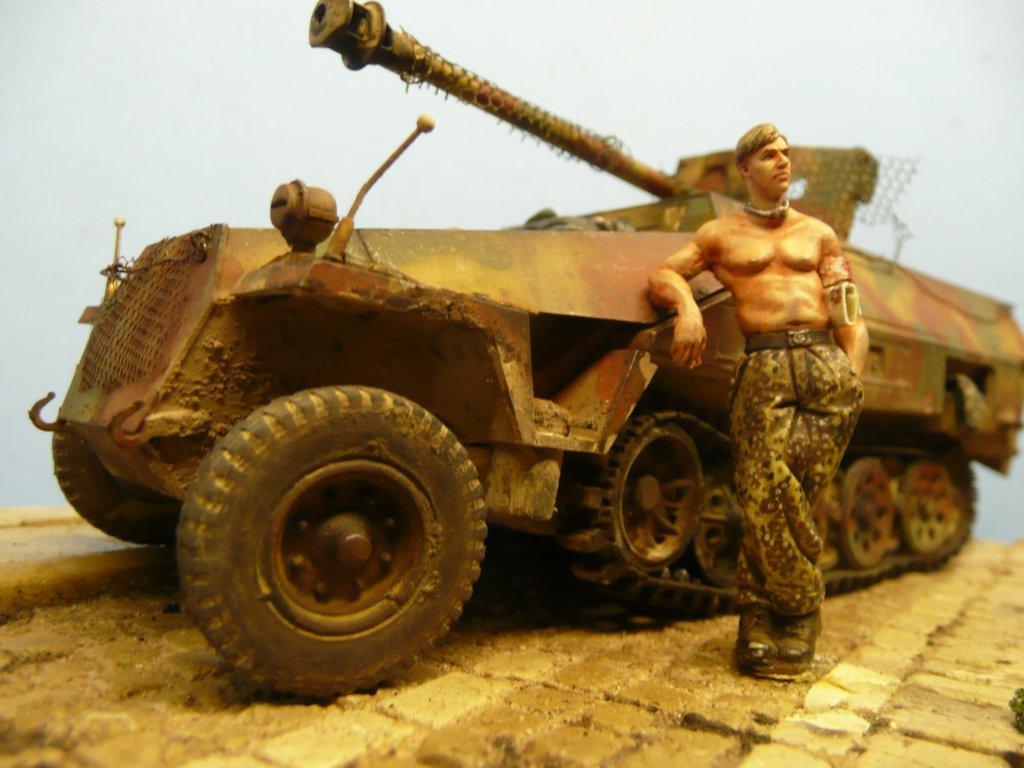
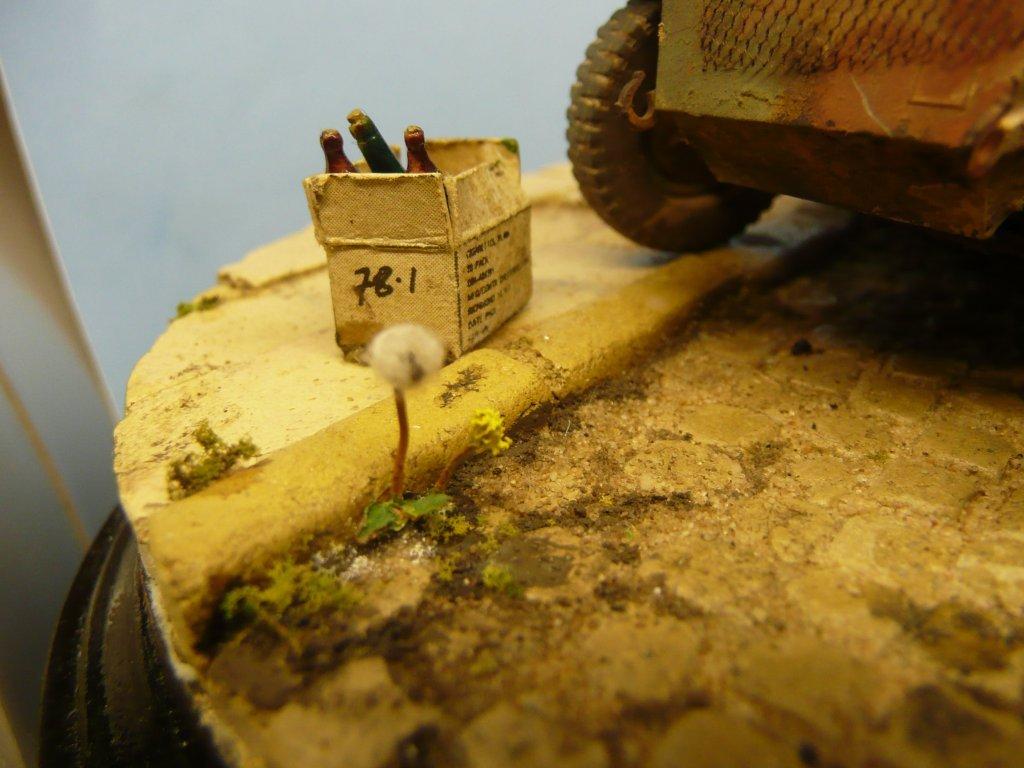
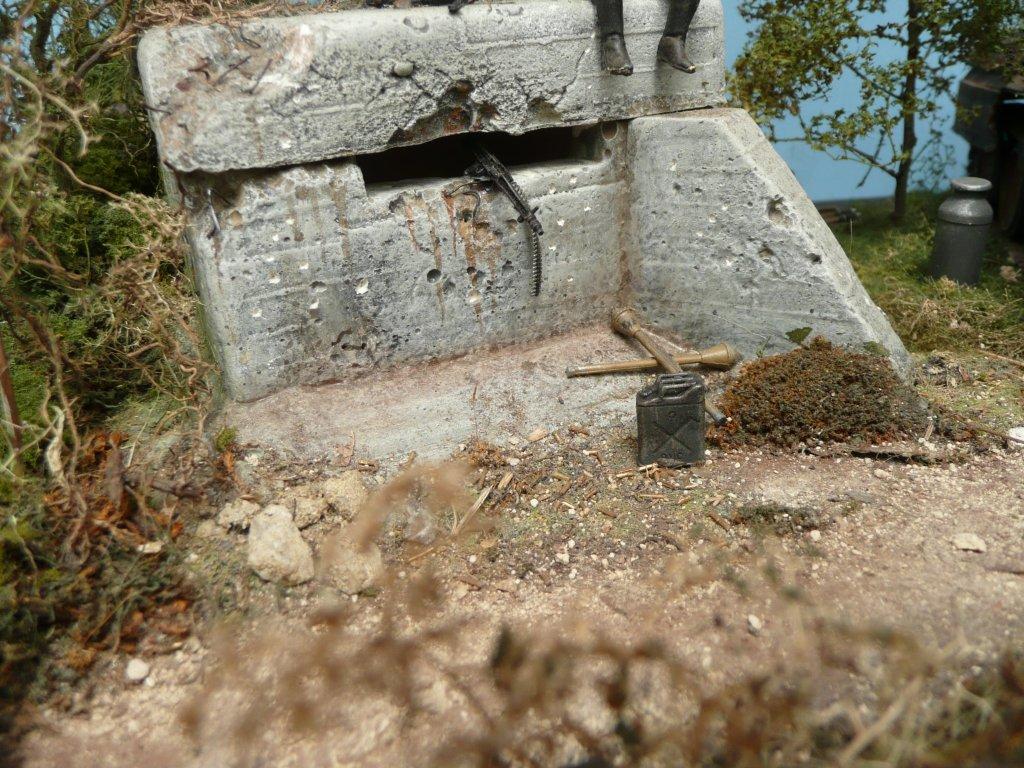
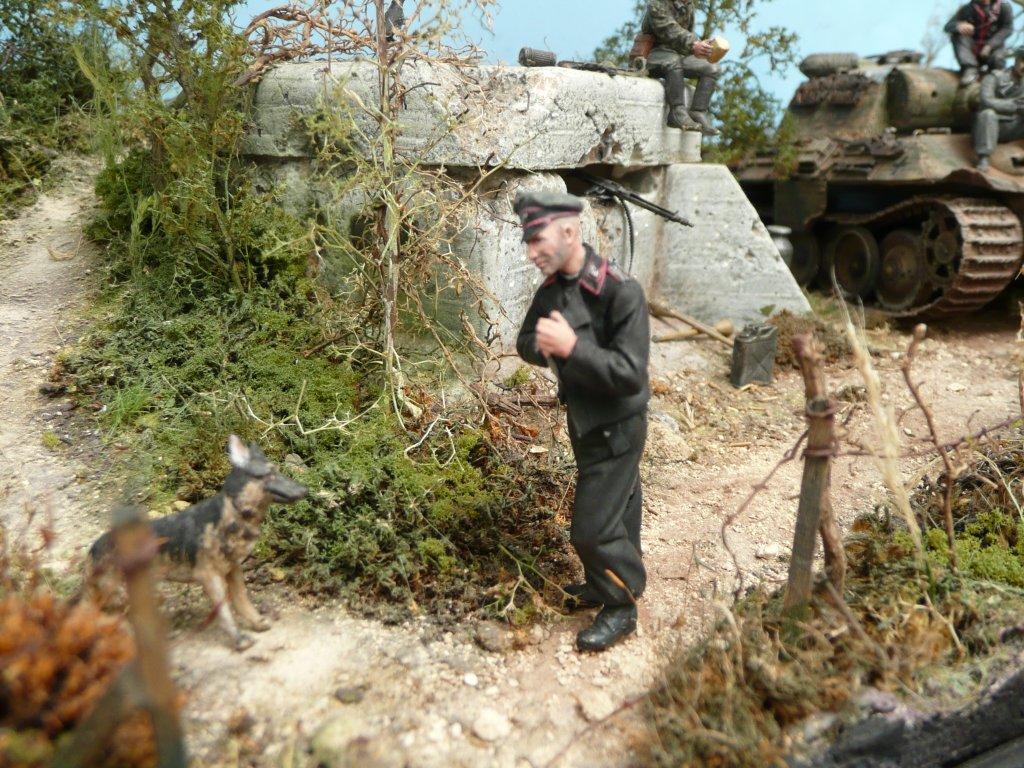
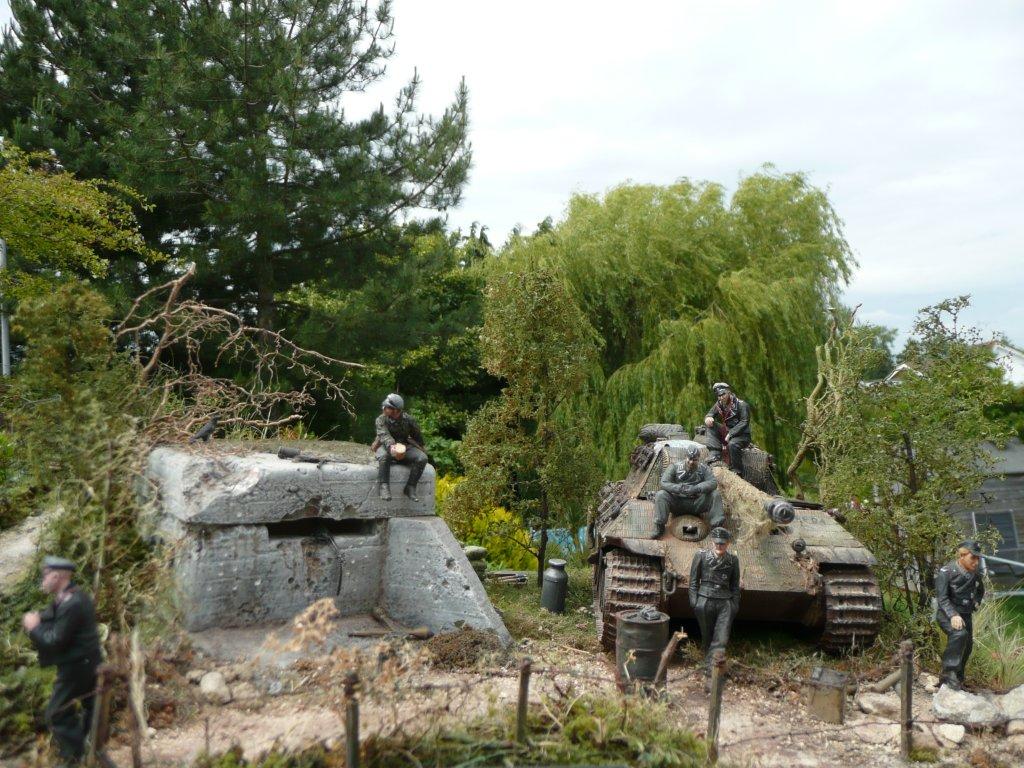
Its France 1944 and the pillbox has been subjected to some bitter fighting. The arrival of a Panther A on the scene has made the allies retreat and allows for a welcome break before the inevitable happens. The allies will be back.
The panther is the old Italeri one and is built out the box and painted in Enamels.
The figures are a mixture from Tamiya and Warriors with some Hornet heads used.
The chap sitting on the pillbox is feeding the blackbird in the tree with some bread, while the dog awaits a treat from his master. The rest are looking at the horizon and wondering what awaits them. The Panzer officer that has his leg up on the rocks in the foreground is of a bit of unusual interest. This being the rocks are actually some chips of concrete from a defence bunker in Holland that i picked up whilst there on holiday. I thought this was an appropriate place for them to end up. All figures were painted in enamels with the exception of one in acrylics.
The foliage was a mixture of Sea moss and moss with some gravel added for the paths. This was added to the plaster base with scenic cement. Verlinden barbed wire was also used.
Andy Argent.

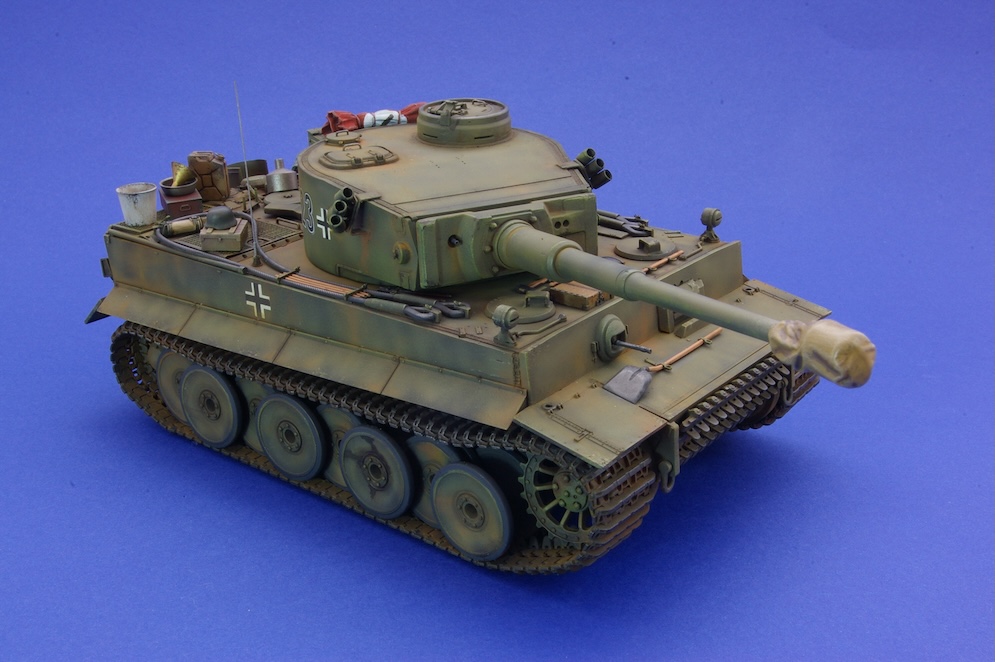
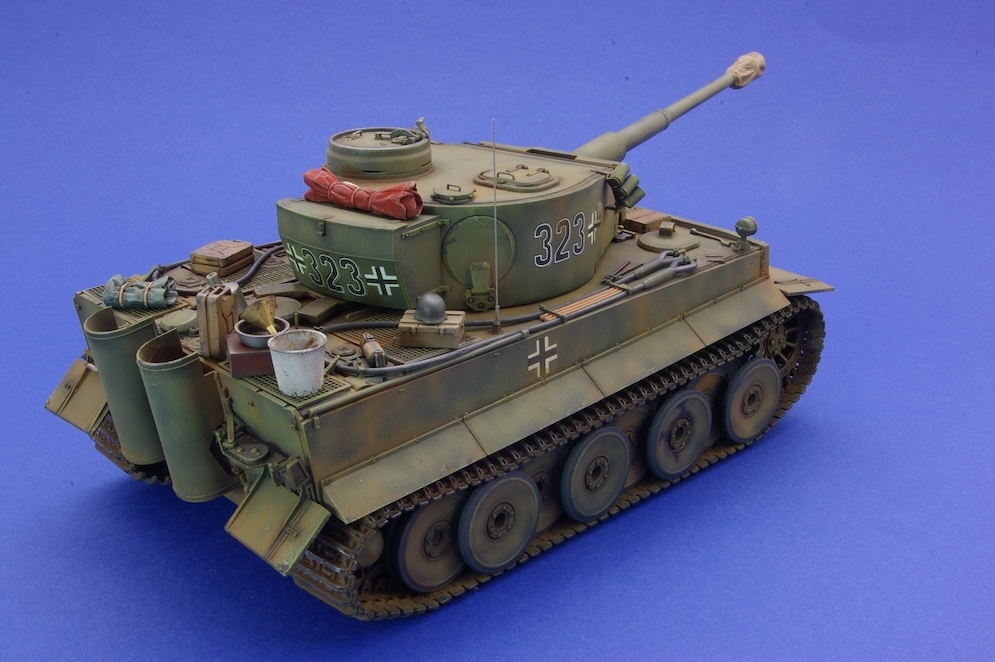
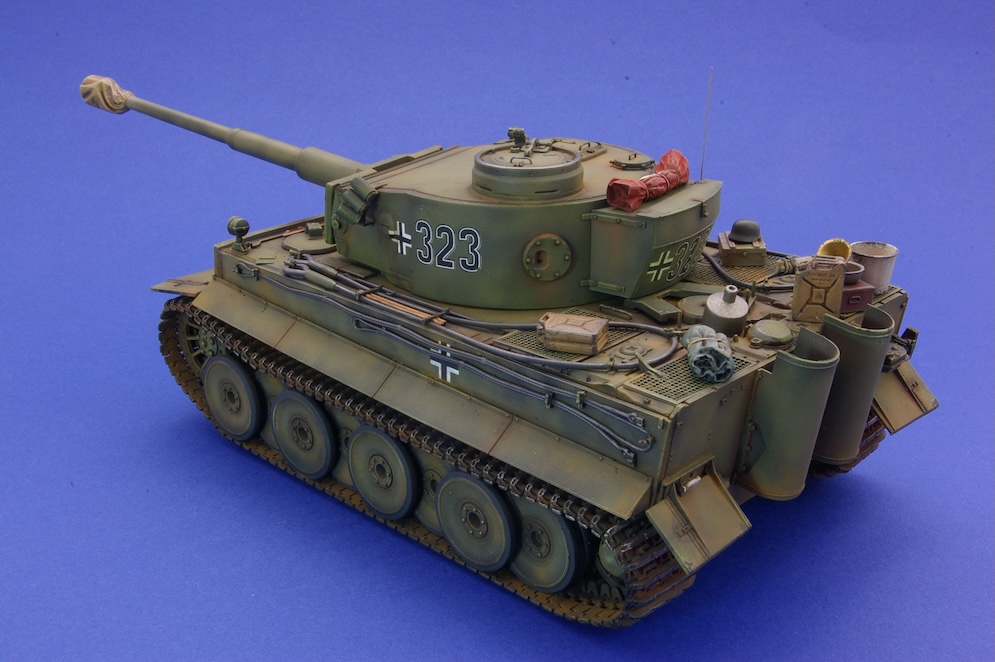

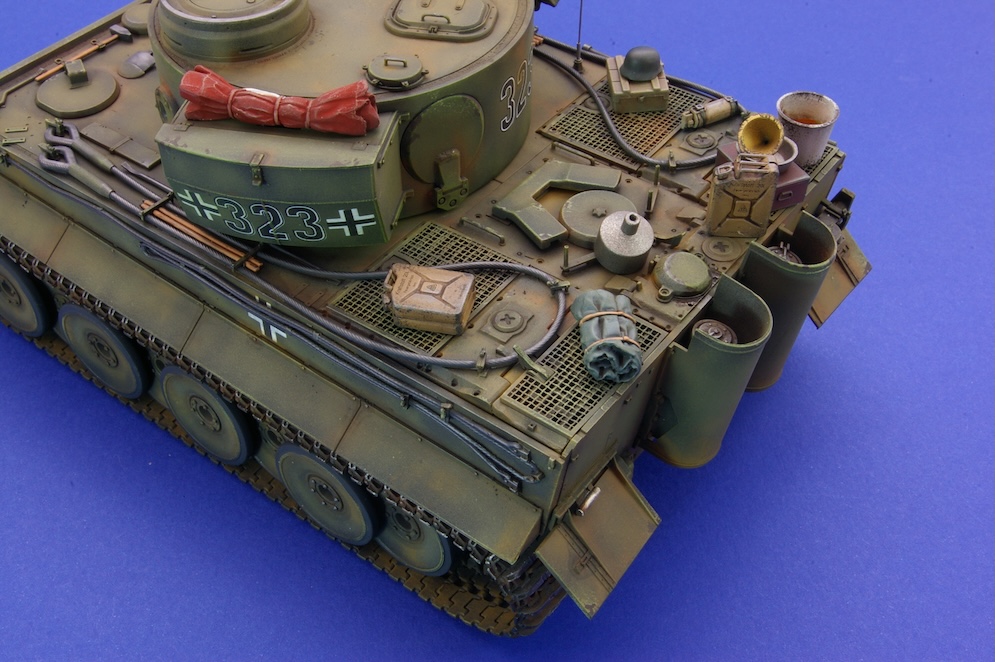

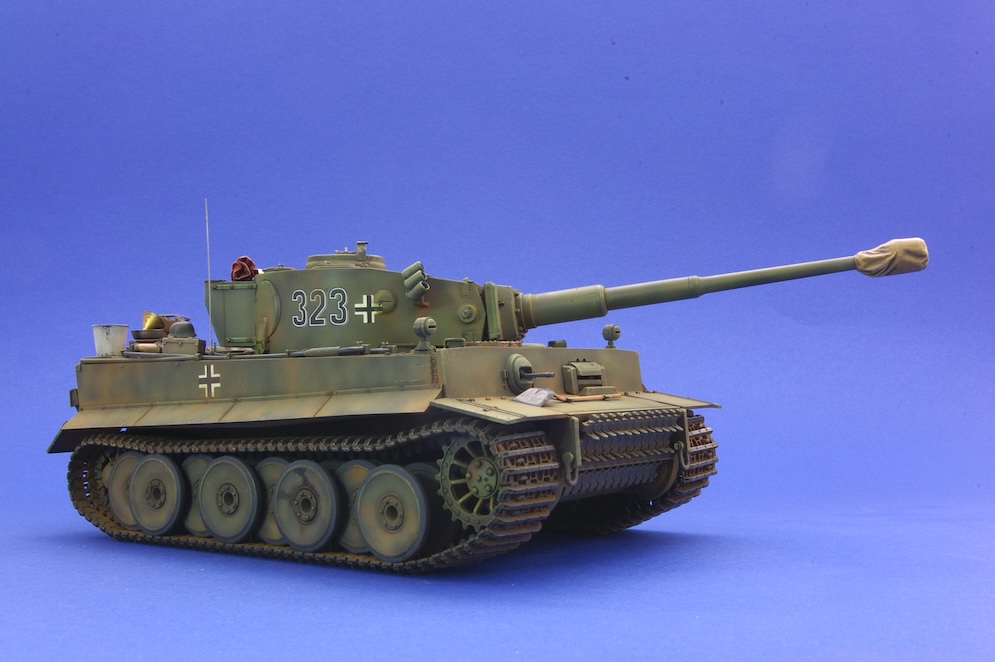
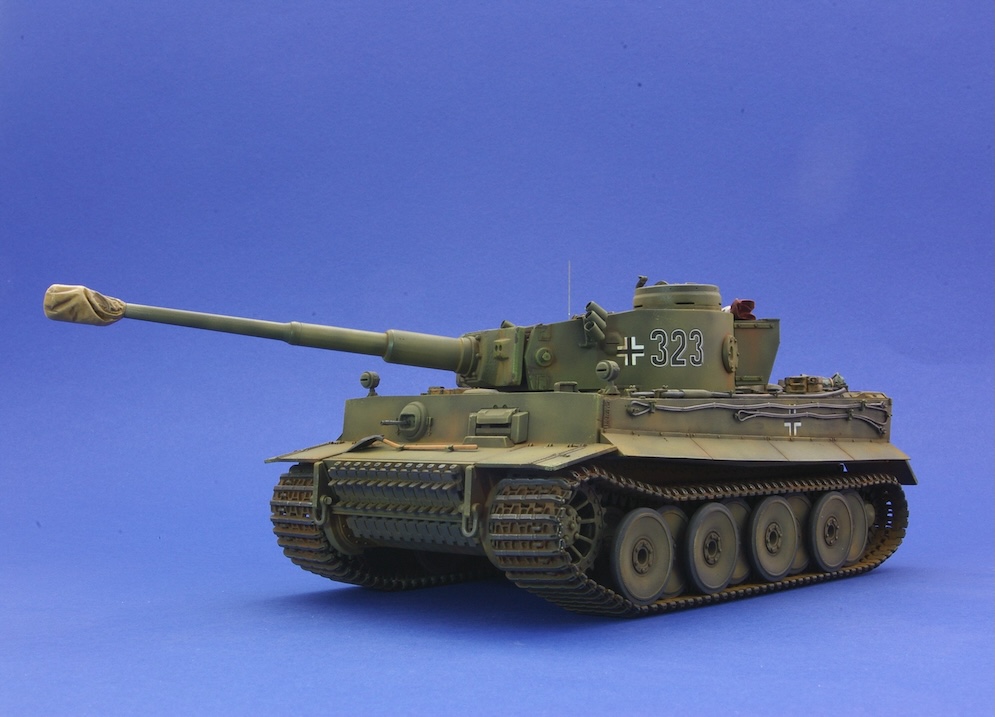
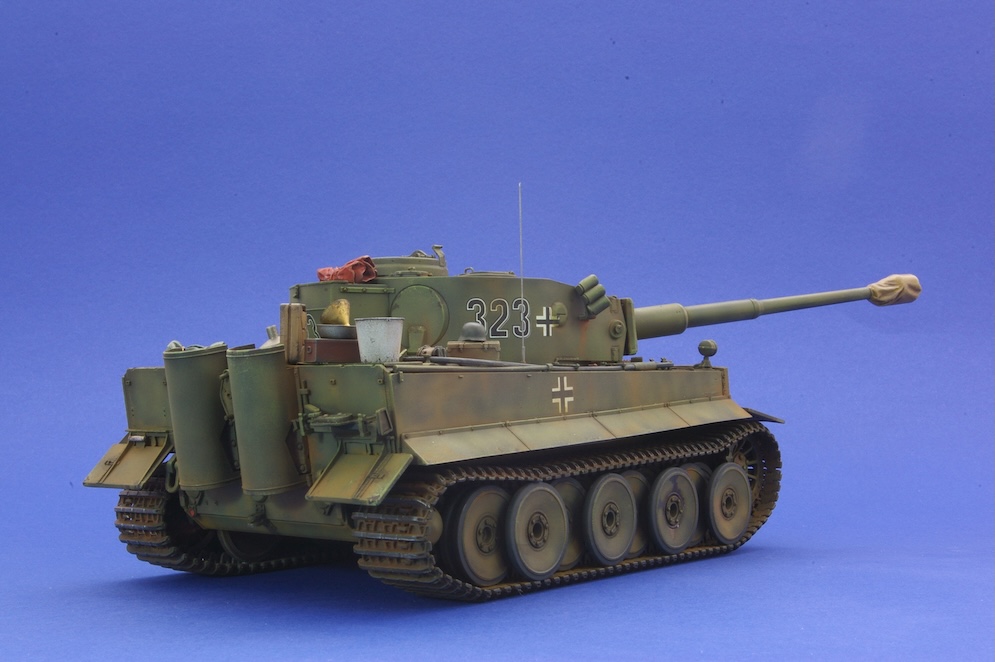
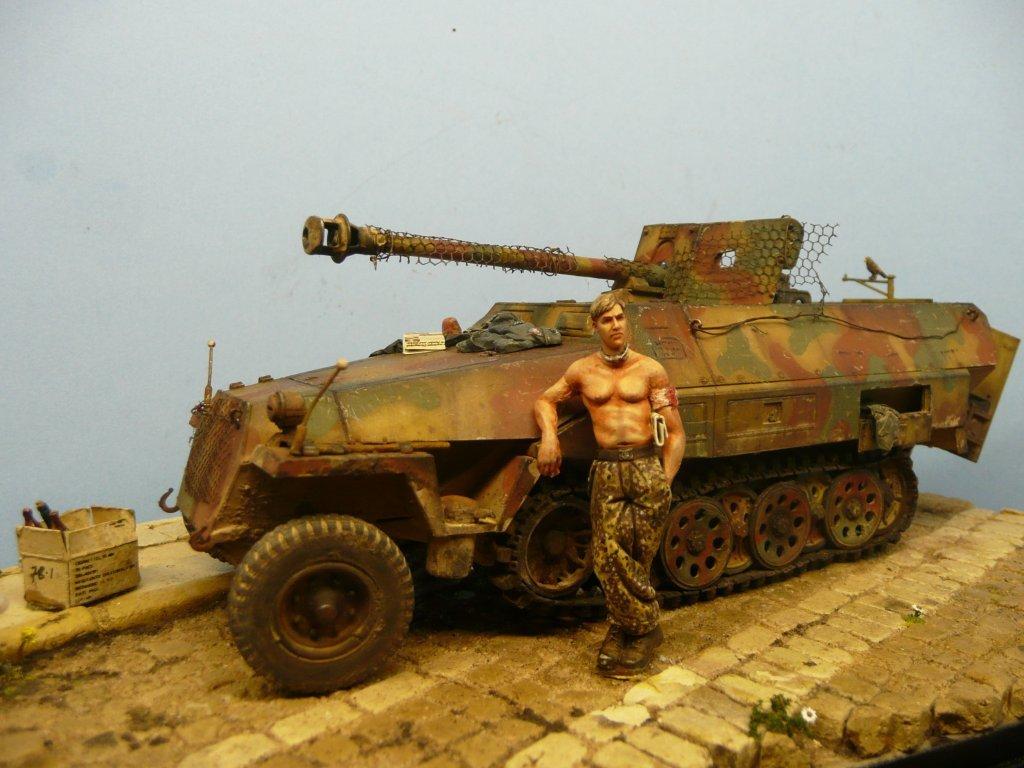
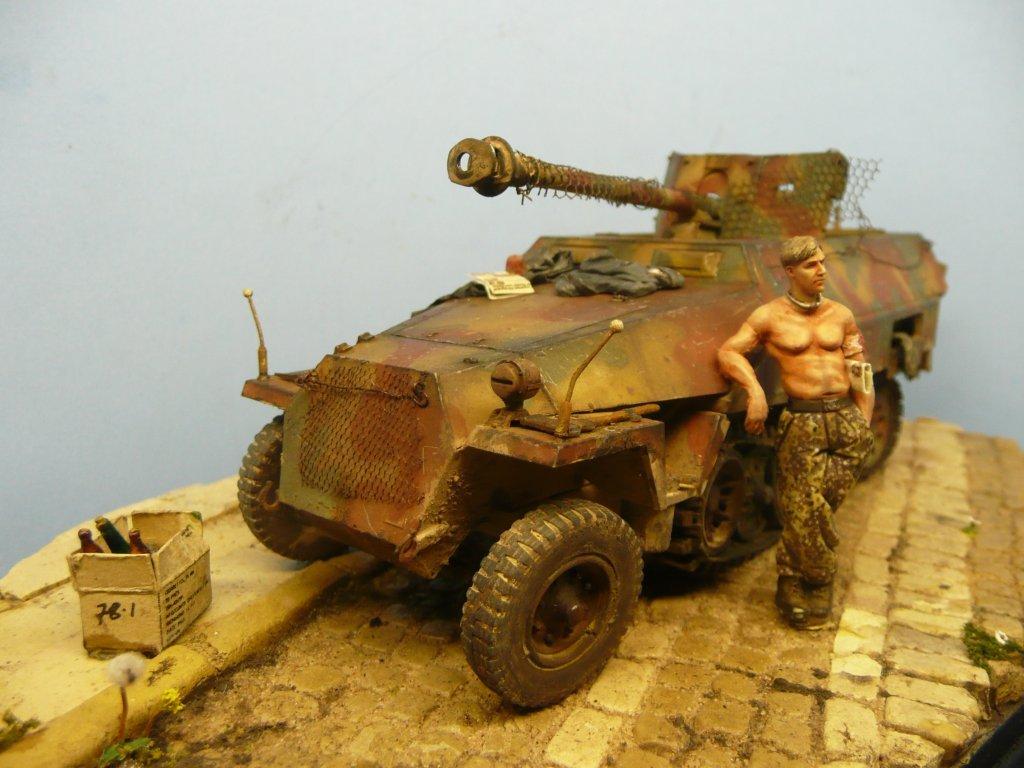
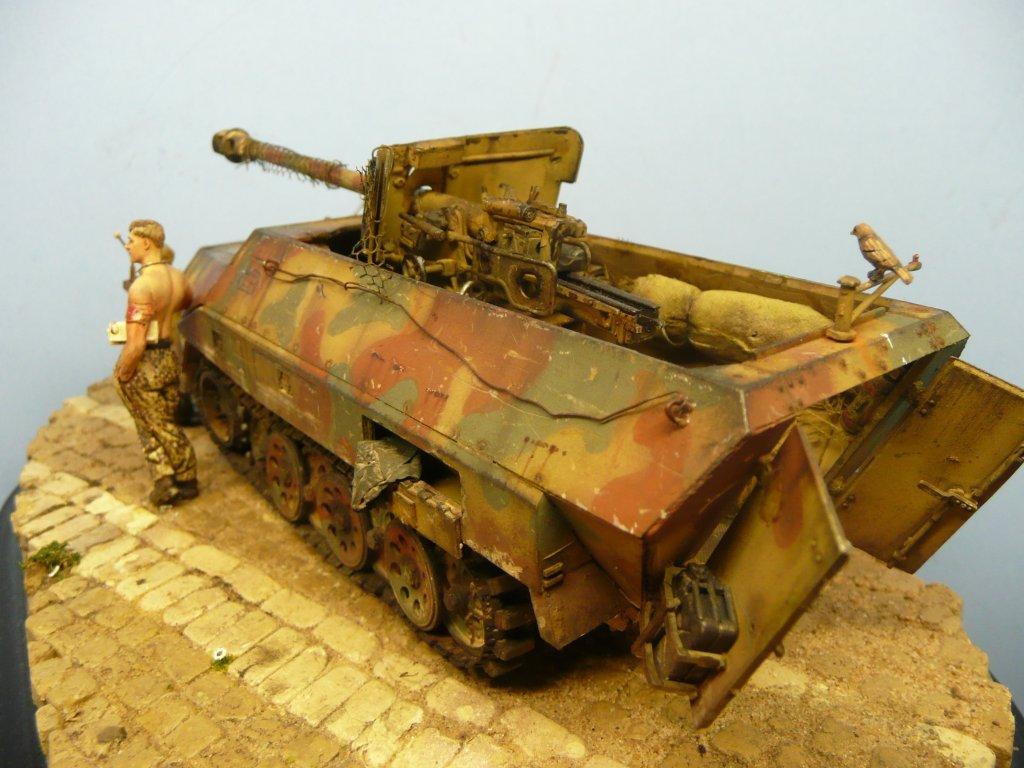
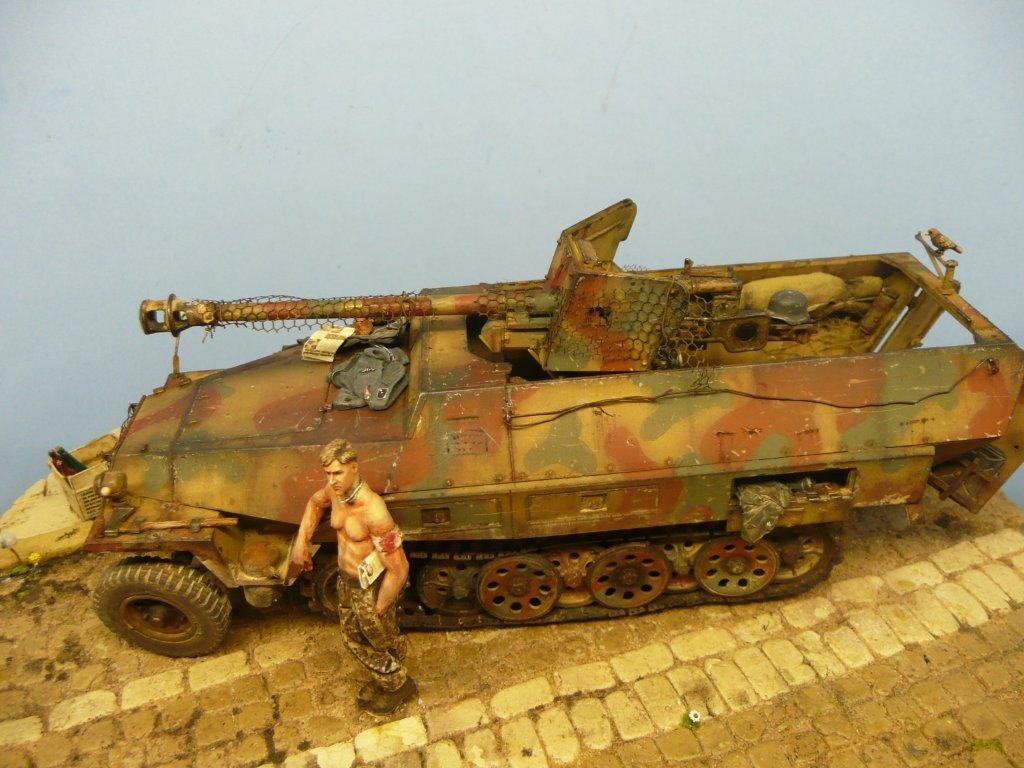
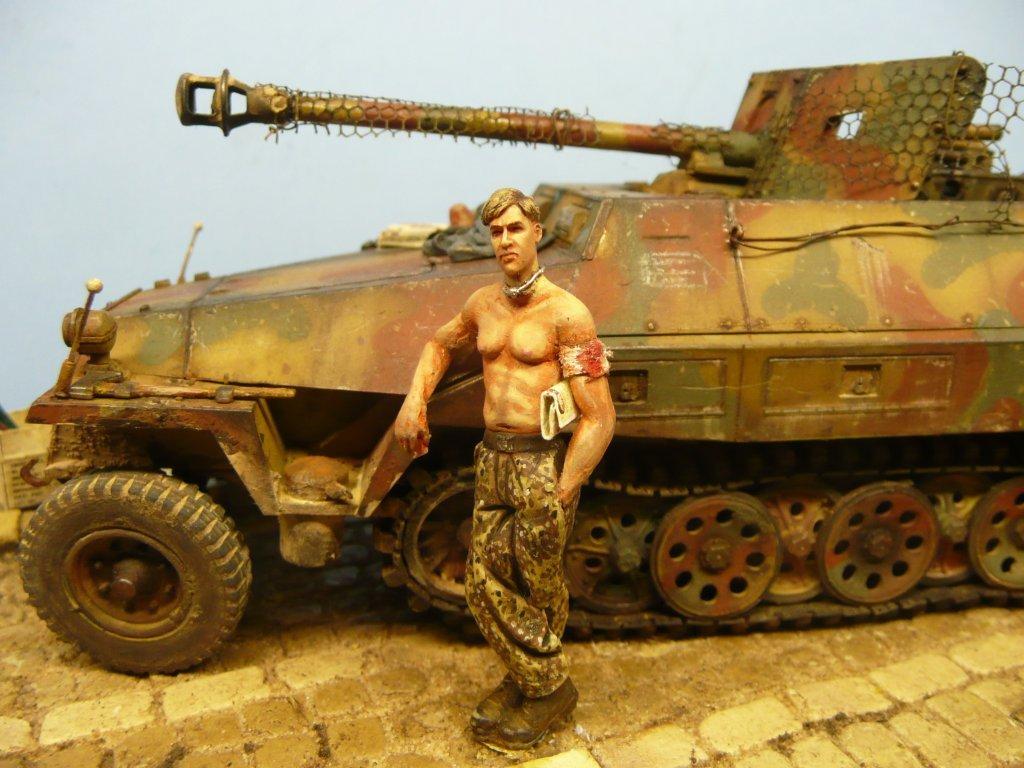
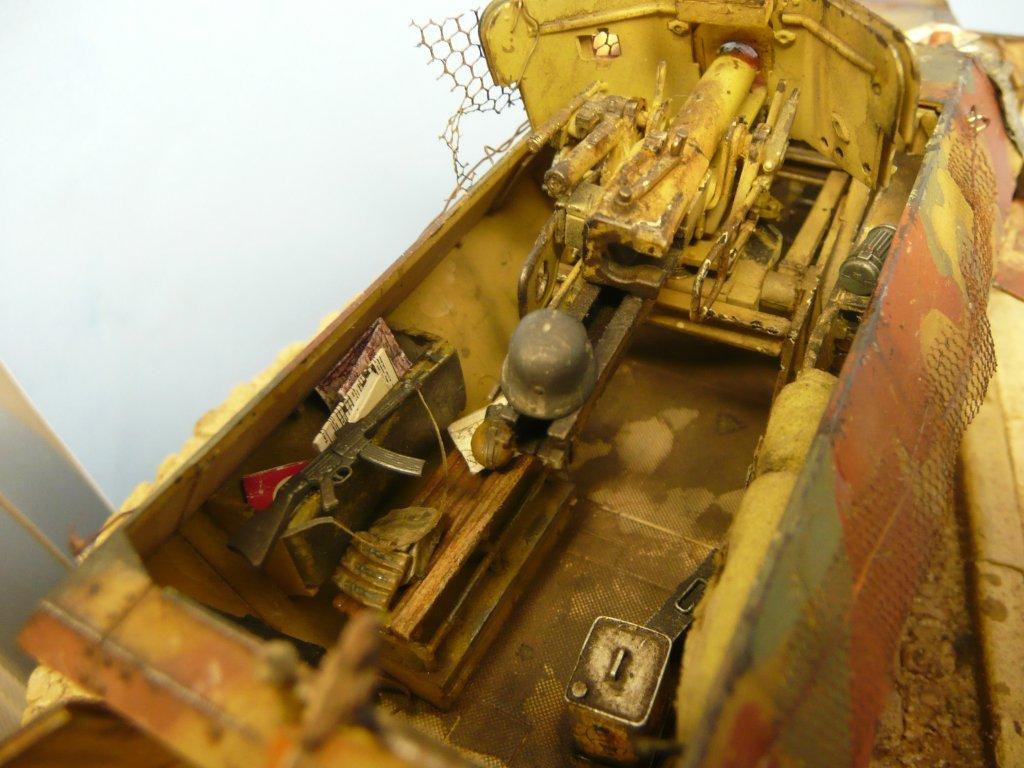
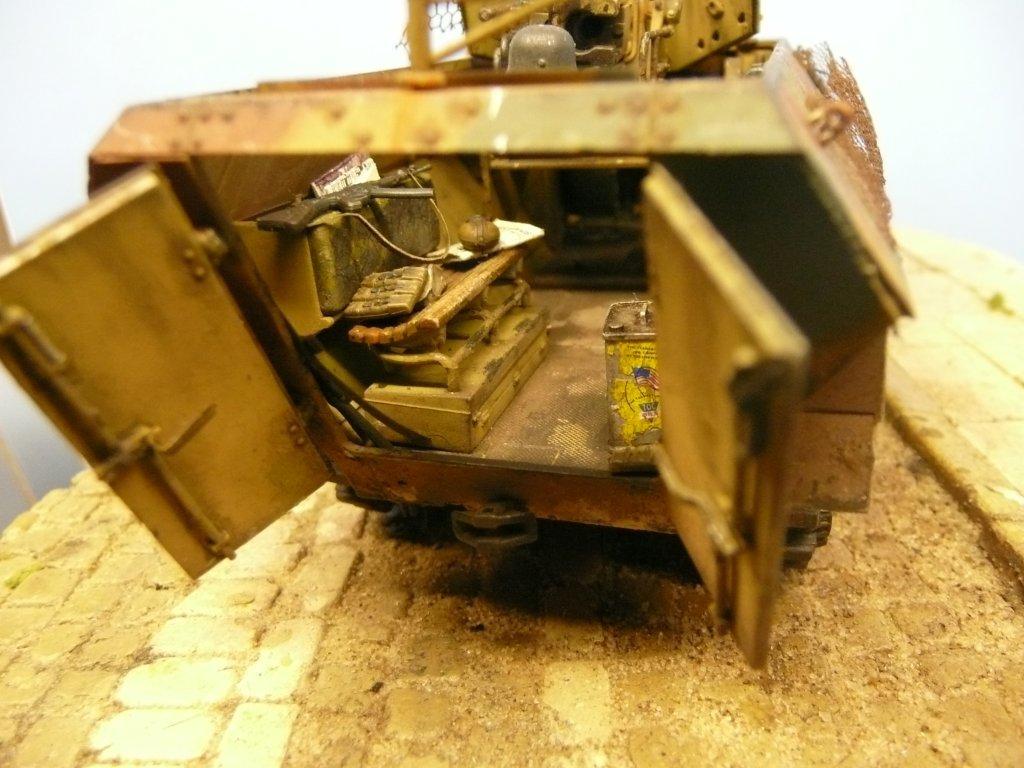
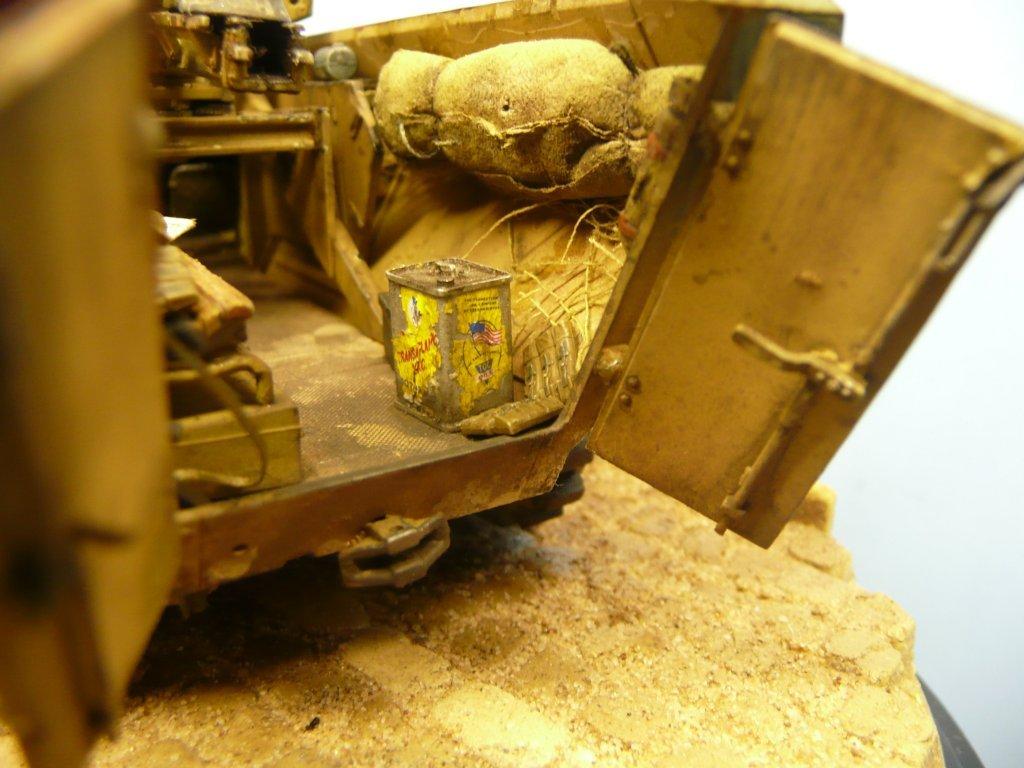
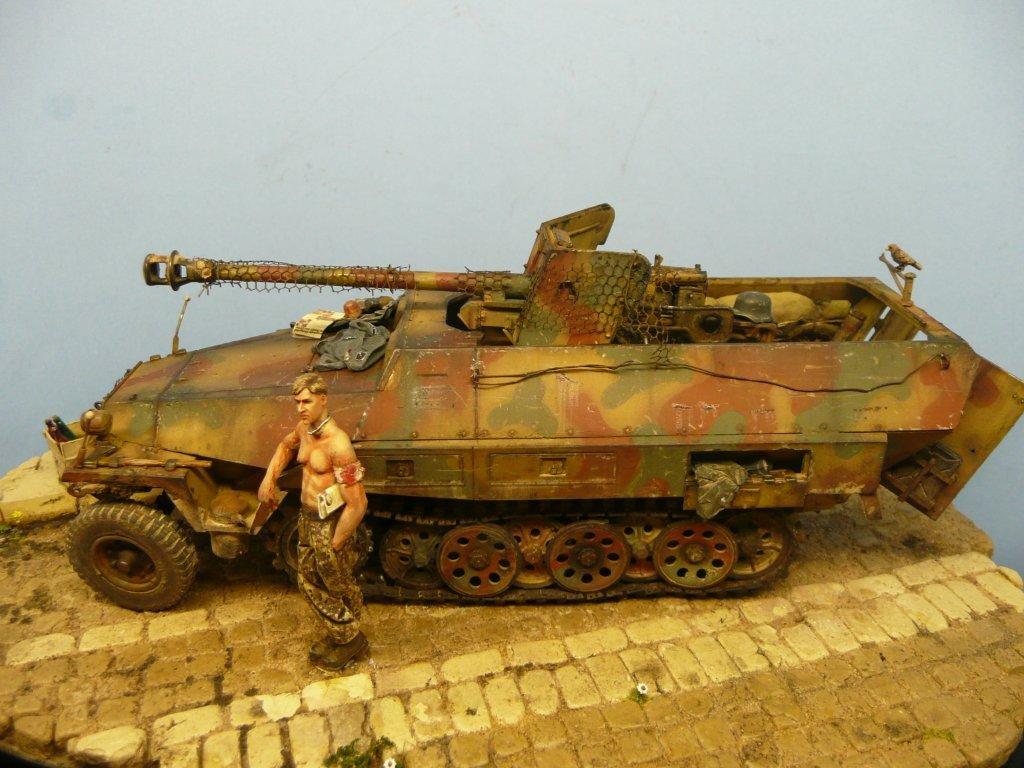
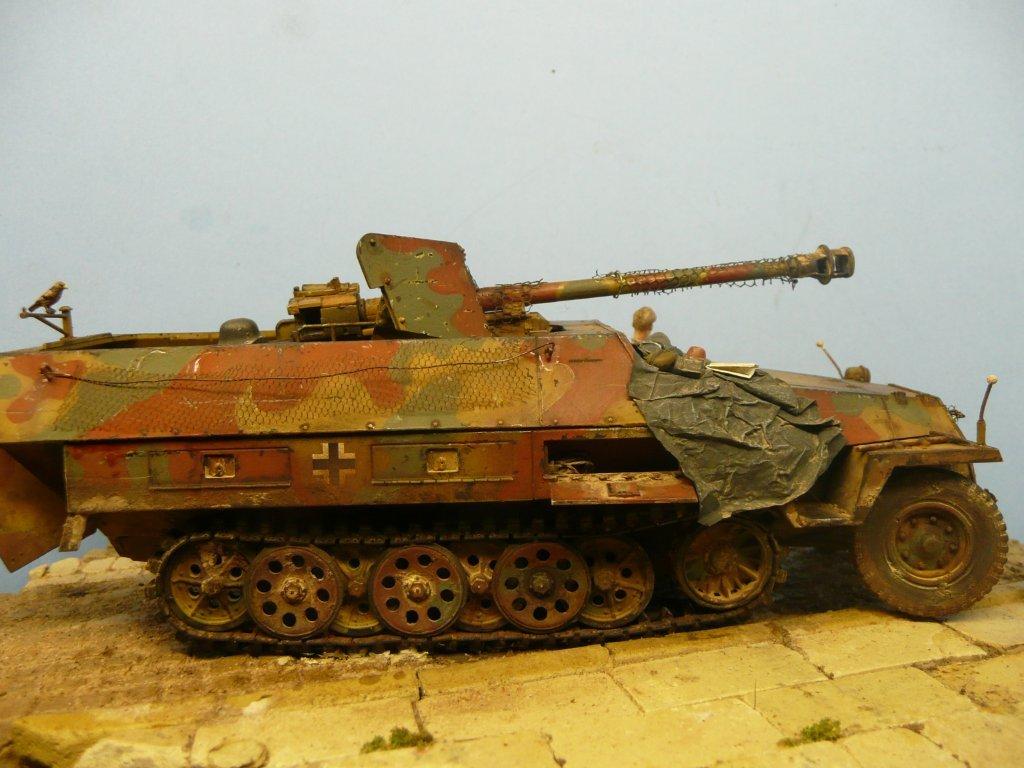
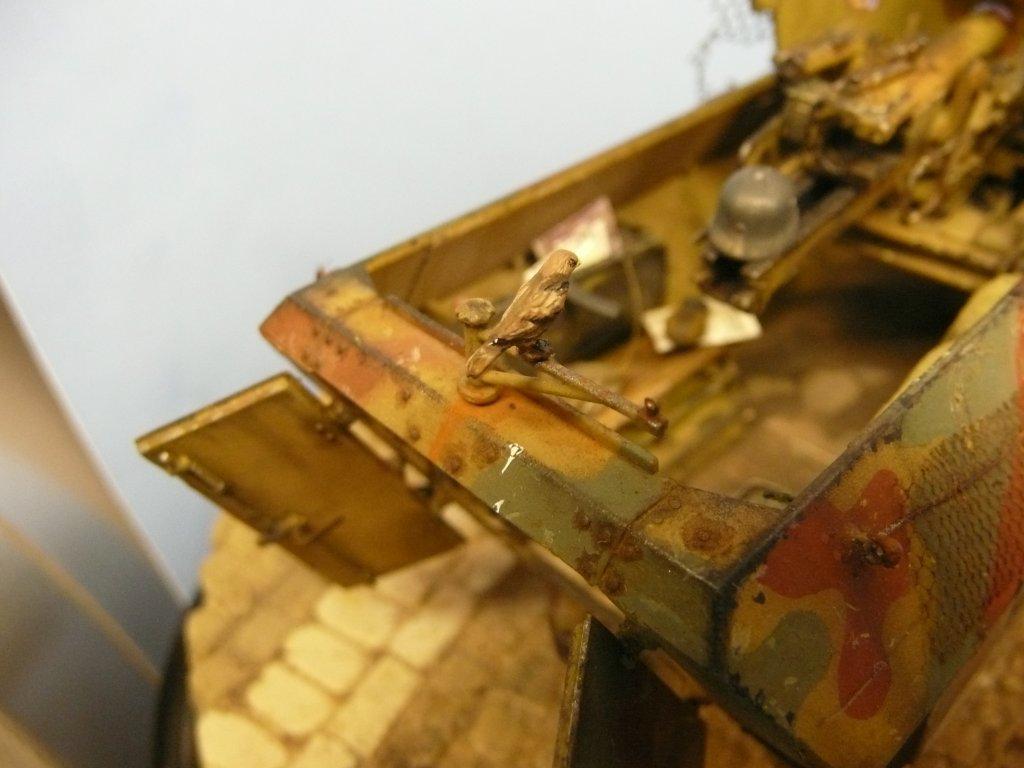
The kit is a good modern moulding with a high level of detail and numerous and very welcome optional accessory parts such as jerrycans and funnels for fuel, un-ditching logs and stowage boxes. A metal gun barrel is supplied along with photoetched frets for the radiator grills and even the barbed wire used on some vehicles, presumably to prevent intrepid enemy troops from climbing onto them.
There have been some criticisms of the kit on the internet, questioning the positioning of some of the cables, the position of some of the weld seams and the texturing (or lack of it) on some of the parts. The kit seems to represent a very specific variant of the Tiger that was produced over a period of just a few months in early 1943 and apparently neither earlier nor later versions of the vehicle from outside of this period can be made without modification.
Even within this short period there were apparently variations between individual vehicles (such as the positions of the clips holding the track mounting cables) which need to be taken into account if you want to make a specific vehicle with complete accuracy.
I feel that a strange feature of the Border Model instructions is that they show the ducting that fed air to the engine (supplied as optional photoetched parts in the kit) on the top of the engine deck which seems very odd. I have never seen anything like this in period photos and I can’t see how this could be correct. I think that they should be on the inside of the vehicle! However, if you add the photo-etched engine grills, little of the interior detail is visible so their omission one way or another is not an issue.
I chose to model vehicle number 323 from Pz.Abt 503. Transfers for this vehicle with its extra non-standard national identification markings are provided in the kit. The instructions show this vehicle with a typical three-colour camouflage scheme with a base coat of dark yellow. However, period photos show the vehicle in what seems to be in a single overall dark colour. It seemed logical that this would be early war dark grey as the changeover from the standard dark grey base coat to a dark yellow base coat occurred in early 1943. However, a couple of references that I found indicate that this unit had their vehicles painted in a non-standard olive-green colour and so I have finished my model in that way.
On my model I have included the exhaust shields that are provided in the kit, even though the period photos of the vehicle show them to be absent. I had incorrectly assumed that they had been fitted as standard (just as they had with other vehicles) but that they had been removed or damaged at some point. However, after finishing the model, it appears that on this particular vehicle, for some strange reason, the shields were never fitted in the first place as the mounting brackets were not present. Sadly, the scanning electron microscope that I should have used to examine the reference photos, which would have allowed me to spot my error was at the menders that day, so now they’re going have to stay there.
Despite the criticisms levelled at it from a number of reviewers, I thought that this was a good kit, and I enjoyed building it. However, if you wish to model a specific vehicle, from a specific time period, and possibly even at a specific time on a particular day, you might need to check any available references if you want to be totally accurate!
Dai W.
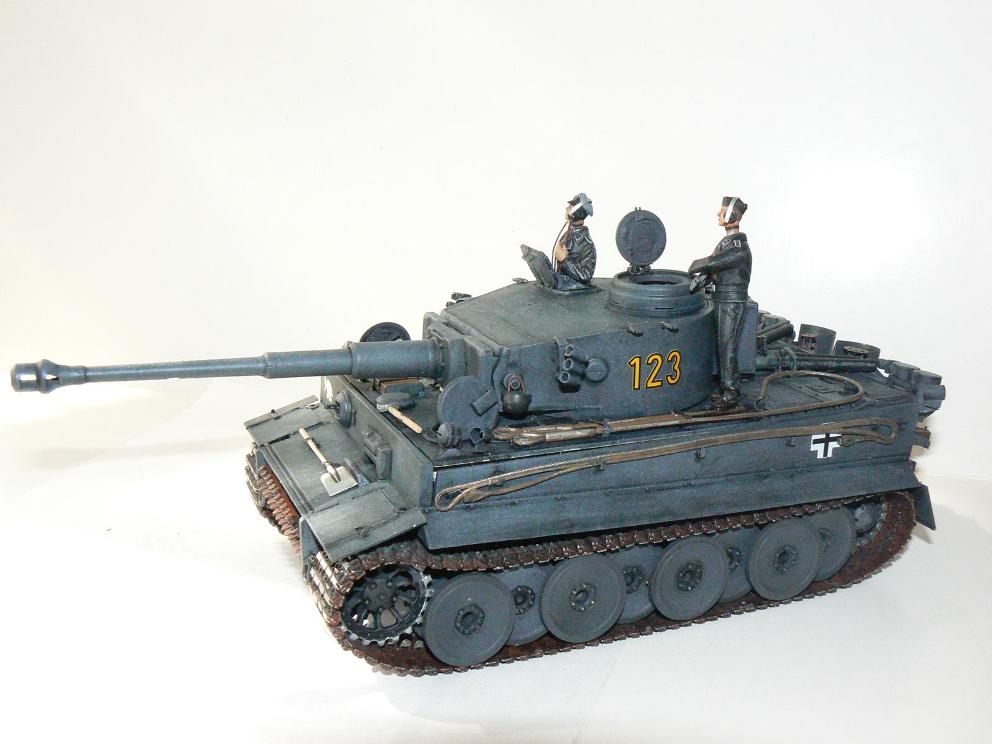
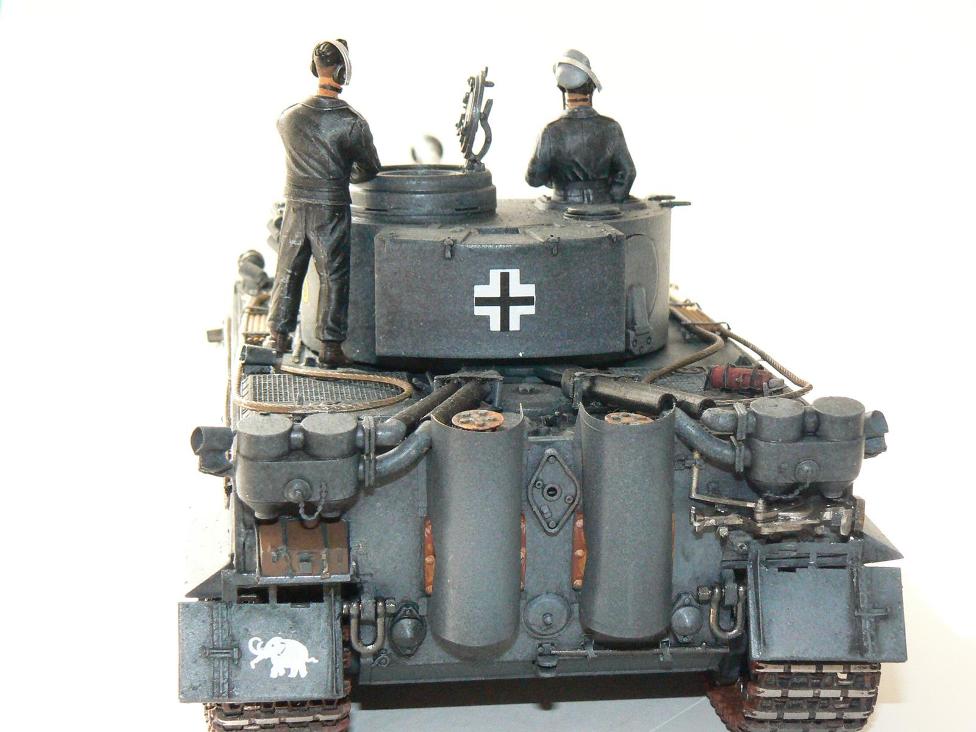
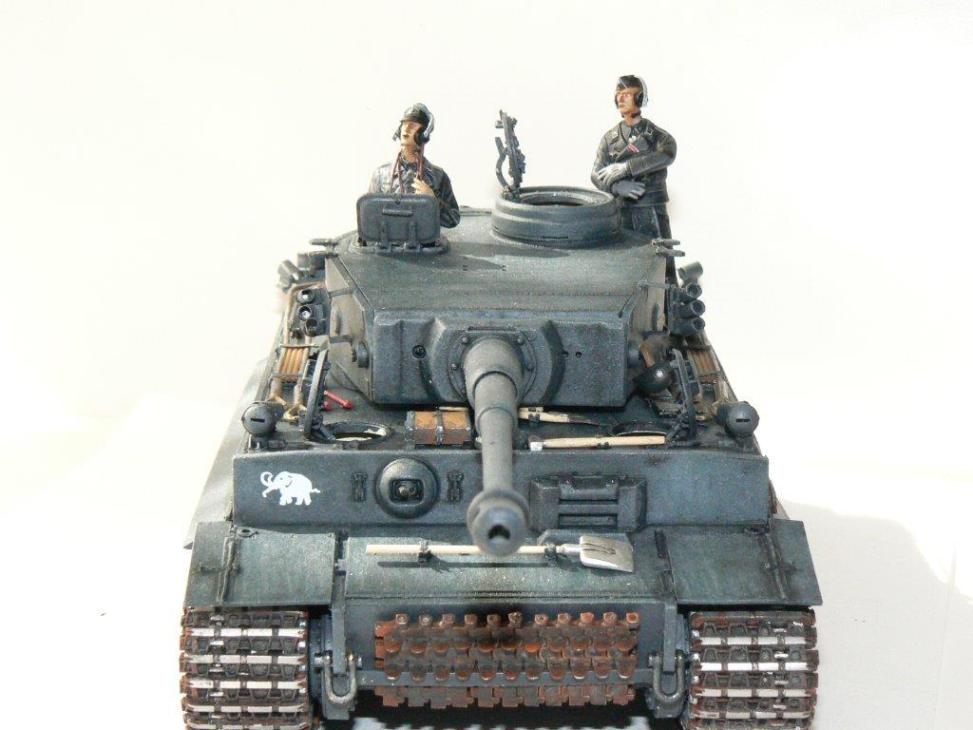
Here’s my Academy 1:35 early Tiger 1.With Eduard etch, Friulmodel tracks and turned aluminium barrel.
The figures are from Alanger German tank crew with Hornet heads with the uniforms adorned with Tamiya German insignia decals. A project newly finished. Where the hardest part is being able to tell yourself it’s finished.


I have had this lovely kit in my stash for some time now but had no real need for either of the above schemes. I then came across an article in a magazine where the Tilly had been painted up as a ‘Desert Rat’ and my mind was made up.
I also have on the back burner a trio of 1:35 LRDG and SAS WWII desert vehicles but I struggle with painting the sand colours, I tend to end up with just a yellow block, not good.
The Tilly then was a great one to build with an idea of trying out a bit of airbrush shading as a test bed for the big three to come. The kit is a dream to build and fits perfectly everywhere. My only concern was the clear canvas back which I find a bit odd to see it moulded in clear as it is very nicely textures but my main concern was that it was split along the roof line, front to rear. A really odd place to have a long seam but the fit is good and required only a sanding to sort out.
Once built, the whole thing was primed and painted using various ‘sand colours’ from Xtracrylix to get a shaded look, the highlights are German Tank interior Ivory! I then used various washes to dirty it up a bit, I didn’t want to make it battle damaged and battered, and it is not a front line vehicle.
I then used a compass cutter to cut arcs of masking tape for where the windscreen wipers are and used Maskol to roughly mask the side windows before a dusting of matt varnish to ‘dirty’ the windows. So, it was a first for me to shade in this way and for a first time, I am very happy with the outcome.
I’ve finished it with AK Real colours which are my new go to paints. The weathering was carried out with various AK and Mig oils and pigments.
Hope you like it.
Martyn F.
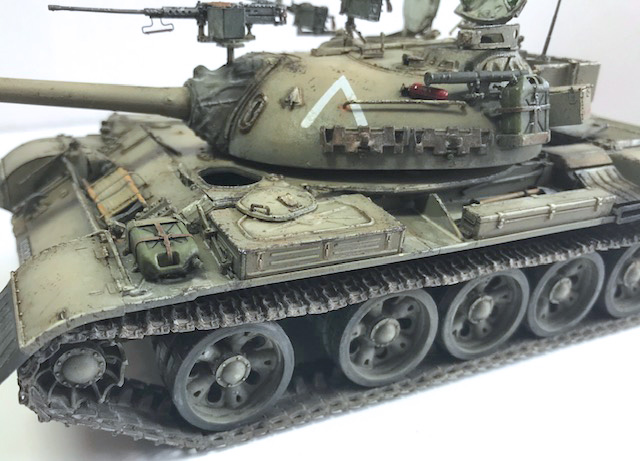
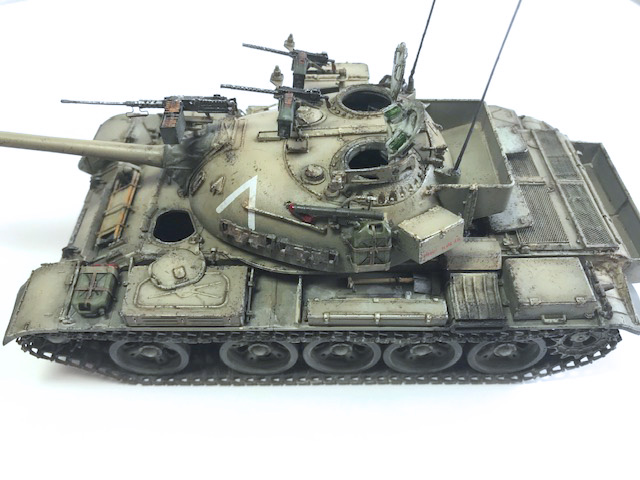
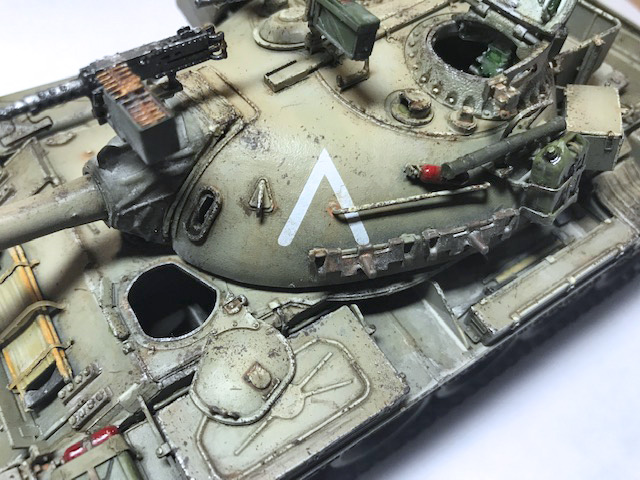
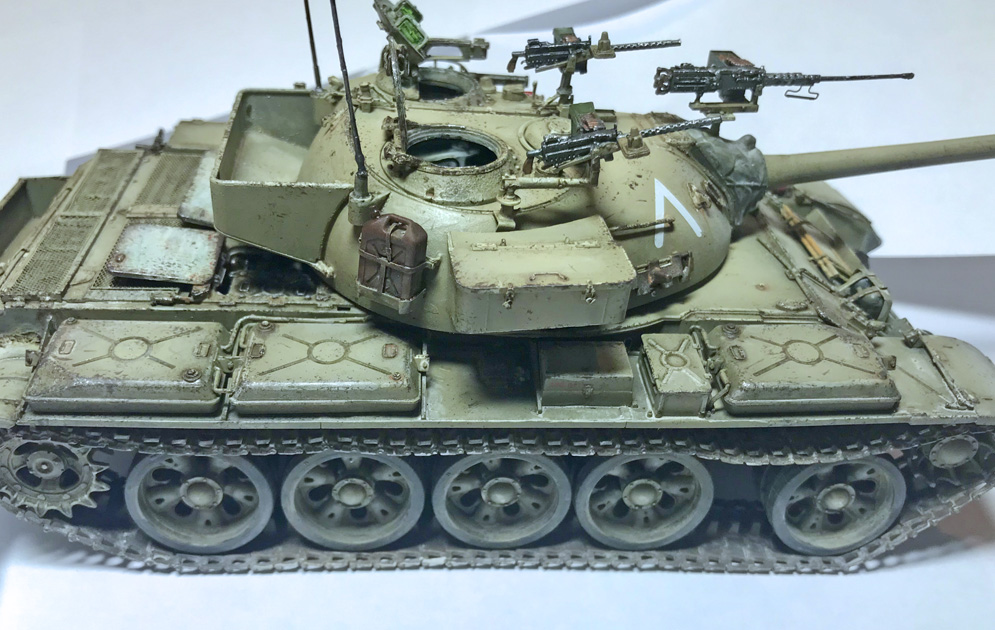
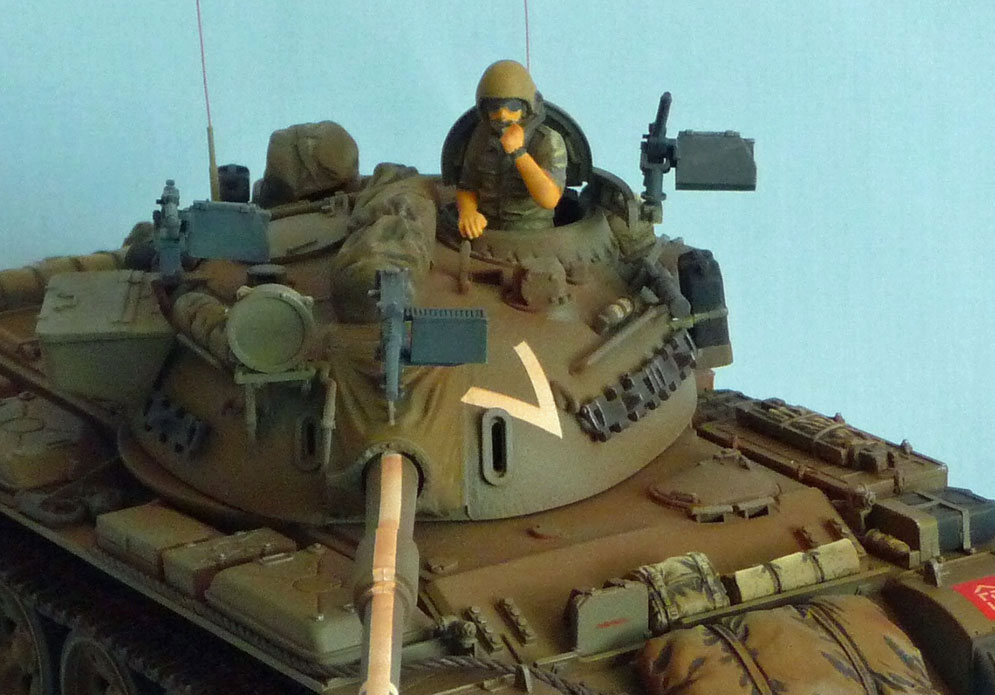
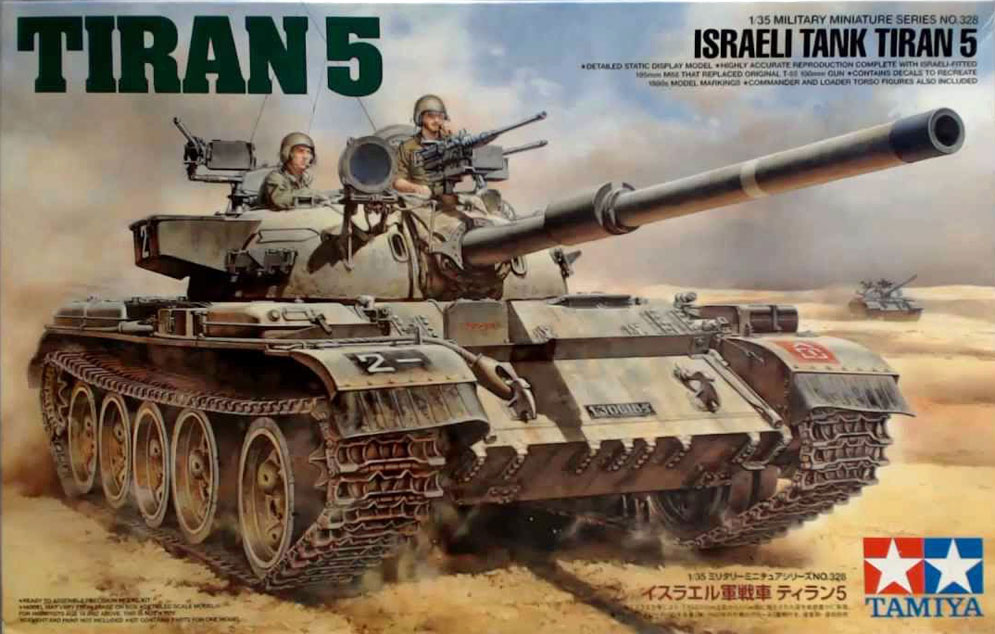
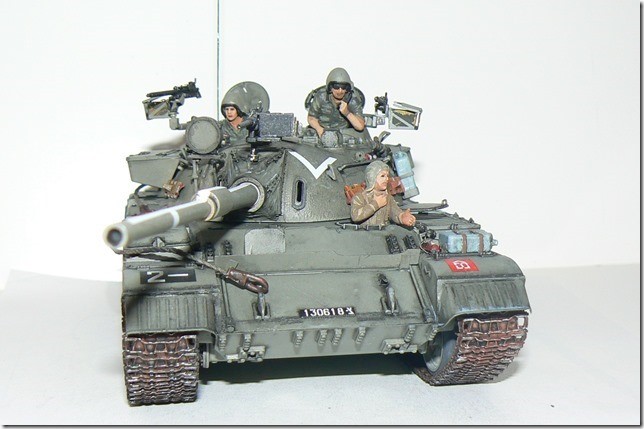
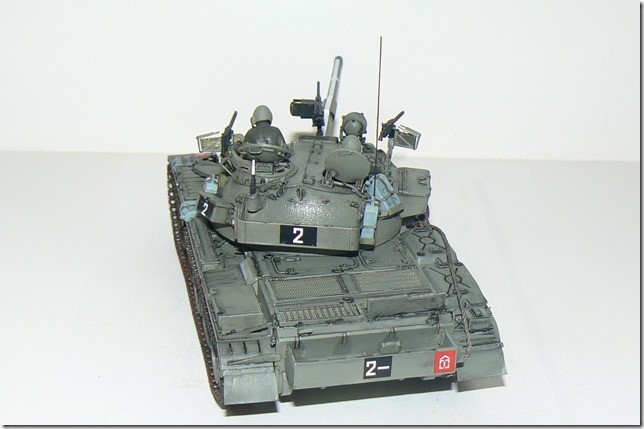
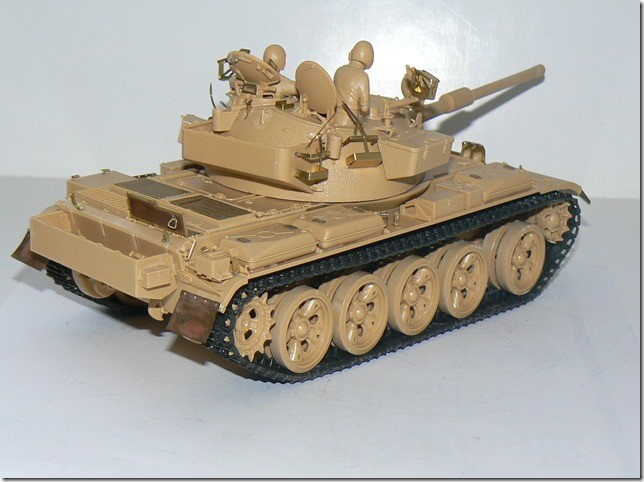
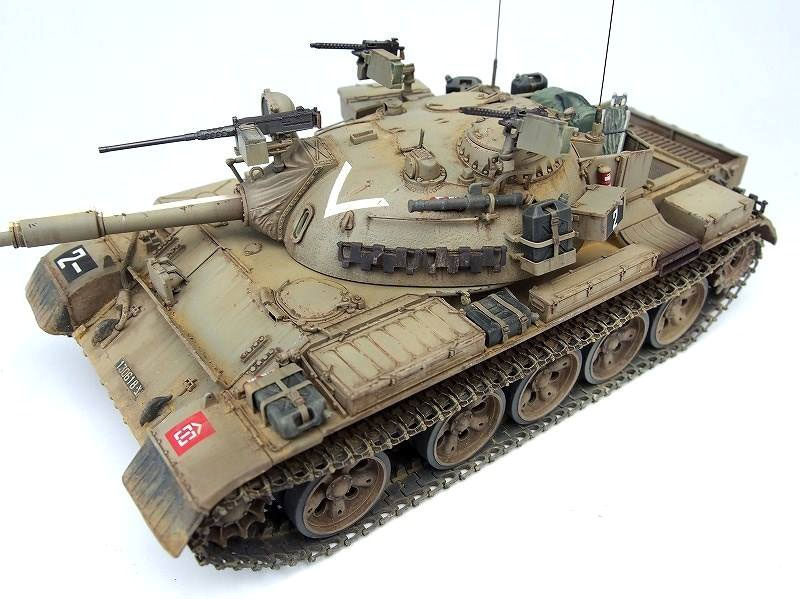
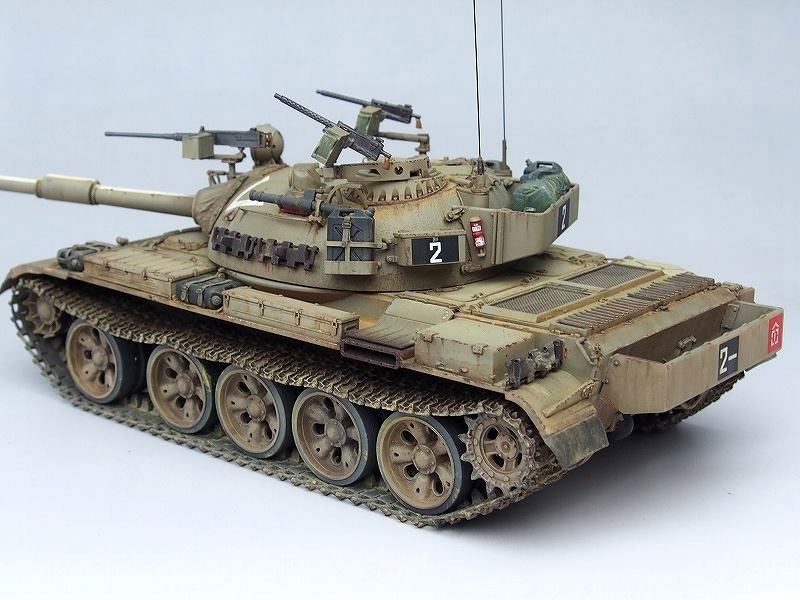
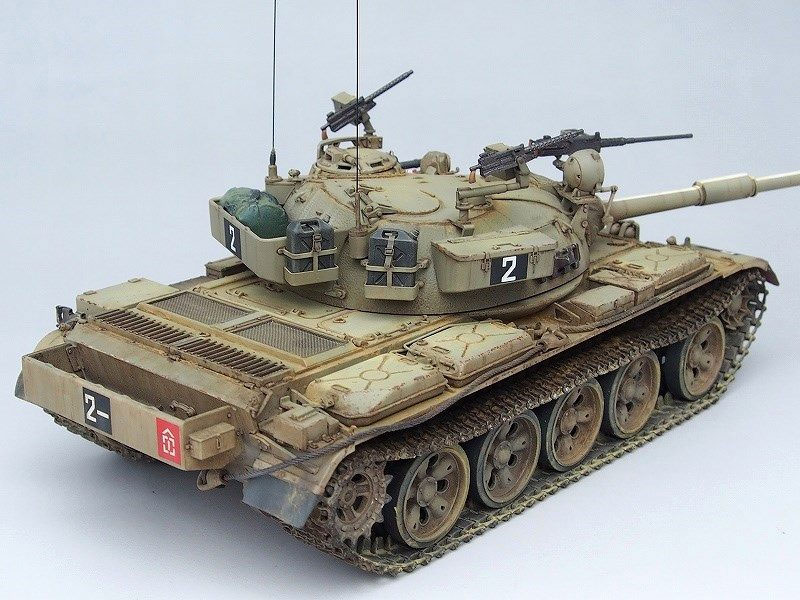
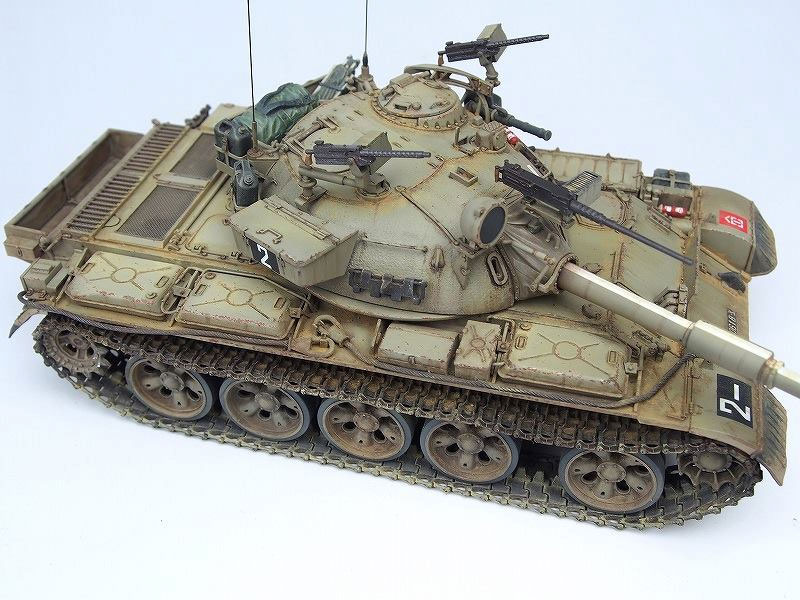
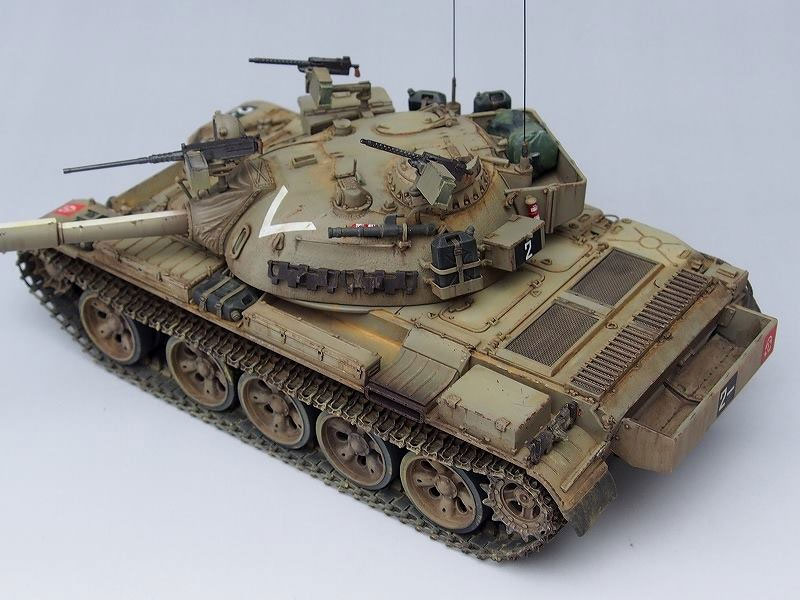
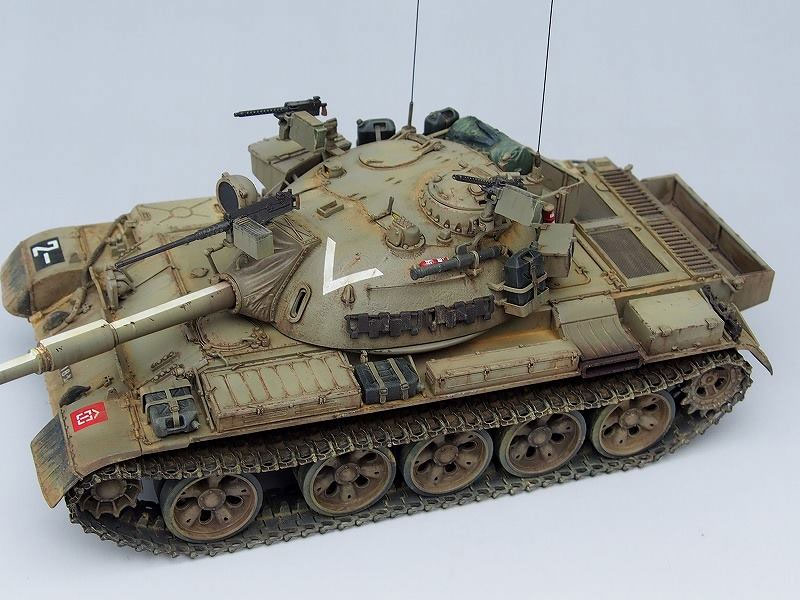
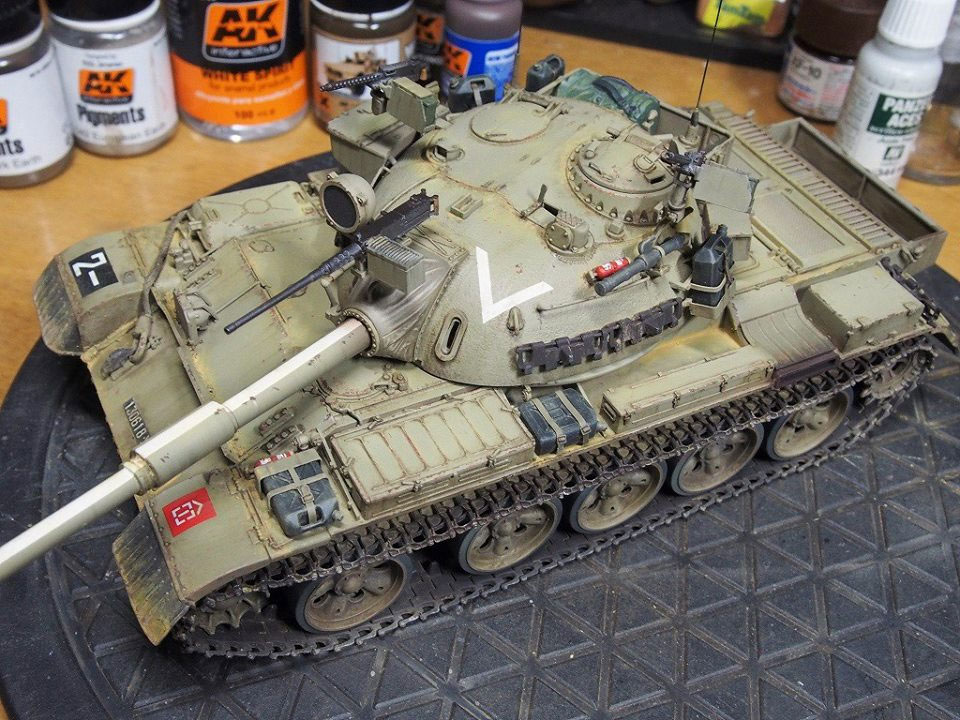
What first attracted me to Tamiya’s Tiran 5 was the box art. Going across the desert in a cloud of dust, the IDF Tiran looked all tank. The Tiran 5 was adapted from T55s captured during the six day war in 1967.
The kit itself is typical Tamiya. Crisp mouldings, nice detail and well-engineered fitting parts.
It was an enjoyable build with no problems.
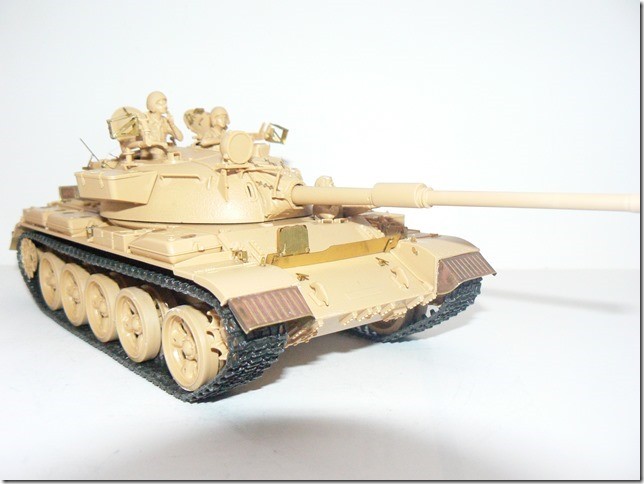
Using Tamiya Acrylic paints for the entire build, I began by applying a white primer from a Tamiya rattle can. When this was dry, the identification line along the barrel & the V on the turret side was masked. Mixing XF49 & XF66 in equal amounts for the main hull colour I sprayed the mixed all over the primed parts.
The road wheels were masked using round masking tape disc. Then the outer rim sections were sprayed XF85 Rubber Black. The tracks were painted XF84 dark iron before attaching them to the road wheels. Gluing the tracks to the road wheels with Revell Contacta adhesive gave them a sagging effect.
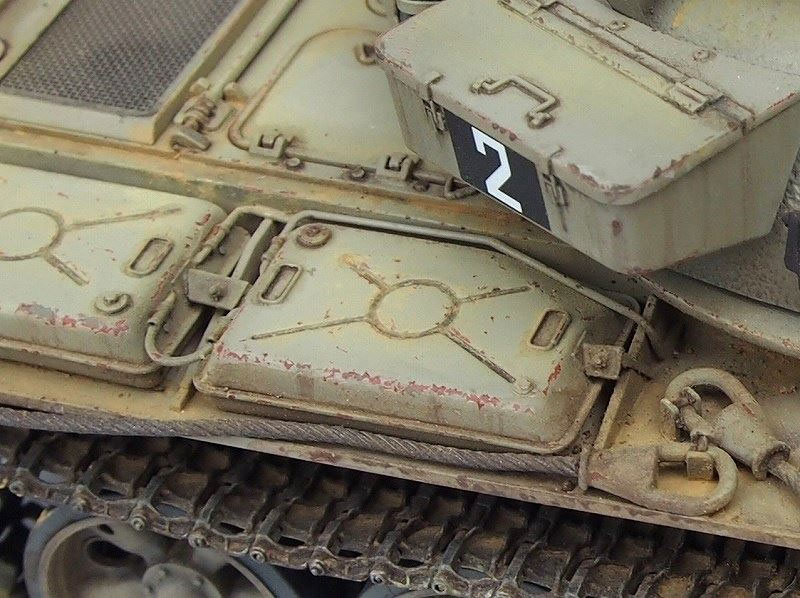
After applying the decals, the model was dusted over with Mig Productions Pigment.
To finish off, a Tamiya weathering set was used to hi-light edges with lighter colours.
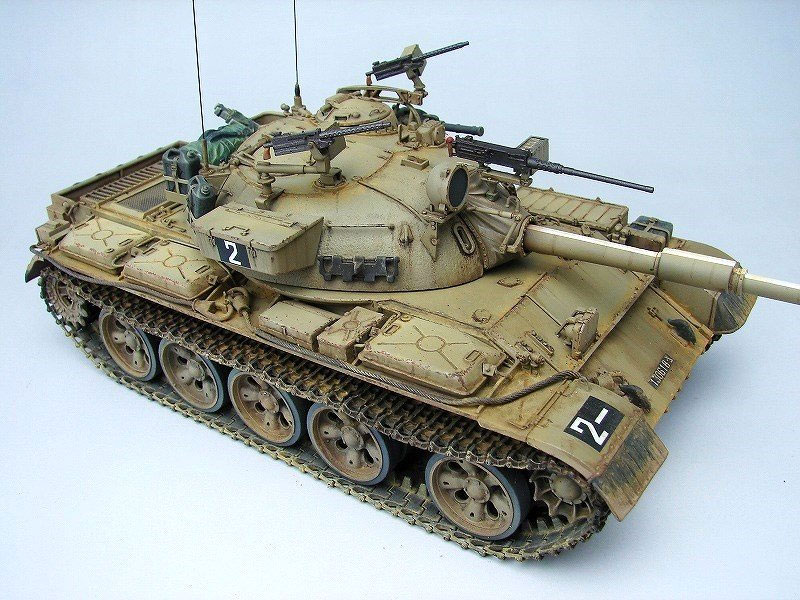
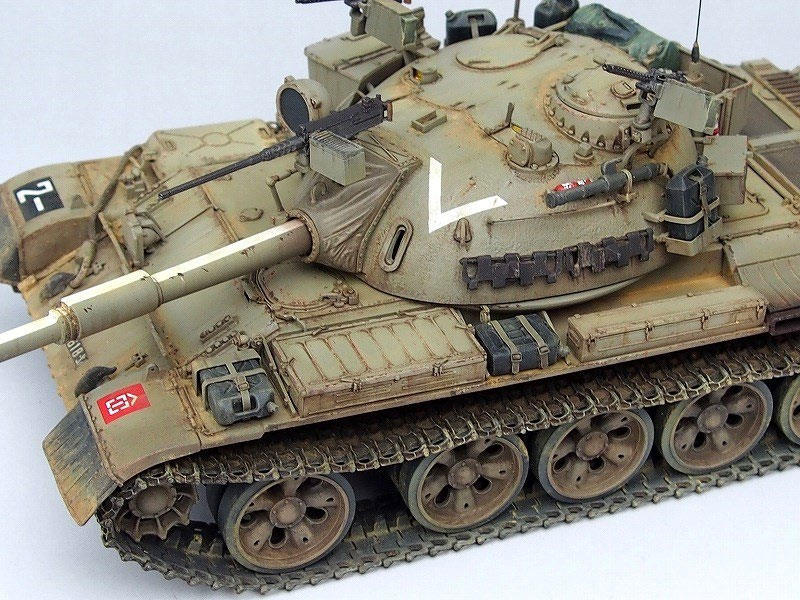
I used items such as kit bags, sleeping bags & sleeping rolls from the Tamiya Modern Military Equipment set to fill the storage baskets. I know this was not accurate, but the baskets looked better full.
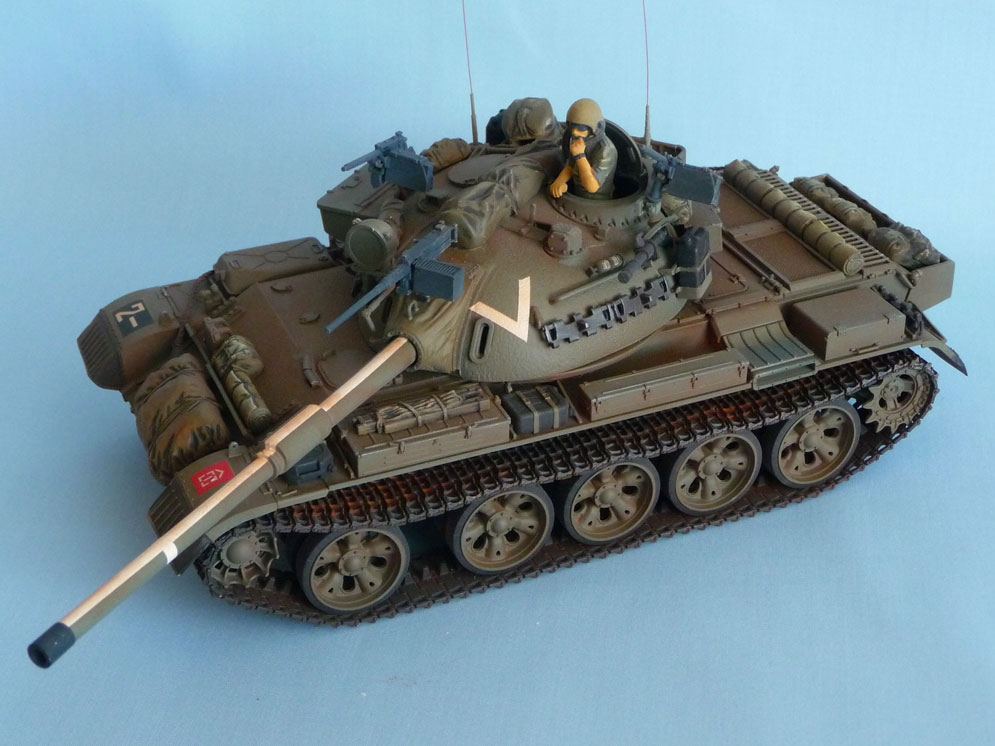
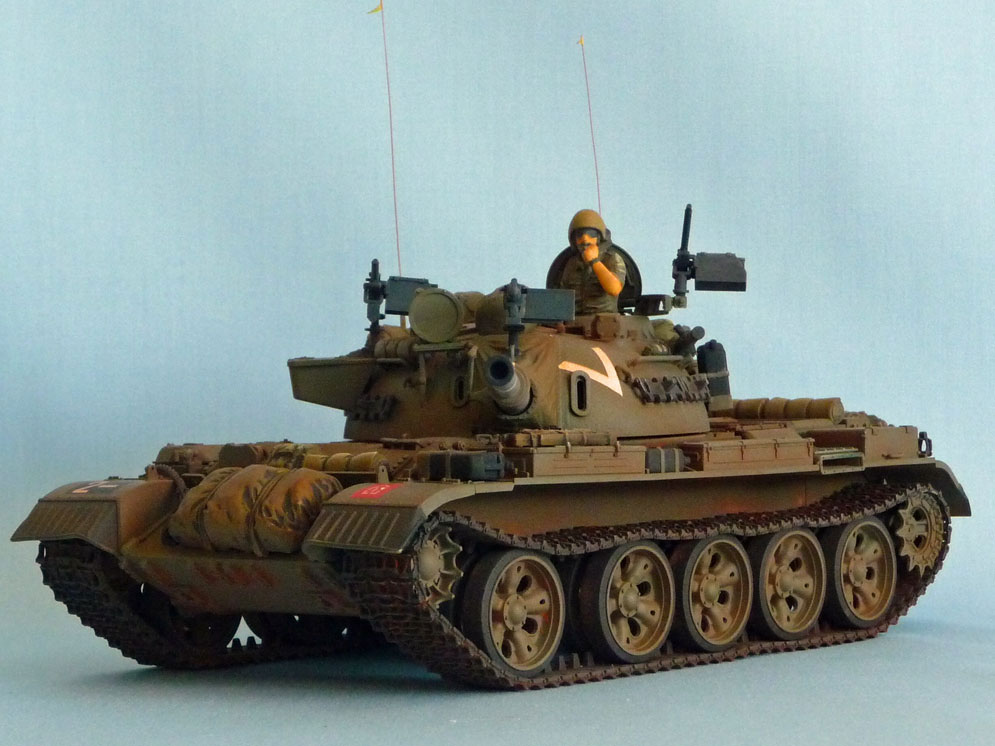
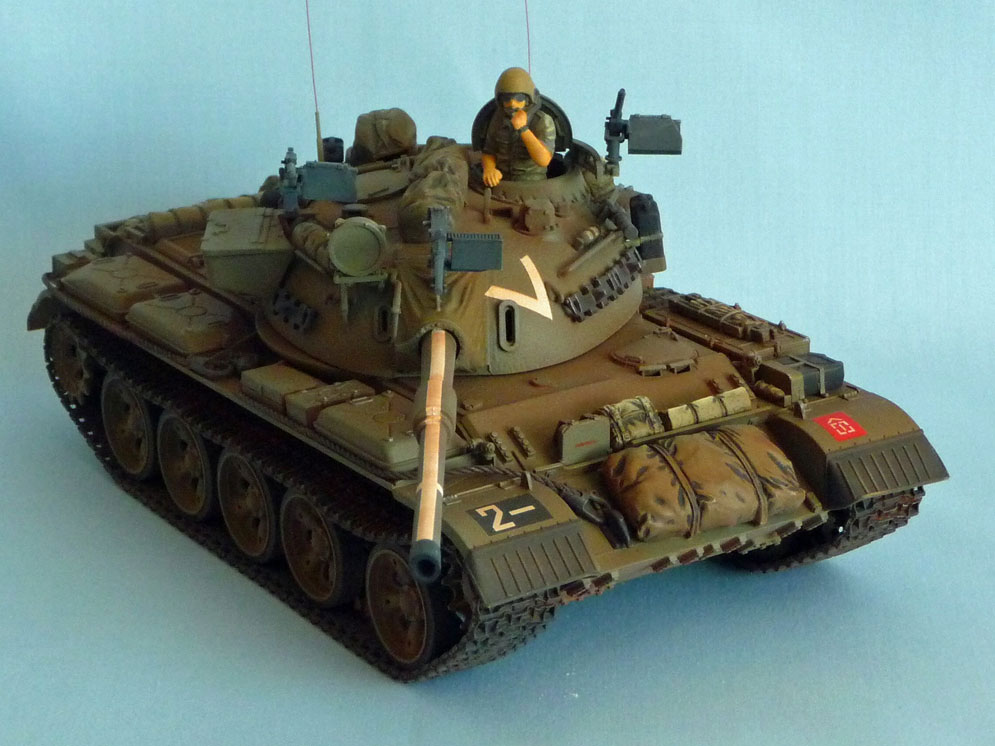
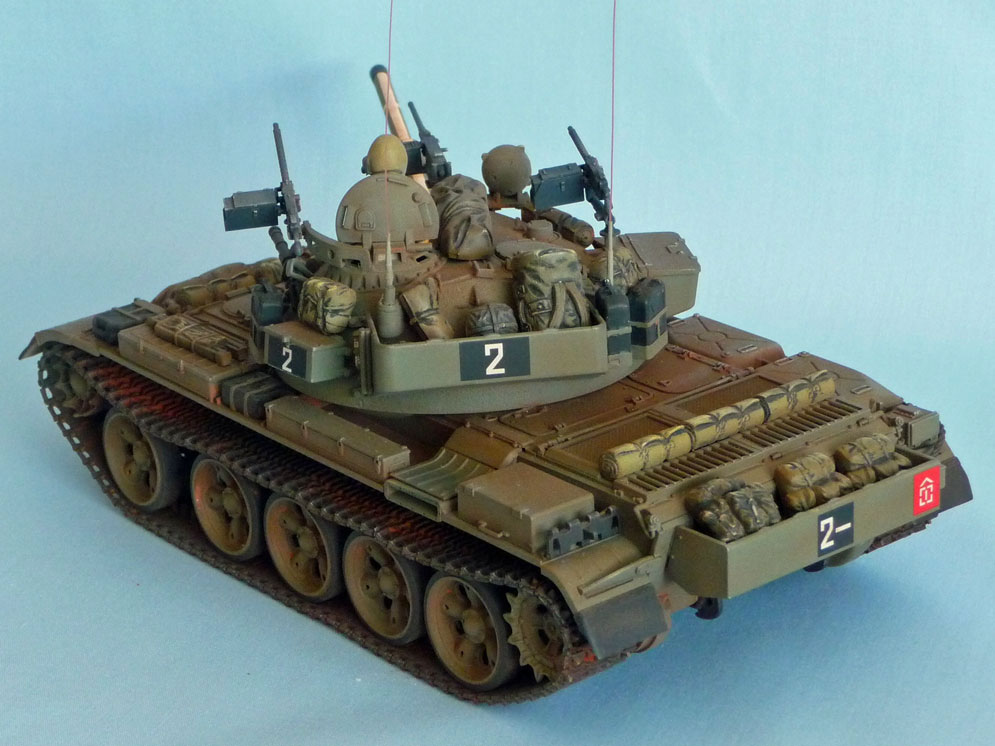
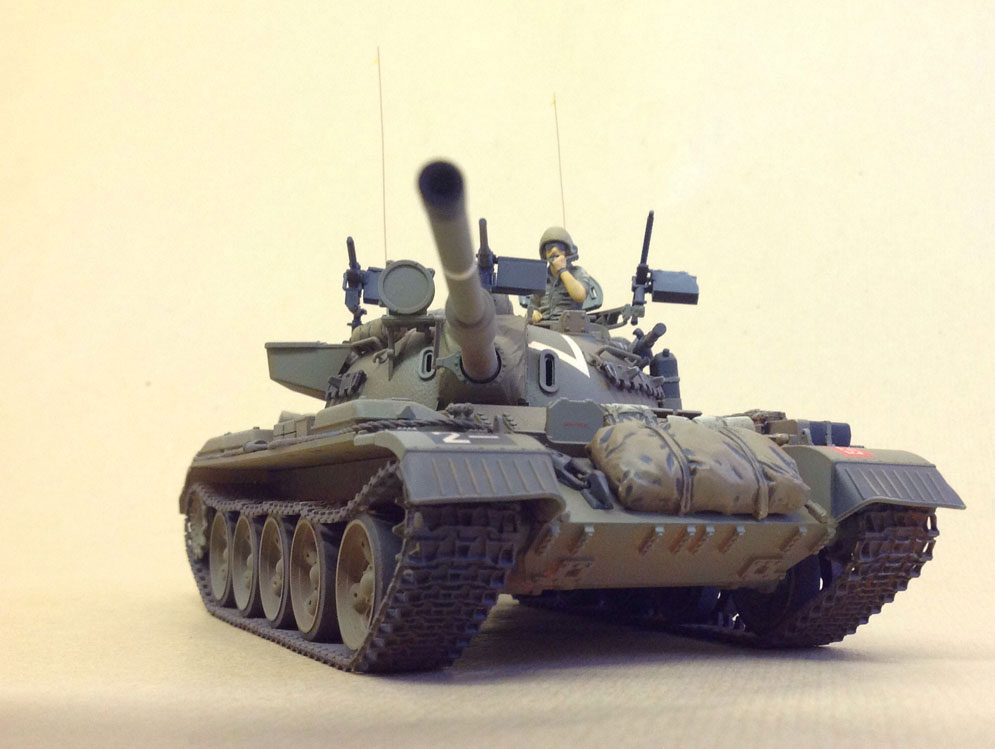
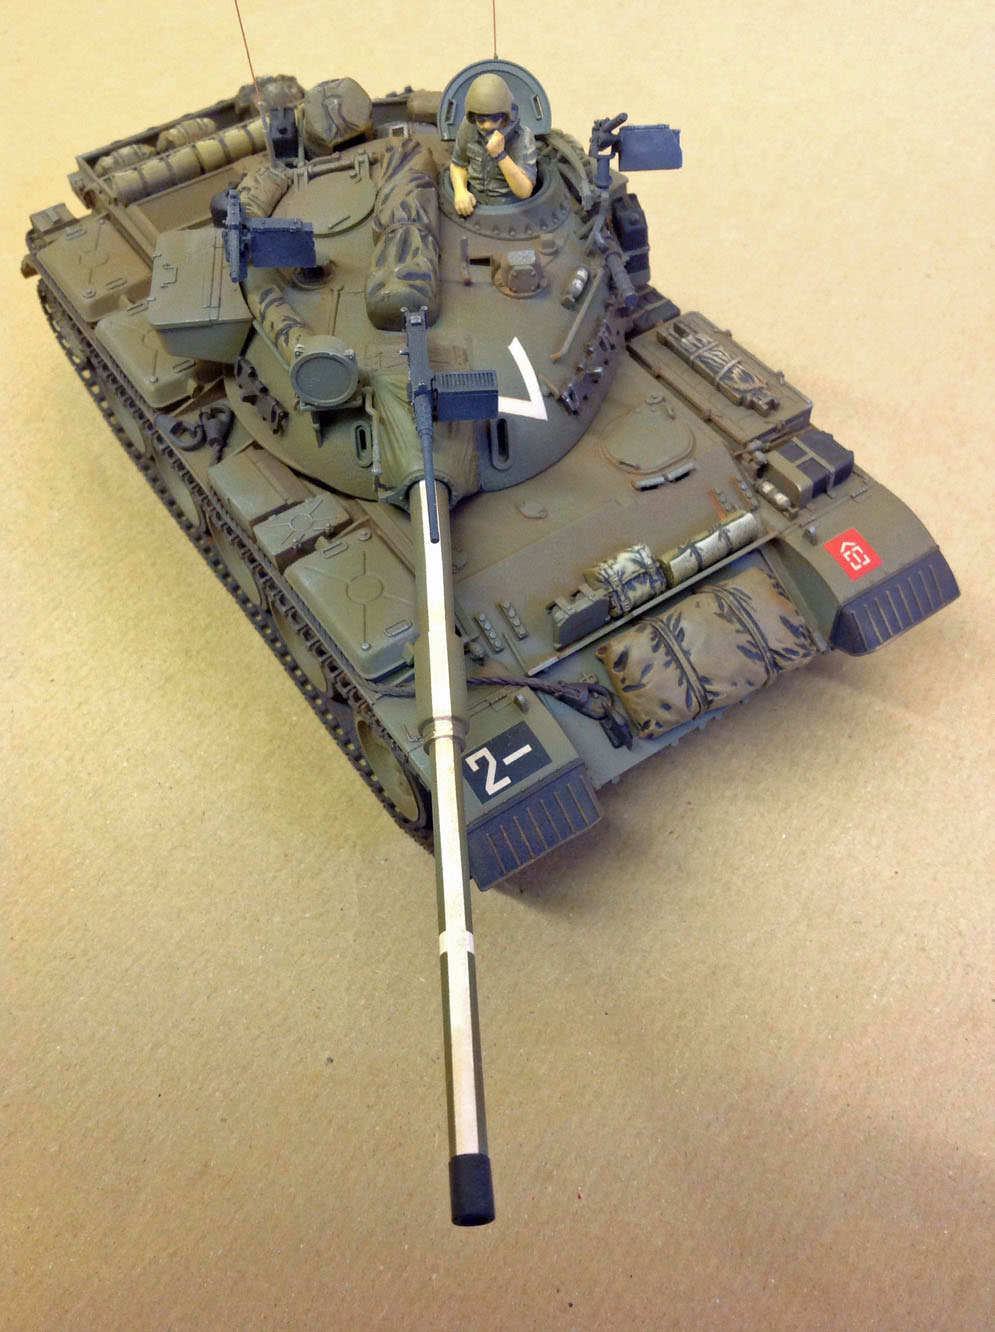
I purchased to go with this kit an Eduard sheet but I found whilst working on it that there really wasn’t any need for it as the detail in the Tamiya kit is certainly good enough. That is unless of course if you want to part with almost £20 which I think now is a bit pricey.
I shall be wiser on my next Tamiya kit. Whatever that may be. However, having got it, I tried to use as much as I could but some pieces were just too small to use. So there was a cut-off point and I only used what I could see and hold in a pair of tweezers.
Again a thoroughly enjoyable construction project to while away the hours.
Chris (Skyboy)


Shigehiro Y.


The model is depicted as a Motorcycle of the British Army Infantry Division in Normandy 1944. It is built virtually out of the box with the only additions being some stowage for the rear carrier rack along with the sling and buckles for the Sten gun.
I achieved the finish using Vallejo acrylics in the main with Tamiya acrylics for touching in small parts. Various Mig Productions powders were used for the weathering along with homemade washes for the rusting and toning effects. All hand painted except for the petrol tank which was airbrushed.
I would highly recommend this series of 1/9th scale motorcycles to anyone wanting an exciting and productive build.
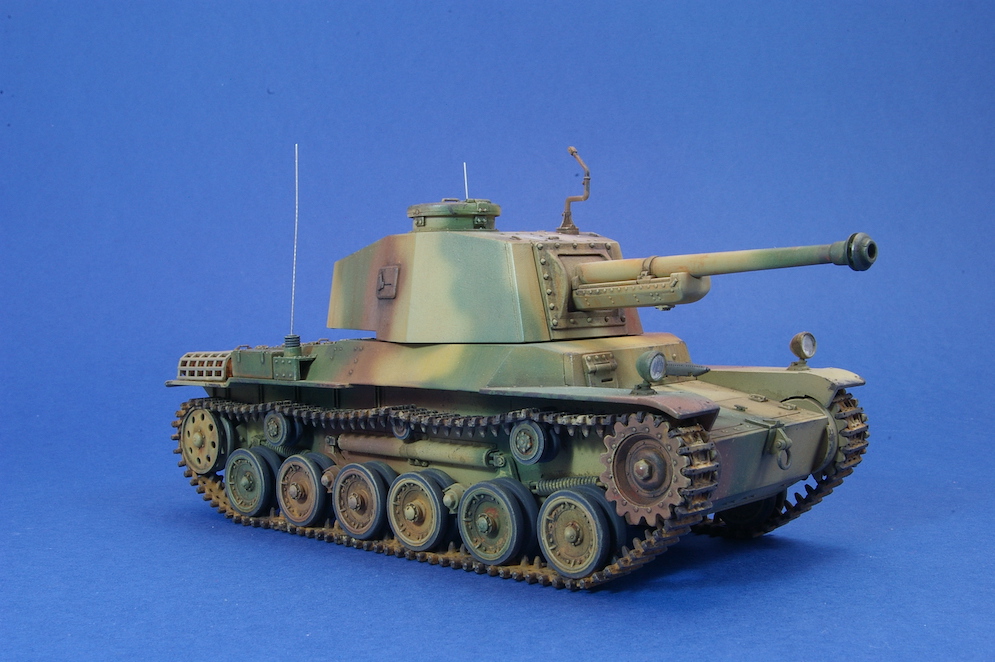
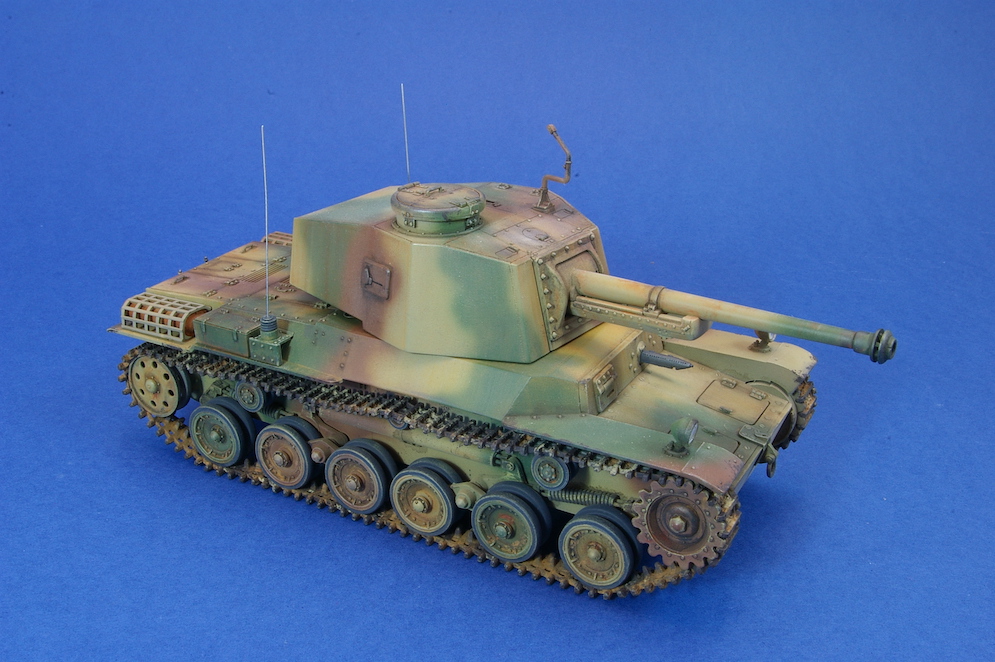
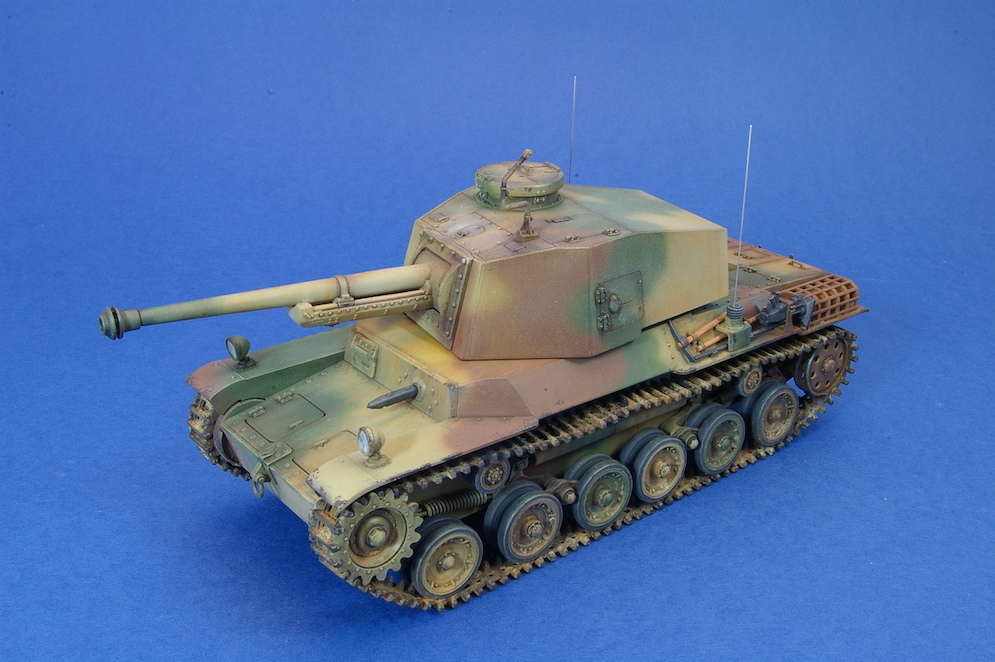
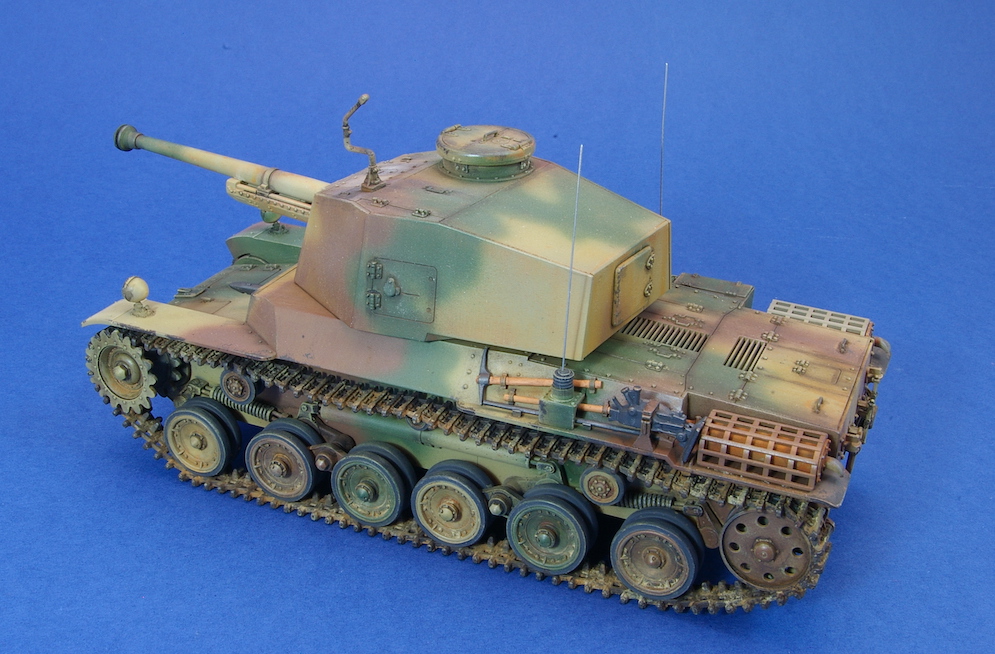
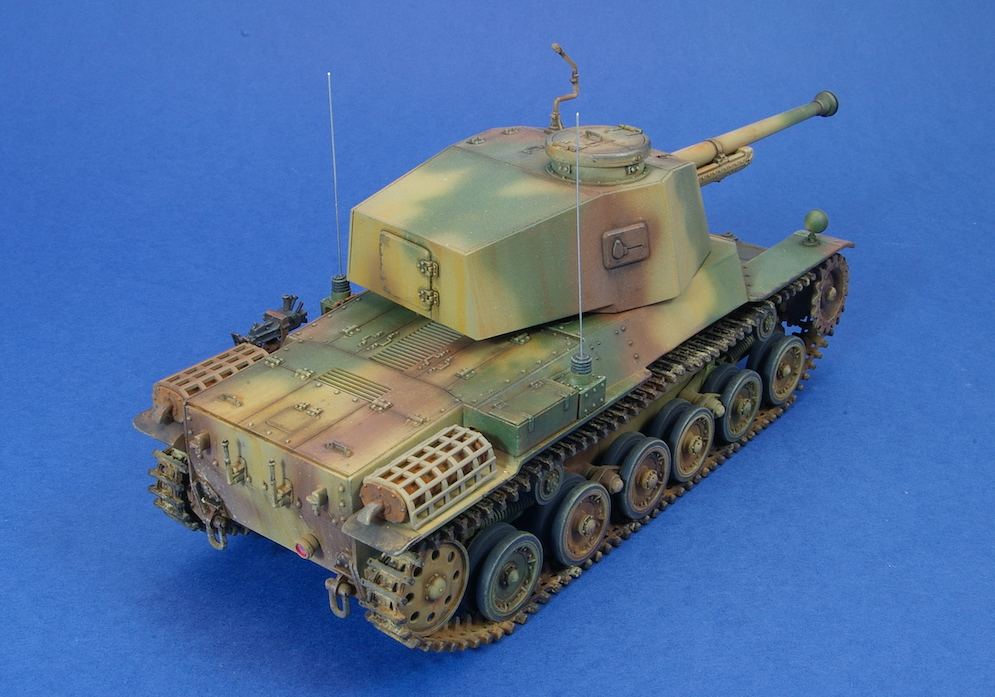
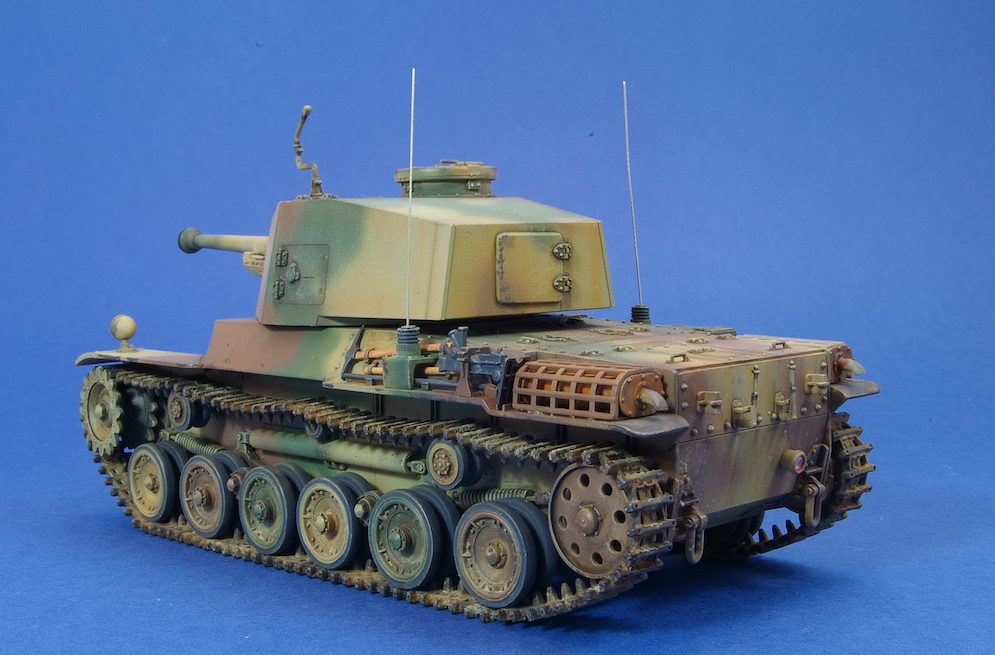
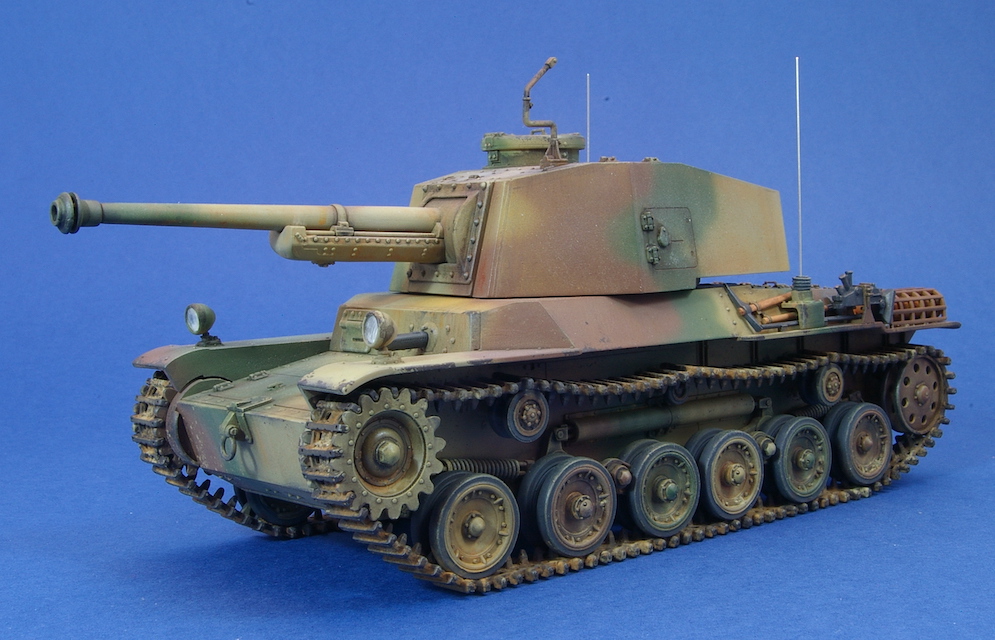
Problems with this production of this tank led to a stop gap vehicle being developed around the chassis of the chassis of the Type 97 Chi-Ha tank known as the Type 3 Chi-Nu which went into production in 1944.
In the end the Type 3 did not see action against the American Army, with all vehicles being retained on the Japanese mainland to counter a possible invasion.
Today there is only one surviving Type 3 medium tank which is on display at the Self-Defence Force Military Ordnance Training School in Japan.
The Fine Molds kit apparently first appeared way back in 1998. It has been released several times since then including a release under the Tamiya label complete with crew figures.
For a kit of this vintage, it is not bad at all and the recent release that I used comes with link and length tracks. The parts are crisply moulded, and the fit is very good. The only things that I added were a couple of radio aerial mounts made from disks of card based on photos of a completed model in an old magazine article.
The painting was done free hand using Tamiya acrylics with oil paints used to discolour the paintwork. The tanks did not see front-line service, and so I thought that heavy weathering was not appropriate. Because of this I limited the weathering to an oil wash and some pastel chalks to outline the raised detail. Further oil paints were used to add some random oil and fuel leaks around the vehicle.
Dai W.


Please though do bear in mind it is my first model of the armour/soft skin variety. It has been built straight-from-the-box.
Spec:
Manufacturer: Fine Molds | Scale: 1:35 | Type: I.J.A. Type 94 Six-Wheeled Truck “Hard Top”
Mike Williams