Welcome to the Subscribers’ Armour Gallery U-Z
Each submission has a ‘gallery’ of thumbnails which you can click on to see an enlarged image along with some short text describing the model – enjoy!
Galleries: A | B | C-I | J-L | M | N-P | R-S | T | U-Z
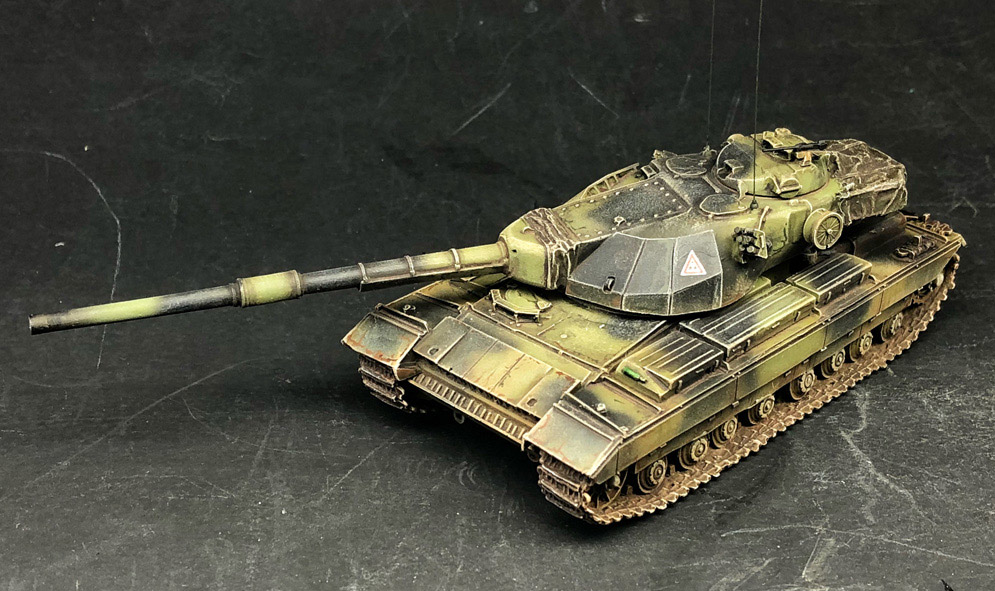
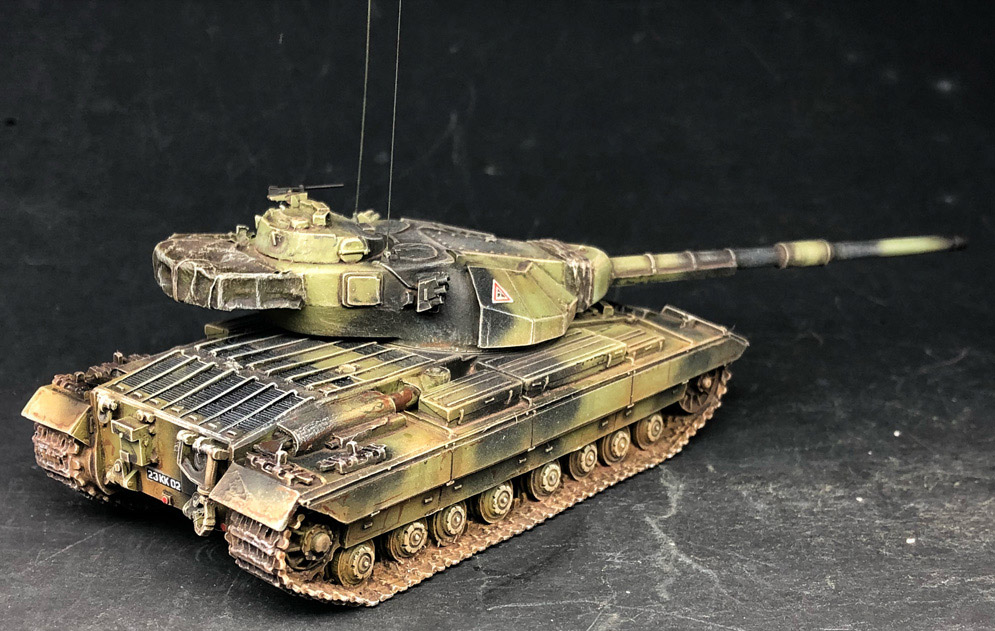
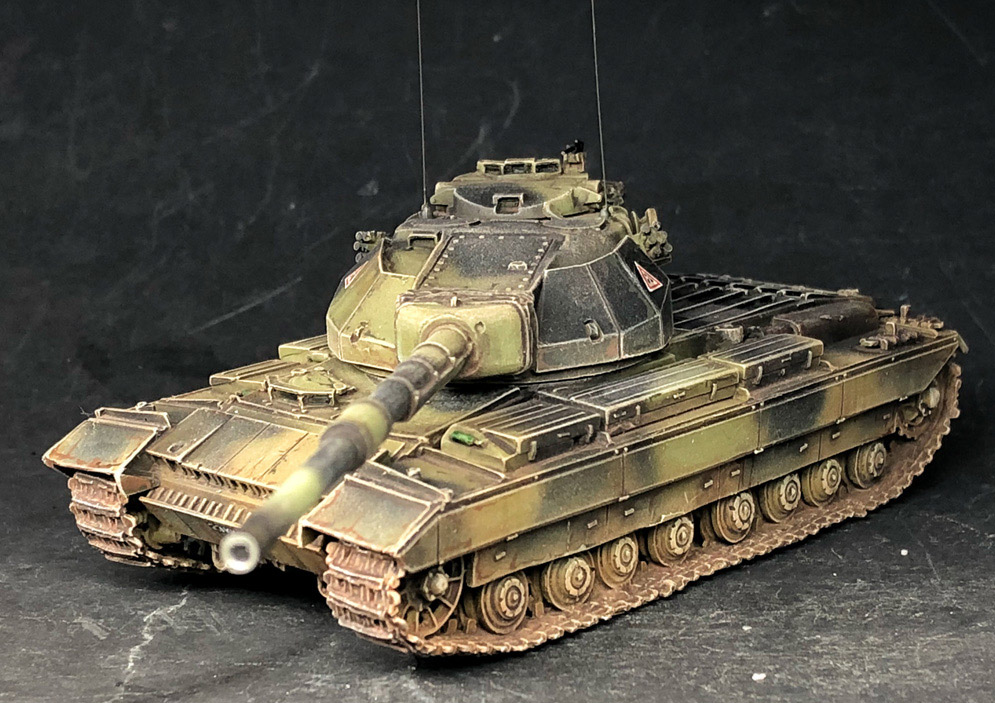
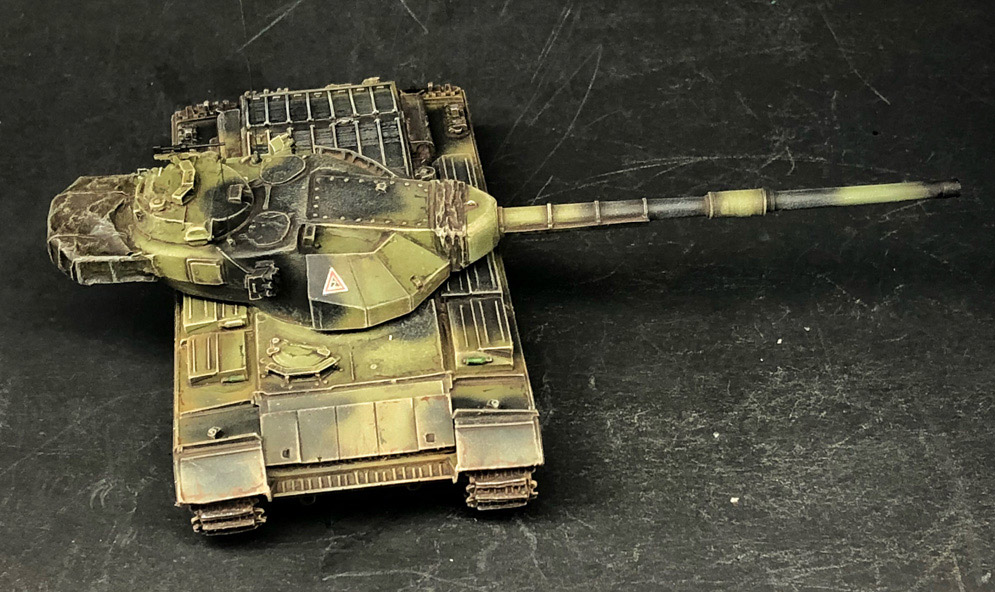
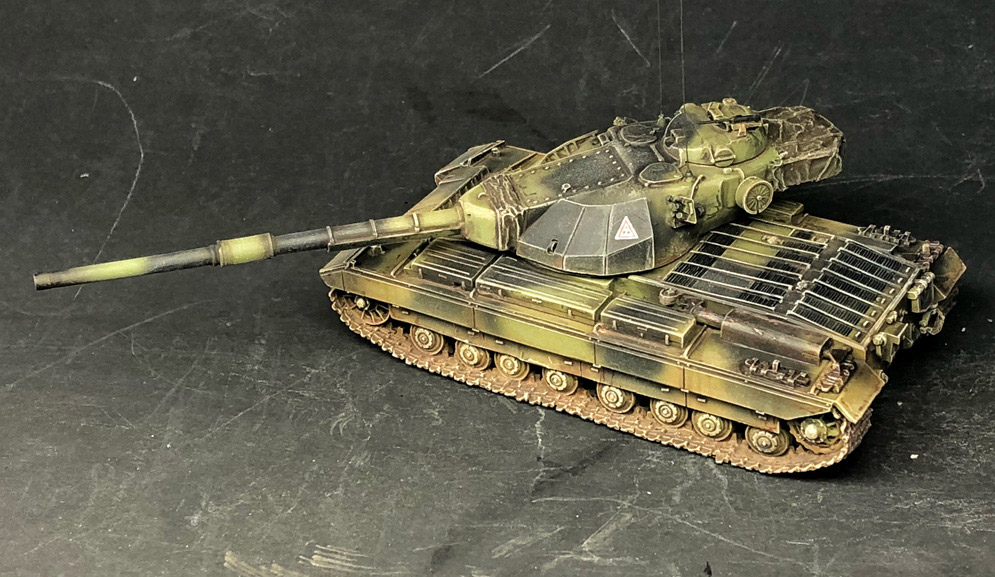
Here is my Cromwell Models 1:72 scale up-armoured Conqueror MBT.
Neil McC.
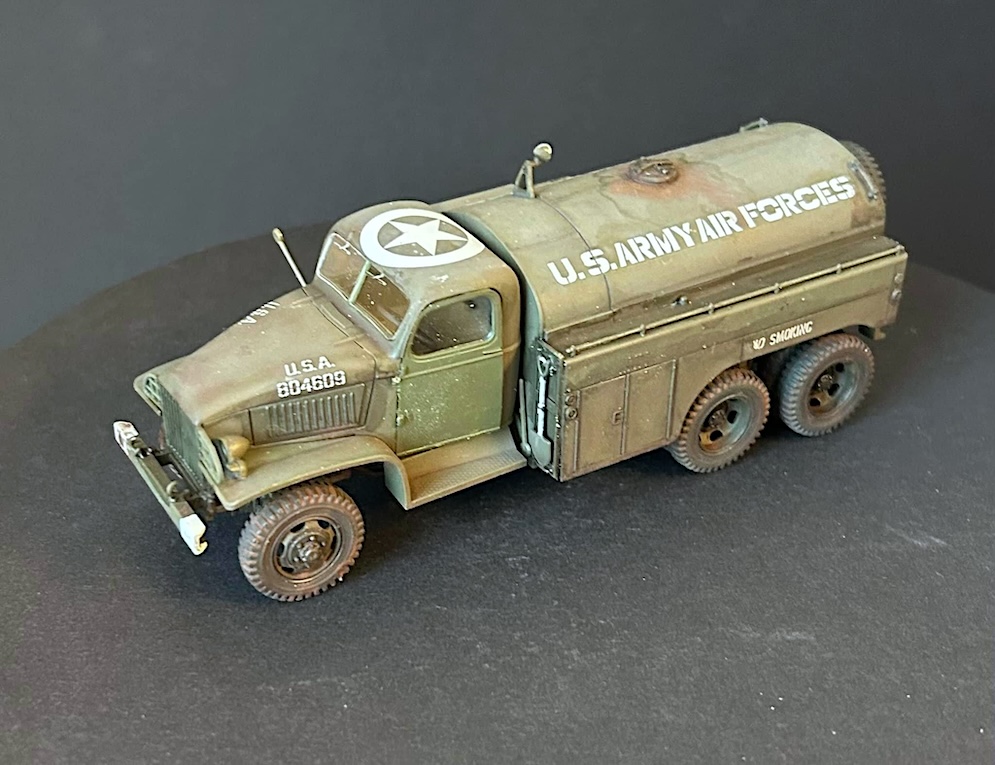
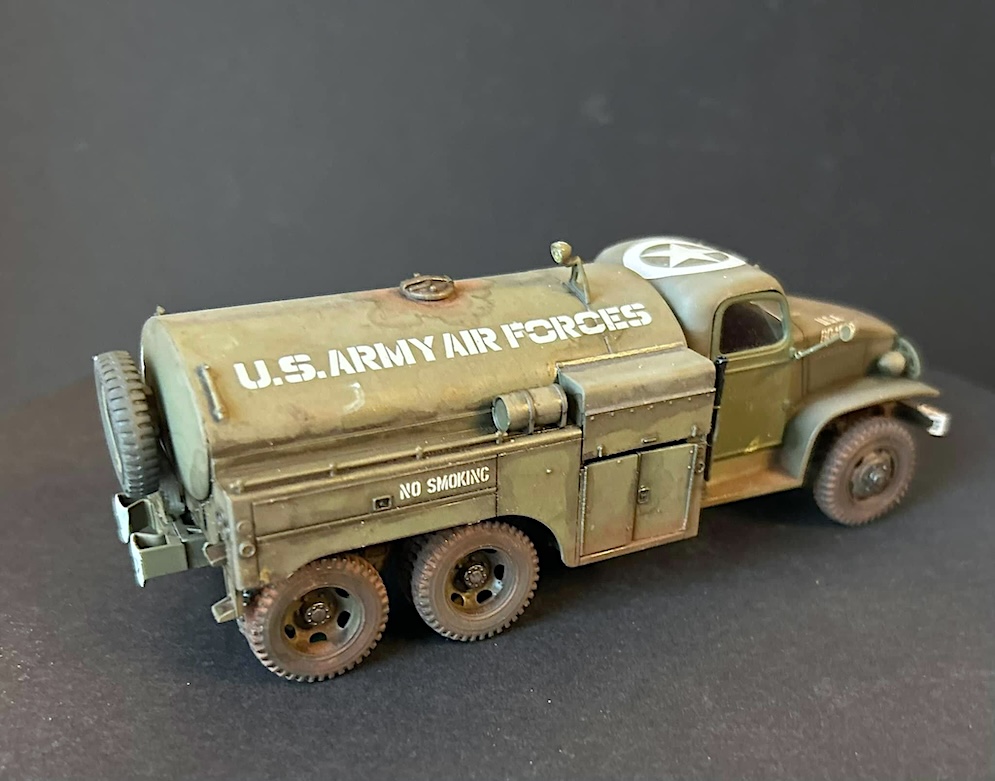
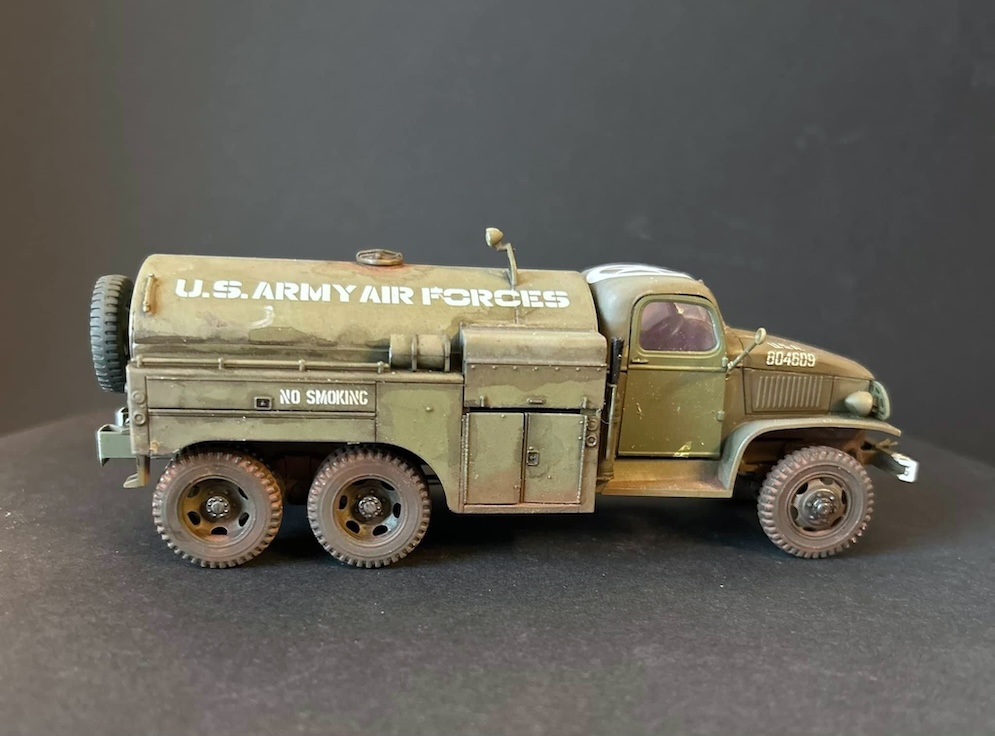
Les V.
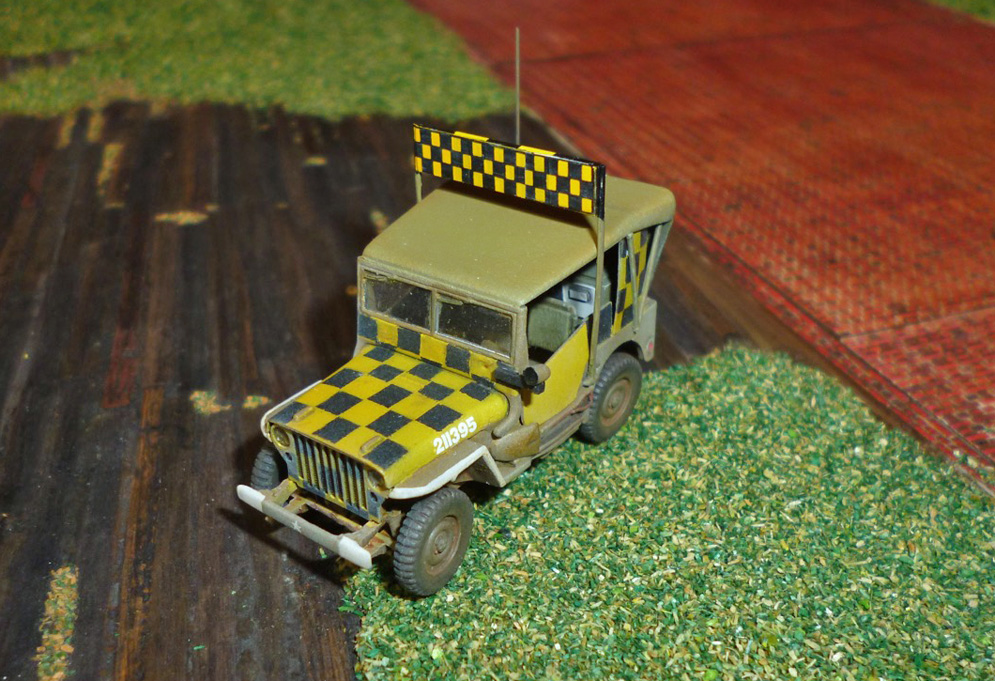
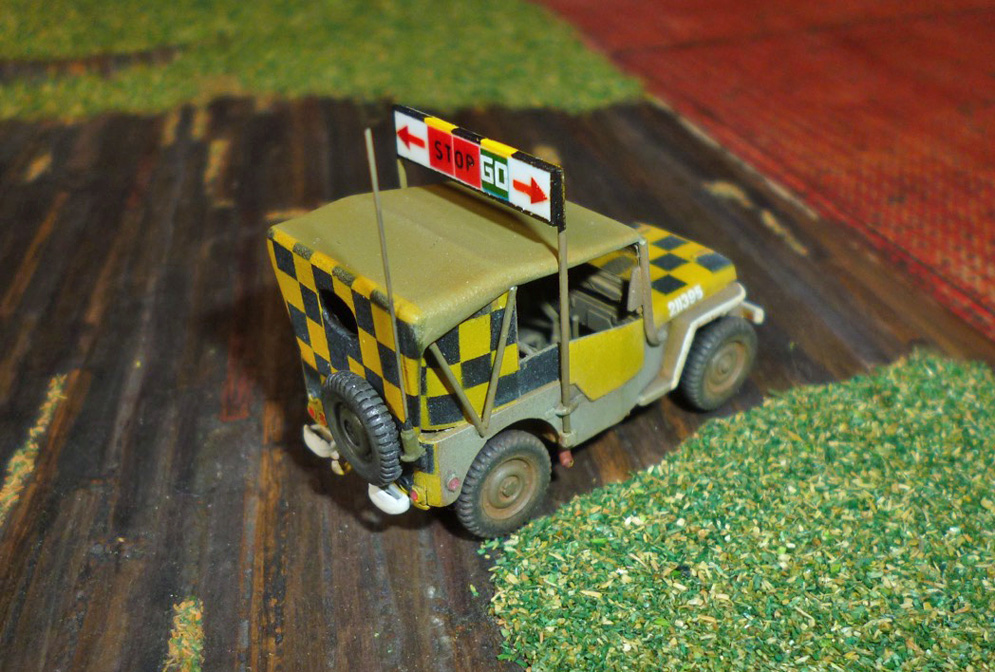
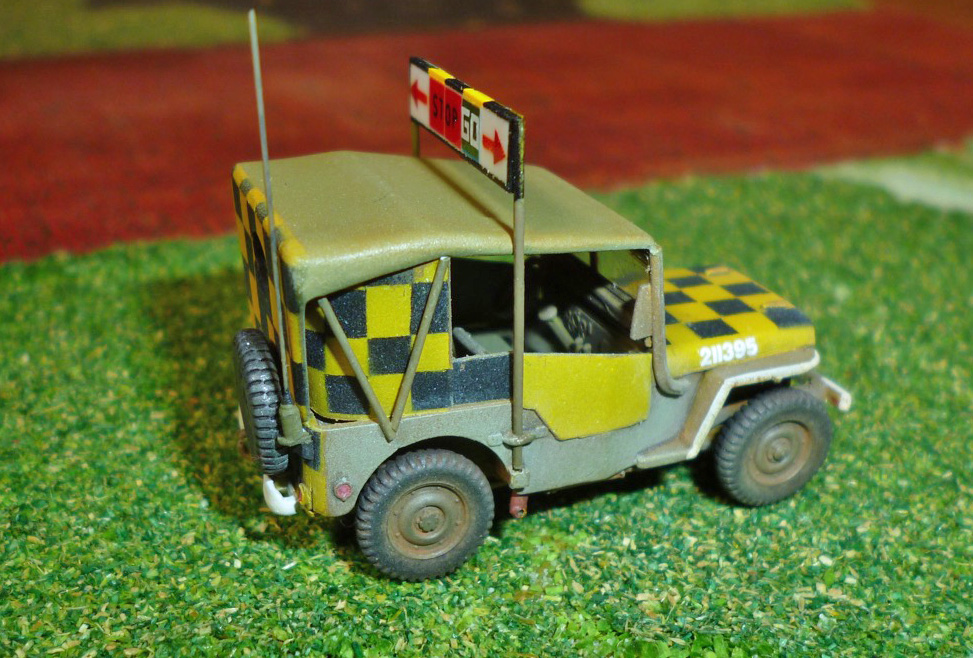
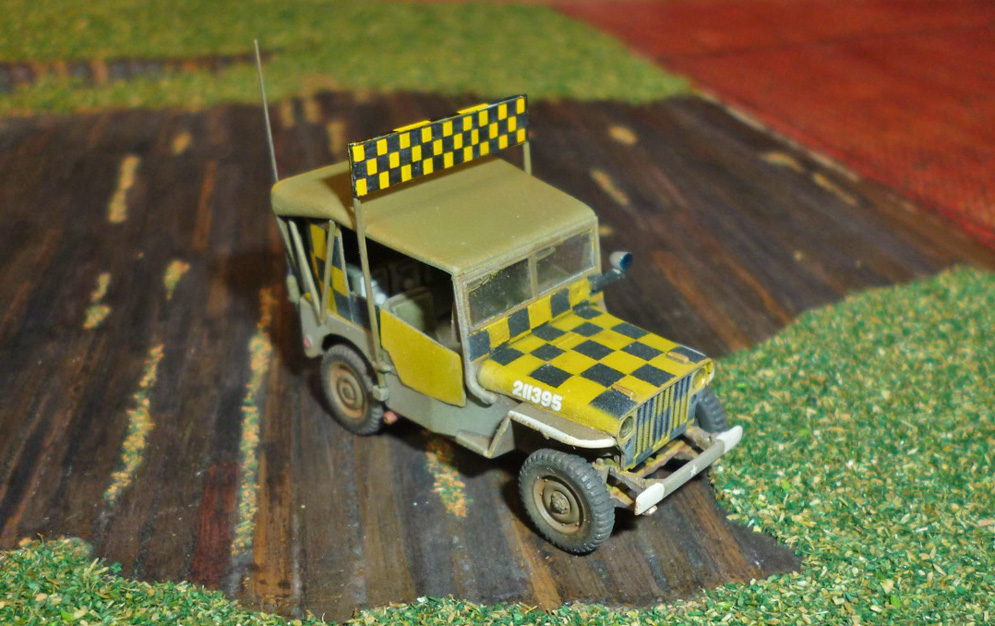
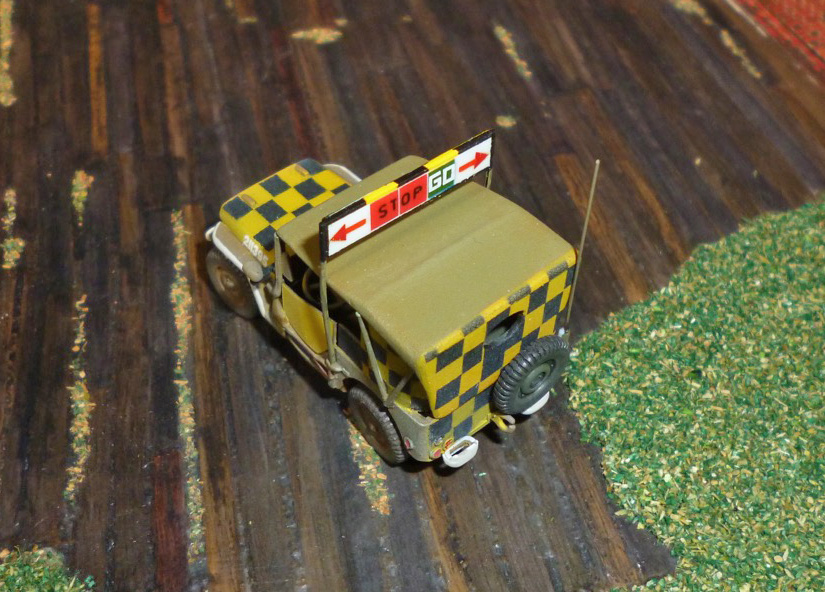
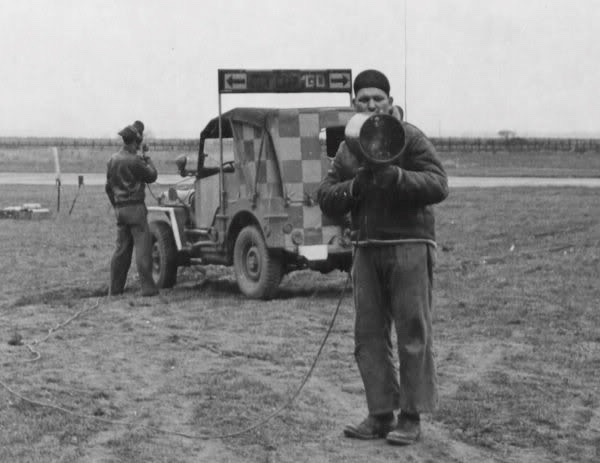

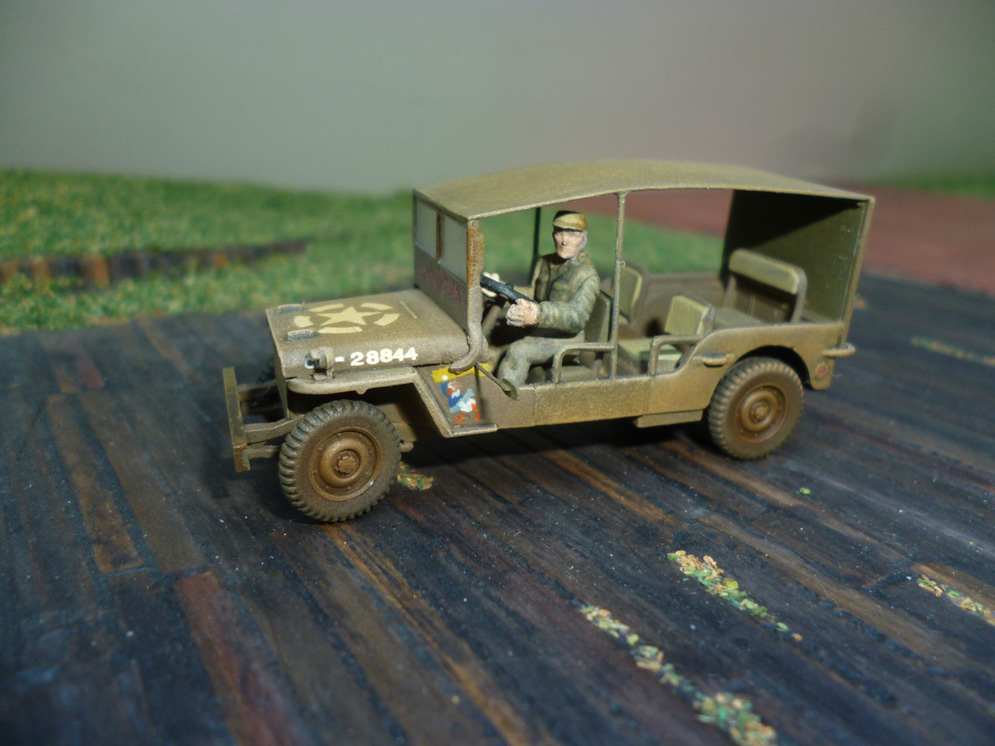
I saw a picture of a ”Follow Me’’ Jeep on the net, and it looked not difficult to make one.
These Jeeps where also installed with a big radio set in the back of the car for communication with the airplanes. These Jeeps had colours that can be difficult to identify from black and white photos.
Black/White, Red/White and this one was Black/Yellow, the reason for Yellow was that on the pictures the sides on the fender are white even as are the two spots on the rear of the jeep. They are much brighter, and I have seen pictures in colour of Black/Yellow ‘’Follow Me’’Jeeps.
The scheme of the front of the jeep is more a guess, but follows the example of other “Follow Me” Jeeps.
The model was OOB, but I had to extend the front of the tarp that was too short. The radio was scratched, even the side panels. Painted/airbrushed with Tamiya paints, and weathering with pastels.
Gerhard La C.
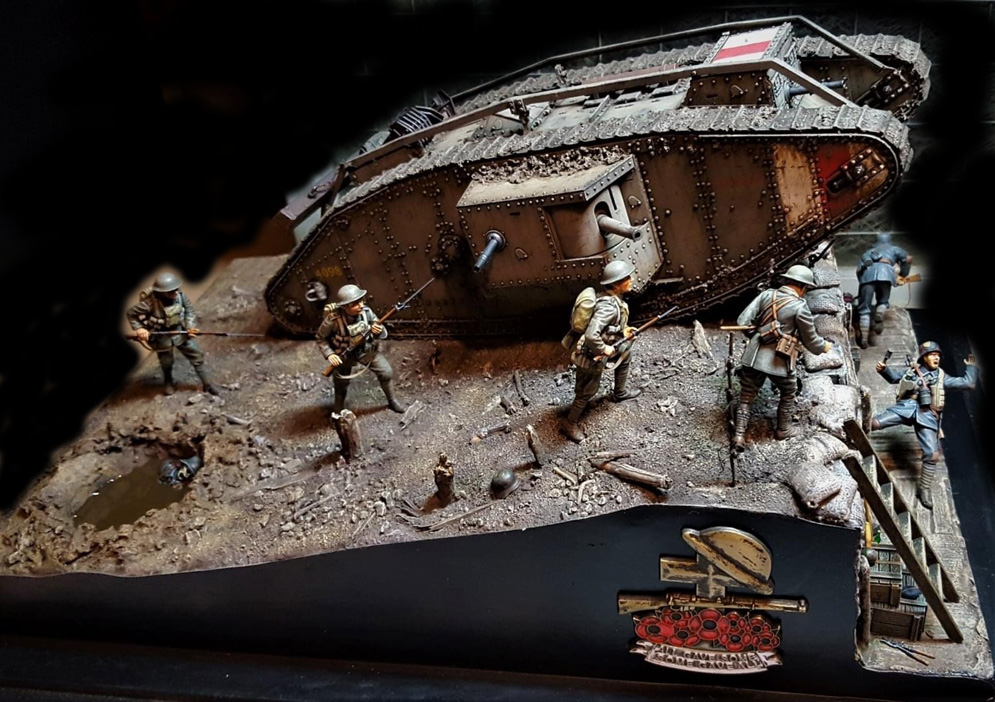
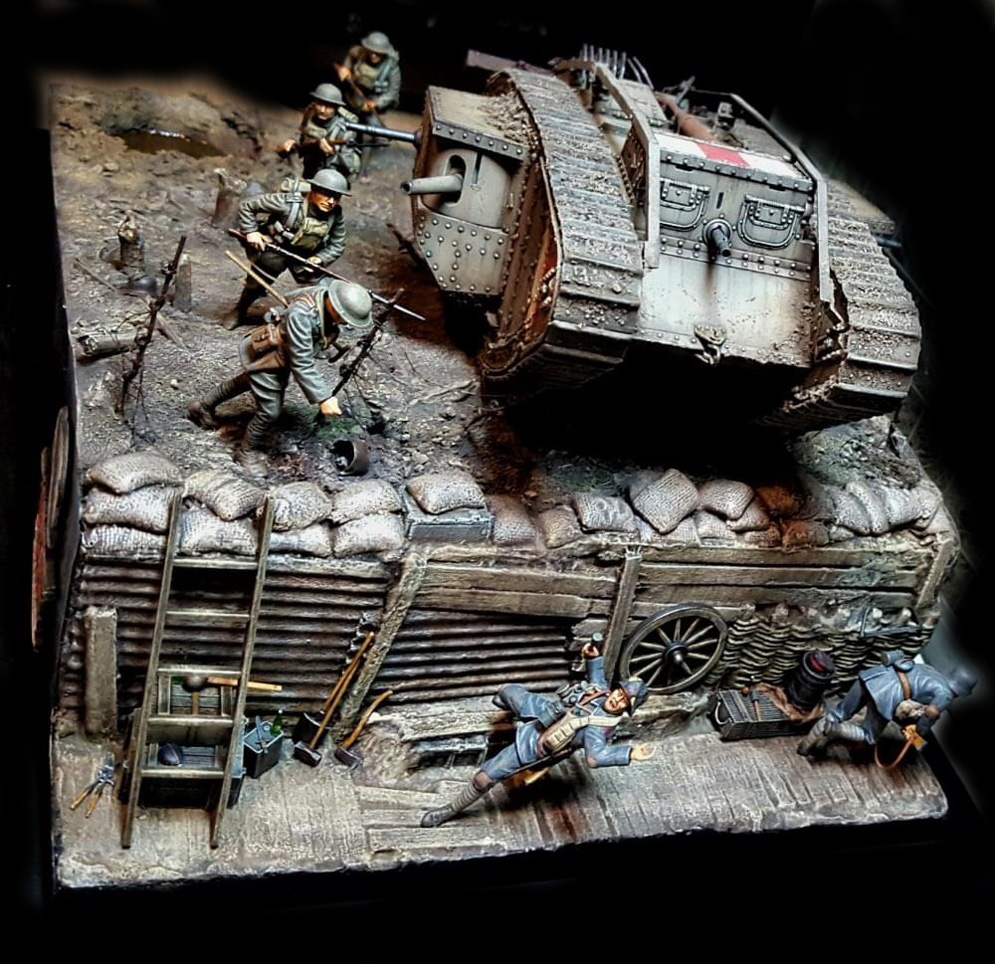
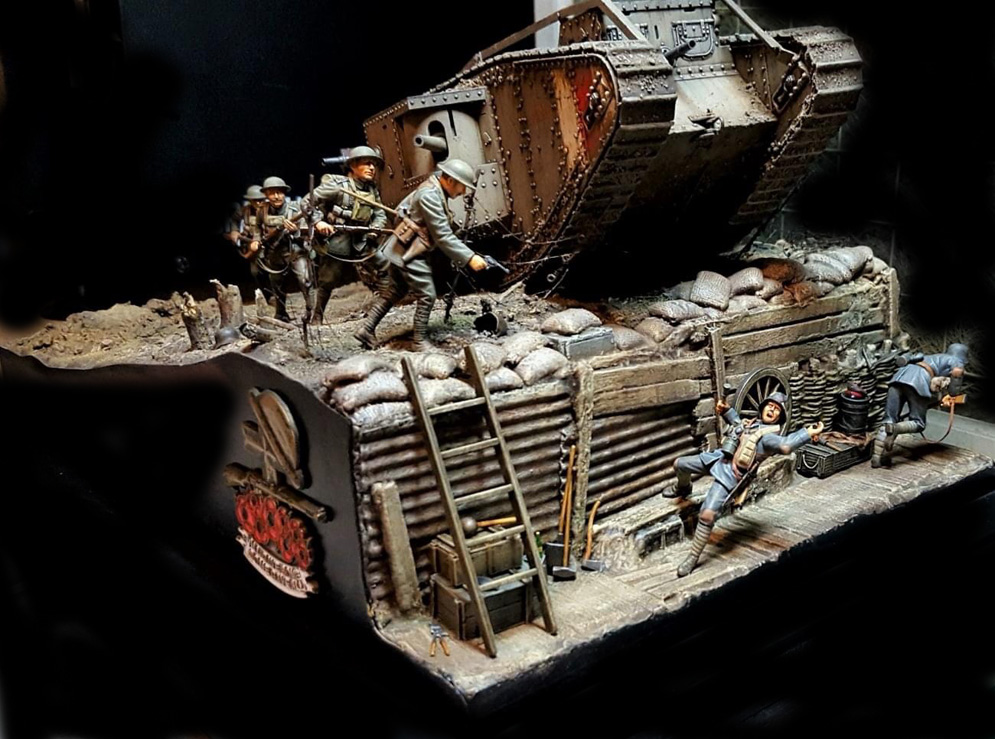
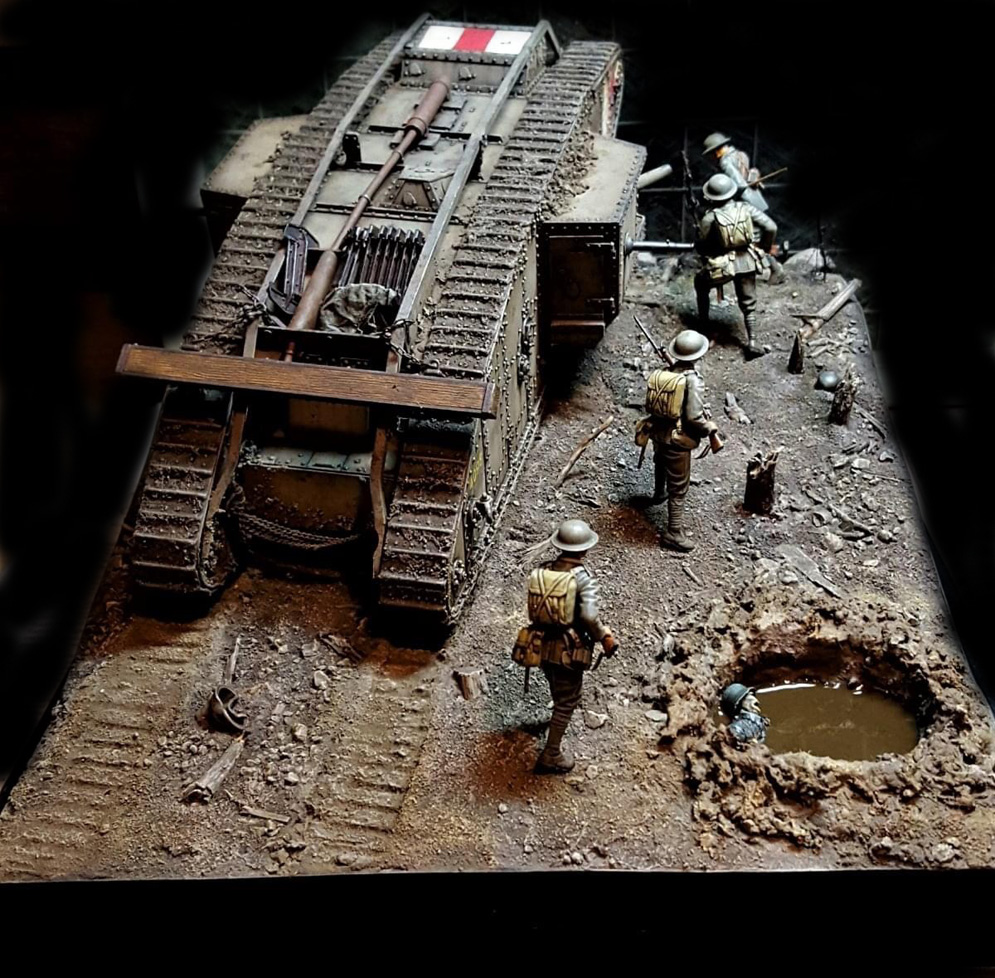
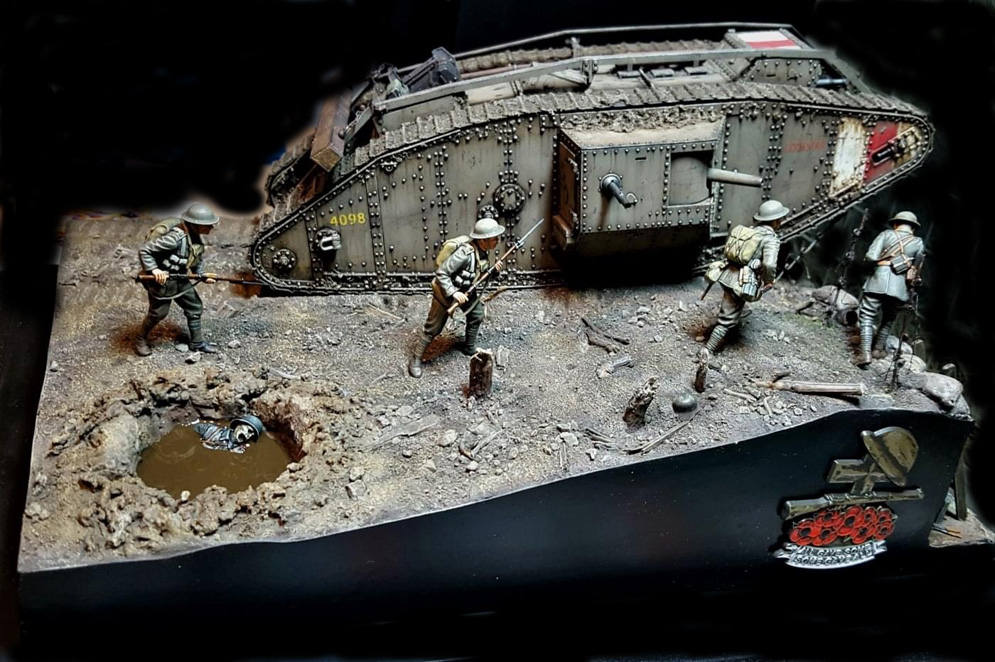
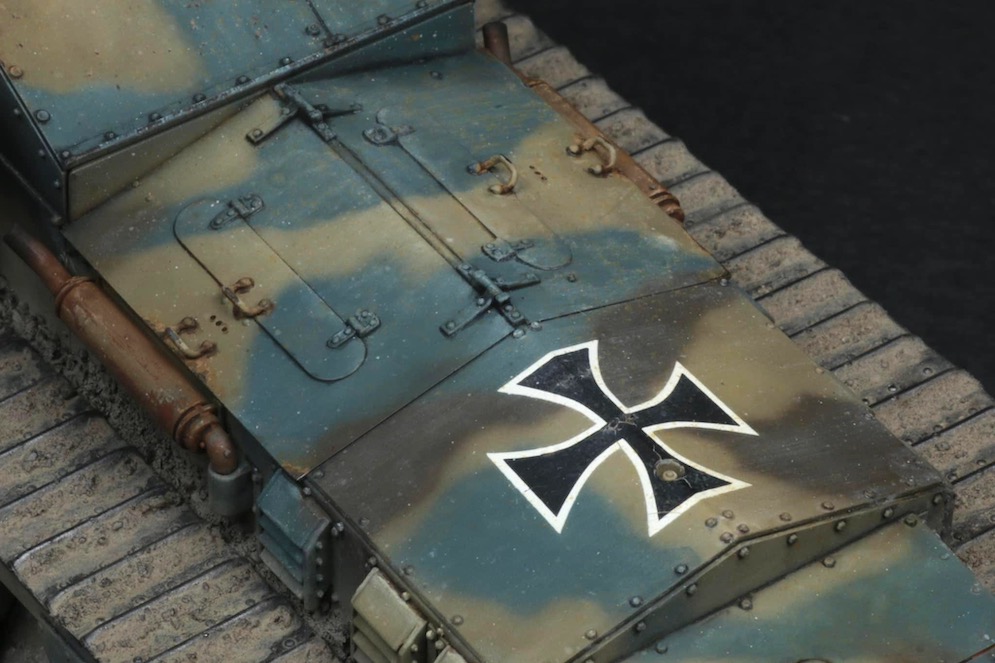
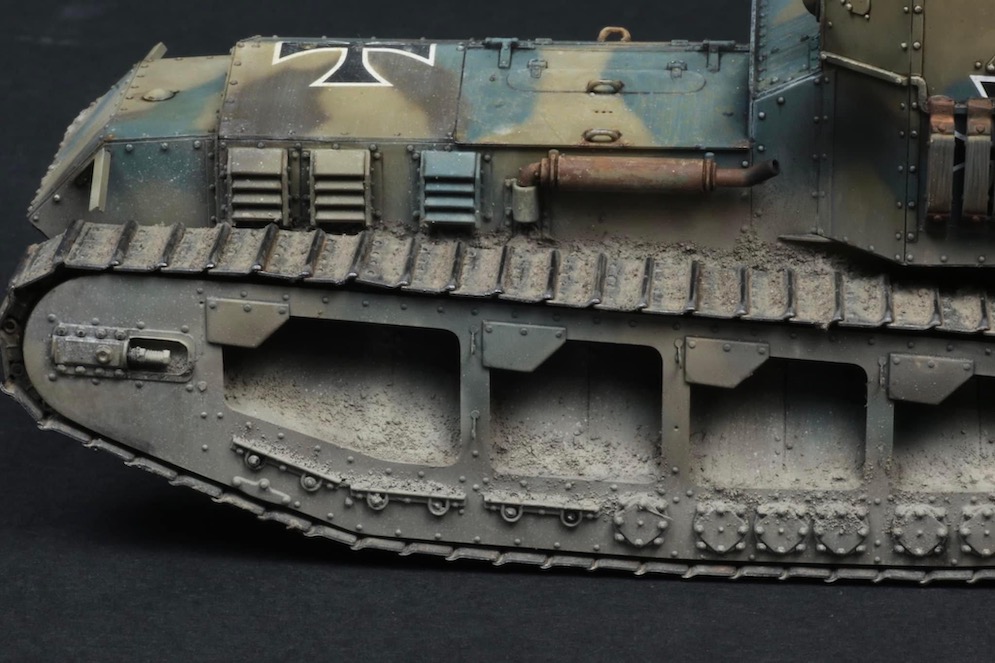
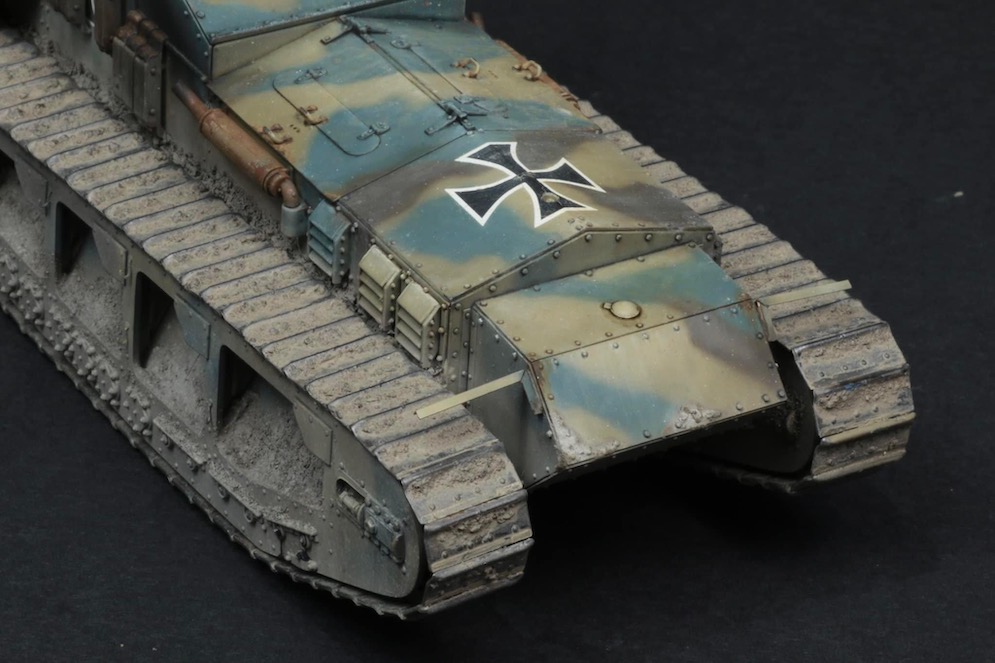
This is my latest 1:35th scale WW1 Diorama, the scene is set somewhere on the Western Front 1917 with British infantry and a British Mk IV Tank attacking a German trench.
The falling German is a reworked ICM Figure as is the British officer shooting at him I reposed both of them.
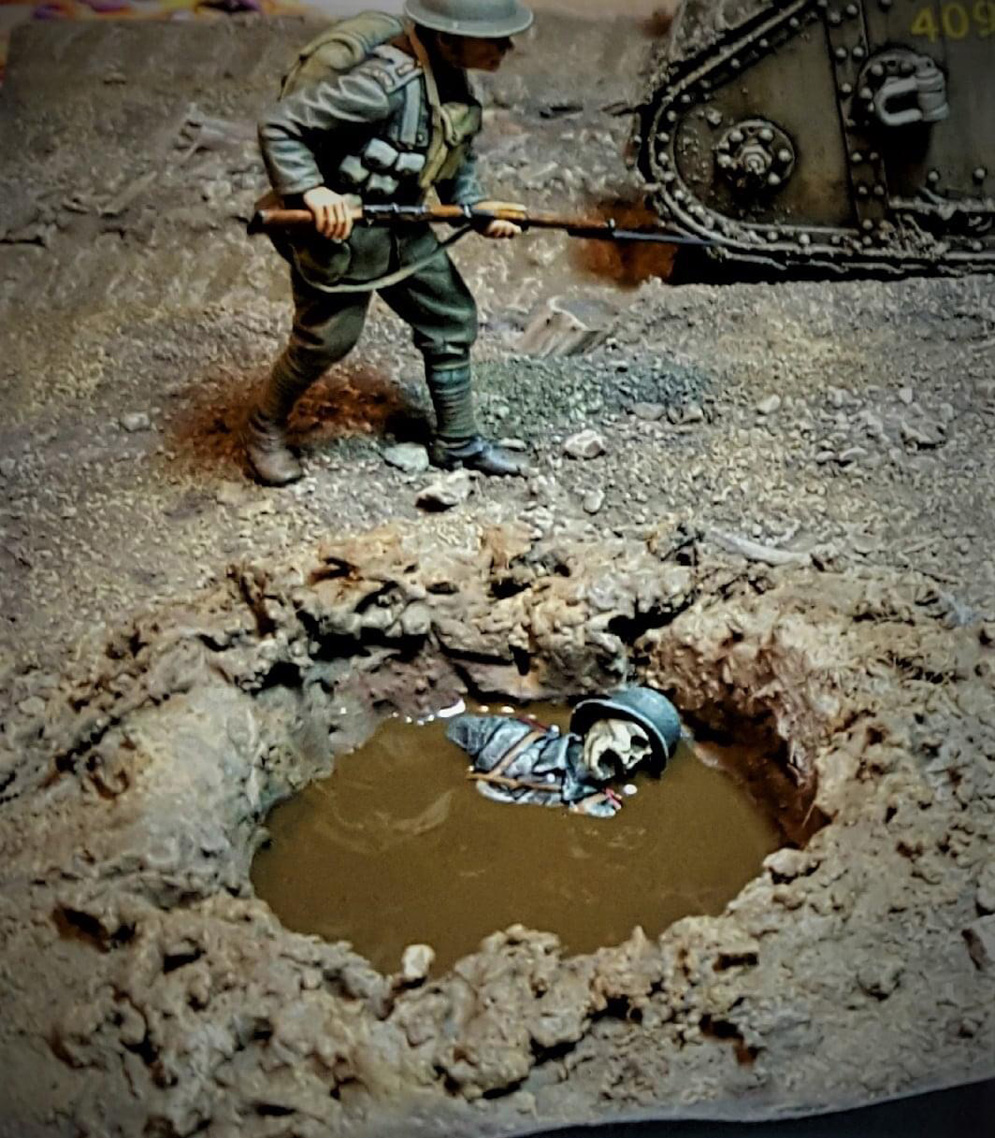
I added the corpse in the flooded shell hole to add a bit of WW1 style horror, it is made from parts of several ICM figures cut up and reposed I then attacked his face with a knife and dental burrs to try and make it look like a rotting corpse.
The tank is a 1:35th scale kit by Takom of a Mk IV (Male) Tank; Male tanks had 2 machine guns and two cannons (Female) tanks had four machine guns and no cannons.
This has taken many hours to build and paint the figure and tank kits and also creating and painting the scenery, groundwork and base.
Hope you like it? I’m pleased with it.
Cheers, Andy B.

Kit: Takom 1:35
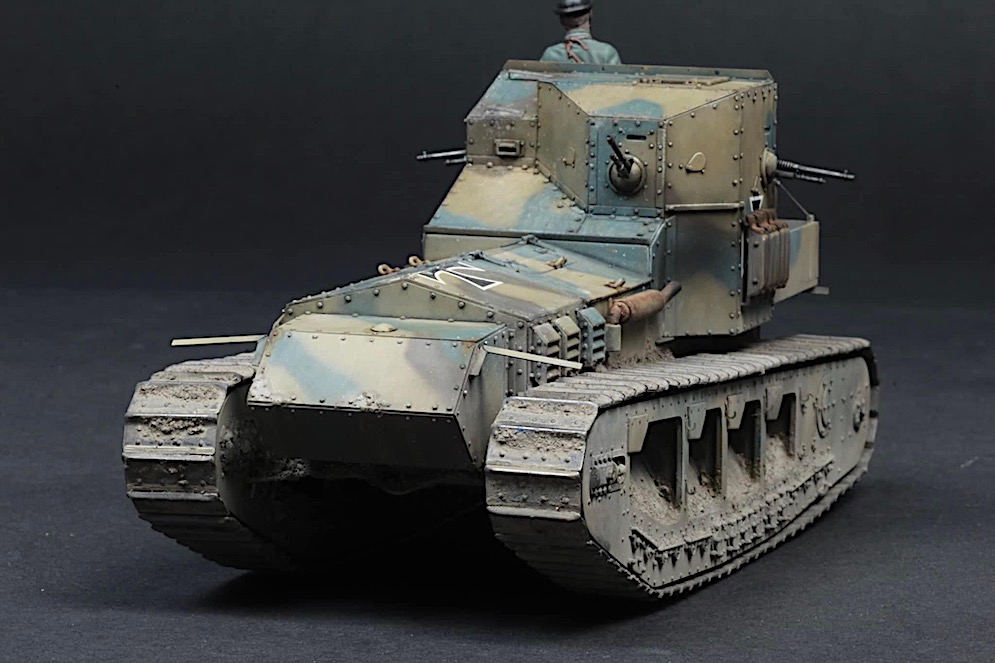
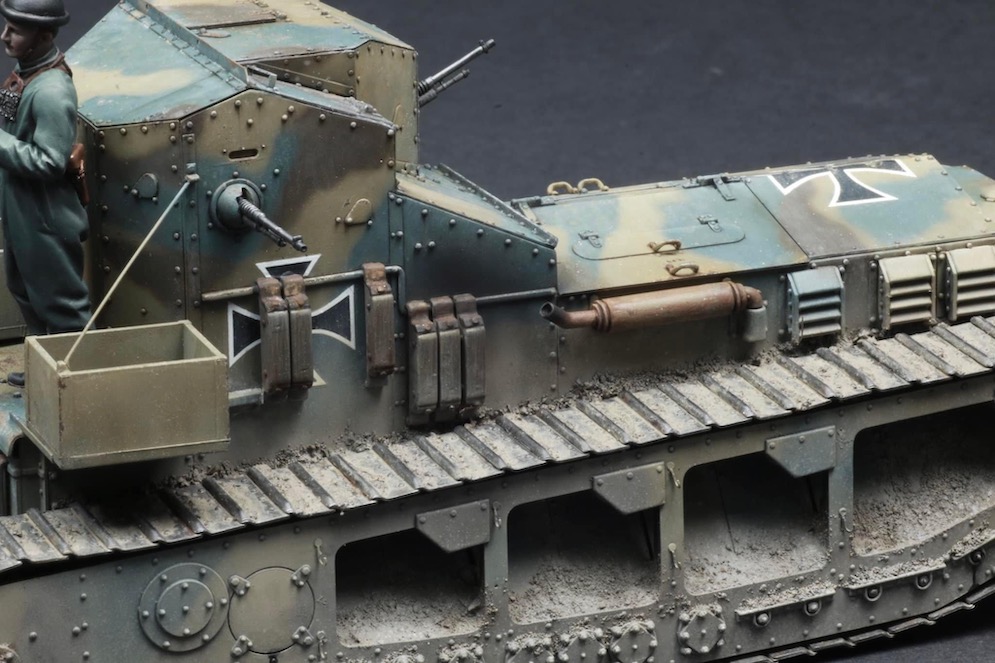
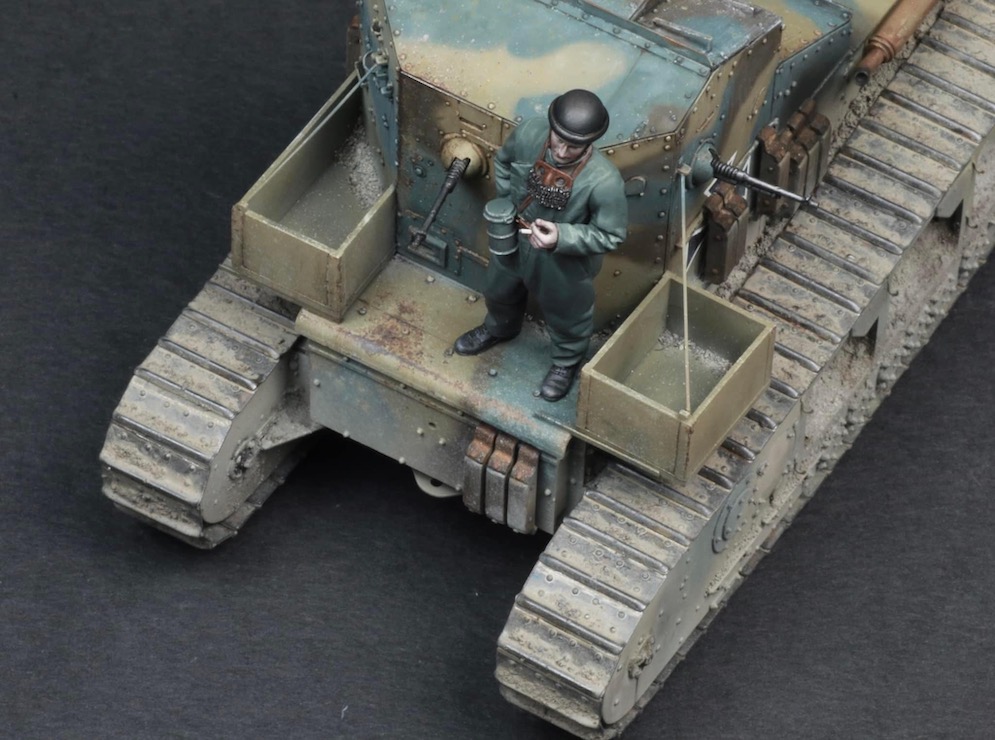
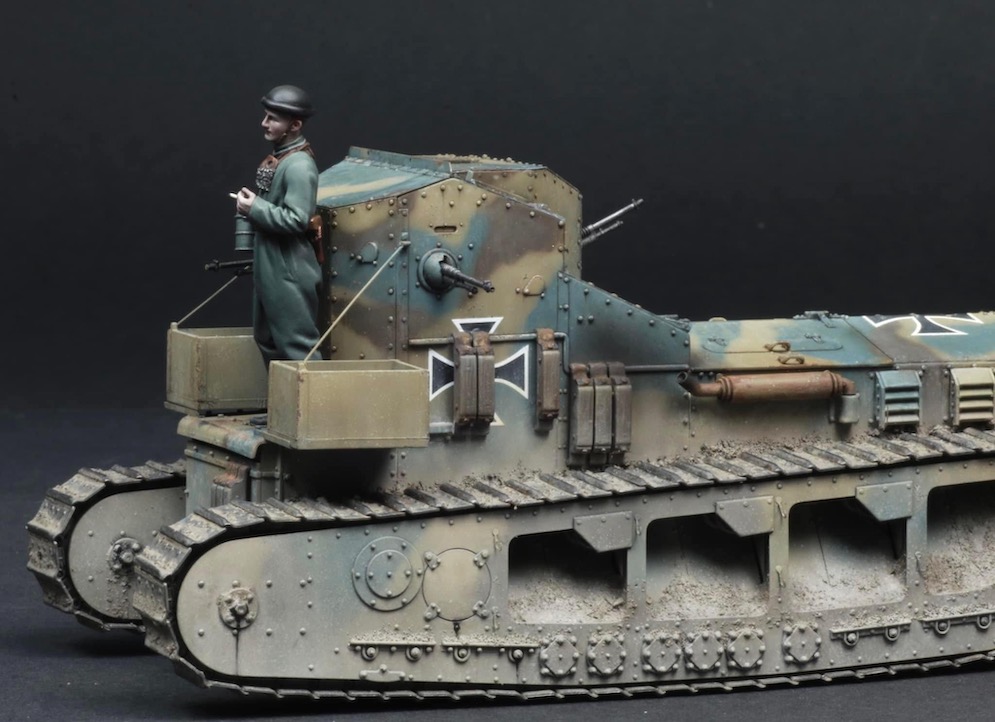
Whippet painted with Tamiya and weathered with oils and soil
Model Cellar tanker painted with oils.
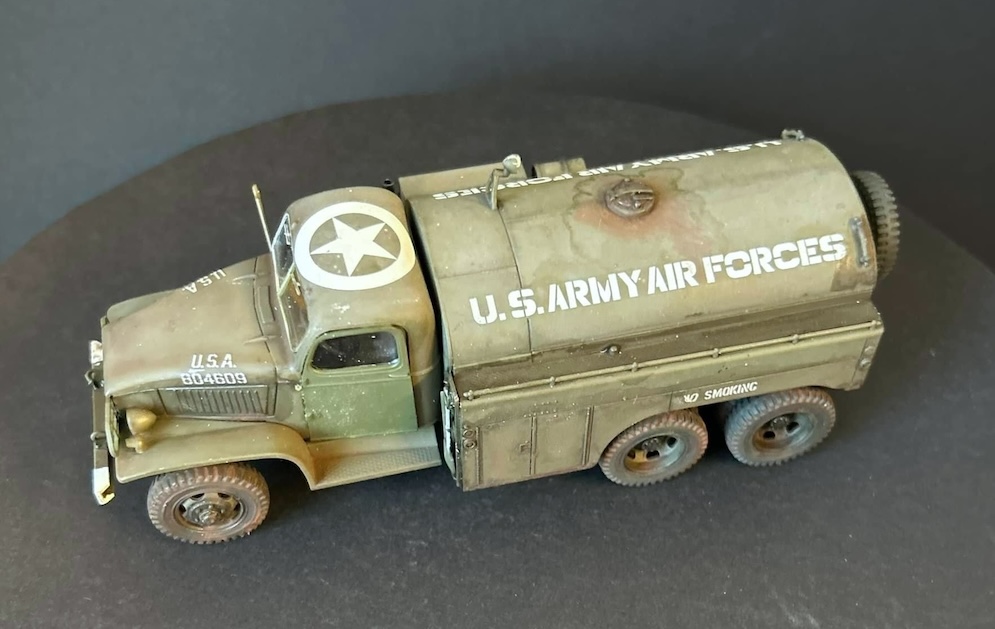
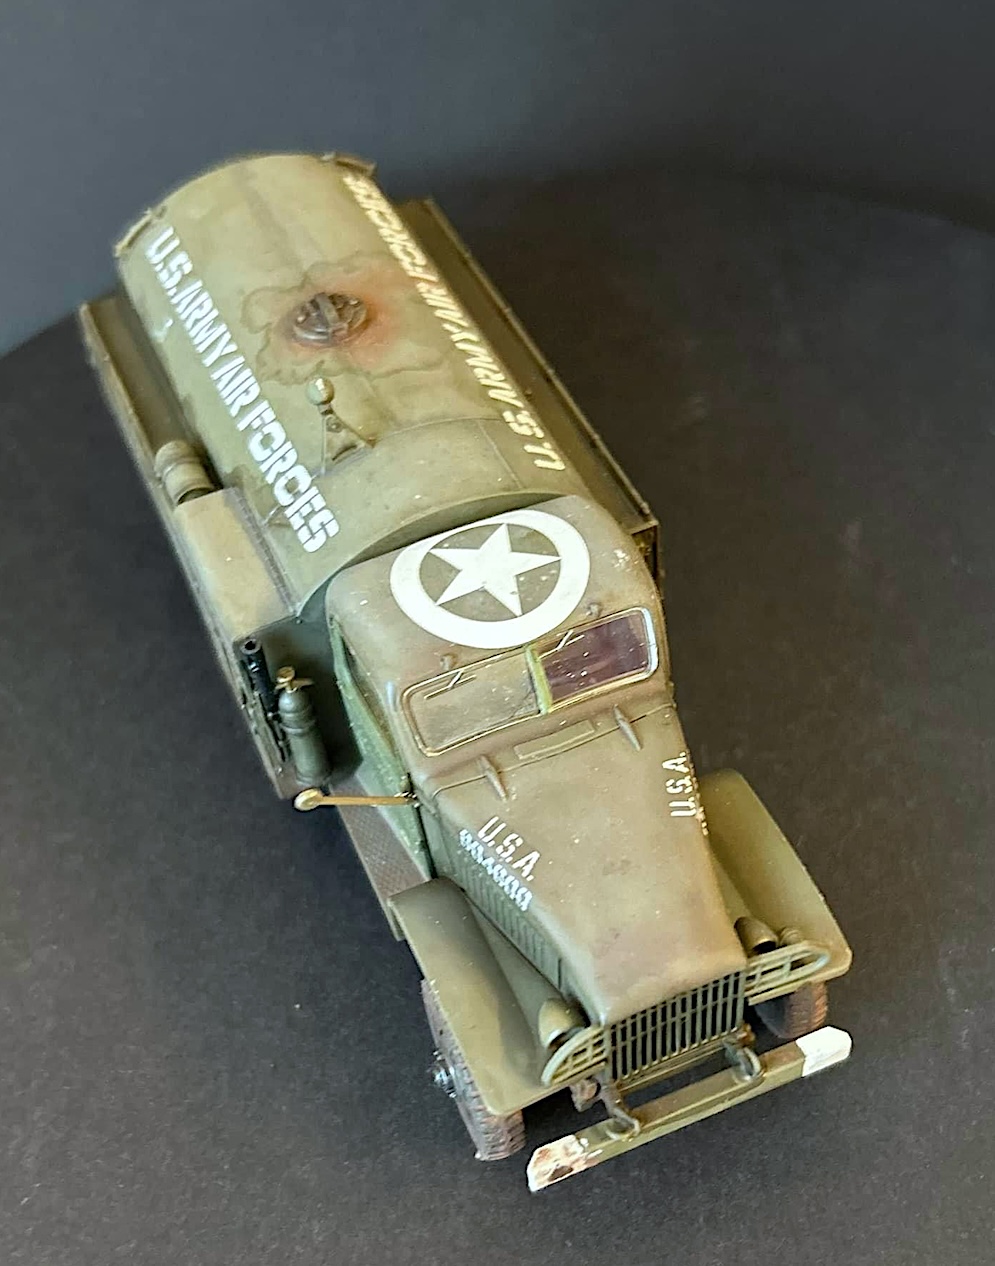
David L.

1:72 scale
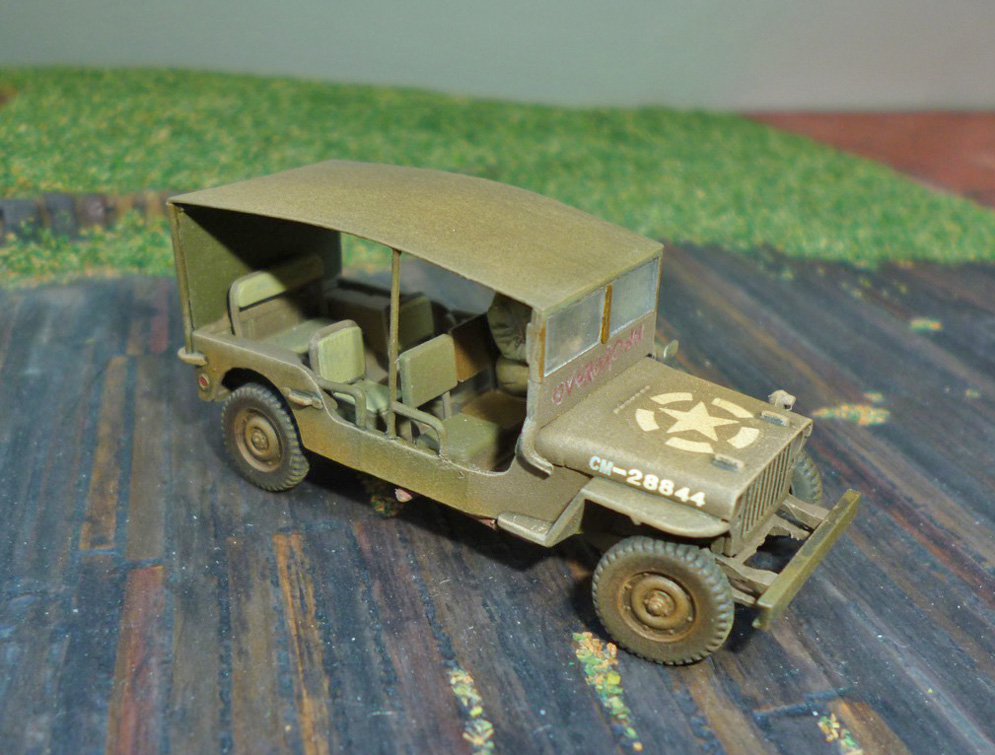
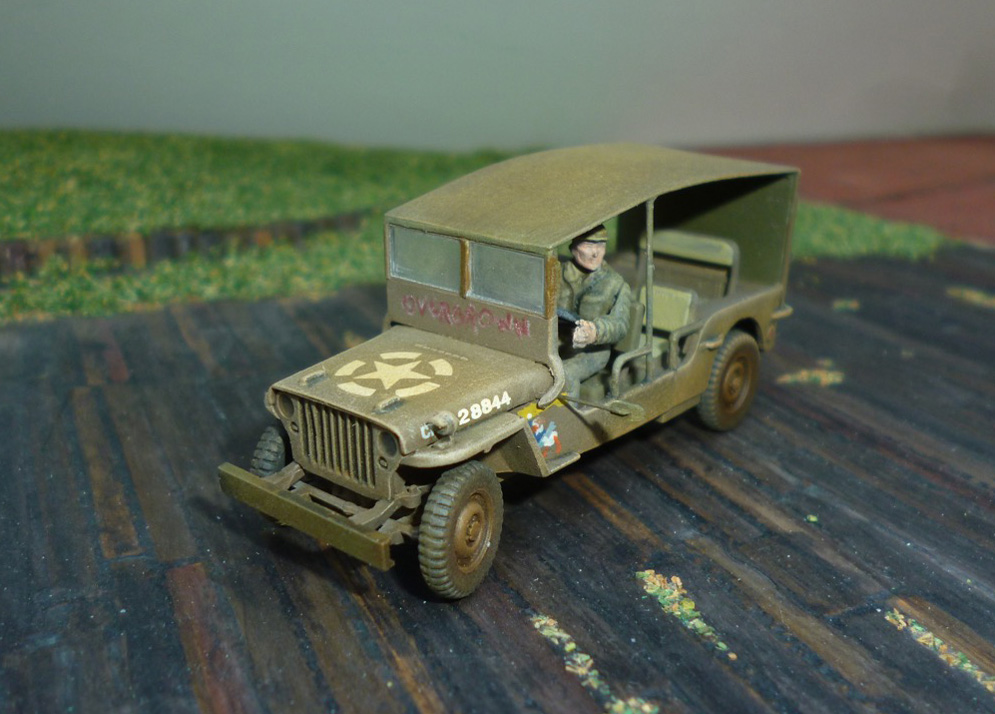
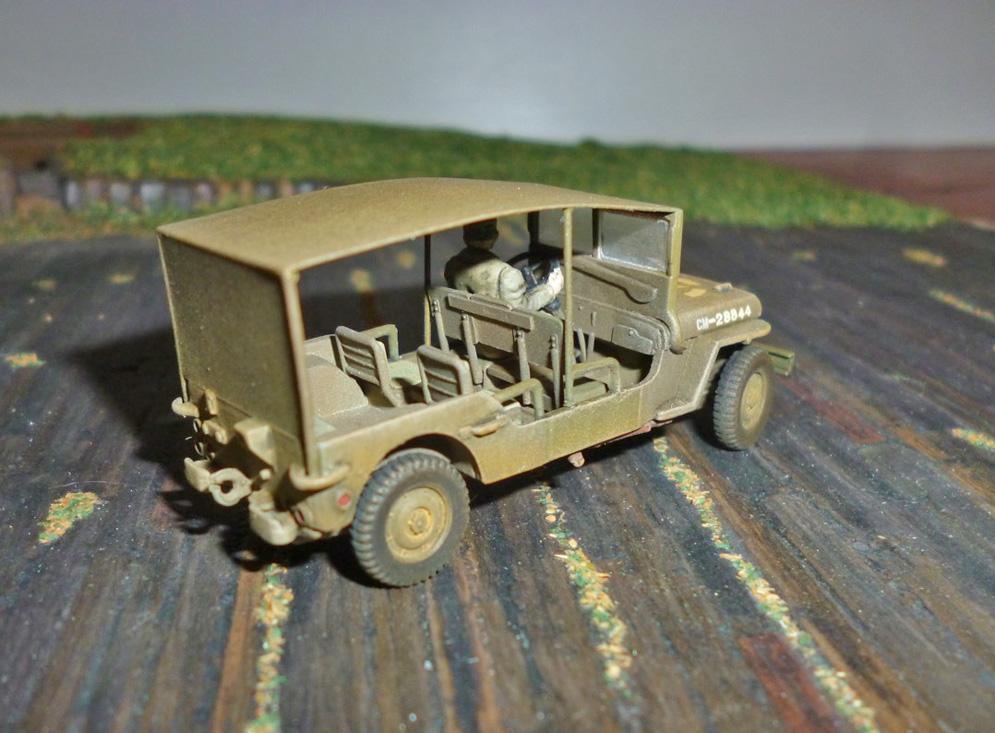
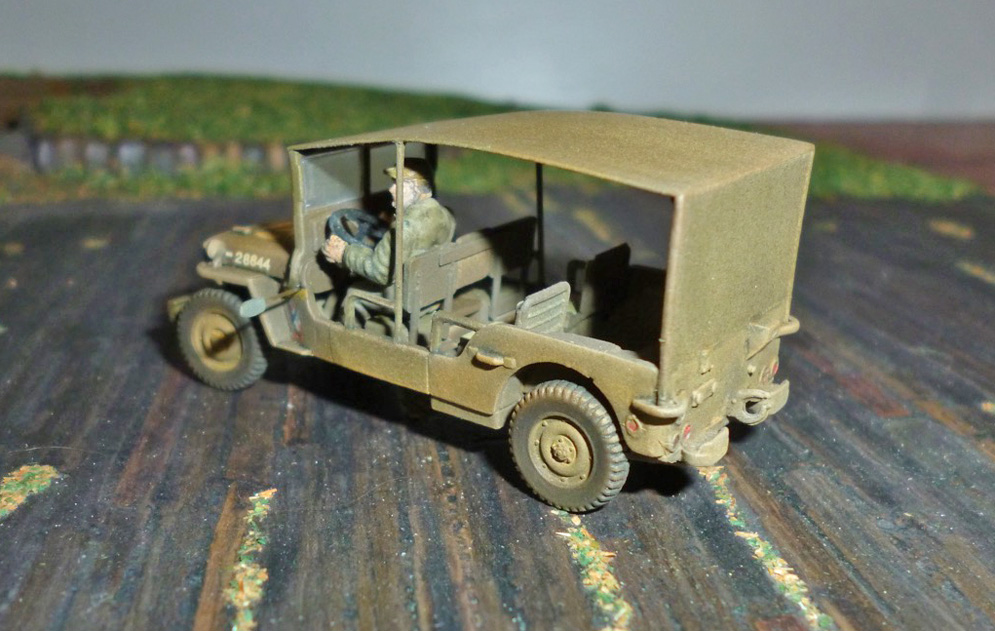
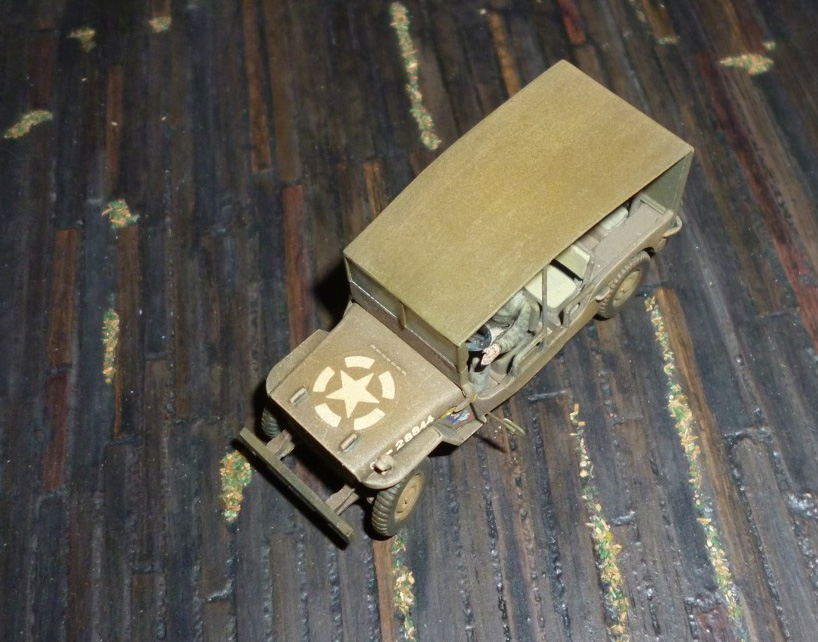
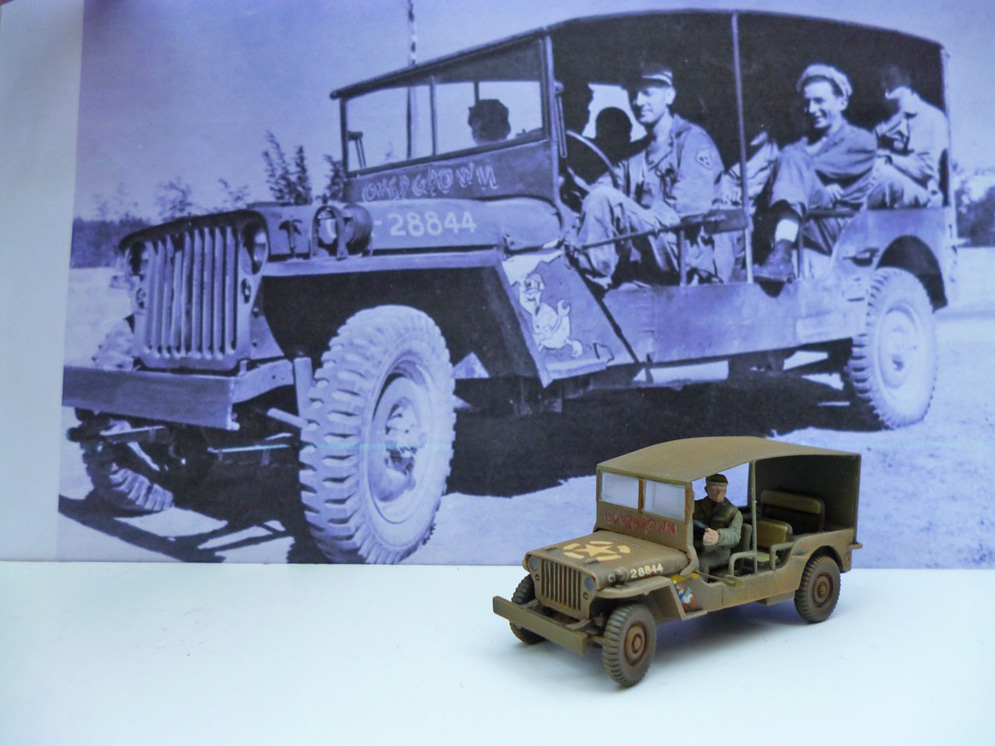
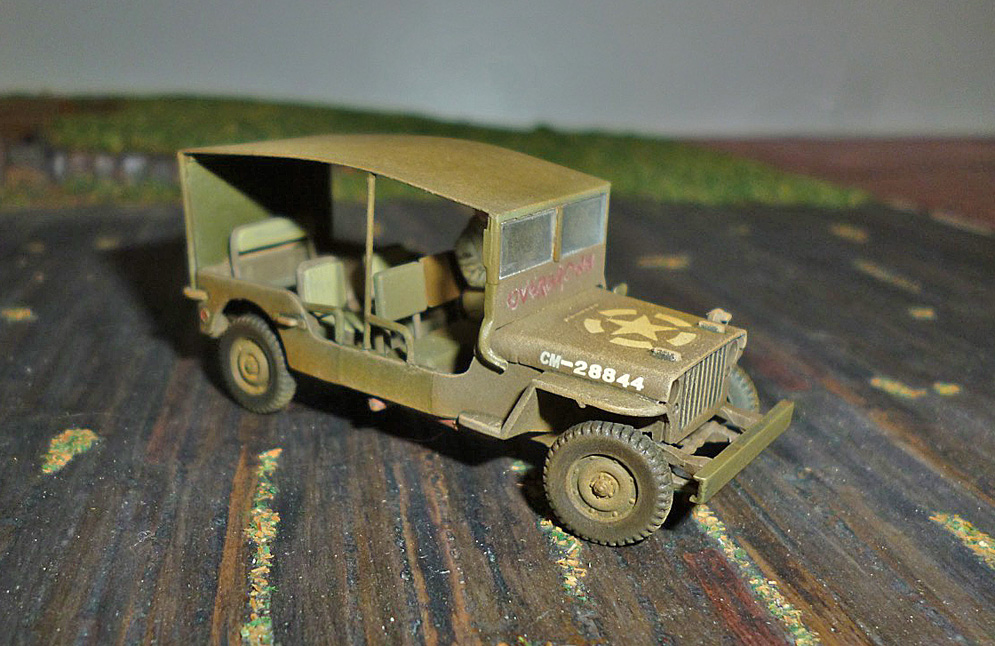
This one is an example of two jeeps made as a ‘’Stretched Version’’
This was made in Italy and was called ‘’OVERGROWN’’ and it belongs
to a B-24 Liberator Group of the 15th Air Force in Italy.
I self-stretched the Jeep, and give it an olive drab colour and painted the duck
on the left side and the words on the front of the window.
Regards, Gerhard
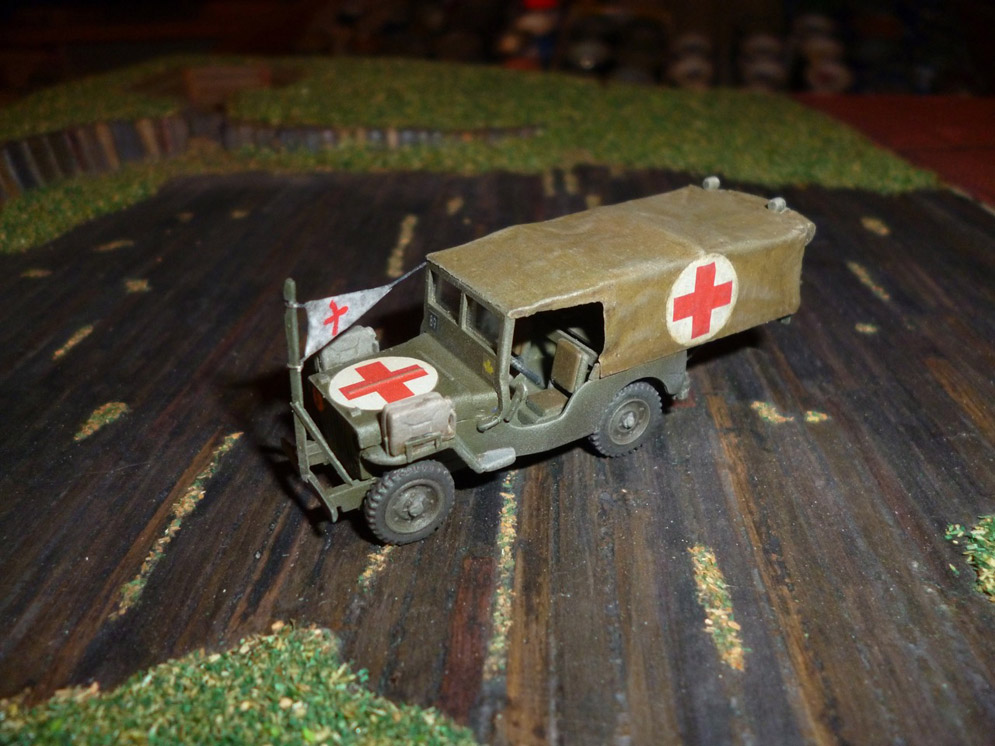

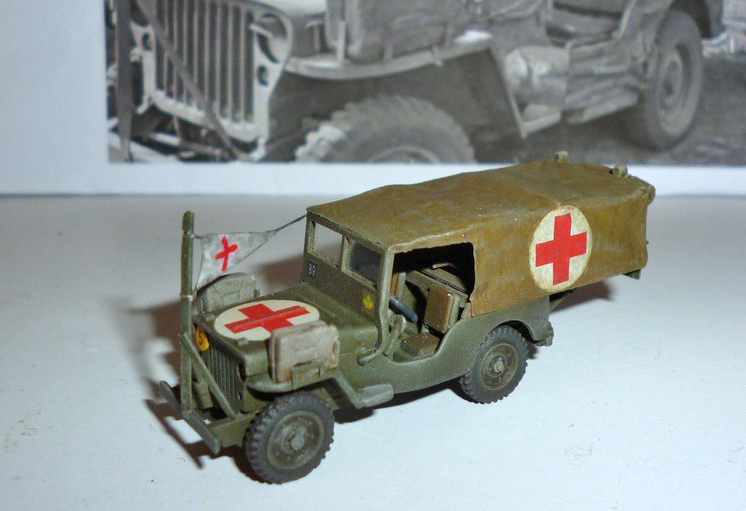

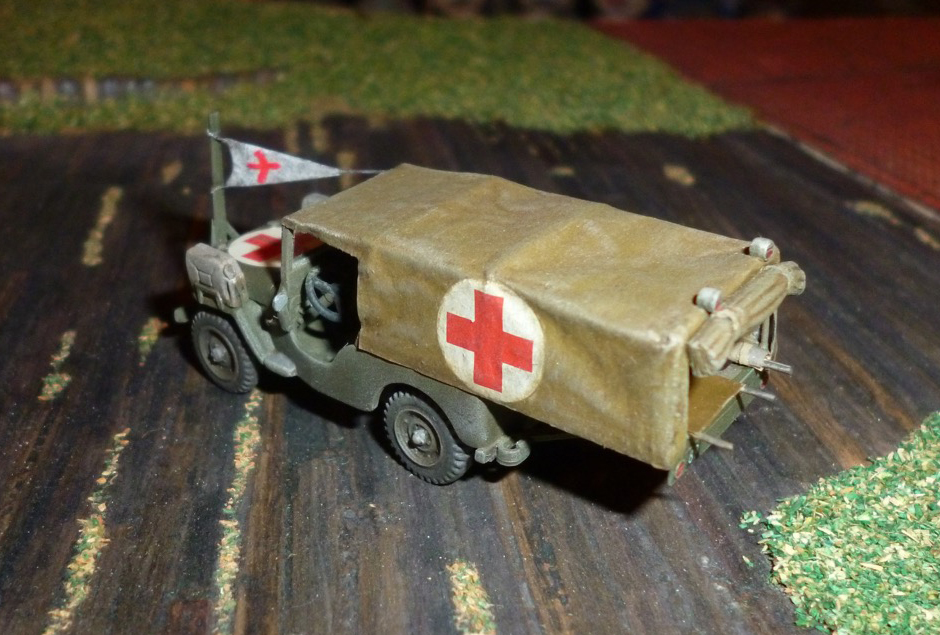
Here are pictures from a Fujimi Jeep, 1:76 that is converted as a:
Canadian Ambulance Jeep of the no.12 Light Field Ambulance RAMC, 4th Armoured Division, Bad Zwischenahn, Germany April 1945.
The colour of the Jeep is SSC15 British Olive Drab, the tarp is made of tissue diluted with wood glue.
If I look at the pictures now, I see that I forgot the spade and axe!
Another point was, where do I put the spare wheel? I decided to put it on the right side, civil models after the war had the same.
But overall the backside and the spare wheel was a guess, could not find pictures of it.
Regards, Gerhard La C.
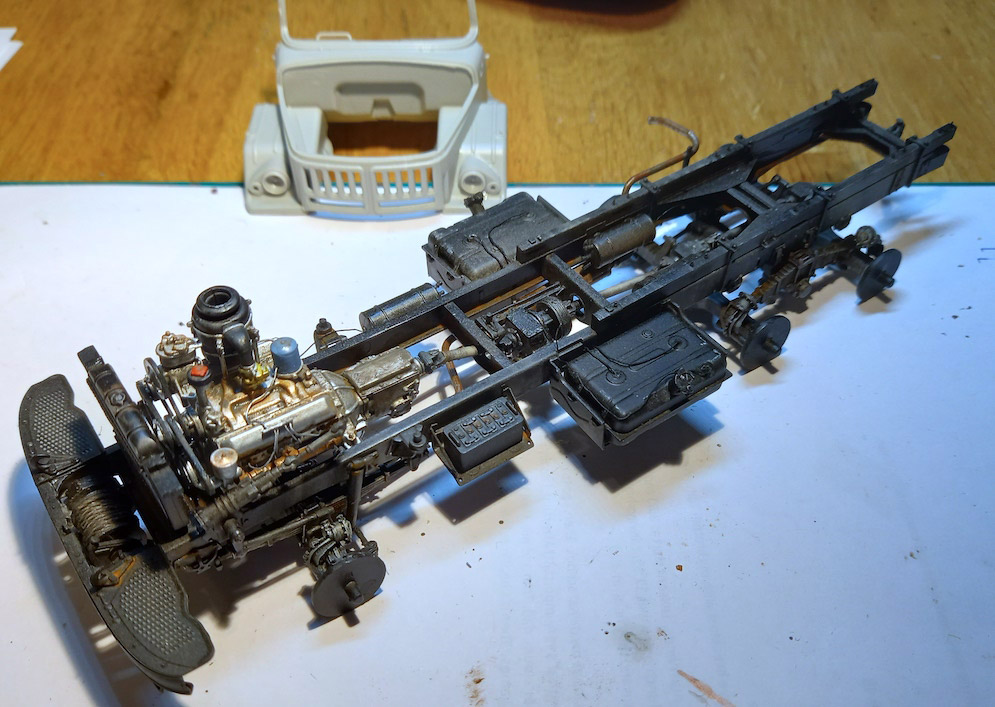
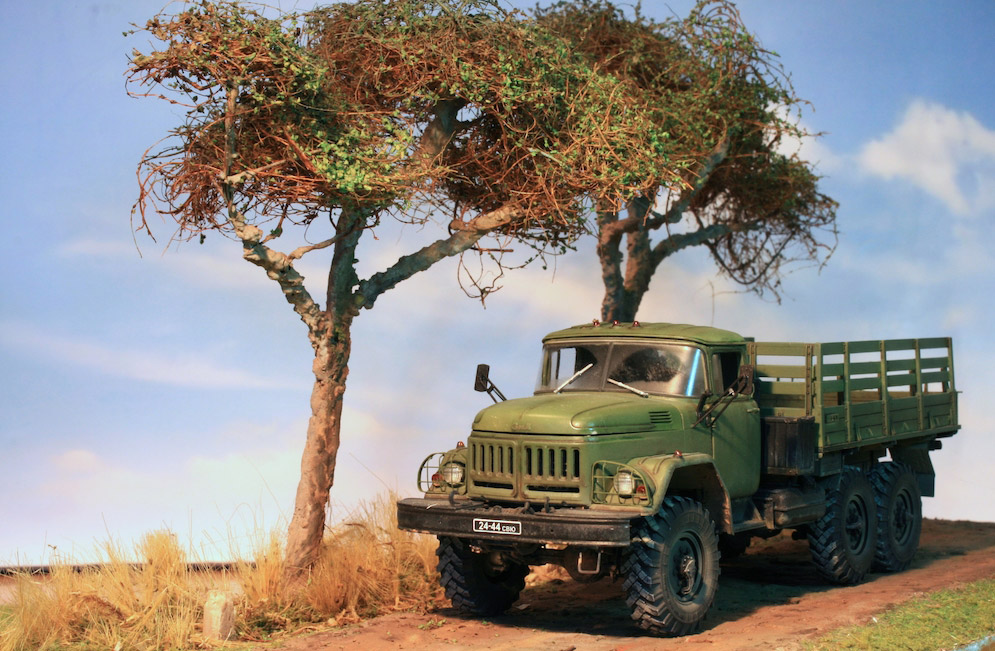
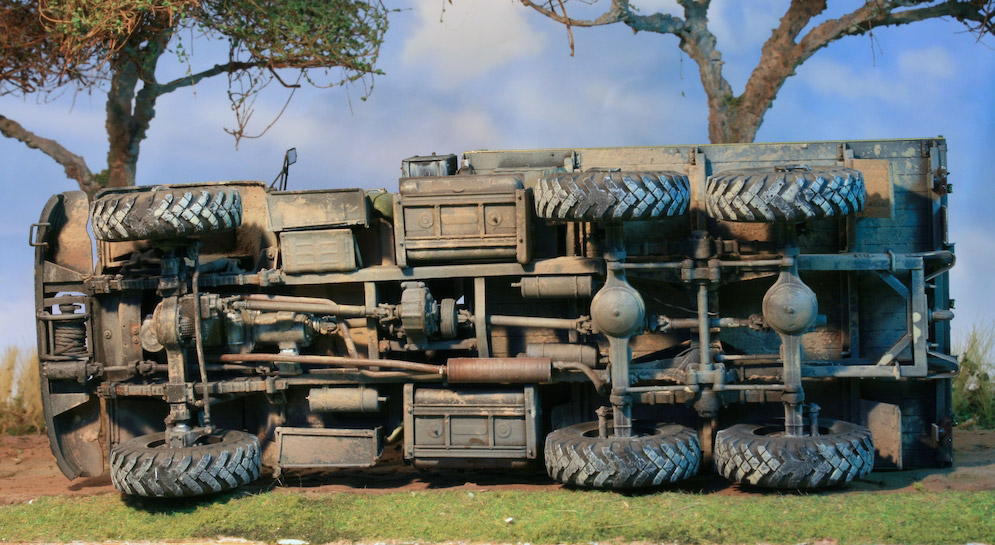
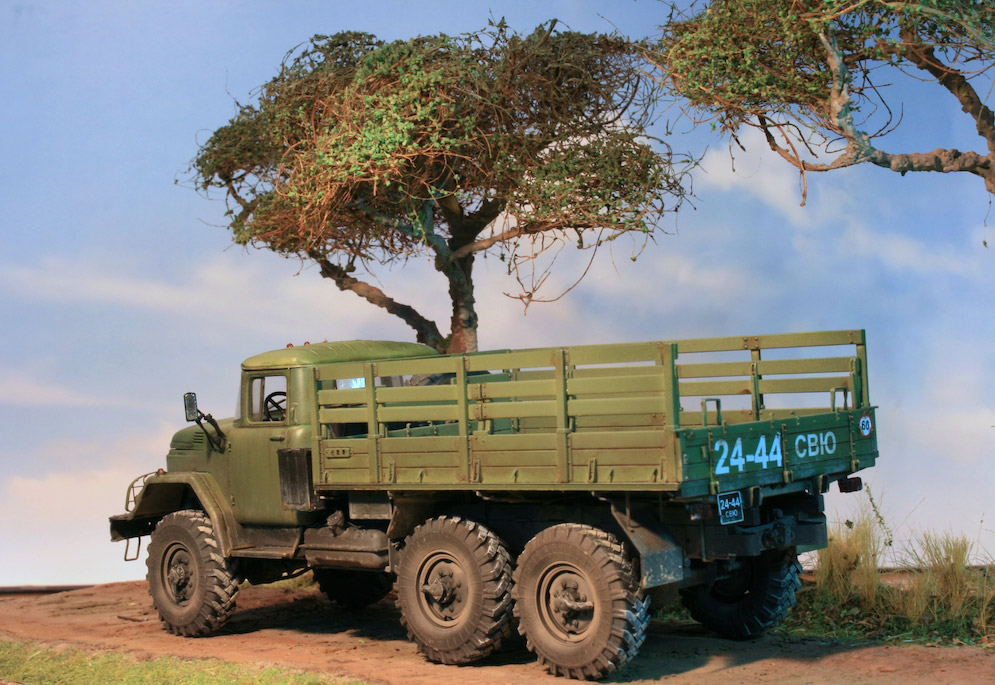
This is the Zil-131 Soviet truck from Trumpeter. Very nice kit but with resin Miniarm wheels and scratch improved engine (and floor mats). Trumpeter forgot there should be an oil cooler matrix in front of the radiator, but this was quite easy to scratch build with lead wire. Lead wire was also used for some of the fuel lines from the tanks and air lines for the brakes. I believe it’s petrol V-8 returned about 5 mpg on the road if you were thinking of buying one!
This 1960s truck is still in use around the world (including Ukraine). I used the Ammo Oilbrushers a lot to temper the green paint and add the dust.
Andrew J.
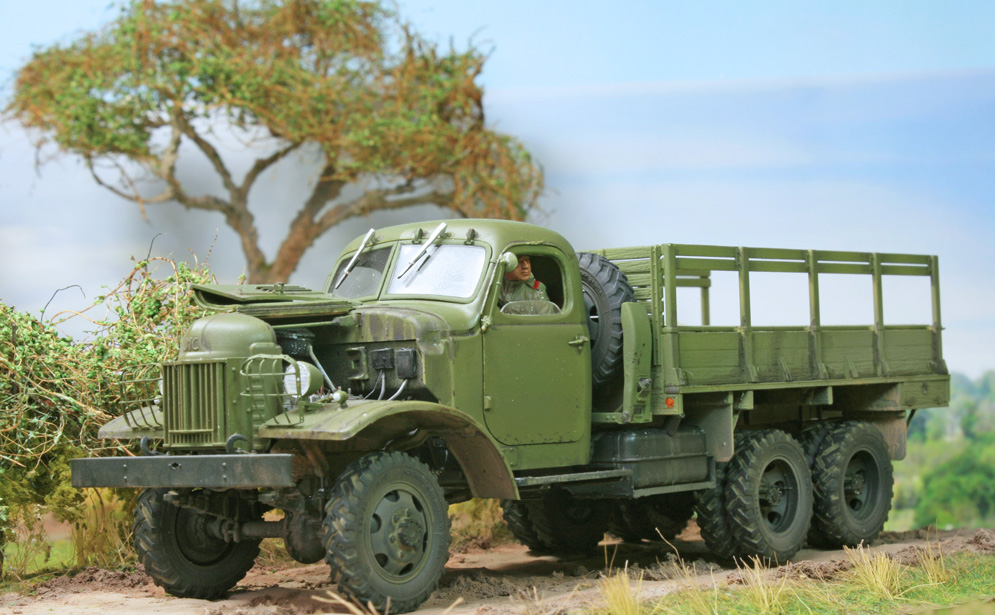


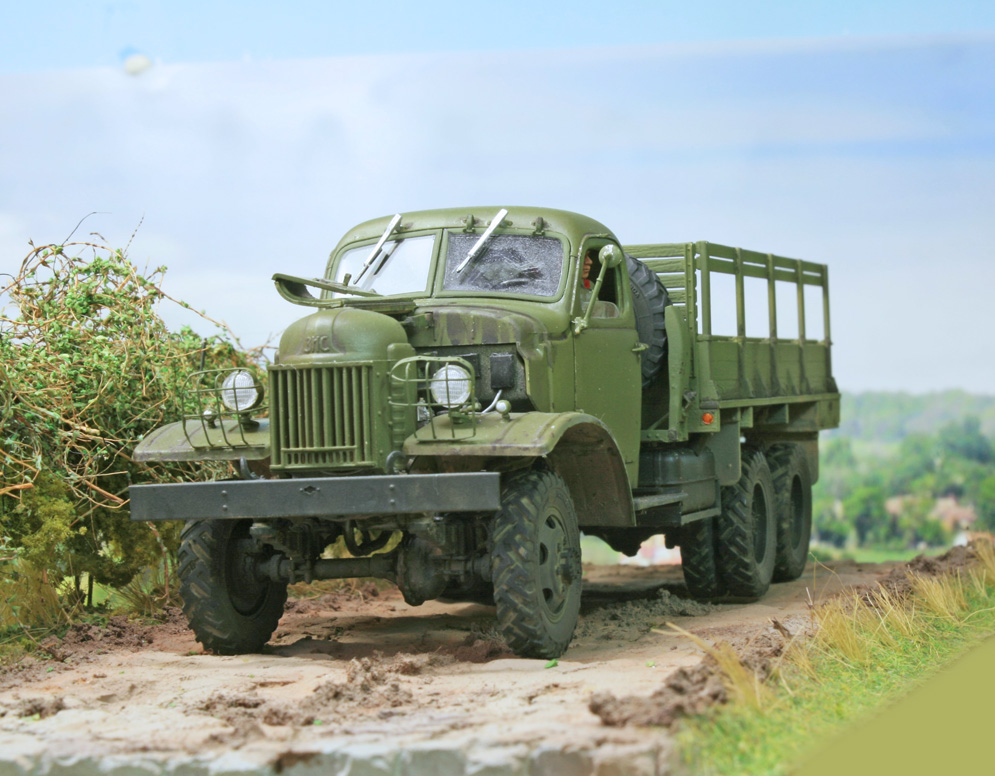
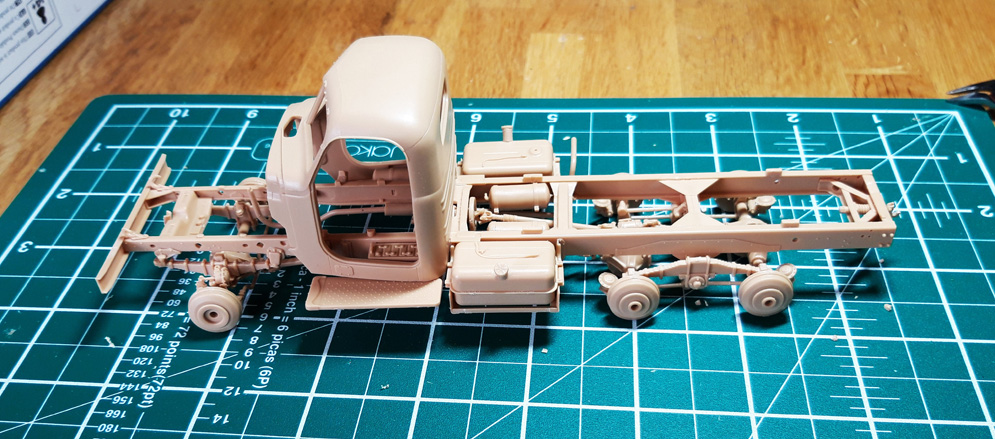
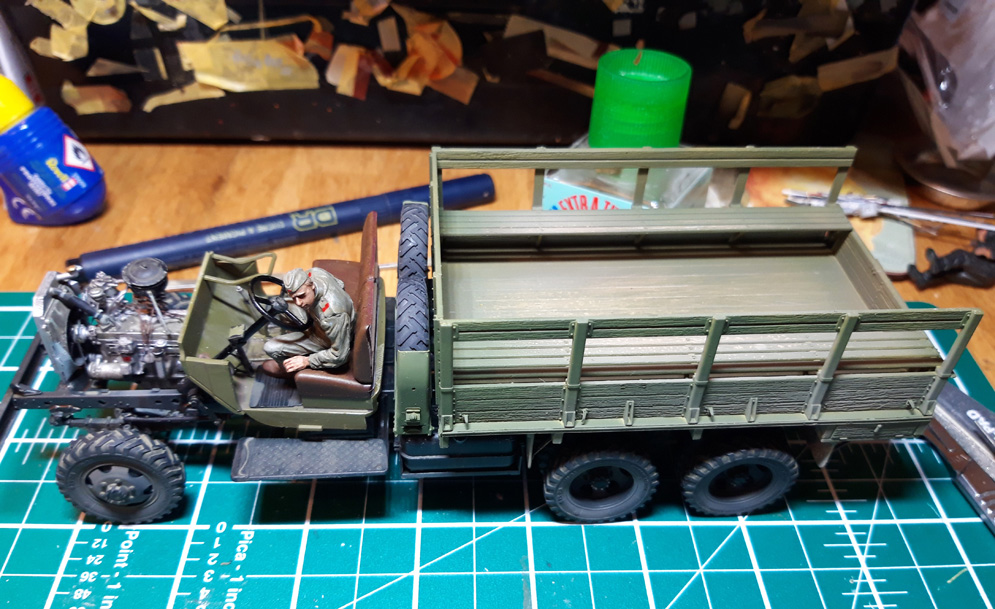
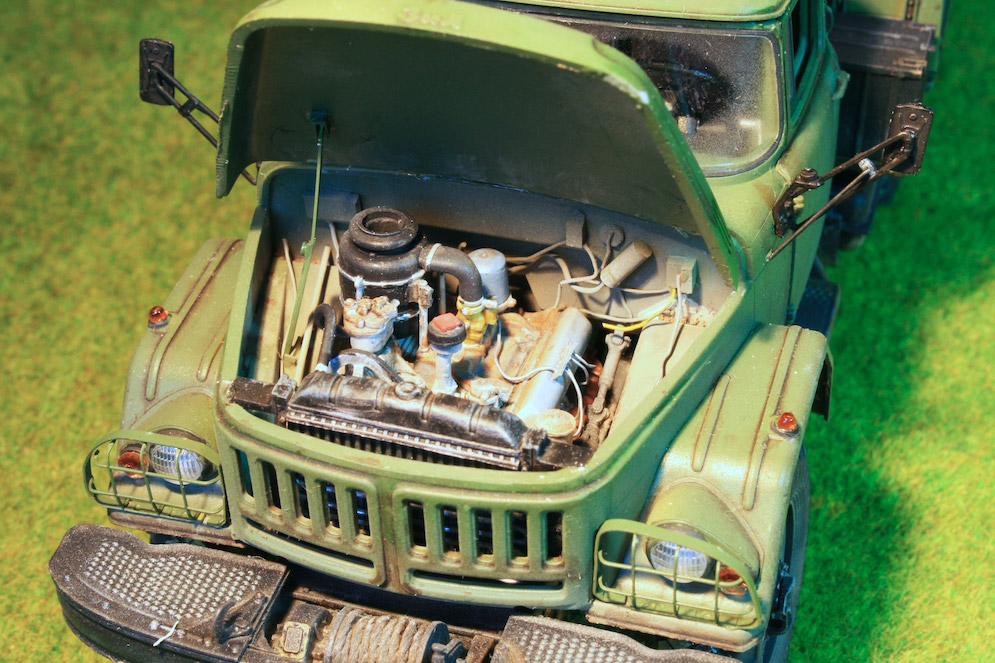
Please find enclosed photos of my latest build. The ubiquitous Army truck in early 1950s’ Russia was the ZIS-151. A largely reverse engineered Studebacker 6X6 which had so impressed the Soviets in WWII.
It was followed by the more familiar ZIL-157 which substituted the double wheels on the rear axles with singles. The larger, broader wheels were more capable cross-country. The kit is a pleasure to build, and I could not stop myself detailing the engine and adding new resin figures from TANK. The resin wheels are from Panzer Art.
Andrew J.