Welcome to the Subscribers’ Armour Gallery.
This vast and growing area of SMN is all about sharing great work from modellers across the world – that’s modellers like YOU, subscribers and guest submissions from modellers whose work I find truly inspiring.
By sharing it here, I really hope that we can all get inspired to start a new project… or try something different maybe… but to keep enjoying this great hobby of ours; whatever your reason to look, be inspired and keep building!
Each submission has a ‘gallery’ of thumbnails which you can click on to see an enlarged image and read the short text describing the model – enjoy!
Galleries: A | B | C-I | J-L | M | N-P | R-S | T | U-Z
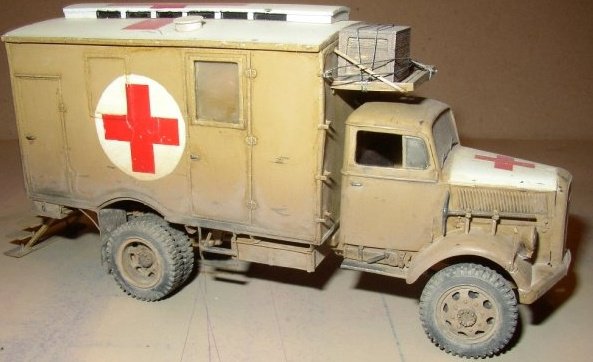
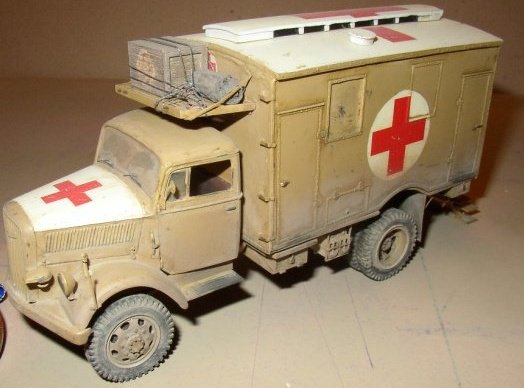
The Ambulance is Italeri’s with the Plus Models 4×4 Ambulance conversion set, 1:35 scale. The only thing used from the original kit was the cab and chassis rails. I used the Eduard PE set also.
Tony P.
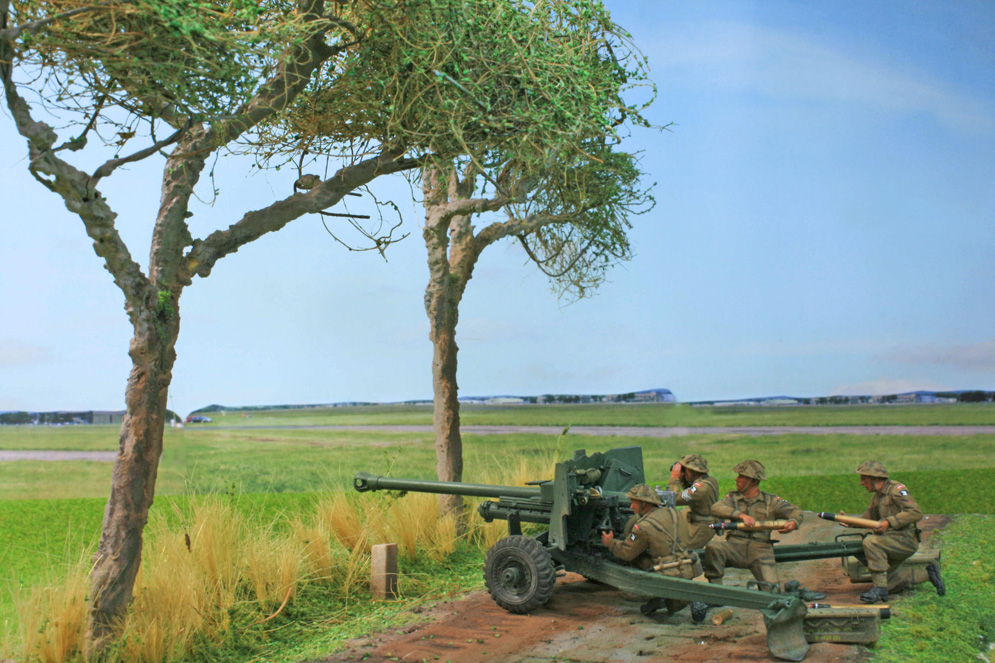
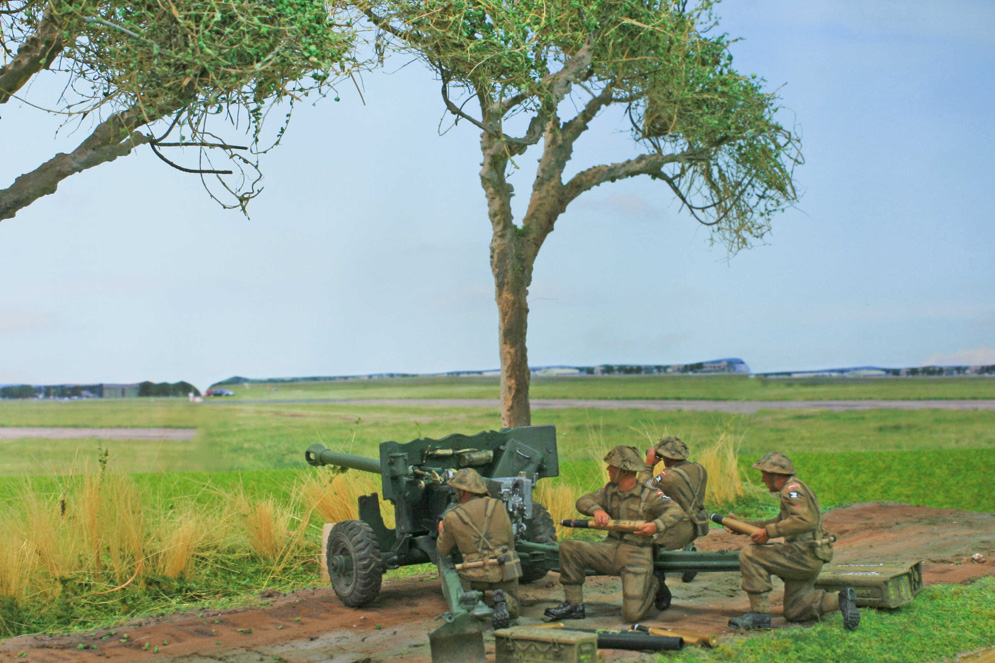
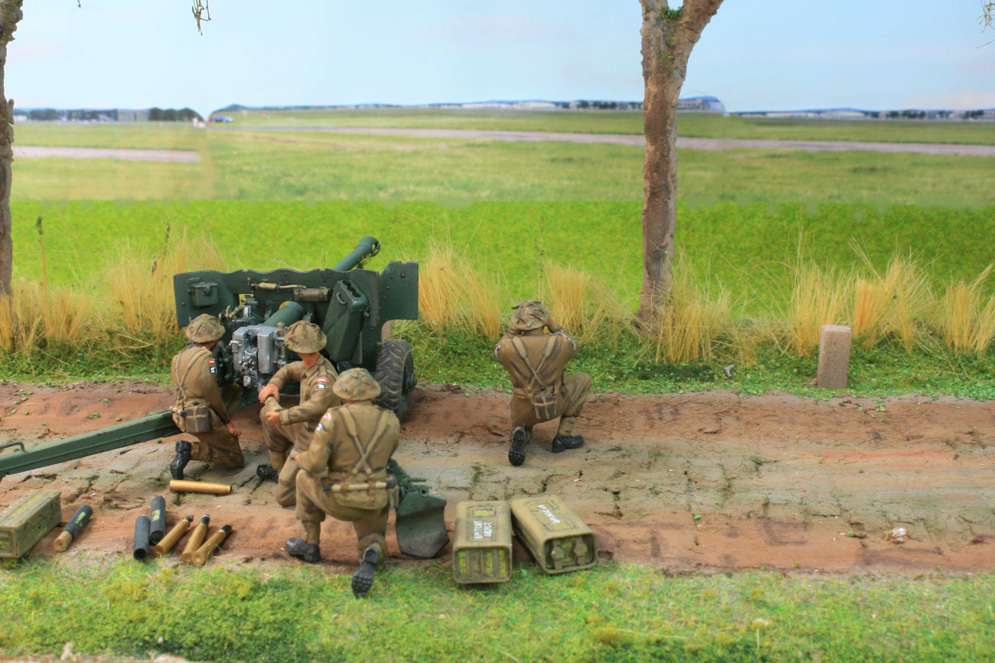
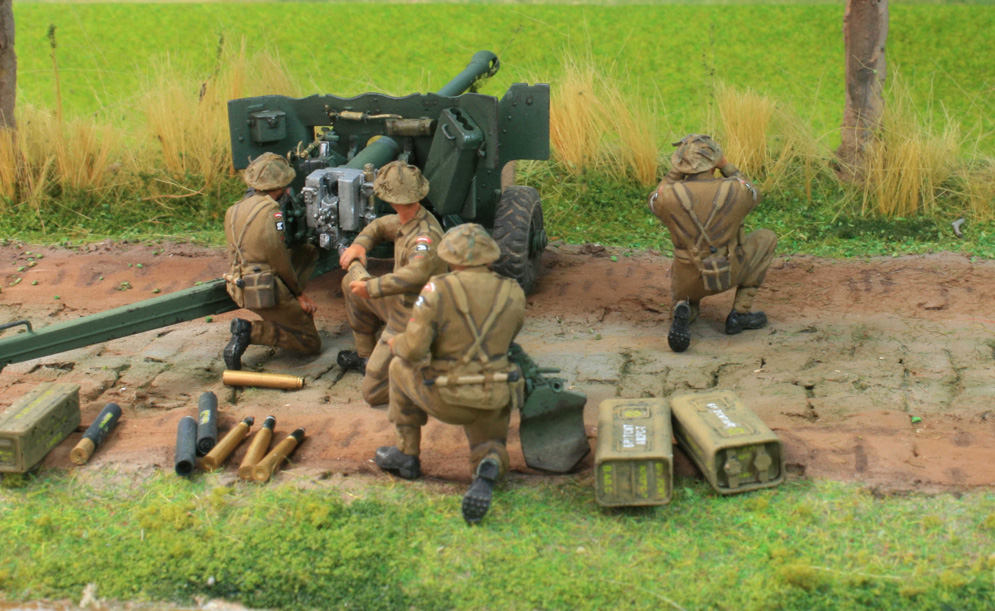
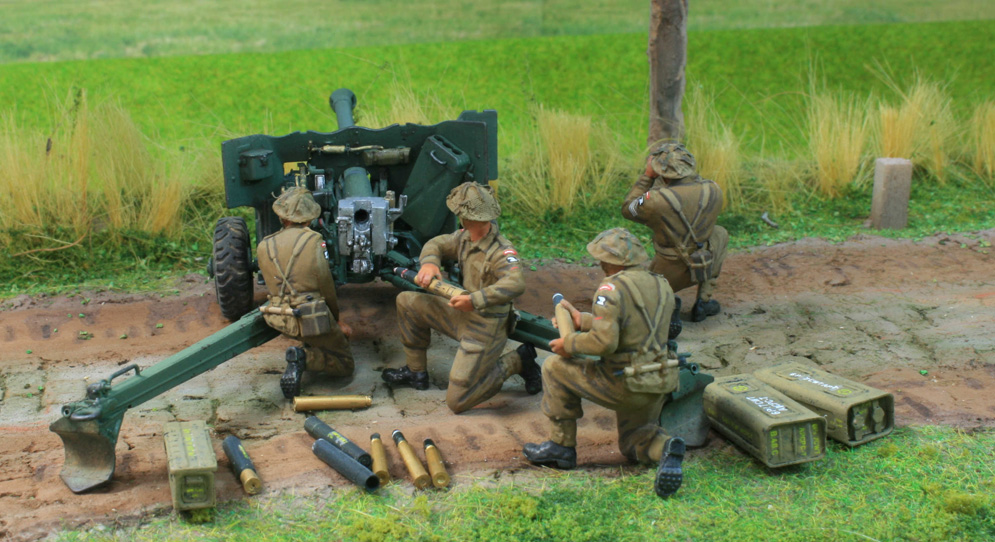
I painted the figures using the AK range for British khaki set. Their insignia is that of the 11th Durham Light Infantry in the 49th ‘Polar Bears’ Division. A sister battalion in the Division, the Tyneside Scottish had one of the most successful actions of the war with the 6 pdr, knocking out 10 panthers whilst defending the Rauray Spur on 1st of July 1944.
Andrew J.

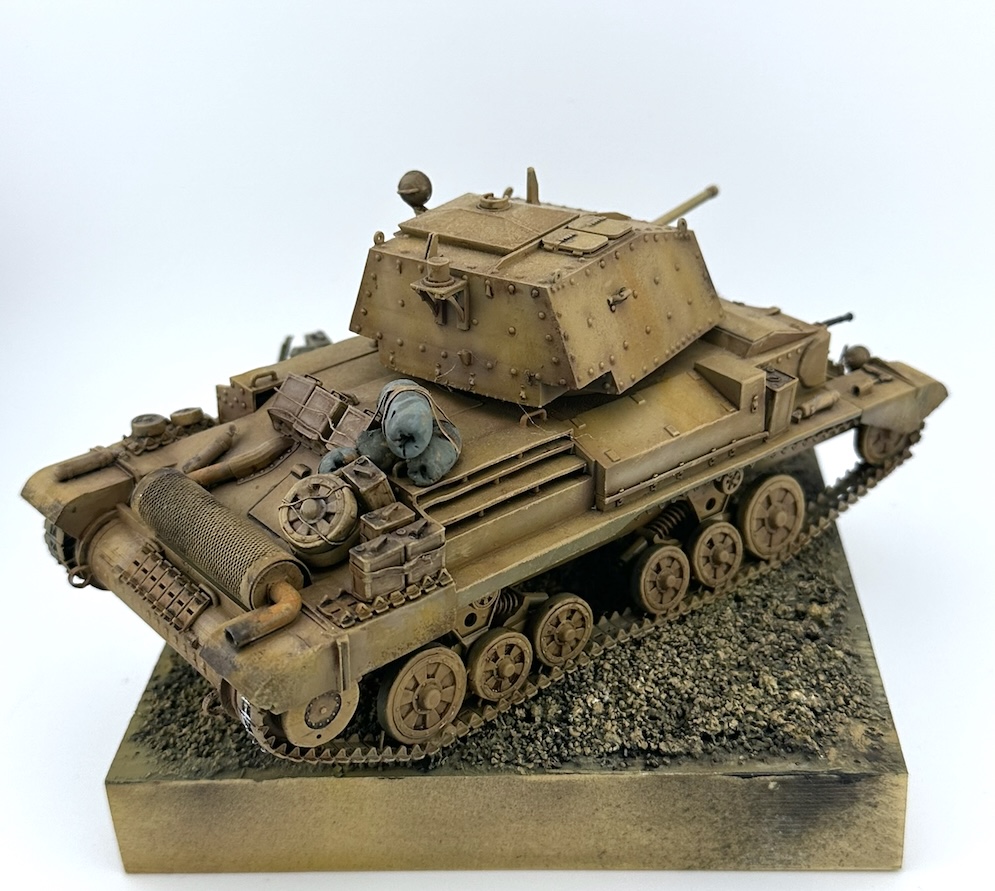
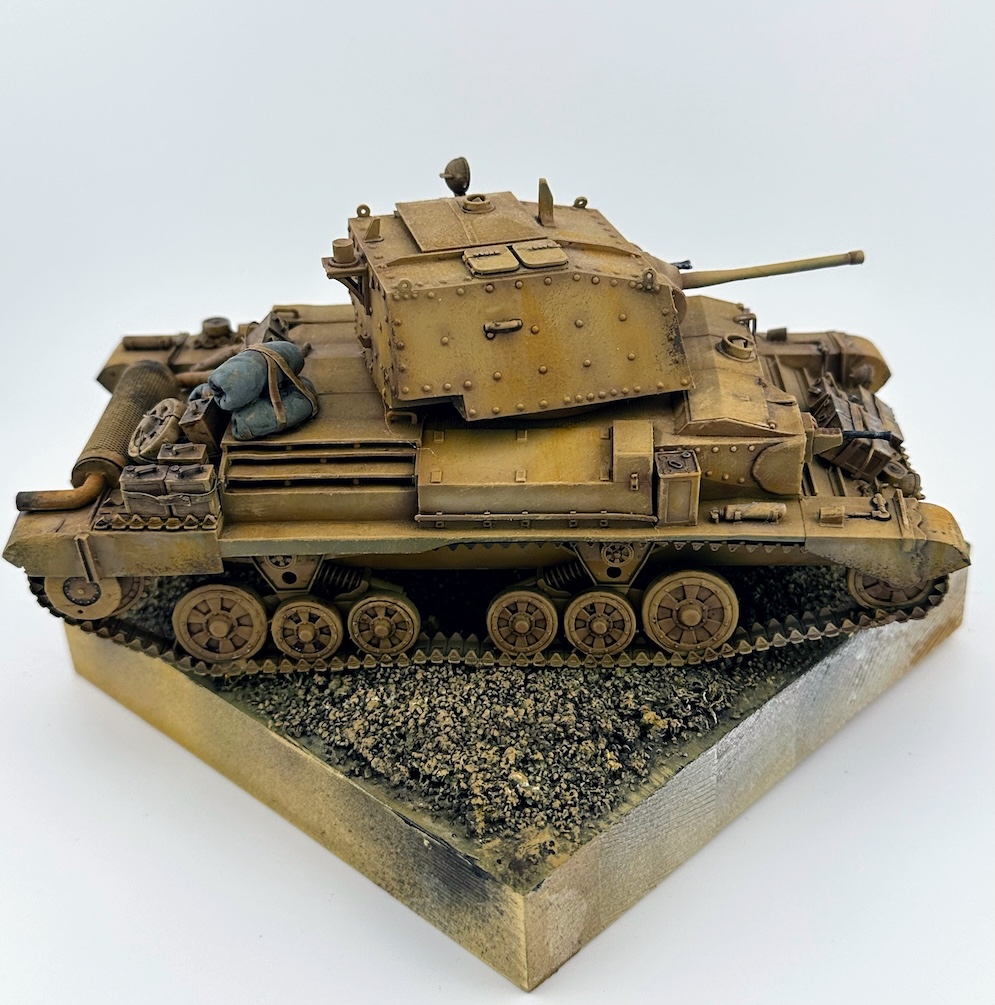
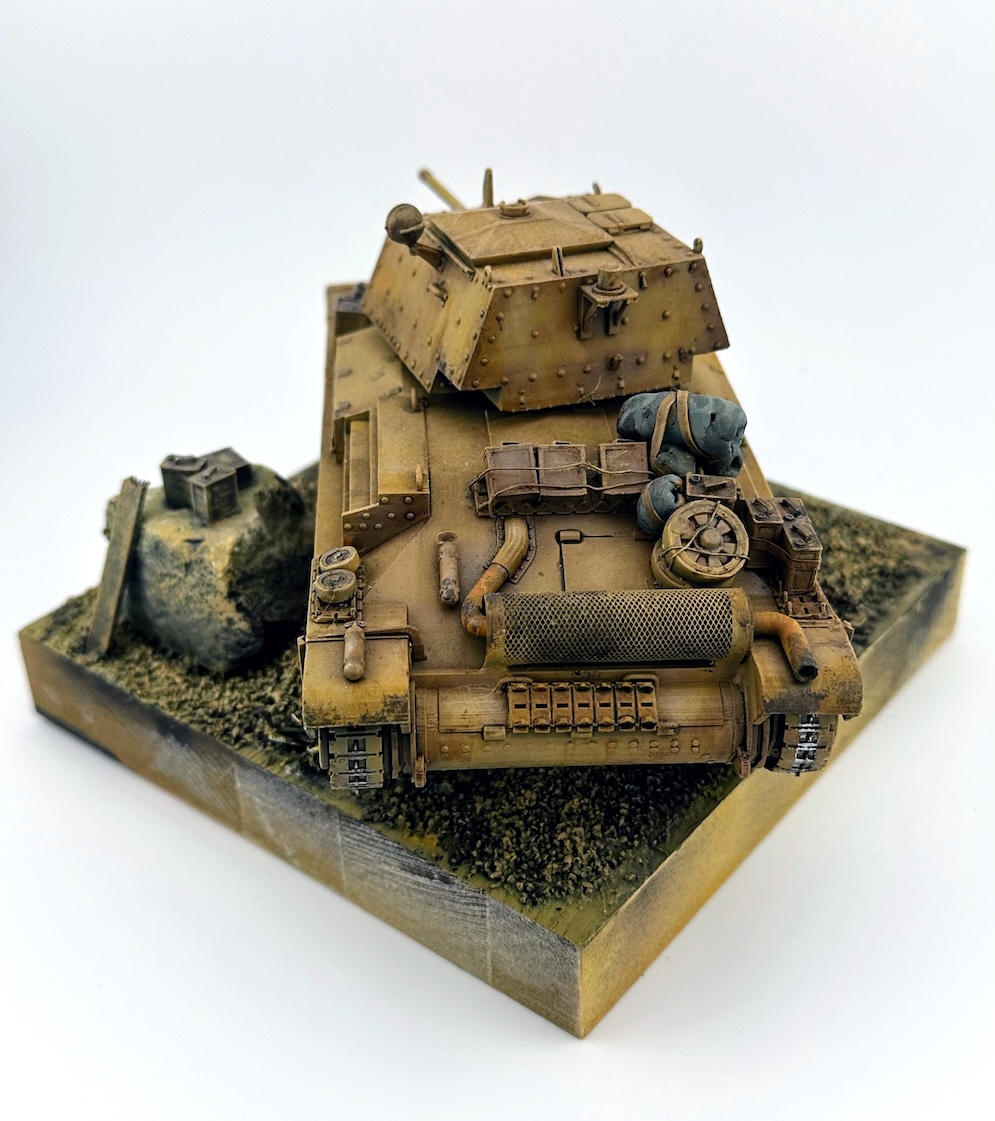
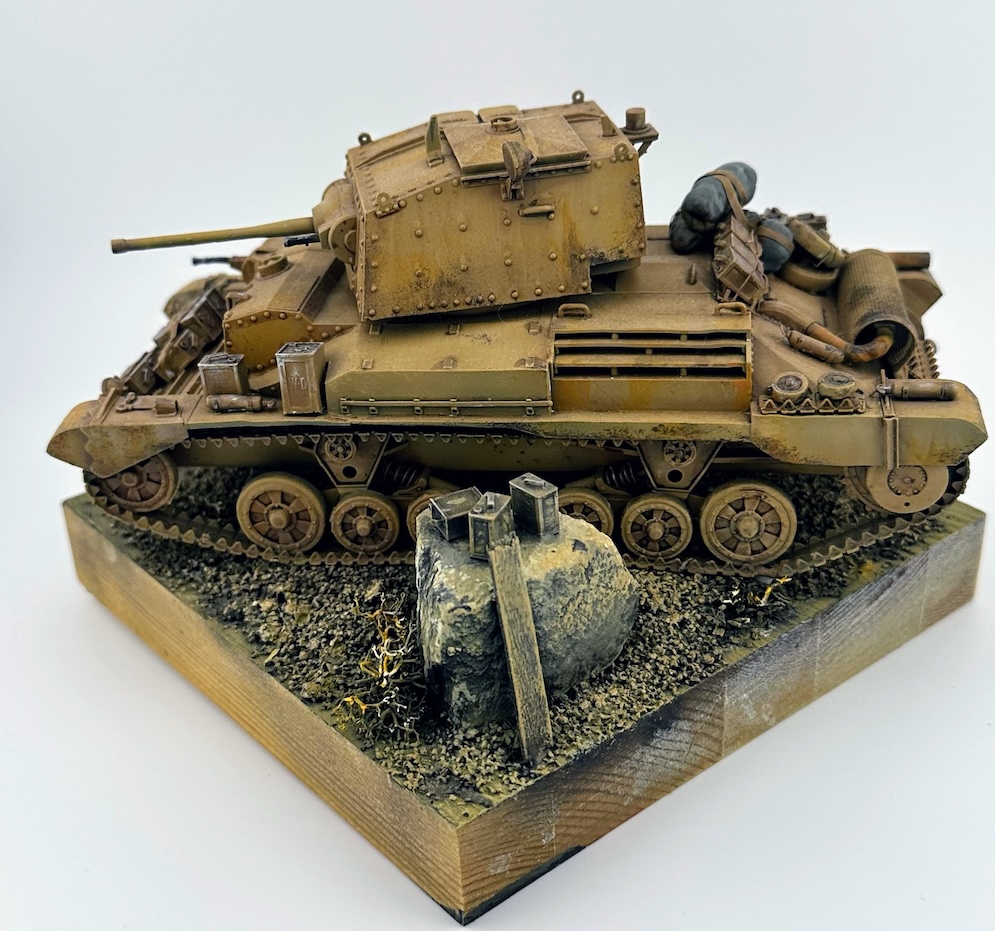
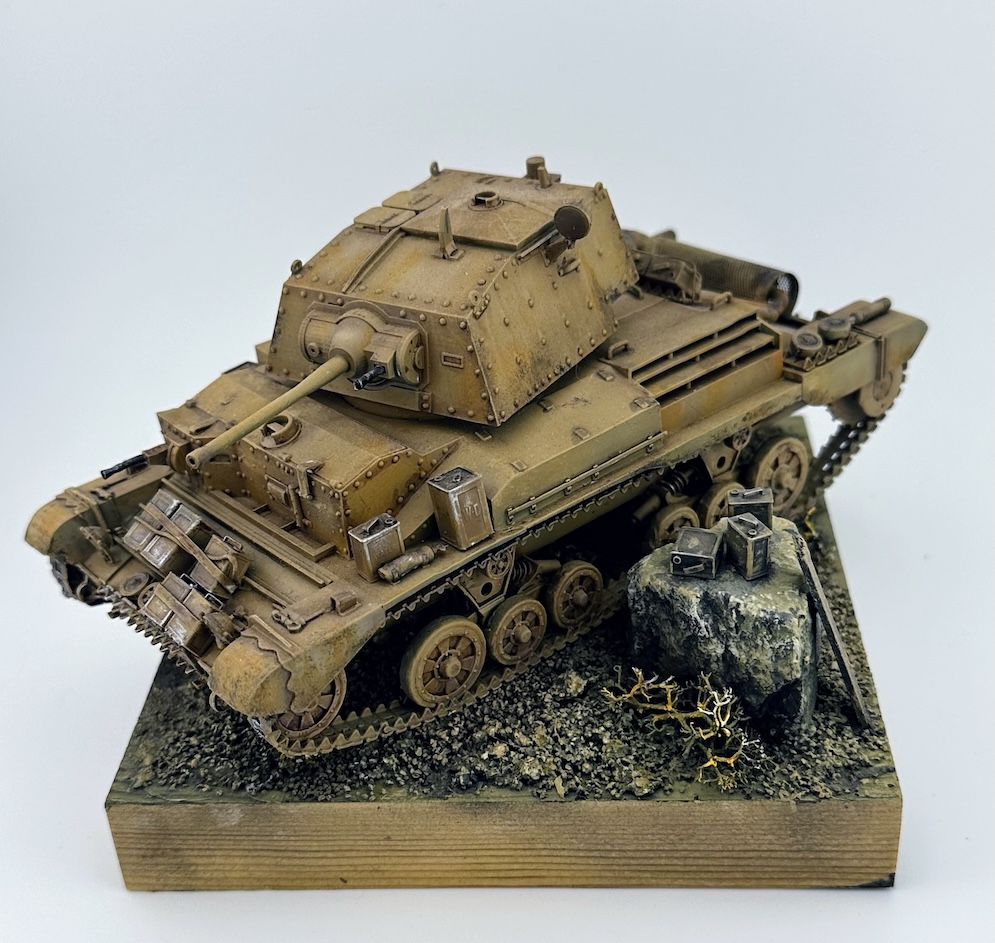
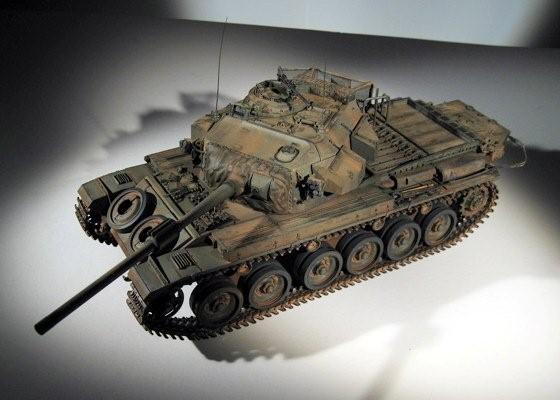
The A10 Mk II cruiser, a prewar design, entered service in late 1939. It prioritized armor strength over speed, which resulted in several operational shortcomings. In the BEF in France, it struggled with off-road performance and track torsion issues but was more successful in the flat terrain of the Libyan desert, notably during the defense of Tobruk.
Model
CGMorph’s STL resin printed model is available on CG Trader (https://www.cgtrader.com/3d-print-models/miniatures/vehicles/a10-cruiser-tank-scale-model).
Printed at 1:35 scale using an Elegoo Mars 2 printer and sliced with Chitibox Pro software, it features separate hull, tracks, and turret components. Mesh grills and stowage were added, collectively depicting an A10 in the Libyan desert circa 1940.
Richard E.

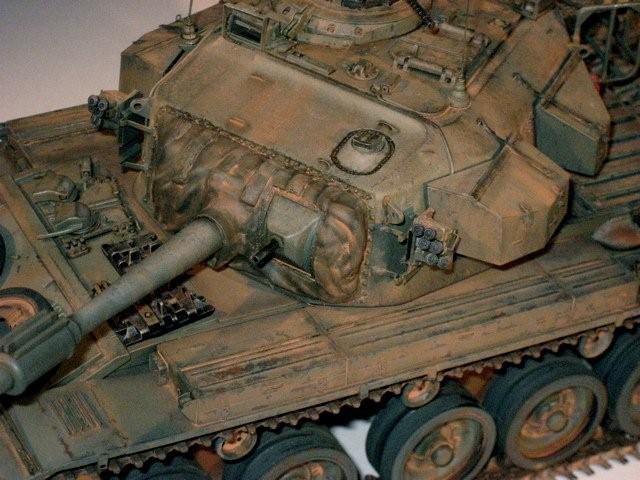
Construction was simple with minimal clean up required which was surprising for such an old kit, I did take time to fill the openings in the lower hull where the on/off switch should have been (the kit is intended to be motorised) and to fill the sponsons. The main problem with the kit is the poor fit of the turret to the hull, in the end this took several shims to be fitted to allow the turret to sit level and at the correct height.
The kit was supplied with the anti slip texturing as part of the mould but I enhanced this further by using flour applied over a coat of PVA. Once the PVA was dry I removed the excess and then sealed the flour with a coat of matt varnish. I then allowed this to dry for 24 hours before starting the painting process.
The model was primed using Alclad excellent primer which also contains a micro filler and then any flaws were repaired or reworked if needed. I then sprayed the entire model in Vallejo Model Air Desert Sand but lightened and toned slightly with Sunny Skin tone. When this was dry I applied an even lighter shade to the centre of the panels to bring some definition to the surface. To enhance this further I then applied several coats of Mig filters and then finally blew the whole thing over with a highly diluted coat of the base coat (ratio of about 5% paint to 95% airbrush cleaner!).
The weathering sages consisted of applying scratches with the “Scotch Bright” method and then lighter scraps being applied with a size 0 brush using acrylic paints. Streaking and rust marks were applied using Aberteilung 502 Oils and Mig pigments. The tracks were sprayed German Tank Brown and the running blocks were then painted in Vallejo Black Grey. They then received a wash of Mig pigments using various shades. To finish things off some edges were rubbed with a graphite pencil to show wear and also to provide more definition to specific areas.
The final job of painting the crew and stowage was done using Vallejo Model colour Acrylics and oil washes where required.
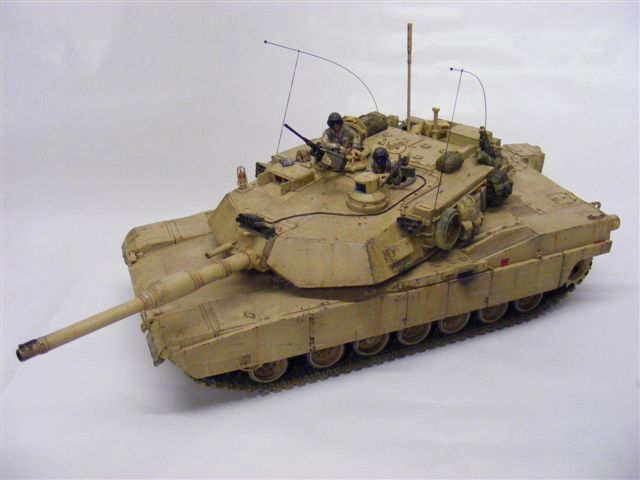
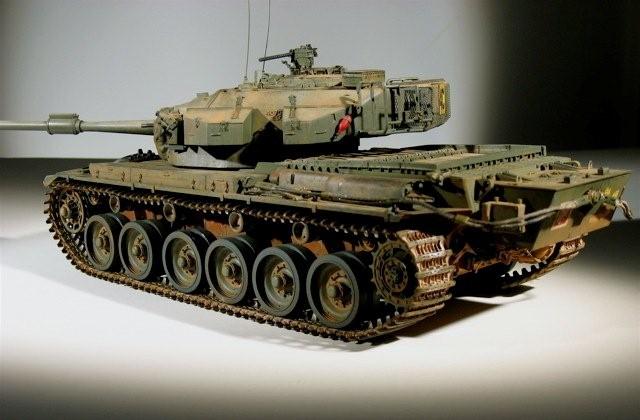
For my first attempt at “modern” armour I am happy with the result and look forward to building more AFV’s of this type in the future.
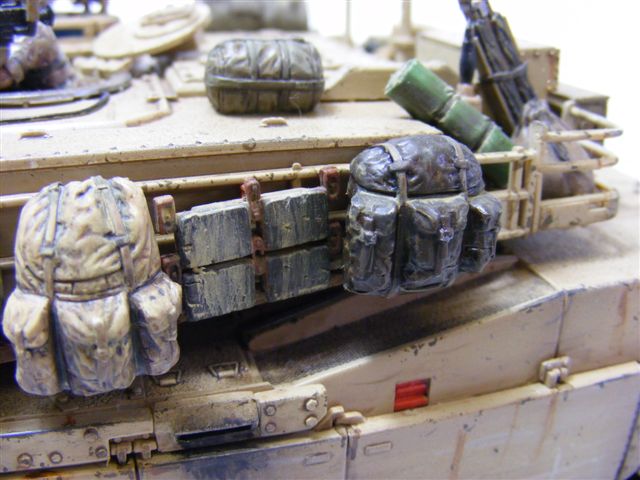
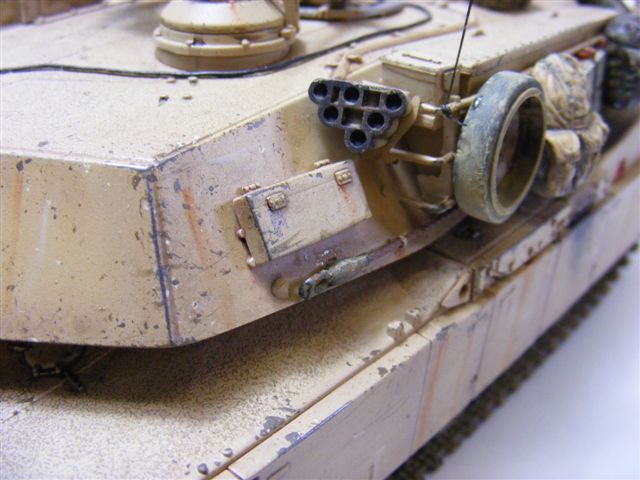
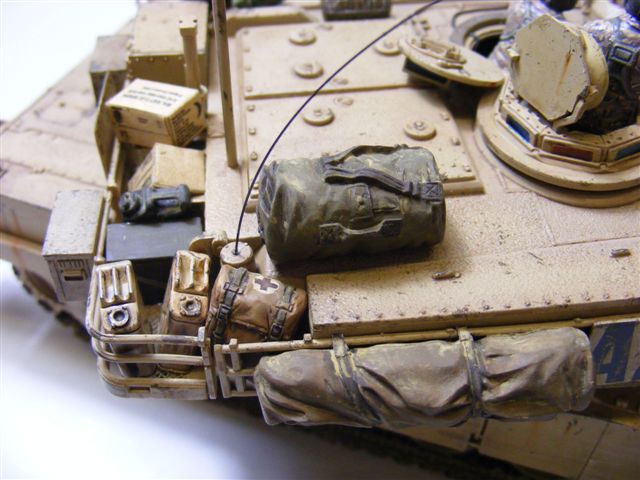
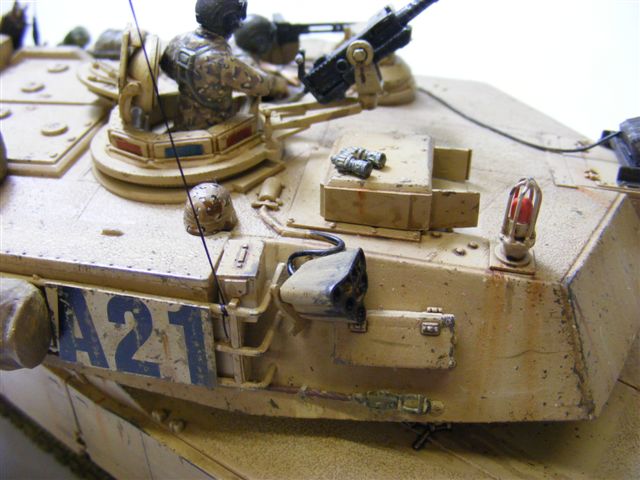
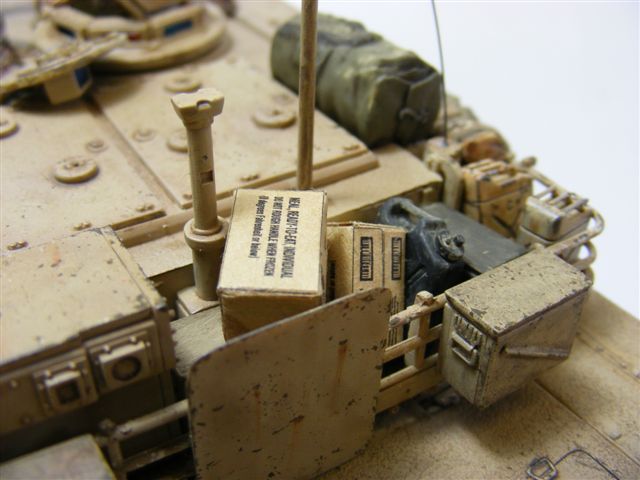
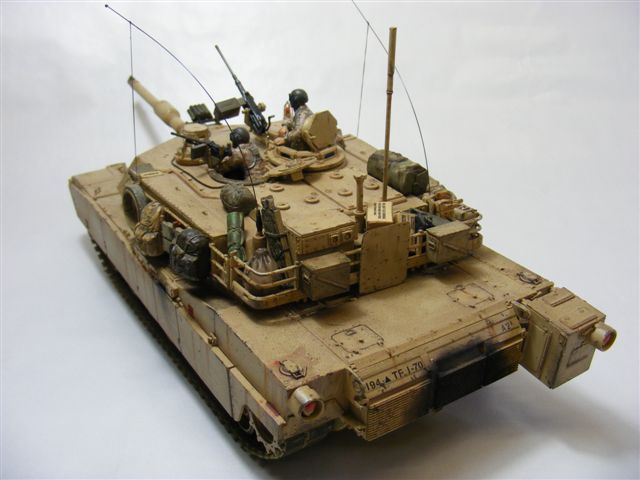
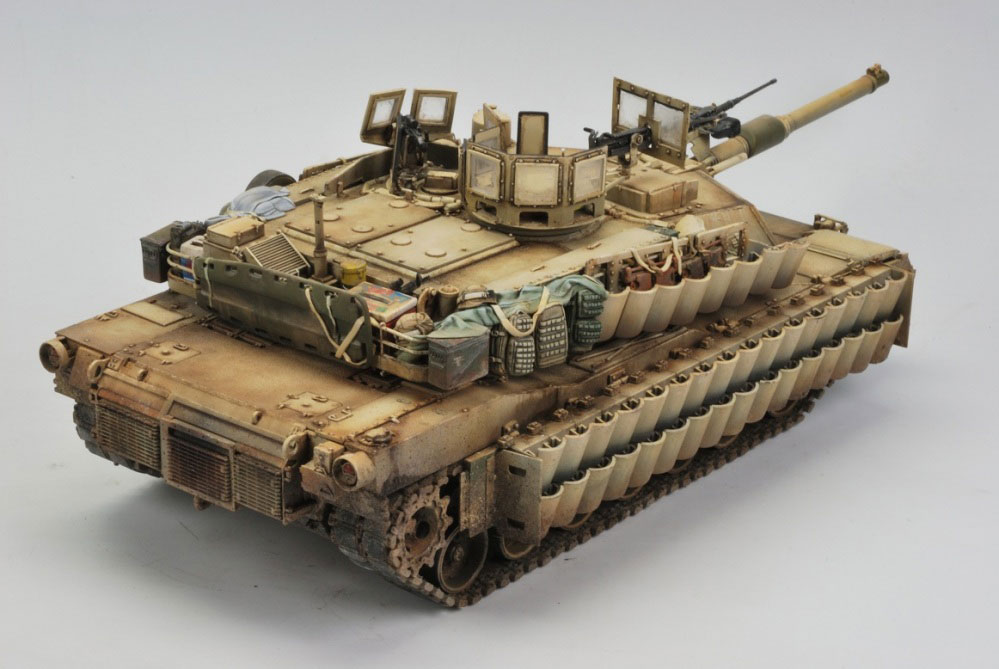
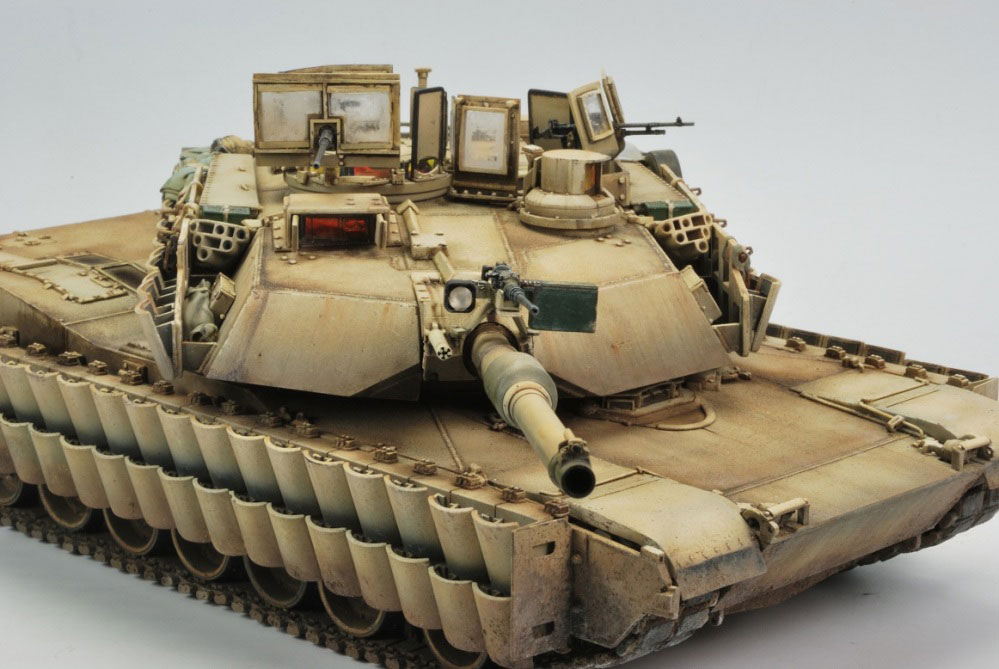
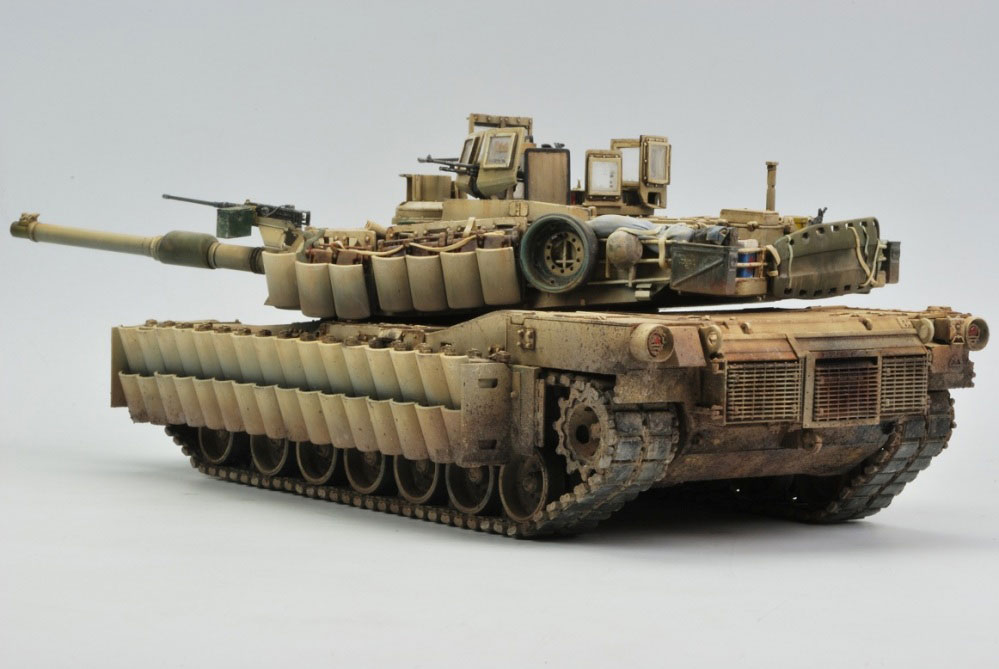
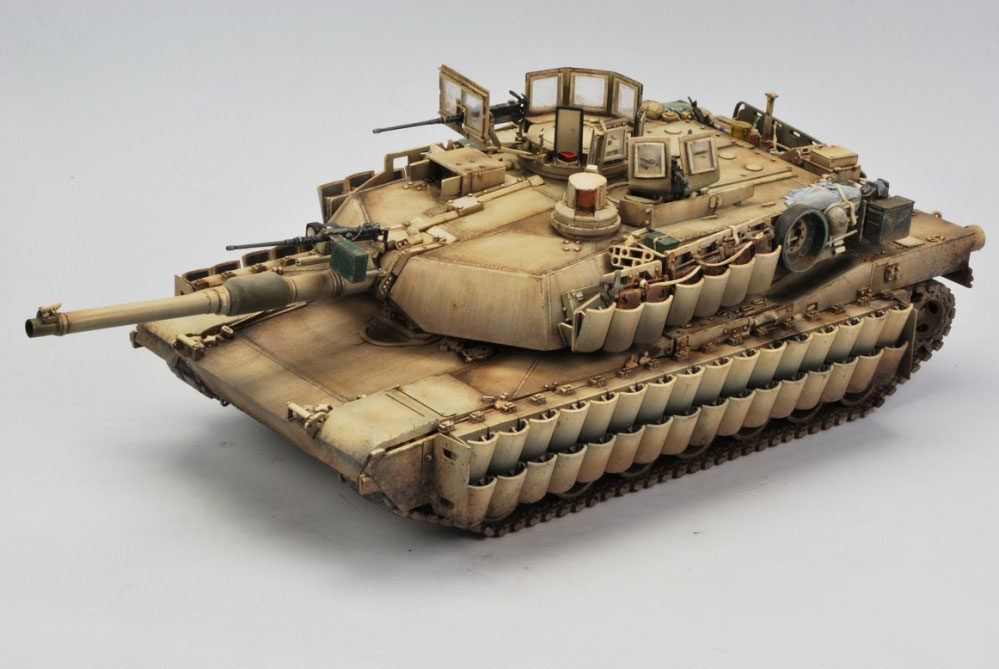
Scale: 1:35
Conversion: Tusk II Conversion kit from Perfect Scale Modellbau
Other accessories: M1 Abrams Tracks from Bronco; front and tail lights from SKP; PE Set from Eduard; gun barrel from Voyager
Stowage: Blast Model, Black Dog, Tamiya
Surprise (Murphy Law): Tamiya will release one Tusk II Abrams this Christmas! (2012)
Best regards, José Luis
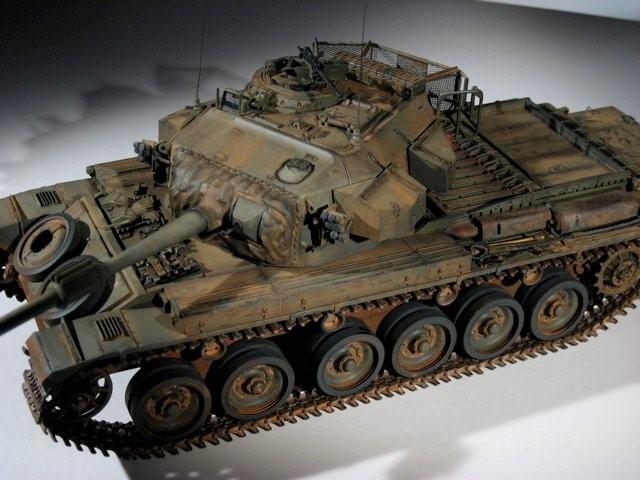
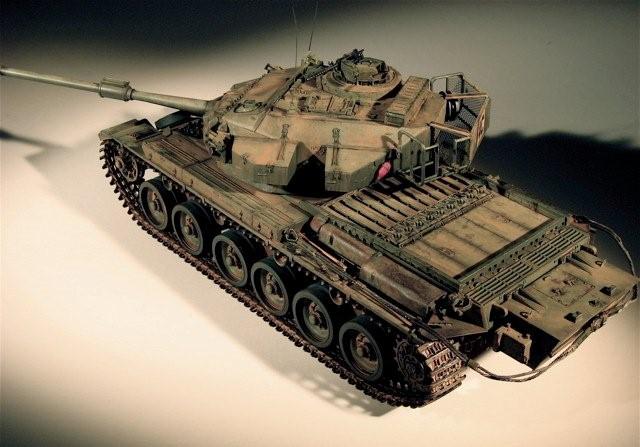
“This is the Oz Centurion I built a while ago. It was the AFV club 1:35thkit. It has a lot of Eduard extras on it (straps buckles etc) and as it did not come with the cloth mantlet I carved it from Milliput filler. I started with an Oz Vietnam green but not very seriously as I knew that this was not going to be near the final colour which, with washes etc was more Vietnam dust!”

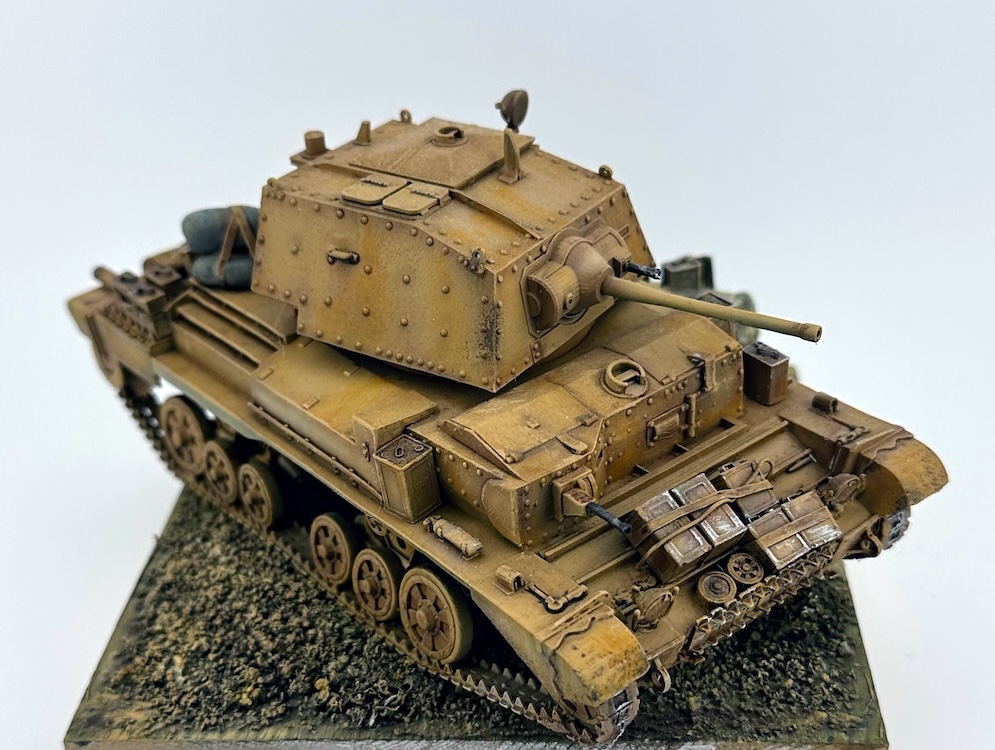
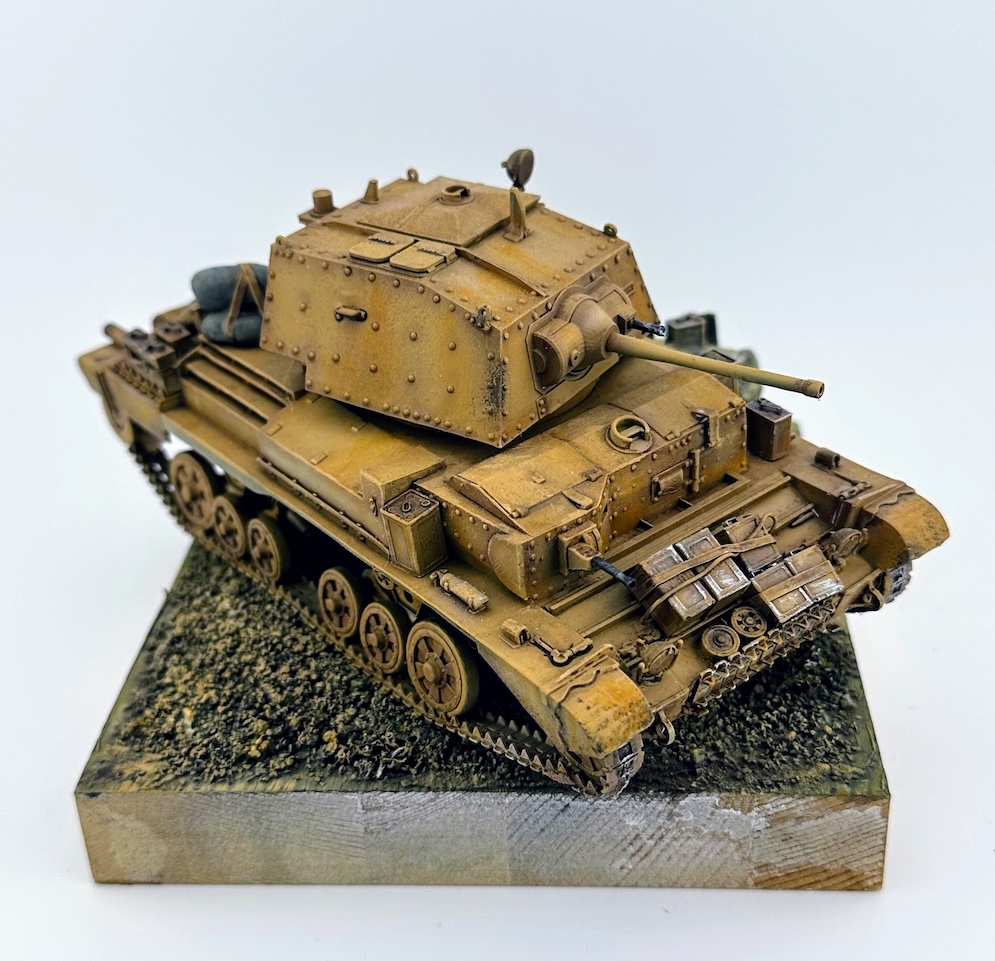
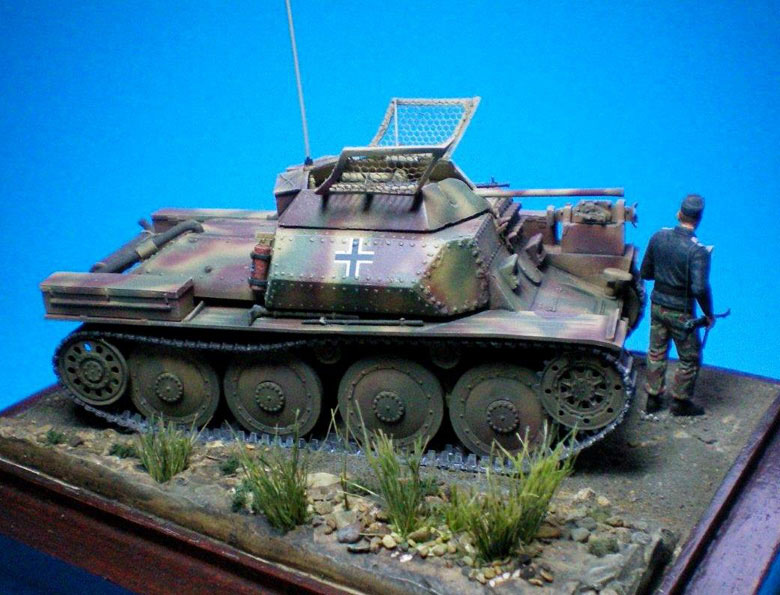
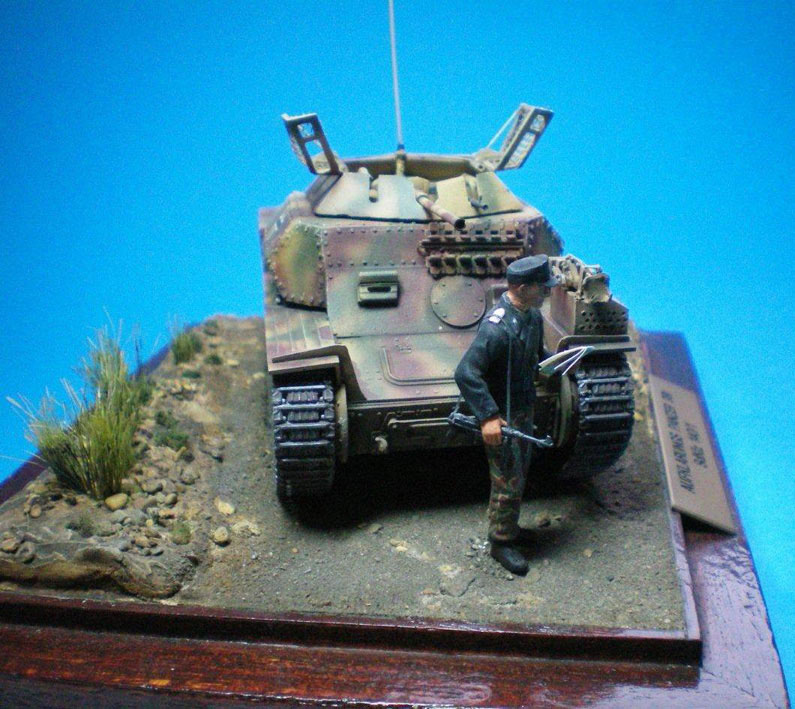
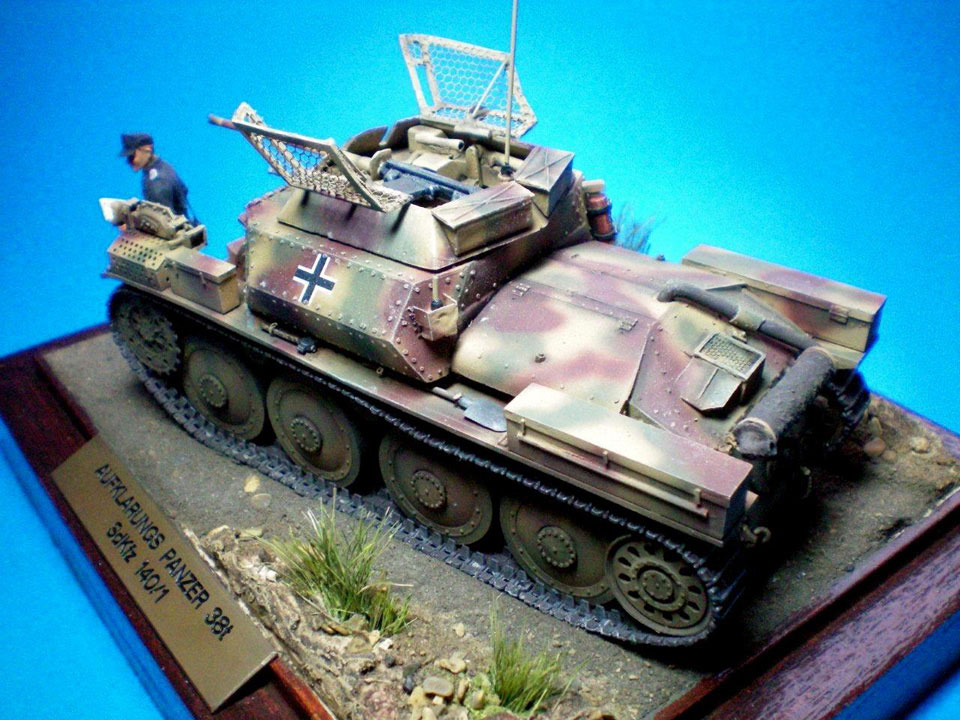
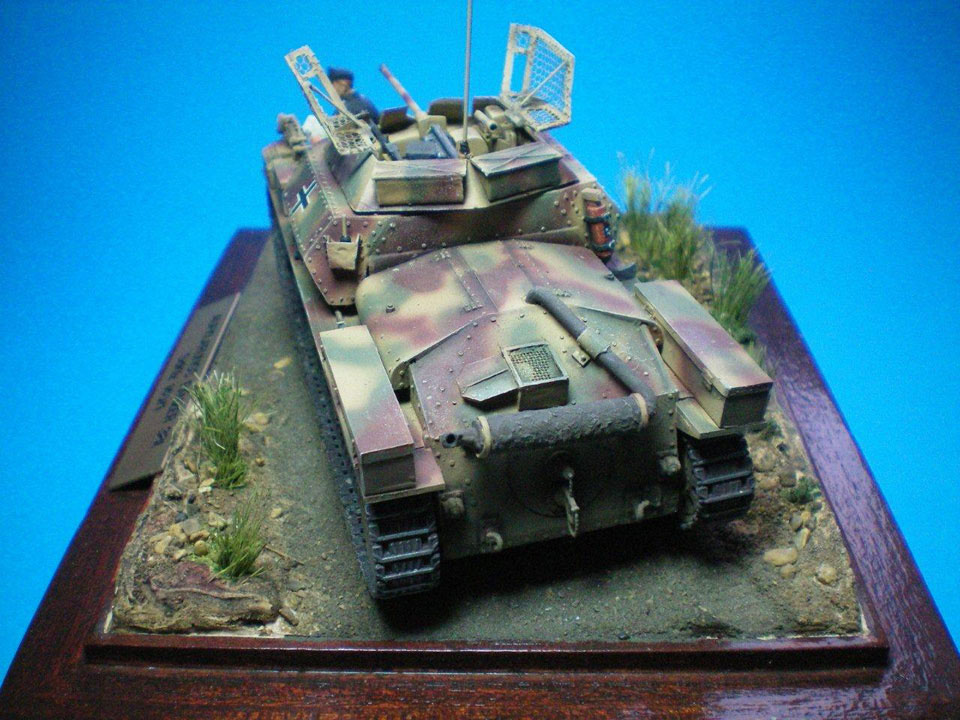
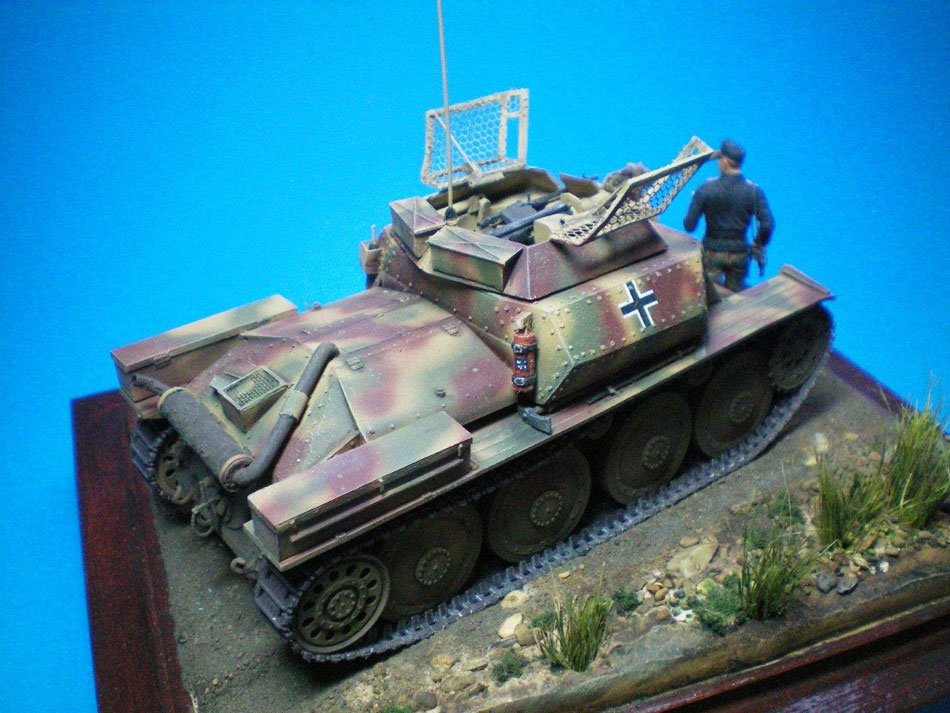
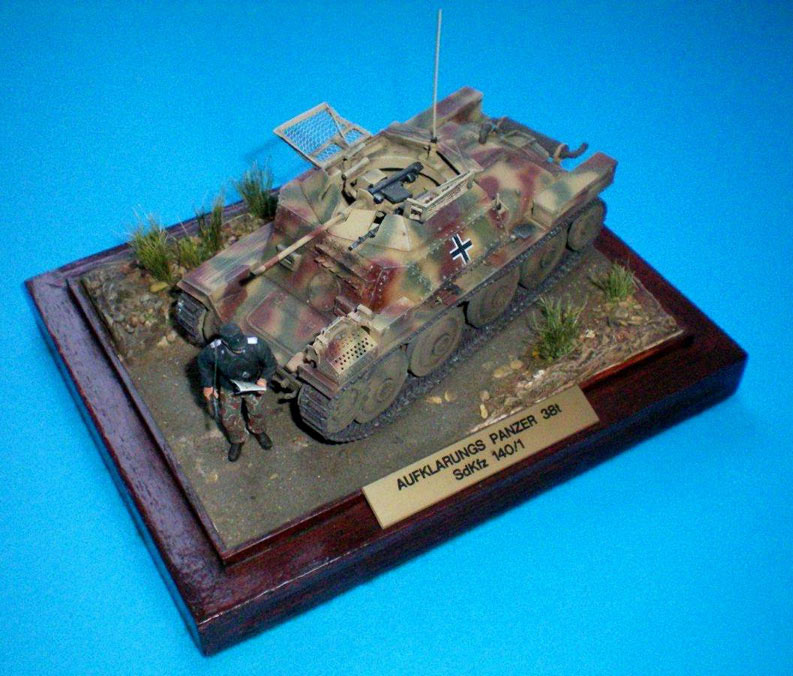
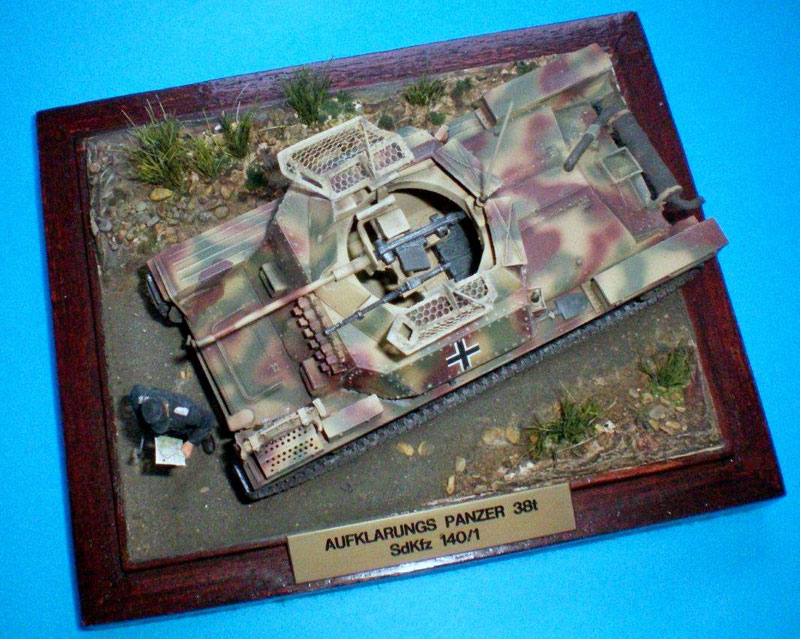
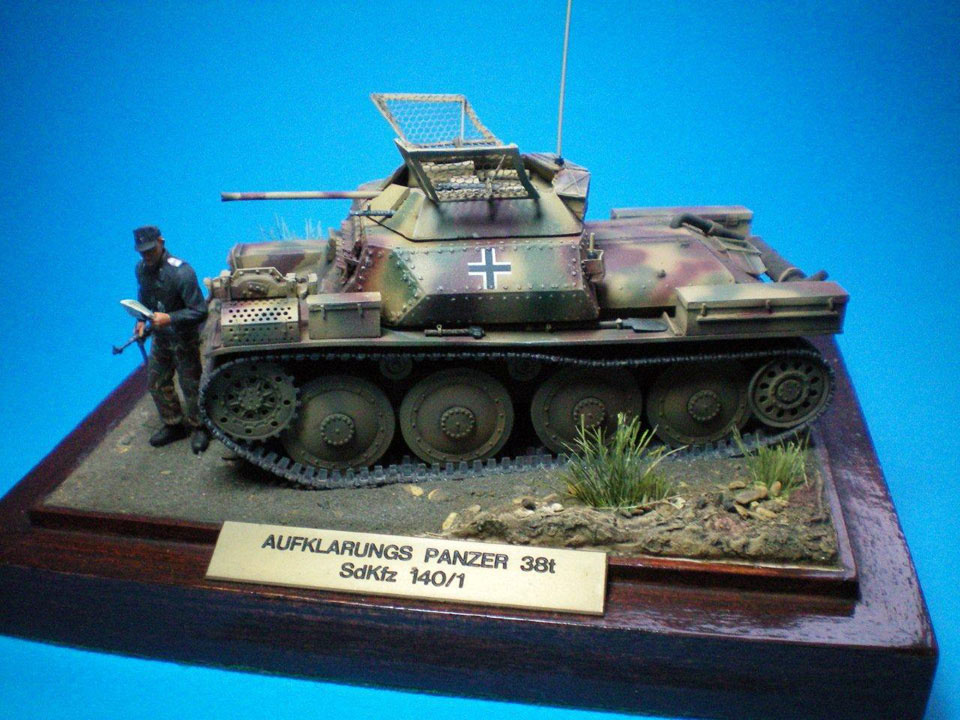
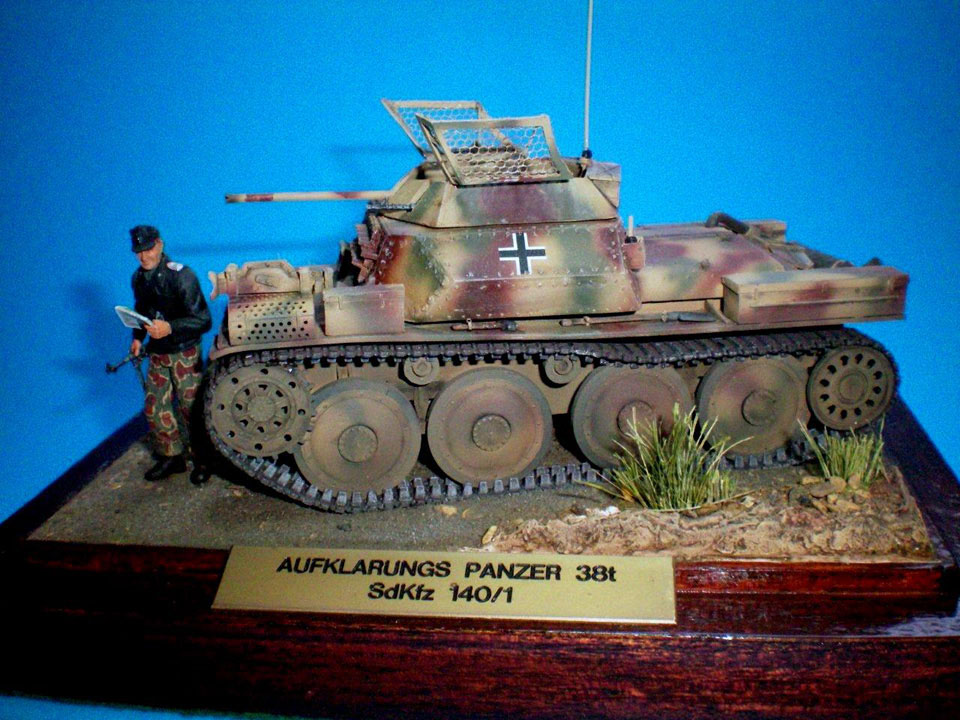
This was a stop gap measure produced by BMM of which about 50 were produced with the 2 cm gun being issued to the armoured reconnaissance units from April 44, on both the Eastern and western fronts.The model consists of the Italeri 38(t) gun tank with the turret and gun from a Tamiya Sdkfz 222 kit.
The superstructure was cut in front of the engine access panels and using the kit glacis plate all other panels were fabricated from flat card. The visor covers were used from the original kit being glued to the front plate along with a blanking plate for the machine gun mounting. Lines were pencilled on the card and marked for the rivet head position. The rivets were then made with a punch and die set and then attached with liquid cement. The turret was made as per the instructions and set aside for painting. Two boxes were fabricated for the fenders from flat card and attached.
The model was then washed and set aside to dry. This was followed by a primer coat of Halfords grey which was allowed 24 hrs to dry. The base coat and camouflage colours were then airbrushed on and again left to dry. Pin washes of dark brown were applied in to all recess lines, rivets and raised detail. A light dry brush with the base yellow was done next. The exhaust was painted with dark brown and talcum powder and then dry brushed to give a worn effect. The sub structure was painted with a mix of black and earth colours. Tracks painted black then dry brushed with gunmetal and washed with a brown earth colour
A small base was made and a figure added to give scale to the model. Finally a name plate was purchased made from brass and engraved with black lettering.
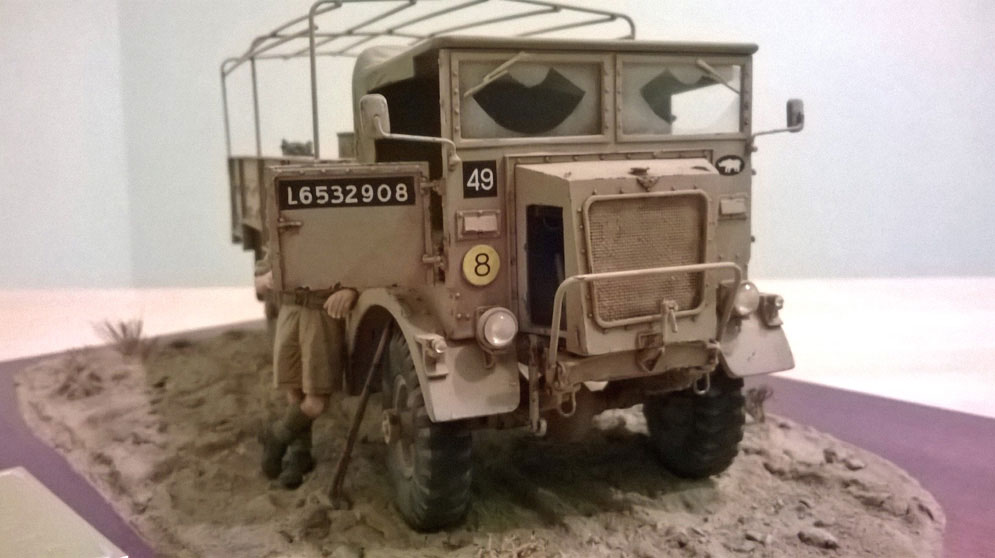
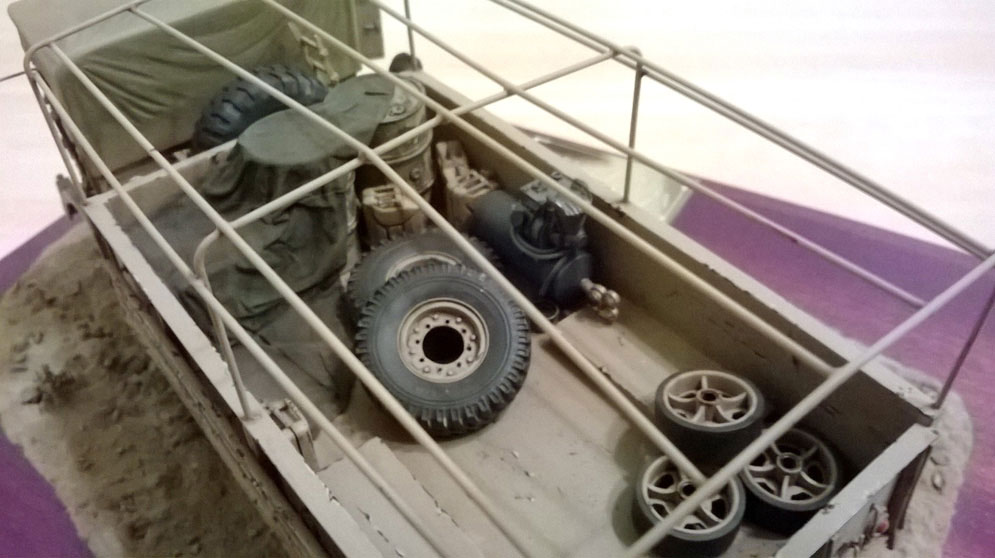
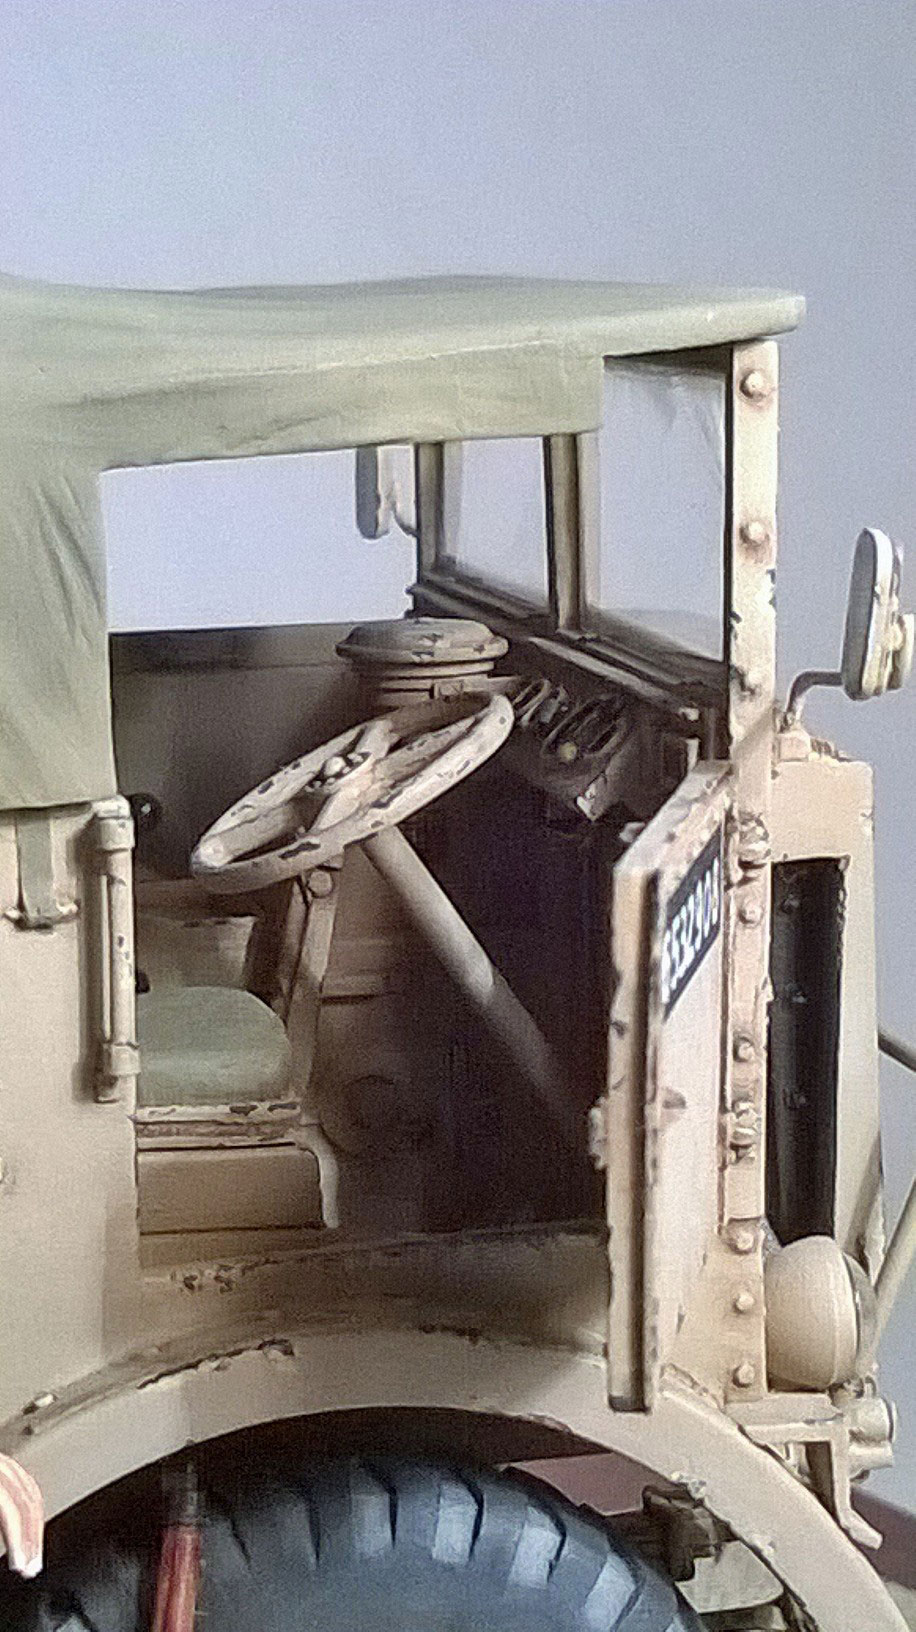
The rear tilt frame, front bull bar and door mirrors are not supplied in the kit so had to be scratch built from brass rod using a small jig I made at work (it pays to be a cnc machinist sometimes). The prominent air filter that sits on the engine cover inside the cab is also not supplied so this was turned on a lathe from brass with fixings made with etch brass from the spares box.
The main problem with the kit is that the engine cover is made from a solid block of resin leaving no room for the engine that comes with the kit to fit into, so out came the Dremel and after a lot of time, cutting and dust I had a slot big enough to allow the engine to fit under the cab. Because this was to be the North African campaign version of the K5 the outer engine covers were left off so some wiring was added to the fire wall.
After construction was completed the model was given an undercoat of Skull White straight from the can, then airbrushed with a desert sand color mixed from Tamiya acrylics. Once dry the paint chips were added using Vallejo model color, an oil paint wash then followed with a dusty over spray of Tamiya Buff. The figure is also from Sovereign 2000 and was painted with Windsor and Newton oils.
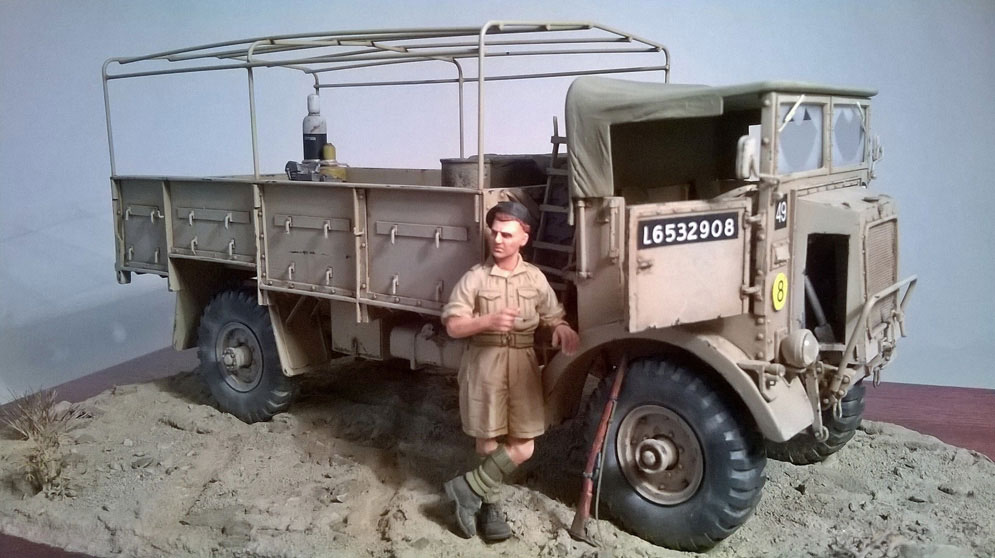

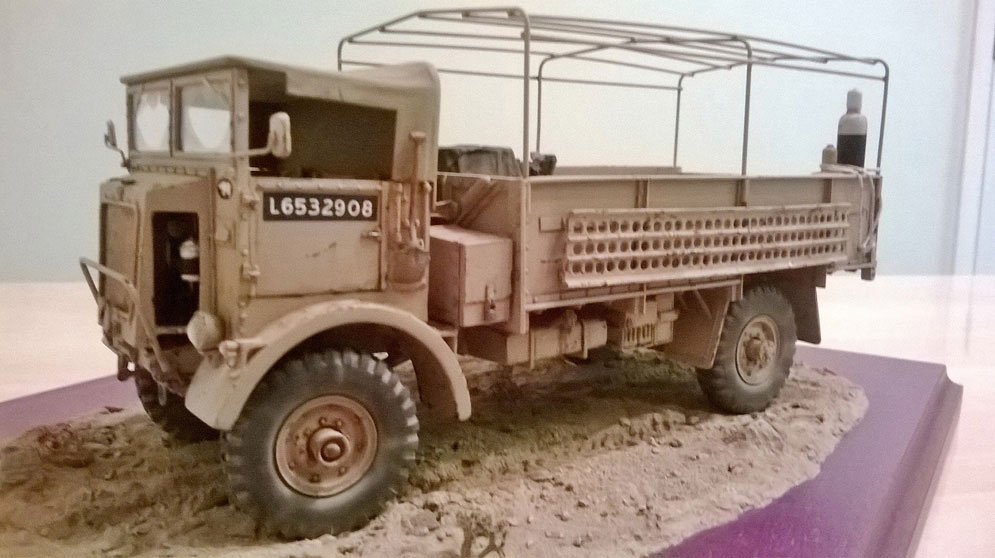
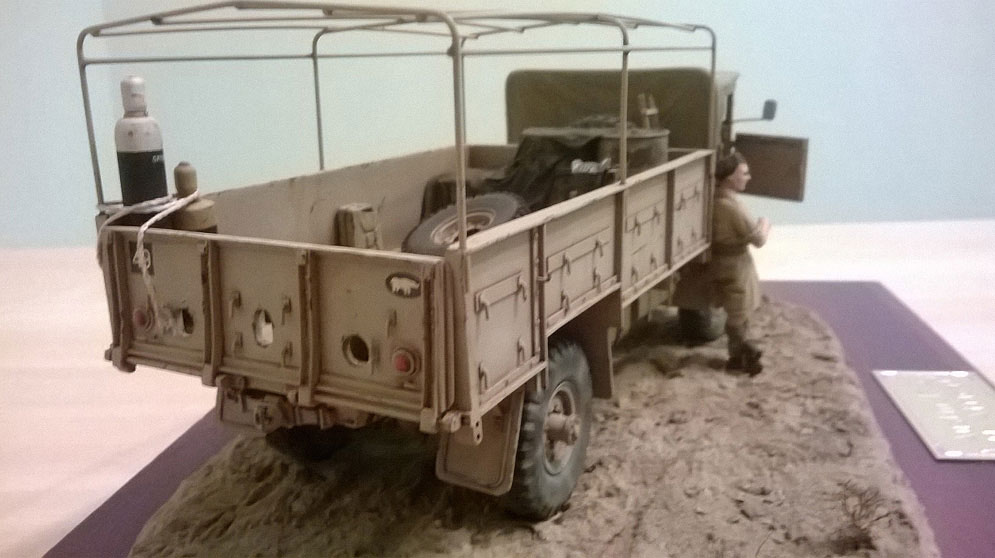
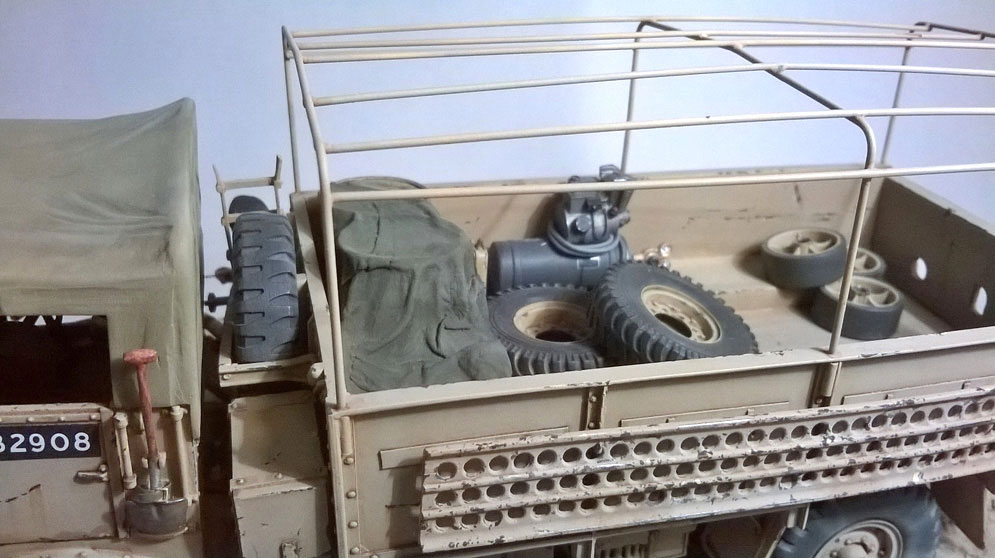
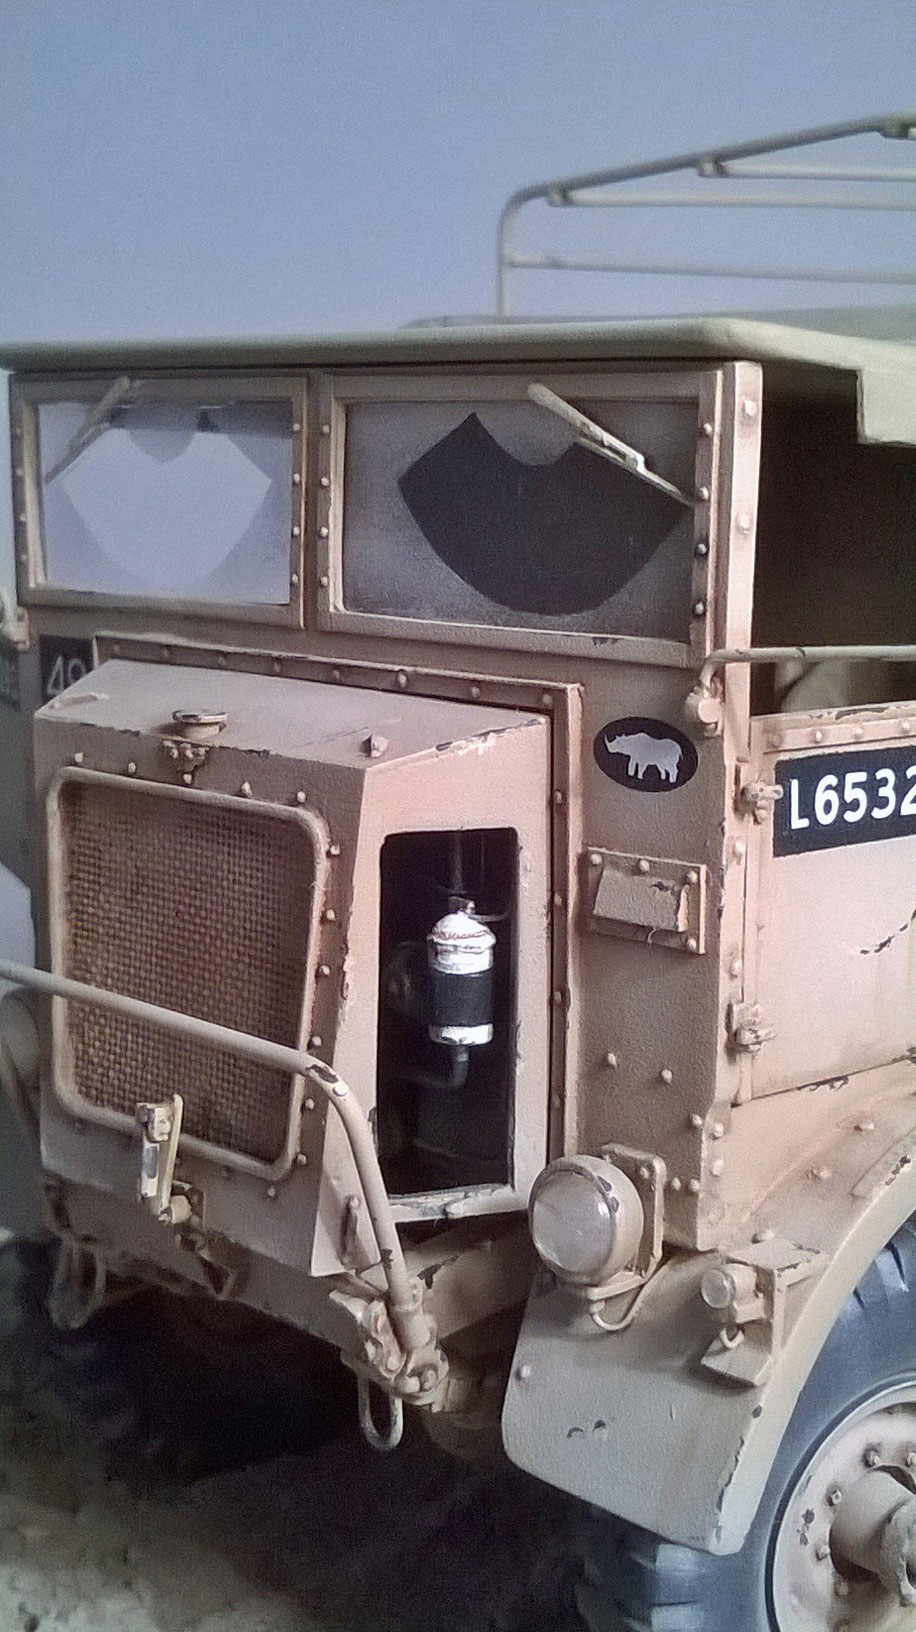
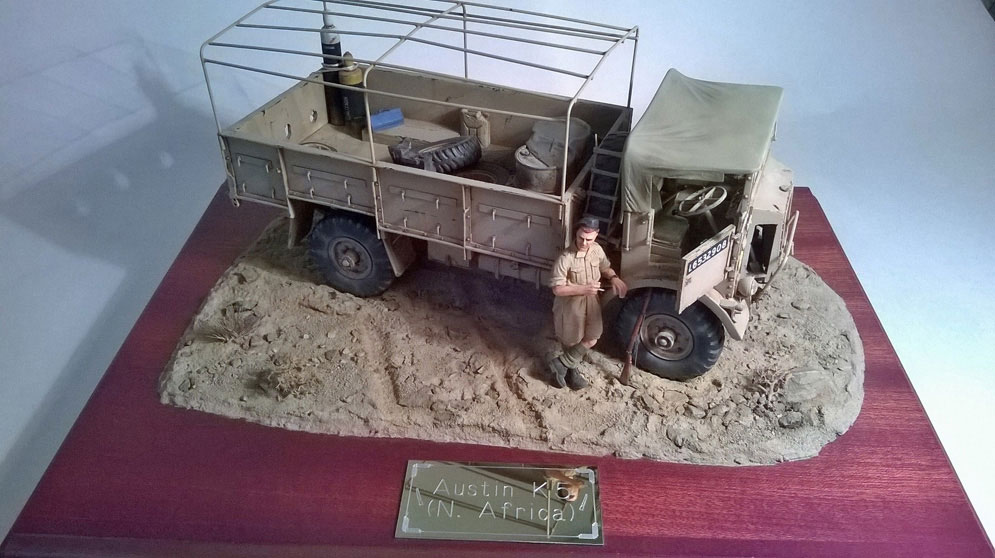

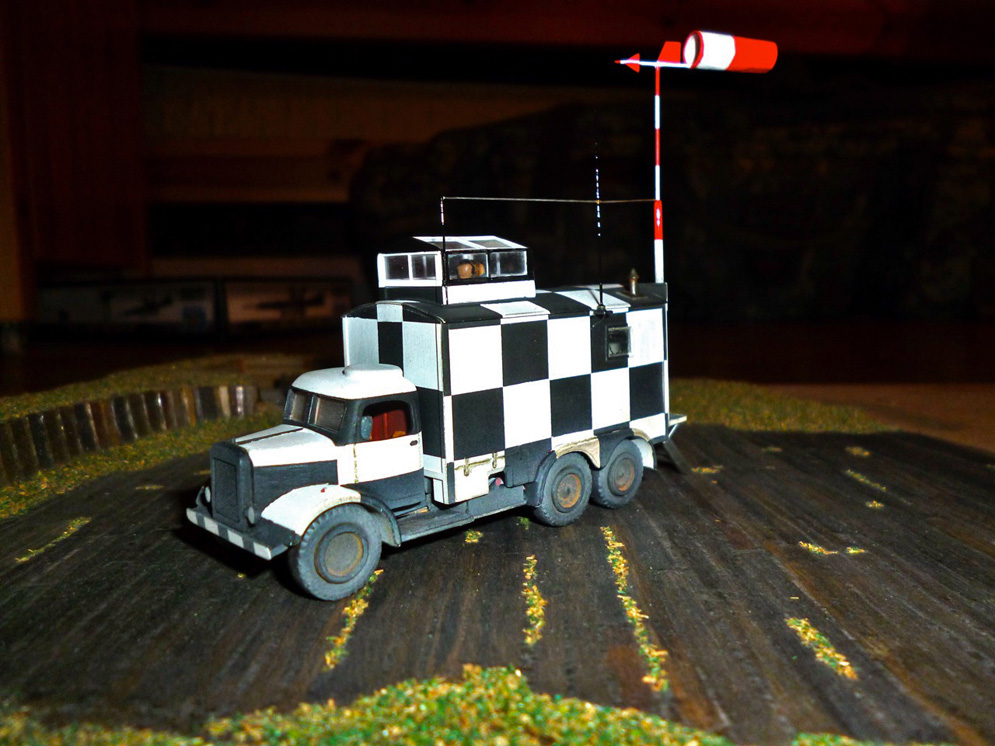
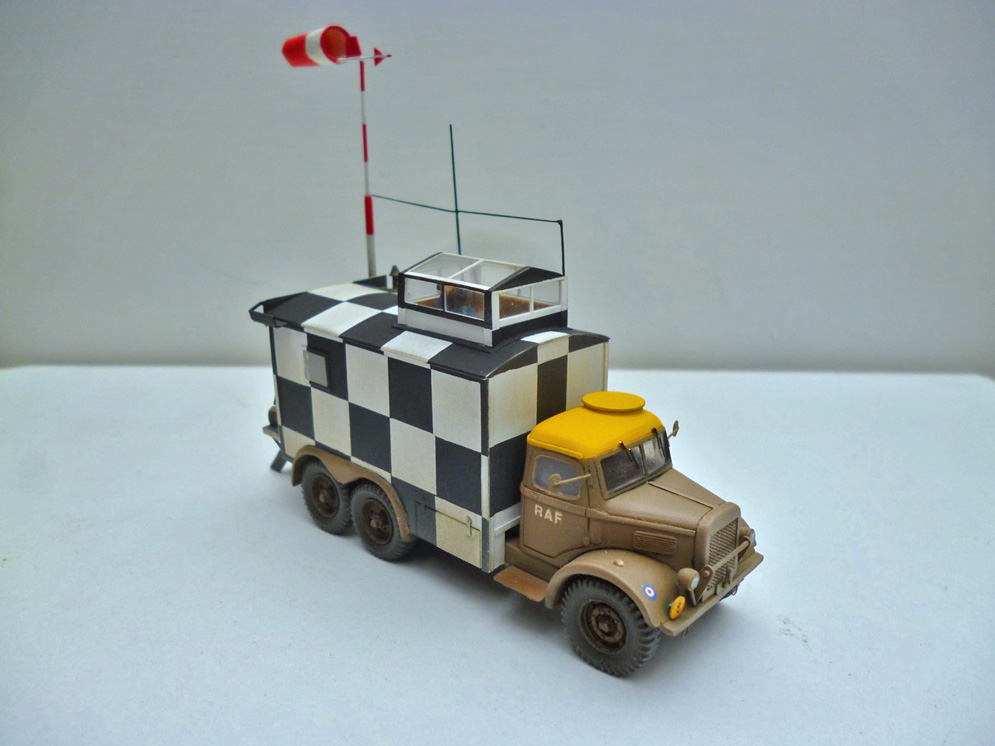

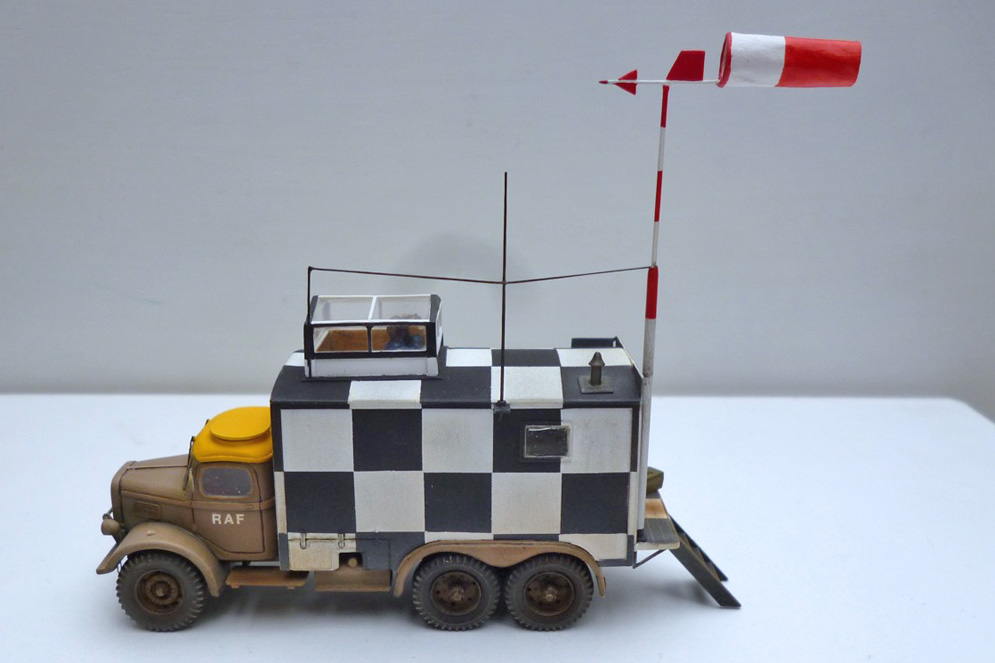
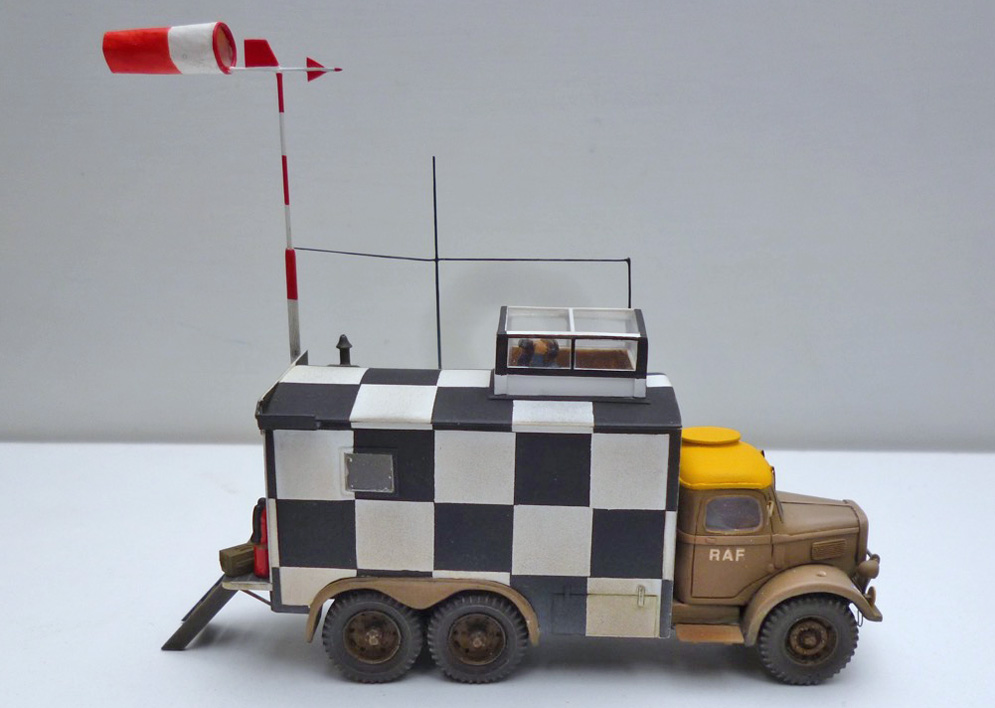
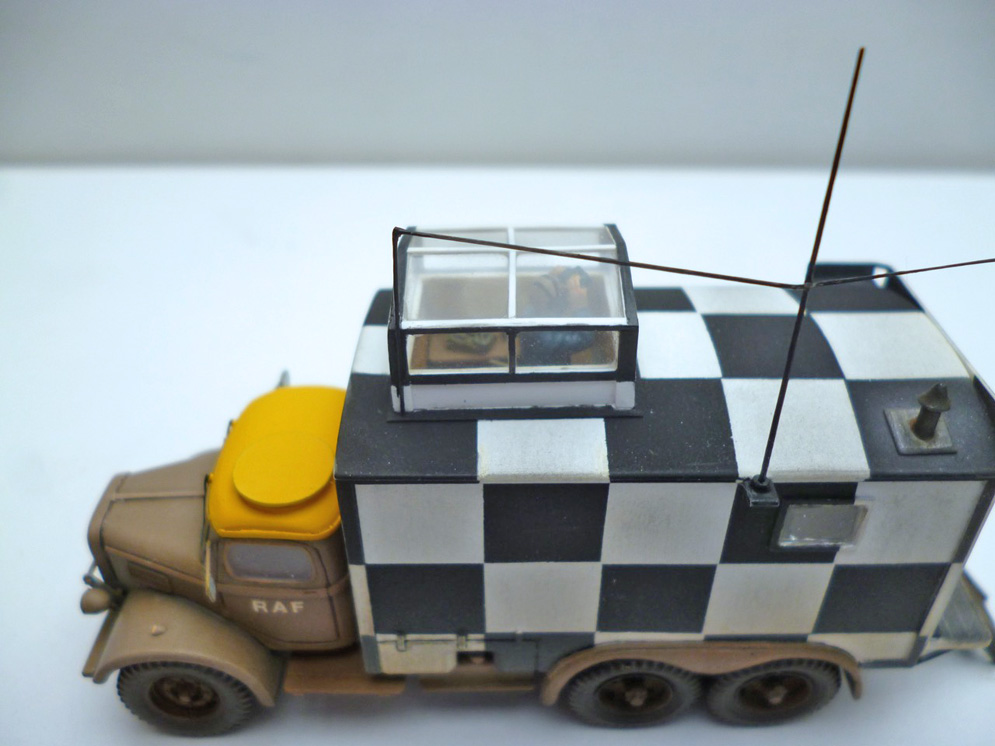
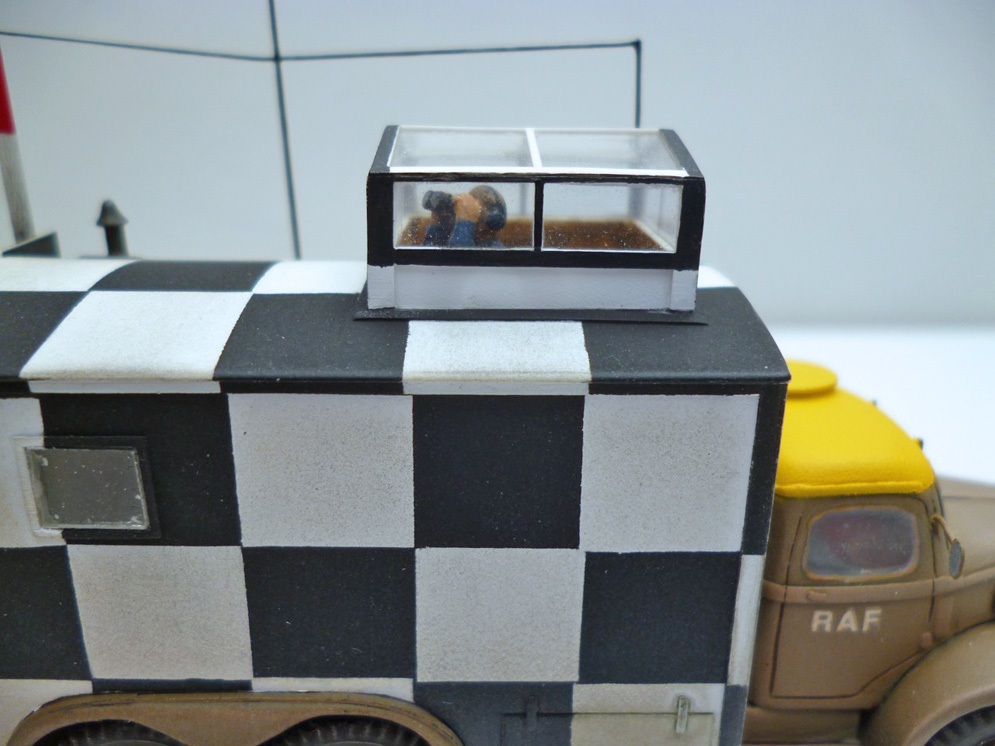
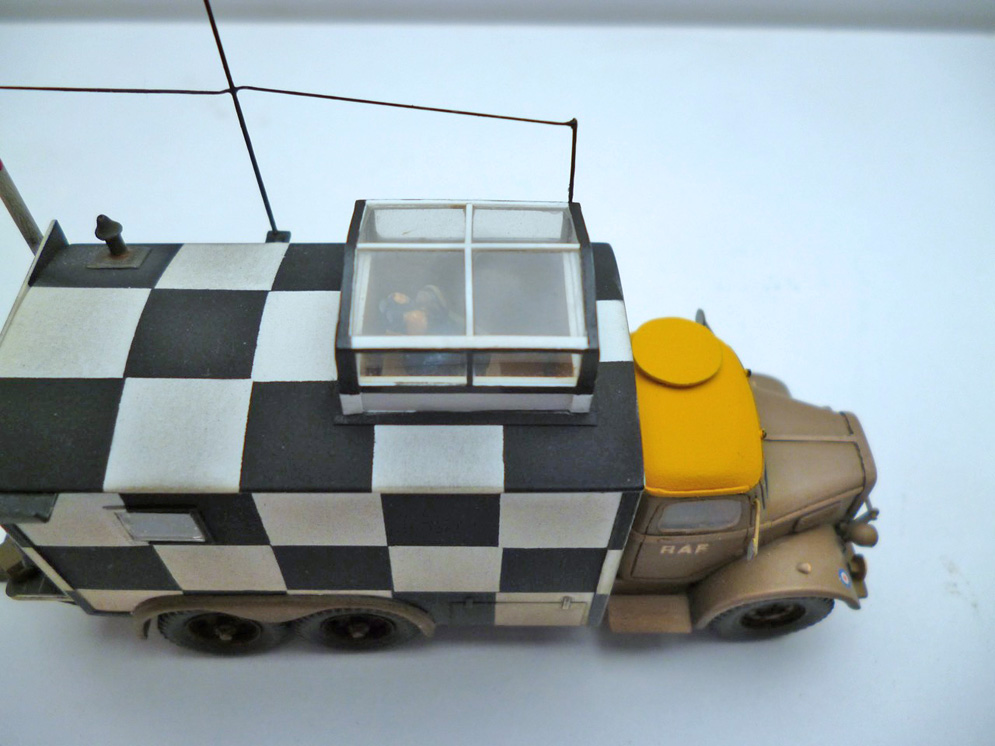
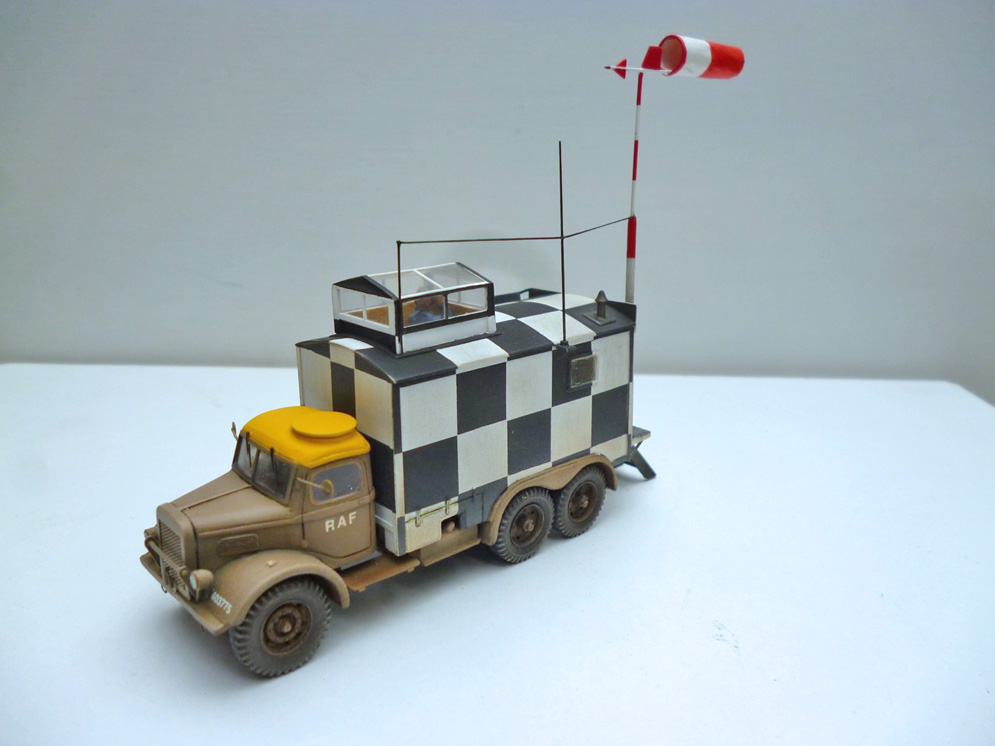
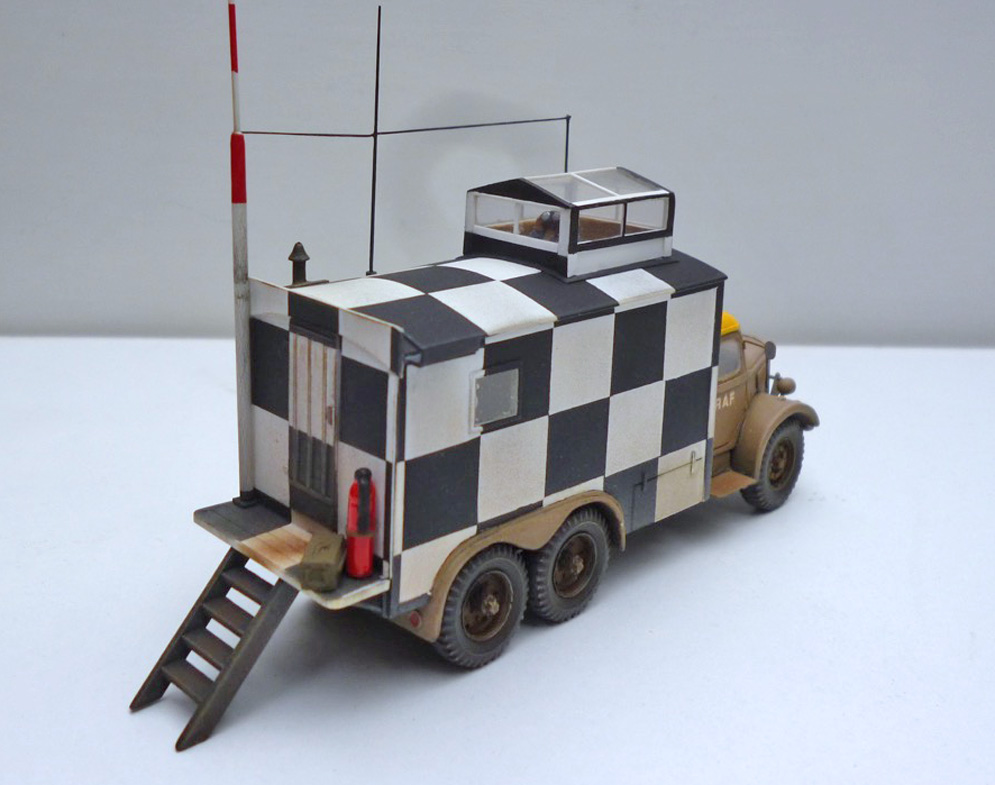
This one is built from an old (30 years) Austin K6 Crashtender from the 1:76 Emergency kit from Airfix.
The original build (white roof pics)
After a few years, last year after the 2018 North Shields Model show I decided to make the car better, and a more realistic colour for an RAF Car in 1943/44.
So I made new windows, headlights, and mirrors. (Yellow roof pics)
The result that I found much better….
Gerhard La Crois