Feature article by Laurent Tabib
Intro comments from Geoff
It wasn’t that long ago that I came across the excellent modelling work produced by Laurent T and had to see more. The more I saw the more it has become apparent that Laurent is an excellent scale modeller who thrives on interesting and different modelling subjects and projects. This build in SMN is typical of what Laurent is capable of – a warbird that is now in civilian markings – the full story as well as Laurent’s plan and thinking follows and I think you will enjoy it as much as I did.
I have learned a lot from seeing his approach, as well as the materials he uses and how he uses them to get the excellent results you will see here – after all, isn’t that what a good modelling article is all about?
Here are a few photos of Laurent’s completed TBF Avenger – how different is this!
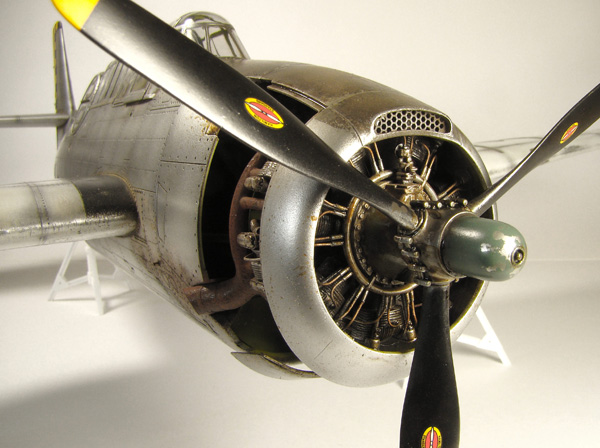
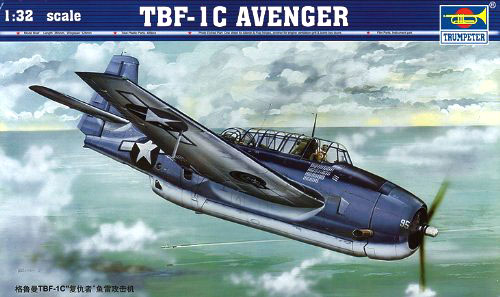
The Grumman Avenger was the United States’ response to Pearl Harbor and the Japanese attack. The most powerful single engine WW2 torpedo dive-bomber and warbird had been produced as a replacement to the Douglas TBD devastator. Over 600 units where produced by the end of 1942. It served in numerous Allied air-arms and beyond WW2, a lot of conversions could be seen until 1954.
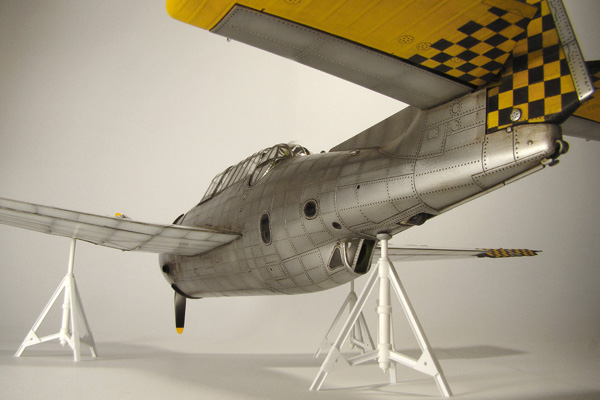
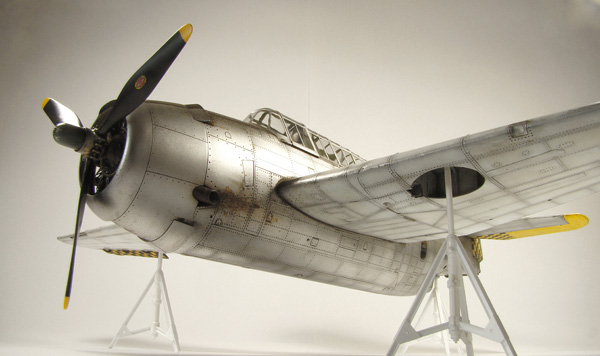
As an aviation enthusiast I had to build this particular warbird that will always be of great interest. The Avenger’s silhouette with the Grumman ball-turret and the long glass-house, shaped my childhood and grown-up imagination. My passion for this bird was so extensive that I had to represent a personal post-war civil airworthy version. Unarmed, the Avenger looks like a big streamlined camping-car! I can easily imagine the Avenger in a converted sightseeing role or travelling vehicle. There is enough room to organize a spartan living space, combining the bomb bay and the rear bombardier’s compartment.
Unfortunately time and other obligations conditioned the building and conversion process. I decided to build the Avenger without any internal or external modifications. The kit has the reputation to be a long build with a bunch of sub-assemblies.
What’s the plan then?
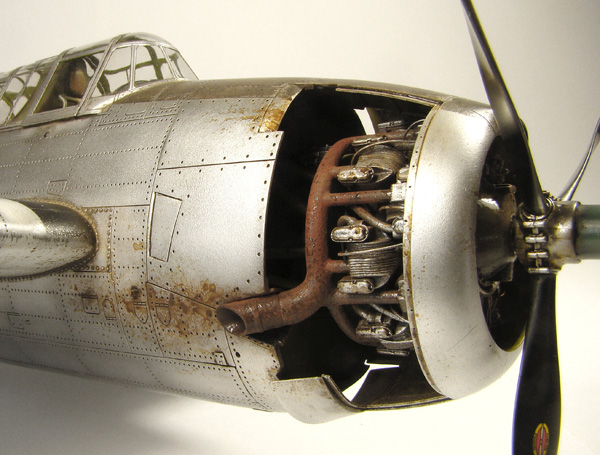
Lots of reasons to choose natural metal finish for the fuselage, black, yellow and white colors and shades for the checker sections, and the monochrome wings. Walkways will be done along the fuselage and wing roots, in black.
With no specific scenery in mind, I wanted though to keep the flying silhouette as a main guide and feature. 3 maintenance jacks would carry the airframe with retracted wheel wells doors without main landing gear. I wasn’t looking for an ultra-realistic rendering, more a subject using artistic license with few army references such as the Zinc-Chromate and Interior Green (the 2 colors are home-made with for each 3 or 4 different shades).
Out of the box, the Trumpeter 1:32 kit is simply stunning and a pleasure to build. Masking from Eduard are the only after-market accessory used. Plastics and engineering are the usual high quality standard batch from the brand. Assembly moved along smoothly, fittings were great with very minor sanding and filling to do. As I usually do, all the to-be-glued edges and surfaces are masked, ready for further work during assembly. Panel lines and rivets allow whatever chosen painting technique and a high number of paint layering possibilities. I really do love this engineering style, it allows us a lot of opportunity to experiment.