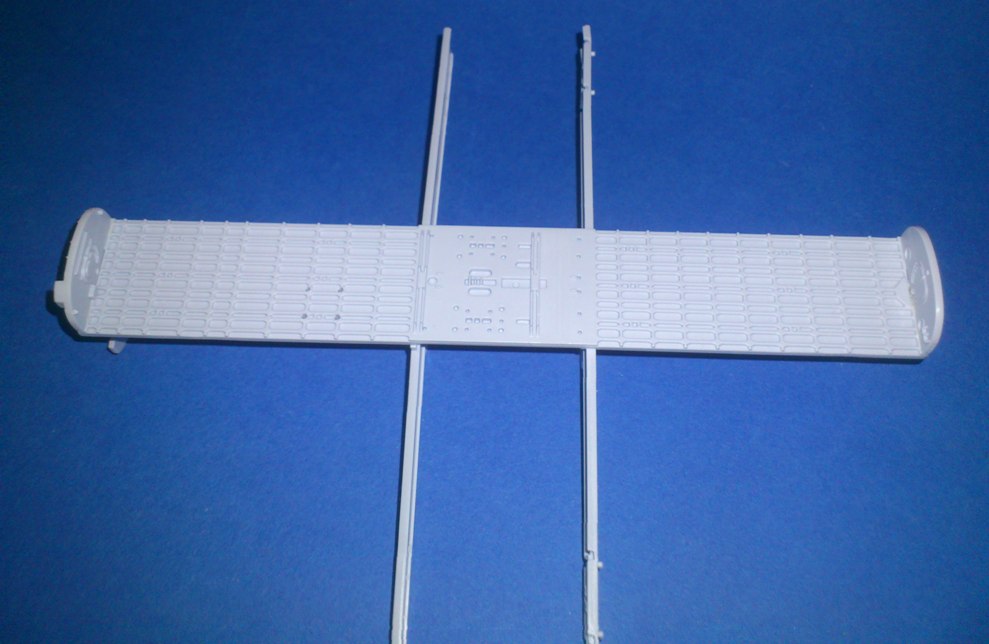
Bomb bay
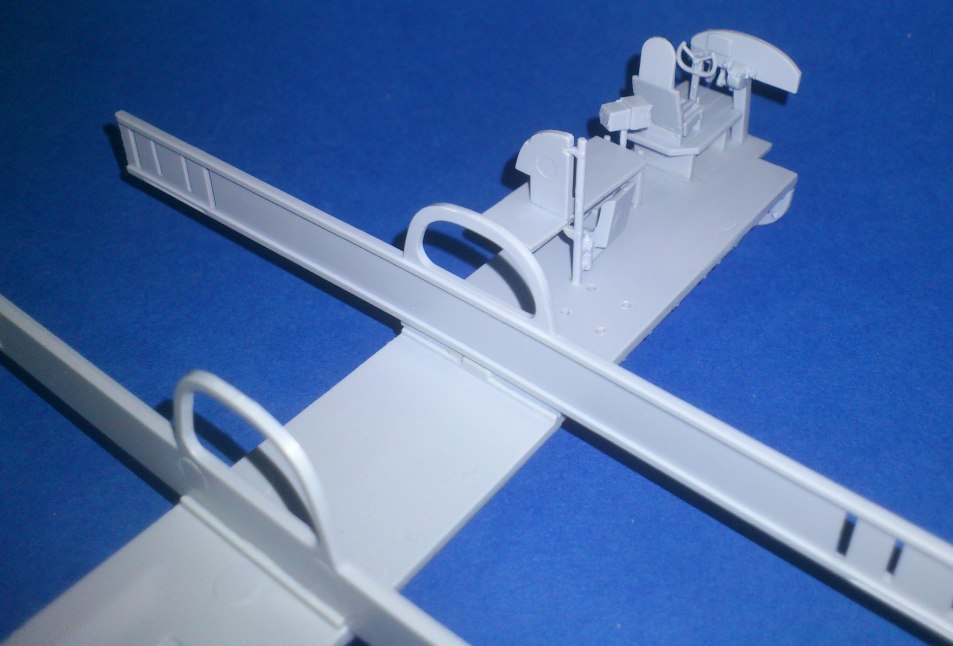
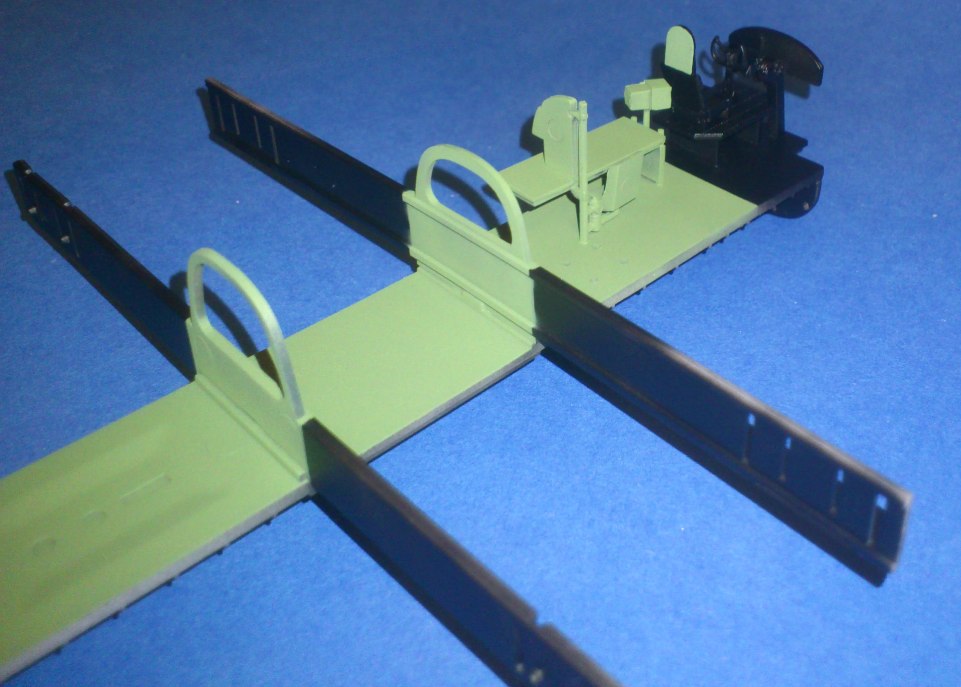
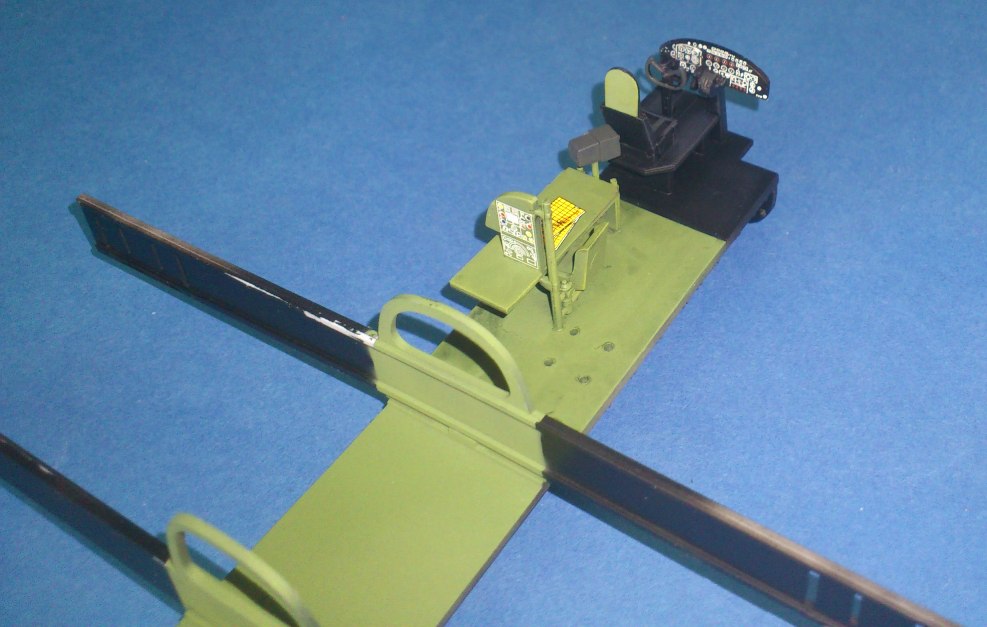
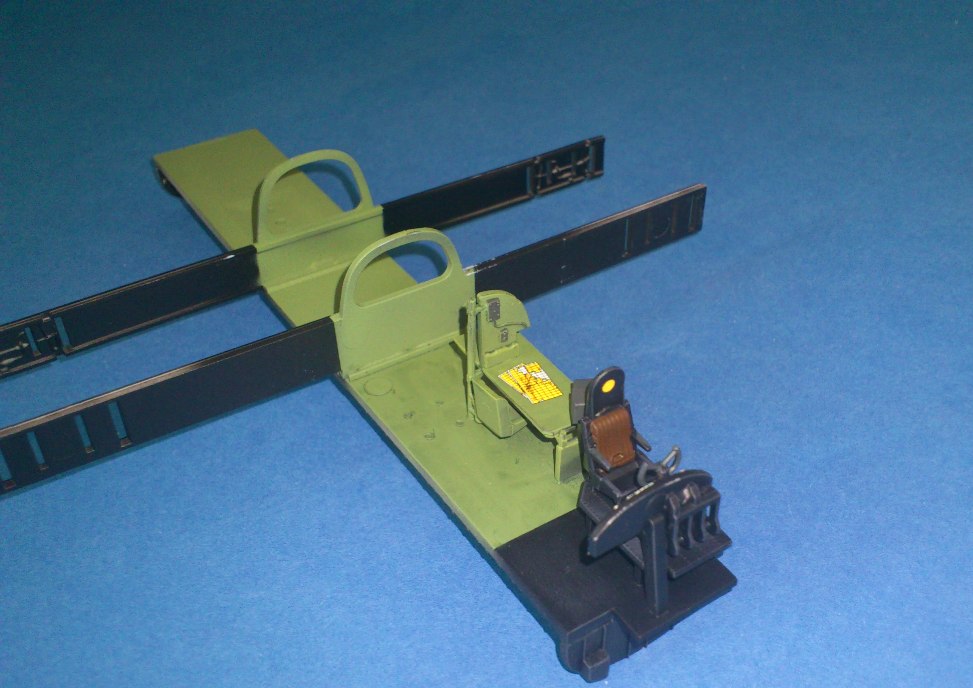
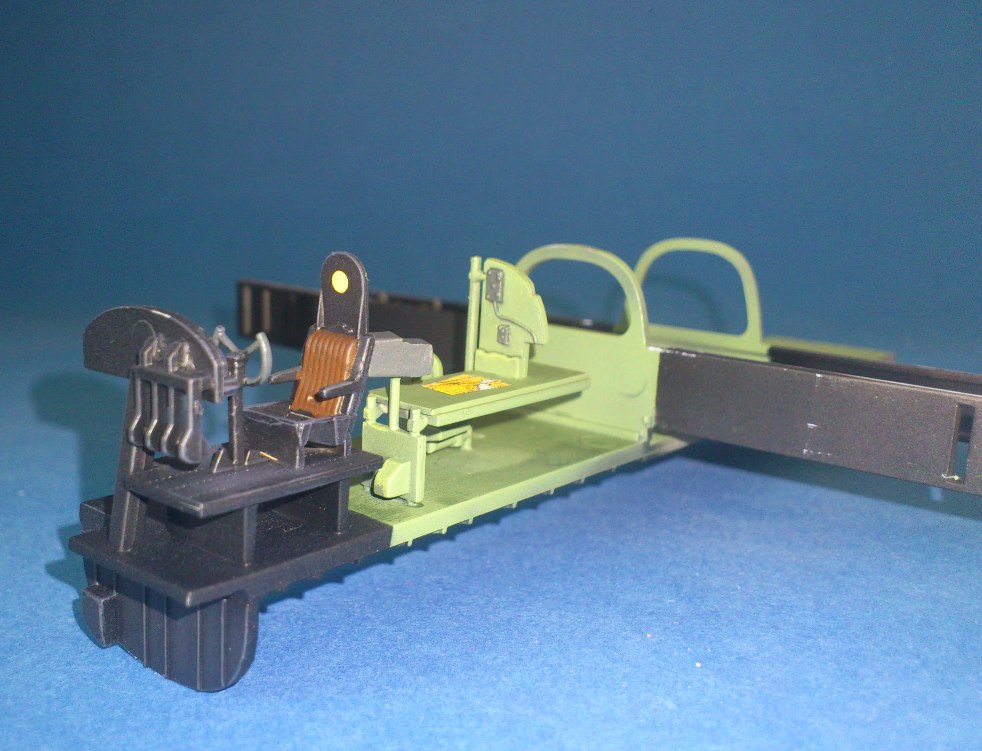
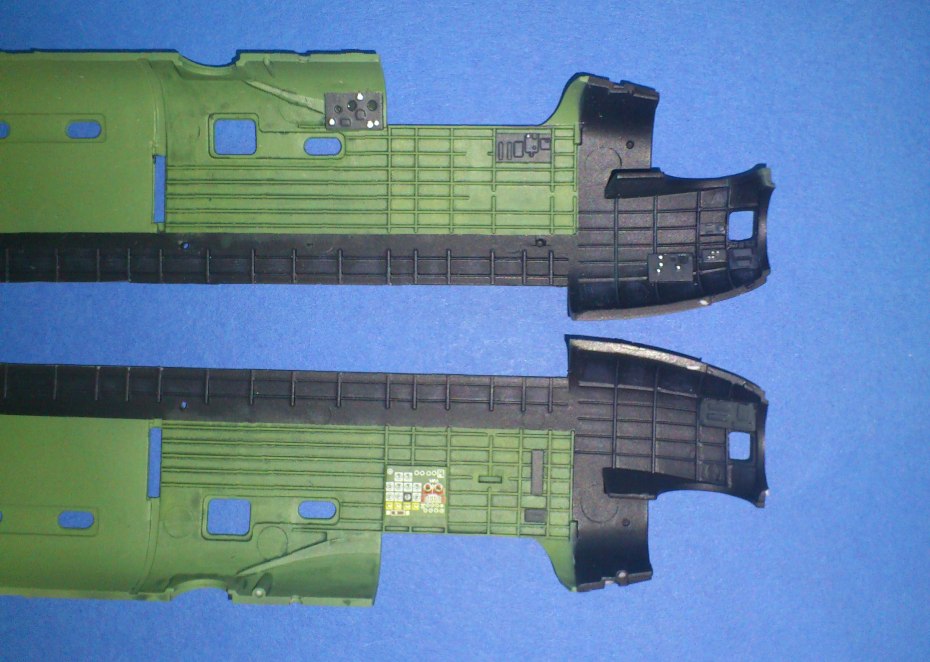
The build begins with the bomb bay, which is also the interior floor. After the bay end-plates are fitted, two substantial bulkhead/wing spars are fitted to the floor. These look like they’ll give some necessary strength to the enormous wings, but we shall see later. The Pilot, Navigator and Wireless Operator’s stations were built as per the instructions and added to the interior structure.
Main painting was done using Tamiya acrylics, with X-18 SG Black used as a base and main colour for the black areas whilst XF-71 IJN Green was used for the remainder. I wouldn’t usually use pure black for an interior colour, or any black areas, on a model as it is just too stark, but the subsequent matt coat and washes/highlights would tone this down. I used W&N oil paints to make the washes, thinned with white spirit, and also to drybrush highlights onto the nicely moulded raised detail.
Decals are supplied for the instrument panel, which is fine in this scale, and there is also a decal supplied for the navigator’s bench depicting a map with the planned route for the mission. I do like this little touch. It is just a shame though that seatbelts, in any way, shape or form are not supplied. Due to a self-imposed time limit I have chosen to leave these out of this build.
Joining the fuselage
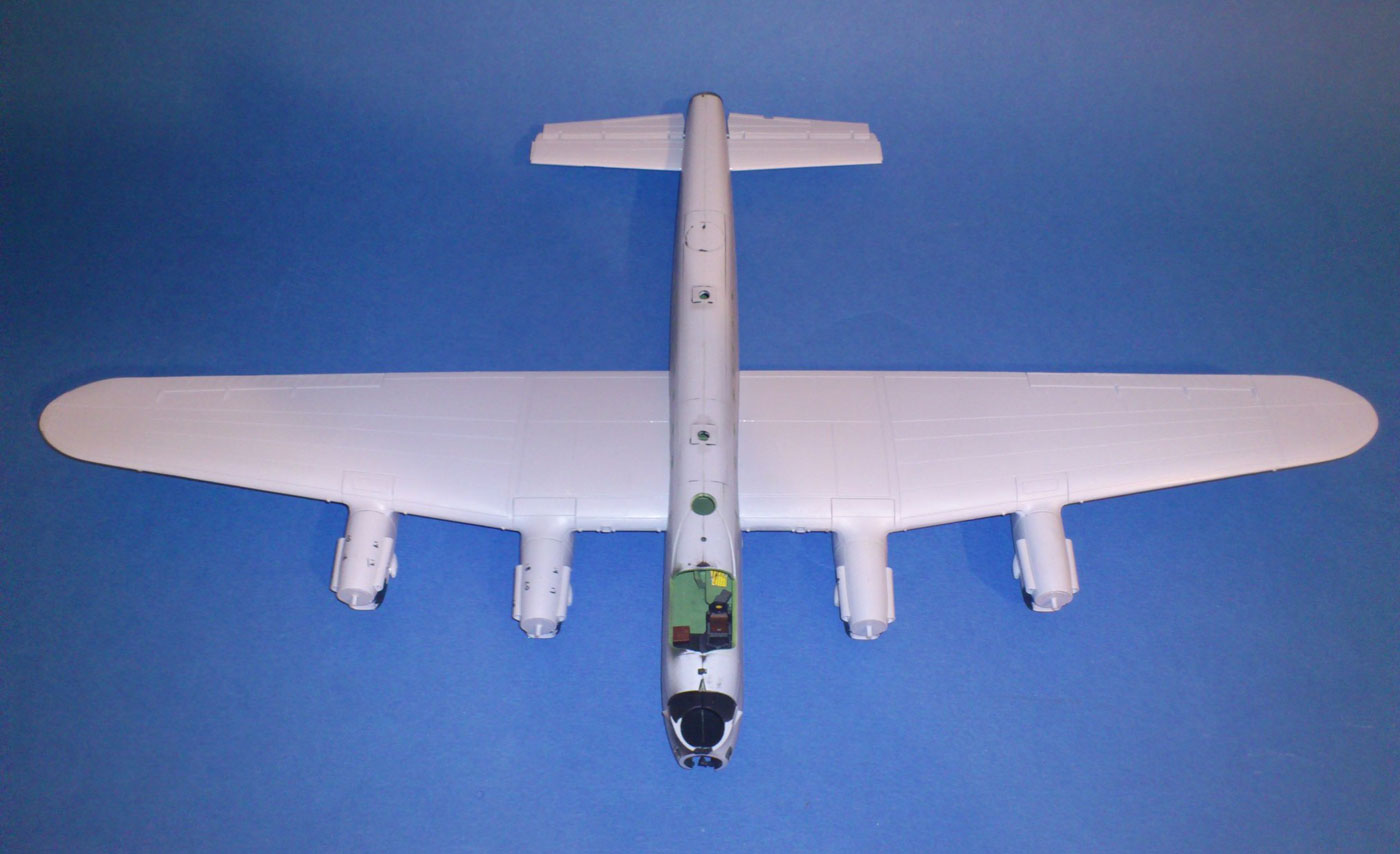
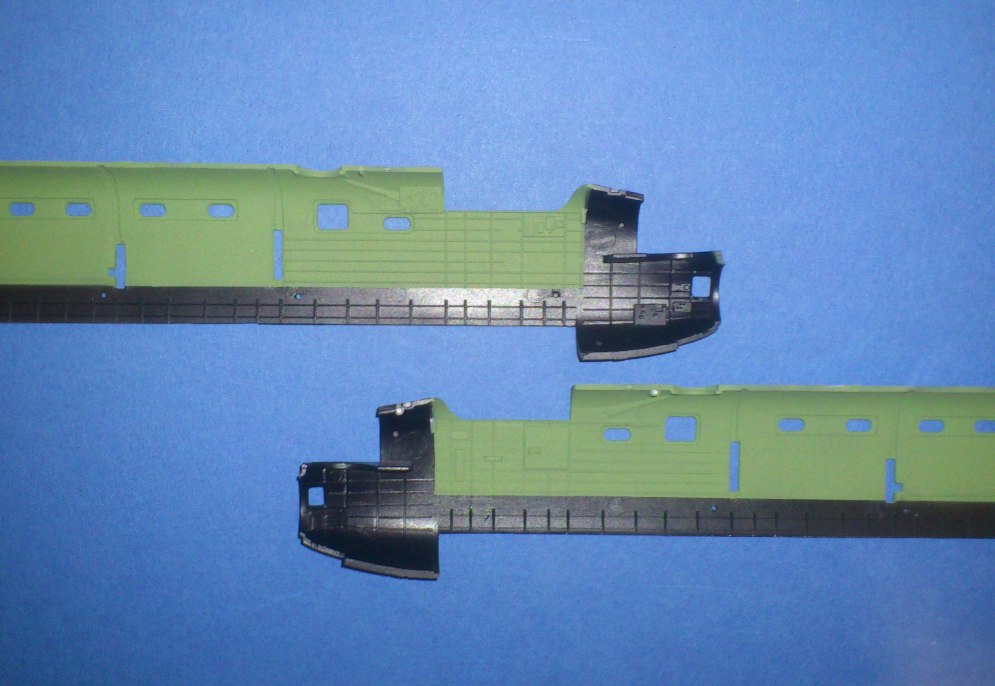
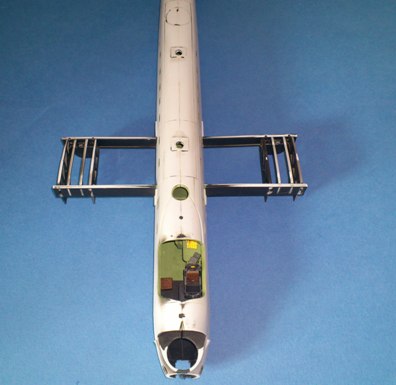
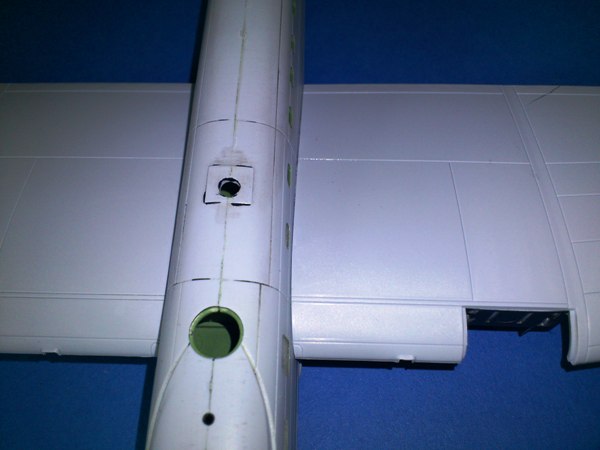
In no time at all, I was ready to join the fuselage together. The spars were a tight fit into their slots on the fuselage halves, so a quick going over with a flat file sorted this out. Fit of the two halves around the interior was a little tight, but the use of clamps and liquid cement ensured this went as smoothly as I could get it. I did end up with small steps in a few areas, and this is most definitely of my own making. A bit of Mr Surfacer 500 and gentle blending sorted this out. I did drill out the recessed mouldings for the rooftop emergency exit hatches as it would be impossible to clean these up. I will use Microscale Kristal Klear to fill these hatches later, together with the fuselage side windows. I just don’t fancy masking them all up, so I’m taking the easy route.
Wings to fuselage
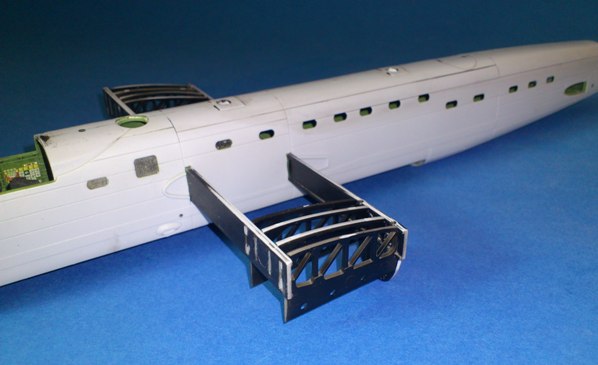
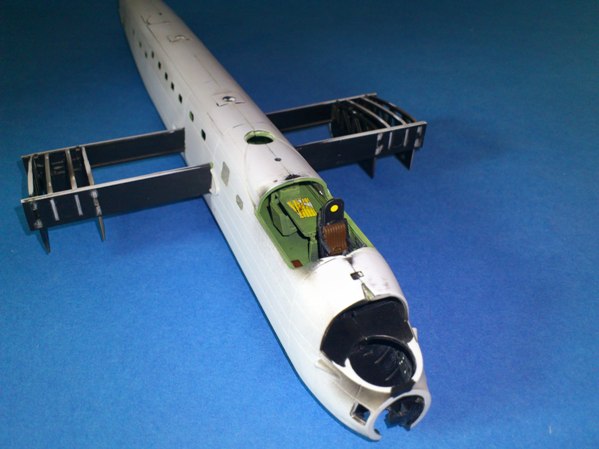
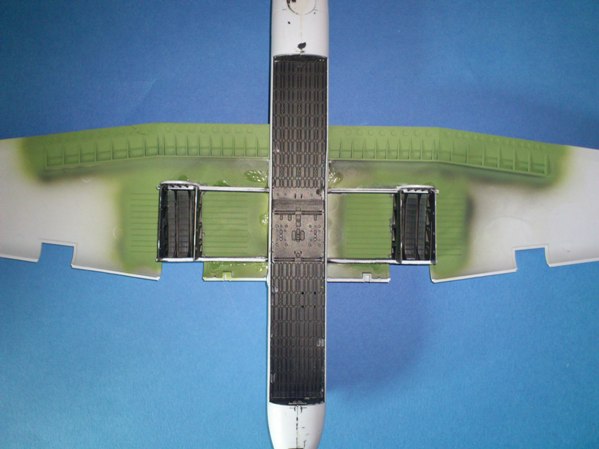
The time soon came to attach the wings to the fuselage. The instructions would have you attach the top half to the spar/fuselage assembly first, followed by the lower half. This actually worked out very well and enabled me to tackle the hairline gap left at the top wing roots from the inside. Again, well thought out from Airfix. The spars provide a good amount of support for the large wings and also hold the undercarriage bay structure, just like the real thing. Medium viscosity superglue was used to add strength to the upper wing spar joints, together with Plastic Weld liquid cement. I found that the horizontal tailplanes were very tight to fit and as such, I ended up splitting the joint on the aft lower fuselage. I think you should test fit these before joining the fuselage halves, and reinforce the inside of the joint with superglue as I did second time around. I have left off the fins for now to ease painting, but a dry run showed a fuss-free fit.
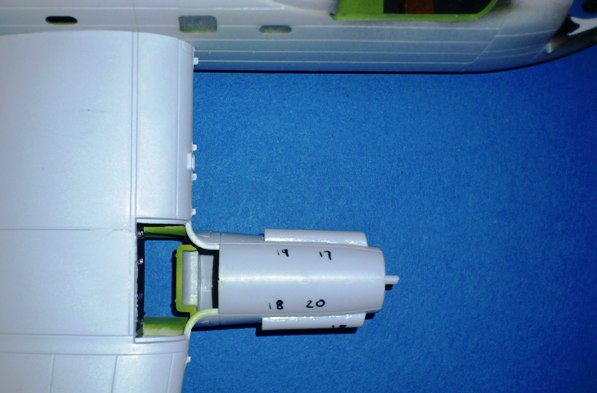
Engine nacelles
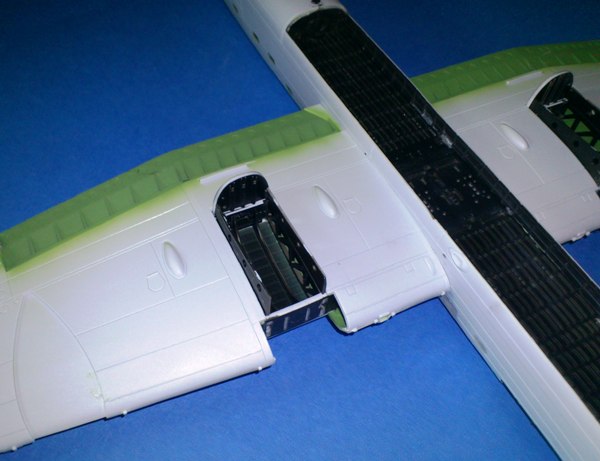
While the wings were drying, I took the opportunity to make up the engine nacelles. These went together with no real issues, but I did find an error in the instructions with regard to the exhaust shrouds. In steps 39 and 44, parts F18 should be F19 and in step 51, part F19 should be replaced with F18. This was simple enough to figure out by dry fitting the parts, although it was a little time consuming and I hope that my ramblings make sense. There are also errors in steps 30 and 32 for the assembly of the horizontal tail planes. Just swap around B8 with A6.
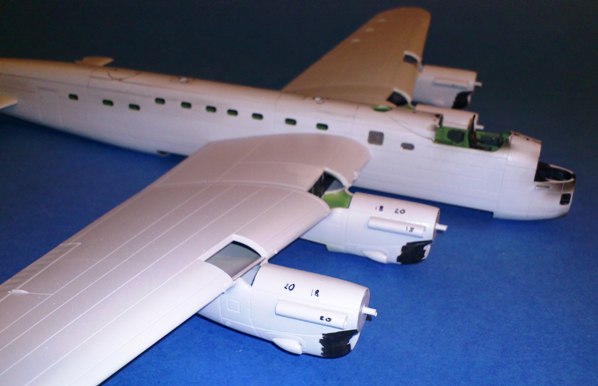
The nacelles were fitted with no problems, but Airfix have yet again gone down the route of getting you to fit the undercarriage before you can finish building the airframe. They have provided a separate panel for the rear nacelle/wing leading edge section to allow the undercarriage legs to be fitted through the top of the wing. I think this will give a nice sturdy undercarriage, but makes assembly difficult. The insert panels are a bit of a sloppy fit, and the undercarriage legs are not the same colour as the underside. Together, these give some issues. I will need to paint the wing undersides first before fitting the legs and insert panels. The inserts will then need blending in before painting the top sides. The problem of this in my head is that because of the black undersurfaces, the top camouflage colours will be painted first. I will still be able to do this, although in a bit of a time consuming order! I shall let you know how it goes.
Canopy masking
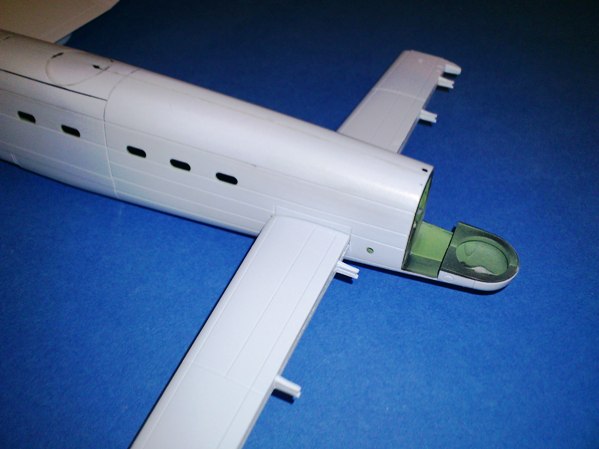
The canopy was masked with Kip tape (a bit like Tamiya masking tape or you can use Frog Tape – see your Techniques Bank) applied in large sections and cut out with a brand new No. 11 blade. The prominent (but not too prominent) frames aided this, but it was still a time consuming process. I also found a rather nasty looking blemish on the inside of the Bomb Aimer’s blister. Due to the shape of this, it would be virtually impossible to polish this out. Luckily, I have the 60th anniversary boxing (the double pack with Tornado GR.4) and was able to use the blister from that kit, although I needed to remove the Bomb Aimer’s floor panel to make it fit. It is spot on in diameter though. The rest of the transparencies were also masked at this time, using kip tape again together with plenty of patience!
This pretty much takes me up to the point where I can start getting some colour on this girl, and I shall cover how I’ve done this next time.