• Skip to primary navigation
  • Skip to main content
  • Skip to primary sidebar

Scale Modelling Now

Scale Modelling Techniques

  • HOME
  • CONTENTS
    • What’s New
    • Techniques Bank
    • Aircraft
    • Armour
    • Classic Kit Builds
    • Civilian Aircraft Builds
    • Vehicles
    • Sci-Fi, Fantasy, Space
    • Maritime
    • Figures
    • Gift Certificate
    • Book Reviews
    • Dioramas
    • Modelling Workshops
    • Podcasts
  • WHAT WE OFFER
  • FREE SAMPLES
  • EVENTS
    • EVENTS
    • NEWS
  • ABOUT
    • CONTACT
    • ABOUT US
    • TRADERS
  • LOGIN
  • More results…

    Generic filters
    Exact matches only
    Search in title
    Search in content
    Search in excerpt
Pages: Page 1 Page 2 Page 3 Page 4 Page 5 Page 6 Page 7 Page 8

Wingnut Wings Sopwith Snipe (Late) 1:32

November 19, 2013 By

Struts and rigging prep and decals

SONY DSC
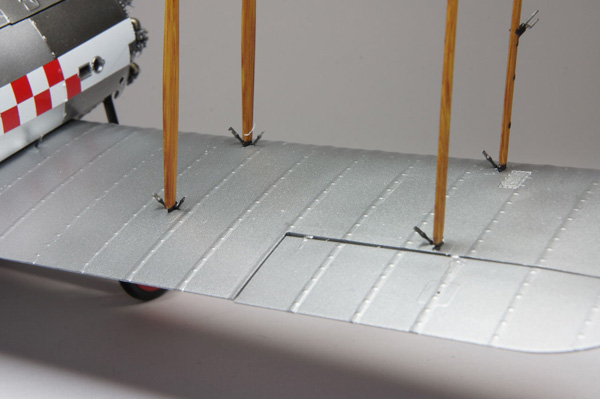
Each of the wing struts where fixed in place next and the rigging holes were slightly enlarged in order to take Gaspatch Models RFC Turnbuckles. I now looked at the engine whilst the struts dried in placed.
SONY DSC
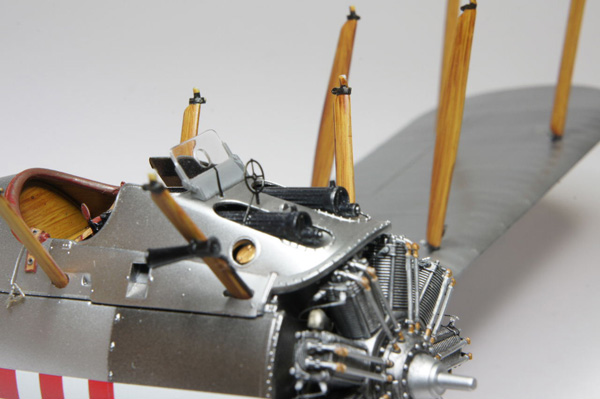
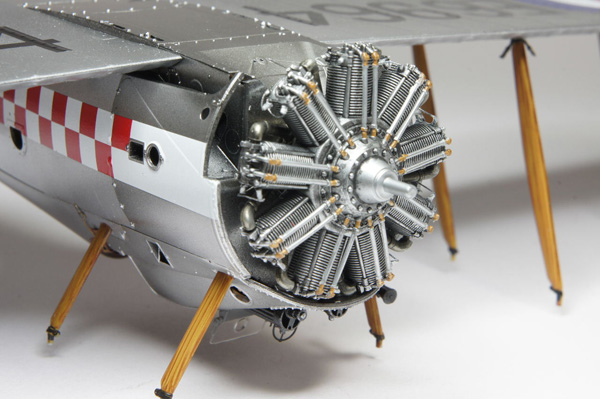
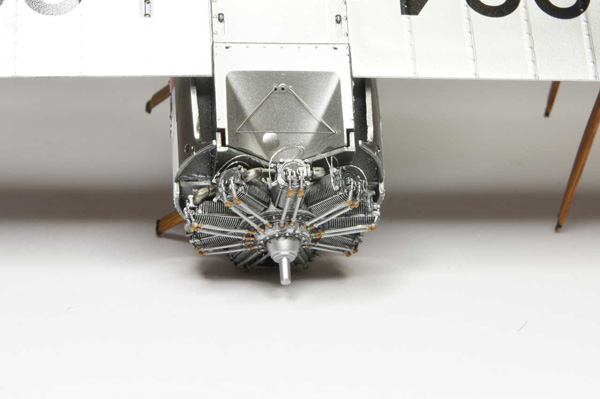
This is quite a simple affair but with some careful paining, weathering and the attachment of ignition wires it can be made to look very realistic. The aileron horns and associated wiring can also be fixed in place at this point. You can probably notice by the pictures that I had also applied the decals during this stage of construction. As with every set of WNW`s decals I have used they performed flawlessly – that said I did have a little bit of creasing in the white band as it wrapped around the front of the cowl, this was hardly noticeable but my OCD made me remove the offending decals and the stripe was painted on this.

SONY DSC

SONY DSC

SONY DSC

SONY DSC

SONY DSC

SONY DSC
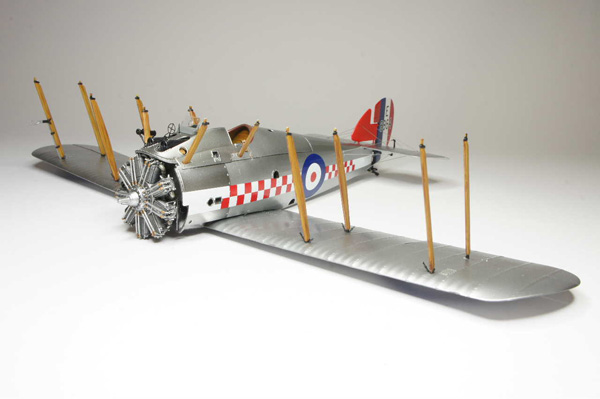
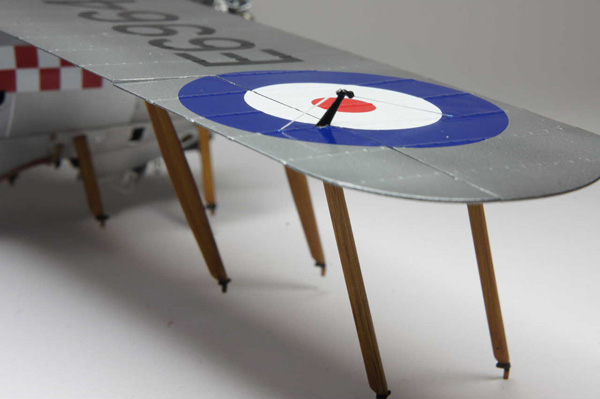
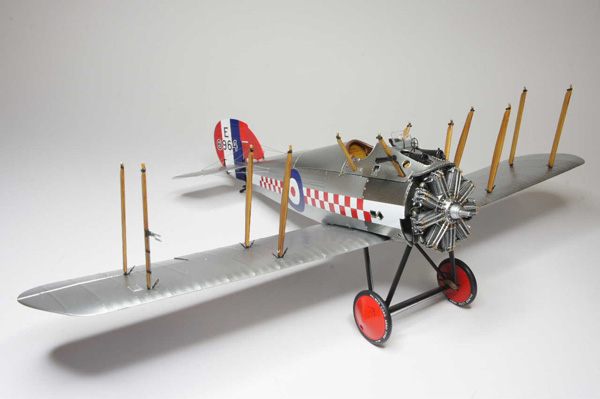
The top wing is a one-piece moulding and it was finished off using the same process as I used for the lower wing – the ailerons were again pinned in place for robustness. The kit supplies a checkerboard decal for the upper wing which was common on later inter-war biplanes but it is unknown whether the Snipe had this marking but I decided to add it to my model as I think it just looks great. The upper wing can then be dry fitted in place – the fit is good and once I was happy Tamiya extra thin glue was very carefully capillaried into each strut/wing joint. This is then left for a good 24 hours to dry.

Rigging and finishing off

Pages: Page 1 Page 2 Page 3 Page 4 Page 5 Page 6 Page 7 Page 8

Primary Sidebar

All the completed Aircraft builds.
Click on a Manufacturer below to see a list of all SMN's completed builds from their range.

BACK TO AIRCRAFT MAIN PAGE

Login

You are not currently logged in.


» Lost your Password?

SEARCH THE WEBSITE

More results...

Generic filters
Exact matches only
Search in title
Search in content
Search in excerpt

Finished Aircraft Reviews

  • Academy
  • Accurate Miniatures
  • Aeroclub
  • AFV Club
  • Airfix
  • A-model
  • Airmodel
  • AlleyCat
  • AMK
  • AMT.ERTL
  • ARII
  • Arma
  • Attack Squadron
  • Azur
  • BPK (Big Planes Kits)
  • Bronco Models
  • Classic Airframes
  • Czechmaster
  • Dragon
  • Dynavector
  • eduard
  • Fisher Model
  • Fly
  • Frog
  • GasPatch
  • Grand Phoenix
  • Great Wall Hobby
  • Hasegawa
  • Halinski
  • Heller
  • HGW Models
  • HpH Models
  • High Planes Models
  • HK Models
  • Hobby Boss
  • ICM
  • Ideal Toy Corporation
  • IsraCast
  • Italeri
  • Khee Kha
  • Kinetic
  • Kit Form Services
  • Kitty Hawk
  • KoTare
  • LF Models
  • Lukgraph
  • MPM
  • MRC/Academy
  • Mach 2
  • Meng
  • Mirage Hobby
  • Monogram
  • Pacific Coast Models
  • RS Models
  • Rareplane
  • Revell
  • Roden
  • SBS Model
  • Scratch-builds & Specials
  • Silver Wings
  • Simian’s Stuff
  • Special Hobby
  • Sword
  • Takom
  • Tamiya
  • Tanmodel
  • Trumpeter
  • Valom
  • Vector
  • Vintage
  • Whirlybird
  • Wingnut Wings
  • Xtrakit
  • Zoukei Mura
  • Zvezda

Copyright © 2025 · Scale Modelling Now · Online Scale Modelling Magazine · Scale Modelling Techniques and Tips · Privacy Policy