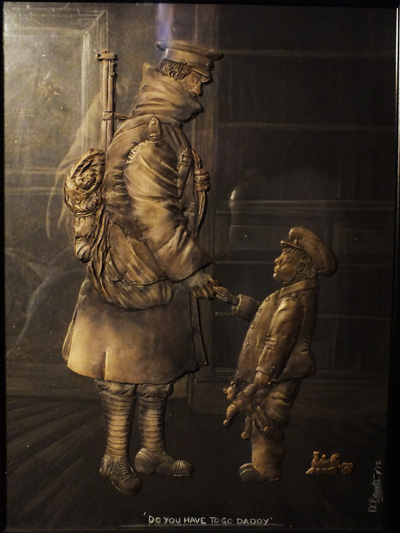
Starting to sculpt
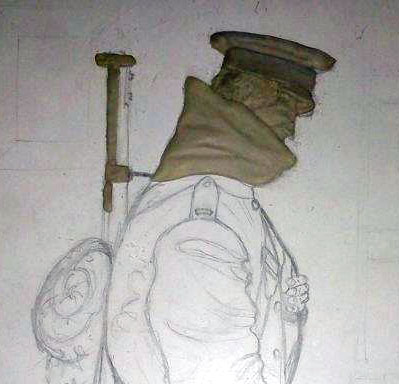
I always start from top left to bottom right, so I started with the man’s hat and face. This was fairly simple, I mixed up a ball of Magi-Sculp, about the size of an acorn giving me plenty to work with. I laid down the basic shape of the hat, head, collar, and shoulders not going much thicker than 2 to 4mm. You’ll be surprised how far an acorn size piece will spread!
Once this was down I started to add the details in the folds and edges of the collar, eyes, the hat detail – this was all done by adding extra to the base. The hair was fashioned with a homemade tool; it has a cocktail stick added to the tip to get fine lines and hair. It’s good to use a lot of water to smooth things off. The whole piece was done over several sessions so you will see a distinct colour change in the mix of the Magic-Sculp, It also depends on how dirty your hands are.
Once I’d done what was needed to the face head and hat I started to work slowly down the piece. To smooth out the creases I use a flat ended wax engraving tool, and some homemade tools and shapes that are made to my own needs. Yes these are fishing floats! I also use a series of synthetic bristle brushes that are moistened with water. They are used in one direction, to feather out the crease, different sizes for different size creases. Once the jacket and bedroll was done as much as I could do in one sitting I left it to dry for a few hours.

A break
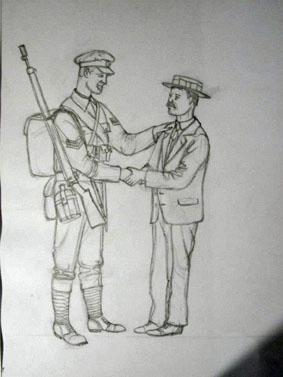
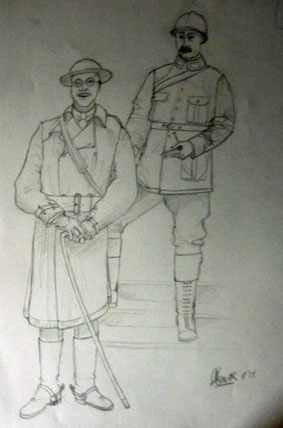
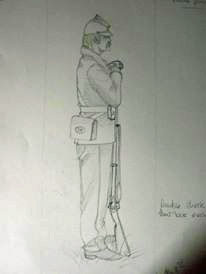
Whilst this was drying I had a look through the book as to which piece I would like to do next and found a picture of a father saying farewell to his son. I started to roughly sketch out this piece (I have yet to start this piece it is still in the sketch form, along with at least another dozen more pieces).
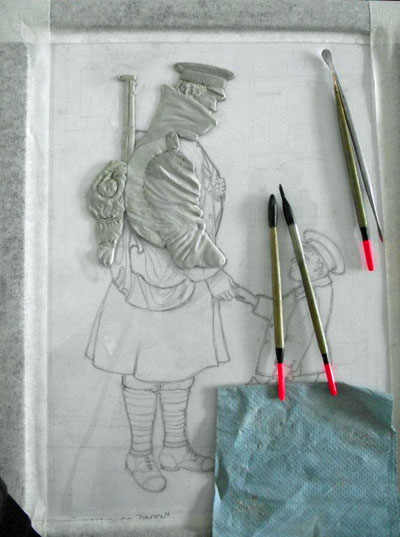
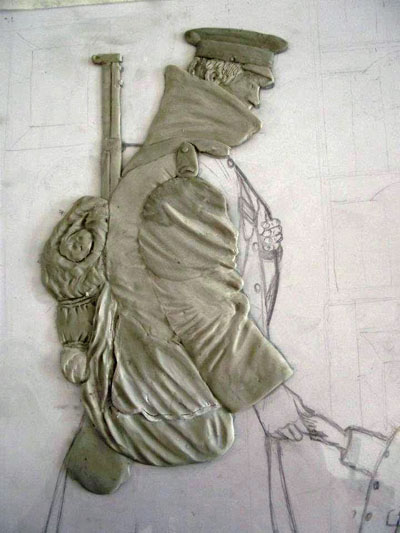
When I’d completed the greatcoat I started to work out how the Gaiters would look like on the legs, I got an old crepe bandage and started to wrap it around my trouser leg, this gave me an idea of how it would look. I then made a start on the leg of the piece, this was a fairly simple task and not as complicated as I thought it was going to be. Once dry I started to work on the creases with some wire wool, the finest you can get. It’s the best and came from a painting and decorator suppliers. Cutting a small piece off, (don’t try and pull it apart it will cut straight into your skin and it can get infected very quickly; it is nigh on impossible to see it once it’s in the skin! I then started to ‘polish’ the creases and folds, this takes away any unwanted blemishes on the surface, be careful not to go too far with this, and don’t go too hard on it as it will leave scratch marks on the surface.
Time for the little fellow
Again I started with the head and hat – I knew this wouldn’t take long so I mixed up enough Magic-Sculp to do the entire figure. It took me nearly two hours to complete. The best part was the teddy bear, I enjoyed it, It bought back memories of my ted that I used carry with me everywhere, (still have him).
The toy train as a flat was an afterthought and I had a little bit of M/S left but I think it makes a nice little bit on the side.
Painting
Well this was a challenge – as originally I was going to paint as a normal piece, flesh tones and everything else. However, I started with the uniform first as it was the biggest area of one colour. I had painted the whole piece in black to start with, and I had caught the face a few times with the dry brush so I decided to do the whole piece in an old Sepia-type of picture as is the original photograph. Never tried this before, working in a ‘monochromatic’ style.
Background?
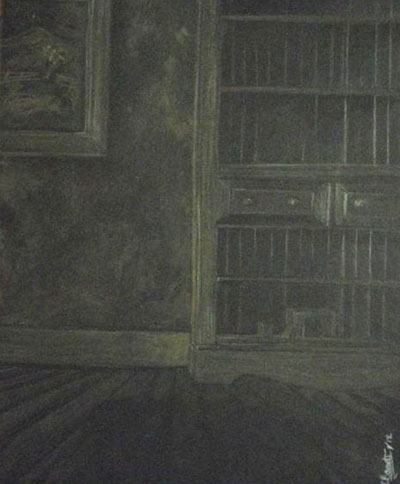
It was at this time I started to think of the background to the piece I didn’t want to do the studio background that the original piece had, I thought it would be nice to have a homey look to it, table, chairs, and fireplace.
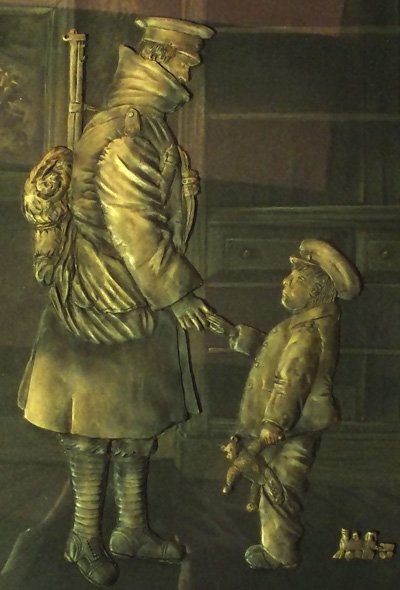
I did several sketches of different scenes, nothing came and jumped out of the page saying ’this is the one’, so I left it till I went and helped a friend move all his departed father’s stuff out of the cottage he lived in, and there was the scene! The dresser, the way the fireplace was in the room, the bare floor boards, it had a table in the middle of the room but I could see around it. So after a few roughly done sketches, I came back home and started to sketch out the scene. I originally did it on white paper painted in acrylics but it stood out too much, so I decided to use a piece of black mount board and sketched it on with brown, orange, black and white pencils. To get the perspective right for the floor boards took me back to my technical drawing and art days at school. After a lot of cursing and turning the air blue I did it.
The picture size is 15” X 11”, the frame was made to fit the picture.
I think I’ve not done too badly with it, it seemed to get quite a lot of praise from visitors at the Wings and Things model show in Spalding in 2012 – its first and only outing to a show.
Dave B.