Short Feature Article by Gilles Pepin
The building of an RAF Control Tower
An oldie but a goldie: kit dates back to 1988. Recent re-box of the same kit
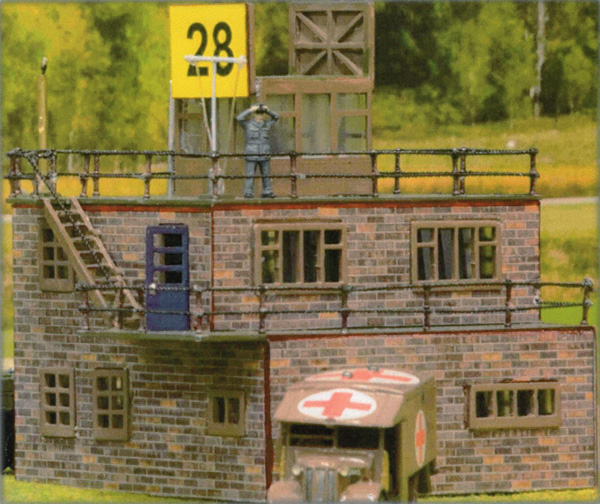
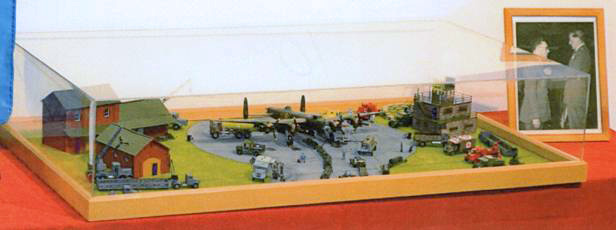
Control tower, part of the RAF Linton-on-Ouse diorama built as part of the diorama tribute to Squadron Leader Malcolm Dalton Loucks, now on permanent display at the Montreal Aviation Museum. Note the added stanchion at the bottom of the stairs and the guardrail rigged from it to the stanchion at the top of the stairs
During World War II, there was a huge construction boom in air fields throughout southern England, to accommodate the increasing number of squadrons, both British and American, who needed space for the vast air fleet poised against Germany. The ‘heart’ of these operations was the field’s control tower. This space provided radio contact with the aircraft, weather information and general ground control during operations.
These control buildings were generally quite similar to each other and housed several rooms aside from the one on top that had direct control over the aircraft on and around the field. These control towers housed the weather office, the radio room, as well as the room that provided power for the various runway lighting and other aids. There were generally block-shaped structures of three stories and had a balcony on the second and a roof-top observation area.
Several still exist in the UK, though the number has been steadily dwindling over the years as room is needed for other uses of the land. An excellent source to see one of these is the movie ’12 o’clock high’.
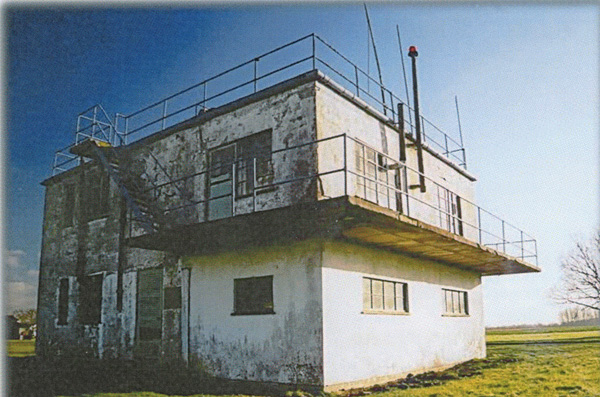
RAF Metheringham (Lincolnshire), circa 2010
Walls
It seems virtually all modellers paint the bare stucco-like wall surfaces in some sort of camouflage scheme. I chose to cover all walls with Busch Dekor-Platten ”Klinker” HO7424 in order to more or less match the brick pattern of the combined administration/storage buildings on a specific diorama. Had I decided to ”brick” the
build prior to assembly, I would have saved a lot of time when tracing out the window/door openings as you will see a little further on. Arts and Crafts 101:

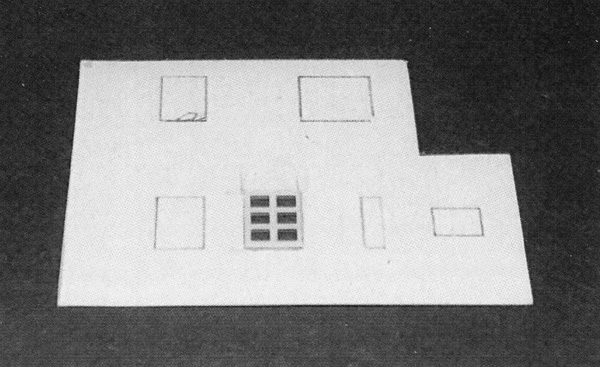
Testing the window opening and overall concept
Please note that the very small window above the main entrance was not cut out and installed, as doing so would have weakened the bricking material excessively.
There are five wall sections and 20 openings in all; the brick pattern cardboard was cut to fit each of the five sections. These openings were precisely cut out, as the doors and windows supplied with the kit left little if no room for mistakes. I then simply applied a light coating of household white glue and ”bricked” the tower.
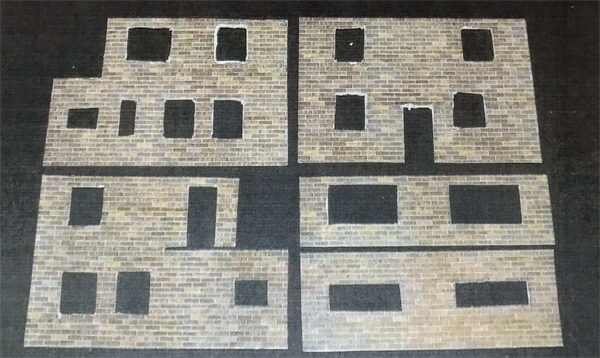
Now ready to ”brick” the main building. Window frames painted Tamiya XF-52 Flat Earth
Due to the thickness of the ”brick” cardboard (0.50mm), the windows were inserted front to back (window sills inwards). All windows were then ”paned” on the insides. The seams were touched up using a fine reddish brown felt-tipped pen.
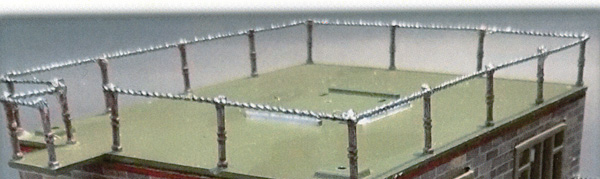
Once all 25 stanchions installed and painted, I moved on to the guardrails. I used pipe cleaners, with the ”fuzz” burned off and the residual soot cleaned. The advantages of using this rigid material is that it is readily available, inexpensive, easy to cut once in place, simple to paint, but mostly offers structural integrity to the inherent weakness of the stanchions, whereas using any kind of string will not. Simply attach a piece of pipe cleaner longer than needed with thick-gel CA and, once set, trim the excess ”railing”. Once all upper and middle railings are in place, coat the pipe cleaner wire with india ink or, as I did, Tamiya X-19 Smoke.
All stanchions and upper railings completed.
Prior to affixing the Air Control Office (for lack of a more suitable name), assemble the two seats, paint them in a light colour (Tamiya XF-15 Flat Flesh for these and the two desks and chairs), paint the two figurines (a note on the standing figurine appears towards the end of this review), and position sitting figurine per instructions.
Air Control Office
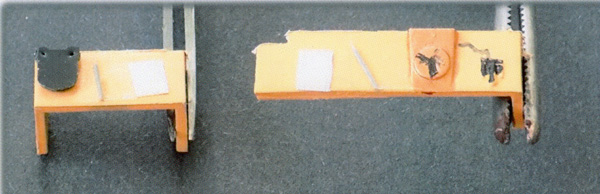
Dressed-up desks in the Air Control Office: pencils, note paper, telegraph key, …
Complete the assembly, but do not use those awful kit-supplied drain pipes. I had prototypical left-over gutters and drain pipes from the many 1:72 MiniArt buildings I have constructed in the past. Discard the ”flag signal mast” and scratch-build a better version, complete with halyards (see photograph on page 1). I added a hollow length of brass piping in lieu of the light post, got a 1.5 volt green light (made for train modellers), and rigged the battery pack through the base of the diorama with enough wire to then position it behind the diorama base.
Then I added the sole figurine on the observation deck, depicting Squadron Leader Malcolm Dalton Loucks, the Senior Flying Control Officer of 426 (Thunderbird) Squadron, for whom the diorama was built as a permanent tribute to his 44 months of overseas war-time duty.
![]()
http://www.cahc-ccpa.com/en/all-projects
