• Skip to primary navigation
  • Skip to main content
  • Skip to primary sidebar

Scale Modelling Now

Scale Modelling Techniques

  • HOME
  • CONTENTS
    • What’s New
    • Techniques Bank
    • Aircraft
    • Armour
    • Classic Kit Builds
    • Civilian Aircraft Builds
    • Vehicles
    • Sci-Fi, Fantasy, Space
    • Maritime
    • Figures
    • Gift Certificate
    • Book Reviews
    • Dioramas
    • Modelling Workshops
    • Podcasts
  • WHAT WE OFFER
  • FREE SAMPLES
  • EVENTS
    • EVENTS
    • NEWS
  • ABOUT
    • CONTACT
    • ABOUT US
    • TRADERS
  • LOGIN
  • More results…

    Generic filters
    Exact matches only
    Search in title
    Search in content
    Search in excerpt
Pages: Page 1 Page 2 Page 3 Page 4 Page 5 Page 6 Page 7 Page 8 Page 9 Page 10 Page 11 Page 12 Page 13 Page 14 Page 15 Page 16 Page 17 Page 18 Page 19

HobbyBoss Pz.Kpfw. VI Tiger I 1:16

July 11, 2013 By

The exhausts!

Then the bit I had been looking forward to, the rusting of the exhausts! I had done this effect before on the Tamiya 1:25 Tiger, and had enjoyed ‘playing’ with the effect.
4aTamiya-Tiger-1.25-scale
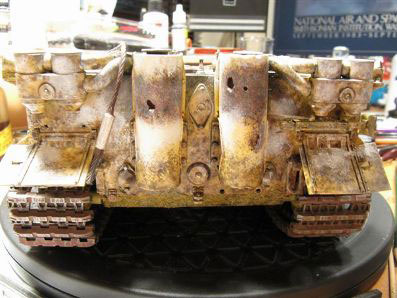
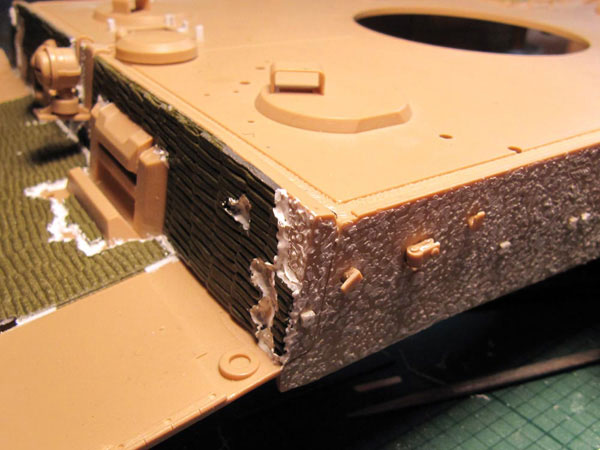
Firstly, the exhaust covers had to be suitably ‘damaged’ and so were ‘dremelled’ on the inside face, thinning the plastic, so that an amount of ‘buckling’ could be applied, and a few bullet holes inserted

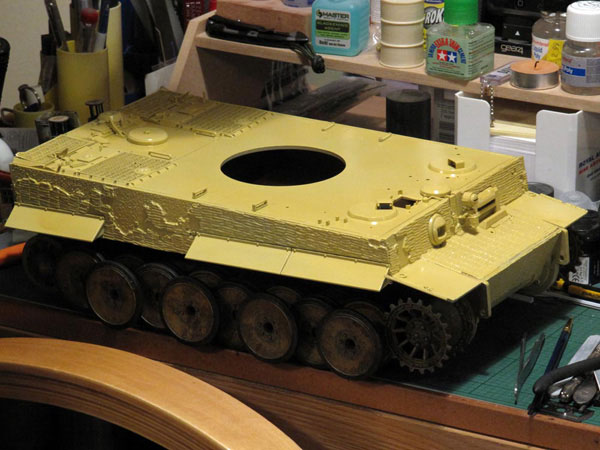
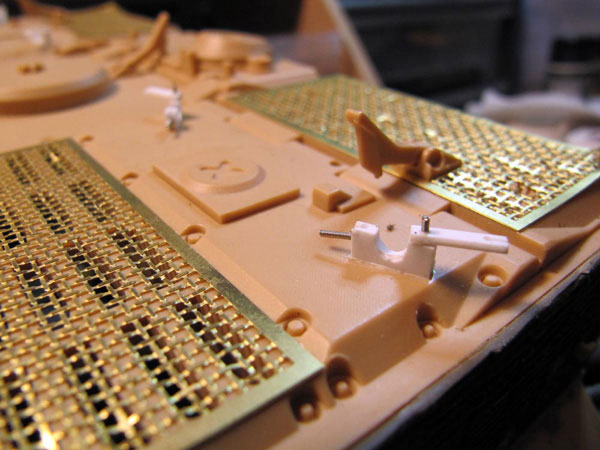
All the components to be fitted to the bulkhead were sprayed Desert Yellow and left to dry.

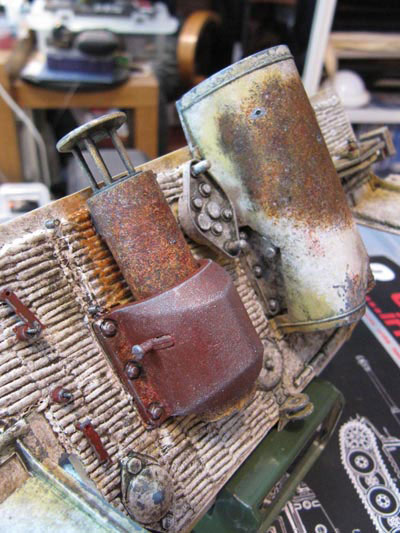
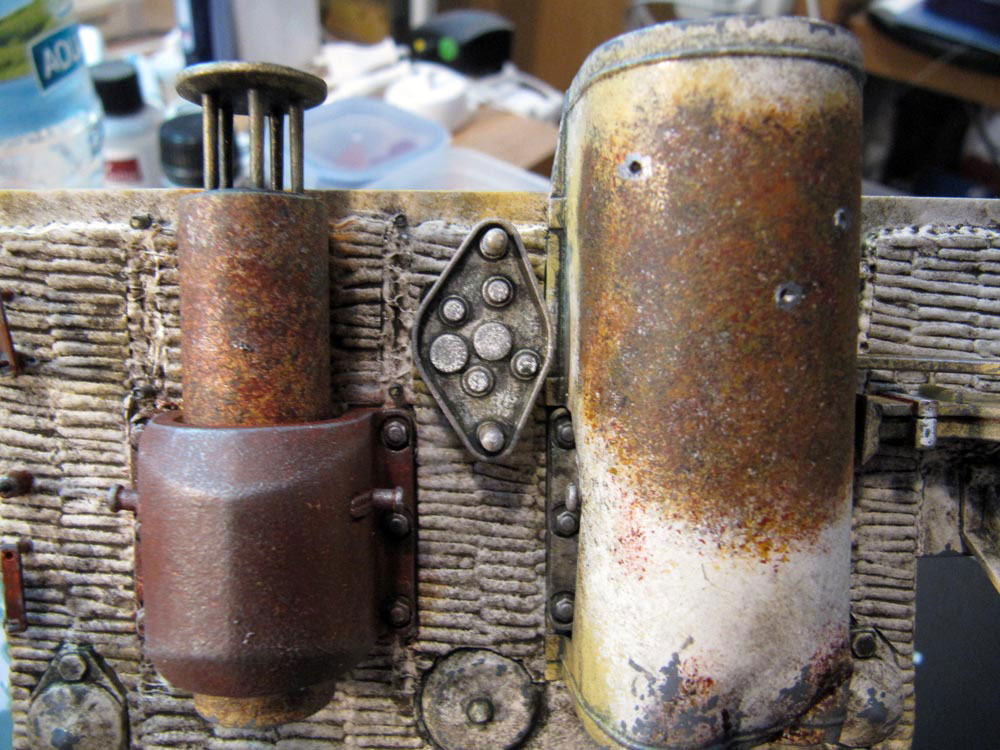
I enjoyed weathering the jack, in this large scale you can really go to town with oil weathering and chipping effects, I think I spent one night just on this alone!

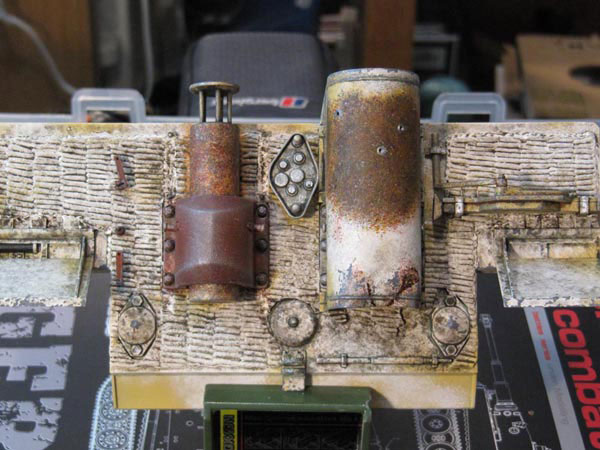
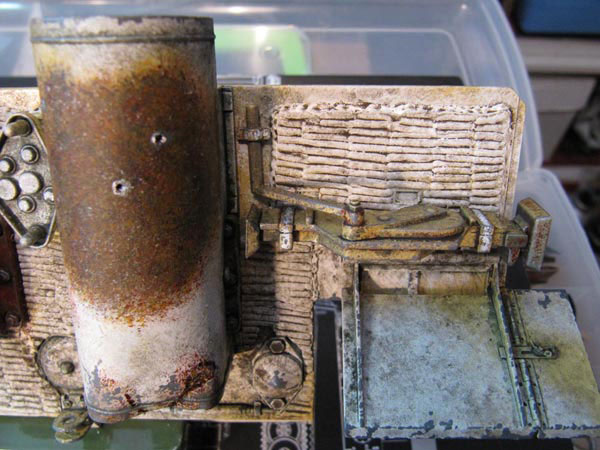
The exhaust shields were given a coat of stippled white, and while it dried, I did the exhausts themselves.

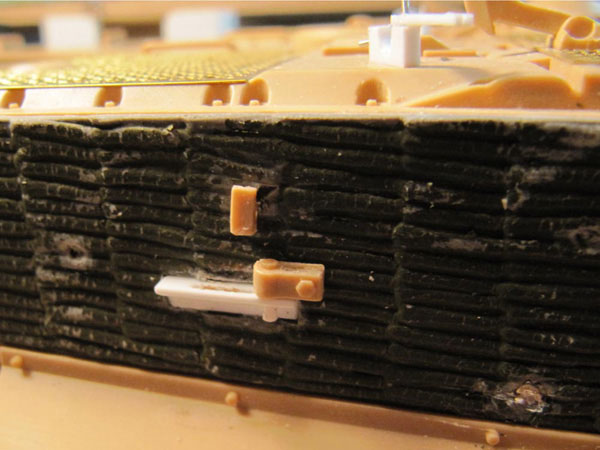
With the technique that I use, I firstly stipple on a base of black acrylic, to give the ‘edge’ of the rust area, and then use a few different browns, metallics and finally, white, very faintly, to give the effect that I’m after.

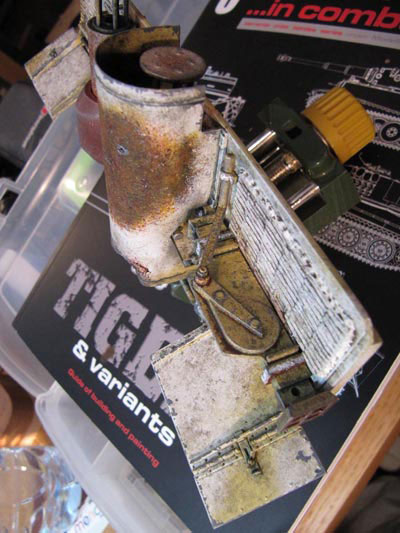
After, I painted the stacks themselves, with the large cast covers around them. These are different as the effect here is blistered paint and metal, not the addition of rust, as on the covers, so they look quite different.

It was at this point that I decided to leave off one of the covers due to ‘damage’, as I liked the look of the two different effects and I’ll be damned if I’m doing all that work and not be able to see it!

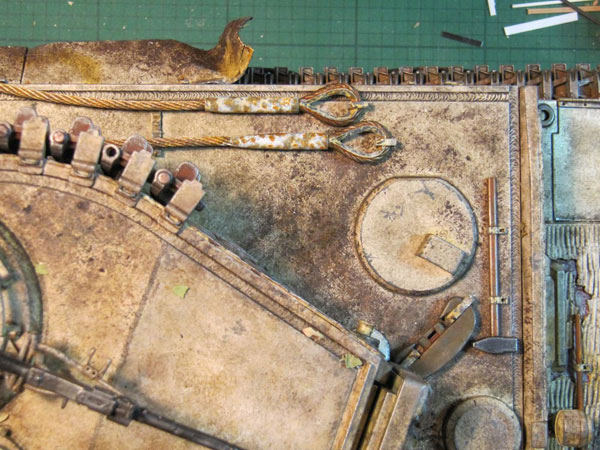
A little more work had to be done on the top of the hull, as damaged tow cable lugs were to be fitted on the right side, and tow cable clamps missing from the model, fitted to the engine deck.
11IMG_3374-smn

12IMG_3376-smn

13IMG_3378-smn

14IMG_3380-smn

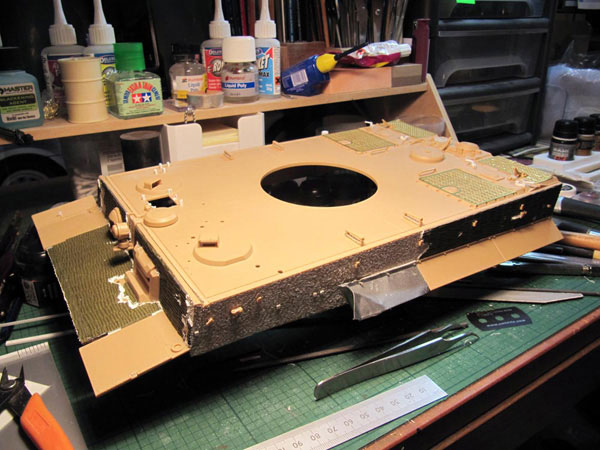
The completed rear bulkhead was screwed into place, and cemented in just a couple of places; the screws, holding it very accurately.
15IMG_3382-smn

16IMG_3384-smn

The tracks…

Pages: Page 1 Page 2 Page 3 Page 4 Page 5 Page 6 Page 7 Page 8 Page 9 Page 10 Page 11 Page 12 Page 13 Page 14 Page 15 Page 16 Page 17 Page 18 Page 19

Primary Sidebar


LOGIN/LOGOUT

Lost your Password?


All the completed Armour builds.

Click on a Manufacturer below for all SMN's completed builds of their kits.

BACK TO ARMOUR MAIN PAGE

SEARCH THE WEBSITE

More results...

Generic filters
Exact matches only
Search in title
Search in content
Search in excerpt

Finished Armour Reviews

  • Academy
  • Accurate Armour
  • AFV Club
  • Airfix
  • Amusing Hobby
  • Azimut Productions
  • Border Models
  • Bronco
  • CMK
  • Copper State Models (CSM)
  • Cyber Hobby
  • Das Werk
  • Dragon
  • Eduard
  • Field of Armor
  • First Fight
  • Gecko Models
  • Great Wall Hobby
  • HobbyBoss
  • ICM
  • Italeri
  • Master Box
  • Meng
  • MiniArt
  • Mirage Hobby
  • ModelCollect
  • Resicast
  • Revell
  • RFM
  • Riich Models
  • Roden
  • Ryefield Model
  • Sovereign
  • Specials
  • Takom
  • Tamiya
  • Tiger Model
  • Tristar
  • Trumpeter
  • Ultracast
  • Zvezda

Copyright © 2025 · Scale Modelling Now · Online Scale Modelling Magazine · Scale Modelling Techniques and Tips · Privacy Policy