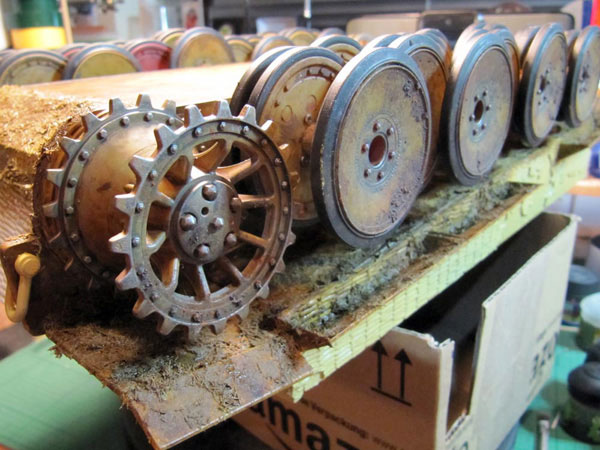
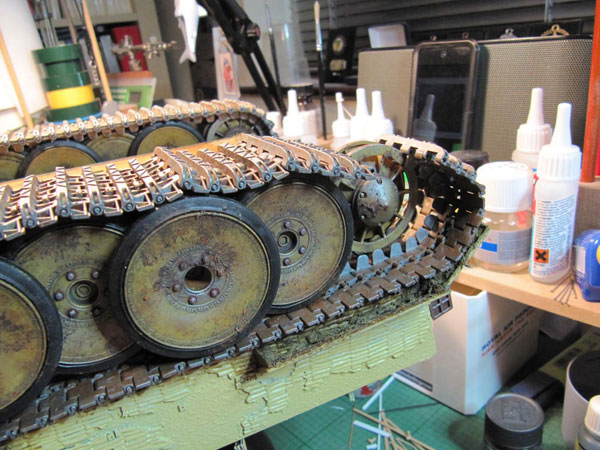
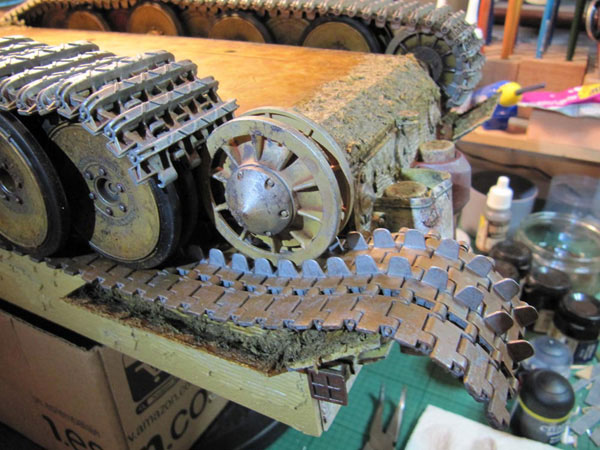
• Skip to primary navigation
  • Skip to main content
  • Skip to primary sidebar

Scale Modelling Now

Scale Modelling Techniques

  • HOME
  • CONTENTS
    • What’s New
    • Techniques Bank
    • Aircraft
    • Armour
    • Classic Kit Builds
    • Civilian Aircraft Builds
    • Vehicles
    • Sci-Fi, Fantasy, Space
    • Maritime
    • Figures
    • Gift Certificate
    • Book Reviews
    • Dioramas
    • Modelling Workshops
    • Podcasts
  • WHAT WE OFFER
  • FREE SAMPLES
  • EVENTS
    • EVENTS
    • NEWS
  • ABOUT
    • CONTACT
    • ABOUT US
    • TRADERS
  • LOGIN
  • More results…

    Generic filters
    Exact matches only
    Search in title
    Search in content
    Search in excerpt
Pages: Page 1 Page 2 Page 3 Page 4 Page 5 Page 6 Page 7 Page 8 Page 9 Page 10 Page 11 Page 12 Page 13 Page 14 Page 15 Page 16 Page 17 Page 18 Page 19

HobbyBoss Pz.Kpfw. VI Tiger I 1:16

July 11, 2013 By

Tracks

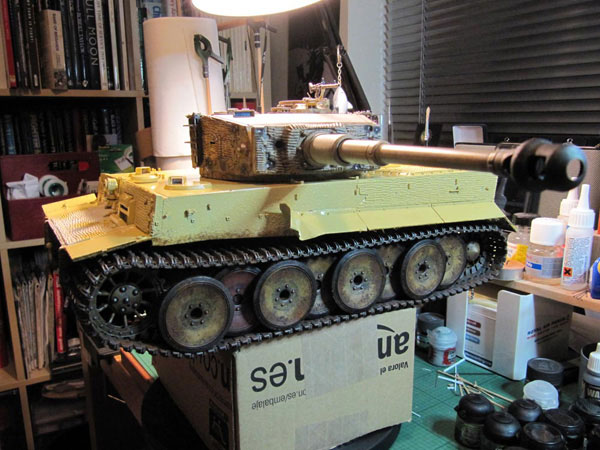
The Tracks were then removed from the previously completed rolling chassis, ready for the fitting of the top to the rest of the hull. This was done with four screws, which, in the main, again, hold the two together very well, a little cyano being used to secure the front bulkhead to the top.

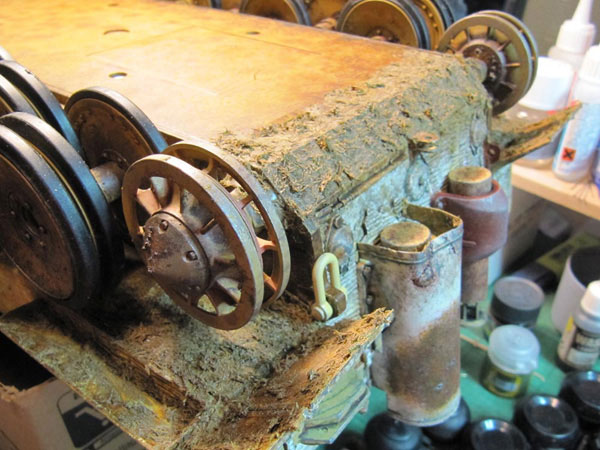
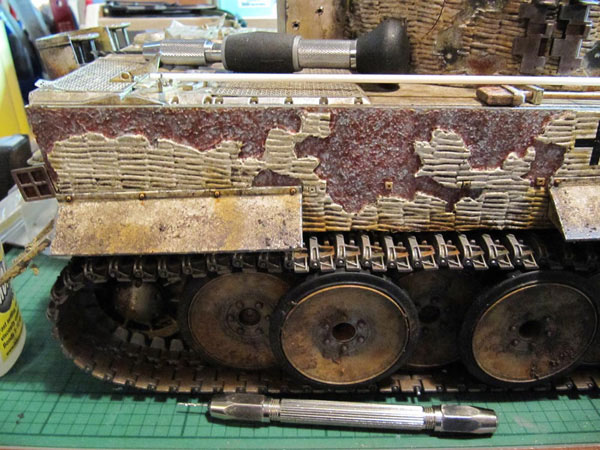
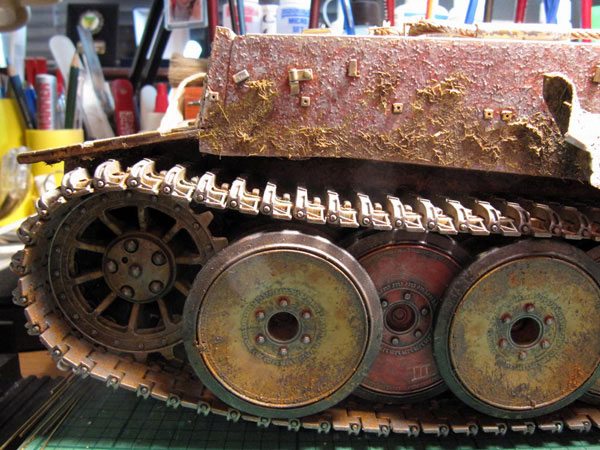
When secure, the bottom was weathered using Warhammer washes, Gryphon sepia, stippled on, to give a beaded effect, followed by Devlin Mud, applied in the same way, which gives the finish a little ‘depth’ I feel. Finally, a coat of Badab Black, to give a little more contrast to the weathering.

Next, a coating of Tamiya textured grass effect was pushed into the track guards, axles, and under surfaces, to give a little grime.

The tracks were then re-fitted.
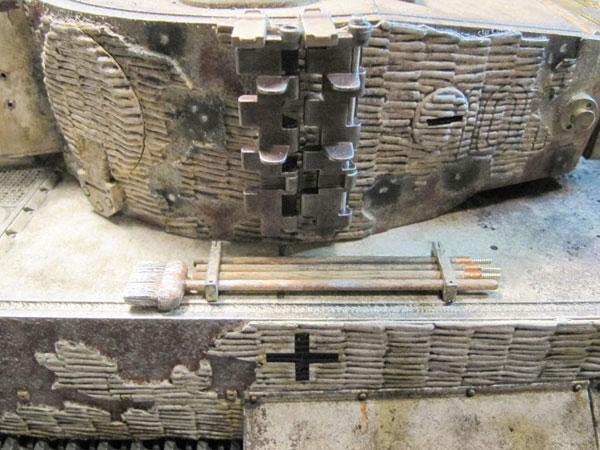
Cleaning rods

Cleaning rods were the next thing to be detailed. I used some plastic tube of the same diameter as the wooden rods, inserted a small piece of wire into the end to support the tube and cyano’d them on, leaving enough room in the tube for the guitar wire used to simulate threaded rod, to fit into the end of the tube. PICs 23, 24, 27-30

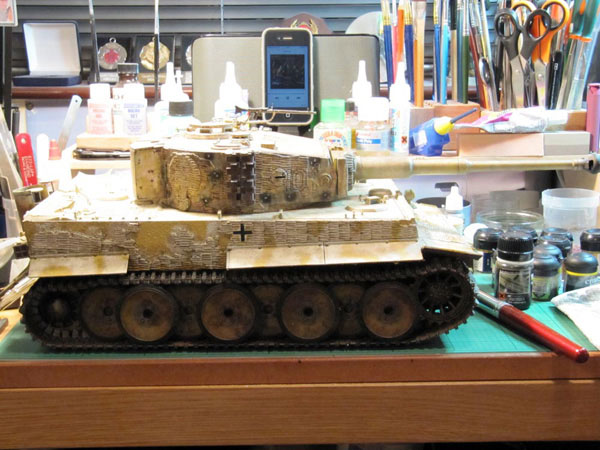
For a change, I decided to paint the red undercoat of the hull in the damaged areas, and when dry used a stipple of grey, to show the zimmerit adhesive cement.
25IMG_3445-smn

38IMG_3476-smn

For a bit of fun at work next day, I constructed a ‘yard brush’ out of a small piece of mahogany, fitted a handle, and daubed white paint over it. It would have been used to apply the white camouflage!
26IMG_3446-smn

31IMG_3452-smn

Now for a bucket… or perhaps later…!

Read on…

Pages: Page 1 Page 2 Page 3 Page 4 Page 5 Page 6 Page 7 Page 8 Page 9 Page 10 Page 11 Page 12 Page 13 Page 14 Page 15 Page 16 Page 17 Page 18 Page 19

Primary Sidebar


LOGIN/LOGOUT

Lost your Password?


All the completed Armour builds.

Click on a Manufacturer below for all SMN's completed builds of their kits.

BACK TO ARMOUR MAIN PAGE

SEARCH THE WEBSITE

More results...

Generic filters
Exact matches only
Search in title
Search in content
Search in excerpt

Finished Armour Reviews

  • Academy
  • Accurate Armour
  • AFV Club
  • Airfix
  • Amusing Hobby
  • Azimut Productions
  • Border Models
  • Bronco
  • CMK
  • Copper State Models (CSM)
  • Cyber Hobby
  • Das Werk
  • Dragon
  • Eduard
  • Field of Armor
  • First Fight
  • Gecko Models
  • Great Wall Hobby
  • HobbyBoss
  • ICM
  • Italeri
  • Master Box
  • Meng
  • MiniArt
  • Mirage Hobby
  • ModelCollect
  • Resicast
  • Revell
  • RFM
  • Riich Models
  • Roden
  • Ryefield Model
  • Sovereign
  • Specials
  • Takom
  • Tamiya
  • Tiger Model
  • Tristar
  • Trumpeter
  • Ultracast
  • Zvezda

Copyright © 2025 · Scale Modelling Now · Online Scale Modelling Magazine · Scale Modelling Techniques and Tips · Privacy Policy