Welcome to the Subscribers’ Maritime Gallery.
Each submission has a ‘gallery’ of thumbnails which you can click on to see an enlarged image and read the short text describing the model – enjoy!
A – G | H | L – S | T – Z
Atlantic Models – Resin Helicopters
Swordfish models – 3d printed life raft containers, boats, BMARC 20mm guns, HIAB, Flt deck lights, inclined ladders & bridge equipment.
Starling models – Chieftain tanks, Stalwarts, Bedfords and Landrovers.
Veteran Models – Vulcan Phalanx
Base – Coastal Kits
Paint – Colourcoats
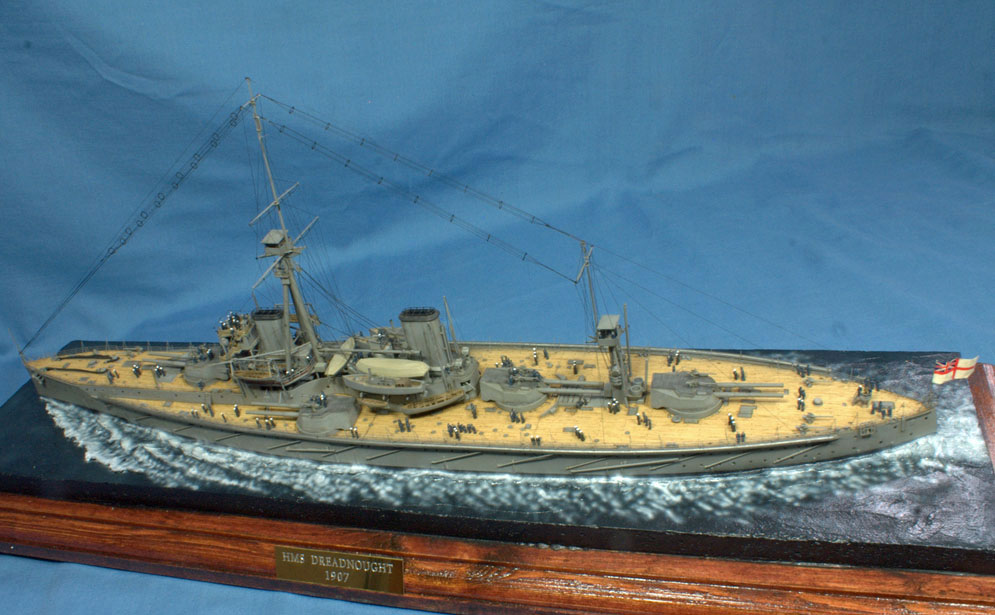
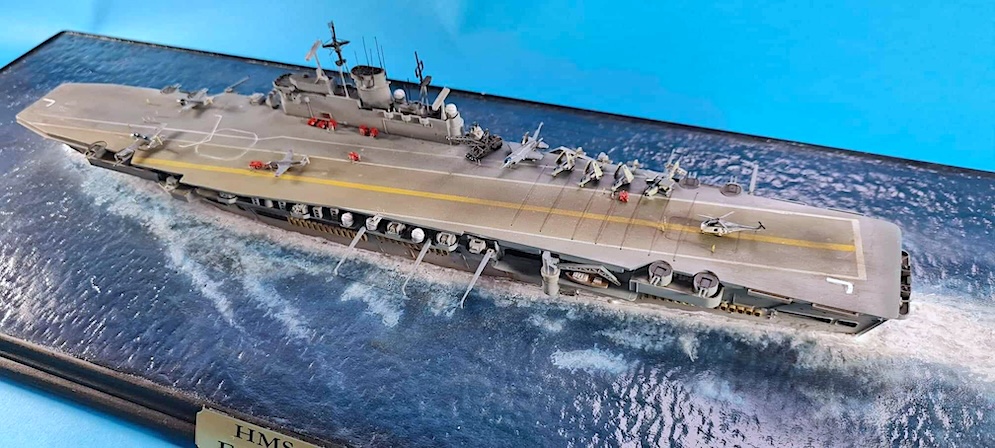
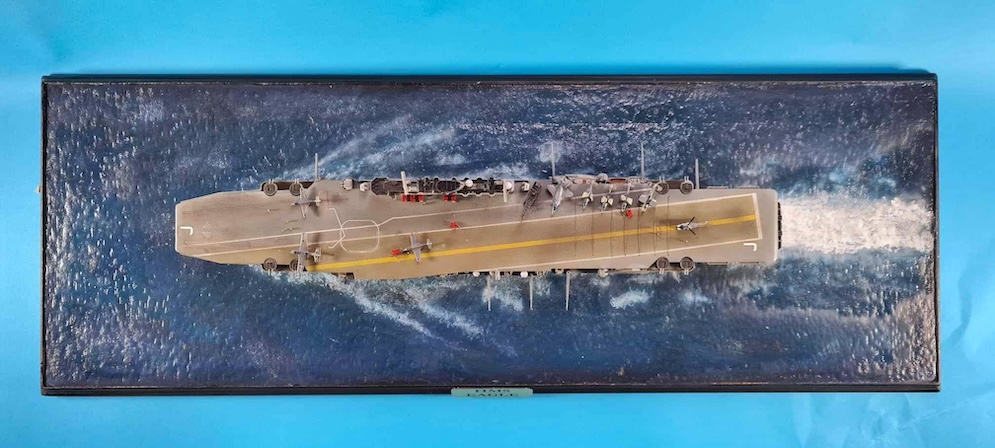
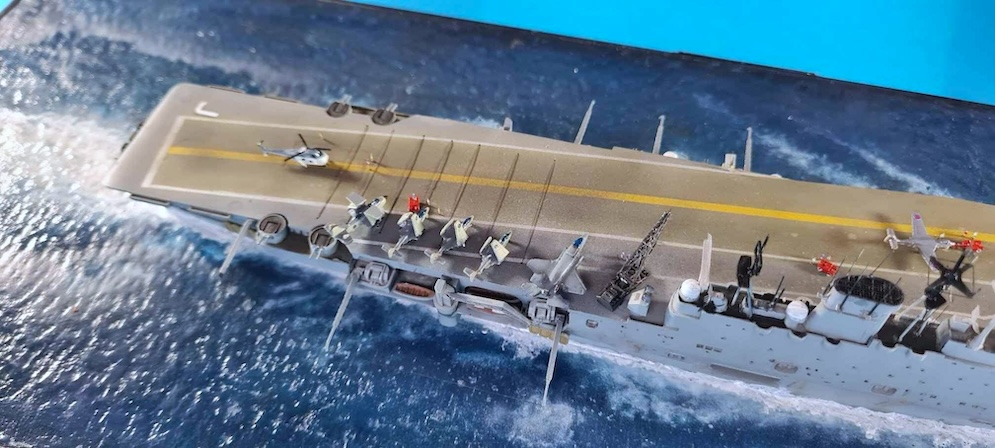
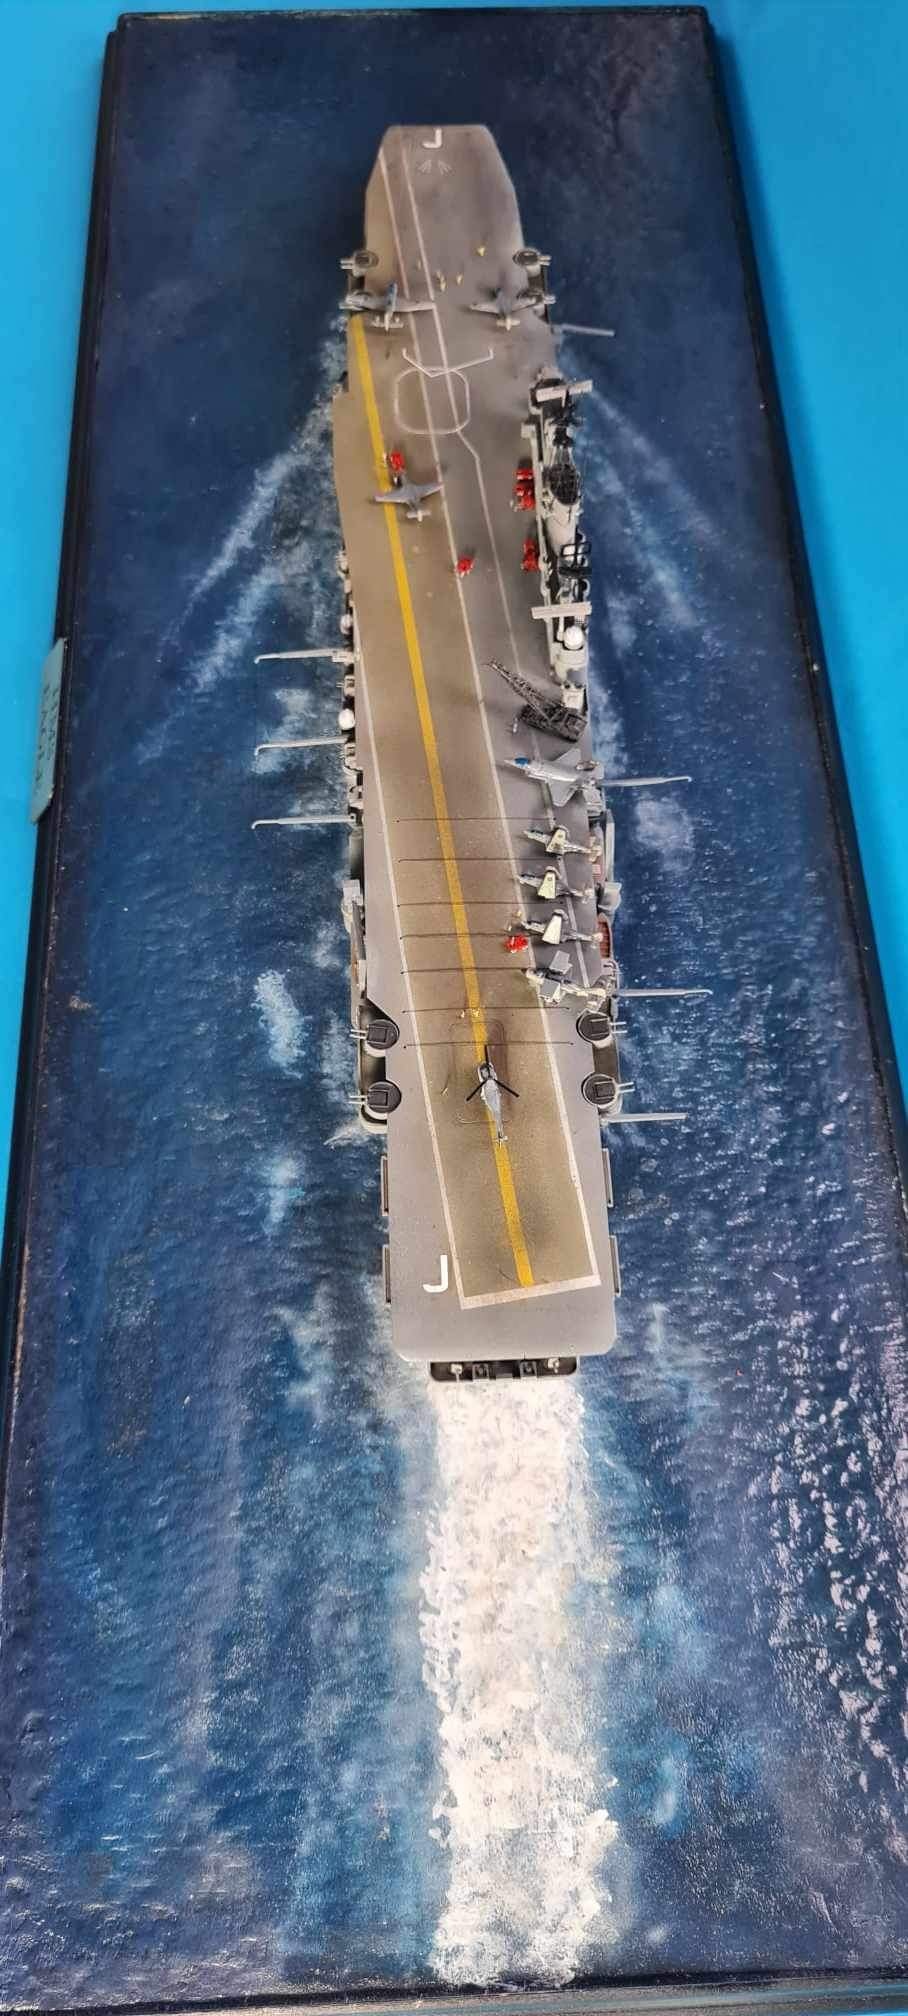
The completed model is 18″ (46cm) long.
Peter S.
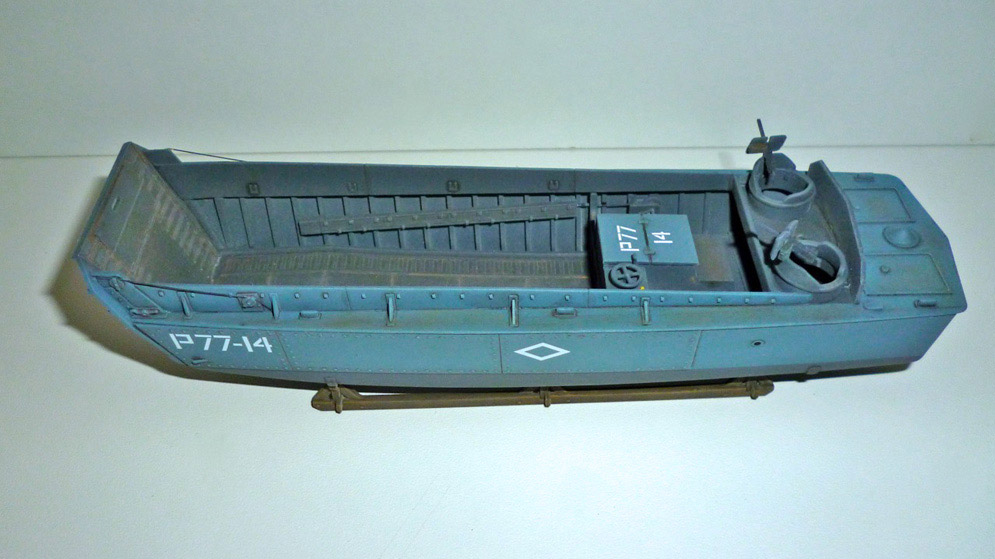
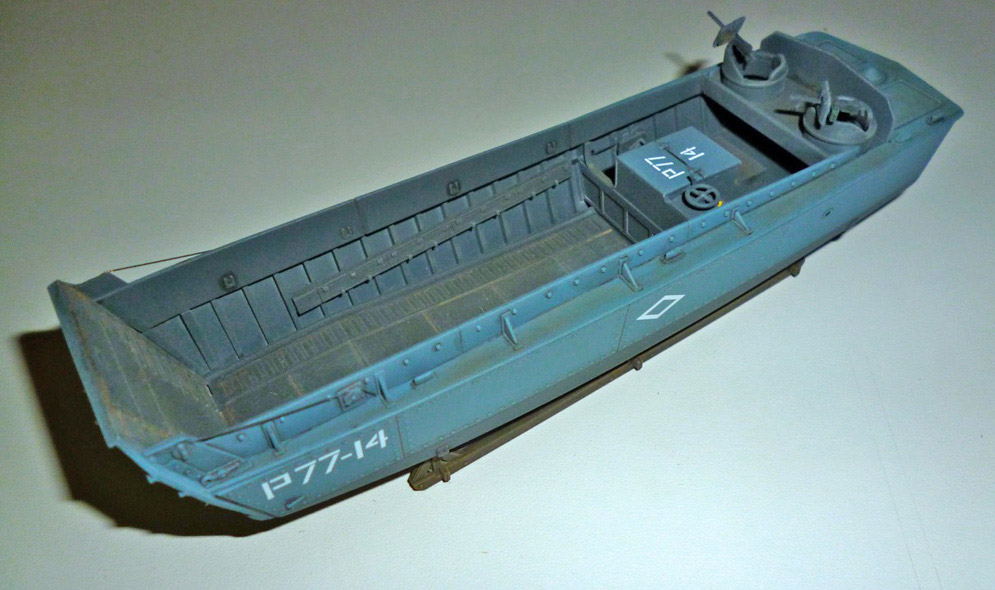
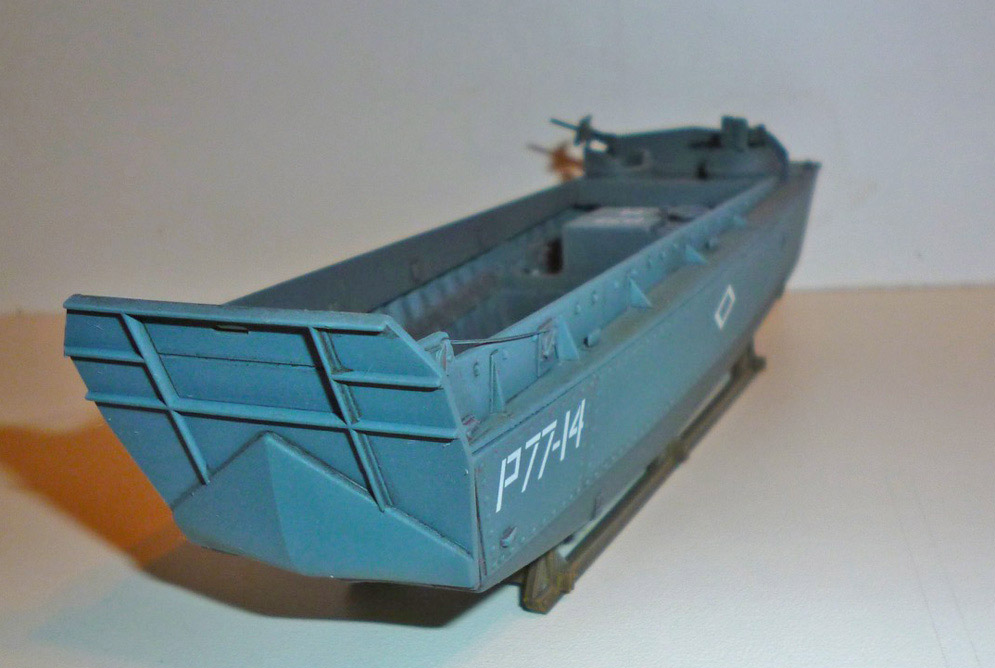
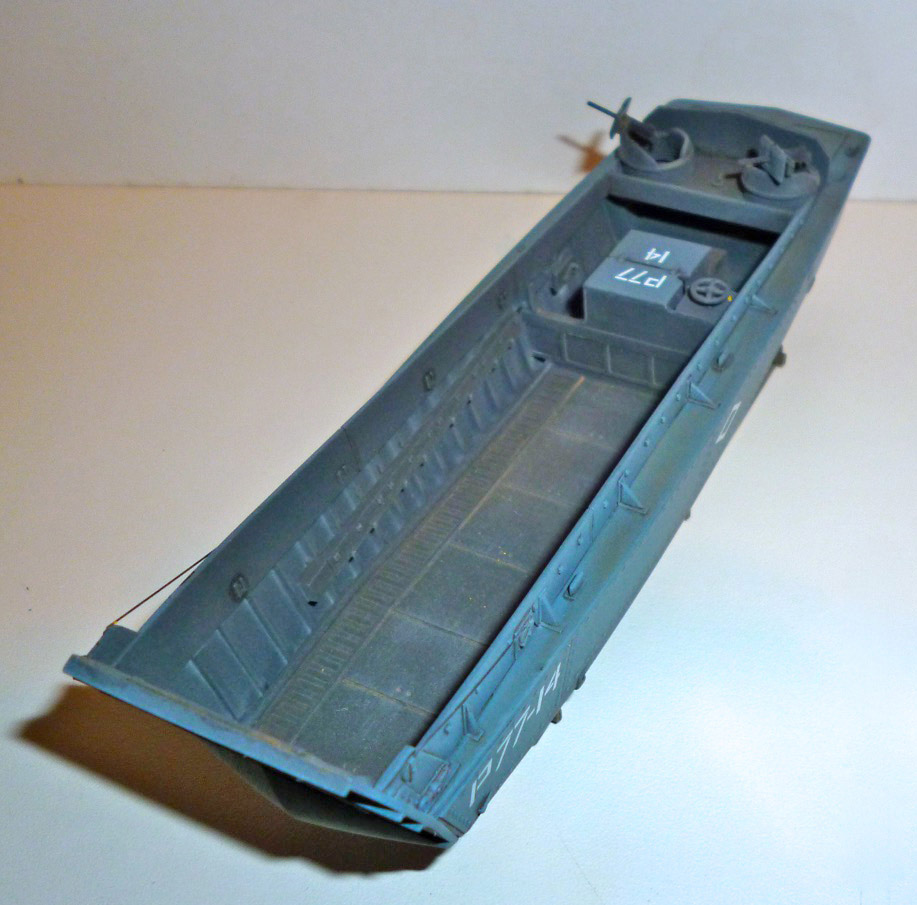
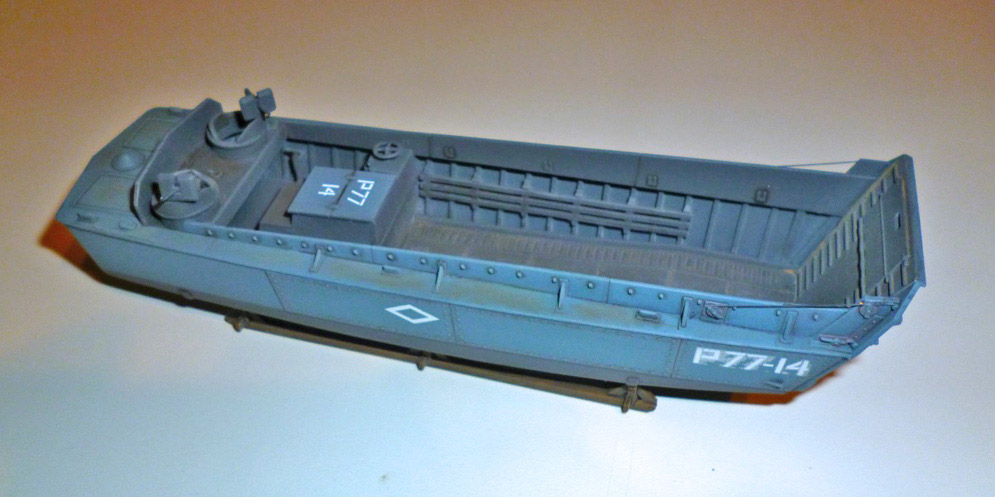

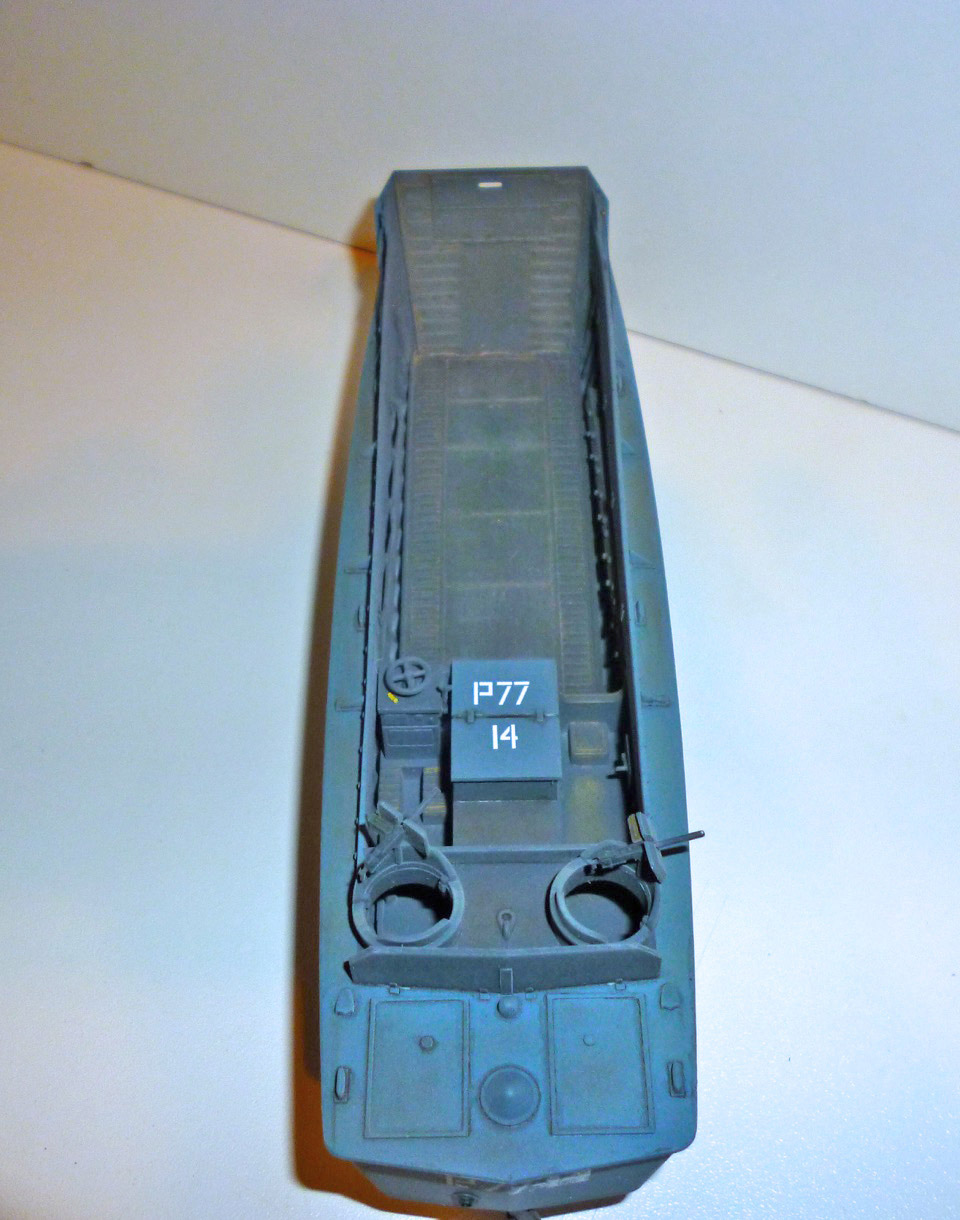

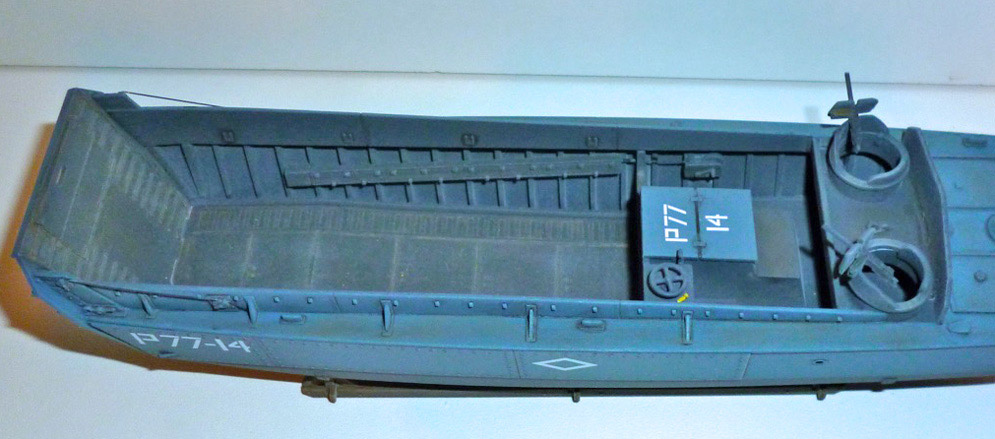
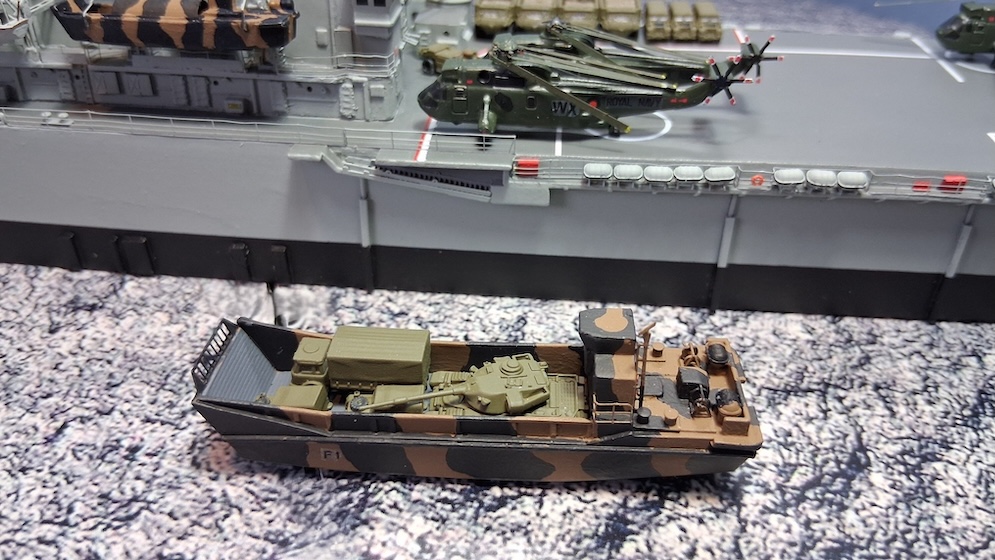
This is the Airfix 1:72 Higgins LCVP, USS Thurston AP-77, 1944.
This was a quick build OOB, airbrushed with Tamiya medium blue and dark grey.
Further I have used some pastel powder for the weathering.
A lot of the LCVP boats were painted in the same colour as the mothership. In this case it was medium blue, there are some colour pictures of LCVP boats from the
USS Thurston on the internet, witch I have used to compare the colours for the build
https://www.battlefieldhistorian.com/detail.asp?id=5327
https://www.battlefieldhistorian.com/detail.asp?id=5328
https://www.battlefieldhistorian.com/ww2_us_soldiers_weymouth_harbour_bhc200513.asp
https://www.battlefieldhistorian.com/us_rangers_weymouth_harbour_bhc200553.asp
Gerhard La C.


The model is in 1:350th scale and is a resin multi-media kit from Atlantic Models run by Peter Hall. There were 3 batches of this class with a few vessels being sub-classes. Peter produces the kits that cover each vessel in the class, so for details contact Atlantic Models.
Ian R.

Ian R.
Here is my White Ensign Models HMS Bluebell flower class corvette in 1:700th scale. It’s about 3 inches long but is supplied with a lower hull. I have added a few pics of the build so that you can see just how much brass there is on such a small model!
Cheers, Ian R.


Scratchbuilt model in 1:350th scale
The entire diorama was scratchbuilt, the only commercially available parts were photo etch sets from White Ensign Models and figures from Gold Medal Models and some bits from the spares box.
The Charlock hull was carved from Modelboard resin with the bulwarks and superstructure made from plastic card and evergreen strip (various shapes and sizes).
The dock was a piece of Balsa wood glued to the base and then covered with 1mm thick plastic card, once smoothed over the building and rail lines were marked out. The building was made of plastic card and the rail lines simply scored into the dock surface. The crane came from the spares box, if I remember was part of the aircraft crane of a Yamato class battleship.
Once assembled the parts were painted separately (Dock, ship and crane) before gluing them into position, finally the figures were put into place.
The whole diorama is small the Charlock herself is only 7 ½ inches long and about an inch wide.


The kit is highly detailed as you would expect from this manufacturer; no fit issues were encountered and for a full write up on this build I will be submitting it to Geoff for inclusion in SMN in the future.
Ian R.


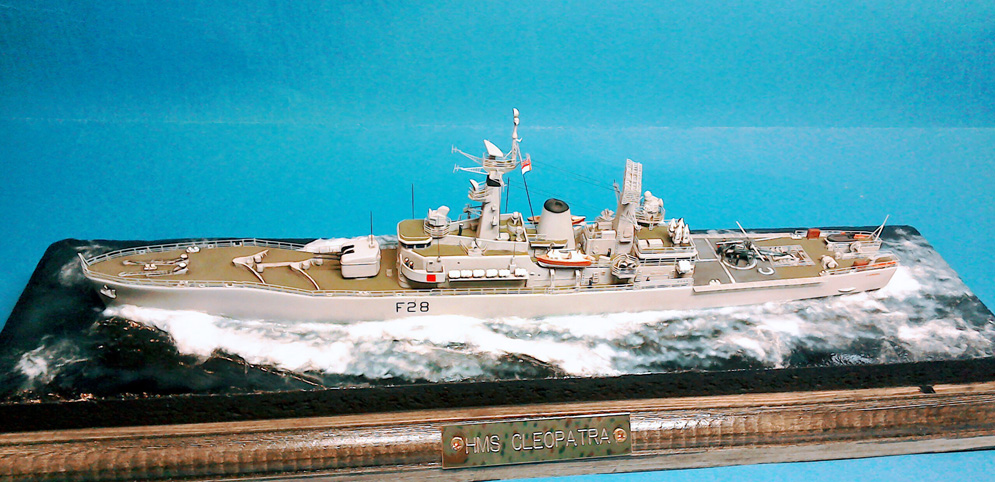
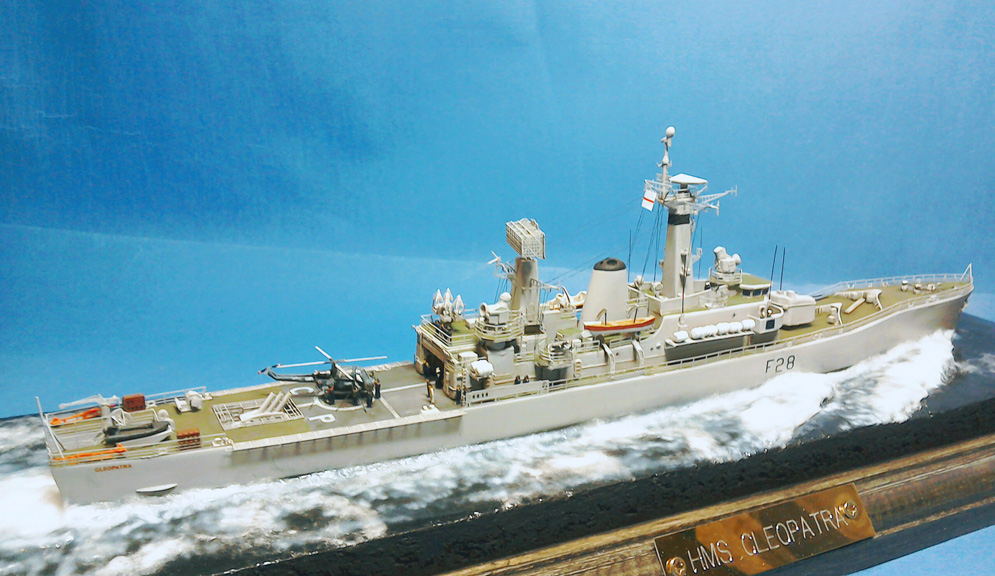
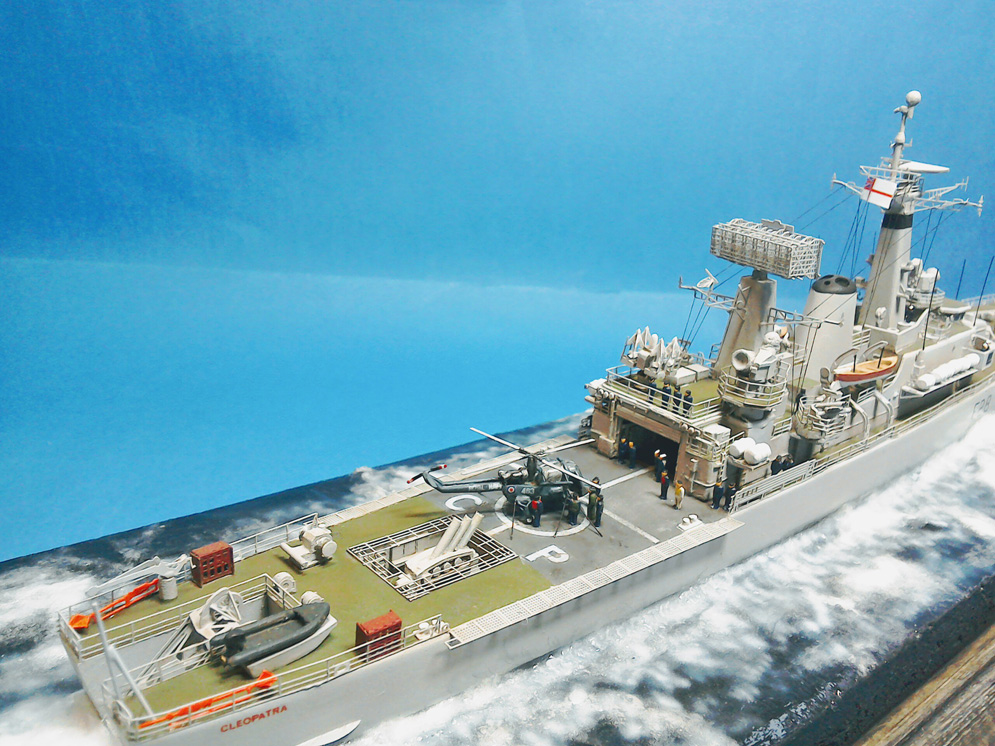
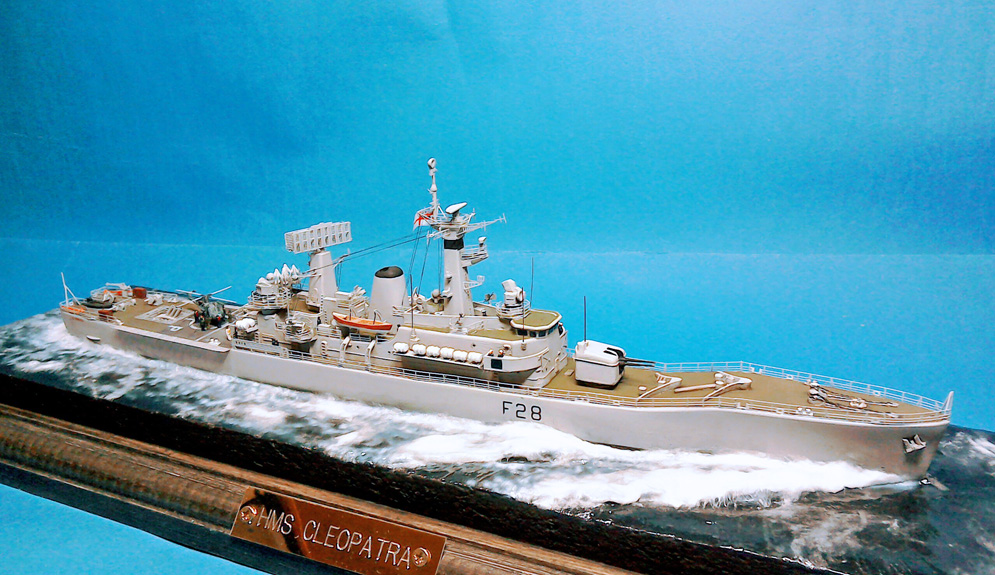
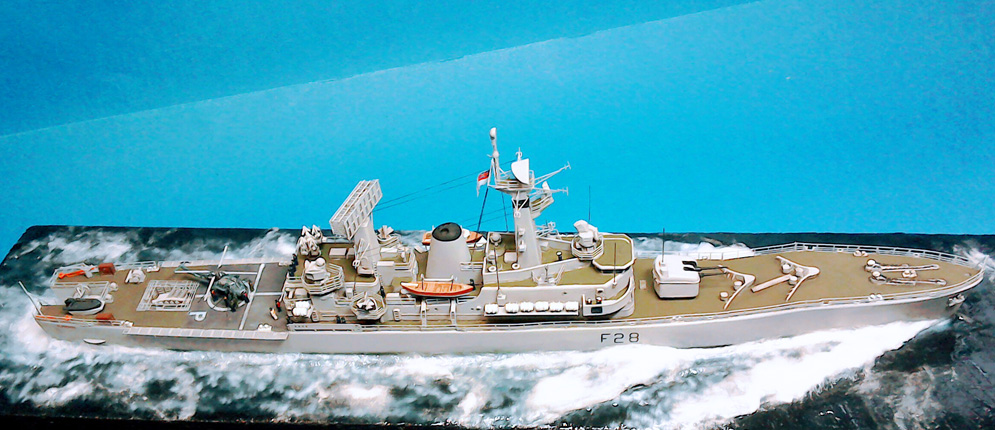
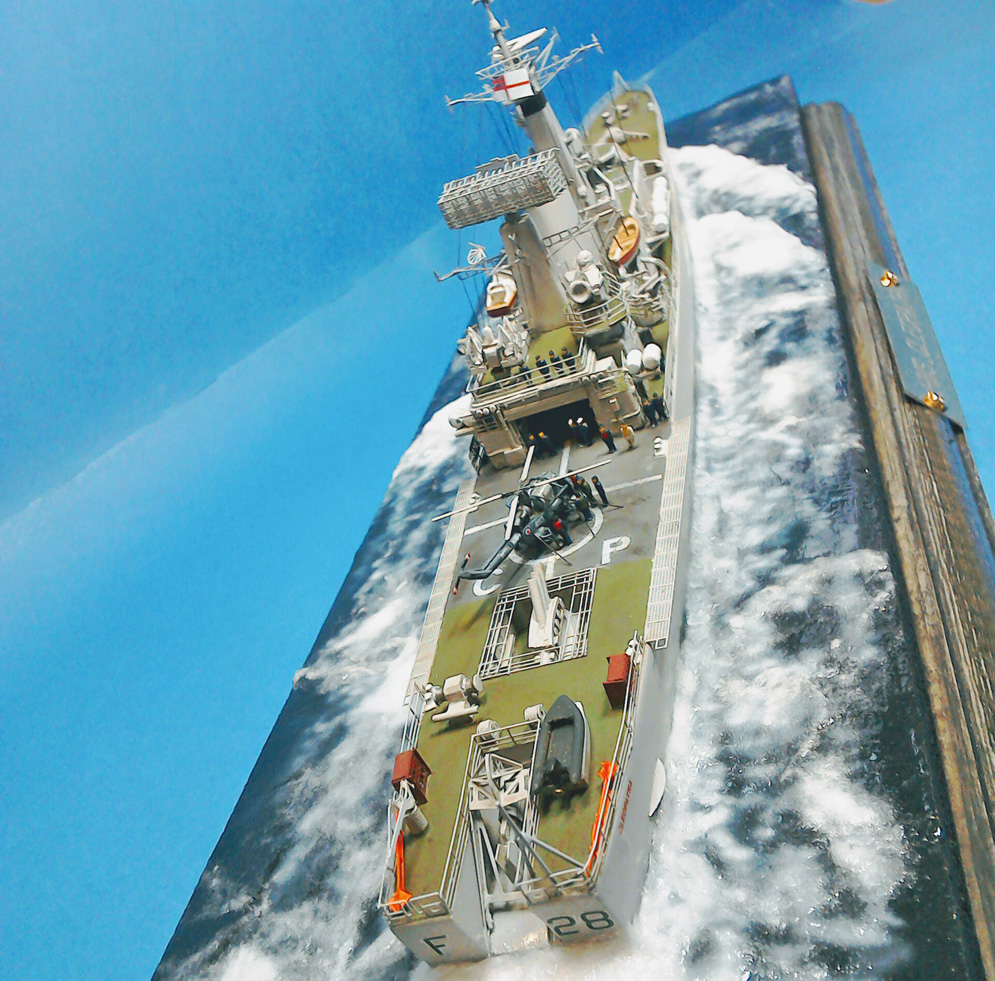
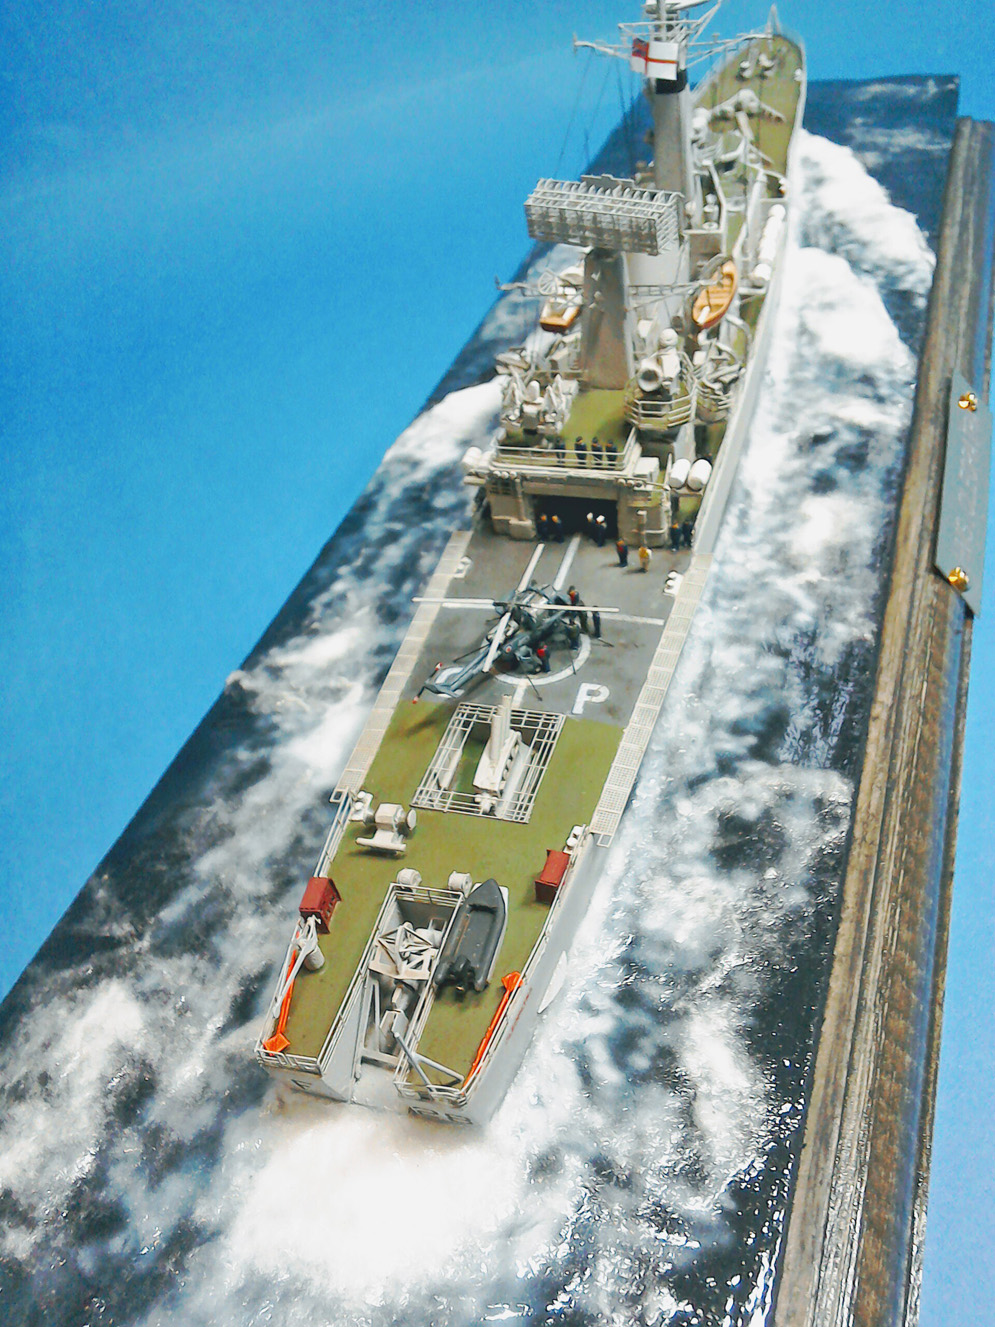
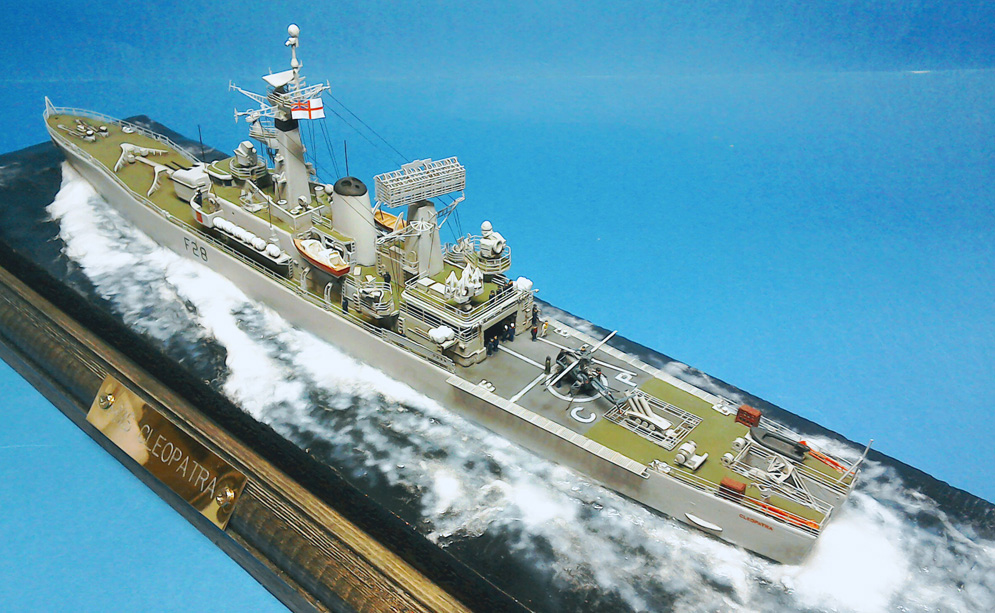
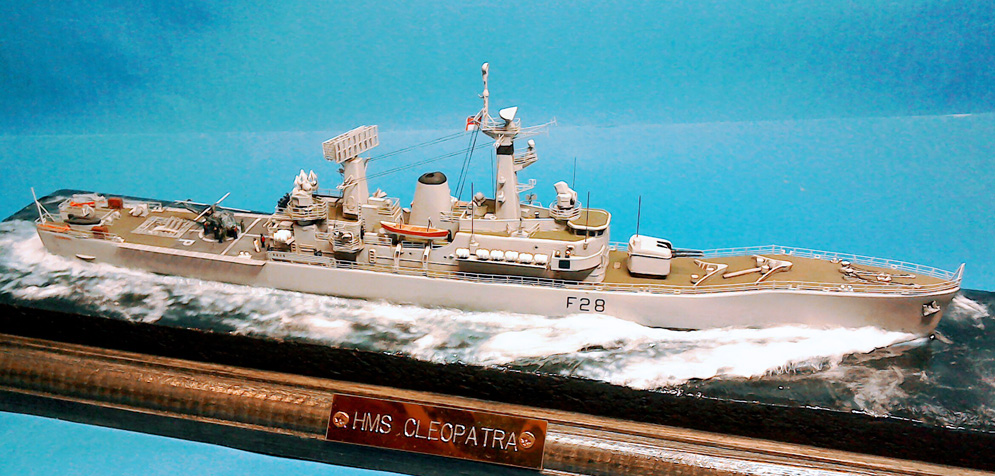
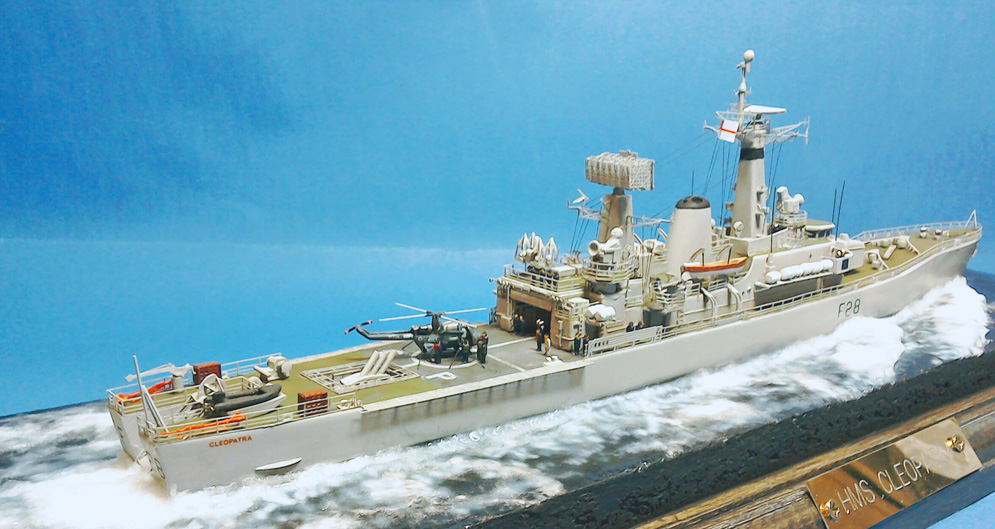

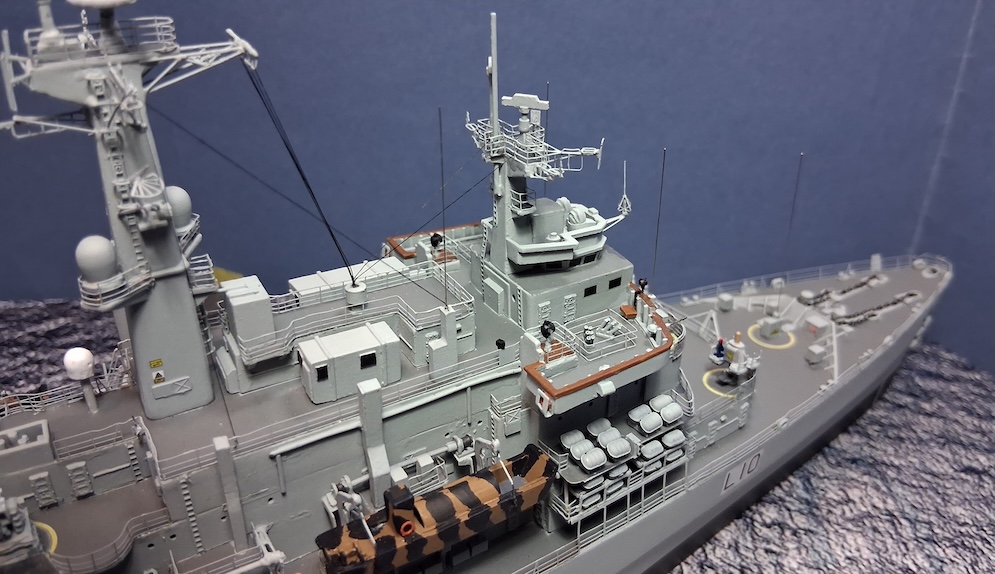
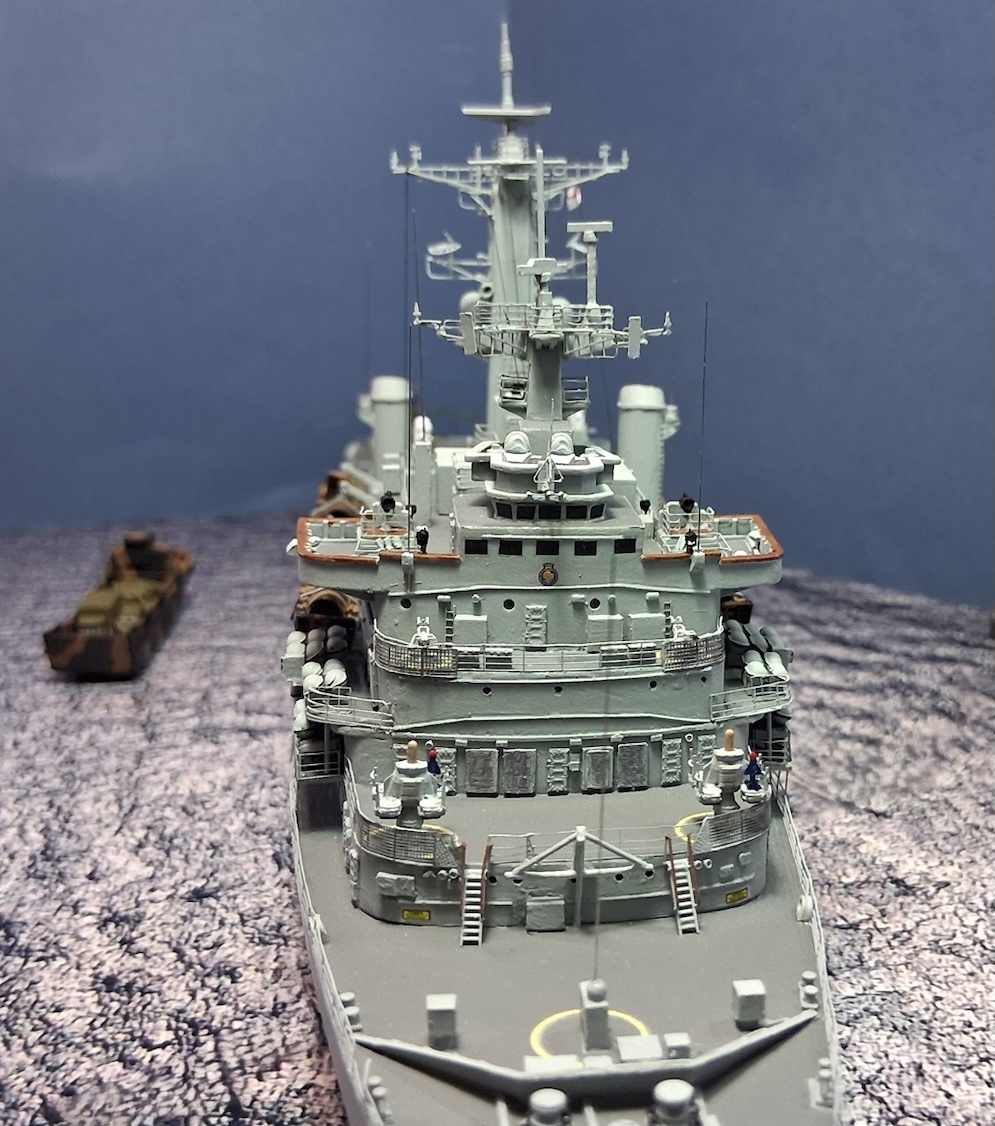
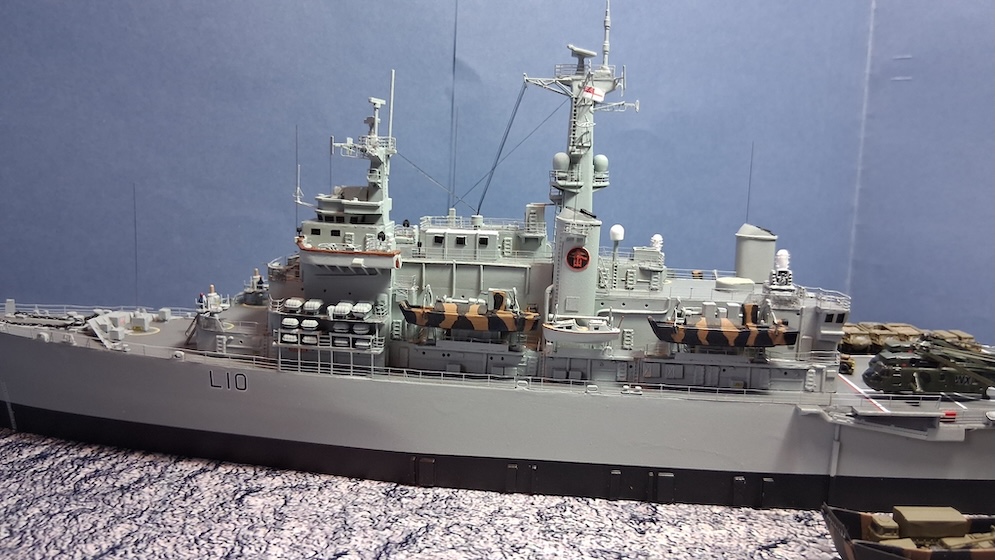
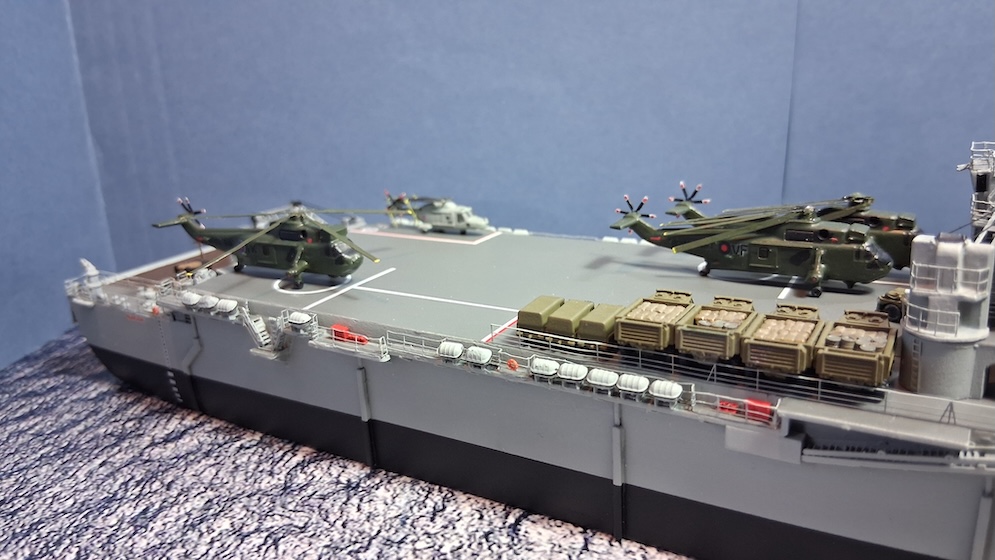
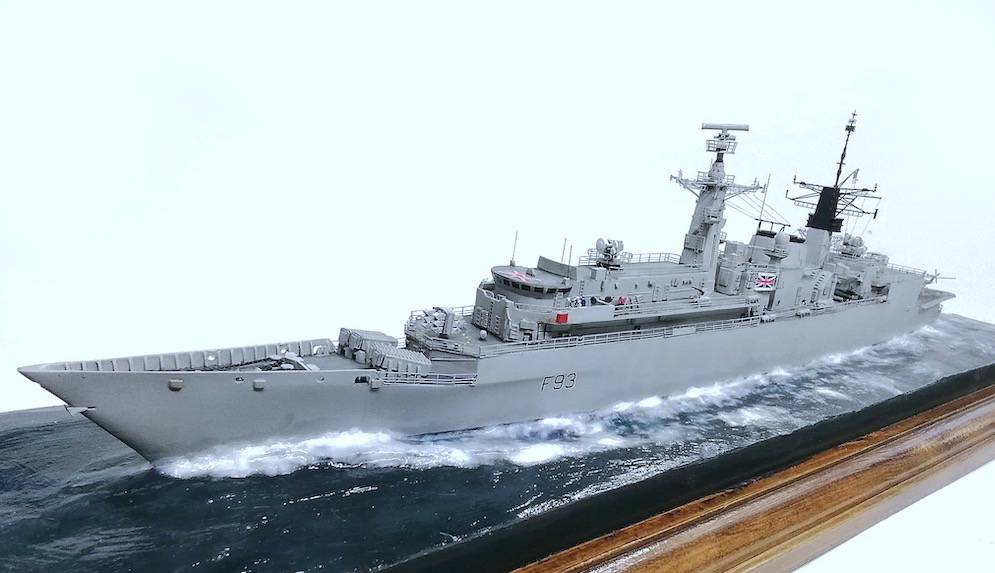
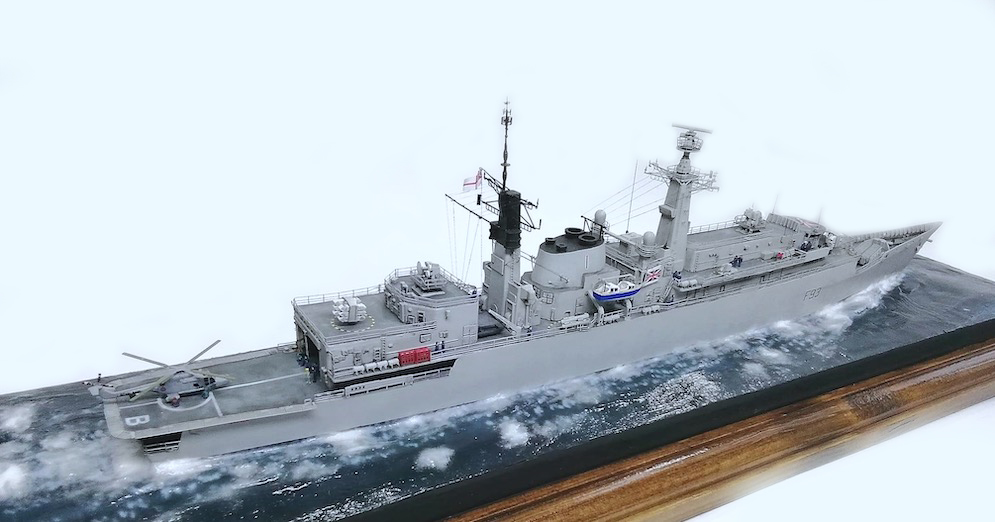
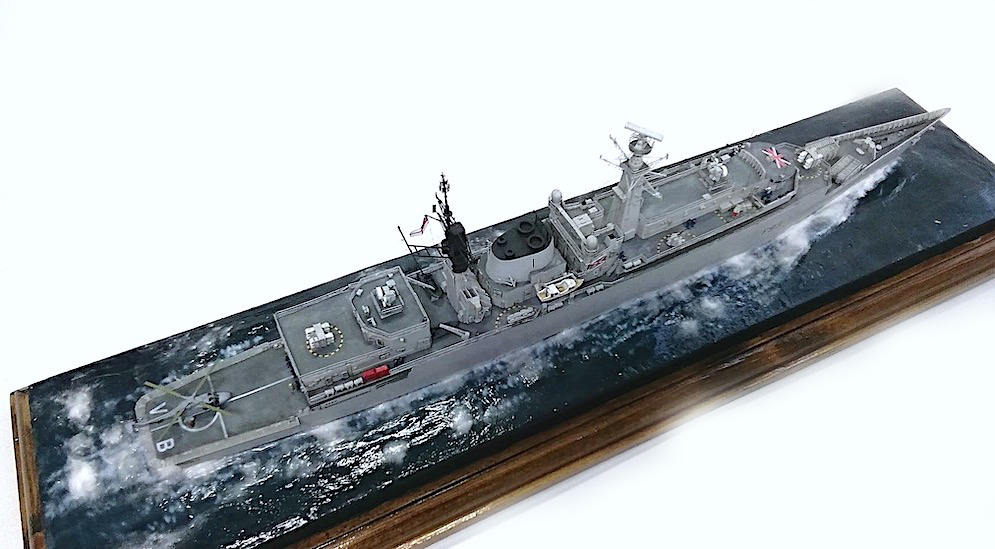
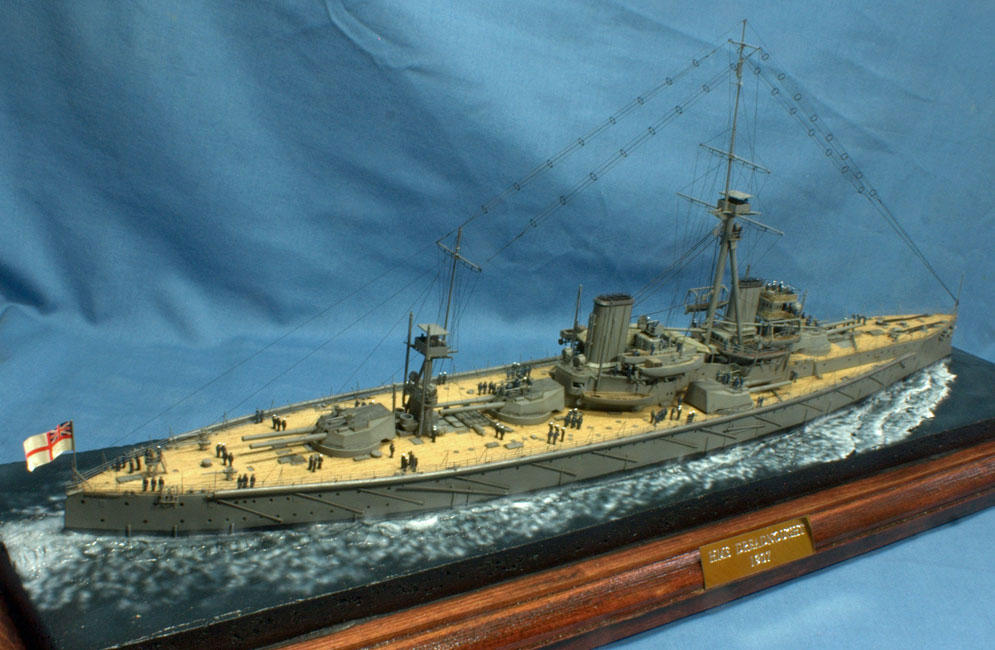
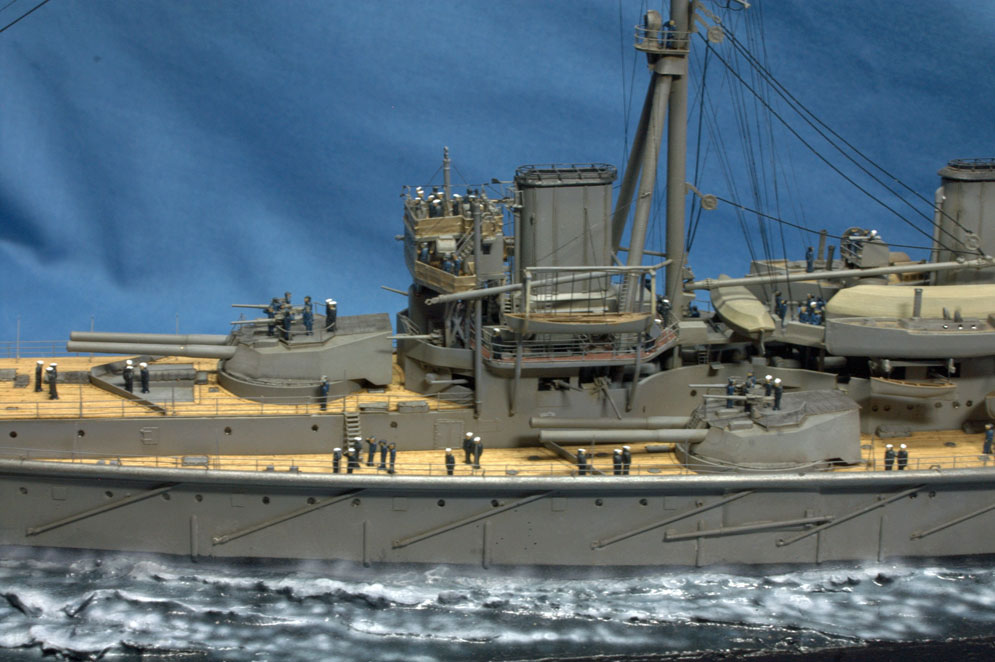
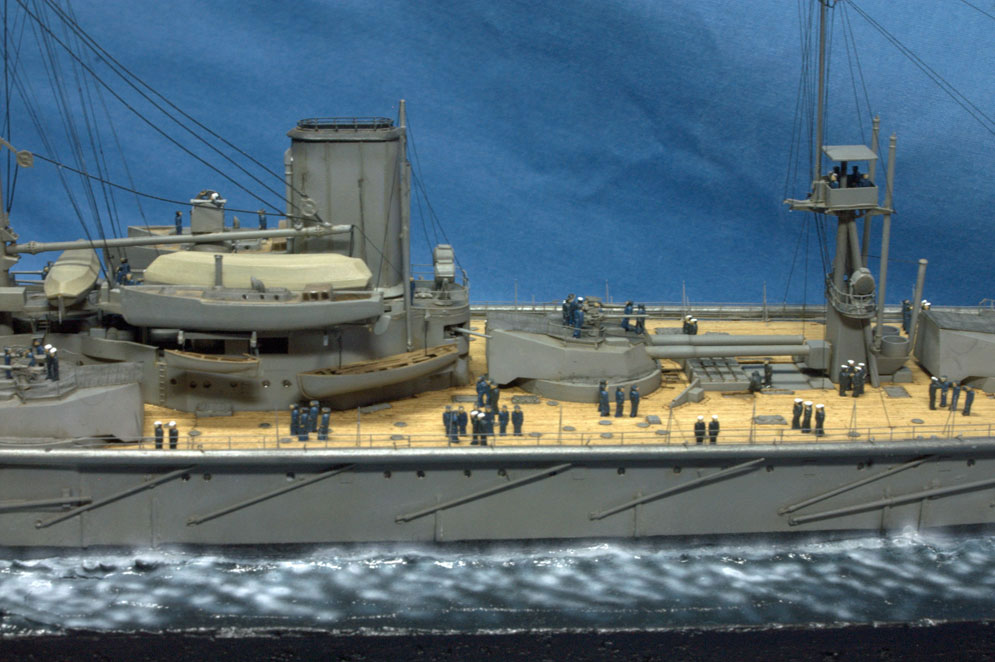
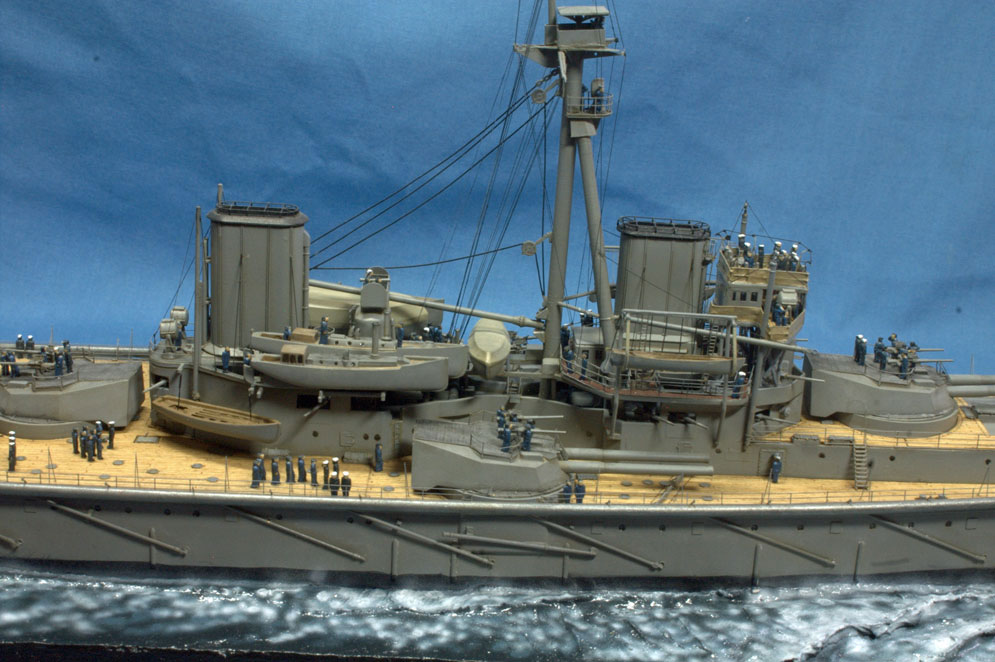
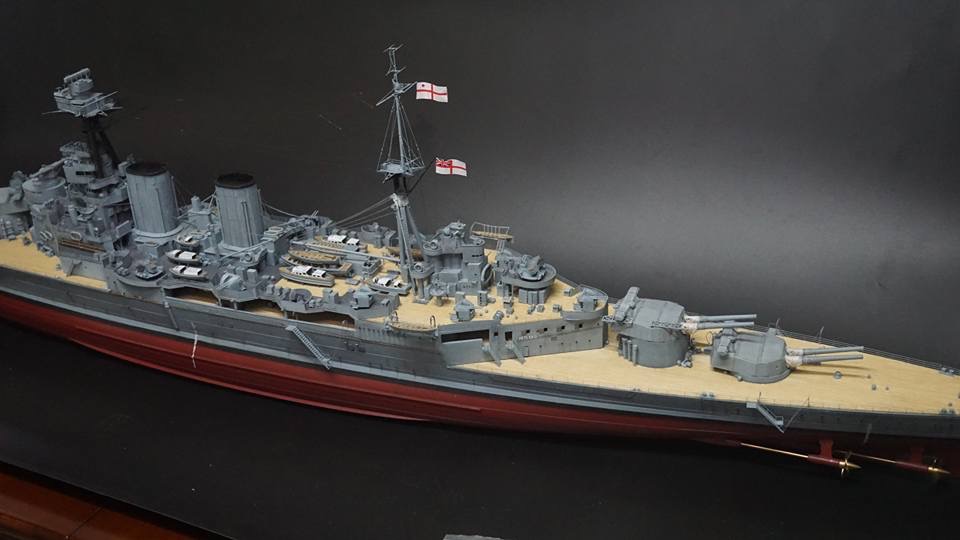
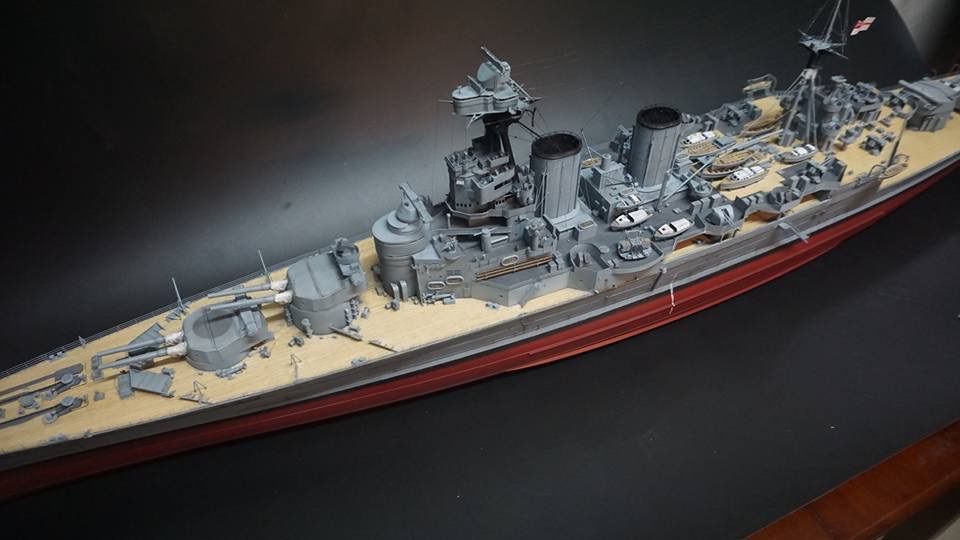
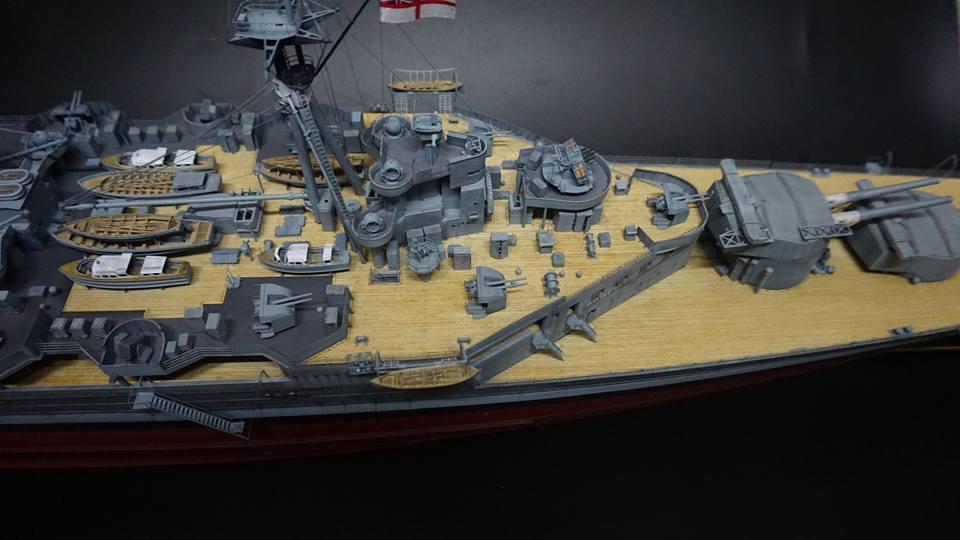
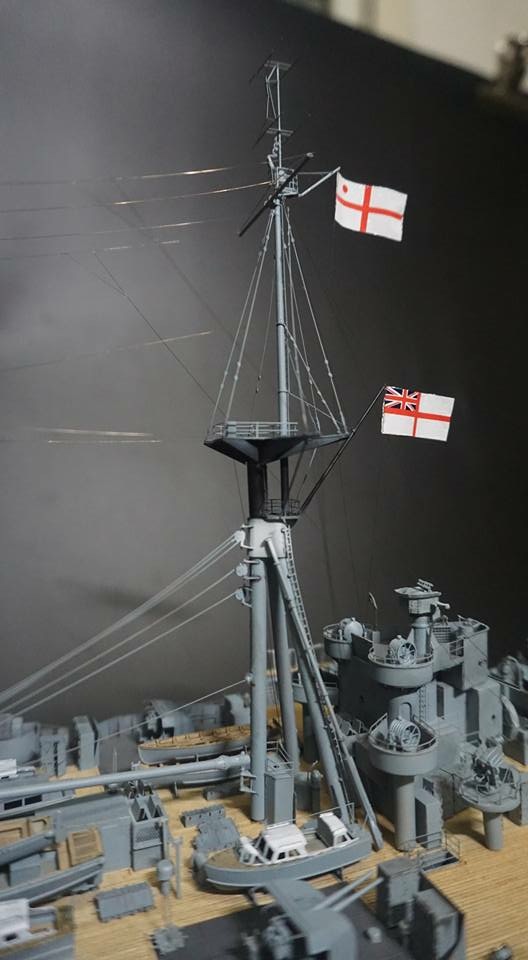
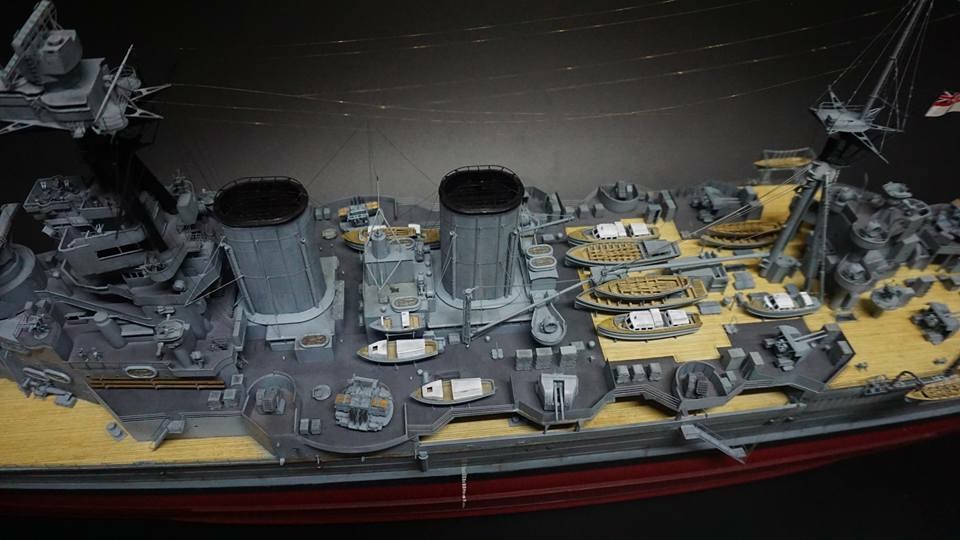
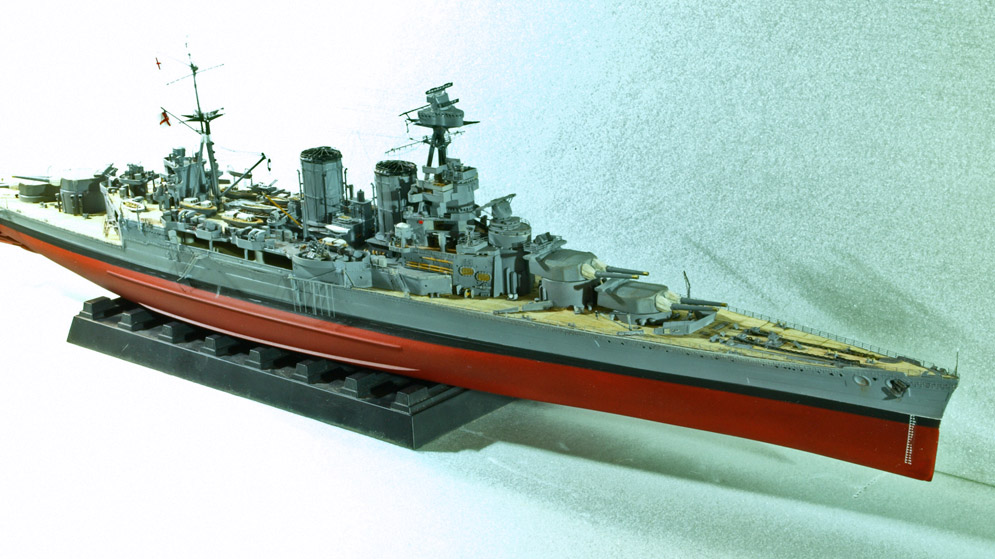
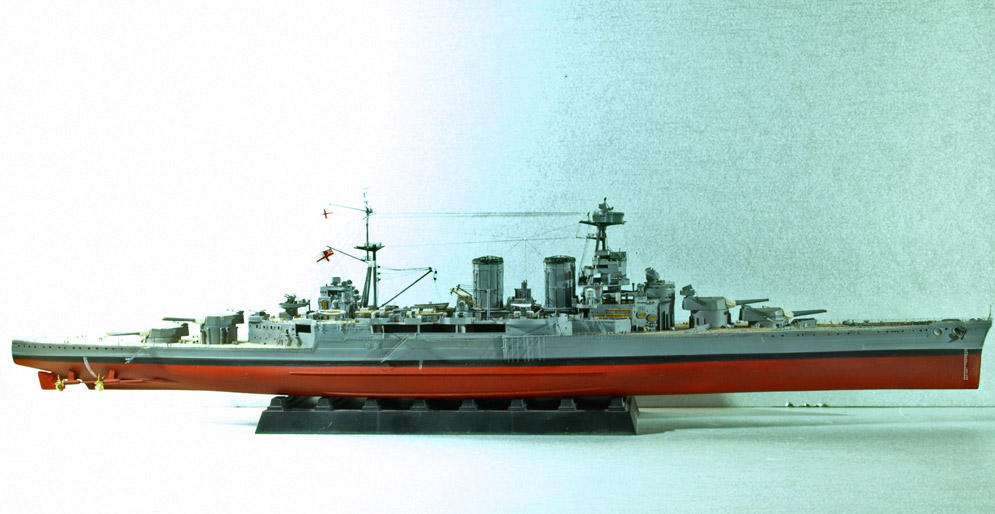
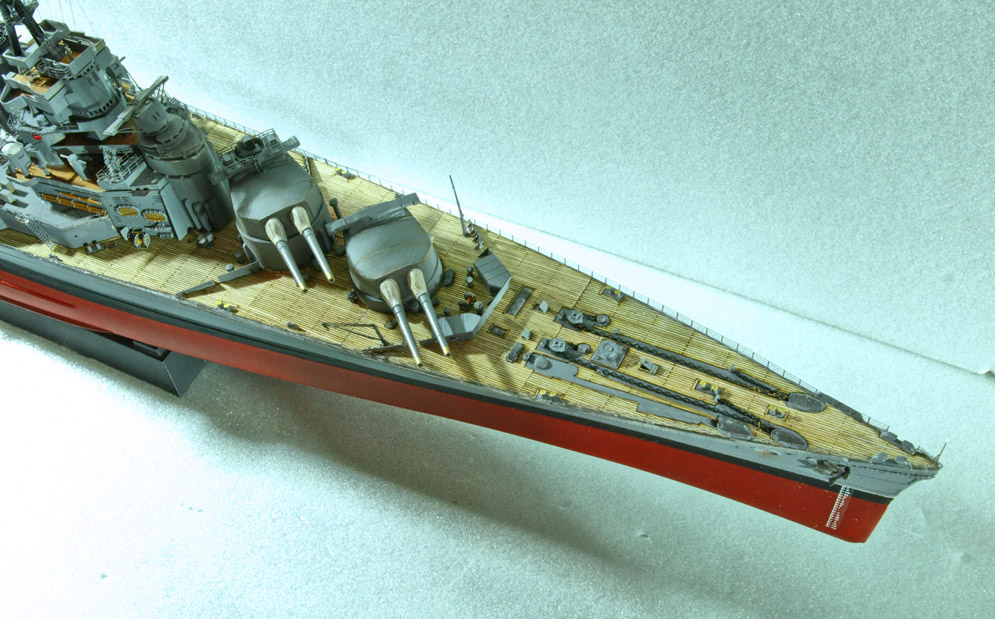
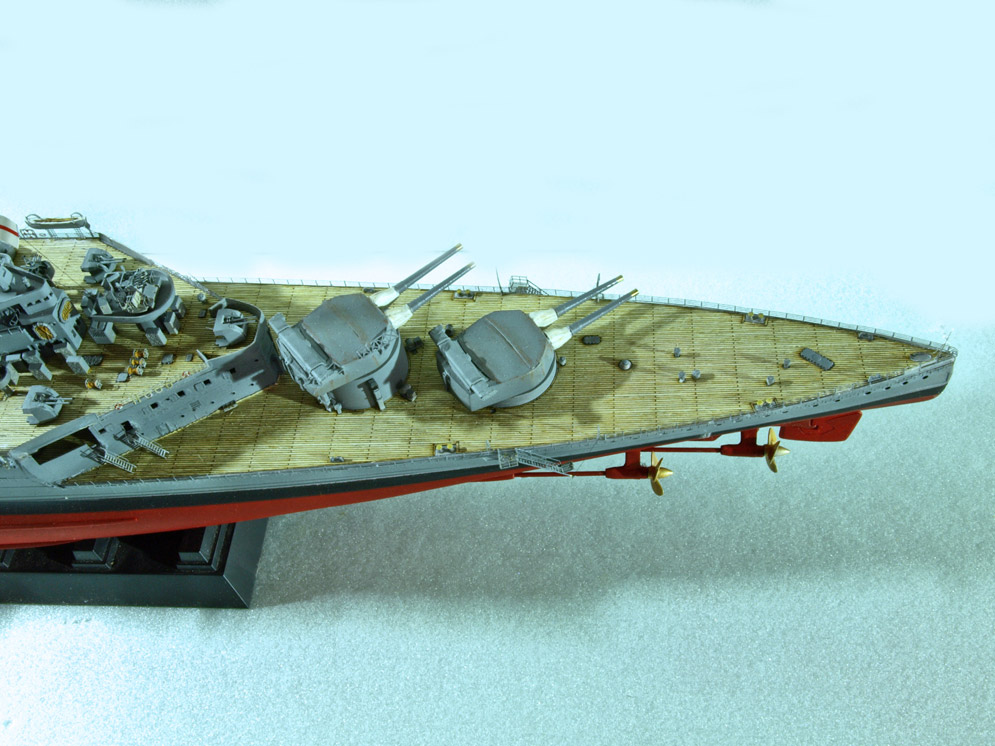
Latest build, it’s a Royal Navy Leander class frigate, HMS Cleopatra circa late sixties – early seventies. The kit is in 1:350th scale and produced by Atlantic Models (Peter Hall who made patterns for WEM), the hull is approximately 12 inches long so not a large model.
Best regards, IR
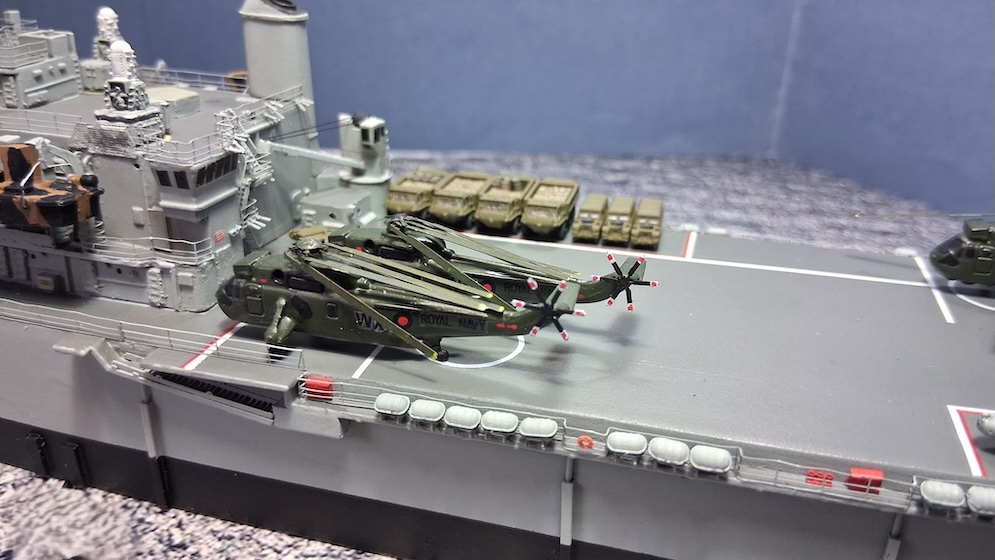
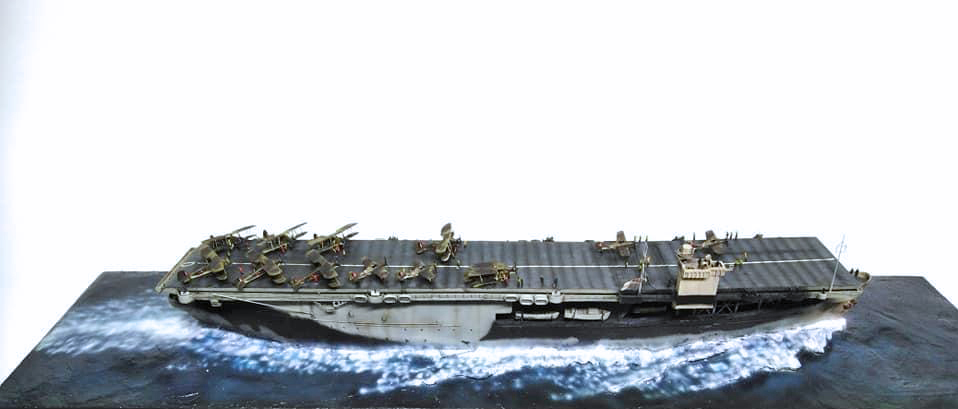
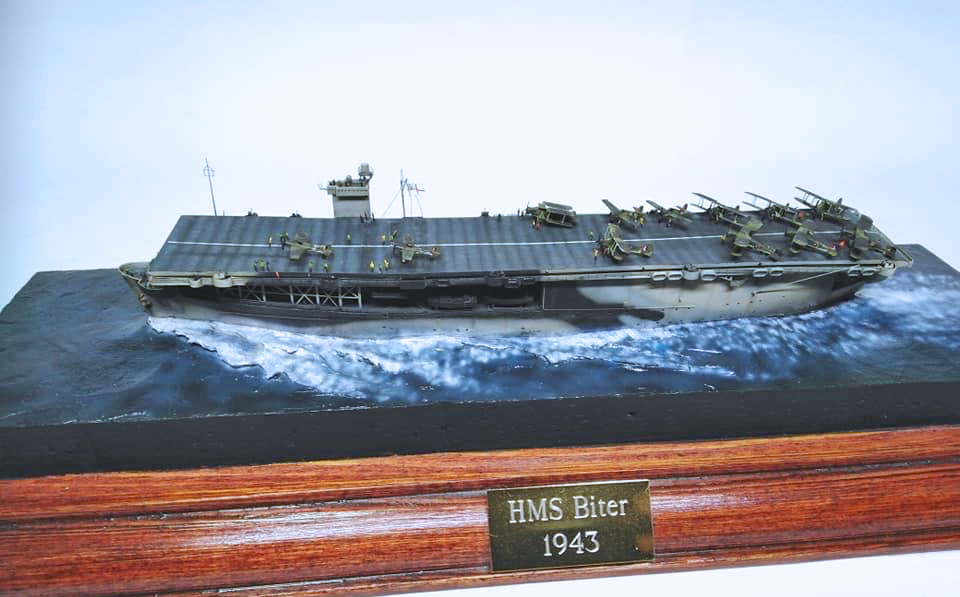
The kit assembles very quickly as the bulk (the hull) is cast as a single waterline piece (Kit is only available as waterline), the various cut outs in the sidea of the hull including the stern are plated over with pre-cut parts of photo-etch brass the largest being the piece that wrapps around the stern and sides of the the rear of the hull. I opted to cut the part into three pieces where the part is to curve around the stern, a little filler was required to blend away the join lines.The model was painted using my usual method , that being to spray the overall colour and post shade it before hand painting the remaining colours. The aircraft were painted in a similar fashion in that they were painted in the underside colour and the upper colours picked in by hand. The markings on the aircraft were picked in by hand as at the time of building there were no British SEAC/Pacific
aircraft markings available.
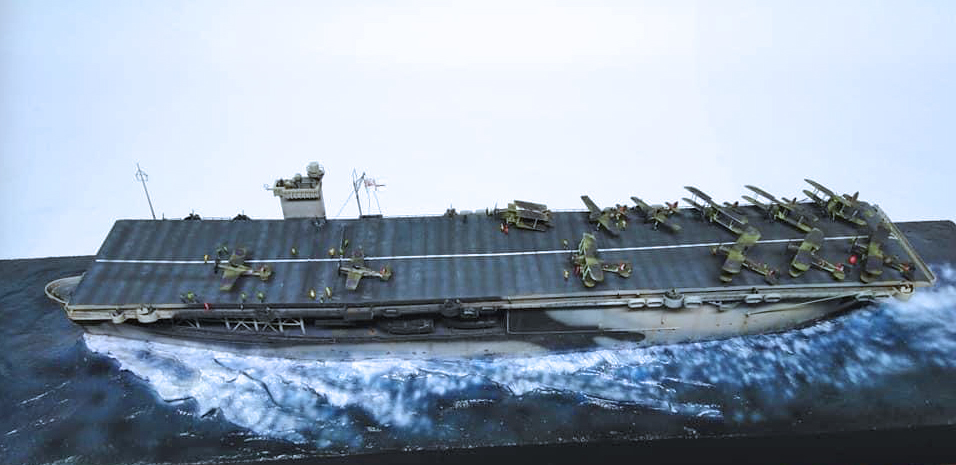
This is a great albeit a little fiddely model to build and fills a massive gap in the lack of Royal Navy aircarft carrier kits, to date I’ve two of these kits, great fun.


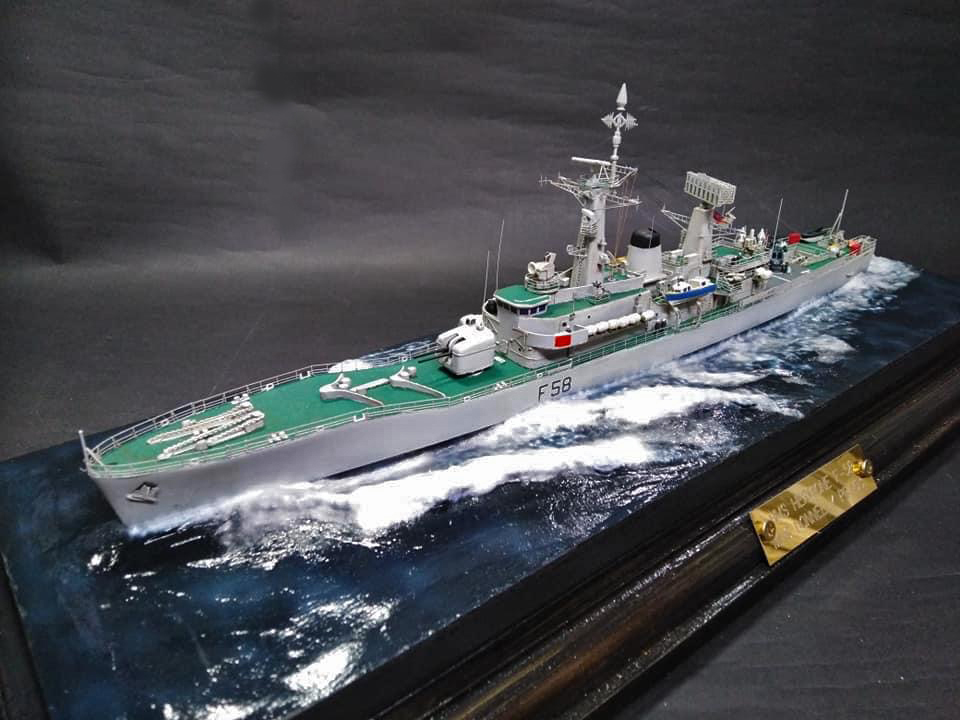
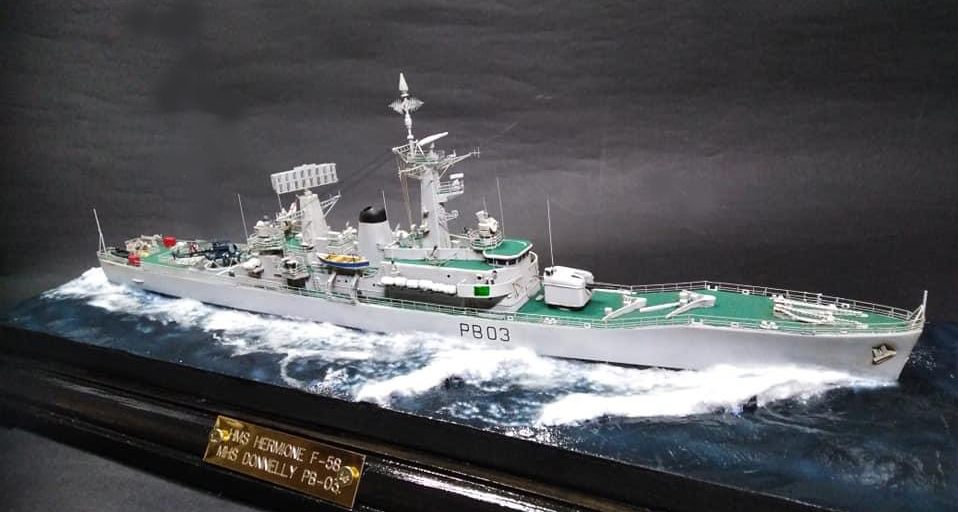
White Ensign Models 1:700th scale kit.
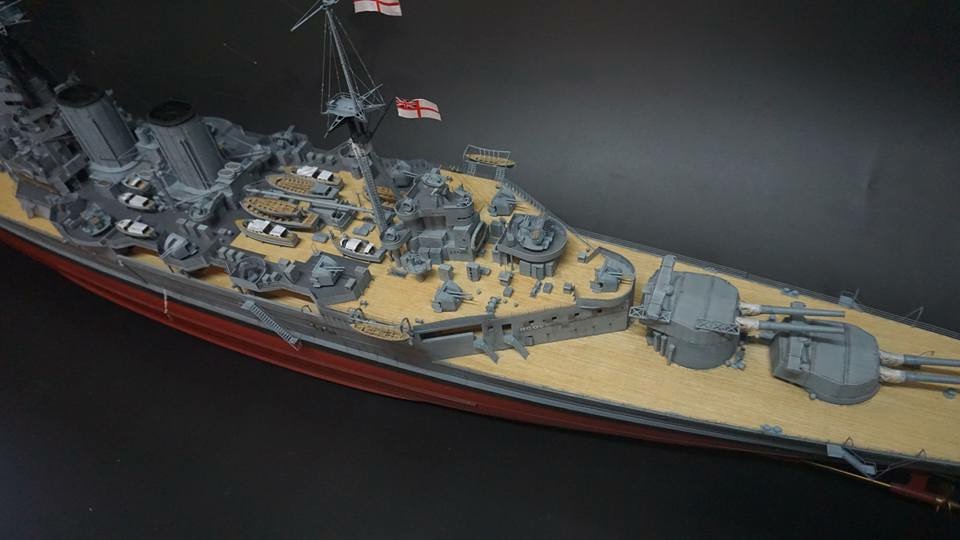
This is HMS Dido a light cruiser and lead ship of her class of anti-aircraft cruisers that served quite well through the War and afterwards. The model is how she appeared during 1942 in the Mediterranean theatre.
I supplemented most of the parts included on the kit’s etch sheet with parts from surplus WEM King George V class battleship etch, although any RN detailing set from cruisers upwards would suffice. This is because Dido was the first resin kit produced by WEM and is starting to show her age especially in the photo etch parts. Apparently it’s due to be withdrawn and re-tooled up to today’s standards when they can get a chance. But saying this it can still be made into an accurate model of the ship and is the “only game in town” if you’re looking for HMS Dido. Unfortunately you can only make Dido out of the box, if you want to build some of her sisters you’ll have to heavily convert the model.


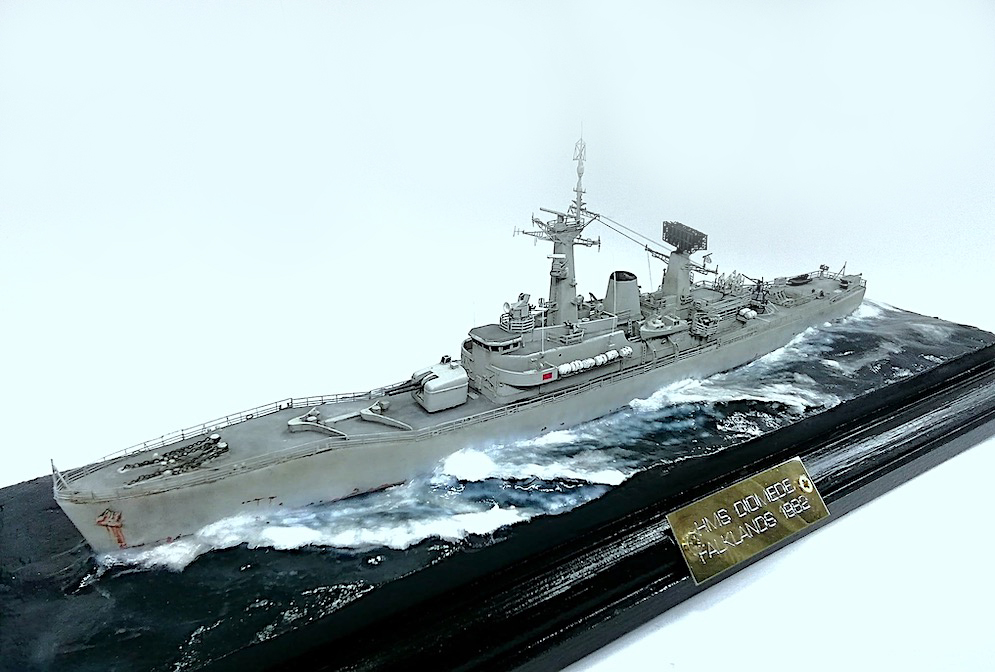
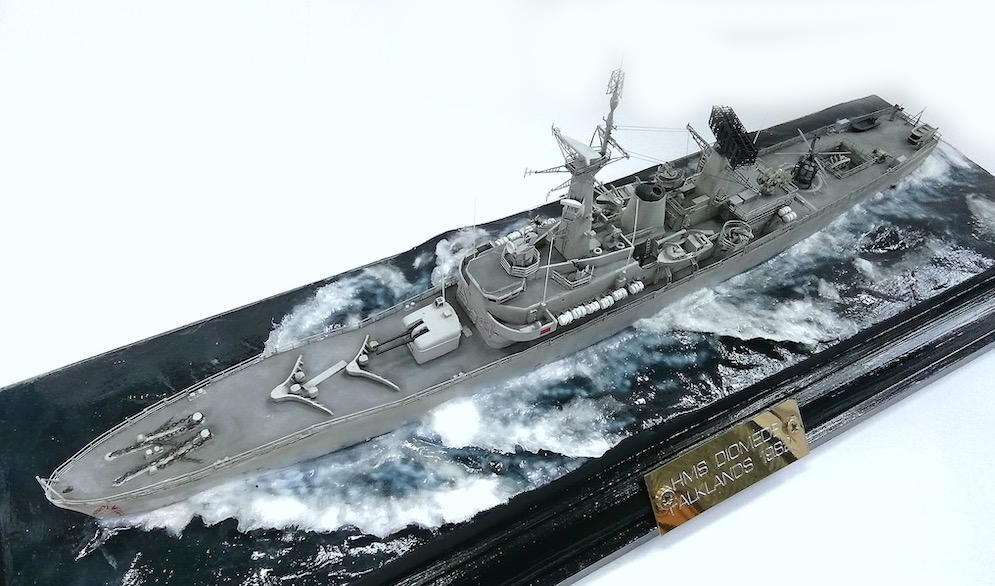
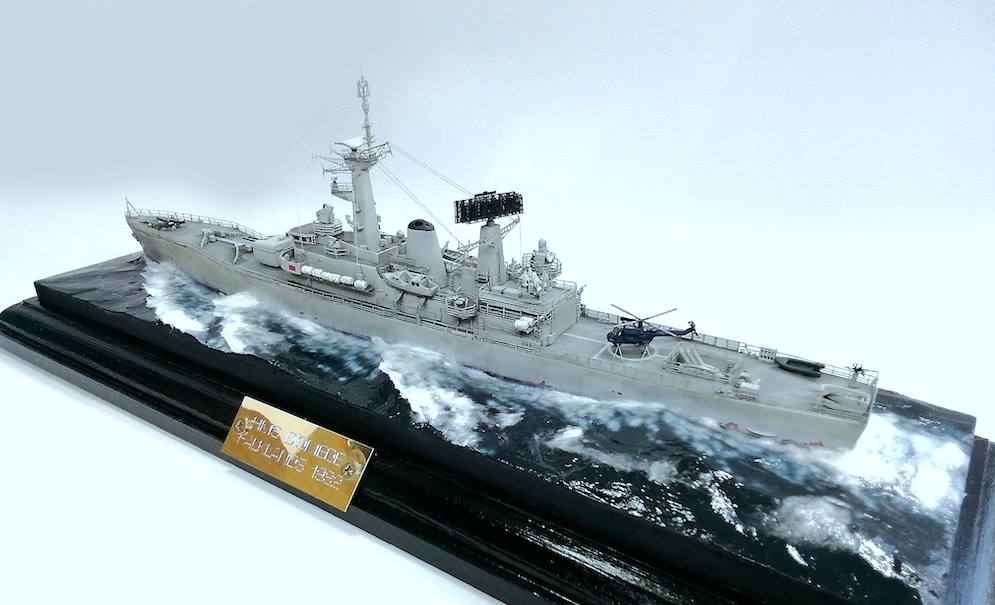
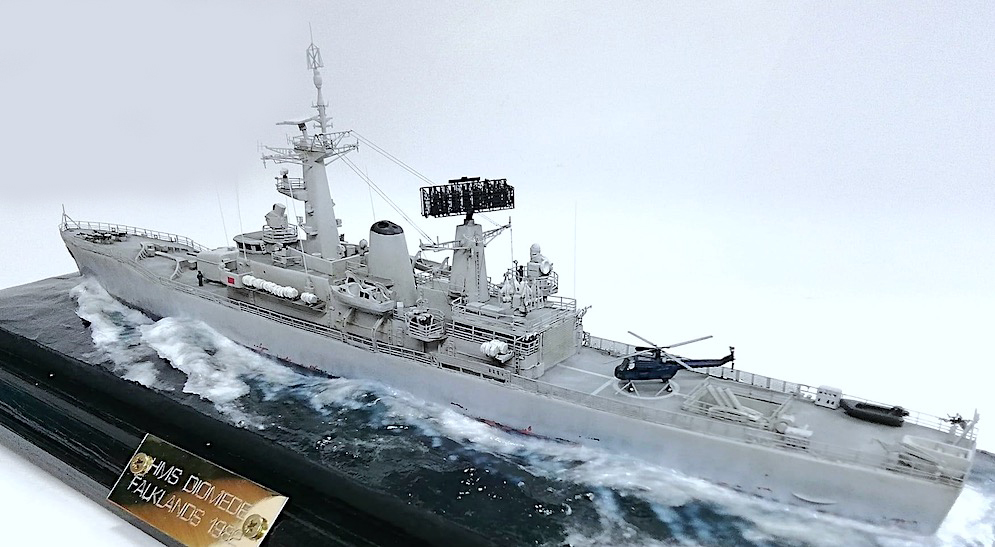
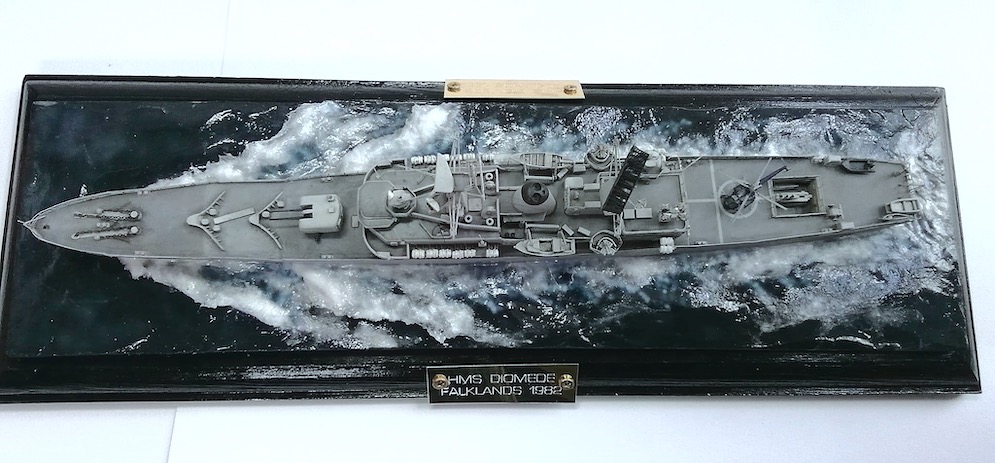
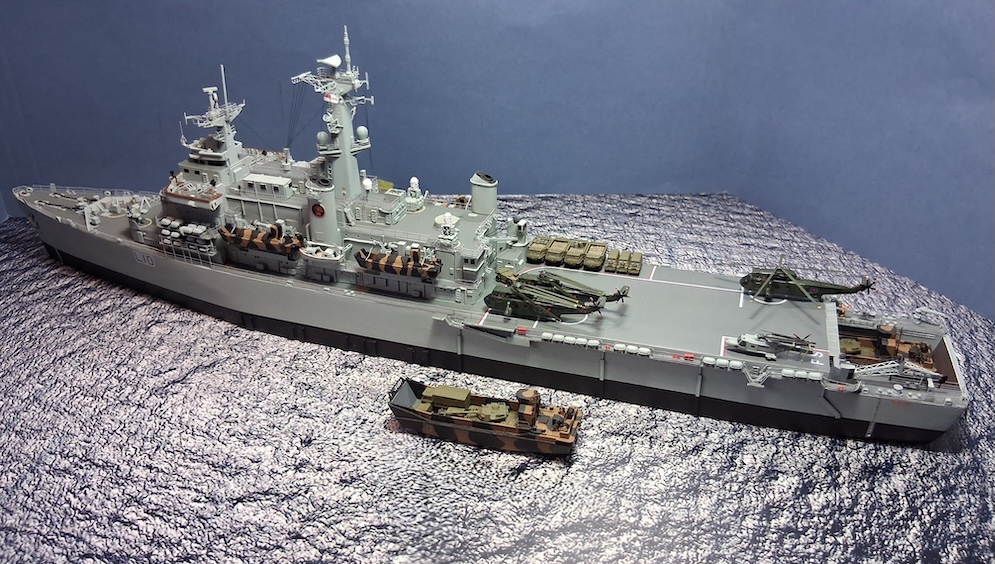
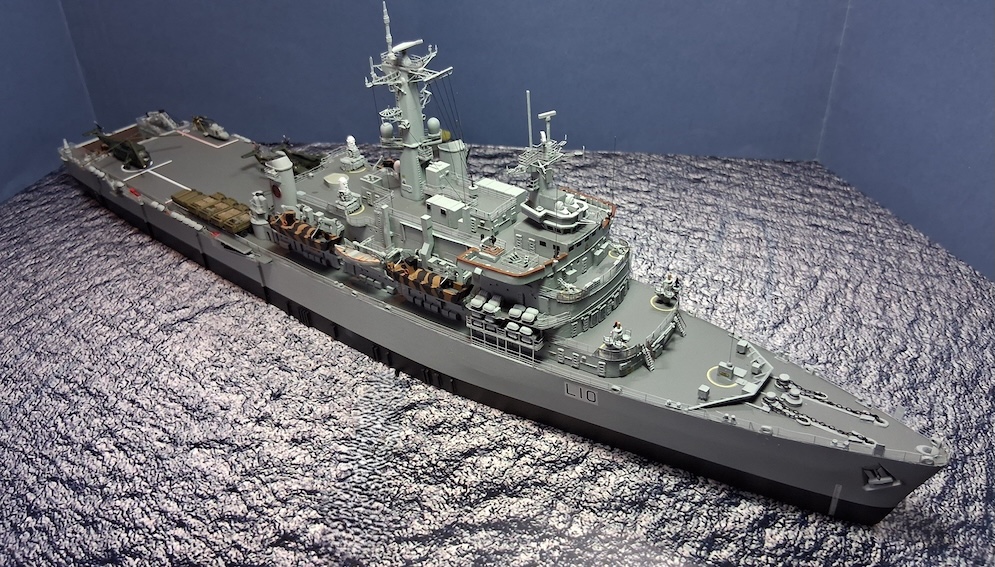
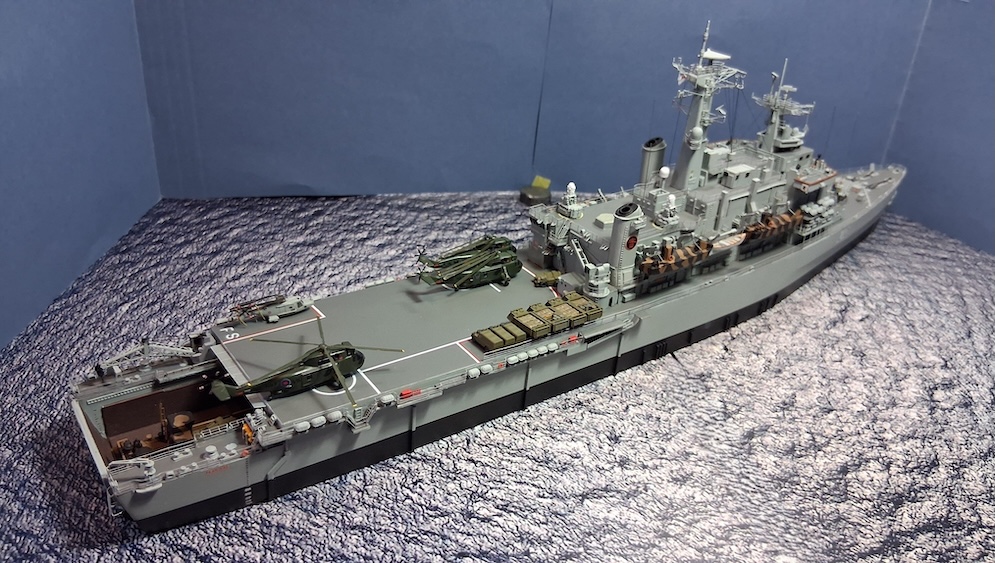
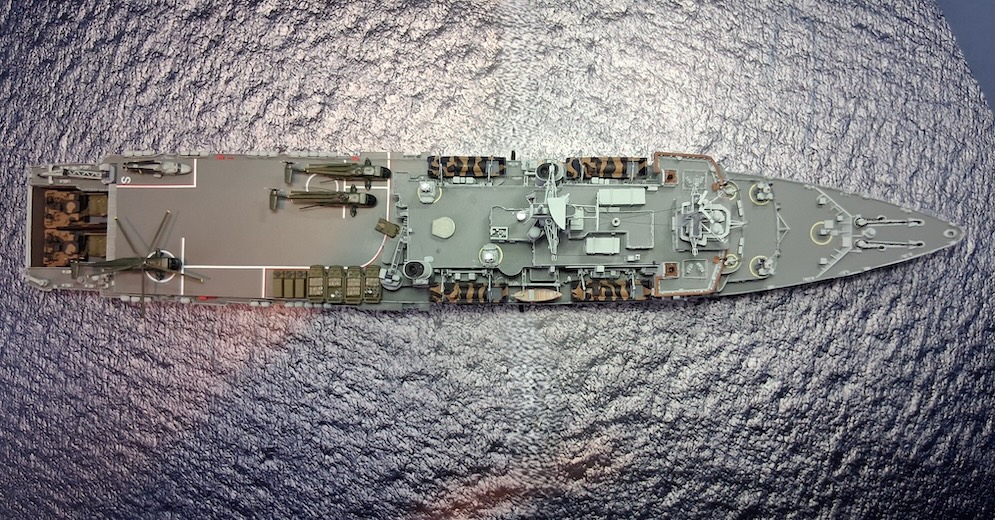
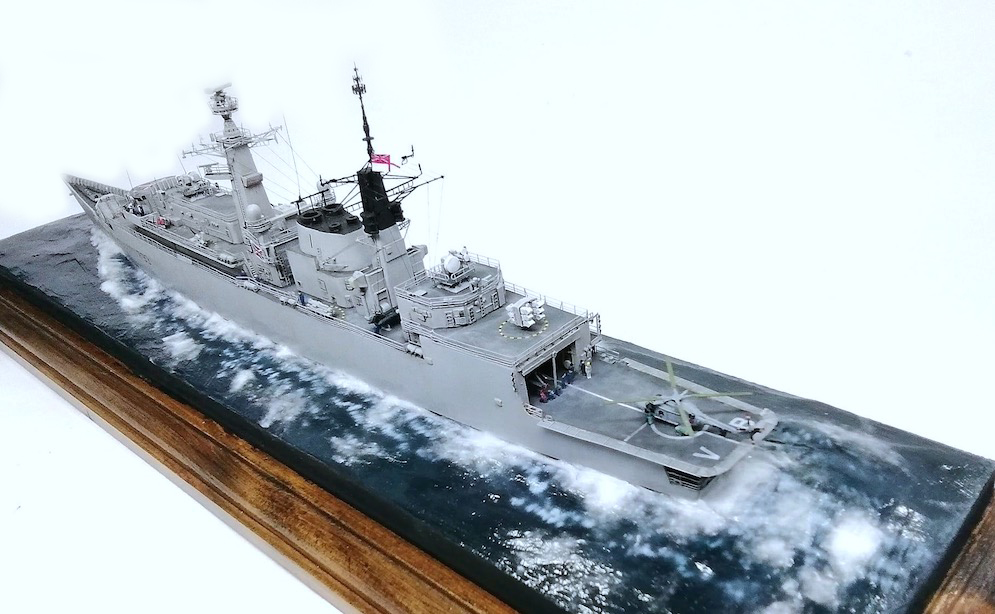
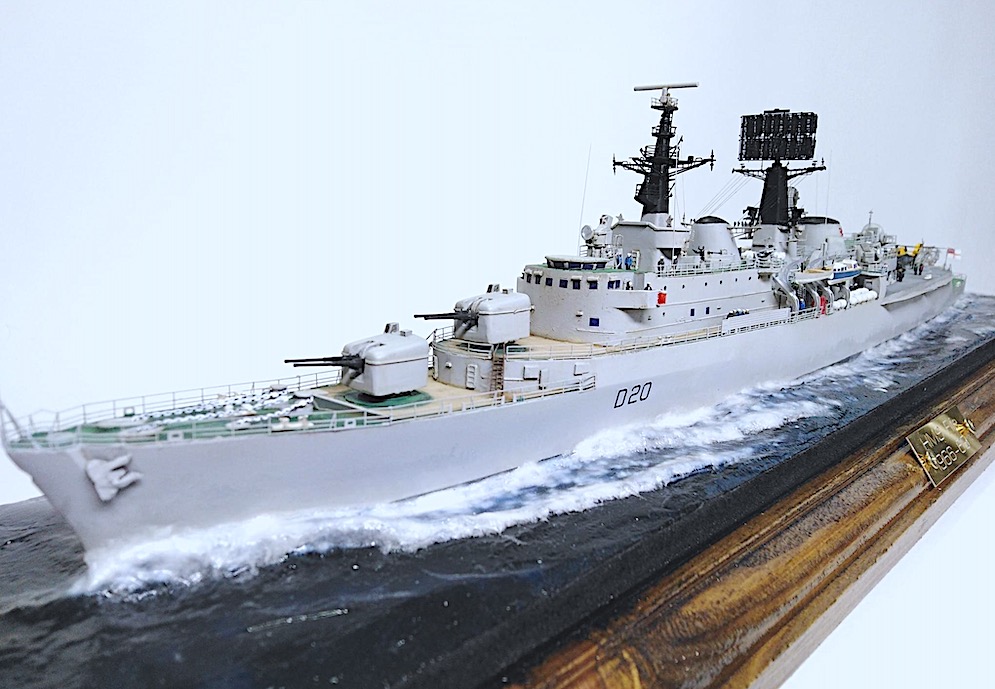
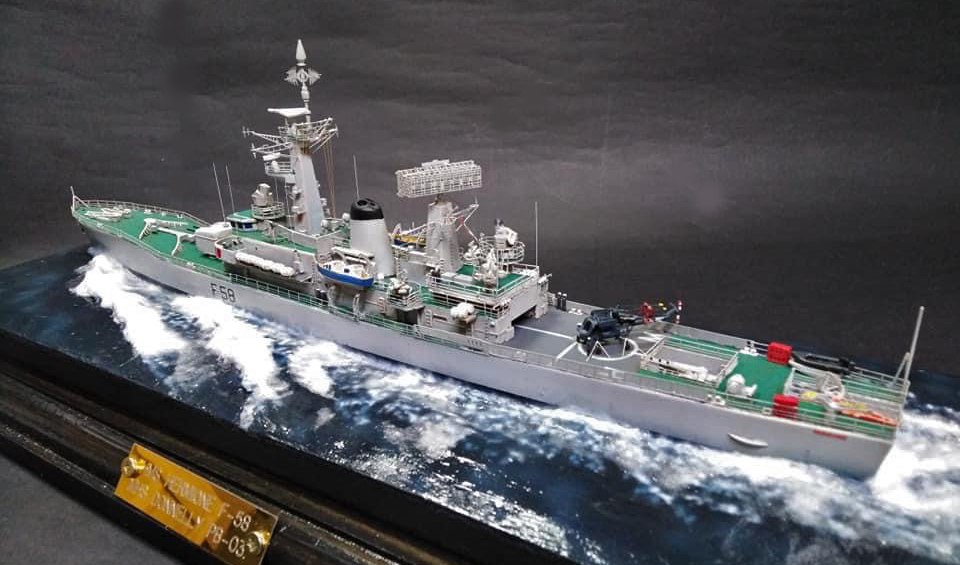
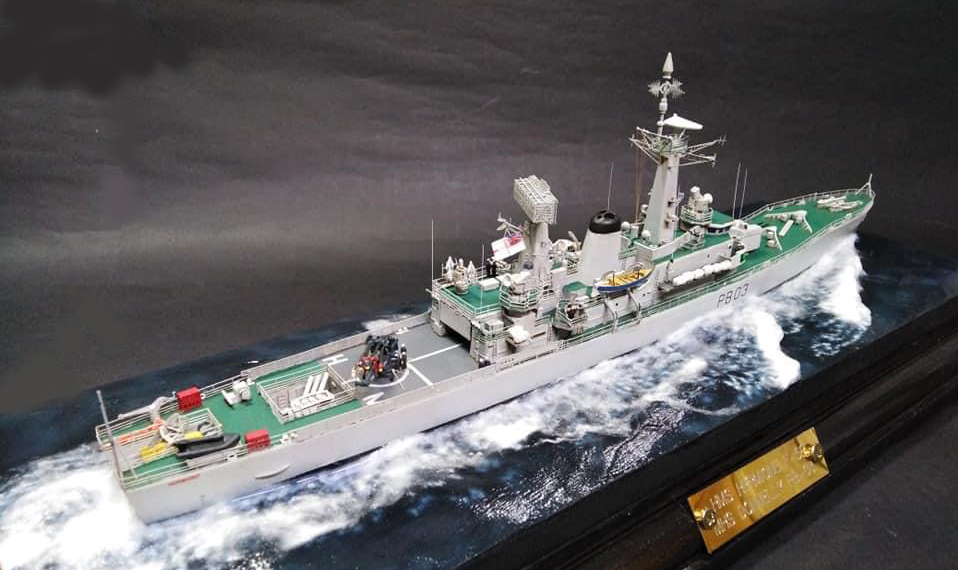
The ship is fitted and painted in her role of patrol vessel post-conflict in 1982. The ship didn’t have her identification Pennants showing and the flight deck letters were removed (painted over).
The model is a conversion of the 1:350th scale Atlantic Models HMS Apollo kit.
Ian R.
This is the Airfix boxing in 1:350th scale, I built it as a review for a magazine a few years ago and it wasn’t a pleasant experience.
Using the then White Ensign Models update set and cast replacement parts I replaced over scale features. The fit and general assembly of the Airfix parts was so bad it meant lots of filling and rubbing down to blend surfaces, when at the same time this company’s aircraft kits were great.
Ian R.


All the best, Mike Moore
Ian R.


Ian R.
I’m sure the eagle eyed (pun very much intended) will notice I forgot to add the anchors prior to photos.
Base is beading and foam from B&Q
Wave pattern bashed using rounded end of lollipop stick
AK Pacific Ocean
Then just a bit of fun with airbrush
Used PE on antenna etc
Figures from Eduard
Vehicles from Starling Models
3D printed Seahawks from Shapeways
Westland Whirlwind from cutting up kit Wessex.
Some rod etc from Albion Alloys for gun barrels.
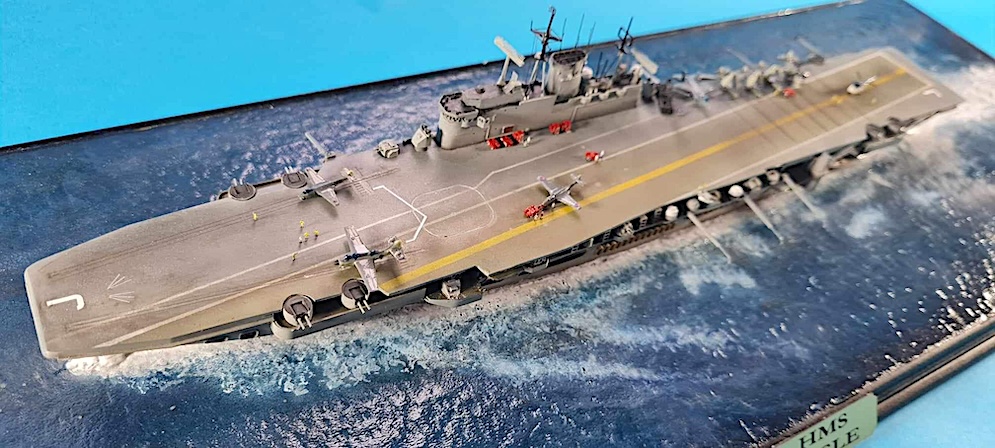
All good fun in the end and passed on to the Ulster Aviation Society to sit beside HMS Eagle and Suez veteran Seahawk WN108
(First attempt at a seascape)
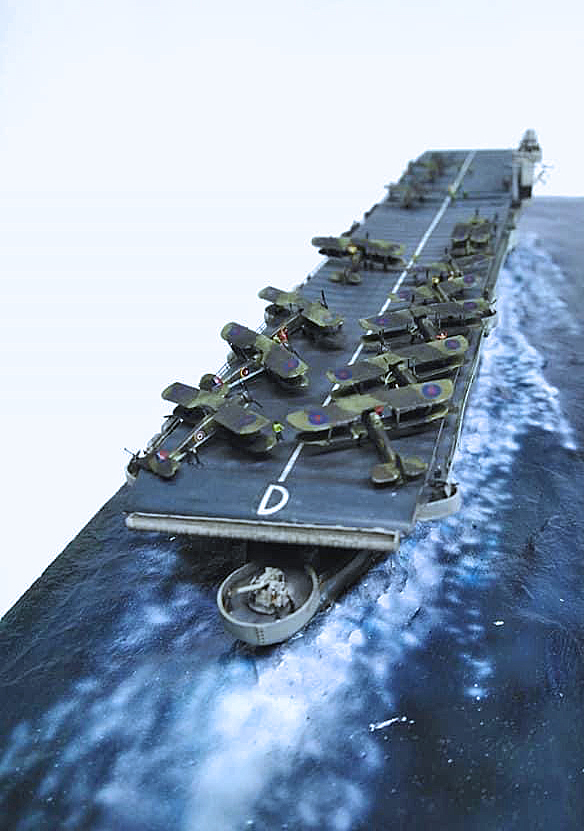
Michael S.
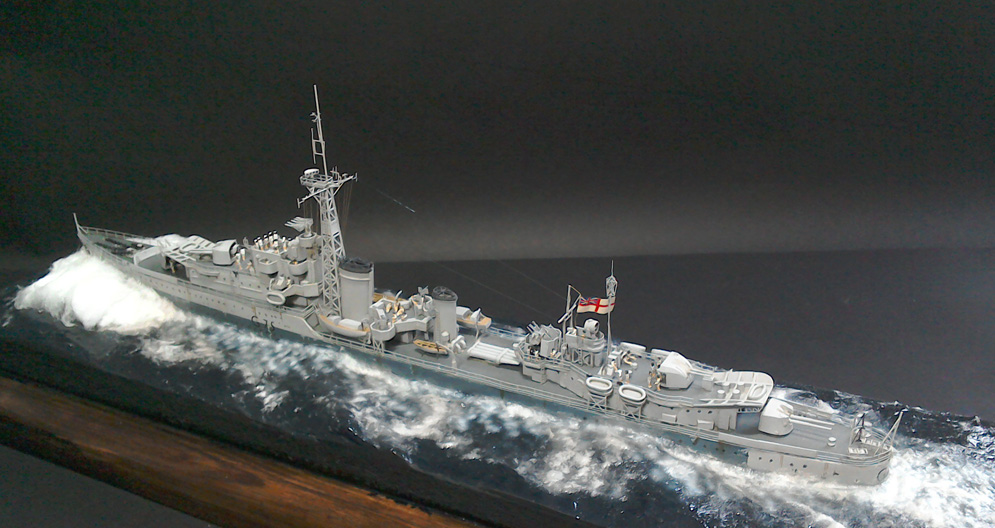
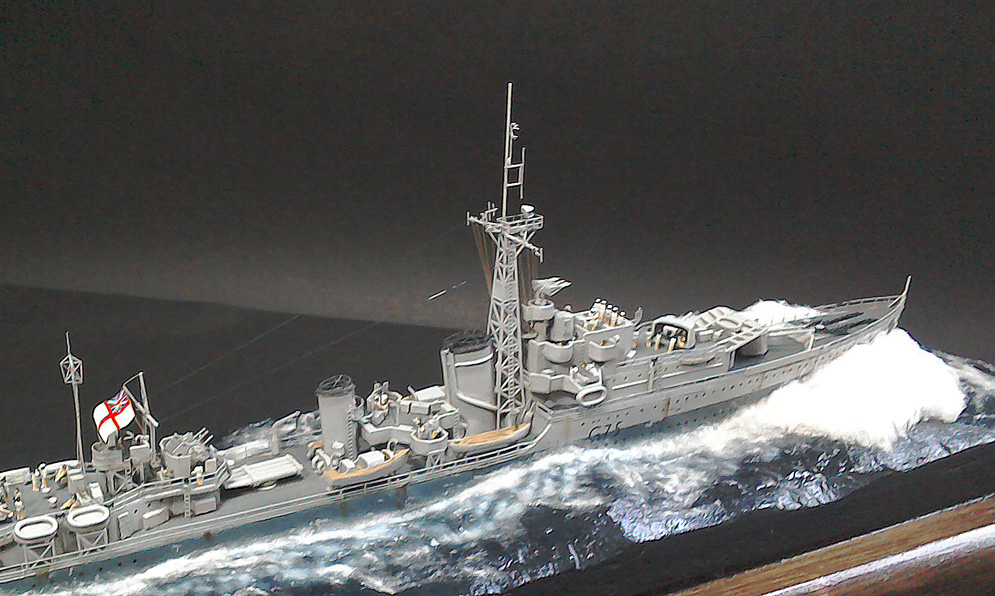
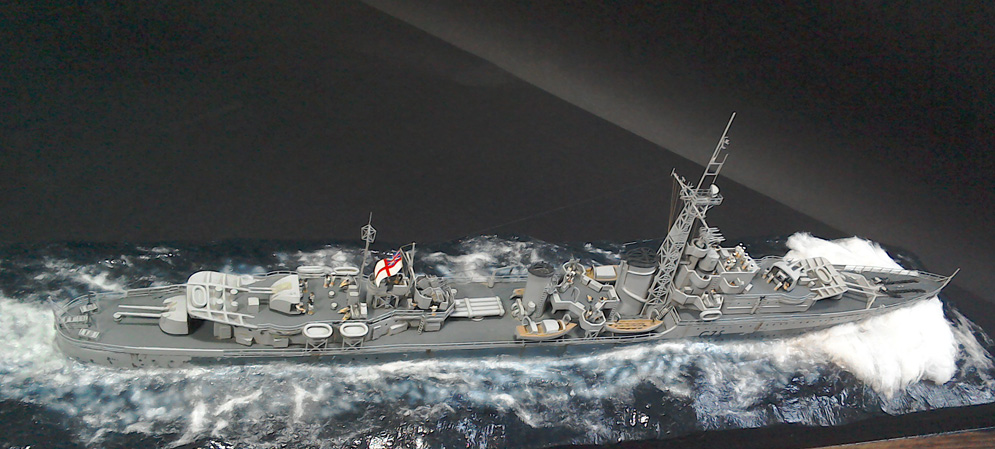
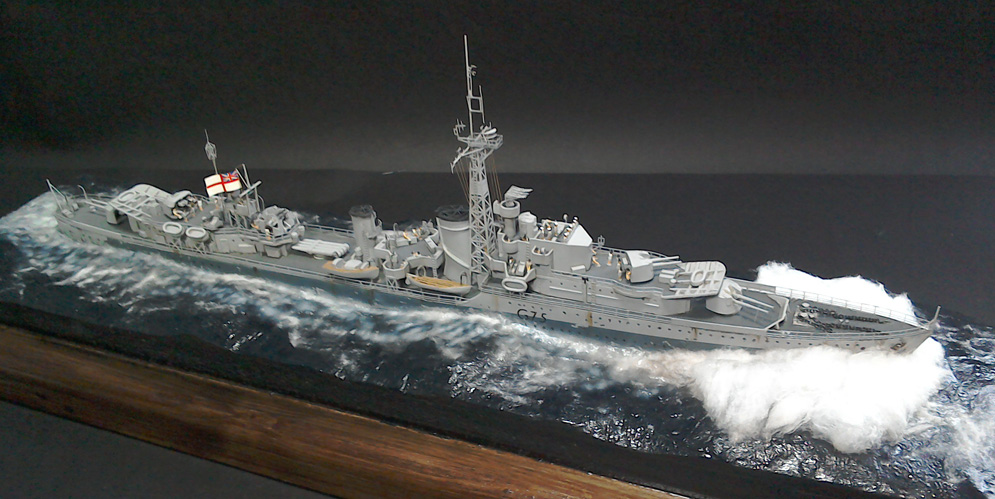
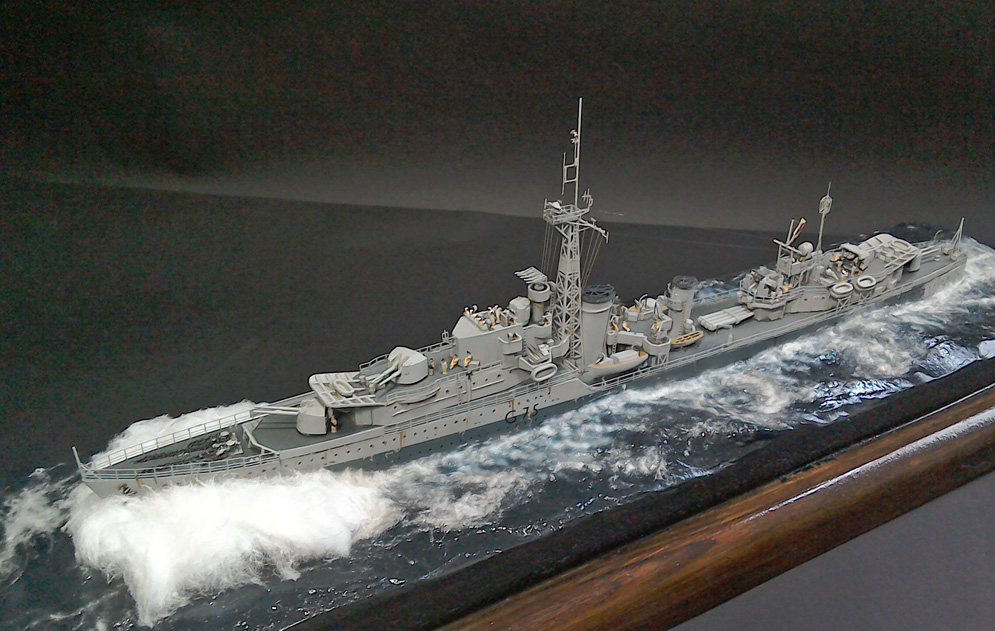
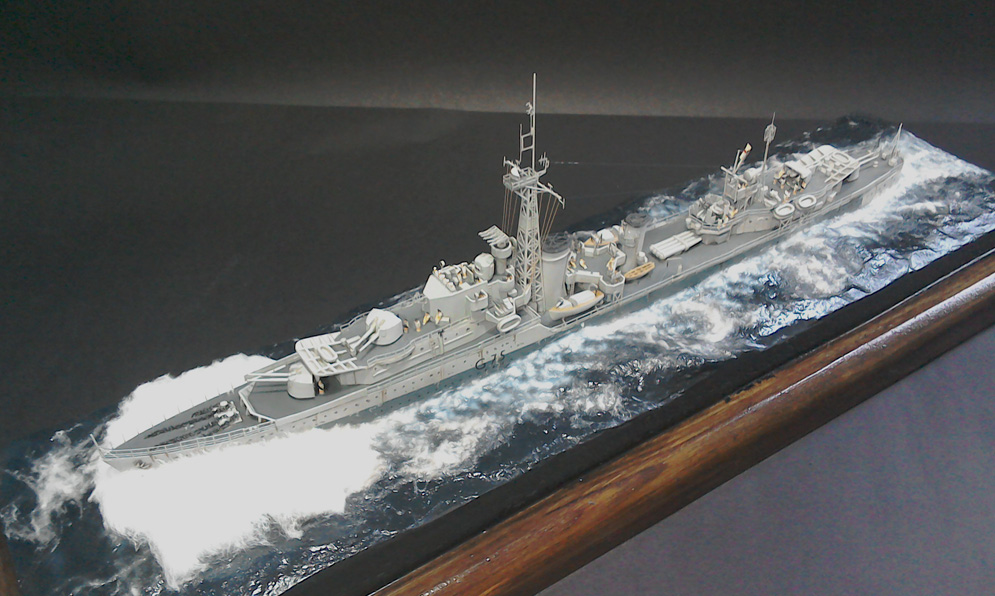
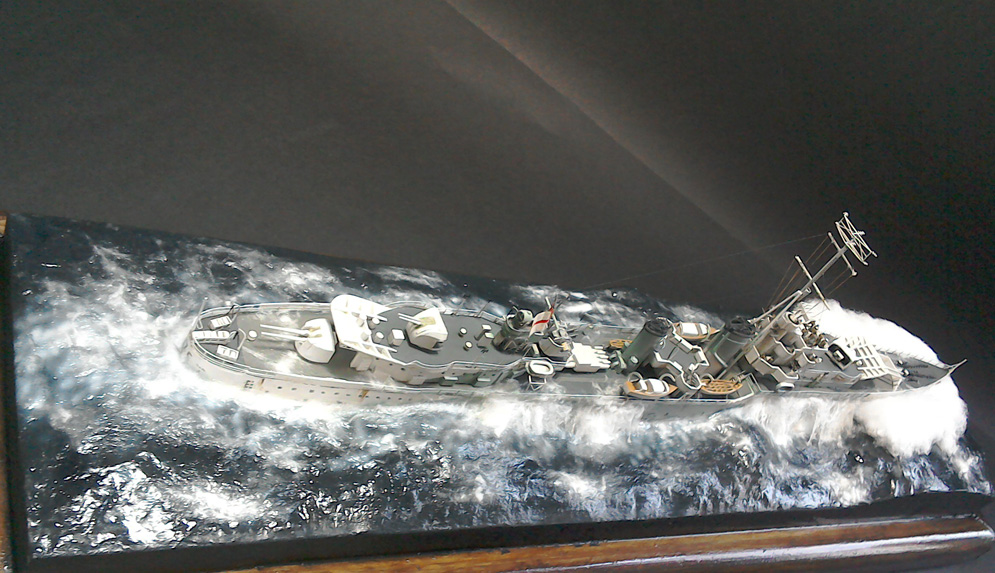
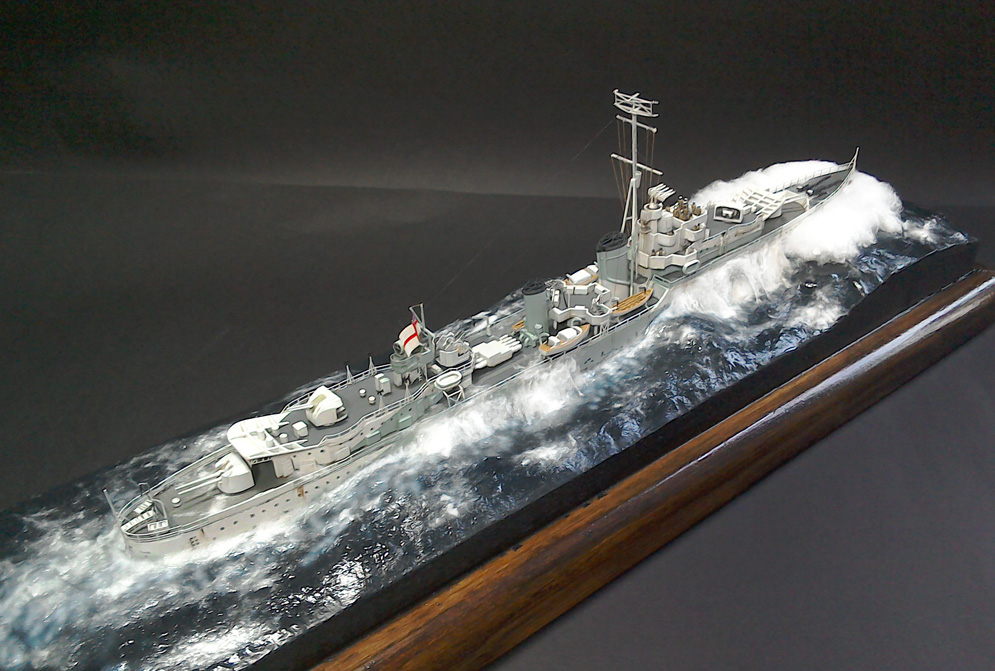
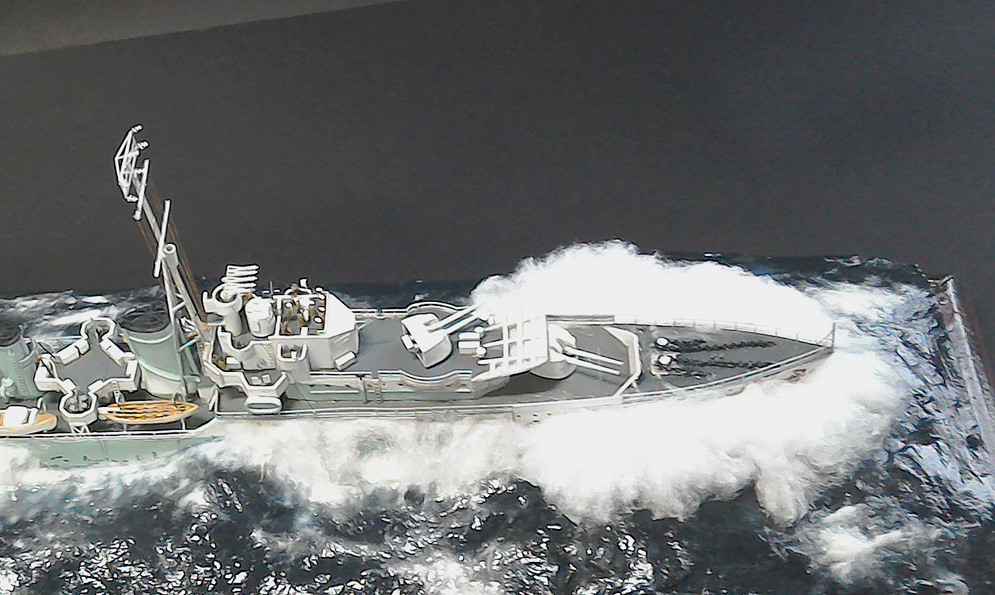
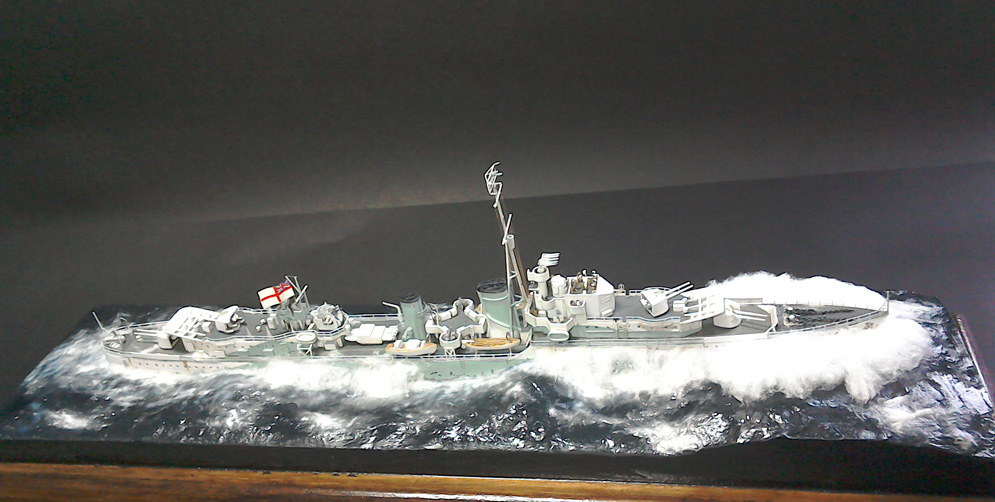
These are the finished models that were used us the recent SMN Modelling in a Day workshop.
The models are of HMS Eskimo a Tribal Class destroyer, the stormy pics are of ship circa September 1942 when escorting Arctic Convoy s and the calmer sea the ship in Early 1945 when serving with Eastern Fleet fighting Japanese forces, note the differences in equipment and mast configuration.
Regards, Ian R.

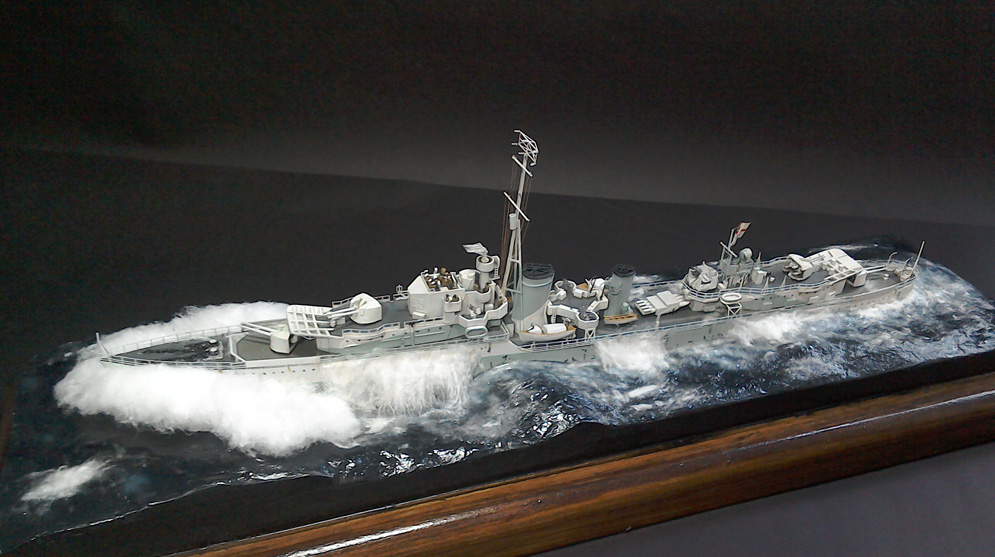
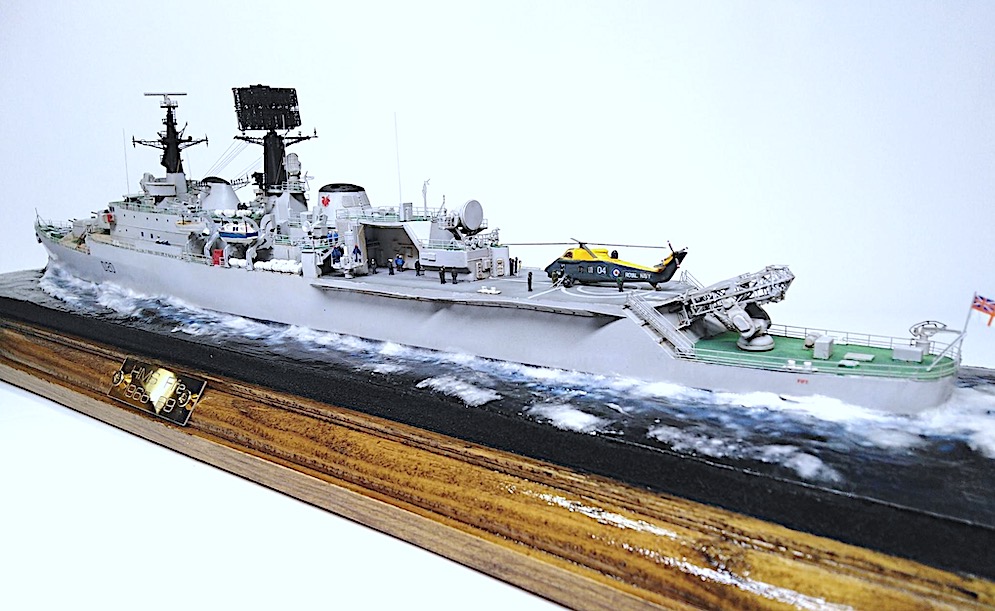

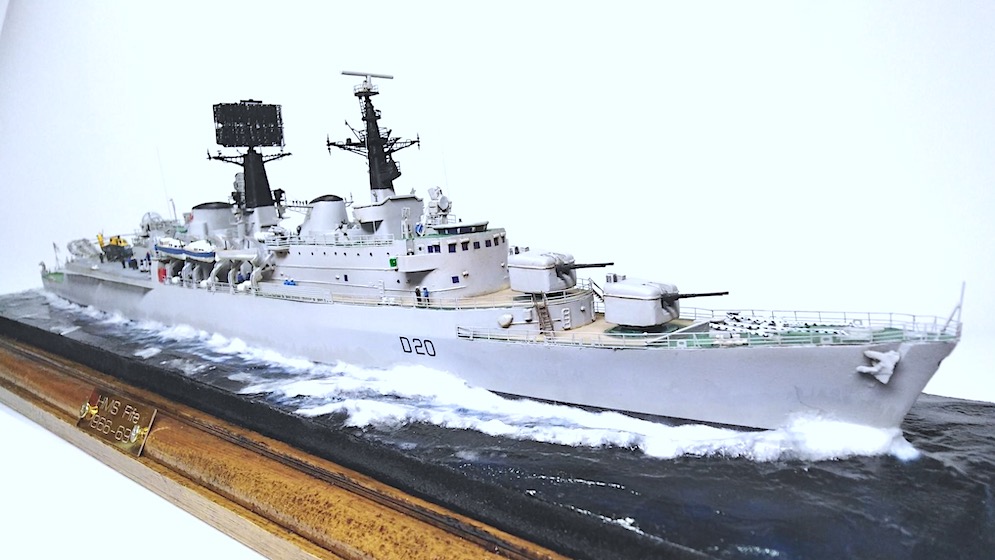
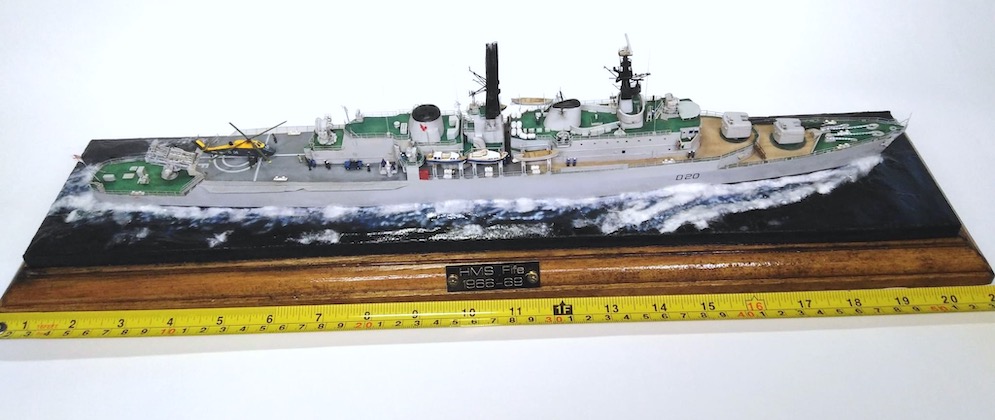
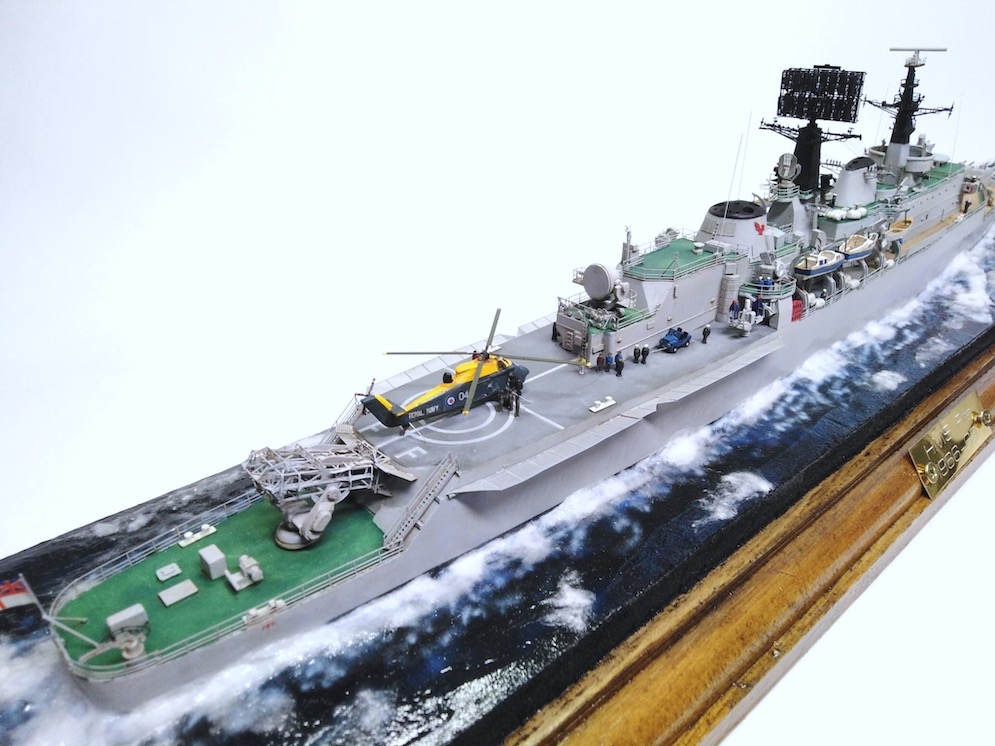
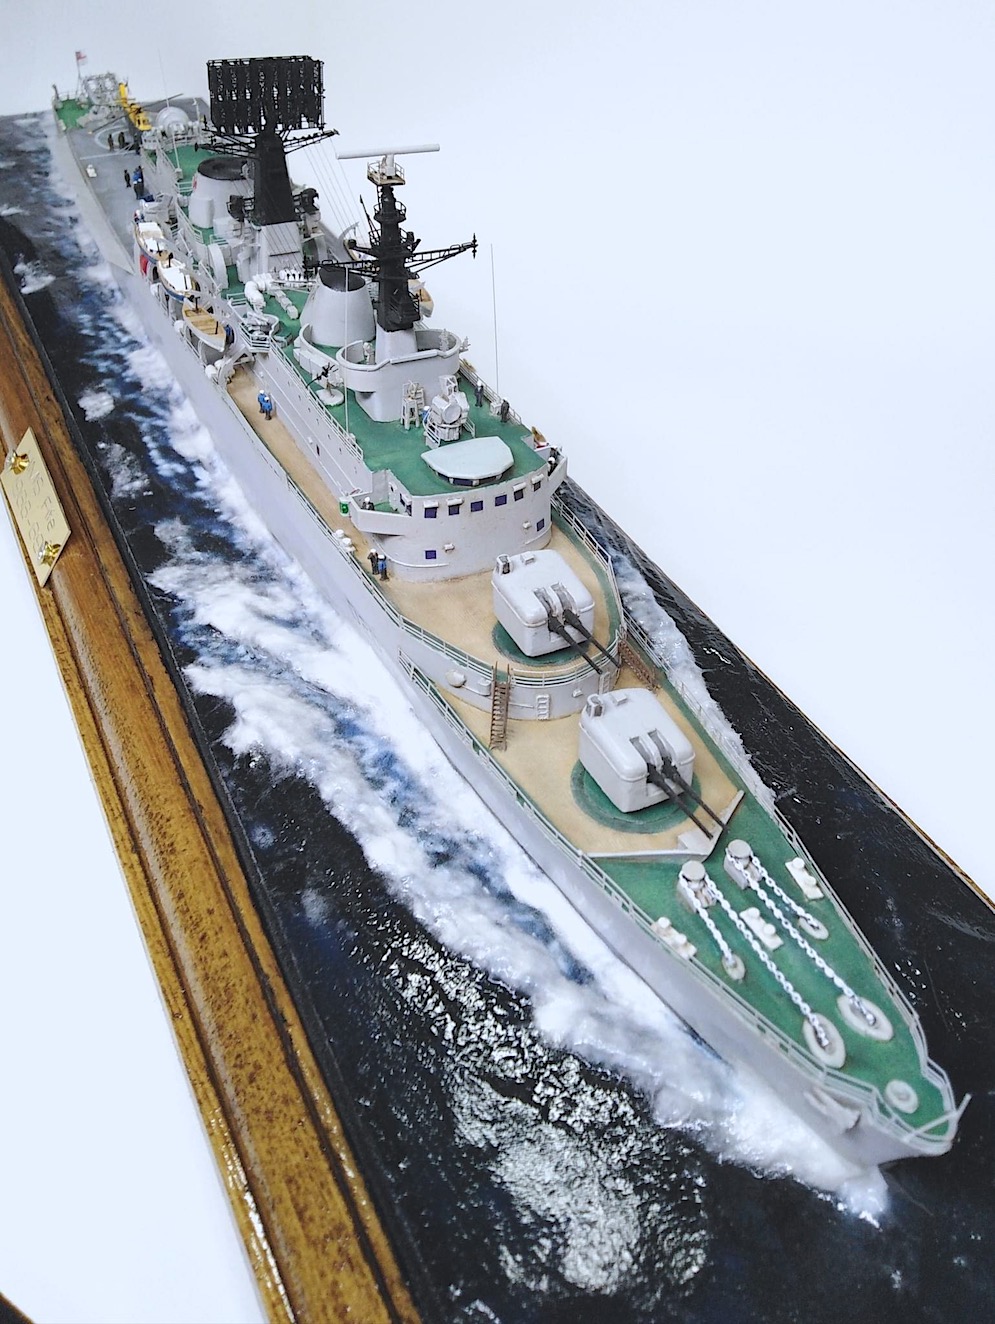
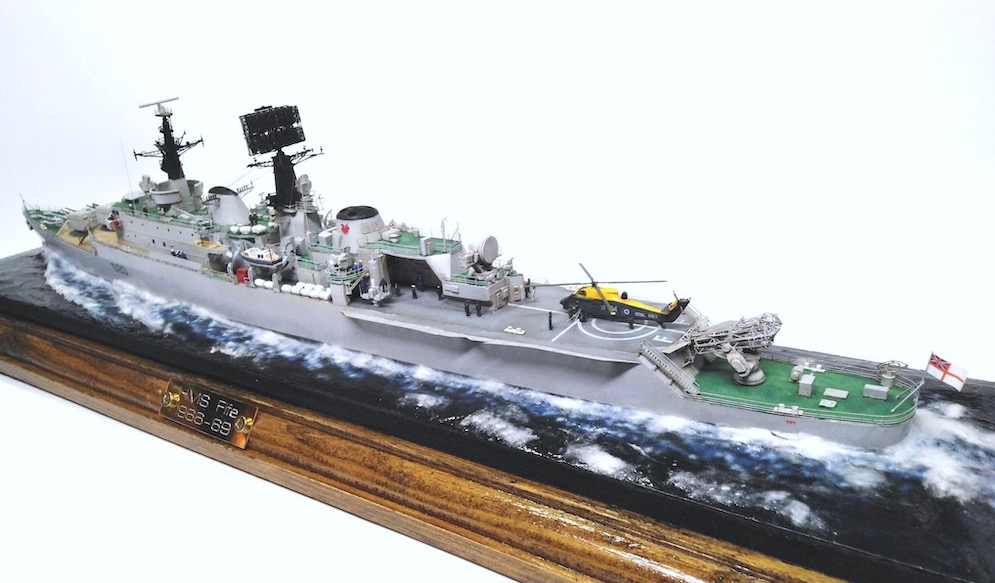
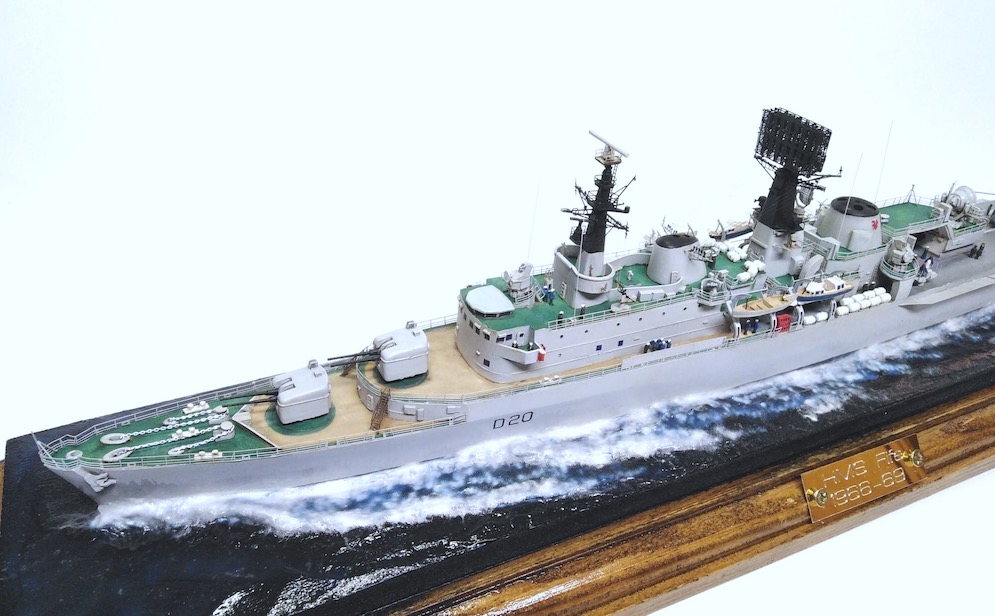
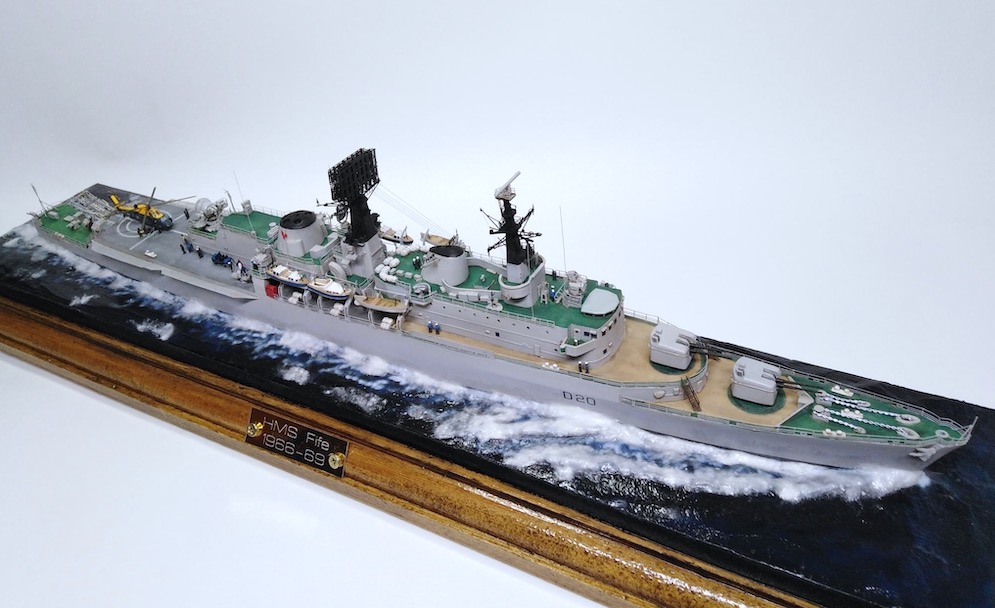
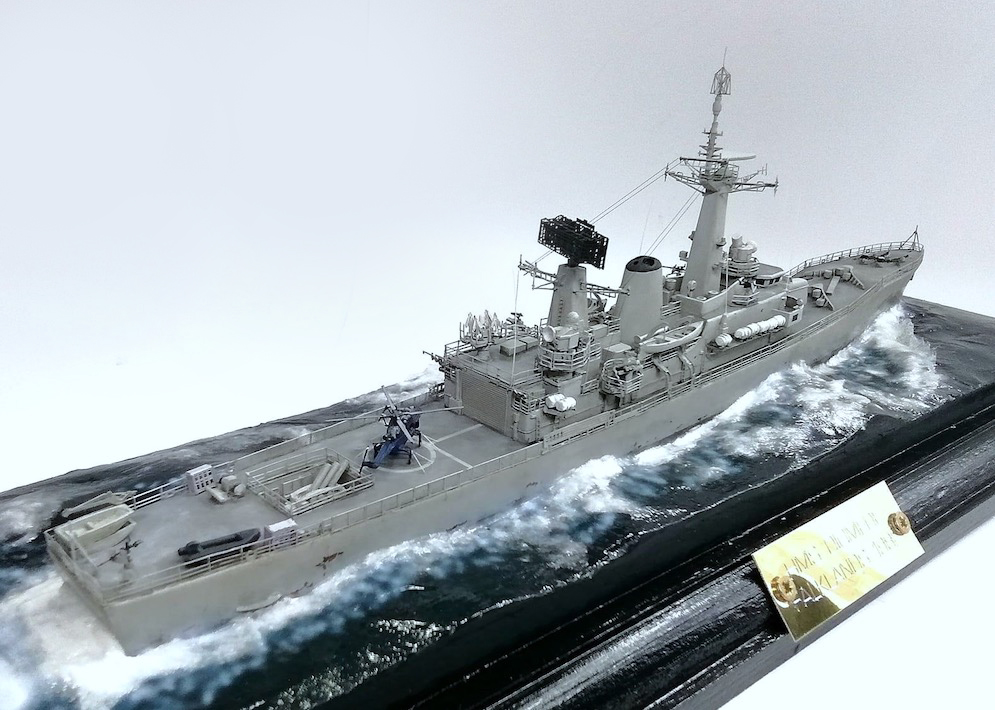
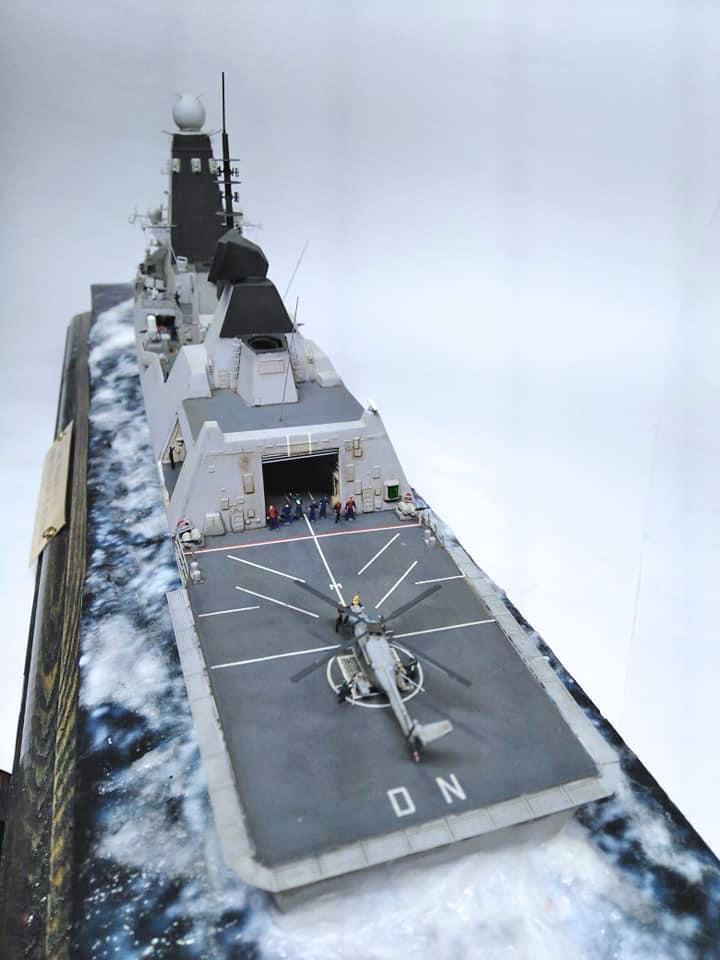
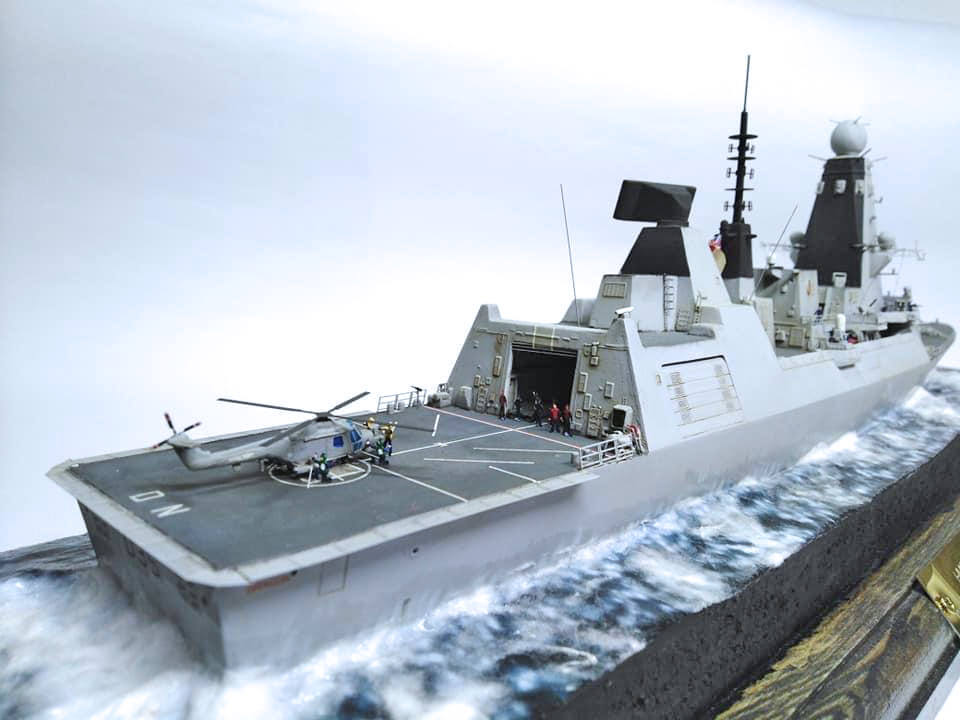
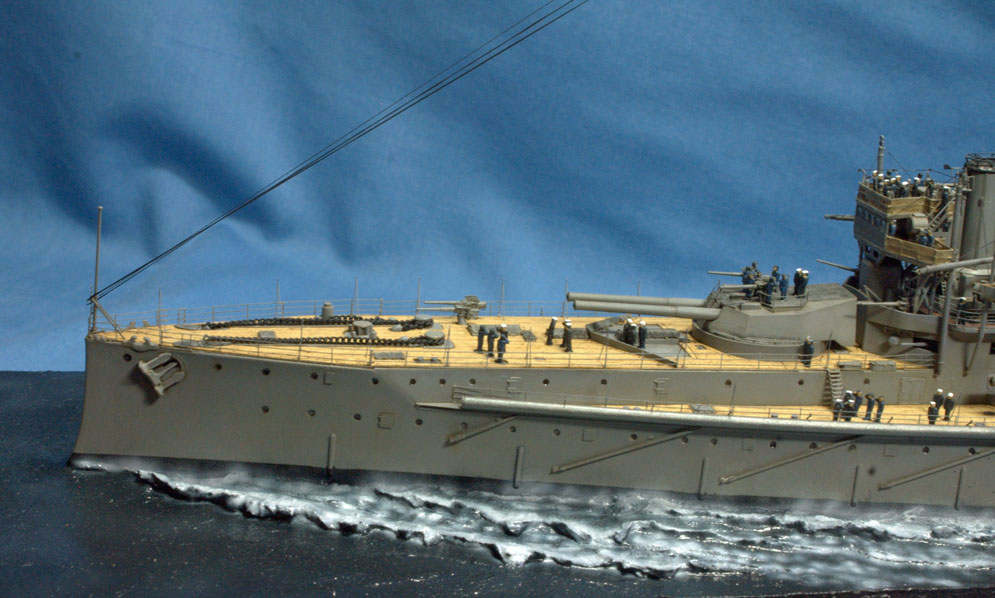
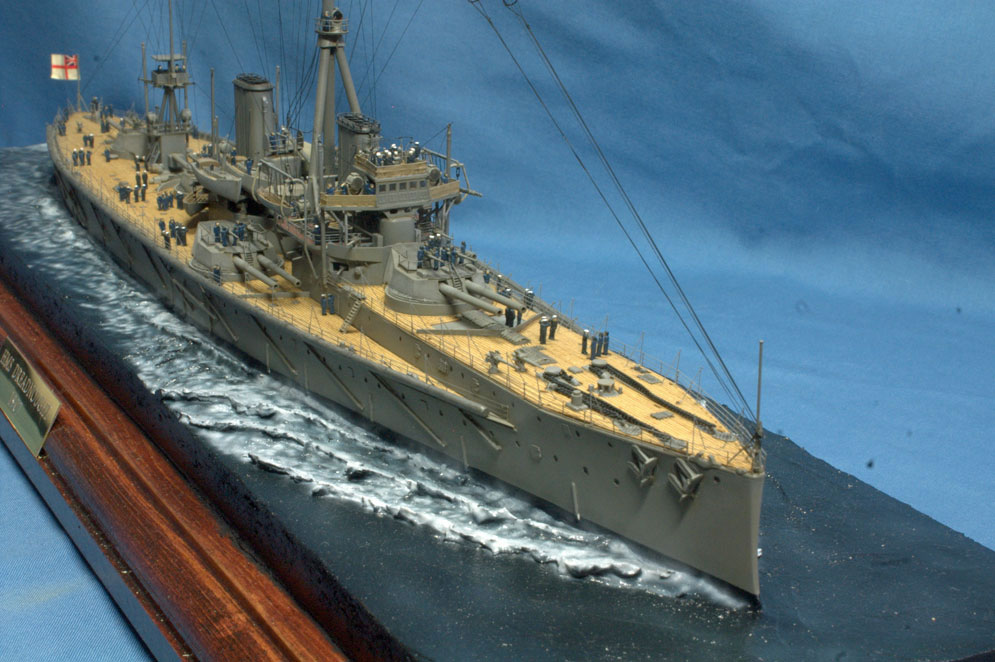
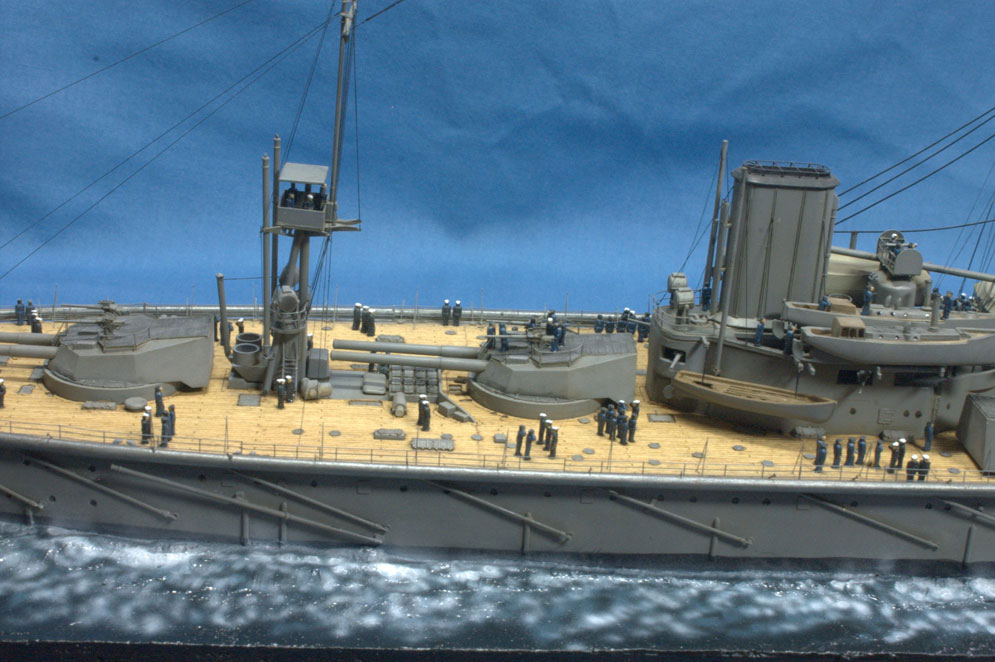
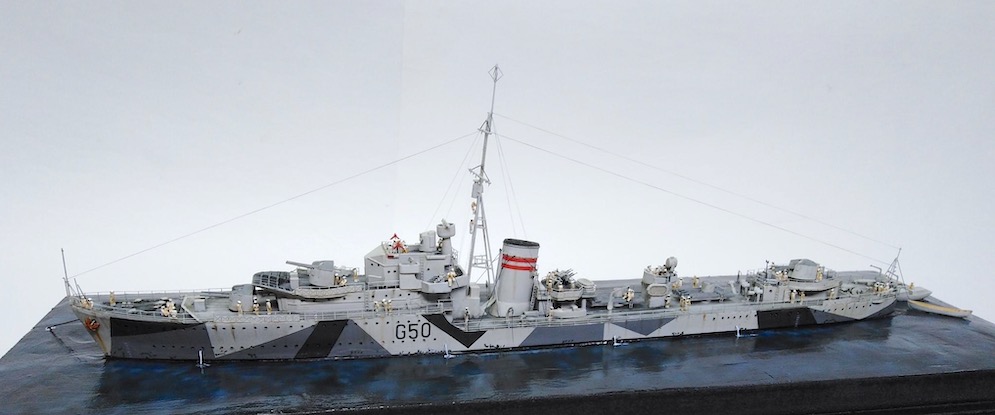
County Class Destroyer.
This is the Atlantic Models resin multimedia kit in 1:350th scale (a figure is about 4mm tall).
Ian R.
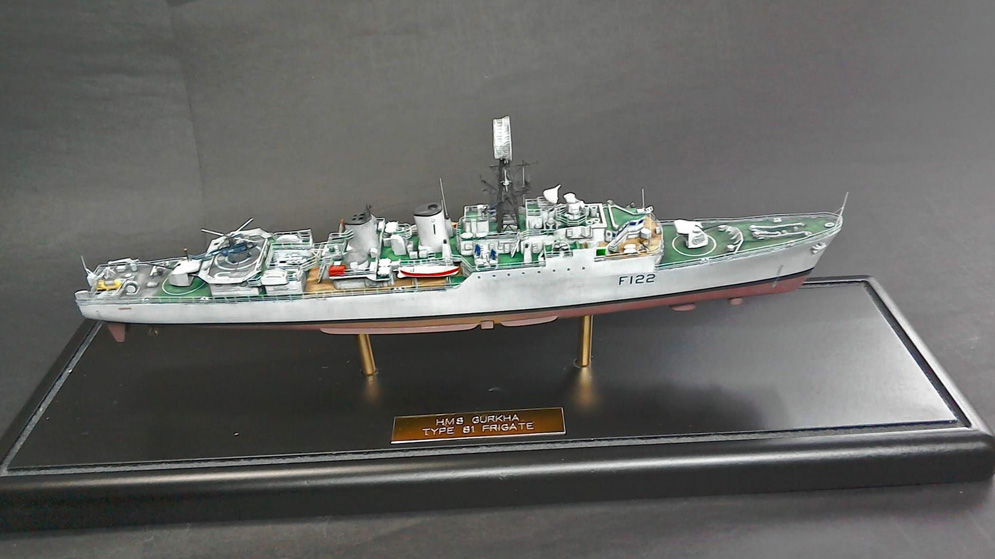
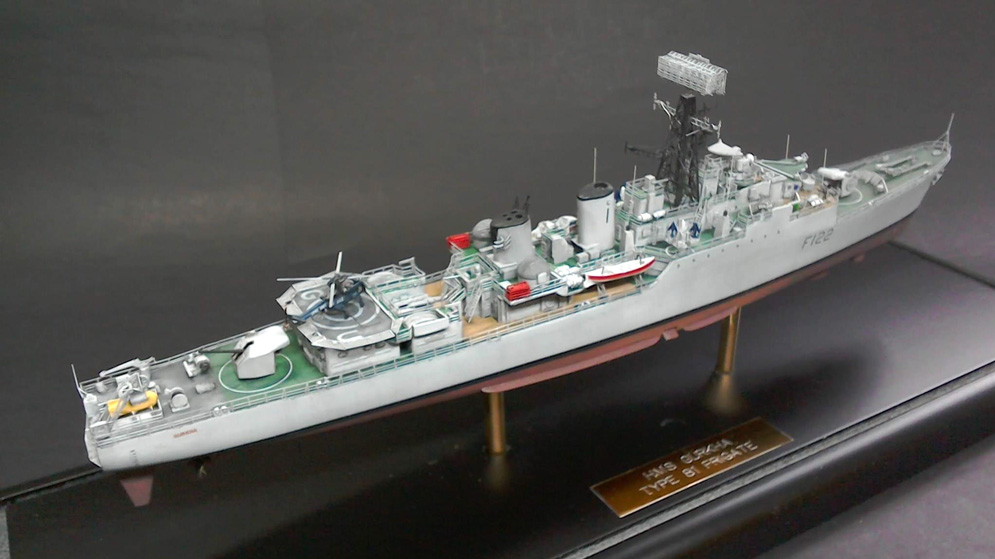
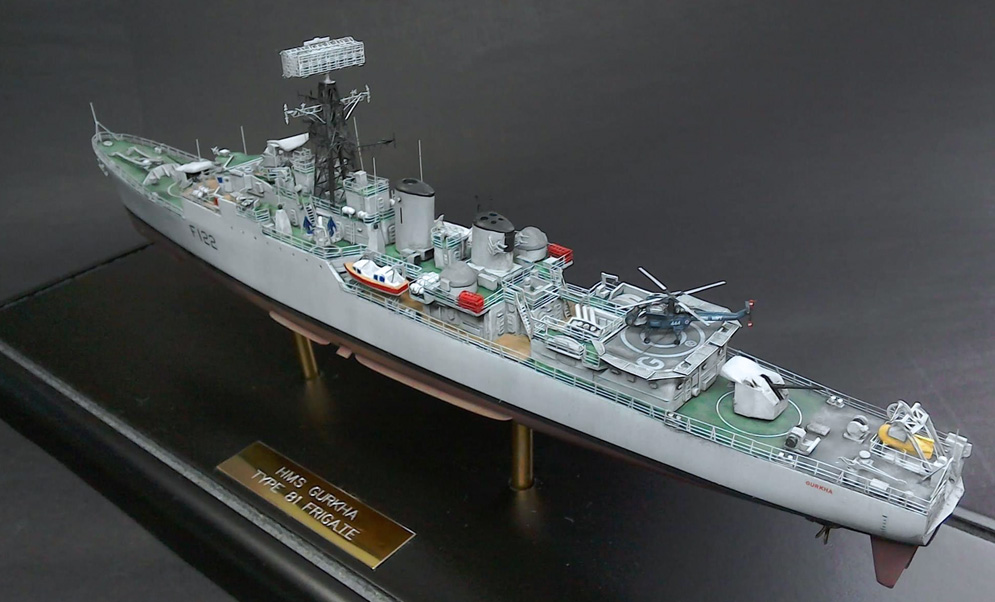
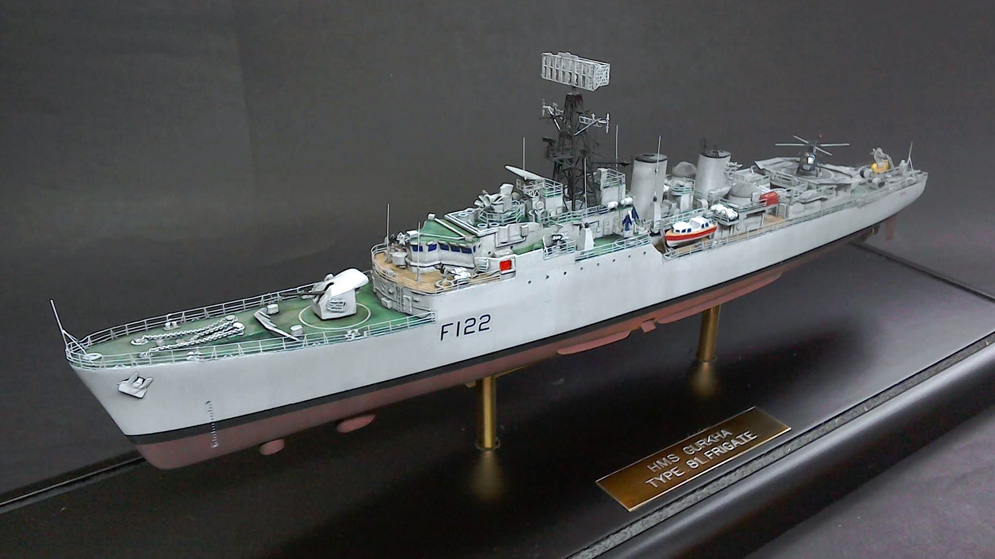
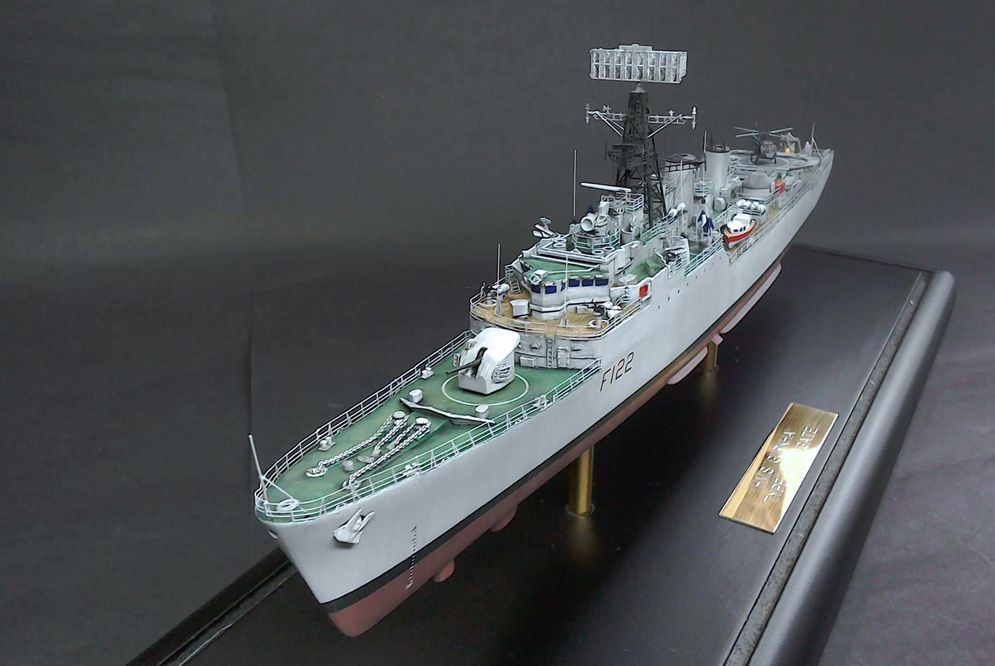
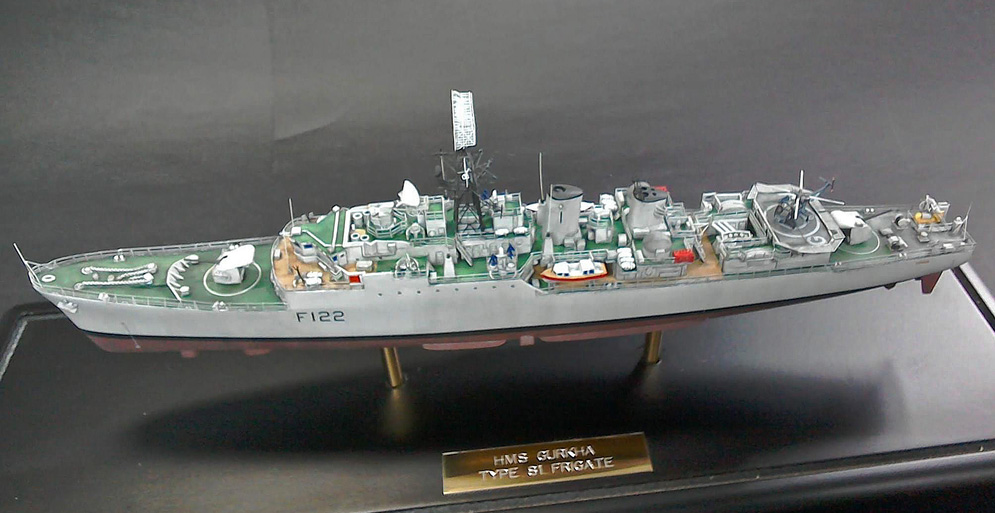
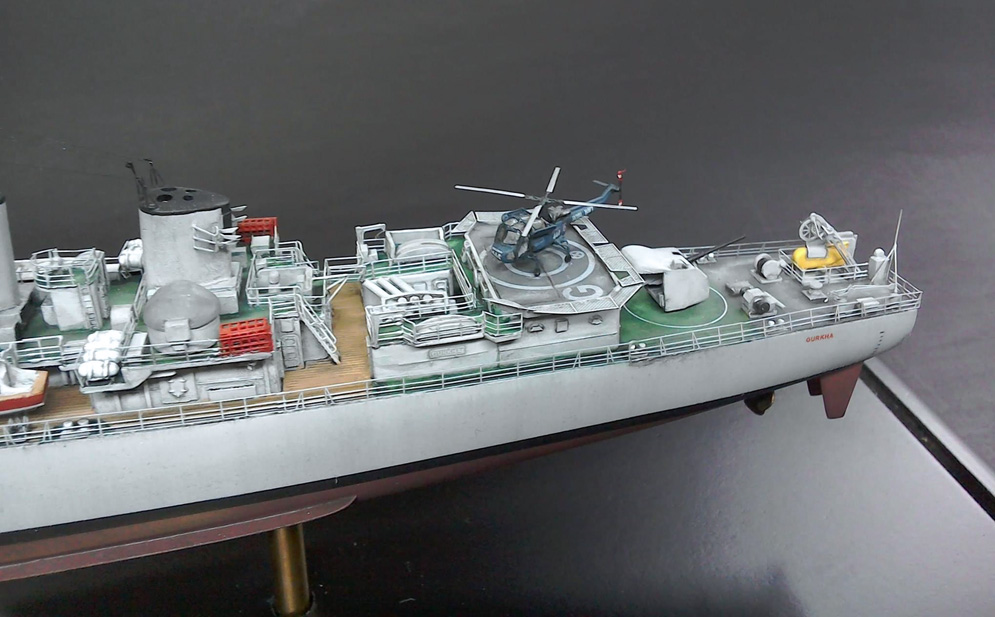
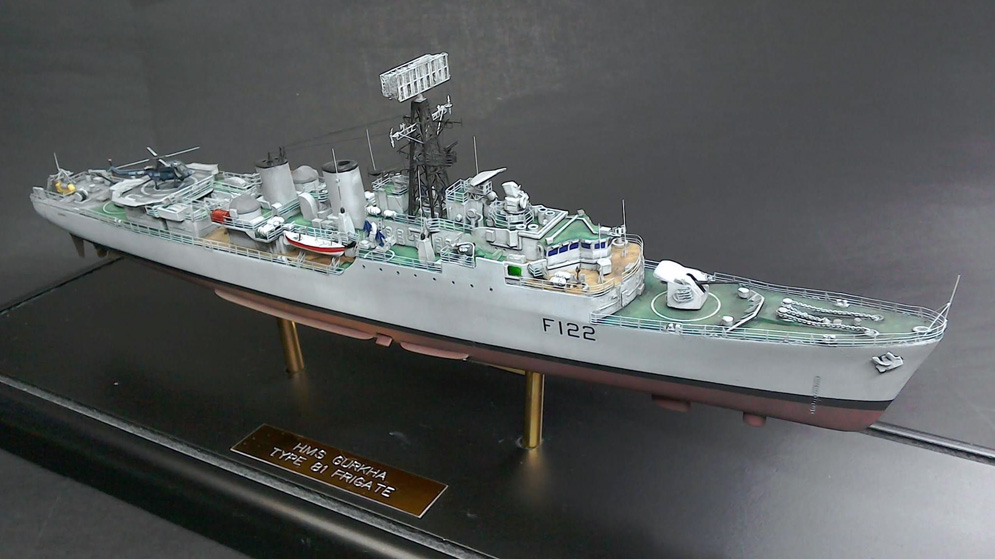
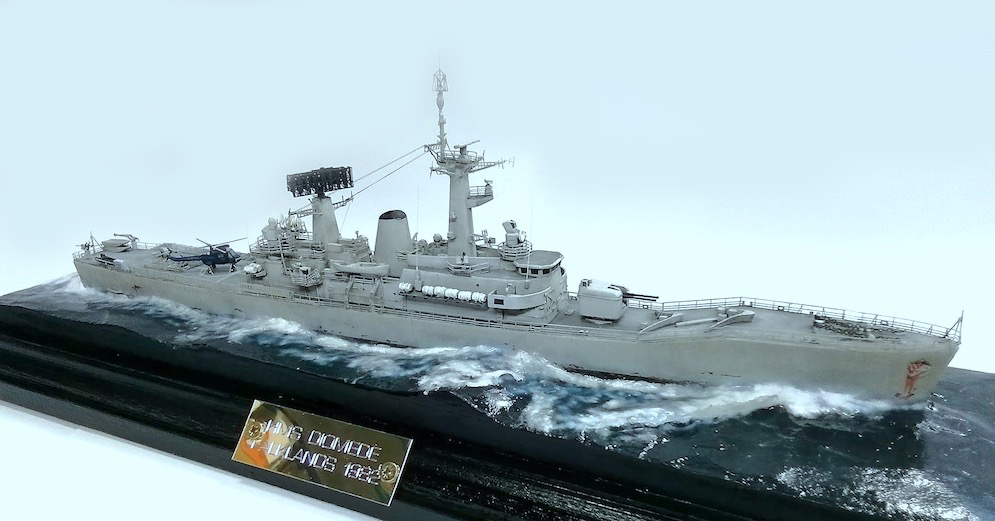
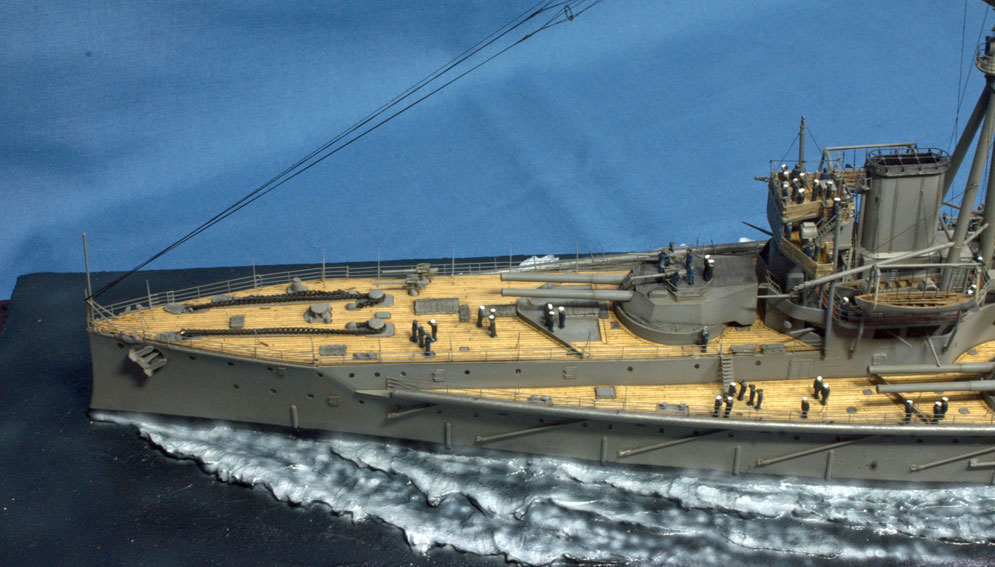
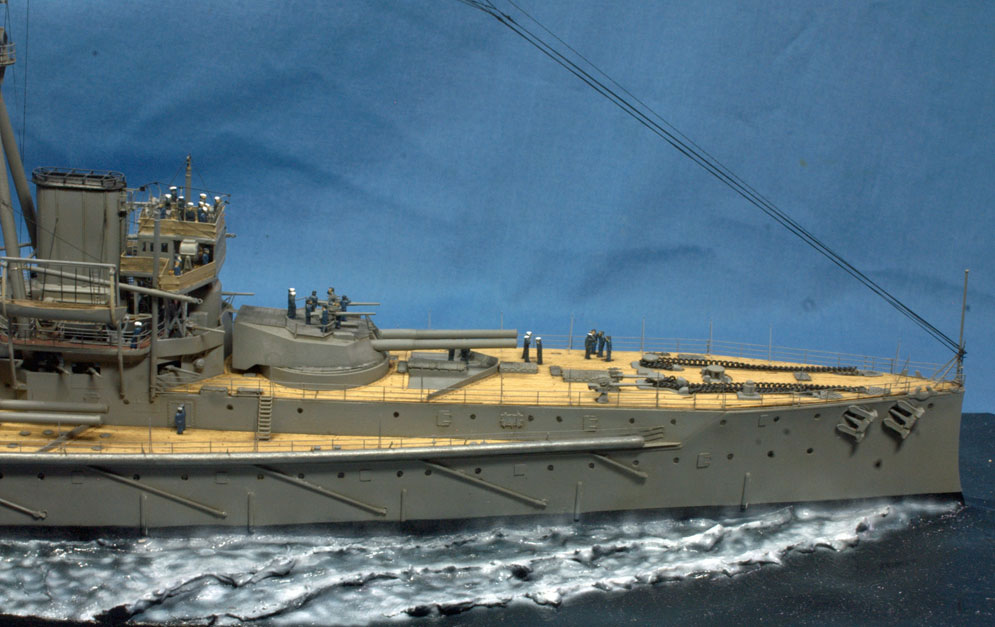
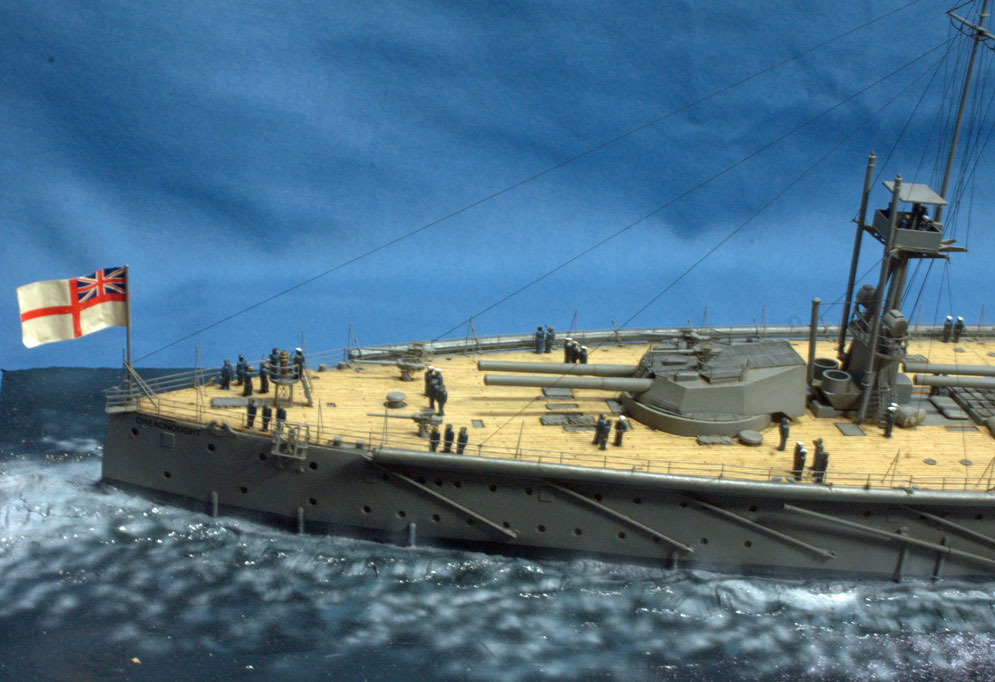
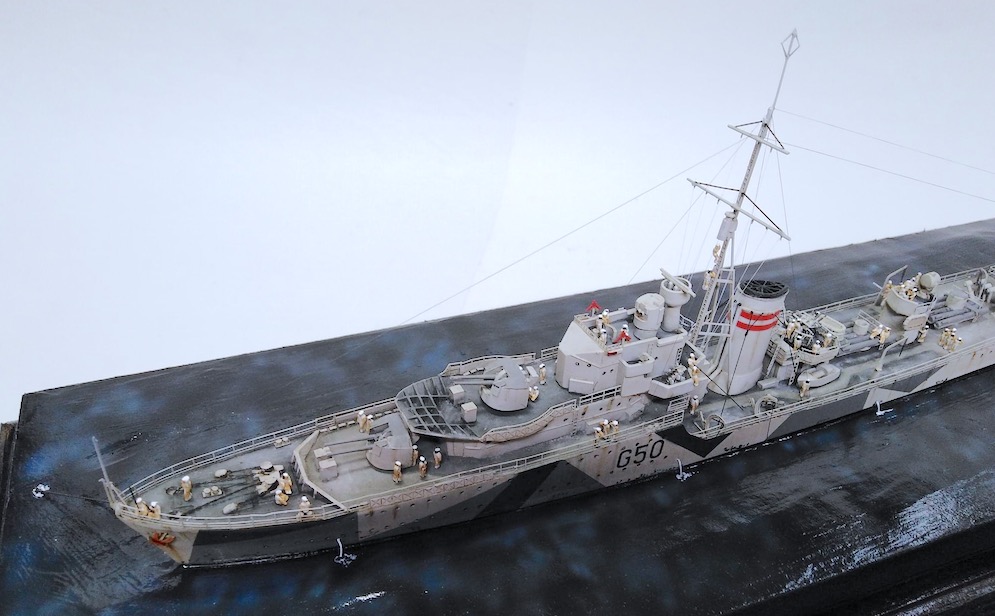
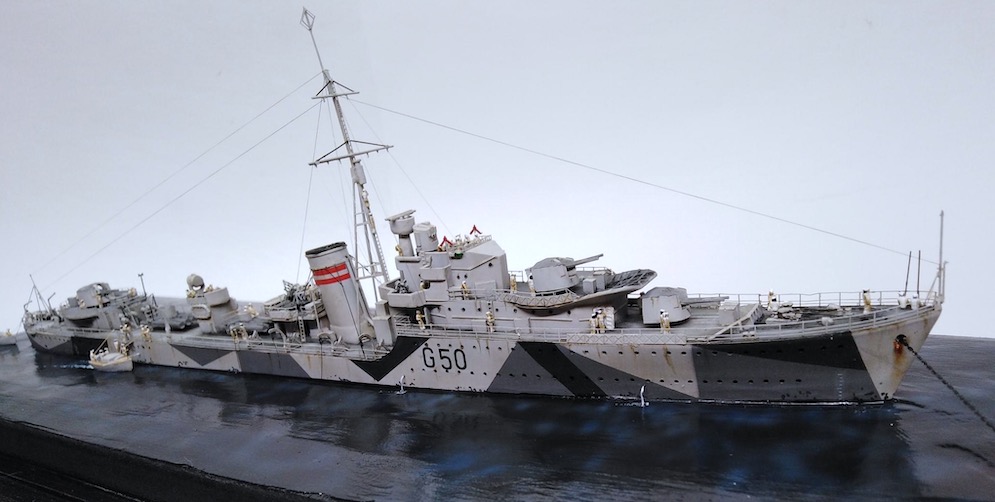
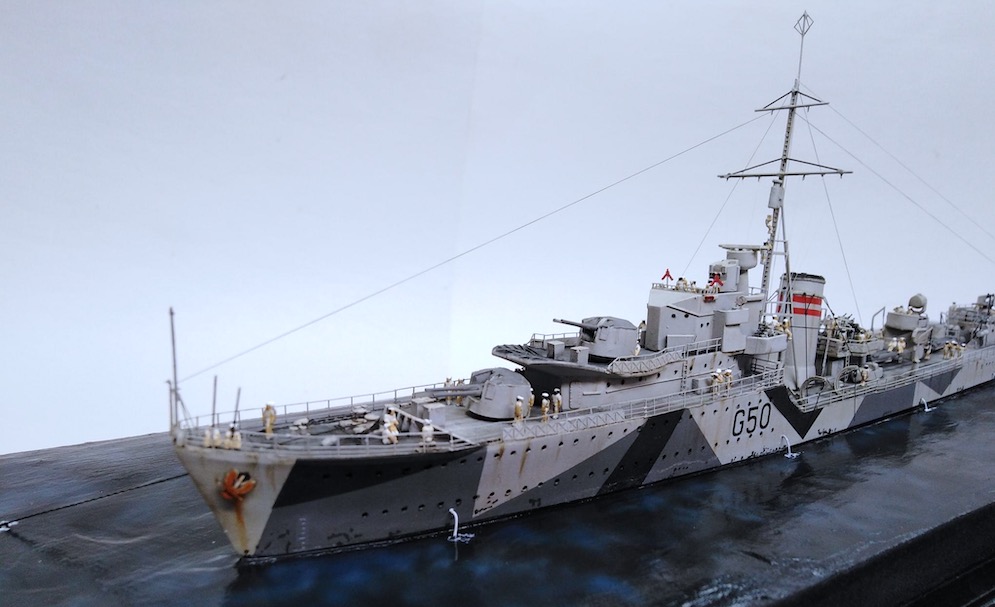
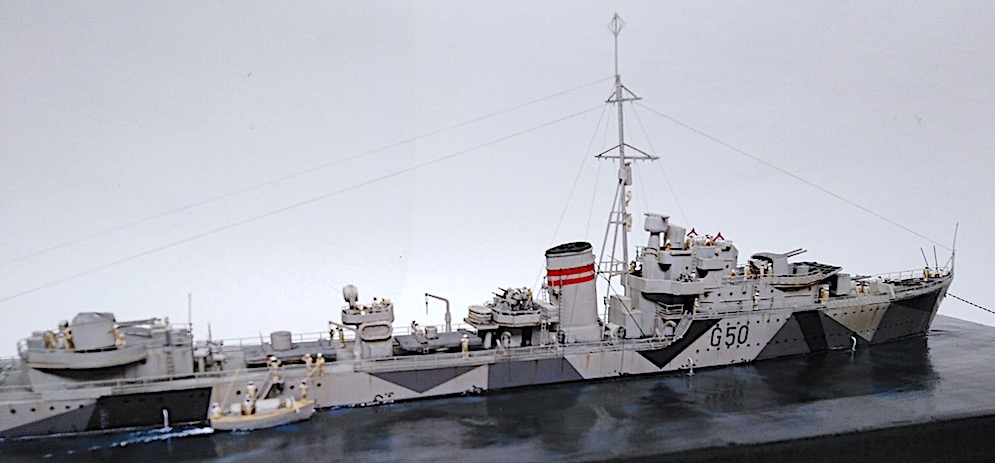
This is the Atlantic Models 1:350th scale kit made to appear as Gurkha. You can make any of the class from kit.
Although hard to tell size, the model hull is approximately 12 inches long. This was built 12 months ago for a colleague.
Ian R
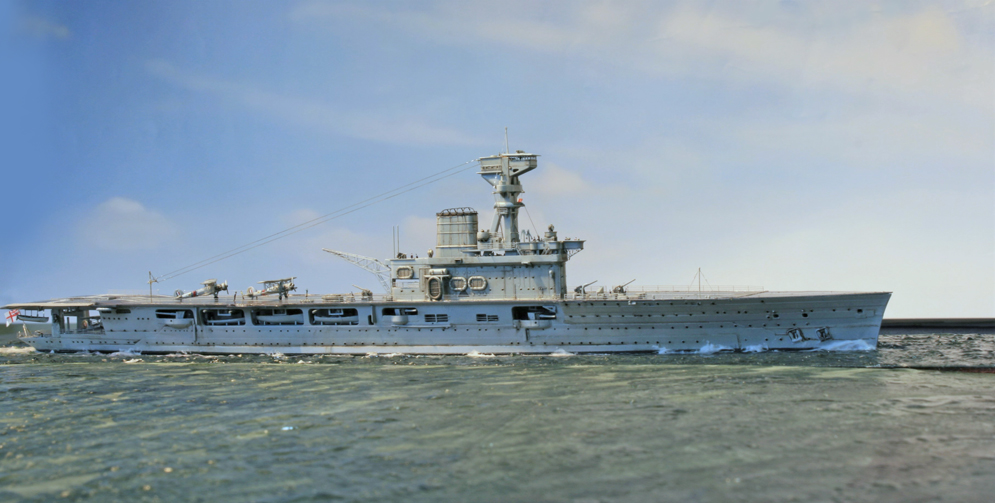
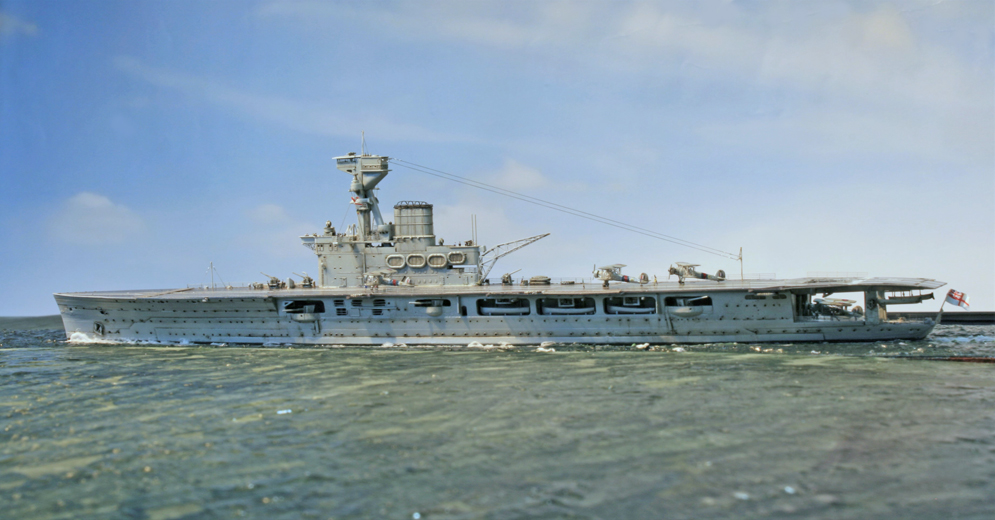
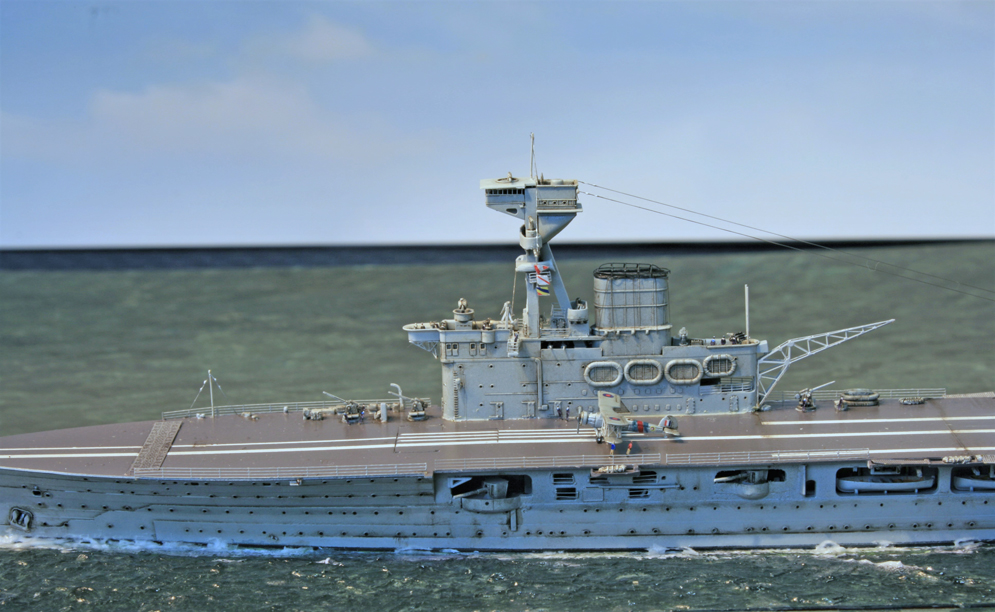
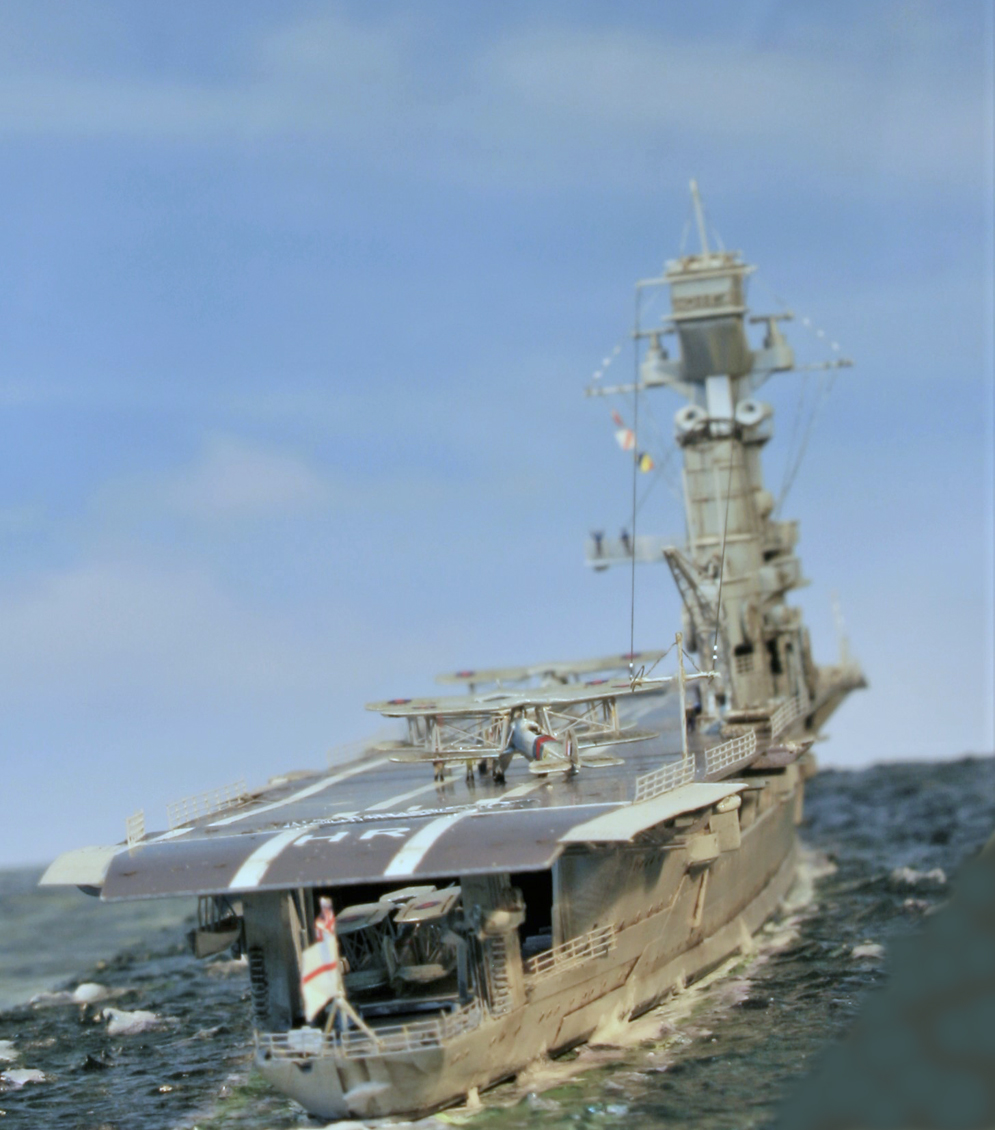
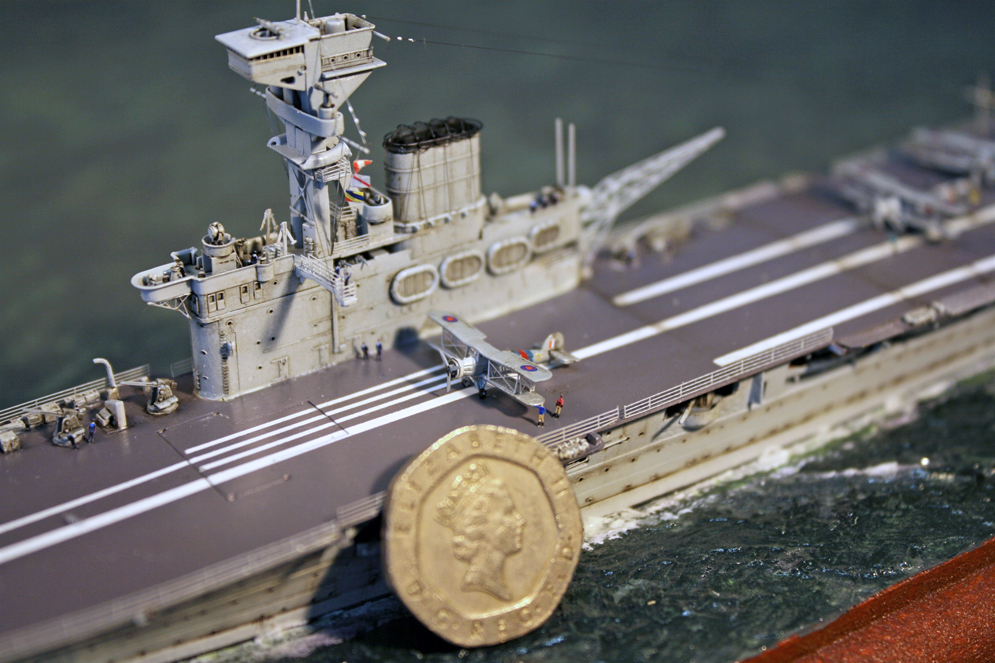
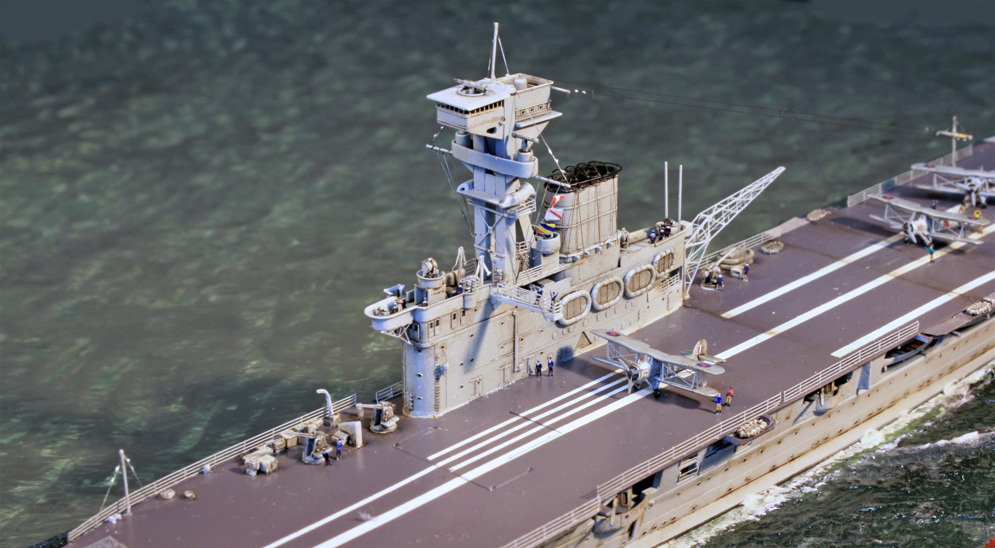
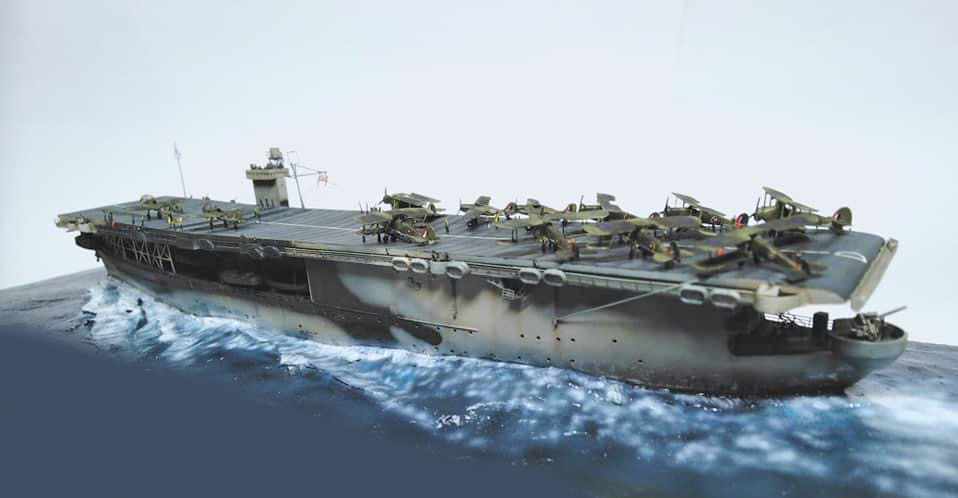
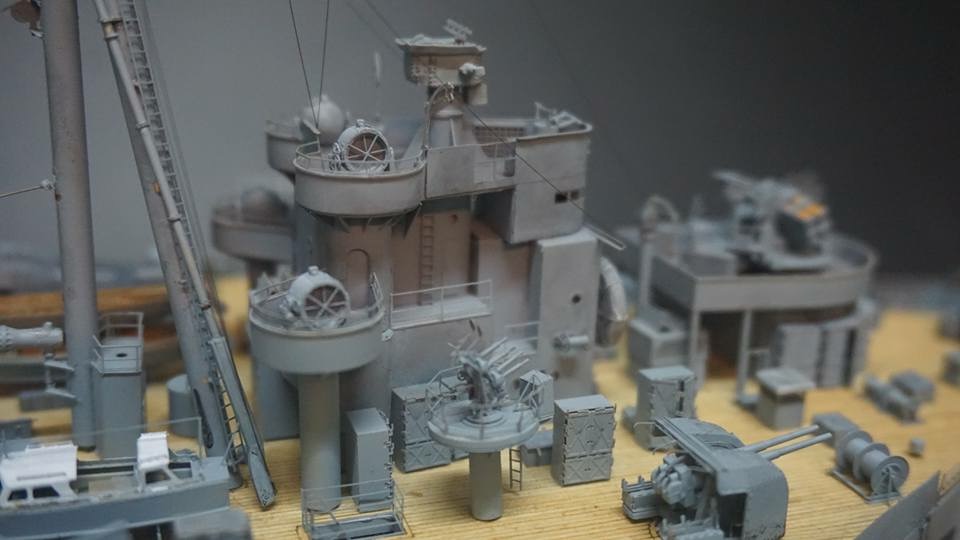
The 11,000 t HMS Hermes has the distinction of being the first purpose-built aircraft carrier in the world. She was laid down in 1918 but had a protracted development that did not see her commissioned until 1924 (The Admiralty wanted to learn from trials with Argus and Eagle). One of the concepts of the time was to operate float planes which were to be recovered by more or less motoring into the hanger from the stern! Another throw back from an earlier era was her spotting top to control her 5.5” guns in ship to ship battles. Nevertheless, with the island to the right and her flared and enclosed bow she looks remarkably modern. A drawback of the small carrier was a relatively small aircraft fuel storage and struggling to accommodate larger modern aircraft. Nevertheless, in August 1939 she took onboard 814 NAS and her Swordfish and this is how I imagine that her Swordfish might have looked before camouflage took over in the FAA. Admittedly the ship might have been in home fleet grey by then too, but most of her previous career had been spent in light grey scheme of the Far East. Her main wartime claim to fame was ironically in an attack by her Swordfish on the Vichy French Battleship Richelieu in July 1940. Sadly, Hermes was annihilated by practically the entire Japanese dive bomber fleet that had attacked Pearl Harbour when she was spotted fleeing modern day Sri Lanka on 9th April 1942 by a Japanese carrier task force.
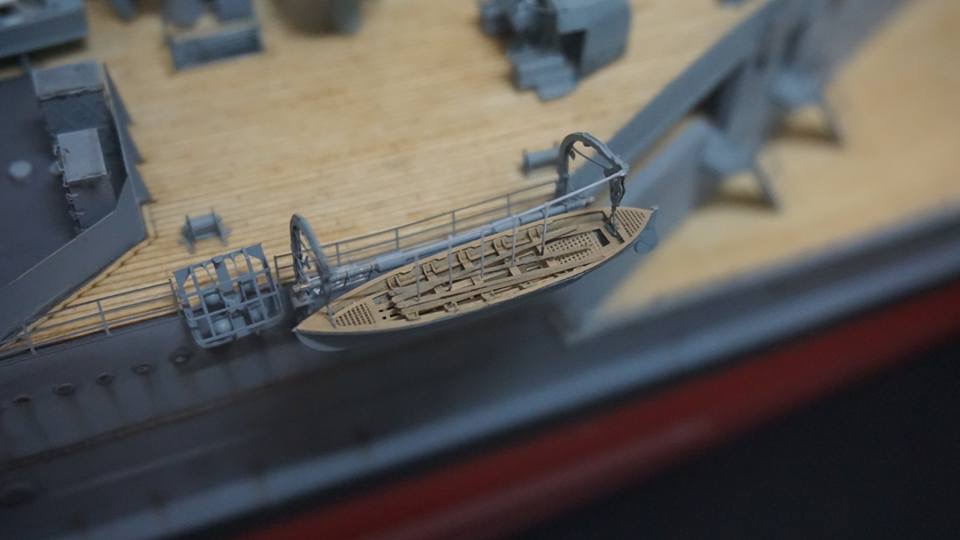
This is the excellent 1:700 Flyhawk kit boxed as for 1937 which includes the Swordfish. Apart from using brass rod for her masts and yards, together with Eduard 1:700 RN and carrier crew members it is practically out of the box. Rather than decals I used masking for the deck markings. I used Mig’s oil brusher paint to weather her deck from aircraft landings.
I hope you can see, if you look carefully, A Swordfish with folded wings on the stern hanger deck waiting to go up to the flight deck?
Regards
Andrew J.

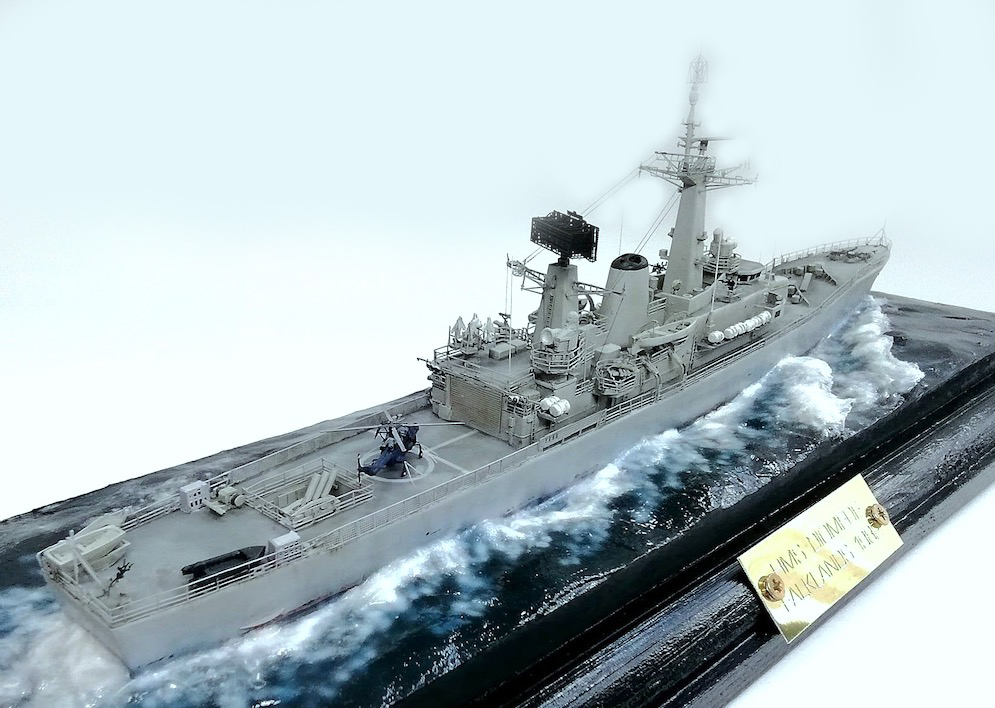
This was built for a commission where the actual Ship’s pennant on her hull side and the client’s number on other.
Ian R.
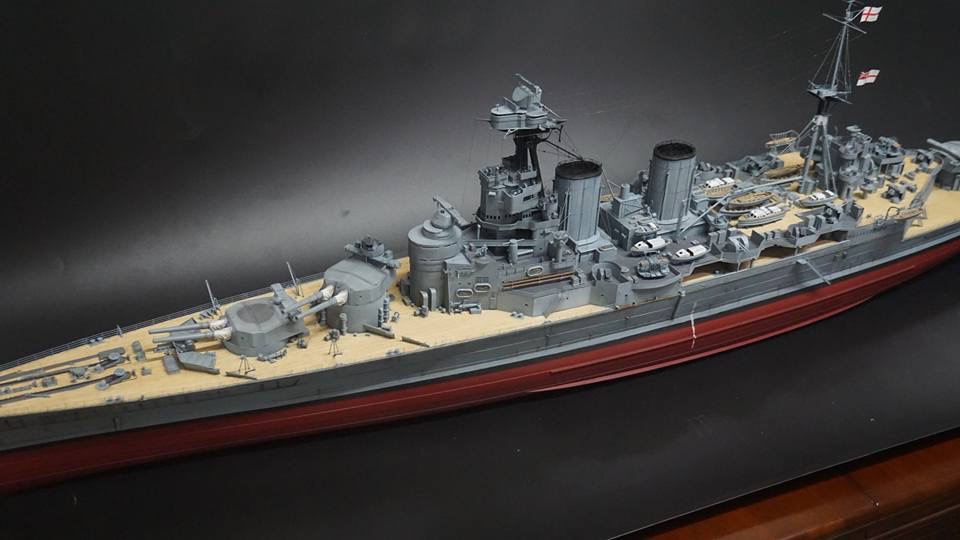

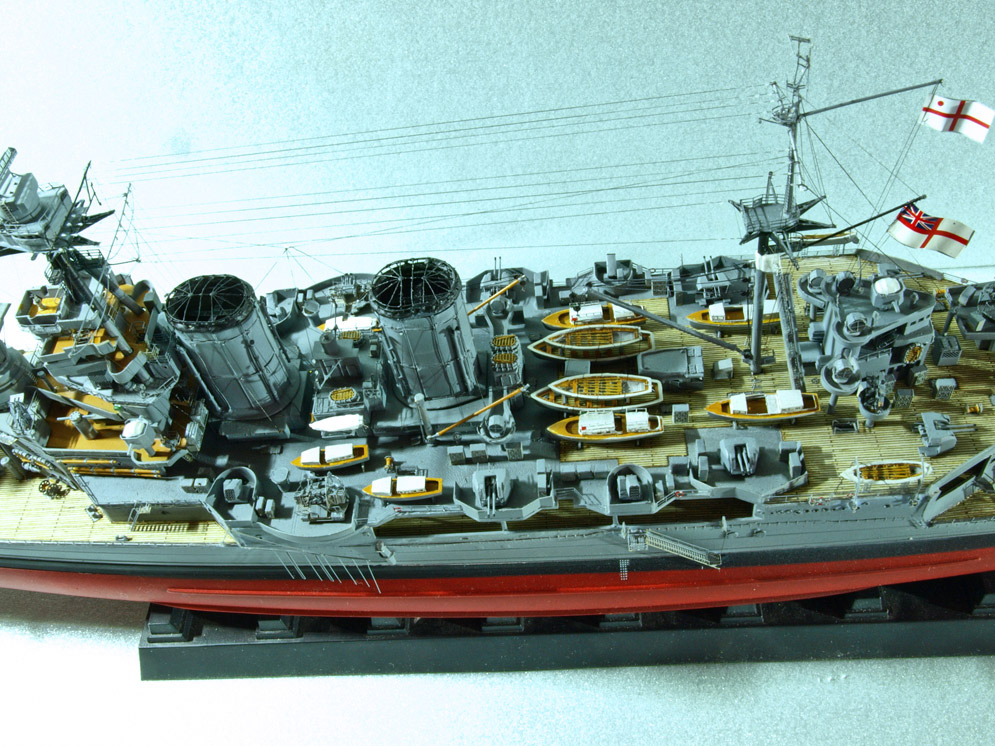
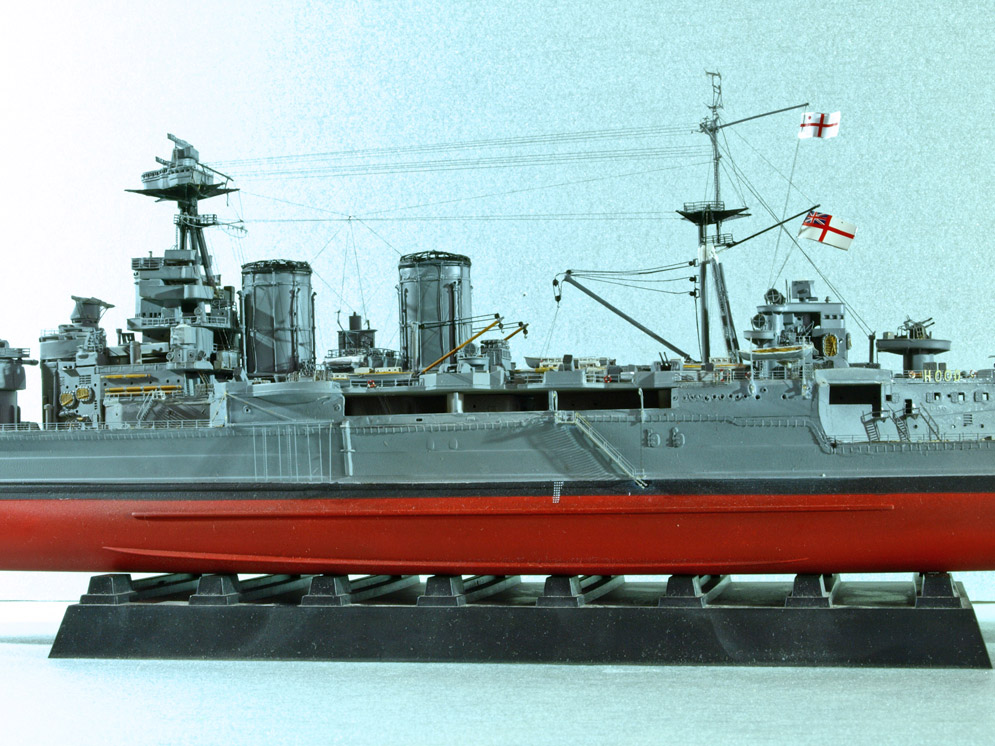
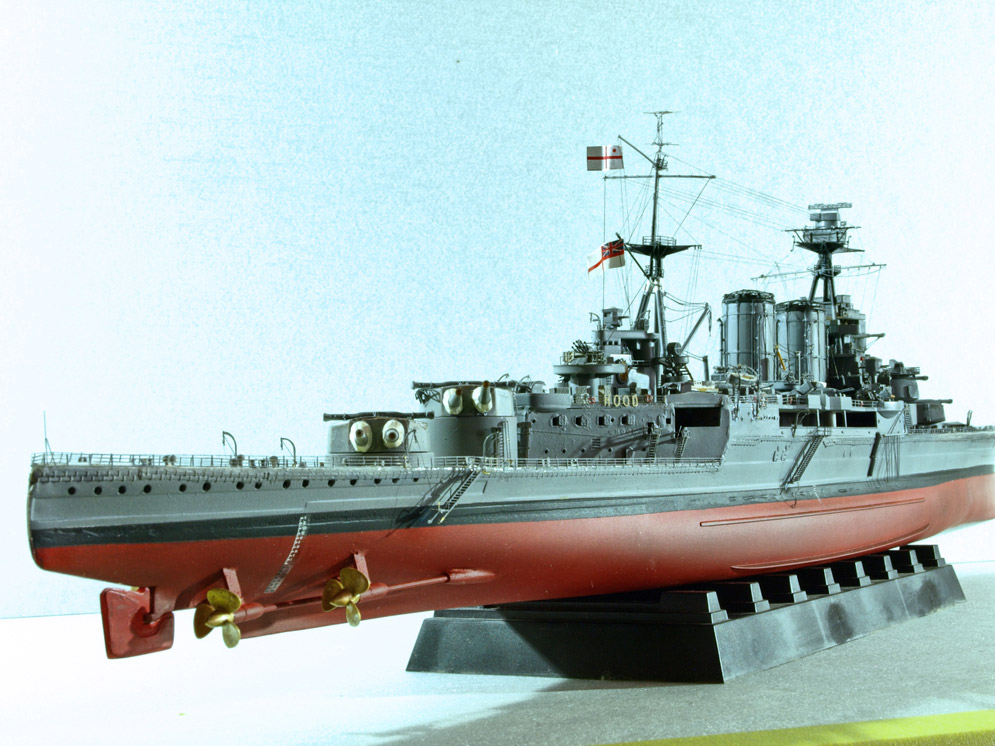
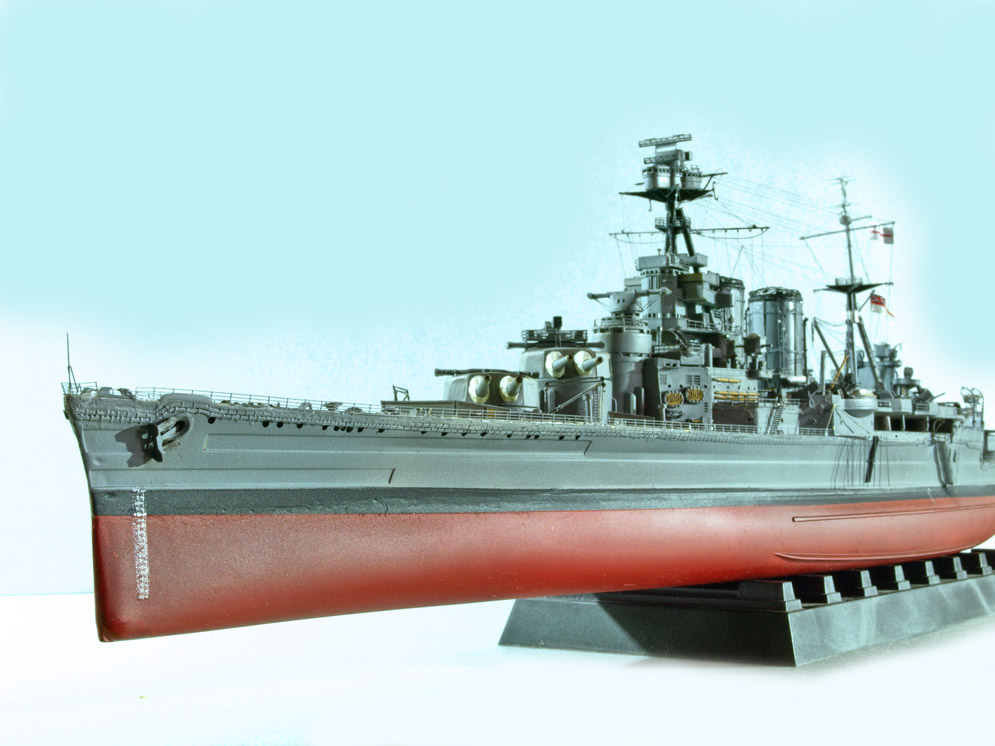
Here’s the first completed model of the big HMS Hood in 1:200 scale. I’m waiting for Chao to confirm that he has used the Pontos multi-media detail sets and by the look of it he has. Depending on when you read these words as I write (Sept17), Julian S will be getting under way with our own mega build of this kit and incorporating the Pontos set.


Aftermarket Parts:
eduard
1:350 HMS Hood (53020) photoetch set: This set contains 4 sheets of photoetch details which include assorted railings, ladders, gun mounts, starfish platforms, vent grilles, boat parts, gun parts, radar, hatches, doors, bulkheads, splinter shield/bulwark supports and so forth.
Flyhawk Model
1:350 HMS Hood detail set FH350098: This set contains brass photoetch sheets and resin replacement parts for the Trumpeter 1:350 scale model of Hood.
Best wishes,
Ihor Matiukh


Best wishes, Lou Carabott

Alexandria Harbour, May 1941.
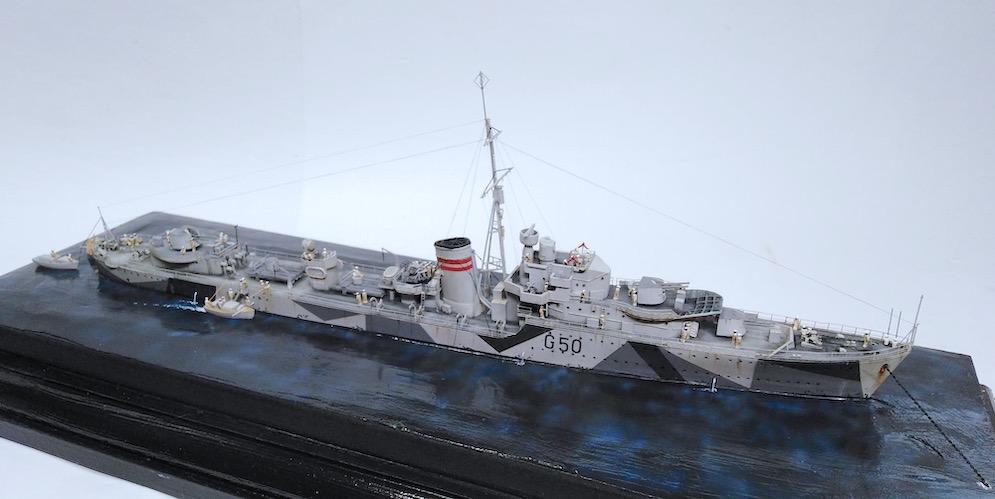
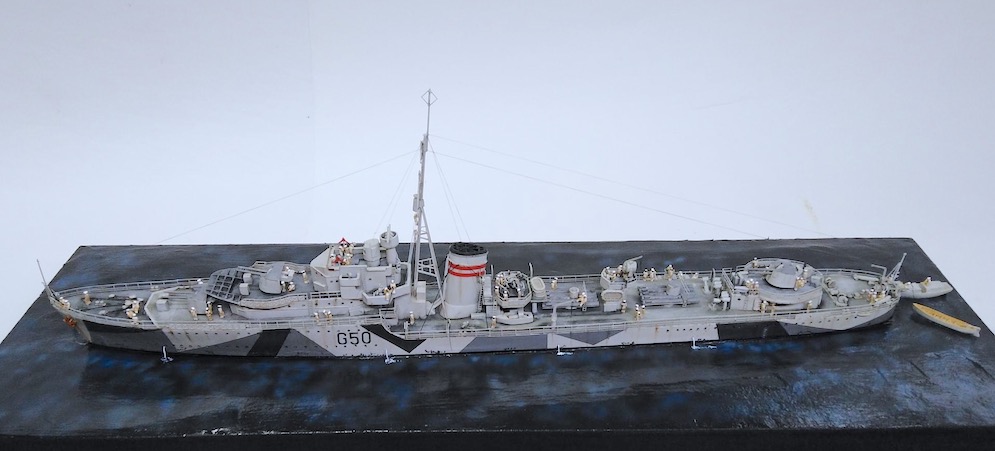
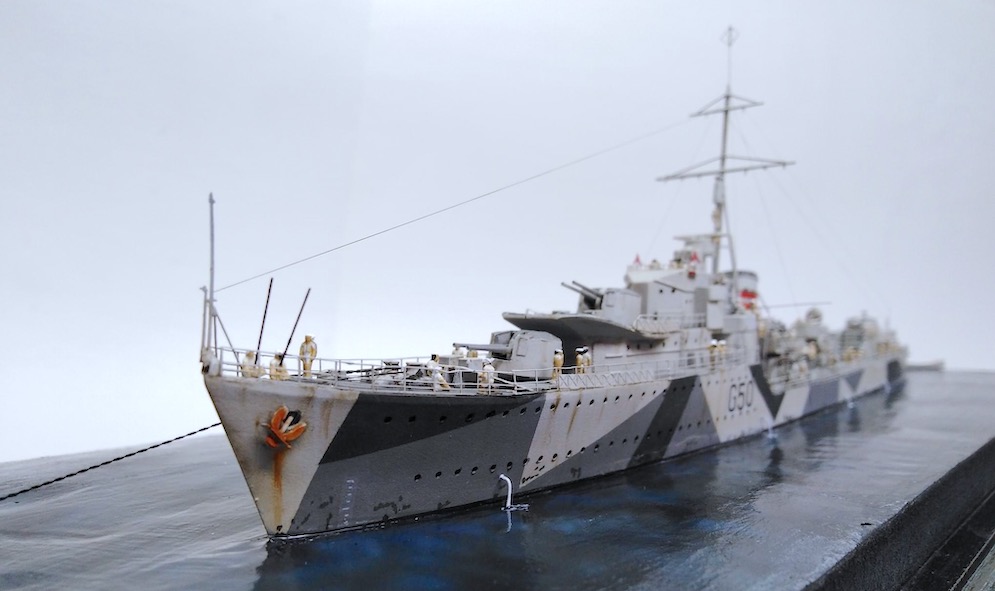
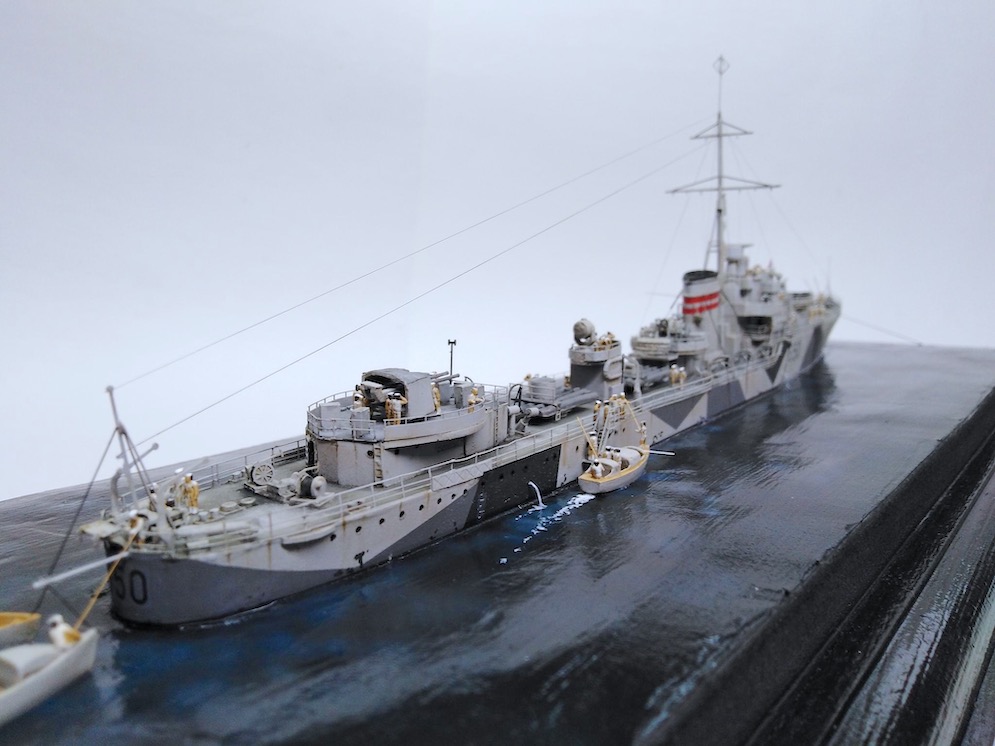
Finally finished this 1:350th scale diorama showing Kimberley at anchor. The crew can be seen either working or relaxing – even 3 members fishing.
The ship is a conversion of the White Ensign Models /Atlantic Models kit of HMS Janus. The company produce 3 kits that cover the J, K&N class commonly known as Kelly’s, the ships are Kelly, Janus and Piorun.
Ian R.