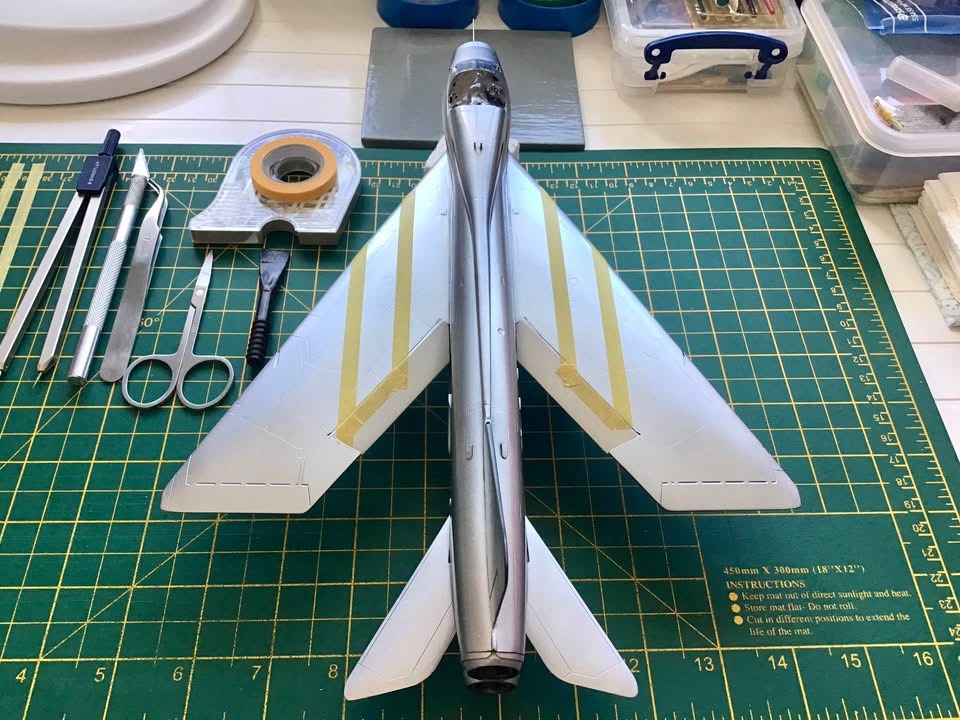
Time to measure and mask the outlines for the yellow Trainer Bands using my trusty ‘compass dividers. Prior to adding the masking the NMF received a protective coat of ‘Mr.Superclear Gloss’ Acrylic/Lacquer Varnish applied straight from the ‘rattlecan’.
This coating has no detrimental effect on the ‘metallic appearance’ of the underlying ‘XTREME METAL’ Enamel Paints.

Perhaps an overkill with the industrial quantity of masking but I wanted to minimise the risk of any overspray issues on the NMF and black surfaces.

Likewise on the underside. Of note here, is the earlier fixing of the main undercarriage legs and doors. These were fitted during the construction stage prior to any painting and again as a precaution against any fixing-issues. Although this resulted in more involved masking I’m pleased that I chose that approach.
Some time and effort with the masking work paid dividends and much of the tape was saved for re-use.
‘Mr.Hobby’ Aqueous Acrylics were used for the black and yellow colours each being diluted to a 50/50 ratio with ‘Levelling Thinners’. When fully dried the airframe received a second application of the ‘Mr.Superclear Gloss’ in readiness for the next stages which include Detail-Painting,Decalling and Weathering.

The undercarriage legs and doors survived unscathed during the masking and de-masking process. Time now to give her an identity and commence the decalling stage.

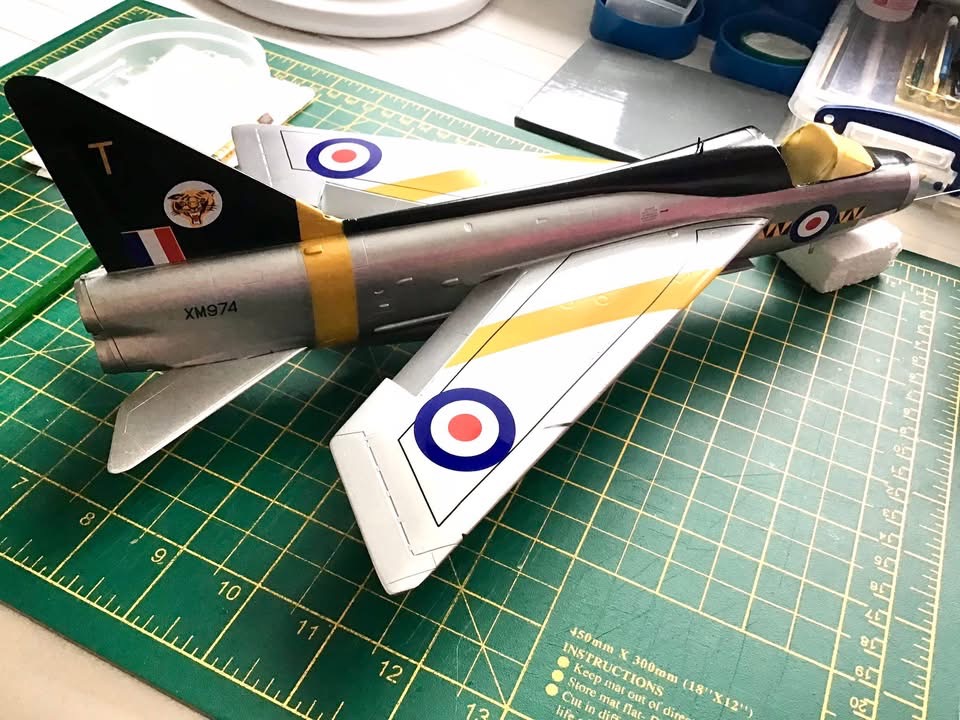
Gaining her identity – The 74 ‘Tiger’ Squadron Markings and Fin Flashes were an option liberated from the Airfix F.1A kit. They have excellent colour-solidity with no dark shading appearing under the white segments. Separate letters and numbers were used to create the serials.
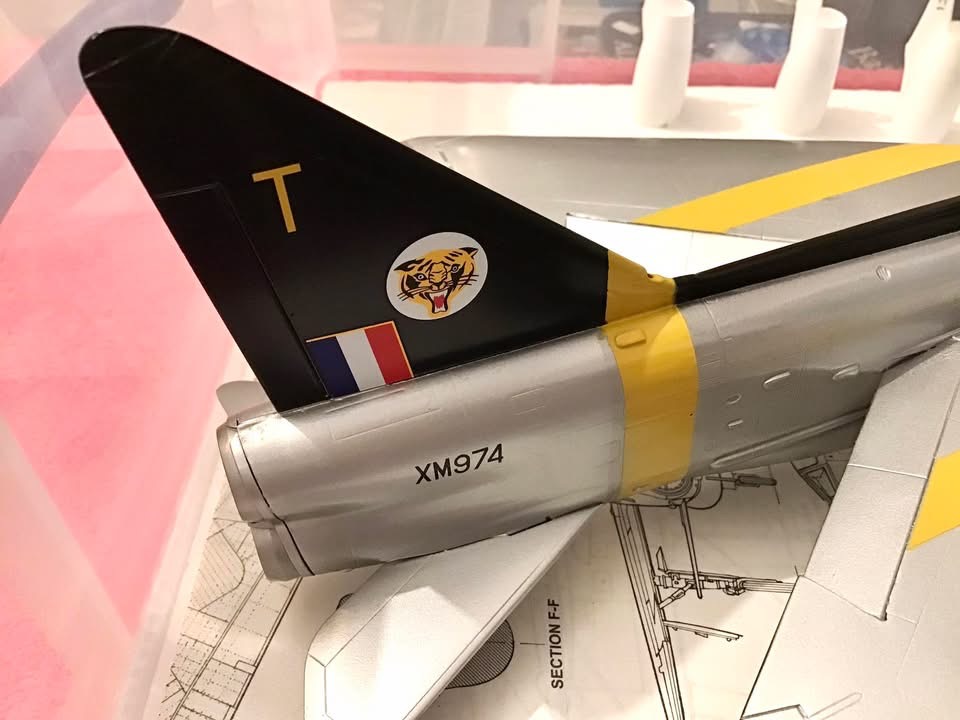
The ‘Sword’-issue kit decals are printed by Techmod. I found them rather a challenge to work with and particularly when applying the wing-lines.They were very ‘flimsy’ and seemed to wrinkle very easily and almost like cellophane.
I thankfully decided beforehand not to use MicroSet solution. I found the best answer was a copious amount of water with a couple of drops of washing-up liquid added.This improved their willingness to manoeuvre.
When settled they responded perfectly with Microsol solution.
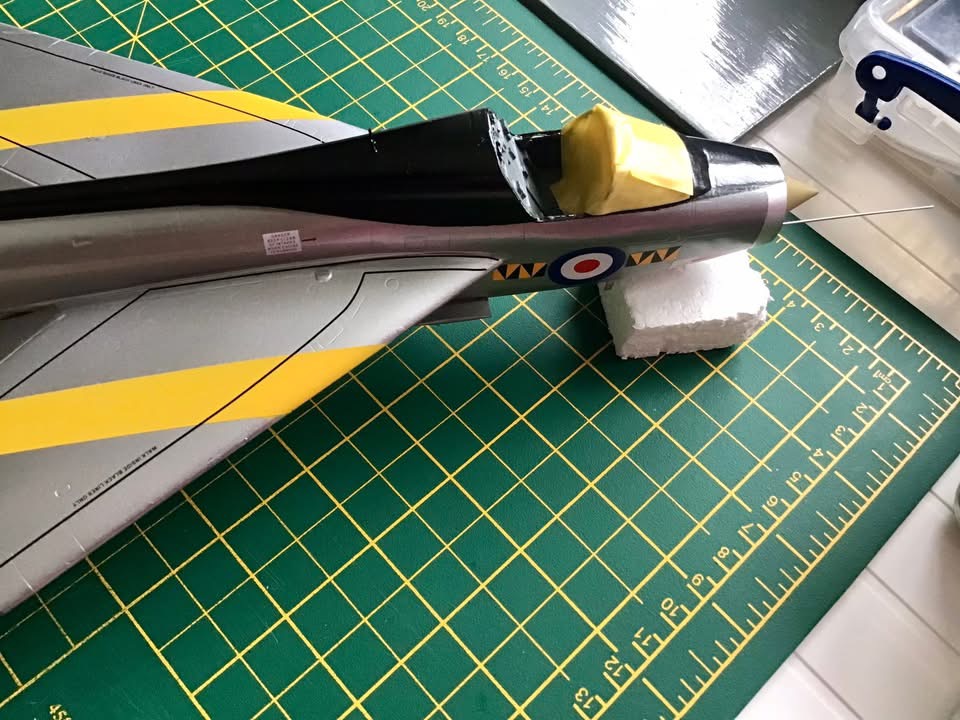
The original photo shows the missile-rail mountings attached to the airframe and represented here with. The rails themselves won’t be added.
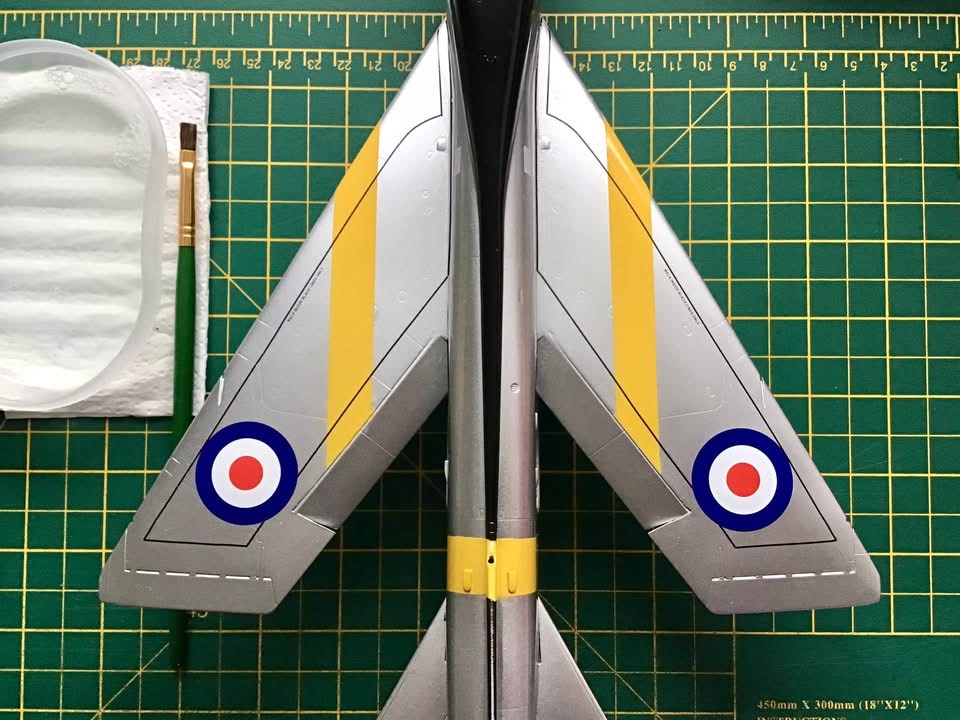
Patience and the use of my trusty ‘compass dividers’ have hopefully worked with the positioning of the decals.
Taking shape nicely . . .
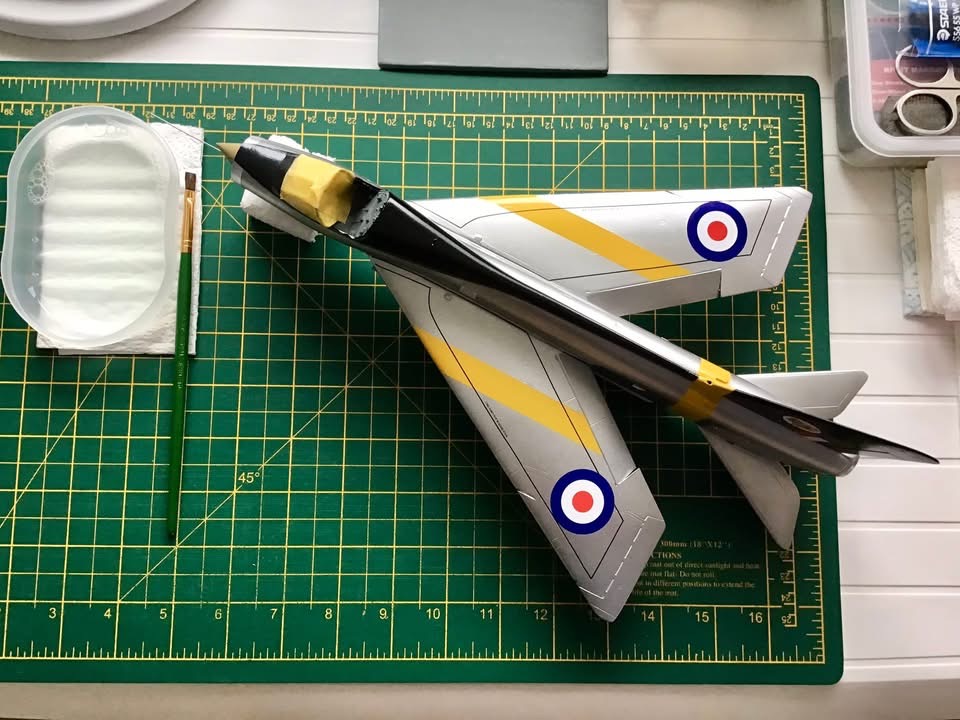
With all the decals added the model received a second coat of ‘Mr.Superclear’ Gloss Acrylic/Lacquer Varnish applied straight from the rattlecan in readiness for further detail work to be added.
 I mainly like to pose canopies in the ‘open’ position but the kit had no provision for doing so as an option. The canopy frame hinges are depicted, so I added and fixed two short 0.6 mm. mounting-pegs centrally on their inner sides with Cyano and drilled two tiny corresponding holes diagonally in the top of the rear cockpit bulkhead so the canopy can be simply slid and fixed in position as a final task.
Rob Ruscoe says
Simply excellent Paul. This is not a kit for the faint hearted and you have made a lovely job of it. I think that, like myself, producing a good result from a limited run kit gives you more satisfaction than assembling a mainstream kit. Superb! 👌👏👍
Stephen Weston says
Great job Paul. It is a shame (1/48) Lightnings are in short supply or people want stupid money for them.
Paul Ainsworth says
“Hello,Rob” – Thank you.That’s very kind and much appreciated.
Yes,I share your sentiment.Apart from my recent Airfix 56 Squadron Lightning all my recent builds have been of a more challenging nature.My biggest skills challenge to date remains the Valkyrie.
My full compliments to you also on your superb builds.
Paul.😉👍
Paul Ainsworth says
“Hello,Stephen” – Thank you so much.
I agree and know there’ll be a plethora of modellers who feel the same about the Lightning as a subject.
I somehow feel confident that Airfix will turn their attention to this type again and either re-release the previous kits or better still release an all-new one as they’ve done with Buccaneer and Jaguar in 1/48 scale.Fingers-Crossed!!
Paul.😉👍
Ian Black says
Lovely stuff Paul – as ever ! – I think the Twin Seat Lightnings are perhaps the hardest aircraft to replicate – The forward fuselage which is bulged and the twin canopy are complex shapes – Your model is superb ! – Having started to restore a Lightning or two I have learnt a lot about how they were built – In essence they are big meccano kits ! – The hard part is the aluminium – It is not uniform some different alloys were used and some panels were never polished but painted – I don’t know why. Great stuff and thanks Geoff for allowing me to join – If anyone wants to follow our progress on P1B you can on.
Ian Black says
https://callsign-collective.ghost.io/
Best wishes for 2026 – Ian
Geoff Coughlin says
Nice one Ian and thanks for getting involved – great to have you aboard! Did you see that we have created you a page for your restoration here in SMN: https://www.scalemodellingnow.com/p1b-lightning-xa847-restoration
Do let me have any updates when you would like to post any news going forward. Geoff C.
Paul Ainsworth says
Hello,Ian – Thank you so much for your reply and welcome to ‘Scale Modelling Now’.It’s great to see you here.
Thank you also for your valued and informative feedback and we all wish you every success with your 1:1 scale projects!
Scale inspiration indeed and what a wonderful subject.
The Lightning Bug is like Phantom Phever – There’s no cure thankfully!🏆🏆
Paul.😉👍.