• Skip to primary navigation
  • Skip to main content
  • Skip to primary sidebar

Scale Modelling Now

Scale Modelling Techniques

  • HOME
  • CONTENTS
    • What’s New
    • Techniques Bank
    • Aircraft
    • Armour
    • Classic Kit Builds
    • Vehicles
    • Sci-Fi, Fantasy, Space
    • Maritime
    • Figures
    • Book Reviews
    • Dioramas
    • Gift Certificate
    • Modelling Workshops
    • Podcasts
  • WHAT WE OFFER
  • AREAS
    • Techniques Bank
    • Aircraft
    • Armour
    • Vehicles
    • Sci-Fi, Fantasy, Space
    • Maritime
    • Dioramas
    • Figures
  • FREE SAMPLES
  • EVENTS
  • NEWS
  • ABOUT
    • ABOUT US
    • TRADERS
  • LOGIN
  • CONTACT

Airfix Harrier GR.7 – page5

April 20, 2010 By

back page 1 | 2 | 3 | 4 | 5 | 6 | 7 | 8 | 9

Undercarriage units
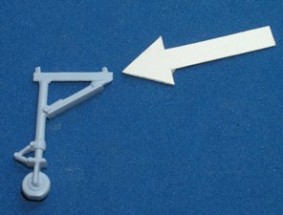
remove tab on top outrigger
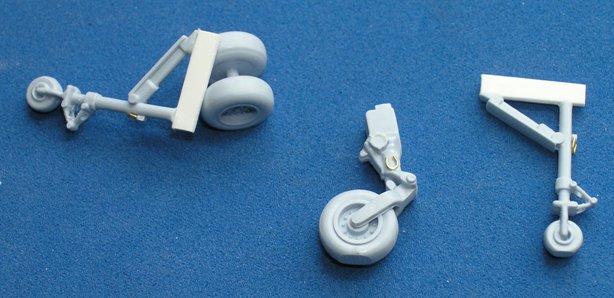
finished uc units note tie-downs
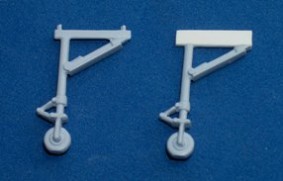
scratched tab on top outrigger

Just about every Harrier I’ve ever built (and that isn’t many to be honest) has had the same problem of all the wheels not being in contact with the ground at the same time – how bizarre is that? This kit is no different, with the left or right wing (plus the main gear units of course) contacting the ground, but not all together. There being about 2mm that needs to be dealt with. In fact, it isn’t too difficult to correct. I test (dry) fitted the wheels in their locating holes. The fix that’s needed is to sand a decent flat onto the main central gear unit tyres and nose wheel. That takes care of nearly 1mm and when you look at pics of the Harrier the tyres do sink under the weight of the bulky airframe.
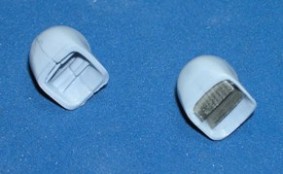
kit and reworked exhaust vents

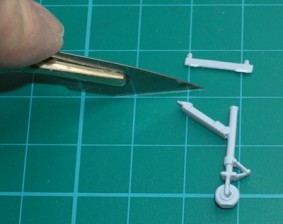
The second stage is to re-work the outrigger units. They can be lengthened about 1-1.5mm without looking odd and this is just enough to fix the problem. What you need to do is remove the rectangular locating tab at the top that attaches each unit to the wing bay. I then cut a slightly ‘taller’ rectangular replacement from scrap plasticard, securing with cyano. Using white PVA glue I temporarily re-attached all the gear units and great! They all make contact. Ok, off with them and a little water on a tissue removes the PVA. All are set aside for later painting and attachment to the completed airframe.
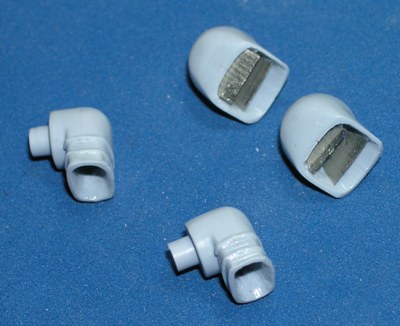
completed exhaust vents

Read on…

Primary Sidebar

Login

You are not currently logged in.


» Lost your Password?

All the completed Aircraft builds.
Click on a Manufacturer below to see a list of all SMN's completed builds from their range.

BACK TO AIRCRAFT MAIN PAGE


SEARCH THE WEBSITE

More results...

Generic filters
Exact matches only
Search in title
Search in content
Search in excerpt

Finished Aircraft

Academy
Accurate Miniatures
Aeroclub
AFV Club
Airfix
A-model
Airmodel
AlleyCat
AMK
AMT.ERTL
ARII
Arma
Attack Squadron
Azur
BPK (Big Planes Kits)
Bronco Models
Classic Airframes
Czechmaster
Dragon
Dynavector
eduard
Fisher Model
Fly
Frog
GasPatch
Grand Phoenix
Great Wall Hobby
Hasegawa
Halinski
Heller
HGW Models
HpH Models
High Planes Models
HK Models
Hobby Boss
ICM
Ideal Toy Corporation
IsraCast
Italeri
Khee Kha
Kinetic
Kit Form Services
Kitty Hawk
KoTare
LF Models
Lukgraph
MPM
MRC/Academy
Mach 2
Meng
Mirage Hobby
Monogram
Pacific Coast Models
RS Models
Rareplane
Revell
Roden
SBS Model
Scratch-builds & Specials
Silver Wings
Simian’s Stuff
Special Hobby
Sword
Takom
Tamiya
Tanmodel
Trumpeter
Valom
Vector
Vintage
Whirlybird
Wingnut Wings
Xtrakit
Zoukei Mura
Zvezda

Copyright © 2025 · Scale Modelling Now · Online Scale Modelling Magazine · Scale Modelling Techniques and Tips · Privacy Policy

ar Arabicbn Bengalibg Bulgarianzh-CN Chinese (Simplified)zh-TW Chinese (Traditional)cs Czechda Danishnl Dutchen Englishfi Finnishfr Frenchde Germanel Greekhi Hindihu Hungarianid Indonesianit Italianja Japanesemt Malteseno Norwegianpl Polishpt Portuguesepa Punjabiru Russianes Spanishsv Swedishth Thaitr Turkishuk Ukrainiancy Welshyi Yiddish
en English