Welcome to the Subscribers’ Aircraft Gallery.
Each submission has a ‘gallery’ of thumbnails which you can click on to see an enlarged image and read the short text describing the model – enjoy!
Gallery D and E
Galleries: A | B | B-2 | C | D | F | G | H | I-L | M | N-R | S | T-V | W-Z
By subscribing to Scale Modelling Now, you unlock full access to 4,500+ in-depth build-reviews, exclusive how-to videos, regular technique masterclasses, and fresh content added weekly: FIND OUT MORE – all for just £1.50/month (£18/year).
I started this as a painting exercise to fill in the time before Border Models released their HE 111 1:35 scale kit. It was supposed to be released in the autumn of this year. But so far no sign. There have been updates on their site showing the CGI progress which looks mouth watering and now a rumour that it will emerge early next year ….let’s hope!!!
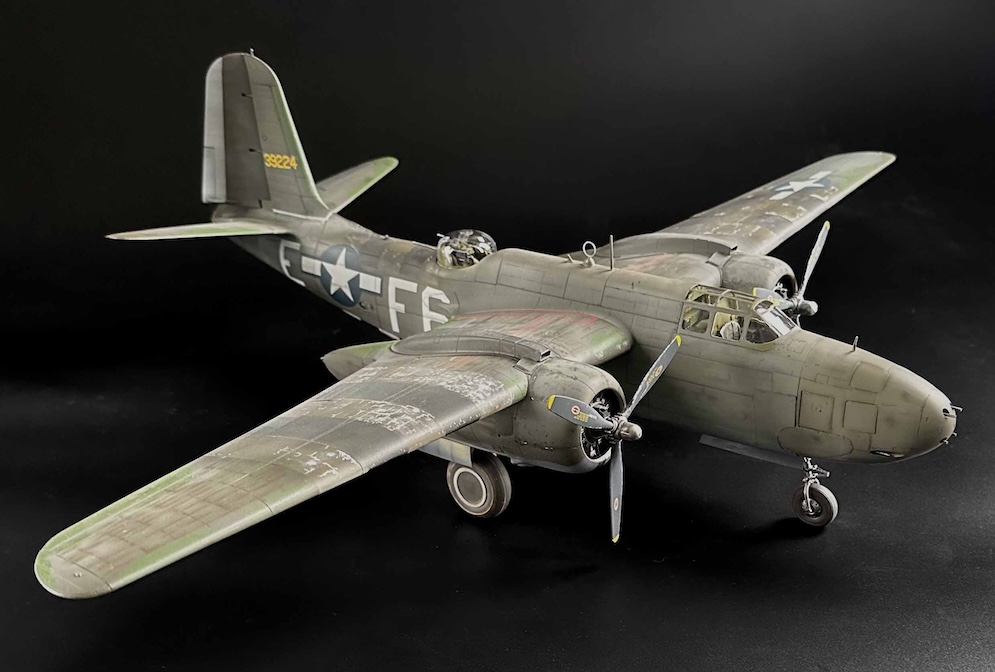
Meanwhile I assembled the kit. There are numerous reviews of it on all the usual sites. It really is a magnificently detailed model and clearly lends itself to “open” display. I spent a bit of time putting the interior in place as parts of the construction are integral in supporting the whole frame.
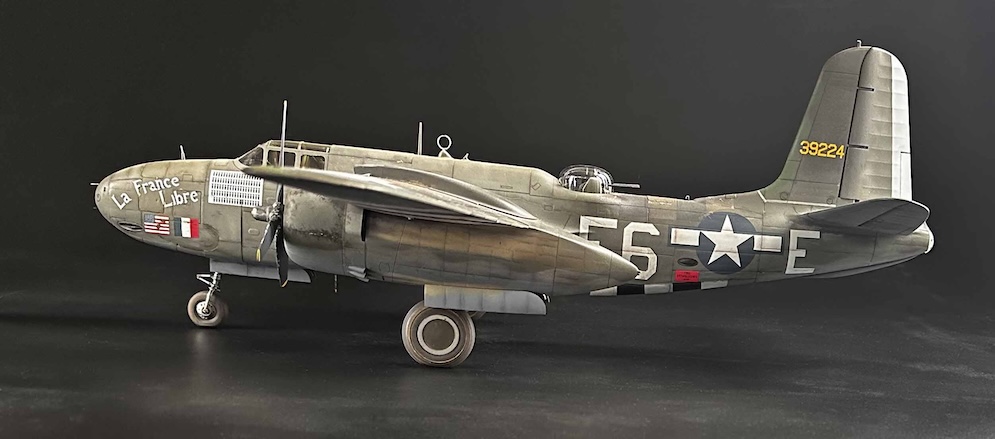
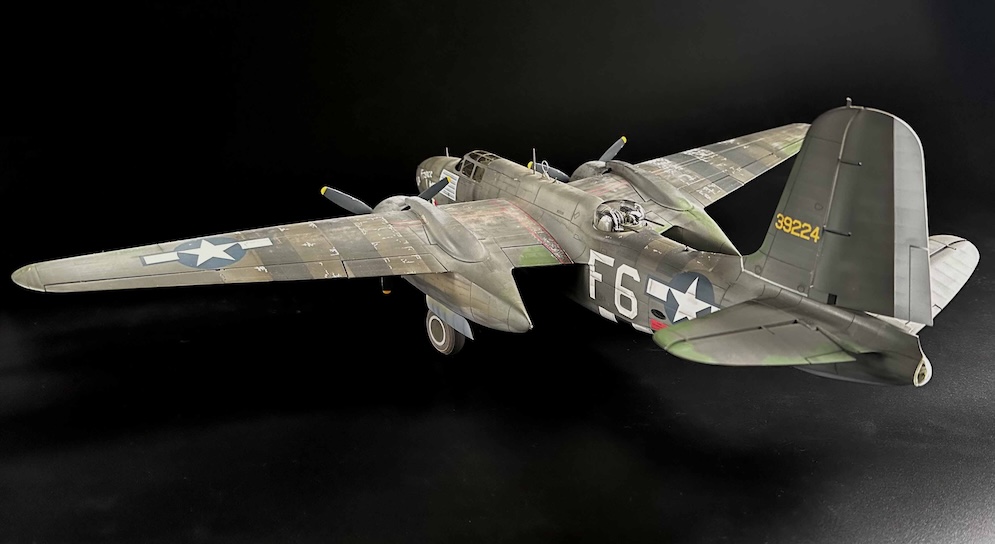
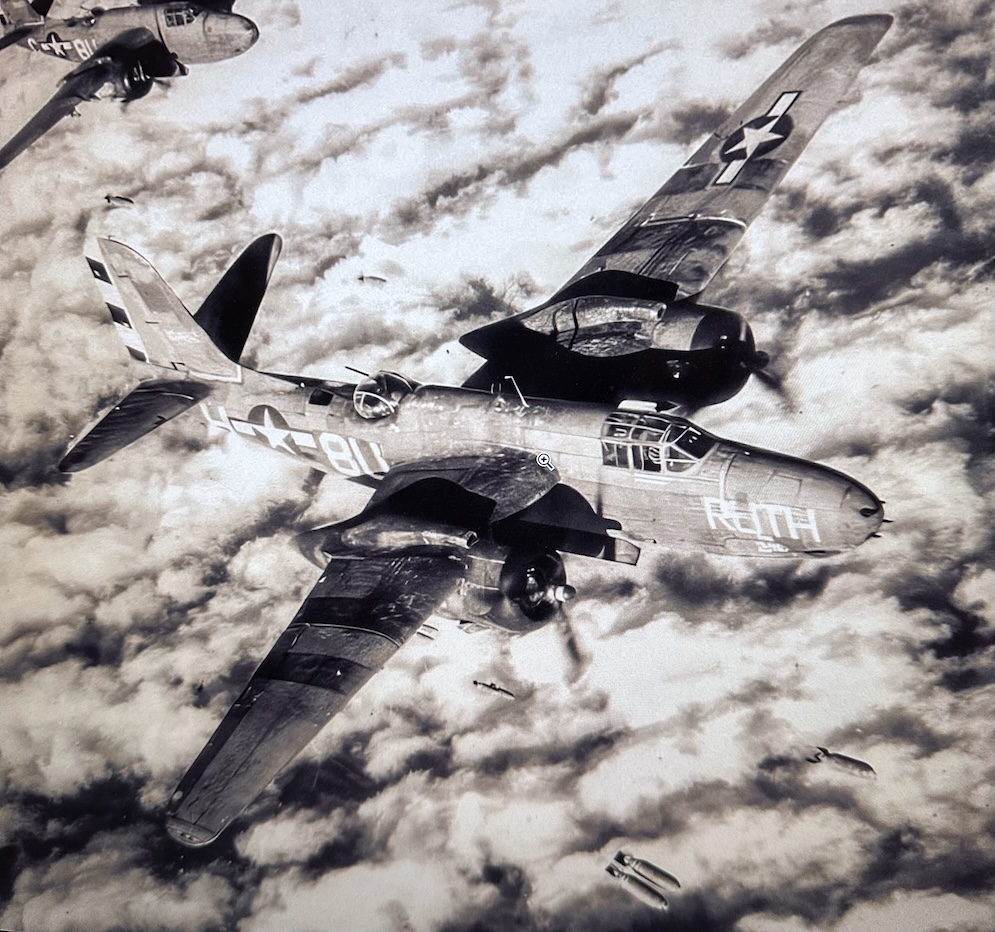
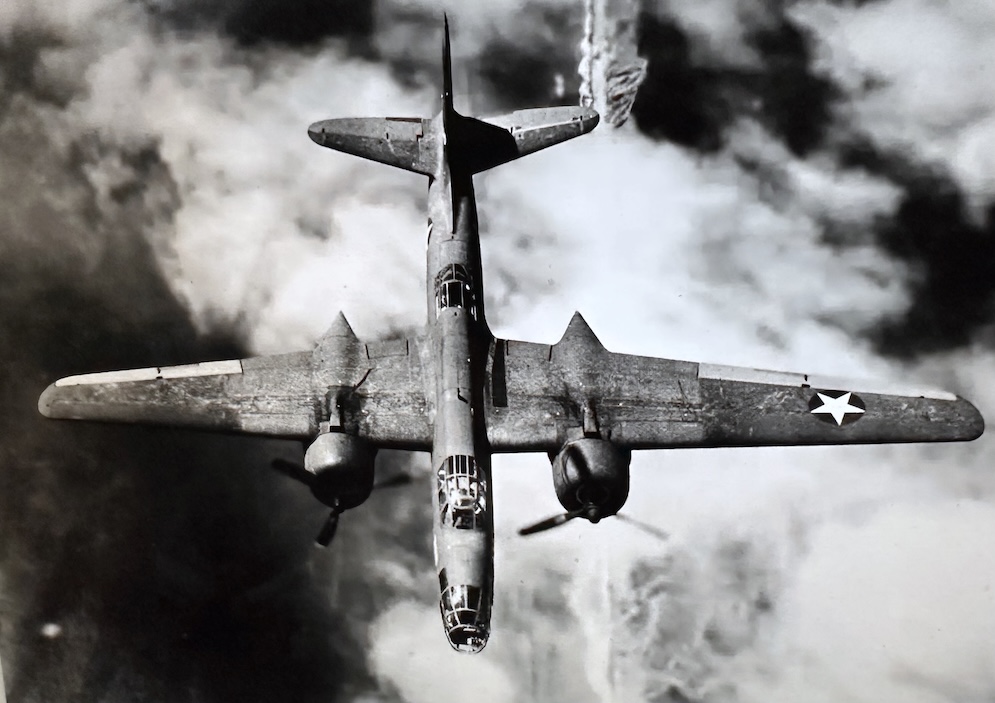
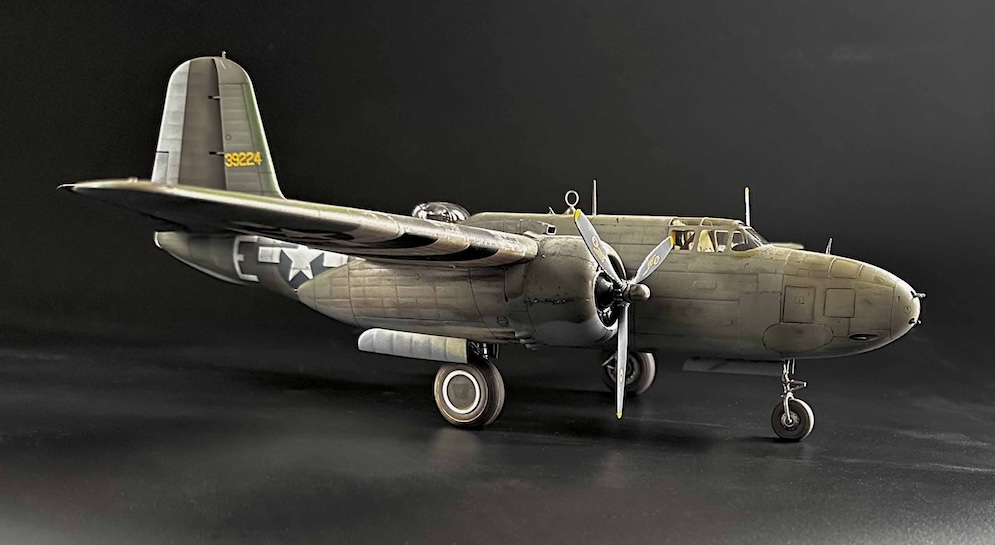
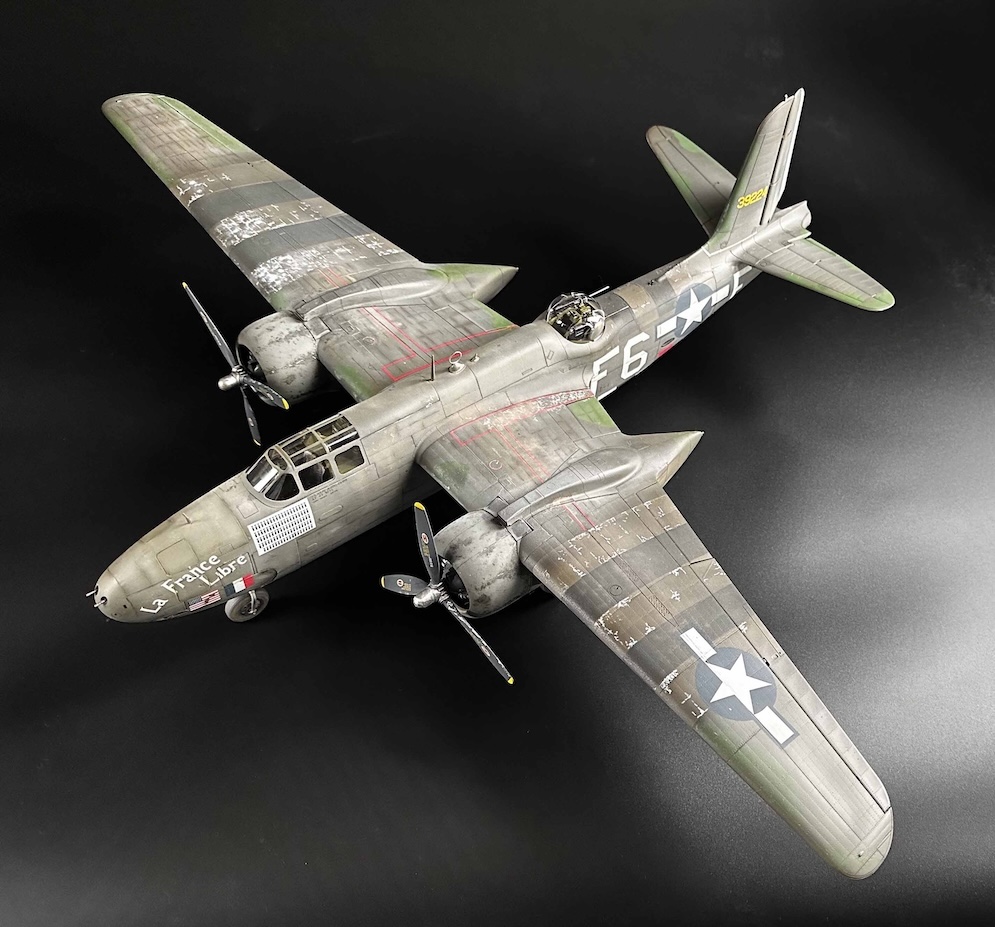
The wartime photos of the A20 Havoc show a pretty dirty aircraft.
This, probably, was not helped by the very matt olive drab paint used by the Americans on most of their bomber squadron’s aircraft. I guess the matt coat was a dust magnet.
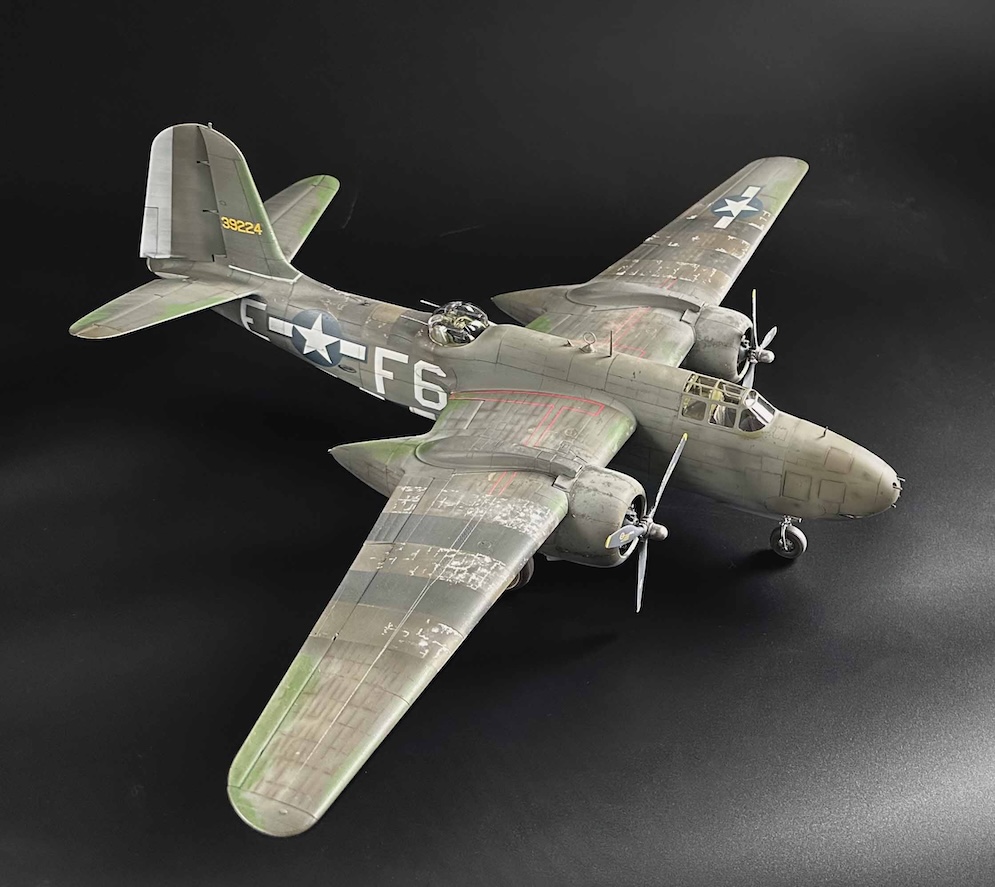
I started with the matt olive as recommended in the kit instructions and quickly realized that I should be glossing it first before applying the decals! So gloss olive drab, having smoothed down the previous matt coat.
Eventually the decals went on OK. I had some trouble before I got used to them as they were very thin and were very difficult to slide. I did have to make up paint masks for the first two letters on the port side as I had completely destroyed them!
Then a matt coat mixed with light coat of light brown, beige really. This was applied unevenly.
The grey paint on the underside was applied first, then masked off for the green to show a wavy line where the upper and lower colours meet.
I used some crayons to pick out the unevenness of the metal surface of the fuselage.
Then a mixture of mud powder, dry-brushing a lighter shade of the olive base coat somewhat randomly.
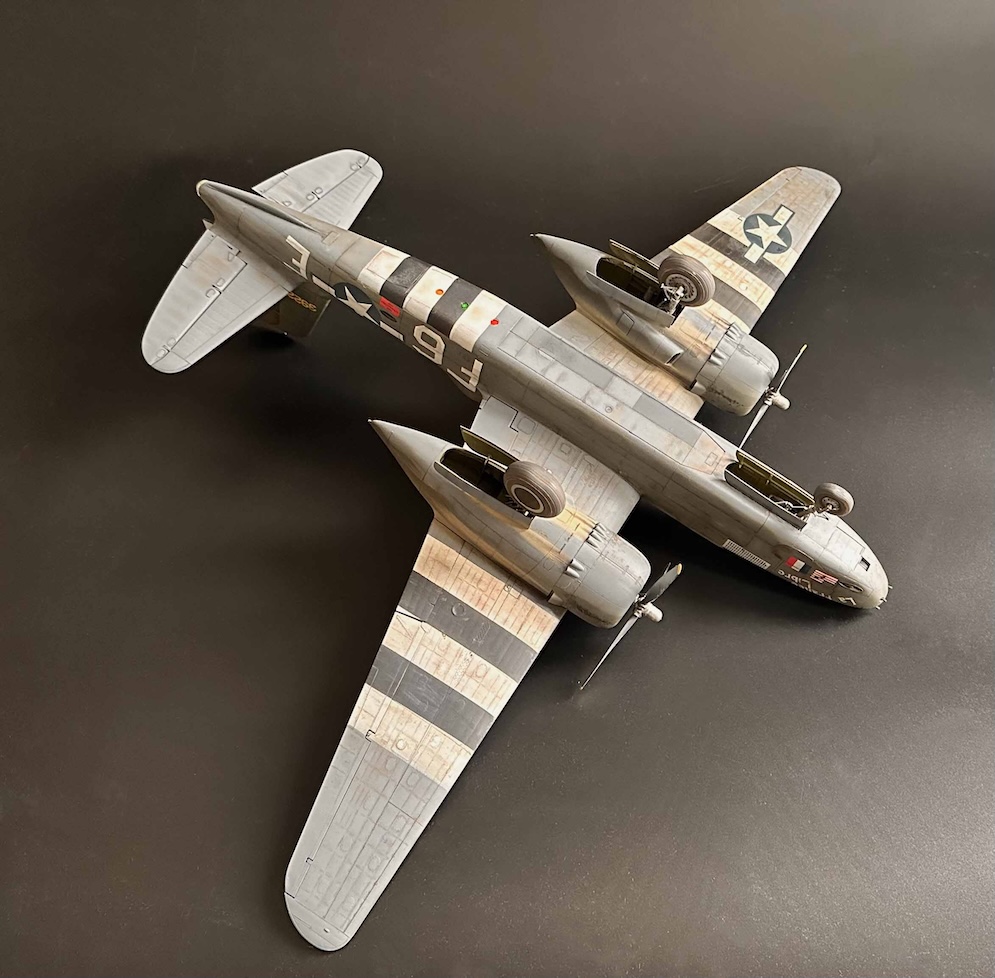
The underside follows a photograph of a couple of Havocs banking in flight exposing quite a soiled surface.
I started the photography before removing the last of the paint masks. I did not replace the photos I had already taken as they are small. There is a photo of the landing lights with the masks removed!
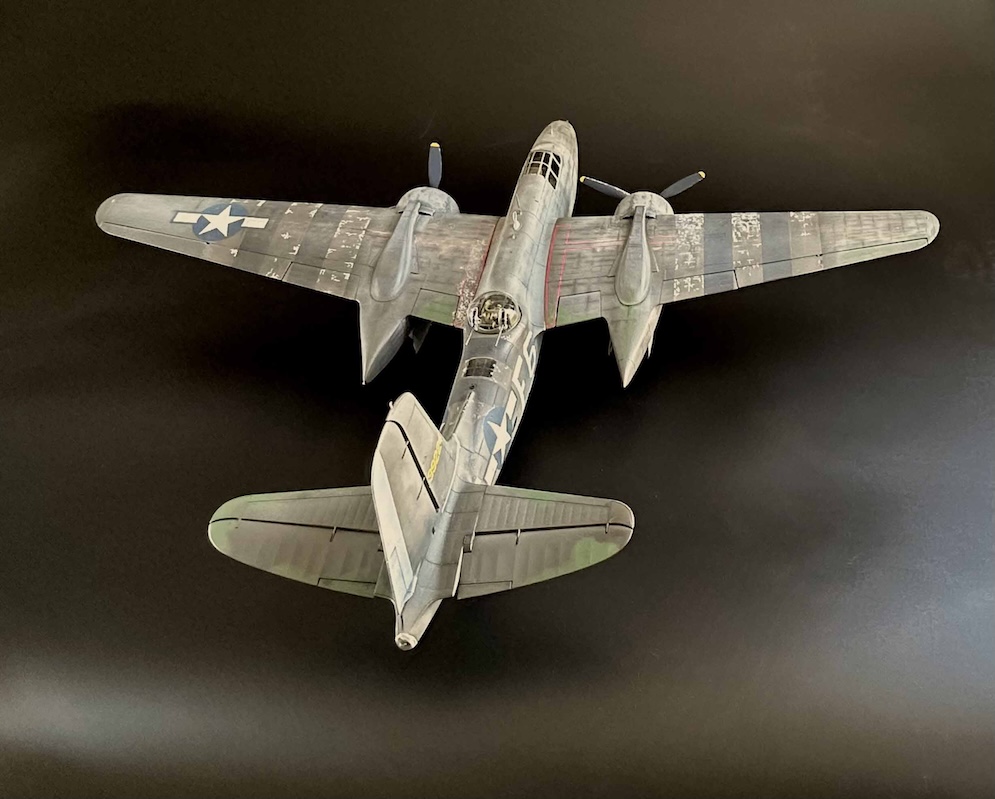
The clear panel just aft of the gun turret was another one I forgot. However, there are photos taken with this painted over with the Normandy stripes. I removed the mask for the last couple of shots.
There we are, a very high quality model just asking to be messed up!!
Julian S.
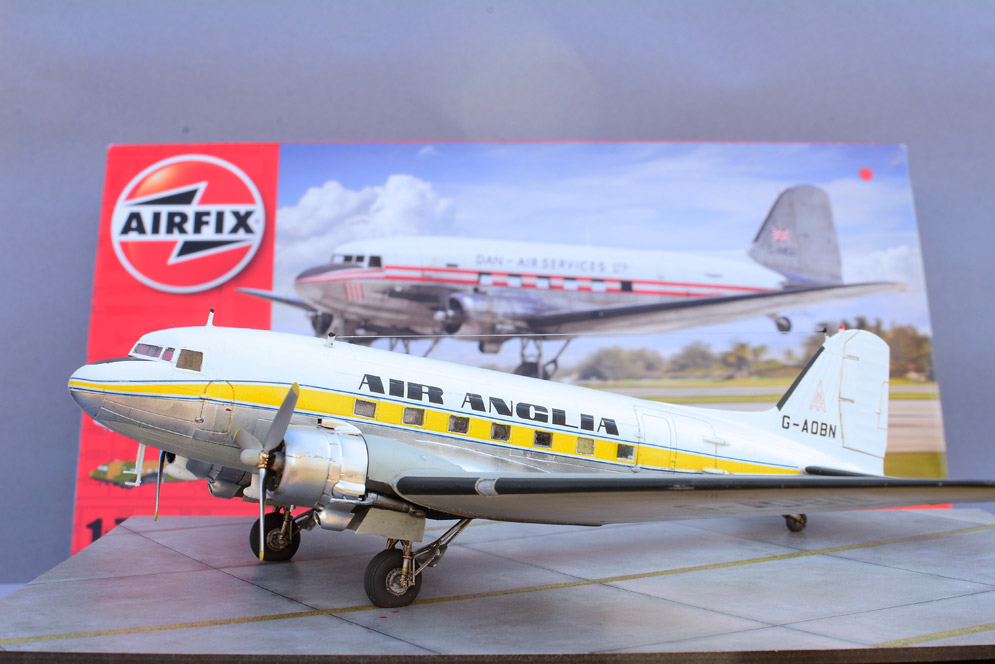

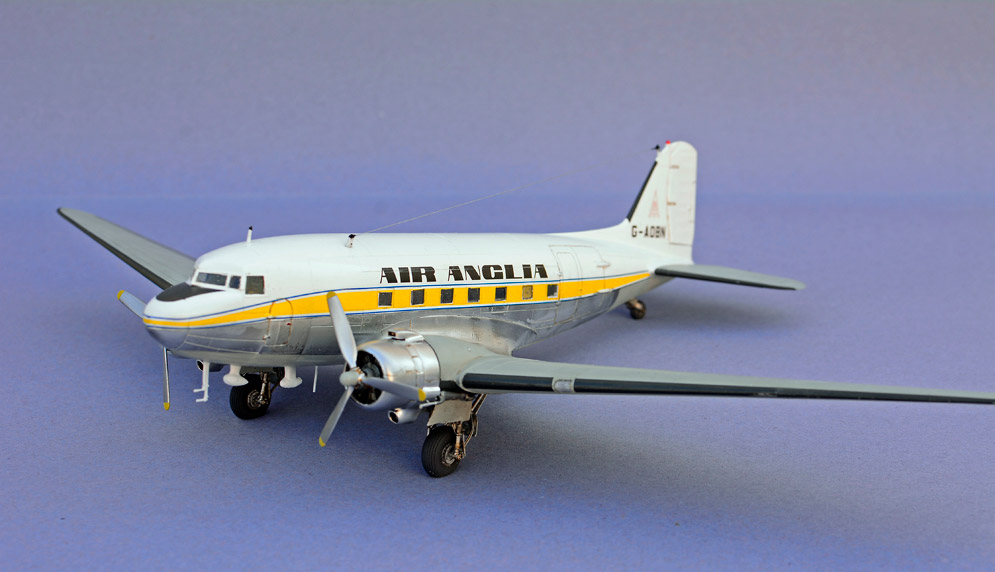


Within the Academy, we have a couple of display cases slowly getting filled up with aircraft that have flown from RAF Horsham St Faiths and latterly Norwich International Airport.
After a recent return to plastic modelling, I had offered to build a Vultee Vengeance TTIV target tug of 695 squadron and a Venom NF3 in 23 Squadron colours, this I duly did, he was impressed with my handiwork, and said colleague, as he grabbed his coat, uttered “How about an Air Anglia Dak?!?”
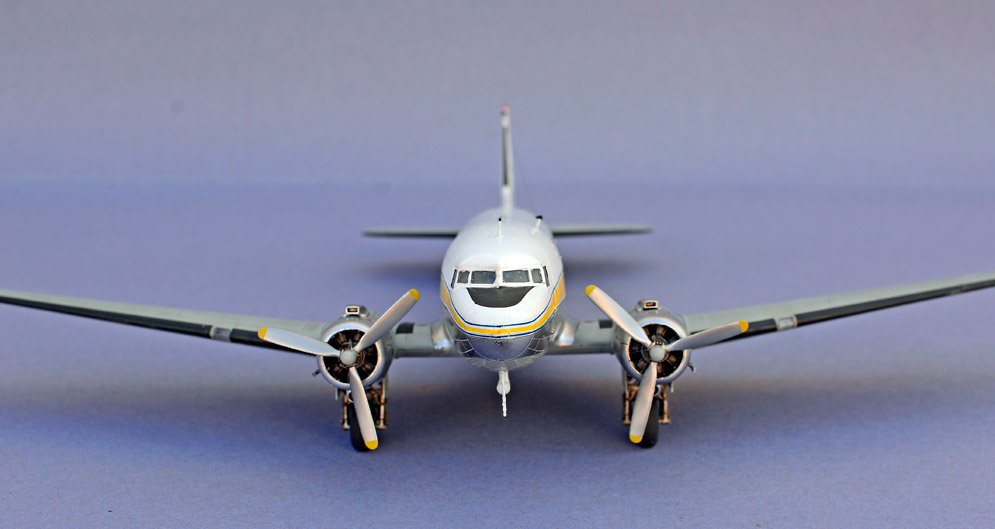
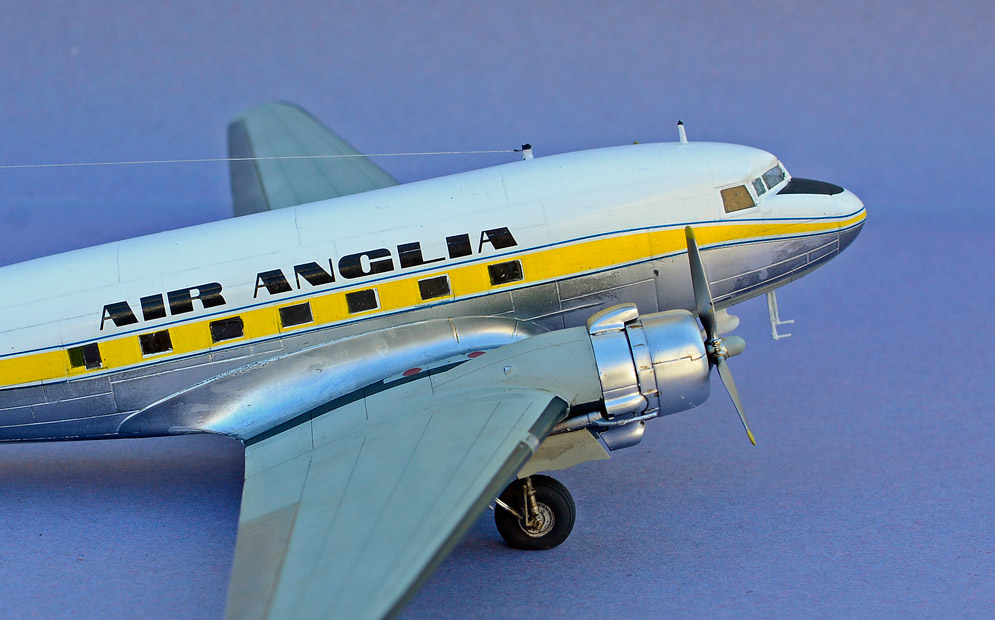
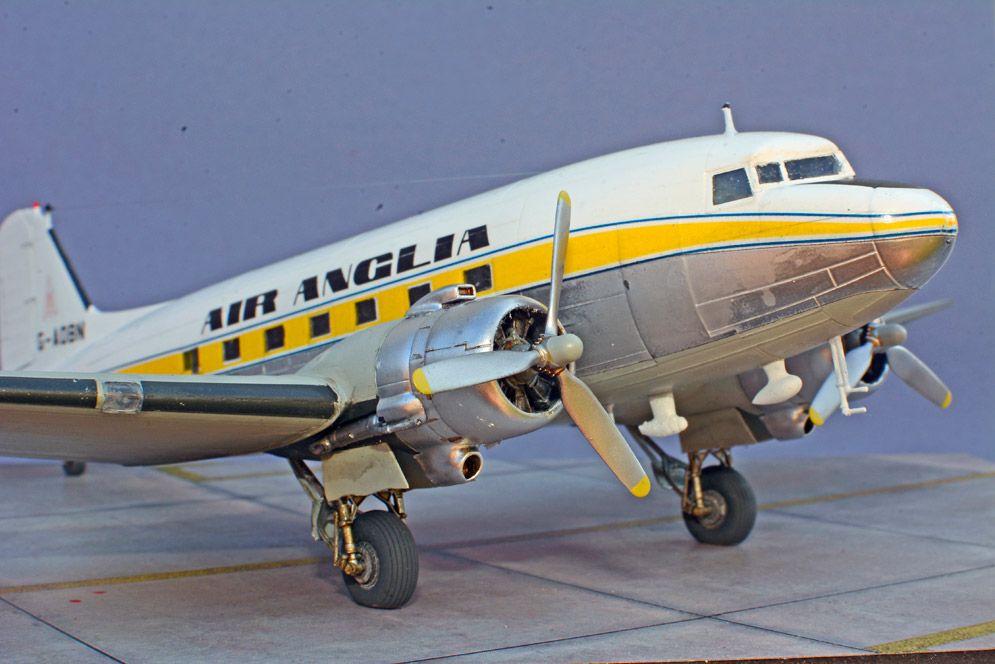
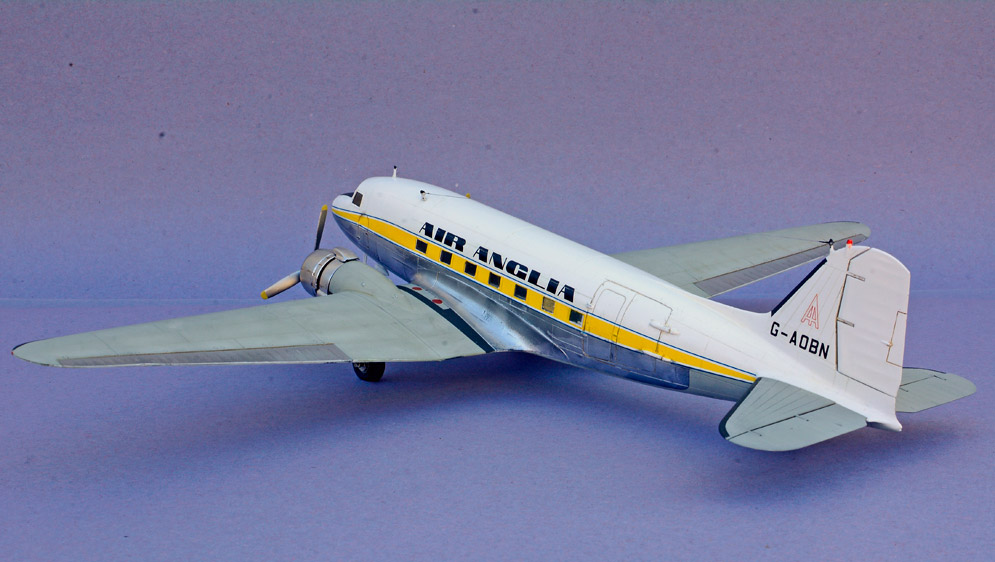
I noted that 26 Decals (Ray Charles) produces some laser printed decals for the Air Anglia Daks that operated out of Norwich in the 1970’s.
So no excuses left, started doing some more research and made contact with one of the local ex Air Anglia pilots and he had quite a few photos of them in period and remembers flying many hours in G-AOBN from Norwich up to the Shetland Isles, Manchester in the early days of “our” local East Anglian airline.
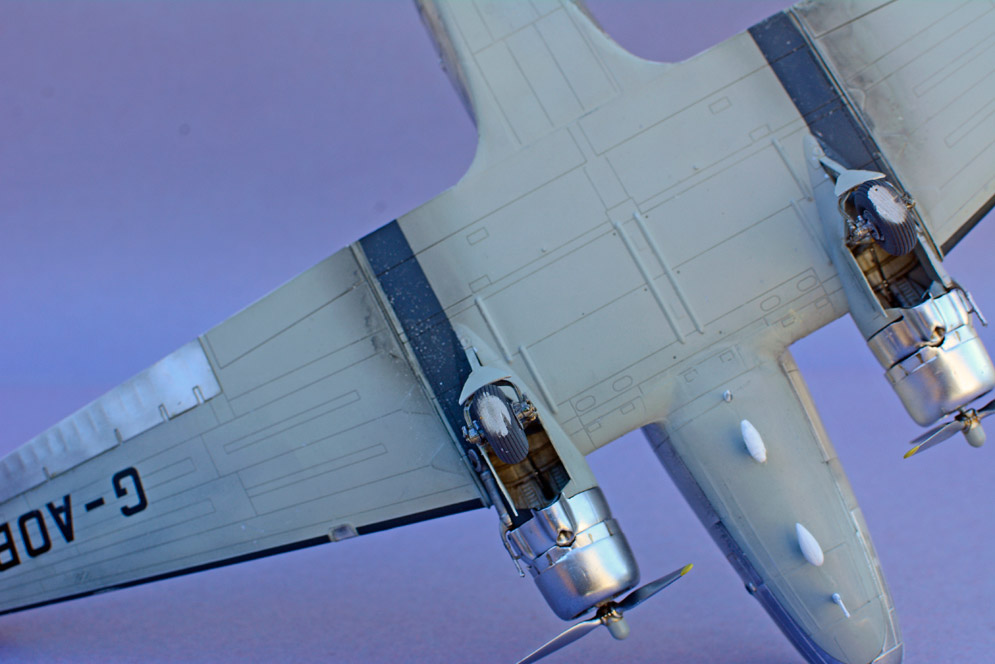
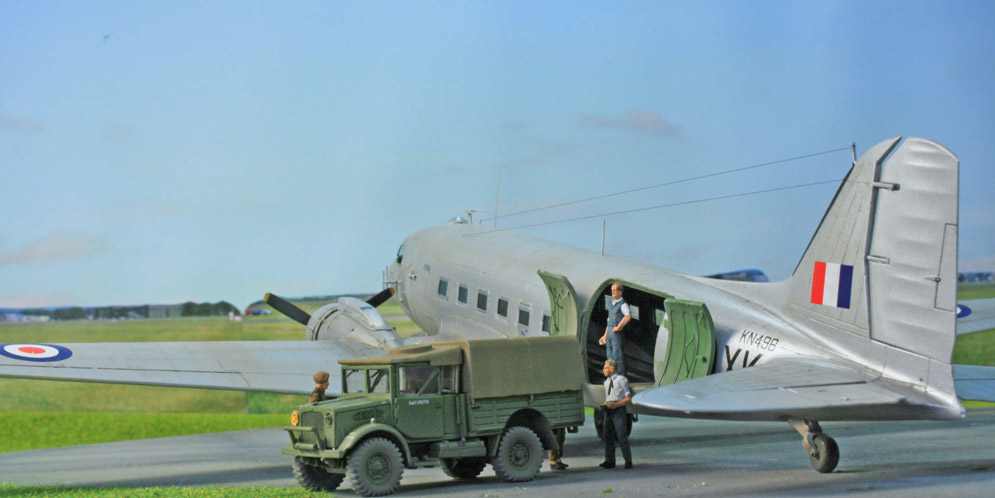
The four Air Anglia aircraft G-AGJV, G-AMPZ, G-ANTD and G-AOBN had all undergone the Transair mod which entails rudimentary undercarriage door mods, a bit more power and extra windows in the passenger compartment.
I had some reasonable photo references of BN, so I chose that as the prototype. She had been used by British United Airlines a radio calibration aircraft in the 60’s, and has a different aerial arrangement to the other aircraft and only required one additional cabin window being added on the port fuselage side.
The model went together very quickly and I didn’t suffer the door fit issues that Geoff had with his Dan-Air model. I needed to add a tail mounted anti-collision beacon to the fin and this was made from 1 mm plastic rod, the additional streamlined antenna under the nose was fashioned from two pieces of sprue turned to rough shape in a drill chuck. Eduard Brassin resin wheels were used instead of the kit items and I “weighted” the tail wheel also.
Painting was a combination of Tamiya Flat White undercoat on the fuselage, Micromeshed to smooth it off before finishing with Halfords aerosol Appliance white. The flying surfaces and fuselage underside grey were Tamiya Royal Light Grey over black pre-shading. I also lightened some of the grey and highlighted the wing panels centres. The matt was buffed to a semi gloss ready which also aided the underwing registration decal to bed down.
Heeding Geoff’s advice, the Alclad came last as it required a gloss black undercoat, together with careful masking of the yellow/green fuselage cheat line.
So as an Alclad2 virgin, I don’t think it went too badly and I used a combination of polished aluminium with flat aluminium patches to try and give it that “lived-in” look. Alclad2 was used for the prop blades with grey spinners and yellow green tips. The build took about 30-40 hours spread over two weeks of evenings and weekends.
If you want to see the model in the flesh, do come along and visit the Norwich International Aviation Academy, it is open to the general public, we also have a selection of engines from Rolls Royce Heritage on display and also a “live” Boeing 737 inside the building which you can view, oh and a great Café!
Stuart M.
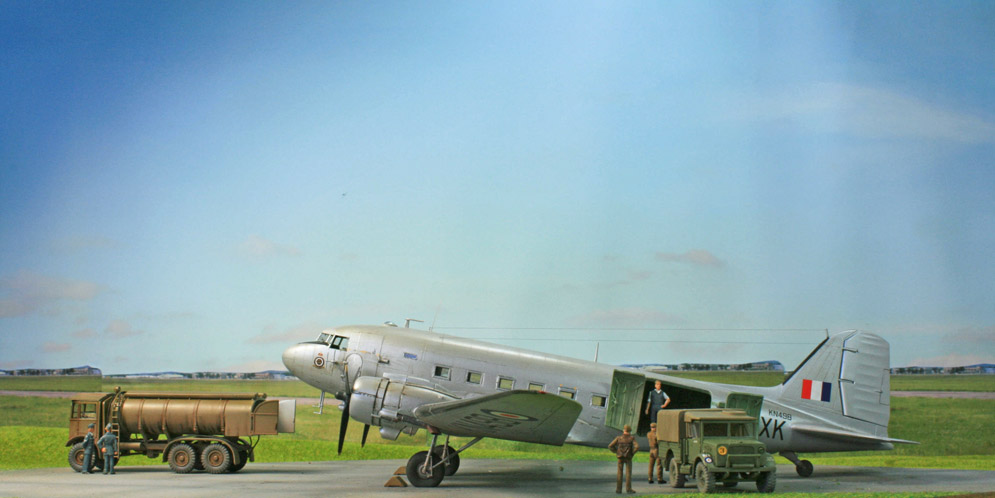

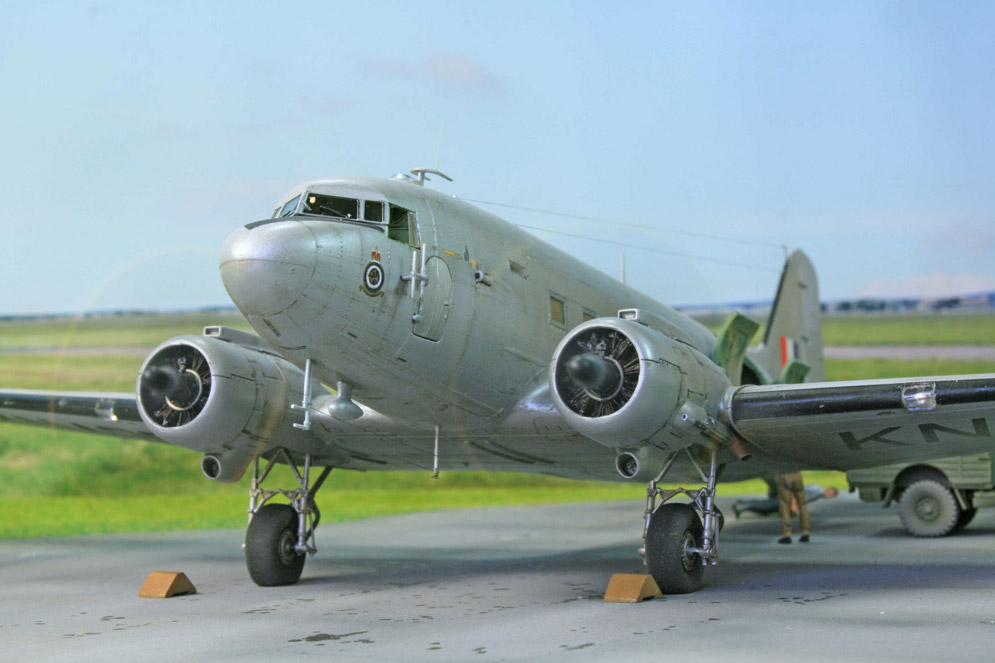
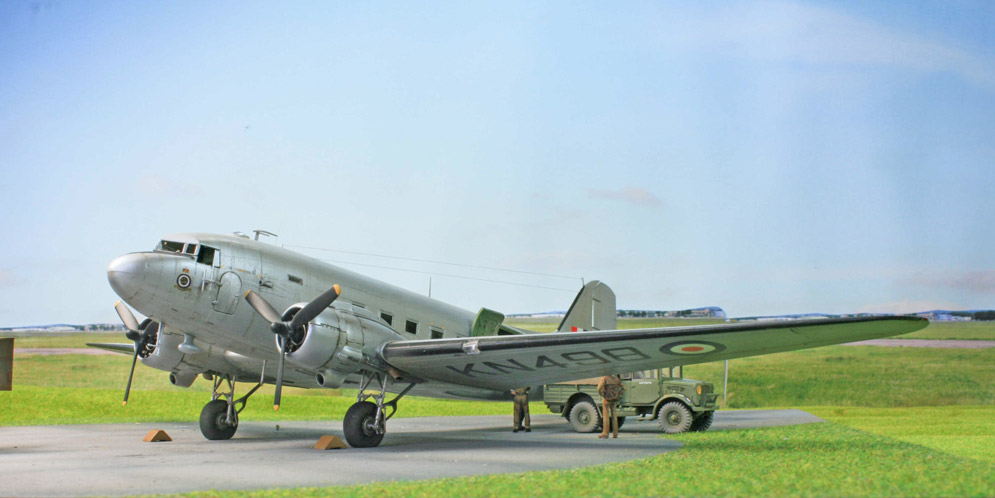
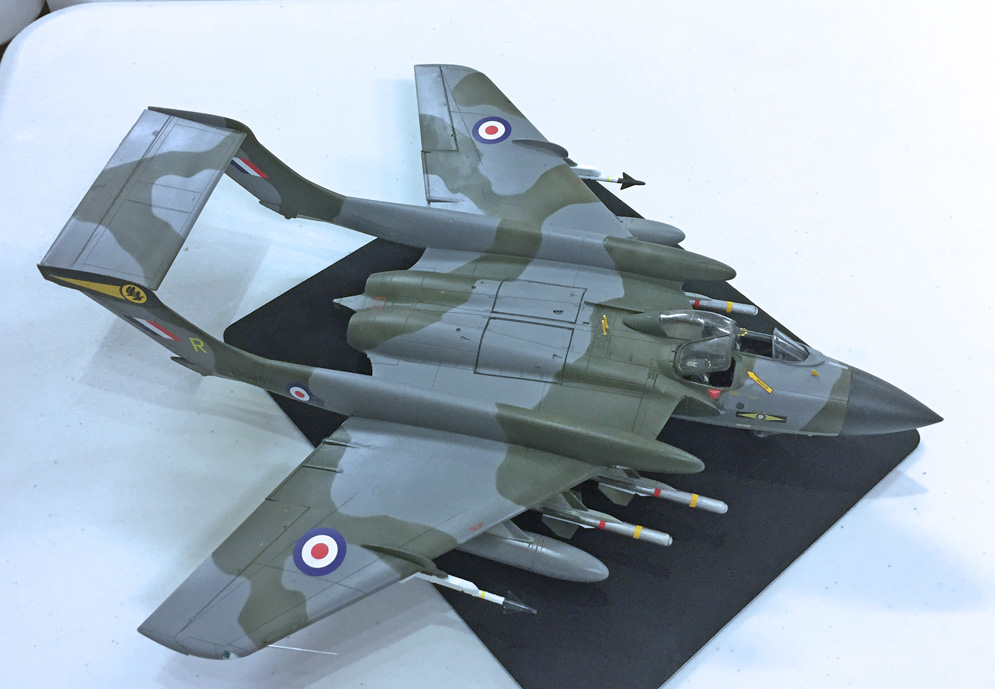
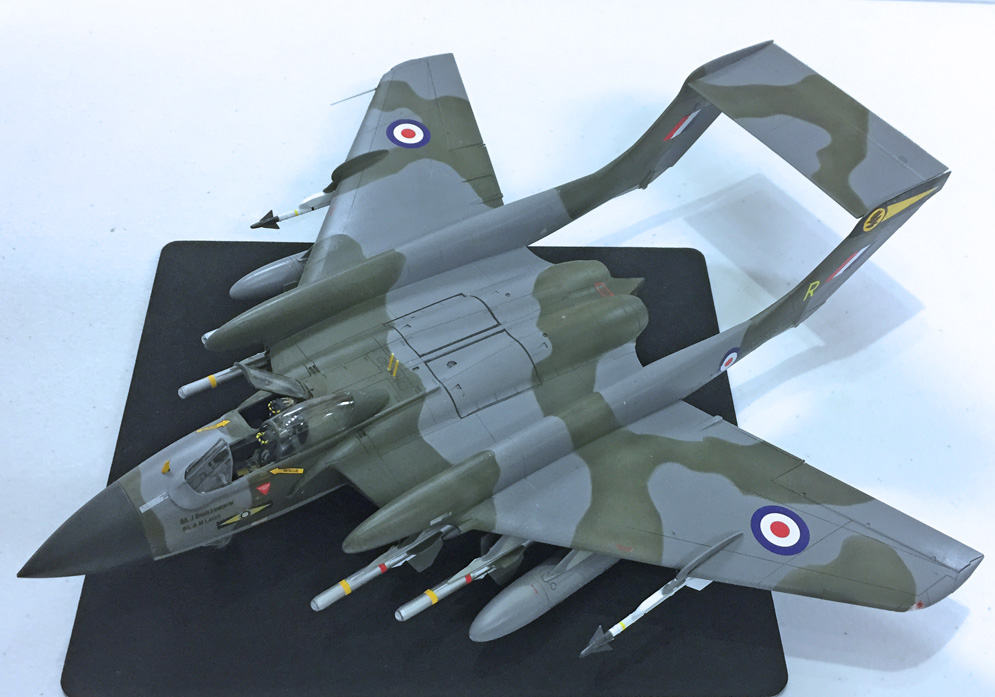
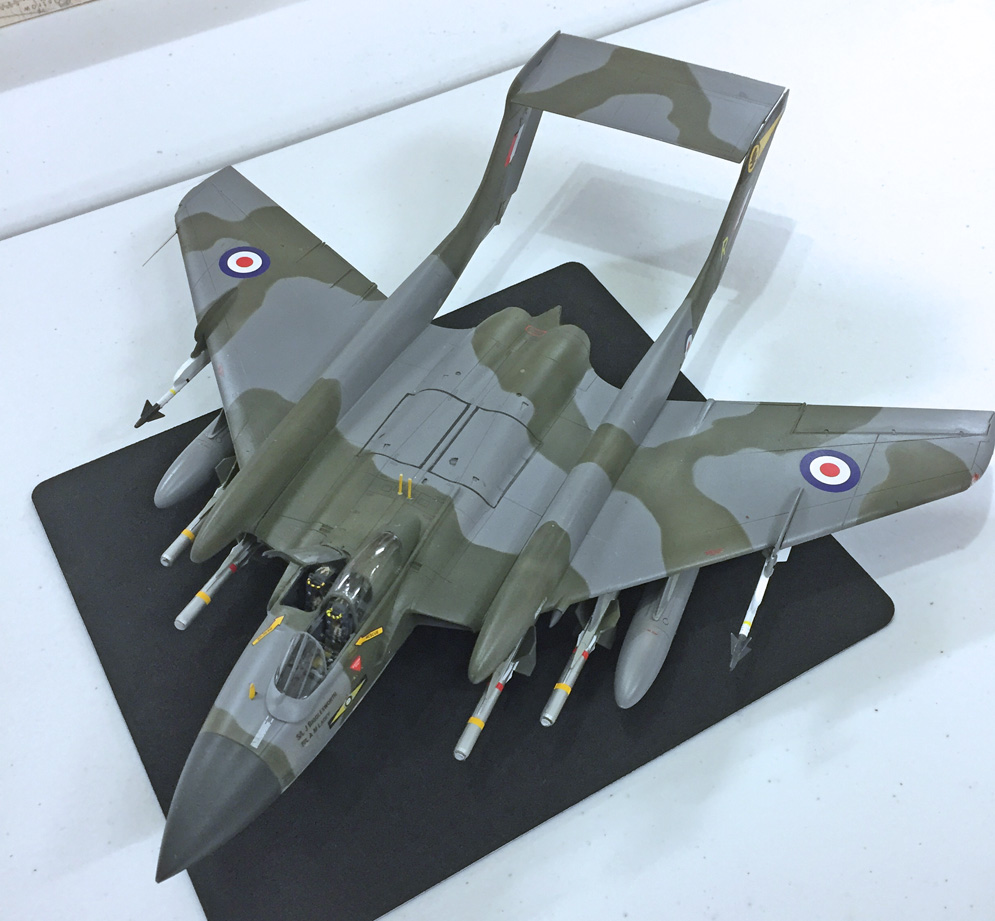
Panel lines partly filled then ‘riveted’. The U-shaped aerial was moved to behind the astrodome and Gee aerial fitted as per the RAF style. Xtradecal decals to represent the aircraft of 46 Squadron normally based at Oakington in 1948. These aircraft were not polished aluminium but painted silver. I think I used AK Interactive Xtreme White Aluminium and then a matt varnish.
Hope you like her?
Cost: £5 from a second-hand trader
Materials: injection moulded plastic
Additional materials used:
Paints: Xtracolor Dark Sea Grey, NATO Green, Aluminium, Humbrol Matt Black 33, Revell 9 Anthracite, Revell 2 Matt Varnish, Winsor and Newton oil paints and pastels.
Neomega: ACES II ejection seats
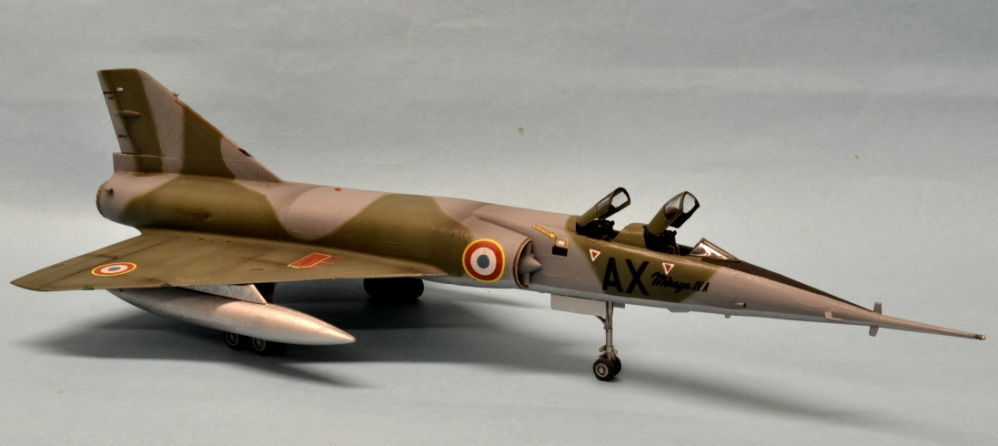
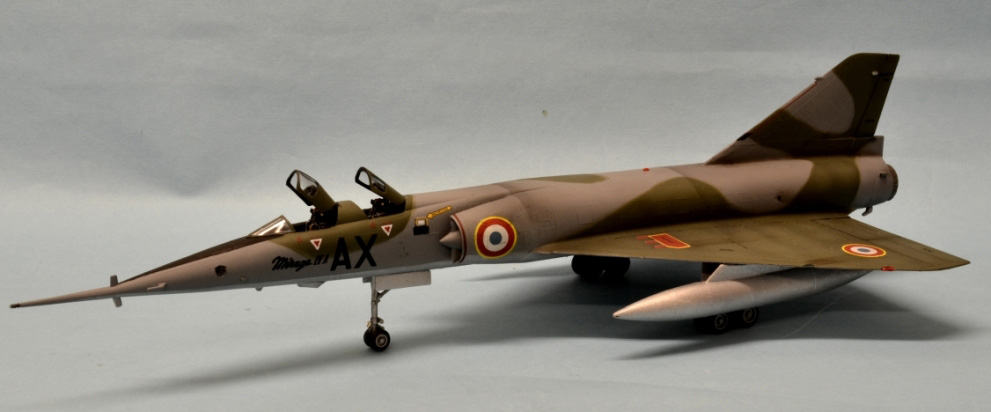
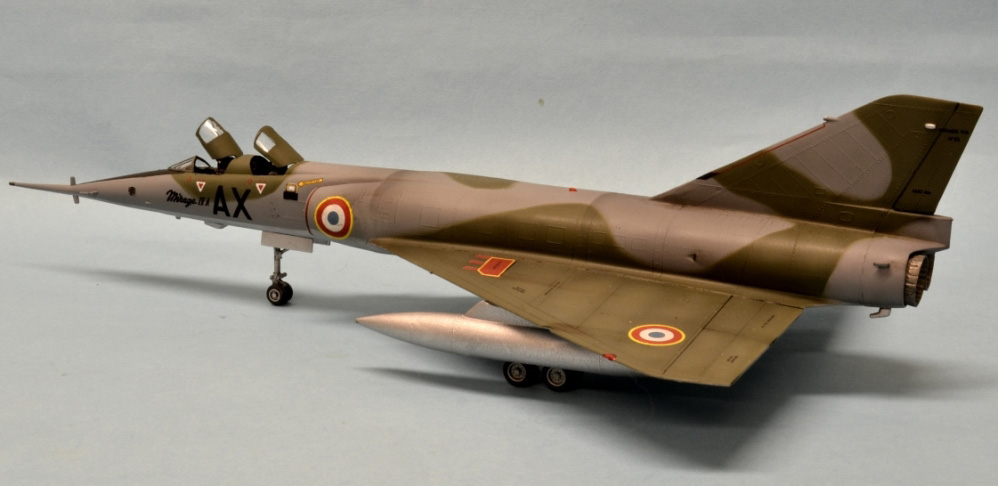
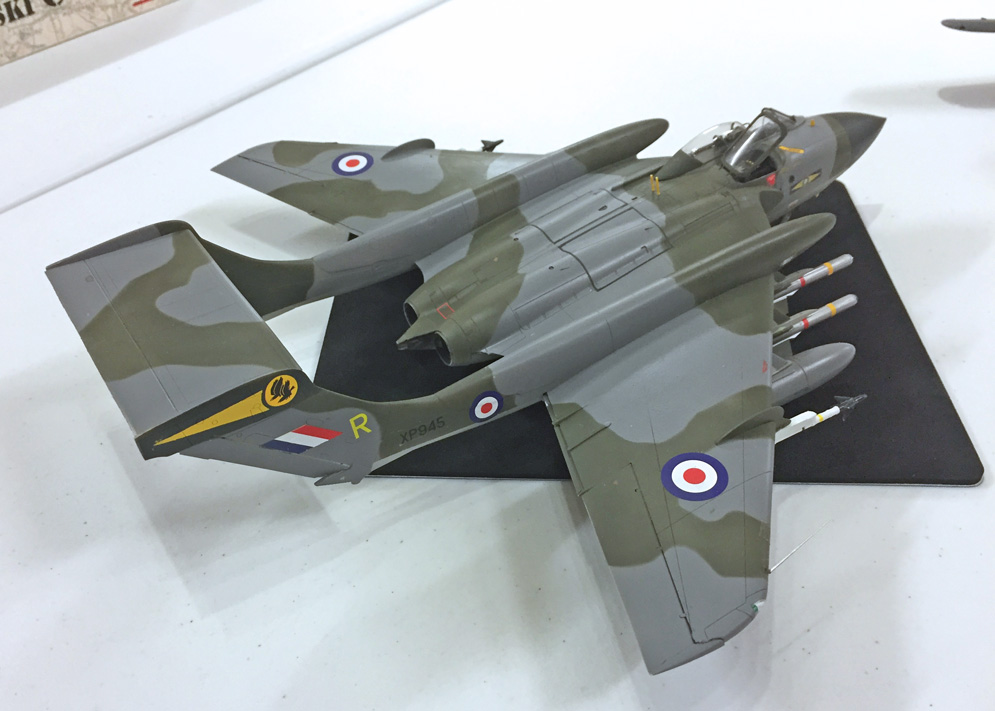
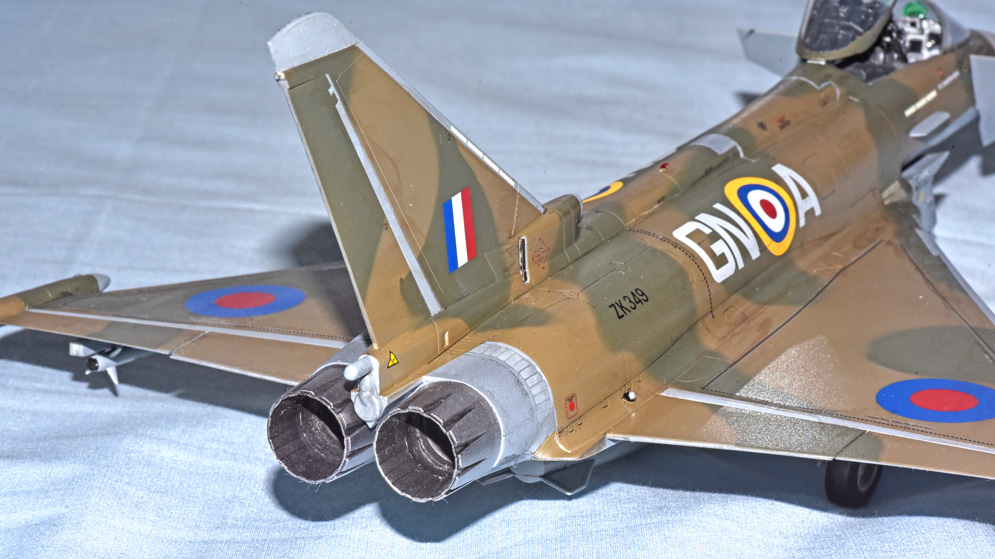
As a more successful contemporary of Britain’s TSR.2, I have always admired the Mirage IV and wanted to depict it in its camouflaged heyday, around the 1980s and 1990s. The aircraft were in service for around 40 years so finishes changed. The kit provides markings for a camouflaged variant circa 1985 and then provides alternative code letters and serials for different individual aircraft.
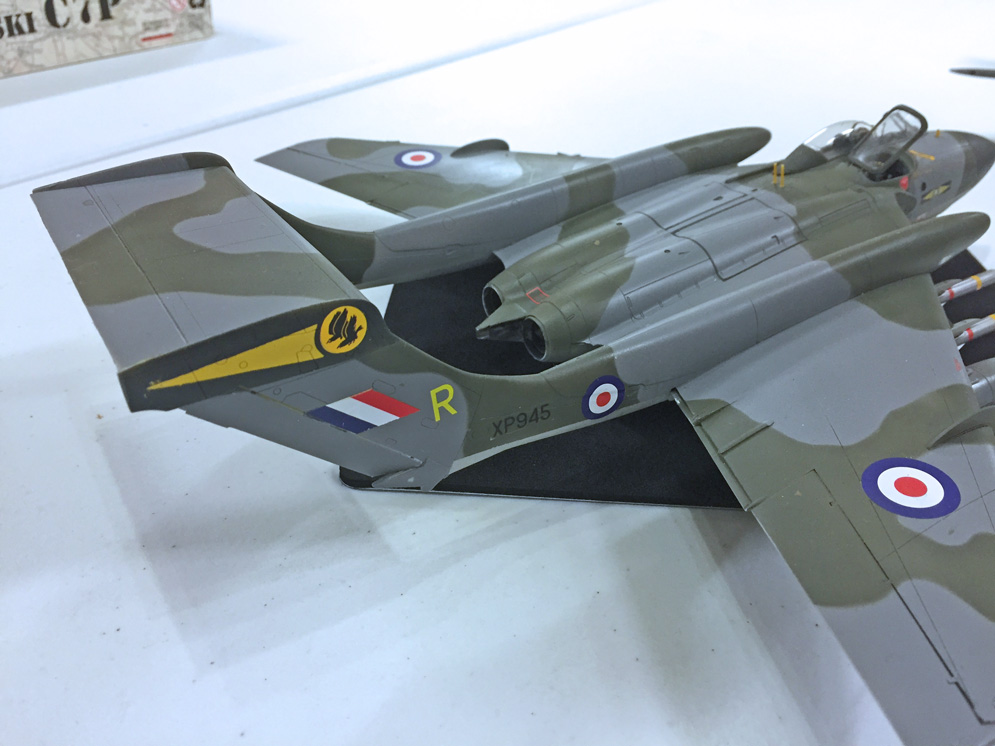
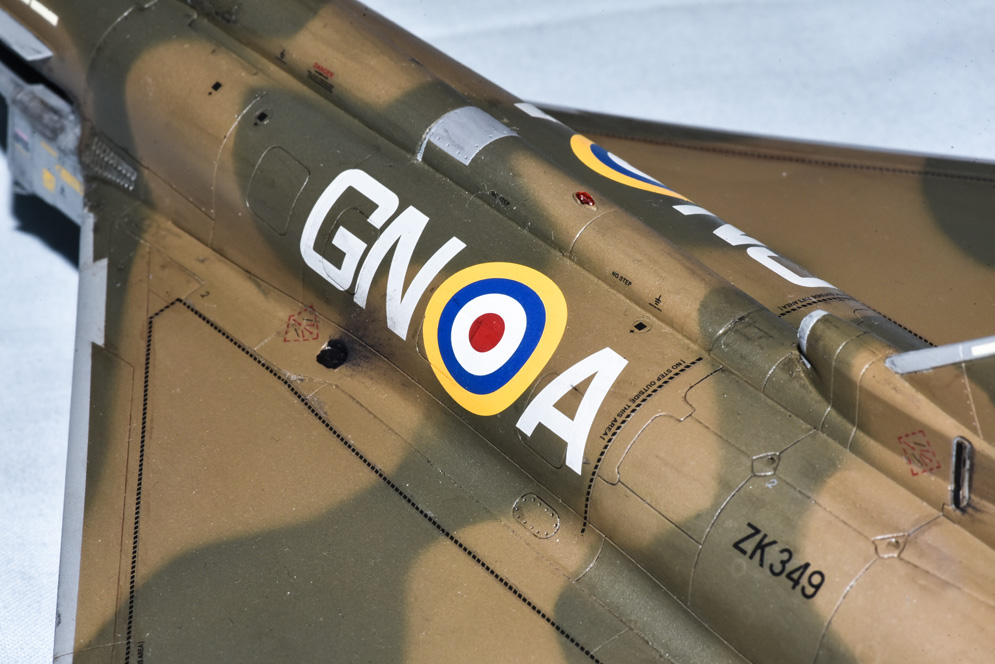
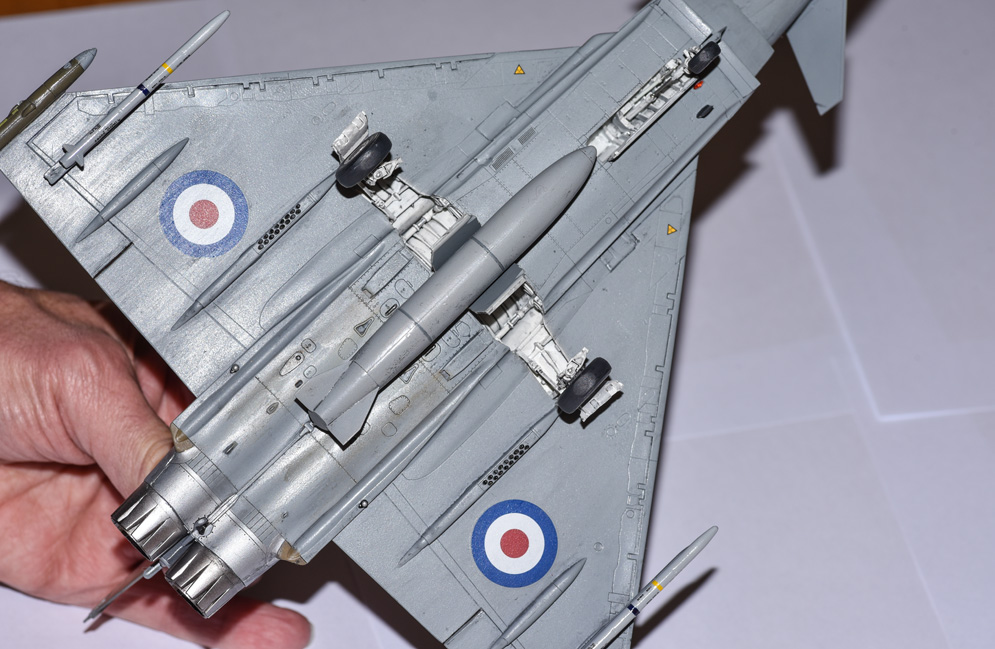
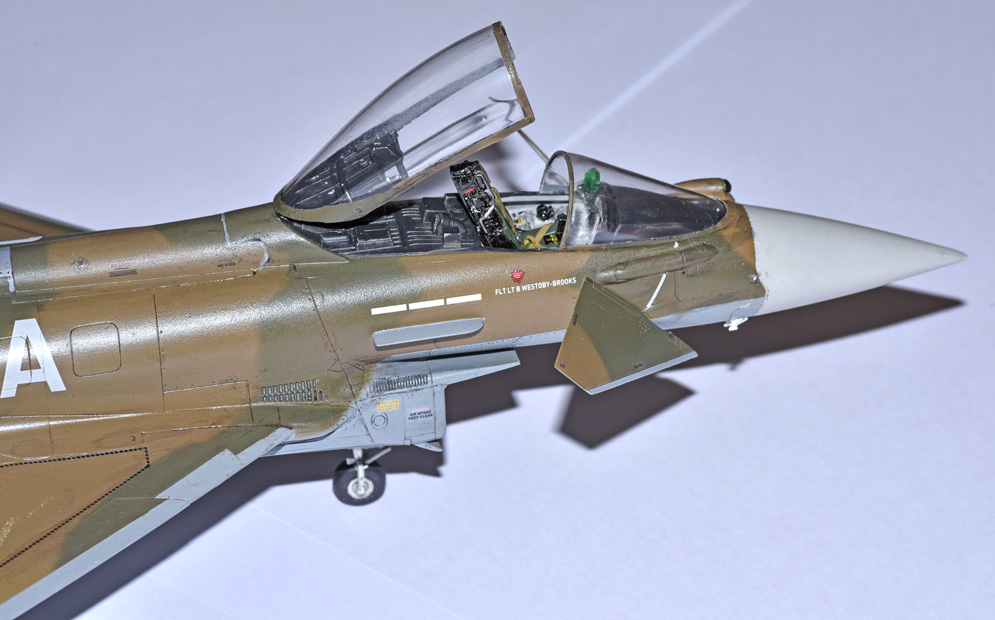
The model assembled easily over a couple of evenings. Some sanding and filling was required at the wing roots, on the fuselage spine and at the rear underside where the housing for the jet pipes joins the fuselage, but nothing serious. I closed the airbrakes which fitted perfectly. I left off smaller parts such as antennae and wheels and then used a coat of automotive grey primer to highlight any imperfections. I then sprayed the cockpits with Tamiya NATO black, drybrushed with grey and then I picked out switches with acrylic red, yellow and white. The cockpits were masked and the undersides sprayed in Xtracolor Aluminium. The upper surfaces and canopy clear areas were sprayed with Xtracolor Dark Sea Grey and then masked with rolls of Blu-Tac, with the inner areas masked with Tamiya tape, and Xtracolor NATO Green sprayed to give a camouflage effect, with lightened areas sprayed over to give a weathered appearance. I sprayed the Stand-off missile while but could find no details of marking or stencilling, so eventually left it off.
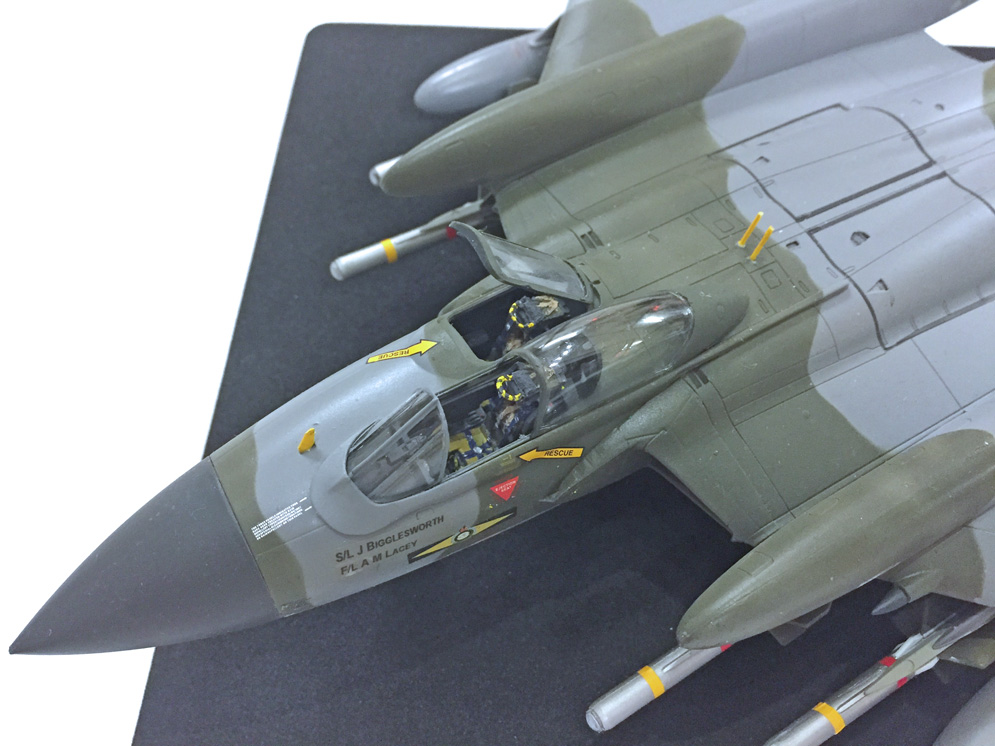
I used mainly the kit decals, which bedded down perfectly without silvering and providing excellent opacity, and Carpena decals for the roundels. Weathering was provided by a quick overspray of Tamiya Smoke, plus a wash of oil paints around the control surfaces. I added ejection seats from a Neomega set (probably ACES II slightly modified) and then added final details such as wheels (Tyres painted with my trusty Revell 9 anthracite), canopies and antennae.
Overall, I very much enjoyed this project and will now search for the Heller 1:48 kit, for which a number of aftermarket detailing sets are available.
Jonathan B.
Scale: 1:32 | Paint: Gunze, Tamiya | Extras: Yellow Wings Decals
I backdated this kit to make it accurate for the Battle of the Coral Sea
Mish E.
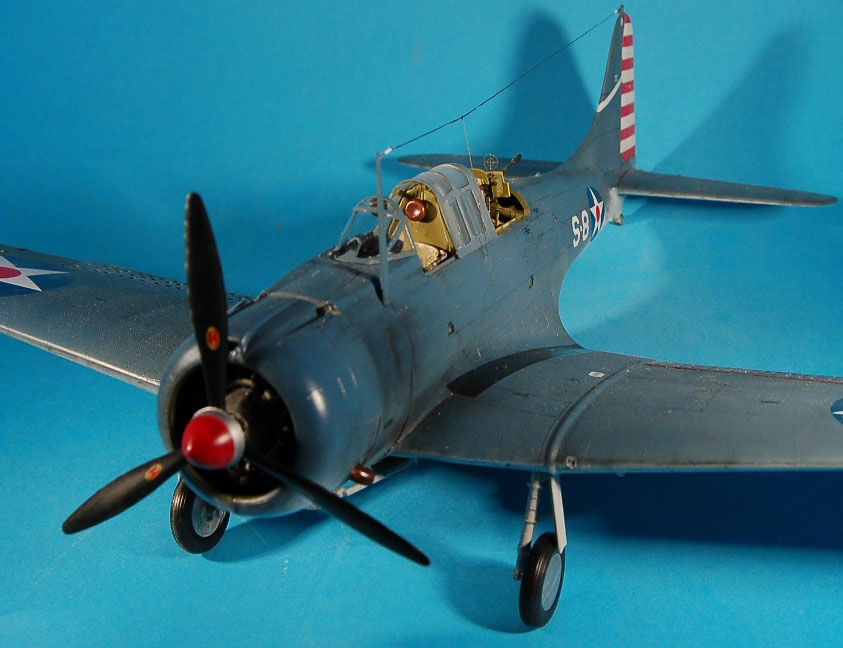

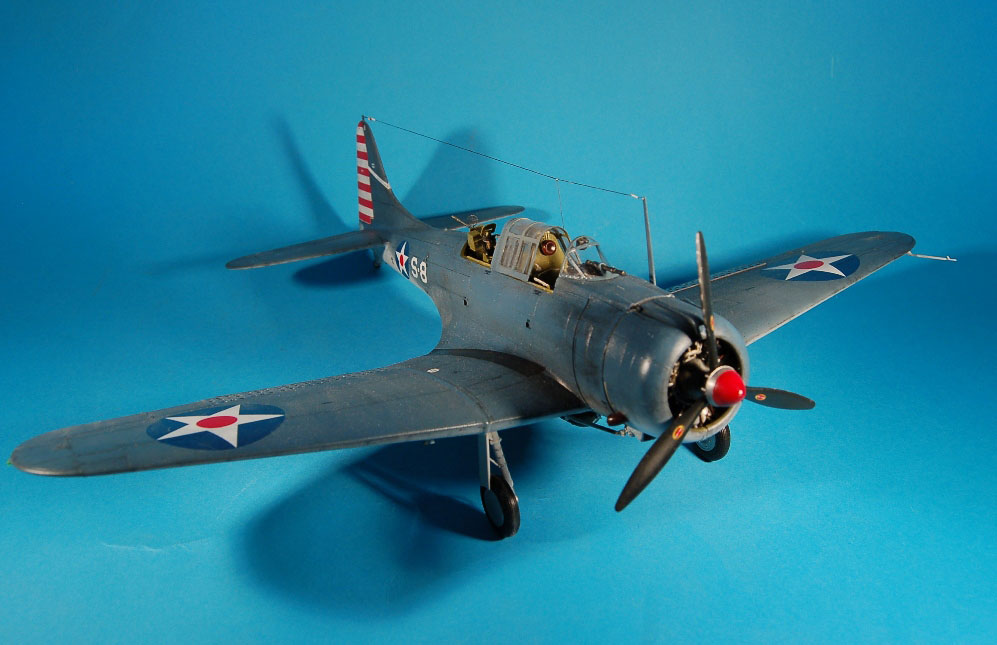
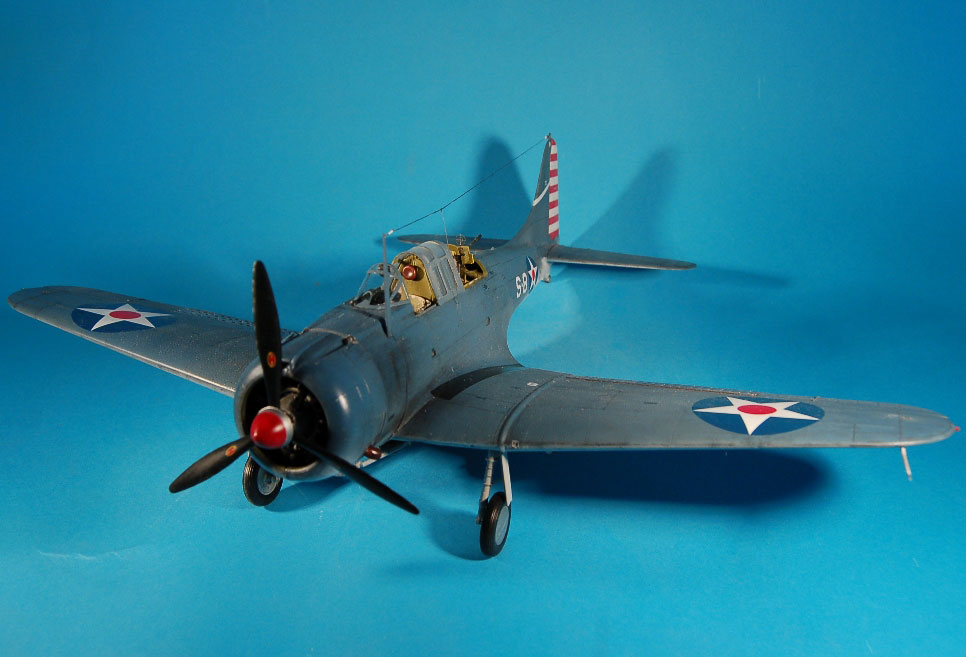
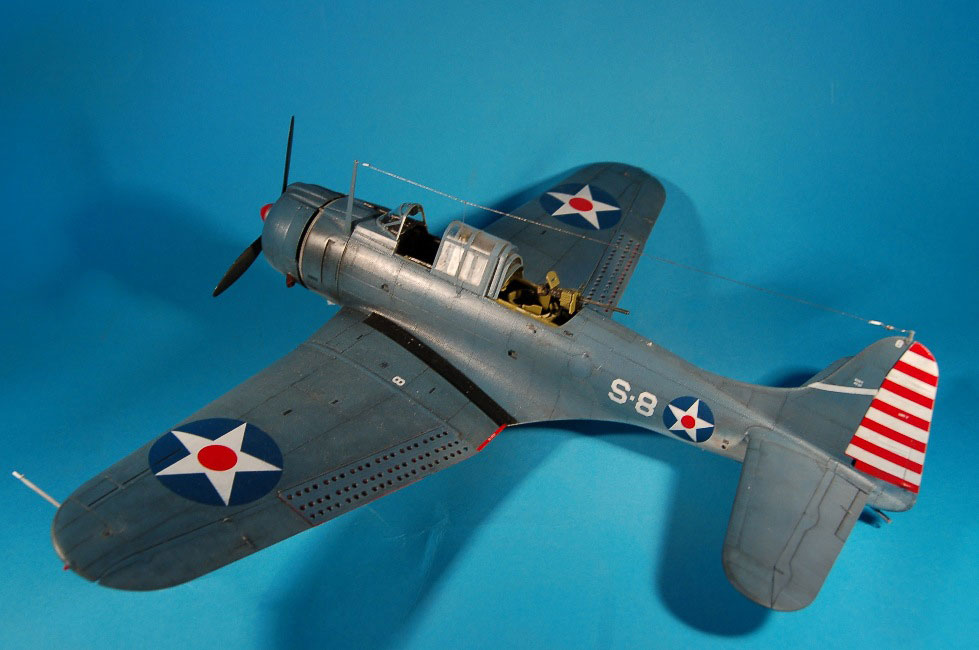
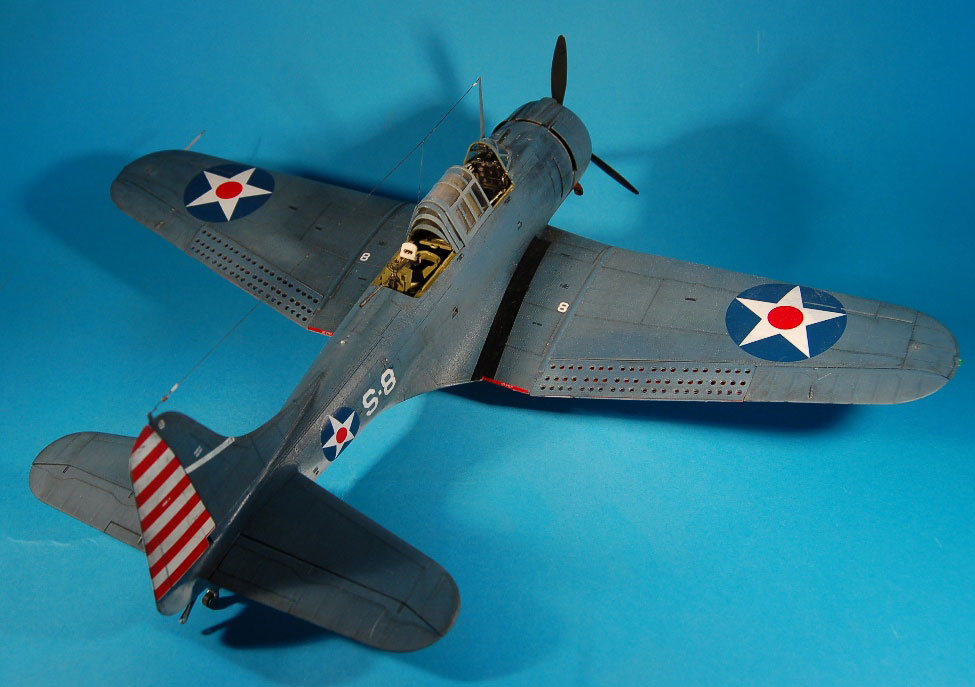
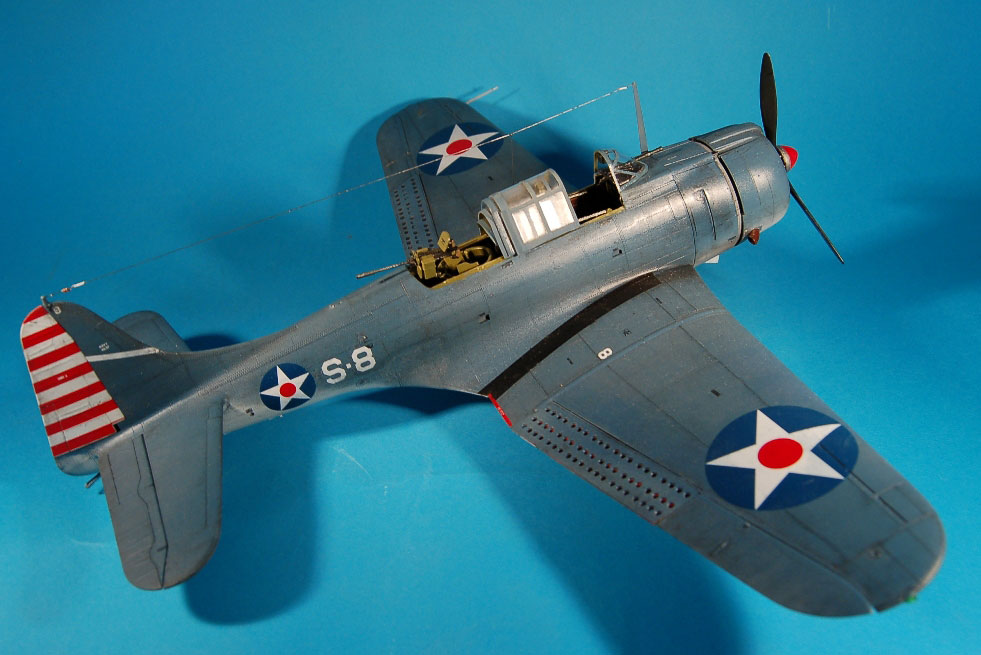
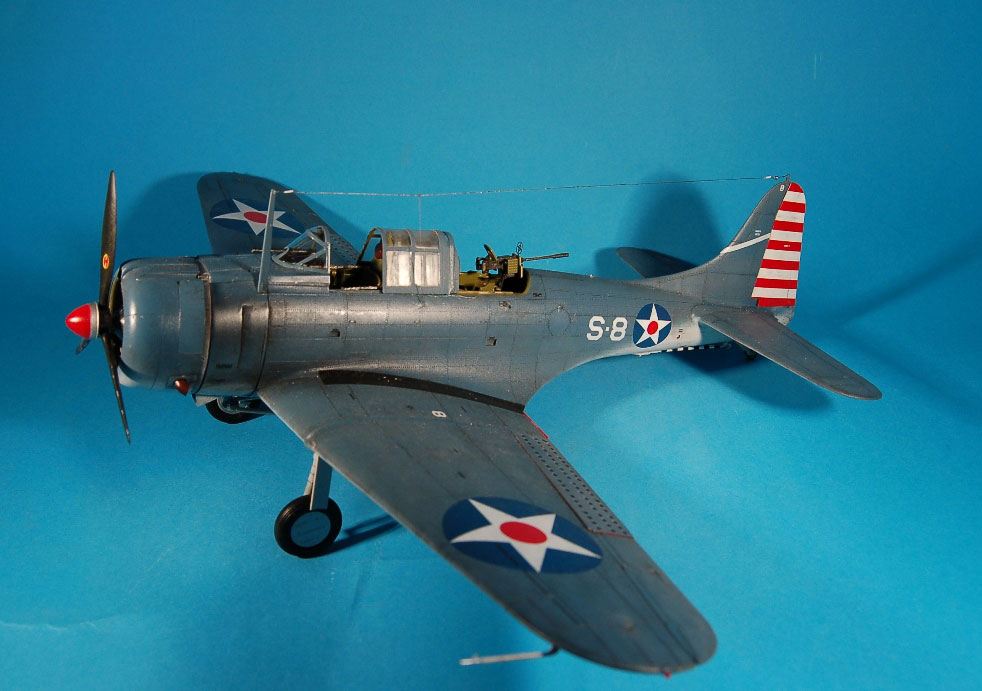
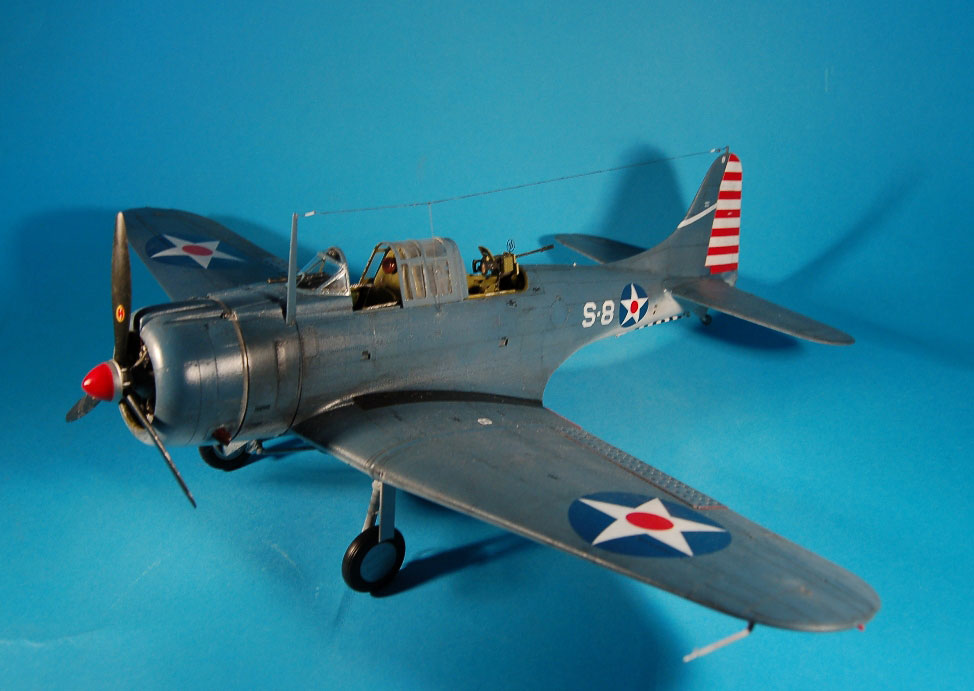

Didn’t follow the paint callouts exactly but wanted it to look like the box art…😎
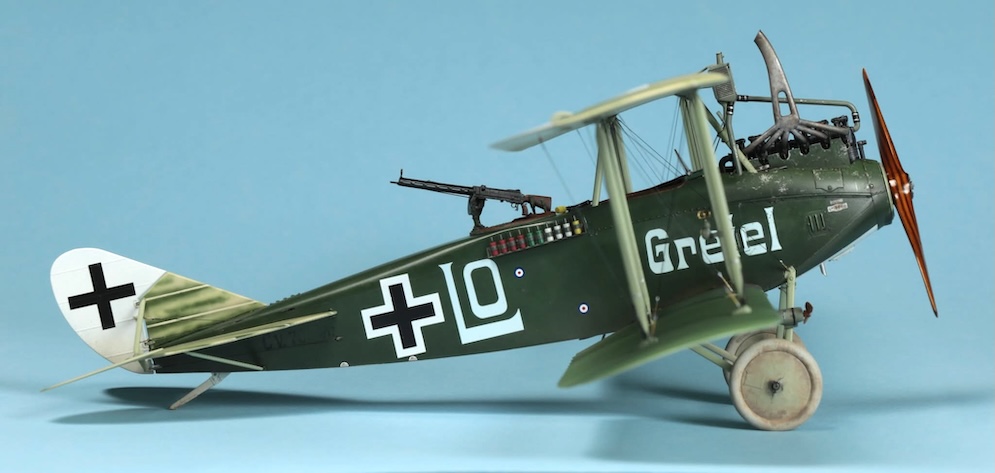
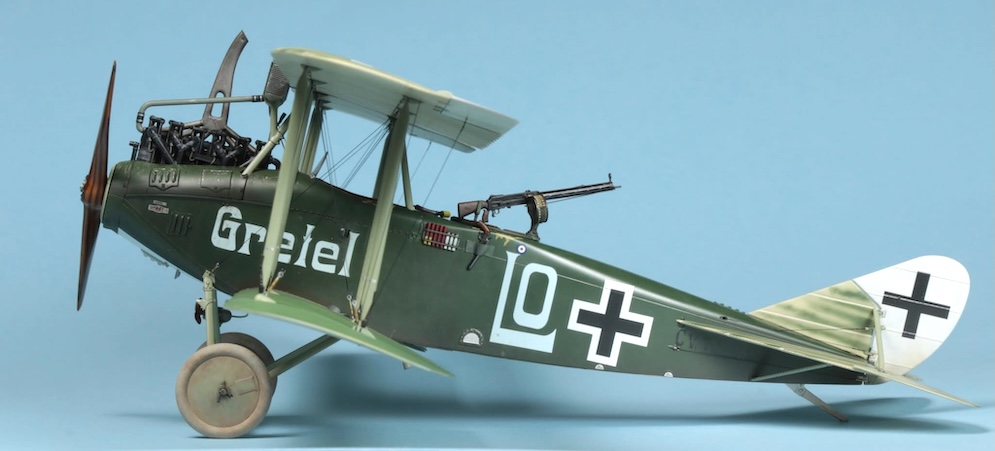
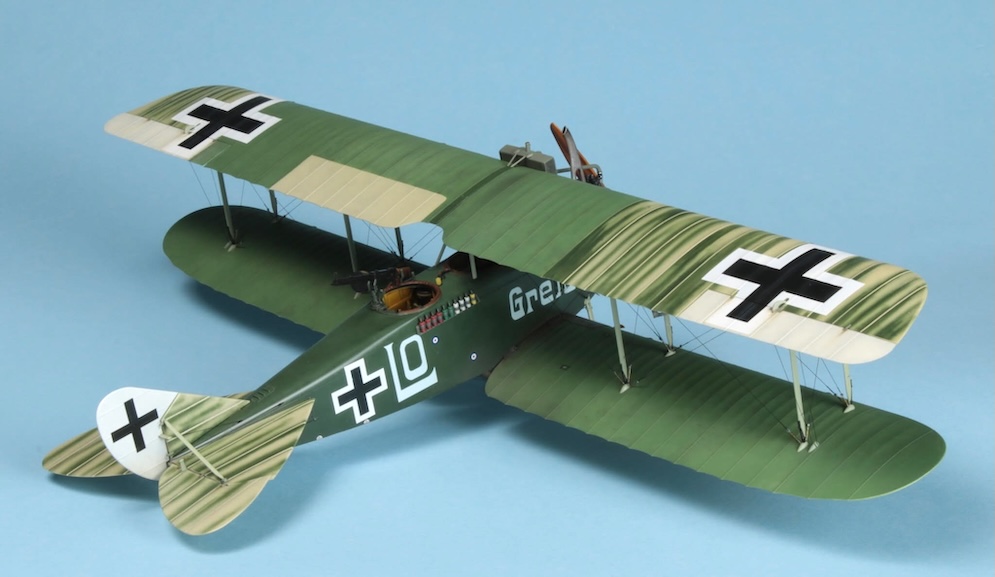
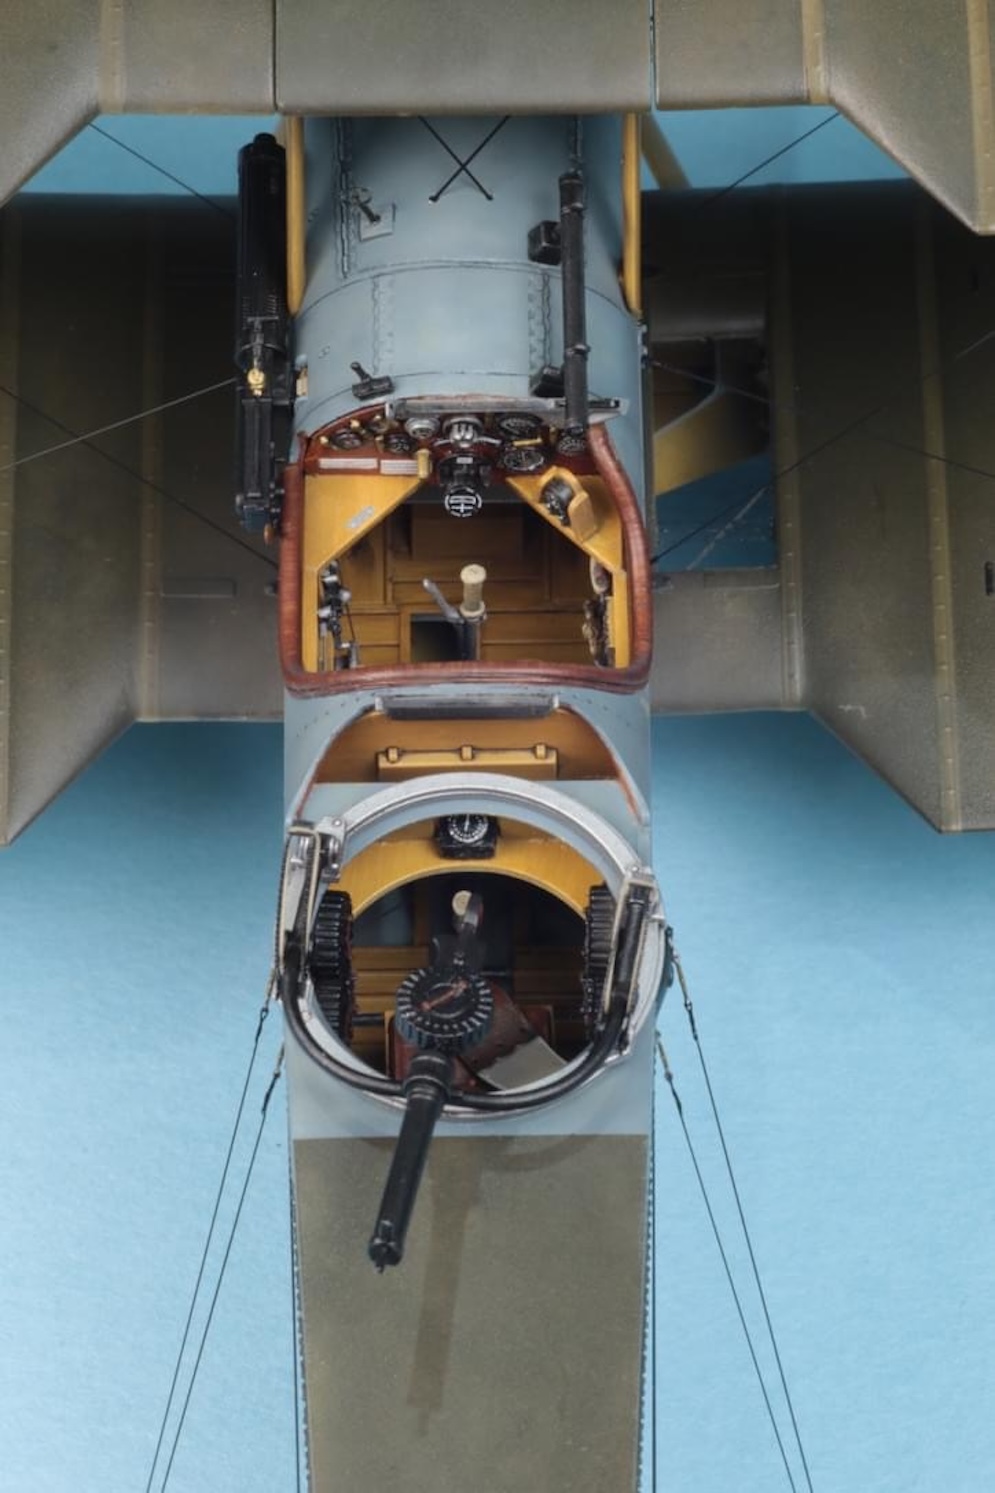
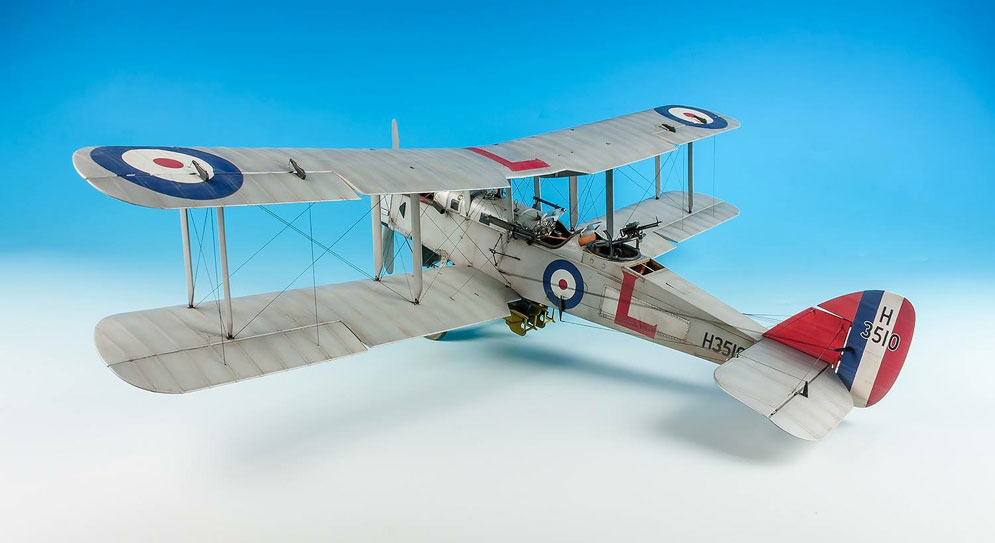
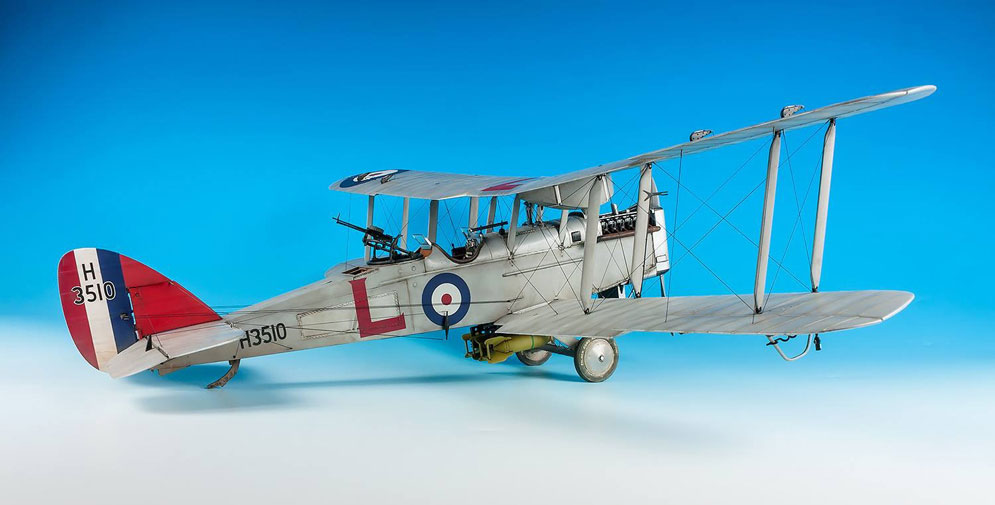
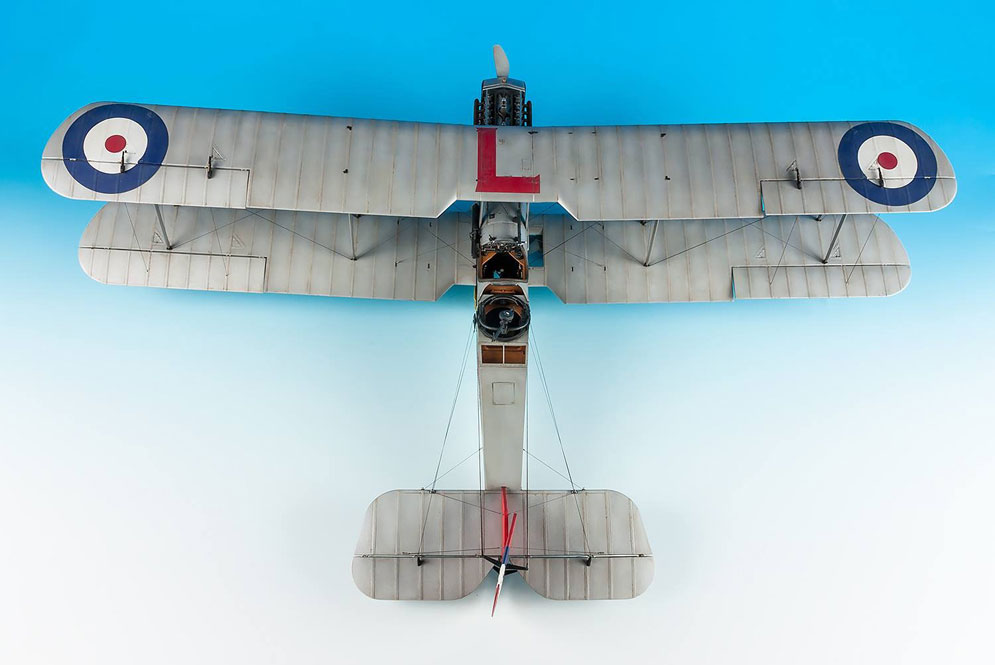
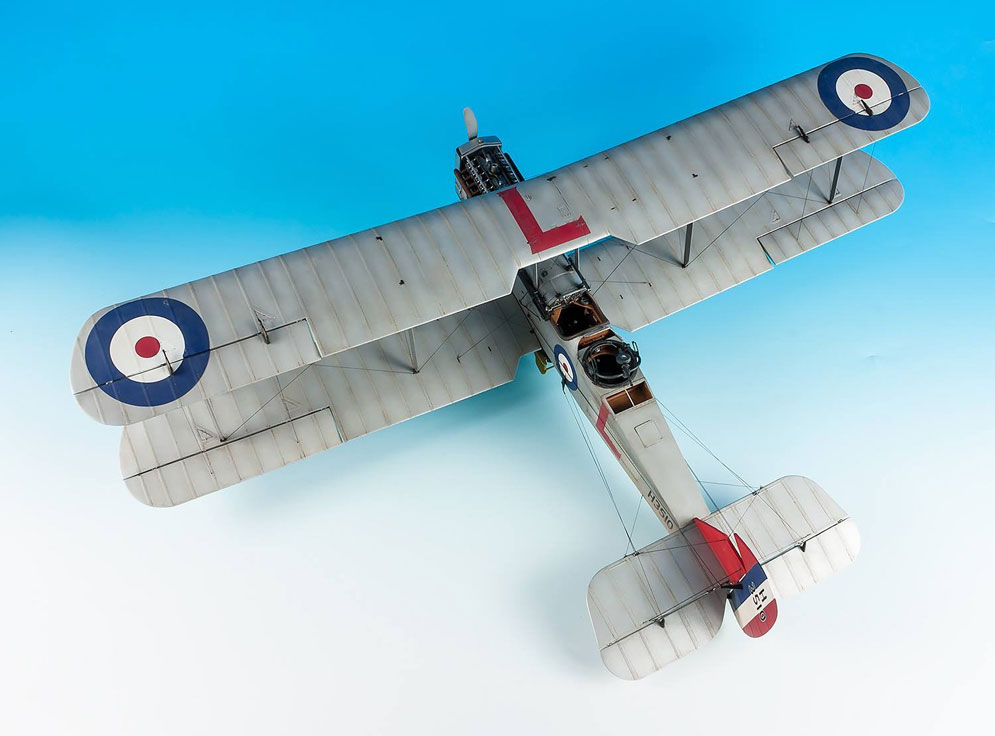
Tamiya, Alclad and printing ink
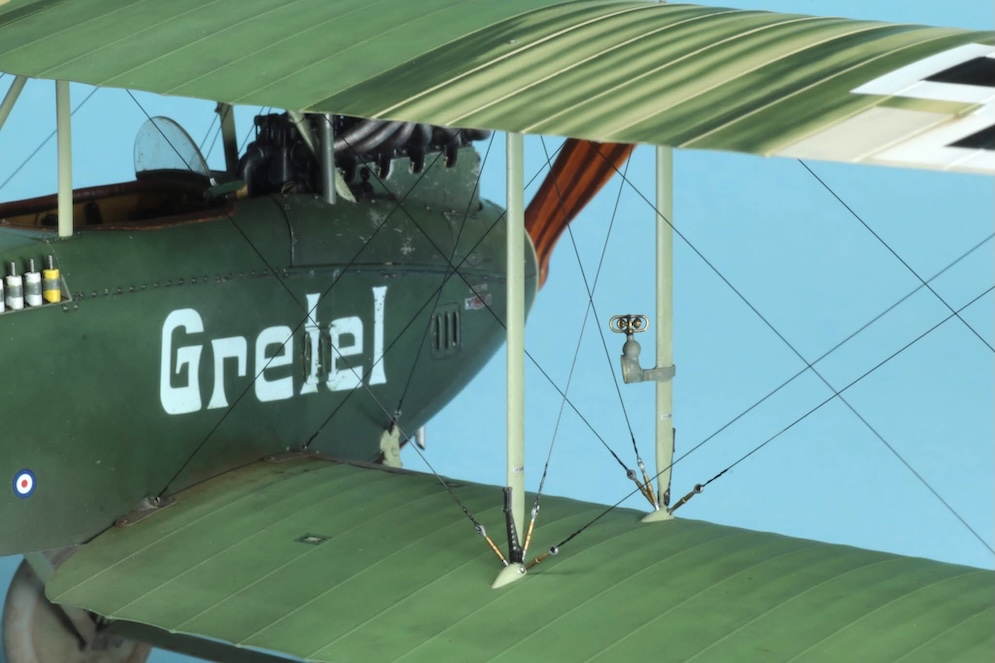
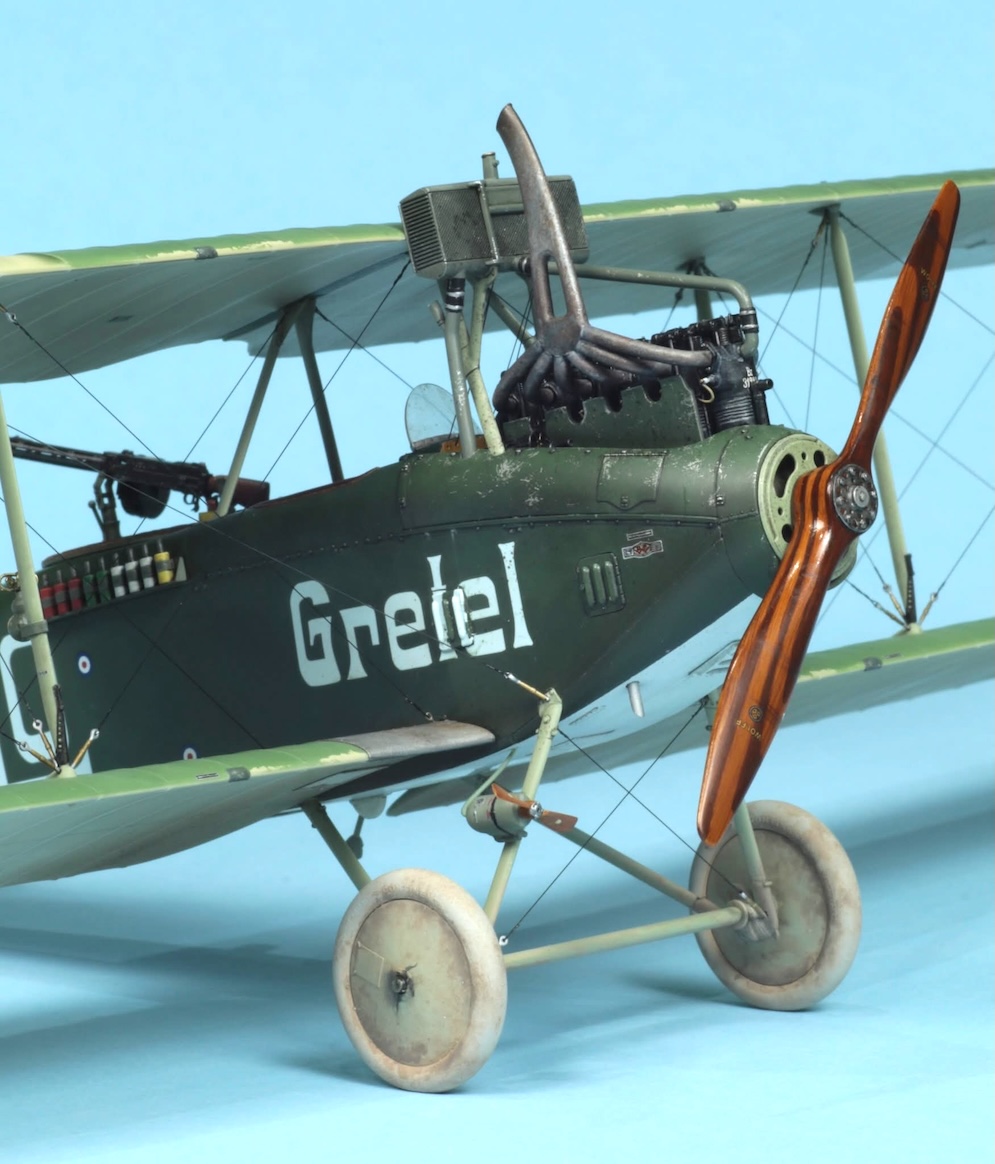
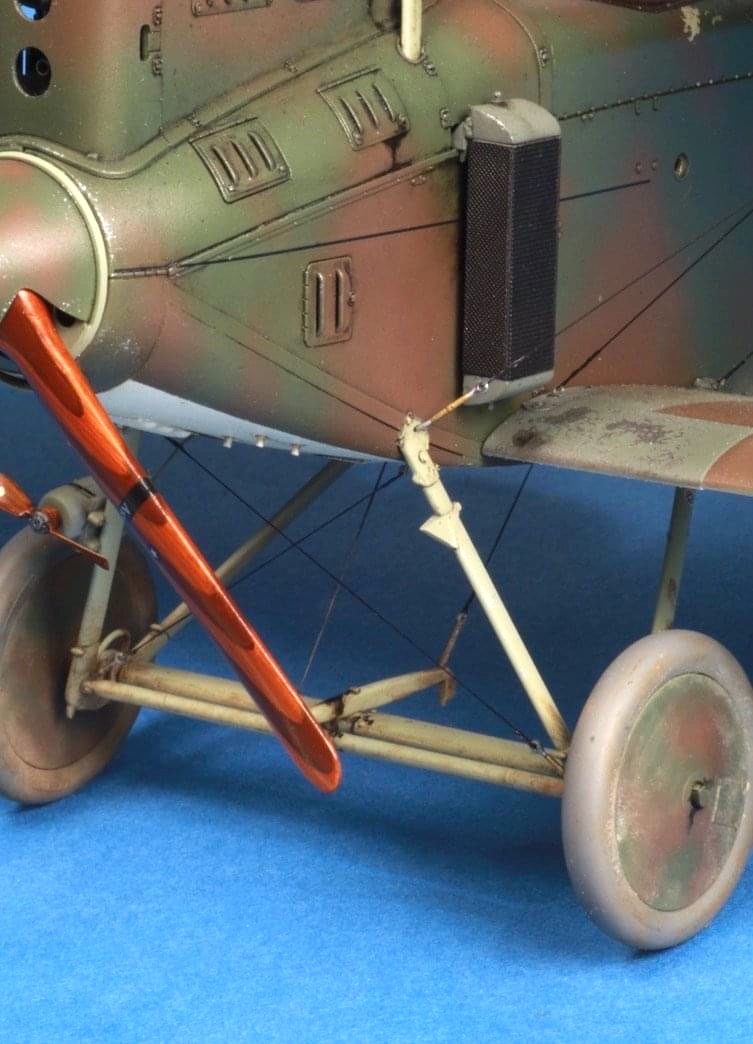
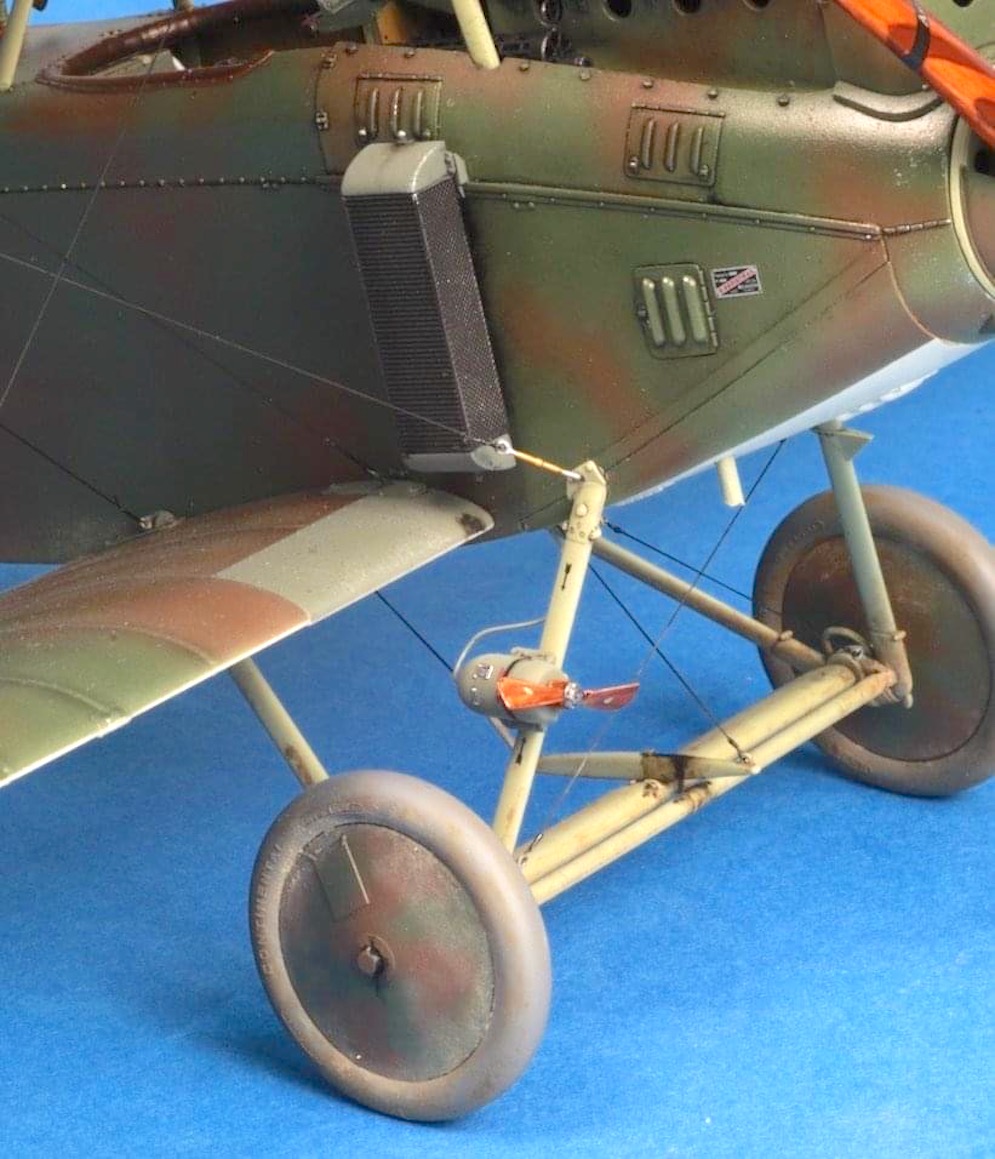
Flare-gun ‘holster from Duro
Undercarriage generator lead from HSS
Gaspatch turnbuckles
Model Kasten rigging
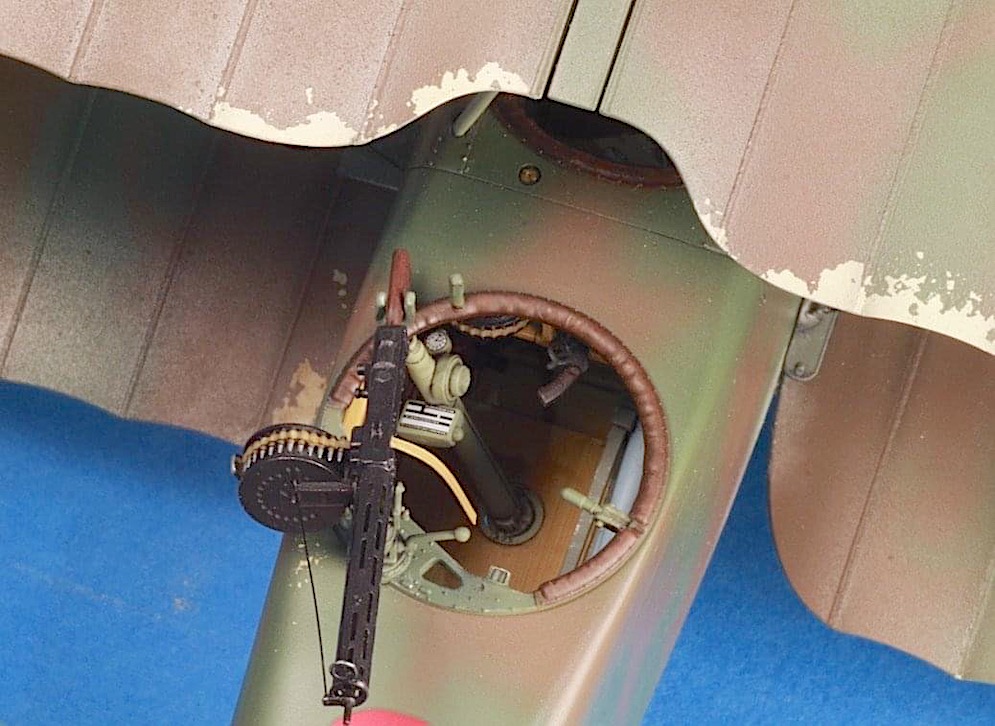
Observers gun Gaspatch.
Prop oils over acrylic.
David G. L.
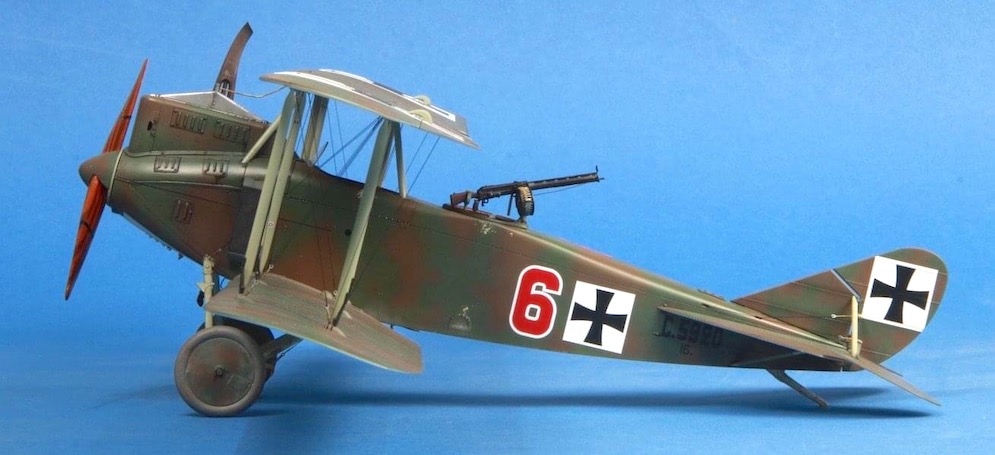
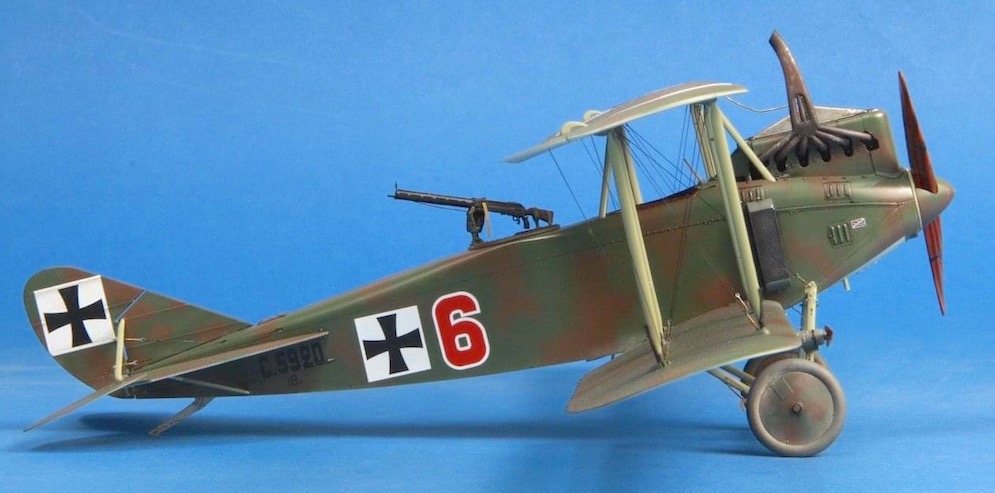
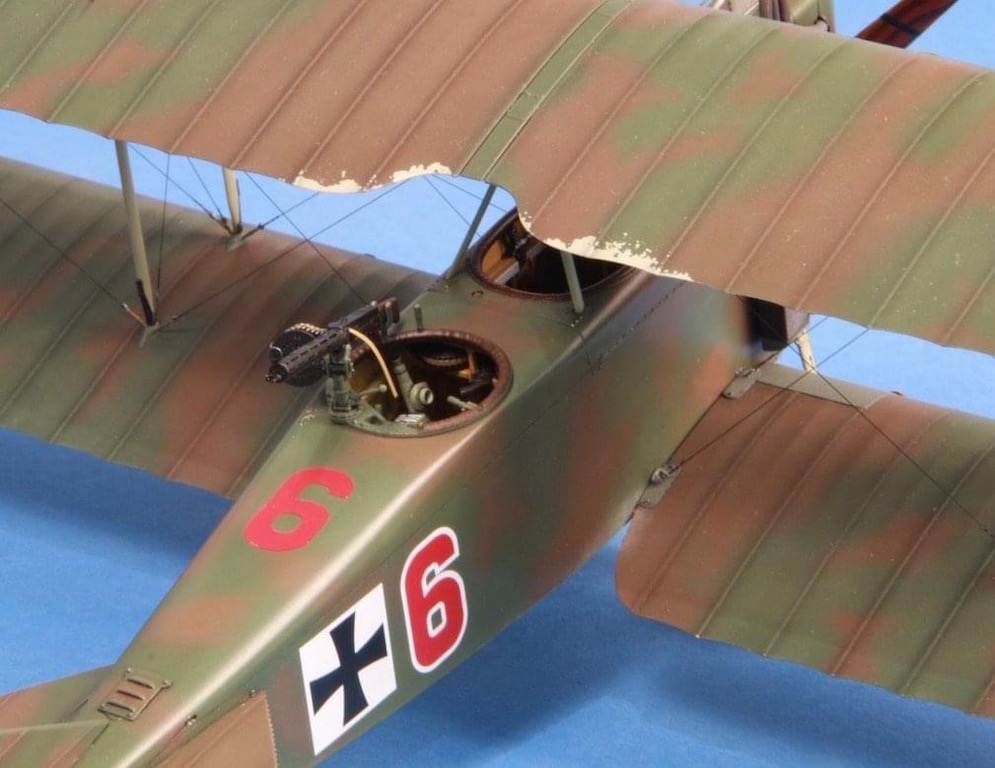

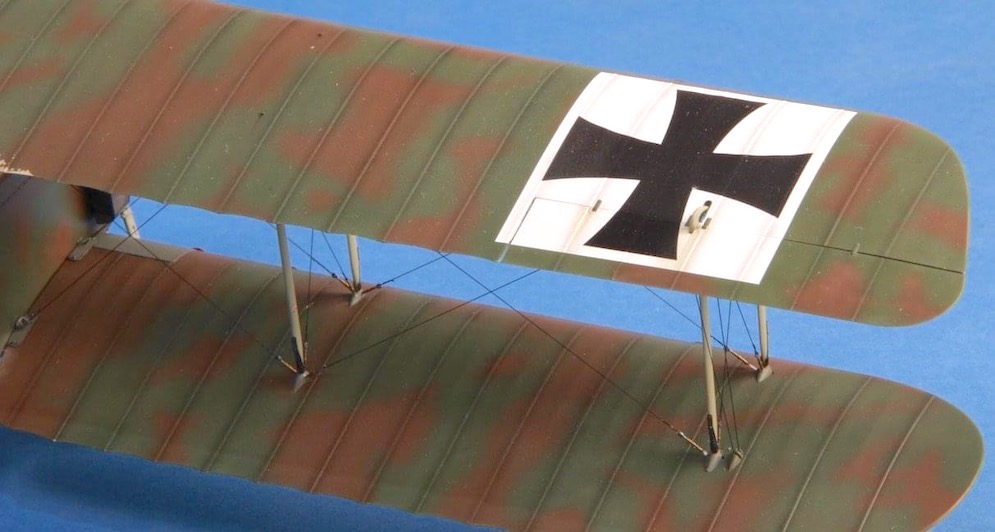
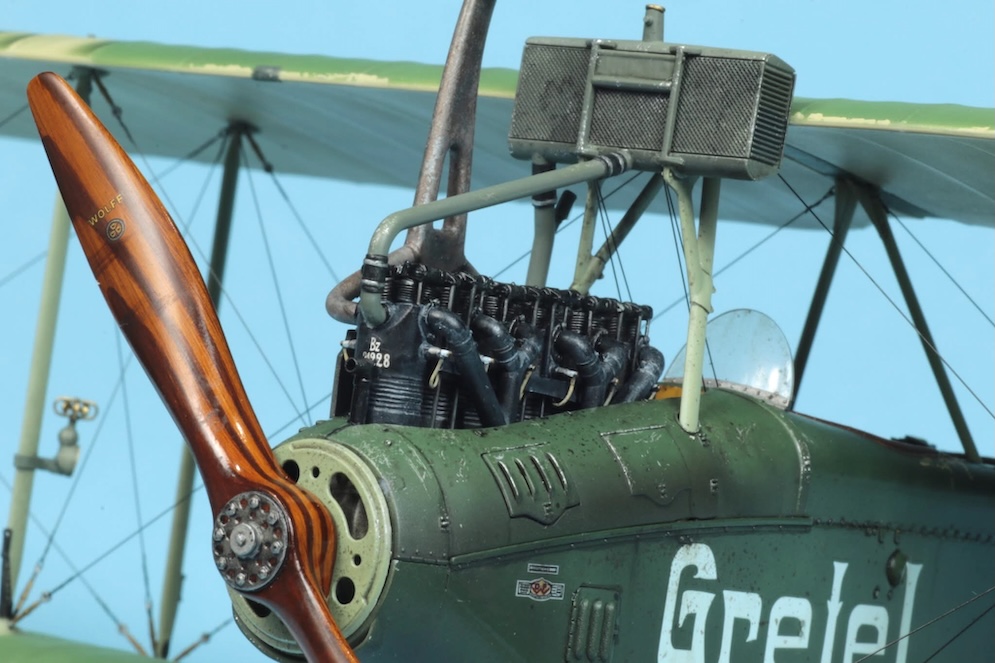
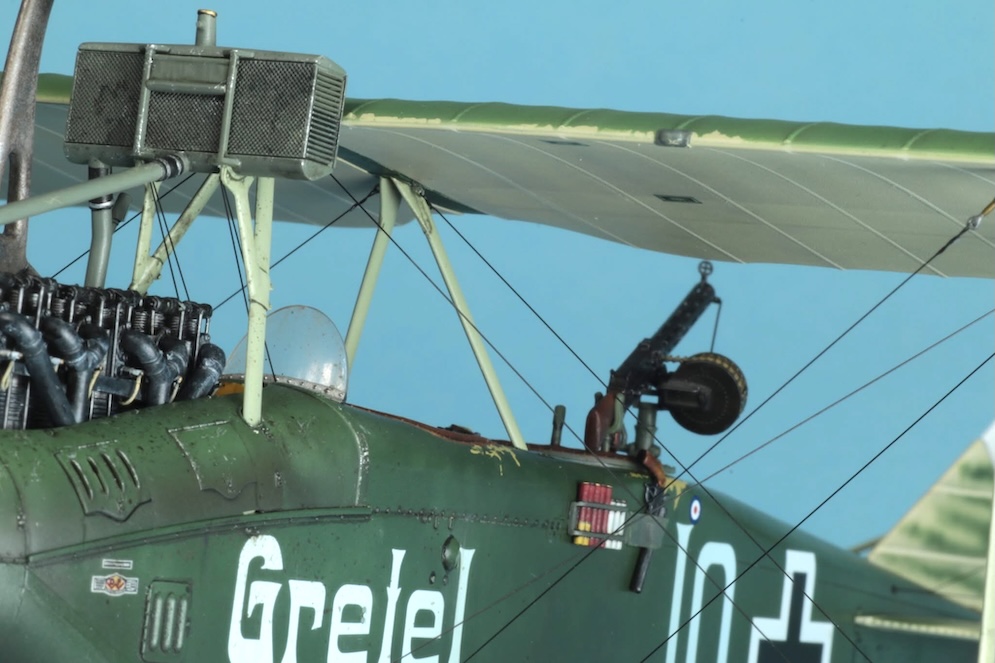
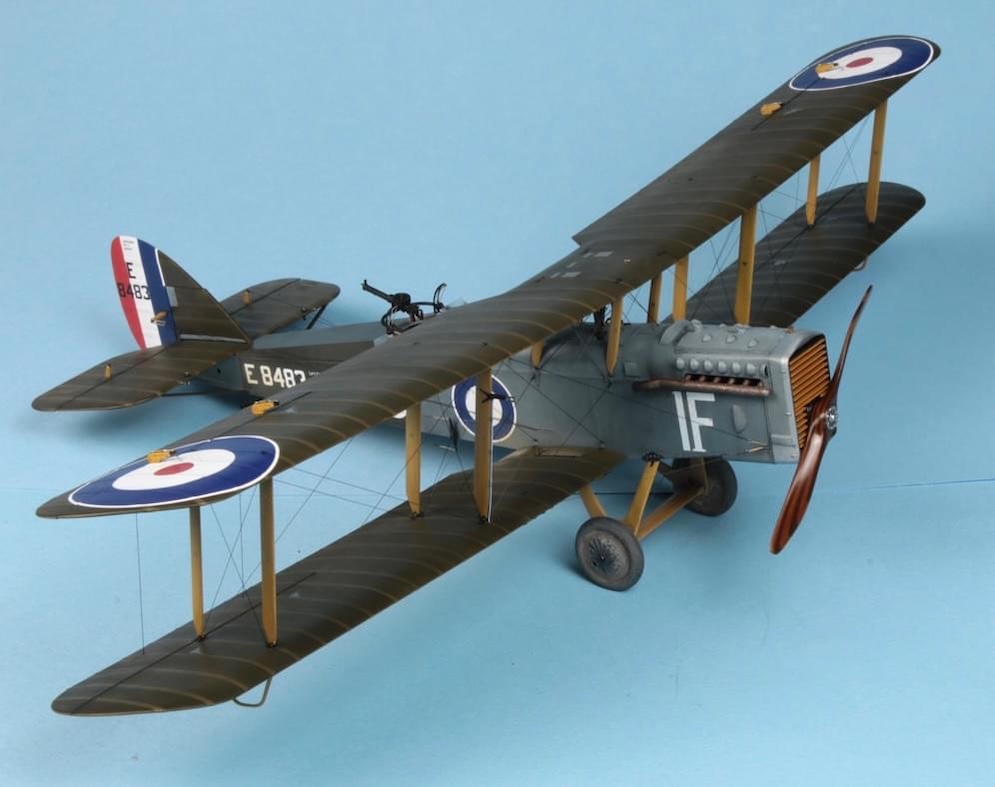
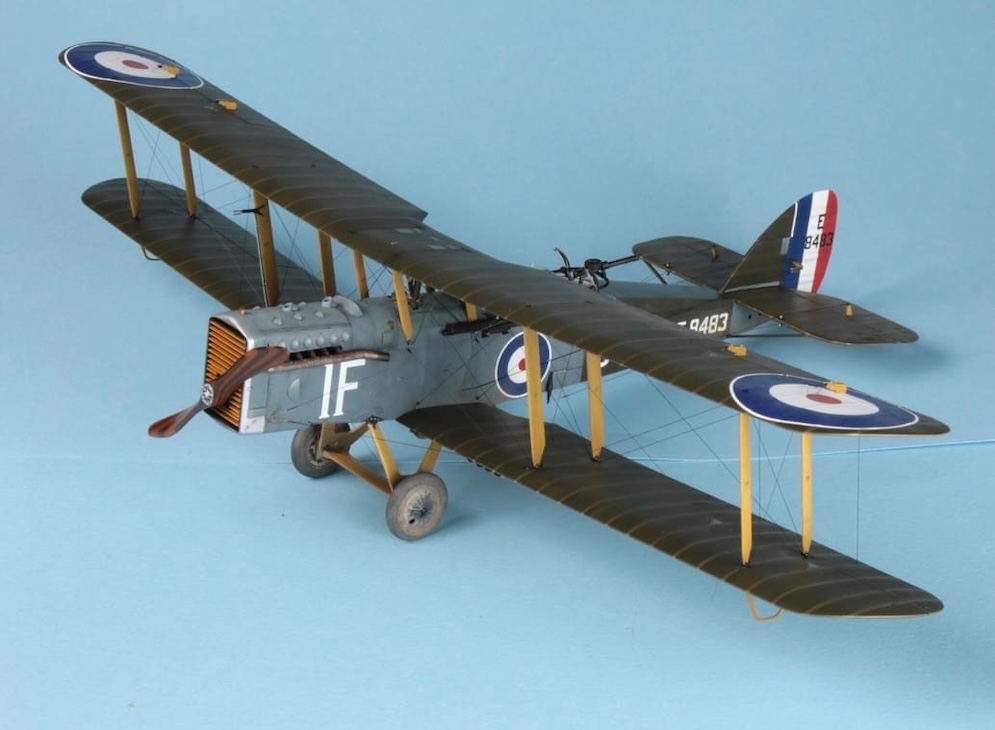
1:32 scale
Tamiya paint
Prop: oils over acrylic
I based the wear on some old photos. There’s a really good late production version with some serious wear and tear on the photos.
David G. L.
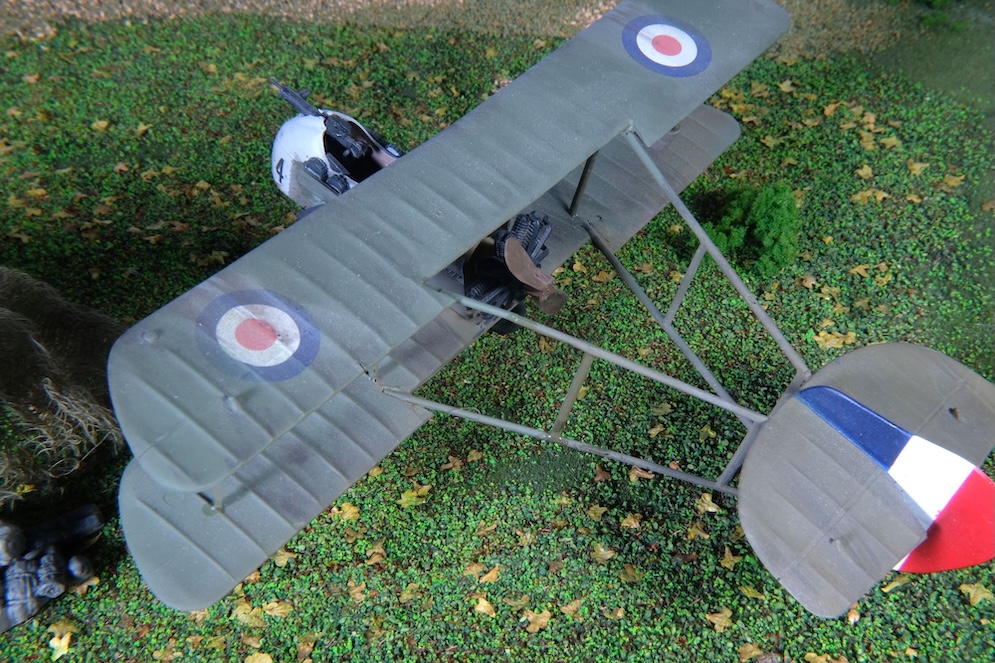
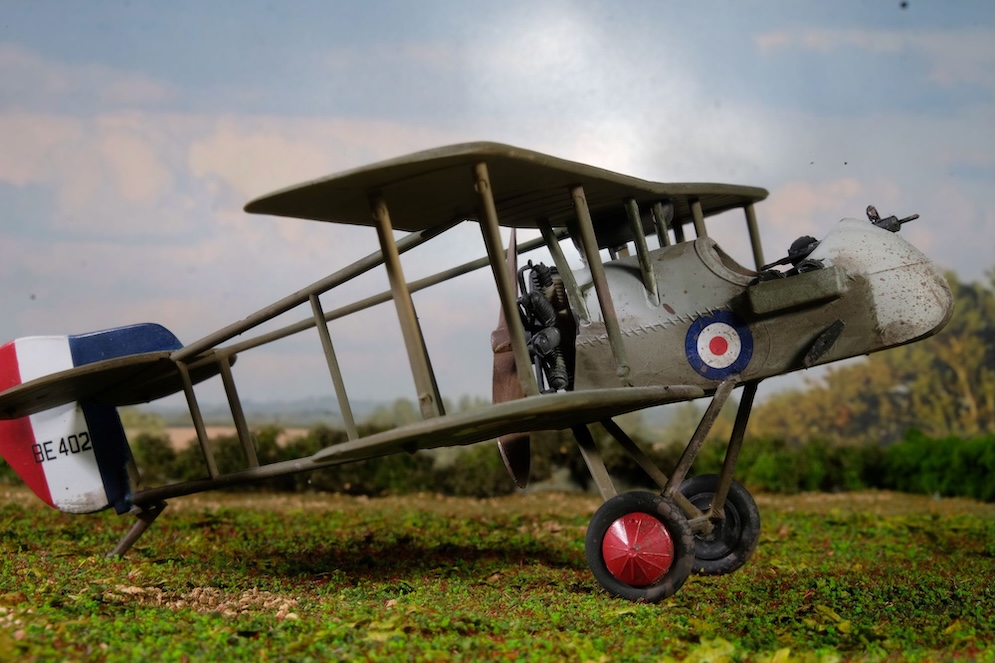
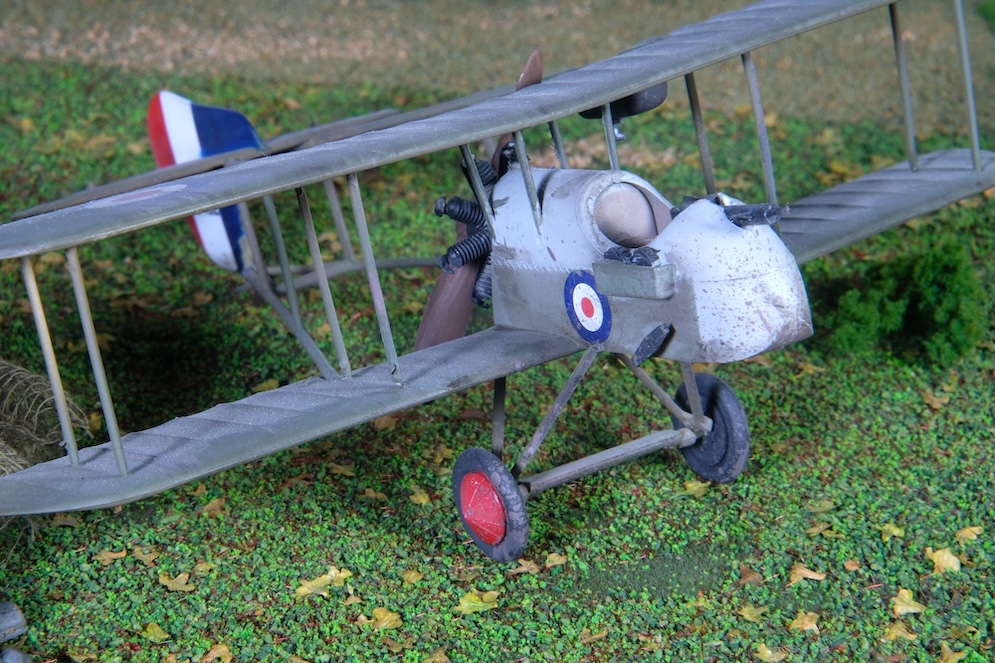
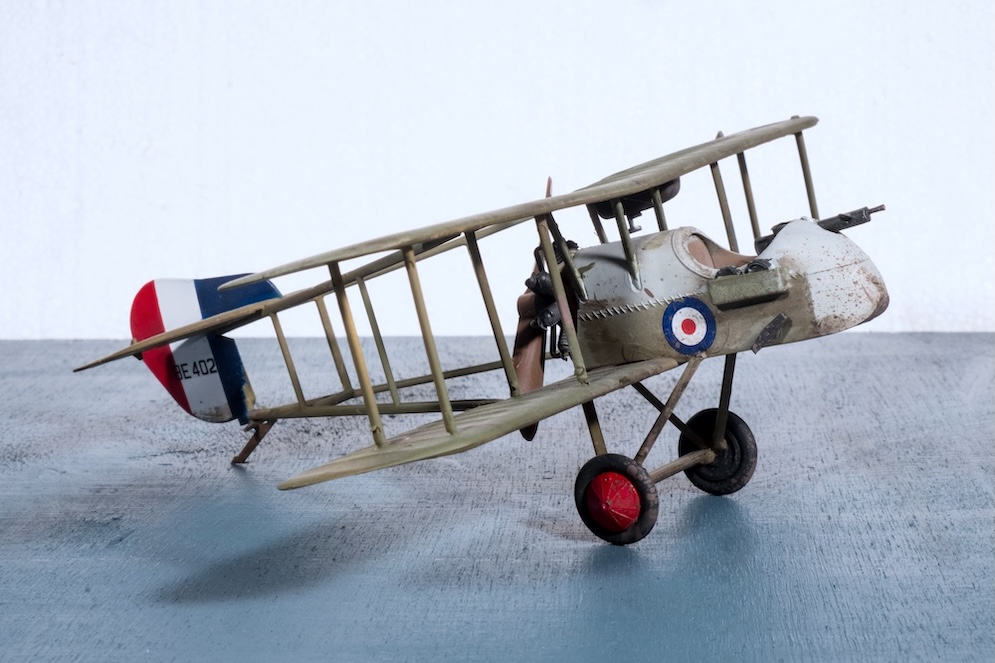
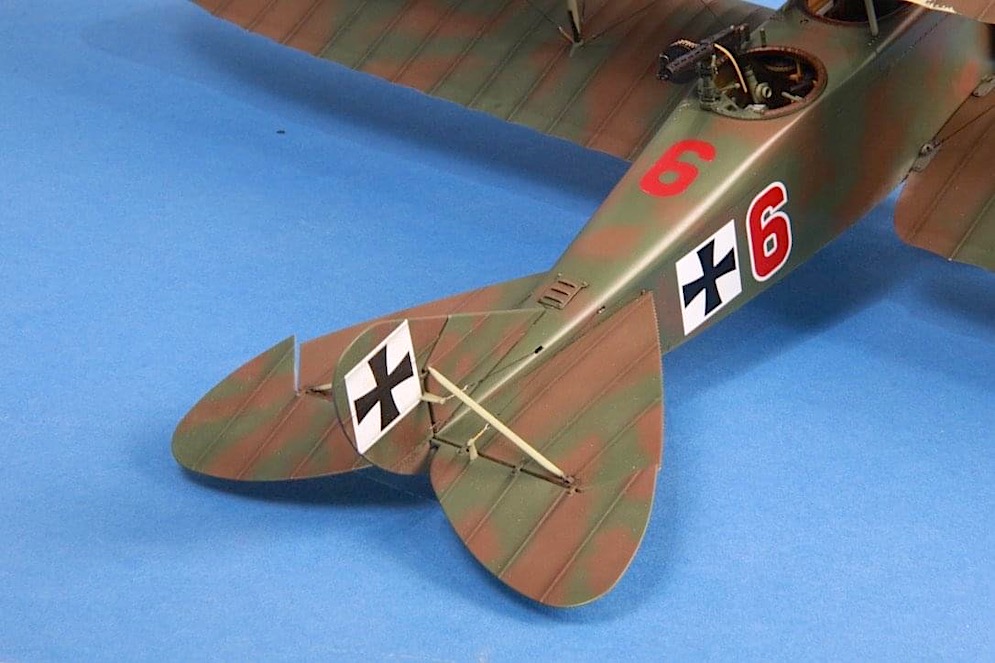
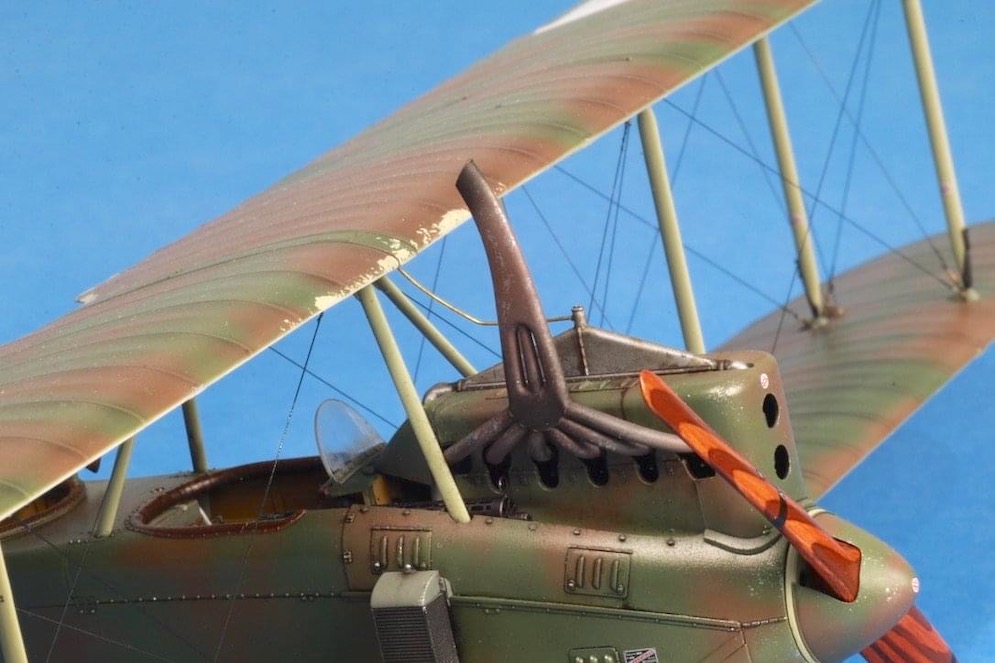
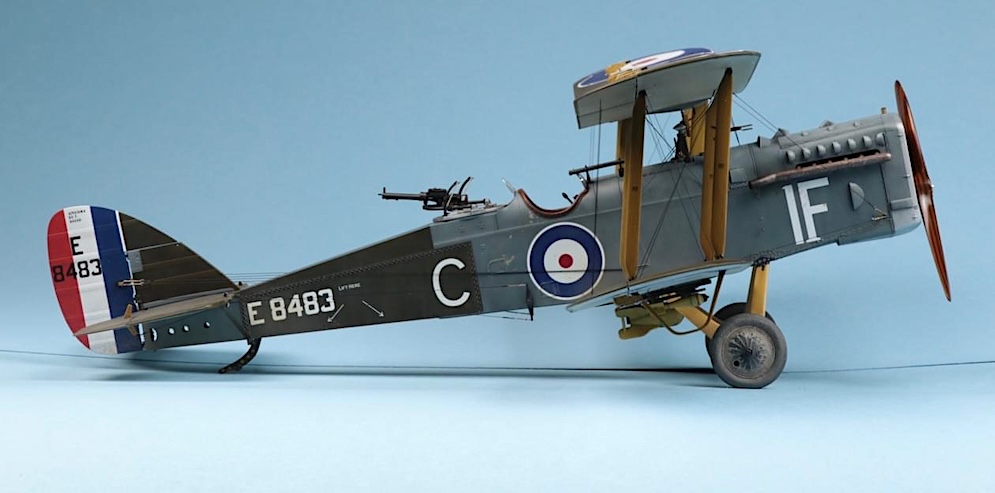
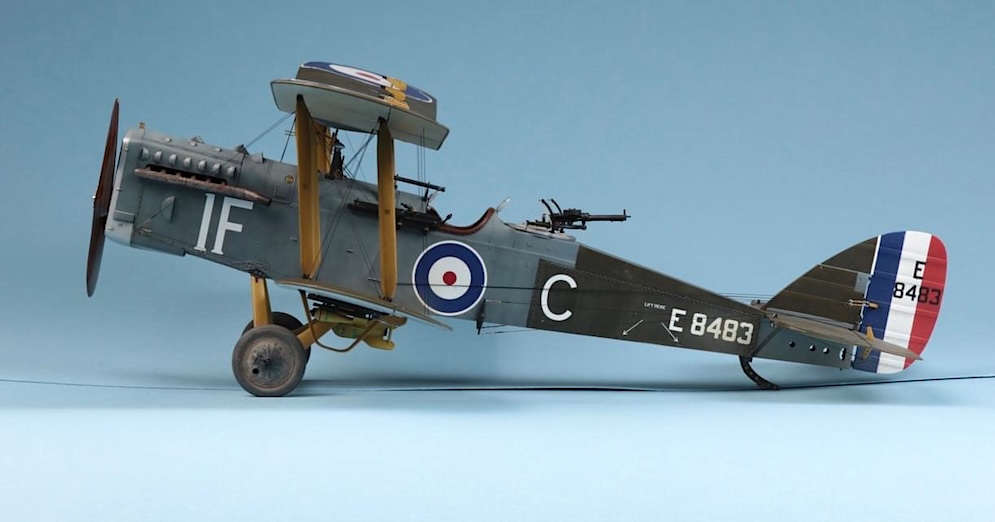
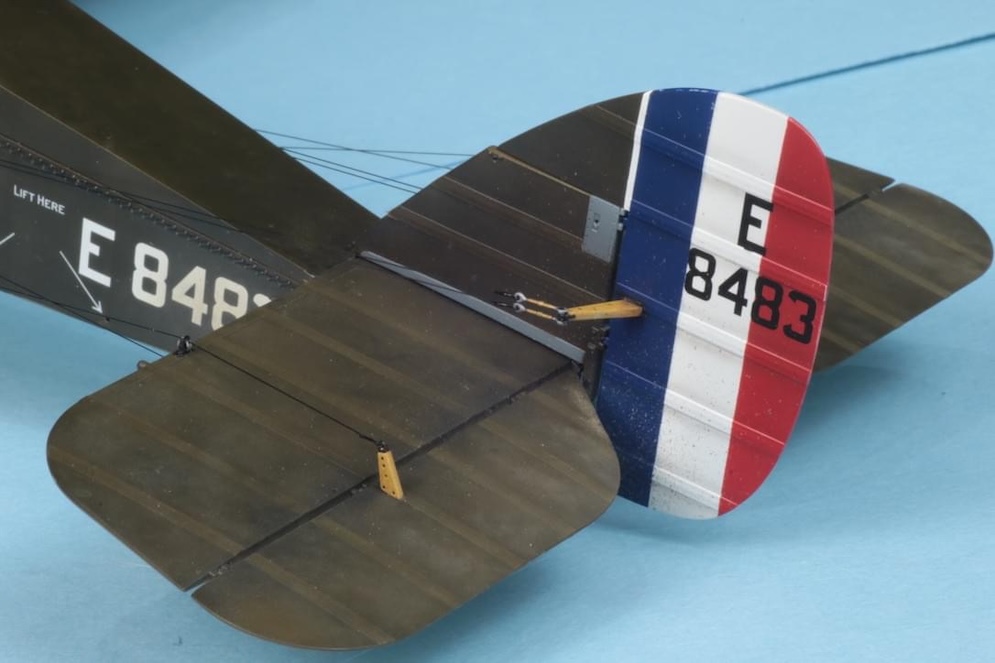
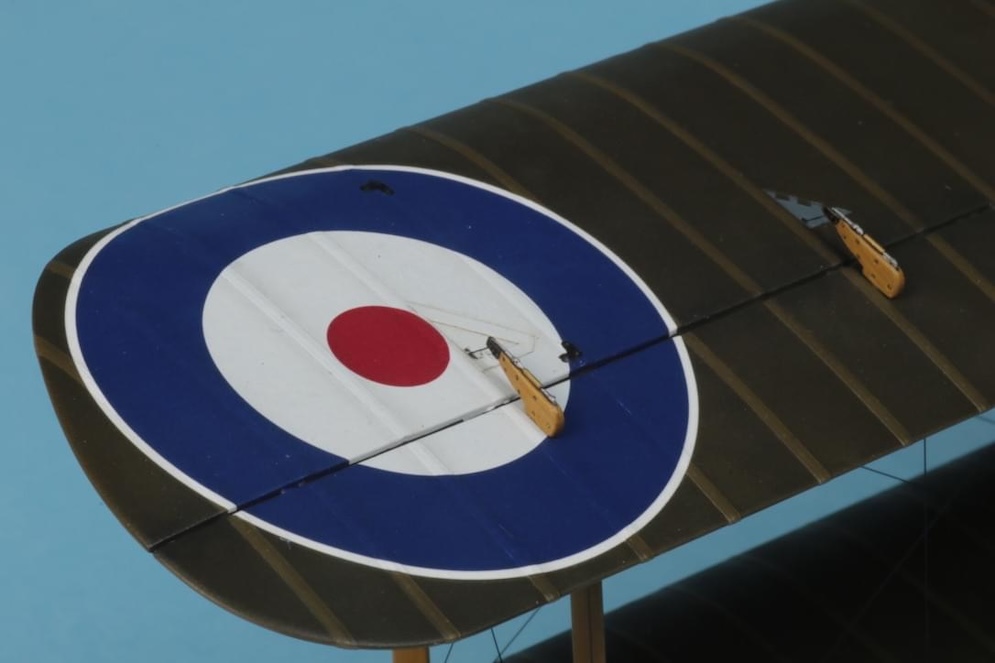
Designed by Geoffrey De Havilland, the DH.2 was introduced to frontline service in February 1916 and became the first effectively armed British single-seat fighter. It served from 1916 to 1917, during an era of incredibly rapid development in fighter aircraft design and technology.
This 1970s vintage Smer kit was very rare on the web, and I snapped it up at a bargain price without even knowing if I would build it or not…… in other words ‘to go in the stash’. Eduard offer the same aircraft.
It is a very simple build and as usual I finished it very well weathered, including mud on the wheels.
My standard consumables used here include Tamiya matt acrylics and masking tapes, Mr.Surfacer primer, Vallejo plastic putty and weathering FX (mud,) Micro Sol and Set, Abteilung Oils, and Green Stuff World masking putty.
David M.
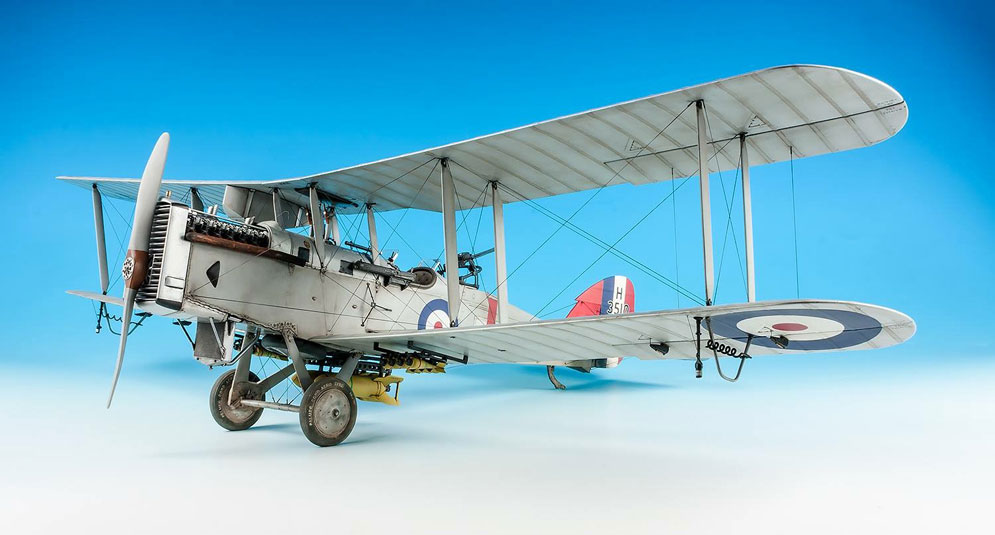
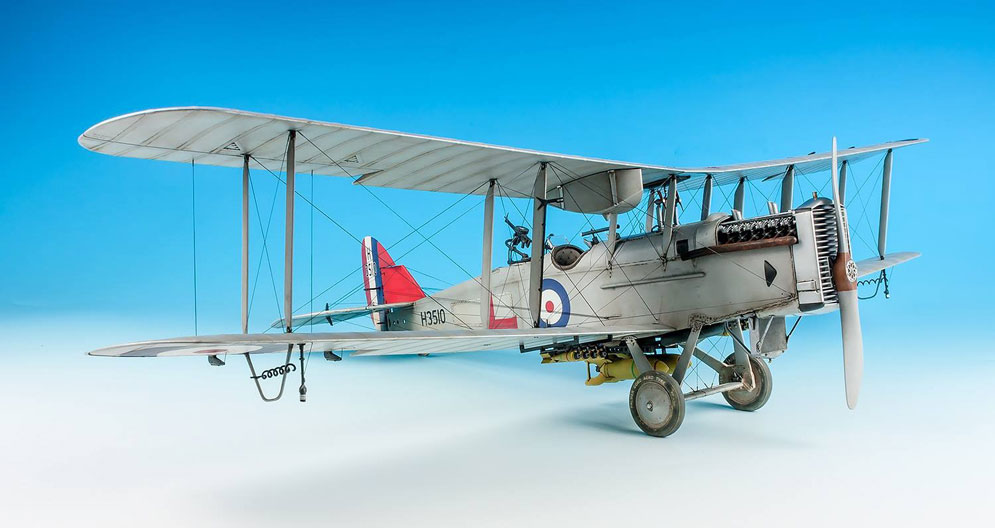
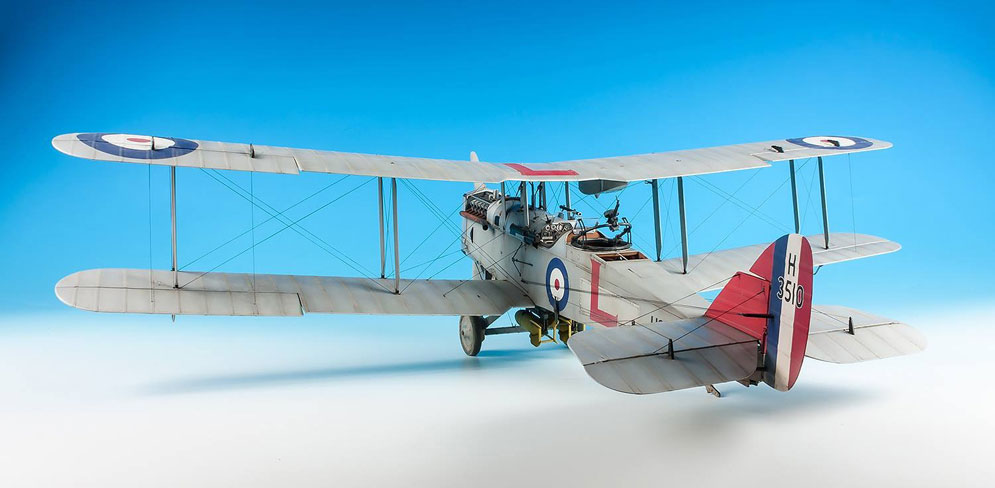
I call this one The Peshwari Nine; Wingnut Wings DH9 in Pheon Afghan decals. Weathered to death. Just waiting for a ground crewman under the wing.
Hope you like it? Dave Pogson
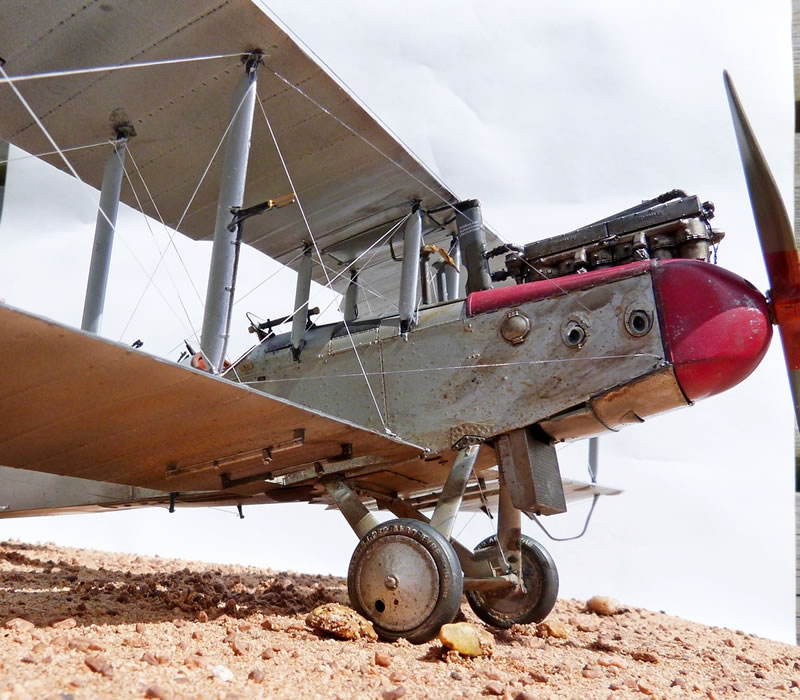
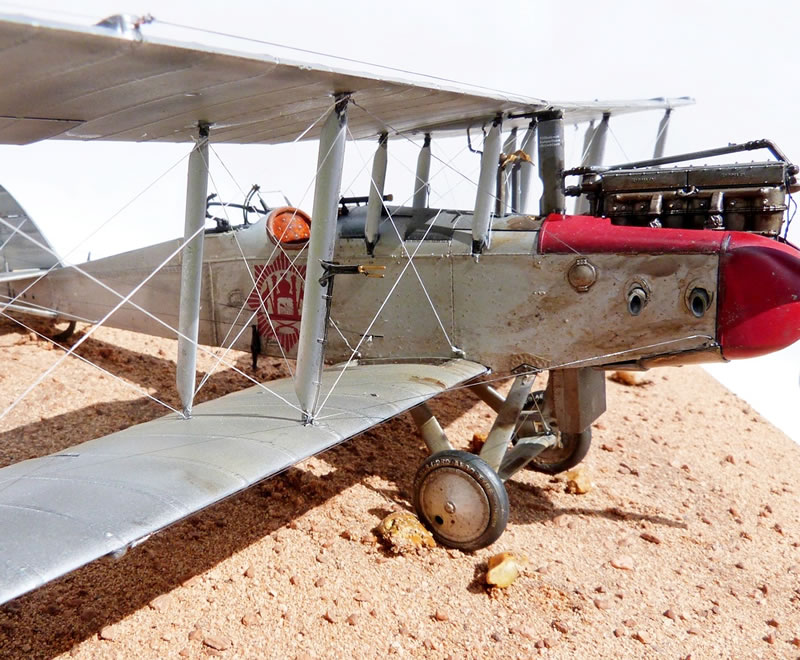
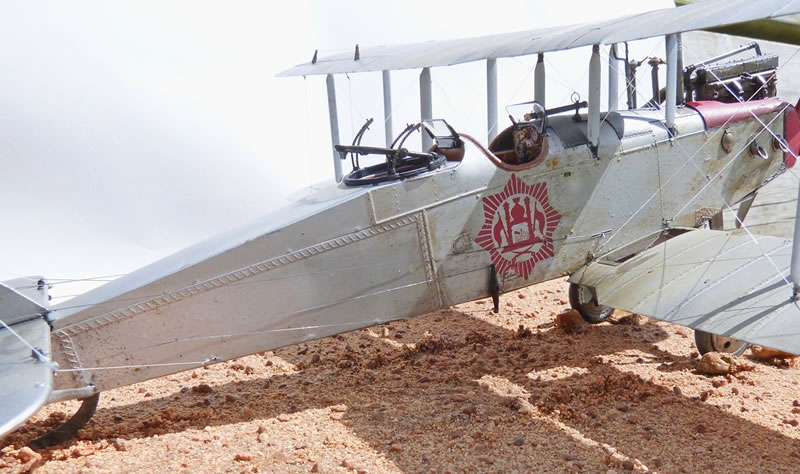
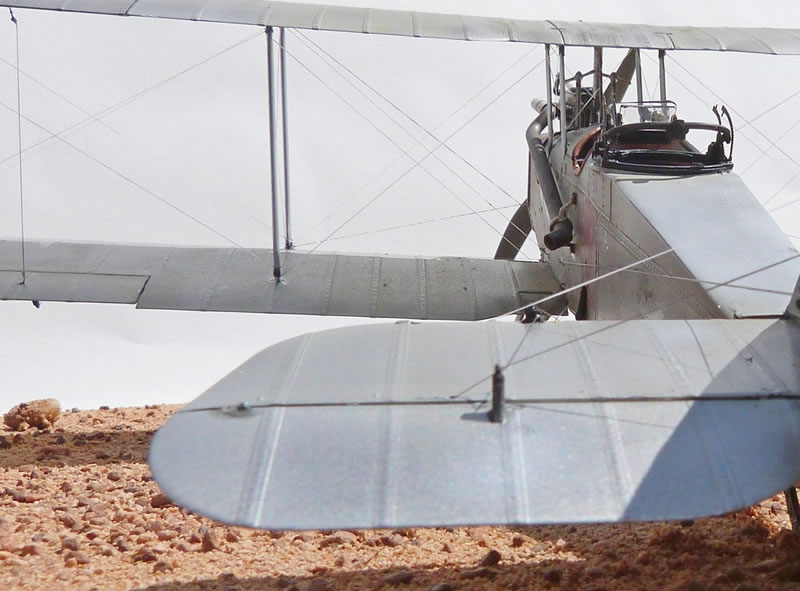
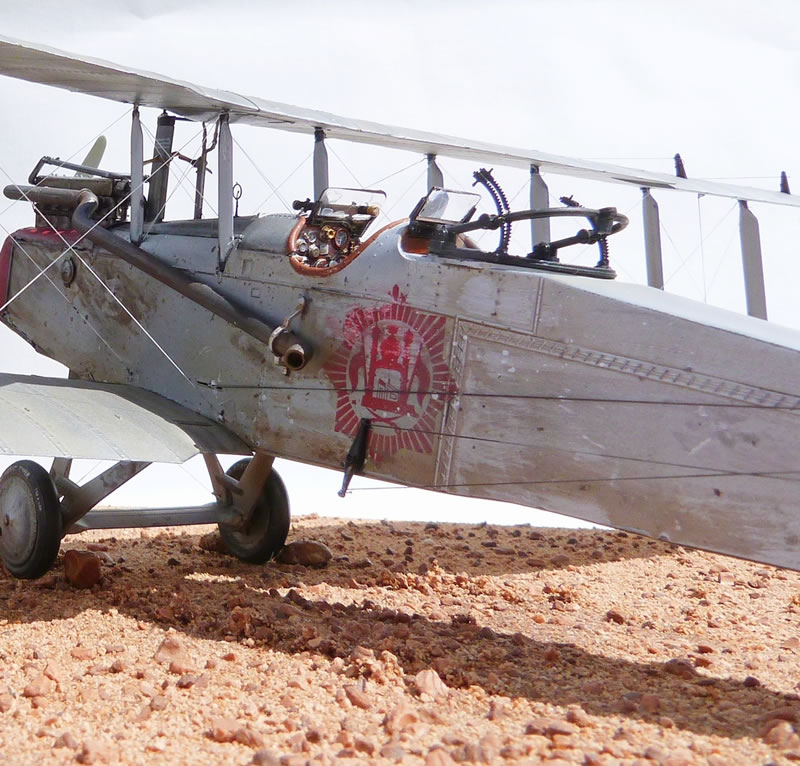
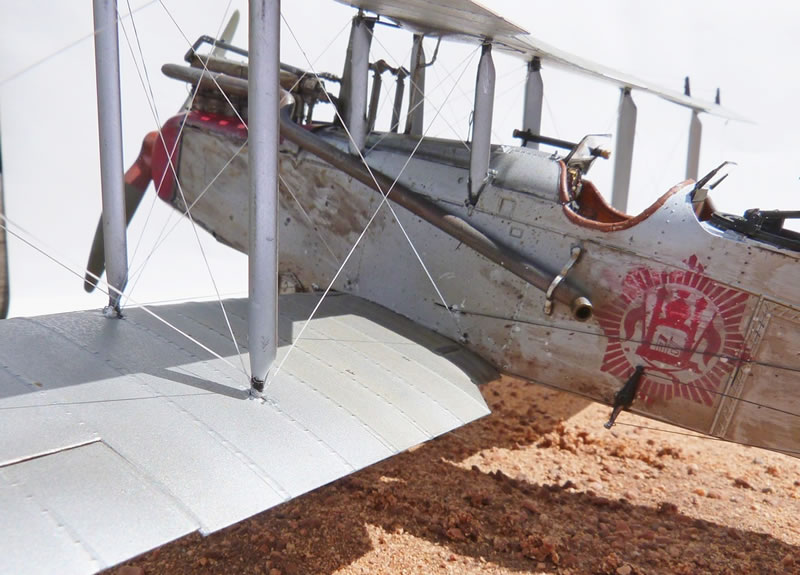
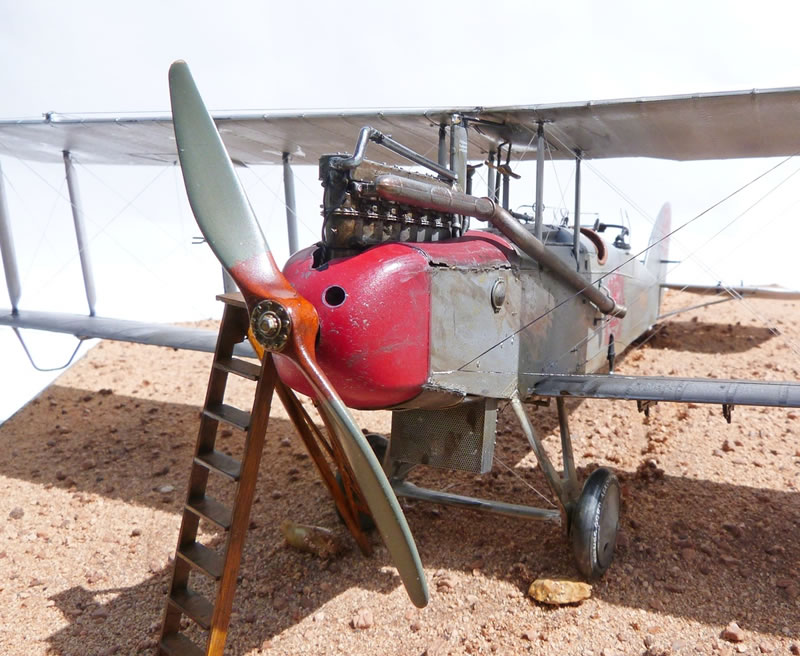
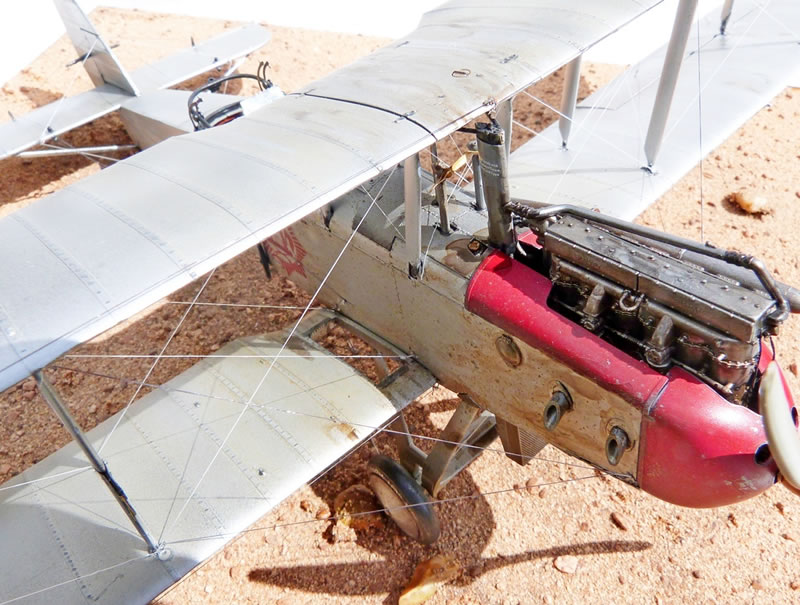
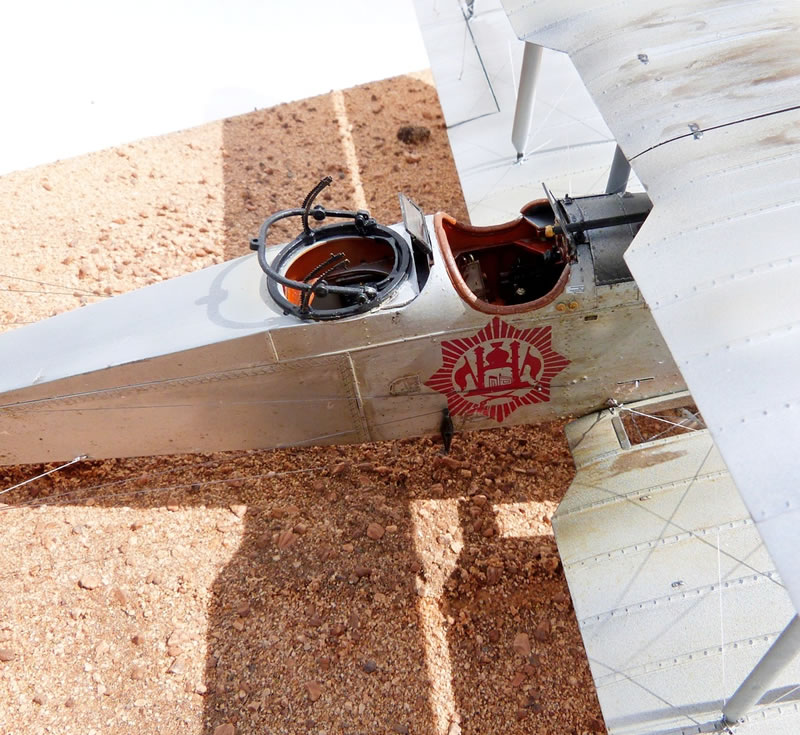
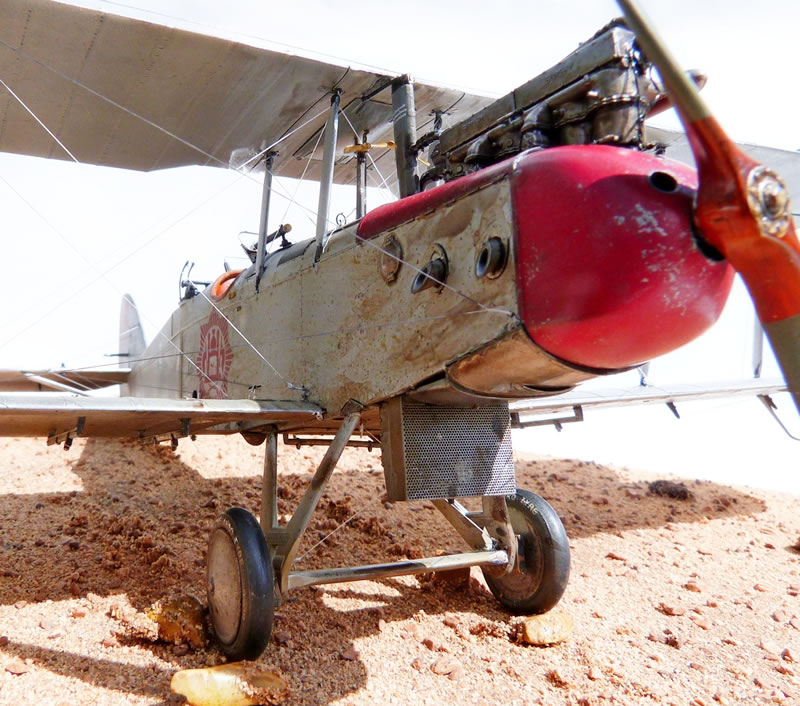
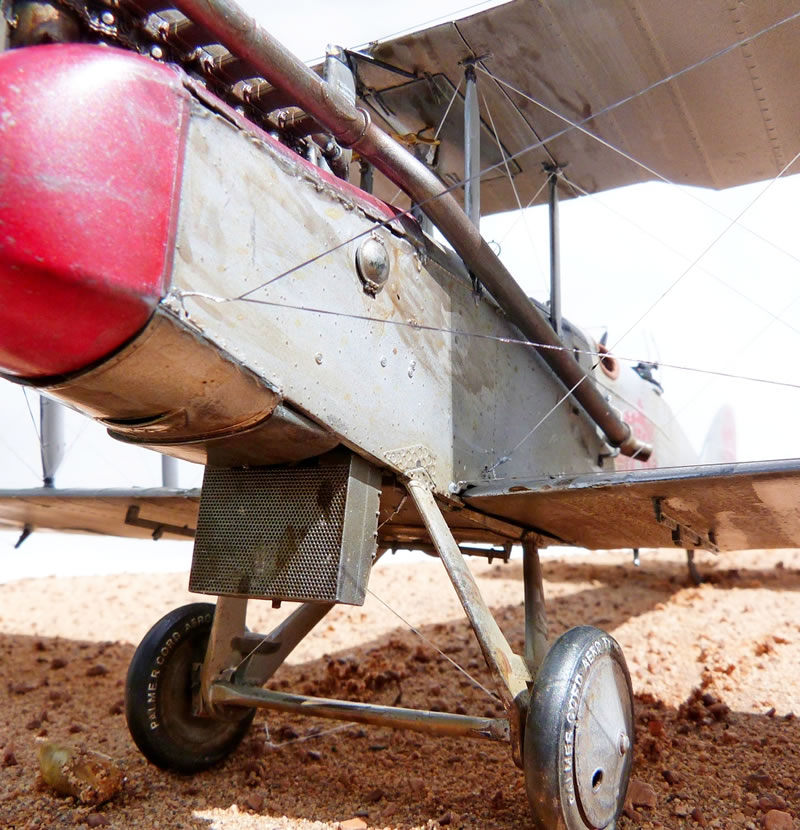
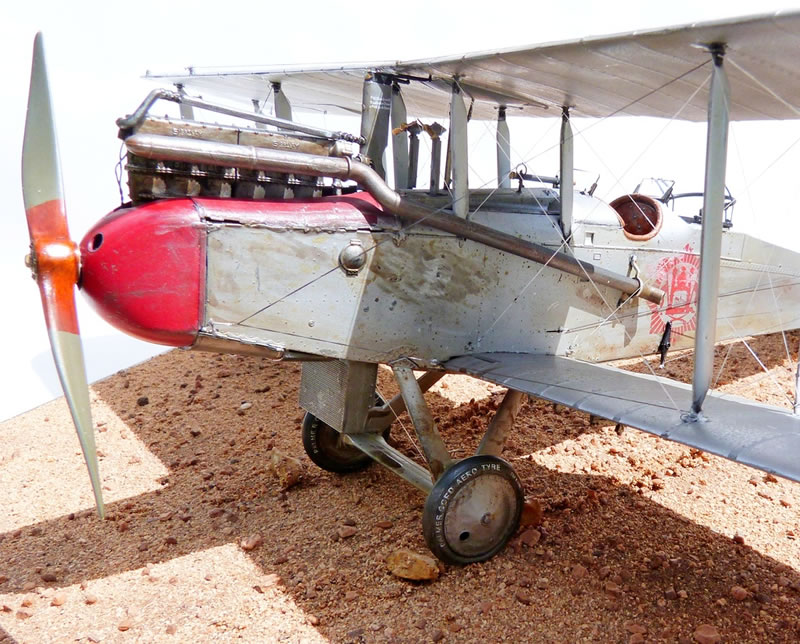


Tamiya, printing ink and Alclad II paints.
Model Kasten rigging with Gaspatch terminals.
Prop: oils over acrylics
50cm wing span and lots of fiddly bits all over it making it tricky to handle!
Enjoy!
David L.
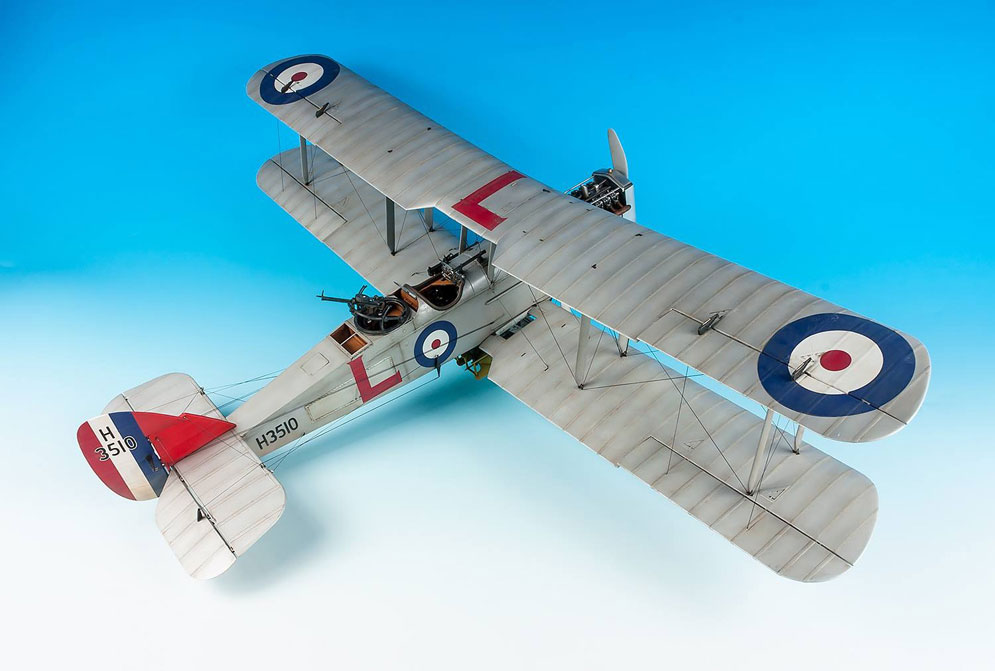
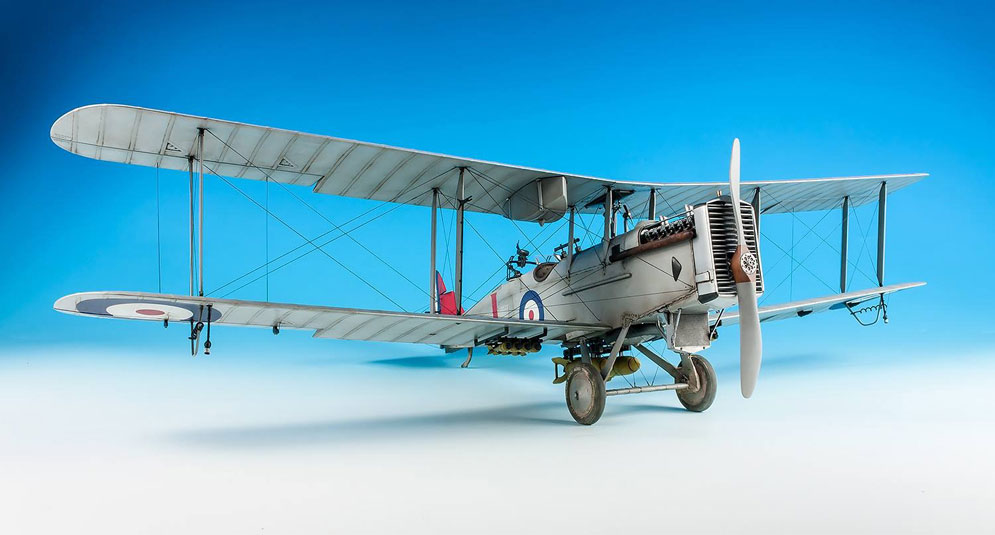
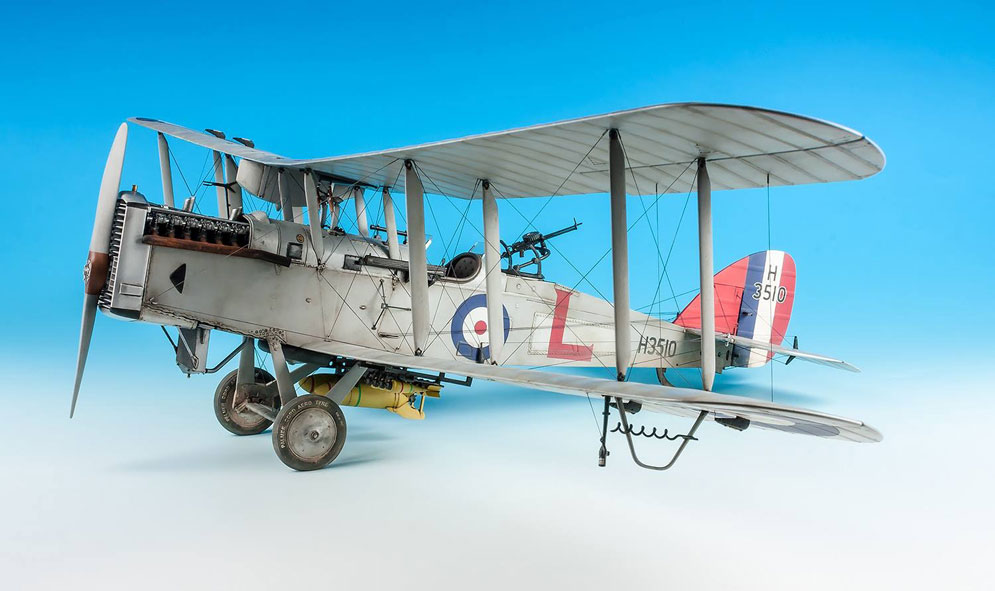
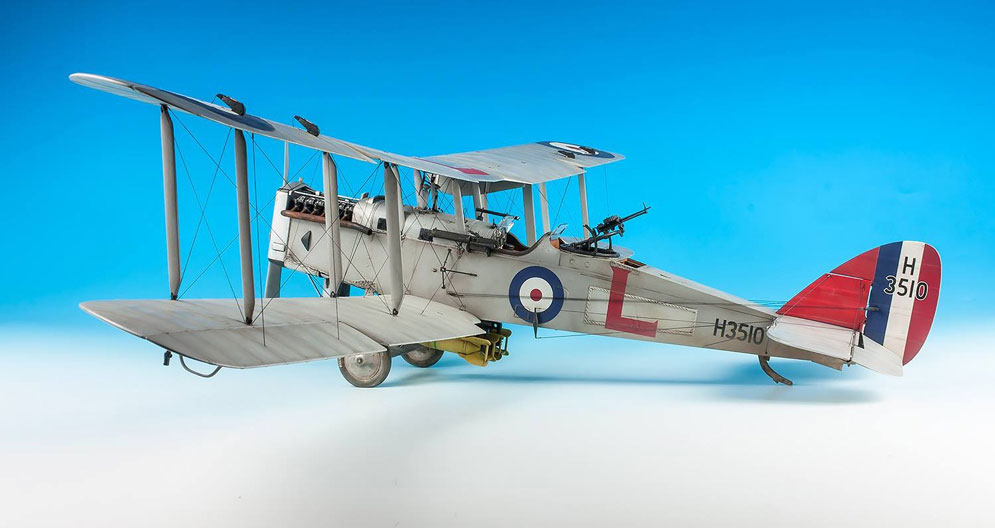

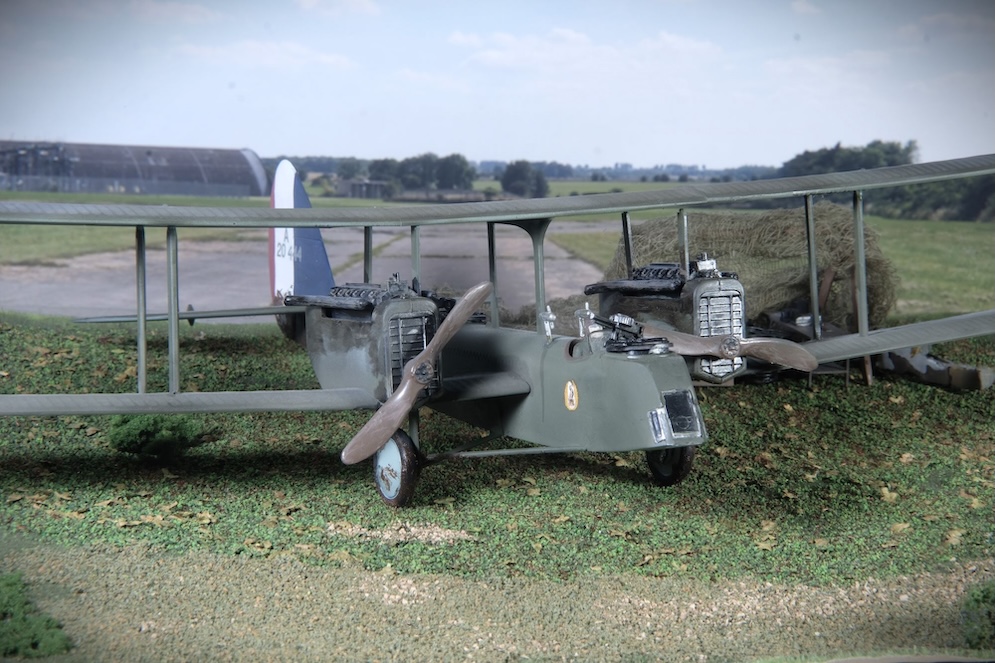
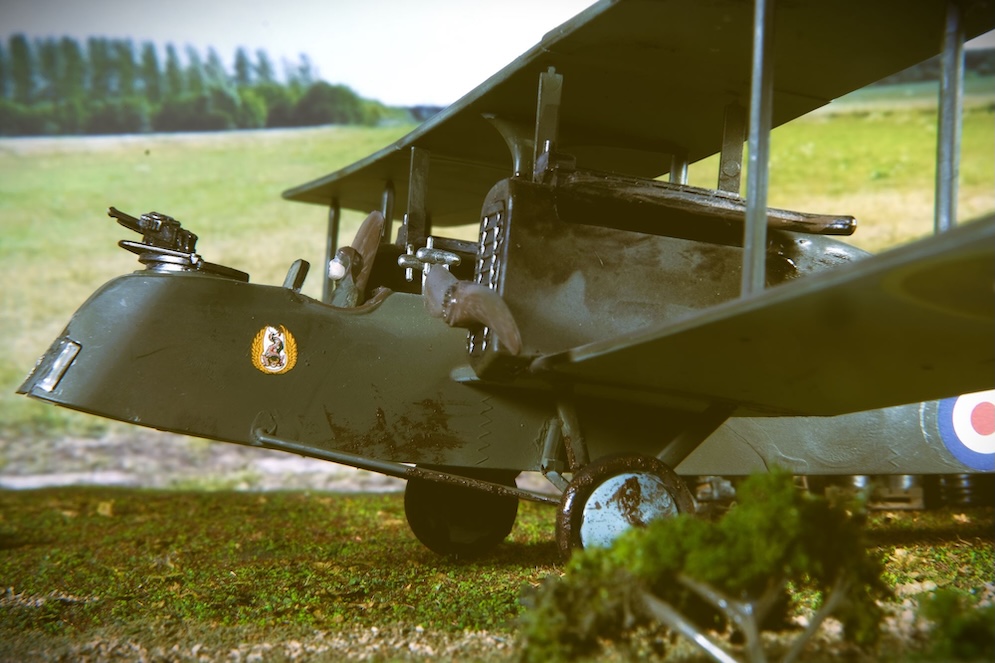
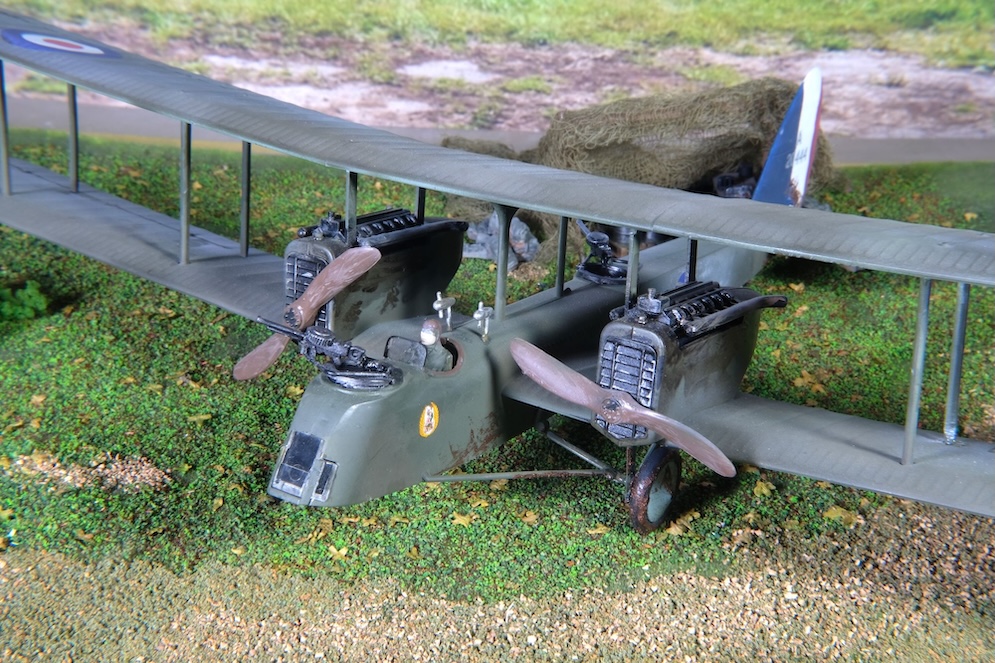
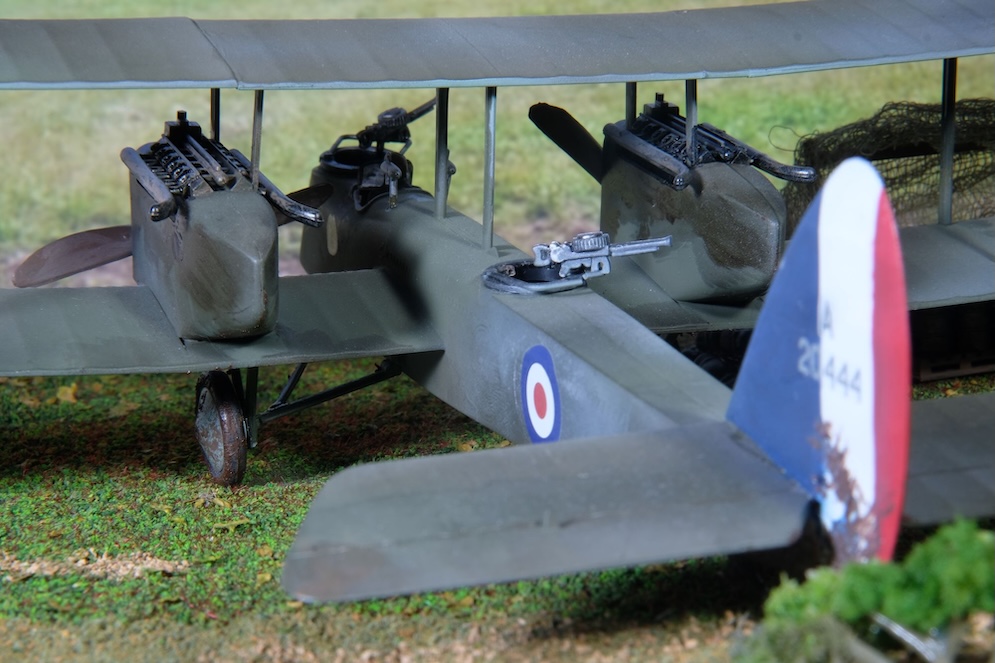
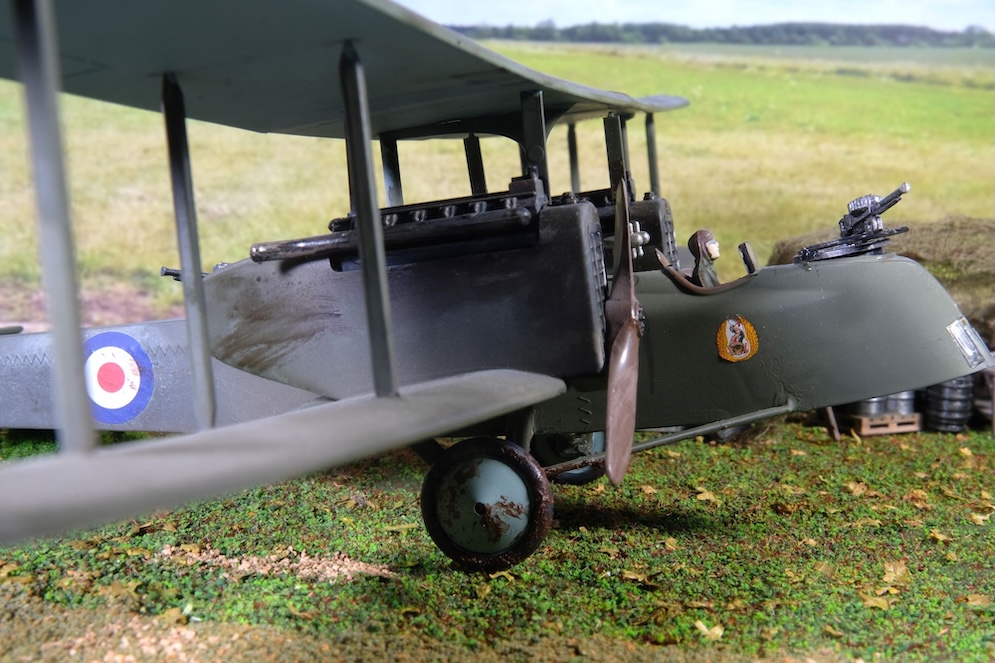
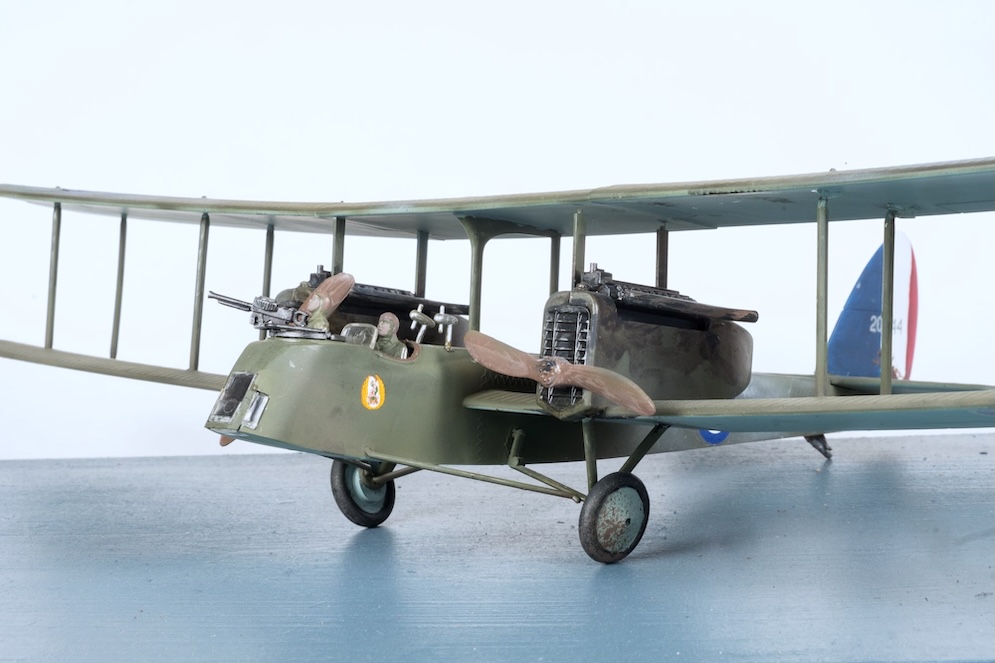
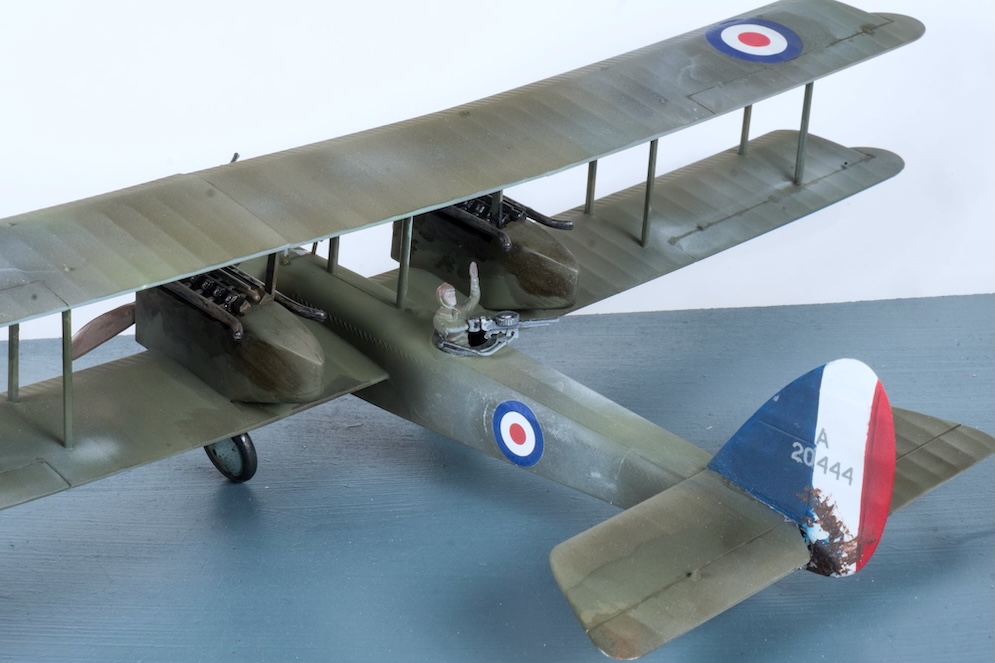
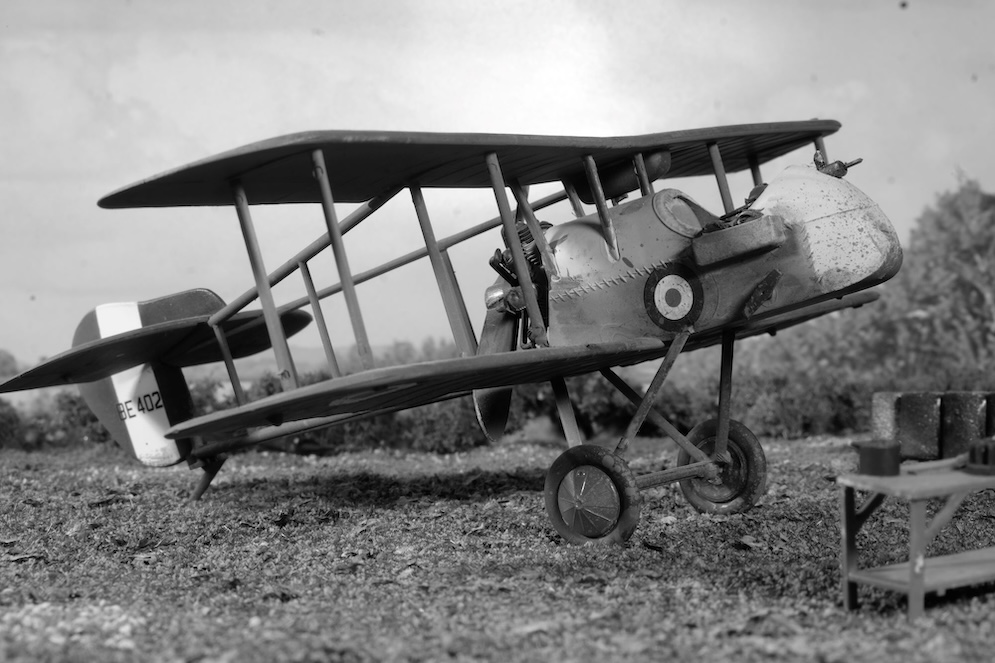
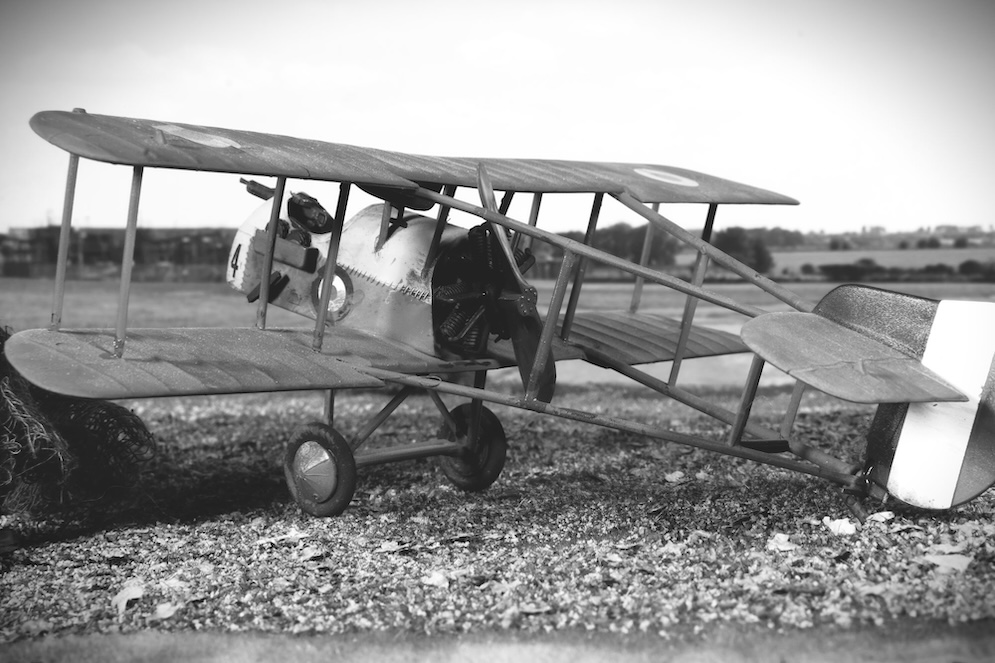
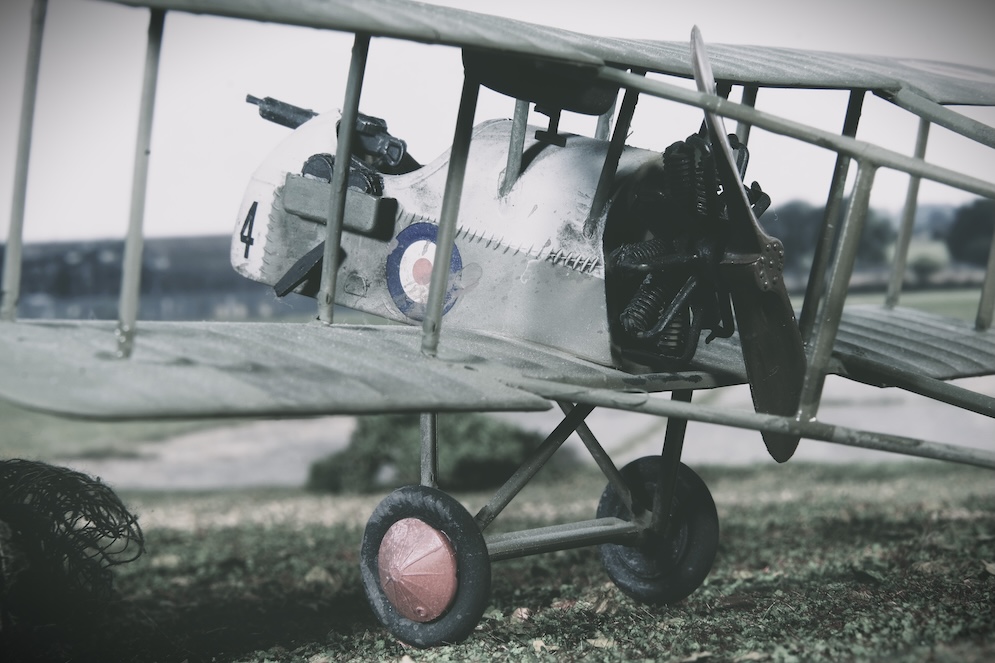
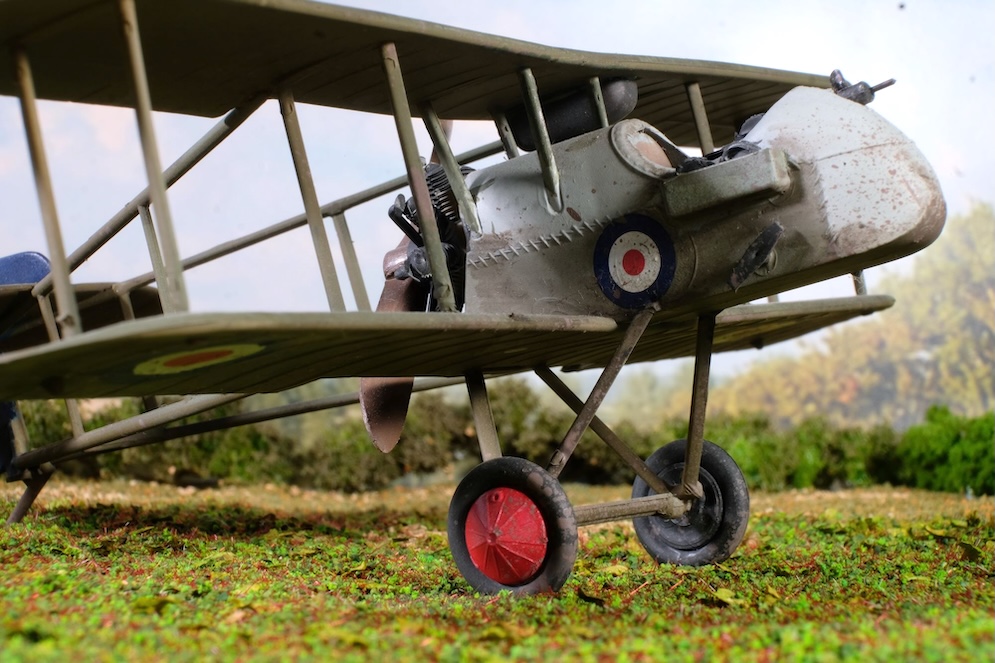
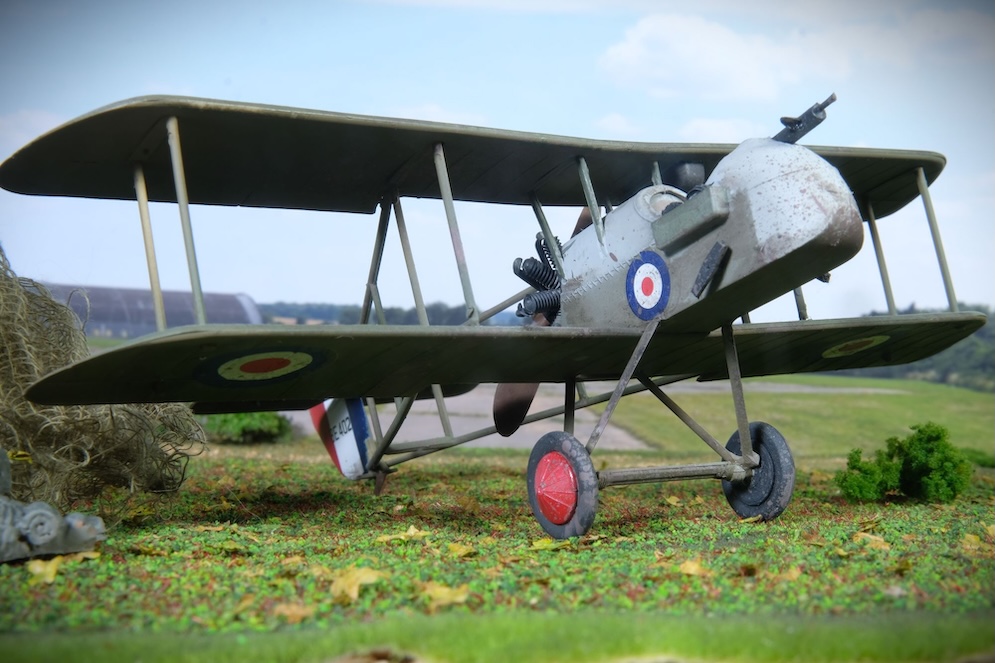
The Airco De Havilland DH10 was a twin engined heavy bomber which served in the final years of WW1 and which had previously been used as a mail plane. Over 250 were eventually built. It had a crew of three: pilot, nose gunner and rear gunner. The aircraft’s active service in World War I consisted of a single raid against German targets on Nov. 10, 1918. The type then reverted to civilian use post-war.
The Aurora kit is a little ‘industrial’, but it was originally made in 1957 with classic Joe Kotula box art, and could do with some upgrading (which, I’m afraid was beyond my capabilities at the time of building). Its a biggy too, coming in at whopping 43cm wingspan and 25cm long.
Here’s the thing… this kit is almost as old as me, which is a sobering thought considering I’ve been getting my state pension for some years! This is certainly the oldest model I have ever made.
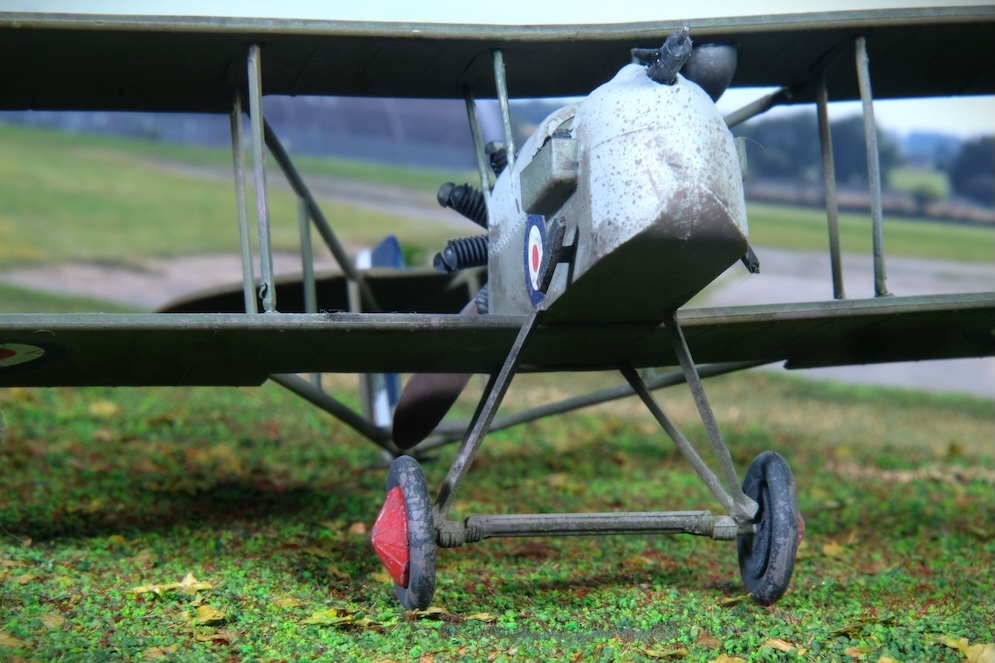
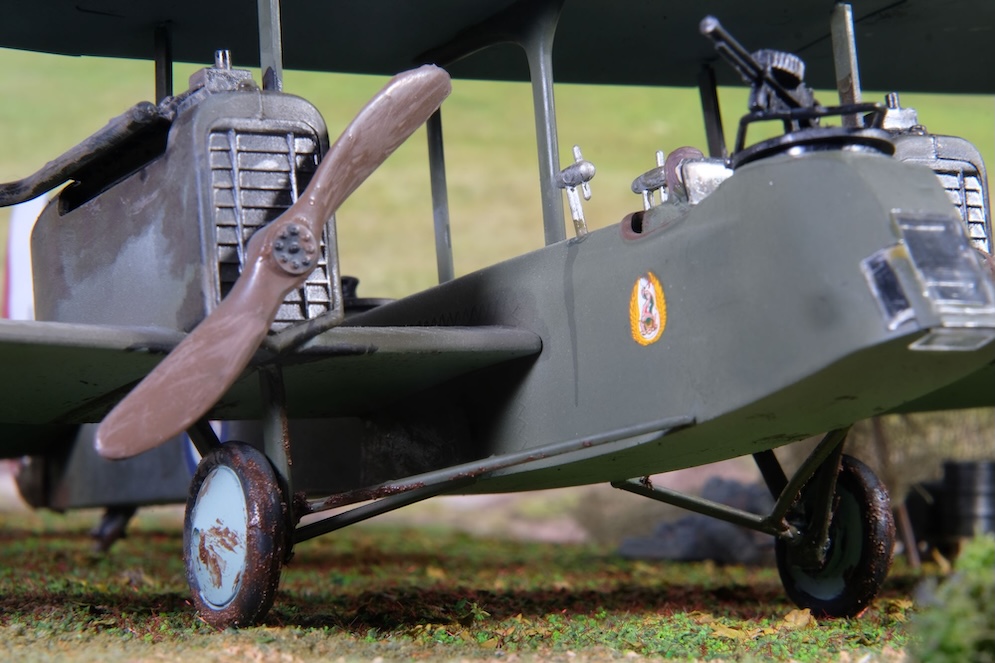
The construction is straightforward, though the wheels assembly left me rather perplexed. The parts only fit together so that the wheels have a very marked inward angle. Reference pictures on the web, both historic photographs and pictures of completed models, seem to show a variety of angles to the wheels. So I made them fit as best I could!
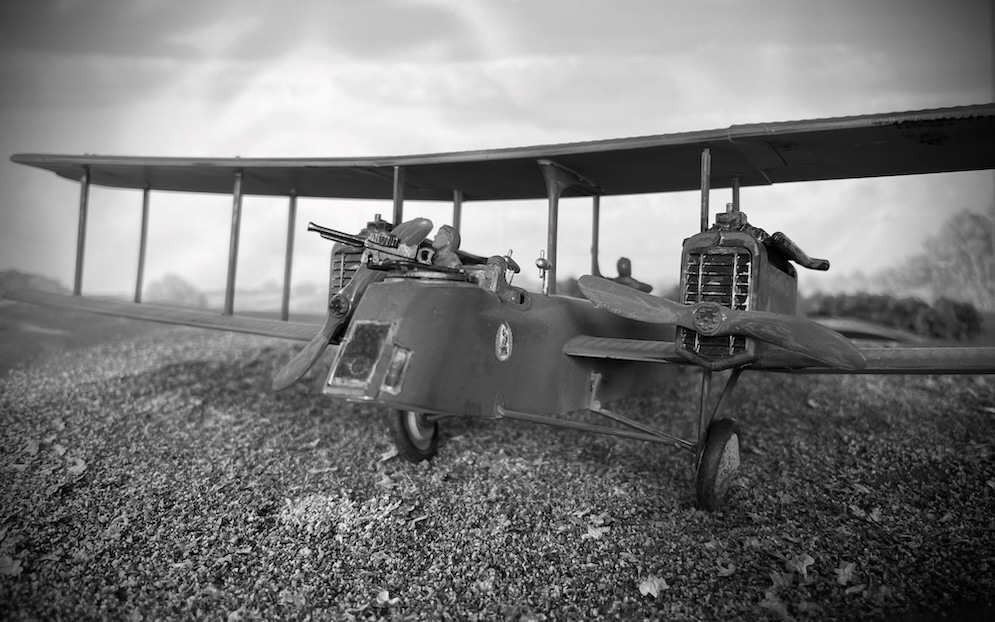
My grass airfield, a plain rural background photo, and my camo net over some ground equipment in the background complete the picture. In the end I found that this was more an exercise in nostalgia and rarity than looking for build quality in the end result.
My standard consumables used here included Tamiya matt acrylics and masking tapes, Mr.Surfacer primers, Vallejo plastic putty and weathering FX (mud,) Micro Sol and Set and Abteilung Oils.
David M.
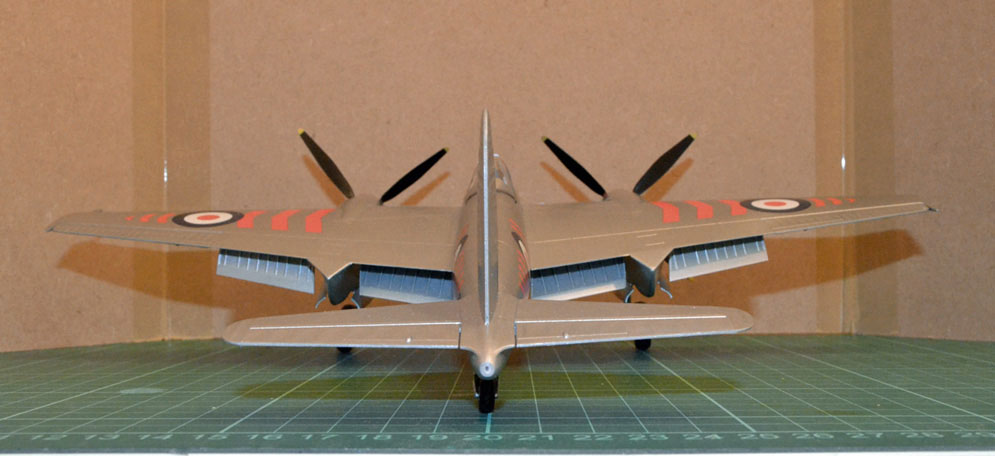
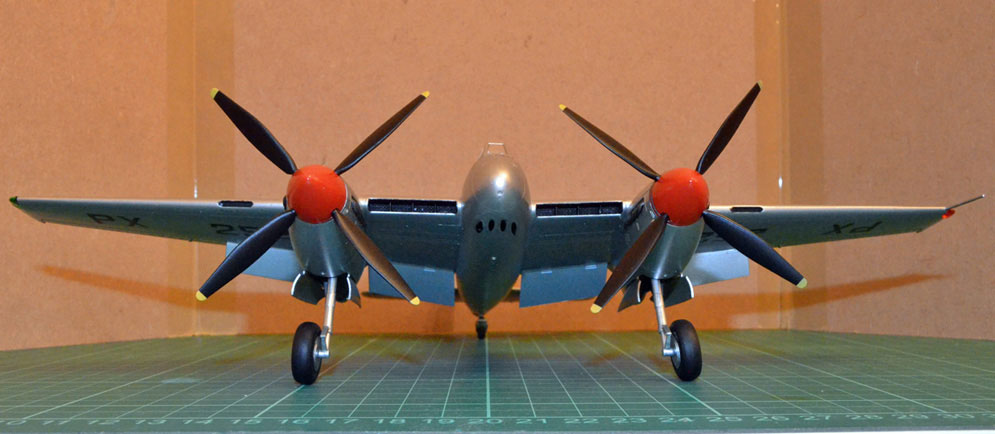
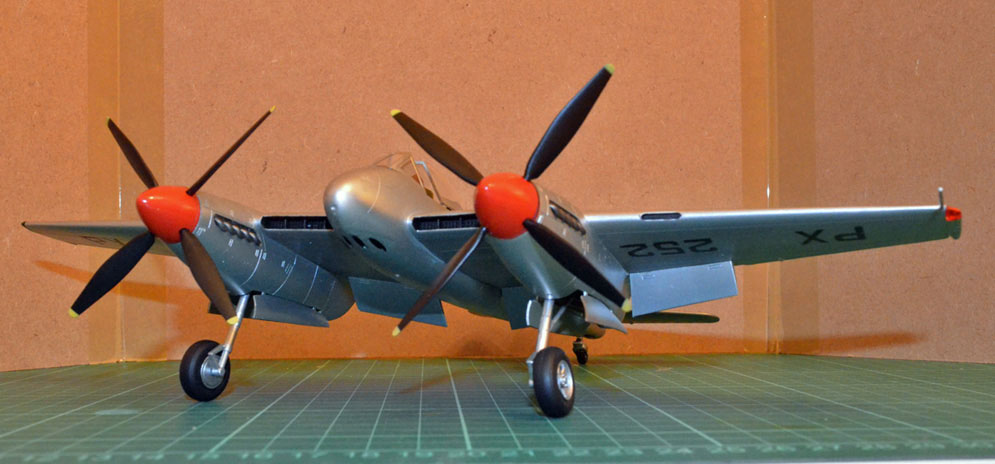
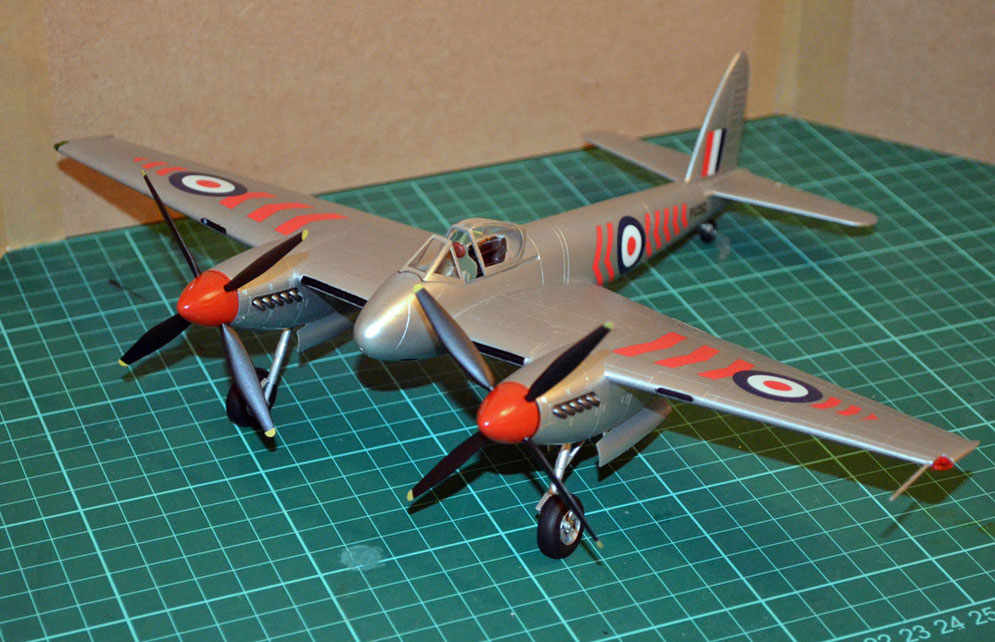
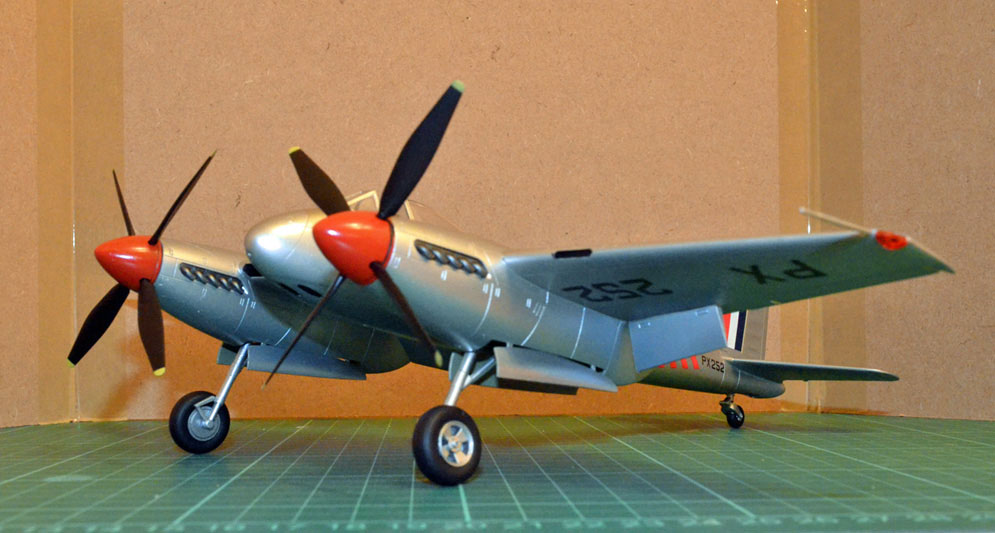
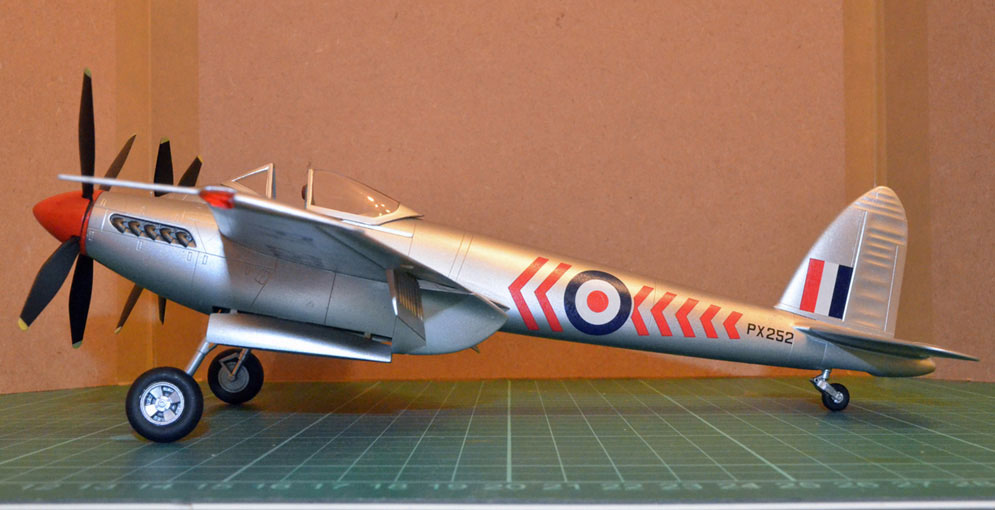
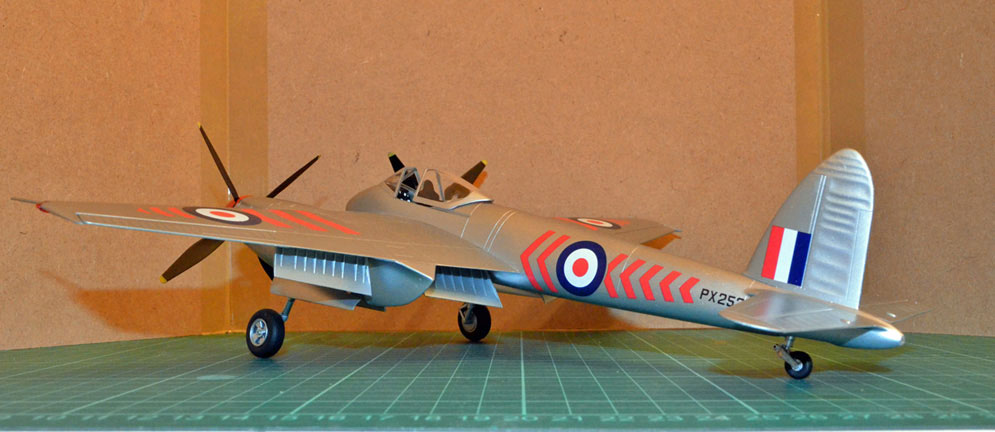
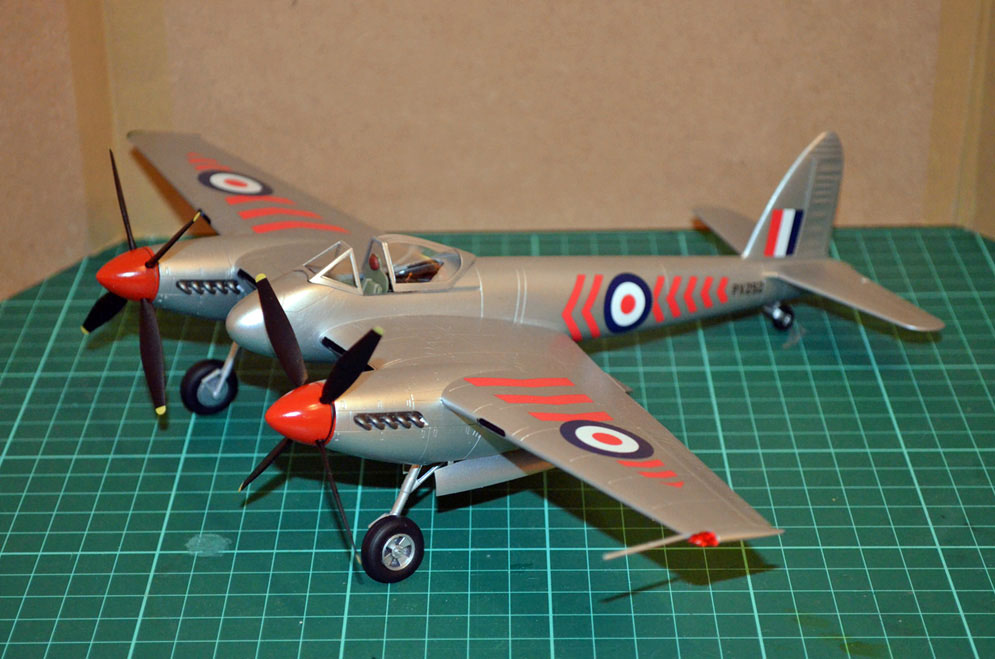
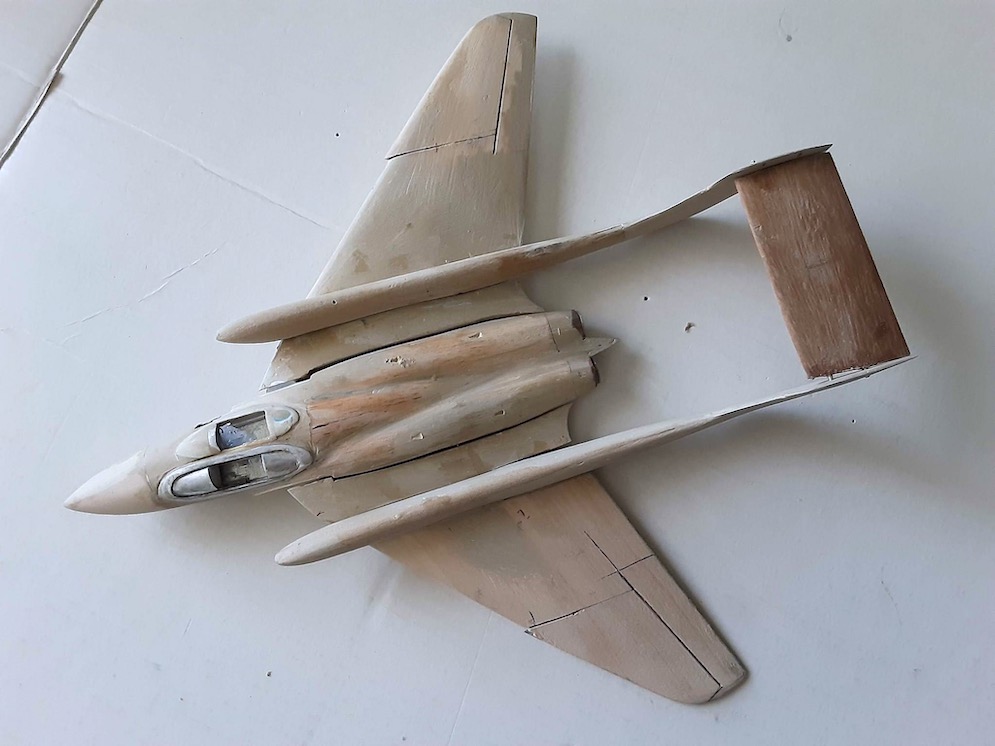
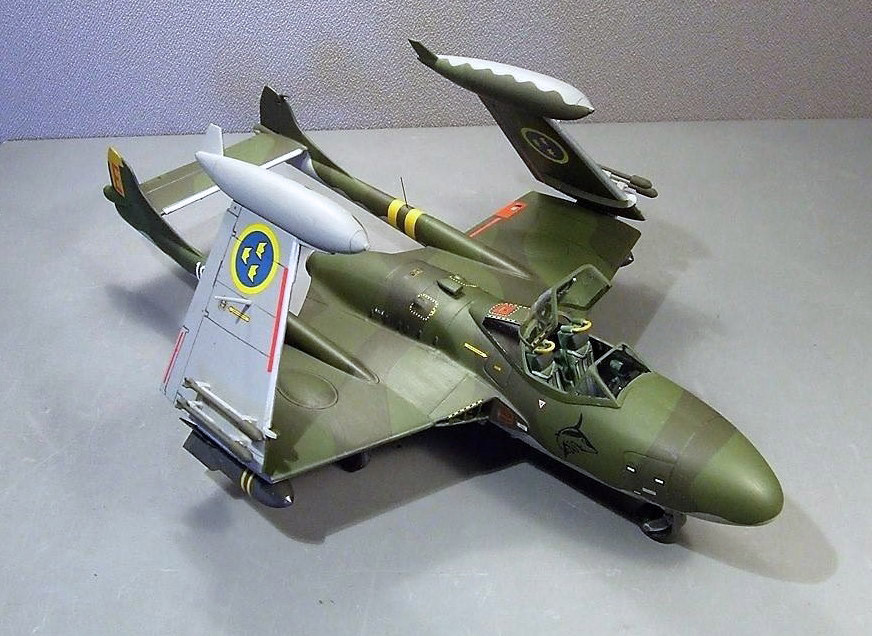
Opinions seem to be divided on Trumpeter kits. Yes they are simple, certainly not the most highly detailed, and some say perhaps not the most accurate (who am I to judge that?) BUT they just keep coming up with the most unusual British subjects … Wyvern, Wellington, Seahawk, Sea Fury, Spiteful, Seafang, Attacker, Vampire, Whirlwind and now the Hornet. What next? Well, the box contains some of the parts for a Sea Hornet so that much is clear anyway.
As I have come to expect from Trumpeter, the parts count is quite low and the instructions very clear. But the quality of the moulding and the fit of the parts is up there with Tamiya to my mind. Absolutely minimal clean-up of joints is required and it virtually fell together!
In keeping with the speed of the build, I decided for once to forgo any priming and went straight for the silver finish using Revell Aqua Colours. The decals were a surprise … they looked quite thick and glossy on the paper, but that was deceptive. I lost the instrument panel decal altogether, completely folded in on itself. Never mind though, as the instrument panel is moulded in a way that lent itself quite well to hand painting. So, forewarned by the time I got to the main decals, I found them amongst the best I have ever used as far as “disappearing into the paintwork” is concerned.
I’ve got another of these stashed away (a shame there’s little choice of colour schemes for Hornets, as far as I’m aware), and I’ll certainly be buying a Sea Hornet (or two) when it appears!
Dave G.
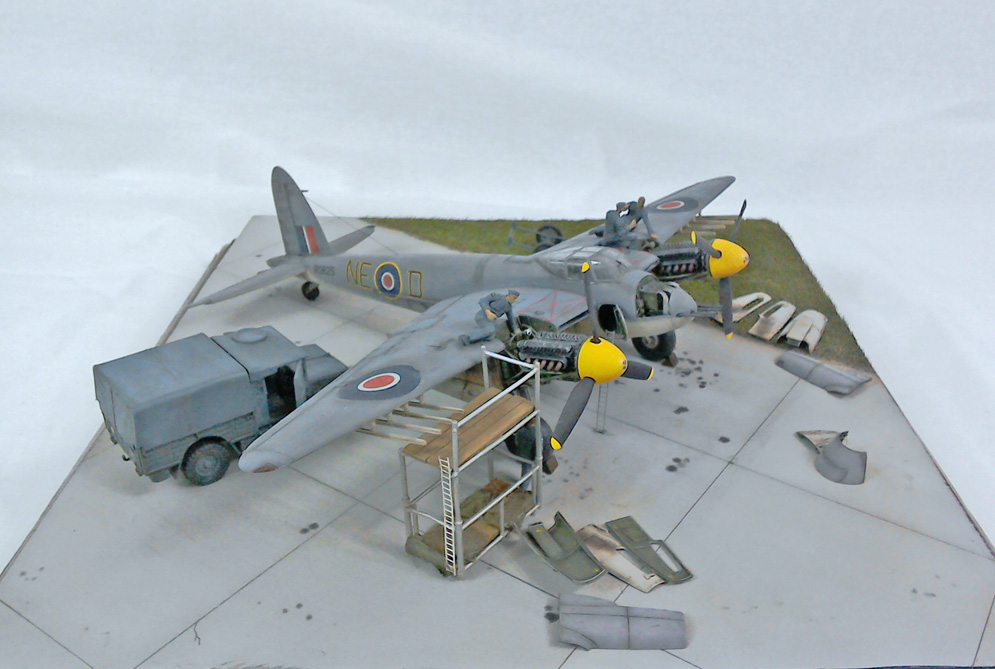
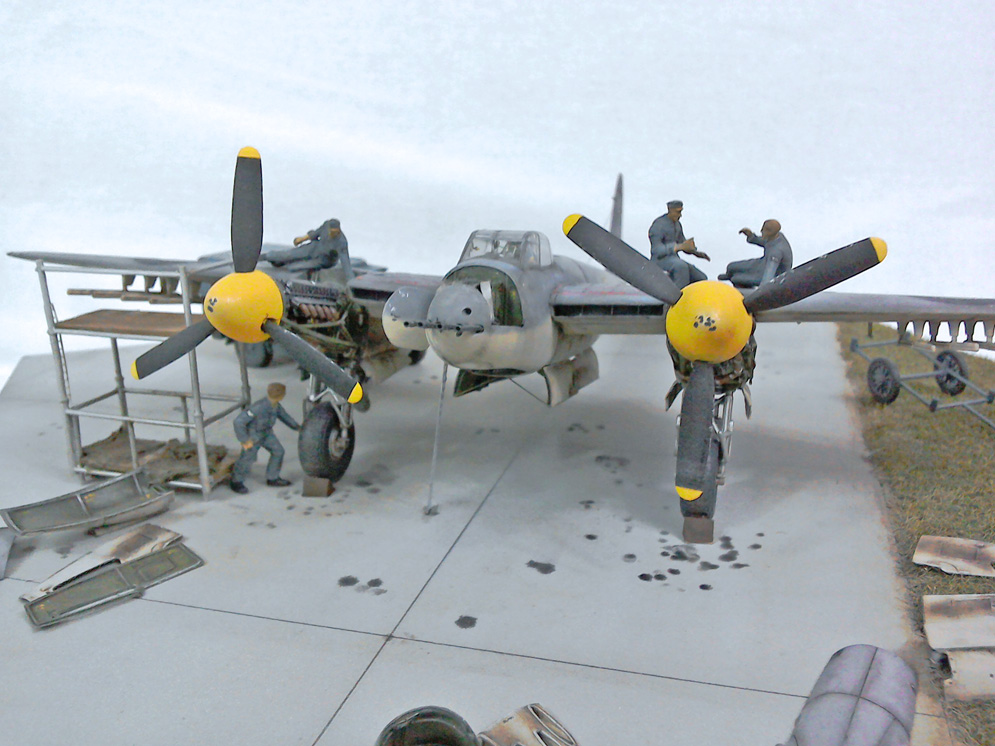
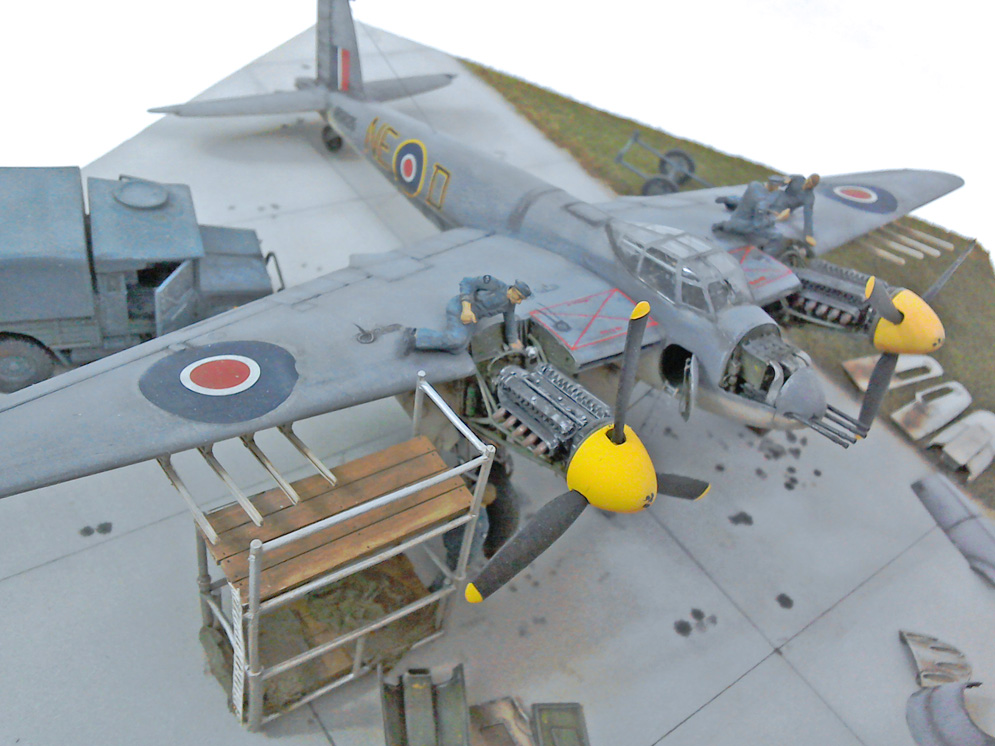
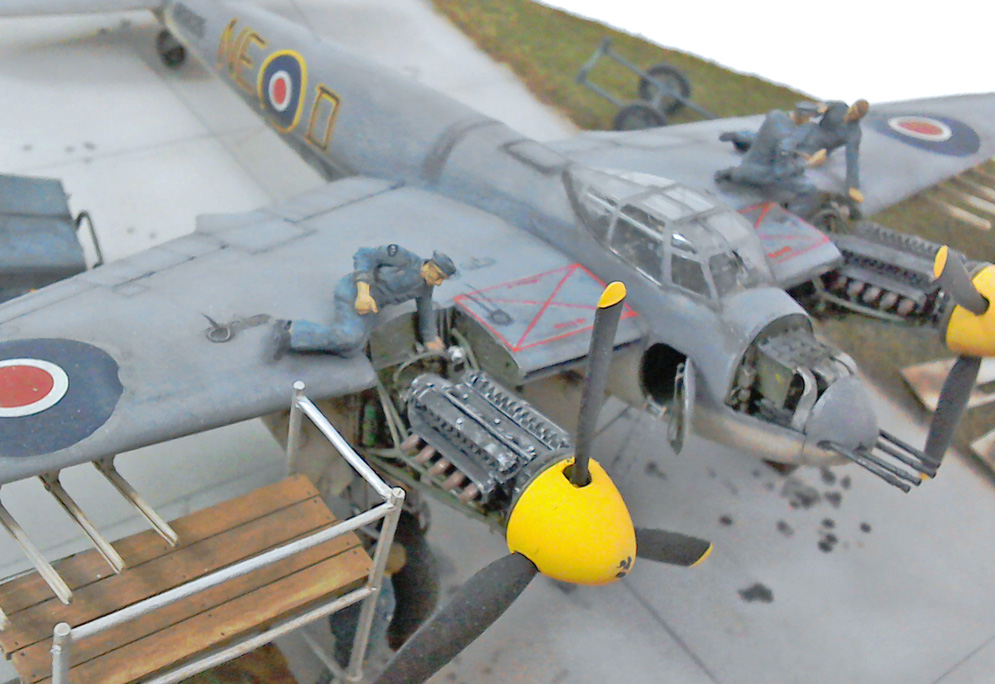
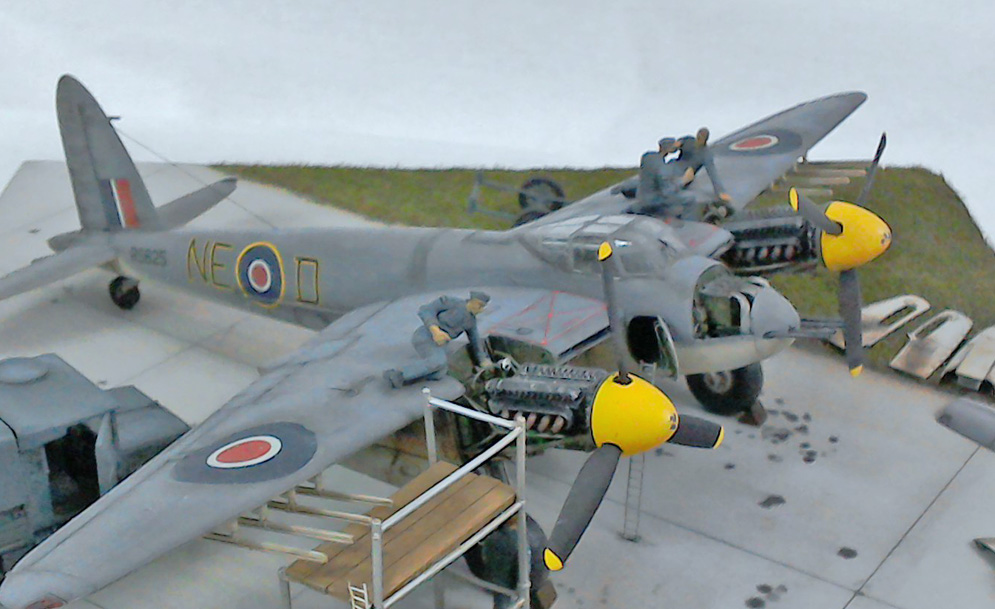
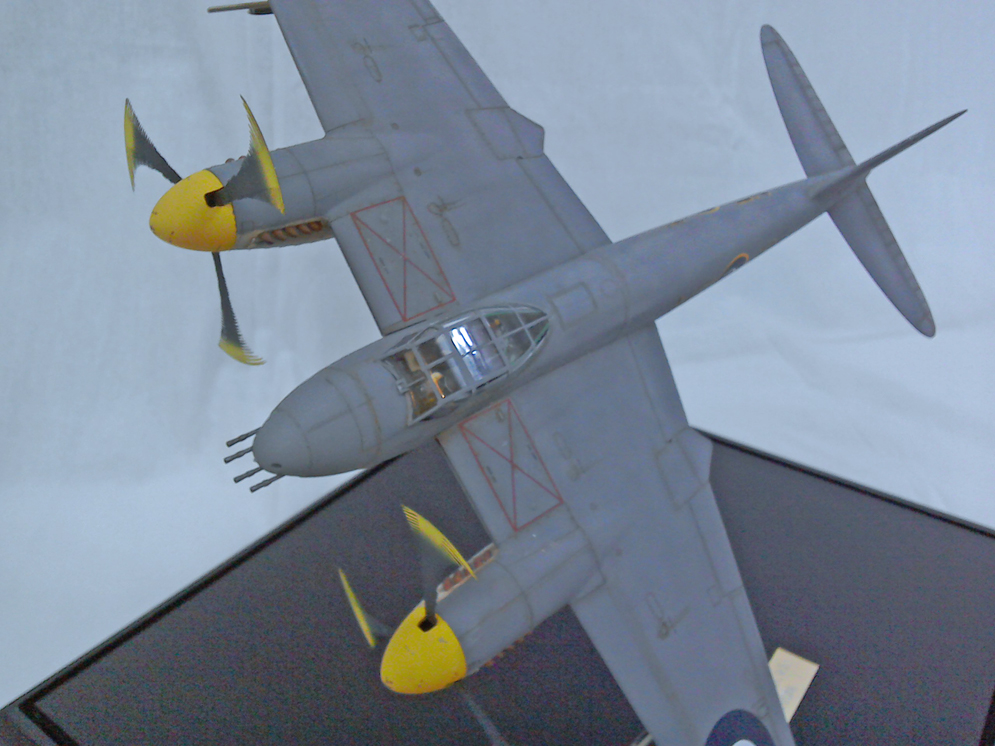
The Tamiya kit on its own is a great number with lots of crisp surface details and fine engraved panel lines. I’ve finished it in markings of one of the squadrons attached to the “Bannf Wing” that carried out anti-shipping raids along the Norwegian coast.
The work platform, and other bits came from Airfix ground equipment set, the figures from CMK.
The whole base is just under 12inches square.
Ian R.
Best regards, Ian R.
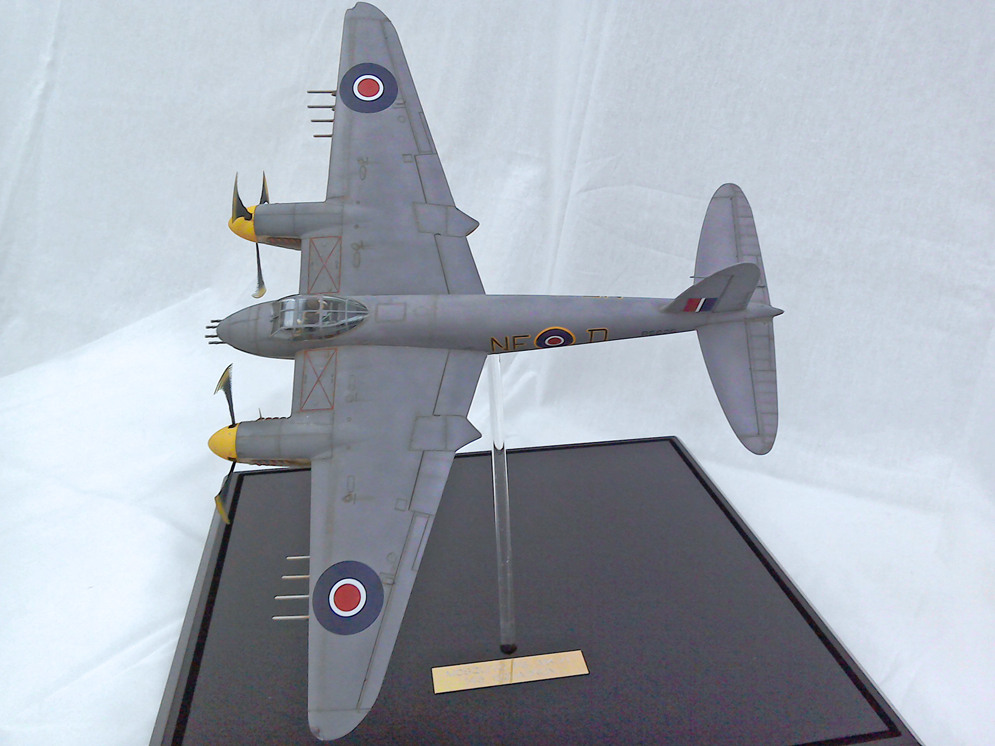
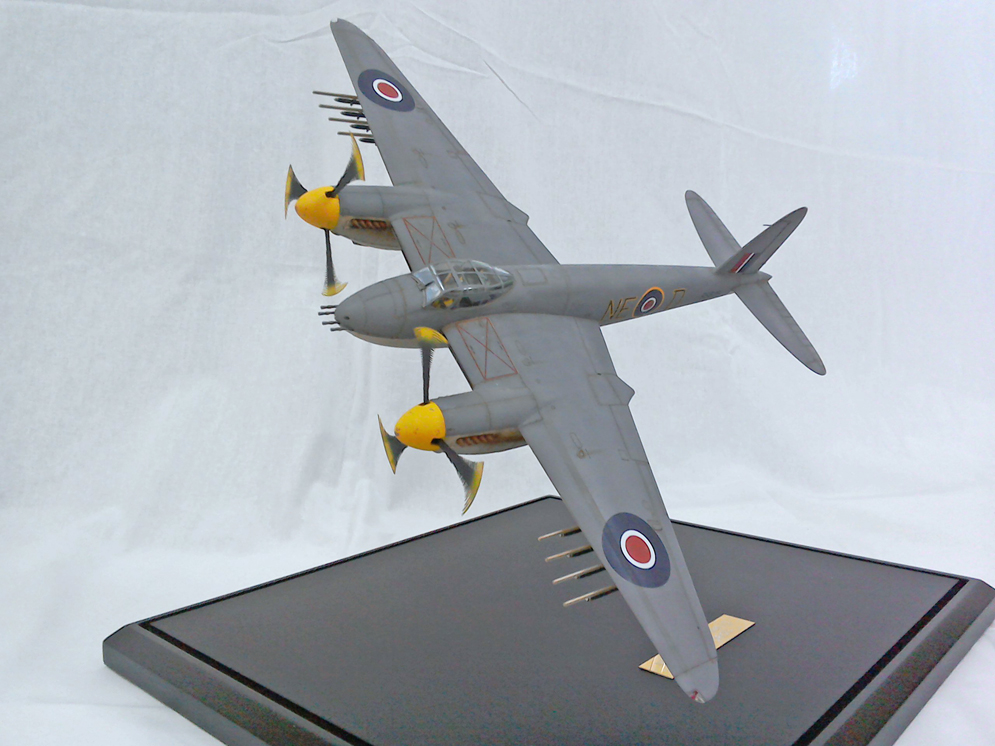
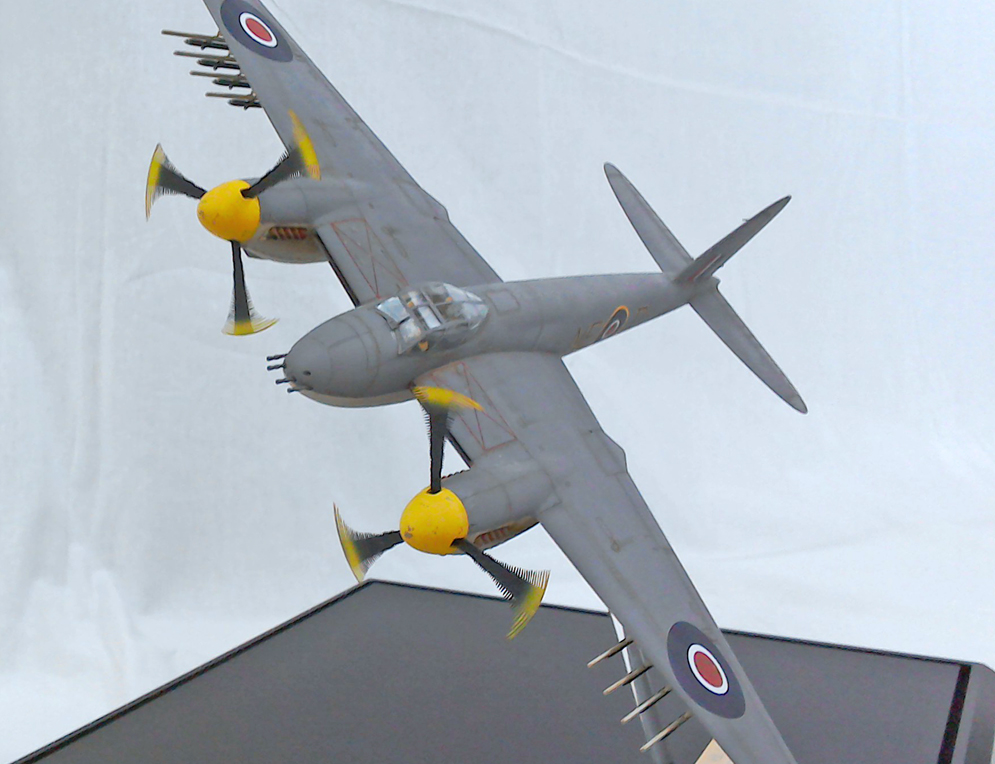
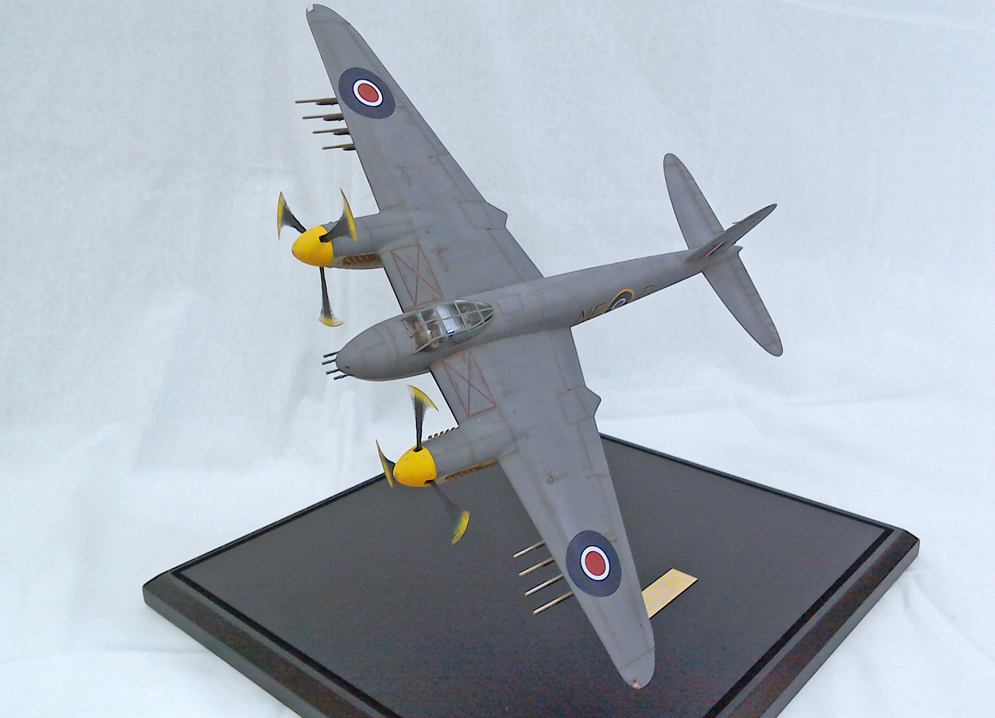
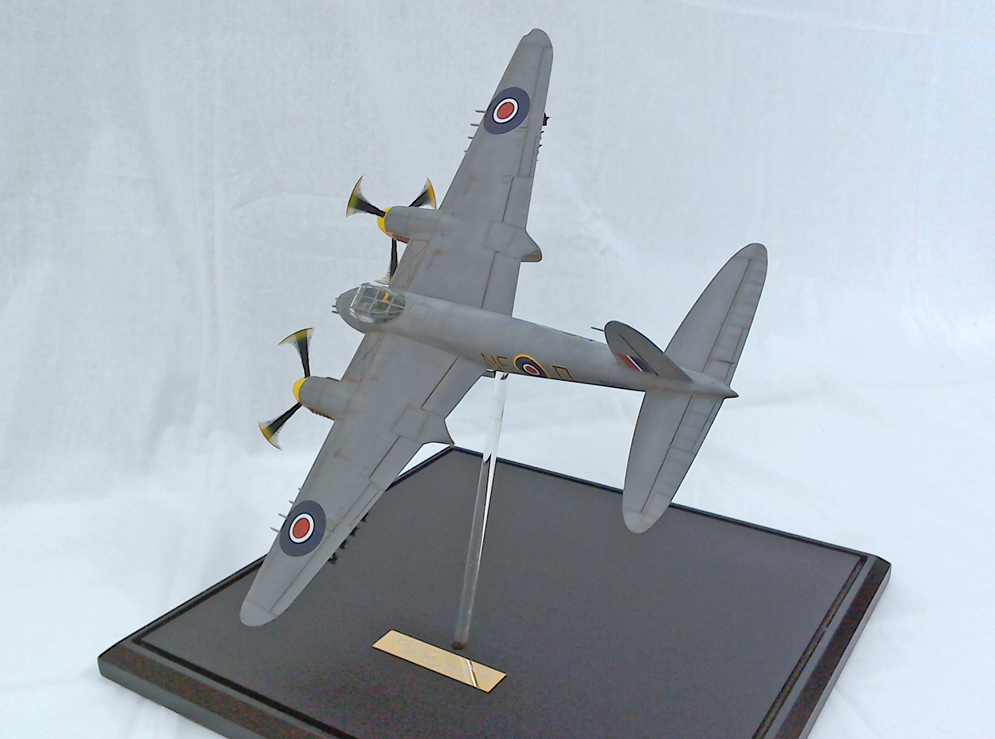
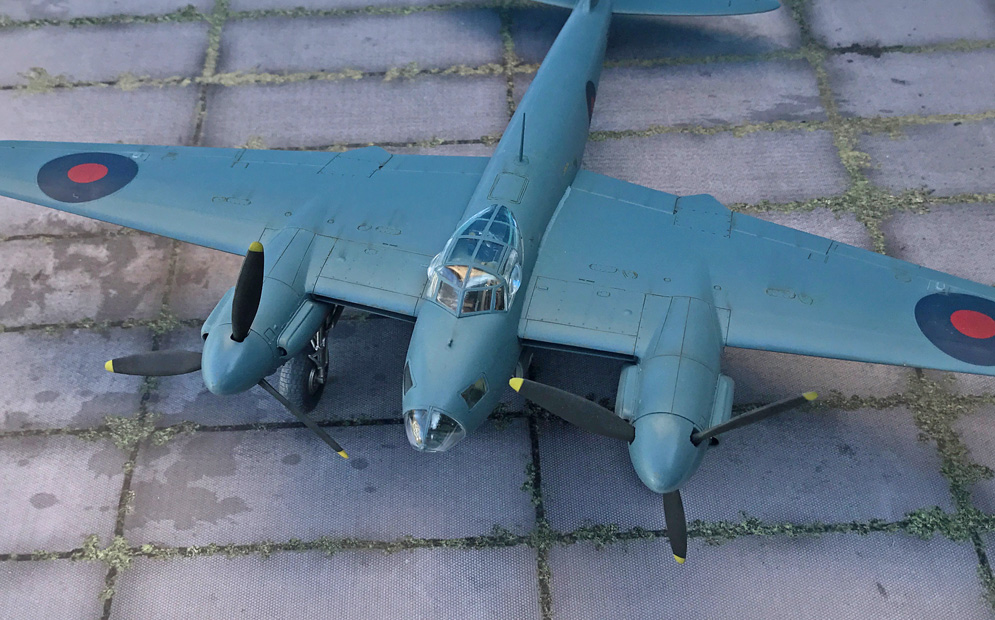
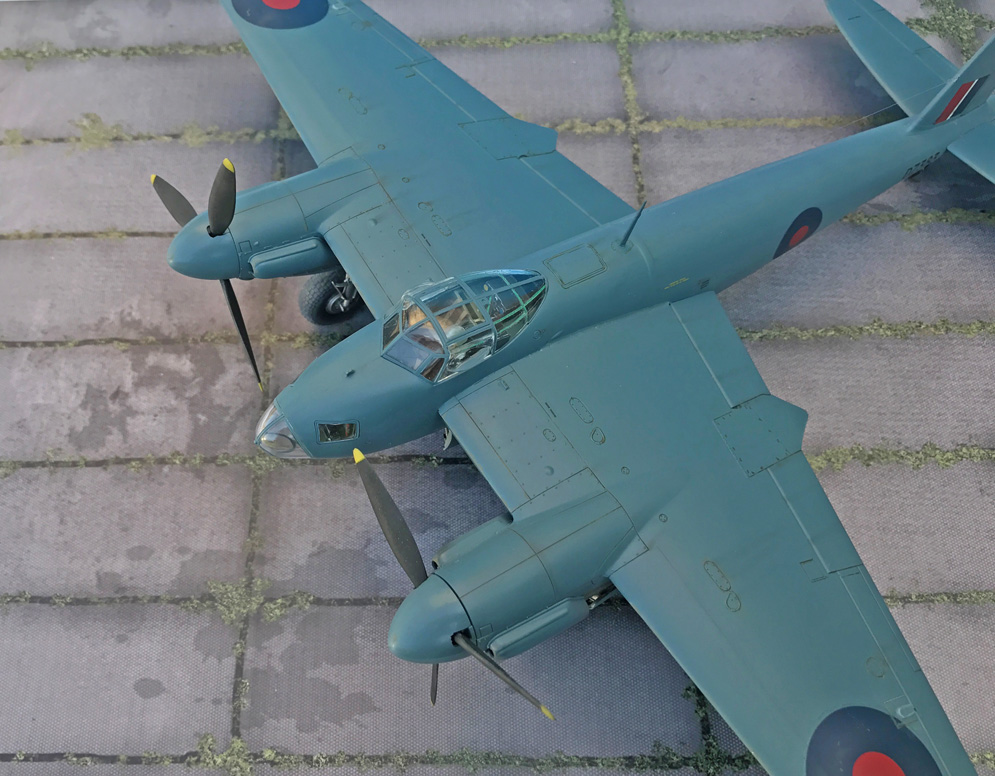
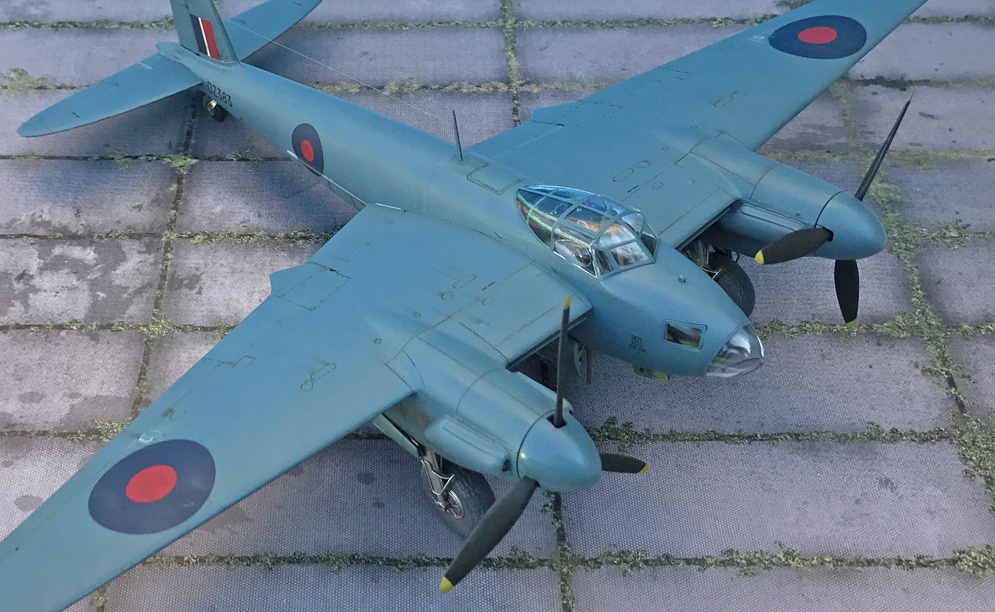
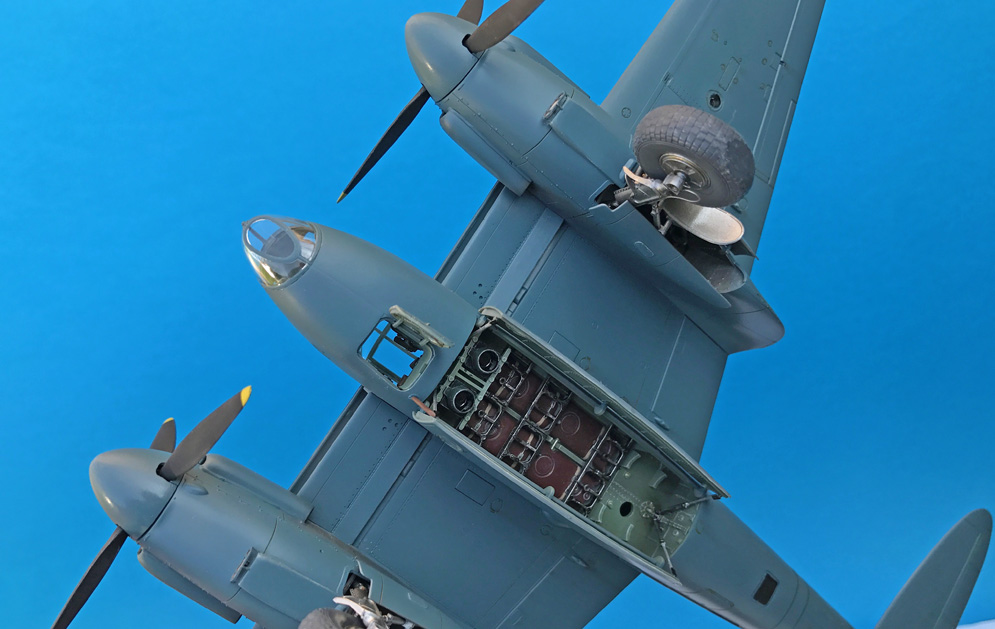
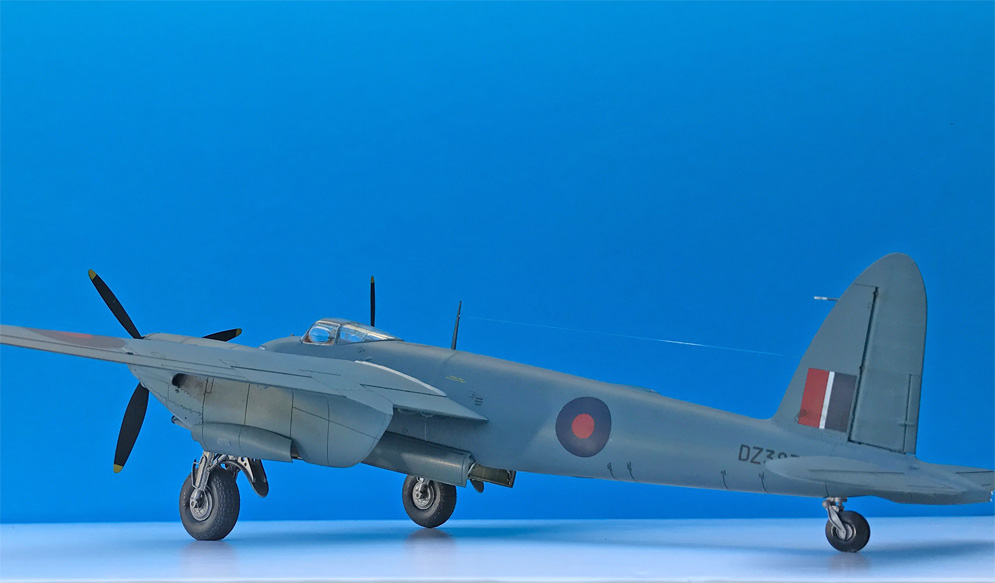
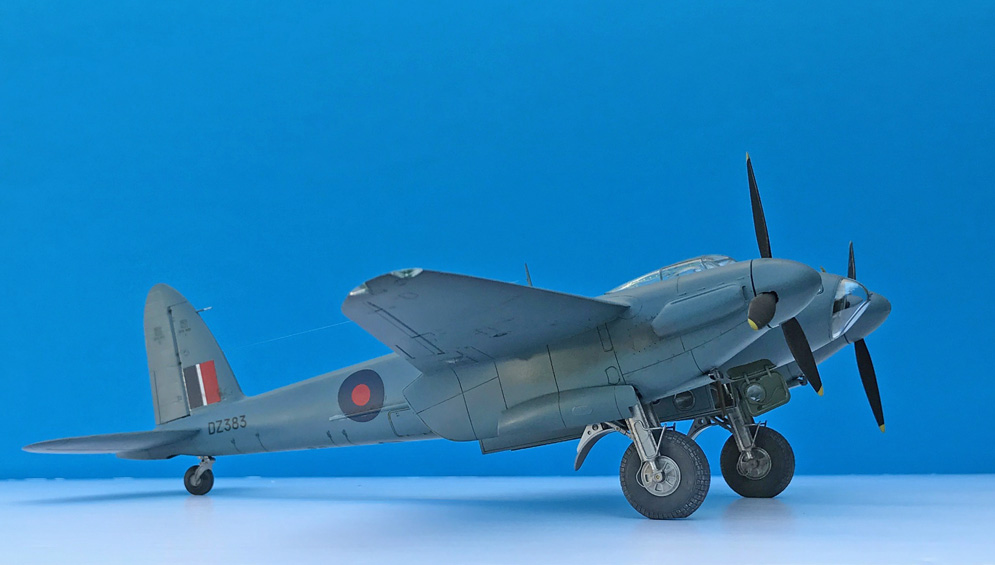
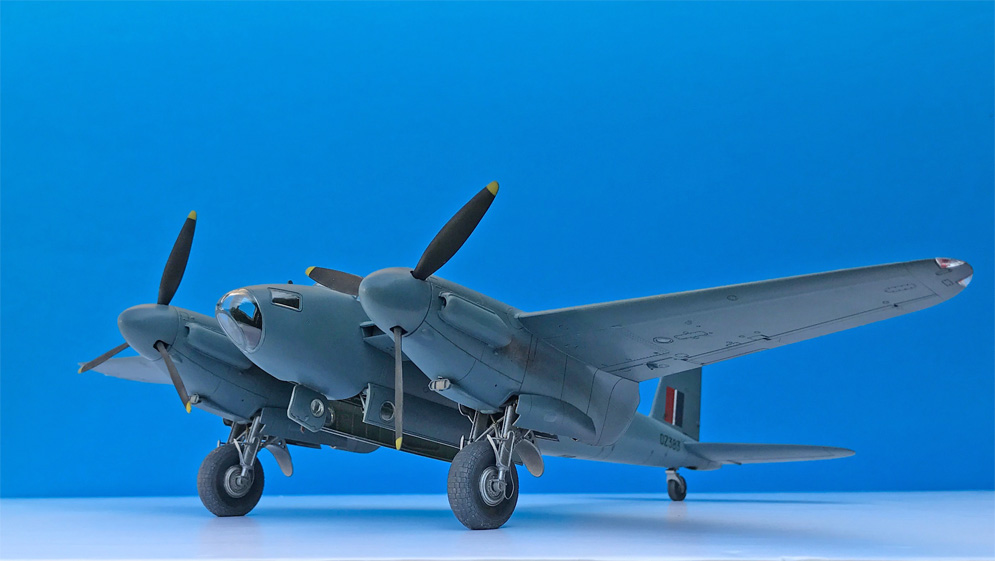
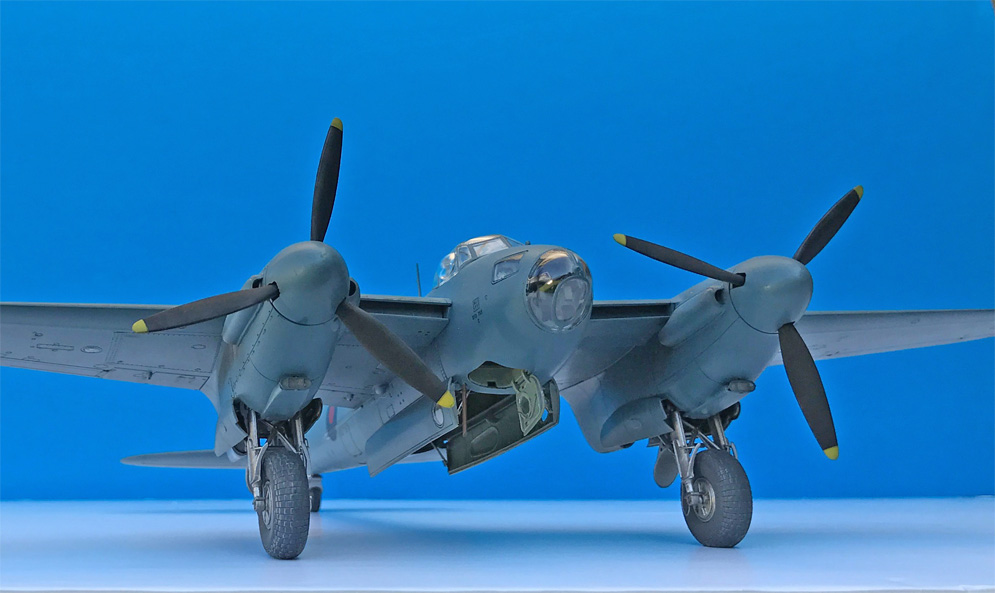
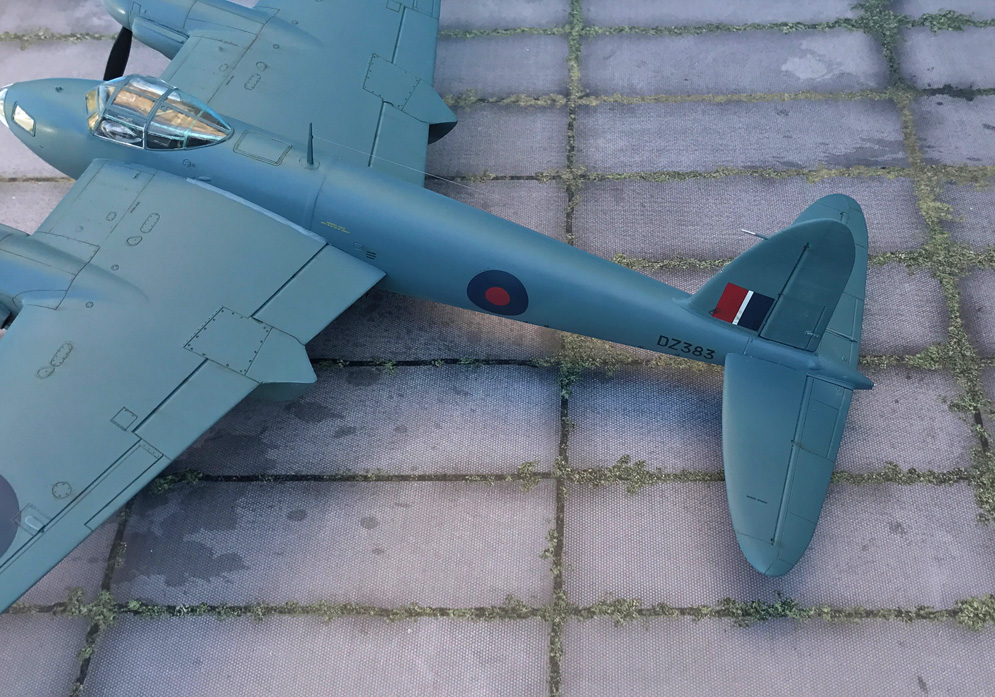
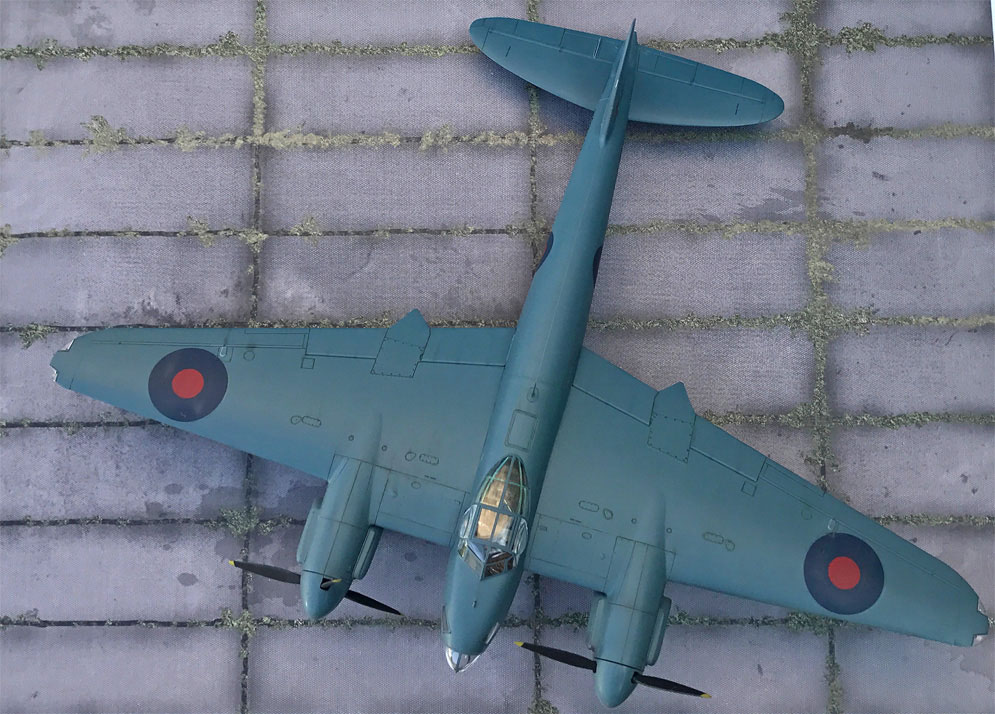
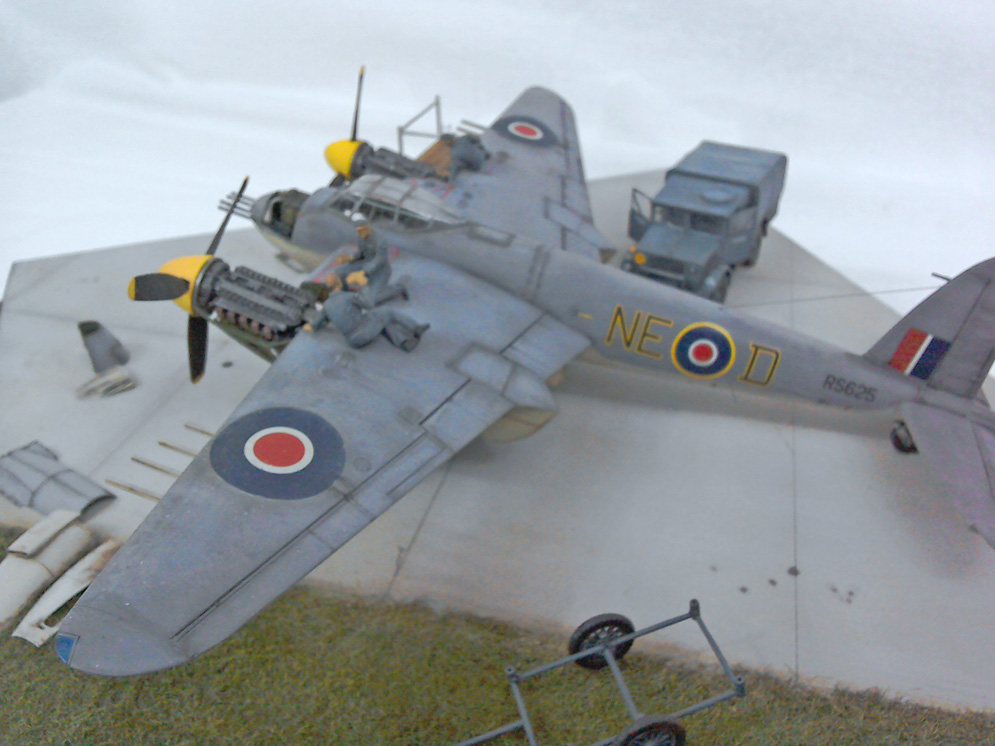
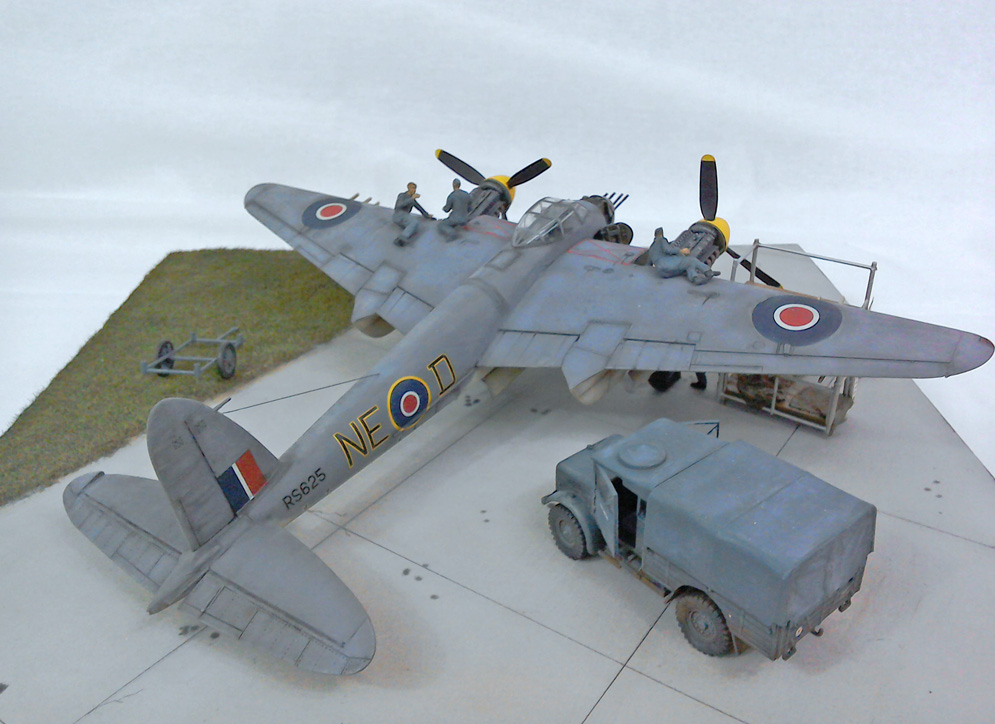
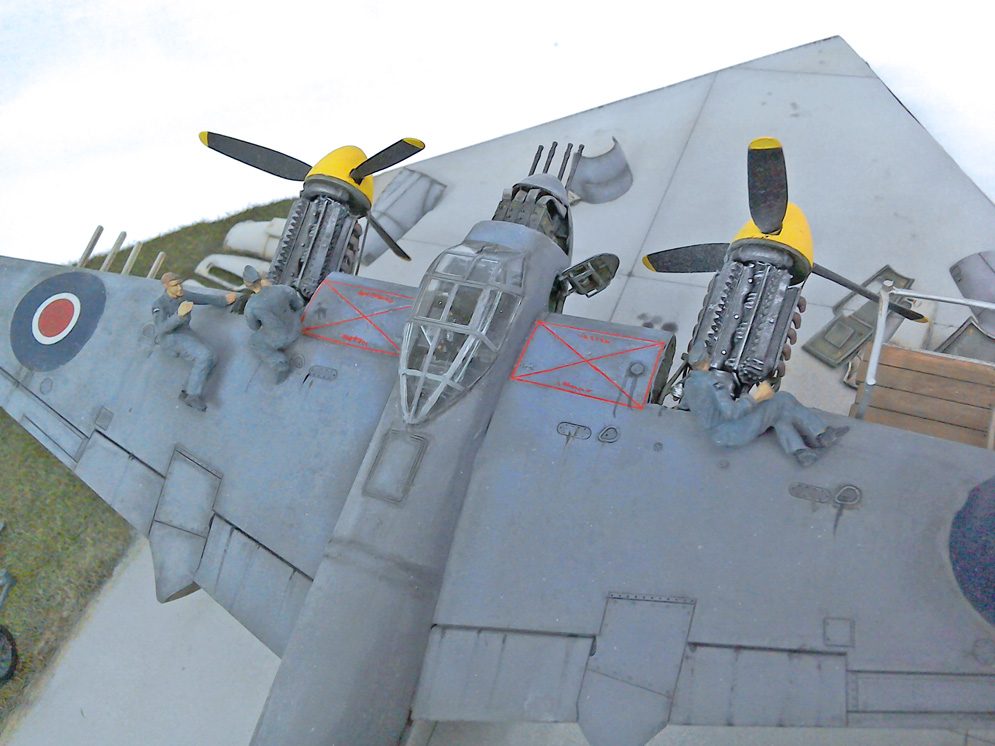
I chose this PR scheme, mainly to create a slightly ‘different’ Mosquito model.
I’m pretty sure at the time I used Xtracolor gloss enamel paint for the main PRU Blue scheme. Some fine details added like the hydraulic lines on the undercarriage units and small cockpit adds.
Geoff C.


It’s a shame there was so little variation in the finishes provided out of the box. There are so many colourful alternatives out there! I have the Model Alliance decal set and a couple more kits waiting in the stash for a rainy day. Wings down next time I think.


Censu C.
Censu C.
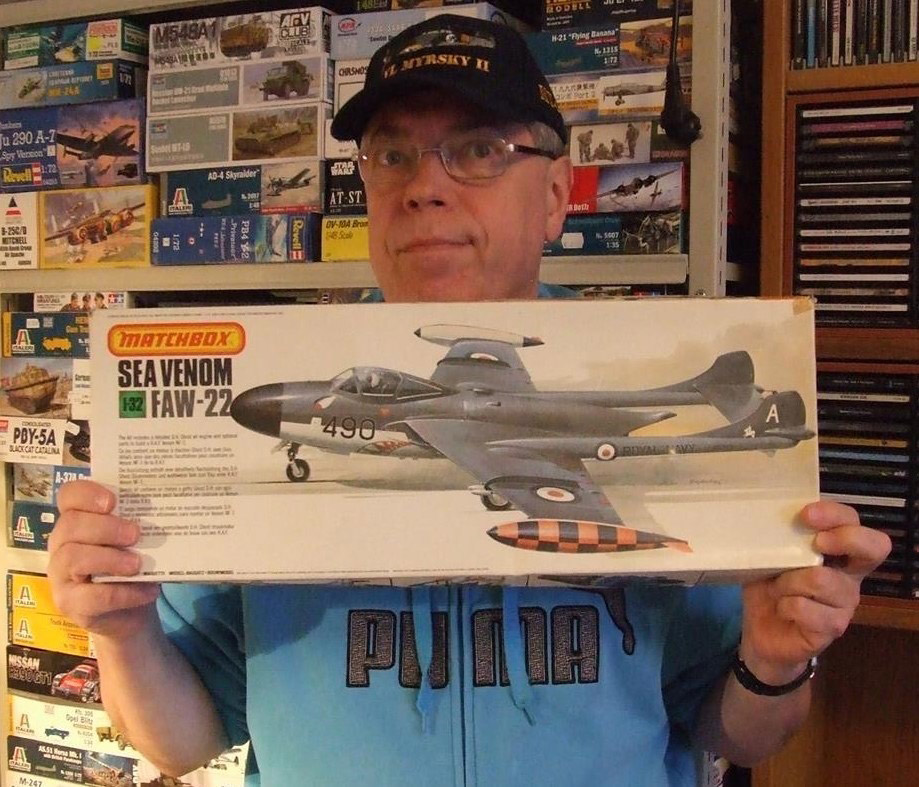
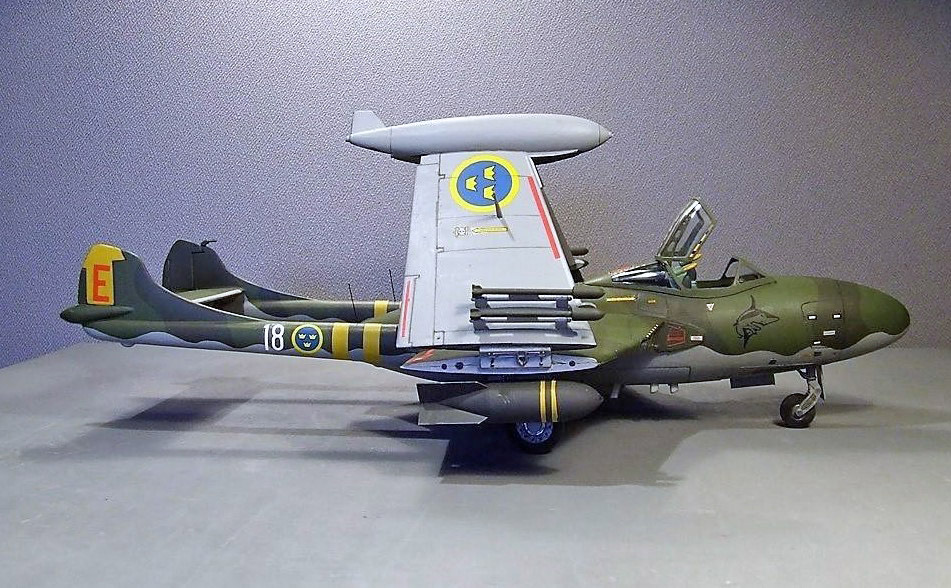
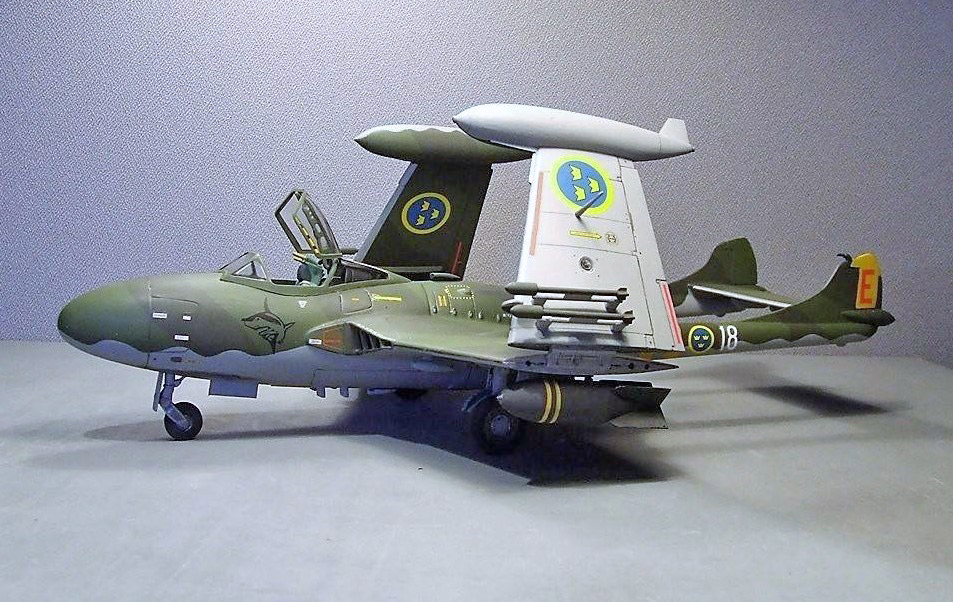
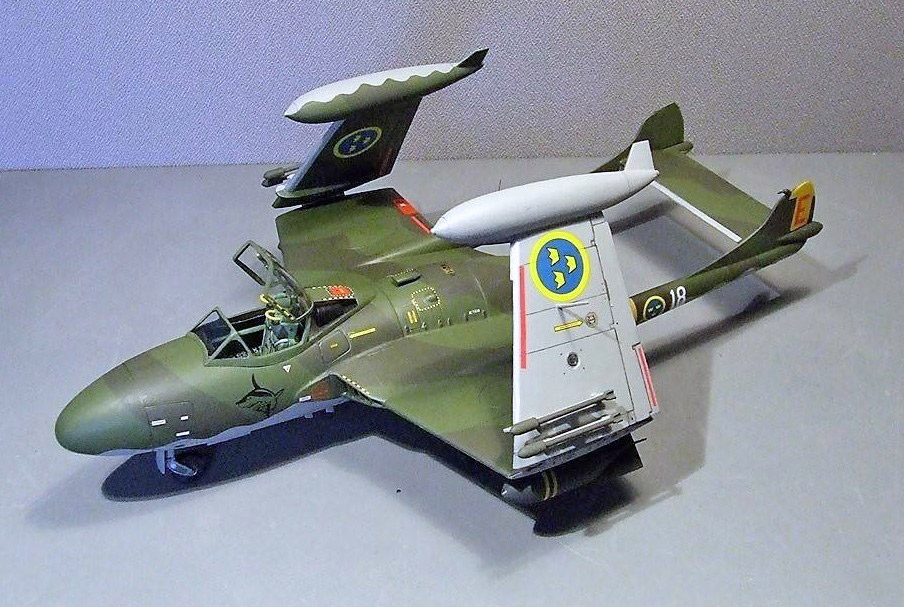
Good old – and BIG Matchbox kit.
Raimo L.


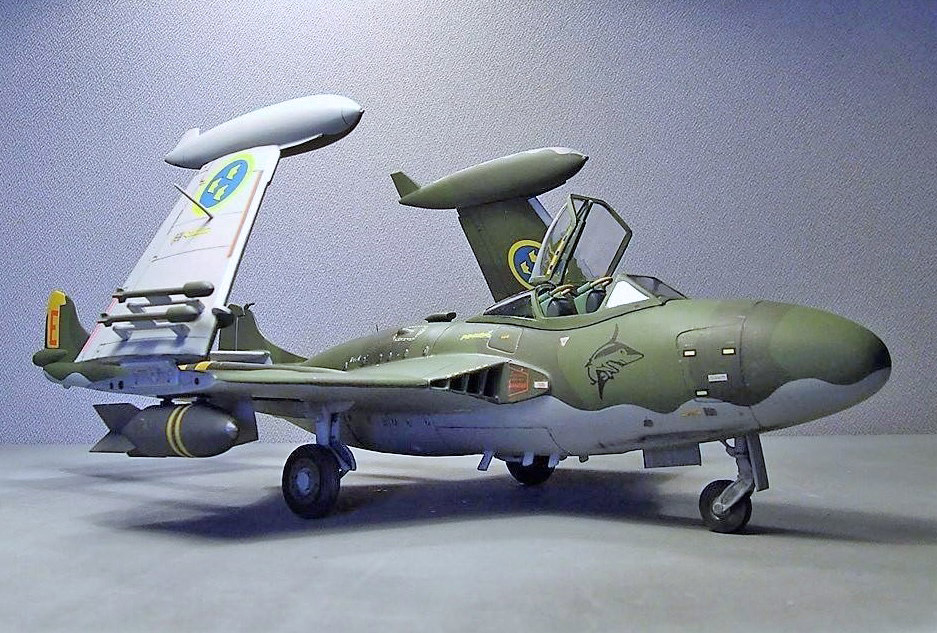
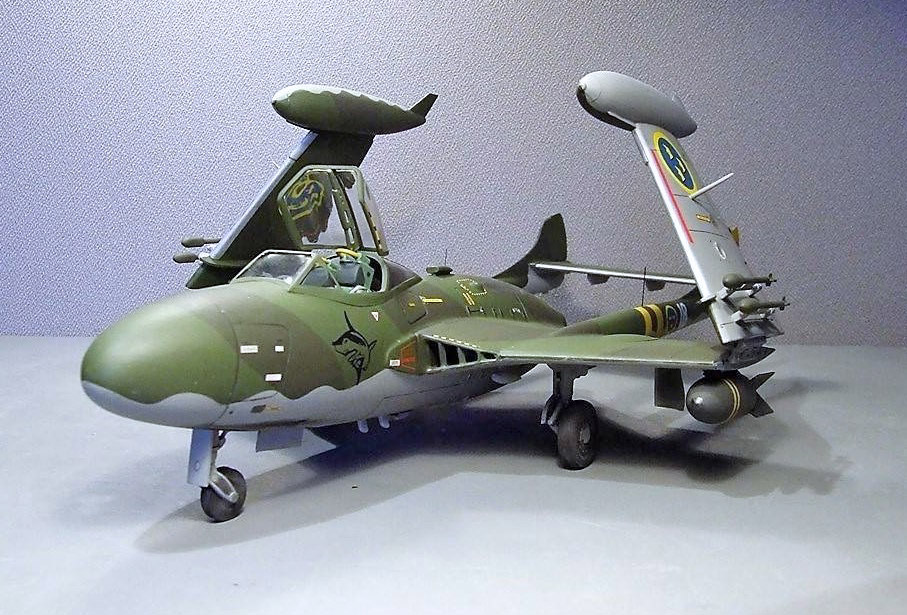
Ian tell the story of this project on the card he thoughtfully provided when displaying his model at a recent model show and I’ve included that at the end of the gallery of photos that go with this entry.
The Airfoil 1:48 scale kit is excellent and when well made and finished in a ‘different’ scheme like this one, it’s just a perfect scale modelling subject.
Great job Ian, well done!
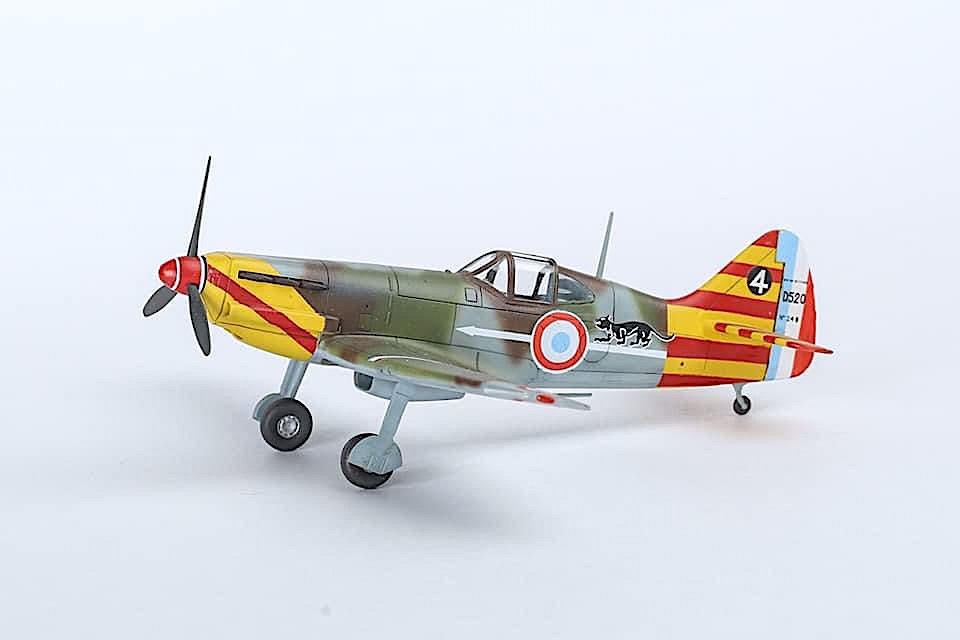
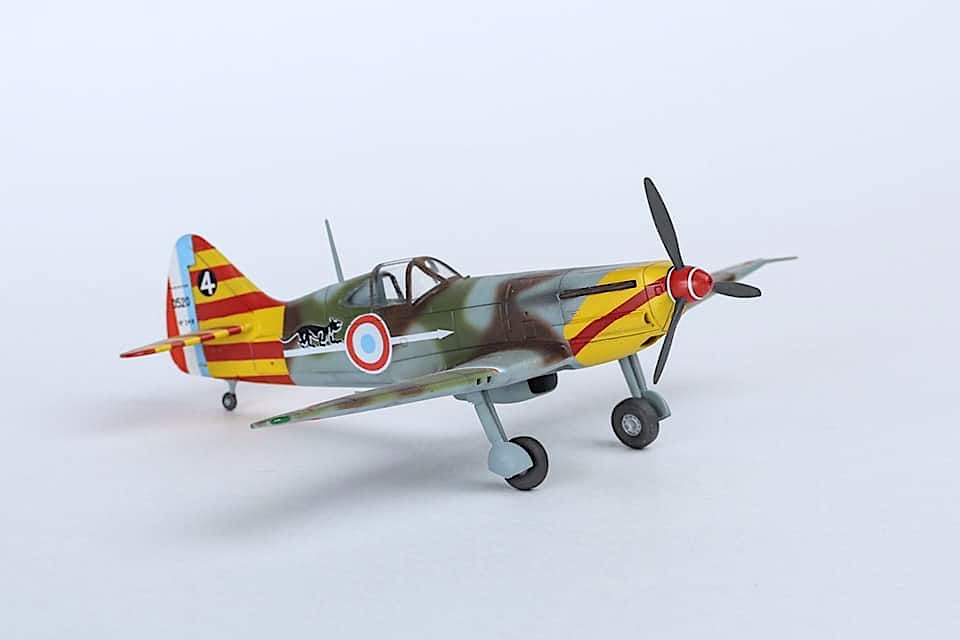
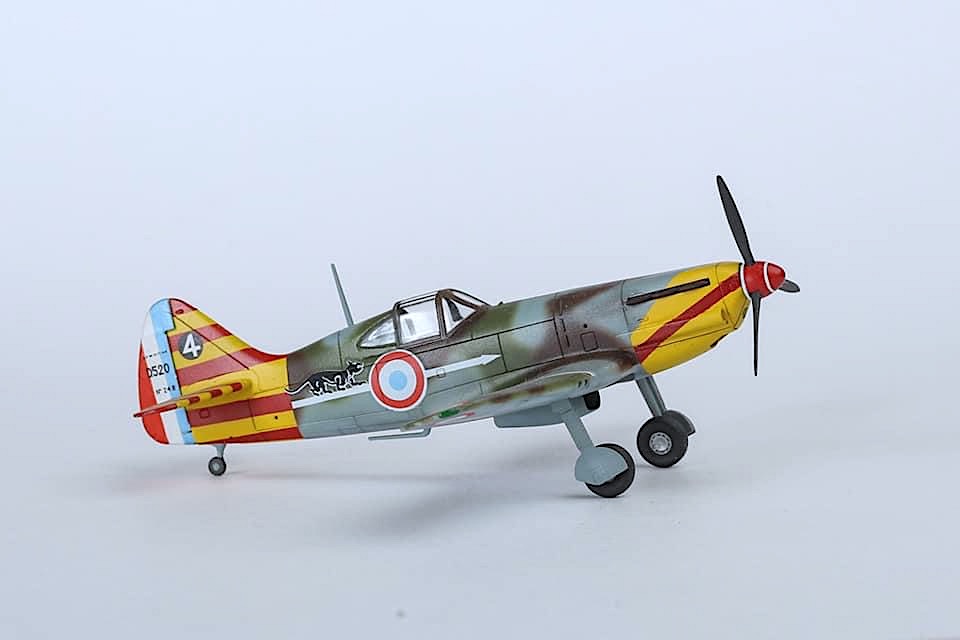
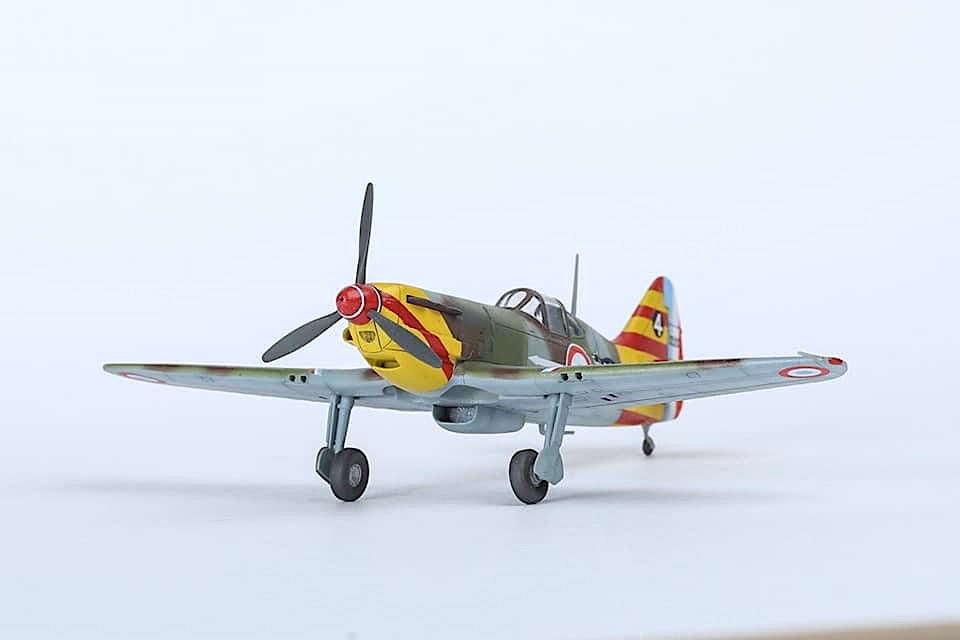
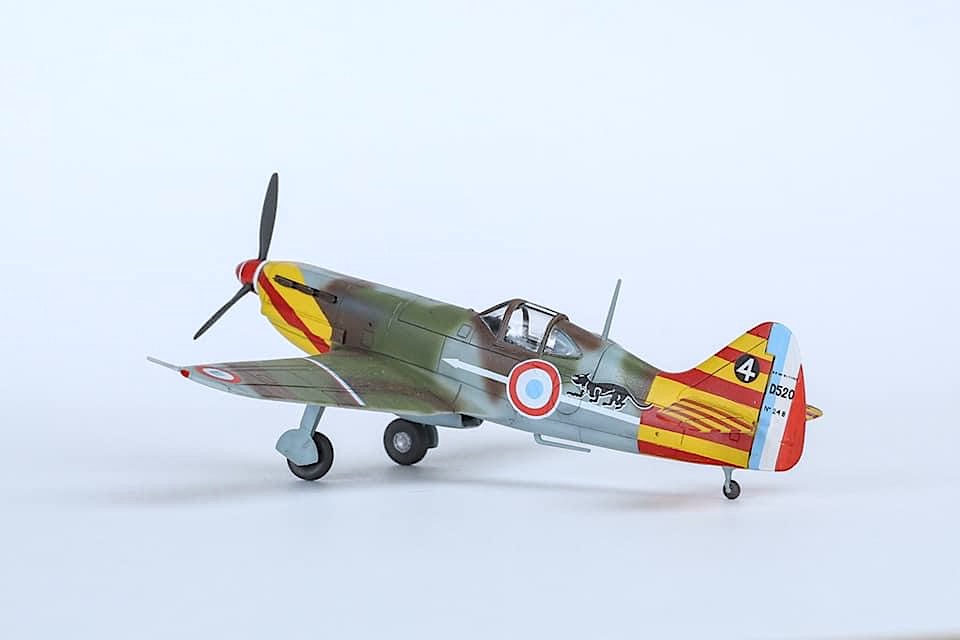
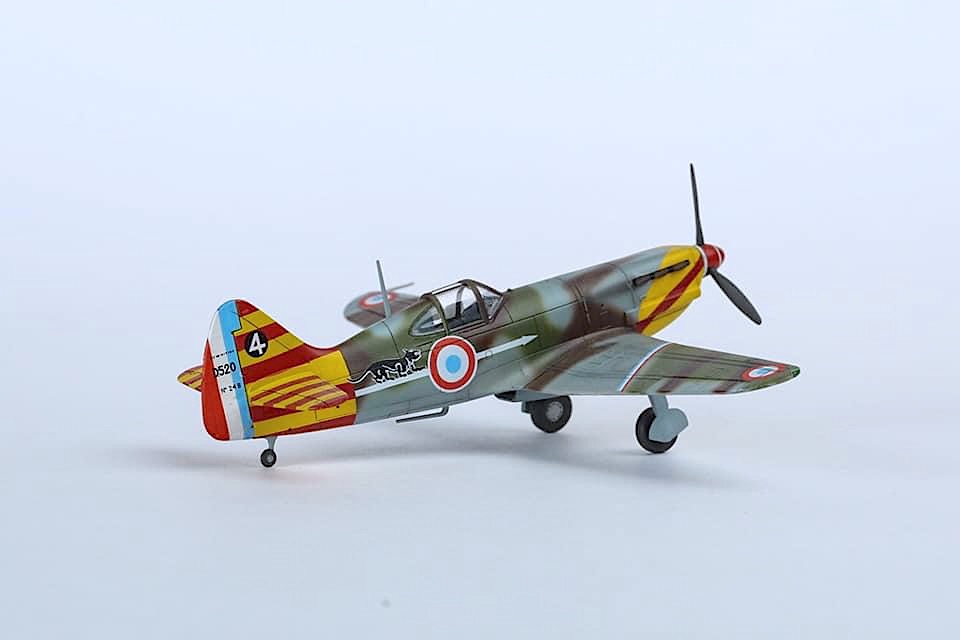
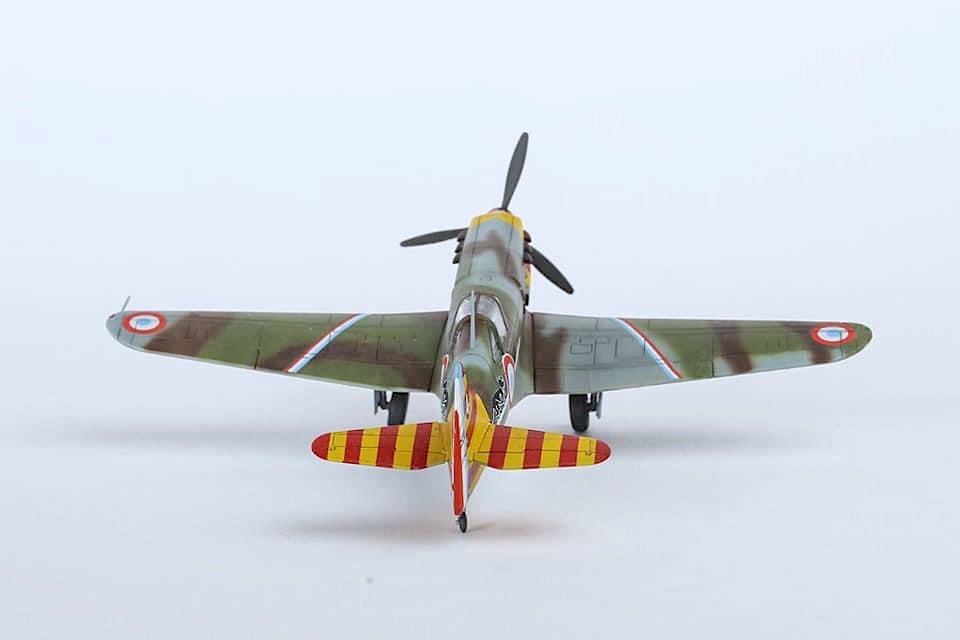
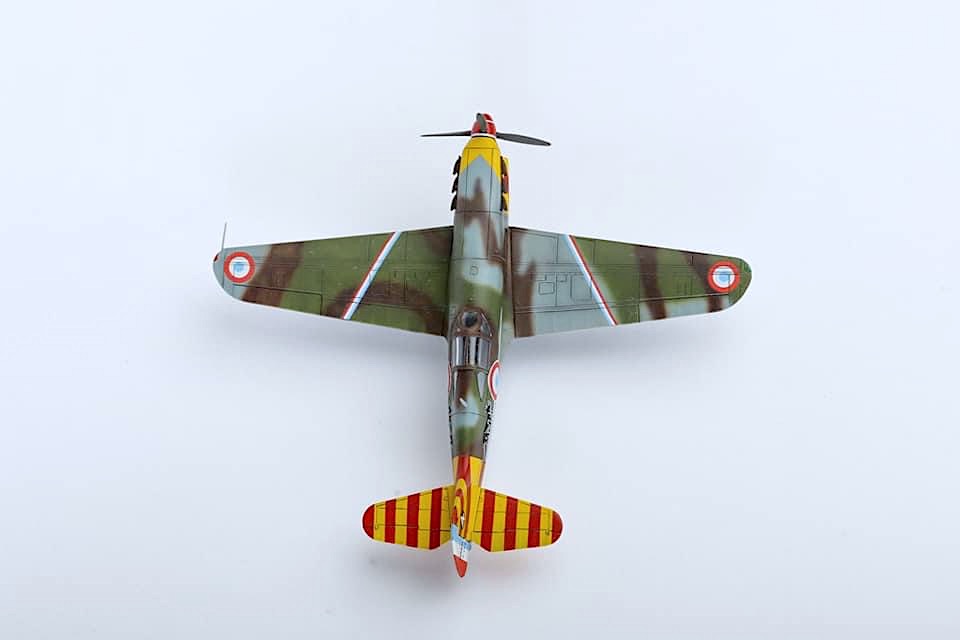
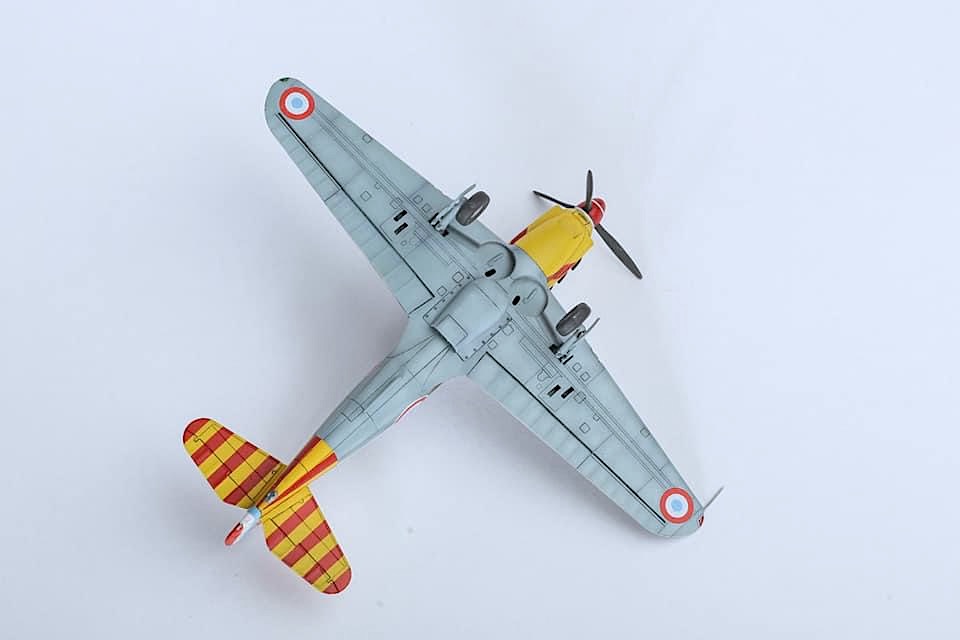
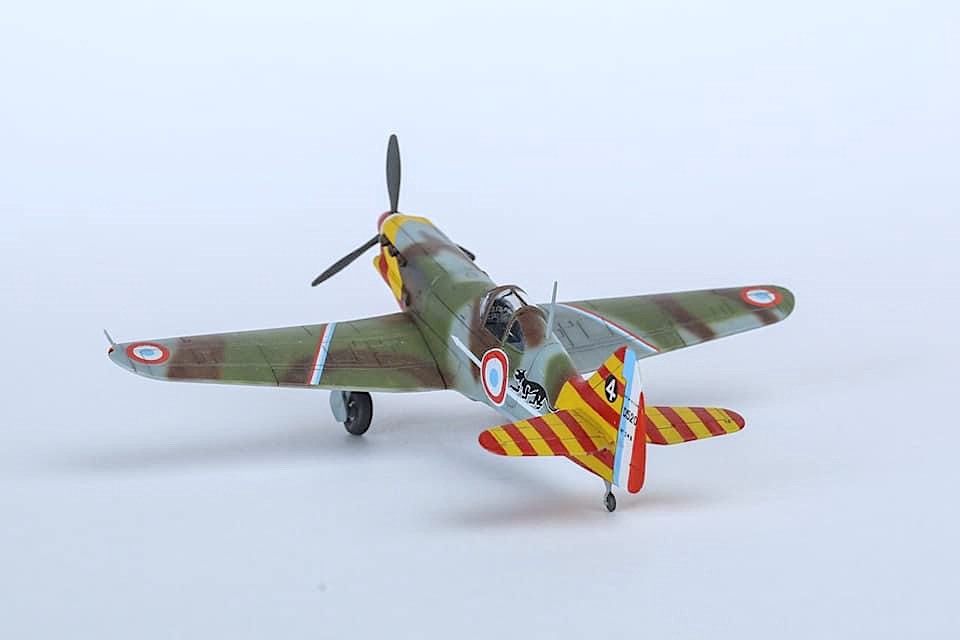
This is my Dewoitine D.520 it’s made from the 1:72nd scale Hobby Boss kit.
Hope you like it…
Alexander P.
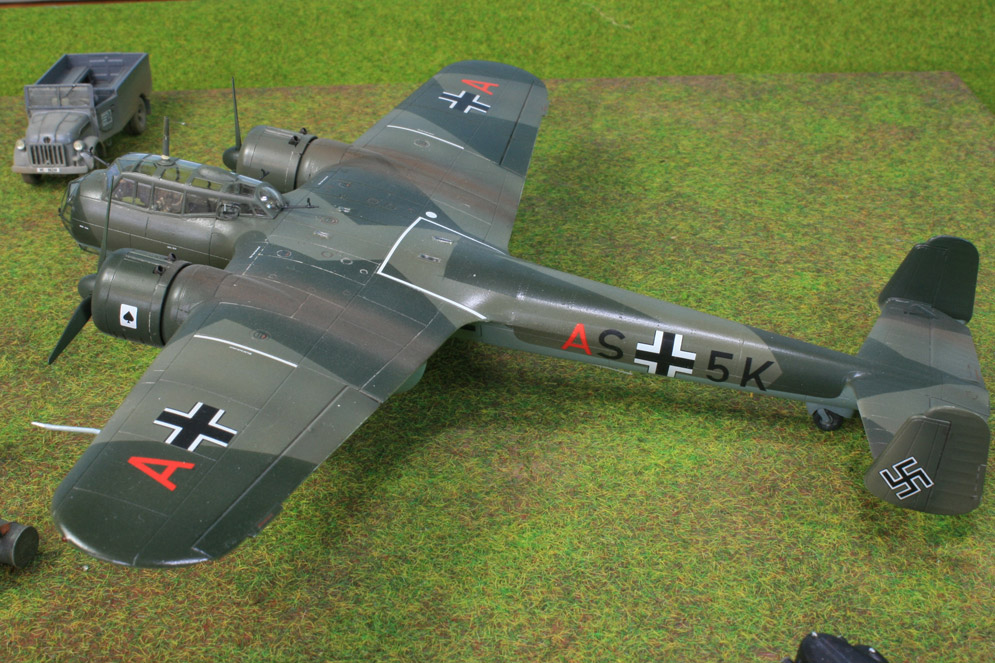
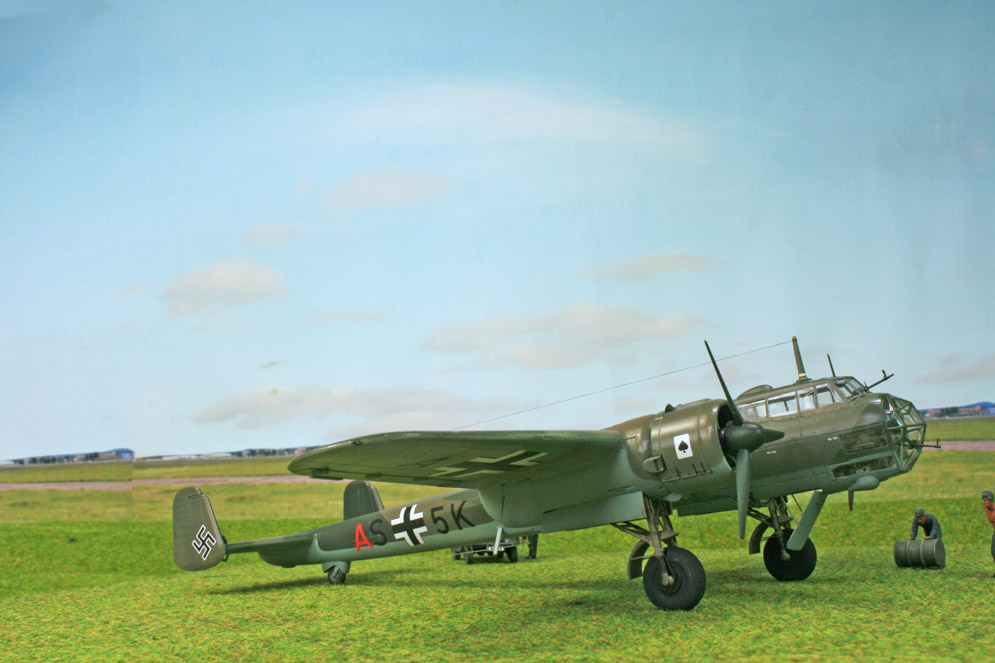
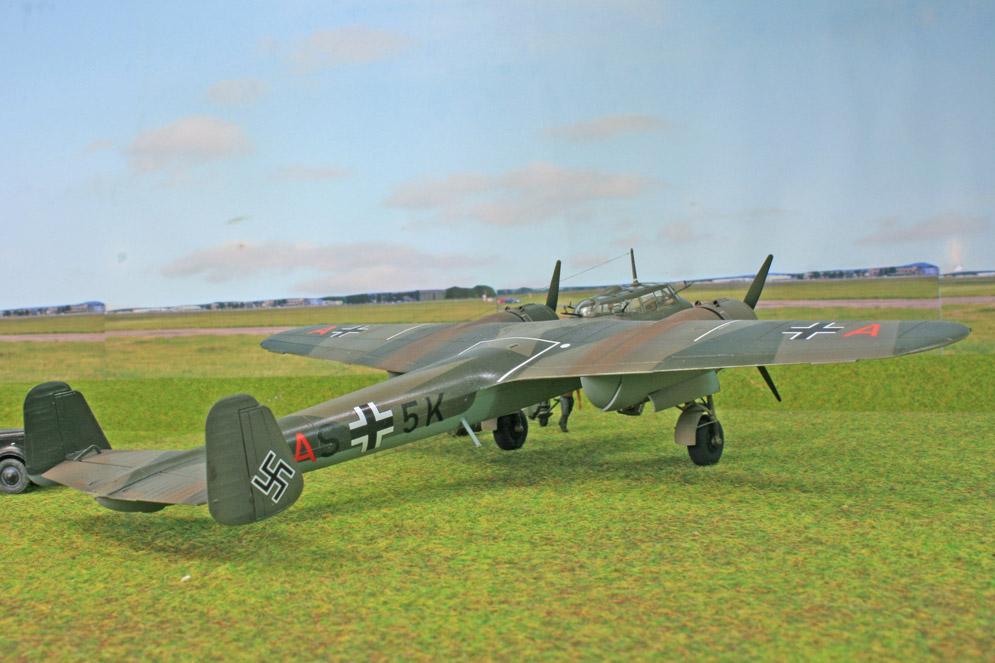
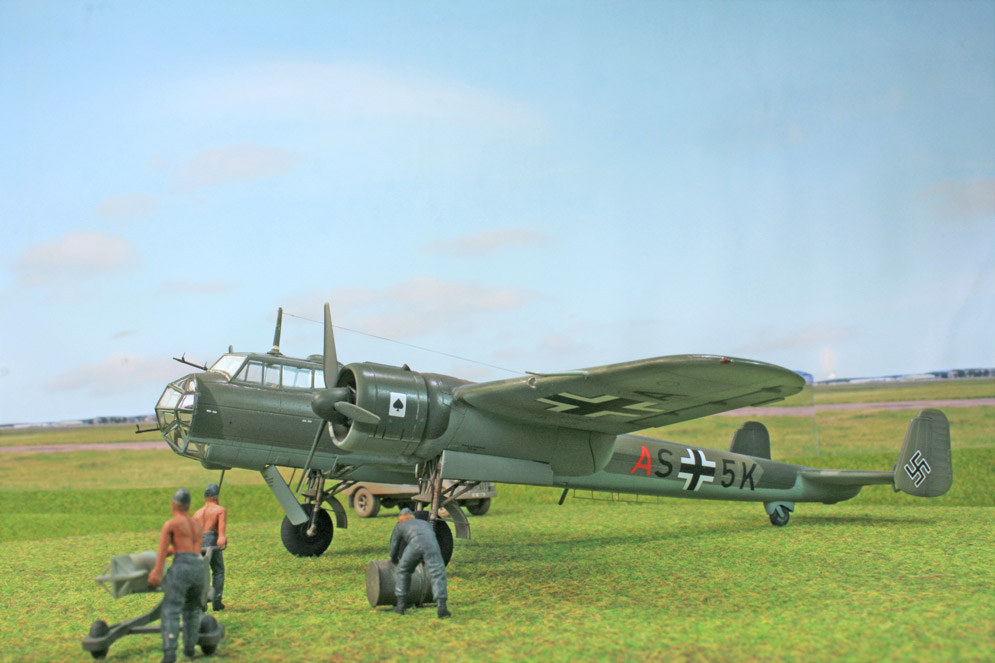
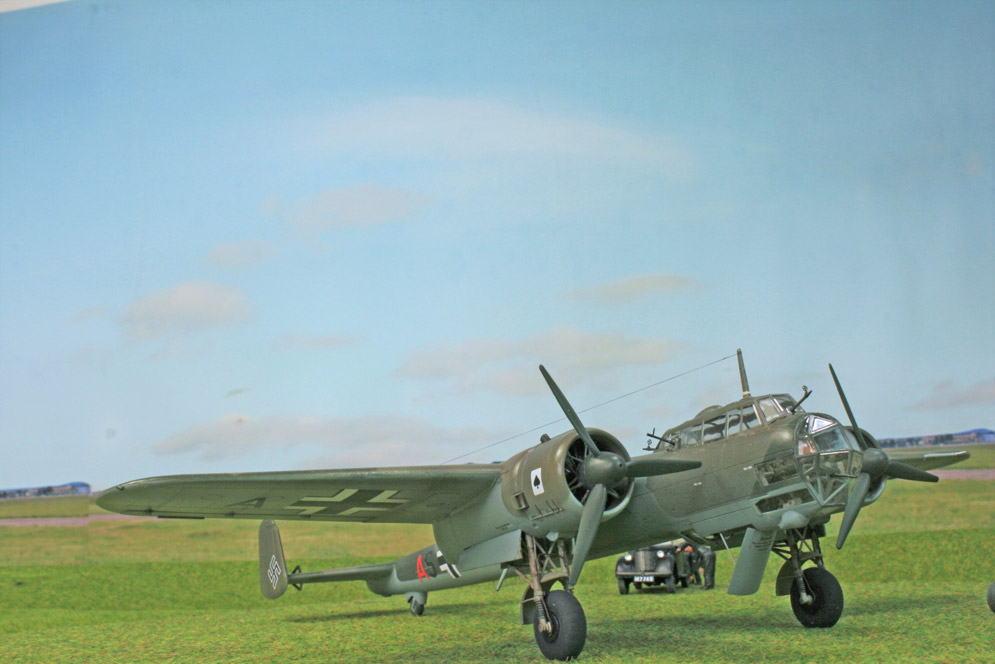
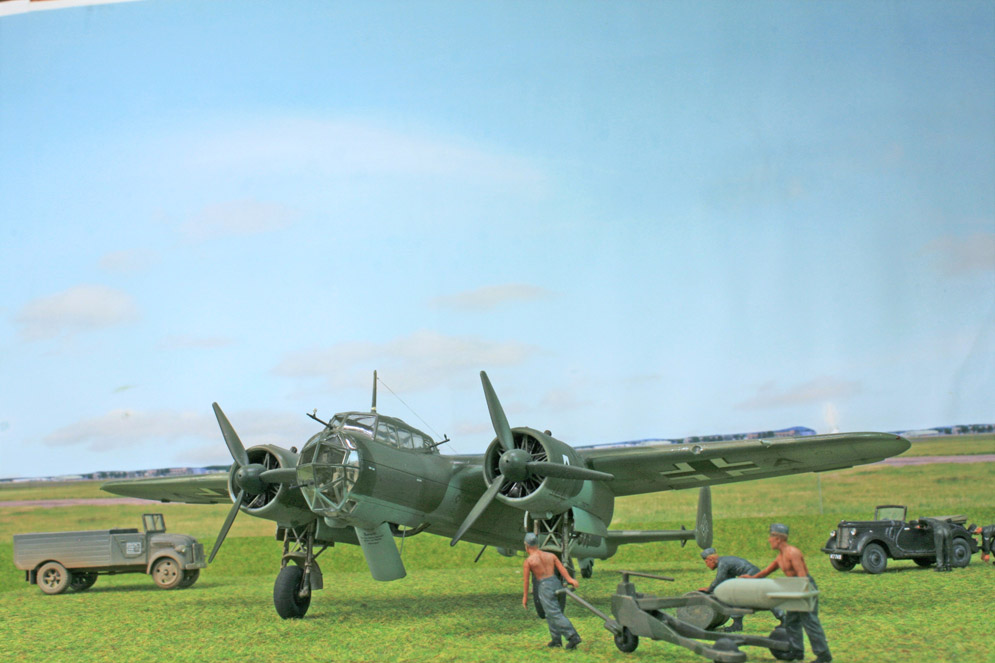
I upgraded the kit with Eduard PE and Eduard resin MG15 machine guns. The decals from Xtradecal are from an aircraft of 8/KG3 based at Le Culot during the Battle of Britain. The Kamfgeschwader formed part of Kesselring’s Luftflotte 2.
The Airfix kit is not entirely straightforward to build but I applaud Airfix’s ambition to be true to the design of the original. The Dornier Do-17Z whilst being a very reliable aircraft, did not have the range or bomb carrying capacity of the Ju-88 or He-111 and so was phased out of frontline duties by the end of 1941.
Hope you like it!
Andrew J.

The kit was built more or less straight out of the box apart from the addition of some seat belts from an eduard set. A set of commercial masks was used for the canopies.
I deviated from the kit’s instructions and painted the cockpit to represent RLM66 as opposed to the RLM02 that was suggested. I think that this darker grey may have been more appropriate for a late-war night fighter.
The markings were mostly from the kit – apart from the Hakenkreuz symbols on the tail which came from my spares box. None are supplied in the kit due to printing restrictions.
The upper wing crosses and red dotted walkway markings were masked and sprayed. I can never get the thin walkway transfers to set in a straight line (entirely down to my ineptitude) and I find it hard to disguise the extensive carrier film on both the walkways and open crosses (also entirely down to my ineptitude).
Thanks, Dai
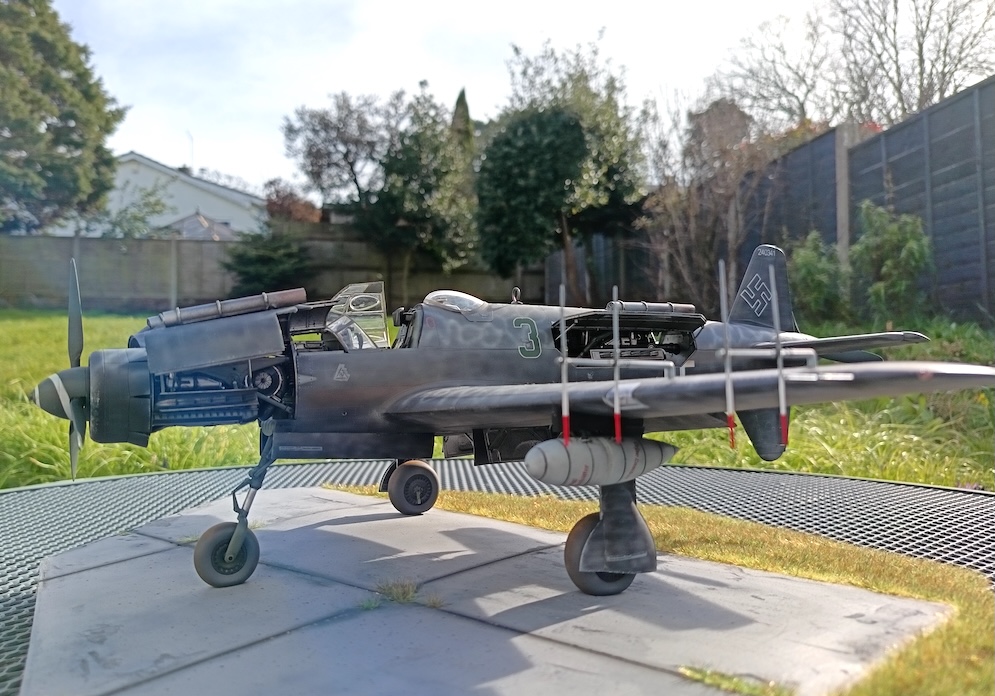
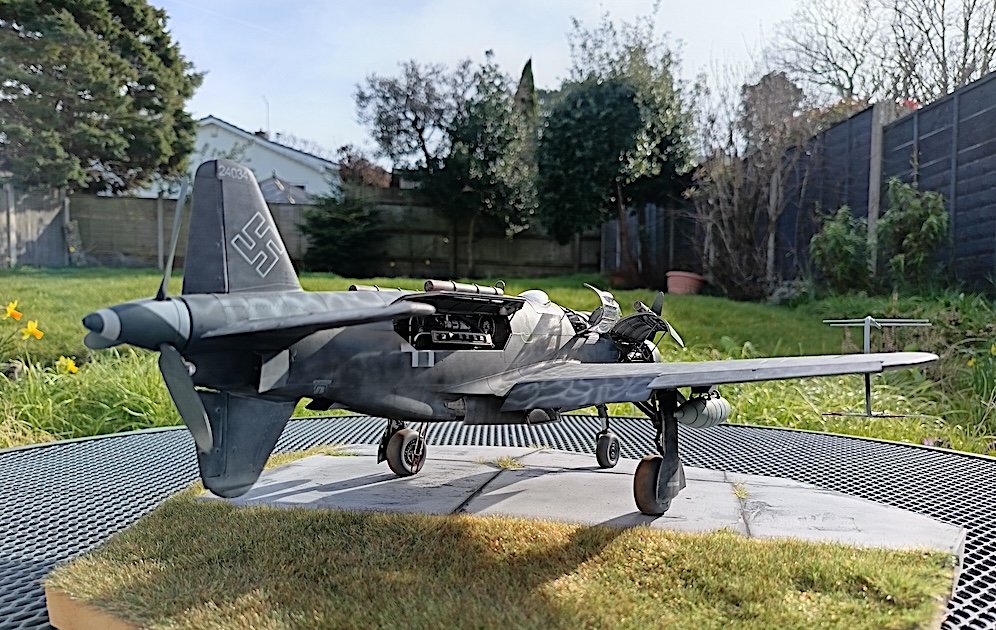
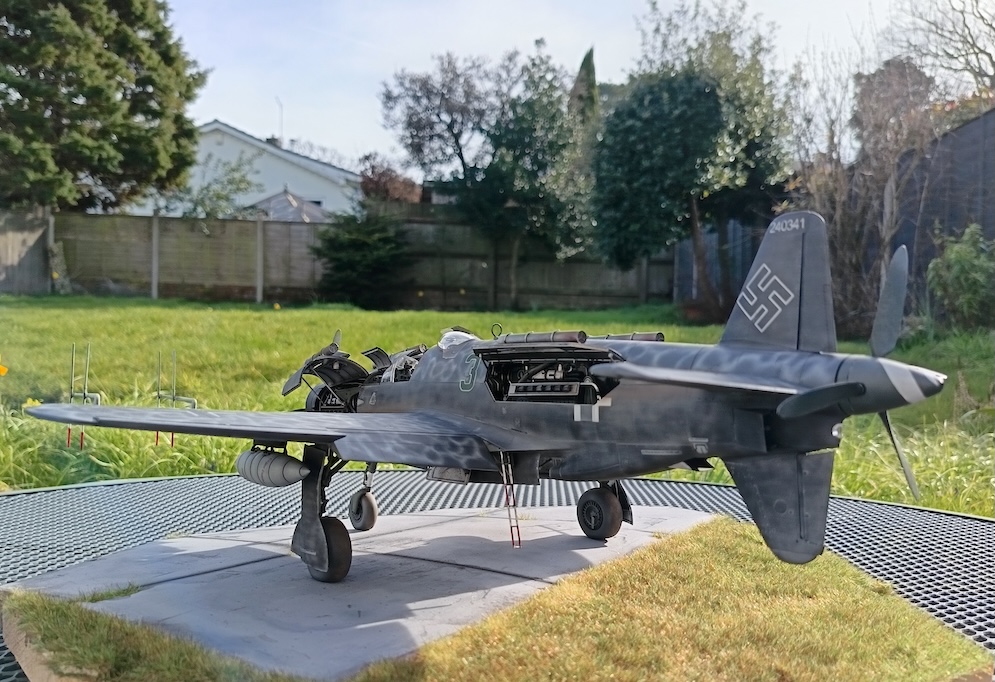
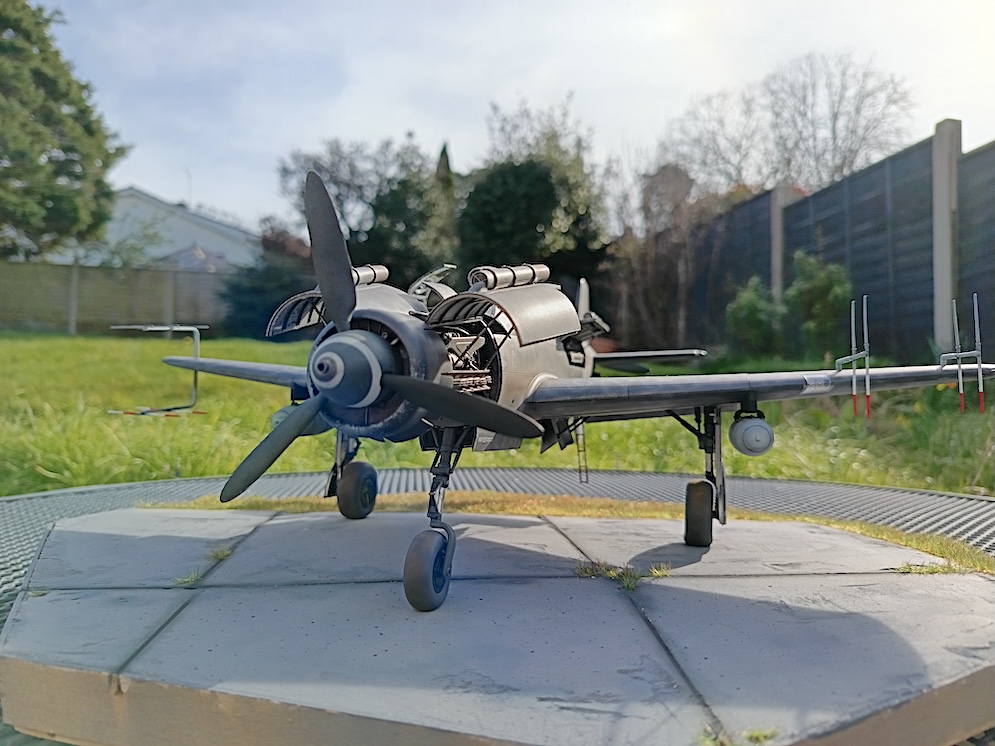
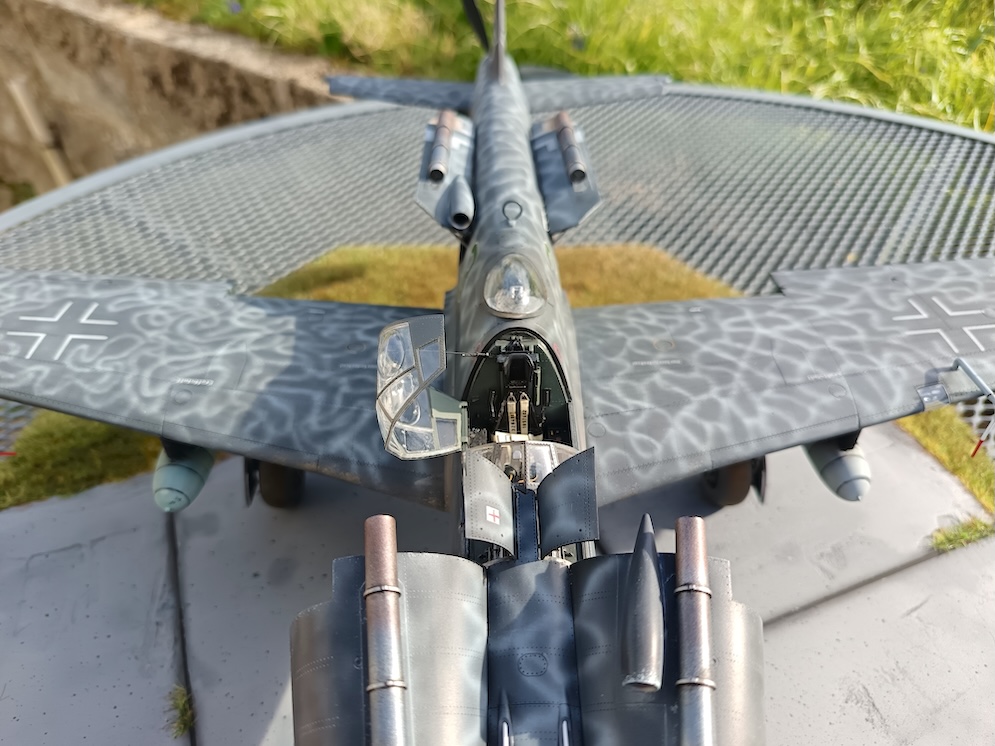
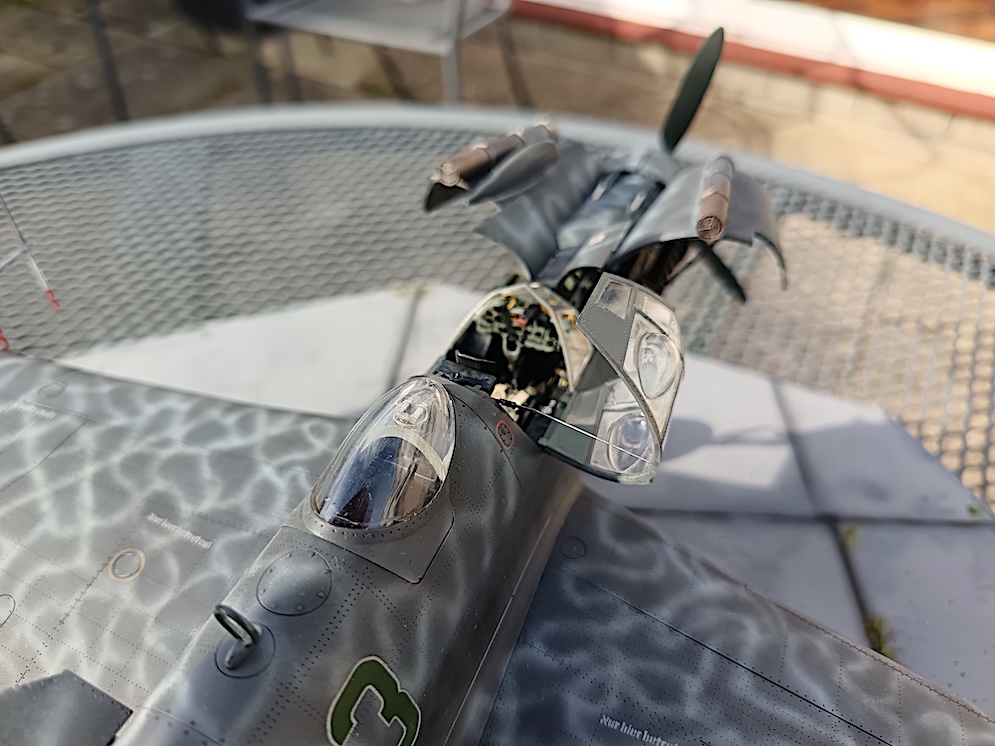
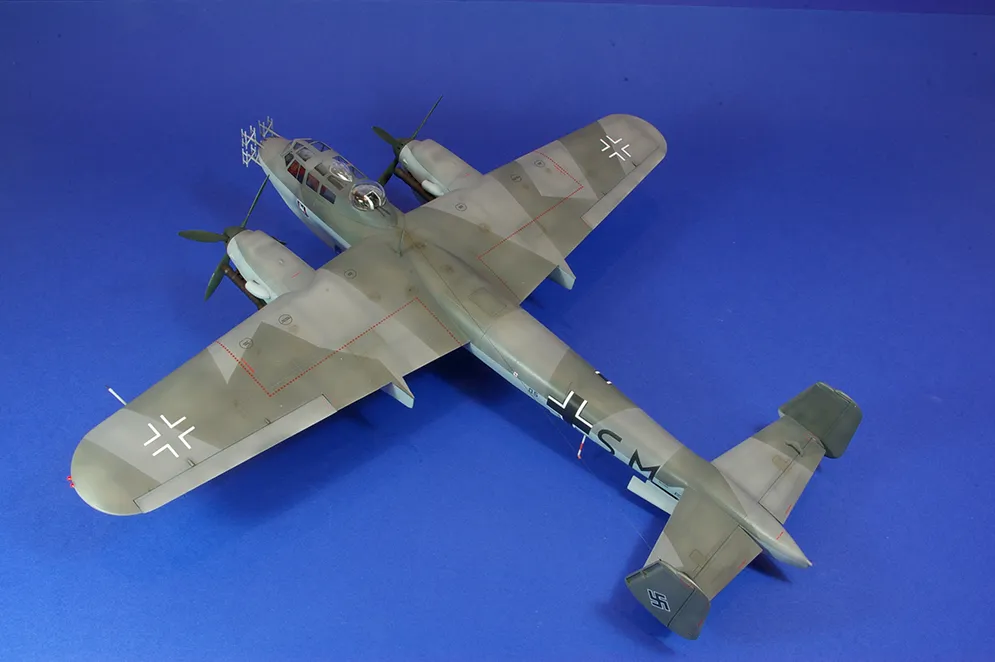
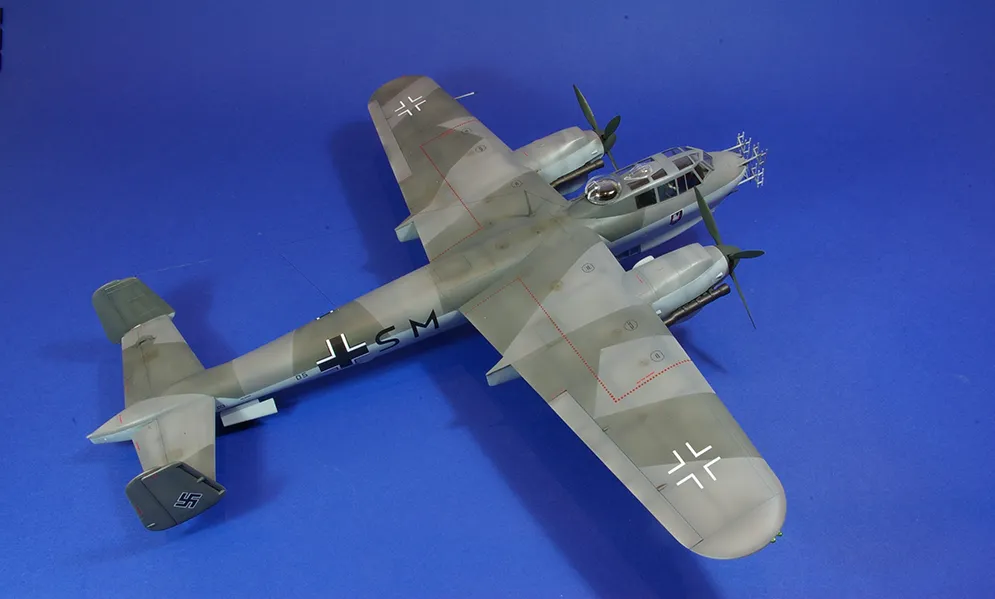
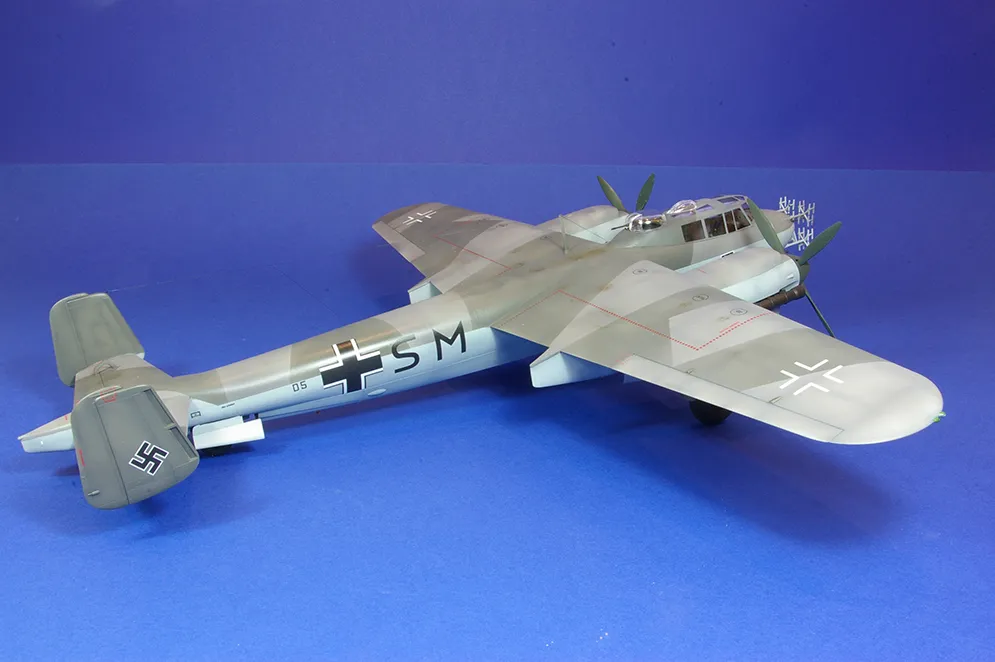
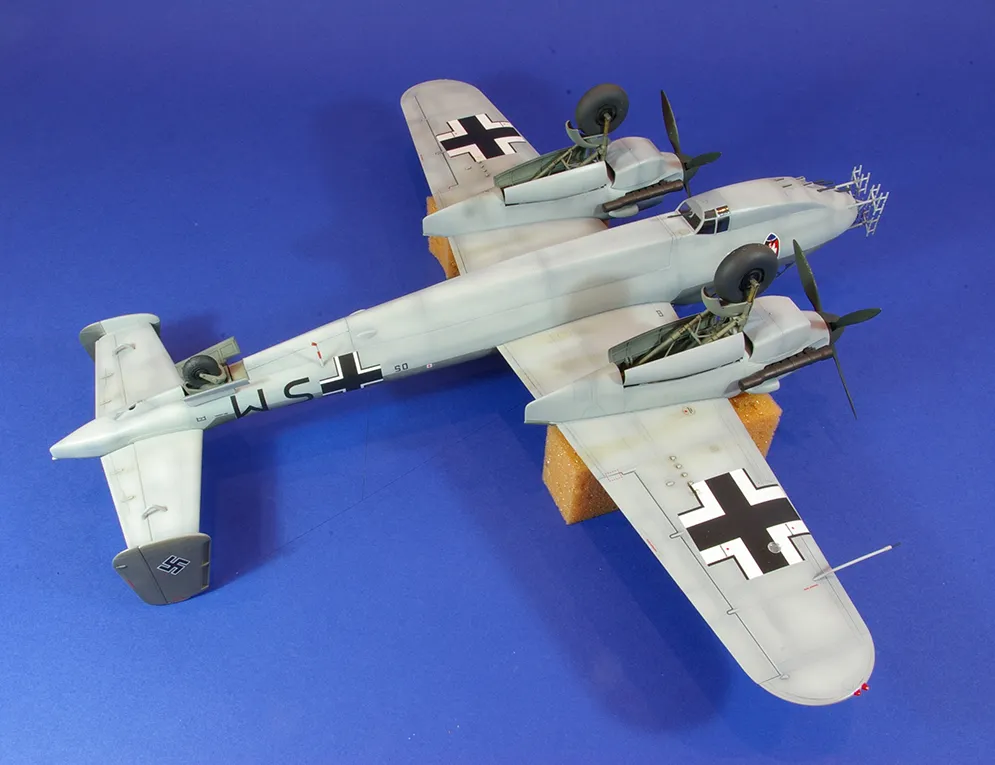
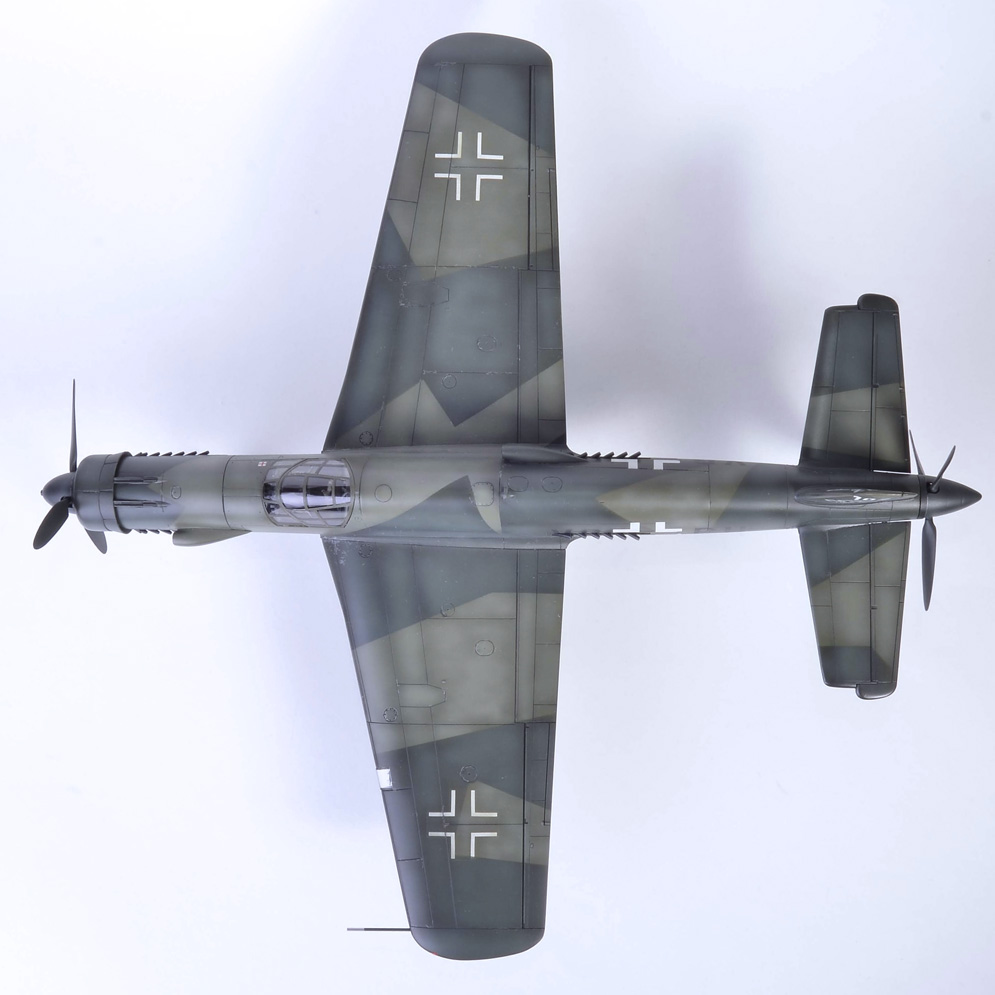
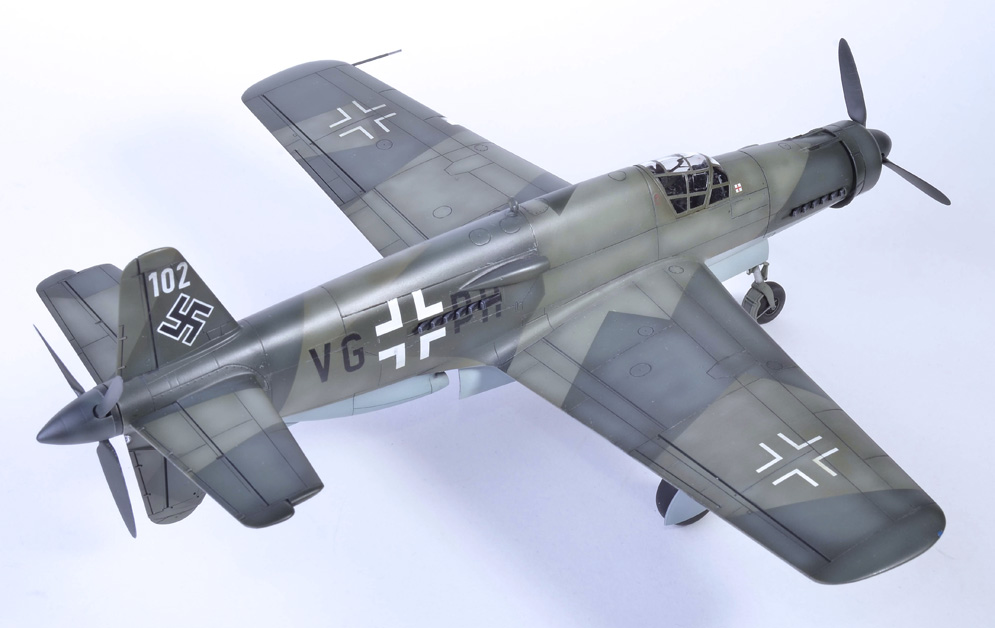
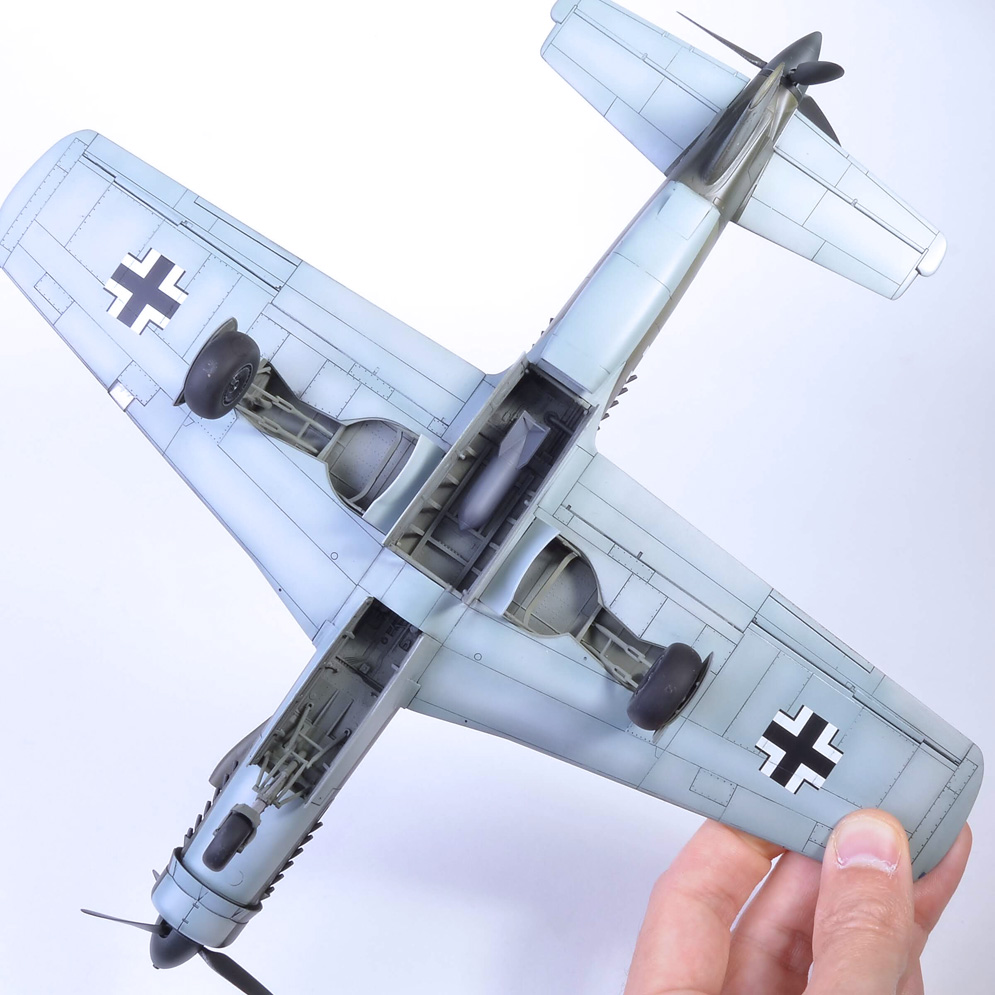
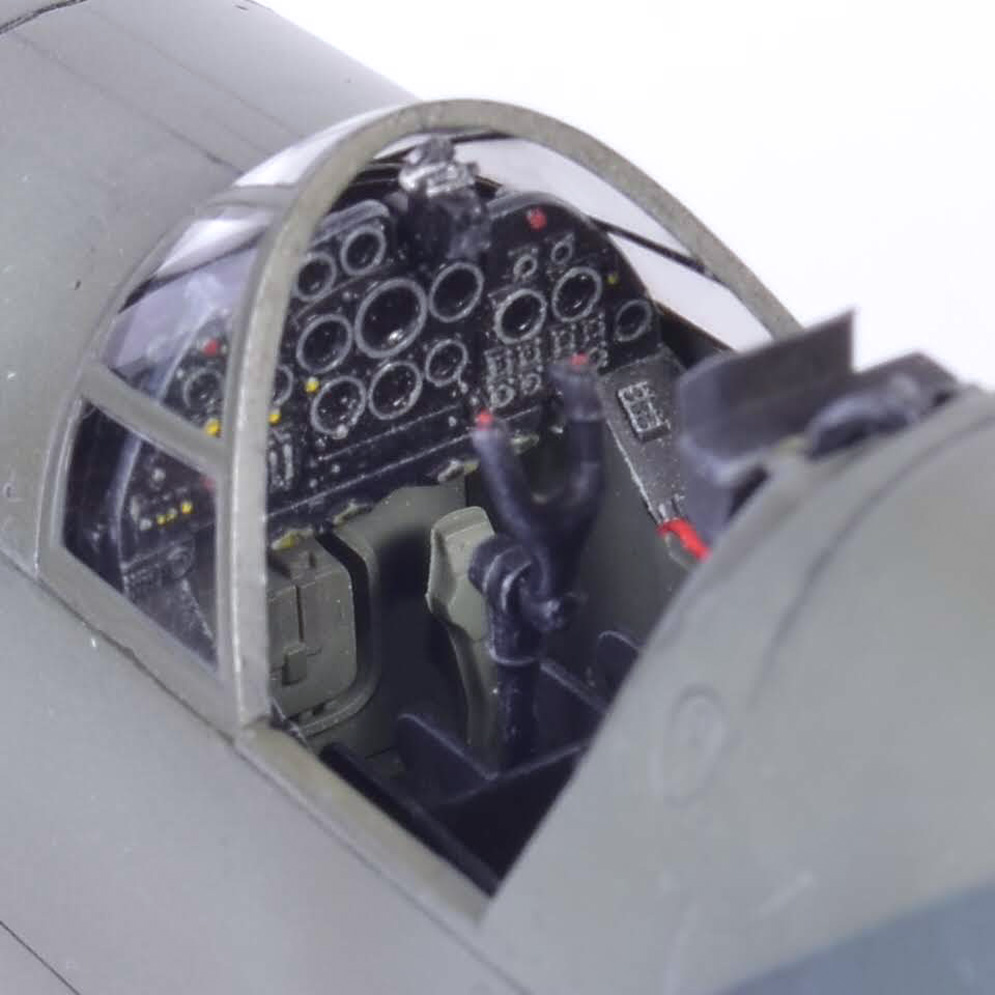
This is OOB apart from belts and a modification to the exhaust shrouds (see below). It went together very well, but took a very long time due to the high parts count. Niggles were that the stubs sticking out from the exhaust shrouds were shorter than the line of exhaust stubs and they were also solid. I elected to cut the stubs off leaving open tubes, whether that is correct, particularly for the front engine I don’t know. Second, although decals were provided for the steps up to the radar operator’s canopy they were not marked in the plastic, which I realised too late to do anything about it. Oh, and nowhere in the instructions did it show where to drill the holes to locate the drop tanks. All a bit lazy by HKM.
Painting is supposed to indicate an aircraft delivered in RLM 76 bottom, 75 top. The 76 has been roughly overpainted in black, with stencils taped over first if you look closely. 75 was then squiggled over the top, and actually I wanted it to look like the starboard wing, but when I started the port I ended up with a much more regular pattern and couldn’t seem to make myself go random again. Aside from stencil lettering all markings are masked and sprayed, including the serial (which I know isn’t the normal style for late war). Finally, it is a big beast and is now sat on a large base (which I don’t have room for) to try to stop bits being knocked off by accident.
Craig W.
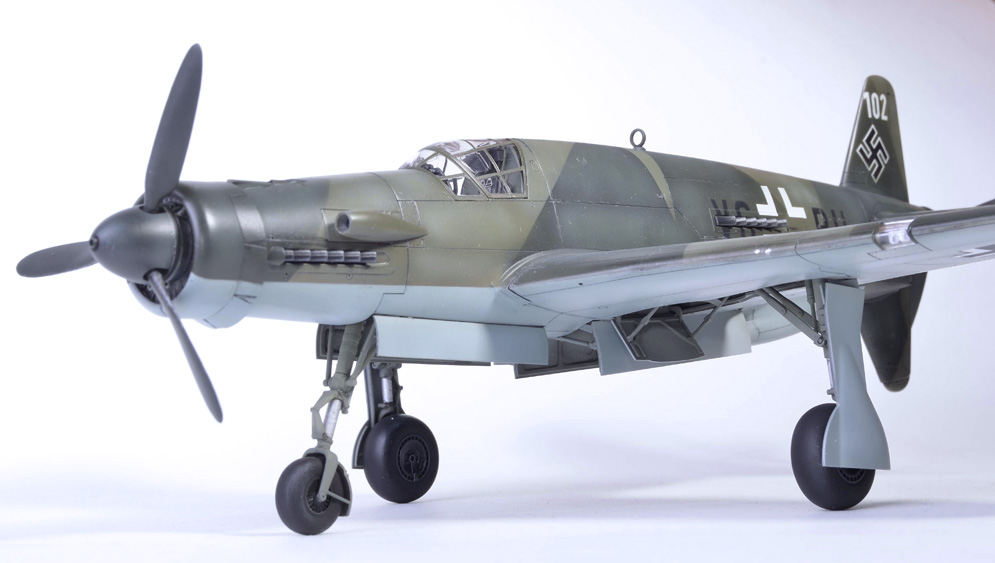
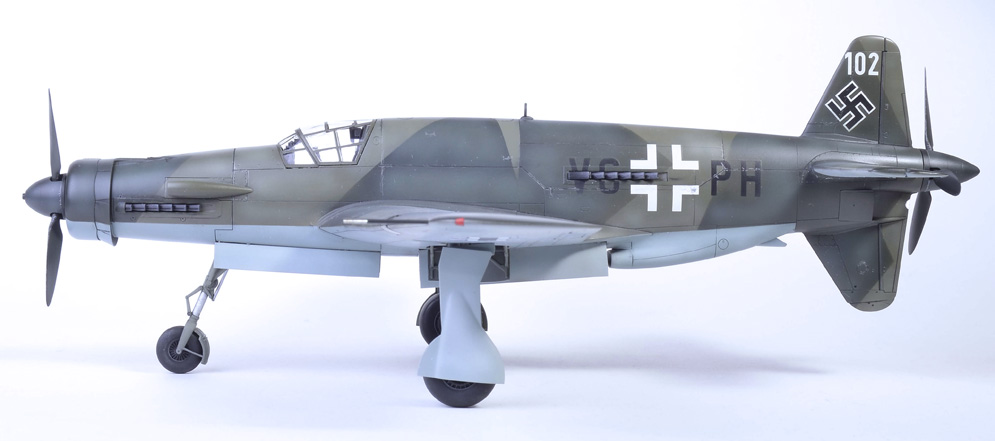
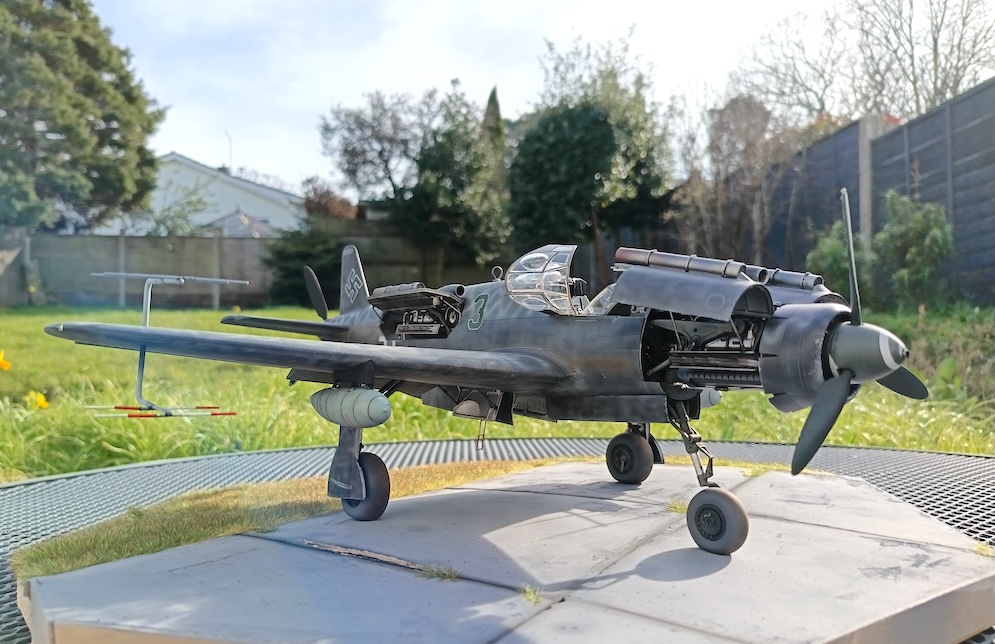
Perhaps a little clean but I don’t like to revisit finished builds so she is what she is. I like the way the top colour camouflage variations came out.
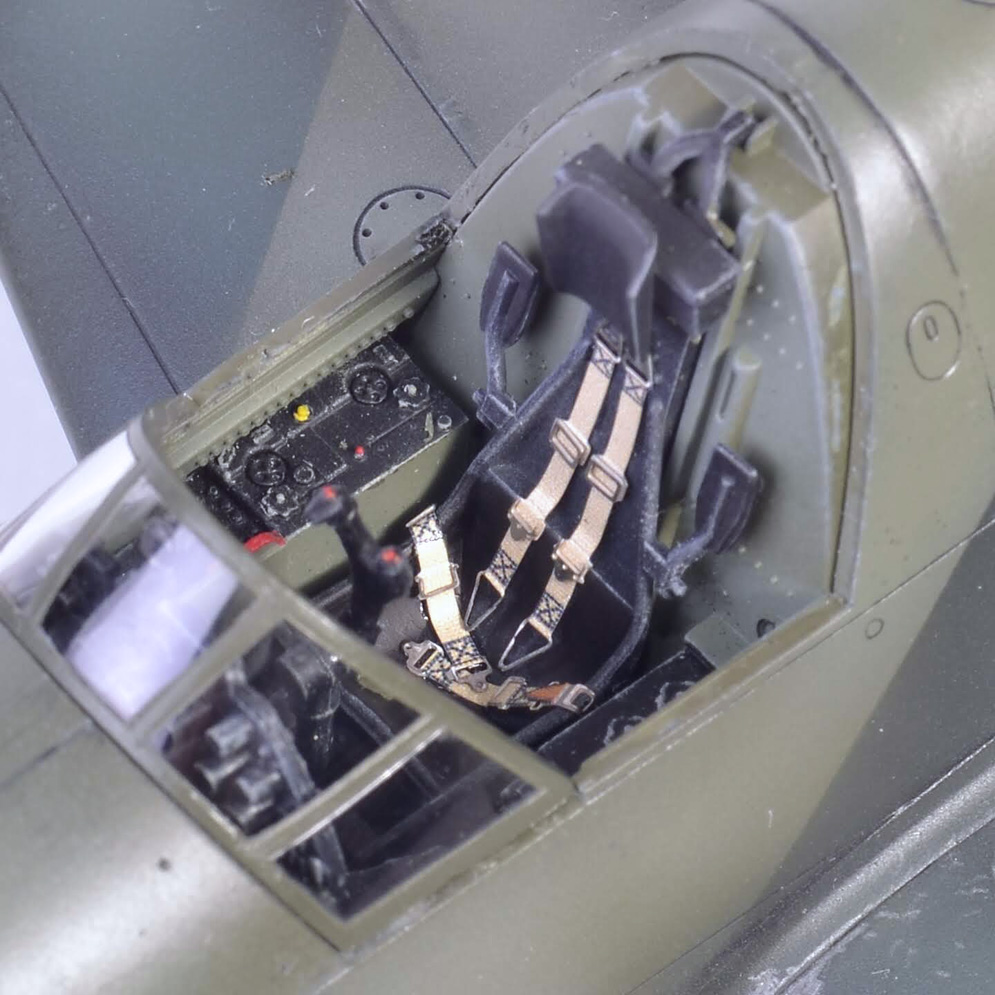
Helped along with the excellent Eduard masking set and a set of late war belts. The cockpit is decent for an out of the box affair. The internal detail is all hand painted. The much lamented Aeromaster warbird colours were used for the main camouflage scheme, sadly they are no longer available.
Rick G.


After 200 hours I’m done!
Alexander W.
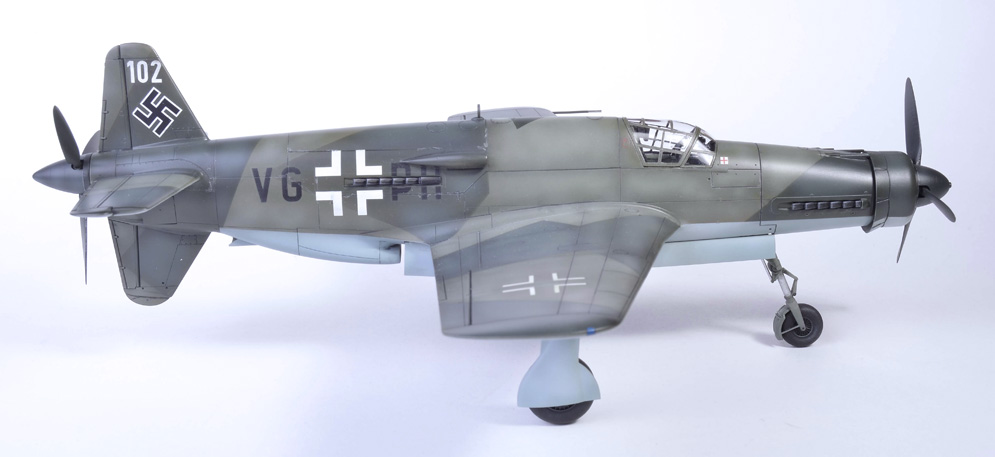
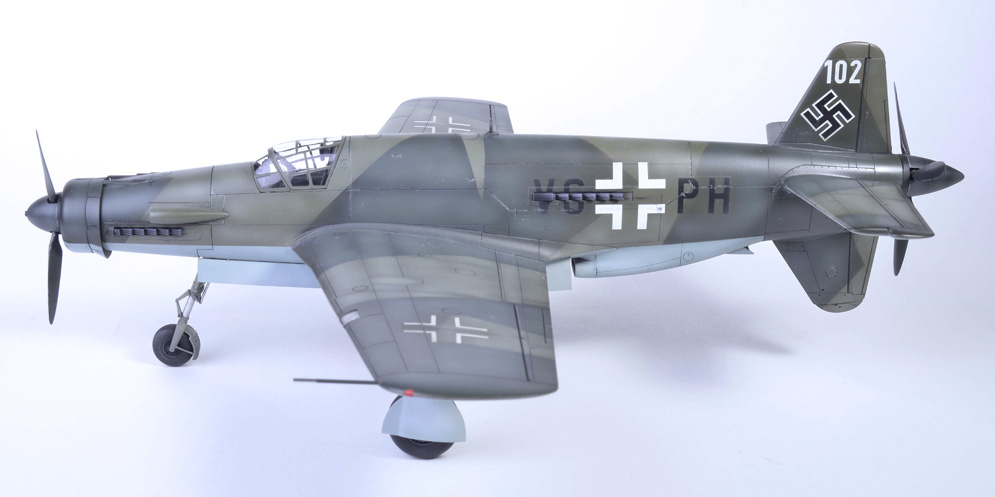
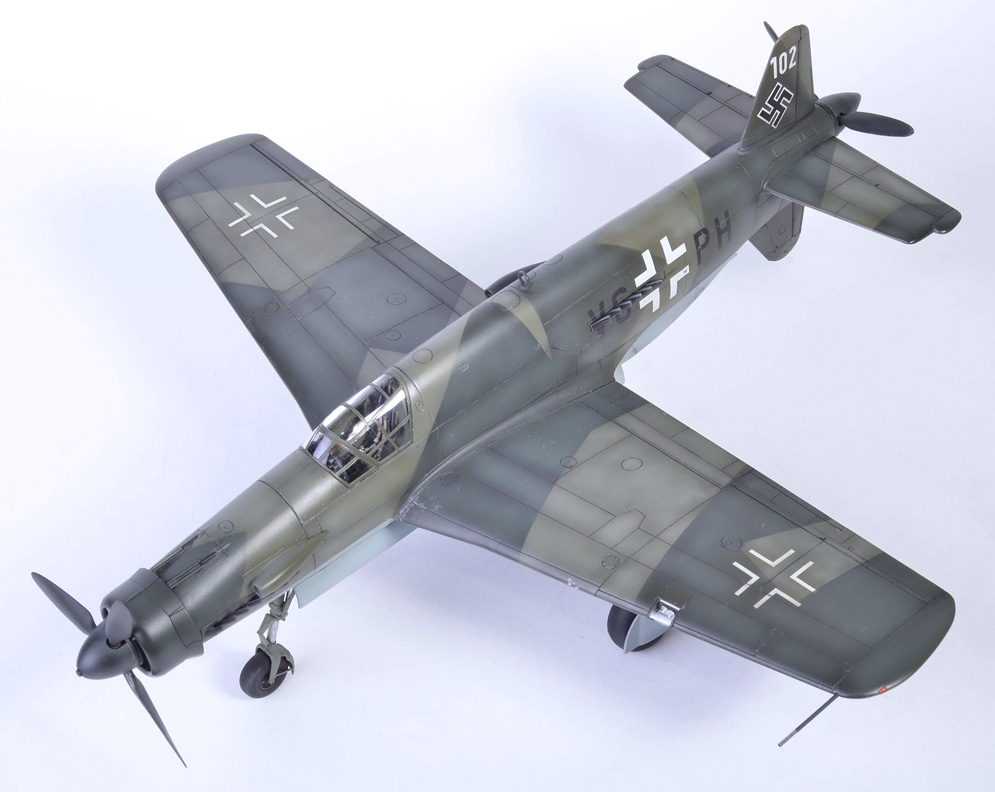
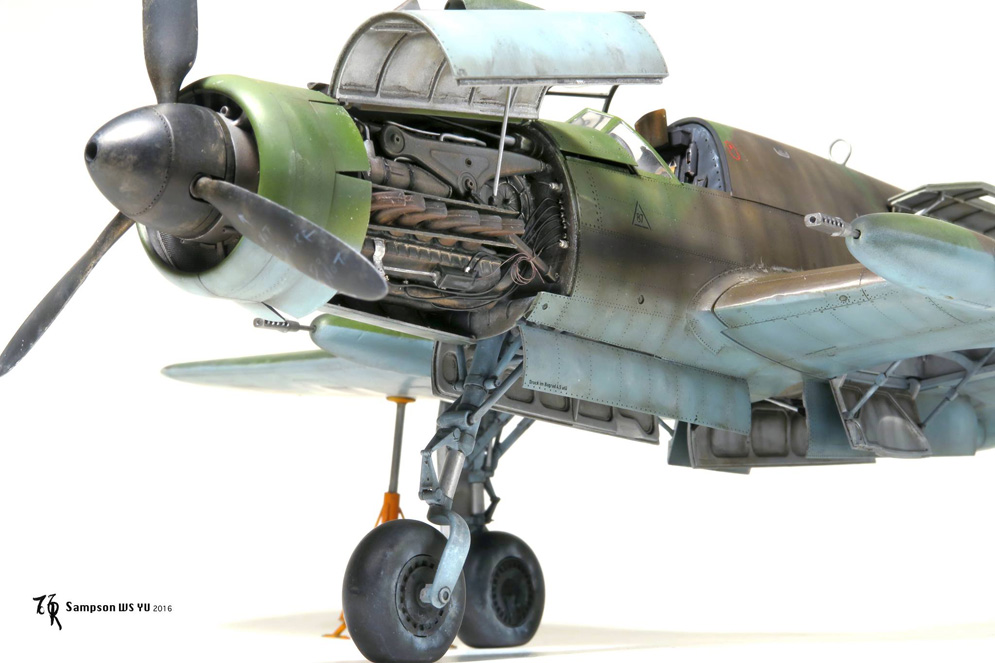
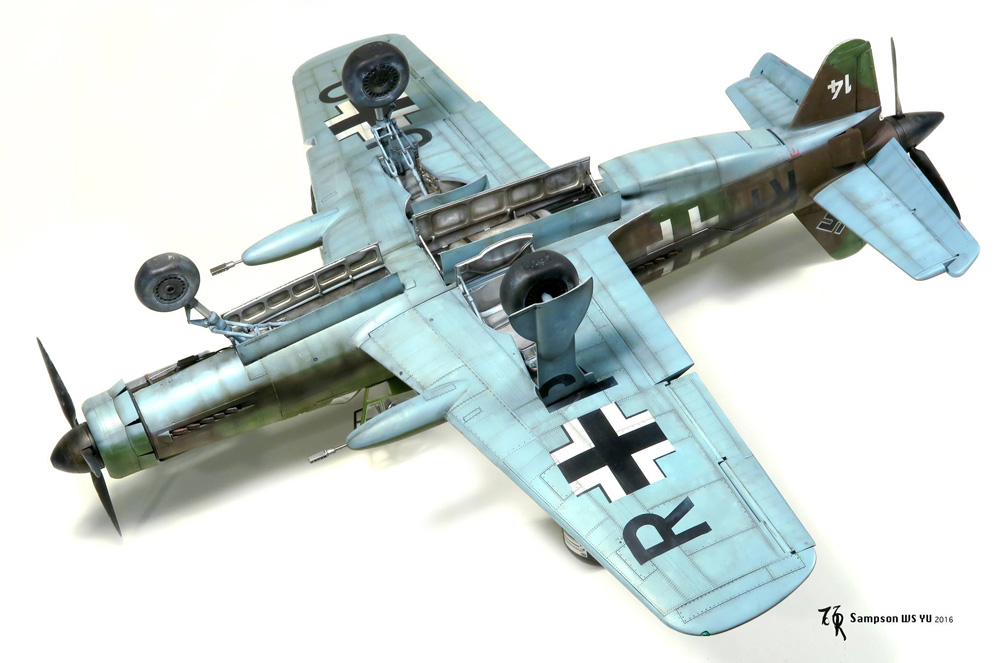
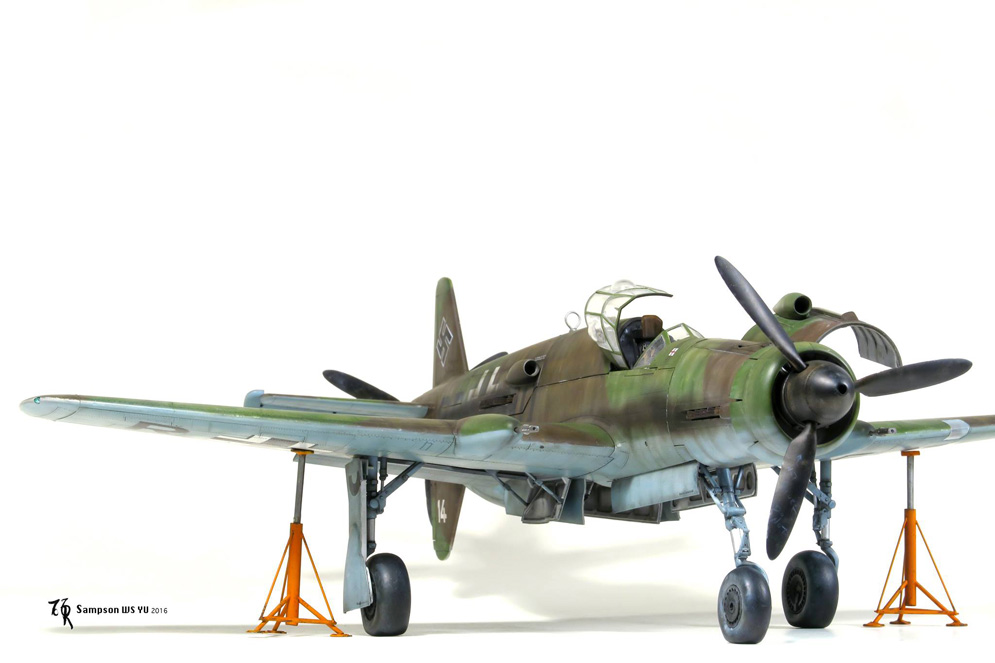
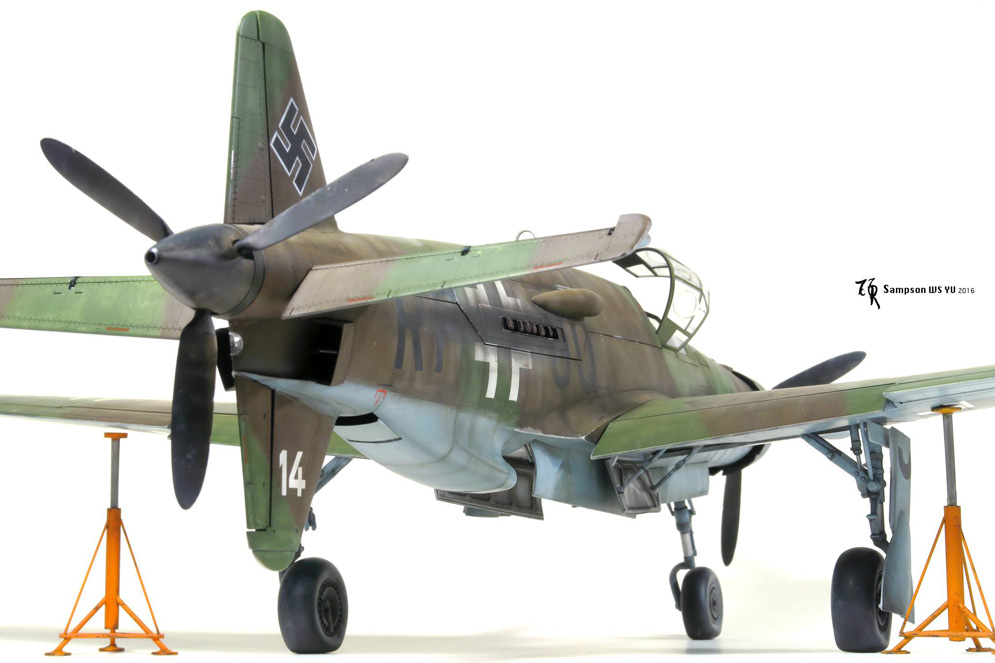
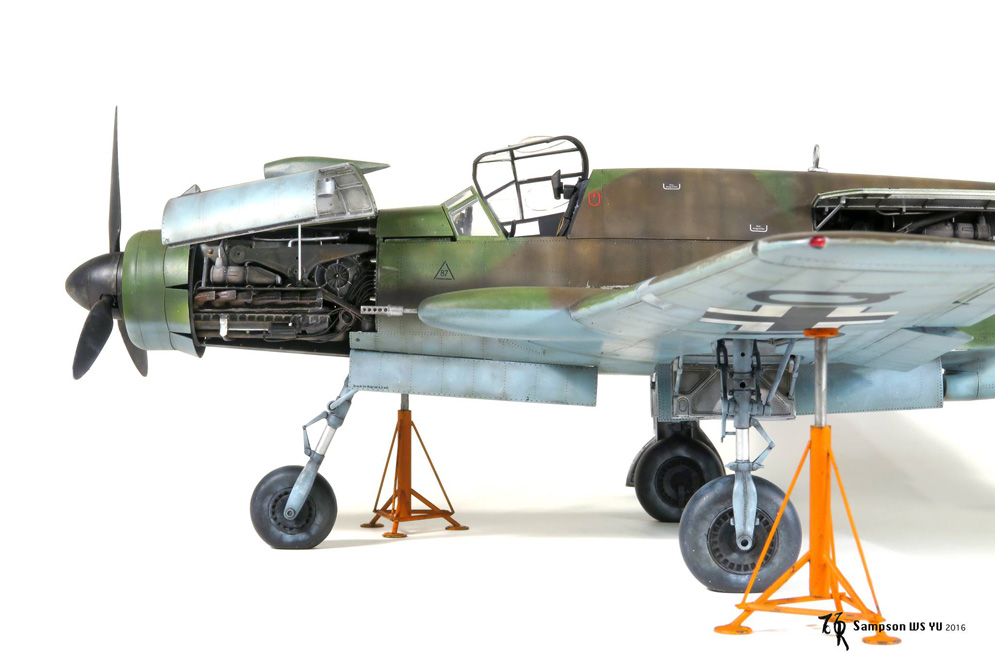
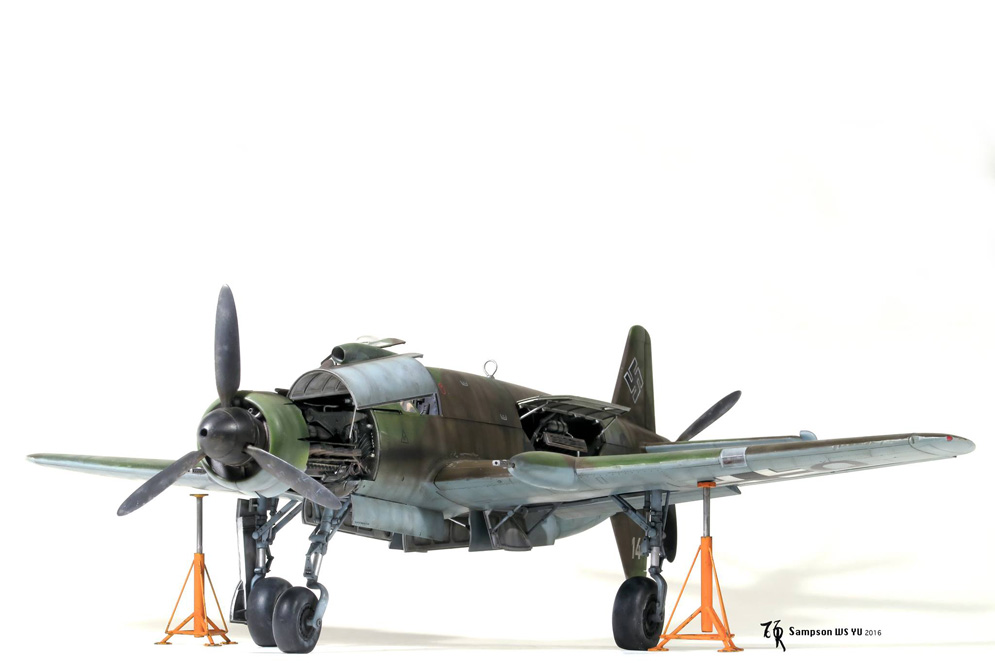
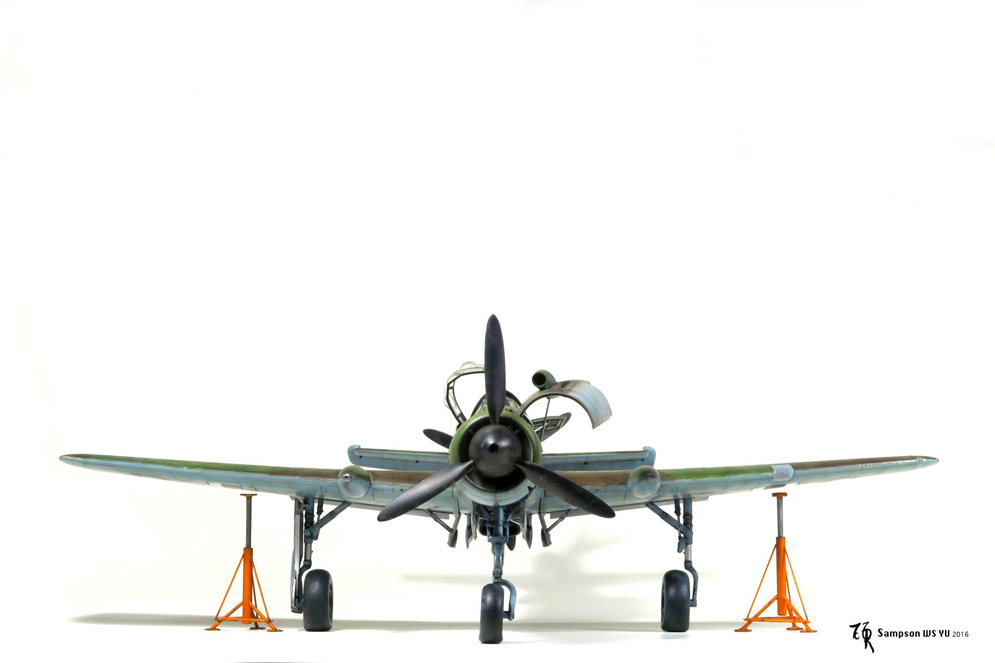
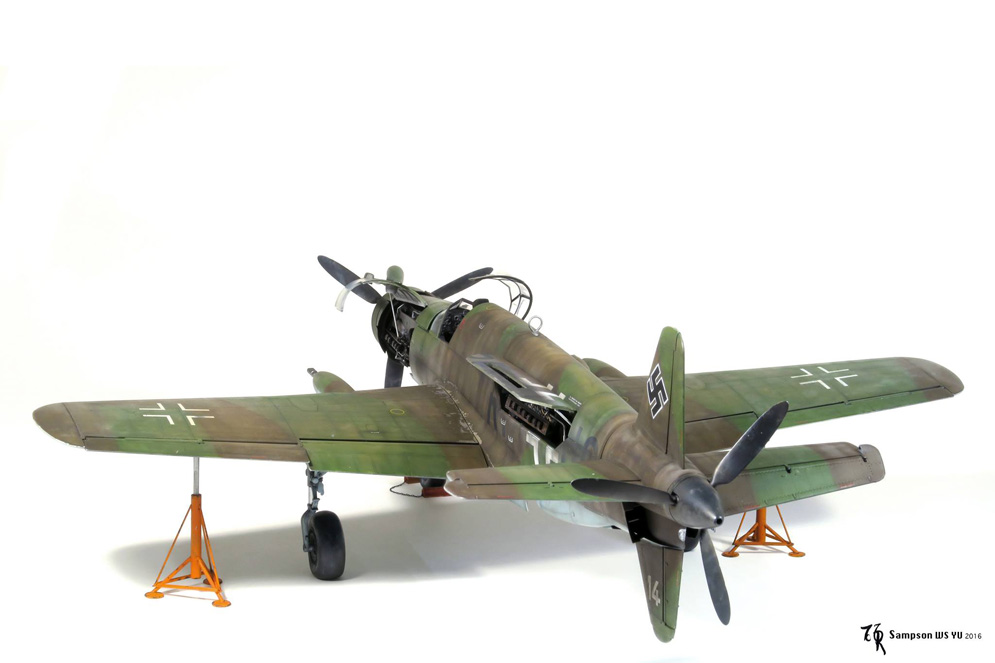
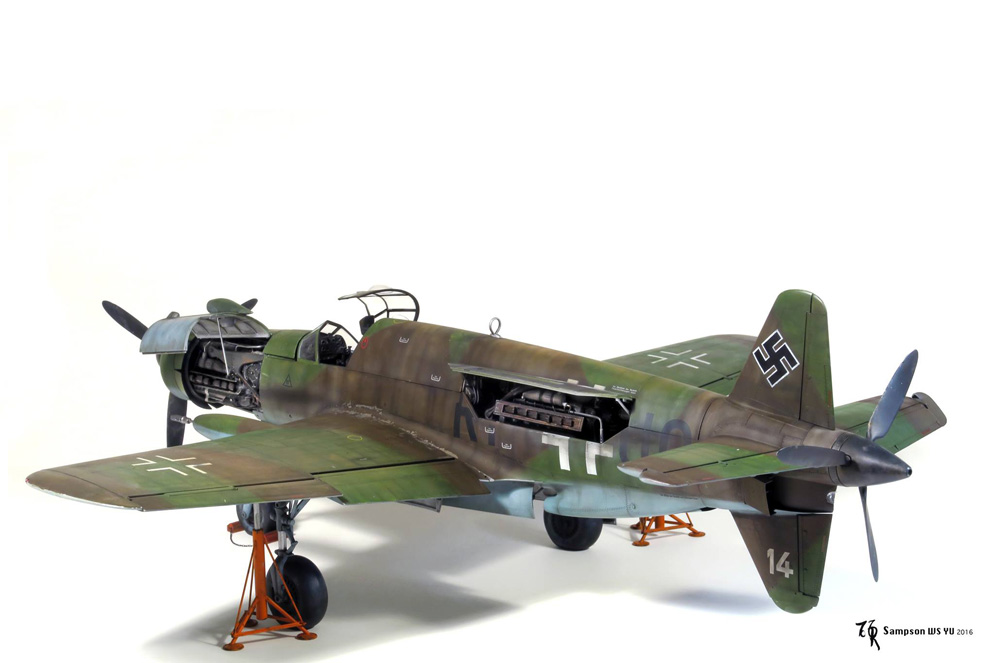
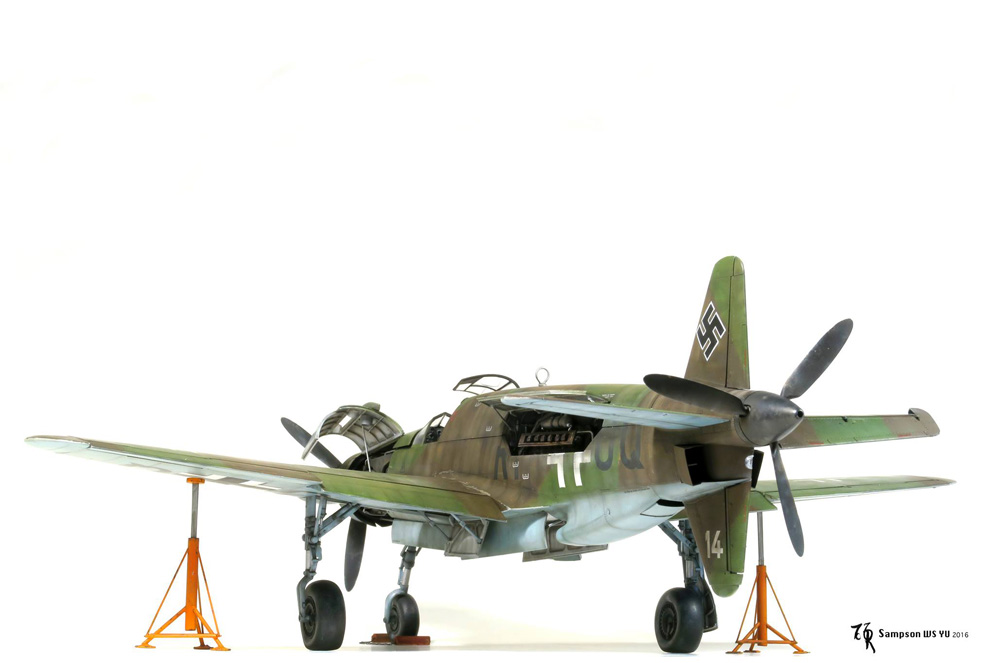
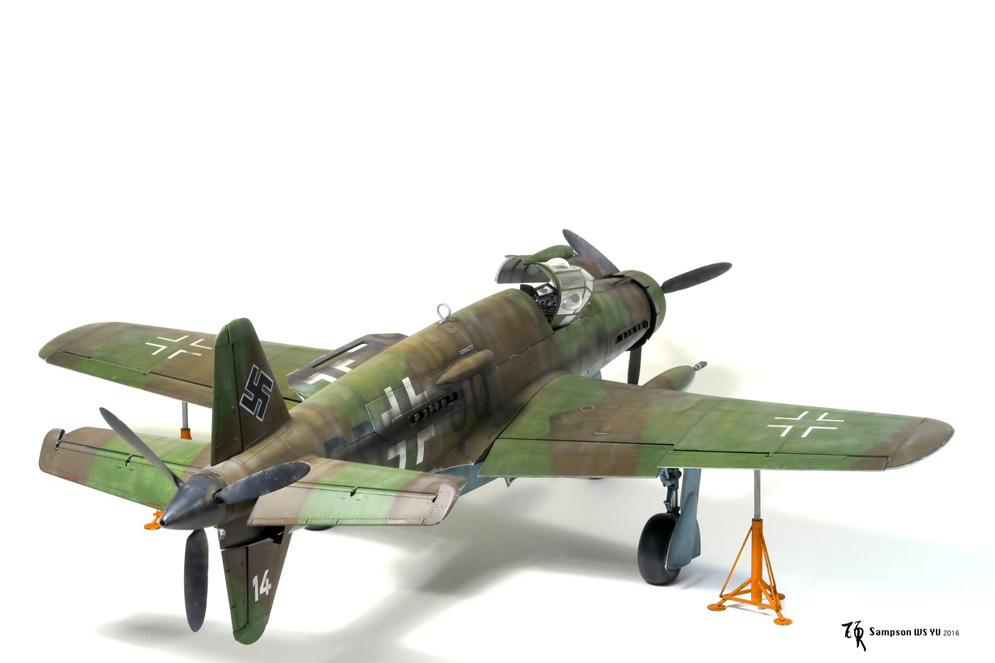
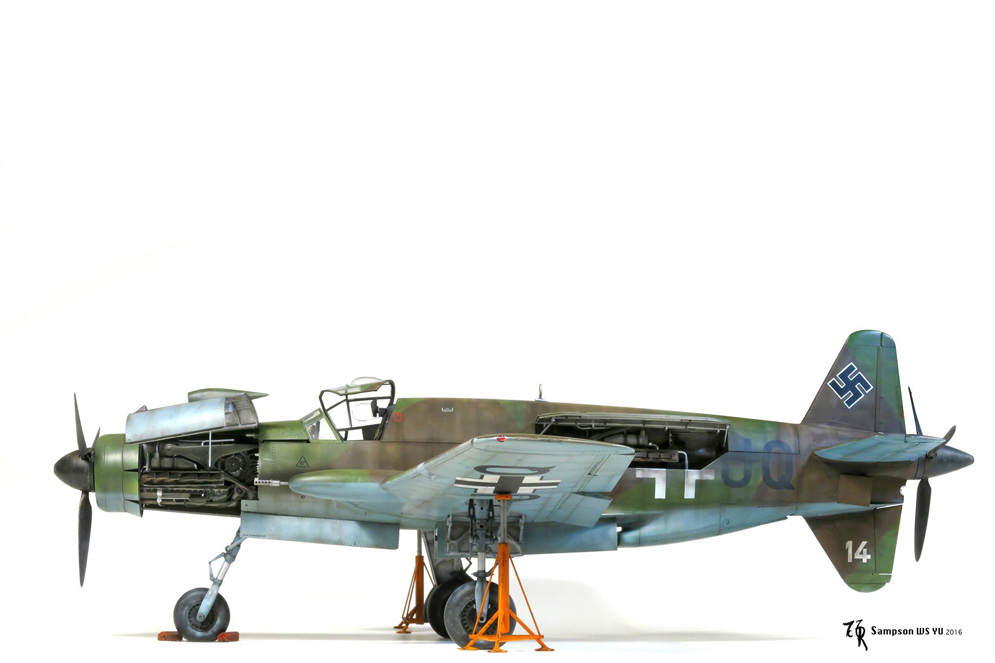
 I recently came across this stunning model by Sampson of the HKM Do335 Phil (Arrow) in 1:32 scale and asked Sampson if we could post his pics here and he readily agreed – thanks Sampson!
I just love the weathering and attention to detail that gives his model such realism and life – just love it and I expect you will too.
As I write these words… (8 April 2016)
We are lucky enough to have received a great sample of the amazing Do 335 Phil 1:32 kit from Volks Zoukei-Mura and you can see a full in-box review here.
Soon after that we will be following up with our own full in-depth build that you can follow in Build Now and then, when it’s complete, you’ll see the whole build in the Zoukei-Mura section of Finished Now.

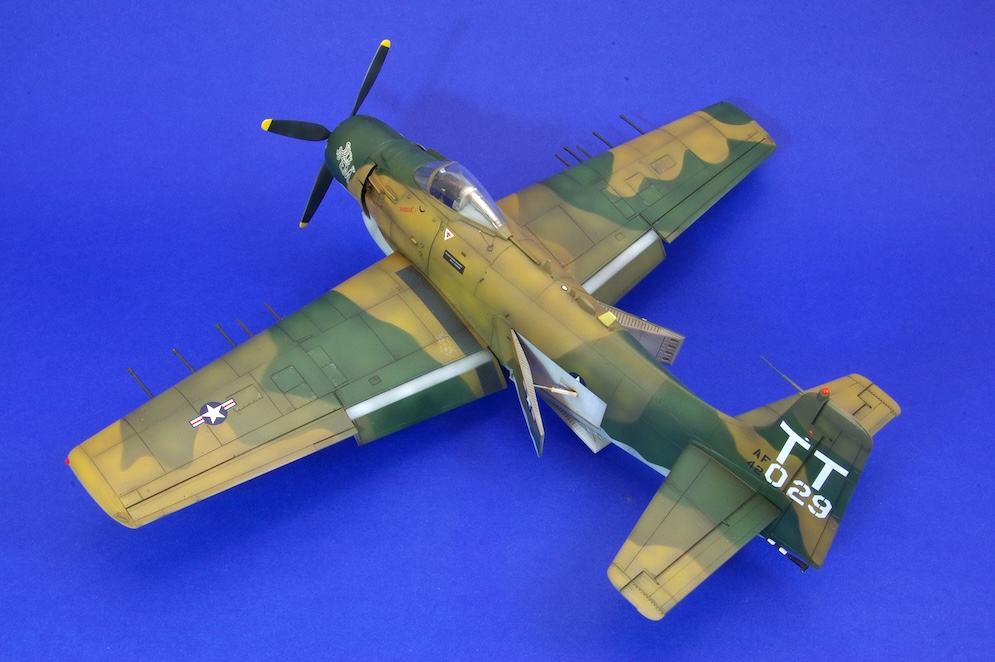
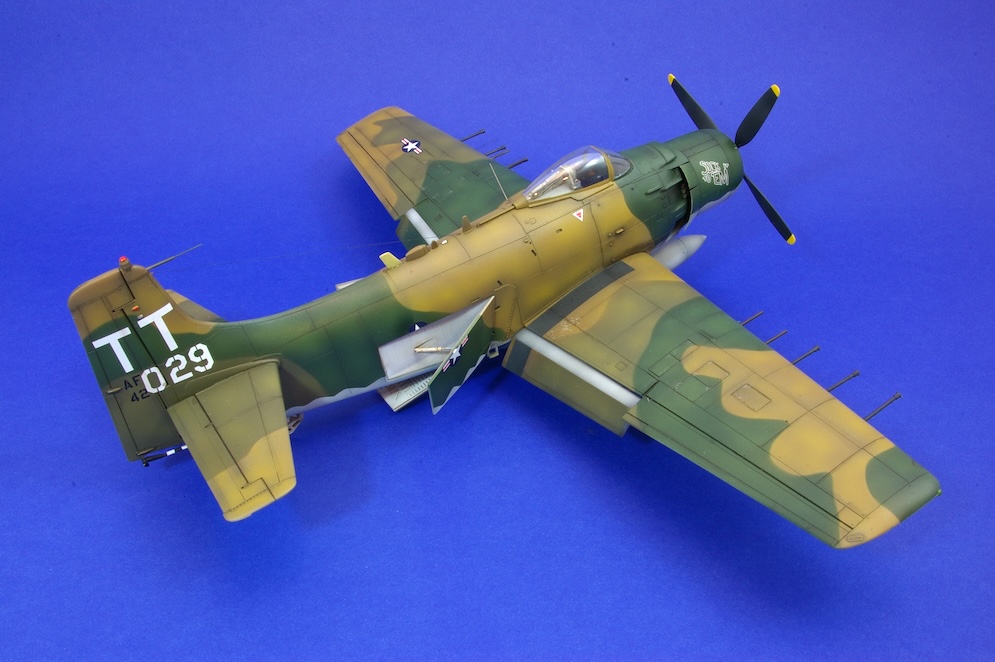
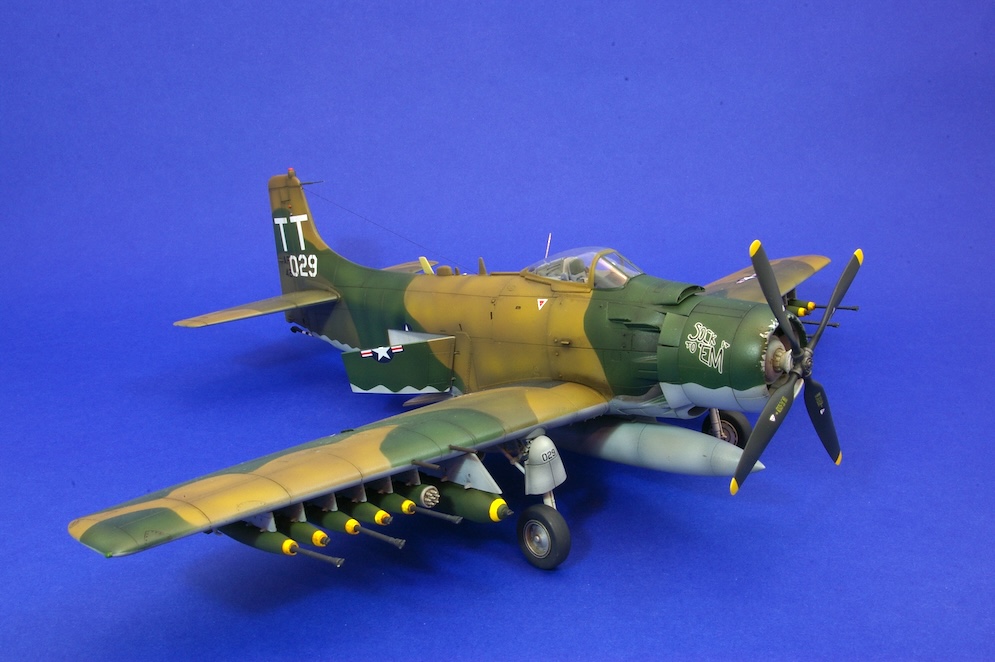
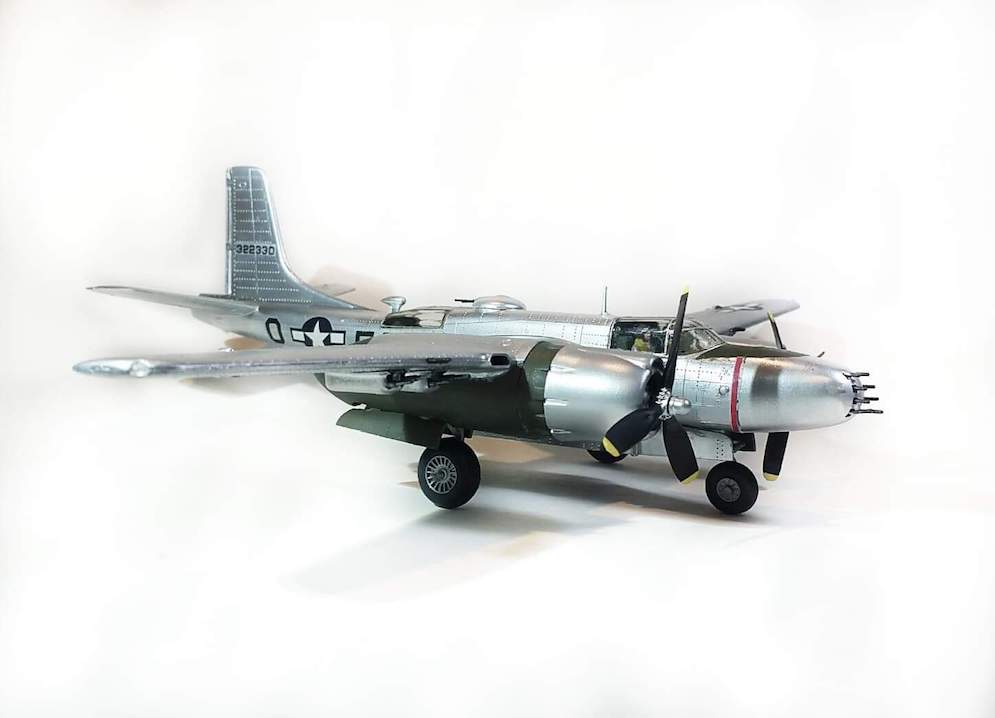
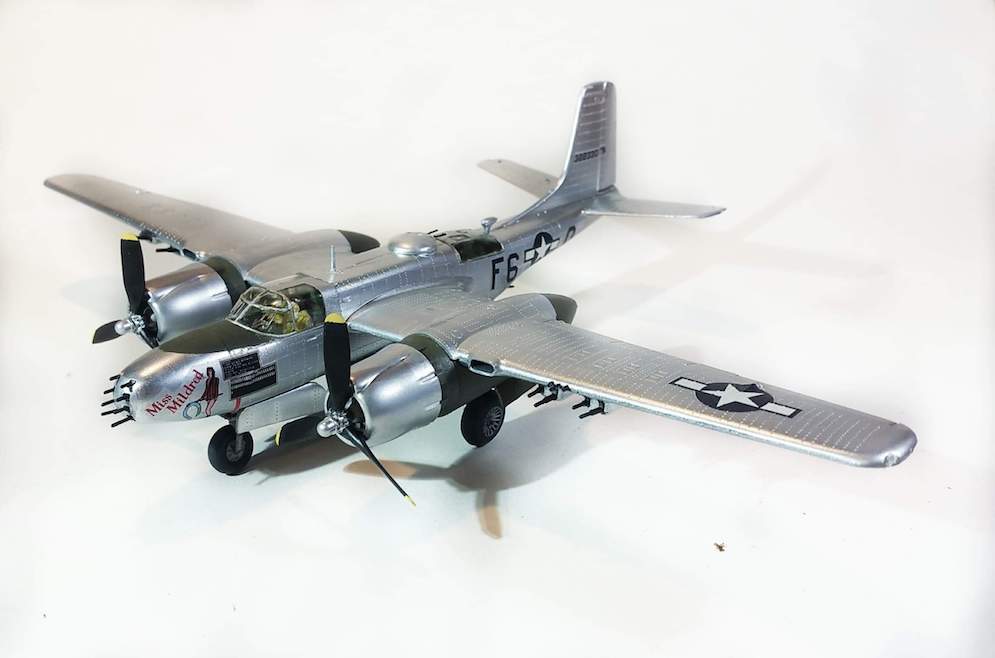
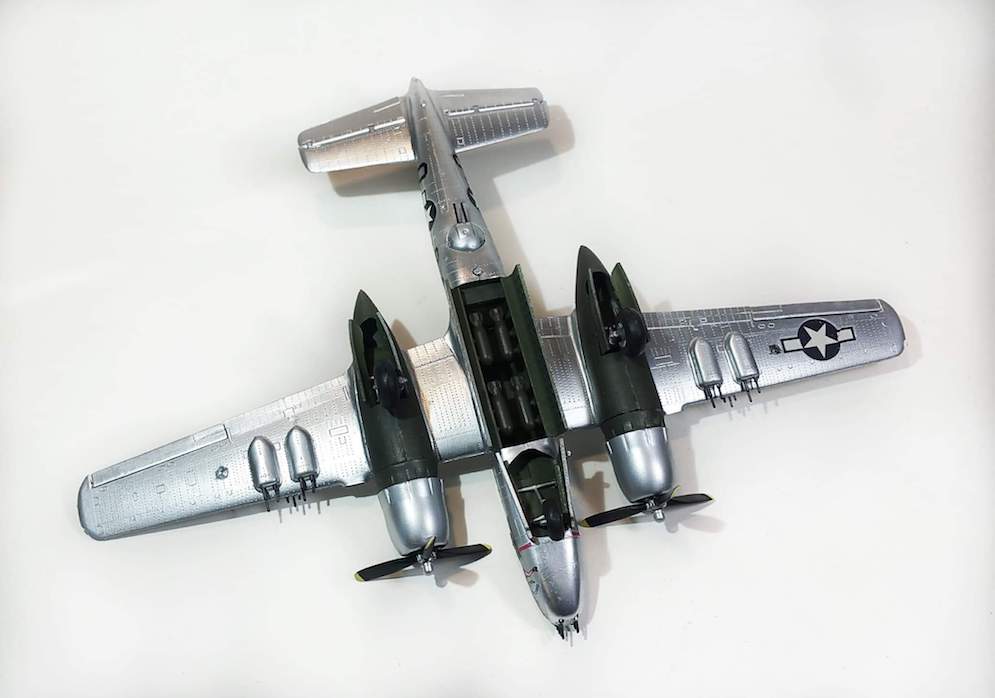
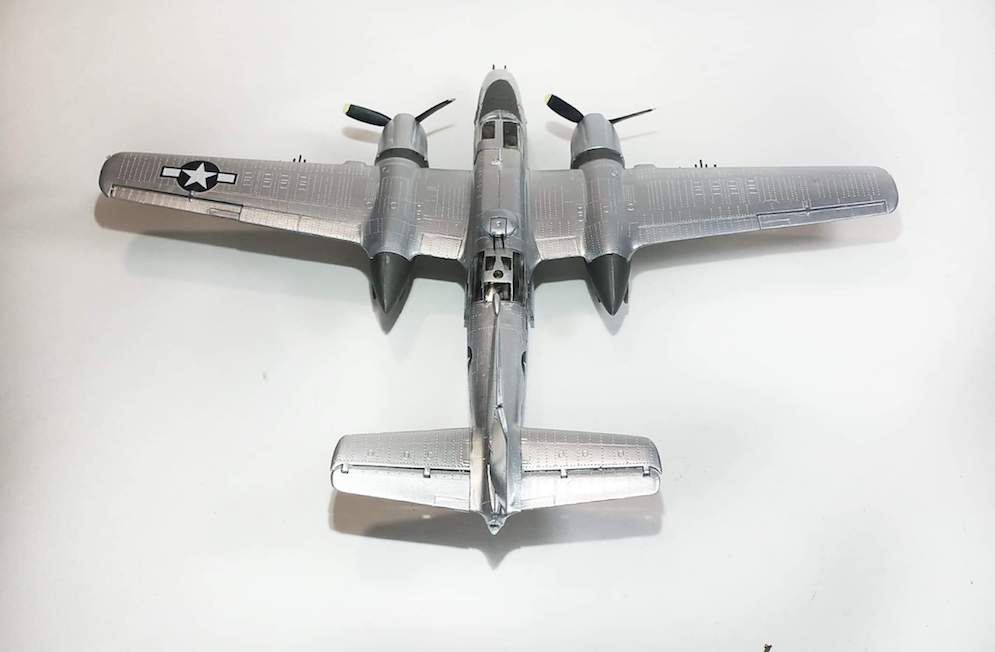
The kit originates from 1998 when Tamiya released the naval version. This slightly modified version came out in 2000.
The model is very easy to build though the modeller will need to add seat belts if required. I took mine from an old eduard set meant for U.S. Navy aircraft thinking that the original naval seat harness would probably have been retained when the aircraft were in use by the U.S. Air Force. I may be wrong here and there may be Skyraider aficionados out there crying and / or rending their garments at this point. However, I felt that if there were any differences, I could live with it.
On some (but not all) aircraft there seems to have been a fabric fairing behind the pilot under the cockpit canopy. This is not supplied in the Tamiya kit. While there are aftermarket parts available for this, or perhaps a suitable item could be made from tissue soaked in white glue or Milliput, I left the area unaltered on my model. The plastic guns were replaced with thin metal tube.
The model was painted using Mr. Hobby paints which give a transfer-friendly satin finish.
An aerial wire was added between the fuselage and the tail using thin elastic rigging thread. This was anchored using a couple of Bob’s Buckles ever useful and very tiny eyelets placed into pre-drilled holes. The antenna at the rear of the cockpit was added using thin steel wire.
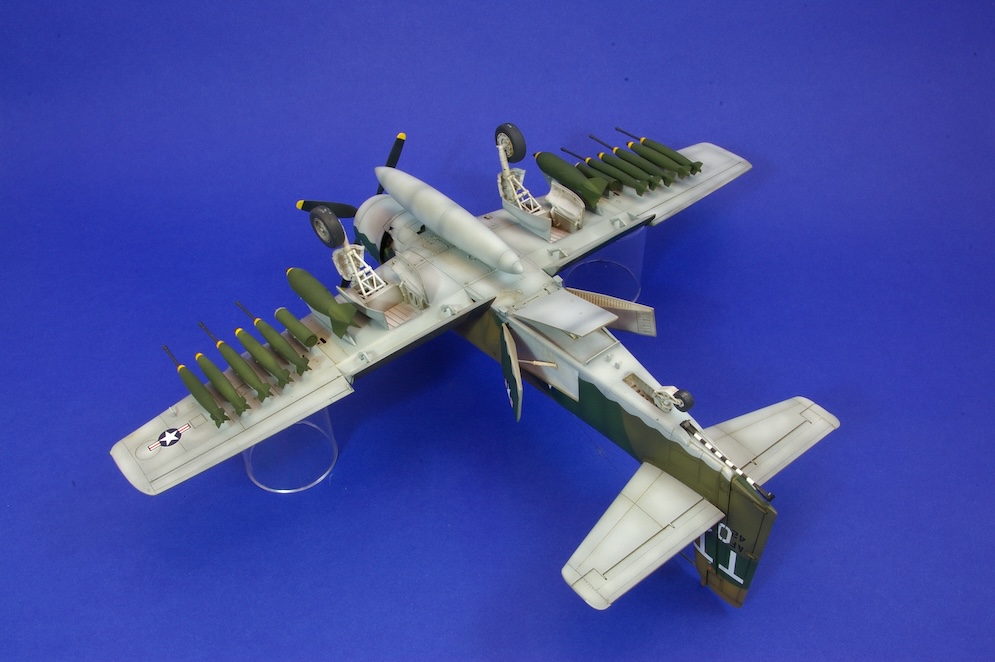
All in all, this was a highly enjoyable project, though I must admit that my attempt to mask and spray paint the yellow markings on the considerable amount of (highly unpleasant) ordinance carried under the wings was less than neat. Maybe under wartime conditions in a sweaty, steamy, disease-riddled jungle they weren’t applied all that neatly on the real aircraft anyway?
We live in hope.
Dai W.
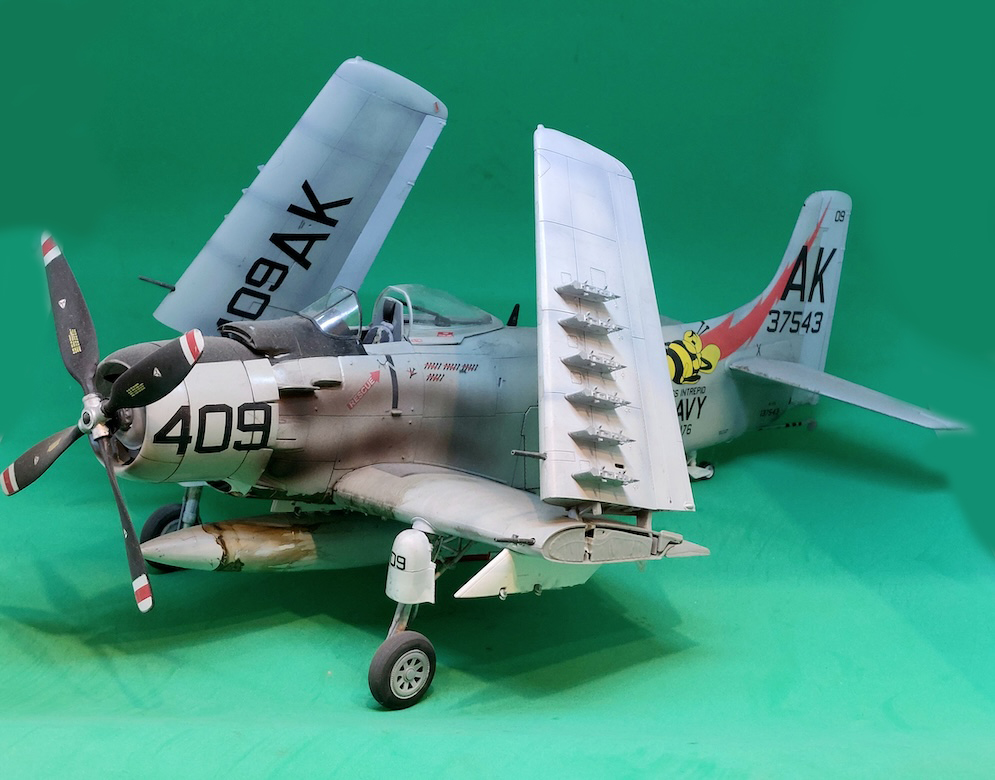
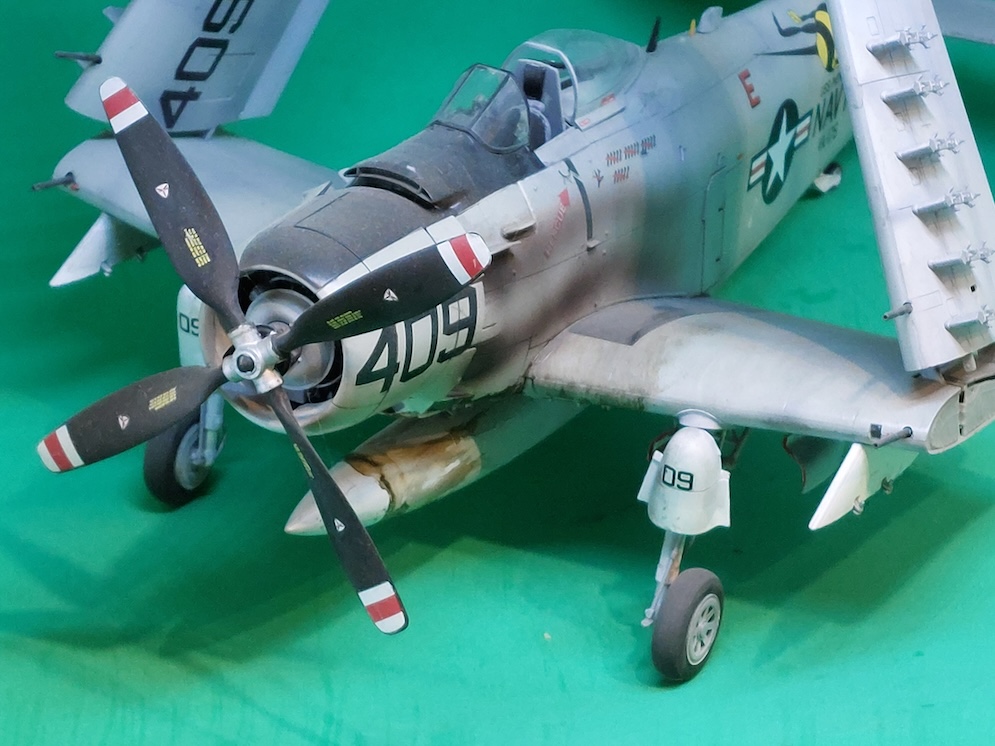
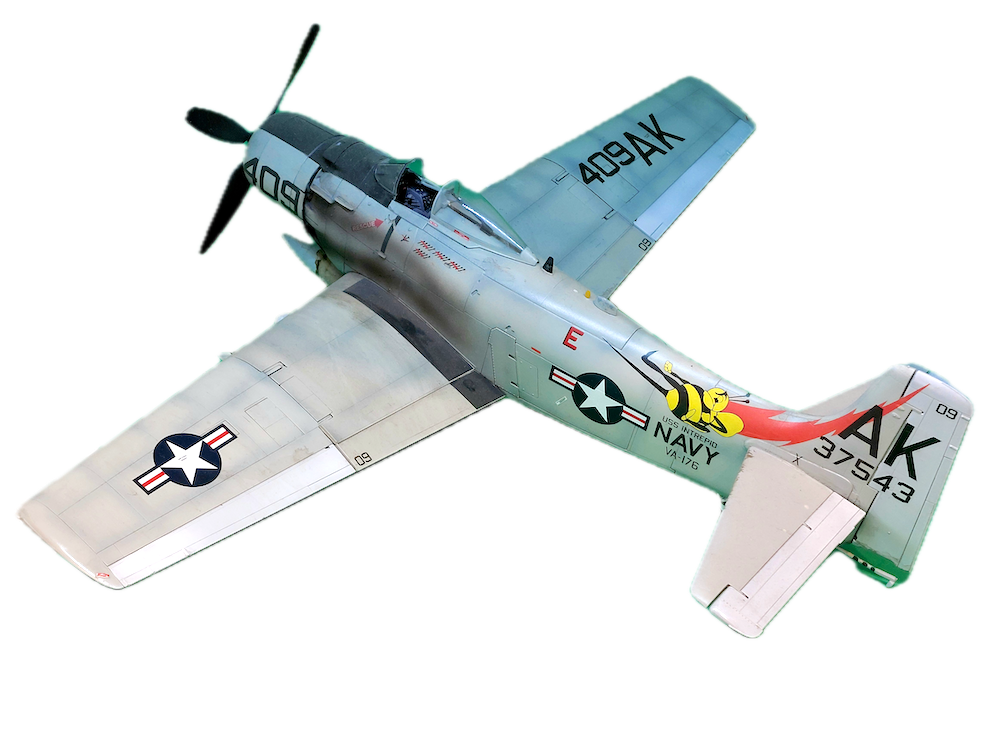
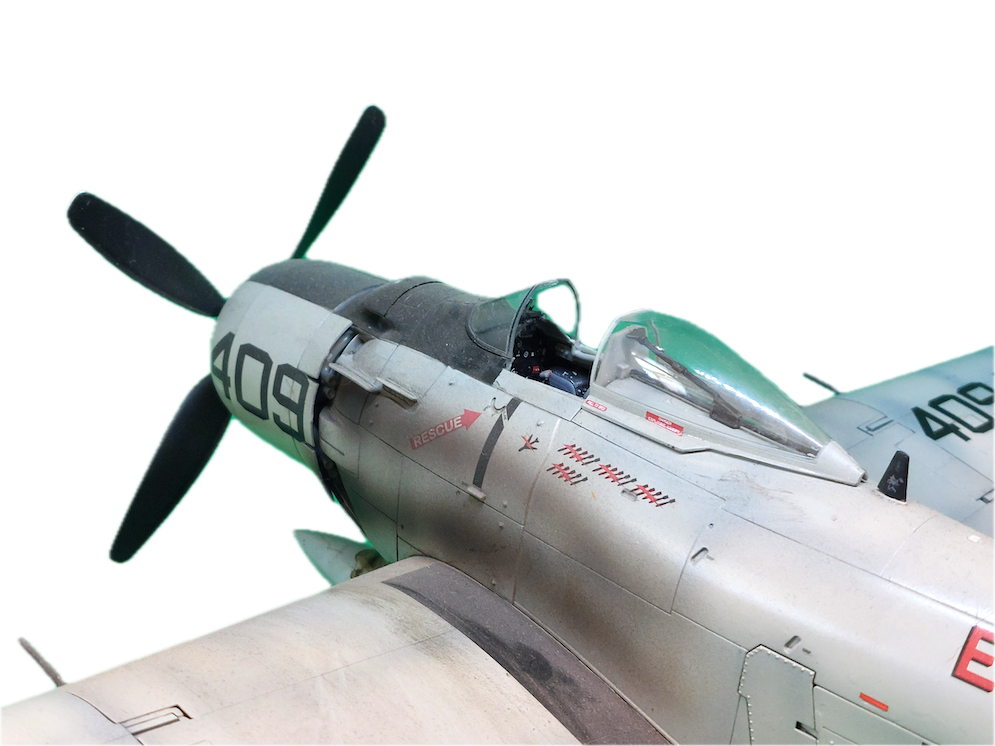
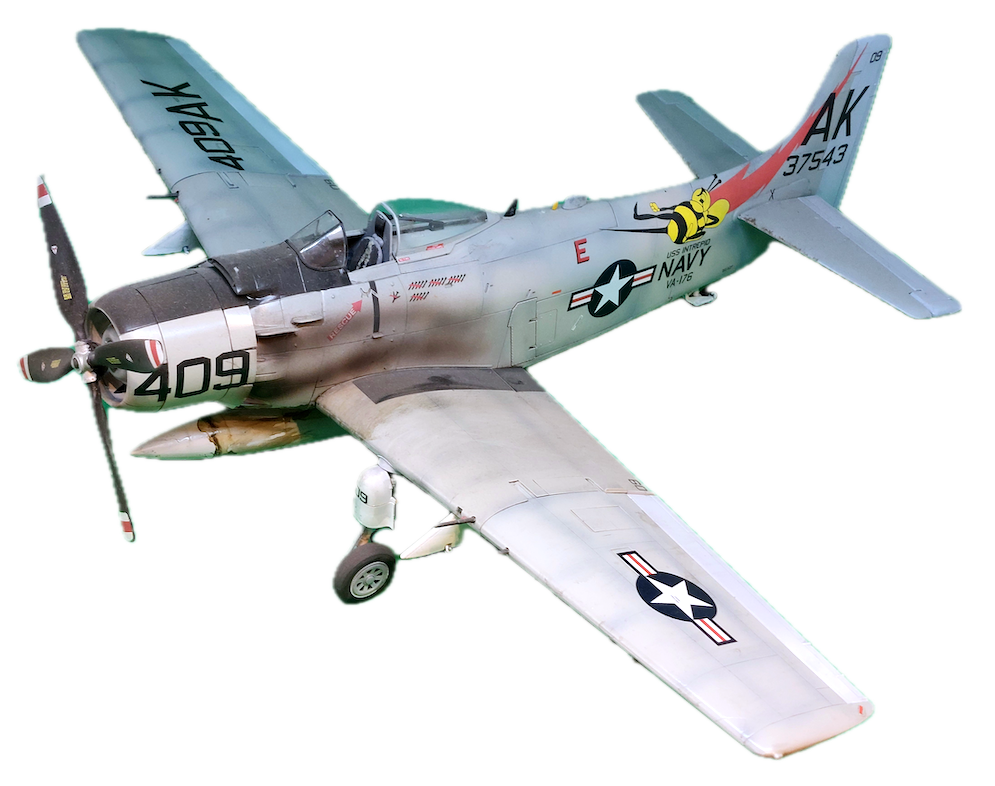
I built this kit three years ago and decided recently to bring it down off its shelf for a clean and re-furb.
I remember that this was a lovely kit to build. The detail is excellent but in some places distinctly over the top in places. For example, the kit includes a set of pistons, master and slave rods to install inside both rows of cylinders! Photos do prove I did install these just for the hell of it.
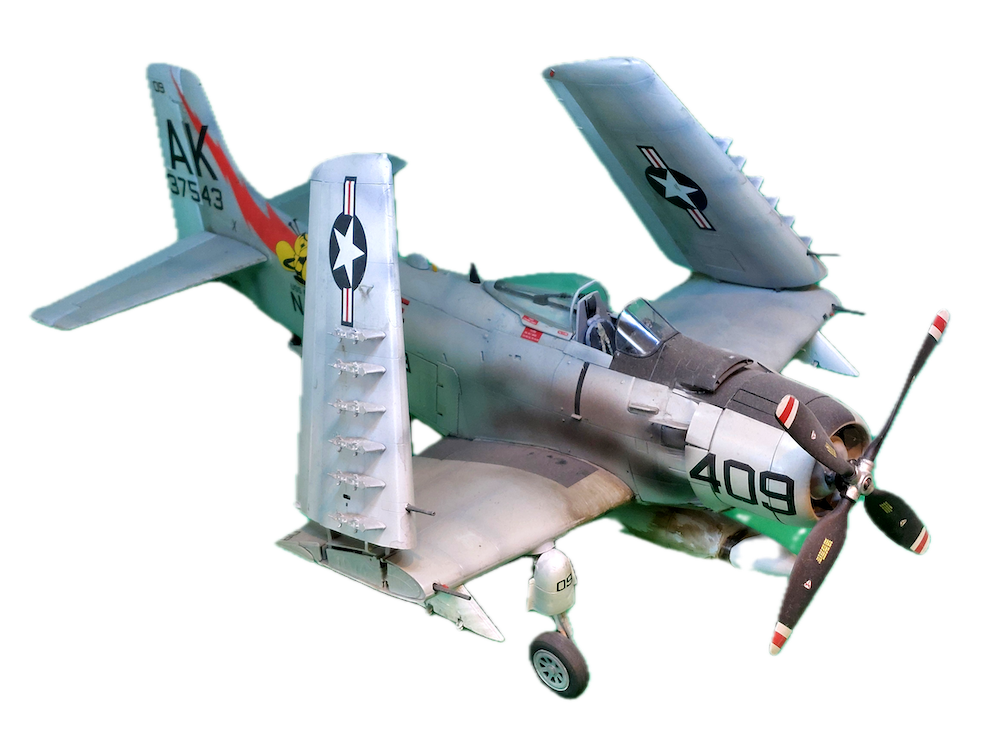
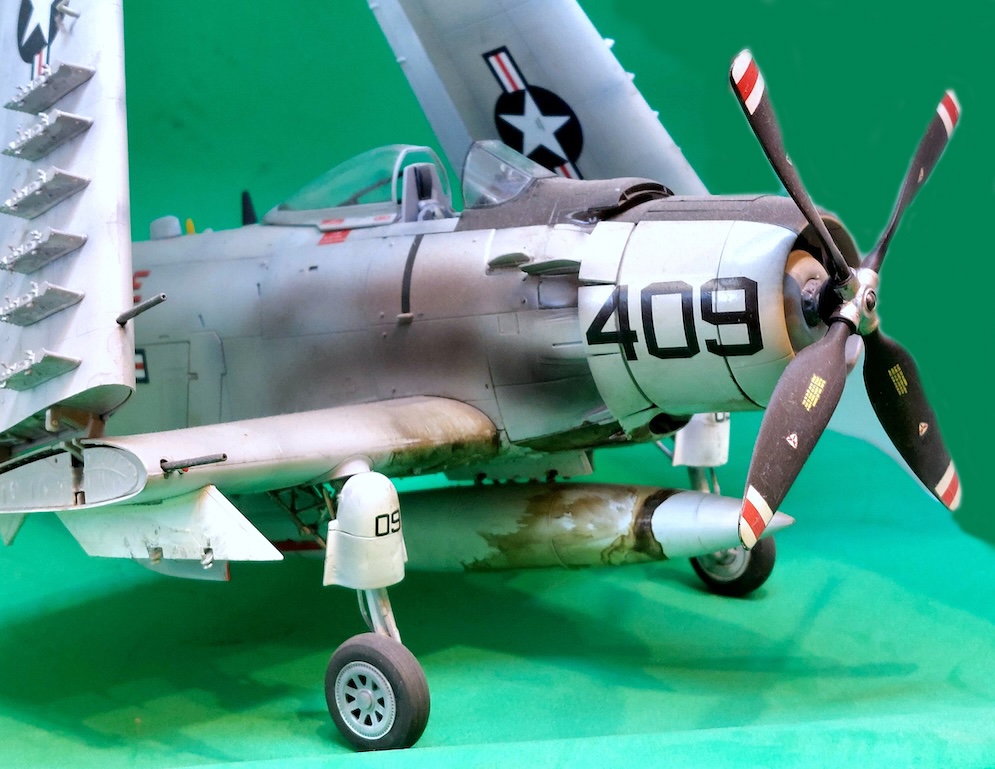
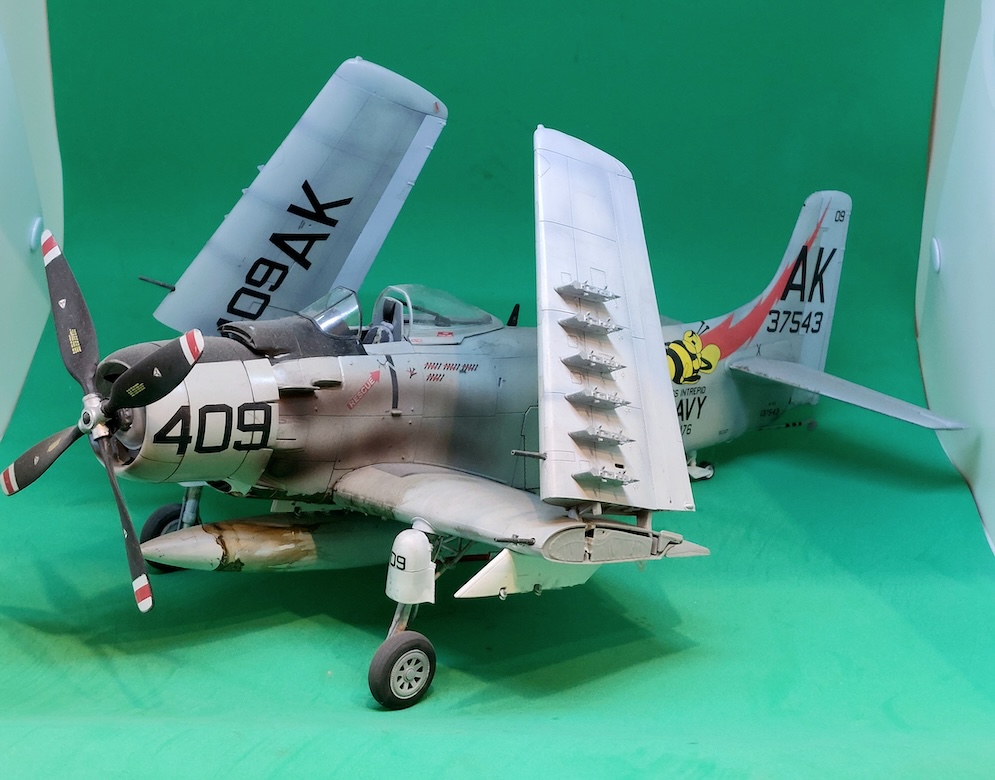
The model was completed in the famous ‘Bumblebee’ markings of VA-176 during the South-East Asia conflict.
The weathering was copied from several photographs taken at this time. The distinctive exhaust staining and oil leakage is not overdone by the way. That massive Wright R-3350 Duplex-Cyclone used between three to five US gallons of oil per hour, most of which was burnt and discharged through the exhausts. The remainder leaked profusely when shut down. The oil capacity, I believe, was a whopping 34 Gallons!
Rob R.
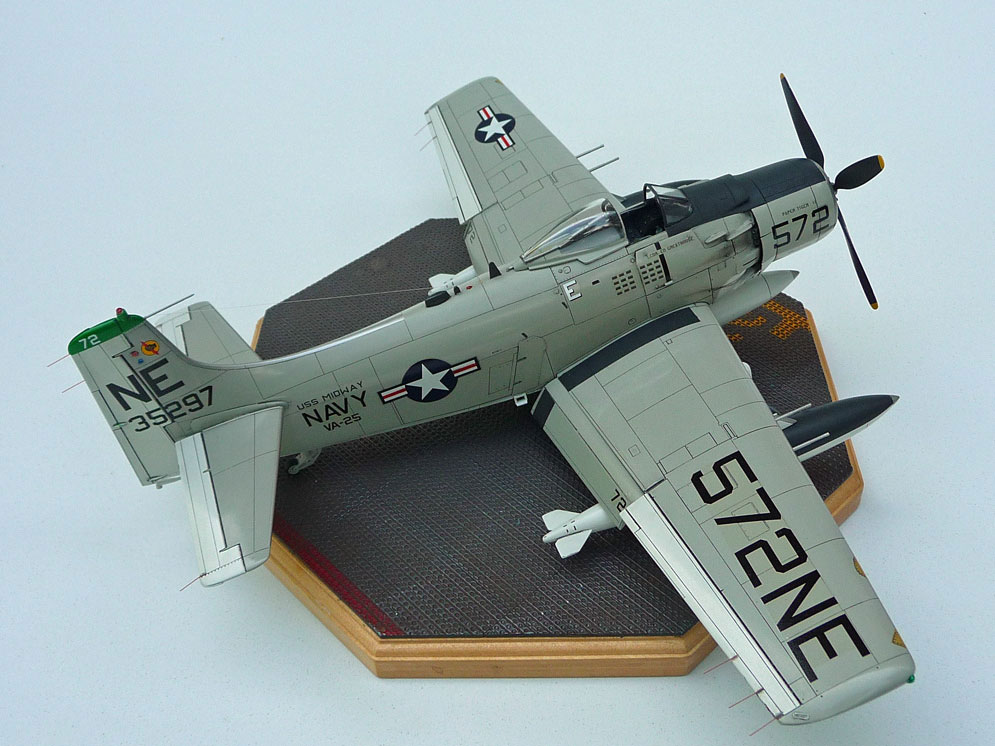
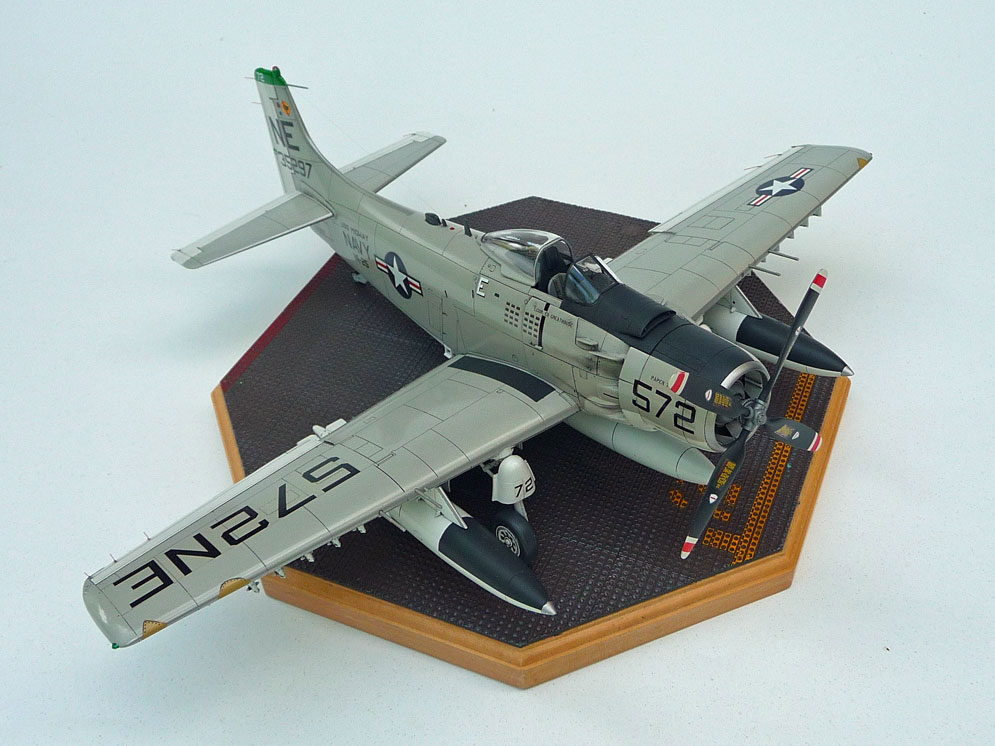
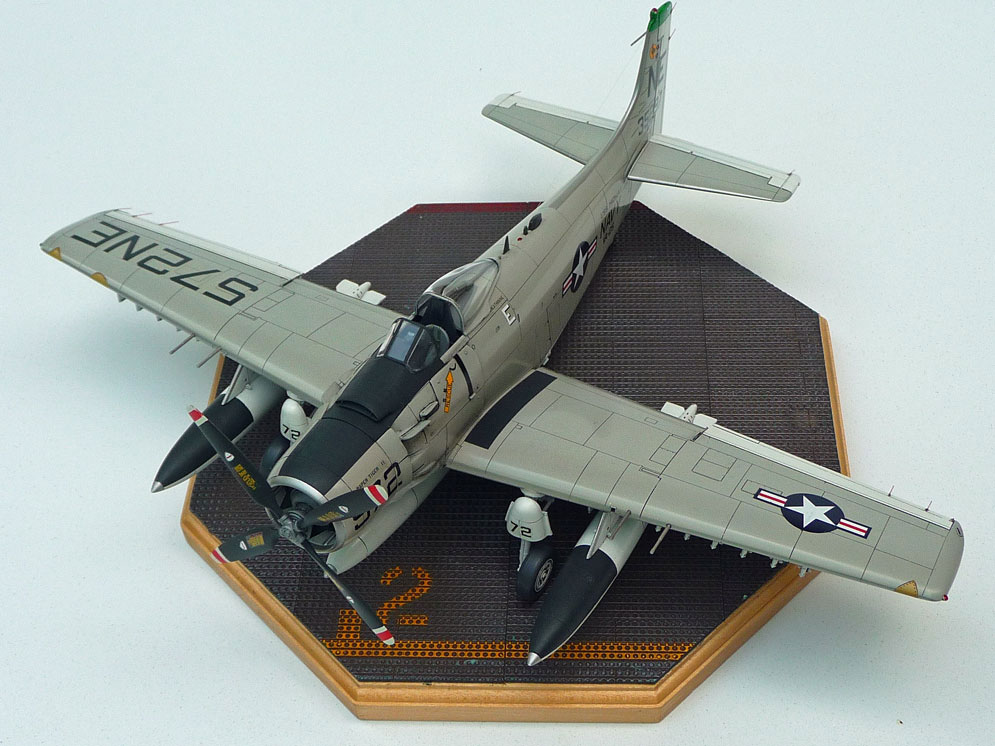
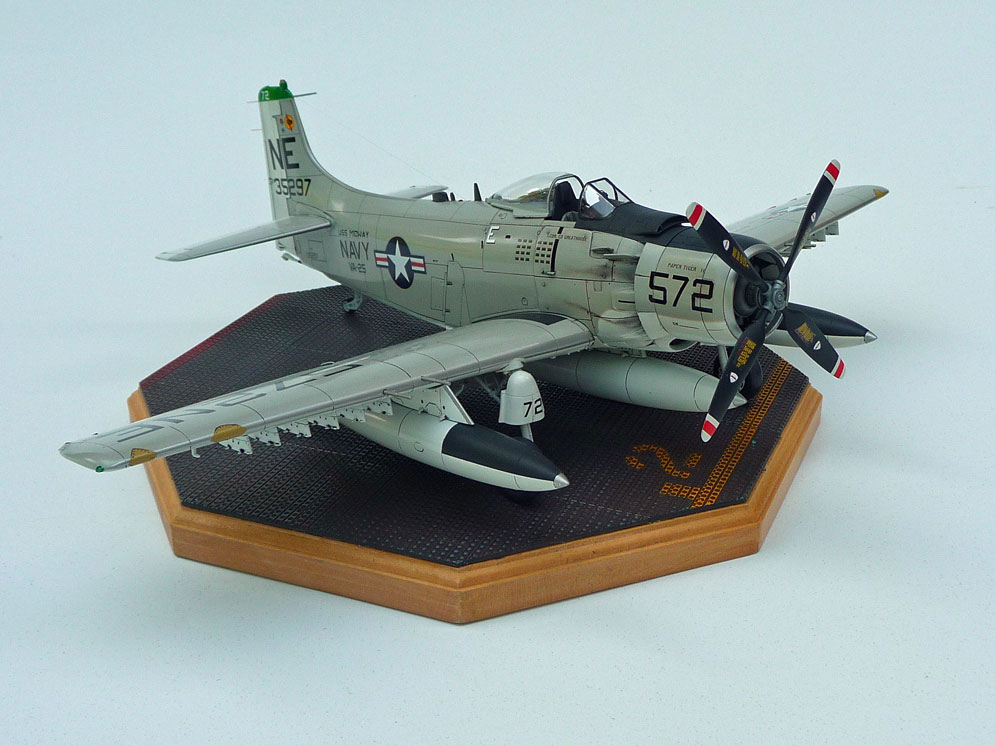
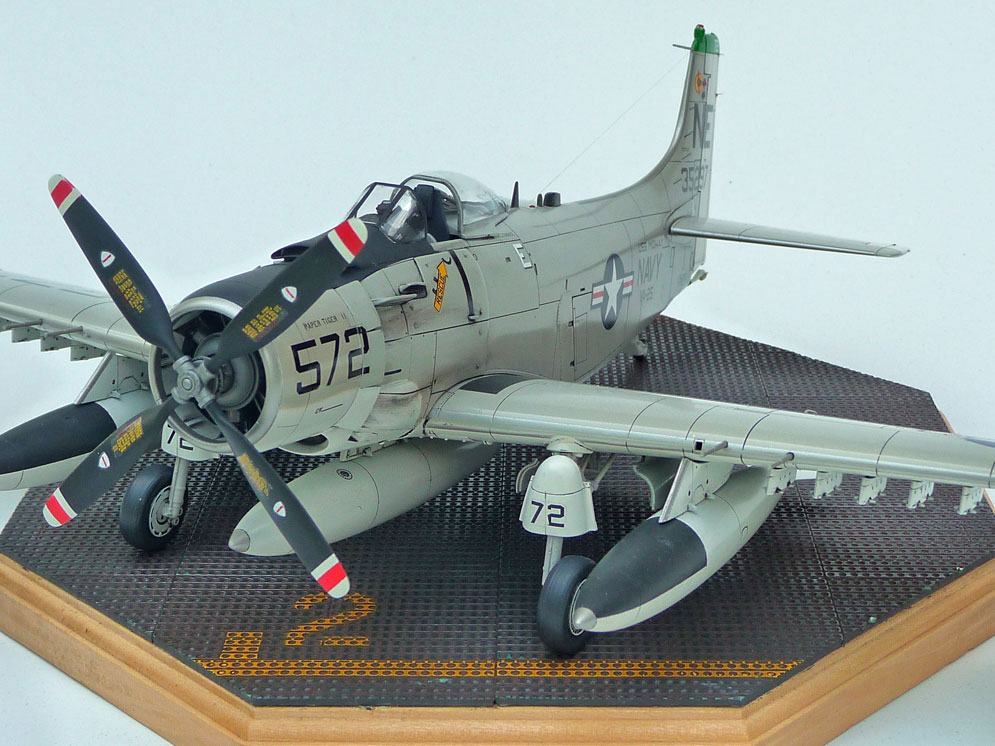
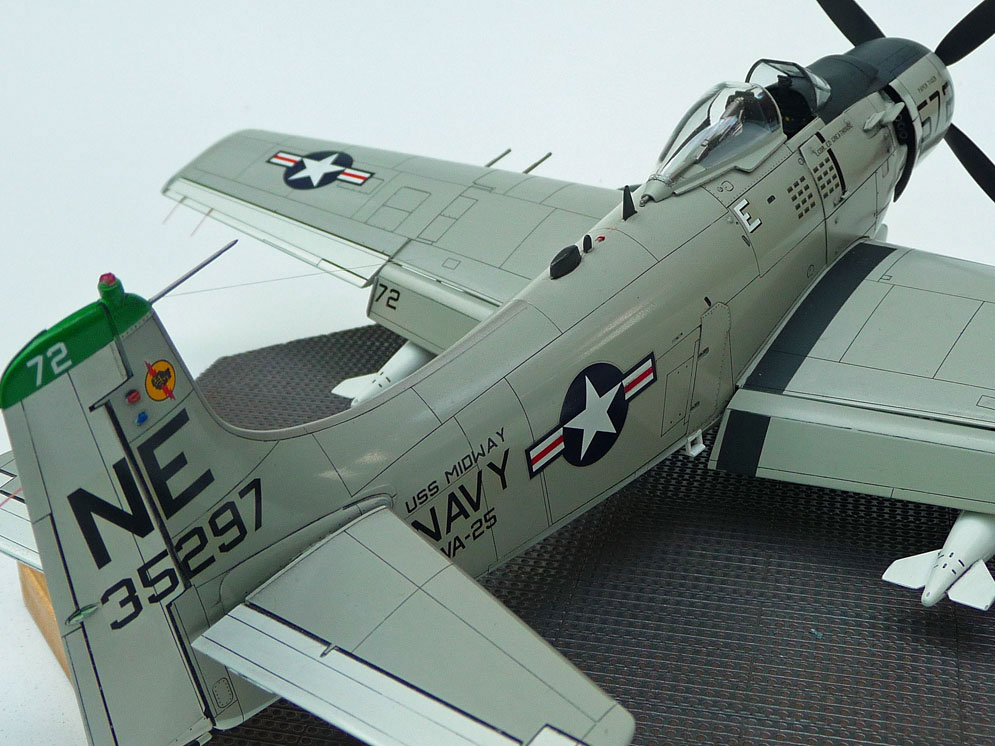
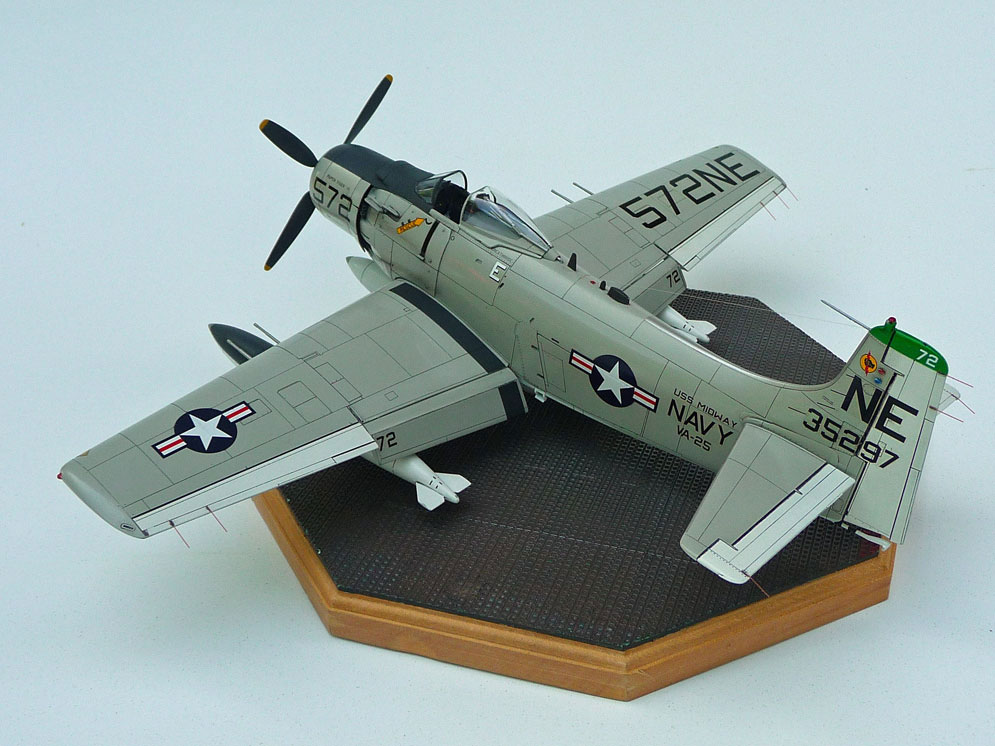
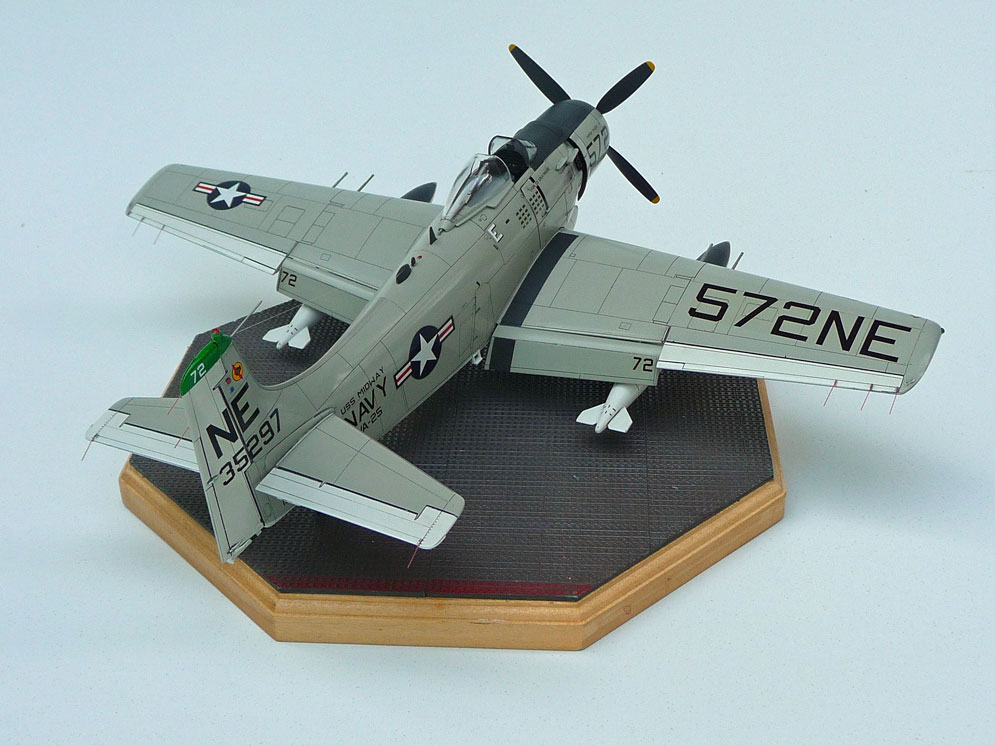
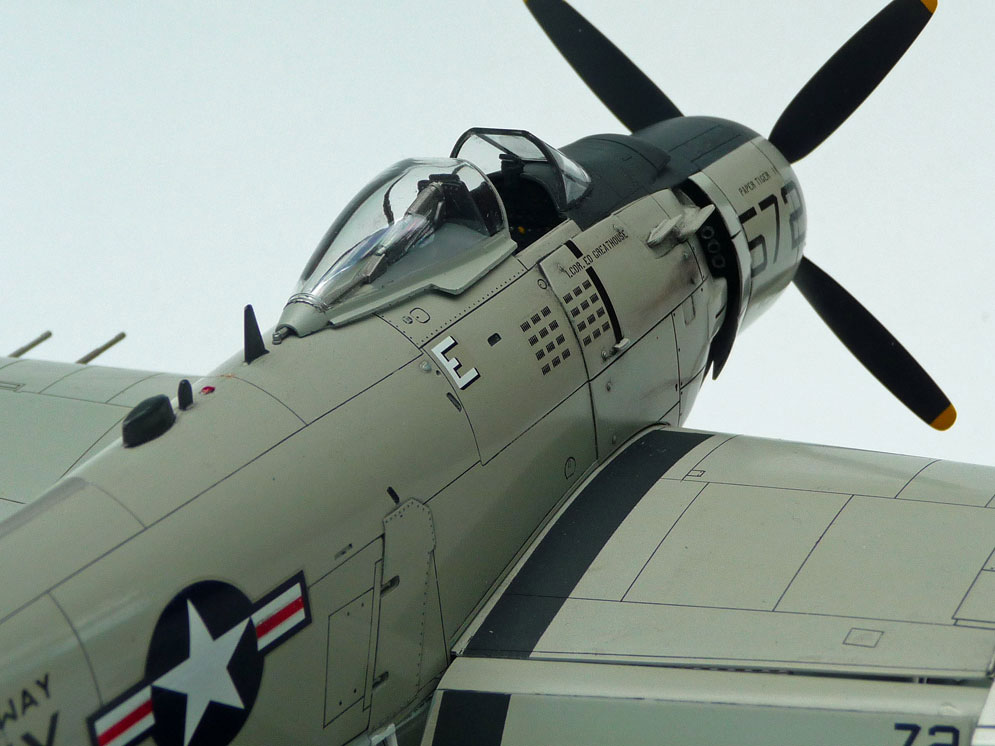
This is a Tamiya US Navy Skyraider in VA25 squadron markings, built from the 1:48 scale Tamiya A-1H kit.
The only additions to the kit, apart from the decals, were etched seat belts. Like most Tamiya kits, this was an easy build that goes together well with no filler required. I built and painted the model in sections, as I normally do, with fuselage, main wing and horizontal stabiliser, making up the main components. I used Aeromaster acrylic matt Light Gull Grey, and Tamiya matt White, to paint the components individually. These were then polished with 8000 Micro-Mesh, to give a sheen to which the decals would later be applied. Before applying those, I weathered each section with black artist gouache. This is a water soluble substance, so it’s simple to remove any excess from the polished surface of the painted model, by rubbing lightly over the surface with a damp tissue. This will leave the gouache in the panel lines and other areas I wanted to appear weathered. If too much is removed, it is simple just to dab on a bit more, perhaps to panel lines, which may need touching up. When I was happy with the result, I gave all the sections a final polish with Micro-Mesh, to ensure a smooth finish for the decals to stick on.
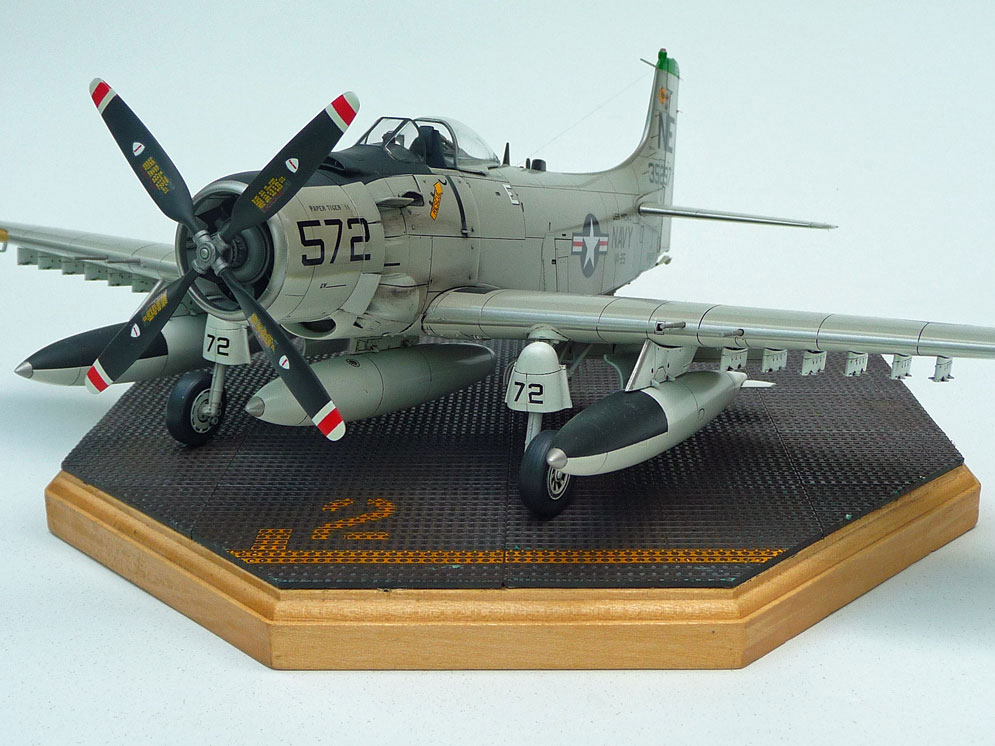
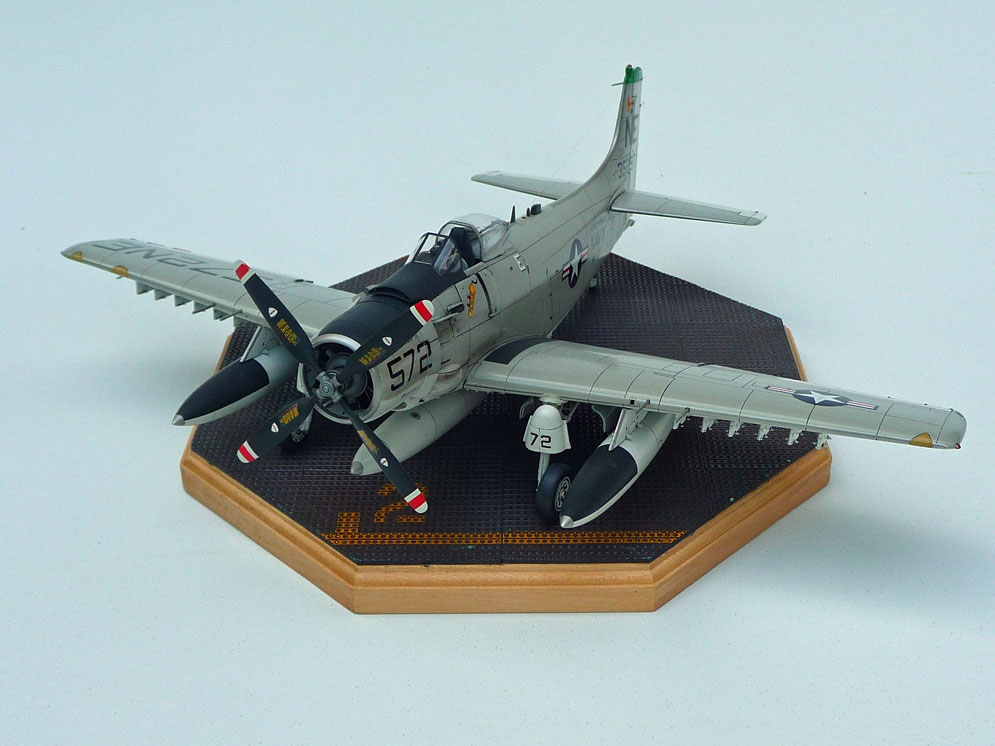
The decals are from Aeromaster set 48-530. Anyone who has used these decals will know they are of excellent quality; the set lived up to their reputation adhering well to the prepared surface. I normally apply a coat of acrylic varnish over the entire model, to give the same finish on the model and the decals. This time, I was happy with the appearance, so I left it unvarnished.
Julian S.


I found it with the MILLIVERSE Decal set for Singaporean Skyhawks, which covers the full range from the early beginnings to the very late birds. One of the best and most comprehensive decal sets I have seen so far! Unfortunately it is not available any more….
I decided on a prototype from Singapore Technologies Aerospace for the A-4 SU with the F 404 engine. It had bright orange patches and an AOA measuring device on the inflight boom. Otherwise a built straight from the box!
Jurgen J.


A different finish for the already started project was needed. Easy in this case, as the former owner of these birds was Kuwait and the Kuwait Air force has a very interesting history considering the Gulf war in 1991. That made me remember my 20 year old Superscale decal set 48-399 (Free Kuwaiti Aircraft)! It took considerable research to figure out the correct camouflage scheme and positions of national insignia but I hope I got it right. Do not trust the Superscale instructions in this set! No Insignia on the wings, only some sporadic stuff on the fuselage. Otherwise some minimal conversion and antenna additions have to be done following the comprehensive instructions in the Caracal Decal set. Hope you like It.
My next A-4 project is the A-4SU prototype following the fantastic decal set from Milliverse of Singaporean A-4´s.
Jürgen J.

It has sone nice touches like the bomb racks incorporated into the bomb bay doors. Helps to get perfect alignment for the “eggs” the nose cone was separate too so plenty of room to add nose weight and being a tricycle undercarriage definitely needed on this plane. I painted it in Humbrol rattle cans. No.11 Silver for the outside and No.86 Light Olive for the interior.
A great kit which I highly recommend to buy if you see it or sale or build if still in your stash.
Happy modelling, Alastair G.
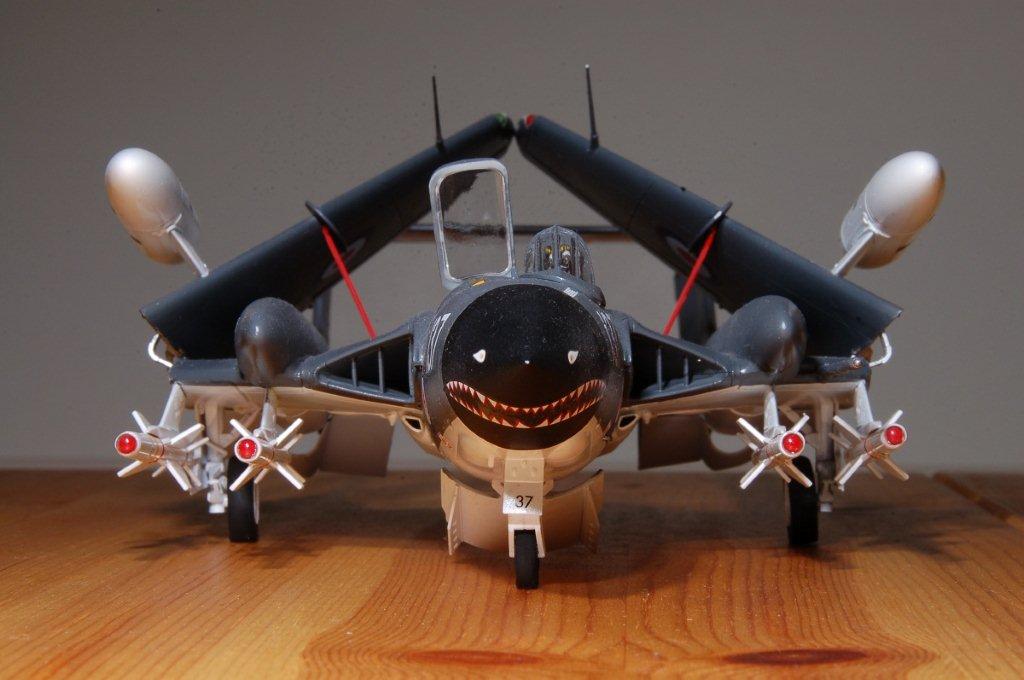
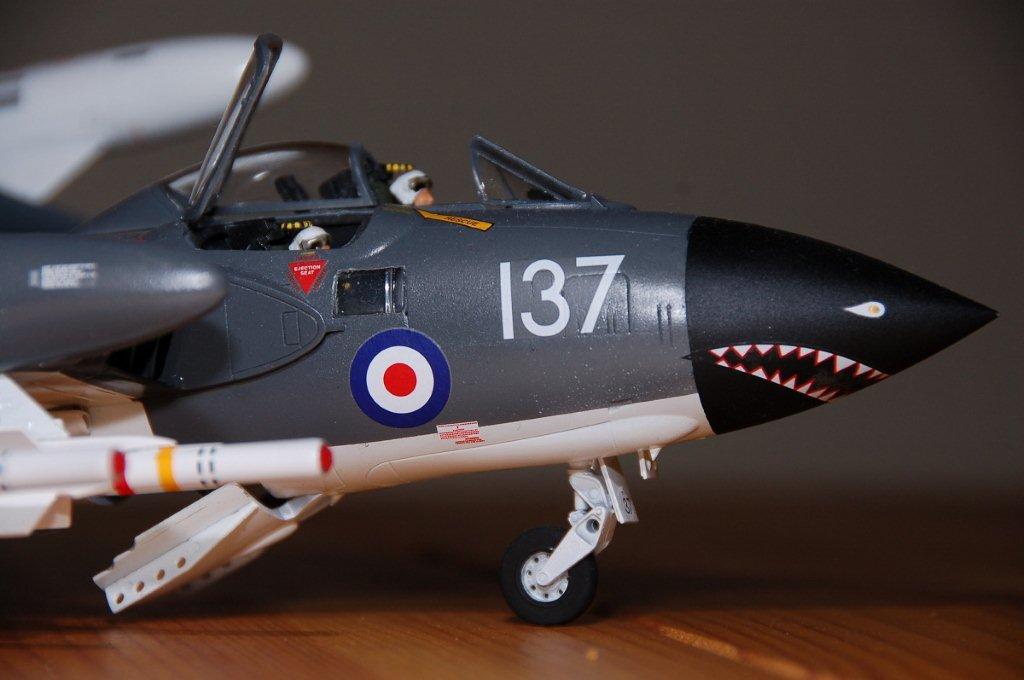
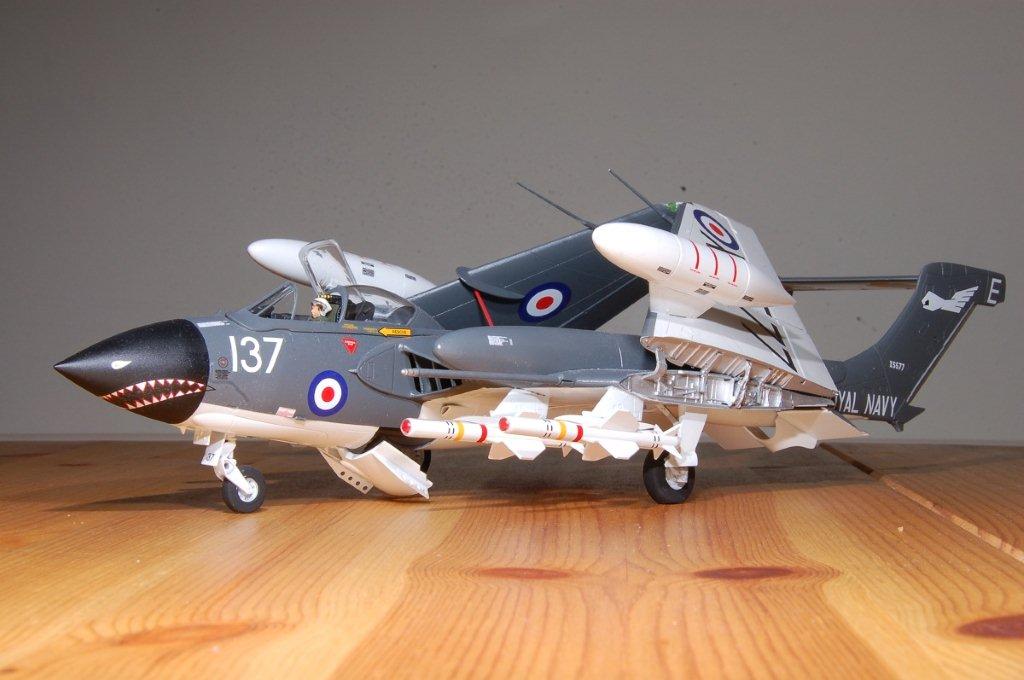
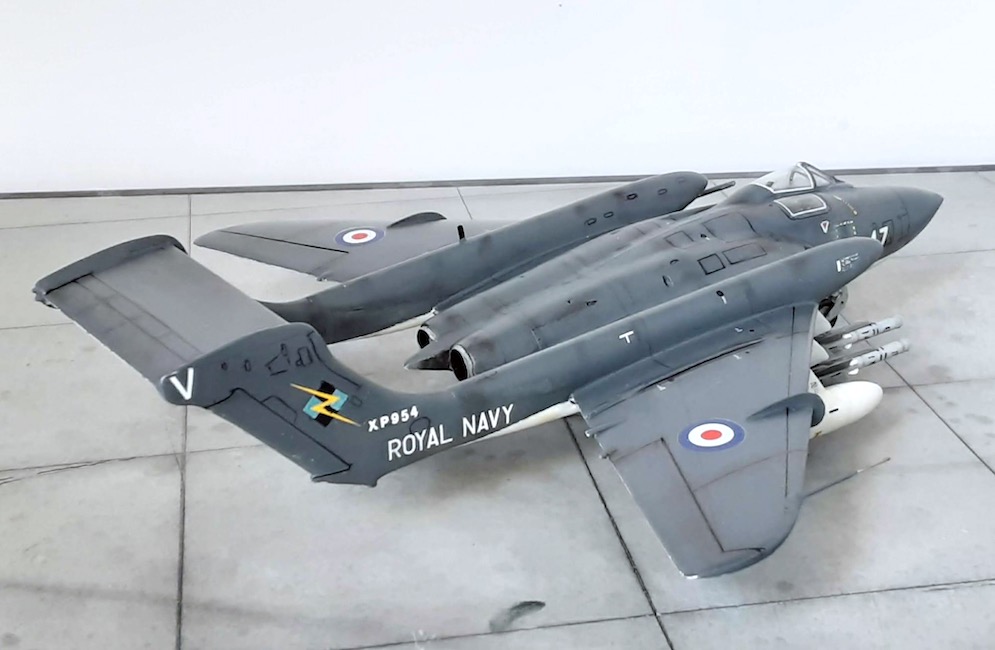
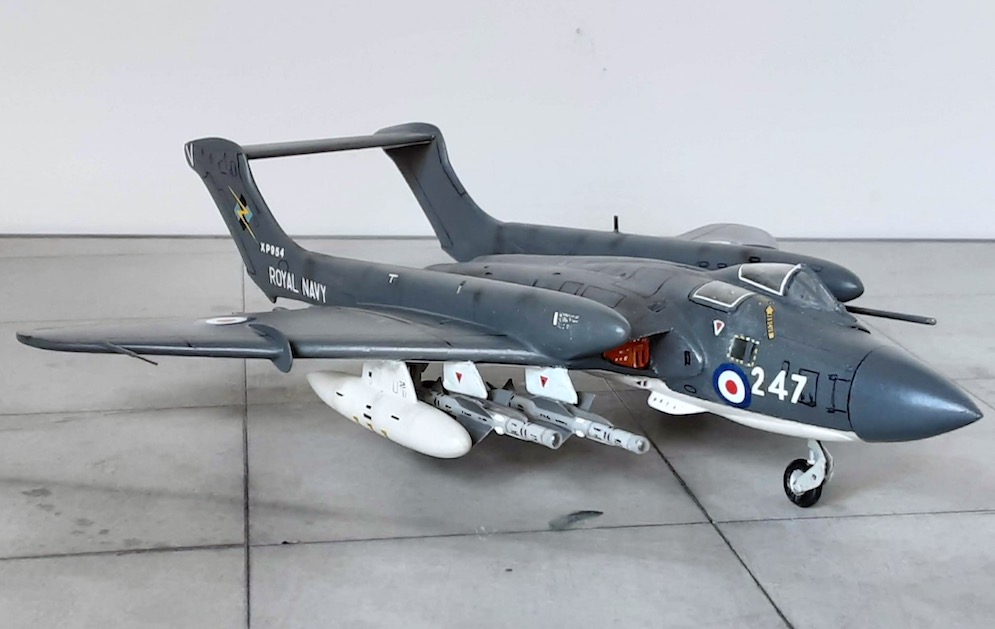
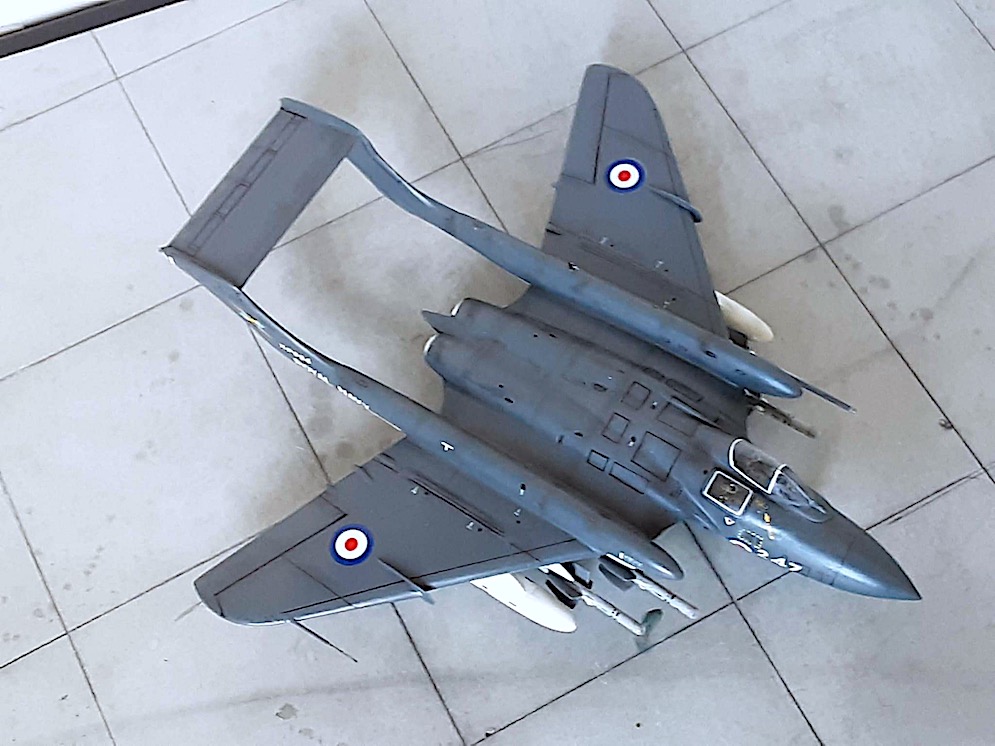
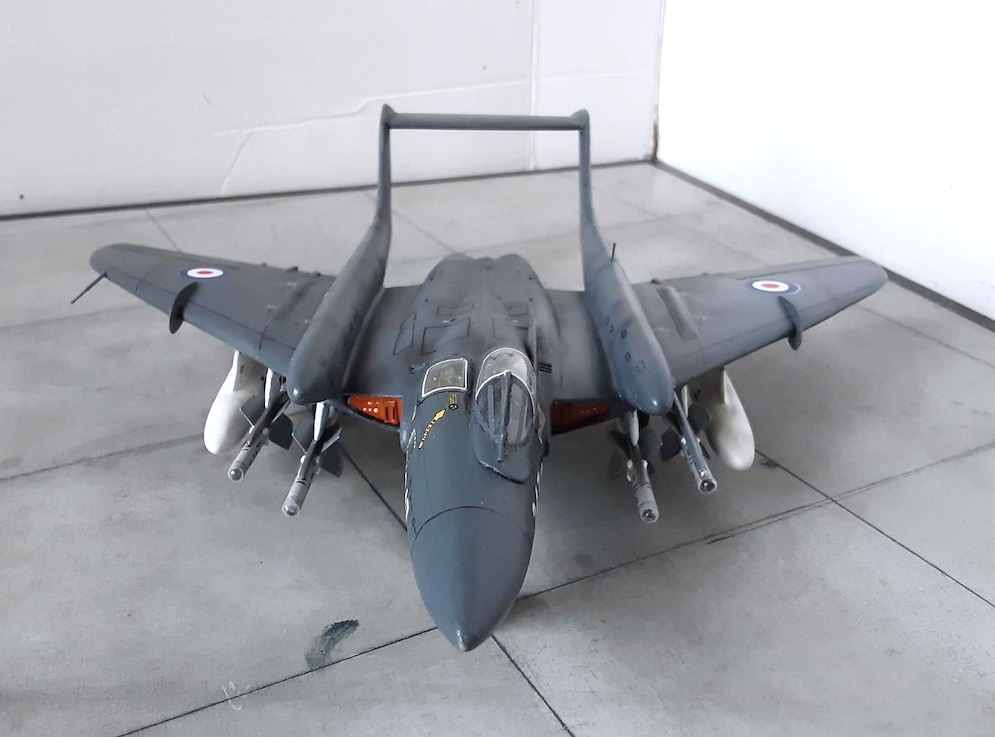
Being aware of the usual glitches in the Trumpeter and HobbyBoss kits I searched for a picture of the real bird and found it in Naval Fighters Number 46 “Fleet Whales” on page 17.
…AND it proved that the kit instructions are wrong in two areas – first there are no rear guns and second there is no radome on top of the fin. On the positive side there is a fully equipped training room in the former bomb bay.
I love this elegant bird.
Jürgen J.


Lovely kit for its age. Really enjoyed the painting and weathering on this one.
Nathan C.
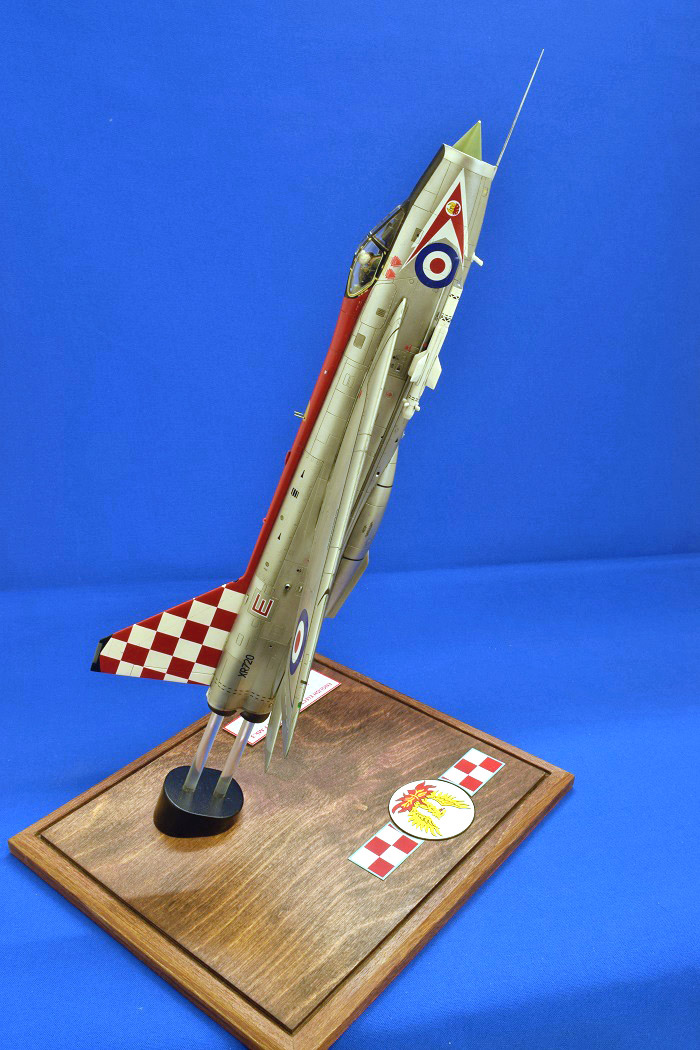

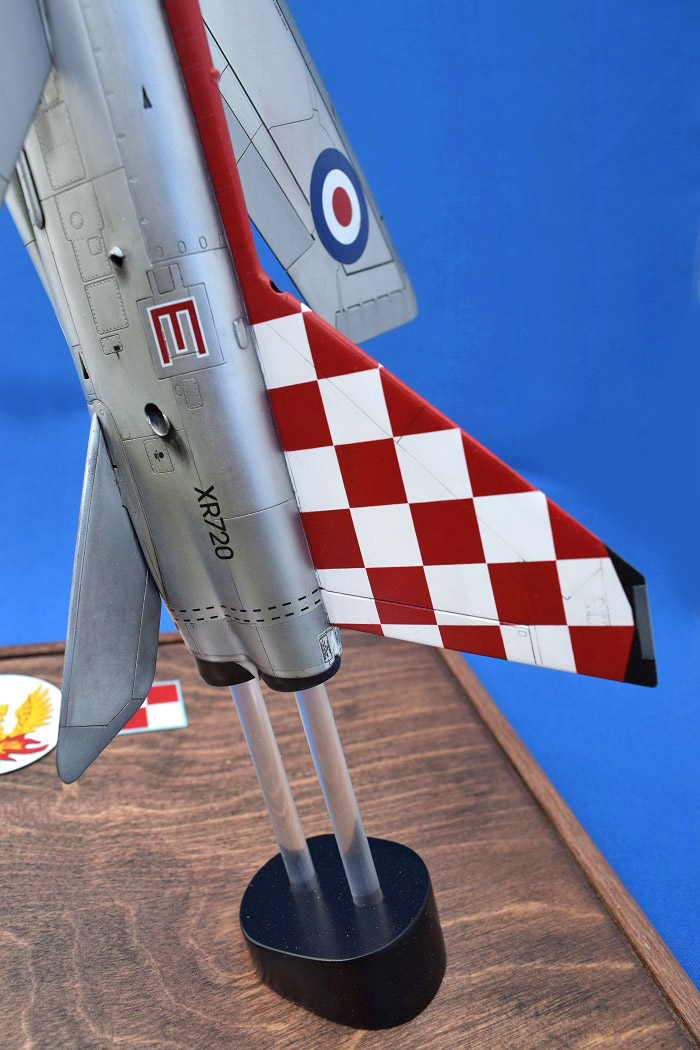


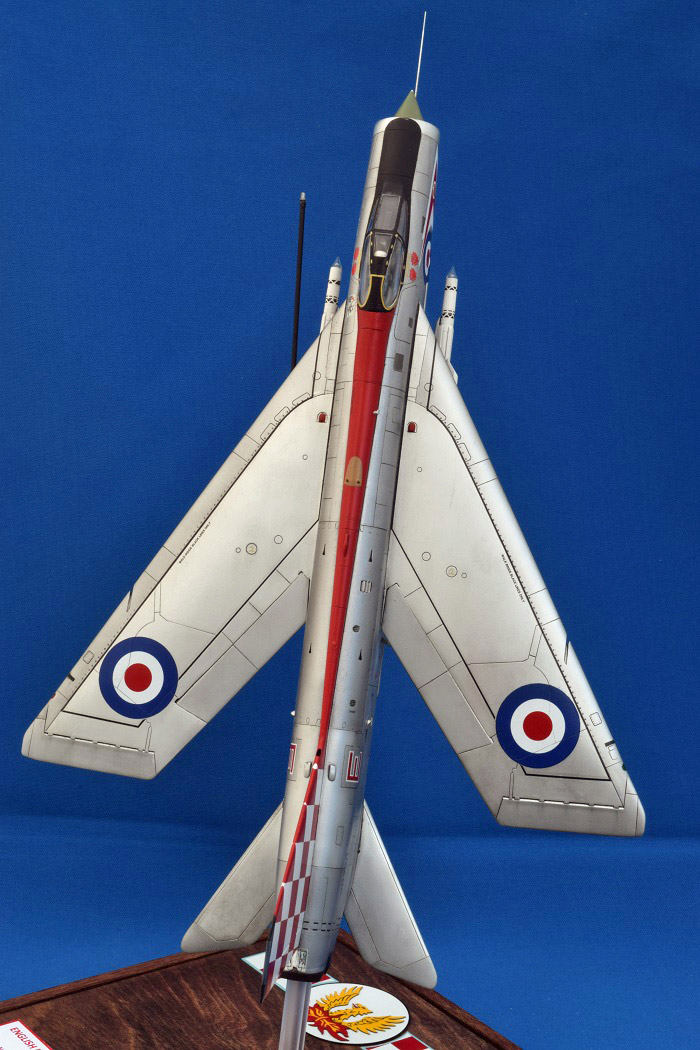
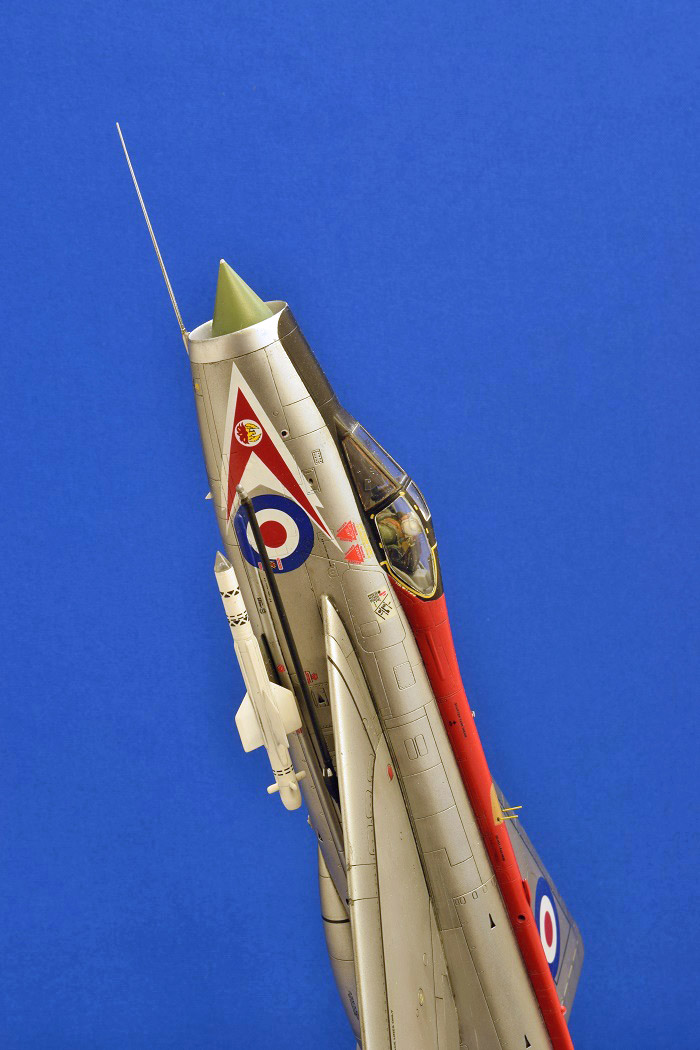
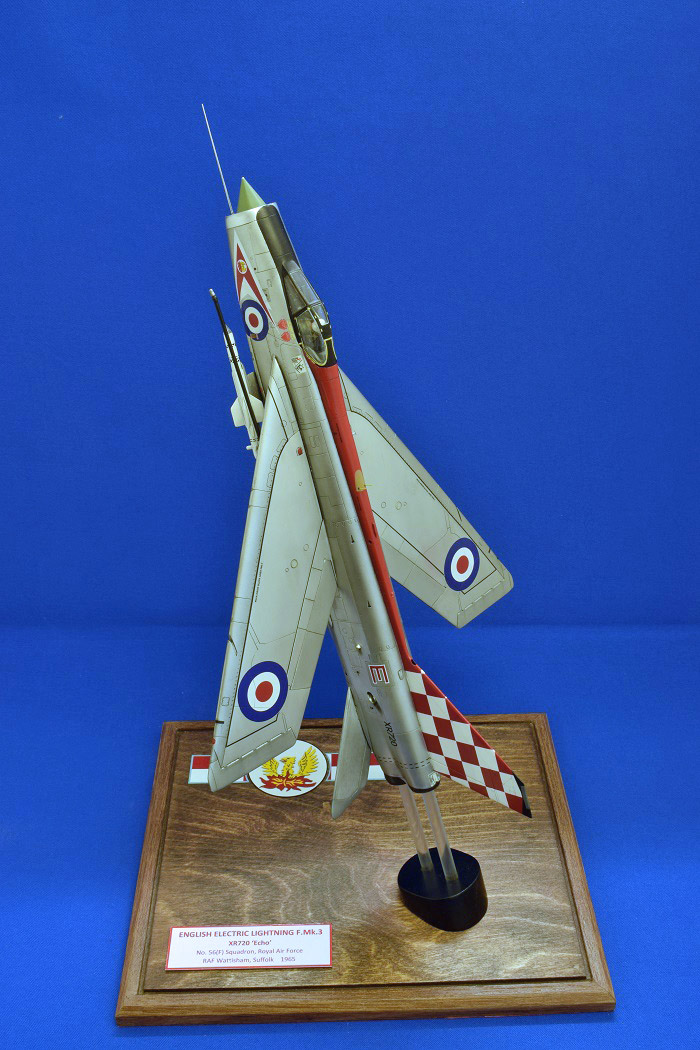
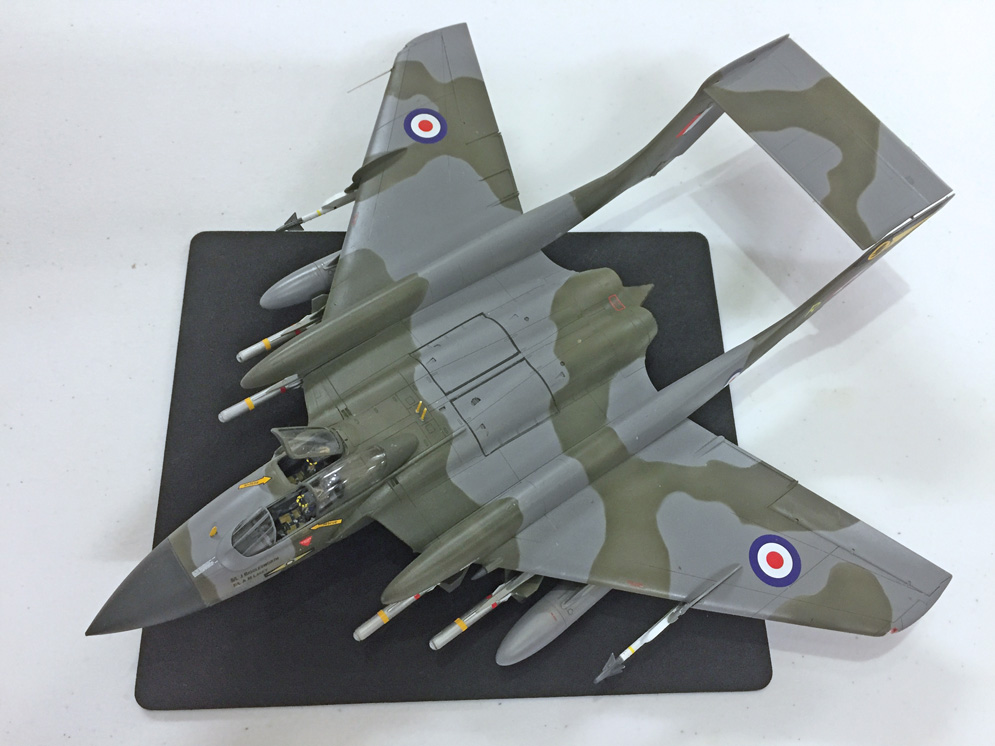
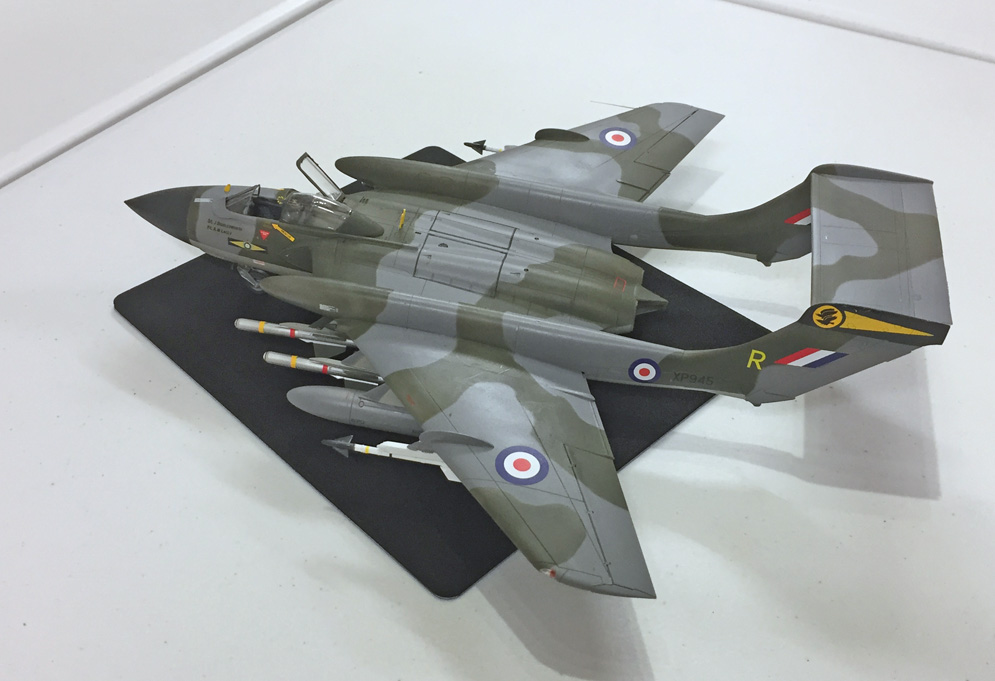
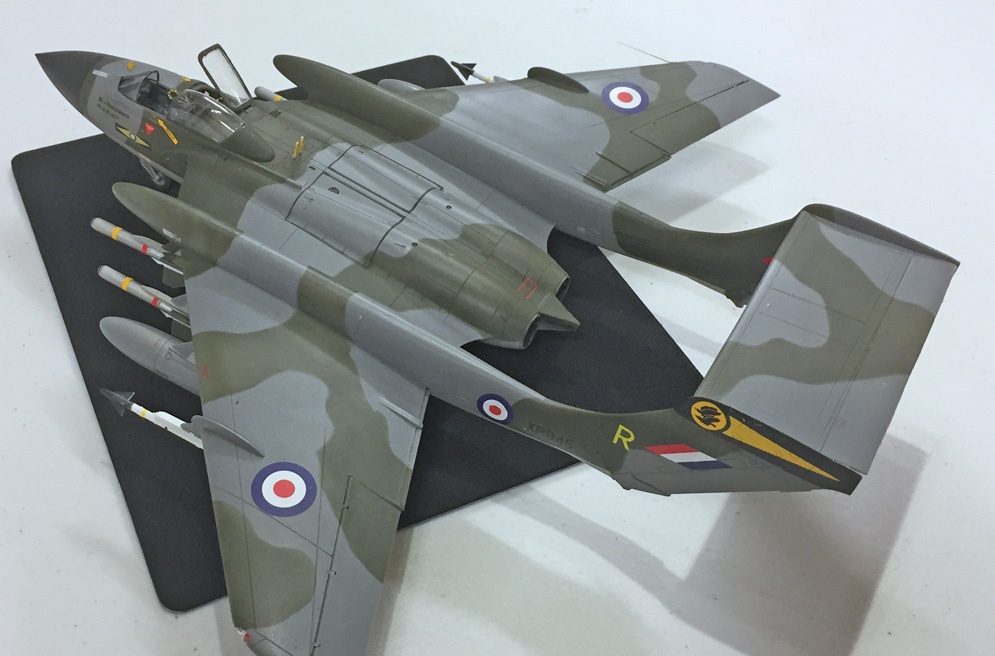
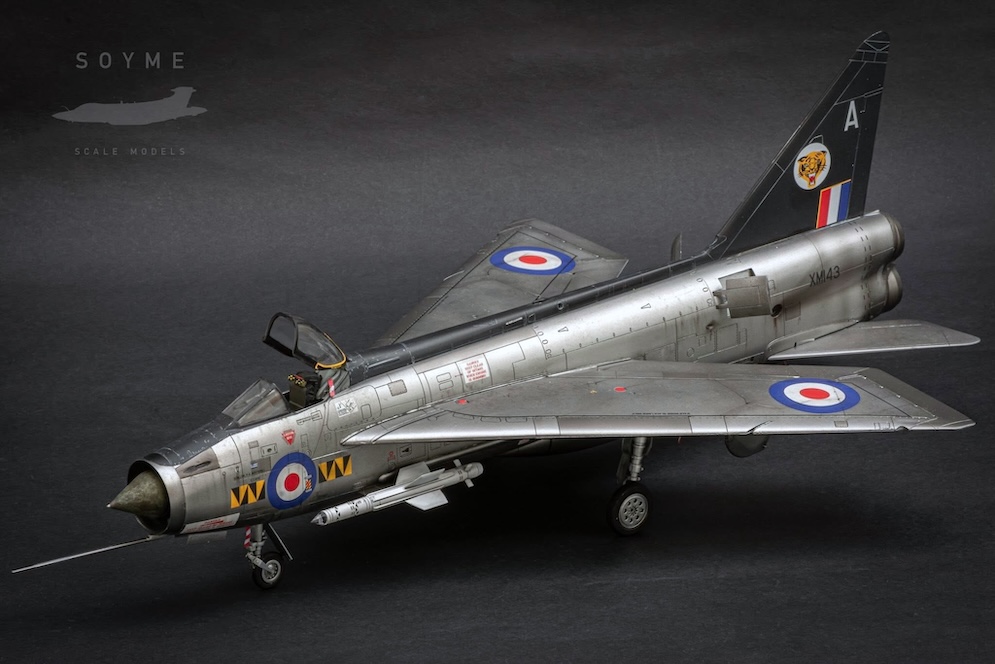
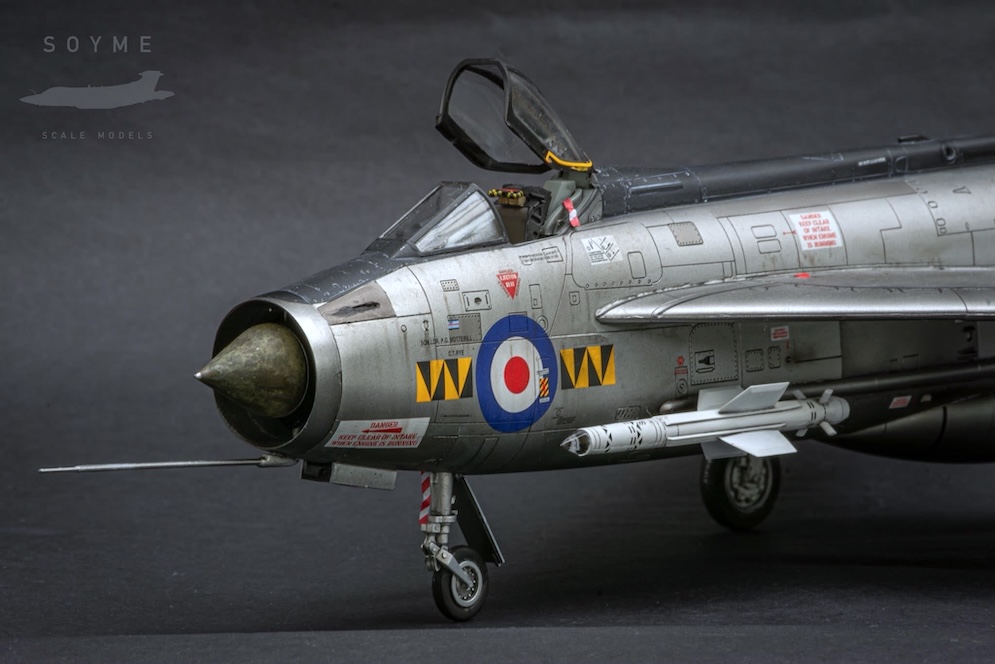
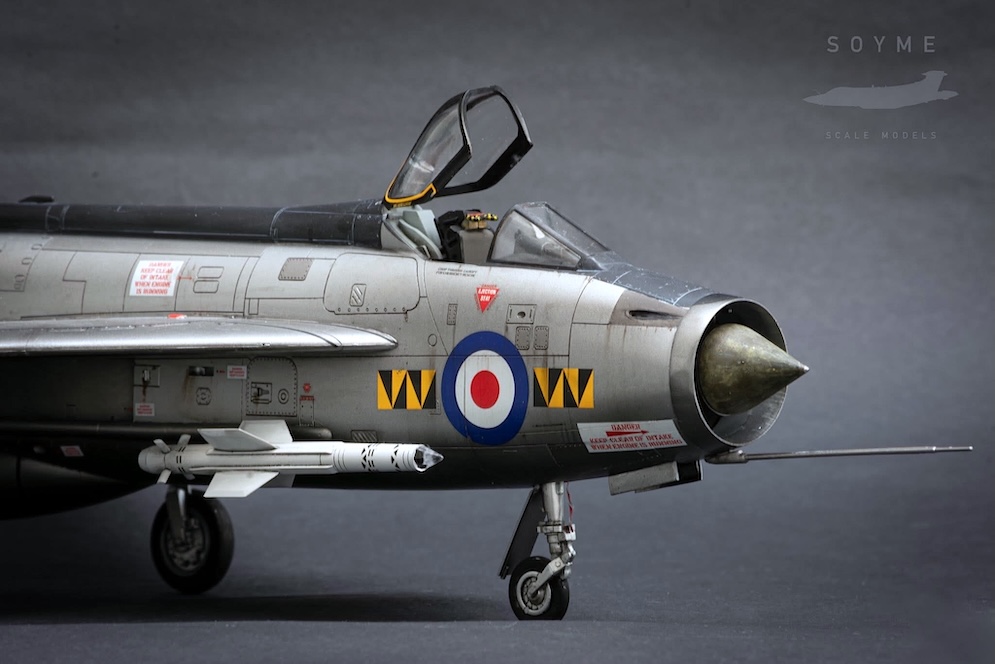
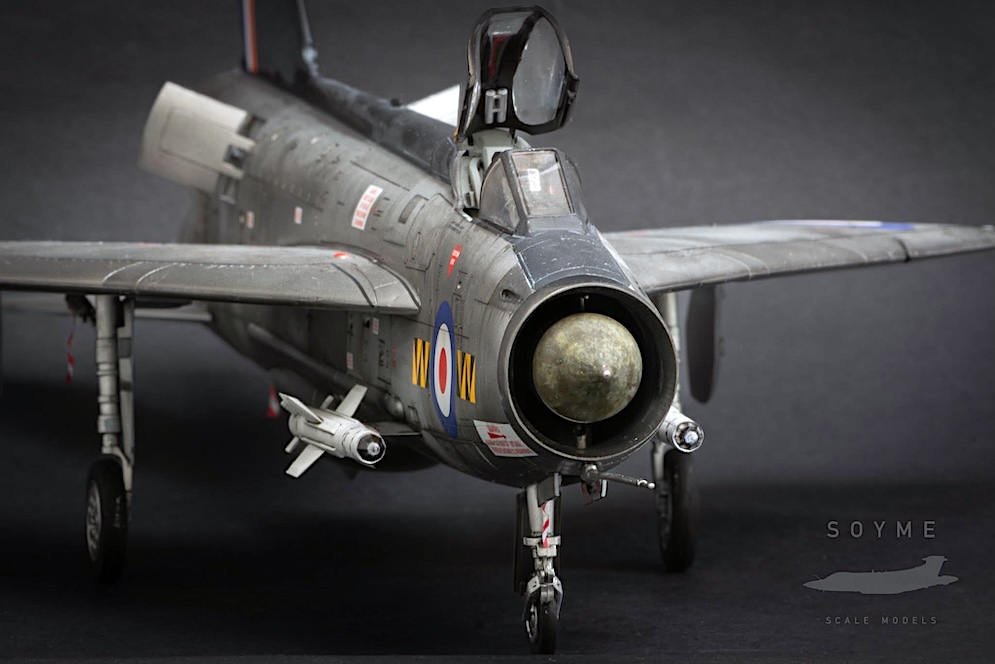
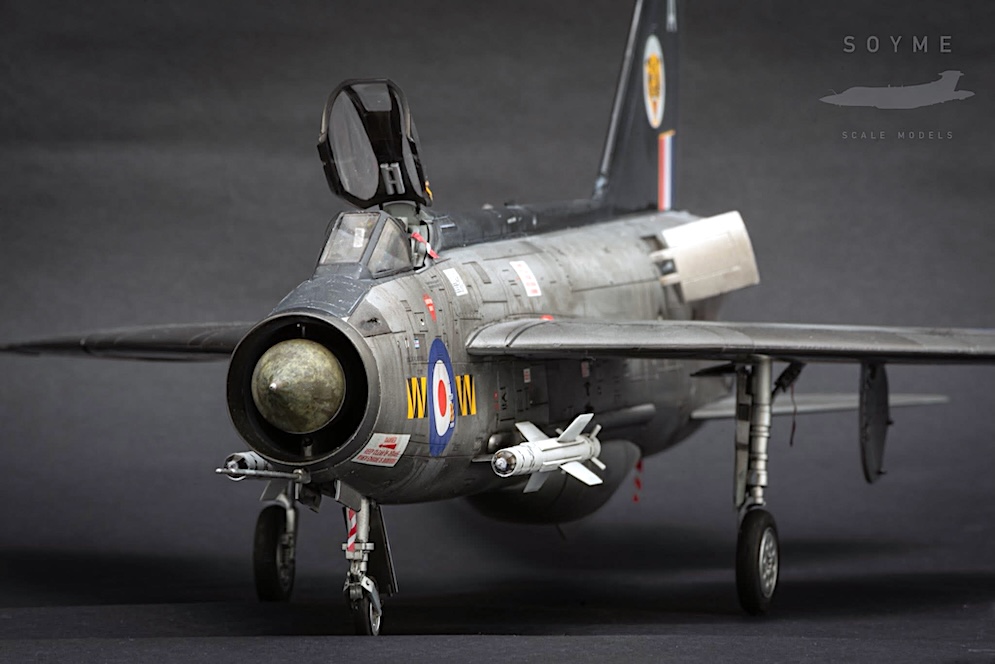
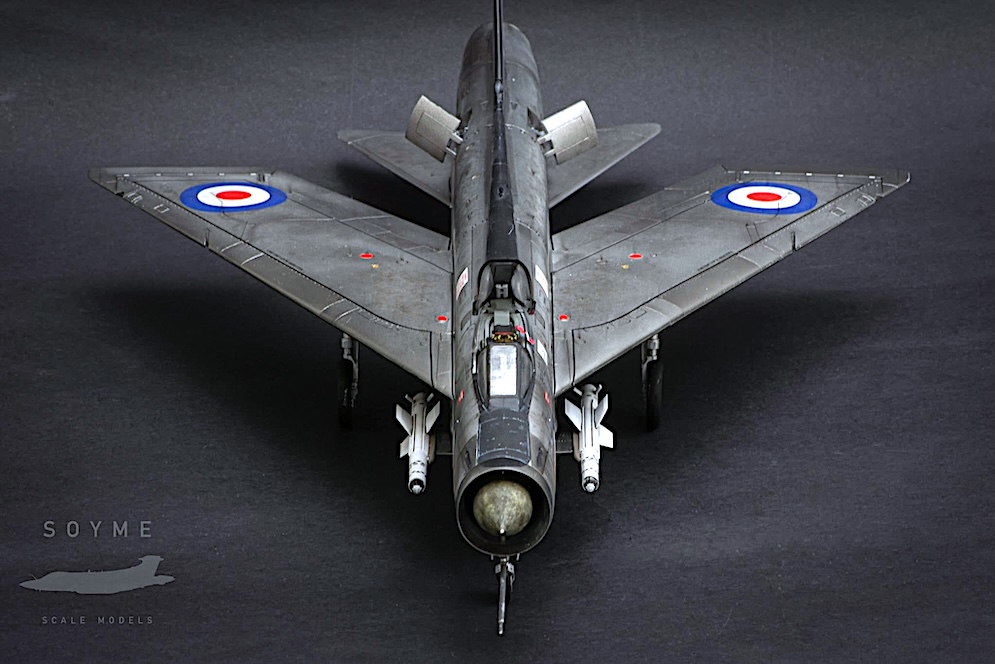
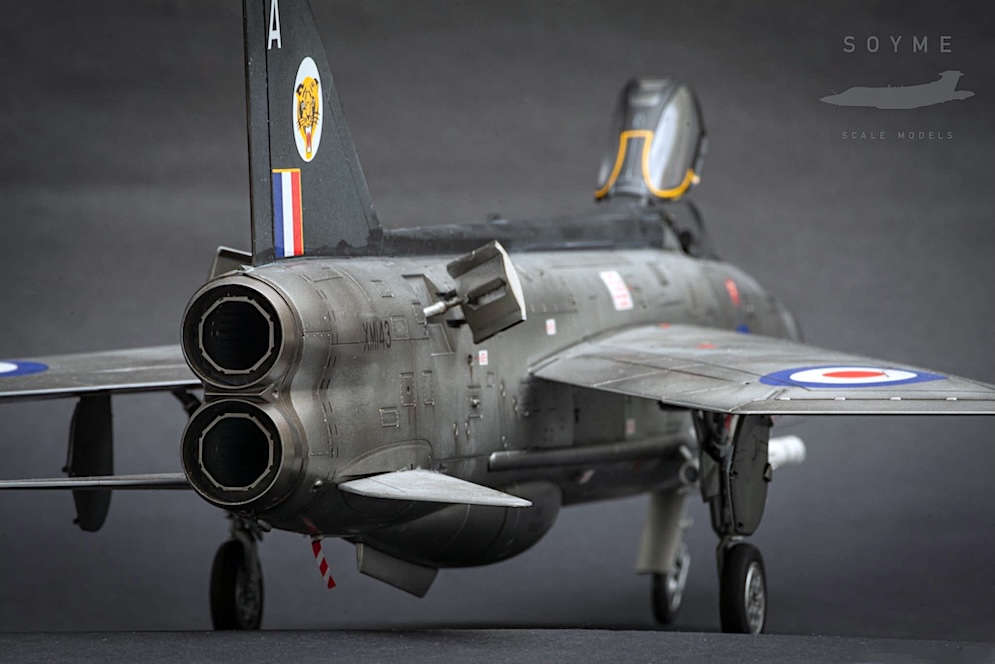
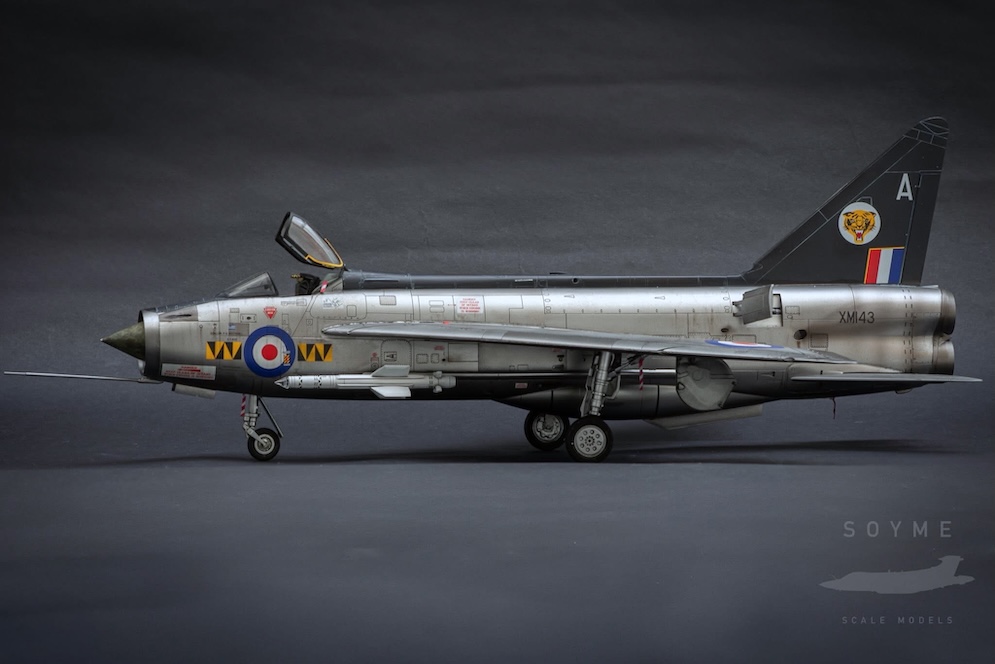
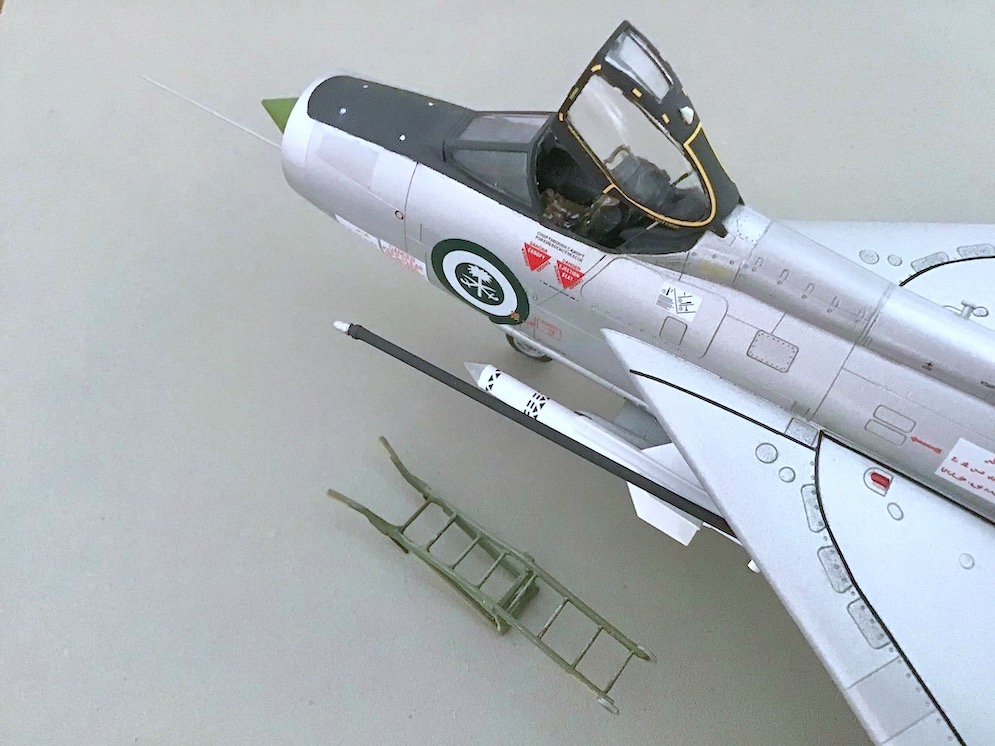
The English Electric Lightning has always been one of my favourite aircraft, particularly the F.3 with the larger tail, straight wing leading edges & small belly tank. When Airfix released their 1/48th version of this kit back in the 1990’s, I snapped one up and, together with Xtradecal sheet X035-48, planned to build one of the 56 Sqn aircraft with the red & white checked tail as an in-flight model.
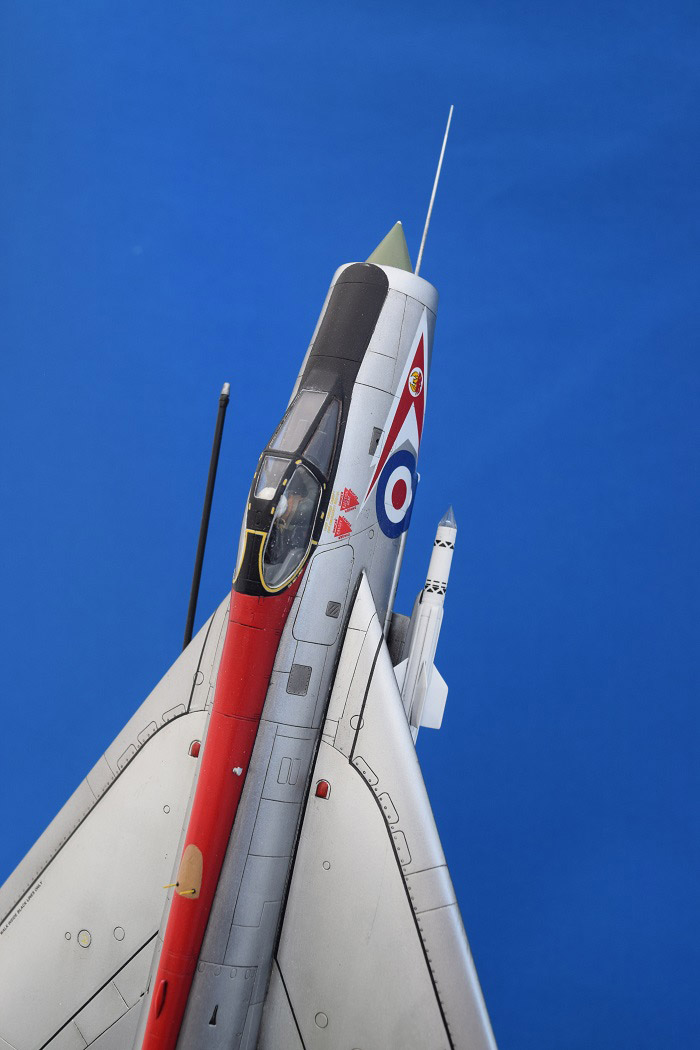
Fast forward 10 years & I managed to get started. I built the kit straight out of the box, later on adding a Master brass pitot tube. All intakes & vents were opened up, thin brass sheet being used to form the deflectors around several of the vents. The undercarriage doors were not a particularly good fit in the closed position, requiring a fair amount of filler & rescribing. I’d decided to use Alclad2 for the first time, spraying polished aluminium over a gloss black base, but I was not happy with the result. The Alclad2 had shown up many areas which needed further attention, so the model was put aside until I had the enthusiasm to continue.
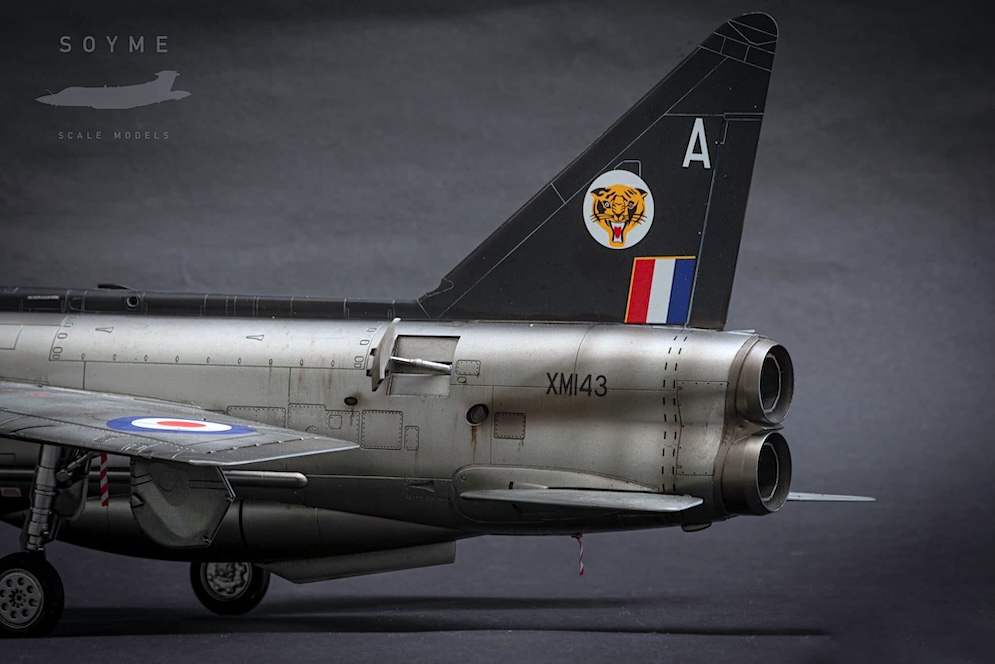
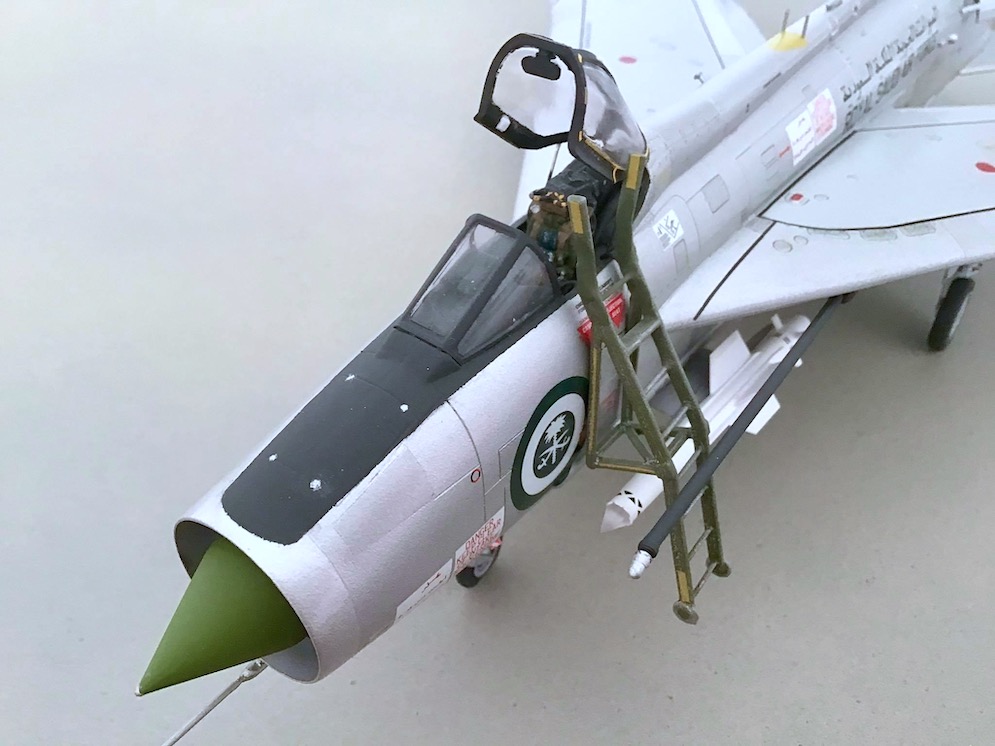
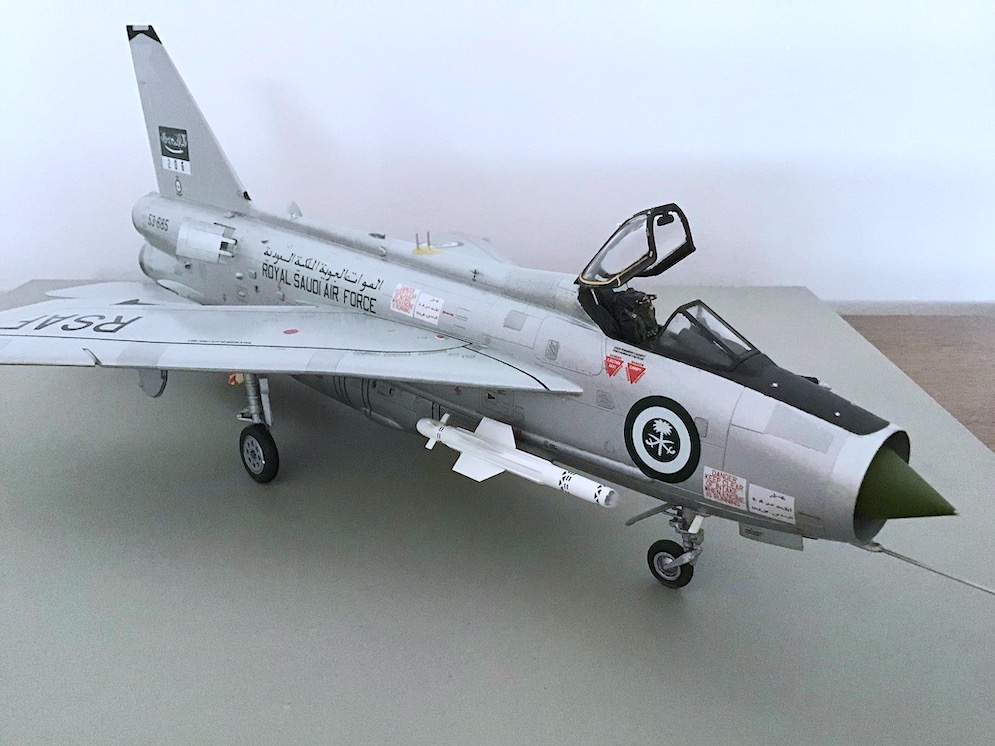
After another 10 years the model was dusted off & checked over. The decision was made to strip the paint off completely, re-scribe many of the panel lines & repair any damage. After successfully applying the Alclad2, decals were applied. Some of the Xtradecals broke up on application, particularly the fin markings which required a lot of respraying. One problem emerged when applying the nose red & white arrows, as they overlapped the cable ducts – photos show they should be clear of the ducts. It appears that the location holes for the ducts are positioned 14mm too far forward. (The F2A/F6 kit appears to be ok in this respect). I managed to remove some of the duct, tidy up & repaint.
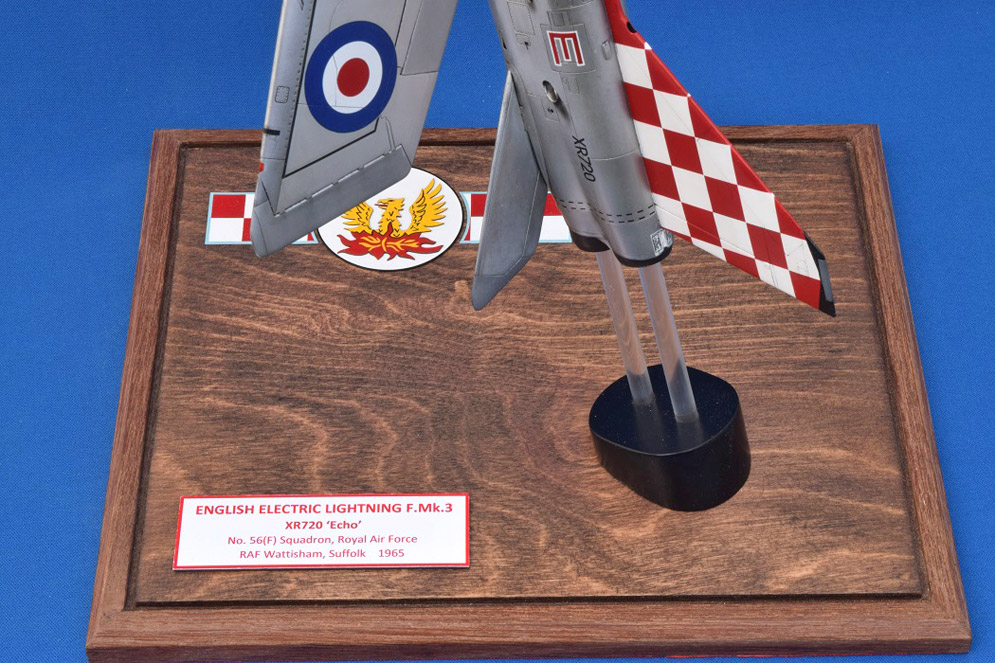
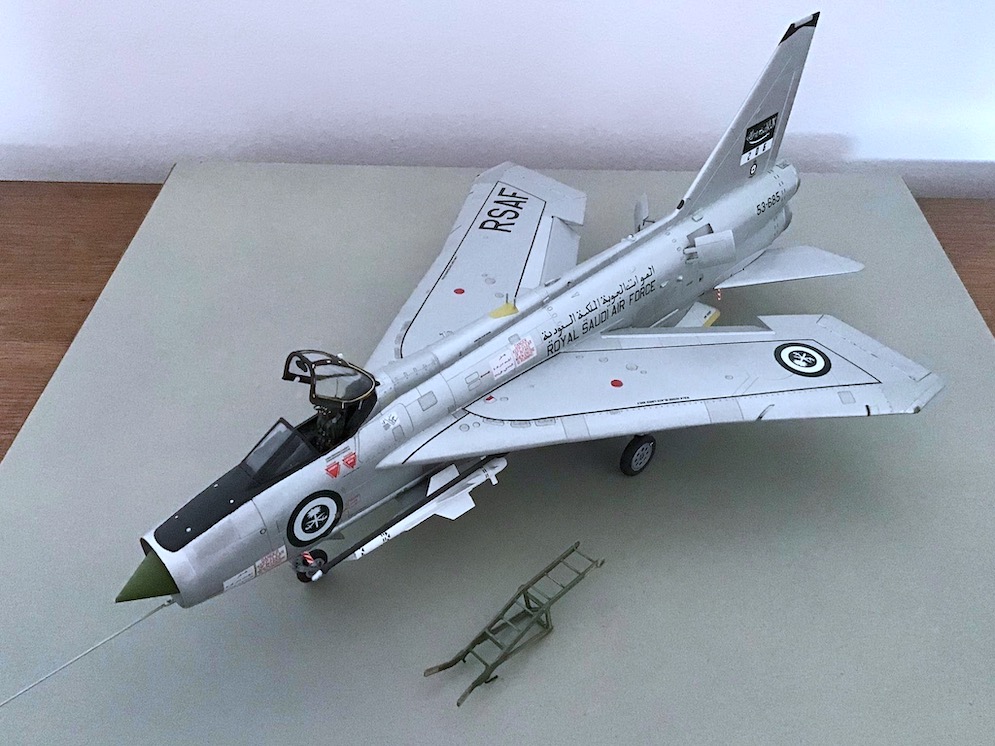
The model is mounted on a base of birch ply with teak strip edging, chamfered with a router. I combined the two elements of the 56 Sqn. markings, transferred onto plastic card & painted. A printed nameplate completed the project.
Overall, I am pleased with the finished model, despite all the setbacks. If anyone has one of these kits in the stash, just be aware of the issue with the cable ducts.
Rob C.
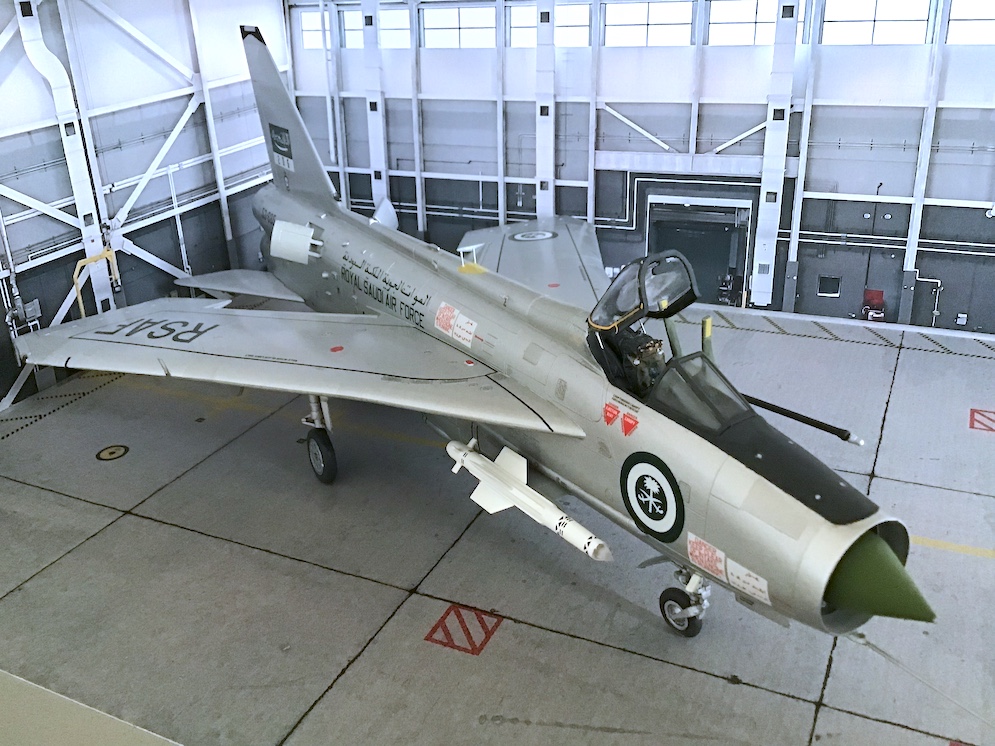
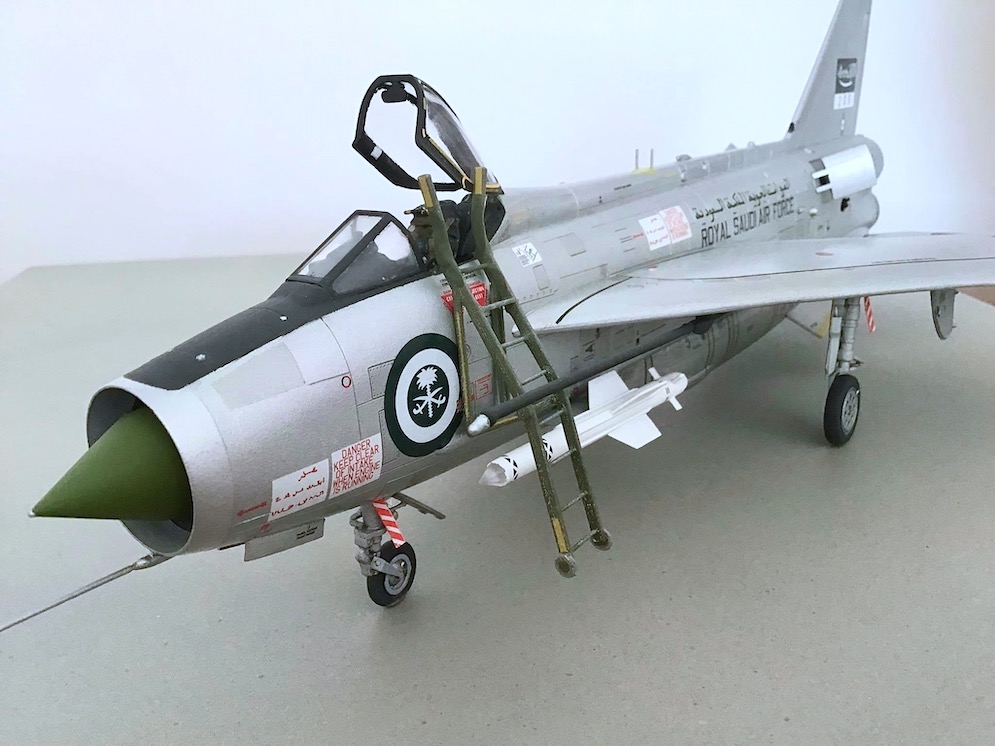
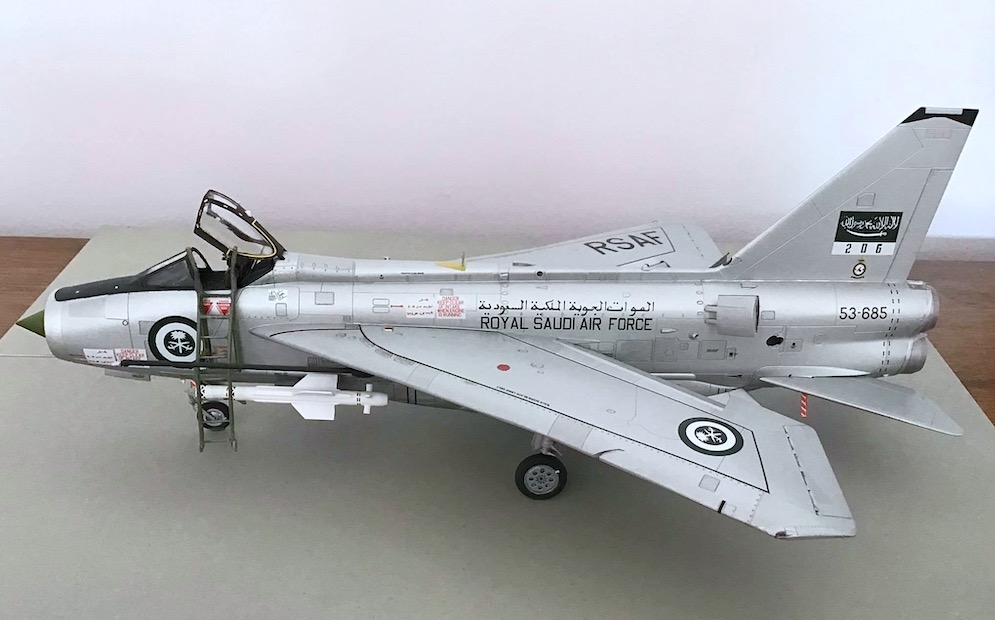
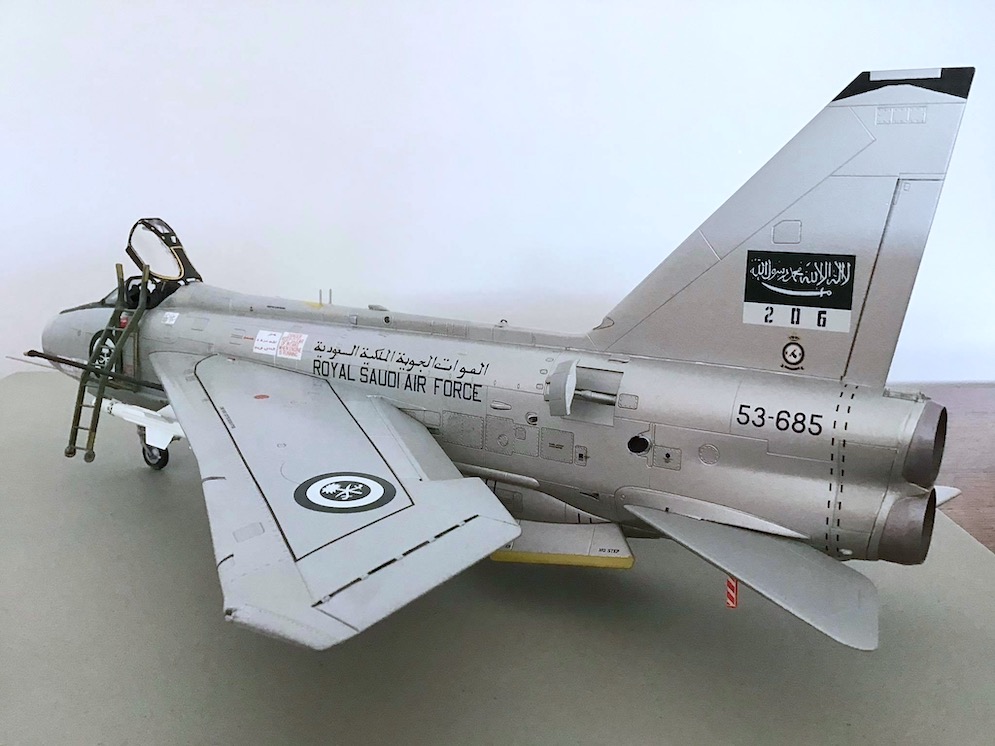
It’s a great kit of a great aircraft. The model was basically an ‘out of box’ build apart from aftermarket decals (Model Alliance) for the chosen scheme and the kit’s plastic pitot was replaced with a piece of Nickel Silver Wire cut to length.
Construction was speedy and straightforward.
I used grey acrylic car primer from a rattle can and Humbrol Metalcote Aluminium Enamels for the NMF. Selective panel shading was achieved by adding a tiny amount of black into the airbrush cup. A protective brush-applied coat of Klear/ Pledge was added before decaling and a further two coats after to achieve the level of finish.
The access ladder is homemade from plasticard and rod. I added a discreet wire hook to an inner edge so the ladder can be simply added or removed without any fuss.
I hope you enjoy viewing. Thank You.
Paul A.


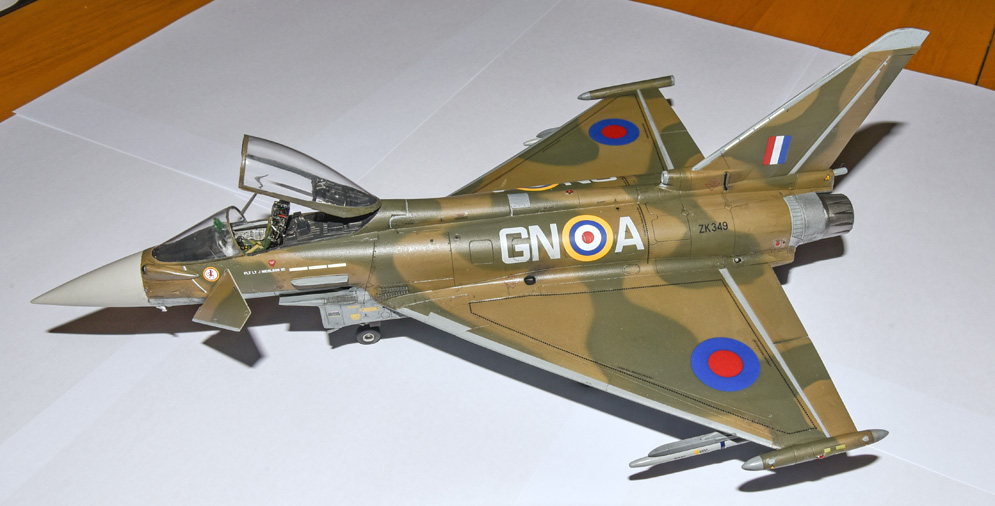
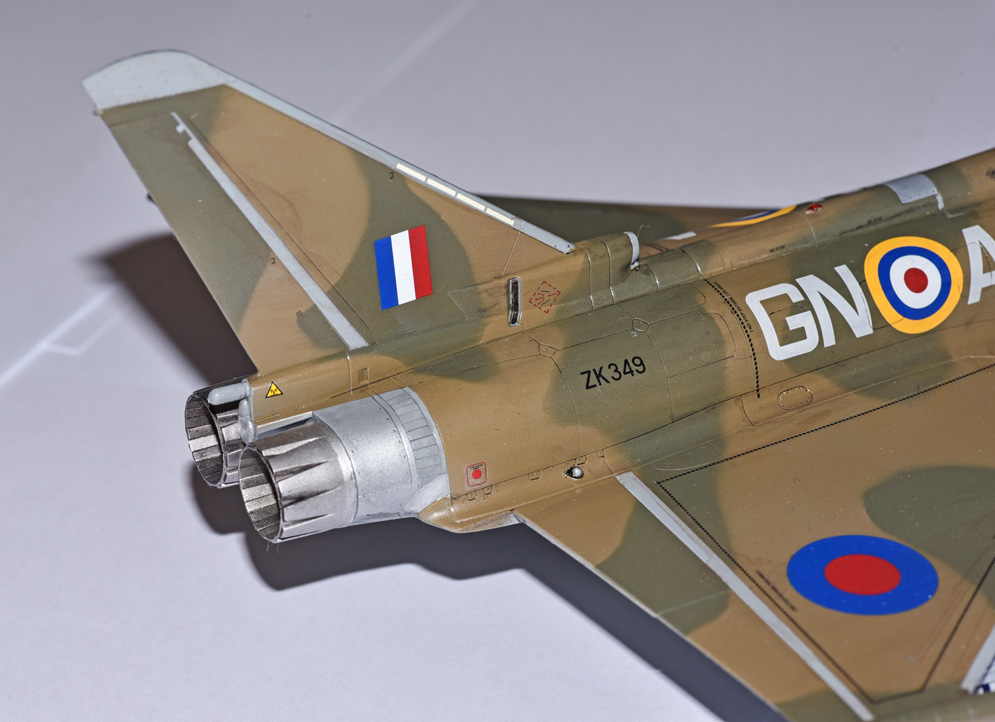
Not a single piece of aftermarket parts was used for this build, which is quite unique for me.
With a rivet wheel, a bunch of rivets was added on the wings, tail, and fuselage.
The model was painted with Gunze paints over Alclad black primer and weathered with grey wash and pastel powders.
Hope you like it!
René VDH.


Kit – Revell 1:48 Bronze Tiger – kit no. 03949
Built out of the box.
Decals – Caracal set No. 48090
Paints used:
Mr Hobby
Alclad2
Revell enamels
Hope you like it!
Keith S.
Galleries: A | B | B-2 | C | D | F | G | H | I-L | M | N-R | S | T-V | W-Z