Galleries: A | B | C-E | F | G | H | I-J | K-L | M | N-R | S | T-V | W-Z
More of our Subscribers’ amazing aircraft: I-J
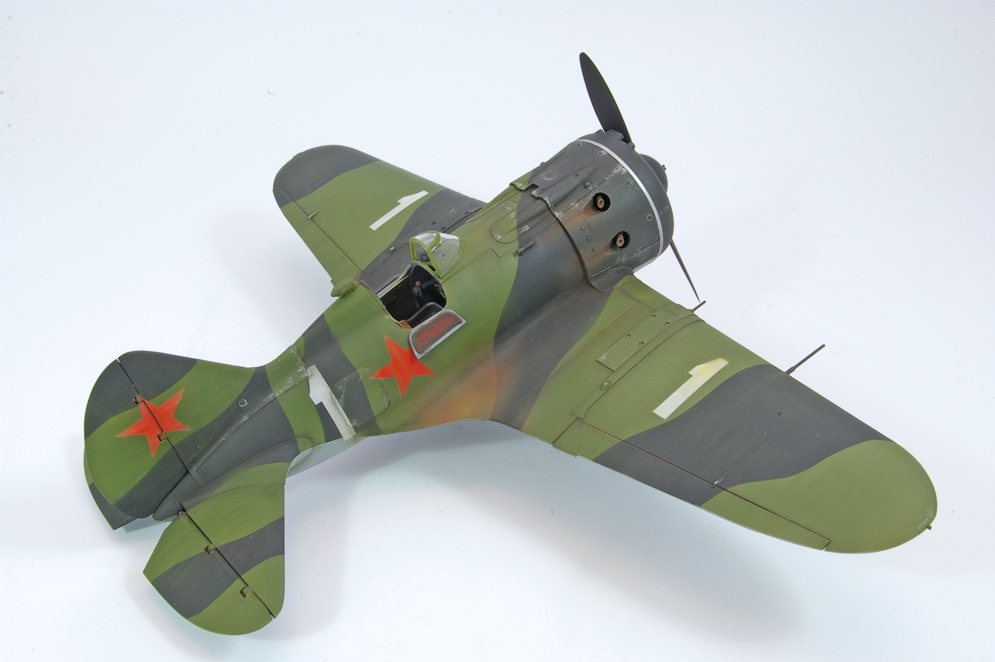
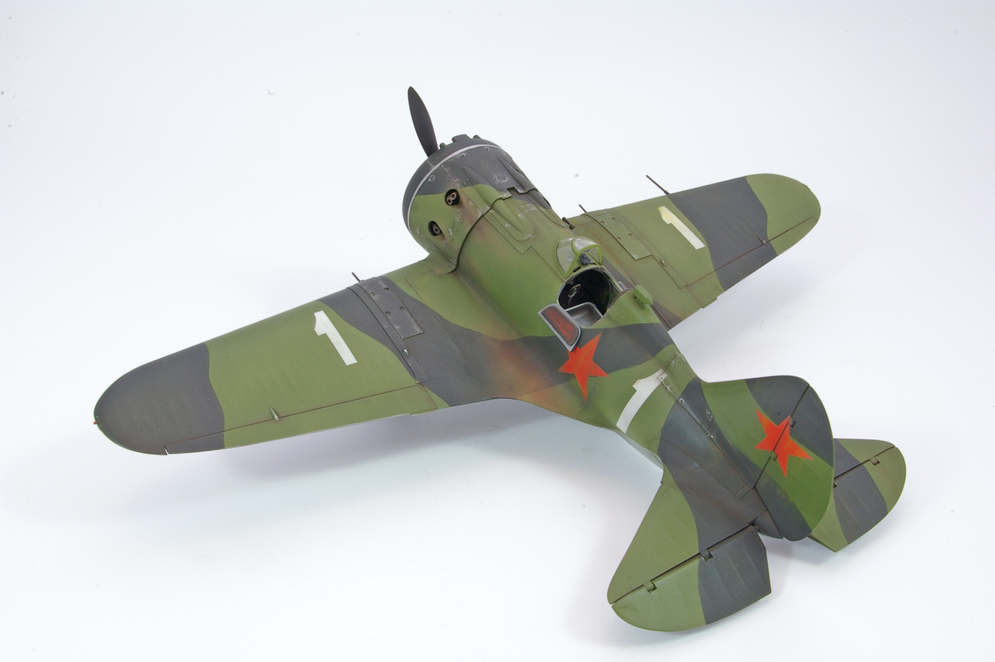
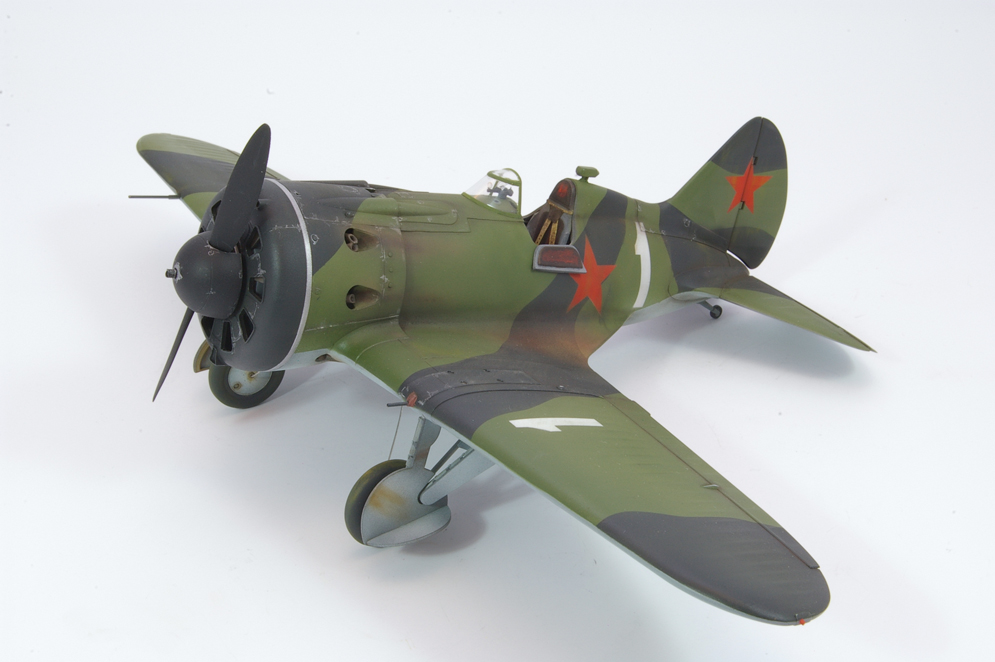
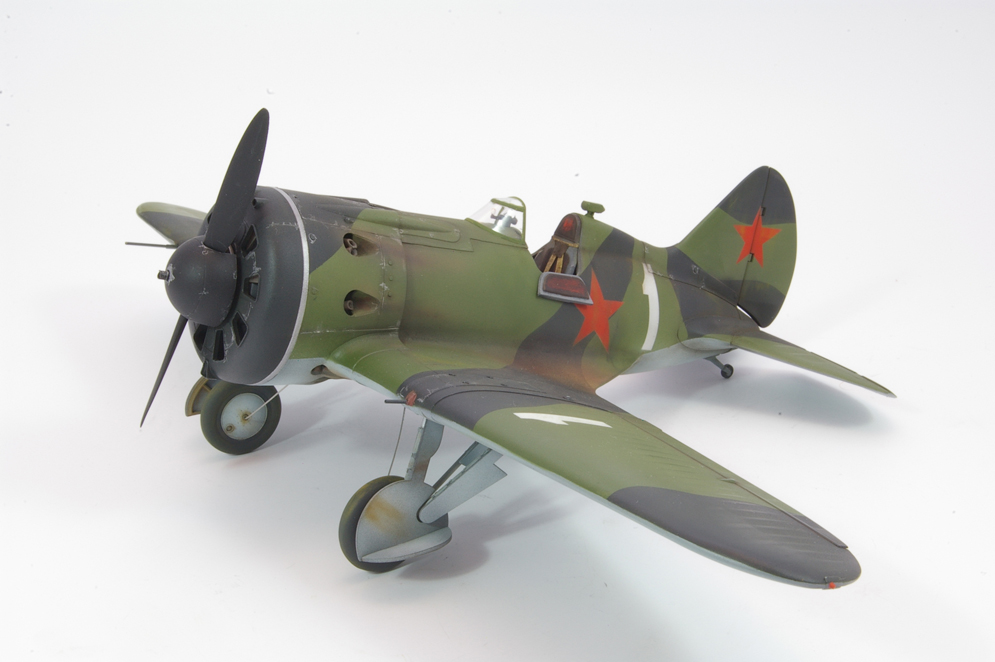
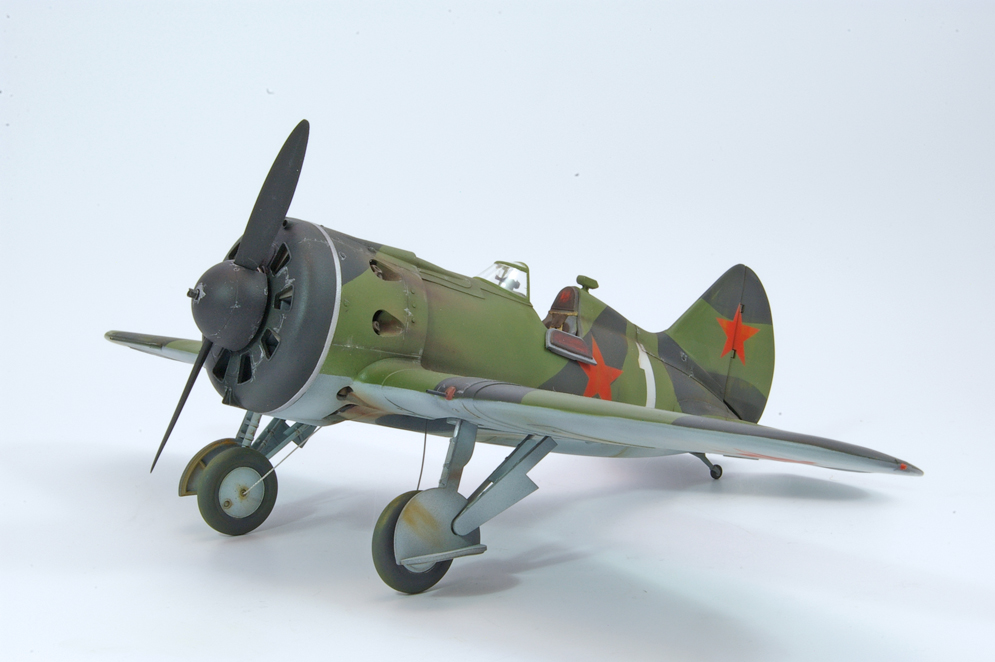
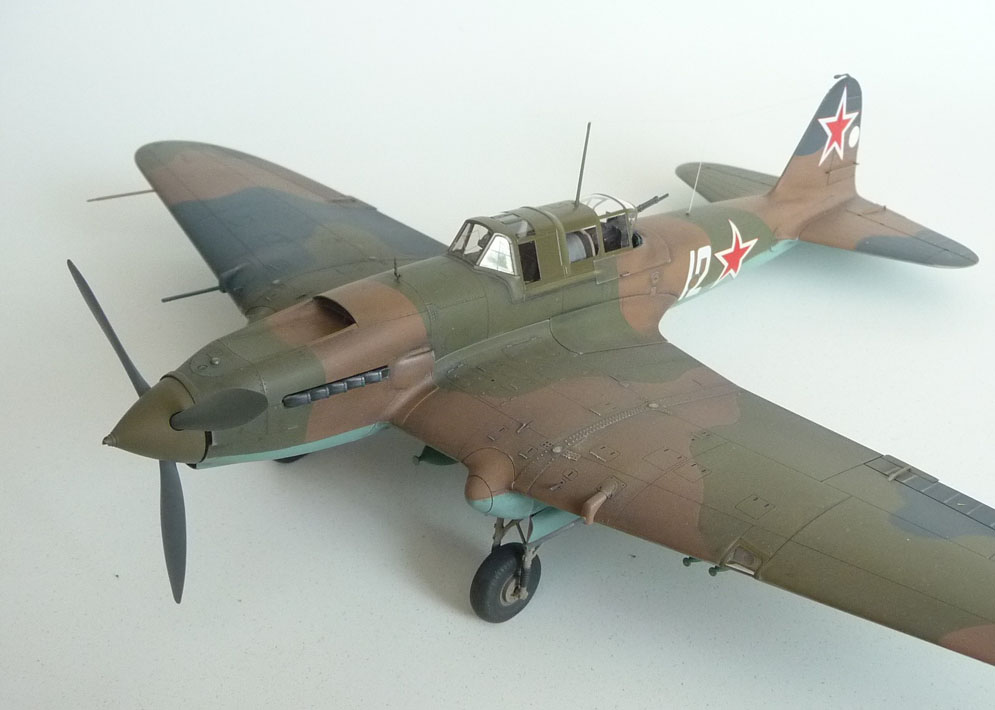
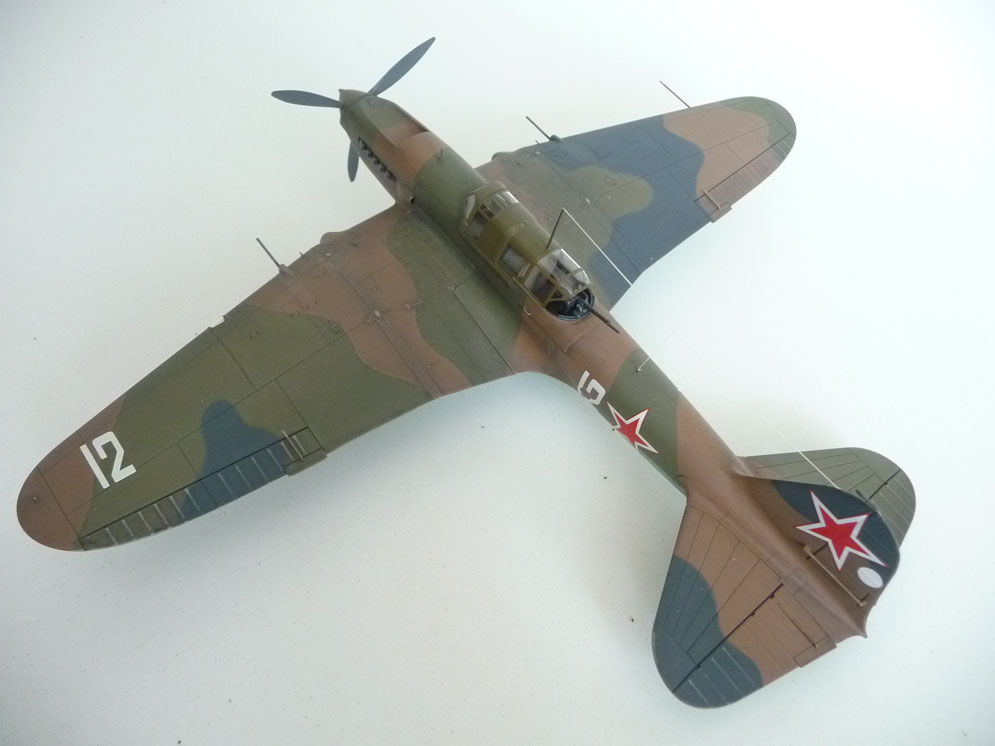
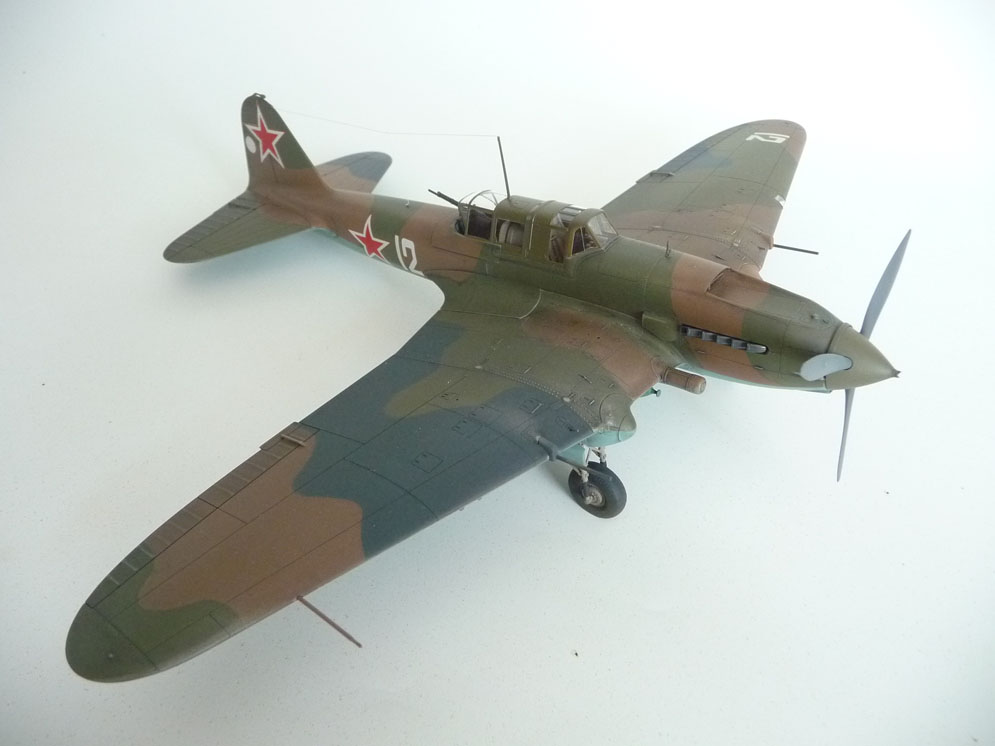
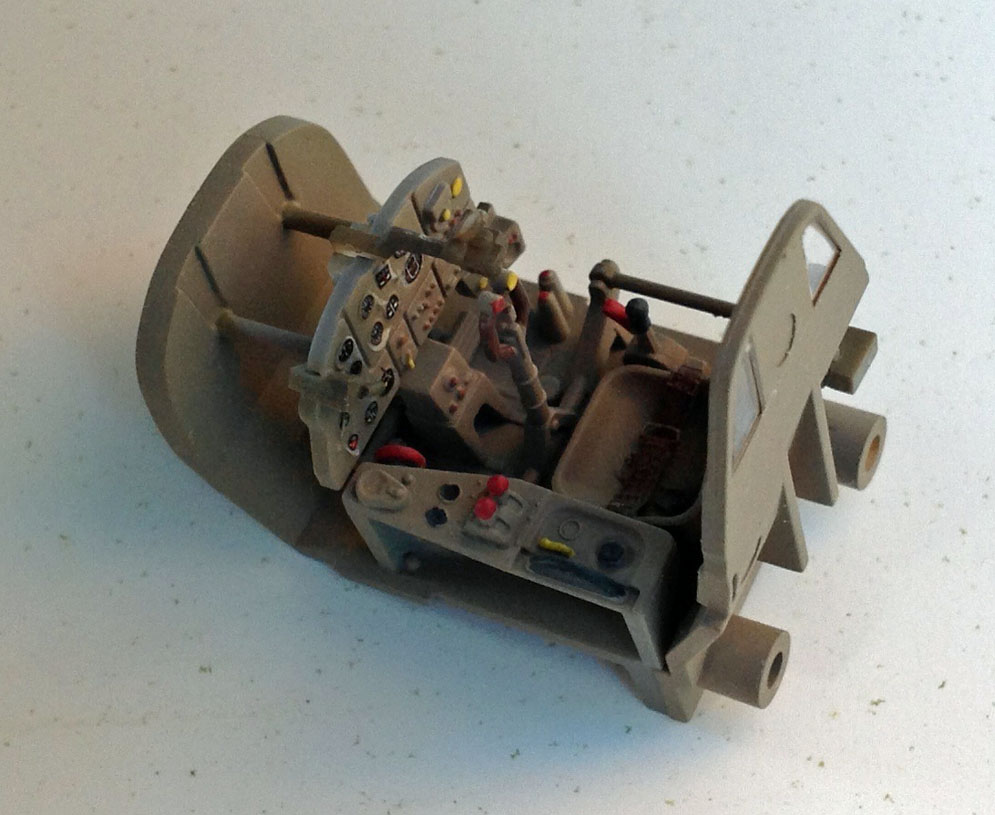
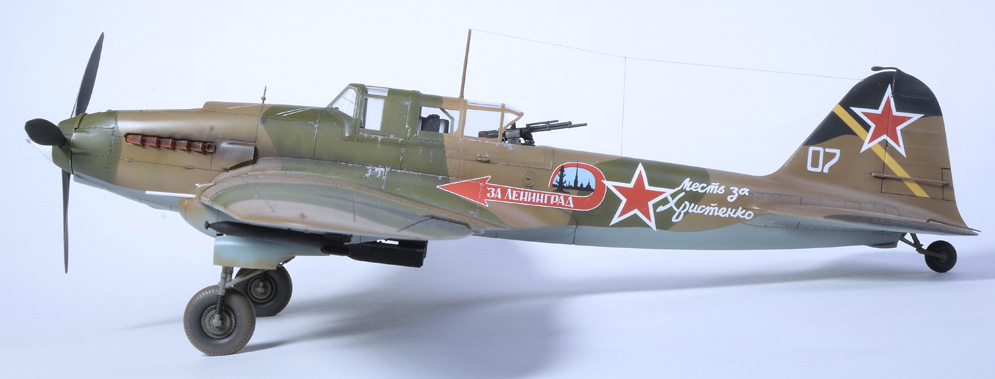
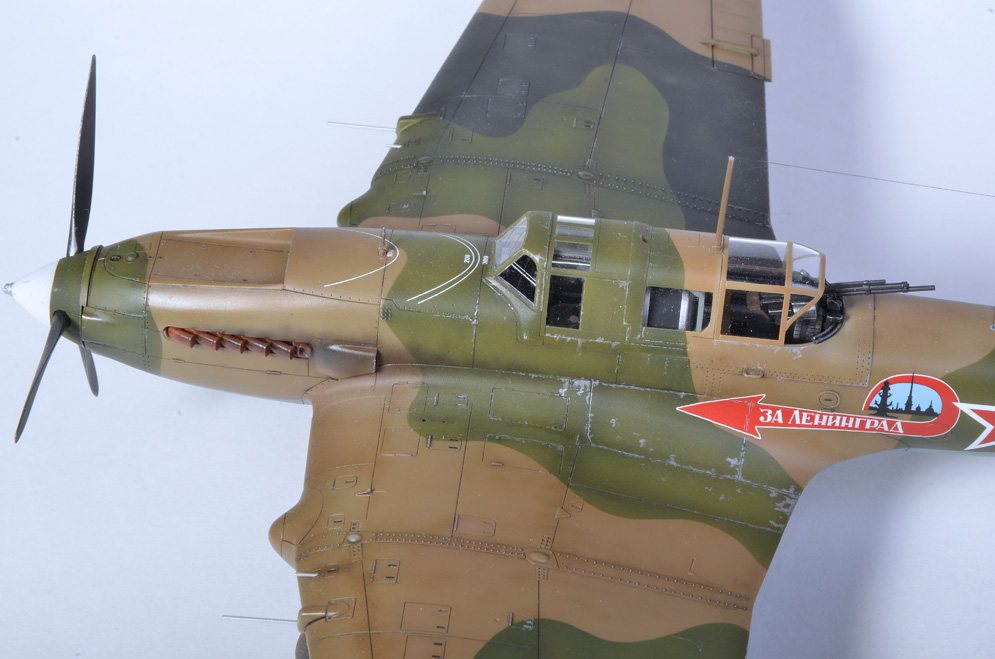
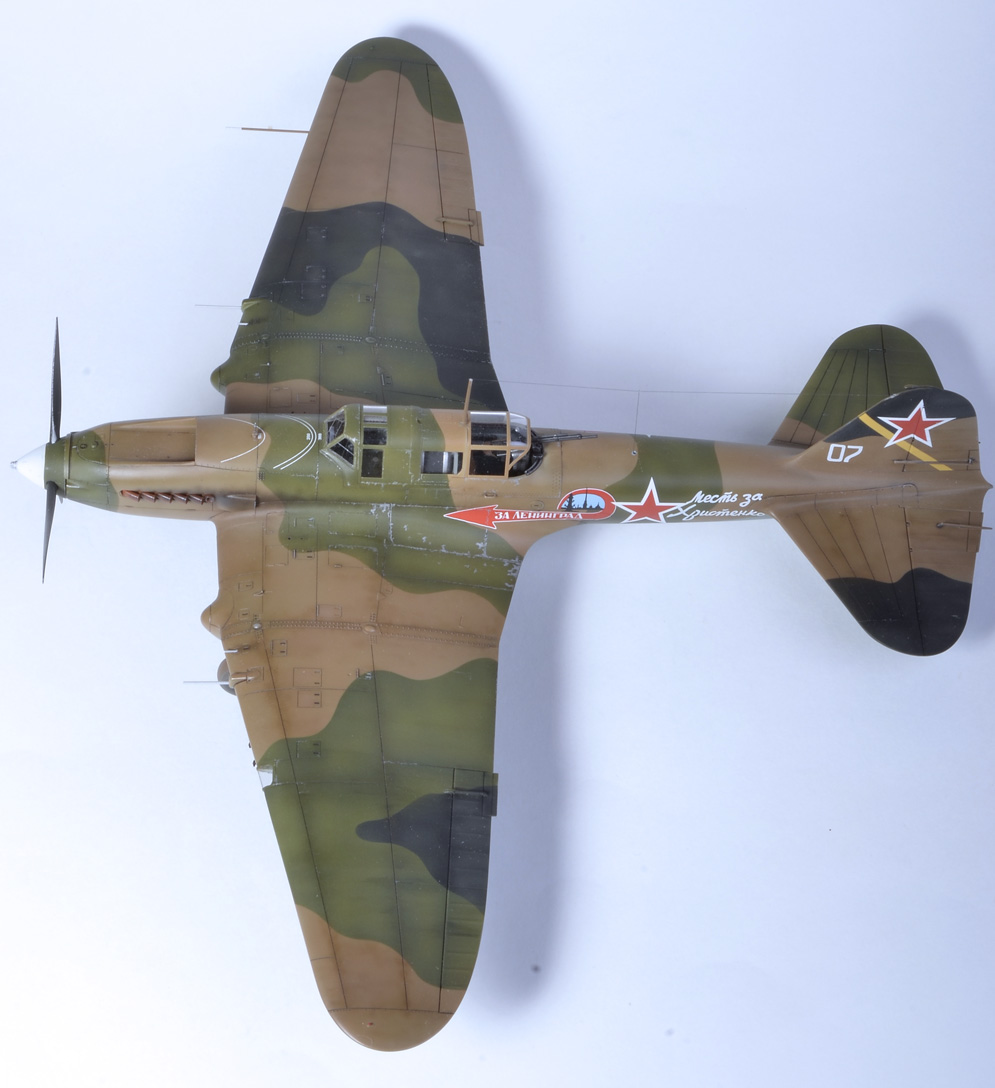
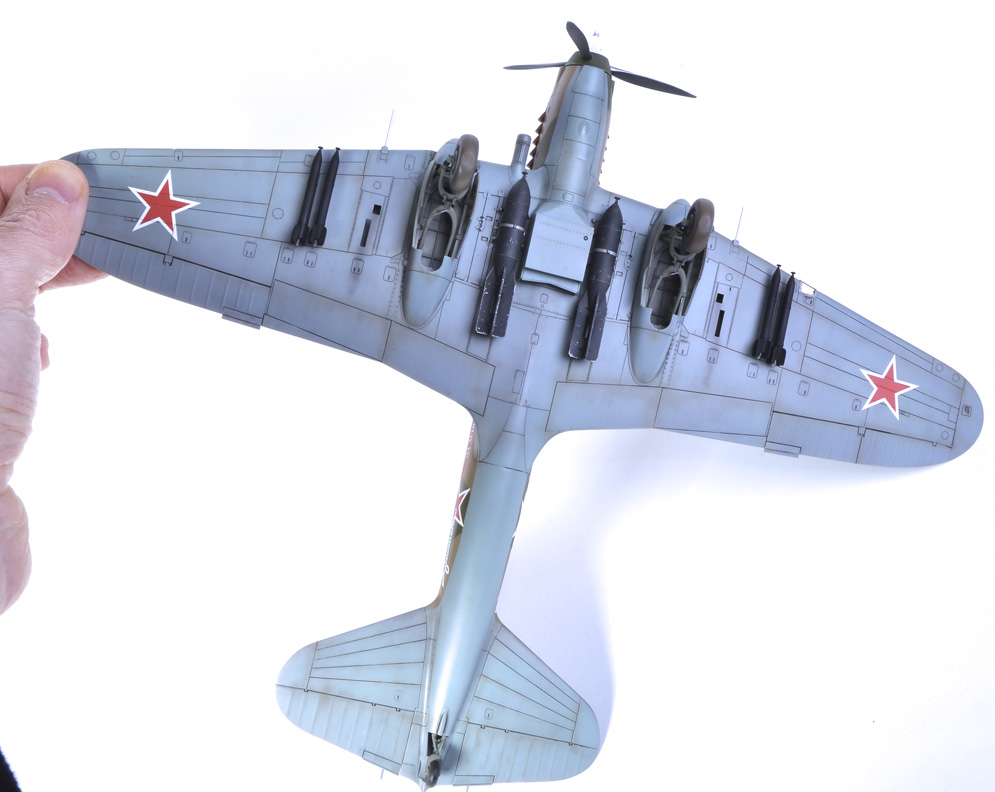
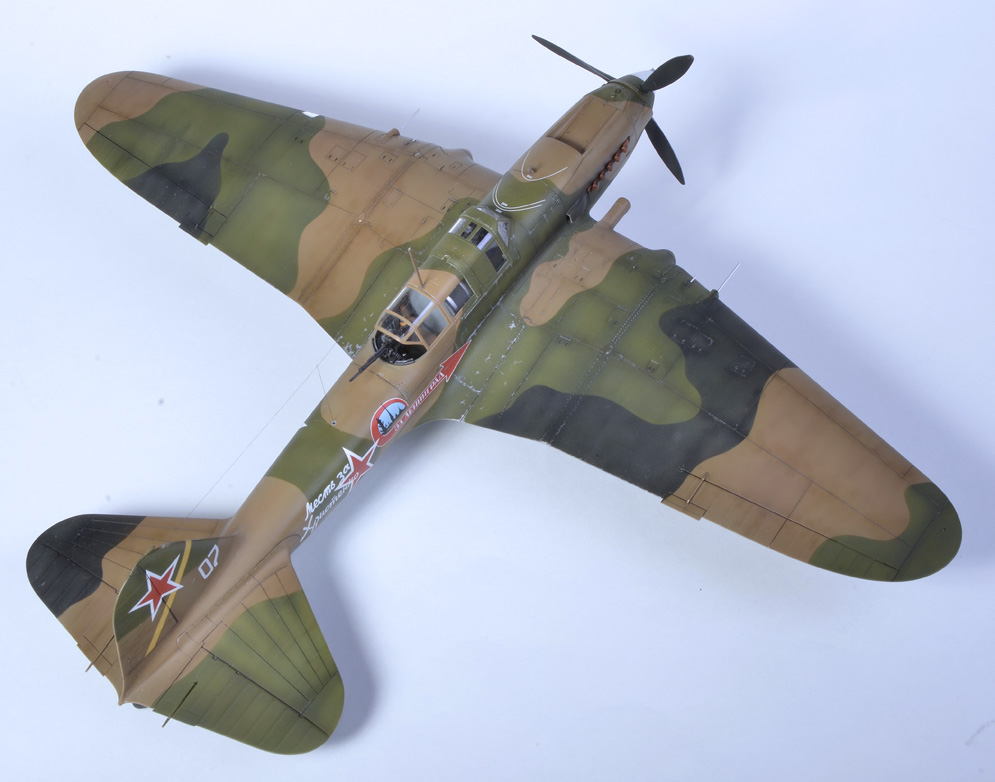
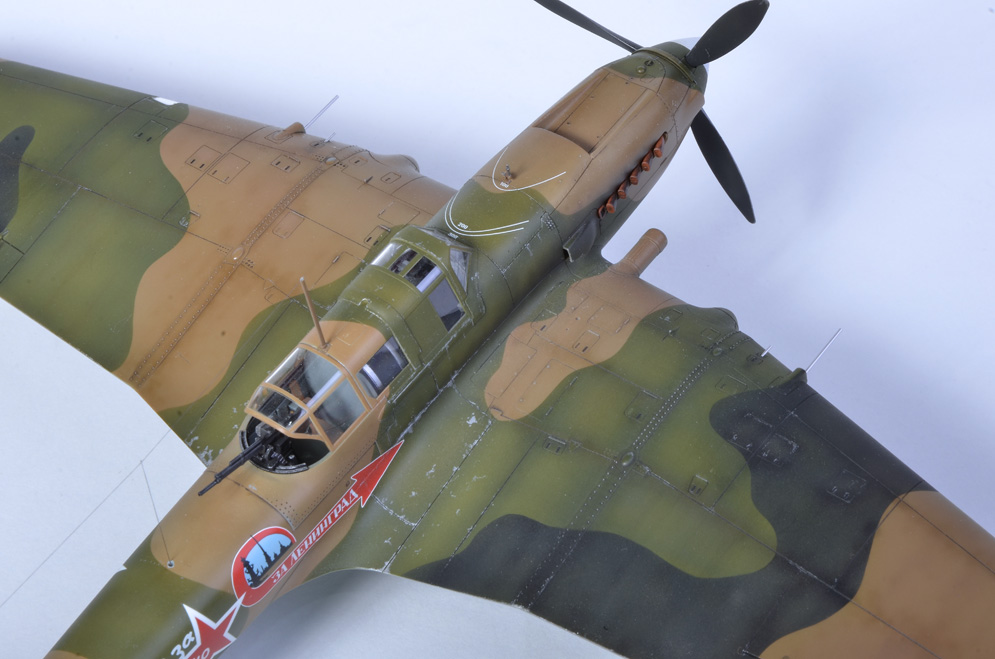
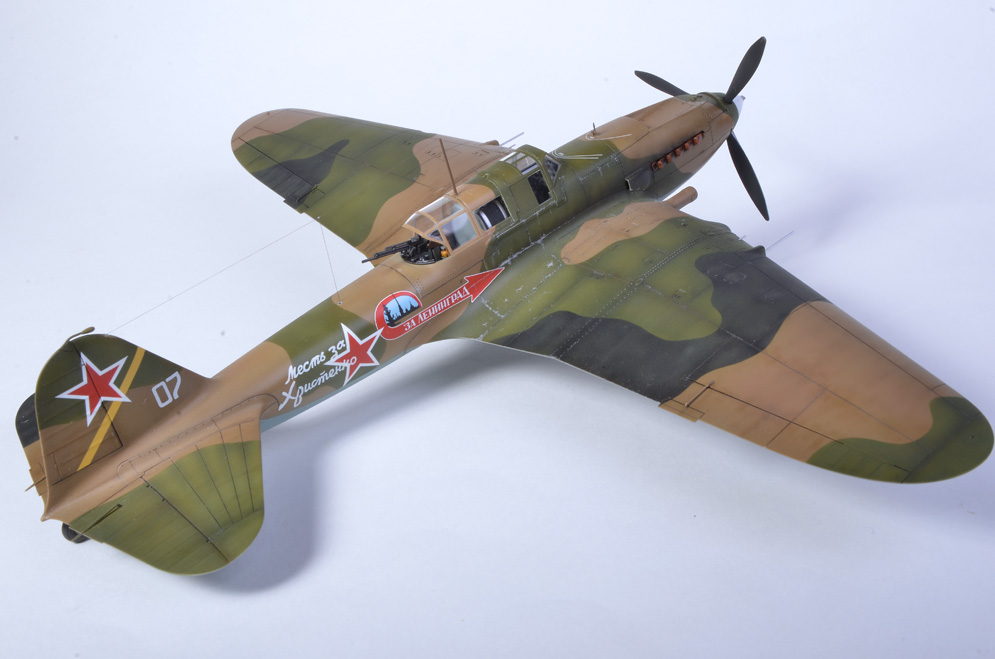
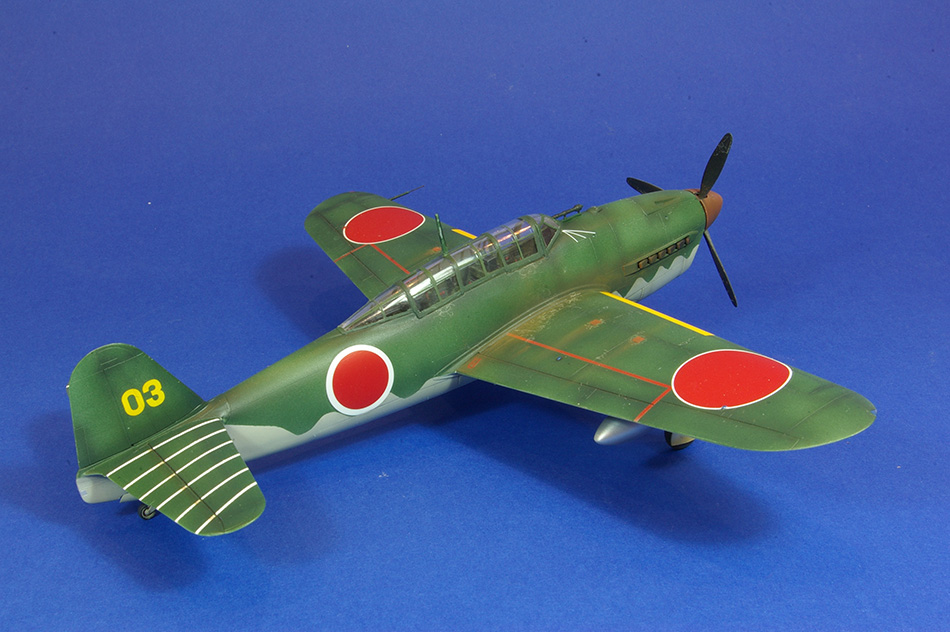
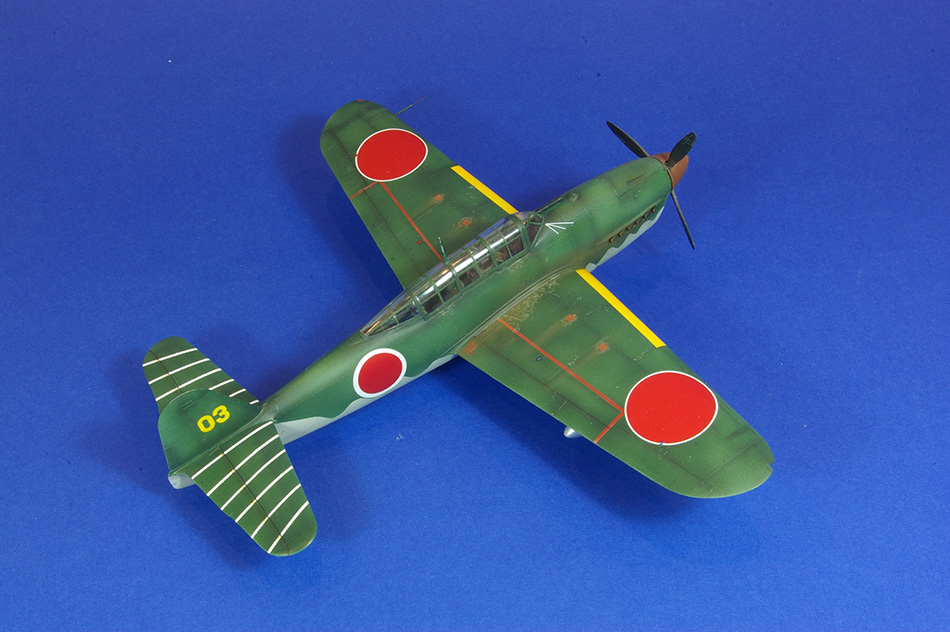
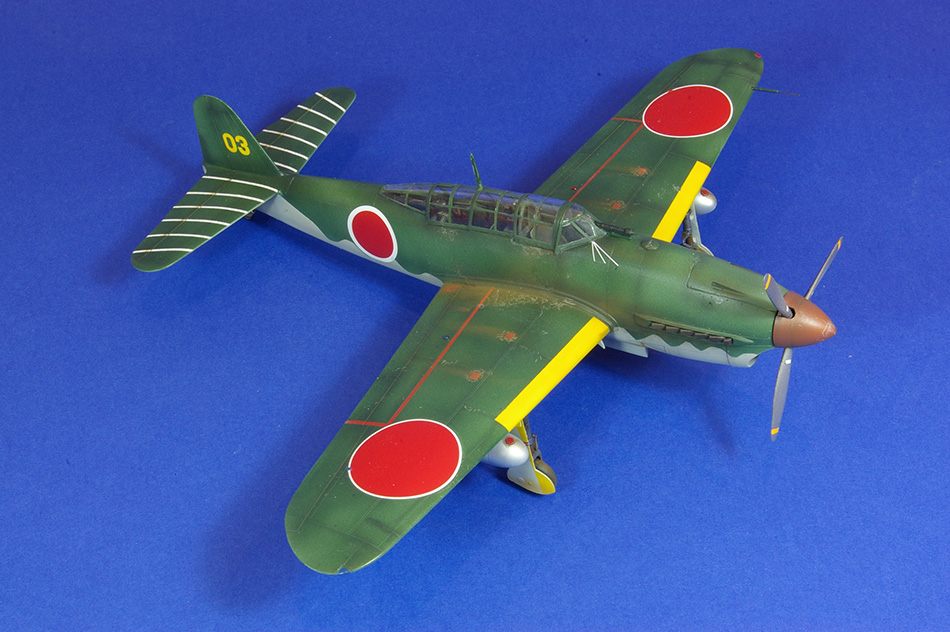
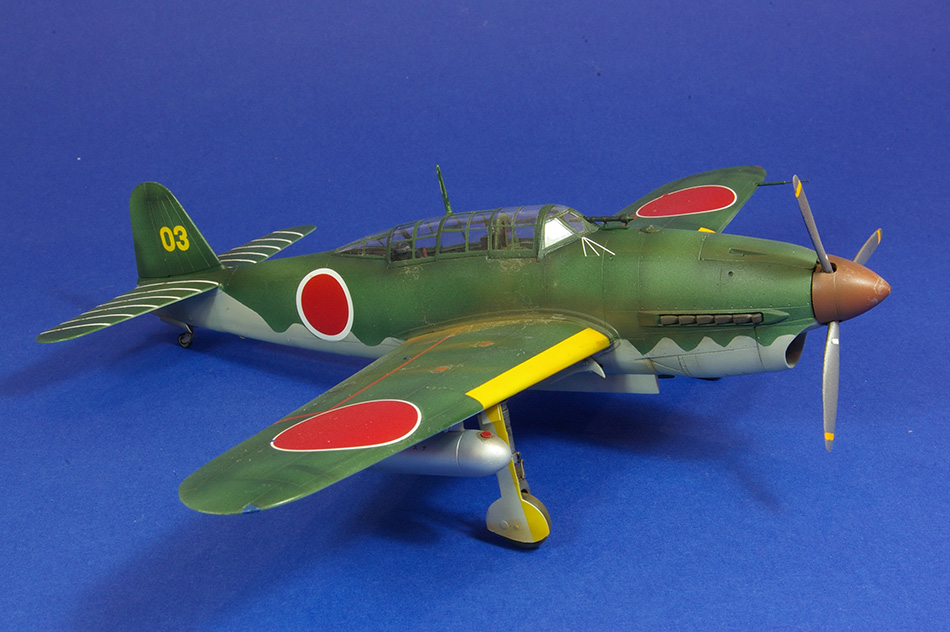
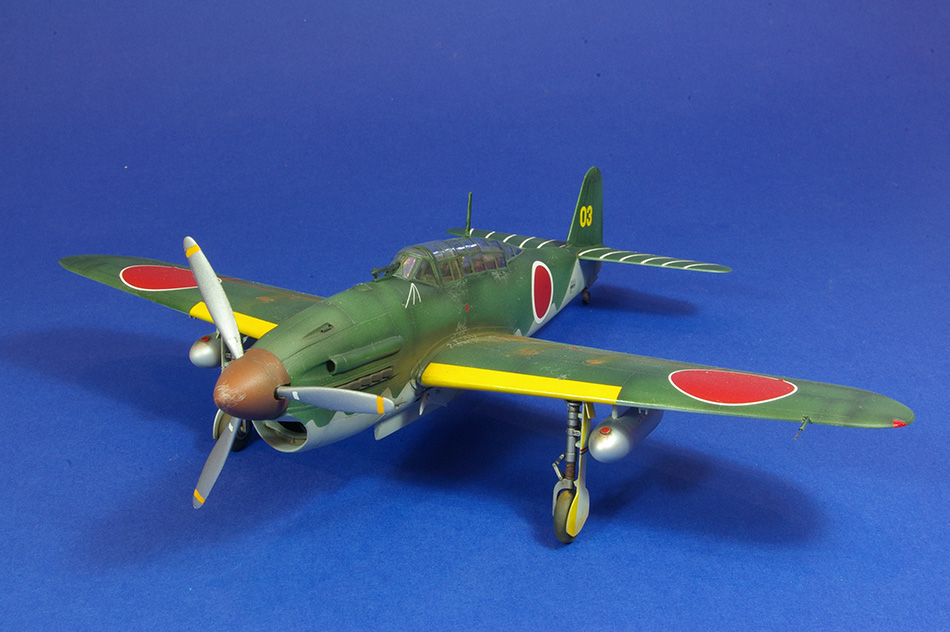
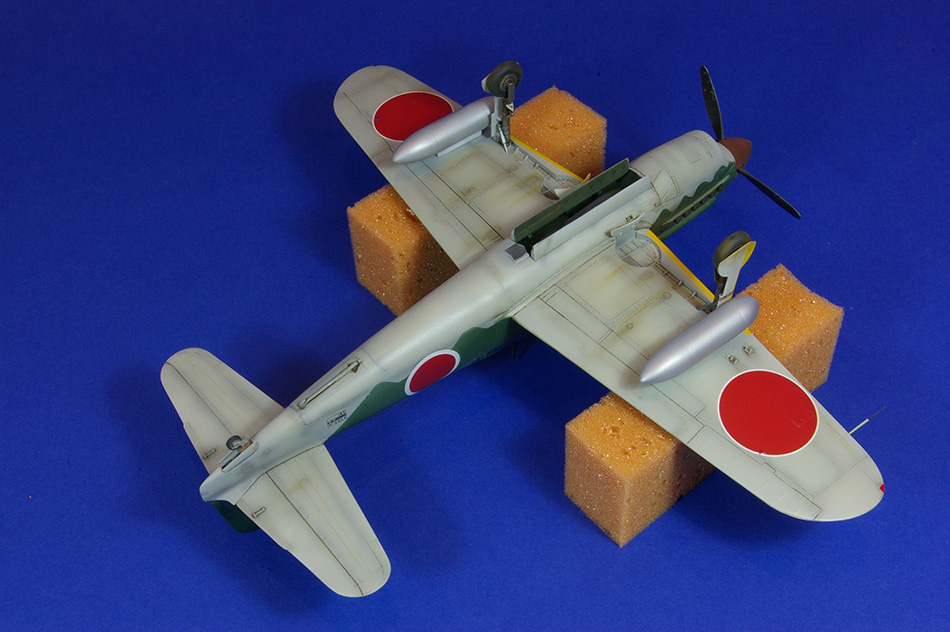
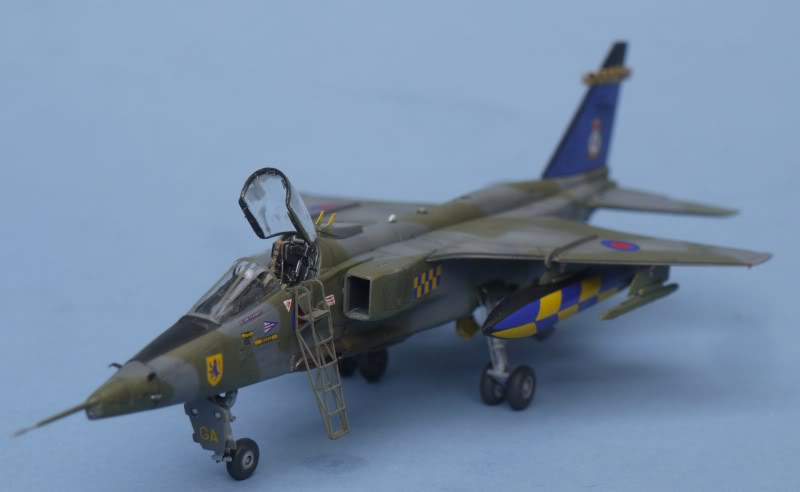
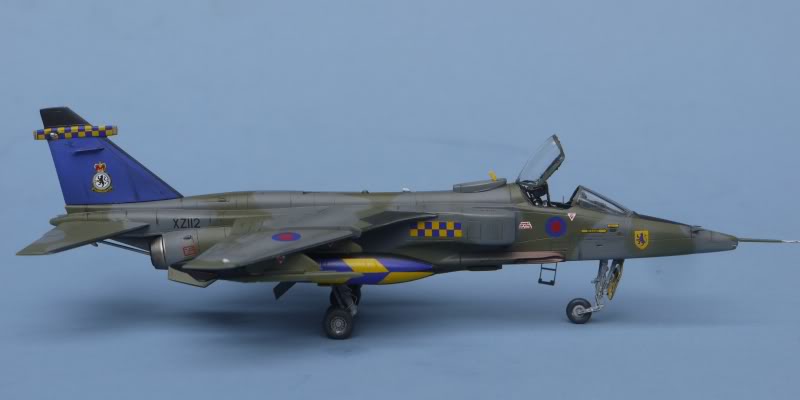
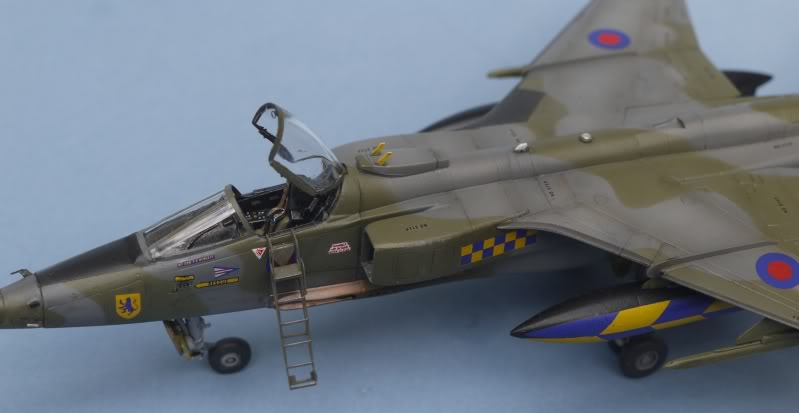
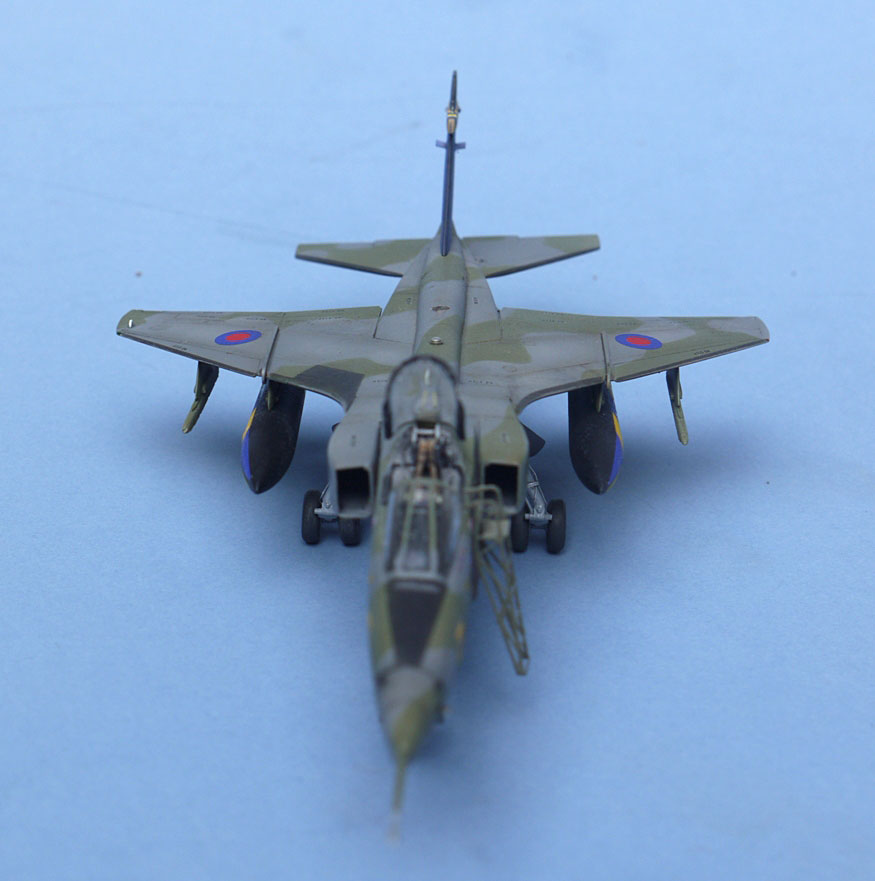
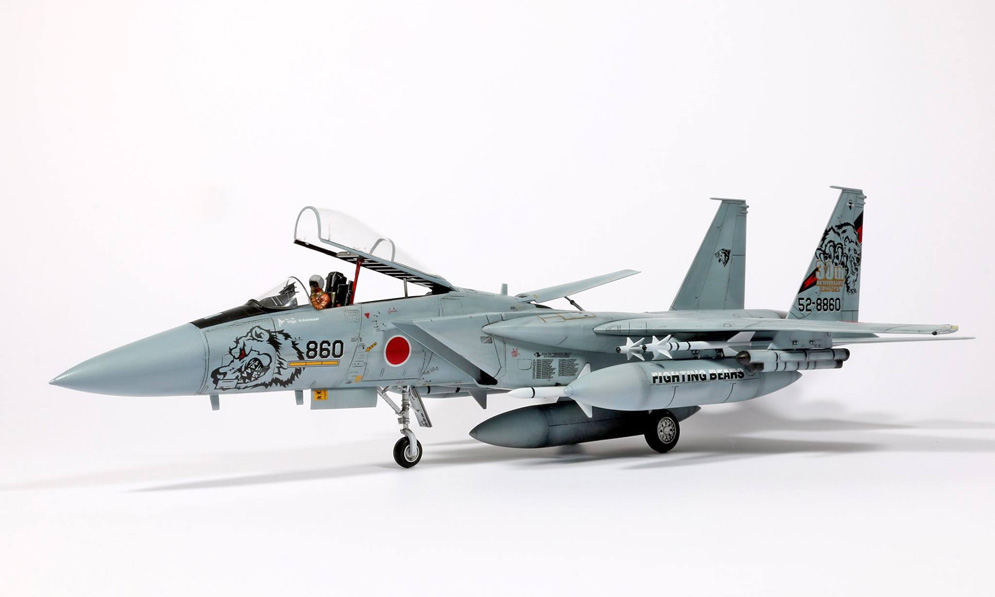
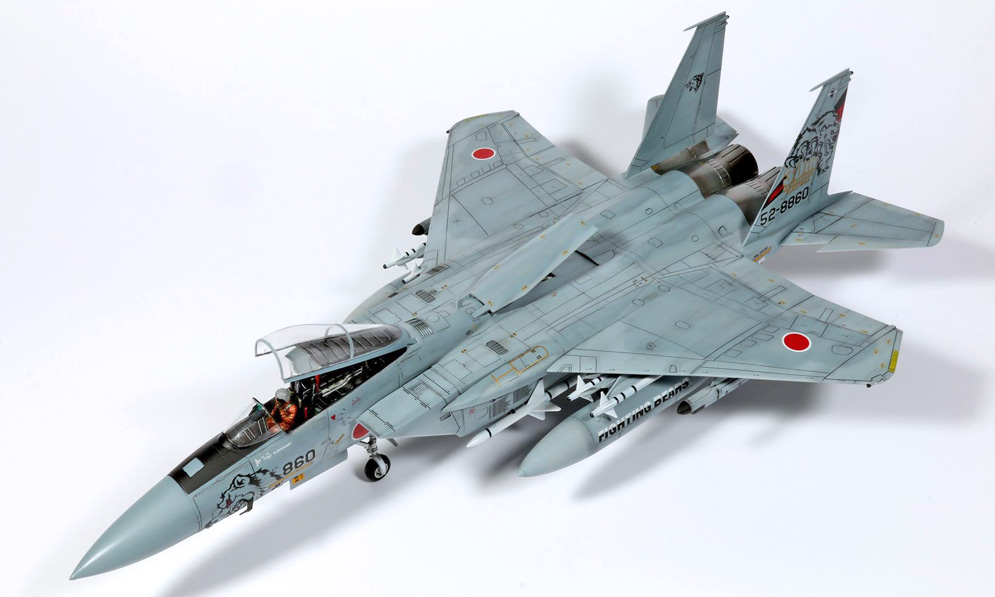
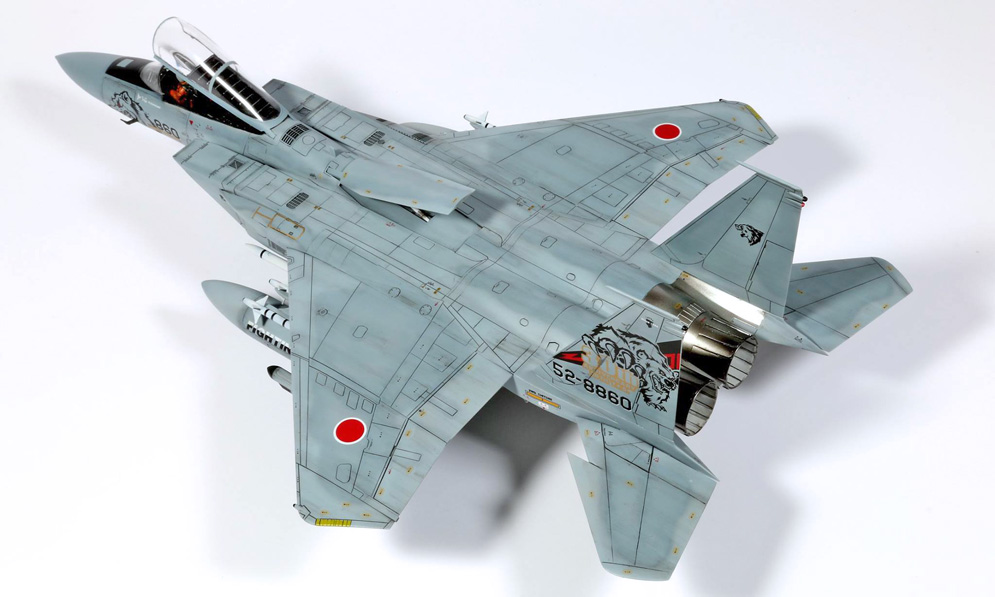
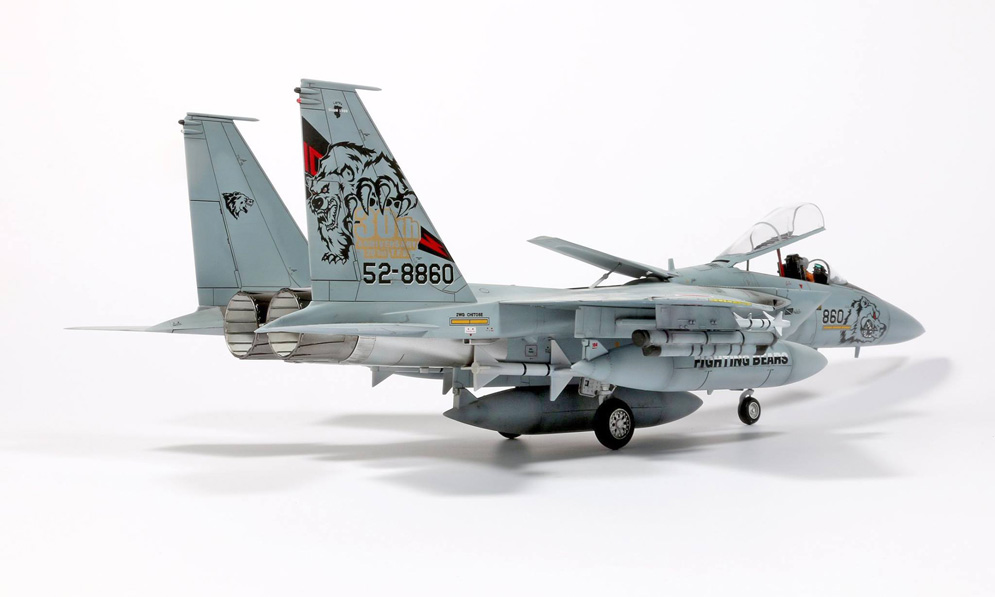
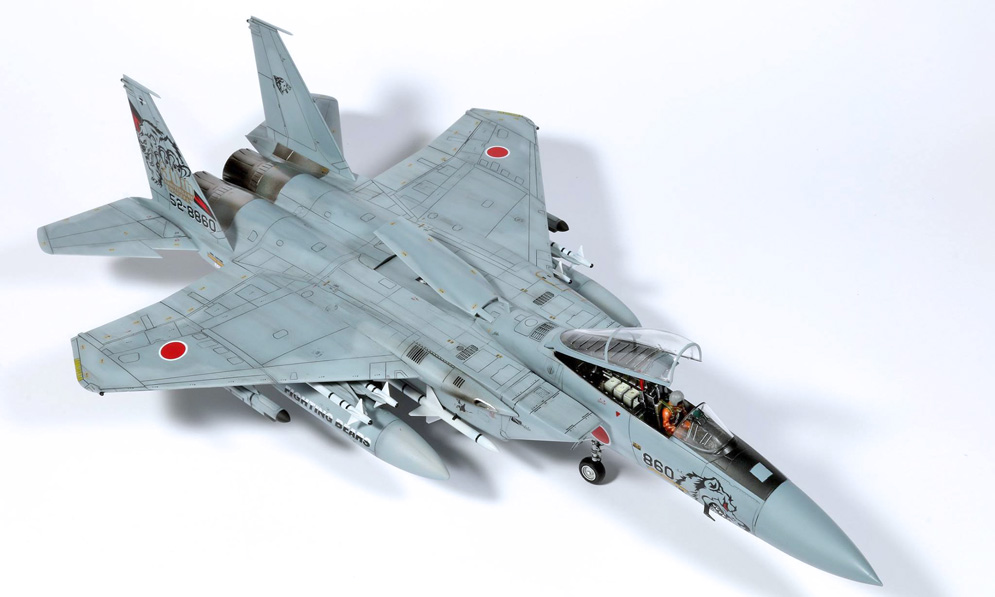
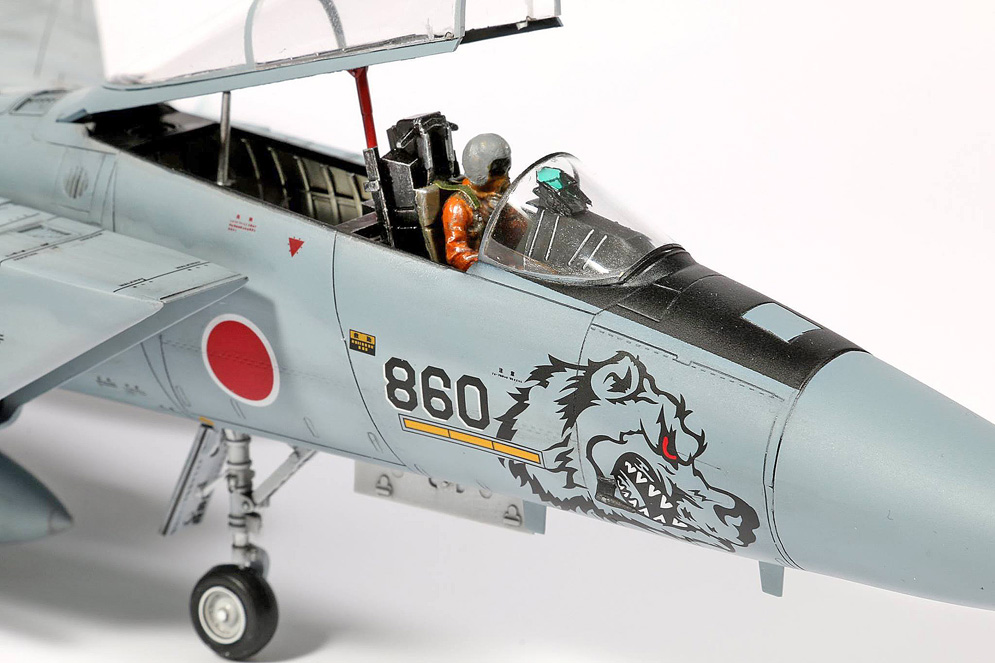
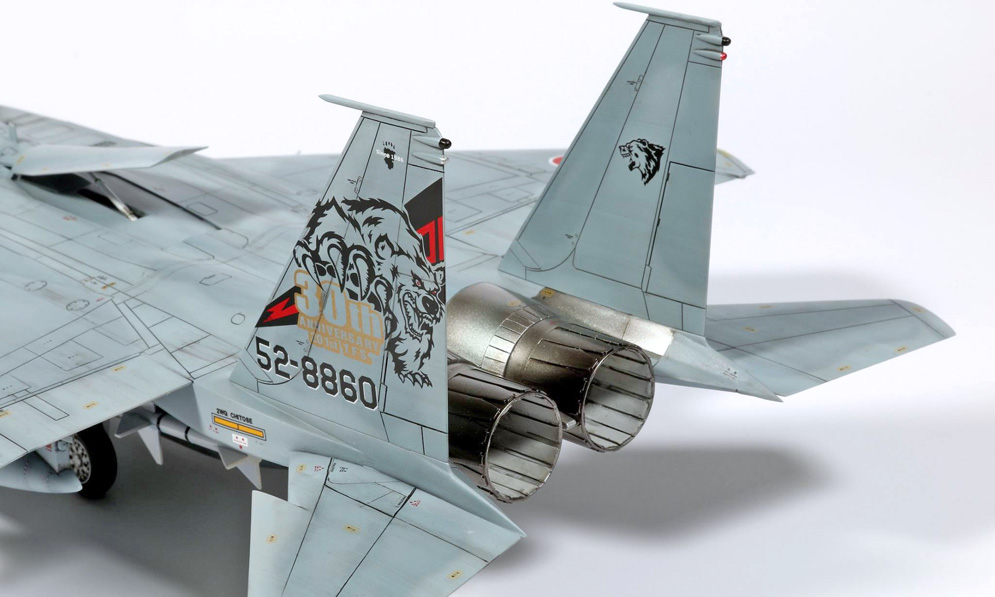
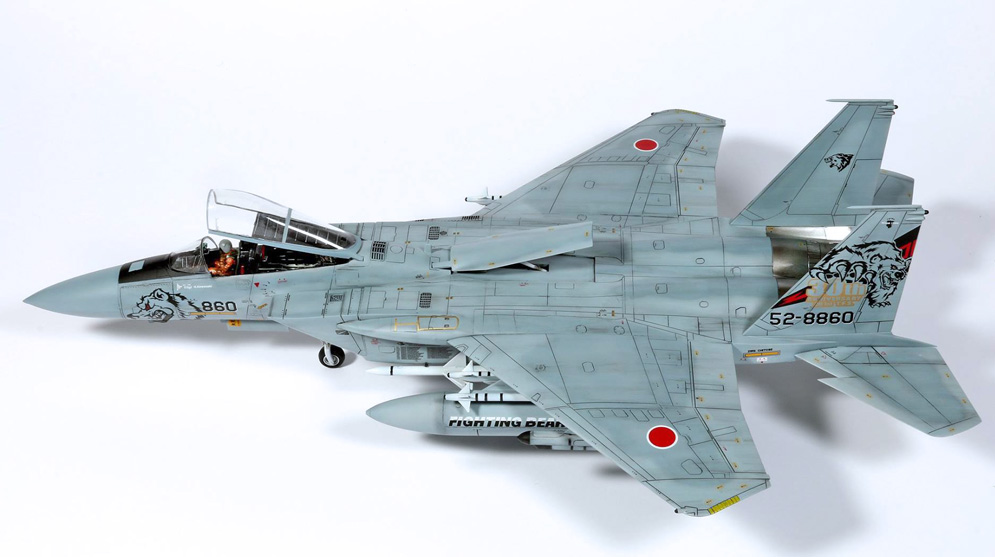
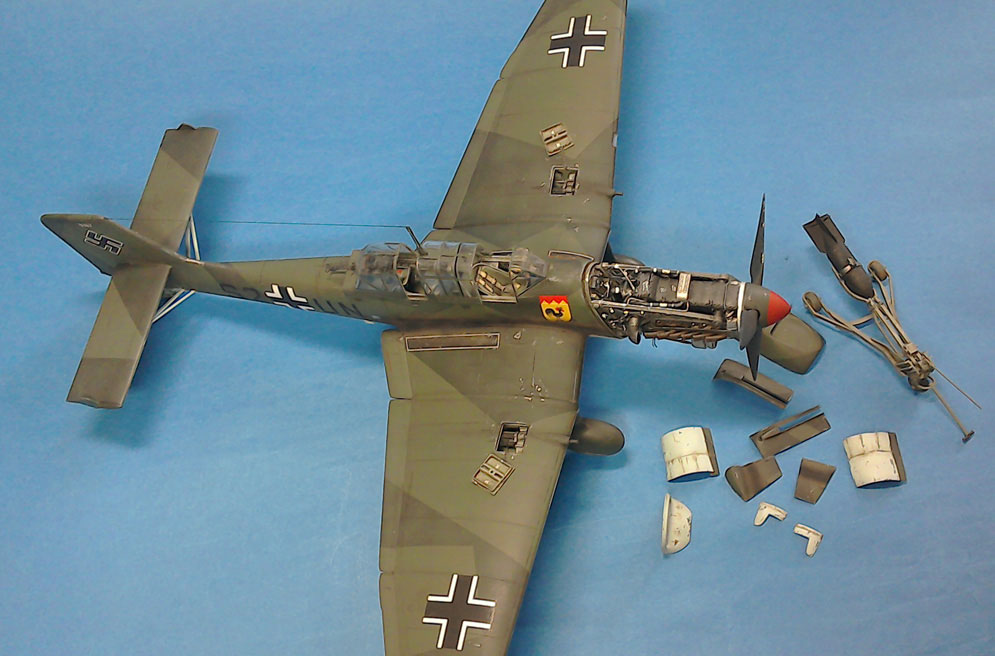
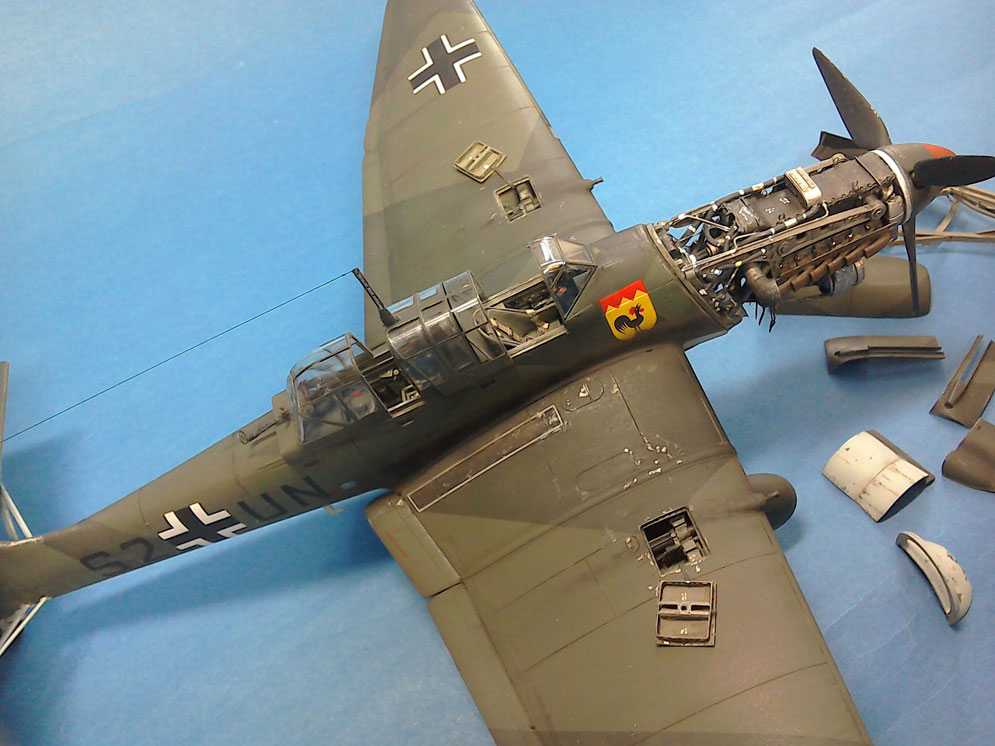
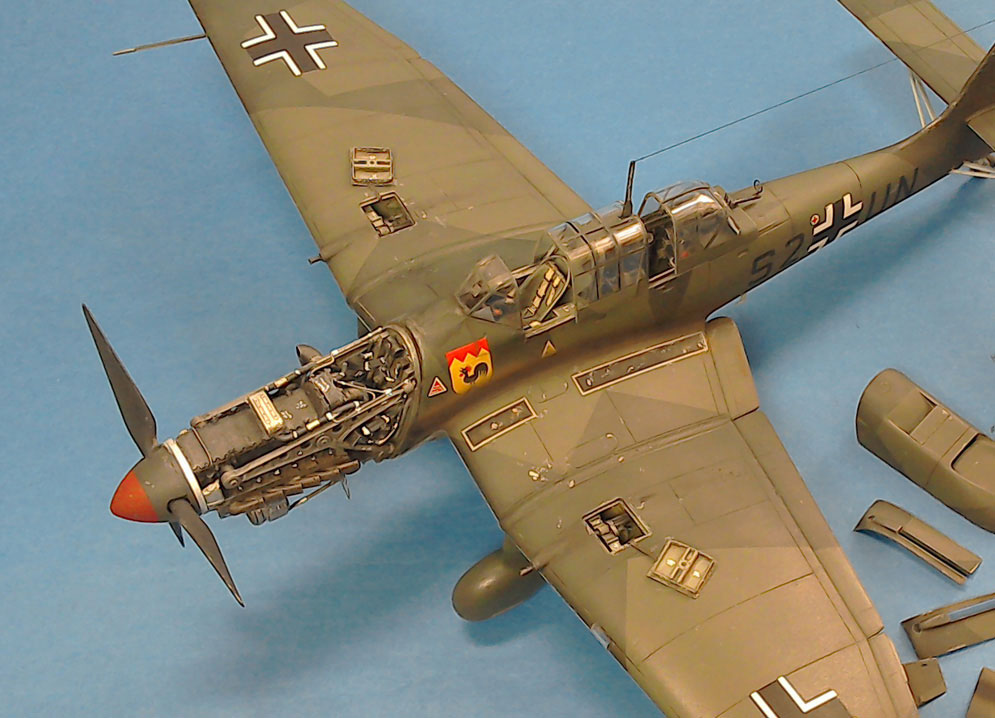
The model was made with only a few modifications. The machine guns and pitot were replaced with telescoping tube from Albion Alloys allowing me to have hollow ends to the parts.
No seat belts are supplied in the kit and so I attempted to make some from parchment paper soaked in diluted white glue. This was not as successful as I had hoped and next time I build a kit in this scale I will acquire some photo etched or preferably cloth seat belts.
The undercarriage was retracted using cables and these were replicated using fine braided wire.
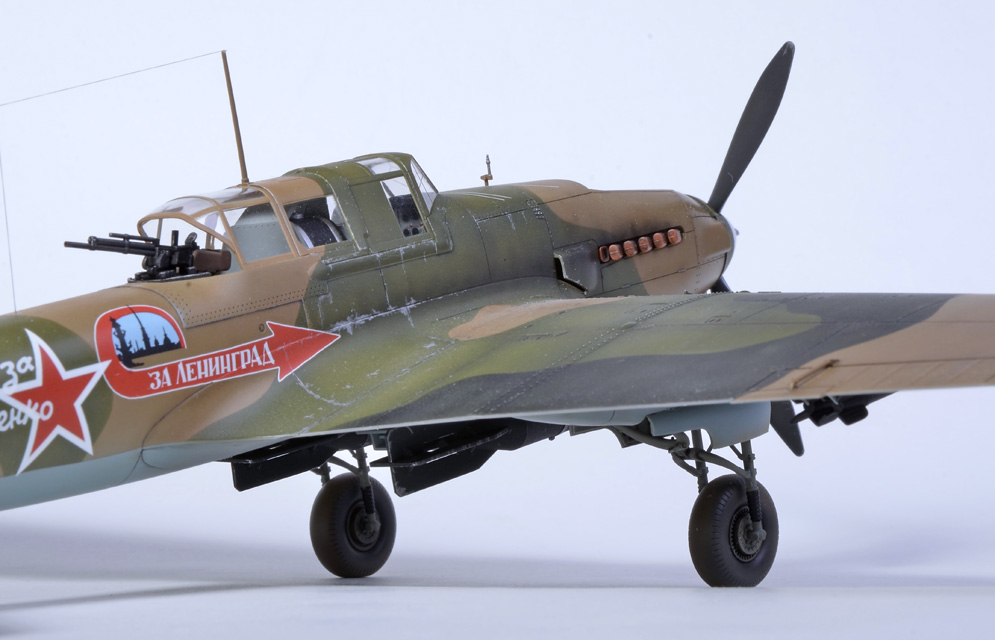
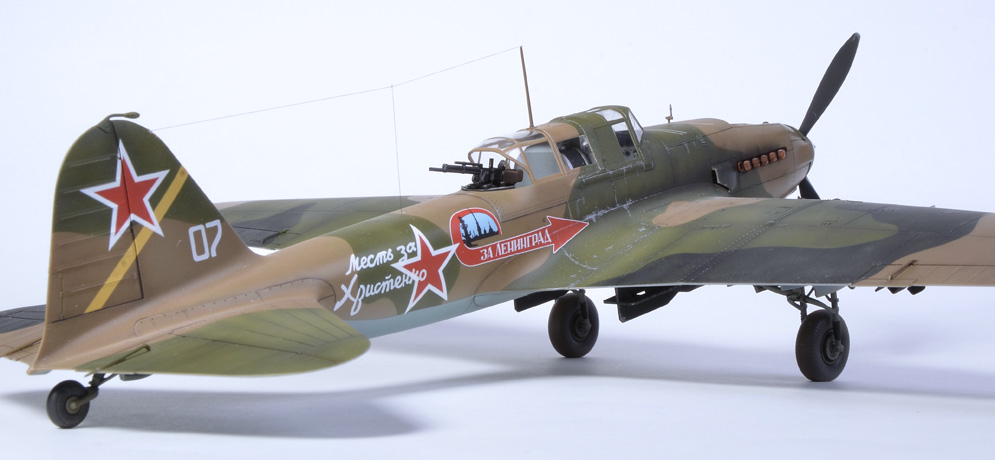
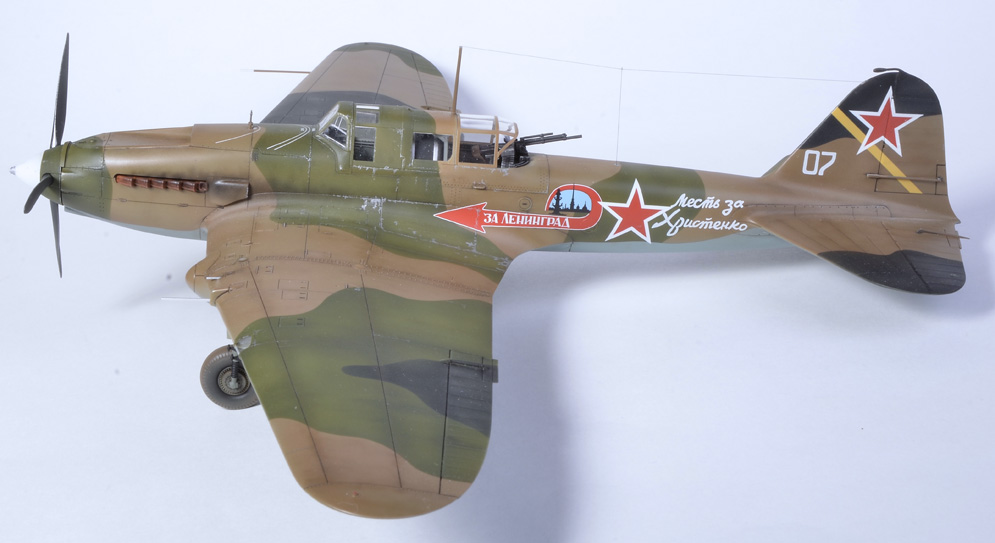
I deviated from the colour schemes available in the kit as I did not wish to use transfers. I made some masks using masking film placed on top of photocopies of the transfer sheet and based the final colour scheme on a photo I found on the internet. I find that red is a difficult colour to spray (particularly over dark colours) and so the stars were sprayed in white first.
My reference photo showed a very battered and beaten up aircraft with what appeared to be quite roughly applied markings, but I couldn’t bring myself to make things look quite that messy!
Weathering was done using some chipping applied with a silver pencil and pastels were then applied to the wing roots to replicate the worn dirty areas seen in photos. Pastels were also used to add some depth to the recessed areas and to give the impression of some exhaust staining.
Hope you like it!
Dai W.
I first did this when I built a Tamiya 1/48th scale Douglas A-1H Skyraider.
Since then I have used this technique on almost every model I’ve made.
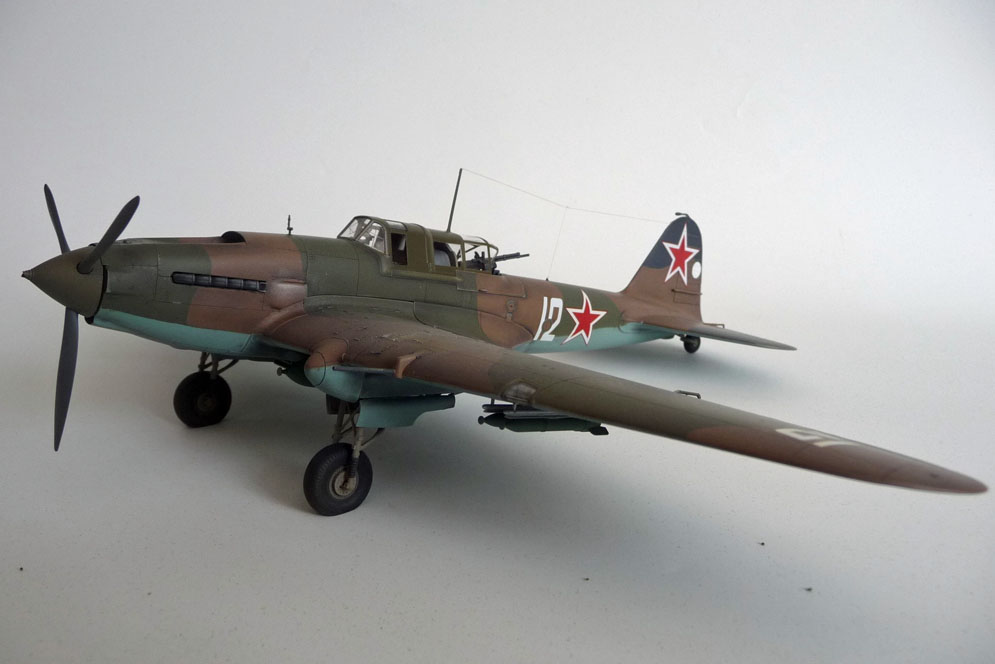
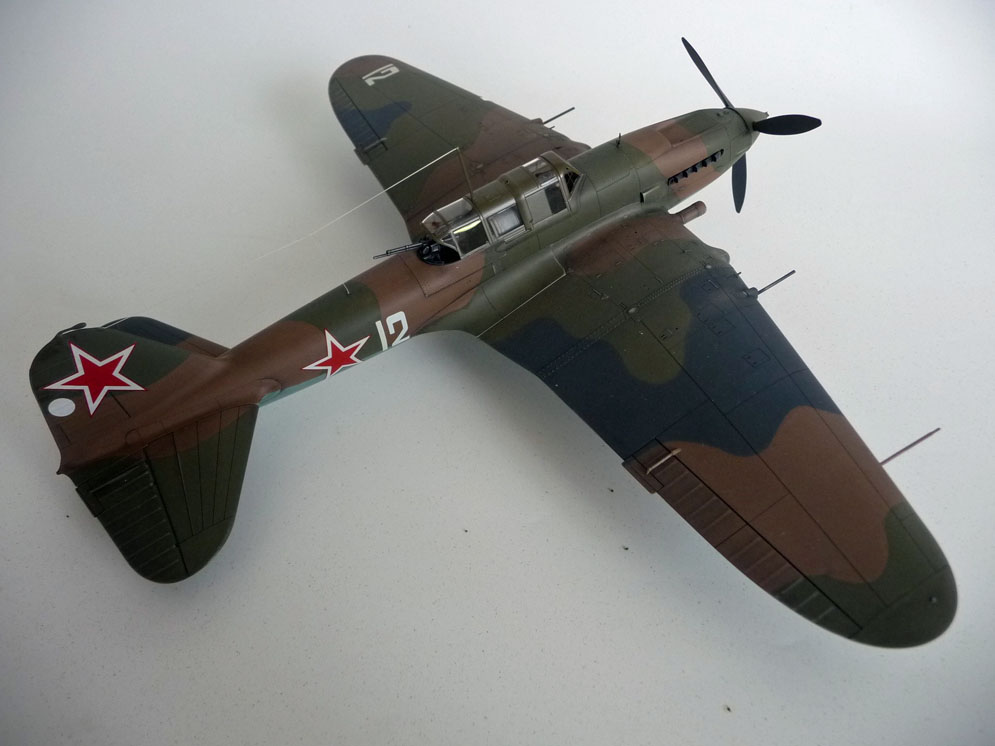
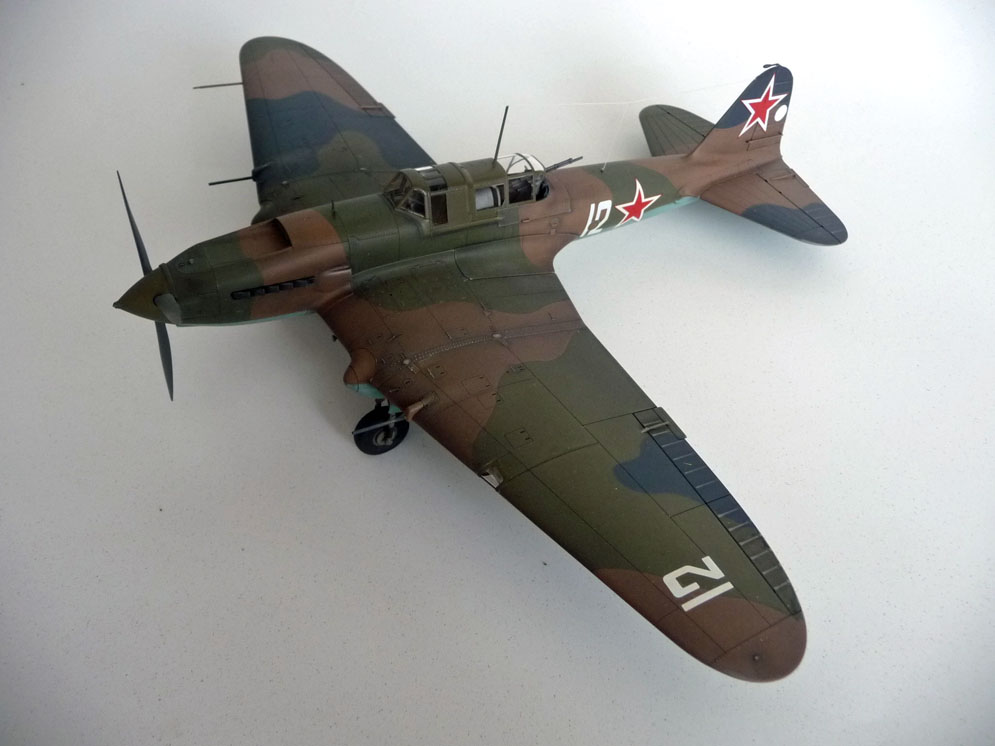
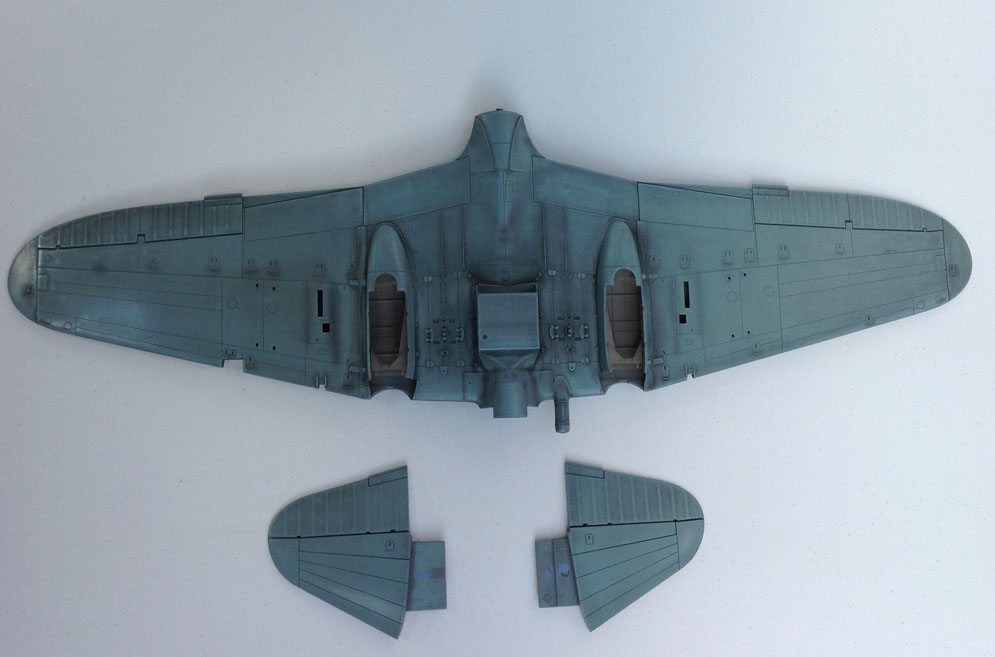
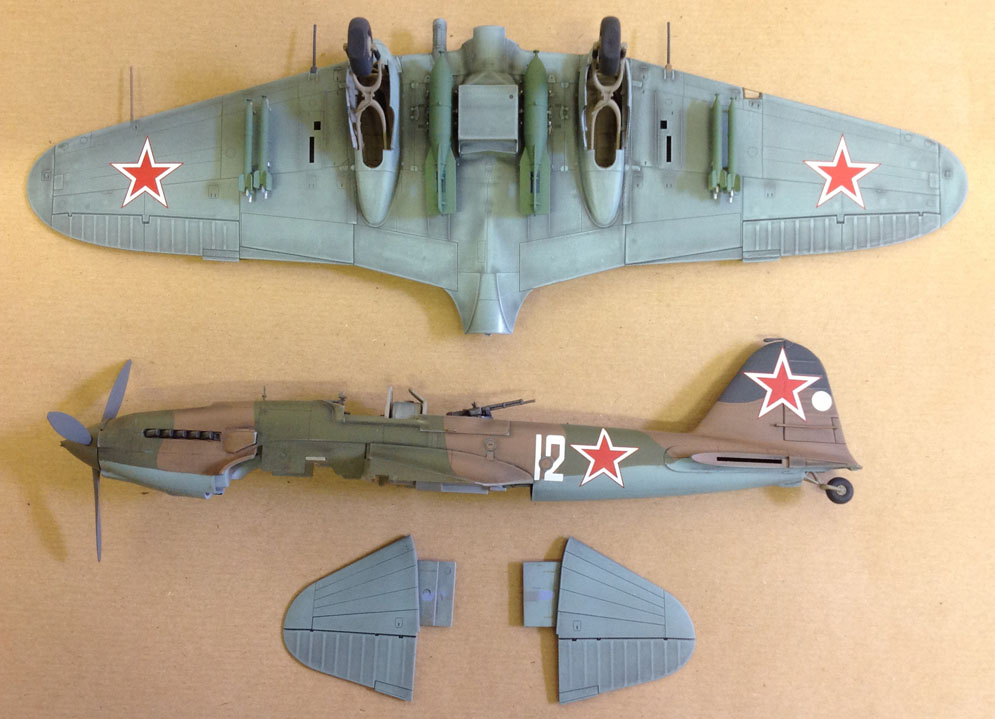
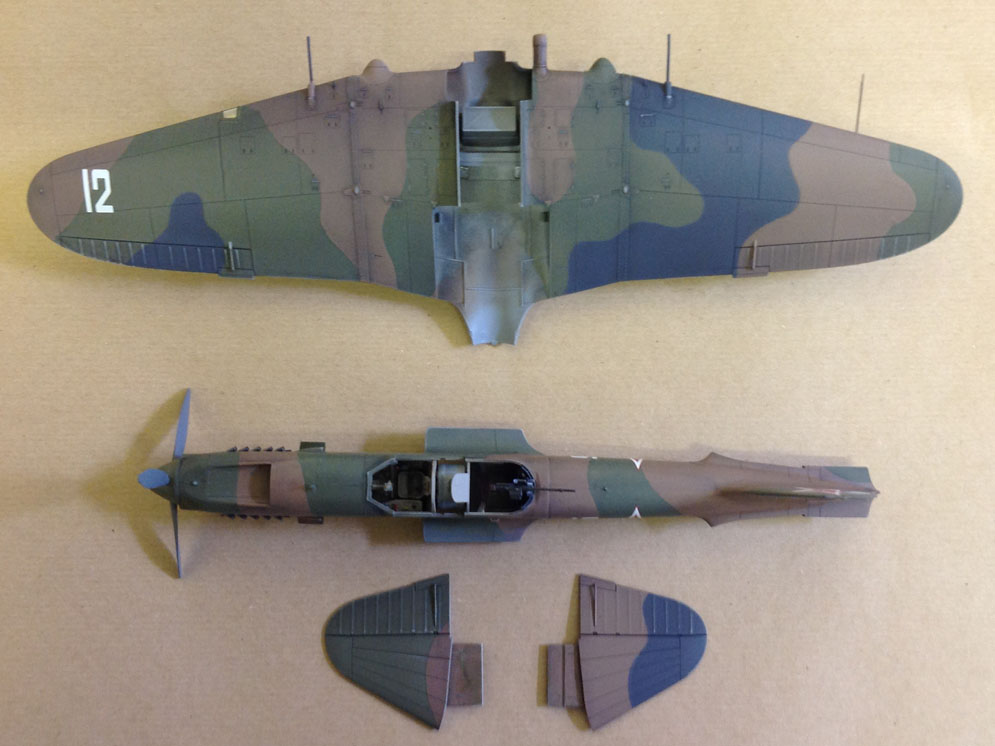
This also includes camouflaged aircraft such as the Shturmovik.
The components can also be weathered & have decals applied before assembly.
With the Shturmovik,I also attached the undercarriage & weapons load.
I left off any small parts that could be damaged,& also leaving off the transparencies.
I painted the entire model using Tamiya acrylics.
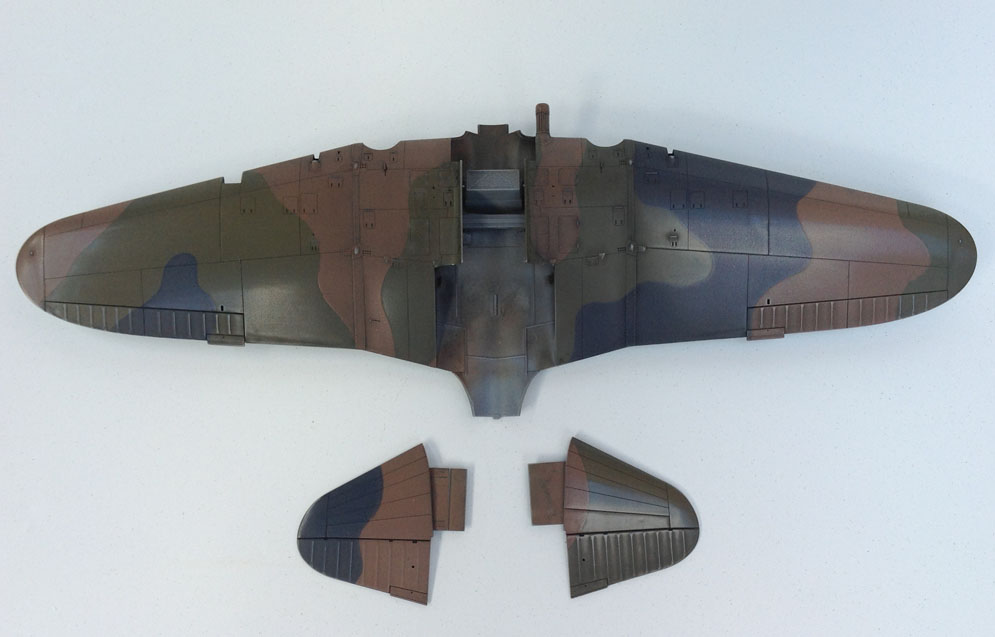
I used a thin sheet of engineering wax to make patterns of the camouflage shapes to use as masking templates.
I’ve never tried it before,but thought I would give it a go as it is easy to cut, conforms to the shape of the wing & fuselage,
& also holds itself in place.
After enlarging the kit plans on a photocopier,I made paper copies which I cut out to use as paint templates.
I stuck these on top of the sheet of engineering wax,then I cut the wax sheet to shape,which gave me templates
for the brown & green sections.
I sprayed the upper surfaces brown first,I then positioned the relevant mask on top to cover the brown
camouflage pattern areas.
I did the same with the green,leaving the Dark grey to be applied last.
I polished the whole model with micro-mesh in preparation for the application of the decals.
Lastly,I weathered the model using black artist gouache & different shades of Tamiya weathering master
for highlighting.
I sprayed the entire model with matt varnish.
The wings were glued to the fuselage,the transparencies were stuck on.
To finish the model I used knitting elastane for the radio aerial.
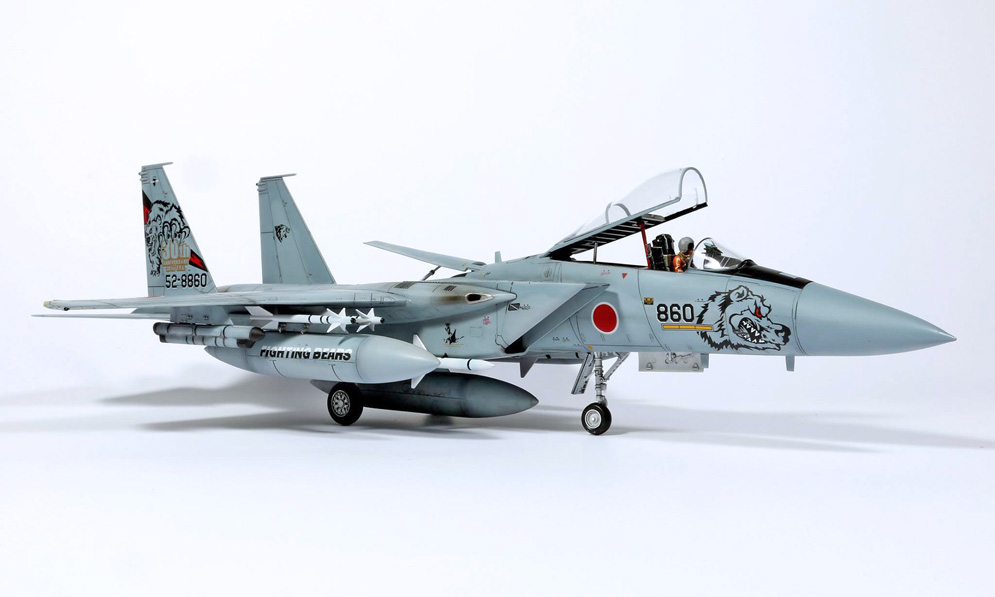
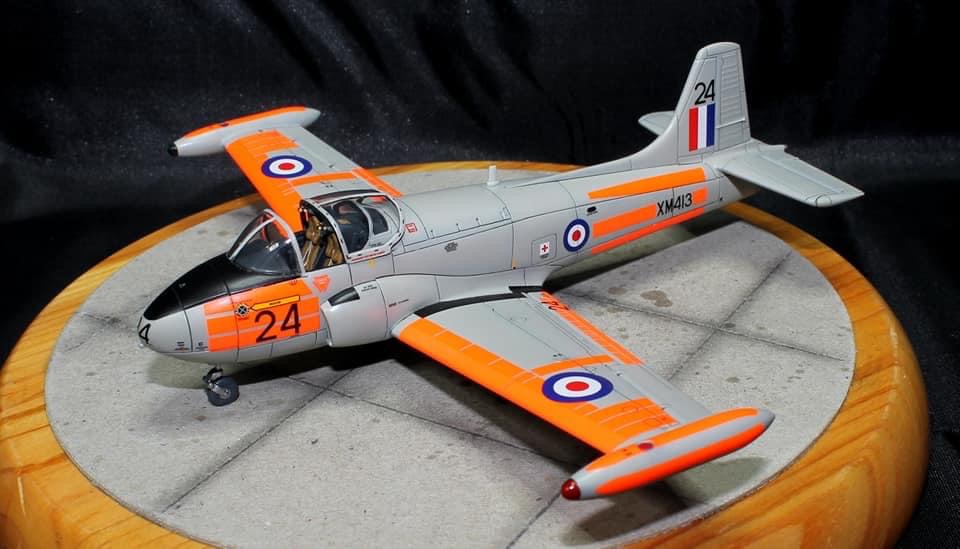
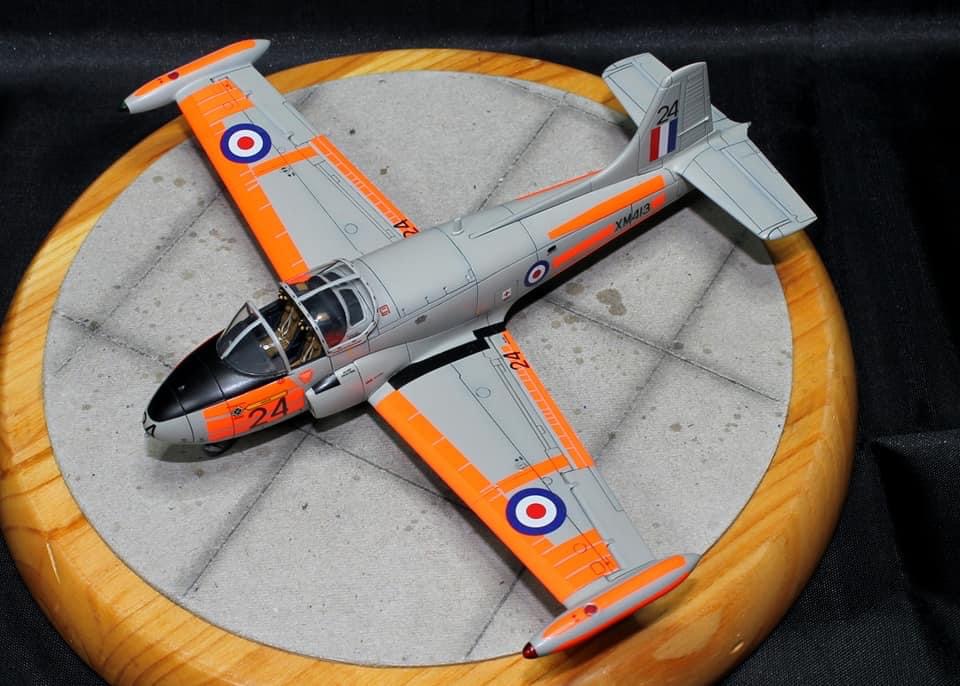
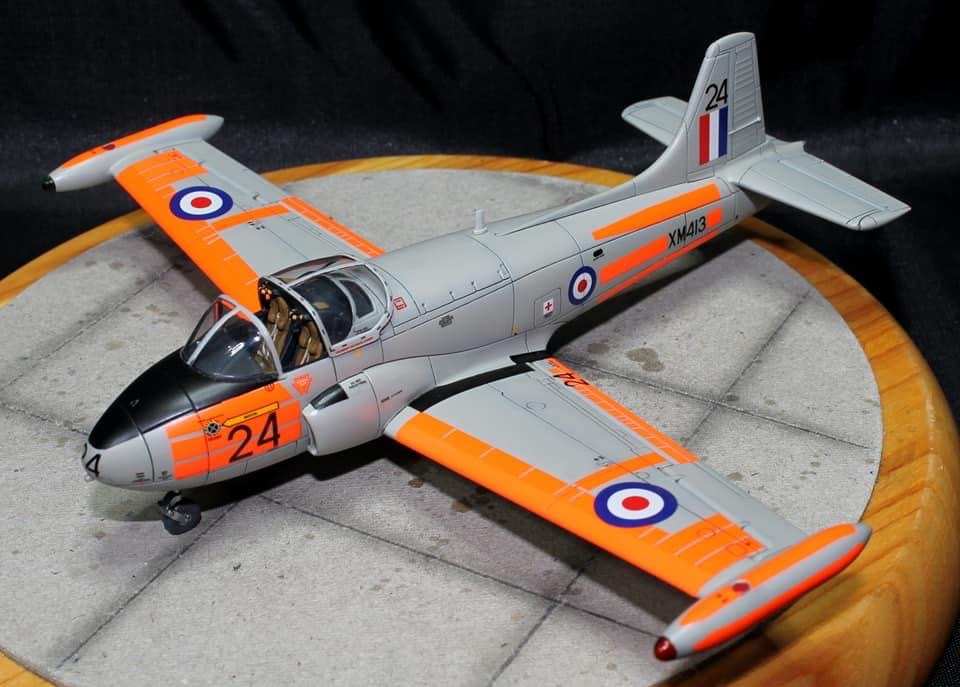
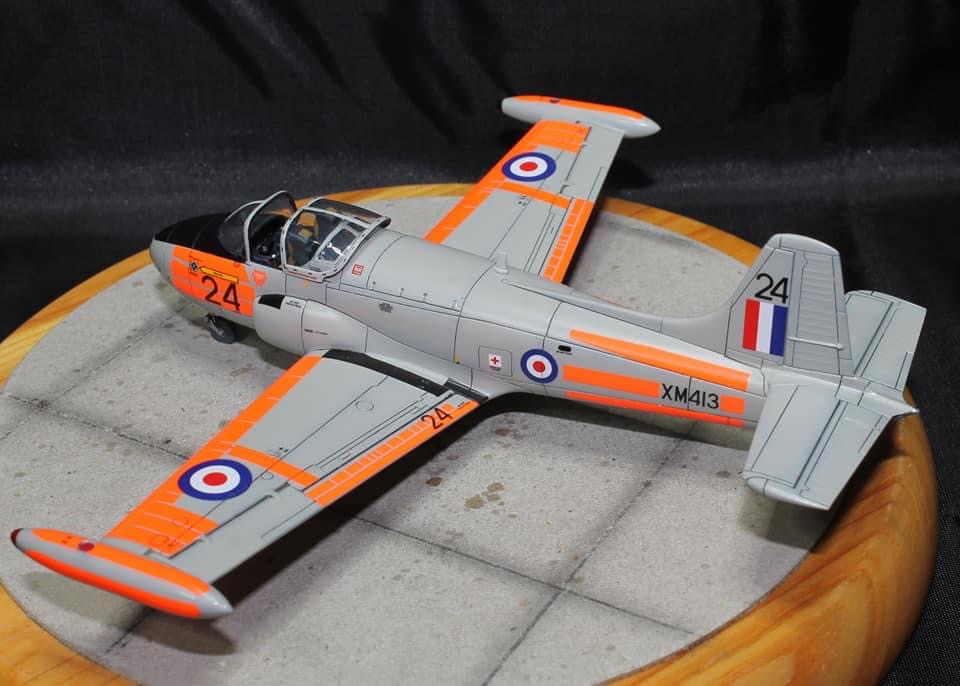
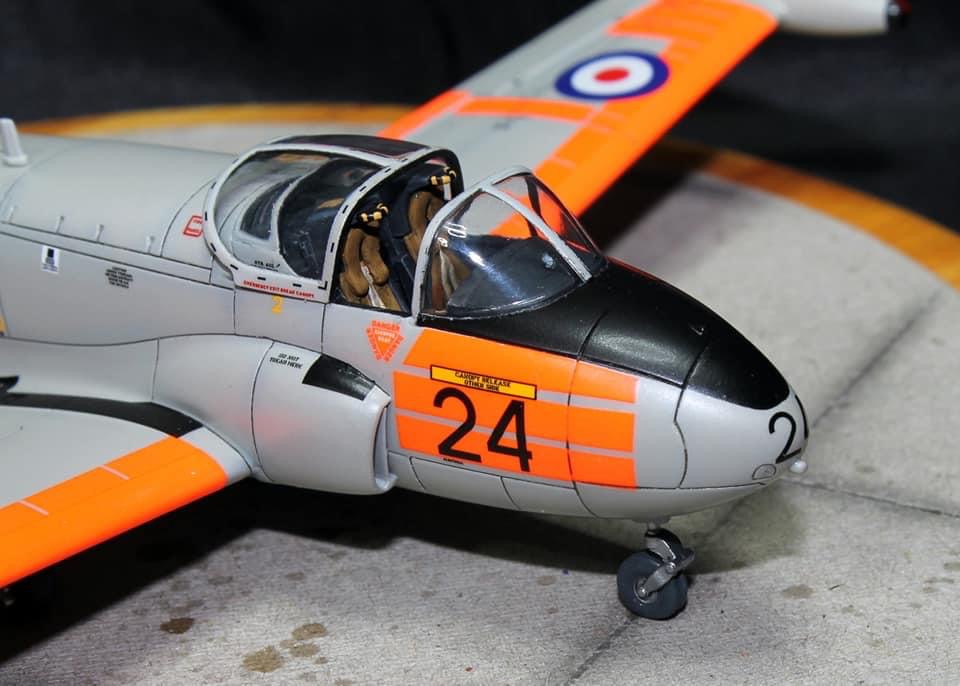
However having heard good things about this particular kit, I decided to give it a go. What a blast. People have said that it’s a well engineered kit. No kidding. As ever, everything fell together, tolerances were precise and everything just clicked into place.
Amendments to the kit included putting flat spots on the tyres, replacing the wing cannon and machine guns with hollow tube and aerial wire from Uschi. The paints are a mixture of Mr Hobby and Tamiya, with fine details picked out with Vallejo. There is some shading and chipping on.
Tamiya supply a set of masks for the windows that you need to cut yourself. They worked really well and I was more than satisfied. They also provide a decal for the seat harness but I went with an Eduard belt for a more 3D look. Nothing beats Eduard buckles for setting off a cockpit. The decals were a mixture of out of the box and the remainder of the Cartograf sheet from the Eduard boxing.
Fair to say that I was pleased with this.
Rick G.
The kit has the look of an early Hasegawa offering, being made from very hard plastic with finely recessed panel lines and (typical for kits of the period) no rivet detail. The kit was built more or less out of the box apart from the addition of some appropriate seat belts from an eduard set.
The interior of the model was painted with Tamiya paints which dry to a matt finish (and would therefore allow dry-brushing to enhance the raised detail) whilst the exterior was painted using Mr. Hobby paints which dry to a more transfer-friendly satin finish.
Most of the markings came from the kit. The walkway markings on the wings and the white alignment stripes on the tail were masked and sprayed to avoid possible silvering of the film on the kit’s transfers.
Thanks, Dai
So here she is… Regards, Gerry
Wherever you go there you are


Cheers, Dave C.

This is the old Tamiya 1:48 scale kit that has Monokio decals (http://stores.ebay.com/monokiomall?_rdc=1)
Glad you like it.
Seung-Yong R.
GALLERY TWO
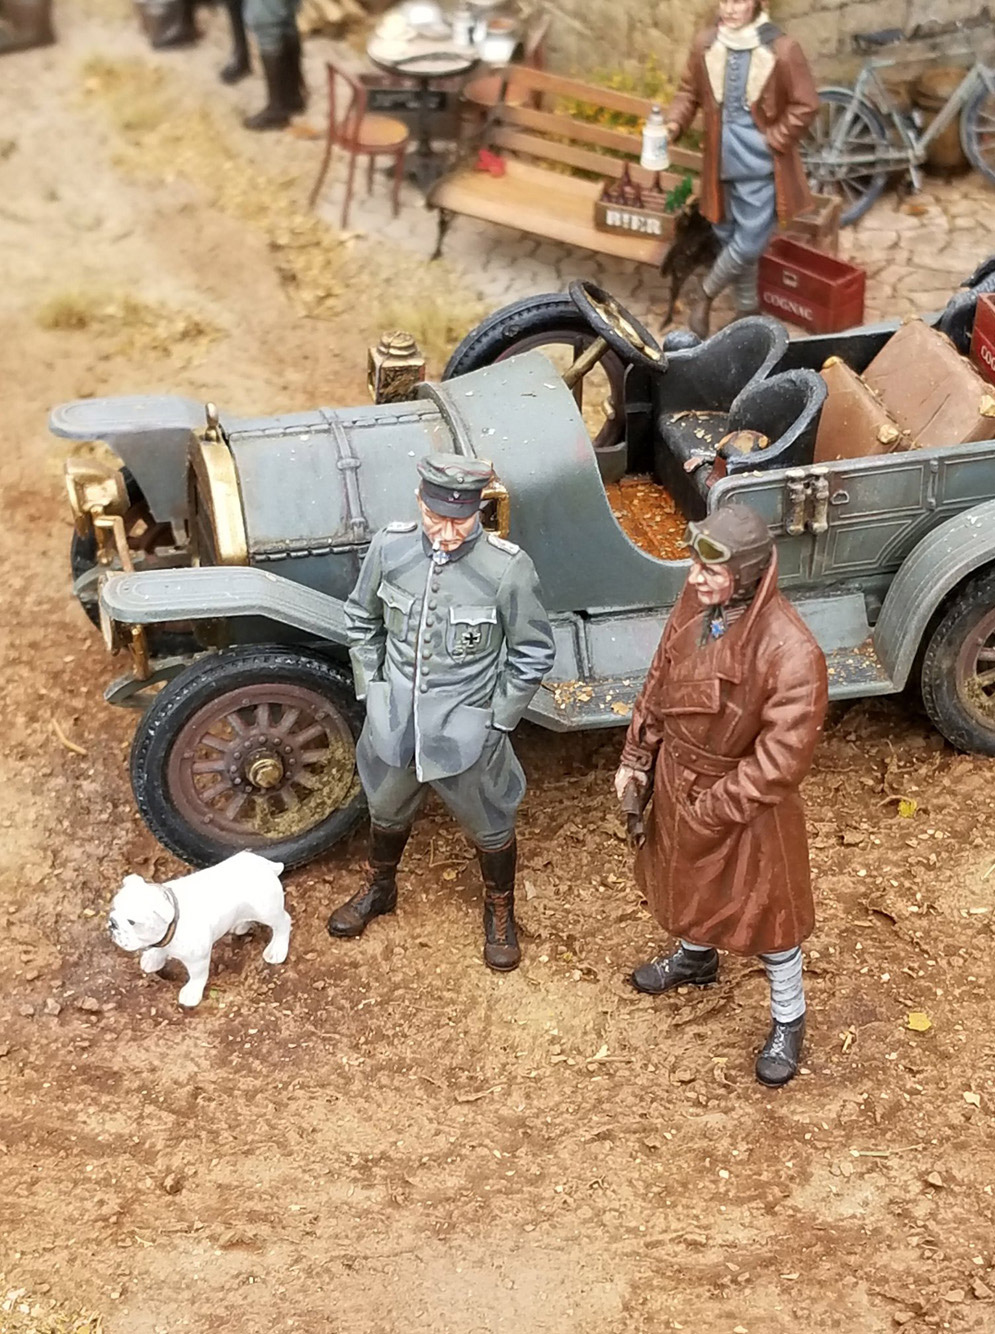
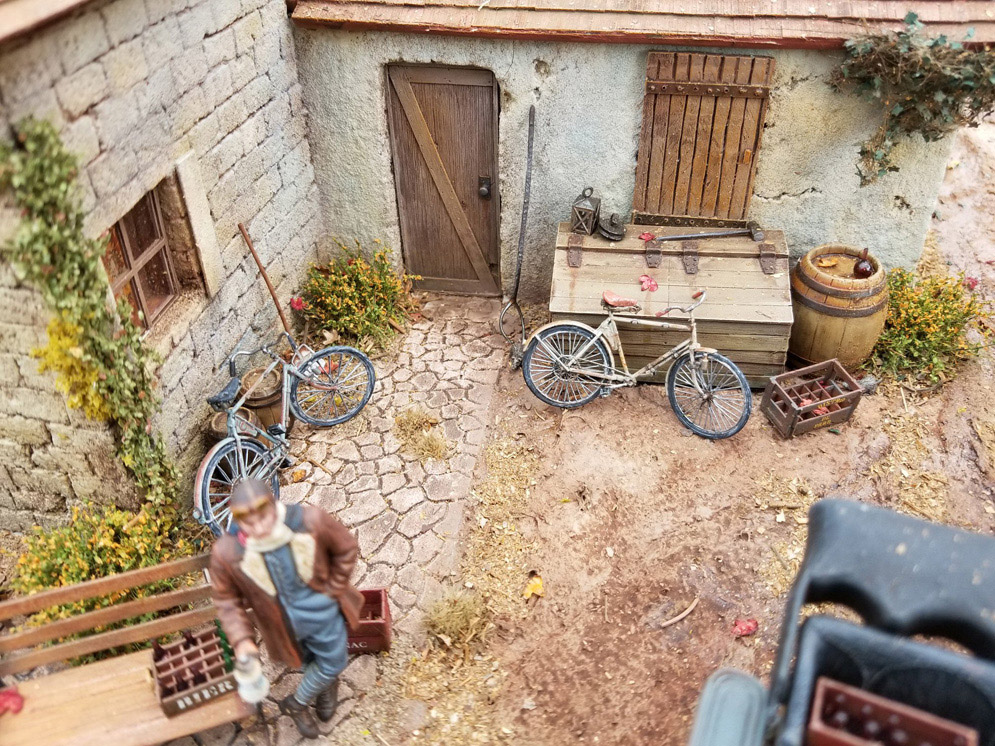
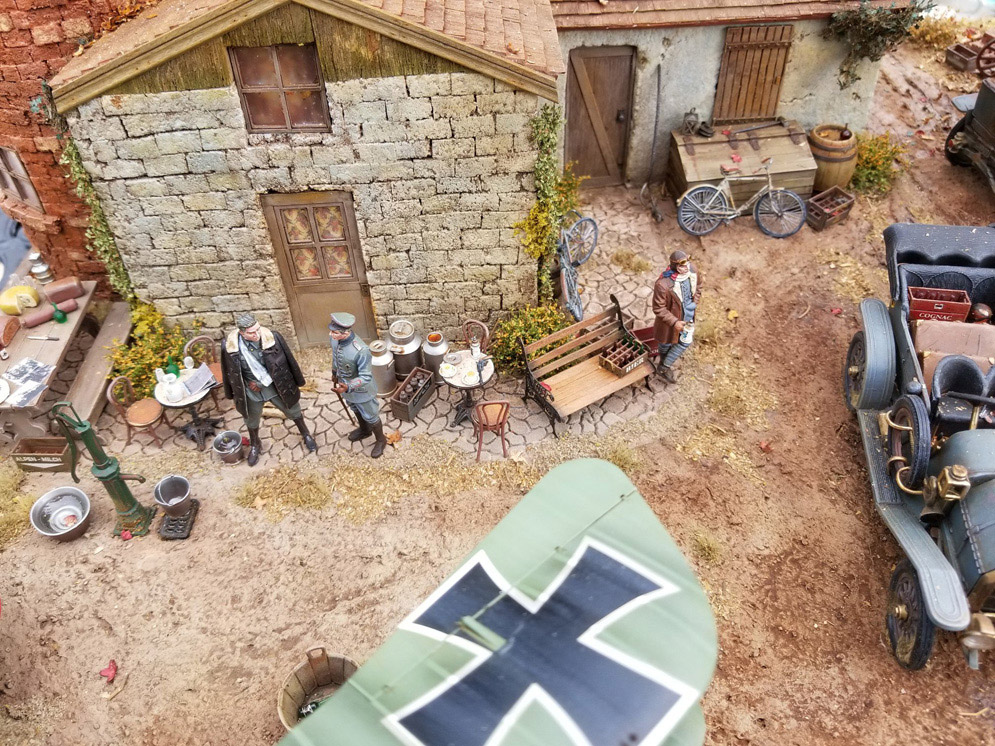
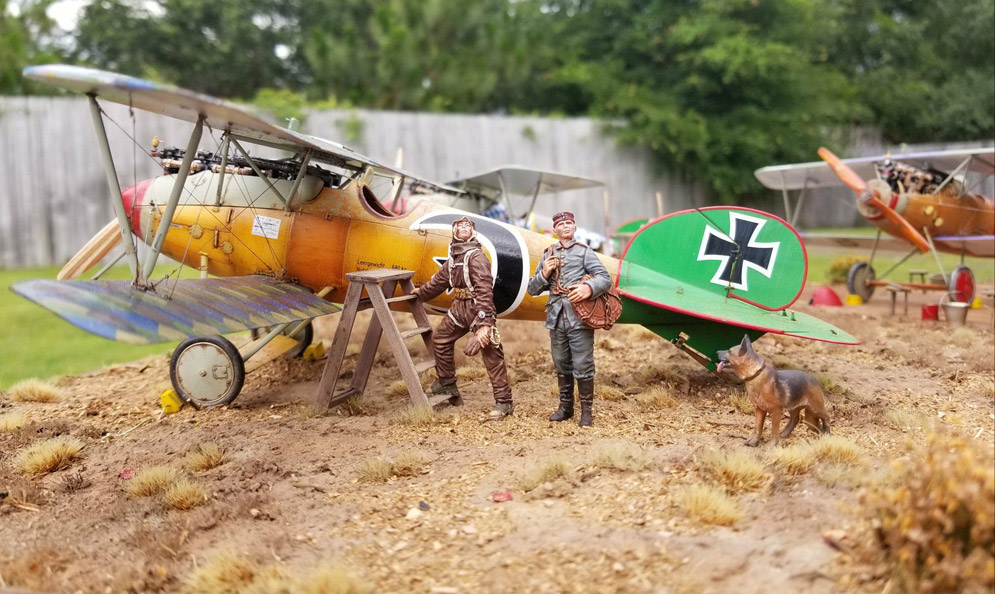
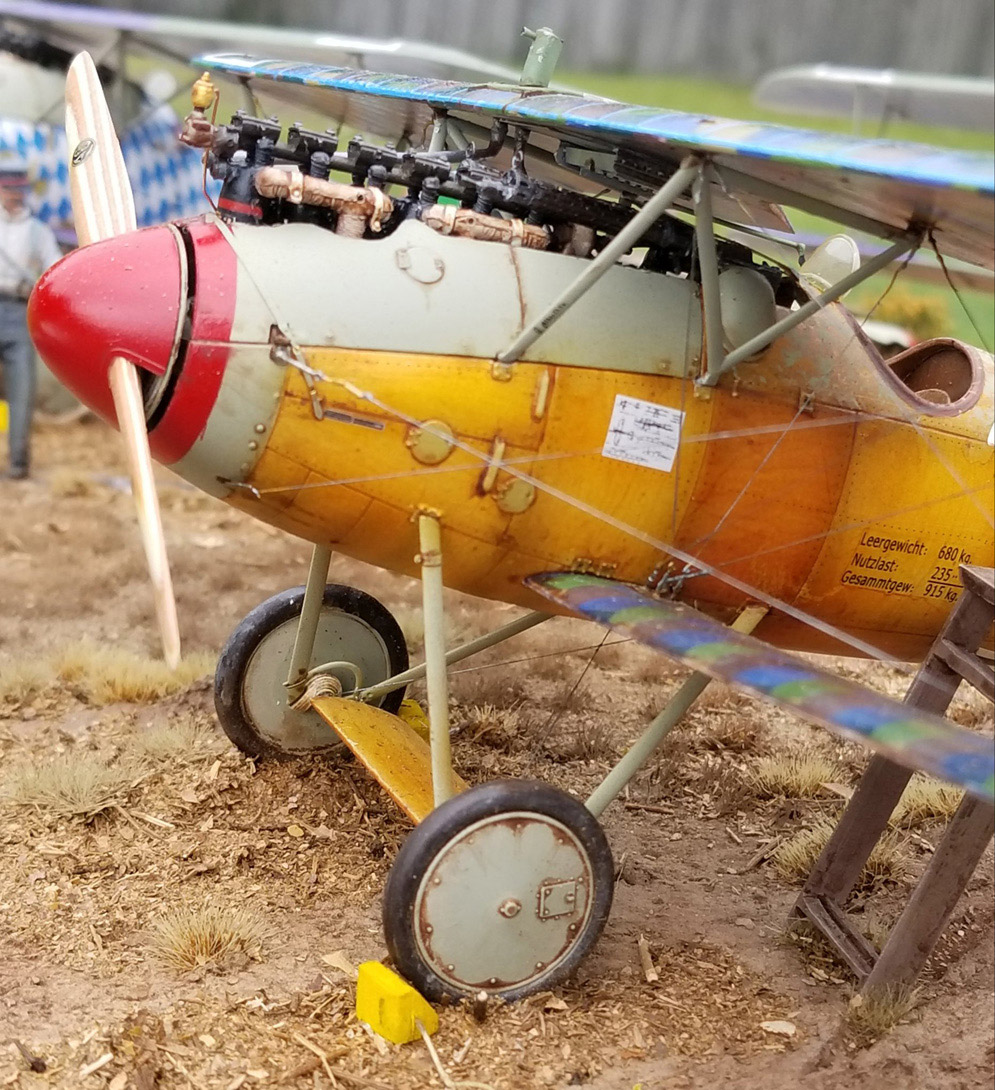
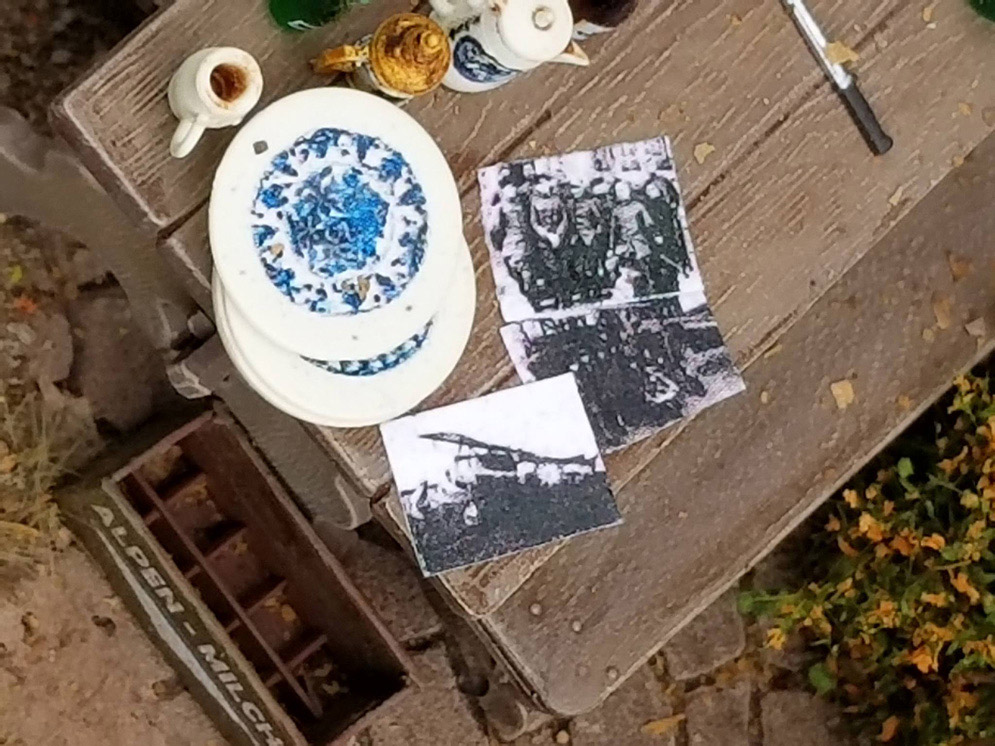
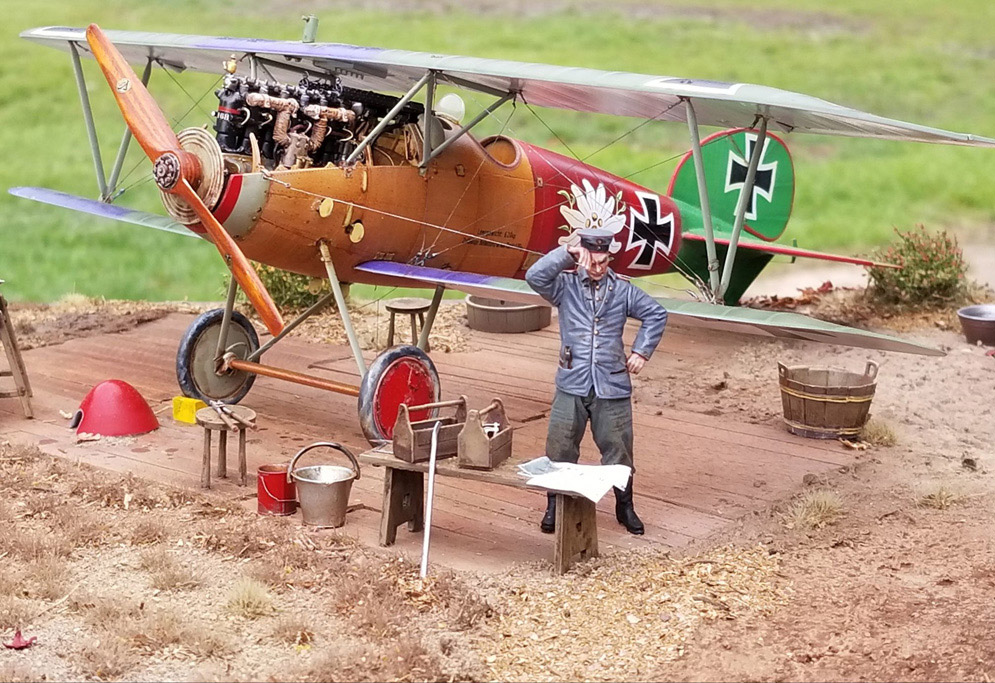
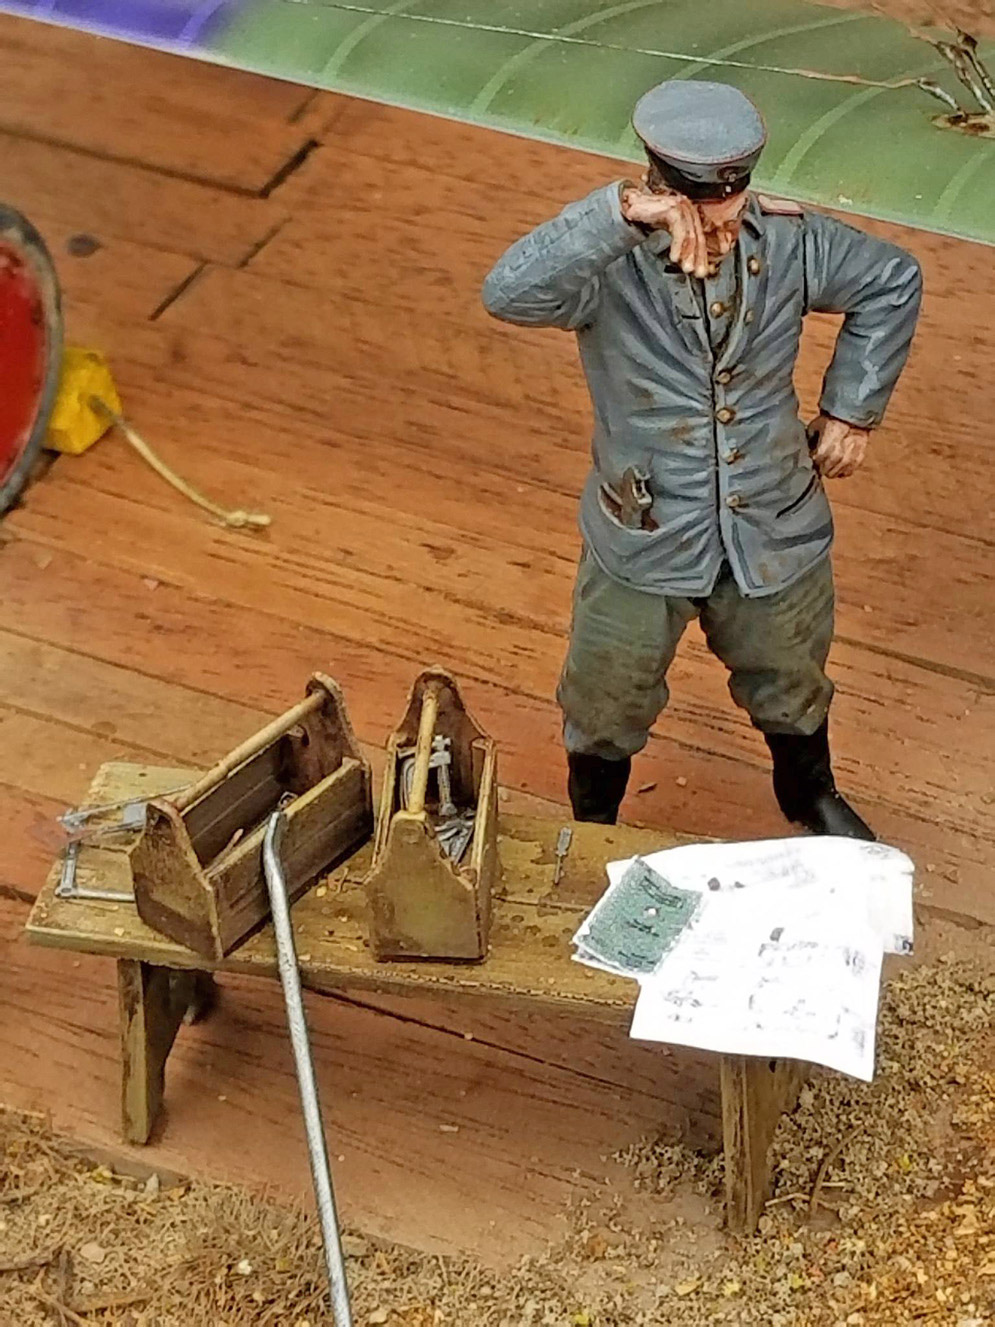
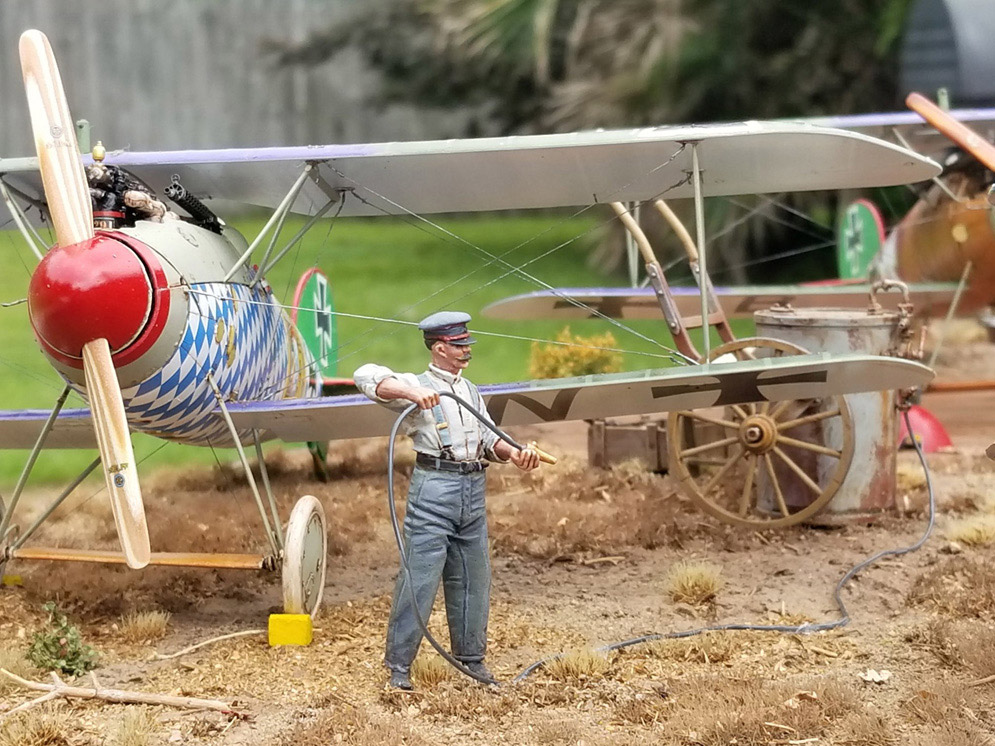
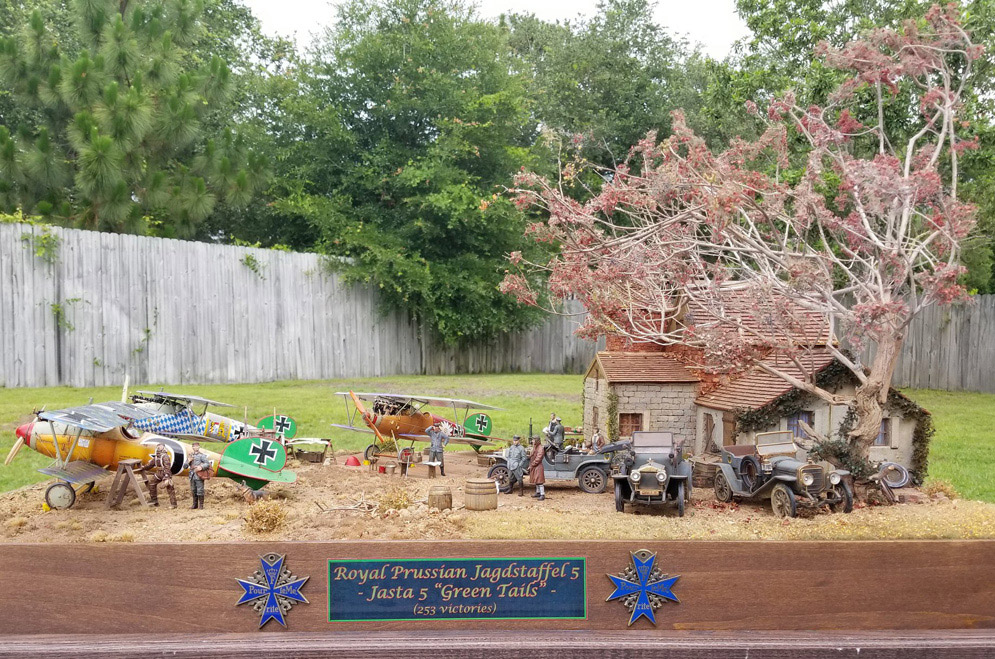
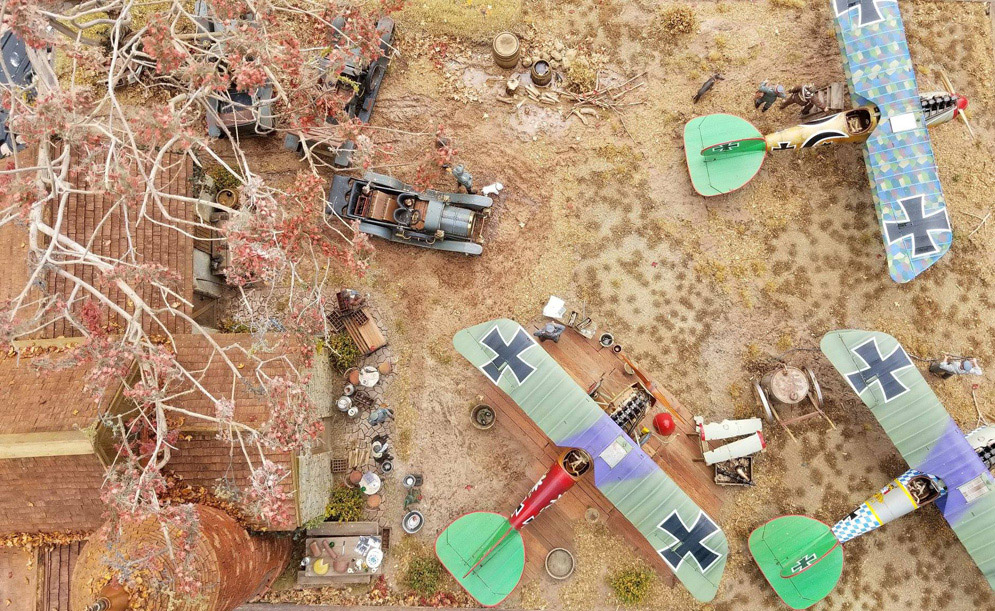
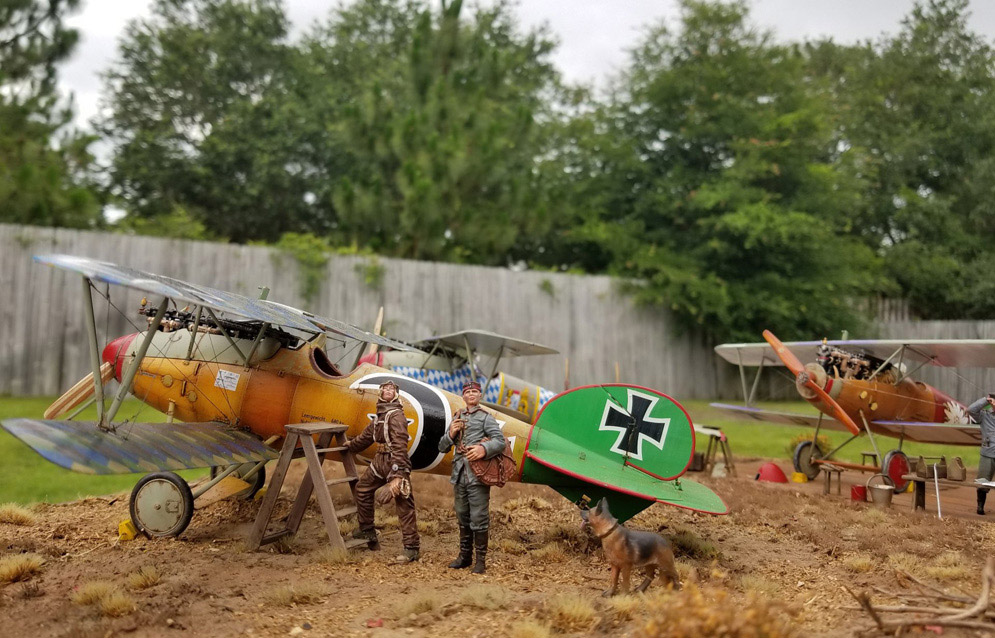
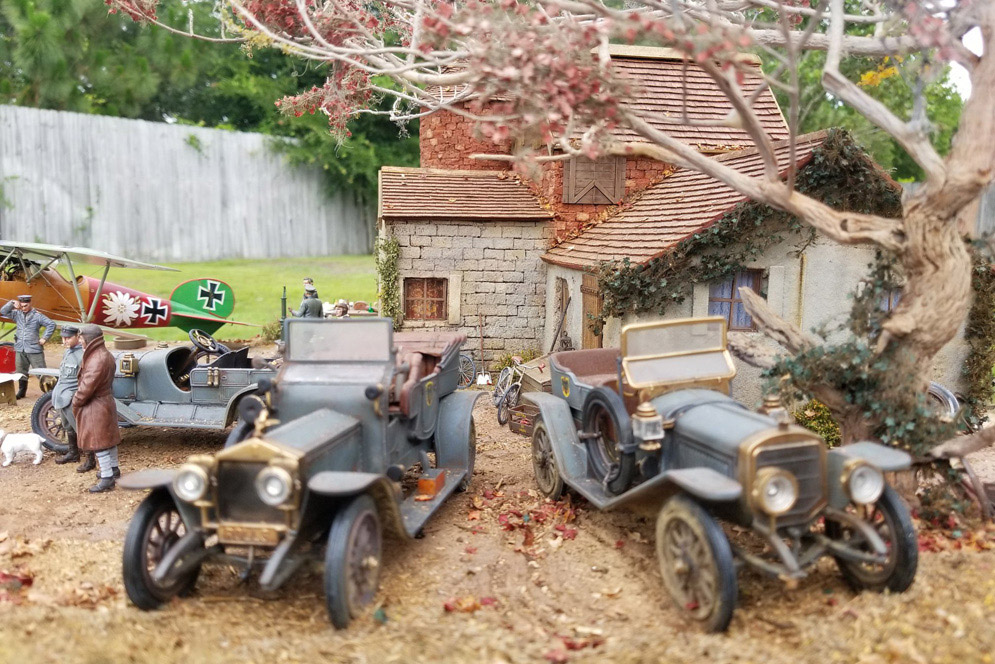
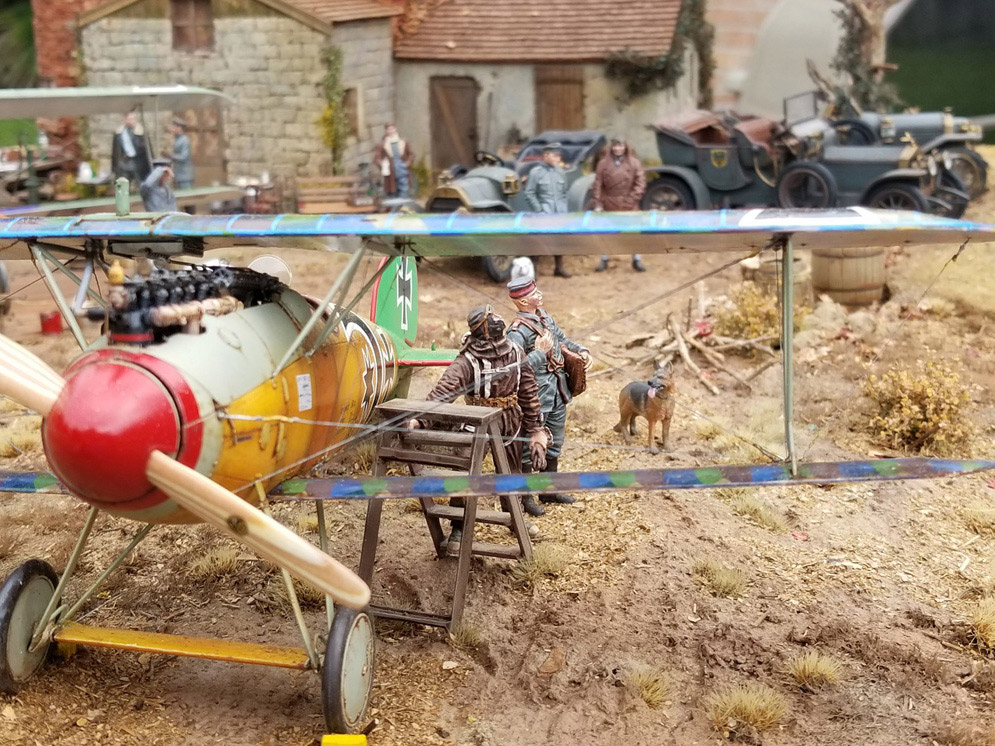
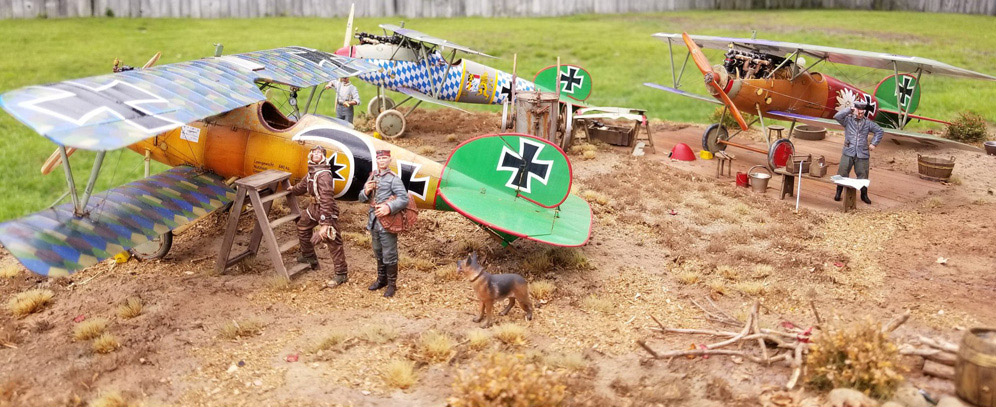
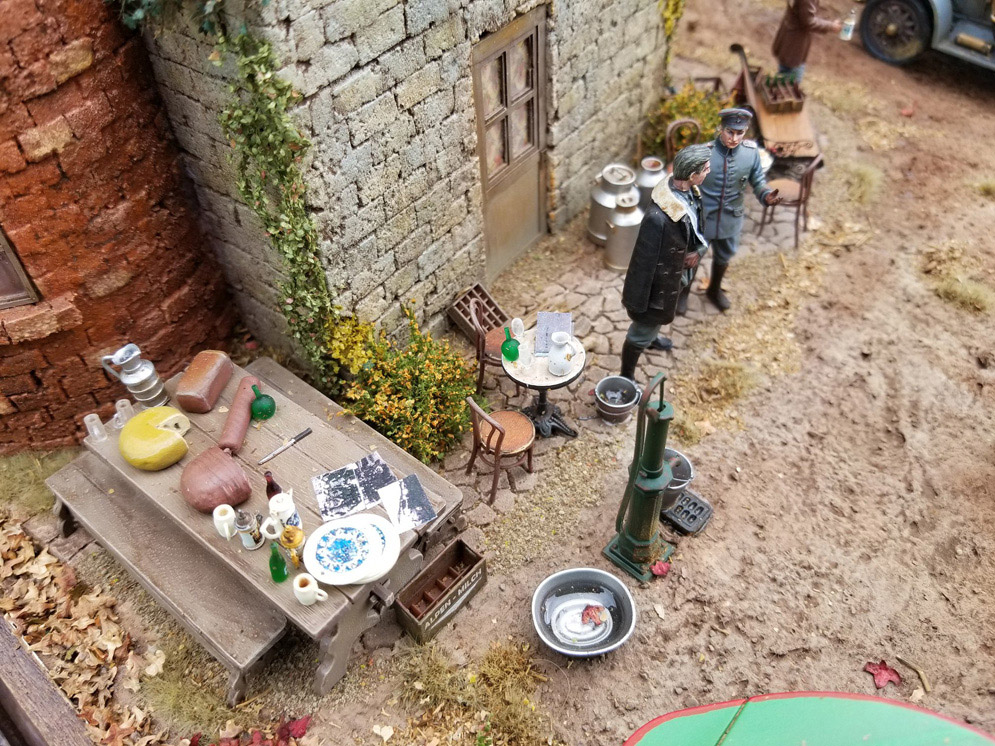
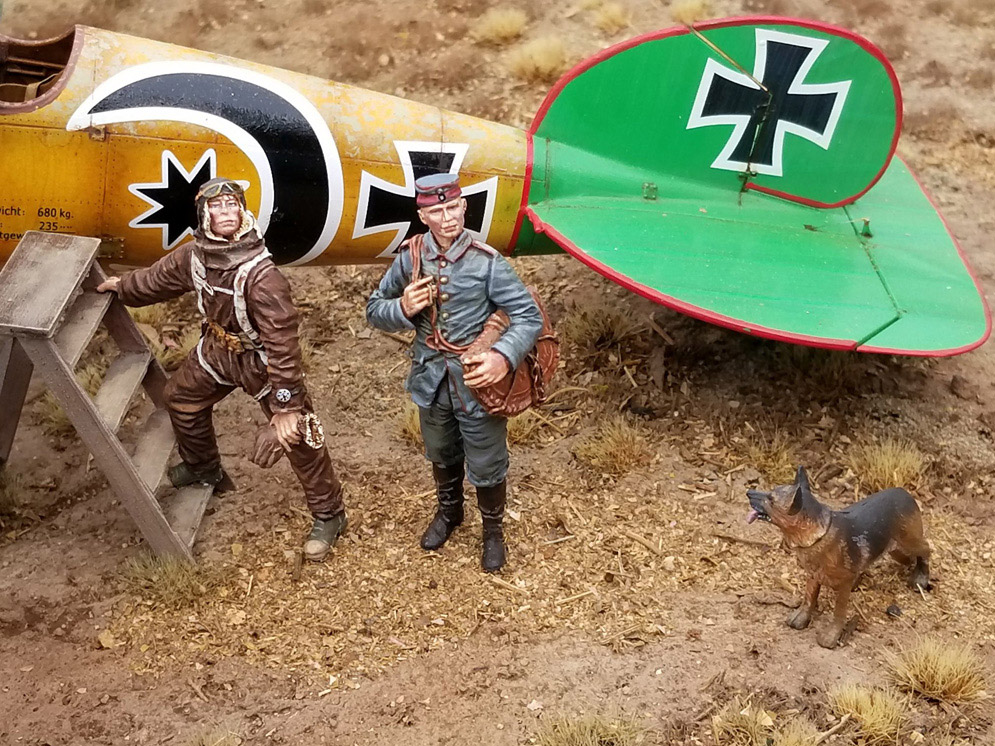
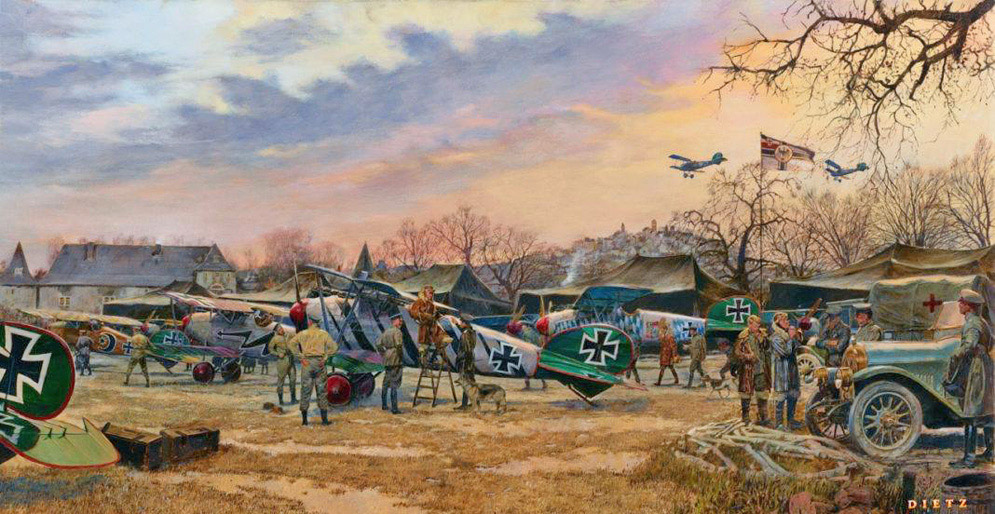
After 10 months of building I’m finally able to call this dio complete. Being a huge fan of the aviation artwork of James Dietz, I came across the print “The Color Guard” and the companion print “View From the Chateau” and the seed was planted.
When Wingnut Wings came out with the Jasta 5 combo kit, the planted seed grew! I present to you my dio titled “Jasta 5 – Green Tails”. Thanks for viewing!
Bob W.
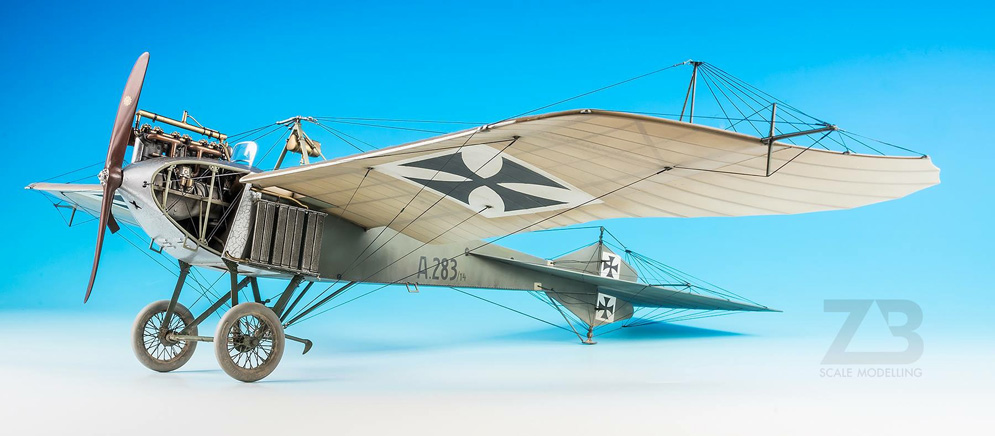
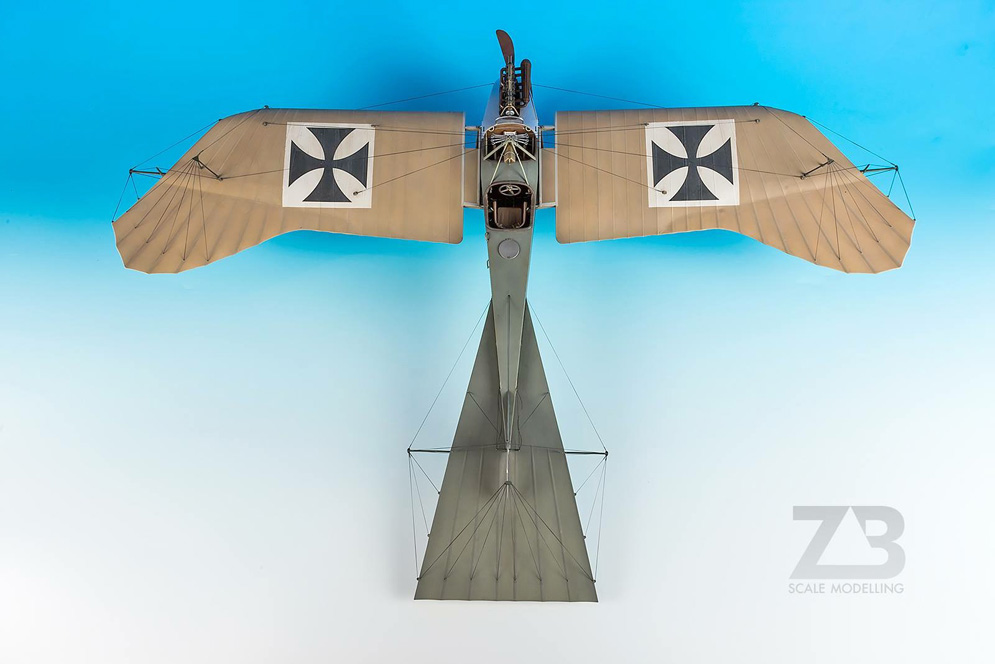
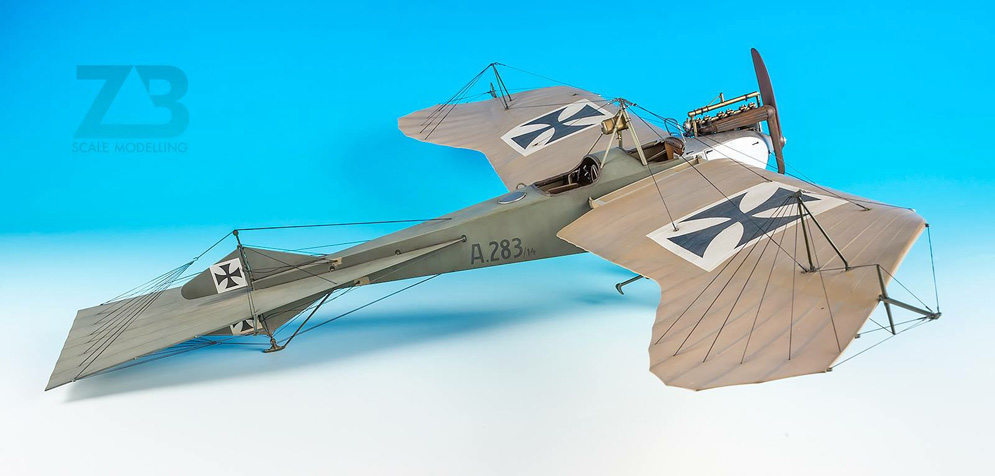

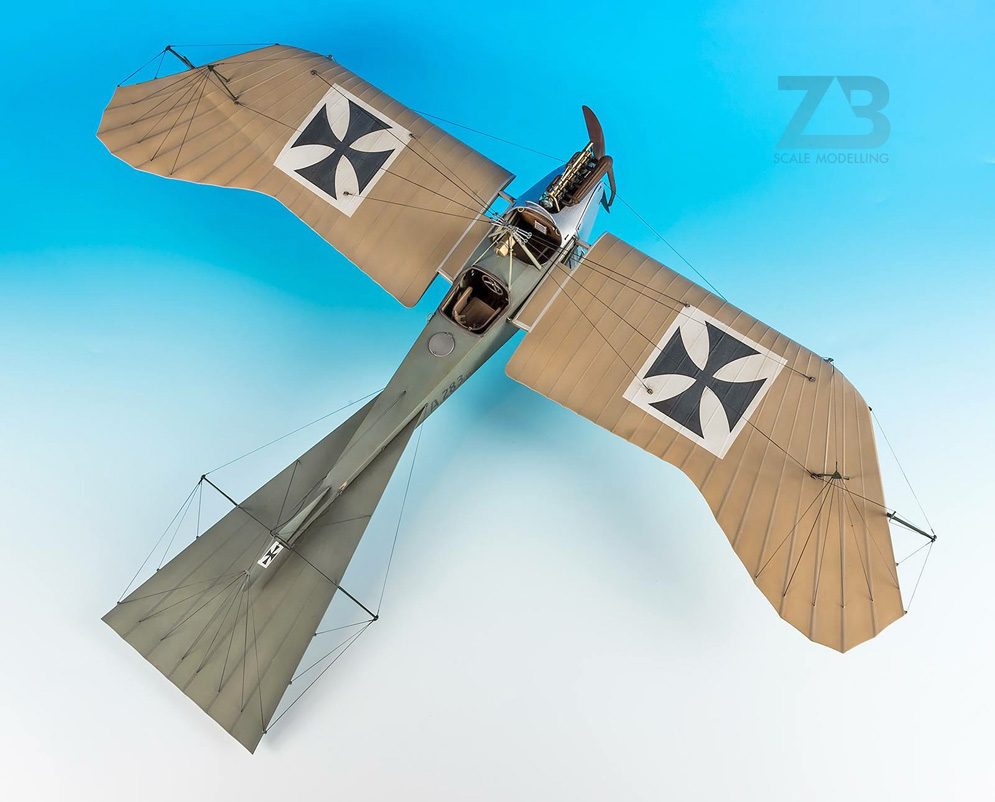
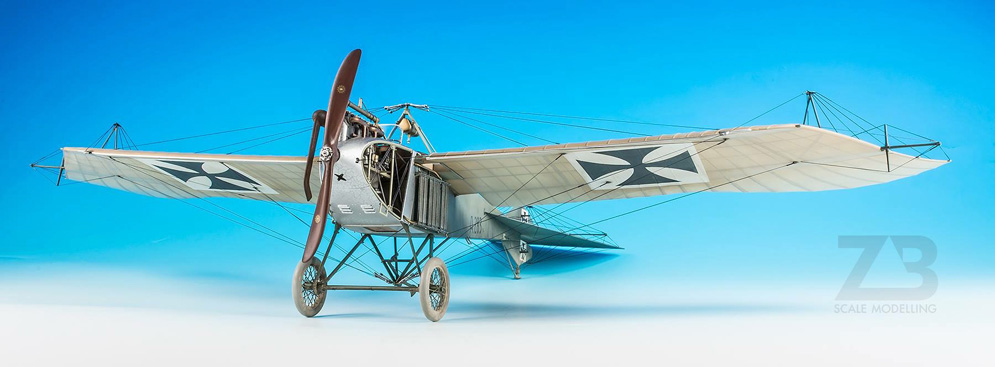
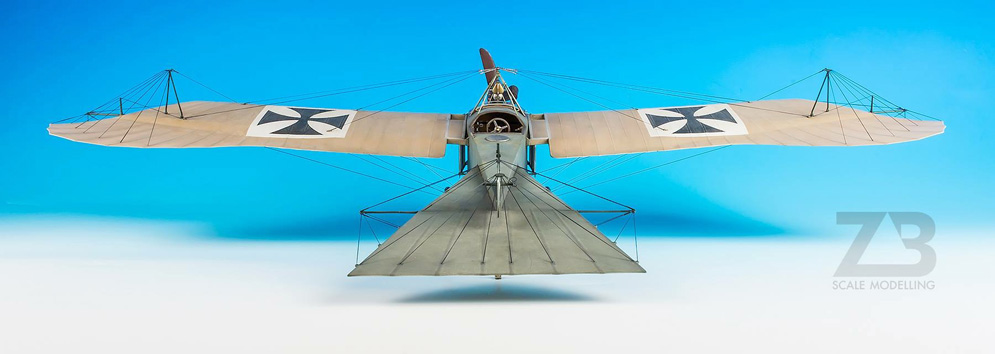
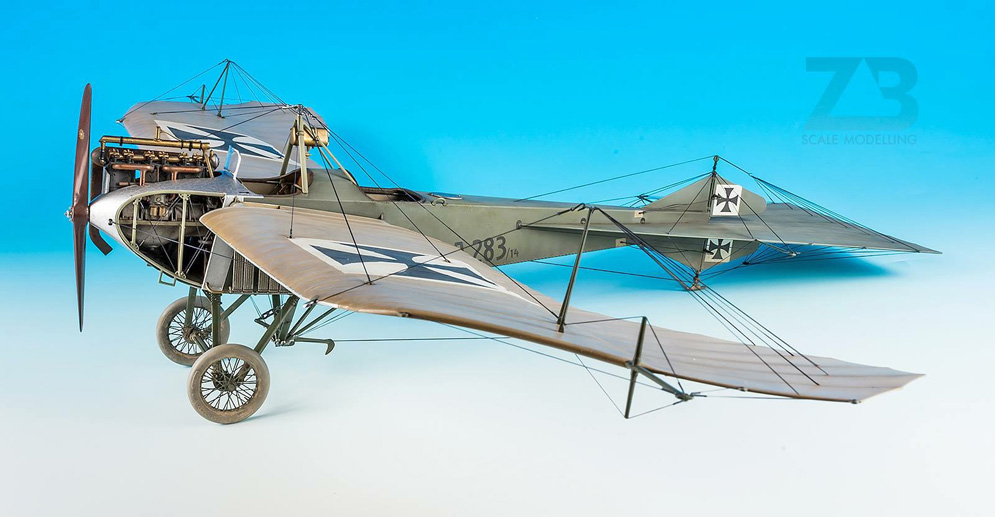
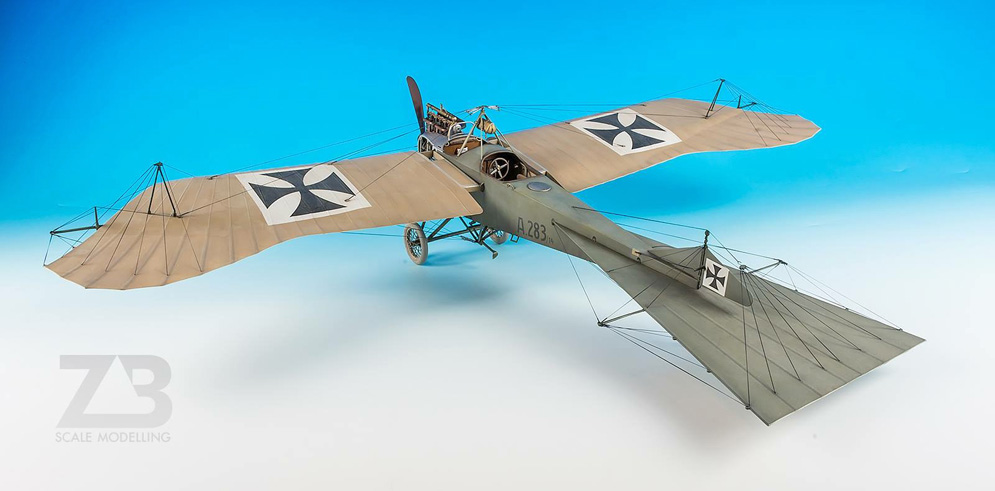


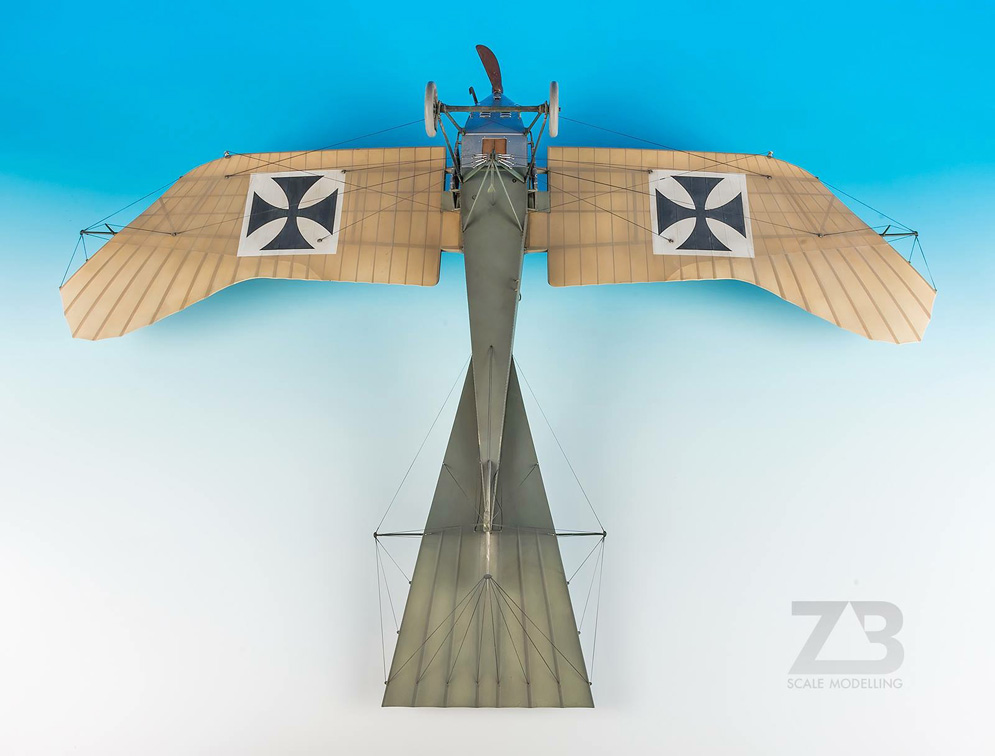
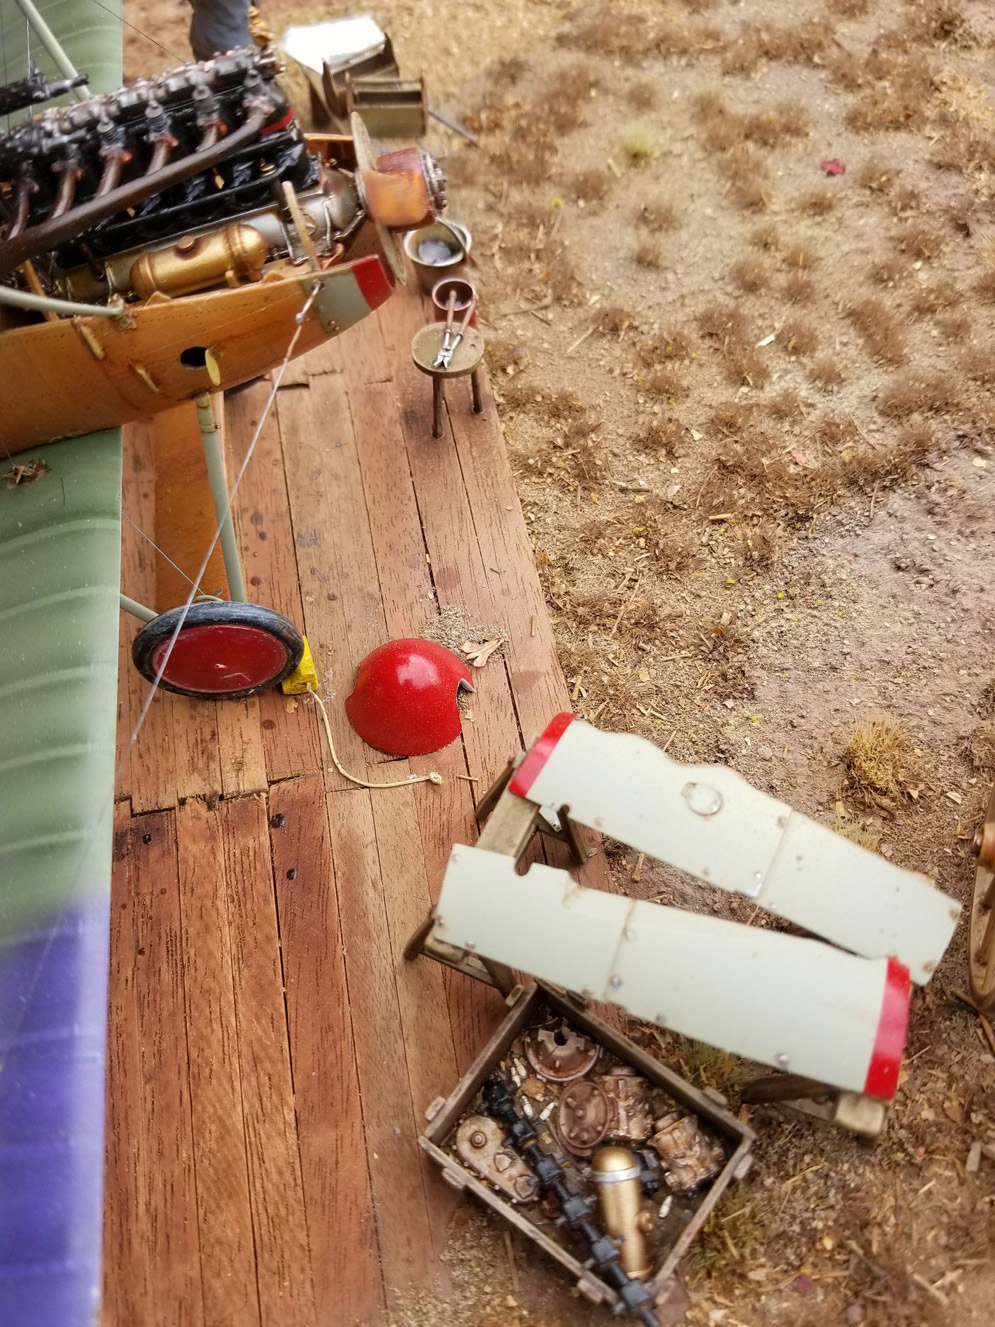
Today (September 2017) I have something really special for you. I am finally allowed to post online the pictures of finished completely new Jeannin Taube from Wingnut Wings. This kit is according to their website planned to be released during October and I really have to say that there is a lot to look forward to. Taube may look like a simple and small airplane, but actually it is large as two Albatroses together. It was quite a huge airplane I must say.
Final model may look a bit complicated, but don’t worry, everything is really cleverly 3D designed actually by Dean Reynolds, who did really excellent job on this kit. It can be seen for example on sections like fuselage/wings joint ,which is so shrewdly made, that it holds geometry by itself. This will be one of the best kits of this year, believe me. And rigging may look complicated, but with EZ line, I had it finished in 5 hours :).
Zdenko Bugan
Hope you all like it!
Joseph F.
Regards Chris M.


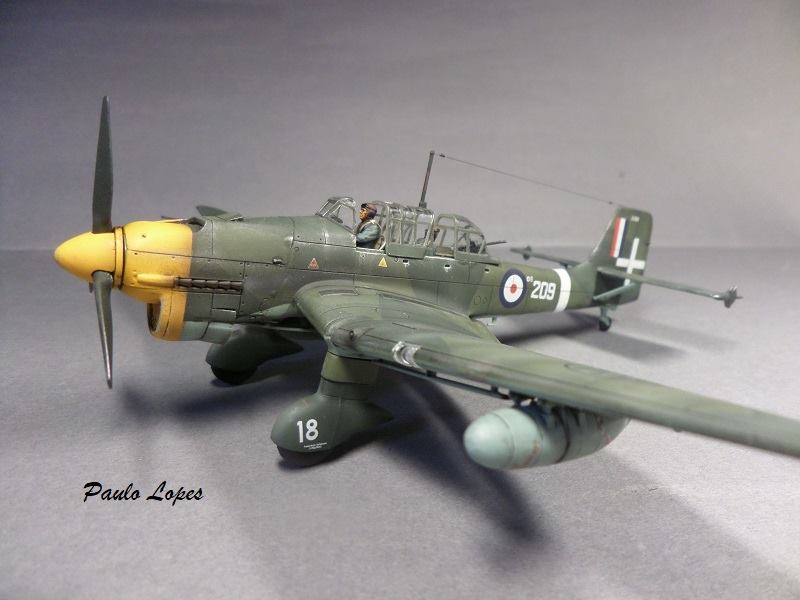
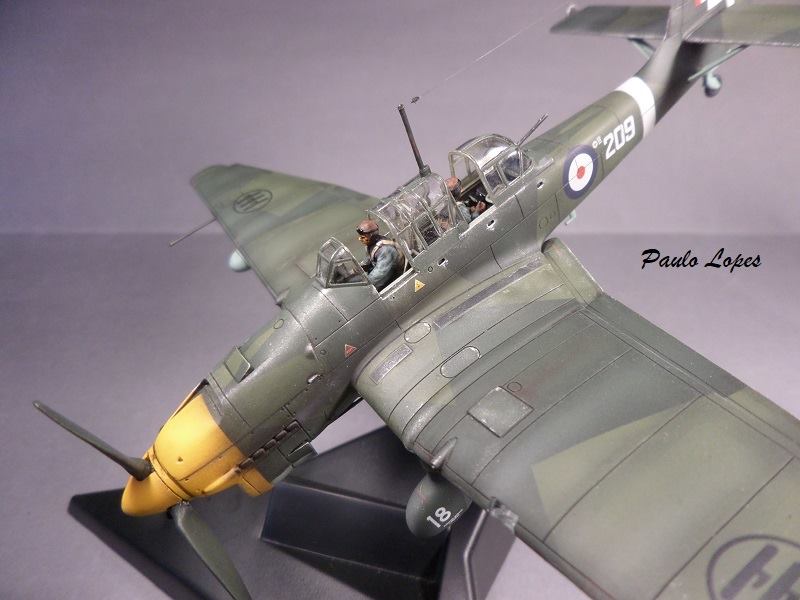
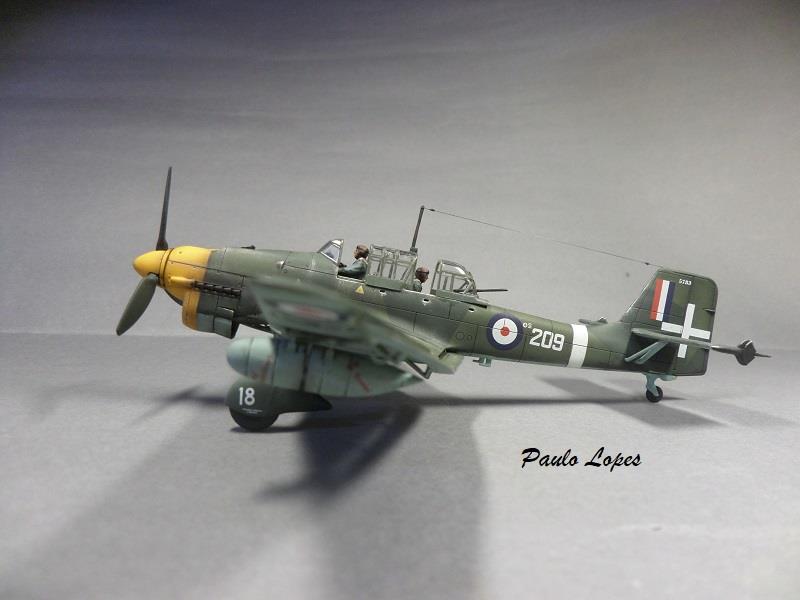
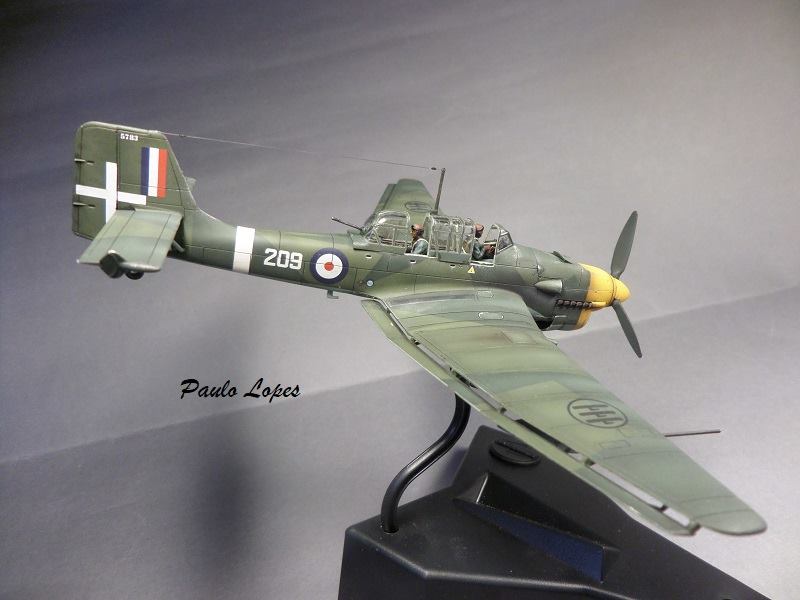
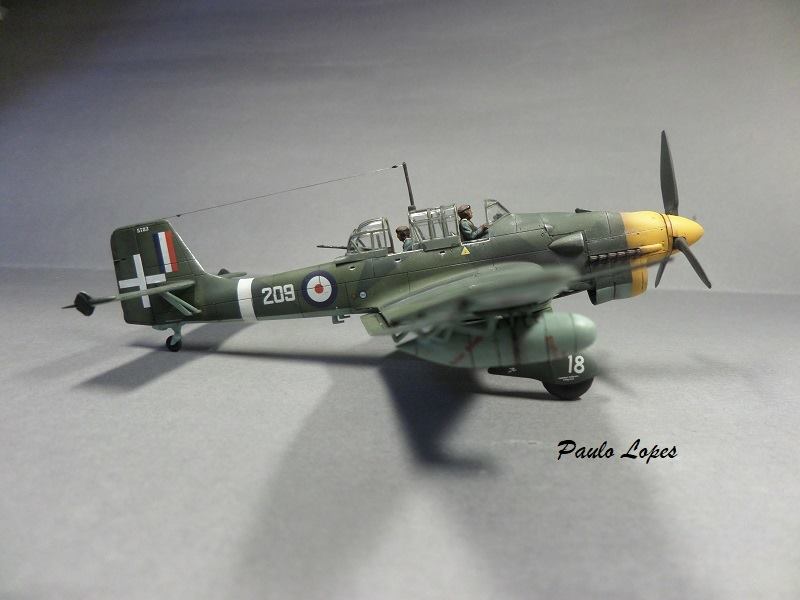
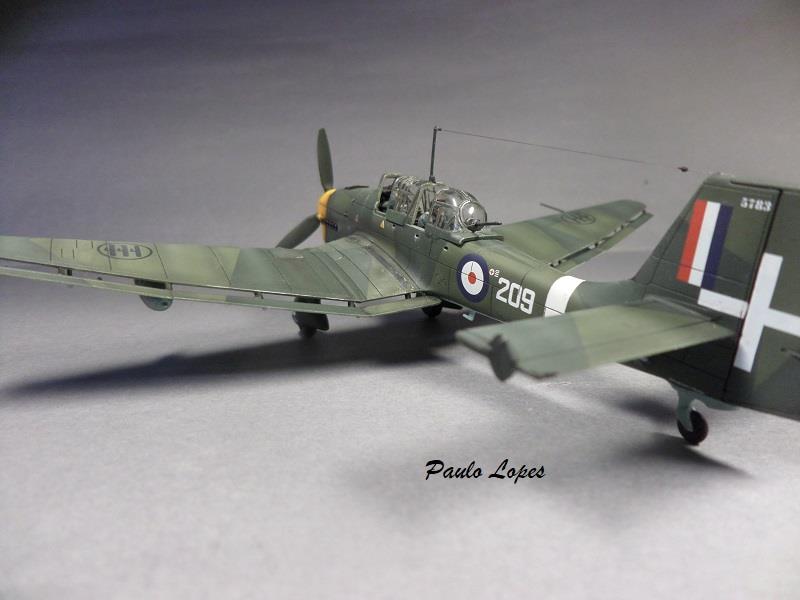

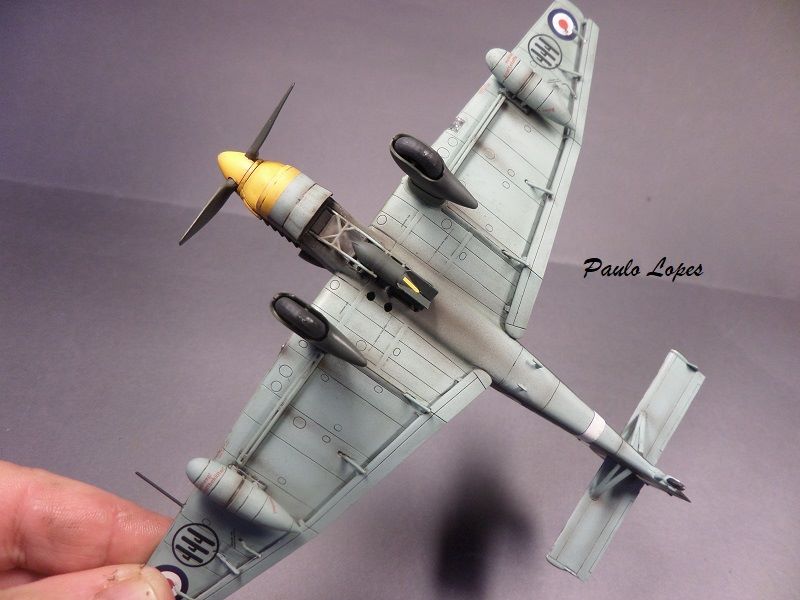
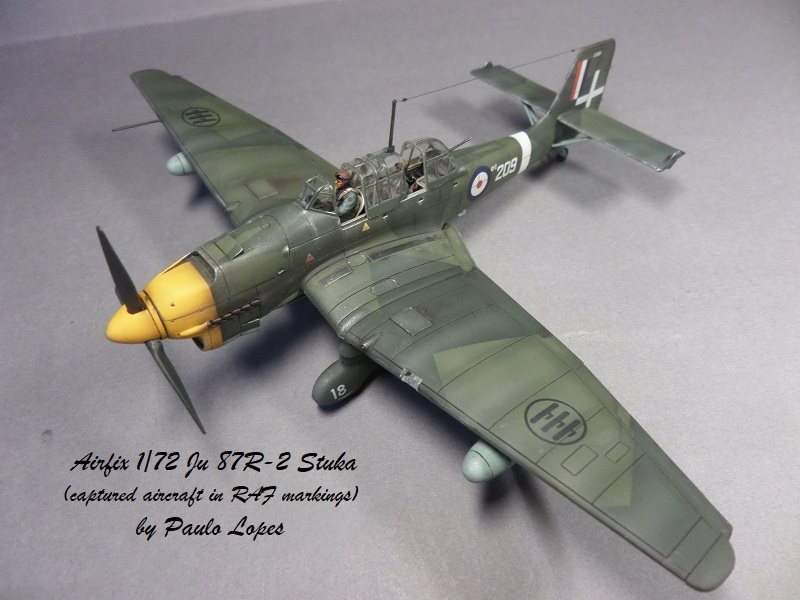
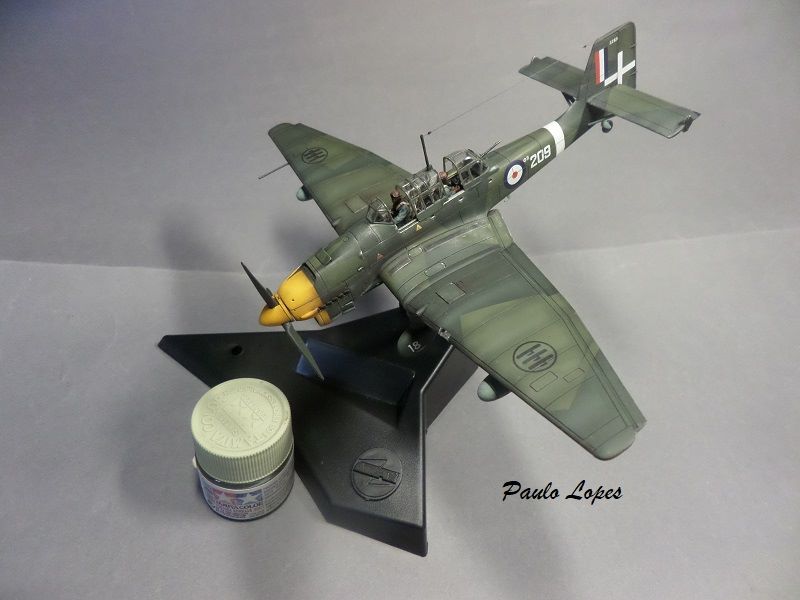
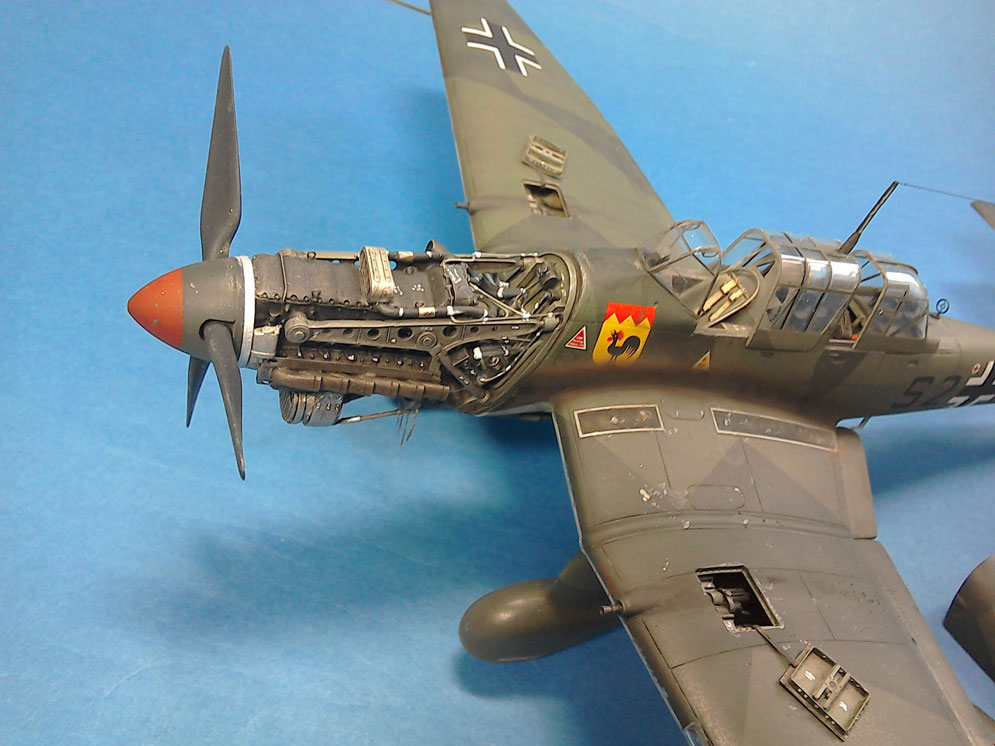
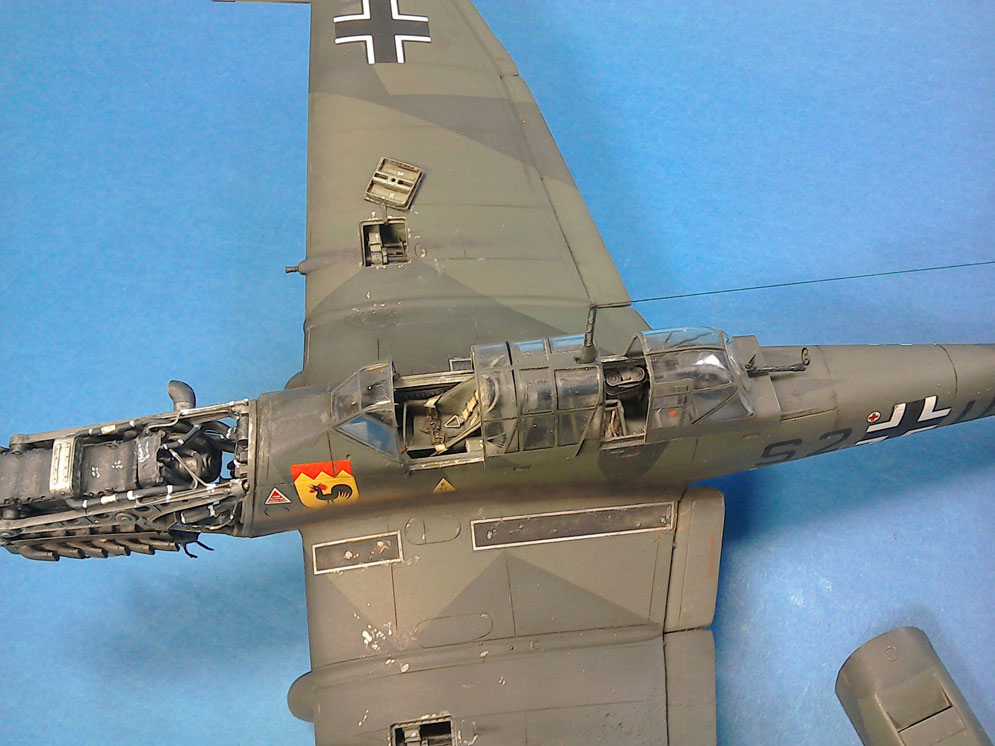
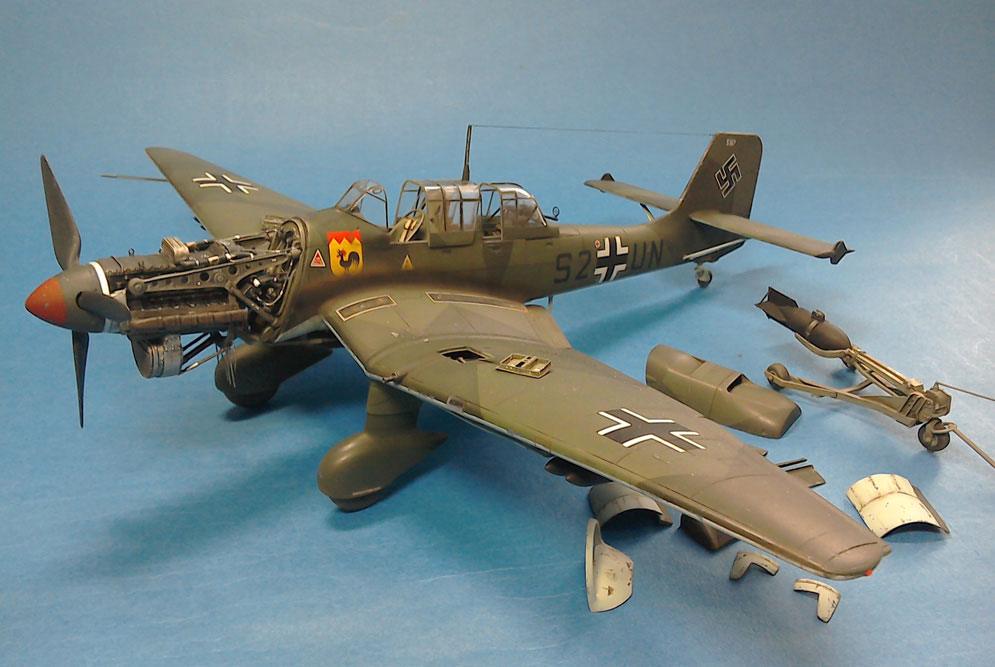
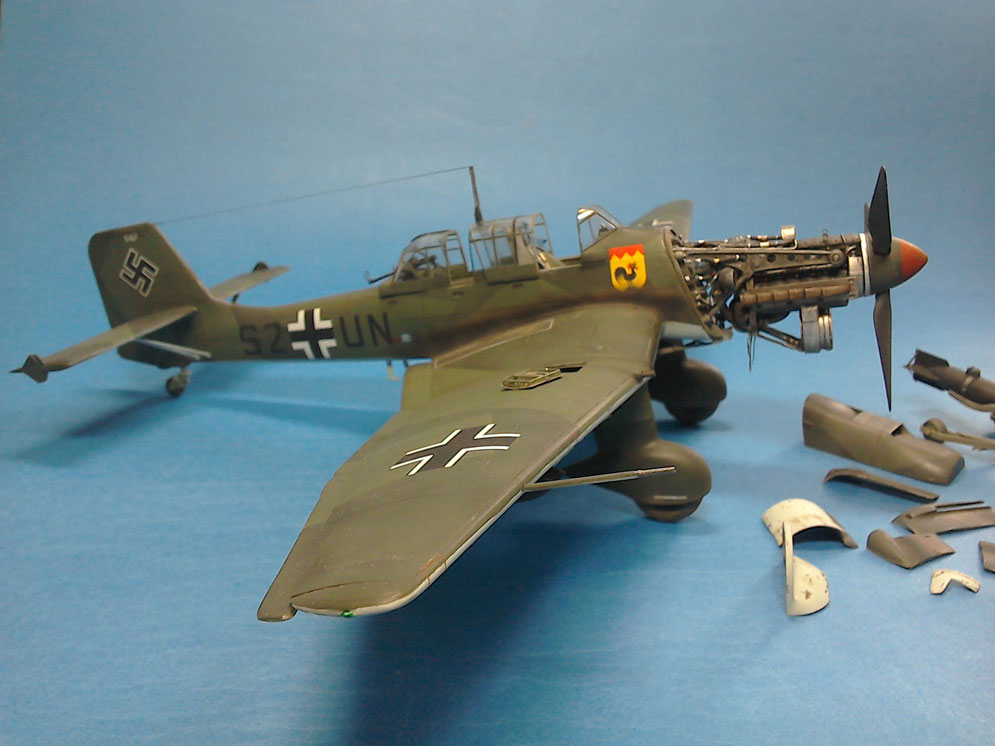
 Just finish this lovely little model: Airfix 1:72 Ju 87 R-2 (captured aircraft in RAF markings). Hope you like it!
Paulo L.
It’s had Aires and Eduard bits inserted into it and a little plumbing by myself on the engine, other than that, pretty much from the box.
Ian R.
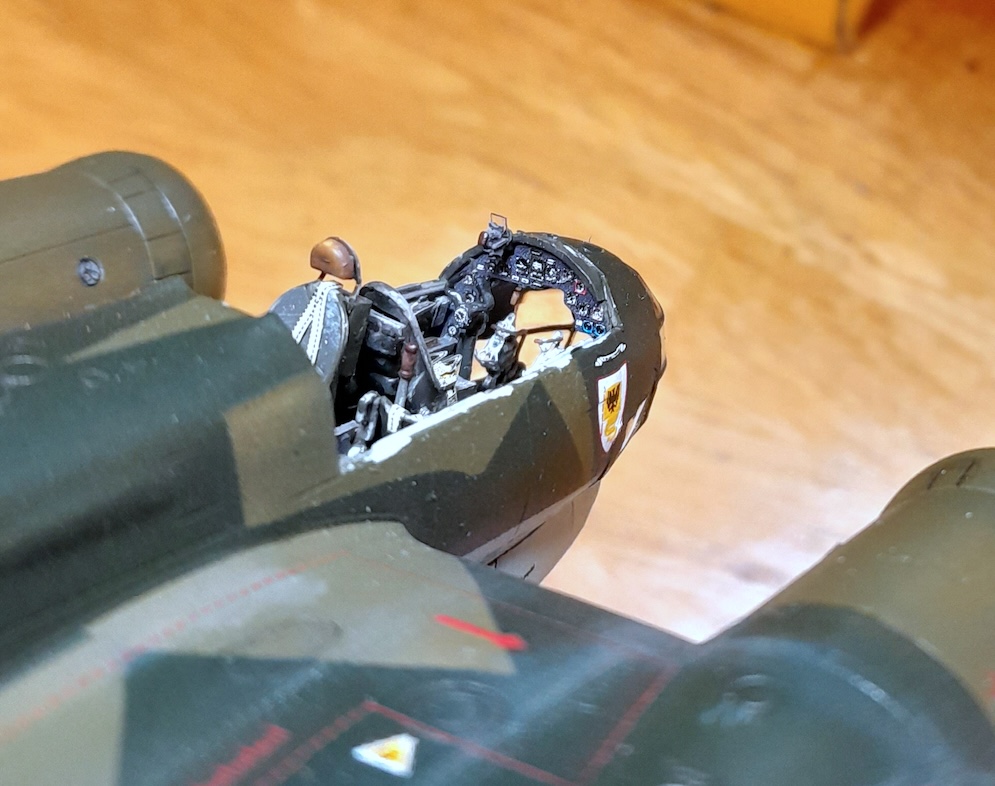
The A-1 has the short squared off wings compared to the A-4. The best part of the Revell kit is the beautiful cockpit. I felt some of the fuselage panel lines where a tad deep, so I sanded the whole fuselage right down, particularly near the cockpit. Here I added the Eduard PE cockpit and Eduard MG-15 machine guns.
The decals are from the Xtrakit Battle of Britain set. This aircraft went out to bomb Woodley airfield on 3rd October 1940 near Reading under clouds, couldn’t find the target so went to the alternate target of Hatfield and hit the de Havilland factory (with Mosquito prototypes damaged). The airfield defences weren’t asleep and hit the Ju 88 which crash landed shortly afterwards.
Andrew J.
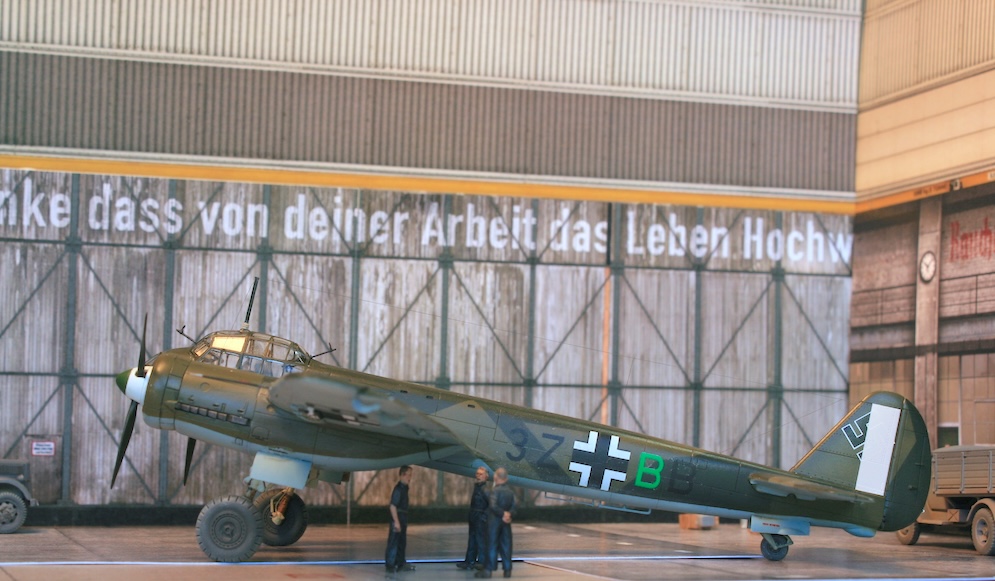
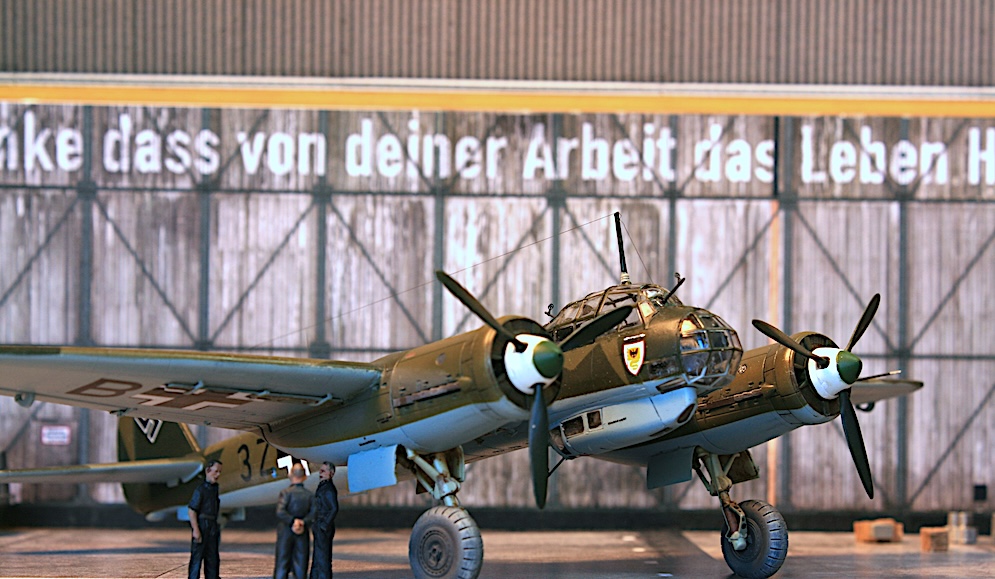
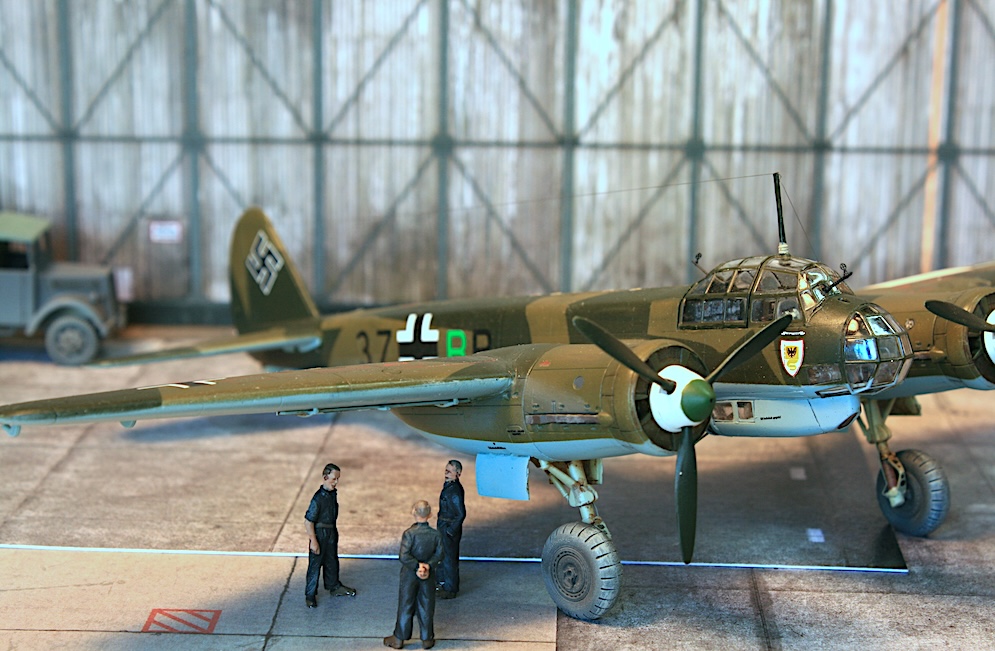
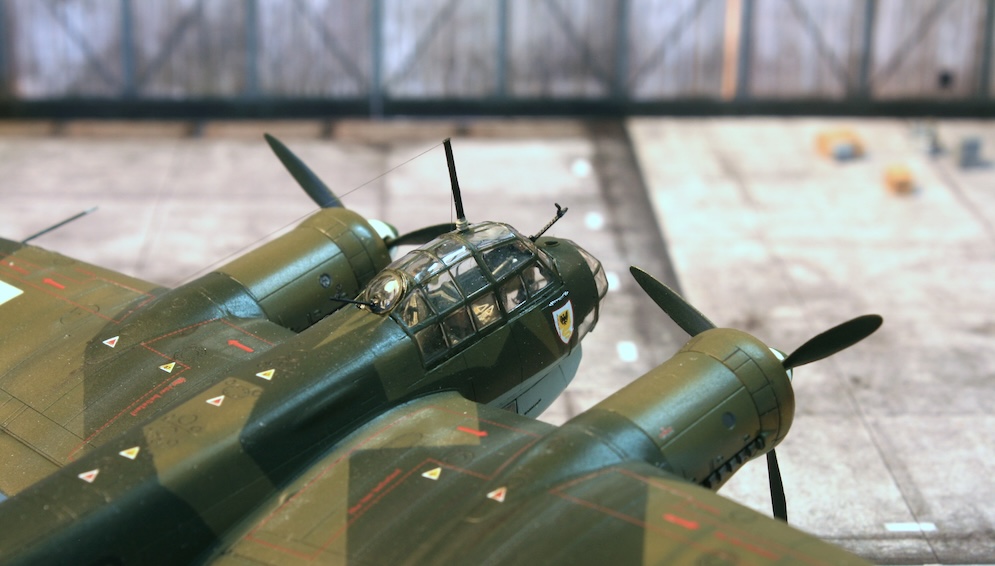
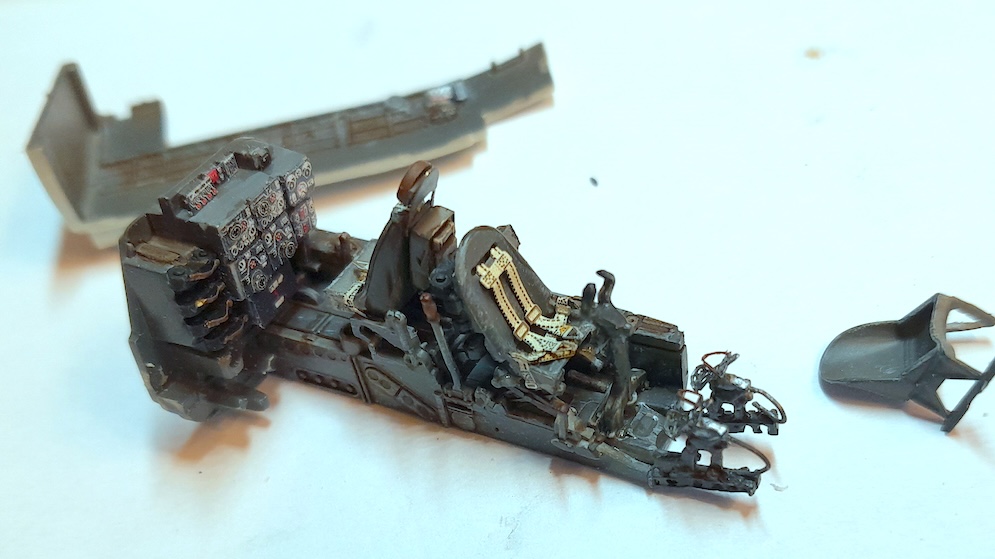
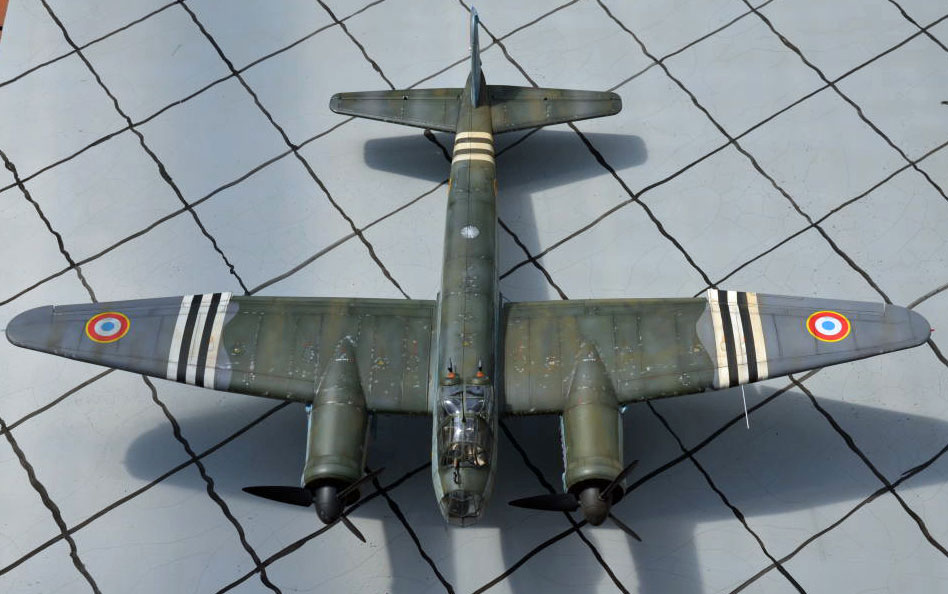
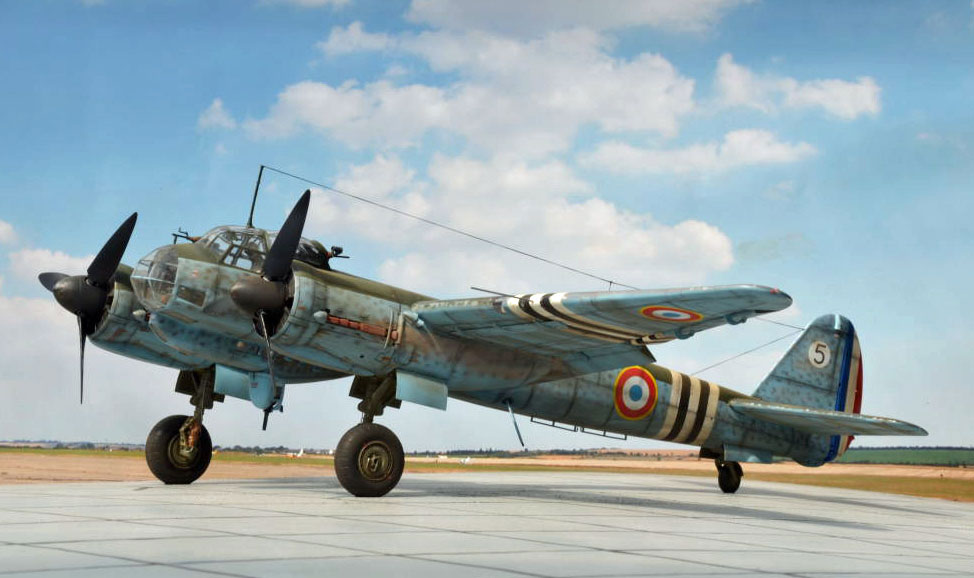
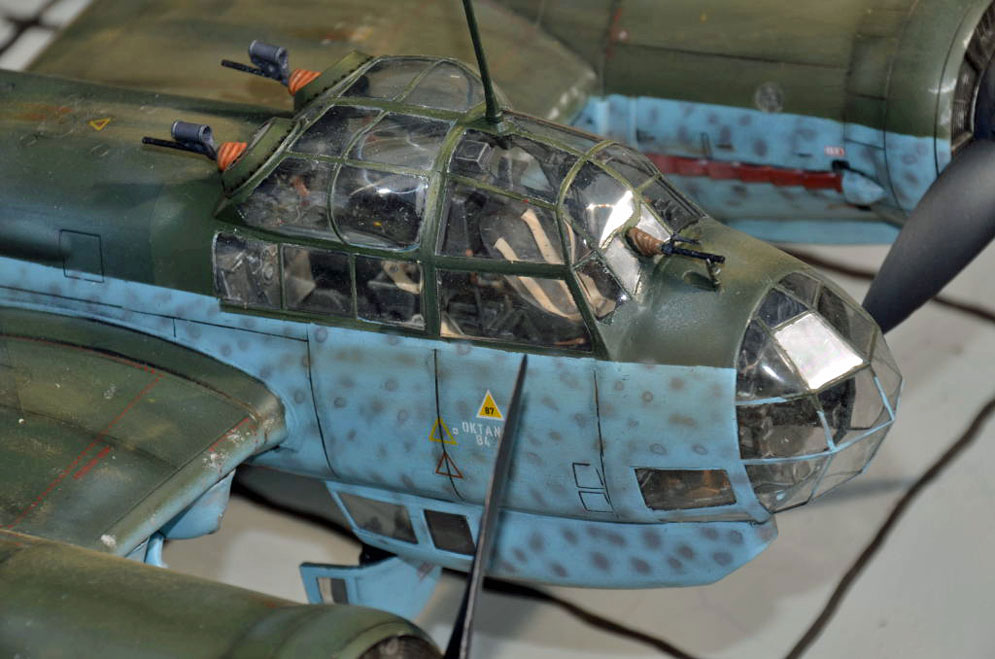
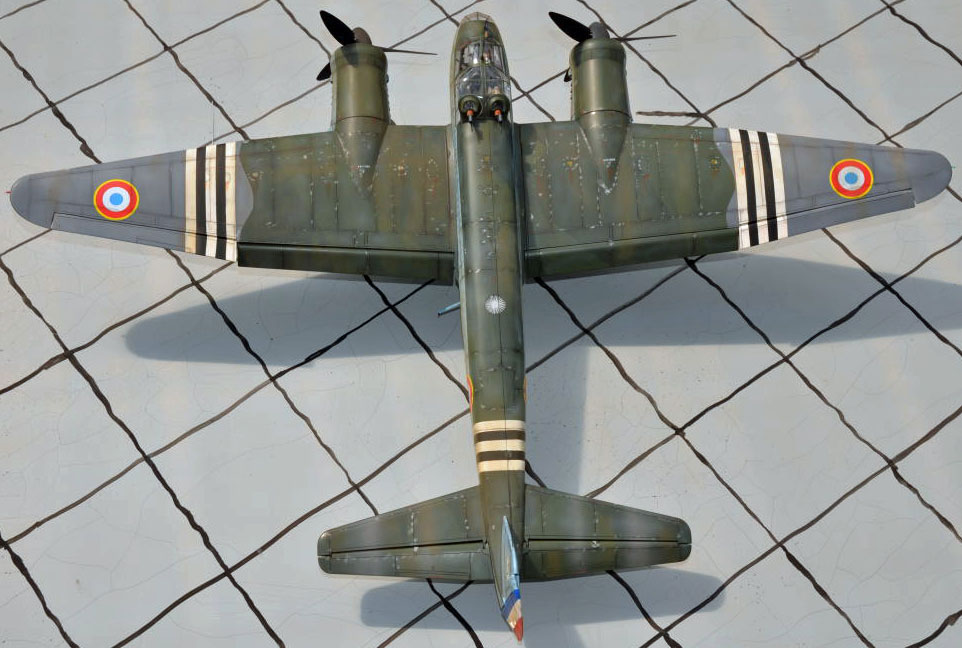
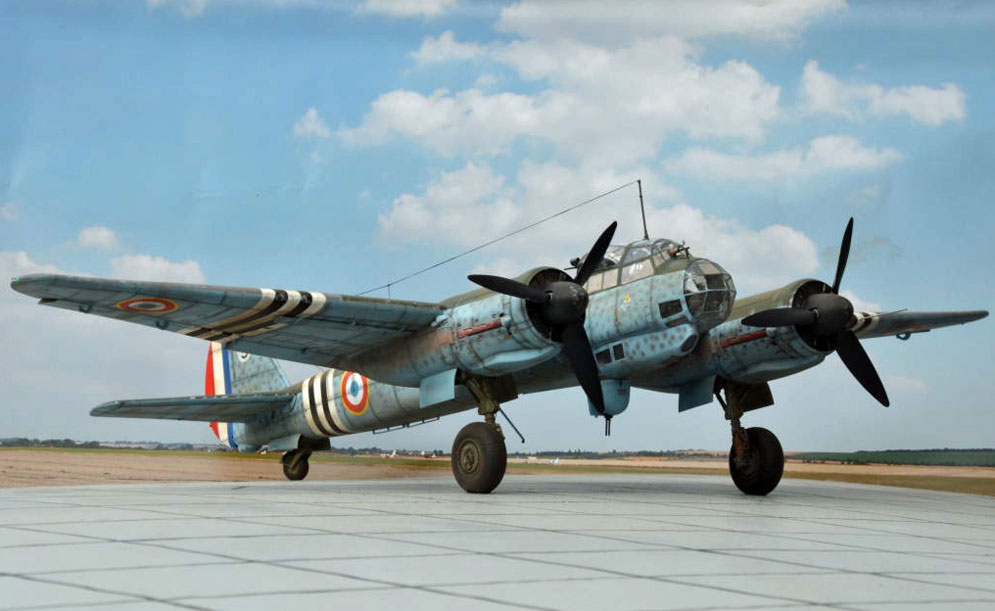
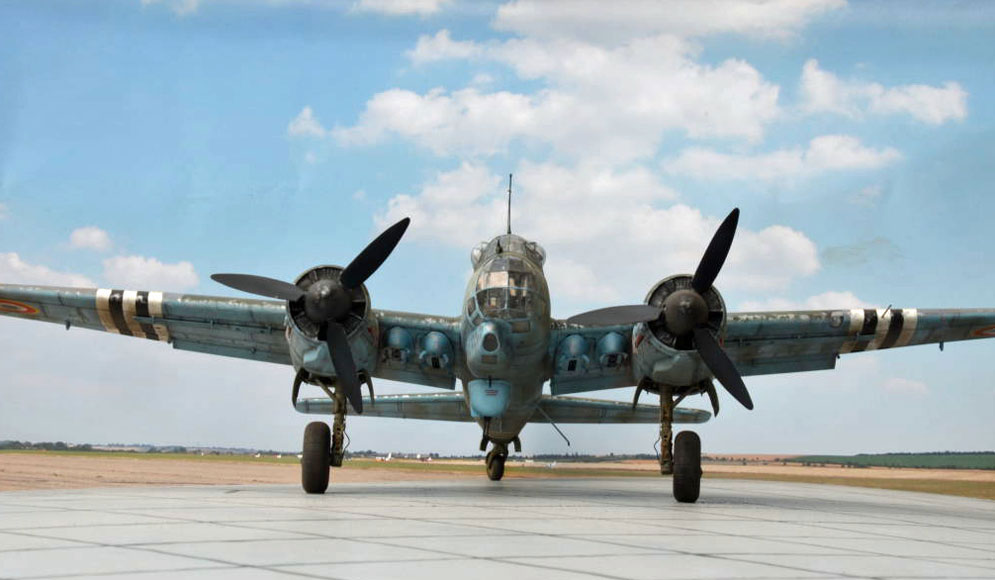
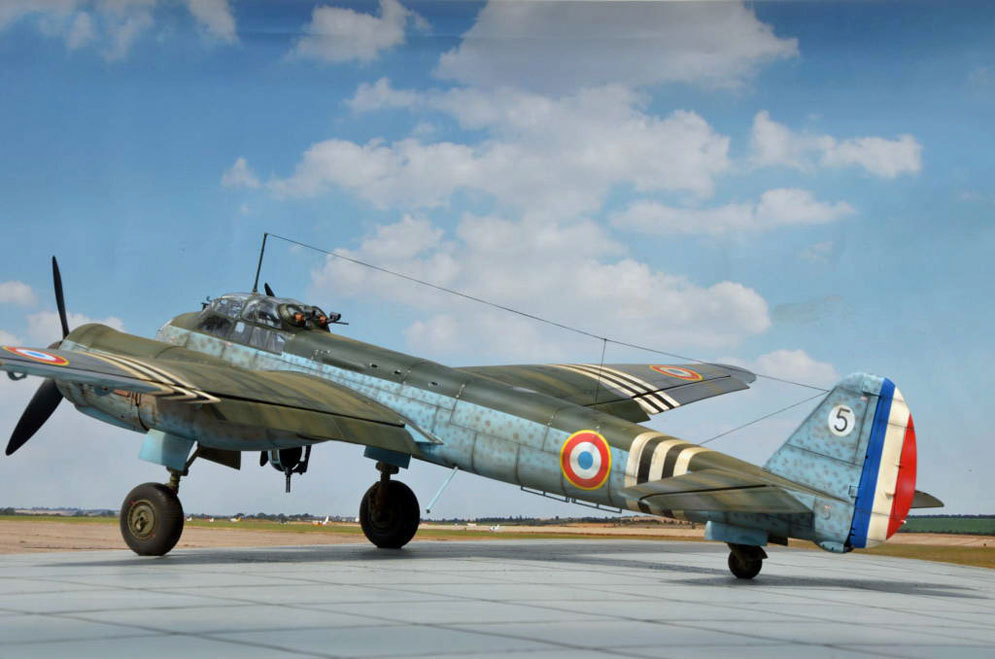
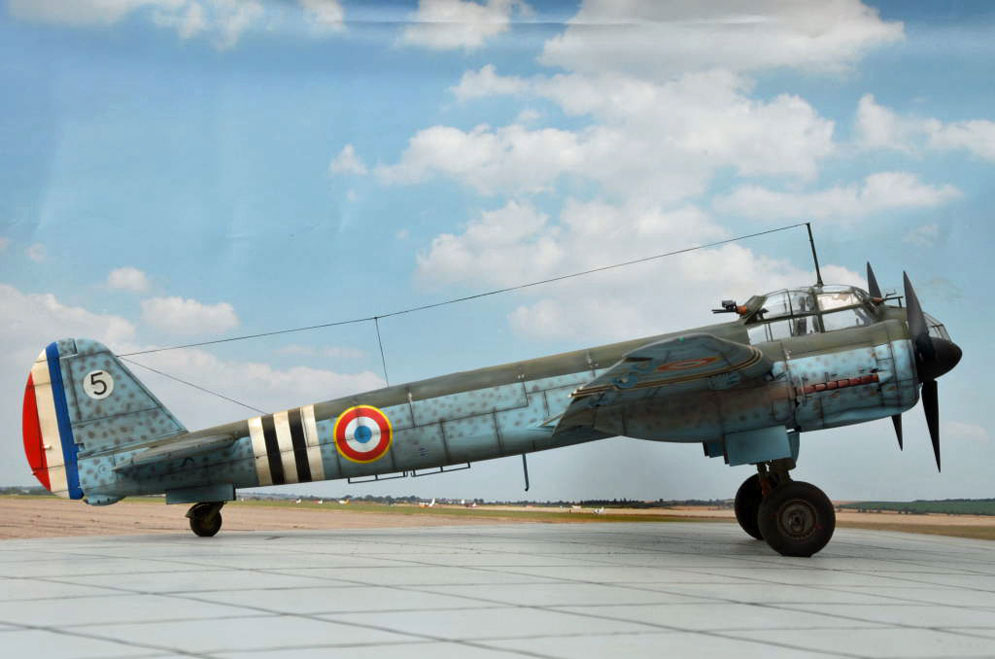
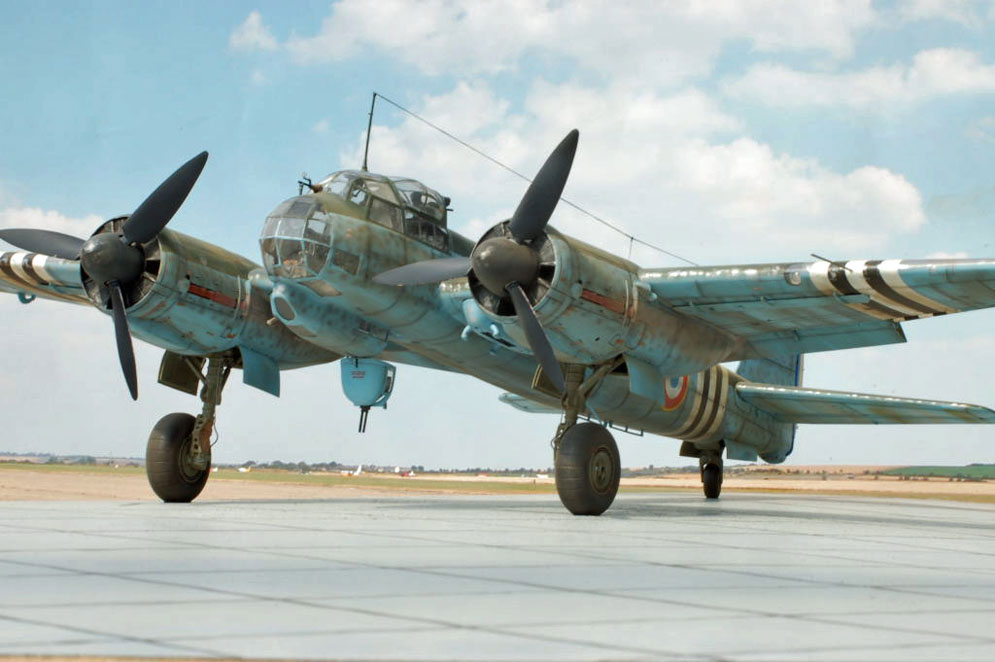
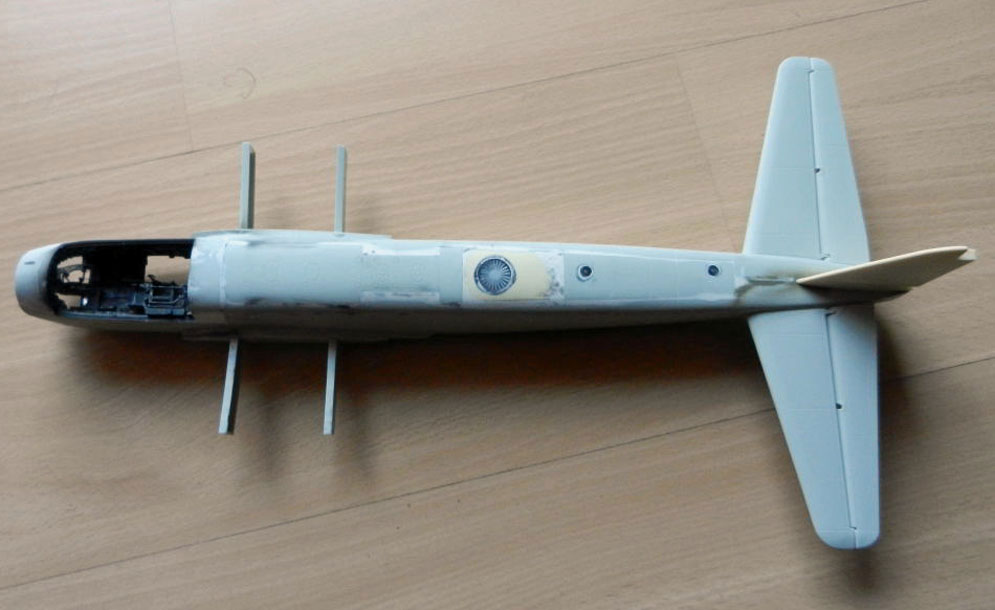
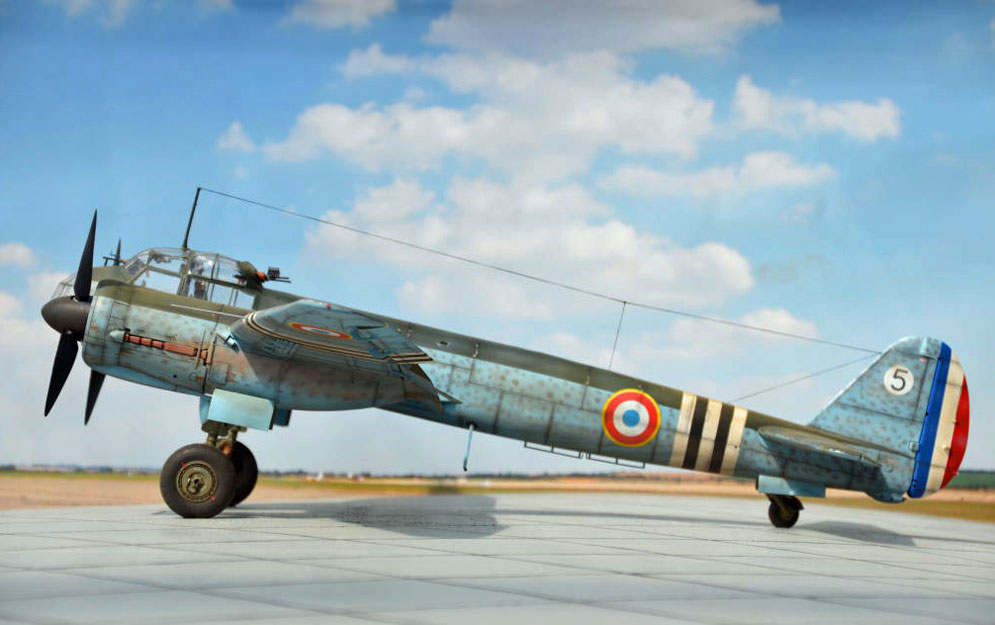
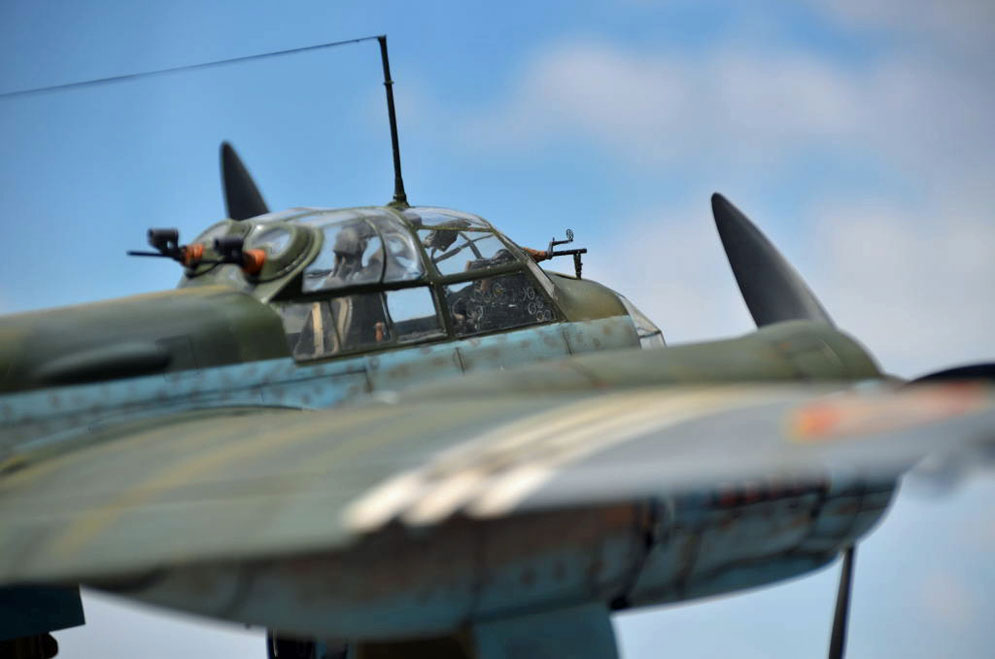
As it’s forbidden by law here in Germany to build correct aircraft from the Luftwaffe (swastika), I tend to build them from foreign users.
To my knowledge there was no foreign user of the A-1. So I bought a conversion set from L´Arsenal Aero and 6 months later Revell issued the A-4! But that helped me later on. When Dutch decal released their Set PT-decal 3201 I had my choice, a Ju 88 in French colours with invasion stripes! I added Ju 88 Bomb racks from MDC, Montex masks and HGW seat belts.
Everything went smoothly, nice instructions from L´Arsenal with resin parts of a good fit. Until I did a first test-fit of the massive resin engines. They must have shrunk, as they are about 4 mm too small in diameter to the Revell parts. Nothing one can correct with some putty – a killer to my project. I thought.
To my help and also dismay then came the release of the A-4 from Revell. I sent an e-mail to “Abteilung X” from Revell and asked for the engine sprue of the A-4. And I got the sprues at an amazing price of 7 EURO! With that I could continue the project.
From there the build was straightforward including the bomb racks from MDC. The masks from Montex were a great help in masking the greenhouse and the decals from Dutch-Decal are fine. A shame that they stopped the PT range with their exotic schemes. The seat belts from HGW are fantastic in their detail, but you need some patience to put them together. The result is worth the effort!
In the weathering I tried to do a compromise between heavy and moderate wear and tear, as the Ju´s were a bit refurbished and partially repainted before their use in the French Air Force.
This is my first try in scale 32 for many years – now I only have to find a safe place for this monster!
Jürgen J.
It’s painted using Revell Enamels with everything by hand and no accessories.
Vladimir K.


Galleries: A | B | C-E | F | G | H | I-J | K-L | M | N-R | S | T-V | W-Z