This gallery is primarily for fans of Messerschmitt aircraft – you will find an especially rich collection of builds. With iconic fighters like the Bf 109 and Me 262, the gallery showcases a wide range of scales, styles and skill levels. With each submission coming directly from our subscribers, you’ll see an impressive variety of approaches — from meticulous cockpit detailing and weathering techniques to striking camouflage patterns and theatre-specific markings. Whether you’re researching a future project or simply enjoy the engineering and history behind Messerschmitt designs, this gallery offers a wealth of inspiration and reference all in one place.
Each submission has a ‘gallery’ of thumbnails which you can click on to see an enlarged image and read the short text describing the model – enjoy!
Not a subscriber yet?! By subscribing to Scale Modelling Now, you unlock full access to 4,500+ in-depth build-reviews, exclusive how-to videos, regular technique masterclasses, and fresh content added weekly — all for just £1.50/month (£18/year).
Other Galleries:
Focke-Wulf and Fokker Scale Model Gallery
Messerschmitt Aircraft Scale Model Gallery
Supermarine Spitfire Scale Model Gallery
A | B | B-2 | C | D-E | F | G | H | I-L | M | N-R | S | T-V | W-Z
More ‘M’ aircraft galleries
Tamiya paints
Oil paint weathered
Hope you like it…
David L.
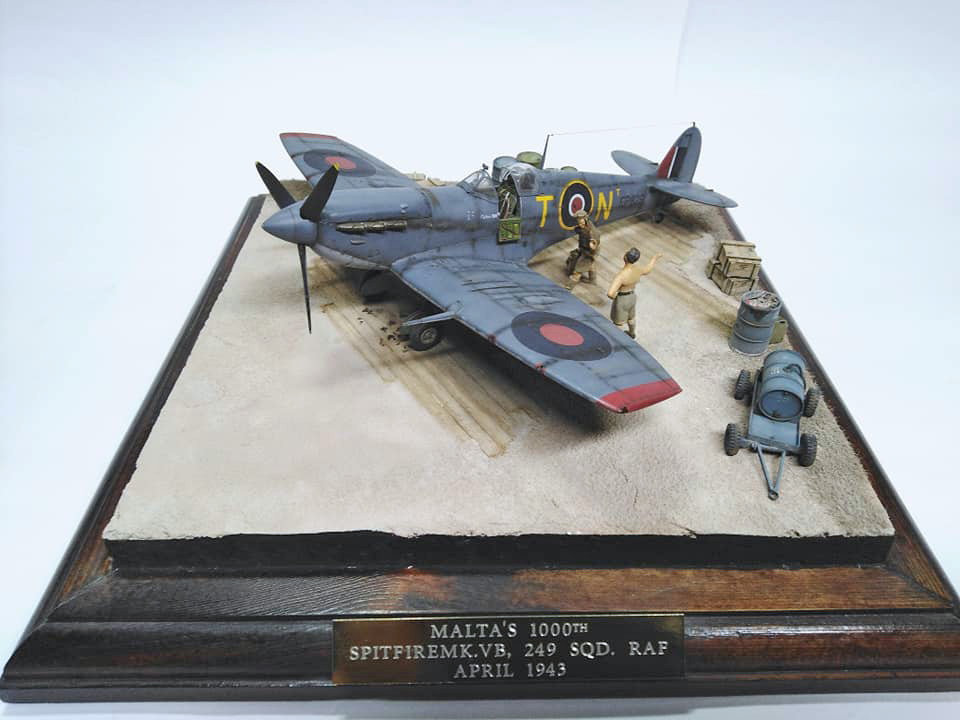
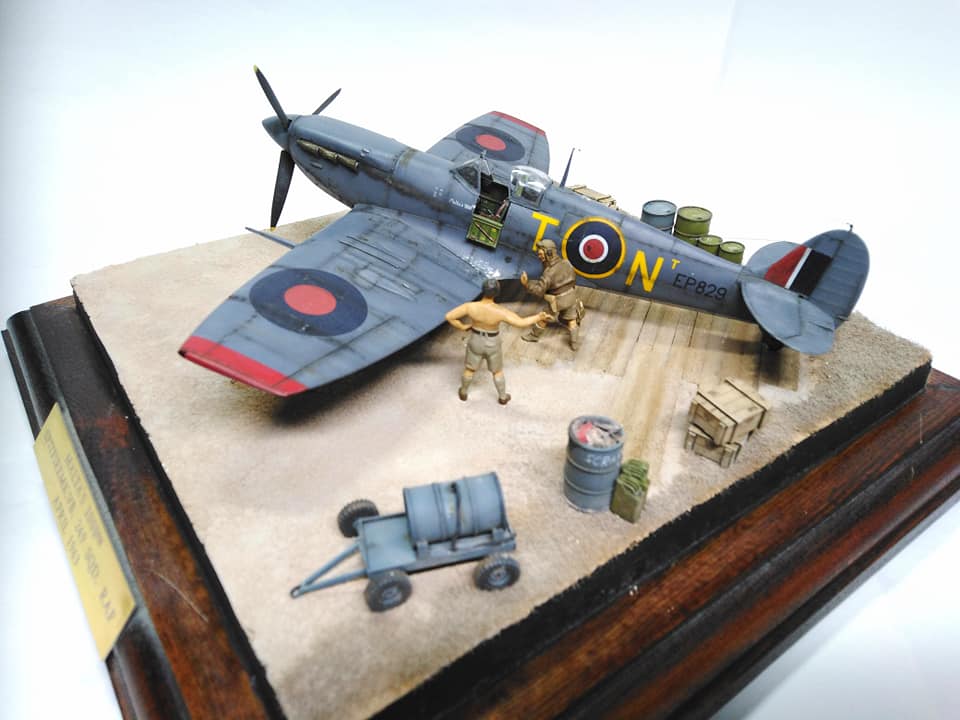
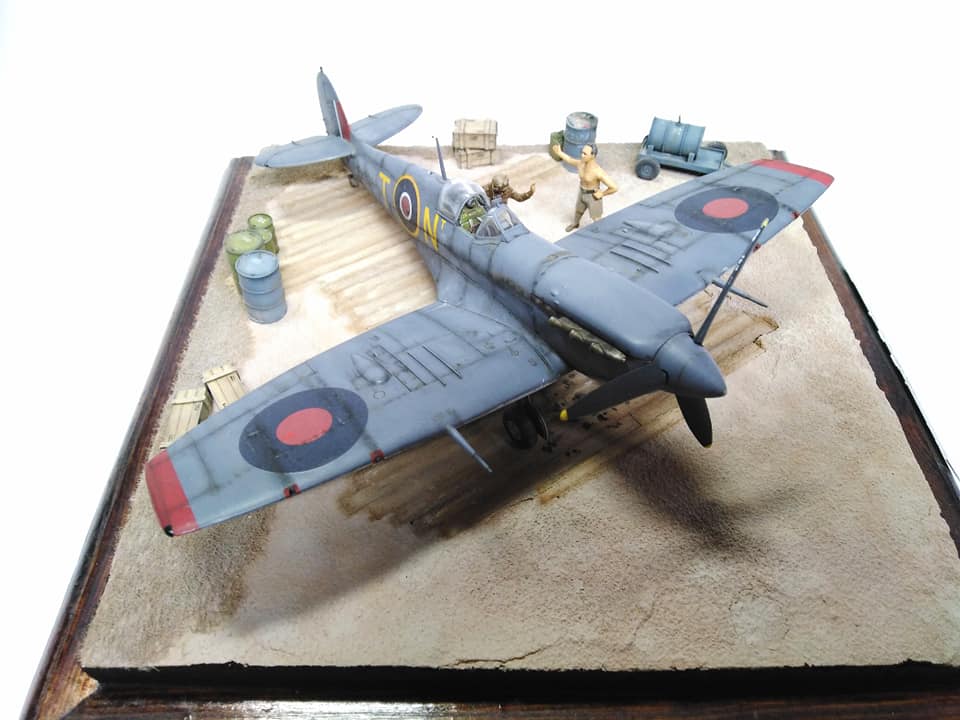
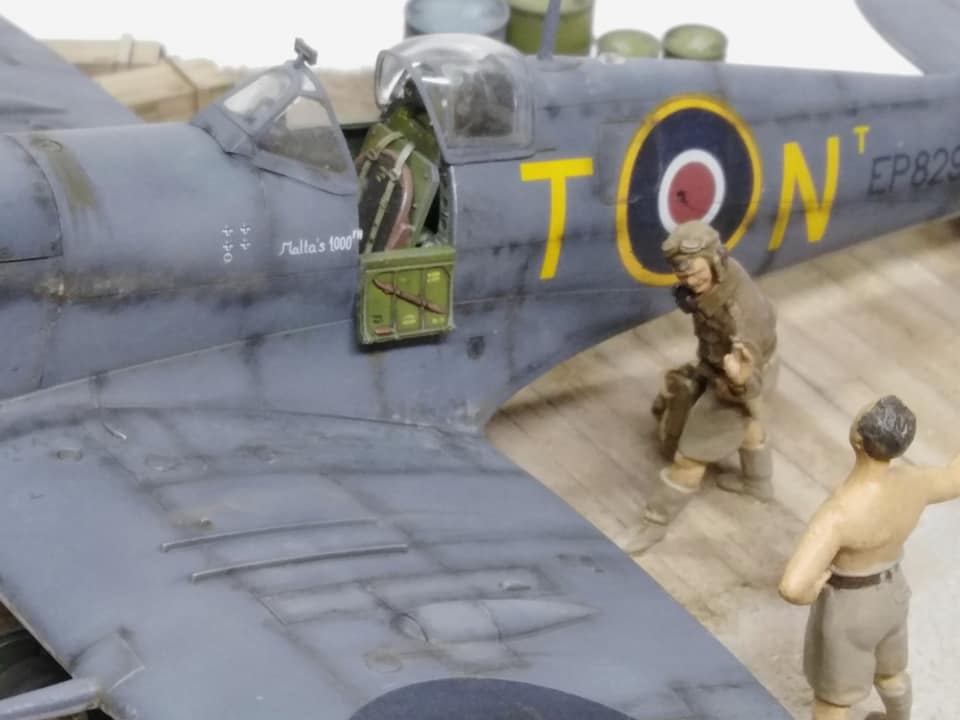
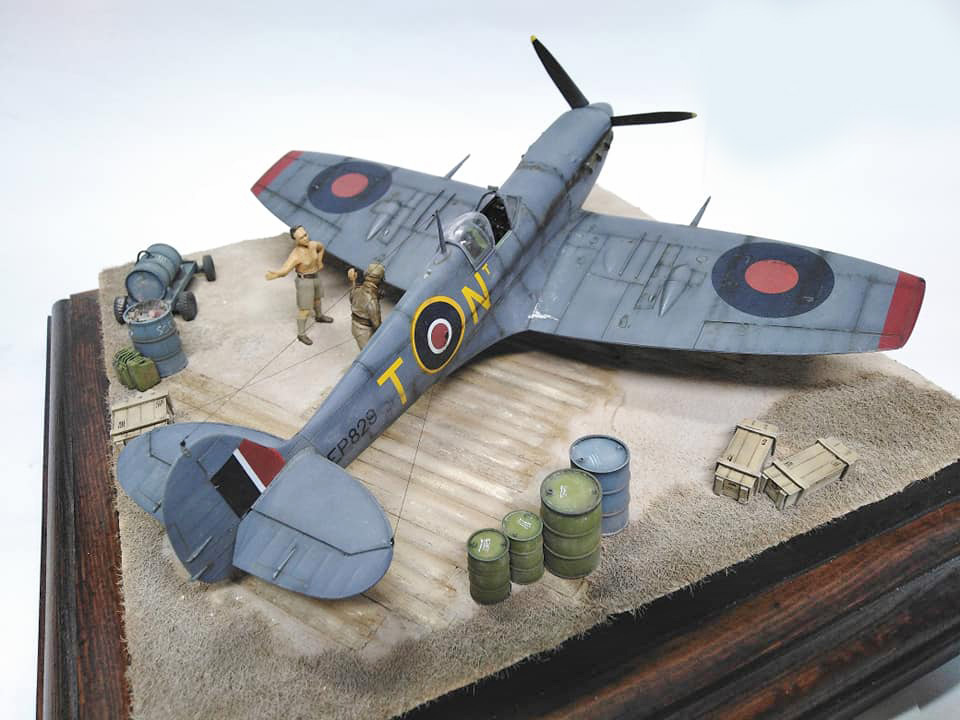
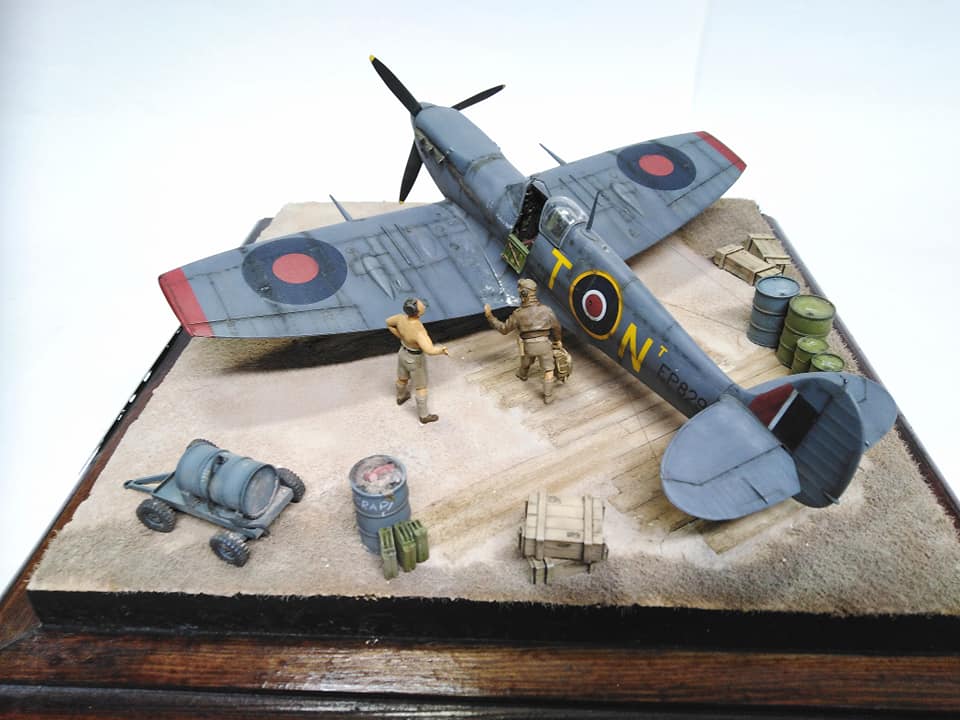
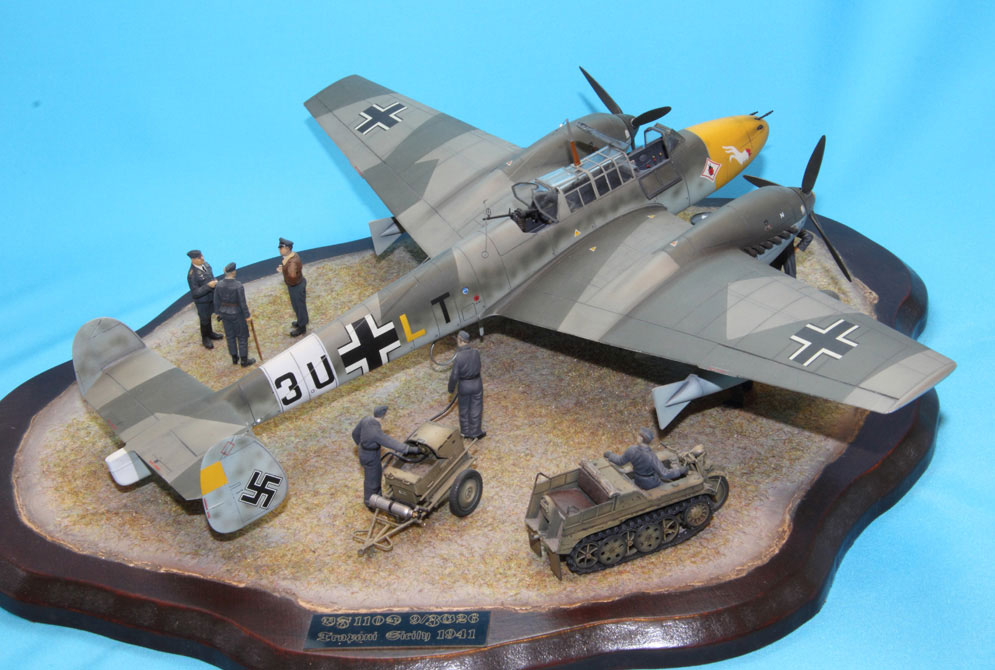
The title marks this aircraft achieving the 1000th kill against the Axis Forces attacking the island.
The diorama was built several years ago between client projects and is still a favourite of mine.
Ian R.
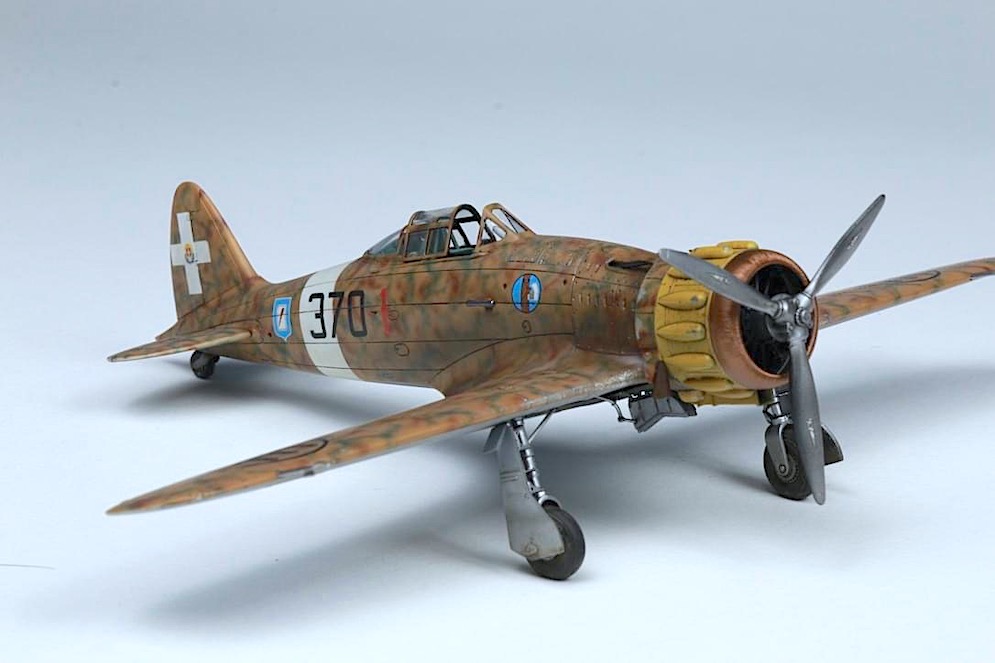
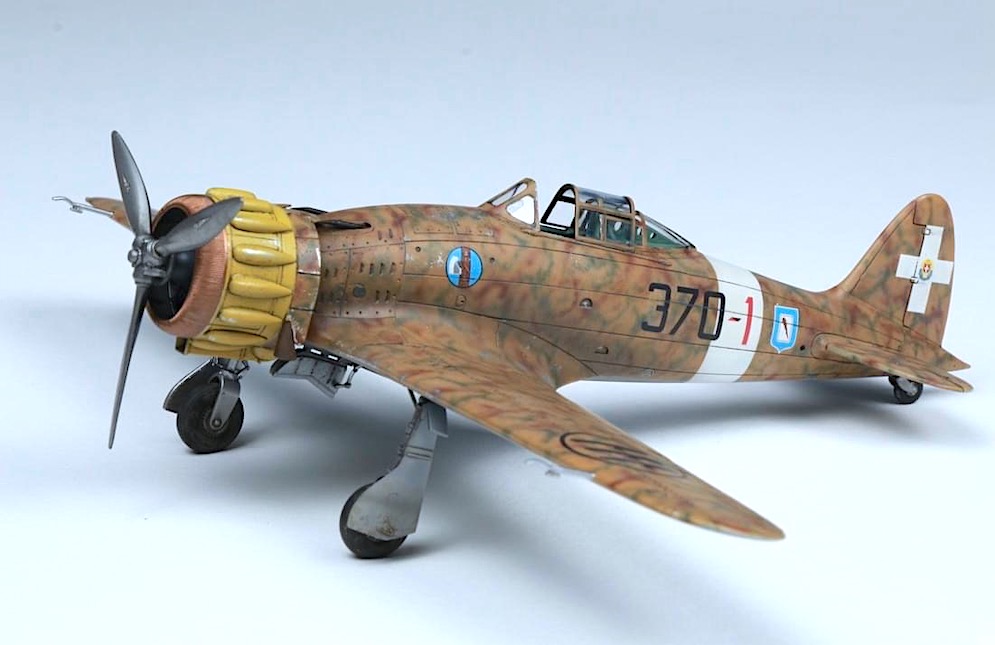
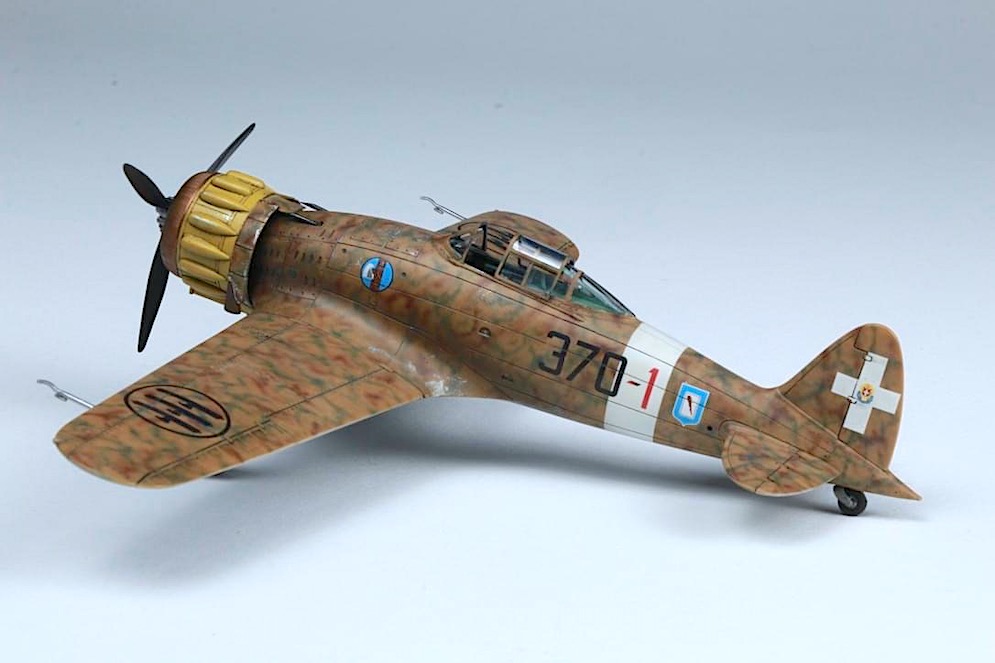
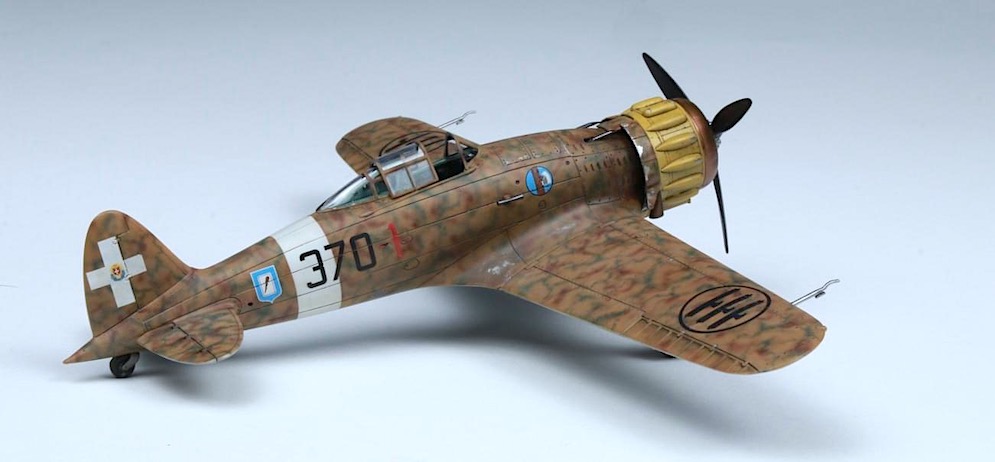
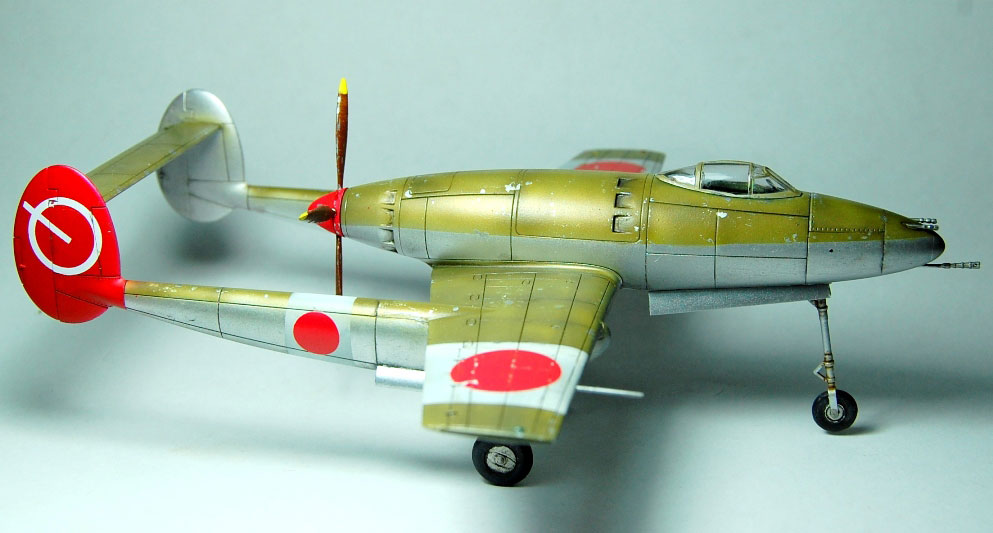
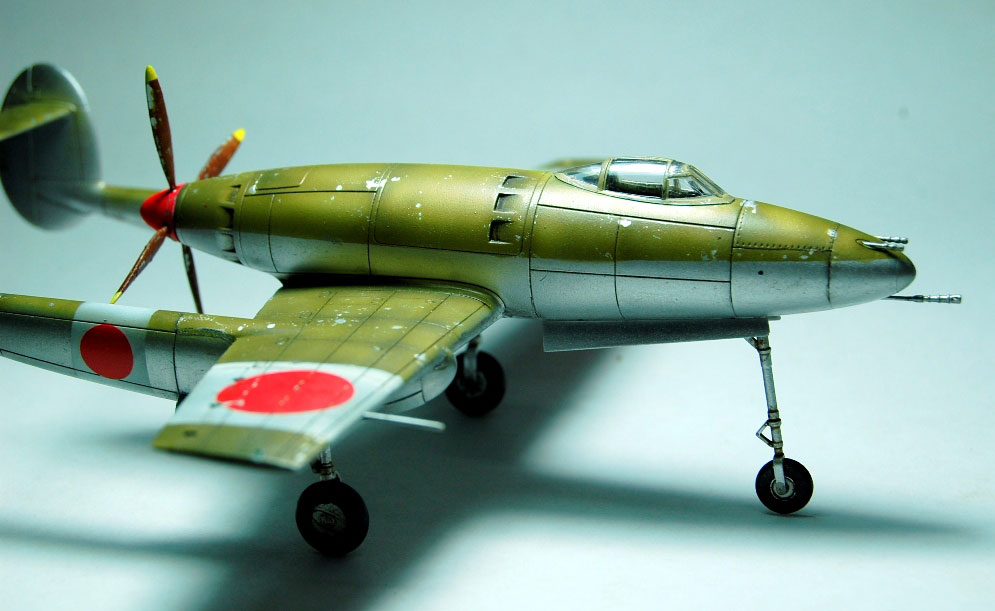
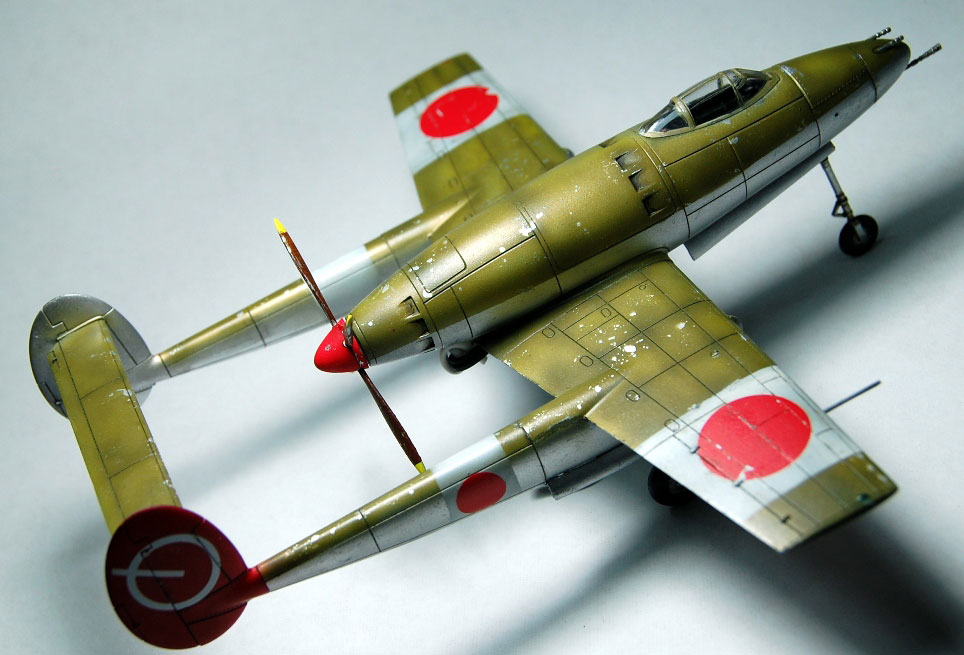
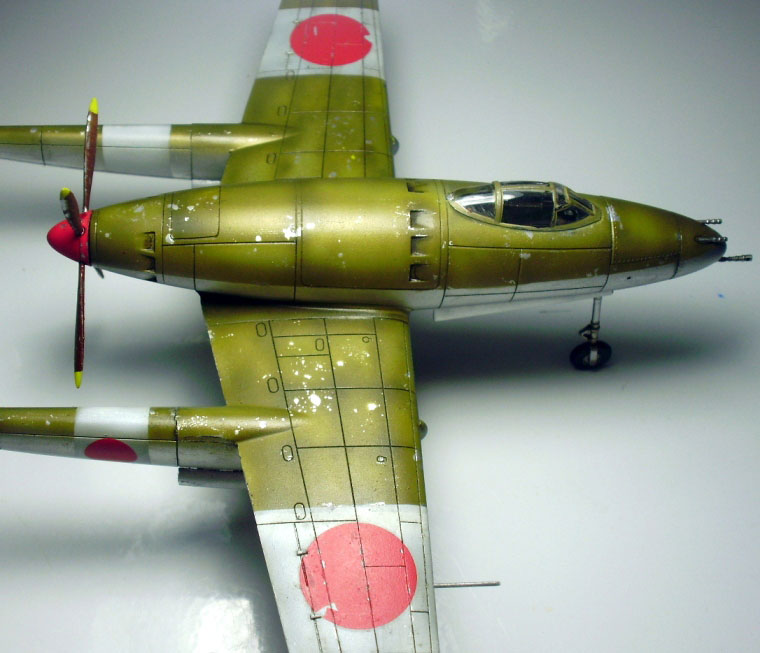
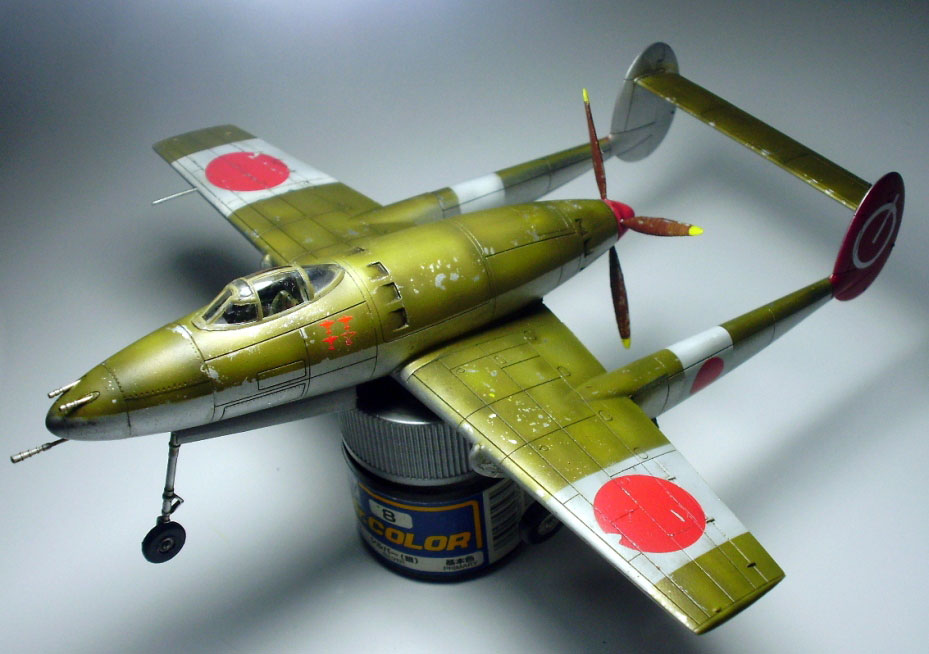
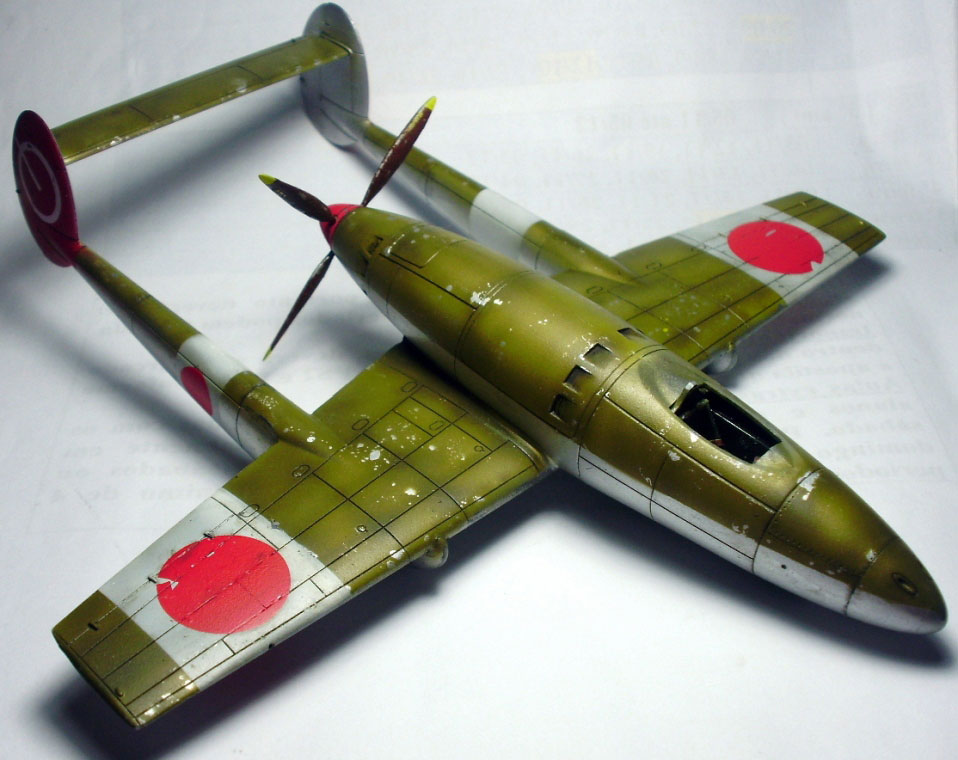
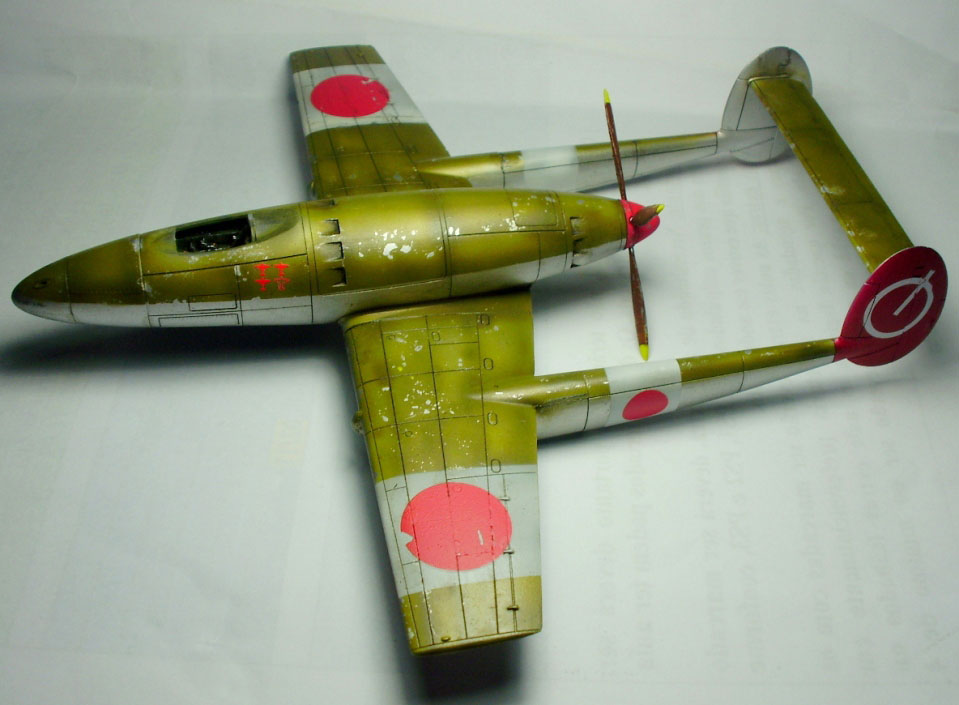
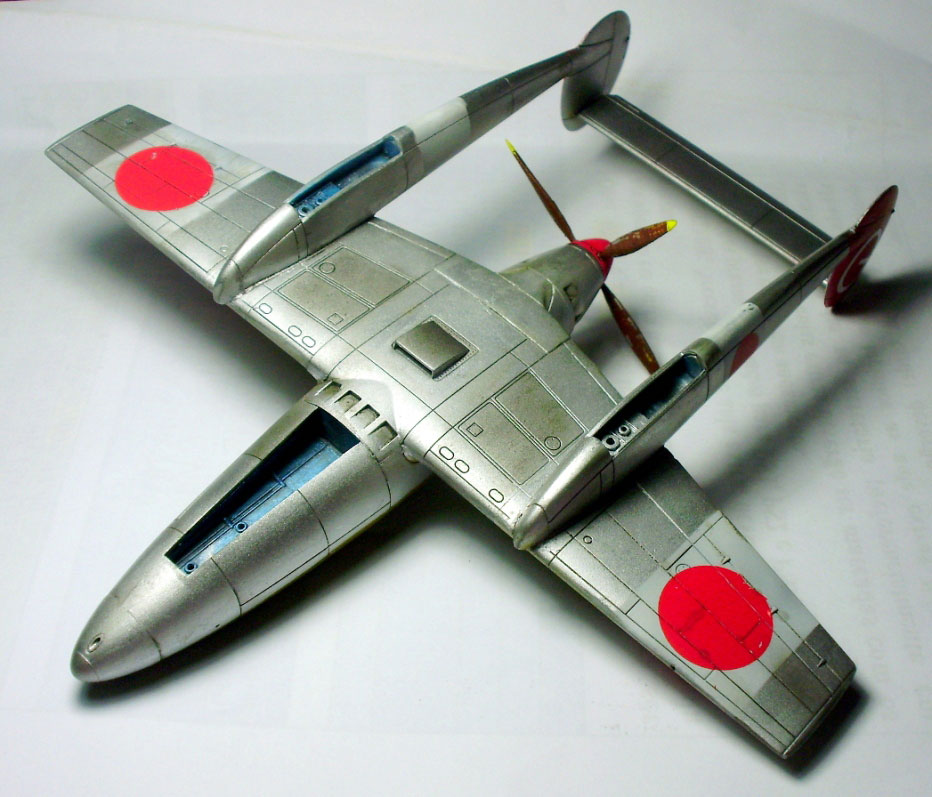
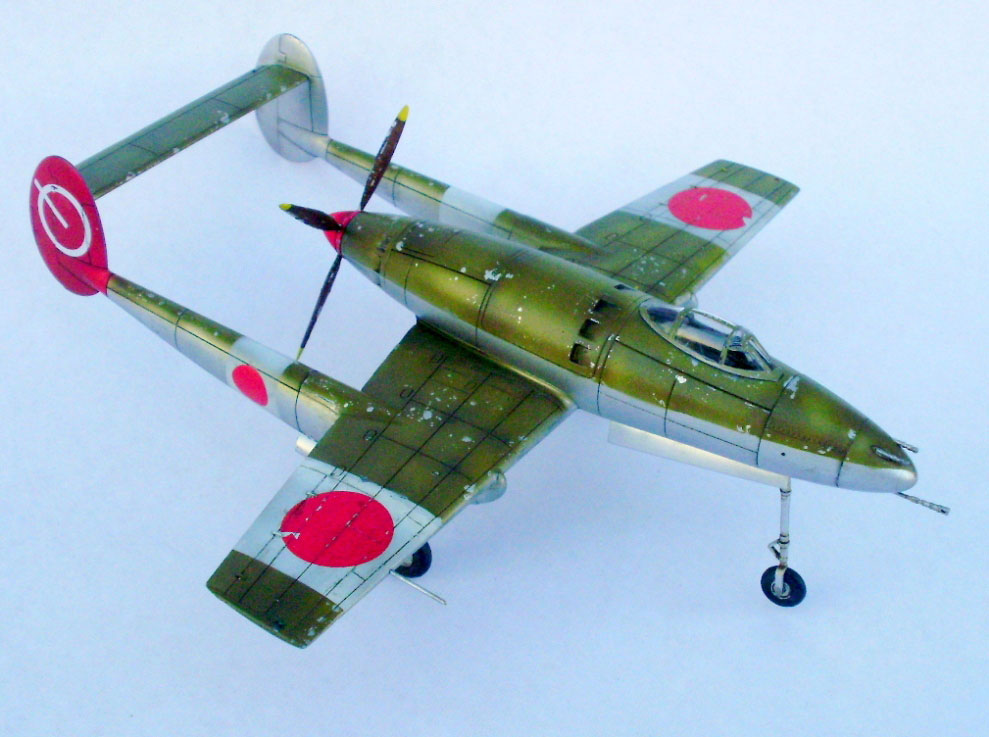
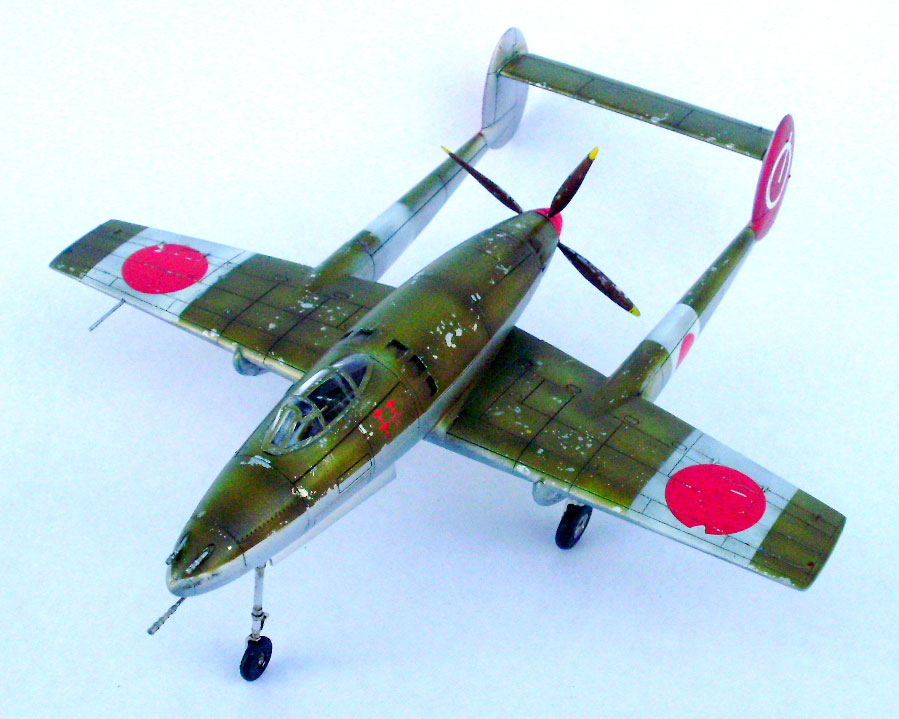
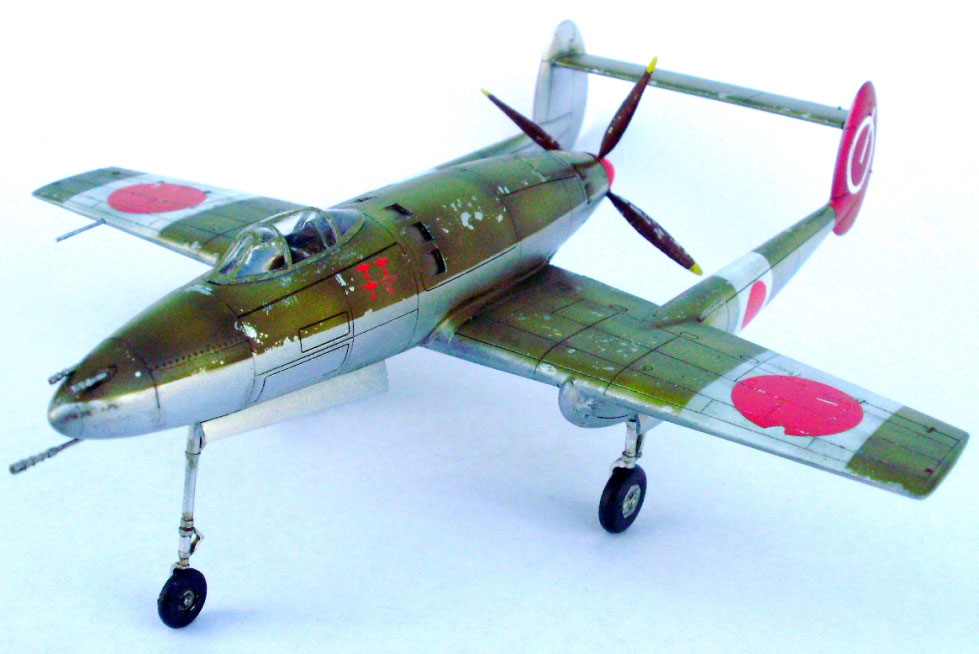
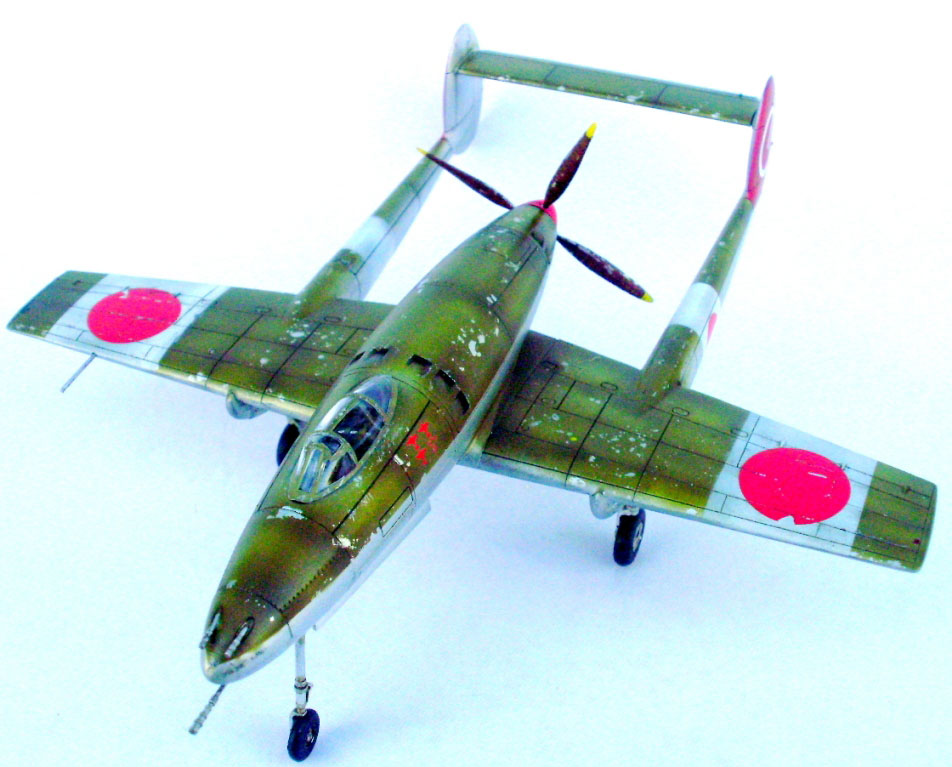
The kit from Meng is very nice injected and a enjoyable build. I didn’t need any sanding work, the fit is awesome. I used Gunze Mr. Hobby Paints and salt technique for the chipping. The pre-shade made with yellow color and covered by IJN Green.
Some details of the aircraft:
Kit Review here: http://kitmaniac.com/site/?p=2162
Engine: Mitsubishi Ha-221 Ru | Power: 2,200hp
Crew: 1
Wing span: 37ft 11 5/16in | Length: 37ft 4 13/16in
Loaded Weight: 9,921lb | Max Speed: 454mph at 32,810ft
Best, Vini
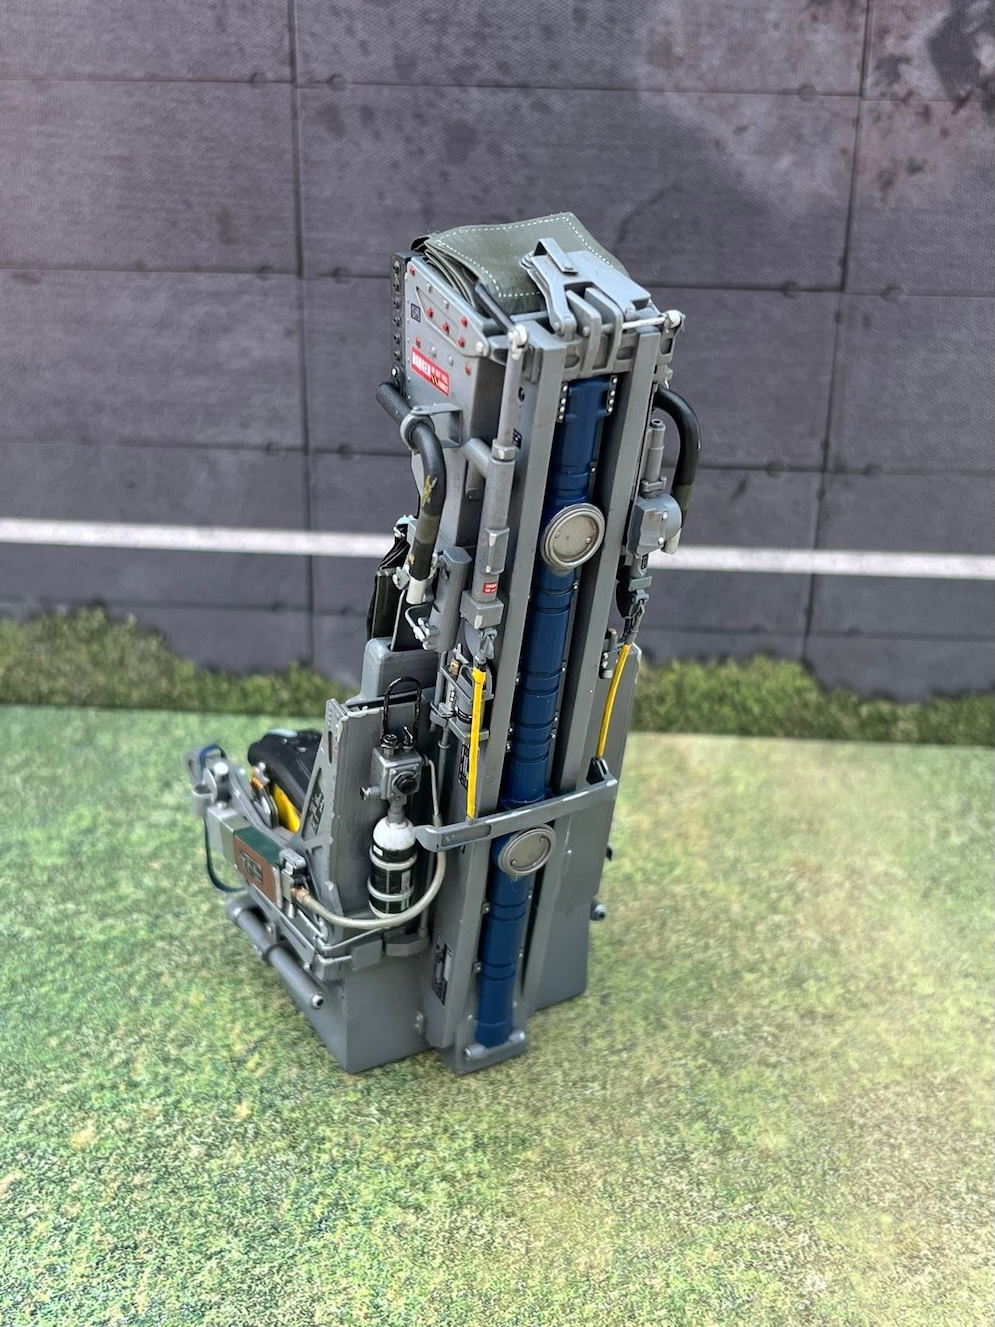
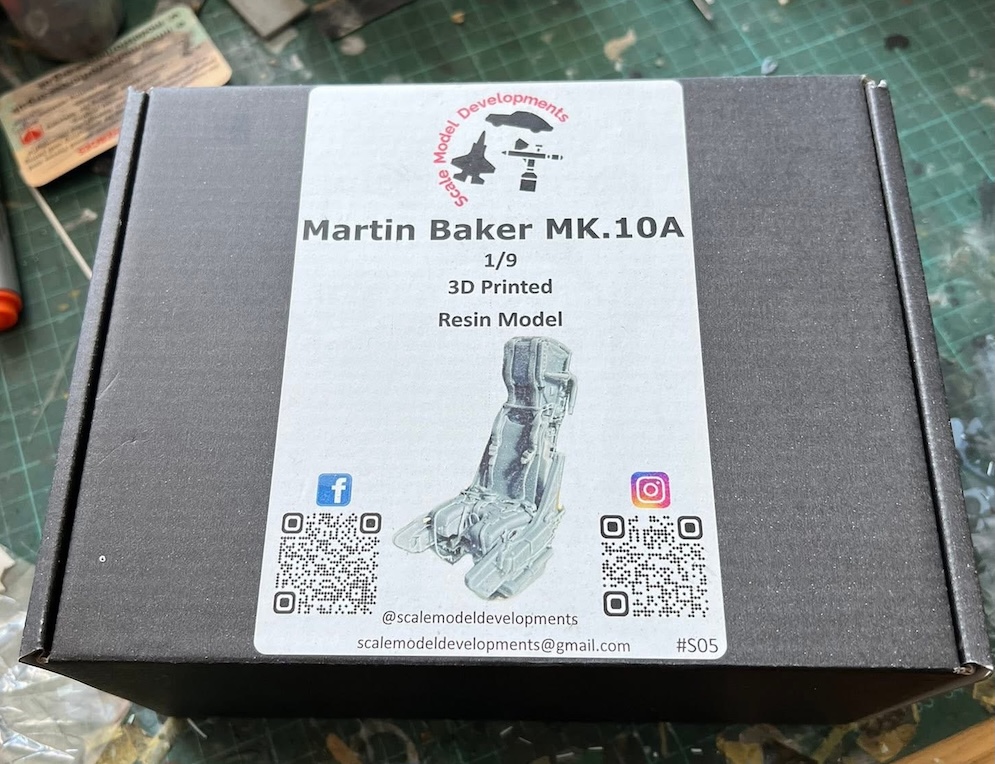
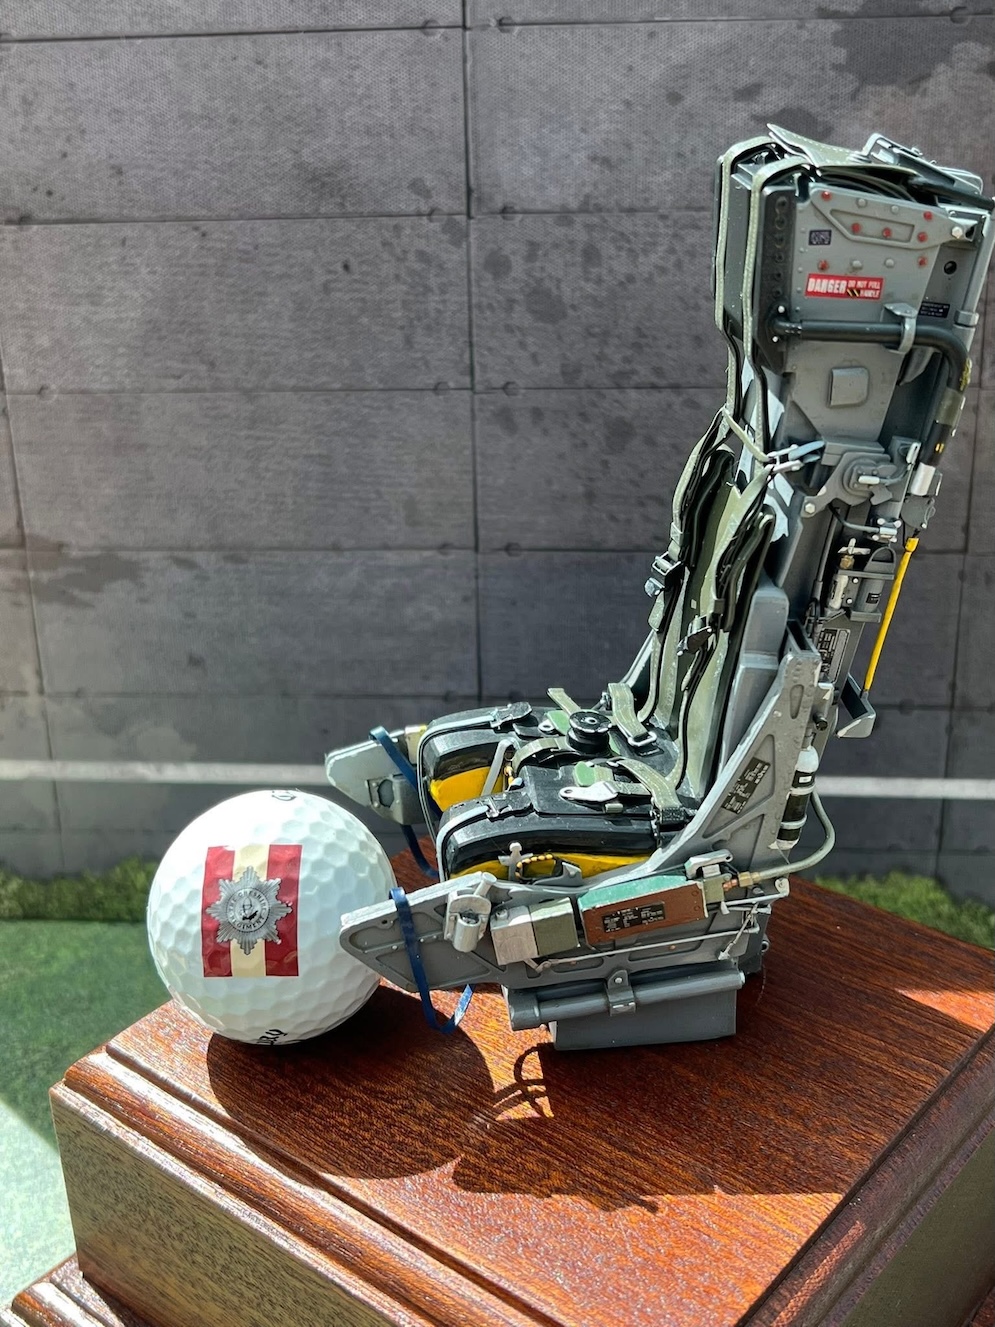
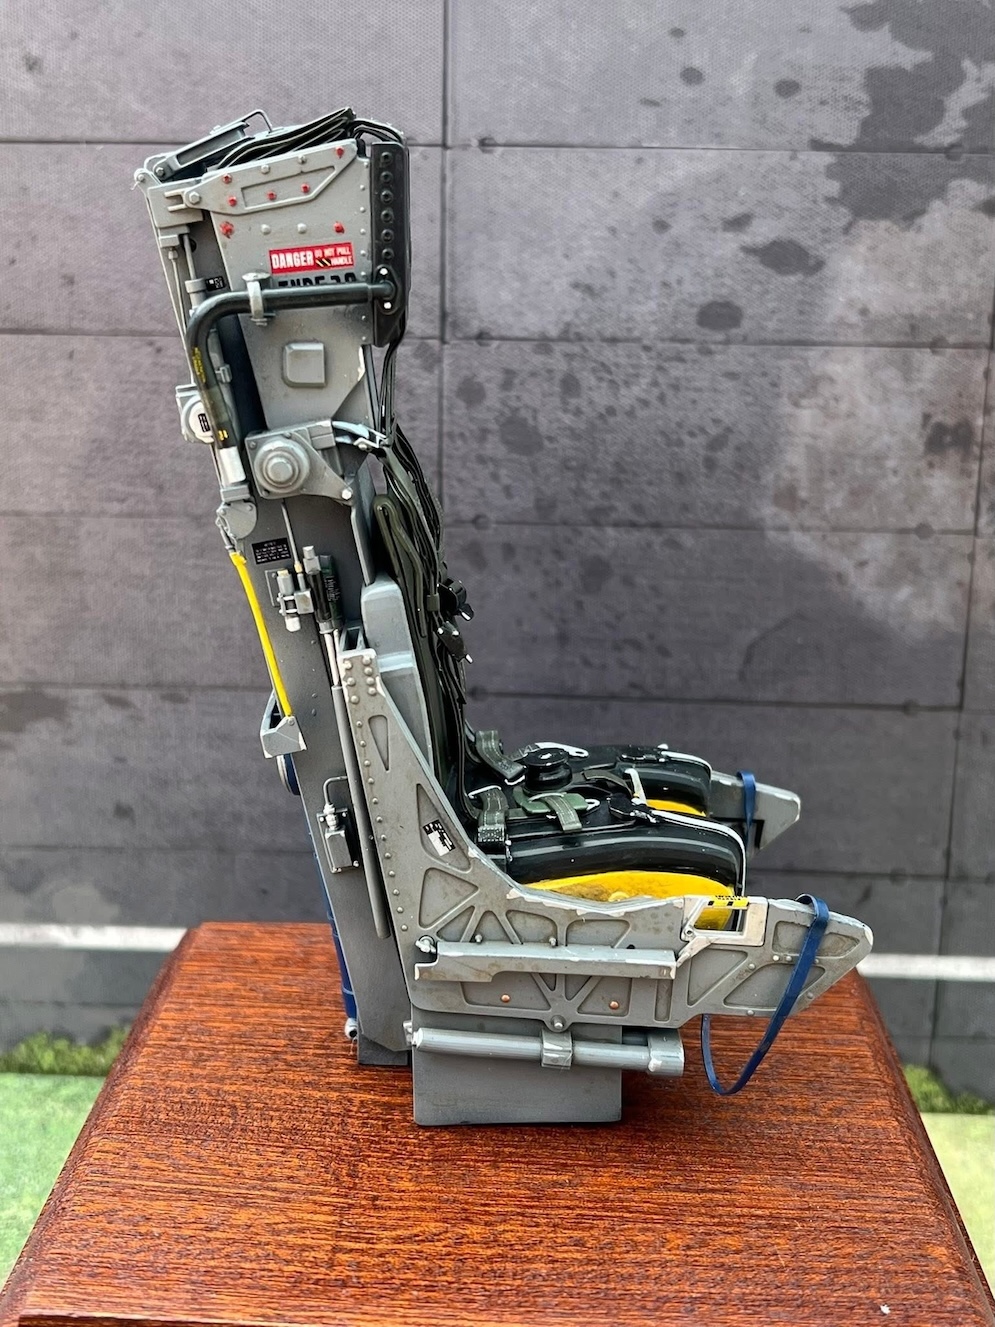
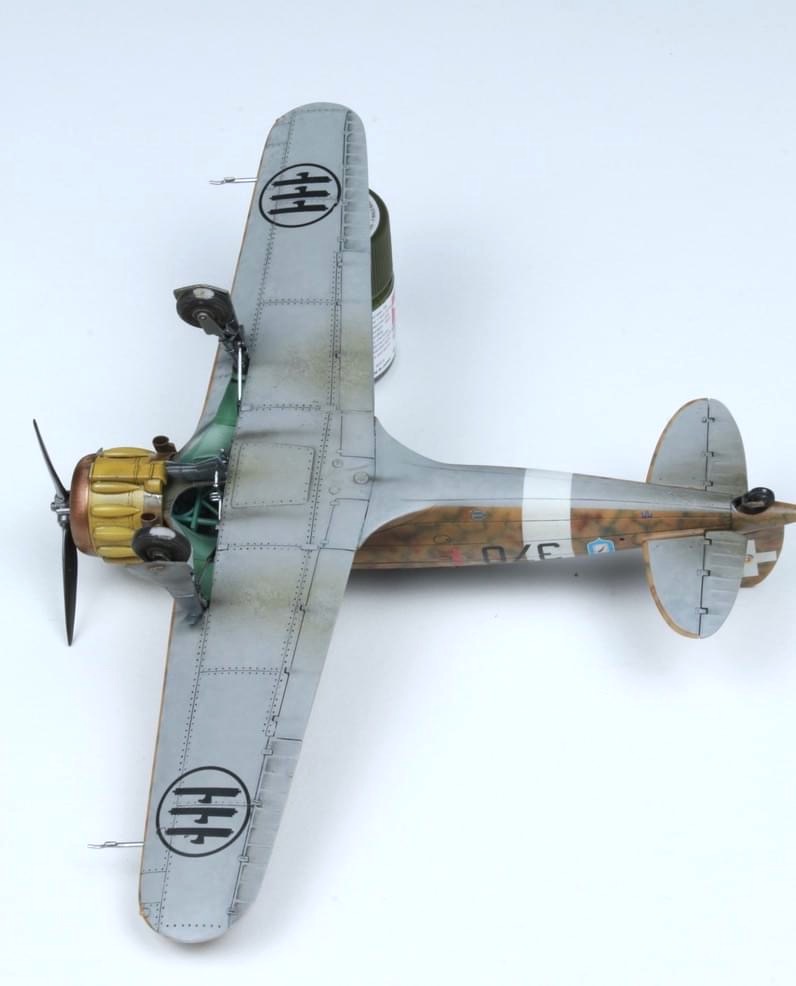
My first attempt at painting a resin printed model. Golf ball to show scale.
Hope you like
Ray J.
A lot of models of Japanese aircraft are shown highly weathered and some almost devoid of paint. It seems that the assumption that the paint used was poor quality and thus had a short life is unfounded. The Japanese produced some very good paints – e.g. lacquers. in all probability it was a lack of primer, and the strong sun in Pacific theatre. The poor old Mavis was a bit lumbering and lightly armed – and thus rather vulnerable. There is a story of a Dogfight between a B17 and “Mavis”!!
Very nice kit – but possibly hard to find.


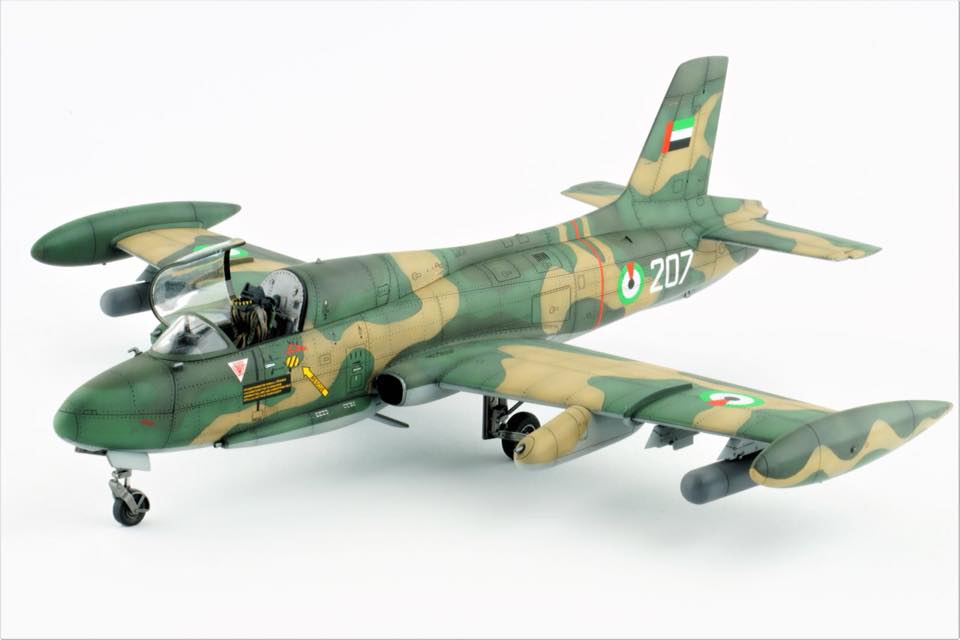
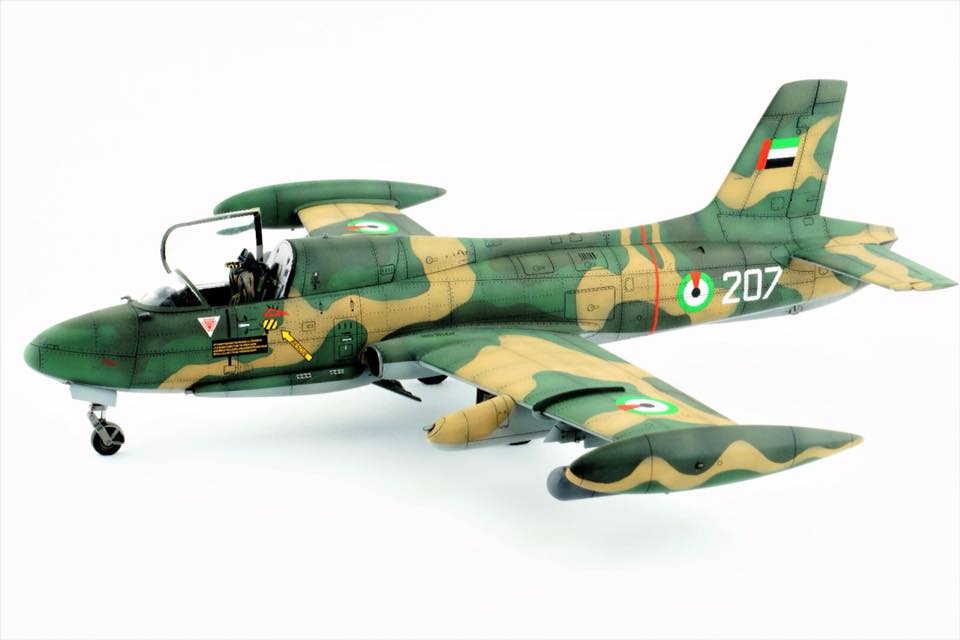
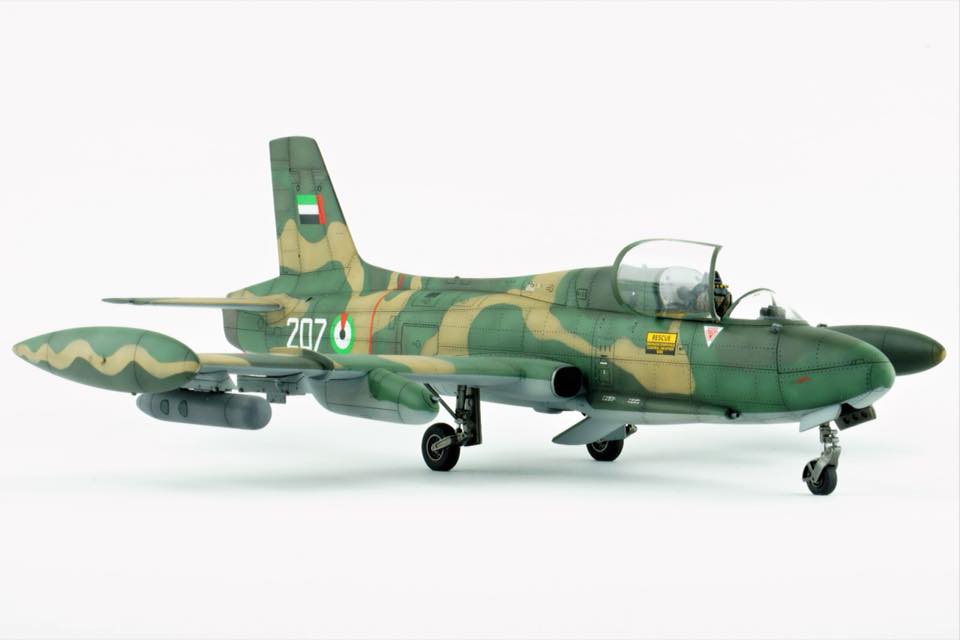
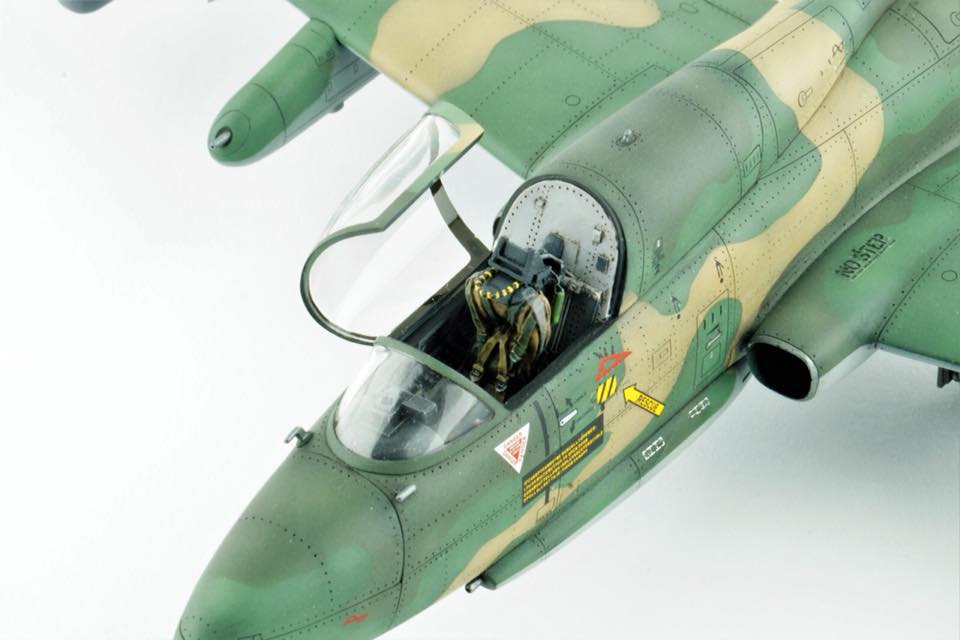

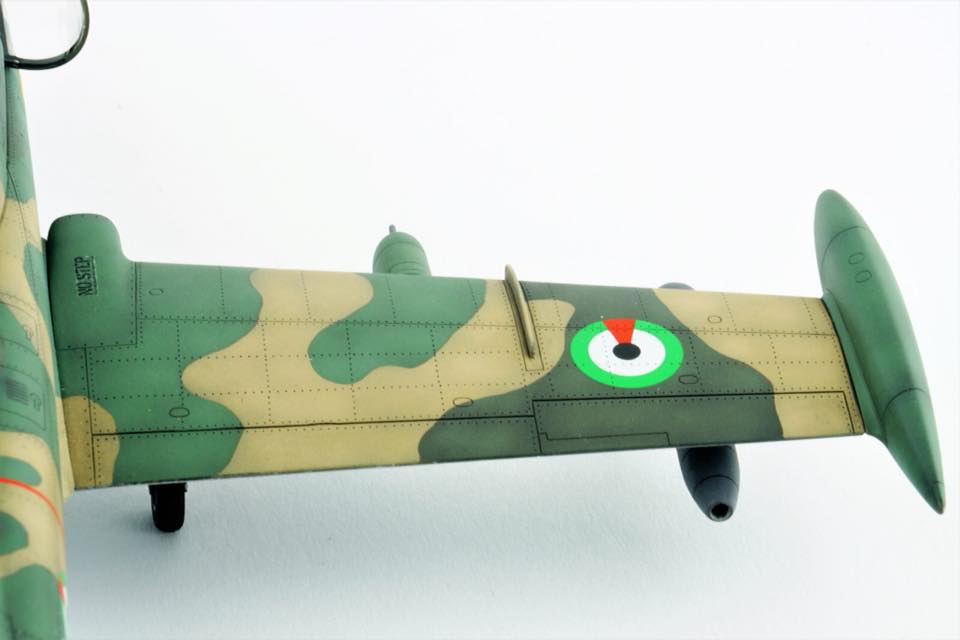
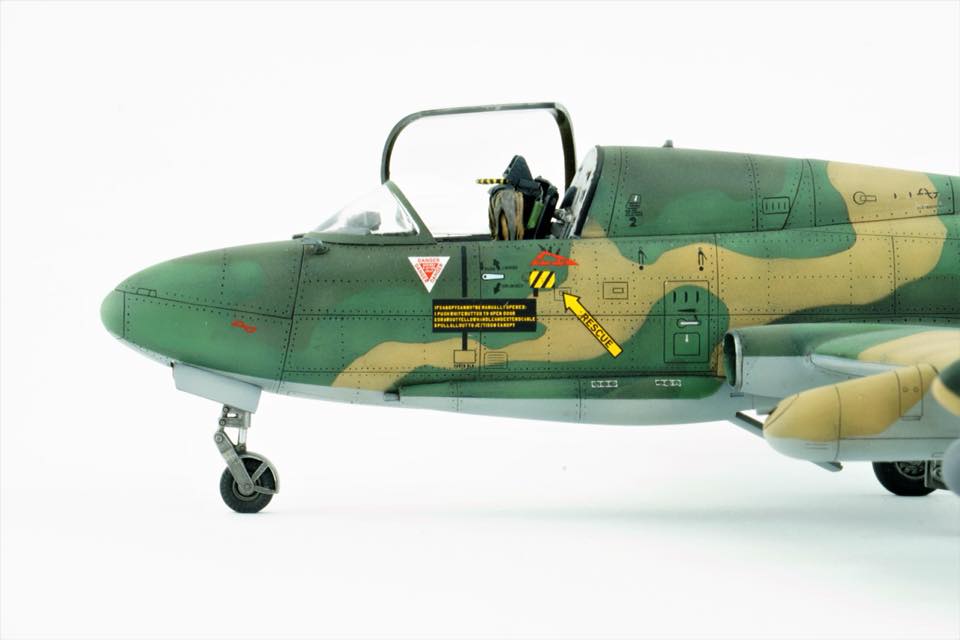
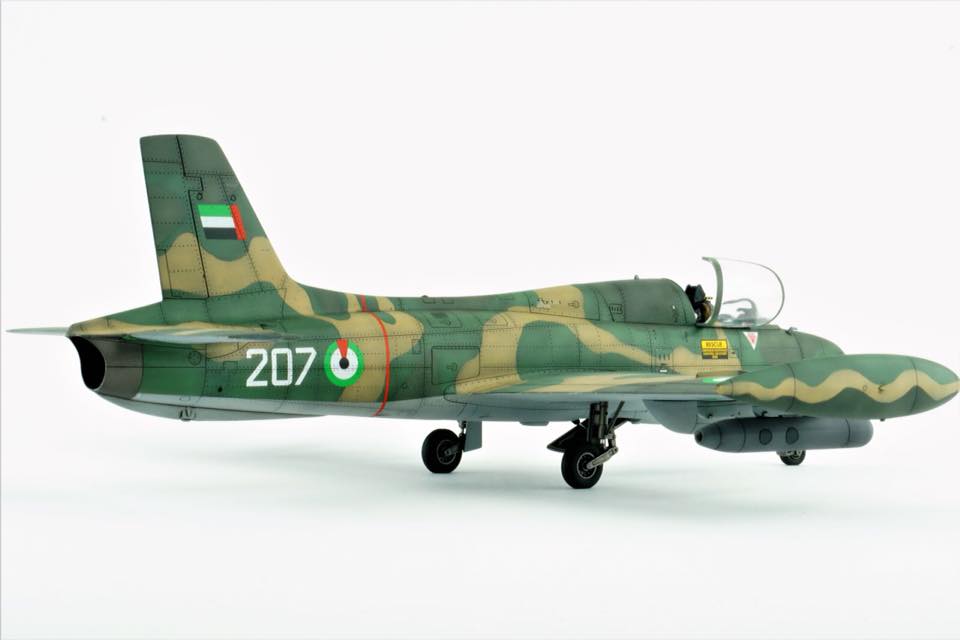

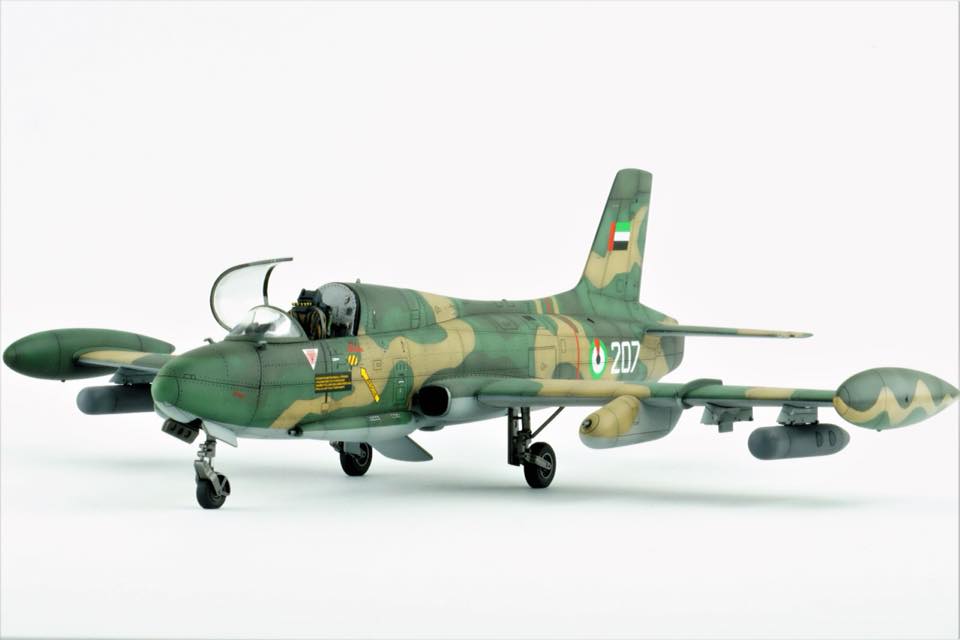
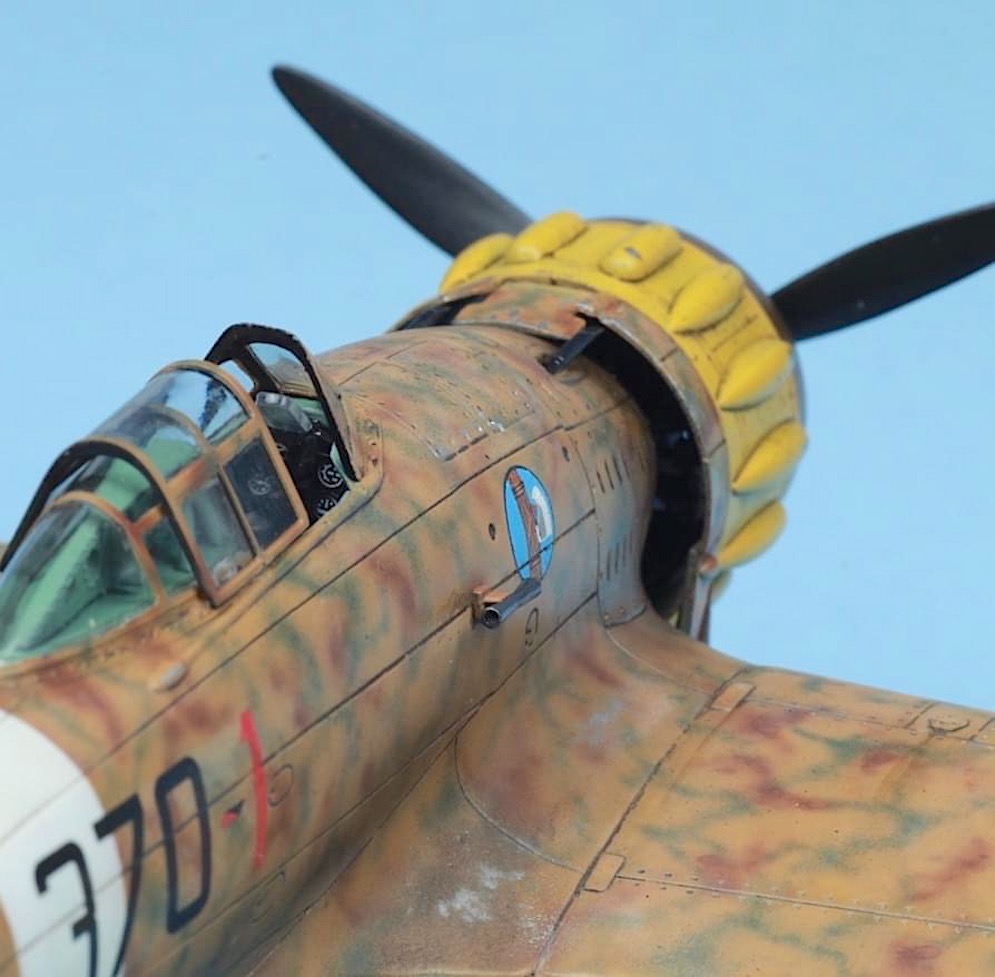
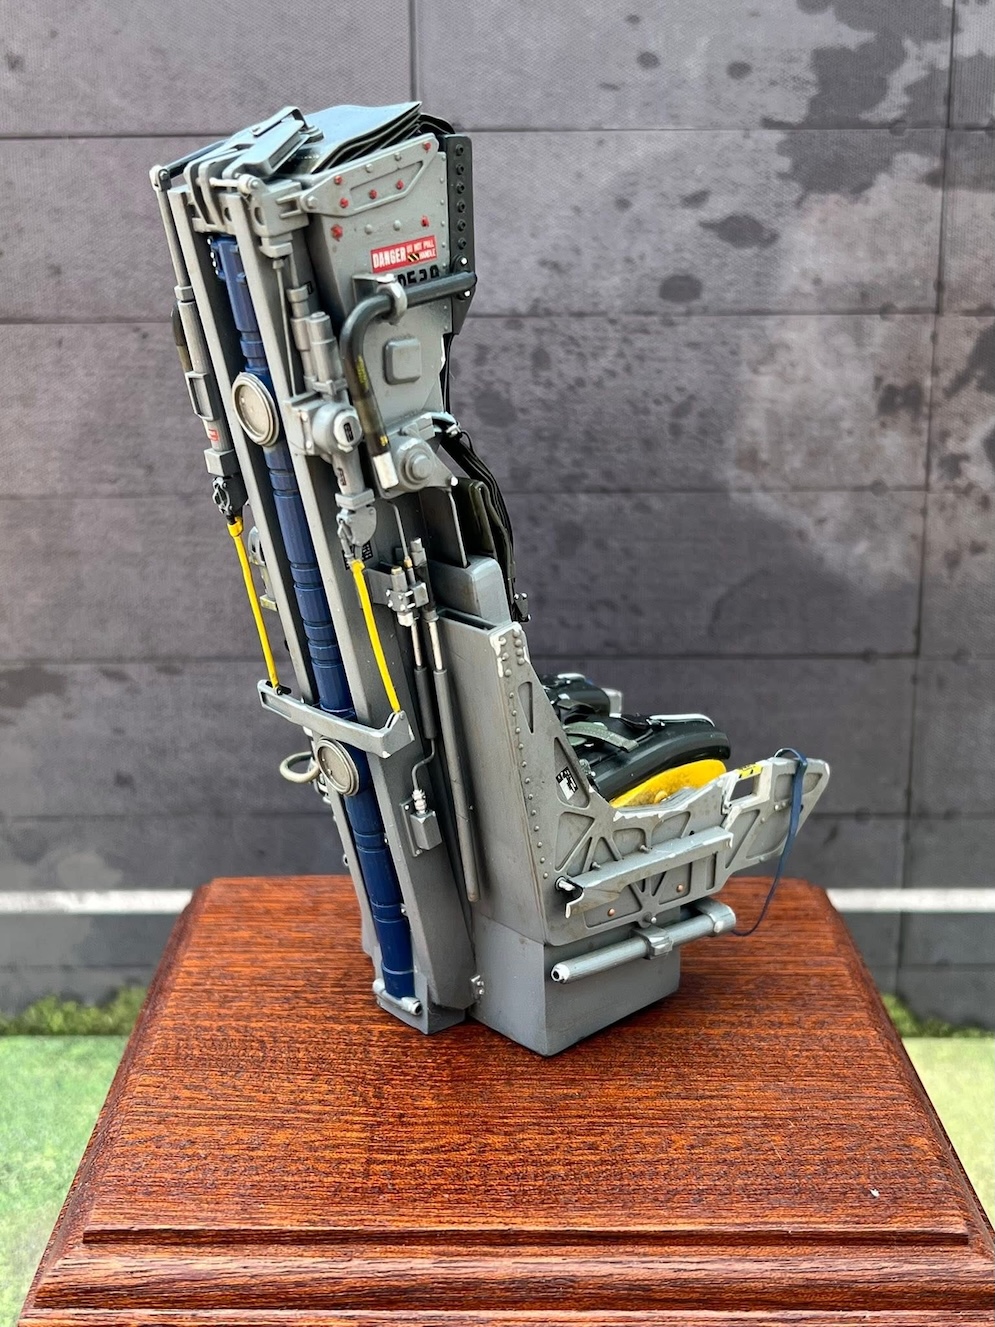
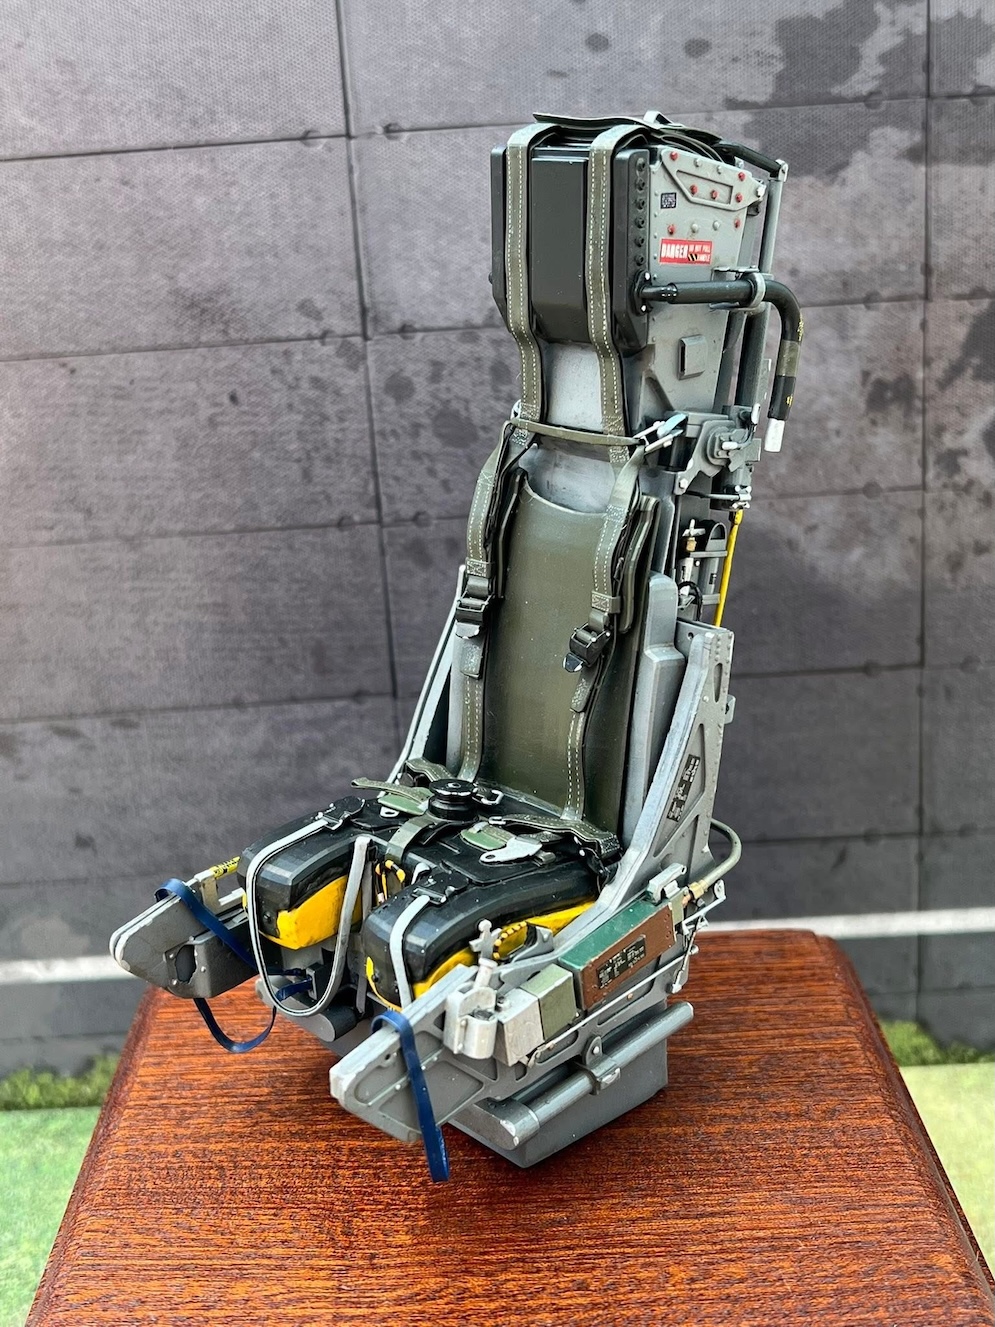
It’s Italeri’s 1:48th scale MB326k Impala kit in UAE trim. This camo was a real challenge to say the least. I added a Neomega resin cockpit to it and a Wolfpack resin bang seat. The rivets were made by hand with Rosie the Riveter and paints used were Gunze. I used Alclad Aqua gloss and Klear cote matte for coatings.
Hope you like it!
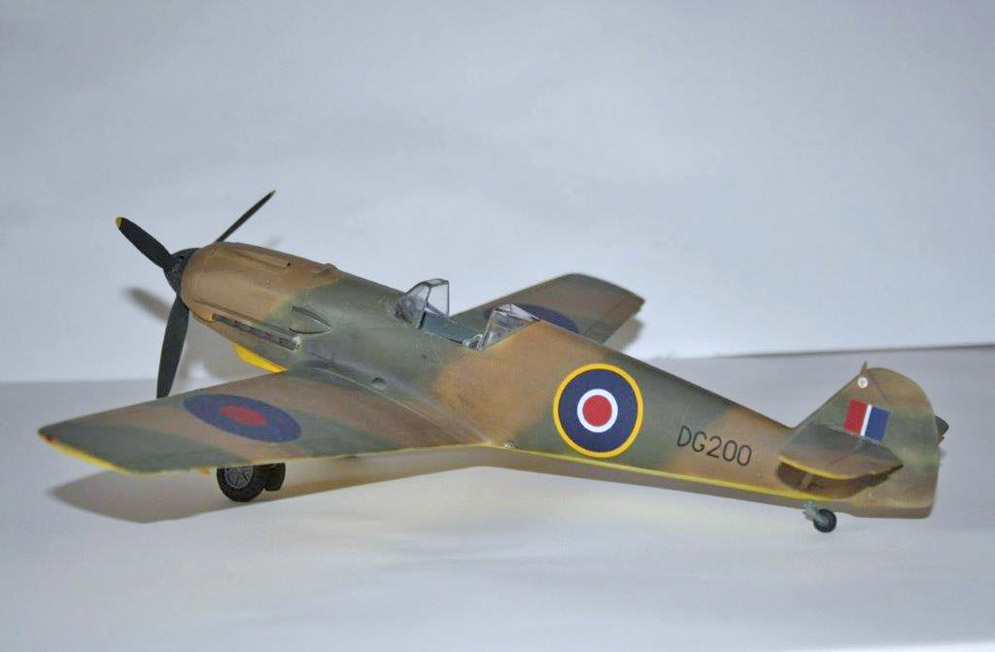
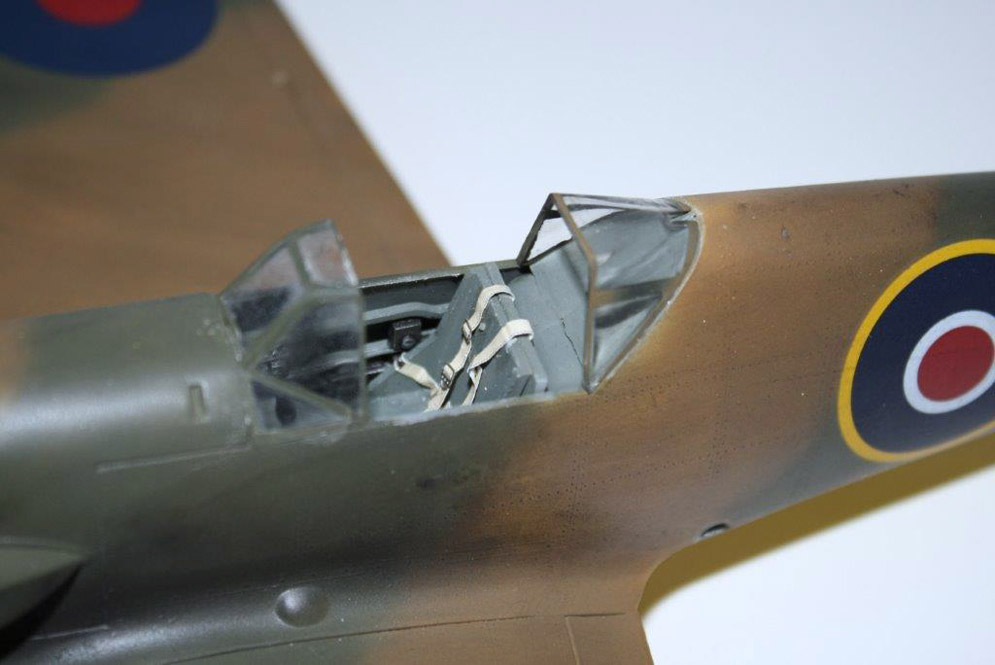
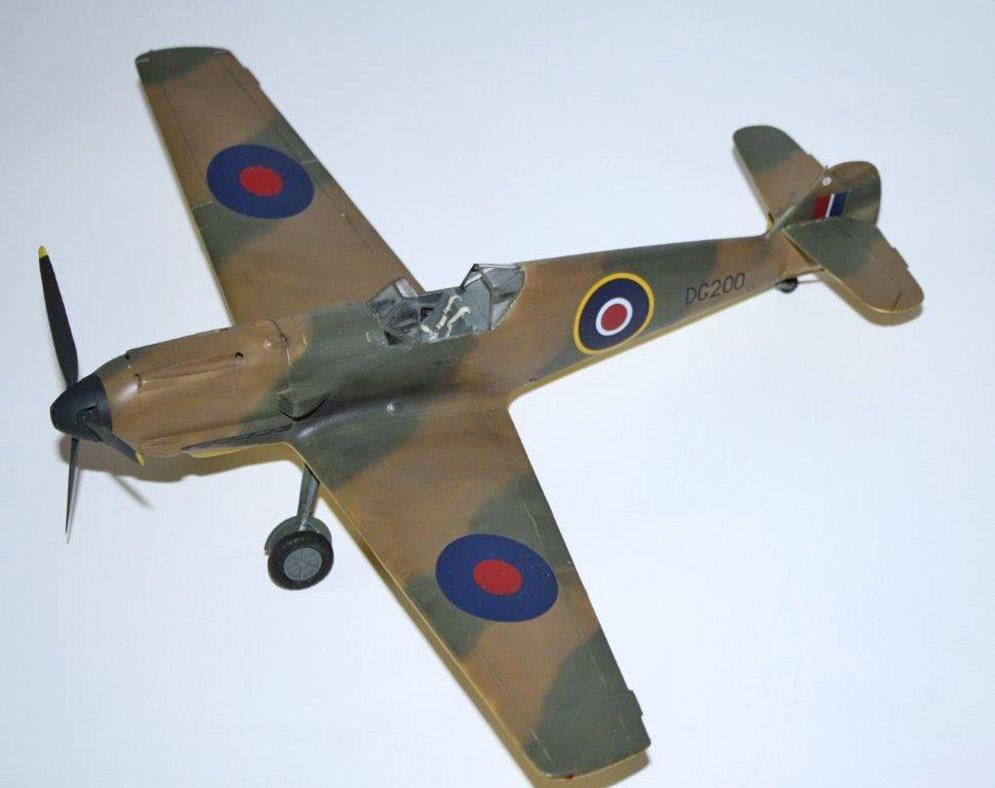
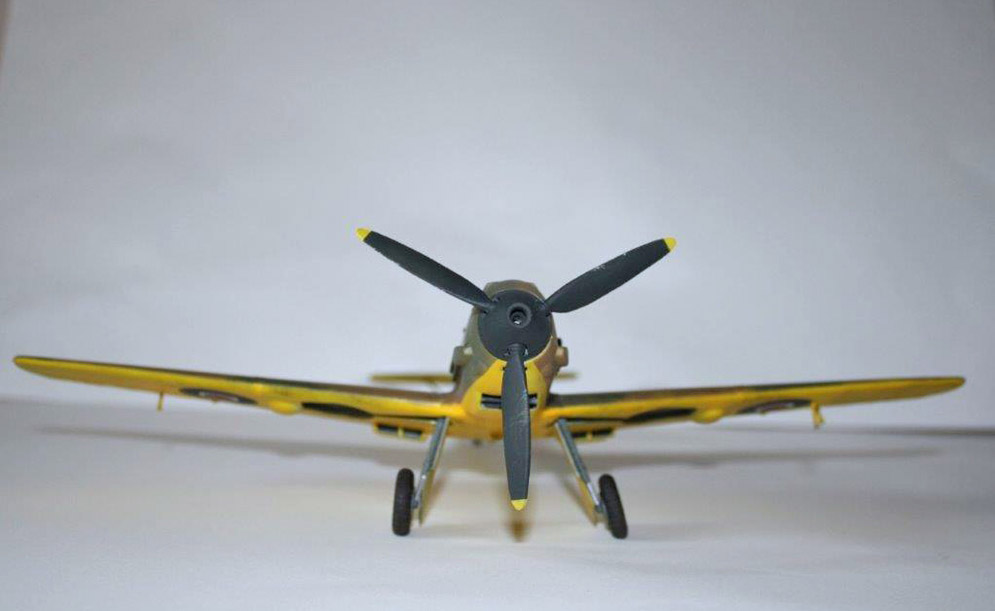
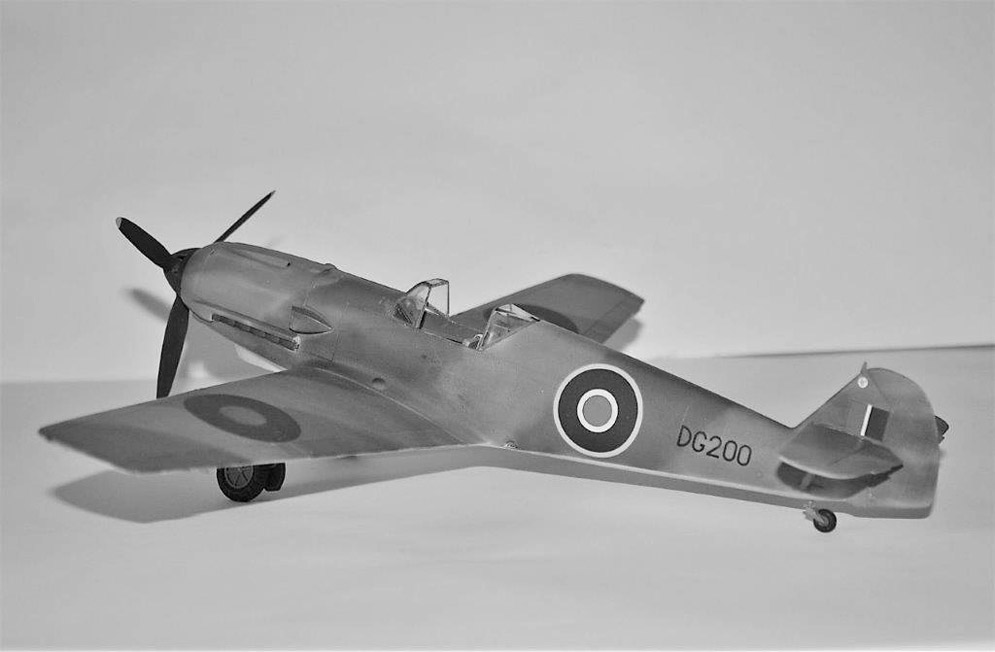
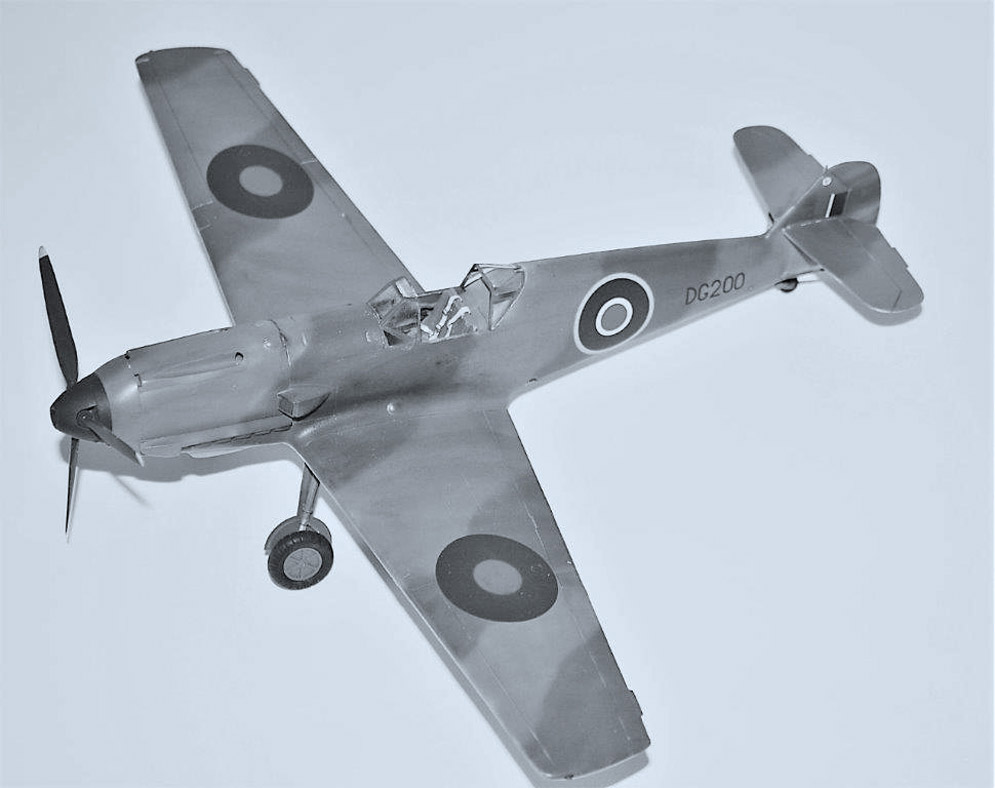
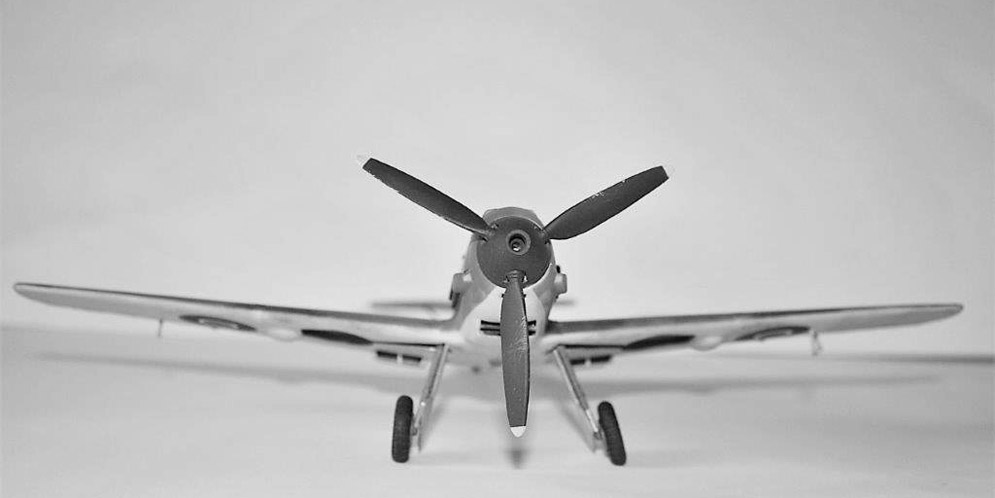
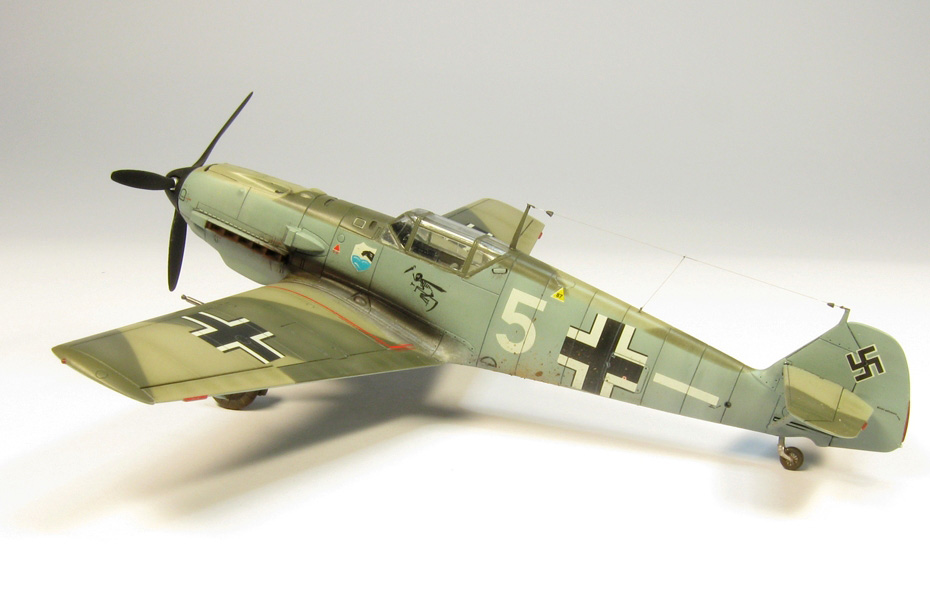
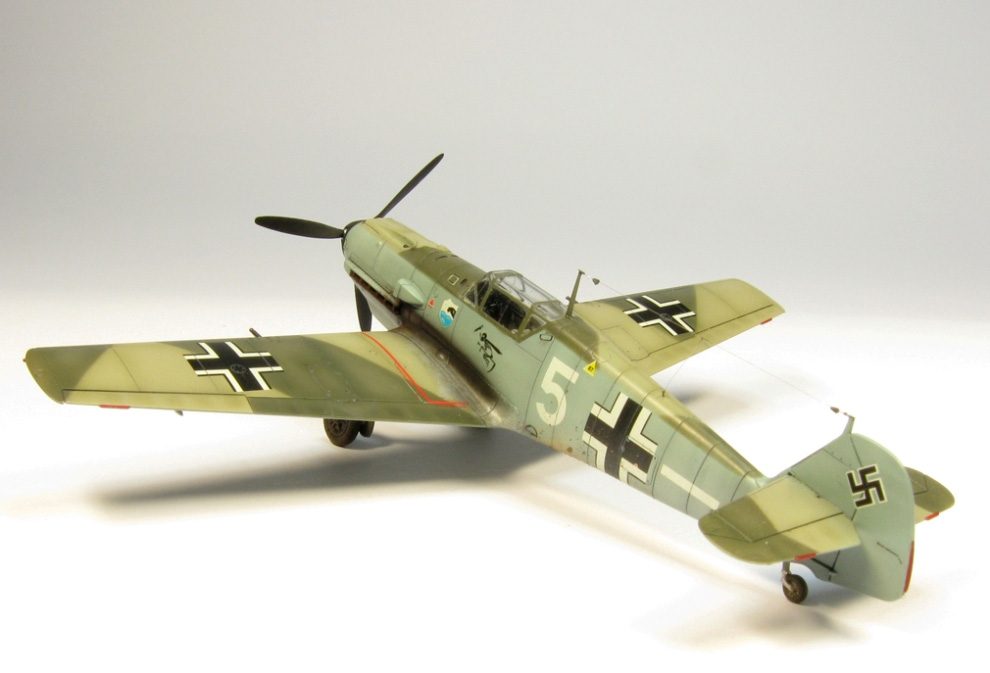
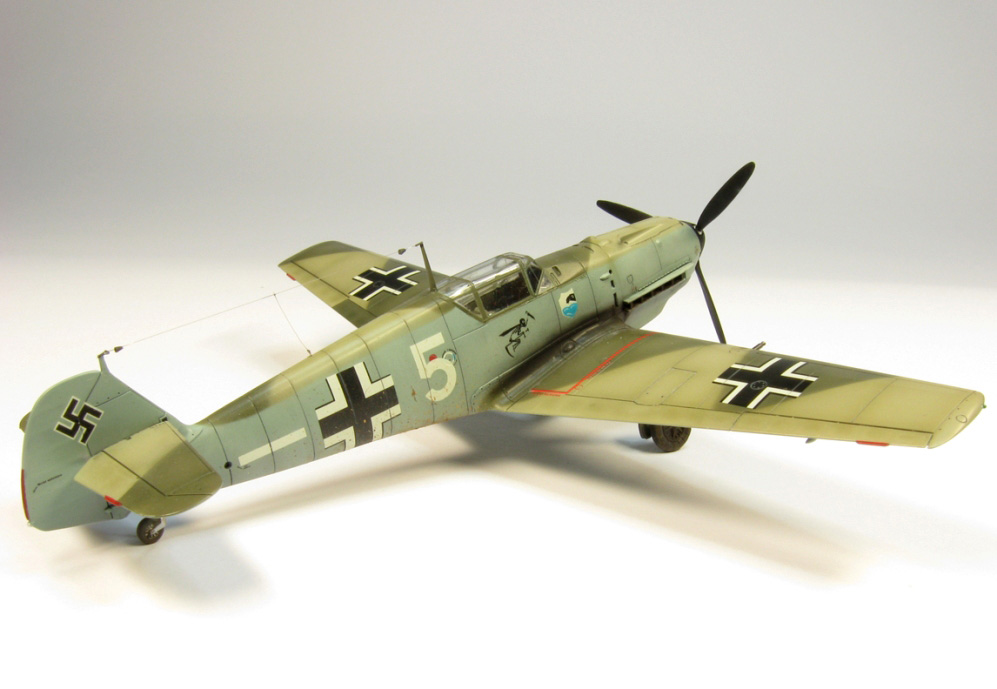
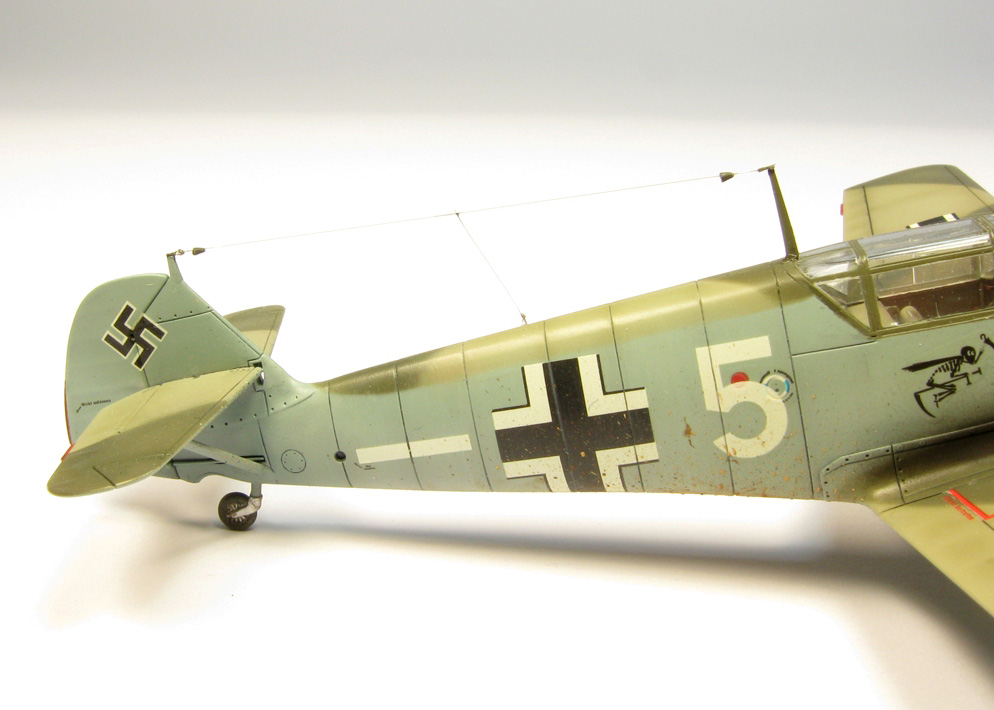
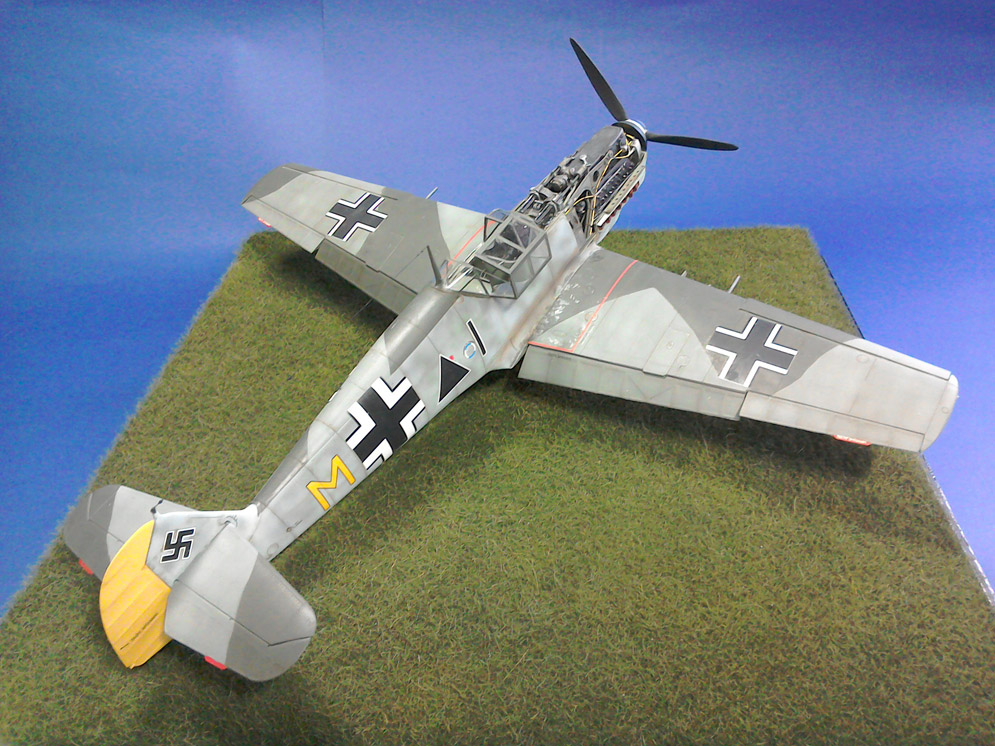
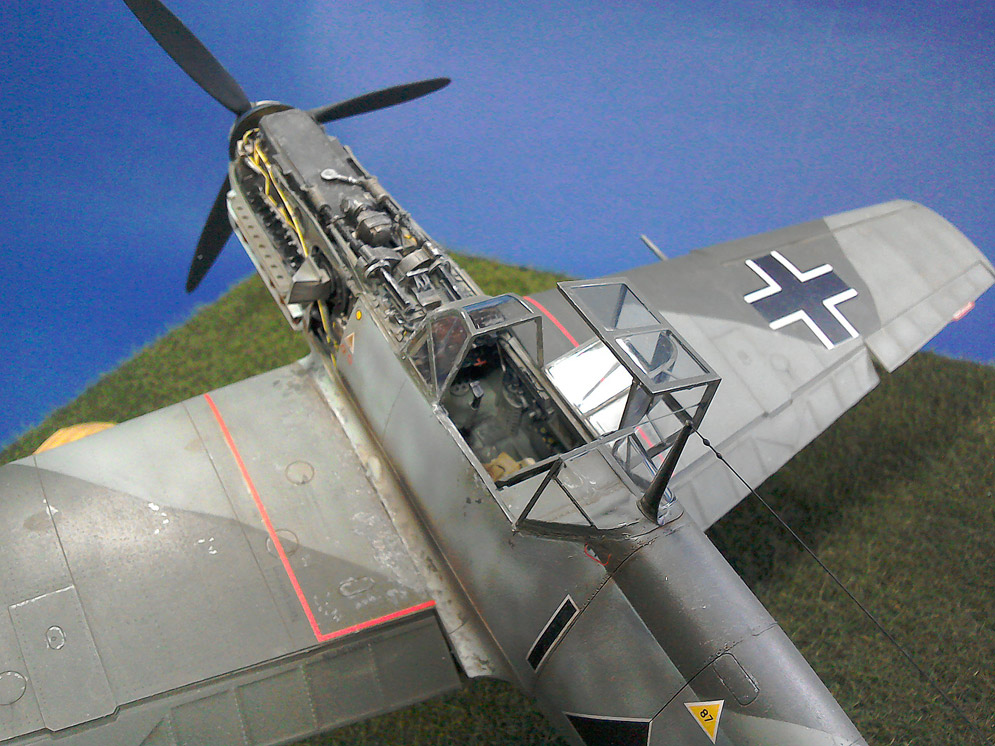
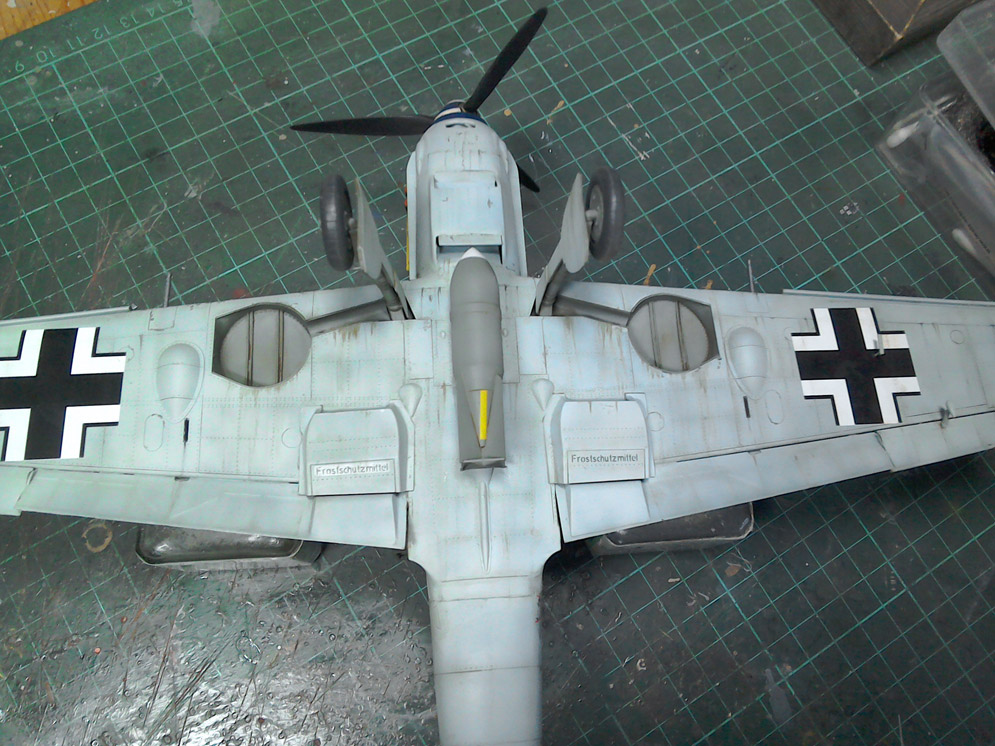
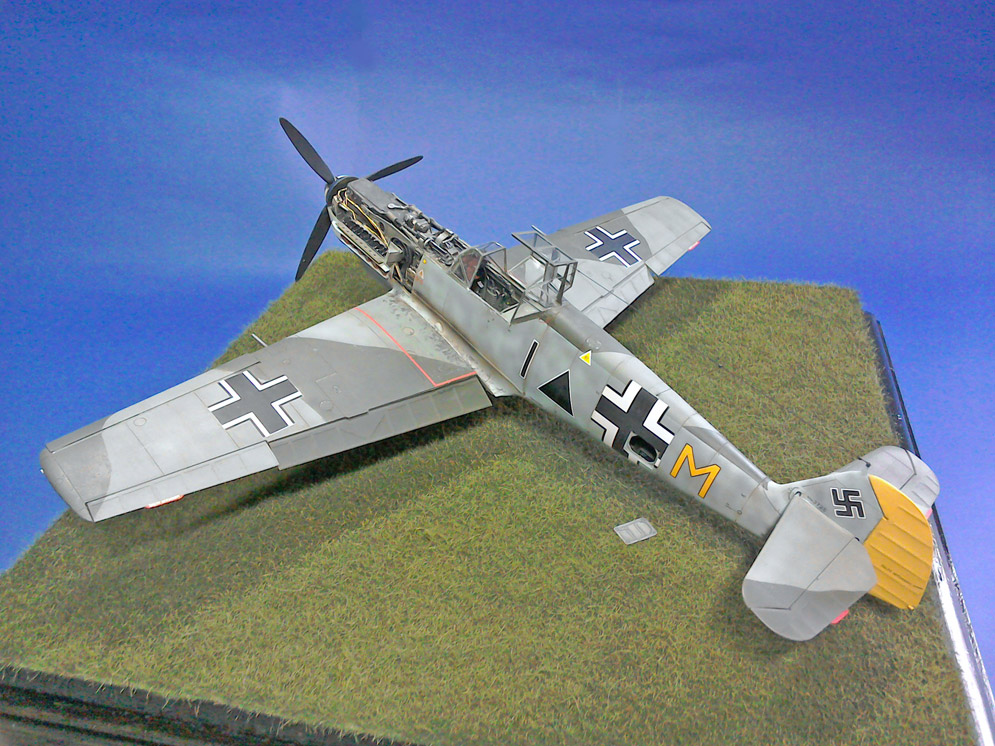
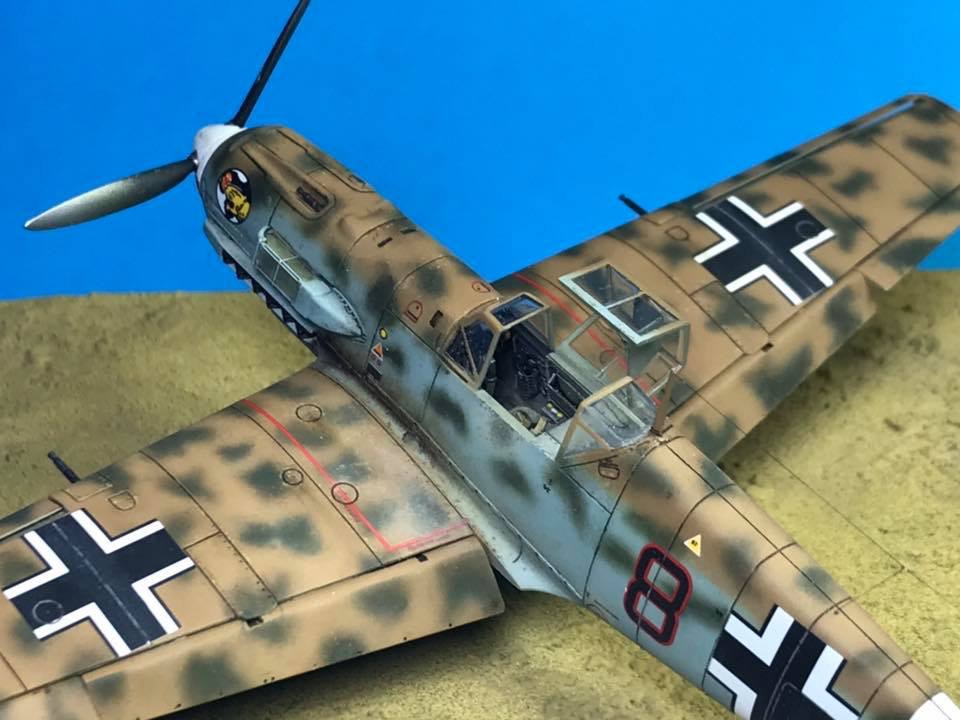
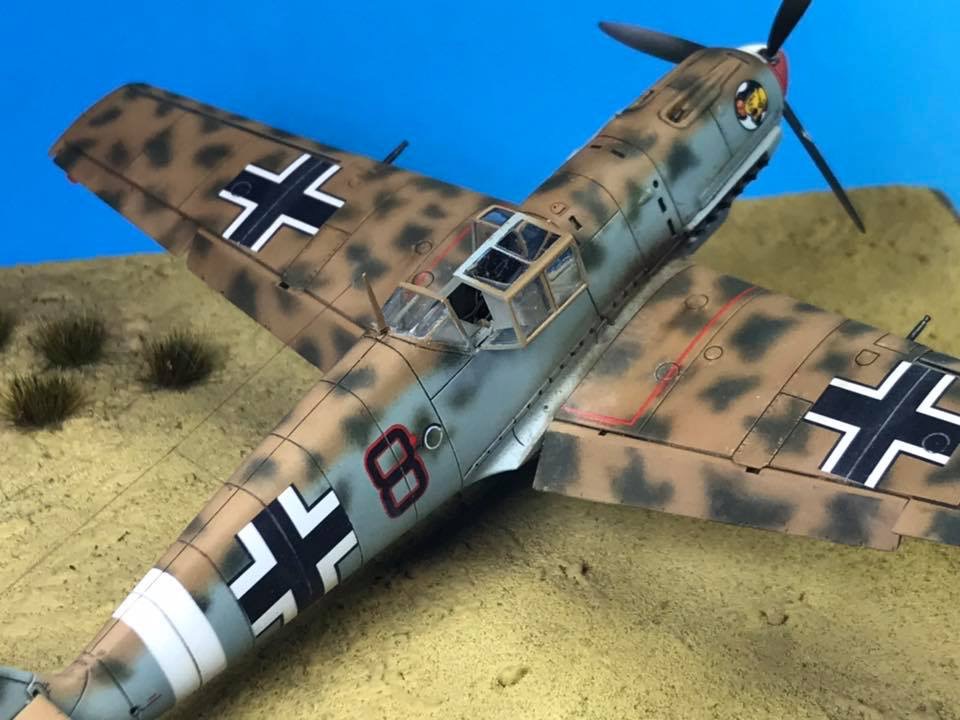
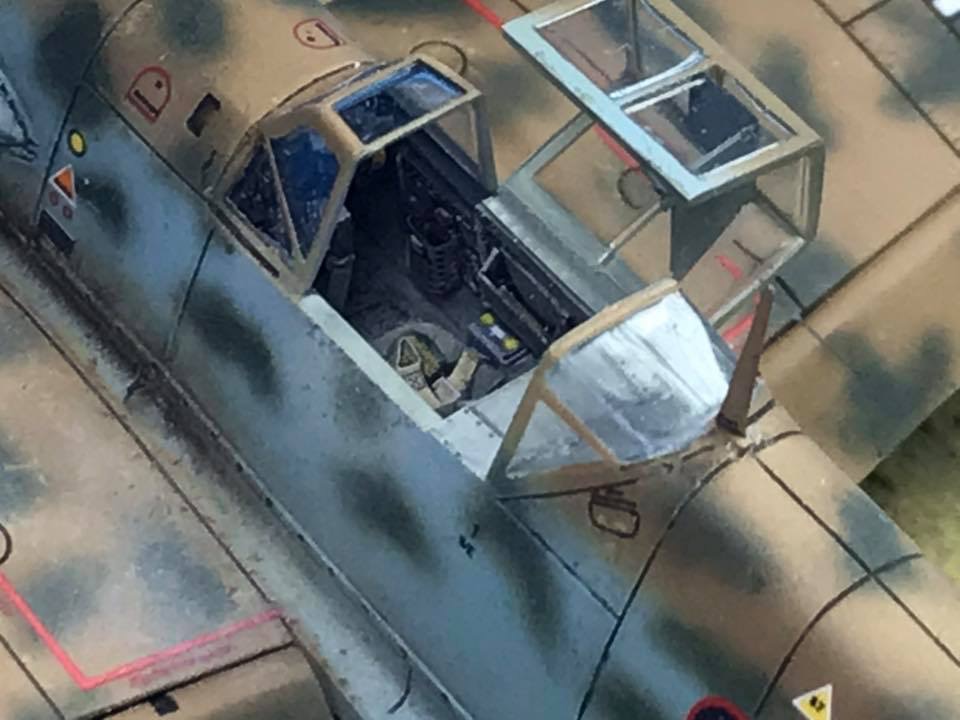
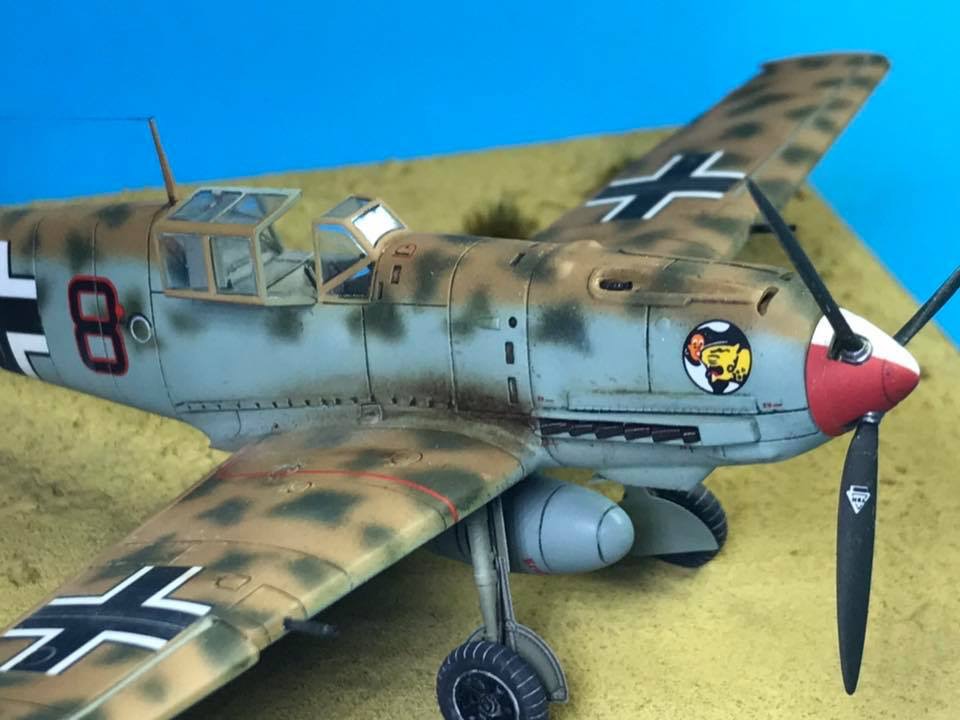
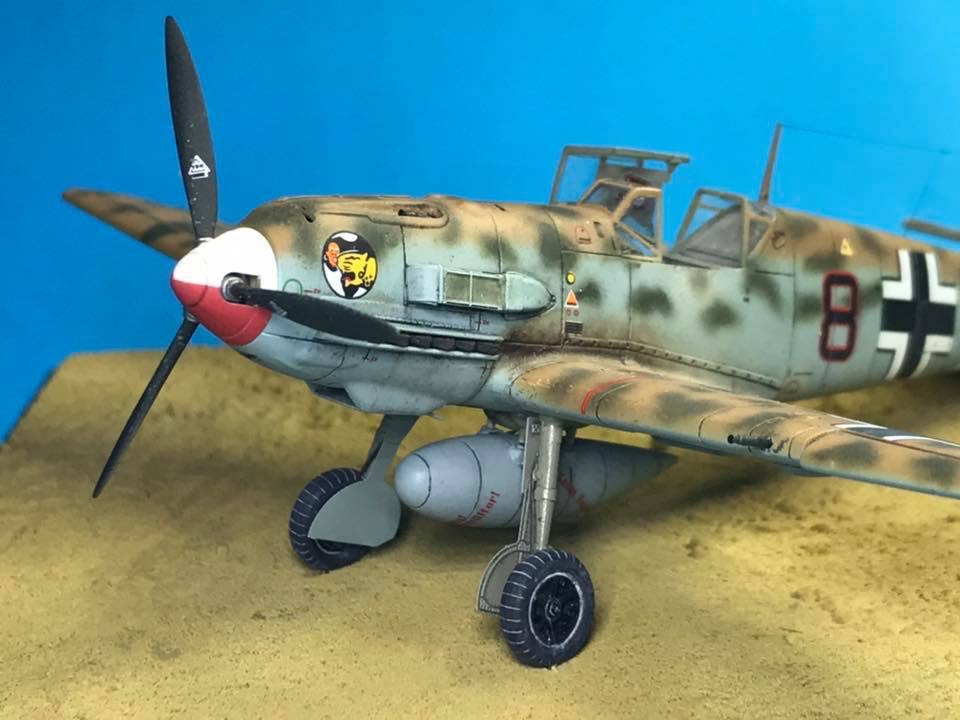
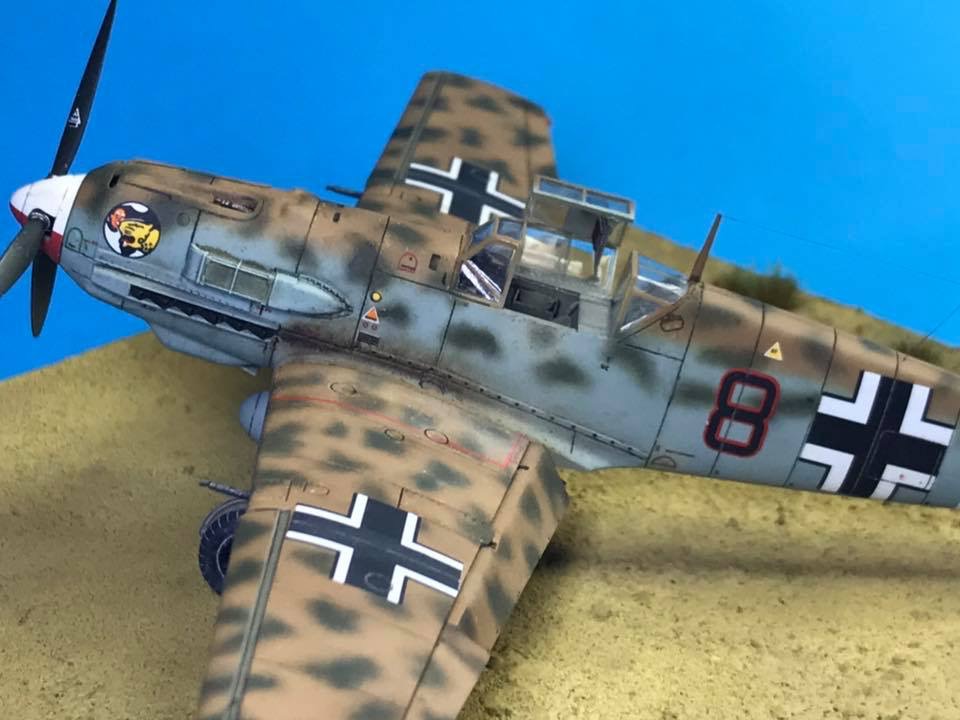
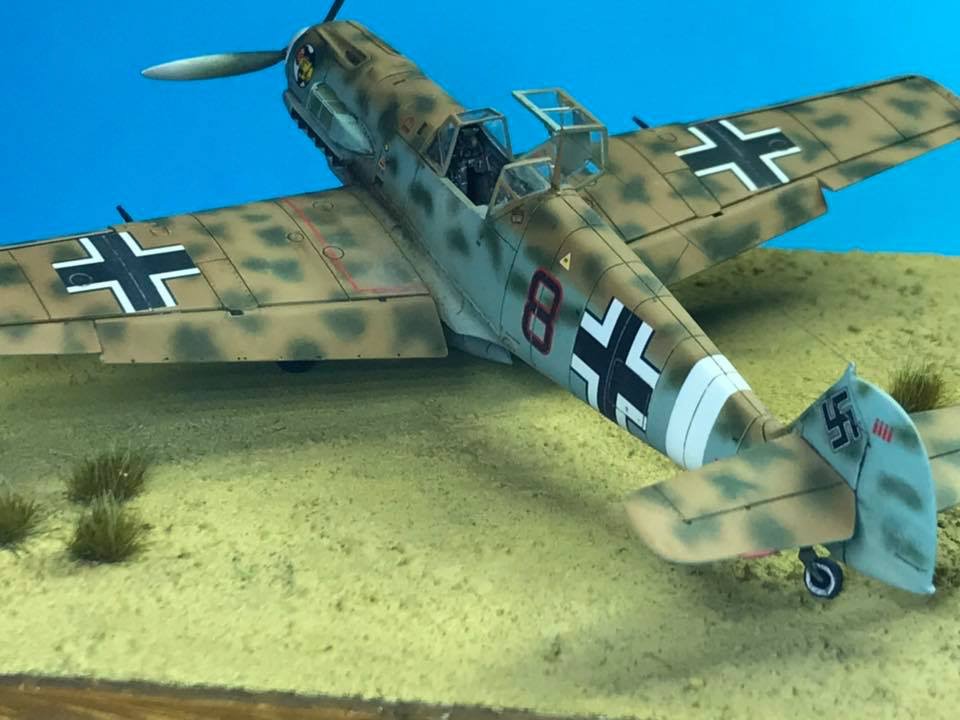
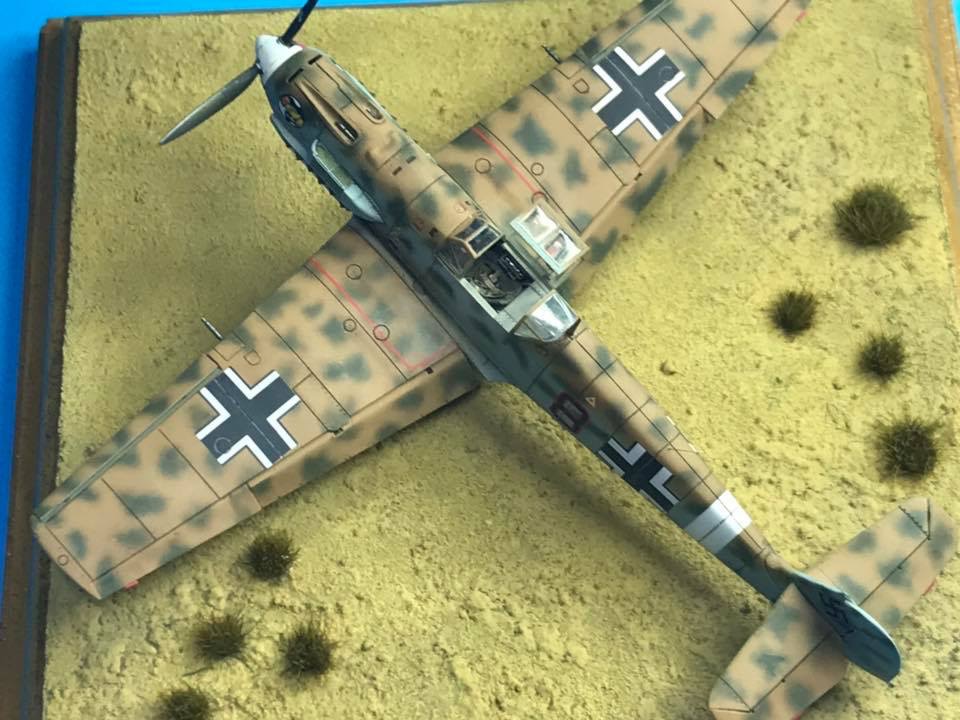
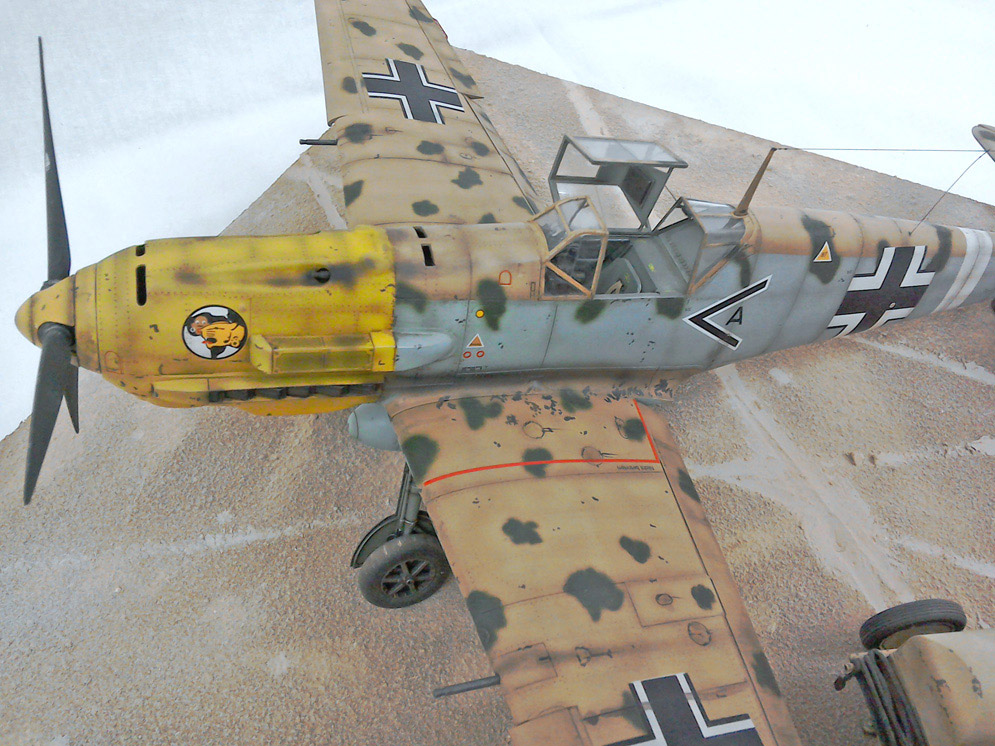
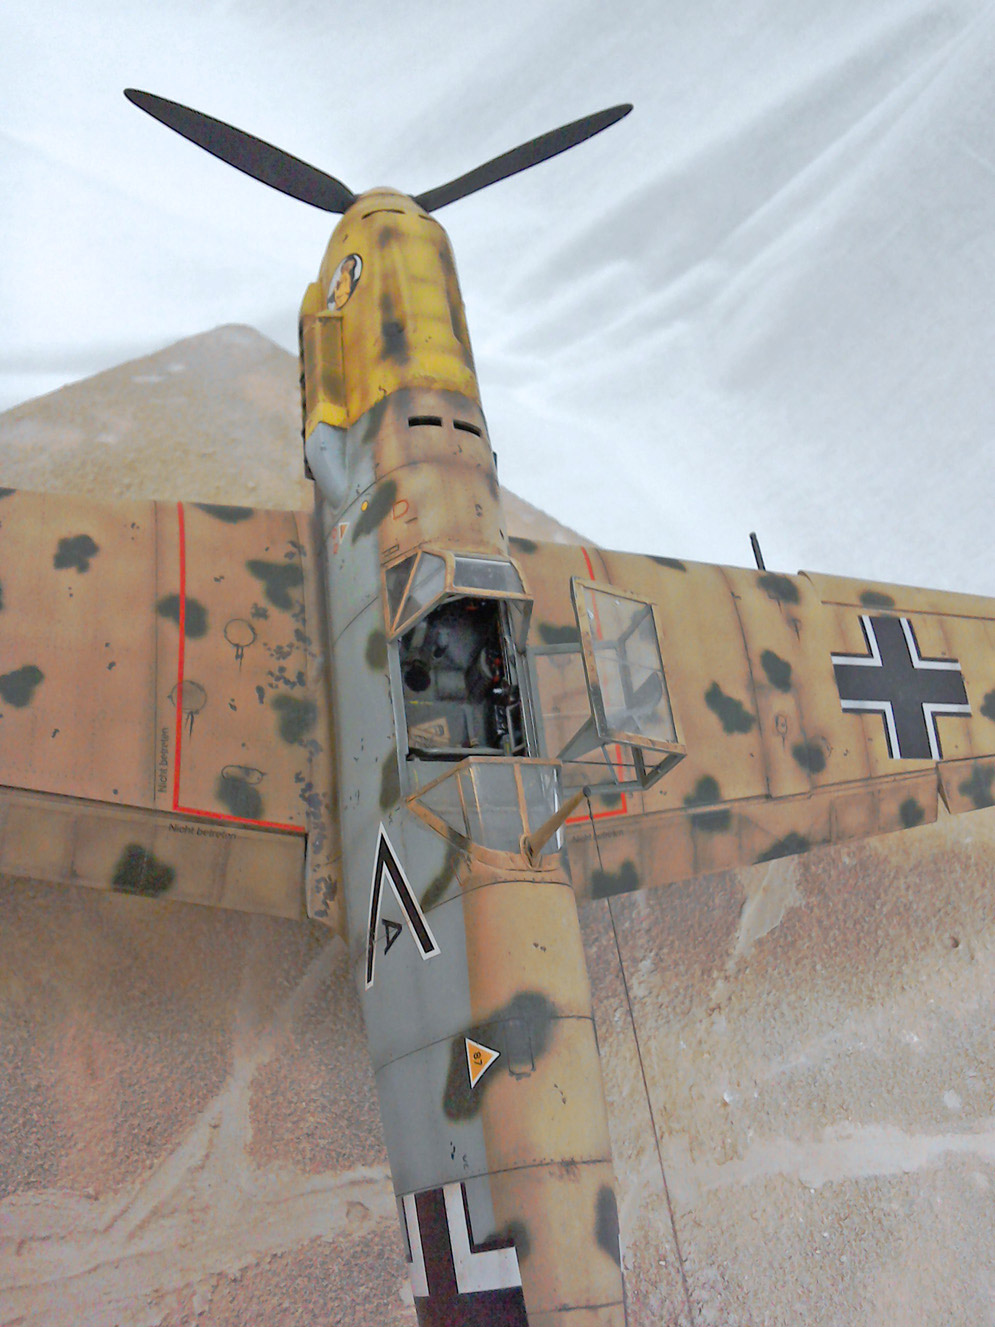
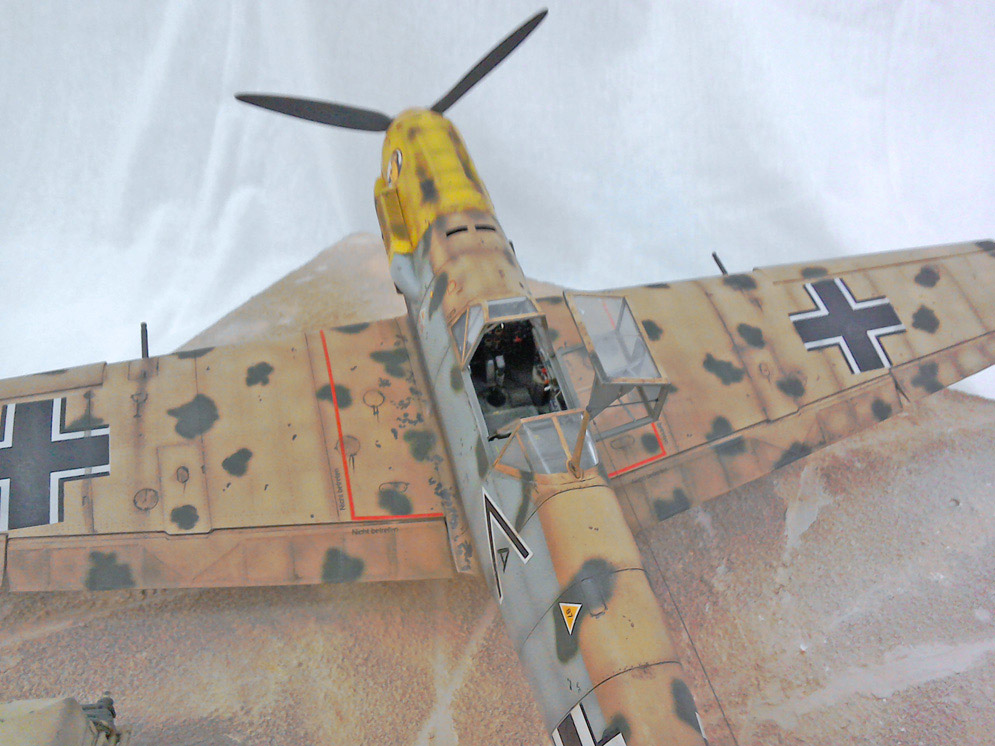
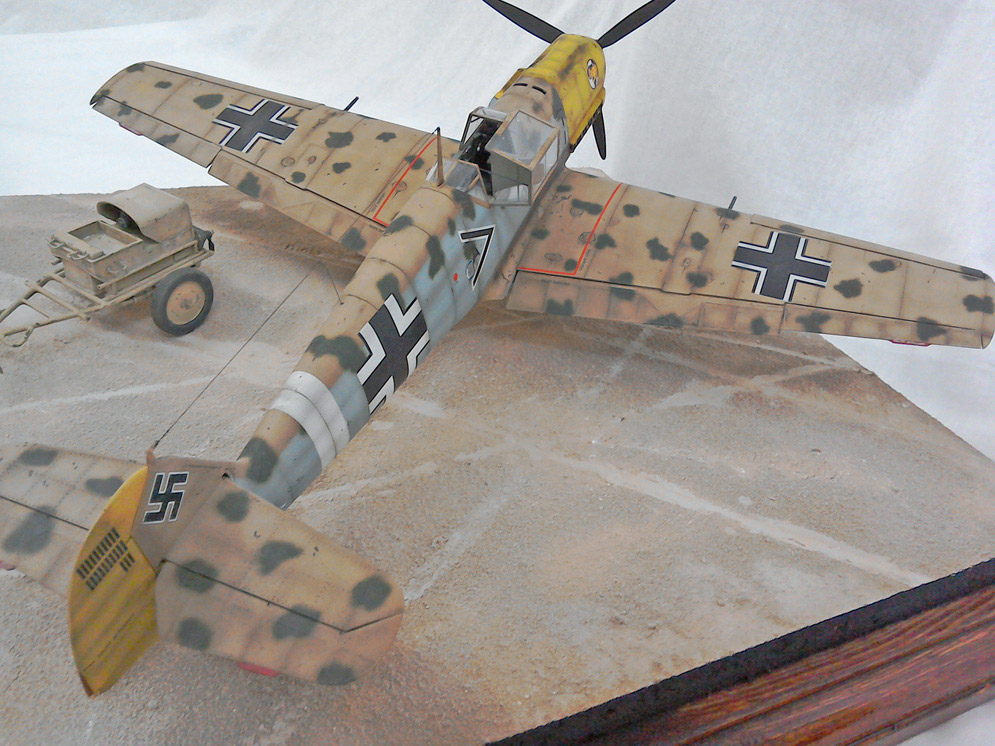
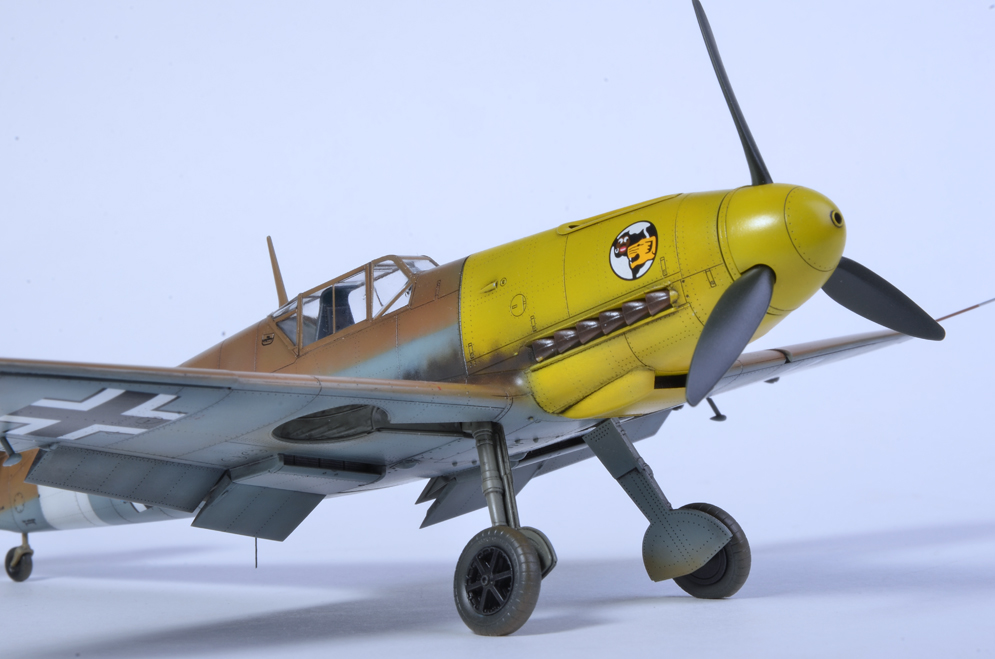
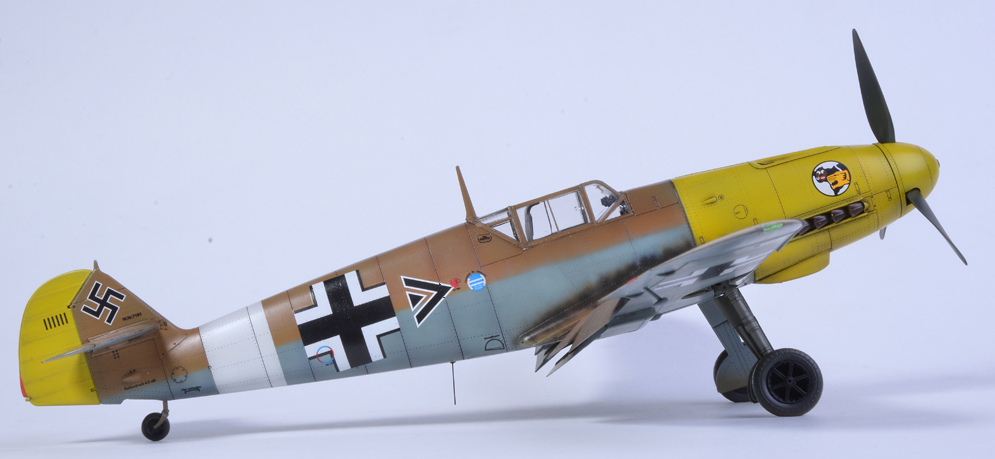
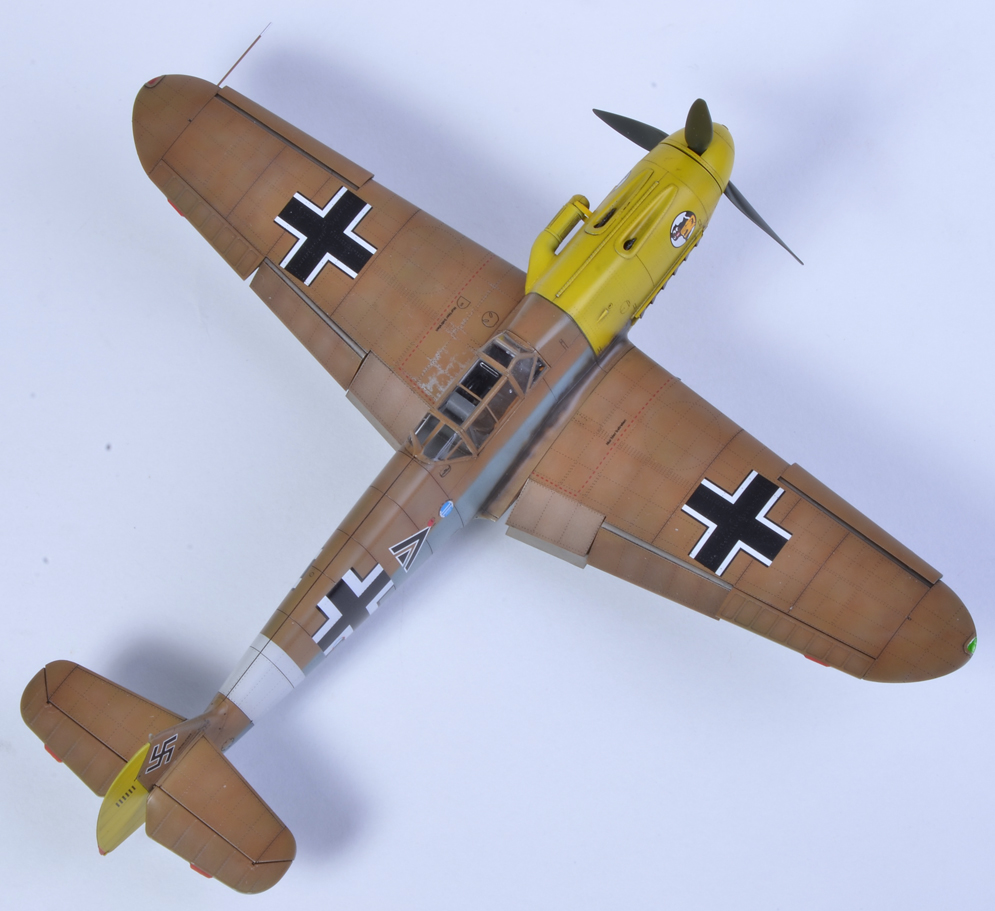
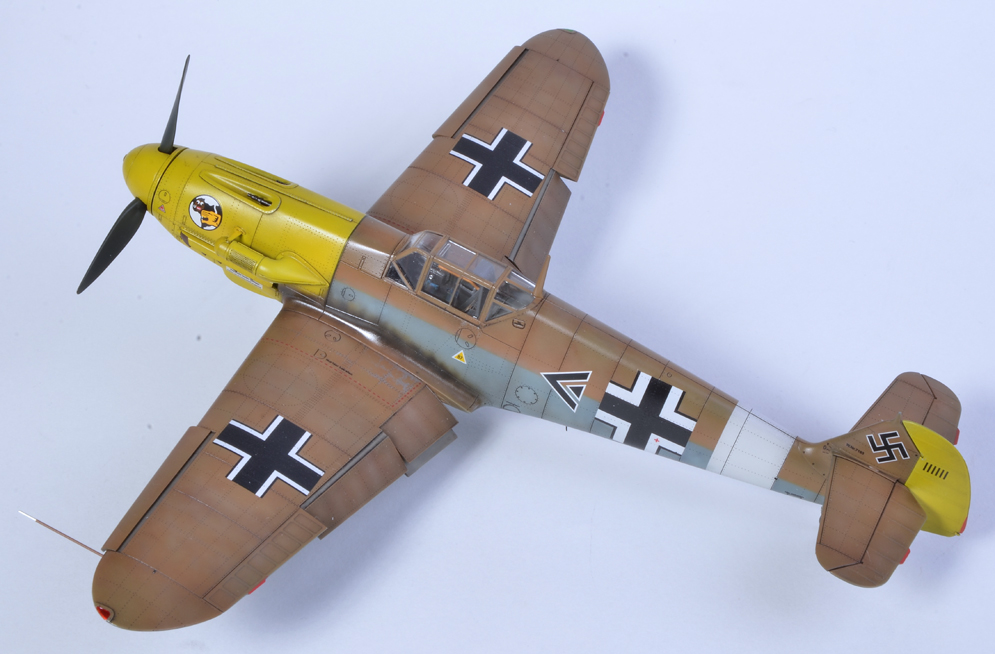
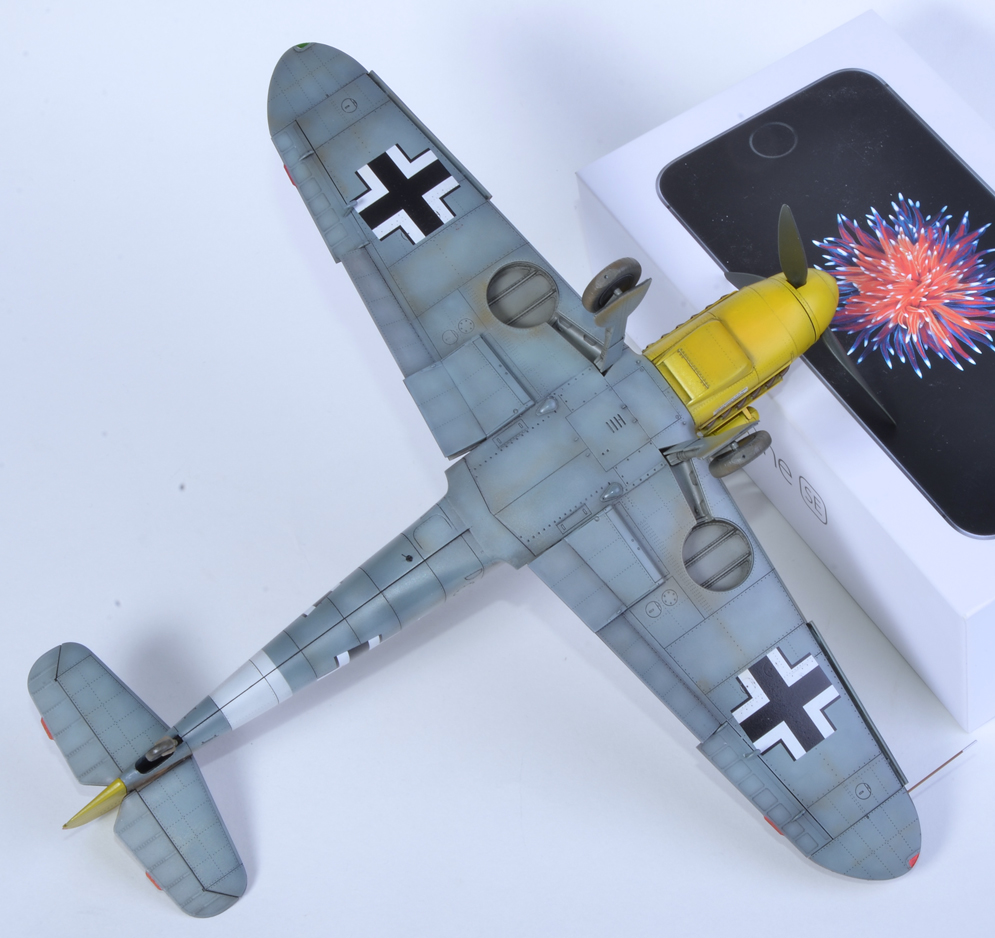
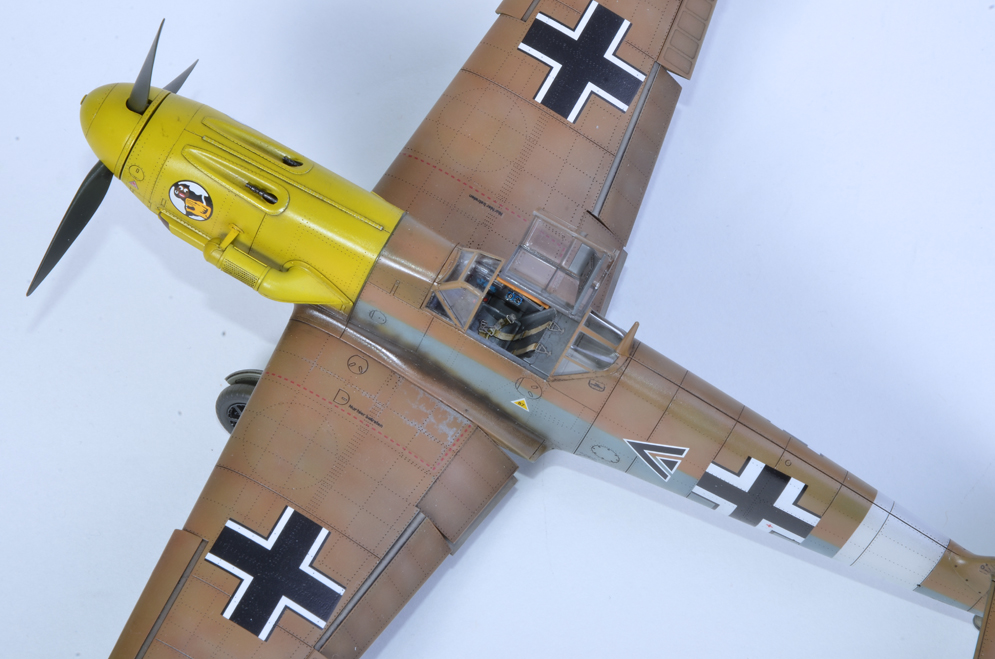
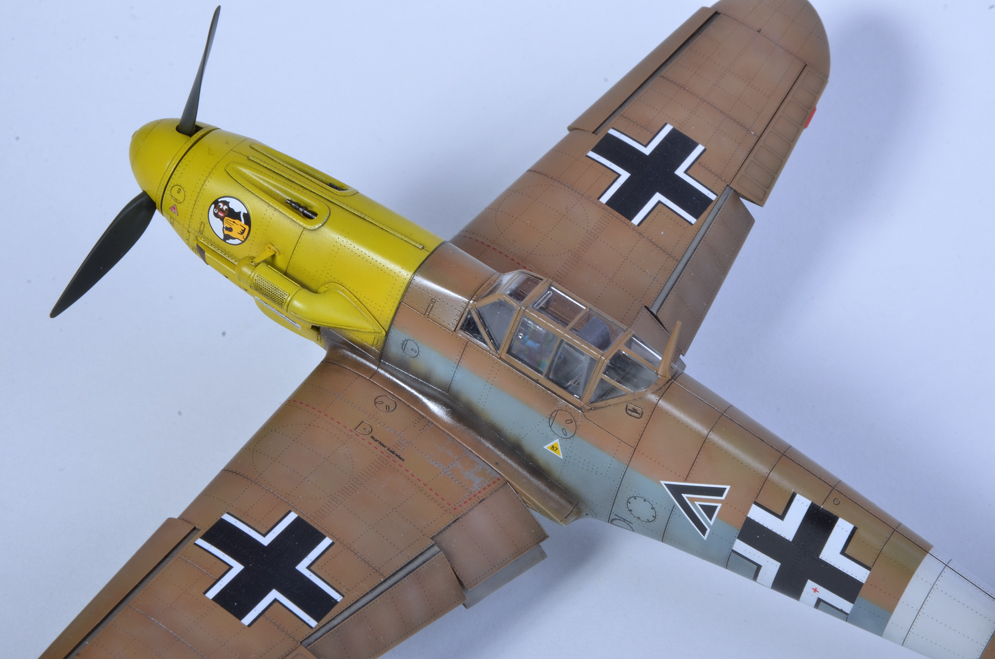
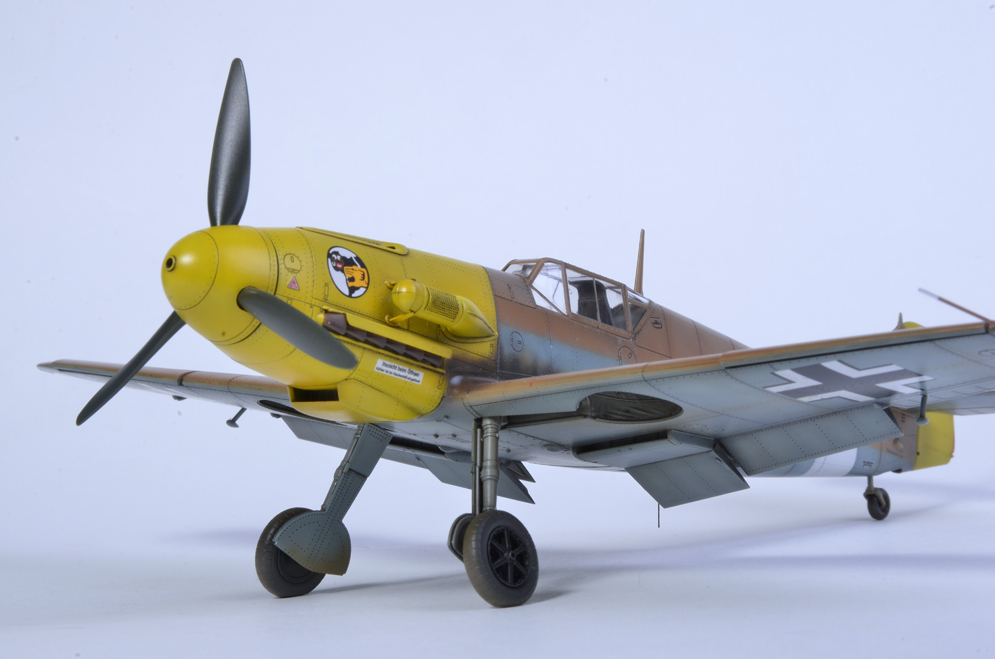
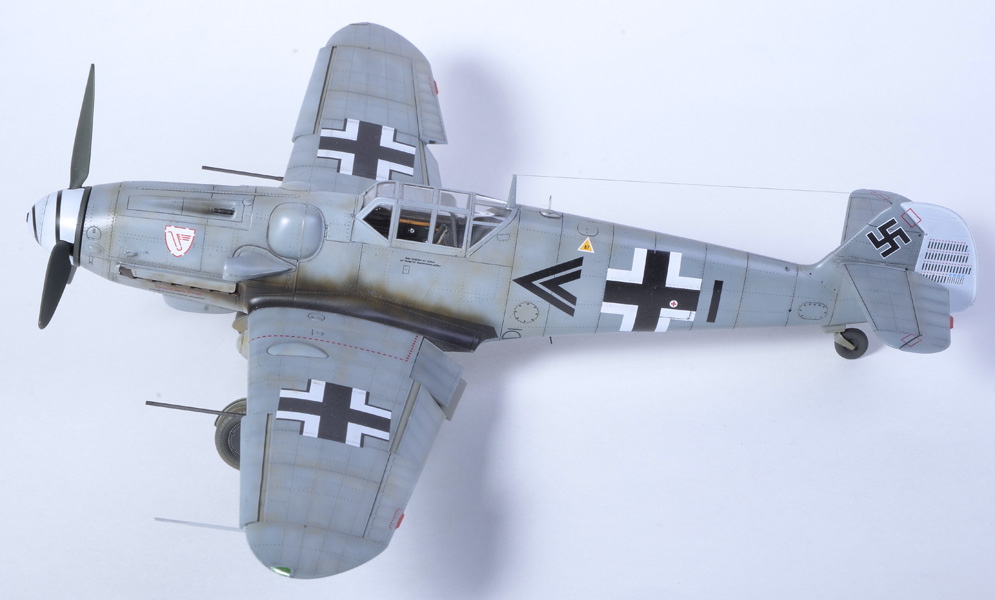
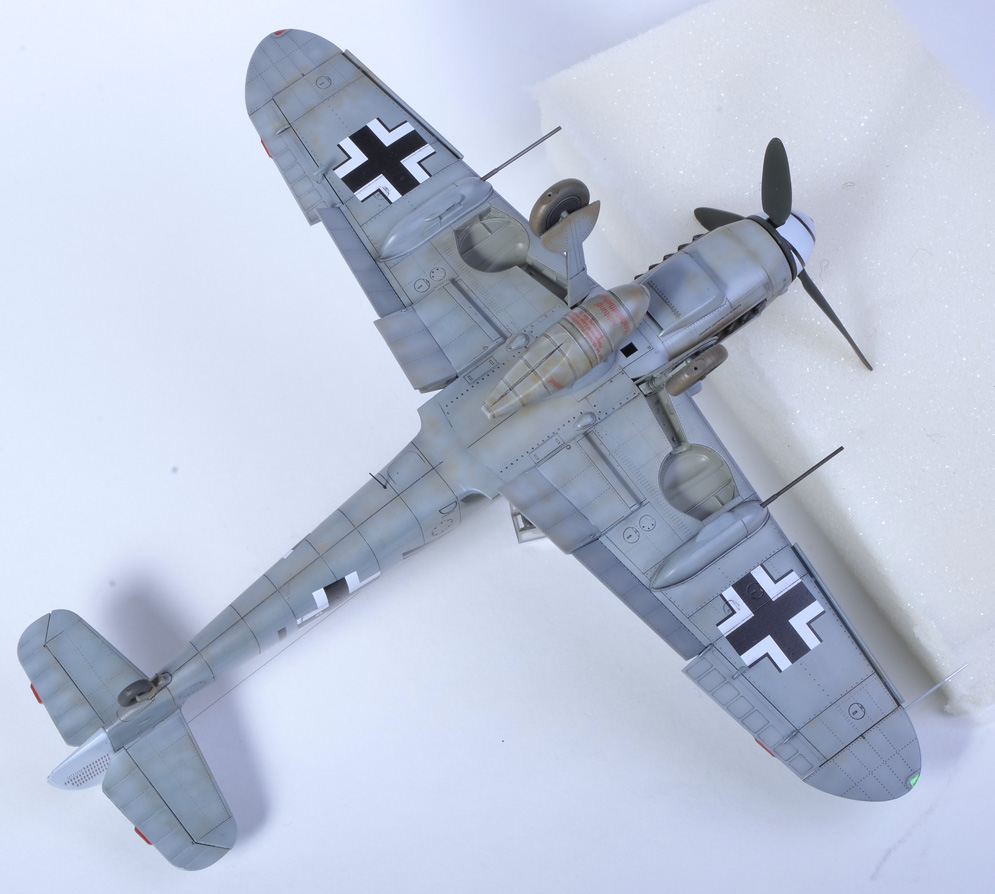
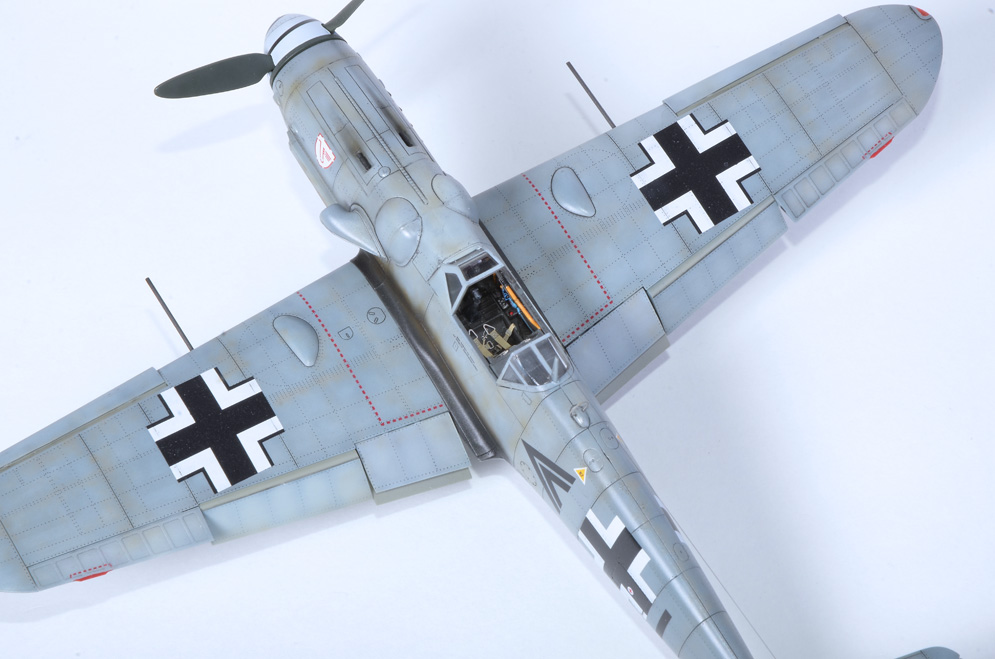
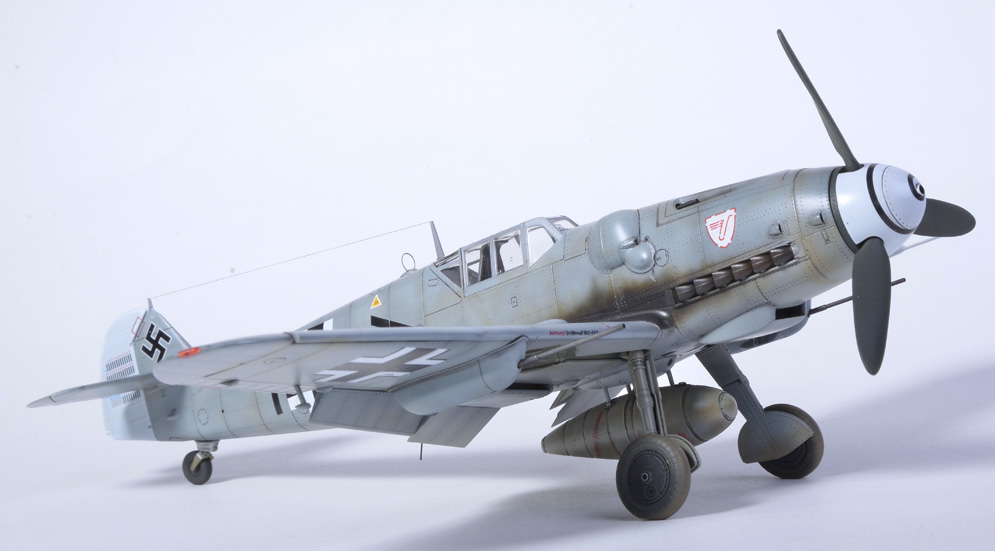
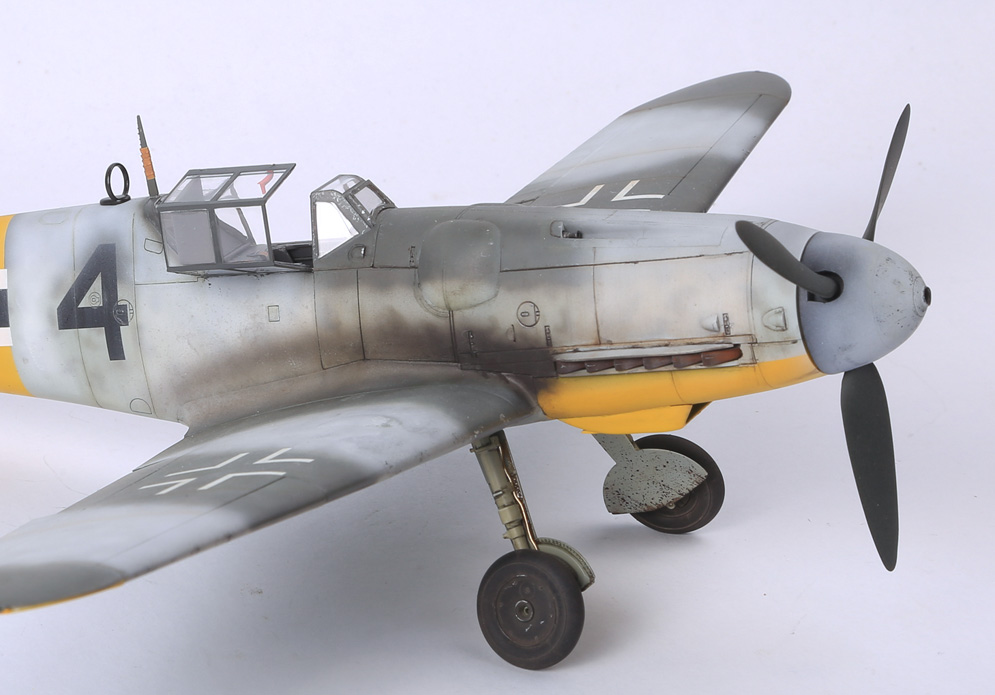
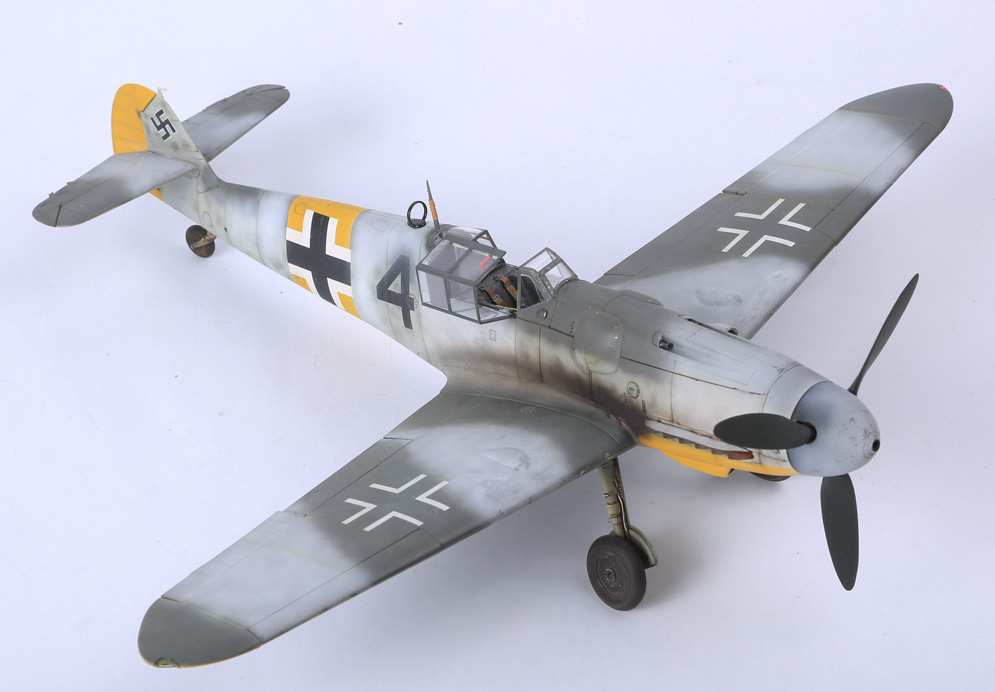
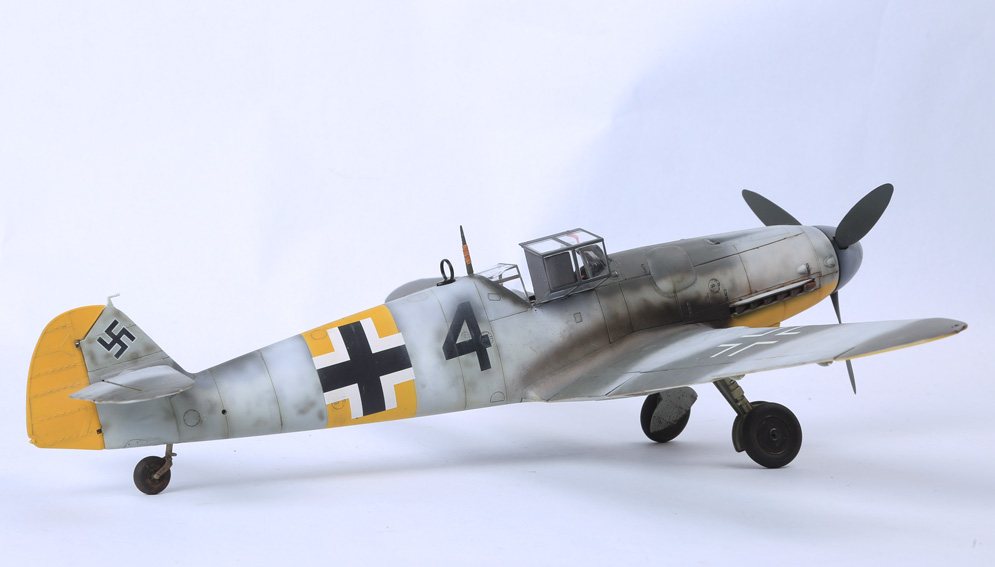
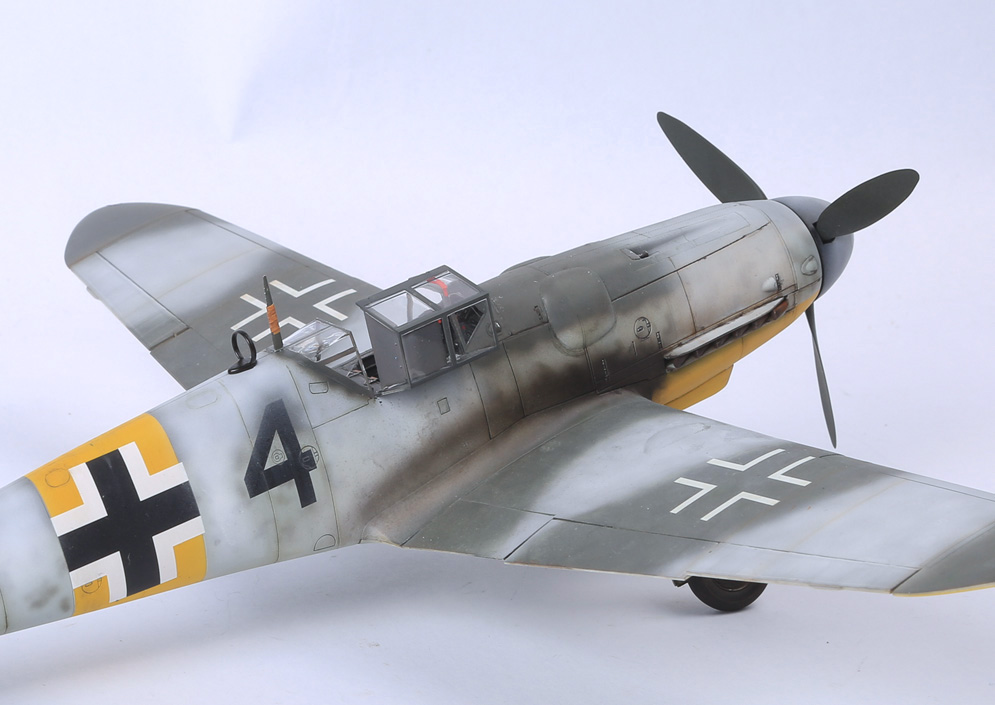
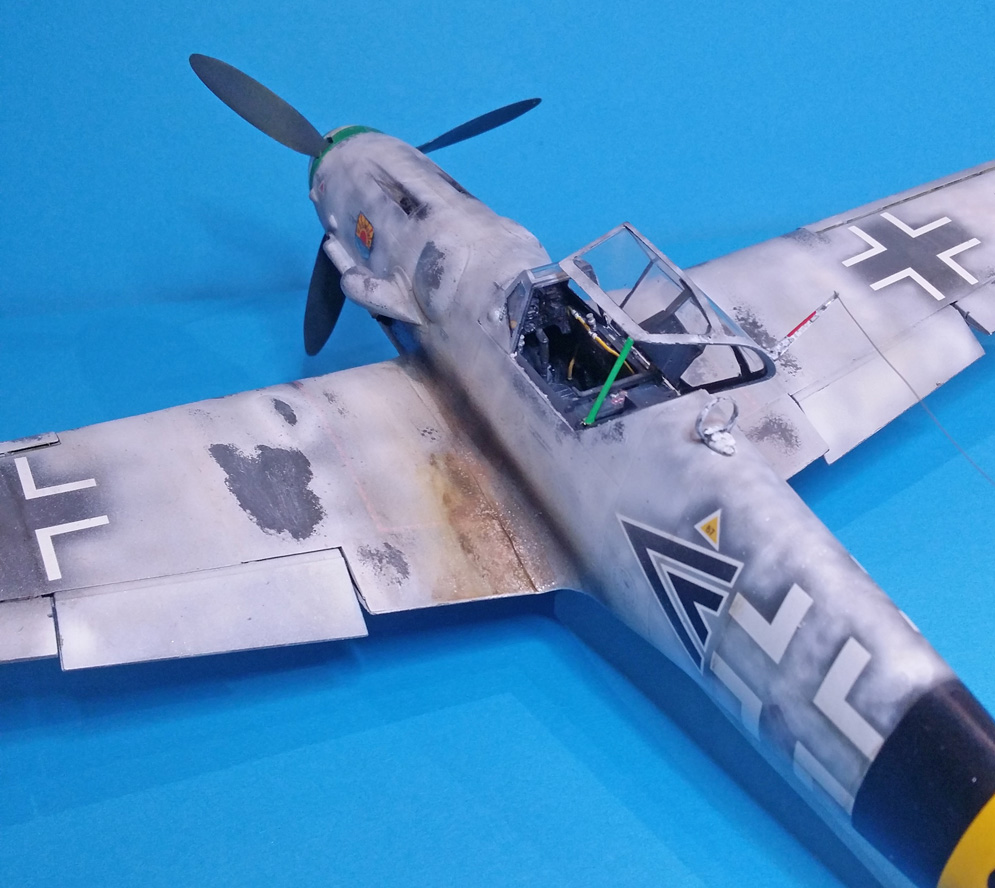
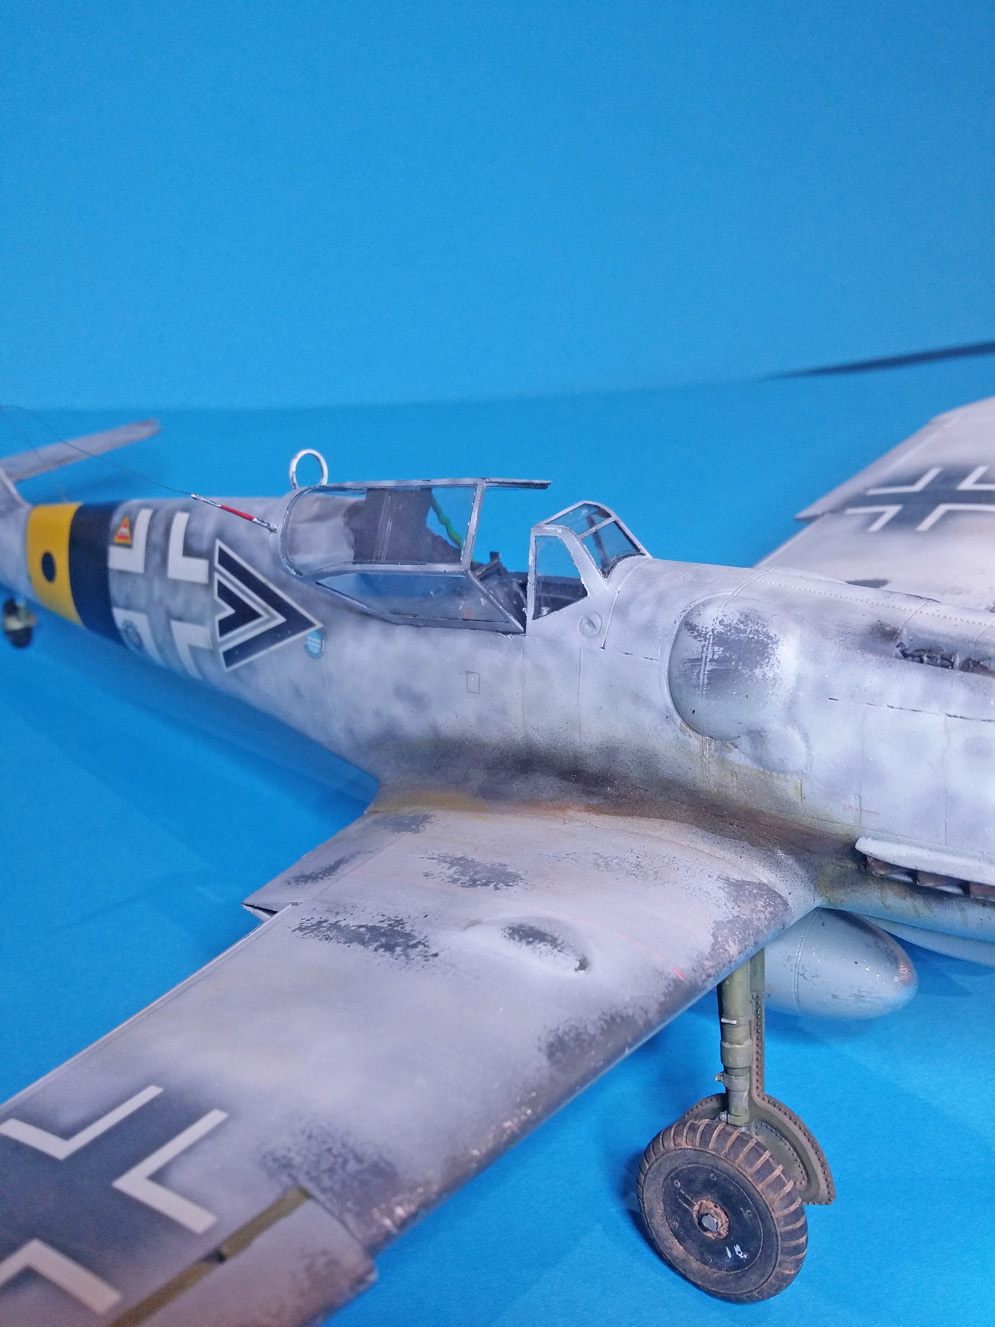
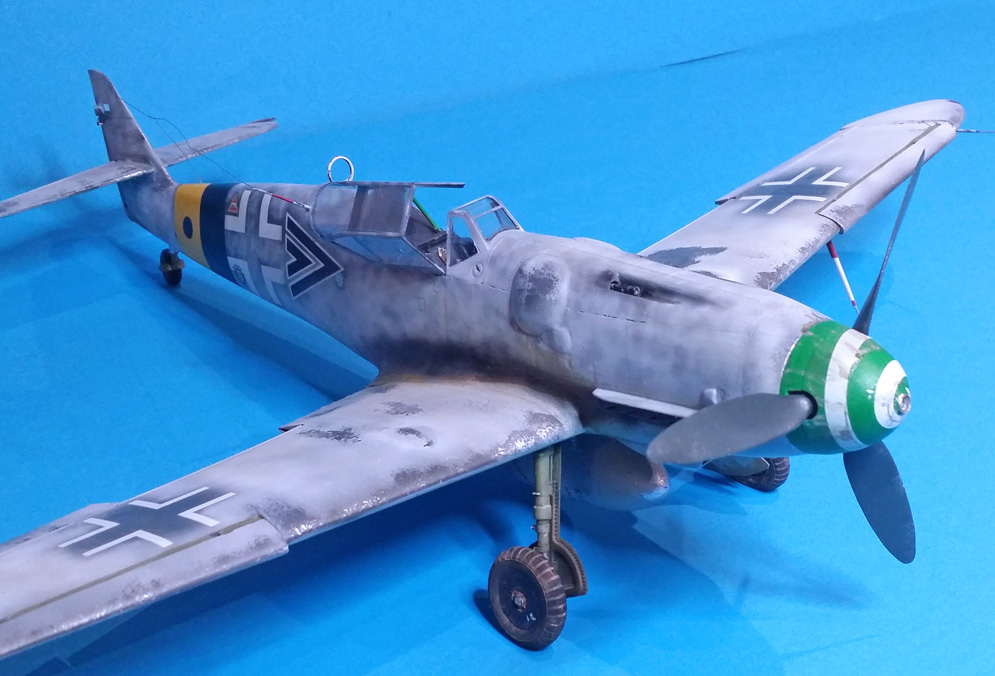
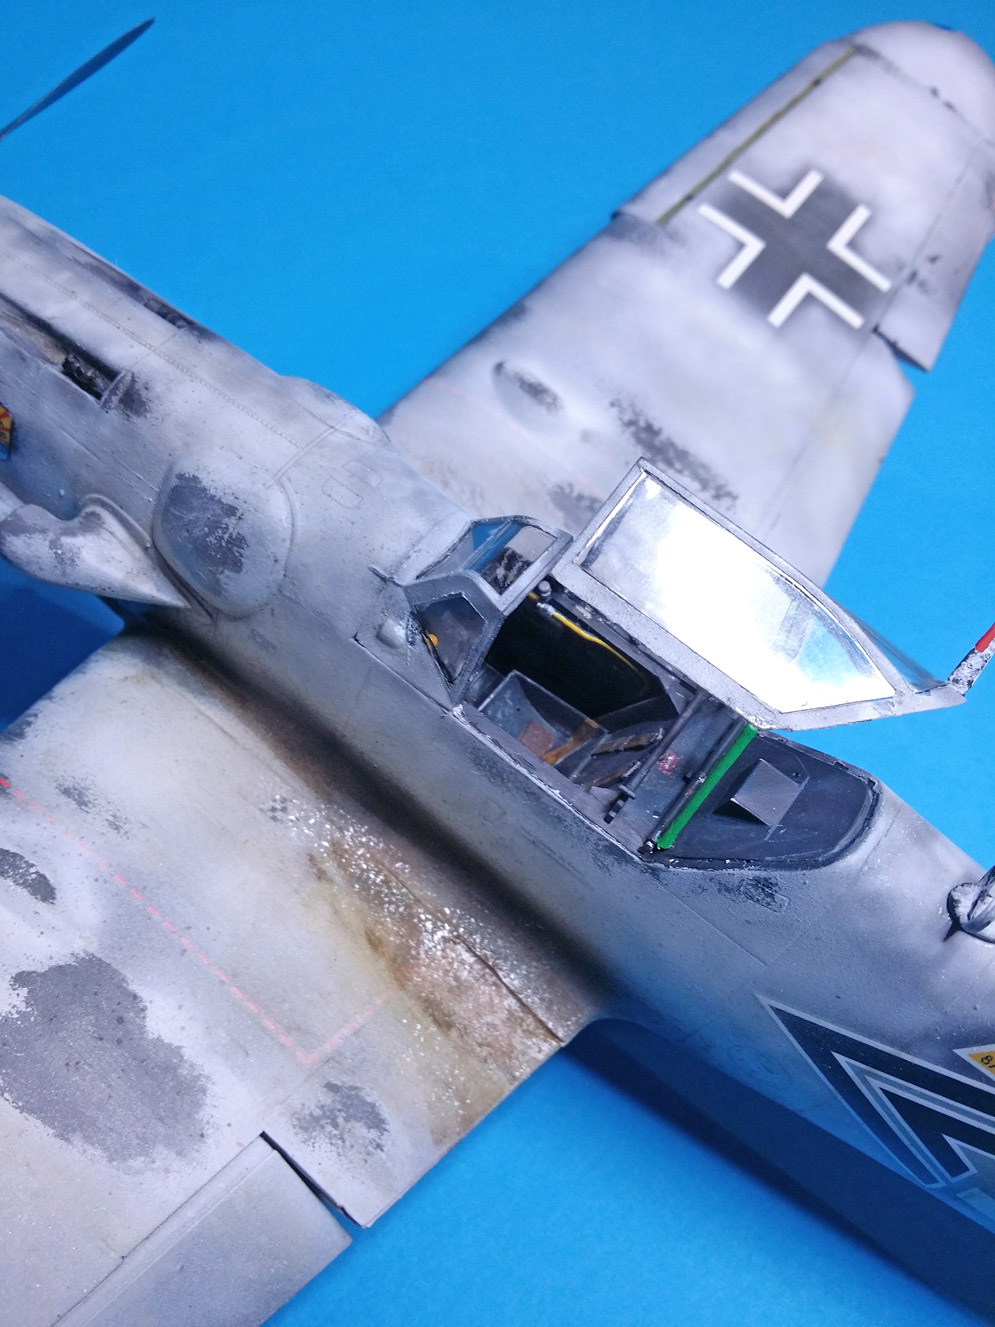
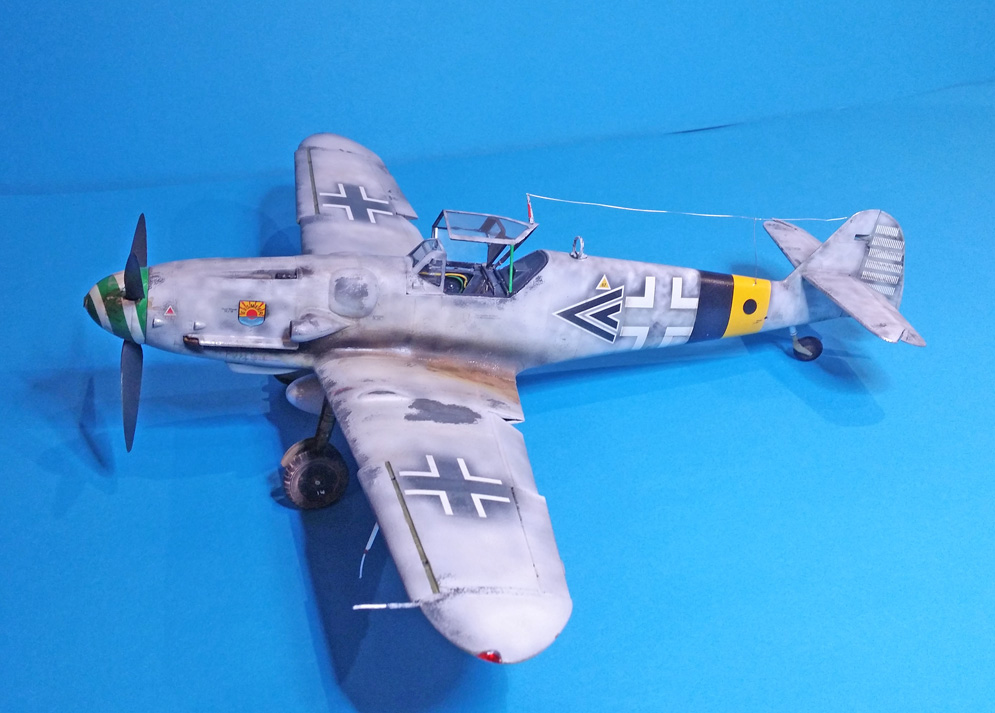
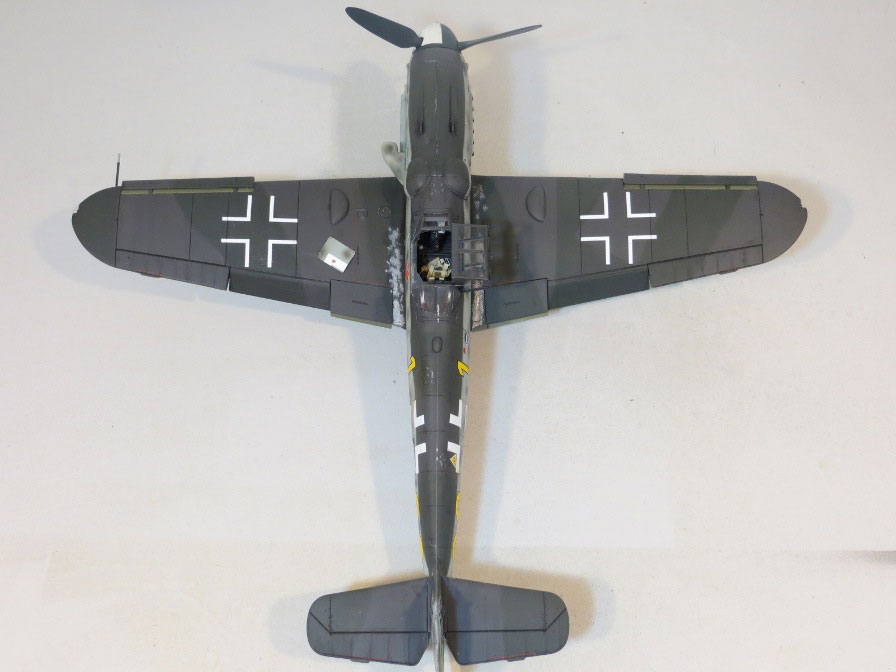
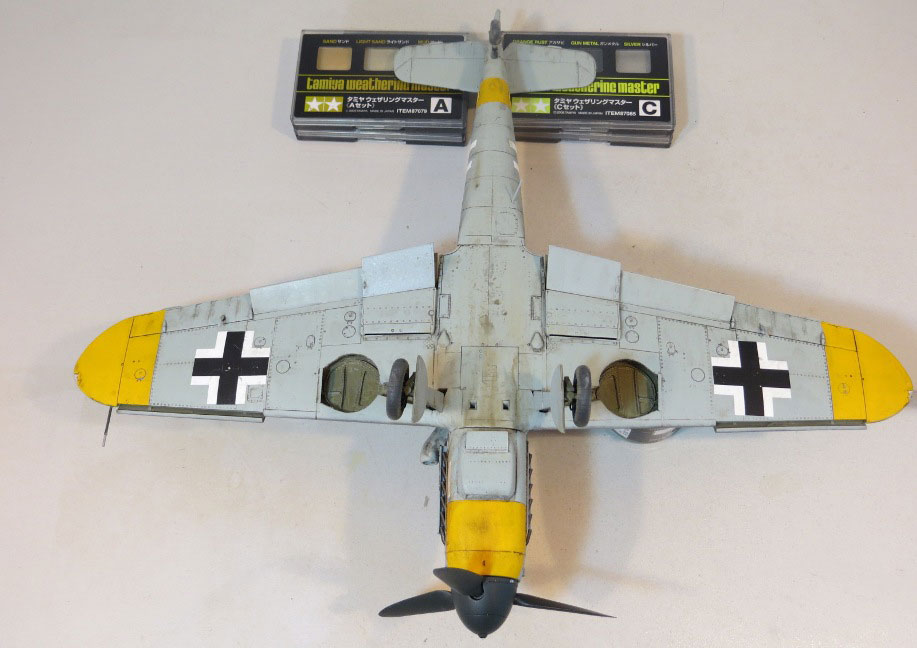
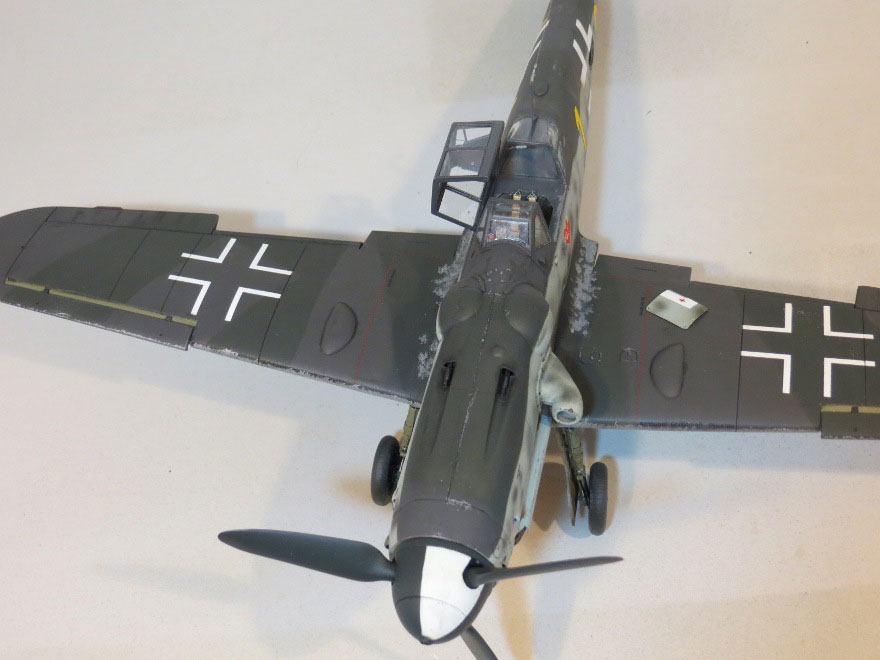
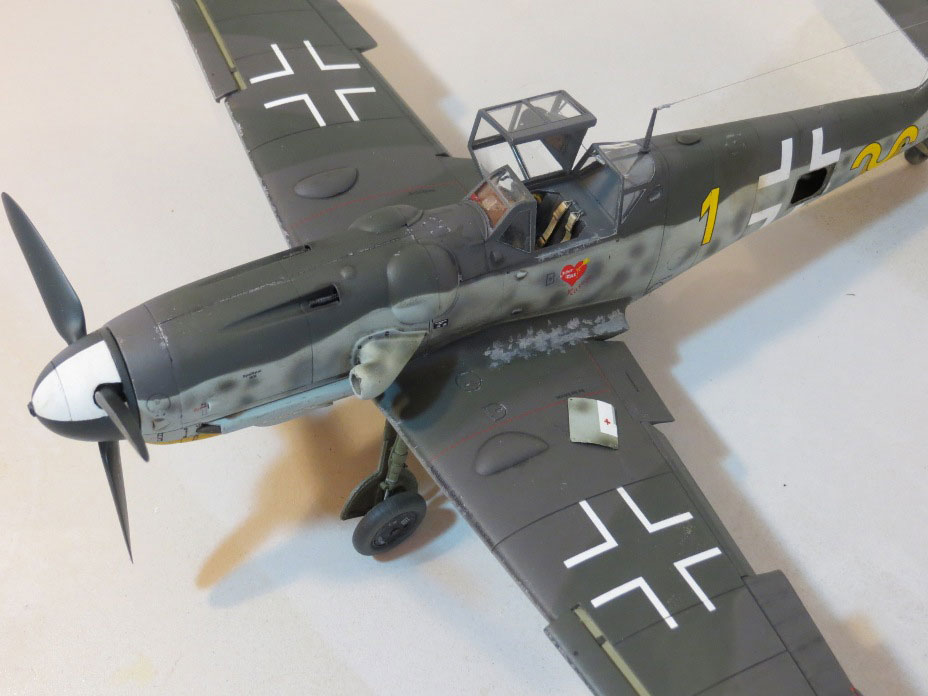
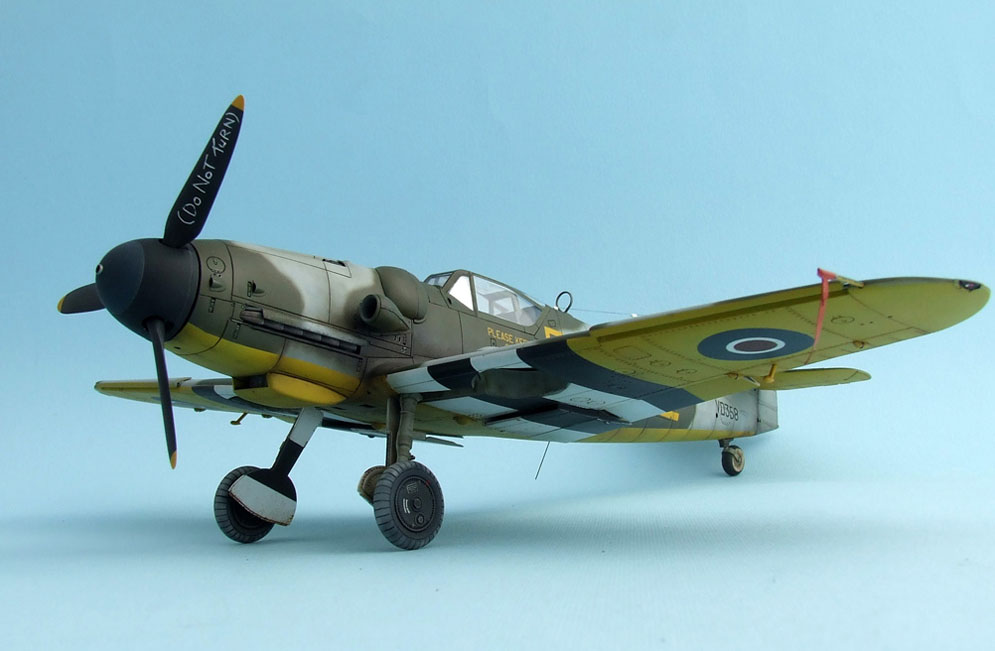
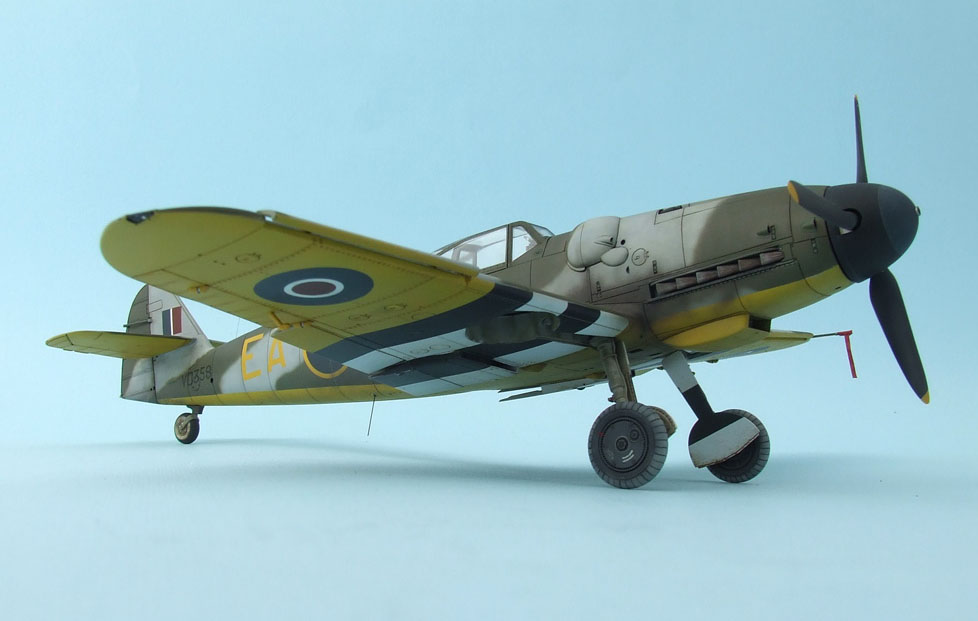
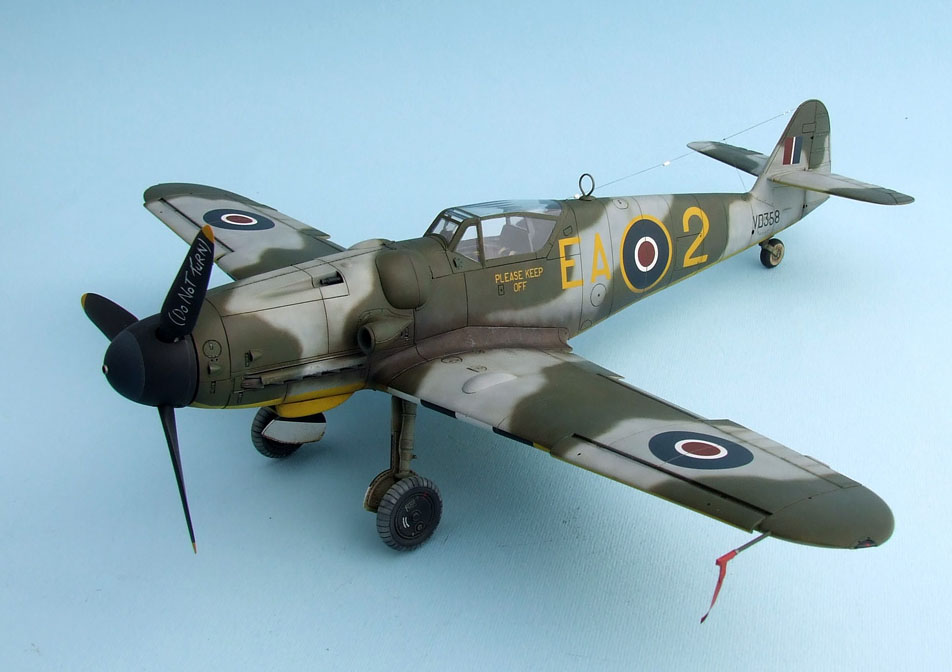
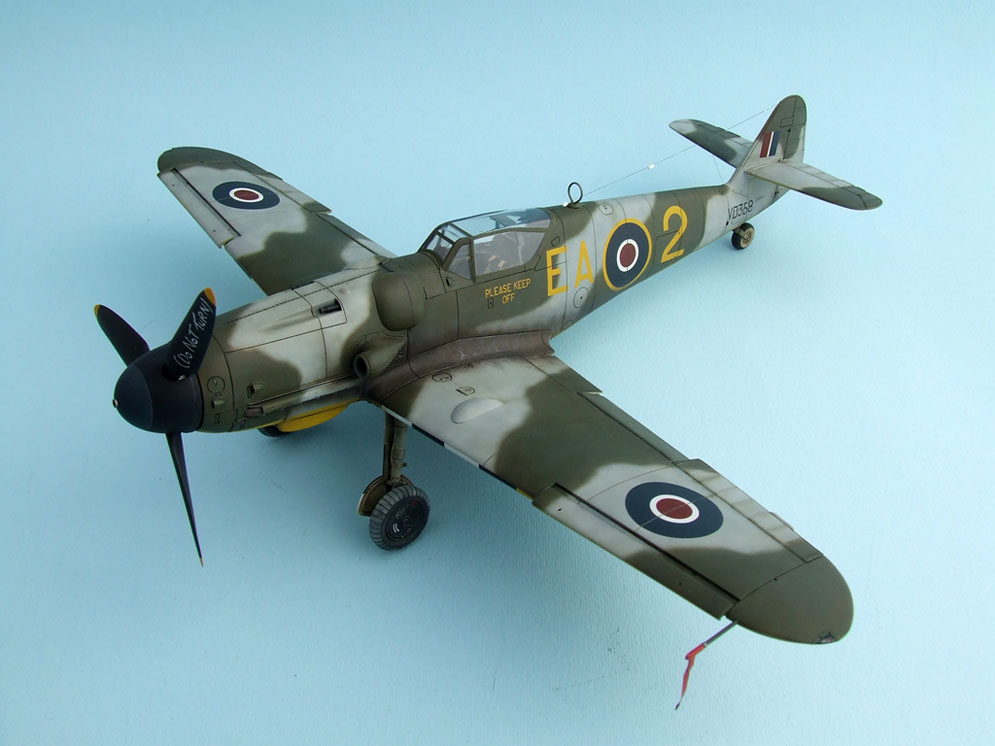
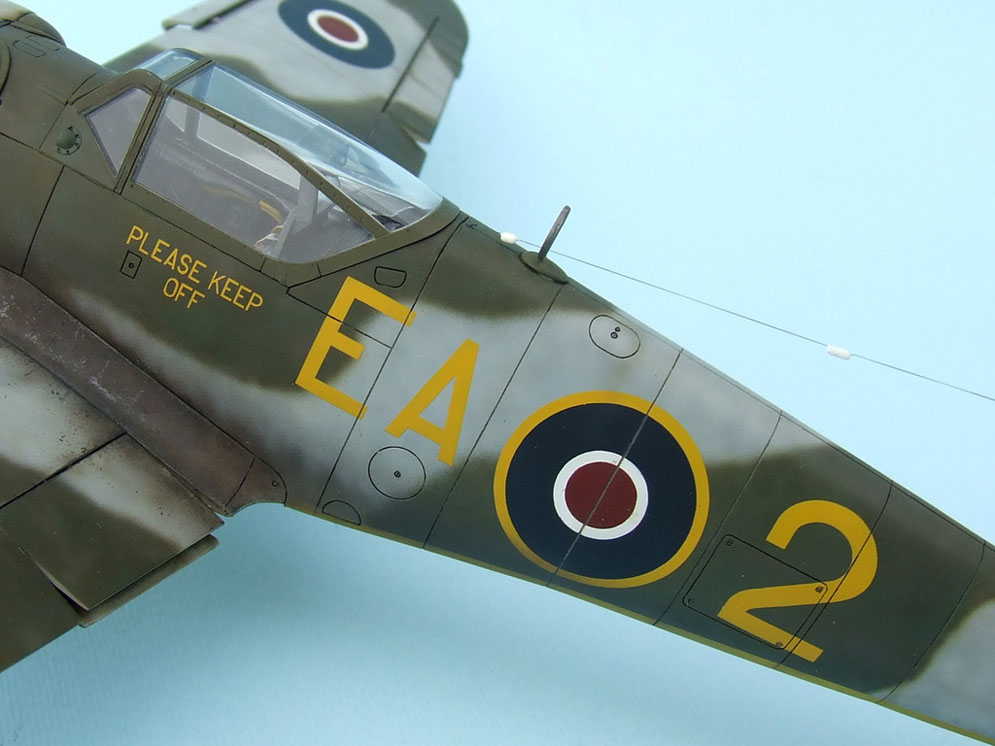
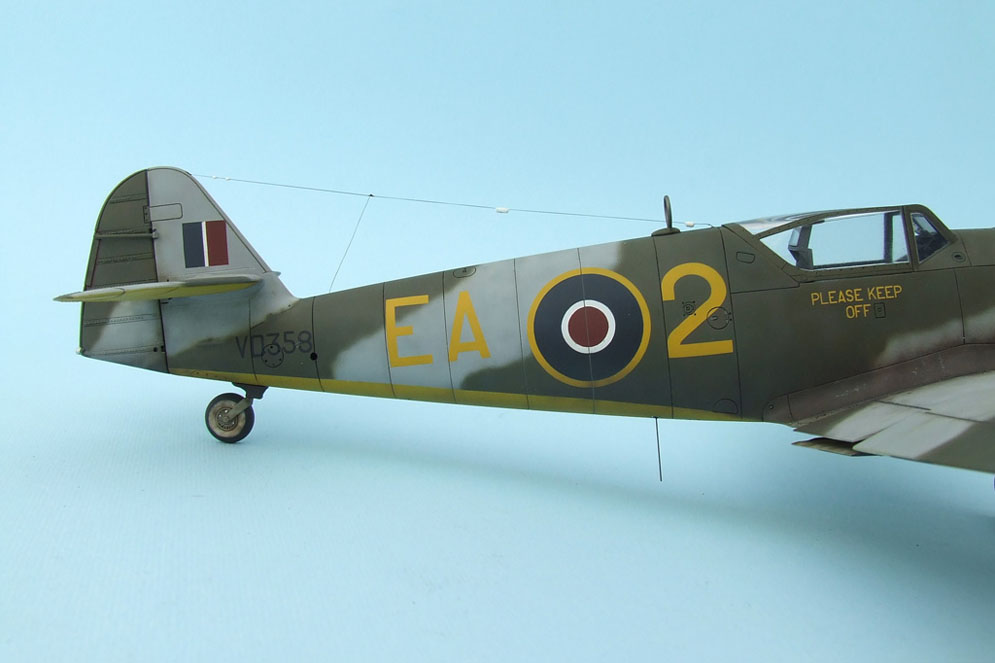
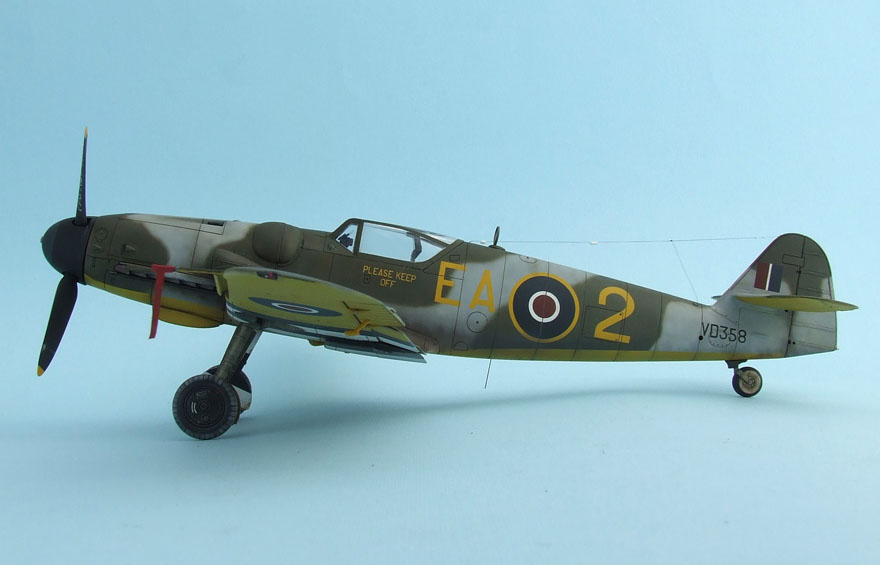
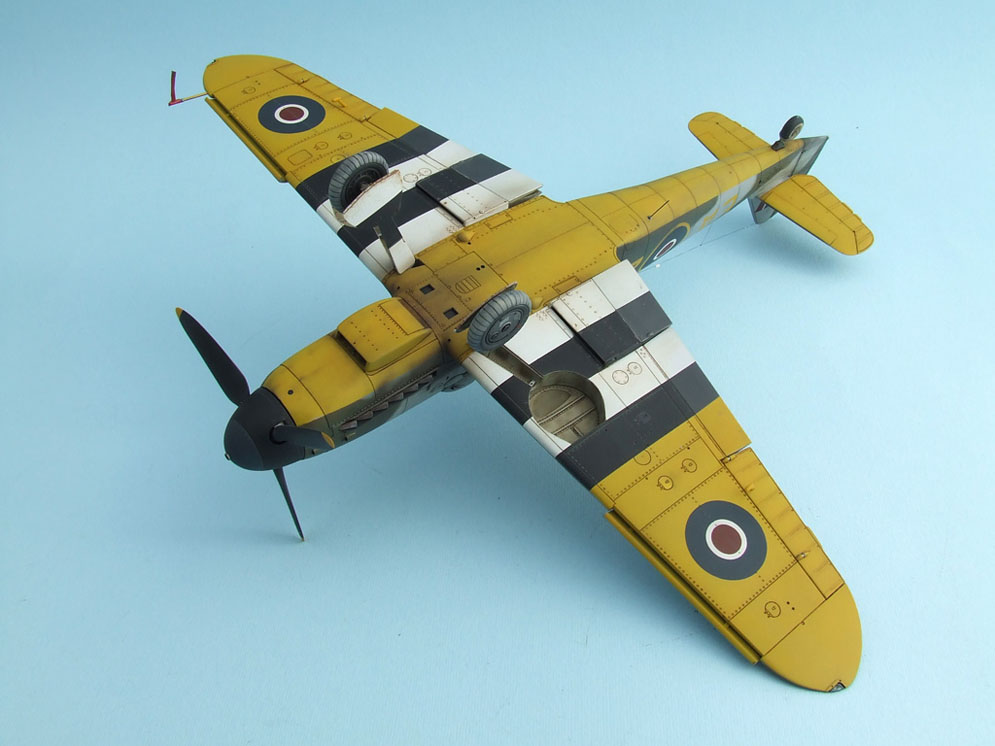
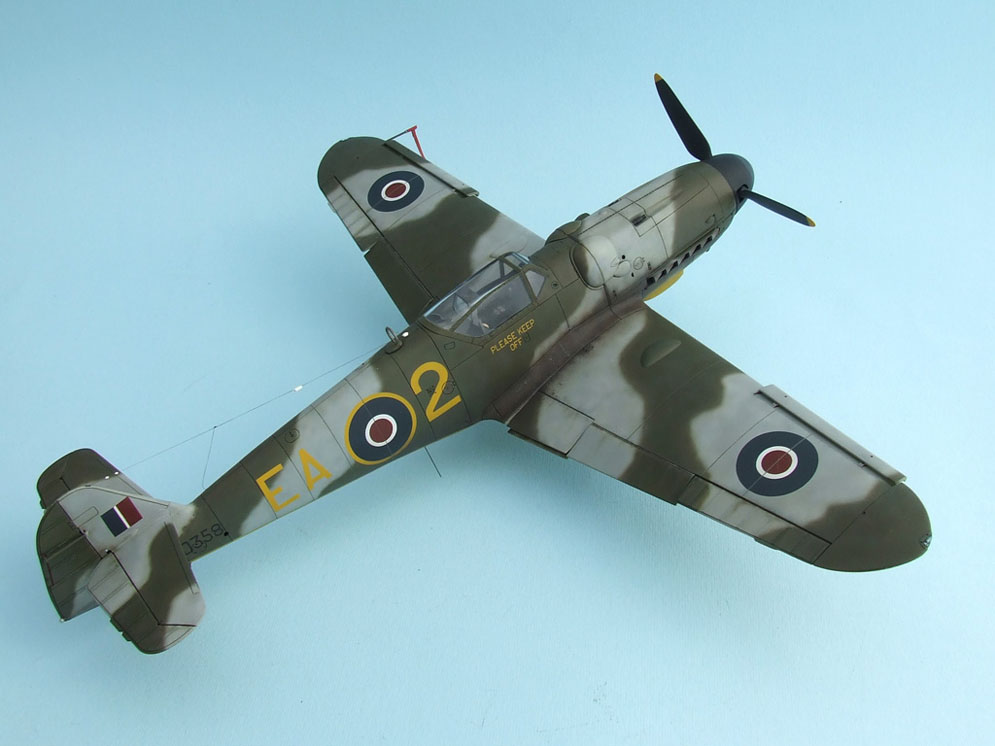
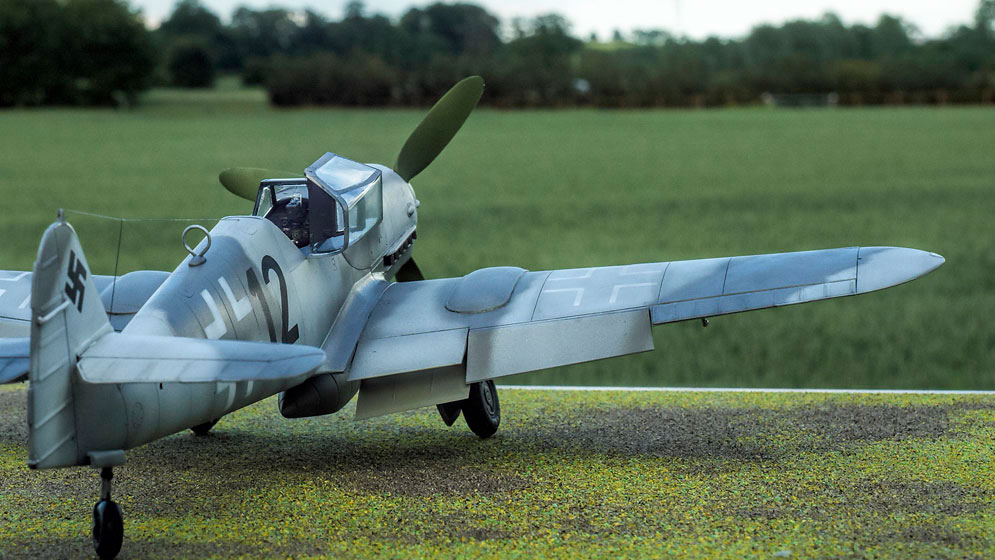
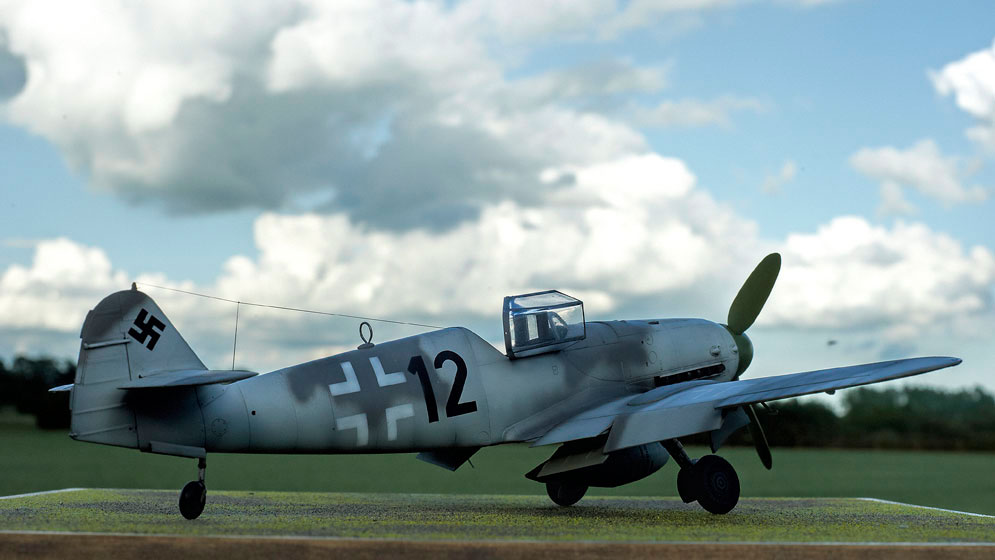
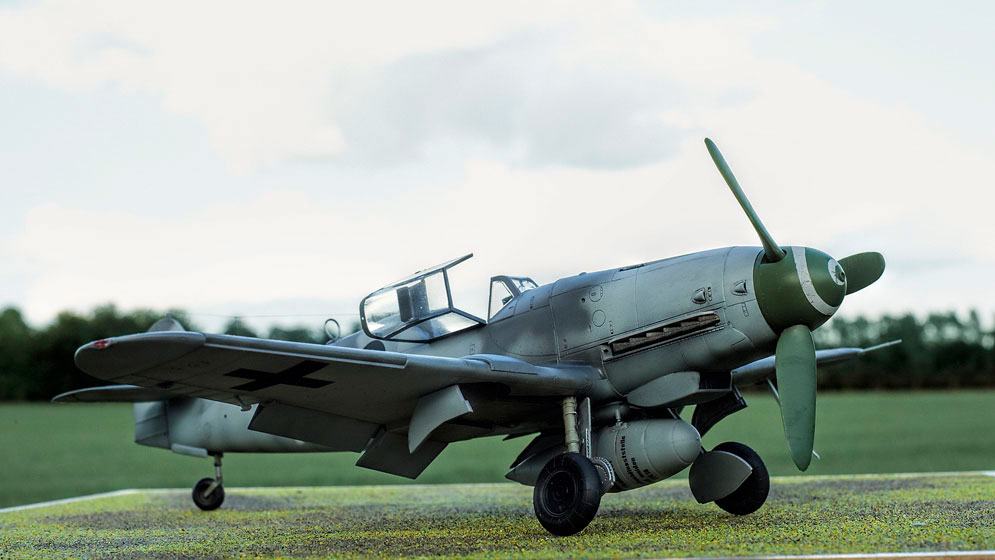
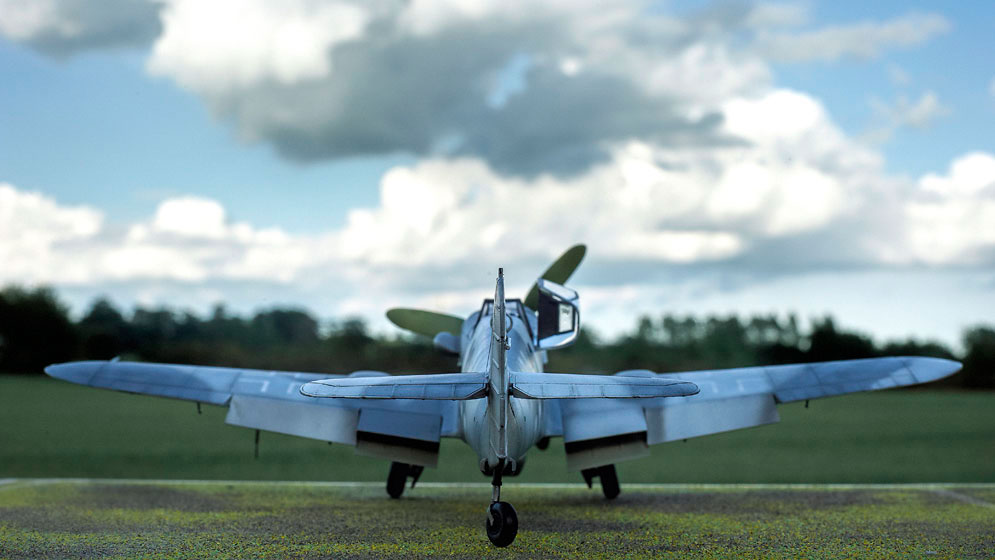
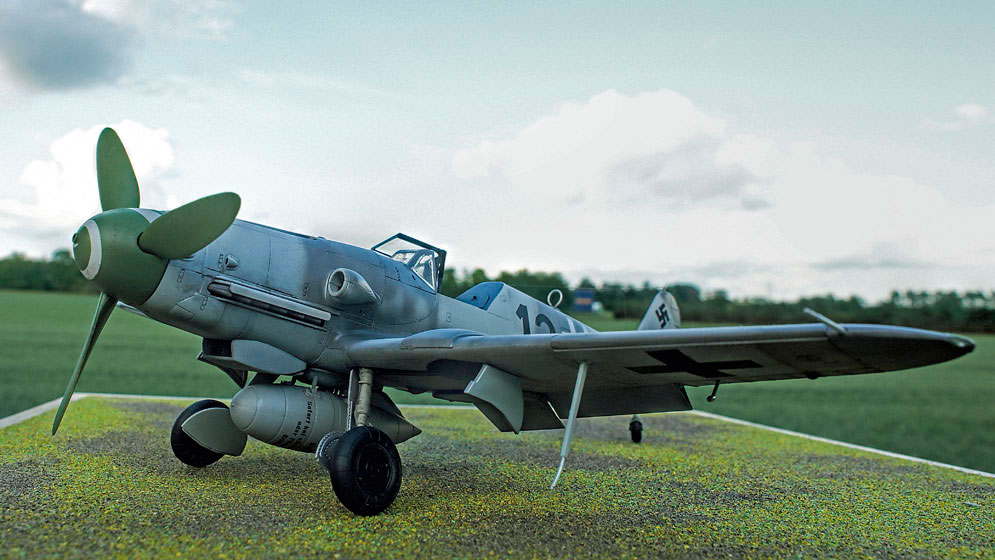
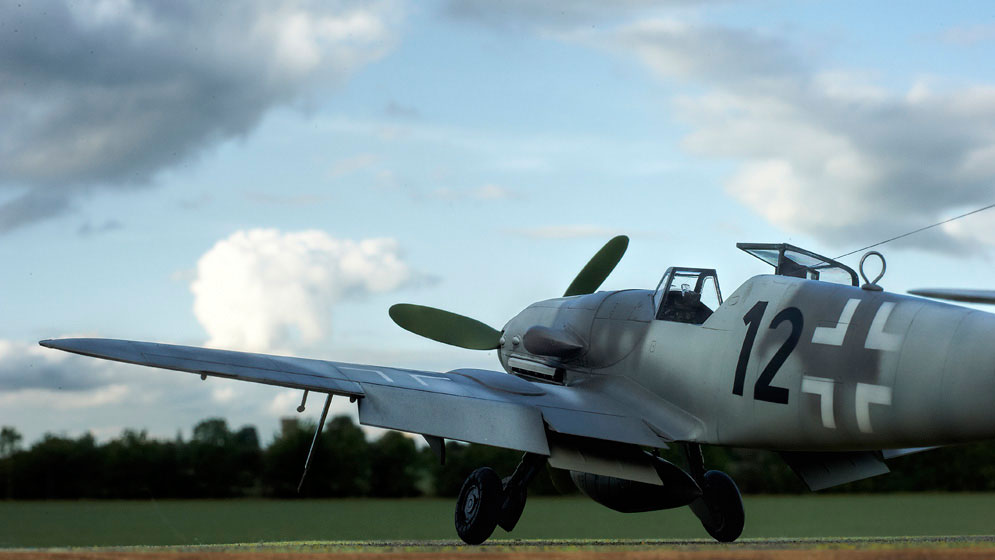
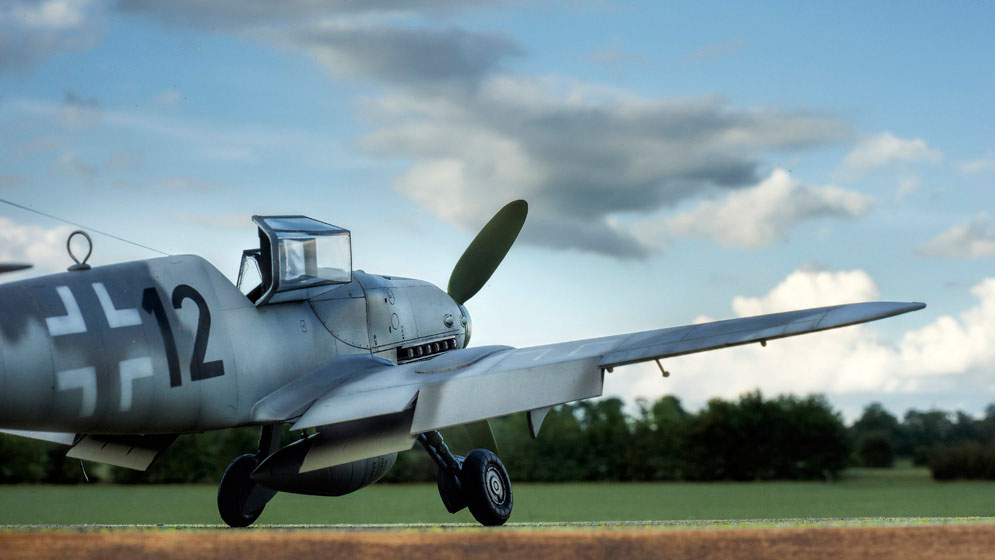
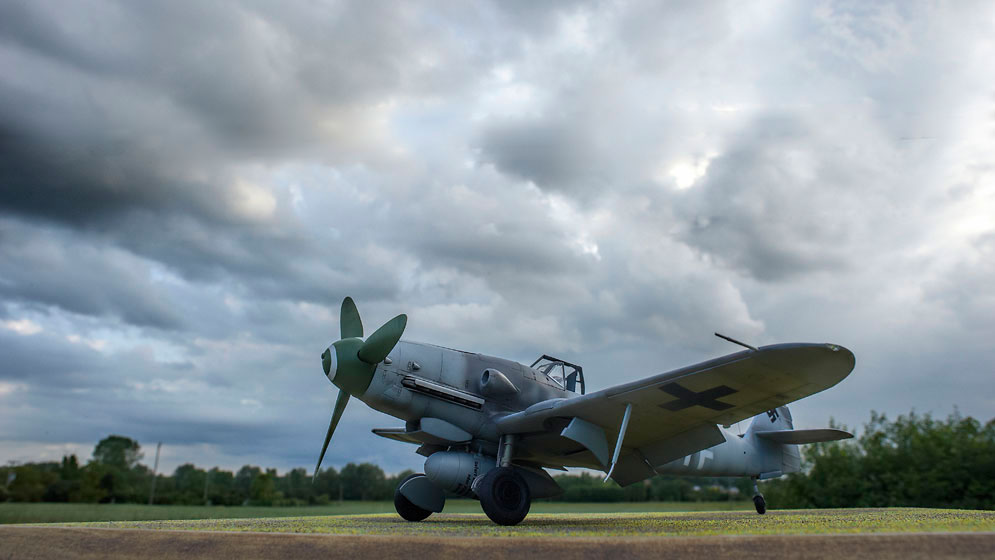
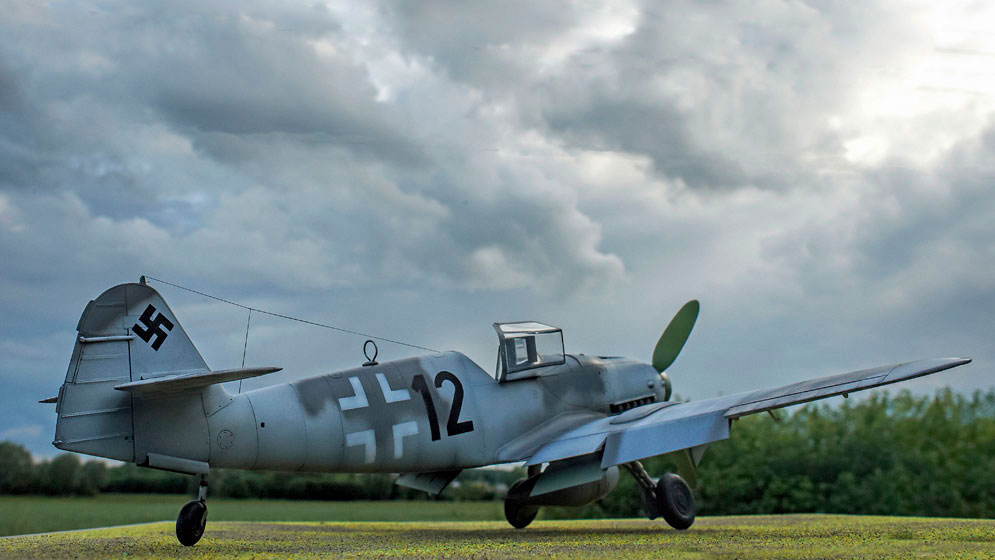
There are several well-known photos of this aircraft to be found on the net. It’s a Bf 109E, of course, built by Erla Mascinenwerke as W/Nr. 4101 in September 1940. It became Yellow 8 of 6./JG52, then Black 12 of 2./JG51. Shot down and force-landed at Manston 27/11/1940, it was extensively tested, then went to 1426 (Enemy Aircraft) Flt. It’s now back as “Black 12” in the RAFM. The canopy is missing because it was removed to accommodate a very tall test pilot while the aircraft was being tested at Rolls-Royce: I don’t know how one mislays a Bf 109 canopy, but it went missing apparently.
http://www.kenthistoryforum.co.uk/index.php?topic=18922.0
The kit was an old Hasegawa 1:32 – dating from the 1970s I think – that I picked up cheap at a show. All I added was a set of HGW fabric seat belts and some Airscale instrument decals – the rest of the markings were made up from generics. Weathering was done with pastels, although I fear I may have overdone the streaking. I’ve also included some monochrome photos as well as the colour ones.
Hope you like it. Regards,
Michael Chilestone
The model is airbrushed with Gunze Sangyo Hobby Color paints. To accentuate the panel lines I mixed and applied three different washes made from Mig Productions “red” thinner and Abteilung 502 oil paints. I chose one of the decal options provided with the kit.
1:48 scale
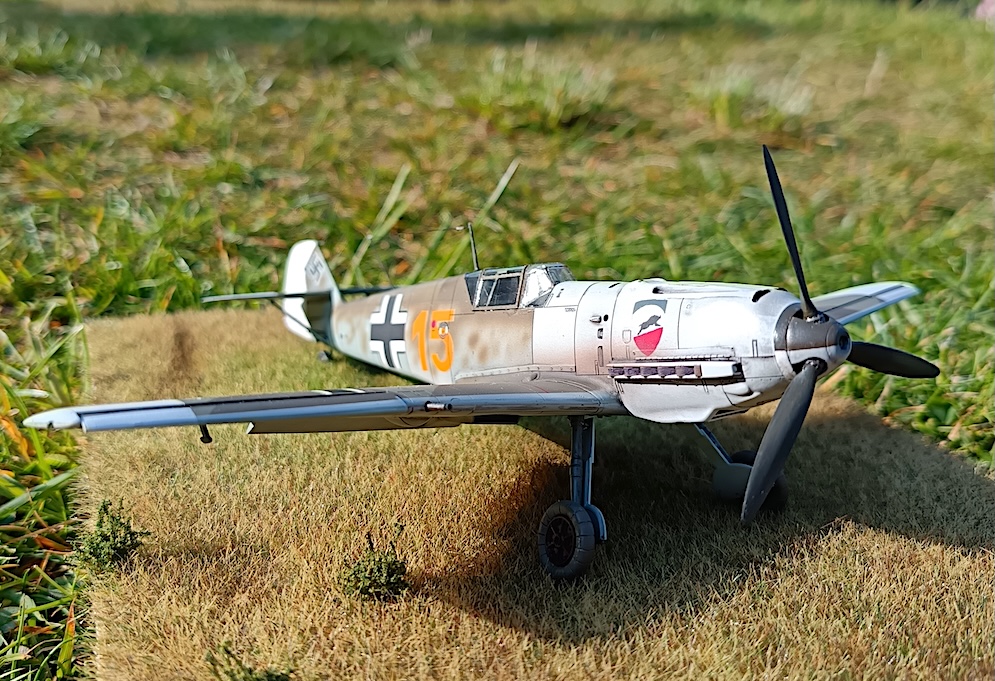
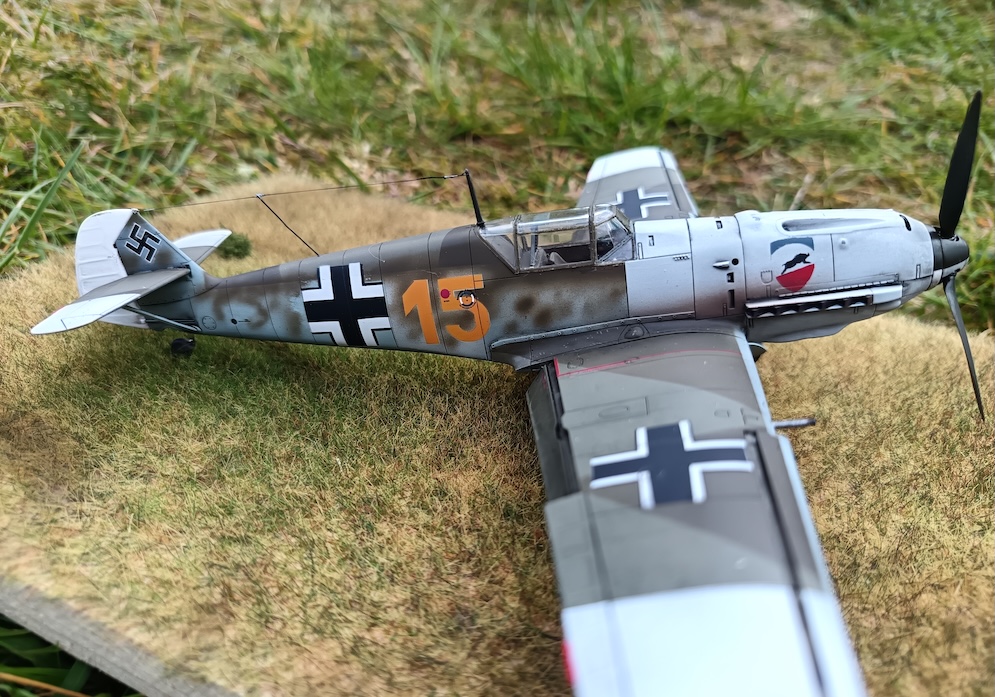
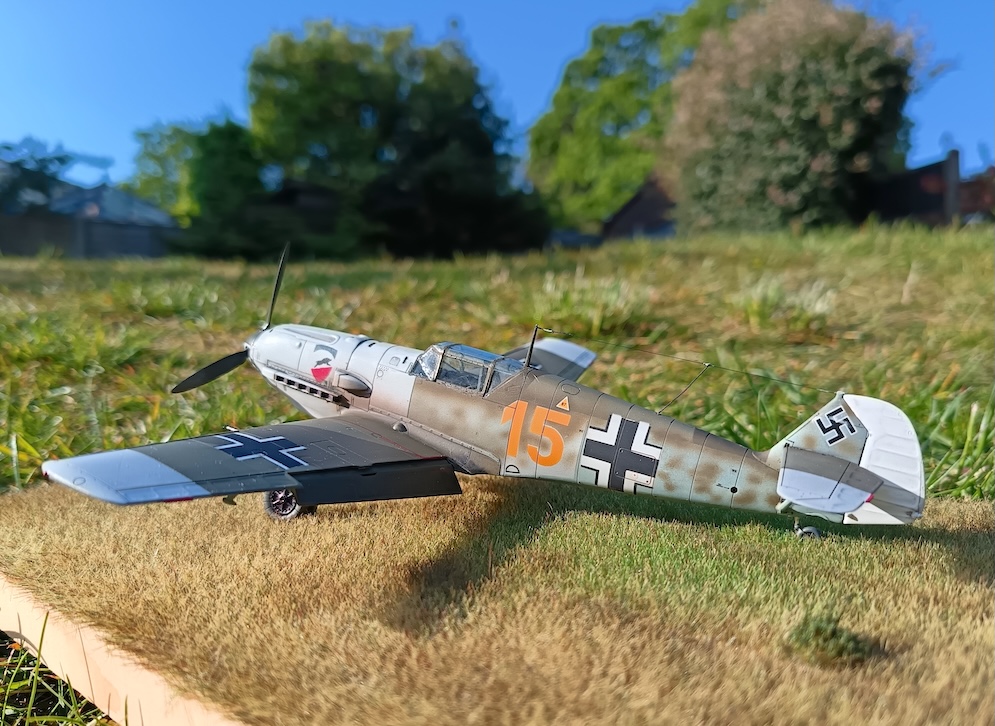
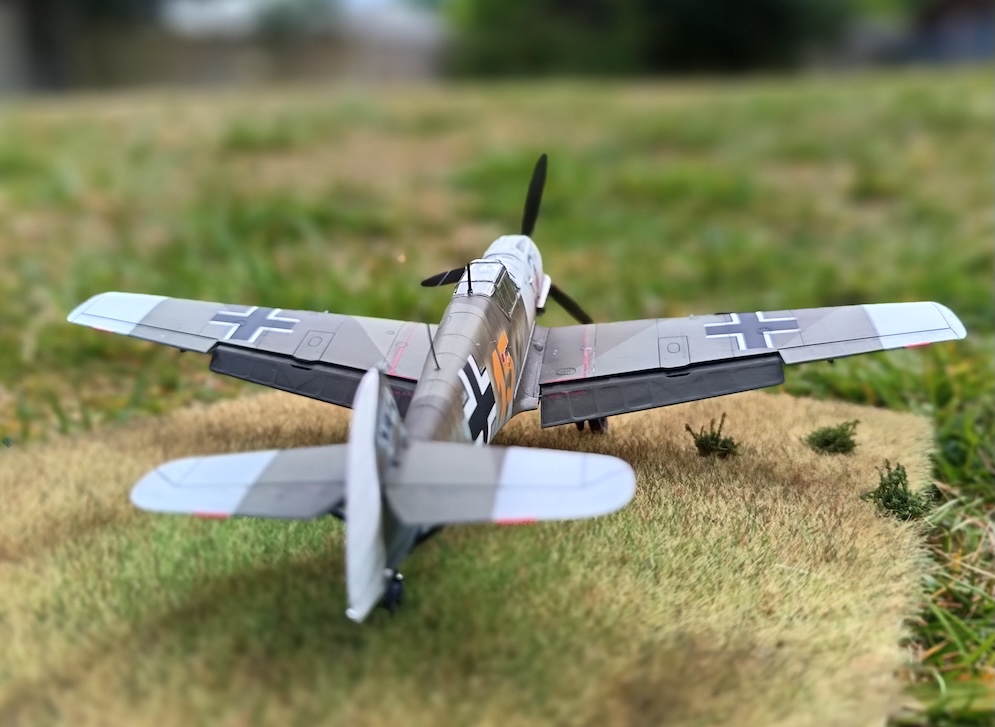
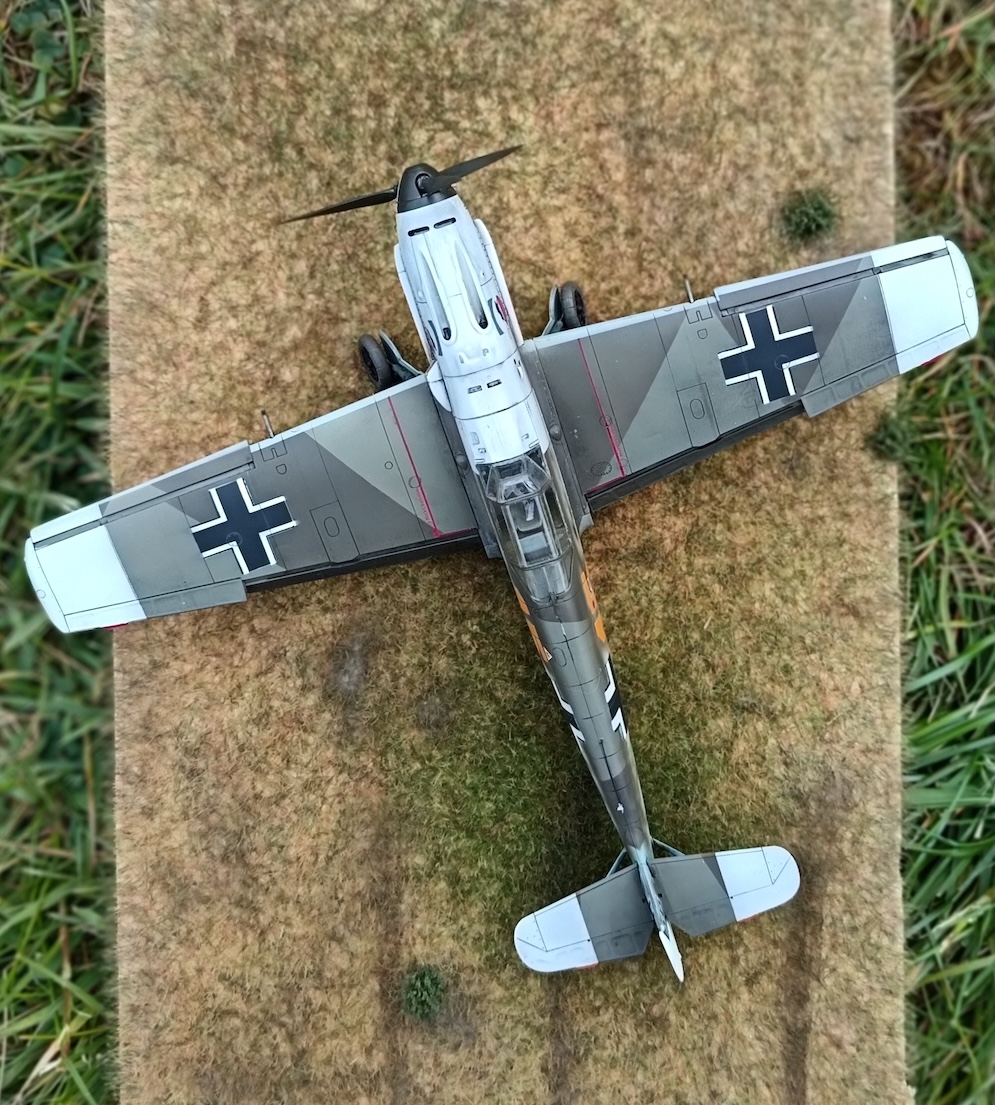
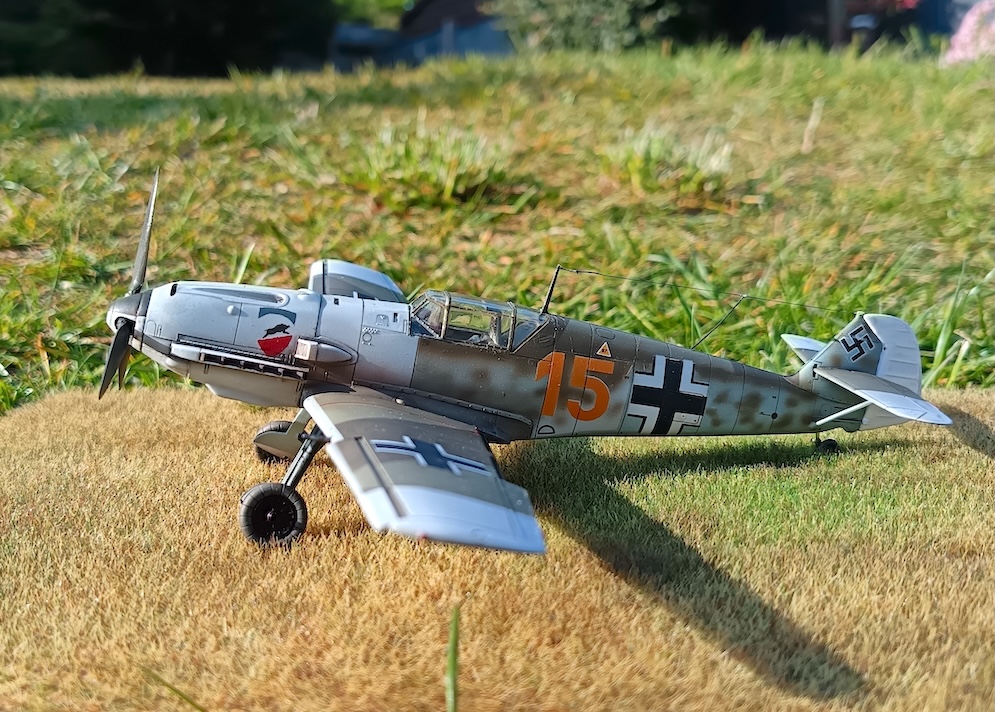
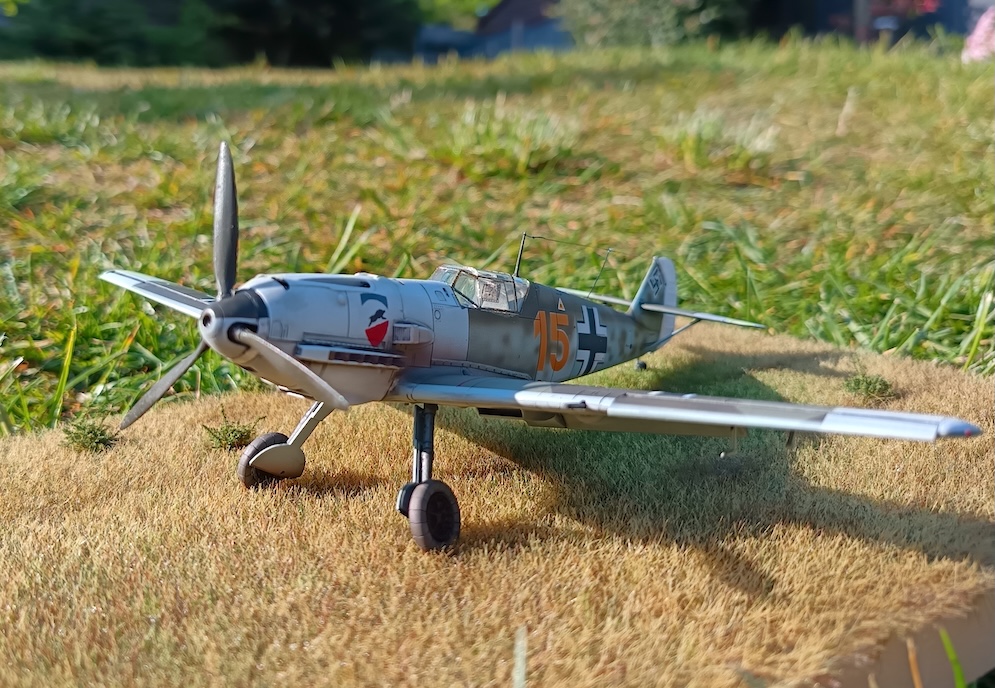
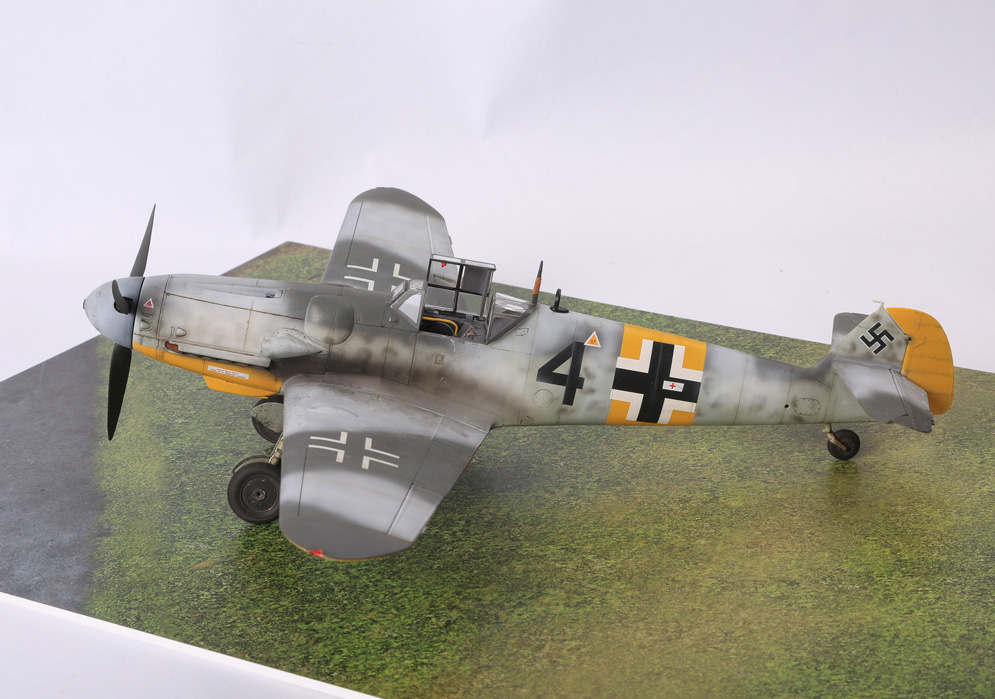
My take on Uffz Karl Wolff’s Yellow 15 1940.
Build was OOB apart from belts and went together very well as you would expect. As far as possible markings are masked and sprayed (including the unit emblem – one boar facing wrong way, not my best work).
Initially I was going to depict this without the mottle (there is a photo online which appears to show this aircraft in that state), but after some fun positioning the 15 decided to do the mottle. It would be nice to do this subject in 1:32 one day.
Craig W.
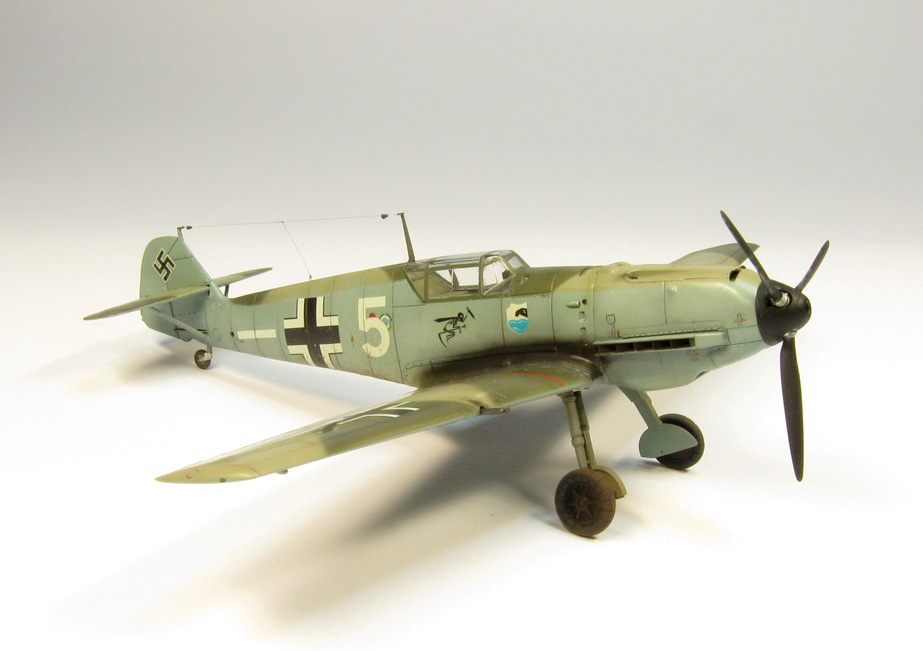
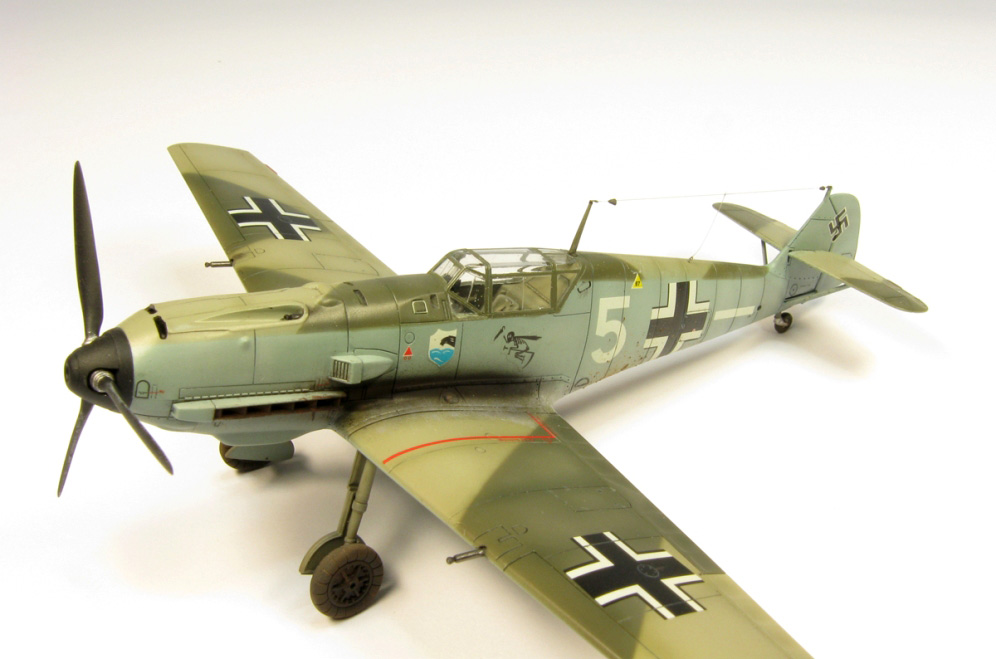
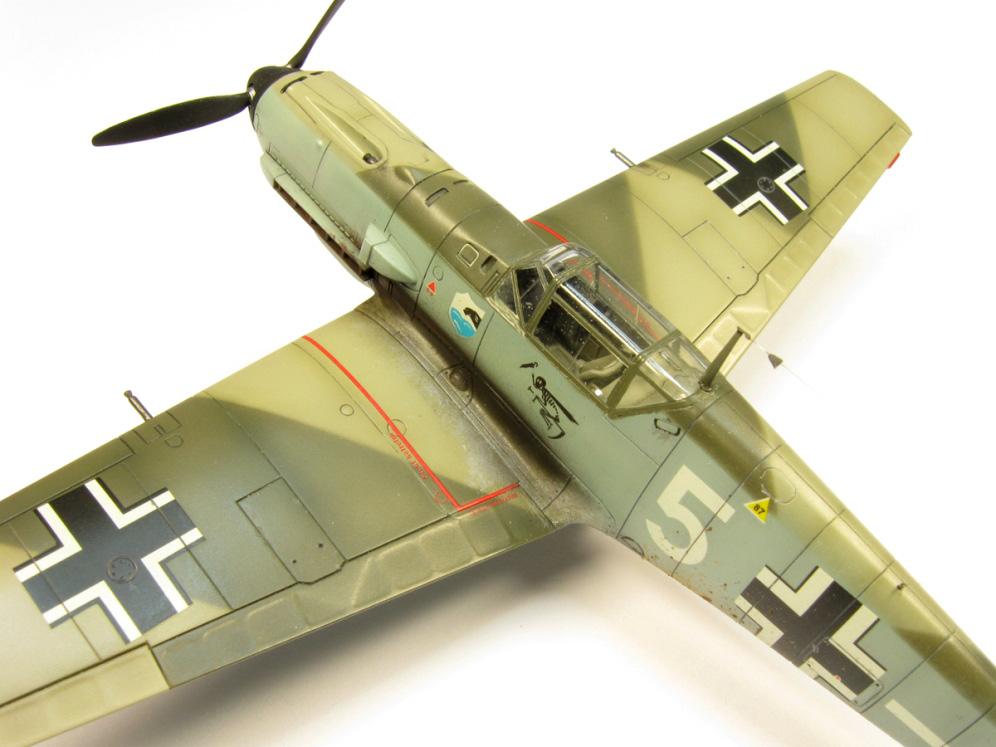
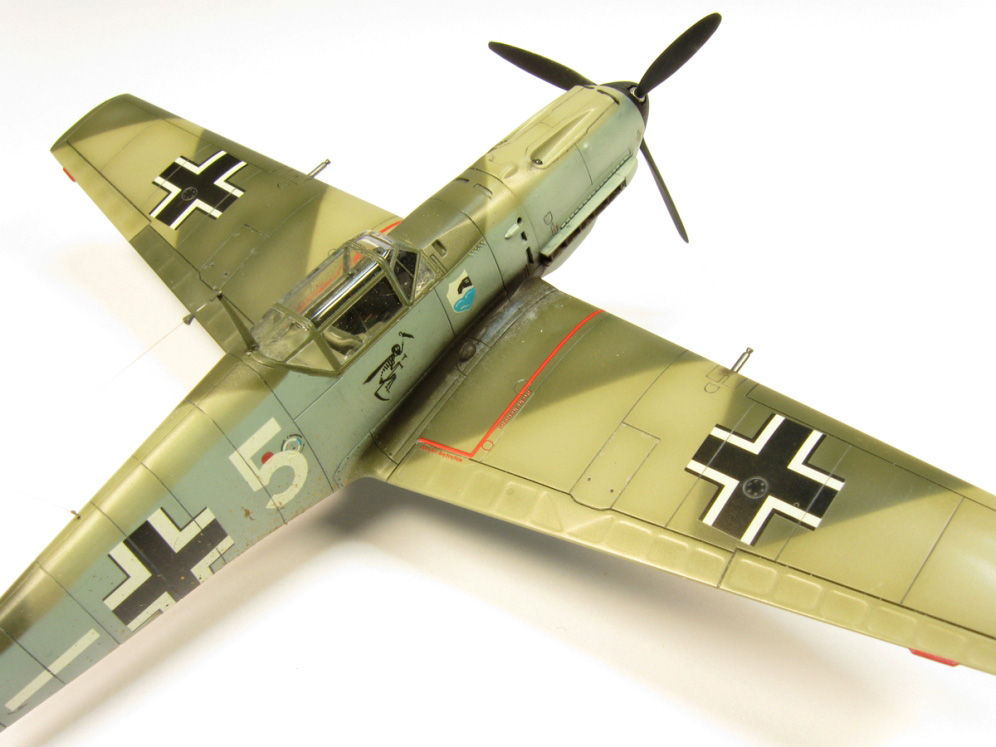
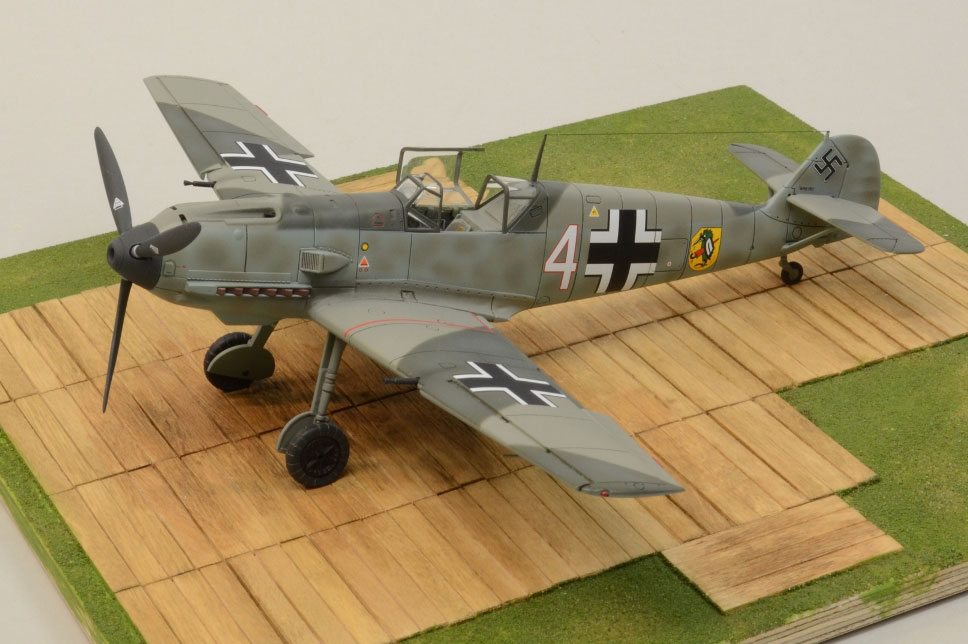
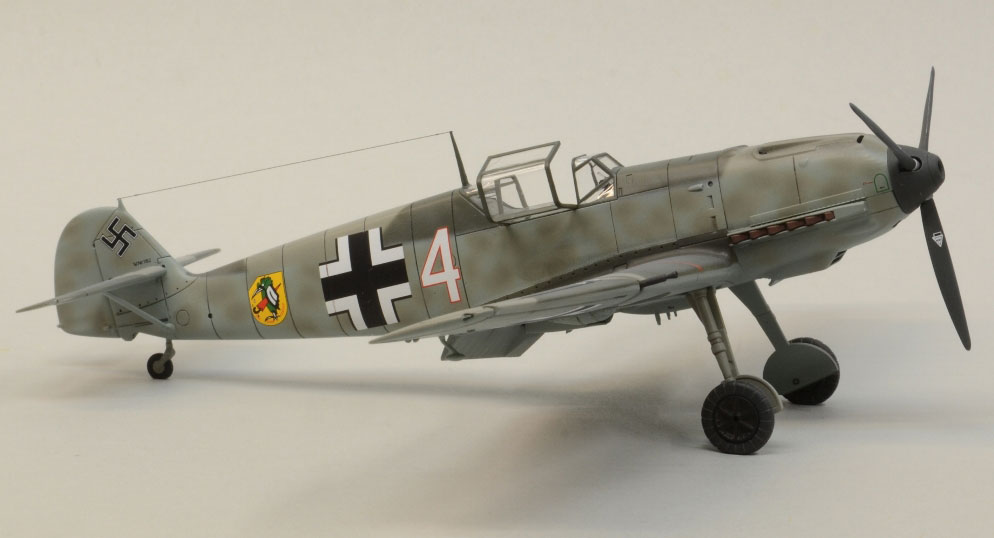
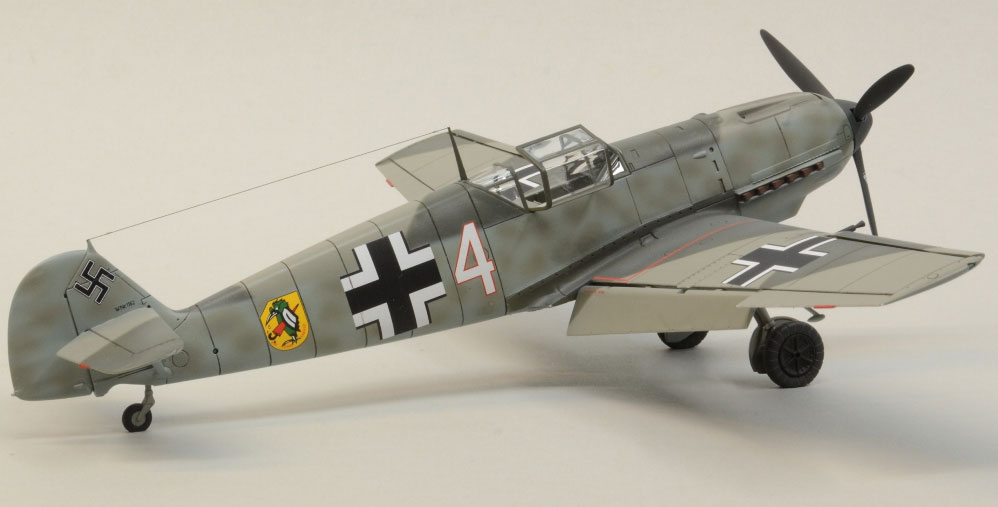
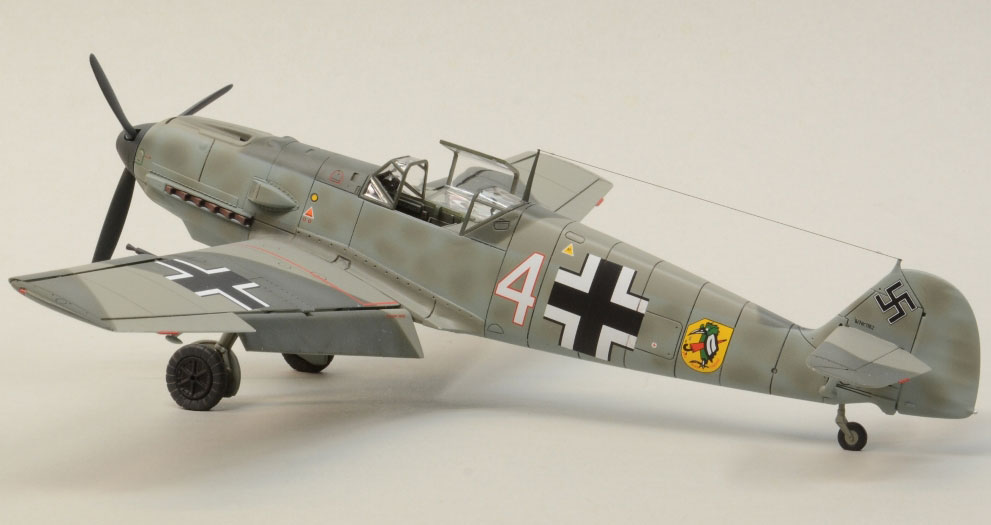
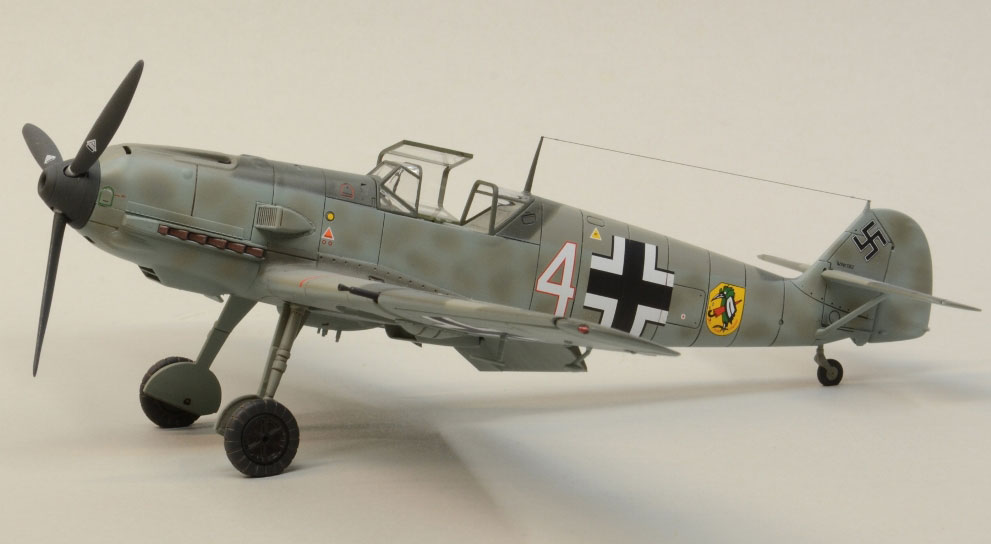
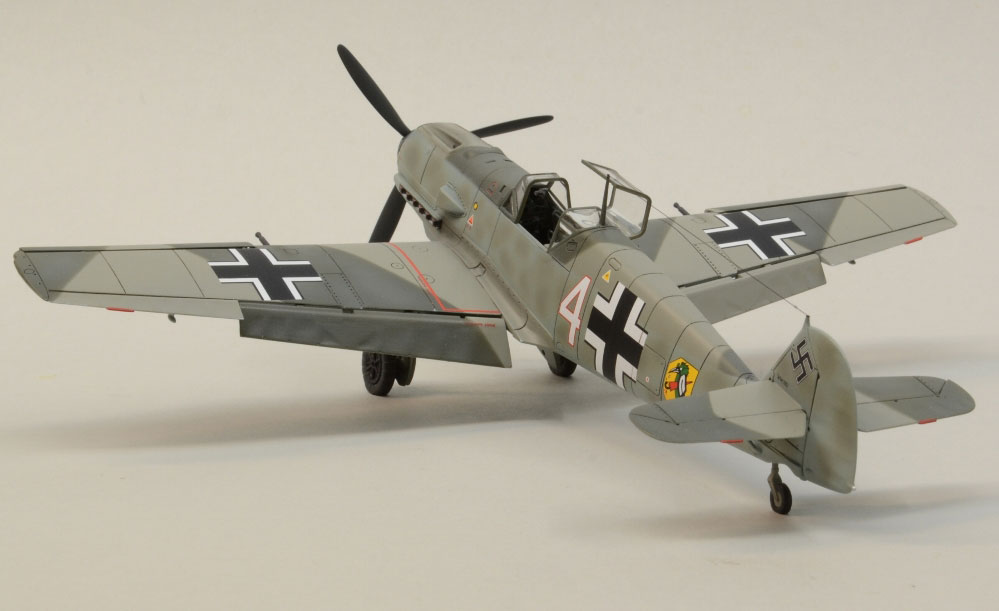
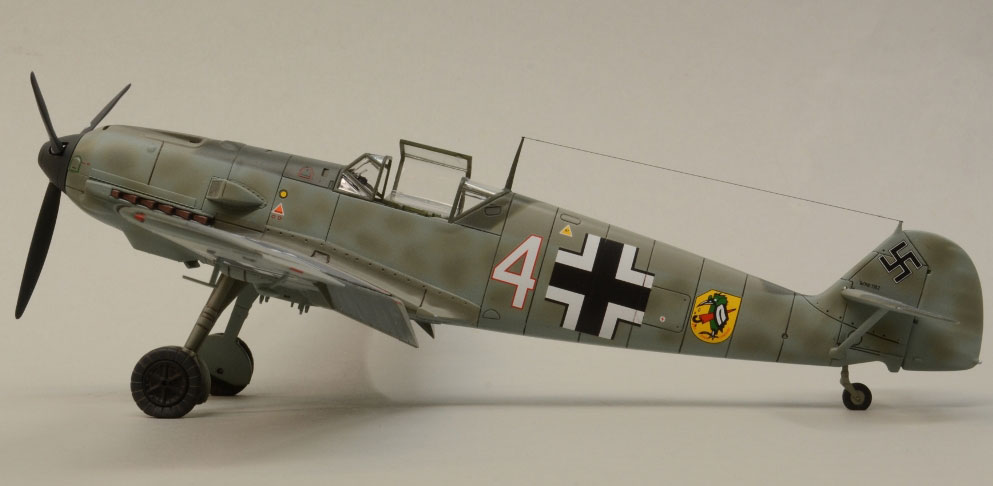
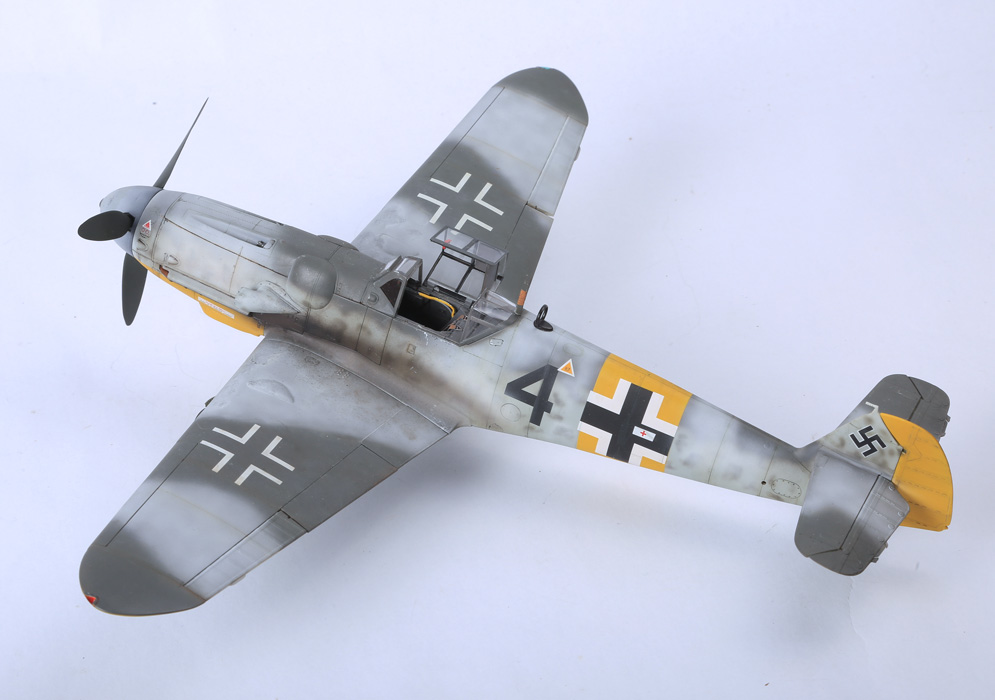
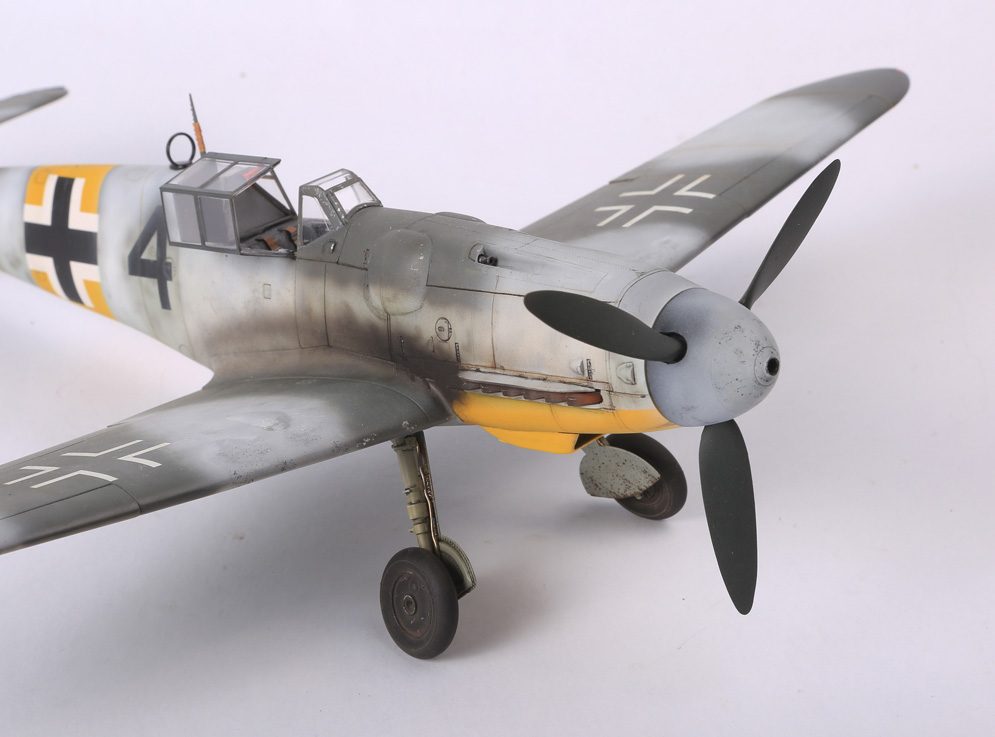
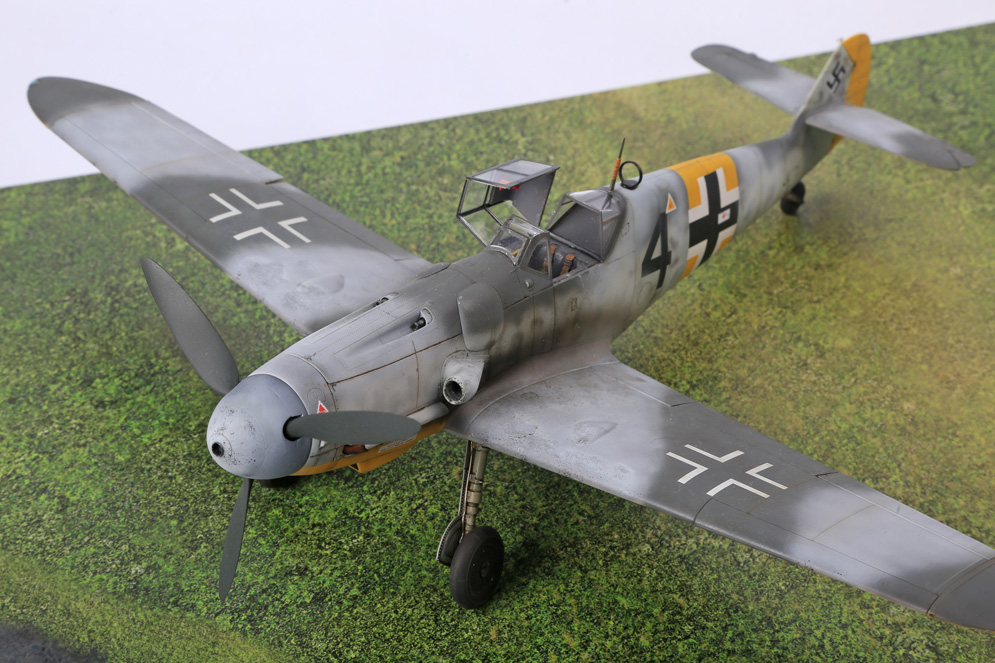
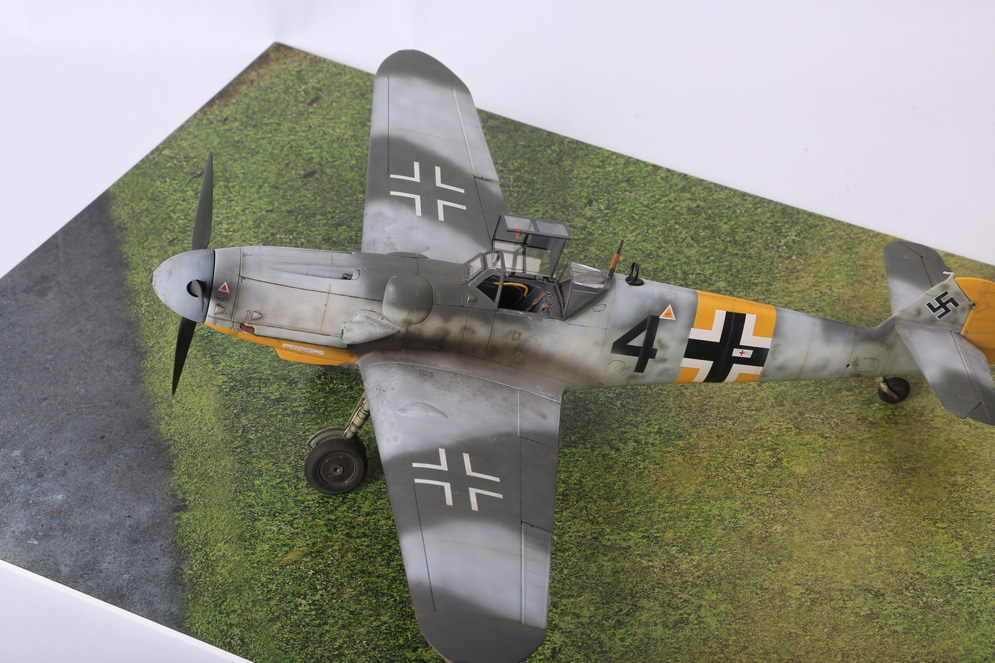
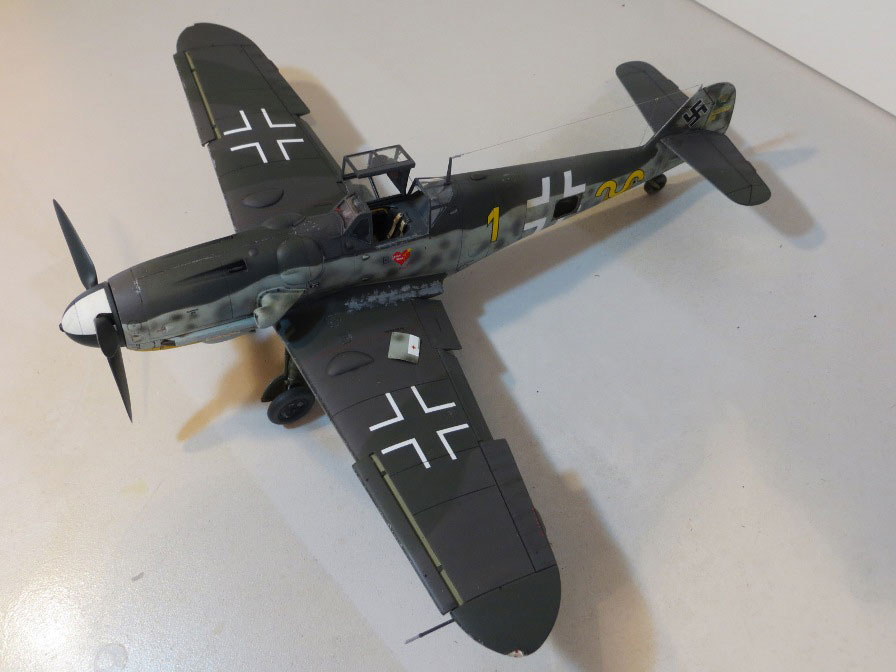
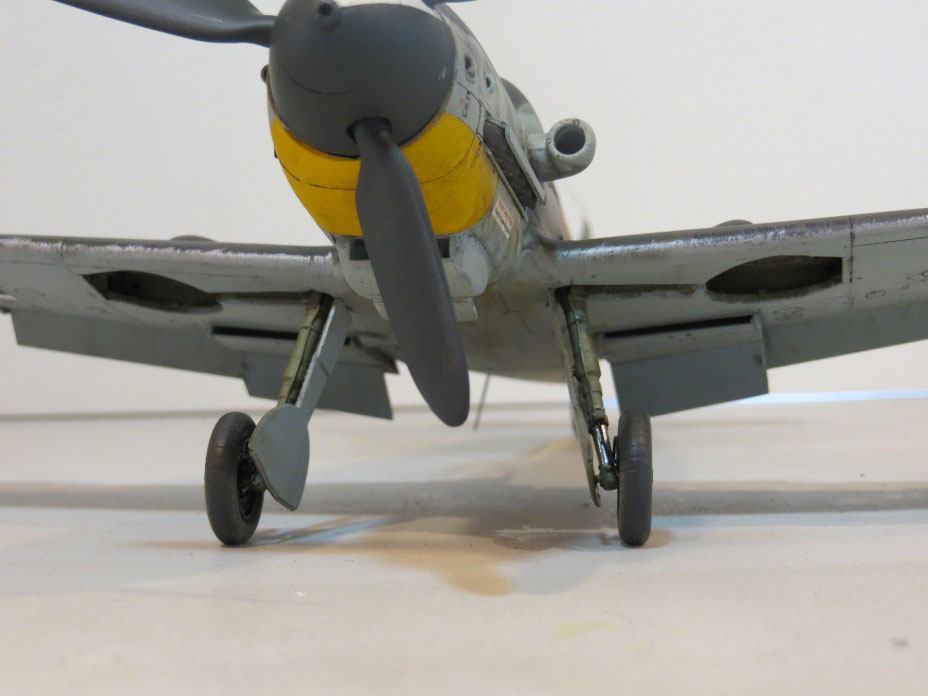
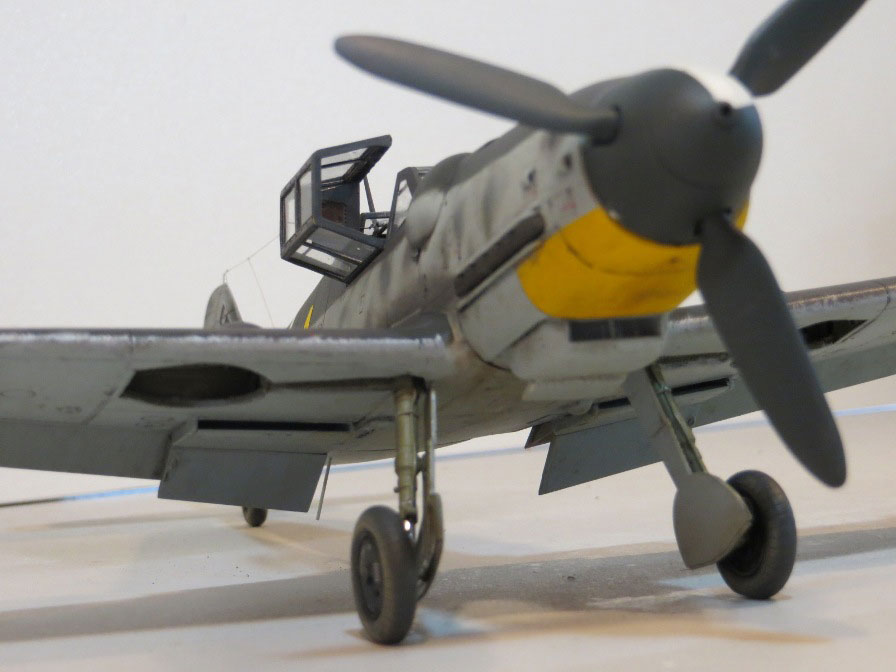
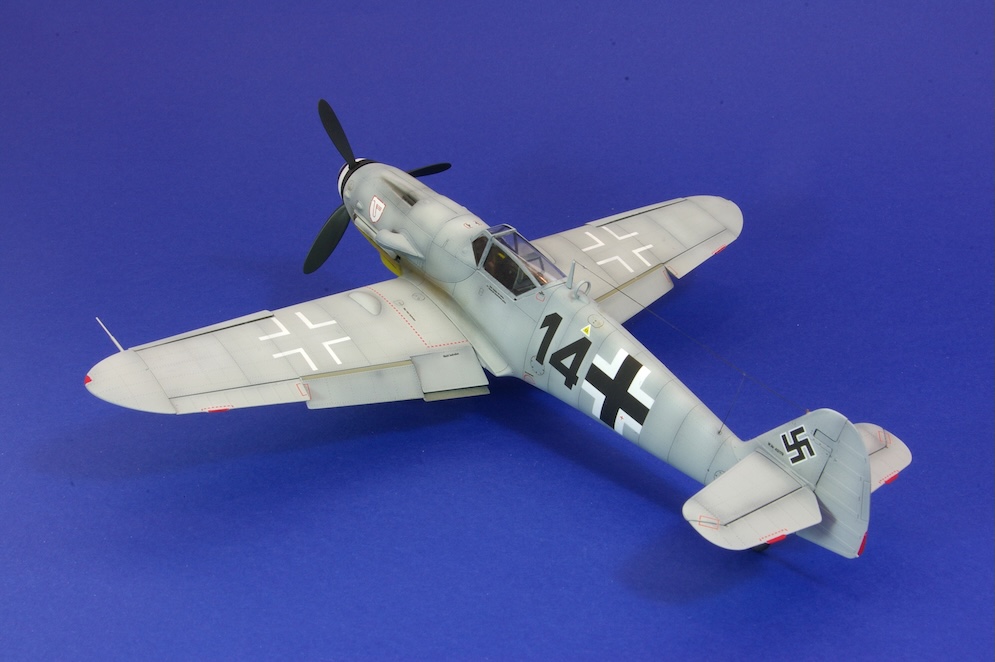
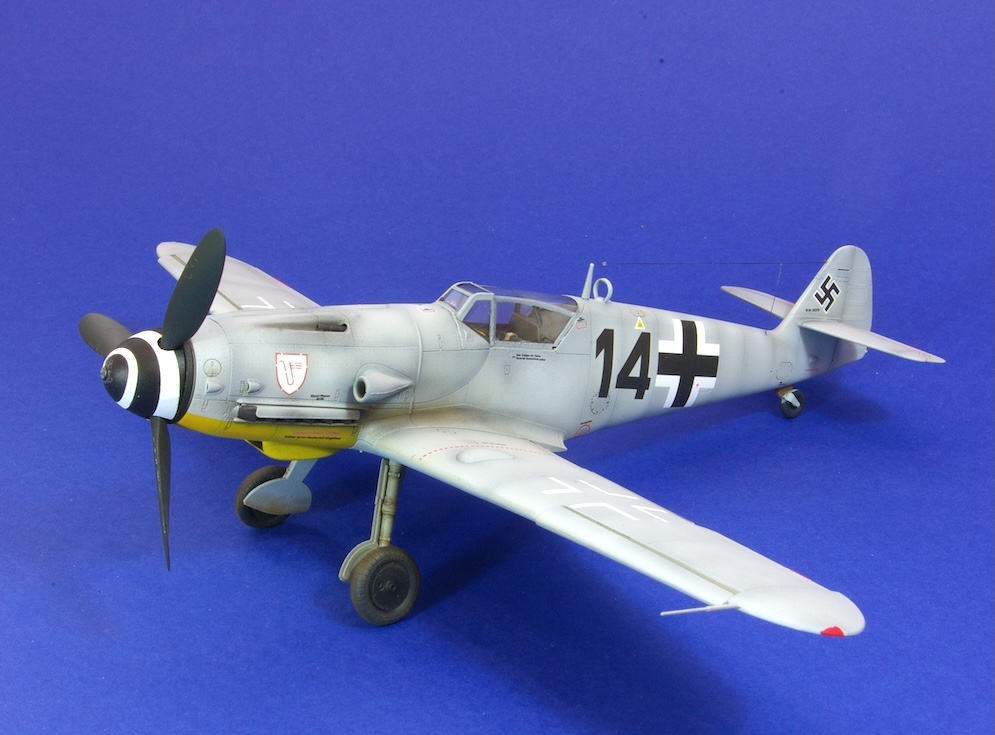
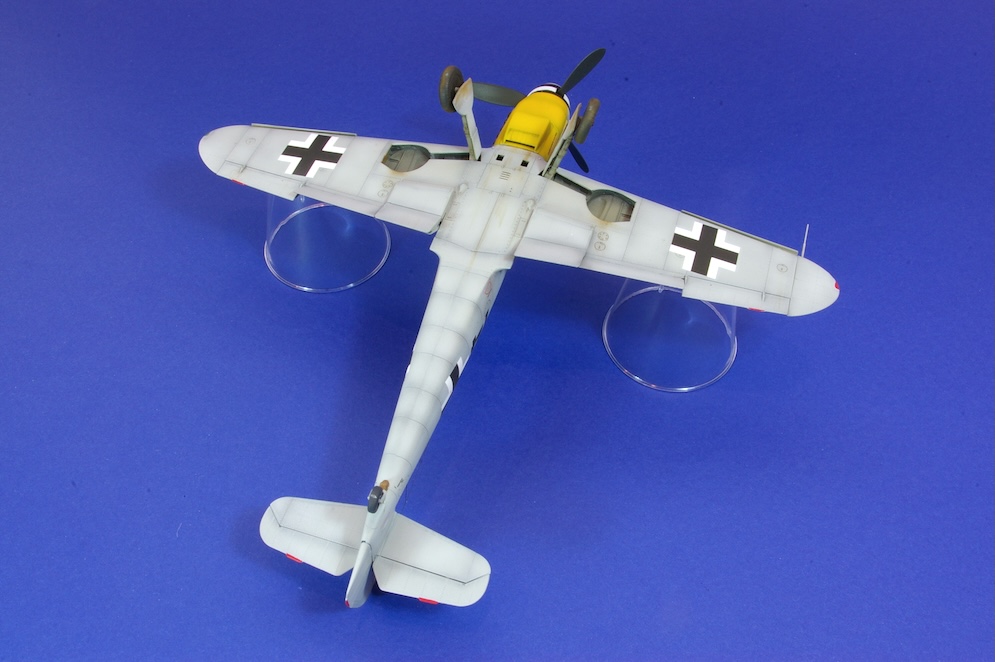
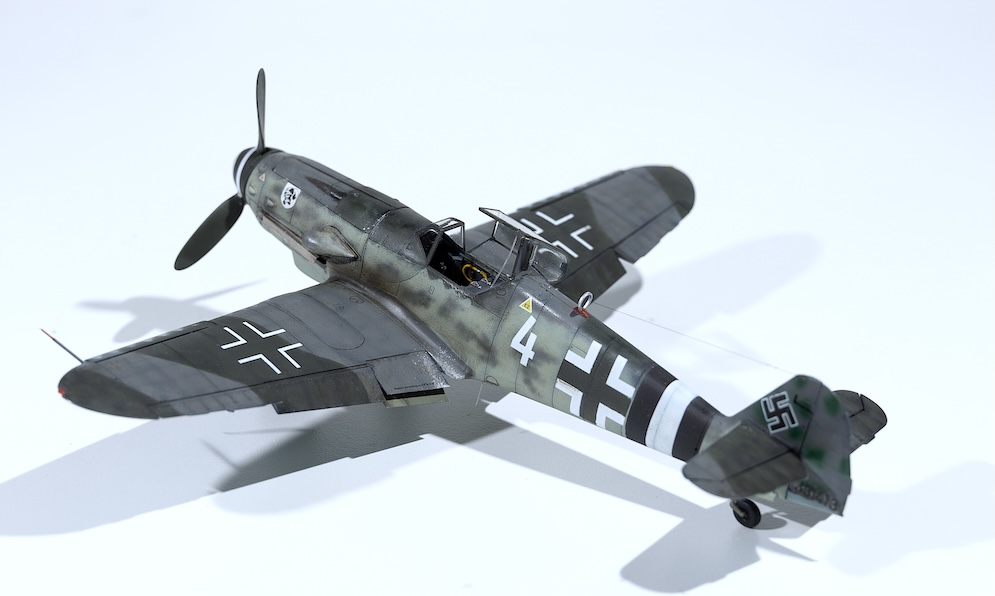
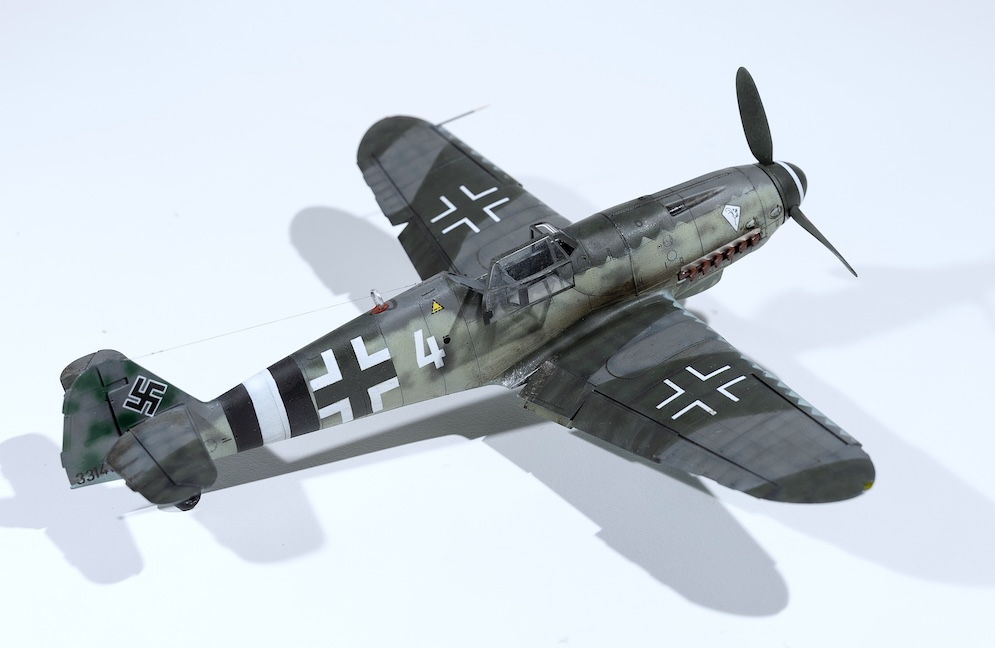
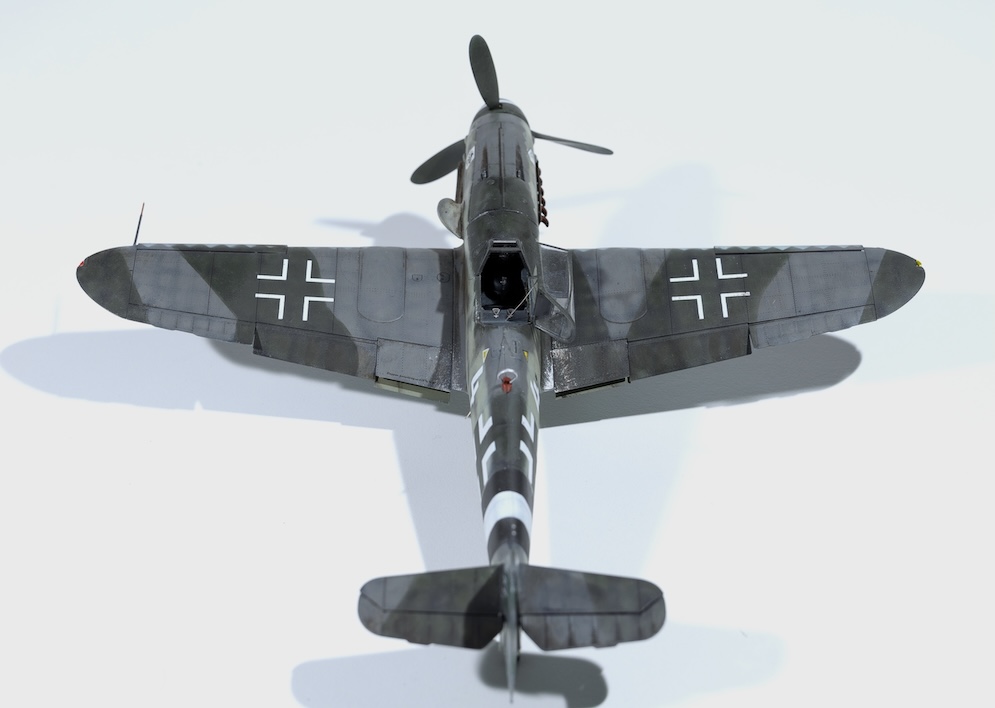
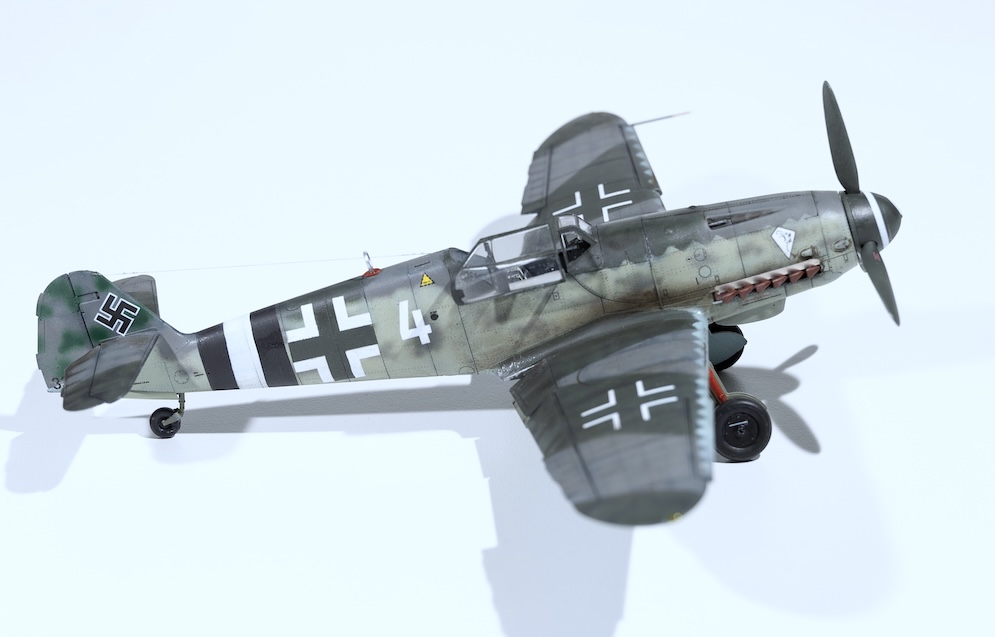
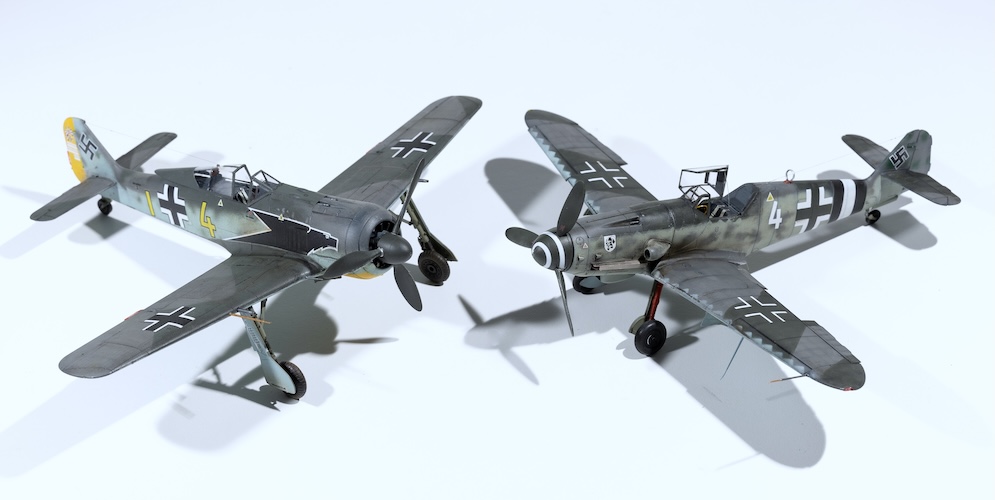
This is my Airfix 1:48 Messerschmitt Bf 109E-3 of JG51. The kit is one of their more recent releases and very nicely detailed and finished.
I just added Eduard seatbelts and made up a brass tube prop shaft assembly; used the Blu-Tack string method for the soft edge camo demarcation. I sprayed the RLM 02 and RLM 71 top side camo first, masked up and then sprayed the RLM 65 lower colour. This was followed by some mottling on the fuselage sides with a mix of 71 and 02.
I used Xtracolor gloss paints and the kit decals which are of good quality and go down very well.
The model was finished off with a coat of Humbrol Matt Cote.
All the very best Roger


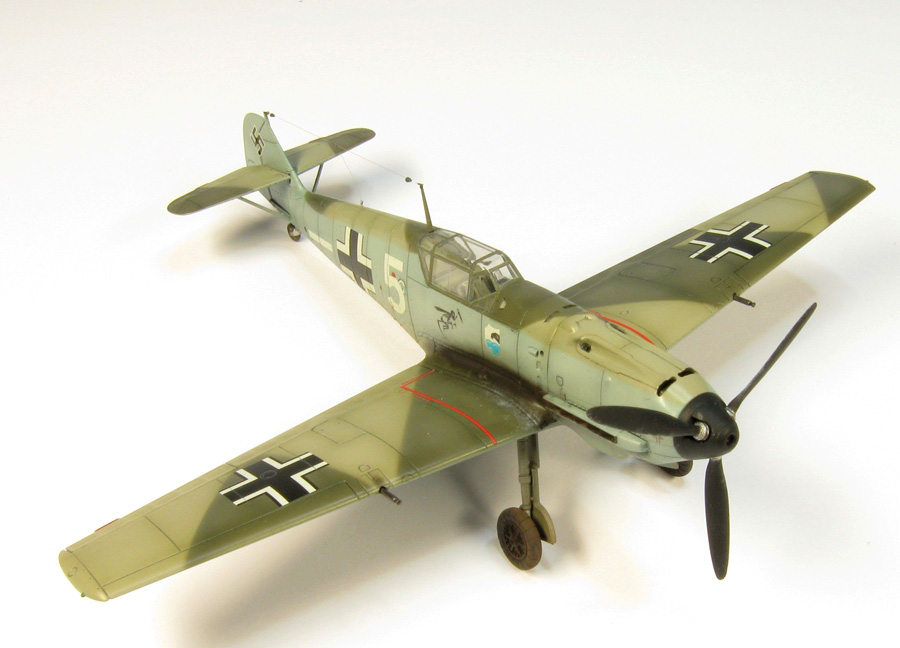
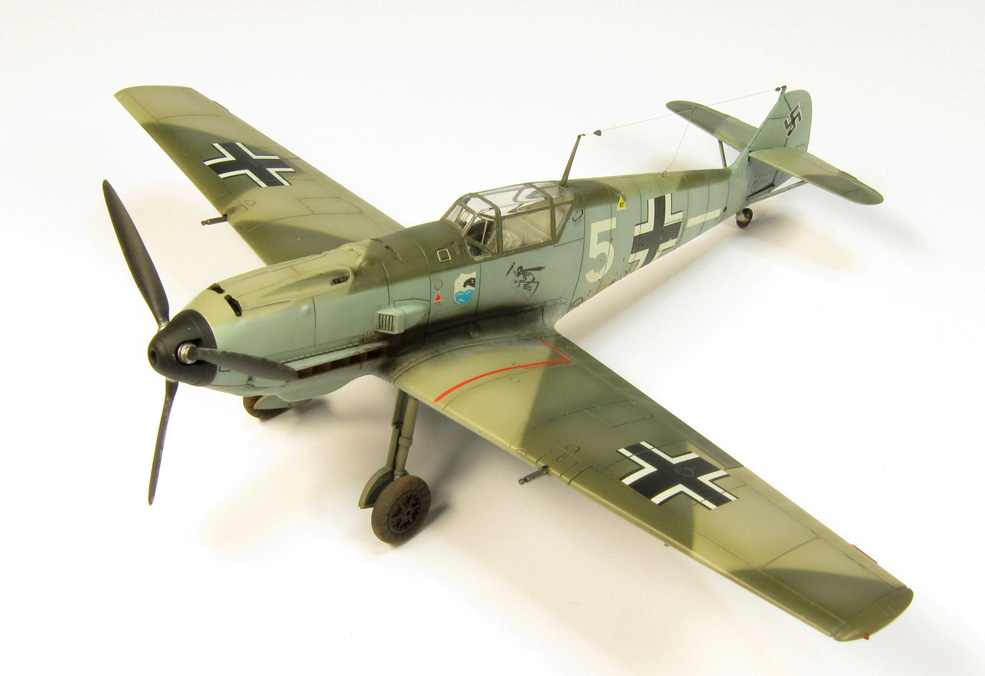
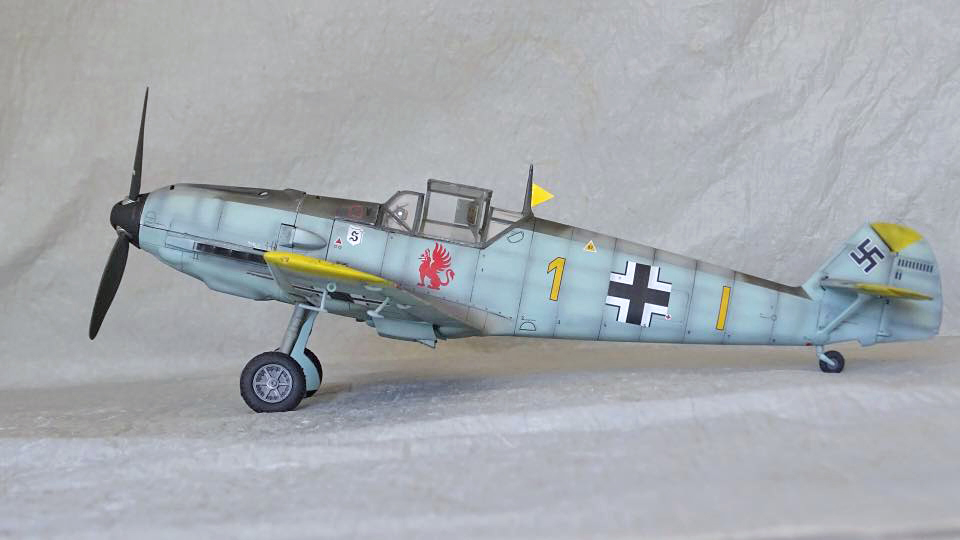
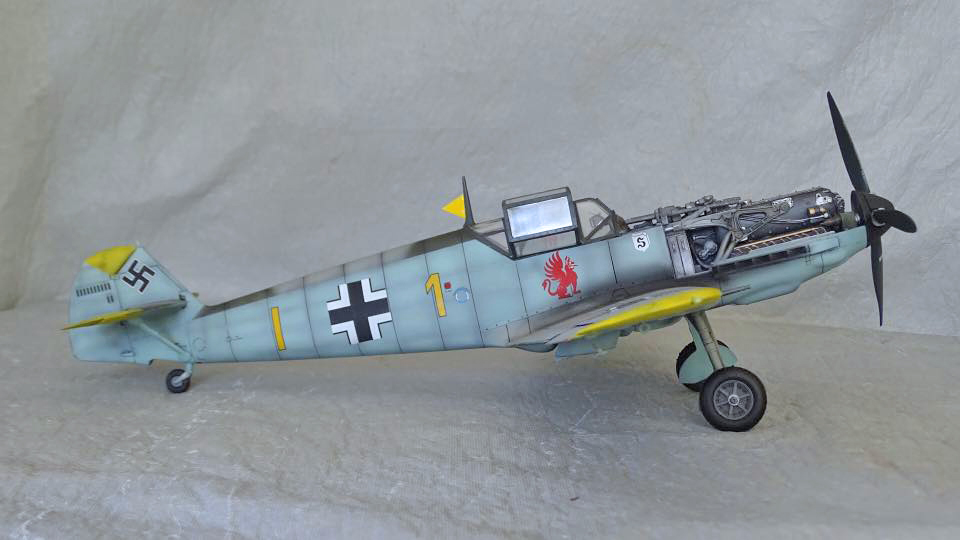
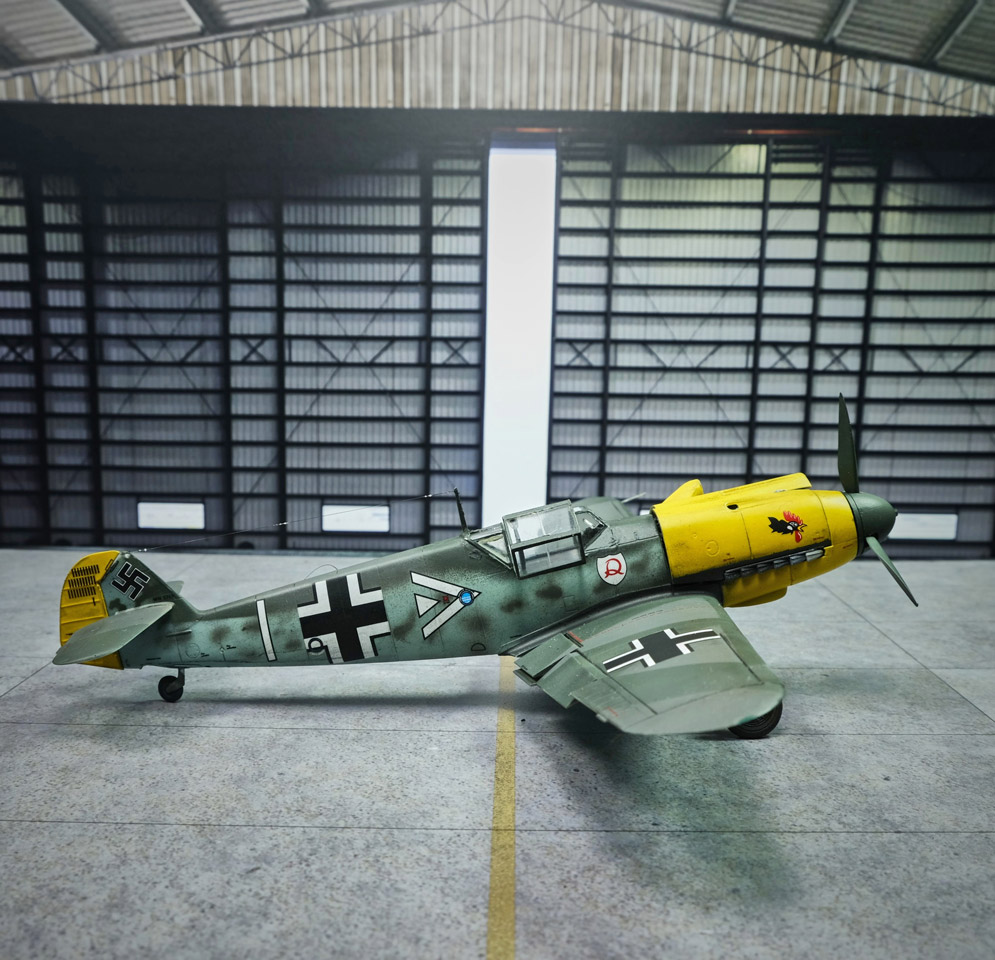
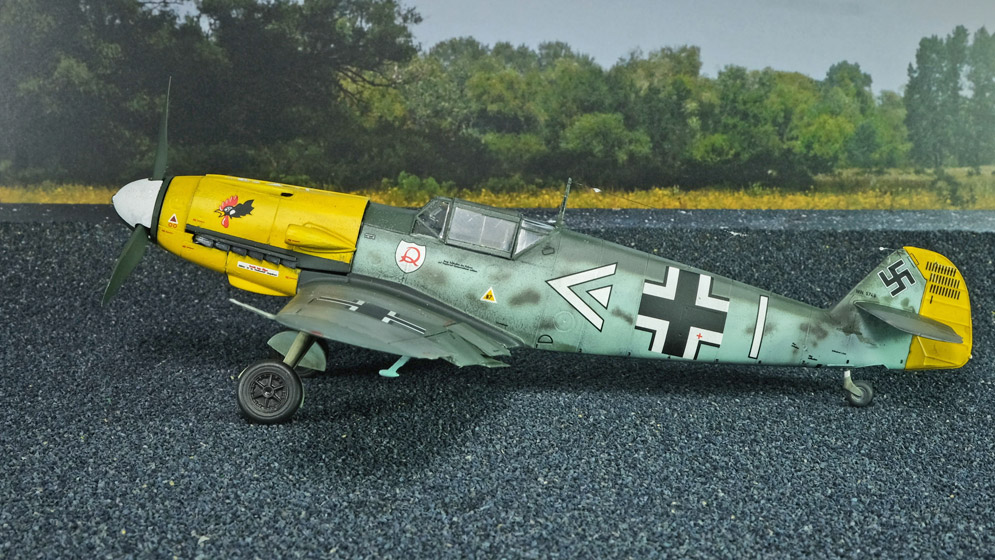
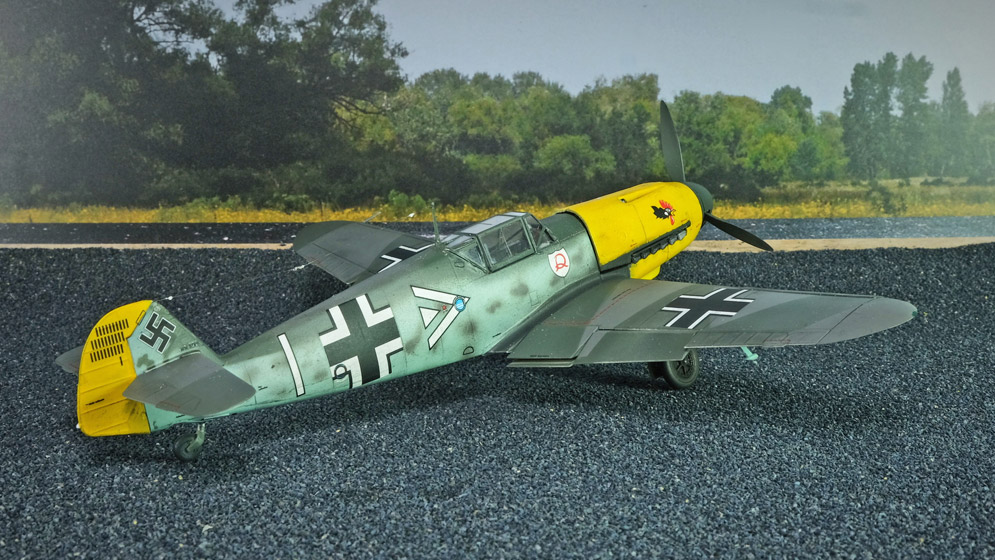
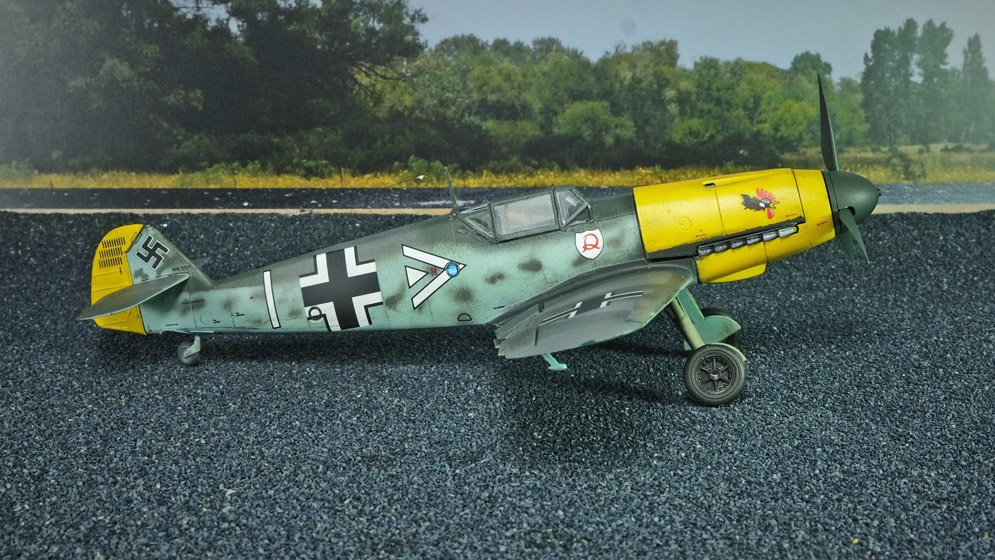
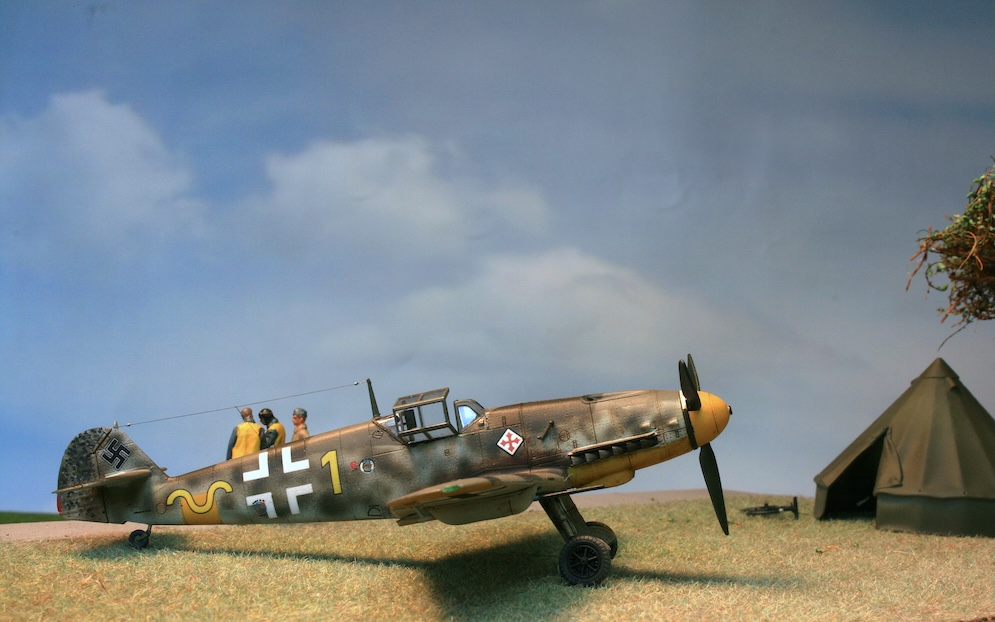
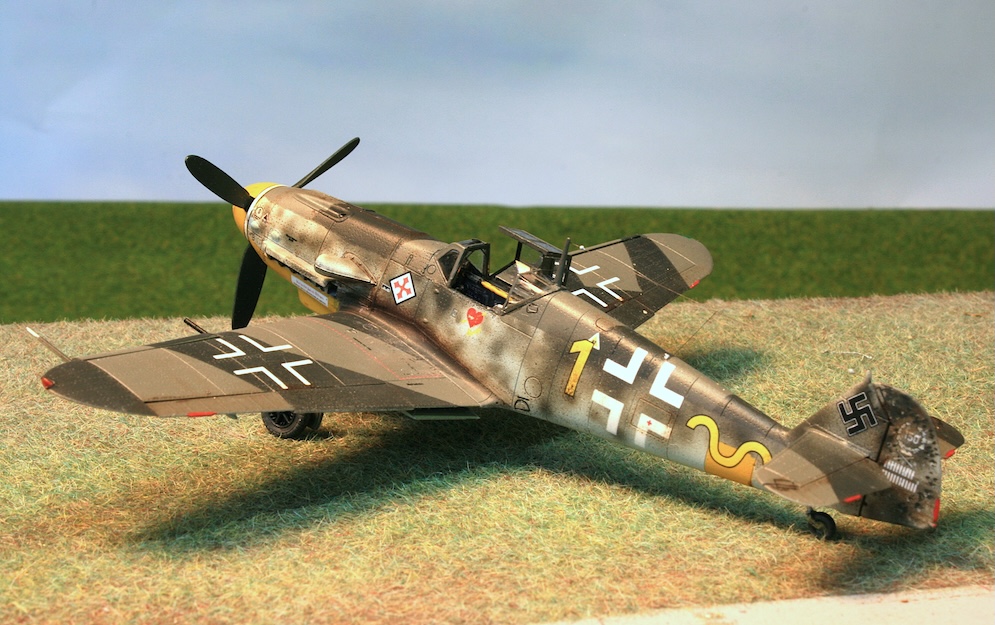
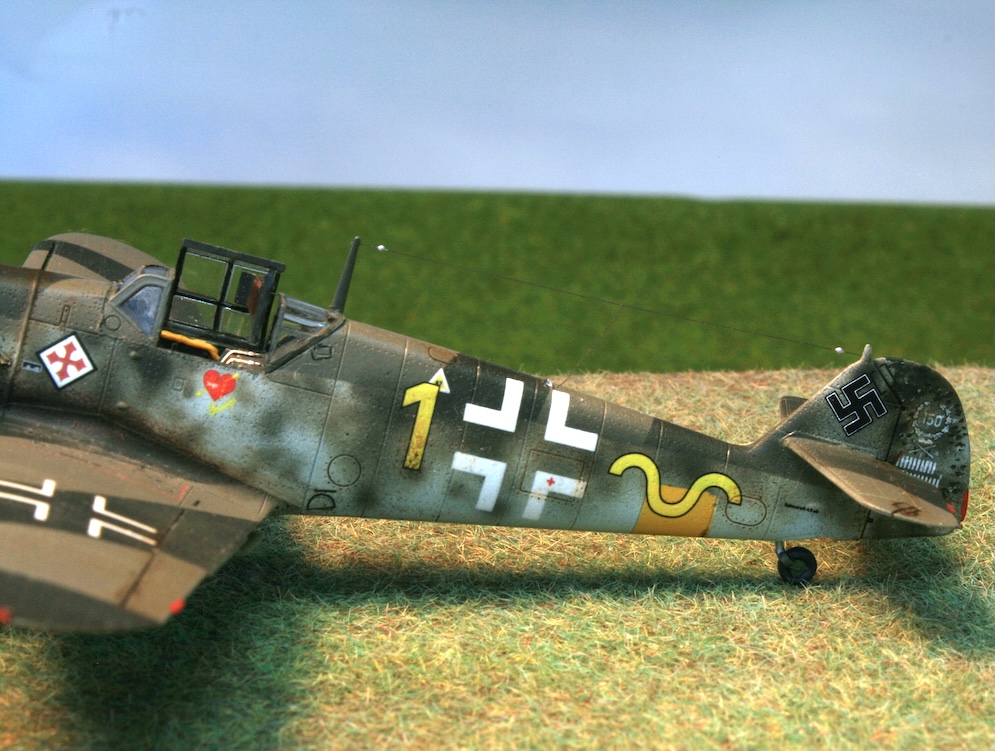
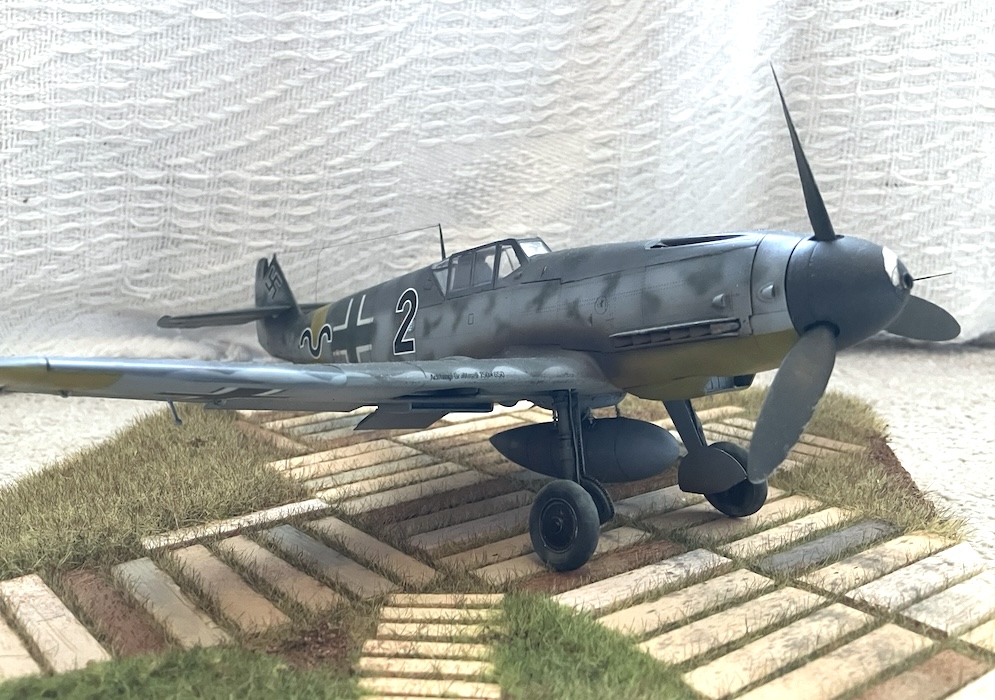
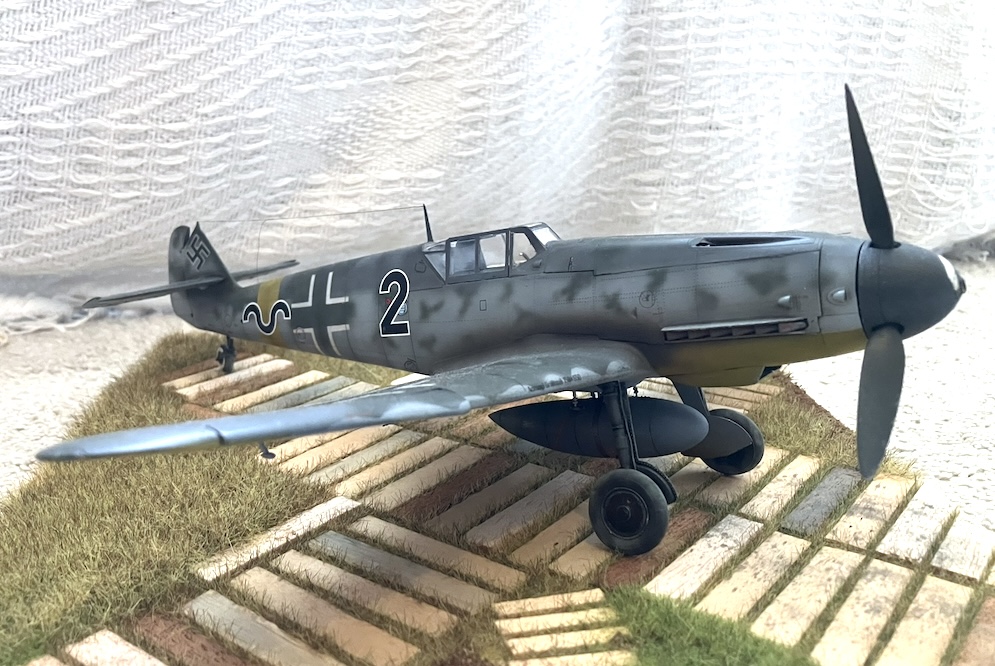
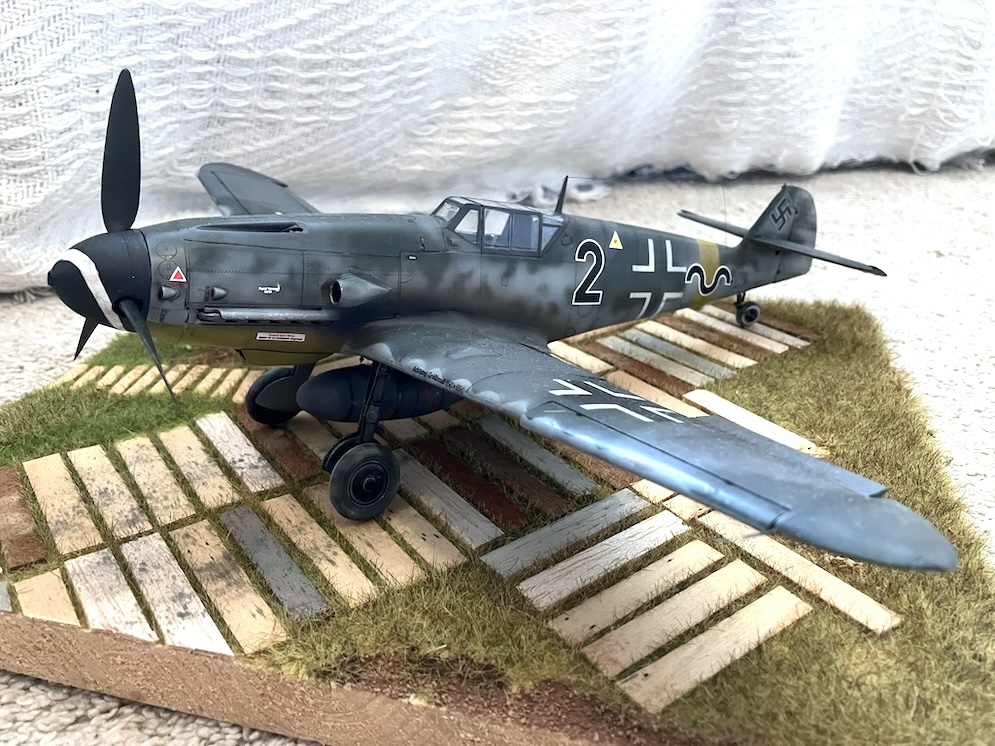
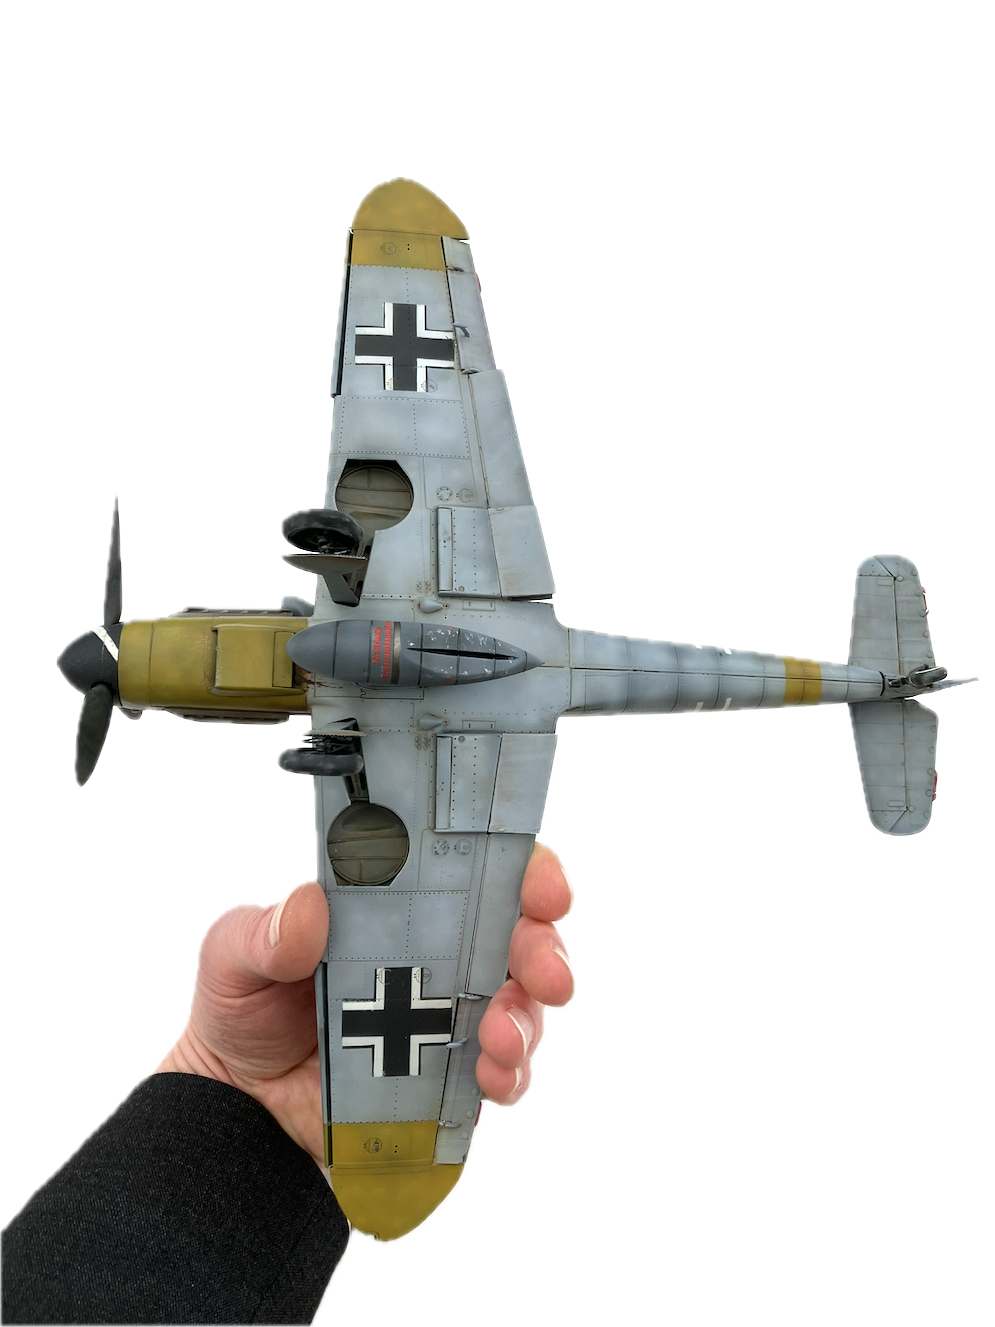
I wanted to do a I/JG52 aircraft whose markings you don’t see so often for 1940’s 109s. This is how I believe their aircraft looked before the yellow paint arrived in mid-August 1940. I was inspired by the memoirs of the pilot in this Gruppe Ulrich Steinhilper, translated into English as ‘Spitfire on my tail’. He was shot down towards the end of the Battle by which time only around 1/3 of their original pilots who started the battle remained, much like their English counterparts.
I did struggle somewhat with getting the nose cowling to fit and the propeller cone to come together but am pleased with the overall look.
Hope you like it?
Andrew Johnson
Hope you all like it.
Andrew PP.
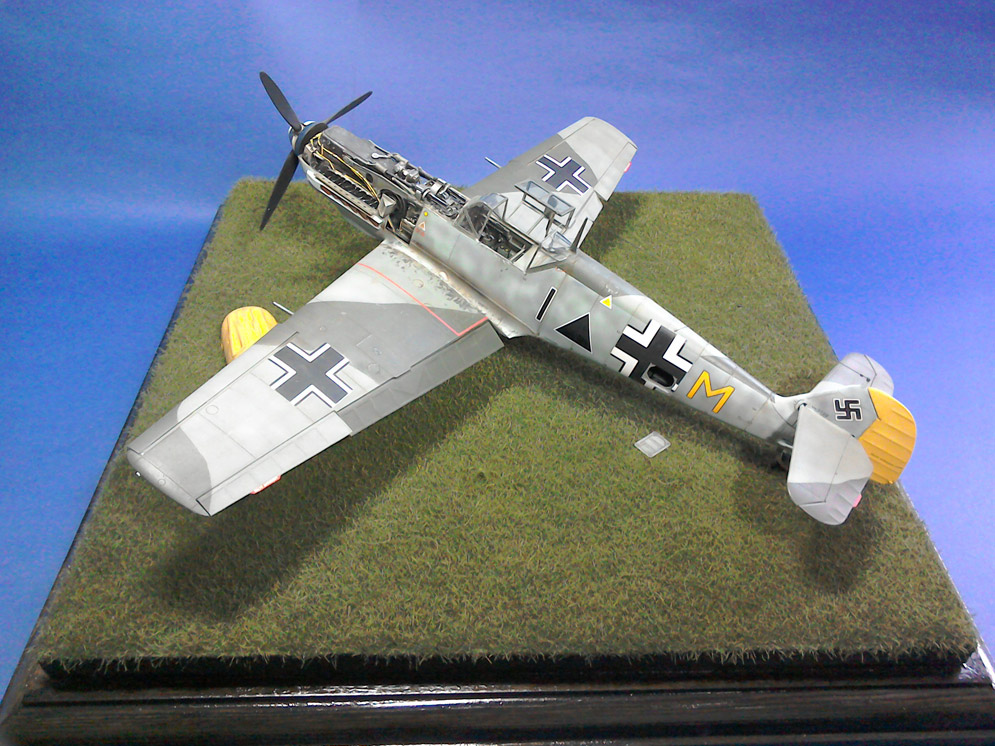
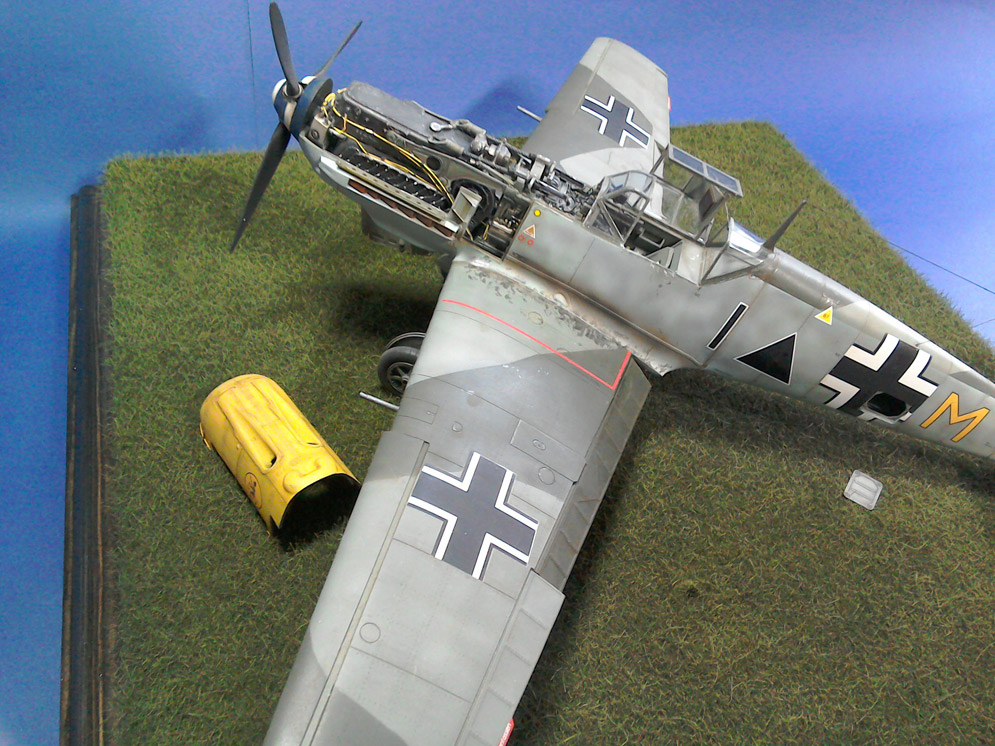
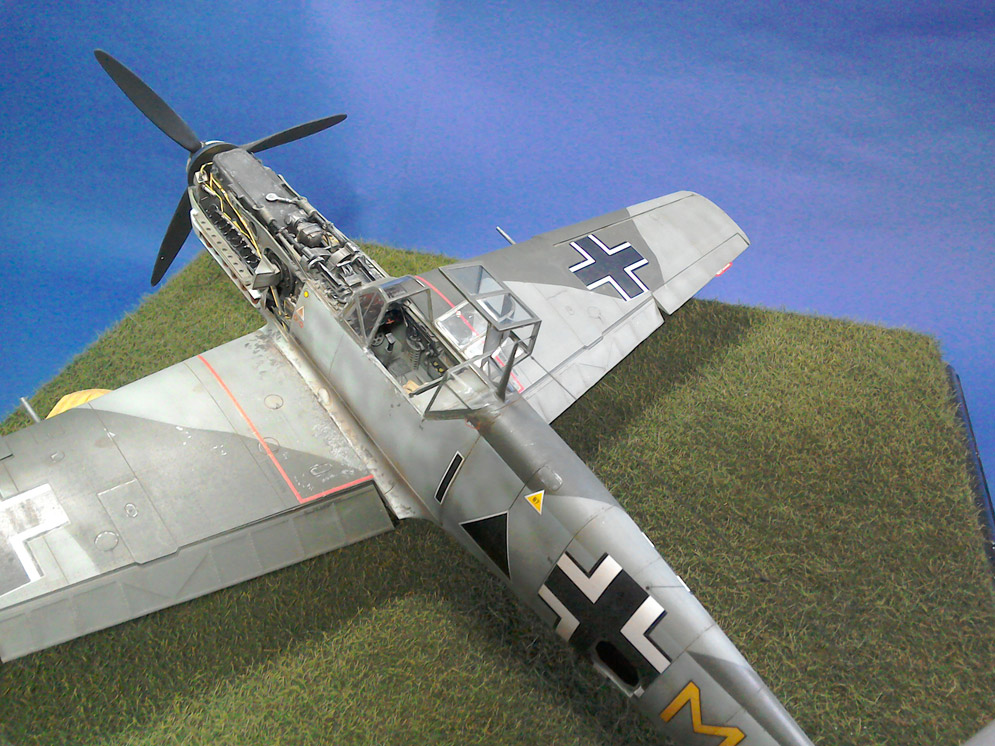
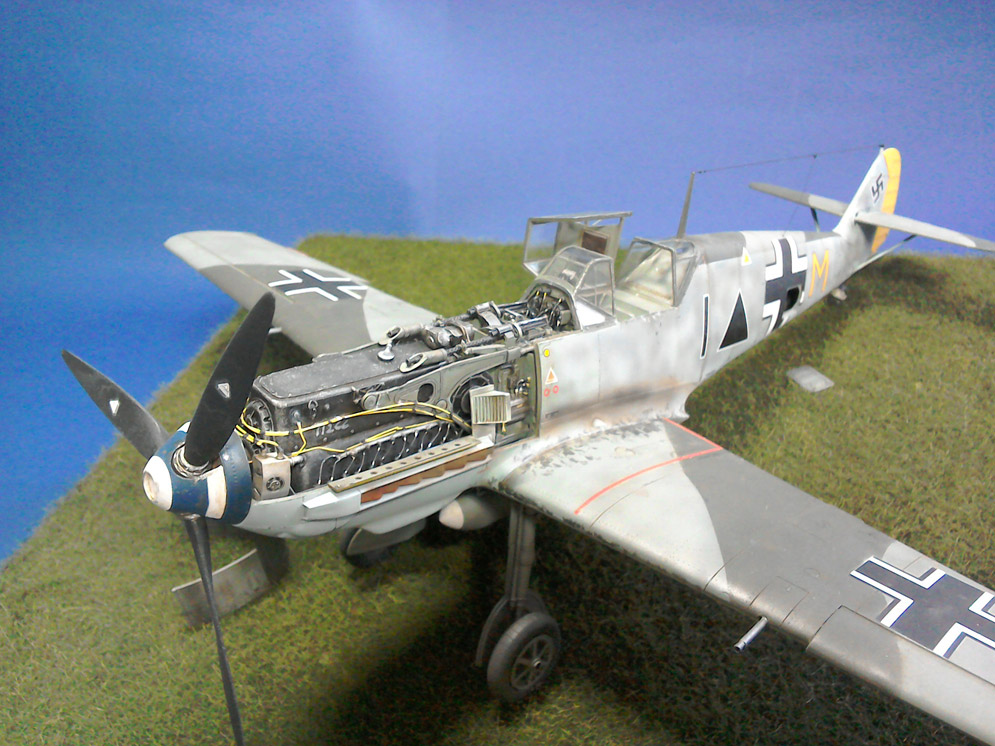
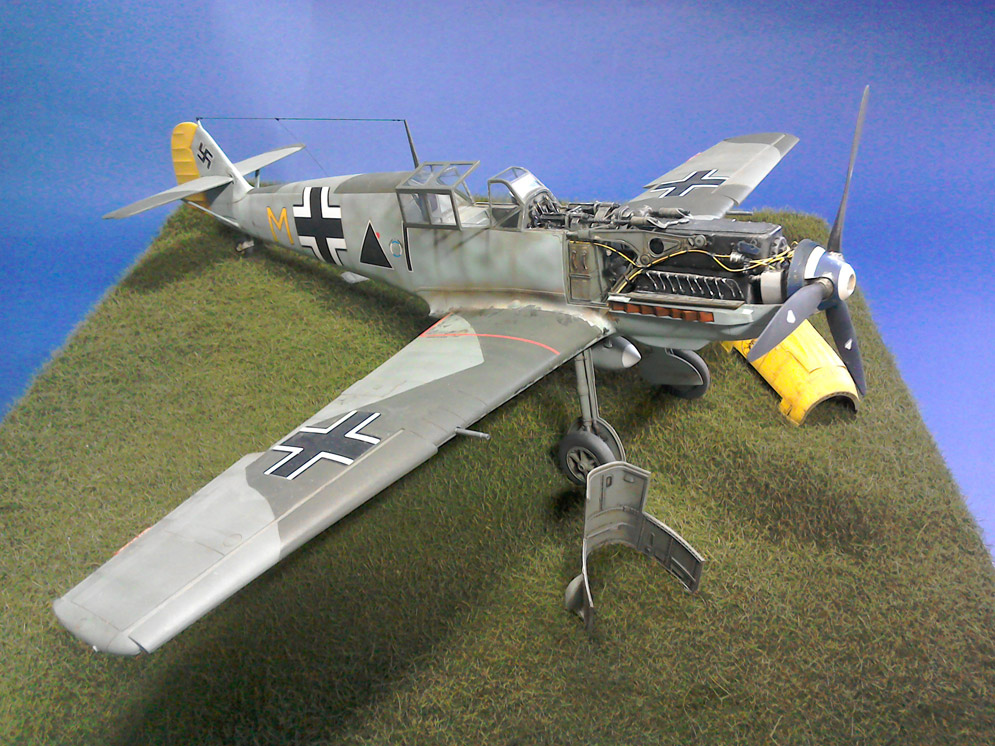
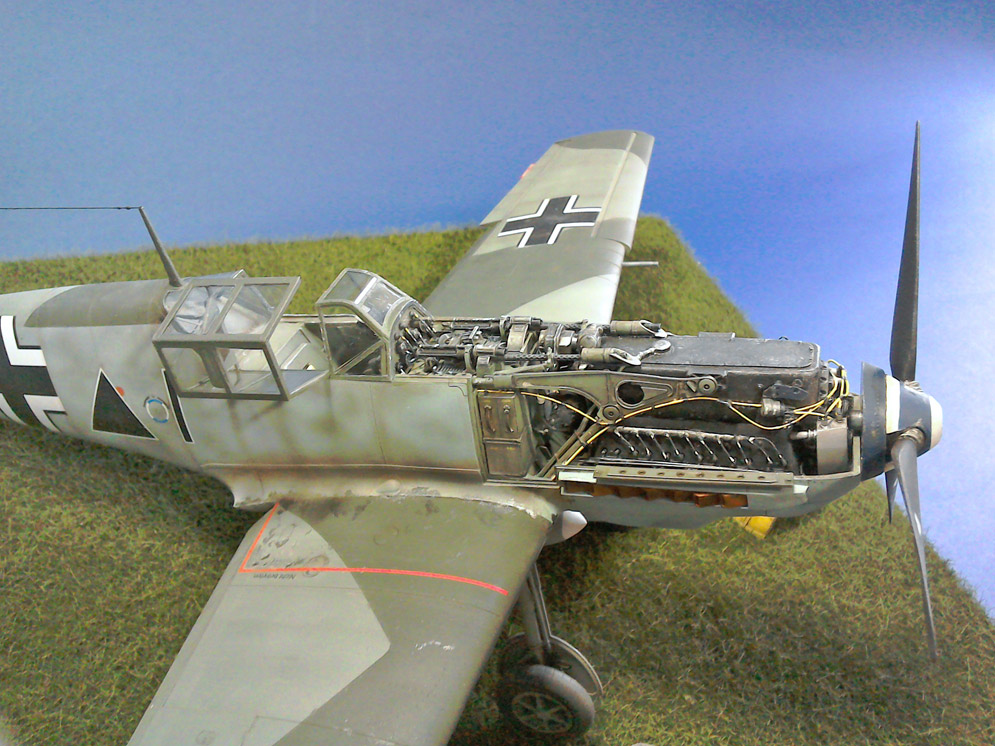
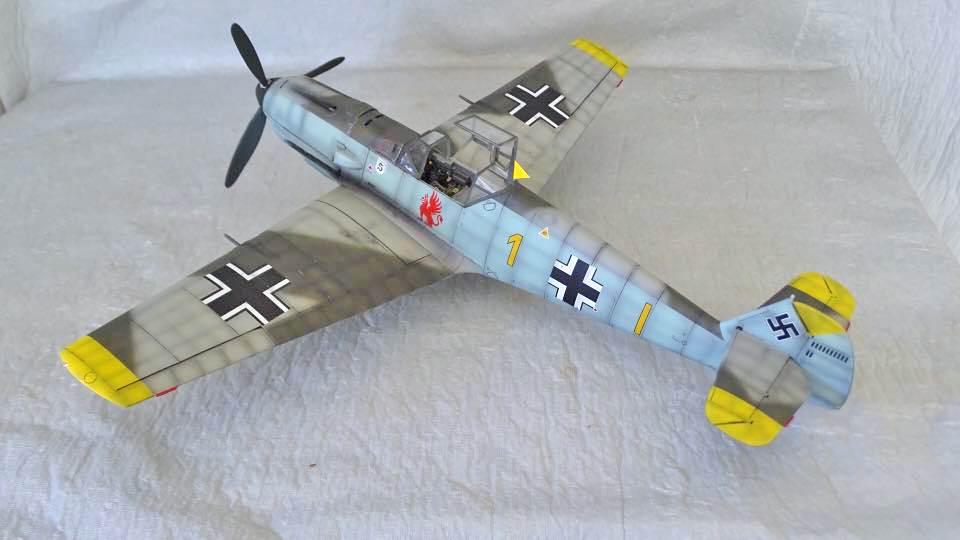
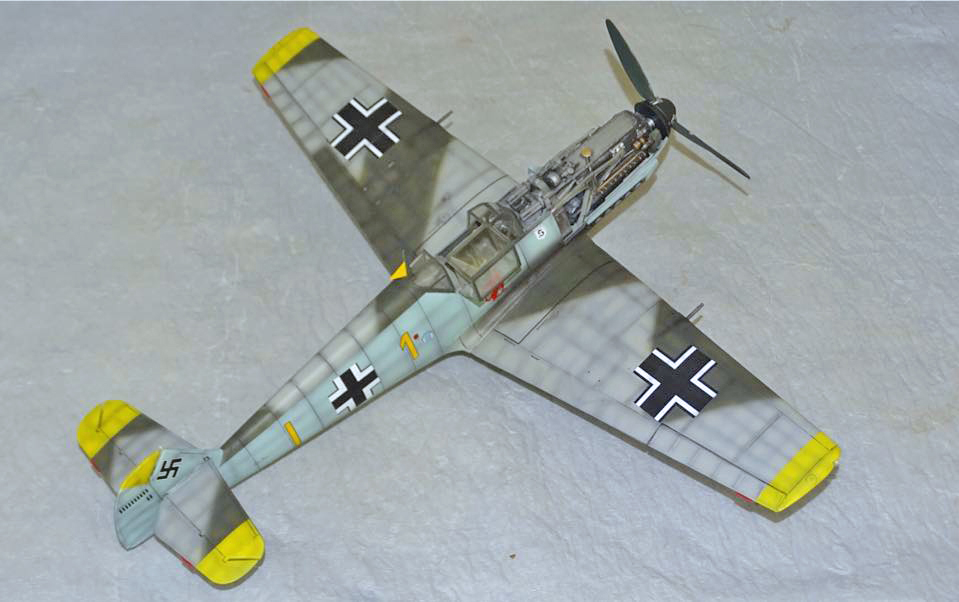
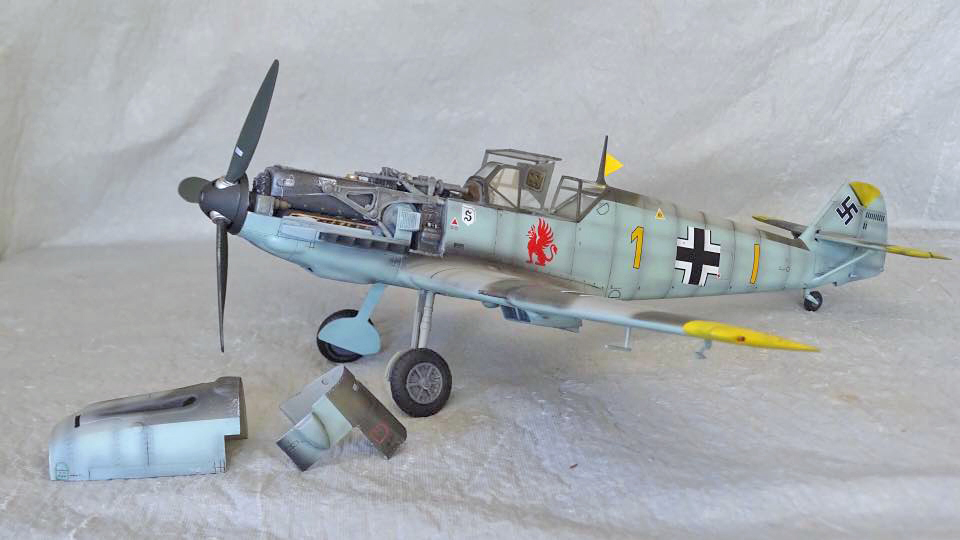
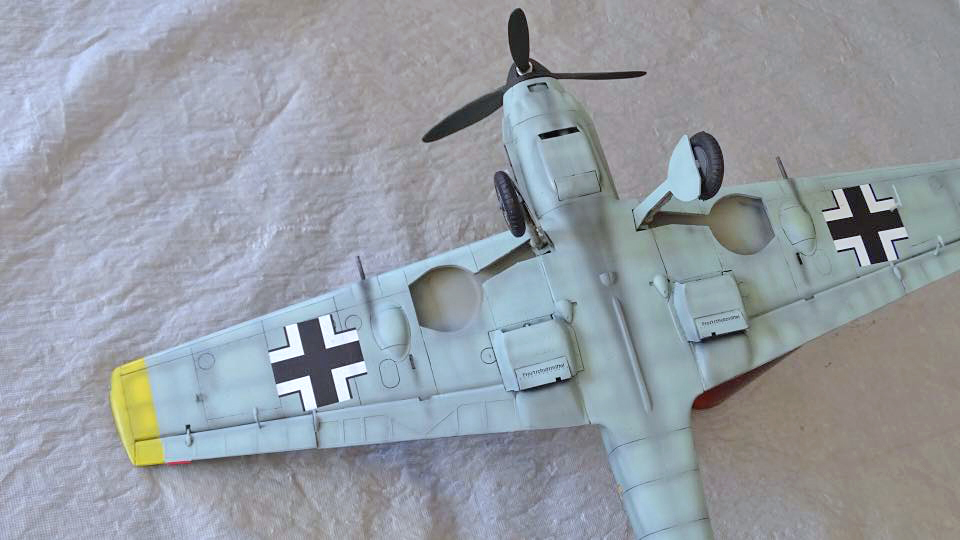
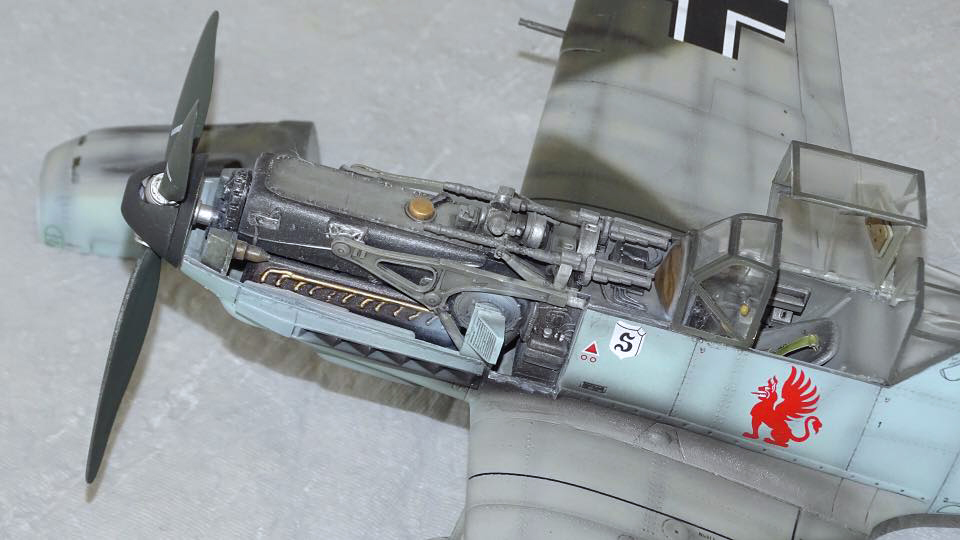
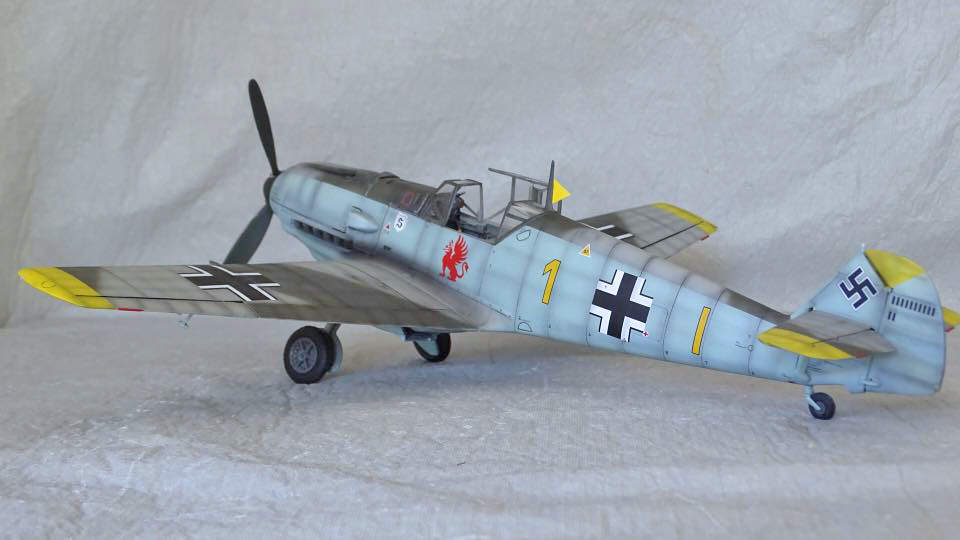
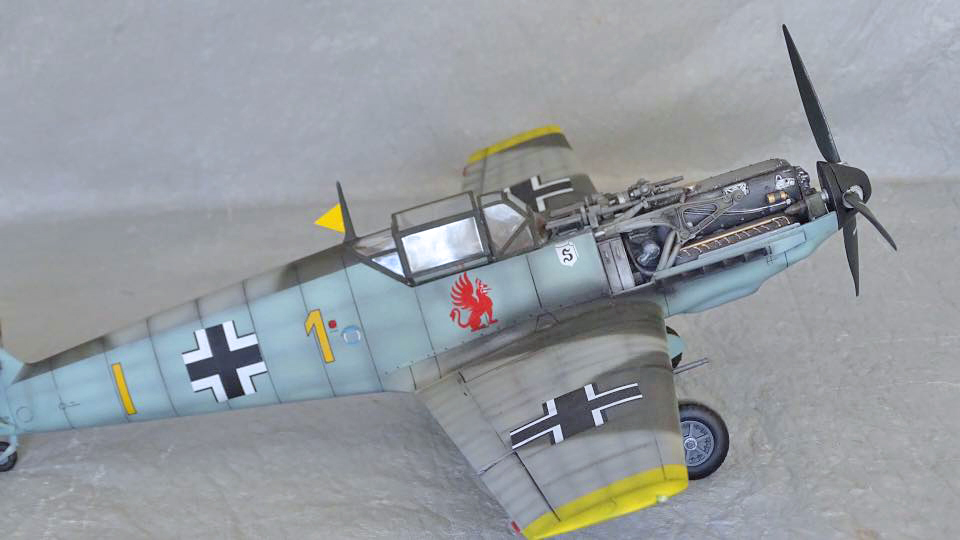
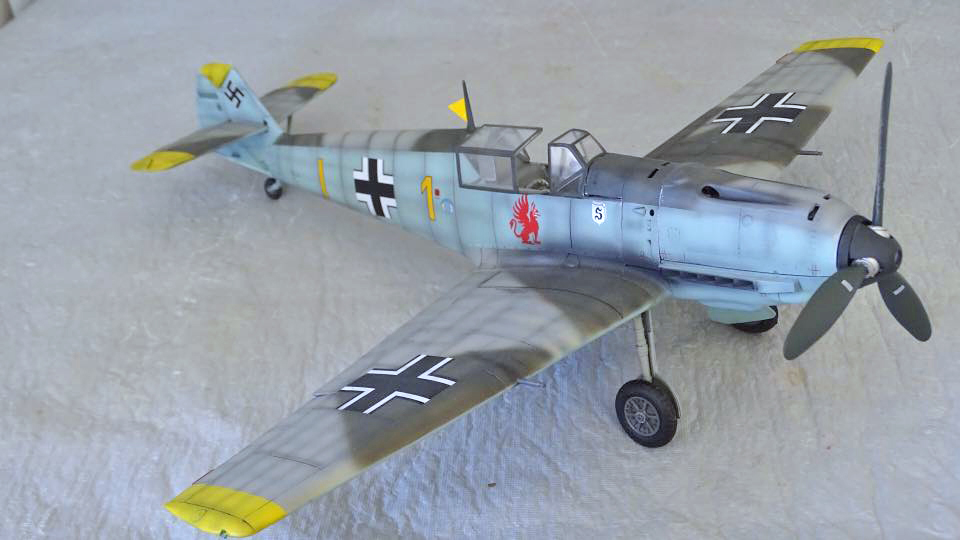
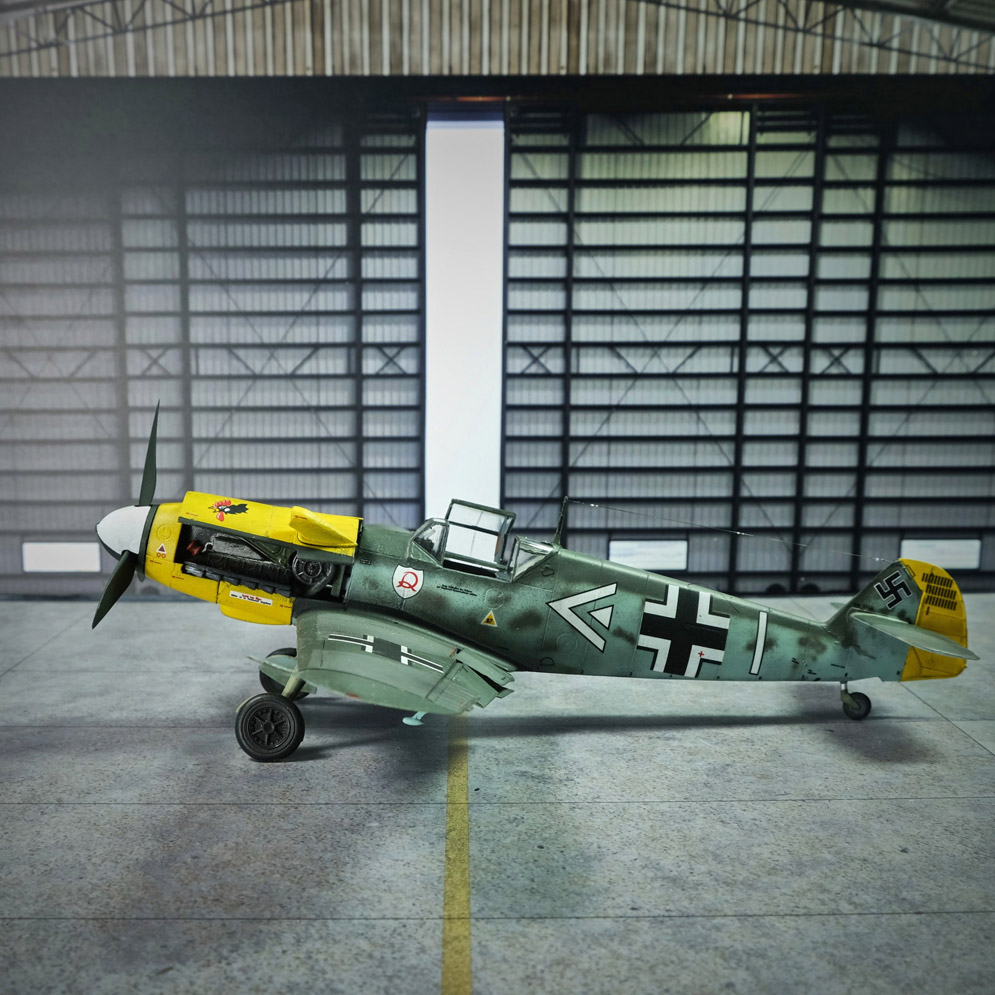
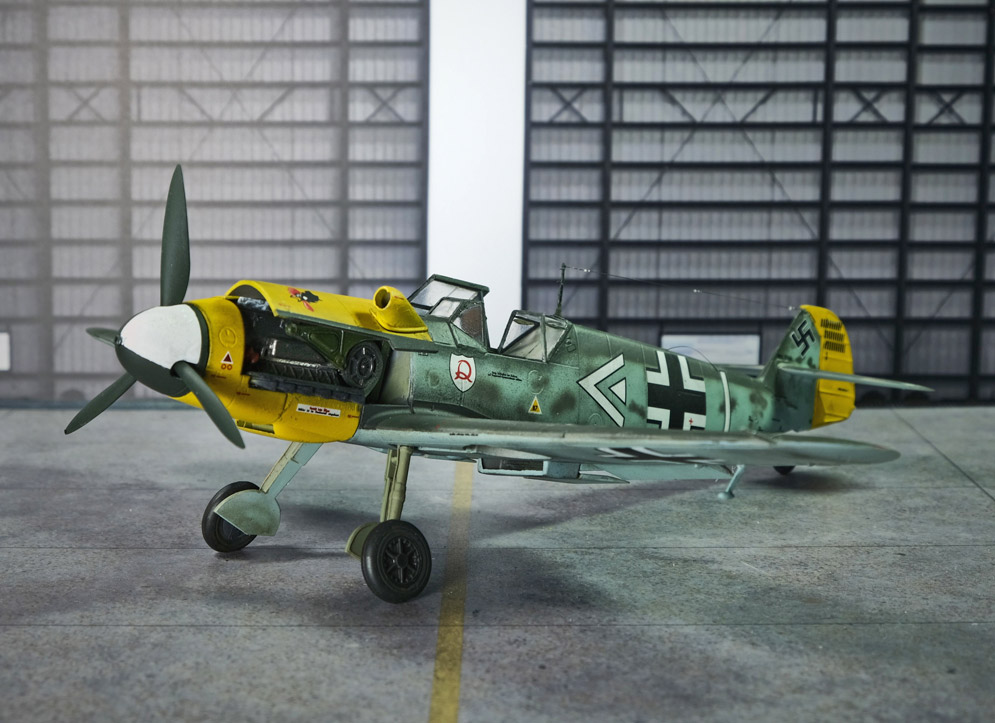
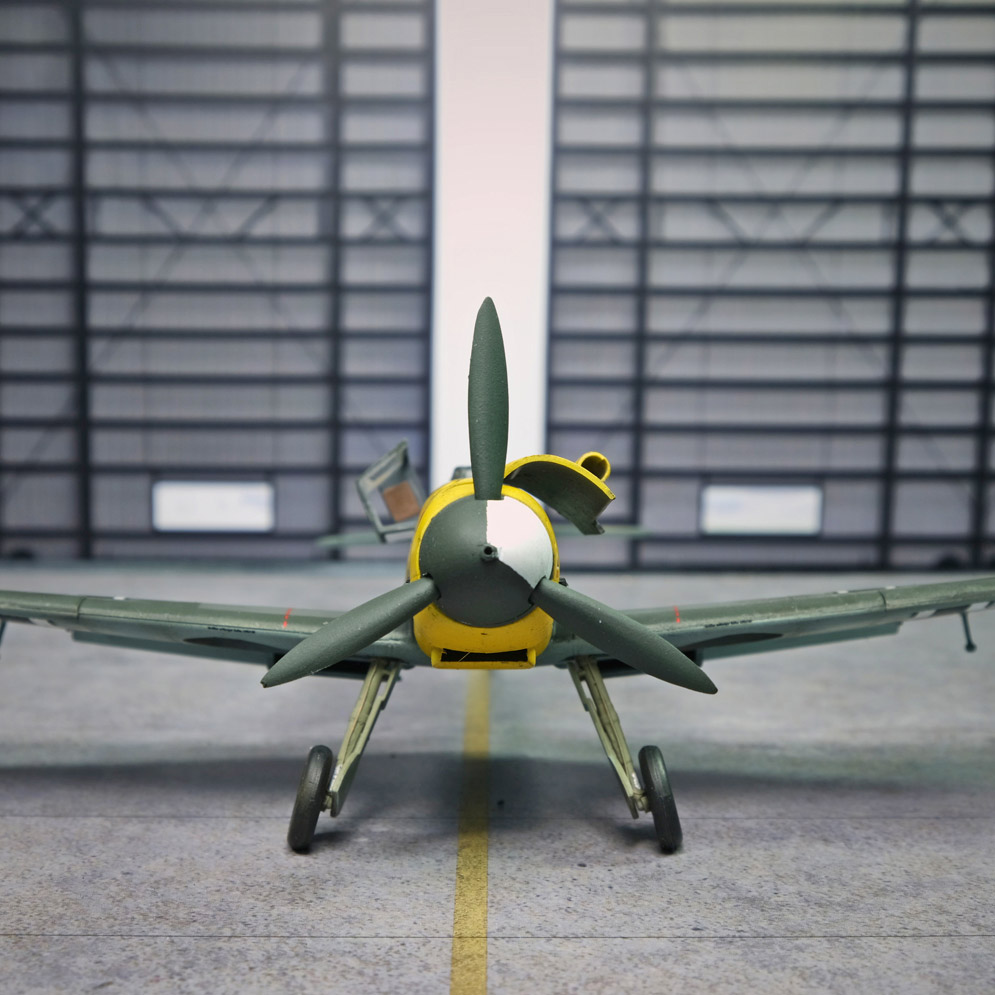
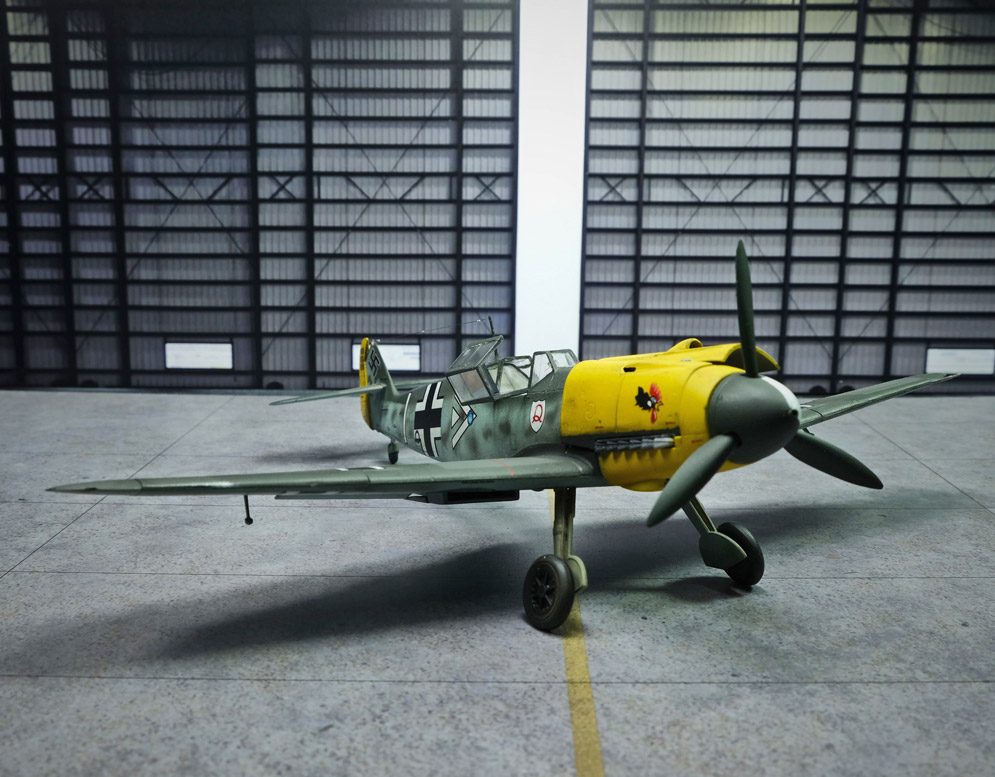
I used the Eduard “Brassin” updates for the engine and gun bays, and an Aires radio compartment (small access panel removed on fuselage where cross marking is located on port side of fuselage). The “plumbing” around engine and sections of gun bay’s were applied myself made from stretched sprue.
Hope you all like it!
Ian R.
Cheers!
Andrea B.

I didn’t open the engine bay has I’d recently built another Eduard 109 kit with all the engine and gun covers removed to show interior workings.
Hope you like it?

This is Revell’s boxing of the ICM sprues with Cartograf decals.
My first ever WW2 Luftwaffe aircraft, so stocked up on the Vallejo Model Air RLM set for the camouflage and using some Tamiya X20A, they airbrushed very well and was please with the effect.
Built out of the box, just adding some brake lines to the gear legs, some home made belts and lycra thread radio antenna.
Glossed using Alclads gloss varnish, the Cartograf decals are great and all went on well with Micro Sol/Set. Matt finish is Alclad2 Matt varnish.
Although my first Luftwaffe aircraft, unlikely to be the last….Hope you like?
Stuart M.

Gunze and Tamiya exterior with Vallejo interior details. There is a fair bit of tonal variation on the wings and fuselage as I lightened/darkened various panels to break up the monotone RLM79 finish. There is some restrained chipping with a silver pencil.
Tyres flatted and pitot replaced with hollow tube. Everything hanging down. The spinner is held on with magnets. I found it centres more precisely that way and can be easily removed for transport to shows. Amazingly it even spins.
A joy to build notwithstanding the cockpit is pretty busy and a bit of a tight fit here and there, especially the instrument panel.
Keep ‘em coming Eduard.
Rick G.

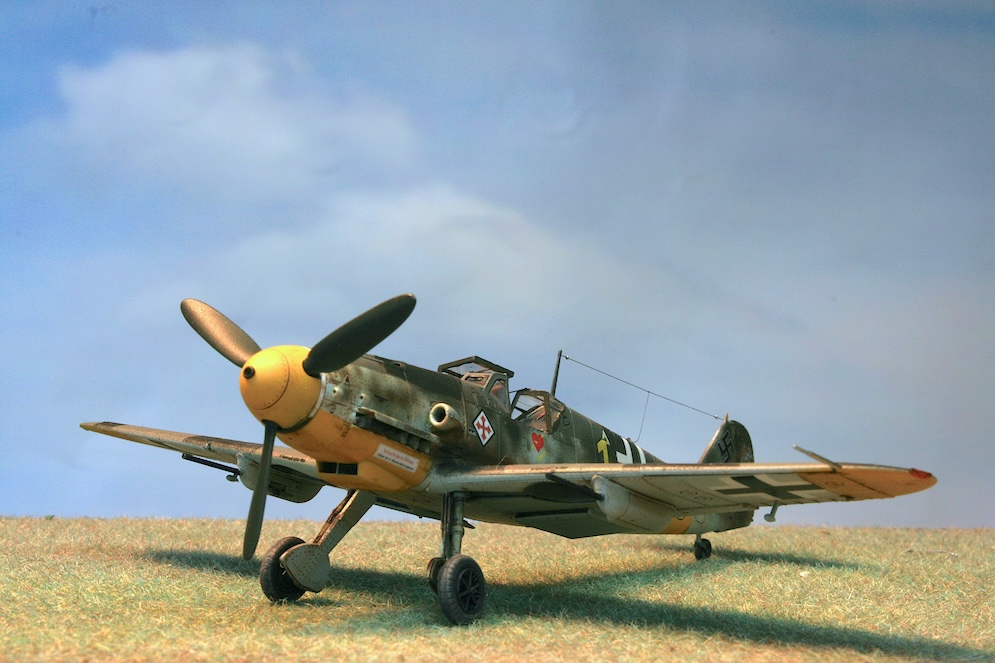
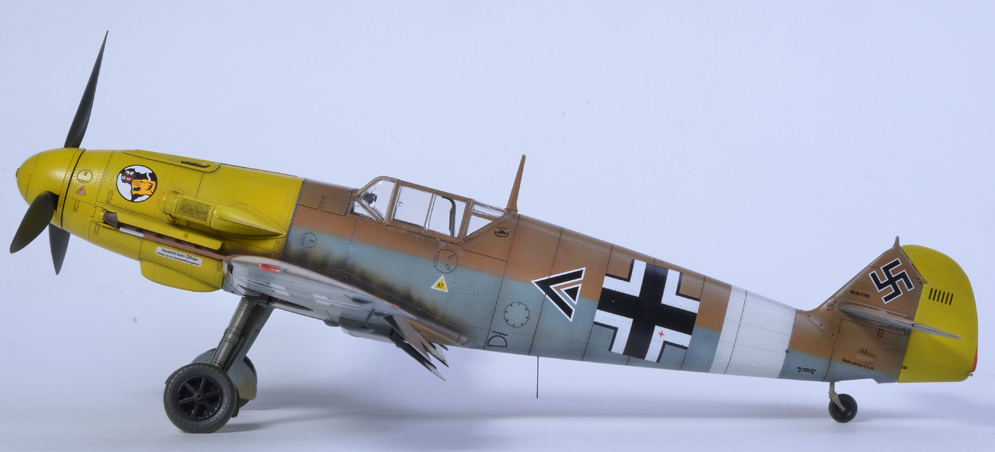
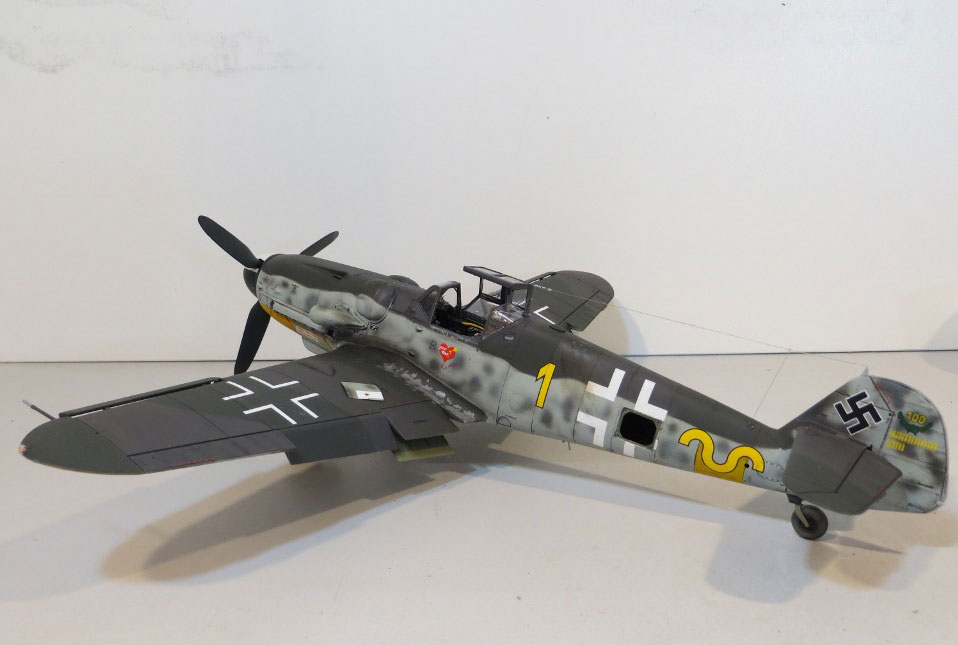
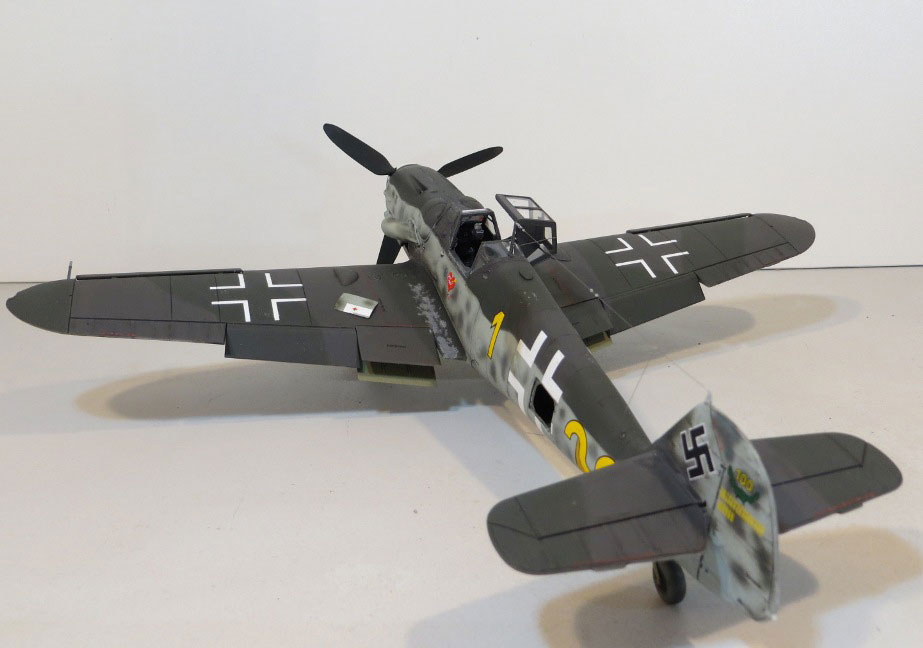
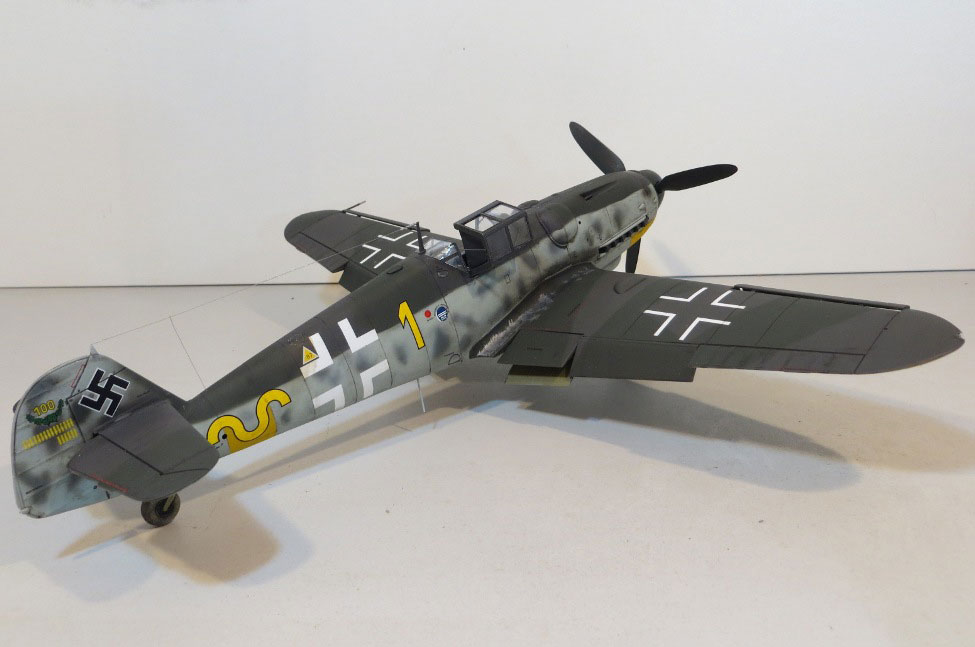
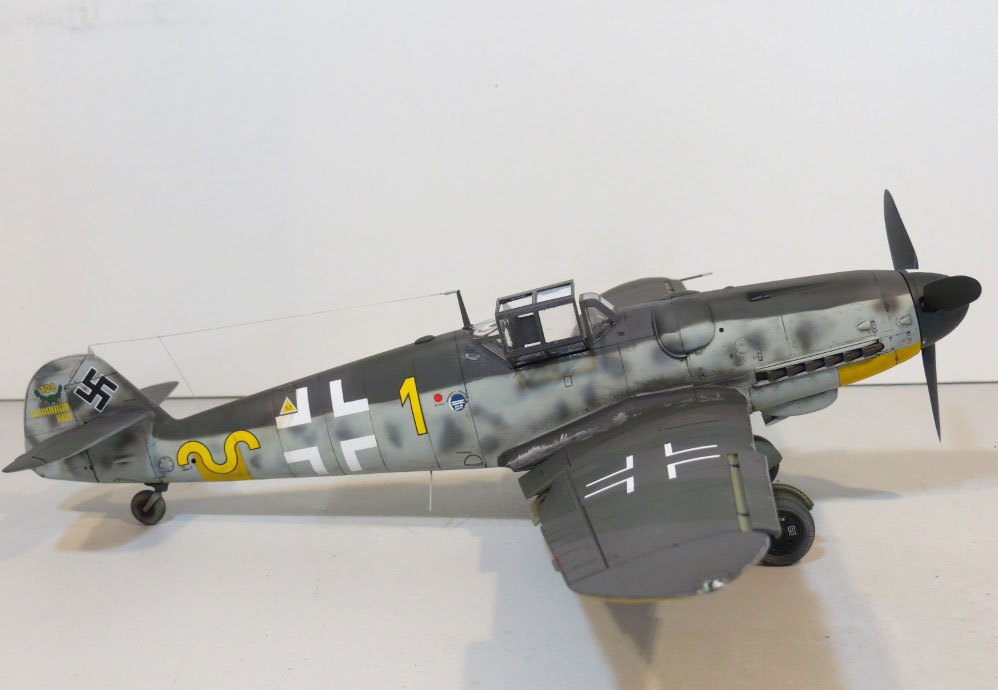
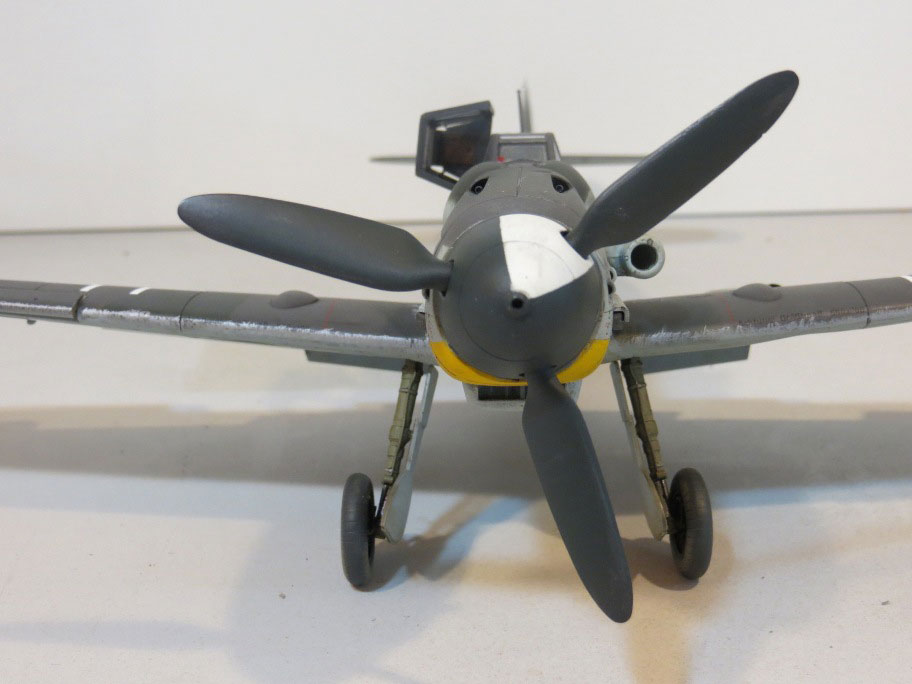
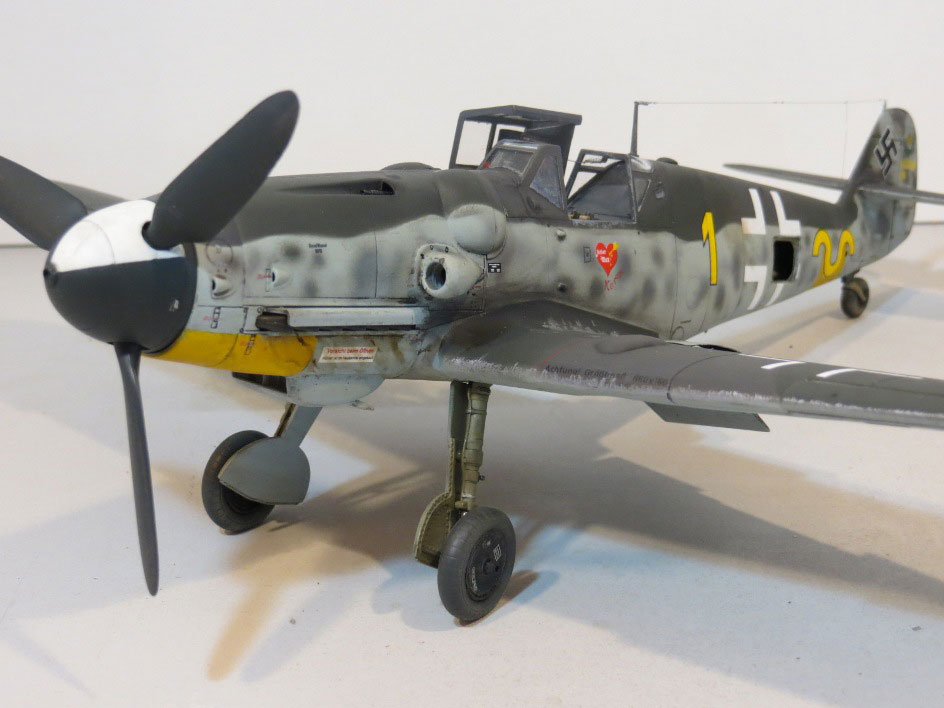
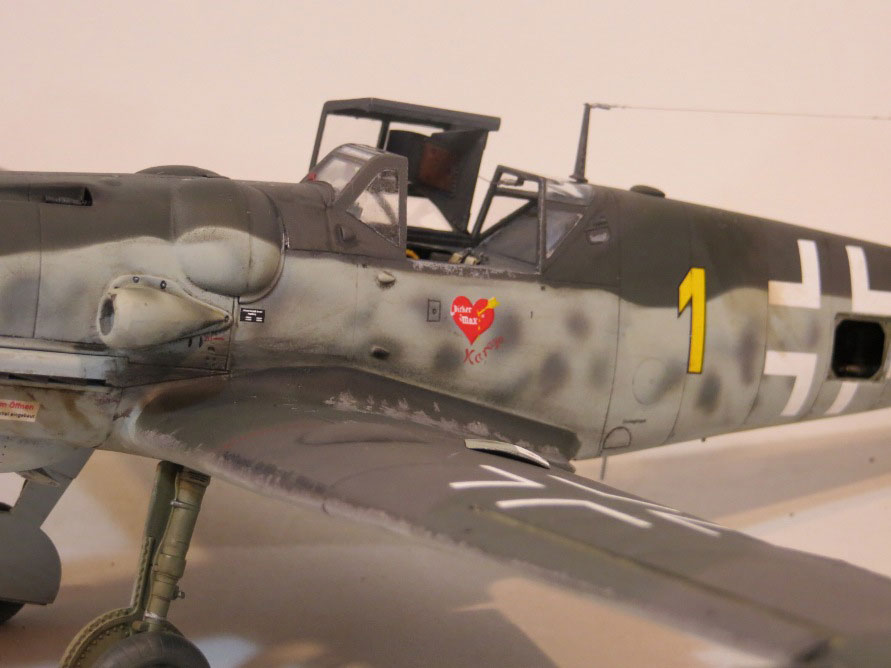
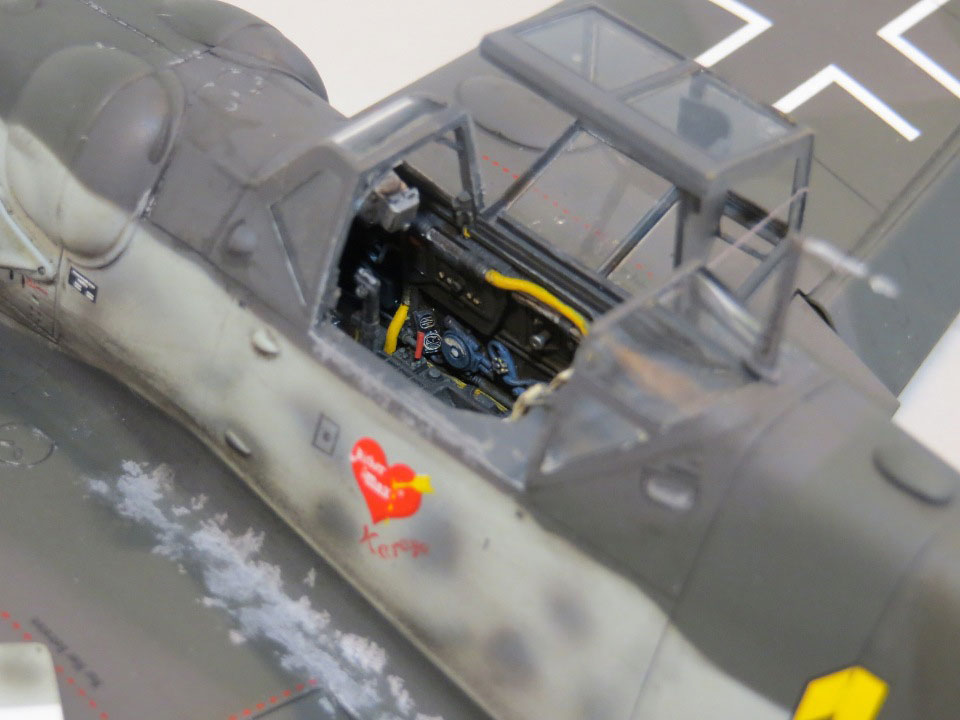
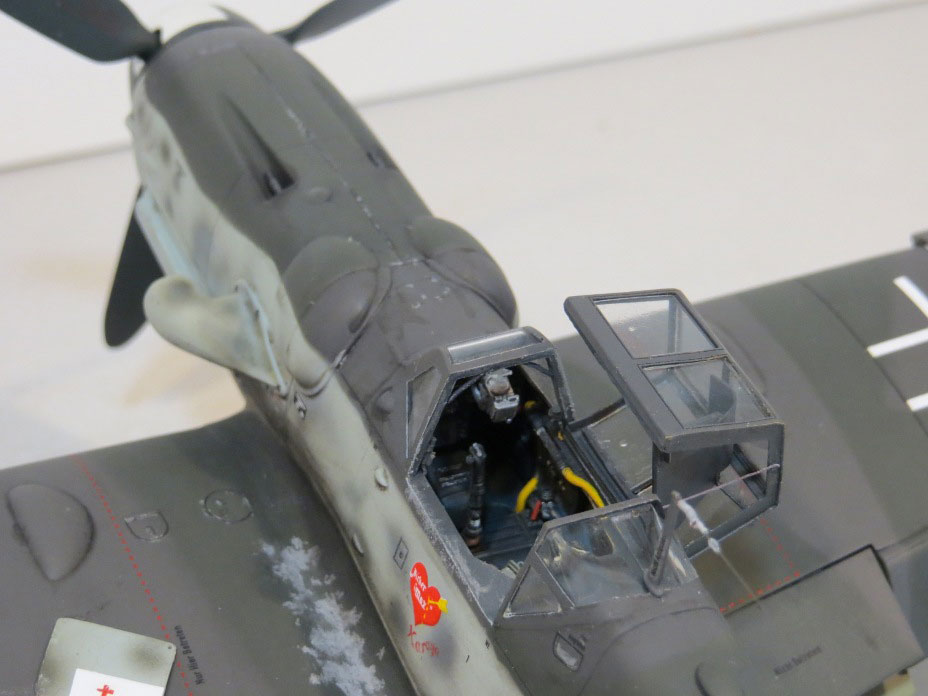
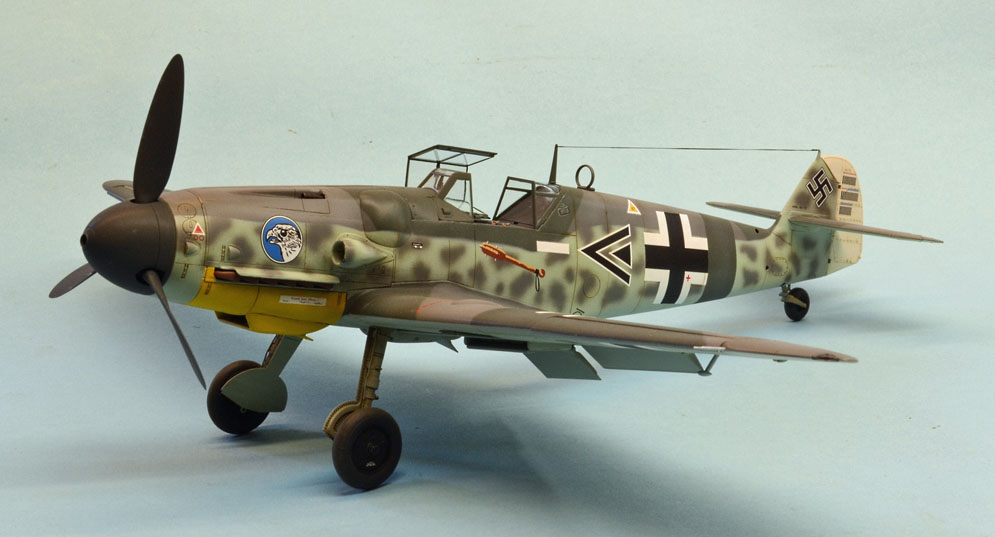
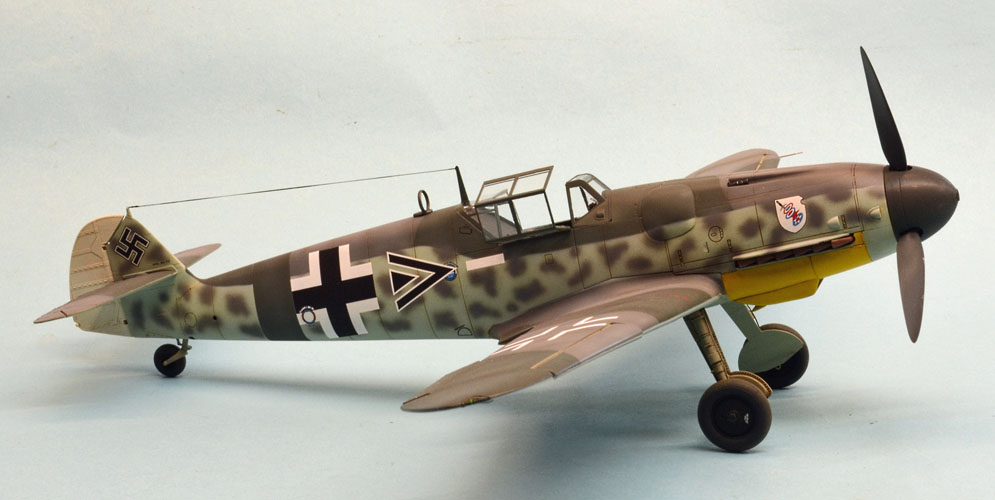
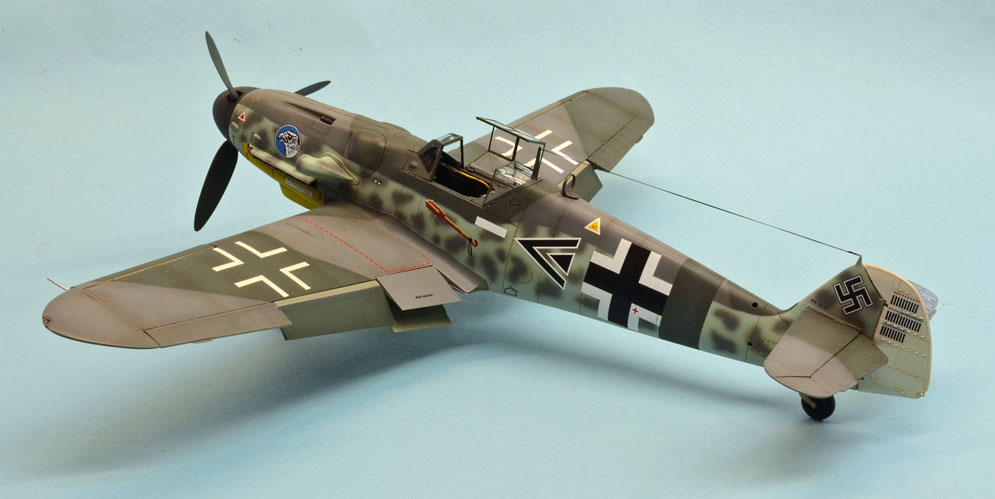
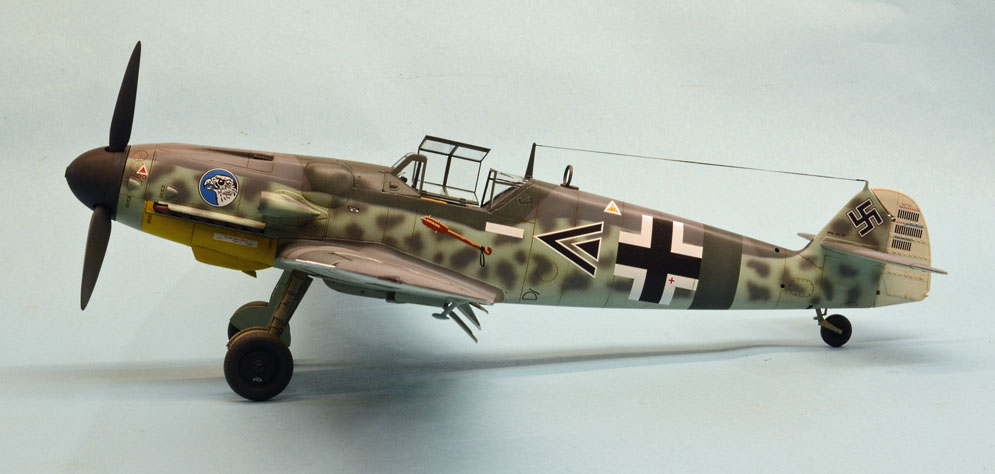
As a Profipack version I added some resin Eduard exhausts and some MG 151 barrels for the underwing gun gondolas’. I did have the Eduard resin MG 17 inserts but getting them to fit under the cowling didn’t go too well. I had to use a bit of filler to neaten it up. I choose one of the markings from the kit of Hptm Hermann Graf, CO of 9JG 52 based at Pitomnik in the Soviet Union in September 1942. This Staffel was known as the Karaya Staffel, after a piece of popular music which they had a record of and which was played endlessly in the ‘casino’, hence the heart under the canopy with the name Karaya. September was a period of intense fighting in Stalingrad when complete victory in the city was believed to be not far away. Hermann Graf was known as a football fanatic, who formed teams wherever he went. He survived the war and went into Soviet captivity. Afterwards he was seen as a controversial figure for apparently cooperating with the Soviet authorities, yet apparently Soviet records do not reveal anything particularly compromising. Rather surprisingly the rudder of this aircraft still exists and can be found at the Technikmuseum Speyer in Germany.
Andrew J.

This was my first build of a 1:32 aircraft for a very long time. I built a Revell 1:32 109 kit when I was about 13 or 14 and was somewhat nervous about tackling another Revell kit, but was pleasantly surprised by the improvements over the last 30 years!
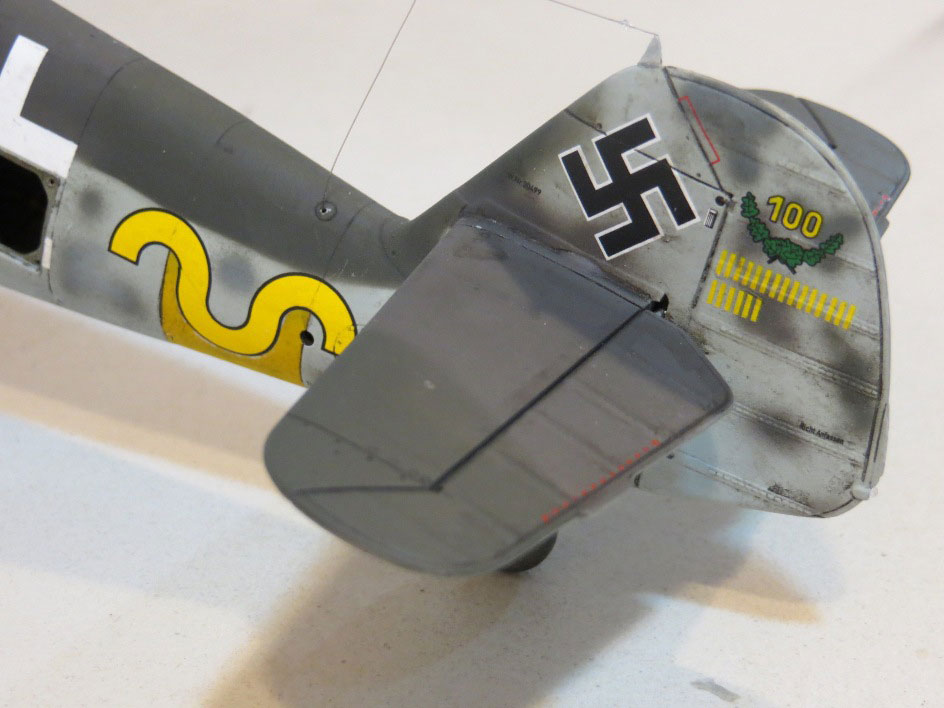
This was also my first serious attempt at riveting and I was moderately pleased with the result. The profile was taken from the WarDrawings site. As far as possible markings were masked and sprayed. I didn’t have any 1:32 stencils so this required some careful modification of my 1:48 resources. I had to use decals for the number, the Gruppe wave (so both appear very black and white) and the stencils.
I wasn’t happy with how the aerial wire turned out, but couldn’t face doing it again.
Craig W.

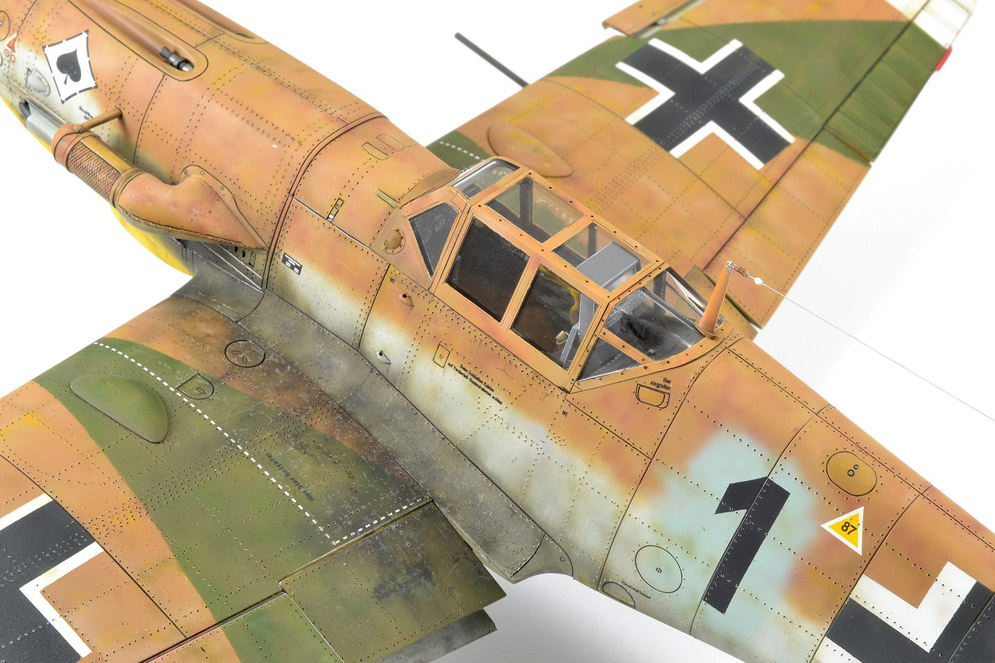
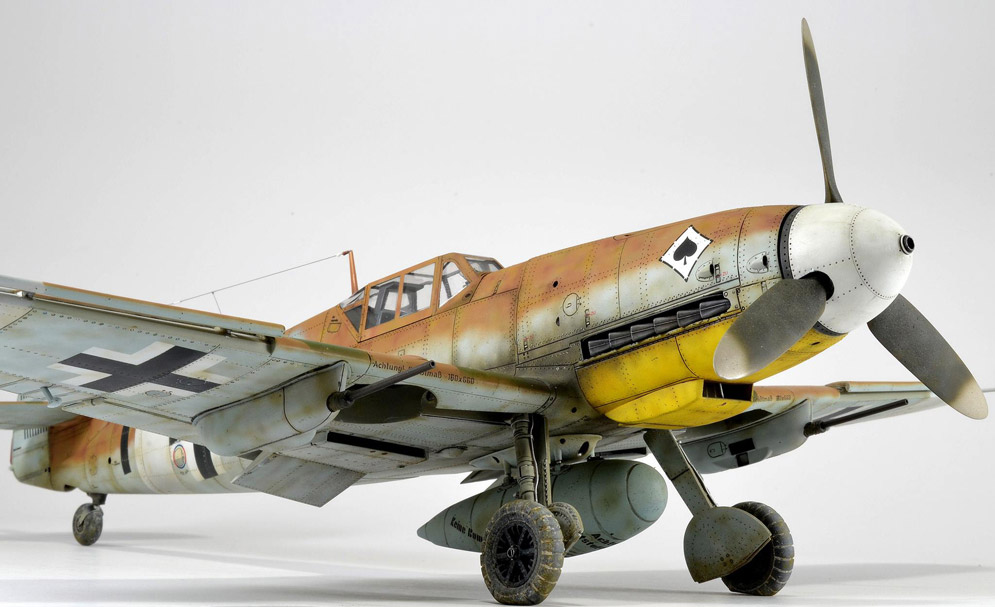


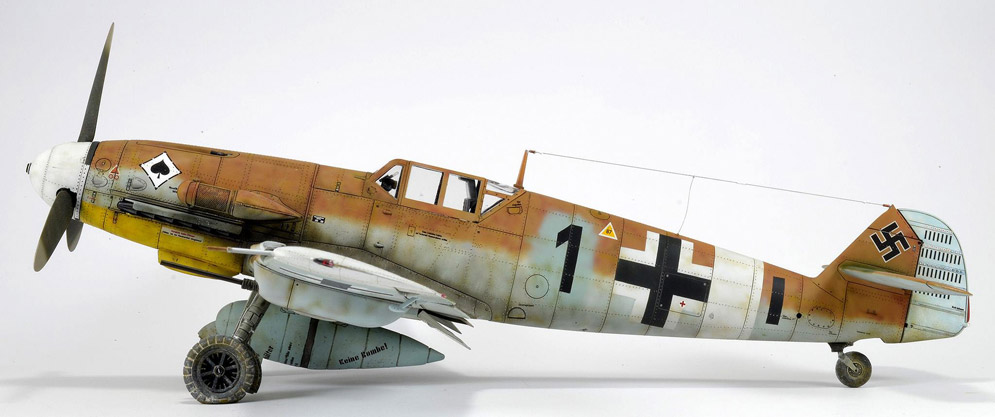
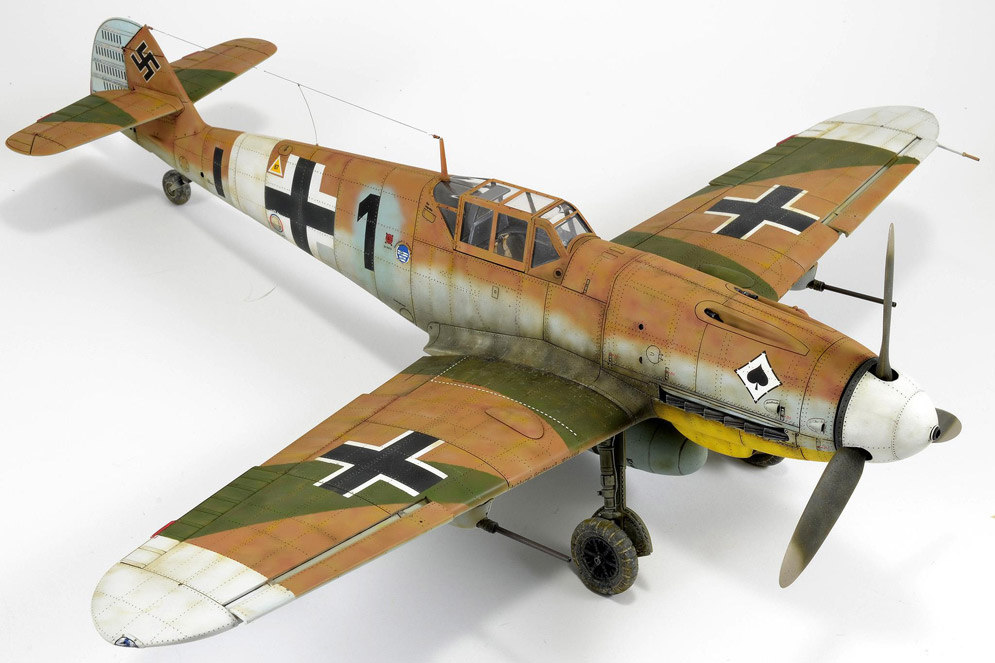

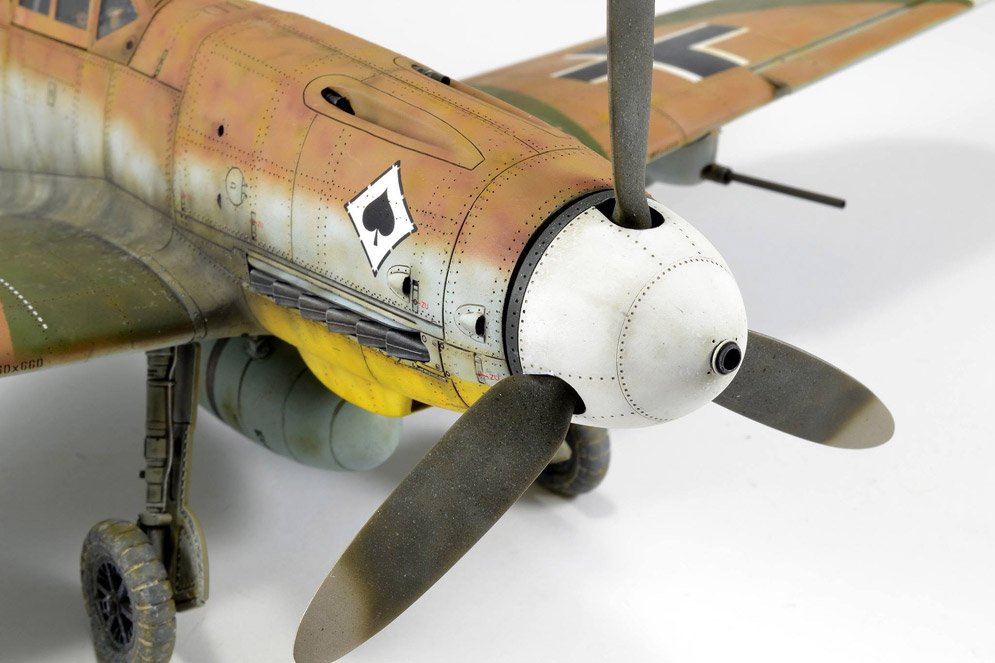
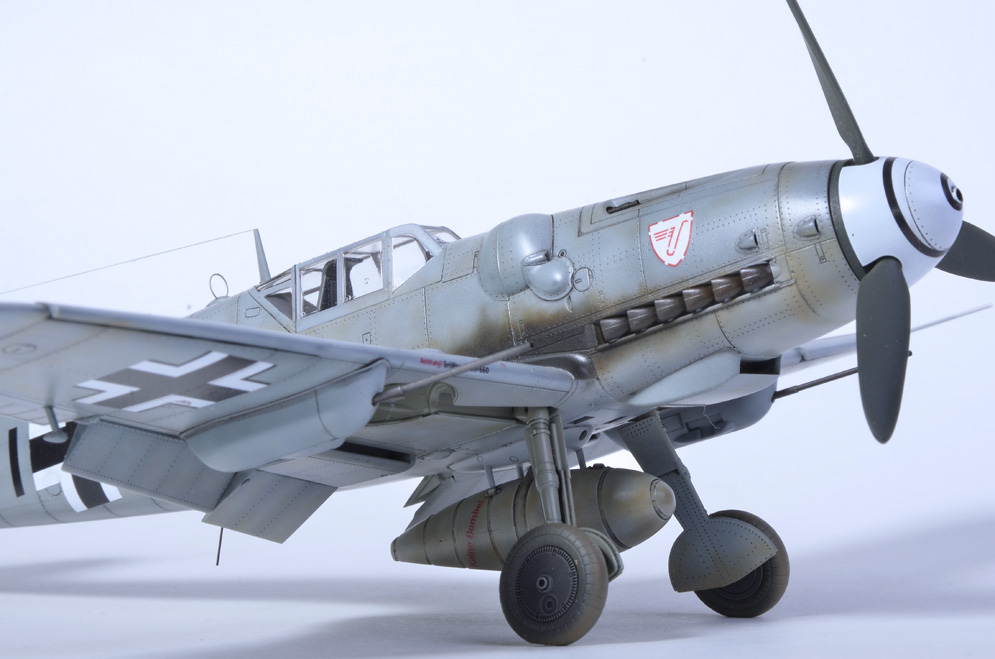
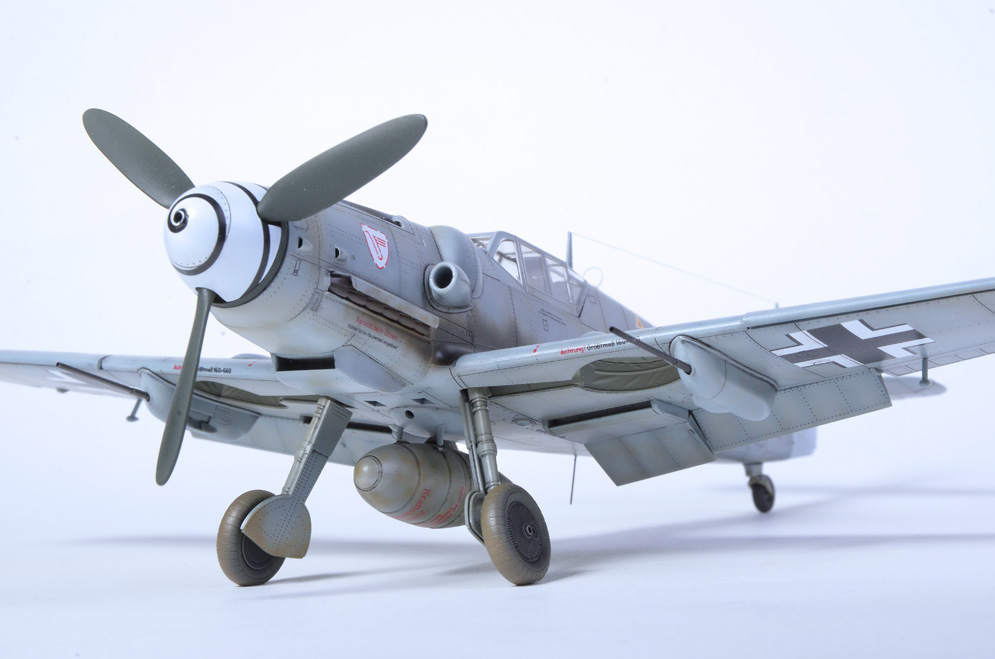
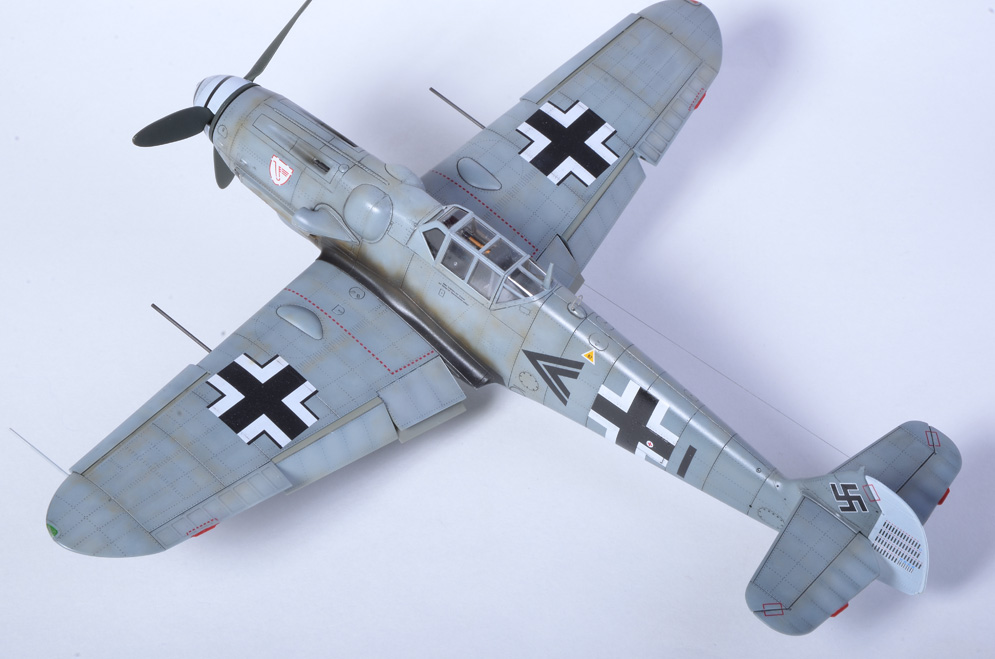
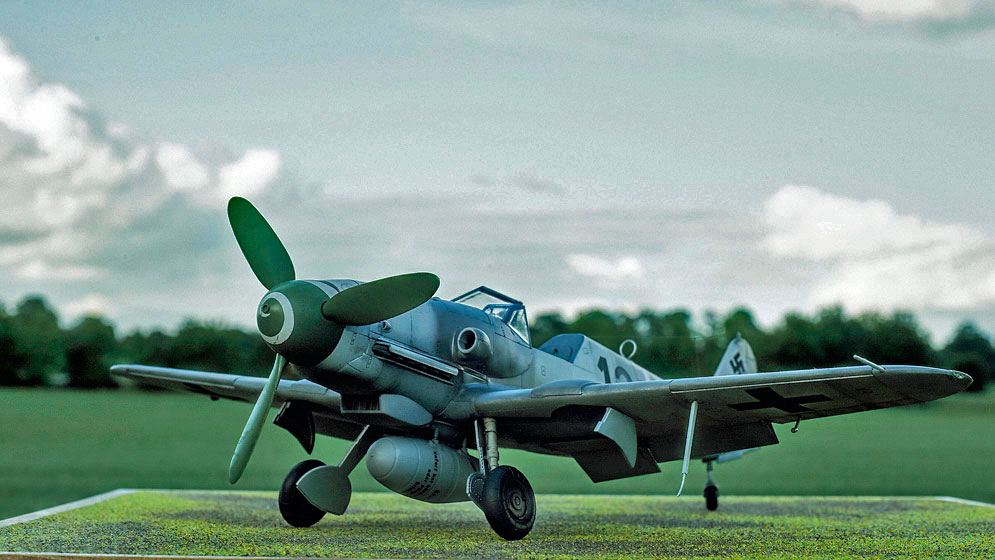
32nd scale Hasegawa kit enhanced with Roy’s (Barracuda Cals) F-4 to G-14 prop and spinner set, and G underwing cannon gunboats set. The “punctured tyres” look is courtesy of some 1993 True Details wheels. Time for a proper set of E/F hubs fitted with the 160 X 660 mm tyres from the Barracuda Studios for the G-4’s!
Hope you like it?
Ralph R.


Built this one a while back. Just a joy of a kit to build. I love Tamiya kits as much as the next guy but with everything they throw in an Eduard Profipack 109 kit, I don’t feel the need to go elsewhere.
I bevelled the panel join line on top and bottom of the fuselage, replaced the wing cannon and pitot with hollow aluminium tube and also the under-fuselage aerial with a fresh acupuncture needle (ouch).
I also flatted the tyres which on a 109 is particularly difficult to get the angle right!
Colours are Mr Hobby and Tamiya. Hopefully the colour variation comes out. Maybe should have gone heavier with it but I like subtle. I think this is a quite an eye catching scheme and the spinner decal is just amazing.
I was pleased with how this came out.
Rick G.


Here’s Christianto’s superb Bf 109G-6 made from the excellent Hasegawa kit. What I love about this model is Christianto’s attention to detail – the fine chipping and weathering at the wing root; exhaust staining, wheels and tyres weathering. Perhaps most of all it’s that waxy look so typical of WWII Luftwaffe fighters – all spot on to my eye in terms of authenticity and a real inspiration. Geoff
Many thanks to Christianto for sharing his excellent modelling skills with us.
Nice work Adam!

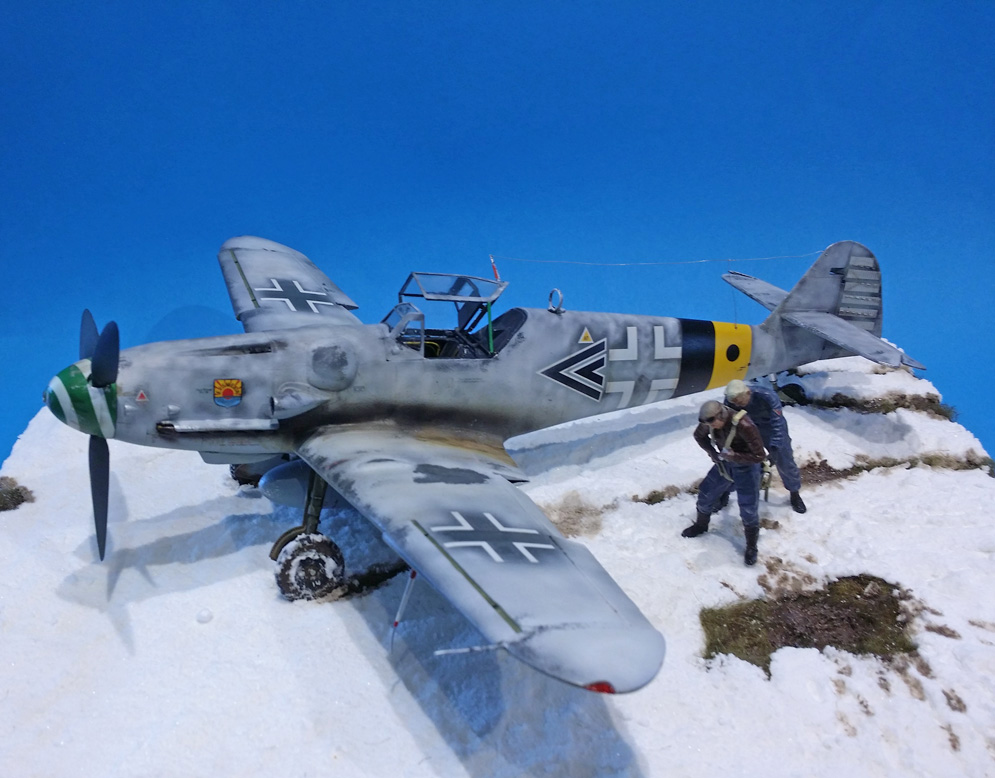
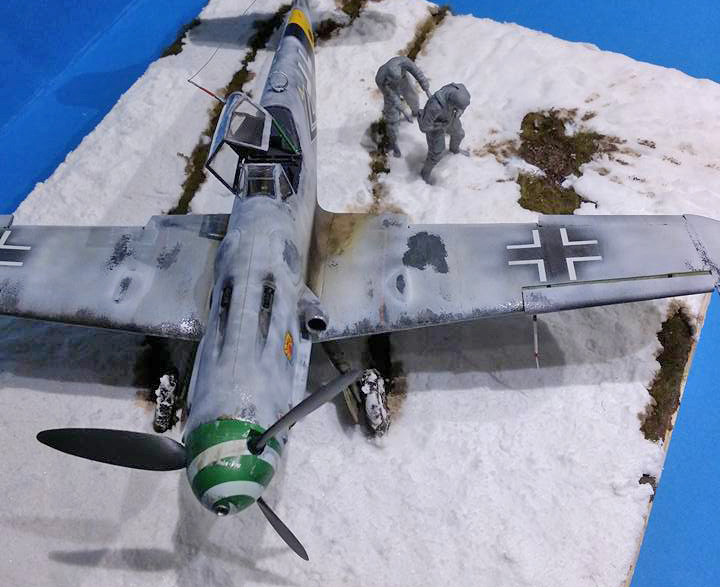
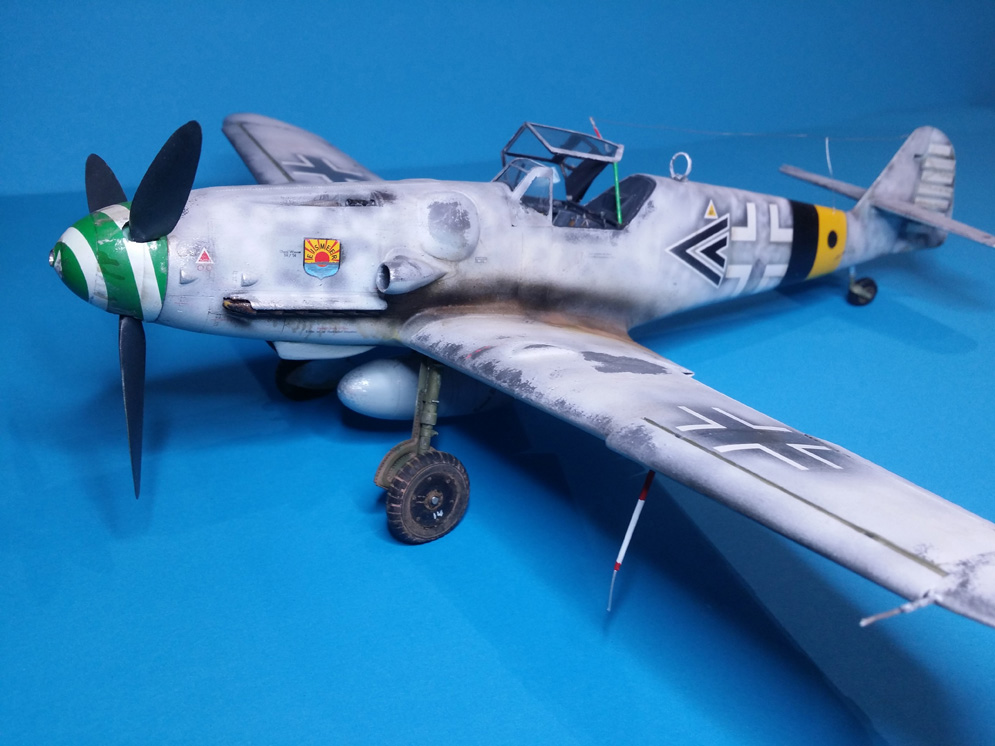
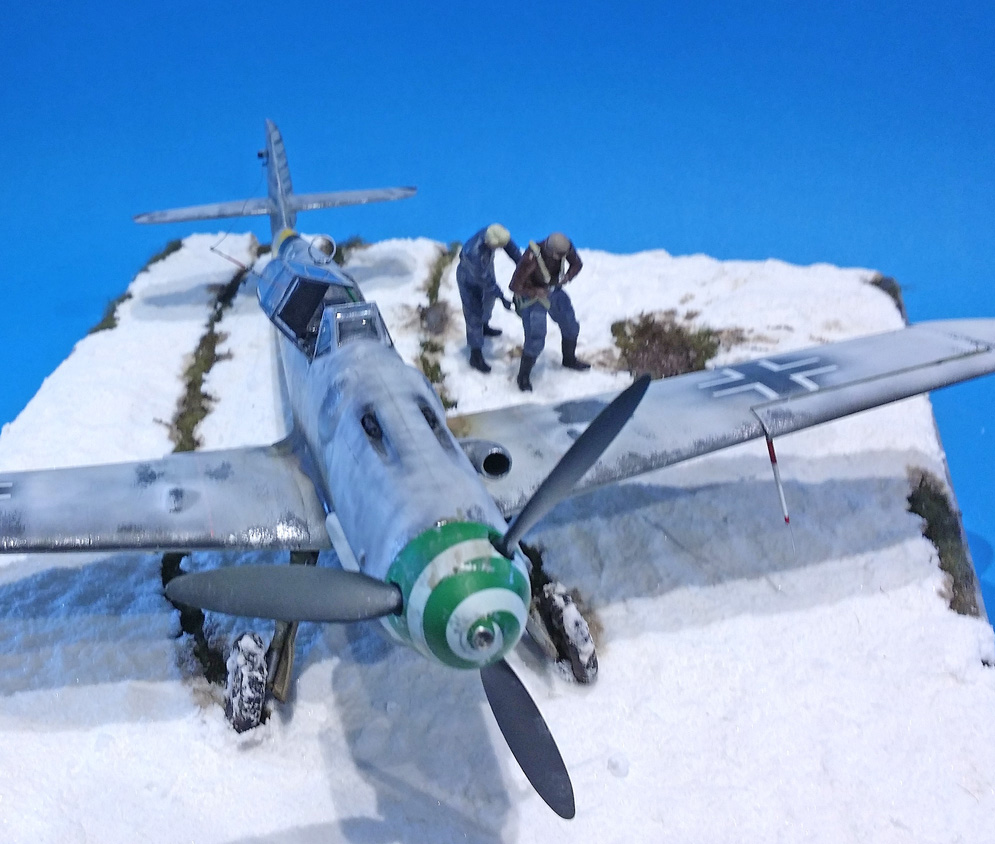
My 109 depicted here was my first ever WW2 aircraft build and was specifically built to take to SMN weathering workshop with Jamie Haggo. The winter wash was achieved by using hairspray on top of the sealed in decals and with a mix of Tamiya flat white and x-22a thinners and then gently rubbed back with a damp stiff paintbrush once dried to give a battle weathered finish. I had learned a whole load of techniques on this aircraft and my favourite was learning how to use oils over the finished to produce localised filters. Pigments were used over the wheels and the bottoms of the undercarriage doors. Exhaust staining was achieved with a thinned mix of black and brown paints and airbrushed. An array of Mig ammo products were also utilised for panel liners and oil staining and oil leaks.
My base hand-crafted using Polyfilla to contour the ground followed by a snow mixture on top. The snow was made using a watered down PVA glue mixed with Bicarbonate of soda to achieve a thick paste. Muddy puddles and sodden ground were made using Mig Ammo Heavy Mud enamel in particular Heavy Earth & Wet Mud. Bits of grass I had were left from previous projects and stuck into place in the mud prior to it drying and the areas of slush and dirty snow were achieved with thinned down Heavy mud product and just touched in with a paintbrush.
Anyway, just a brief incite into how excellent the Scale Modelling Now Workshops are and the end results of being on one.
Hope you like it. Chris C.

MDC: Bf109G-6 cockpit; Bf109G-K corrected spinner; Bf109G corrected wheels, BF109G Mk131 ejector ports
RB Productions: German Seat Belts; Bf109G Radiator faces, BF109G canopy
Aires: Bf109G (late) Radio interior compartment.
EagleCals: The Blond Knight EC036.
EagleParts: Bf109G oil cooler; BF109 Supercharger.
Quickboost: Bf109G gun barrels; Bf109G exhausts
Paints were a combination of Aeromaster “warbirds” RLM02, RLM66, RLM74, RLM75, RLM76 enamels; Model Master, Tamiya and Gunze additional colours. MM Clear flat and gloss lacquers.
The antenna is invisible mending thread with wire “springs” from second hand electrical wire wrapped around a small drill bit. Lead wire, Tamiya weathering pastels.
The build tested me at times but I persisted and whilst there are some flaws, none are fatal and I am happy with the end result. Total build time was about six months. To all those that encouraged, advised and put up with my WIP, I say thank you.
Kent Strickland


The kit is a new-tool and can be built as an early or late version, I chose the early version.
The fit of the parts is good with just some filler used on the engine cowl and wing/fuselage underside joint.
I just added MDC seatbelts and hydraulic lines from wire for the main undercarriage legs. I used the Blu-Tac string method for the soft edge camo demarcation. I first sprayed the yellow underside cowl and masked up. I then sprayed the RLM74 and RLM75 top side camo, masked up and sprayed the RLM76 lower colour. This was followed by some mottling on the fuselage sides with RLM74. The Fuselage was then masked up for the RLM74 band.
The underside of the wing tips and separate rudder were sprayed white. The three piece canopy was masked and sprayed RLM74. I used Xtracolor gloss paints and the kit decals which are of good quality and go down well. The airframe was then sprayed with a coat of Klear to protect the enamel paint for a wash of raw umber oil paint. The airframe and other assemblies were finished off with a coat of Humbrol Matt Cote before the final assembly.
Cheers for now! Roger

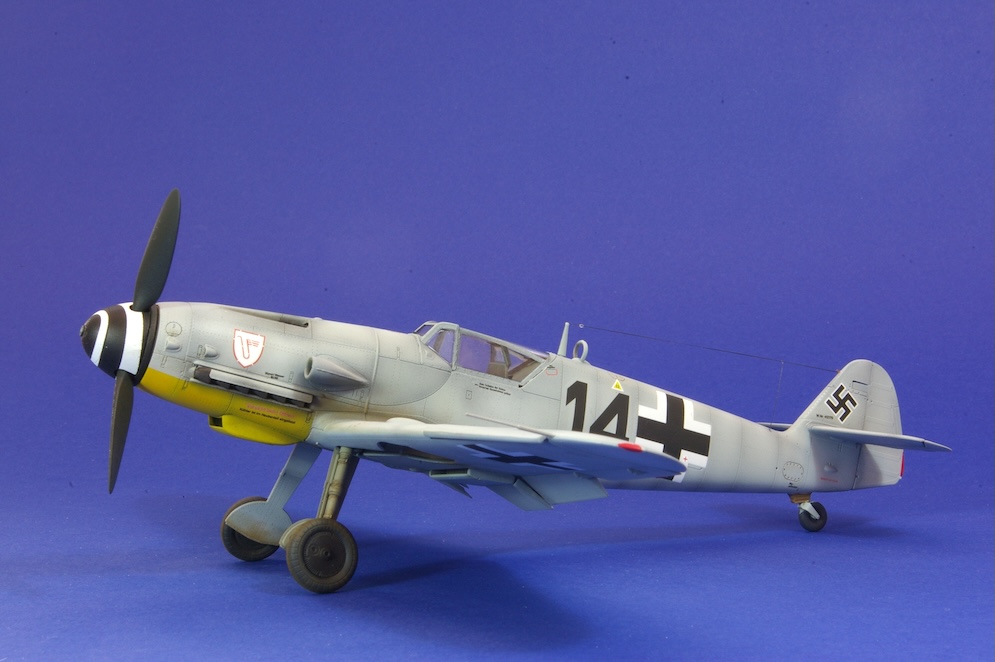

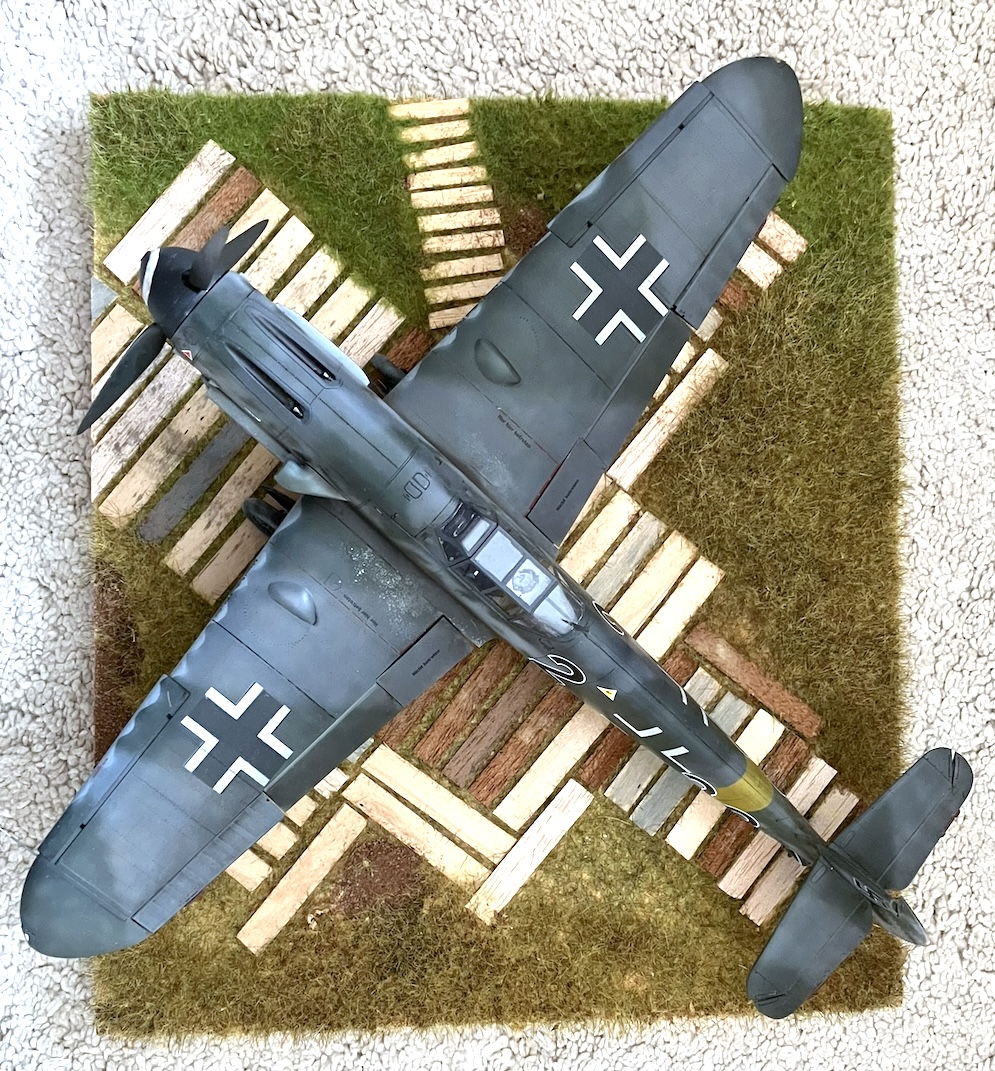
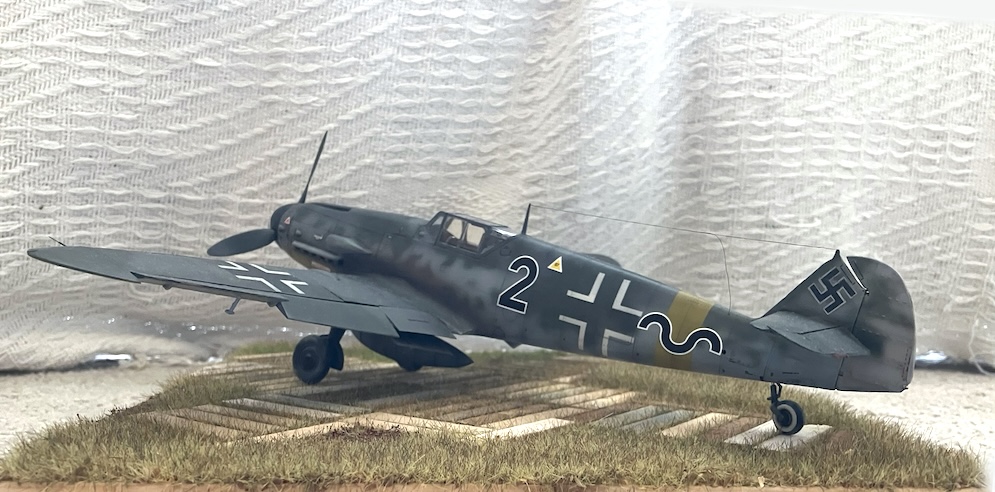
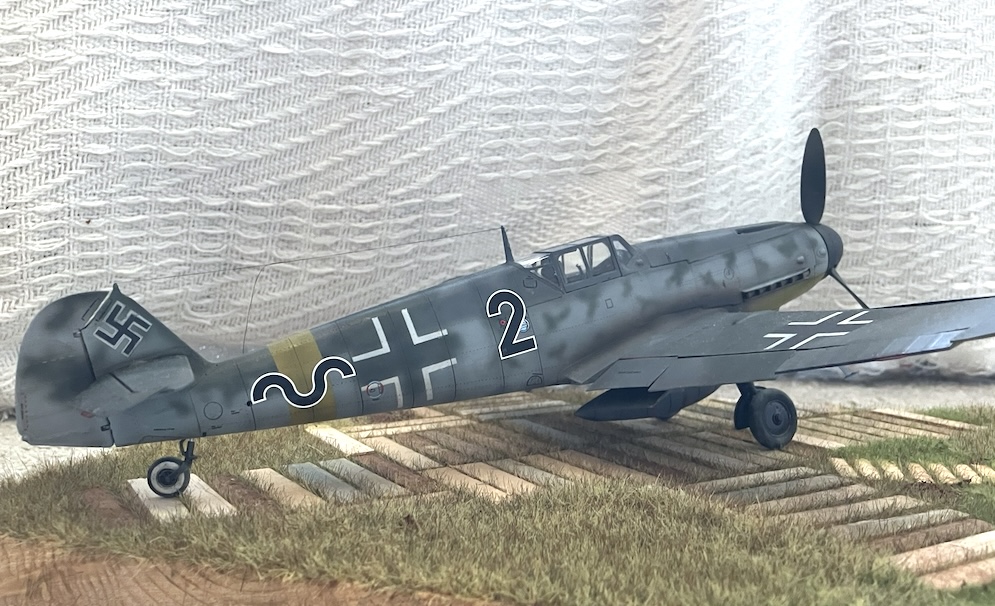
This was the Weekend edition of their Bf109G6 kit and as such it comes without any photoetched parts, resin items or canopy masks. However, the kit contains markings for five aircraft including some Finnish examples and contains an extensive sheet of stencils.
I chose to model the aircraft flown by Horst Petzschler of 2./JG 3 used as part of the Defence of the Reich structure in 1944.
This scheme was chosen as aircraft was in overall RLM 76 which I thought looked a little ‘different’ and I assume that the overall blue scheme meant that it was used as a night fighter?
As none were supplied in the kit, some seatbelts from an appropriate eduard accessory set were used to enhance the cockpit detail.
The date on the transfer sheet was 2020 and so I assumed that it was printed it was possible to peel the film from eduard transfers. An attempt to peel the film from a spare image from the transfer sheet placed onto a piece of card that had been painted in the same way as the model failed and so I didn’t attempt it on the model itself. I bought my kit second hand at a model show, so maybe later issues of the kit will have the newer transfers?
I didn’t fancy my chances of disguising the extensive transfer film inside the open crosses on the wing upper surfaces, nor did I think I could apply the white spiral marking on the compound curves of spinner very neatly, so these were masked and sprayed.
The rest of the markings were from the kit’s transfer sheet. Despite not being the ‘peelable’ type they worked well over a gloss surface and the transfer film was adequately disguised with a few light coats of gloss varnish.
The model was pre-shaded and I felt that this gave enough depth to the finish and that a panel wash was not needed, so only a little weathering / staining using pastel chalks was applied.
The only other items added to the model were an aerial wire made from elastic rigging material with isolators made from blobs of white glue, and a lead in wire made from thin surgical steel wire coloured black with a sharpie pen to match the aerial wire.
Dai W.


Cheers, Dave C.


No real idea how grubby she was, so erred on the cleaner side of “freshly painted in RAF colours…”
Big thanks to Mal Mayfield from Miracle Paint Masks – Cheers, Mal: very much appreciated.
Ralph R.


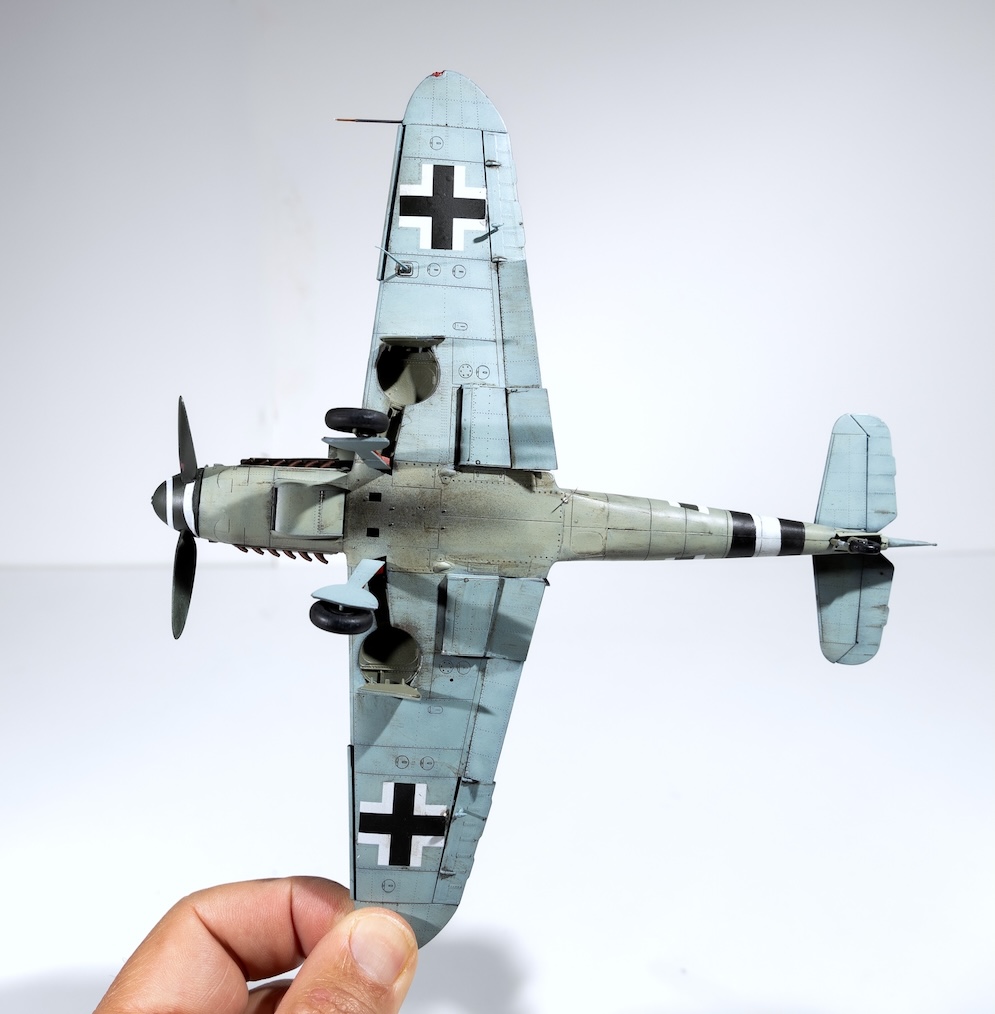
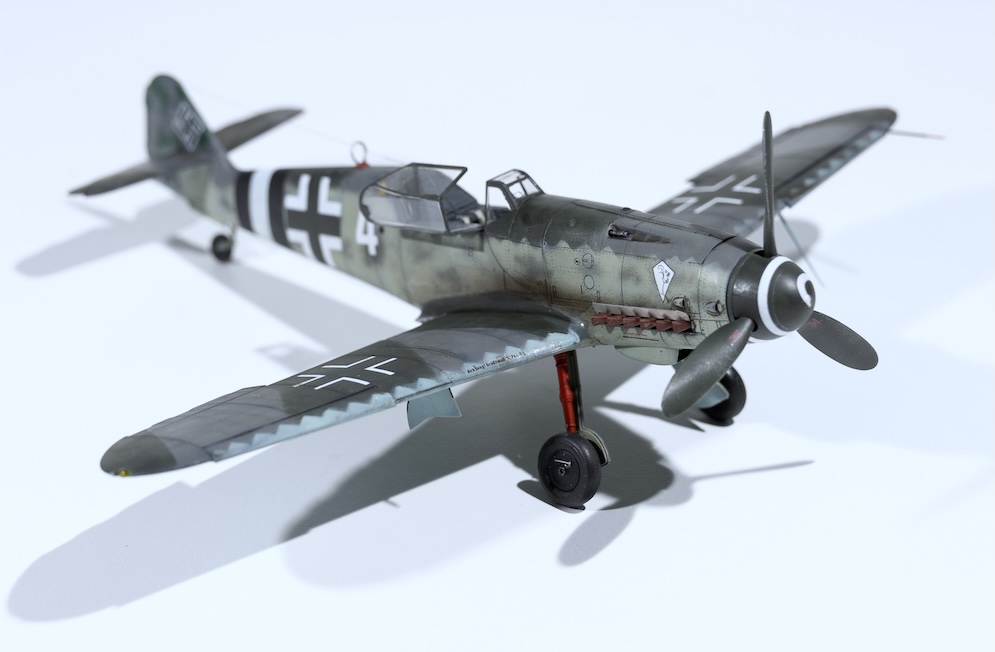
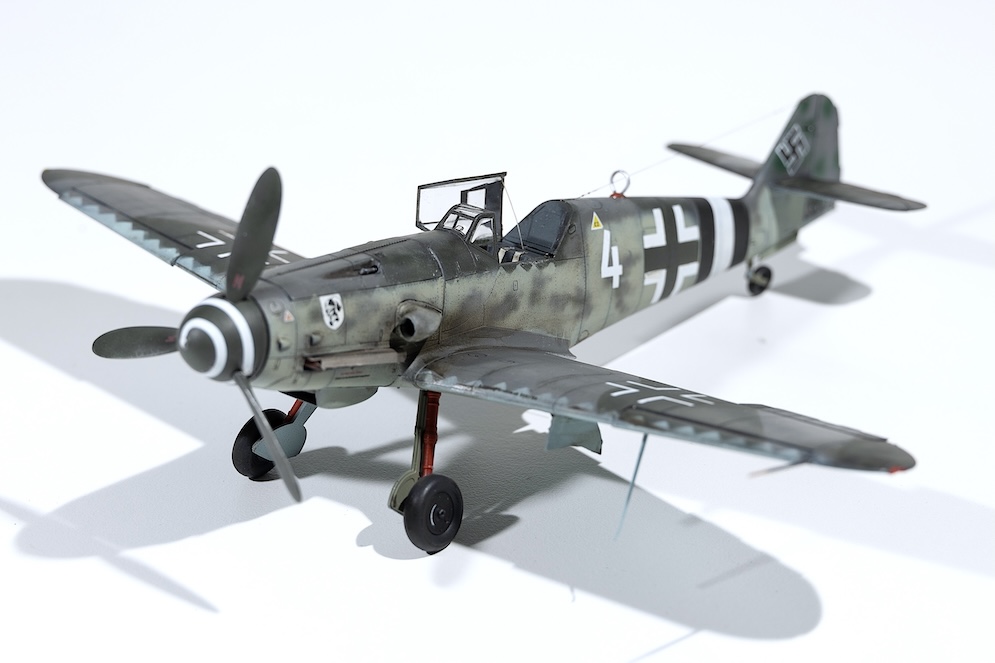
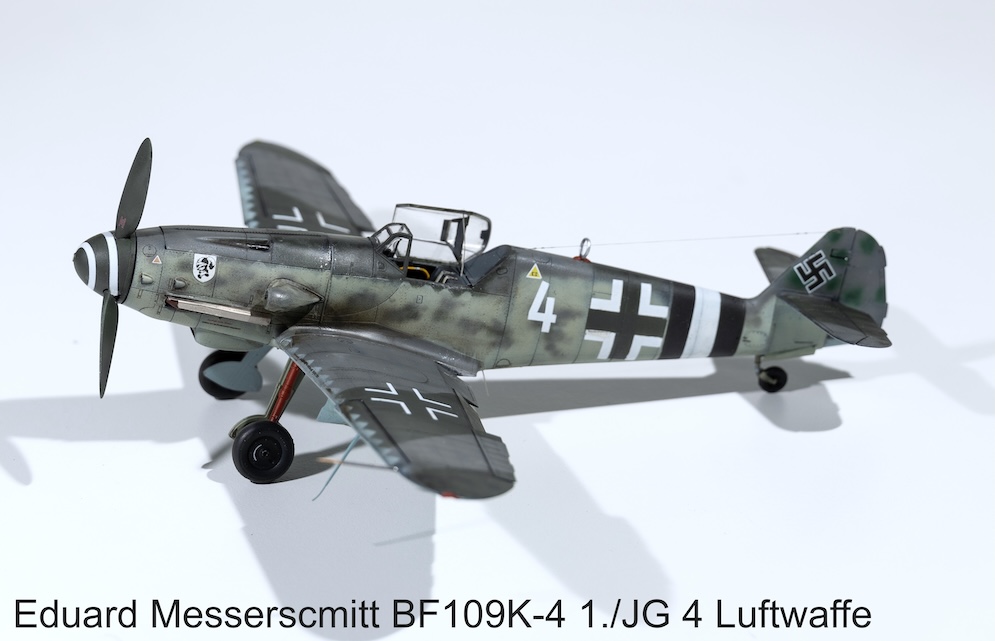
I really enjoyed this build, for me a challenging scheme to apply, but fairly happy with the outcome. Again with an Eduard ProfiPack we have the usual PE parts, masks and numerous schemes to choose from, although for me a tricky paint scheme. I chose the 1./JG 4 option, which looked quite interesting and was quite pleased with the outcome.
I am slowly learning how to get a grip of the PE parts, which do enhance the models significantly!
This I believe is one of Eduard’s newer offerings, excellent and great kit to build, it also goes well with my recently finished Eduard Fw190A.
Richard A.
All the best, Aaron S.


This is certainly inspirational and just what the SMN Subscribers’ Gallery is all about.
Geoff C.
The partial blue spinners also add to the finished look, breaking up the standard mottled came pattern.
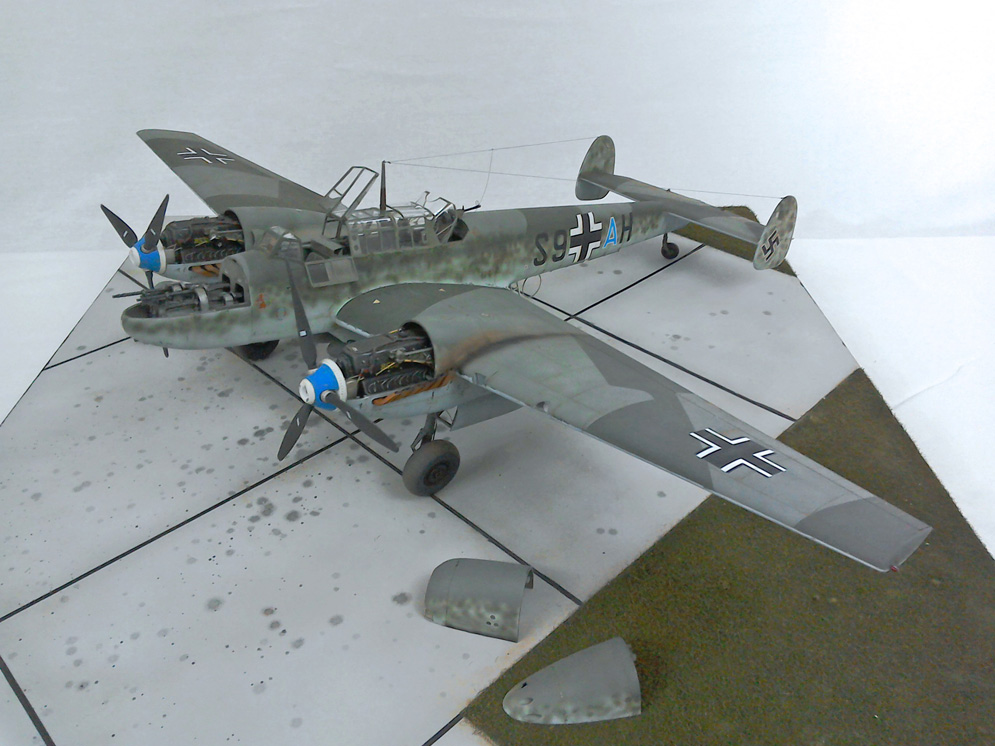

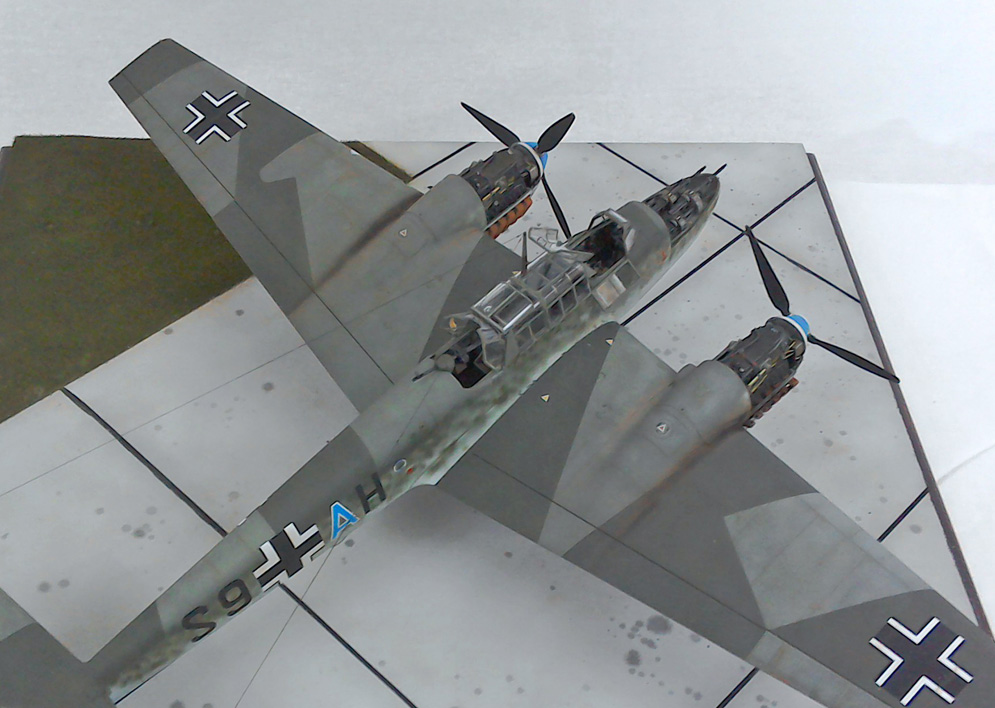
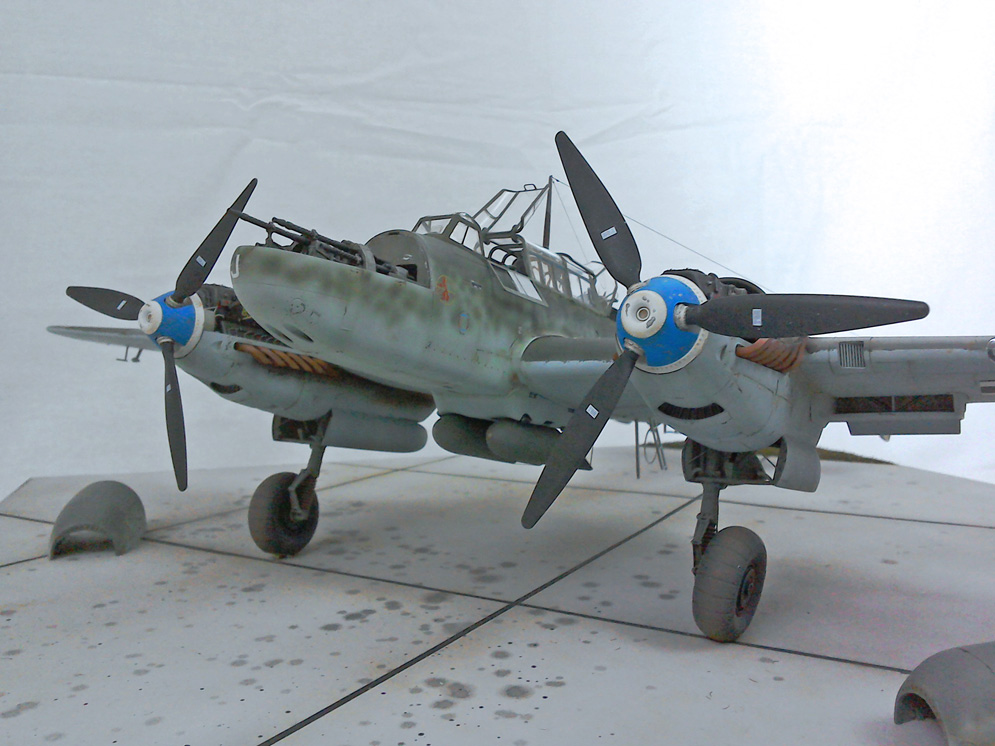
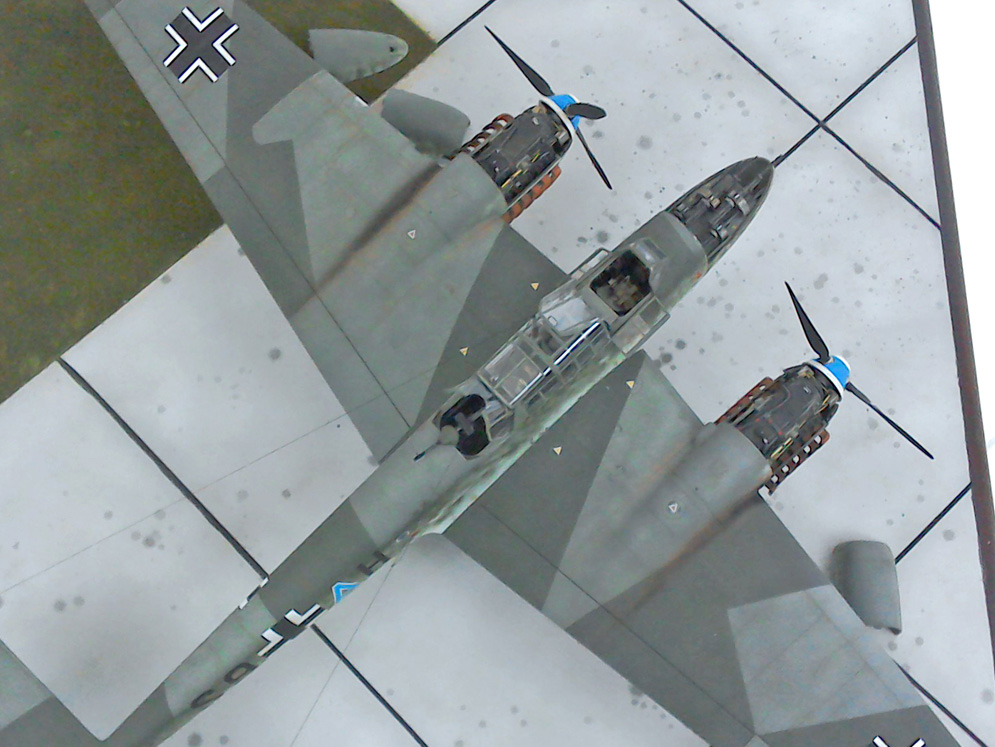
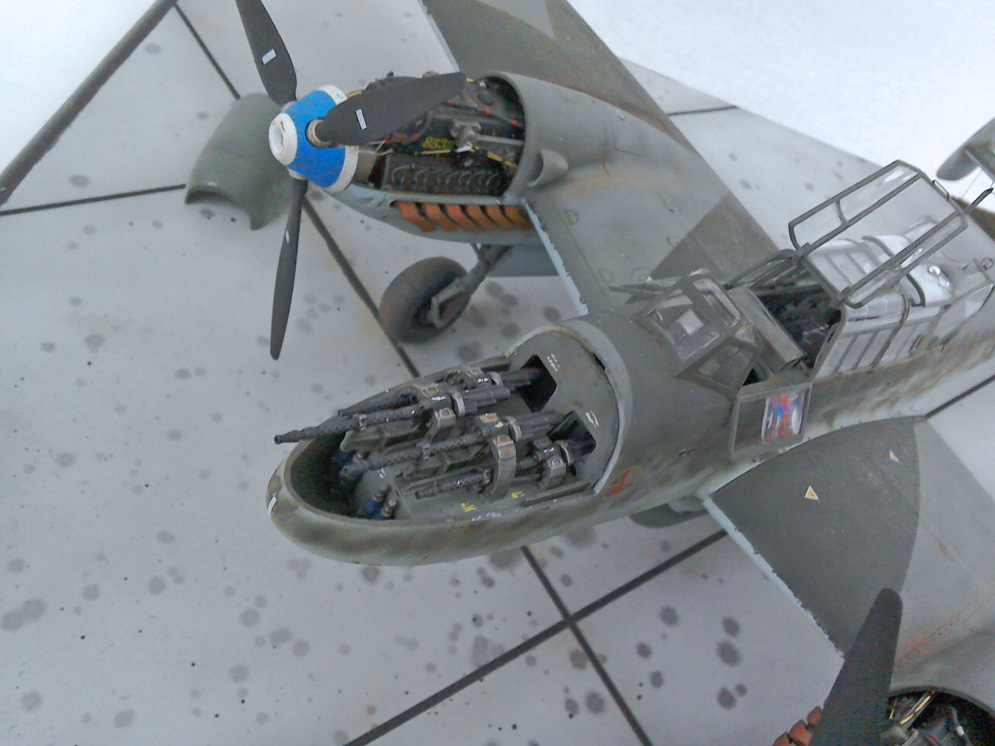
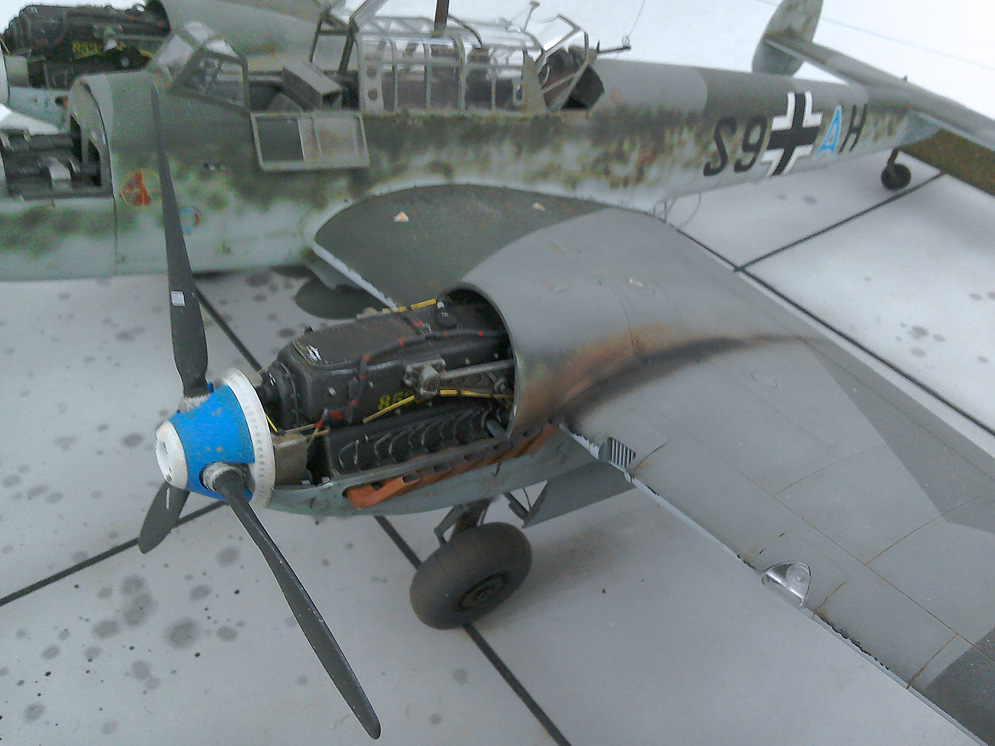
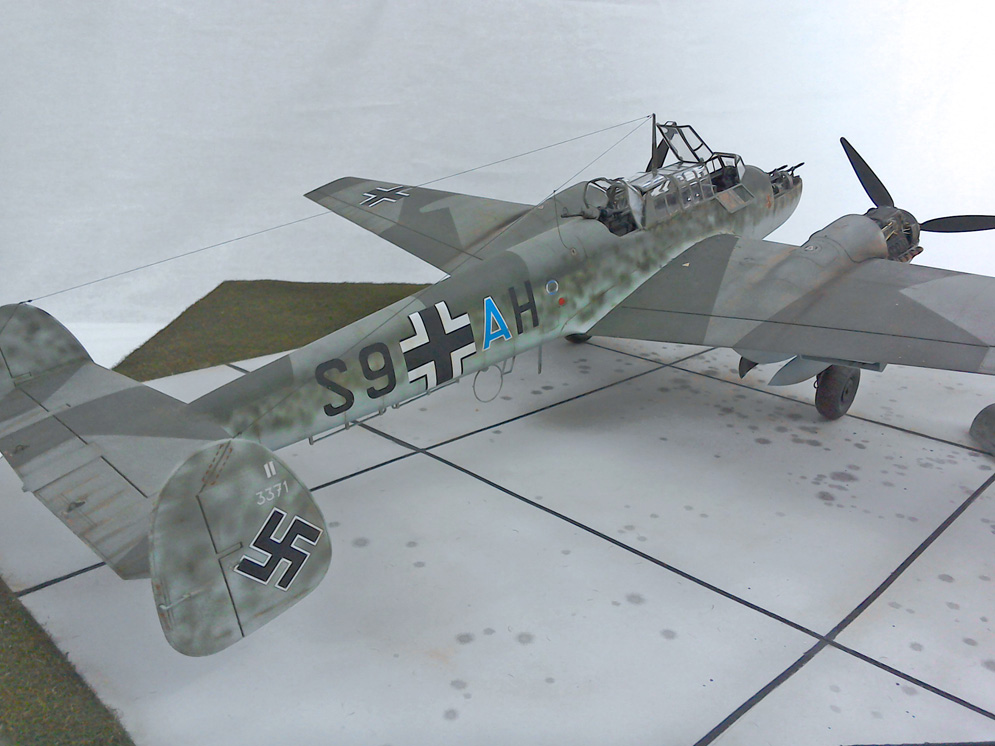
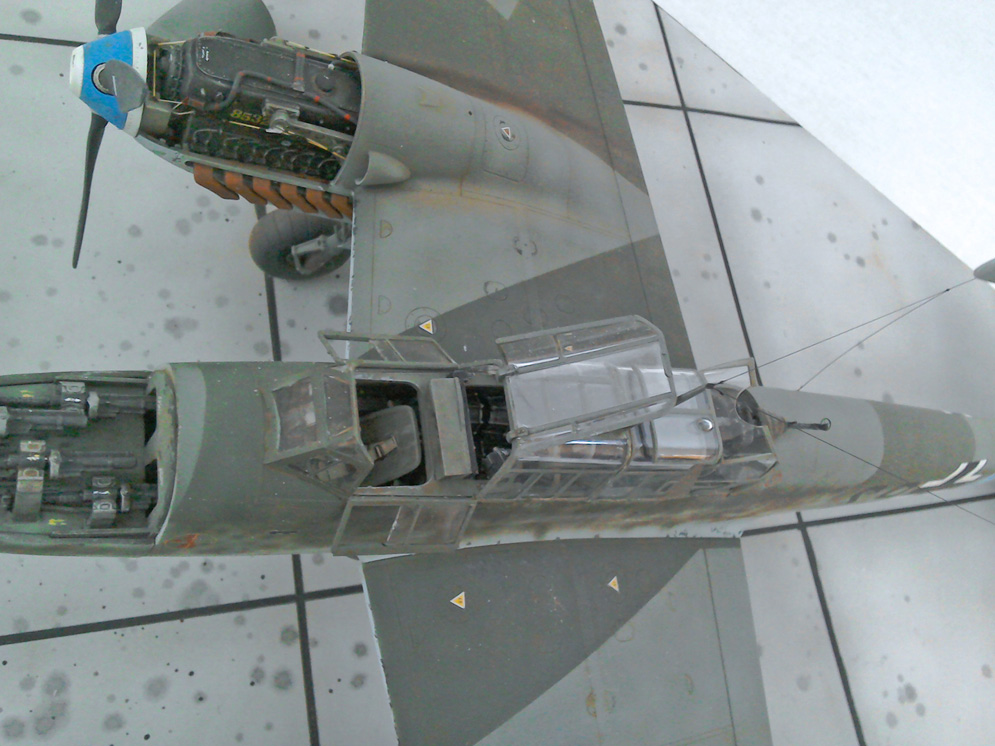
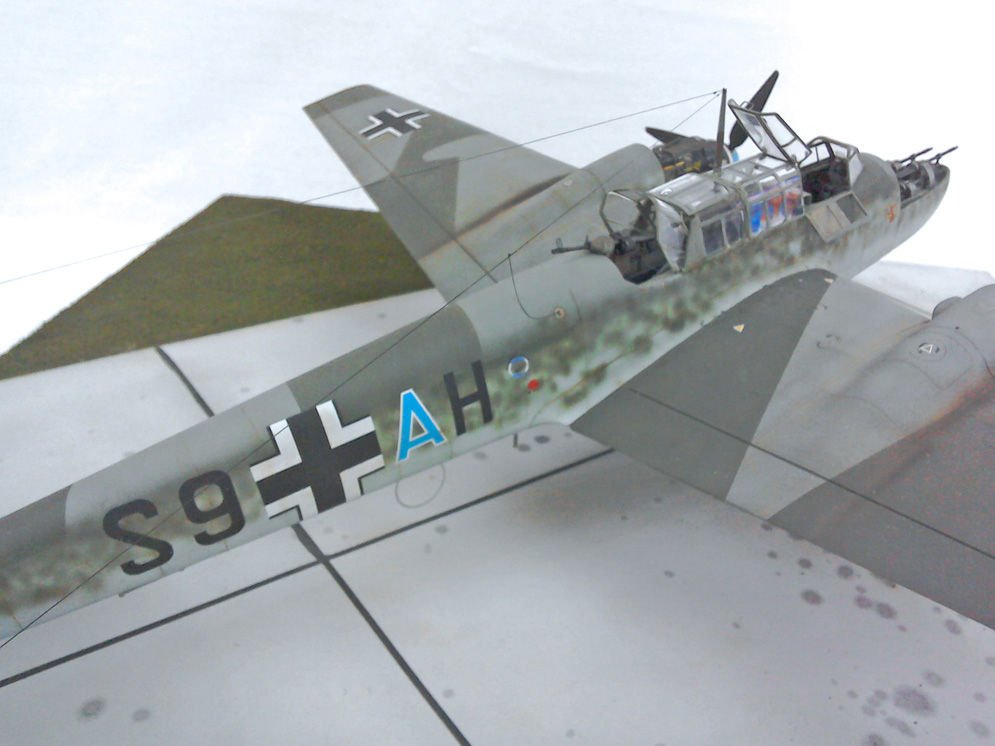
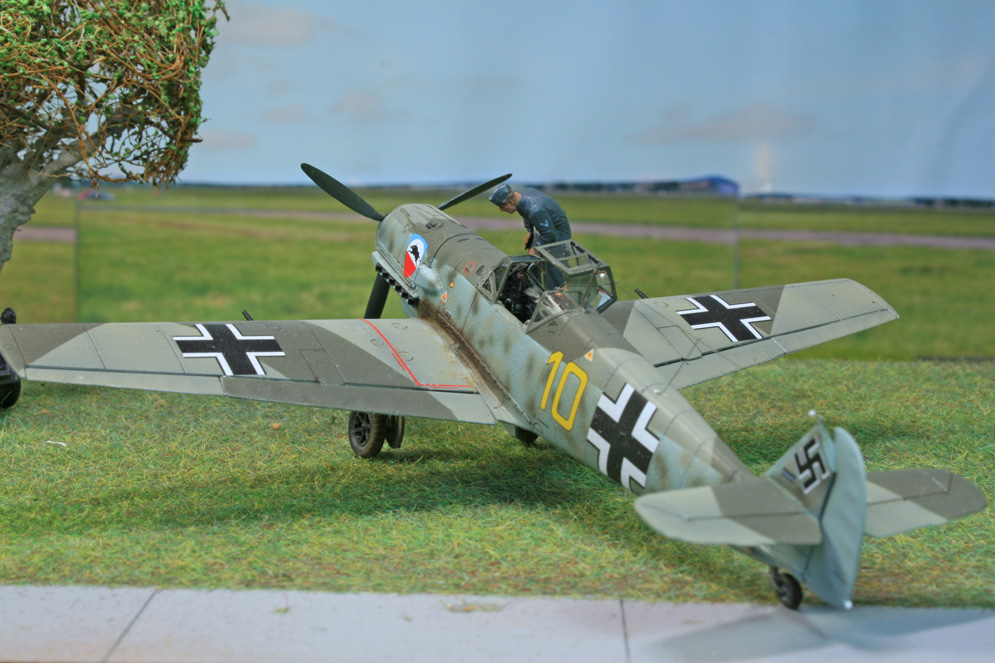
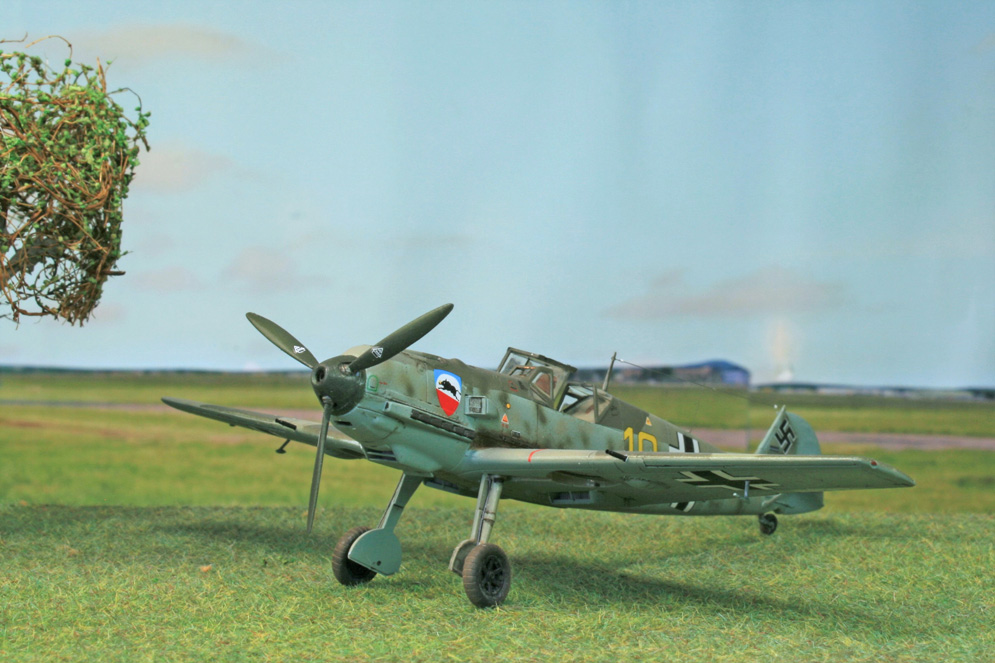
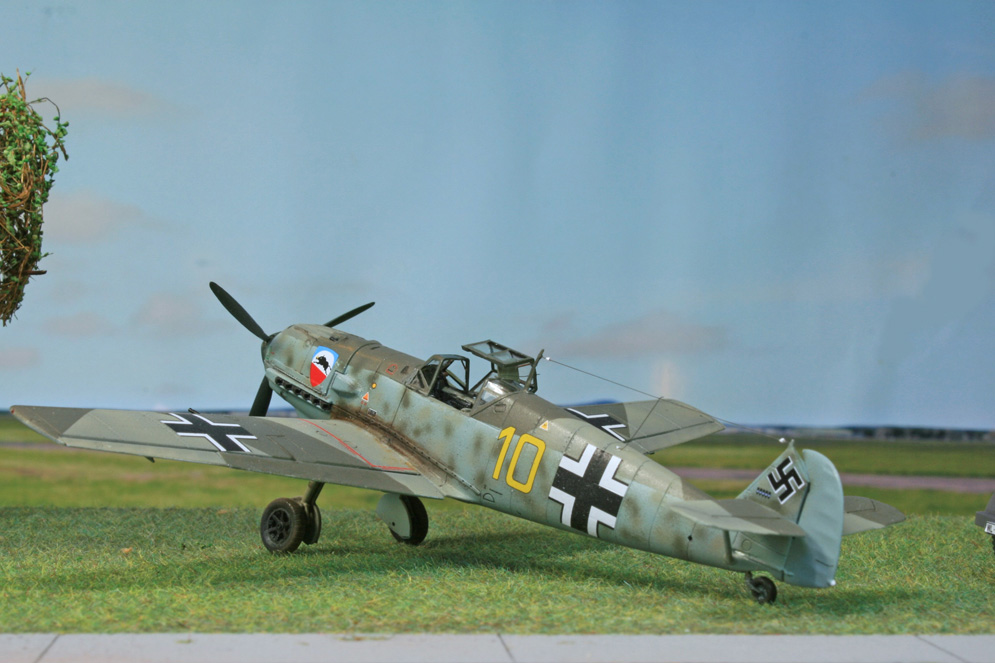
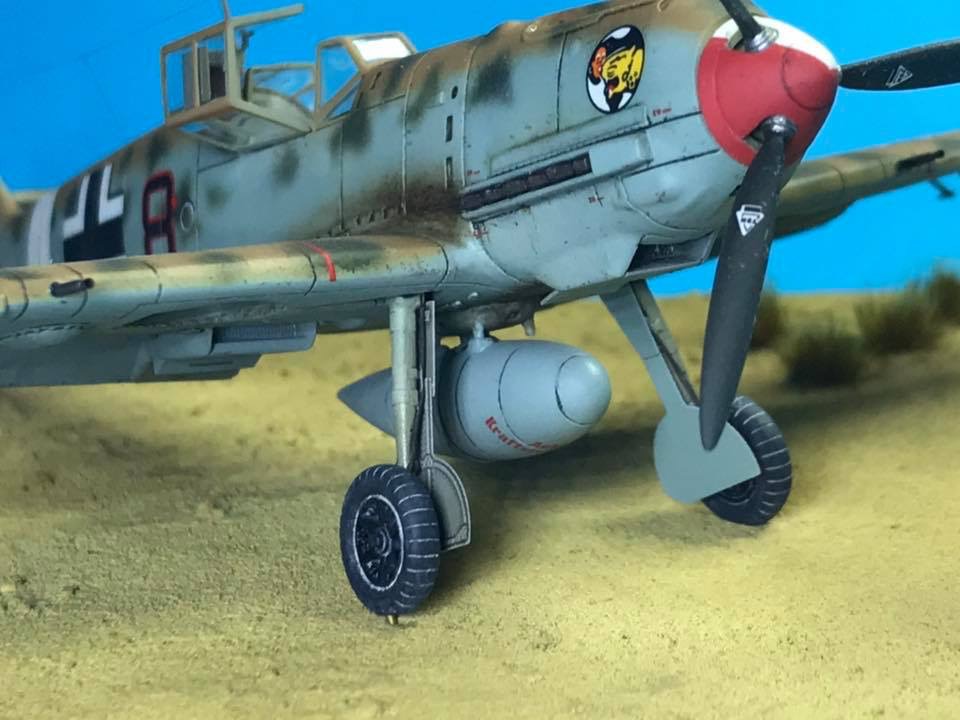
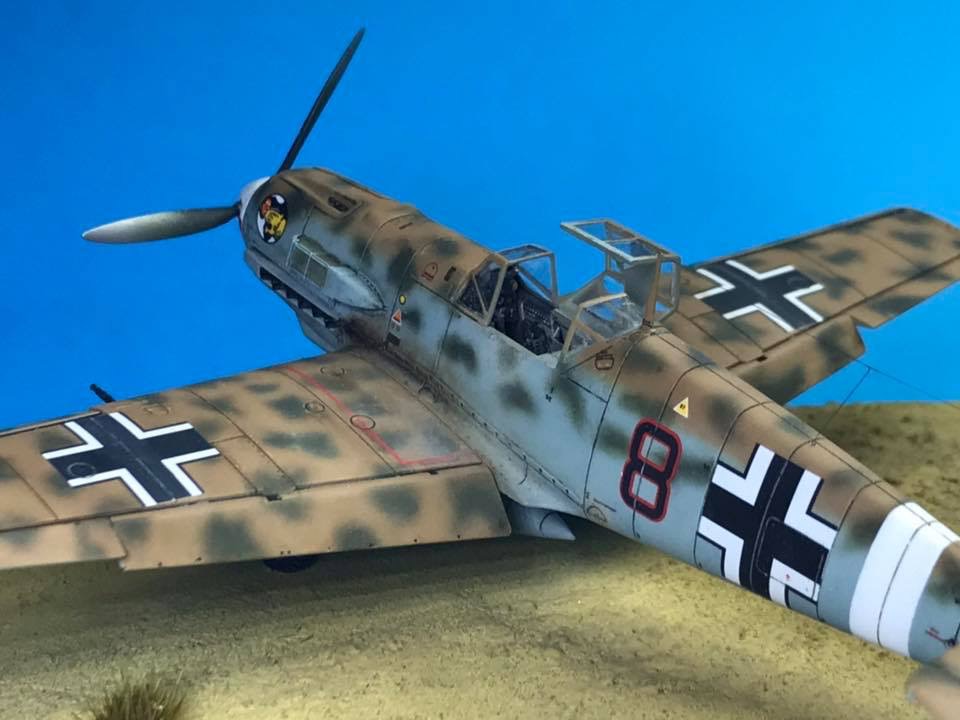
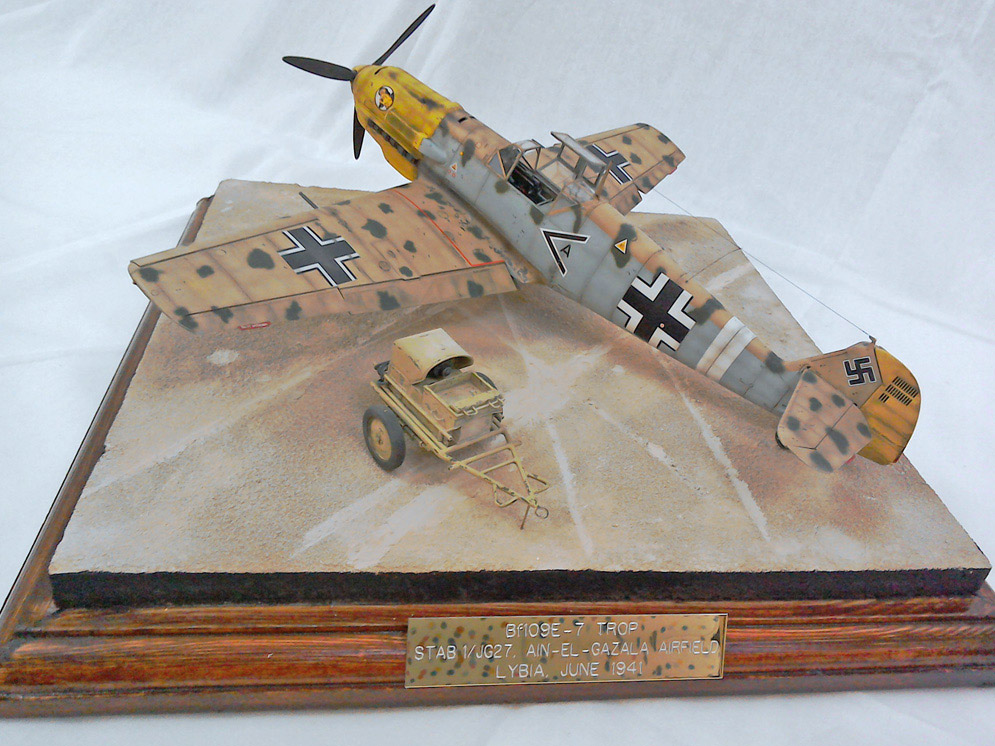
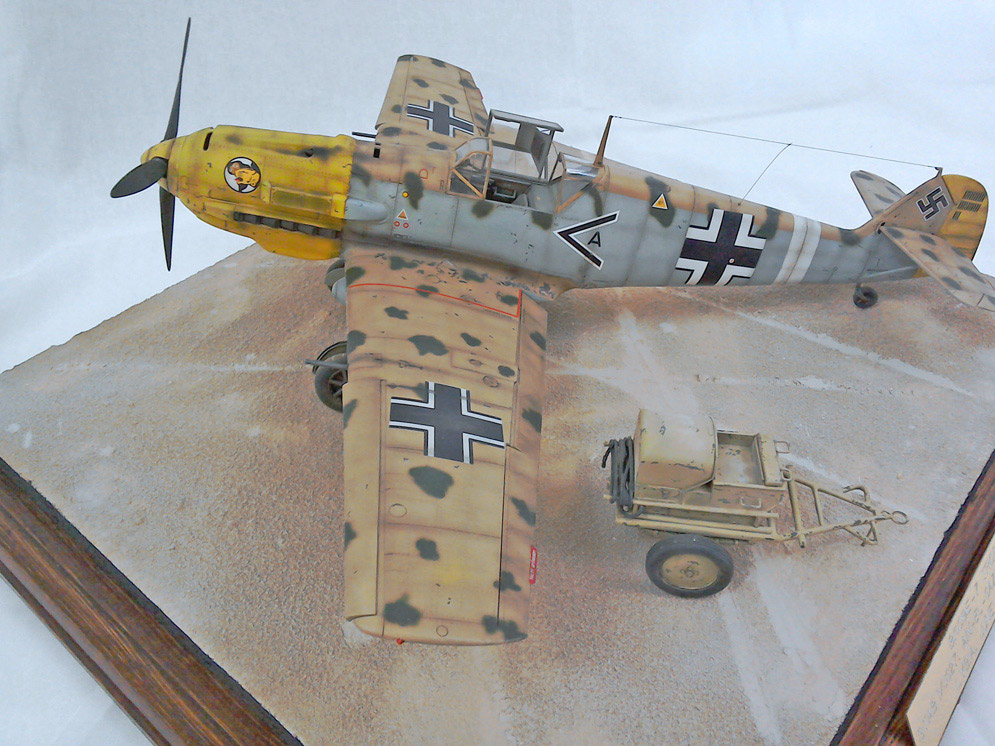
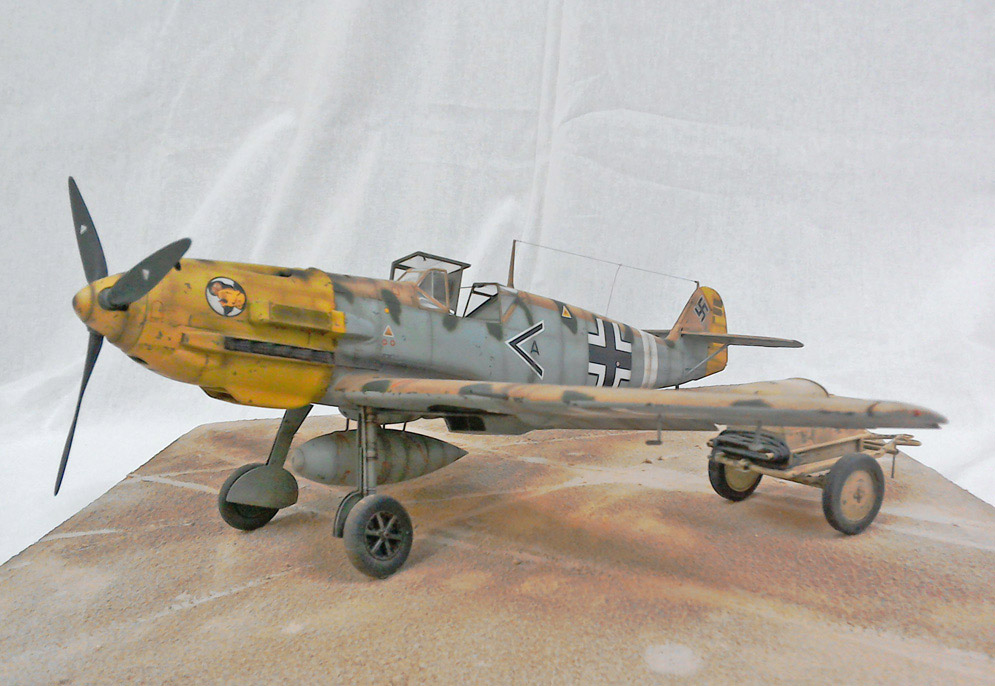
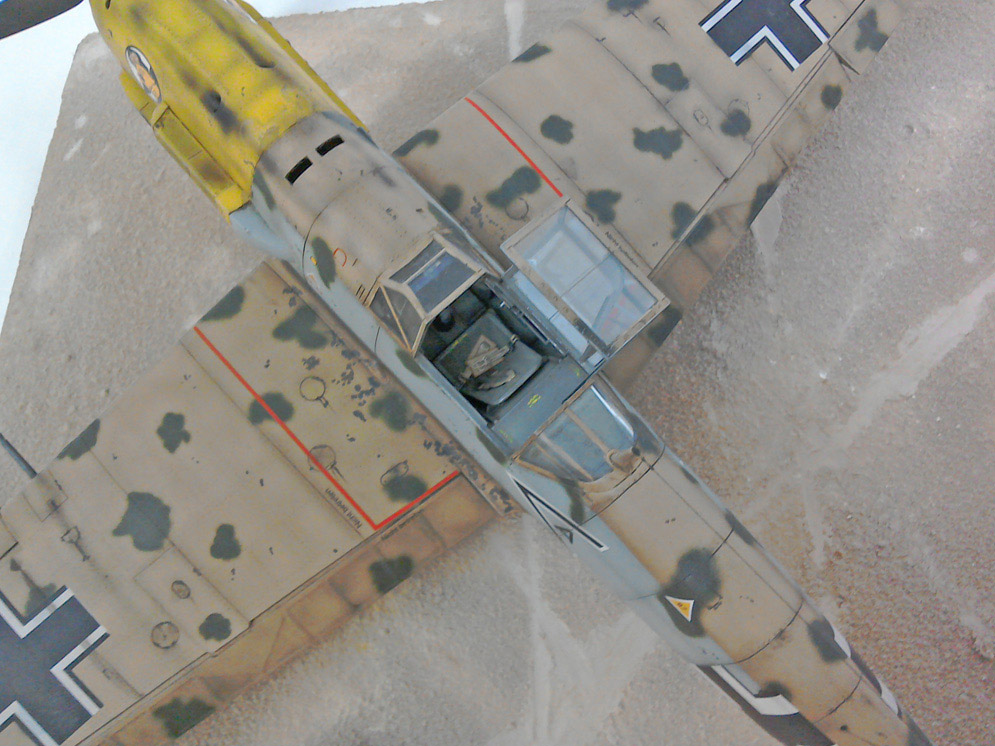
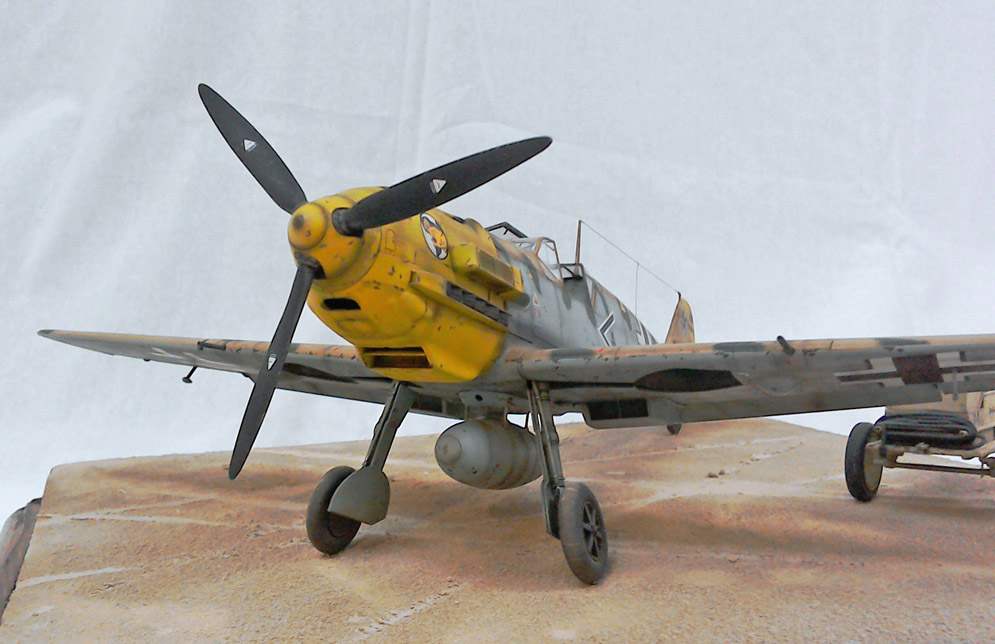
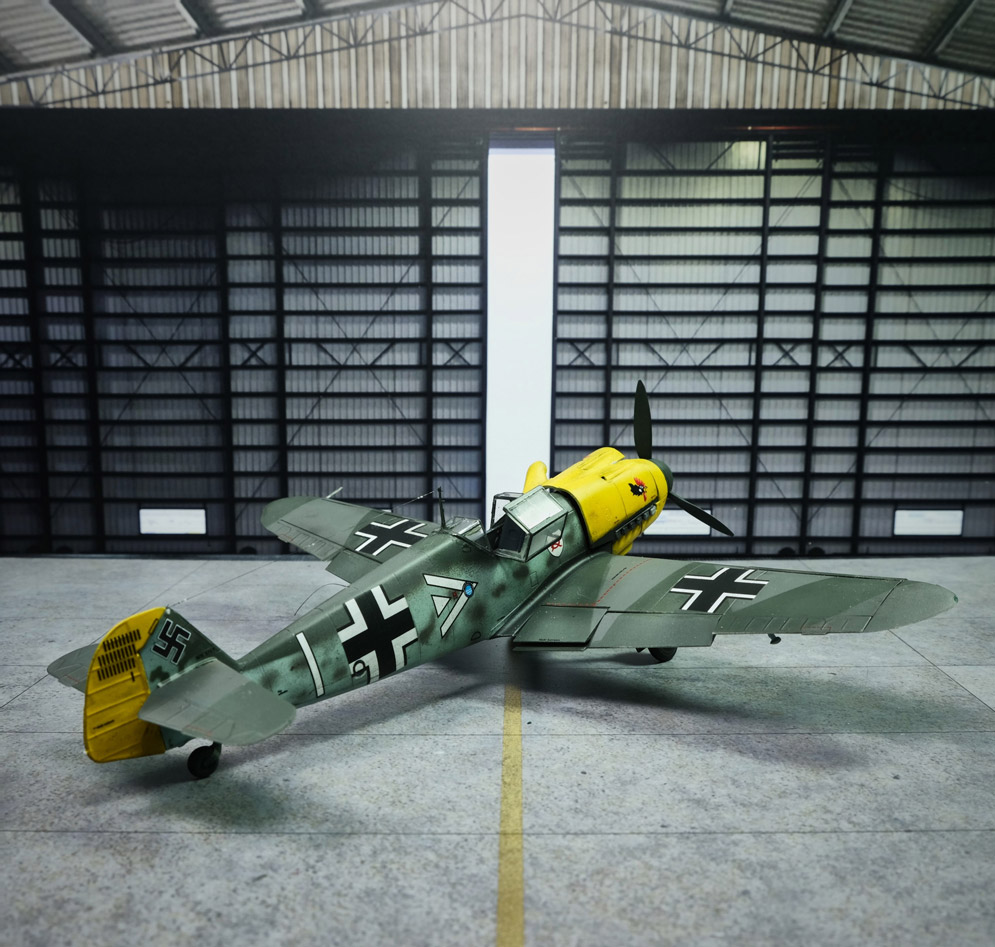
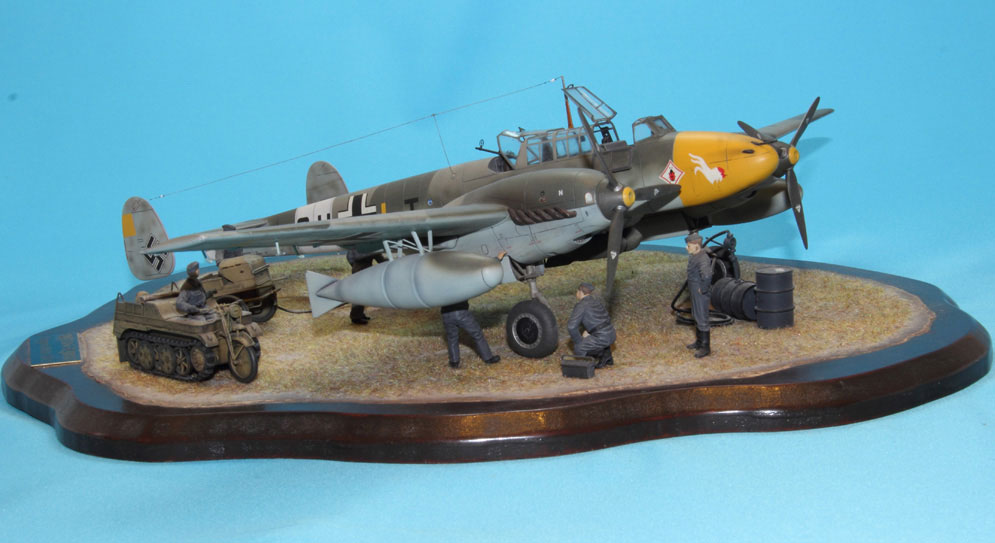
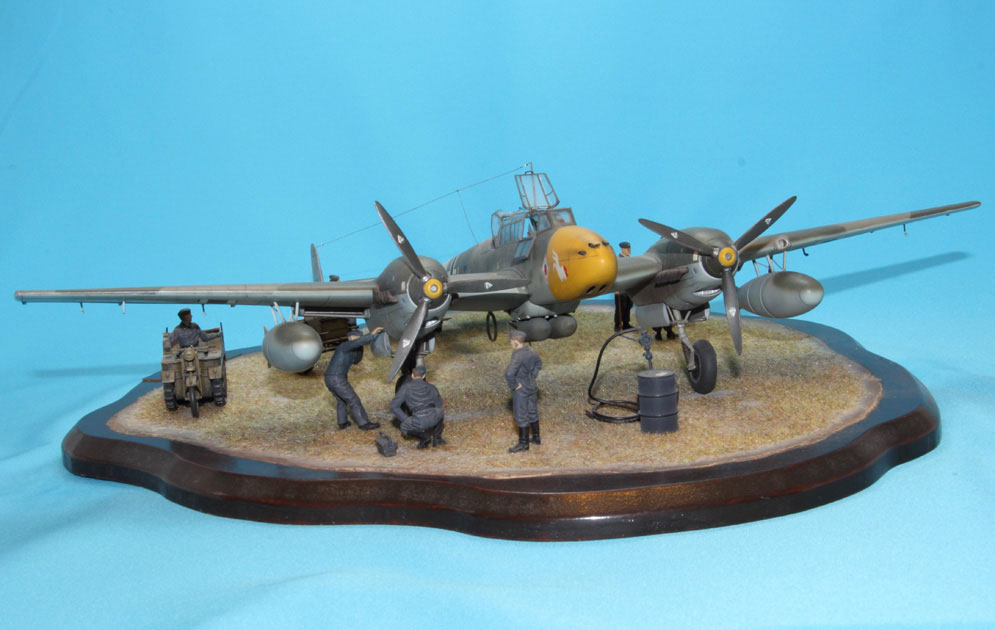
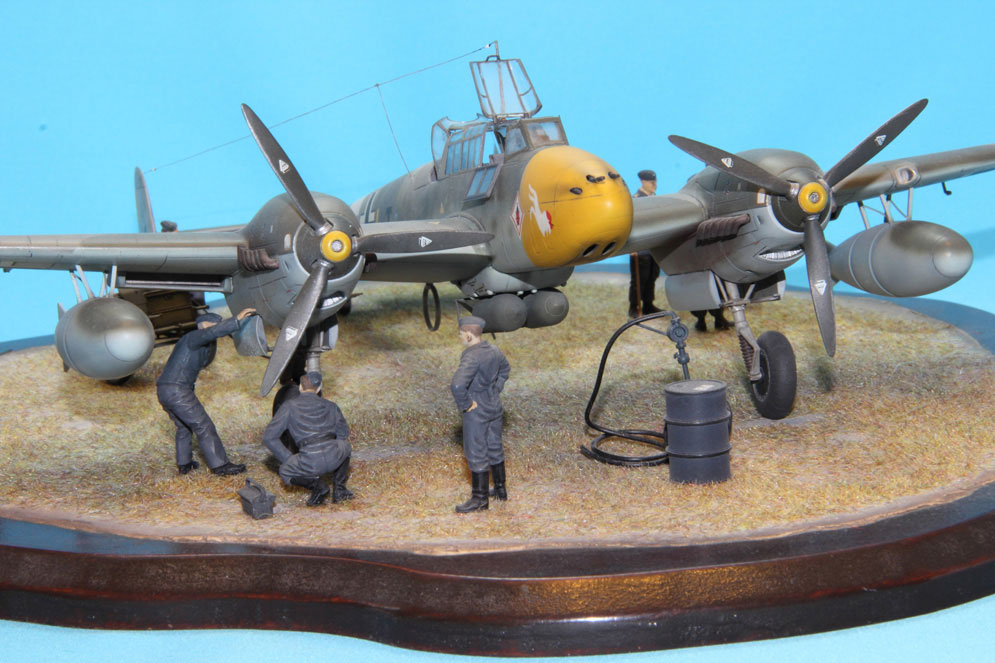
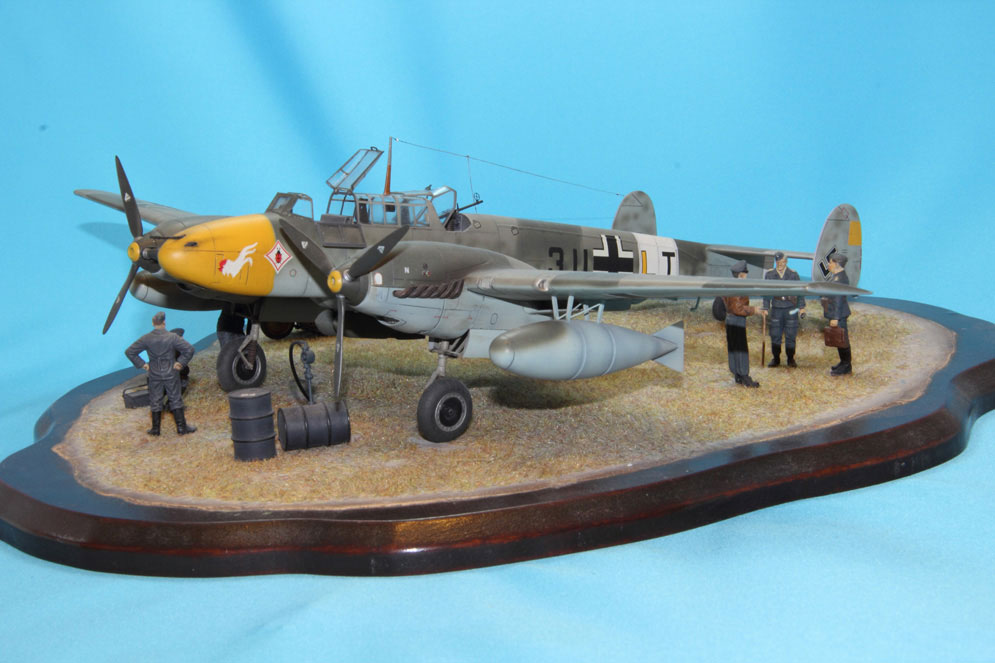
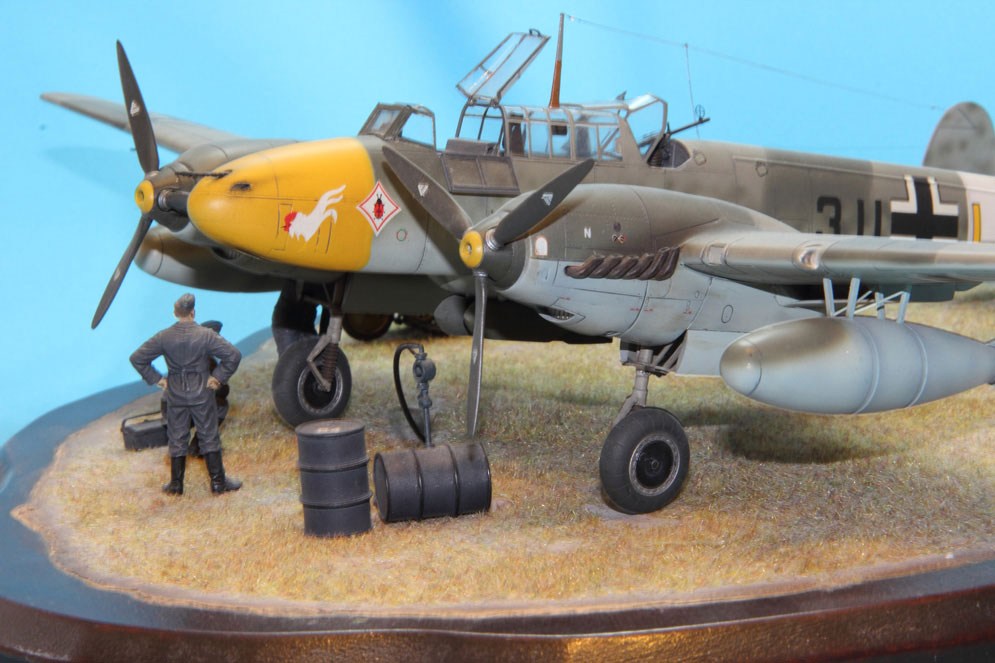
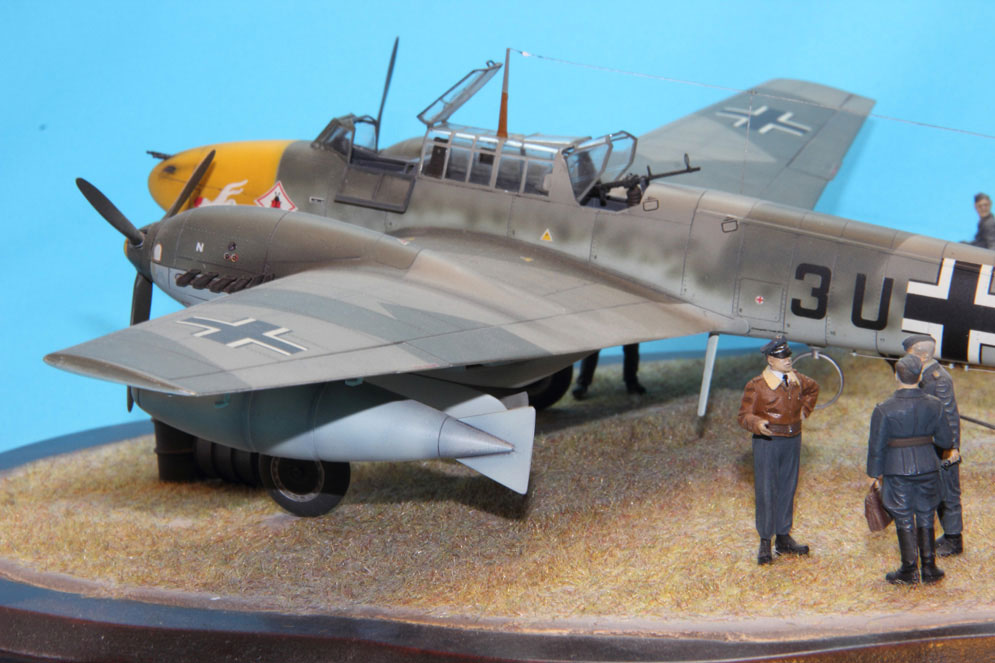
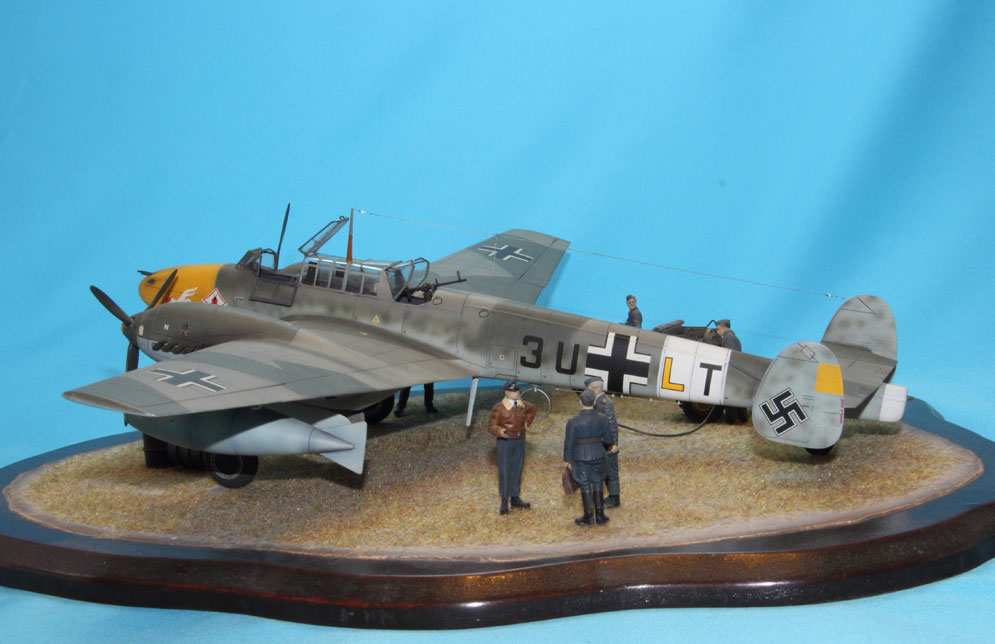
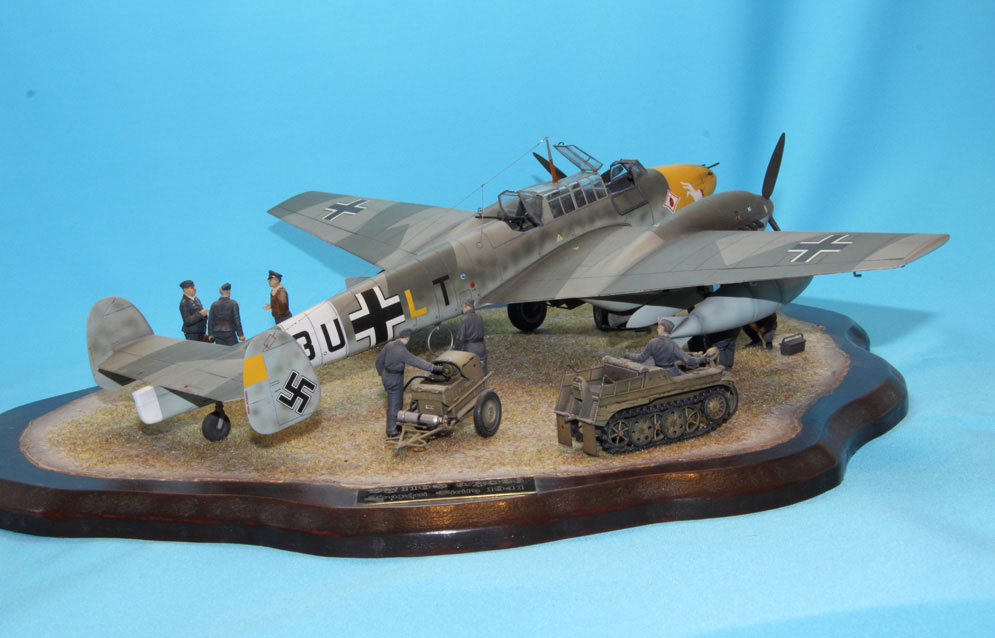
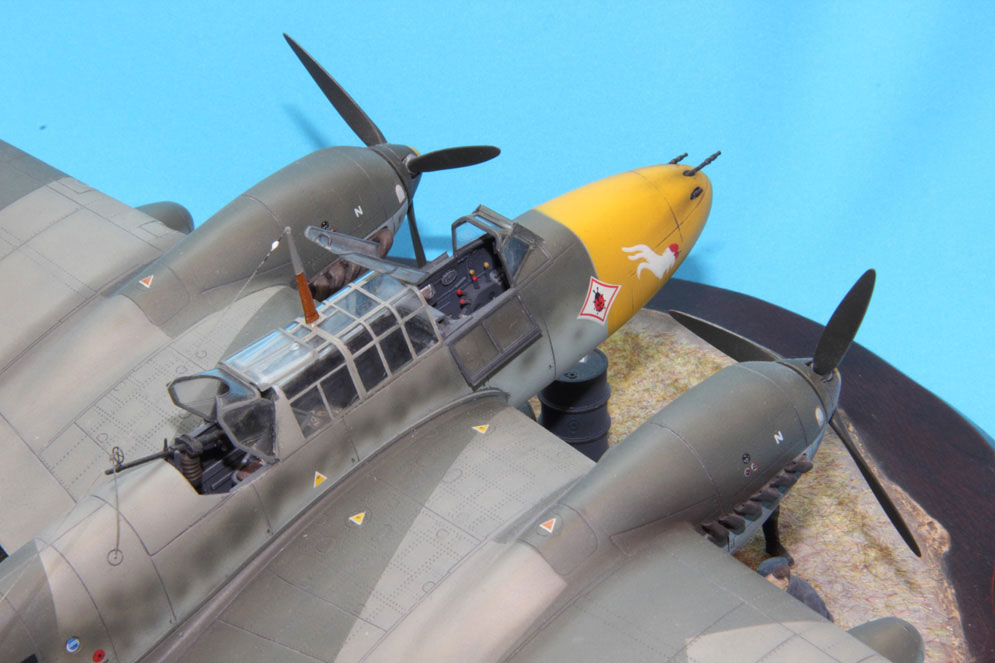
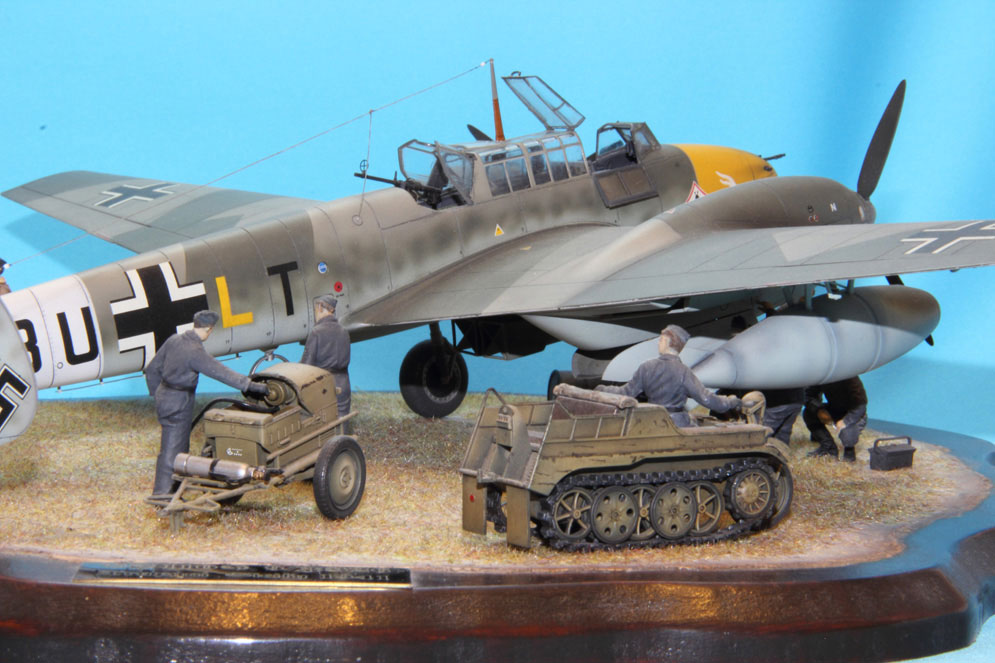
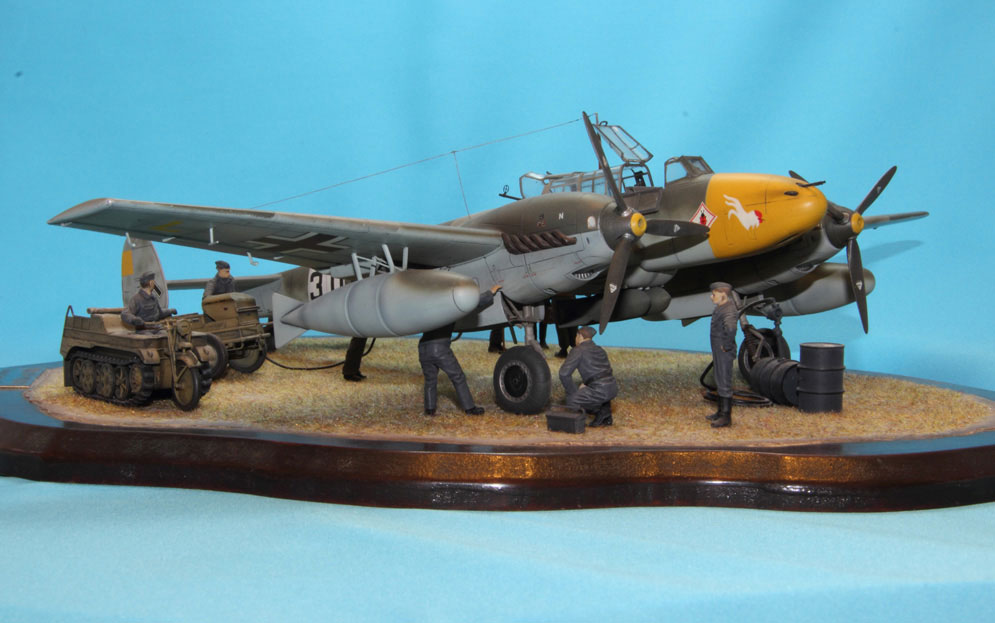
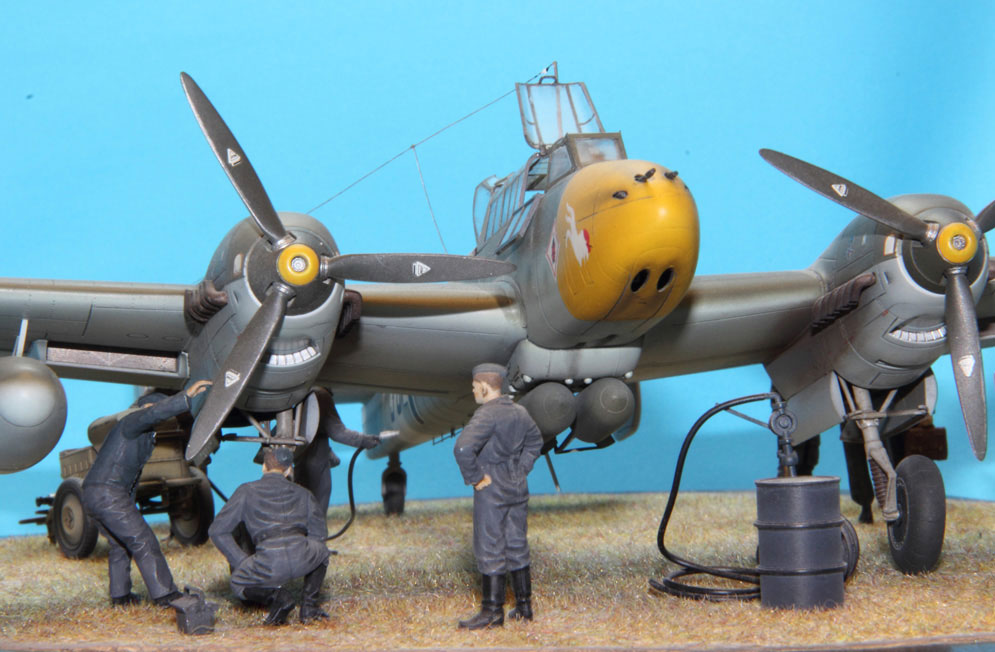
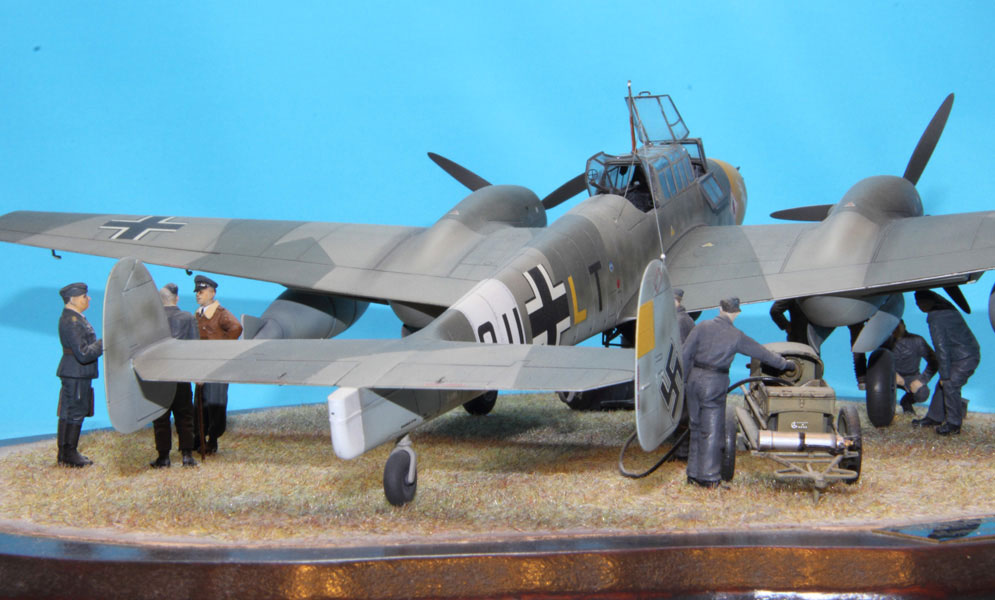
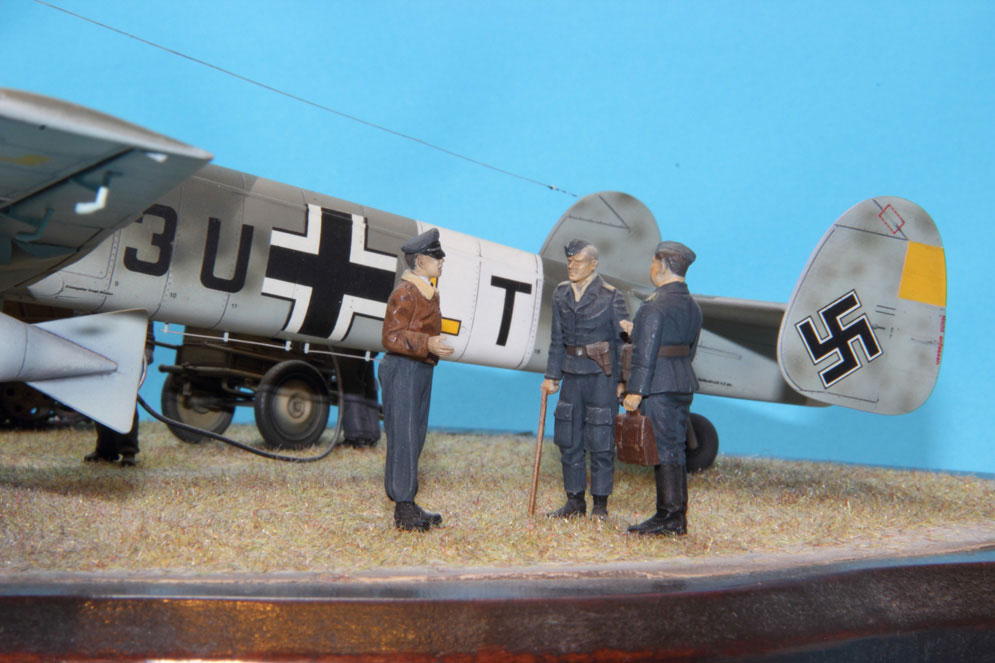
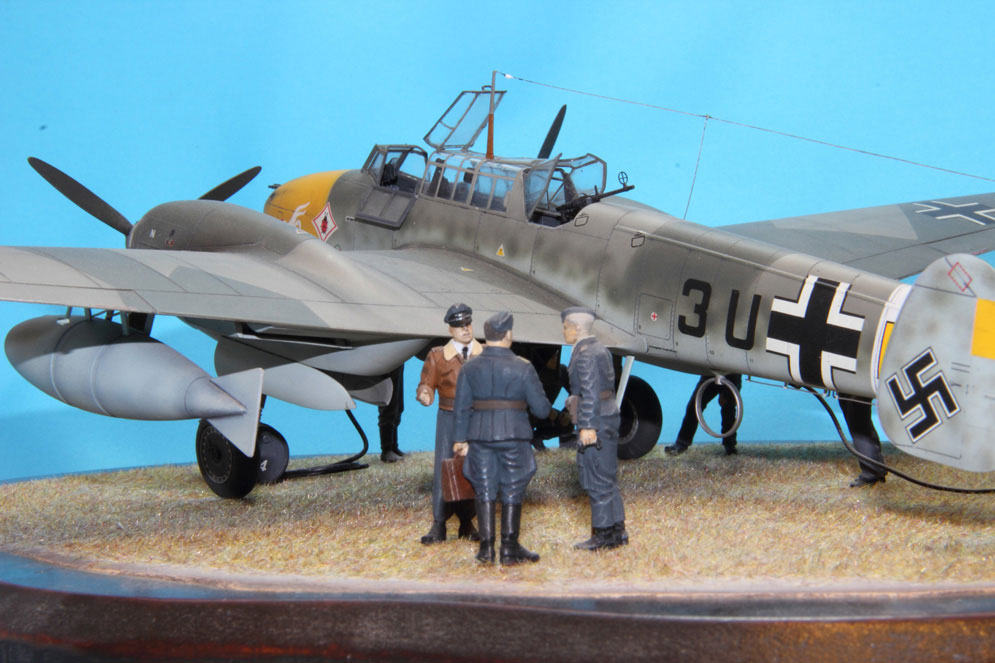
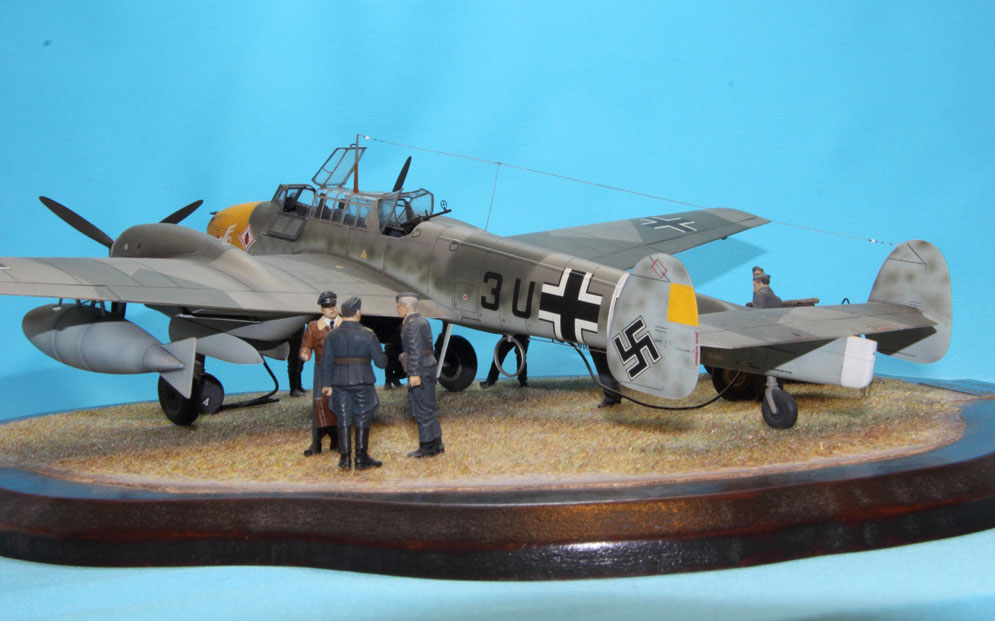
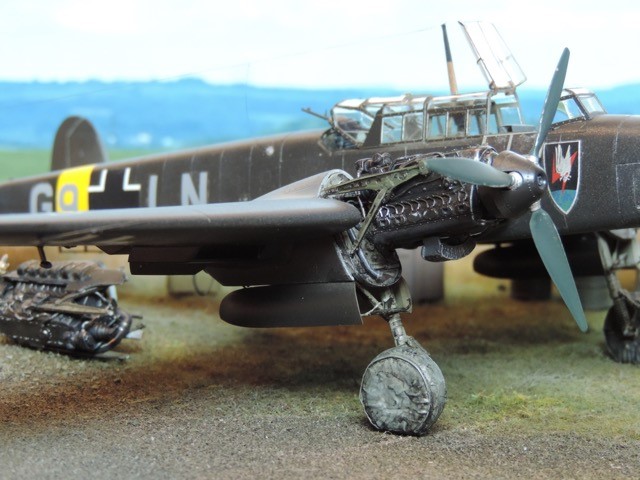
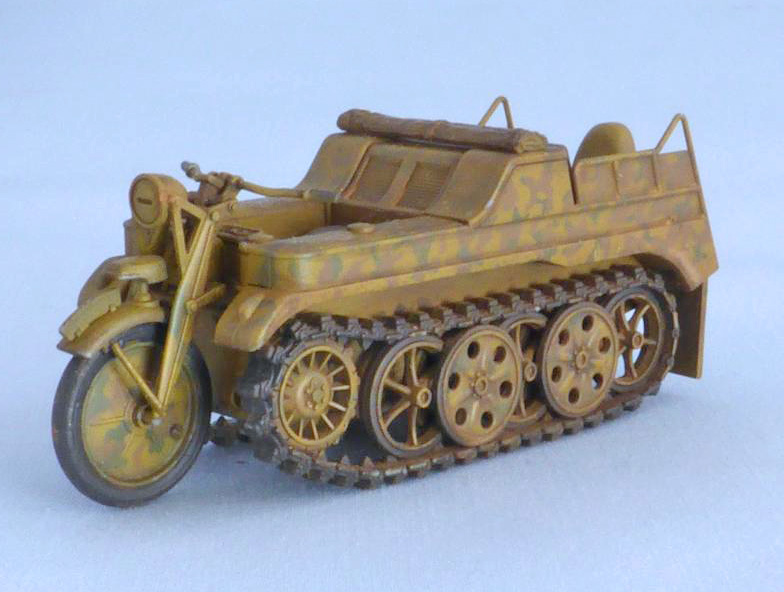
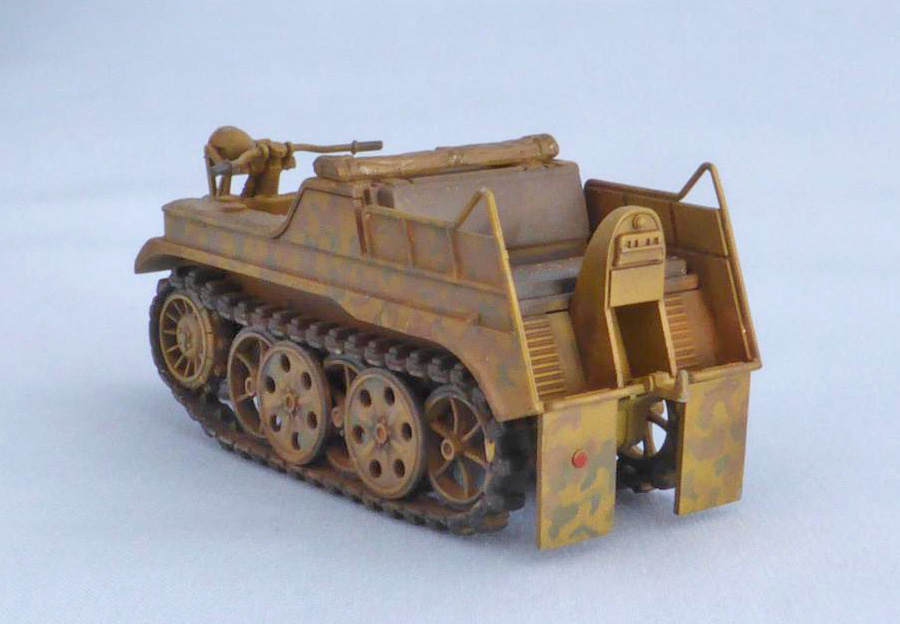
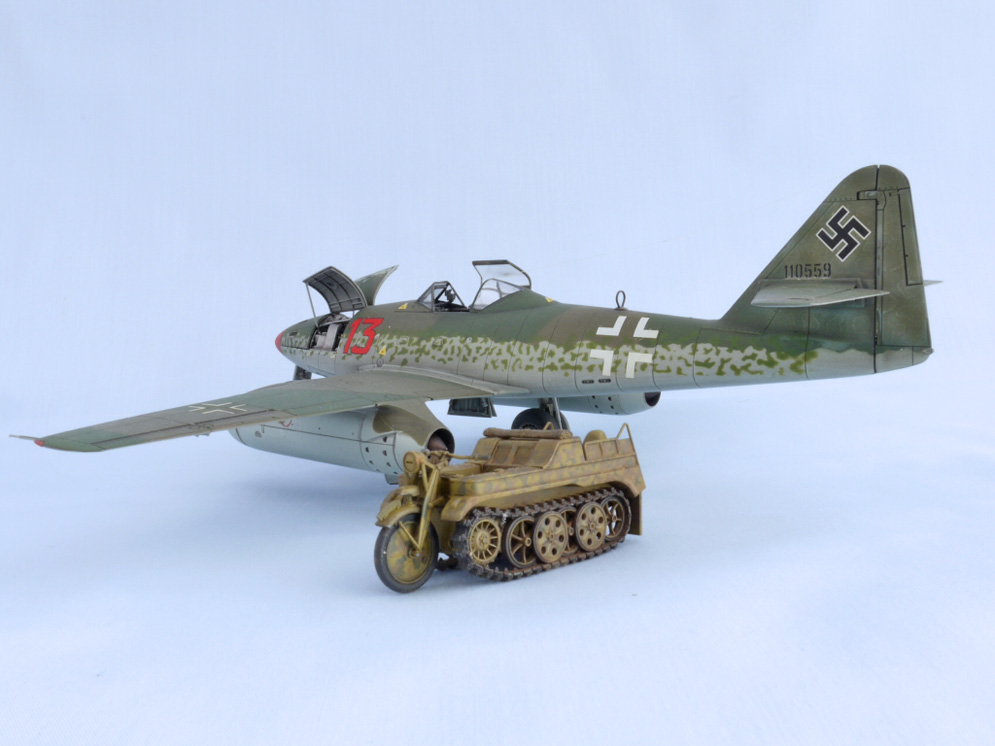
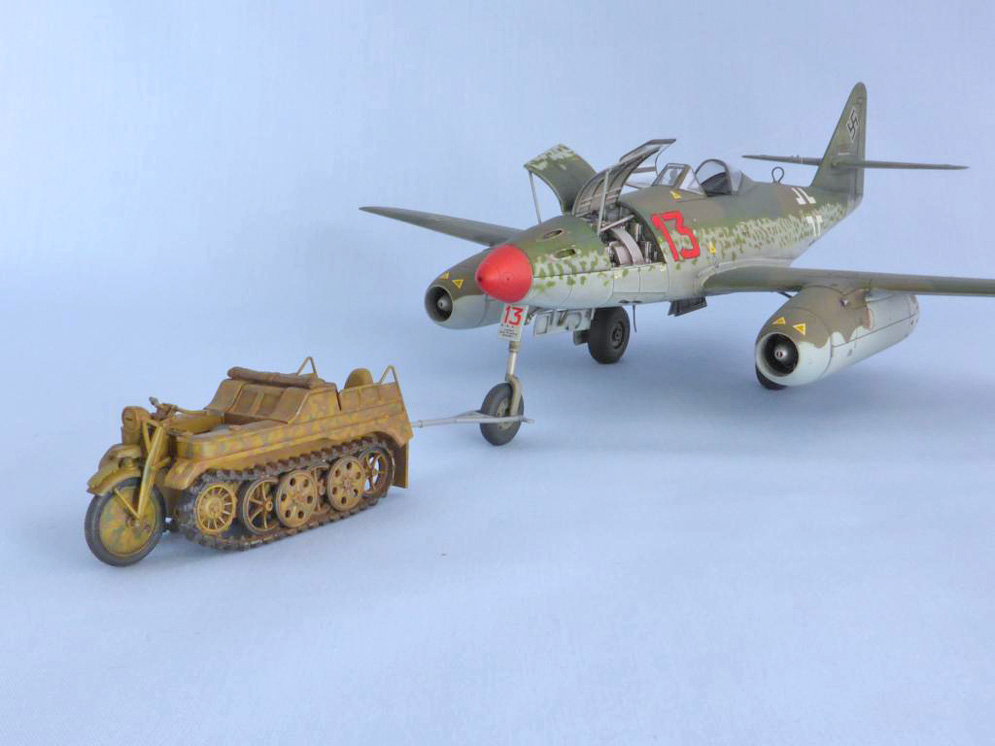
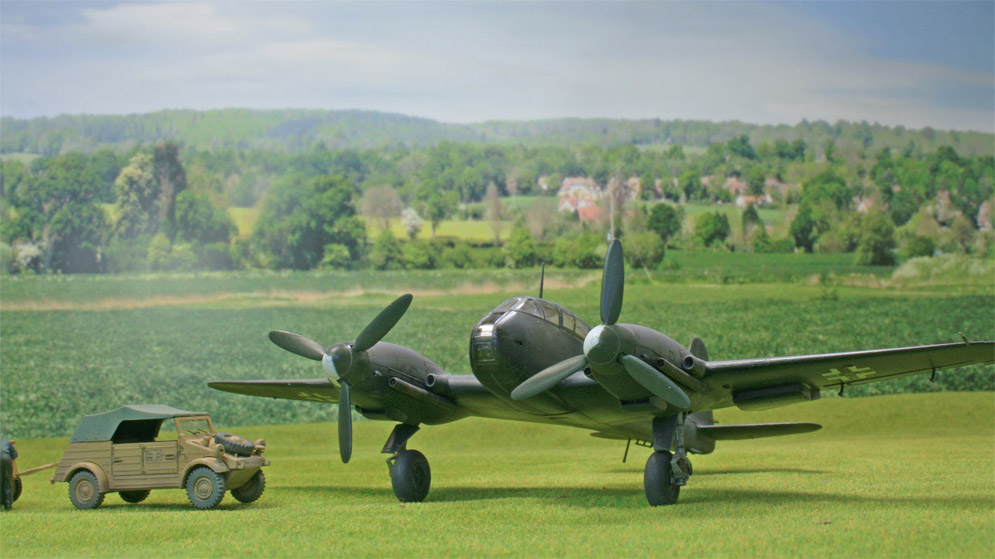
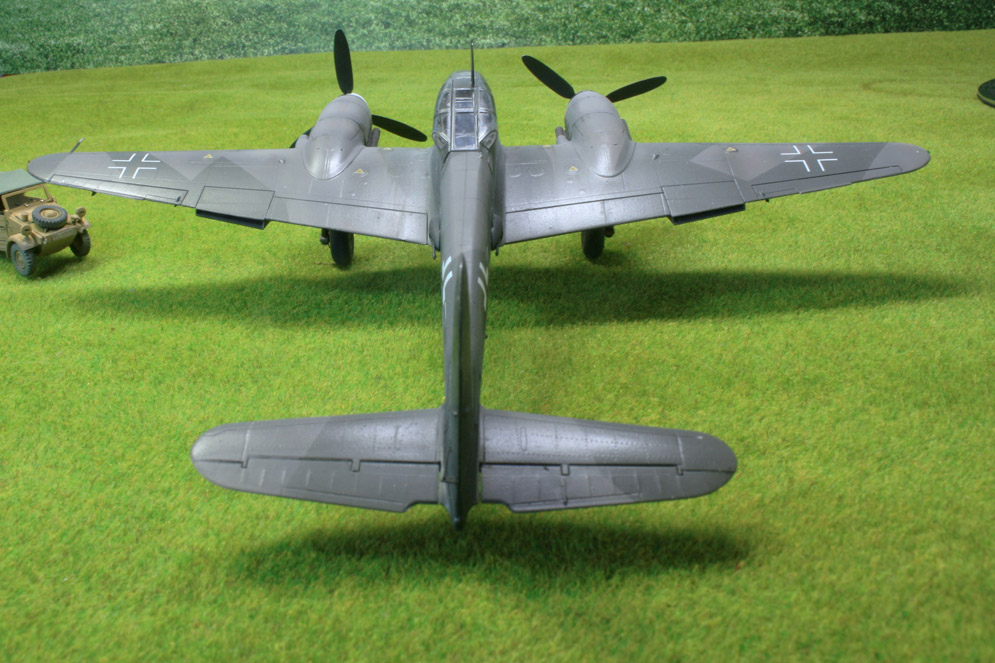
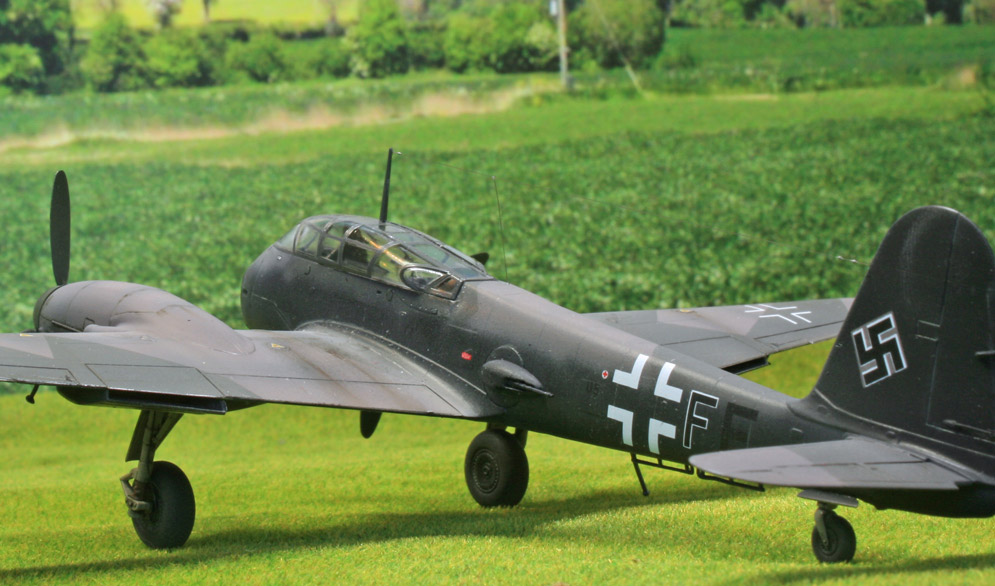
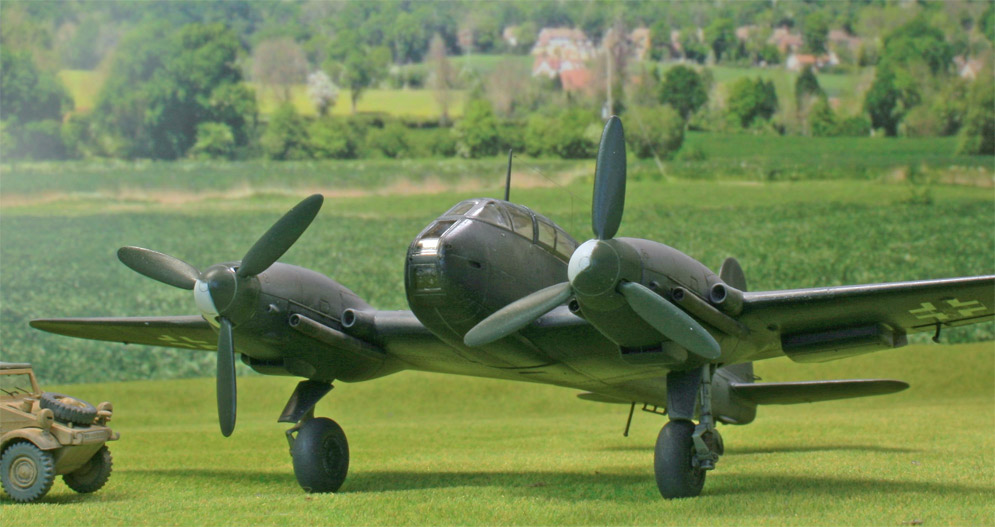
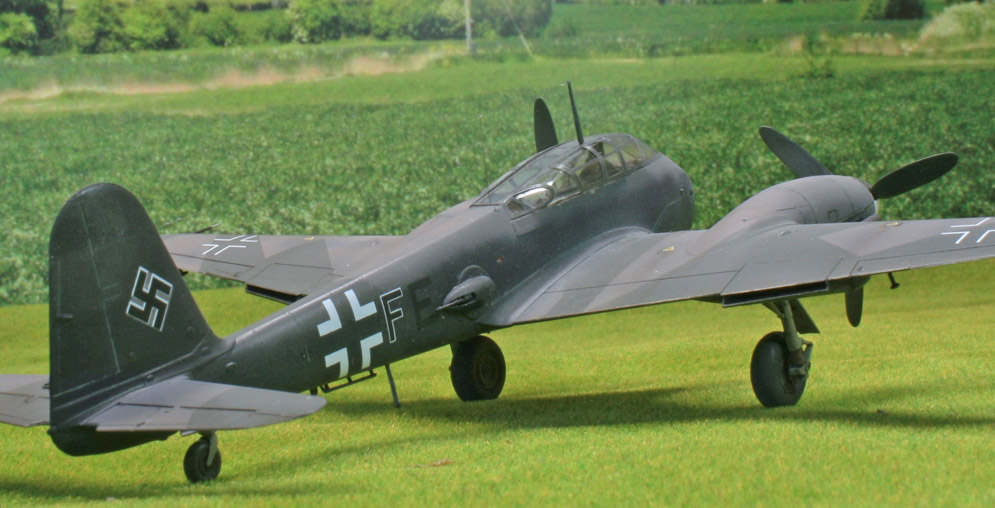
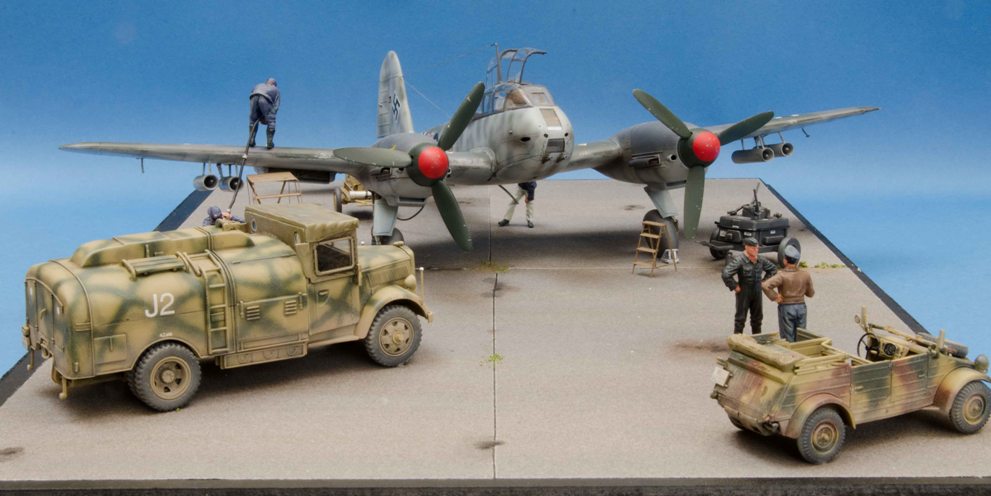
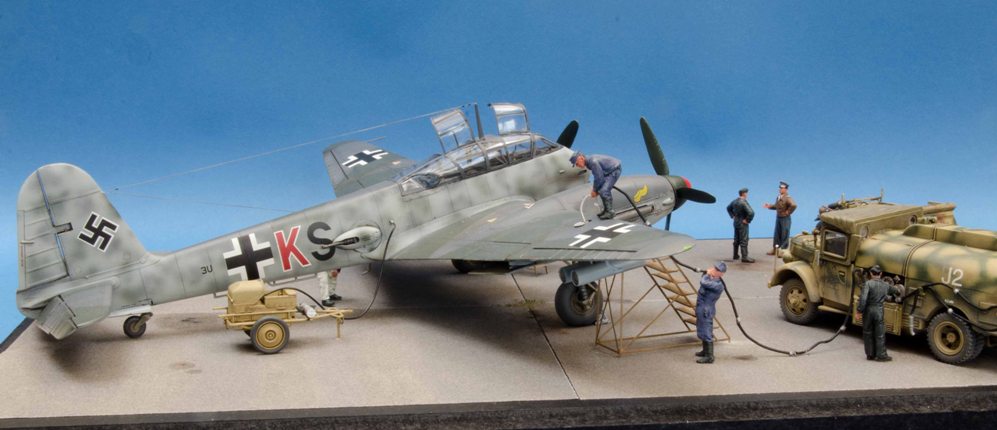
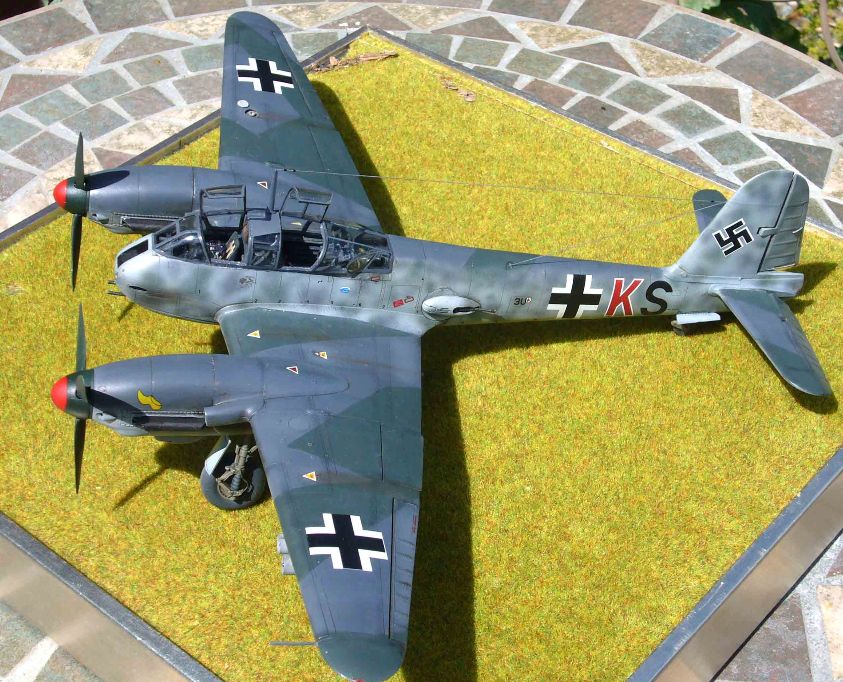
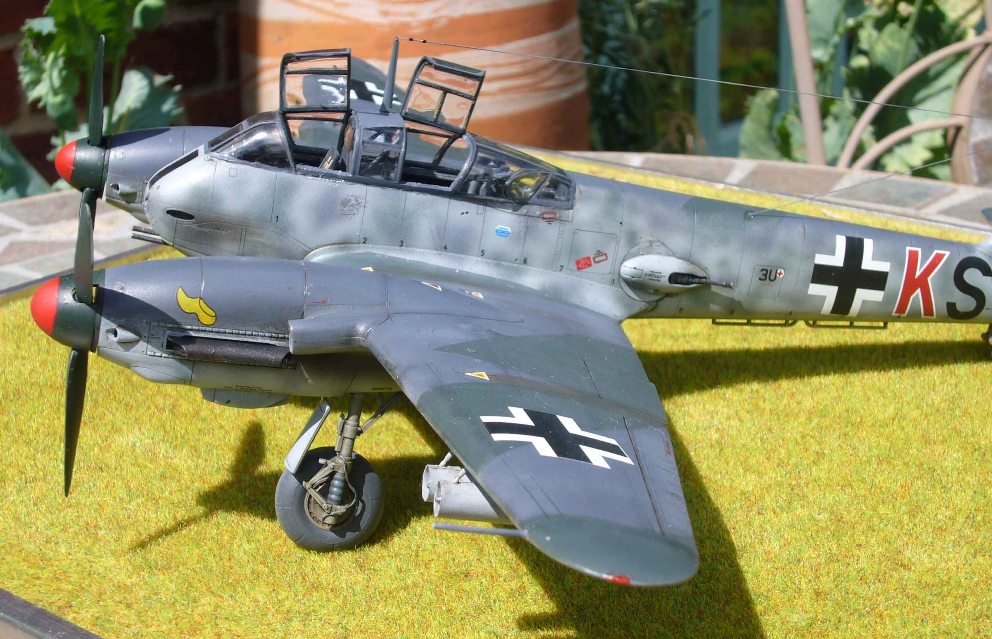
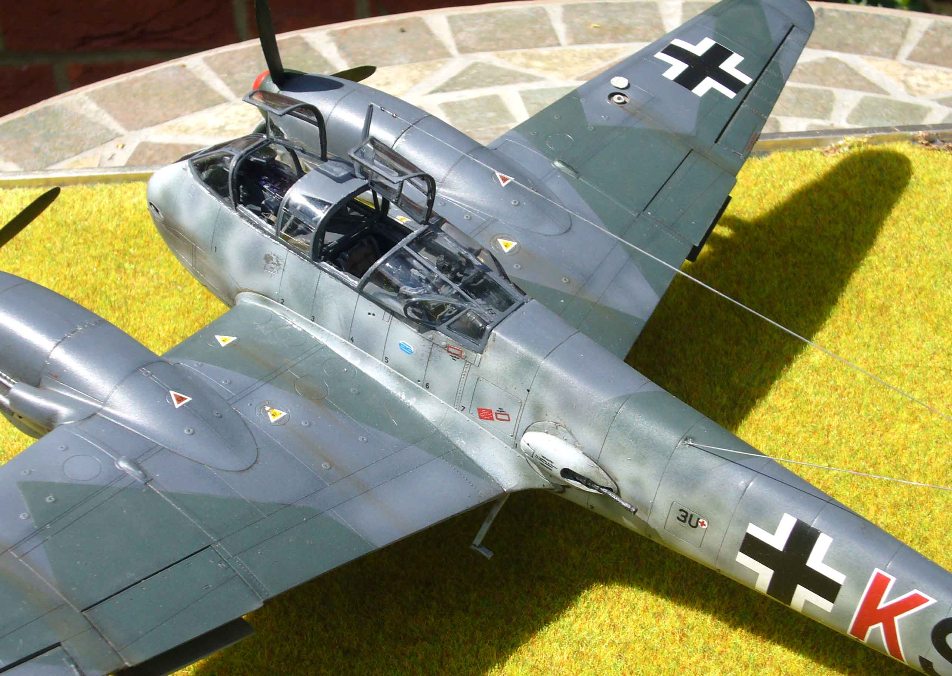
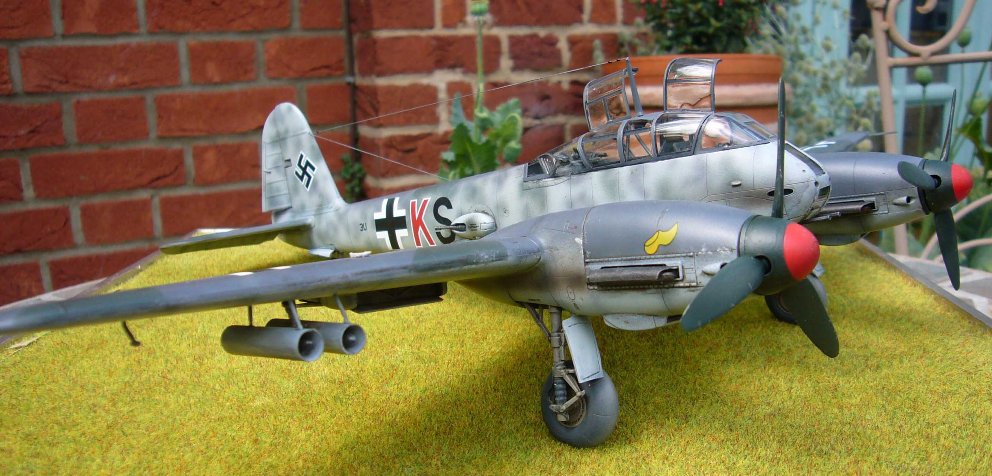
The kit is the Dragon Bf-110 C-7 in 1:32nd scale. The kit itself has some excellent surface detail and fit of parts with crystal clear glazing only let down down by poor instructions, I added some parts from Eduard with the decals from Techmod and some scratchbuilding in the form of plumbing in the open engine bays
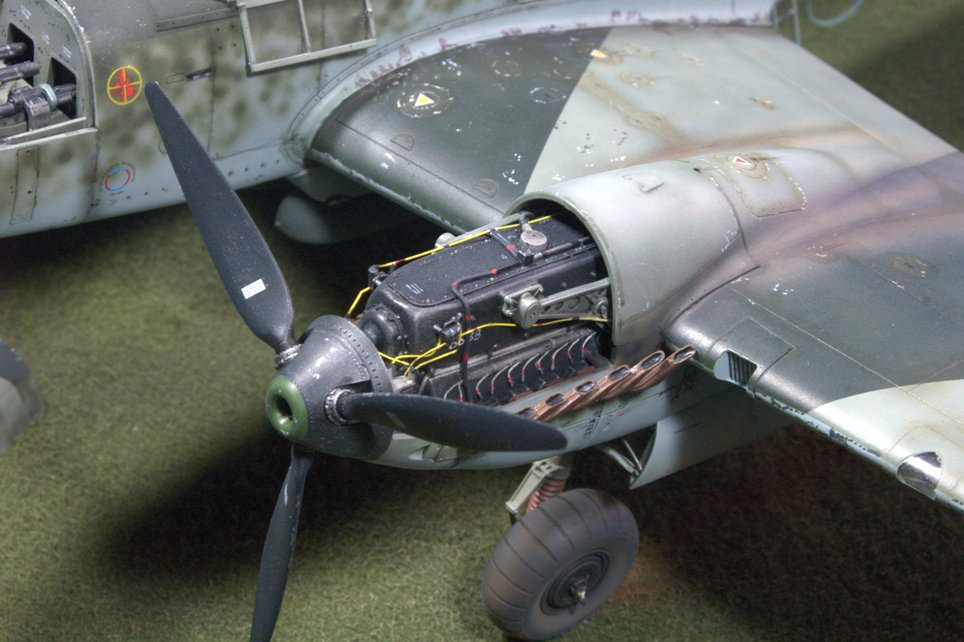
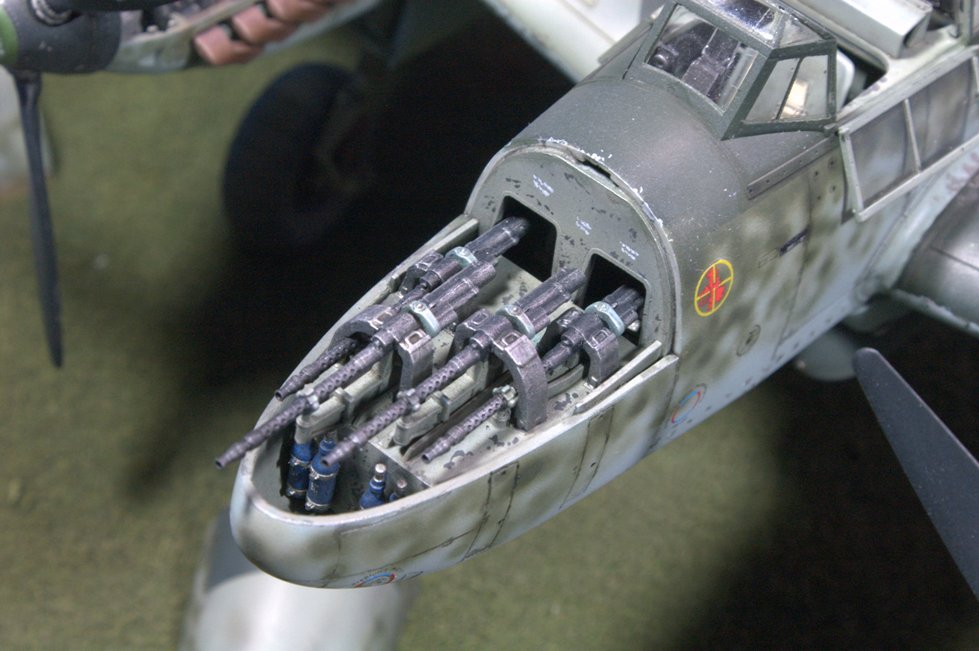
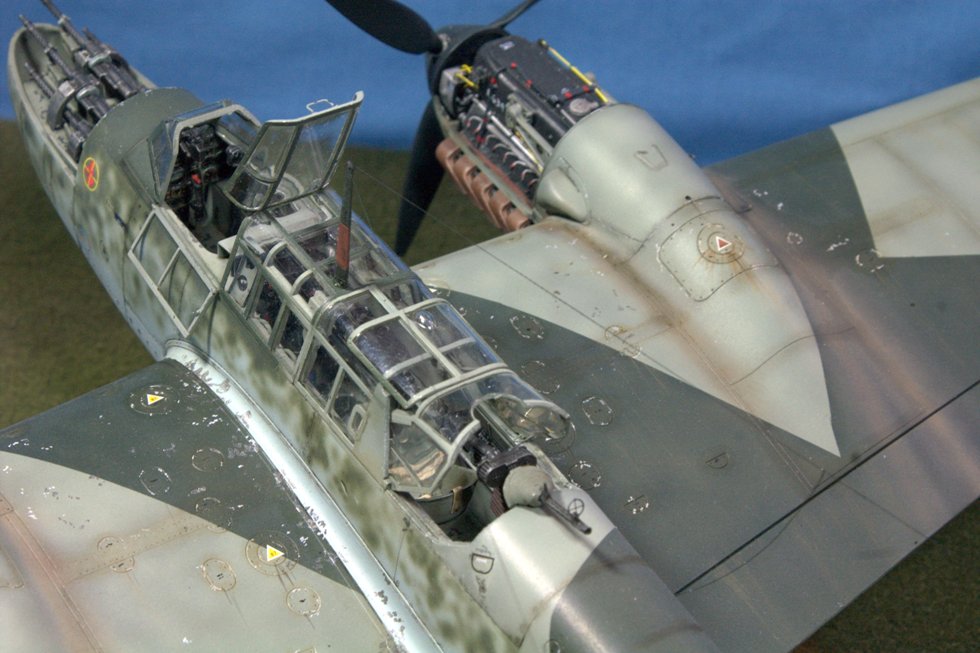
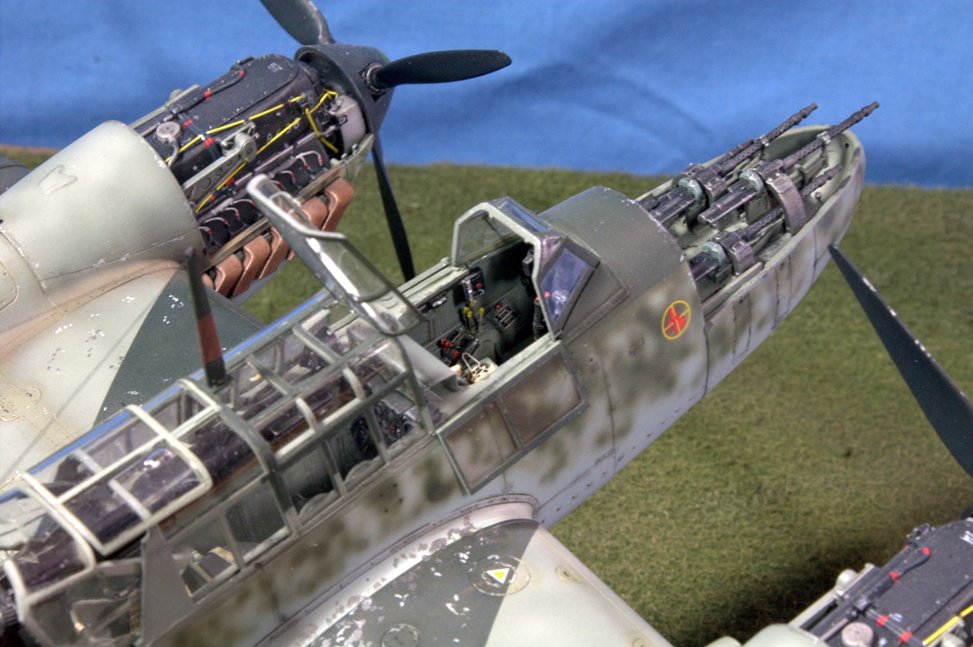
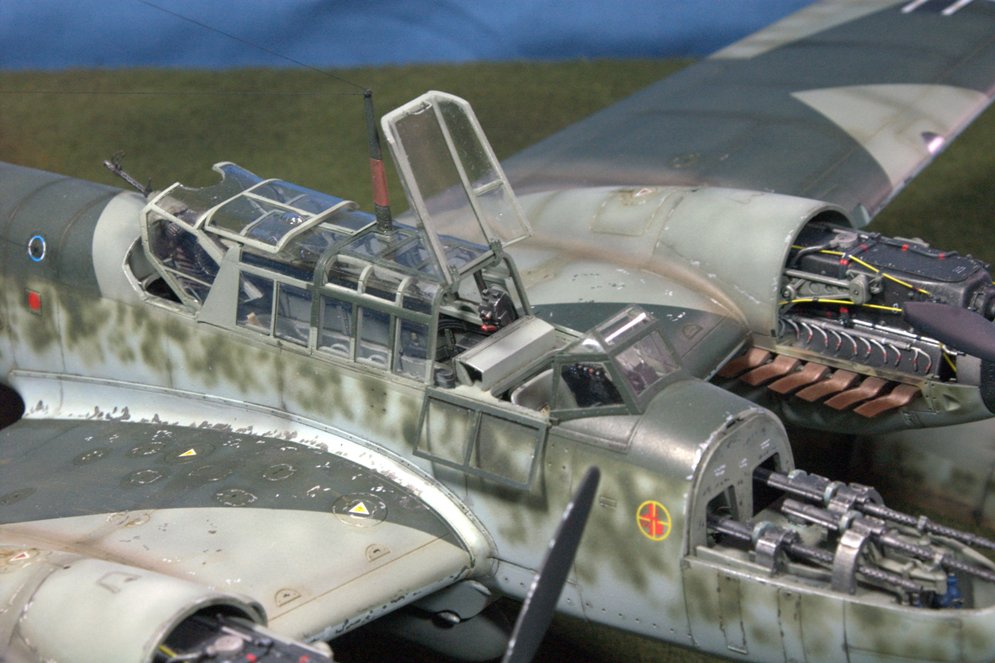
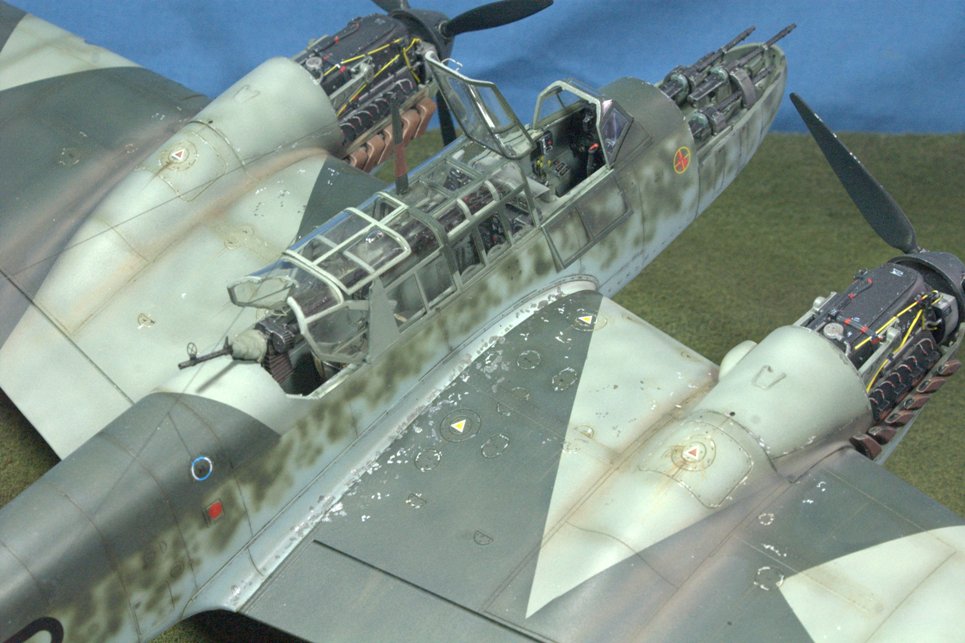
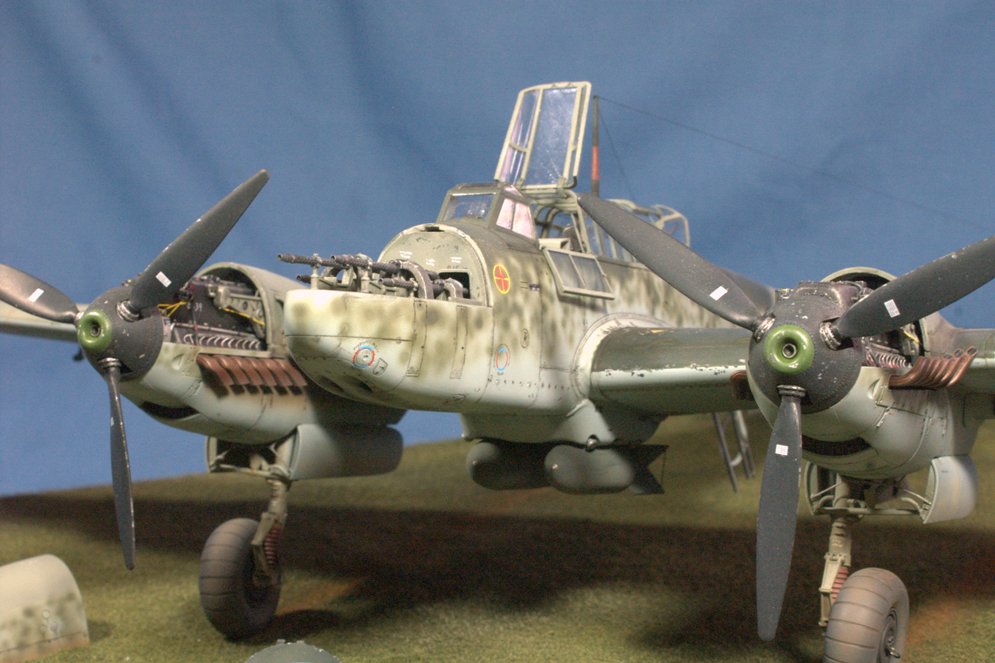
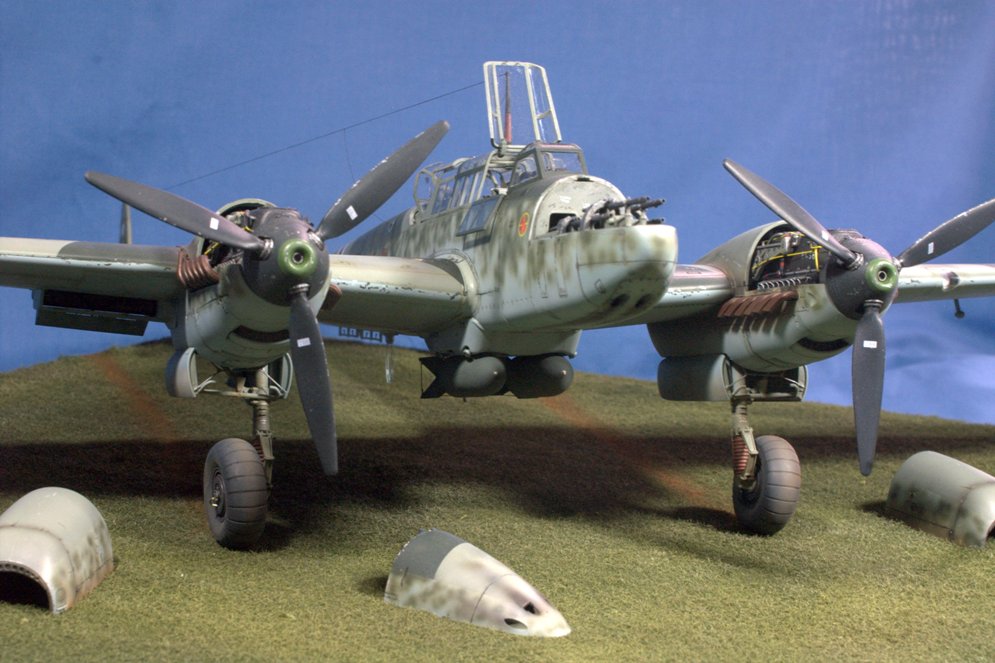
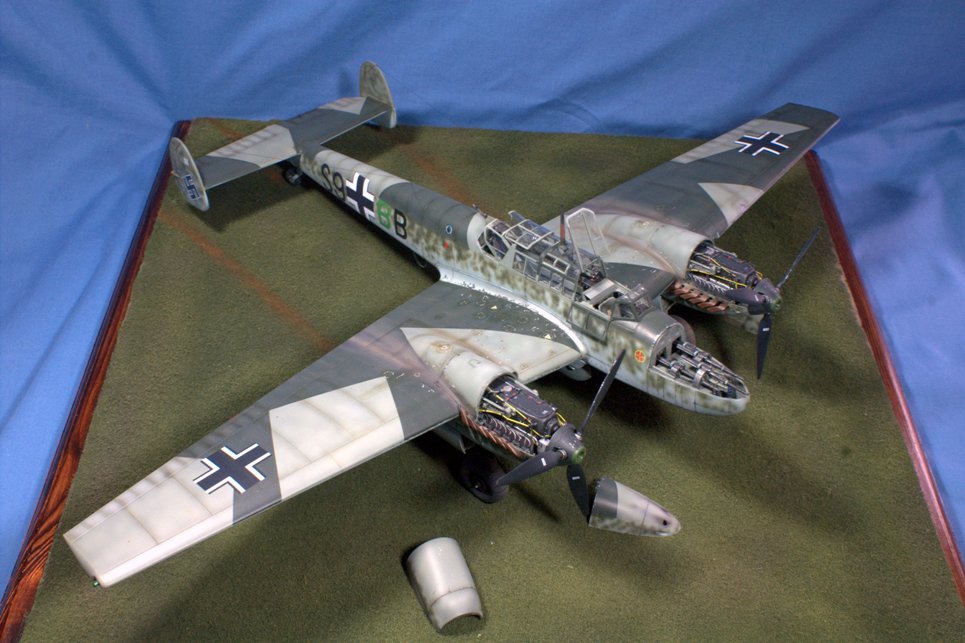
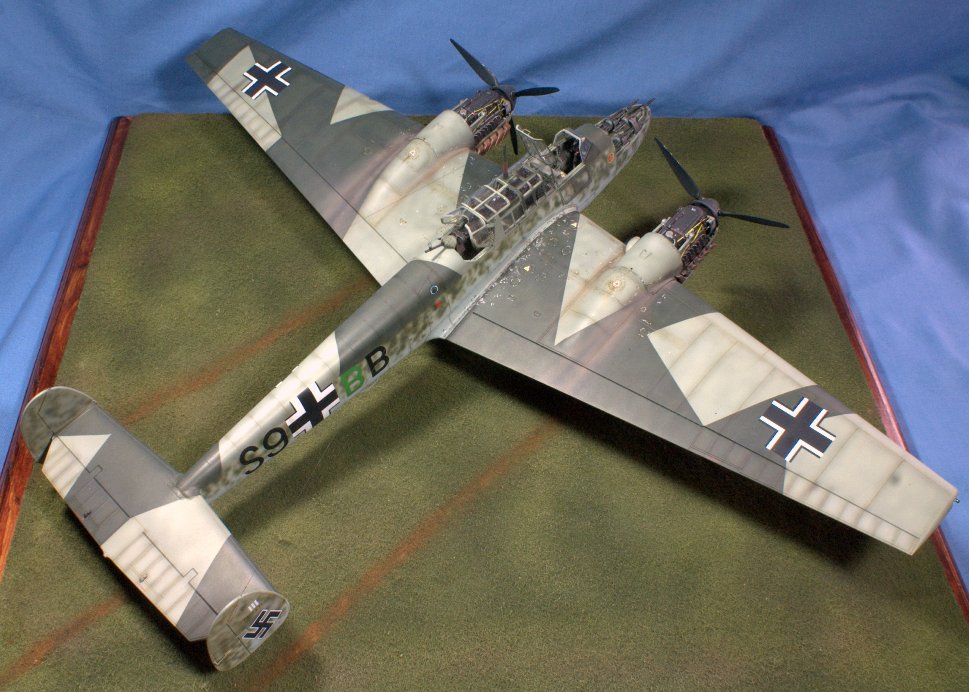
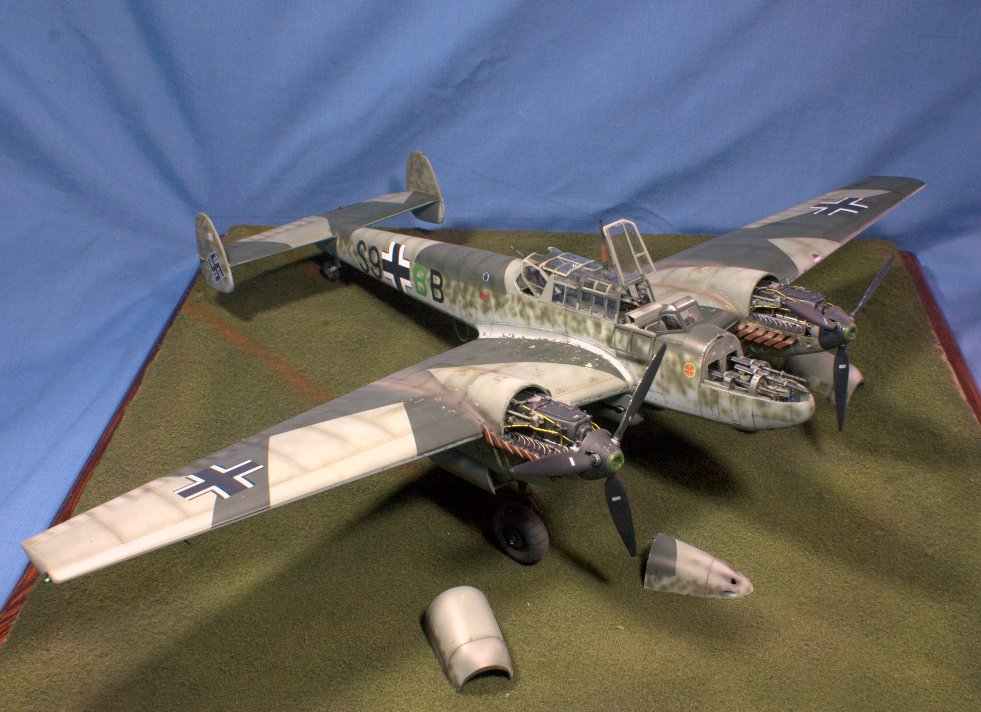
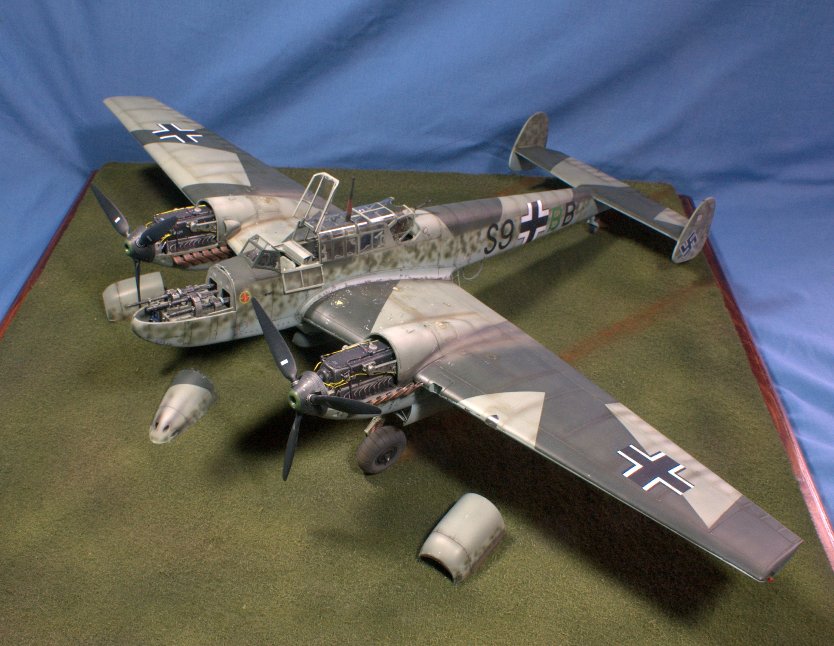
For the most part, the kit assembled beautifully, apart from the engine cowlings, which did not fit well at all. However, a dose of Milliput and some judicious sanding followed by reinstatement of lost panel lines and all was well! The finish was completed using Xtracolor enamel paints. I also find in using these paints, that it’s easier to fine tune my Iwata airbrush when applying mottling on Luftwaffe A/C. The figures and equipment come from the Tamiya Power Supply Unit set and are superb, the three Luftwaffe officers in particular, having plenty of character for such small scale figures. The Kettenkraftrad and power supply trolley were a joy to build; typical Tamiya, they assembled themselves! These items were finished with Tamiya’s own colours. After completion of the diorama, I realised that the ground crew figures should probably be finished in black overalls, not blue!
Mark R.
Hope you like it?
Max W.
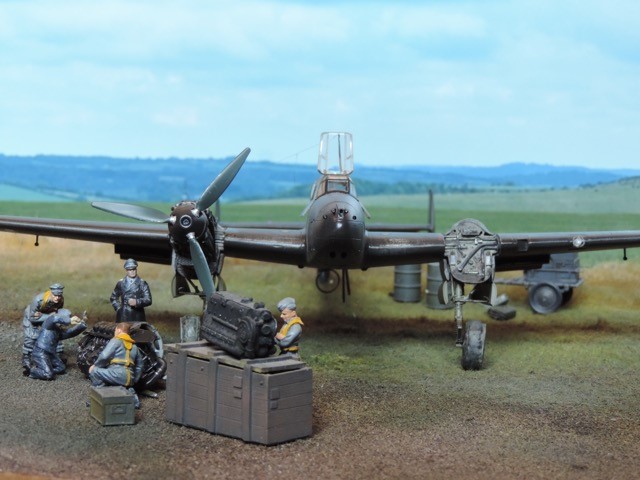
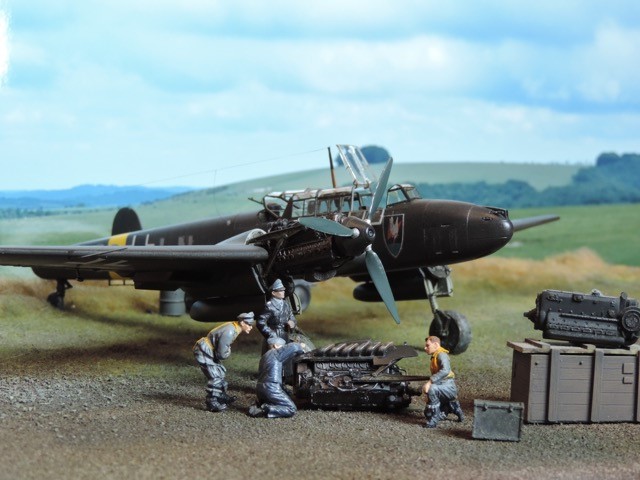
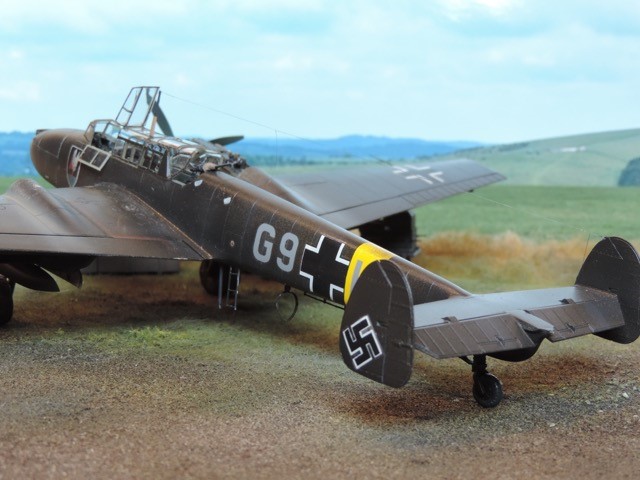
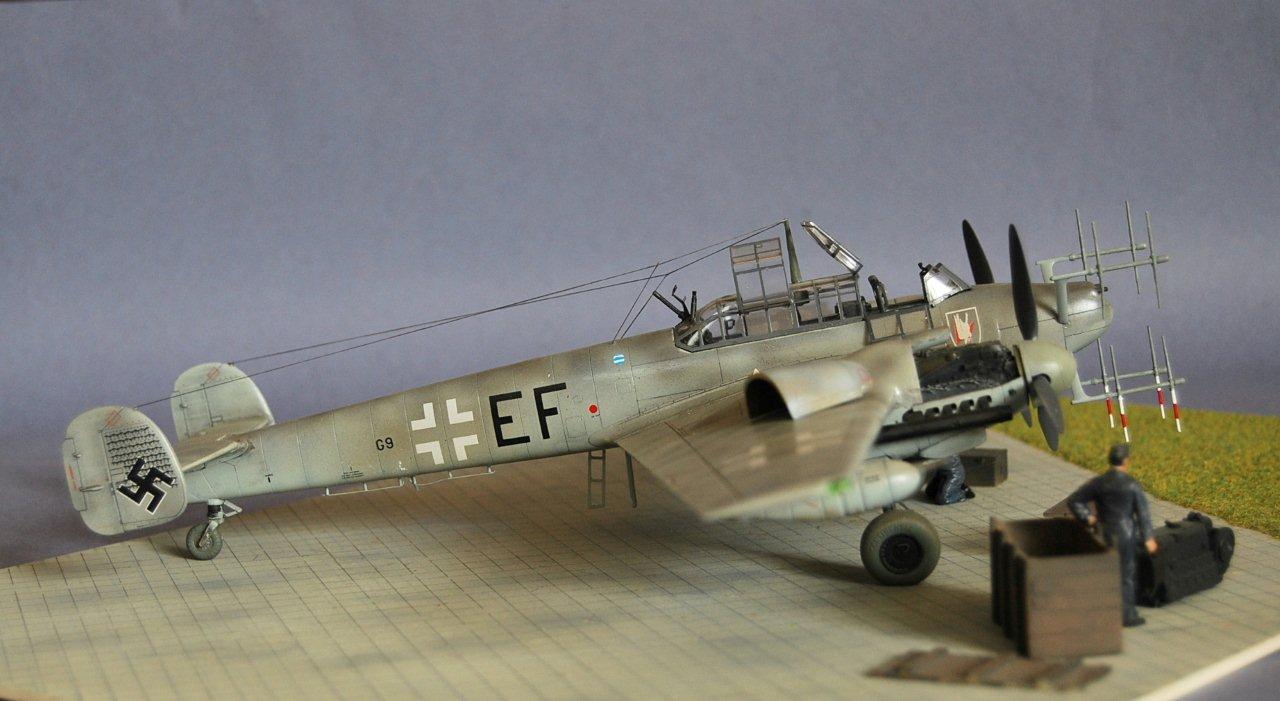
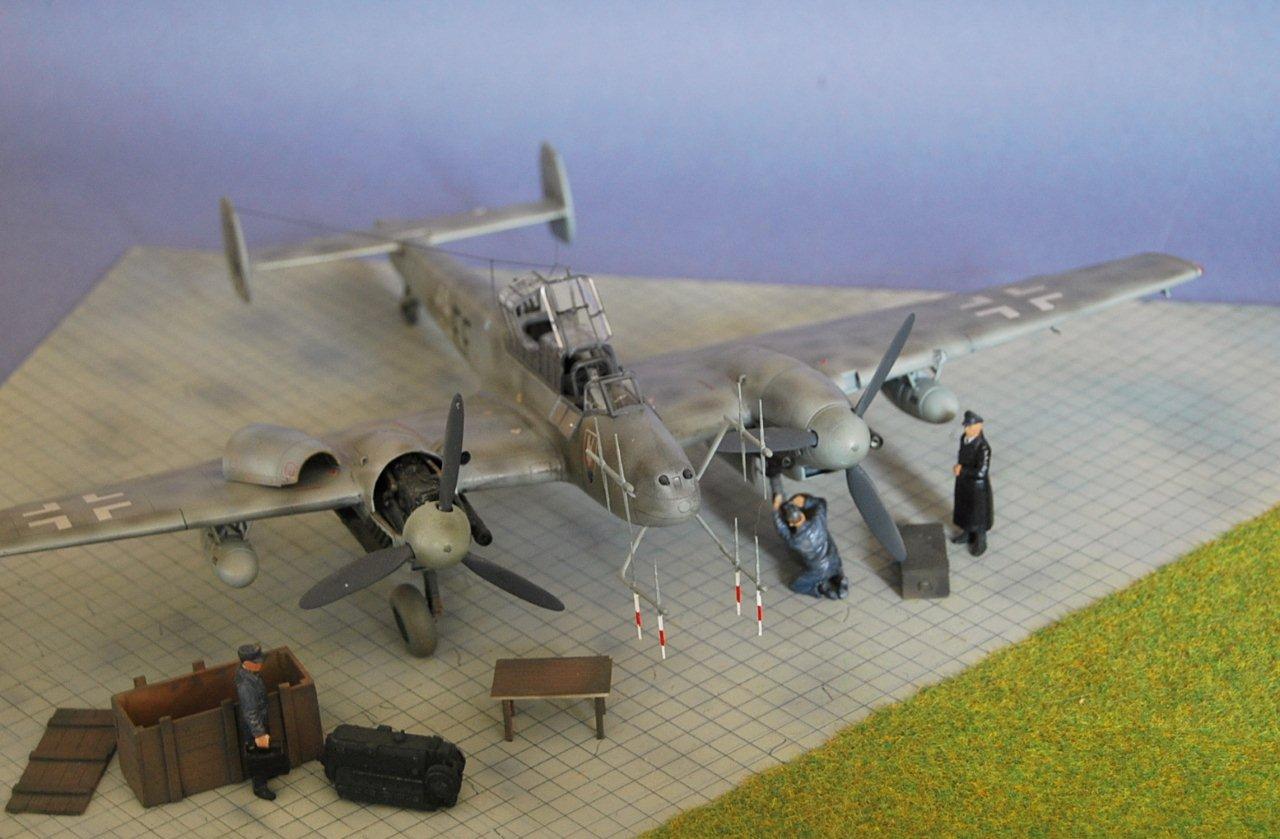
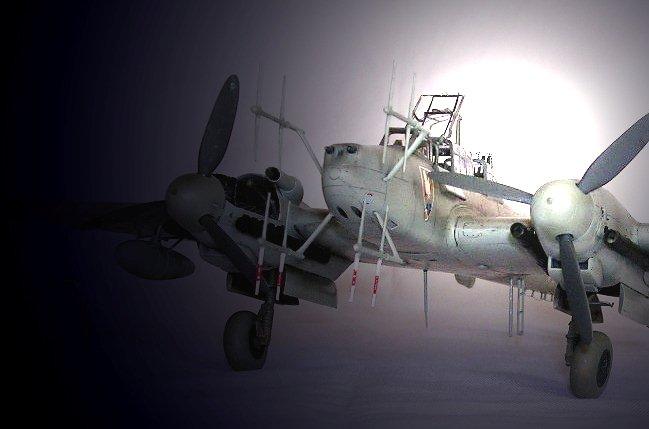
Here are a few pictures of the Bf110G-4 that I built last year.
It is the (now scarce) Revell-Monogram 1/48th model which is well detailed, but which has engine nacelles of the wrong profile. Cutting Edge does a correction kit for this, and for the spinners/propellers which I managed to source in America, since this kit is also discontinued! To give further interest I added the Verlinden engine, machine gun and Schrage-musik cannon. The particular aircraft modelled is that of Major Heinz Wolfgang Schnaufer, his favoured aircraft of G9+EF which he kept in its original markings despite his promotion to command NJG4 from NJG1, the former flying Ju88Gs. Research showed however that for the period that I modelled the plane (Spring 1945), it had been fitted with Eberspacher exhausts and flame dampers, so the recently produced Owl resin kit was added.
Paints used were Vallejo and Xtracrylix, decals were by Owl and Revell/Monogram. The model was given several coats of Klear and the slightly shiny finish was retained since Schnaufer allowed his aircraft to become polished in his search for speed! Figures are by ICM.


Meng Models
I had read several reviews online before building this one and thought the issues must have been caused by the modellers, but I was wrong. The fit of the wings to the fuselage is a real issue due to the engineering. Note that I chose to fit the wings to the fuselage halves then join them. But this didn’t really improve anything and I also ended up with a slight twist/misalignment of the fuselage halves.
As usual all markings use masks, apart from the stencils. The model is not of any particular aircraft, but takes inspiration from the one preserved at the Smithsonian. Overall it turned out as I had hoped, but the mottle on the fuselage should have been darker.
Craig W.


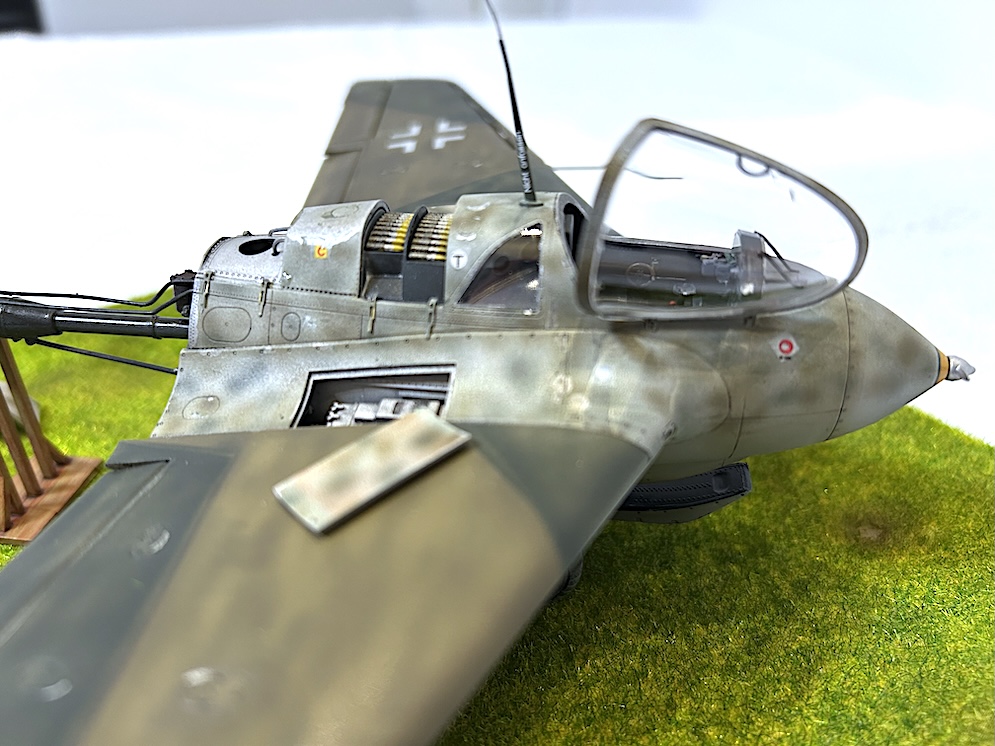
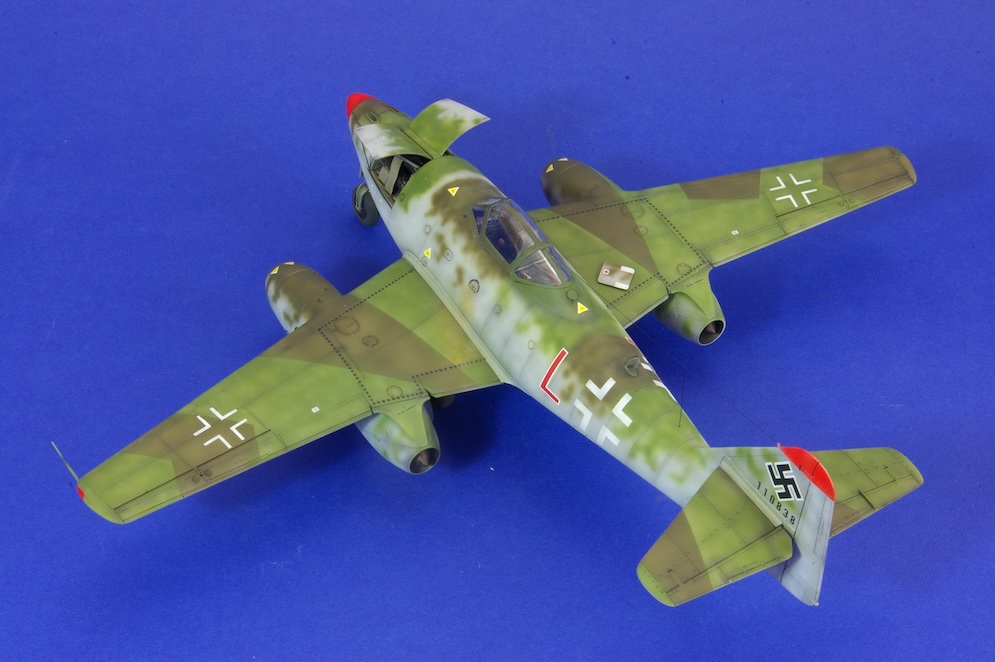
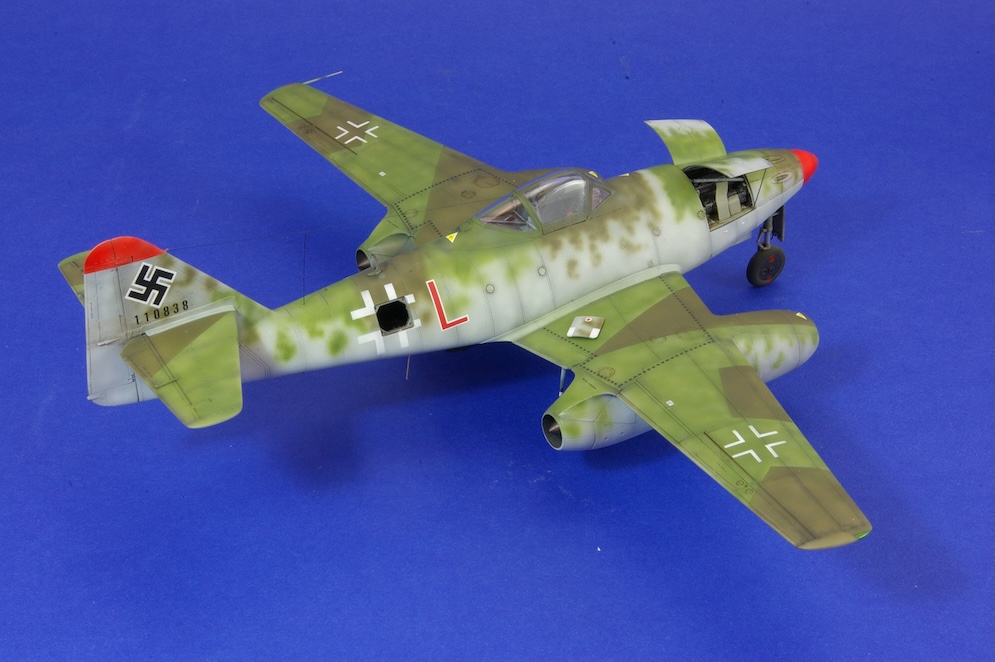
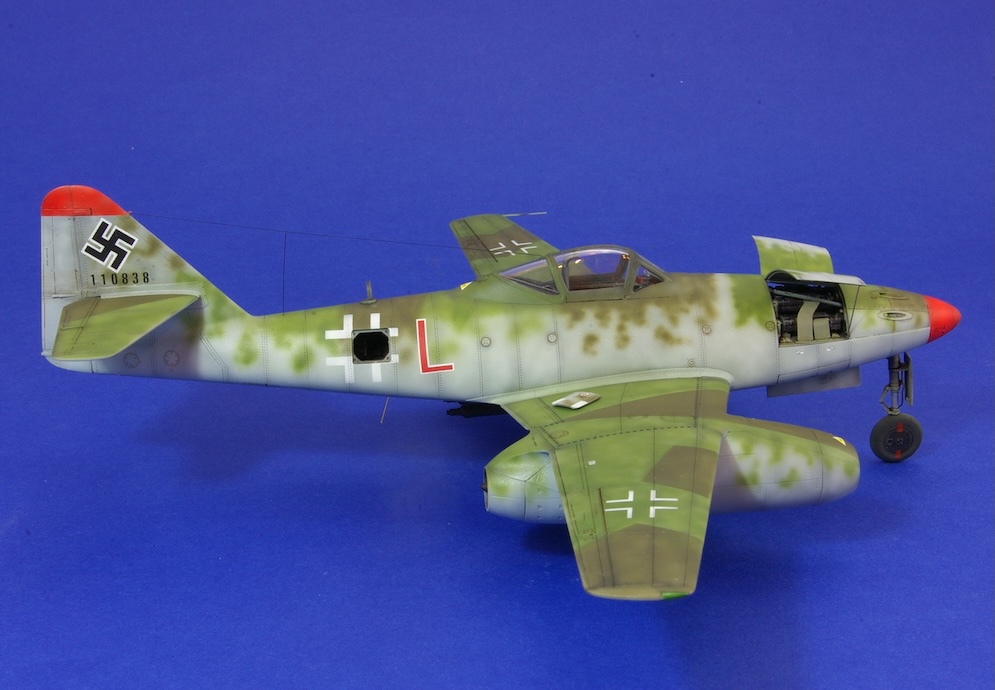
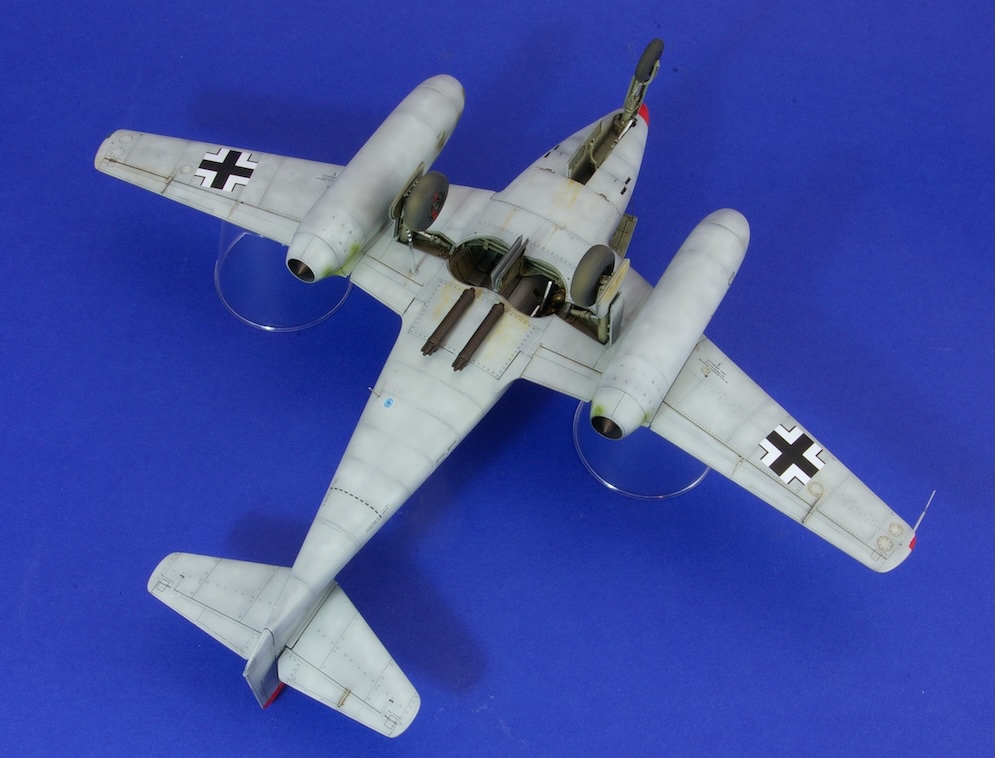
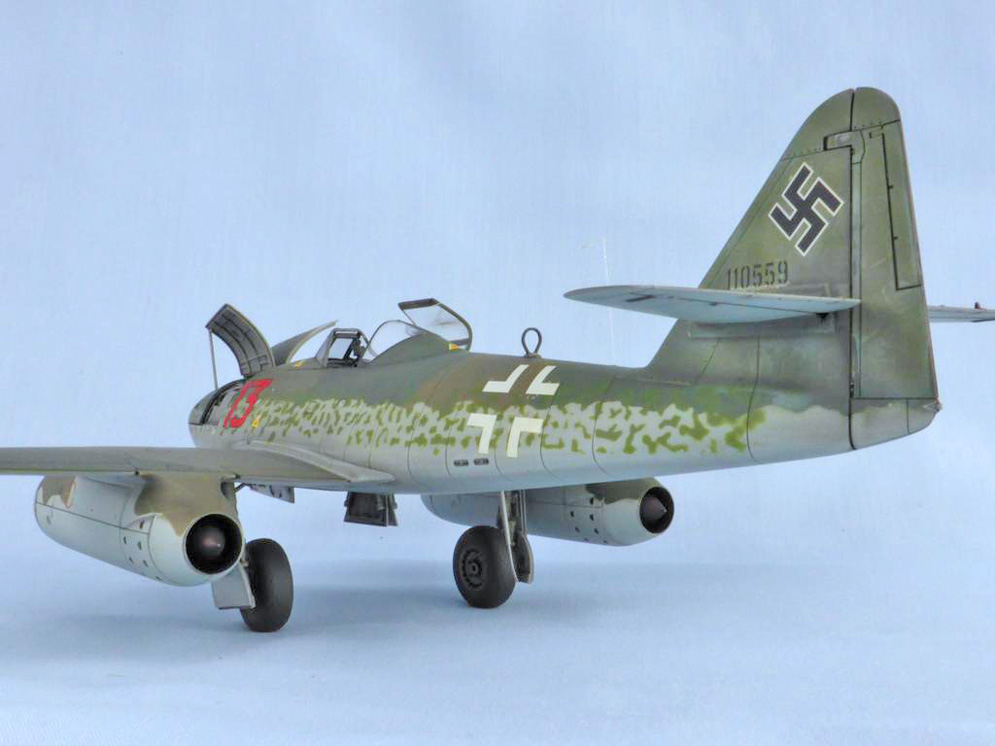
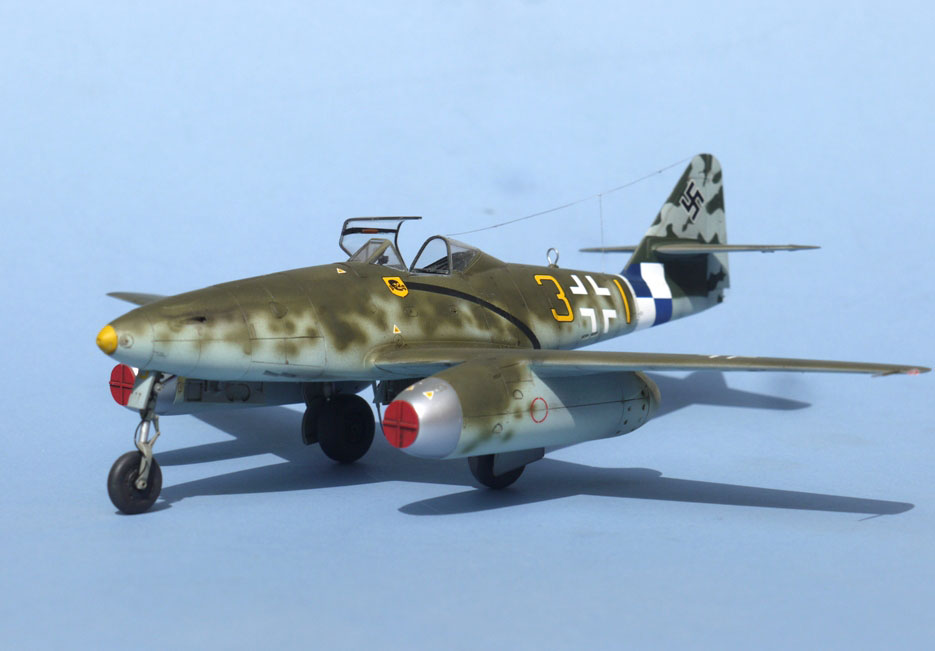
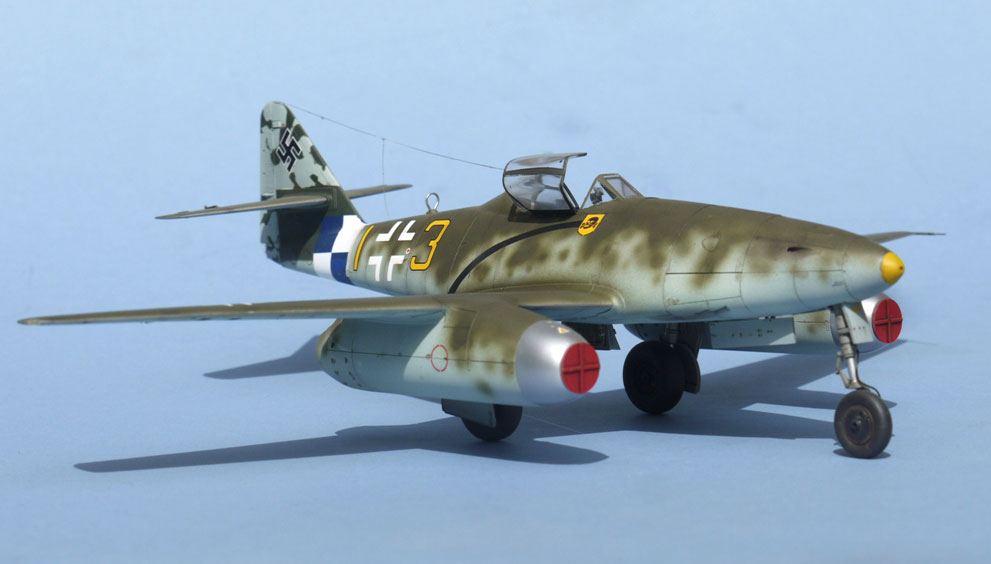
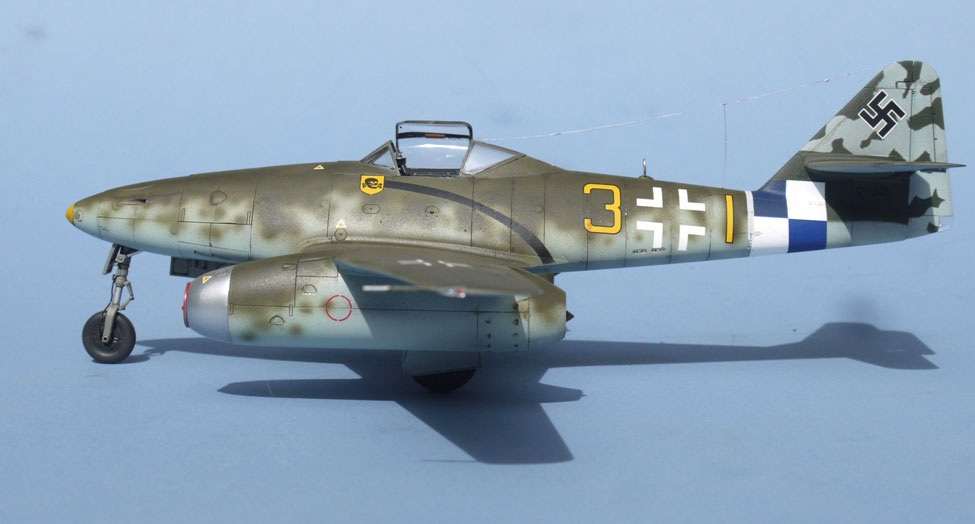
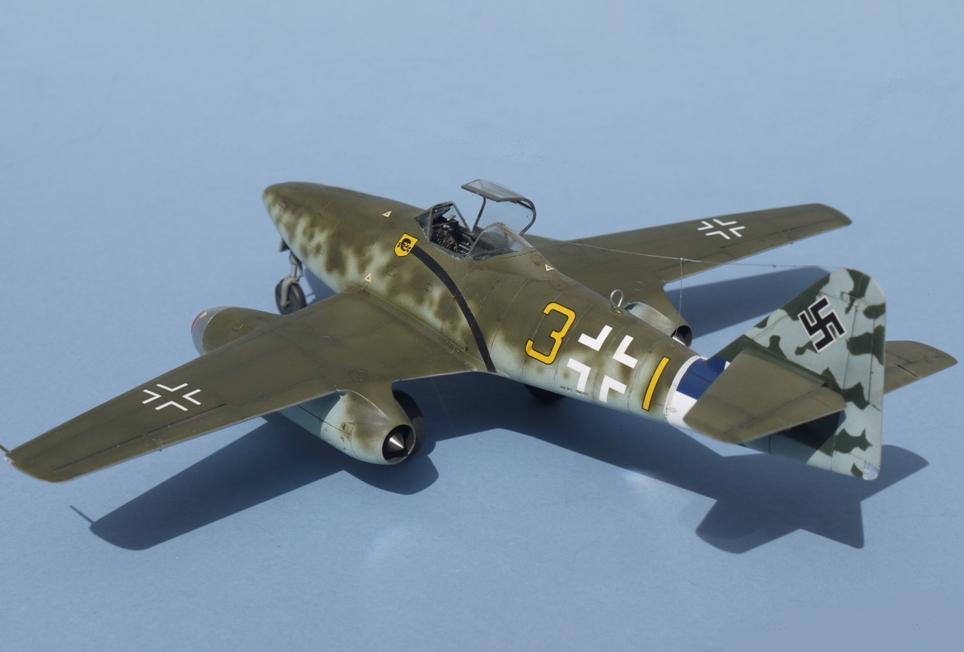
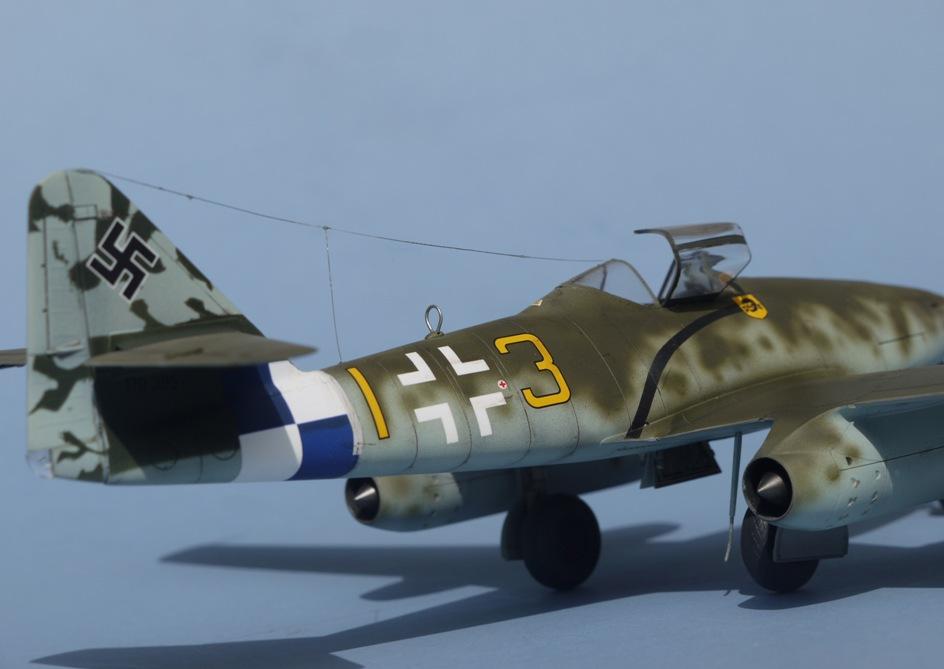
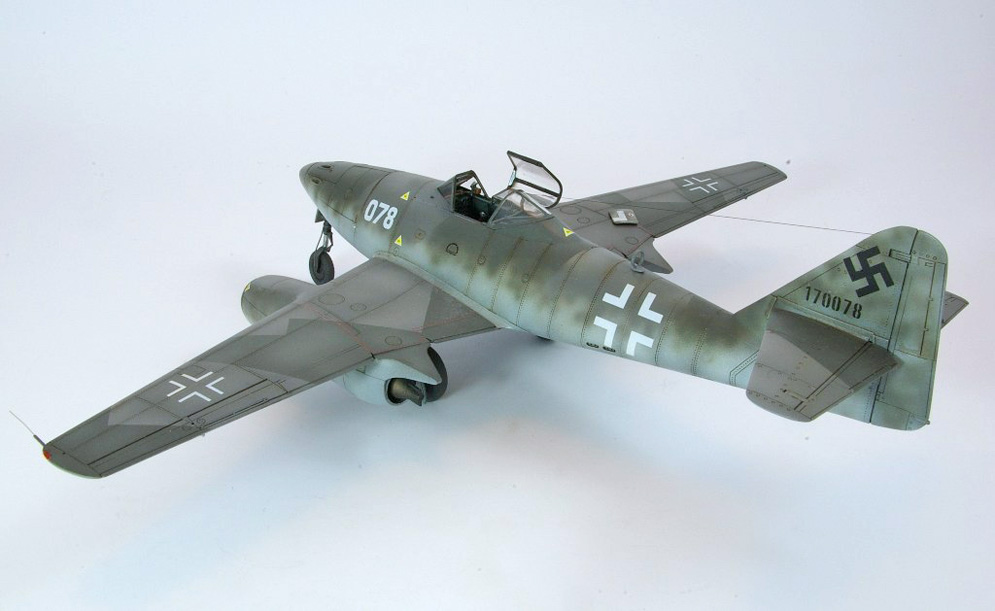
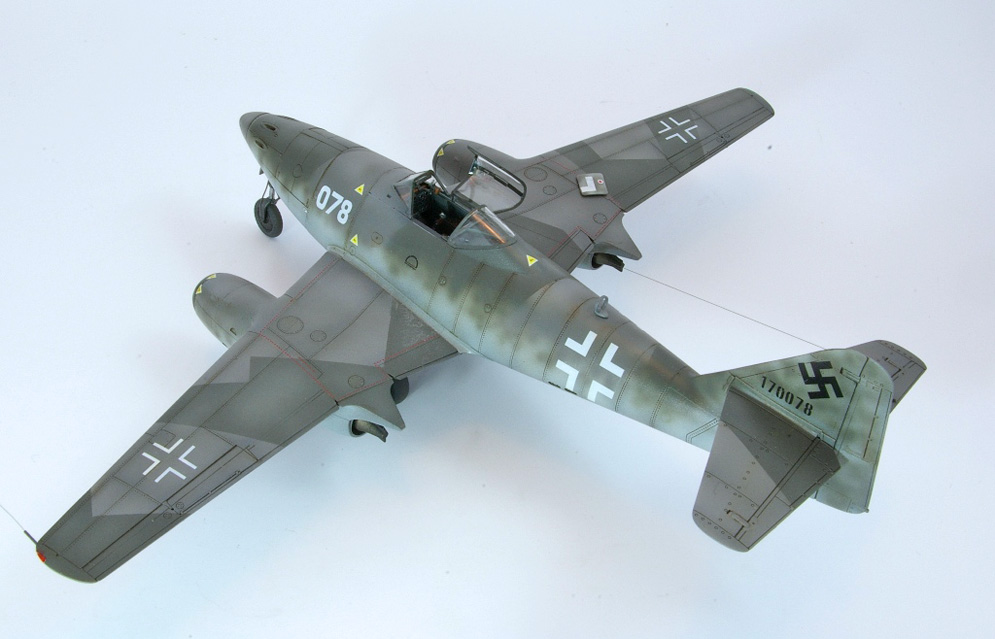
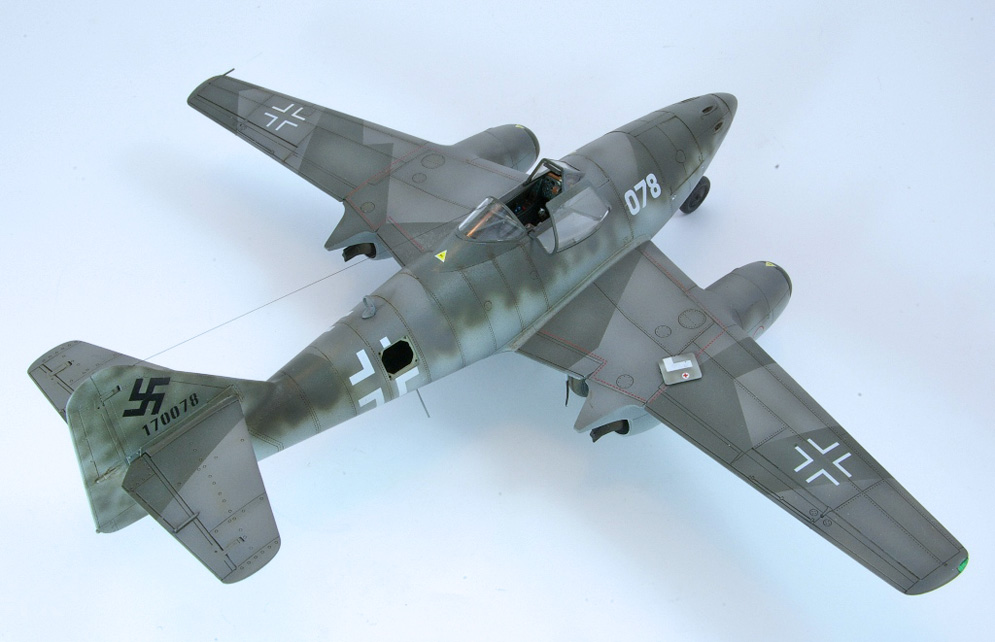
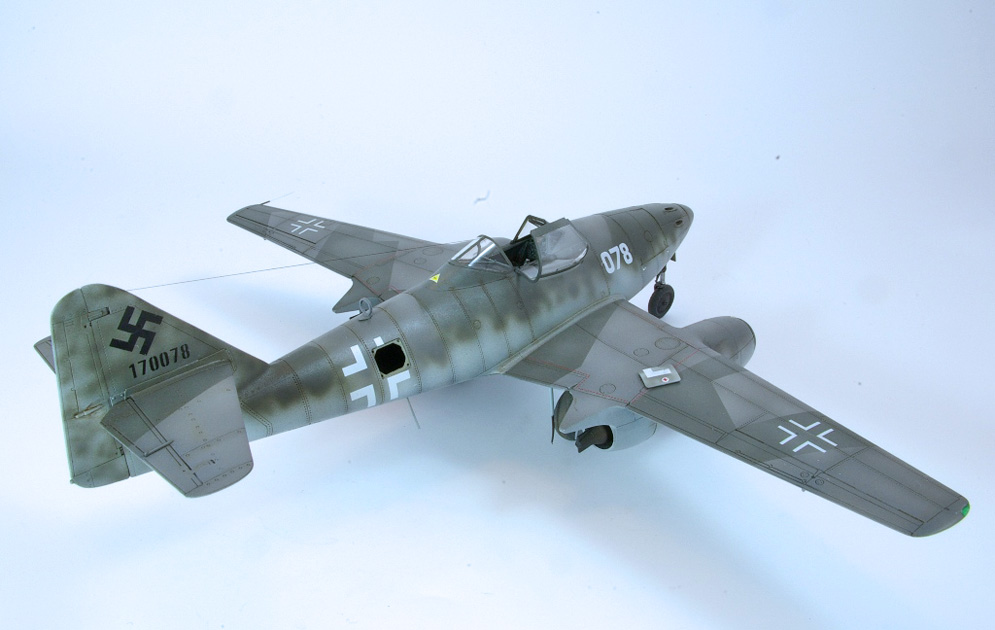
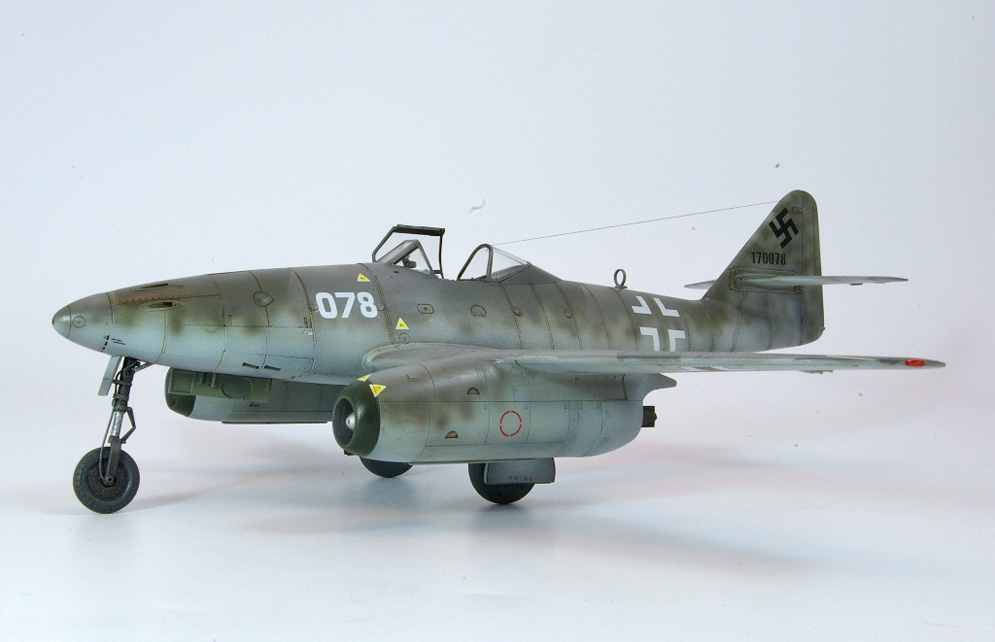
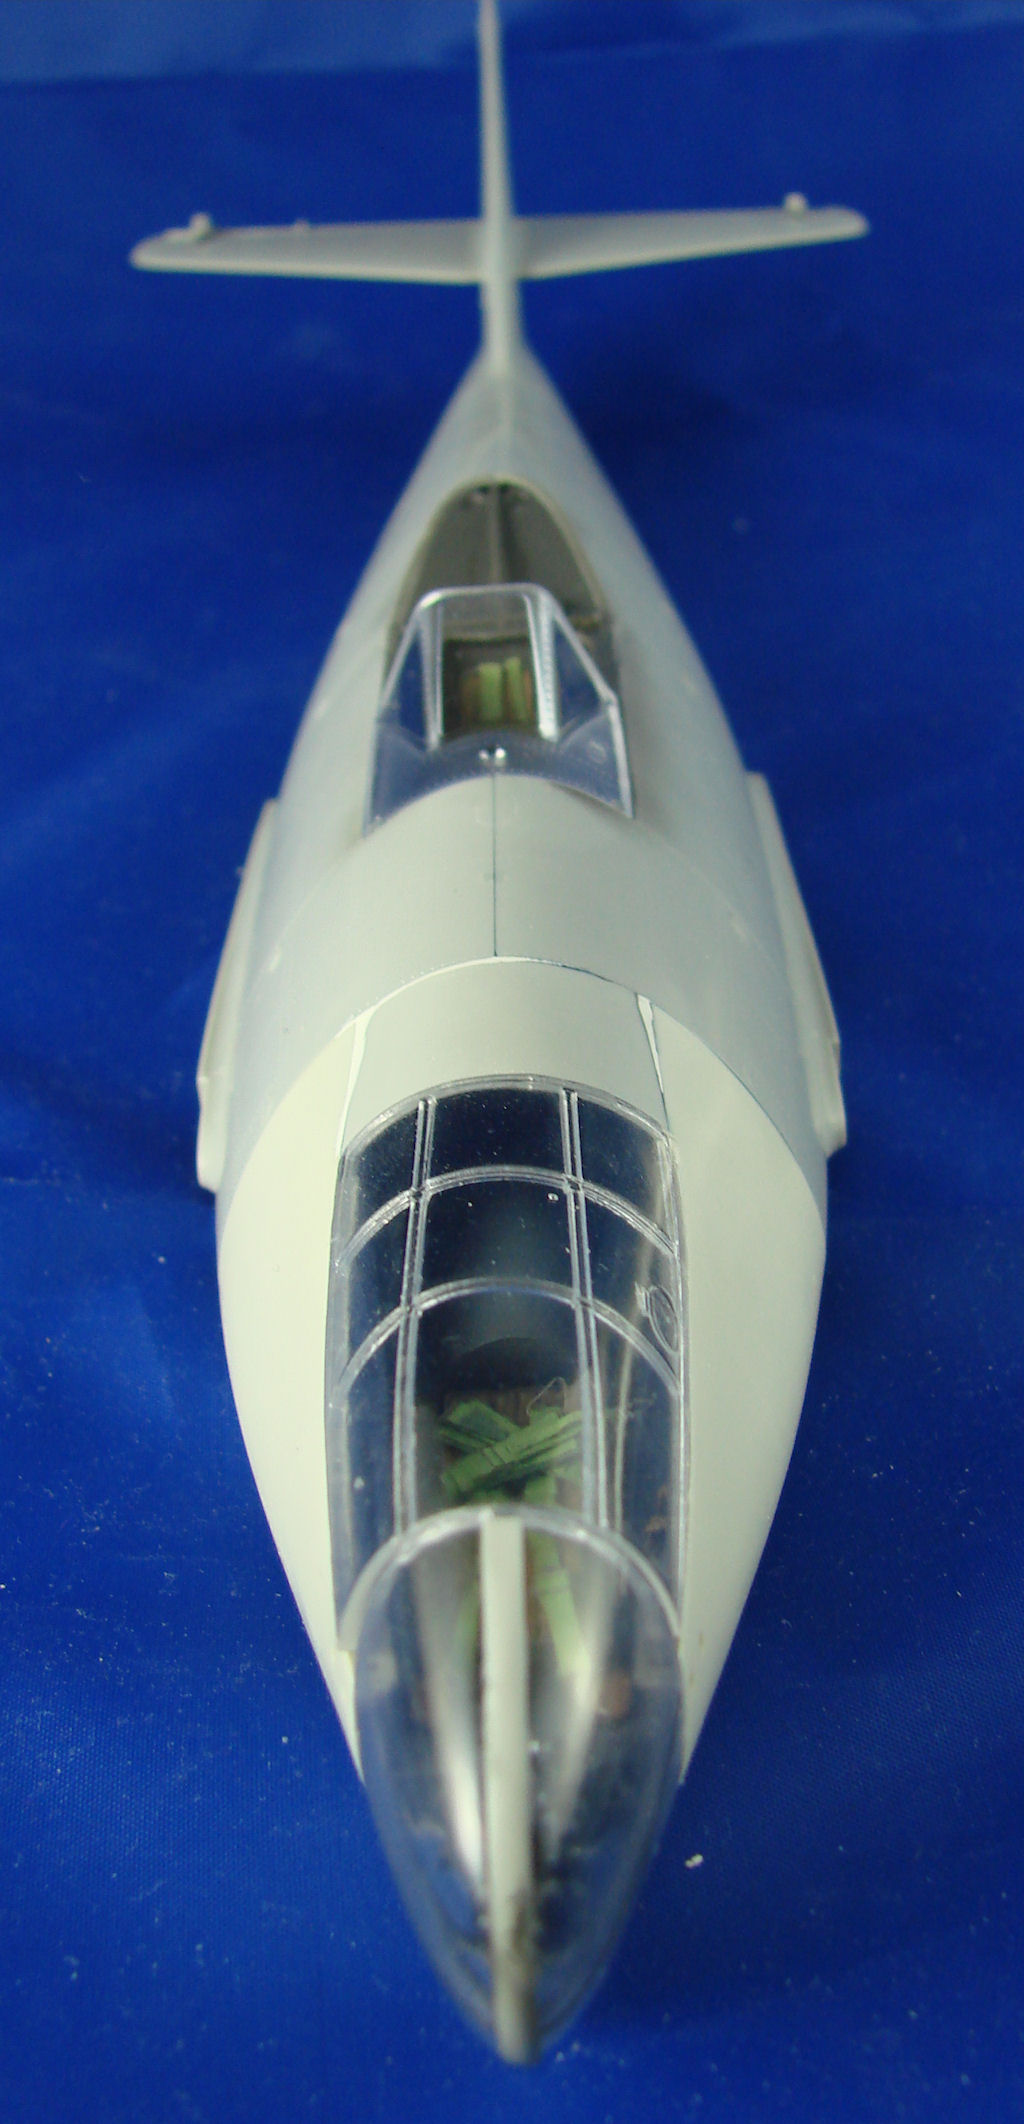
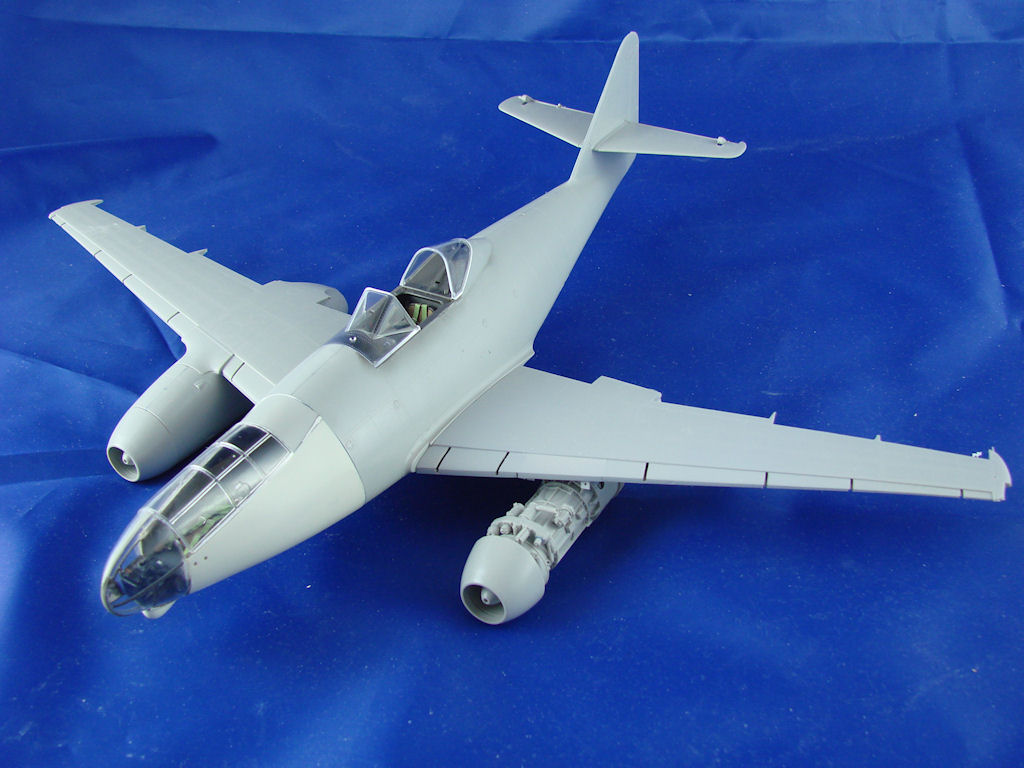
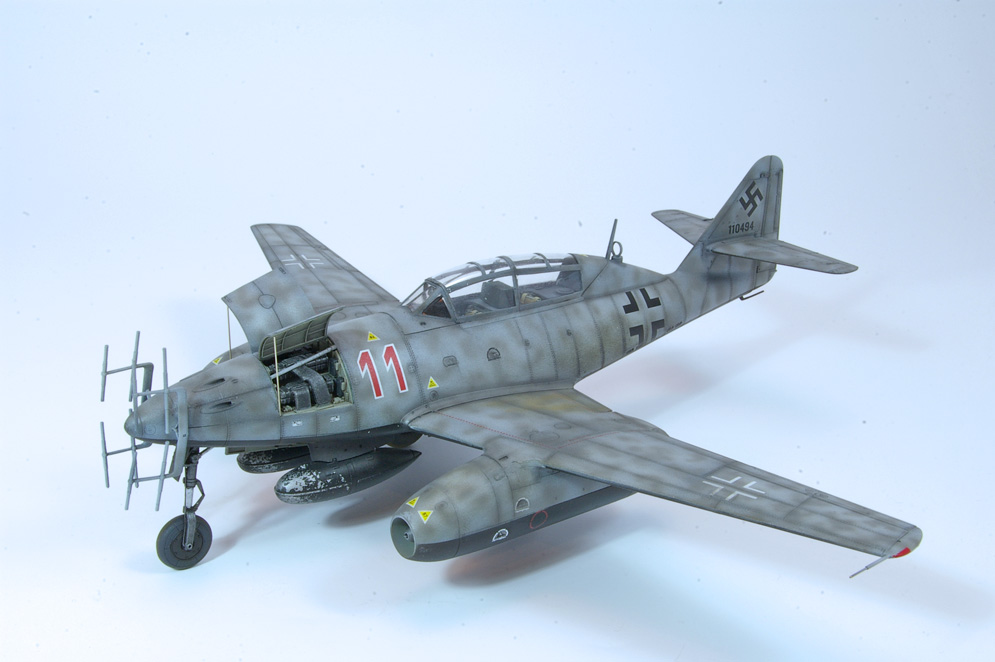
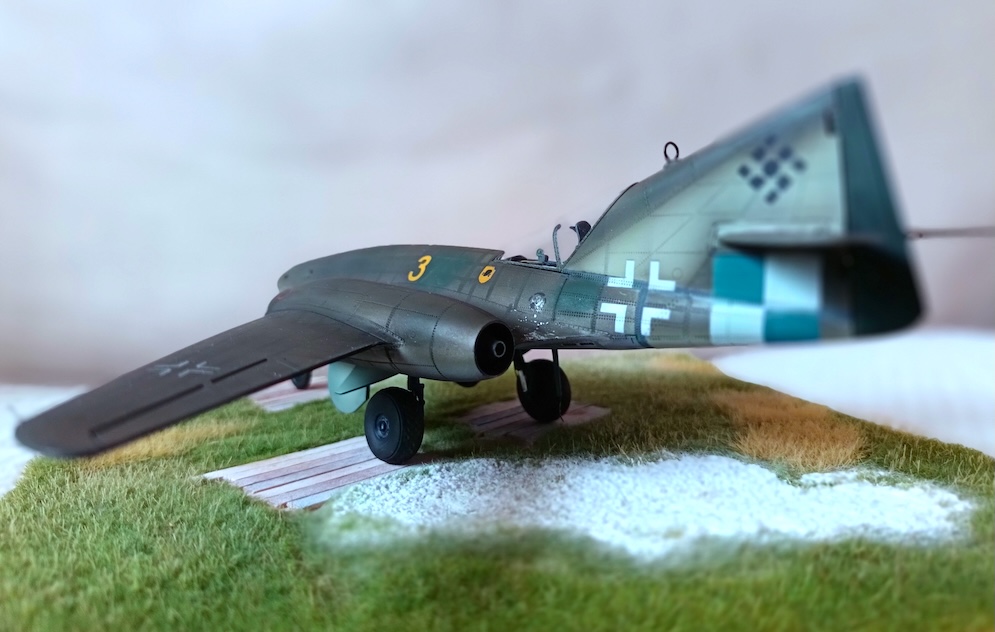
It is common knowledge that the Me 262s are among Trumpeter’s best kits, so building one of these is not difficult.
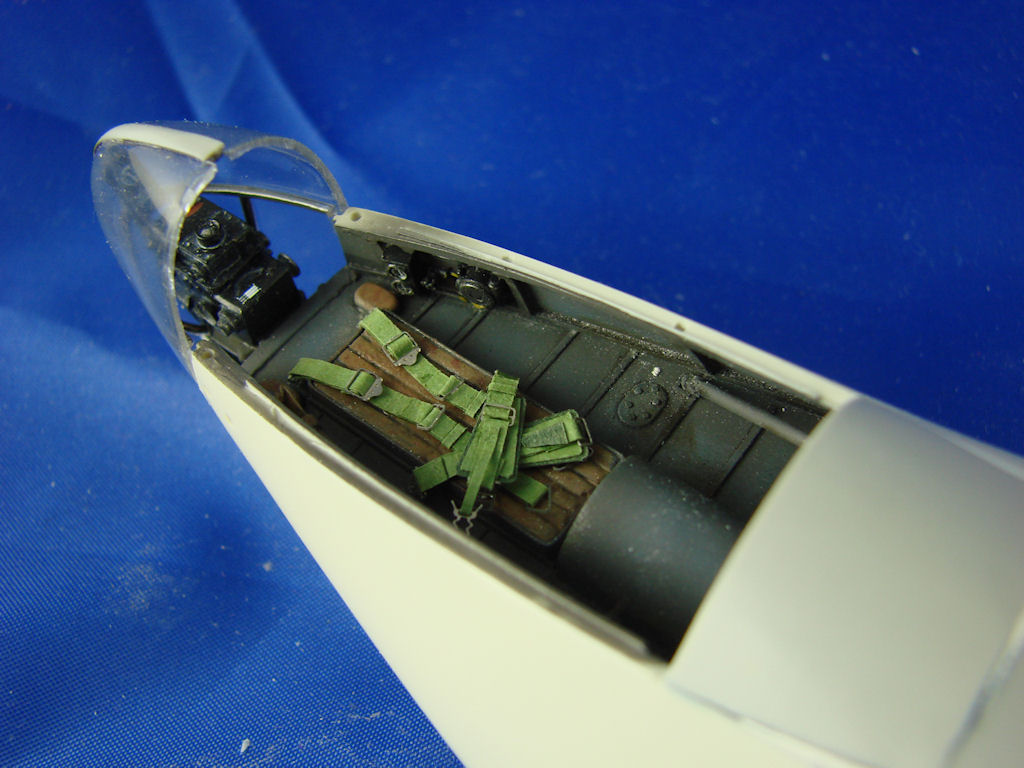
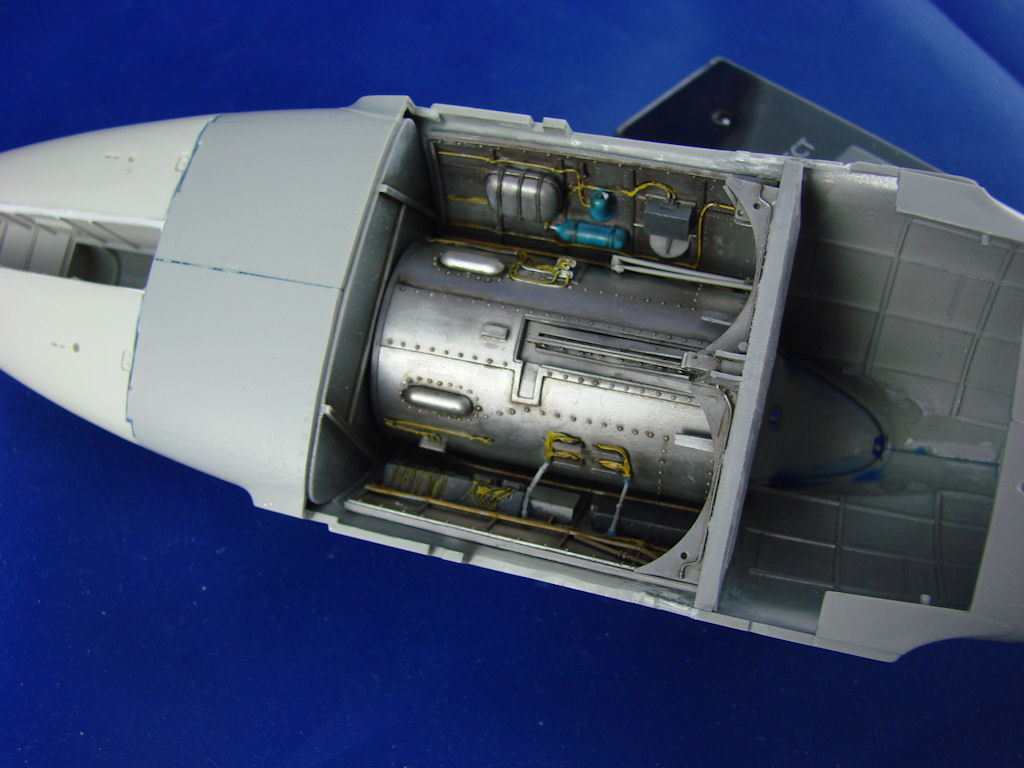
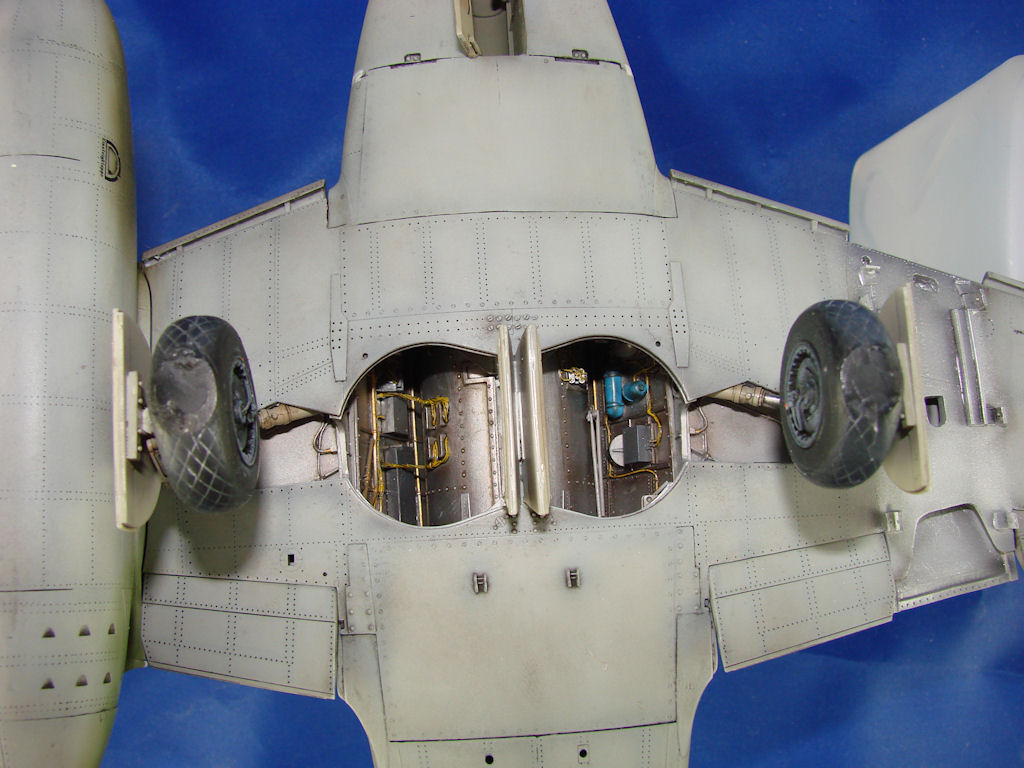
But since Trumpeter also has the habit of providing you with lots of interior that will be invisible when the fuselage is closed, I decided to take the short cut and only to build what would be visible.
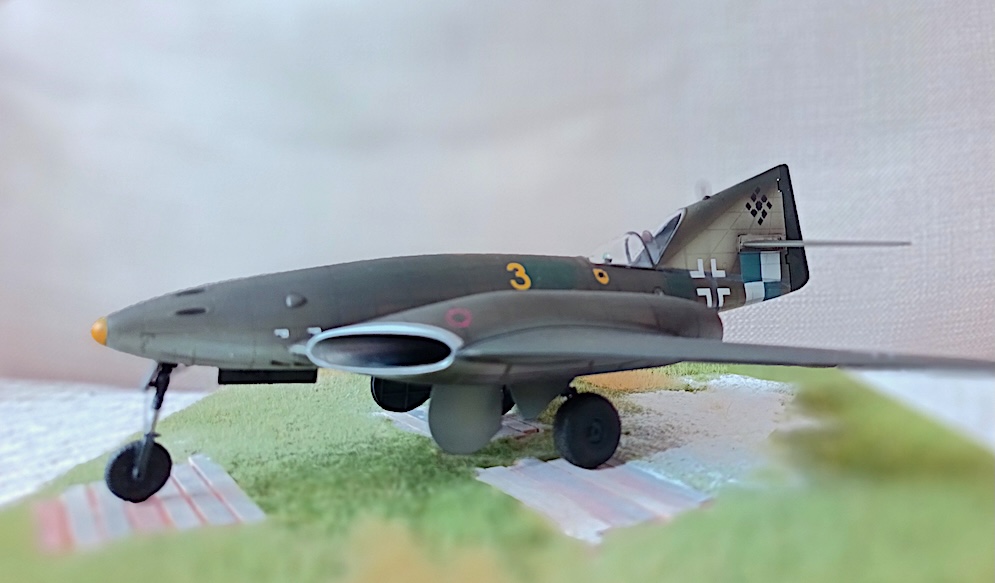
For the color scheme I picked one from a decals sheet of EagleCals (EC#96).
The building of the kit is posing no problems; the fit of most parts is really good.
3M Golden masking tape was used for the hard edge camouflage scheme; the paints are from the Tamiya and Gunze acrylic ranges.
The underside lighter blue color was sprayed first and on both sides of the fuselage quite high up. To bring extra life into the light blue, different colors are added to the base color and sprayed (very diluted) in many layers, the colors added can be very light grey, buff and flesh. To finish an extremely diluted mix of black and red brown is sprayed on some panel lines. Now the light blue area is masked (also on the sides).
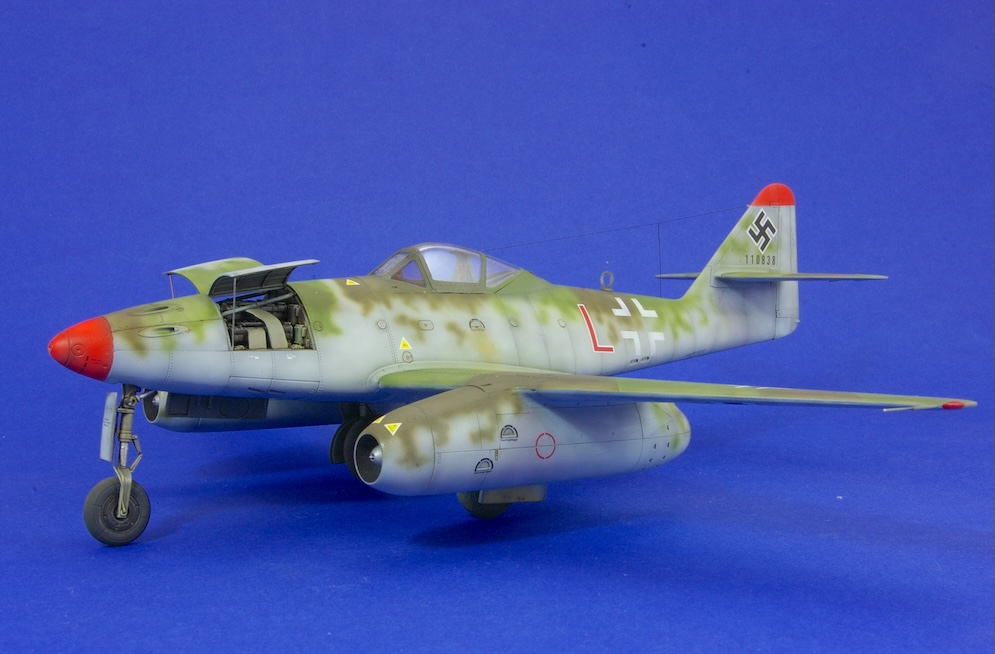
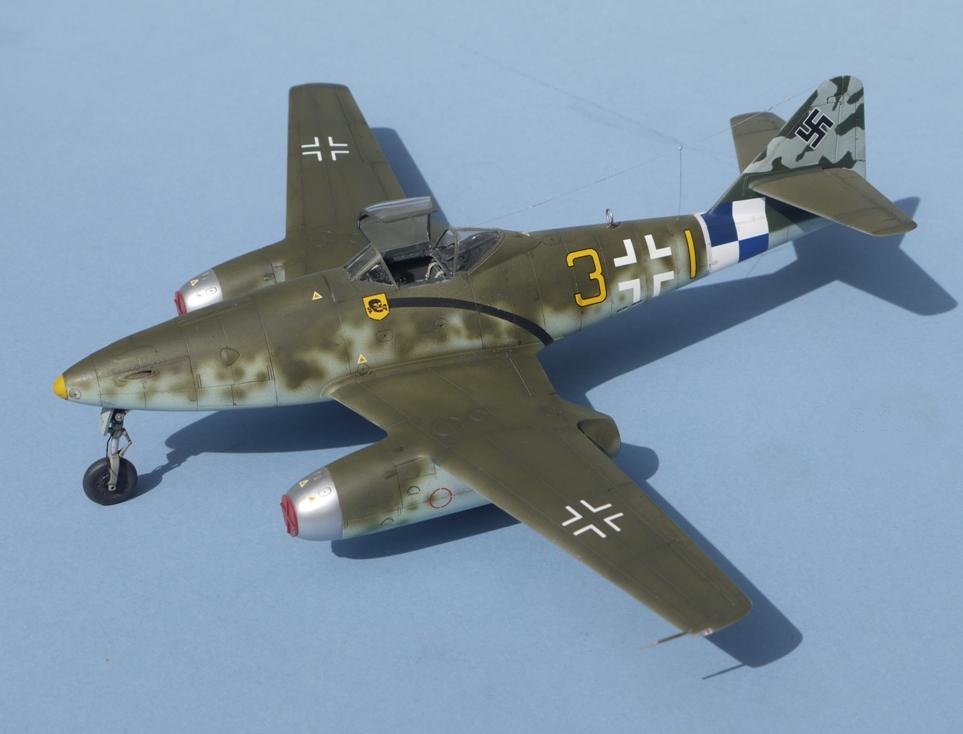
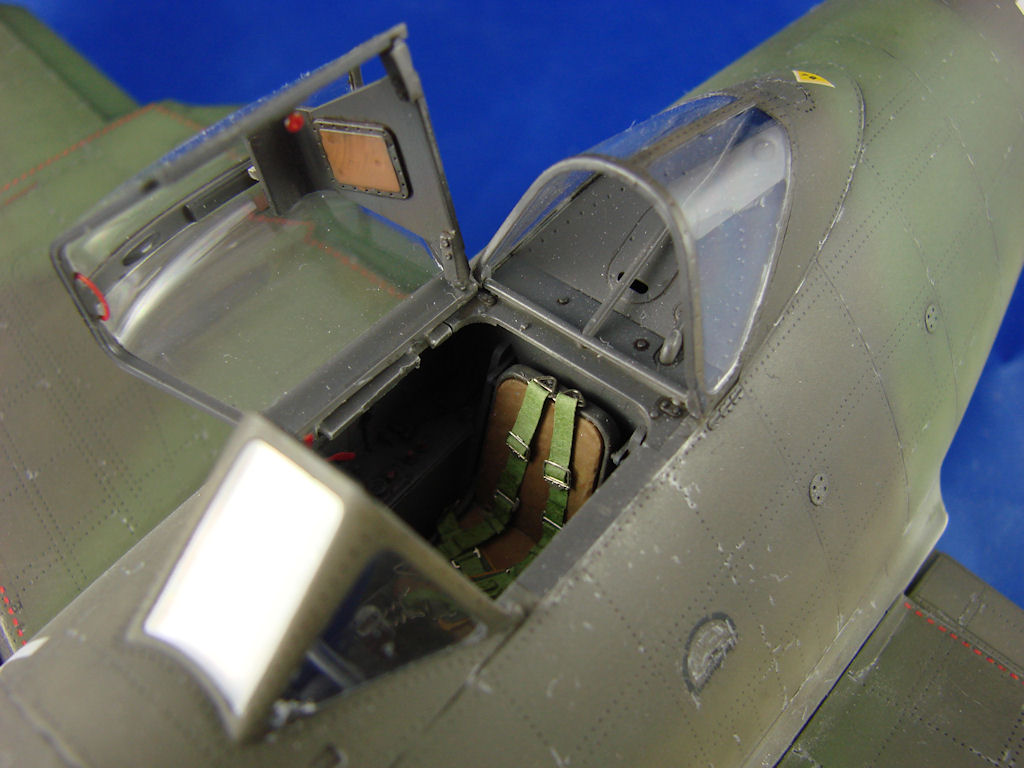
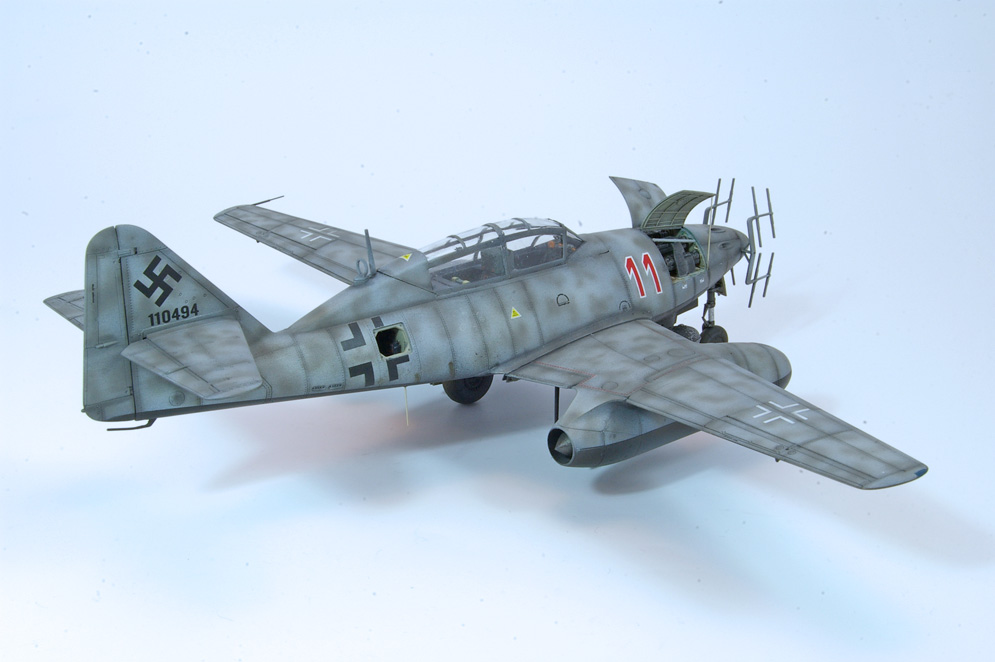
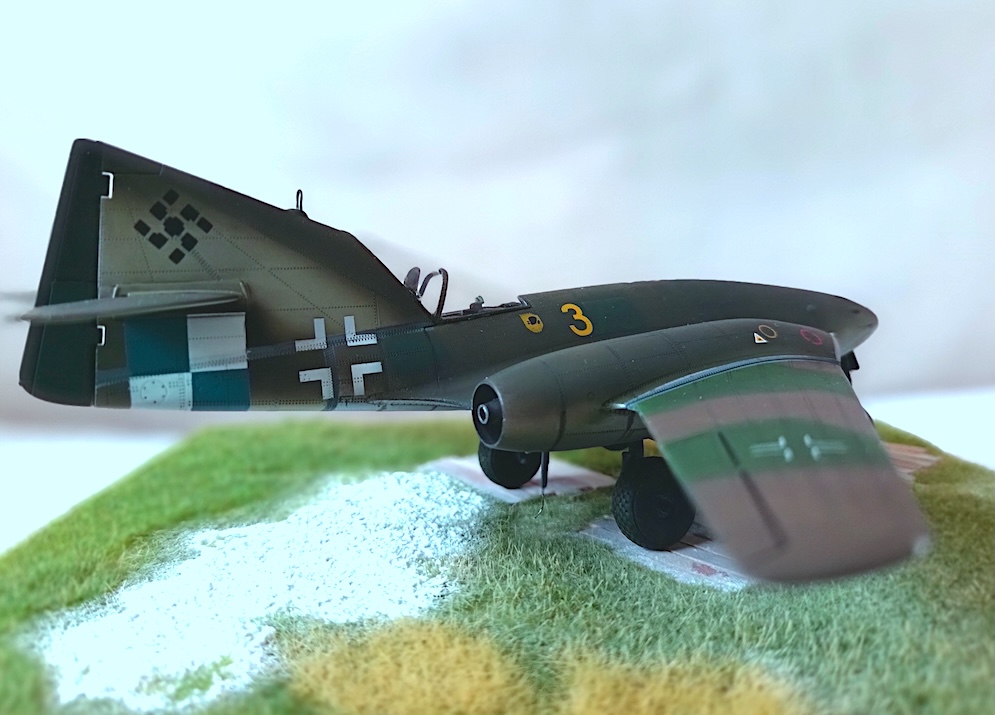
On the topside we start with the green, but here we already mix with yellow, it does give a lighter and warmer shade, but you have to use enough yellow in the mix. Simple reason is that the pure green color will be used to go over the panel lines and randomly on the panels. Finish with a mist of the green to blend it somewhat together.
At this stage your paintwork can still (maybe I need to say have to) be a bit over the top, when you will have varnished the model a few times I a later stage these difference will be smoothed out.
After the green we continued with the brown, also the first layer was a mixed version of the later color, for the brown a mix with buff was applied first. Then the same sequence was followed to bring life into the brown parts. Once this was all done the masking tape was removed and on the sides the green and brown patches are sprayed.
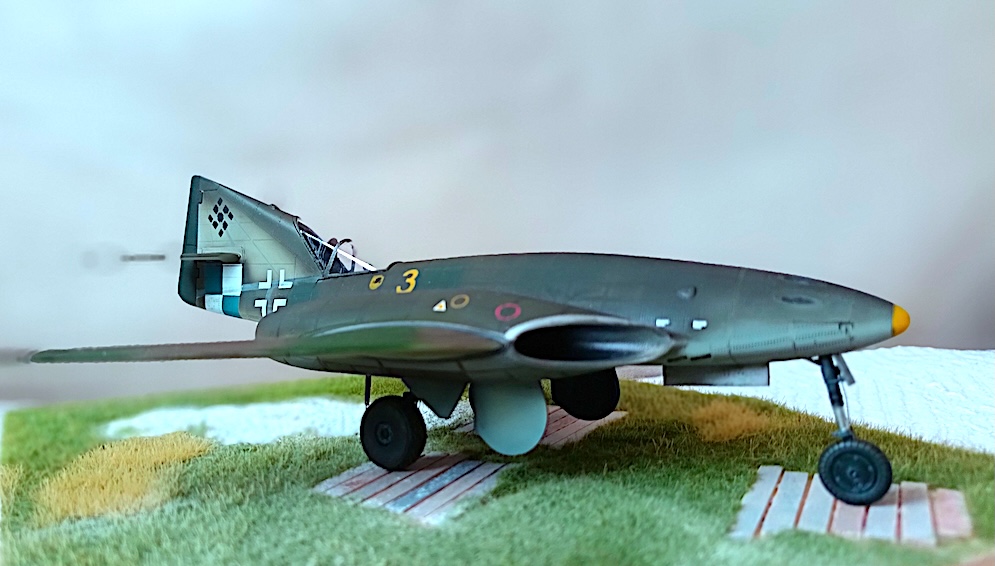
For the red and blue band on the fuselage we first sprayed white a base color, then the yellow and to finish the red and blue. The model is vanished (Tamiya clear) for the decals, they performed very well. Decals are sealed with flat varnish from Vallejo.
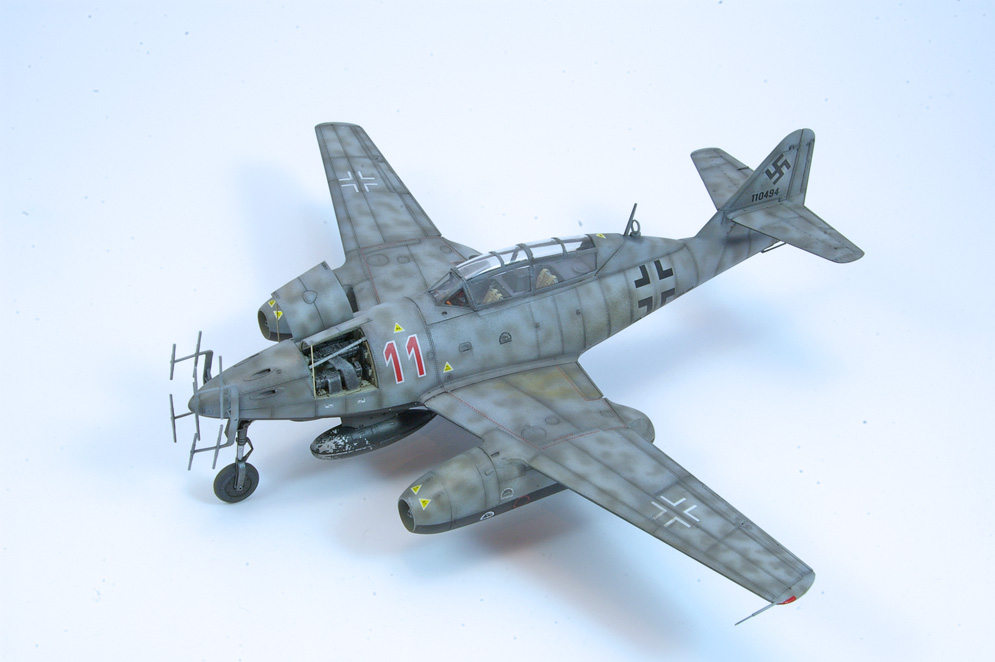
Minor details (those items that always break if you put them on to early) are now glued on.
The almost last stage in the finishing is the use of oil paints around some panels to simulate paint chips; light grey can look good as aluminum without being too shiny. And to finish the model we use another layer of Vallejo flat varnish.
Jan G.
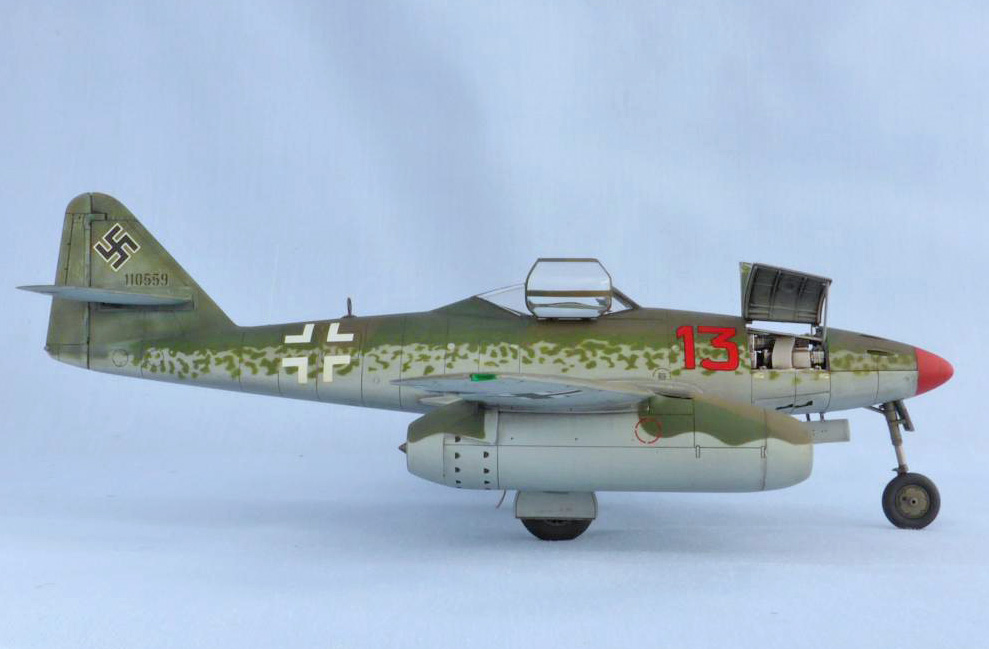
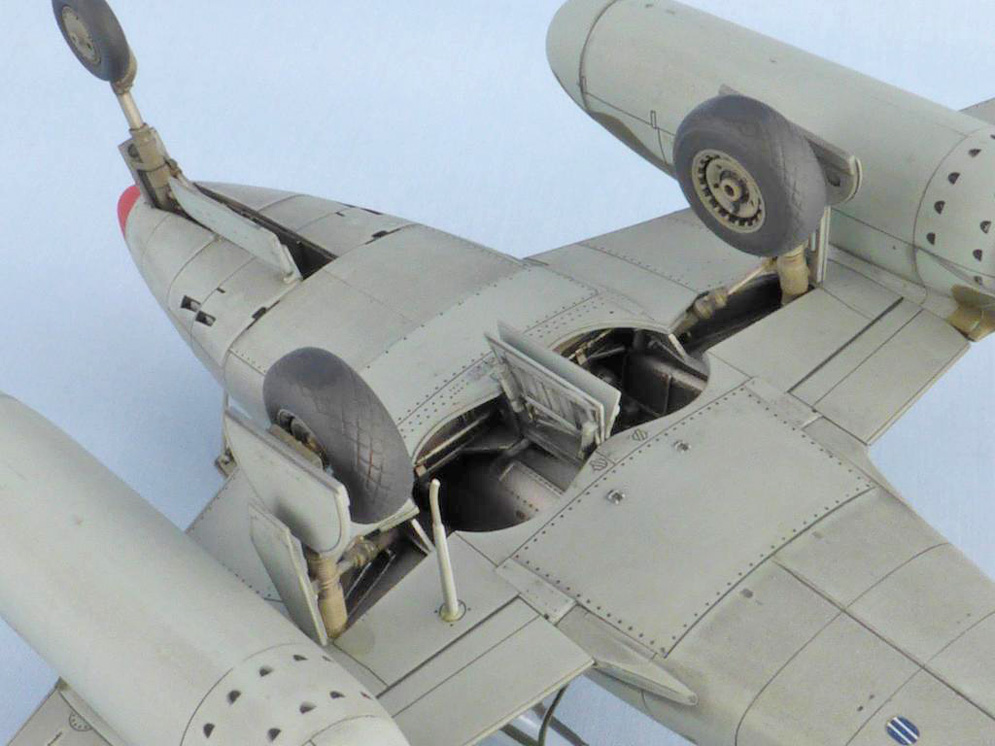
Hobby Boss has given modellers several excellent 1:48th scale kits of the Me262, covering most of the variants including one-off prototypes. I have built several of these in the past, but it occurred to me that I despite having built some of the more esoteric forms of the aircraft, I had never built the basic fighter version.
The kit is easy to build, and Hobby Boss supplies a metal part for the front wheel bay which provides (just) enough weight to keep the model sitting correctly on its tricycle undercarriage.
The kit also provides radio and oxygen bottle detail for the rear of the fuselage which will unfortunately add weight to the back of the model. Some of this internal detail will never be seen through the opening in the fuselage and can be left out, as despite the metal insert, the balancing act is really rather delicate! Some extra weight added in front of the gun bay and / or the nose cone would be helpful here.
The modeller will need to provide seat belts though these are easily sourced from after-market companies such as eduard.
I deviated from the kit’s colour plans preferring to use the (slightly different) late-war camouflage pattern shown in the excellent Valiant Wings publication on the aircraft.
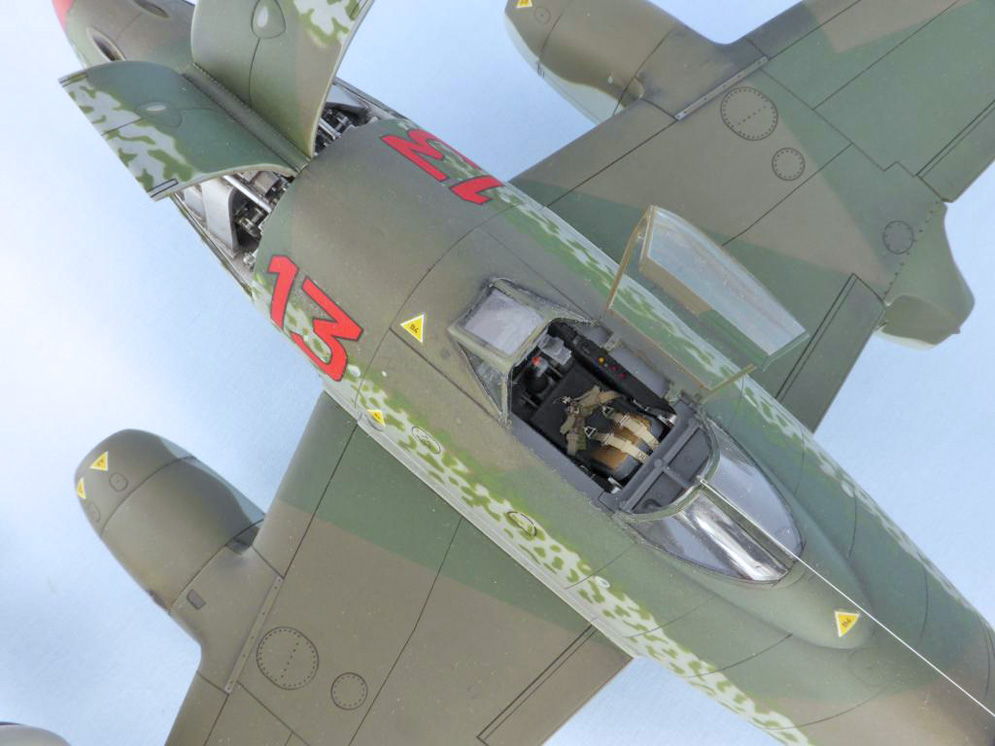
The open crosses on the wings and fuselage were sprayed through commercial masks from Montex rather than use the kit’s transfers. This was to avoid the possibility of silvering of the extensive transfer film that inevitably exists on these images.
I also masked and spayed the dotted wing walkway markings so they may look a little over-scale. The kit provides transfers for these, but they are unfortunately printed on long thin strips of film which I find almost impossible to apply in a straight line. Again, I find it difficult to disguise the carrier film on these images. A slightly wonky, slivered wing walkway would definitely be noticeable. However, a slightly heavy looking, home-made, sprayed wing walkway might not be noticeable (unless of course I mention it in a popular online modelling magazine ….. which I just have).
Dai W.


The only addition was etched seat belts.
Painted with Aeromaster & Tamiya Acrylics, & weathered with artist gouache.
Julian S.

Like Trumpeter with its series of 1:35 Russian KV tanks, Hobby Boss seem to be attempting to cover every possible variant of the Me262 including the one-off prototypes. The A-1b variant represented an attempt to power the Me262 with BMW300 engines as a fallback in case of shortages of the Junkers Jumo engines originally intended for the aircraft. As it turned out the machine was very successful and was in some respects superior to the Jumo powered variants. Despite this no production was undertaken.
The Hobby Boss kits are excellent, being accurate, relatively cheap and easy to build and like the Trumpeter KV series I often use these as simple relaxing builds in between more complex projects. There is a great deal of internal detail included such as the canon bay and equipment in the rear of the fuselage. I found the kits much easier to deal with than the earlier Trimaster / Dragon offerings, they even supply a metal roof to the front undercarriage bay to add enough weight to keep the front wheel on the ground. The only things that I found needed care were the doors over the cannon bay (I think it’s actually easier to leave them open than close them) and the underside / rear of the wing to fuselage joint (this seems to be a common problem with a lot of Me262 kits).
There were a wide range of colour schemes applied to the Me262 and this series of kits could be used as the basis for a very interesting collection.
Dai Williams


The kit goes together very well just like the others in this series. Hobby Boss has provided a metal floor to the gun bay which provides enough weight to keep the front wheel on the ground. The only issues that I had with the construction were with the tabs that located the cockpit inside the fuselage. I found that these had to be shortened slightly. Doing this made it much easier to get the fuselage halves together.
The only things that I added to the kit were some brake cables and the pitot on the left wing was replaced with telescoping rod and tube. On reflection the radar antennae look a little chunky and perhaps I should have replaced these as well to give this area of the model a more refined appearance.
I usually use oil paint as a wash to emphasise the panel lines on my aircraft models. In this case as an experiment I used dark grey pastel chalk. I think that the overall effect looks a little heavy in this case. I’ll certainly be experimenting with pastels in the future, but will maybe restrict their use to darker finishes.
Hobby Boss has covered a lot of the Me 262 variants with well produced, up to date kits that are accurate and easy to build. They are a great favourite of mine and I look forward to building some more of these in the future.
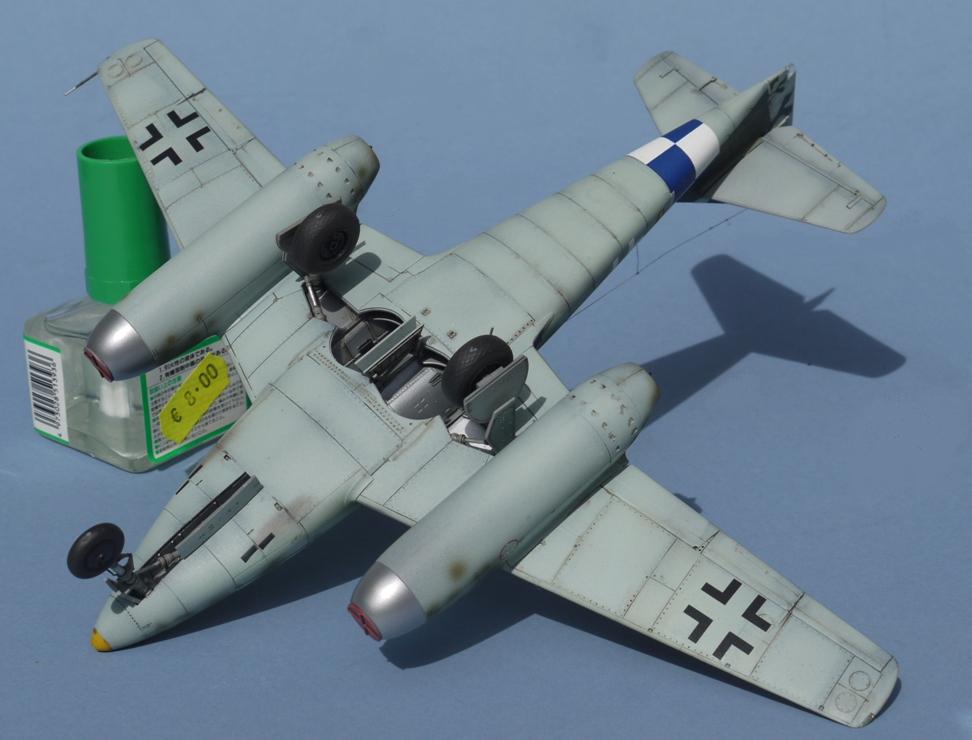
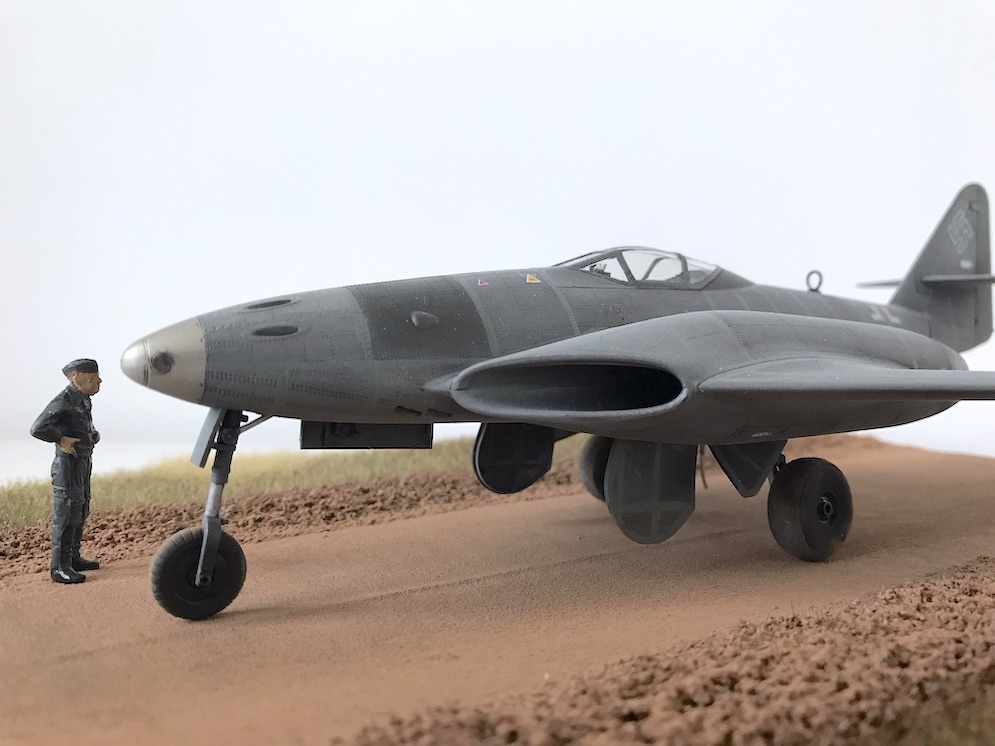
Dai W.


The kit goes together very well, although clean up of the seams in the engine intakes and on the nose takes time. The wheel well lacks any kind of detail, but I’ve had to glue this one down anyway as I started it when travelling and couldn’t add nose weight. All markings aside from the 3 fuel triangles are masked and painted.
Craig W.
It never passed drawing board stage to my knowledge.
The only upgrade I added was a Quickboost resin seat with belts for Me 262.
Les V.
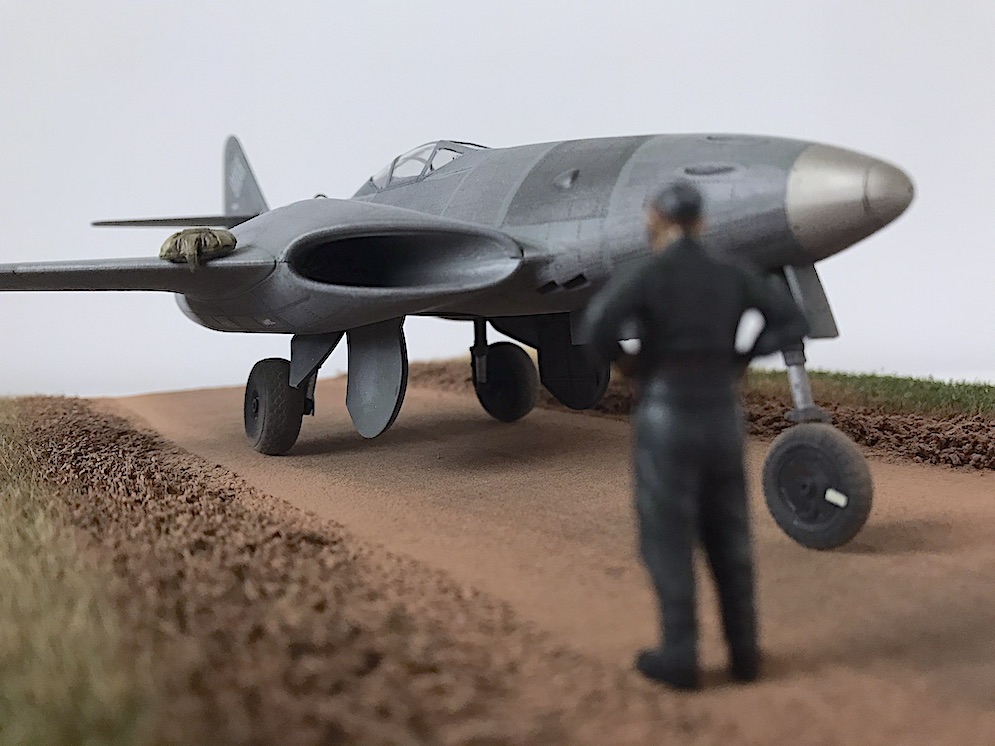
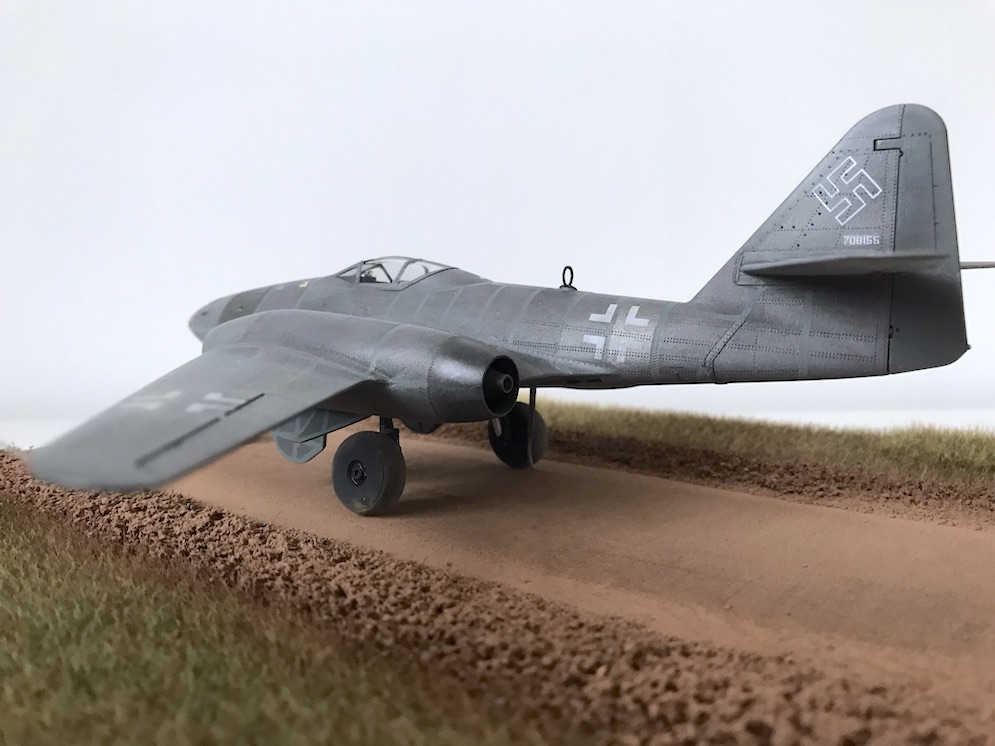
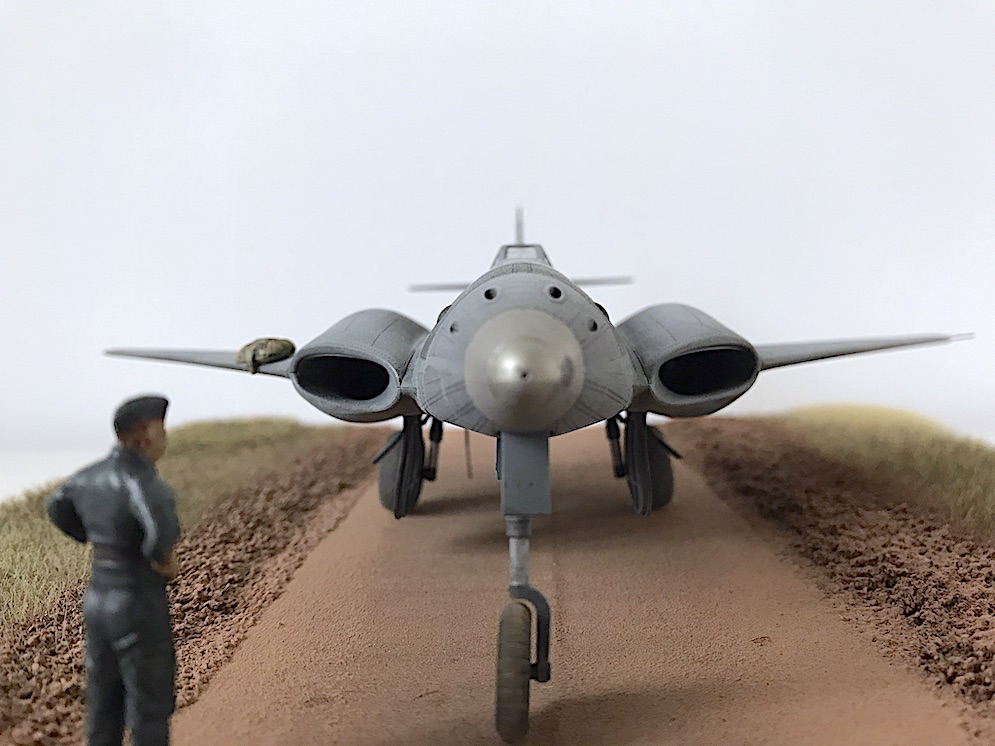
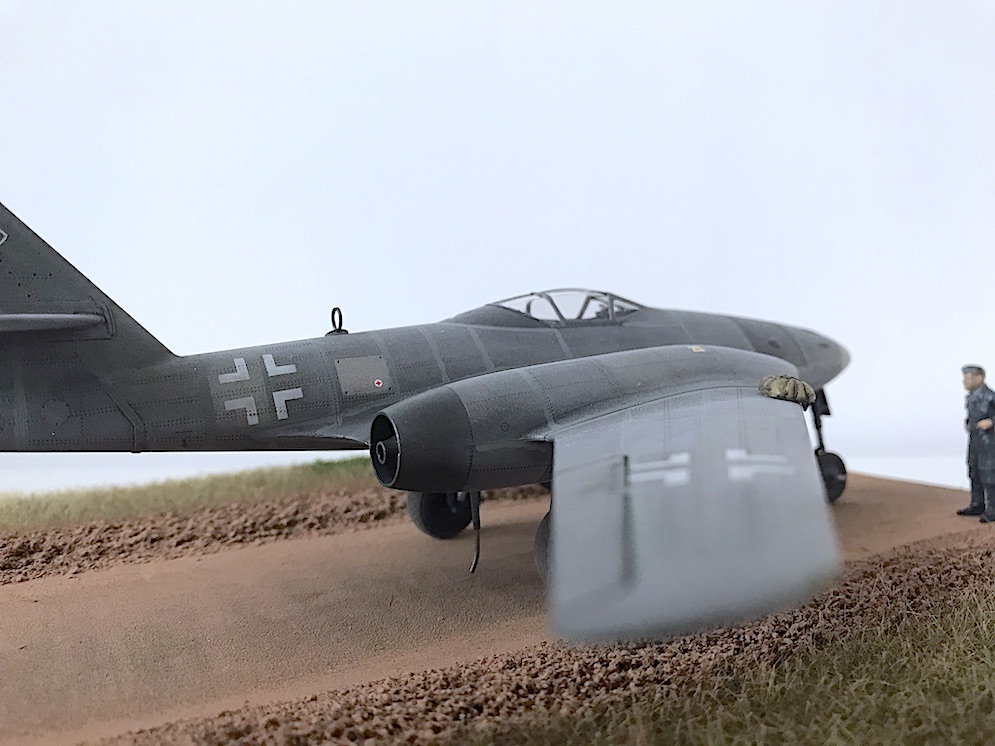
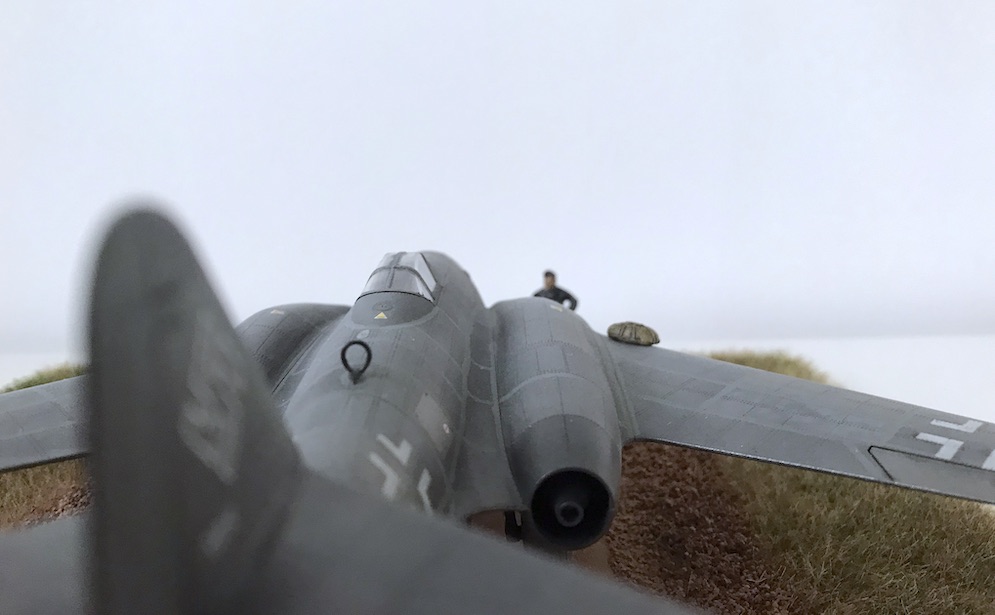
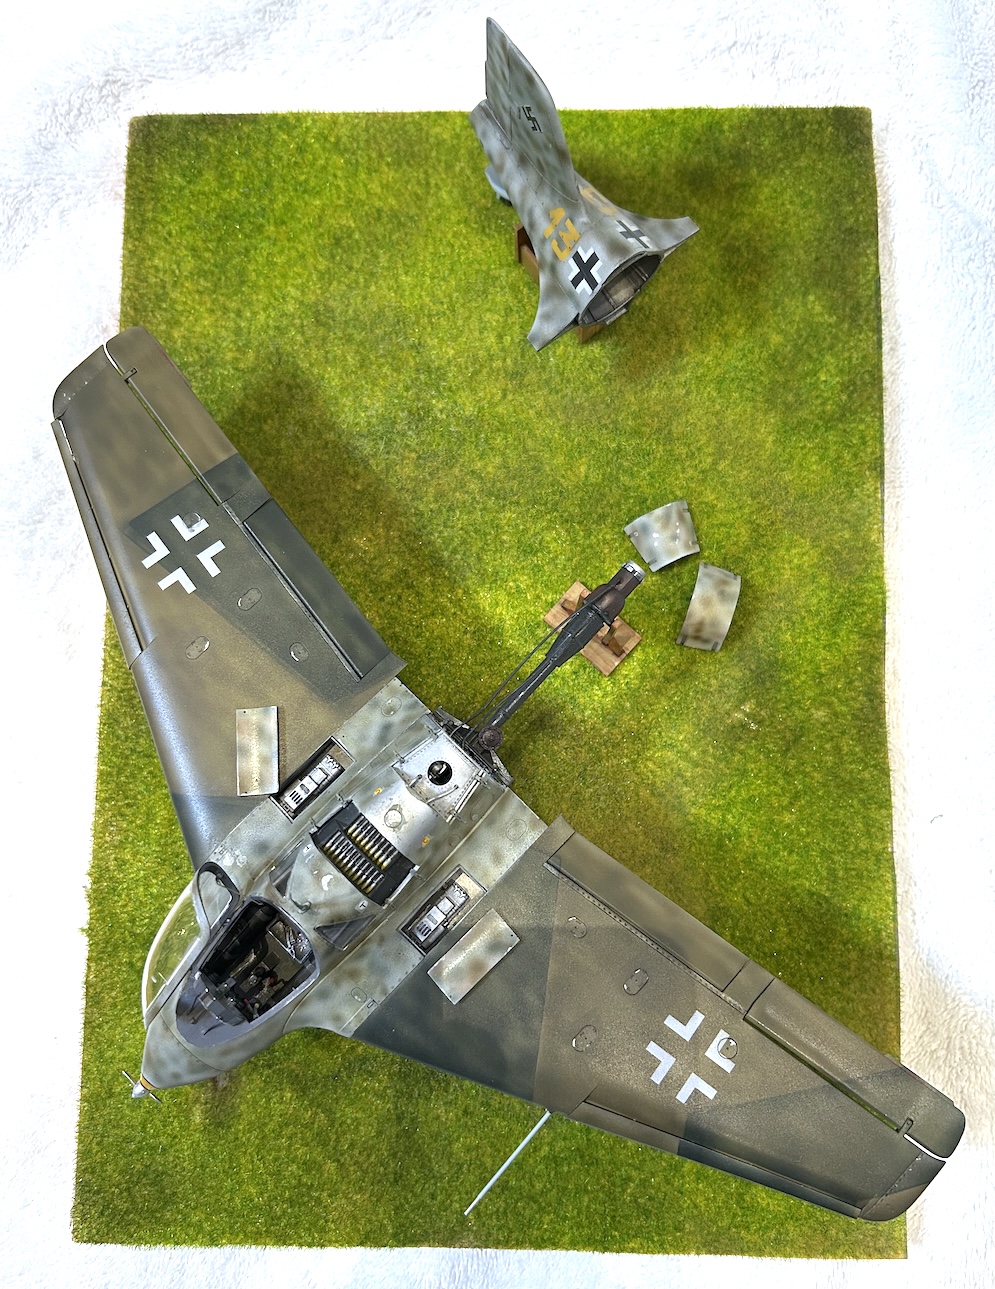
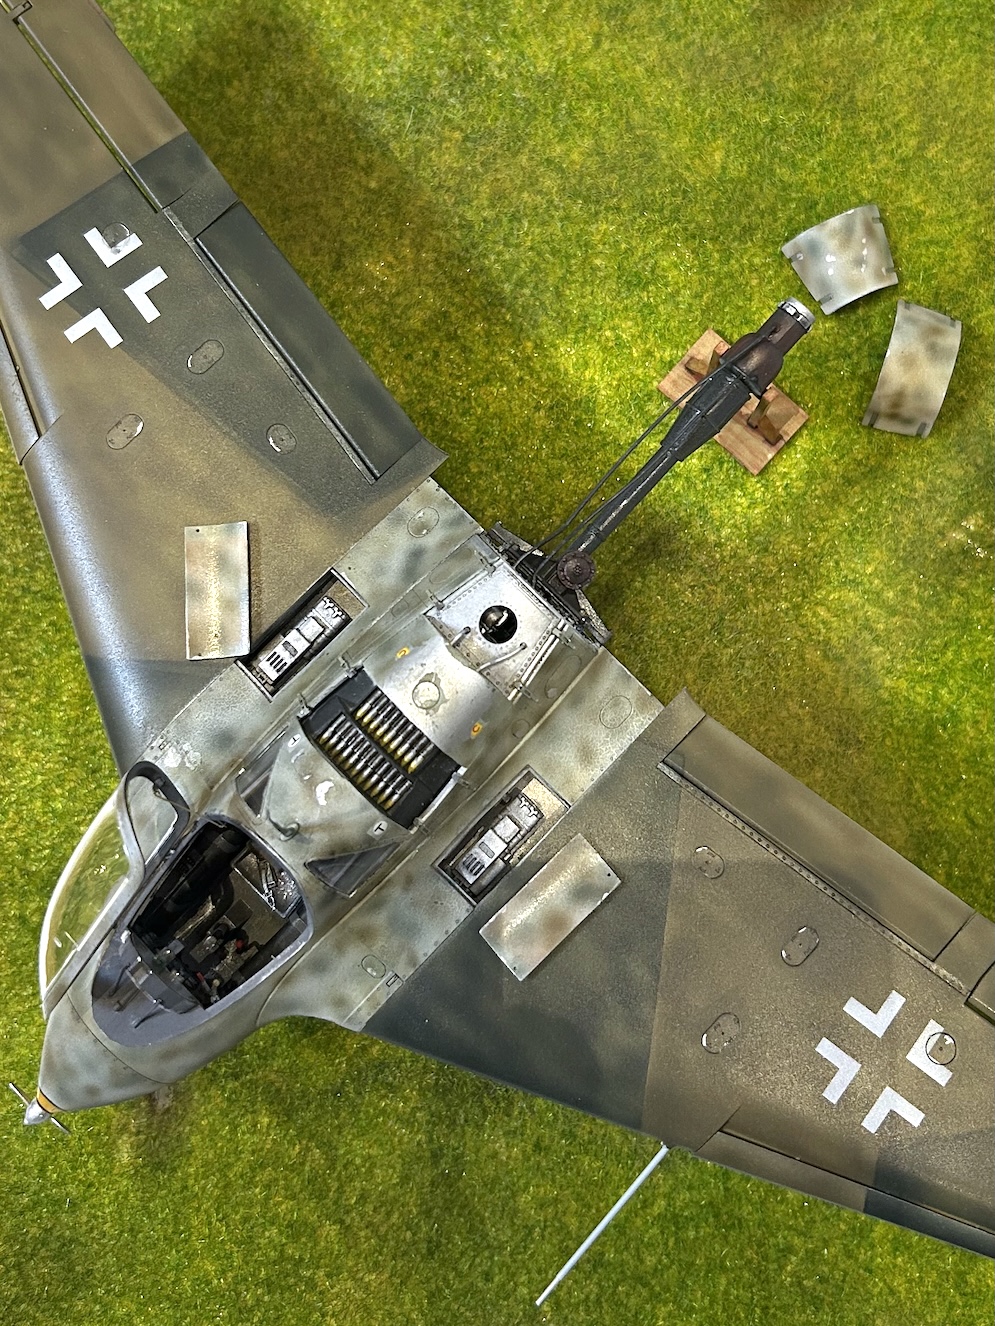
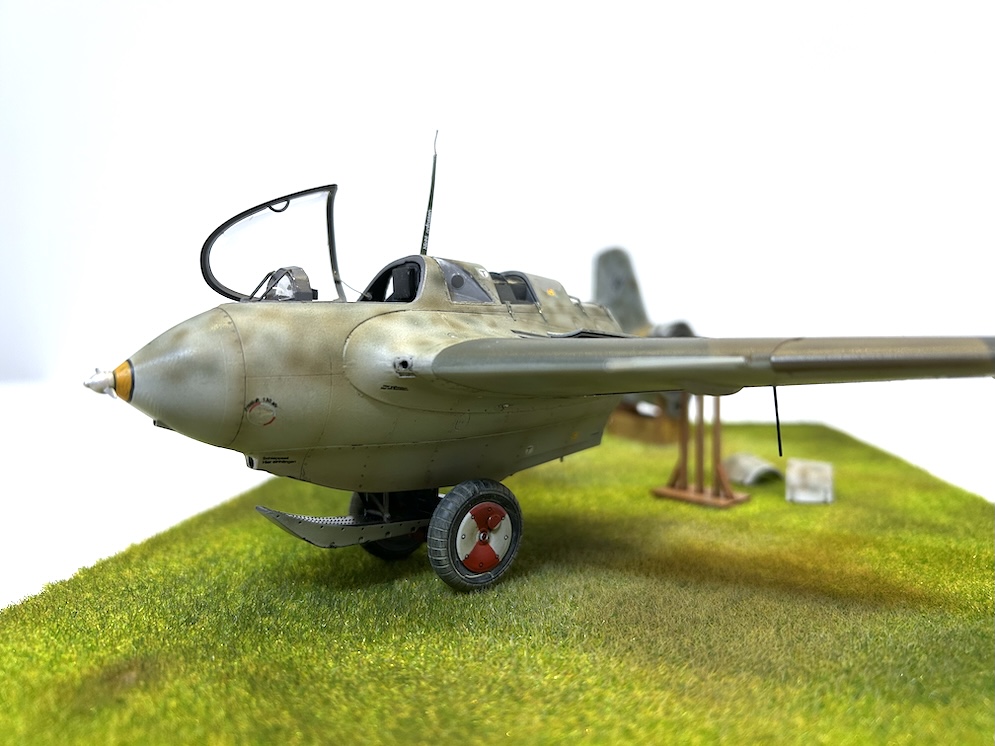
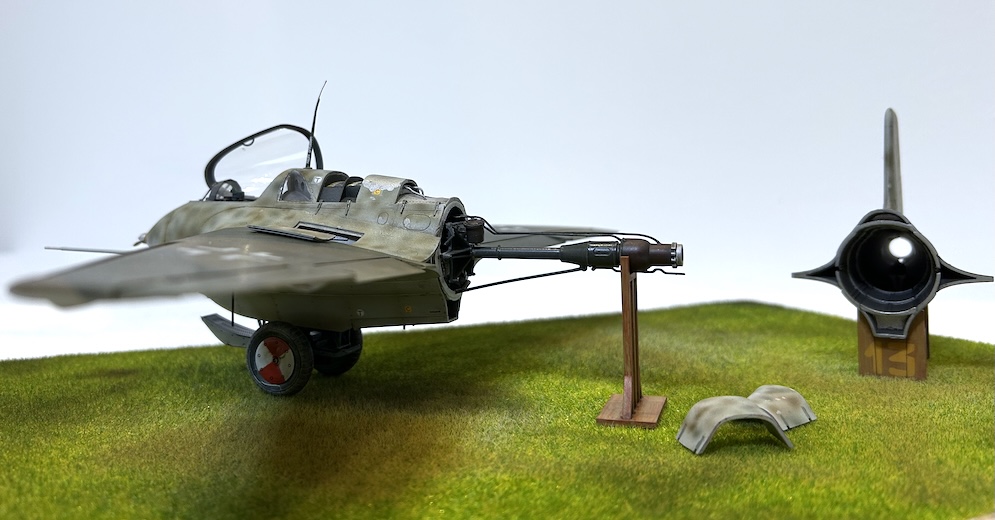
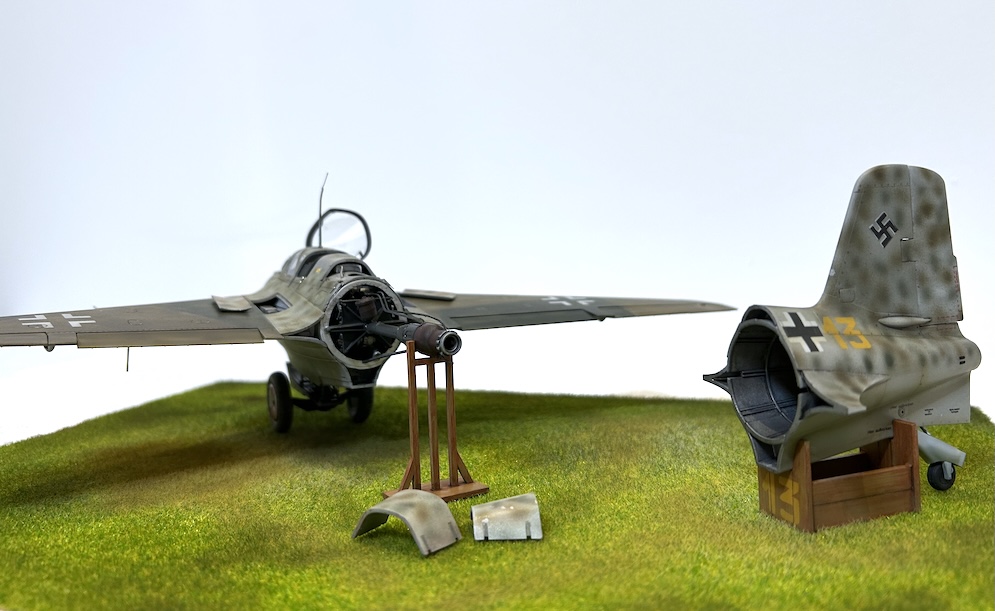
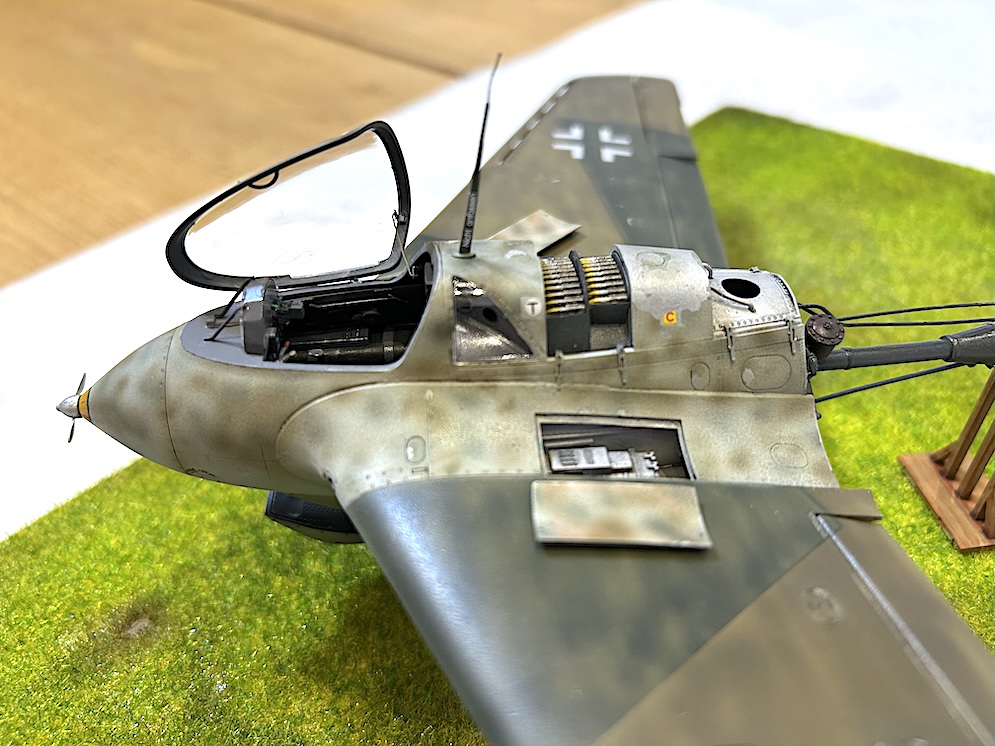
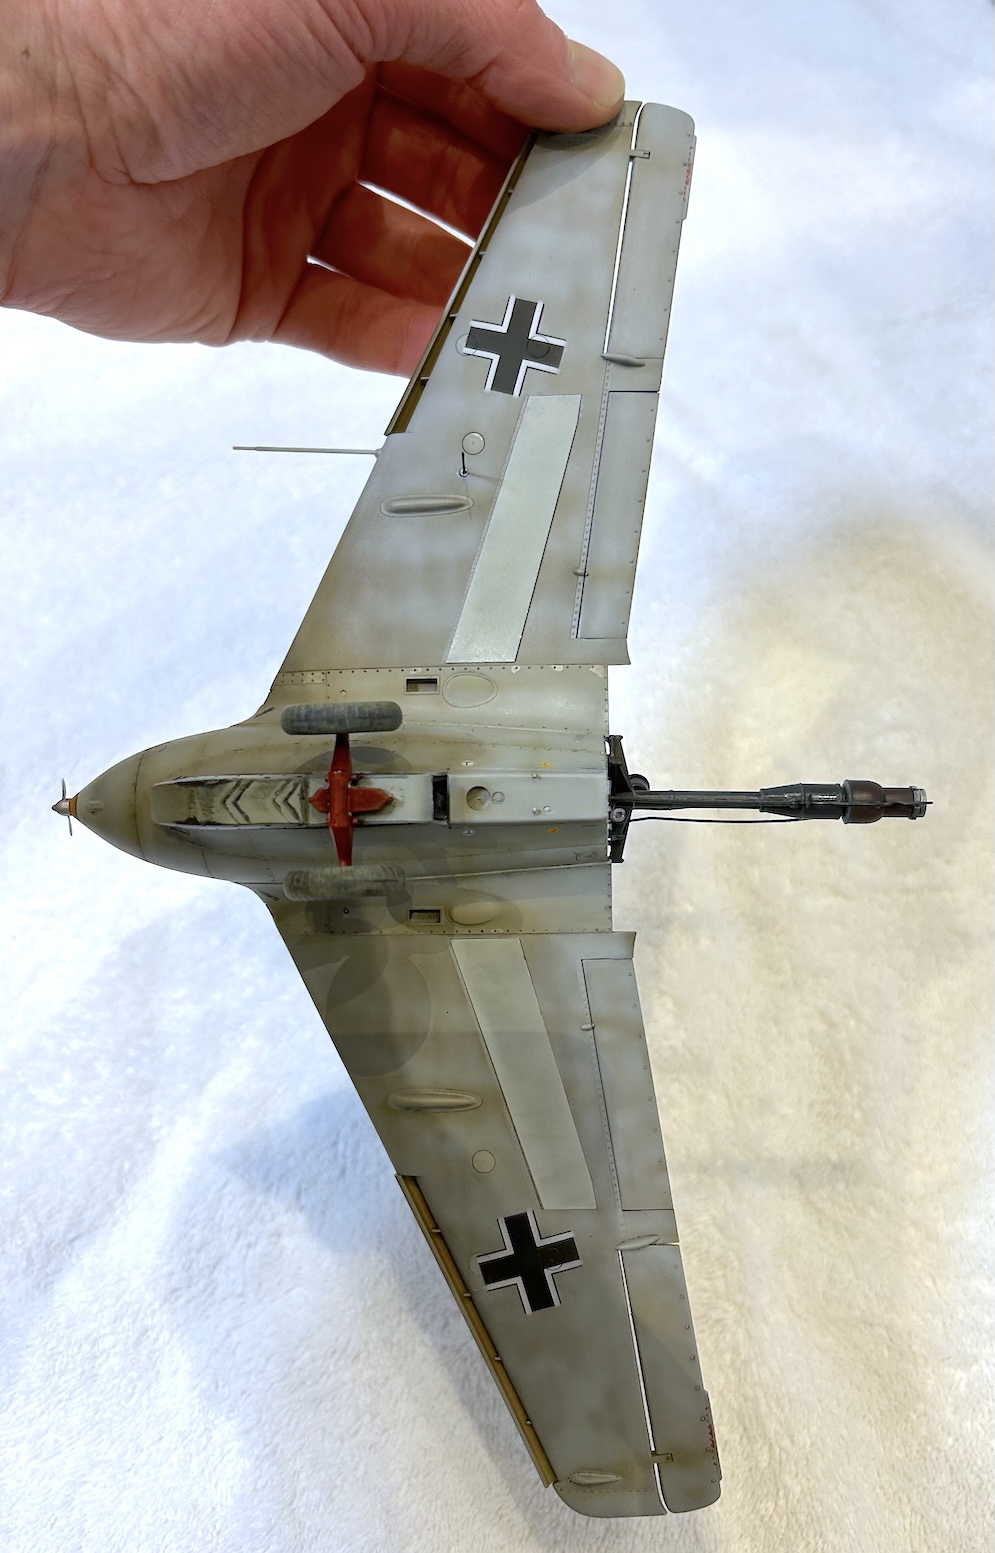
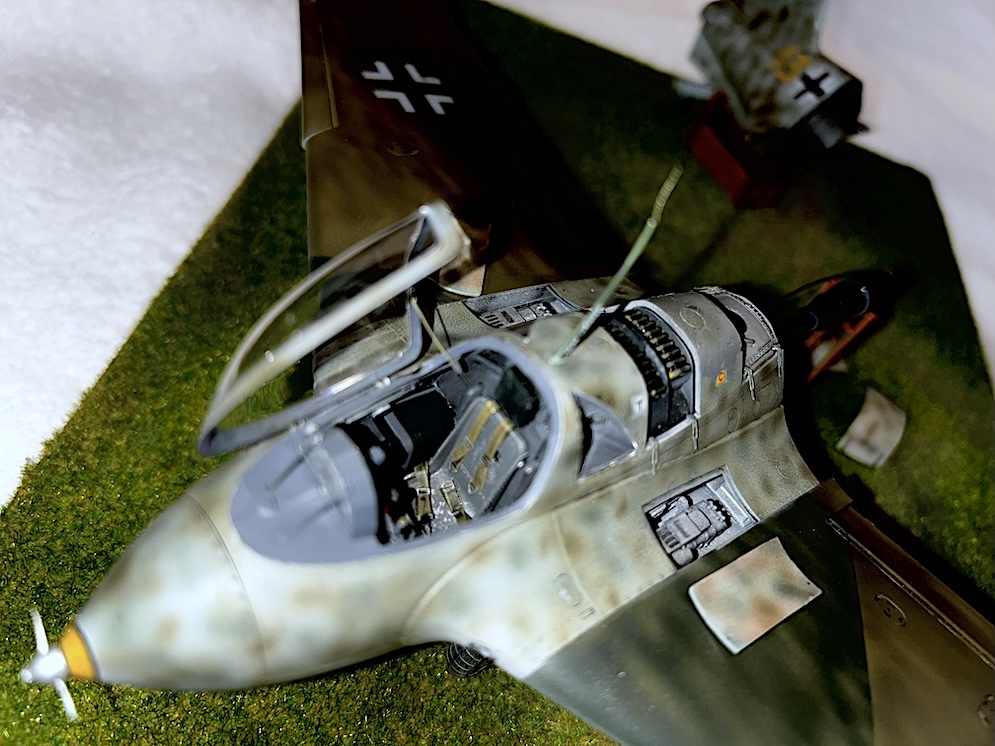
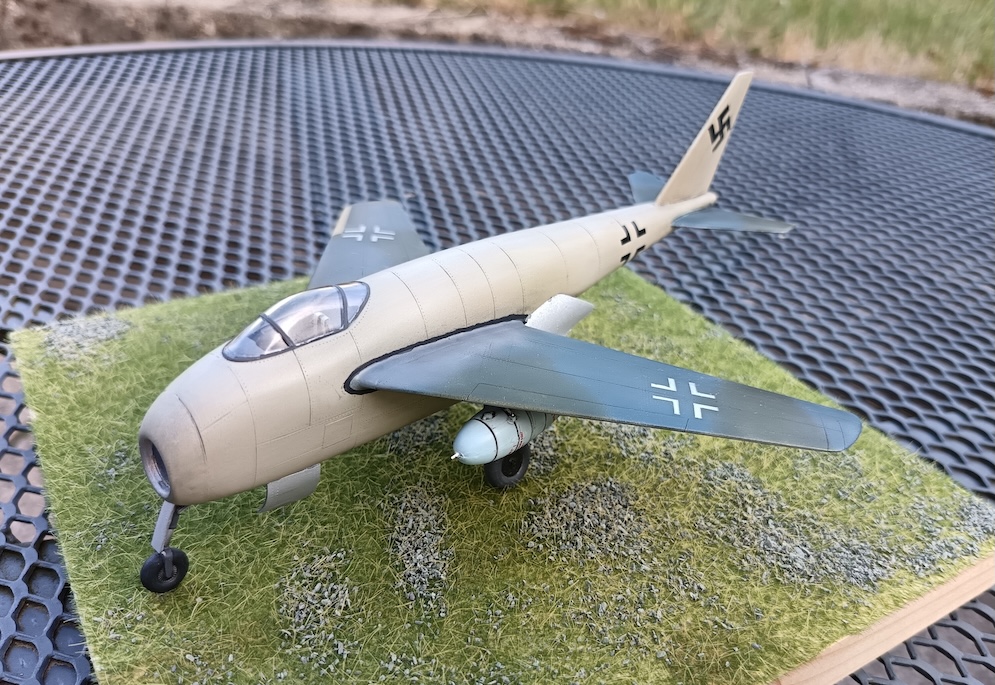
Markings were masked. The kit goes together with no issues and is a pleasant build. It would benefit from internal fuselage and engine detailing given the large open space on the underside, but I didn’t do that this time.
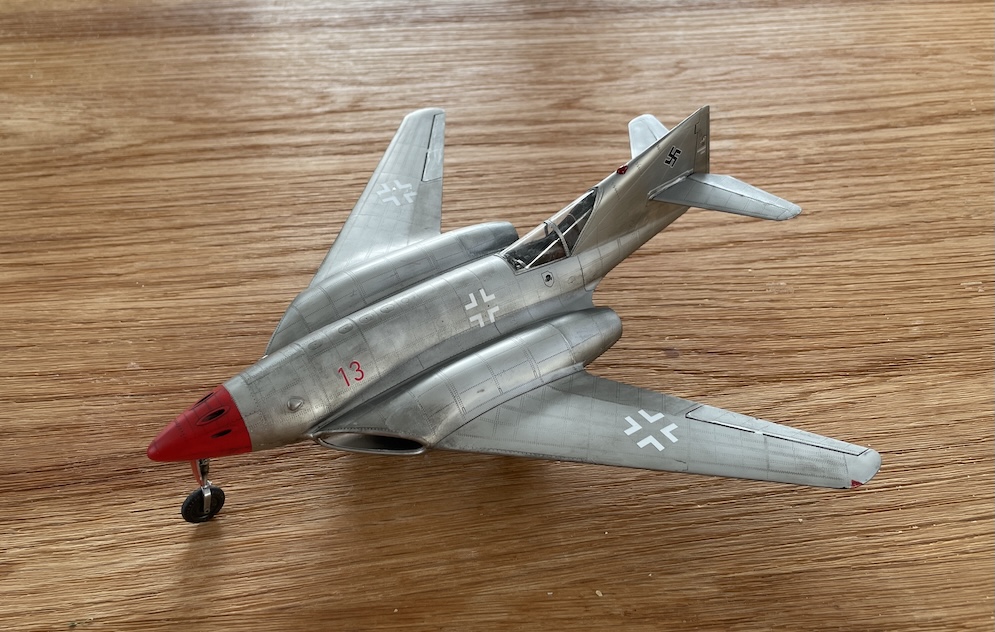
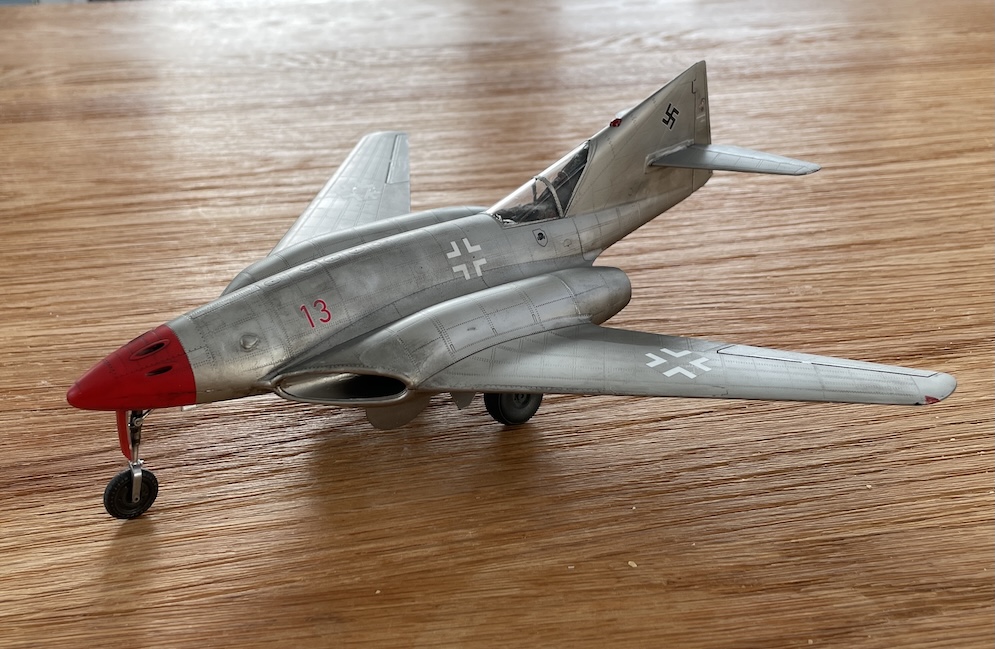
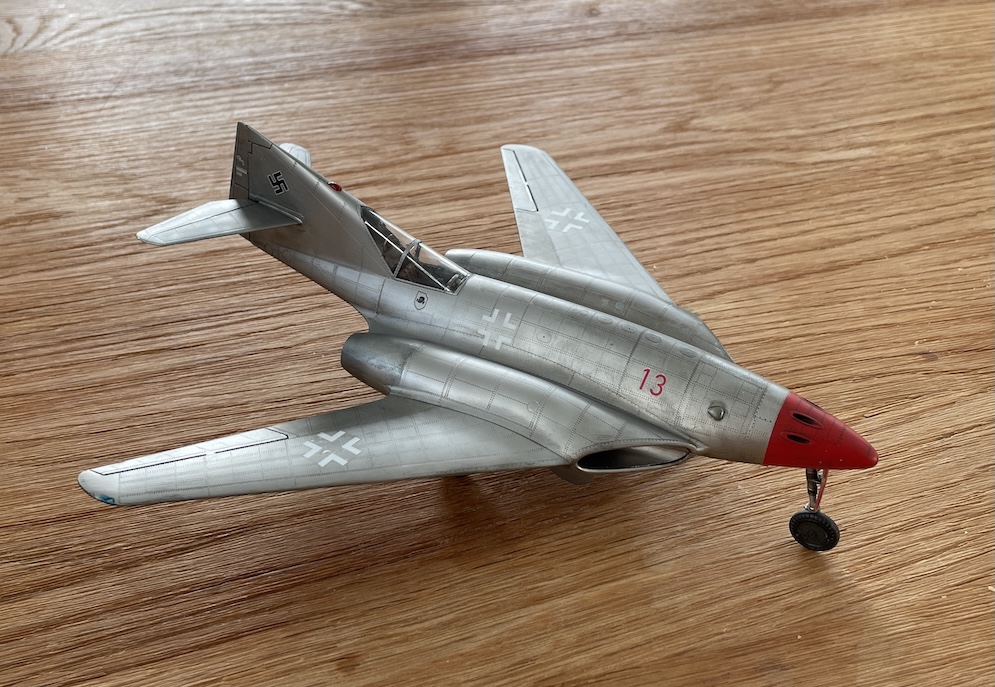
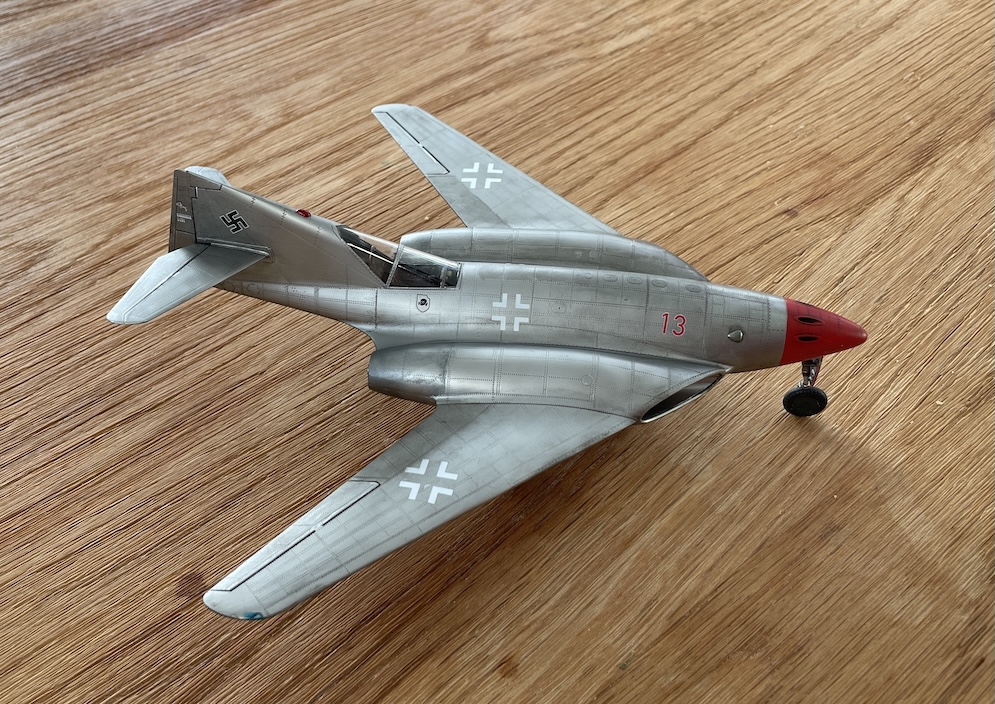
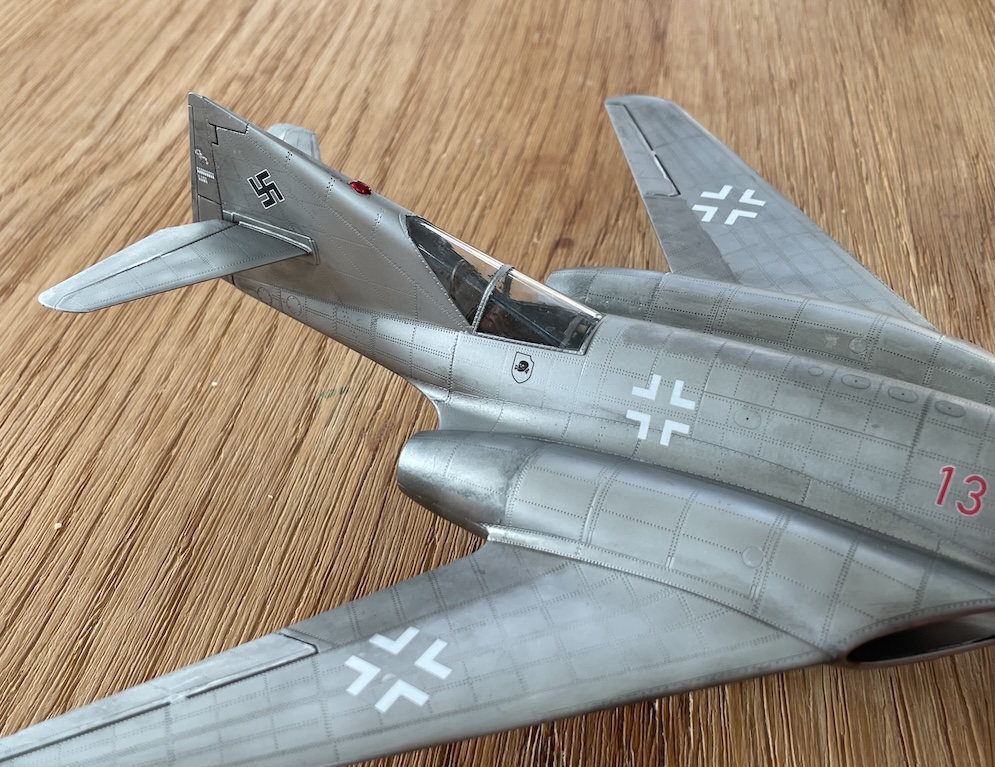
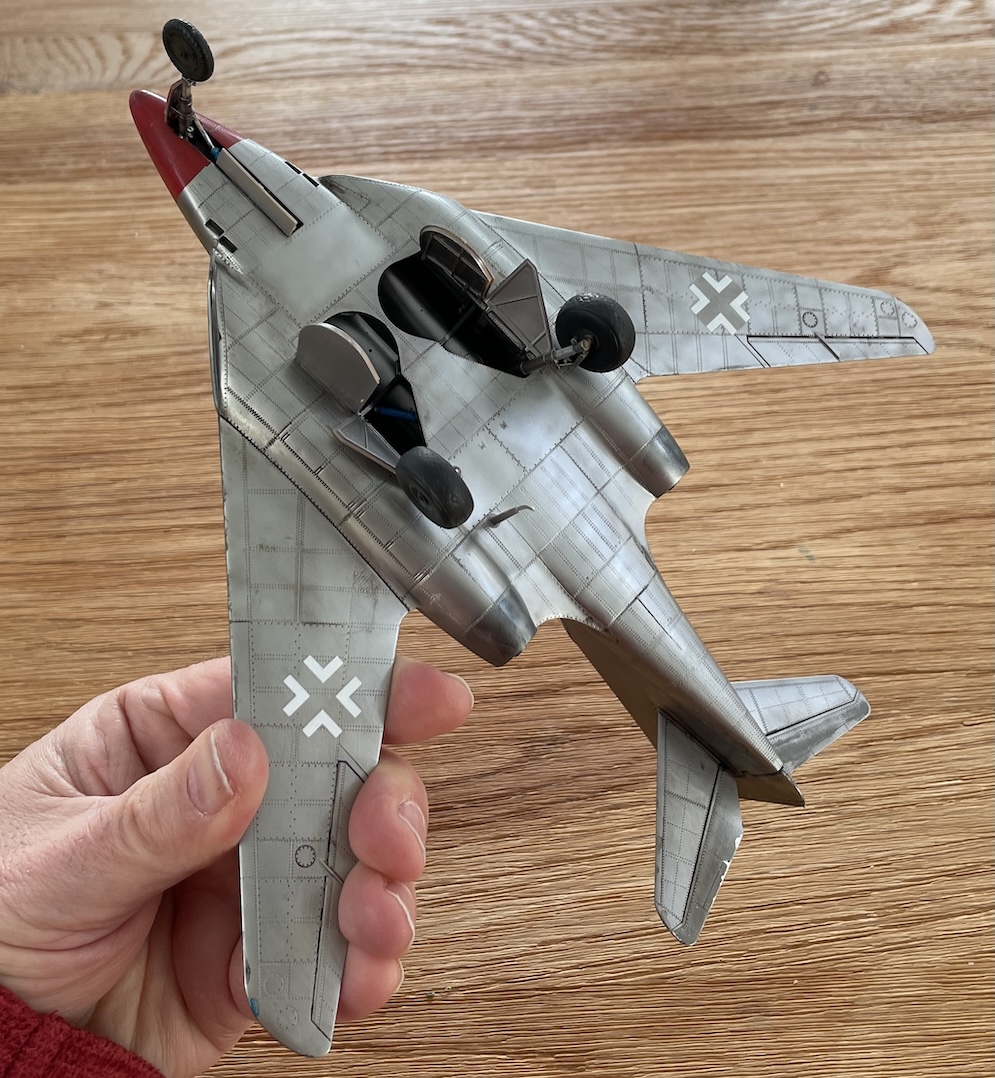
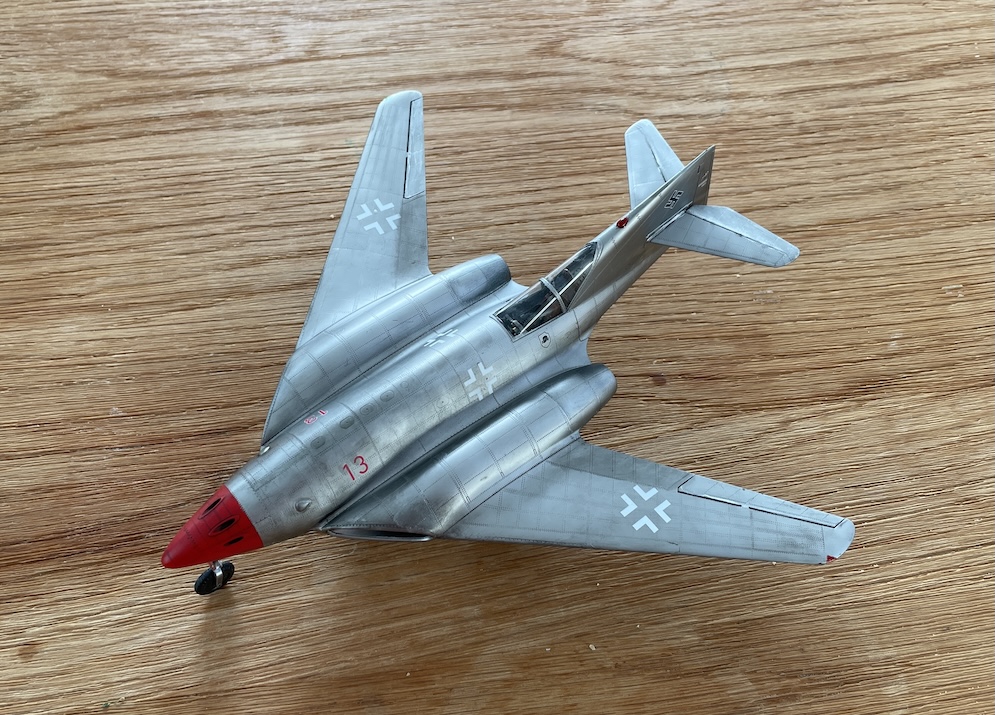
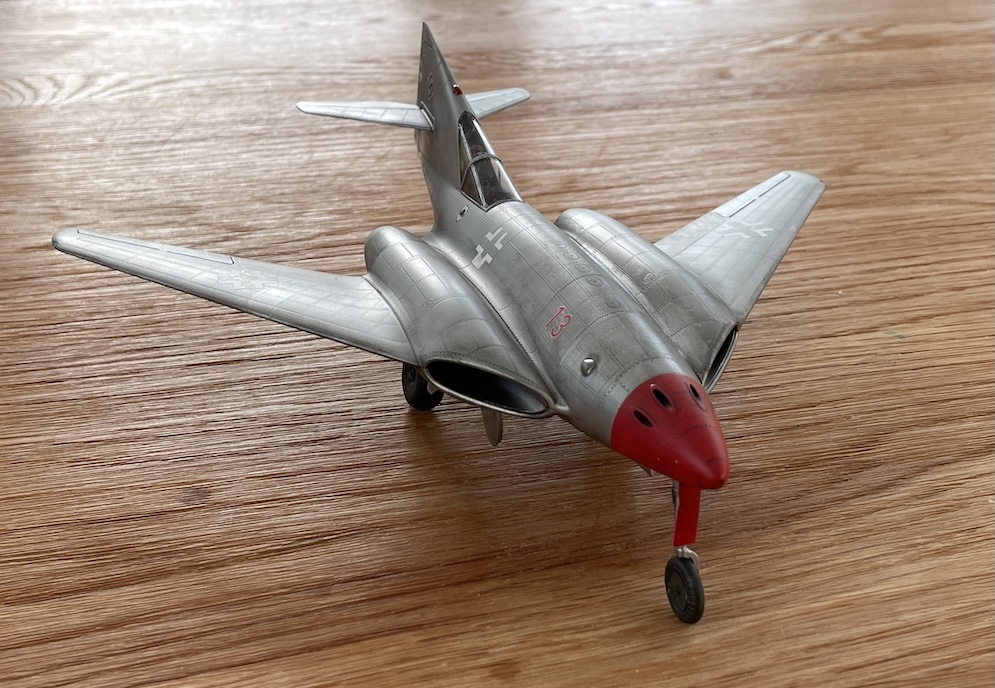
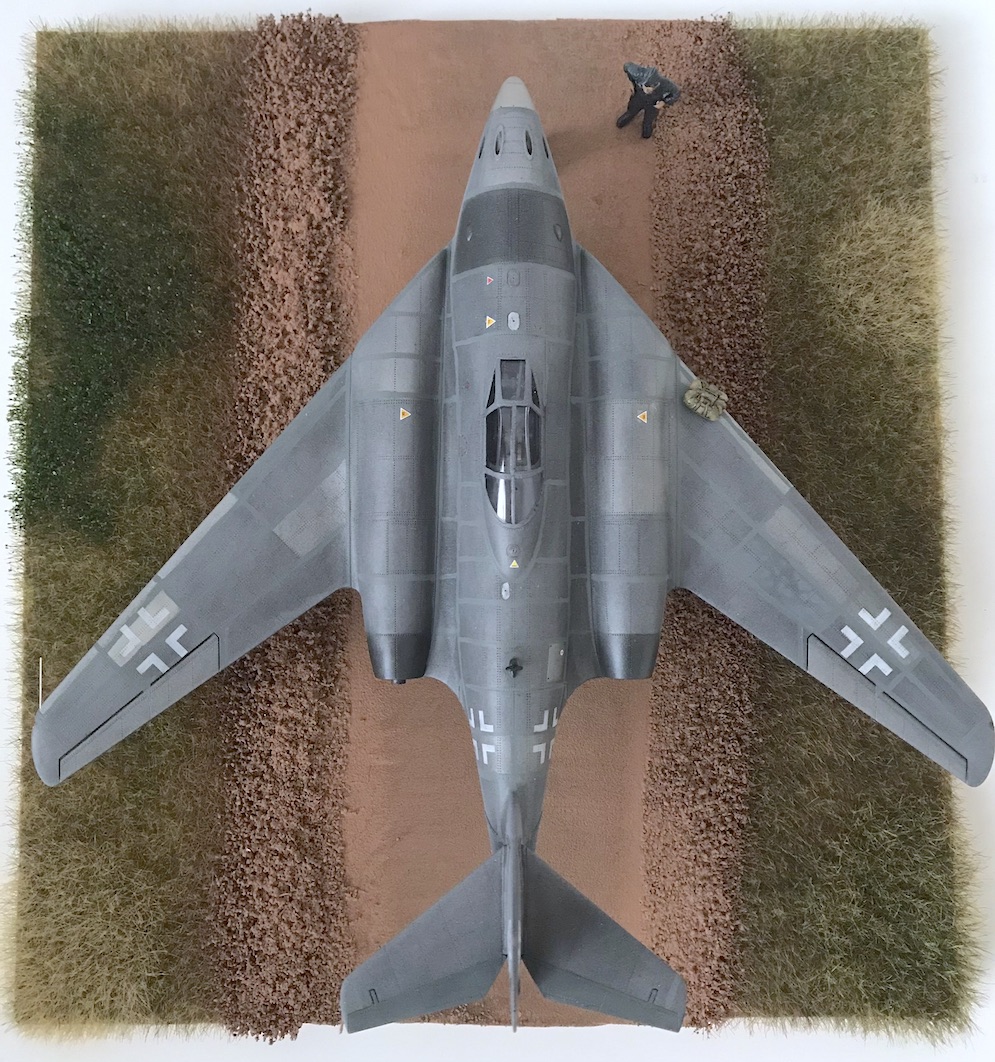
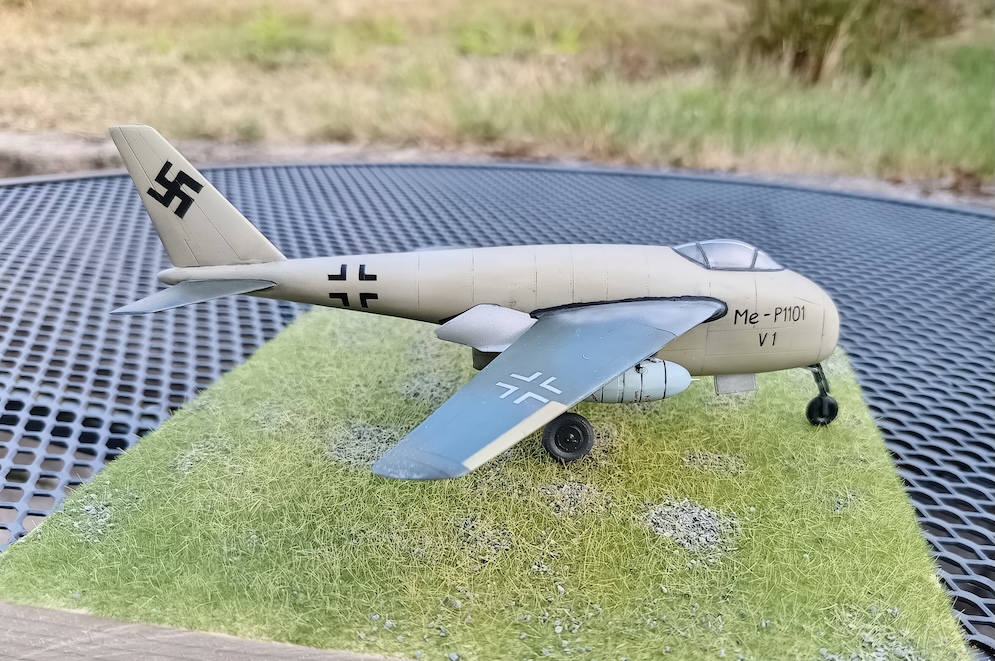
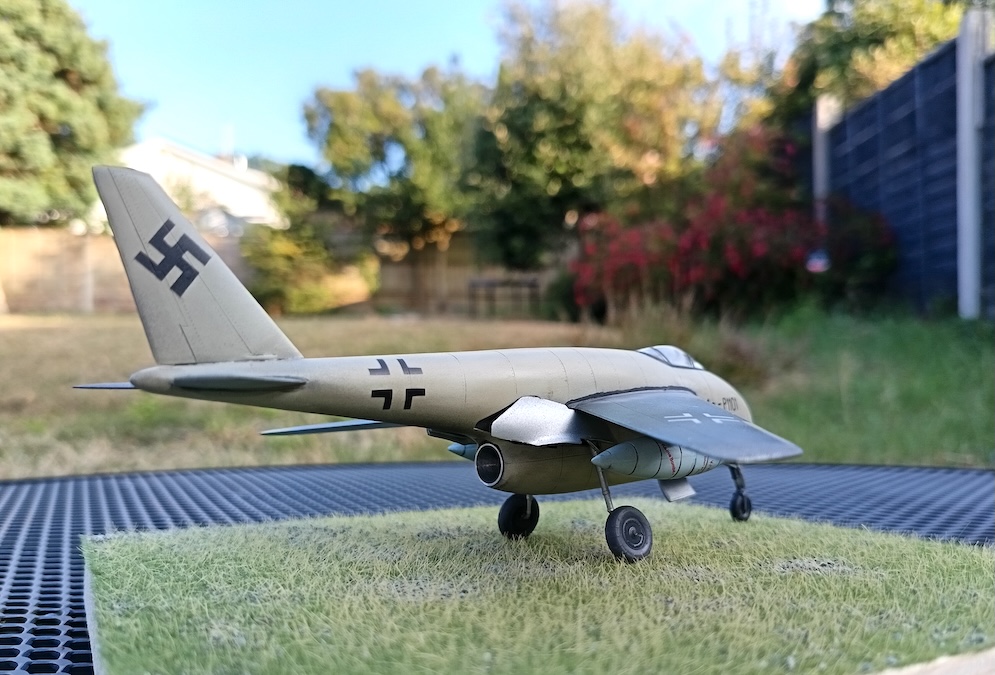
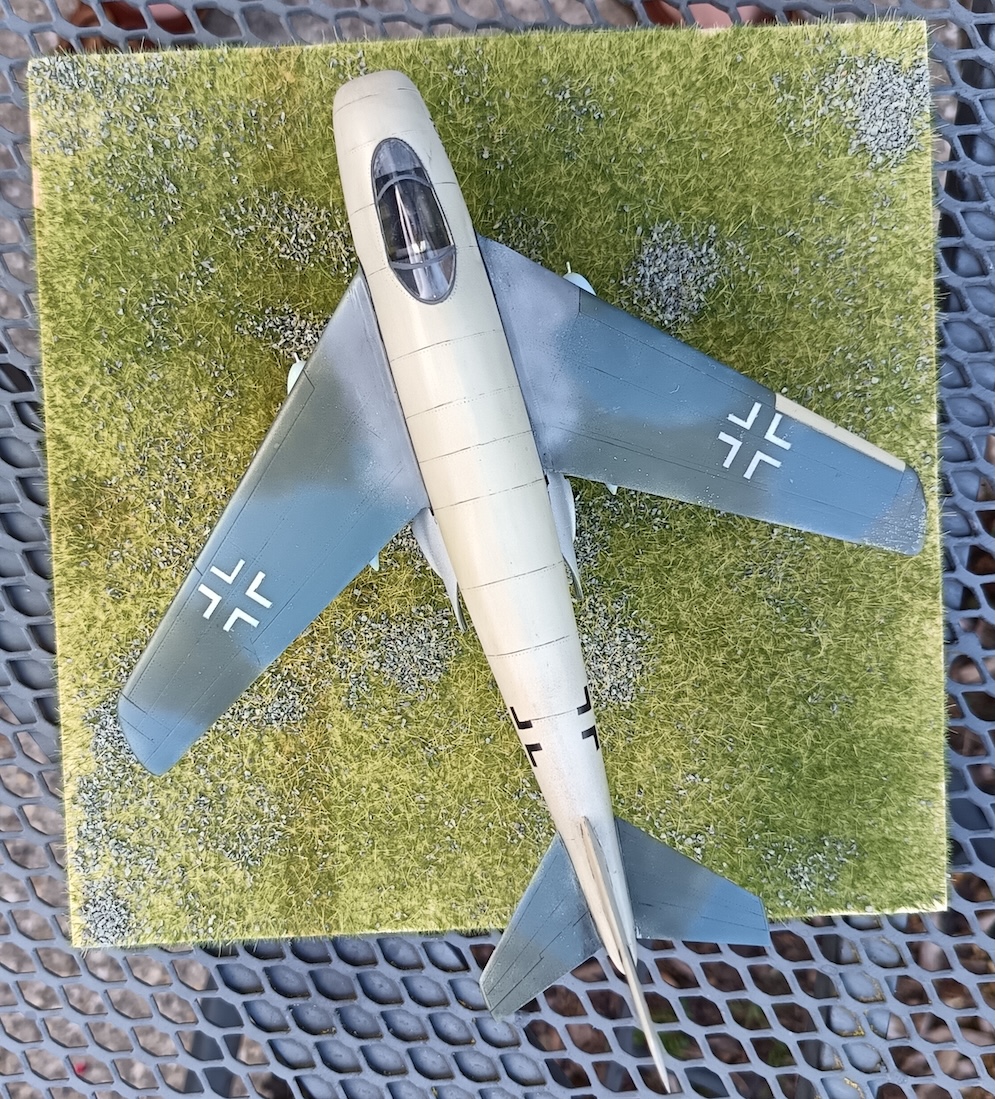
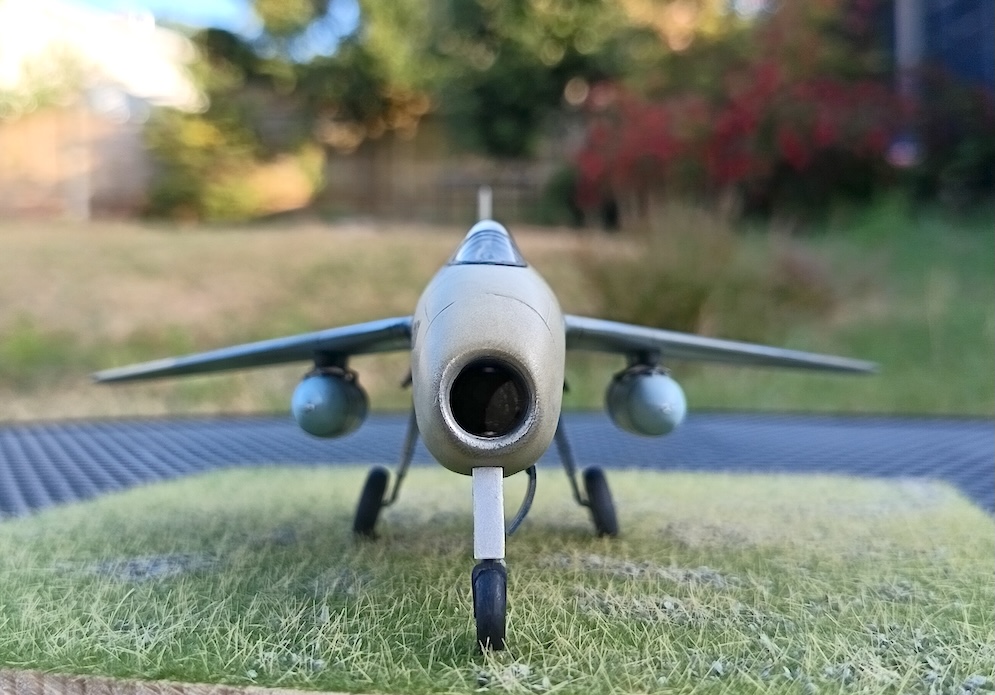
The aircraft is built to represent the prototype. As we know it actually only got as far as a wind tunnel model so benefits from some Luft 46 artistic licence. I’m sure that there should have been more filler (and perhaps that it’s the wrong colour?), but I’ve just filled the major panel lines and left the rest. The scene with the dirt covered trackway takes inspiration from the last story in Pierre Clostermann’s ‘Flames in the sky’.
Craig W

My only additions were to ‘adapt’ an Eduard Bf110 G-2 PE set, a set of Owl resin Bf 110 late exhaust dampers and Fine Molds own Nano Aviation MG131 guns. The kit is very refined and still stands comparison with other 1:72 offerings of 2018. The only challenges are the multi-part canopy and drilling the right gun port holes in the nose.
Hope you like it!
Andrew Johnson
My only real gripe is that some of the Balkankruezes were slightly out of register, which I might try to rectify with some masking and light spraying. It forms the centrepiece of a refuelling diorama, hence the opened fuel filler on the starboard wing. Some of the pics are on a temporary base!
Best wishes, Andy W.

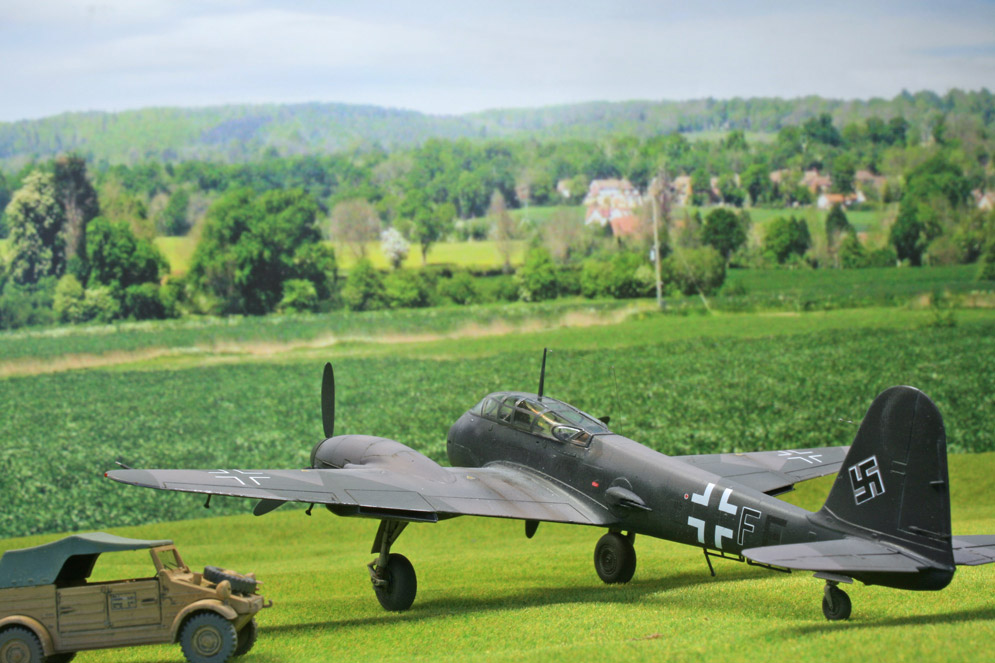
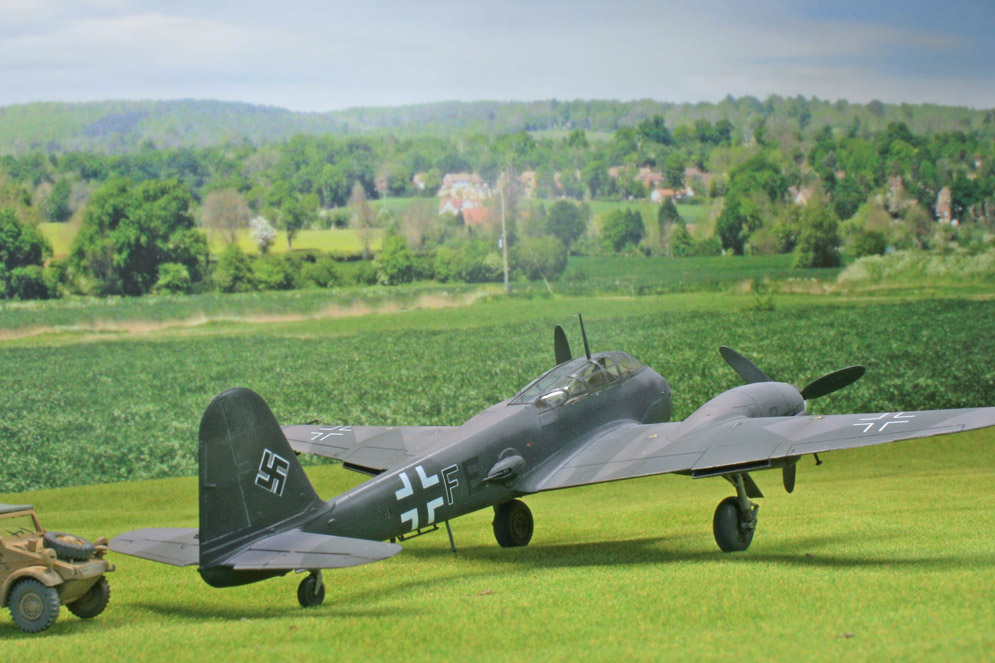
The build was relatively straightforward, although did push me more than some others. I compromised slightly on the undercarriage and replaced the tailpipe with aluminium tube. All markings are masked and sprayed, slightly imperfectly as I did this whilst travelling and had to make do with markings cut from masking tape.
Painting is my best guess based on the available photographs, NMF undercarriage doors are speculation and just to add some colour variety. I have represented as best as I can what I assume was a rubber seal around the variable geometry wing root.
I intend to try to get my hands on a Das Werk 1:32 kit, but haven’t decided if I’ll do the prototype or a Luft 46 aircraft.
Craig W.
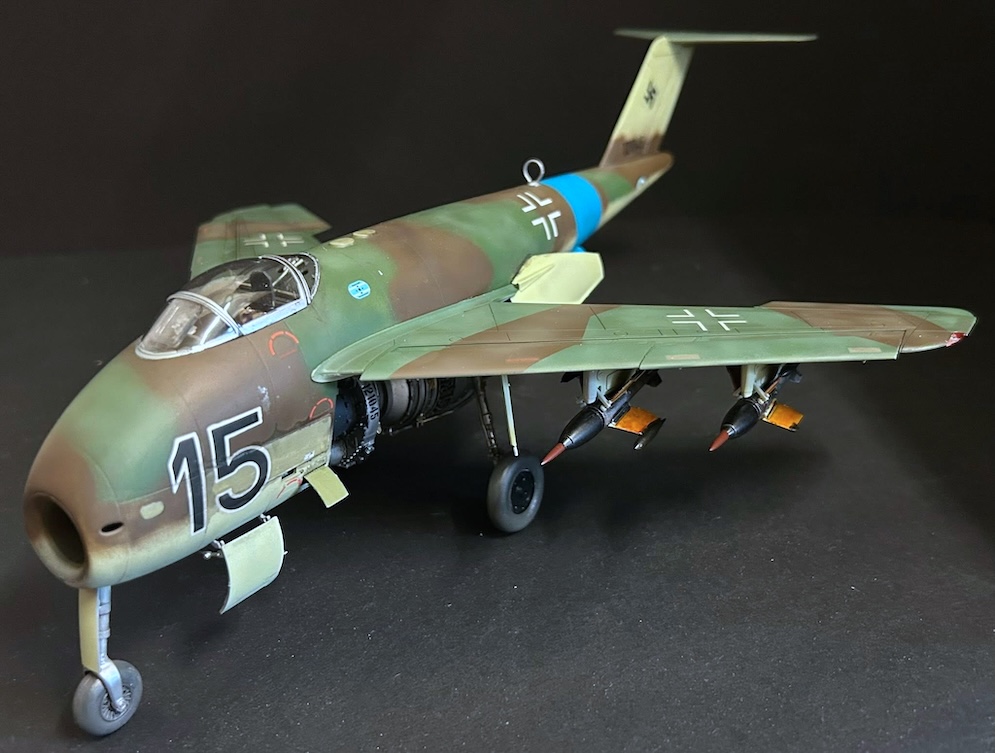
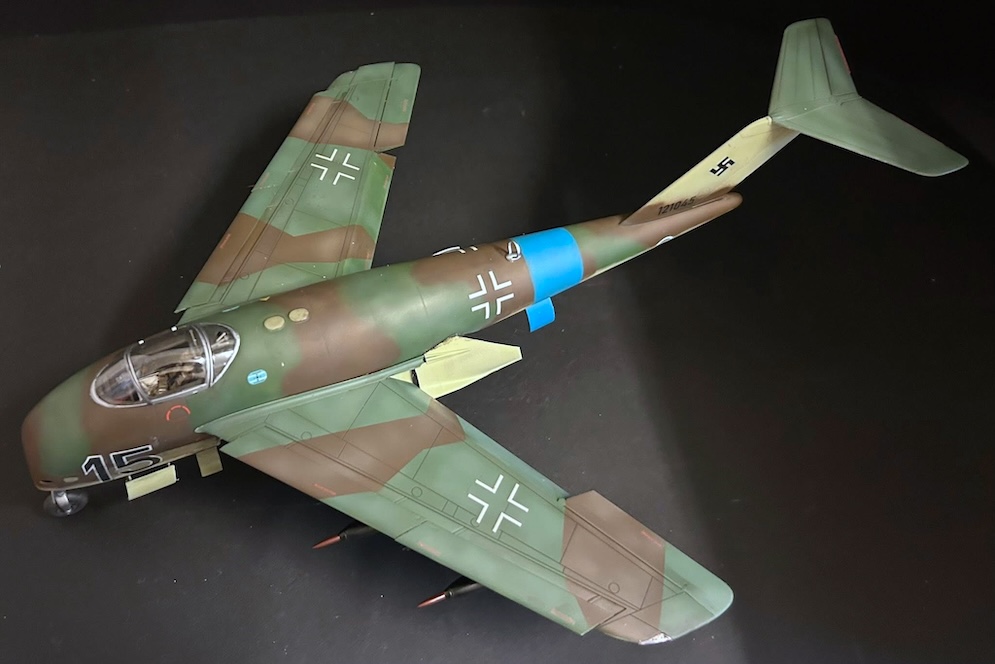
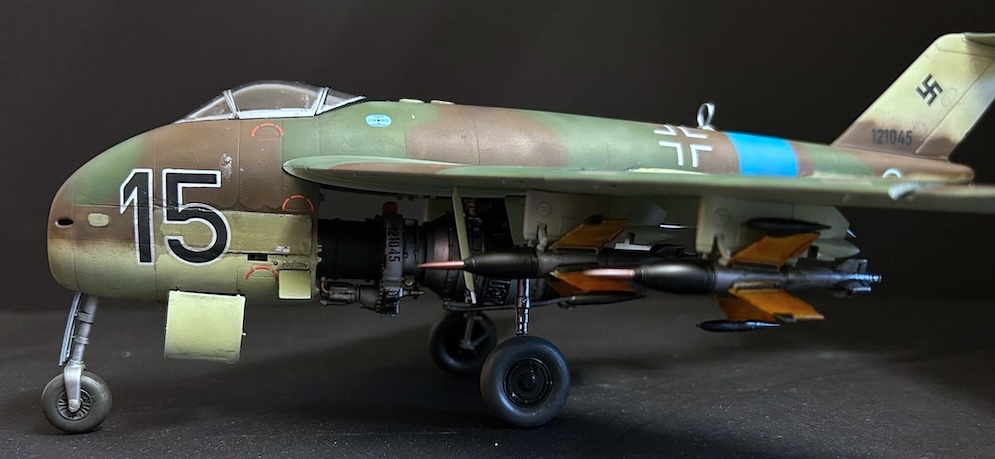
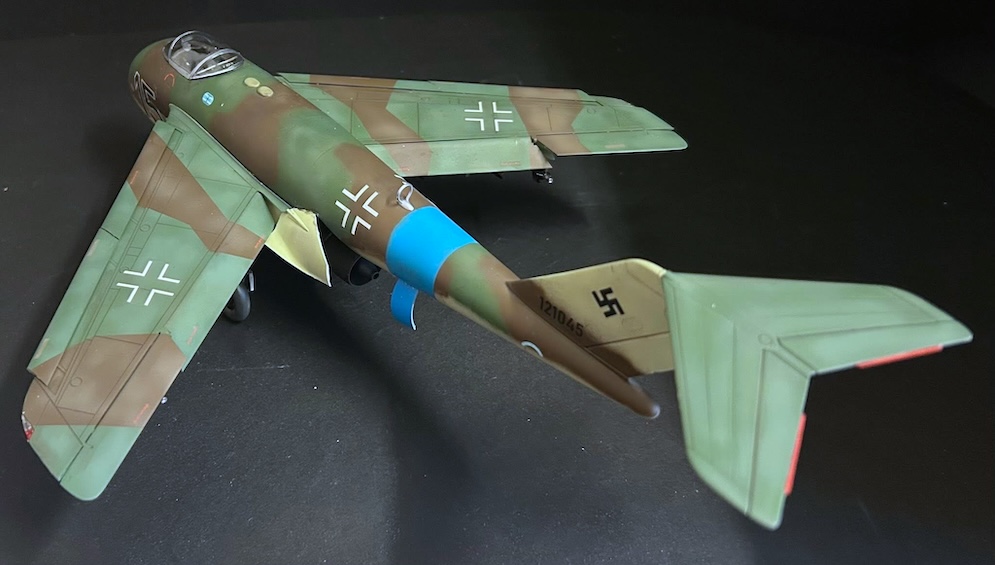

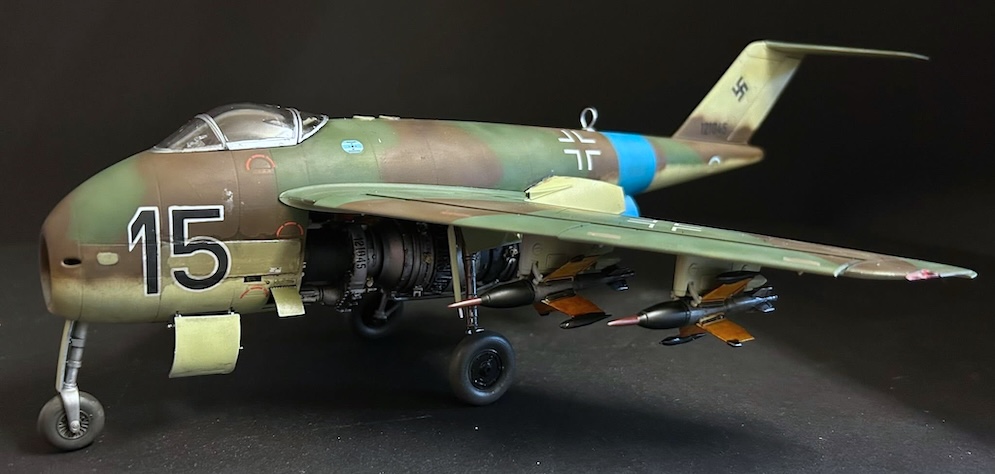
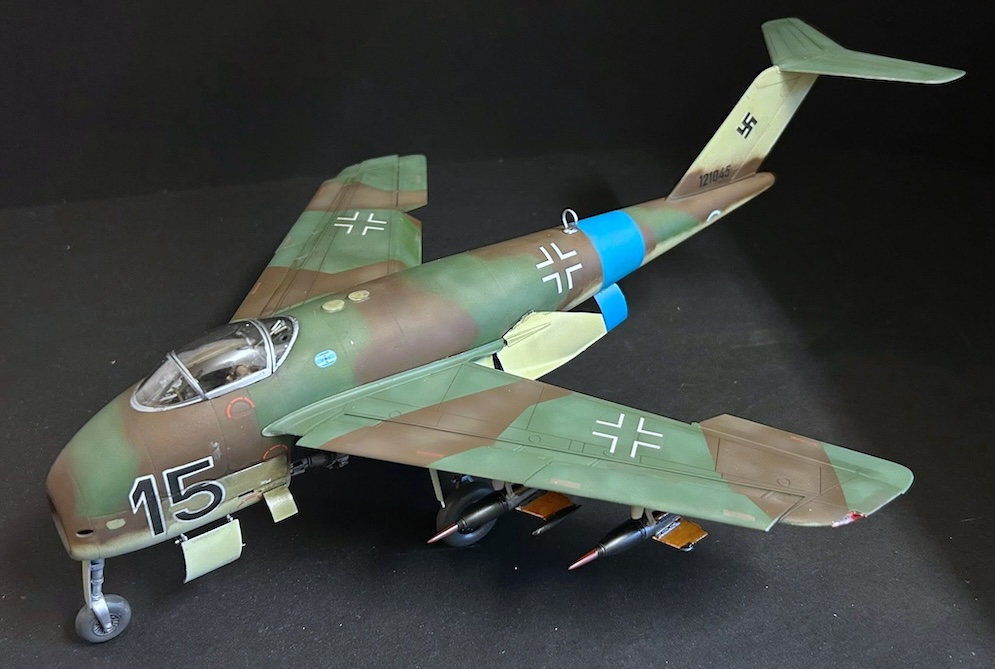
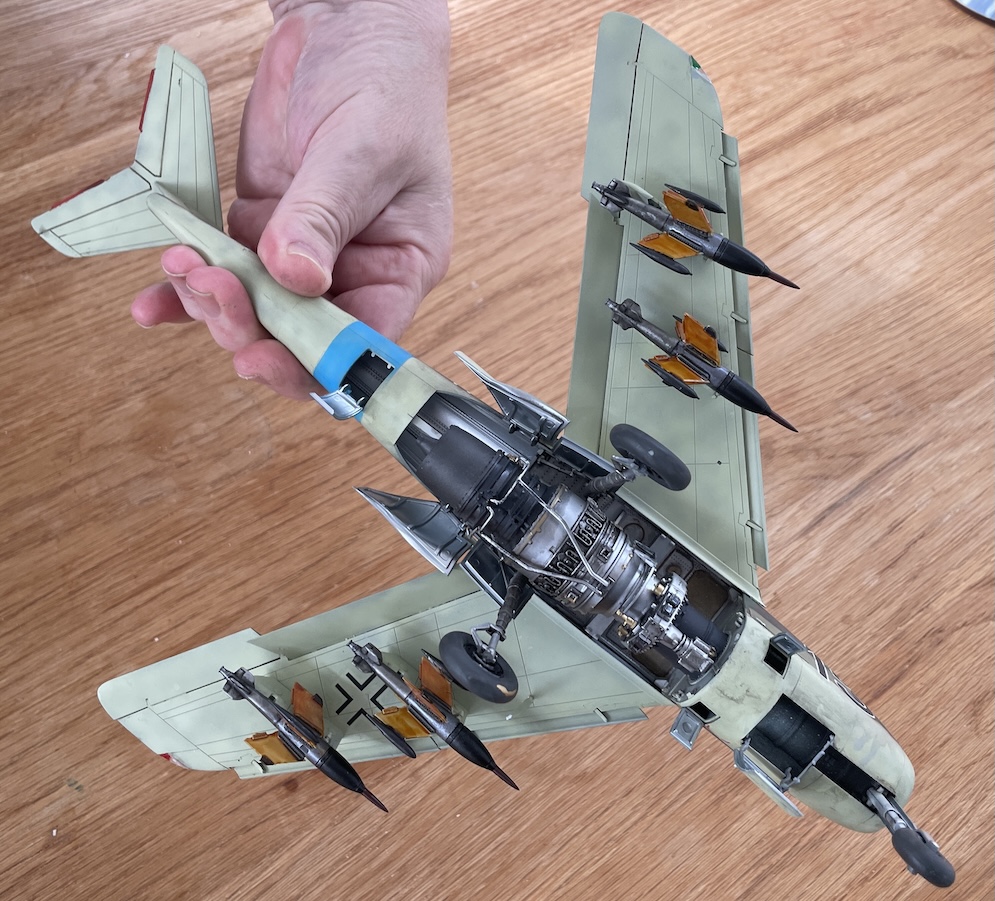
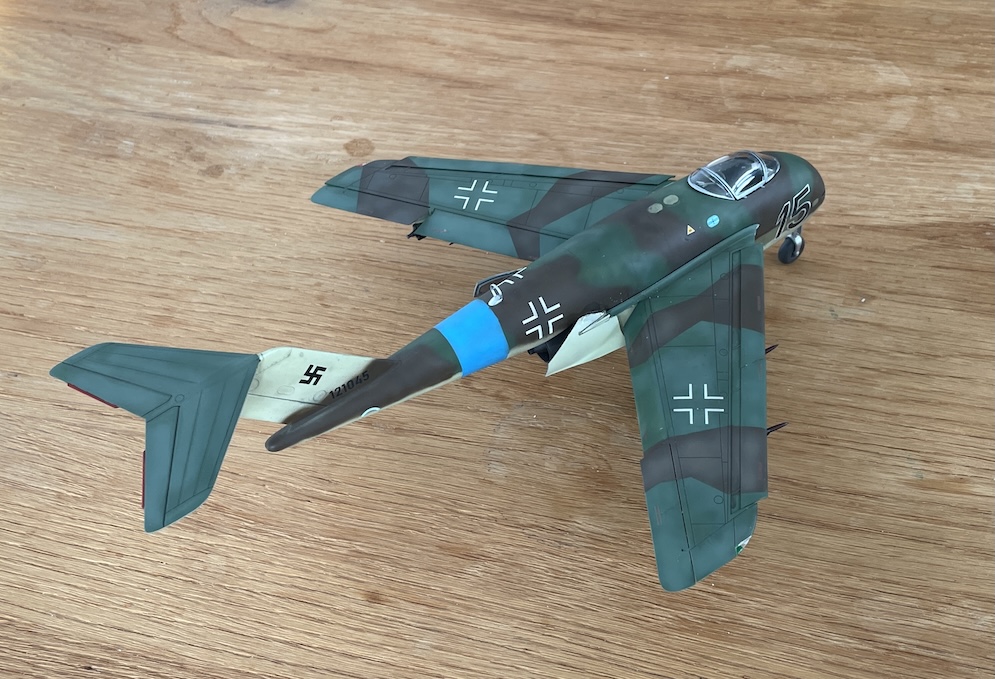
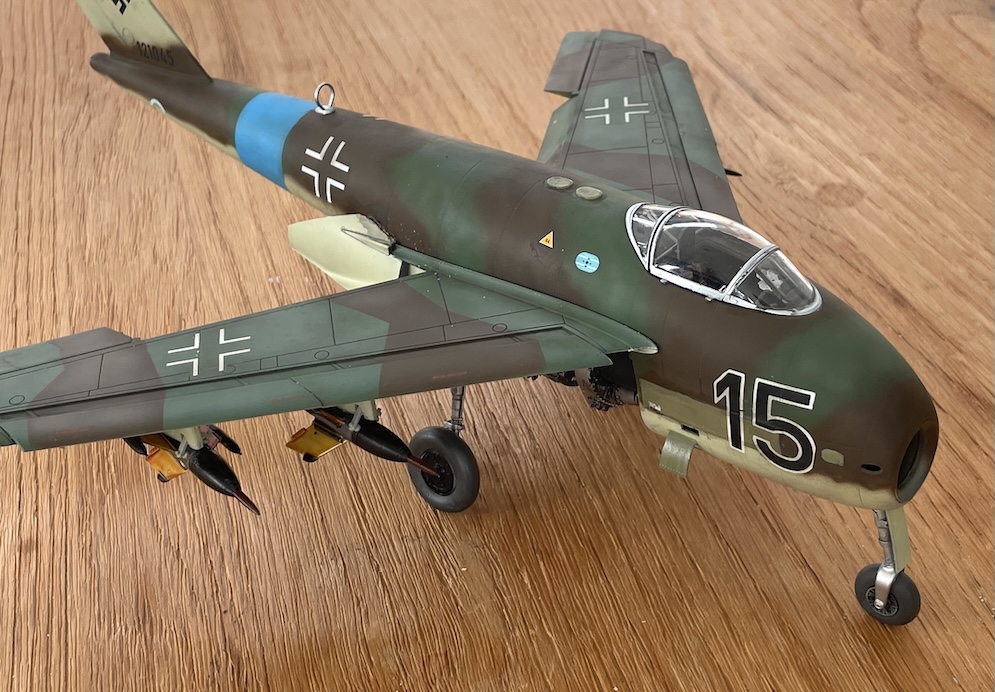
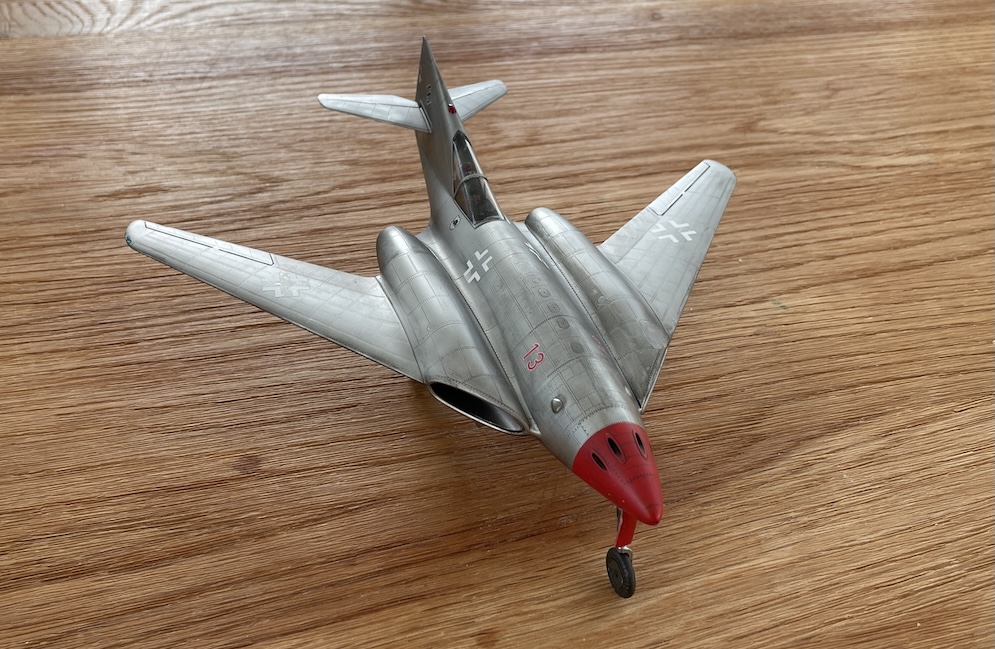
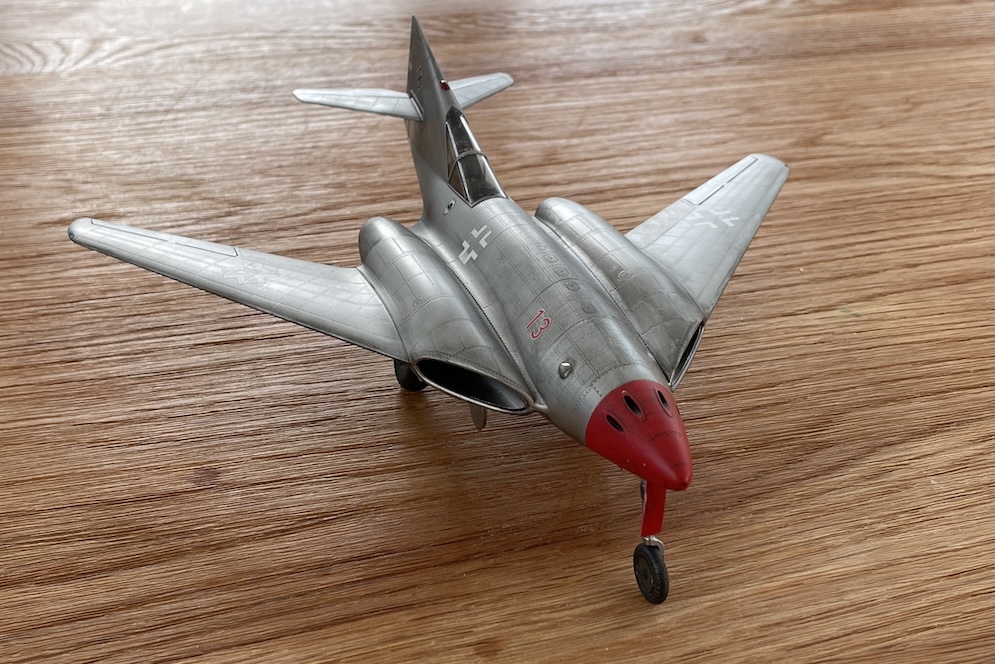
The Messerschmitt P.1101 was a German experimental jet fighter concept developed during the final phase of World War II as part of the Jägernotprogramm.
Les V.
More ‘M’ aircraft galleries
Galleries: A | B | C-E | F | G | H | I-L | M | N-R | S | T-V | W-Z