Whether you’re a seasoned modeller or just getting started, this gallery is a place to share your work, appreciate the craftsmanship of others, and draw inspiration for your next project.
Each submission has a ‘gallery’ of thumbnails which you can click on to see an enlarged image and read the short text describing the model – enjoy!
We warmly encourage you to become part of this community. By subscribing to Scale Modelling Now, you unlock full access to 4,500+ in-depth build-reviews, exclusive how-to videos, regular technique masterclasses, and fresh content added weekly — all for just £1.50/month (£18/year).
Our Aircraft Scale Model Galleries
Focke-Wulf and Fokker Scale Model Gallery
Messerschmitt Aircraft Scale Model Gallery
Supermarine Spitfire Scale Model Gallery
A | B | B-2 | C | D-E | F | G | H | I-L | M | N-R | S | T-V | W-Z
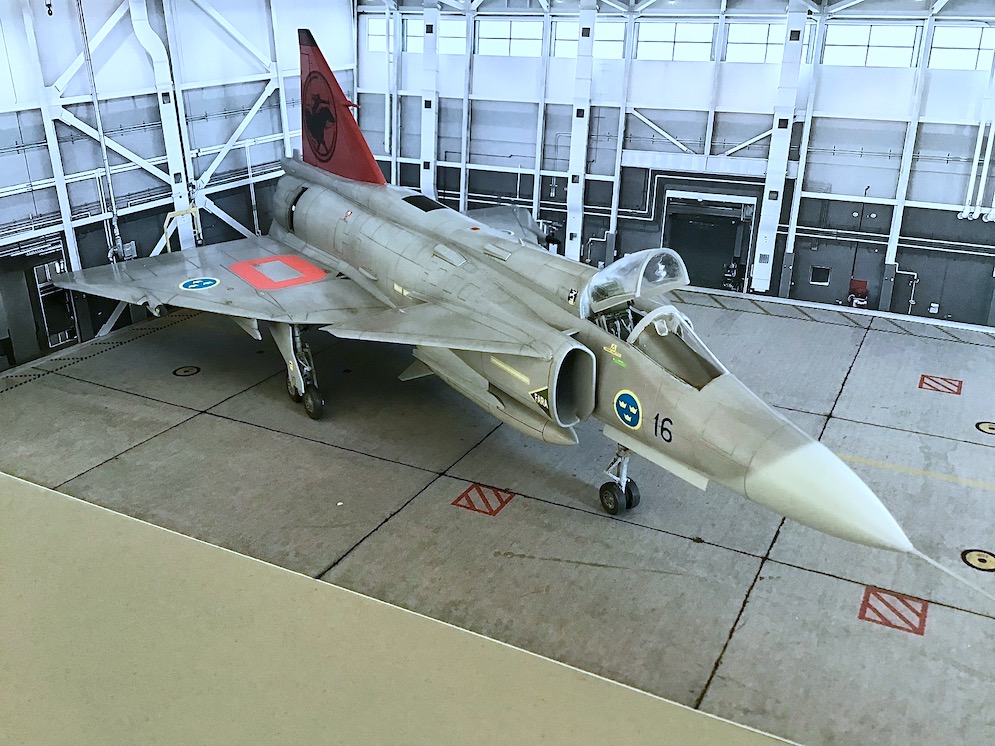
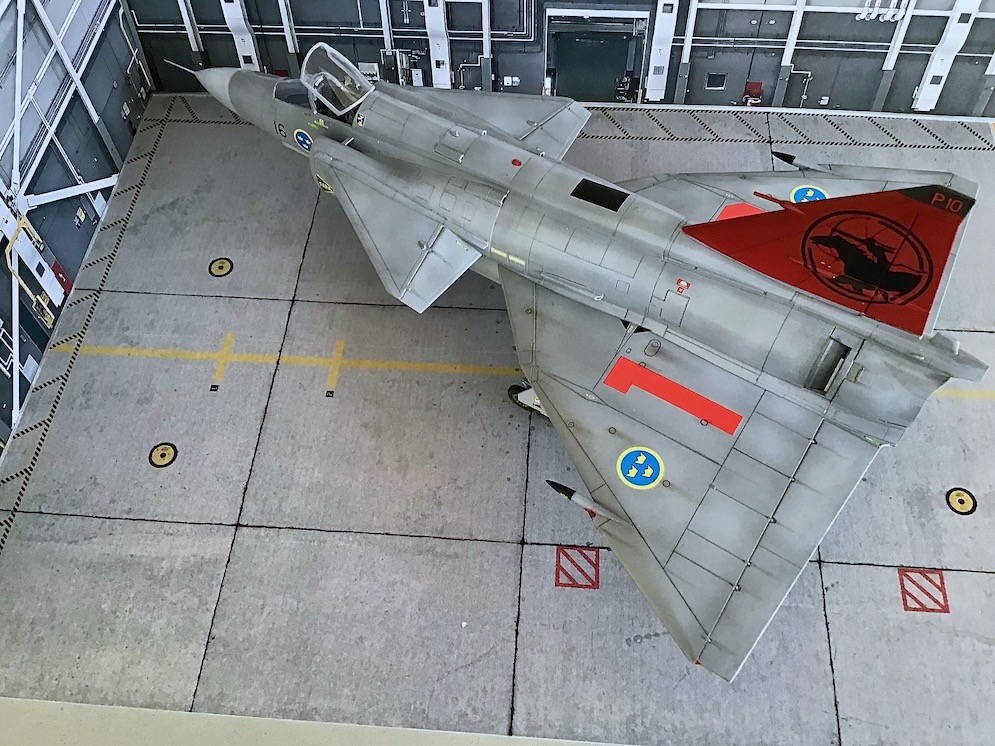

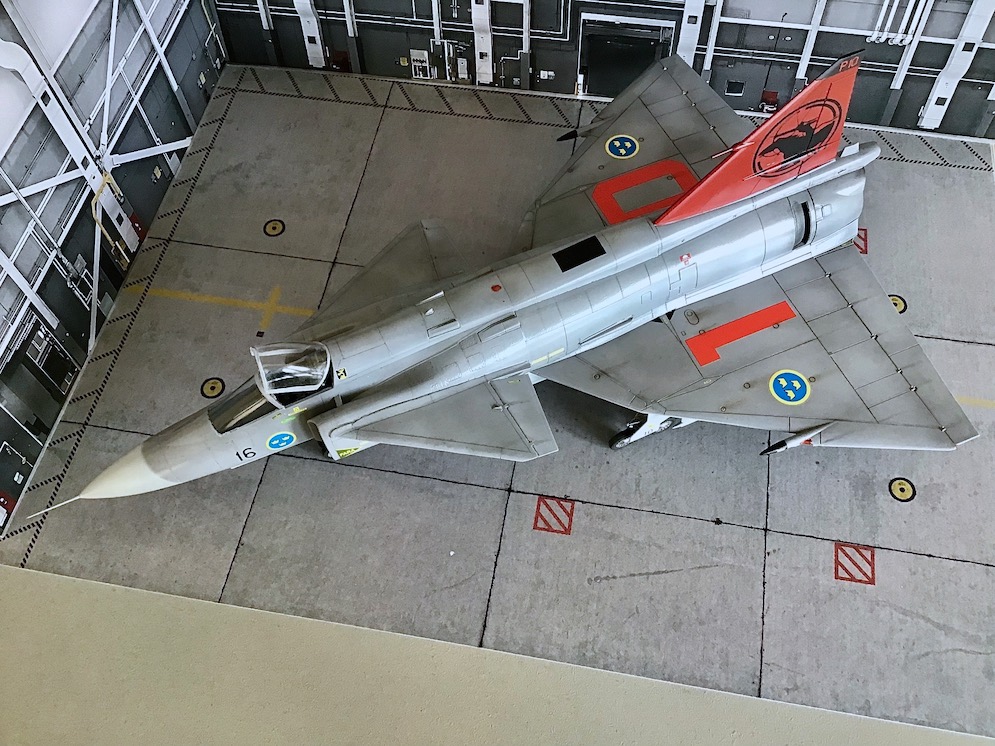
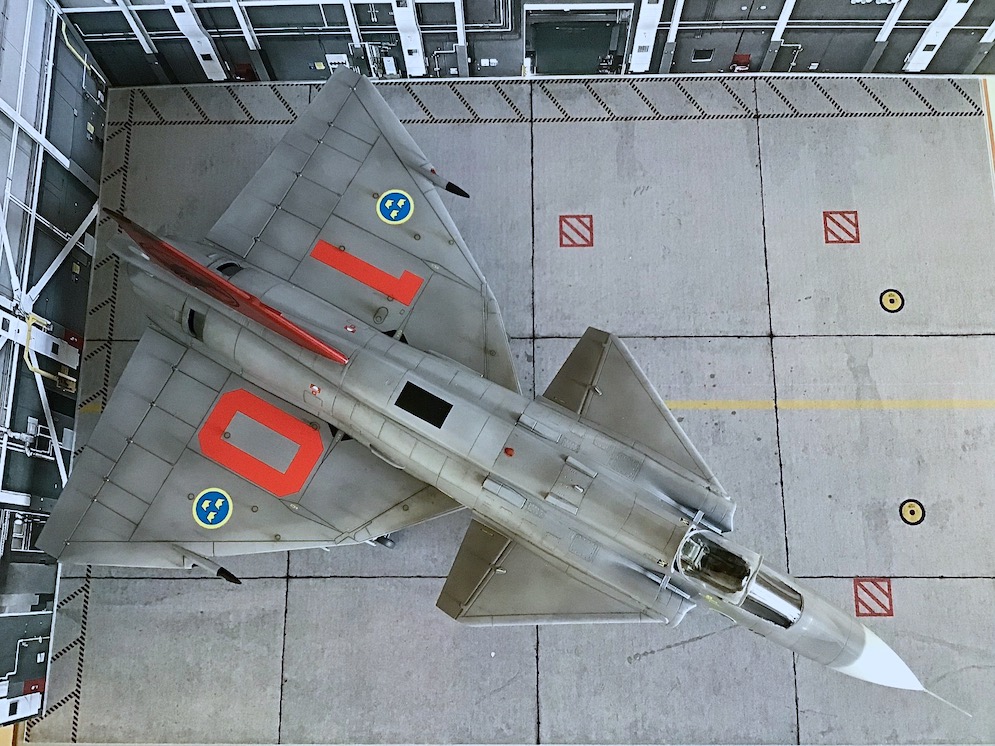
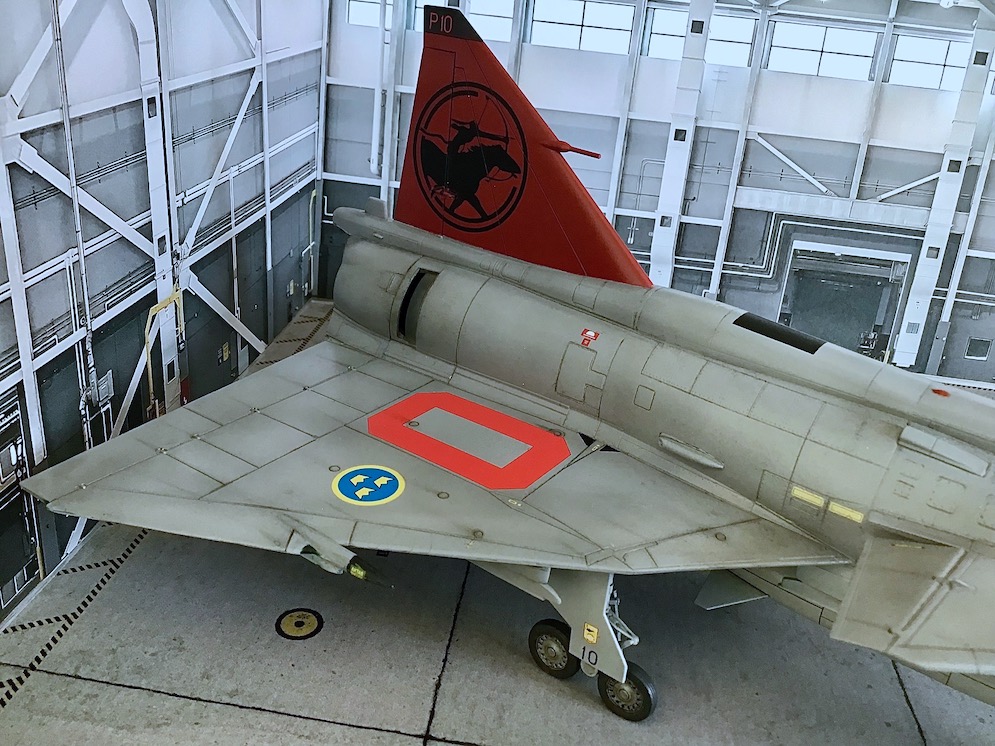
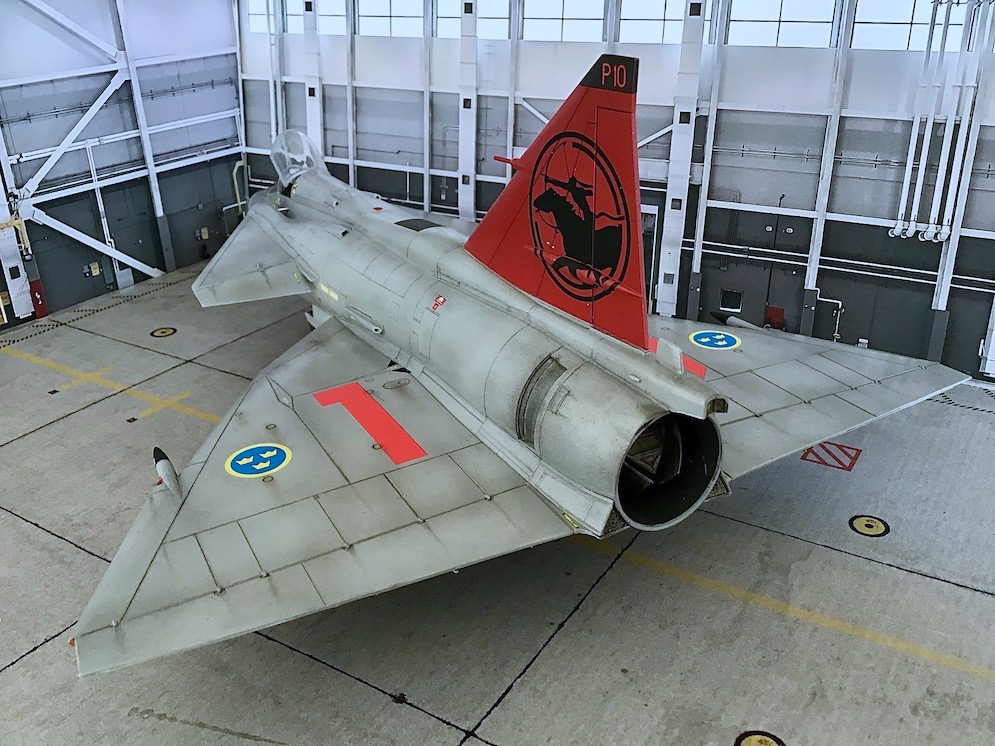

May I present to you my 1:48 scale build of the SAAB ‘AJ-37’ Viggen.
This is the Special Hobby kit and built out of the box apart from an aftermarket pitot probe (Master) and Decal Sheet (Moose Republic).
The kit has pleasing recessed surface details and I found it to be an enjoyable build experience and didn’t find any areas of major-issue during the process. It certainly captures the look of the Viggen to a tee in my book.
I primed the model in Mr.Surfacer 1500 Grey mixed 50:50 with Levelling Thinner and completed the paint scheme with Mr.Hobby Aqueous acrylics, again mixed in the same ratio with Levelling Thinner. I brush-applied a coat of Klear/Pledge to seal the paint surface in readiness for the decaling stage. The Moose Republic decals responded perfectly with just Micro Sol. I avoided using Micro Set because I wanted to make sure I had enough working time to position the tail markings satisfactorily.
An airbrushed coat of Mr Hobby Clear Semi-Gloss was applied overall prior to final assembly. Tamiya weathering pastels were used for that final touch.
I wish to add that this build was my first serious attempt at weathering a model and I must thank Geoff and SMN for my learning and raising my confidence to attempt what has now become a stage I thoroughly enjoy and relish carrying out on all my subsequent projects.
I hope you enjoy viewing and thank you for doing so.
All The Best,
Paul. A
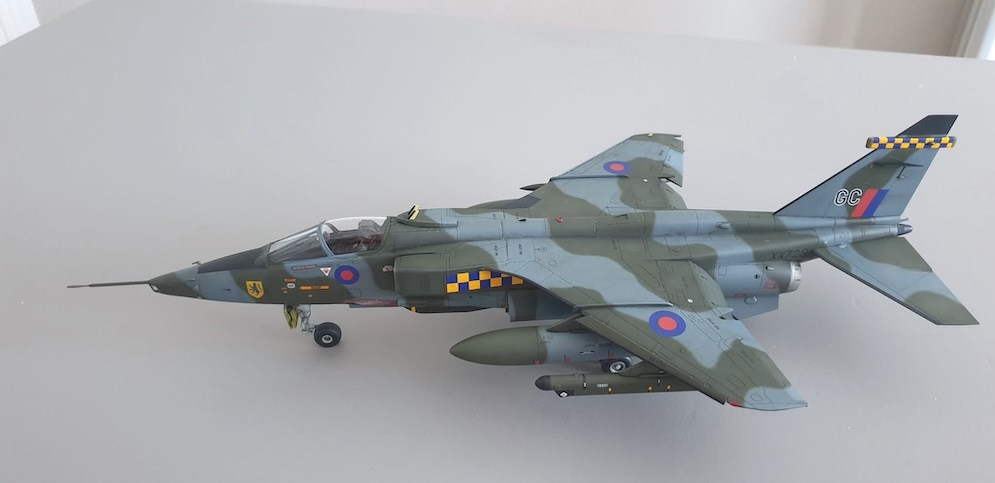
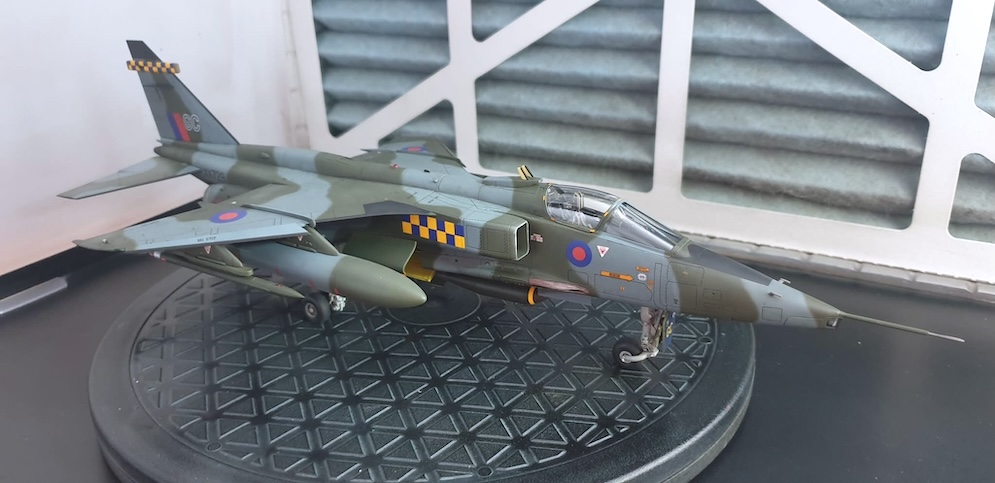
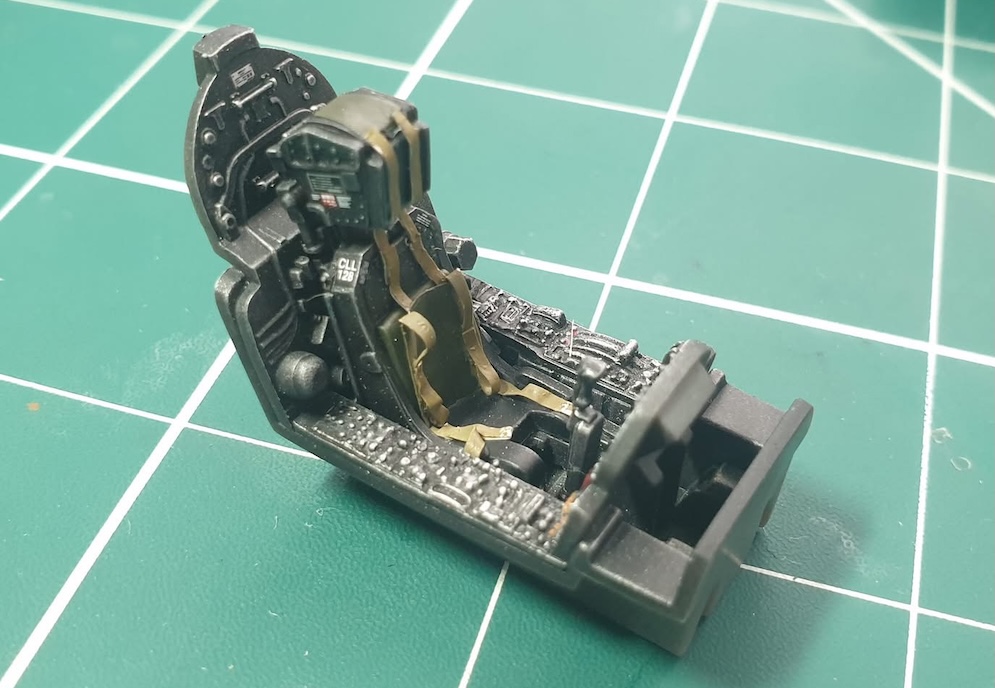
It’s built from the 1:72 Airfix kit, aftermarket included Pavla seat and wheels also Modeldecal sheet used.
John M.
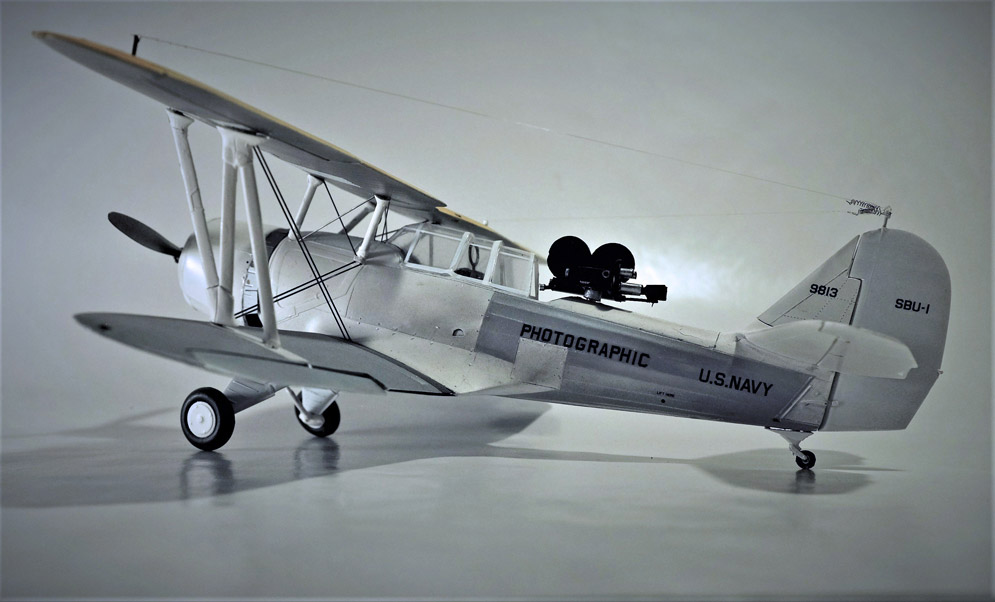
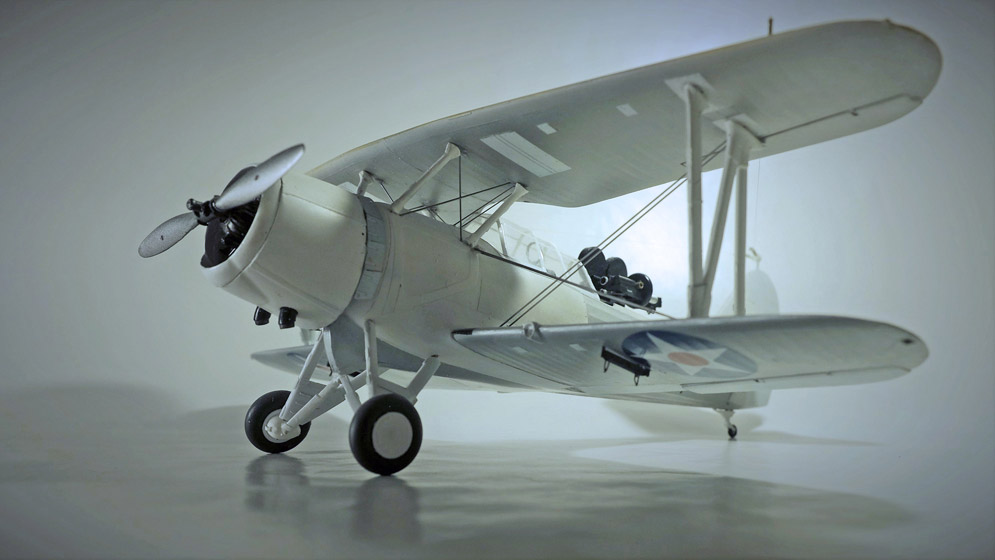
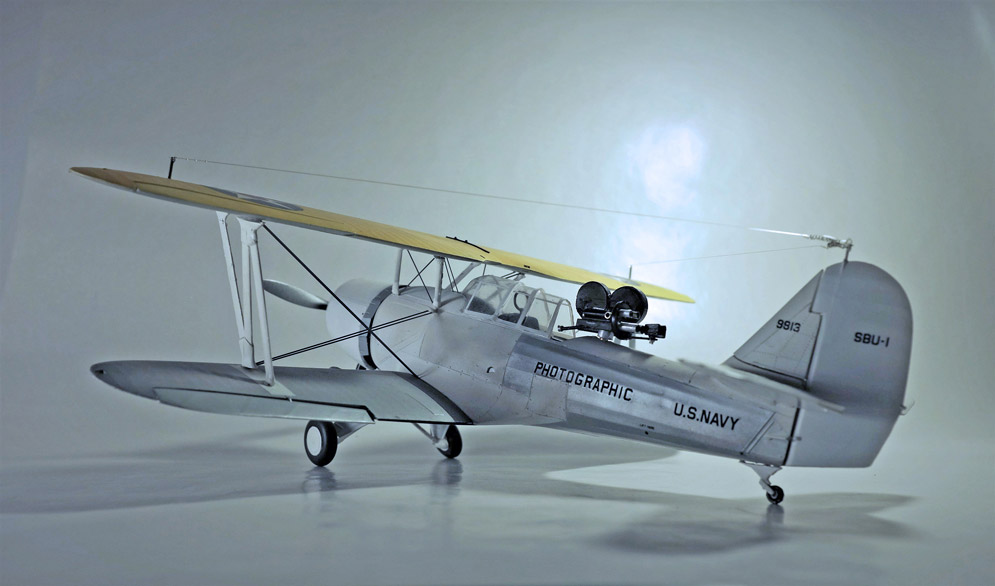
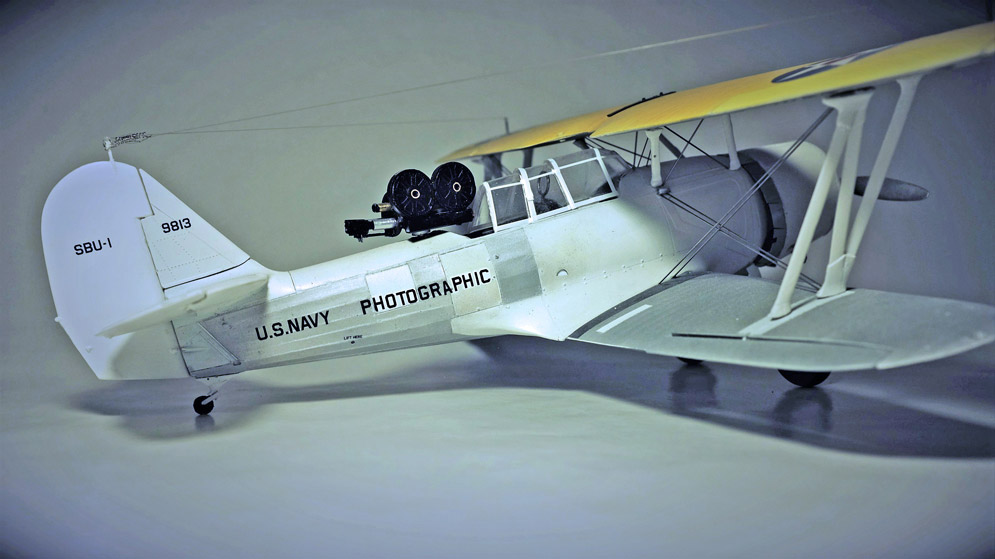

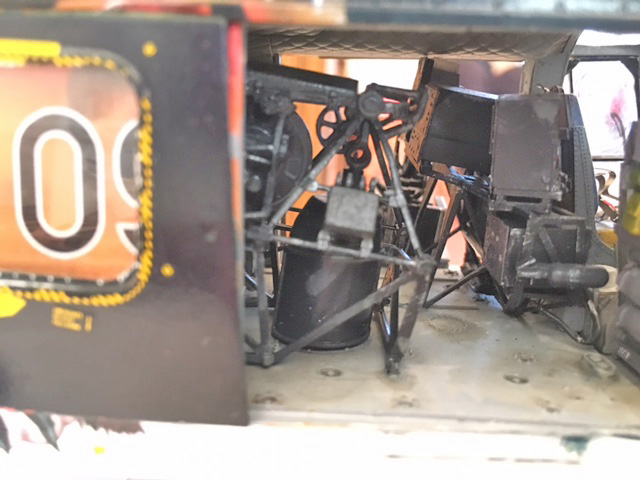
I had originally intended to convert the model to a “Blue Goose” command aircraft and use the magnificent decals for other projects. (To date I have used the Pointer Dog Insignia of Scouting Squadron Two on a Dauntless. They look, to coin a phrase of the day “Just Dandy”). When I finally got round to thinking about starting this model, Lukgraph had already made a Blue Goose variant so I changed direction and built a version of the aircraft away from front line duty at NAS Penascola where the majority of SBU-1 aircraft were stationed in reserve by Dec 1941. This one is assigned to the Navy Photographic Service and is based on an image from William T Larkins “US Navy Aircraft 1921 -41”
I am not aware of any of large movie cameras being fitted to the SBU- 1 in real life, but examples were fitted to aircraft in Hollywood, most notably in the filming of the Howard Hughes Epic “Hells Angels”. Large and heavy mapping cameras were bolted to USN aircraft at Penascola though, principally, Fairchild K series. I took the liberty to replace the aircraft’s defensive machine gun, which certainly would never have been used in anger. The camera fitted here is a scratch-built Mitchell 16mm. It is the classic Hollywood camera of the era, used widely for filming stars such as Humphrey Bogart, Cary Grant and Carole Lombard. It was a camera definitely used by the USN, but possibly not as modelled here. It’s built from bits out of the scrap box, and I hope I have captured the feel of this hefty piece of apparatus.
The rest of the plane is from the box, apart from the glasshouse framing, which I replaced with white parallel lines decals from Hannants. Other Hannants decals were used for the “PHOTOGRAPHIC” insignia on the side of the fuselage. I used numerous shades of white from various paint suppliers to get a representative effect on the different panels.
Alan R.


Built in 2011, slight improvements have been made in some areas such as engine casing, cockpit construction, flaps.
I hope you like it.
Giannis A.
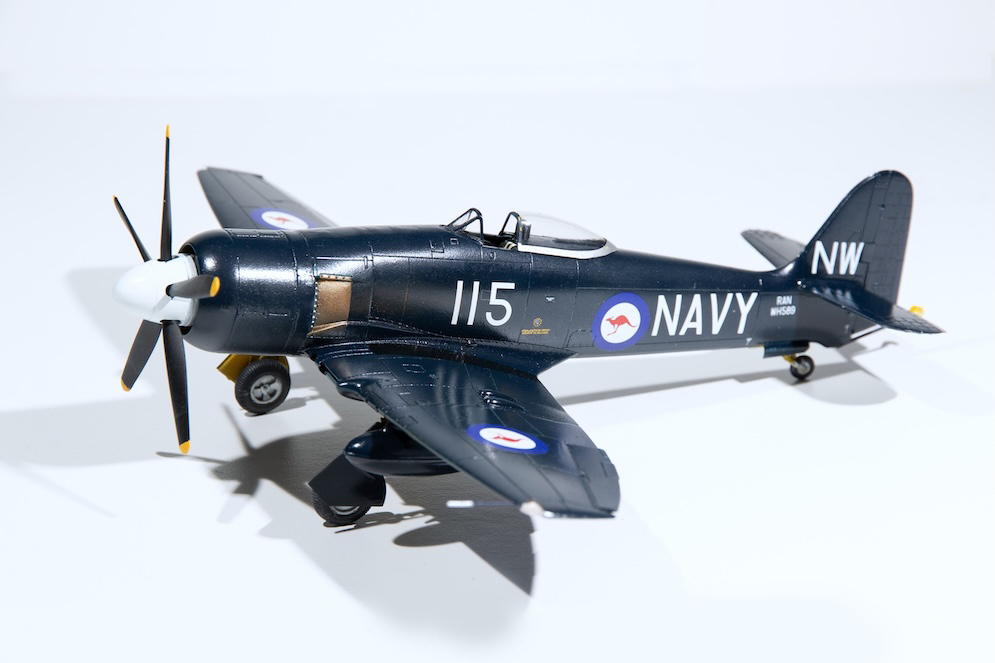
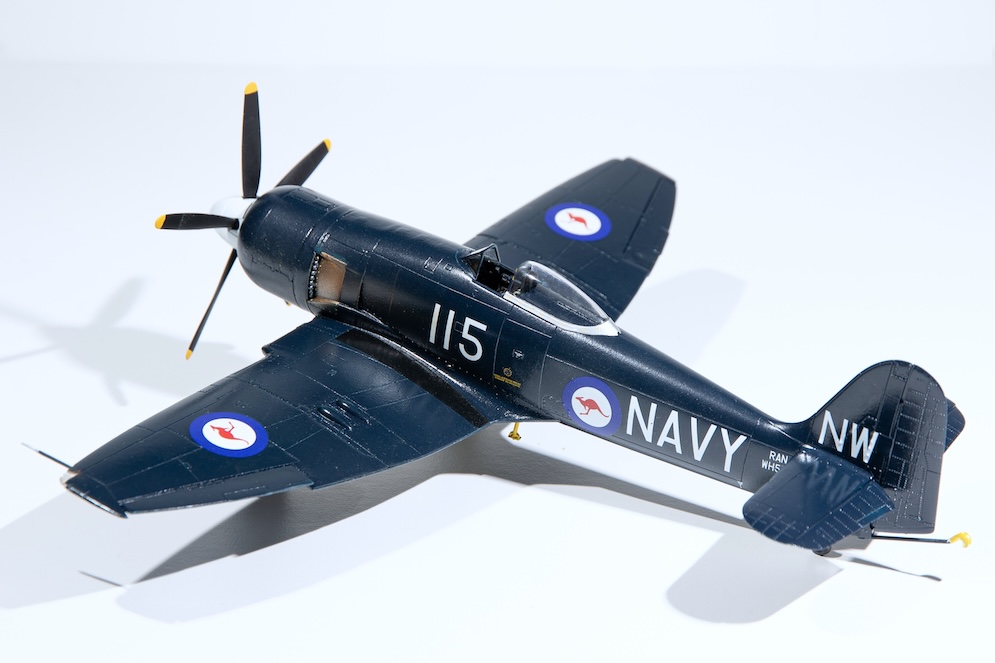
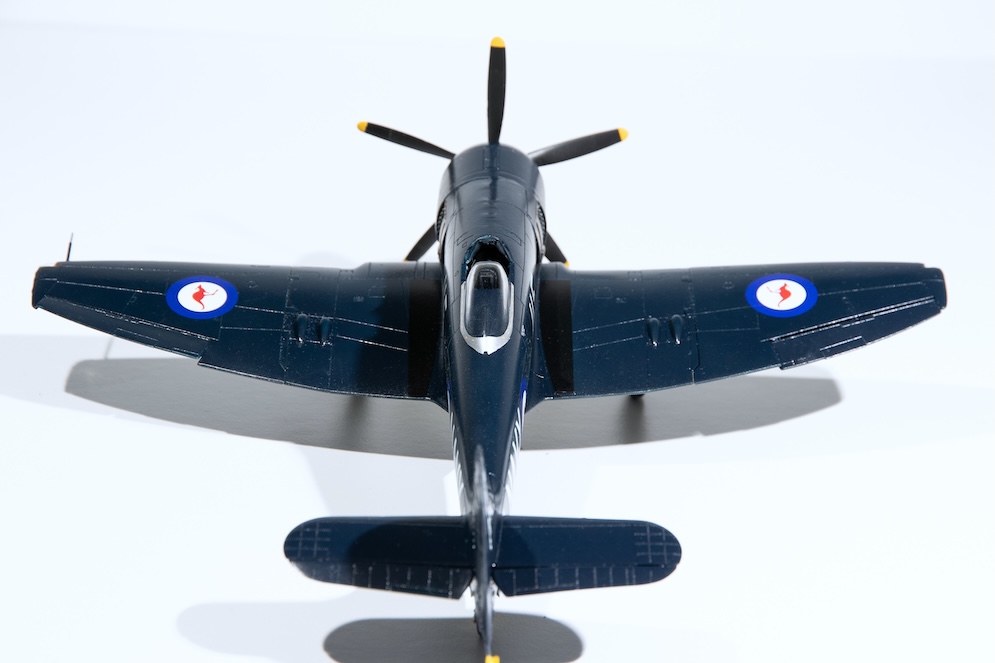

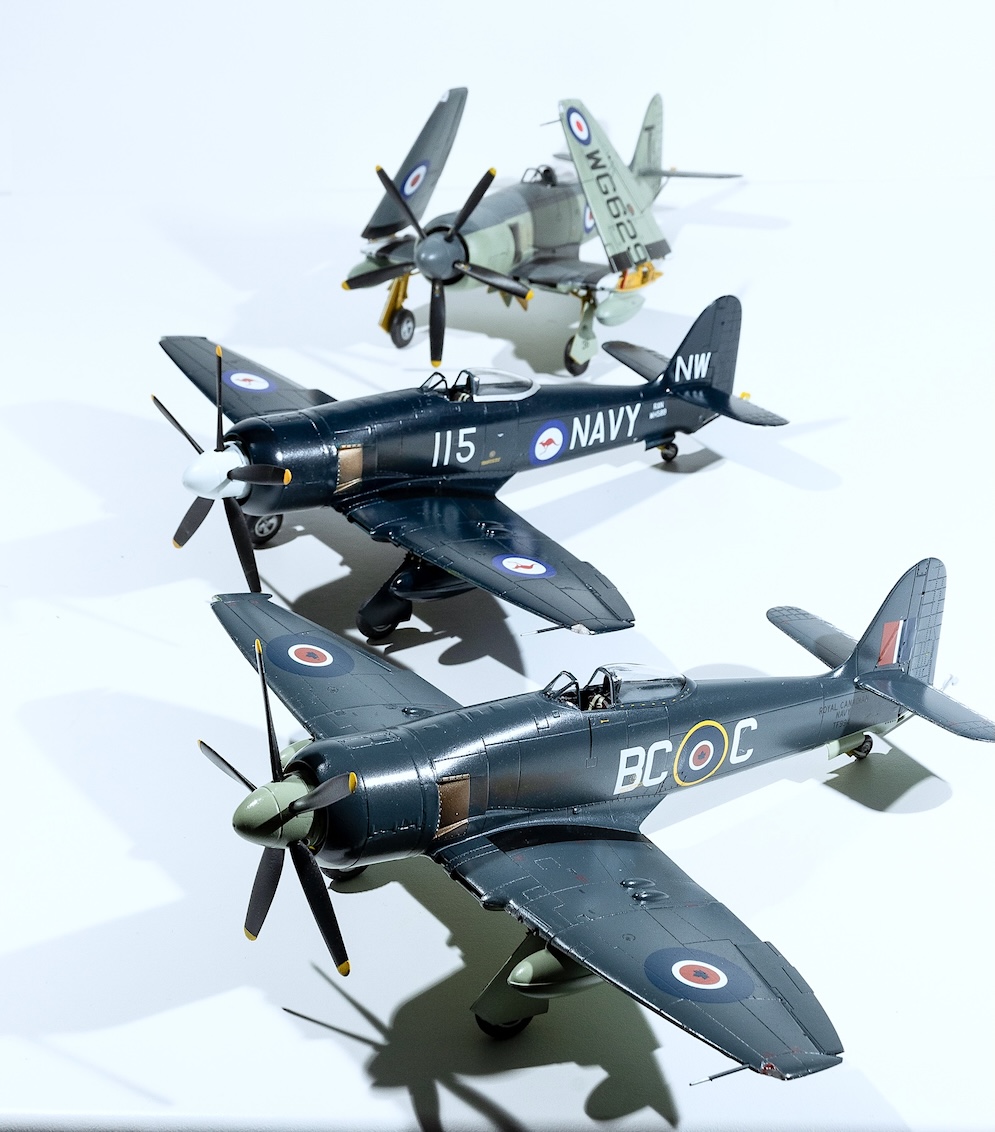
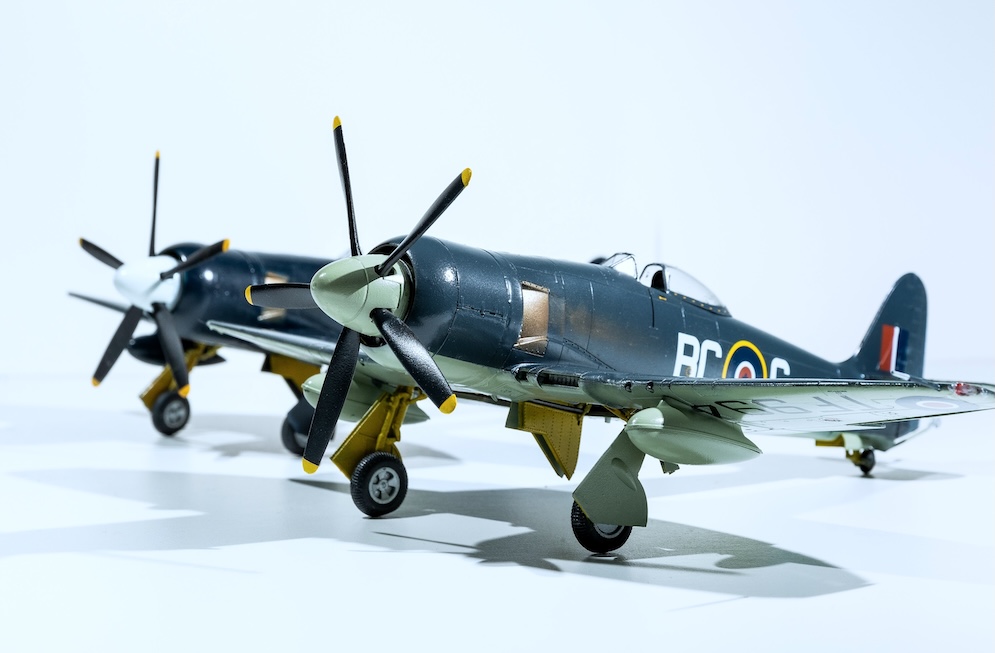
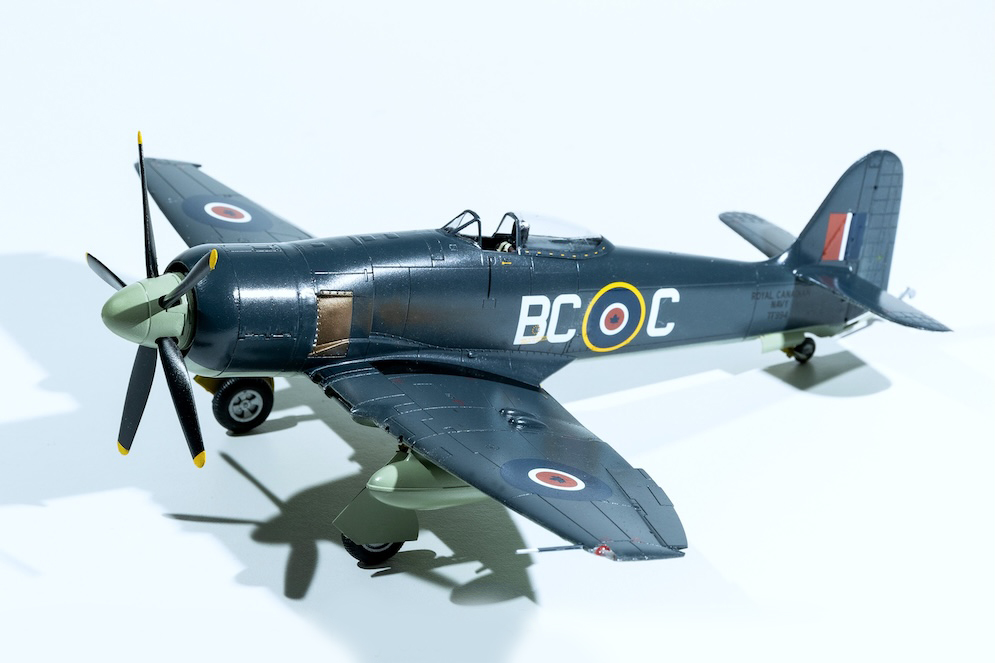
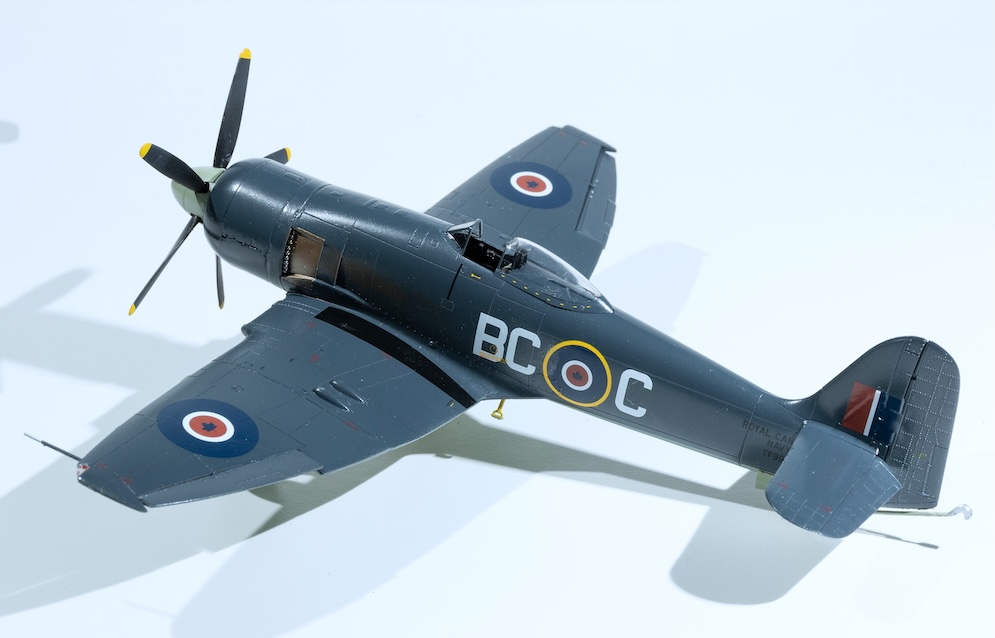
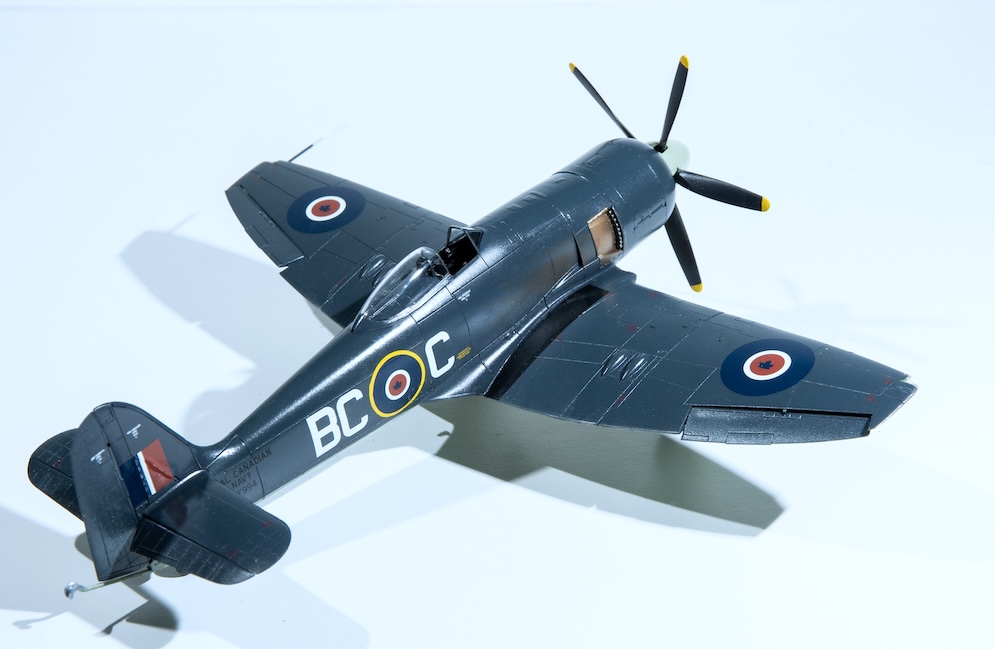
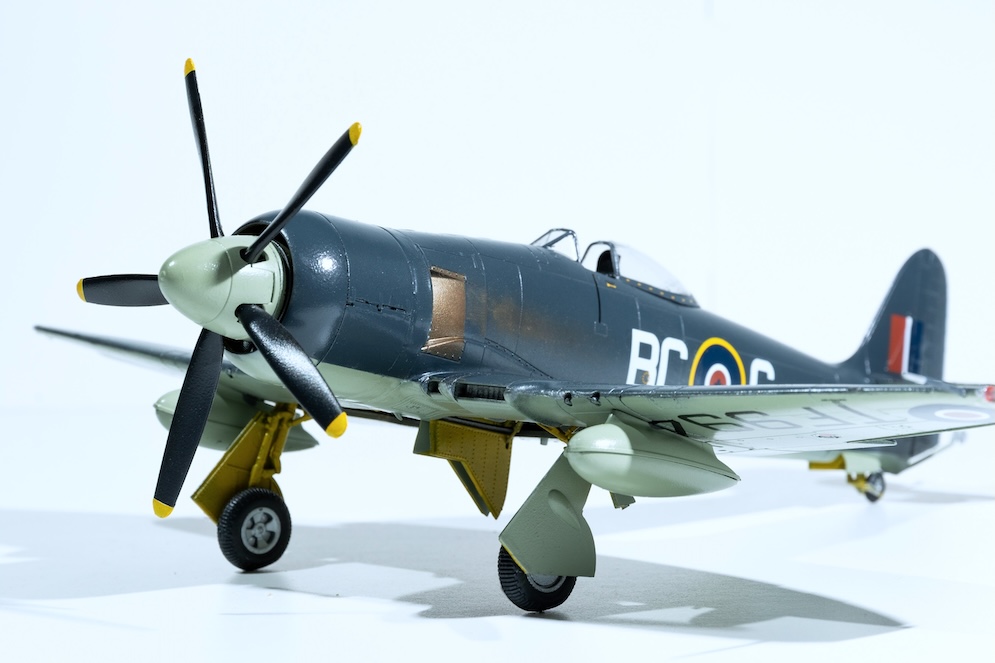
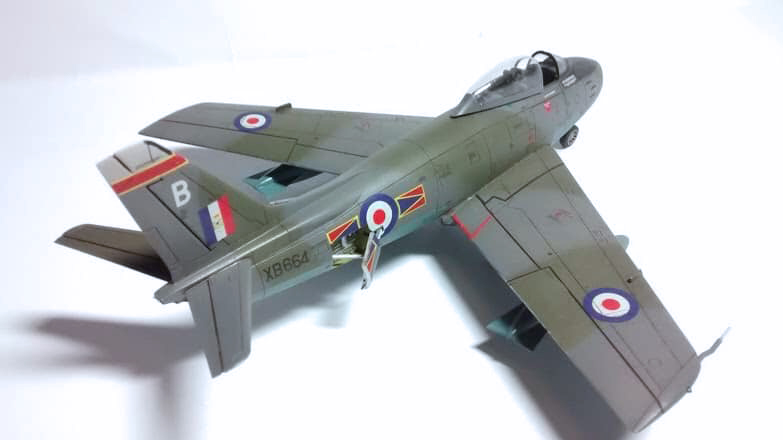
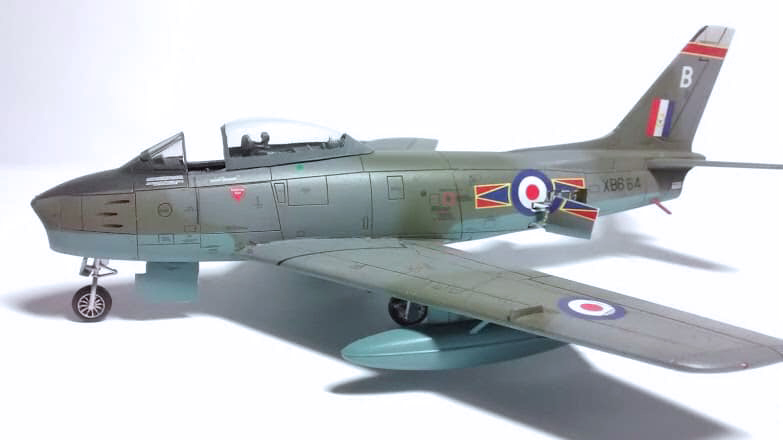
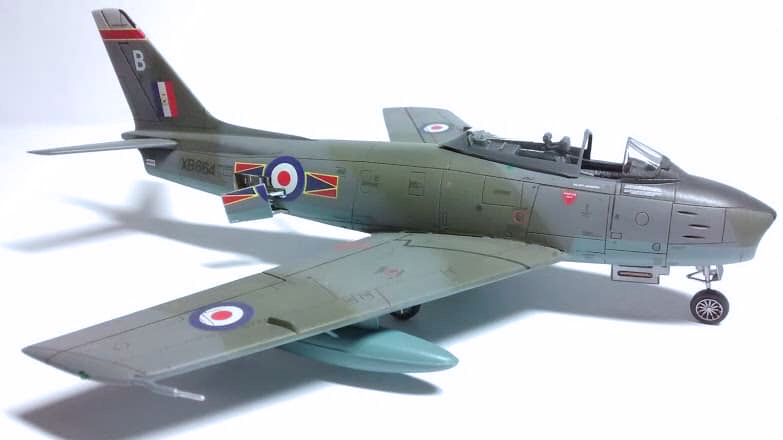
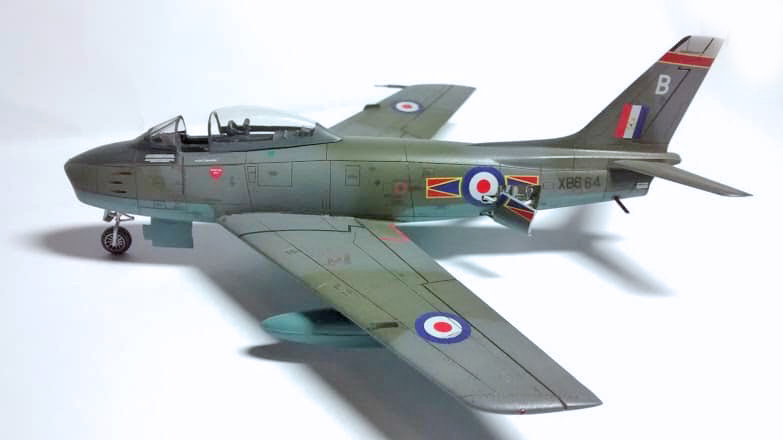
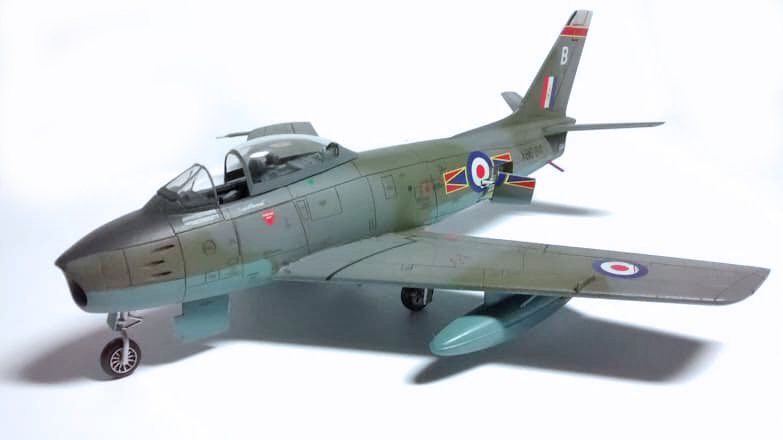
I used Xtradecal for the transfers, which were excellent and of course Eduard seat harnesses. My biggest challenge was getting the Navy Blue gloss finish on the Aussie version, and found it took much polishing and re polishing to get a half decent finish.
The RCN version was mush easier and although also a gloss finish a more satin effect looked good. The much reported engine cowling fit issues were not as bad a reported and managed to resolve with a little .02mm card, also the short short issues were not present on either, so Airfix seem to have resolved this QA issue.
Richard A.
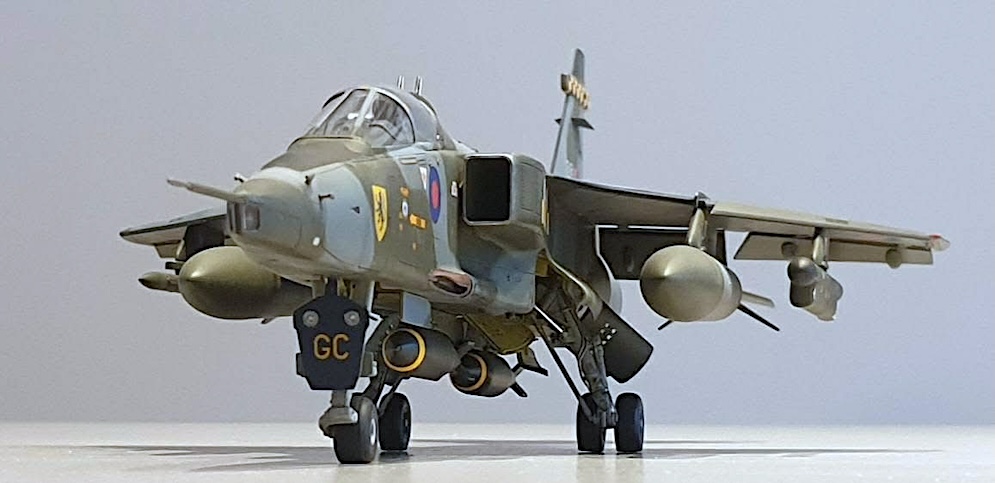
I used a resin oil cooler, guns, and exhausts and a mixture of kit decals with Xtradecal roundels.
Cheers Dave P.
- Neomega cockpit set
- Pavla dropped flaps, ailerons, tailplane, rudder, intakes and exhaust
- Hasegawa AMRAAMS
I used Xtracolor paints and also scribed some panel lines and sanded some raised details away.
Hope you like it?


The basic kit is the Revell offering of the Hasegawa tooling modified to represent a Sea King HAR 3A. To achieve this I used the Flightpath Sea King conversion set, and a few personal adjustments that were not provided in the kits. I also got the sand filter from Flightpath as an extra. This was my first attempt at airbrushing as well as etched brass, weathering and conversion. This is all the result of what I have learnt at both S.L.A.M. (IPMS South Lincolnshire Association of Modellers) and Cranwell clubs, which helped to achieve its second place award at the Newark show.


The basic kit is the Revell offering of the Hasegawa tooling modified to represent a Sea King HAR 3A. To achieve this I used the Flightpath Sea King conversion set, and a few personal adjustments that were not provided in the kits. I also got the sand filter from Flightpath as an extra. This was my first attempt at airbrushing as well as etched brass, weathering and conversion. This is all the result of what I have learnt at both S.L.A.M. (IPMS South Lincolnshire Association of Modellers) and Cranwell clubs, which helped to achieve its second place award at the Newark show.
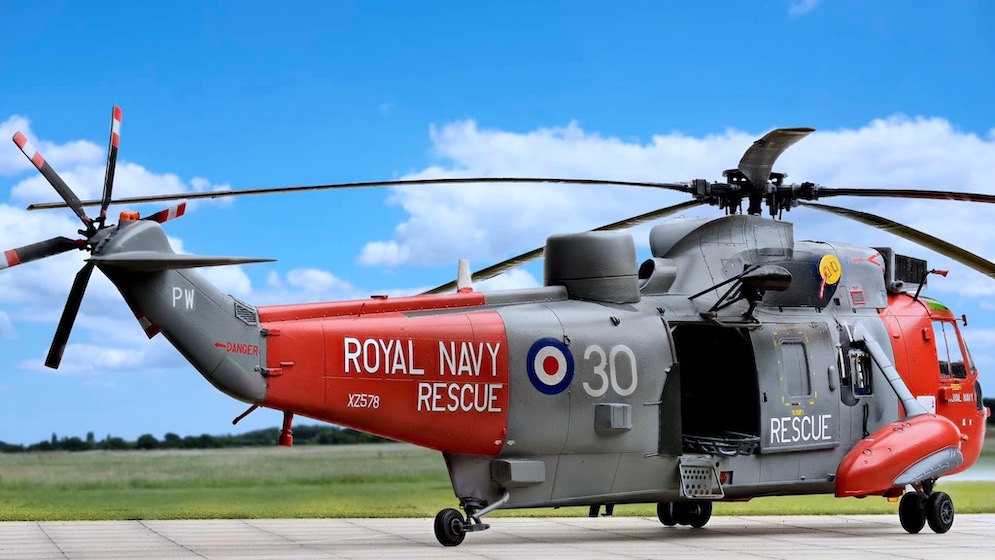
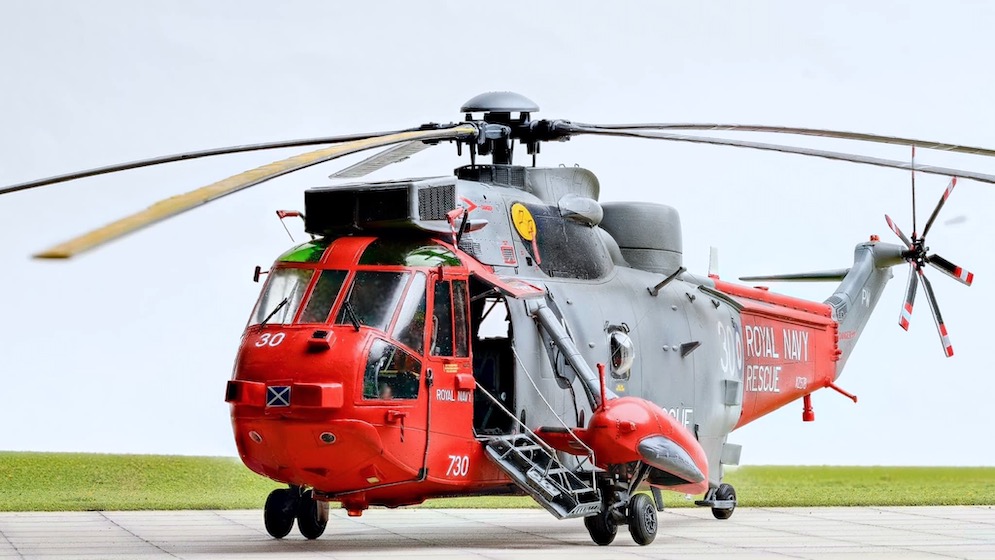
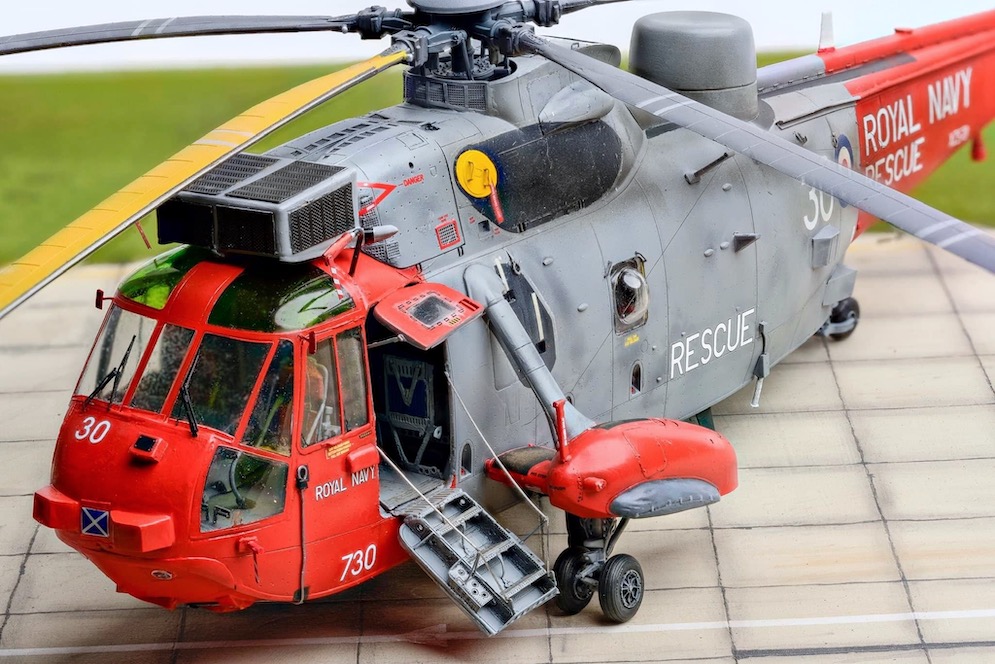
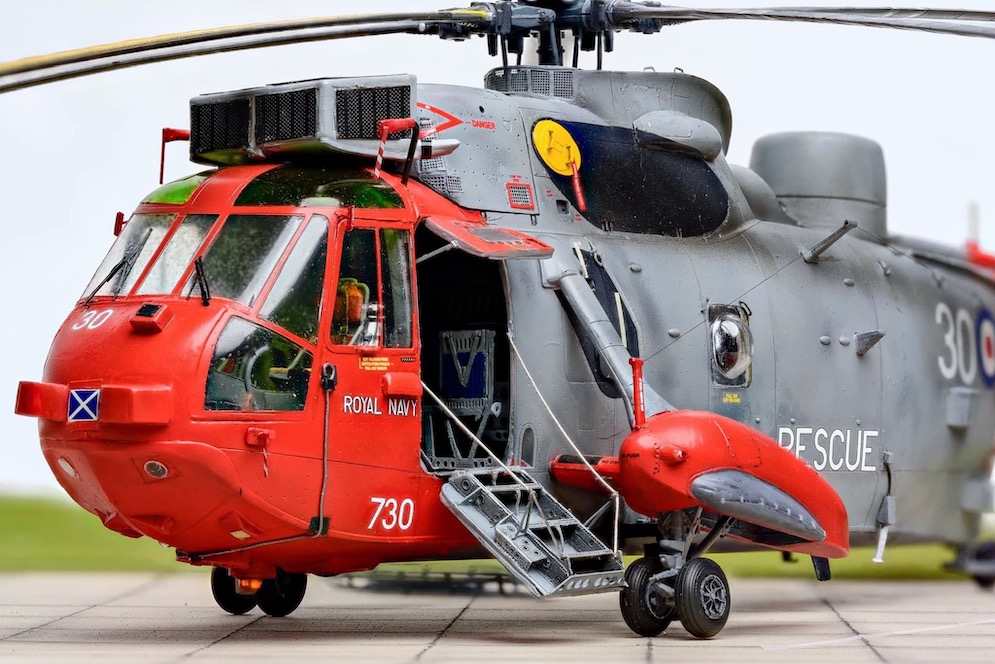
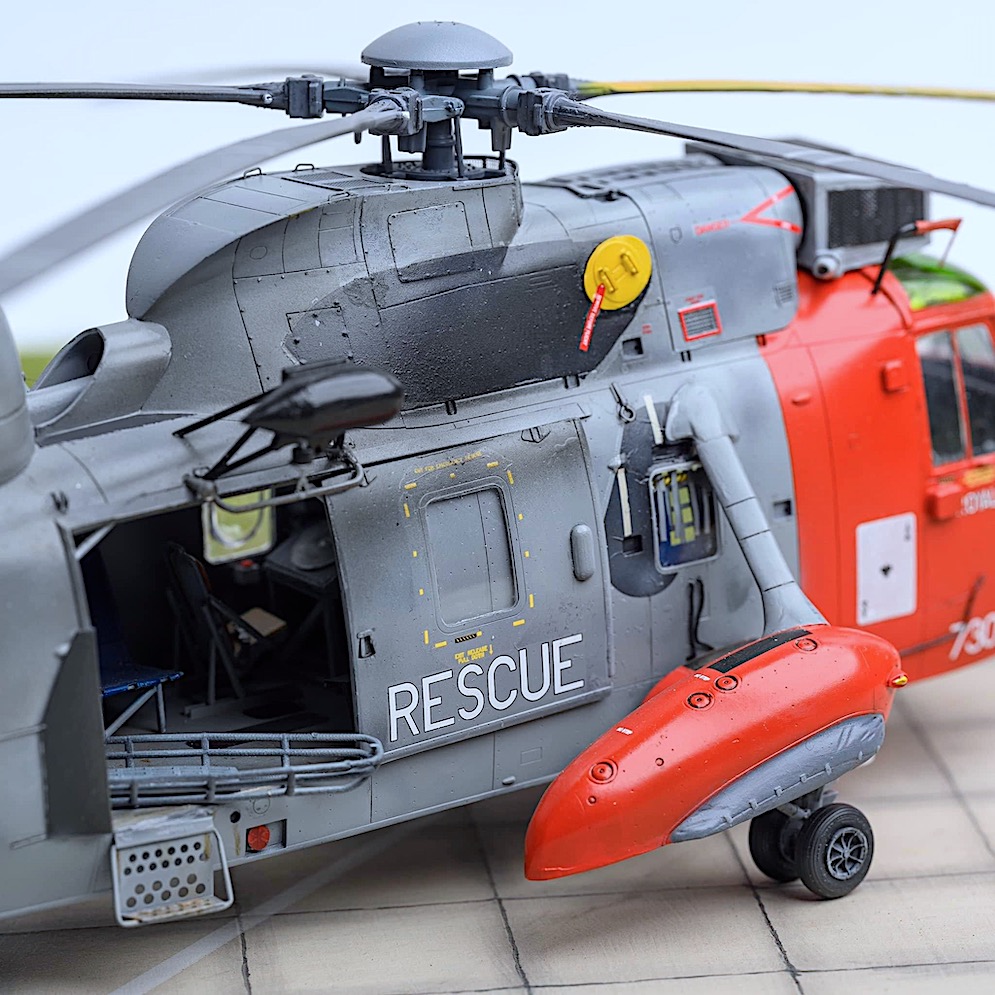
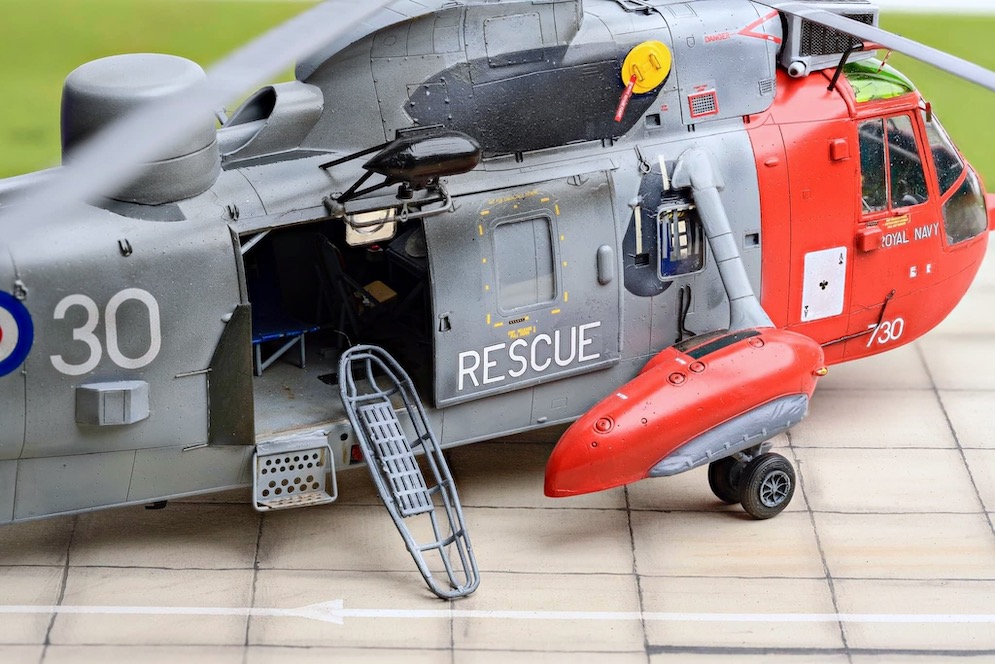

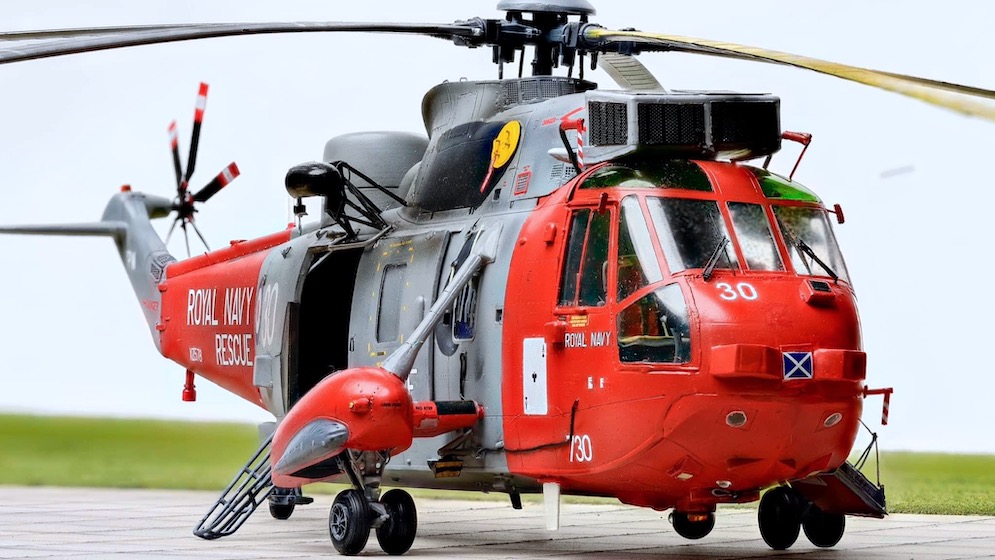

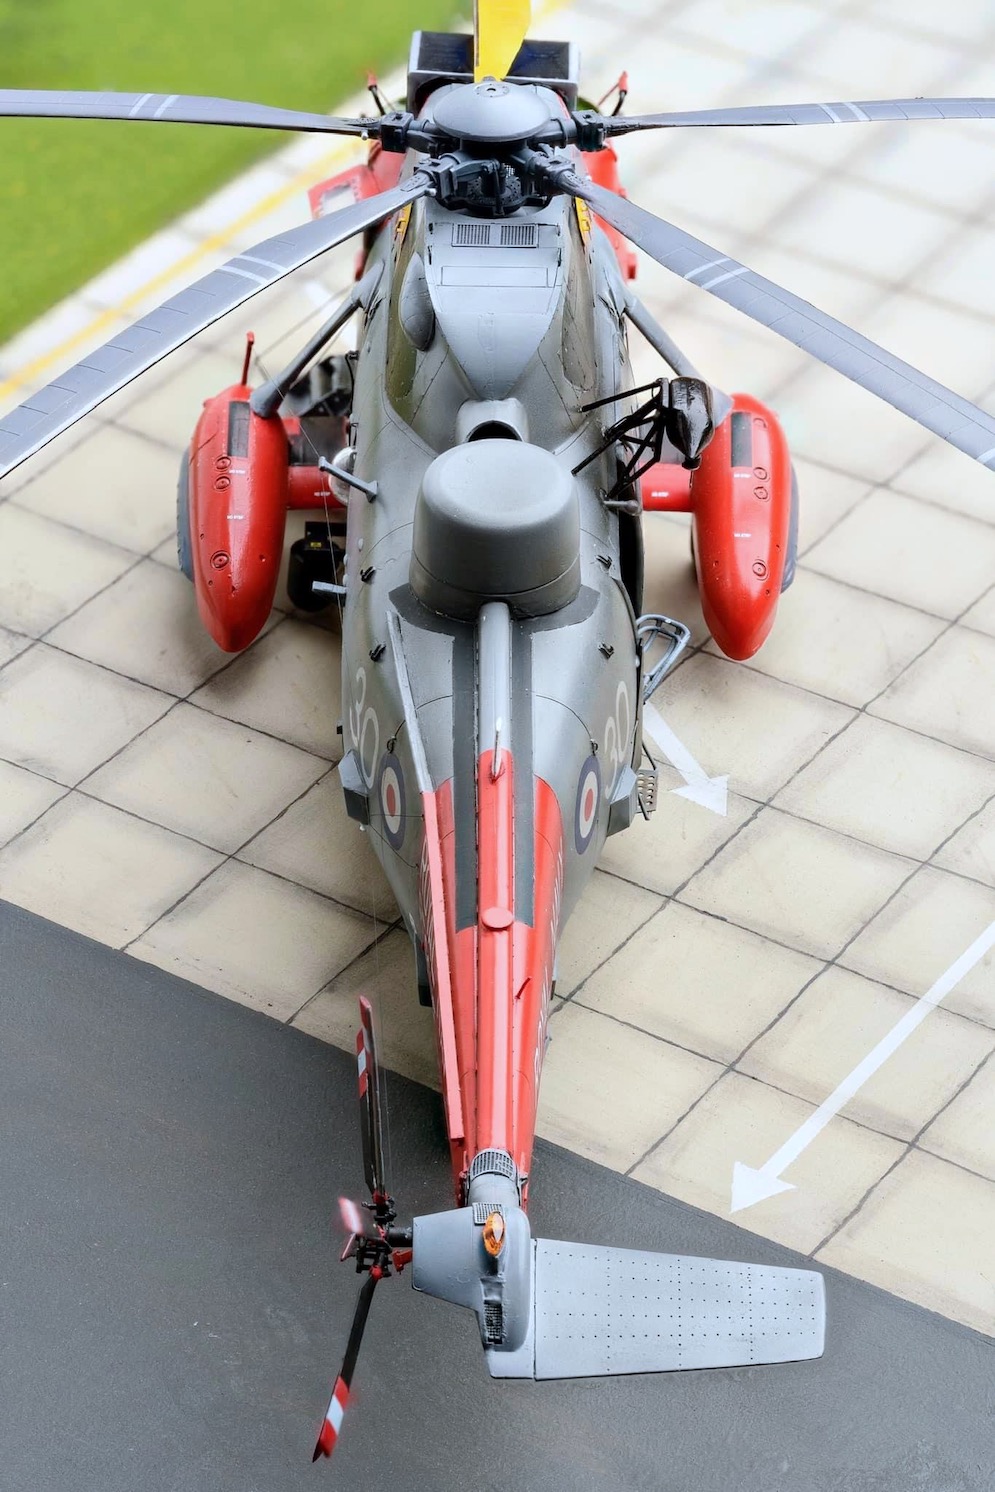
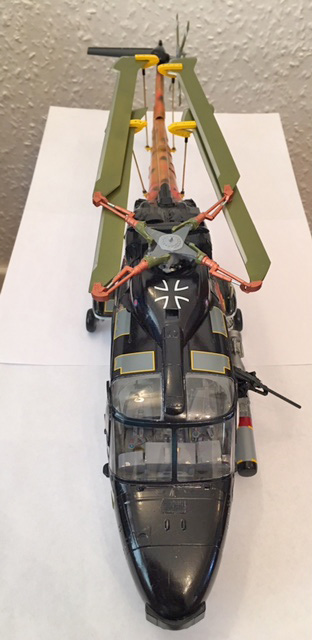
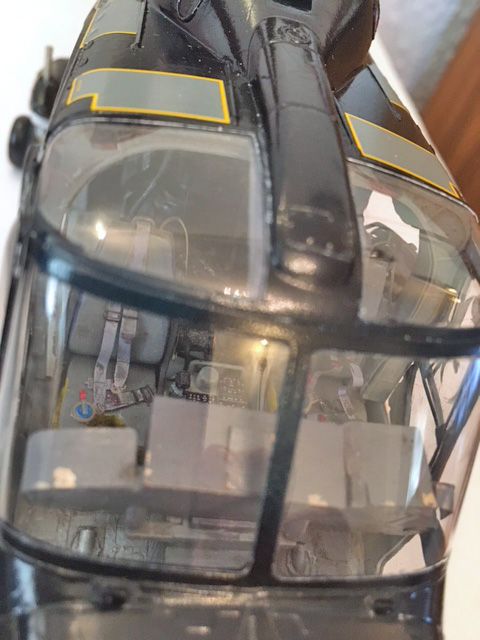
This build came about after I published pictures of my Sea King ASaC7 when a Welsh guy living in Slovakia gave me some great feedback and I said that I had another kit in the stash, an HAS3. We then spent some time discussing what colours it should be in and agreed it would look nice as a Royal Navy rescue bird. It so happened that Mike owns three real Sea Kings, an HU5, HAS3 and an HC4. Quite quickly I agreed to build it as his HU5 as a commission. Mike and the Sea King community provided lots of excellent reference material and assistance during the 65 hour build.
The Hasegawa kits do not have any detail in the rear cabin and the doors are moulded closed, so first thing was to open the doors. I then built the radar console from scratch. Lots of aftermarket was used in this build, the main exterior conversion coming from Whirlybird, which was an improvement over the Flightpath conversion used on the ASaC7, but some components were soft and kit parts and parts left over from the ASaC7 conversion were used as well. Other parts came from eduard, Montex, Quickboost and Reskit. The exterior was painted using MRP lacquers.
David B.
- white metal uc
- wing fold: scalewarship.com
- Paints:
- Mr Color, Alclad2, Tamiya,
- cockpit interior – Eduard PE
- primer: Mr Surfacer 1500 grey
- Tamiya polish for clear parts
Best wishes, Imran A.

- The kit is a new release and very nicely detailed and finished and reminiscent of the earlier FR 46/47 kits
- The build quality is similar to their MK.XII Spitfire
- The kit offers three schemes
- I just added seatbelts
- I used Xtracolor paints and the kit decals which are of good quality and go down very well
- The model was finished off with a coat of Humbrol Matt Cote.


Martin H
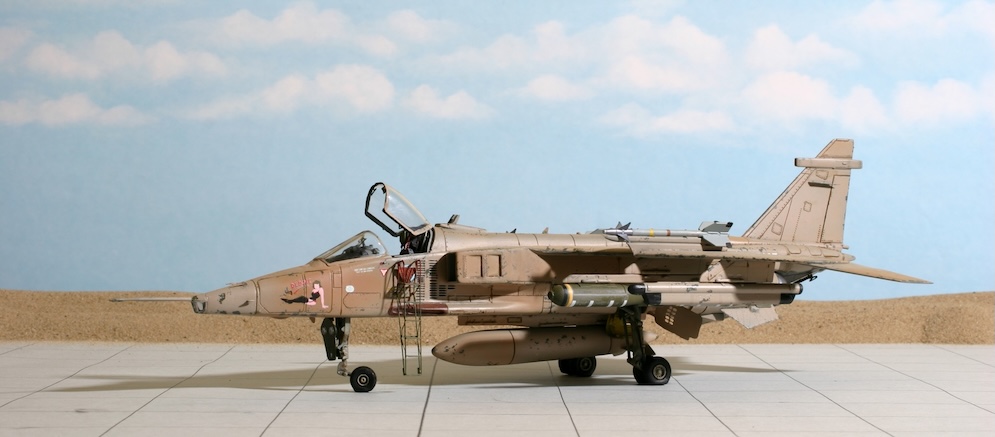
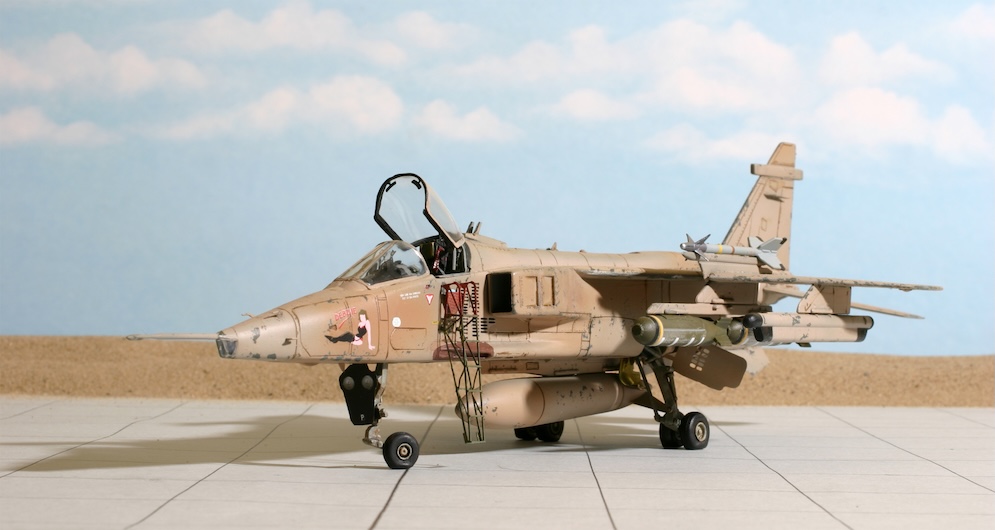
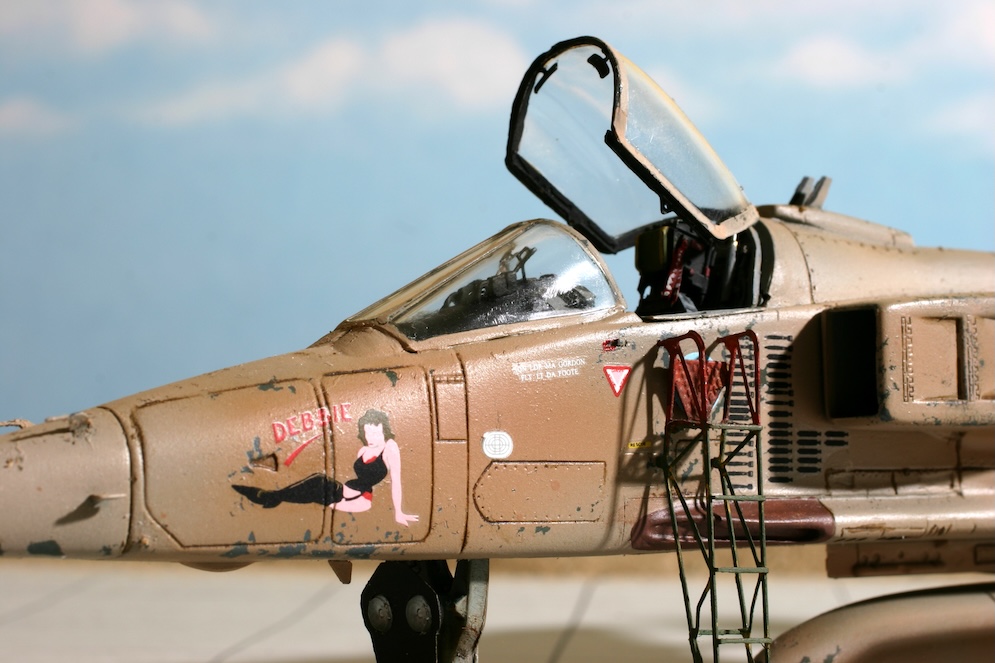
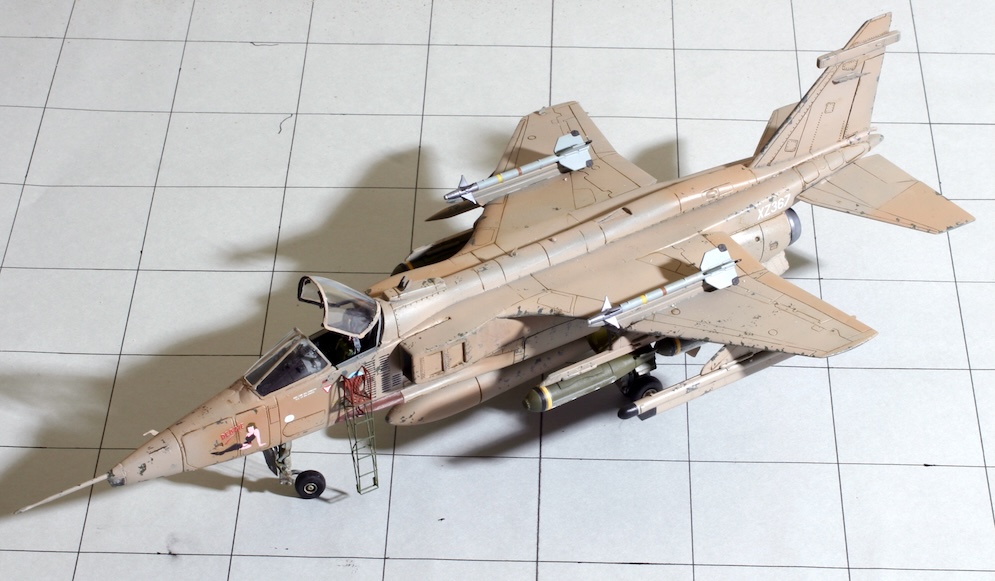
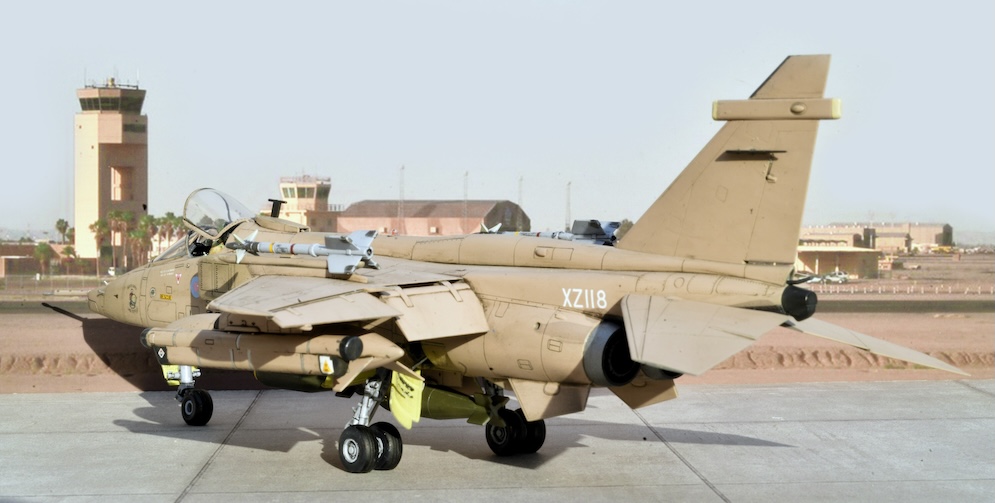
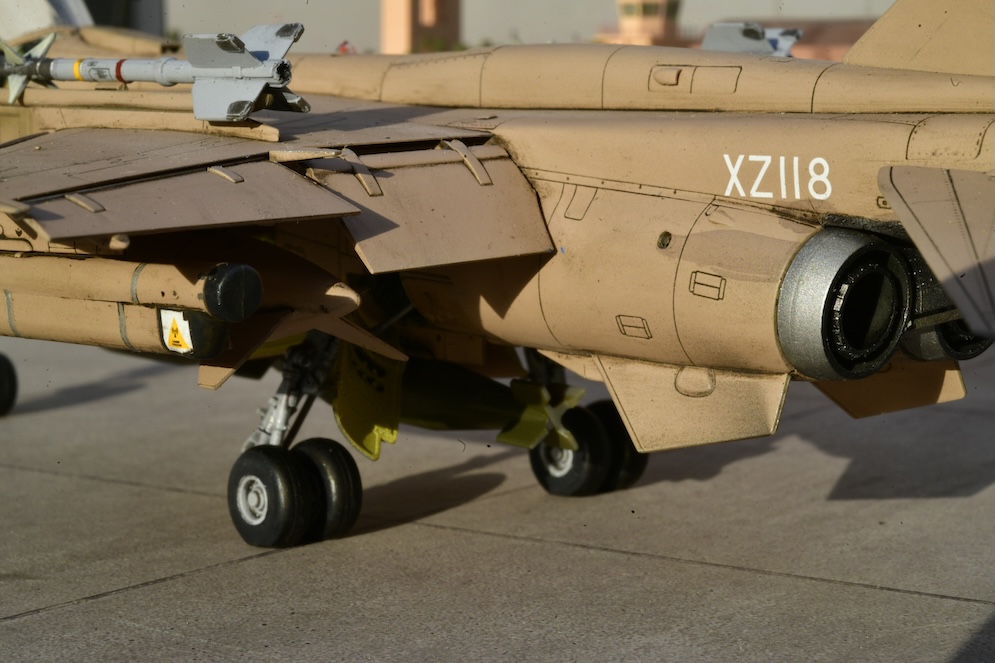
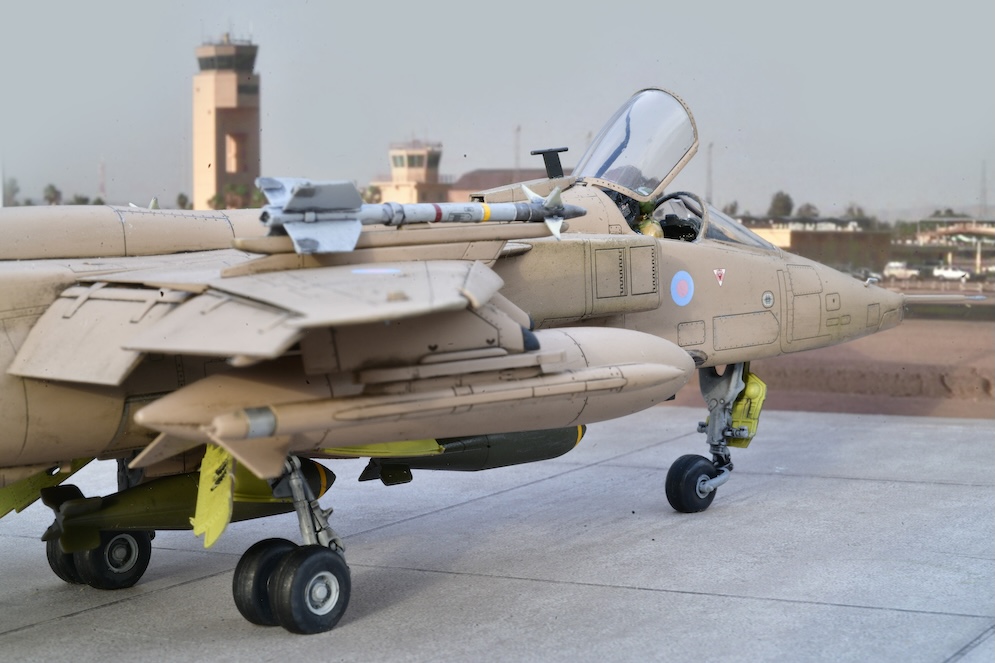
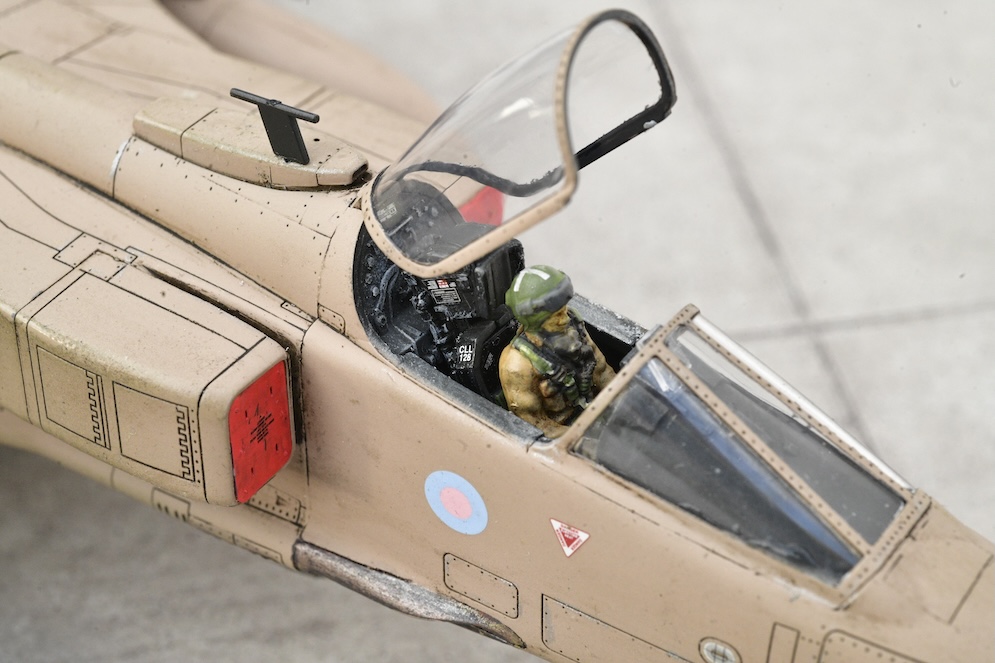
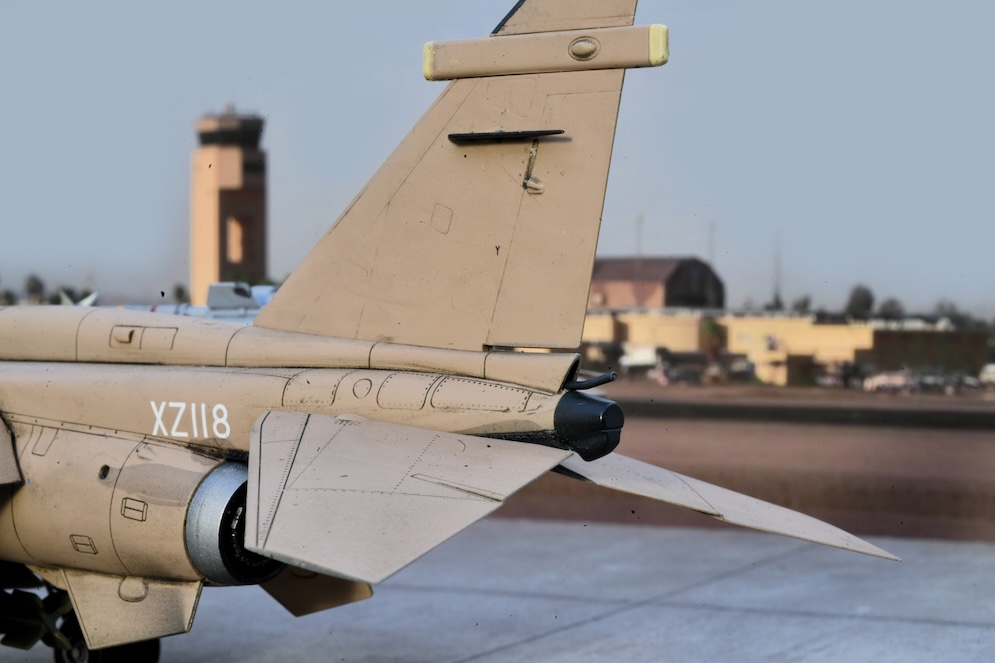
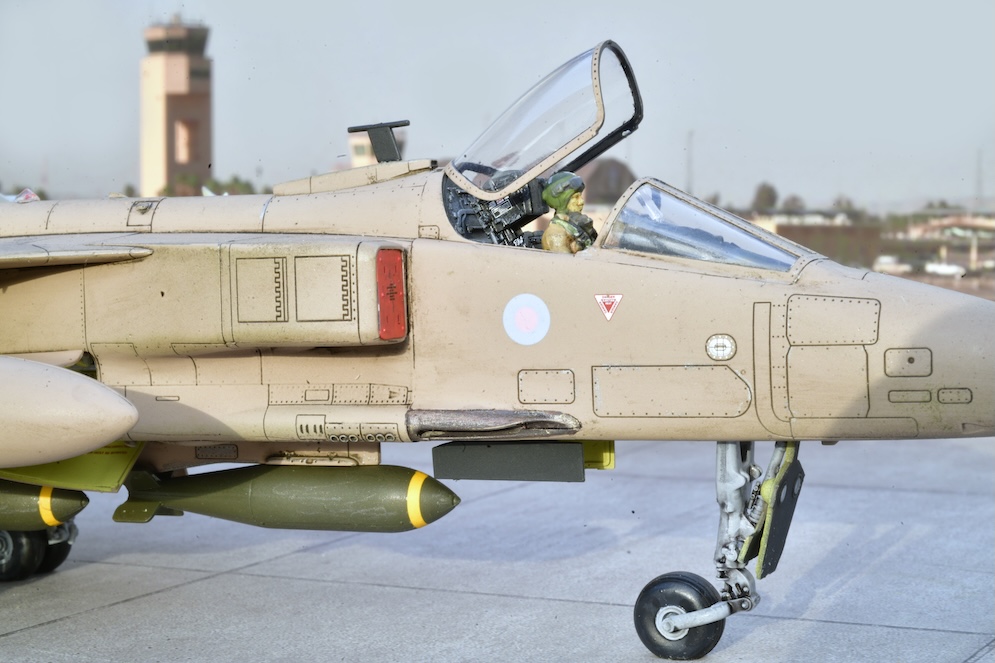
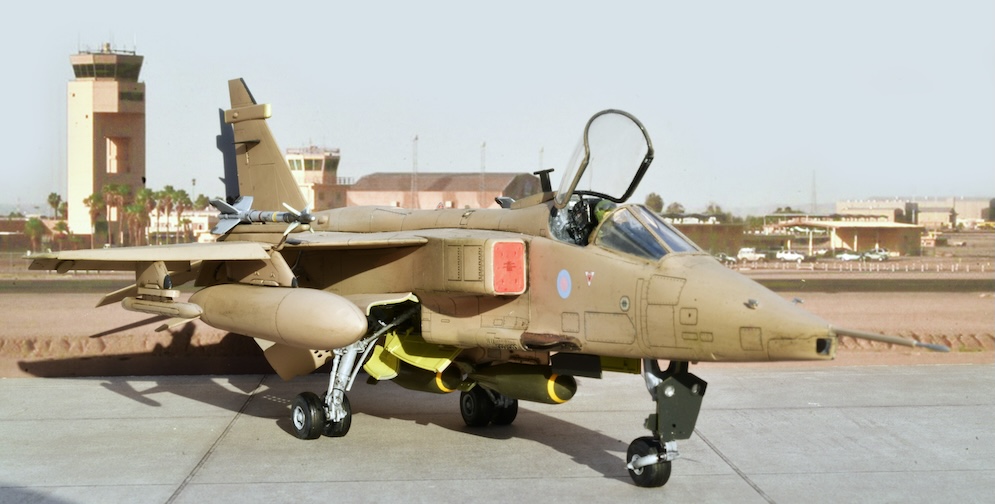
I used a Neomega Cockpit and burner cans, wheels, airbrakes and ladder from Xtraparts. I also made some new wheel bays to avoid the boxed in look but you can’t really see much. I painted it in Humbrol enamels the airframe was painted in the original wraparound scheme before adding latex masking fluid to the model with a sponge and spraying on varying shades of Desert Pink. The masking fluid is then rubbed off and can give a realistic chipping effect. Decals are Model Alliance.
It’s looking a bit tired these days and could do with some TLC but I’m still pleased with it and it’s still in the cabinet.
Mark M.

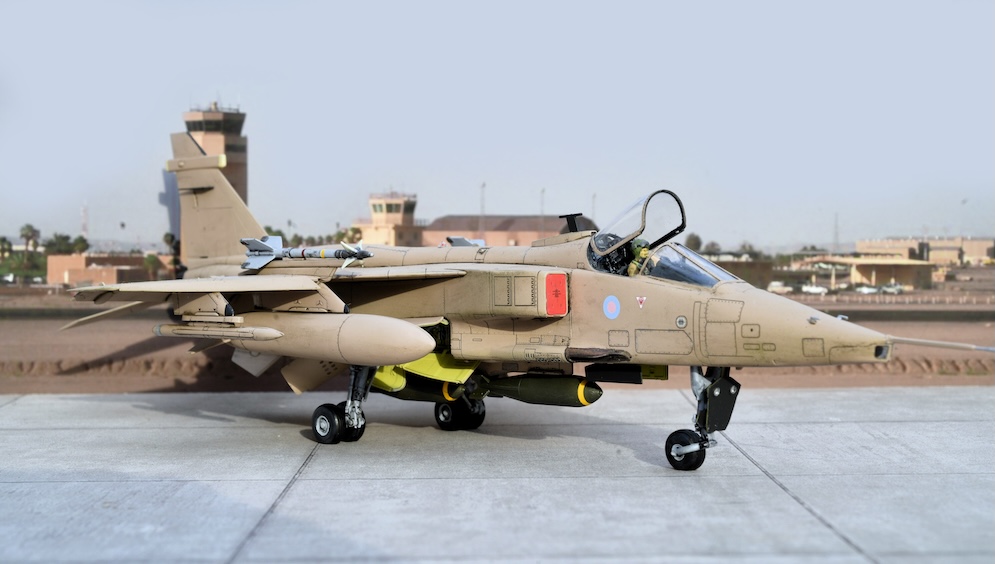

It was built completely out of the box, only using a masking kit for canopy.
Painted in Vallejo Model Air US Desert Sand, Tamiya Yellow Green (lightened) for the zinc chromate gear bays etc, Tamiya Nato Black for the false canopy and cockpit interior.
AK paint pens for pilot and wheels, glossed using Alclad Aqua Gloss prior to decaling and a Flory Models clay was into the panel lines for weathering.
Matt finish was Alclad Flat varnish.
Hope you like it…
Stuart M.
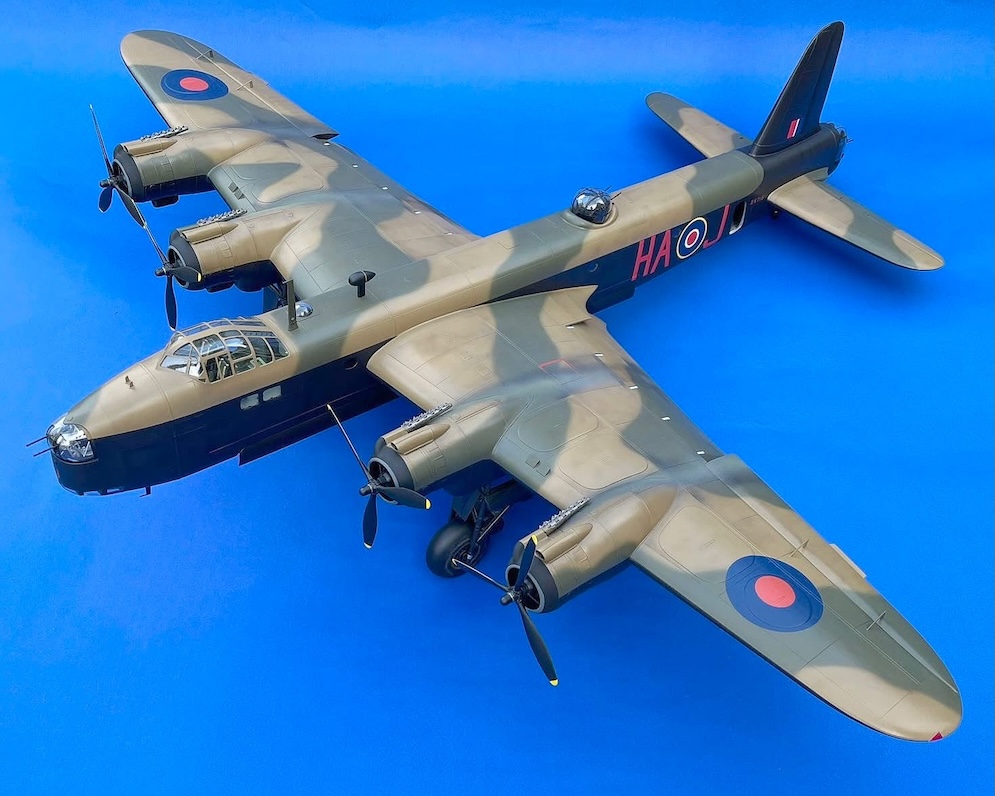
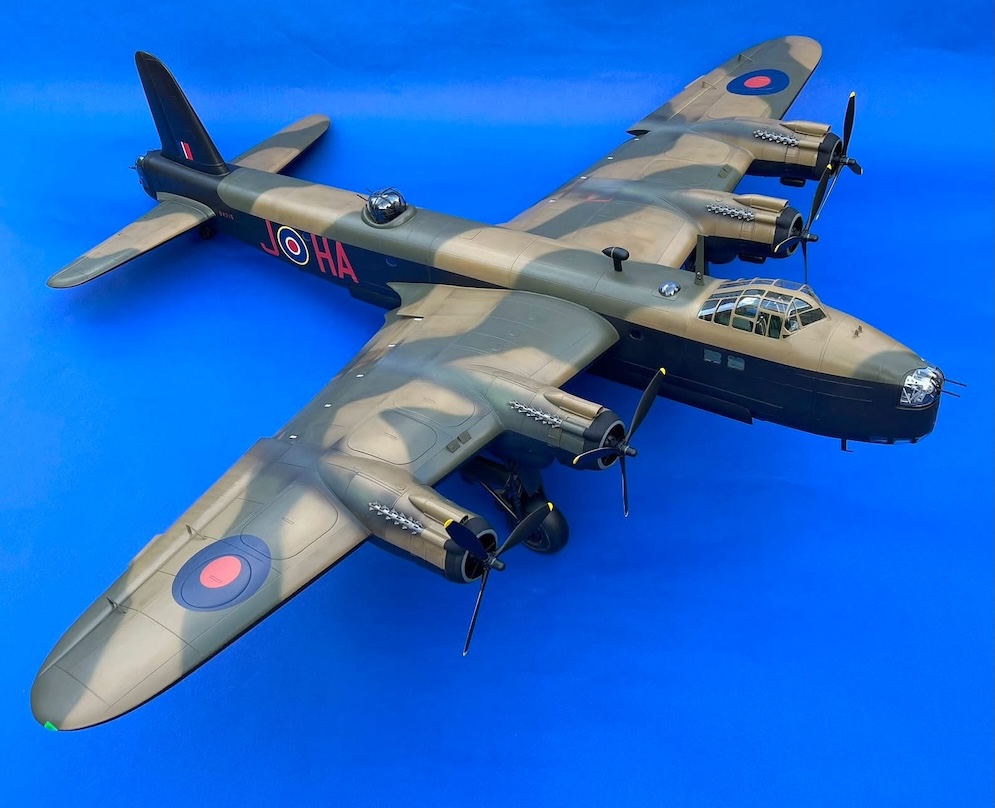
Built as my own small tribute to the crew of BK716 of 218 Squadron RAF, lost in March 1943 and recovered in 2020 when they were buried with full military honours in the Netherlands. Lest we forget.
Thomas P.

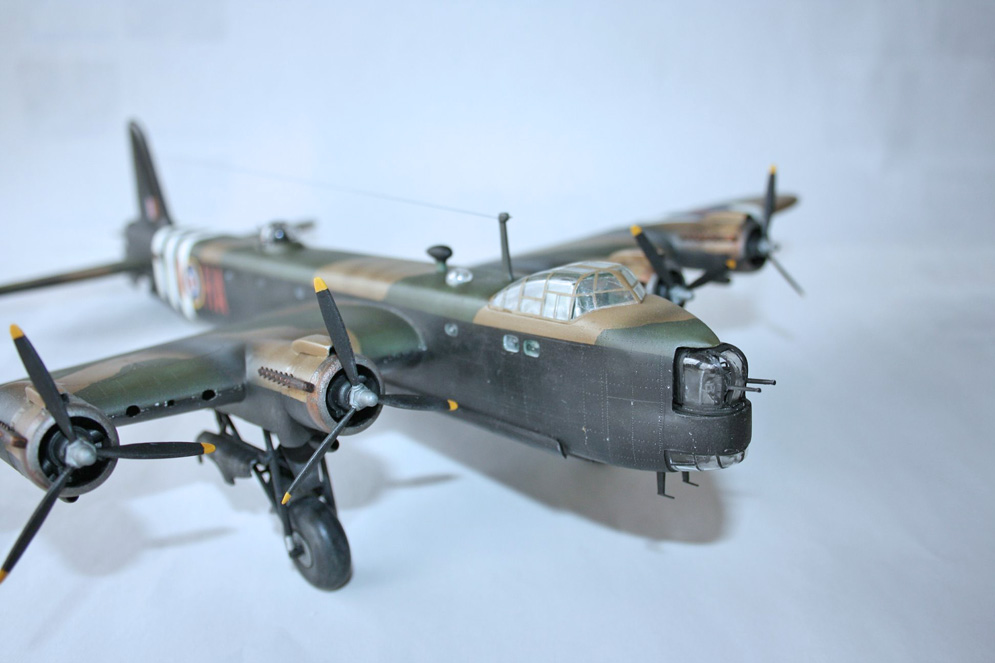
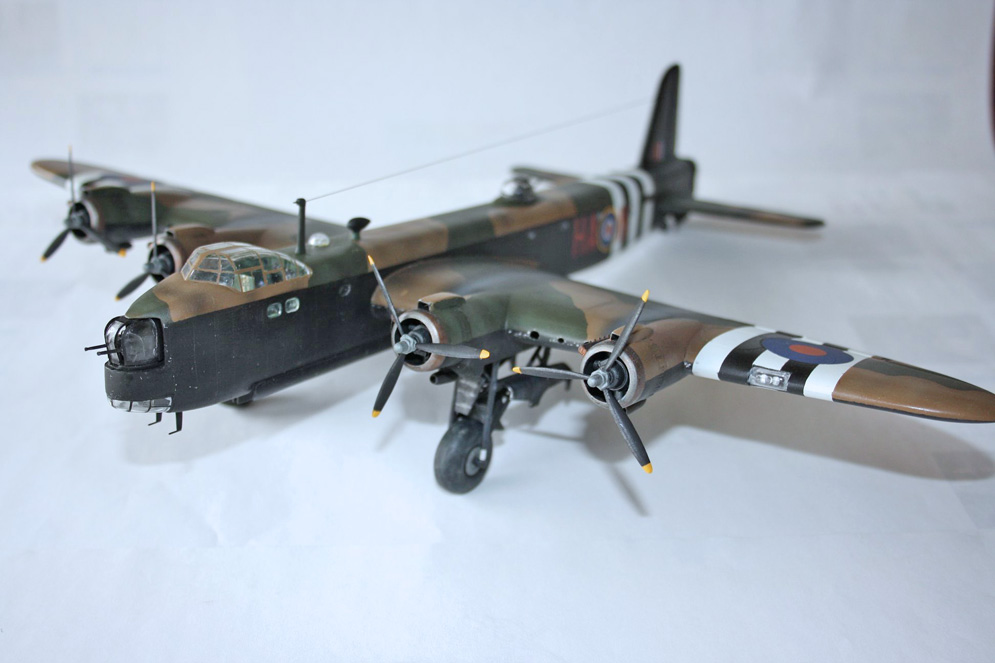

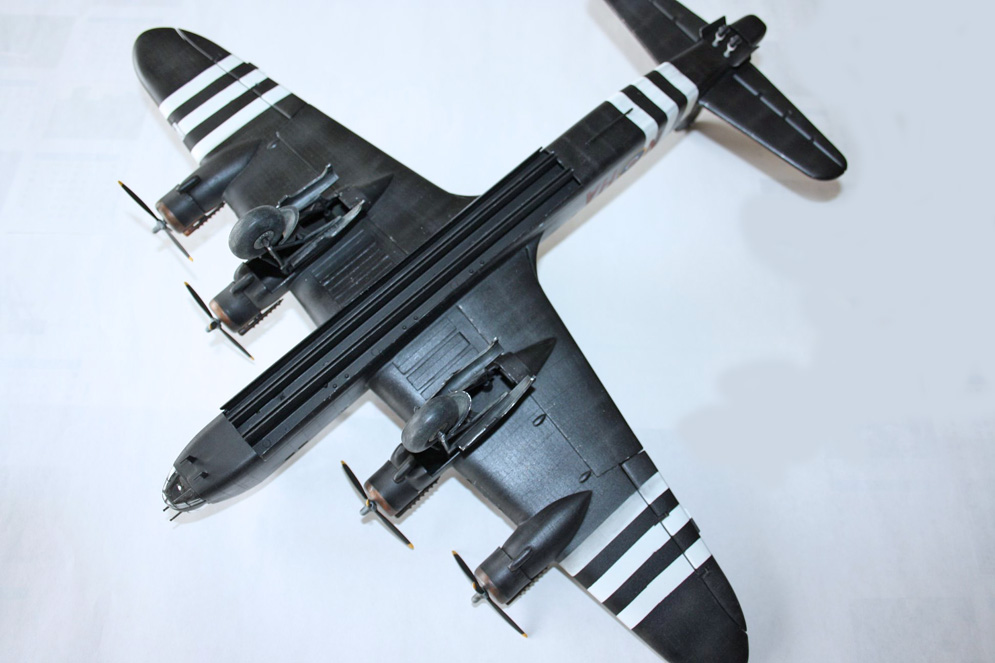
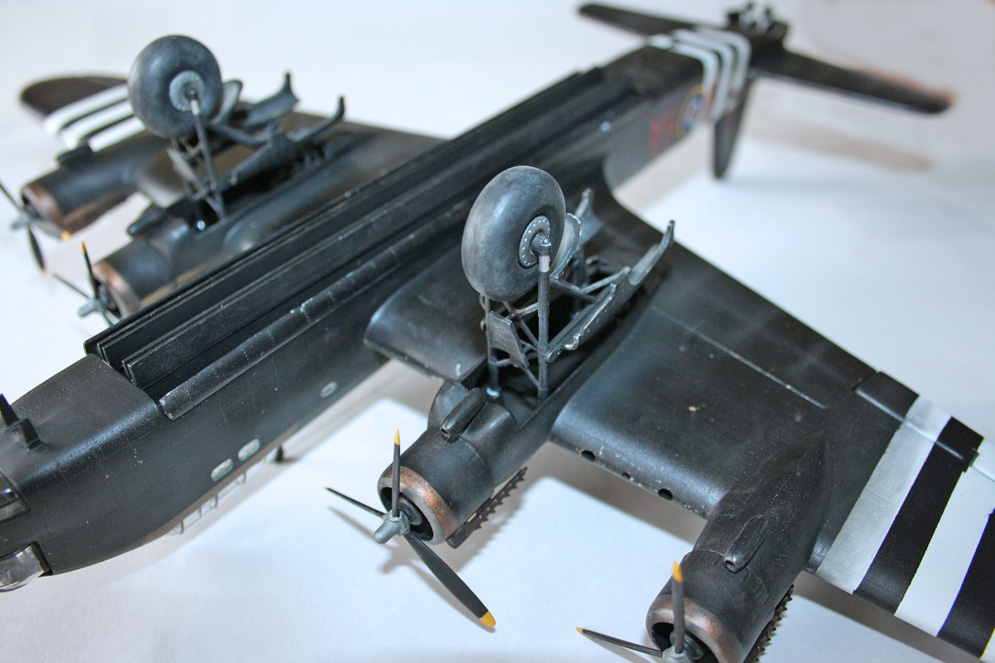
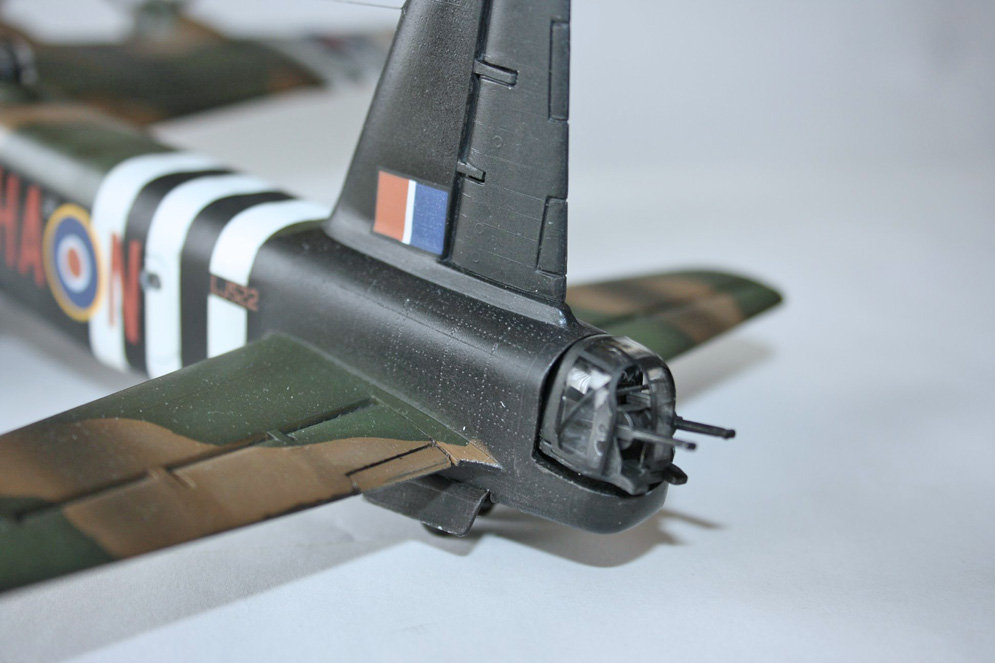
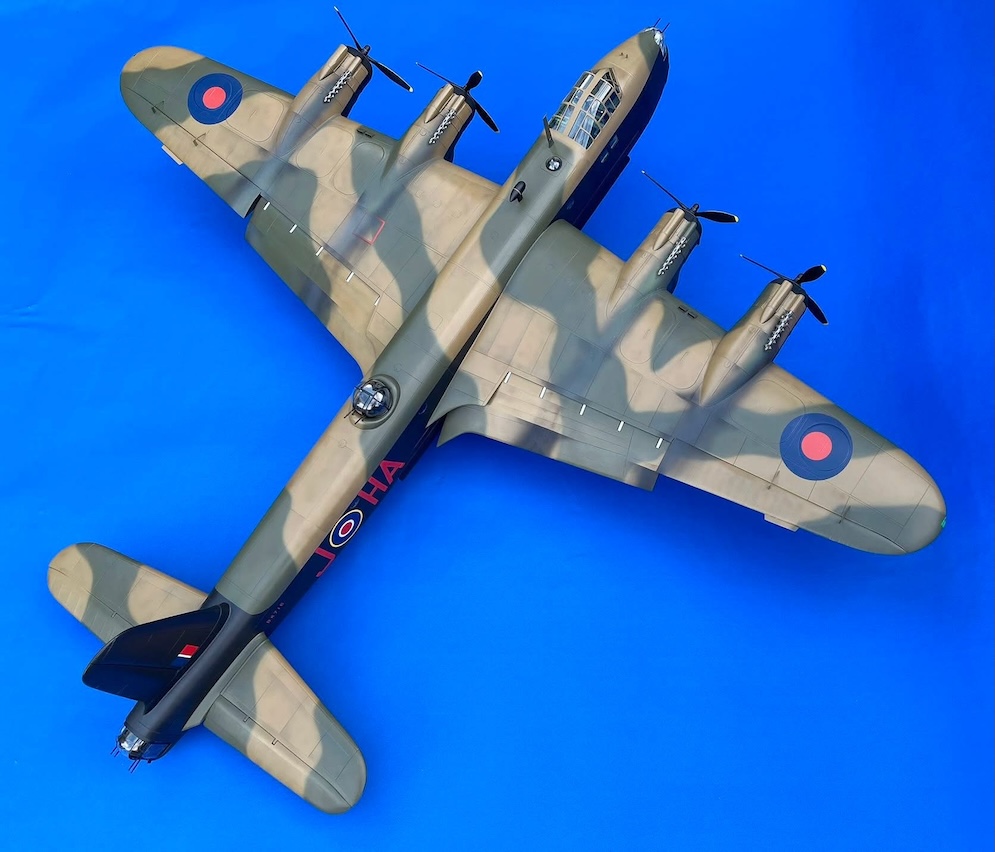
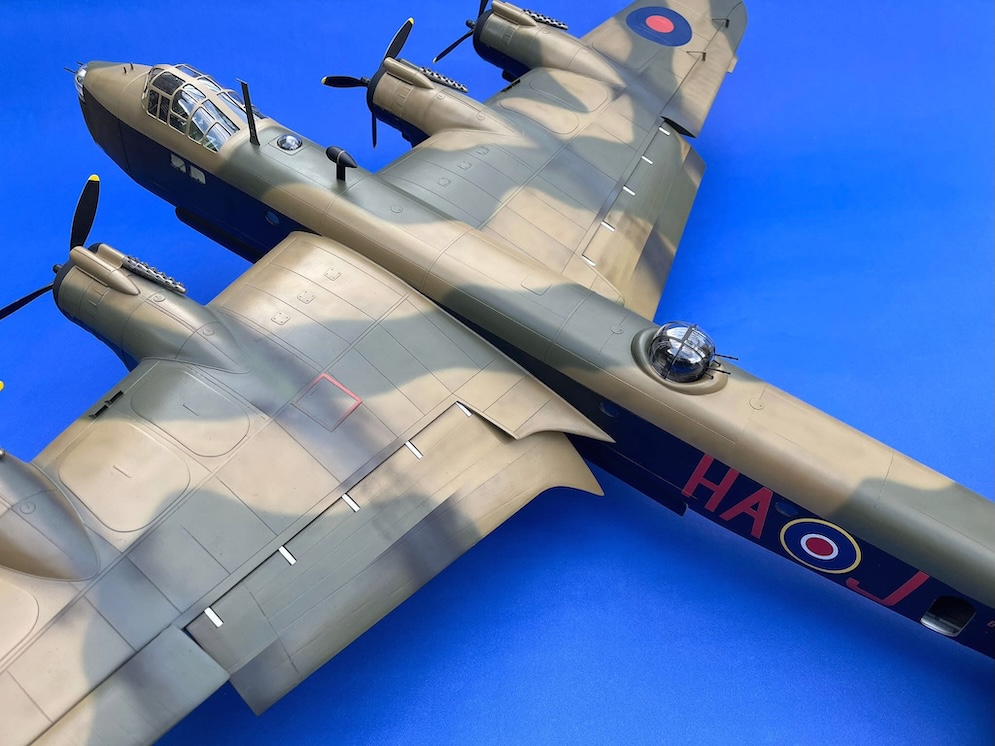
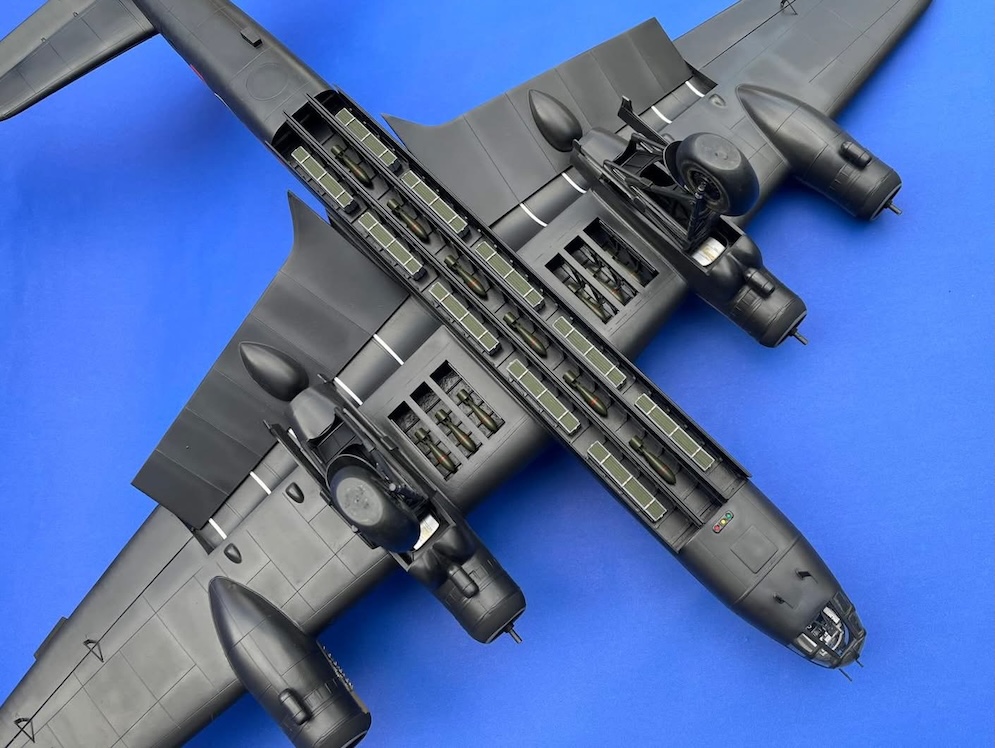
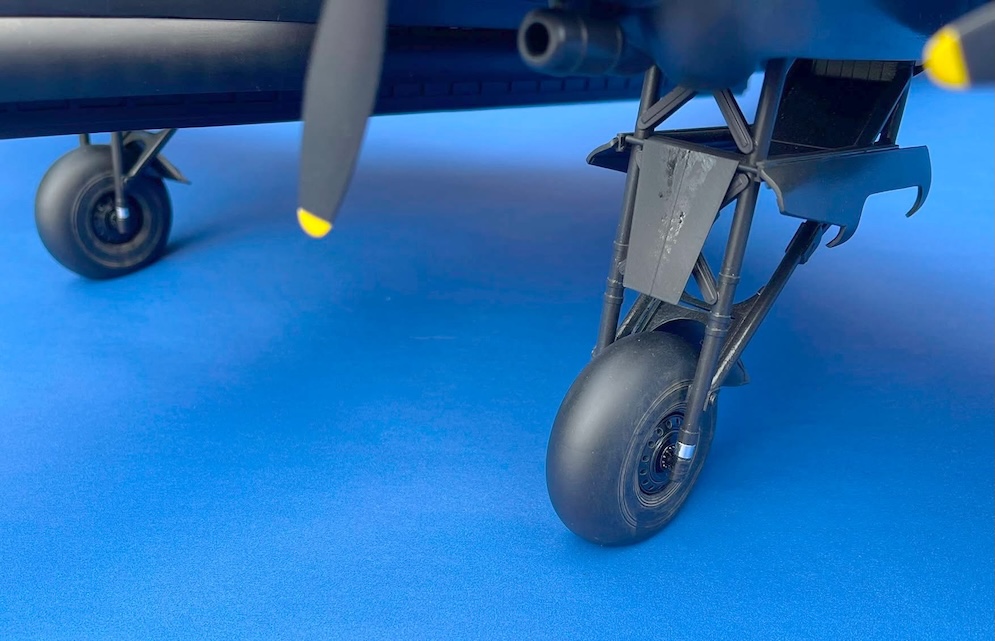
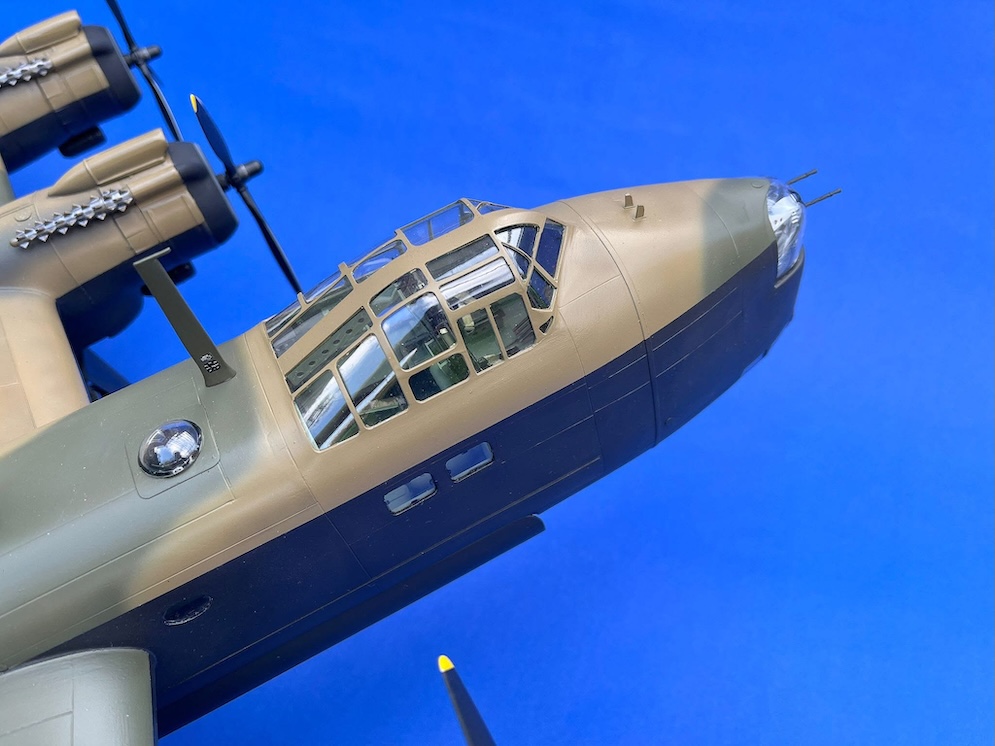
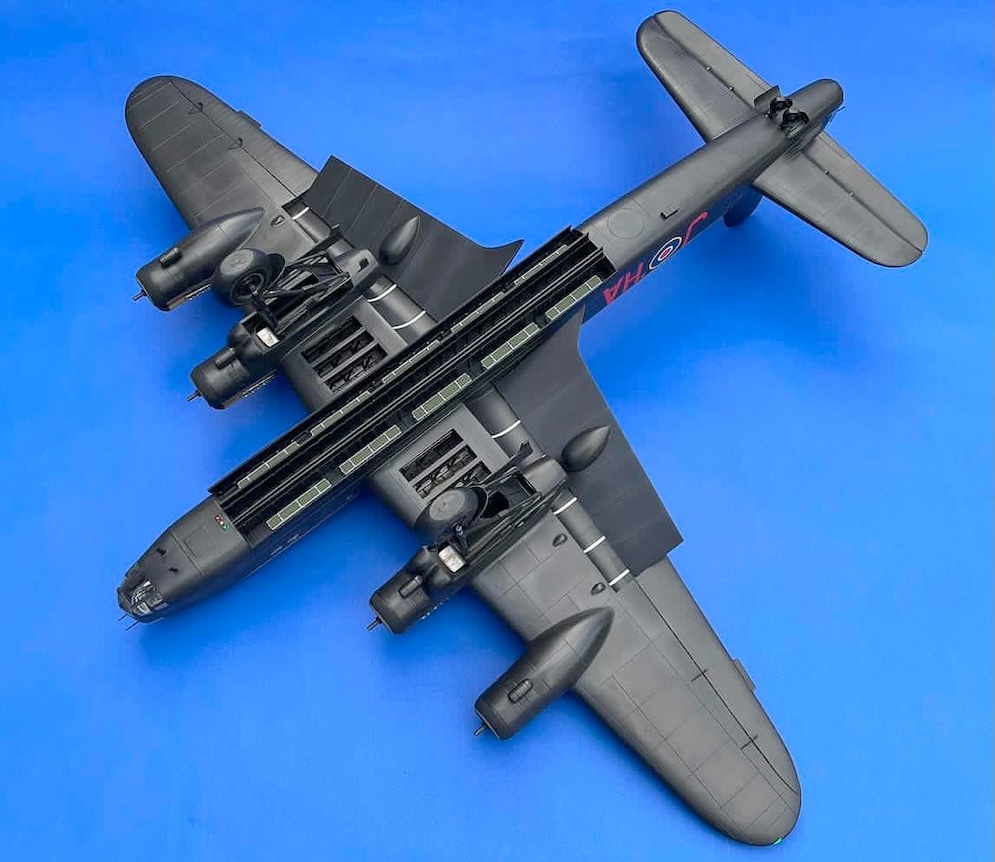
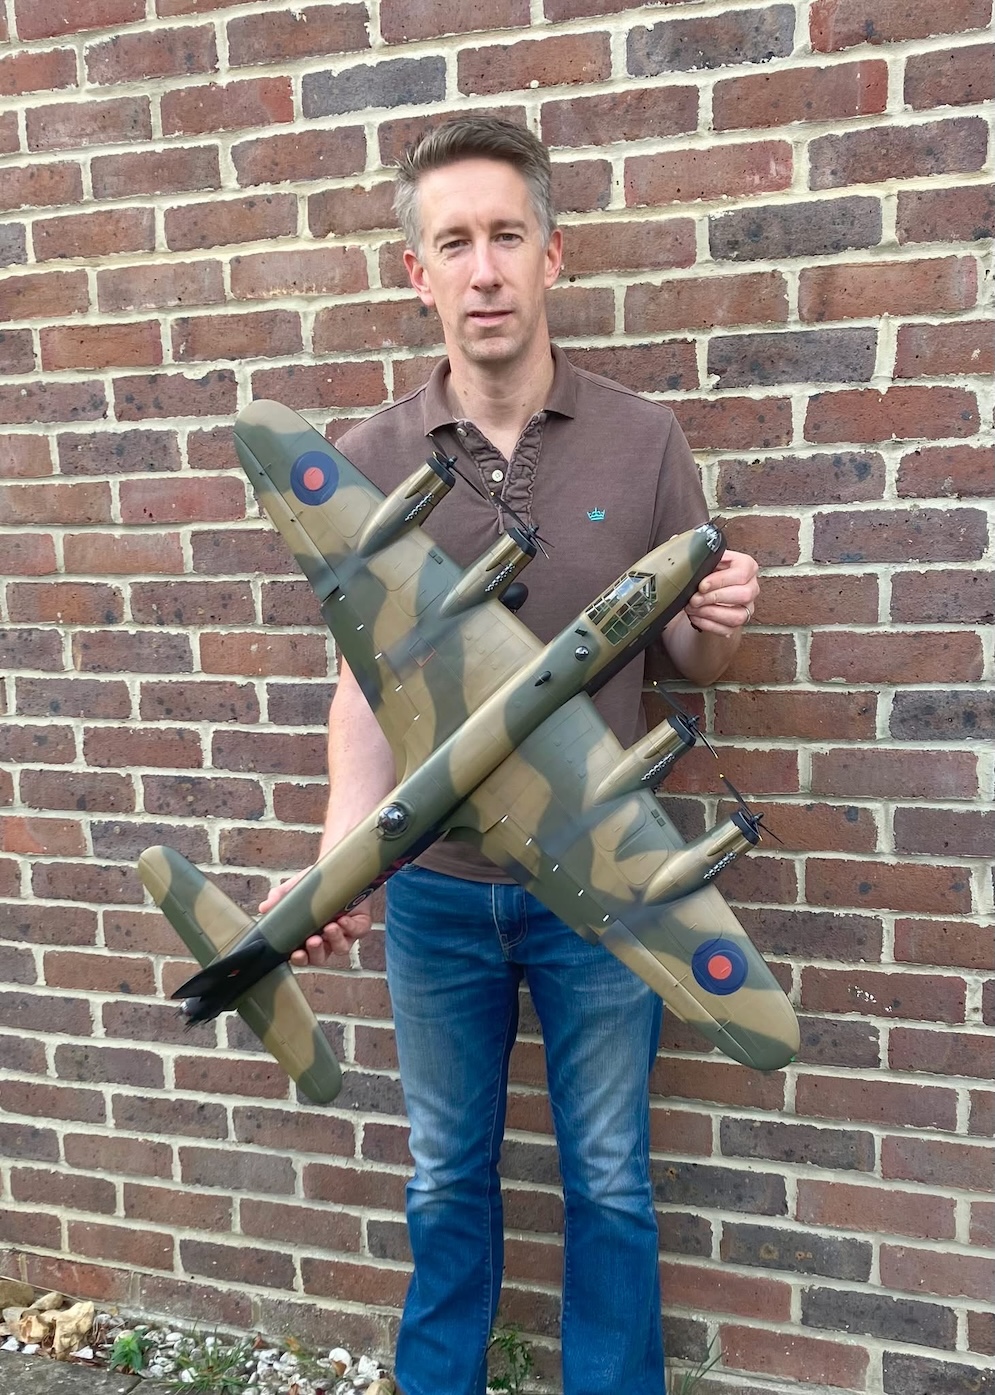
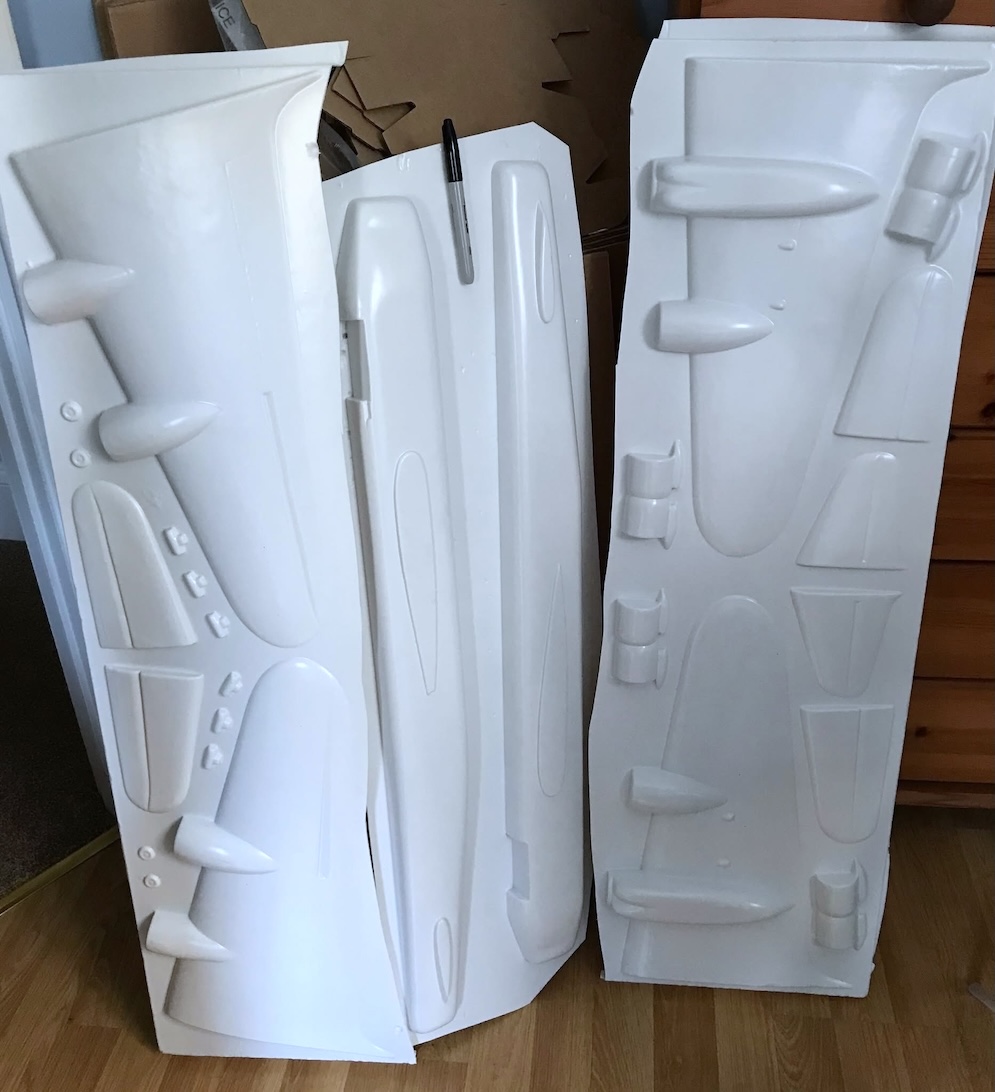
Here is my Short Stirling Mk.III, a good old Airfix kit with more realistic surfaces than the Italeri one…
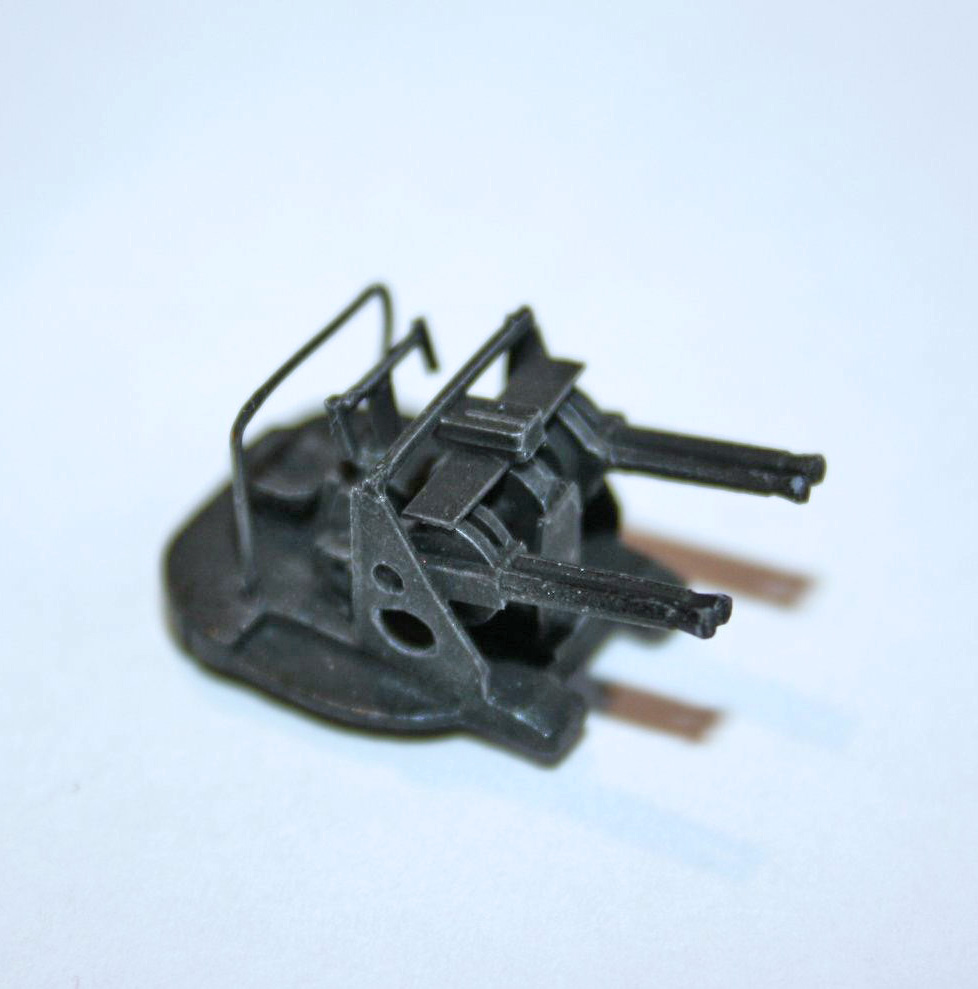
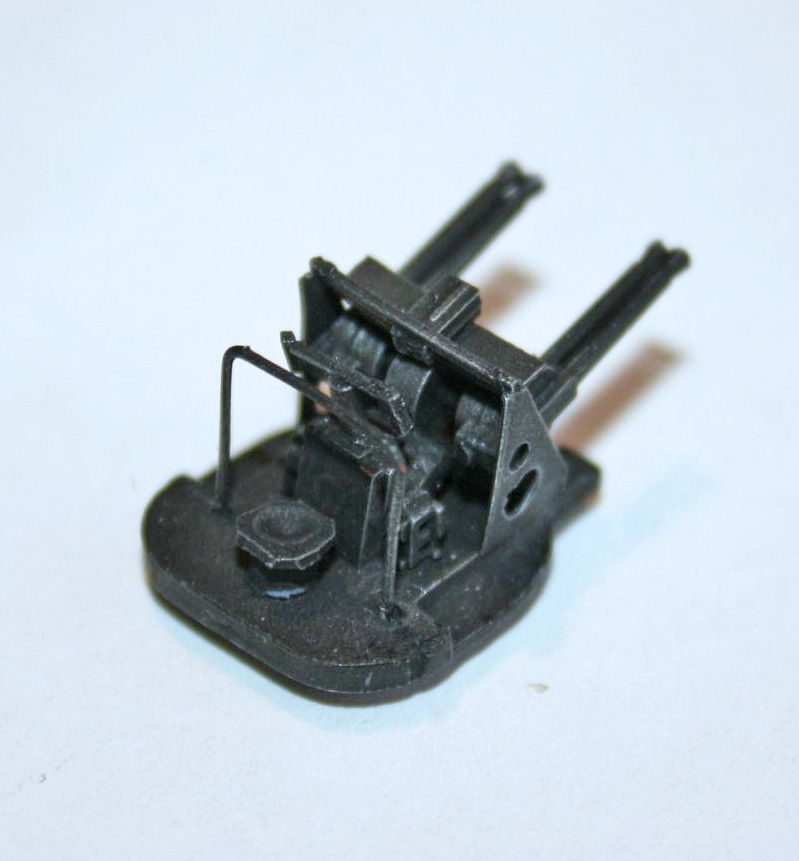
The front and rear turrets have been improved with plastic strips and rods. It’s not really the exact interior arrangement of the turrets but through the clear parts, it gives a good impression.
This aircraft (LJ522) saw service with 218 (Gold Coast) Squadron at Woolfox Lodge. On June 6th 1944, she took part in Operation “Glimmer”, dropping window strips over the Pas-de-Calais to confuse the German radars.
Willy S.
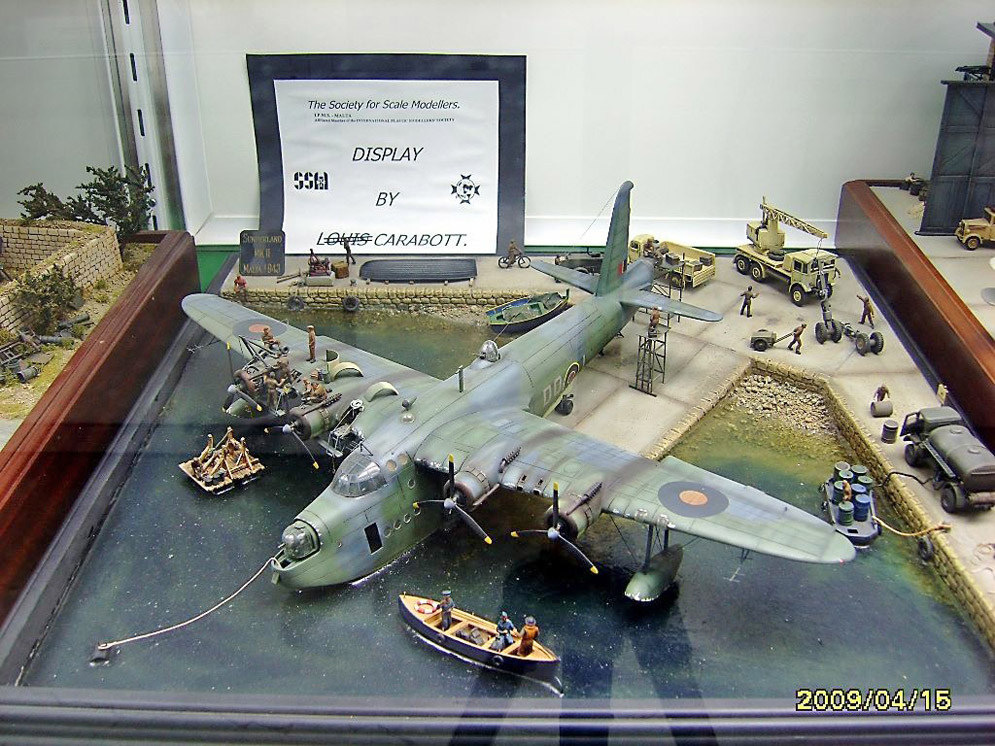
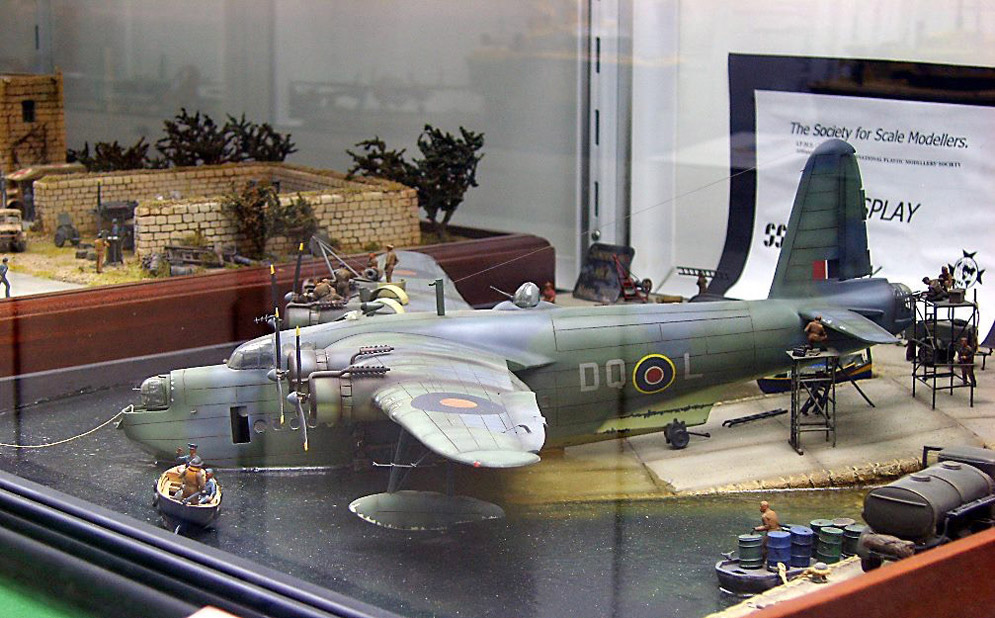
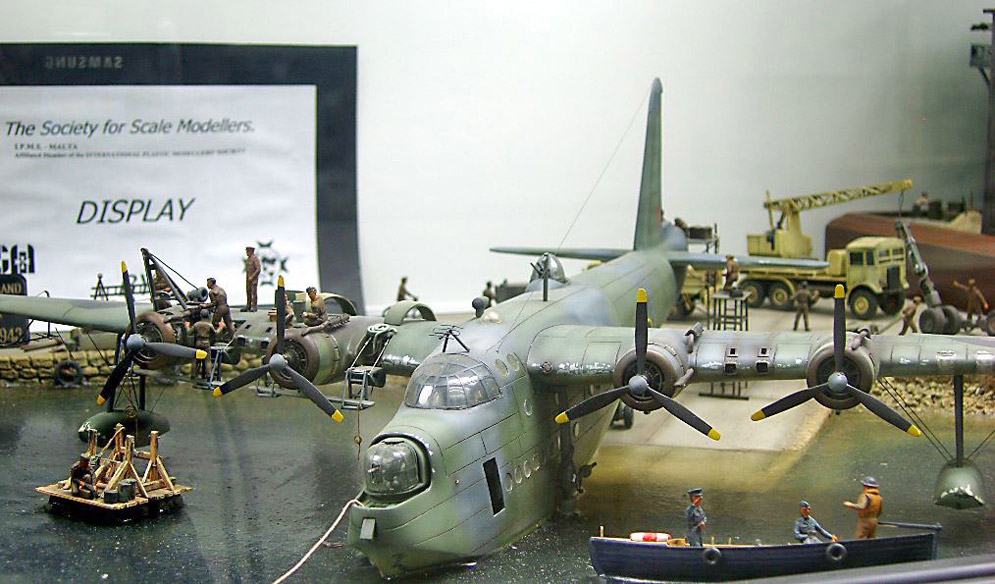
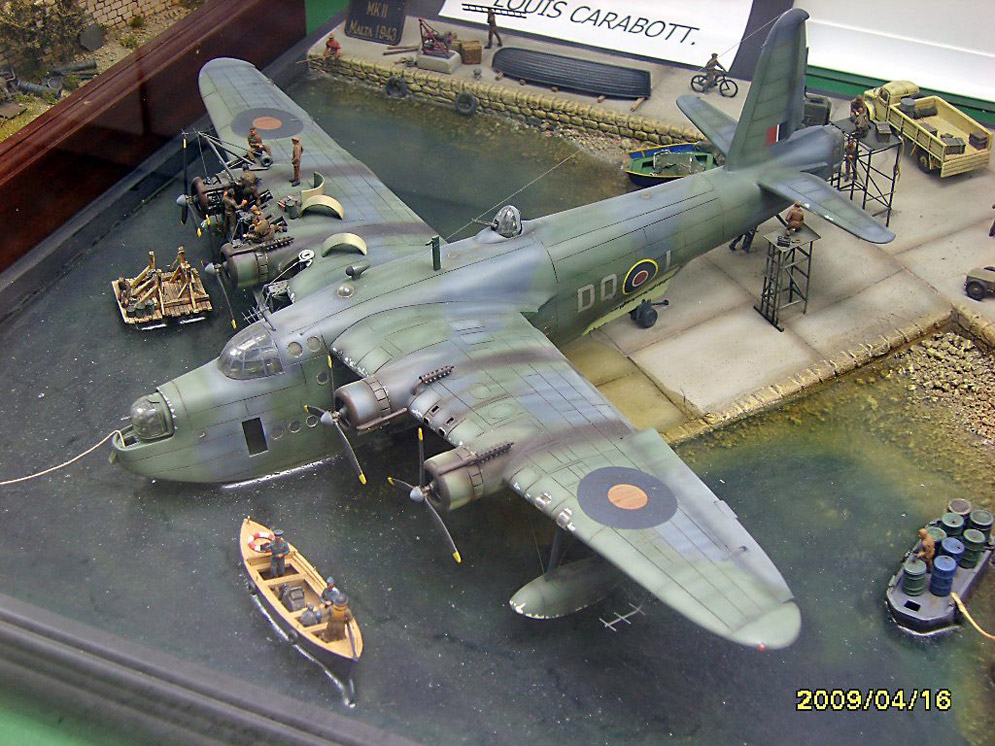
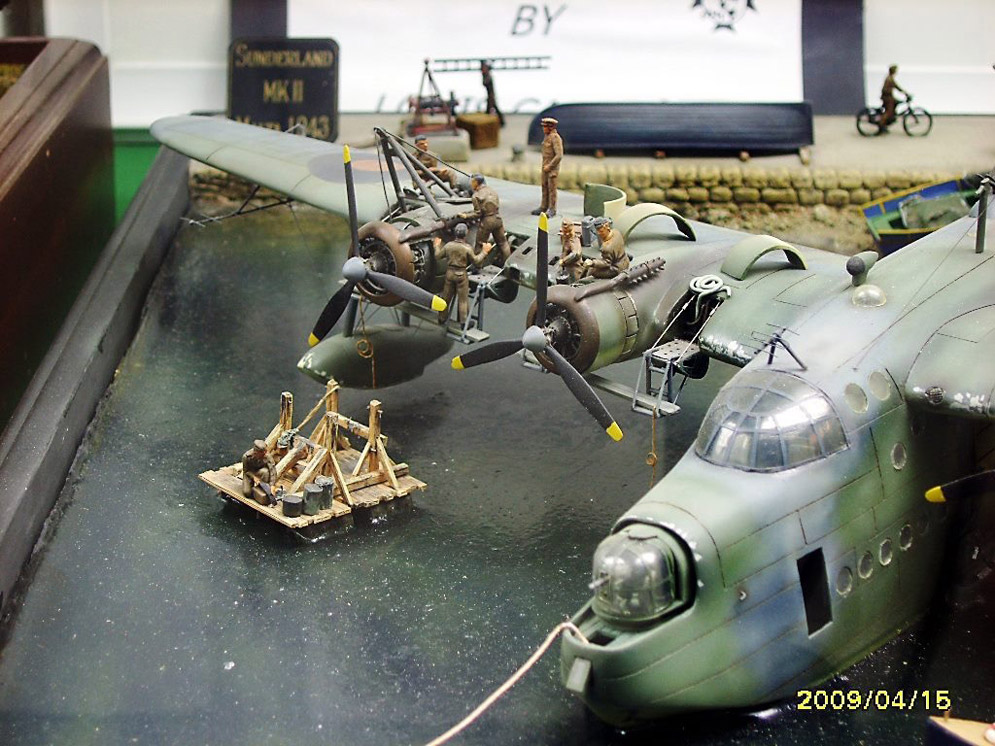
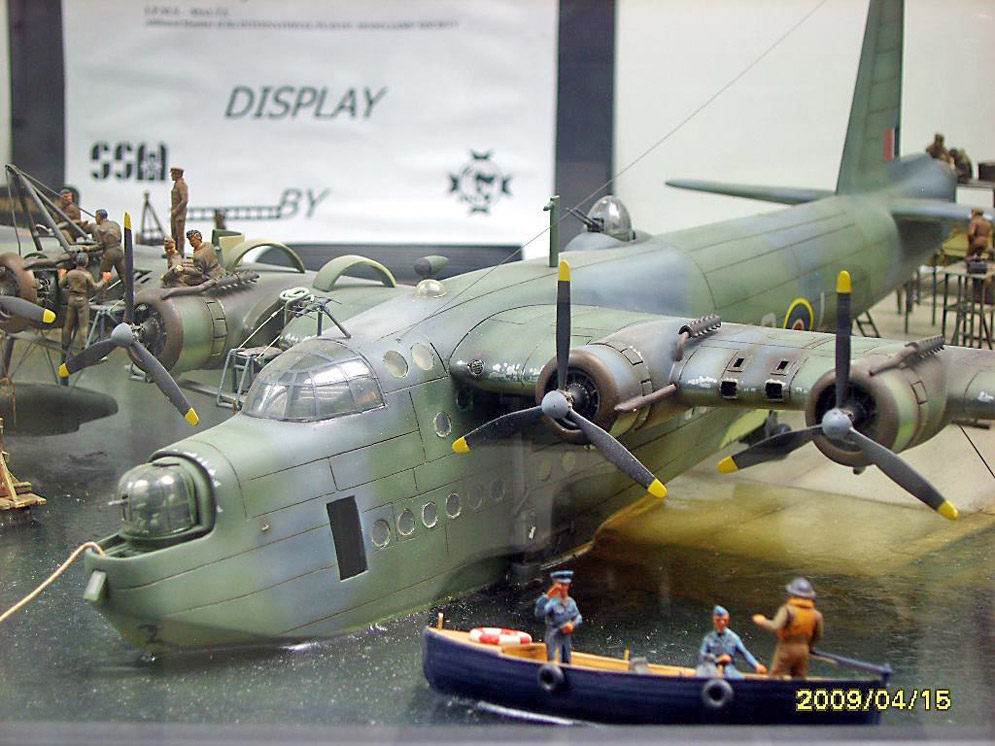
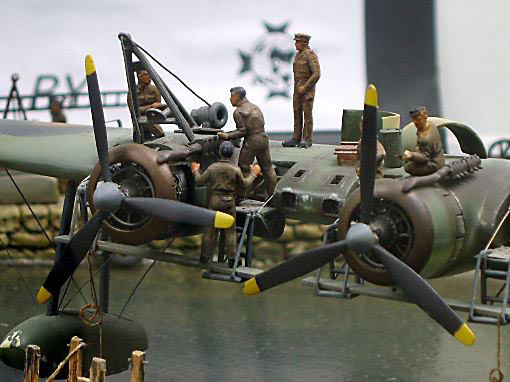
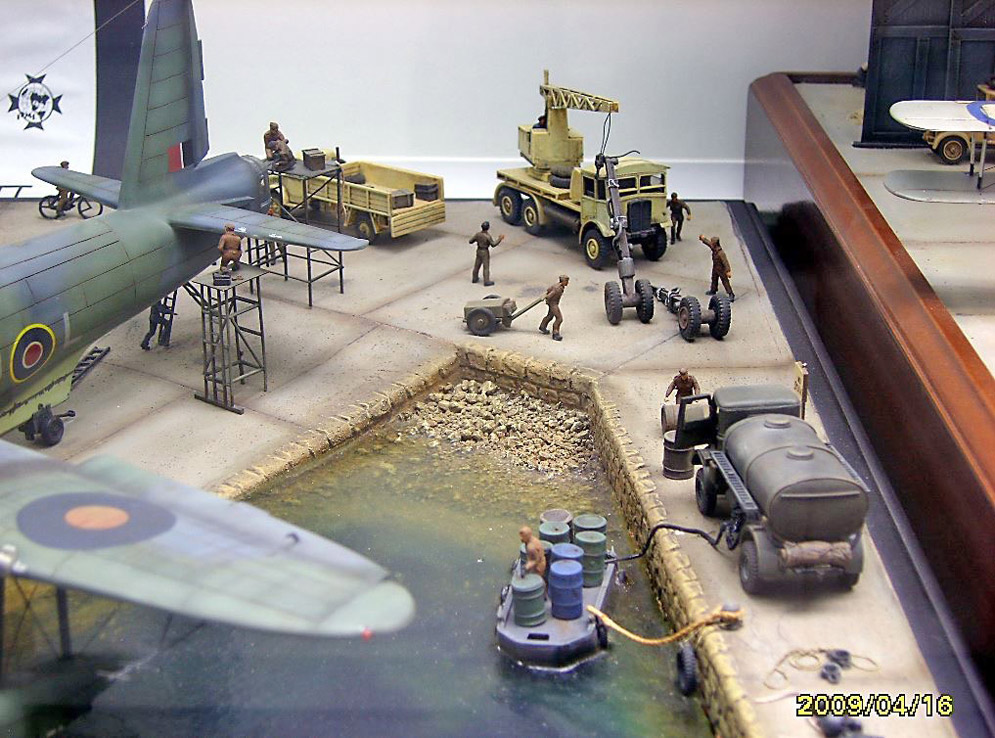
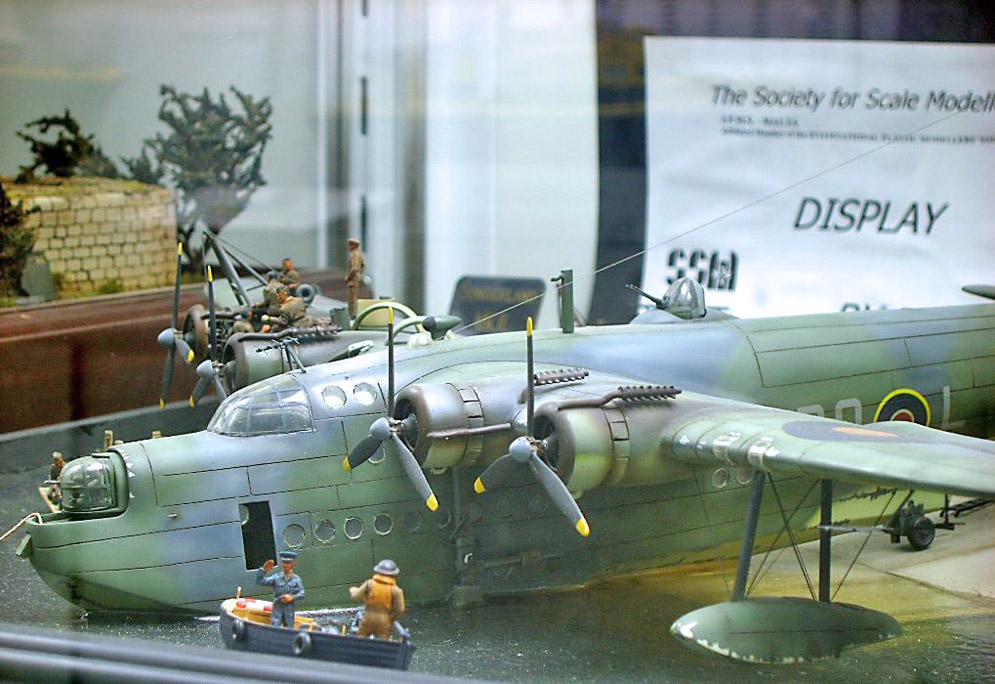
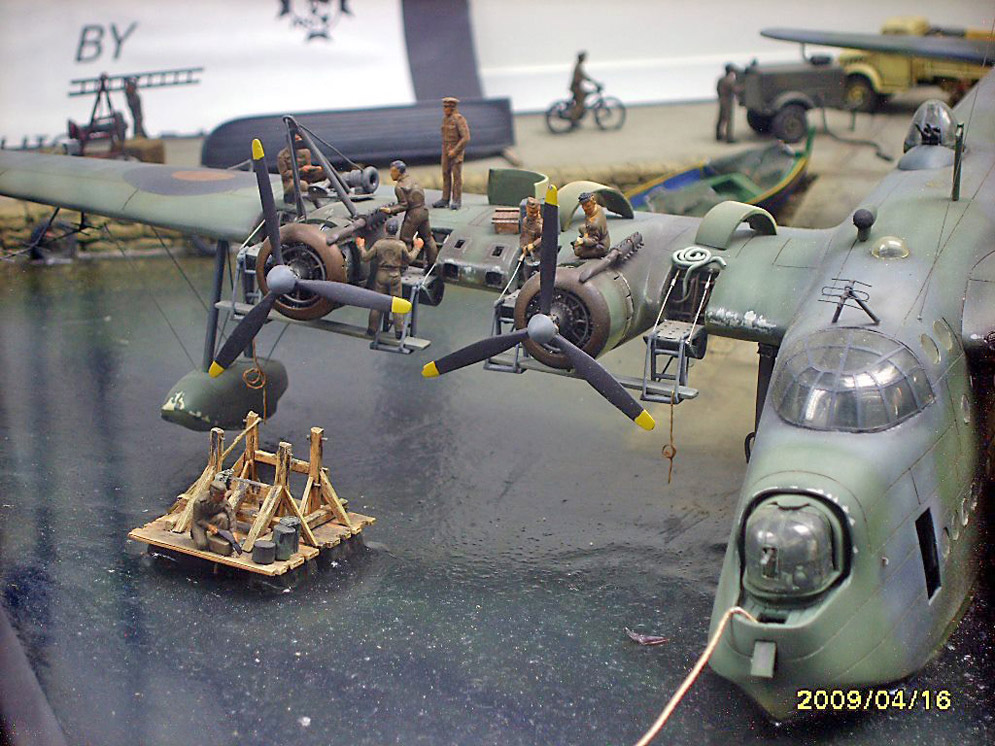
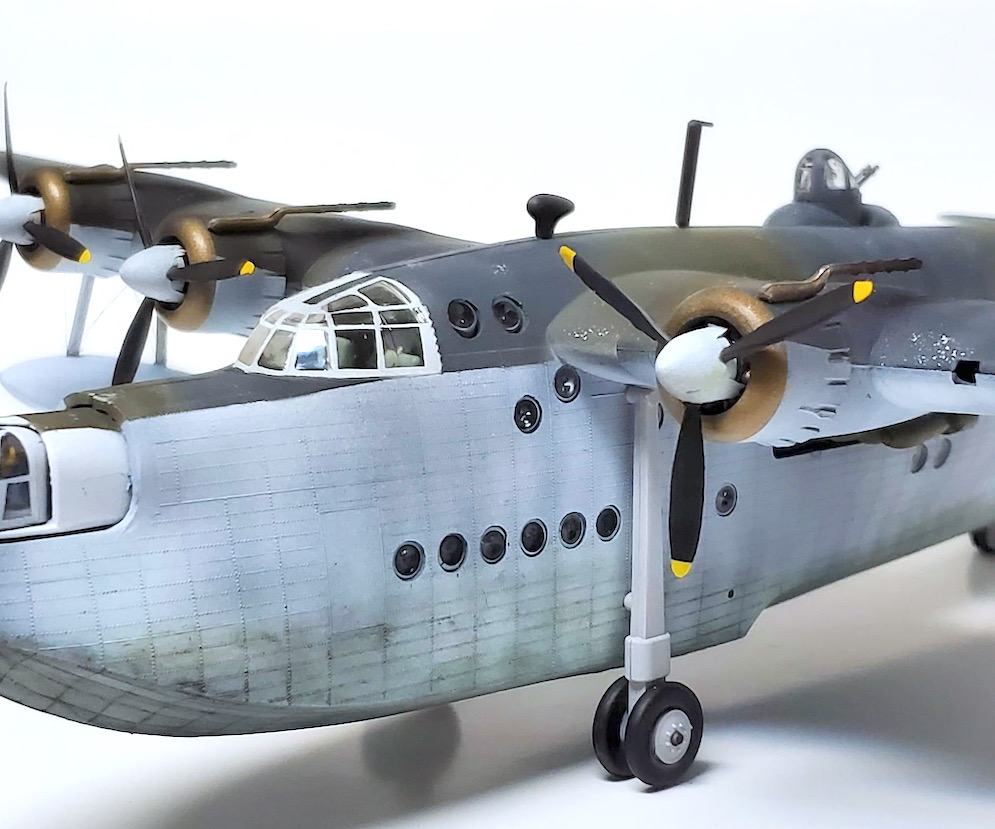
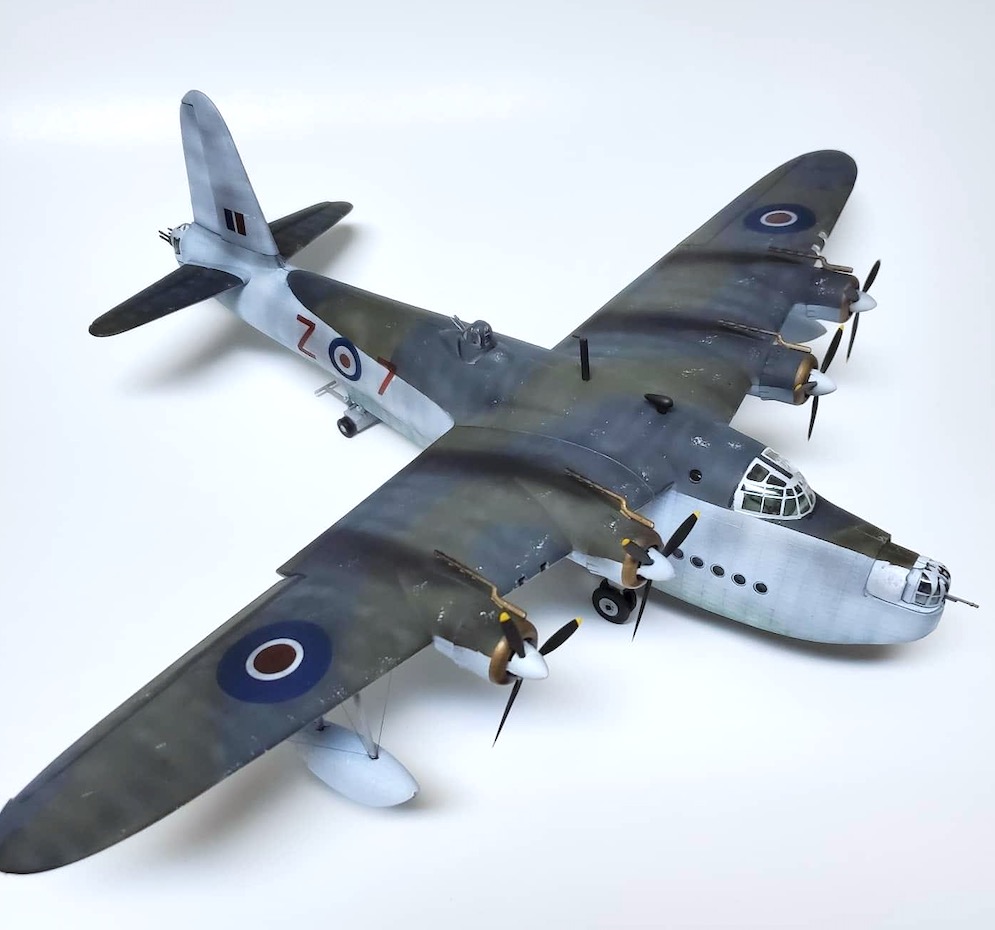
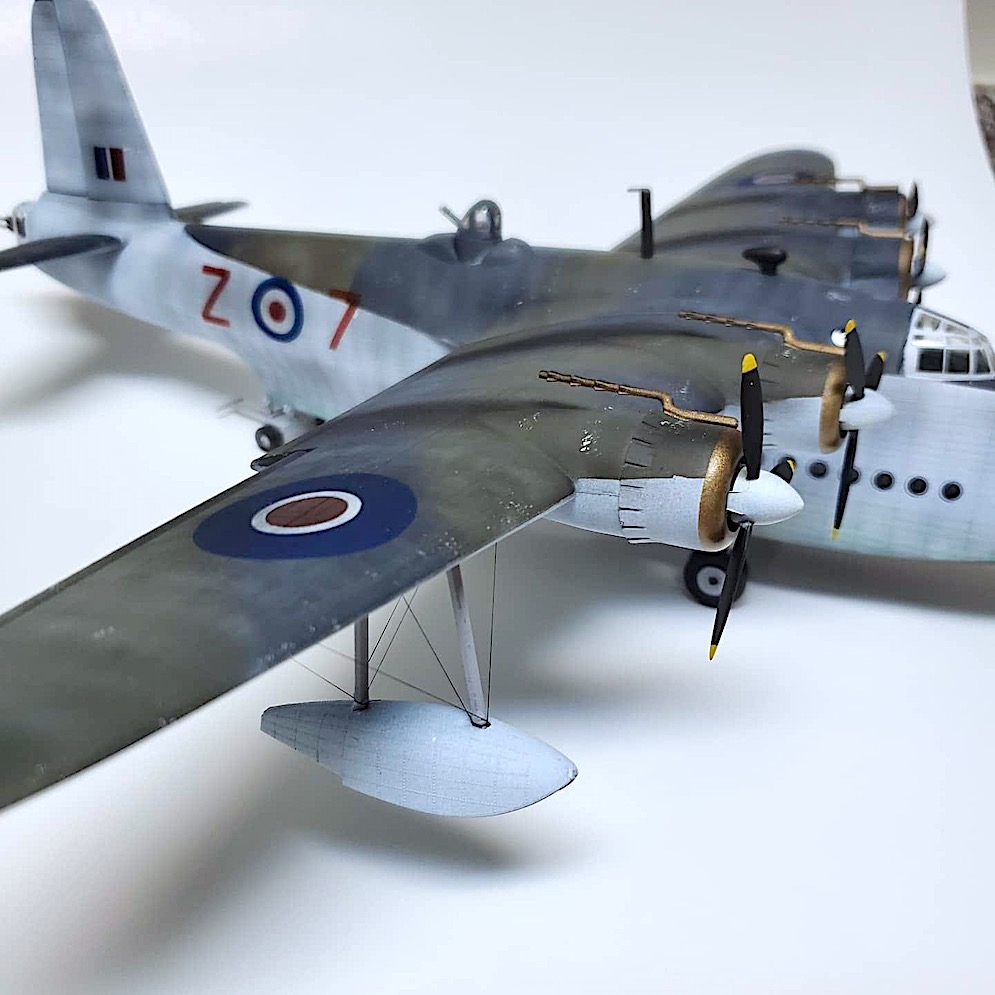
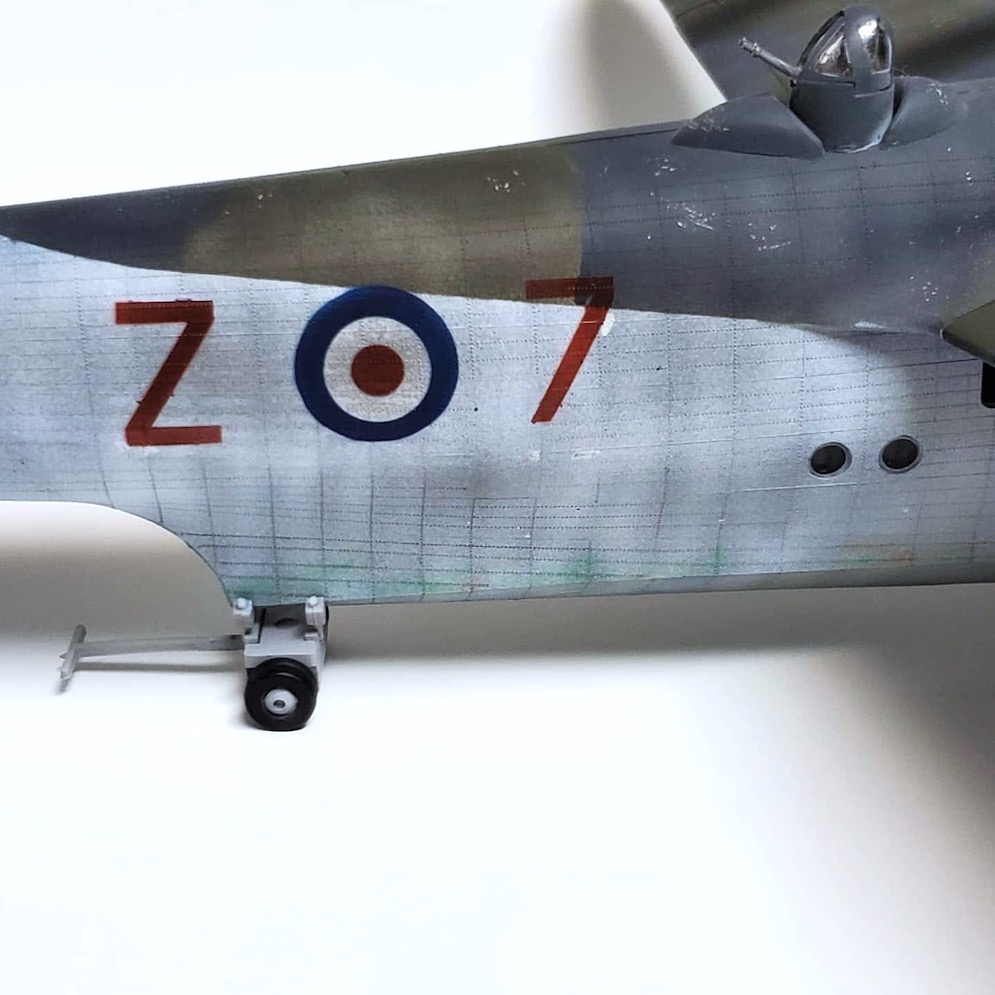
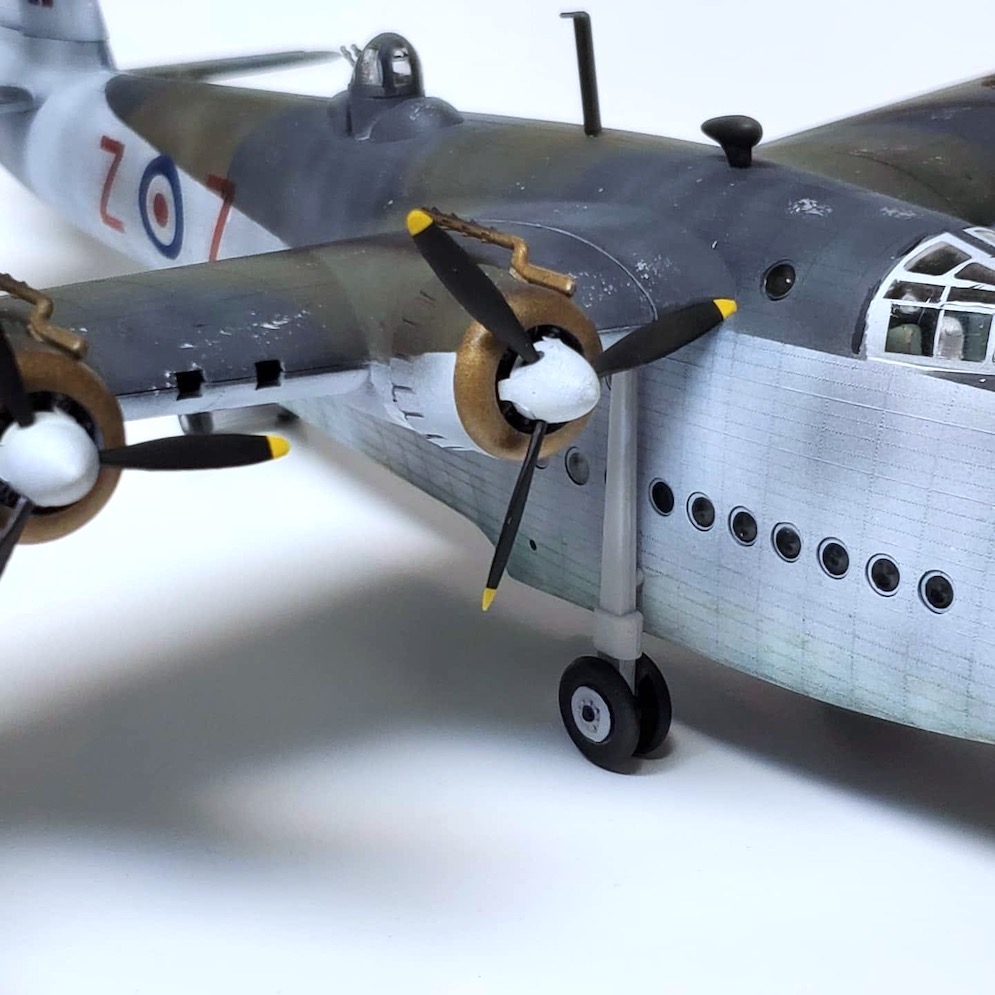
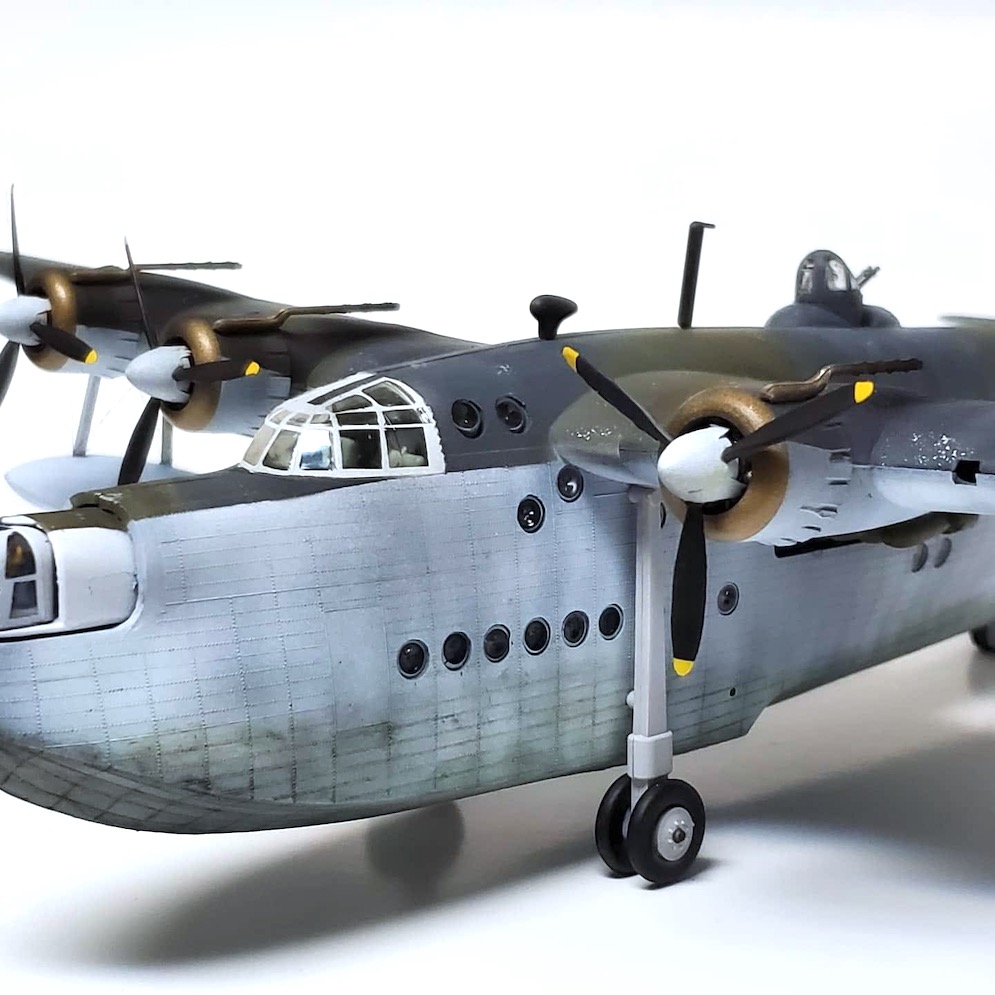
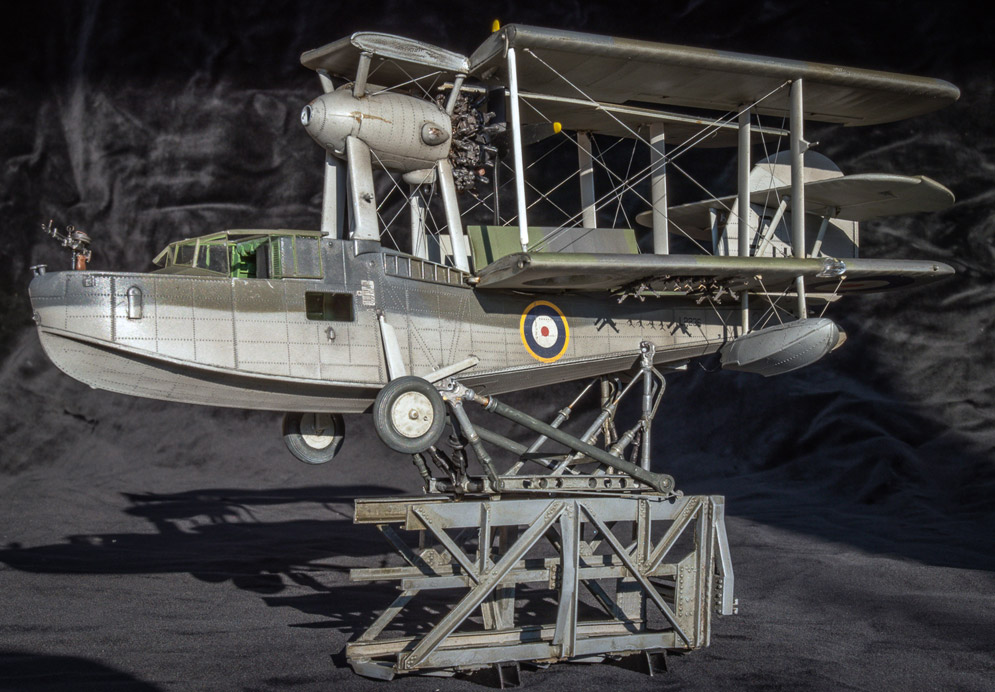
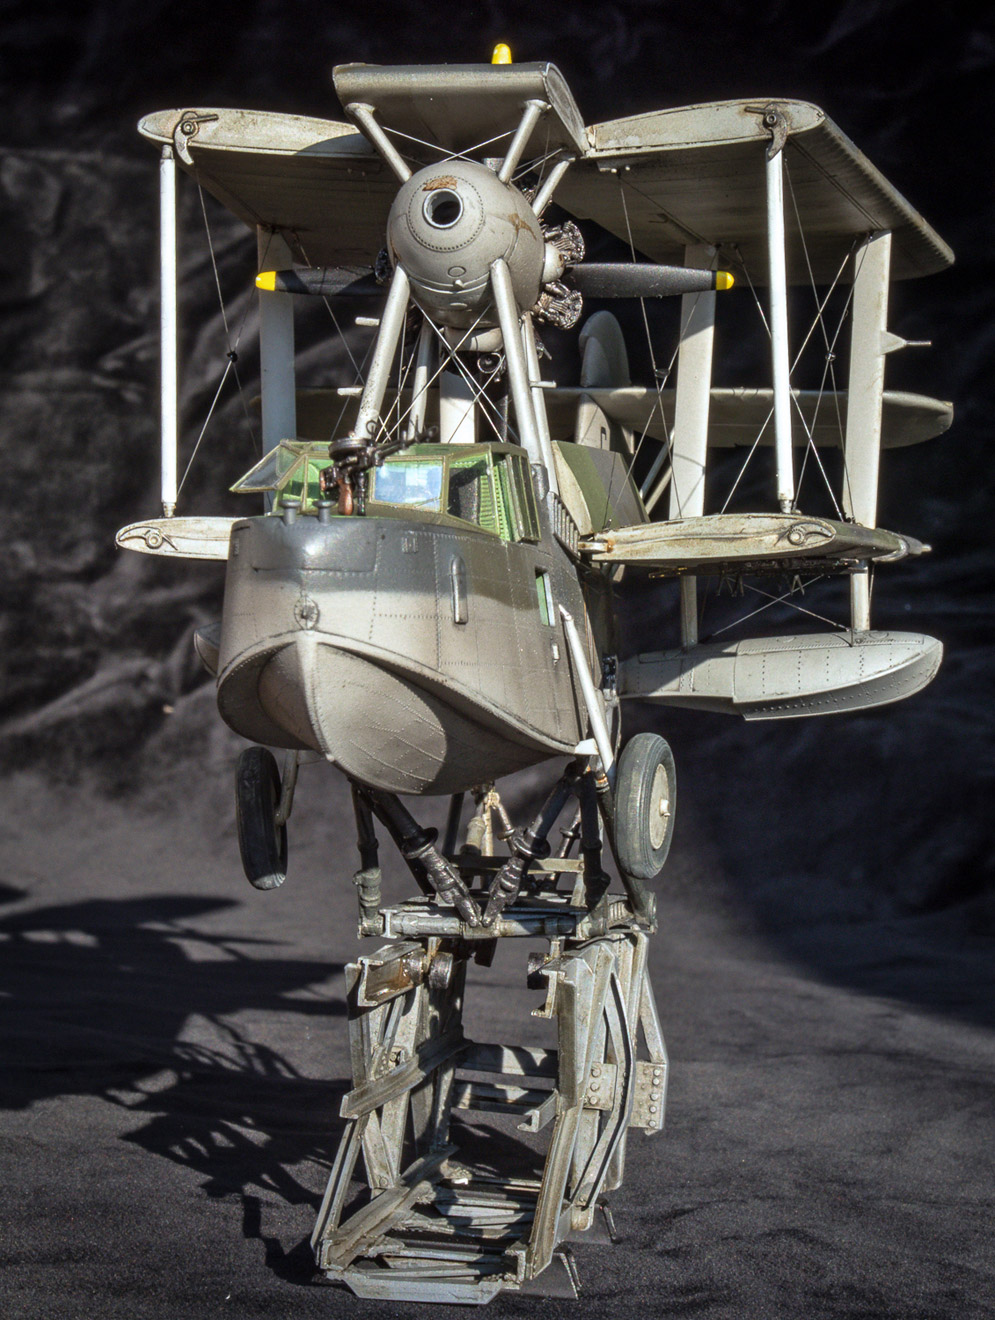
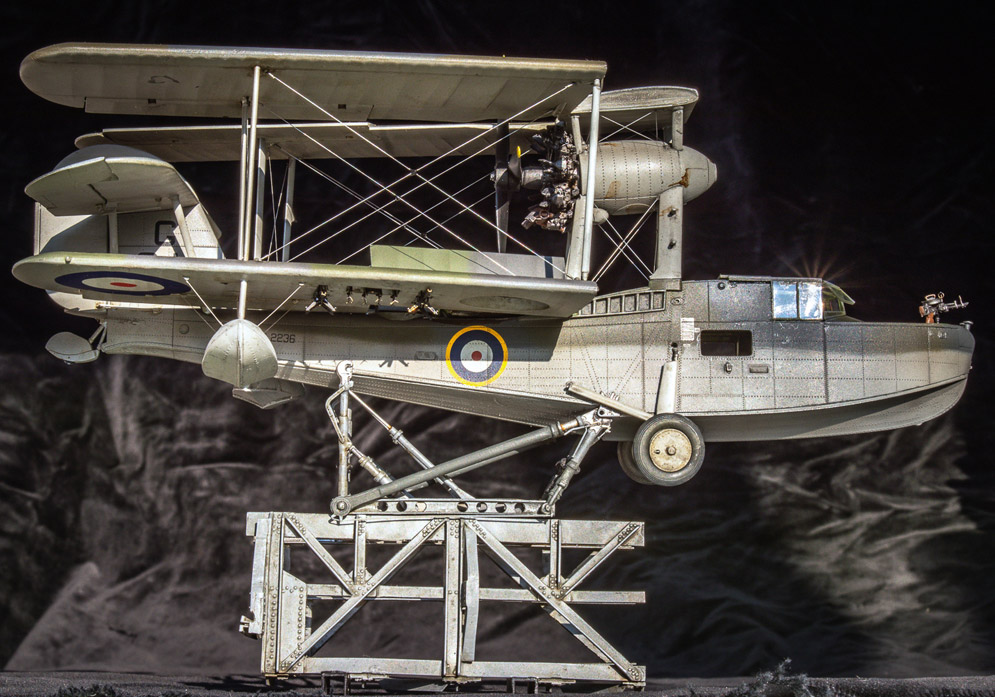
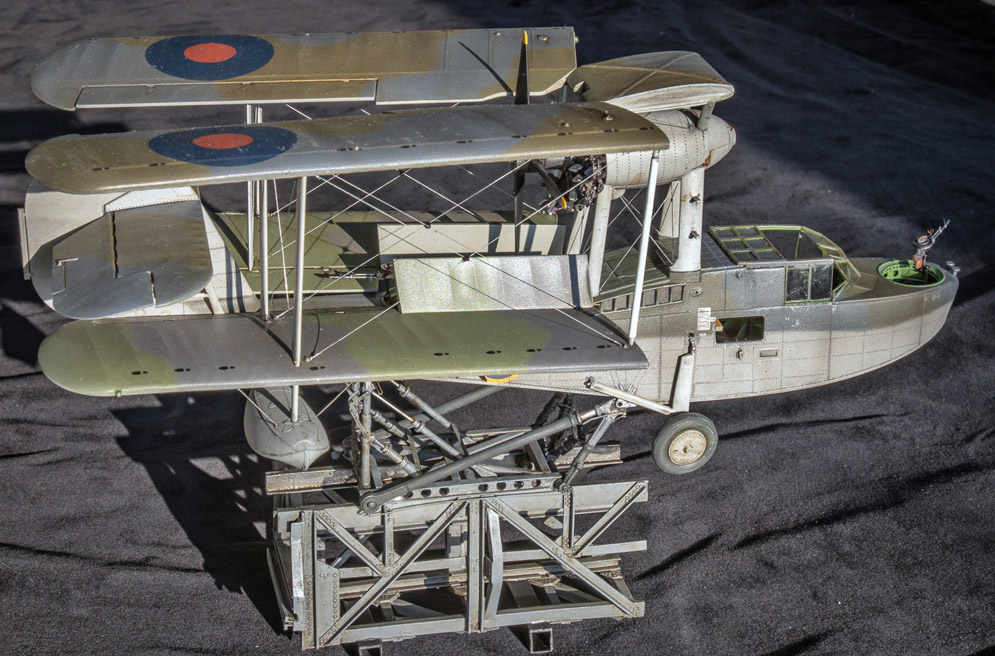
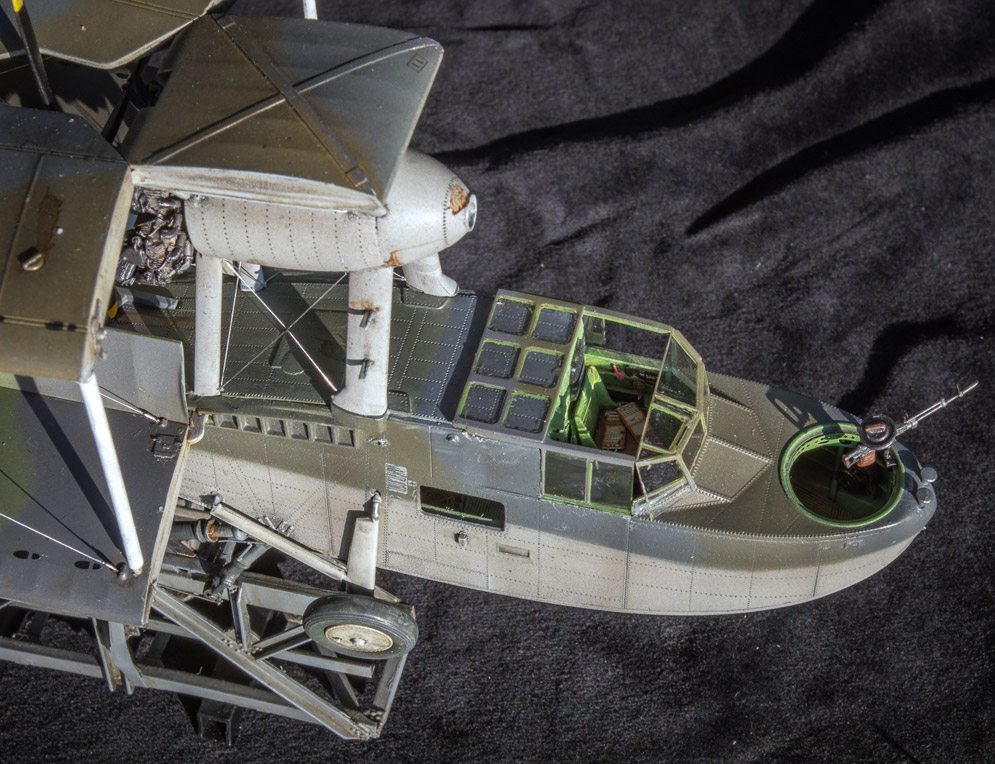
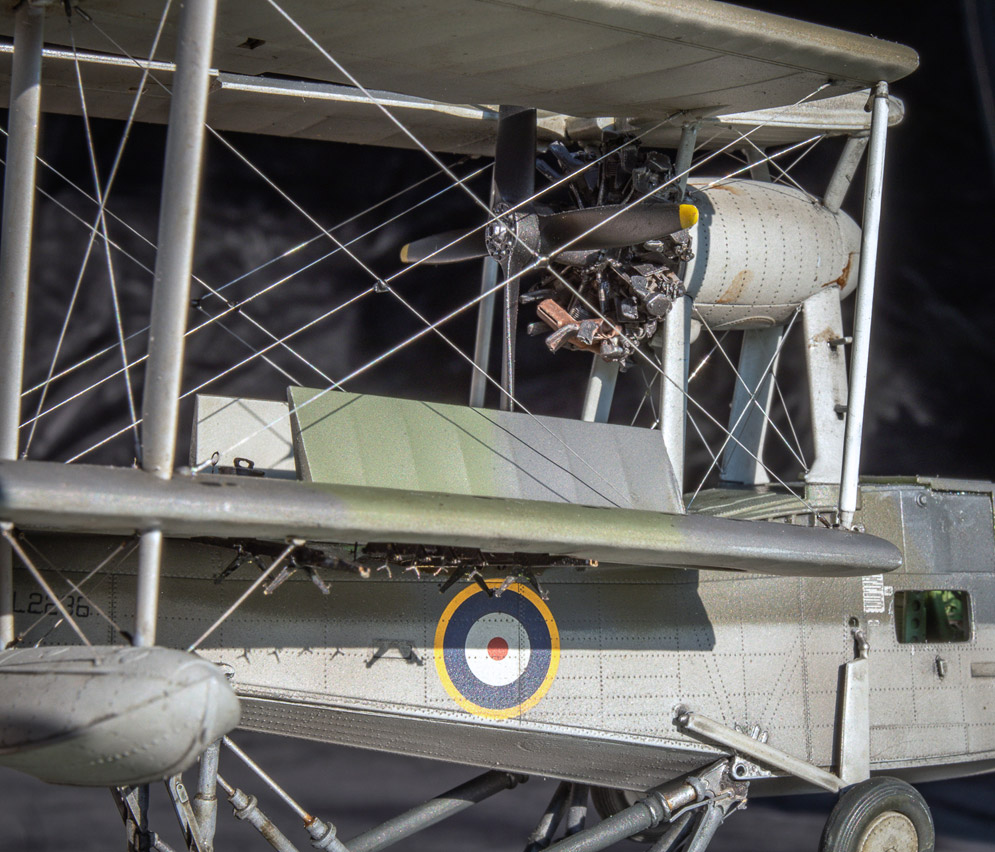
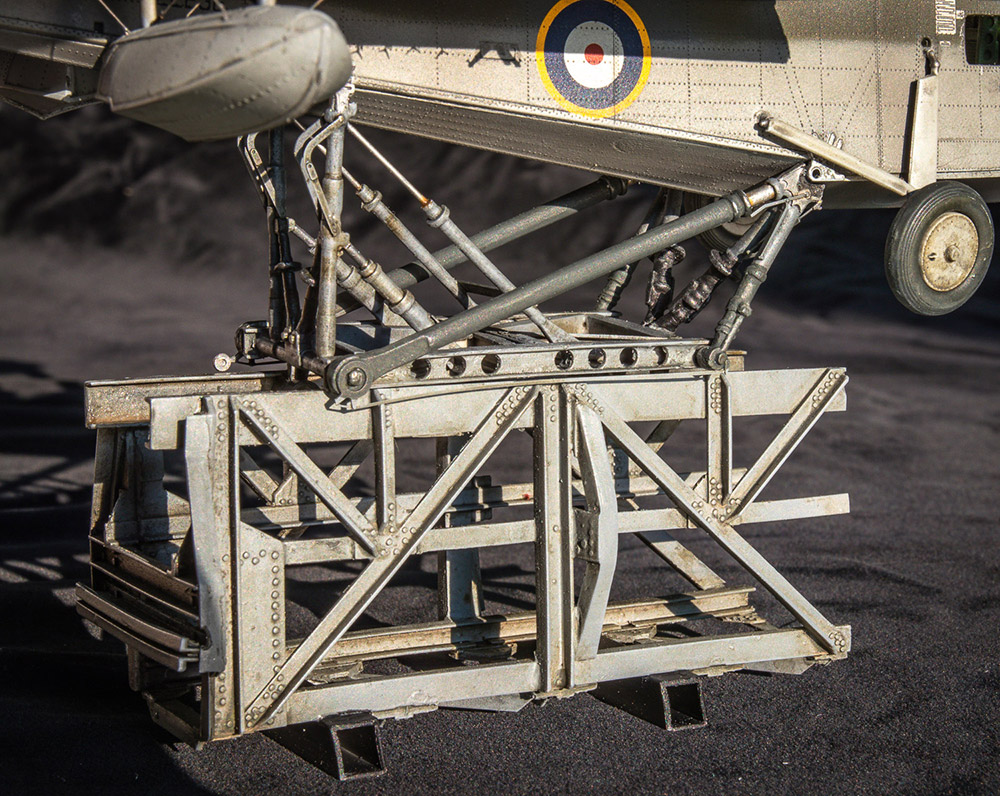
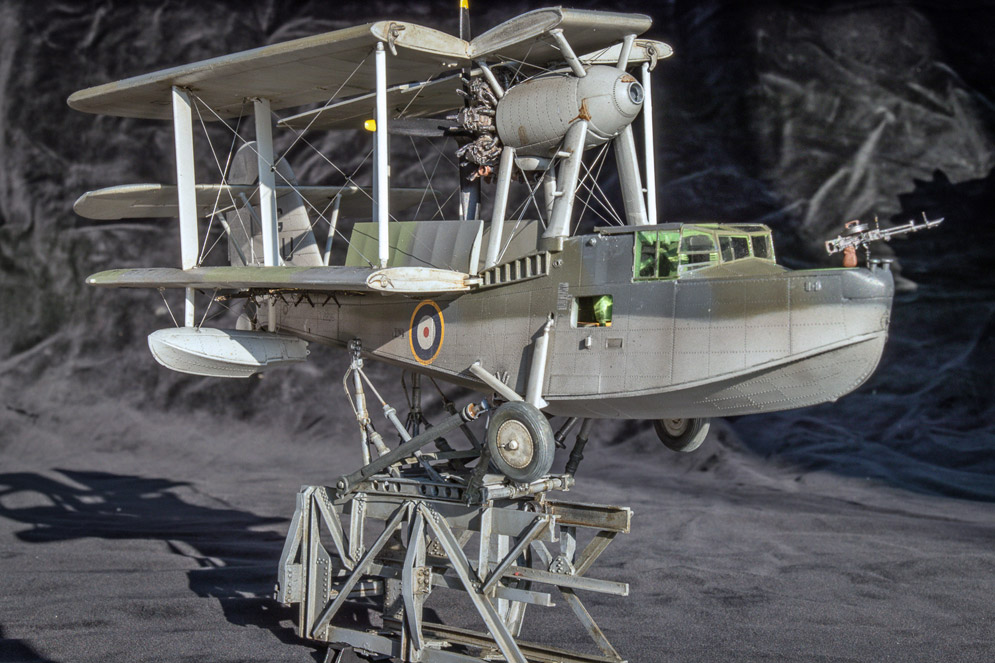
The kit is the old Airfix 1:72 scale model …a short story to this diorama …..
This diorama was actually modelled from a crude photograph taken at that time. This particular aircraft arrived from Alexandria for a technical and fuel stop in Malta. It had engine failure on take off at Kalafrana Sea Base. The engine change was made on the slipway (which still stands to this very day) to get the aircraft out of Malta as soon as possible as air raids were becoming deadlier and more frequent.
I am from Malta and we really took a pounding and had it very bad ….Sicily which being part of Axis held territory being only 60 miles away!
Louis C.


There is something special about making old school kits shine like diamonds. My son, @mann.made.models did a smashing job on my rigging! Check him out!
I had a lot of fun with this kit! I hope you enjoy her as much as I did.
Donald A. M.
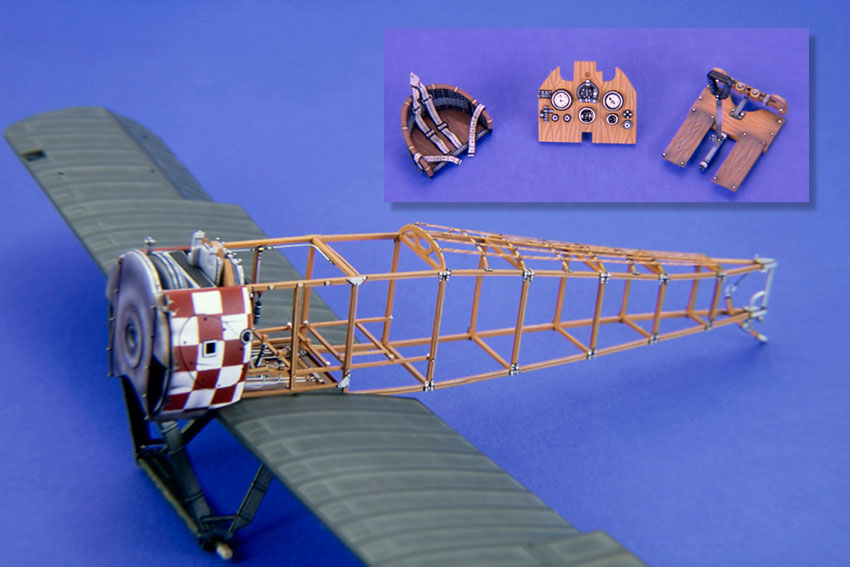
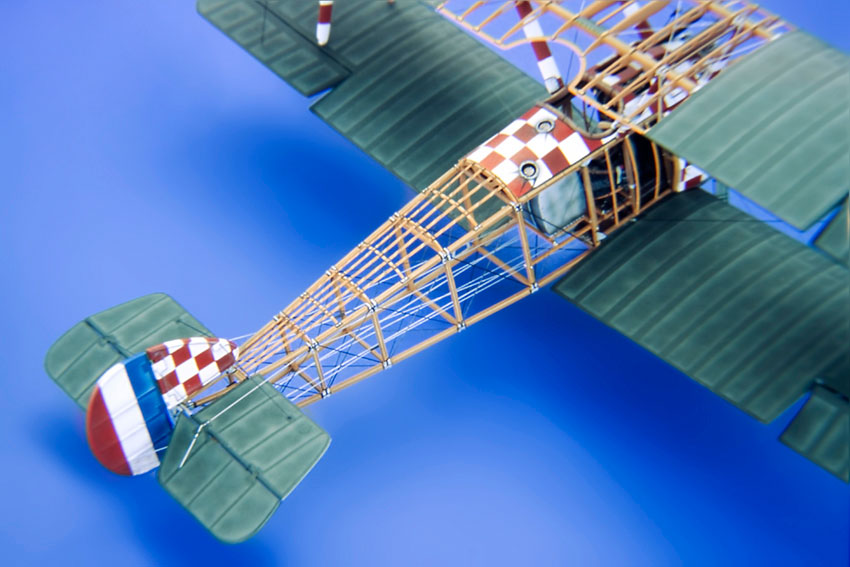
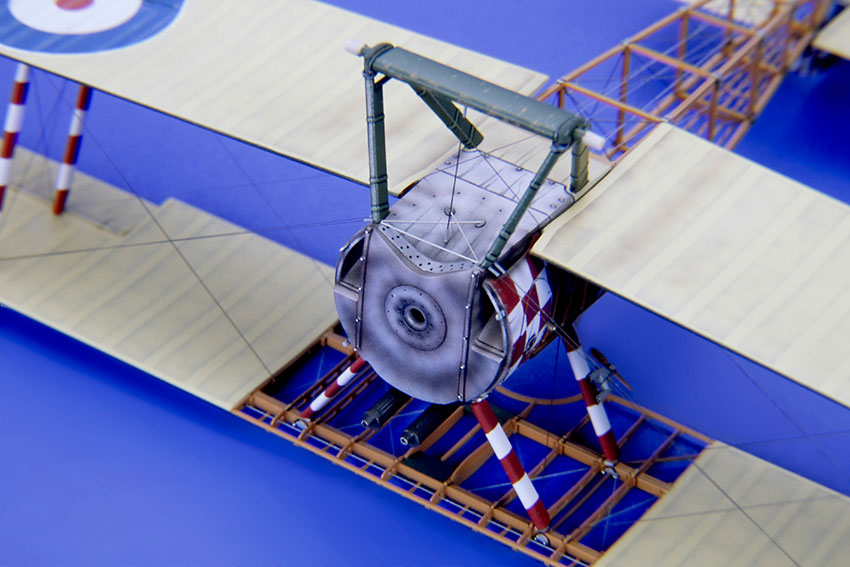
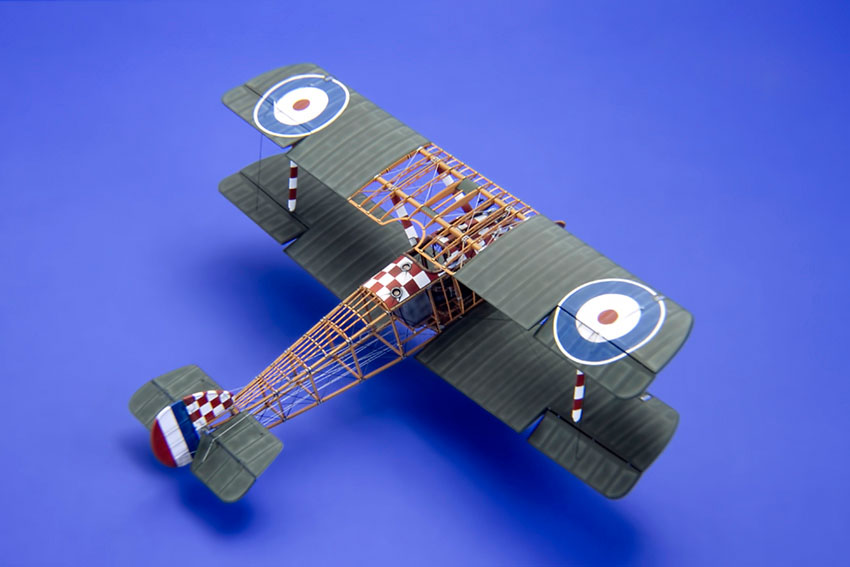
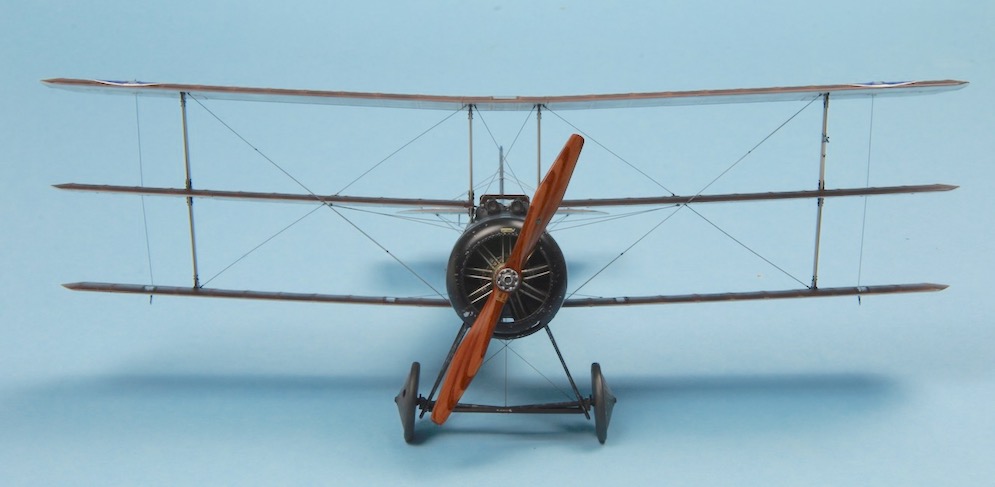
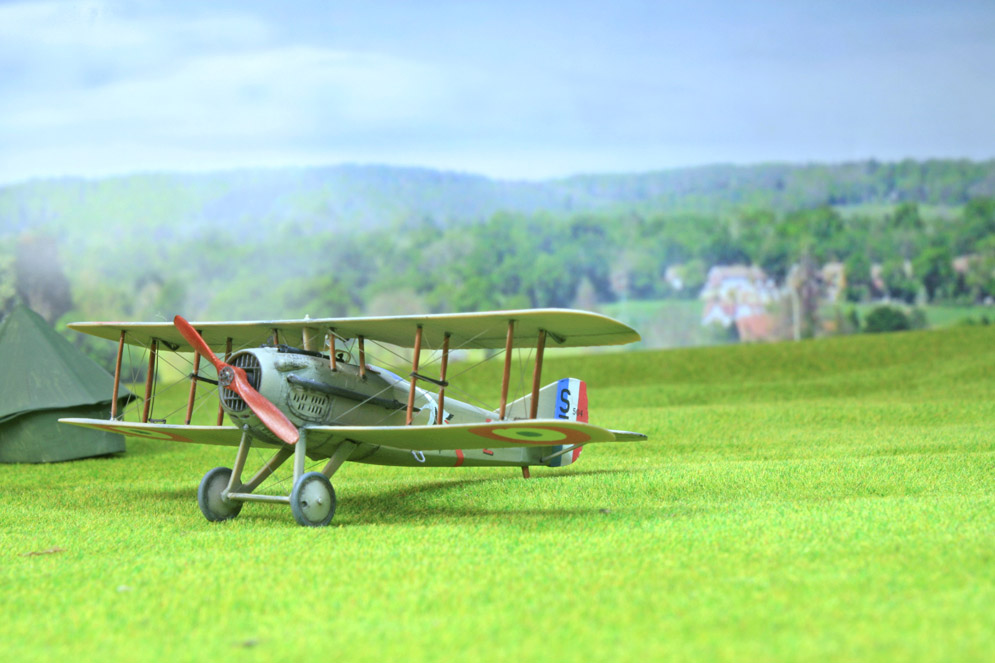
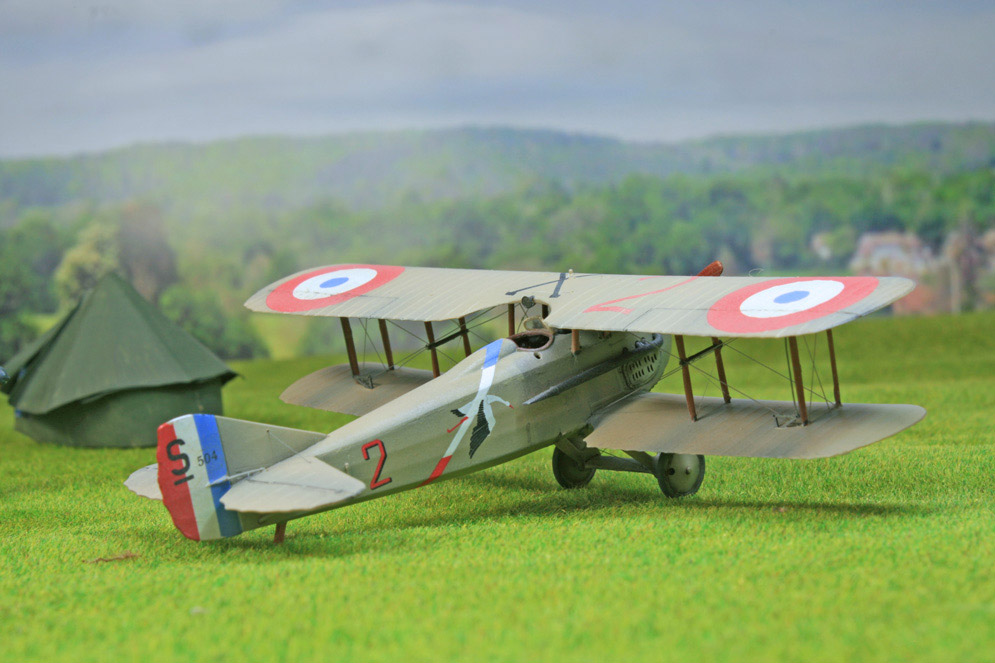
Camel F.1, Eduard 1:48, model detailed to show the fuselage and wing internal structure, all the details were made by using scratch build parts, the materials are Evergreen sections and rods. Best wishes, Juan Villalba
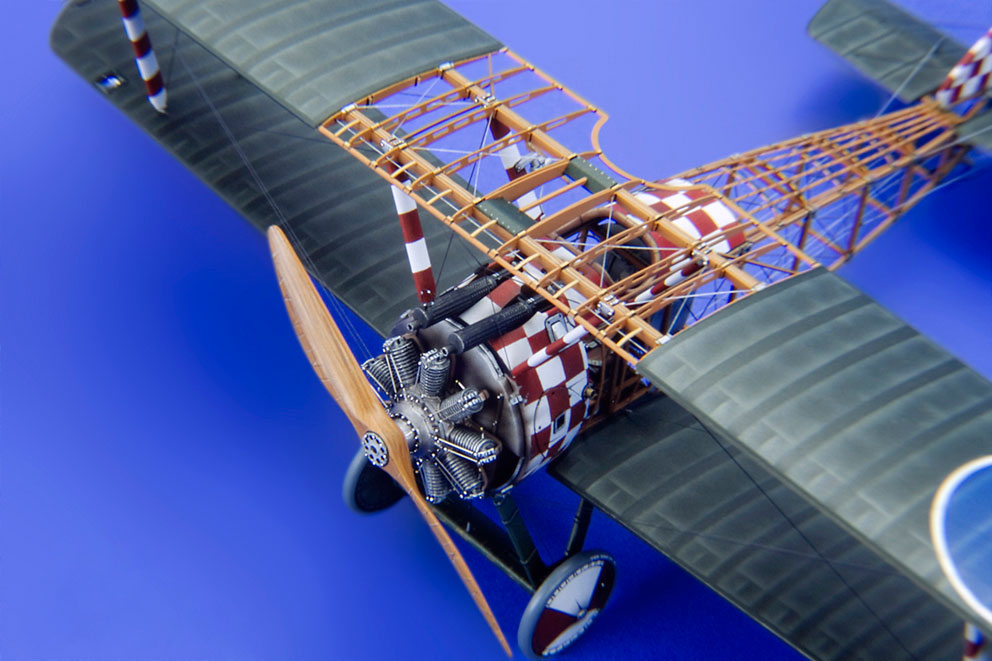
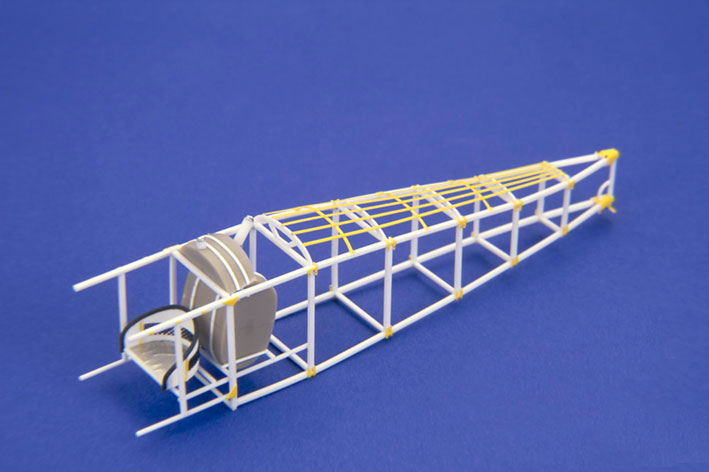
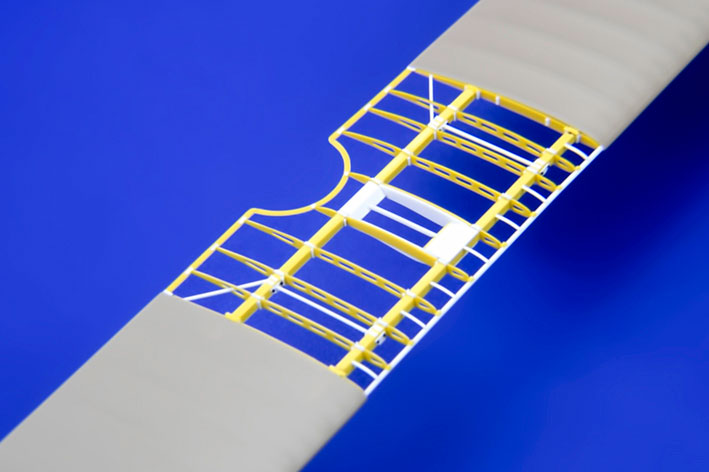

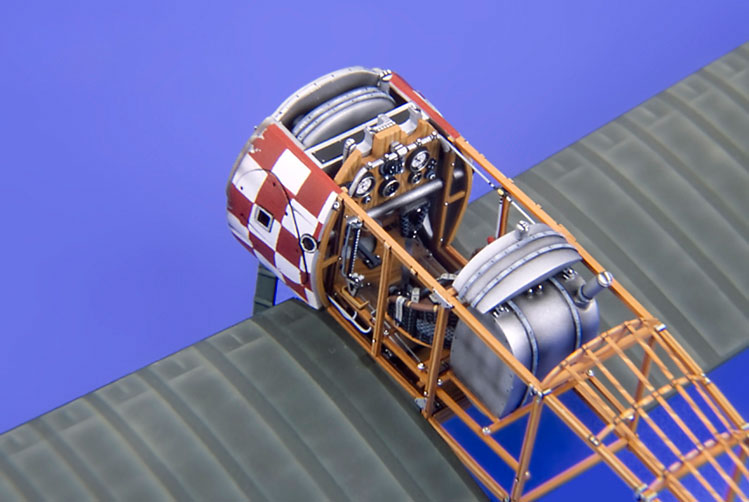

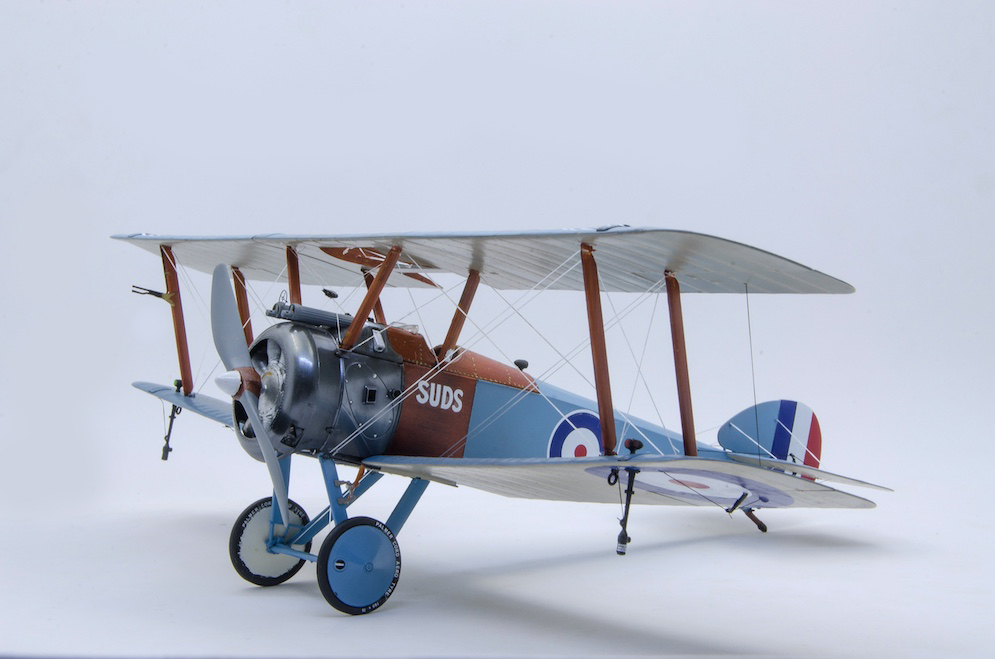


The kits start with the interior, with manly wooden construction on the original aircraft, some wood effect painting techniques are required. A few options are available, my preferred choice is oil paint dragged over the plastic to give a nice wood grain effect. The instruments are applied in the form of separate decals which are supplied with the kit.
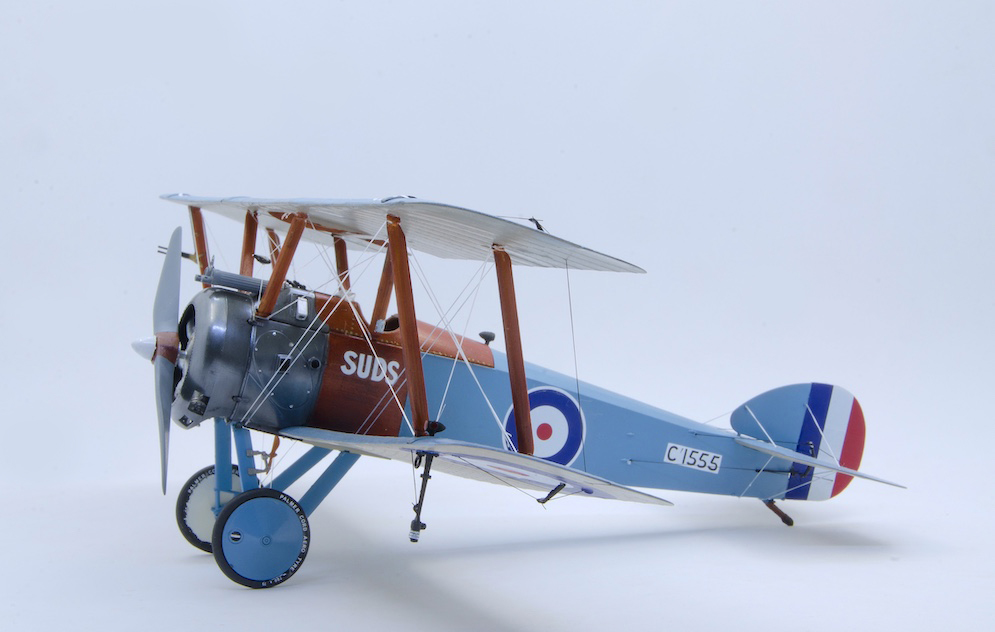
Once the fuselage halves are joined, you need to paint the fuselage and apply the decals, as once the wings and struts are fitted, you would have limited access. For all my First World War builds I use MRP paint, they do a good range of specific colours for the WW1 aeroplanes.
Many modellers are put off multi wing aircraft, this is due to the rigging. I had exactly same view, that was until I built my first Wingnut Wings kit. The process really is not as difficult as many people believe. For the British rigging, which was a flat aerodynamic design, I use sew in elastic, this is also flat and very cheap. Holes are marked on the kit mouldings for the holes, just drill these holes out a little and place the elastic inside with superglue.
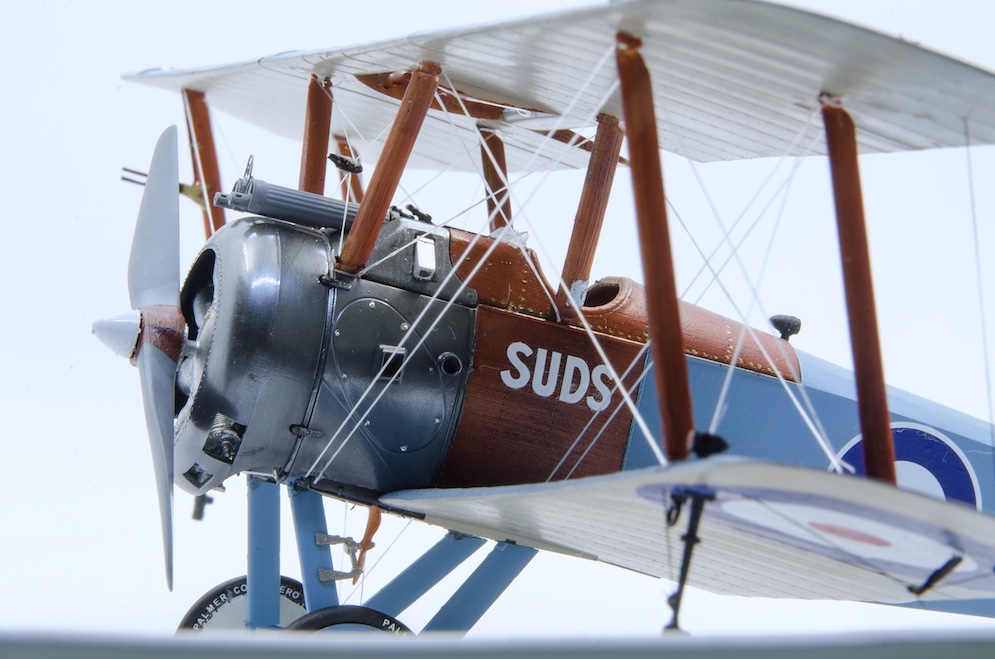
The markings are 10 Squadron of the Royal Navel Air Service in January 1918.
I’m not for one moment saying these kits are easy and should be undertaken by novice modellers, but if you’ve built models before, you’ll be surprised at the amount of detail and stunning models these kits provide, yes, they are expensive, but quality comes at a cost.
Andrew R.
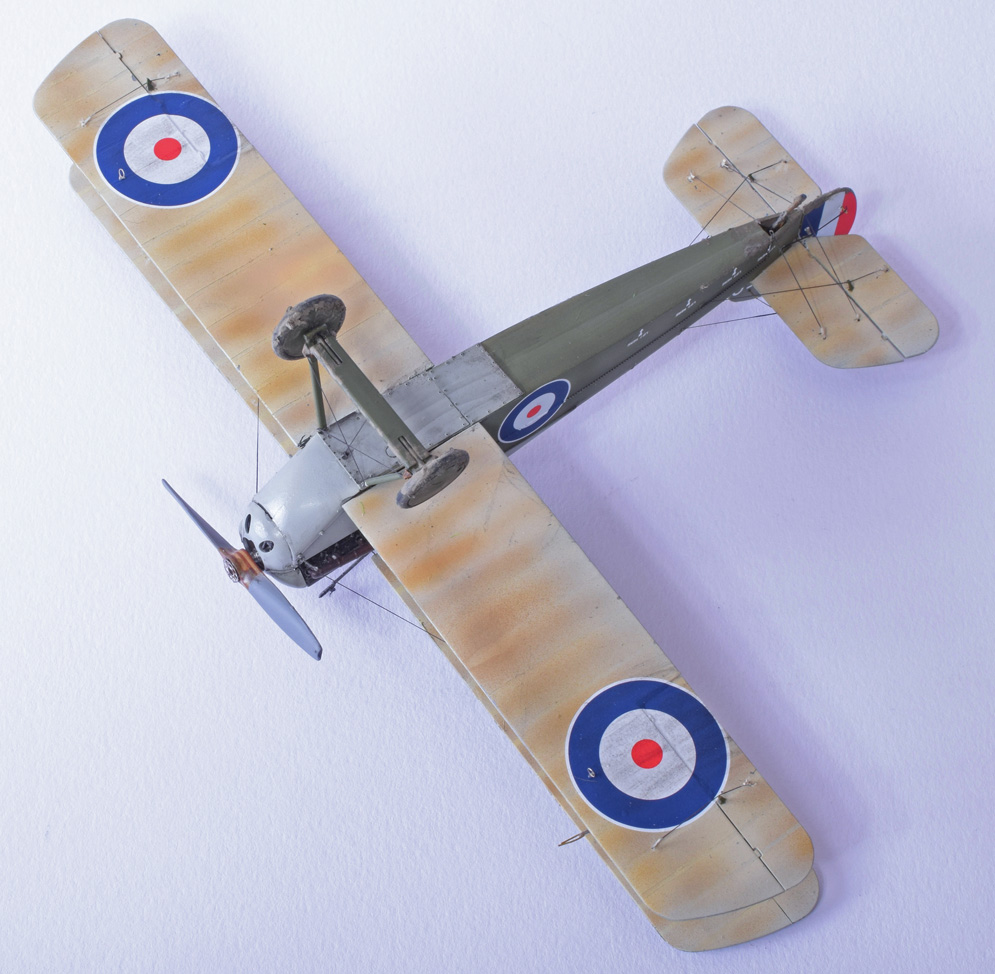
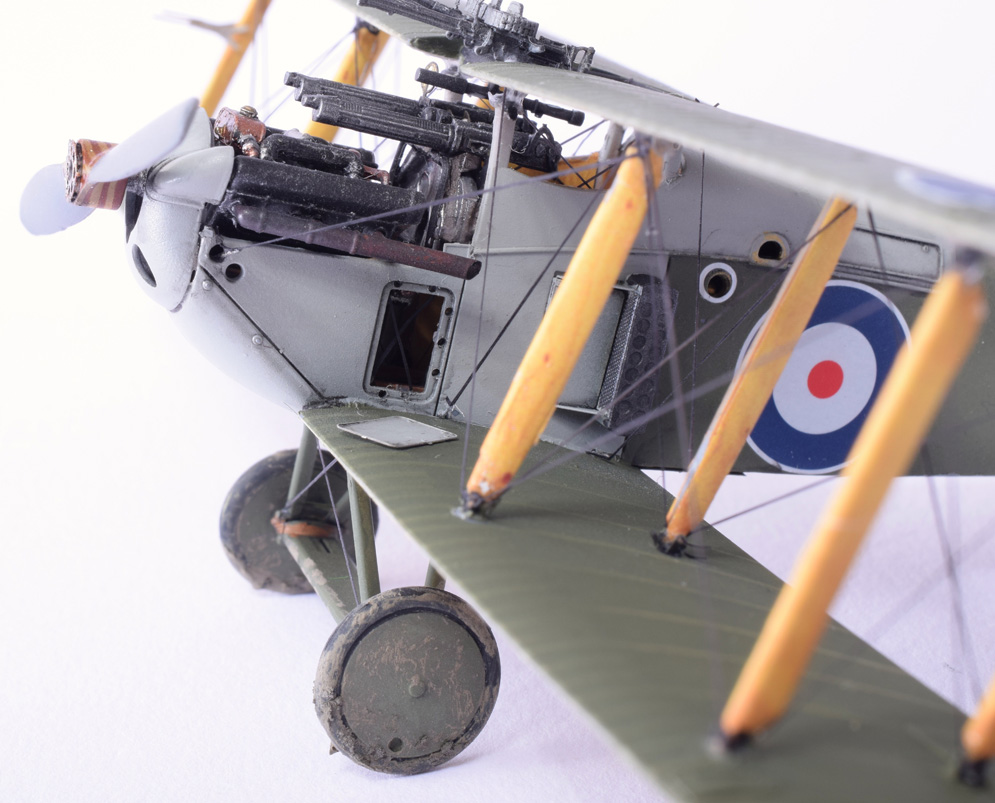
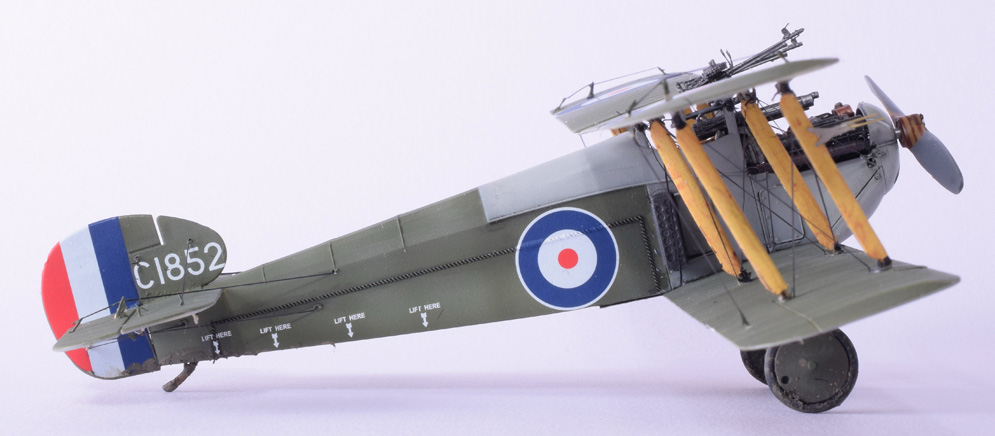
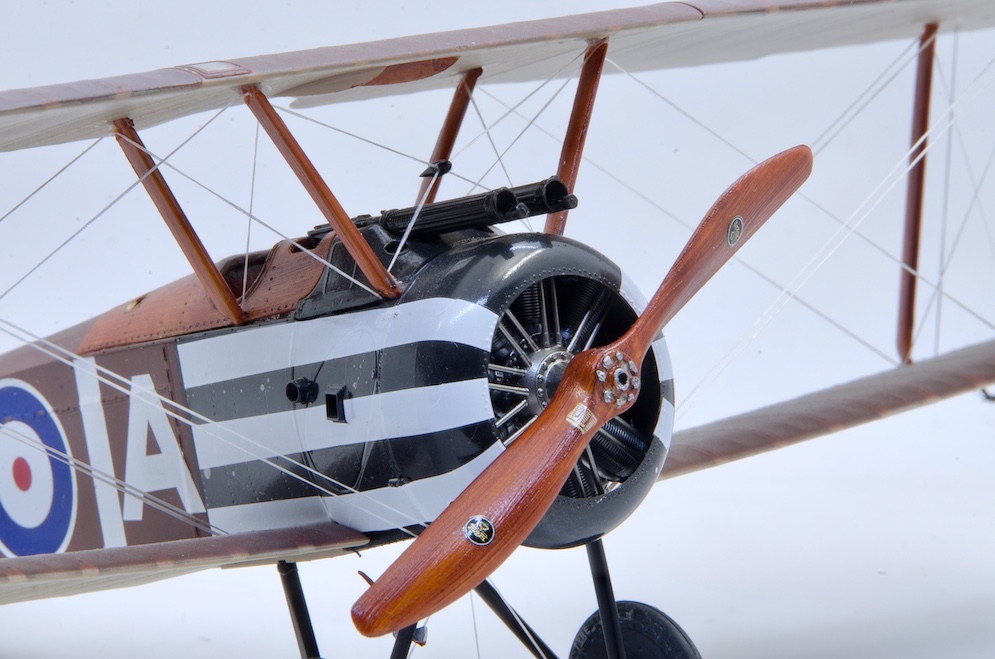
This aircraft is part of my model clubs Tangmere 101 display at the museum. Copper State Models Sopwith Dolphin premium edition is sublime, with PE parts and a highly detailed engine.This particular aircraft is in a photo in the museum, special archive, shown at Tangmere in 1918 with a pilot from 29 Sqn having a look over it. If you notice the actual aircraft does not have any squadron markings, this is because it was waiting to be ferried over to France where it would then be allocated to a squadron.
I loved building this aircraft, I used Vallejo Air paints with pigments aircraft and washes to do some subtle weathering.
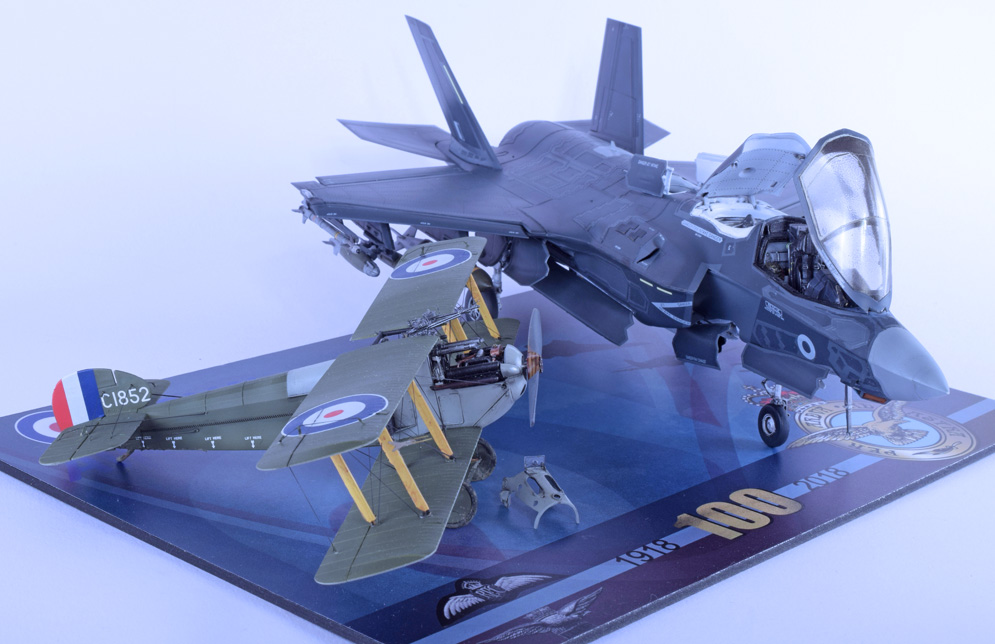
As you can see it can also be displayed with the RAF latest aircraft the F35b, this is to celebrate 100 years of the RAF and I couldn’t think of two more fitting aircraft: The Dolphin delivered in 1918 and the F35b delivered in 2018.
Richard S.
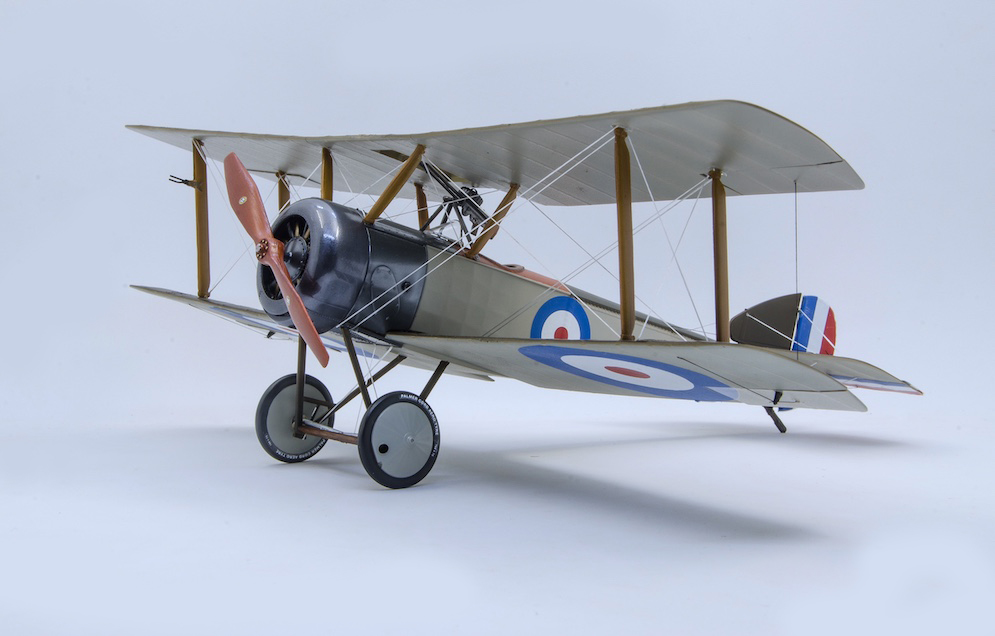
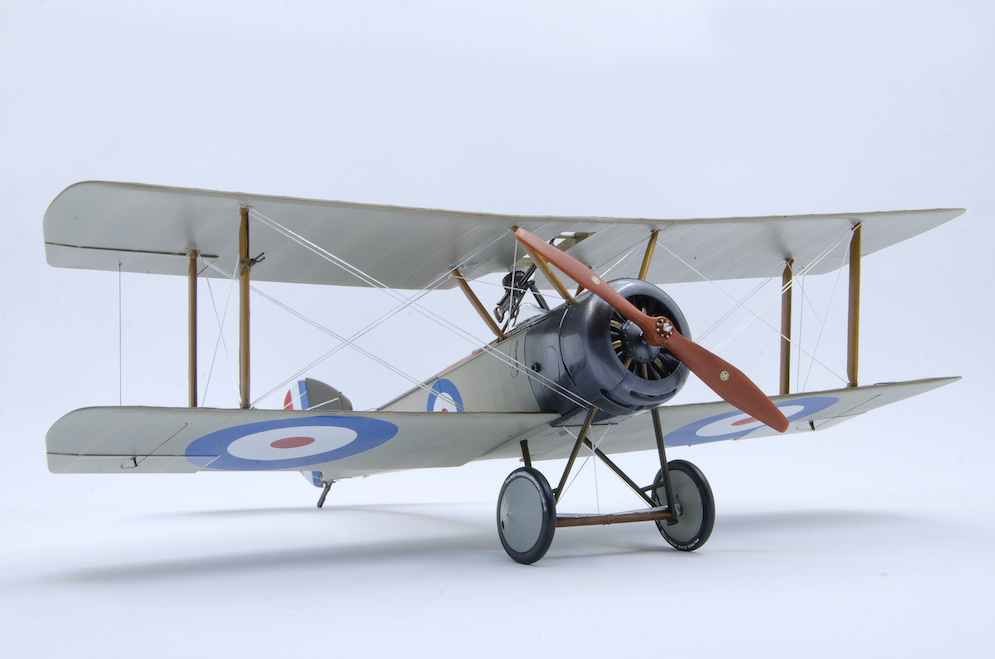
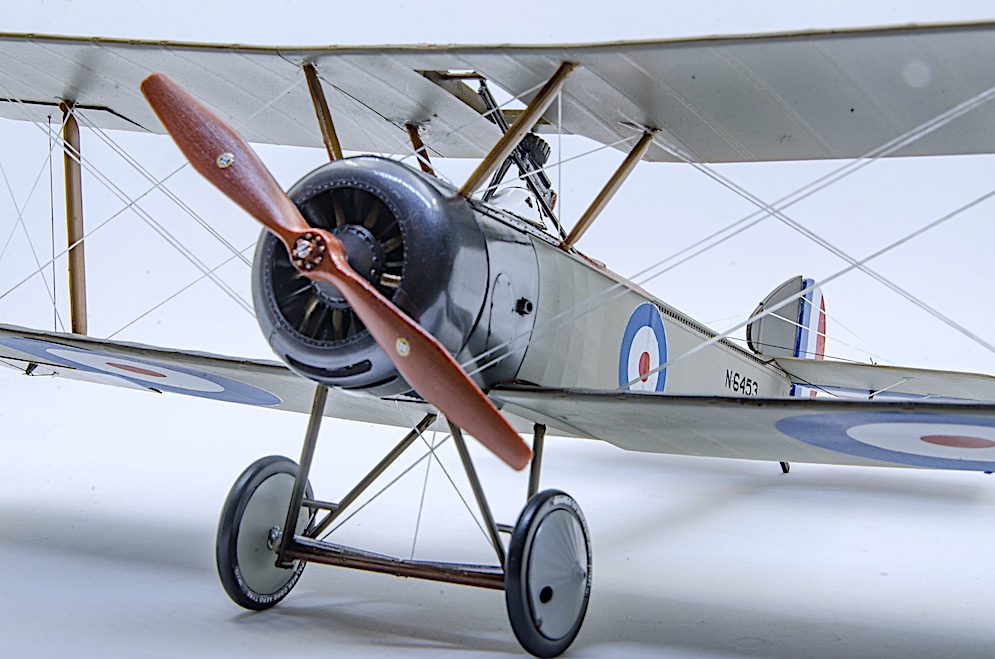

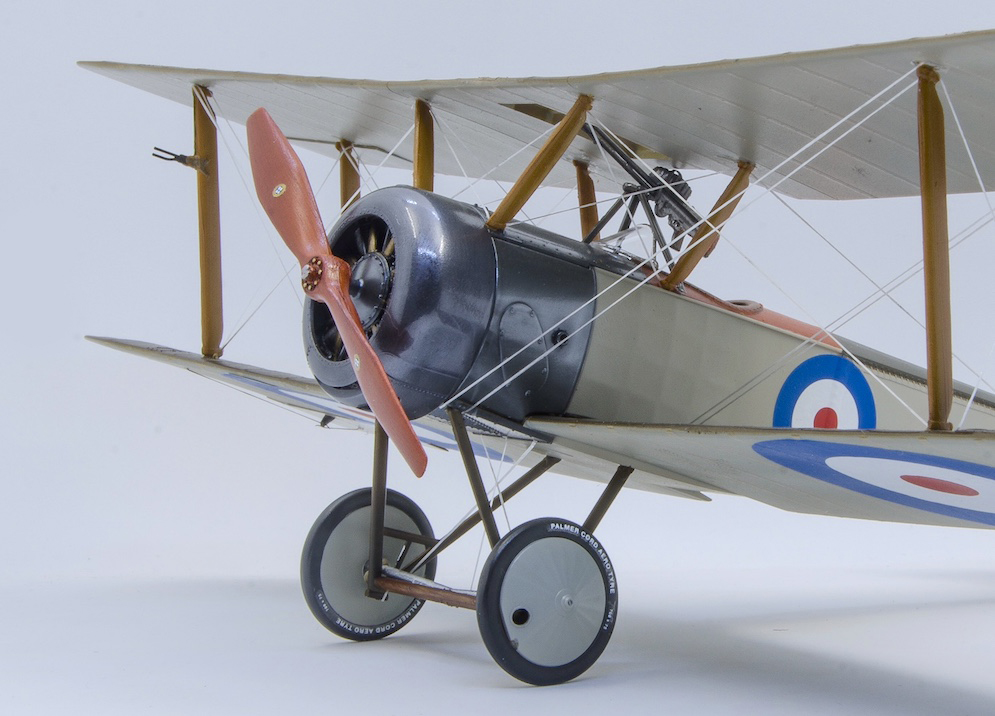
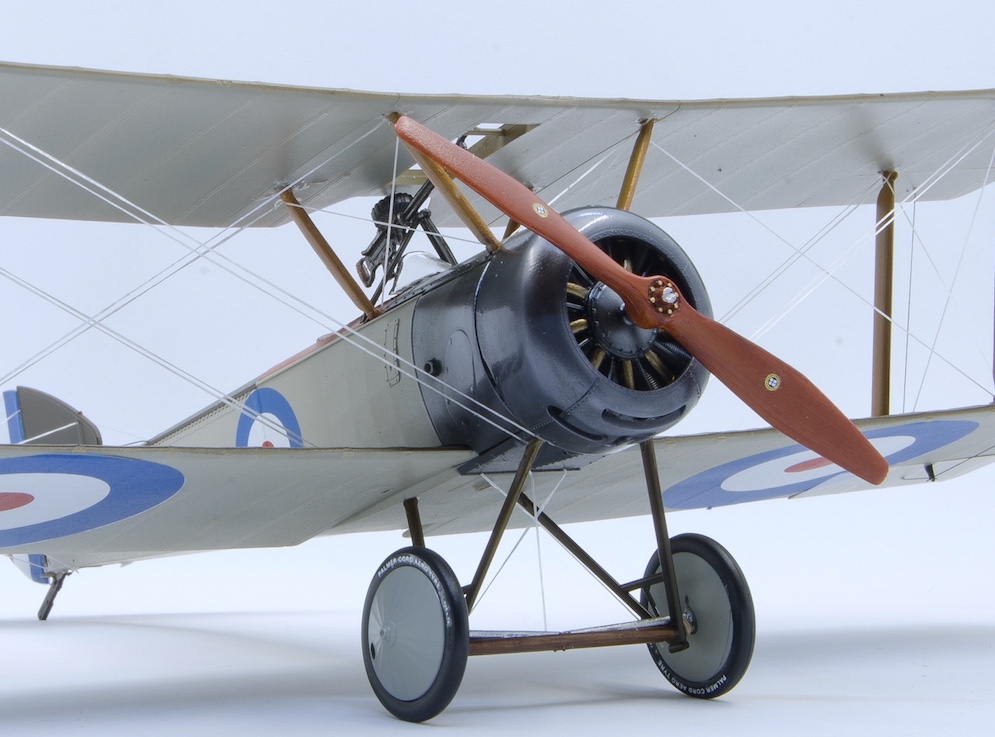
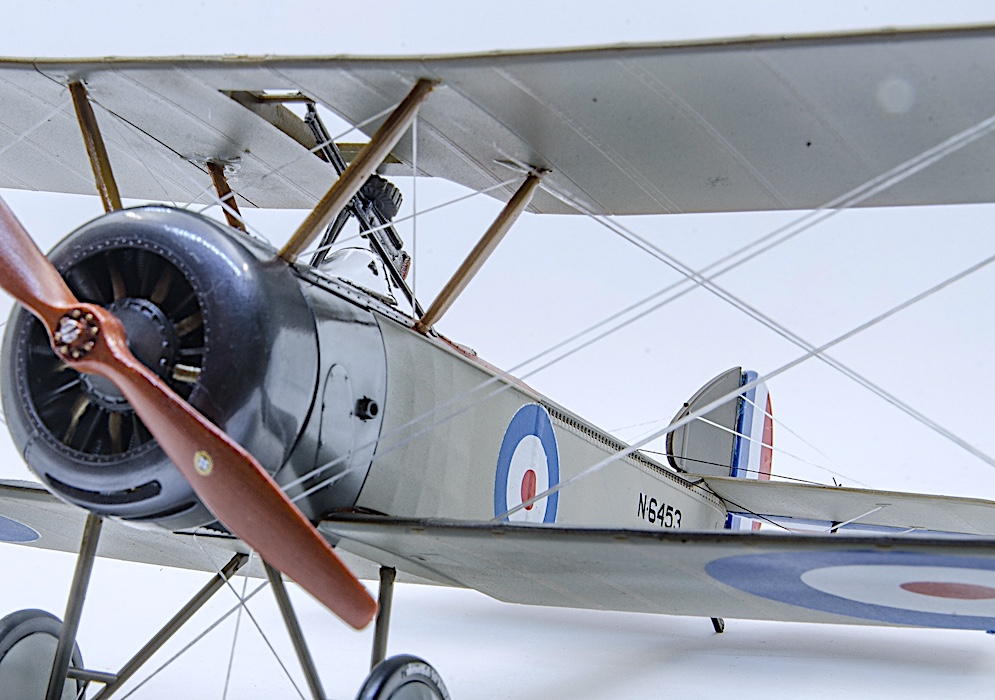
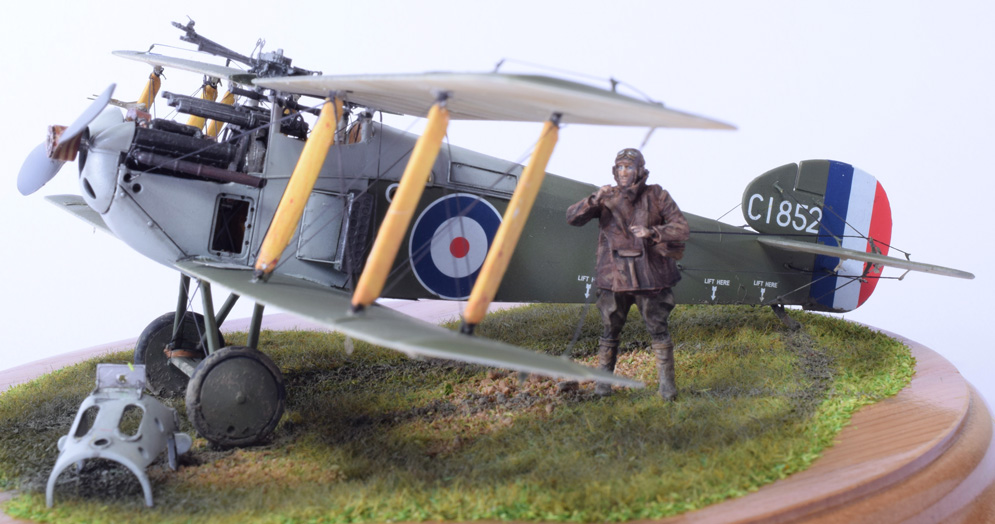
Wingnut Wings has an impressive range of 1:32 WWI aircraft (sadly ceasing trading in 2021).
The interior is the starting point, as with most British aircraft of WW1 we find a sea of wooden panels and batons. It’s a good idea to get all the wooden areas painted first, as the oil paint takes a few days to dry, before it is given a clear coat. With the oil paint dry and clear coat applied, the next step is painting all the brass detailing, fitting the instrument decals and assembling the cockpit assembly, some side panel rigging and the addition of some flight control cables is needed.
With the fuselage painted inside, we now joint the two sides together, a nice mile stone to reach.
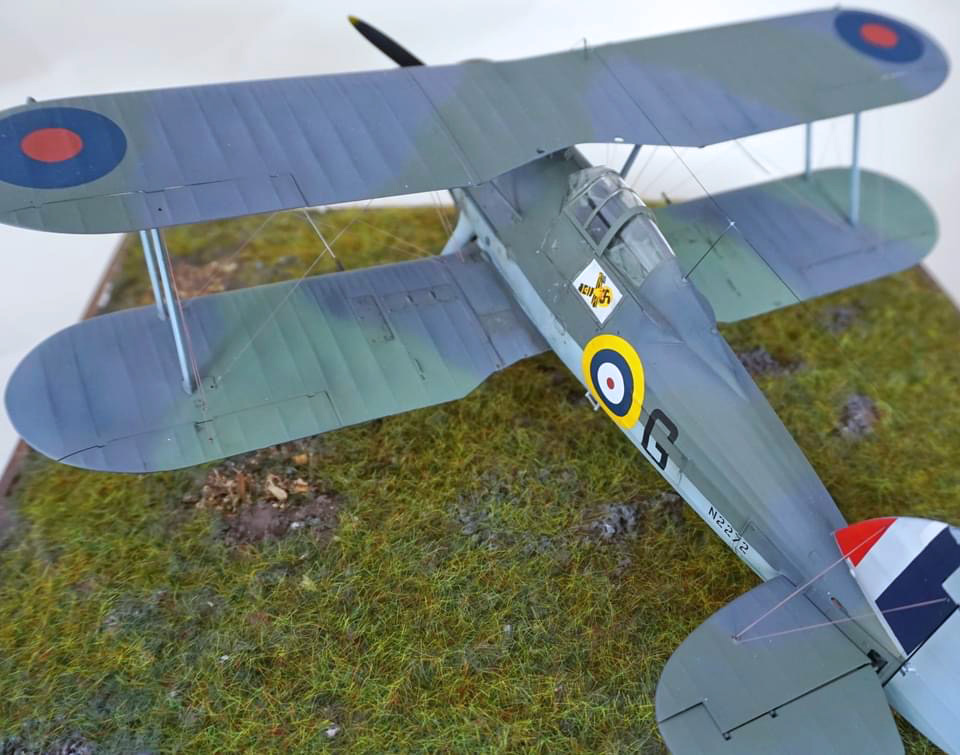
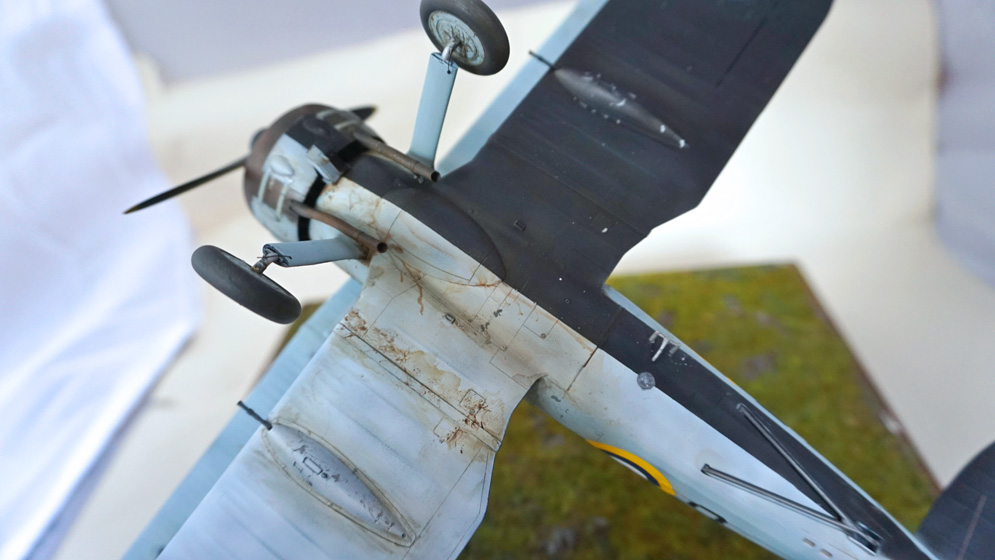
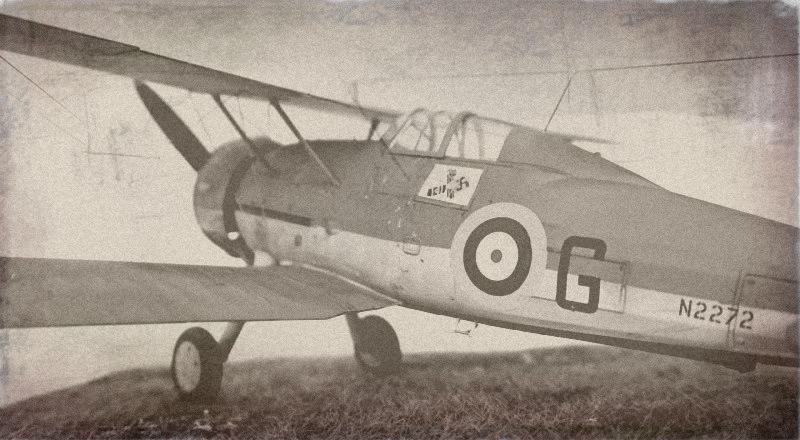
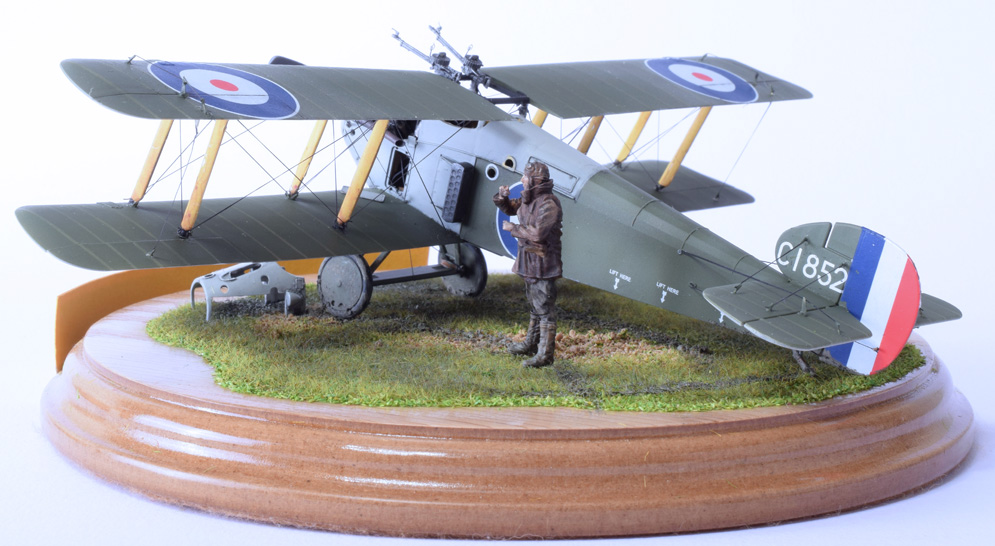
I’d decided to complete my build as N-4653, this aircraft saw service on HMS Furious, and later as a turret-launched aircraft, embarked on HMS Repulse, a Great War Battlecruiser. This required a doped linen fuselage with a green upper section, I used my tried and tested MRP paints, who have a good selection of WW1 colours available.
With the fuselage painted, a coat of Alclad light sheen is applied to the green section, at this stage, the decals are applied and a matt coat is sprayed to the doped linen section.
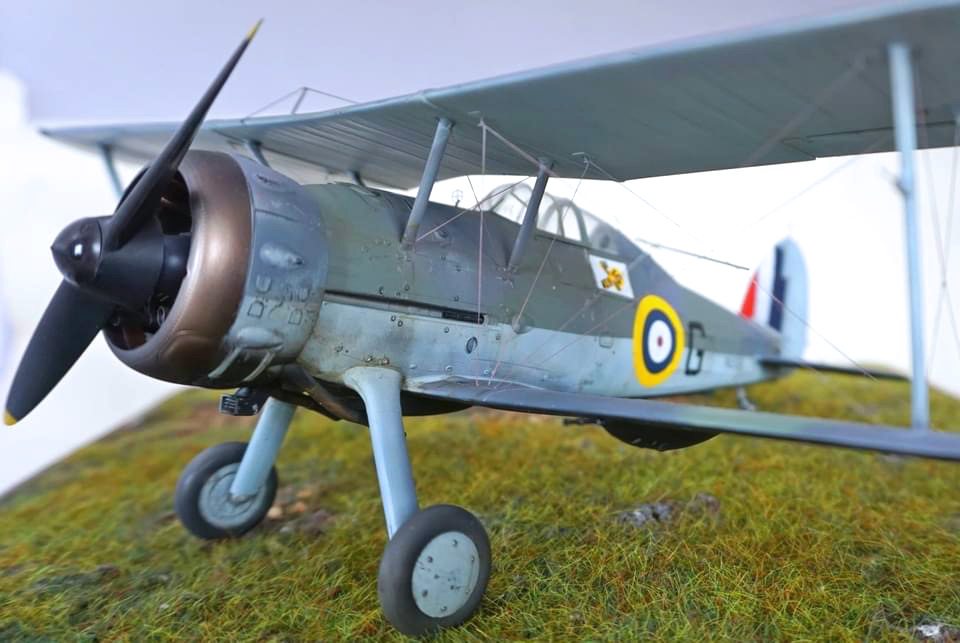
The final details are painted and fitted, these include the engine and cowling, all painted with AK true metal. The tail section, and landing gear are installed, the last item is the propeller, which again, is painted using oil paint, with a gloss coat applied.
If you’ve never tried a Wingnut Wings kit, I urge you to give it a go, you’ll be surprised at how good they are, the fit is superb, and the rigging is doable. I’d say the Sopwith Pup would make a good first build, if you can find one.
Andrew R.
GALLERY TWO


1:32 scale
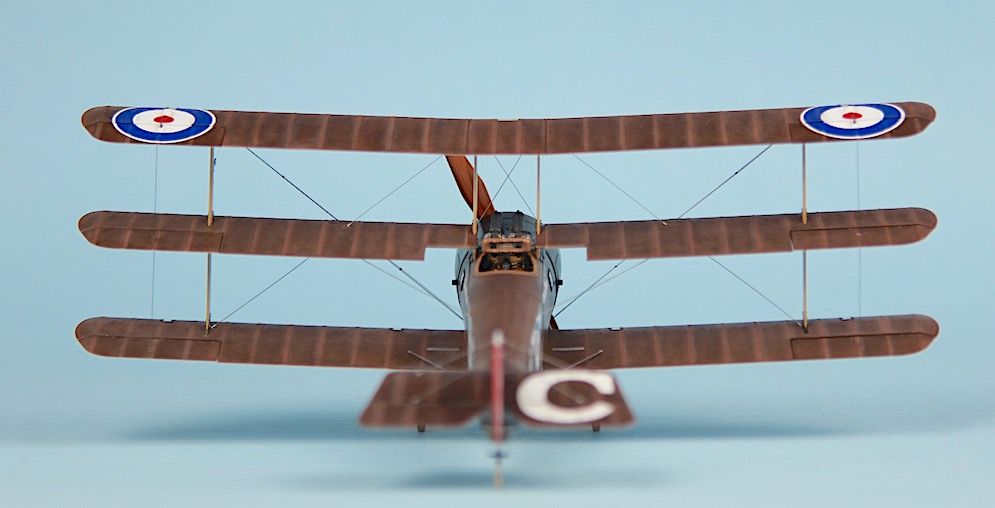
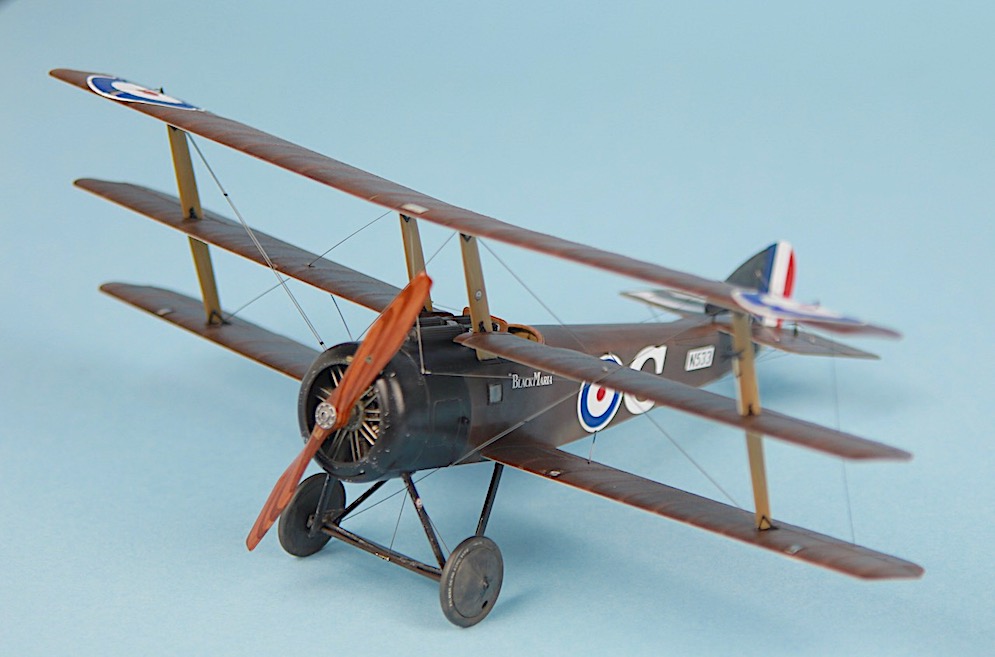
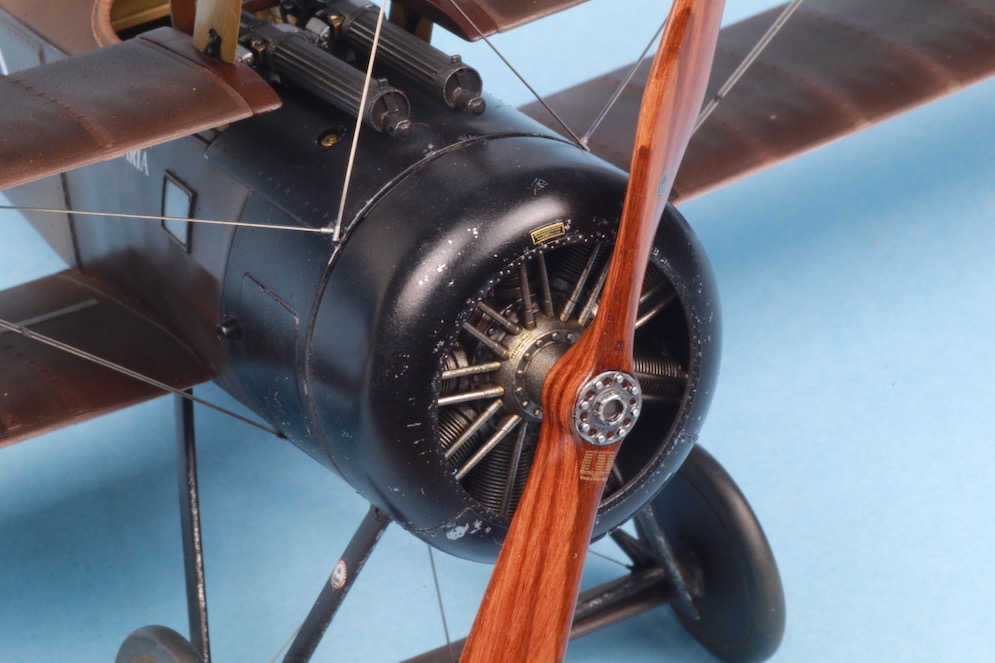
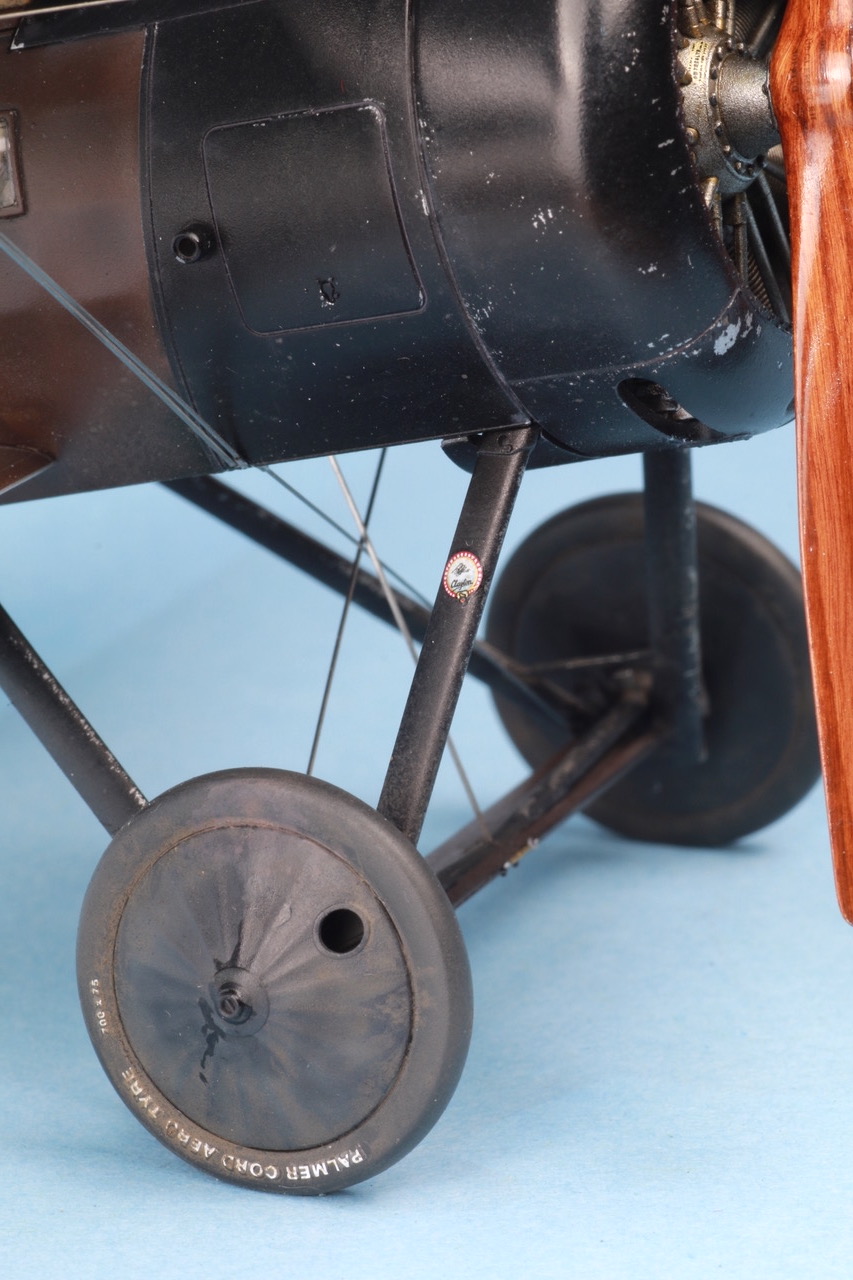
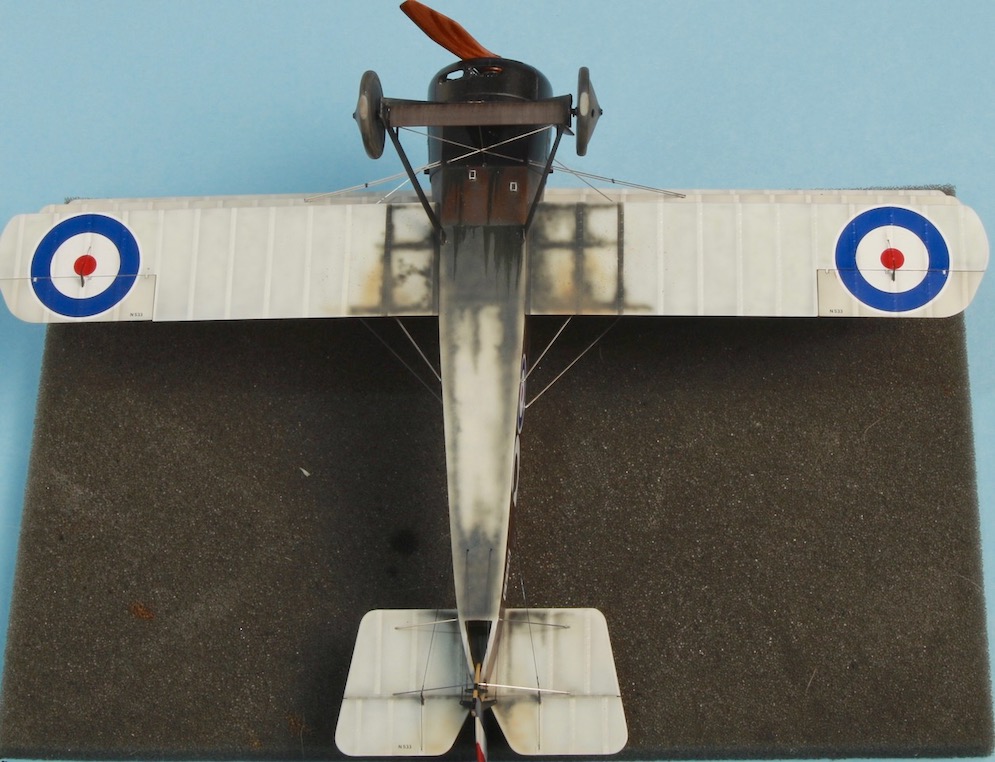
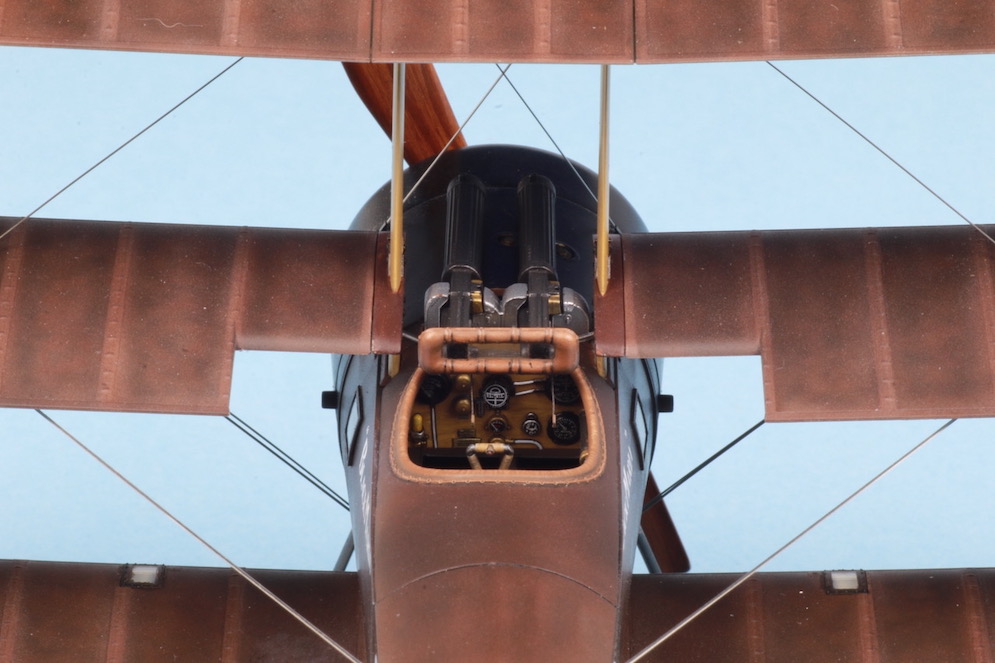
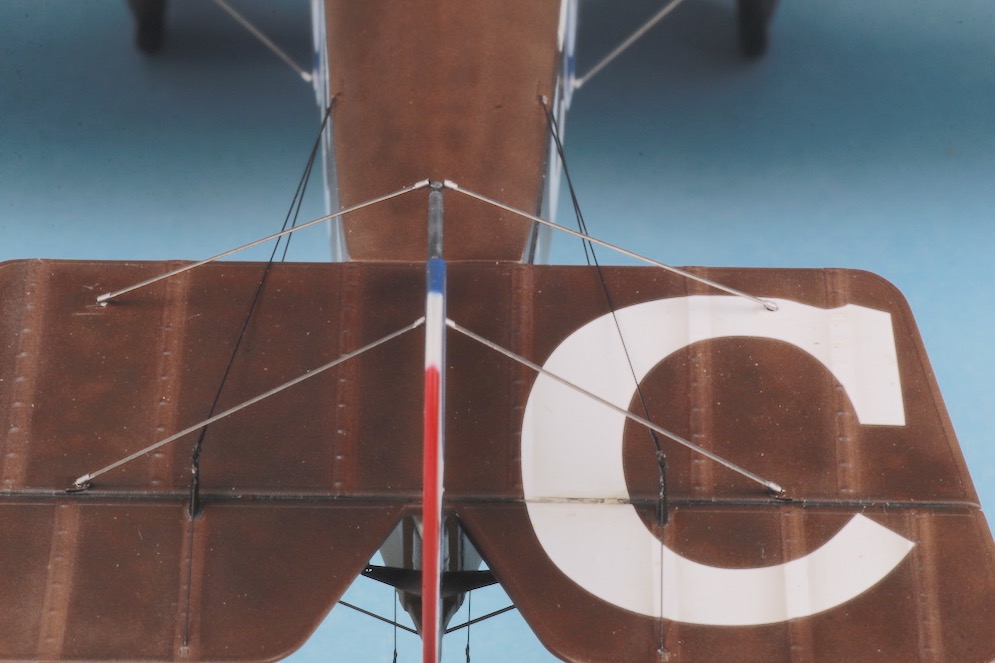
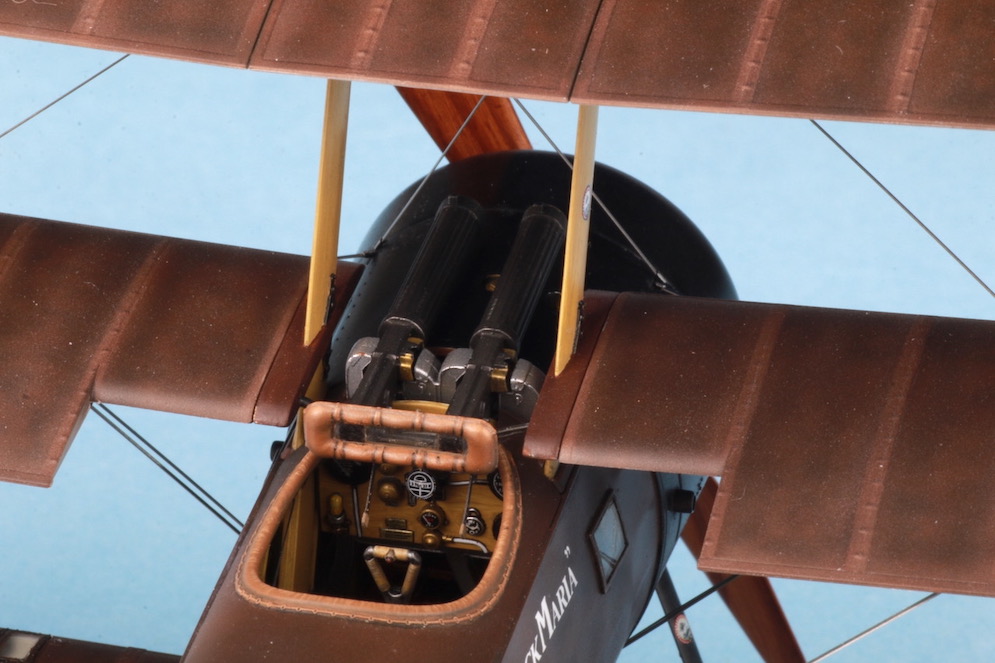
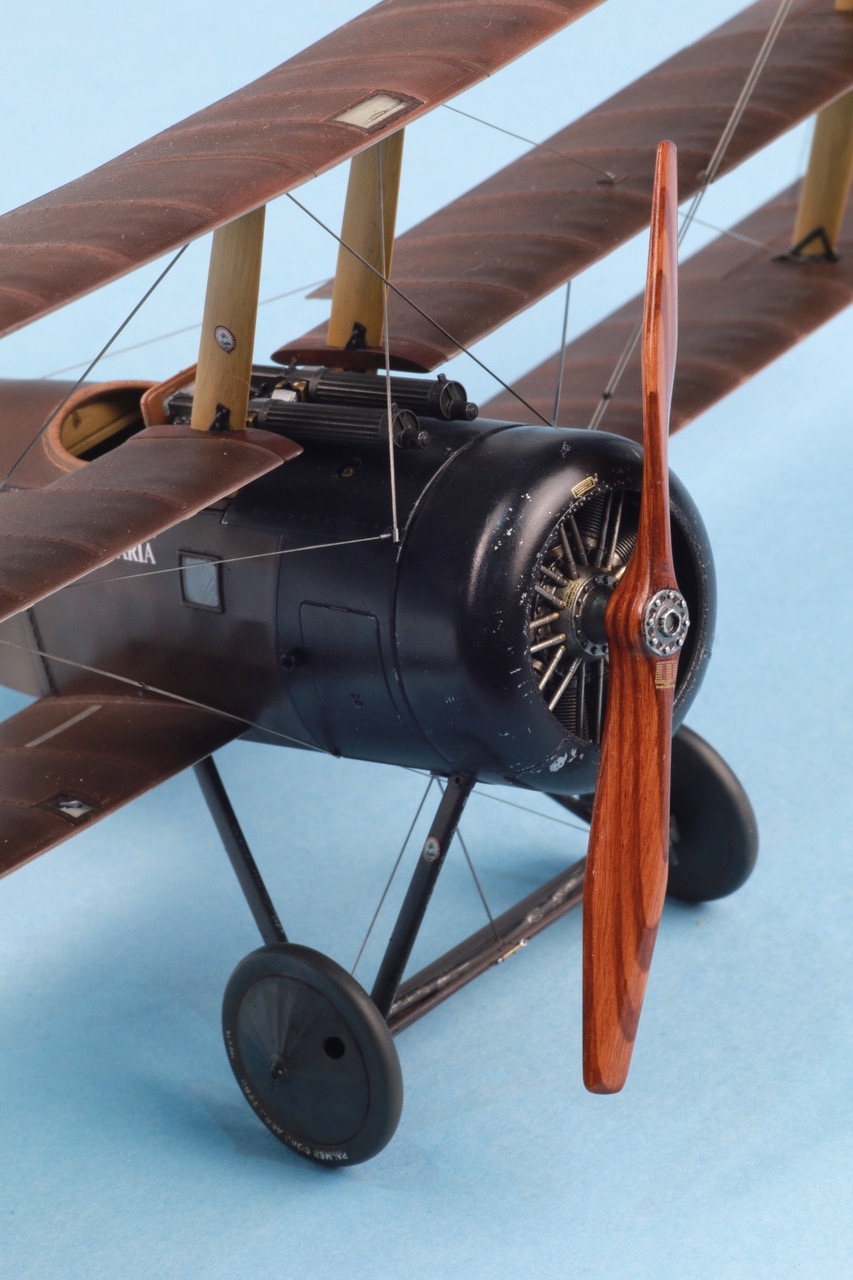
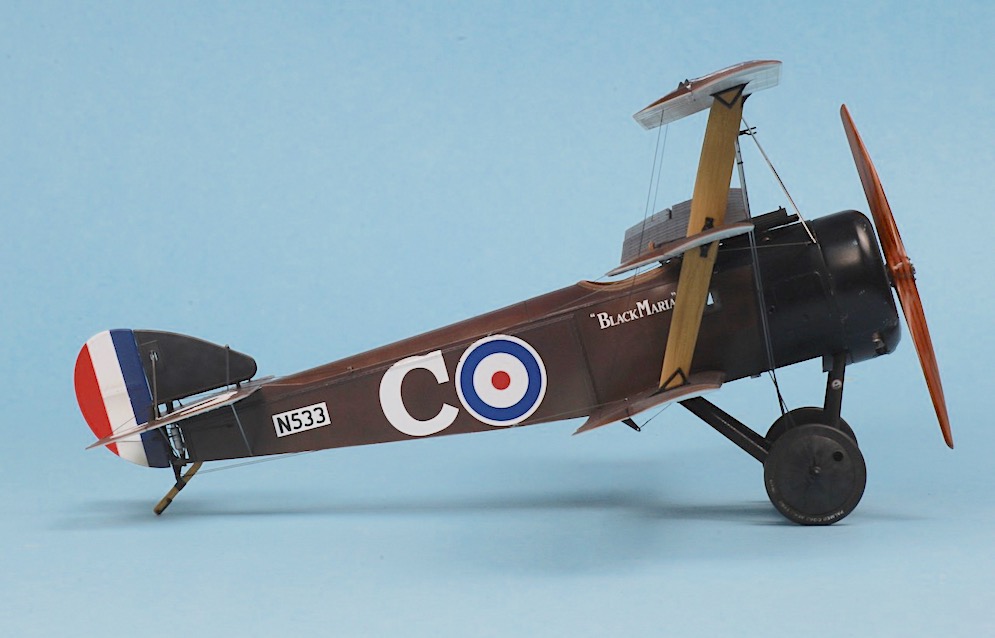
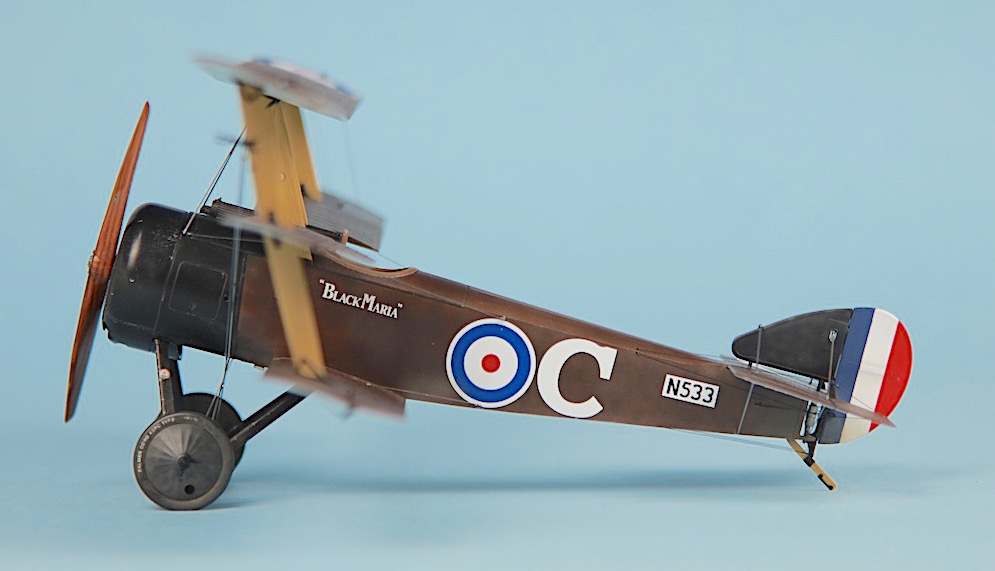
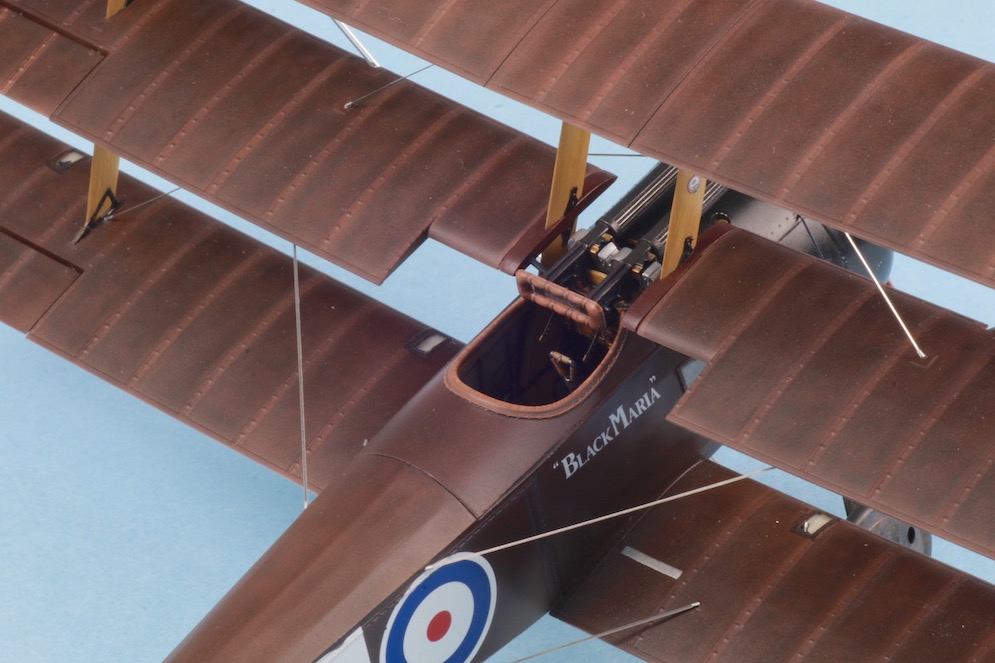
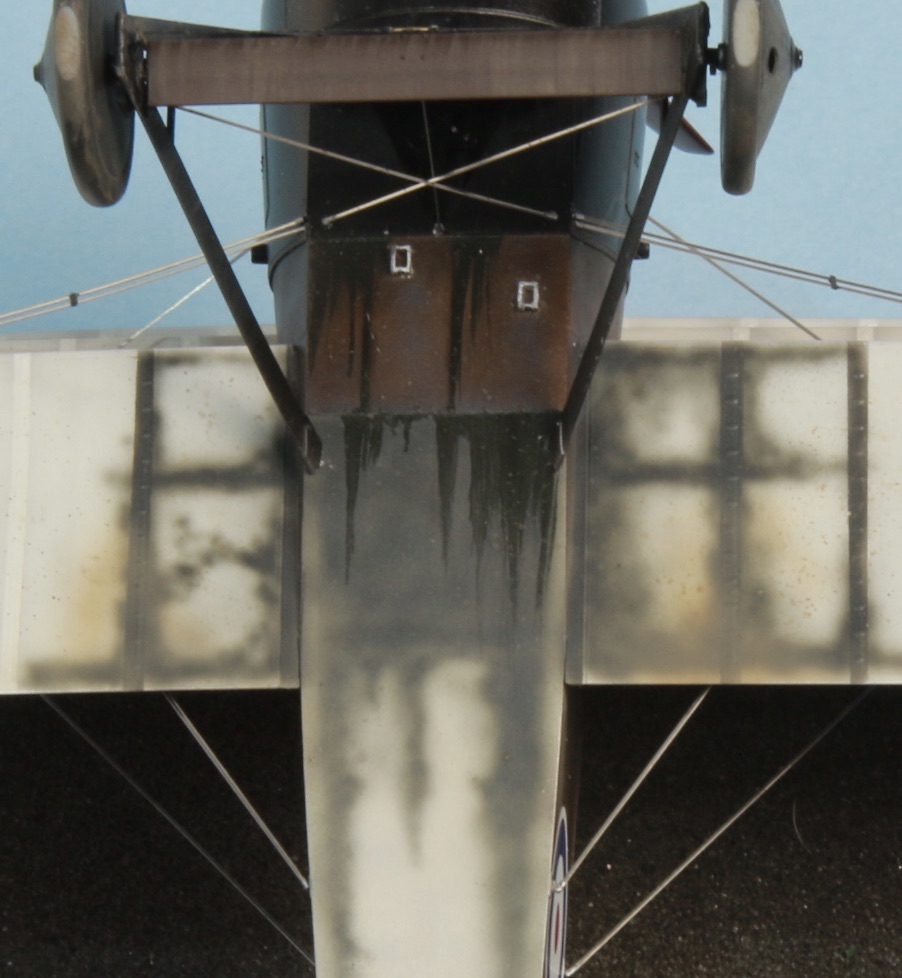
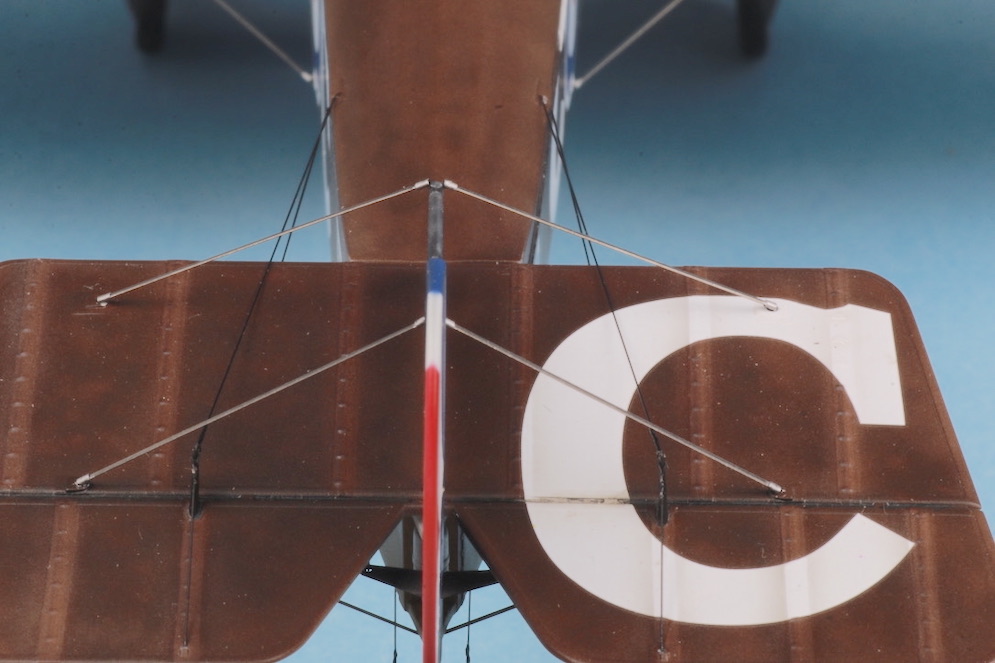
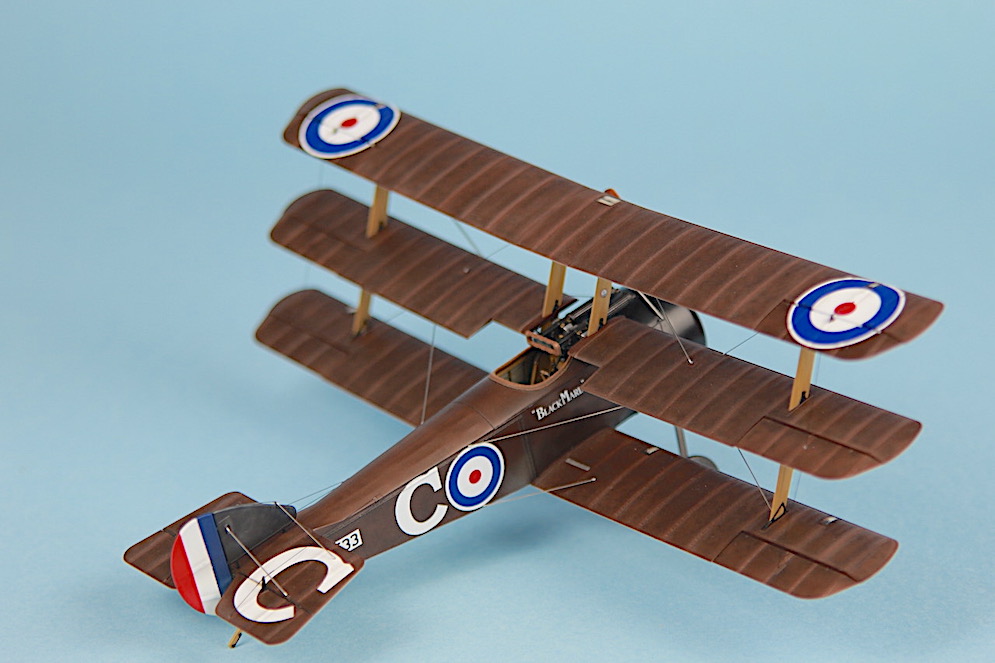
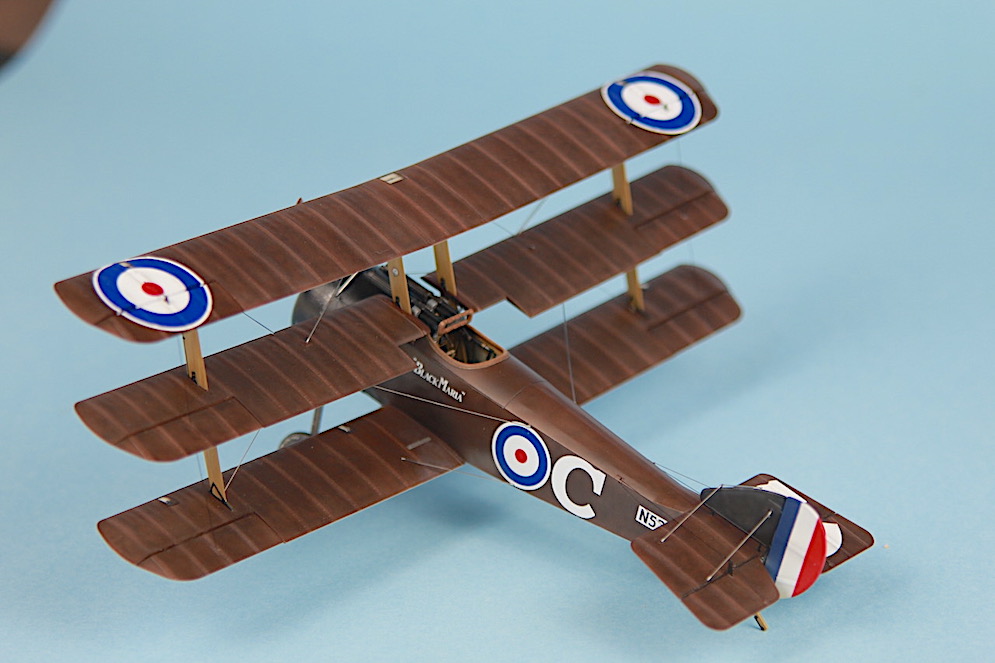
Ray Collishaw Black Maria Sopwith Triplane
AIMS aero rigging
Tamiya paints
Oils over acrylic prop.
David G. Lane
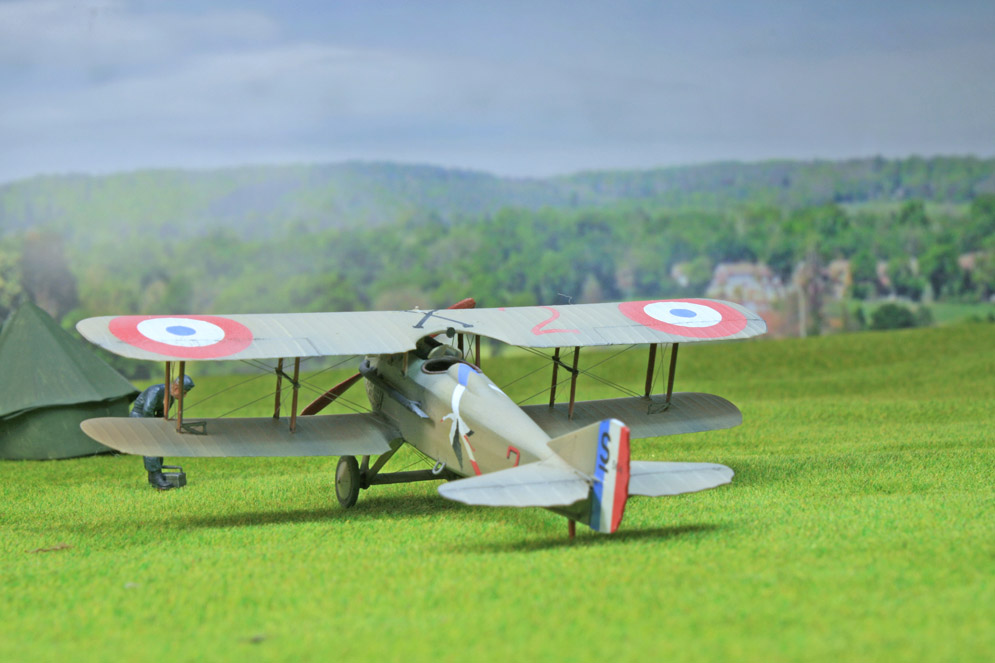

Regards, Andrew Johnson
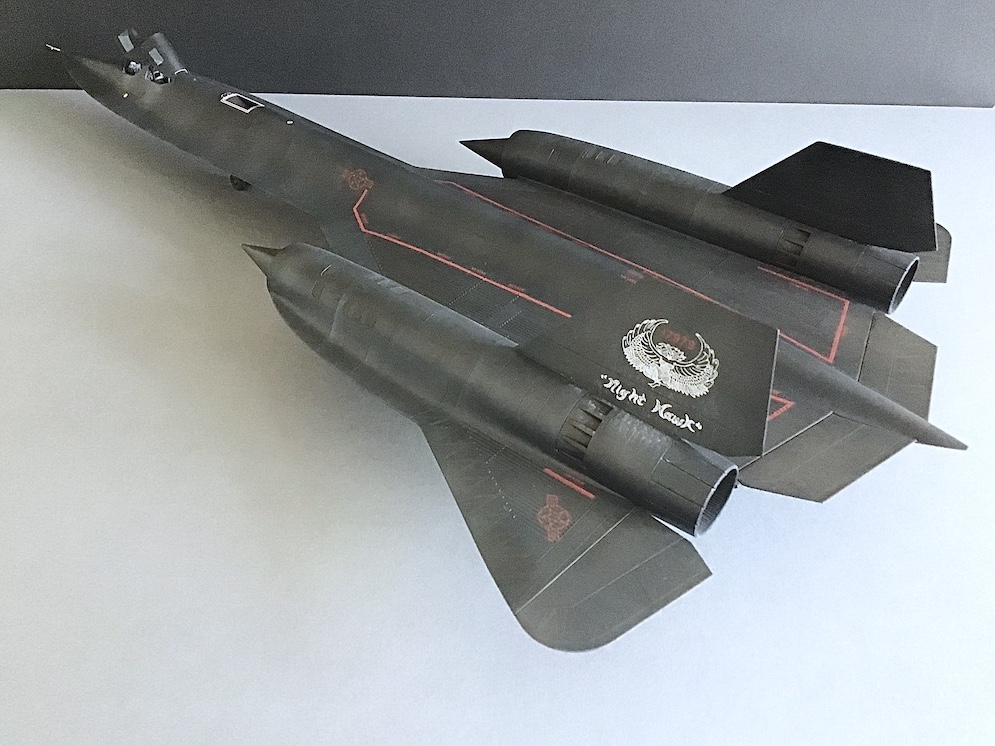
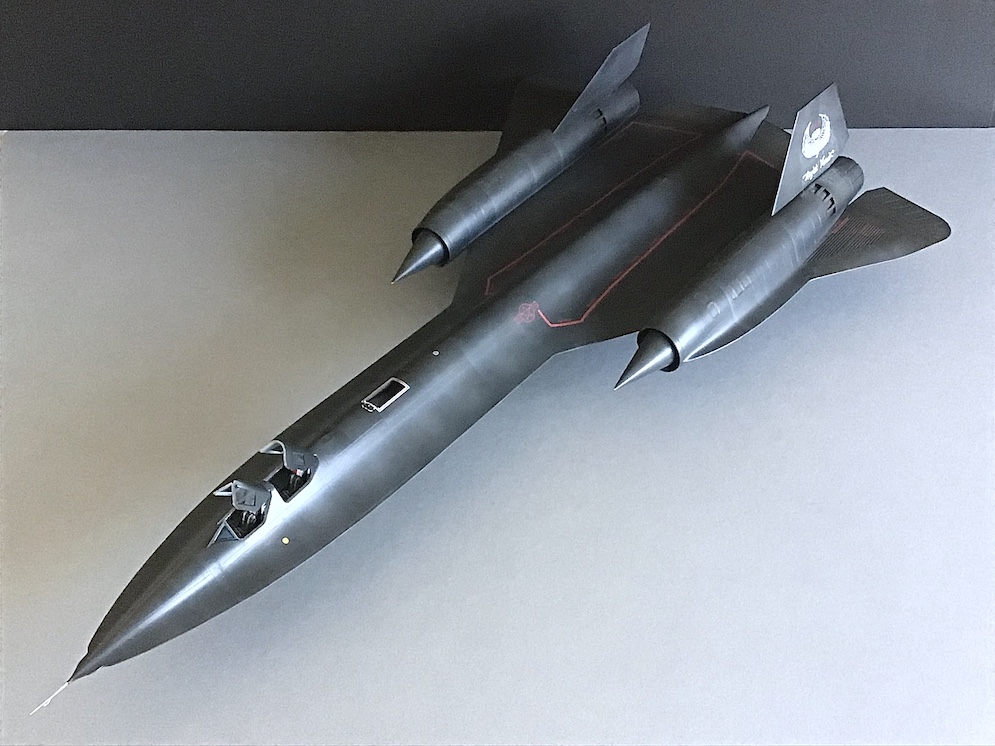
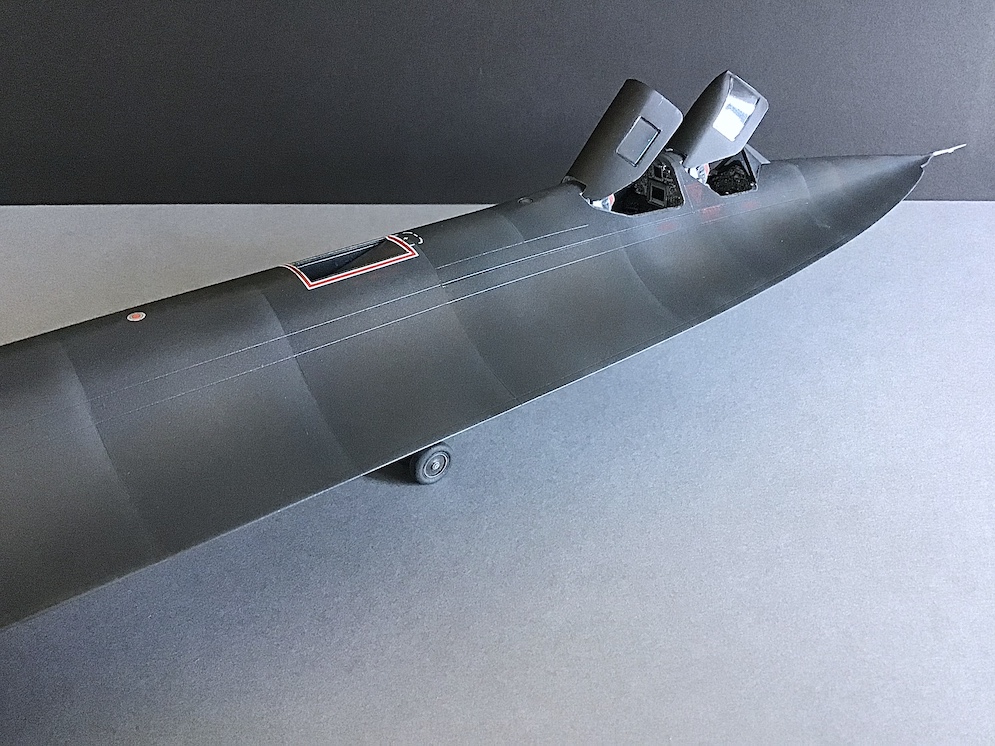

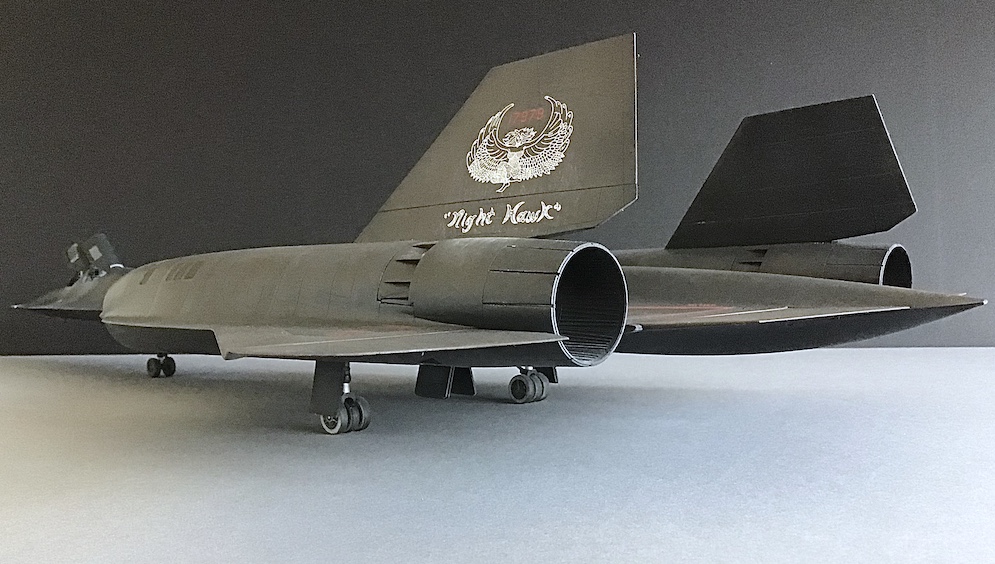
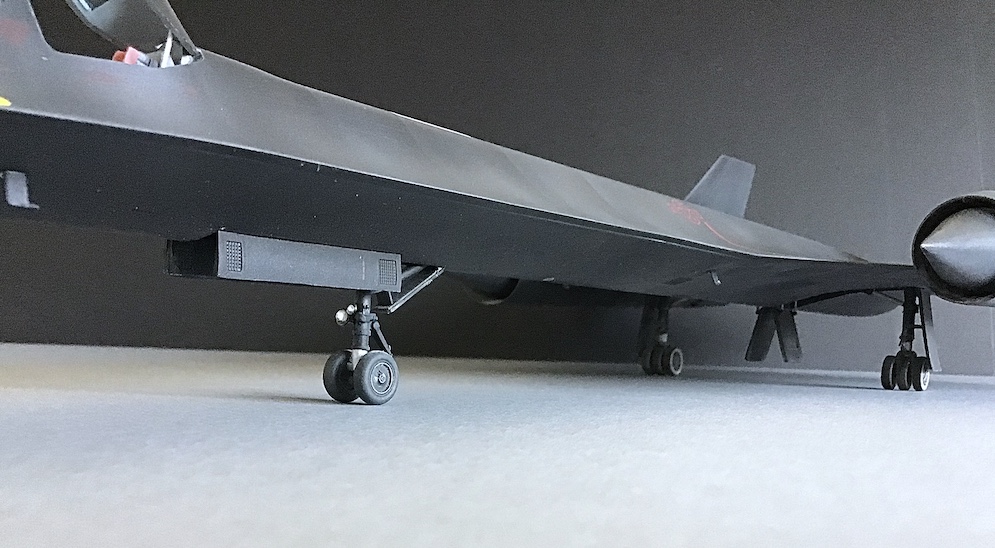
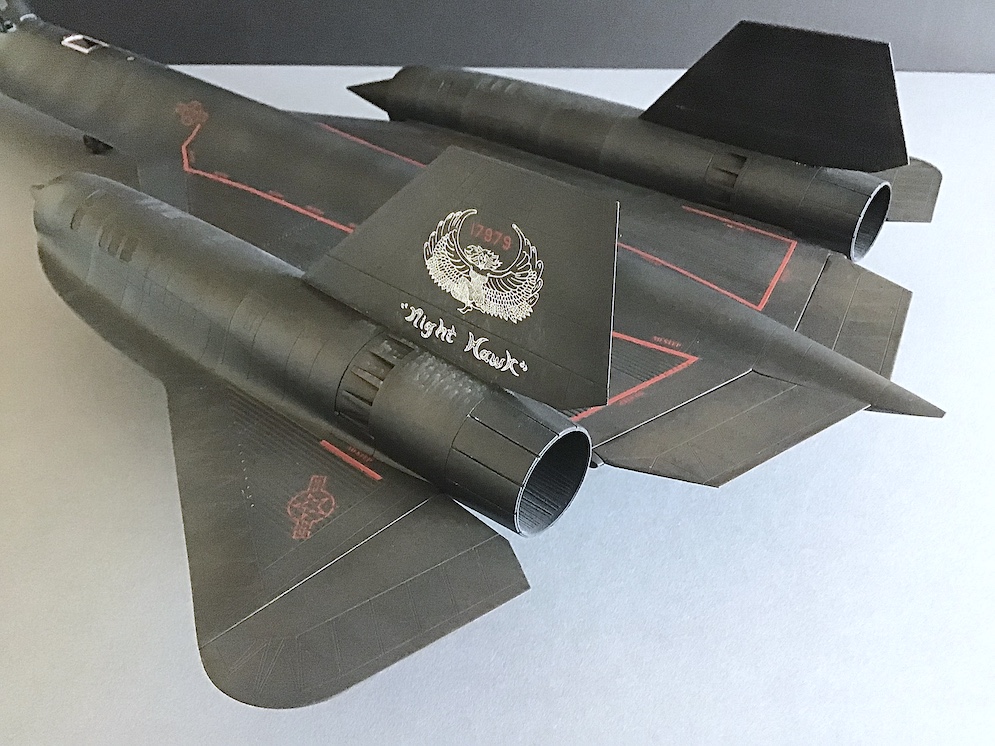
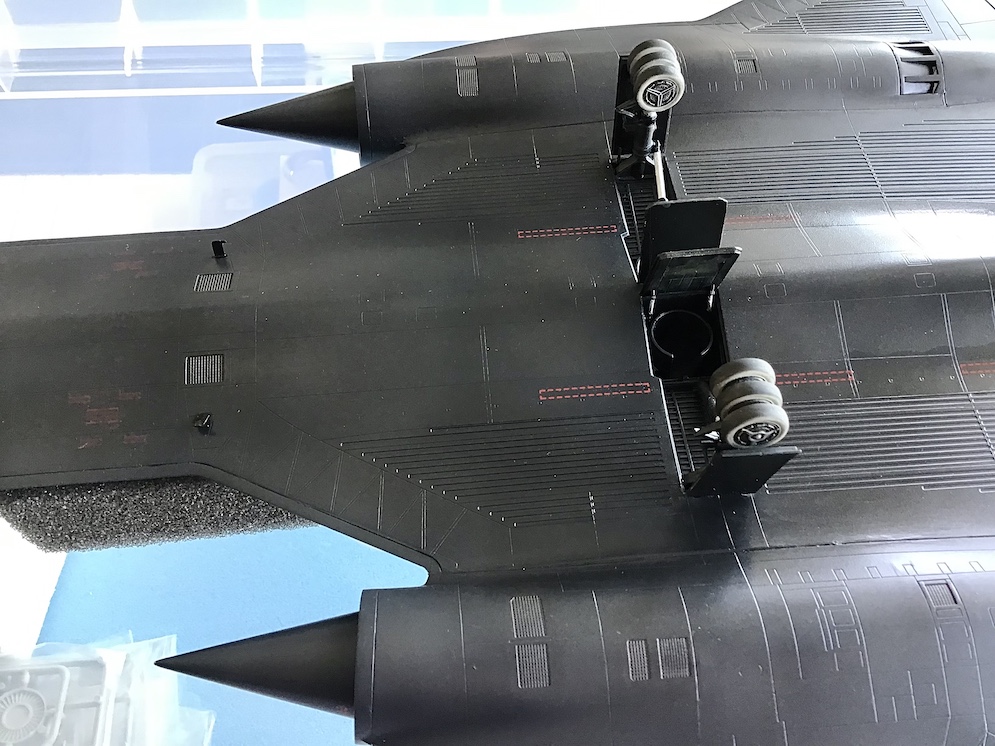
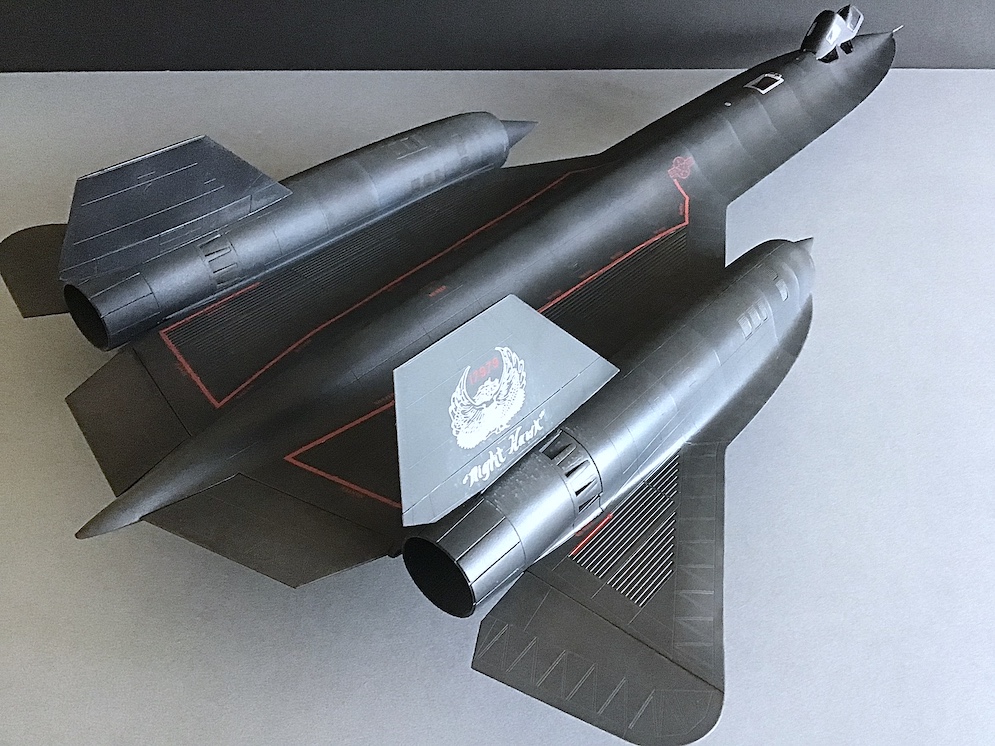
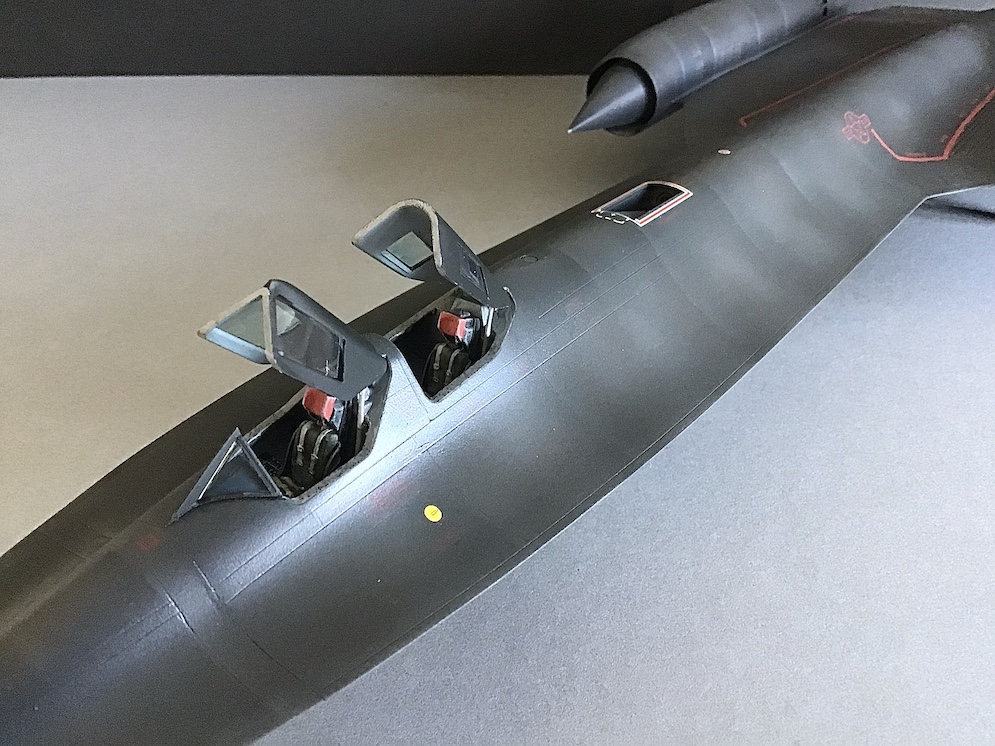
This is my Lockheed ‘SR-71’ Blackbird – Revell 1:48 Scale Build. A fantastic subject and what I consider a fantastic kit.
She’s an OOB build apart from an aftermarket pitot probe (Master) and decals (Caracal).The quality and detail of the kit decals are superb and aftermarket was only chosen because of the scheme options.
I can highly-recommend this kit and despite its price tag I believe it represents excellent value for money. The enormous box contains an enormous amount of kit.
The surfaces are well-engineered with very fine recessed detail. As a precaution and allowing for all the painting and weathering stages, I decided to lightly use the scriber to further define the recesses. An easy and fairly quick task and one I recommend.
The fit of parts was very pleasing considering their sheer size and I thoroughly enjoyed the build very much.
I primed the model with Mr.Surfacer 1500 Black and then used Mr.Hobby Aqueous Acrylics (NATO Black; Rubber Black;Navy Blue; Mid-Brown and Mid-Grey) for the main painting. All paints were mixed 50:50 with Levelling Thinner. The paintwork was sealed under a brush-applied coat of Klear/Pledge both prior and after the decaling stage.
The model then received a light misting of Mr.Superclear Semi-Gloss Acrylic Lacquer Varnish. The chalk effects were finally added with ground pastel.
Here’s my completed model and I hope you enjoy viewing.Thank You.
Best Regards,
Paul A.
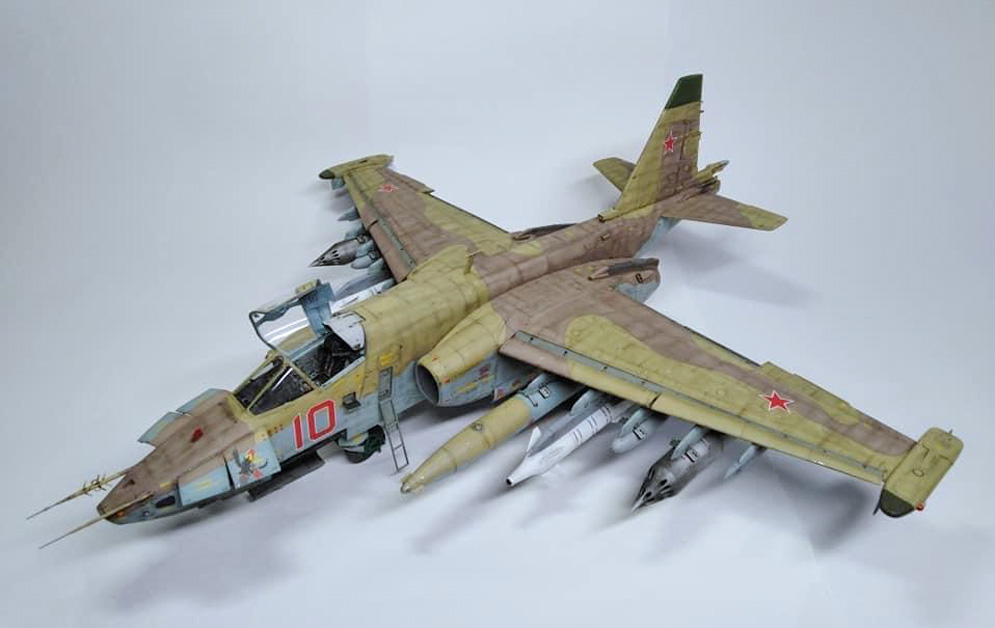
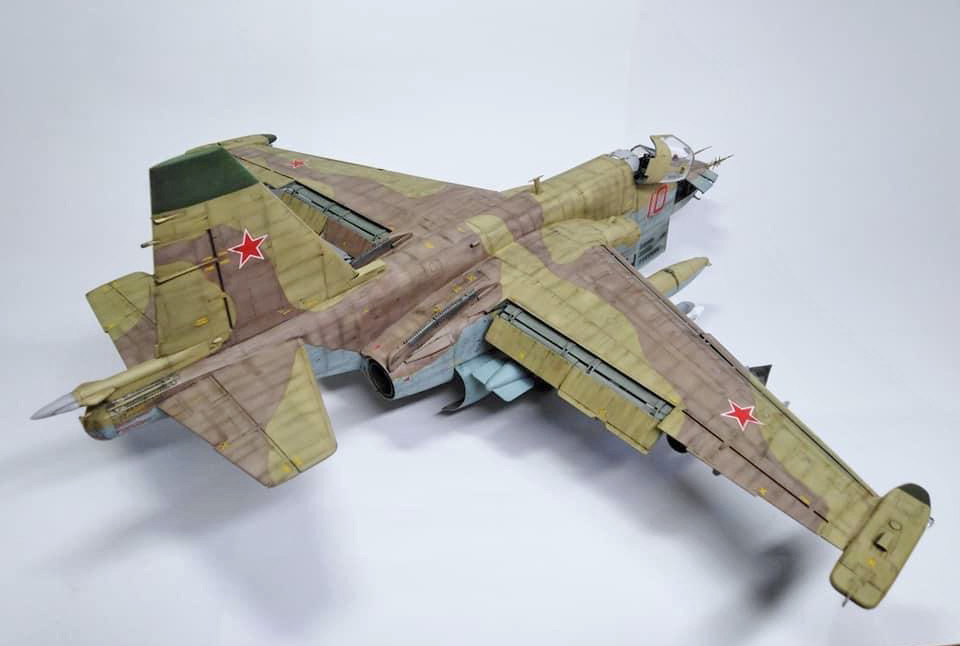
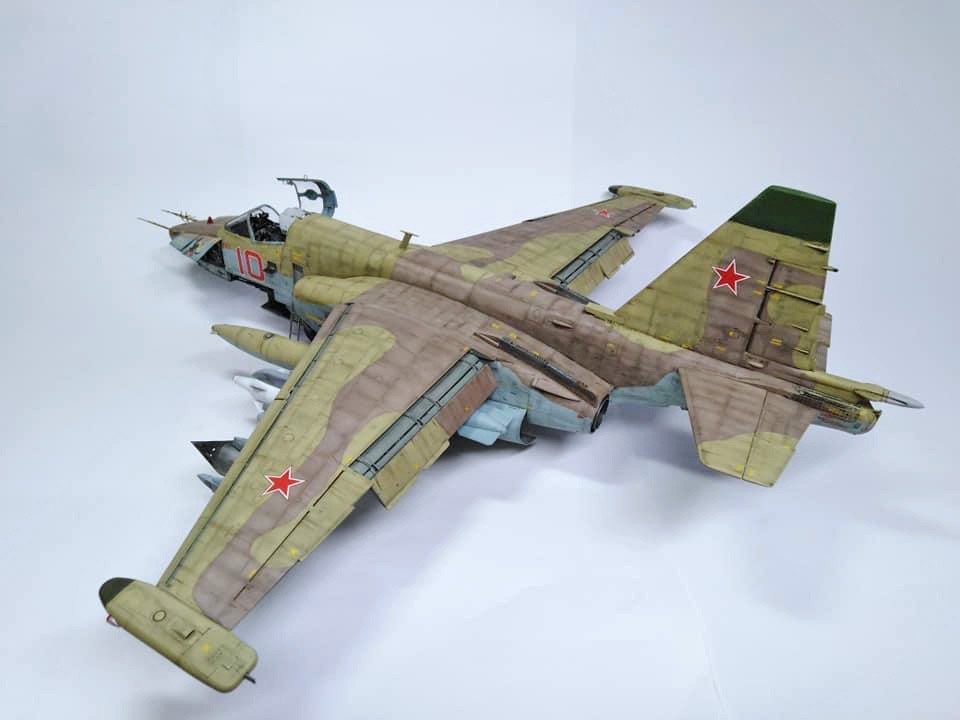
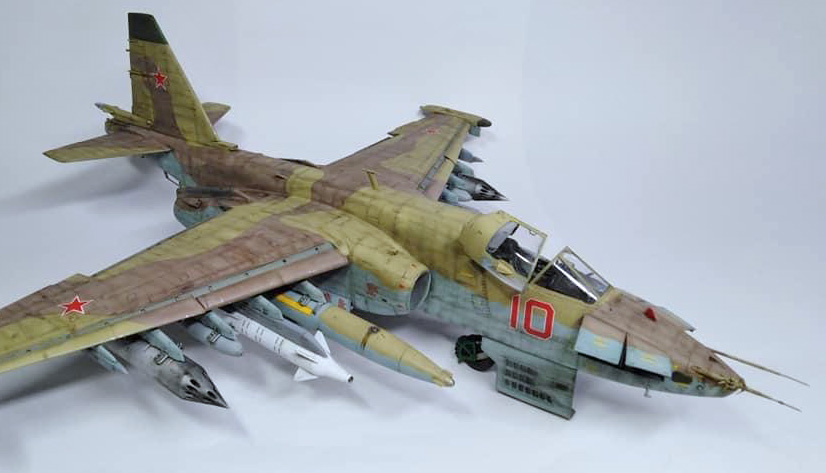
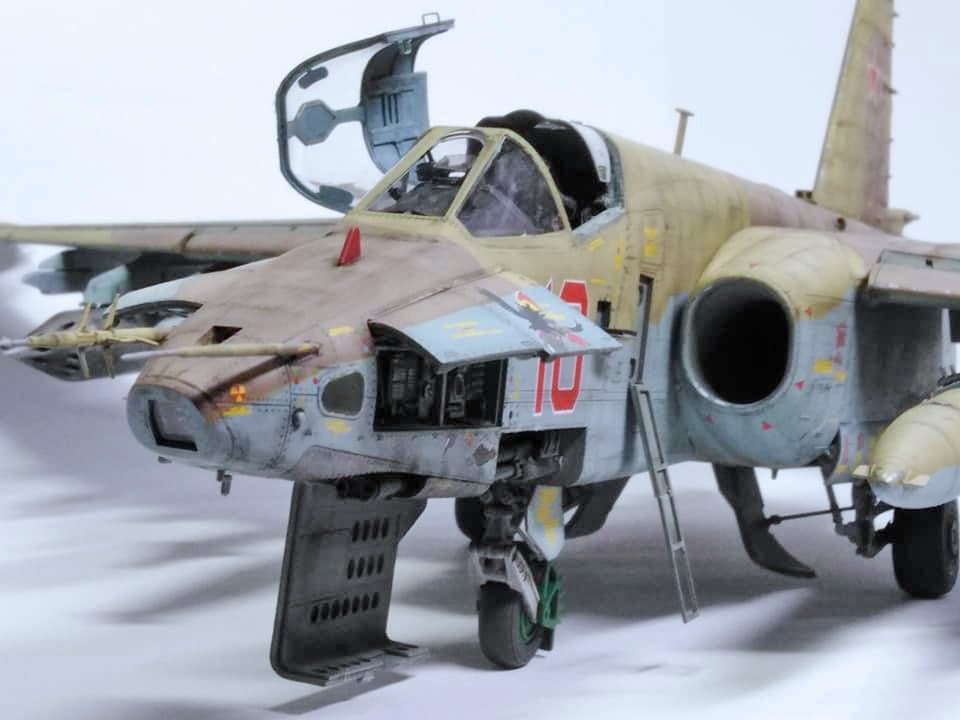
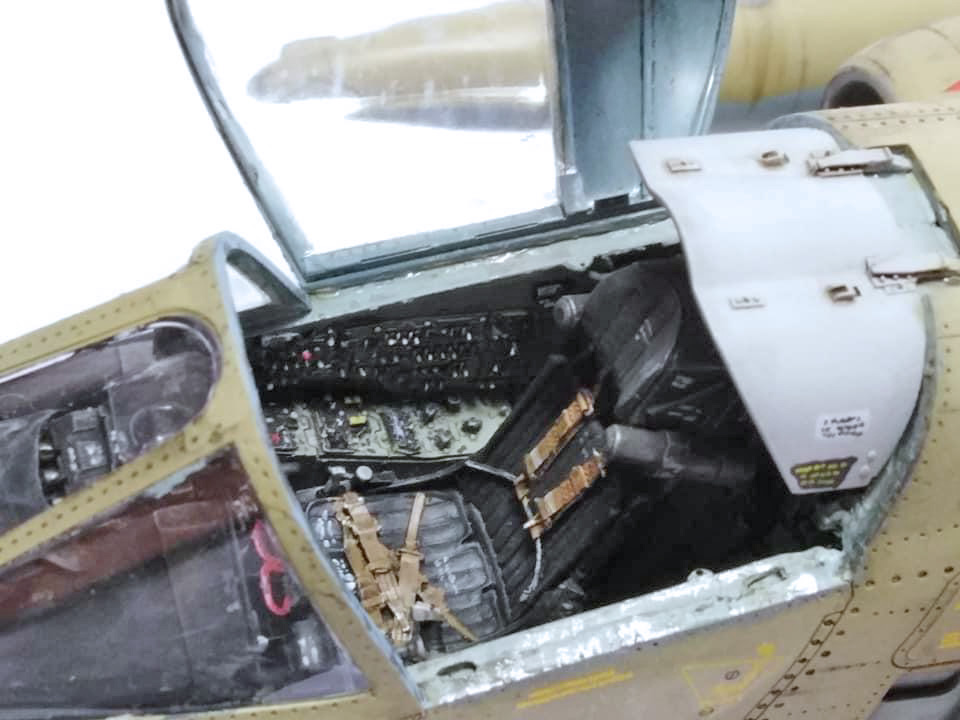
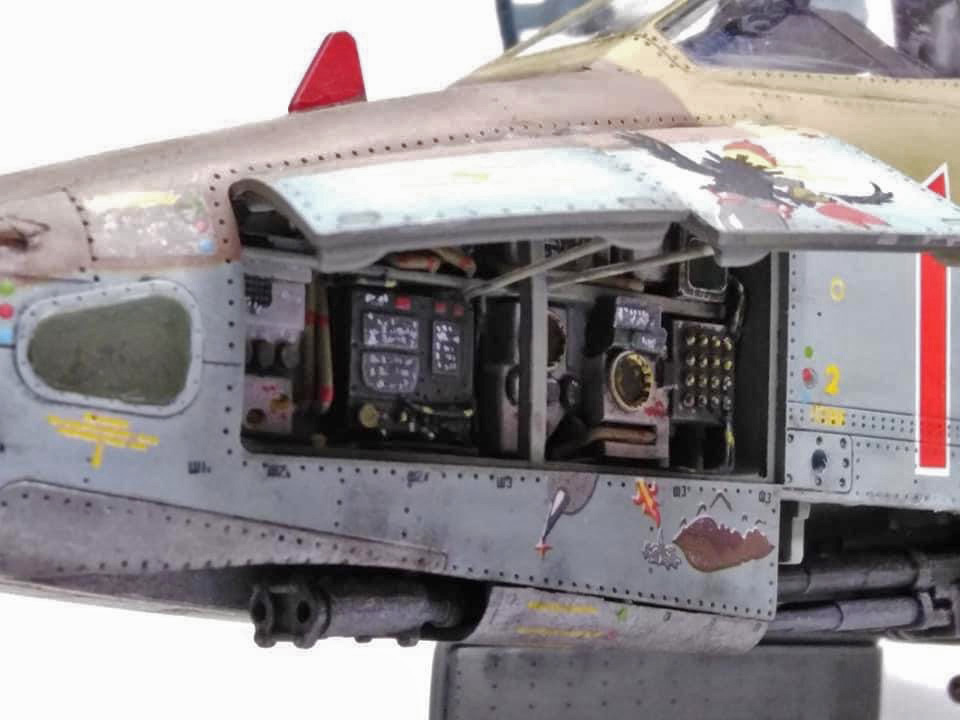
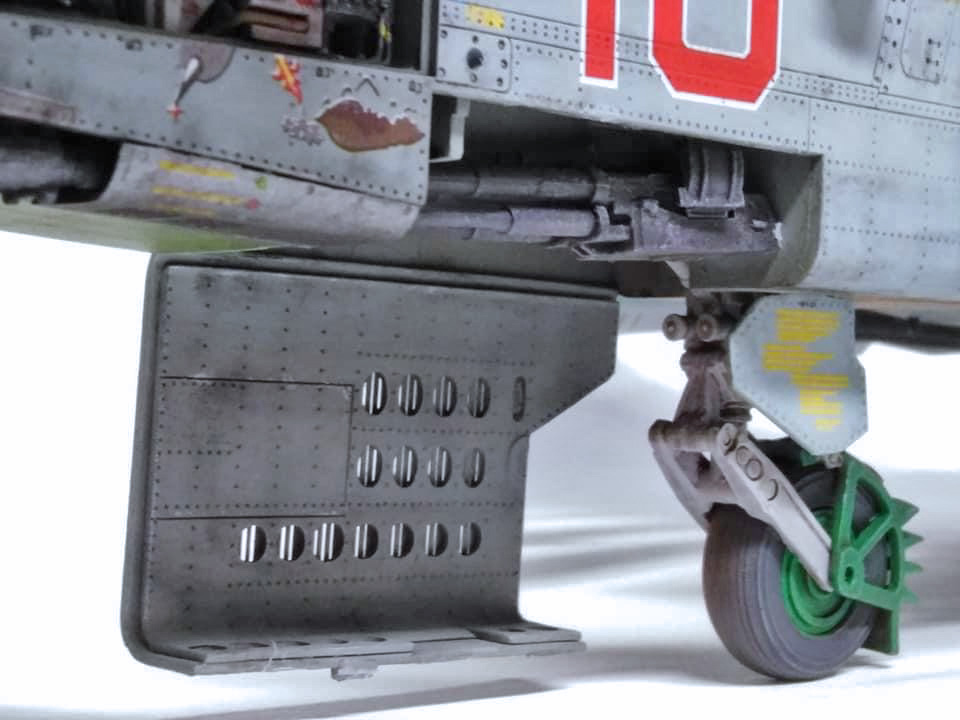
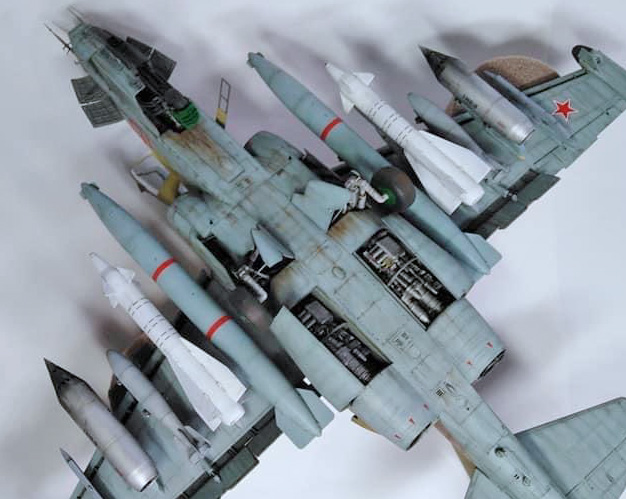
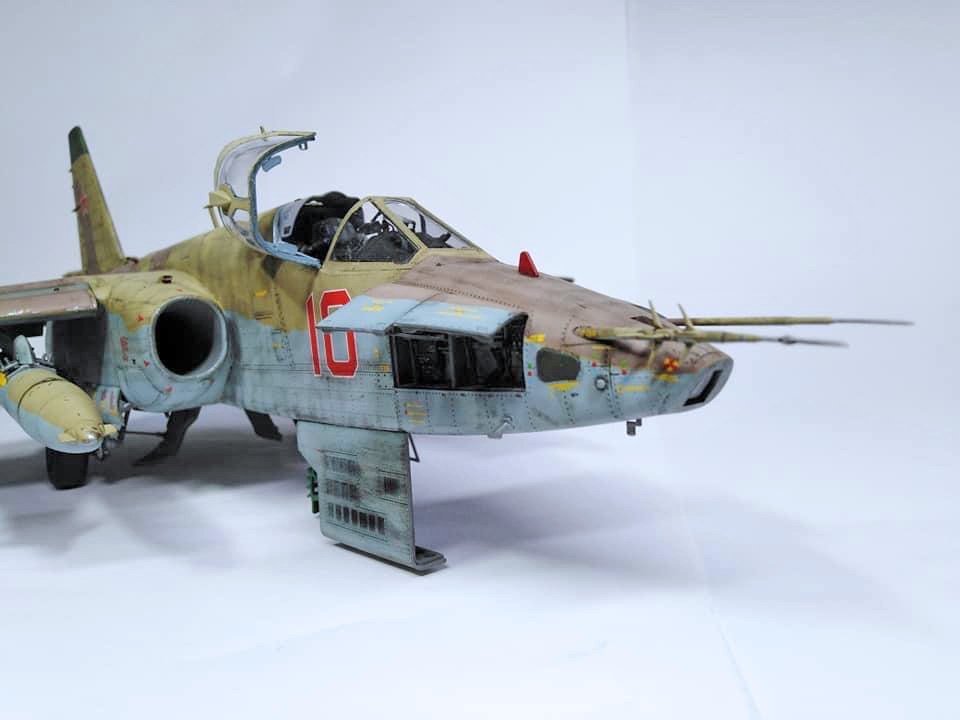
I used Aires resin updates in cockpit, engine exhausts and undercarriage bays, but really the kit examples are perfectly OK. This is for a colleague who wanted the updates installed.
The aircraft is set during time of Russian occupation of Afghanistan in 1980’s.
Ian R.
1:72 scale
Hope you like it!
Censu C.

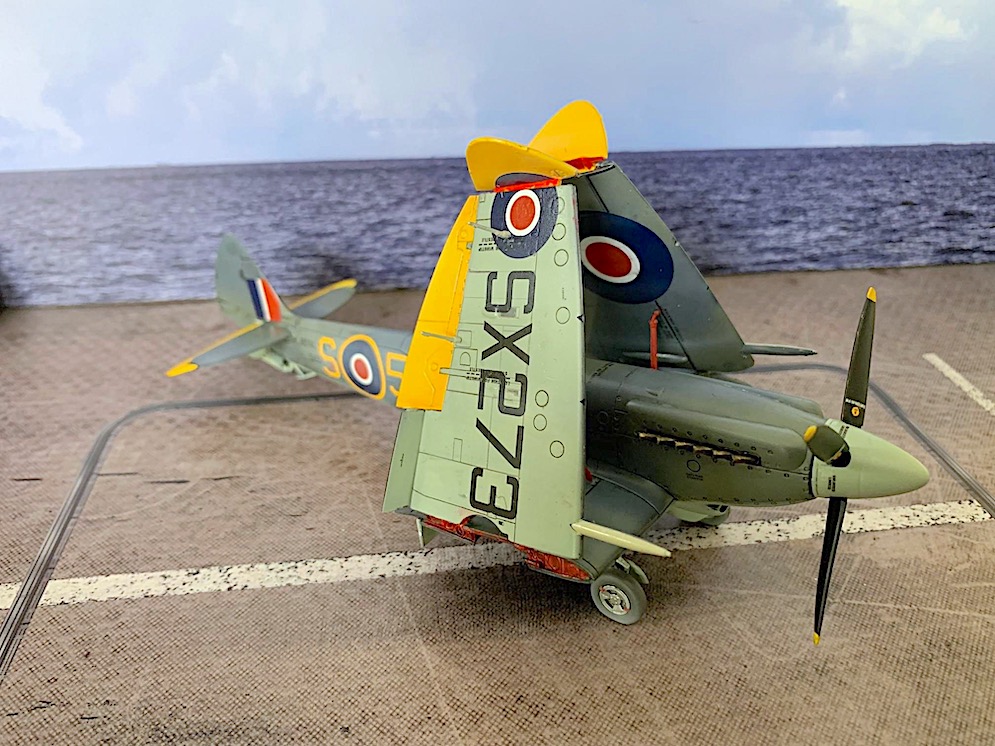
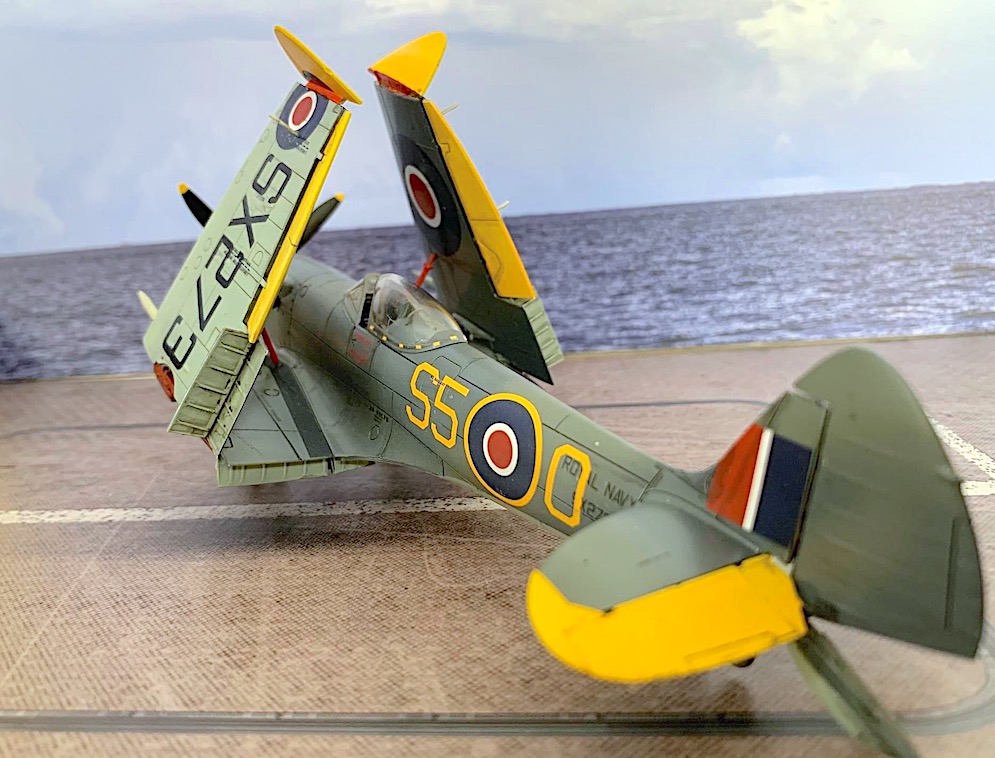
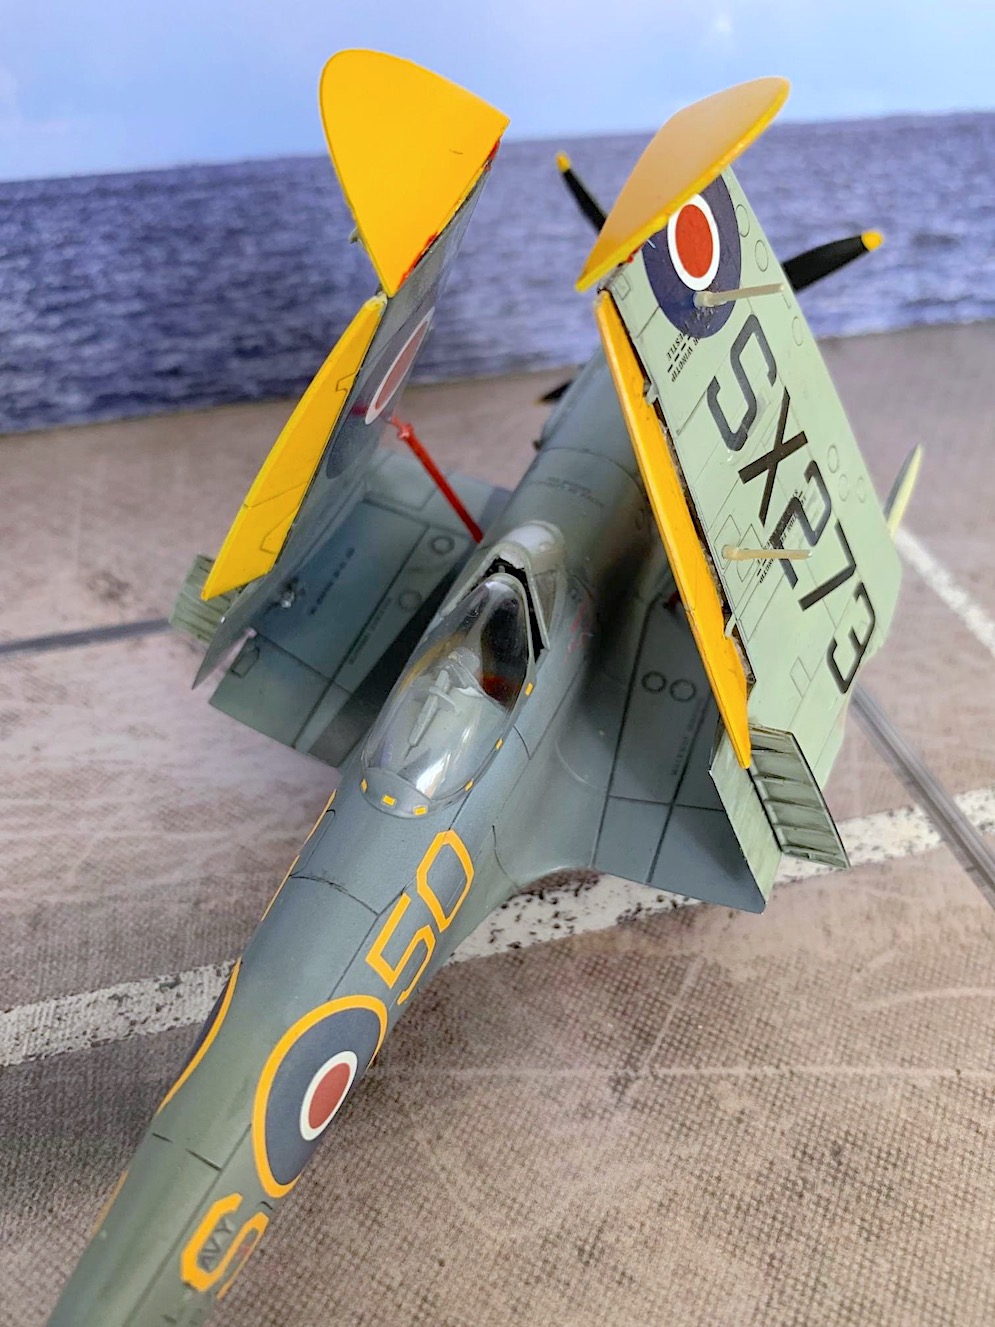
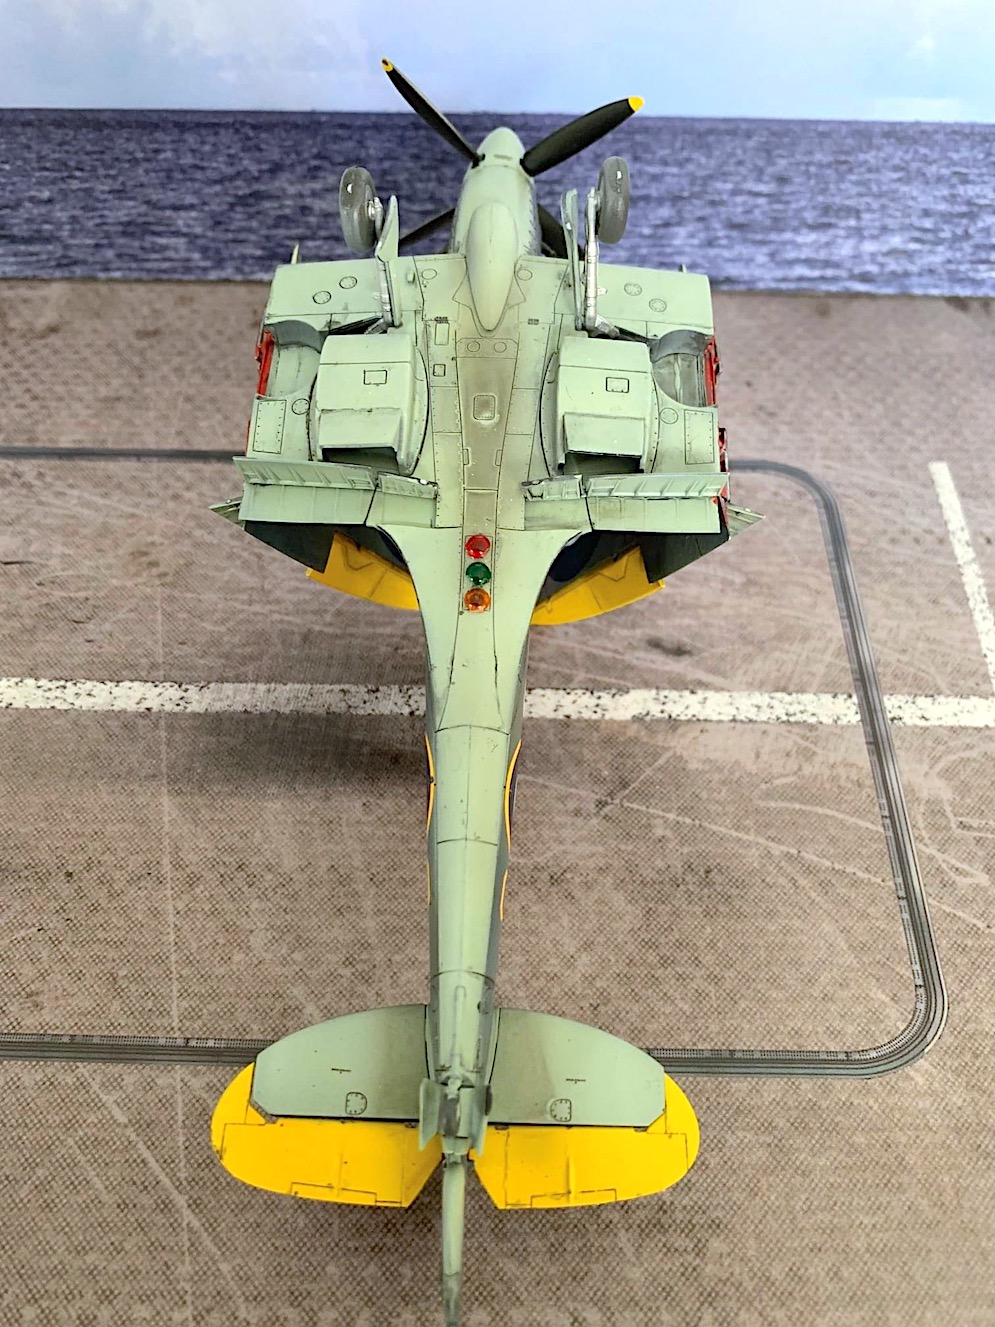
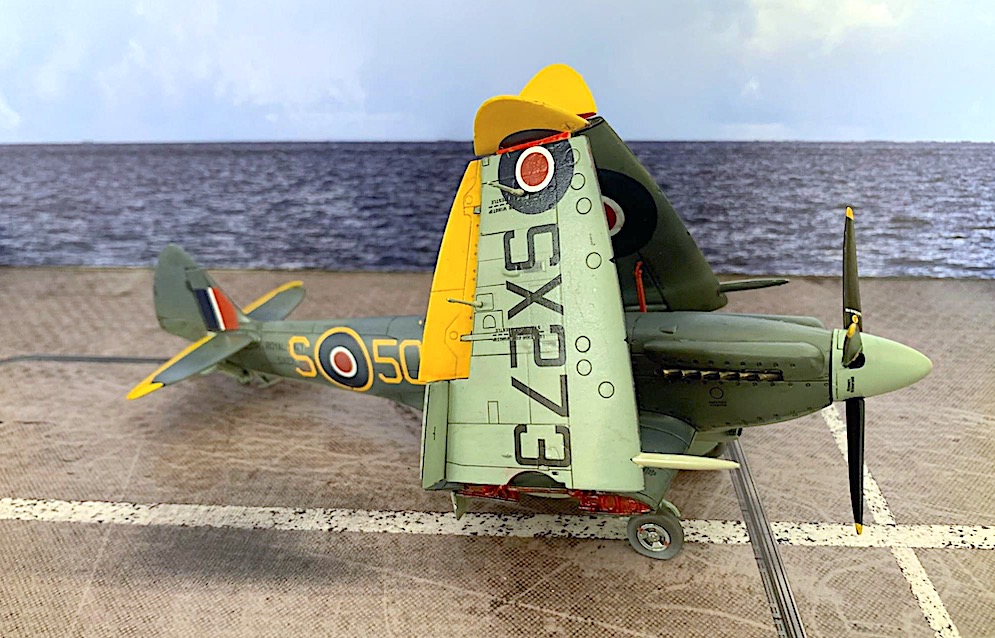
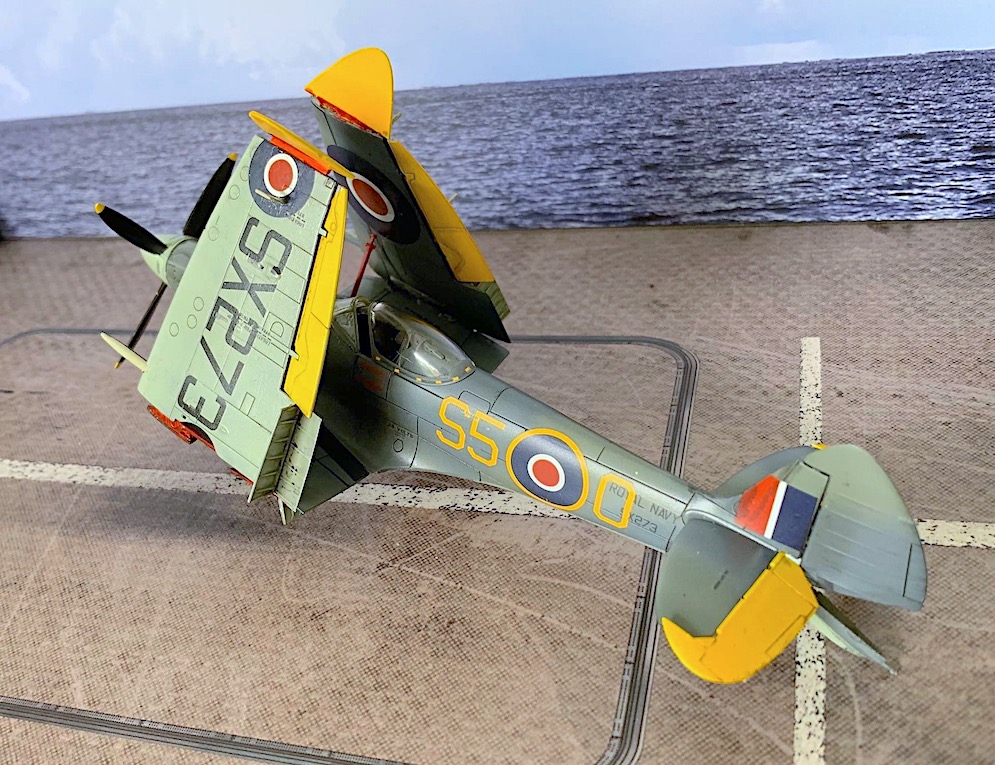
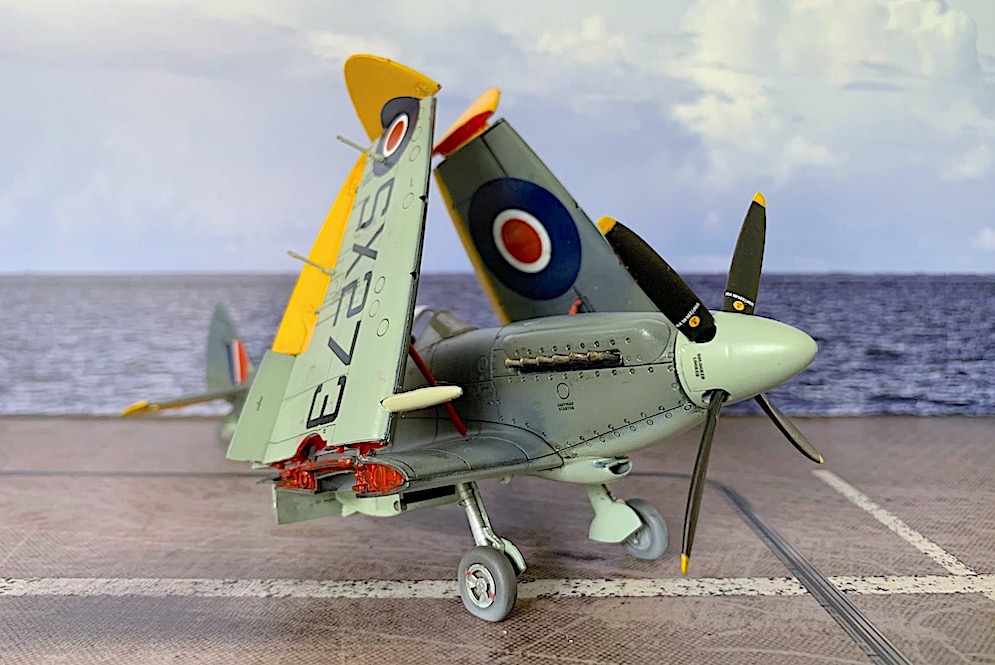
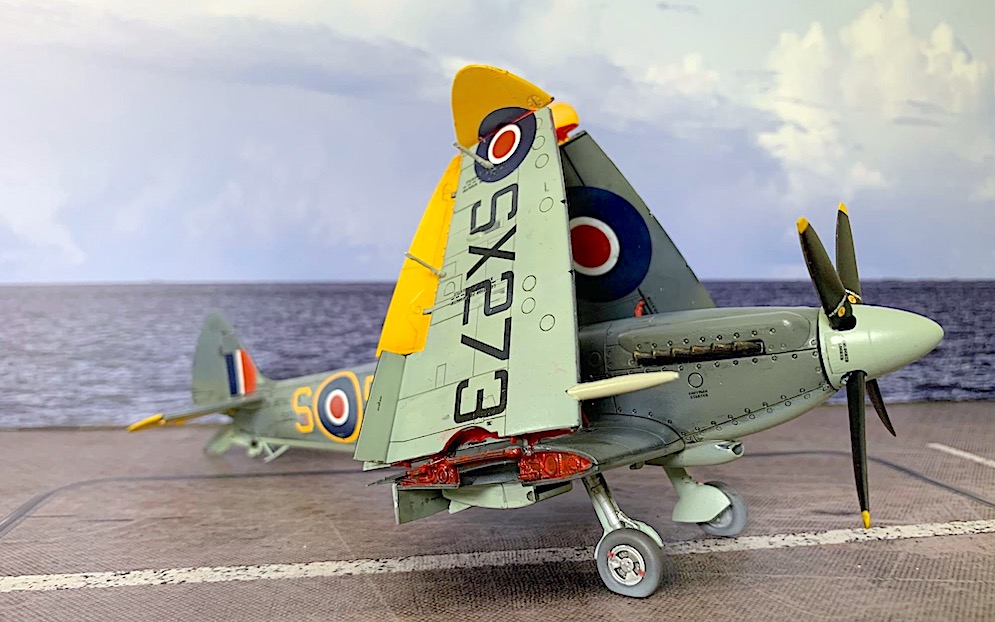
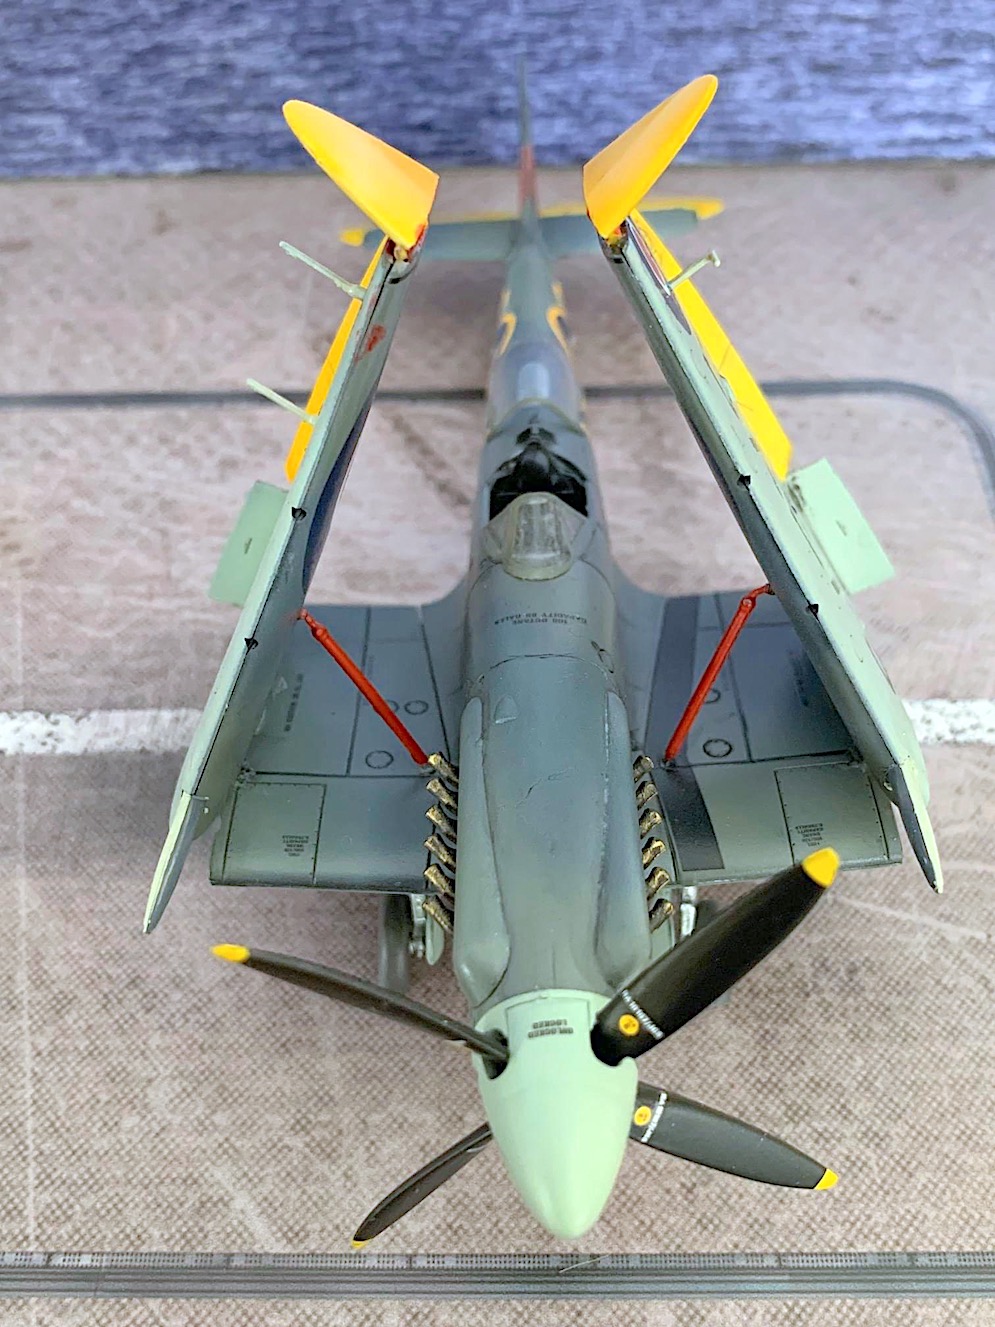
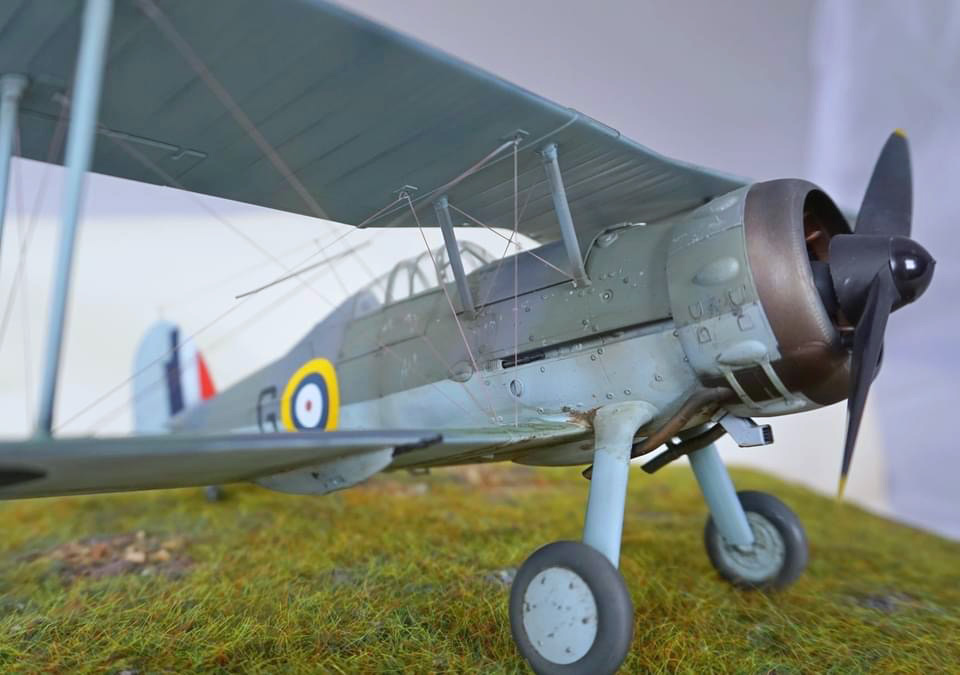
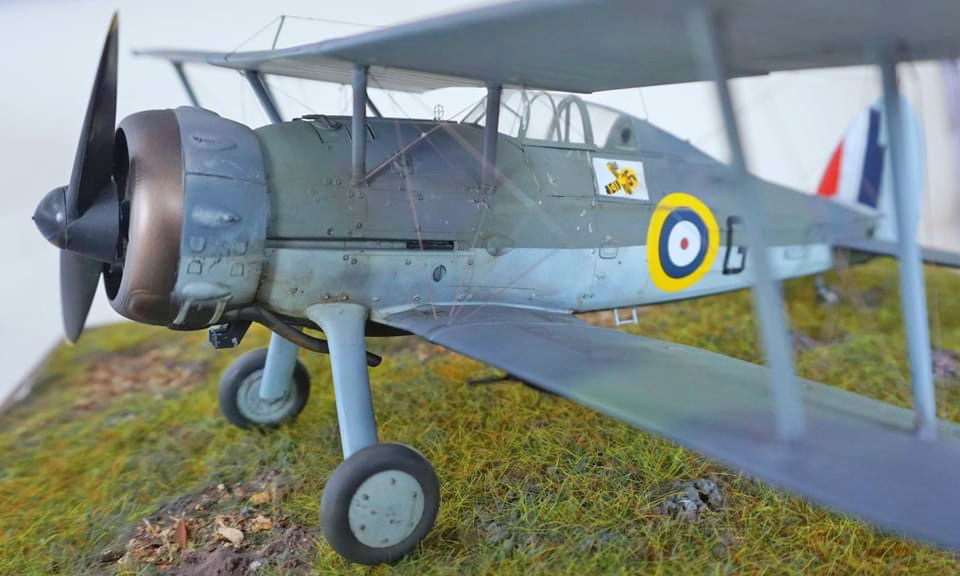
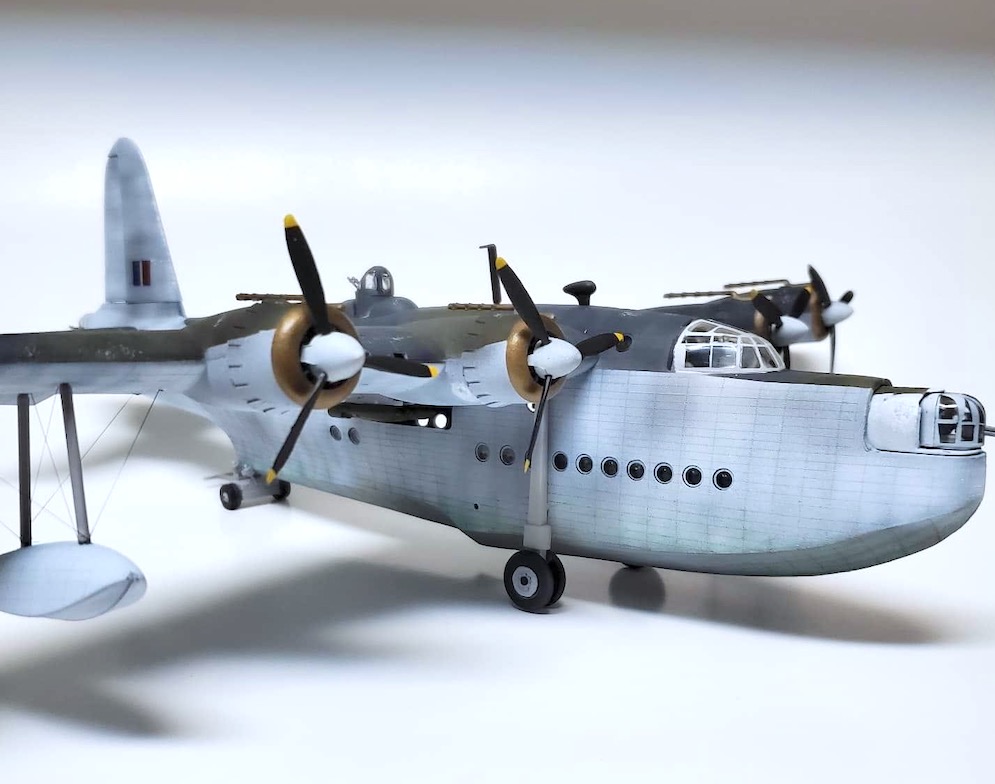
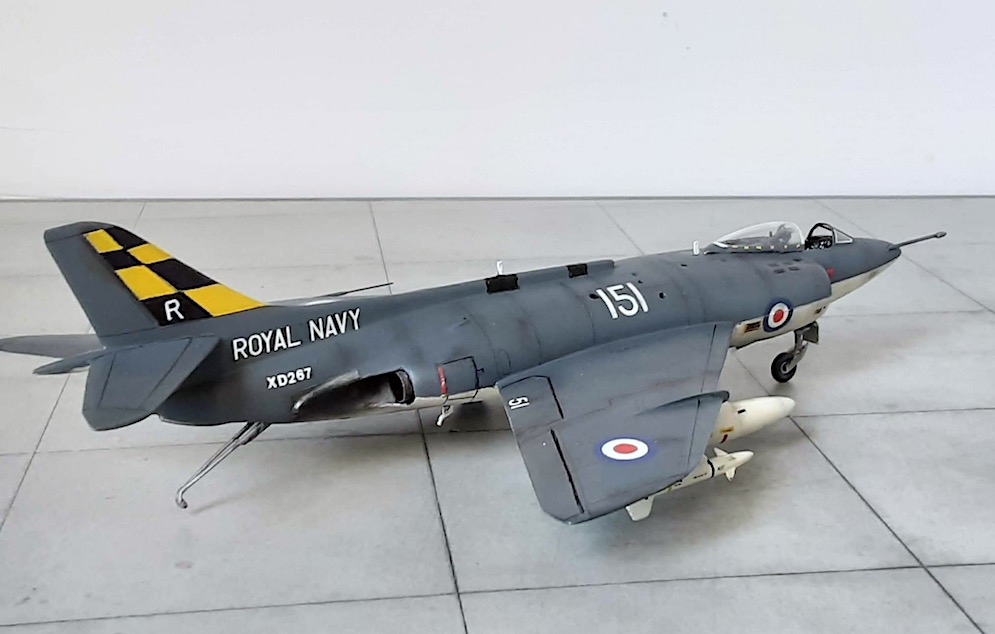
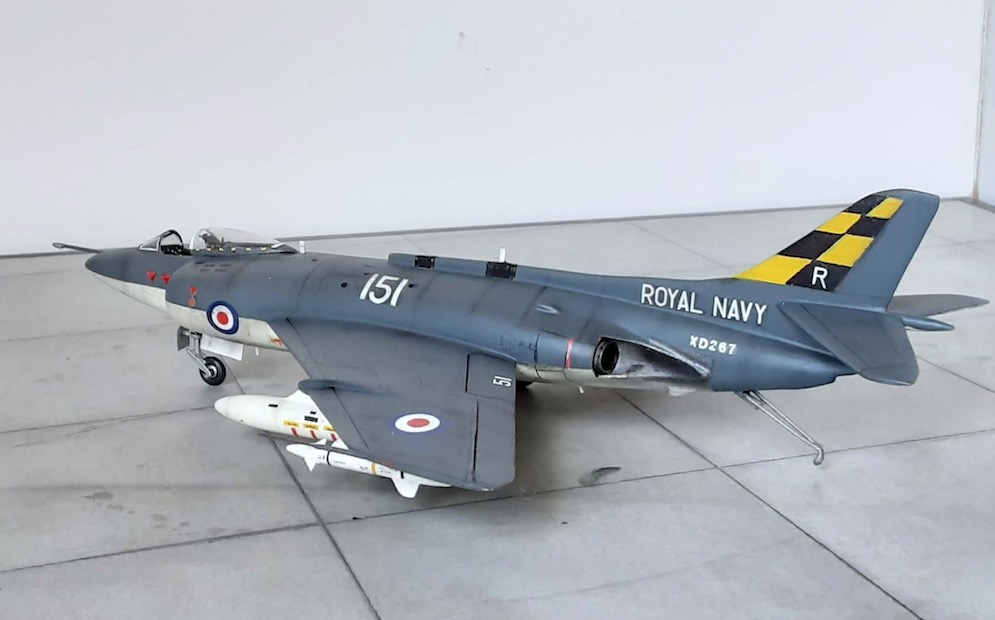
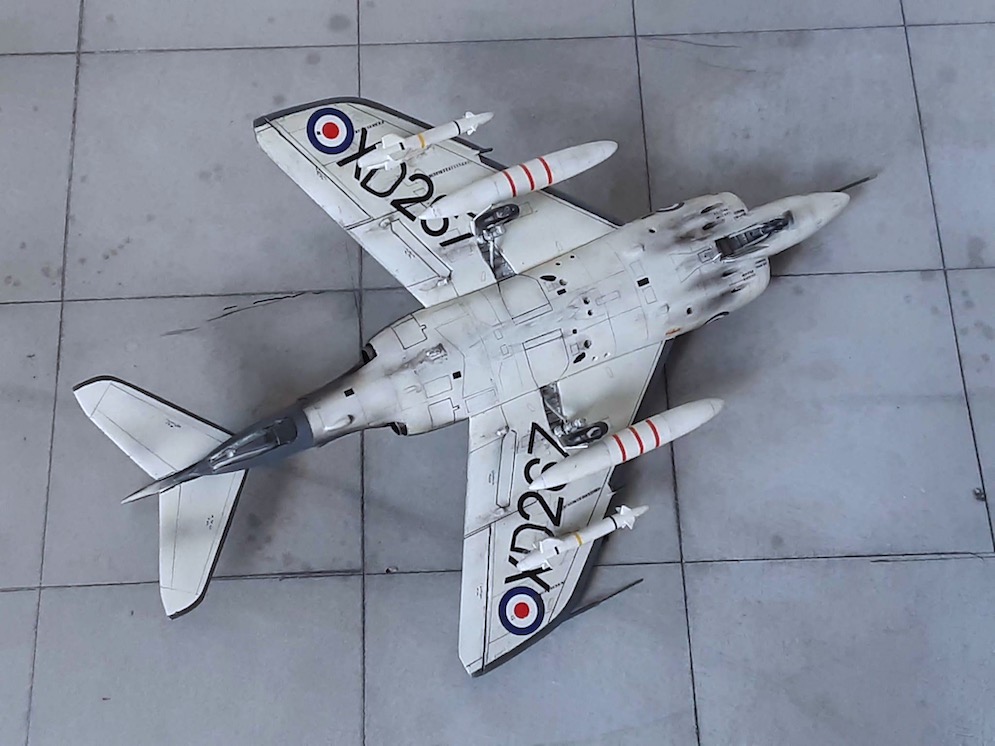
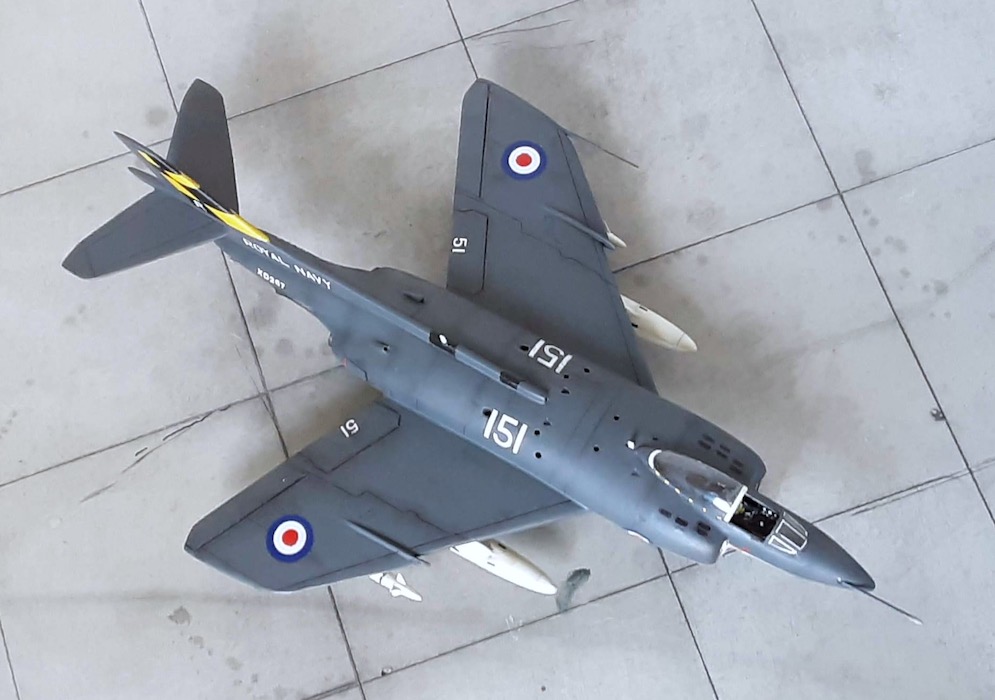
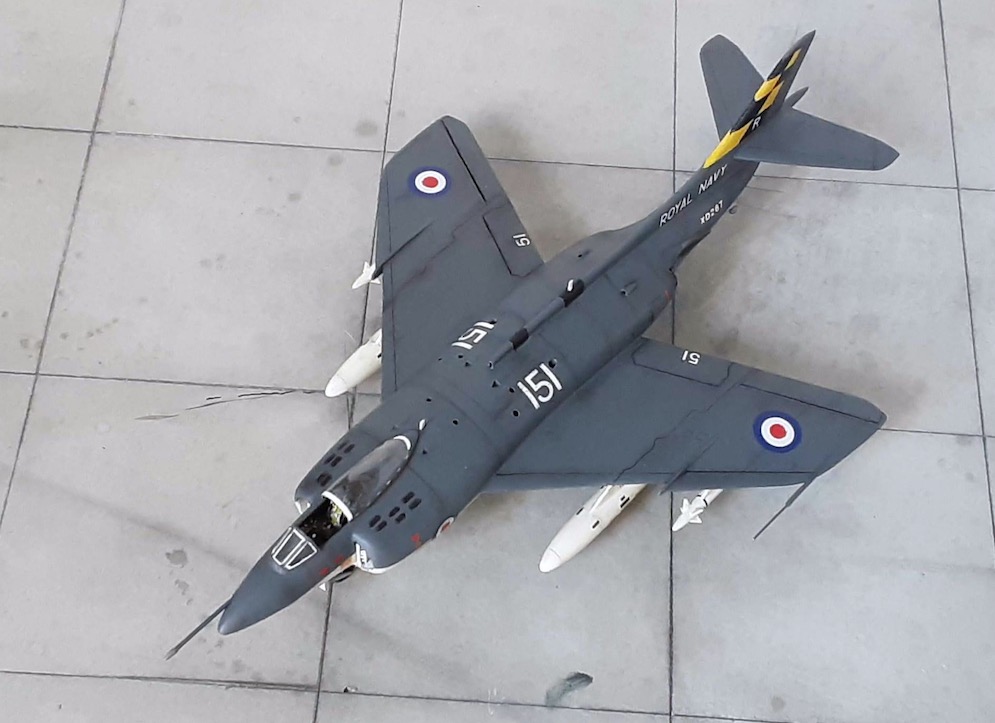
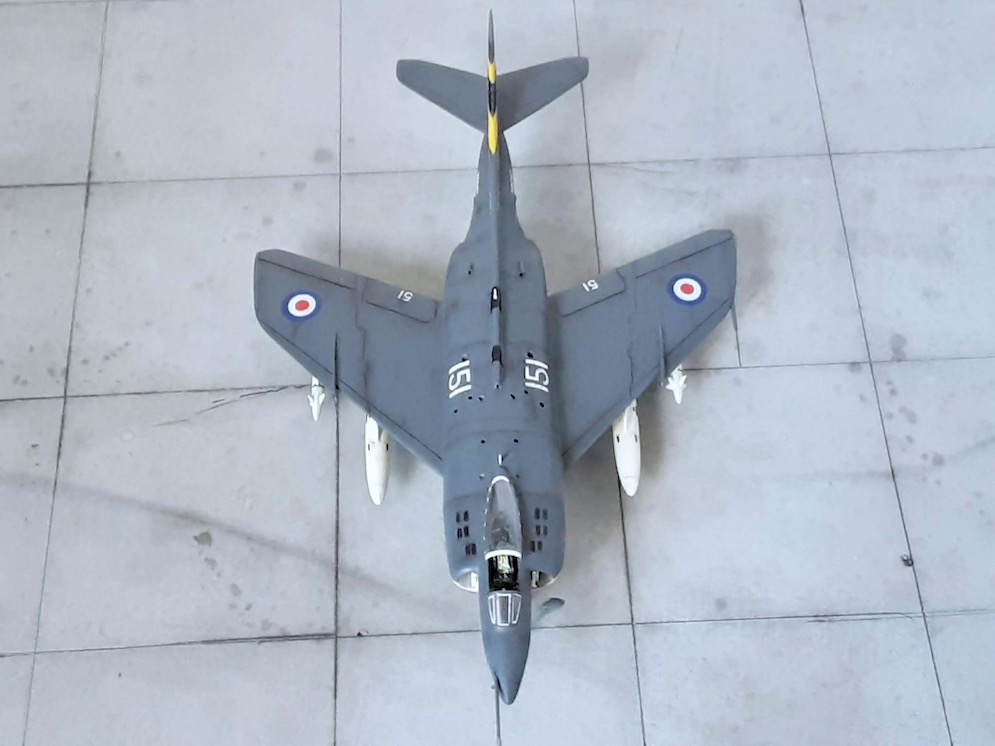
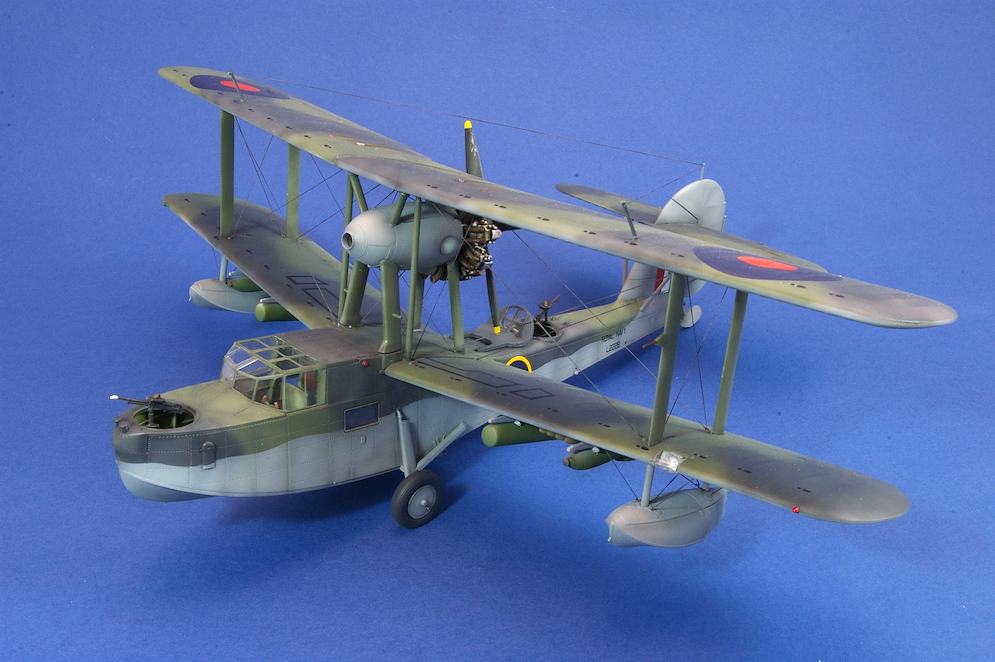
The scheme I have chosen is that of 714 NAS SX273 1947 – St Merryn, Cornwall Extra Dark Sea grey, Dark Slate Grey, Sky.
This scheme really stood out to me because of the Yellow ailerons, elevators and wing-tips. Also really liked the Extra Dark Sea Grey and Dark Slate Grey camouflage combo.
Used the amazing MRP paints and have chosen not to go too heavy on the weathering with this one.
Wings are slightly wonky but I don’t want to risk damaging the kit to repair them.
Overall happy with the result but as usual many mistakes which will hopefully be improved upon on future kits.
Hope you guys like…
Anthony B.
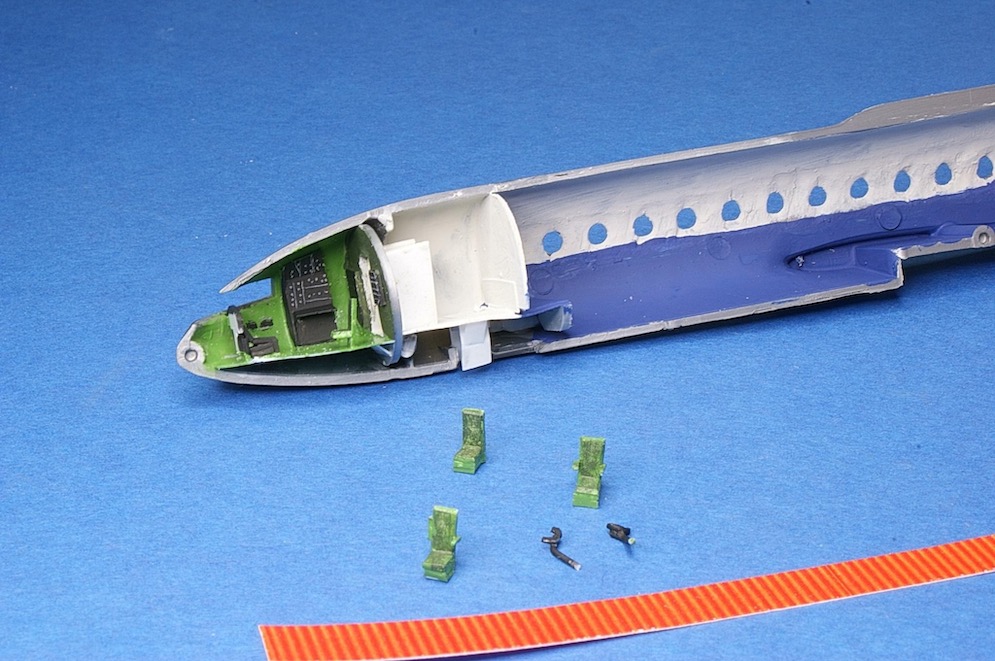
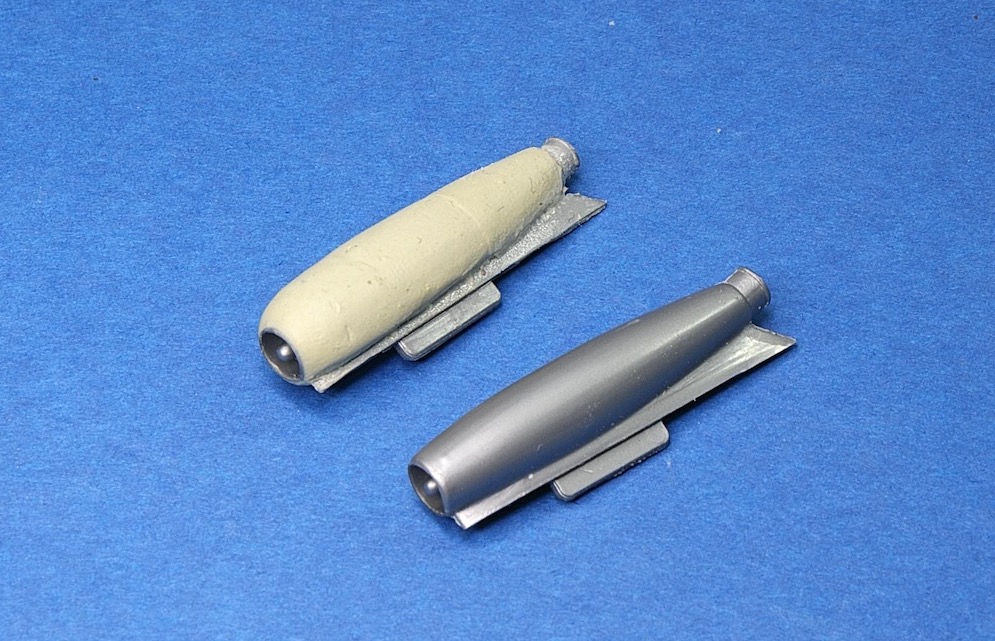
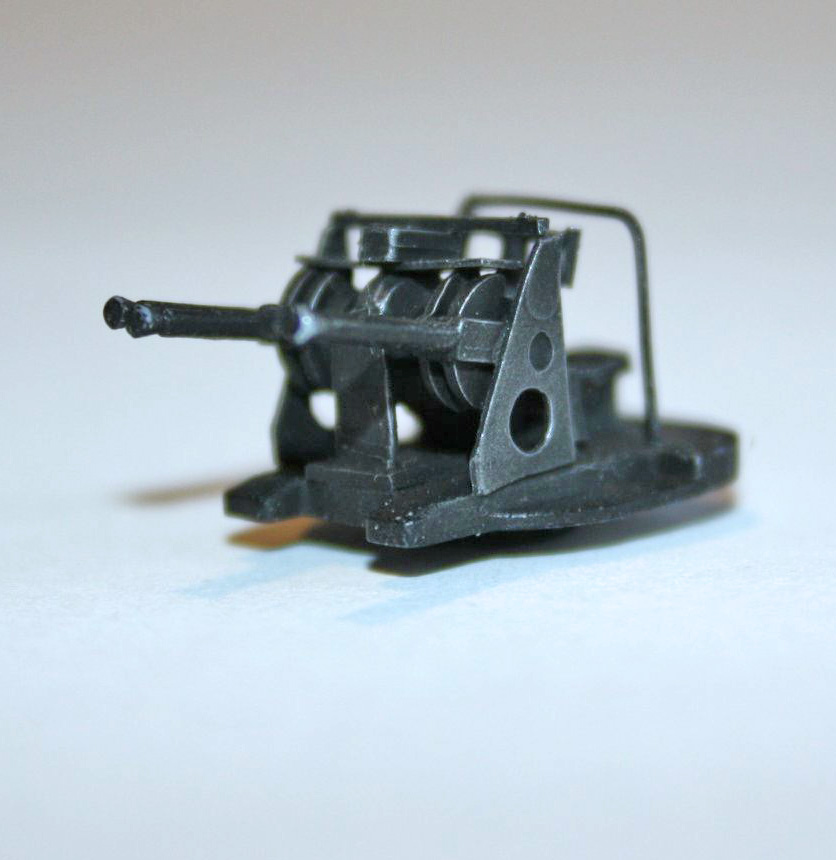
Here’s where you can get the resin catapult set.
Geoff C (with Gordon U.)
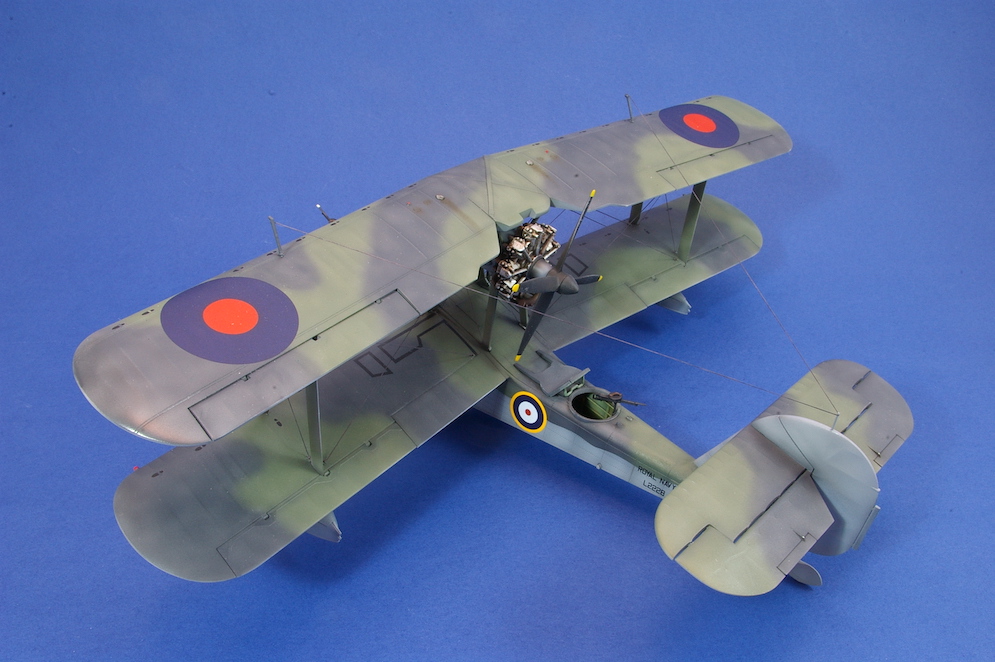
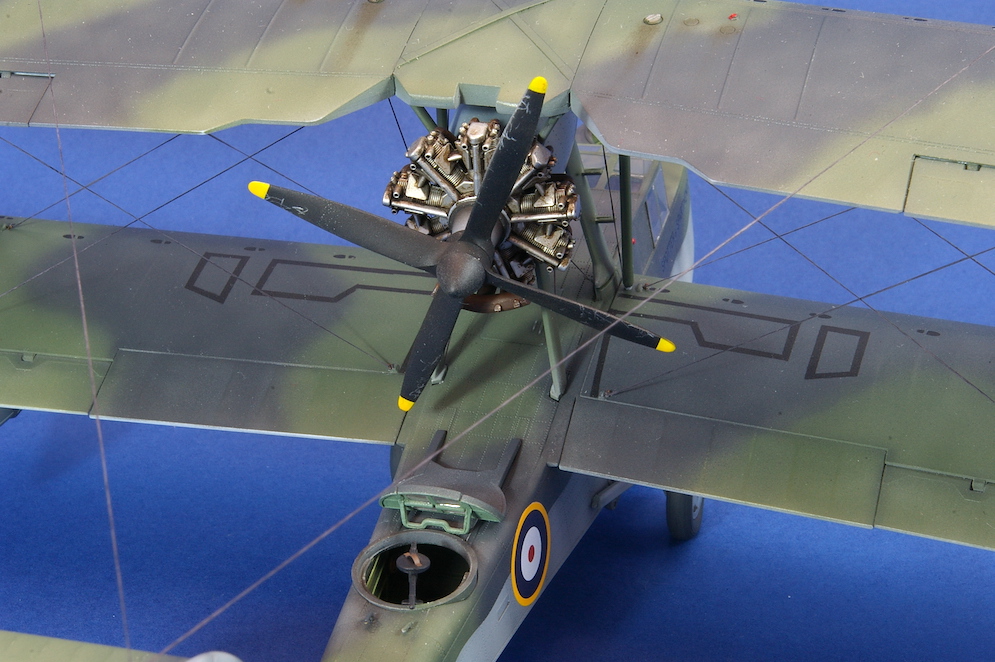
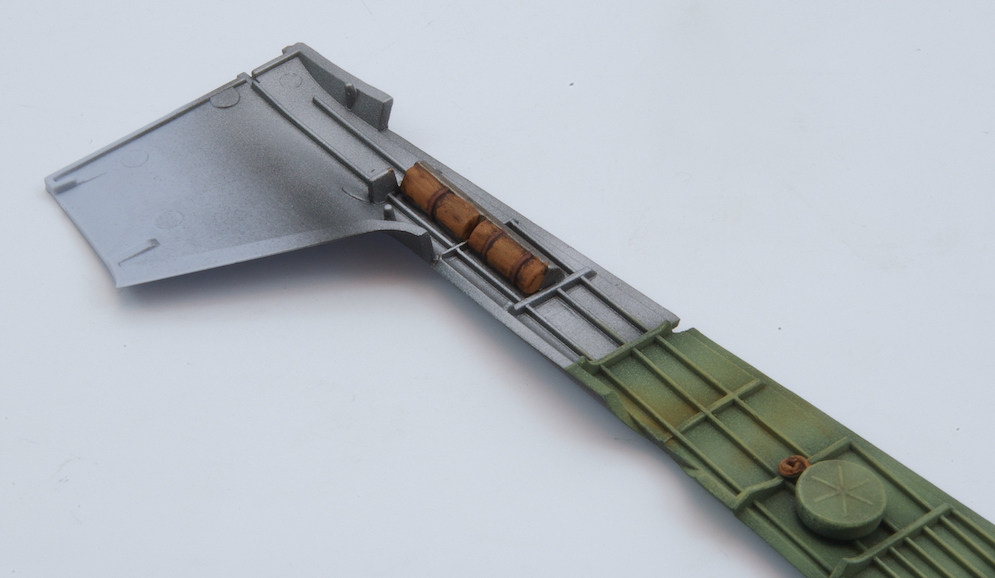

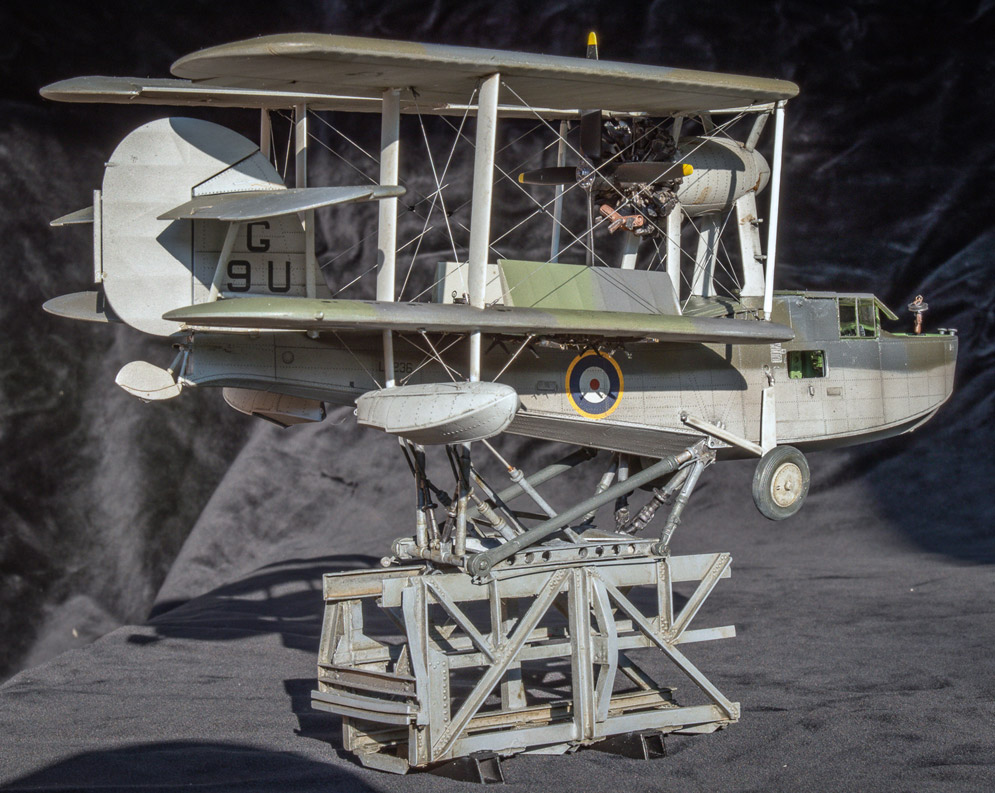
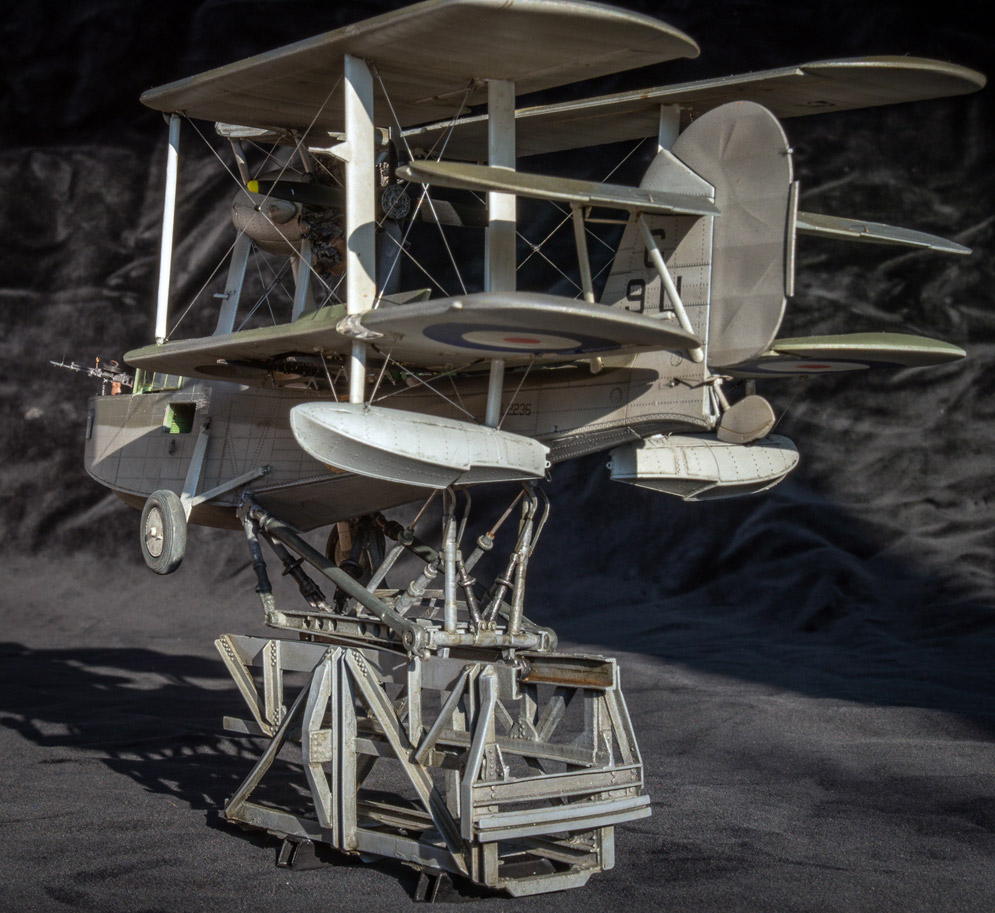
There is a full build article of this kit by Dave Coward in the Finished Now section of Scale modelling Now which shows in depth how to build the model. I chose to model a different aircraft from the one in Dave’s article. A wartime photo of (what I think is) this particular aircraft showed that it did not have the grab rails along its sides, nor did it appear to have the protective fairings in front of the side windows that Dave added to his model.
I used a mixture of Mr. Hobby and Tamiya paints on the model, and the upper surface colours were sprayed freehand in thin coats allowing some of the underlying grey primer to show through giving a faded worn appearance.
The only problems that I had with the kit were the transfers which refused to detach from their backing sheet. They were eventually coaxed off the sheet after having been soaked for around 10 minutes! They then welded themselves to the model as soon as they touched the surface and refused to move. I think that this may have been an isolated problem with my kit as I have never had problems with Airfix’s transfers before. Other people I have spoken to do not seem to have issues with this particular kit either.
Care needs to be taken with the tiny footprint markings as Airfix provides the exact number needed with no spares!
I didn’t fancy my chances of getting the angular walkway markings onto the lower wings without them silvering and so these were masked and sprayed.
Photos of preserved machines suggested to me that the Walrus had rigging wires with a flattened / streamlined cross section. Because of this EZ Line was used for the rigging. This has a slightly flattened cross section and this is preserved even when the line is stretched slightly. Despite my best intentions I found it hard to stop the rigging lines twisting while attaching them. I thought that the end result looked a little unnatural on the finished model.
I think that I will use a different material such as the elastic thread from Uschi Van Der Rosten on my next biplane project. This seems a lot finer, and I think it also has more of a round cross section – maybe not prototypical, but the end result might look neater.
I used eyelets from Bob’s Buckles to attach the rigging wires. I think that these are excellent and a real time saver as I think life is way too short to make them myself. I also considered using his pre-cut brass tube to represent turnbuckles. However, photos of preserved machines suggest that there were no turnbuckles present so I just used the eyelets.
I thought that this was an excellent kit that was actually very easy to build given the complexity of the original aircraft. The fit of the parts was excellent and I found the instructions clear and easy to follow.
All in all, this was an enjoyable project (apart from the odd behaviour of the transfers) and I thought that the end result was a surprisingly large and rather attractive looking model – even my wife liked it!
Dai W.
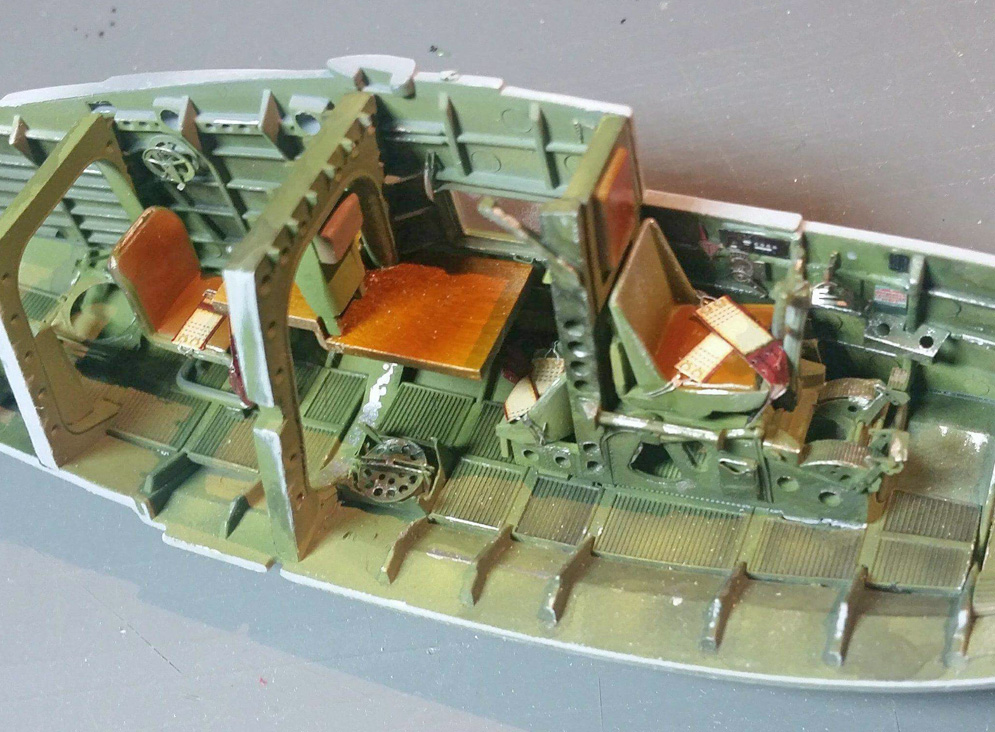
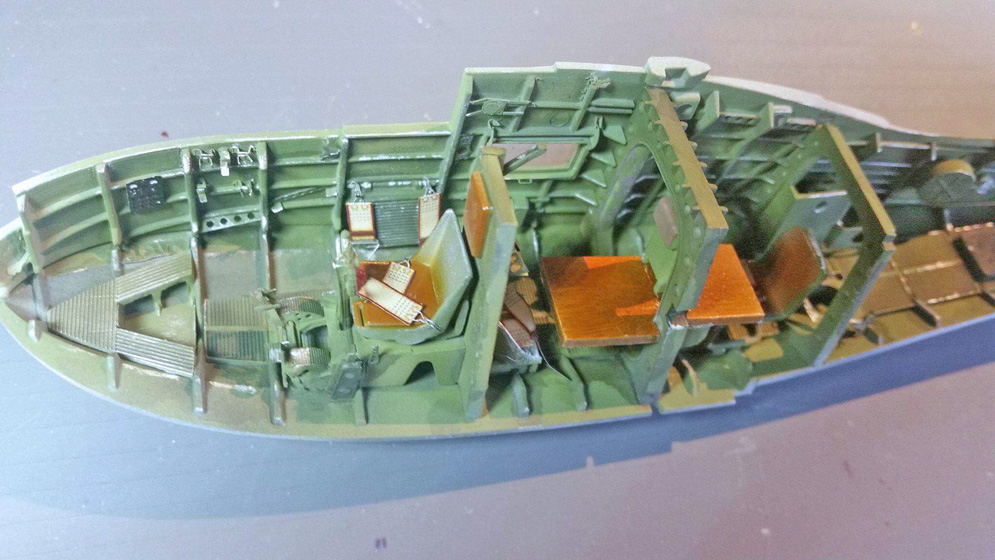

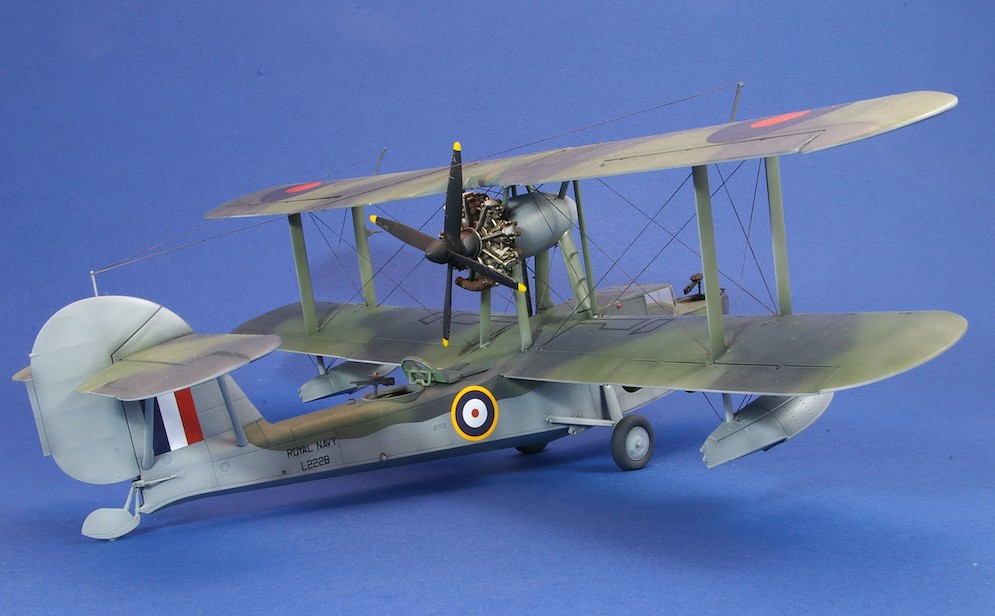
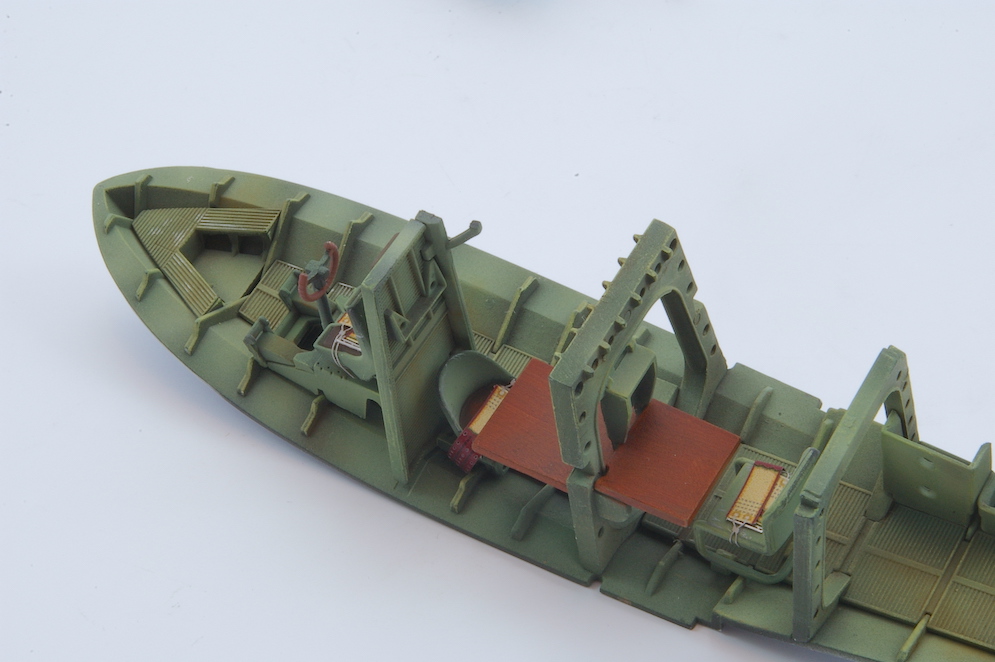
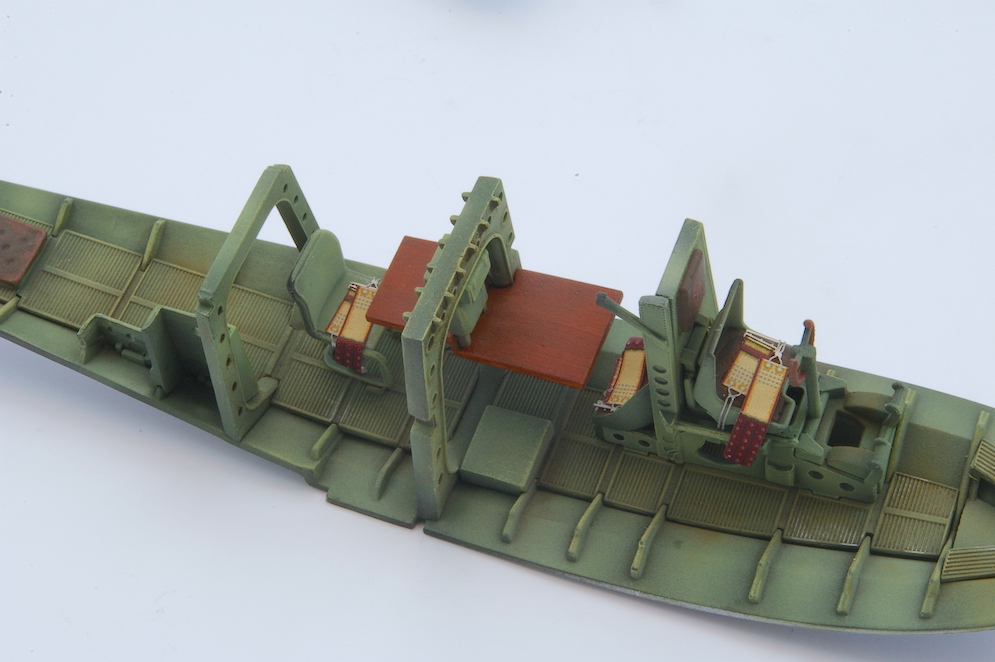
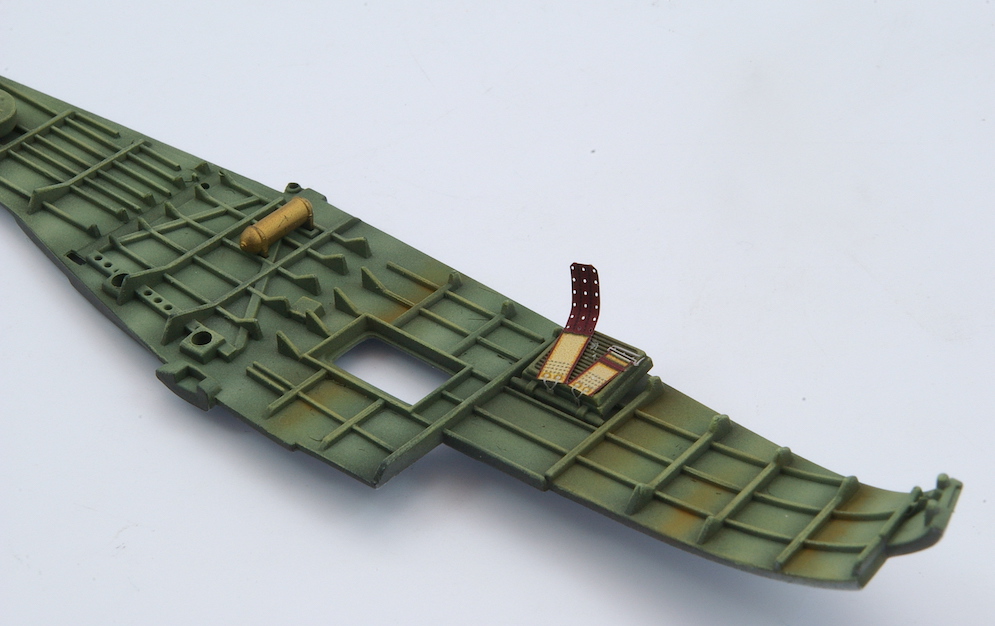
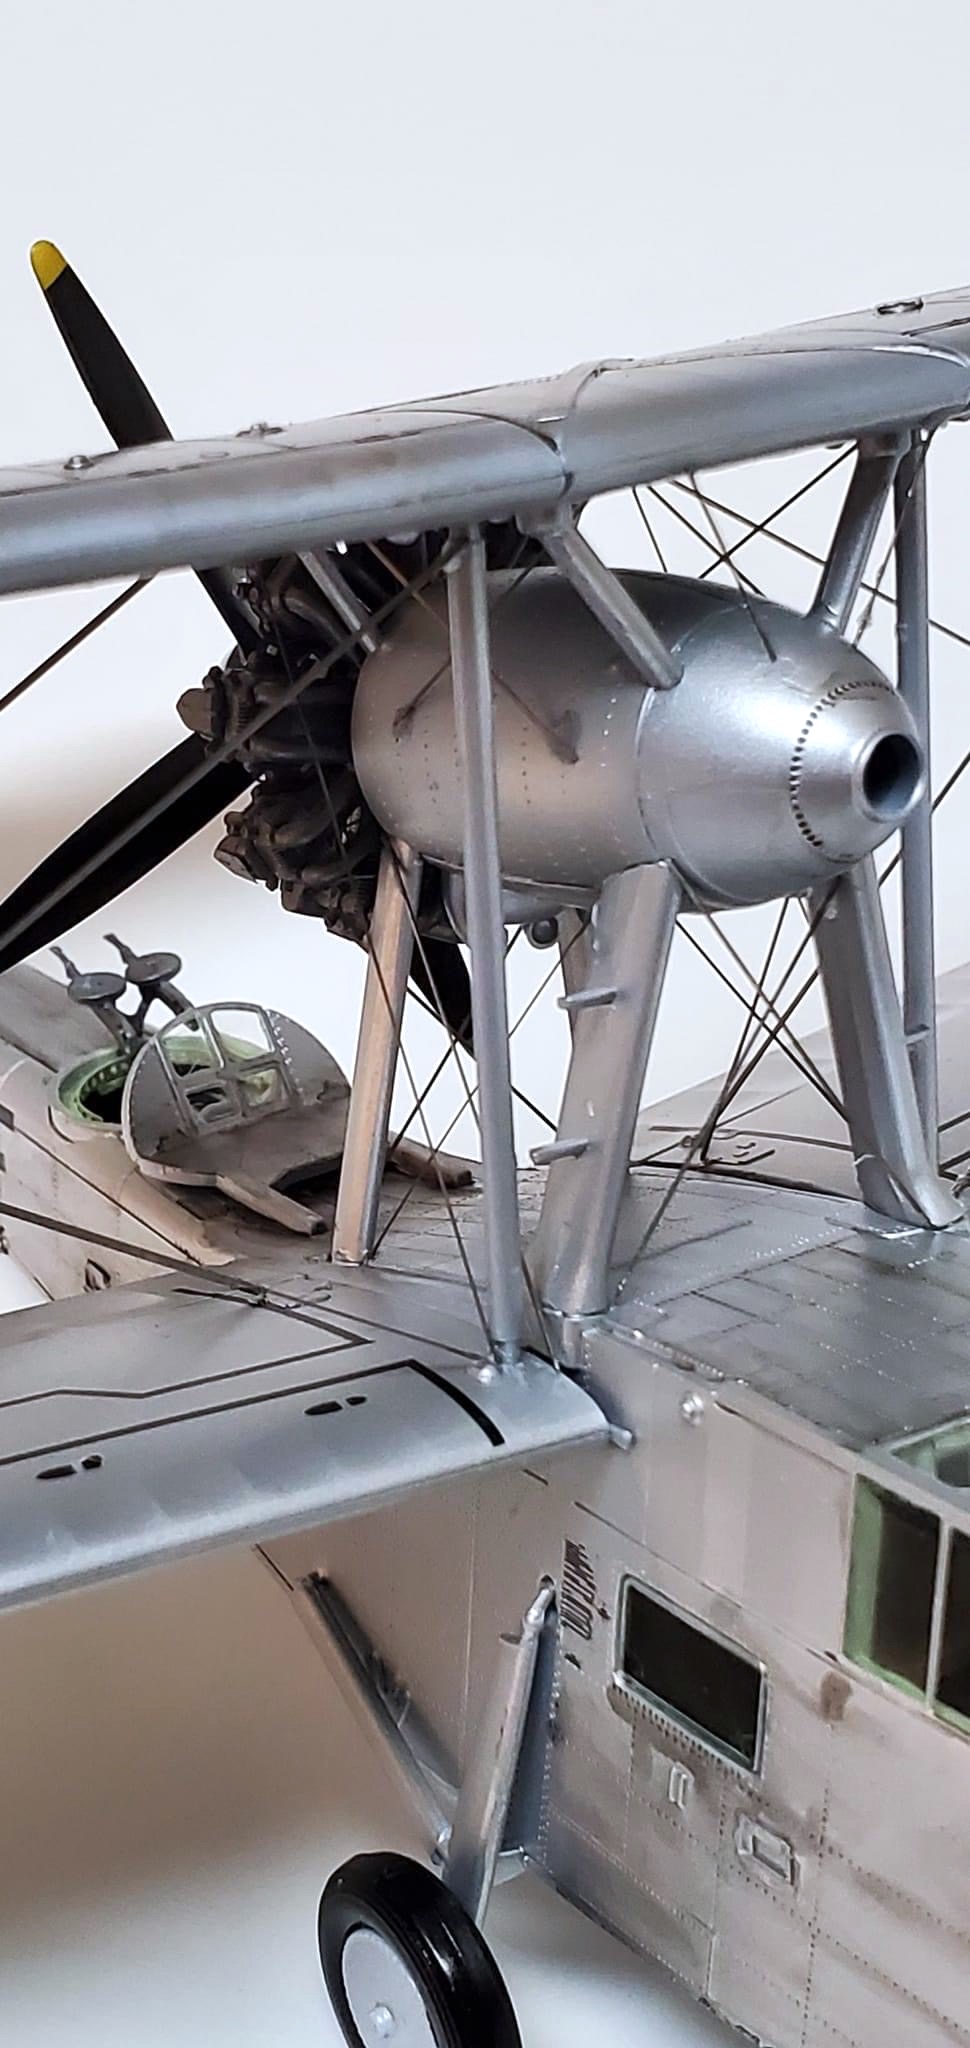
If it’s ok I thought I would send you some photos on my latest build for your Subscribers’ Gallery. It is the lovely Airfix 1:48 Walrus. I have also used the Big Ed set and resin wheels. The decals came from the Xtradecal sheet and I painted it using a mix of Tamiya silver and light grey. Rigging is from flat sewing elastic.
I was wanting to give her a painted on silver dope look that is not too silvery with a feeling of being out in the elements.
The wooden tables are Tamiya deck tan, Raw Umber oil spread with sponge then a light spray of Tamiya clear orange. Interior is a mix of Tamiya greens (just what I had in the drawer).
Anyway I hope you like the photos.
Regards
Michael Scott.
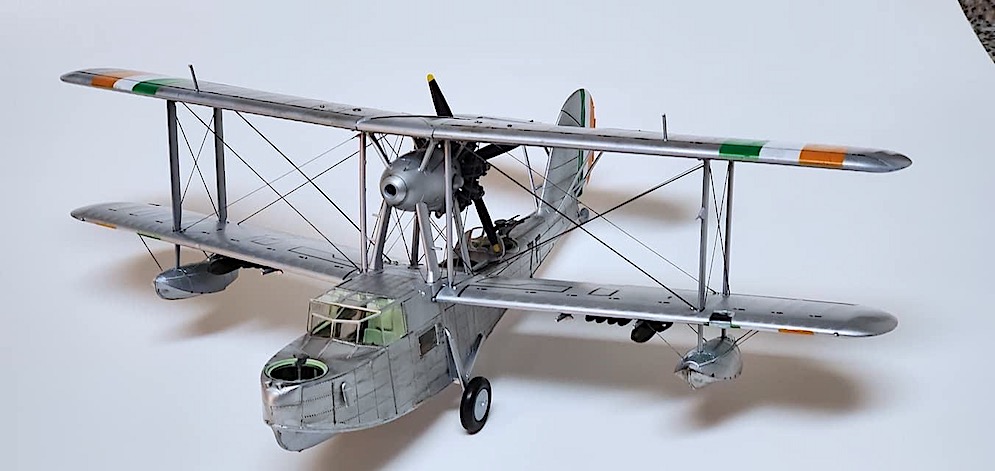

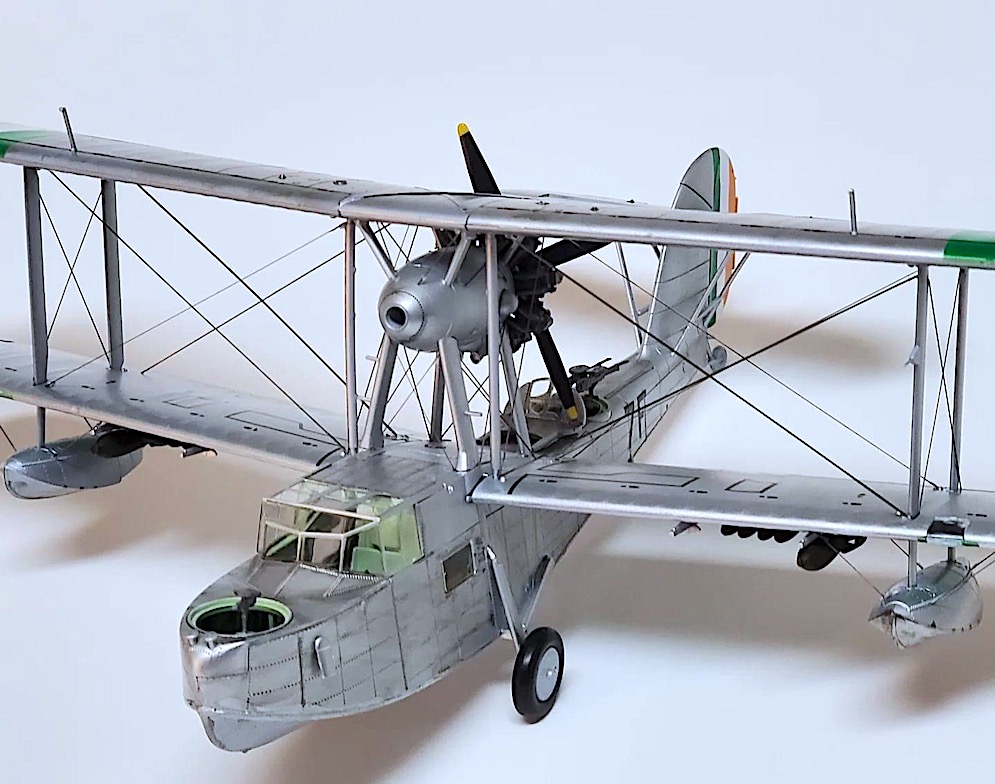
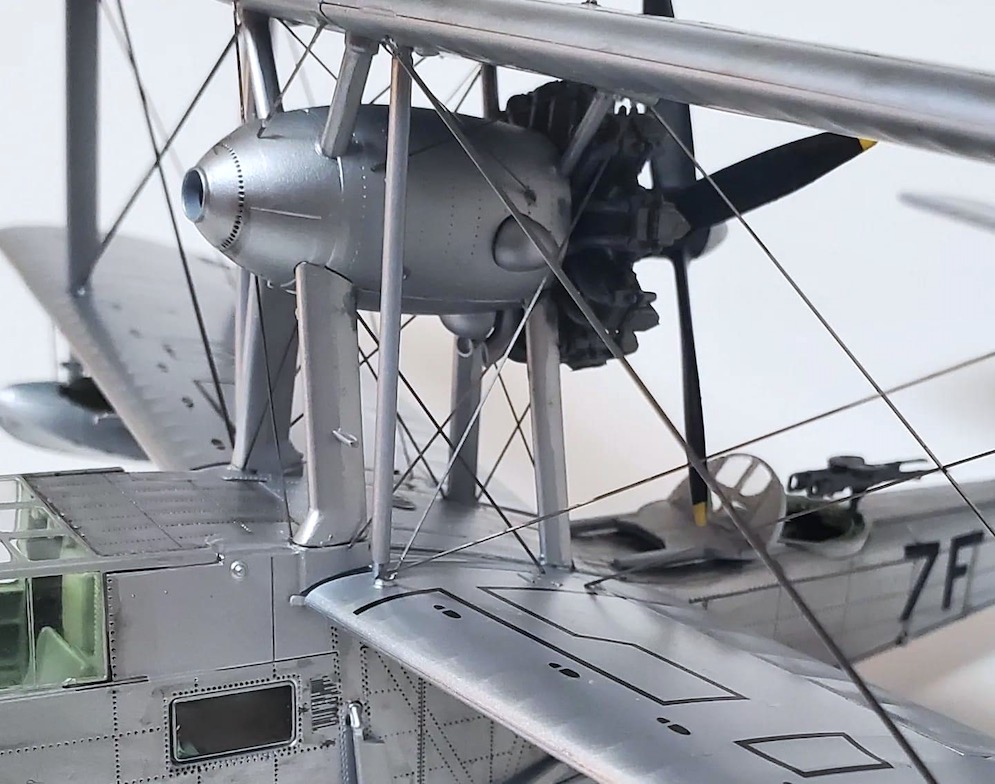
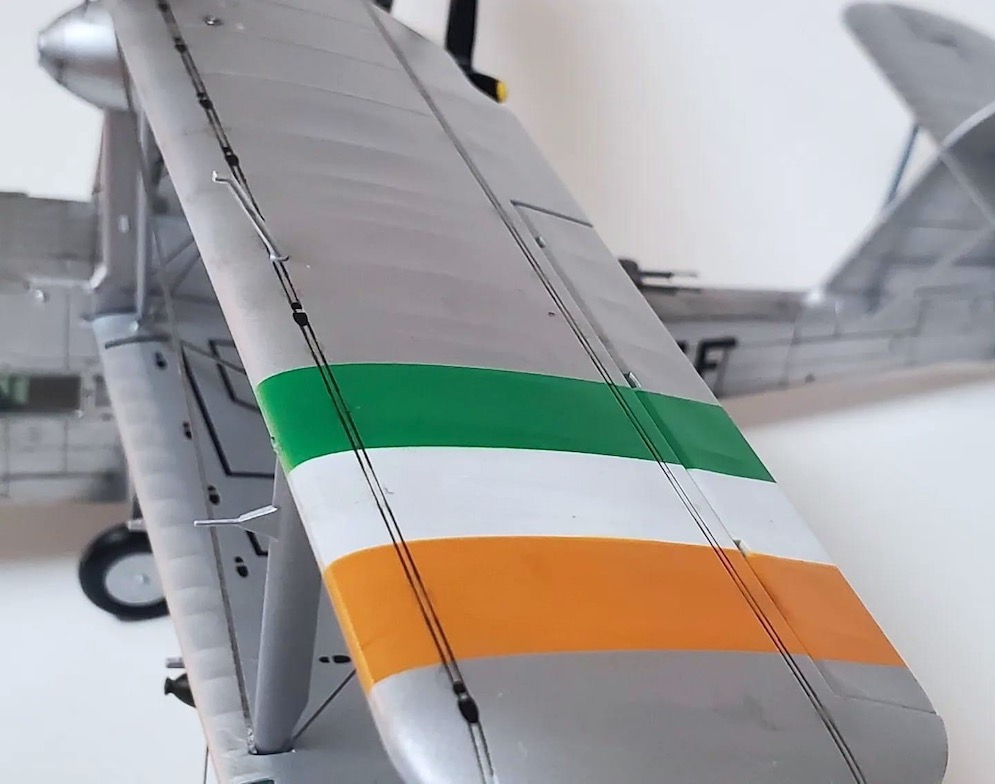
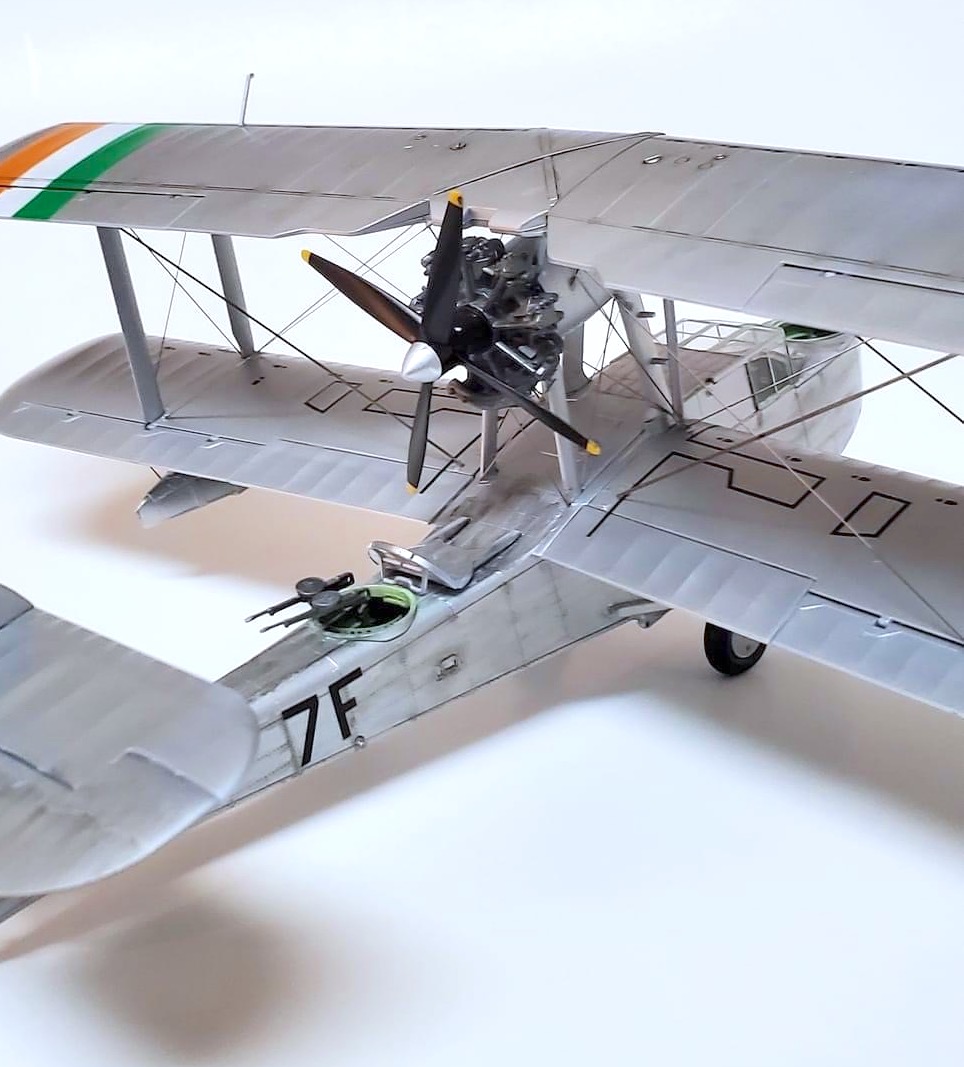
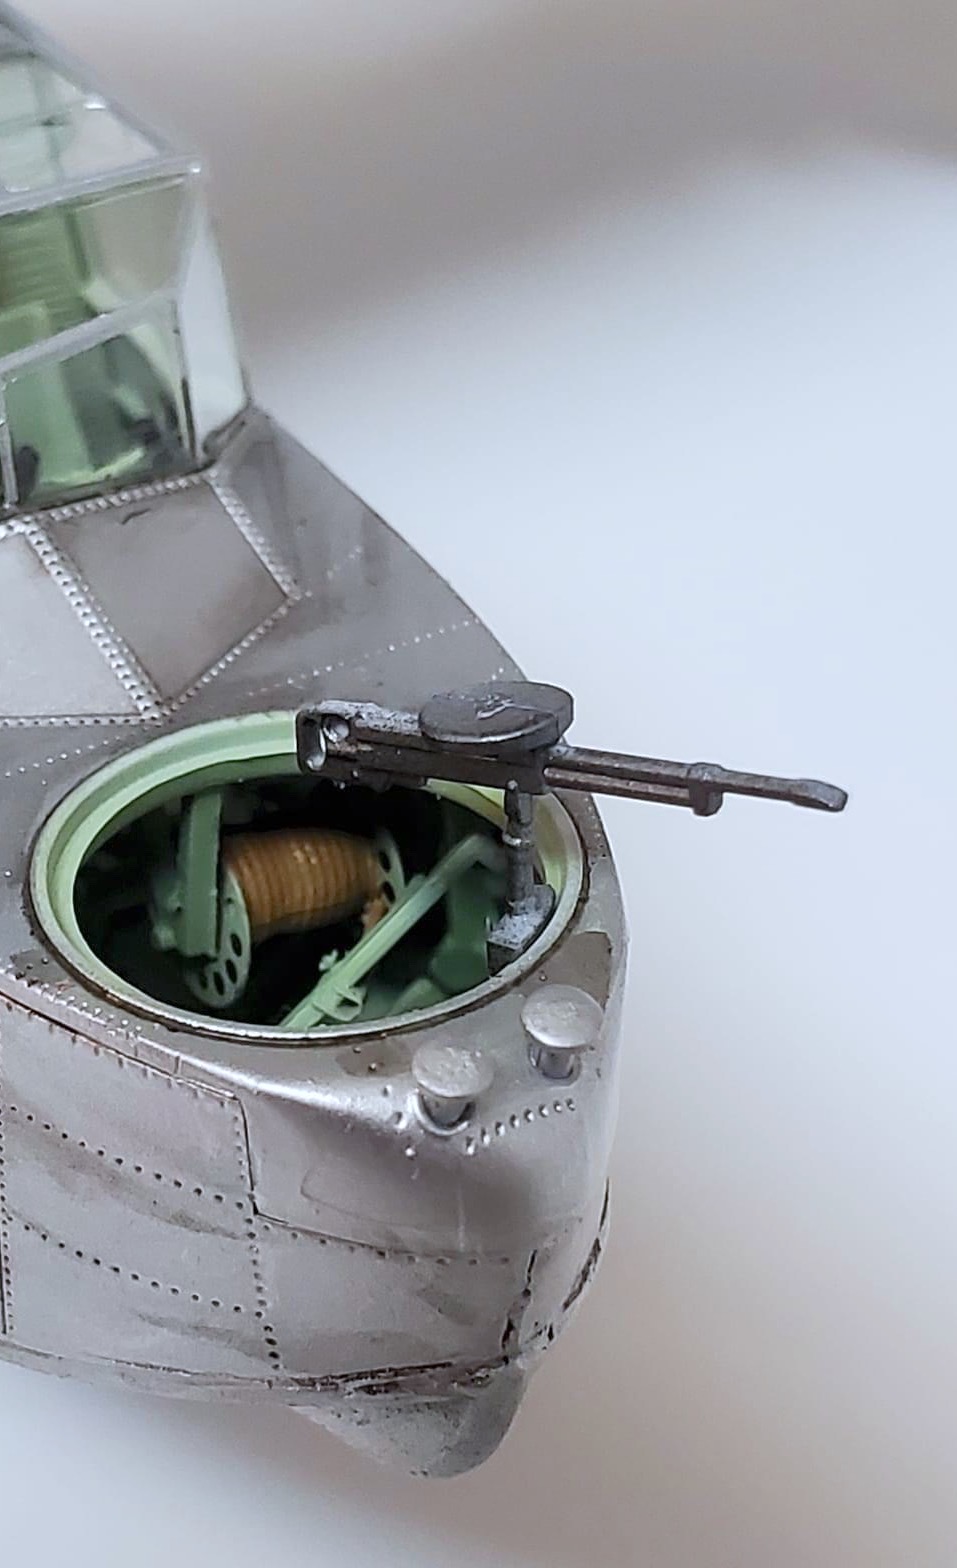
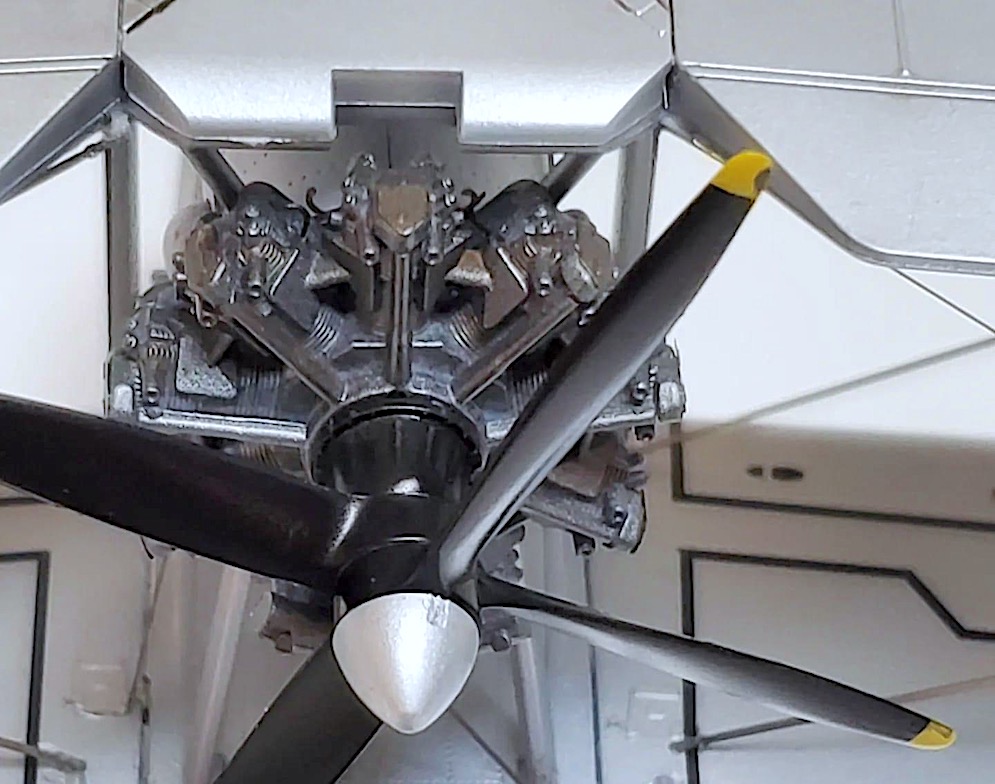
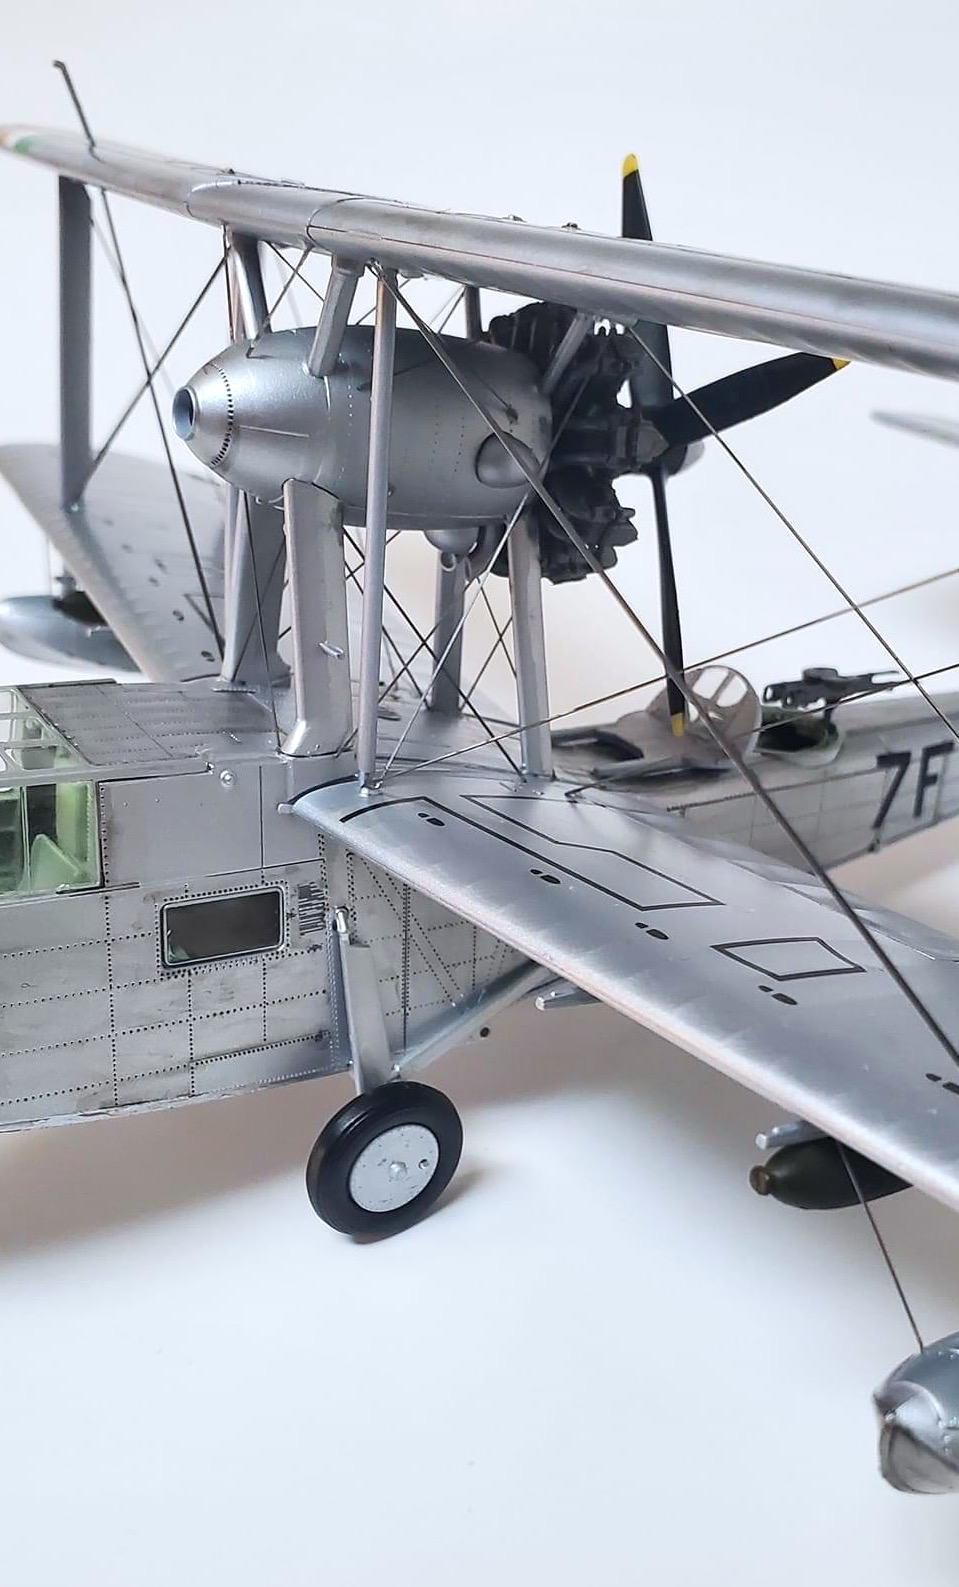
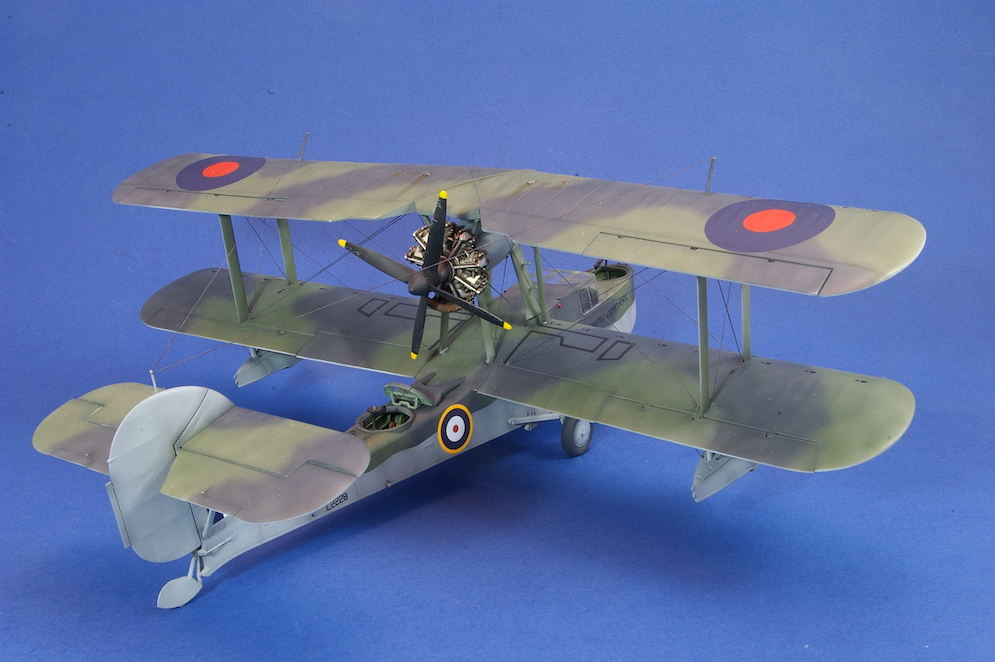
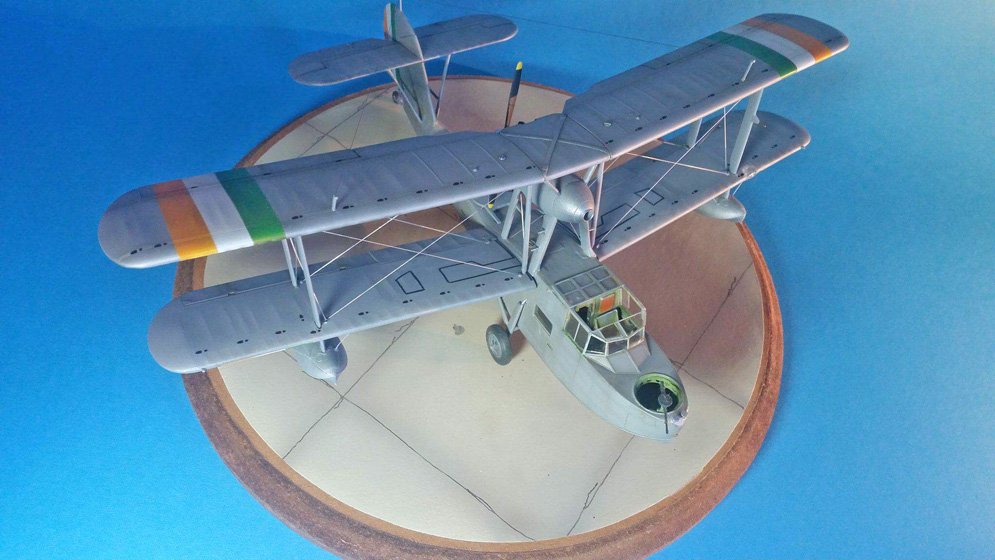
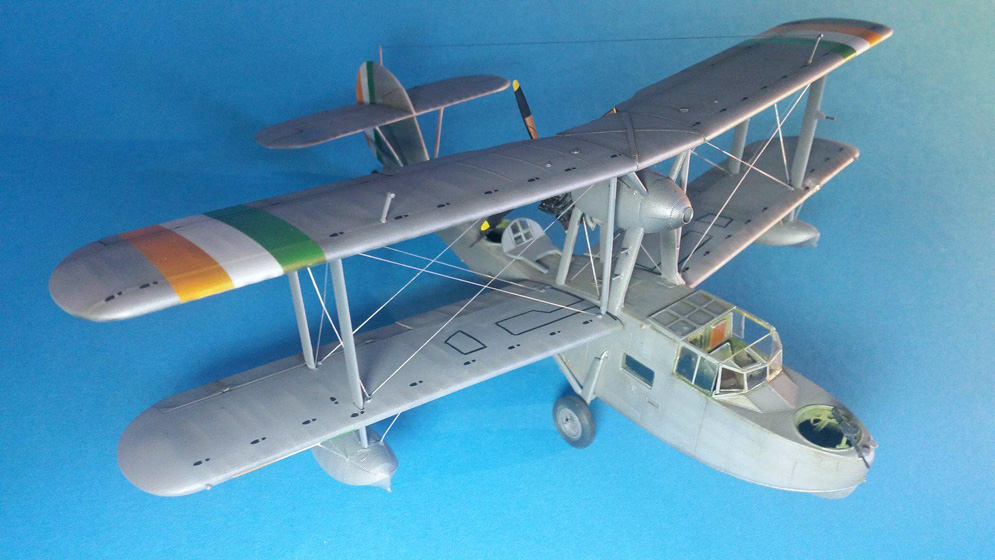
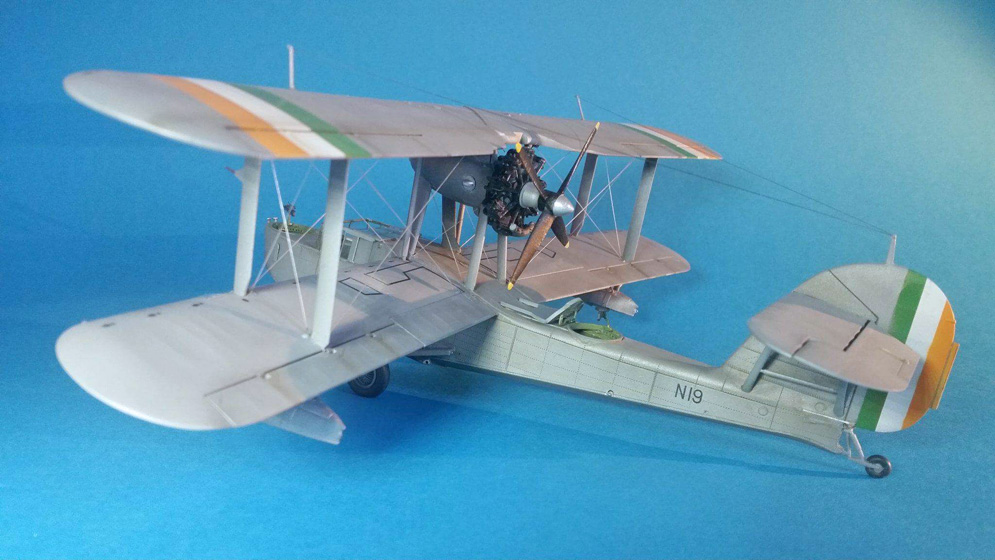
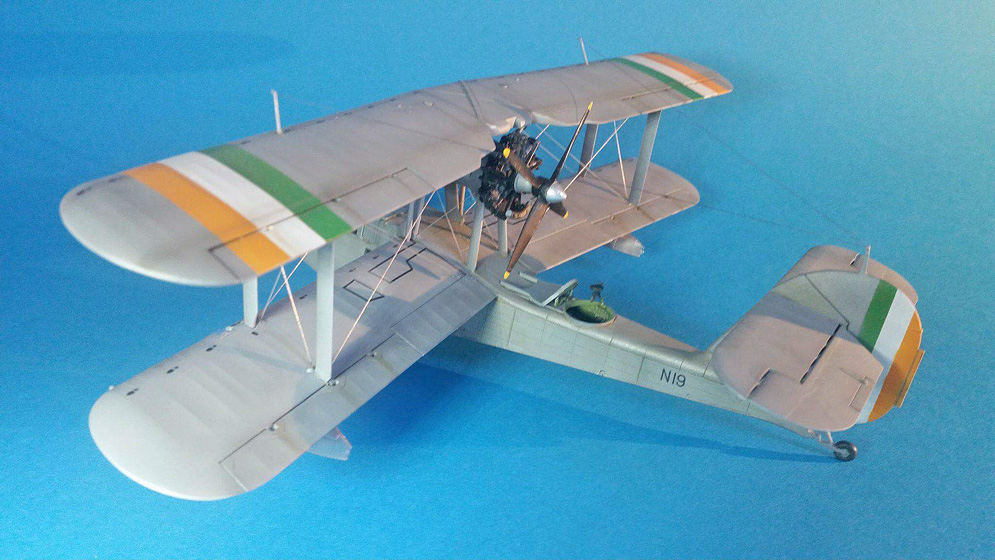
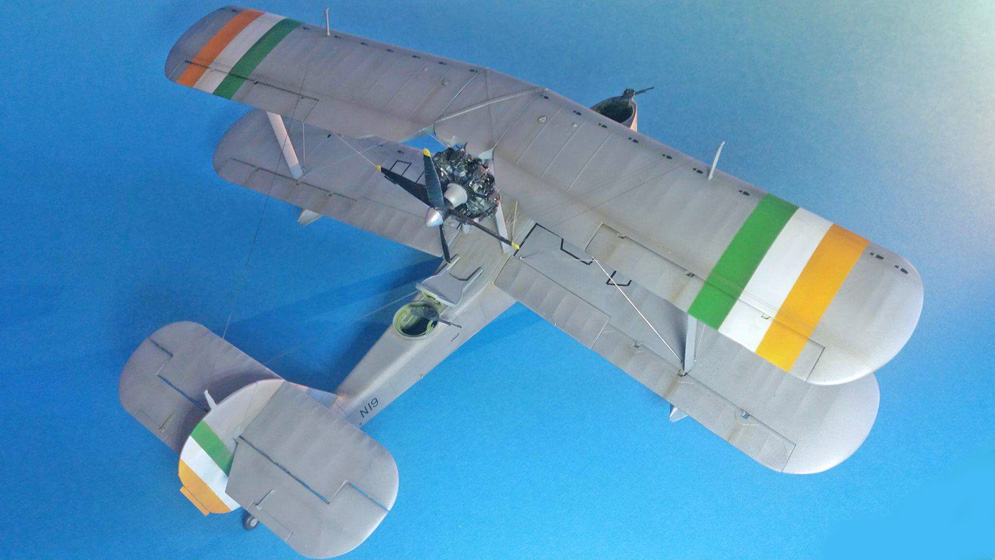
I built a 1:72, Matchbox kit and it was a beaut; but too small for my liking. I then found that Airfix had made a wonderfully detailed 1:48 version and it had to be mine. I went full out on the extras with full photo etched and including Aims metal rigging to make it stand out.
The kit went together splendidly and with very minimal filler. I was thinking of doing her in her traditional Royal Navy colours most commonly seen perhaps, but then stumbled upon Irish corps markings and knew that I had to finish her this way.
So with a good amount of masking and searching for proper colours, I did her well.
I had a lot of fun building this kit and it has filled my passion for amphibious planes and maybe yours.
Thank you for checking her out.
Donald A. Mann

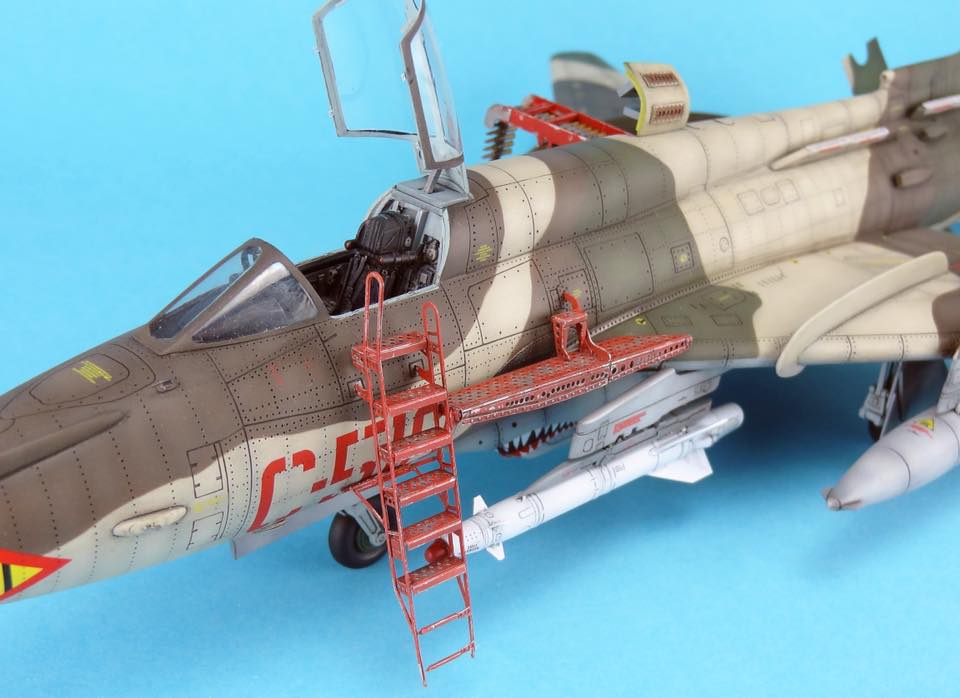
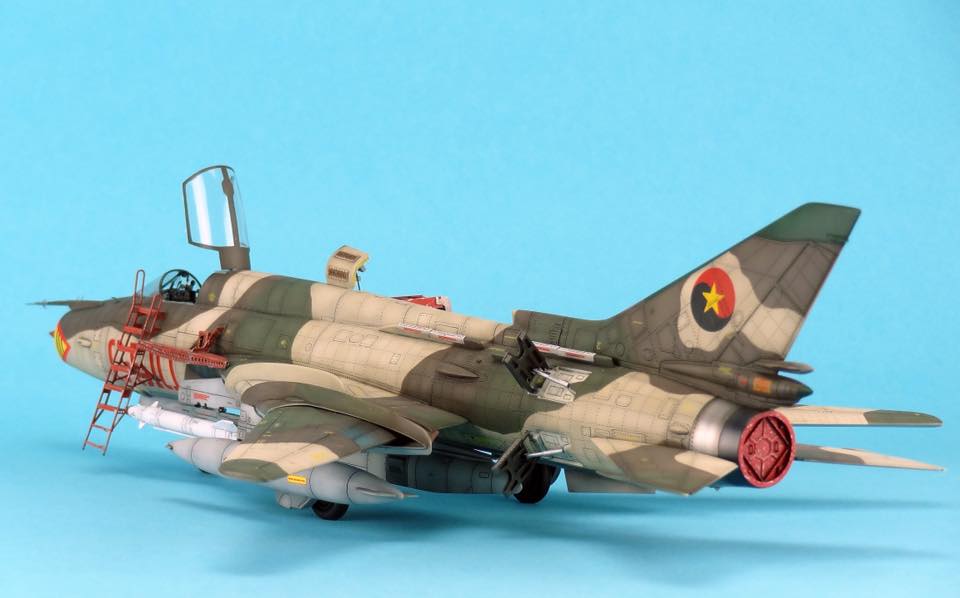
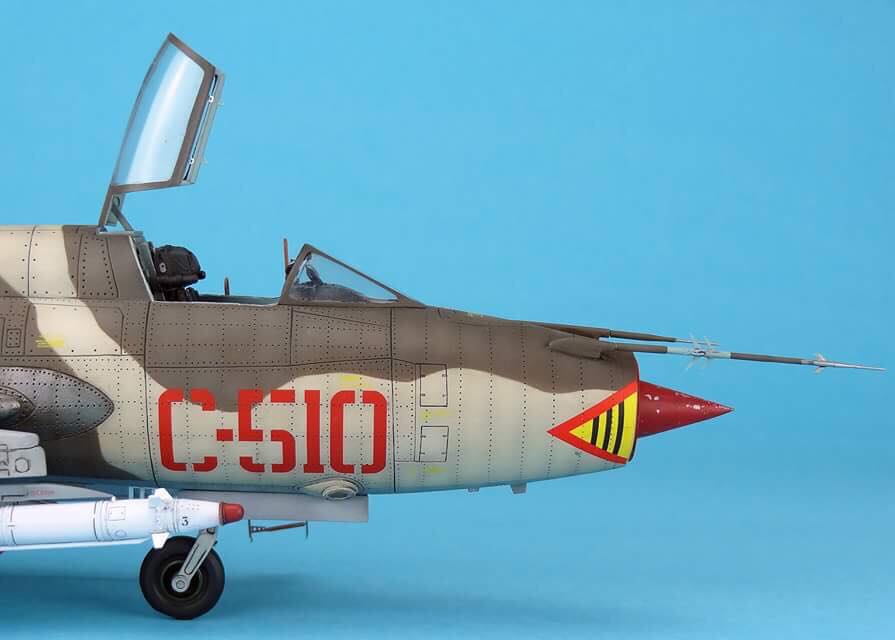
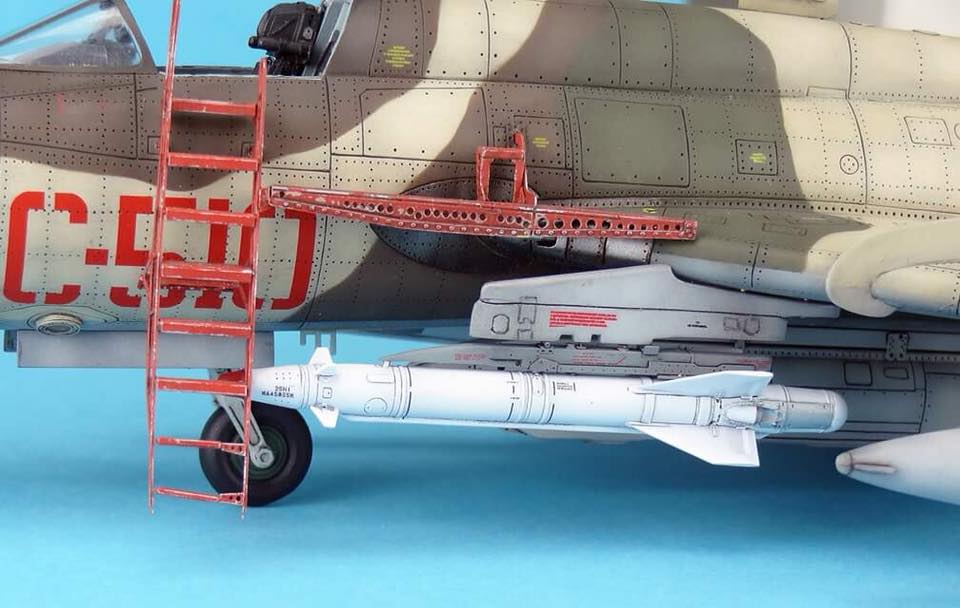
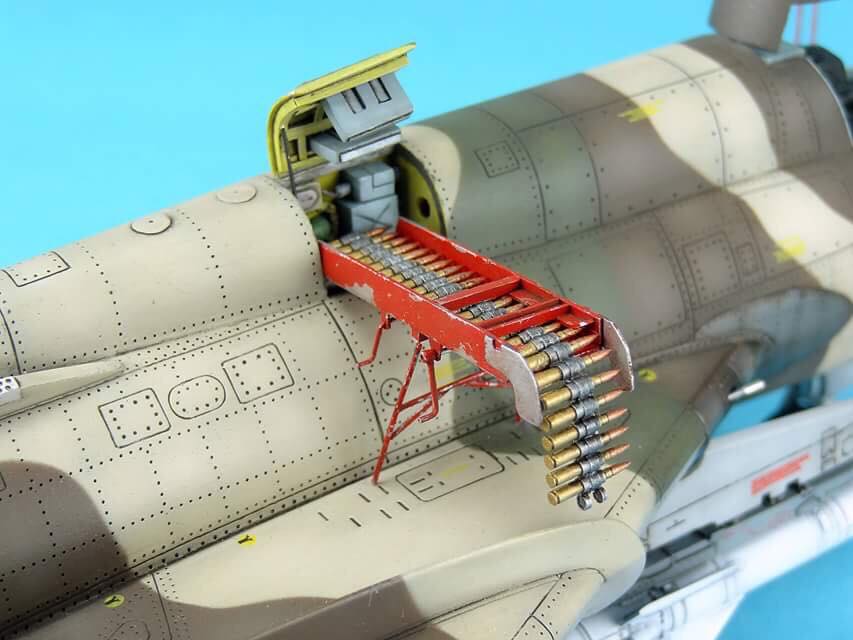
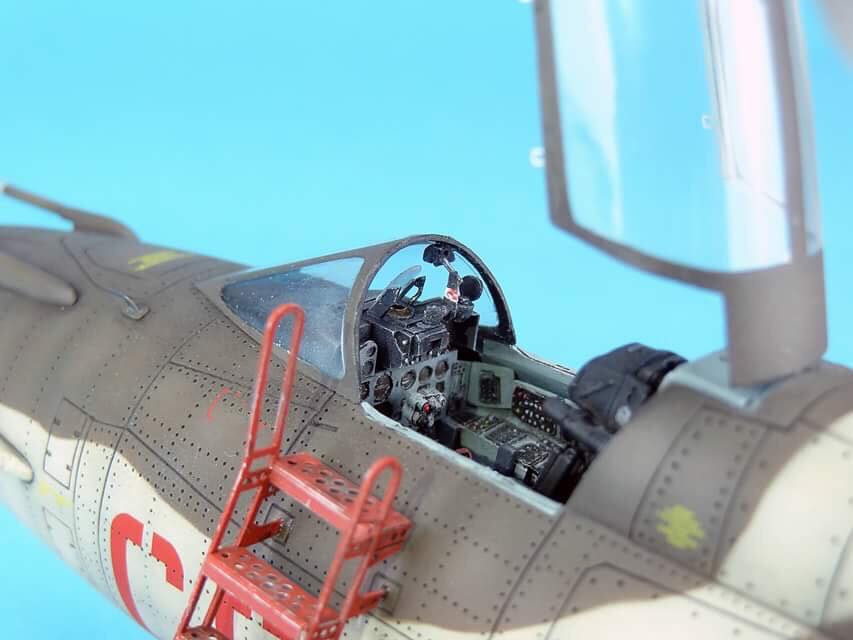
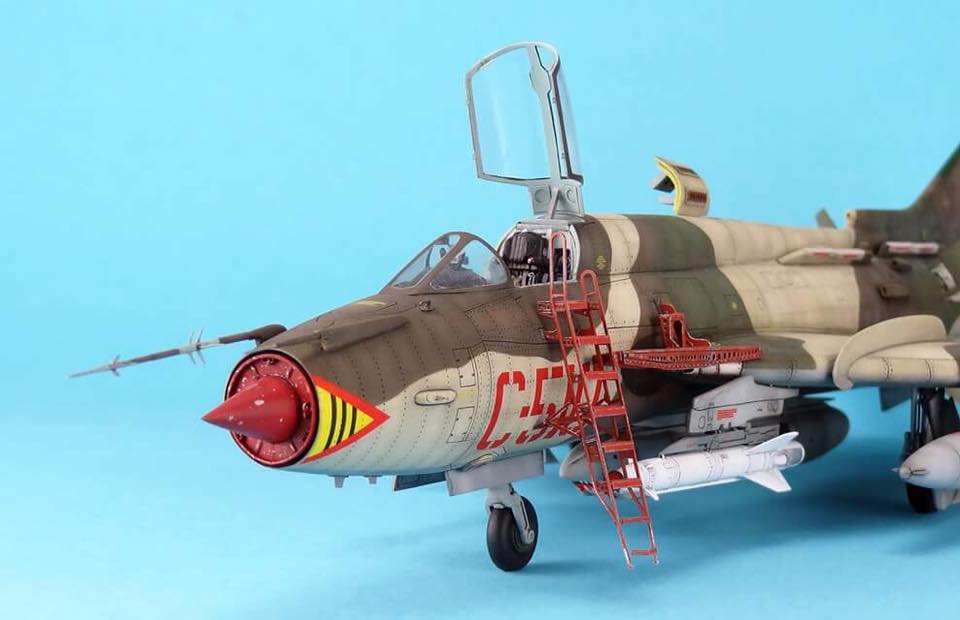
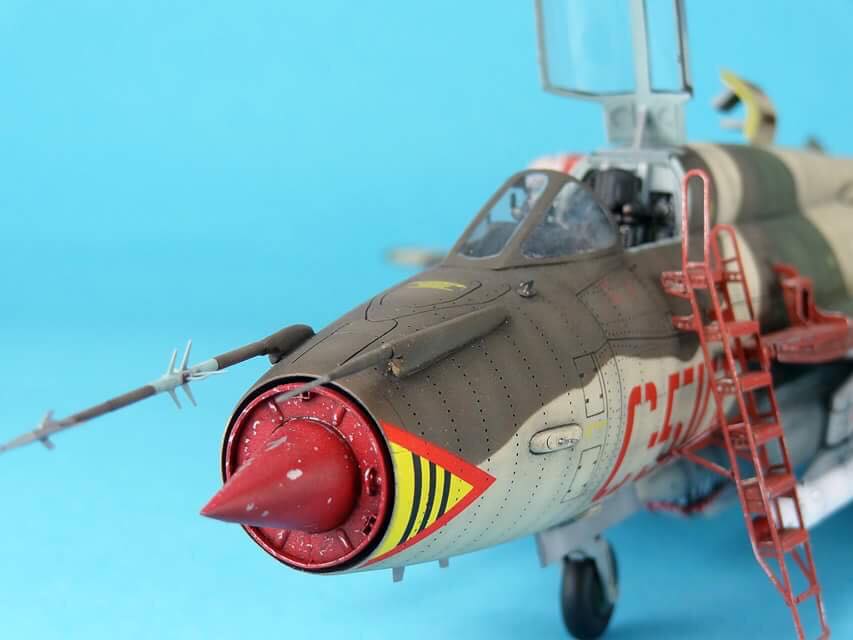
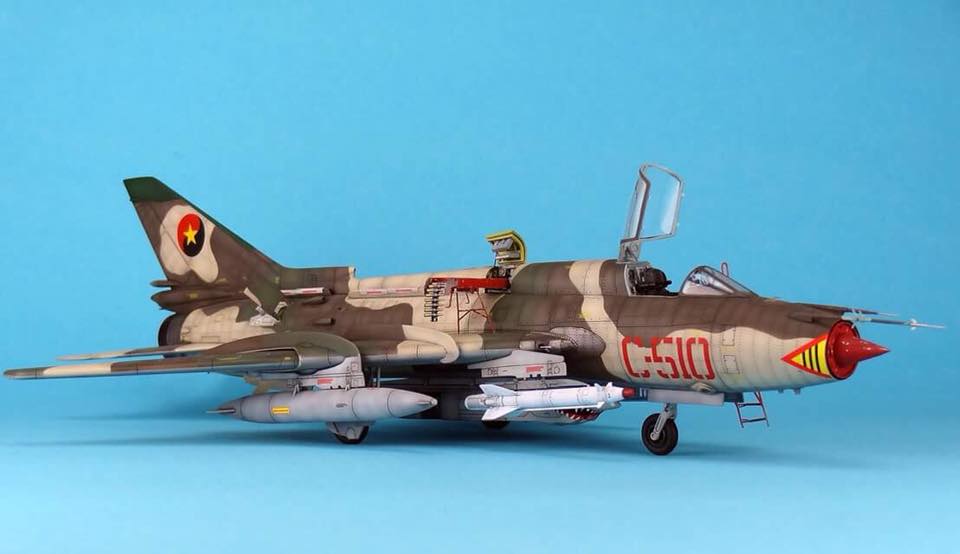
Here’s my OEZ Su-22 in 1:48th scale. Gunze paints, Aclad metals and coats (Aqua gloss and clear kote matte). Eduard photo-etch (PE) sets and ladder and a scratch-built ammo loader. The cockpit is from Aires and the missiles Eduard Brassin.
Hope you like it!
Jeroen B.
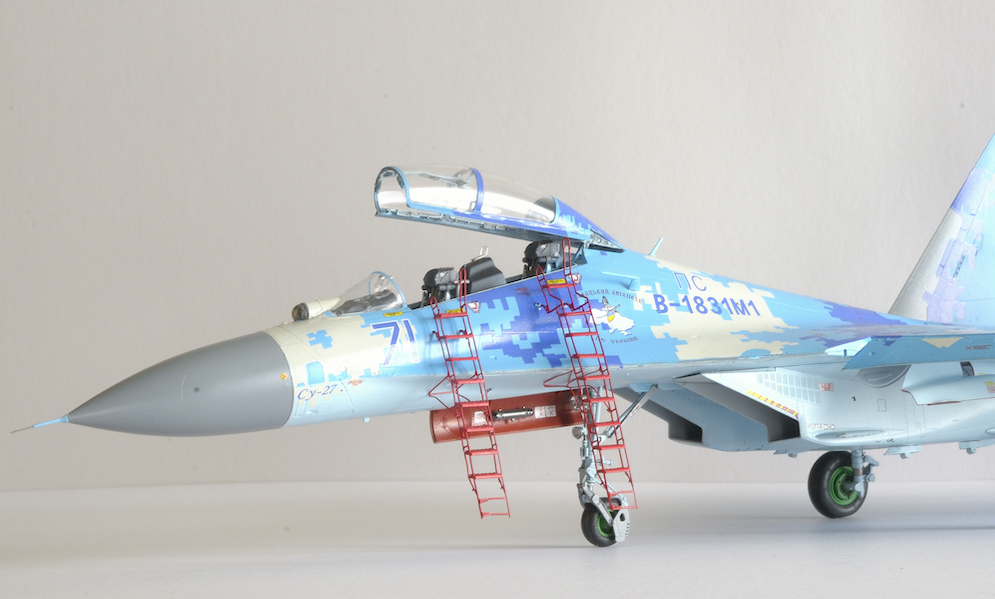
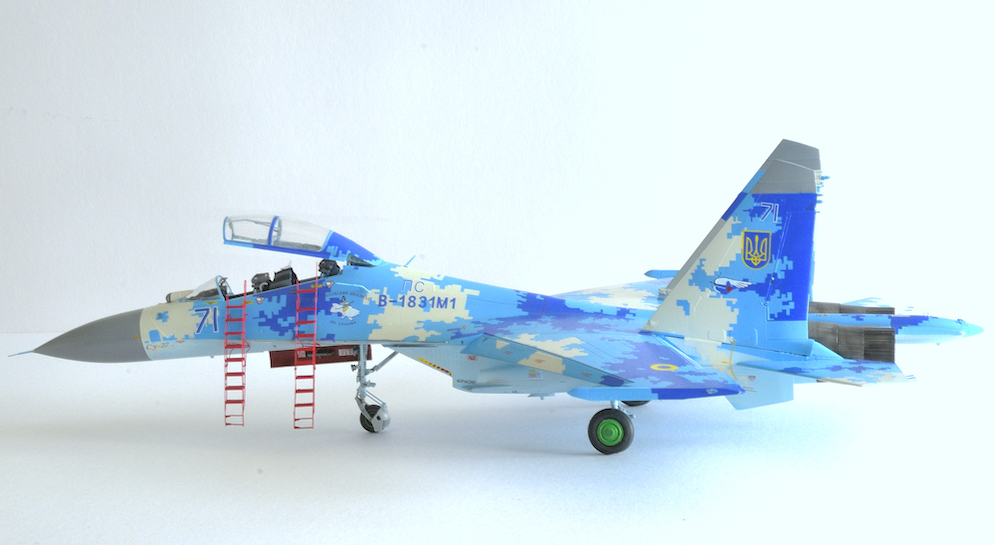
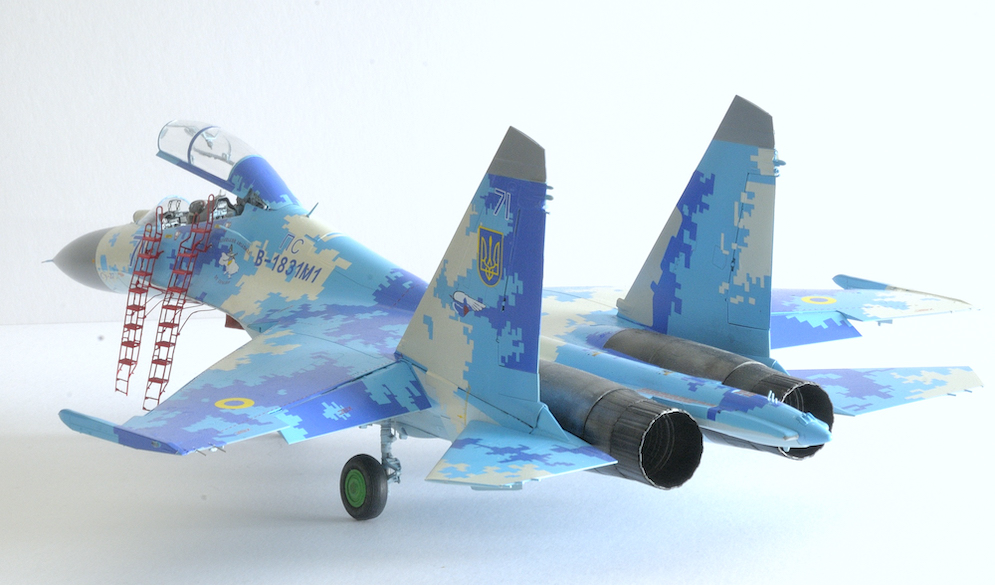
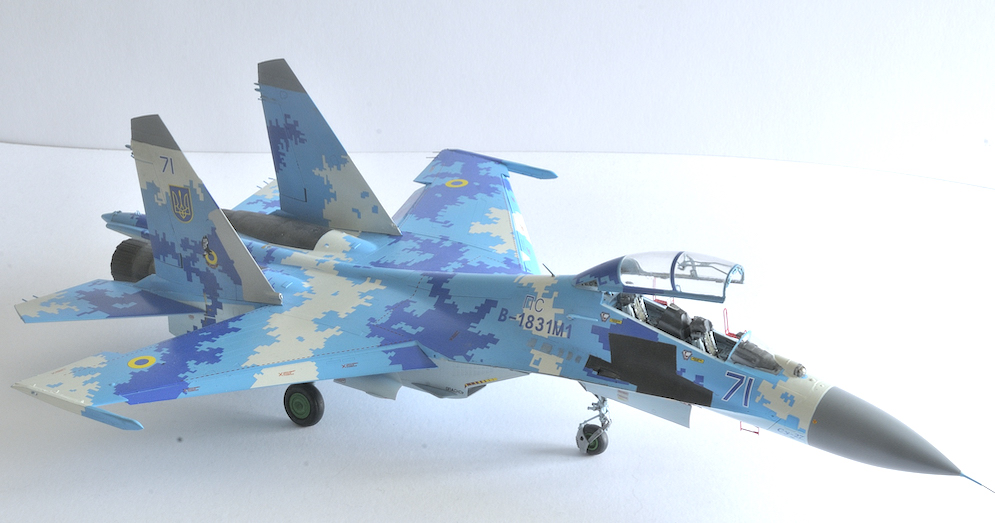
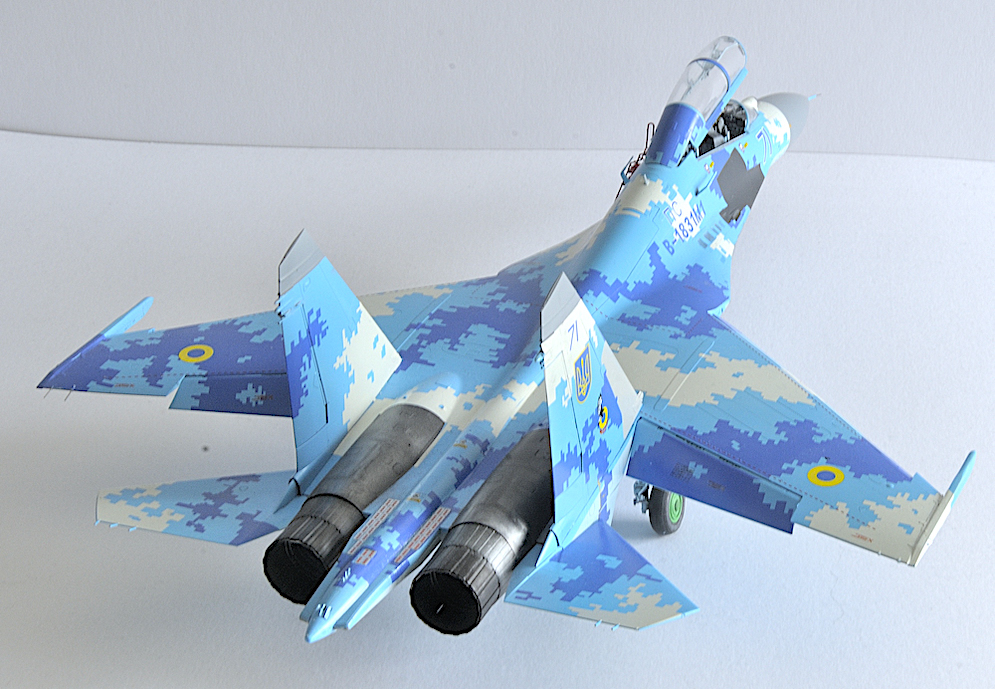


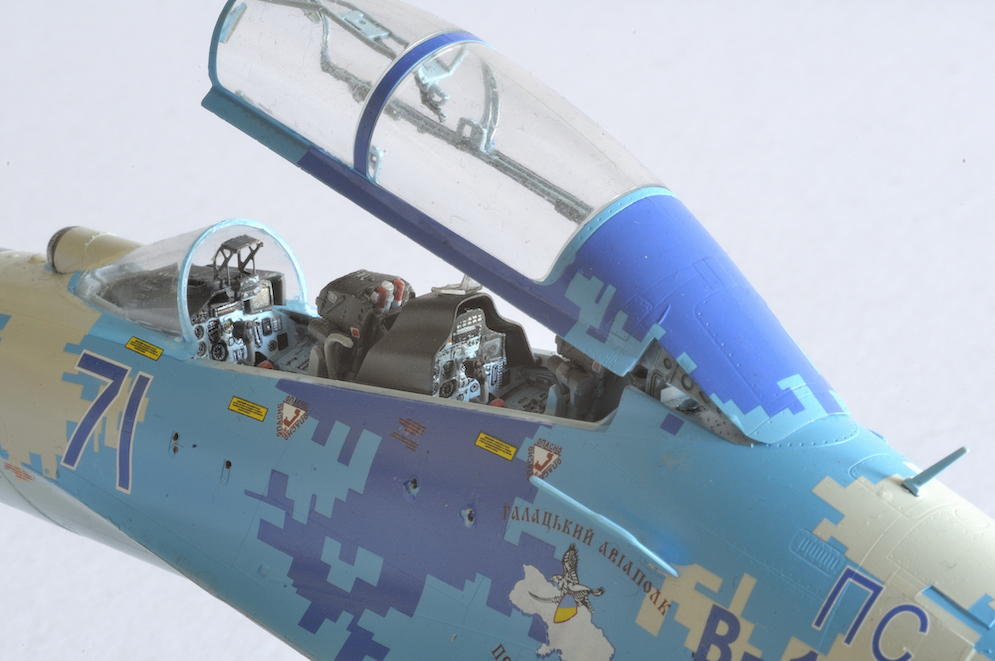
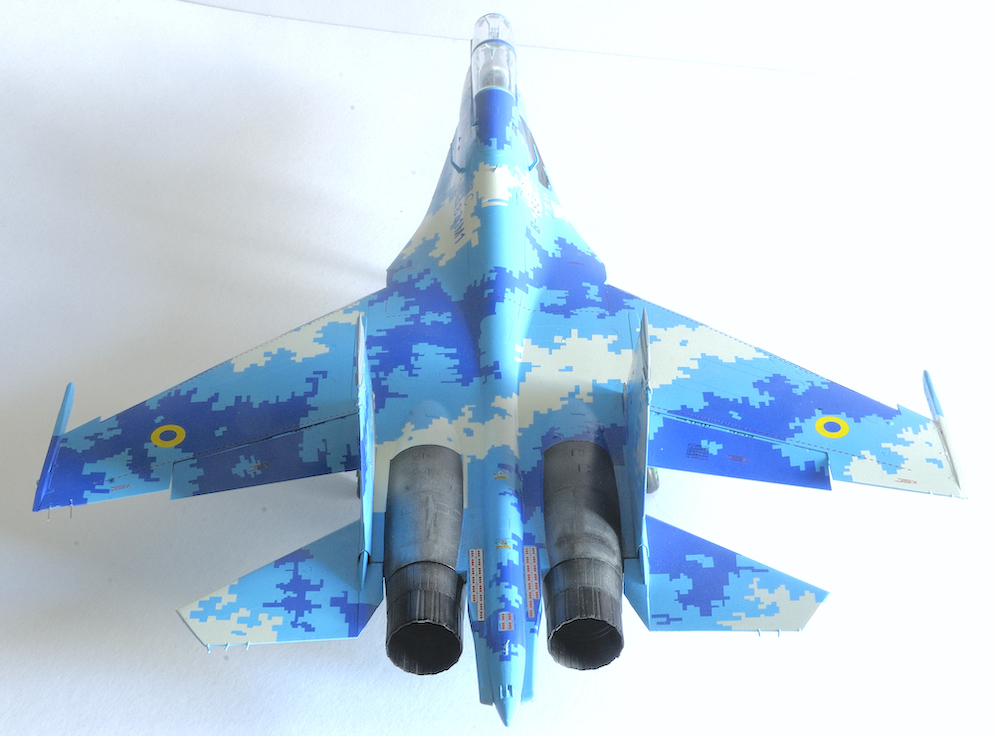
I wouldn’t normally submit a copy of someone’s build but as Dave used the single seat Flanker with paint masks for the camouflage to build a Ukrainian aircraft I thought the newer GWH release with the 2 seat version and crucially, decals included with the kit for the digital camo, was worth a couple of pictures as a comparison for people with a fear of paint masks on a large scale.
I used MRP paints as they give an ultra-smooth surface so no need to gloss coat for the decals. The decals are superb, there is no carrier film to silver so the edge of the colour is the edge of the decal. I cant speak highly enough of these decals. They sit down perfectly with a little Micro Sol and are strong so large areas joined by small sections don’t break, as well as being very thin.
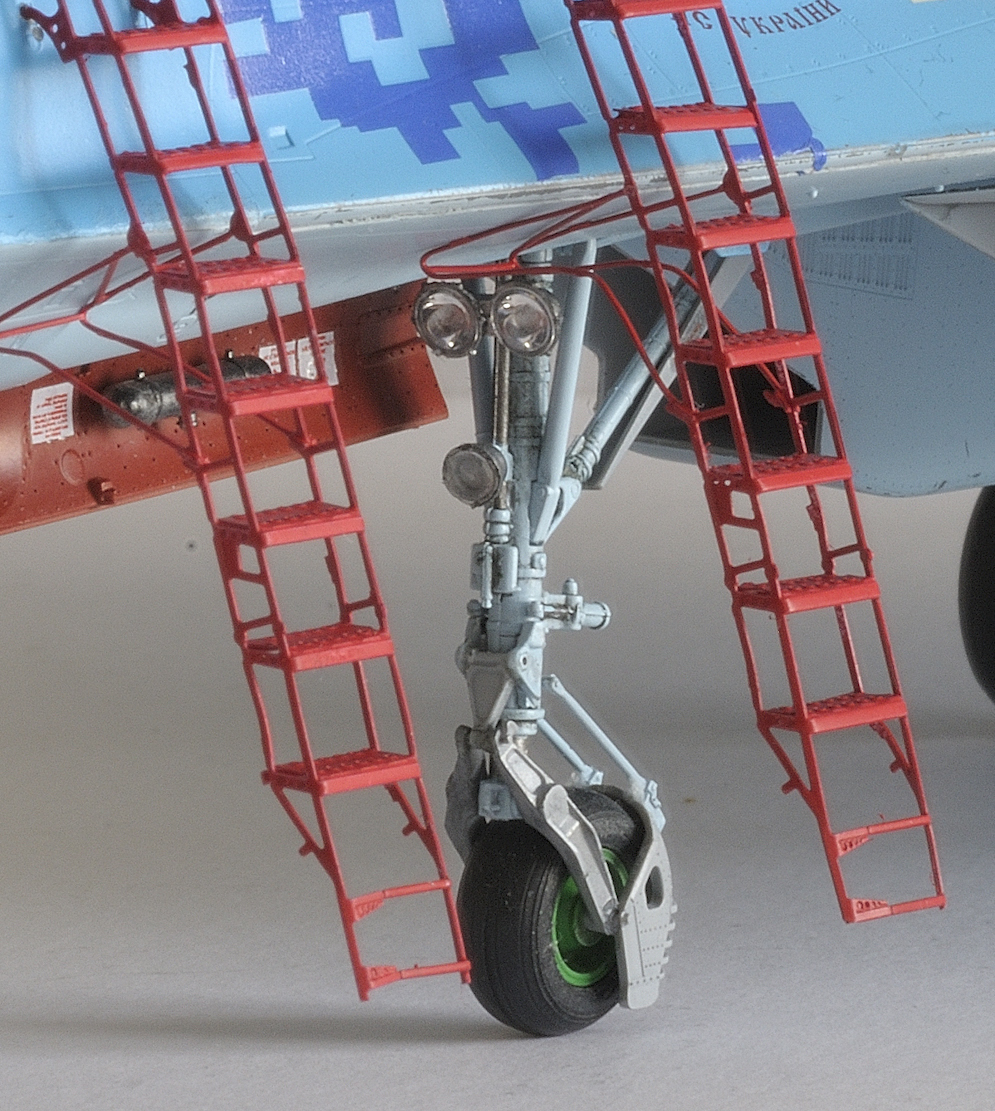
Ladders are Flightpath brass and thicker than the usual Easter European offerings which is a good thing in this case.
The model is based on the often seen in the West air show display aircraft so has no weapons or pylons in the box which is a shame.
Sorry the photos are not up to your sites usual high standards but I live in a north facing flat and light is always a problem anyway I have sent a selection and maybe you can find a couple to demonstrate the decals apposed to the paint masks.
Kind Regards
Paddy B.
Our Aircraft Scale Model Galleries
Focke-Wulf and Fokker Scale Model Gallery
Messerschmitt Aircraft Scale Model Gallery
Supermarine Spitfire Scale Model Gallery
A | B | B-2 | C | D-E | F | G | H | I-L | M | N-R | S | T-V | W-Z