More of our Subscribers’ amazing aircraft: W-Z
Galleries: A | B | C-E | F | G | H | I-L | M | N-R | S | T-V | W-Z
Each submission has a ‘gallery’ of thumbnails which you can click on to see an enlarged image and read the short text describing the model – enjoy!
Unlock full access to 4,500+ in-depth build-reviews!
By subscribing to Scale Modelling Now, you unlock full access to 4,500+ in-depth build-reviews, exclusive how-to videos, regular technique masterclasses, and fresh content added weekly — all for just £1.50/month (£18/year).


Brian W.
Brian W.
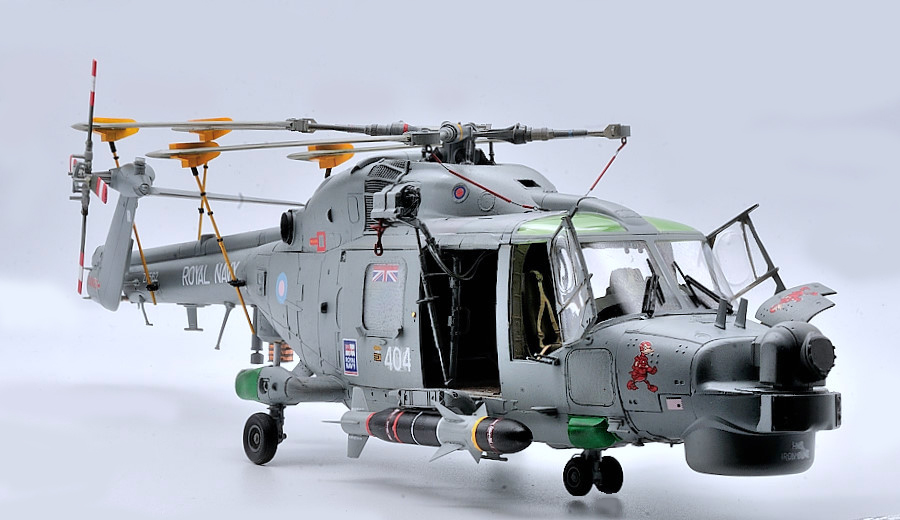
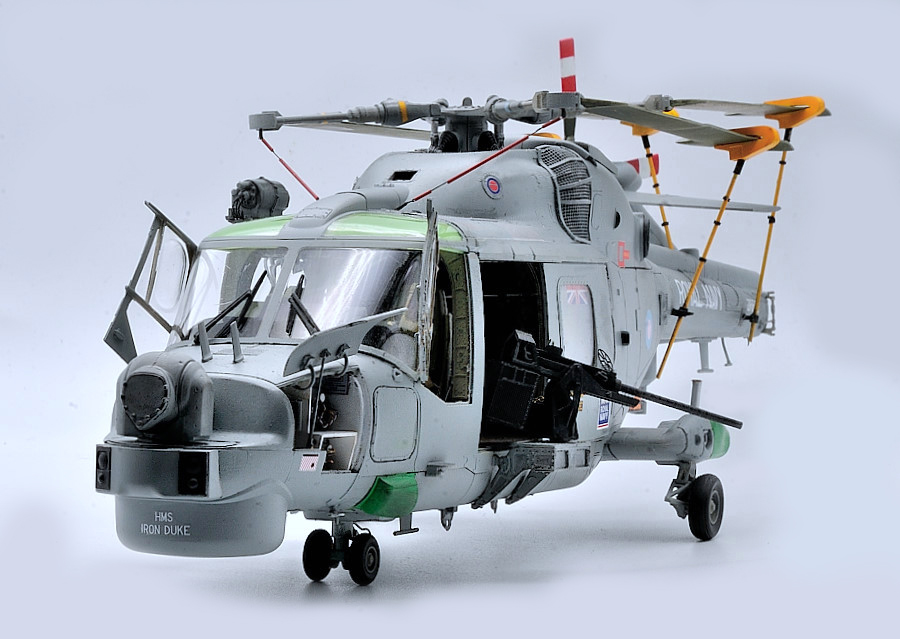

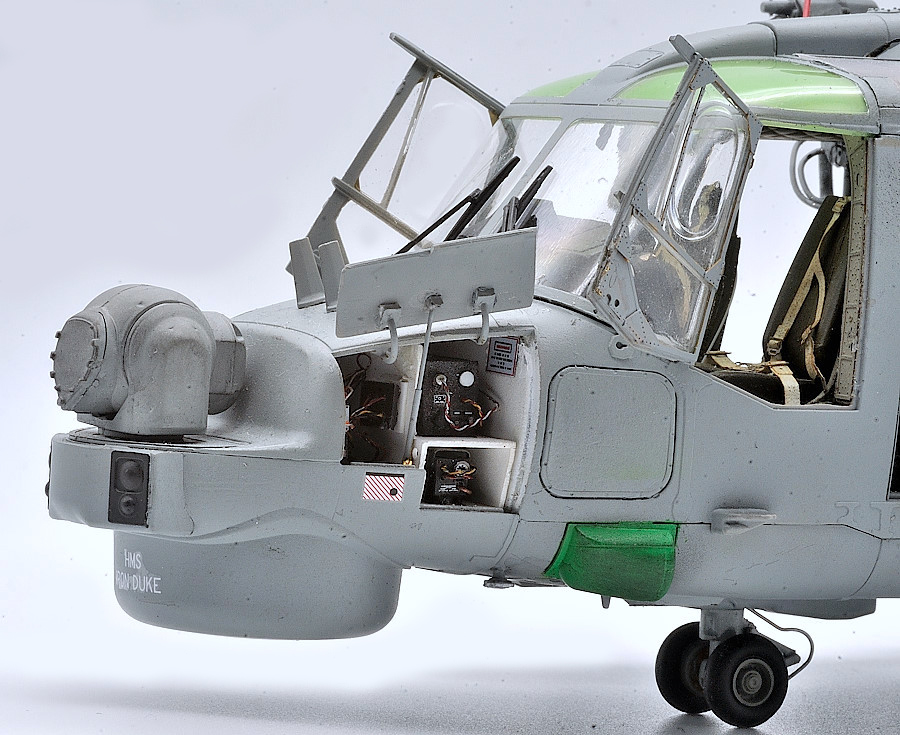
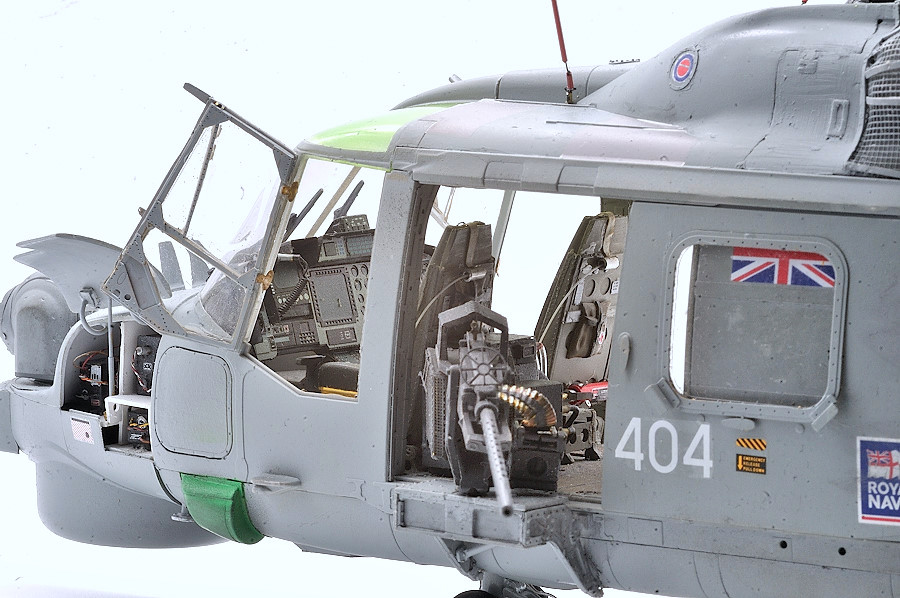
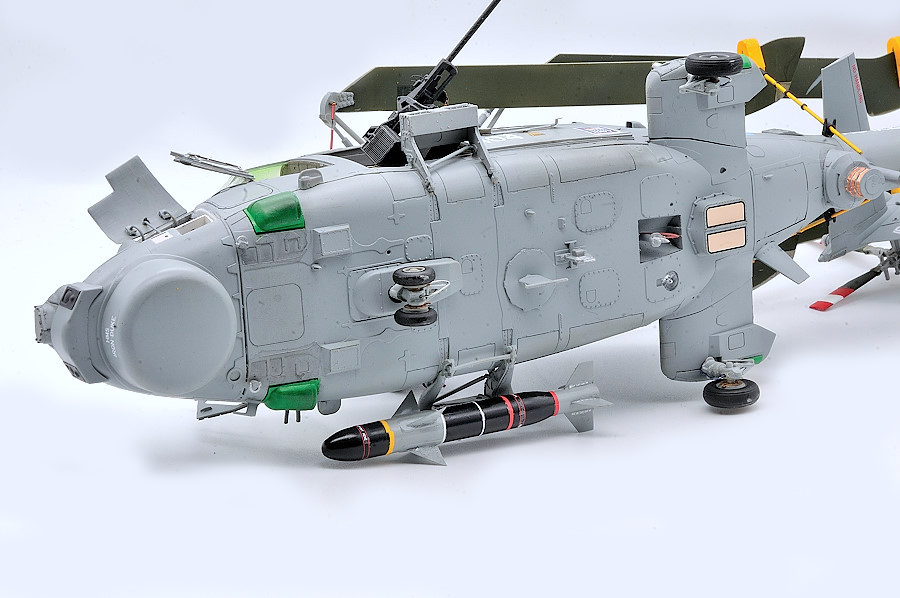
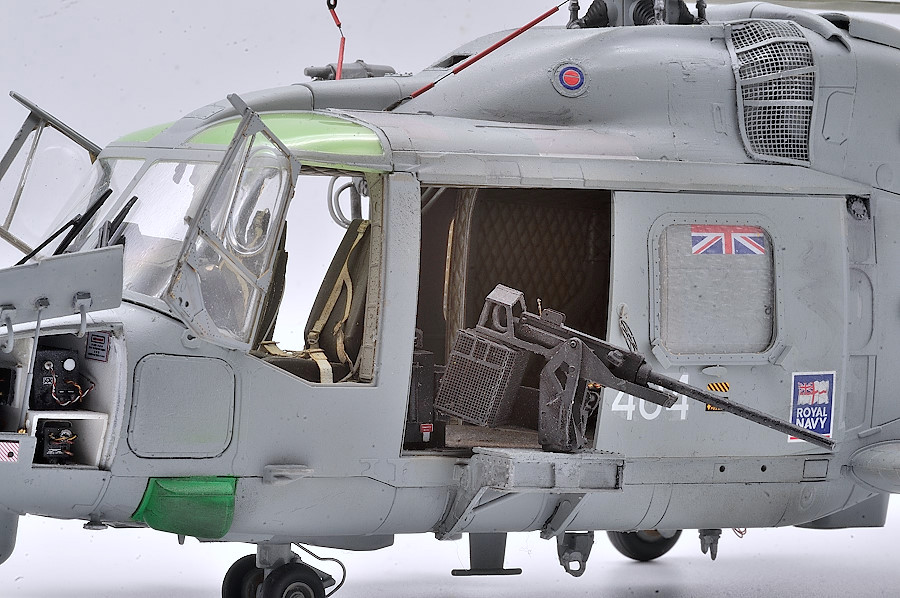
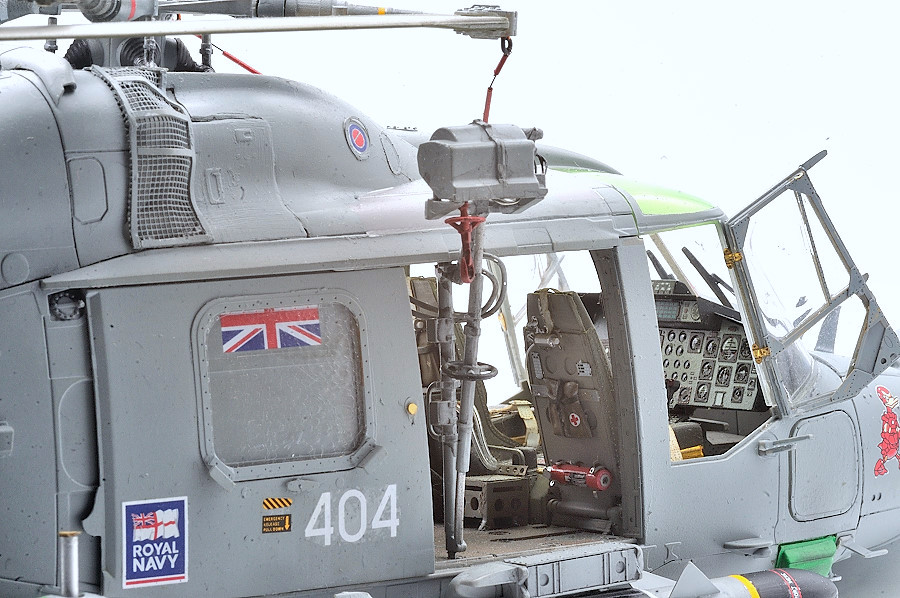


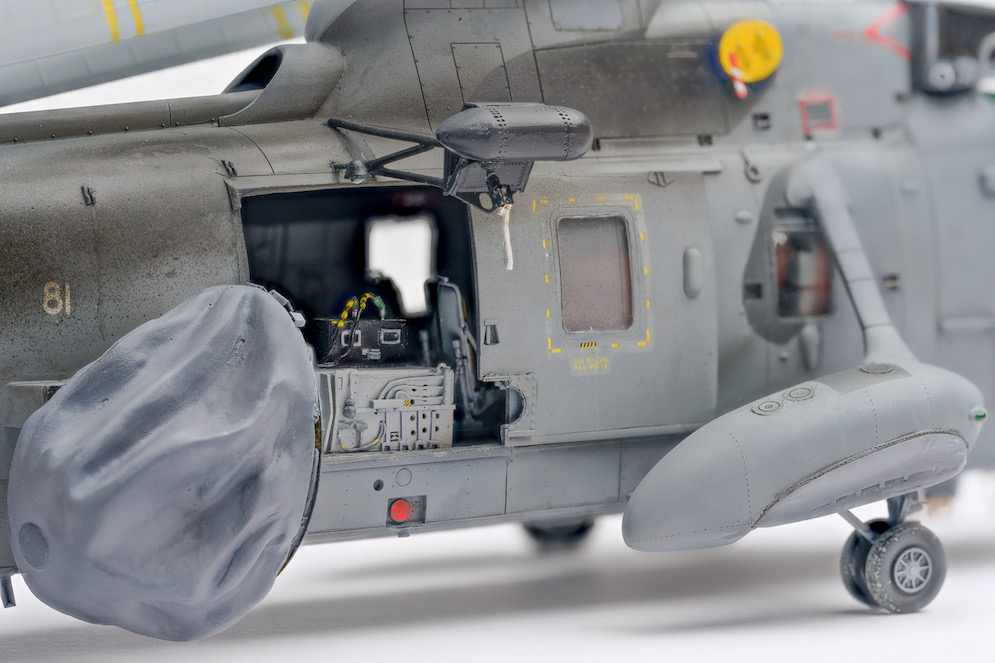
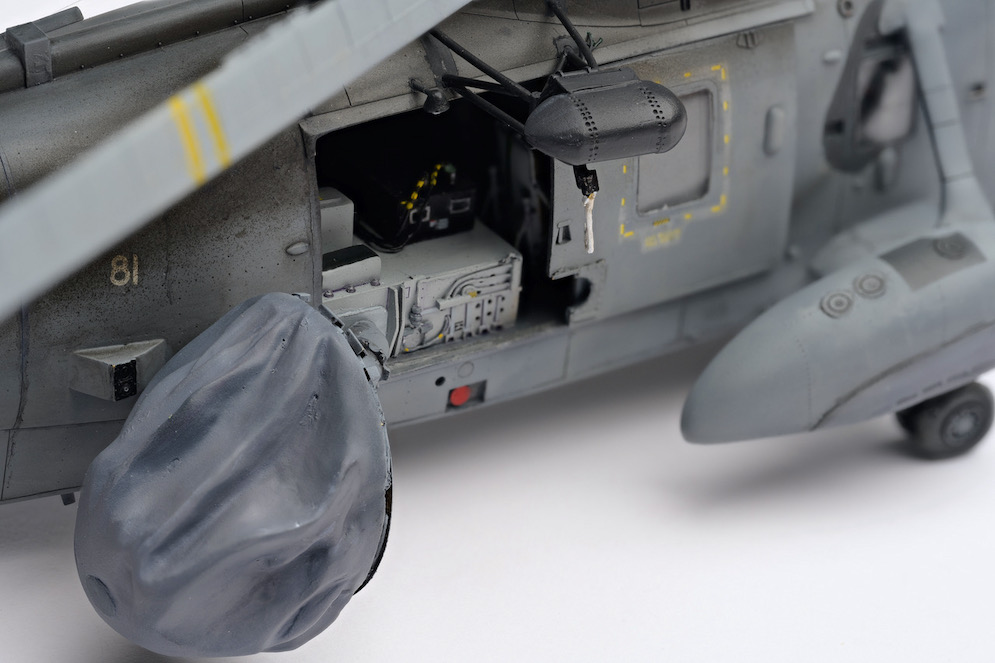
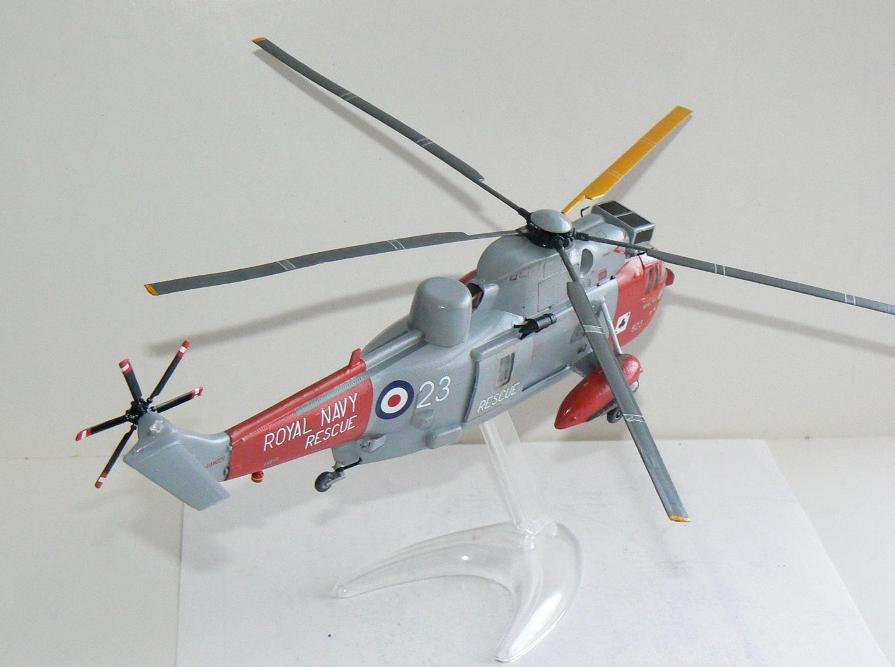
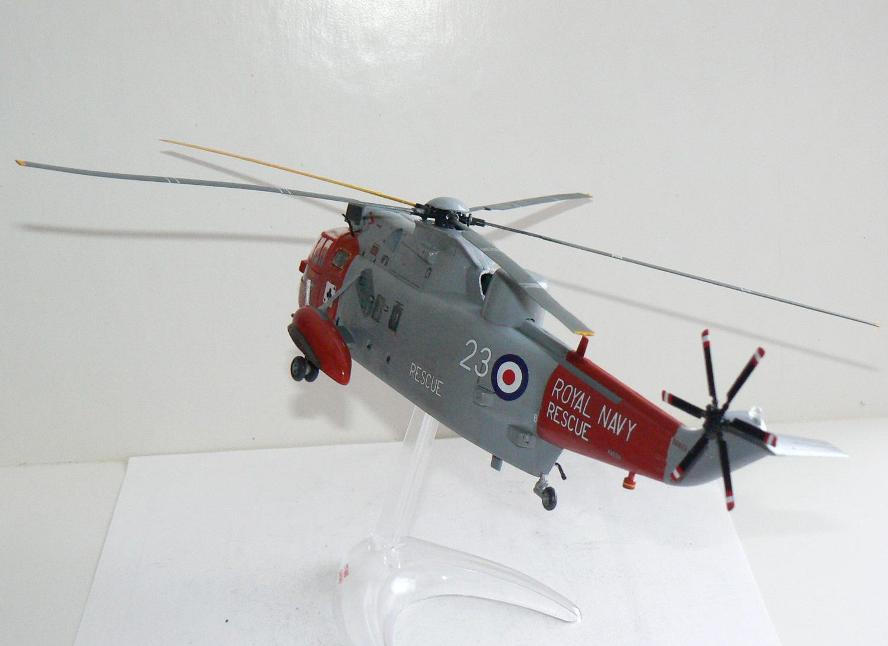
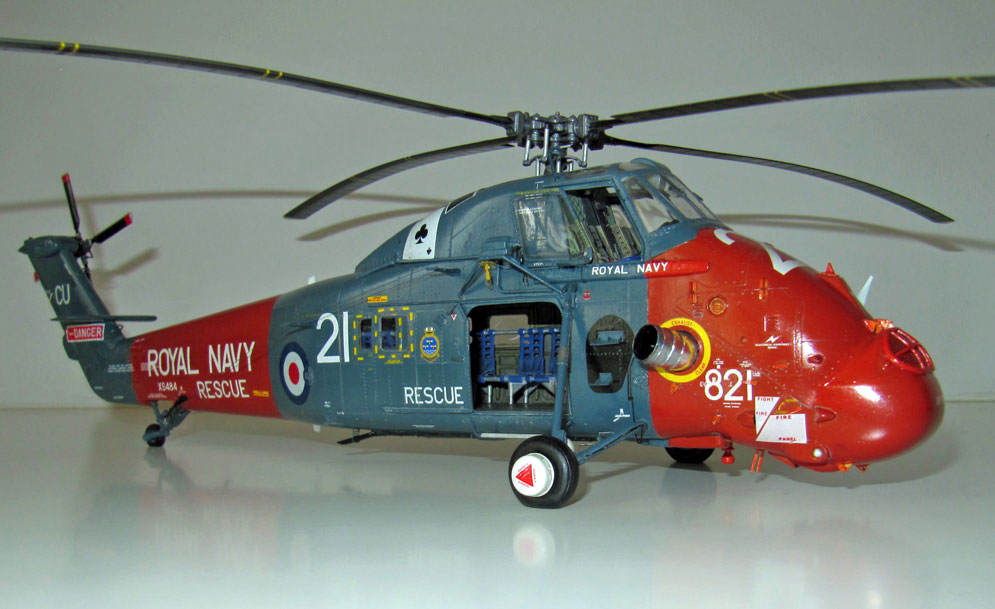
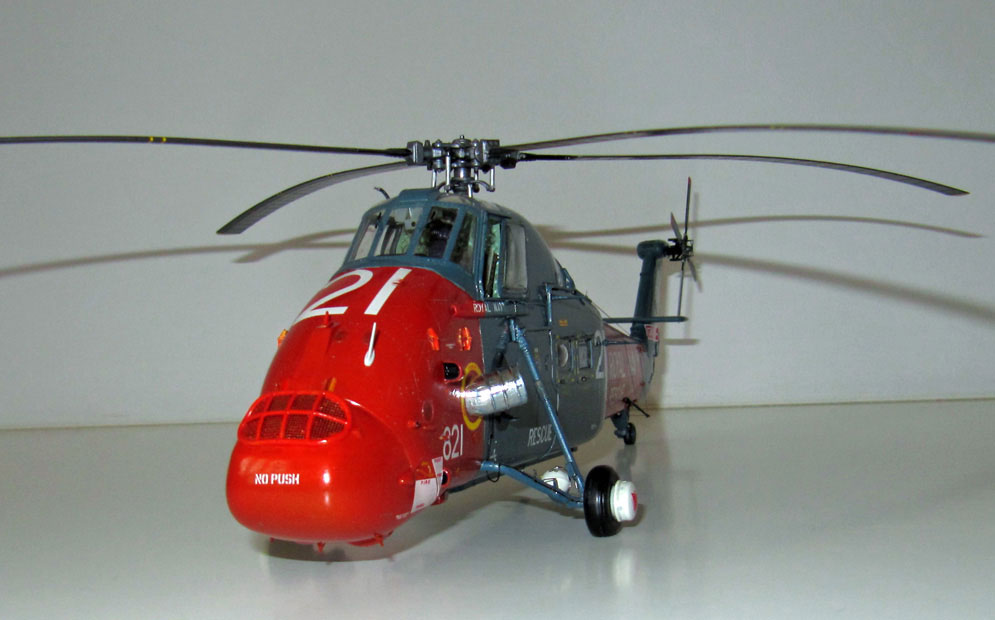
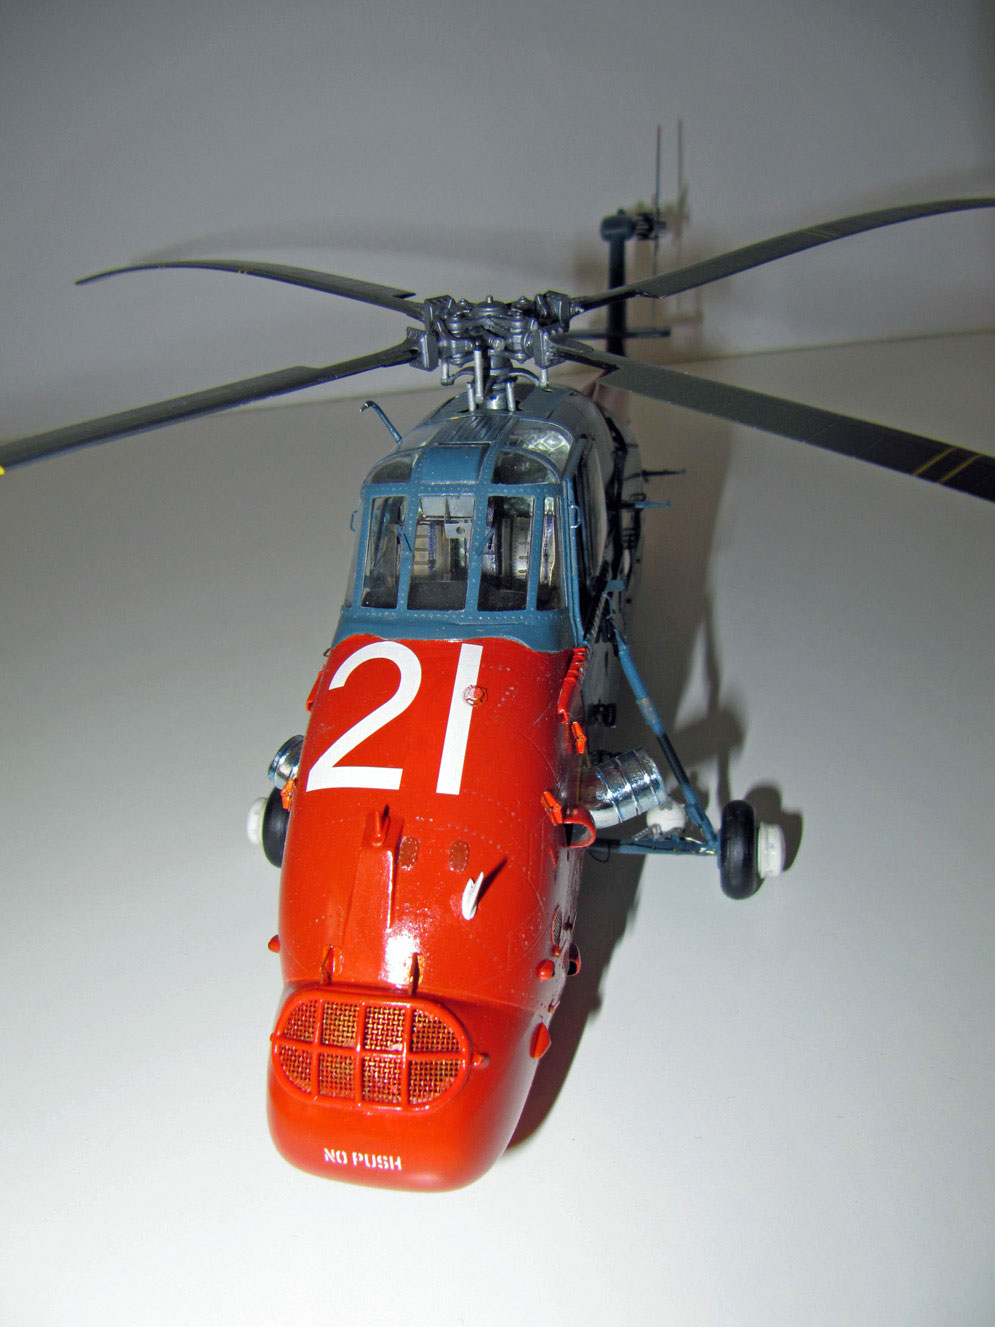
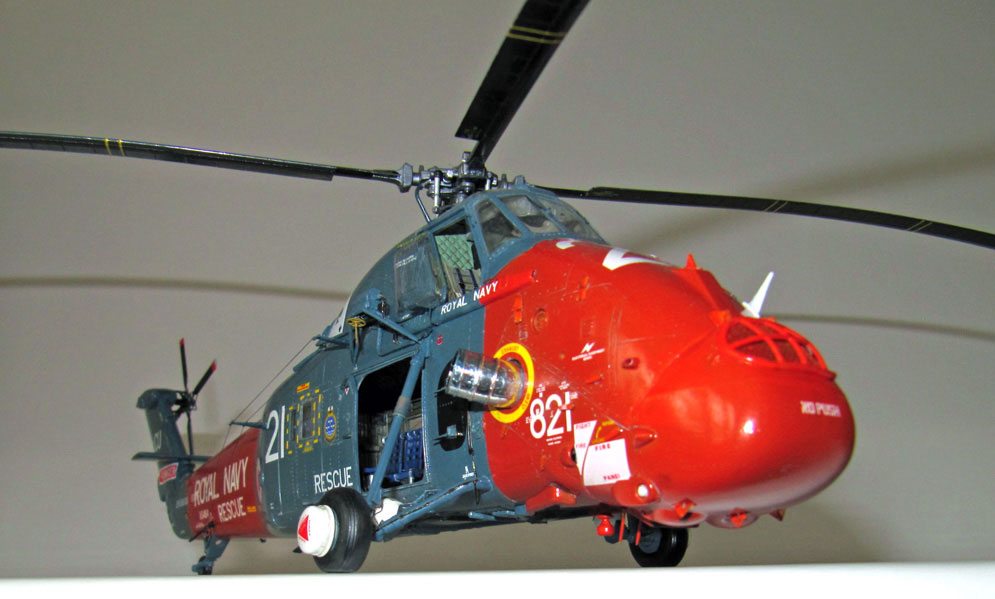
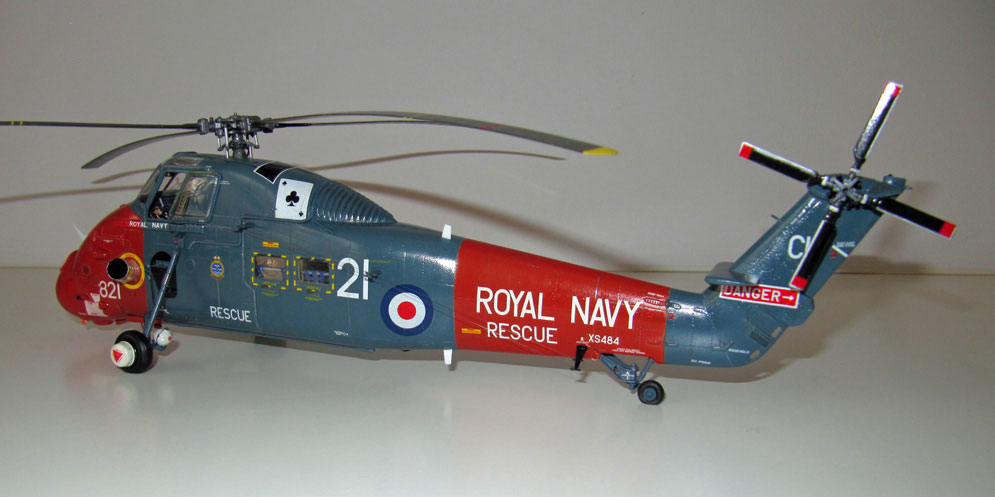
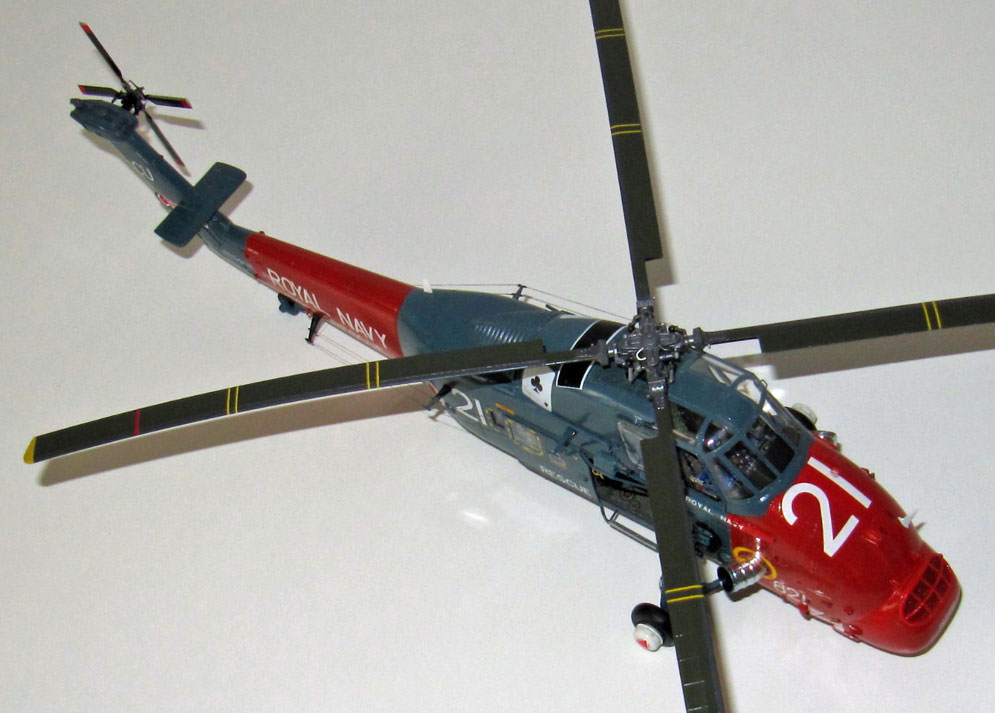
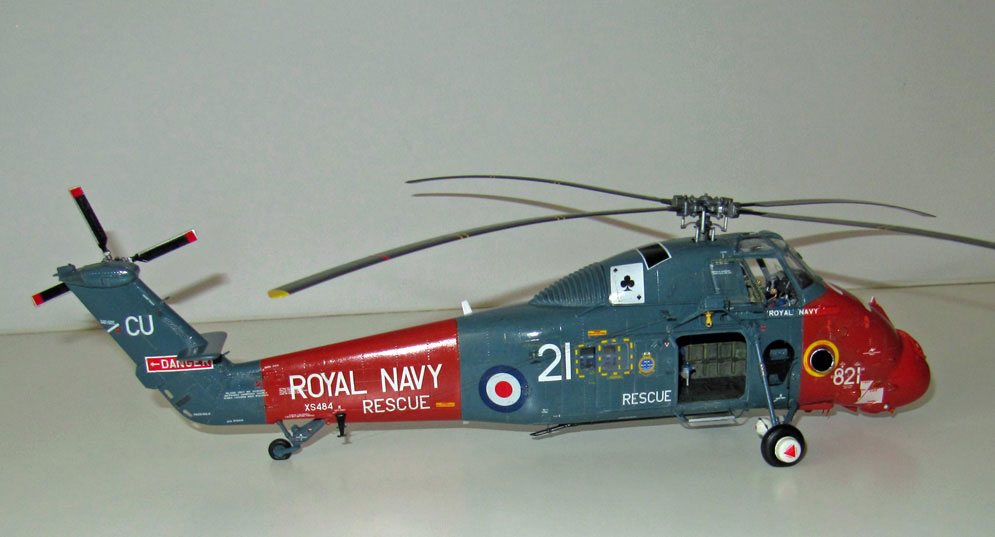
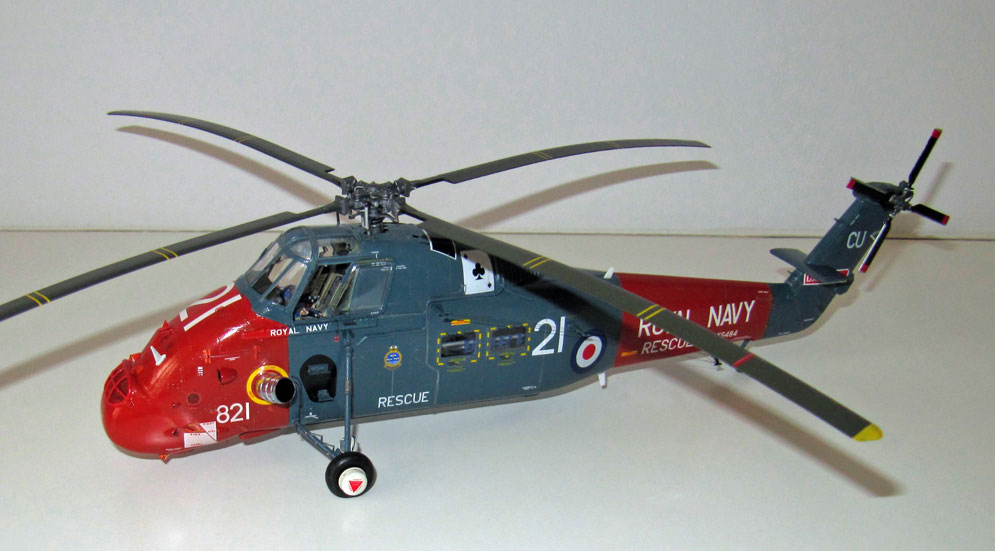
The kit is the Revell 1:32 Mk.8 Fleet Air Arm version with aftermarket rotor fold by “scalewarships” , scratch radio compartment and tail fold and also the eduard Big Ed PE set.
It’s a good kit and lends itself to detail as it can be opened up as in the pictures (doors etc), only real problem I found was in the eduard PE where the interior door panels are printed back to front but TBH like most PR, you don’t really need it as the kit parts are more than adequate.
Radio compartment parts are Evergreen plastic, some punched out discs, sheet for the shelves as well as painted and twisted copper wire. Tail fold kit is great and makes shelf display so much easier!
Hope you like it…
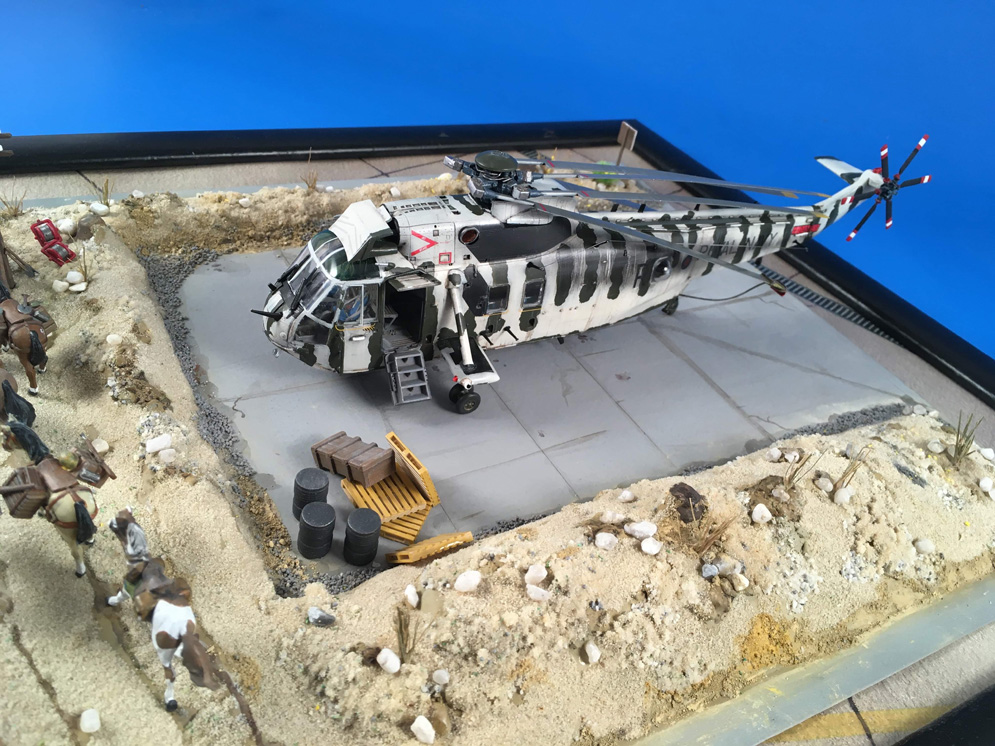
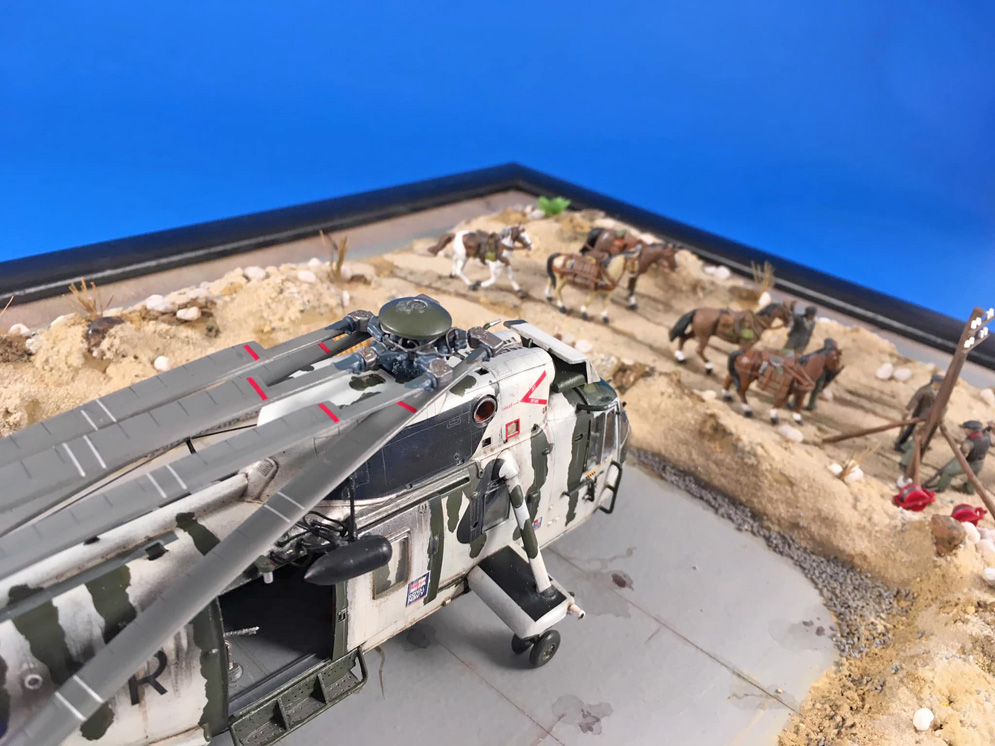
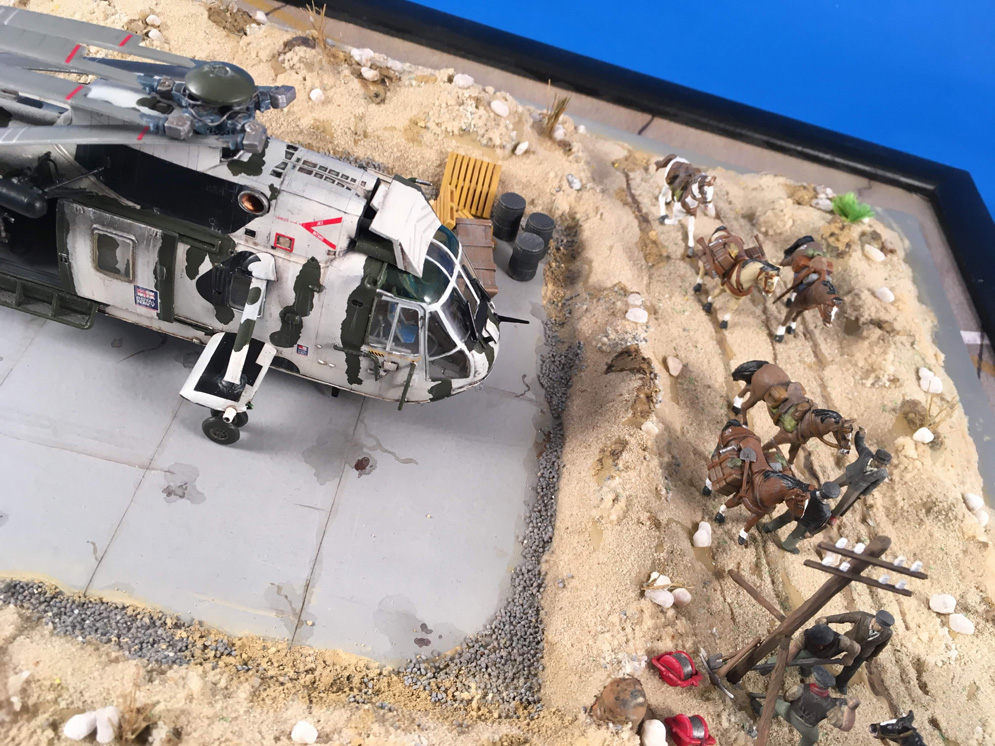
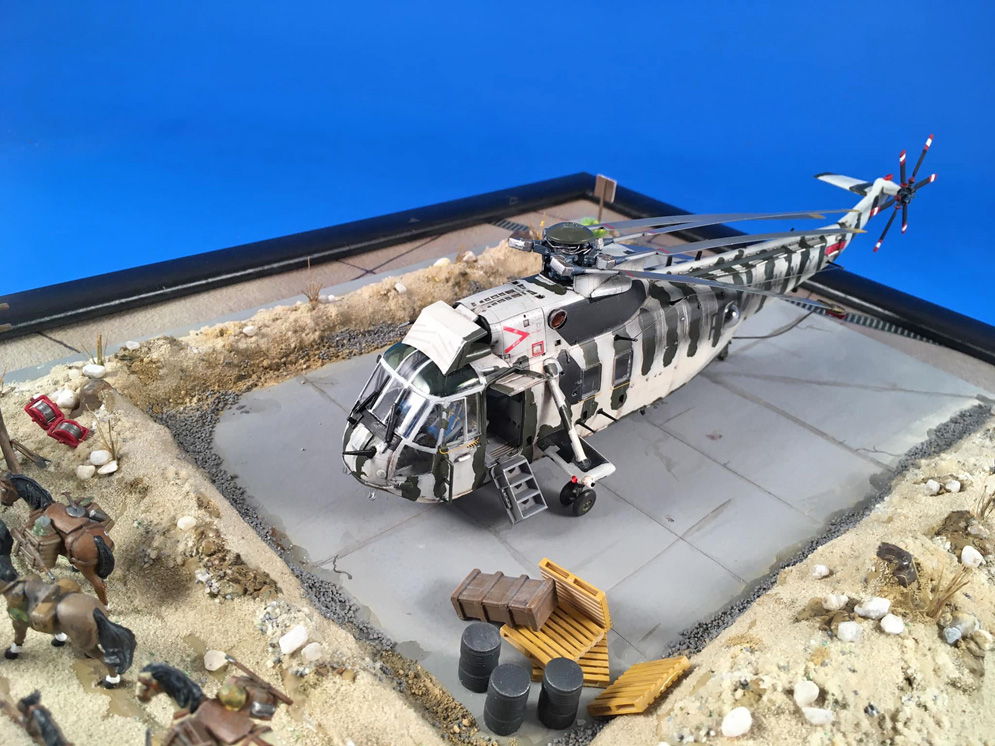
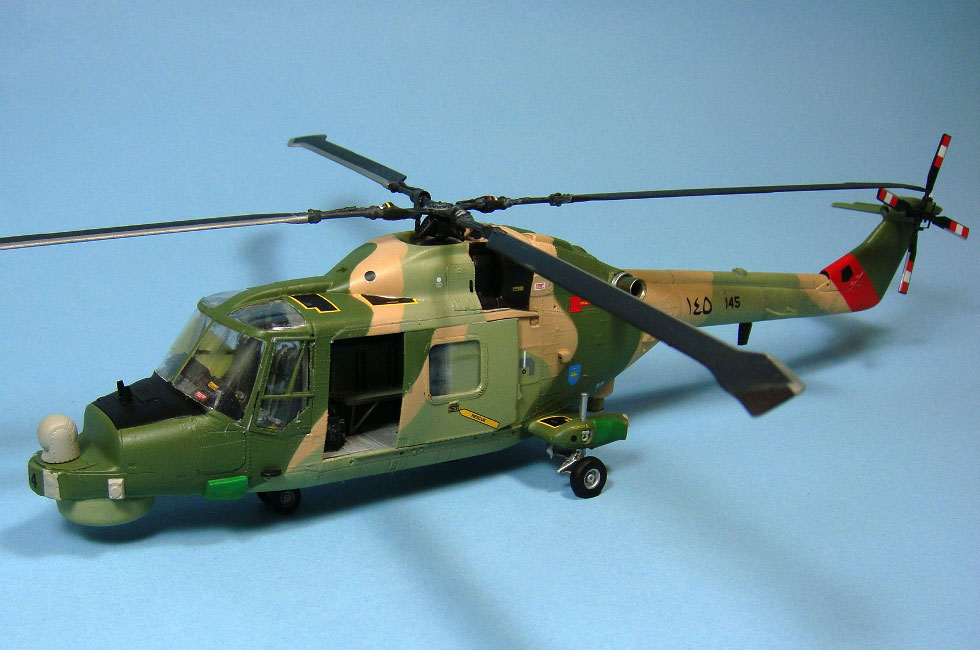
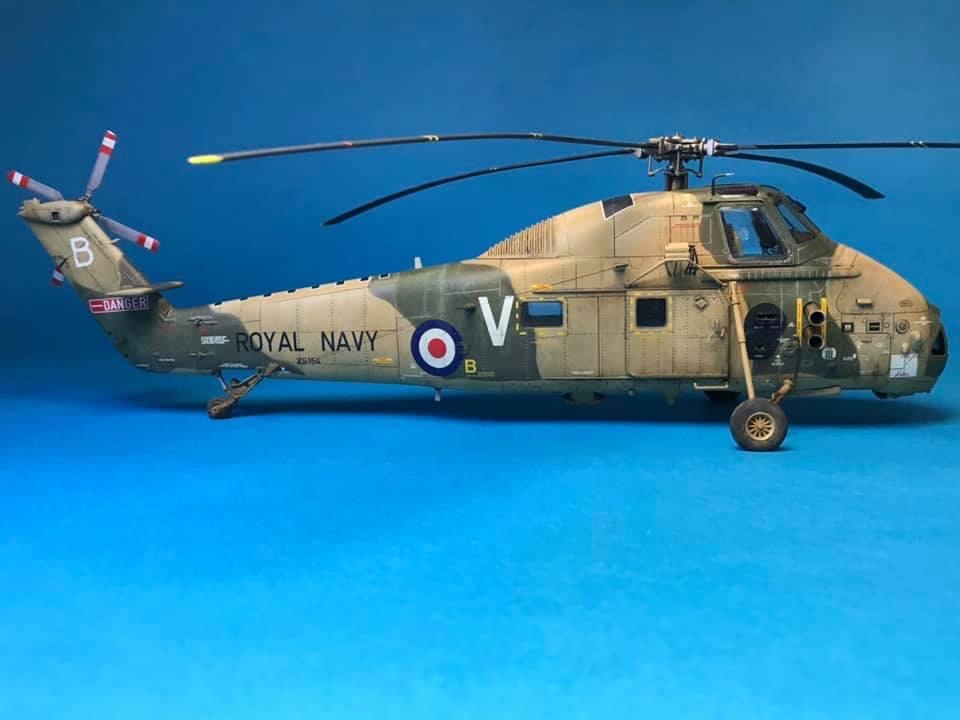
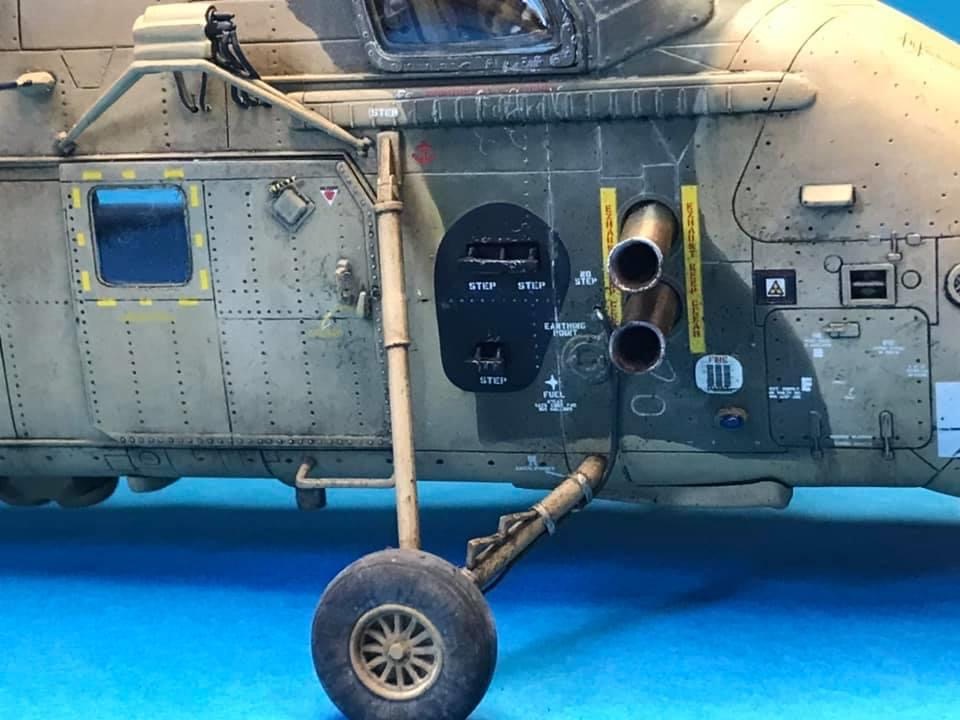
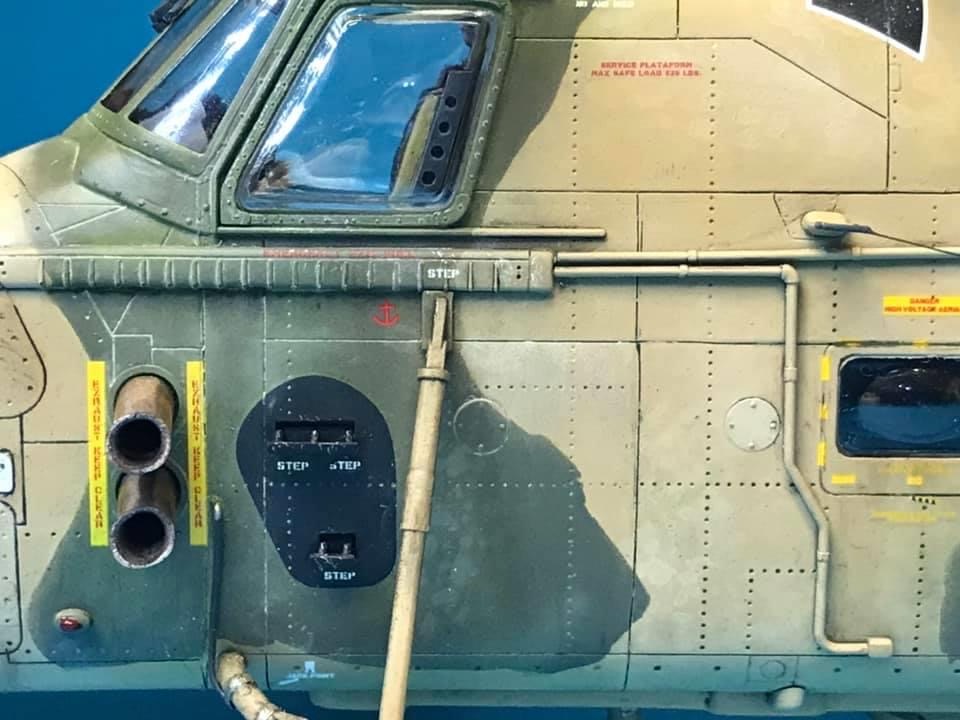
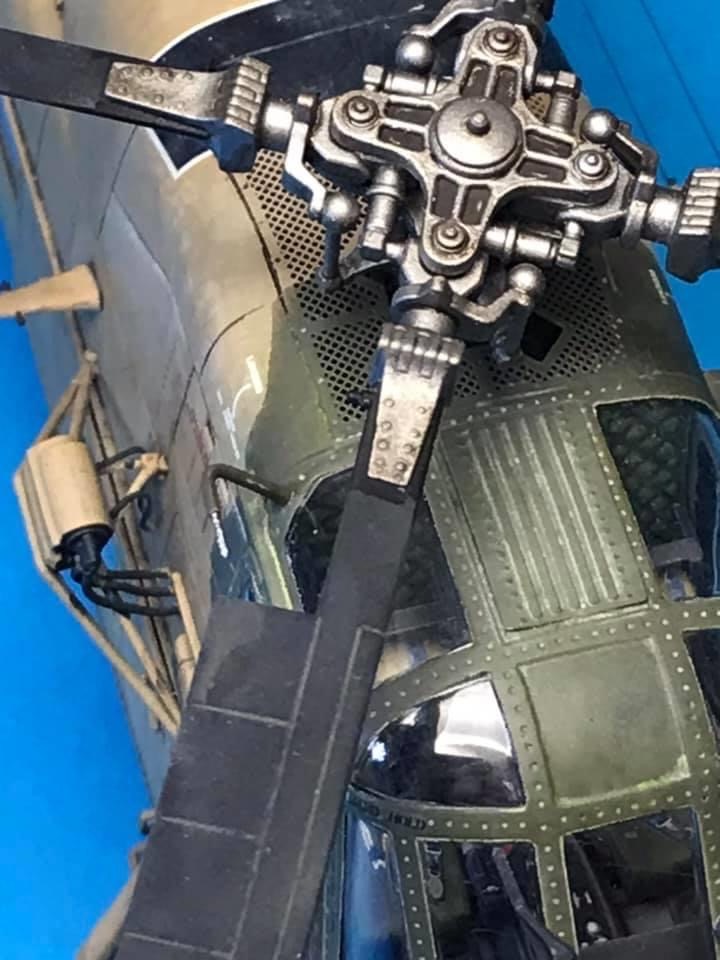
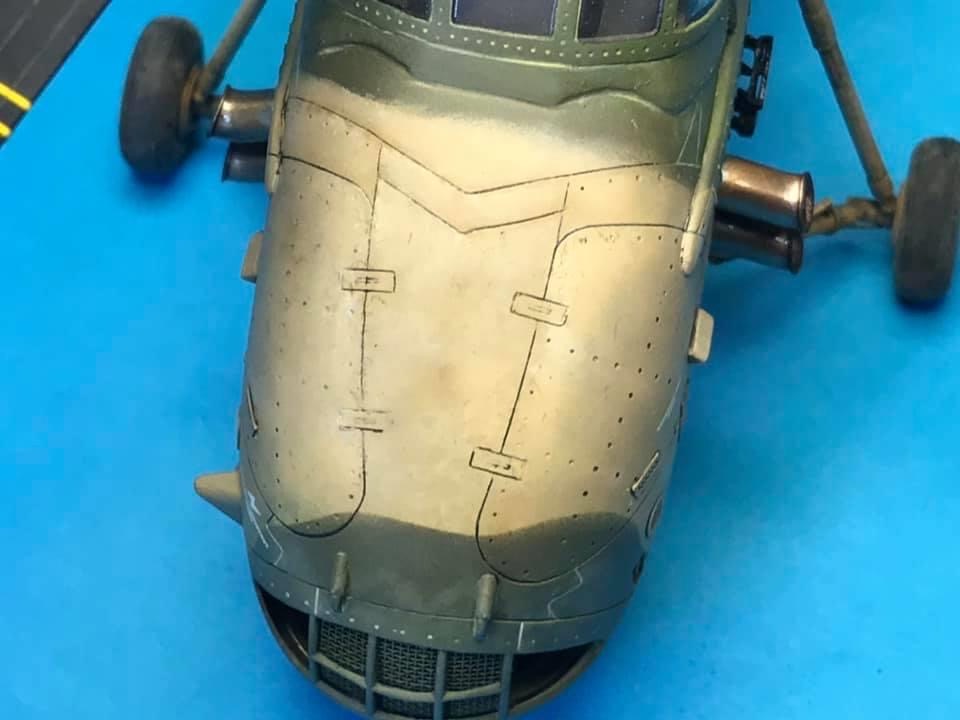
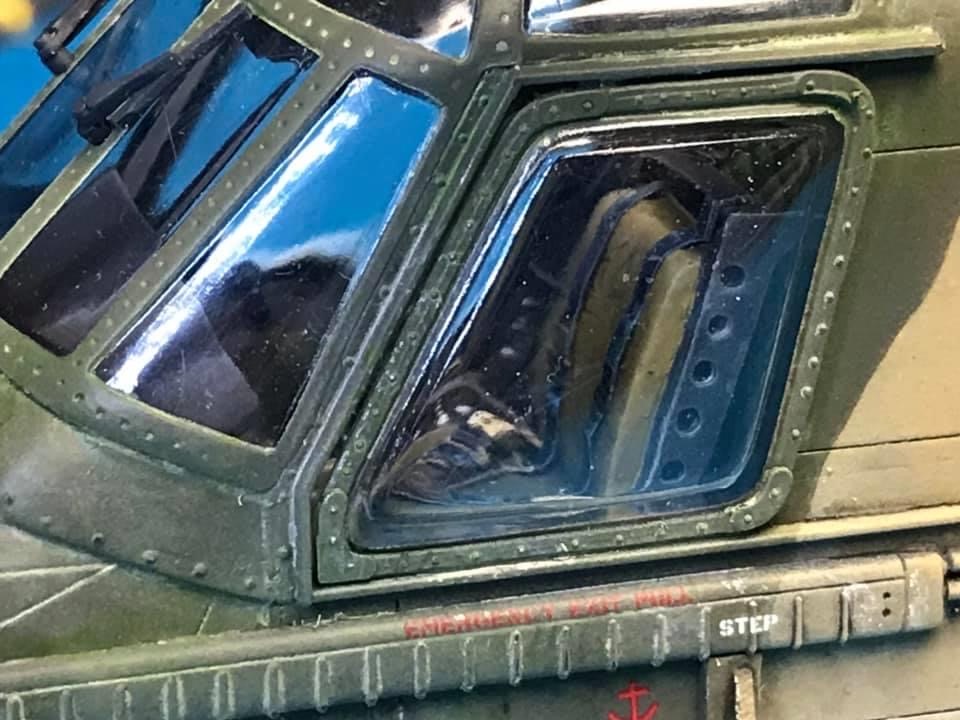
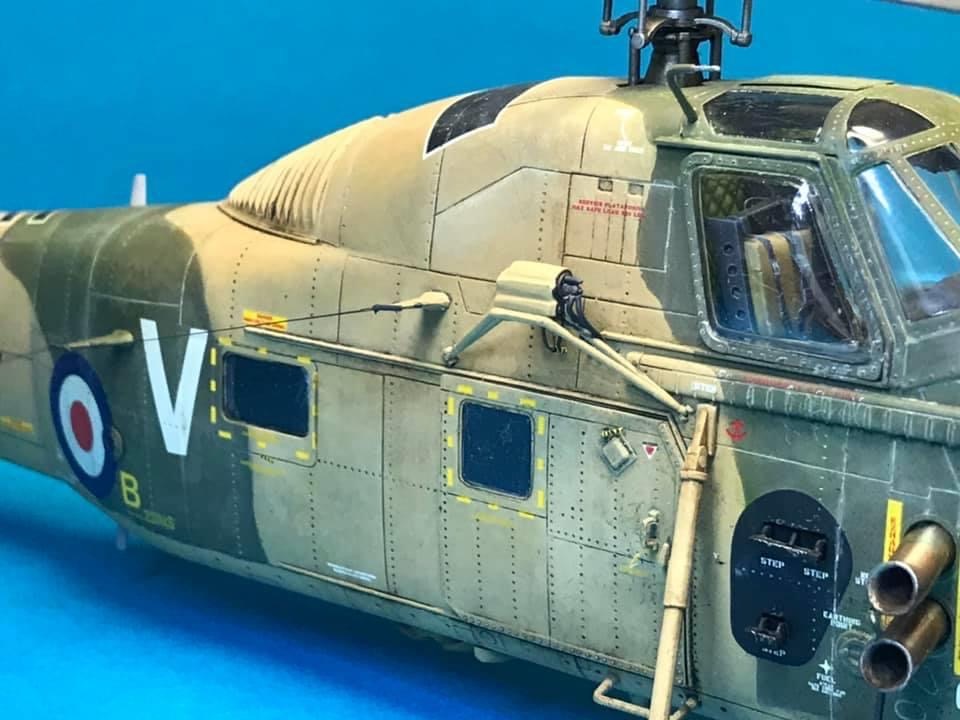
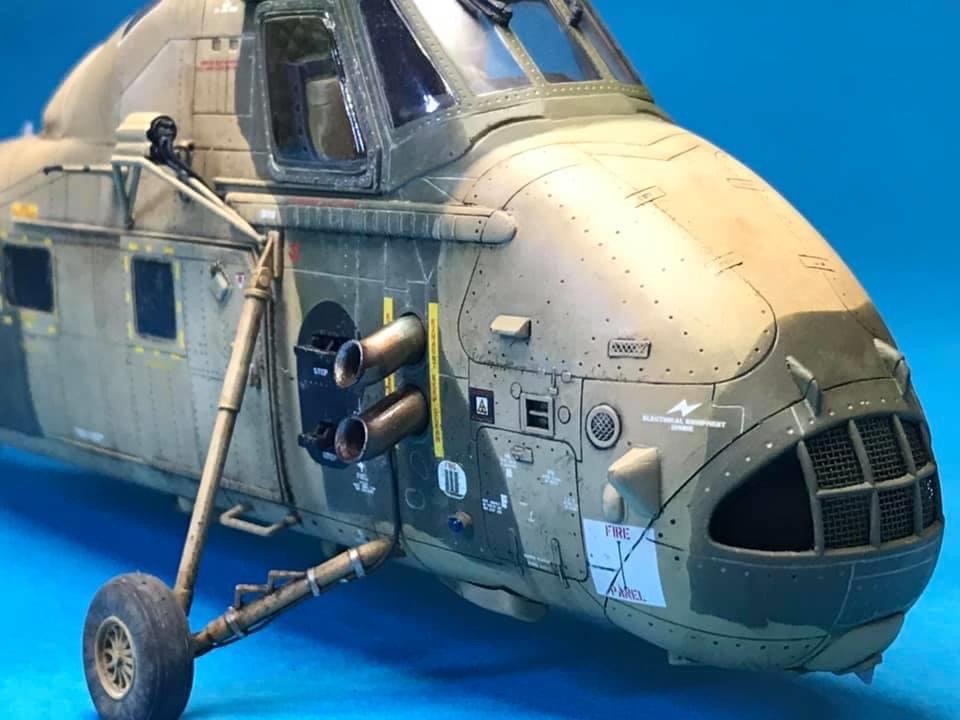
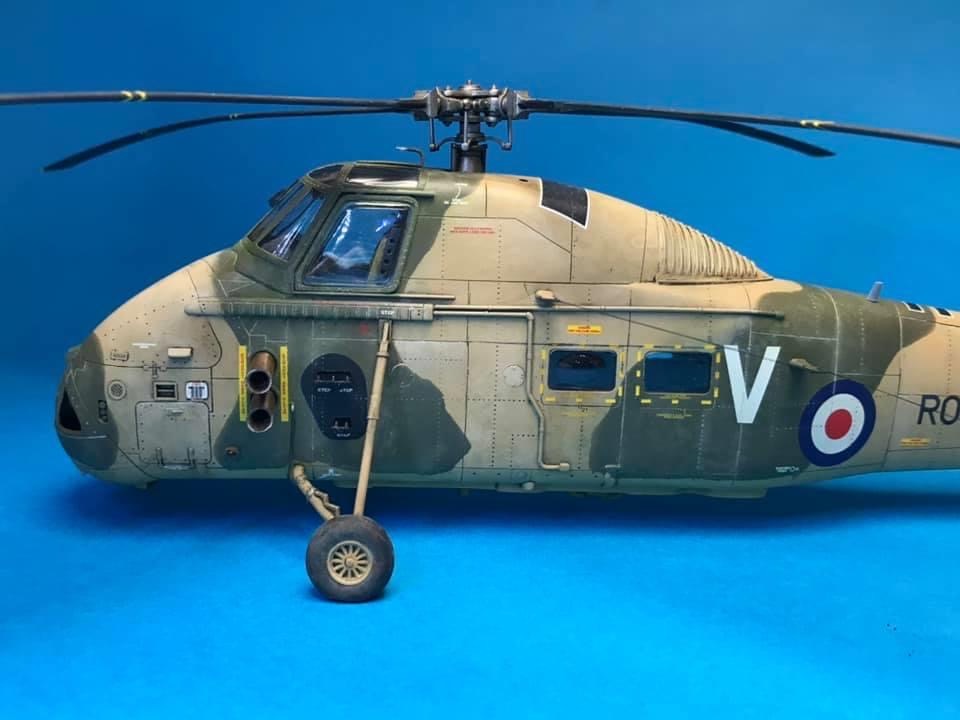
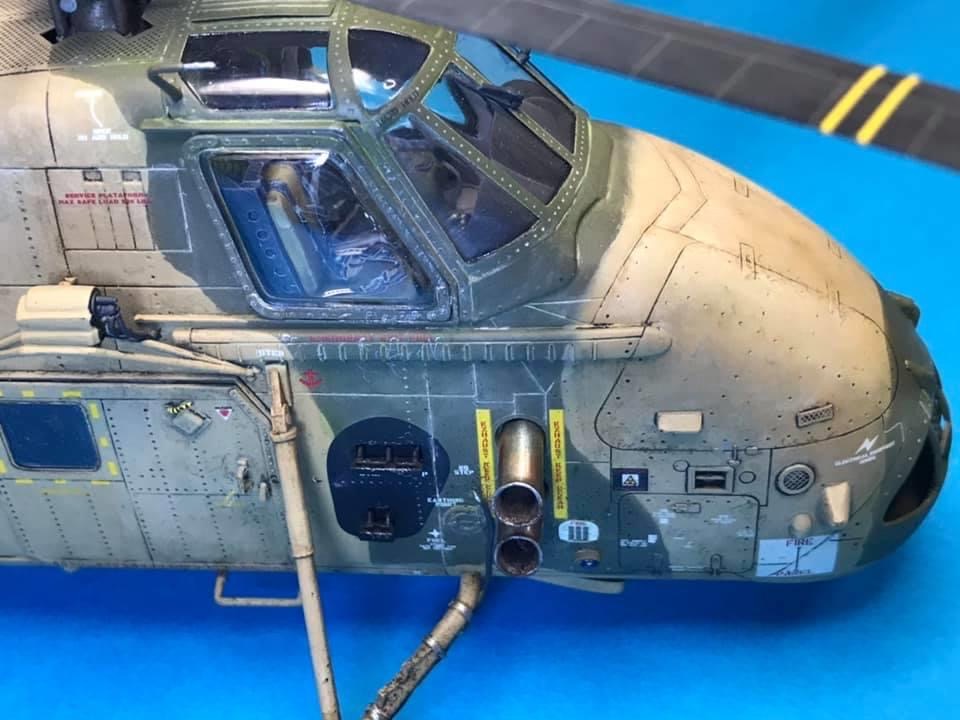
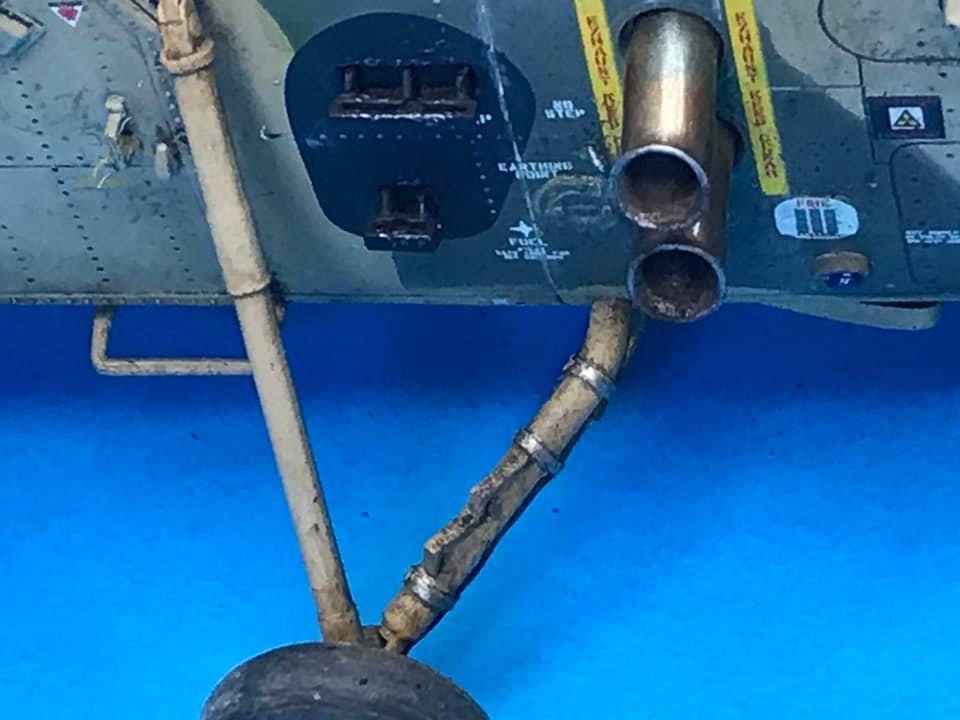
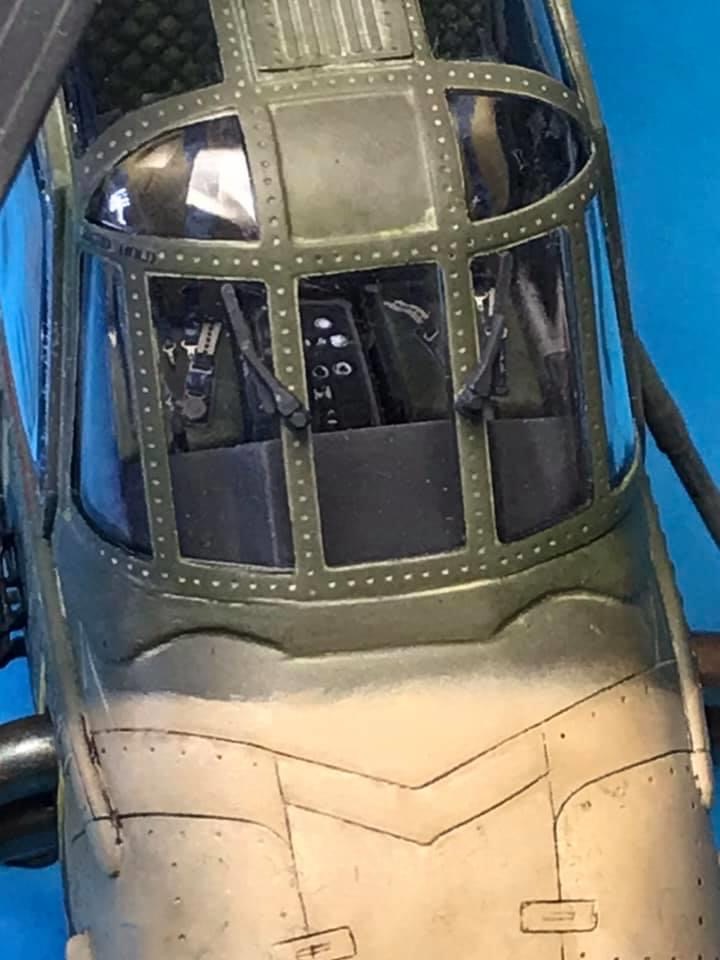
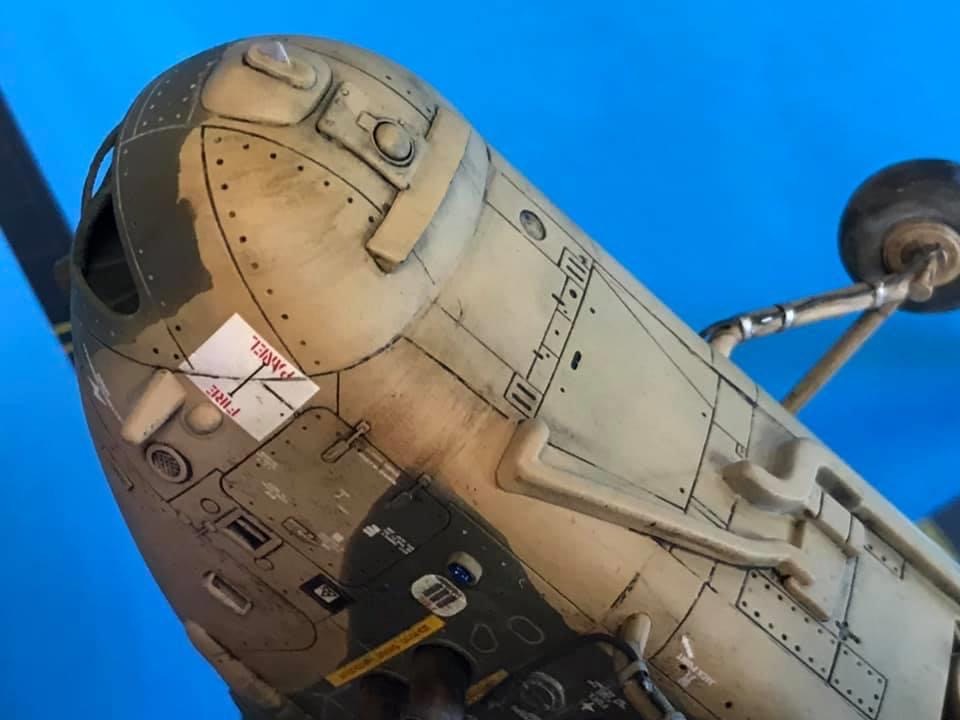
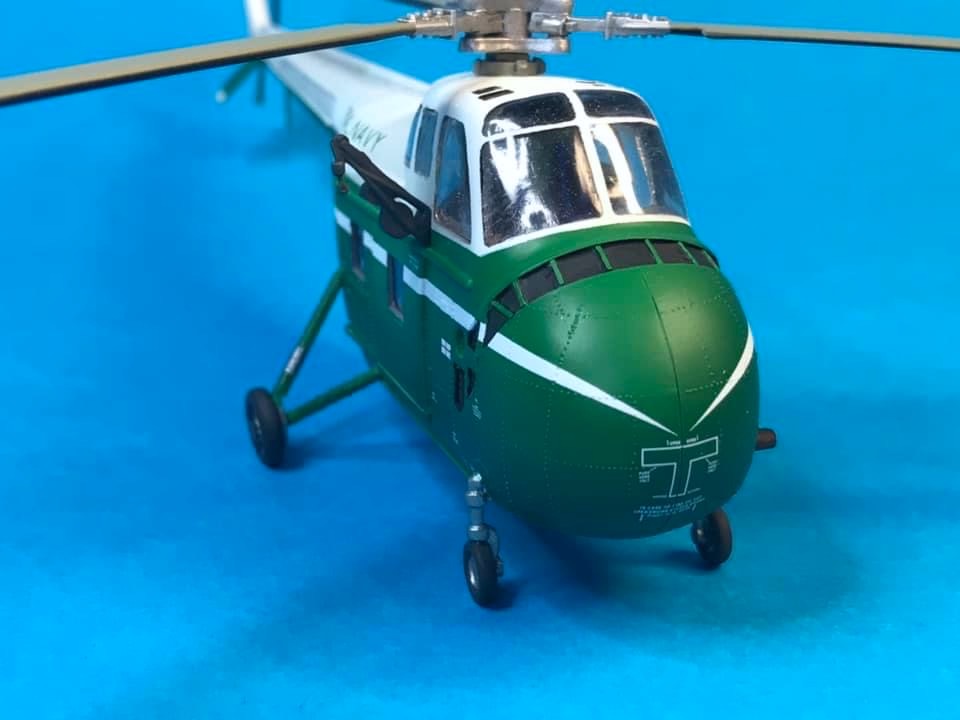
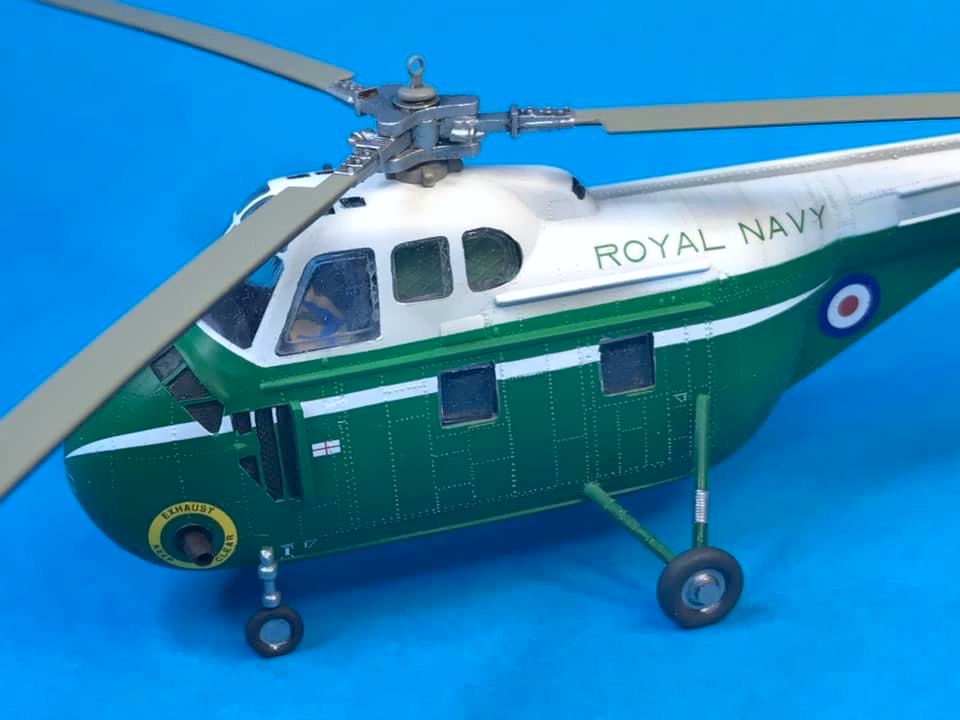
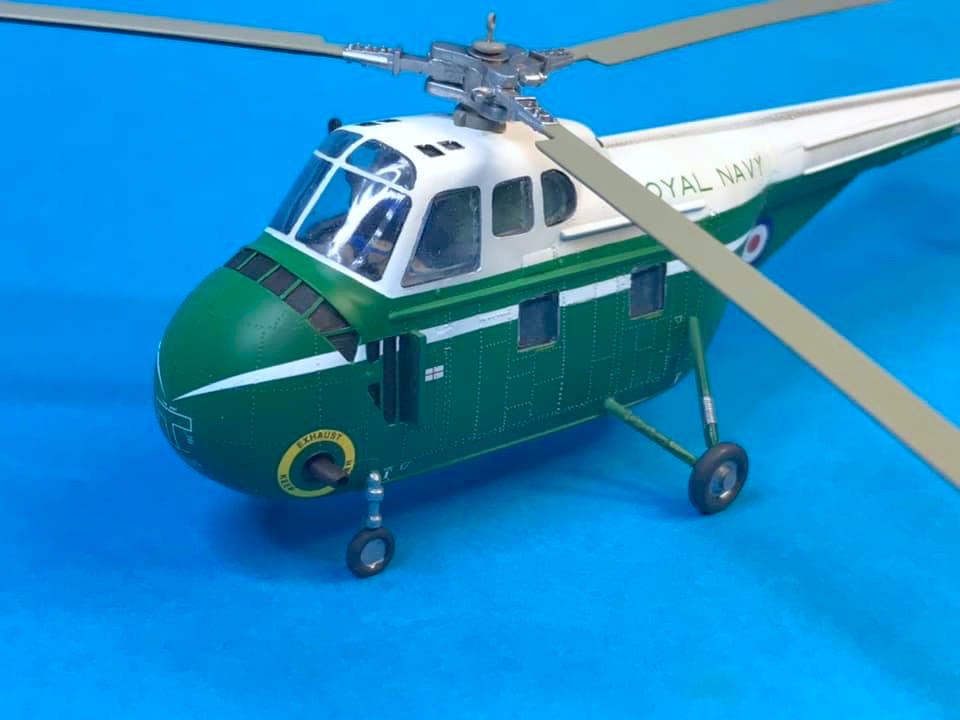
Paddy B.
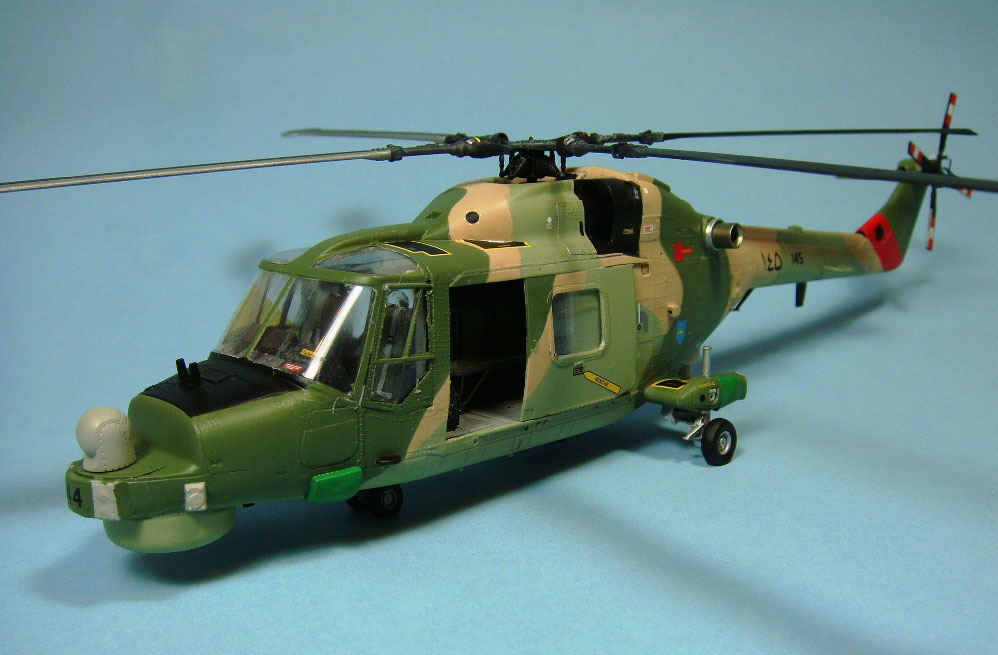
Sure, the engine cowls are all wrong, for the sharp eyed among us, but as a commission build for an old Omani friend who served, he’s happy and I can live with it. The Mk-120 export version continues to operate in the mountainous and desert terrain of the Sultanate and is still the fastest helicopter in the Middle-East.
Mick S.


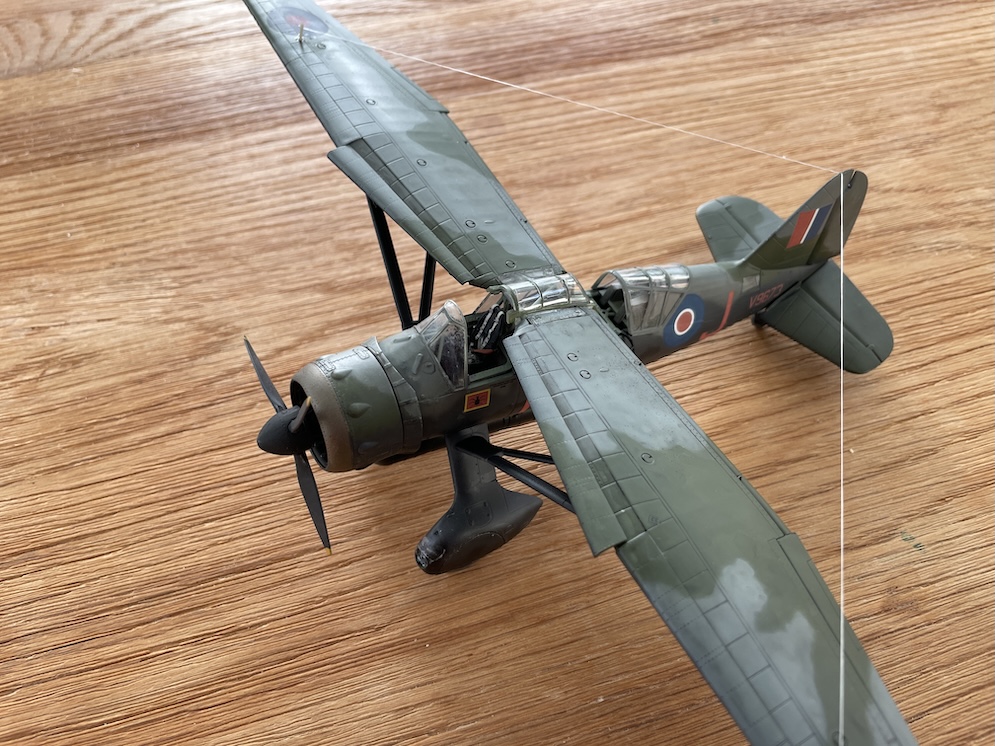
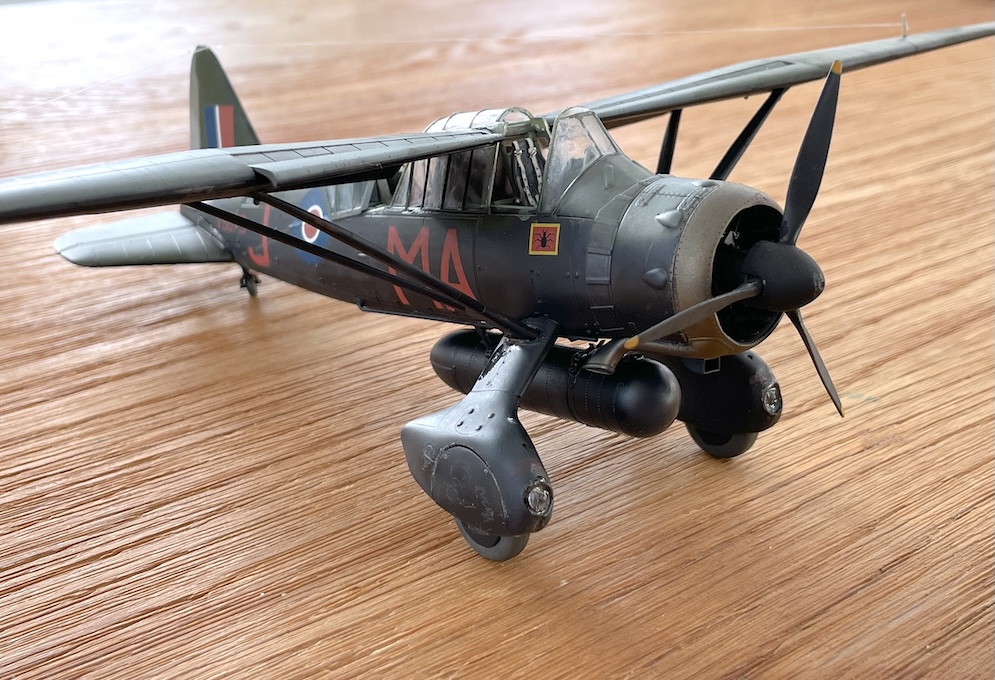
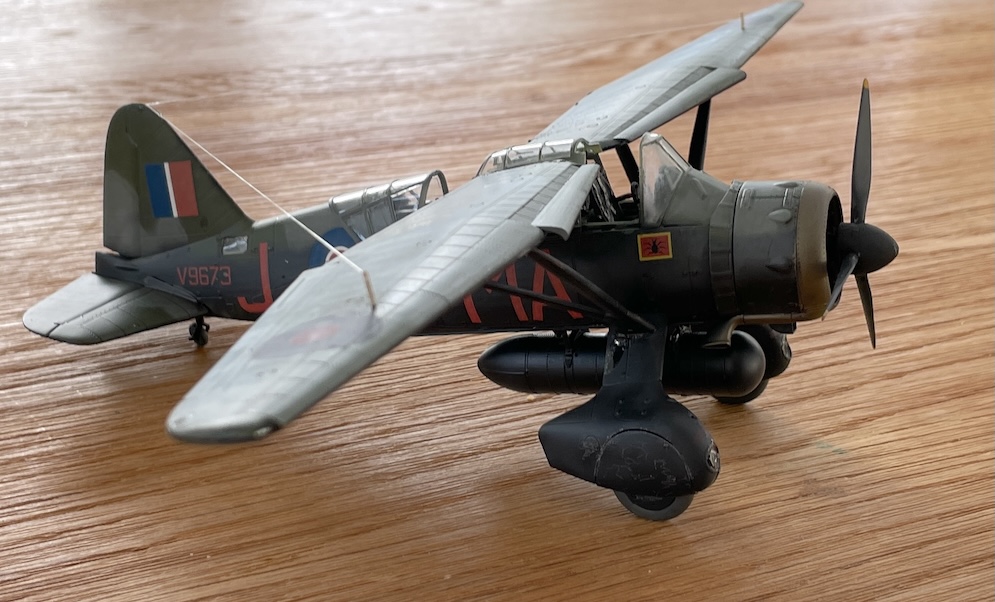
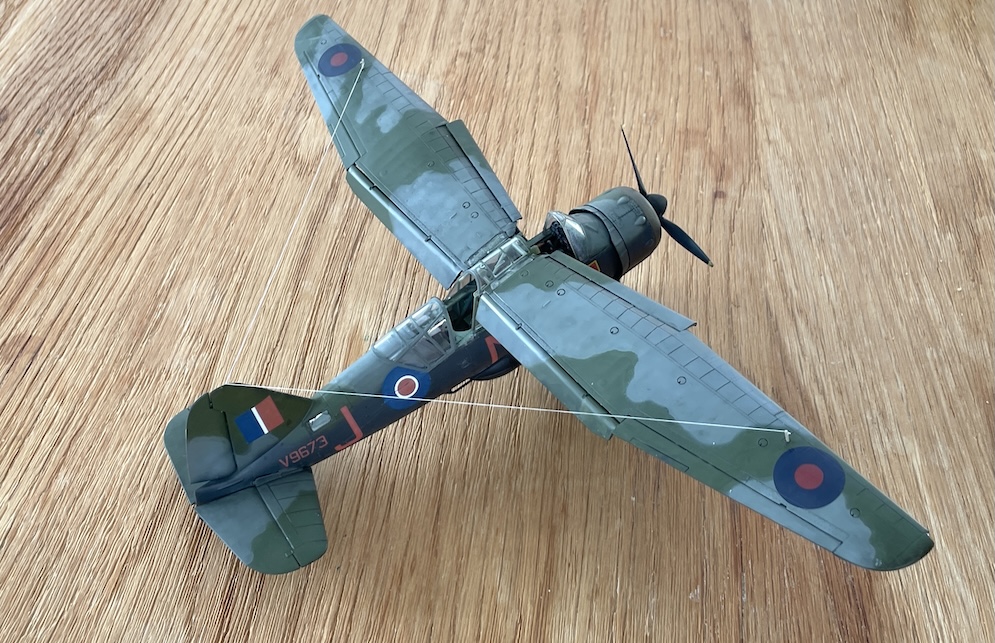
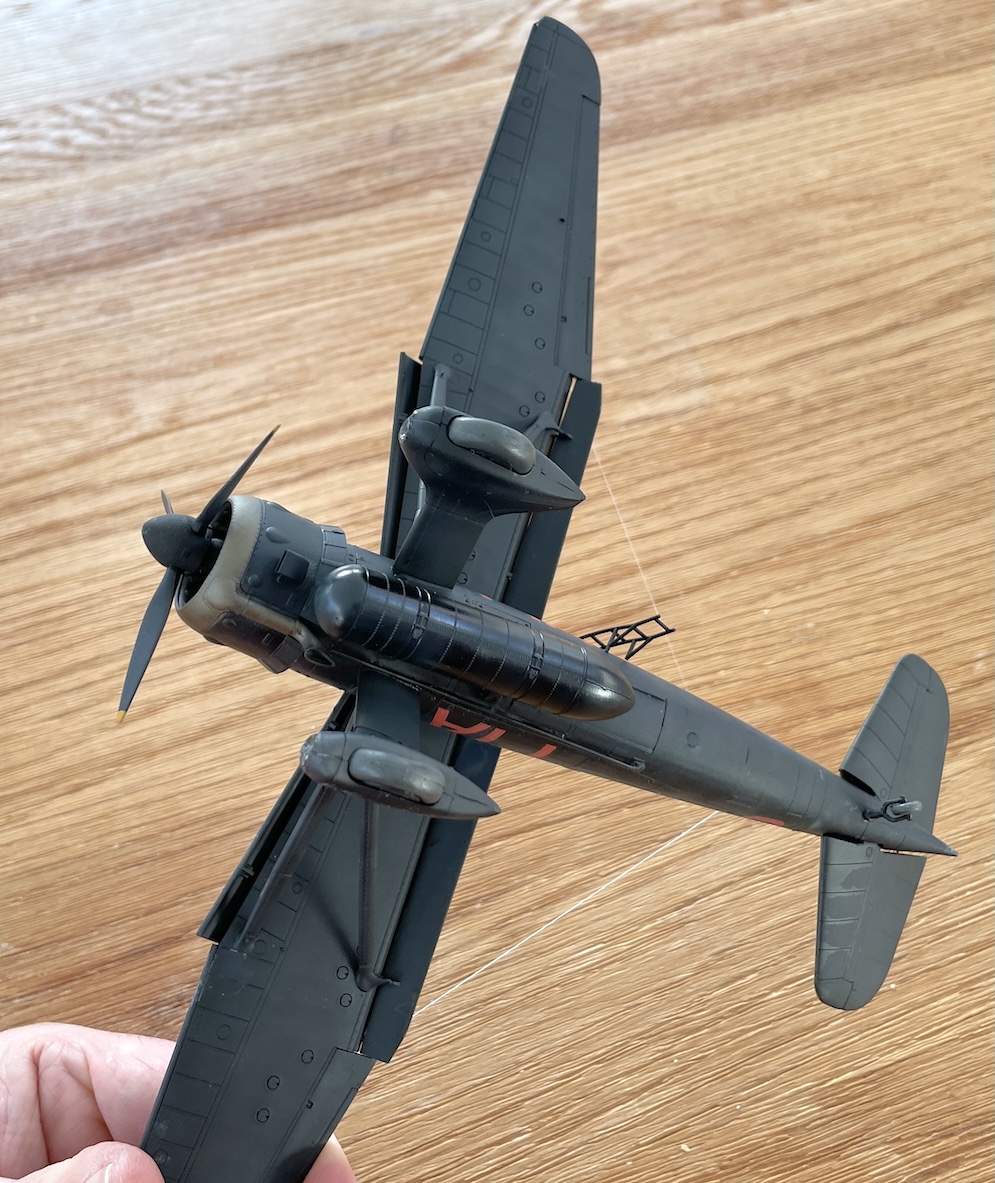
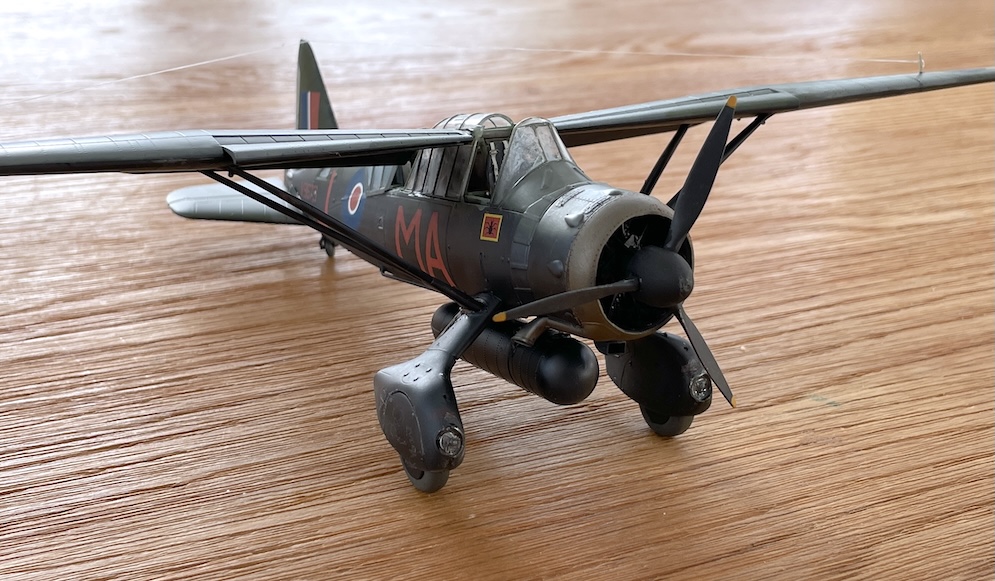
Painted with AK real Colours Ocean Grey/Dark Green over a Mr Surfacer black primer with white mottling.
Decals, which are not great, come with the CMK Conversion. I also added Eduard seat belts and ASK Masks.
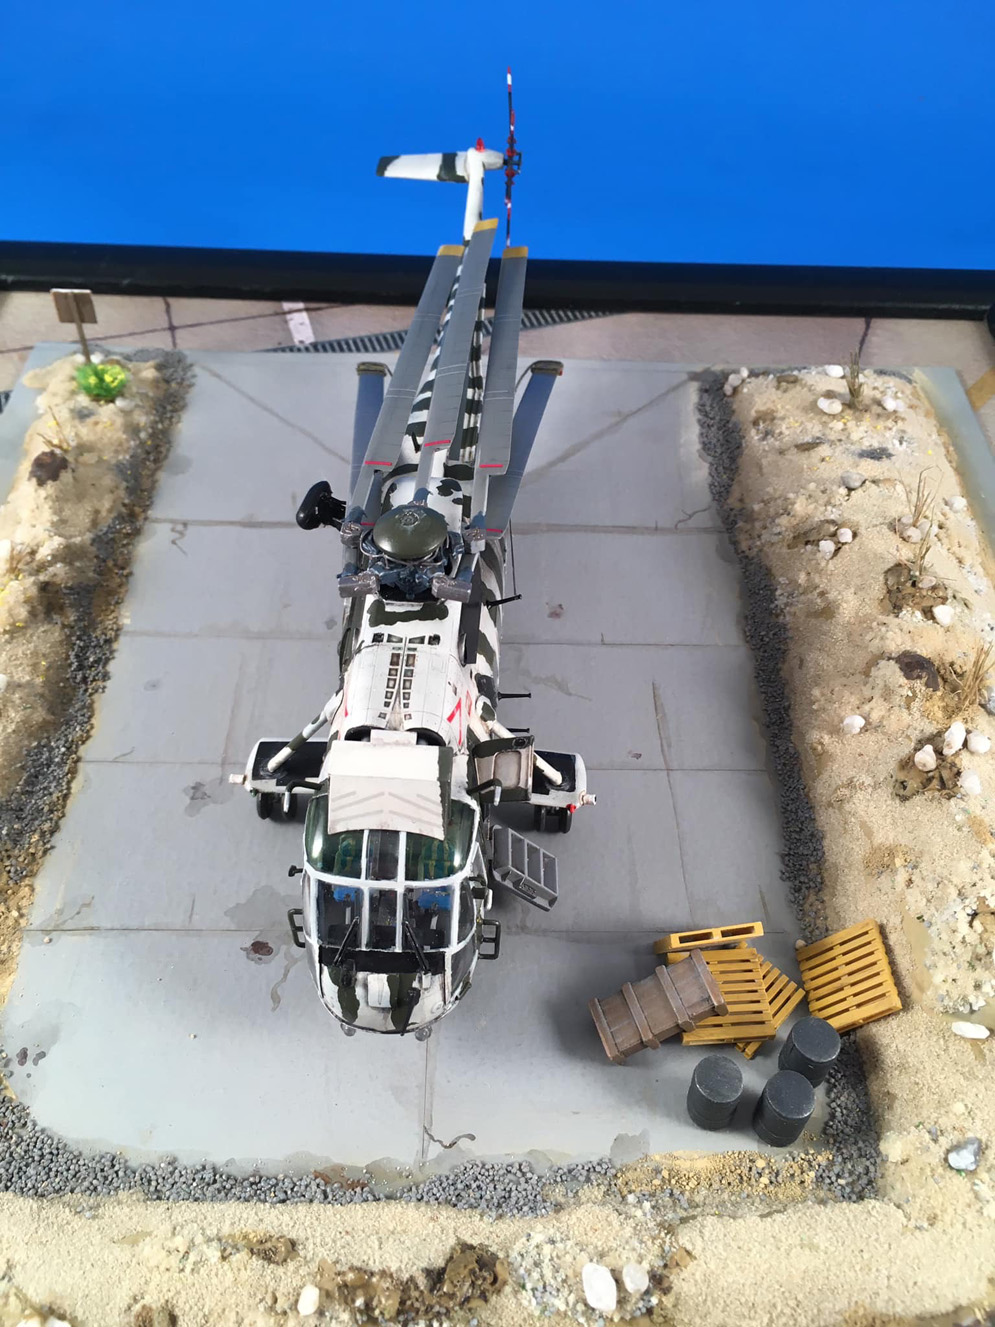
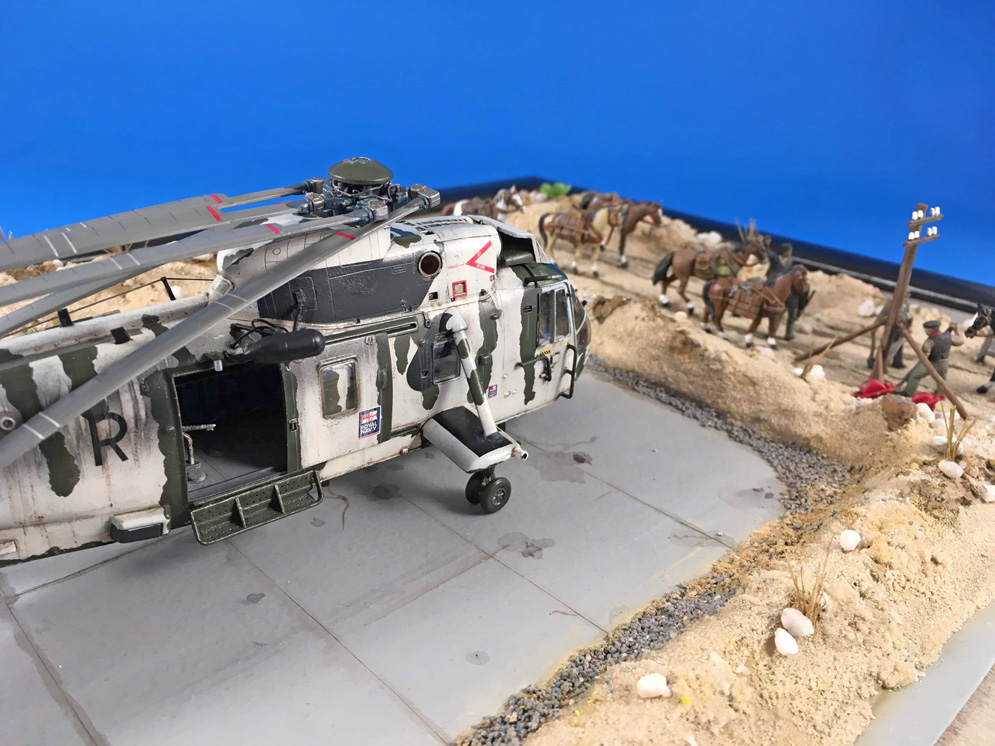
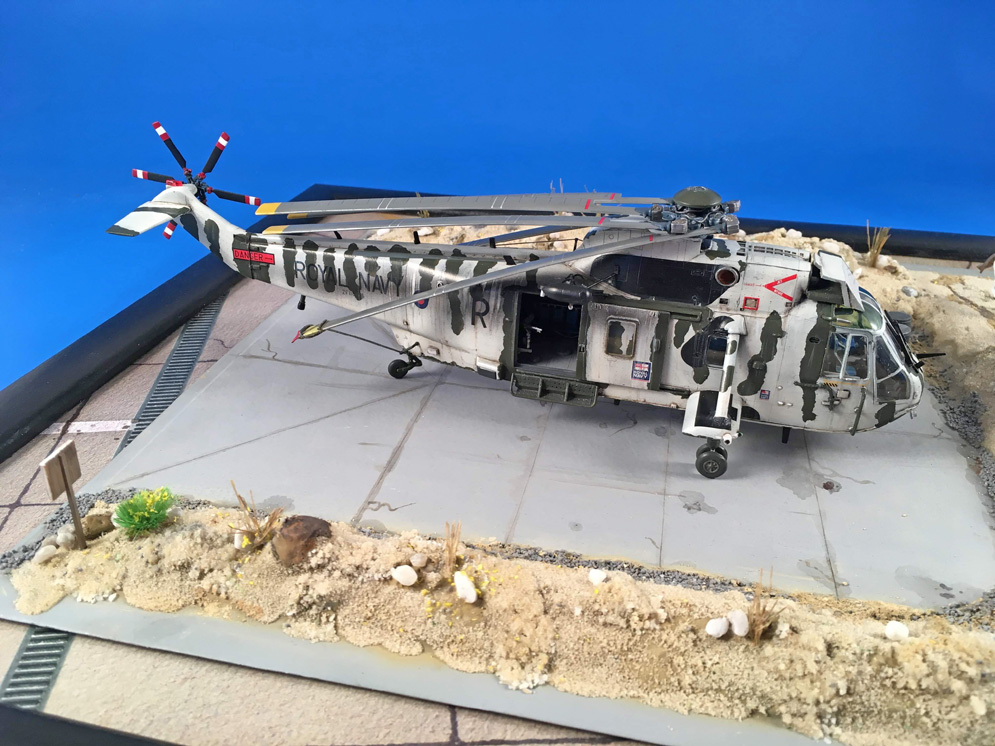
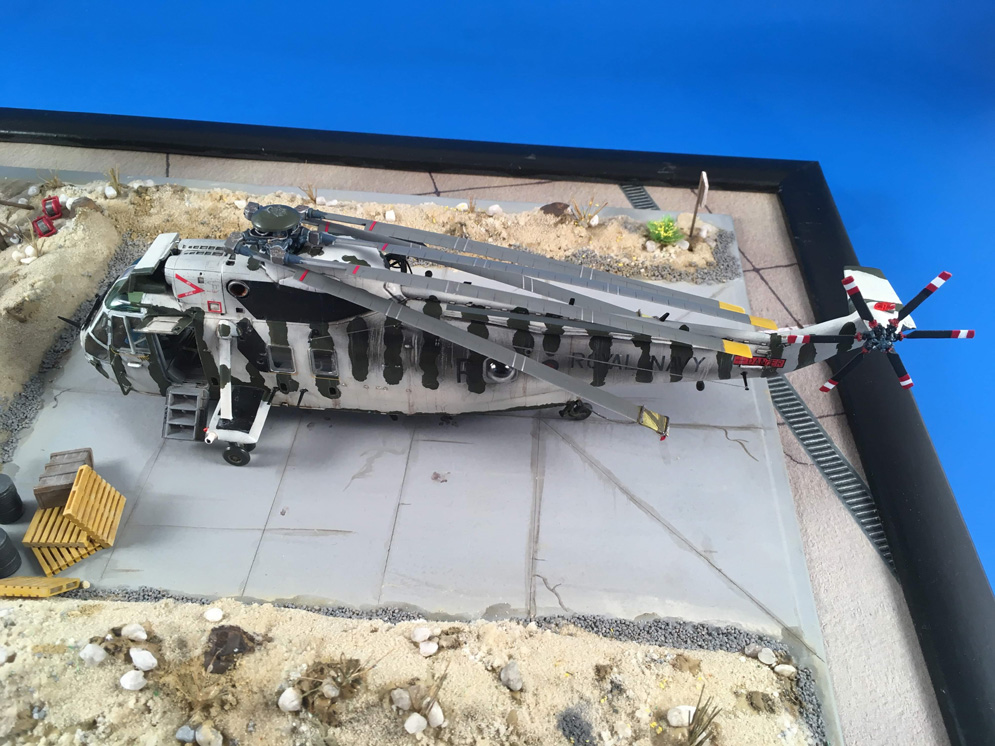
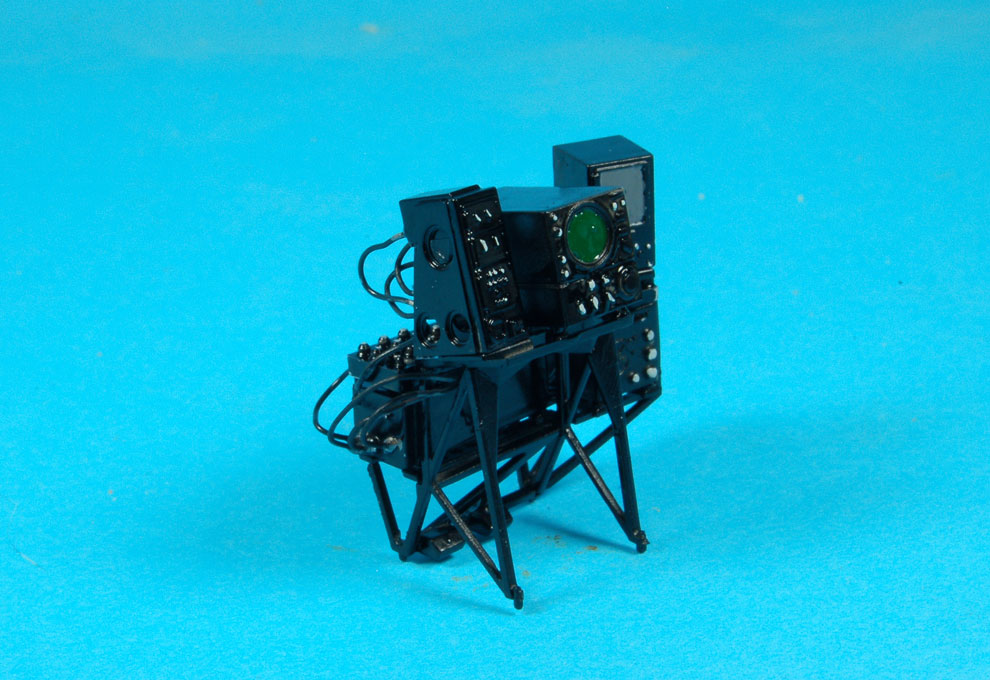
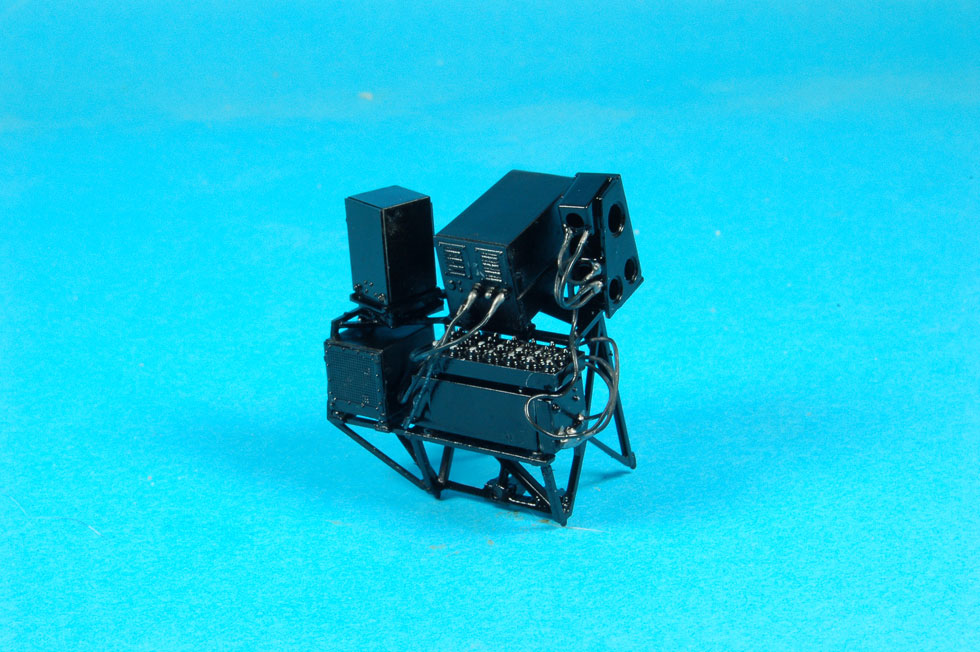
Les V.
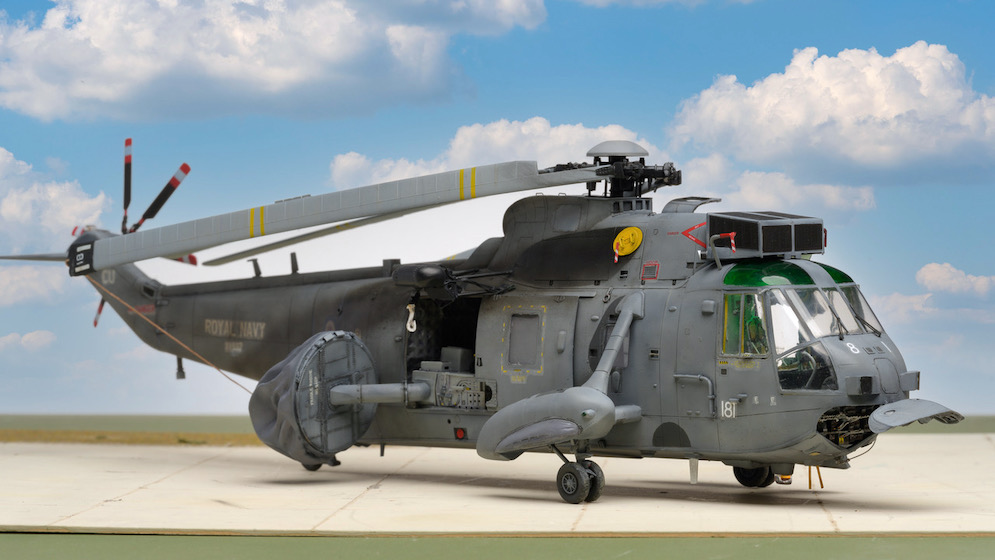
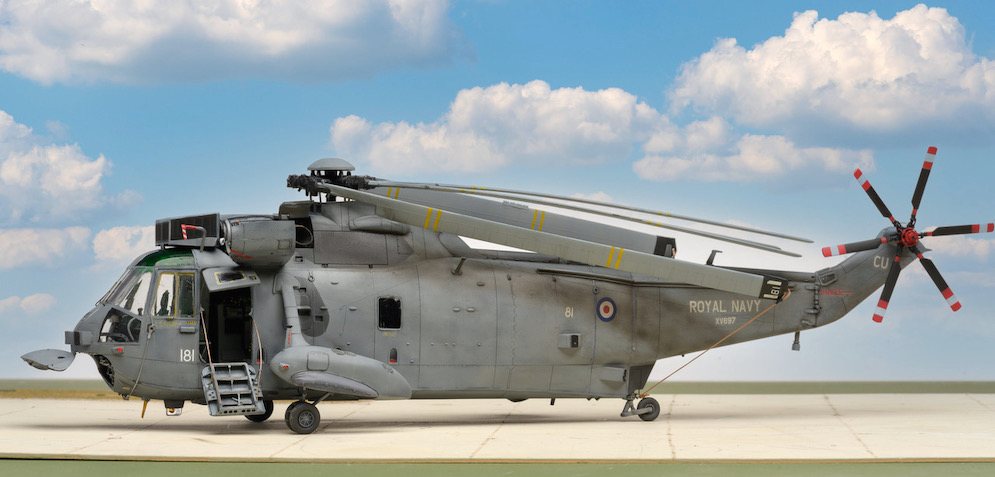
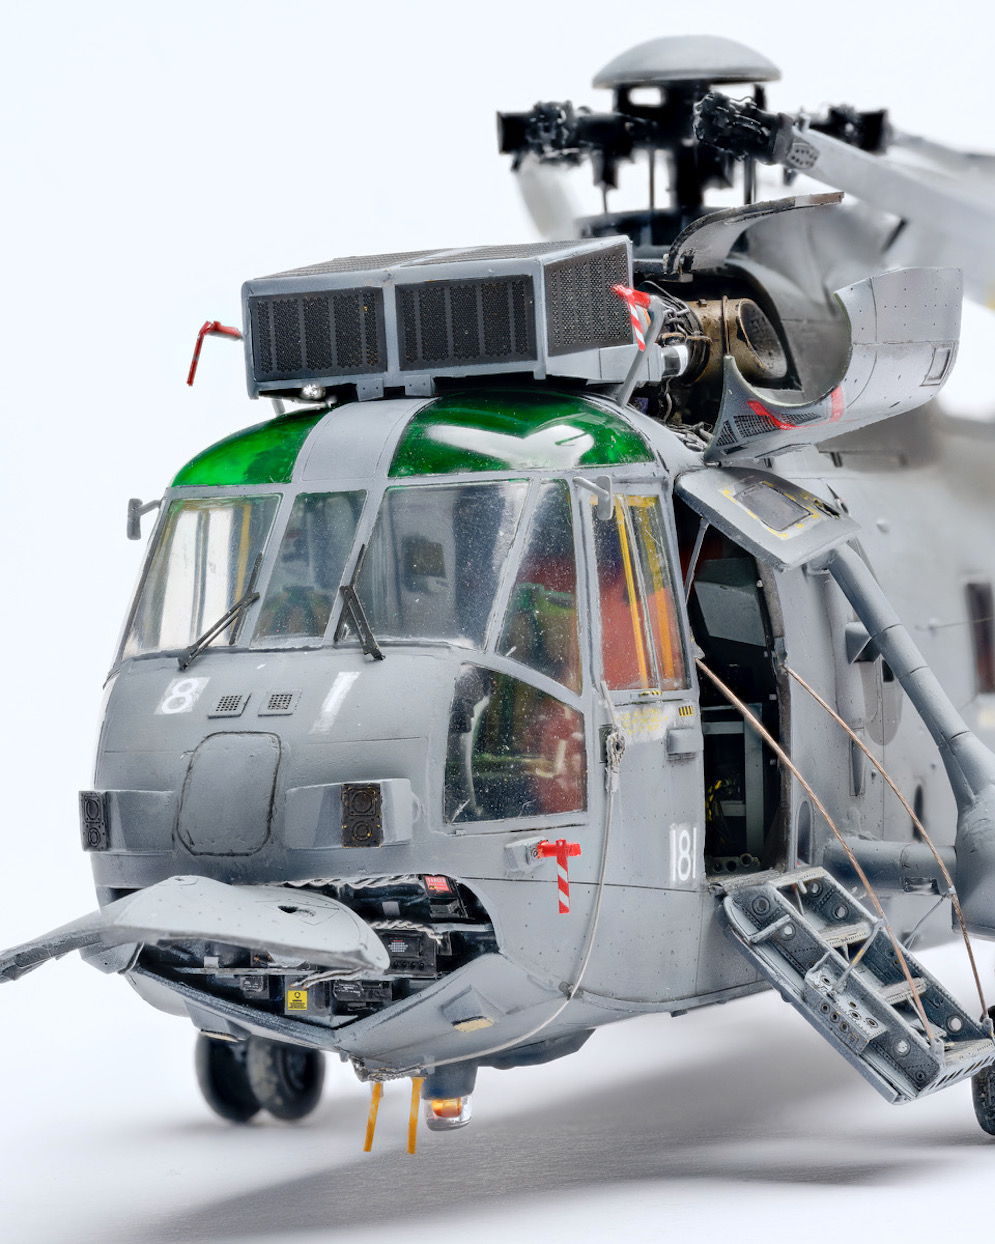
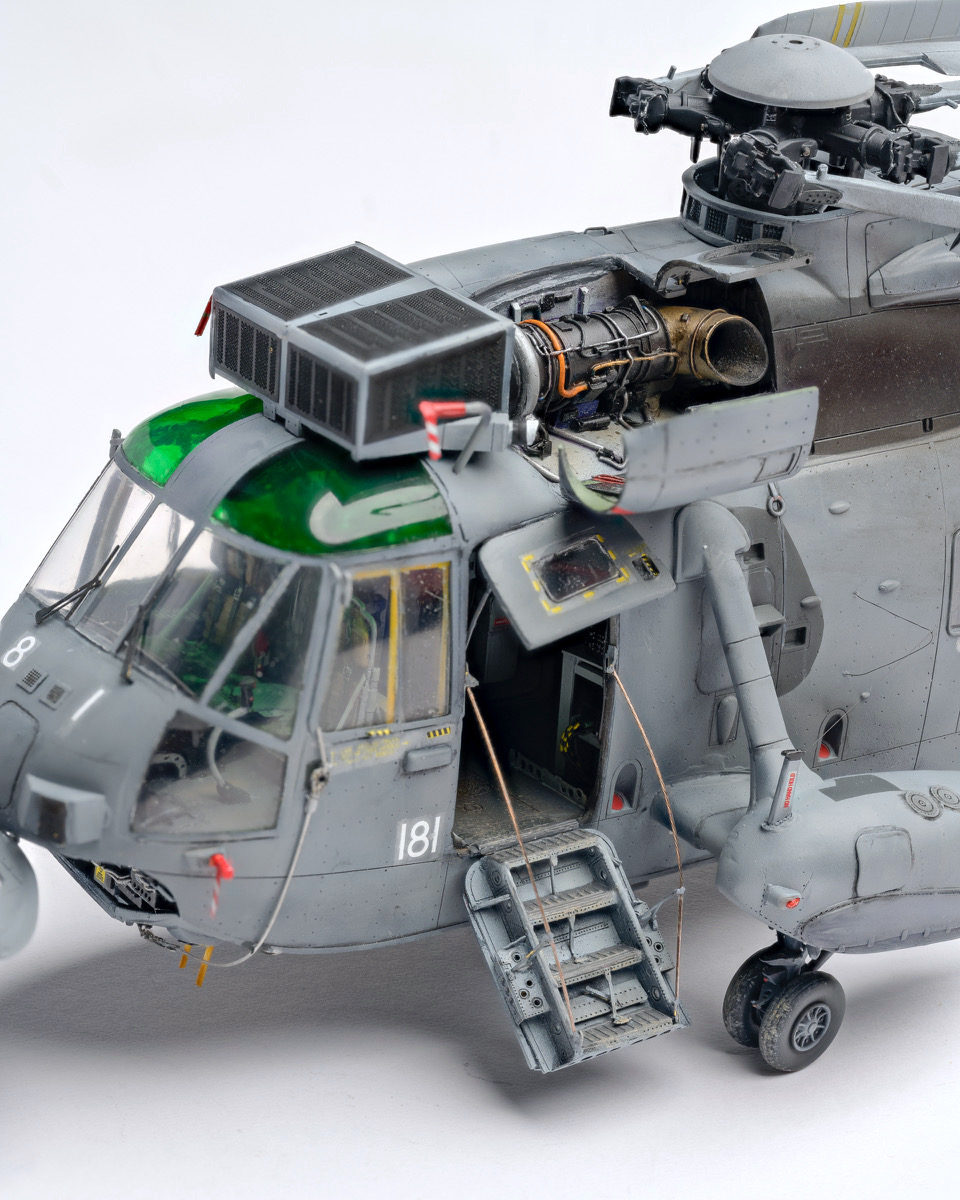

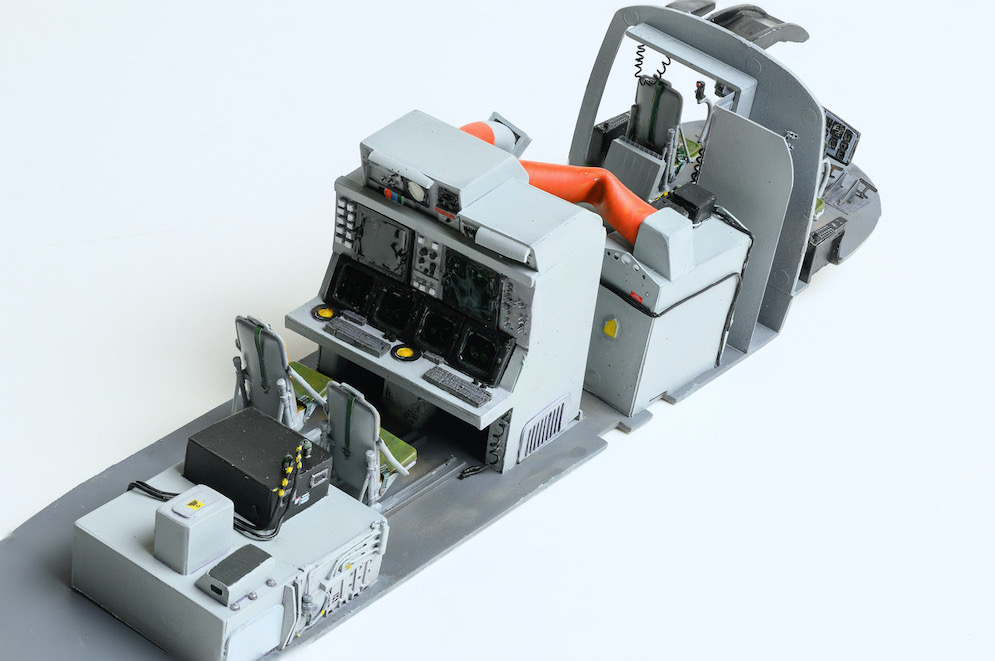
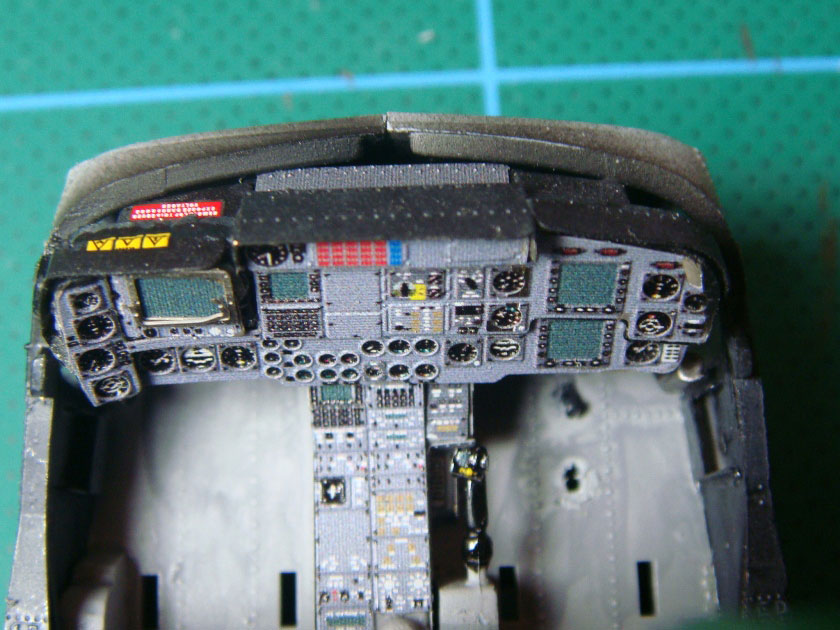
The model is based on Hasegawa’s Westland Sea King AEW2 boxing. The most disappointing thing about this kit is there there is no detail in the rear cabin and both cabin doors are moulded closed! As there are no aftermarket interiors kits in this scale I would be forced to scratch build my own. Using the interior dimensions of the kits cabin and good reference photos I drew up the interior boxes in 2D and cut these out of thin plasticard using a craft robo cutter. The parts were then assembled and detailed using wire, plasticard and ANYZ knobs. Even the tracker ball and keyboard were scratch built. The kit seats were used in the rear cabin and replaced in the front with superior quickboost ones.
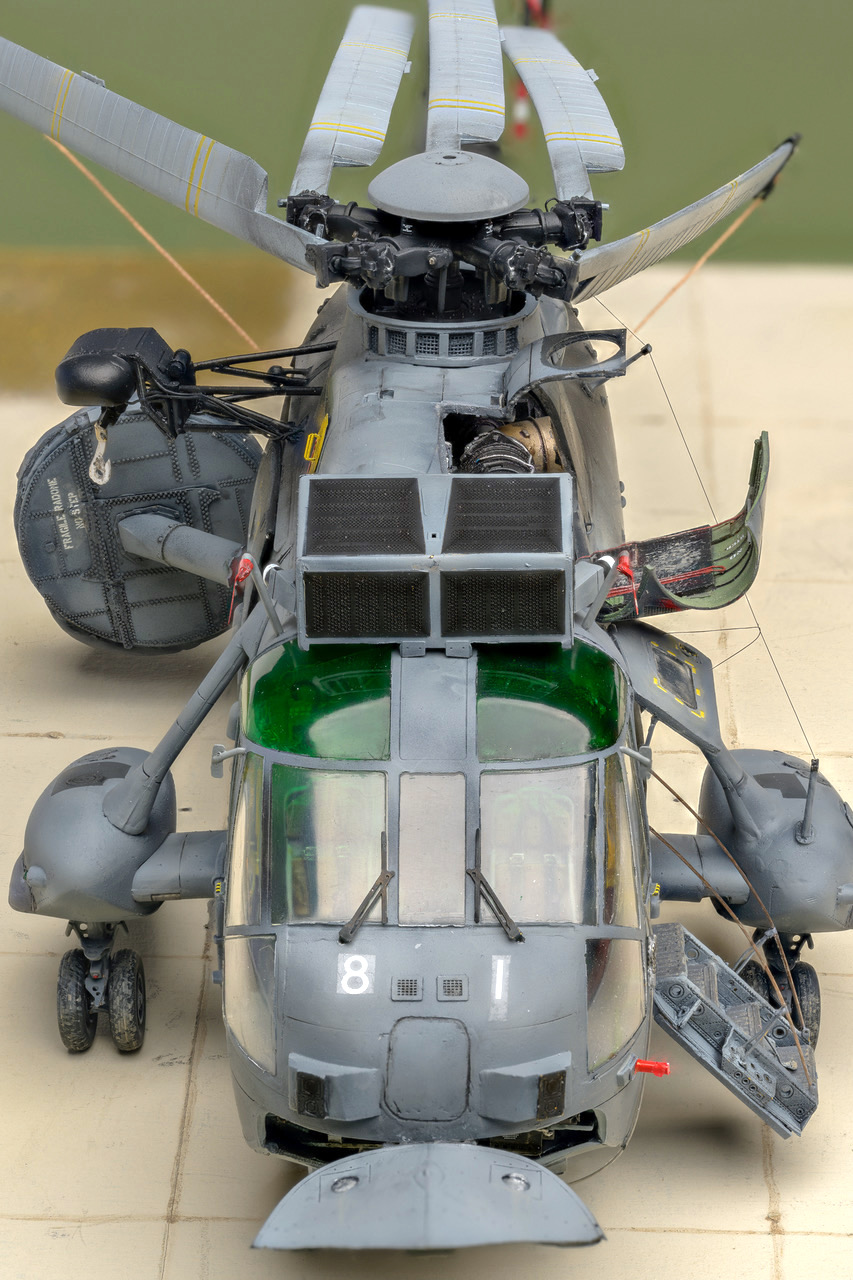
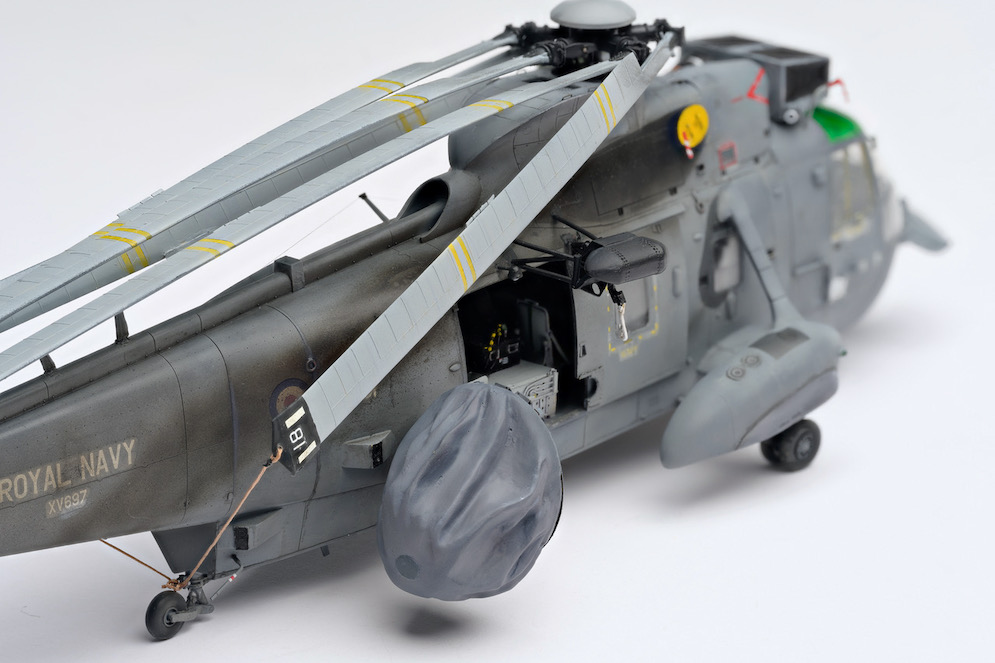
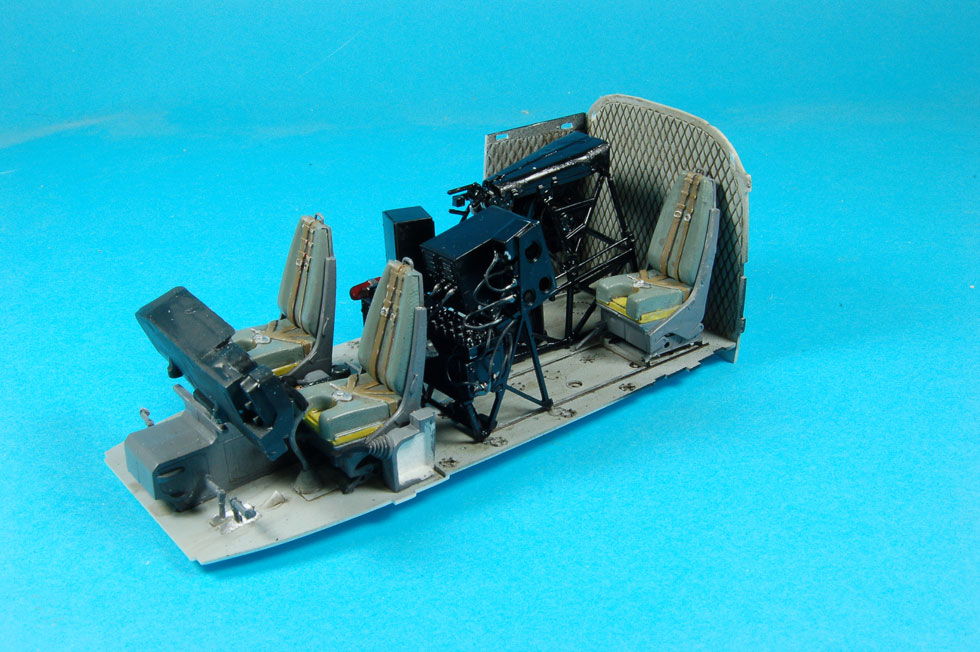
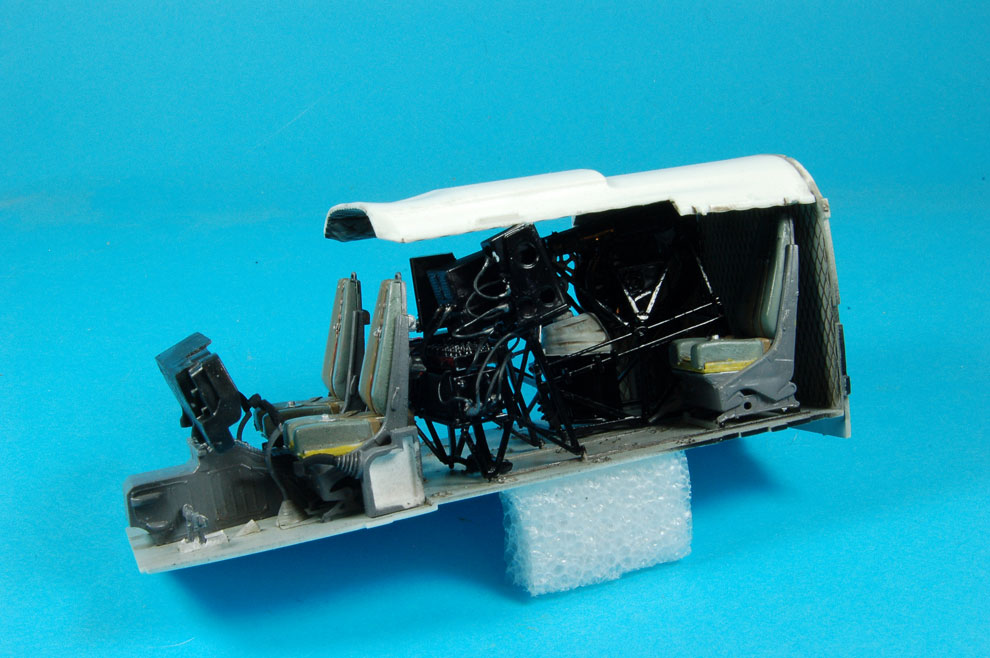
The front cabin was detailed using a mixture of eduard and Flightpath etch plus scratch built detail. The extensive Flightpath conversion kit was used to detail the exterior, providing items such as the air filter and winch. If you don’t like using PE, this kit is definitely not for you! A Rotor Craft deflated radome was used as this was better than the one supplied by Flightpath. Blackdog provided resin for the engine and nose electronics bay. I have to say that the resin engine / cover is a work of art and a definite ‘must have’ for anyone building a Sea King. Paint came mostly from the MRP range, which is my favourite paint.
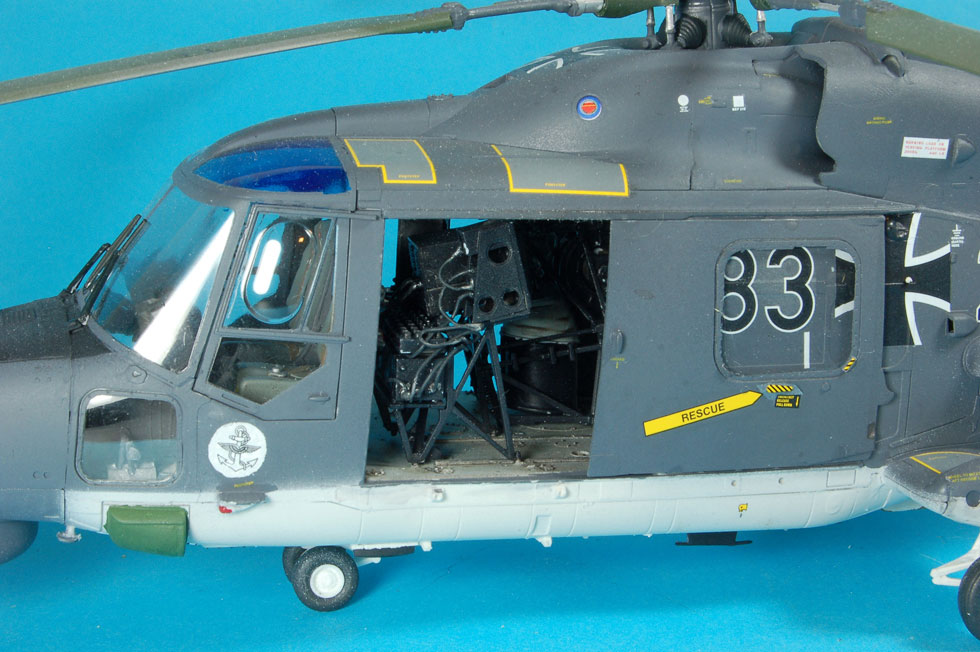
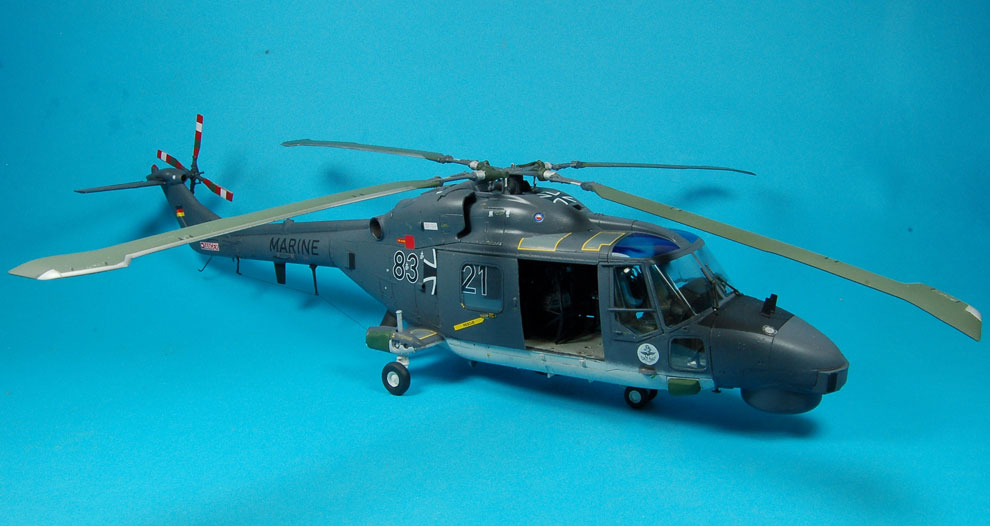
David B.

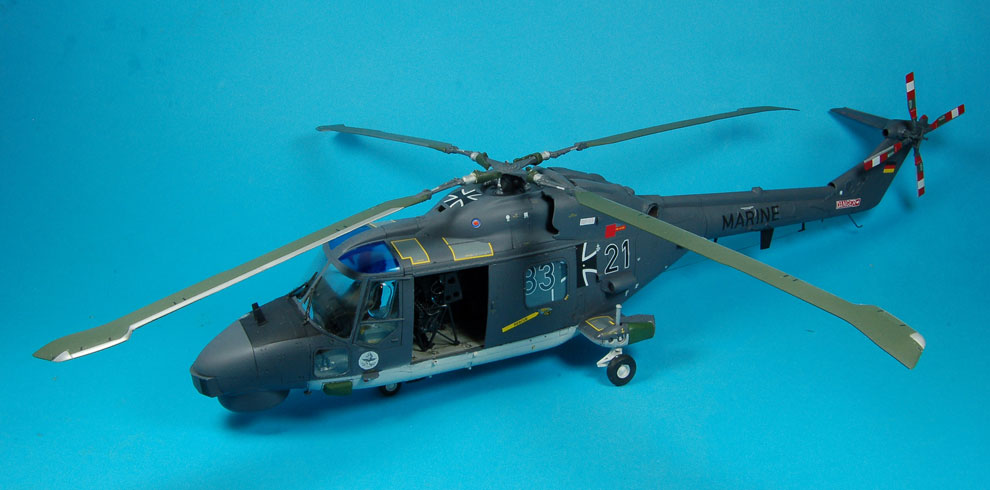
One day I sat on a beach opposite St Ives town and watched a Seaking Helicopter doing some drills about half a mile out to sea; I watched it for about an hour. I thought to myself, I have never ever made one of those.
I have now.!
The build itself was straightforward with no real putty need just a little plasticard shim on one panel and some Mr Dissolved Putty in a few others.
The model was built in eleven days of about 12 hours over the Christmas and New Years holiday; it was a real fun build.
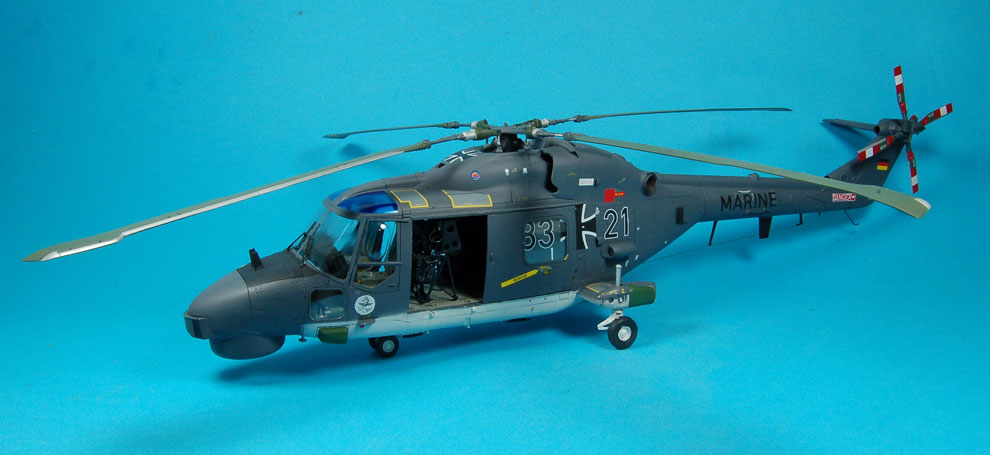
I finished the model with Tamiya and Gunze paints and I chopped the registration decal around to turn her from 83+12 in to 83+21 just to make her a bit different from the kit option.
Mish E.

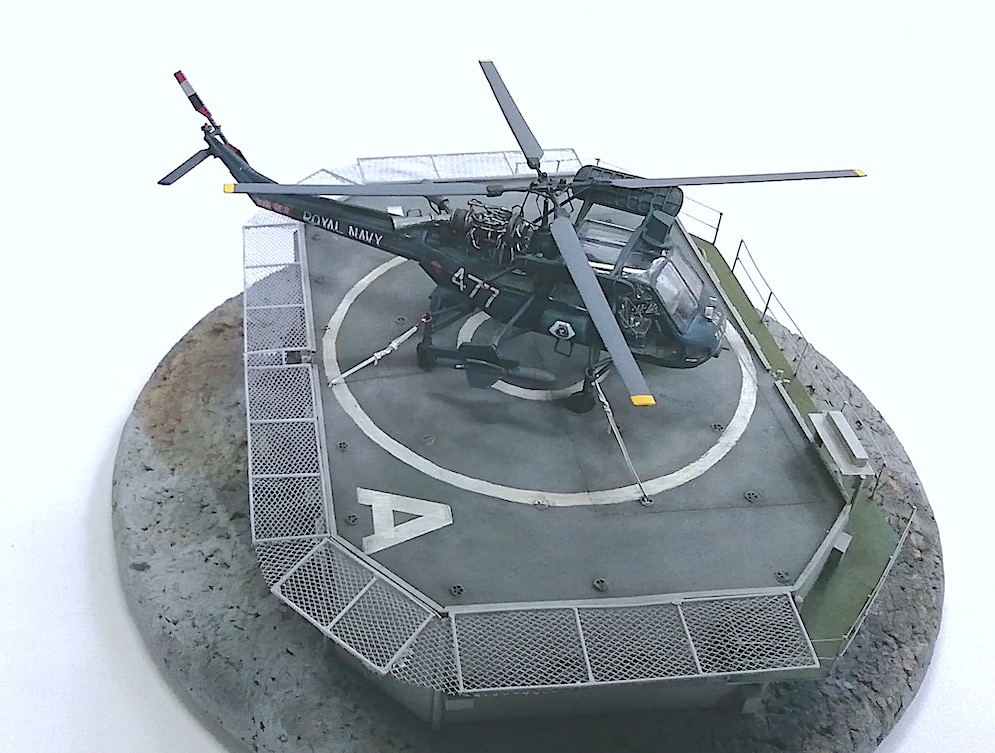
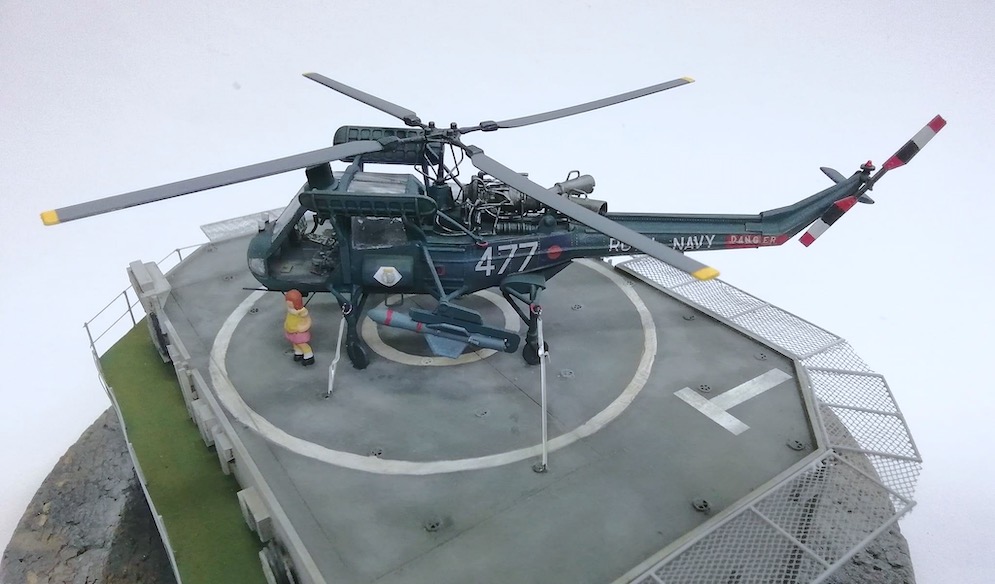
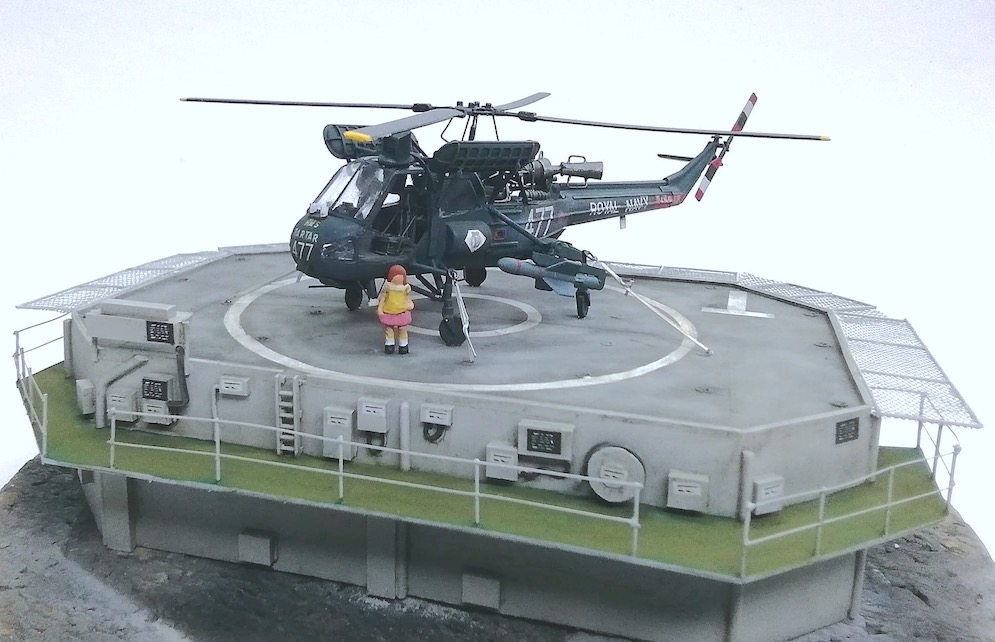
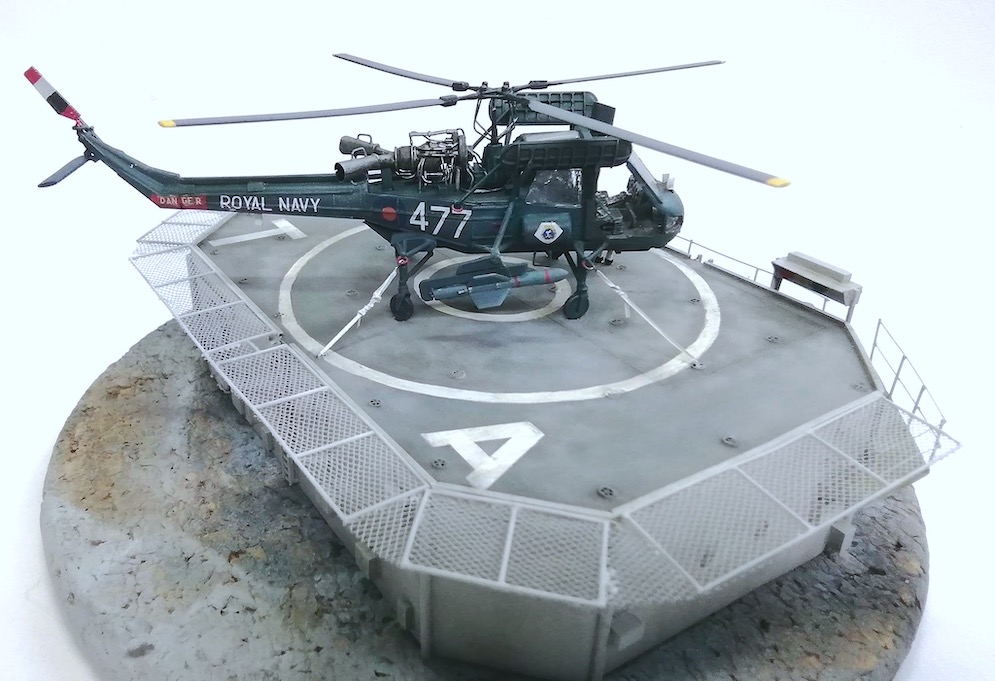
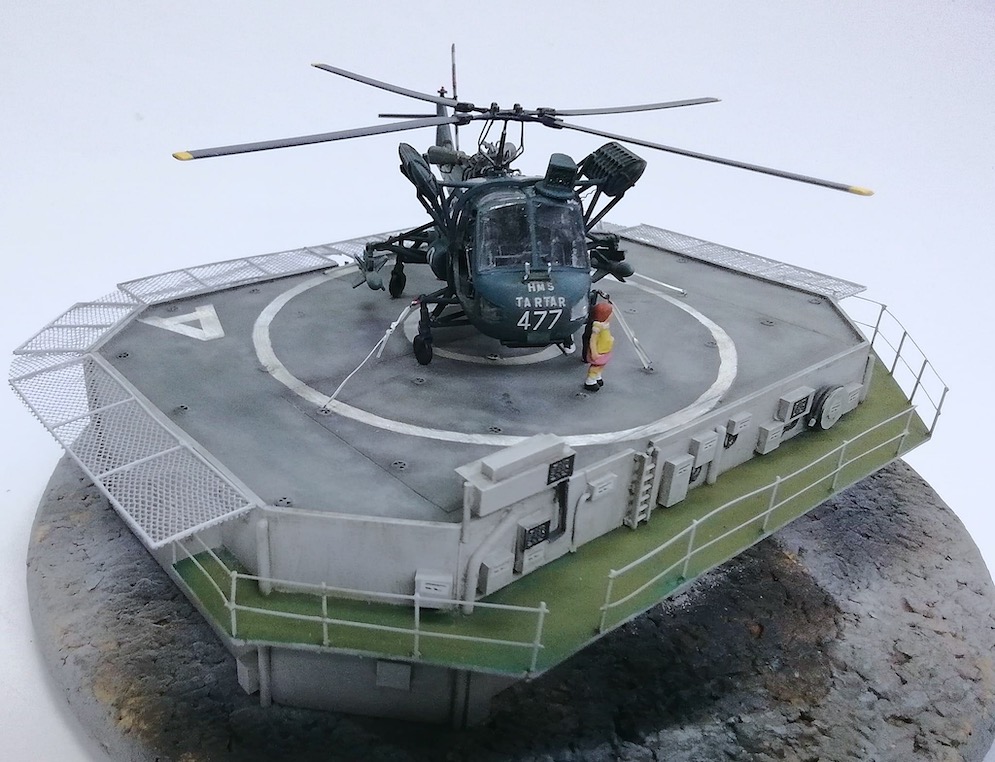
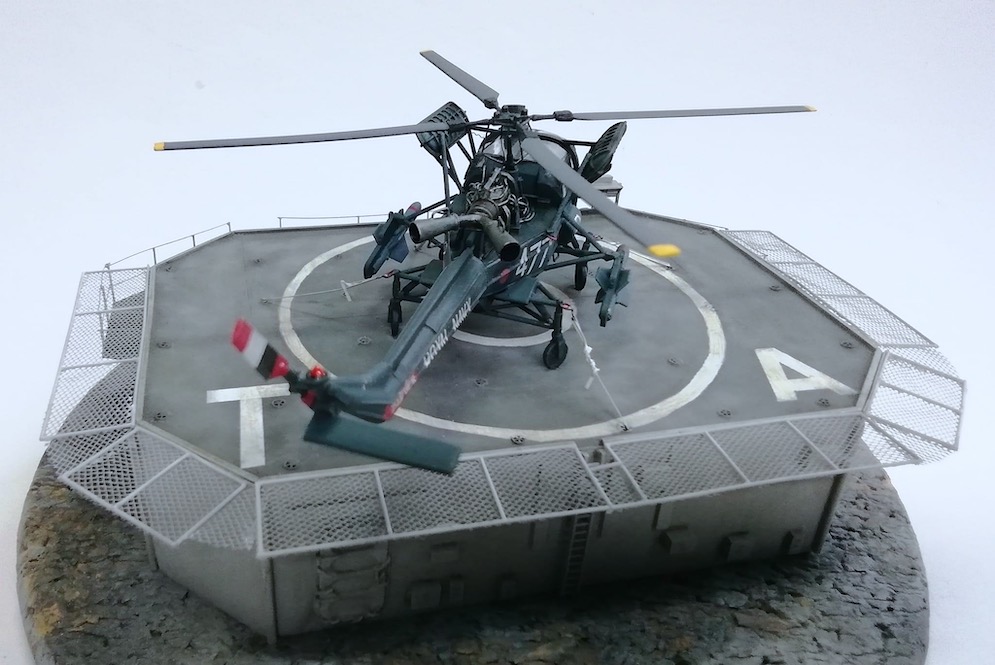
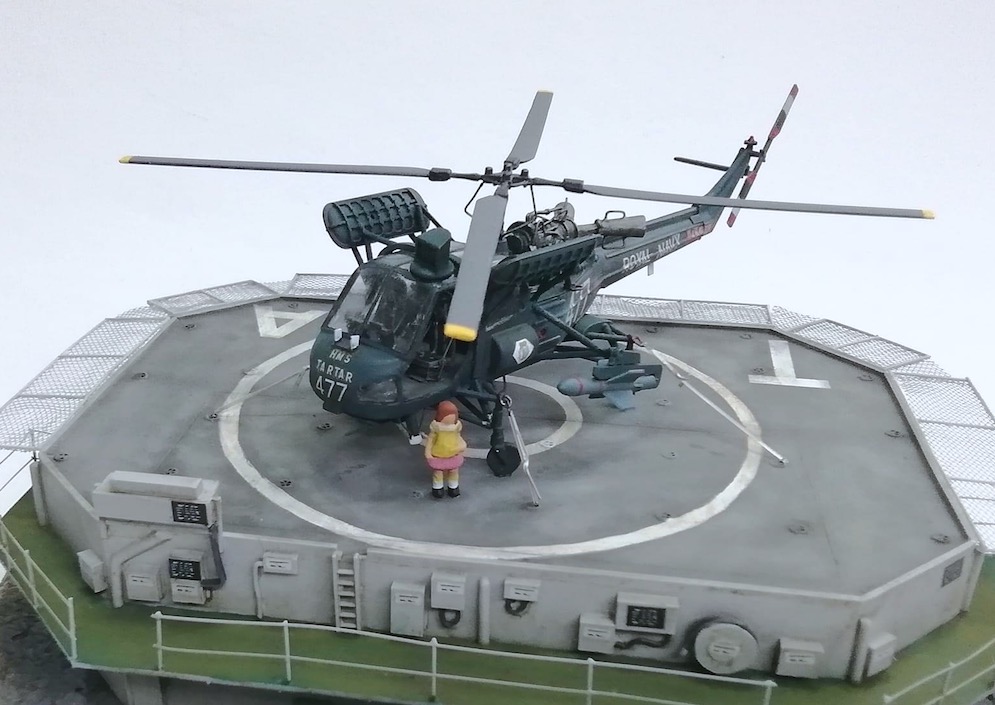
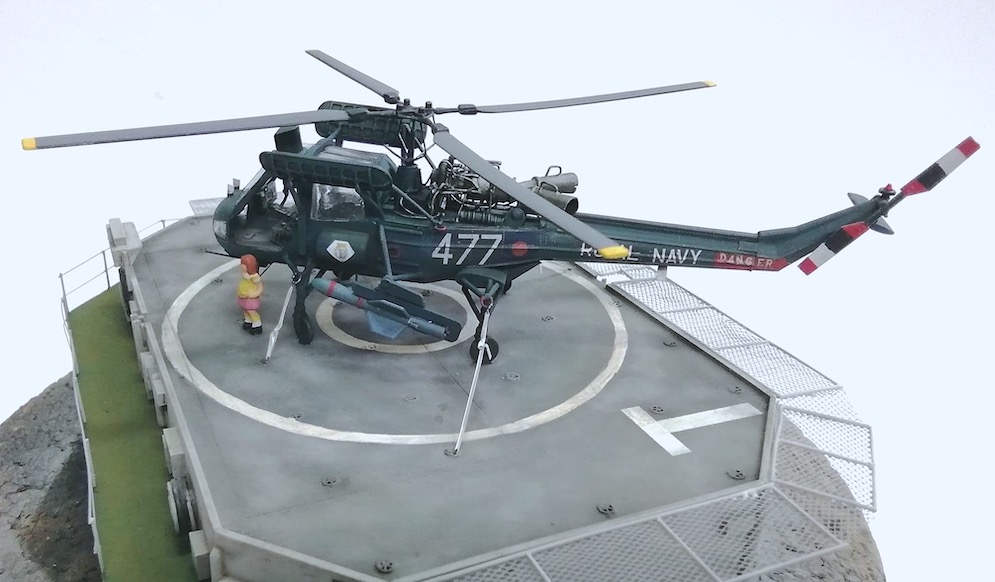
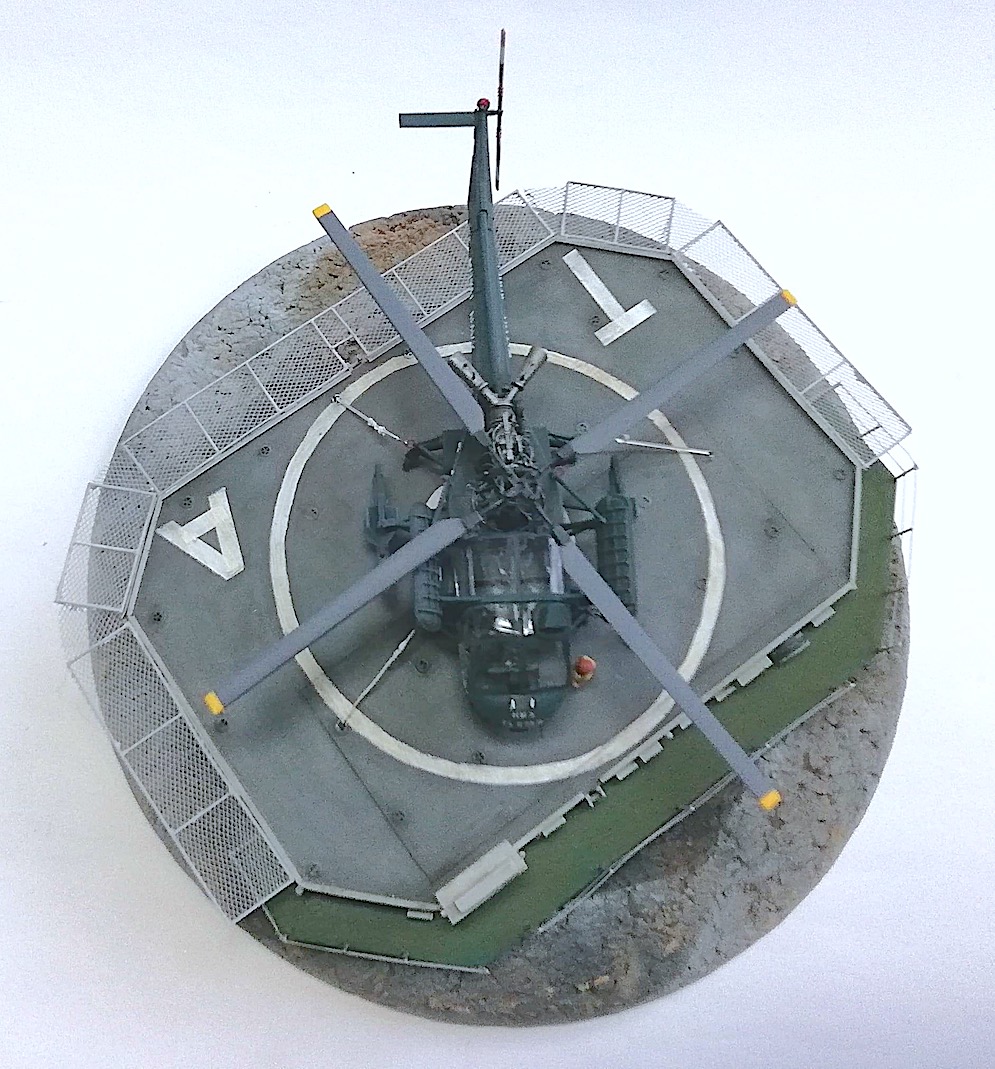
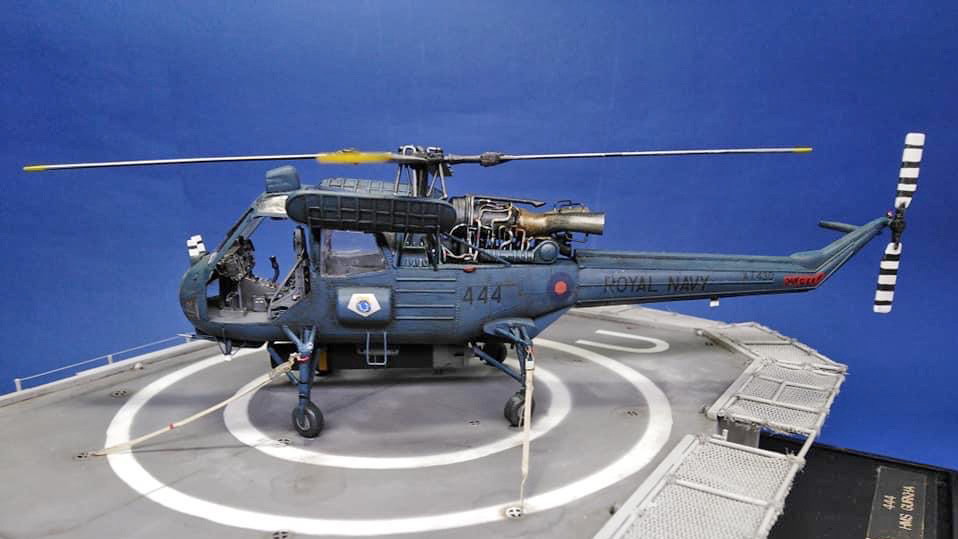
I was asked to using the old Airfix Scout kit in 1:72nd scale to convert it to a Royal Navy Wasp using some parts from Shapeways 3d printed conversion and weapon sets and also some scratchbuilding myself.
The brief was to show the aircraft tied down to the flight deck of the client’s then ship HMS Tartar, a Type 81 Tribal Class frigate and put a figure of a little girl next to the aircraft representing his daughter.
The flight deck was made from a base of Basswood covered in plastic card and detailed using plastic stock and for the hatch on one side a 3d printed example. The safety nets were plastic rod and fine netting, with the tie downs and straps coming from a White Ensign Models photo etch set. The figure came from a set of figures by Hornby, having failed to find a more detailed example (there was nothing in stock).
Ian R.
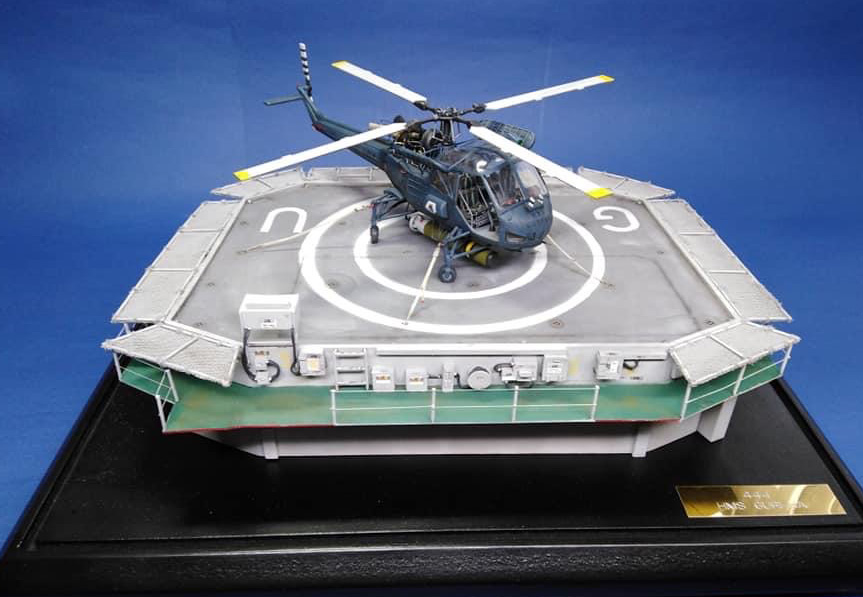
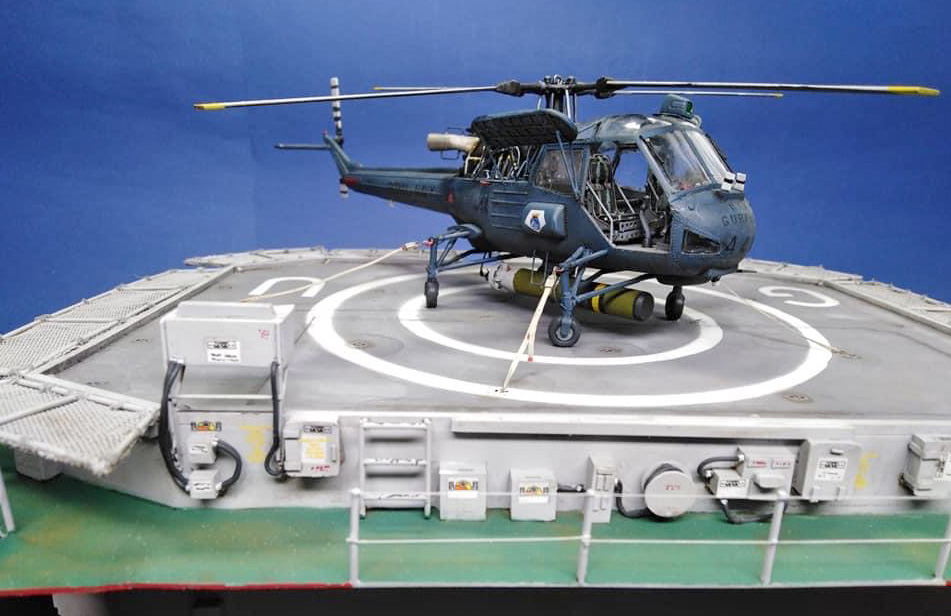
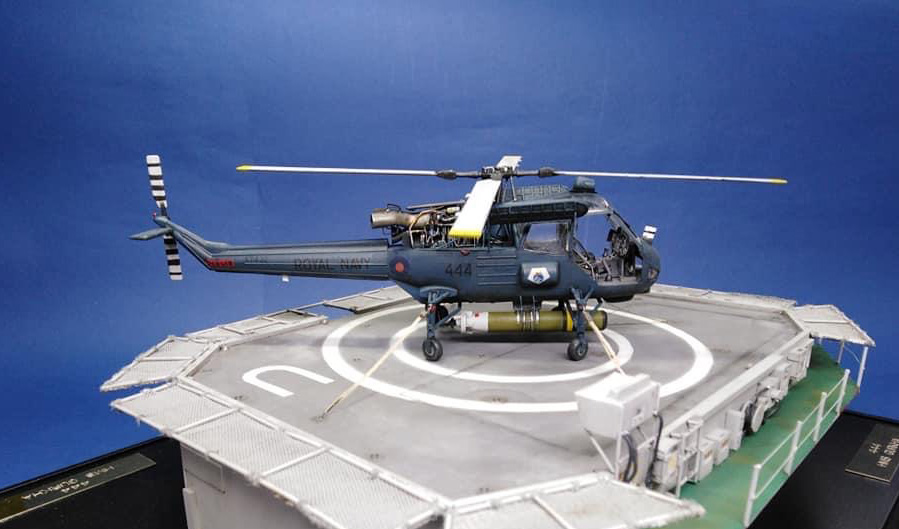
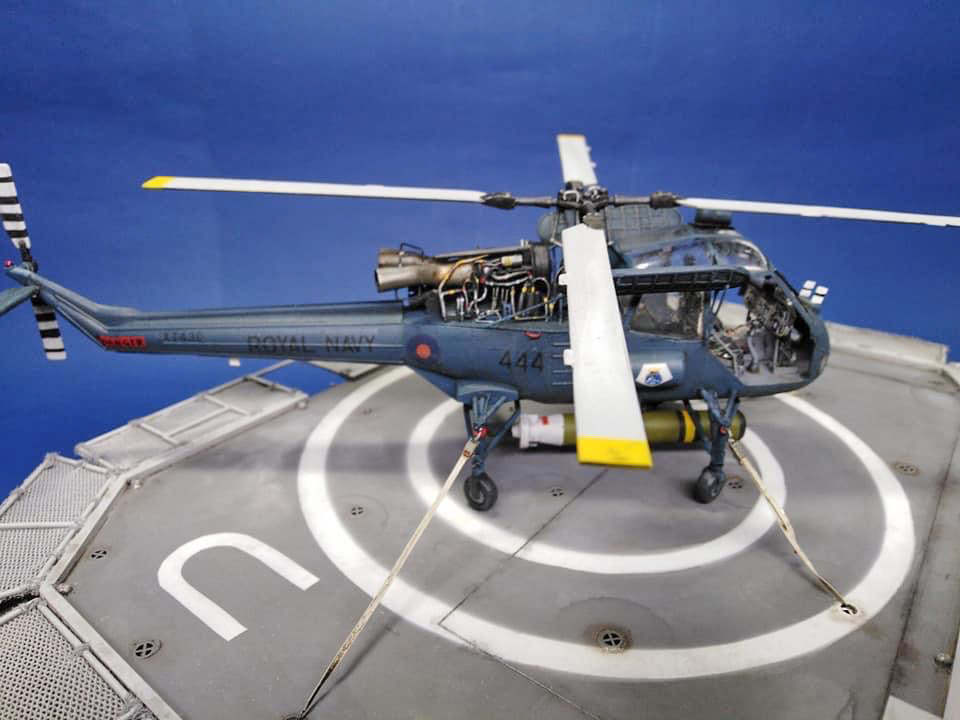
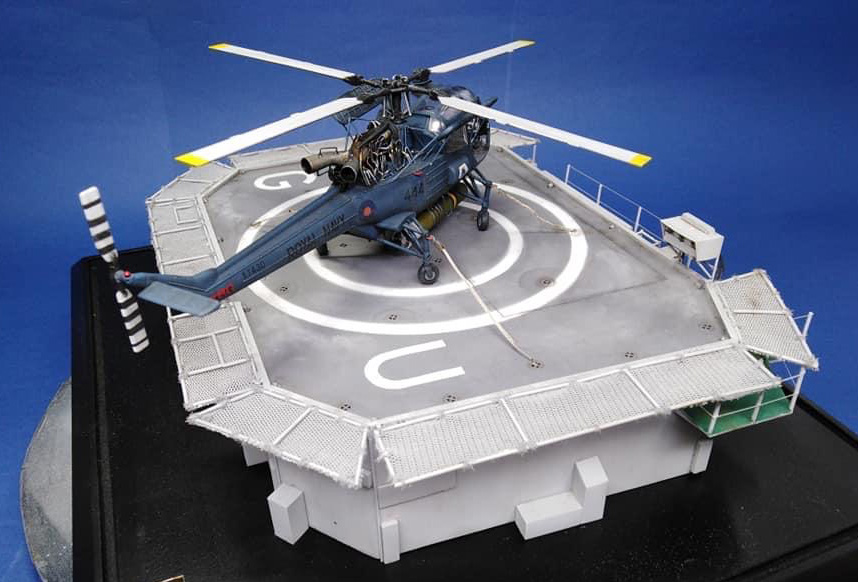
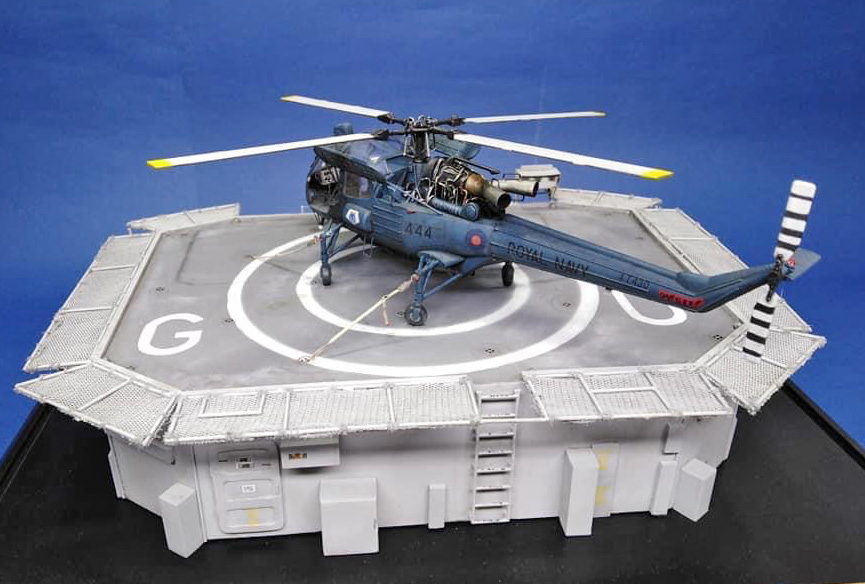
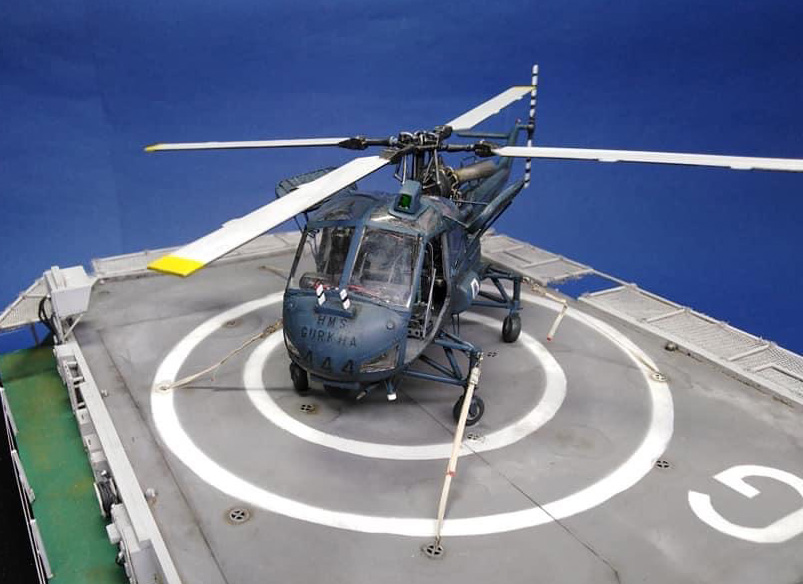
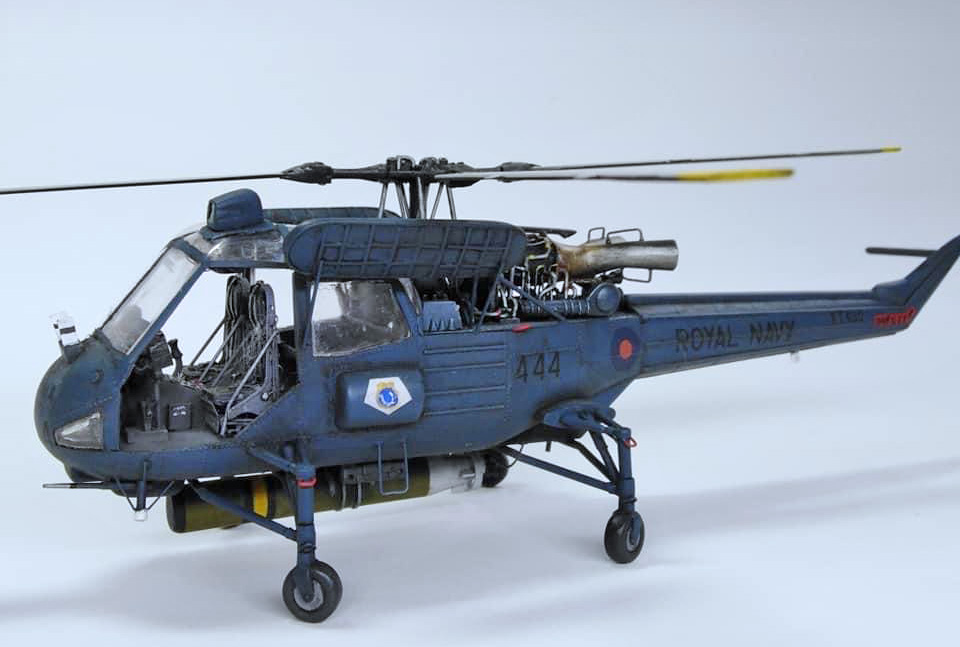
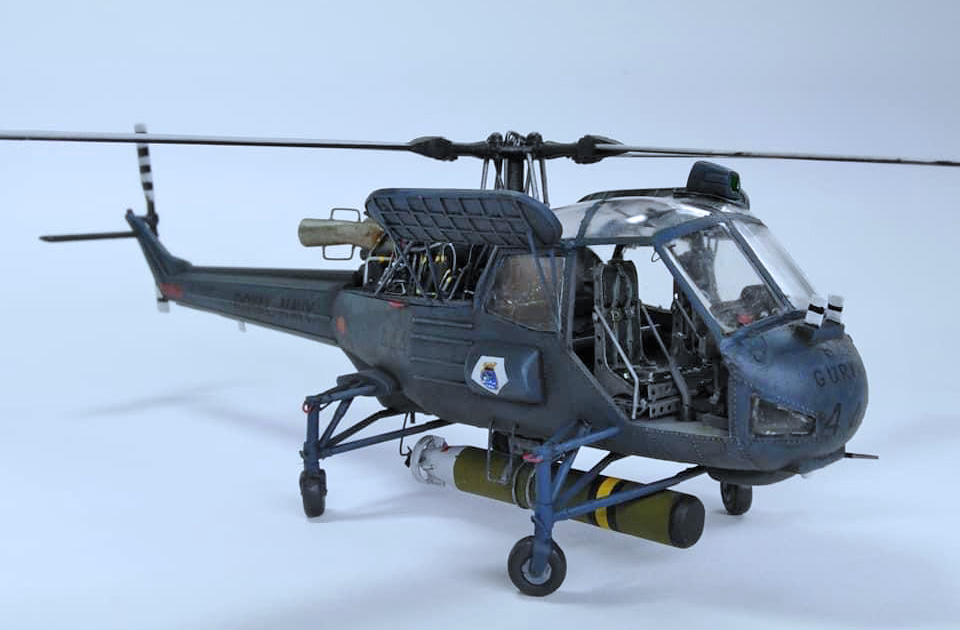
I finished this project at the start of this year using the poor Fujimi kit (which is not easy to find) and practically rebuilt it. The client wanted it based on a flight deck setting of HMS Gurkha – a Type 81 or Tribal Class frigate he served on.
The flight deck housing is made from pieces of basswood covered in plastic card.
Ian R.


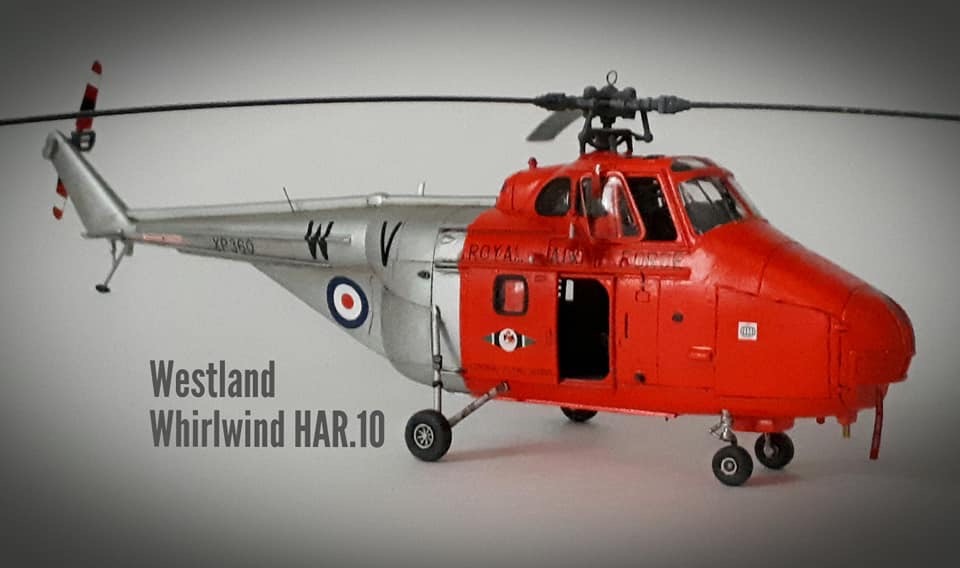
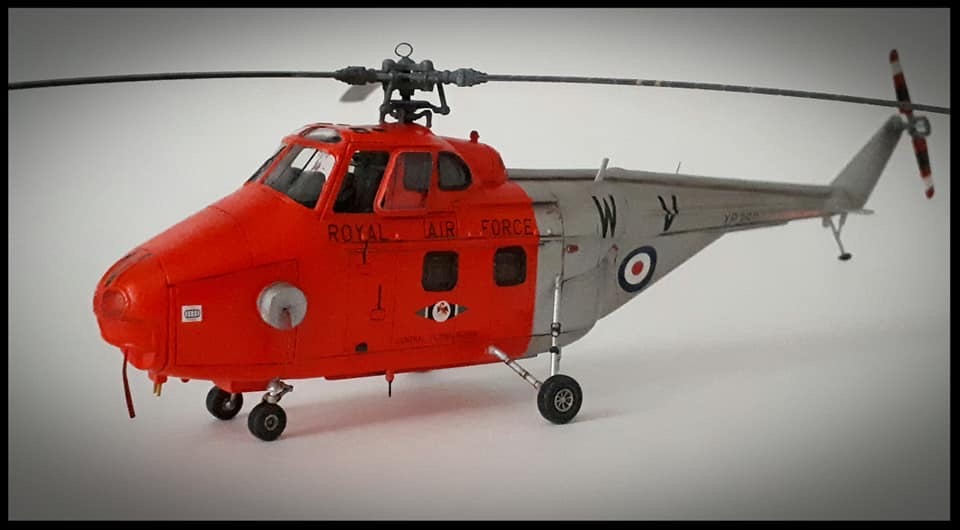
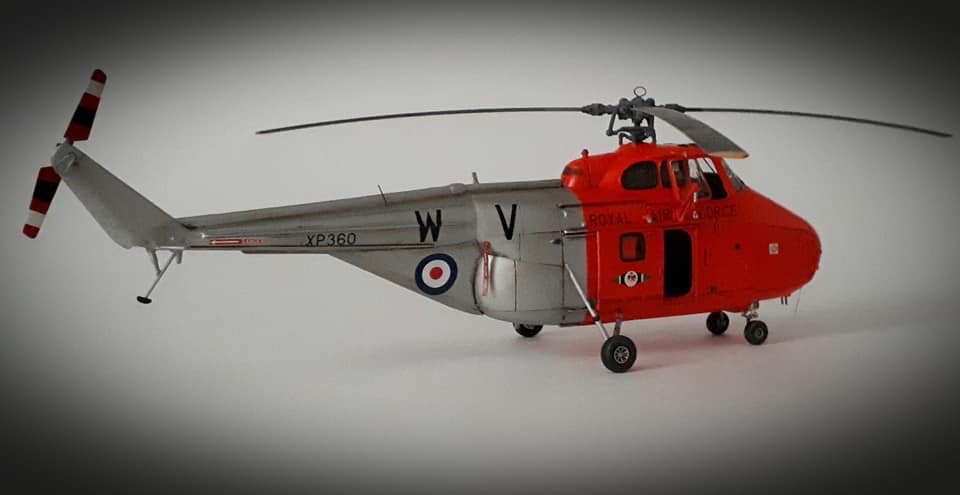
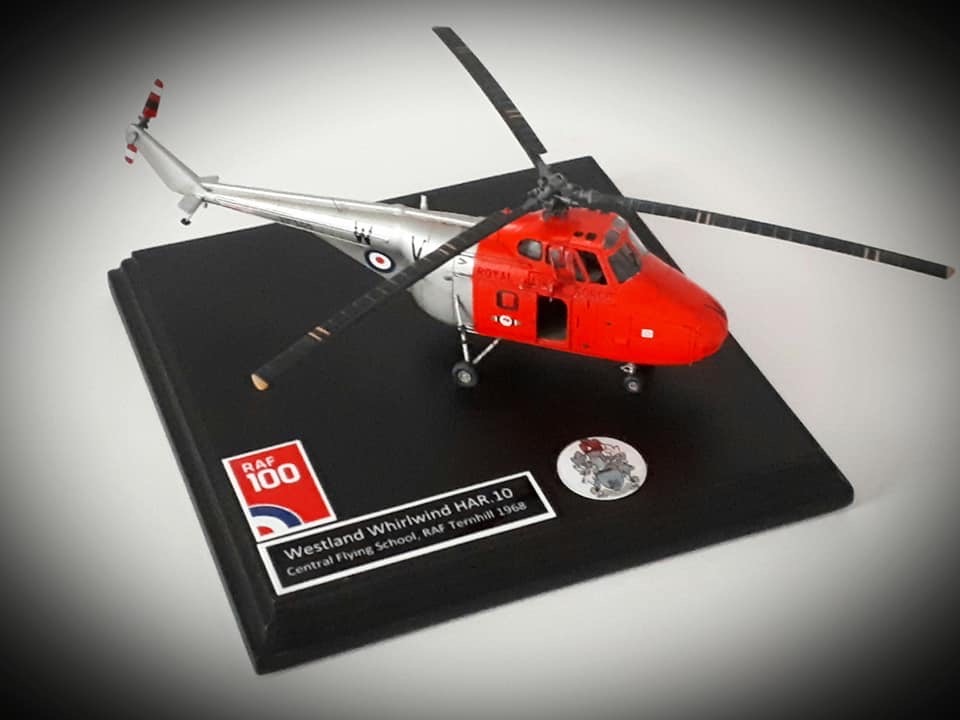
Italeri Westland Wessex HAS.1 1/48 scale.
Cheers! Andrea B.
I have used the Eduard interior and exterior detail sets together with their transparency mask; paints are general Humbrol enamels, with Humbrol clear, gloss cote varnishes used as required. Decals are from L Decals Studio mixed with the kit decals based on best scale representation (using photos for reference).
I have added a small amount of additional detail in the form of hydraulic pipes on the winch and various pipework on the fuselage. Weathering is very minimal (using Flory Washes) as these aircraft always look to be very clean in any photos. The exhausts were covered in bare metal foil and touched in with Humbrol Clear with a small touch of blue ink added to try and represent heat discolouration (not sure it worked!)
Best regards, Tim Haynes

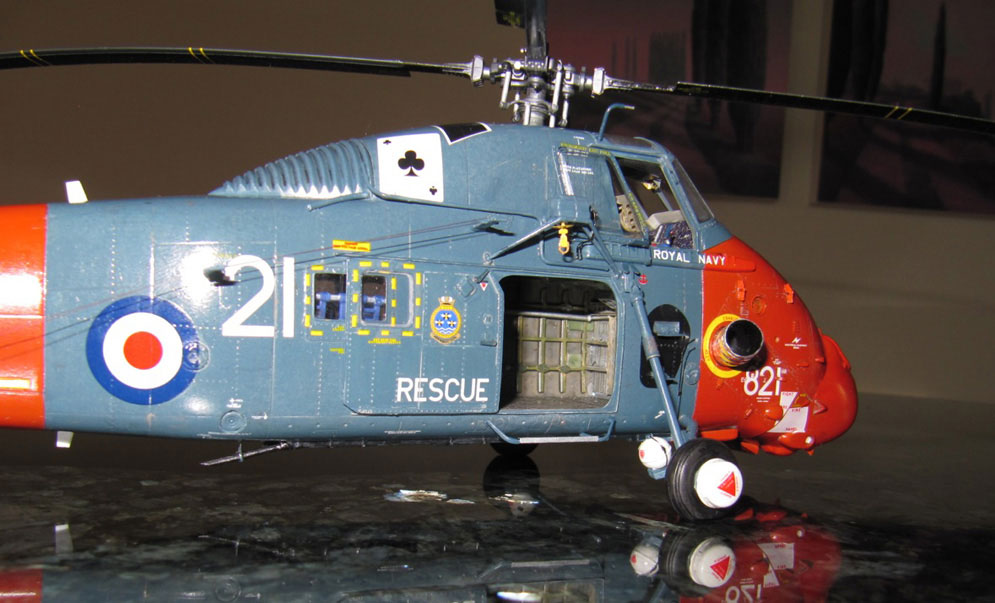


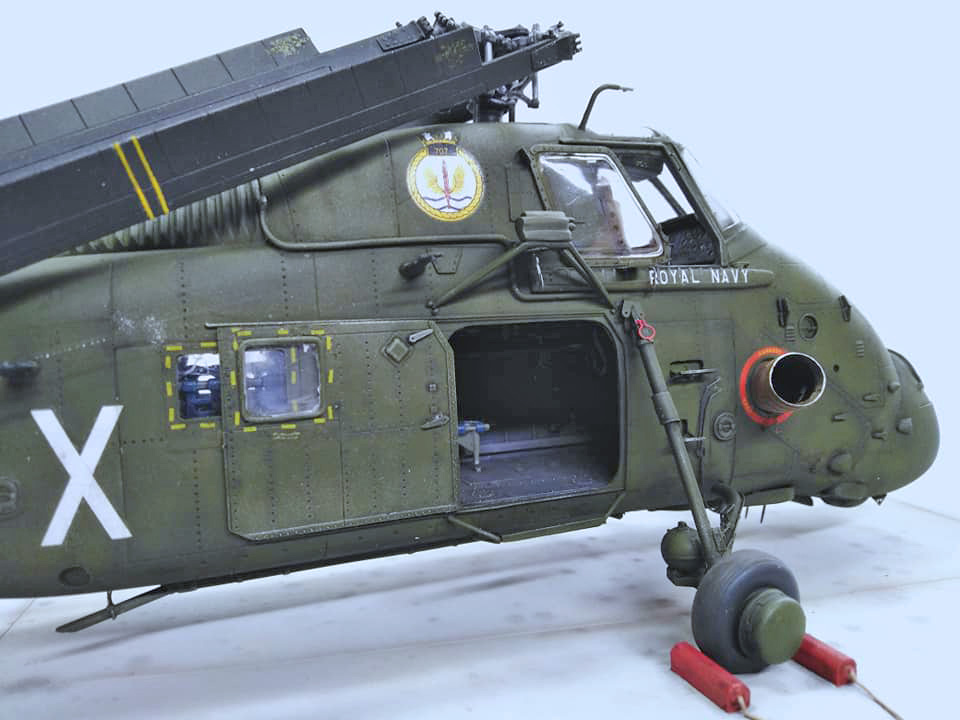
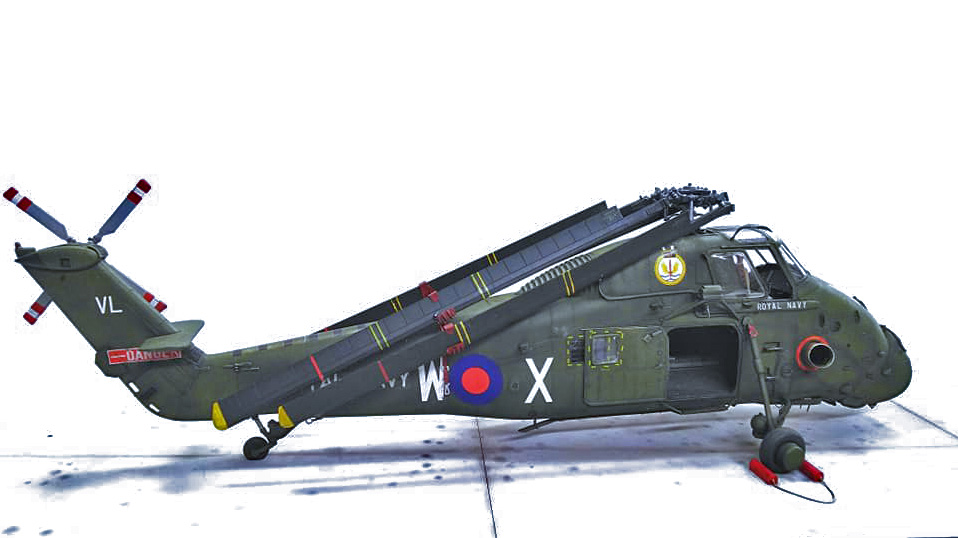
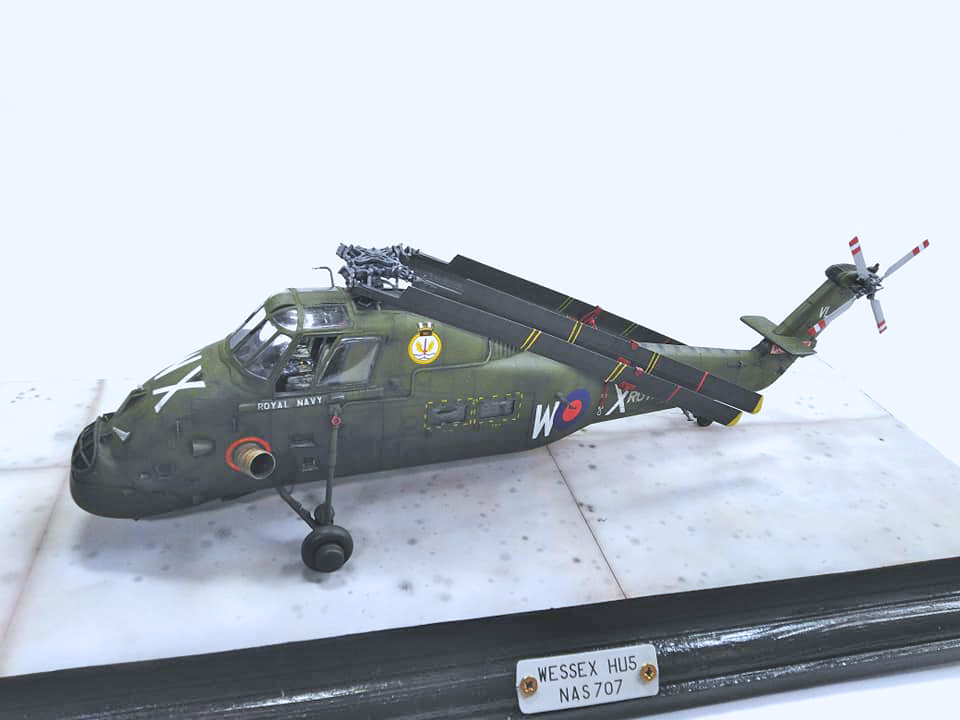
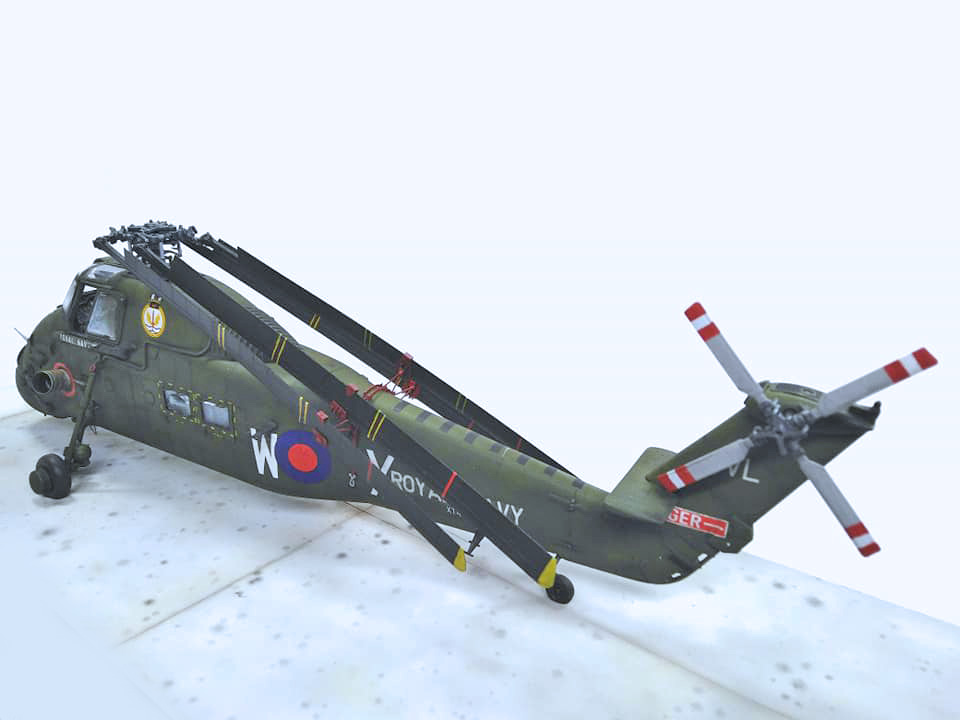
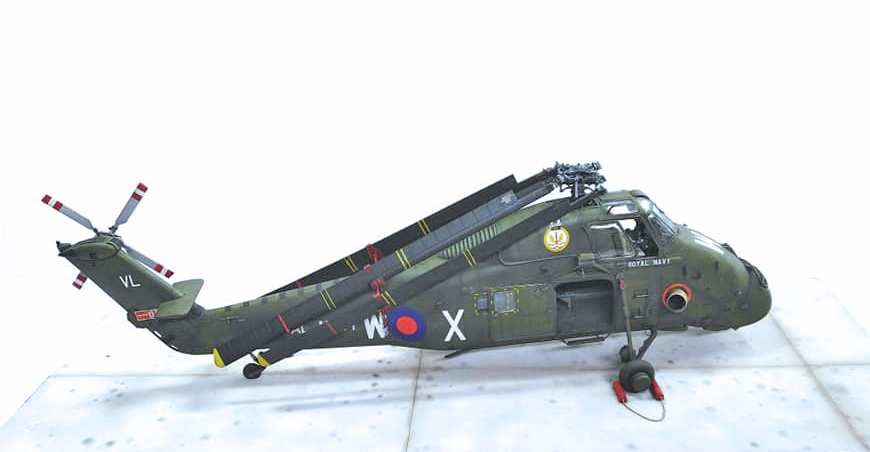
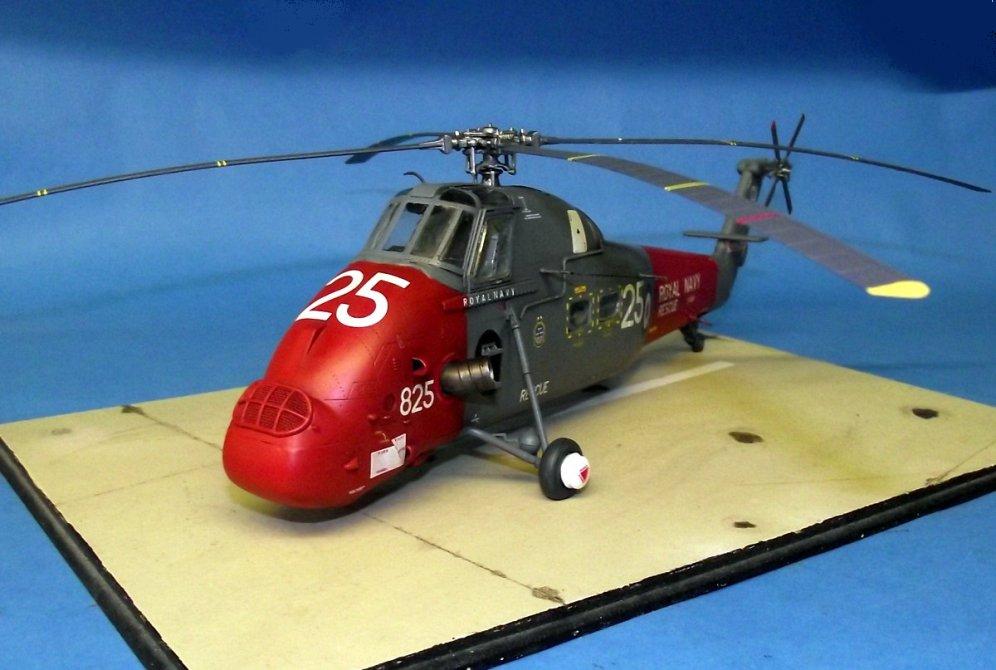
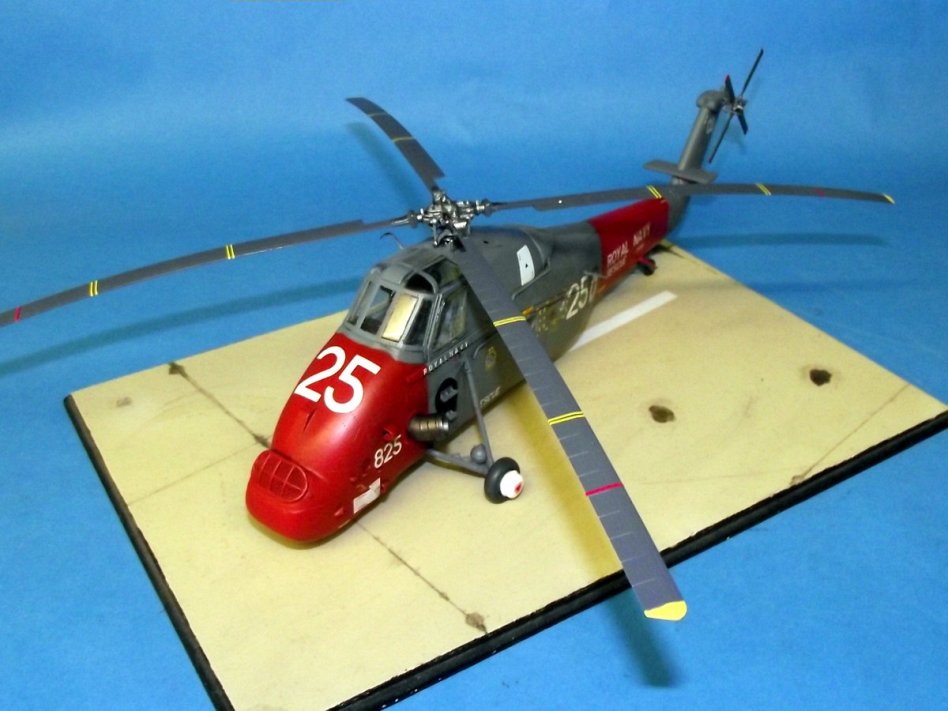
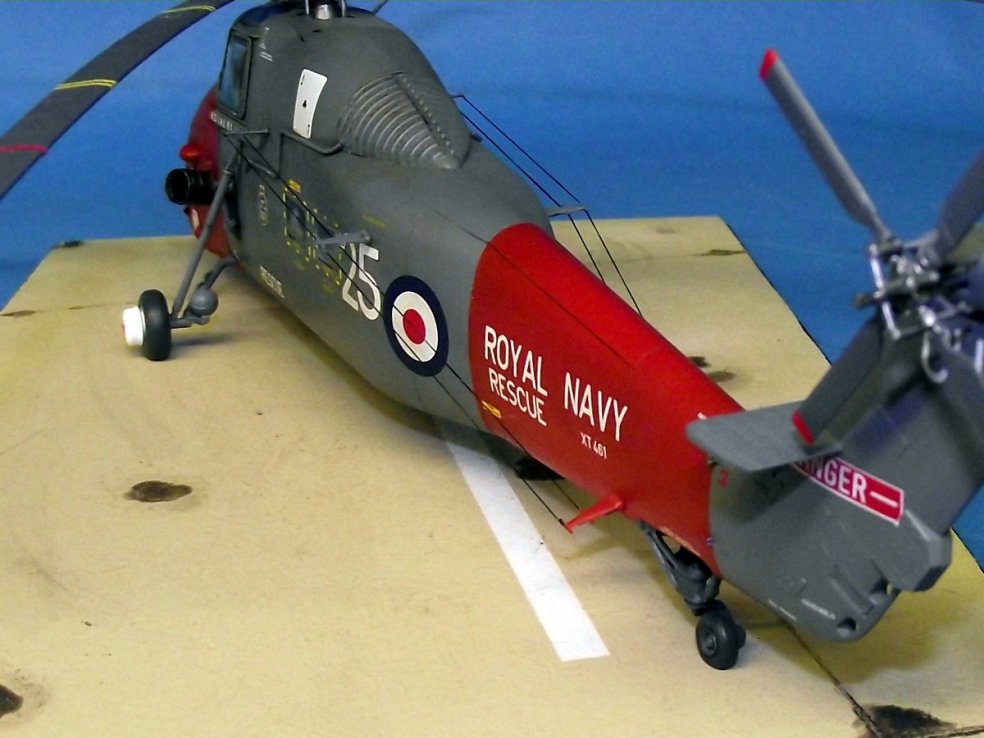
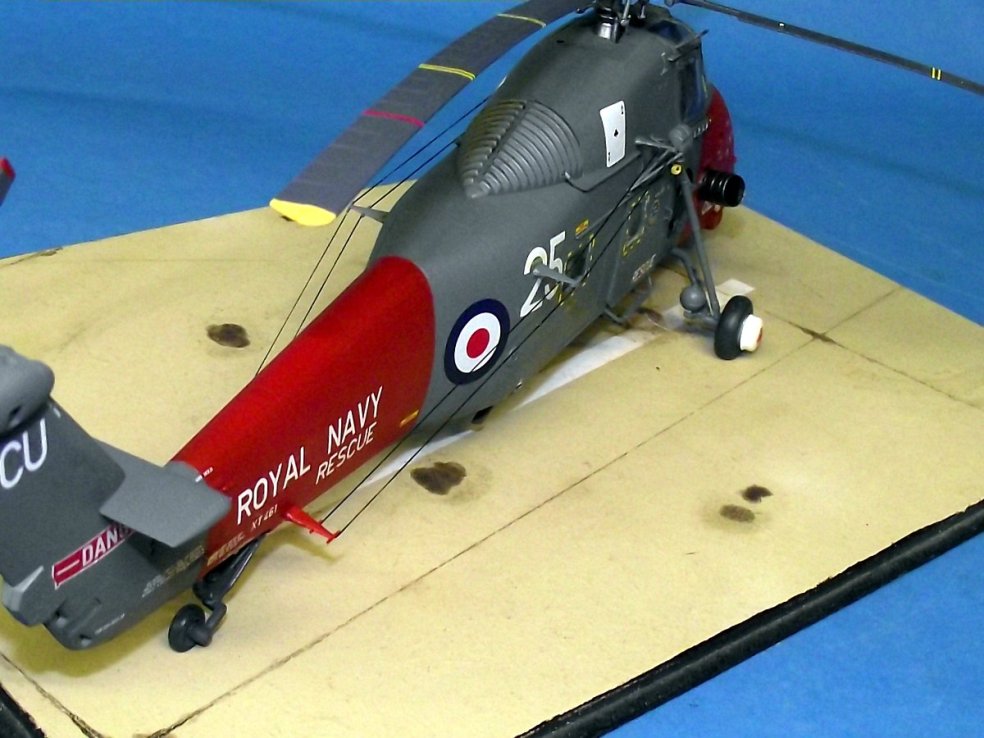
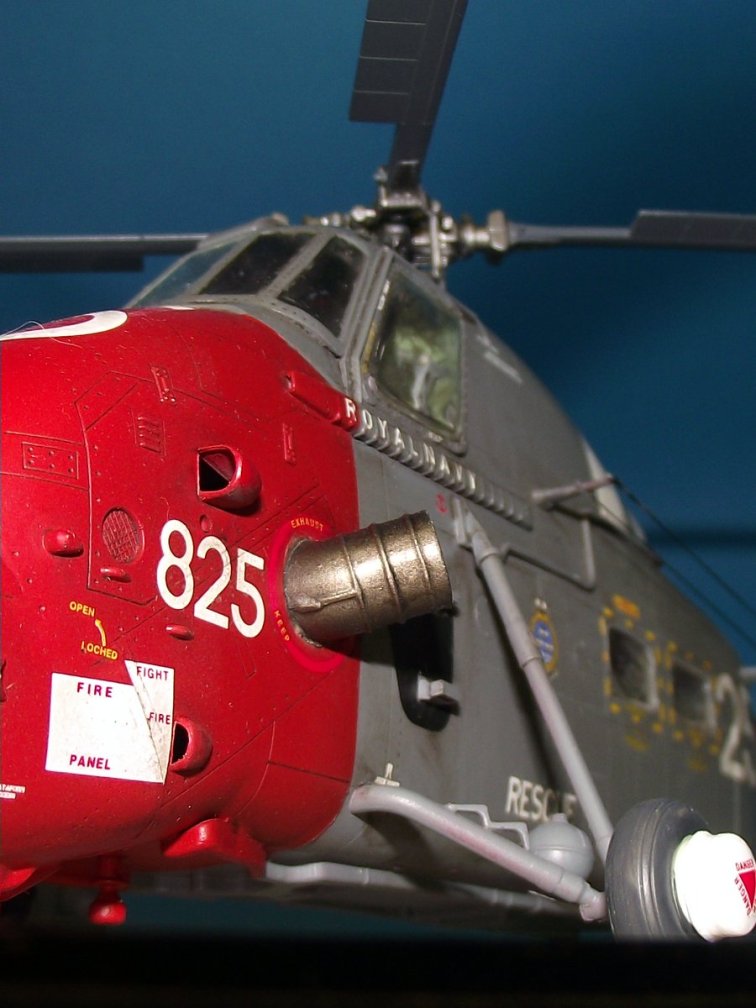
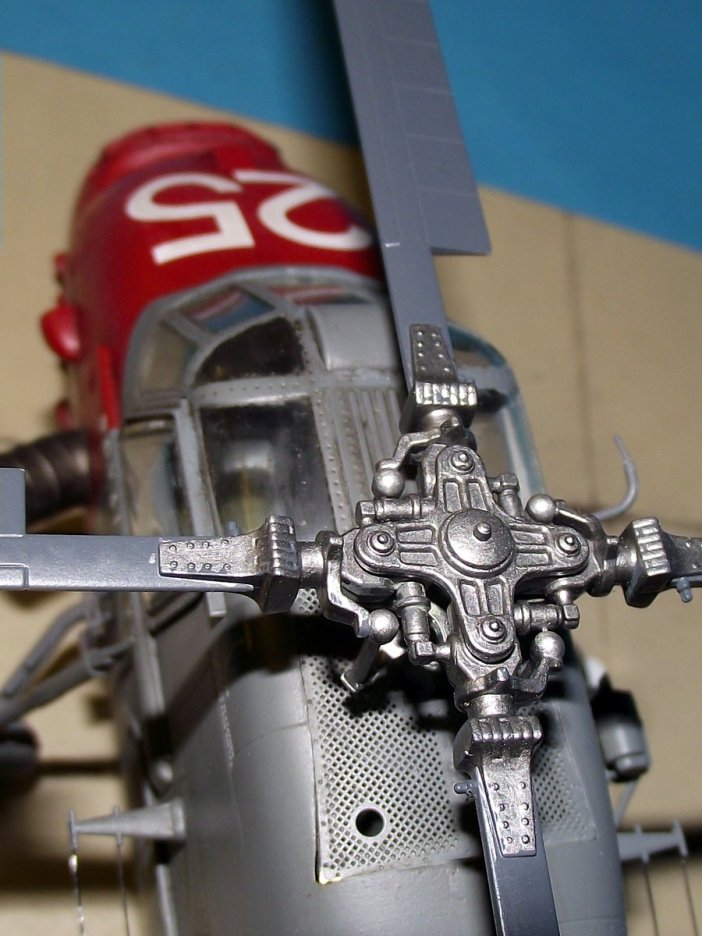
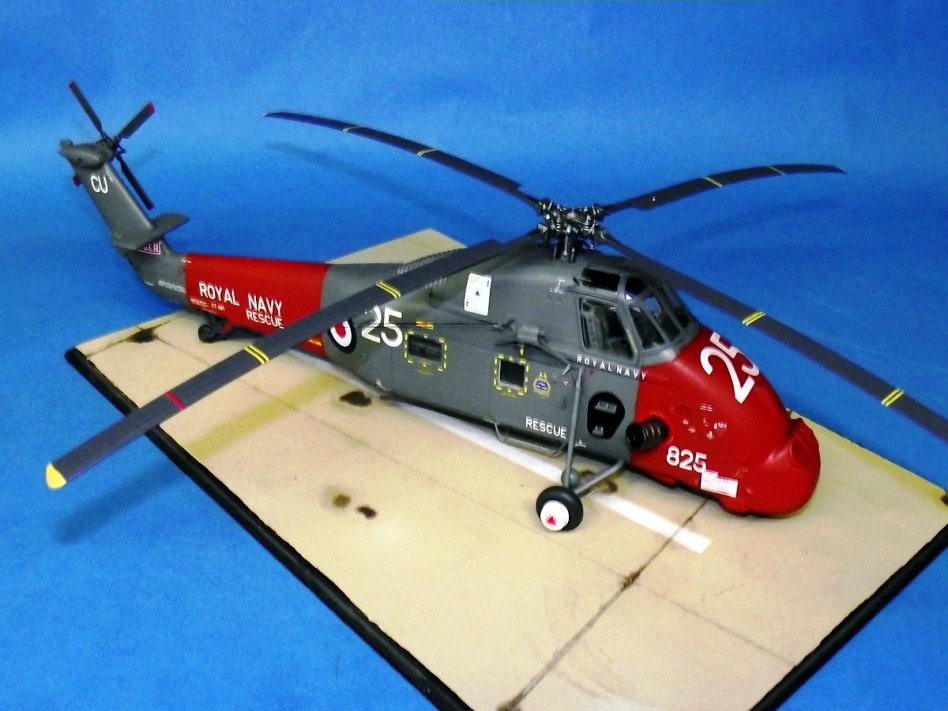
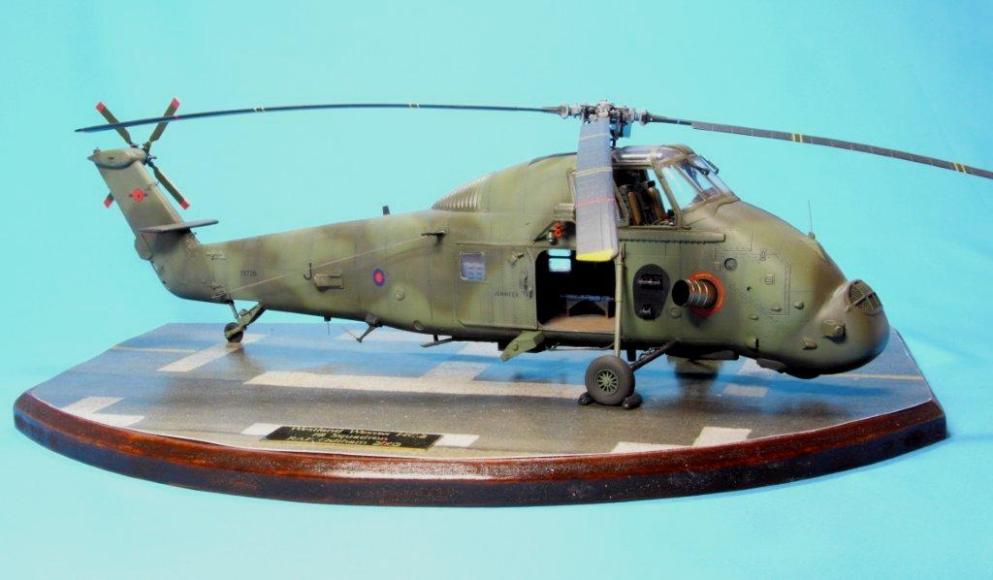
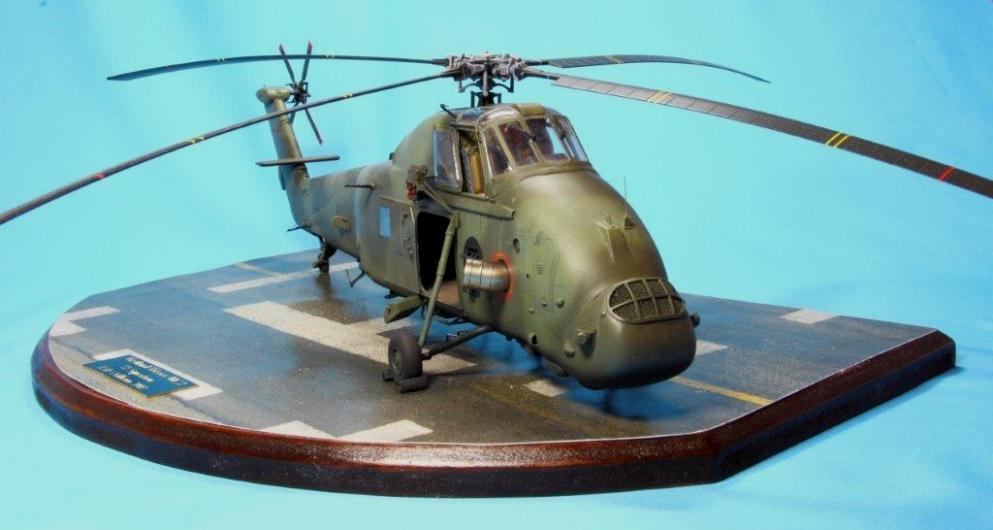
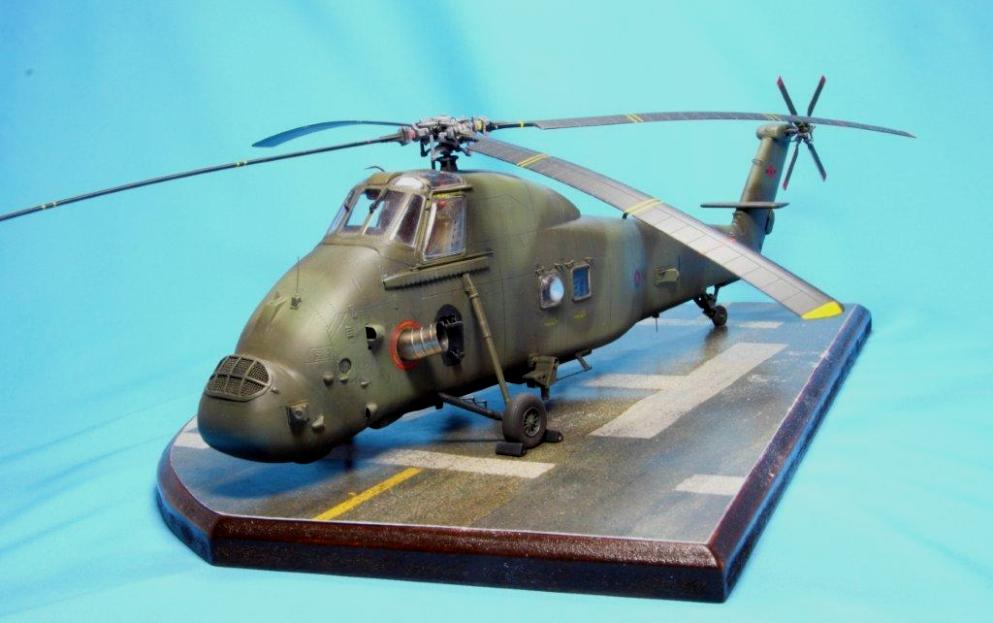
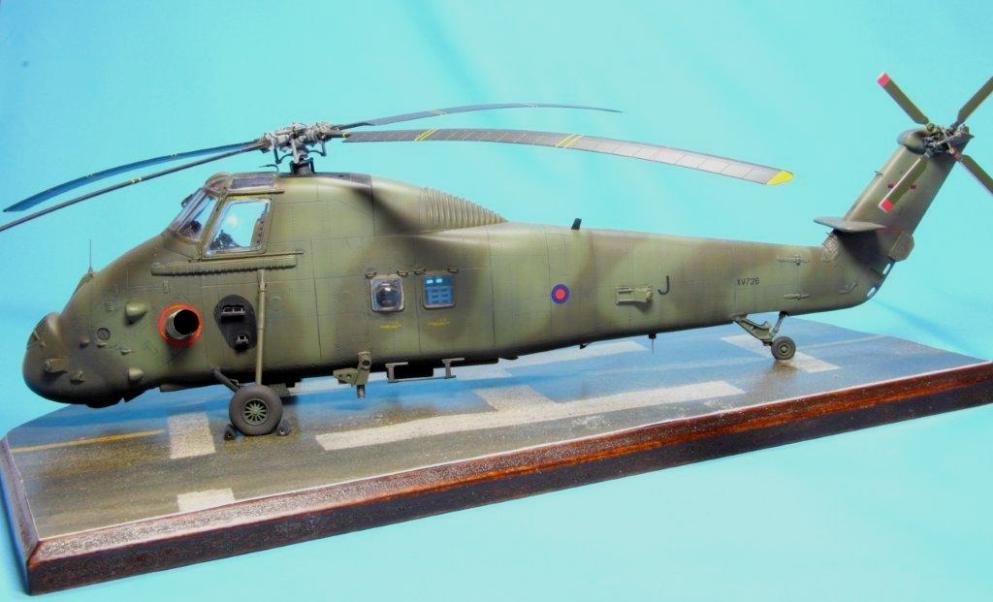
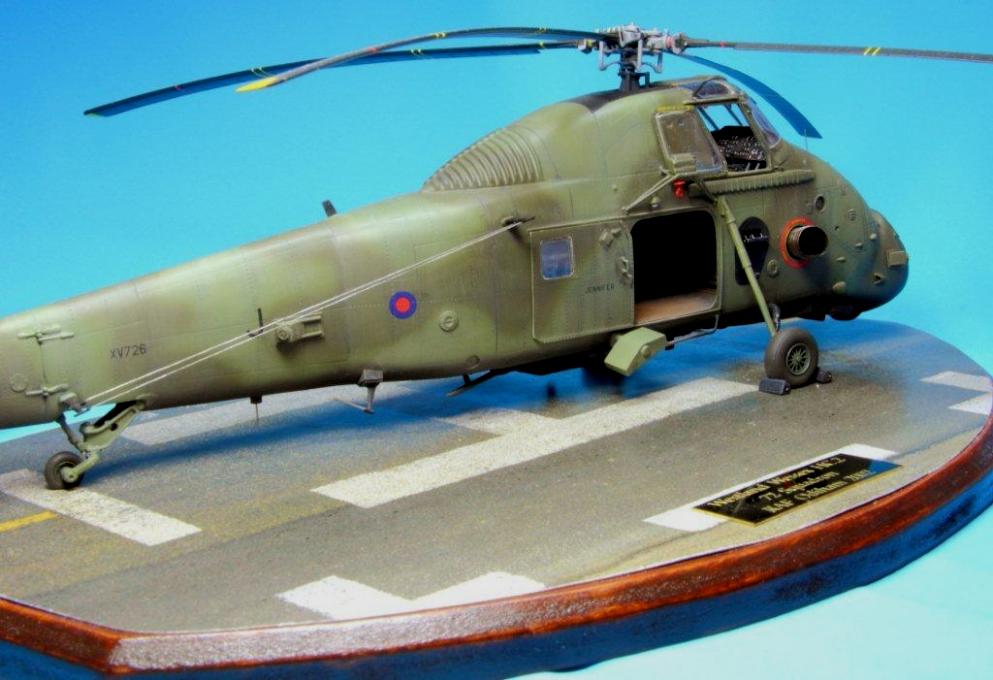
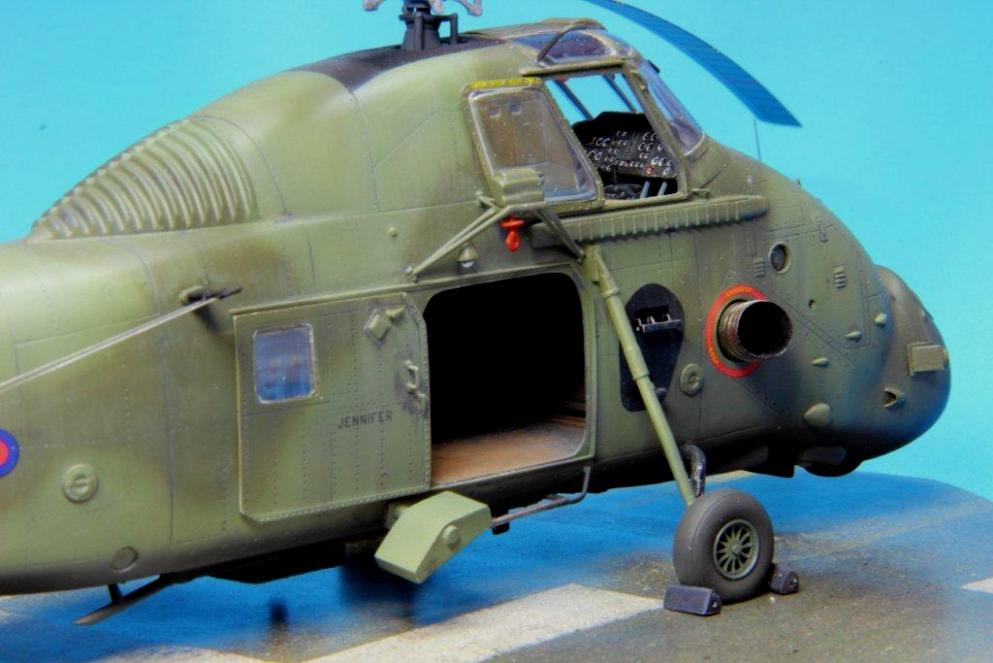
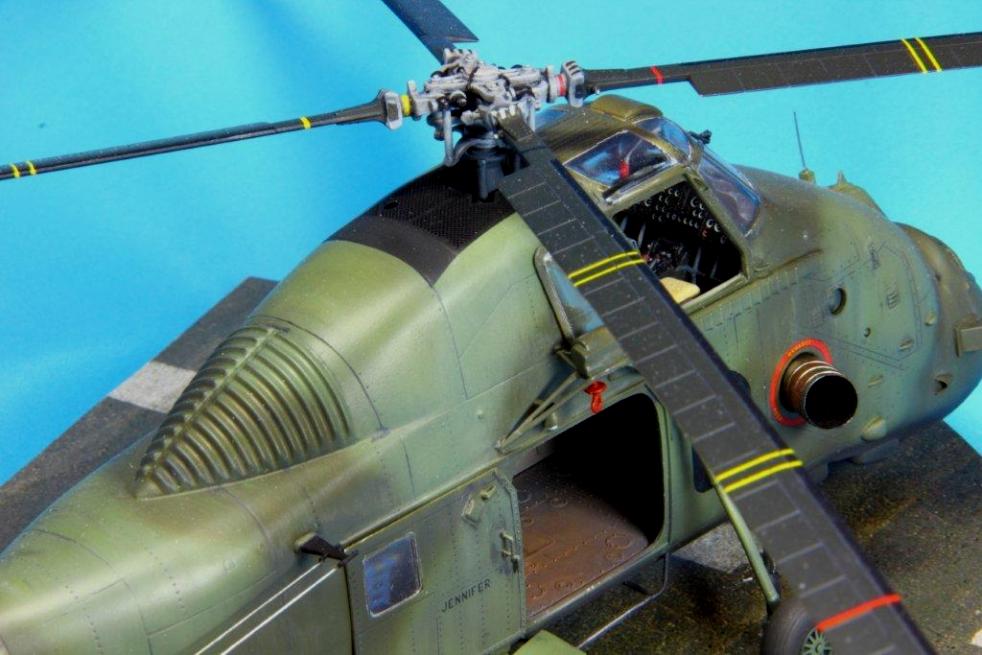
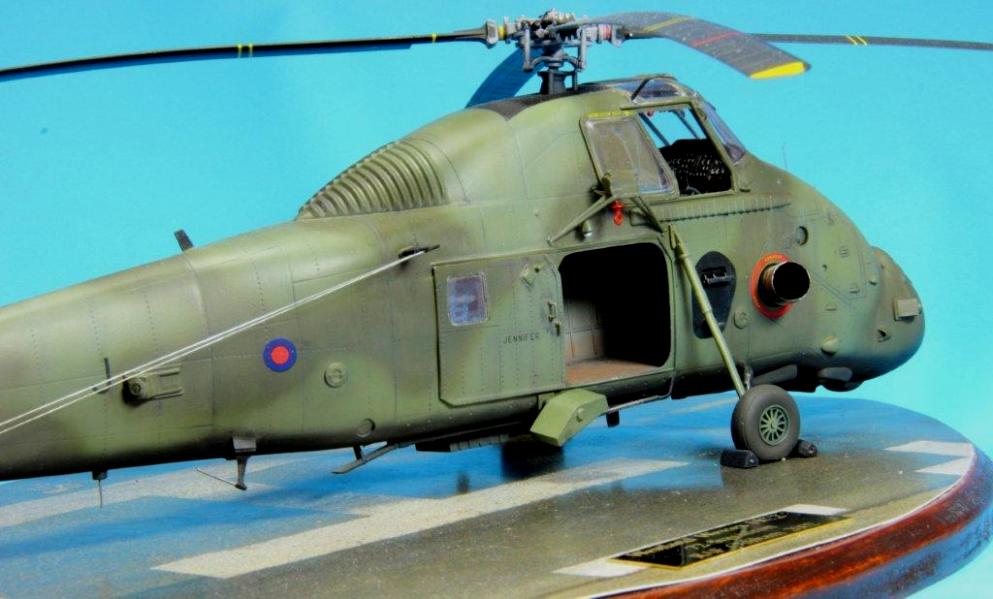
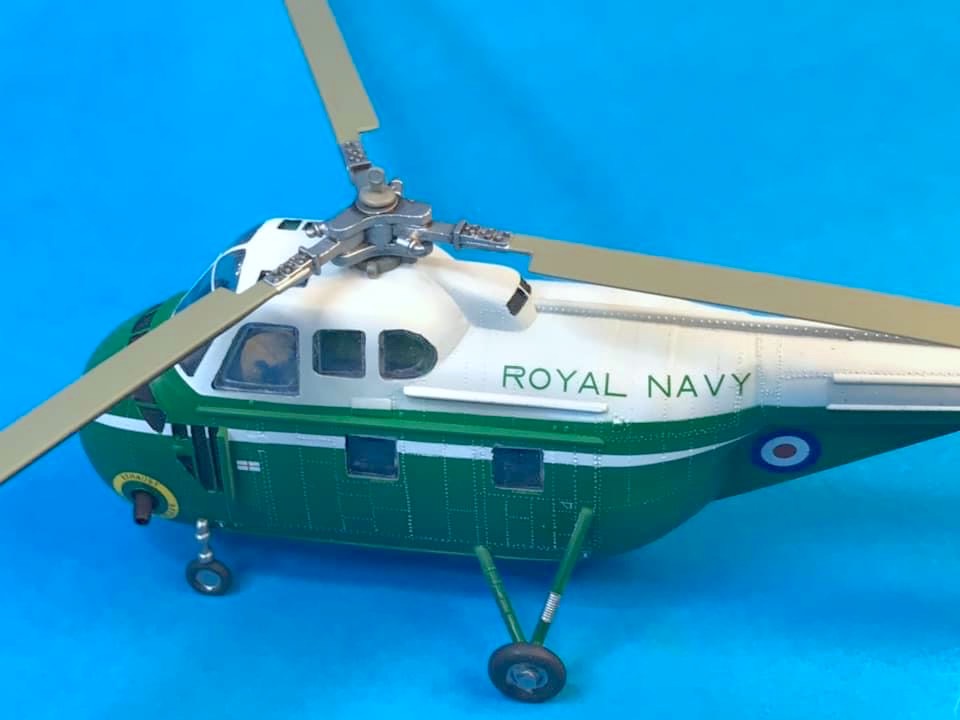
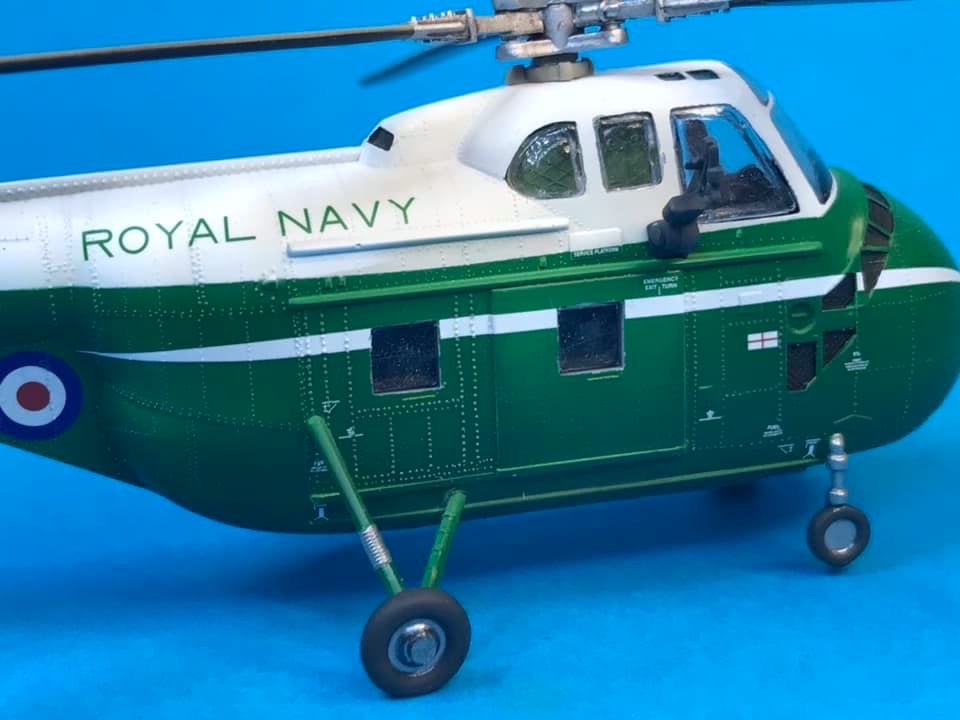
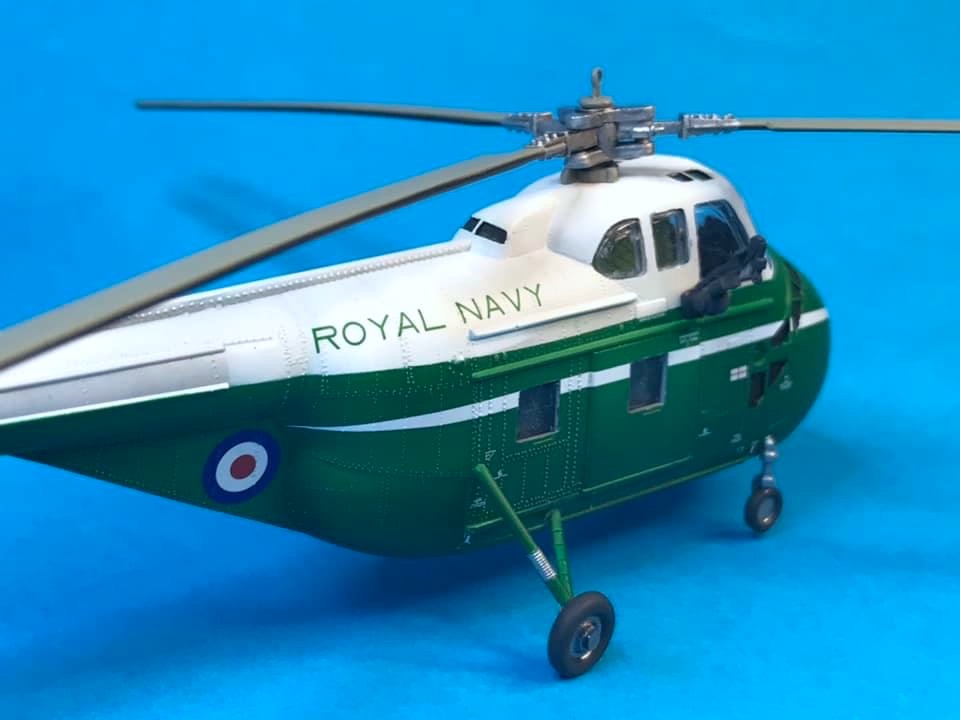
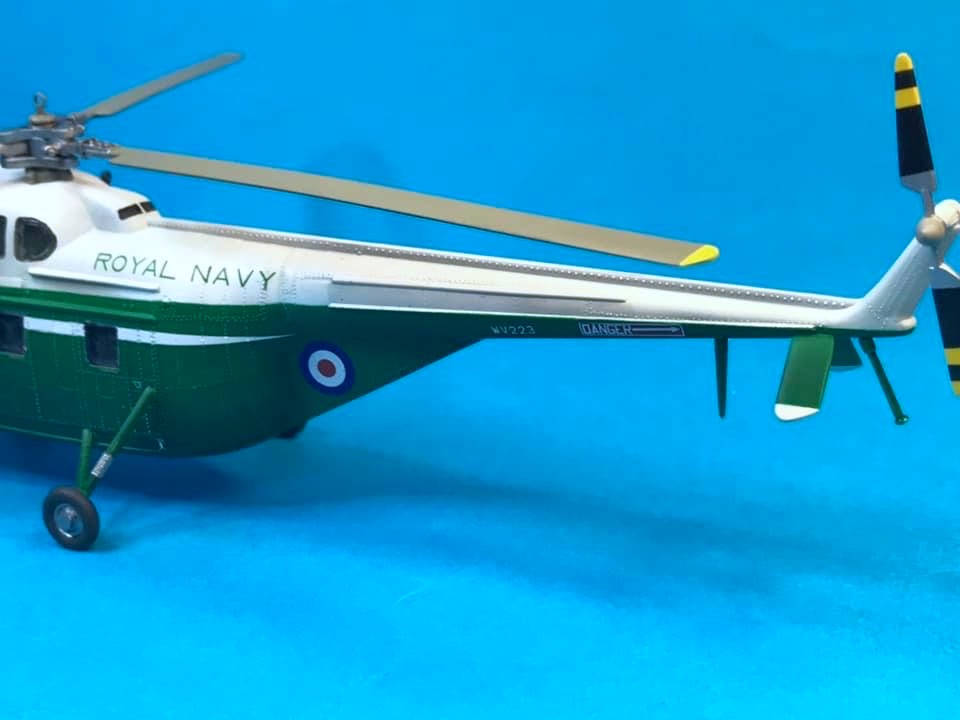
This started out as the 1:48th scale Academy kit of the venerable Wessex. I updated the kit using eduard etch, Scale Warship rotor fold set and some scratch building of my own for the cabin/cockpit.
Hope you like it…
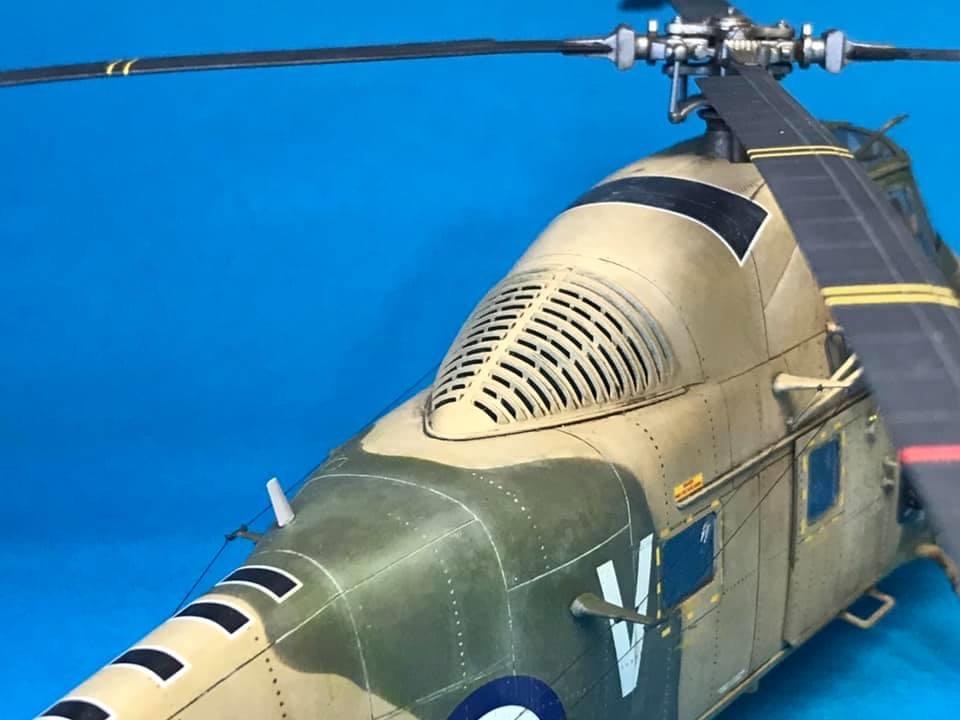
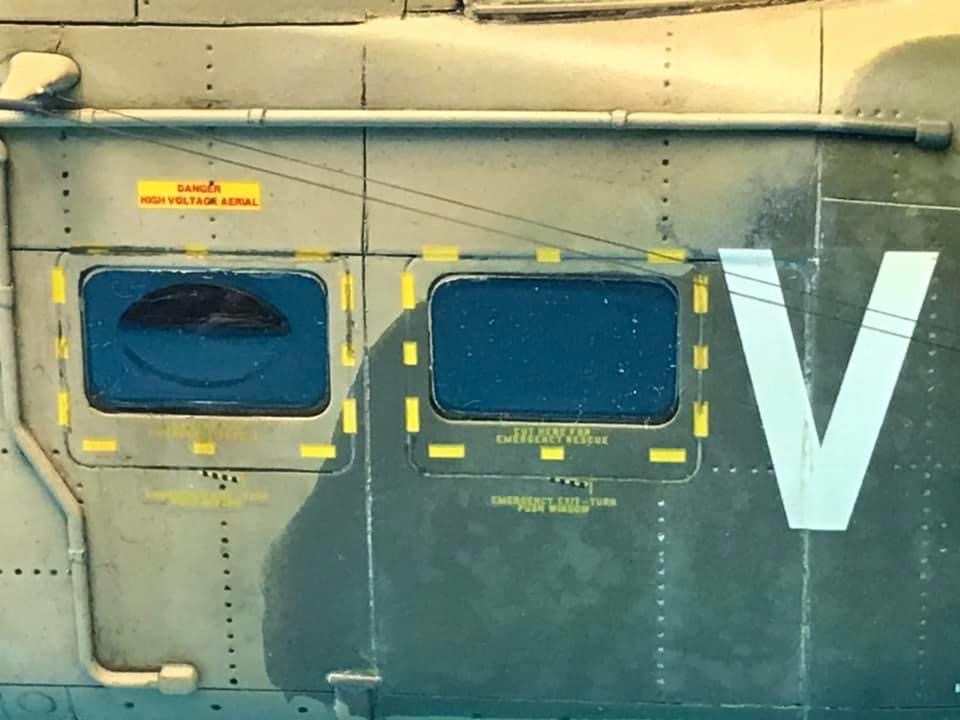
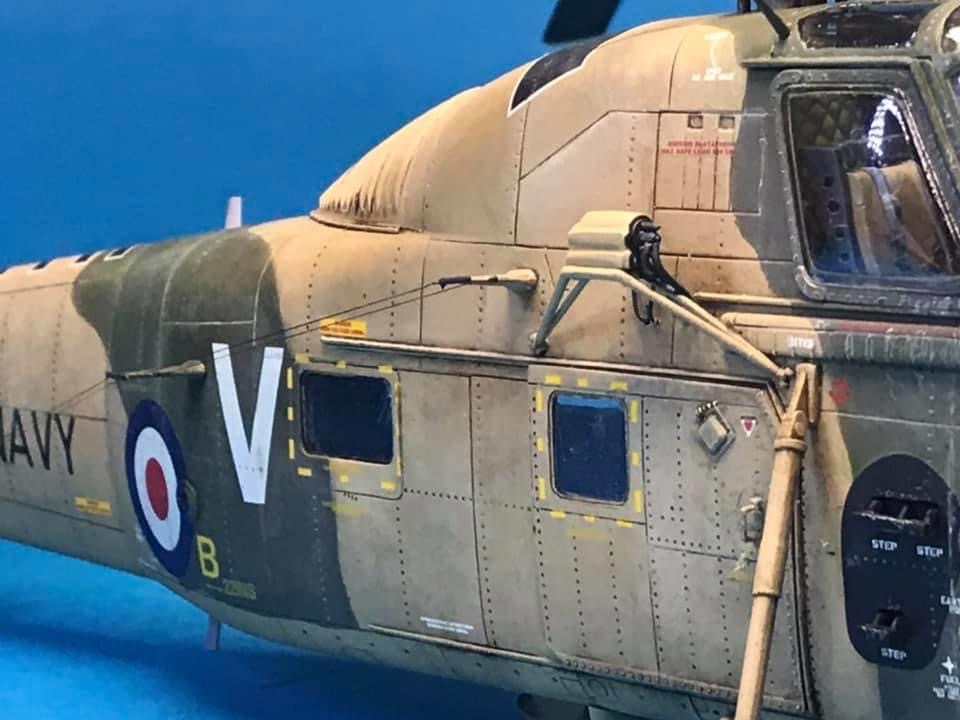
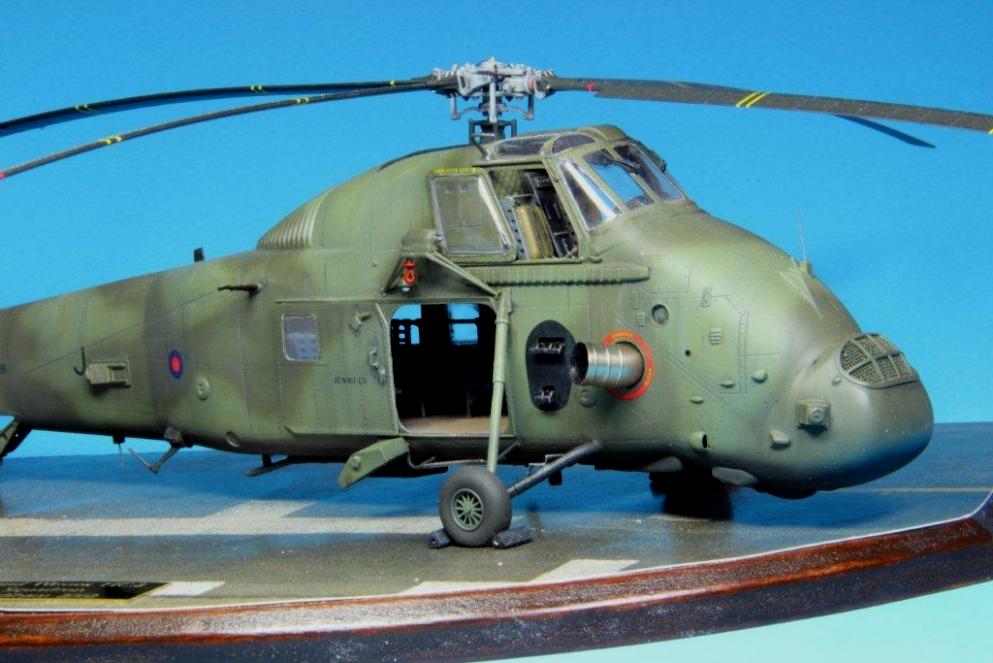
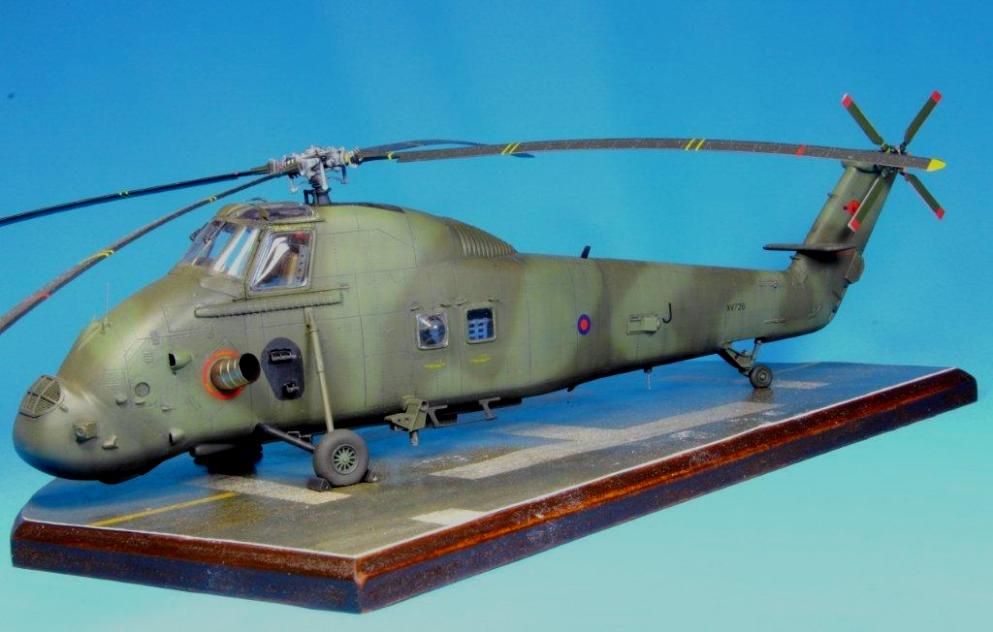
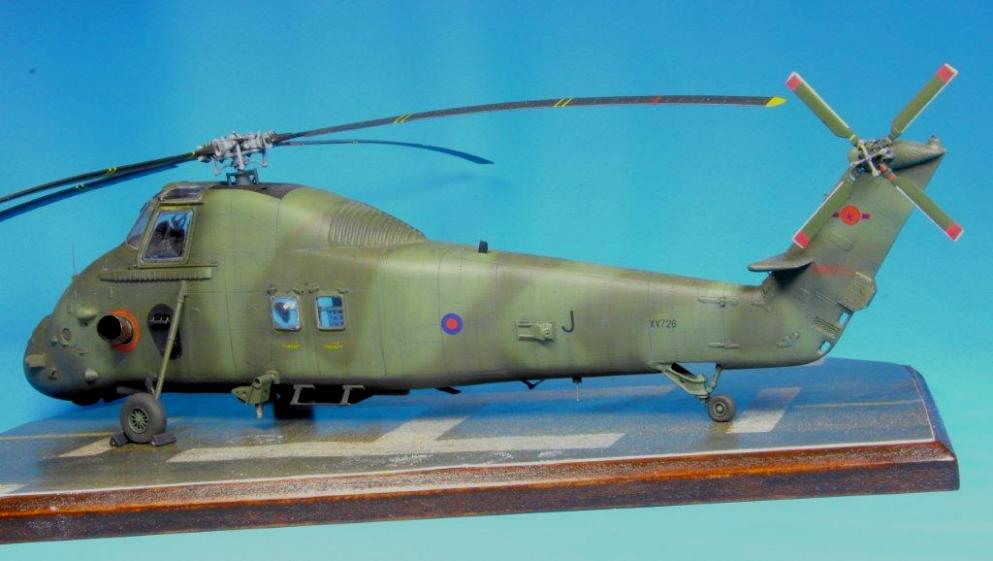
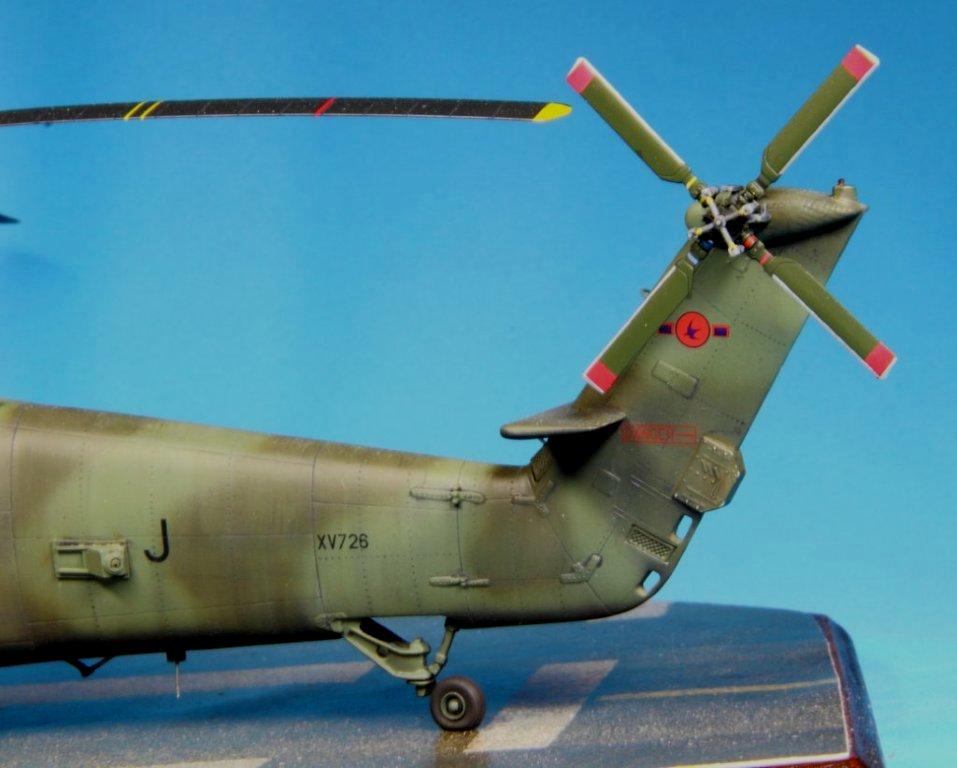
Ian R.


Cheers, Neil P.
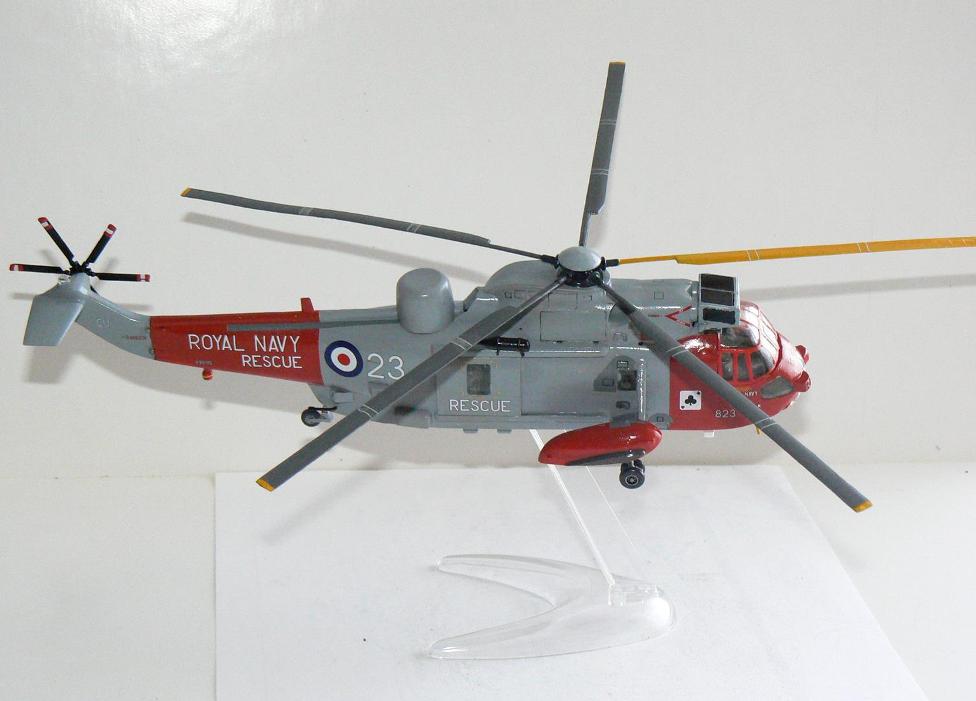
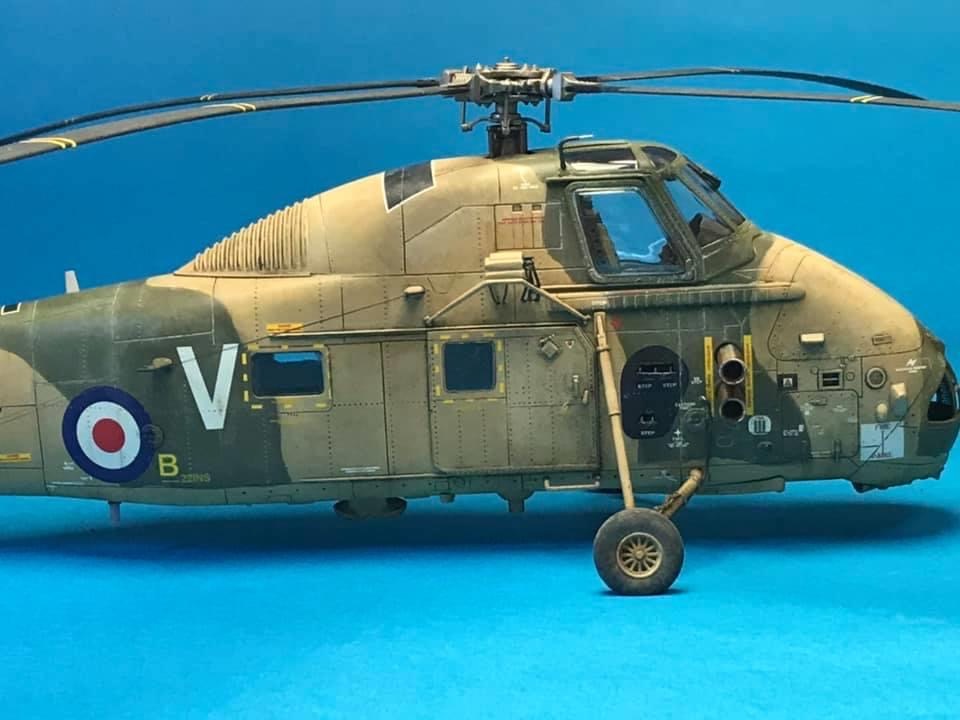
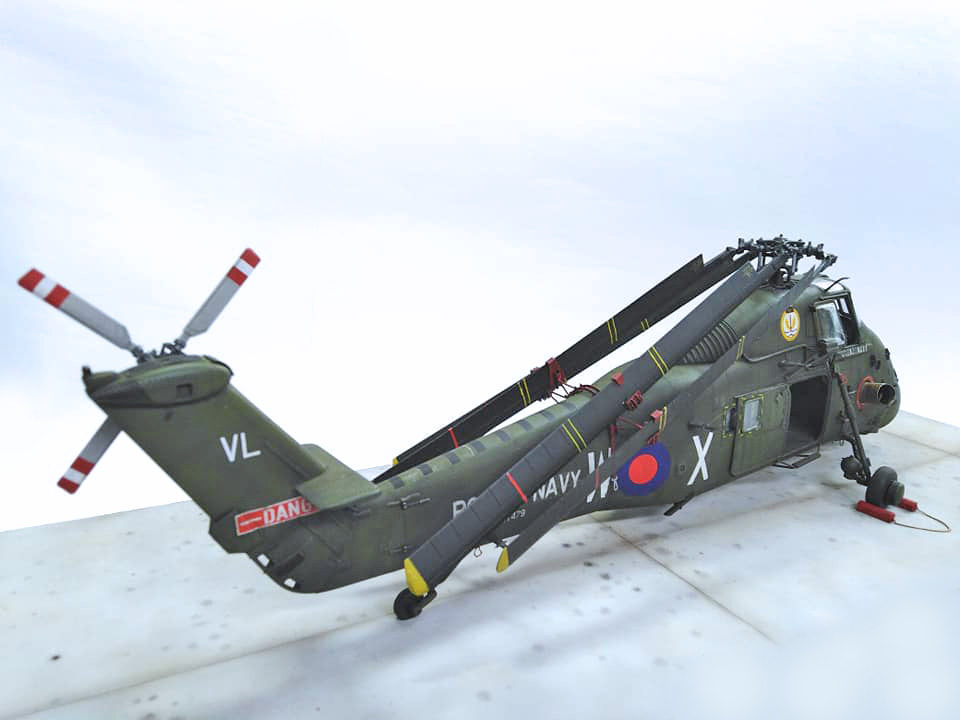
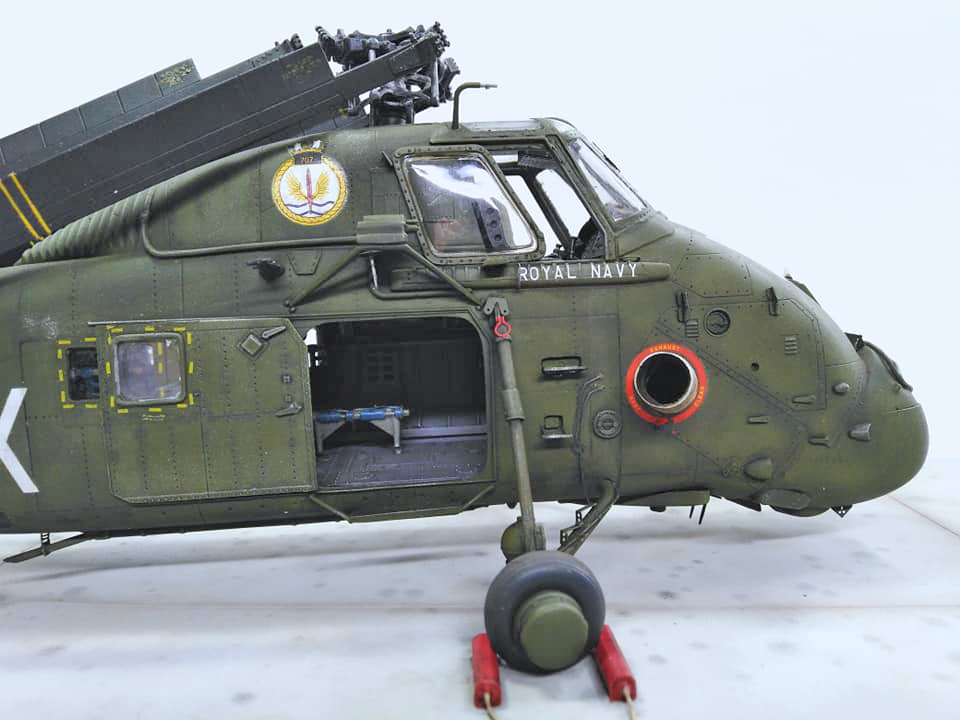
The conversion was relatively simple, the main change being the resin replacements of the fuselage belly panel and cabin windows. The fuselage panel required the removal of both plastic and resin to get it to sit flush. Any resultant gaps were filled with Milliput superfine putty. The kit cabin windows were measured and chain drilled following the Rotor Craft instructions. Cyanoacrylate glue was used to fit the windows in place and to fill any gaps. The remaining resin parts consisted of various aerials and chaff/flare pods.
Other details added were a scratch built fire extinguisher and rotor brake lever in the cockpit. Seat straps were made from masking tape and various cables and wiring were fitted using lead wire in the passenger cabin. The main undercarriage legs were replaced with the Scale Aircraft Conversions items. Other scratch built items was the anti-collision light on top of the tail rotor housing and finally, a little-lens was fitted to the underside to represent the landing light. The paints used are the Dark Green and Lichen Green from the Xtracolor range. The underside was Tamiya Flat black highlighted with Tamiya NATO Black. The decals were from an Xtradecal sheet and represent an aircraft from 72 Squadron RAF Odiham in 2002. Flory models dark wash was used for the panel lines and after an application of an acrylic matt flat finish, the colours were toned down using the oil dot method.
Mark Rooks

Glenn W.


Hope you like her…
Andrea B.

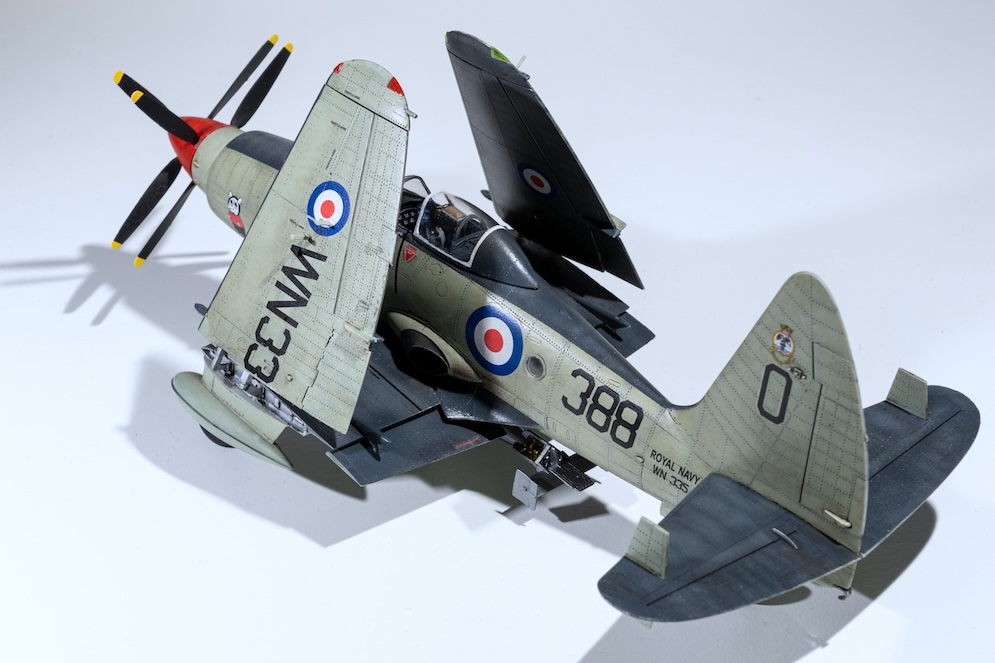


1:48 scale
This was really a test bed for the Gannet I am building, especially the pre-shading, painting and weathering, which I am pleased with.
The kit is wonderful and Trumpeter has done a great job, it really stacks well against any Eduard or Tamiya kits I have done recently. Added some photo etch for the cockpit including seat belts but nothing else really required.
Only flaw were the out wings, which initially I wanted down, but wouldn’t fix with fairly weak structural join, so eventually ended up locating them in folded position.
Ultimately one of my favourite builds for a while, and adds to the Fleet Air Arm project nicely.
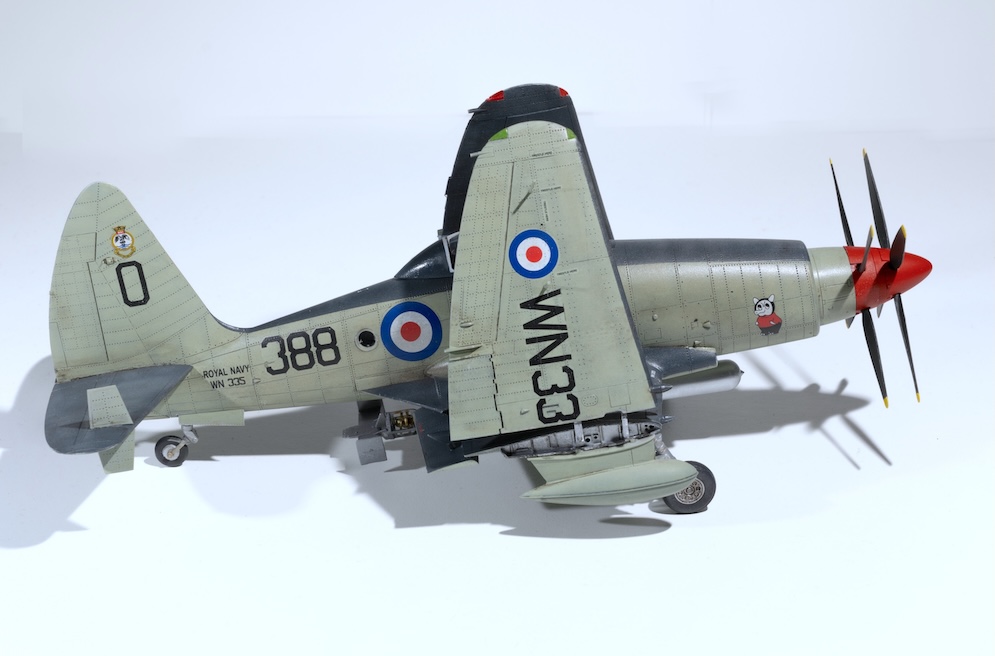
Richard A.

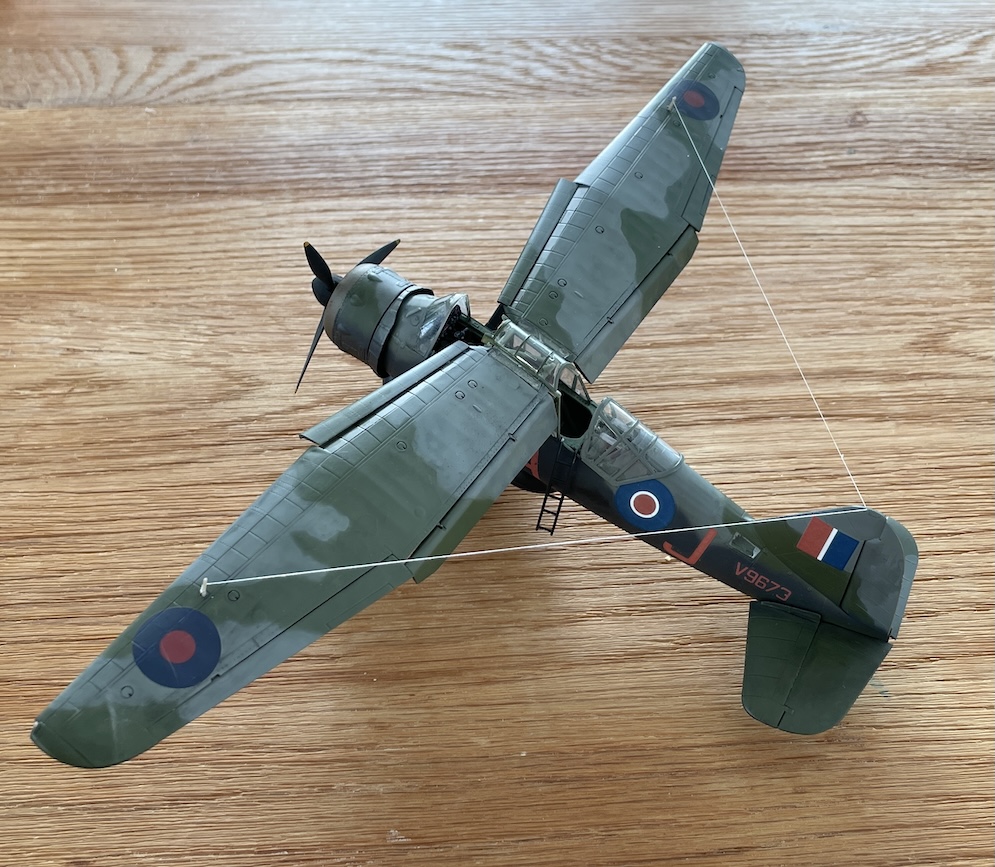
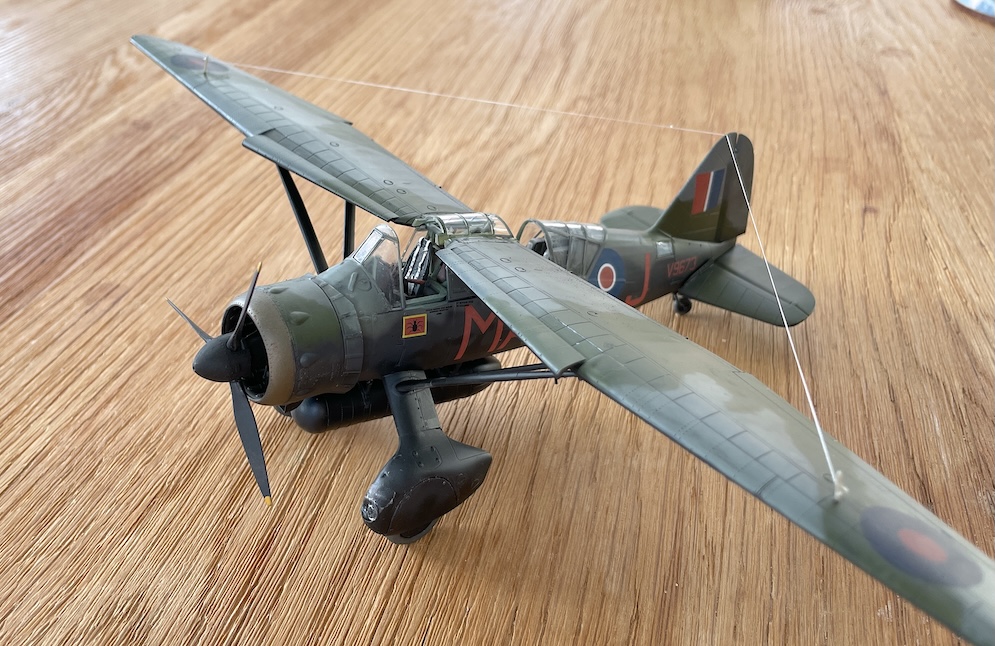
The model is built from the old Classic Airframes 1:48 kit and to keep with the old school theme was painted in Xtracolor enamels and airbrushed with Klear to give a protective gloss over the finished model.
I added an Airwaves resin prop hub so I could position the props at different orientations, added some brake lines to the gear legs. I also fitted wingtip navigation lights fashioned from transparent sprue and drop of red and green paint in a drilled hole.
I struggled with the old decals splitting, but finally got them on the model in more or less one piece!
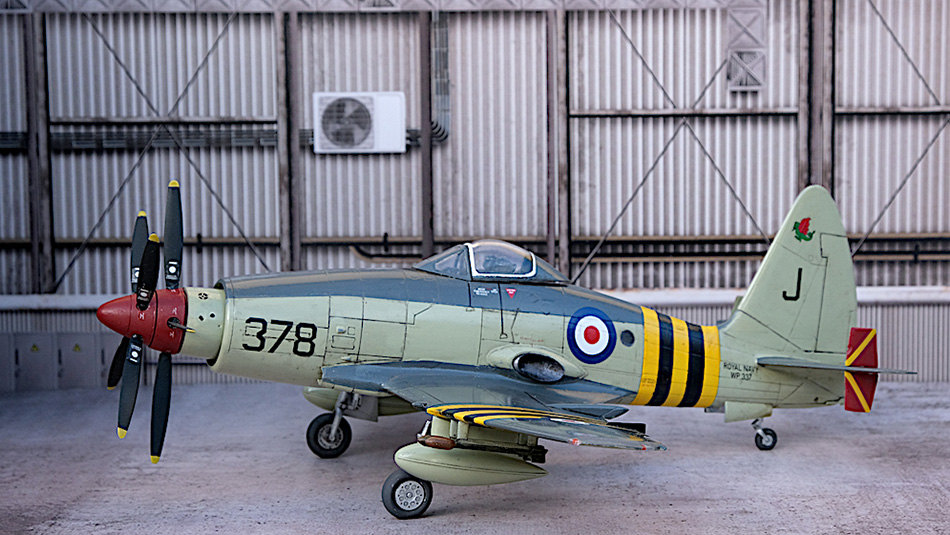
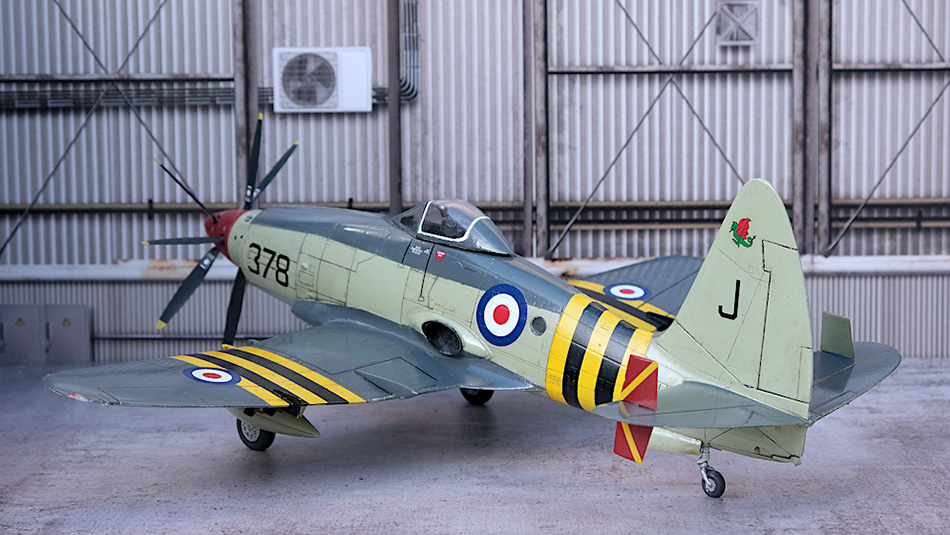
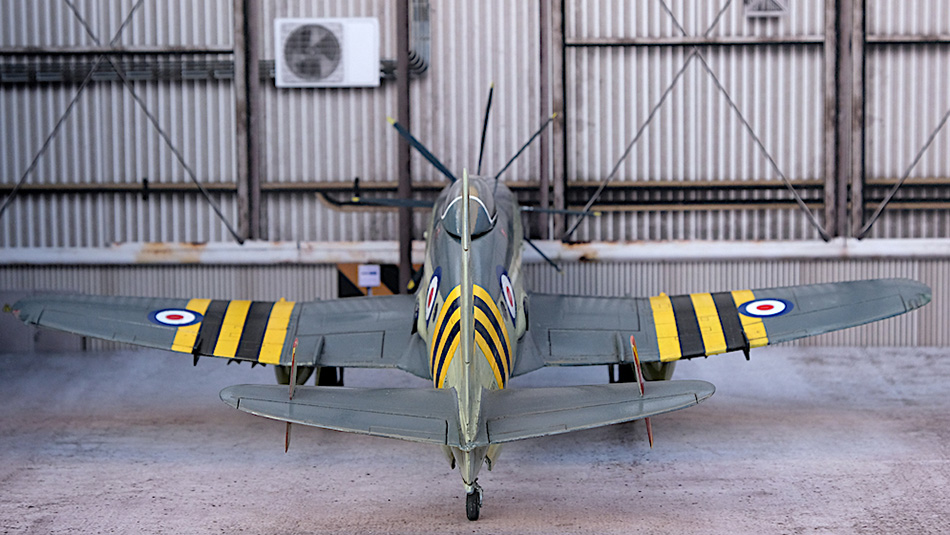
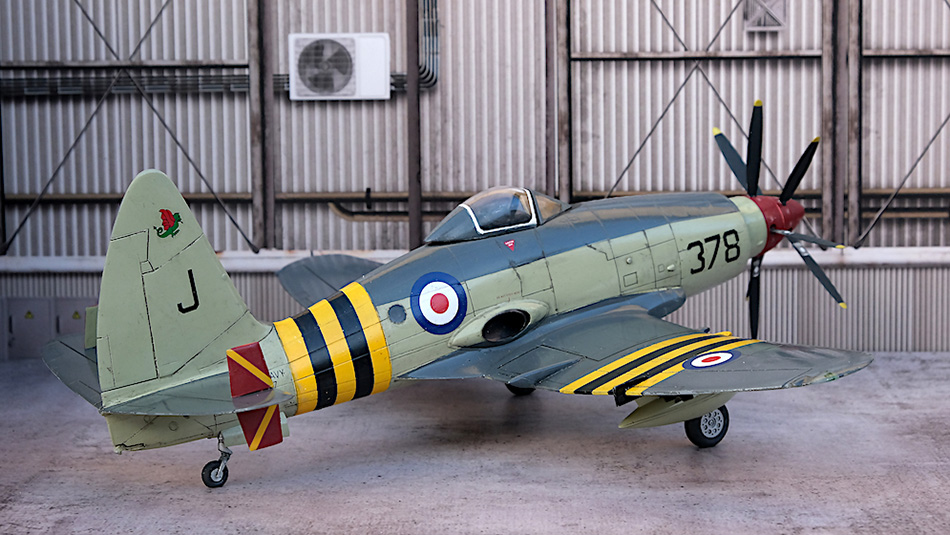
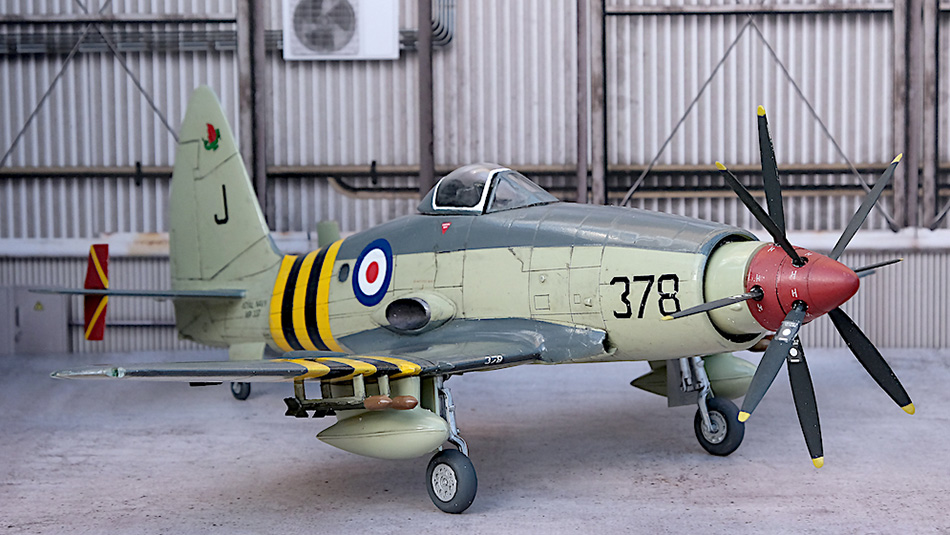
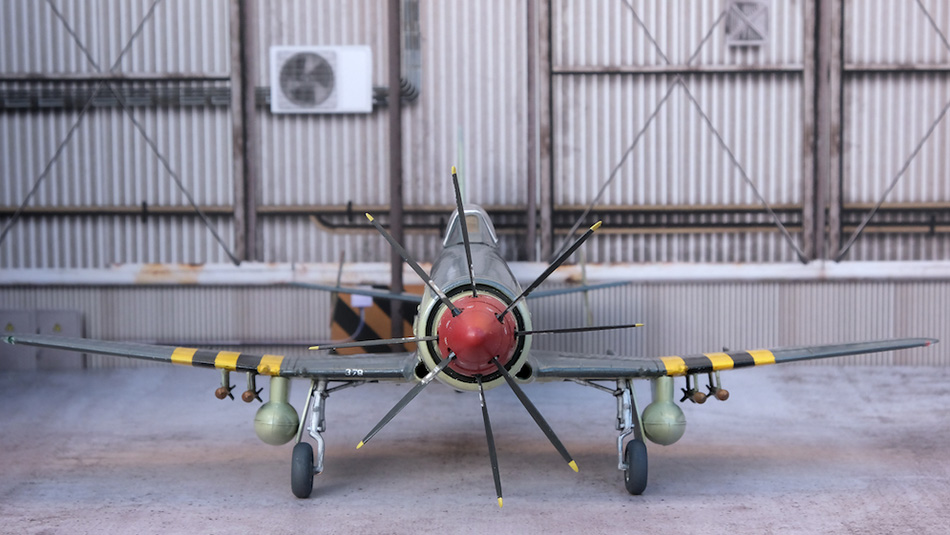
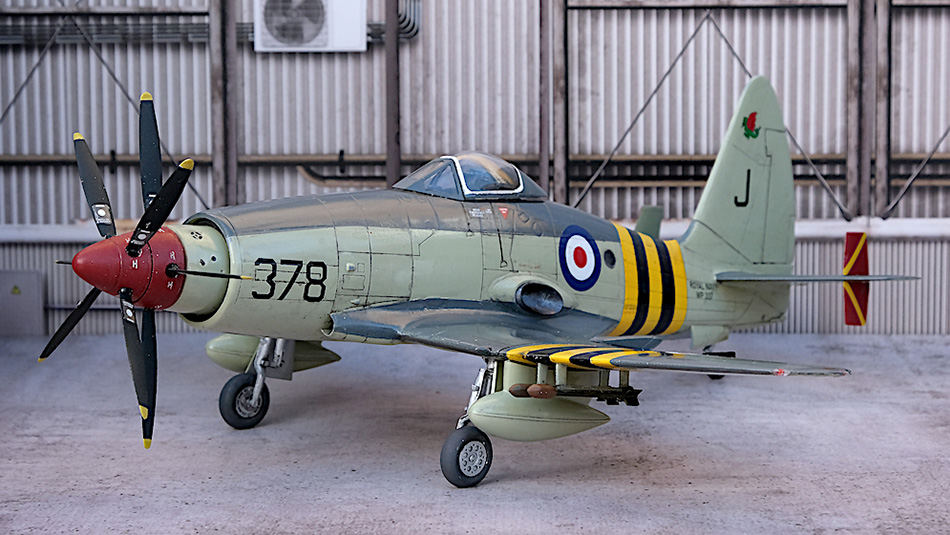
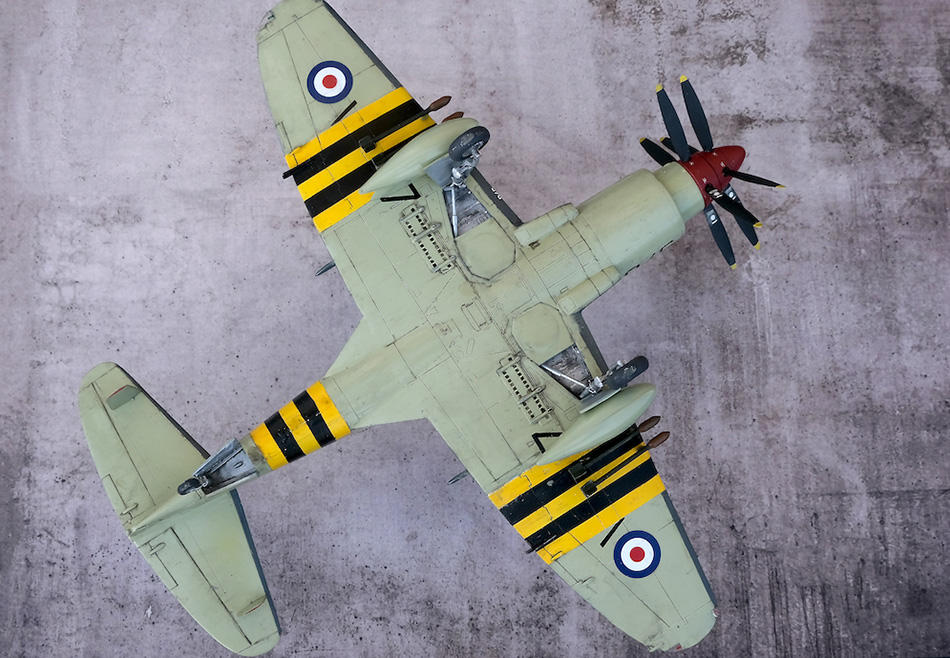
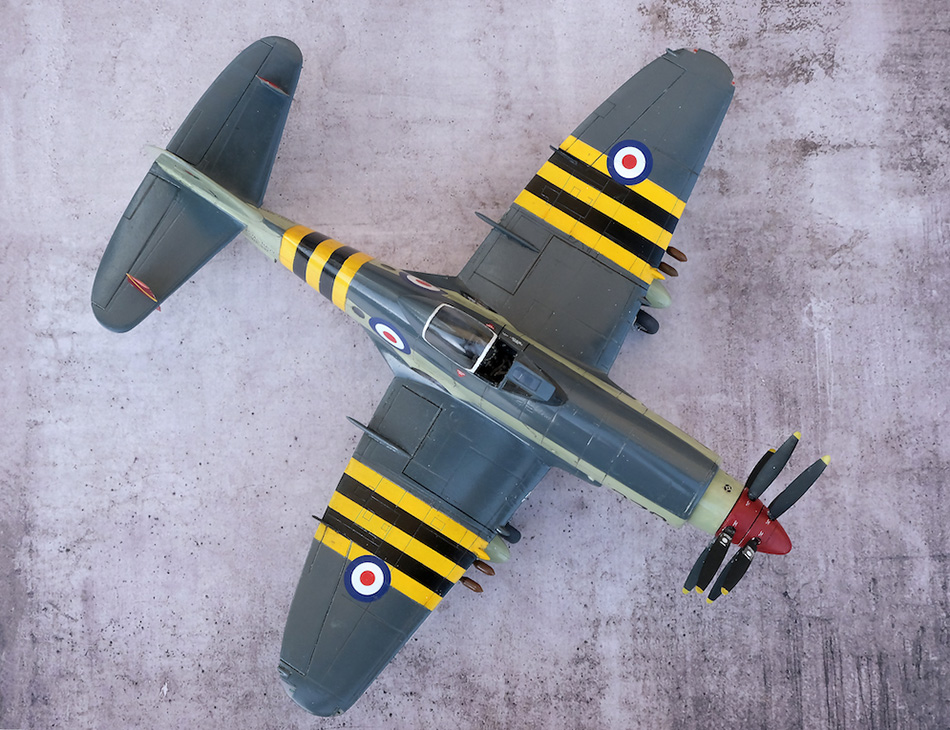
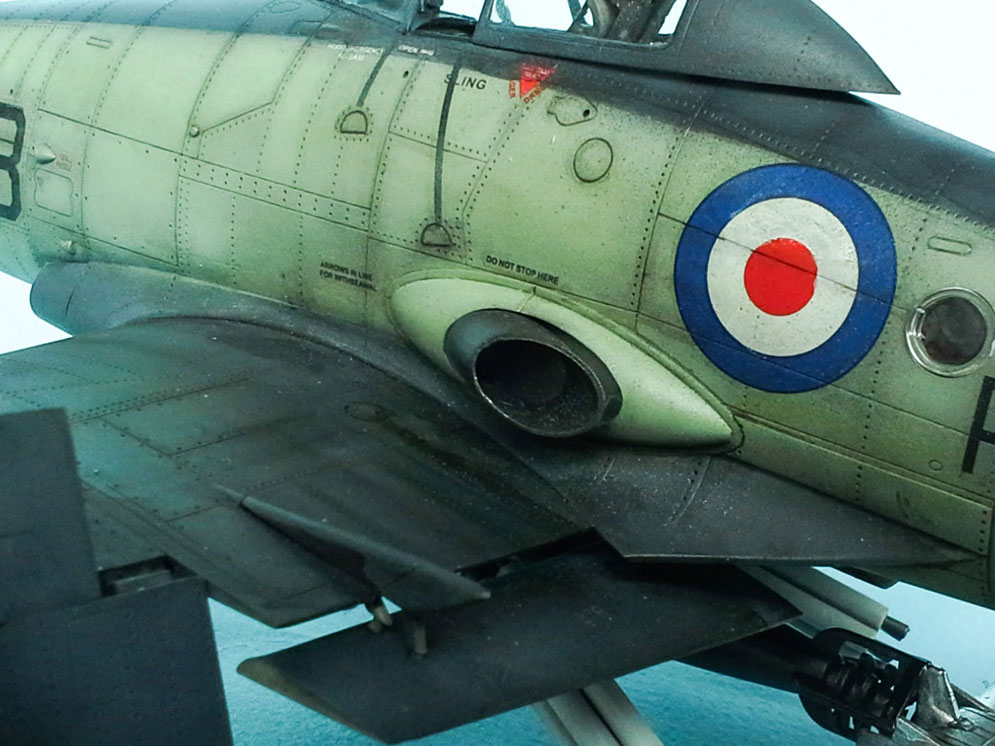
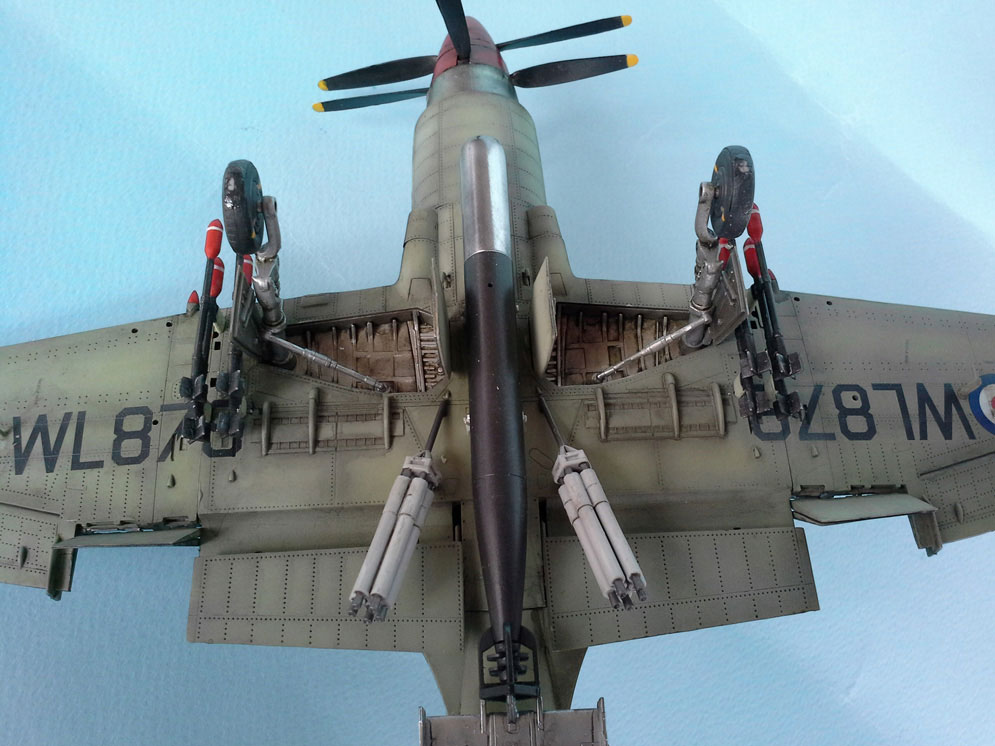
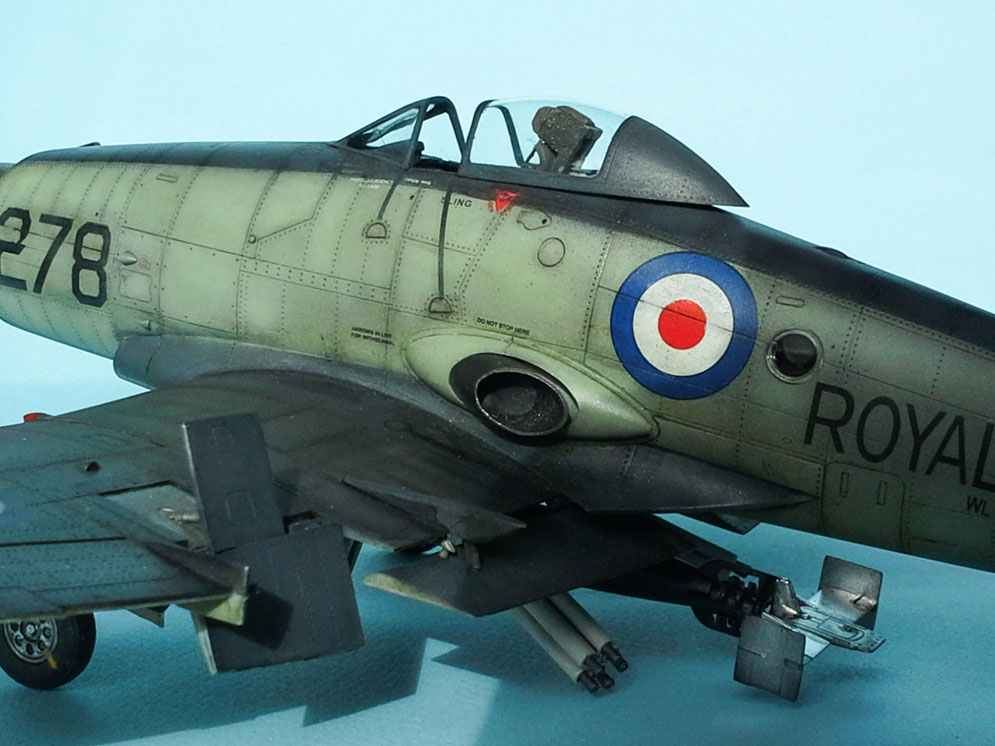
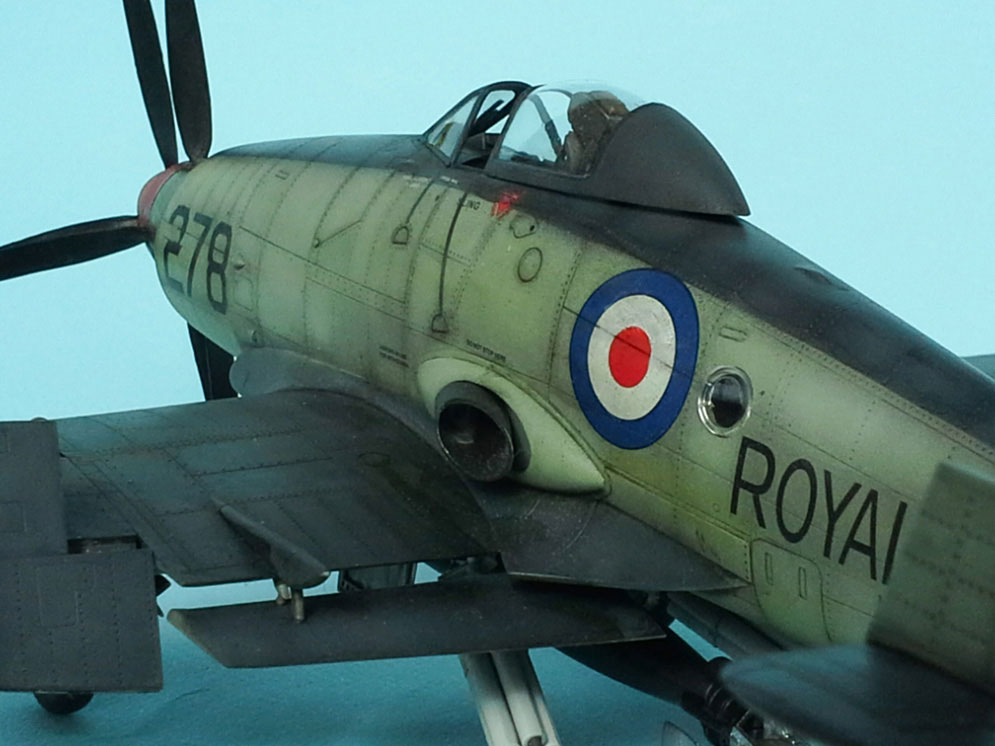
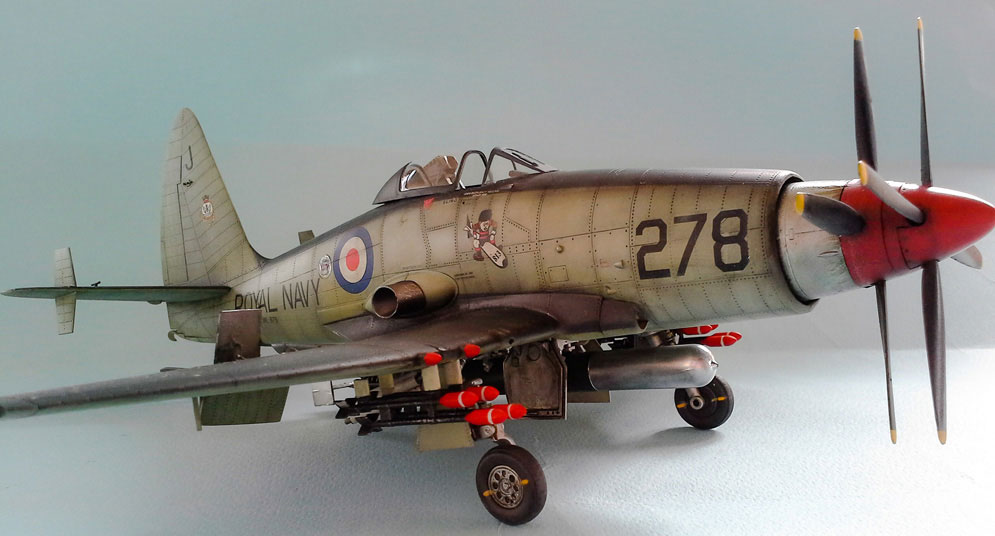
Stuart M.
My paint choice this time fell on Tamiya, XF-21 Sky & XF-50 Field Blue + XF 1 Flat Black for the Extra Dark Sea Grey; diluted with 95% alcohol so as not to cover up the detail on this great kit. Alcohol makes Tamiya acrylic pigment extremely fine. I decided to not apply lighter post shading to the Sky, but only on the EDSG so as not to “disrupt” the basic tones. Panel lines and rivets received a highly diluted wash, using exclusively Vallejo washes (light grey on Sky and dark grey on EDSG). The process is simple but it requires a bit of practice; these washes need to be diluted with tap water to allow a pointed, sharp brush to pass on every panel line or, like here, on rivets. The color excess can be removed with a clean cotton cloth just dampened with water. Dry stains can be wiped off just adding a drop of Vallejo airbrush thinner. This kind of panel enhancing system, leaves very subtle, translucent shade that gives a good 3D effect to the whole model. Weathering was completed with some oil streaks obtained with MIG enamels Python engine metal cover, torpedo warhead , exhausts and rockets received some spray of Alclad metalizers. Minor details were hand-painted with Vallejo acrylics.
Nat P.


This was an OOB model with some scratch build seat belts. The only issues I had with the construction were the poorly fitting bulkheads which required some shimming.
Wing stripes were masked and painted as the kit decals disintegrated. This was also my first attempt with spraying metallics which I feel turned out ok. A good kit all round from Trumpeter.
Regards, Vaughan


- The Yak-28 is a 1960’s Soviet supersonic interceptor. The aircraft served well into the 1980’s with units trading in their Yaks for Mig-31 Foxhounds and Su-27 Flankers
- The Amodel kit requires a lot of work to produce a decent model, however this is the only kit there is!
- The fuselage, wing and engine assembly involved lots of filling and sanding and re-engraving
- Much of the undercarriage had to be re-built from stretched sprue and rod
- A pitot was made from 1mm aluminium tube and stretched sprue
- The canopy framing was achieved with Bare Metal foil, cut into 1mm wide strips
- Some panels were first sprayed with Xtracolor Natural Steel and then masked off
- The overall finish is Humbrol Chrome Silver 191
- The radome was sprayed with Humbrol 196 light grey
- The kit decals were not so good, I used a set of stars and numbers from Hi-Decal Line.
Cheers for now, Rog
Alexander P.
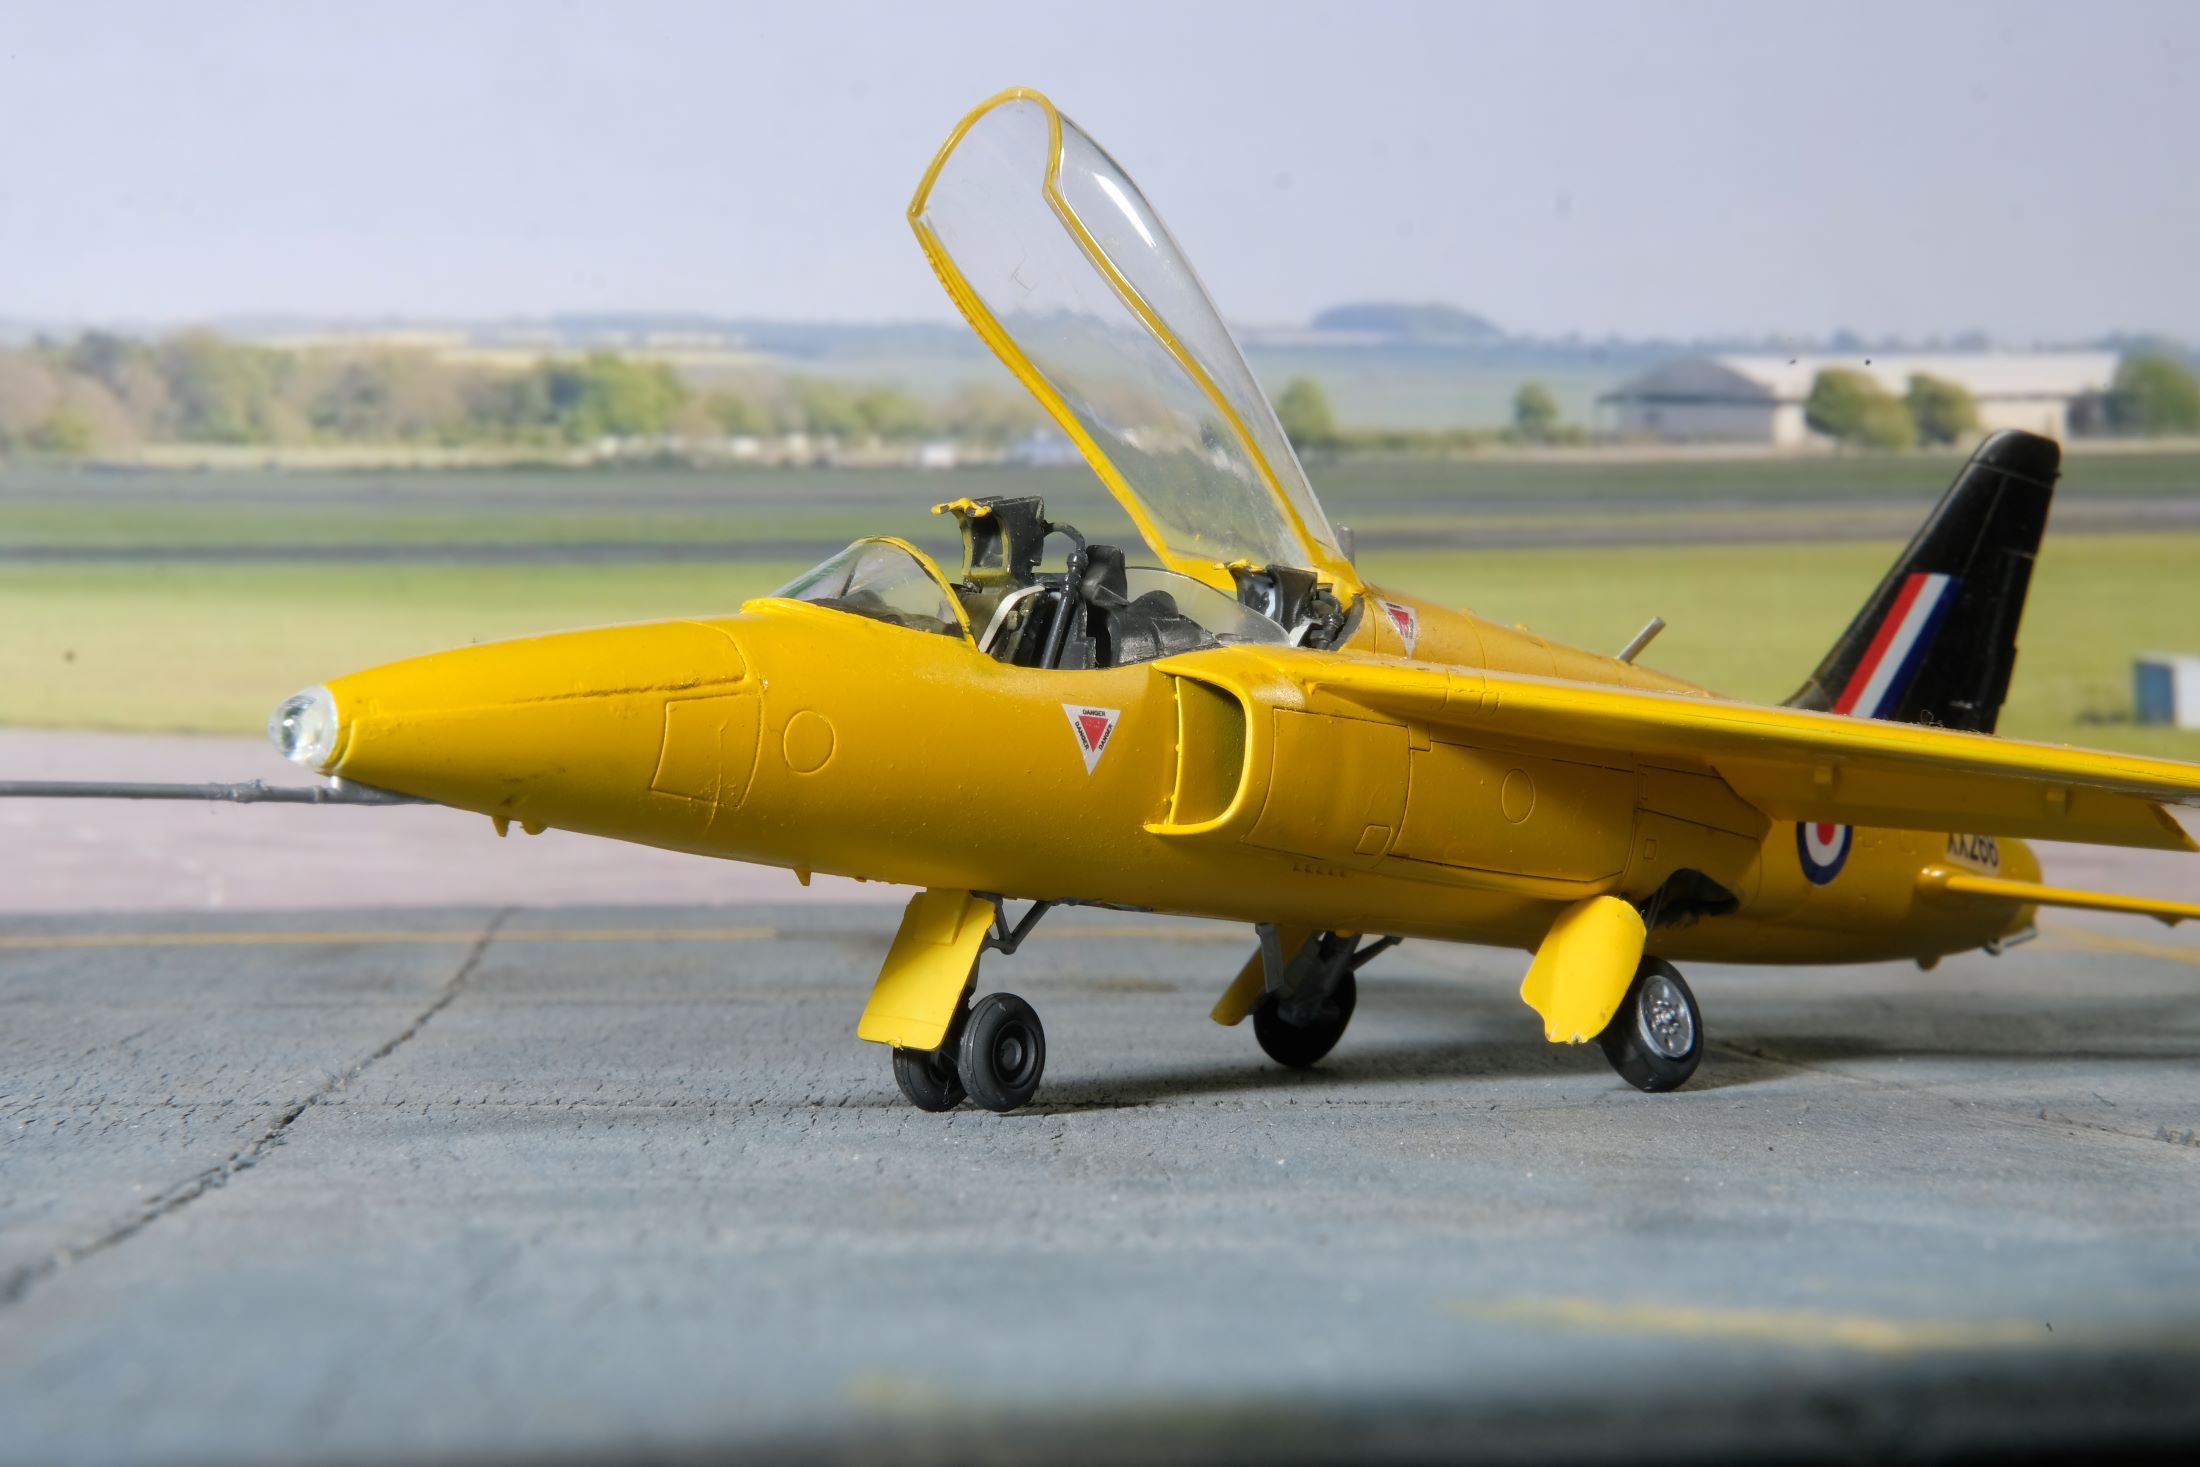
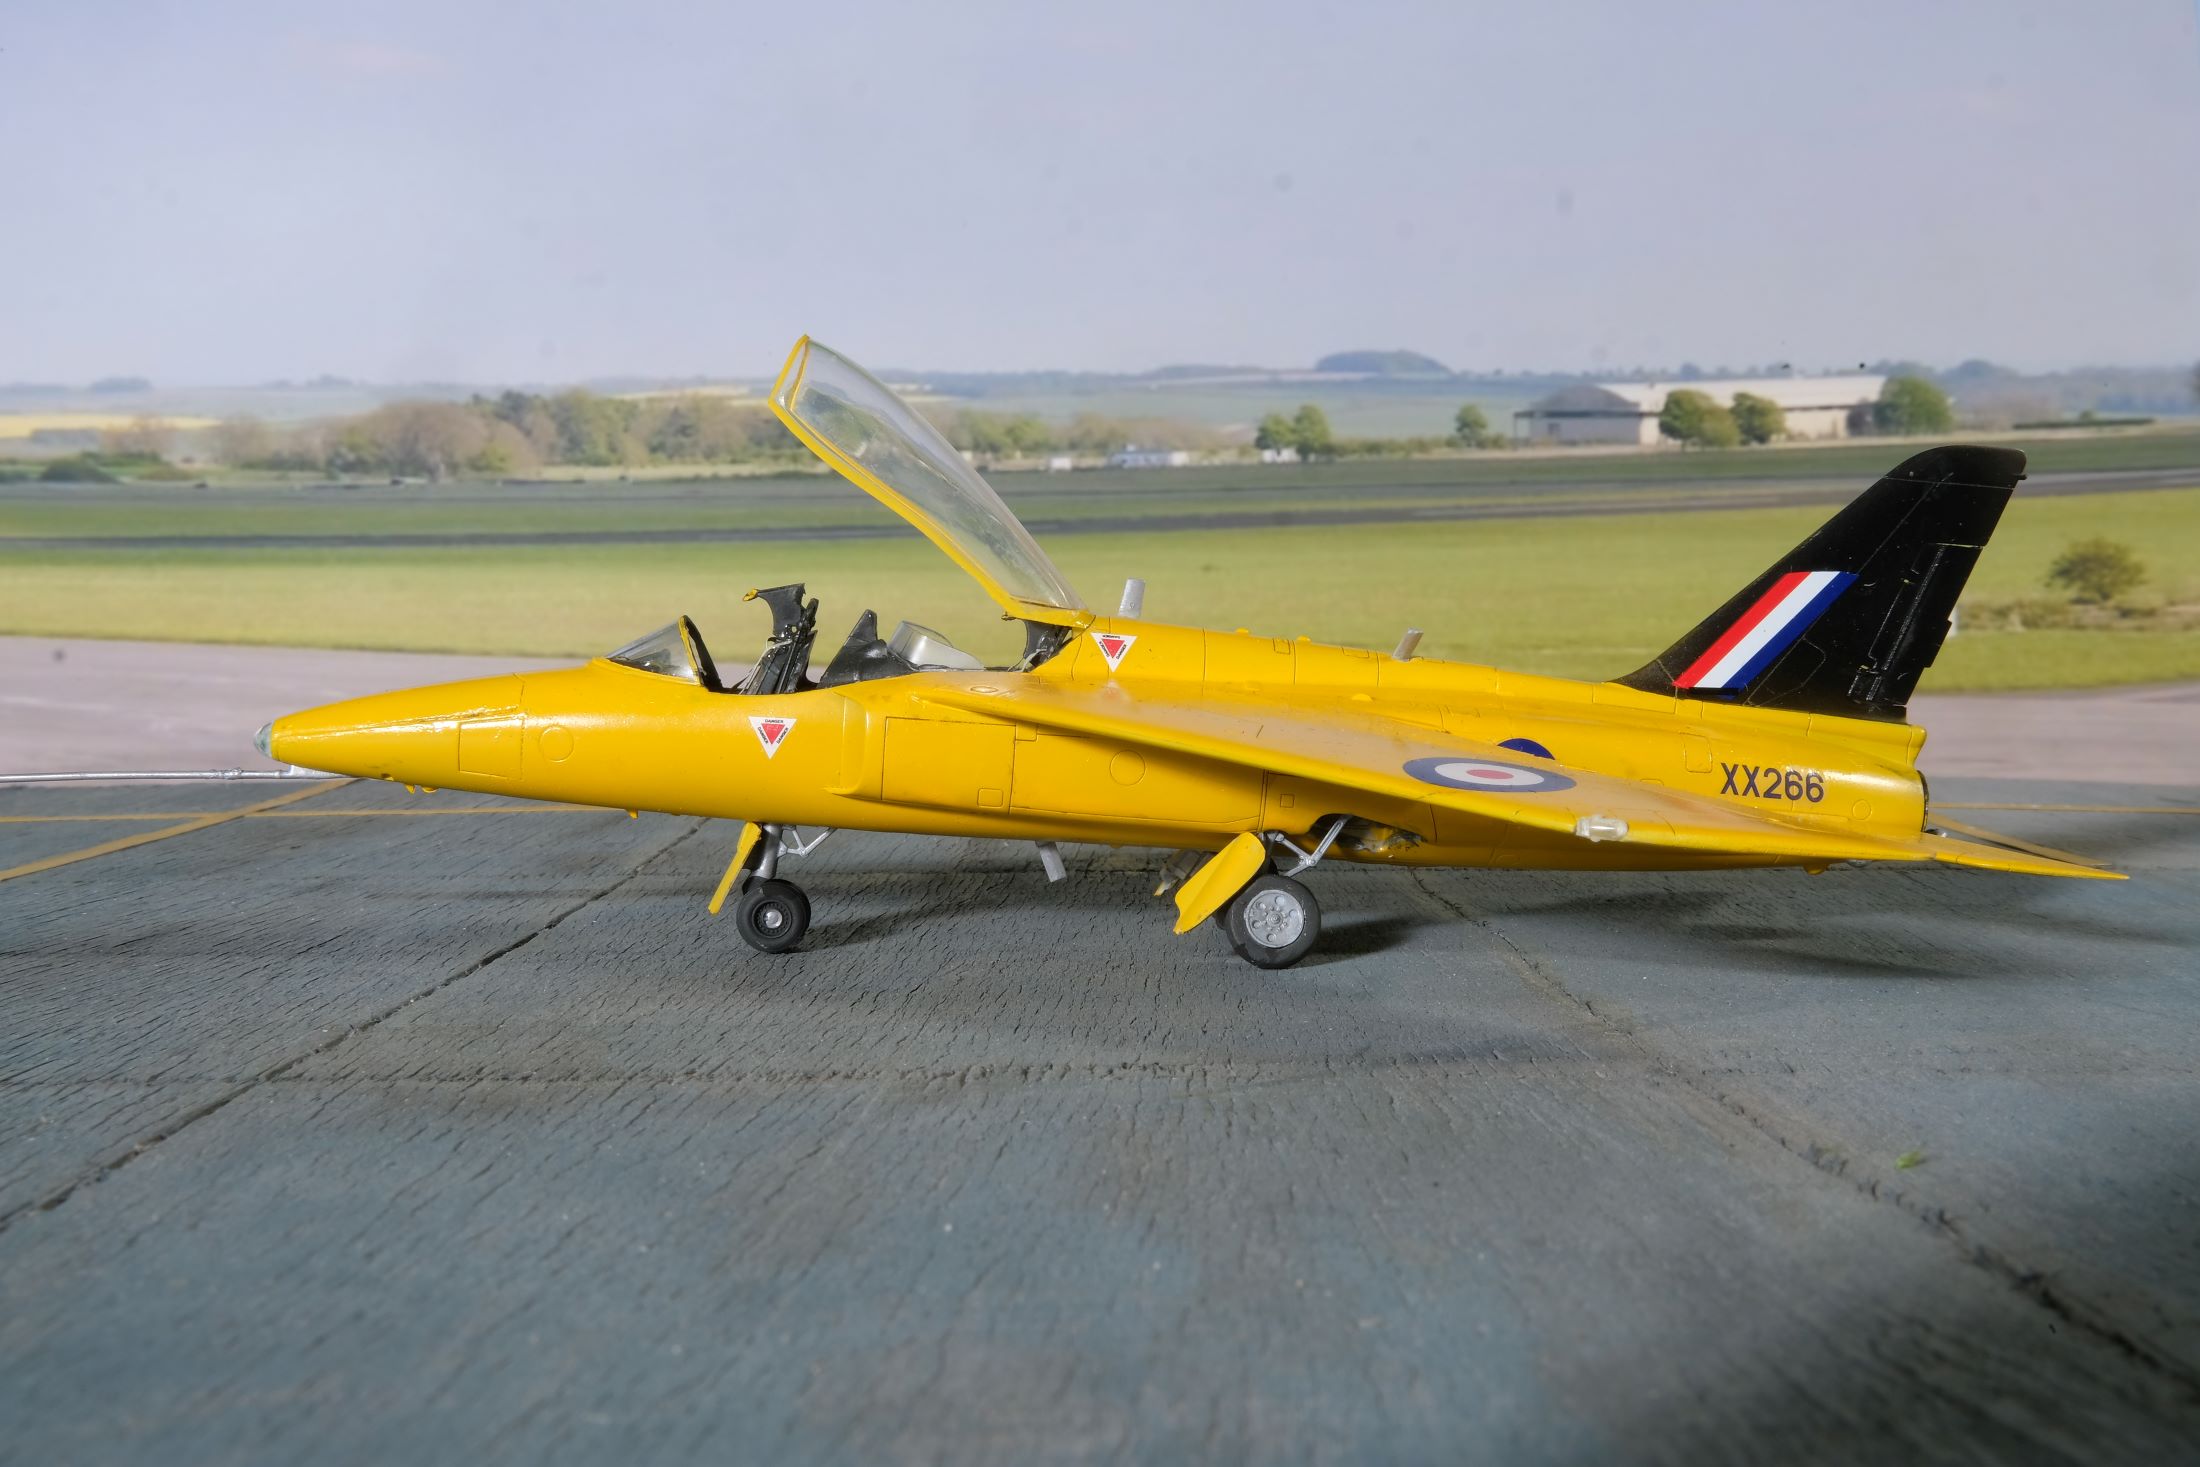
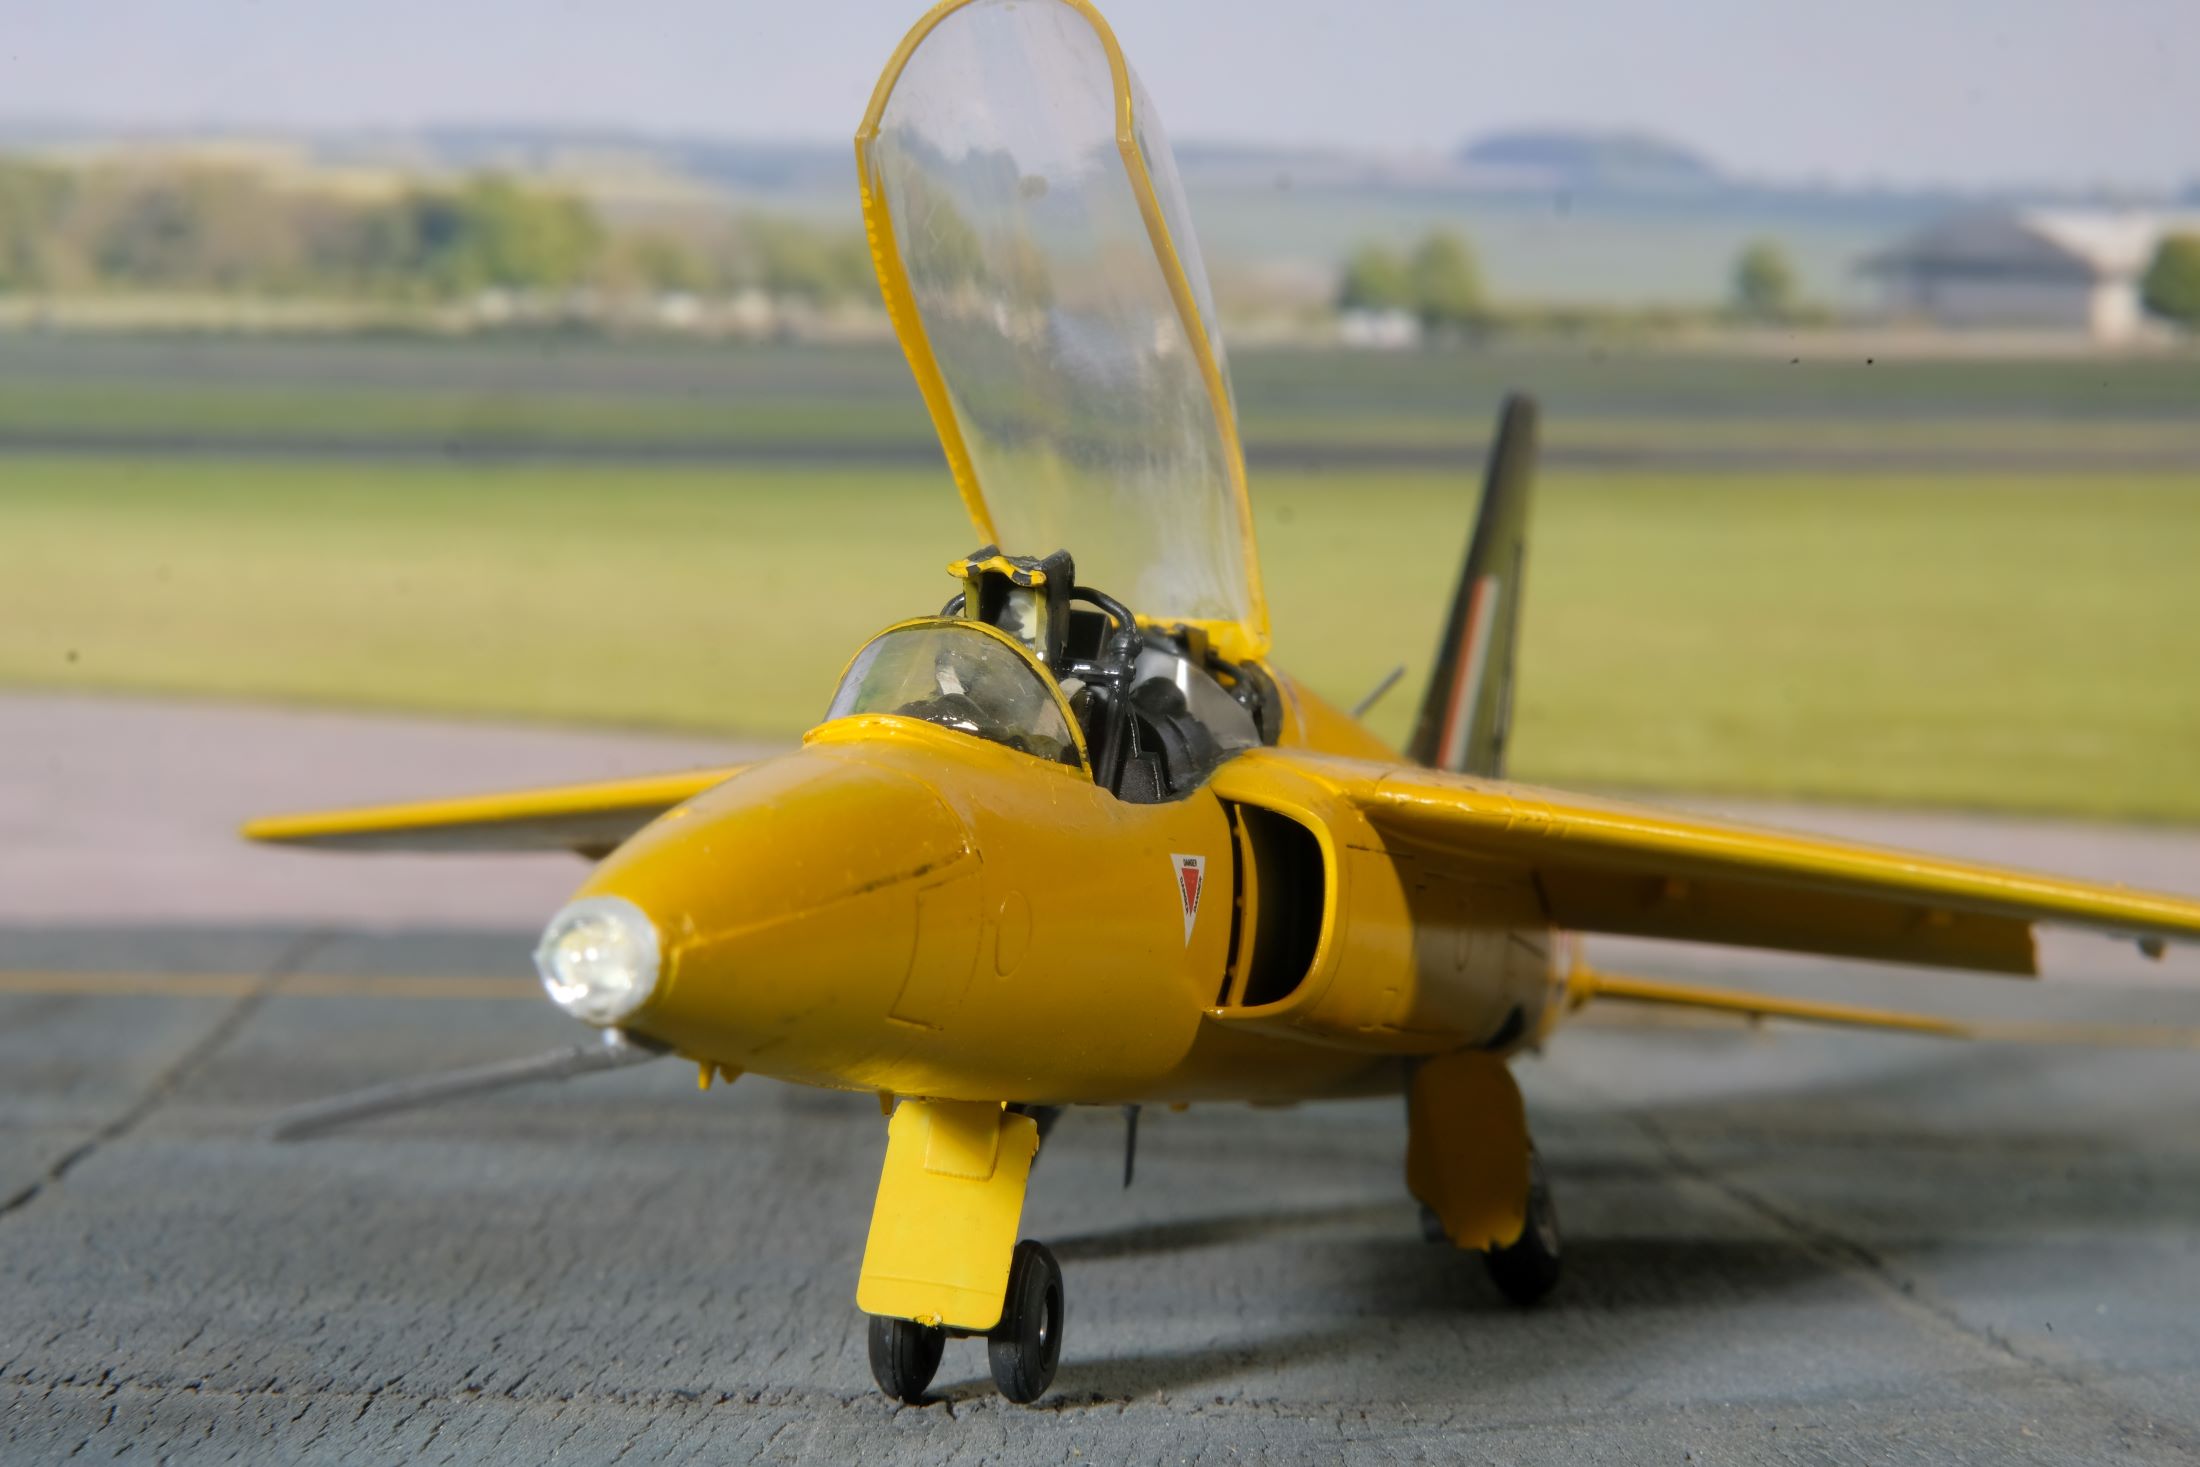
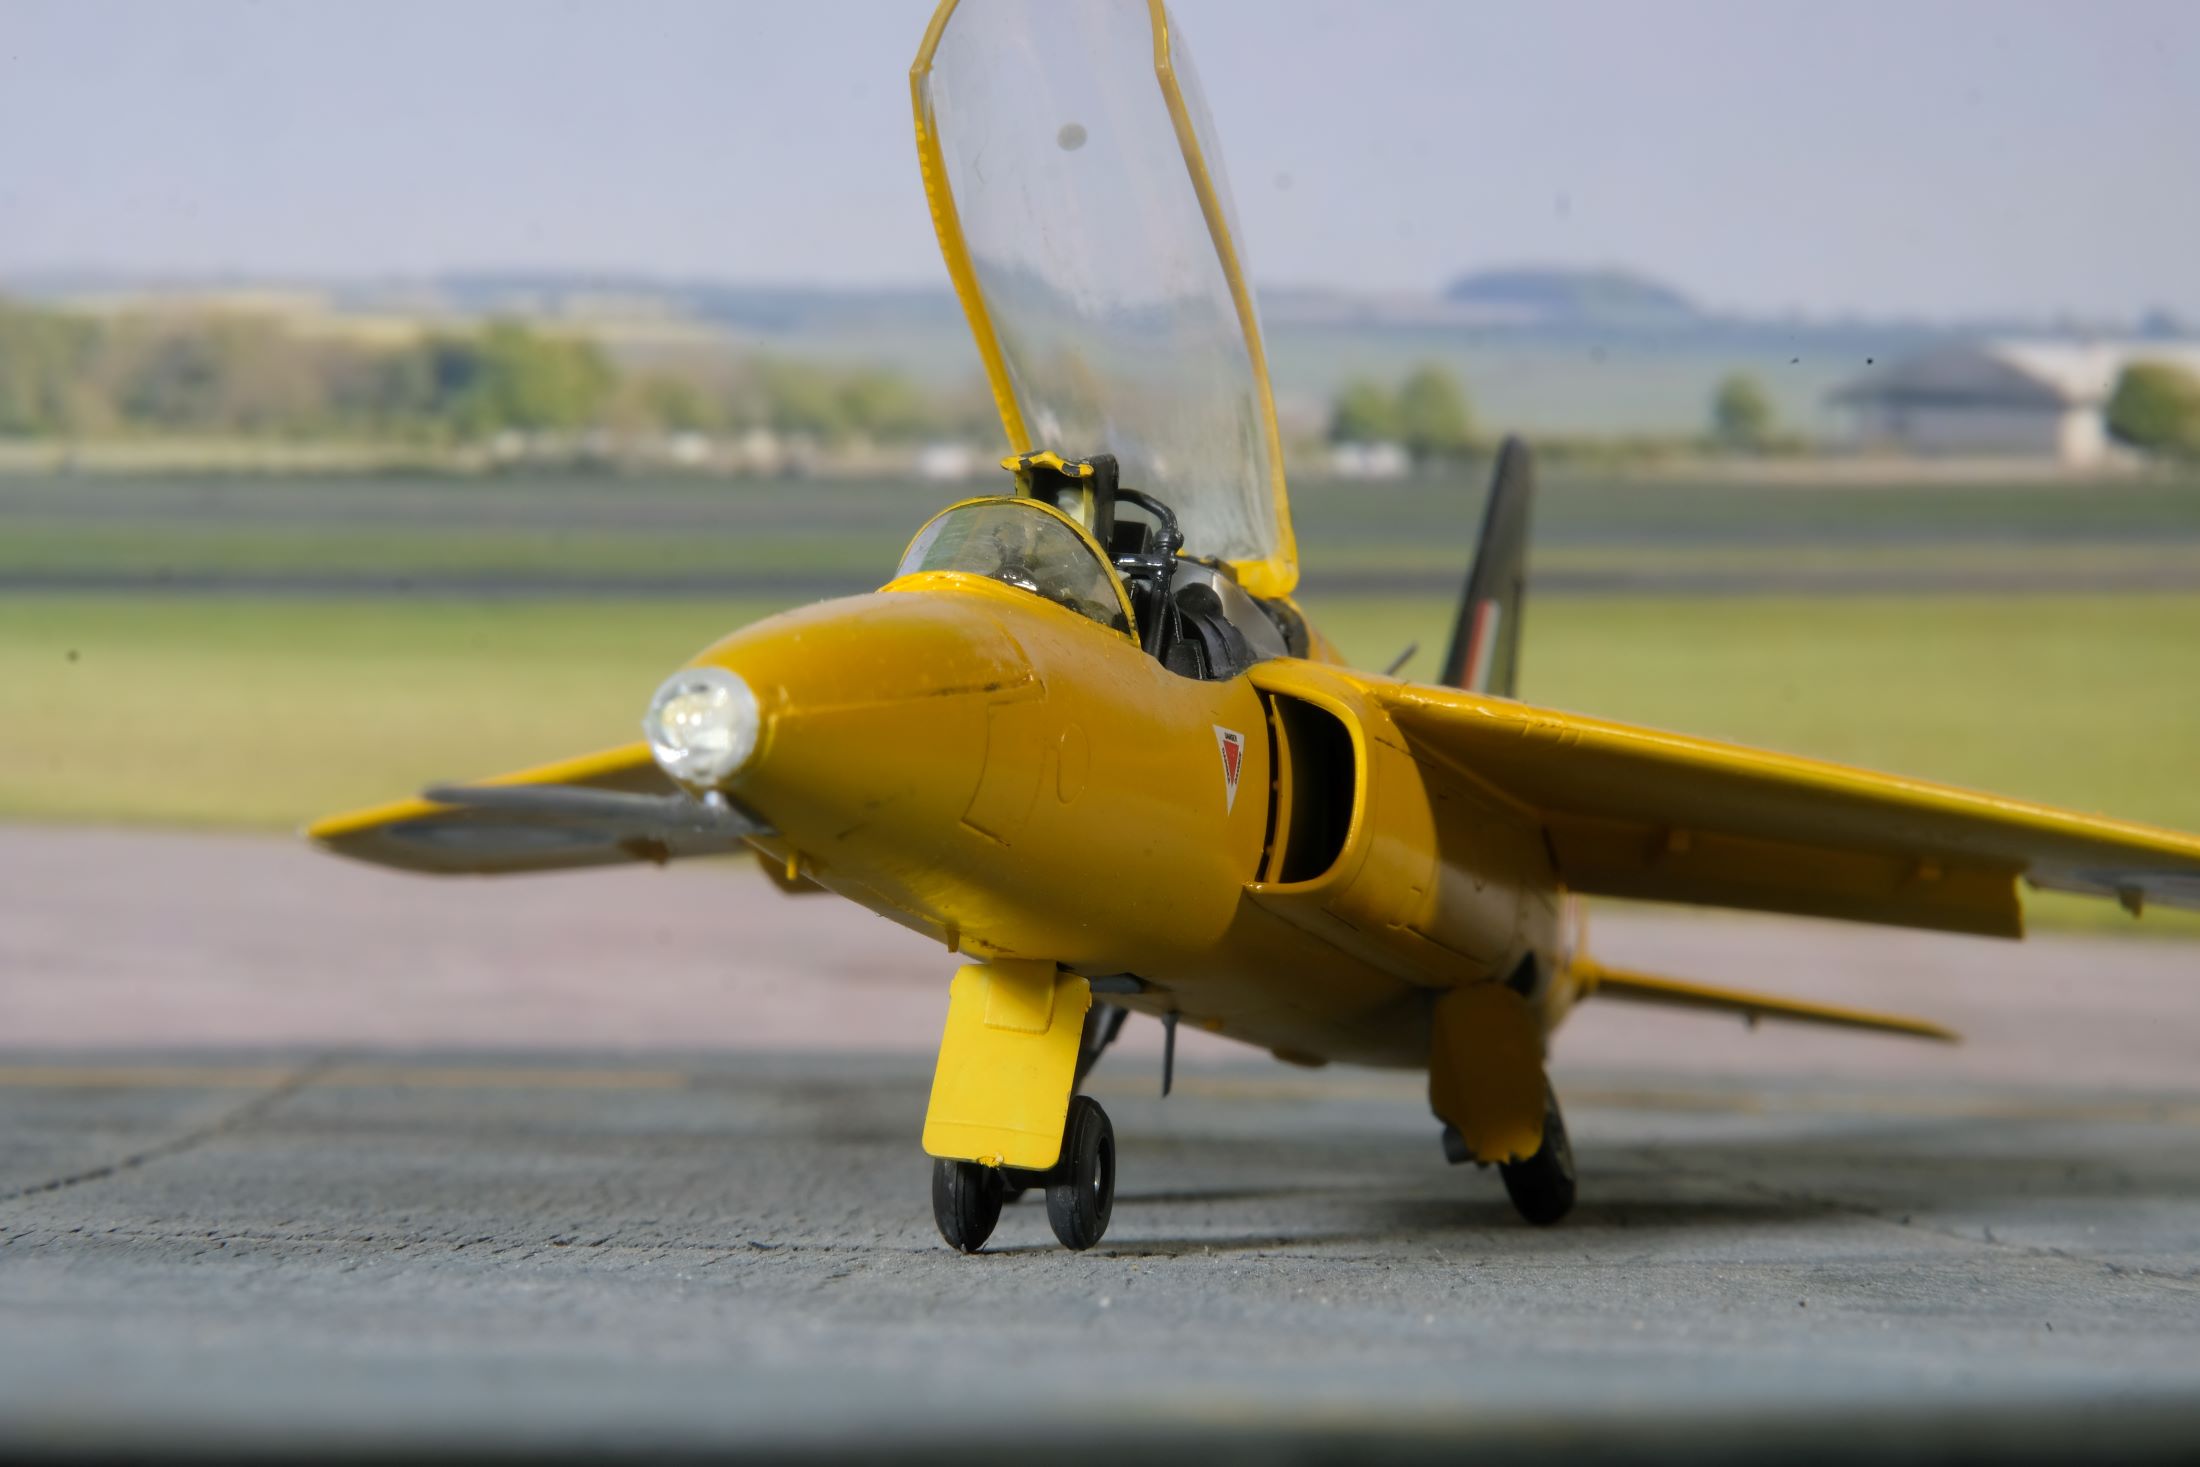
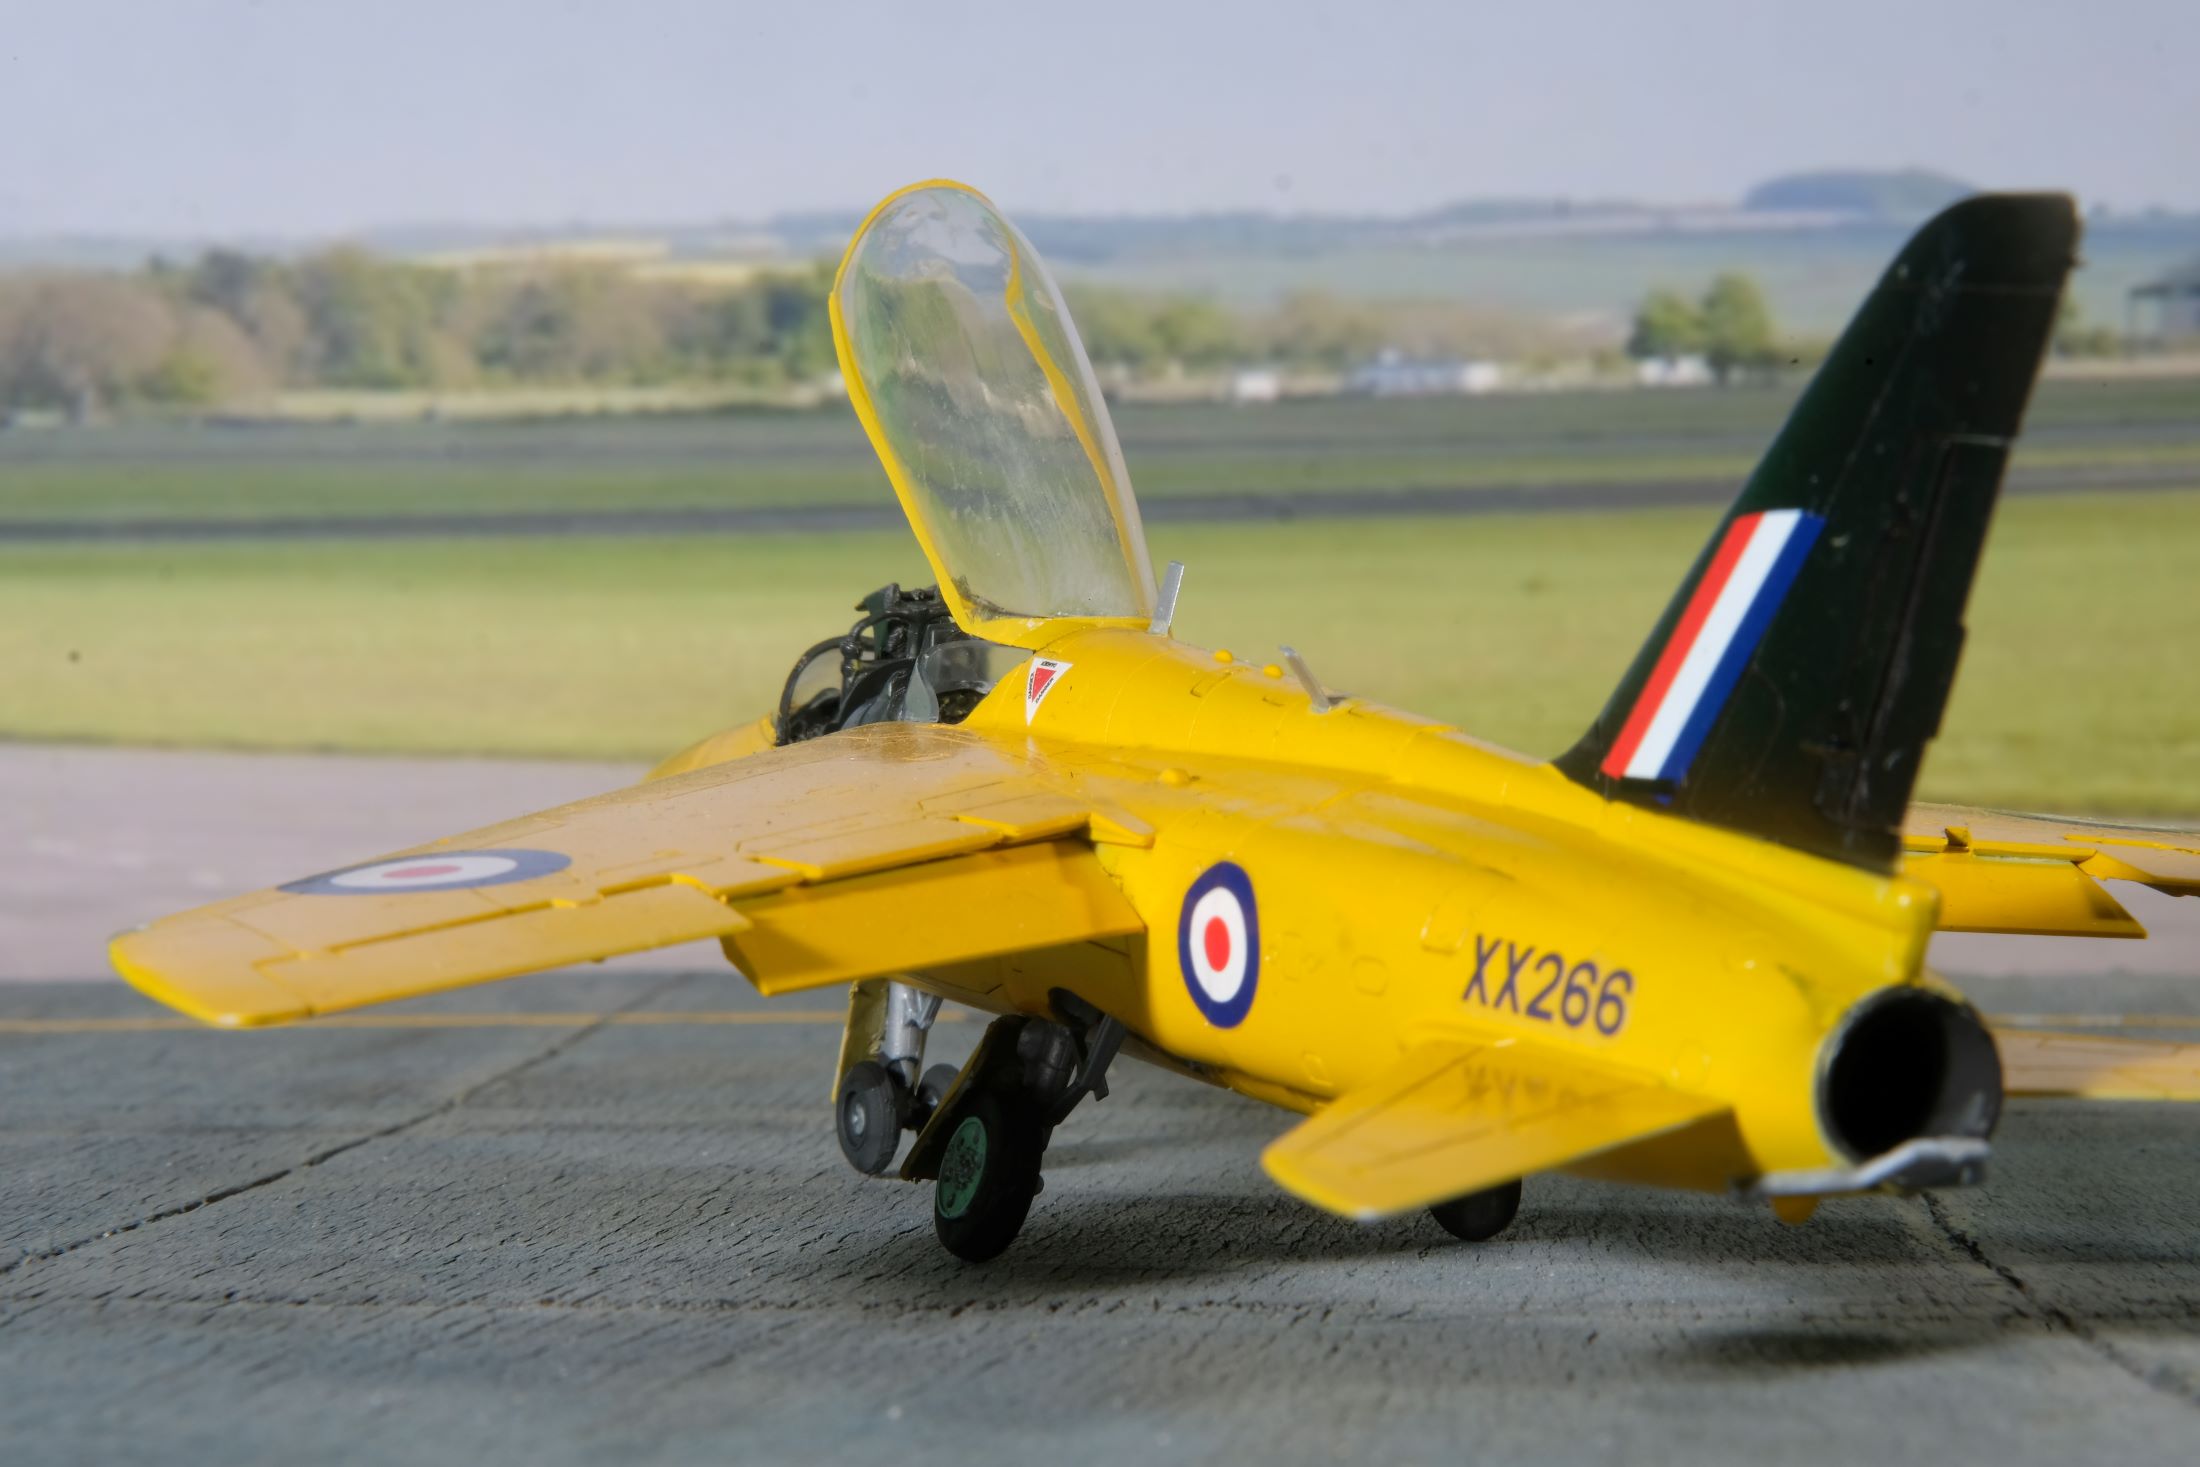
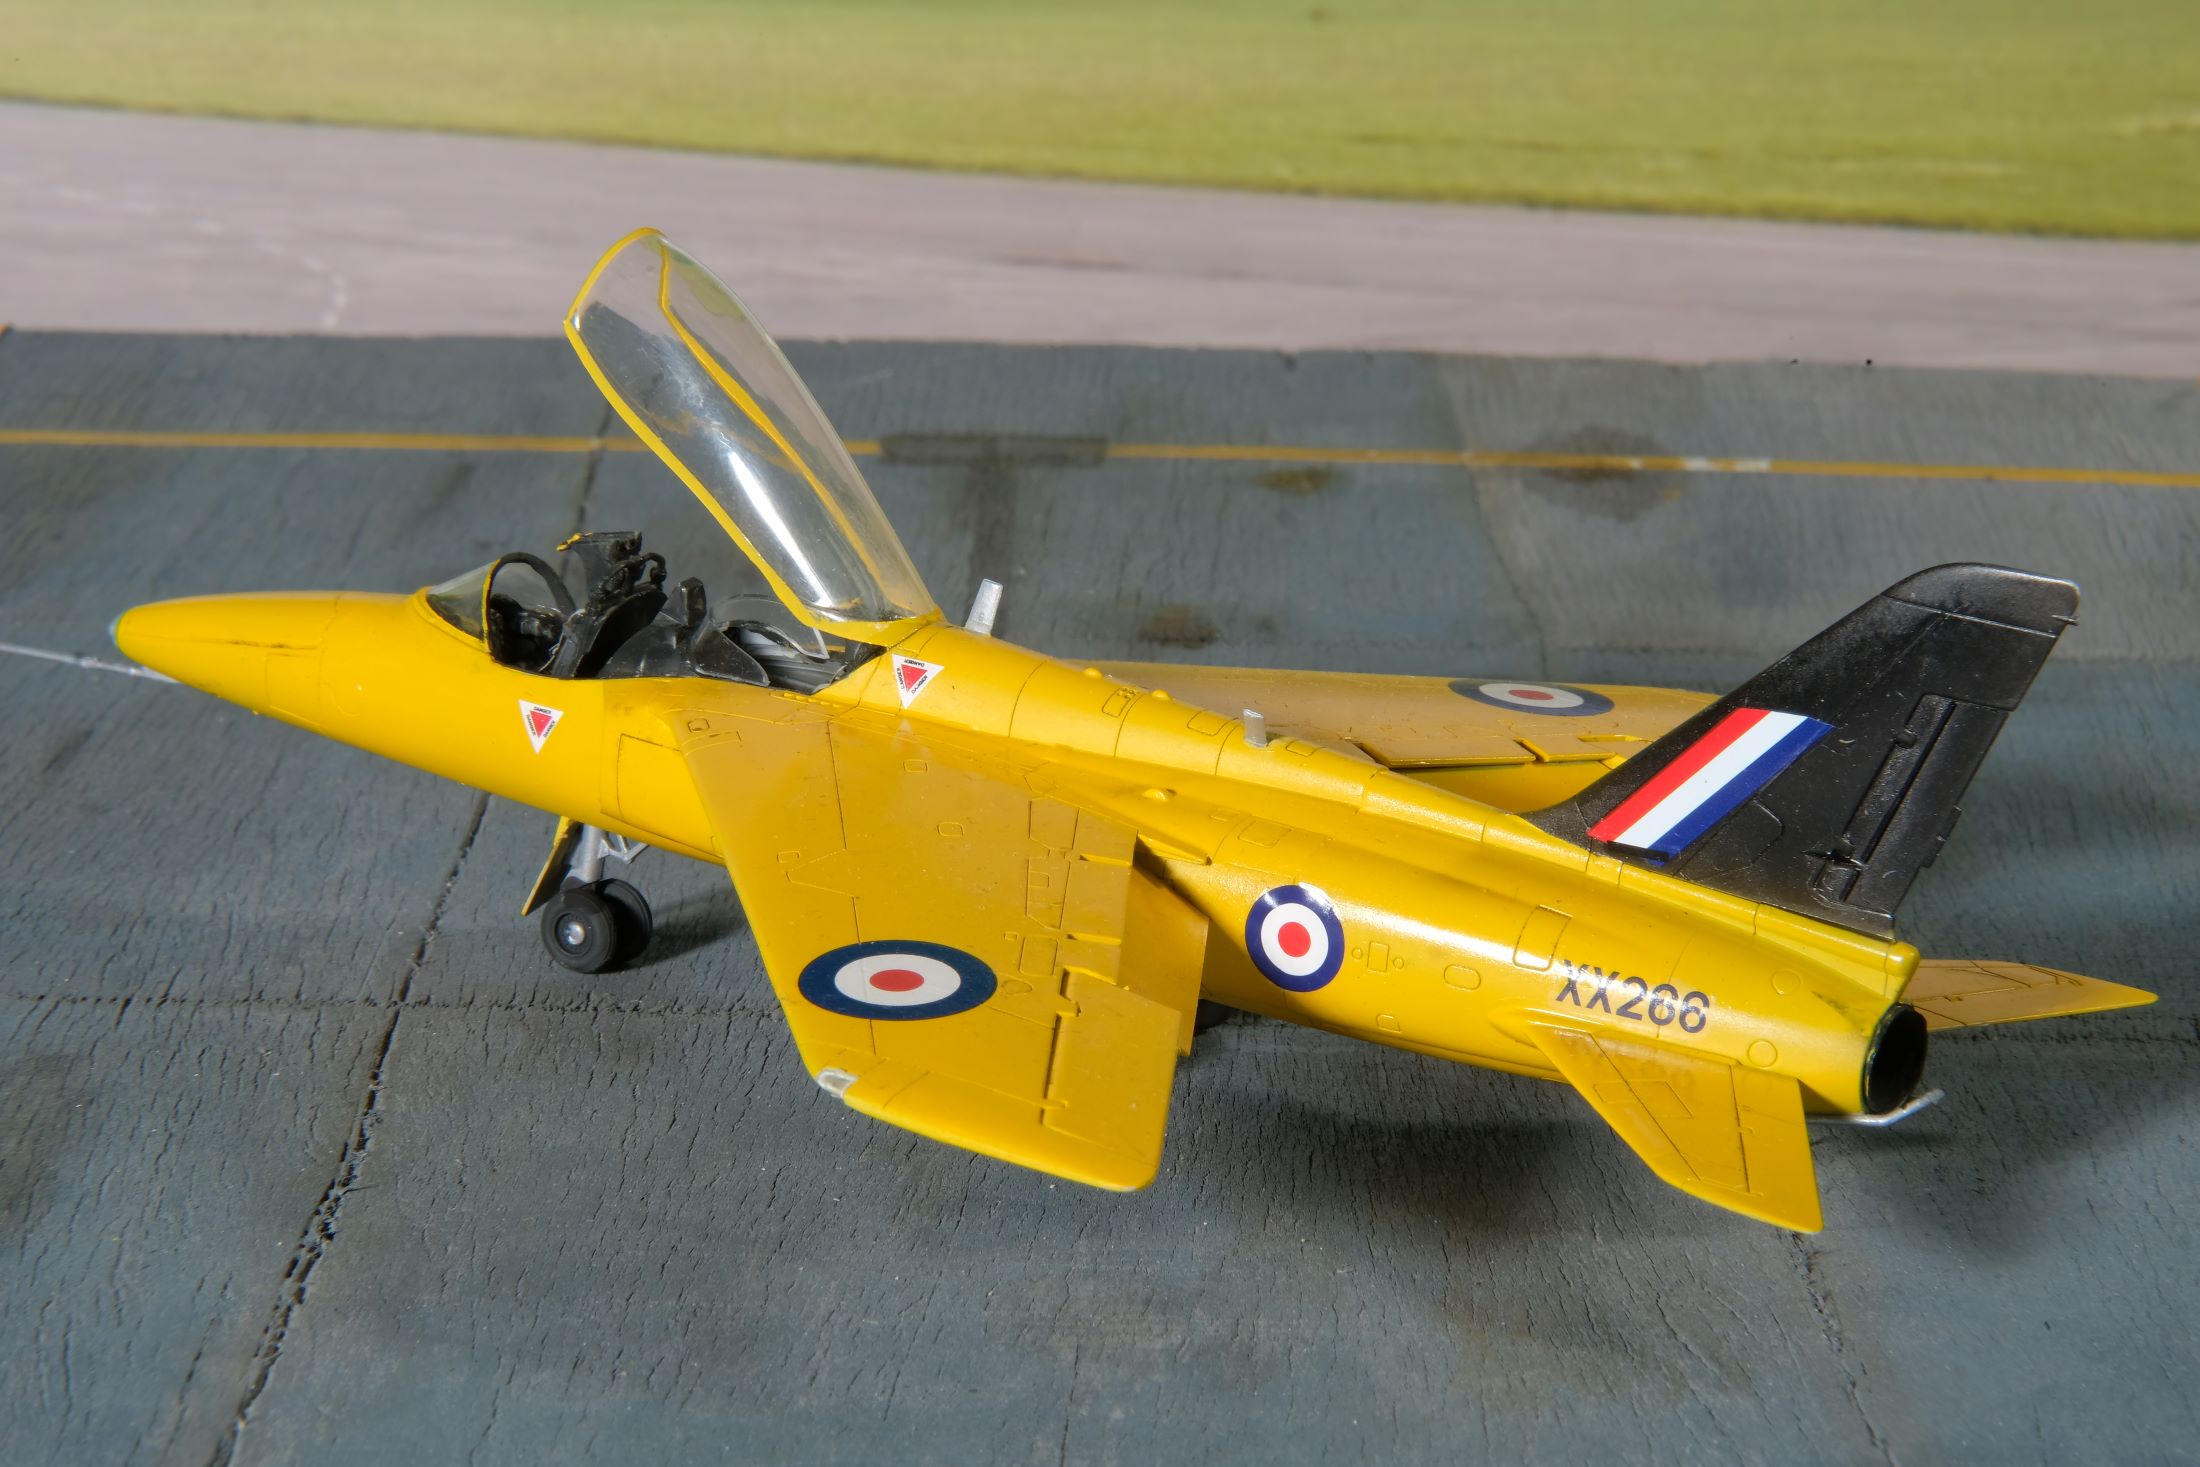
Flt. Lt. Pollock was the intrepid Hunter pilot who flew under Tower Bridge in protest at the lack of commemoration of the 50th anniversary of the founding of the RAF. He was solo display pilot with the team.
The model is SOOB apart from the colour scheme.
Thanks, David


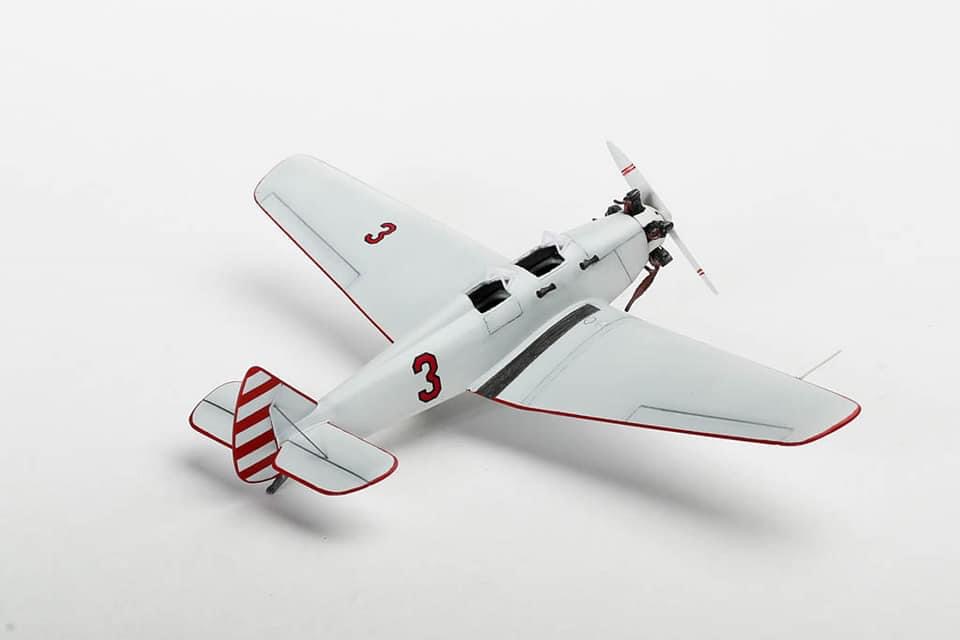
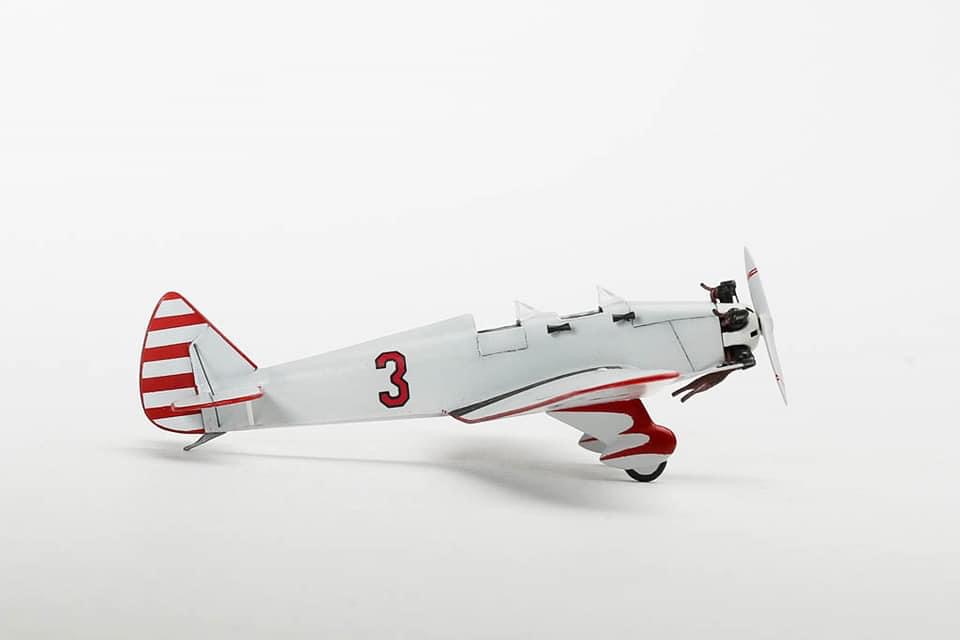
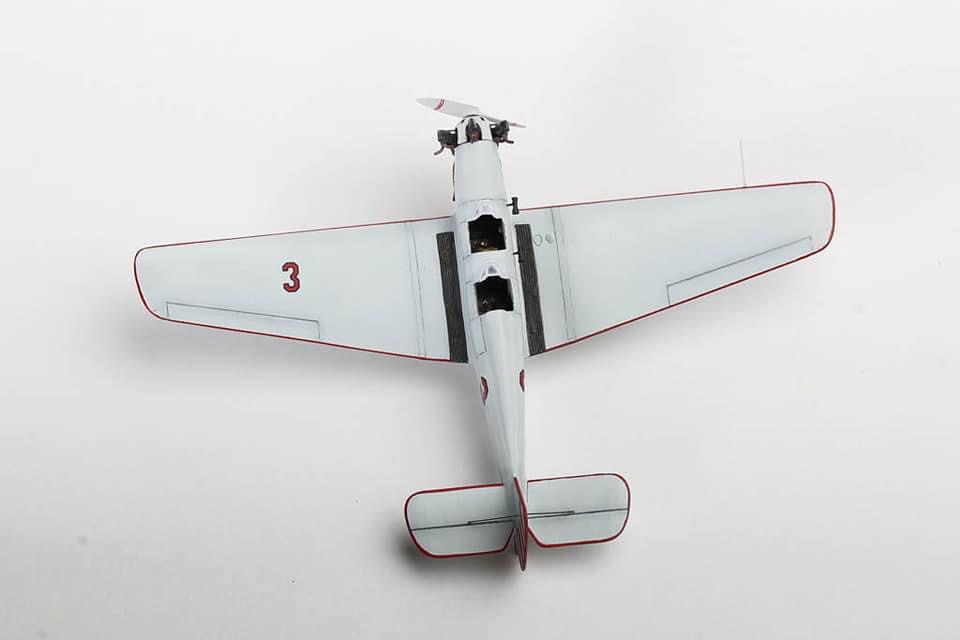
The Z 526’s layout was organized with the pilot in the rear, and the student in front. The aircraft could be equipped also with tip tanks and a constant speed propeller. The Z-526F was introduced in 1968 and was equipped with a 135 kW (180 hp) Avia M 137A engine, the export version Z-526L differing by being equipped with a 150 kW (200 hp) Lycoming AEIO-360 flat-four. Single-seat versions included the Z-526A, Z-526AS, and the Z-526AFS. The Z-526 AFM was built between 1981 and 1984 and was powered by a 155 kW (210 hp) Avia M337 engine, had tip tanks and a lengthened fuselage. The aircraft was later developed into the Zlin Z-726.
More than 1,400 Z-526s were manufactured, many for military and private flying schools.
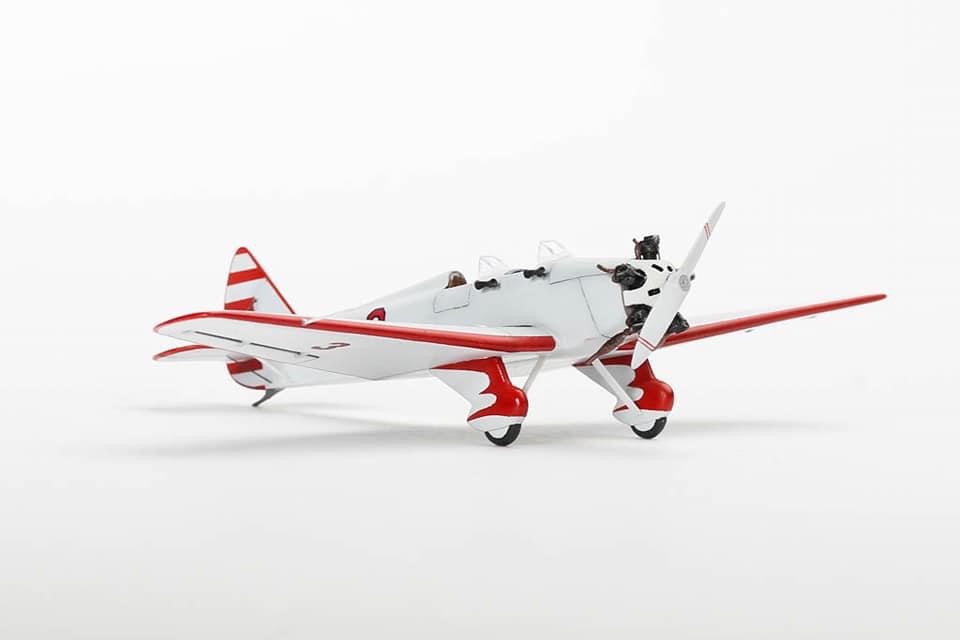
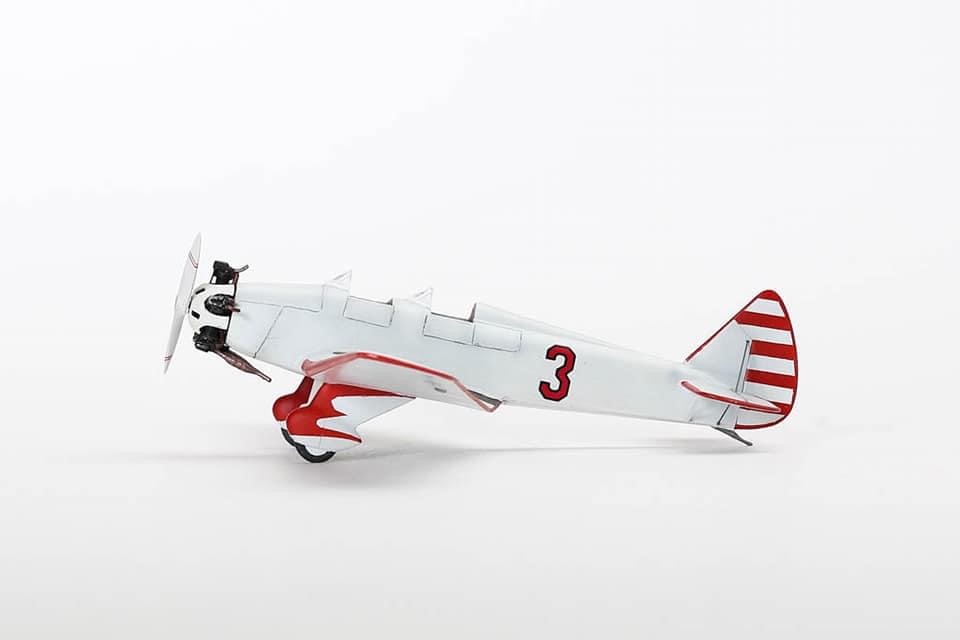
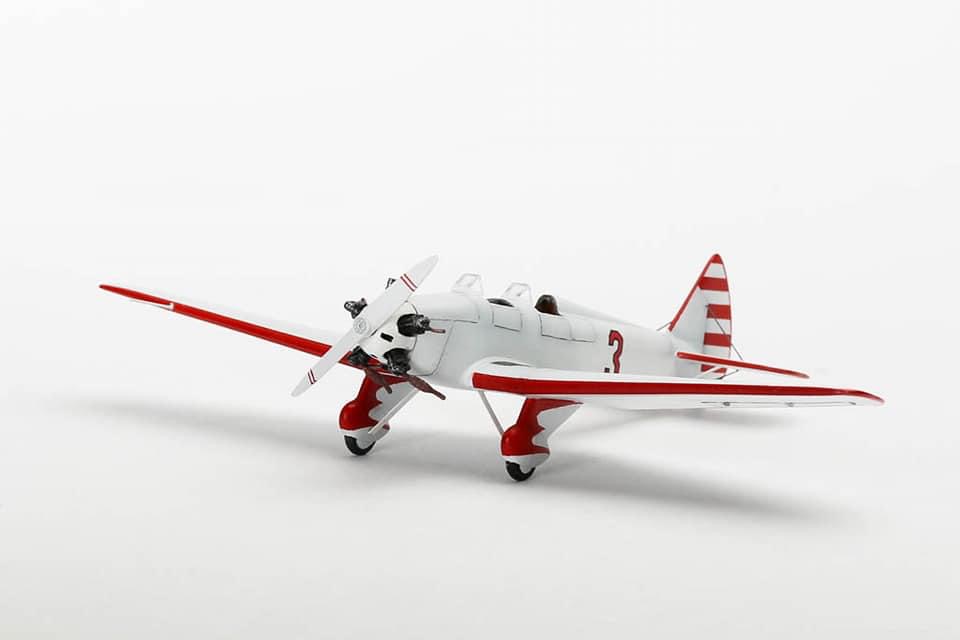
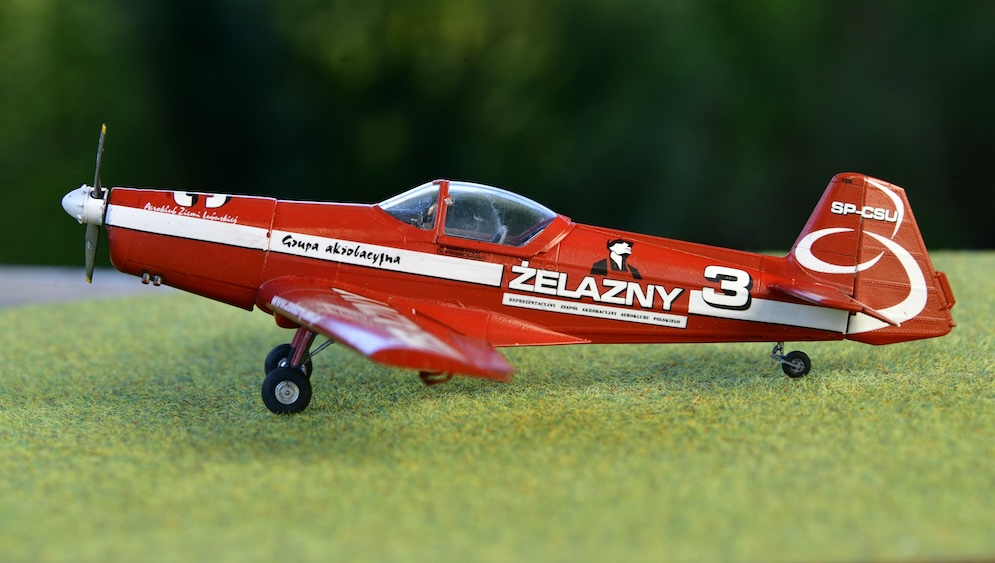
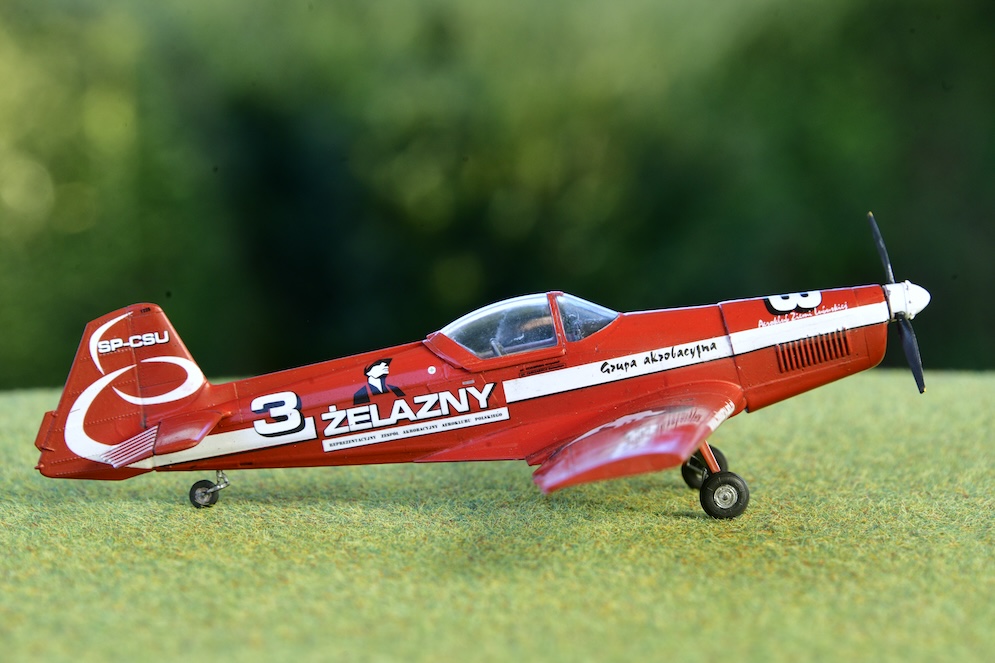
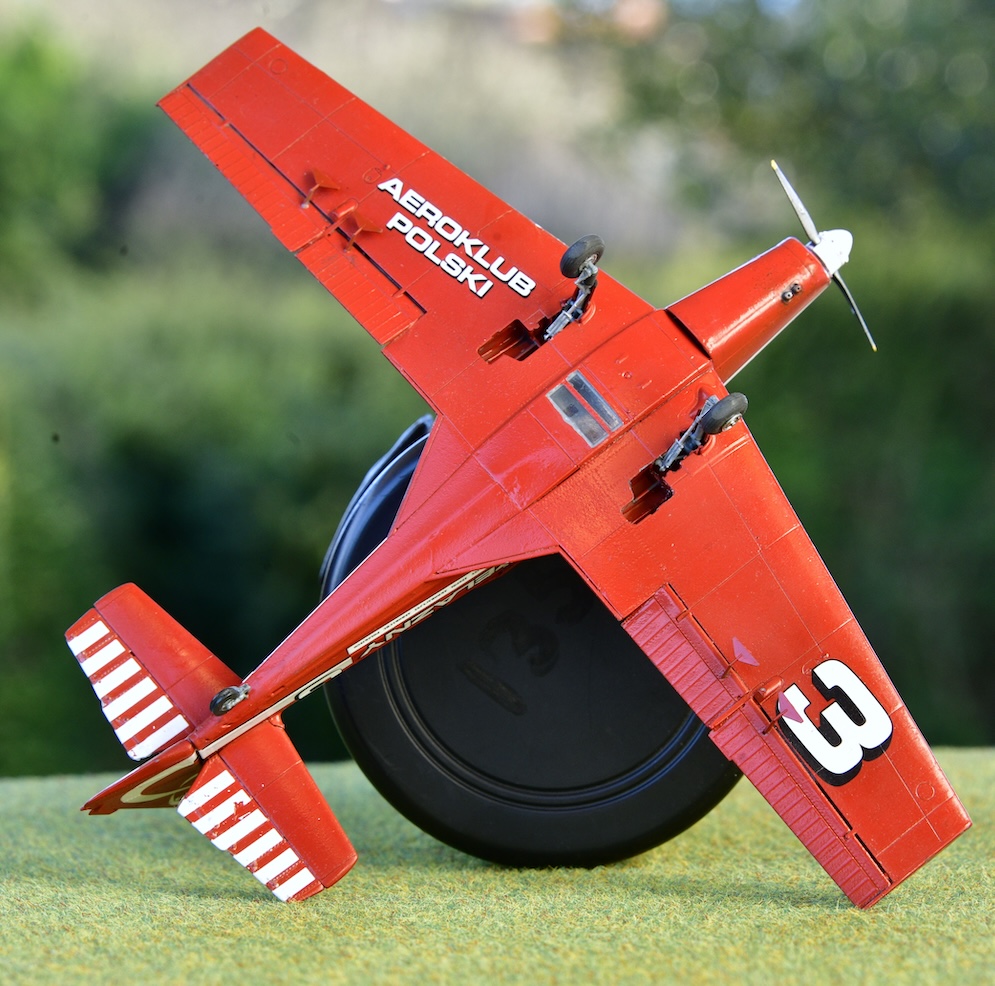
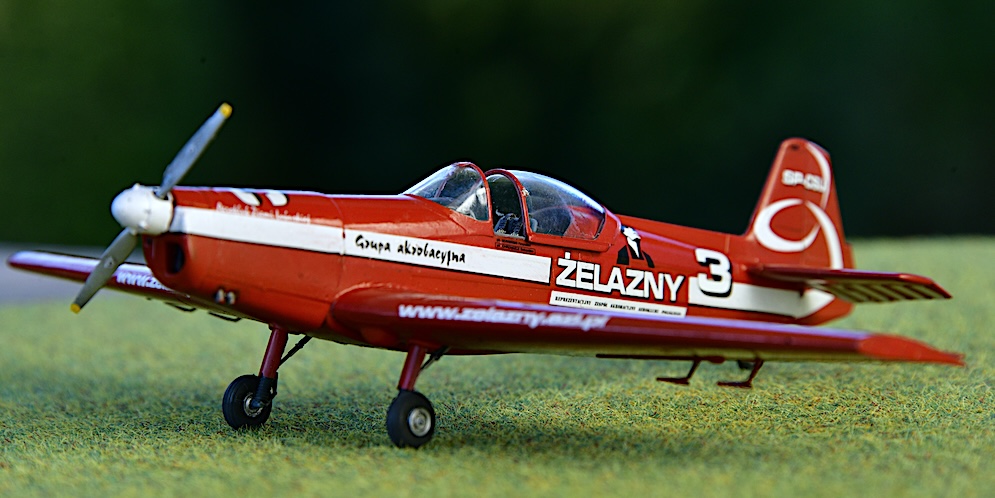
This model is to 1:48 scale and is one of the range of Zlin types produced as a kit by Eduard in the Czech Republic. This is the single seat, clipped wing version used mainly as a serious competition aerobatic mount. I have always been a fan of the Zlin types from an aesthetic and performance standpoint. Because they were produced behind the then, Iron Curtain, they were a seldom sight in British Skies.
I had bought the model from Hannants at SMW Telford in 2022 and one year later finally got around to spending a winter weekend building and painting it.
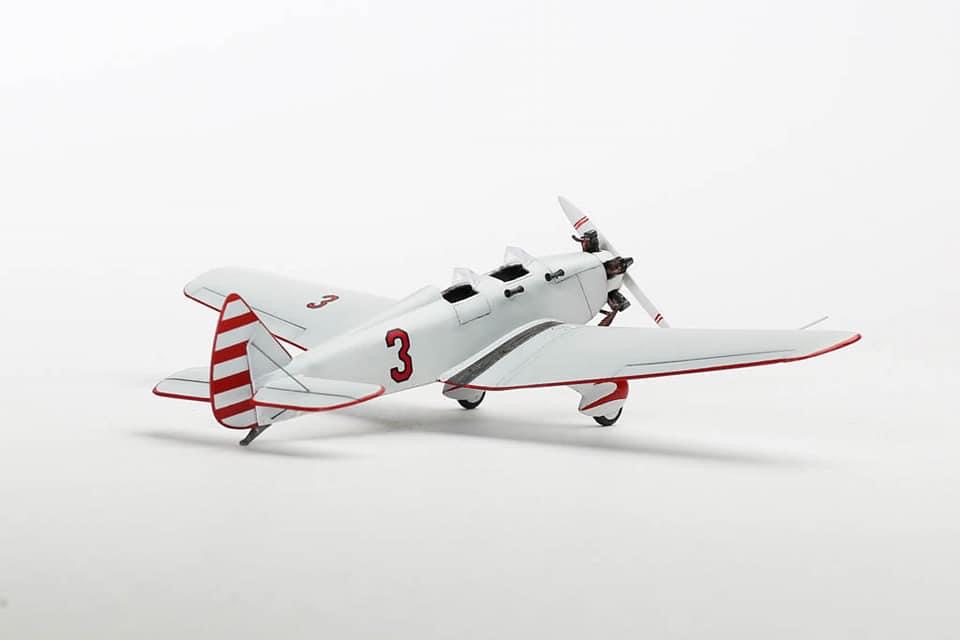
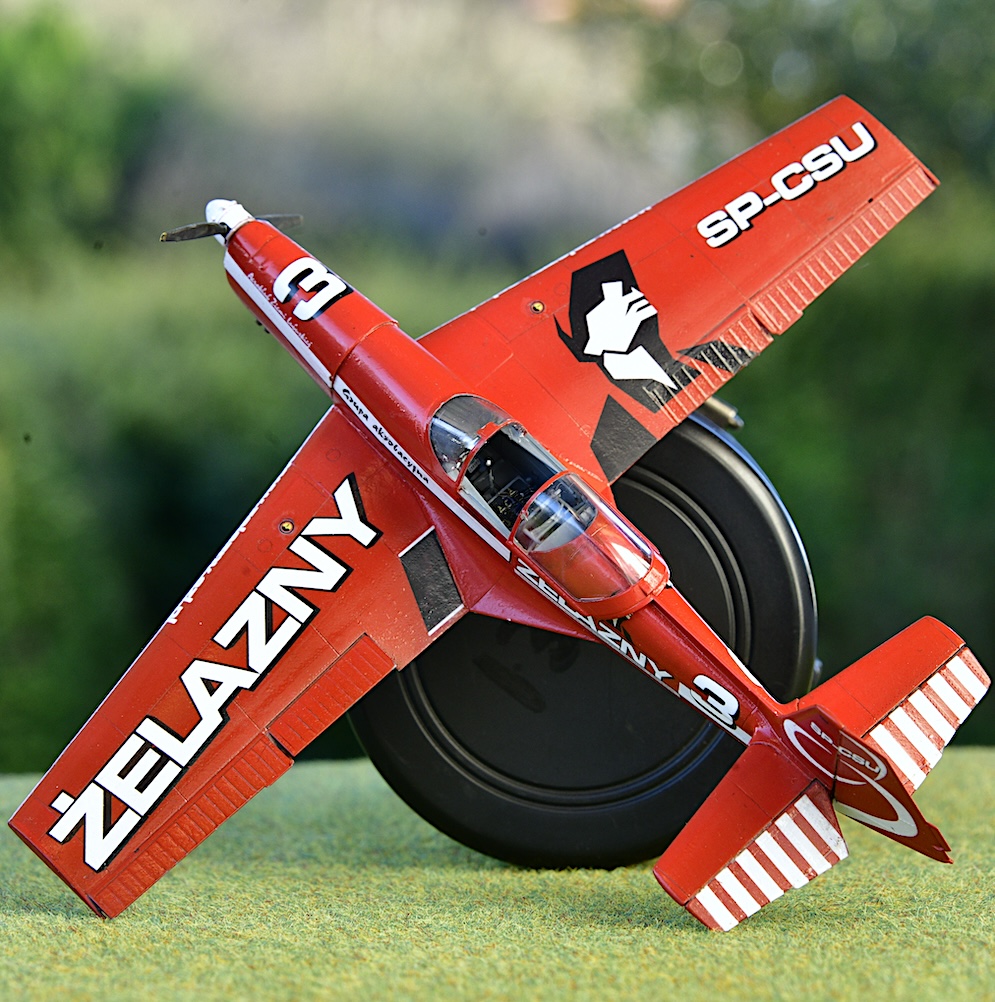
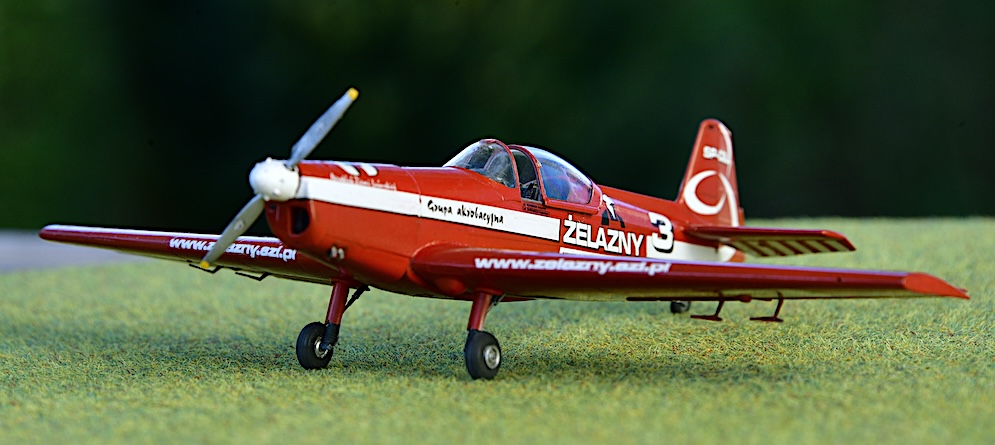
It represents aircraft No 3 of the ill-fated Polish Zelazny Zlin aerobatic team, which was a survivor of three aircraft formation aerobatic manoeuvre which went horribly wrong with aircraft 1 and 2 colliding in mid-air with the loss of both pilots, aircraft 3 survived and is the one that I have modelled. There are a total of five schemes included in this boxing, all of which are very colourful!
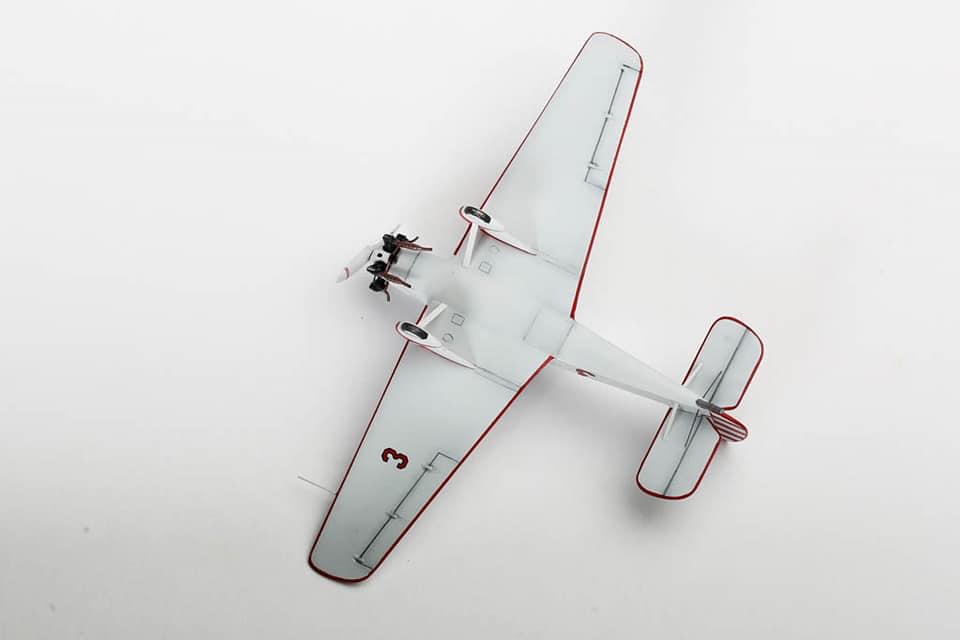
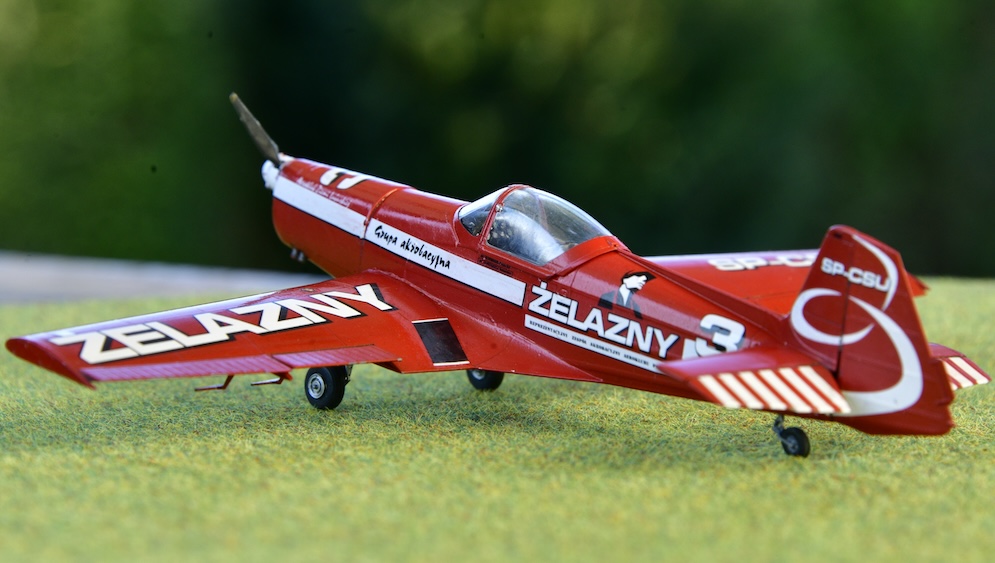
All built out of the box (it is the Profipack version of the kit which includes canopy masks and photoetch details) I chose to add the Eduard Zoom pack which includes a made/painted resin dashboard and other cockpit details such as belts etc.
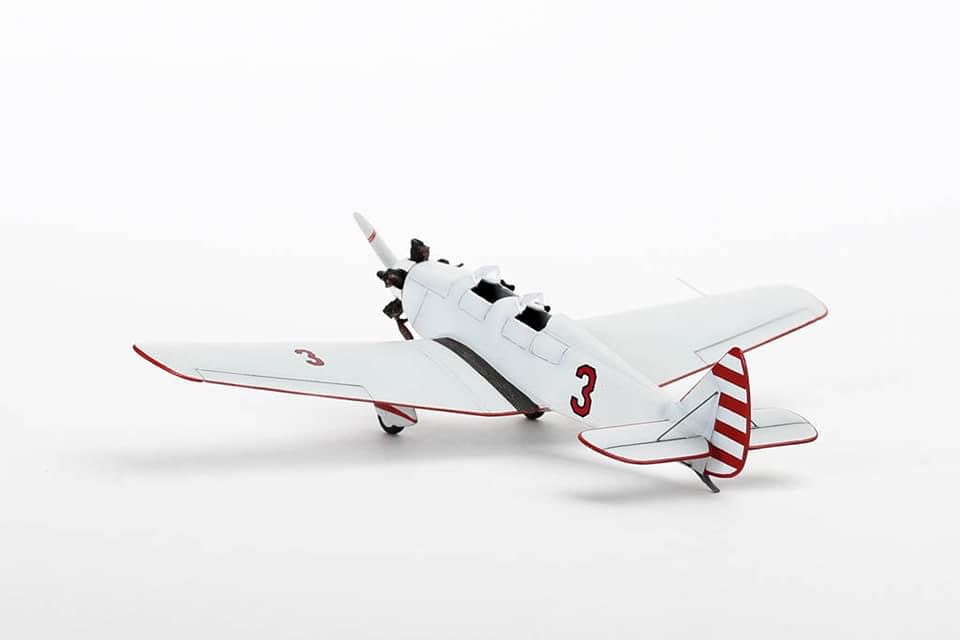
Parts fit is Eduard quality, which equates to superb! Wing and tail fit required no work or filler at all. The only issue I faced was losing a couple of the very tiny photoetch details which catapulted themselves into the middle distance! I primed the aircraft using Alclad grey primer, which was great for the interior and airframe parts, but in hindsight, I wish I had used a white for the Revell Fire Red acrylic used for the main scheme.
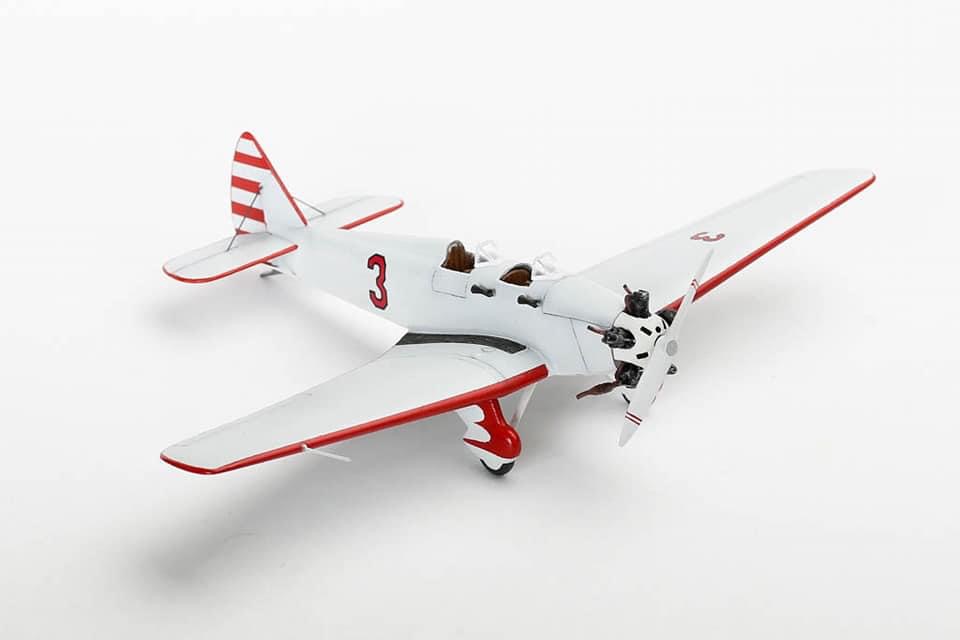
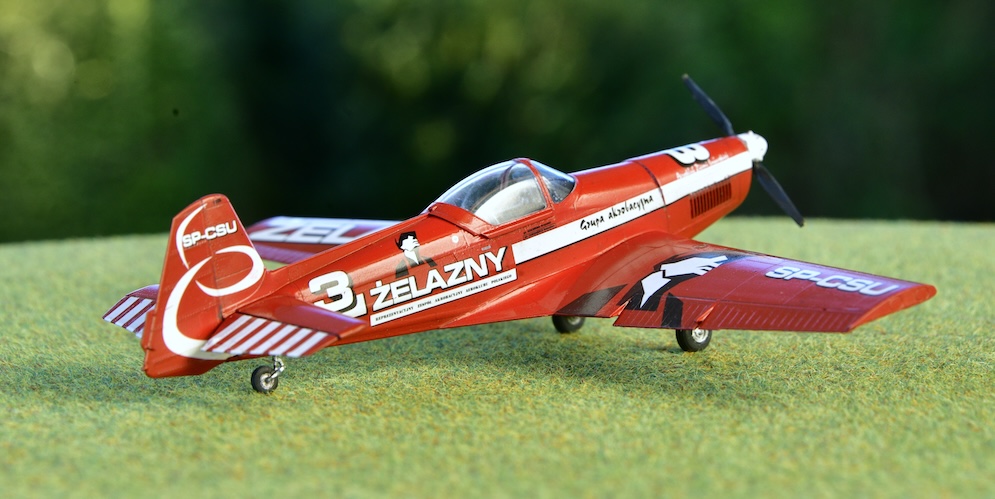
To sum-up a lovely, quick building model of a very unusual light aircraft, I just wish someone would produce the Gold Leaf British Aerobatic Team’s aircraft so ably flown by Neil Williams and James Black back in the 70s in the Era preceding the Pitts Specials.
Would I build another…? It is certainly different and the answer is a most definite YES!!!
Stuart M.