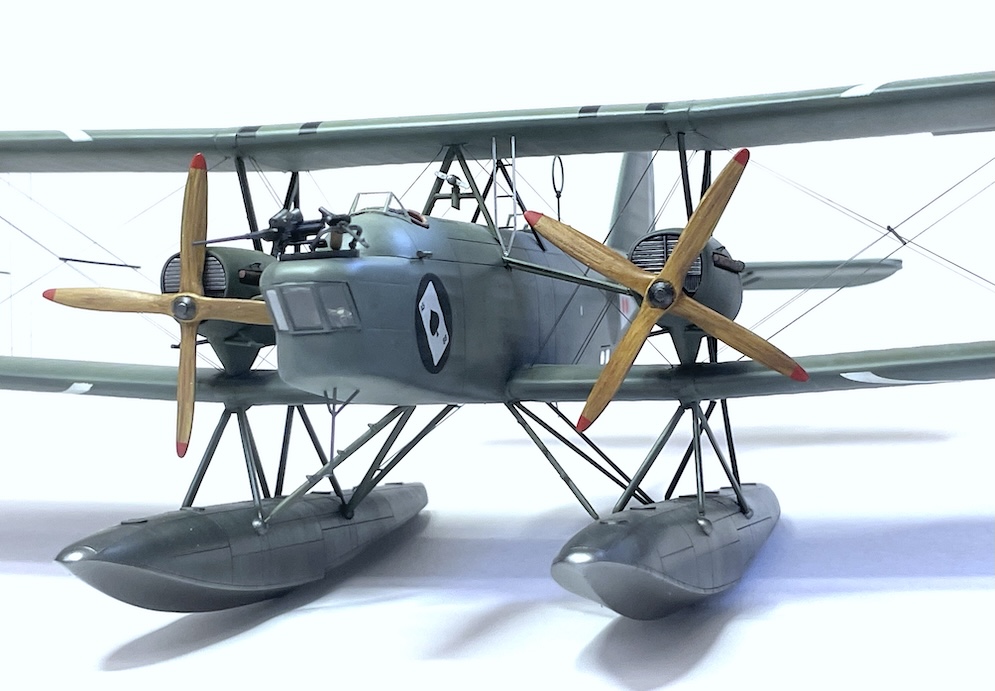

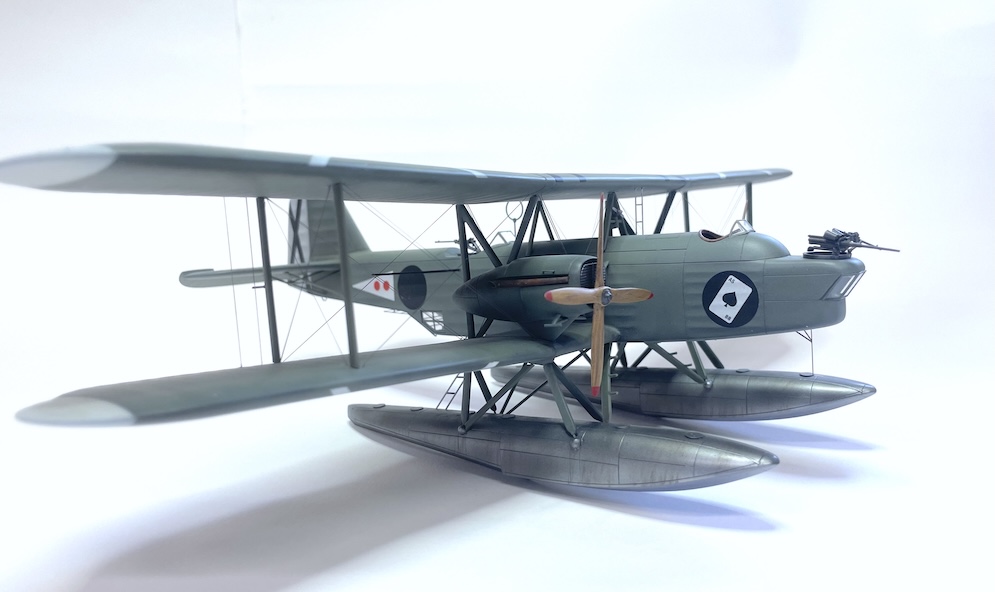
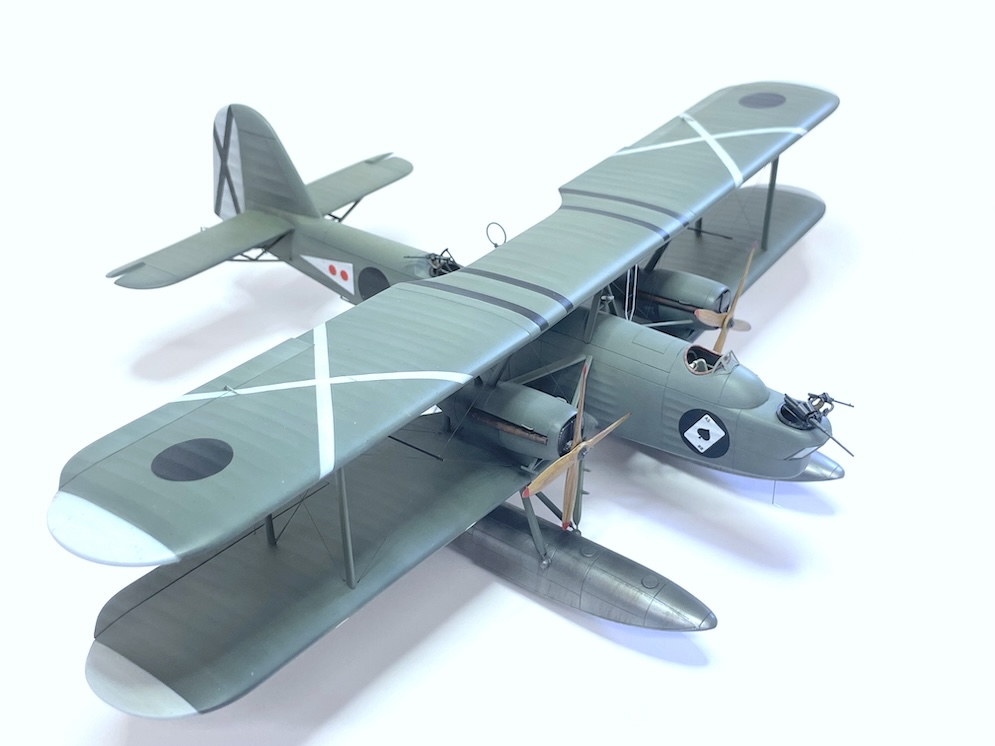
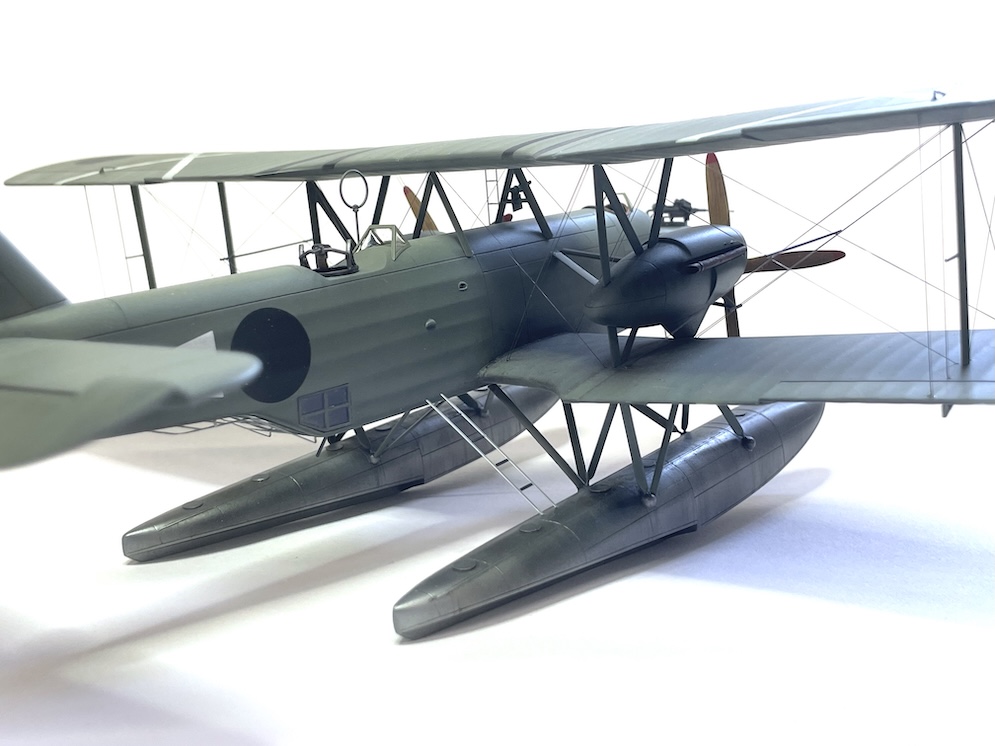

This is an old boxing of the kit but I managed to get one of the new upgrade sets direct from Special Hobby when they released them in 2024. These included some nice 3D printed armament as well as other internal details. Seatbelts are Eduard.
I haven’t really added much else to the kit, the upgrade set was enough in my opinion!
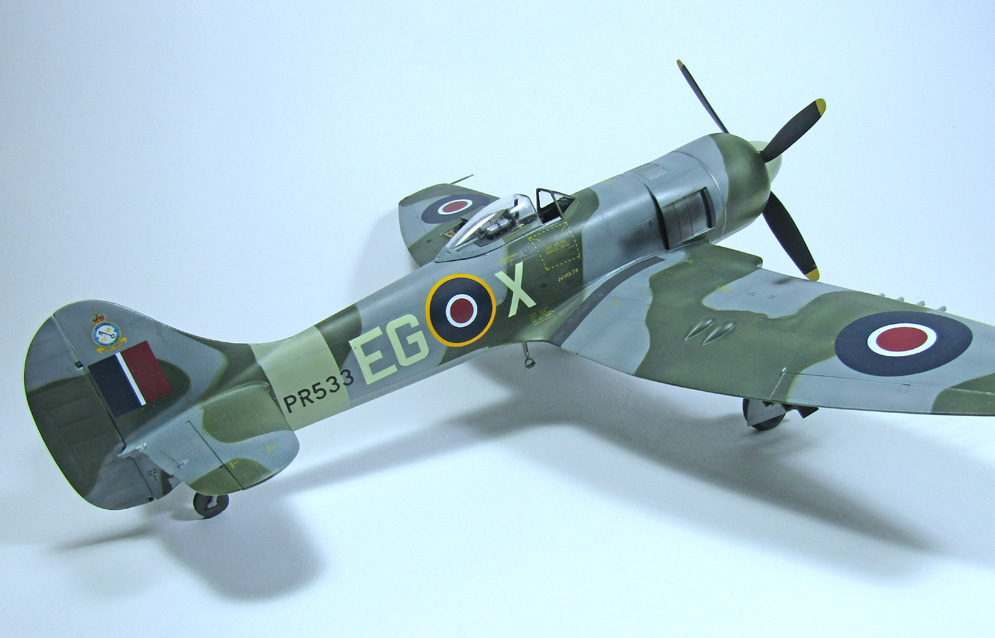
The model is painted in Vallejo acrylics with Alclad being used for the metal floats.
Kit decals were used except the white crosses and black stripes on the wings which were masked and painted.
Weathering is with oils.
Thanks
David O.
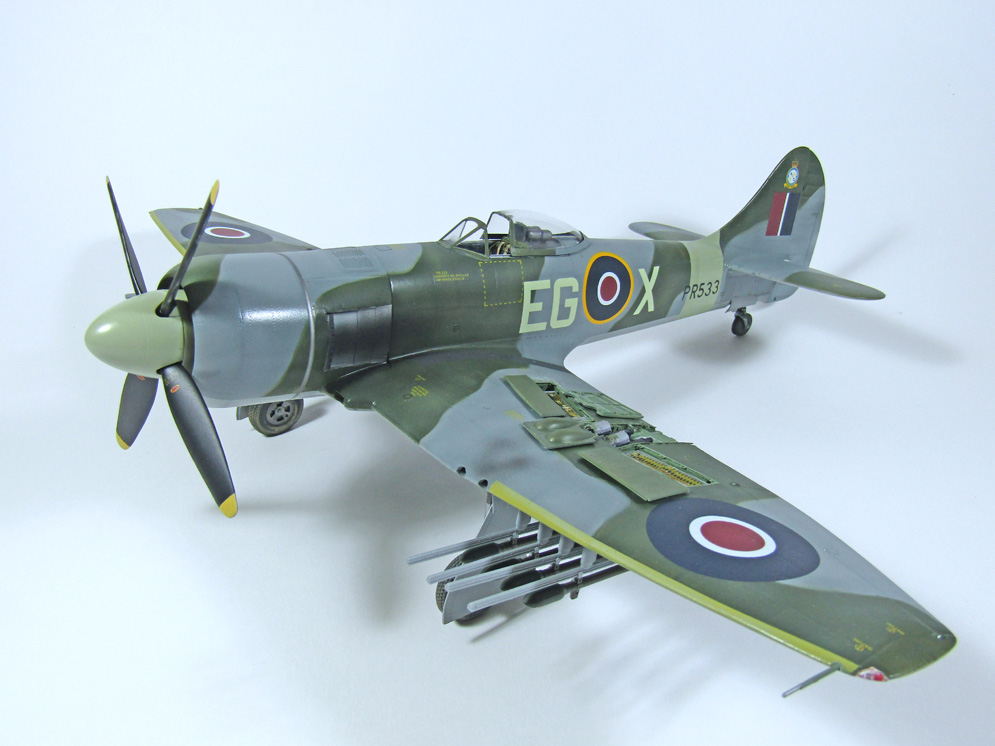
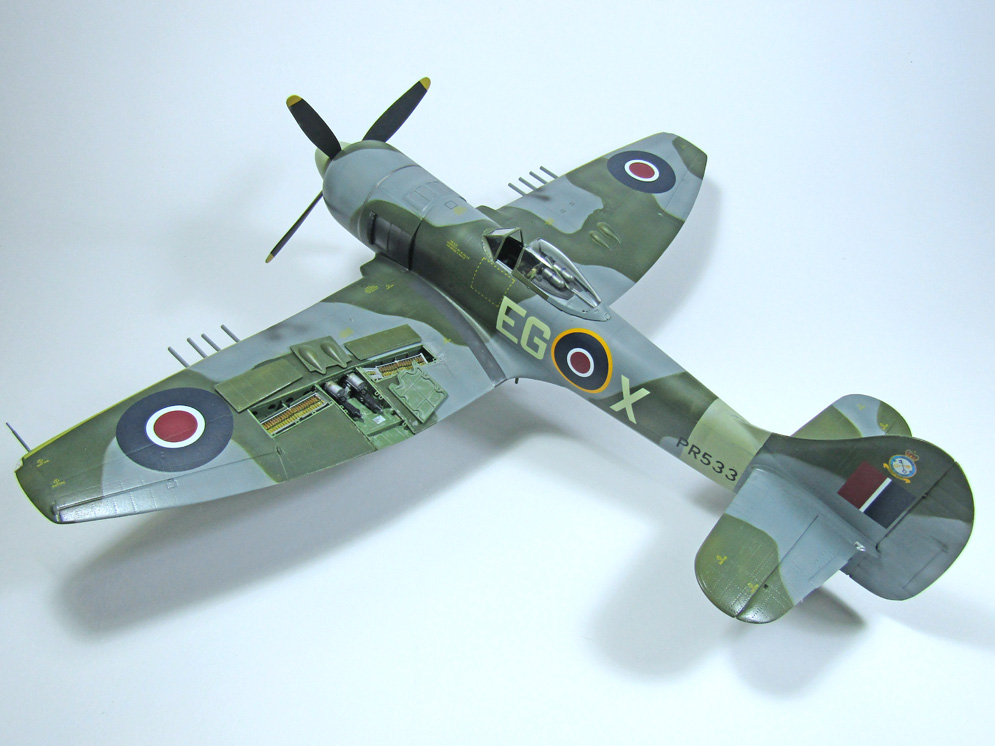
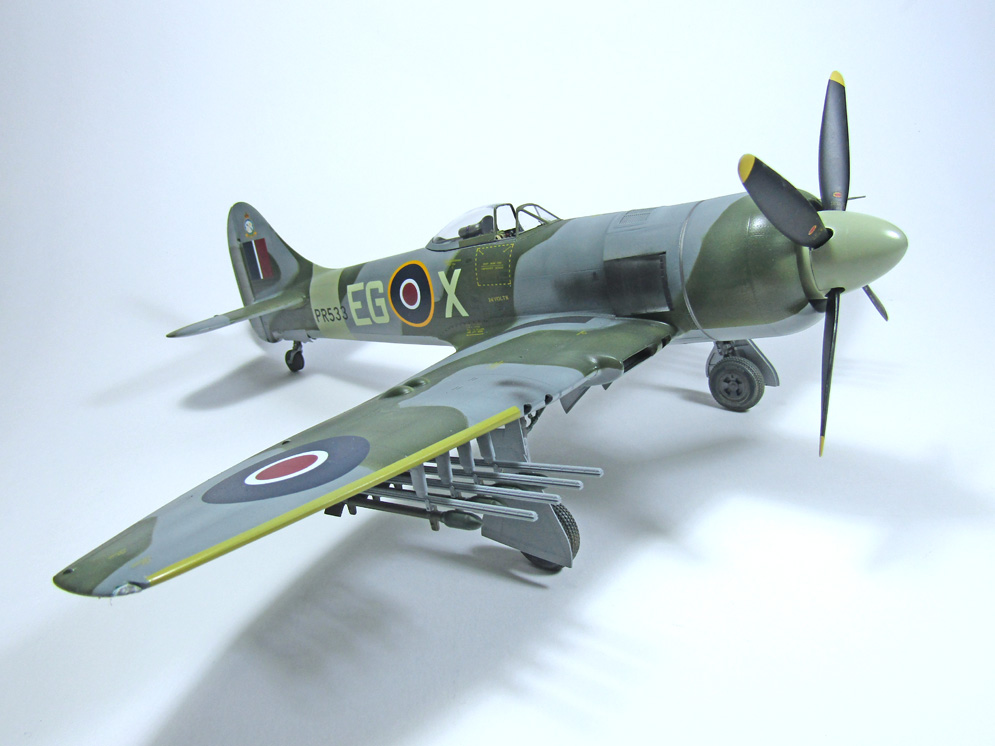

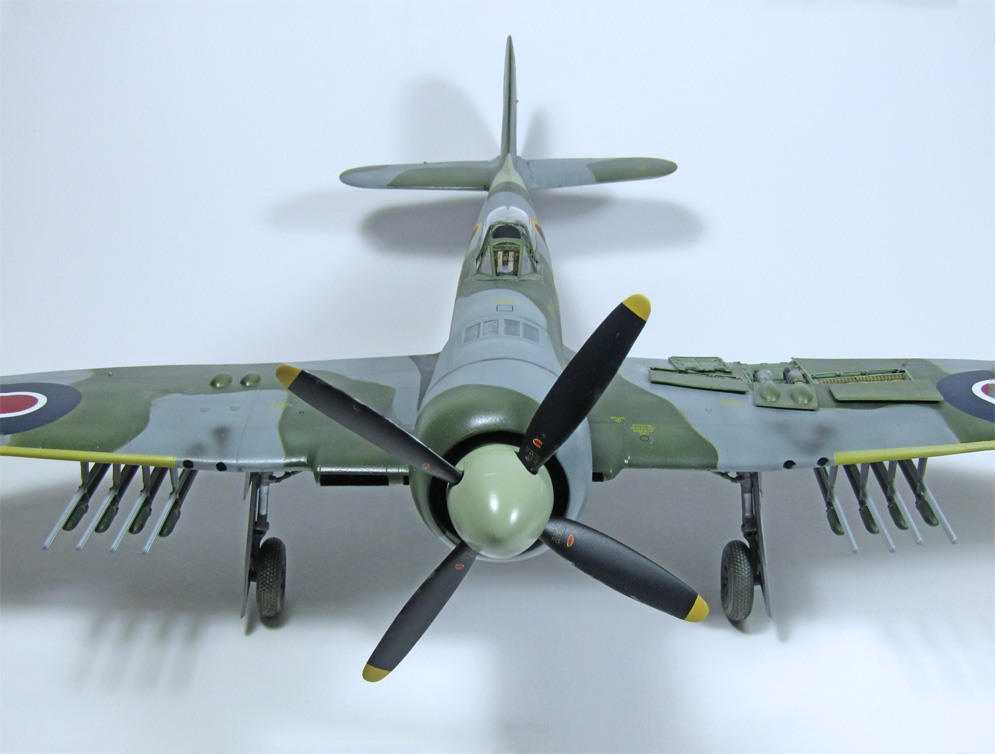
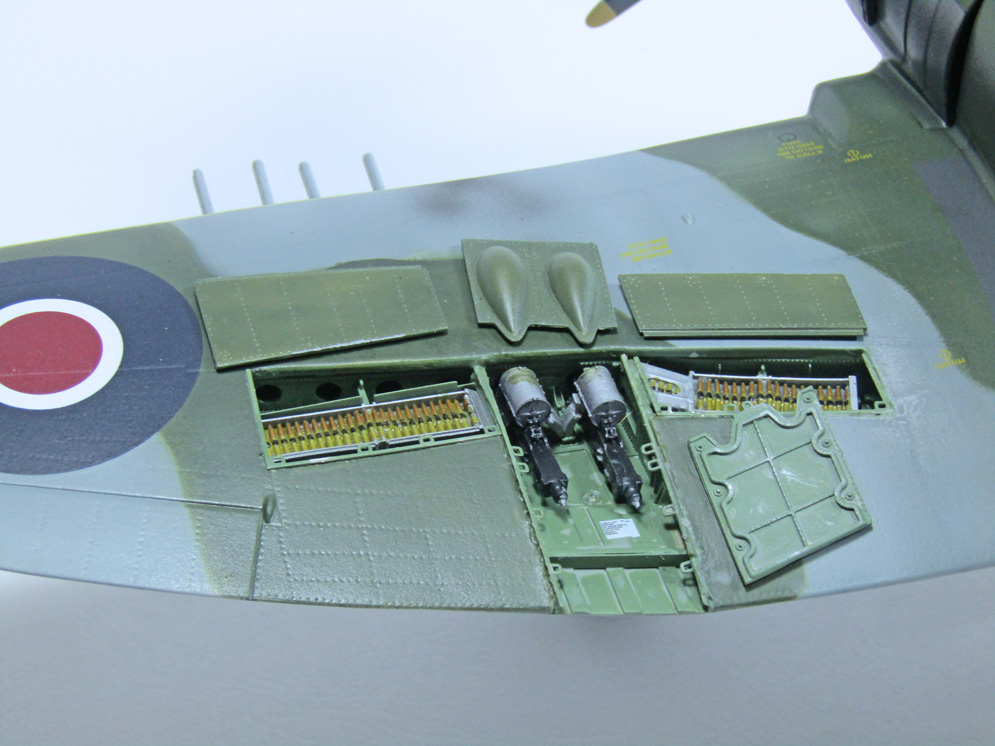
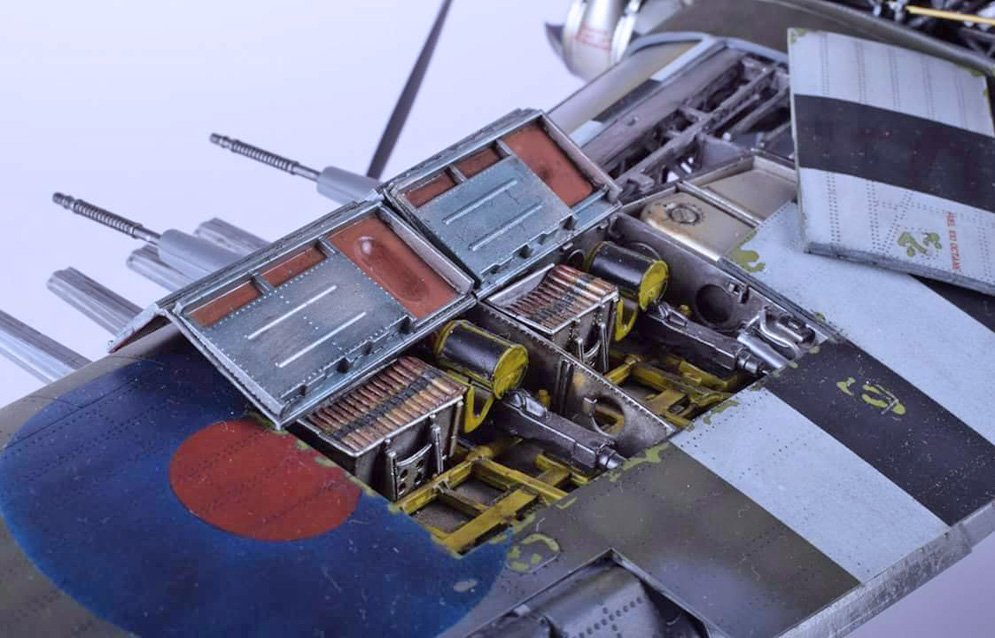
The kit comes with resin details for the cockpit and some very nice replacement weighted wheels and tyres. A nice addition is the open cannon bay for the starboard wing, which takes a bit of work to fit snuggly but is worth the effort in the end.
The Tempest is bigger than you think so make plenty space on your shelf for display.
Mick S.

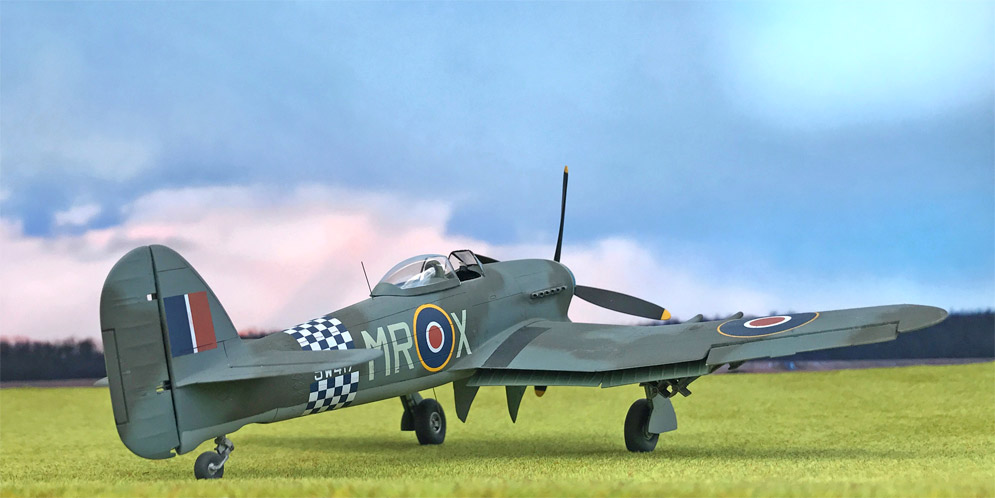
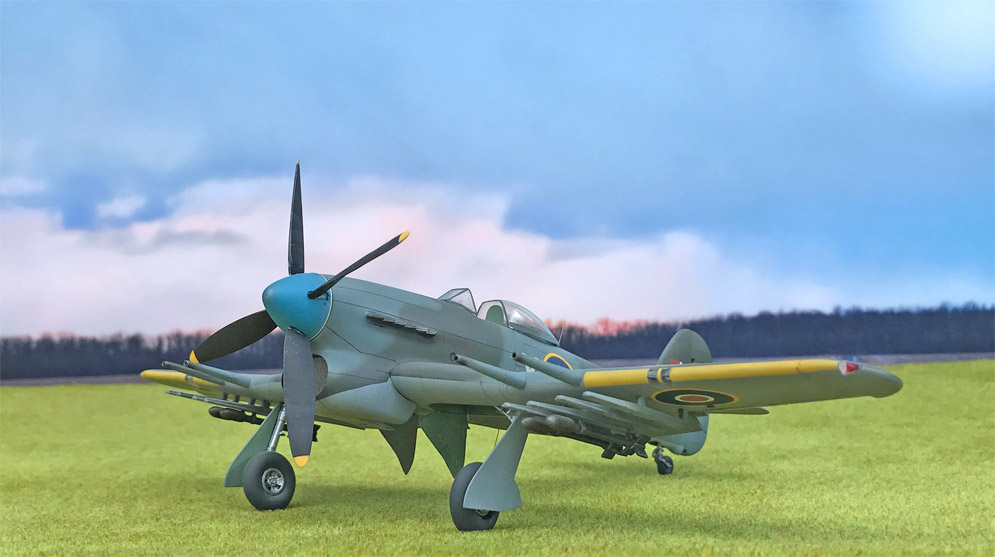
This is my 2nd build depicting an aircraft flown by Howard Morely (2nd from left standing), this time I used the Special Hobby 1:32 Hawker Tempest Mk.II ‘Hi-Tec’. Again I made my own masks instead of decals.
It is painted with Tamiya paints and weathered with oils.
Daniel Baxter
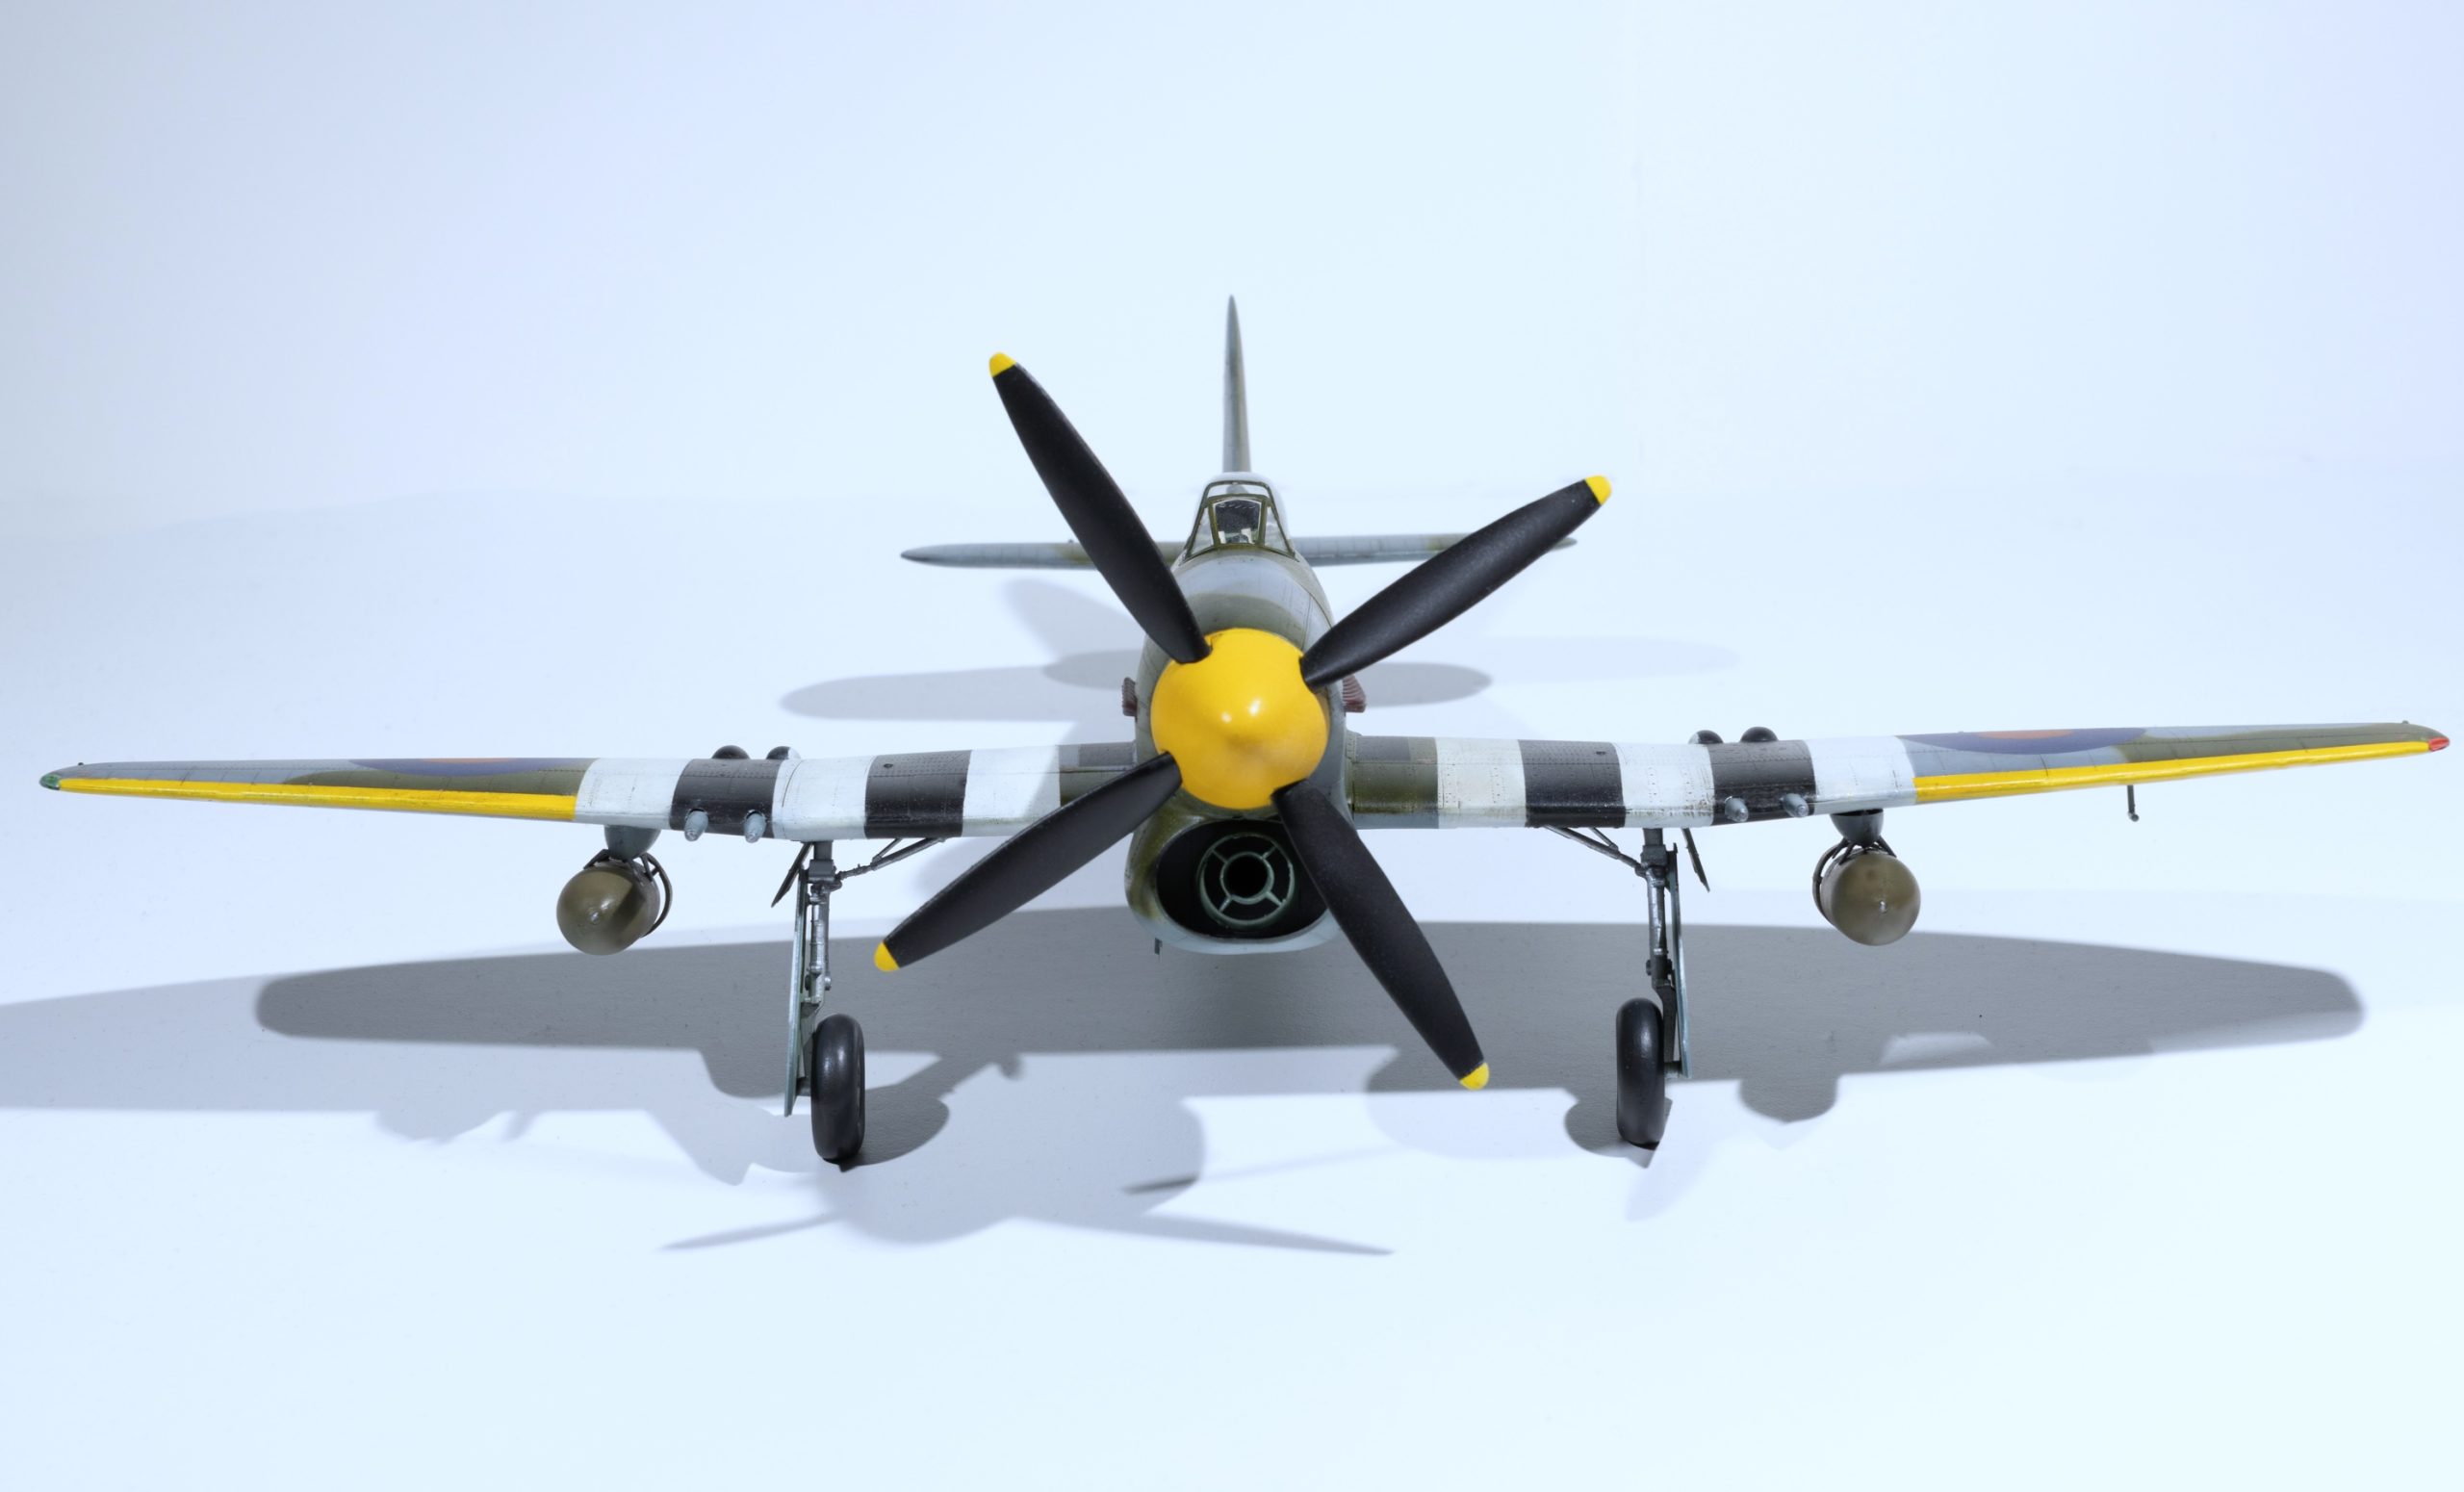
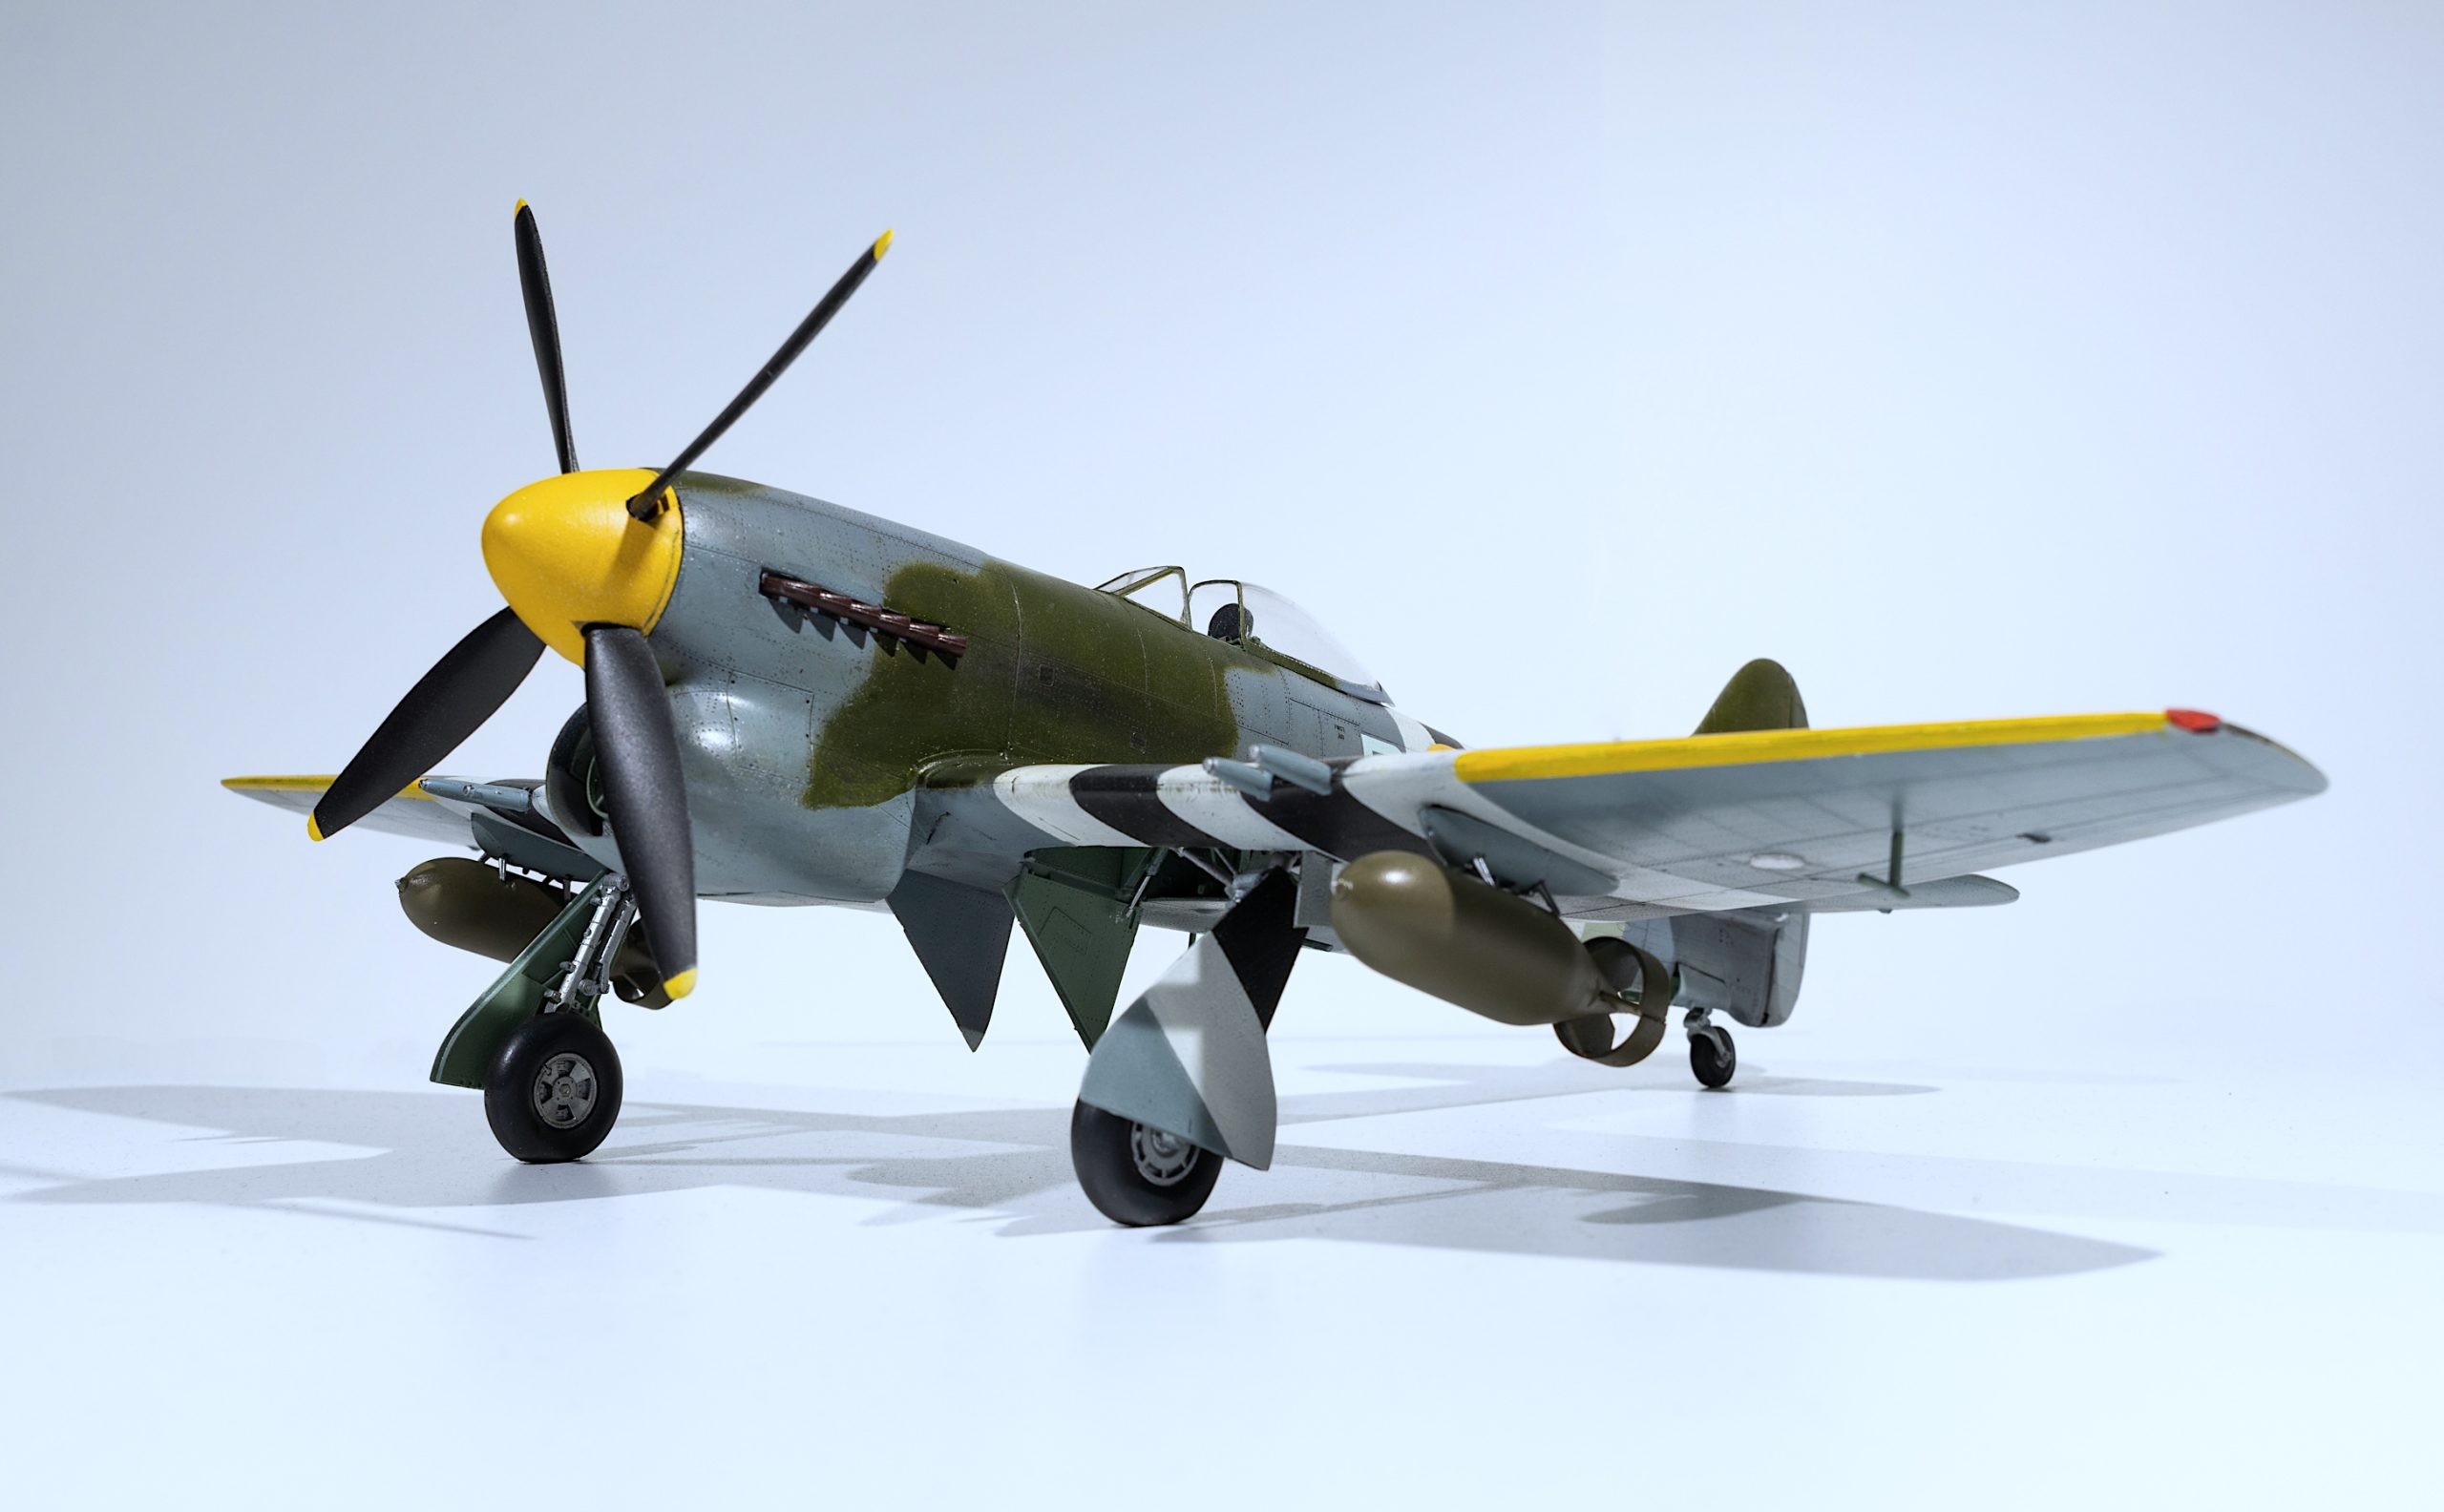

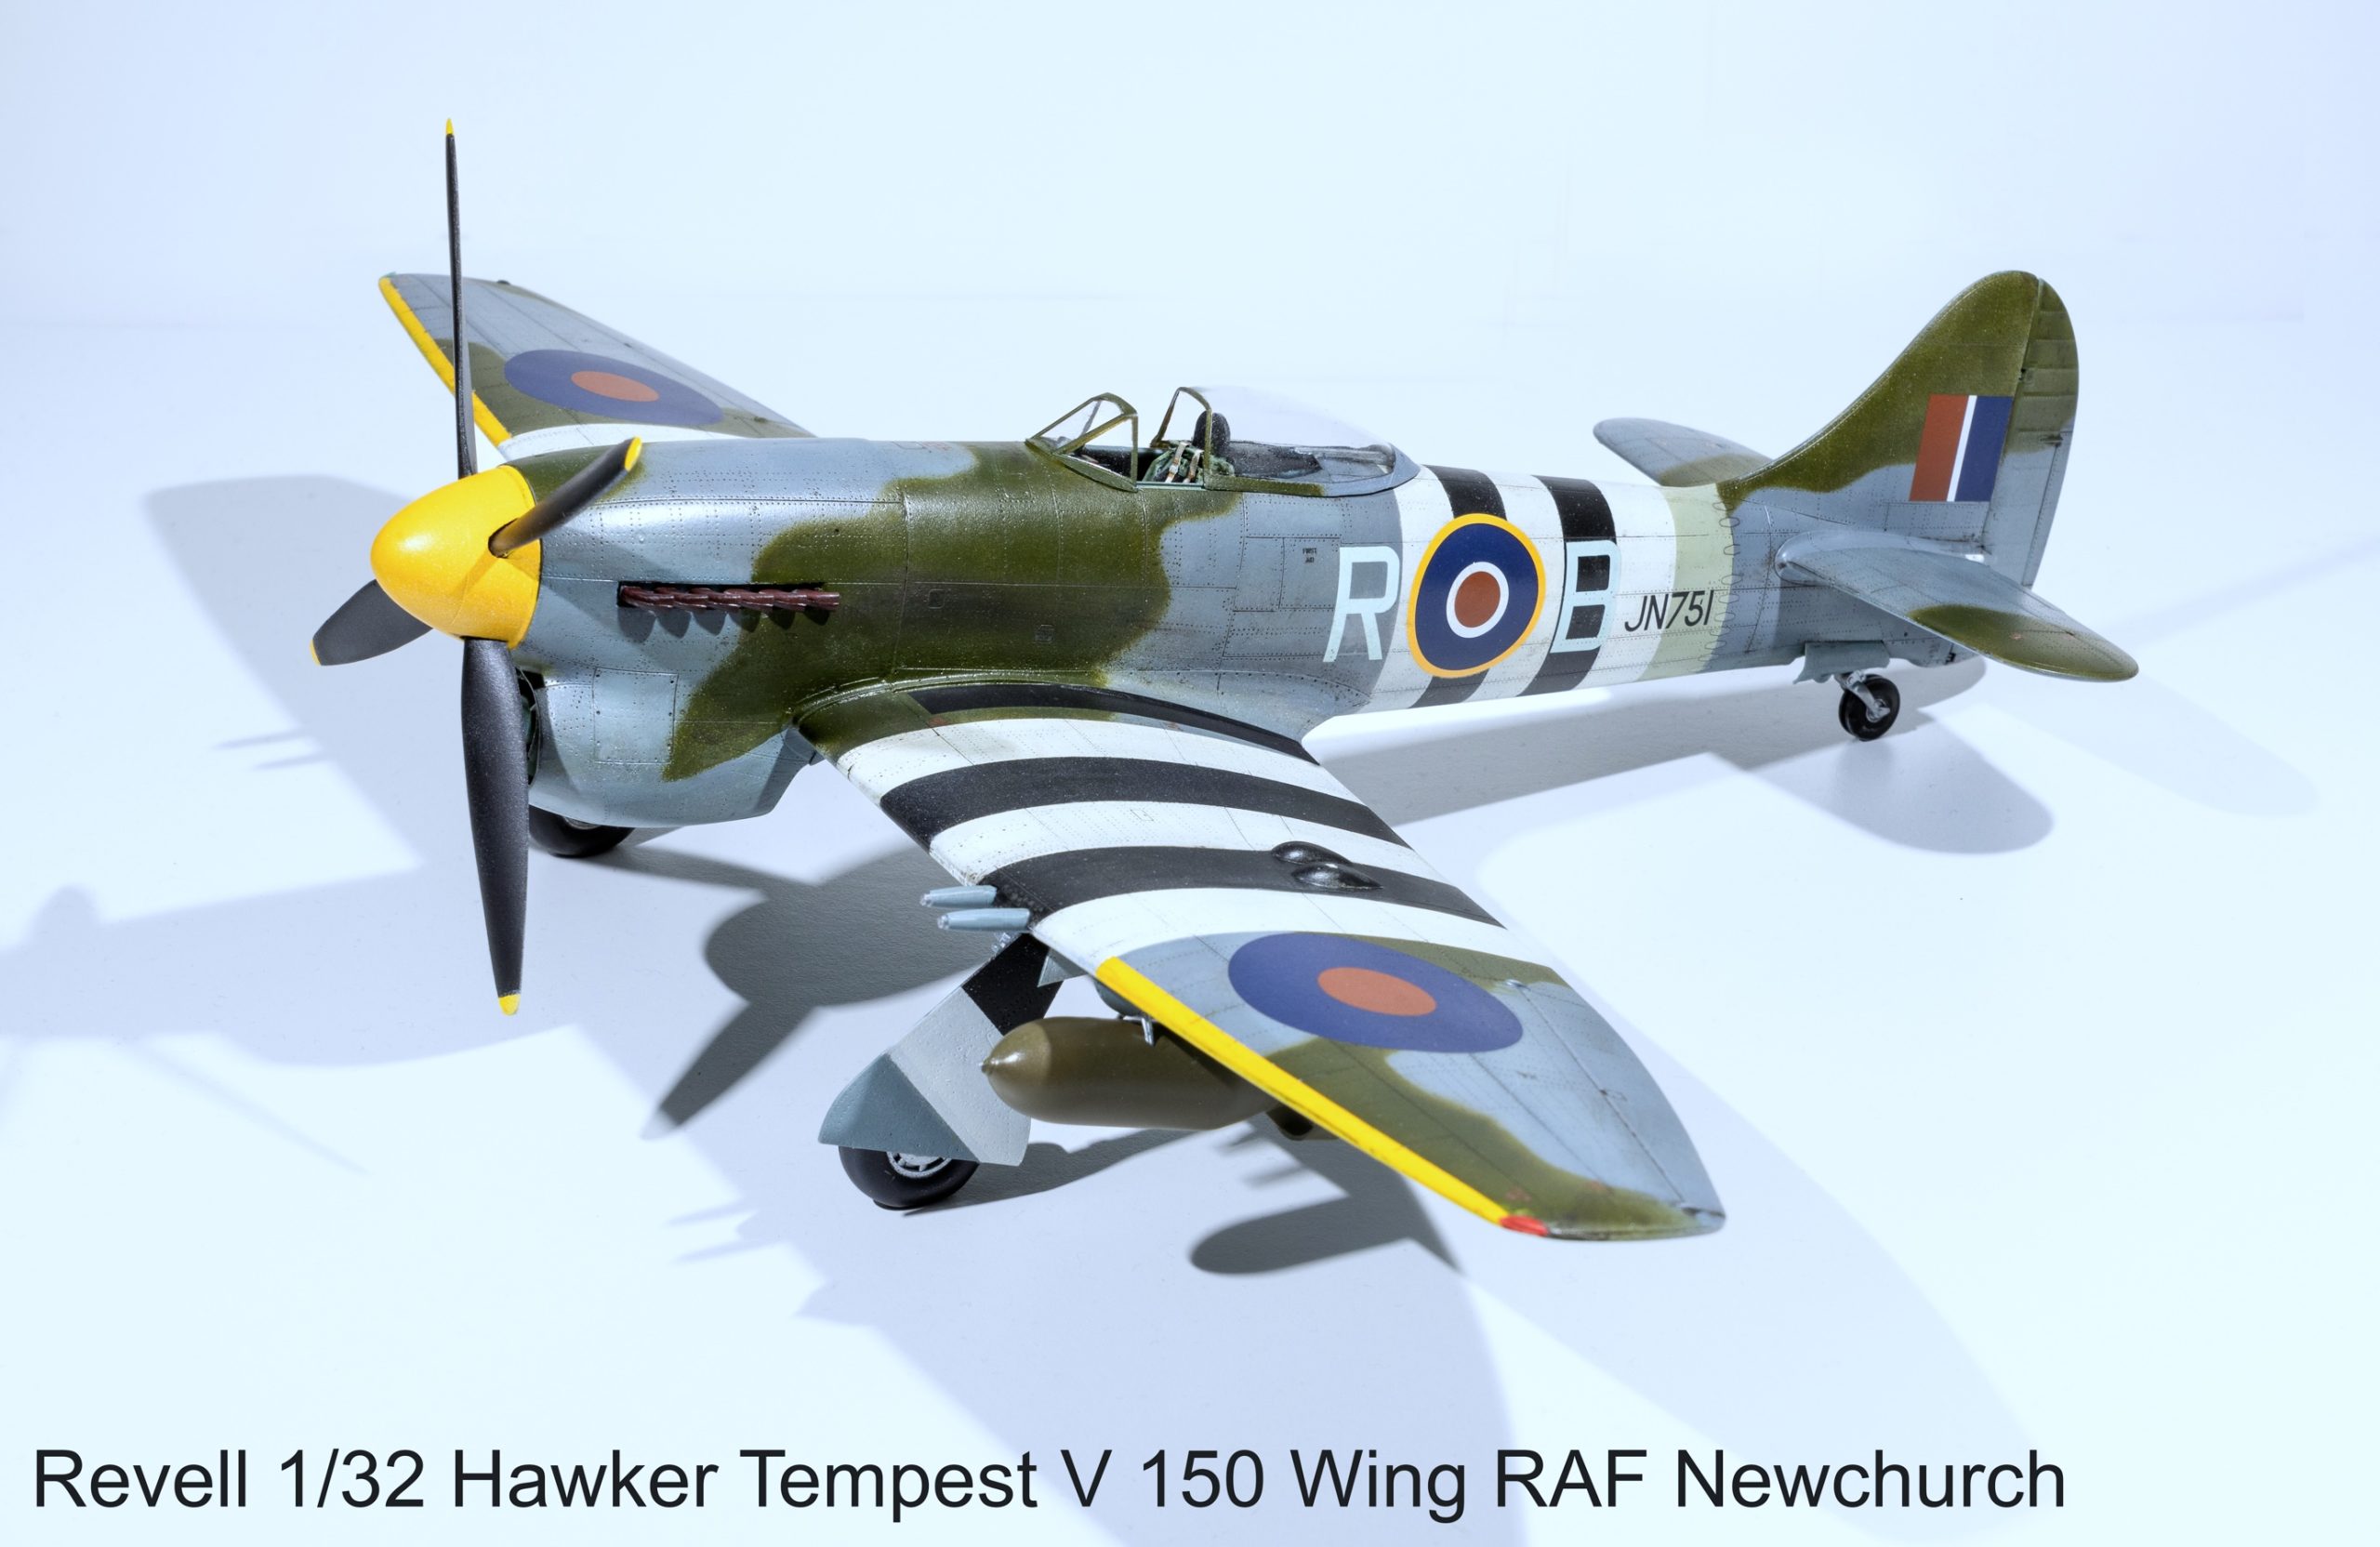
Most challenging build for a while, poorly fitting parts especially around the engine and undercarriage bay, this one certainly fought back with lots of filler and sanding needed!
The detail is, however, great with a good cockpit and only needs some third party seat belts to finish it off nicely. Decals are pretty good, suffered some crackling on one of the fuselage roundels but the rest went down very well. I really like the 1:32 scale and is quite impressive once finished, looking good against my earlier Eduard 1:48 Tempest V of same frame.
I did plan on complementing the Revell Tempest with a Special Hobby 1:32 Tempest II but will need some time recover lol!
Richard A.
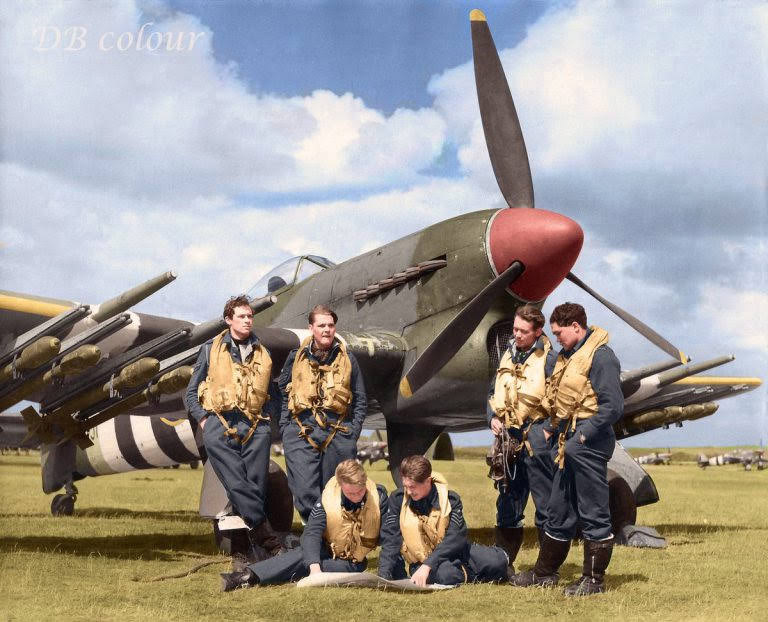
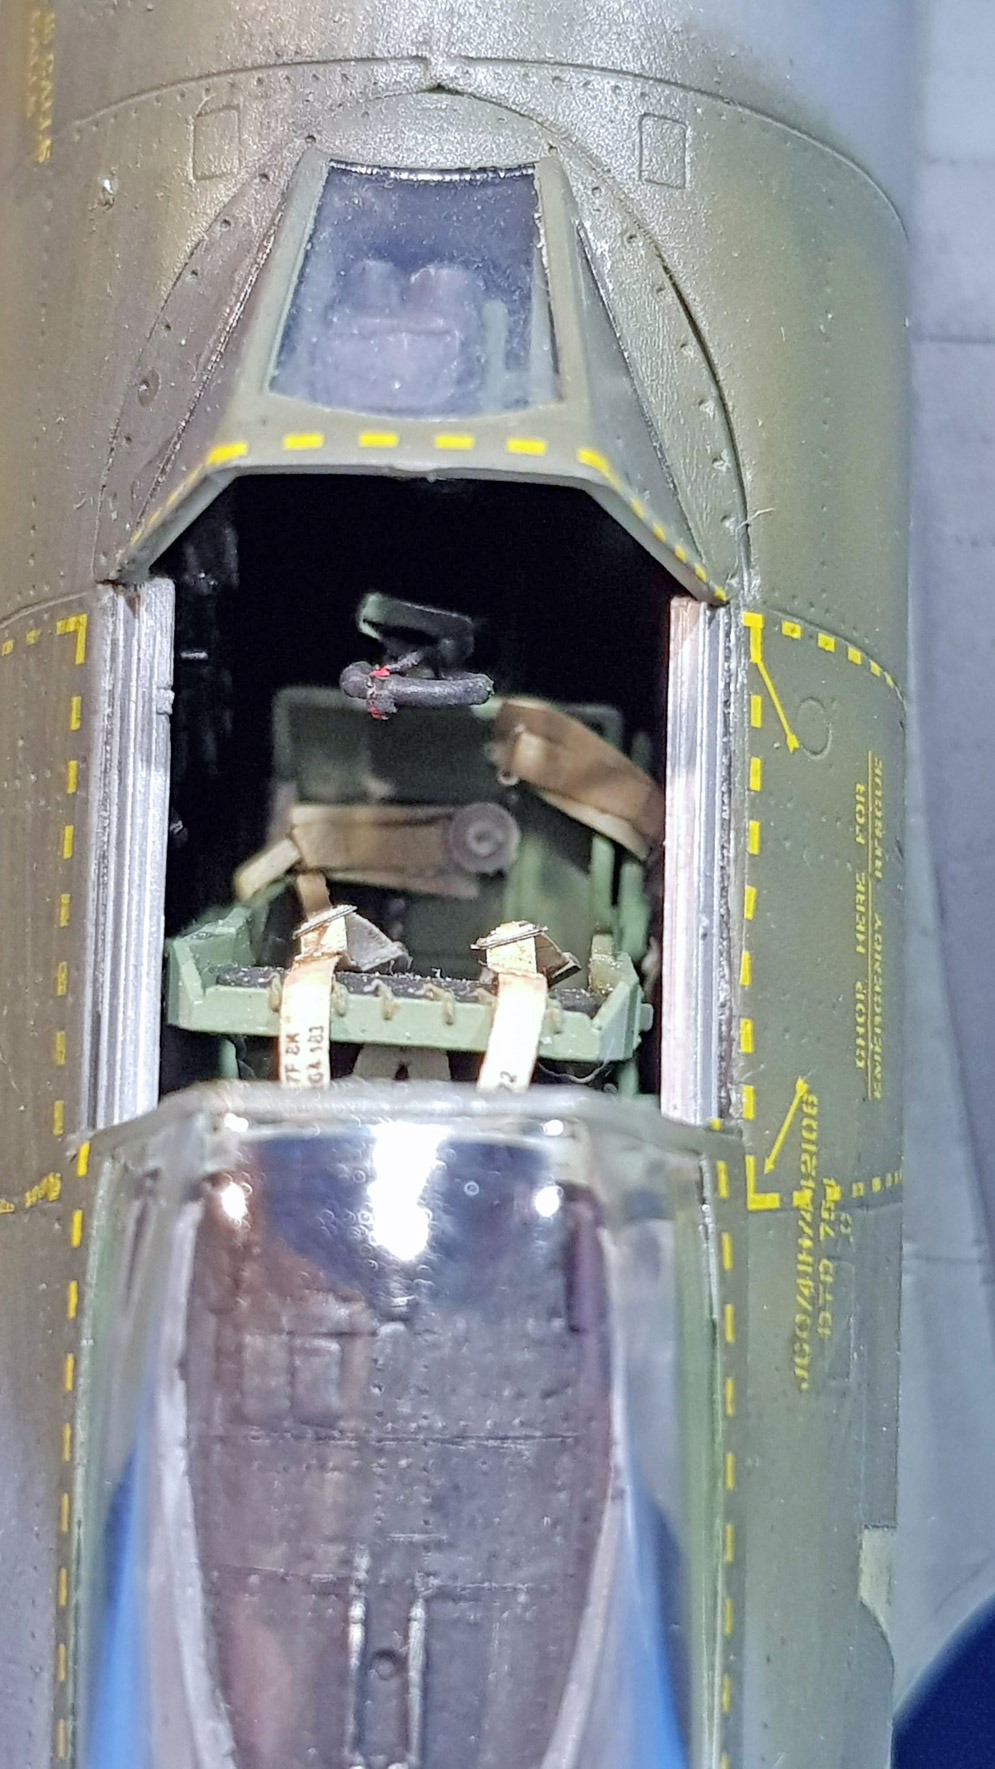
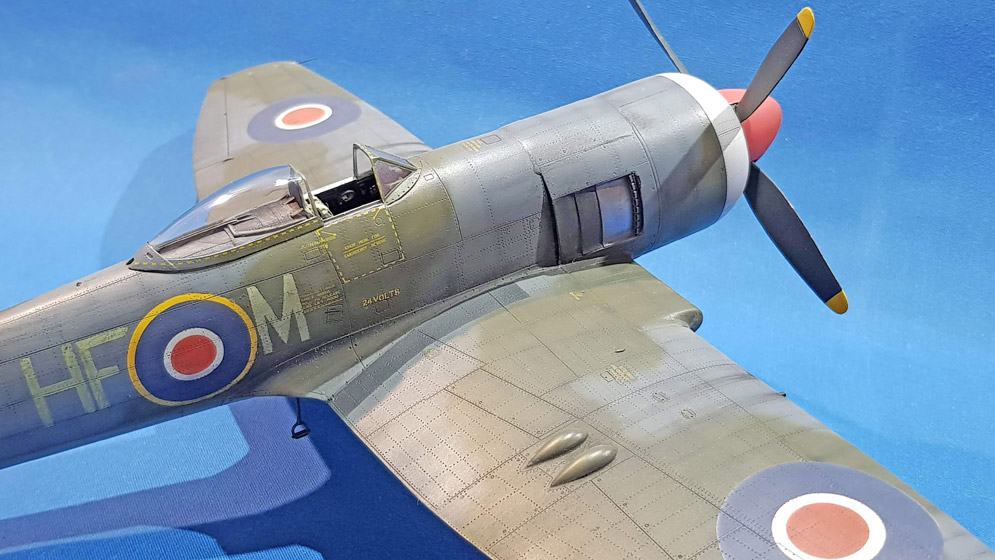
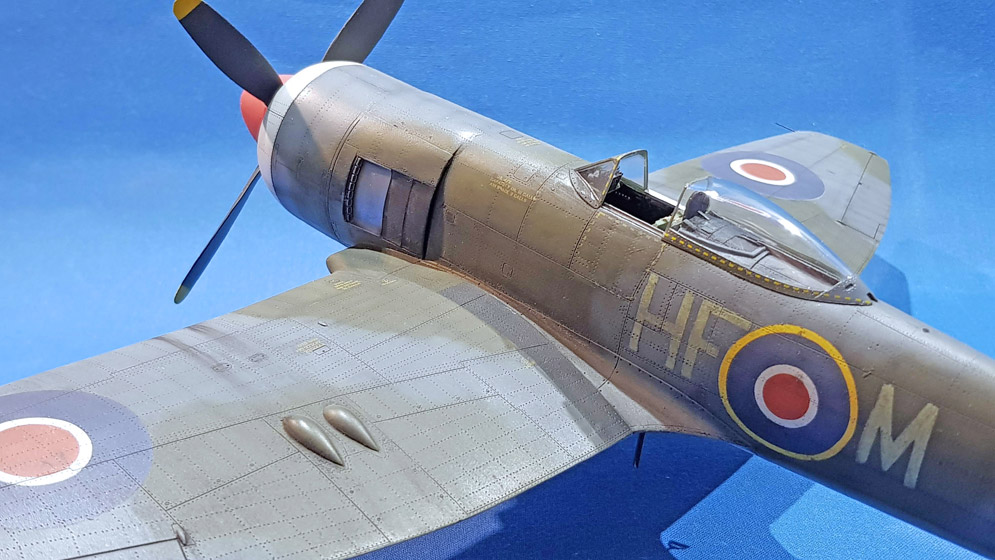
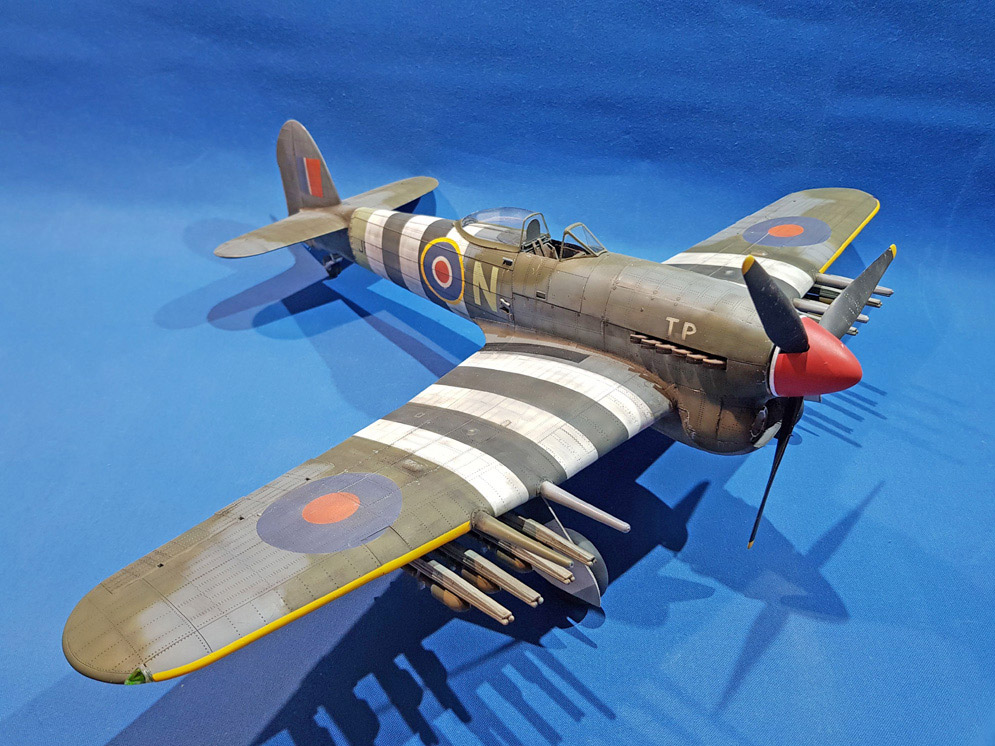
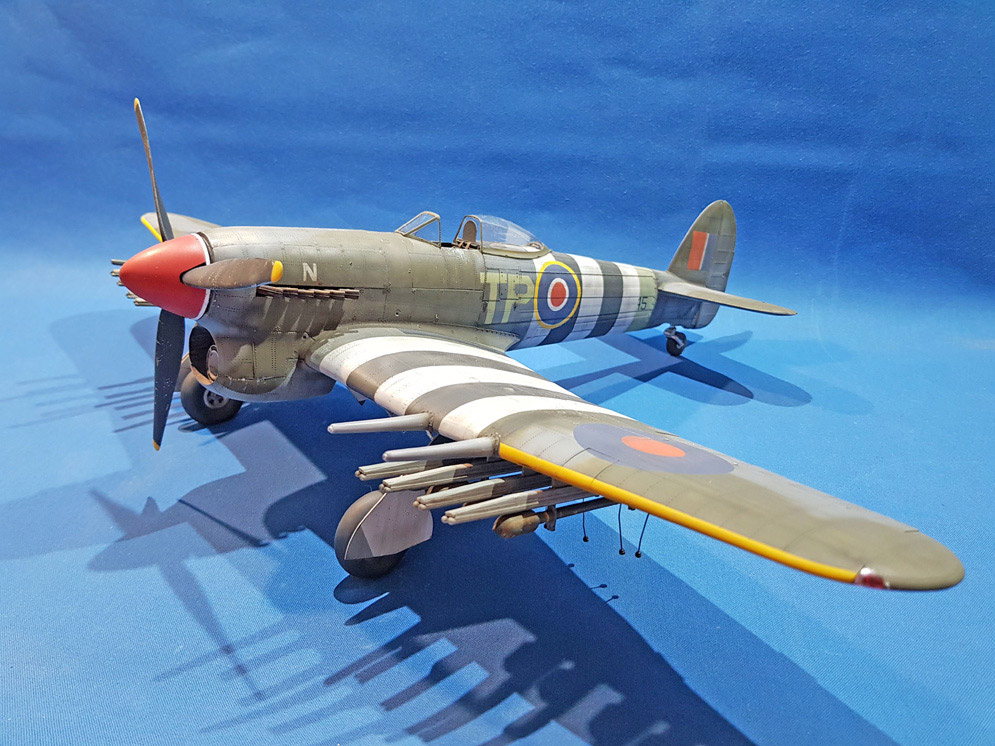
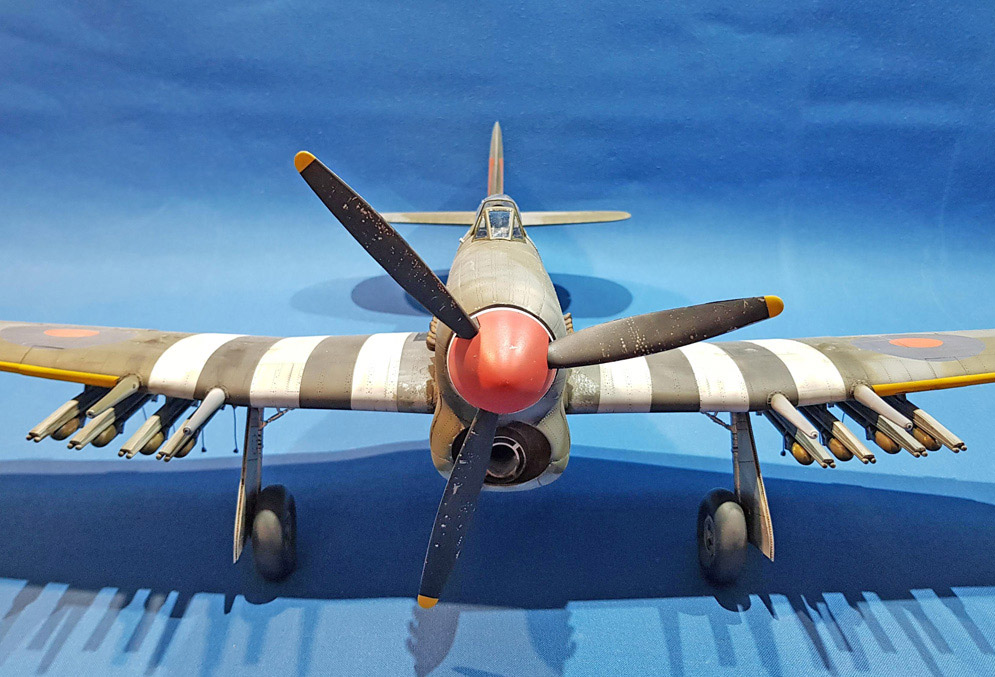
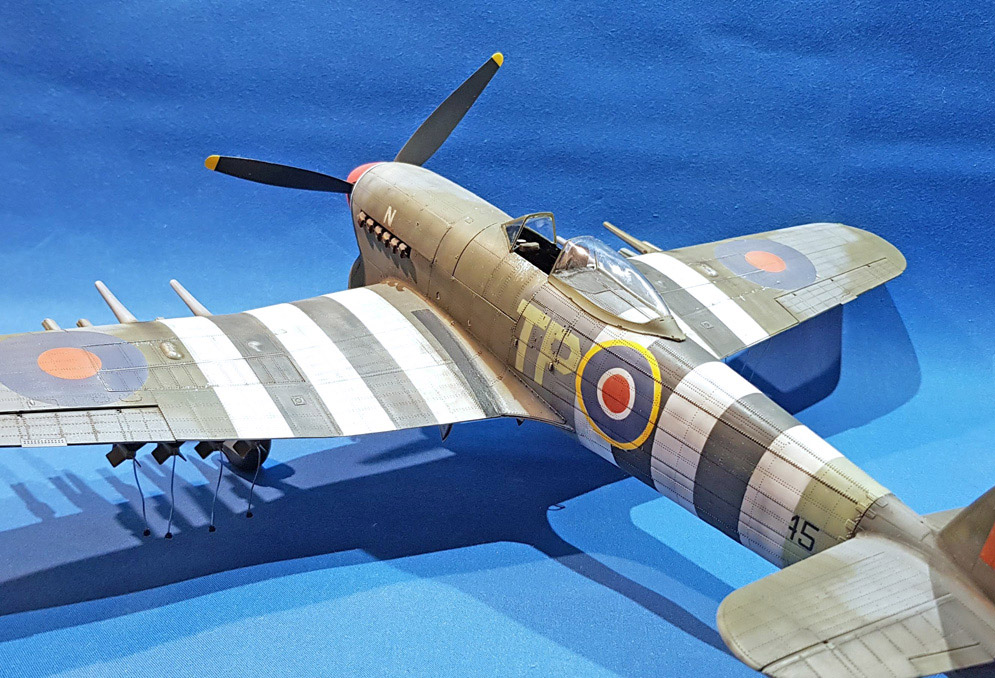
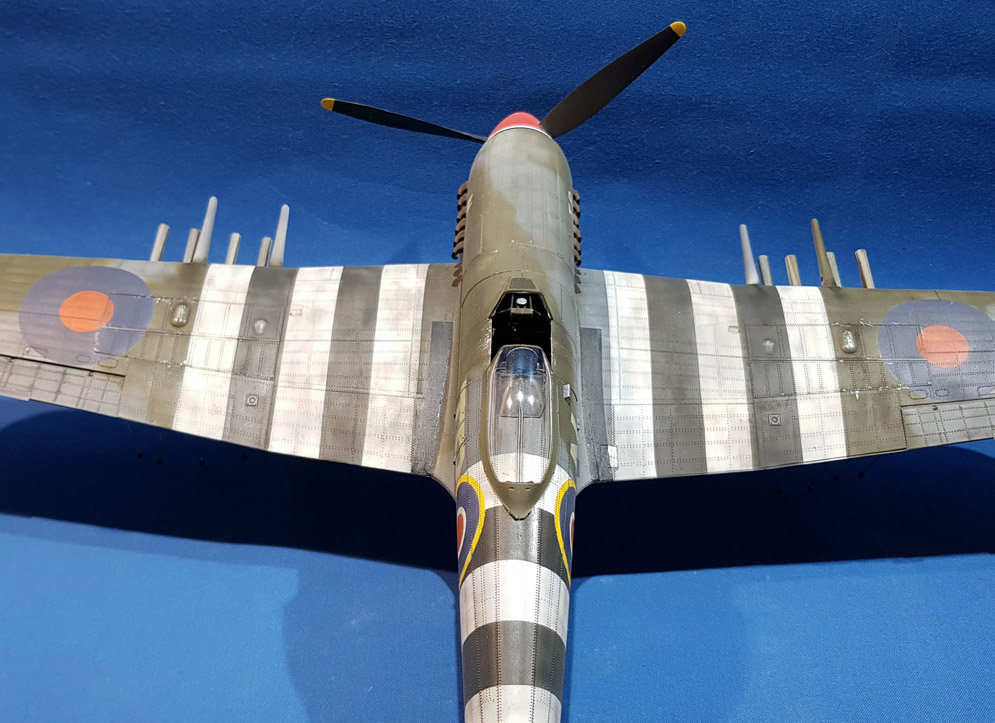
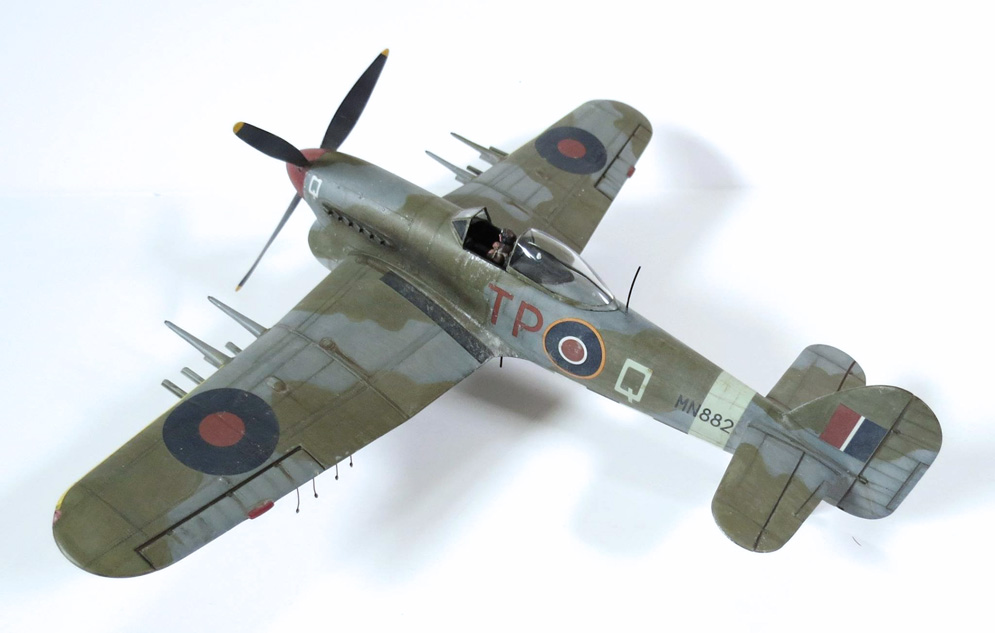
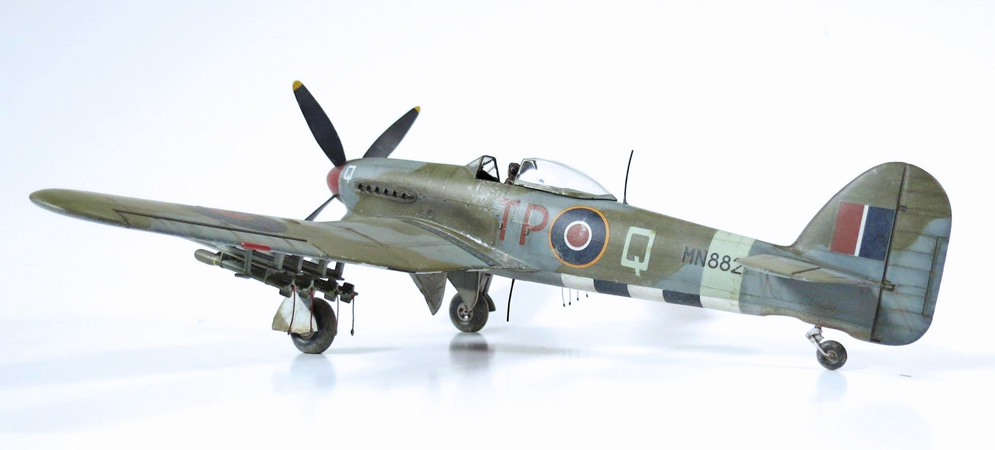
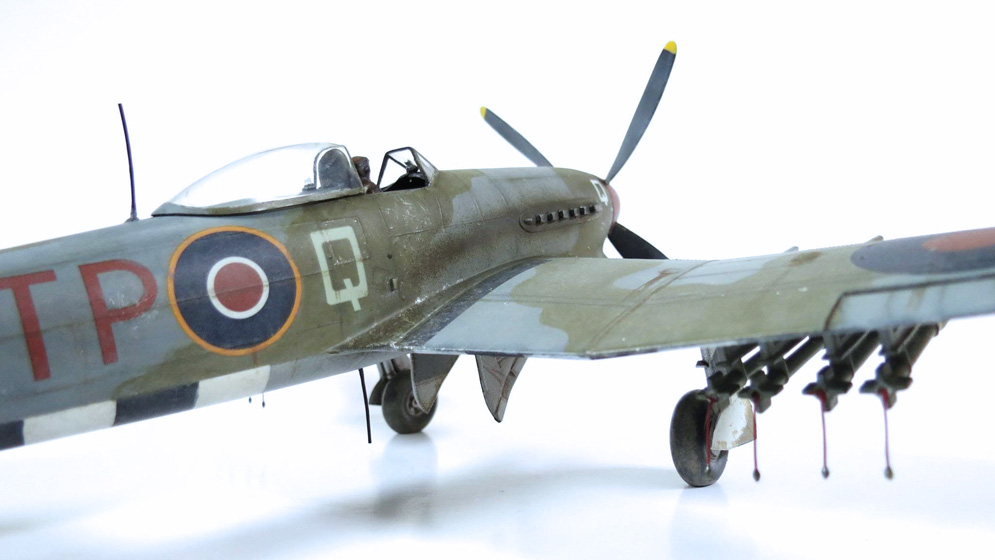
I used as reference a very beat up aircraft pictured in Normandy. In fact it was much more “used” than the one depicted here. I love the Typhoon – a short life but an extremely effective one!
The MDC kit as I recall had a slightly twisted fuselage and had to be heated to straighten it out. It was pretty ruggedly built and I think the kit reflects this in that there is not much superfluous detail. Even so it was not exactly a quickie as parts had to be cleaned and carefully lined up before cementing. I used a Revell canopy – it was just more convincing than the MDC one.
I mostly used armour techniques for this project in the painting. No pre shading though. I put a clean coat of each colour then broke it down with oil washes and specific weathering (leading edges of wings for example). It was more like painting a canvas with a lot of blending of colour.


Jim H.


This is the 1st of two models I built depicting aircraft flown by Howard Morely (2nd from left, standing in the photo).
This is the airfix 1:24 Hawker Typhoon Mk.1b. For this kit I didn’t use any decals but made my own masks instead. It was painted with Tamiya paints and weathered with oils.
Hope you all like it!
Daniel B.

Airfix 1:24 Hawker Typhoon Mk.1b
This was built as my 1 year in model making skills test. I absolutely love this kit and could happily build another 10.
The main paints used were Tamiya. Built out of the box with some modification to the wing and cockpit wall to show some of the internal structure.
Hope you like it!
Daniel B.
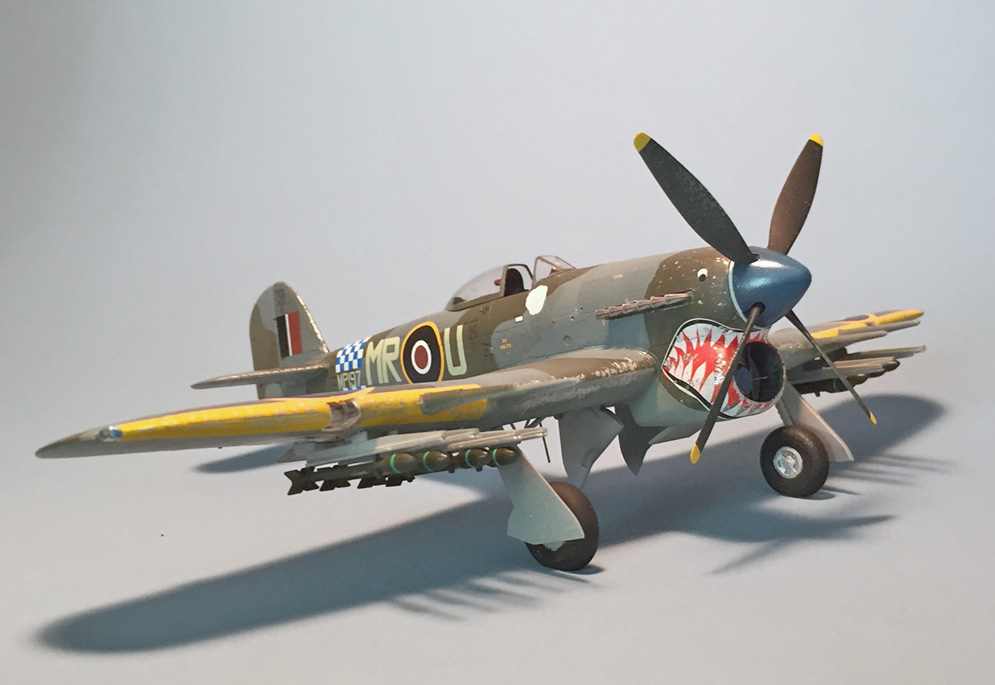
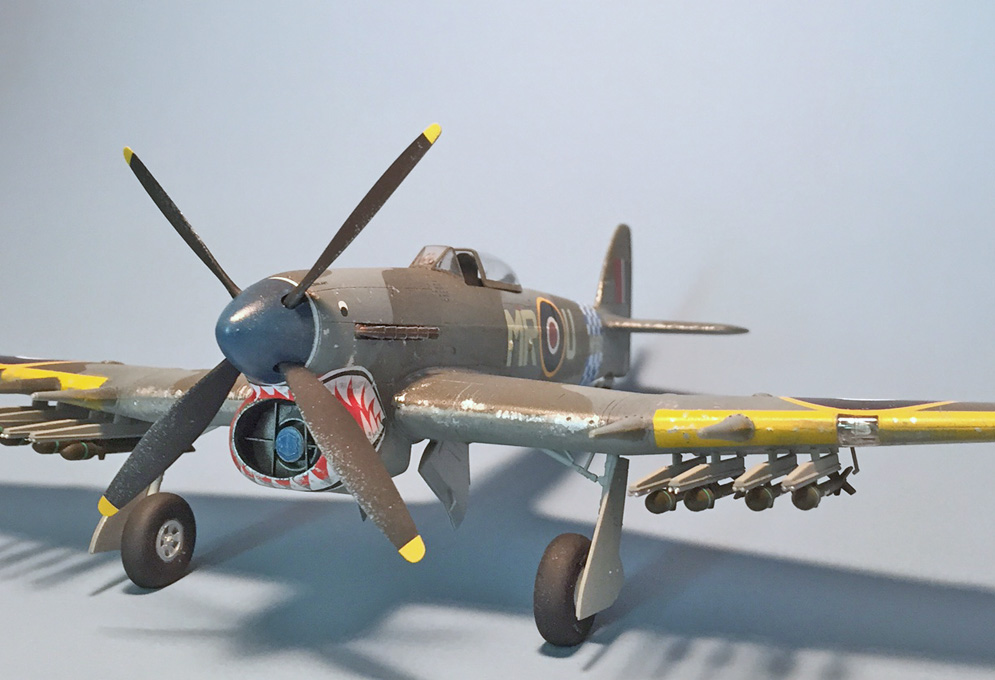
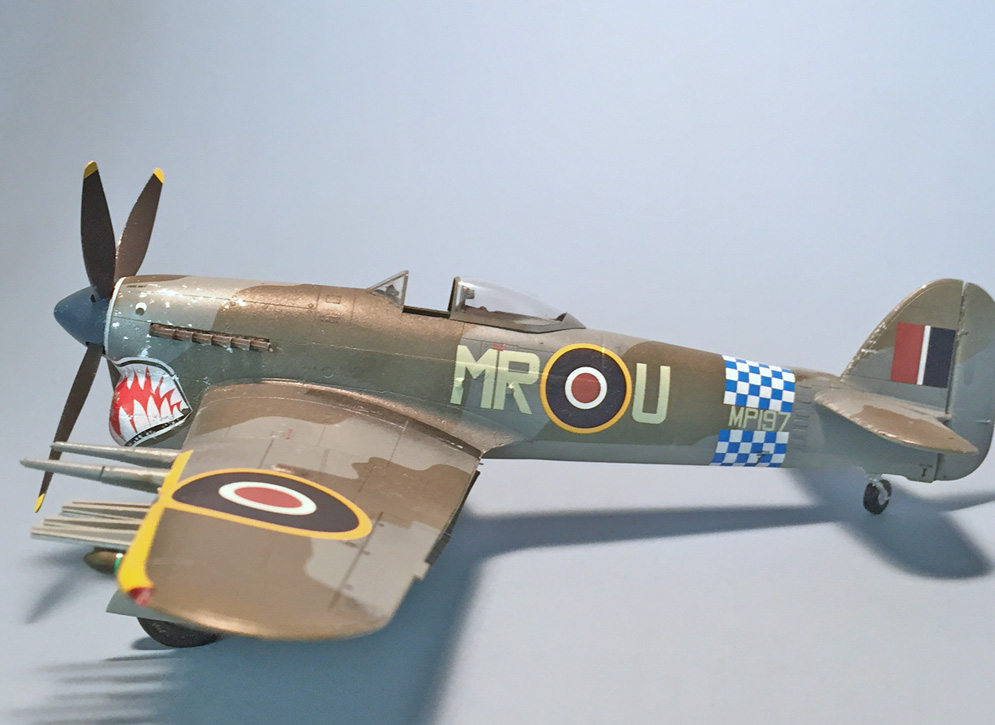
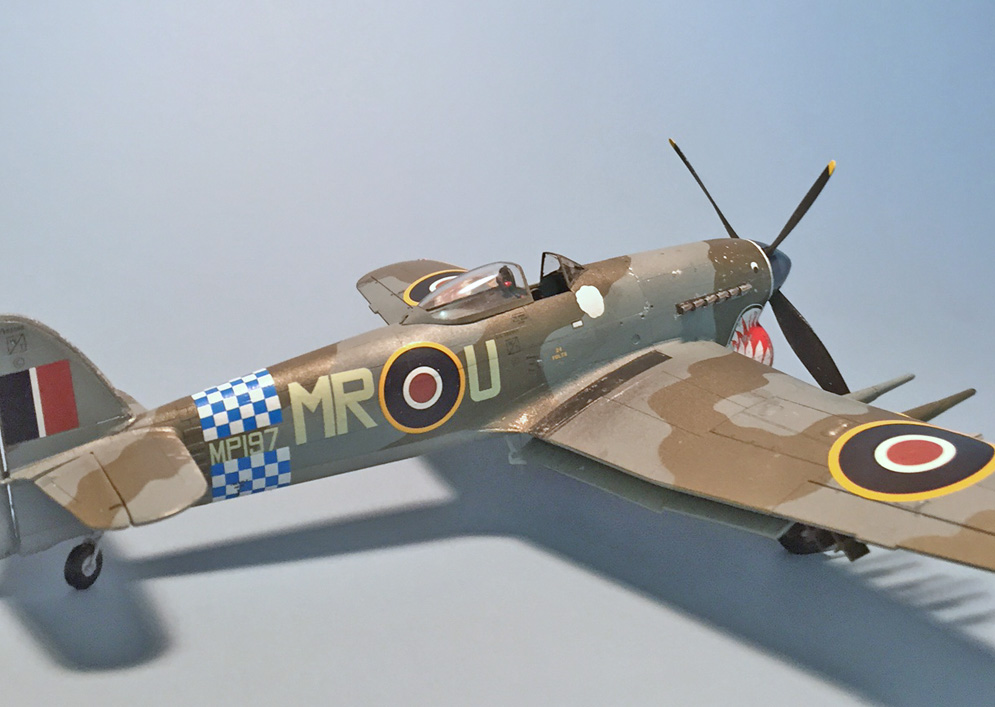

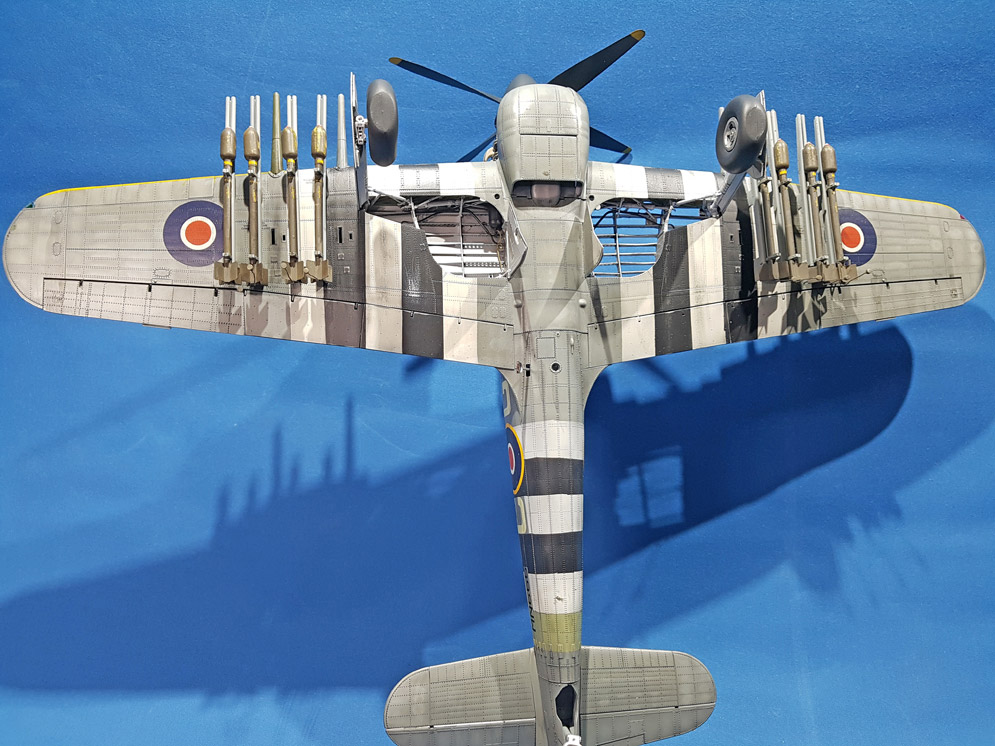
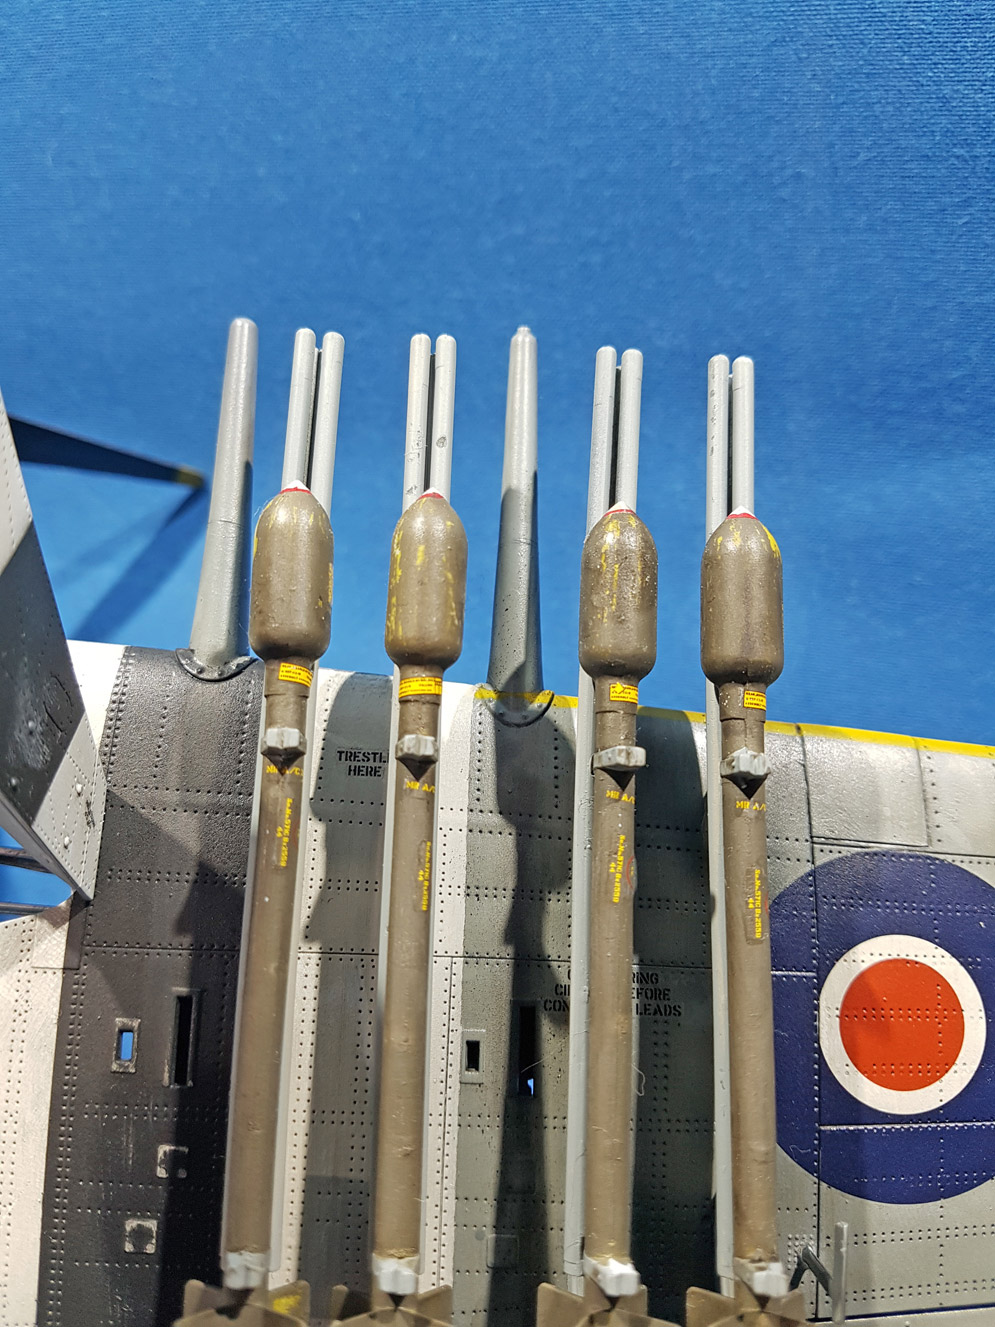
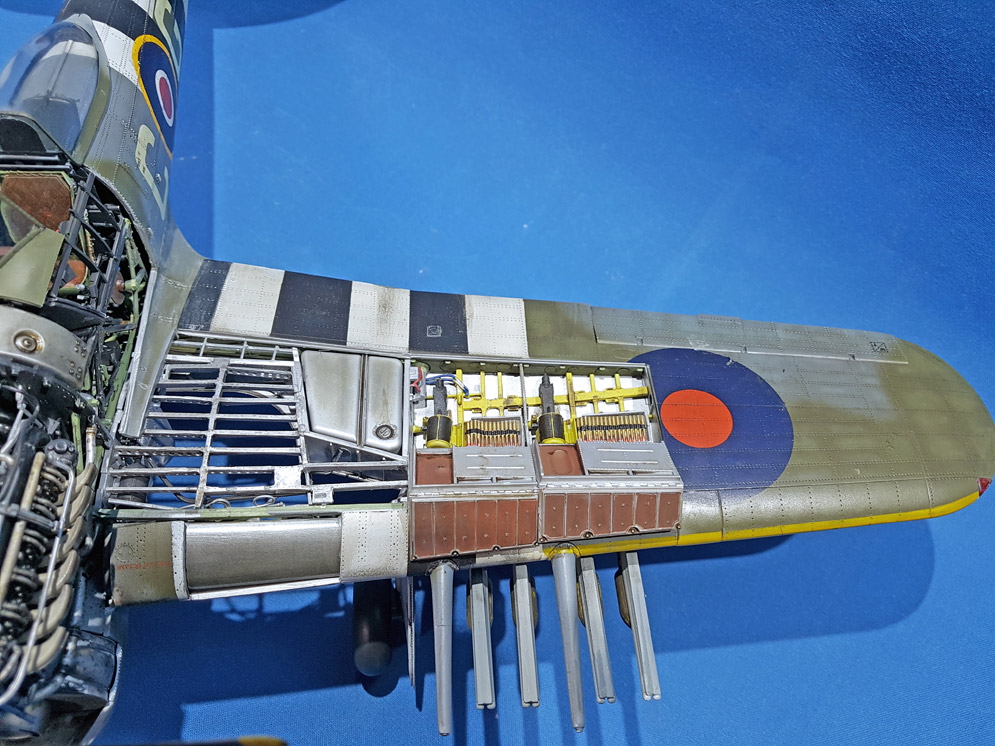
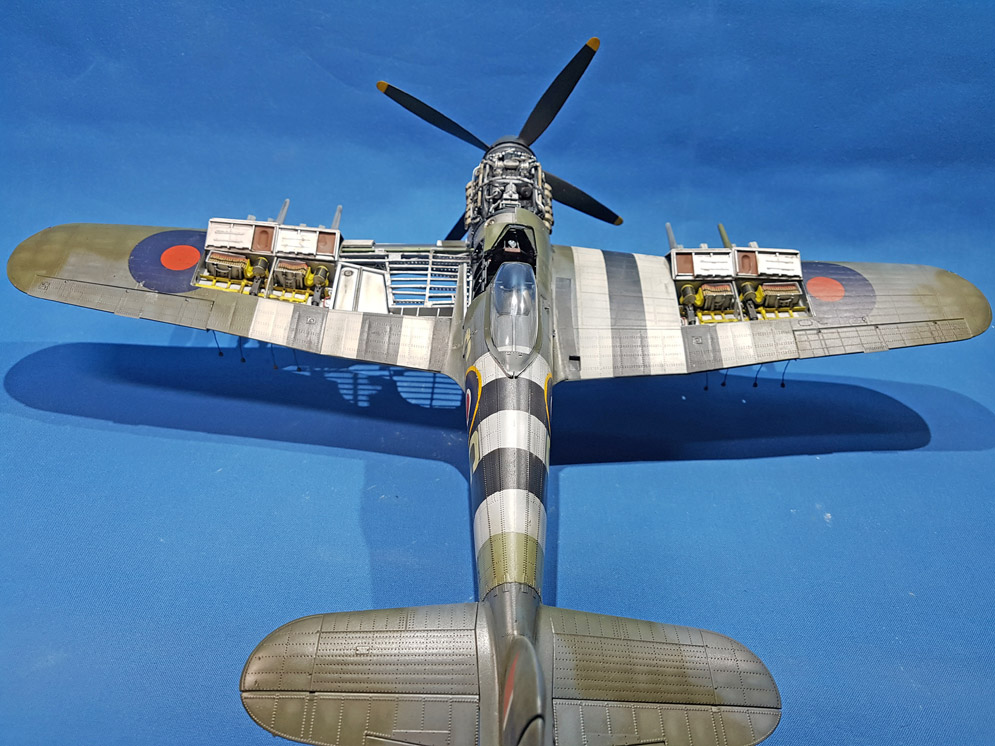
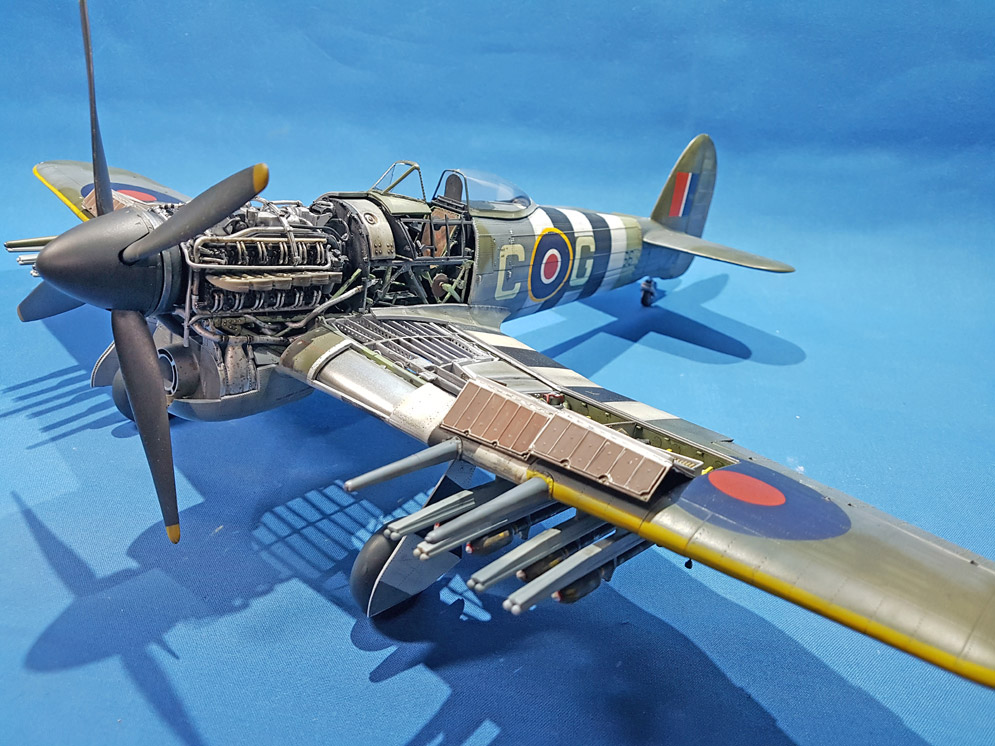
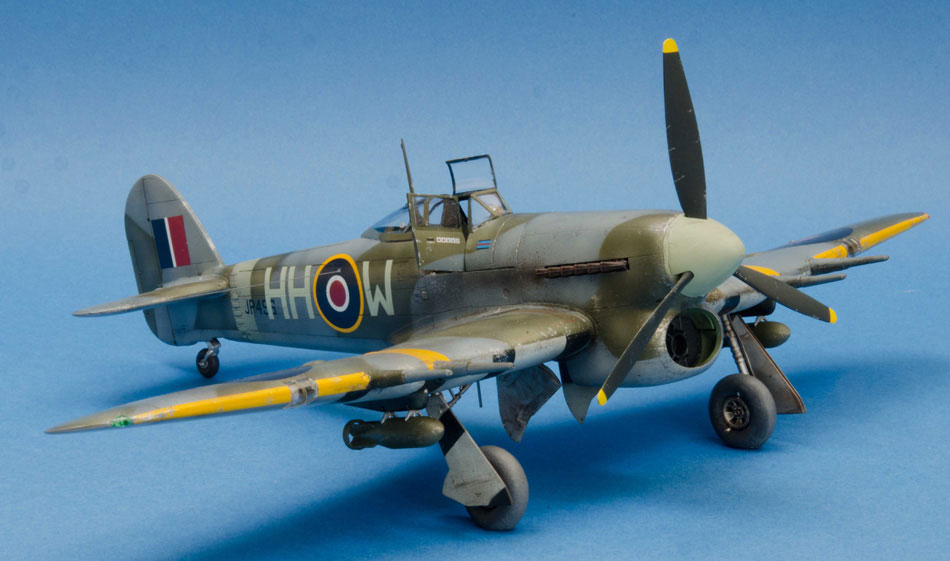
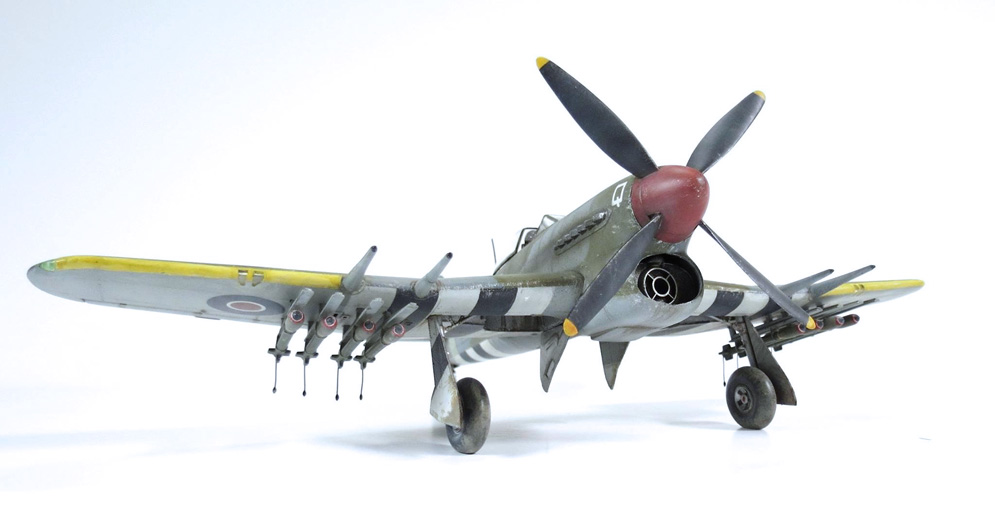
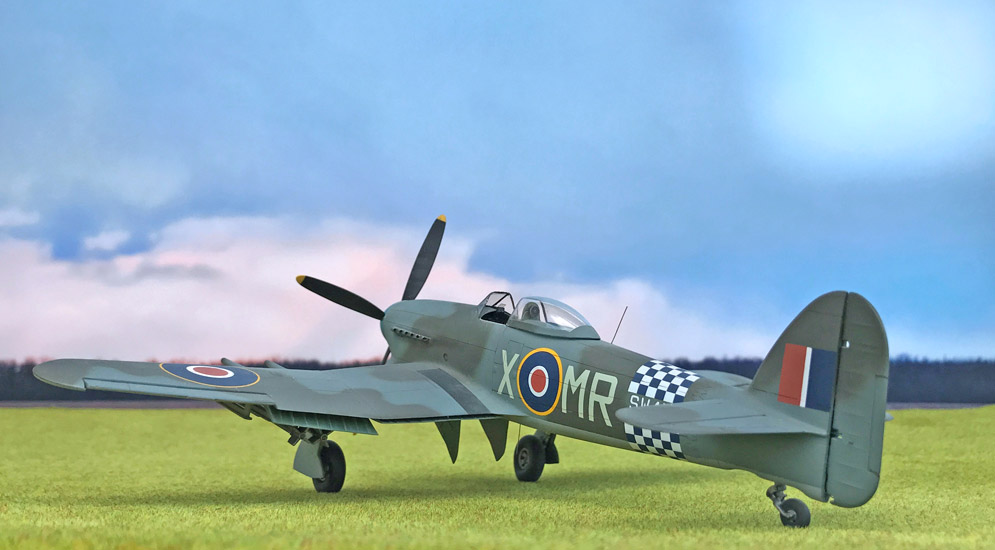
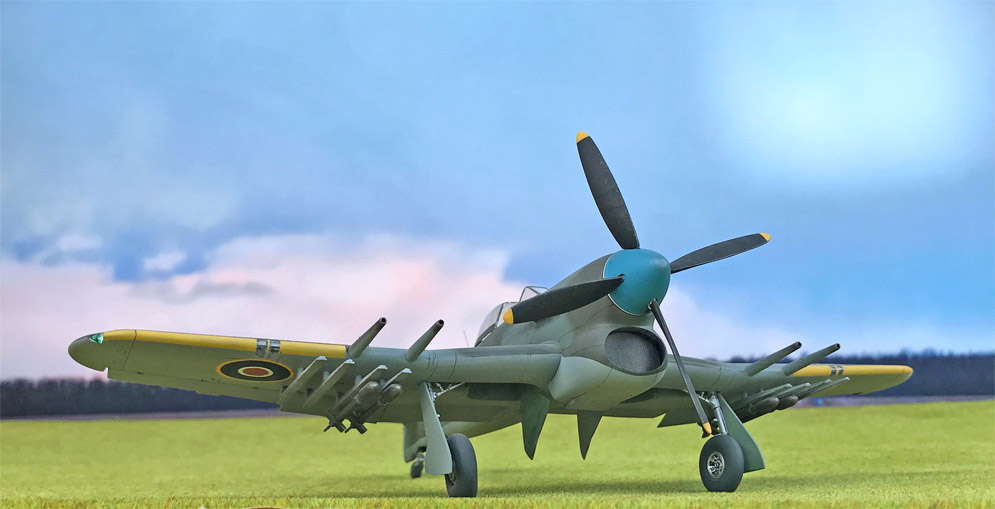
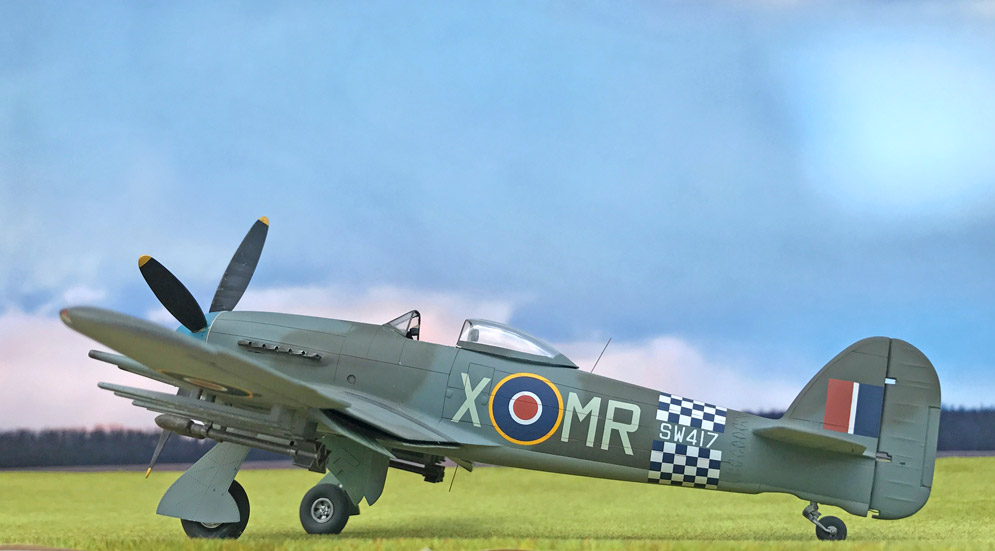
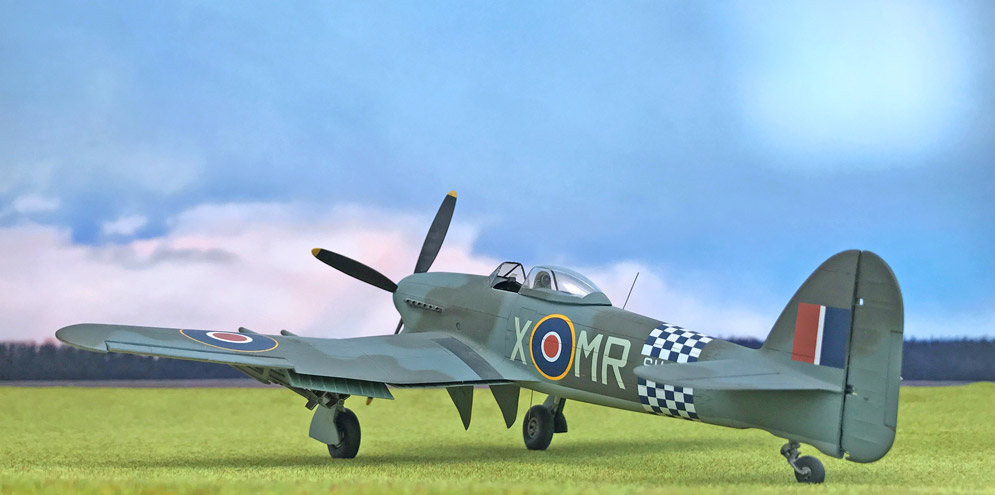
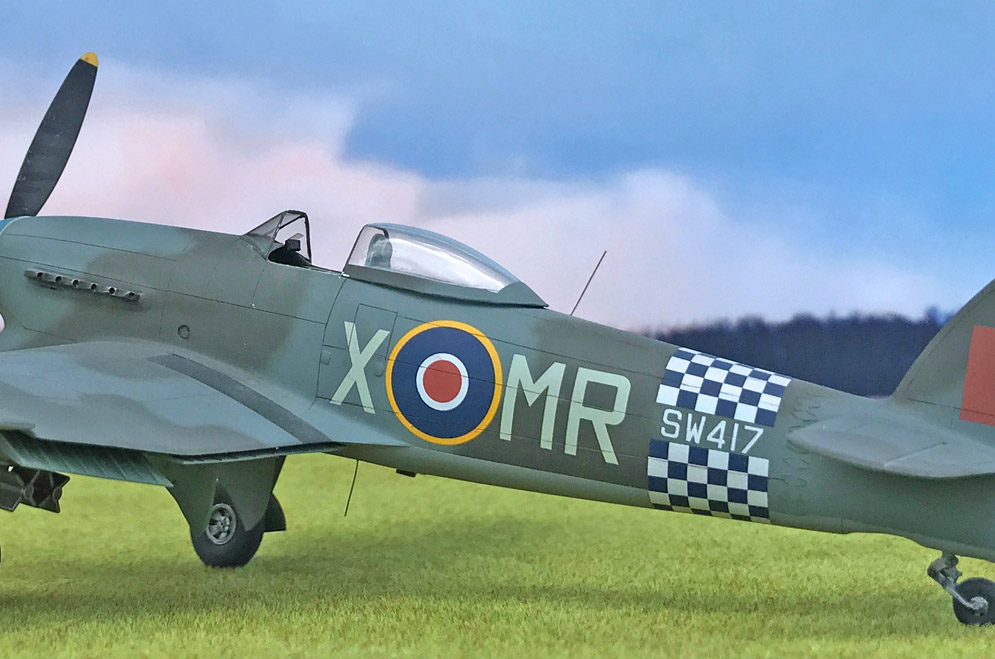
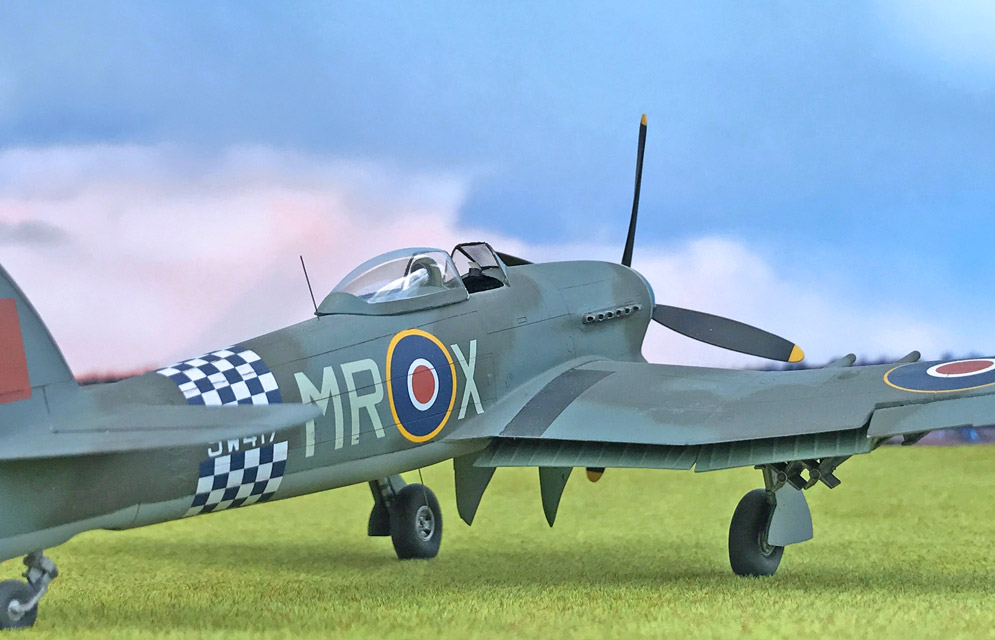
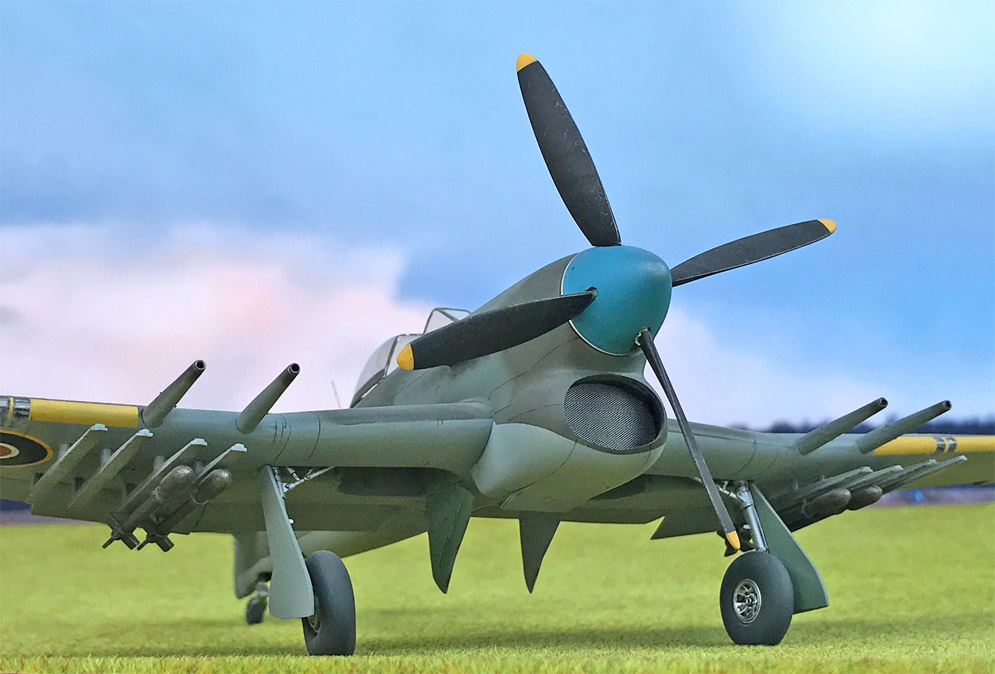
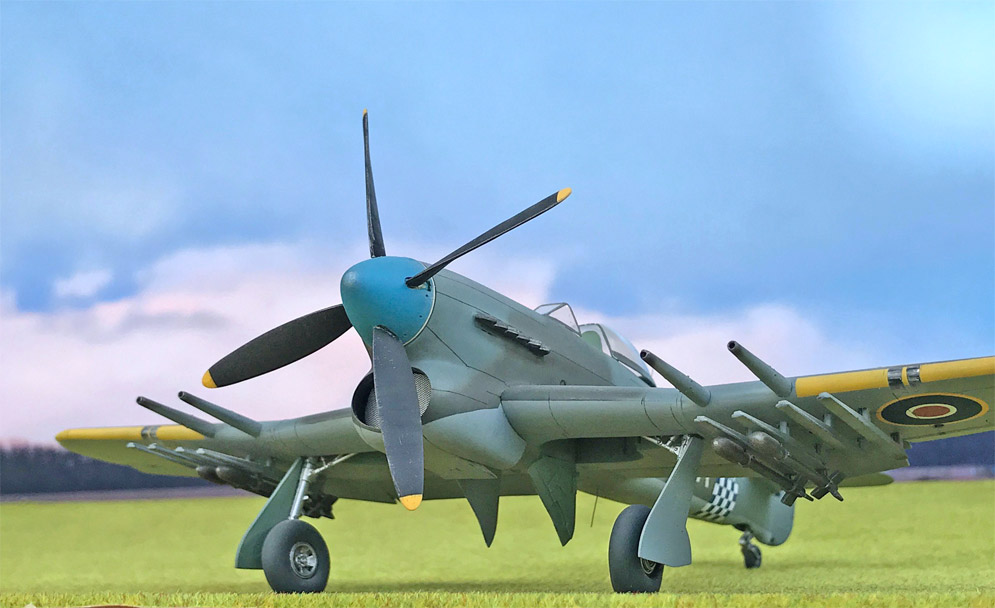
I continue to be fascinated by the WWII Tactical Air Support story and read books on the subject. I decided to build the complementary and important British aircraft in this story, the Hawker Typhoon.
This is my third model, it is the 1:48 Italeri Hawker Typhoon. I saw a picture of the aircraft “Sharky” so decided upon on that as the subject. I cut off many of the control surfaces and used these great resin pieces located in open and moved positions. I also tried Alclad2 natural metal finish prior to applying the camouflage pattern over the salt crystals. These planes did hard low level duty and took significant debris hits on all the leading edges and surfaces, so consequently Sharky is pretty chipped up.
Hope you all like her?
Stephen A.
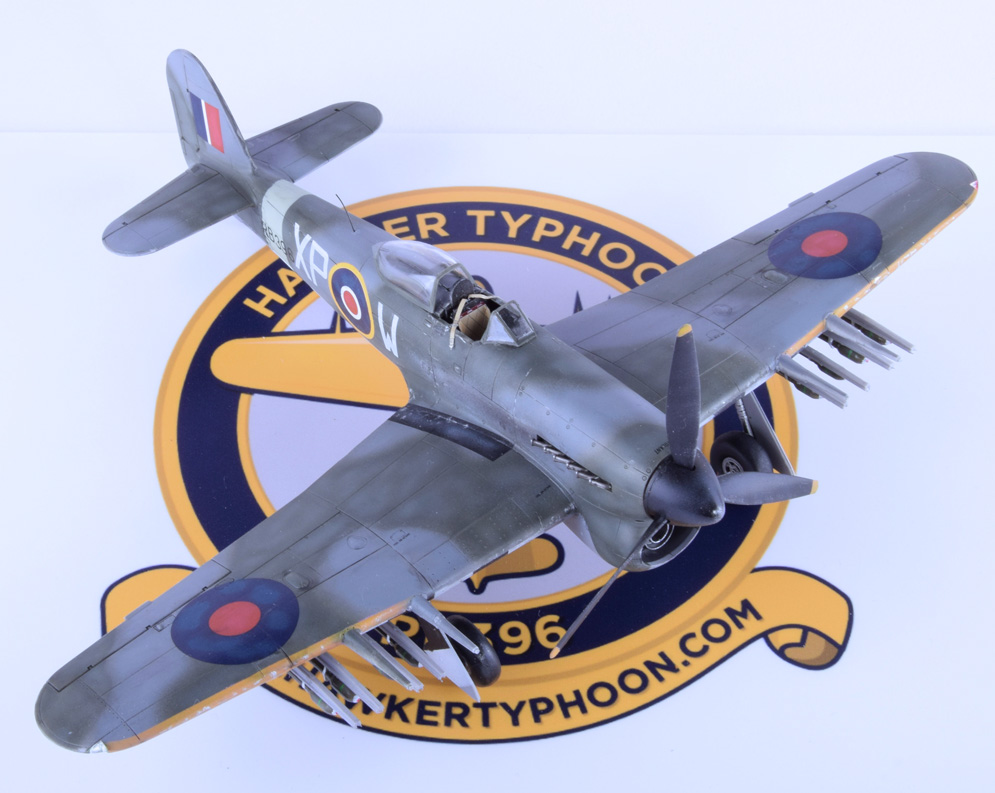
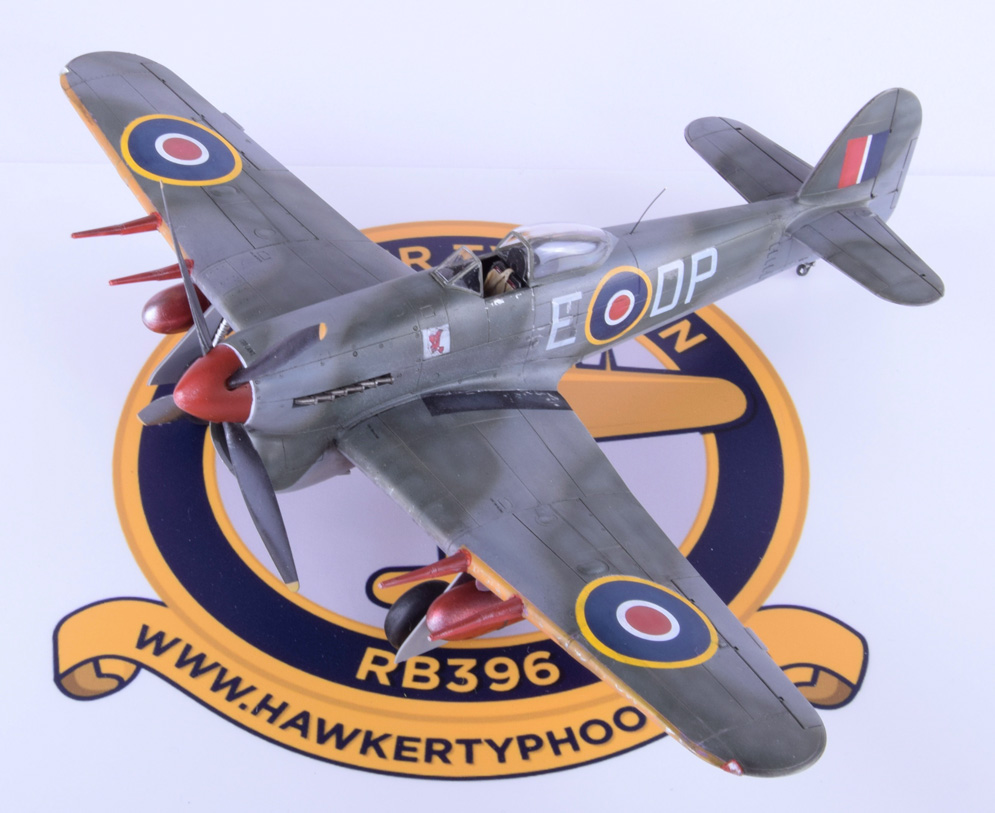
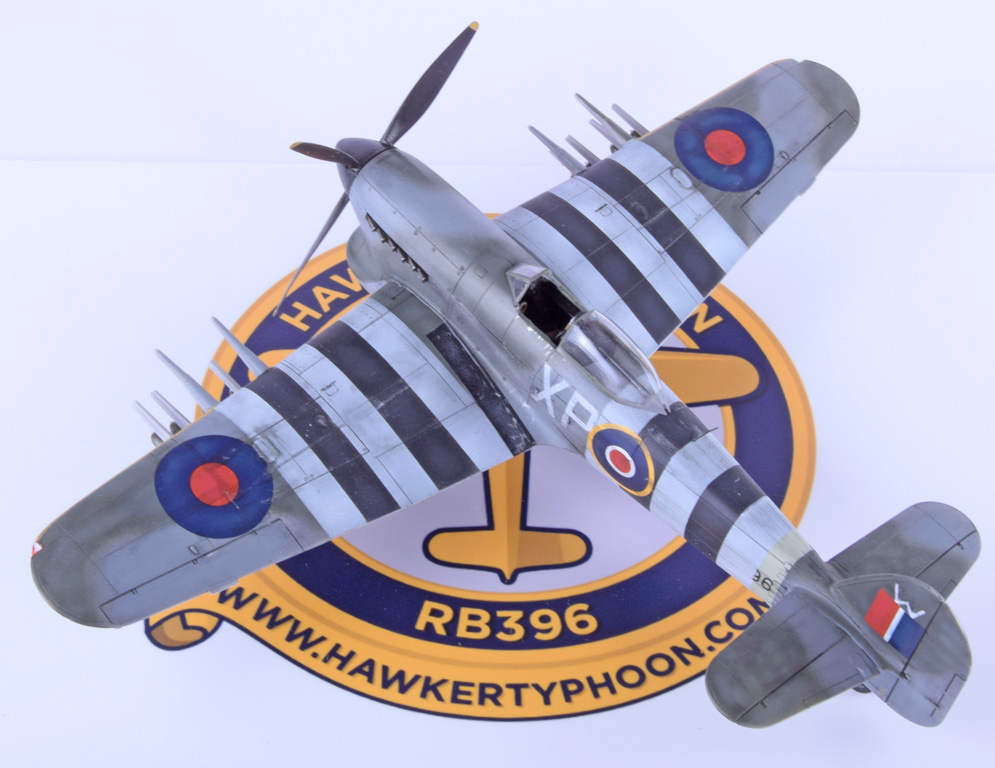
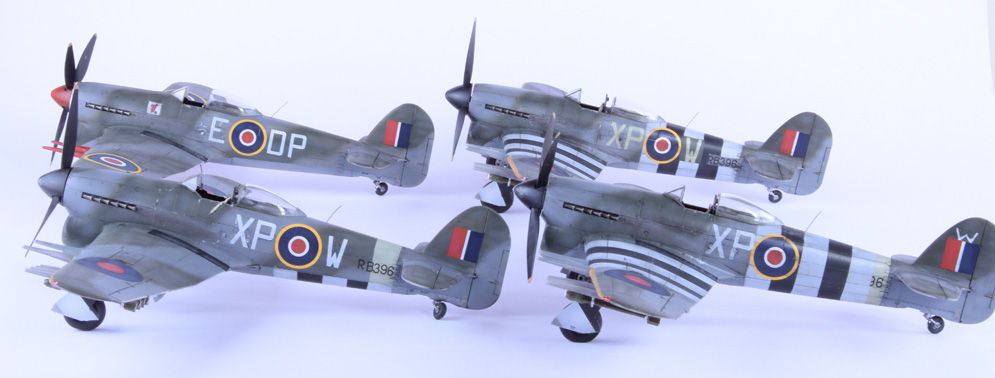
…for the Hawker Typhoon Project
1:48 scale
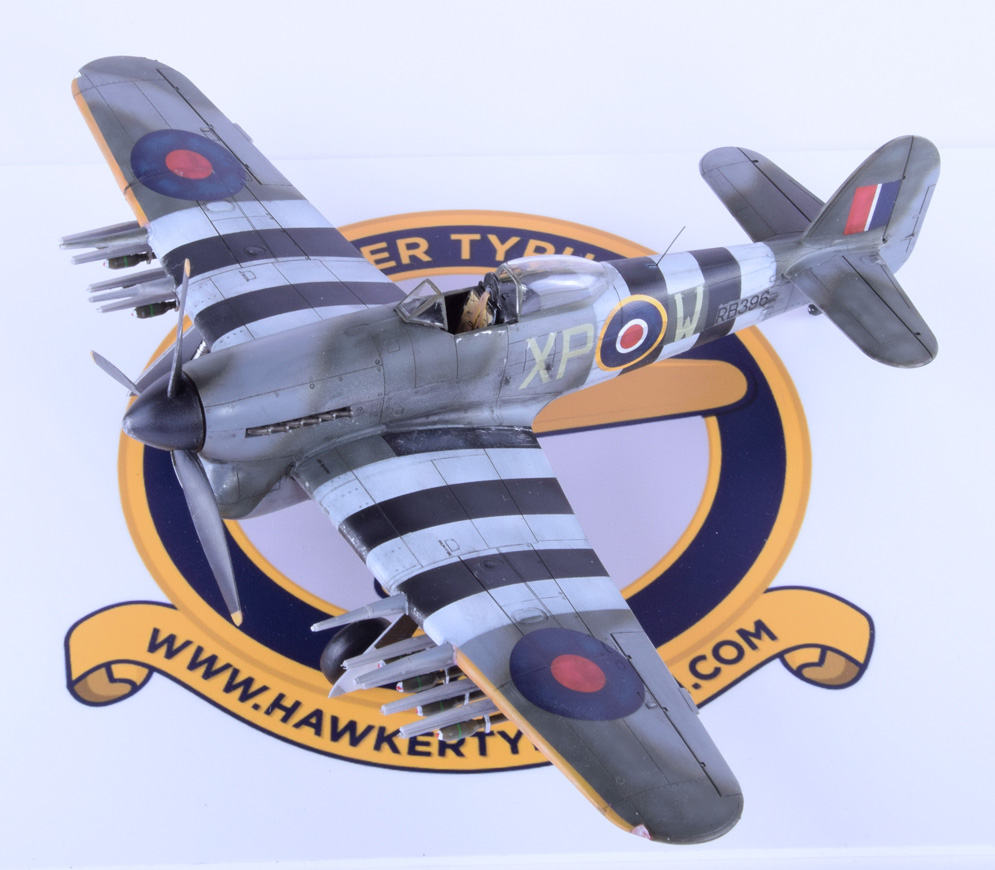
I am lucky to be the official modeller for this important and amazing project (thee charity is currently restoring the world’s only genuine Hawker Typhoon MkIb to flight) as a result I am asked to build scale models for customers and supporters of the project, where all the monies go to the charity.
This quadruple build shows how versatile the Italeri kit is to be able to produce different markings of the and aircraft. Extras include the Yahu cockpit instrument panel and or crafted Eduard PE seat belts. Markings are done using Xtradecal decal generic WWII sheets.
Painting is with UP light grey primer and Vallejo air paints. lol and or crafted are pre and post shaded and weathered with washes and pigments.
Three of the aircraft represent the actual airframe being restored in various markings. Whilst the fourth one is of the test aircraft who trialled Napalm bombs at the back end of WWII.
Richard S.
1:24 Hawker Typhoon MkIb (Airfix)
This is Airfix ‘ first new tool 1:24 scale kit and it is superb, The level of detail is sublime and and the size of the kit just cried out to be opened up and need super detailed around the cockpit area. HGW harnesses were used to enhance the cockpit alongside the Yahu photo etch instrument panel.
I opened up several extra panels on the fuselage and wing and scratch built further detailing using brass rod and styrene.
Painting was completed using UP light grey primer followed by Vallejo Air colours. Pre – shading and post shading are essential as these birds were battered and bruised on a daily basis. Chipping was done using a chipping medium.
The main markings were masked as I felt that the decals on this aircraft wouldn’t do it justice.
To finish it off I custom made aircraft wouldn’t base aircraft wouldn’t end had privileged access through the Hawker Typhoon Restoration Project to have all questions signed by Typhoon pilots.
Richard S.
It does tend to get a bit forgotten by the bubble canopy version, which is a shame. The fuselage insert that Hasegawa supply to make either the car-door or the bubble top; lots of people criticise it, but I found that it fits very well with no filler needed. With some minor sanding and re-scribing, it blends into the fuselage well. Also, the Richard A Franks Typhoon book is a great modelling resource.
Andy W.

 This is my Monogram 1:48 Hawker Typhoon Mk.1b (1967 Tooling)…my latest build. This is a 50 yr old kit that has raised surface details and a minimal cockpit. But, with some TLC, scratch-built seat-belts, whip antenna, UHF antenna and rocket fuse wires, it can look reasonable :)
Hope you all like it?
Martin L.
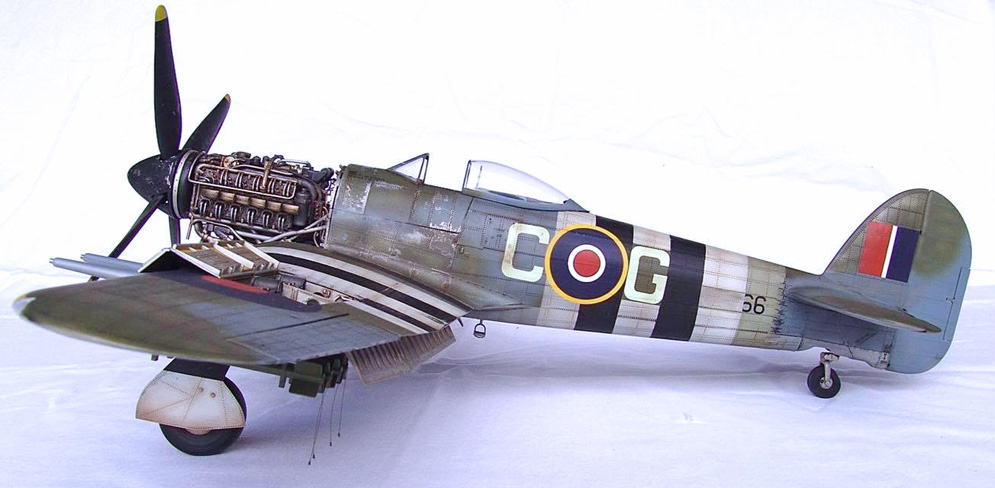

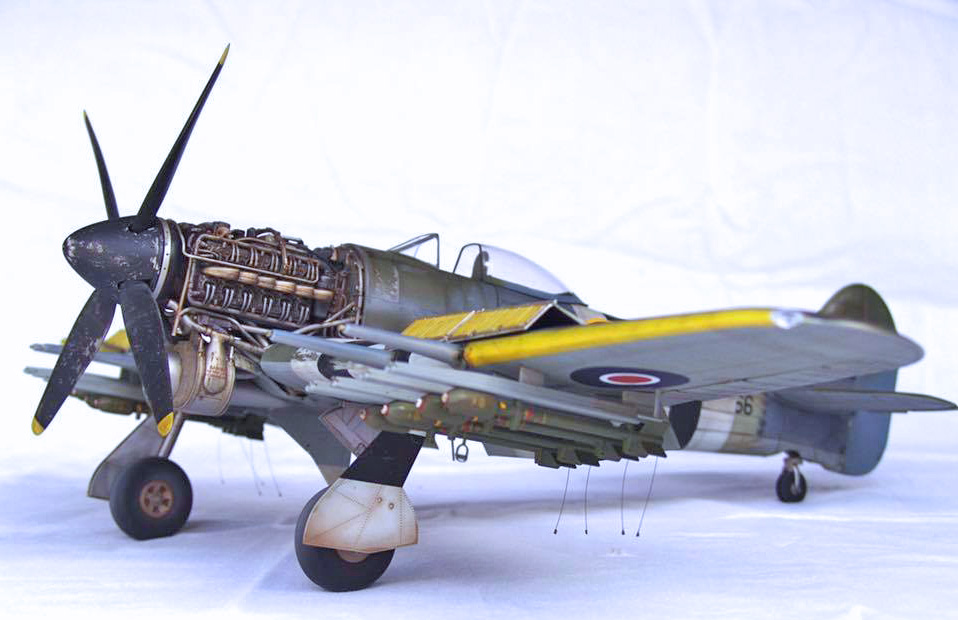
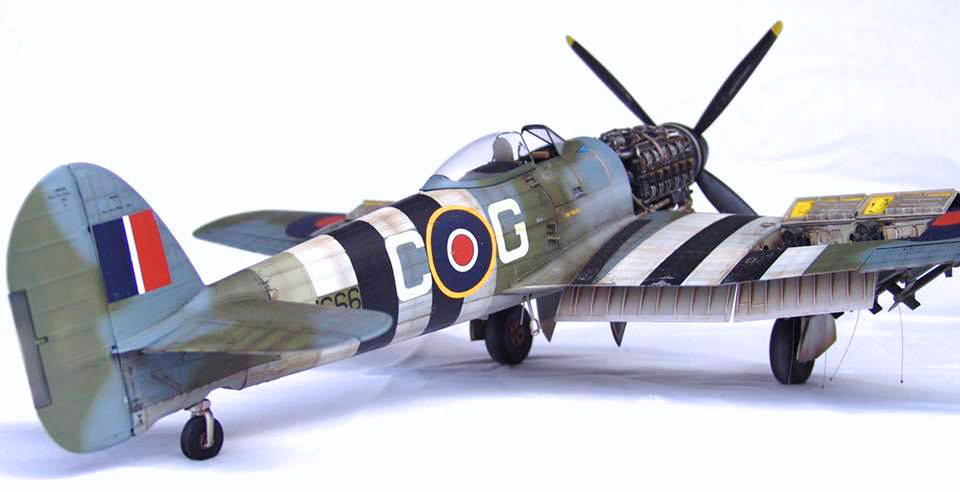
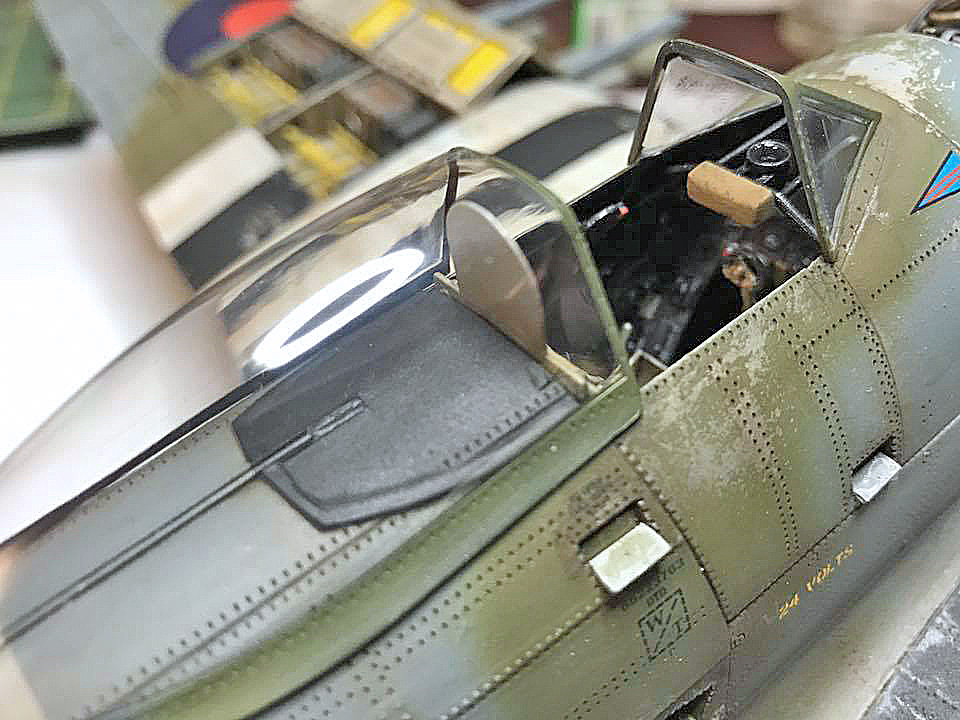
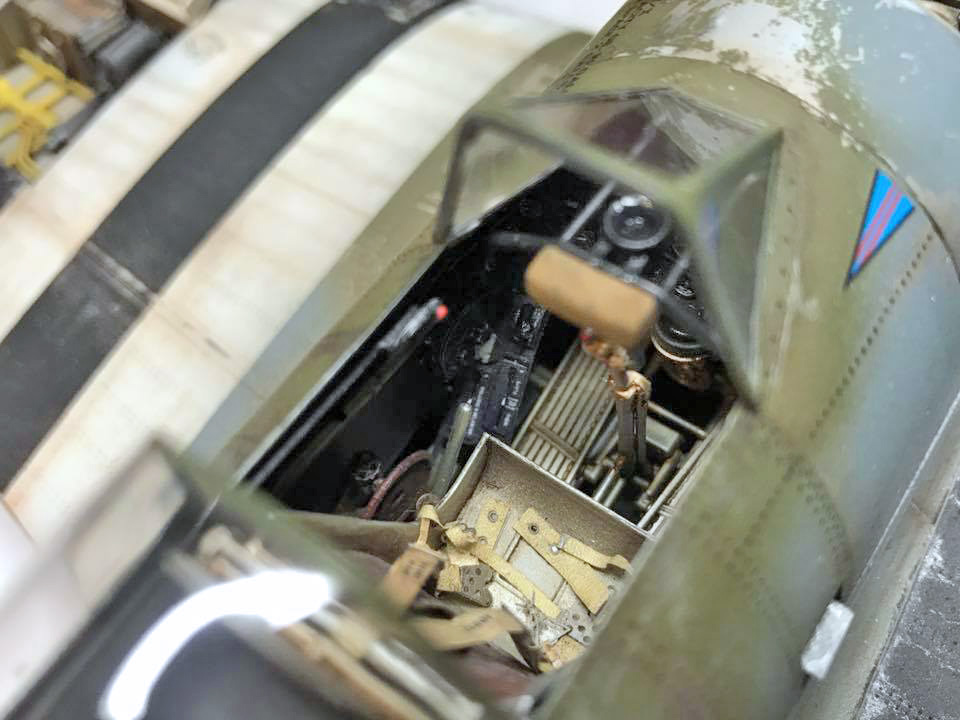
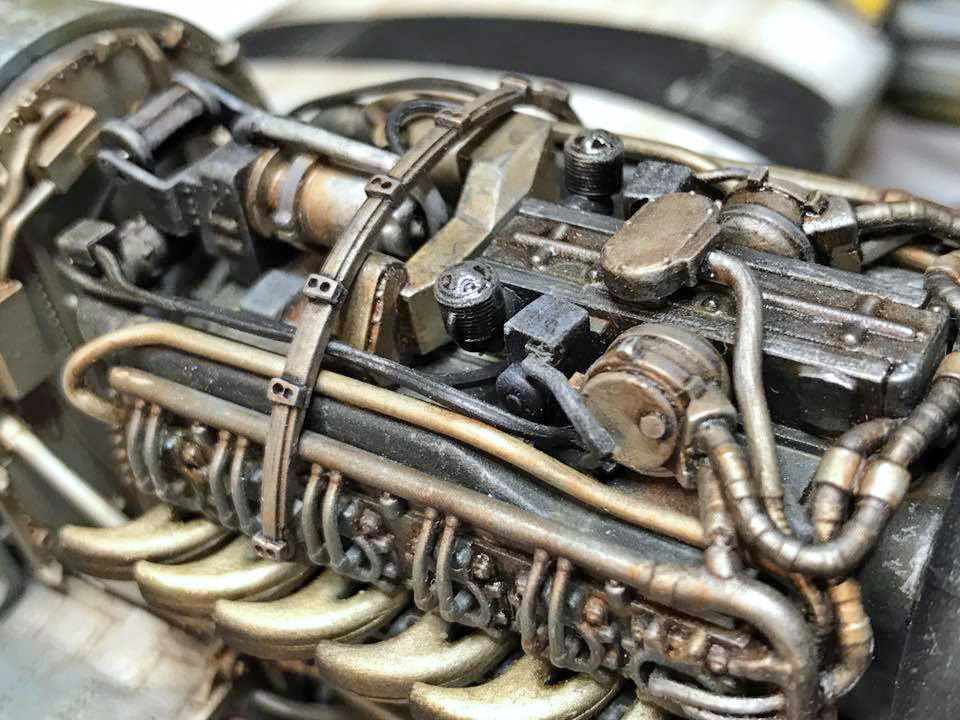
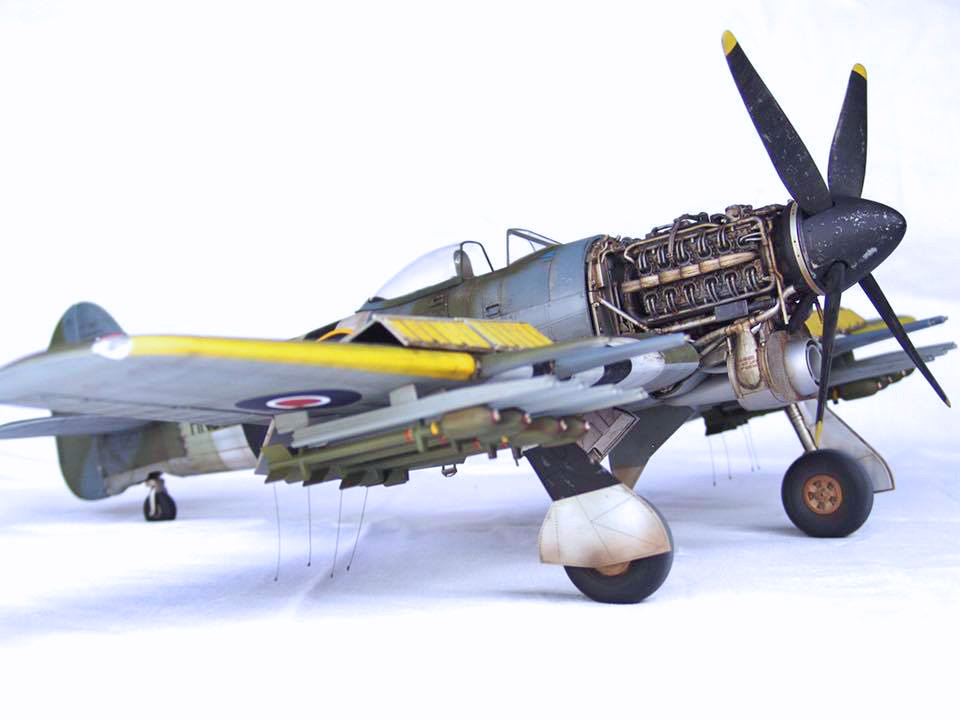
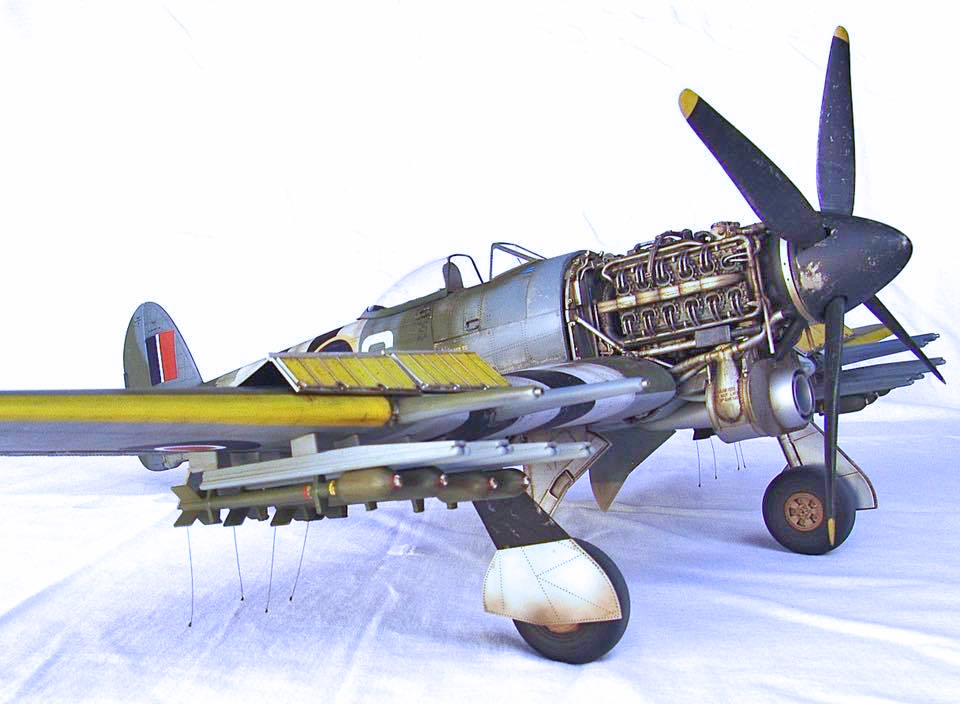
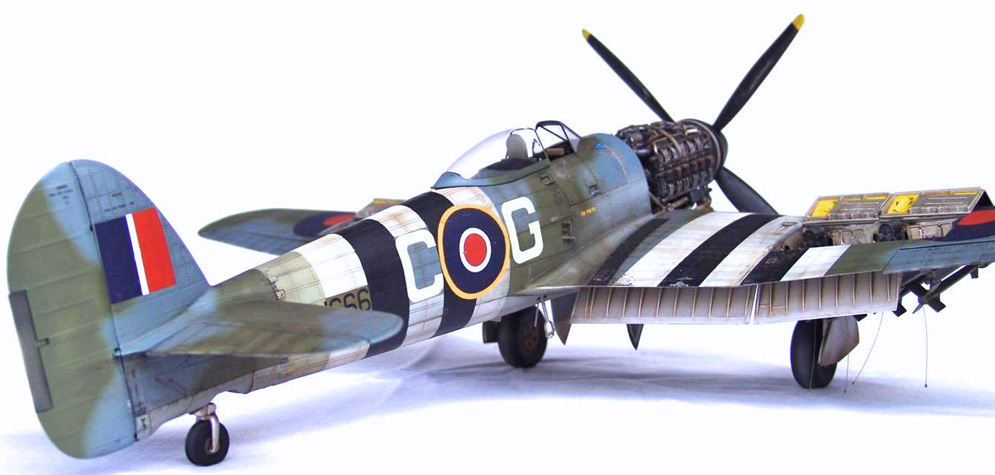
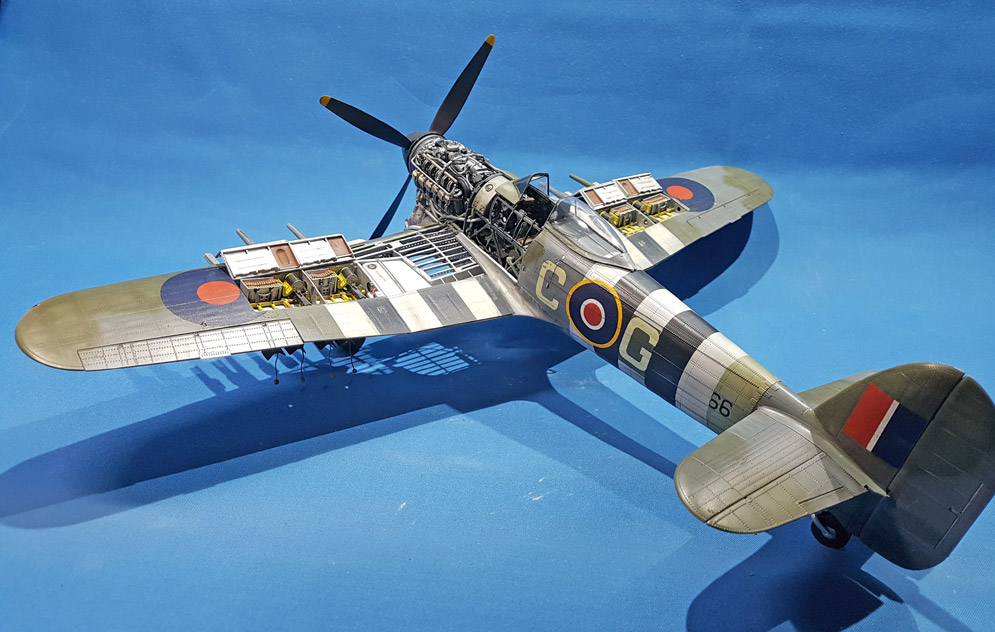
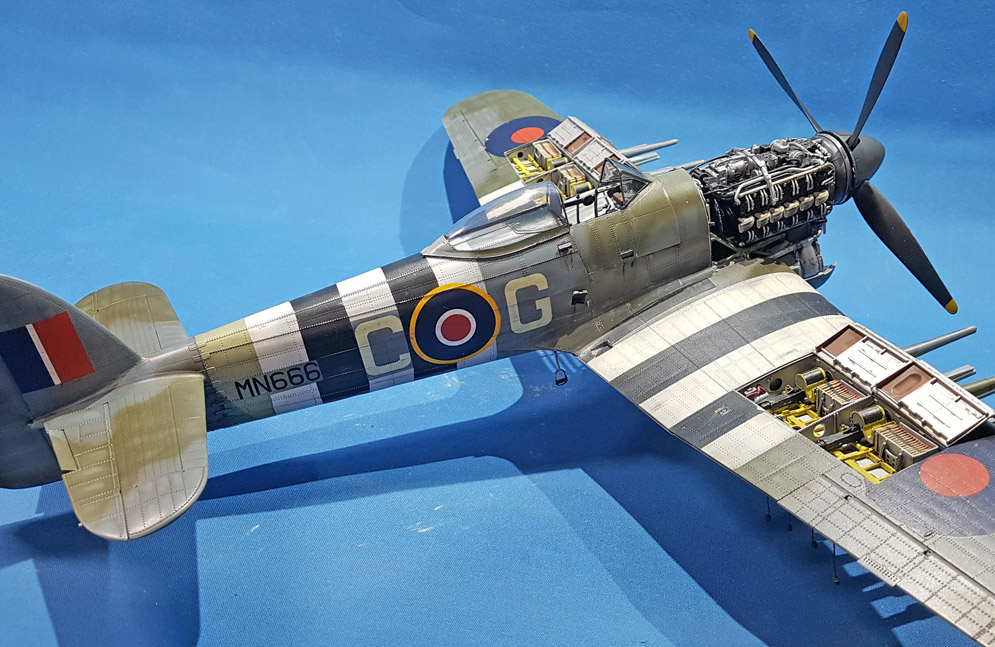
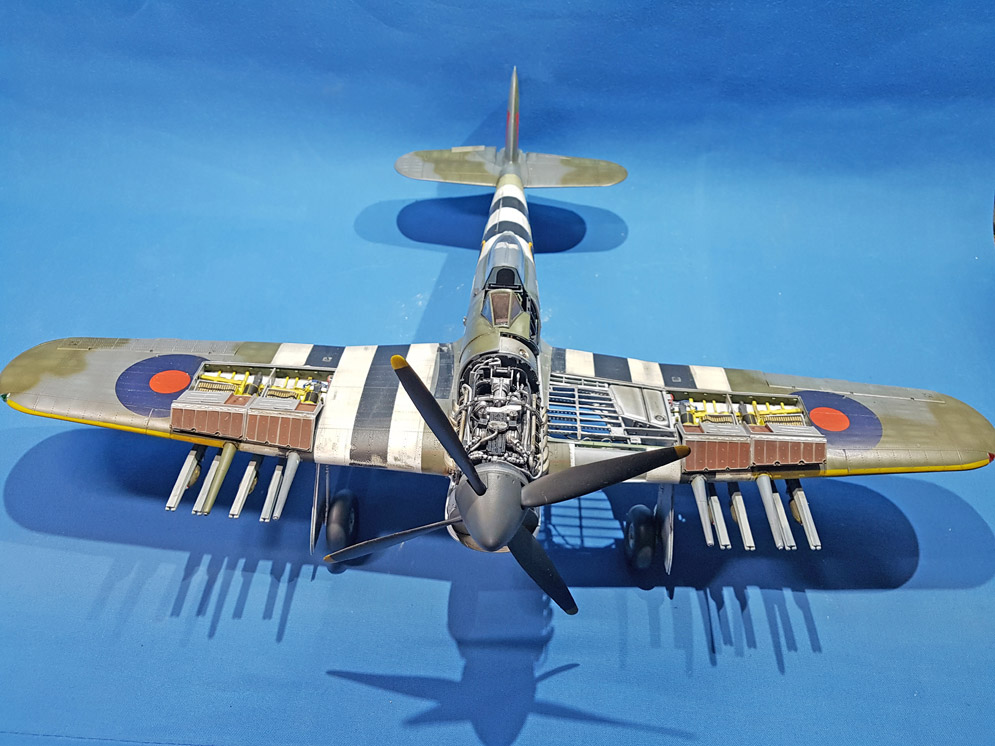
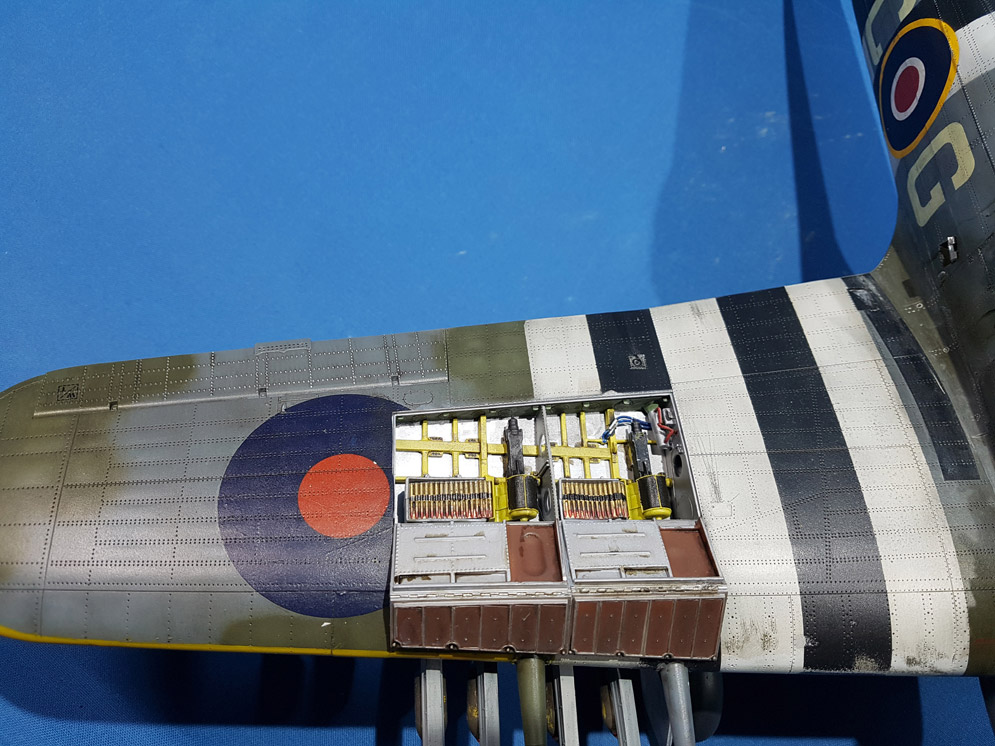
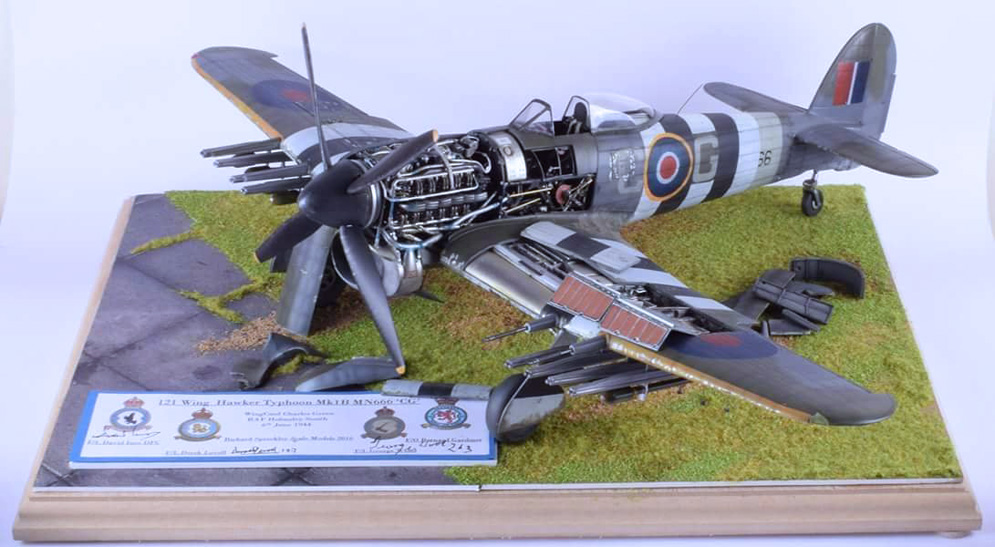
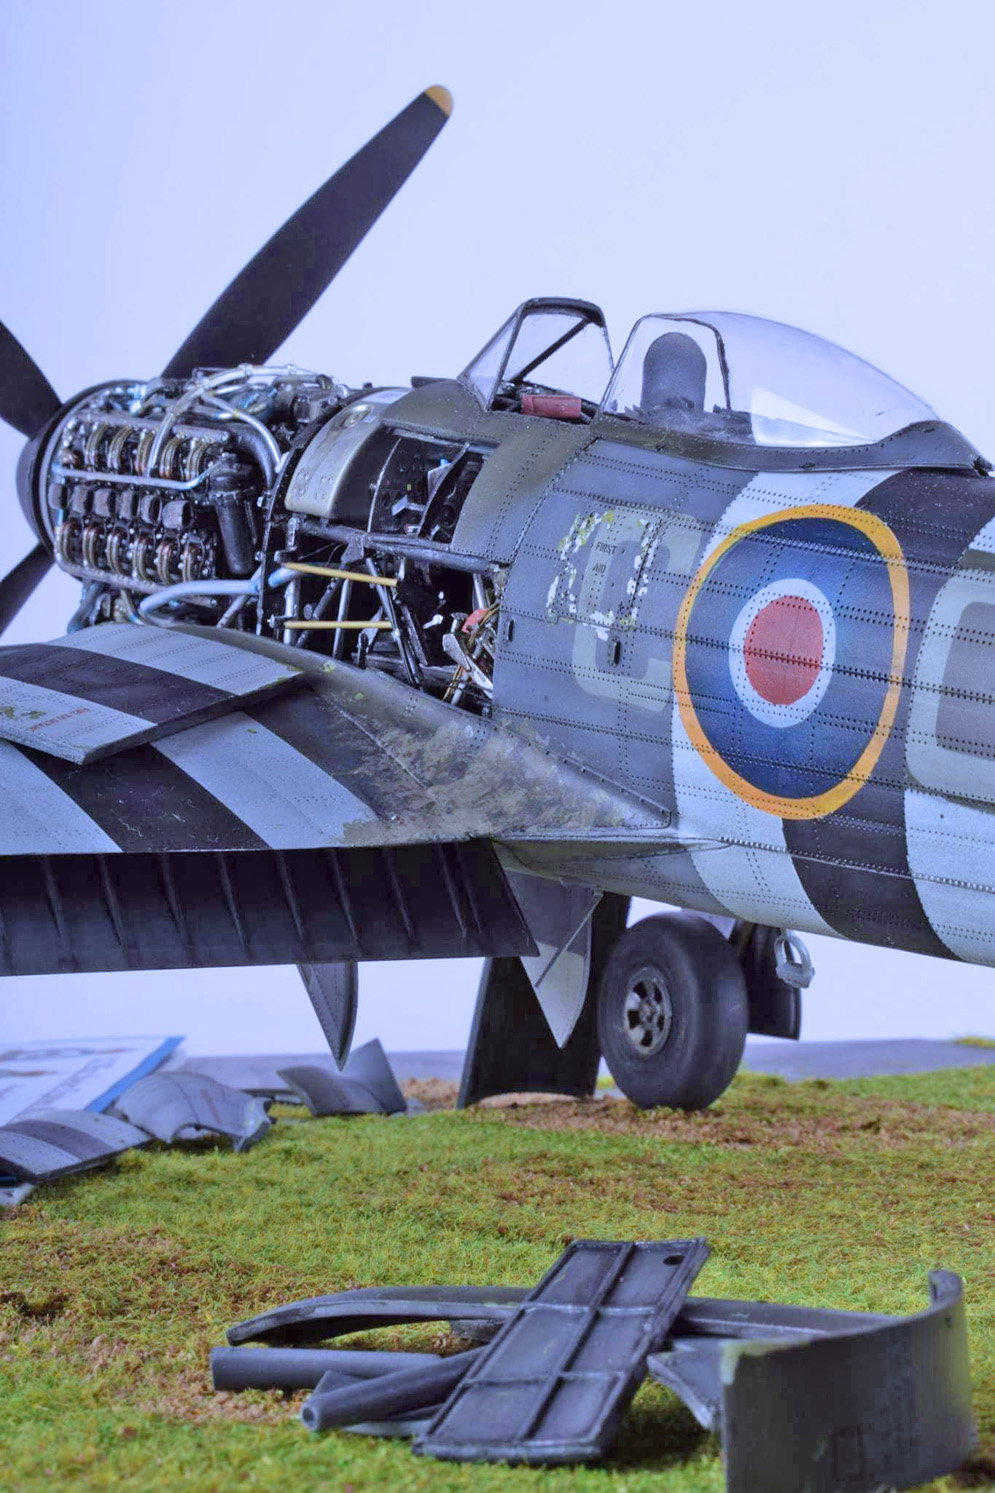
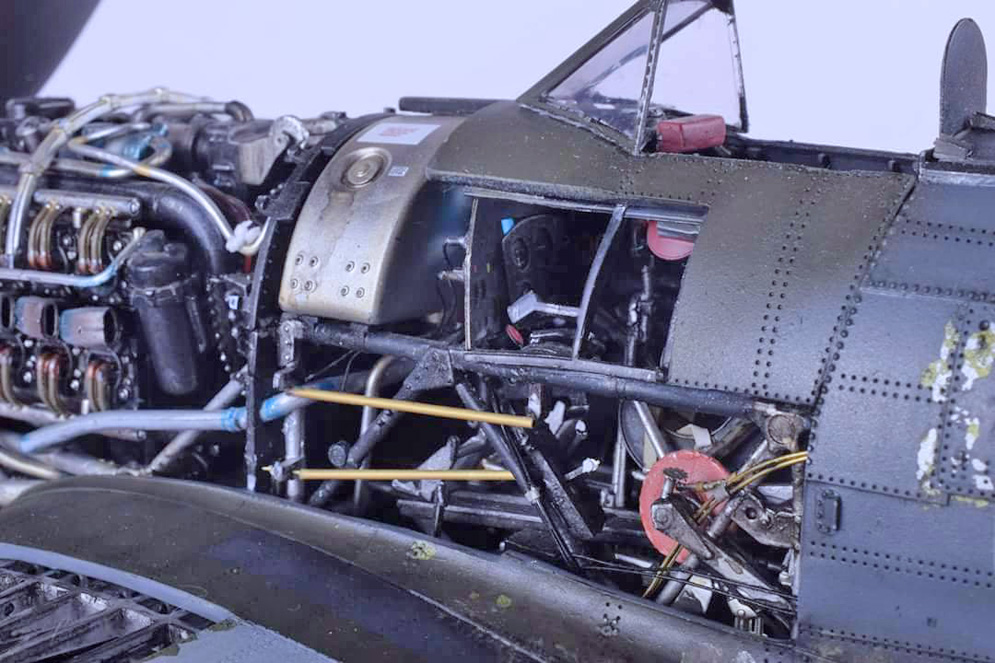
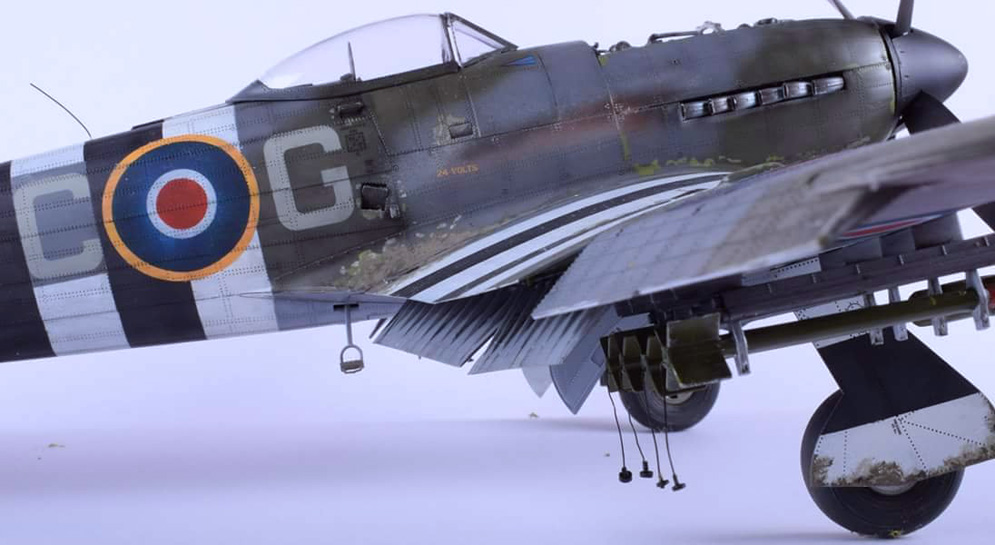
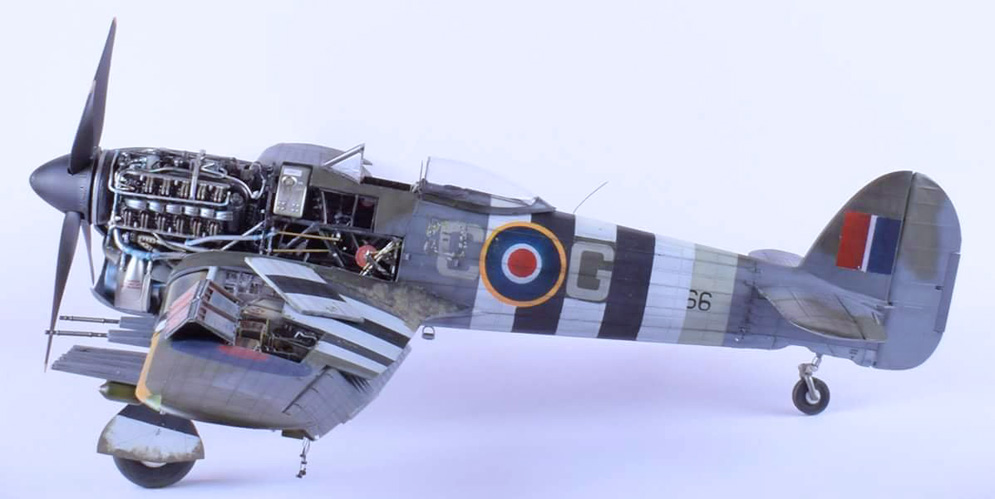
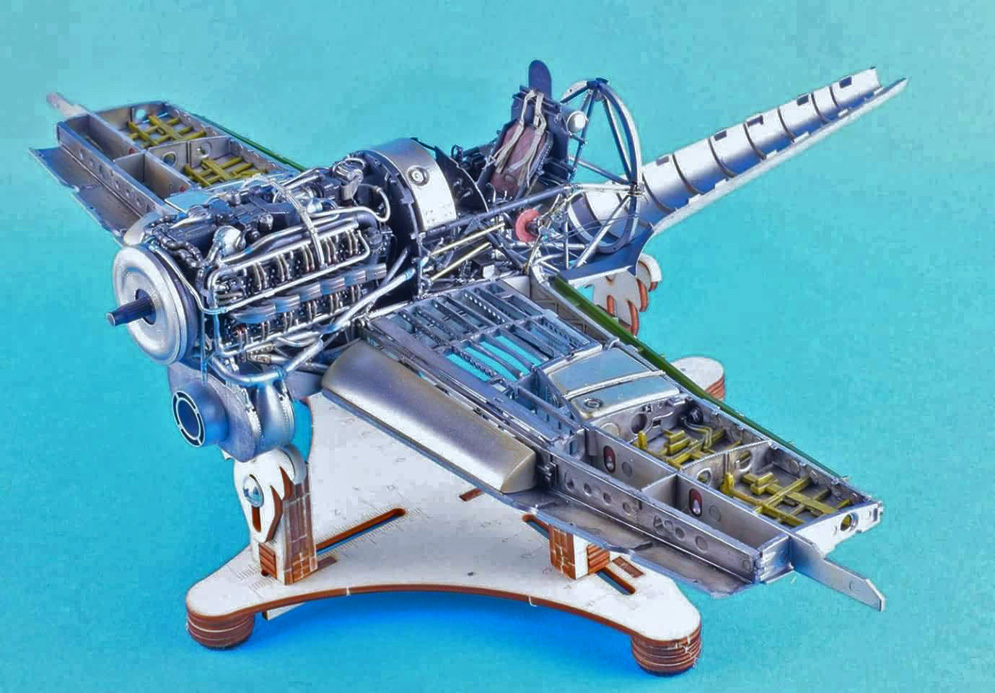
This is my Airfix 1:24 scale Hawker Typhoon MkIb.
Throughout I incorporated a comprehensive aftermarket Mk1 Design Detail set into the build as well as a set of Barracuda cast weighted resin wheels and a set of HGW Sutton Seat Harnesses.
I painted the Model using my preferred choice of trusty Tamiya Acrylics. To weather the model I used Windsor & Newton oils and highly diluted Humbrol paints of differing browns and green shades to weather the engine.
I finished the model in the Markings of MN666 piloted by Wg Cdr Charles Green.
Sean M.
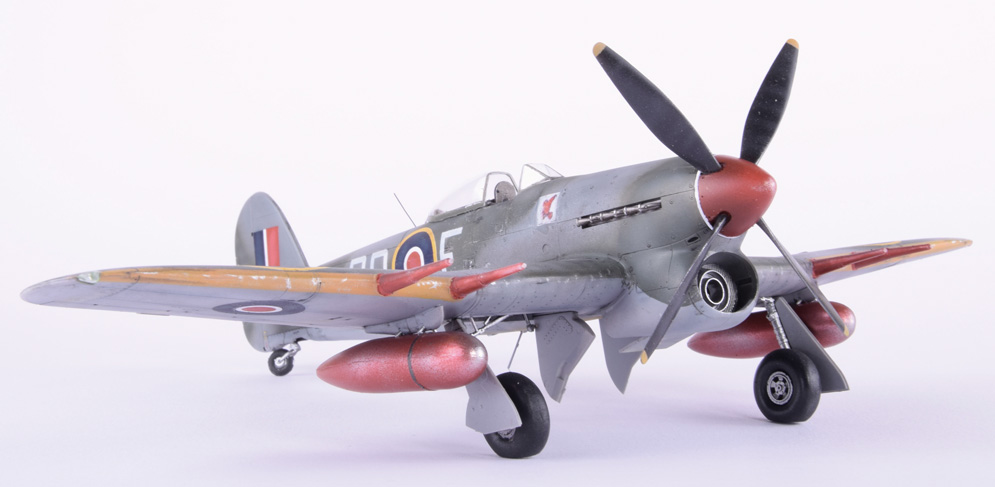
Here’s a model I finished from the old Monogram 1:48 kit, heavily modified by re-scribing panel lines, adding a resin cockpit, wheels, prop blades and correcting the tail.
I like the scheme from an aftermarket decal sheet (pretty sure it was an old Aeromaster decal sheet, sadly not now readily available).
Hope you like it?
Geoff


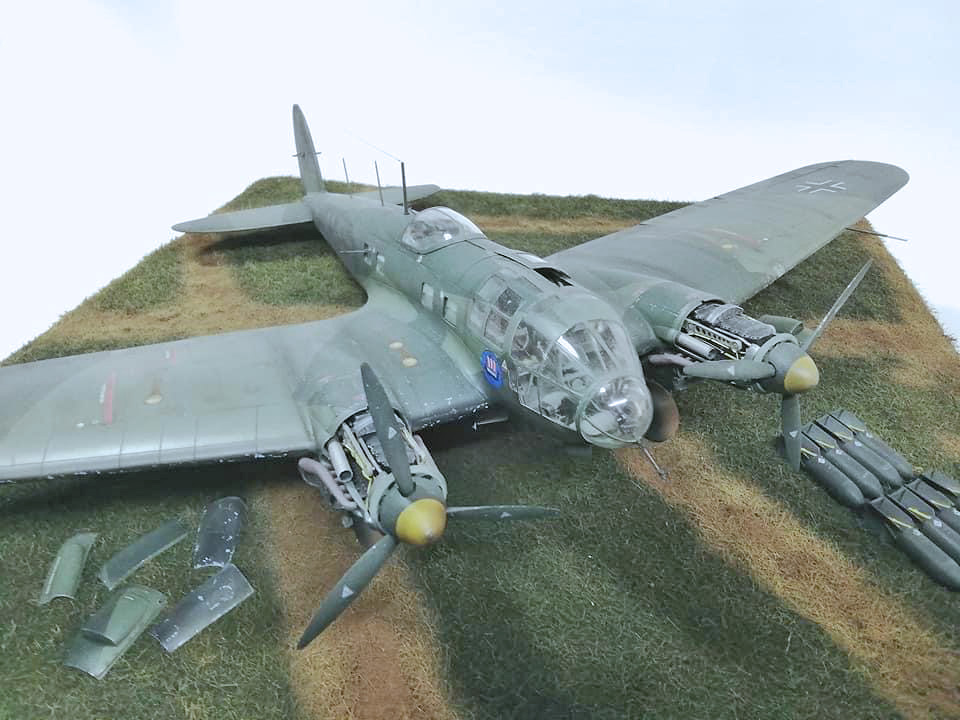
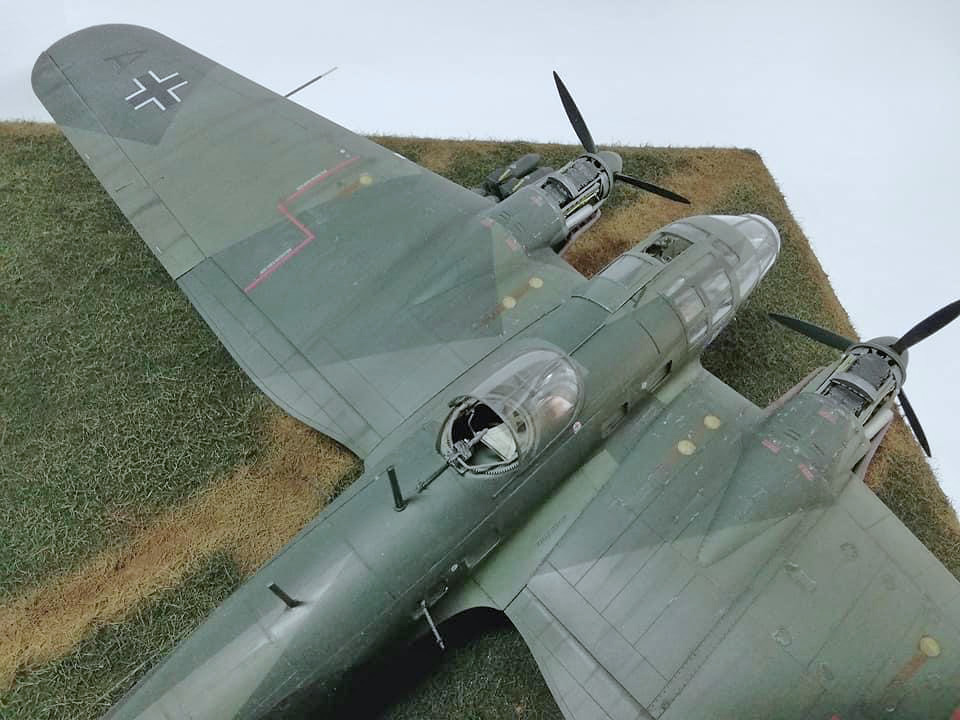
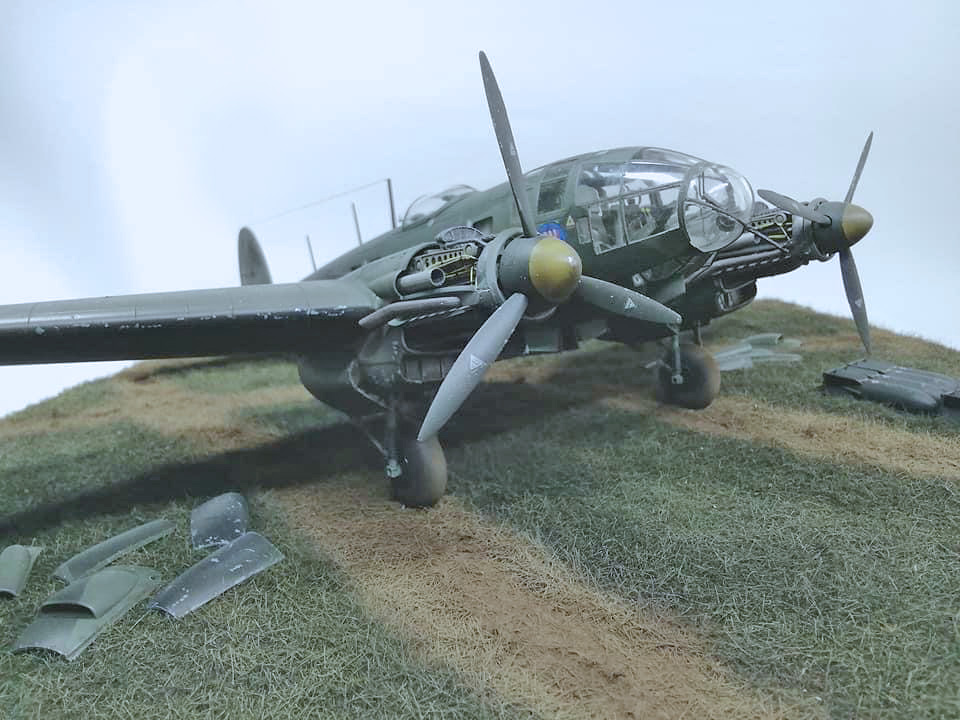
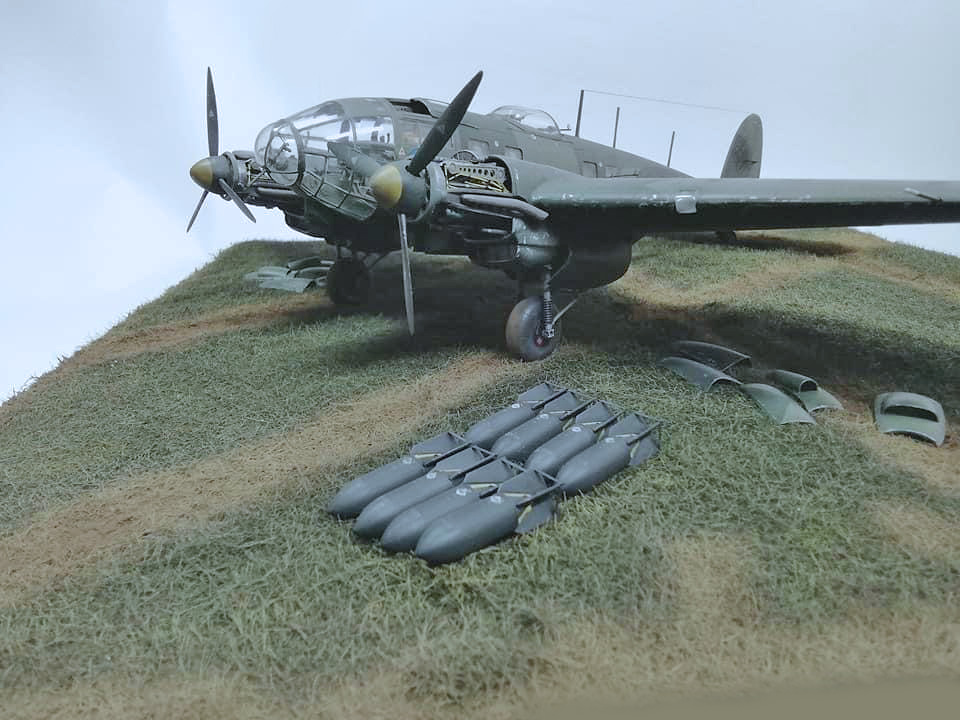
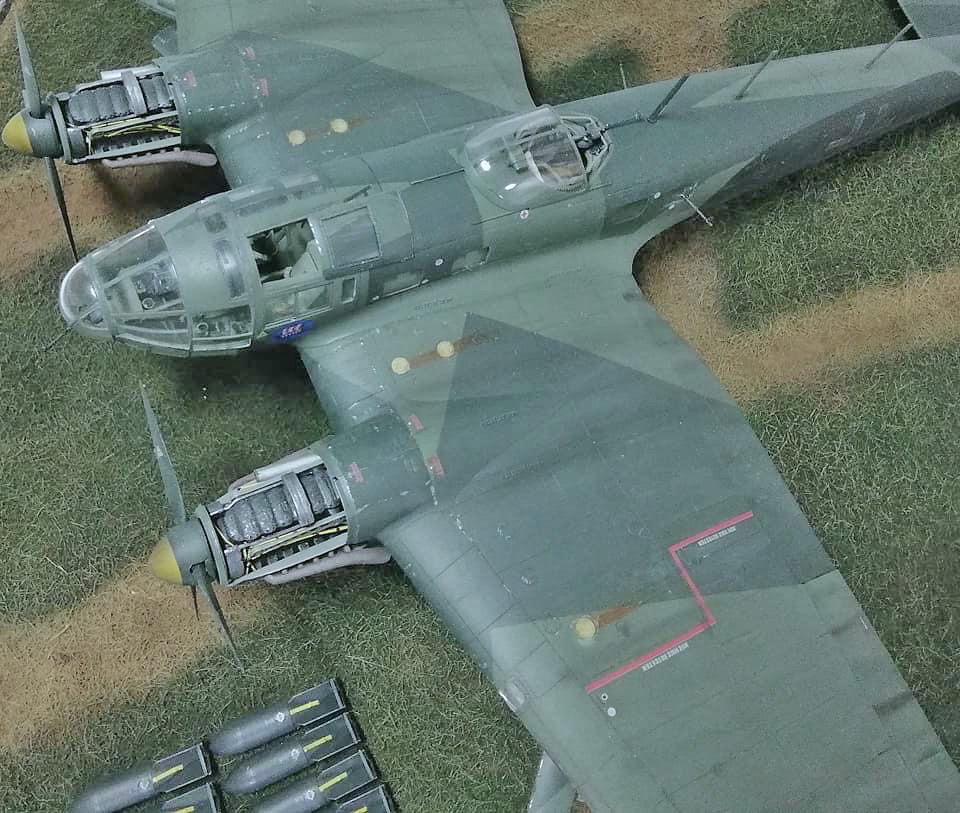
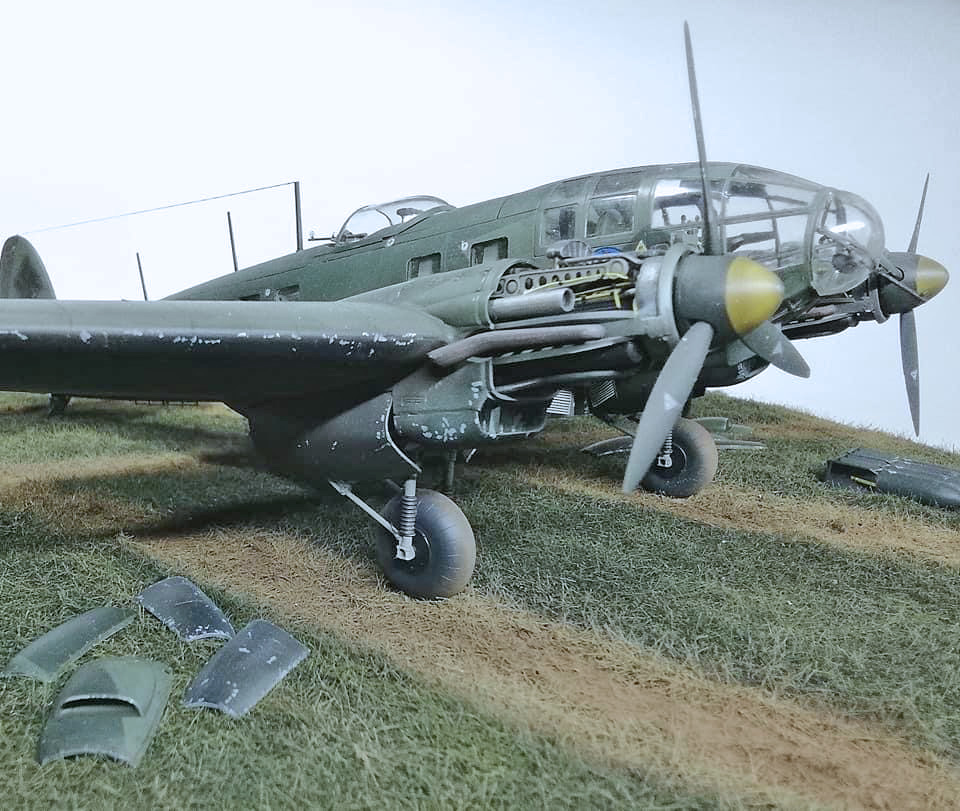

I made a decent base and added detail to the engines and used eduard sets on the interior.
Ian R.
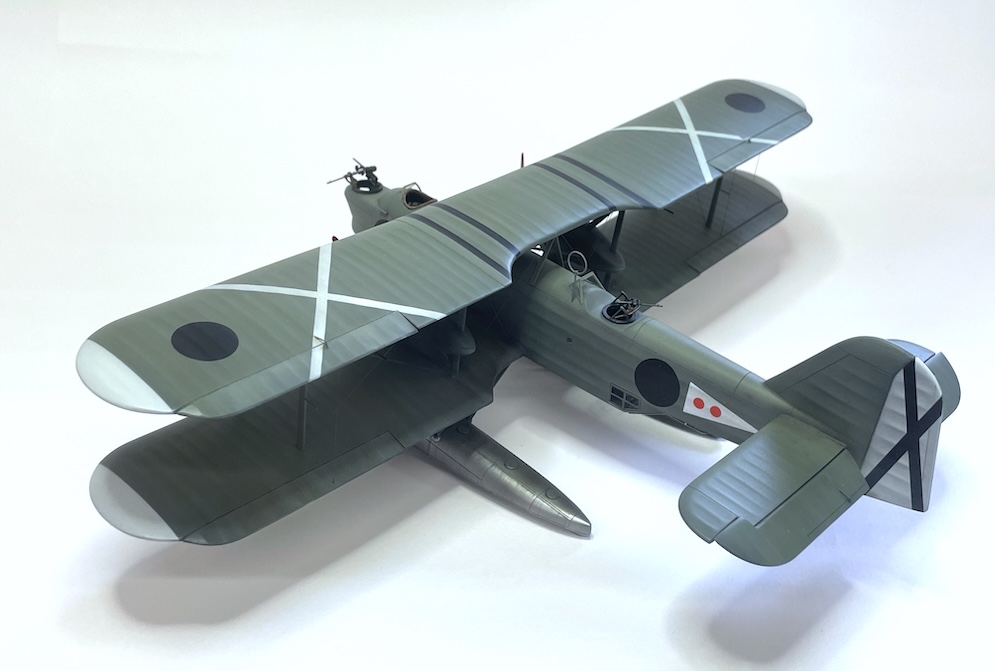
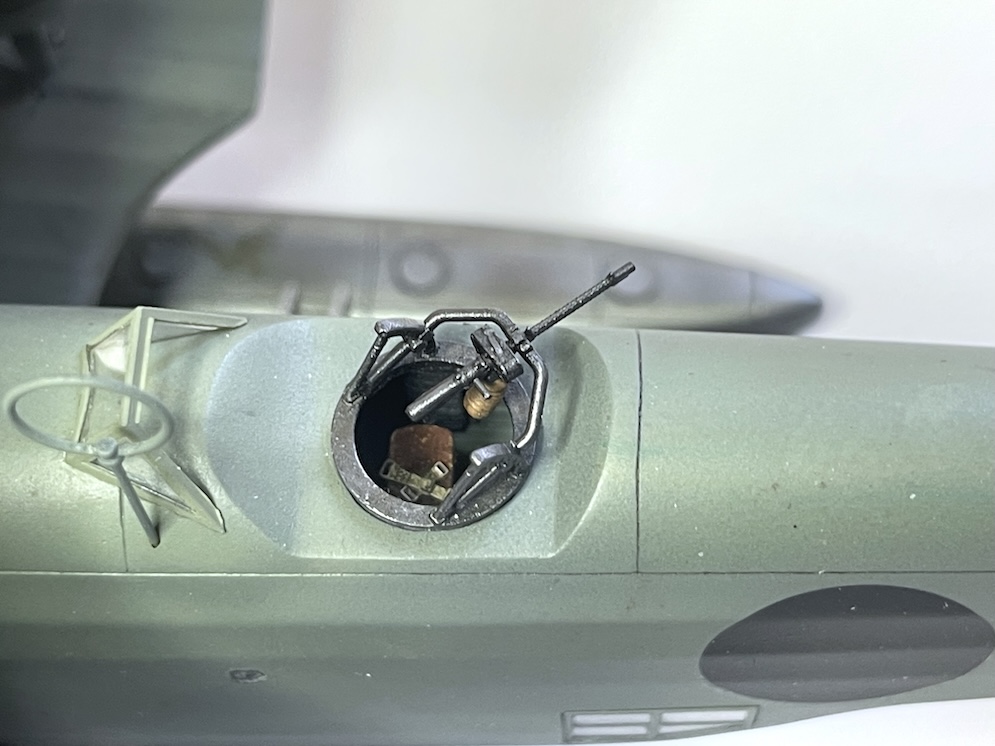
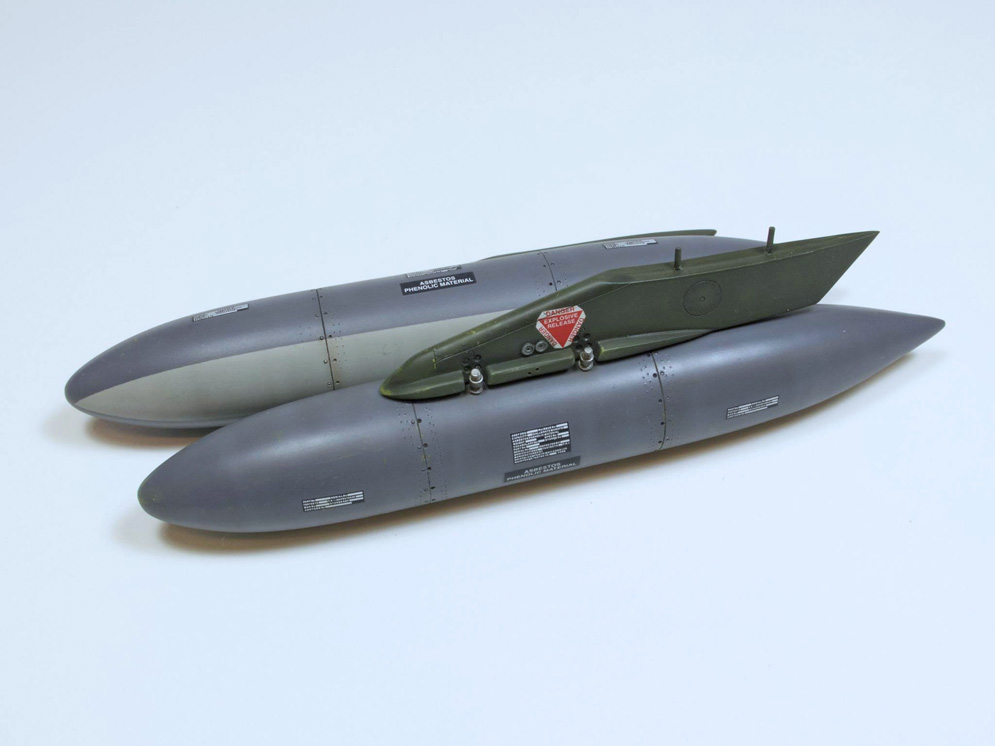
This is the Cammett 1:32nd Scale Resin kit that includes the Mistel ‘flying-bomb’, take-off trolley and attachment points for the parent aircraft the Revel He-162. The additions I made include an Eduard cockpit set for the He-162 as well as detailing the kit supplied engine using wire card and scrap brass. The engine for the Mistel comes from a Trumpeter Me-262 and after cutting off the resin engine nacelle I built the engine bearers and detailed the engine in the same way as the He-162. Finally the Mistel never flew so this is how I interpreted a late war development aircraft to look. The He-162 colour scheme is genuine and a well documented photo is in many references.


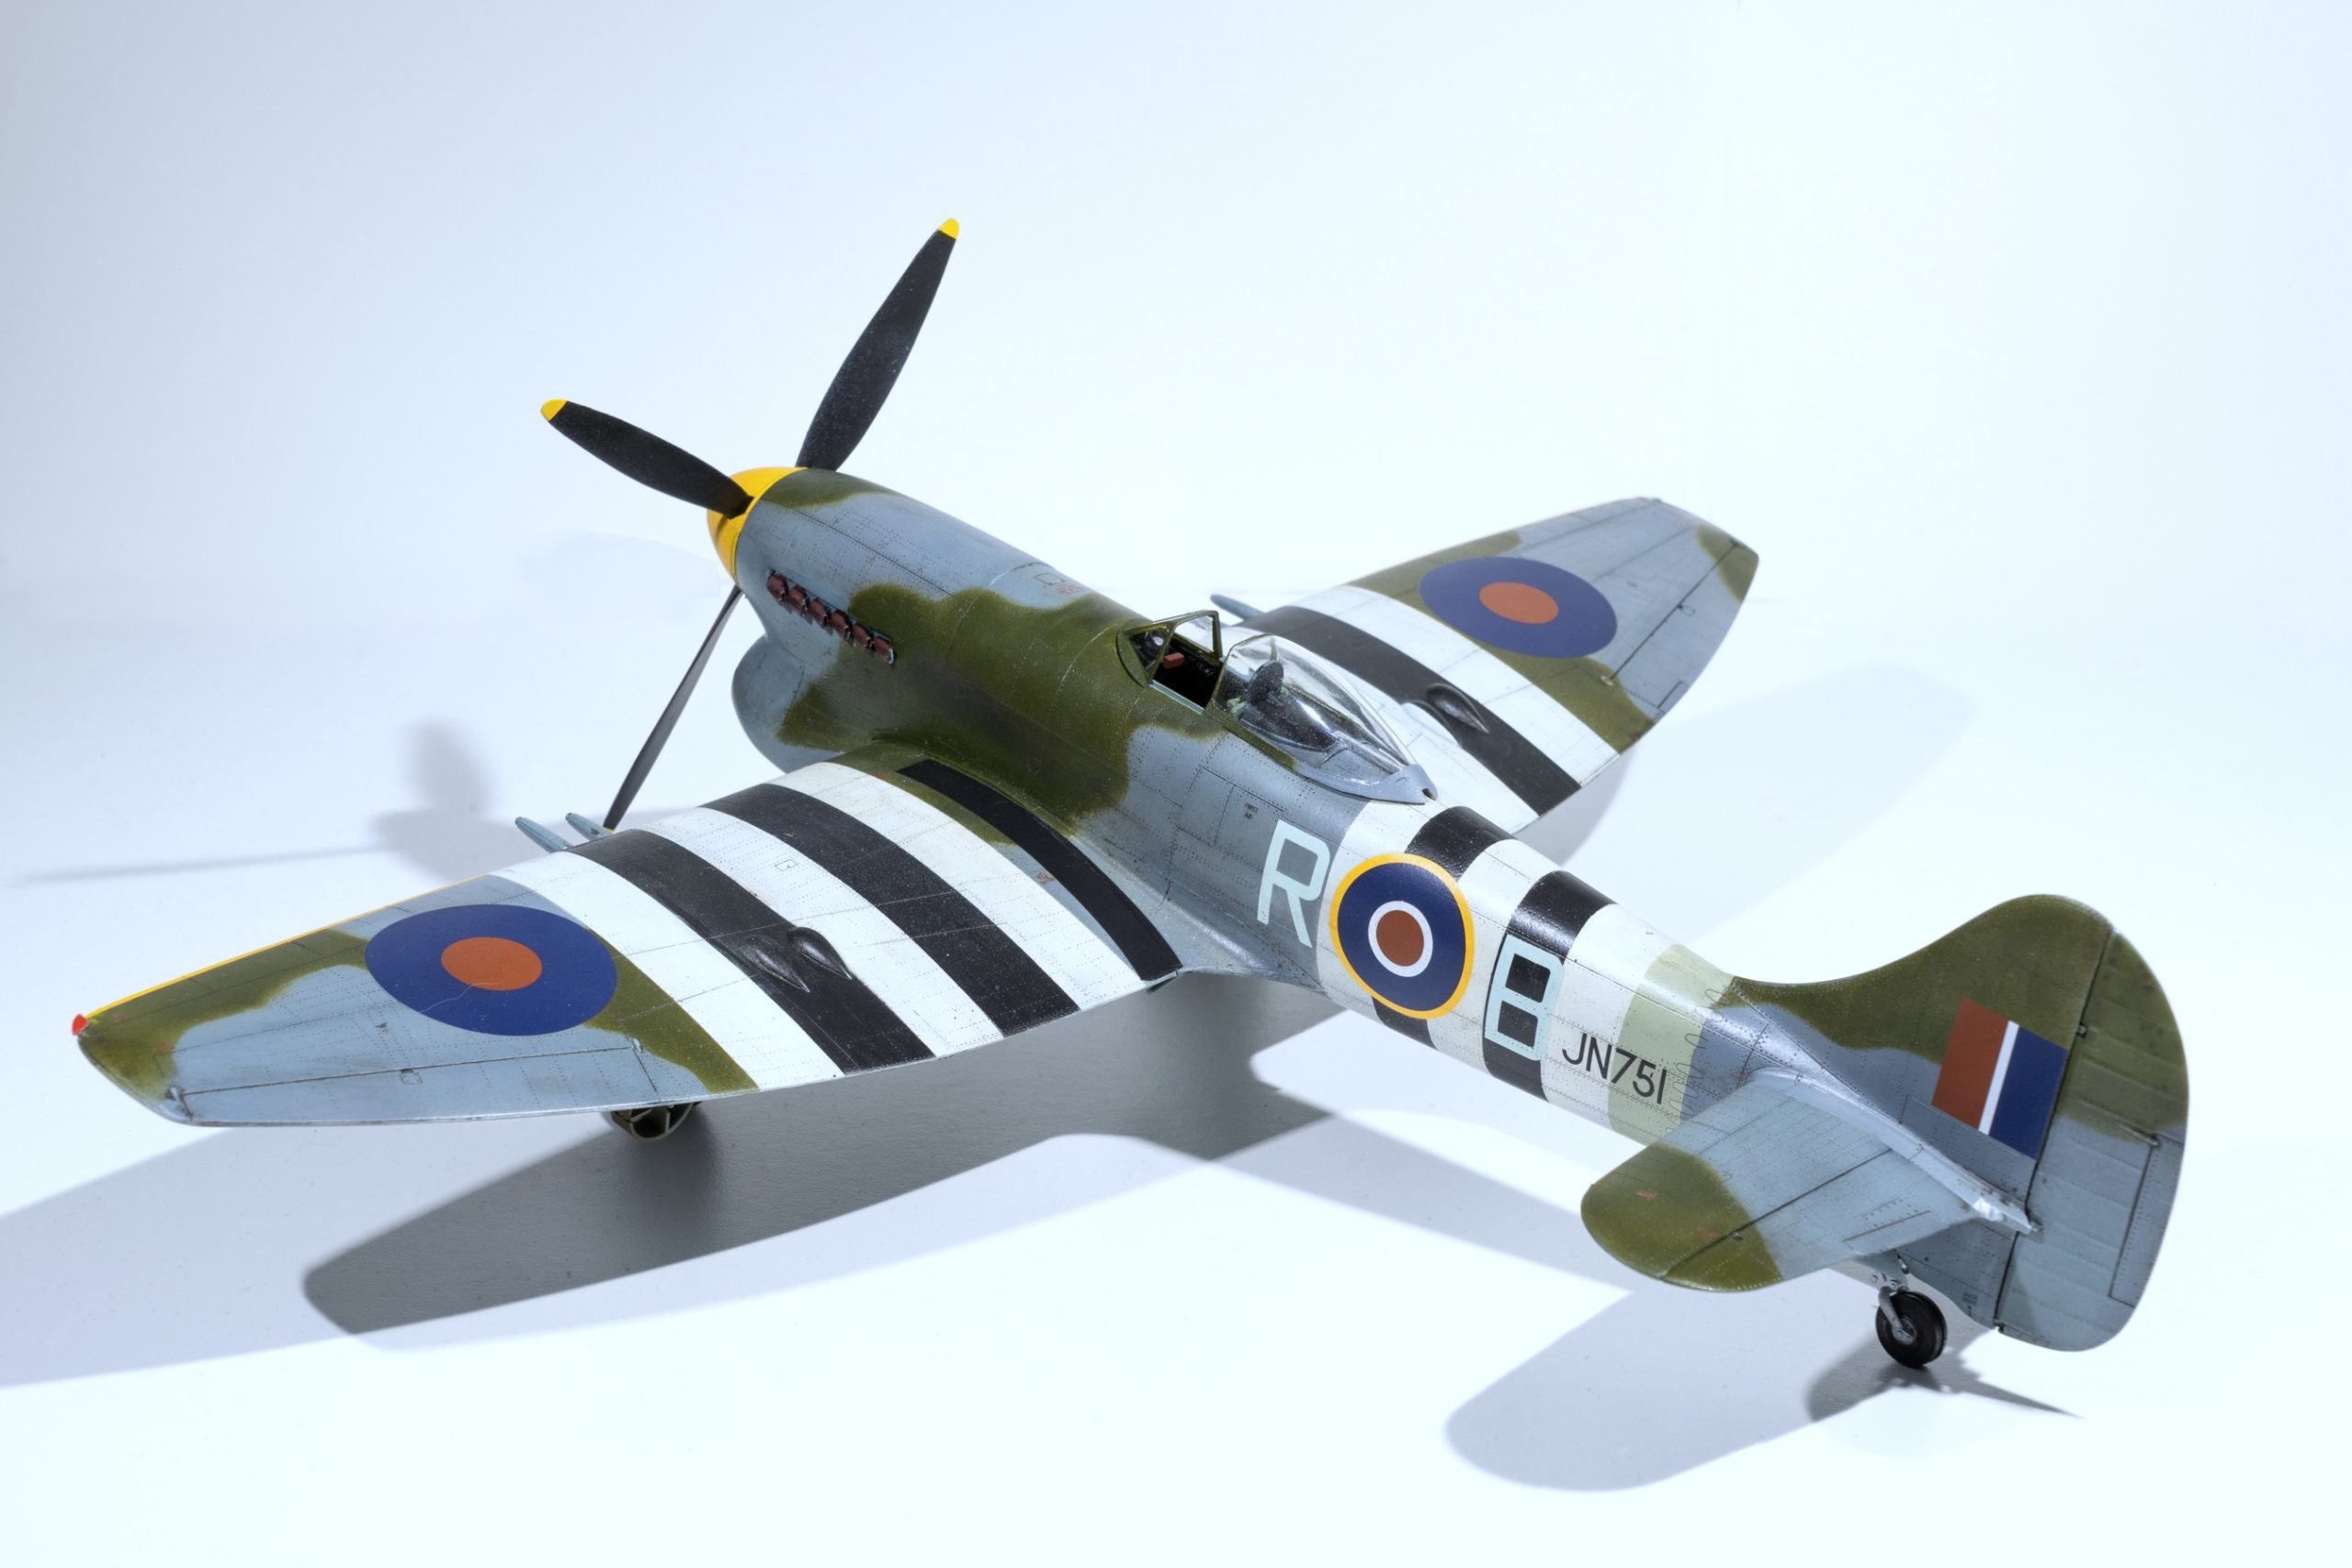
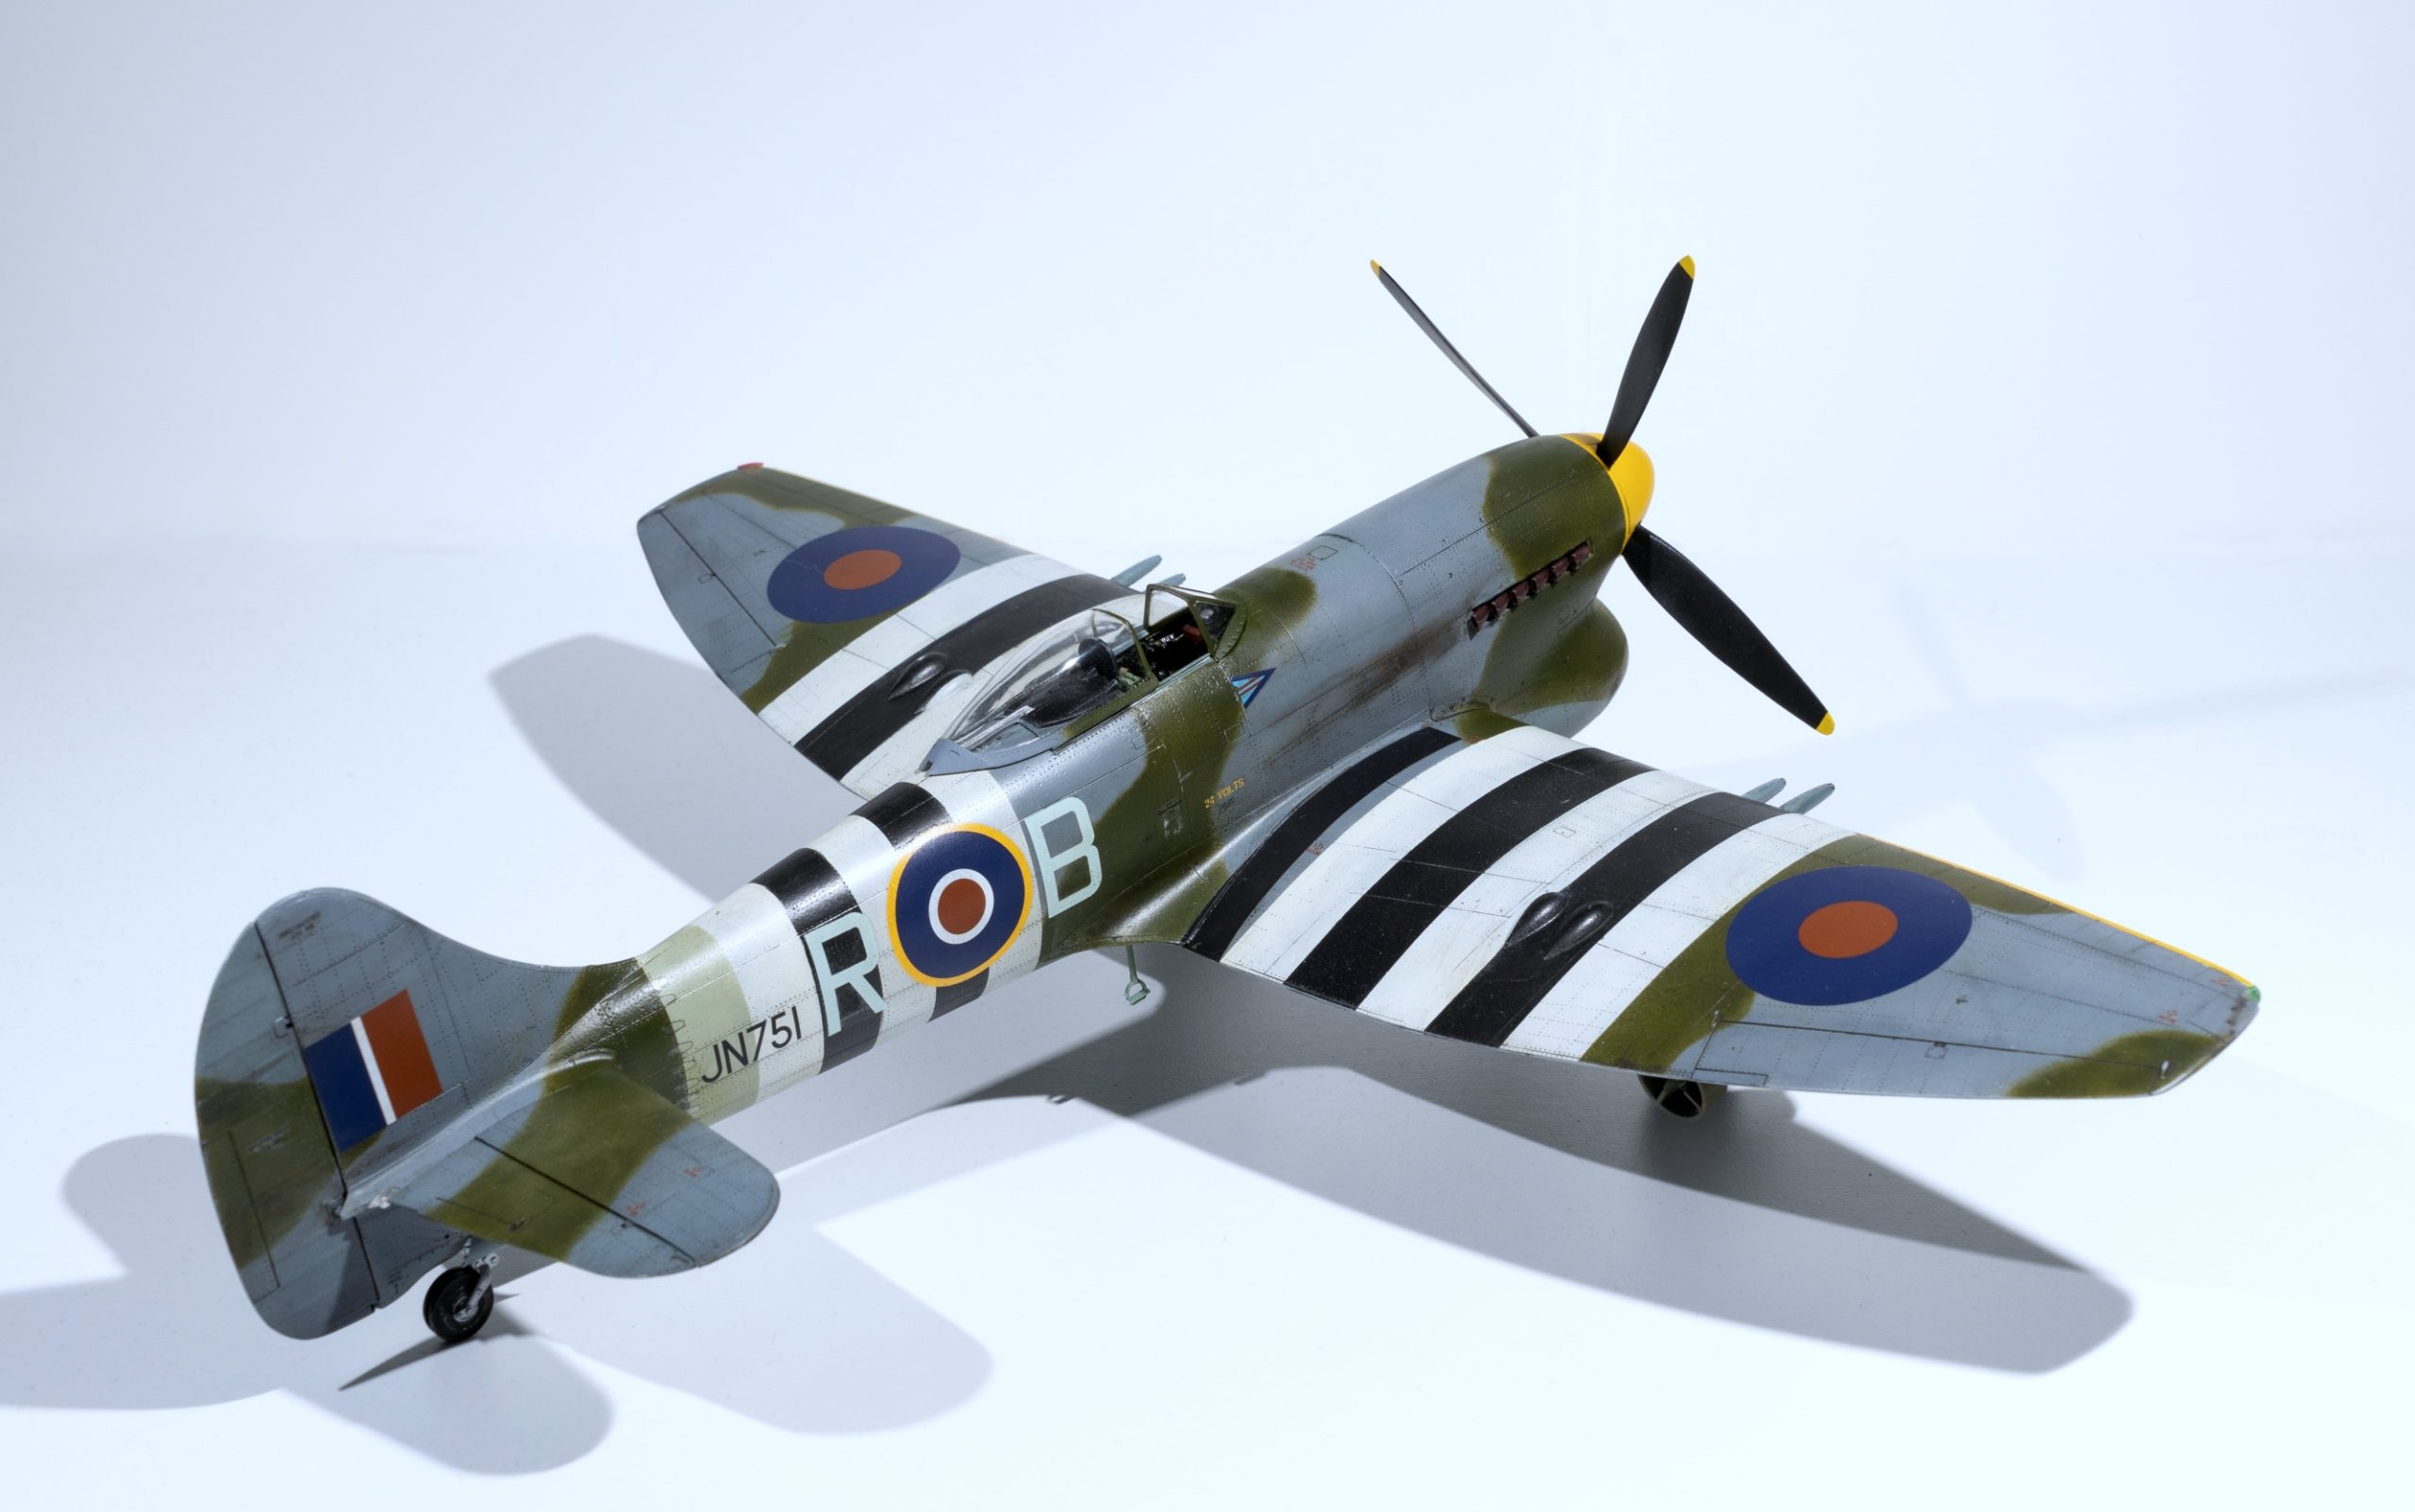
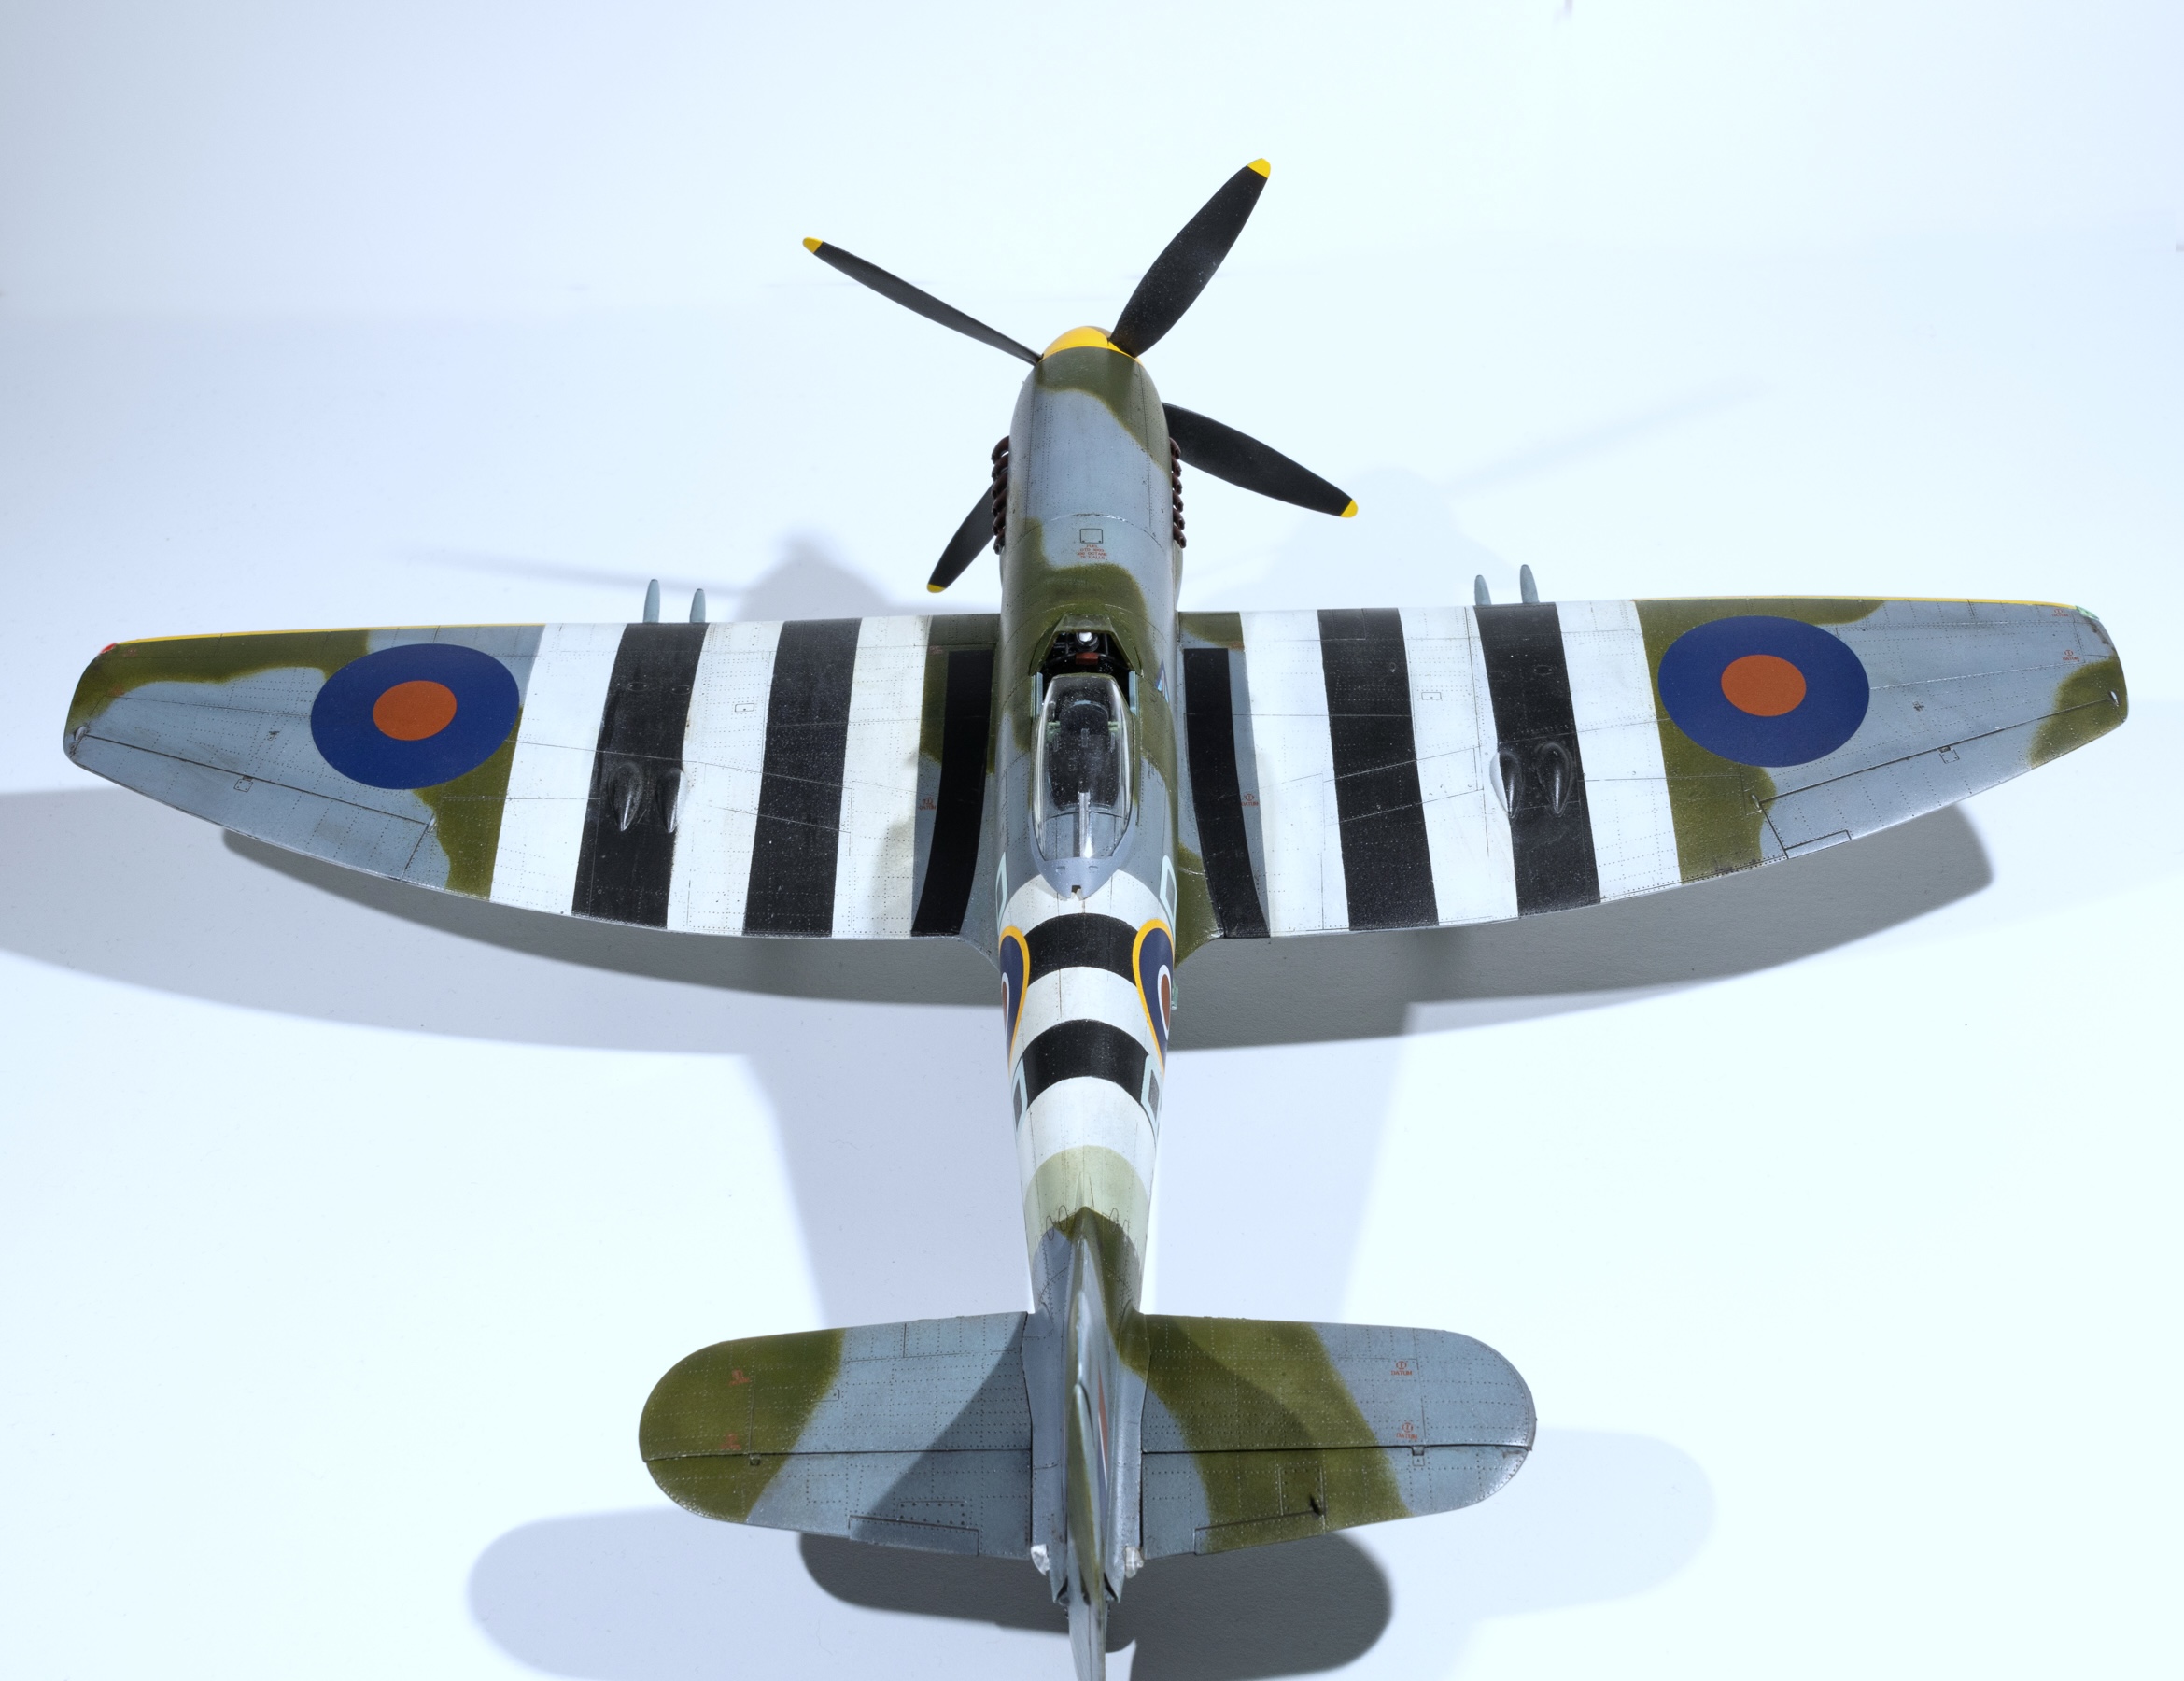
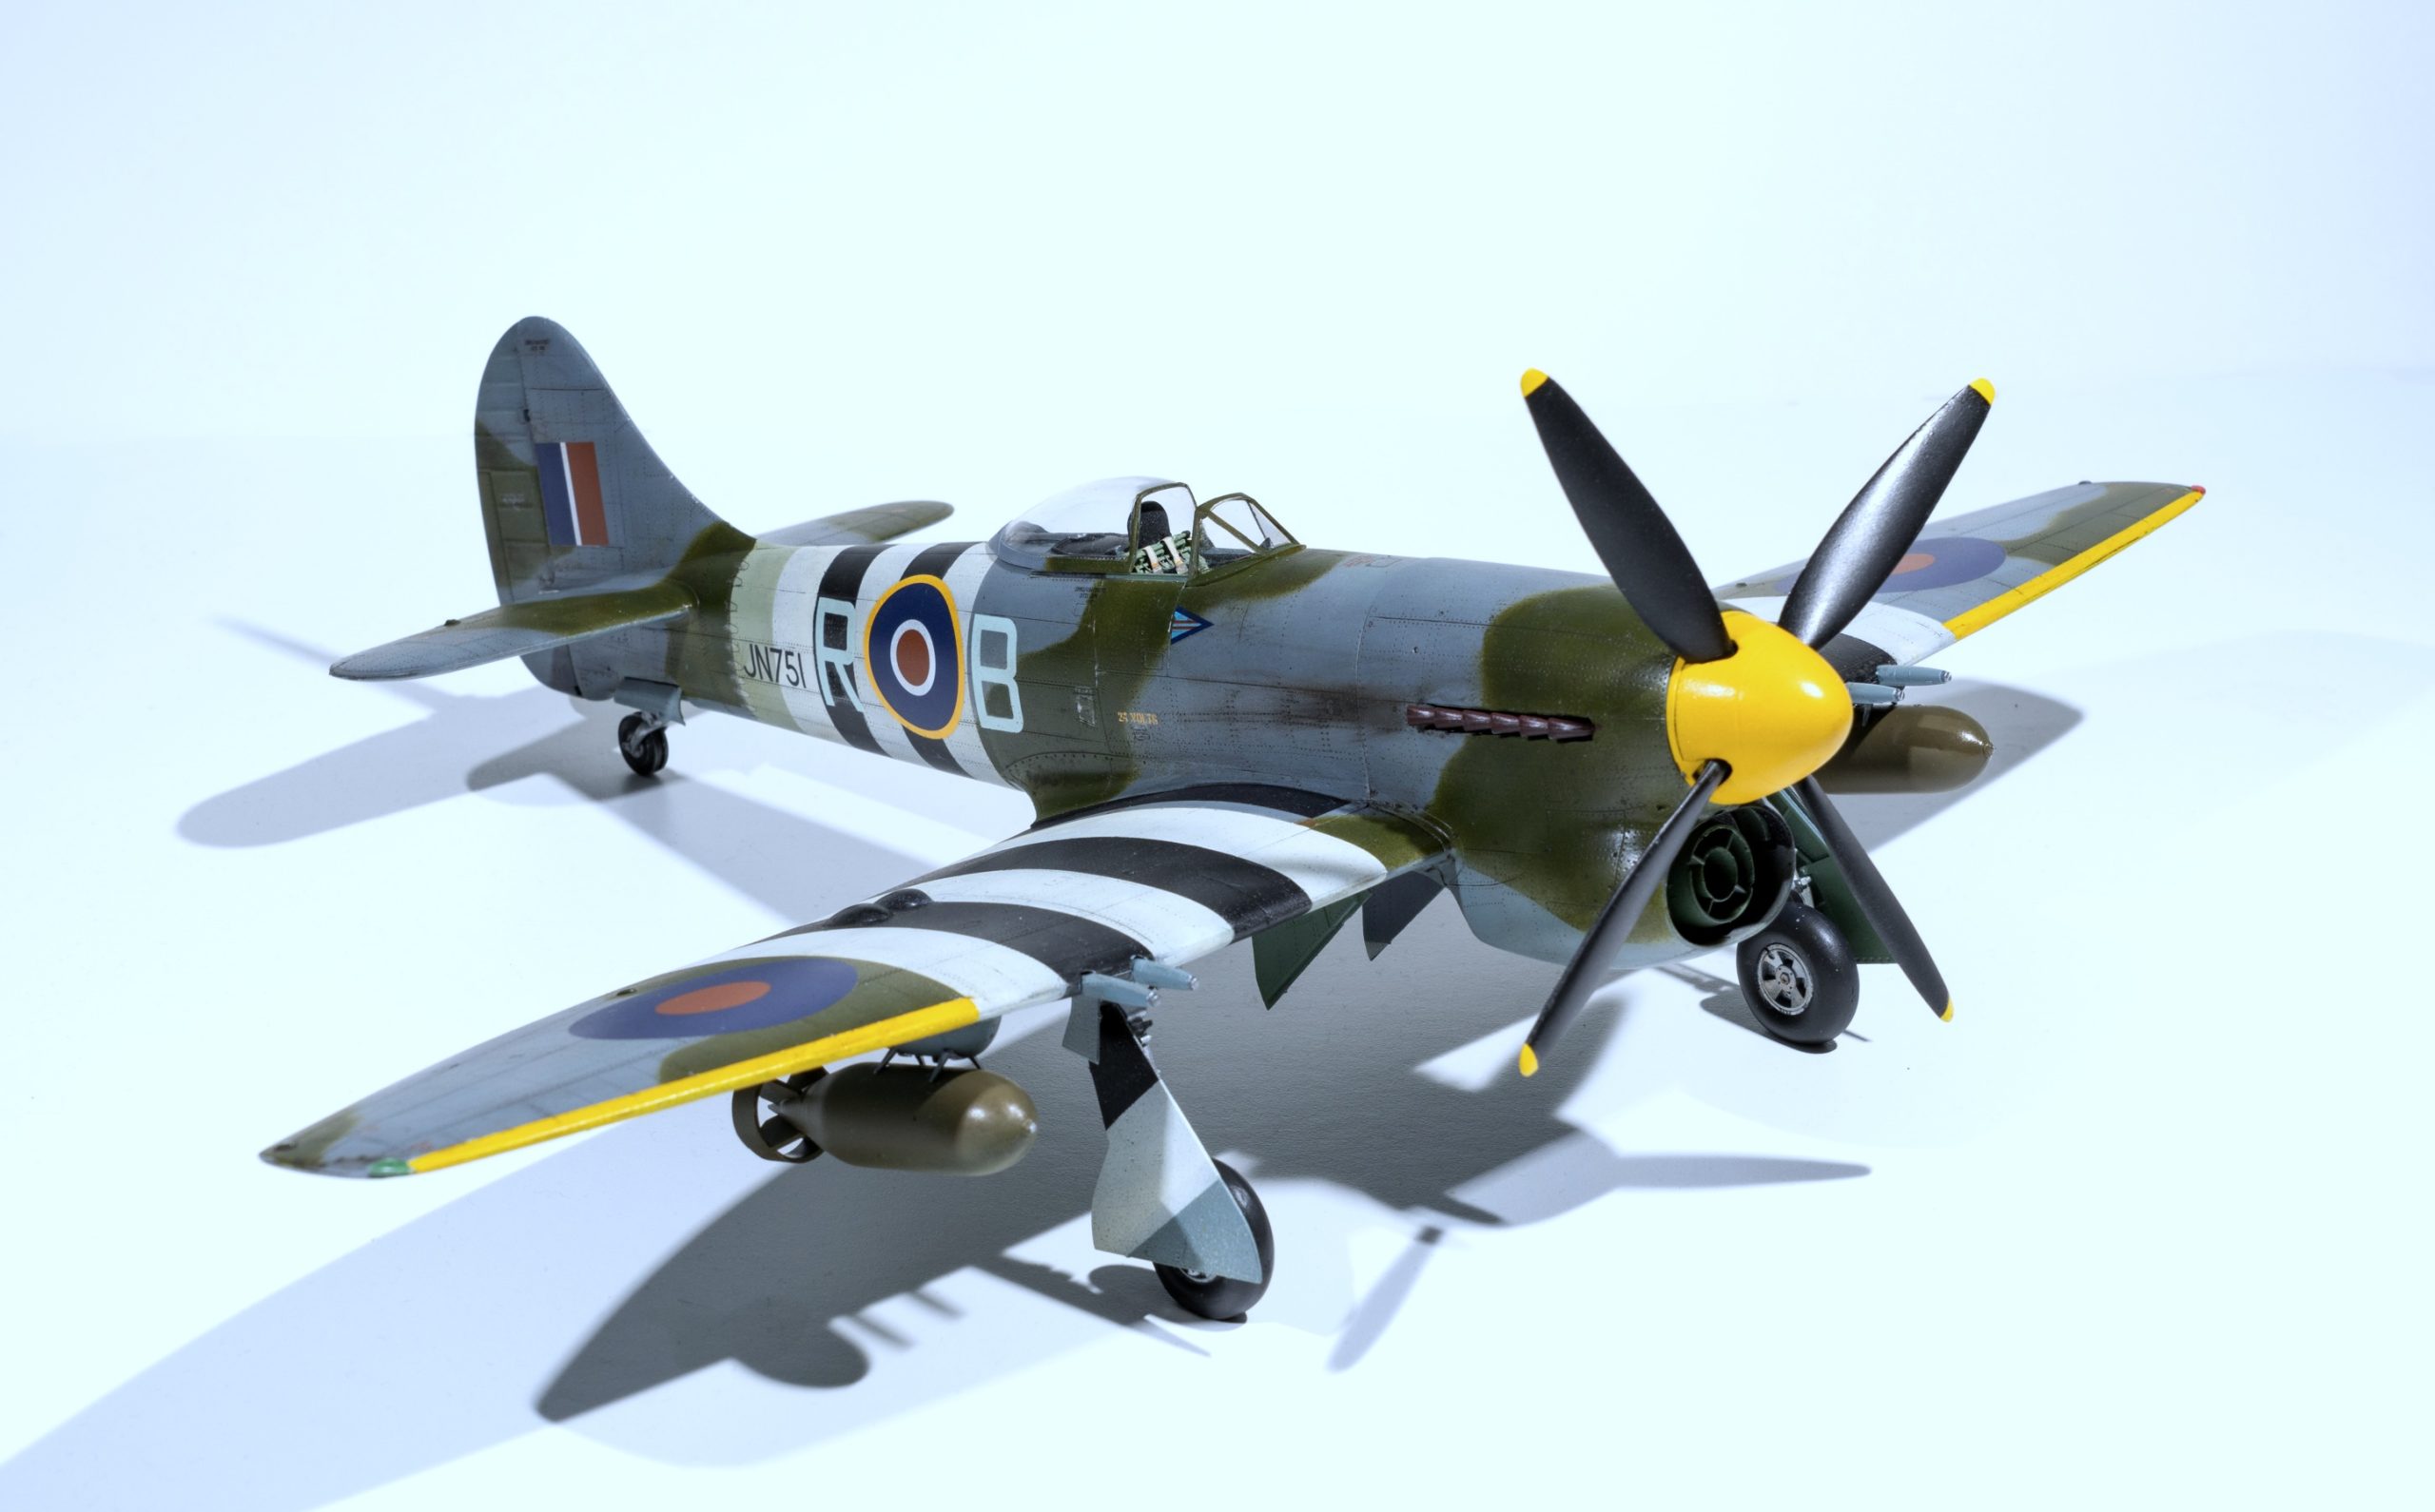
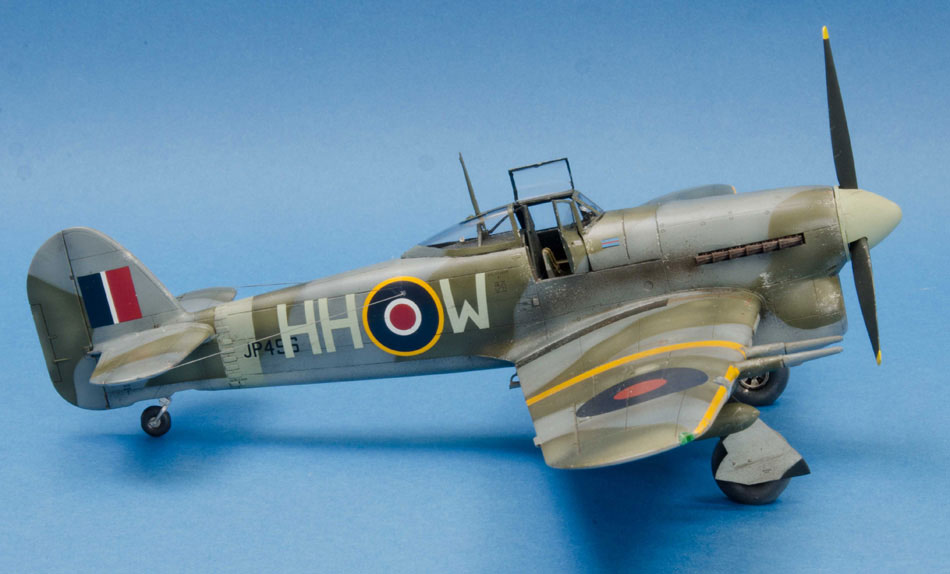
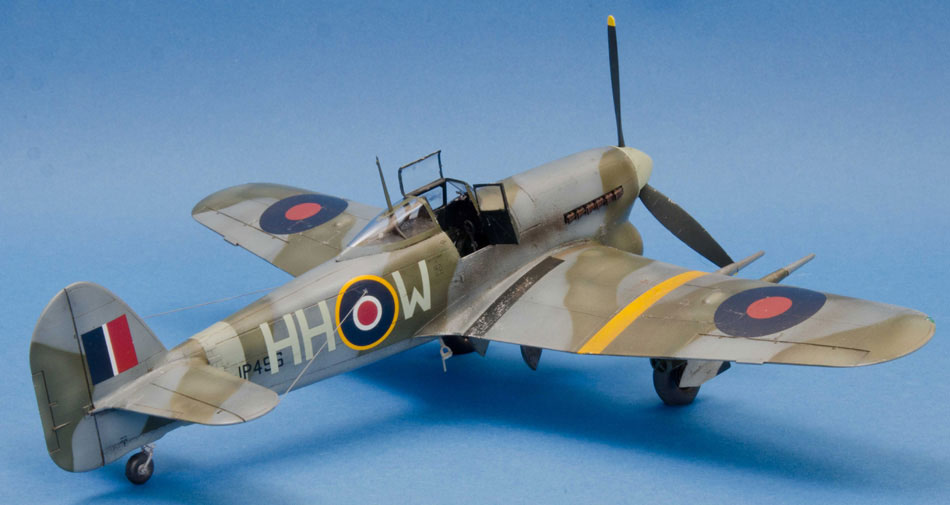
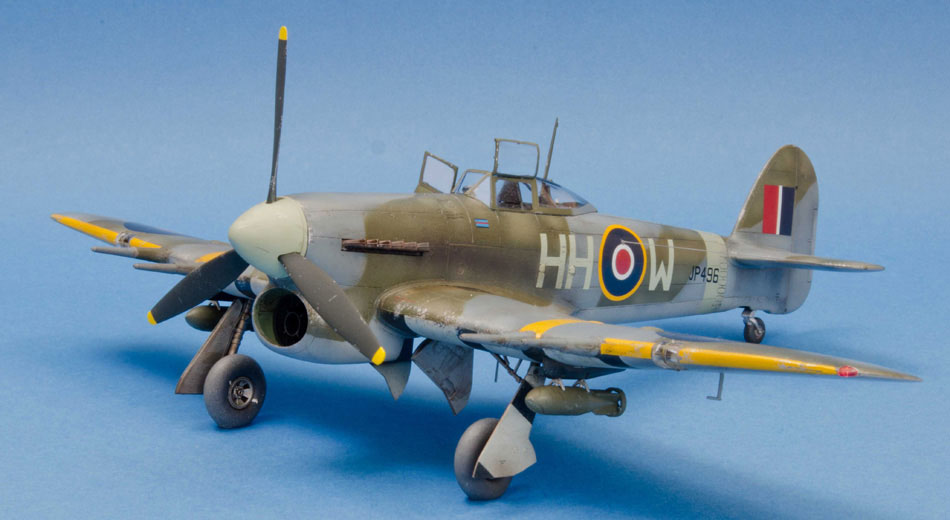
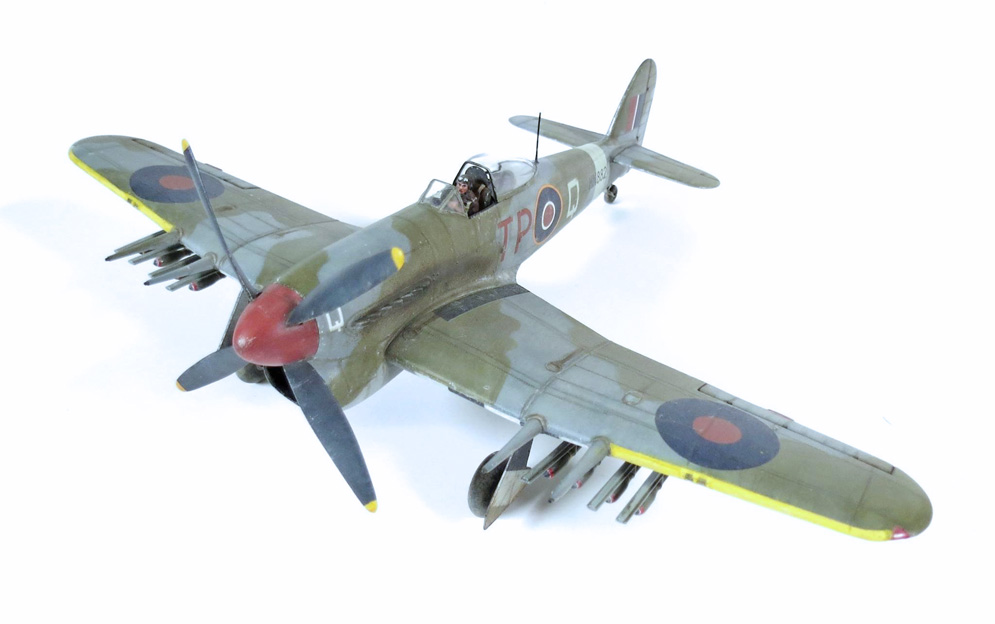
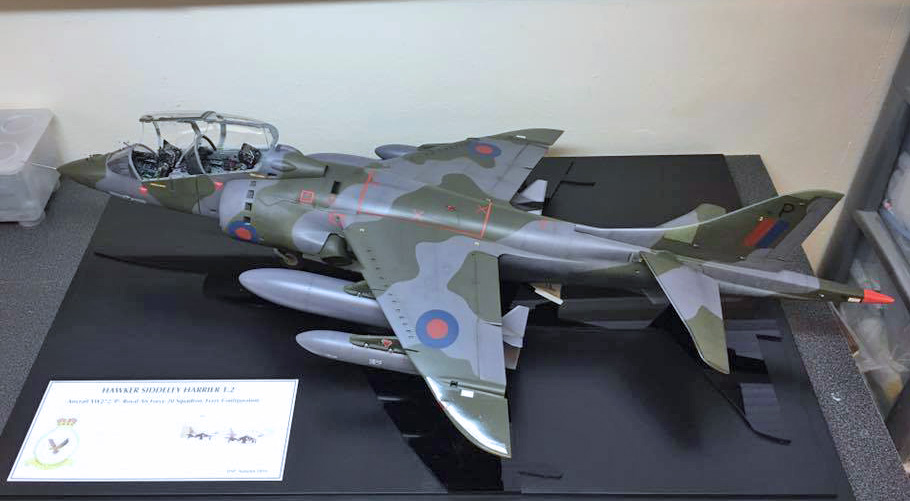
Test aircraft at RAF Farnborough Sept/Oct 1944
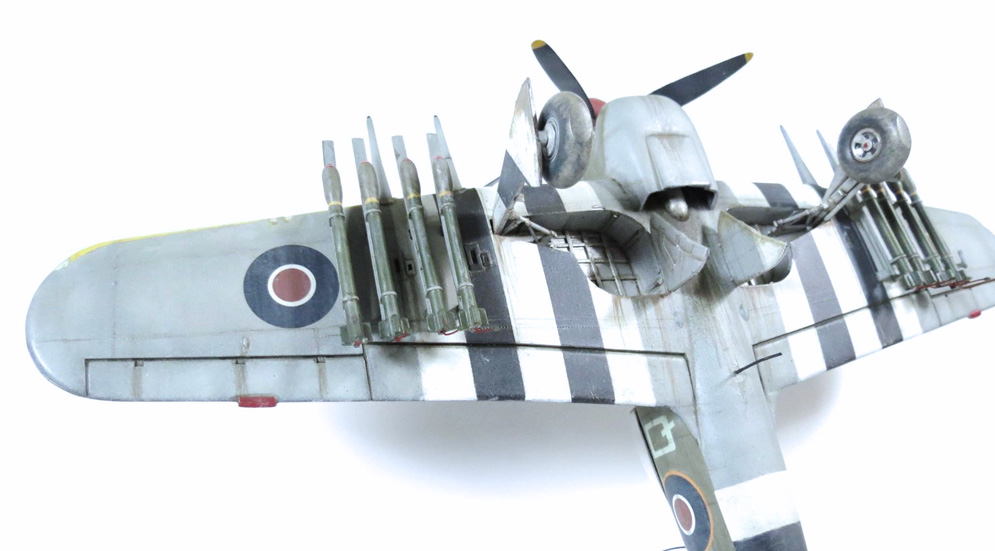
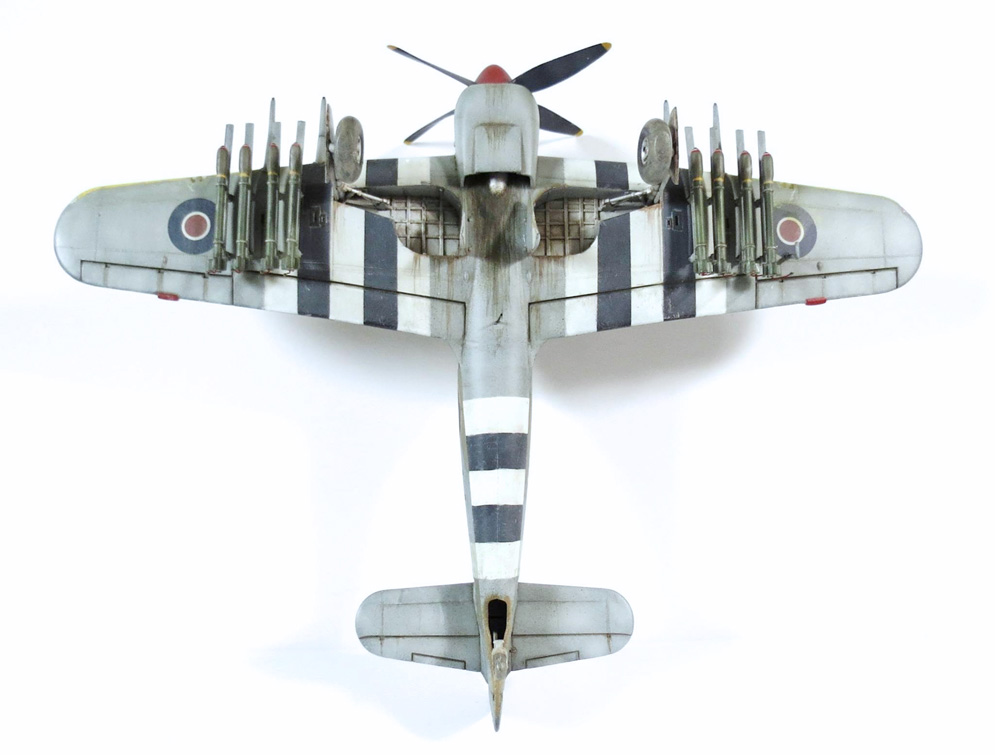
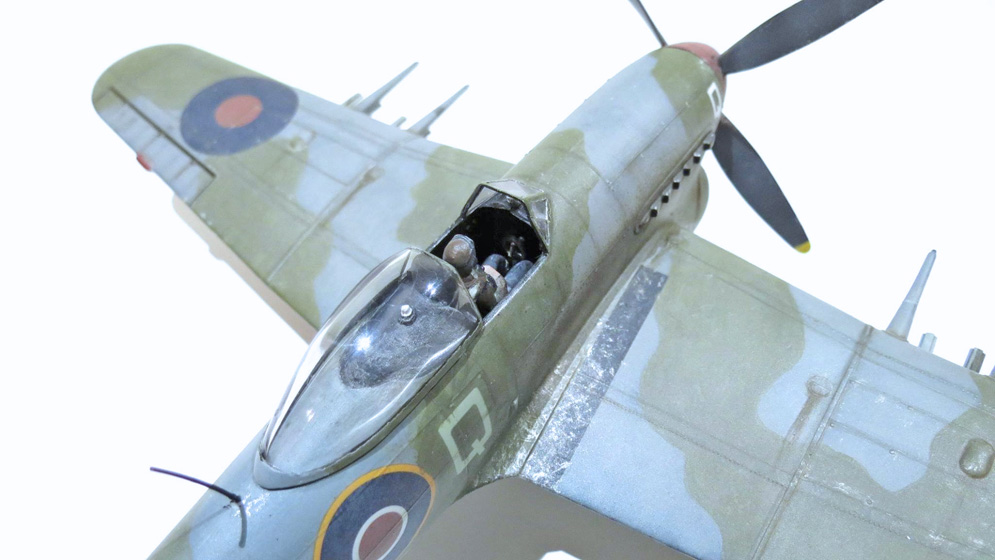
This aircraft was captured by French Resistance Forces at Toulouse-Blagnac in September 1944 and repainted with Invasion stripes, French roundels and French colors on the rudder. Shortly afterwards it was transferred to the UK and again repainted with a red rudder, RAF roundels and a yellow “P”.
My model represents this British bird.
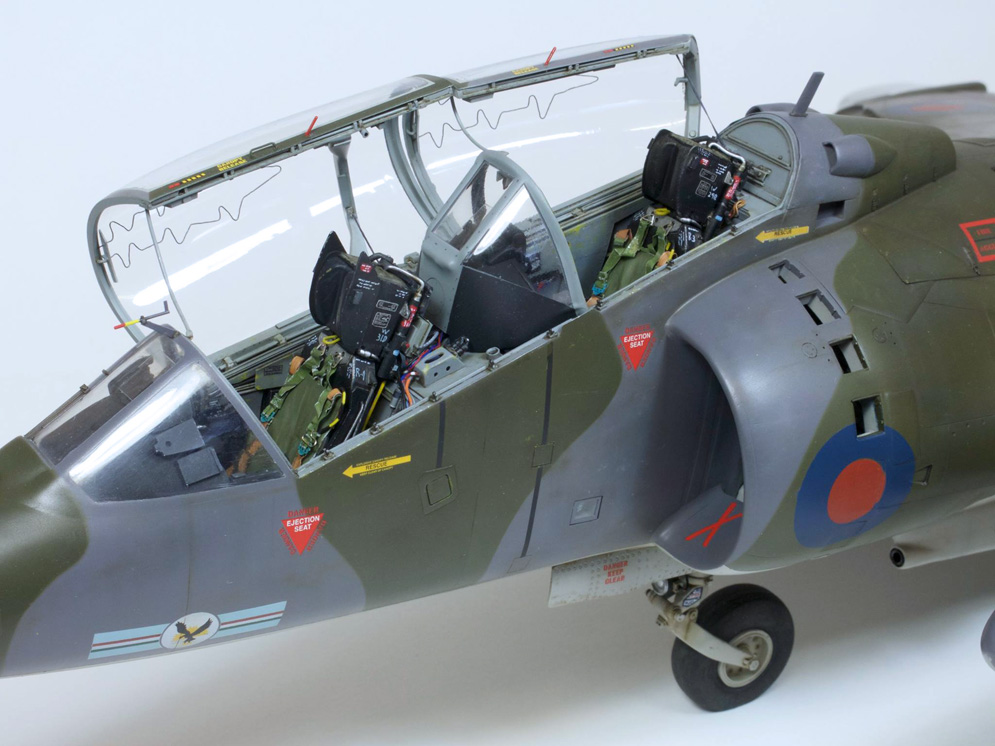
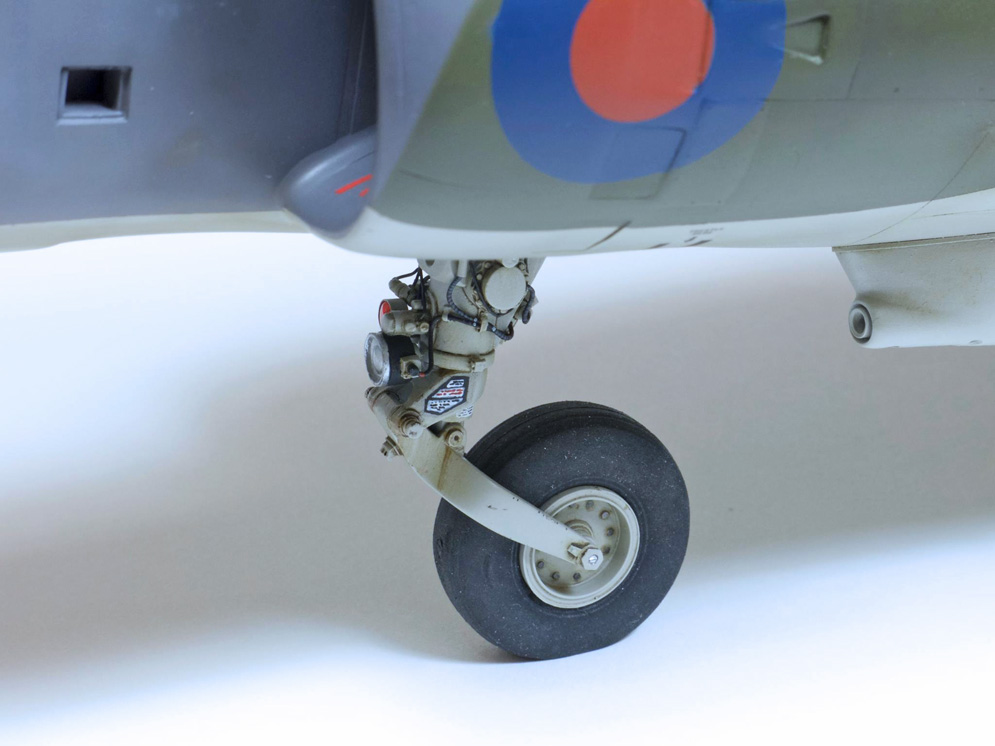
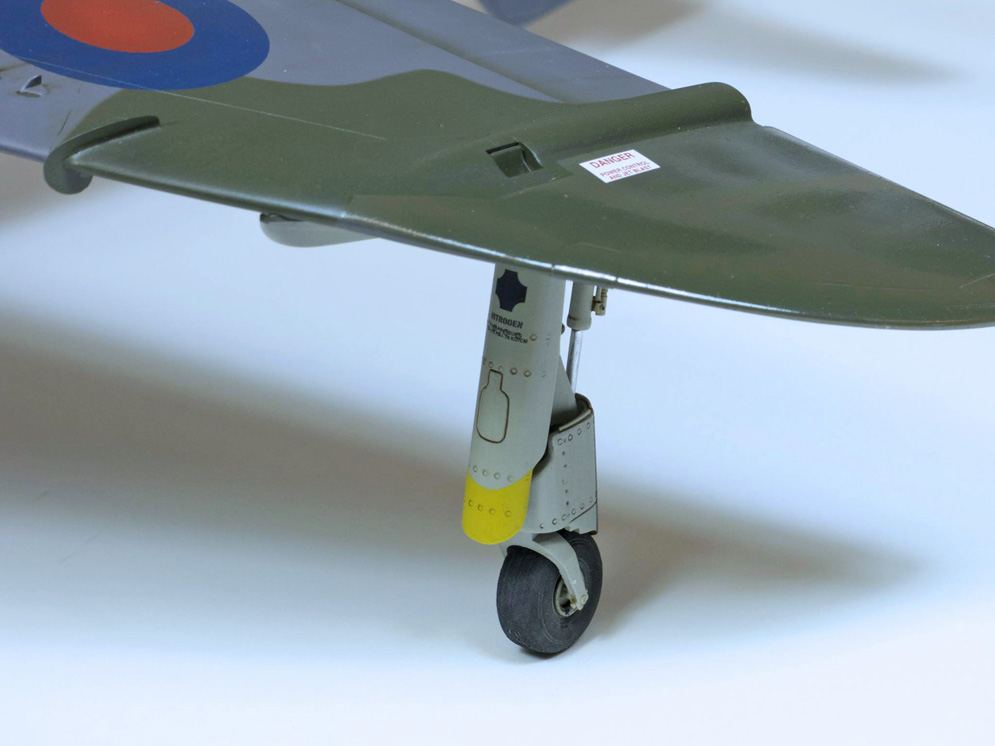
It is a built out of the box from the MPM kit, even the decals are out of the kit. The construction was typical for a short run kit. A bit of putty here and there, also around the canopy, which meant some precise sanding. I used the Eduard cockpit etched set, which included instruments and seat belts, well to be seen in the glasshouse cockpit. Montex masks eased the painting a lot. All the weapons were left off, as this was a captured bird for test purposes. The only tricky area was the fit of the main undercarriage, free interpretation of its fit to the wing and lots of superglue were needed. Otherwise a straightforward kit, unfortunately not available any longer, as the MPM brand is discontinued by Special Hobby.
Hope you all like her?
Stephen A.

My model is from the box.
Les V.


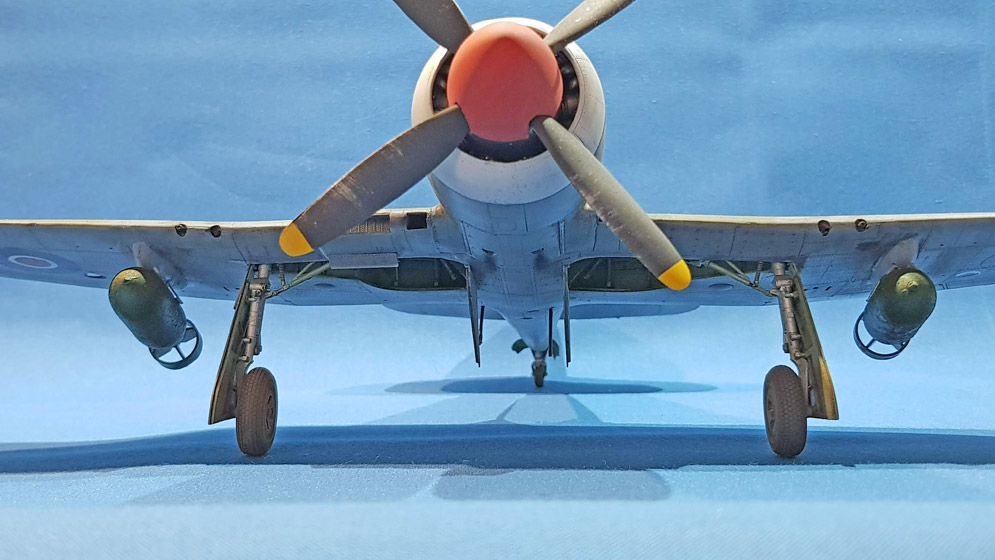
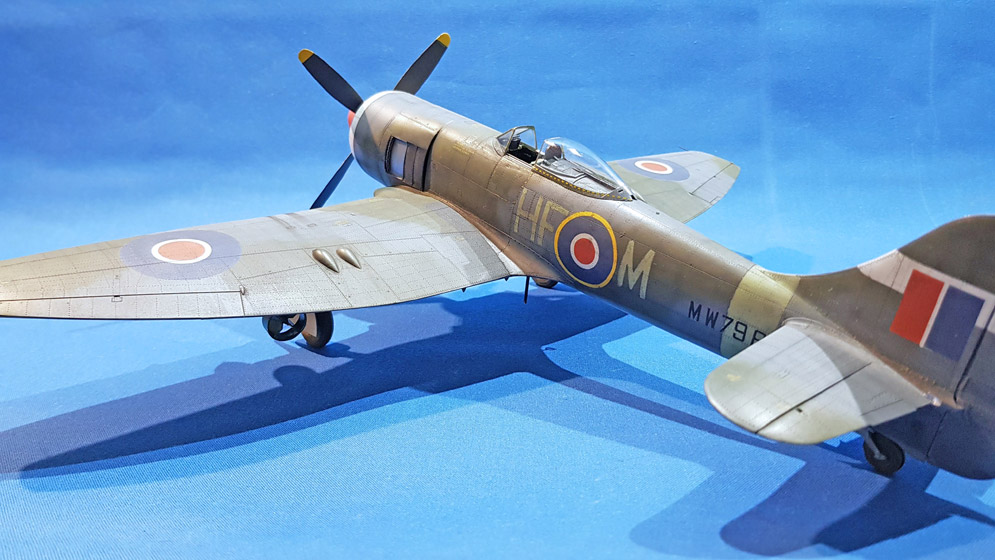
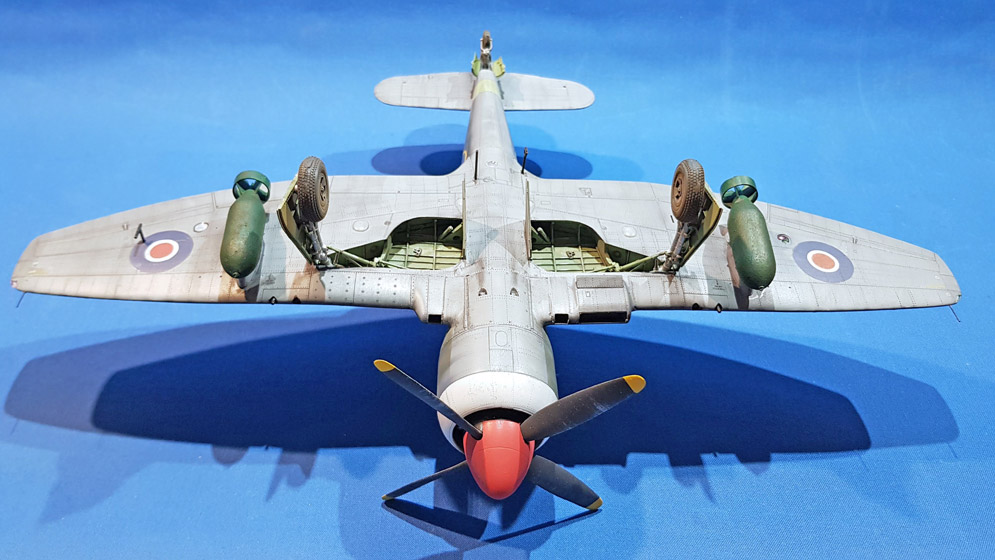
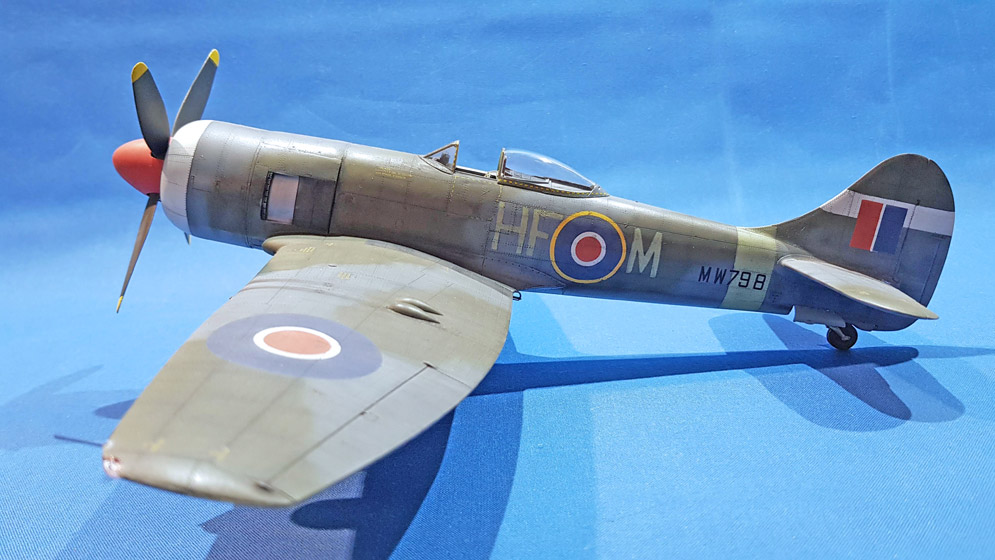
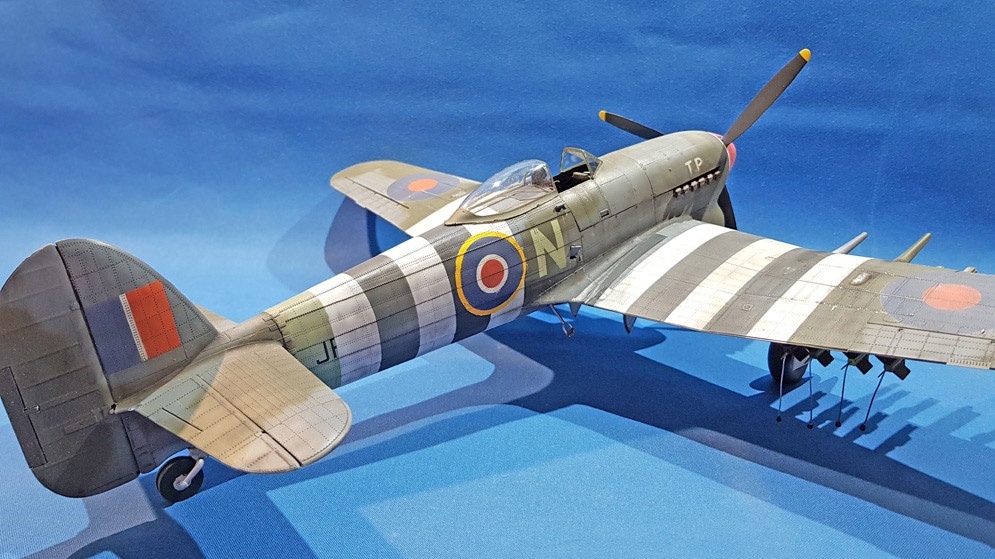
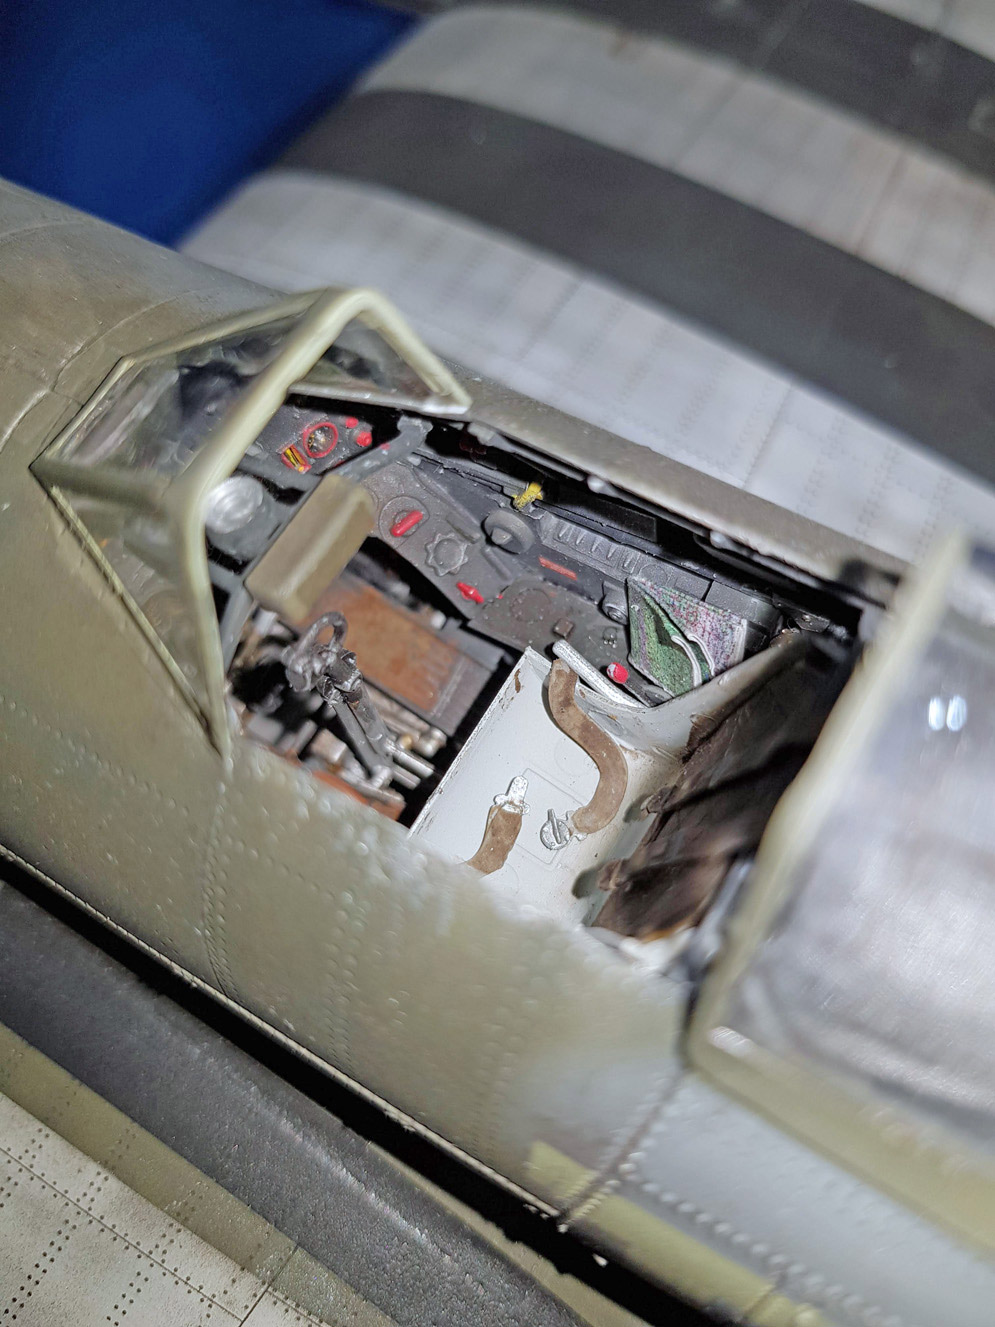
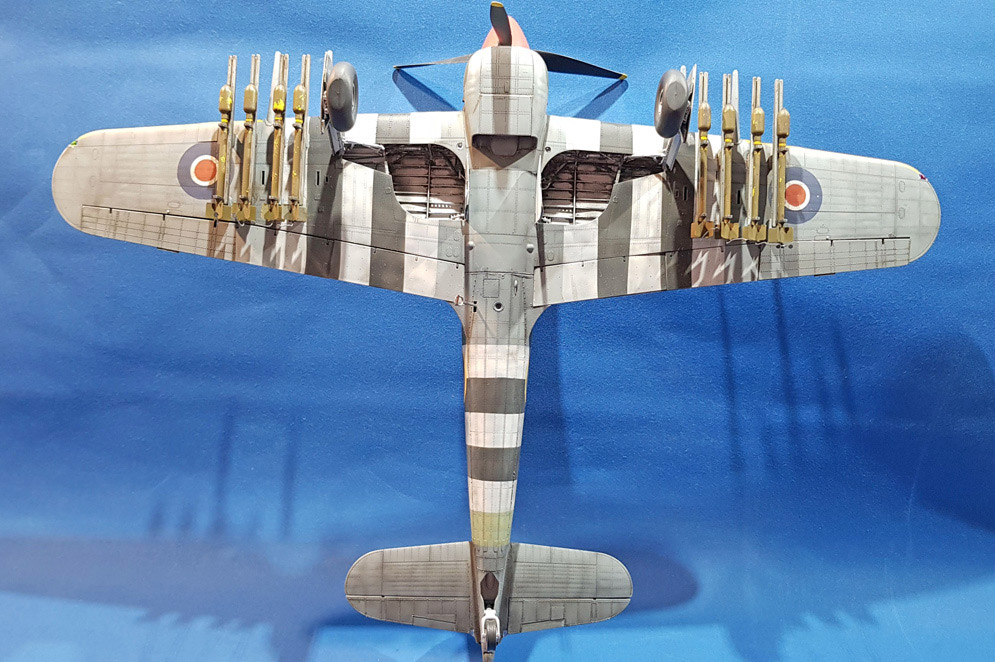
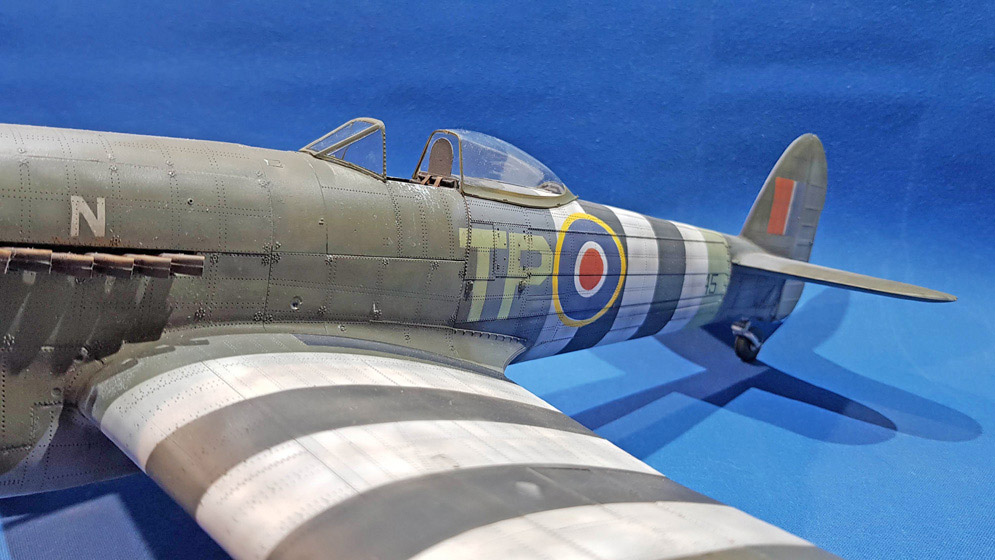
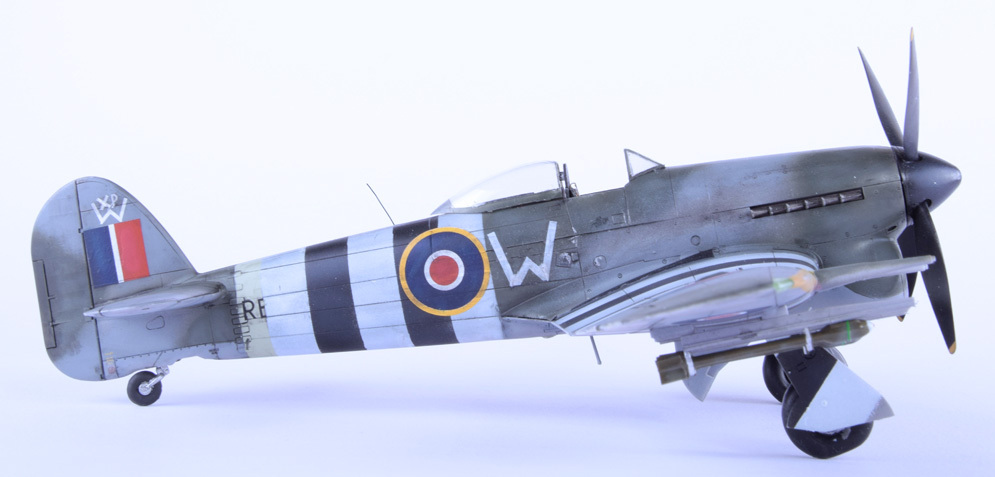
Vallejo Model Air acrylics were used to portray JV131 “E o L” as she appeared in June 1944, flying from HMS Emperor in support of D-Day operations. I sprayed the invasion stripes over the camouflage to try and reflect the real machine, but I think they turned out a little too perfect. Next time I’ll make them a bit rougher. The decals were a real treat to use, being of the usual Cartograph quality.
Weathering consisted of post-shading with a lighter hue of the base colours, followed by a water-based “sludge” wash. This was a fairly thick mix of washing-up liquid, Paynes Grey watercolour and a bit of water to help it flow which was then slapped onto the model. This was left to dry for half an hour or so and then wiped off to emphasise the surface detail. Exhaust staining was airbrushed with a highly thinned Black/Brown acrylic mix, with a bit of grey thrown into the mix too.
This was a highly enjoyable kit to build and finish and I hope you enjoy the finished model as much as I enjoyed making it.
Andy G.


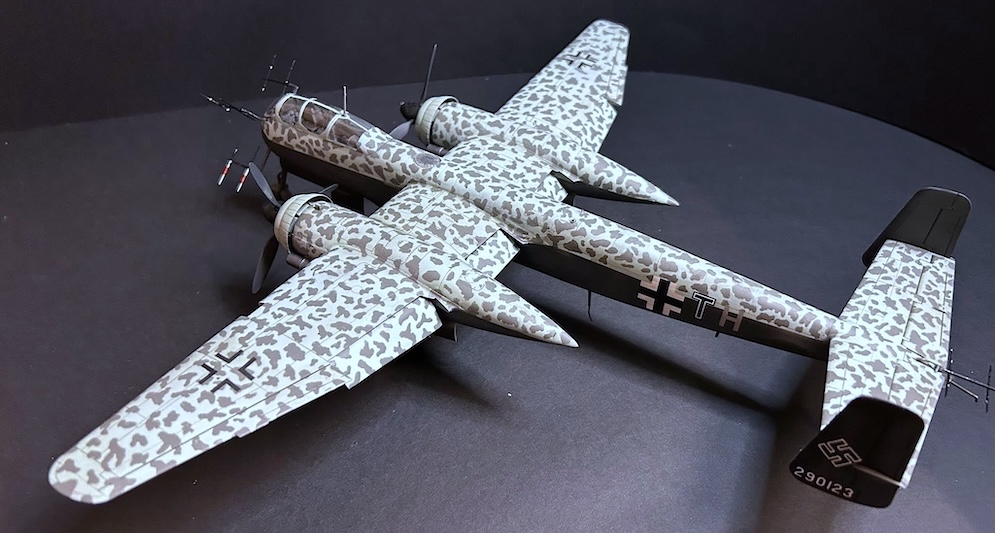
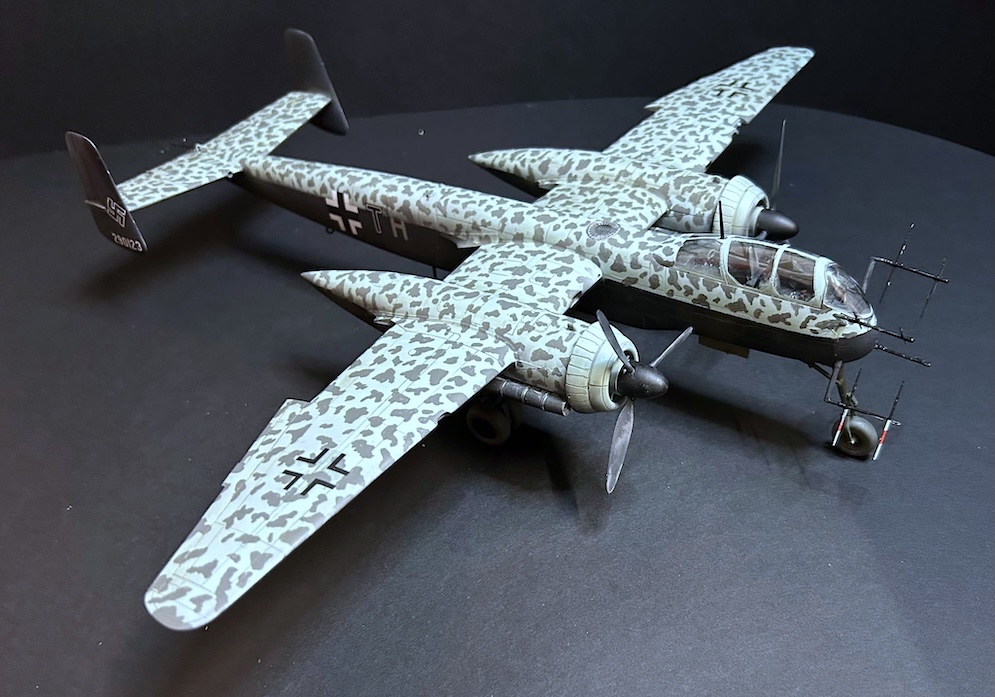
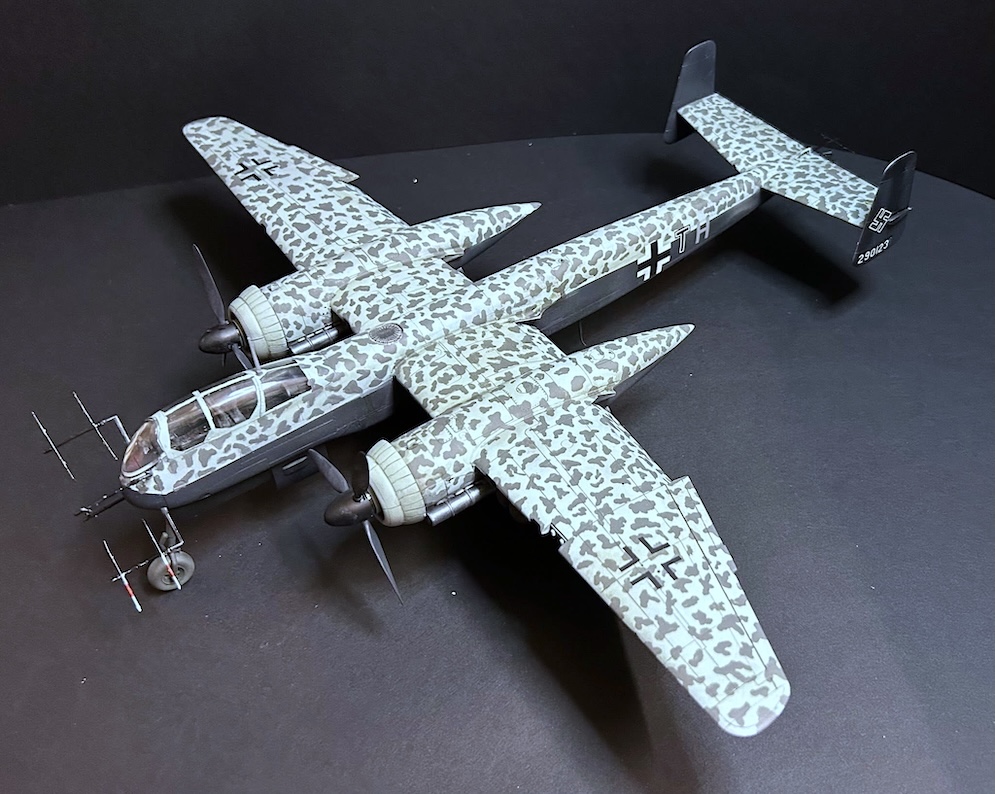
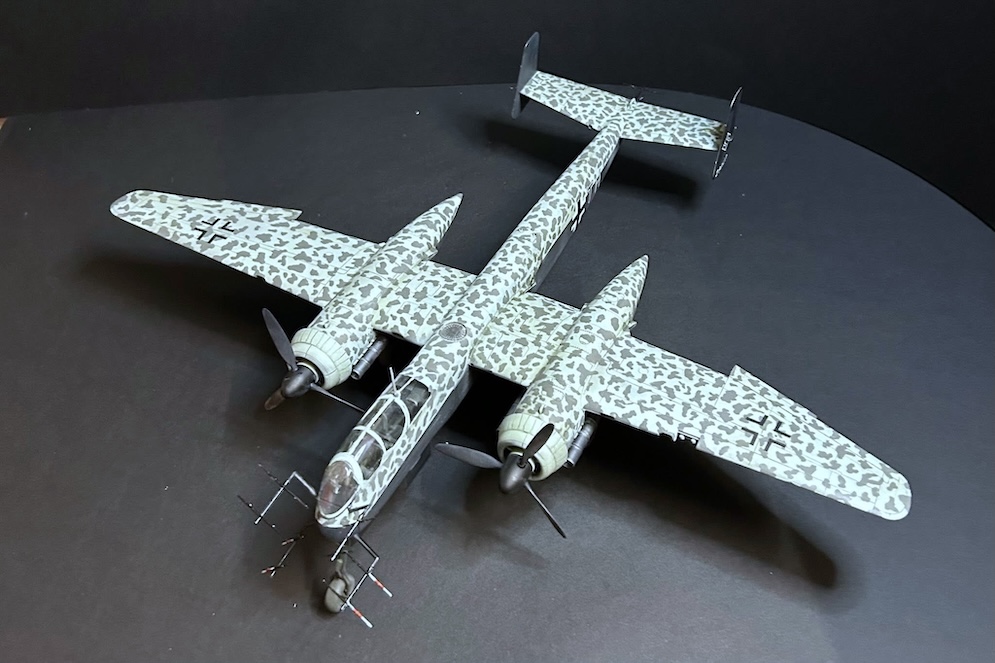
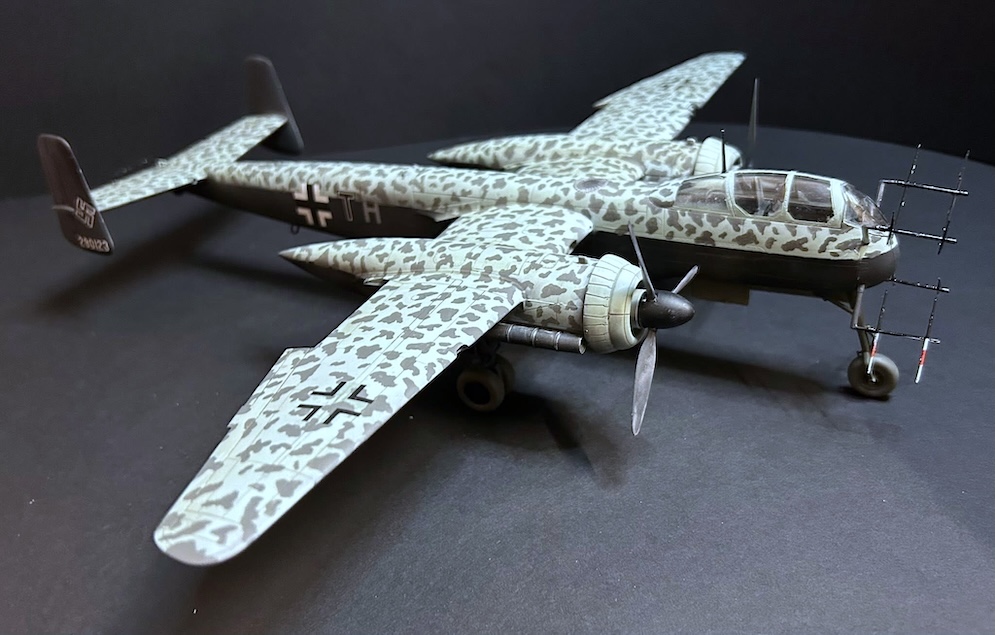
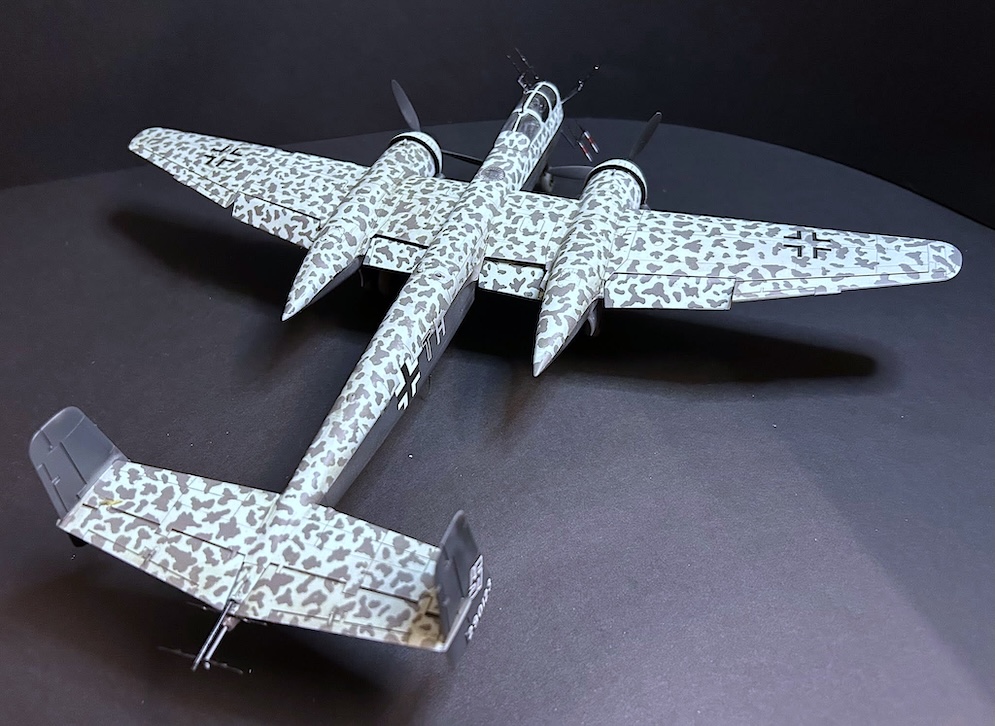
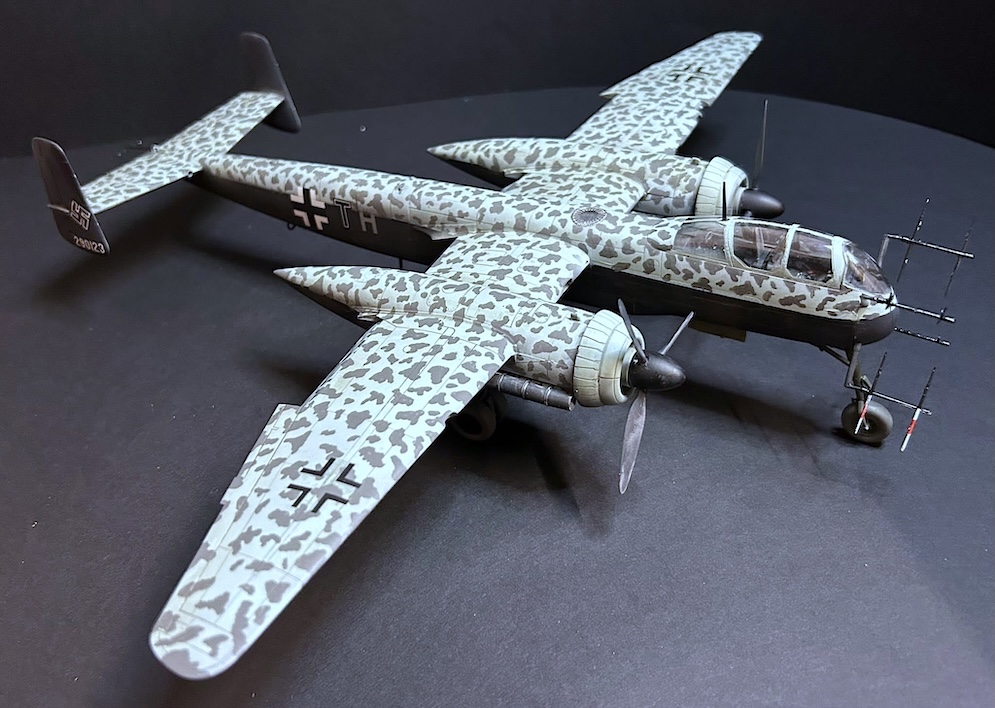
- I built this model from the box, with just the addition of 1mm brass tube for the Cannon barrels
- Construction is straightforward but some care must be taken when attaching the wings to the fuselage
- I decided on the camo scheme after looking on the internet where there are some good images of proposed schemes for this aircraft
- The model was first sprayed overall RLM76. (Xtracolor)RLM 76 was then mixed with RLM 75 and sprayed over the outer wing panels and RLM 75 then sprayed in a mottle pattern
- The aircraft was then masked off and the area behind the jet engines sprayed Xtracolor Oily Steel
- The kit decals were used
- A coat of Humbrol Matt Cote sealed it all off.
Cheers for now, Roger
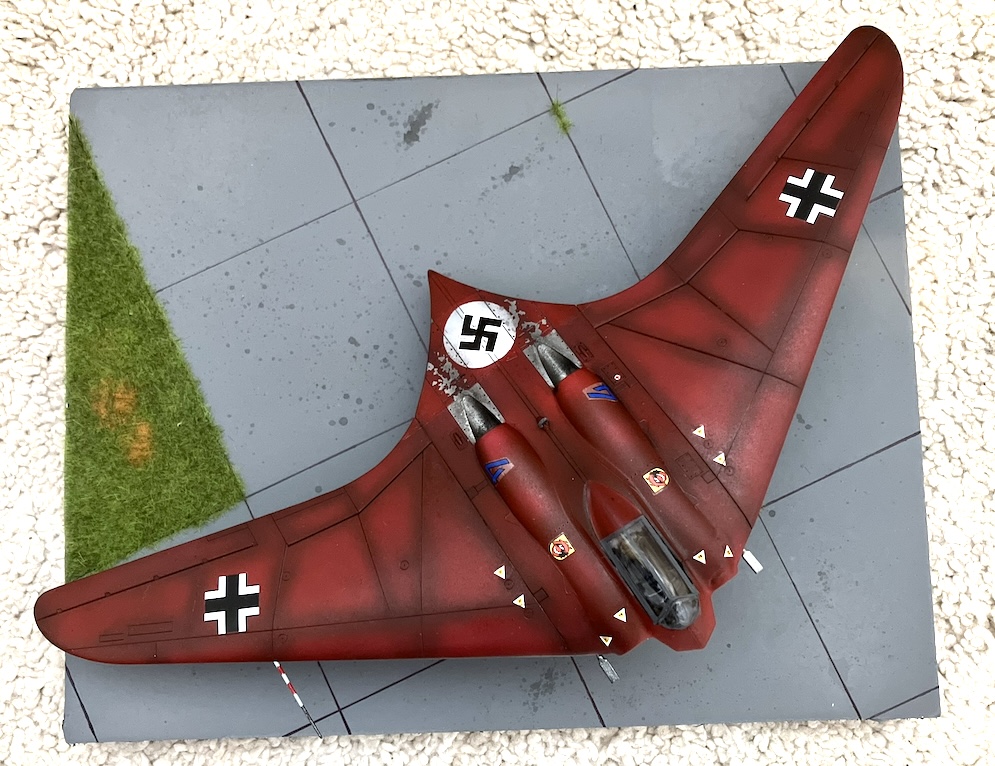

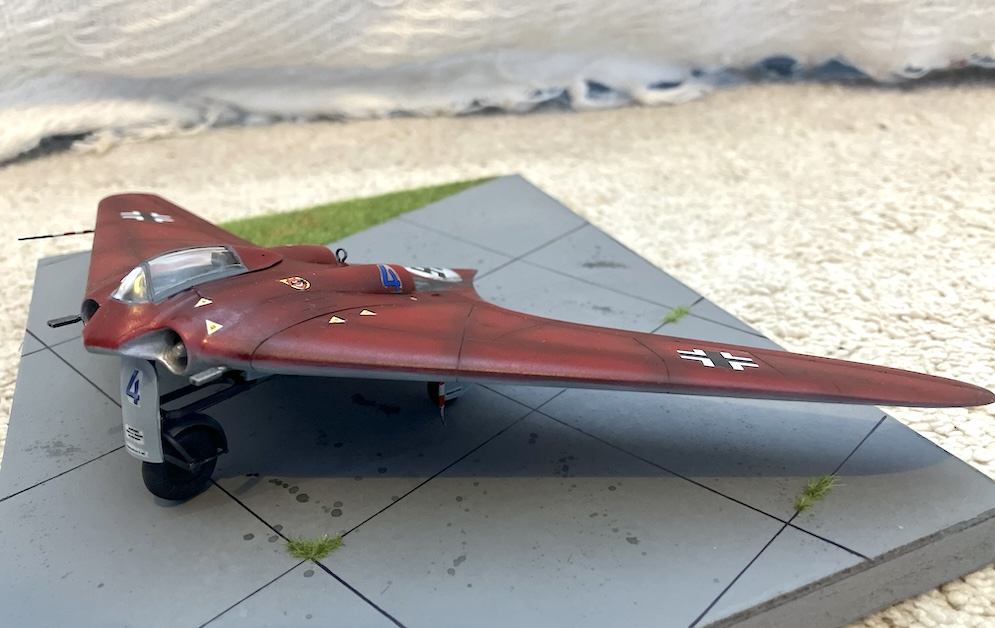

This was bought as a quick model to build whilst travelling for work and I fancied doing something a bit different, hence the red Luft 46ish scheme.
The white circle around the swastika is too big and I didn’t have one without a white outline so you can see the two different whites! You can also see that I struggled with the decals silvering for the numerals and stencils (I hate decals). I do like the way that the red turned out though. Its poor covering ability/translucent nature means that the pre-shading really shows through, which very much gave me the ‘overdone’ look I was seeking.
Craig W.
1:32 scale
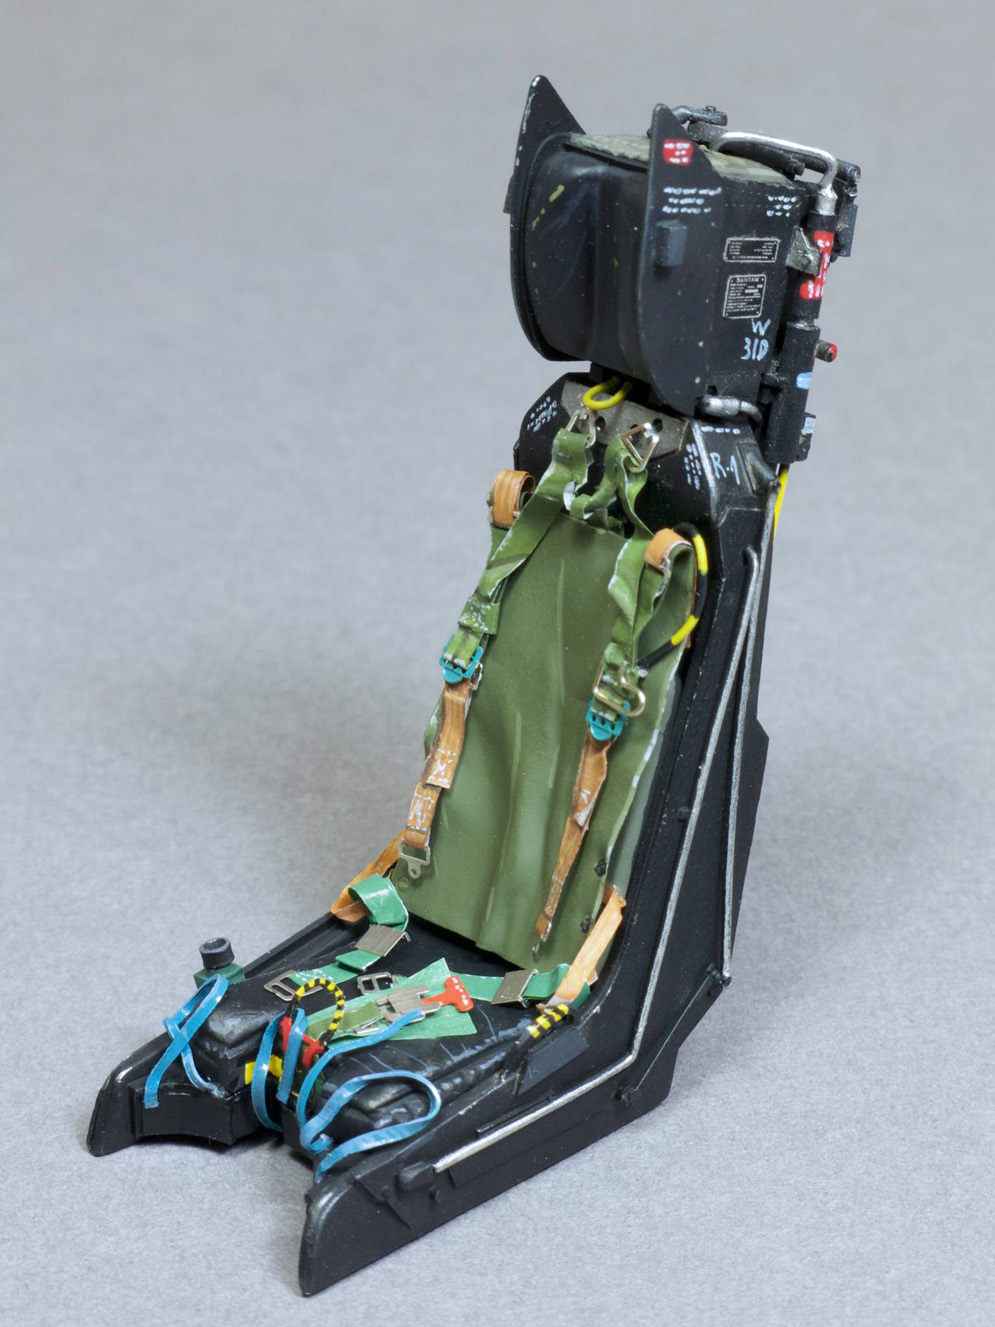
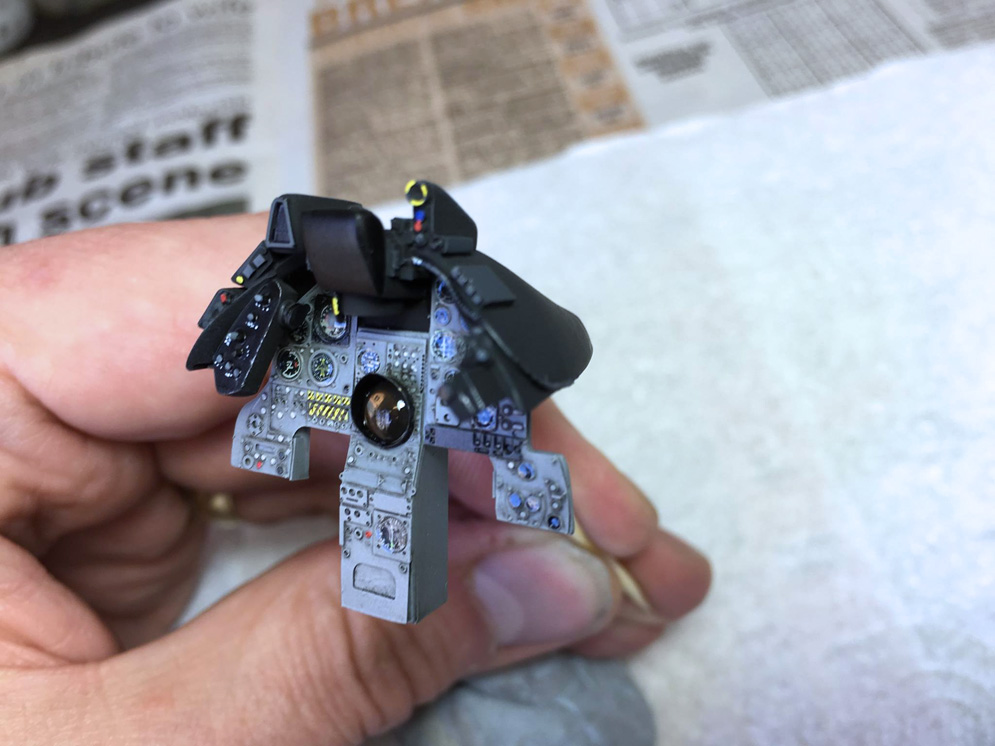
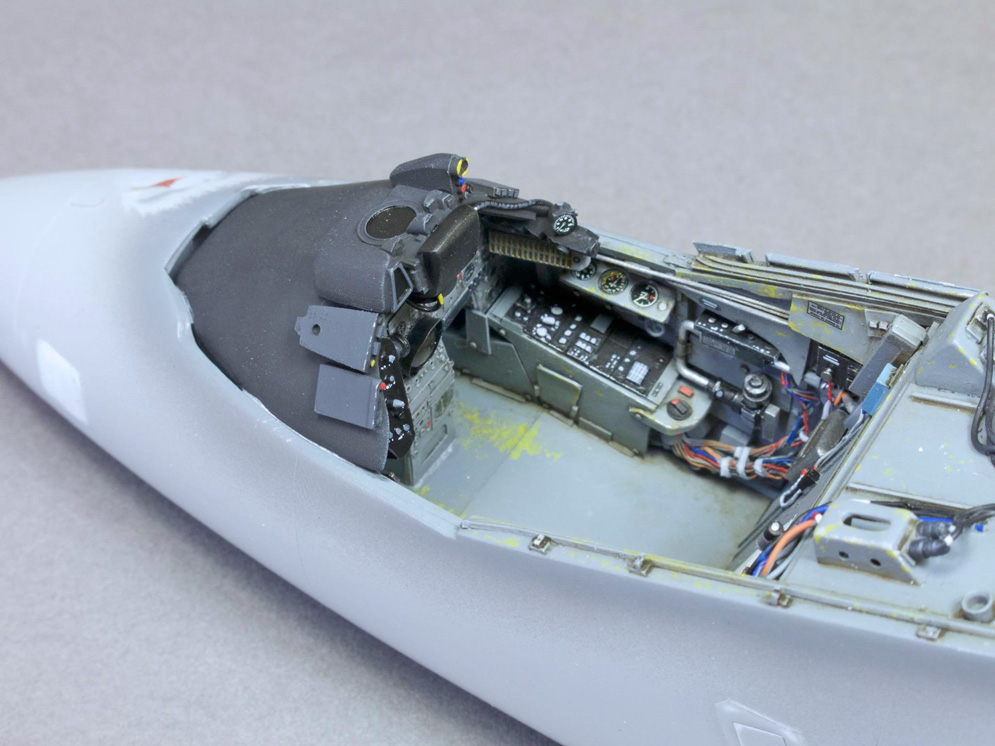
Really interesting scheme chosen by Dave here. His model is the excellent Revell kit that can usually be picked up for an incredibly reasonable price. Accurate masking and a flawless airbrush finish make his model stand out. Note Dave’s nice touch in adding the pilot’s ‘bone-dome’ to the cockpit sill. Presenting his scale models in an interesting, varied way is a true hallmark of the builder – nice work!


Revell 1:72nd
1/72nd scale kits are not normally “my bag” as Austin Powers might say, but in desperate need of a submission for the quarterly round of my local club’s competition and with insufficient time to complete a 1/48th scale kit, I picked this model up from Newark Air Museum’s shop. The kit is an absolute beauty and looks every bit a Hunter when complete, capturing the elegant curves and slender features that characterise Sir Sydney Camm’s finest creation. The kit is particularly well moulded and the panel line are crisp, consistent and perfect for holding onto the oil wash that I use to accentuate the lines during the weathering stage of the model’s construction. I enjoyed building this kit so much that I built another straight after it using the Royal Netherlands markings provided on the kit’s decal sheet and you can see that model elsewhere in the Gallery. The kit took me a week of evenings to complete and had no major flaws worthy of mention; any potential difficulties can be avoided by patient dry fitting of parts before they are eventually glued into place.The parts were stuck together using Ambroid Proweld, the best capillary adhesive bar none in my opinion and after preparing the surface for painting with Alclad’s grey primer, the model was finished with Hannants Xtracrylics XA1001 RAF Dark Green and XA1004 RAF Extra Dark Sea Grey. The wraparound scheme that I chose to adorn the kit was quite challenging as I use the ‘blue tack sausage’ method to obtain the demarcation between colours and for those of you unfamiliar with that technique, let me provide you with a brief explanation. After priming, the whole aircraft was sprayed with the camouflage grey colour and then with long thin ‘sausages’ of blue tack rolled out much like a child might roll out a plasticine snake, the demarcation lines of the camouflage green area were laid out on the model. The grey areas that were not to be sprayed were then protected with a heavy coat of liquid masking agent applied between the ‘sausage boundaries’ and once that had dried, the green was airbrushed on. Within a few minutes of the green drying to the touch (and using hands protected with surgical gloves), the blue tack and liquid mask are carefully removed and hey presto a lovely tight, but soft edge is revealed!This kit was finished using the stencil data provided on its own decal sheet in conjunction with the 12 Sqn markings and national insignia taken from Xtradecal sheet 72-046. All-in-all a thoroughly enjoyable, quick and satisfying build and a kit that can be used to produce a most attractive model in very short order.


Revell 1:72 scale
This kit was built straight from the box and with the exception of the mediocre ejection seat, the kit is a joy to build and paint. The painting process used to finish the kit is described in my other Hunter article elsewhere in the Gallery and as with the other kit, Hannants Xtracrylics paints were used (XA1001 and XA1004) and the underside was sprayed with a tin of Halfords Aluminium Primer. A simlpe wash of Raw Umber oil paint was used to weather the model, applied over a protective coating of Johnsons Klear and the flat finish was achived using Hannants Xtraflat varnish. The touches of detail that I employed to bring the model to life consisted of the streched sprue whip aerials, visible sticking out of the upper surface of the wing tips and the aircraft’s spine. The pitot tube is also stretches sprue but using the tappered section of the ‘stretch’ to better represent the pitot found on the real aircraft. The polished metalic effect on the pitot tube was achieved by rubbing SnJ Polishing Powder onto the bear plastic, which although not a very durable finish, is arguably the best metalic effect that can be achiveved on a model, especially for part that will not be touched once the model is complete.


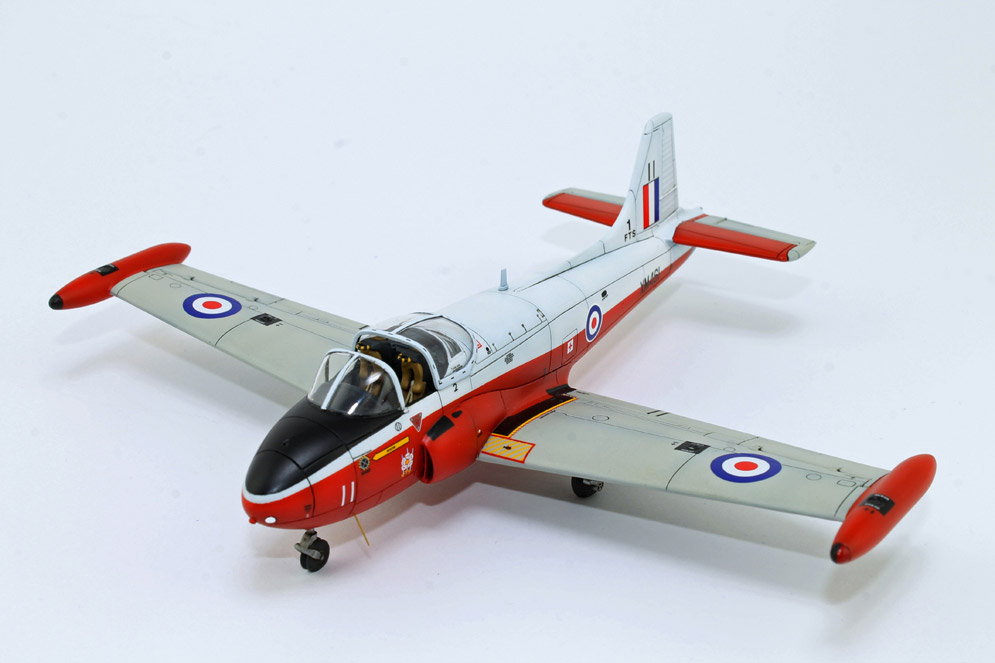
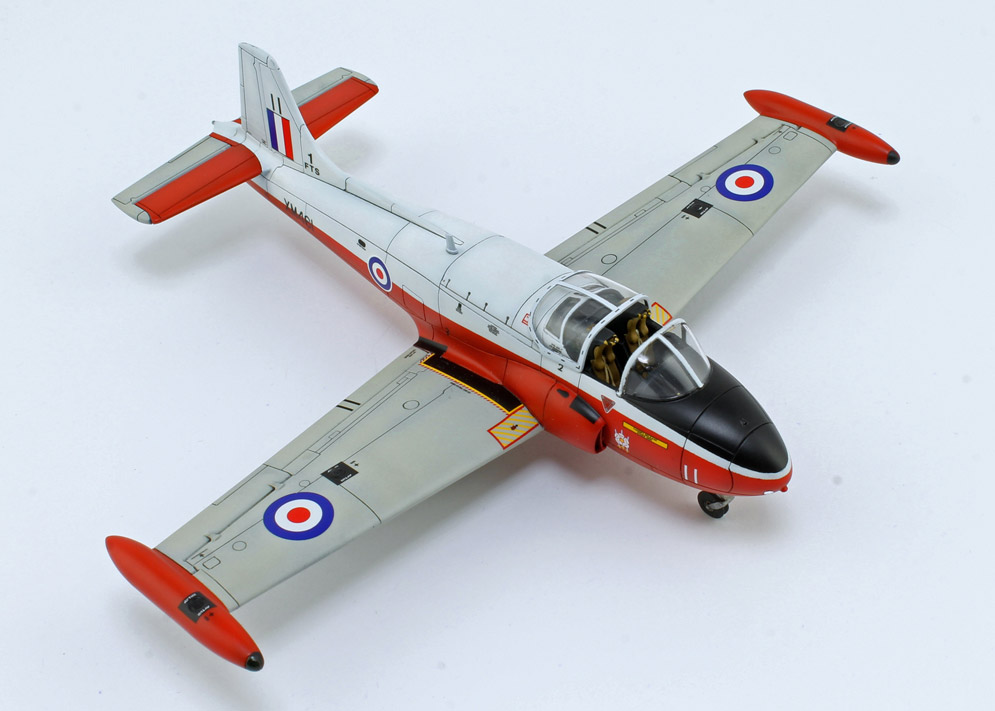
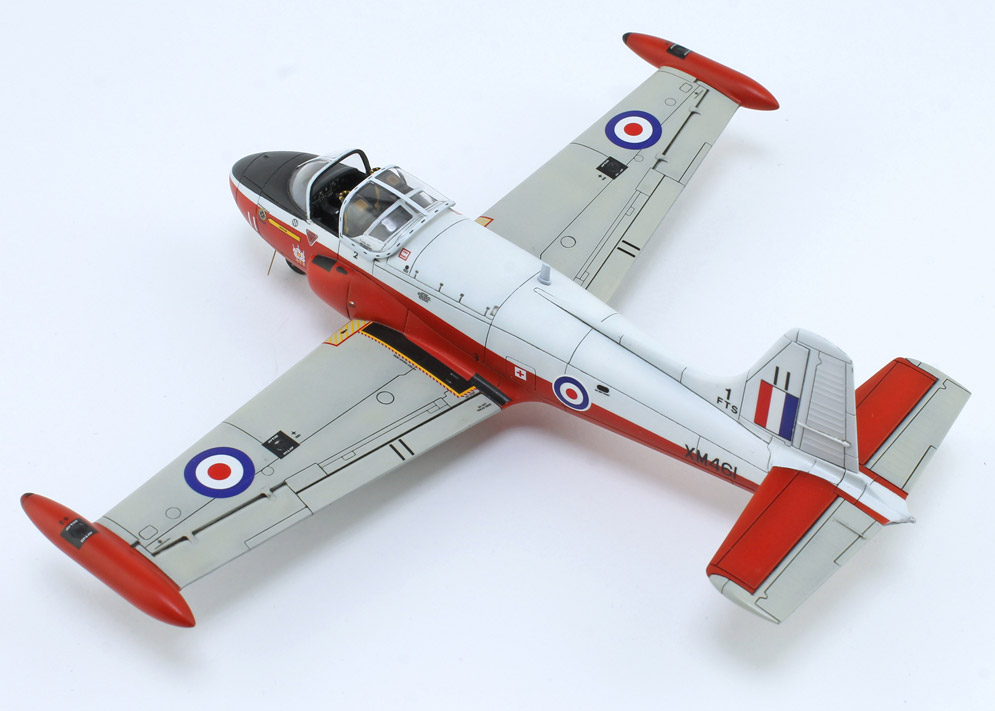
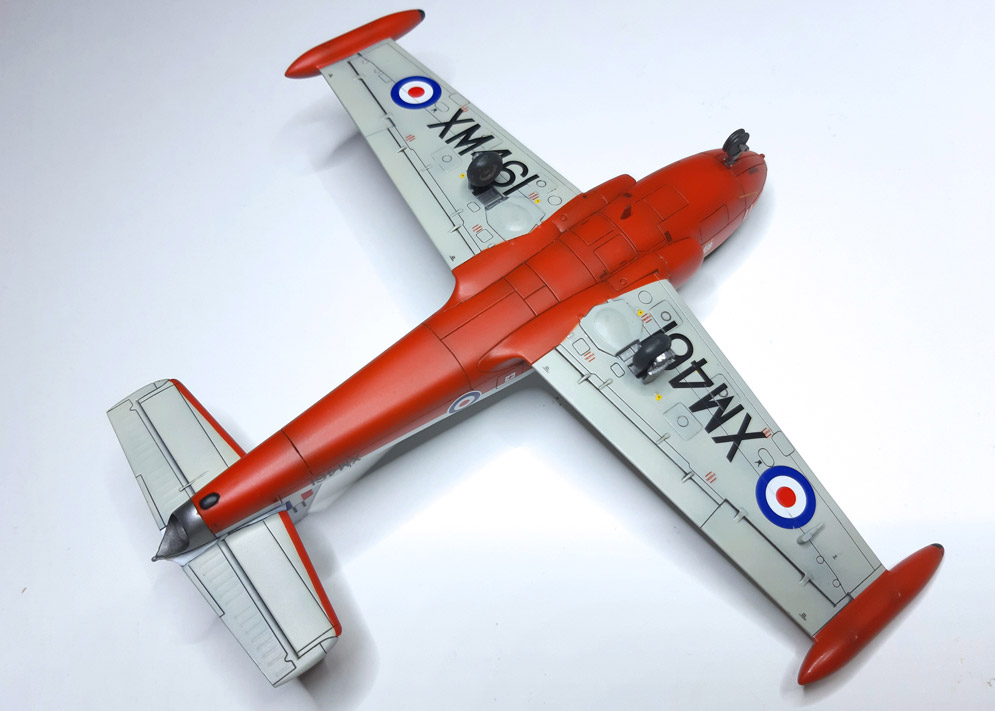
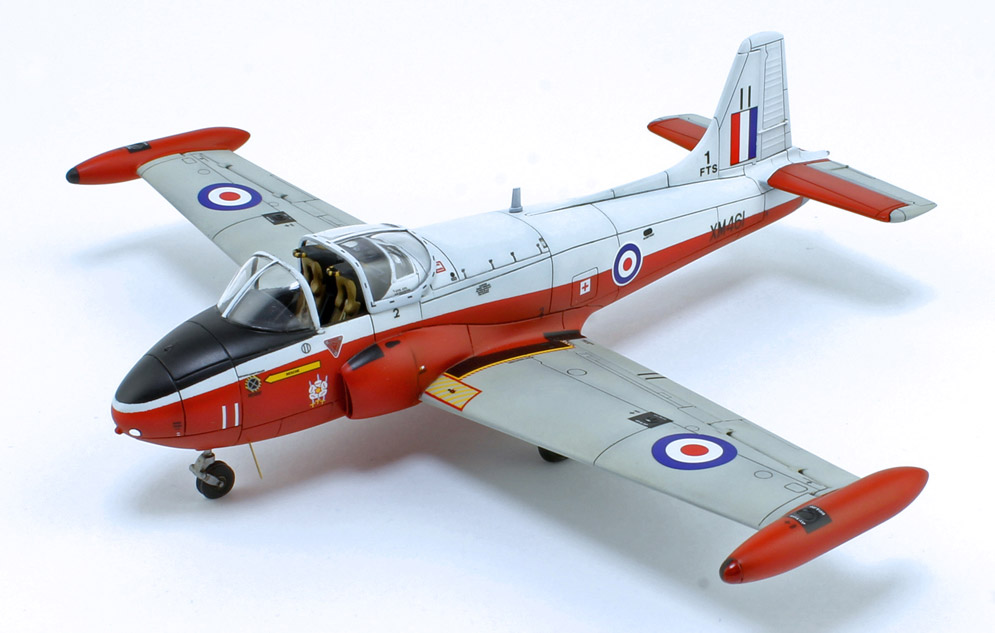
This is my Airfix 1:72 Hunting Percival Jet Provost T.3a
This is the new-tool Jet Provost released by Airfix back in 2016. It has been reissued since then with new decals and also in starter pack. This is the first release kit A02103.
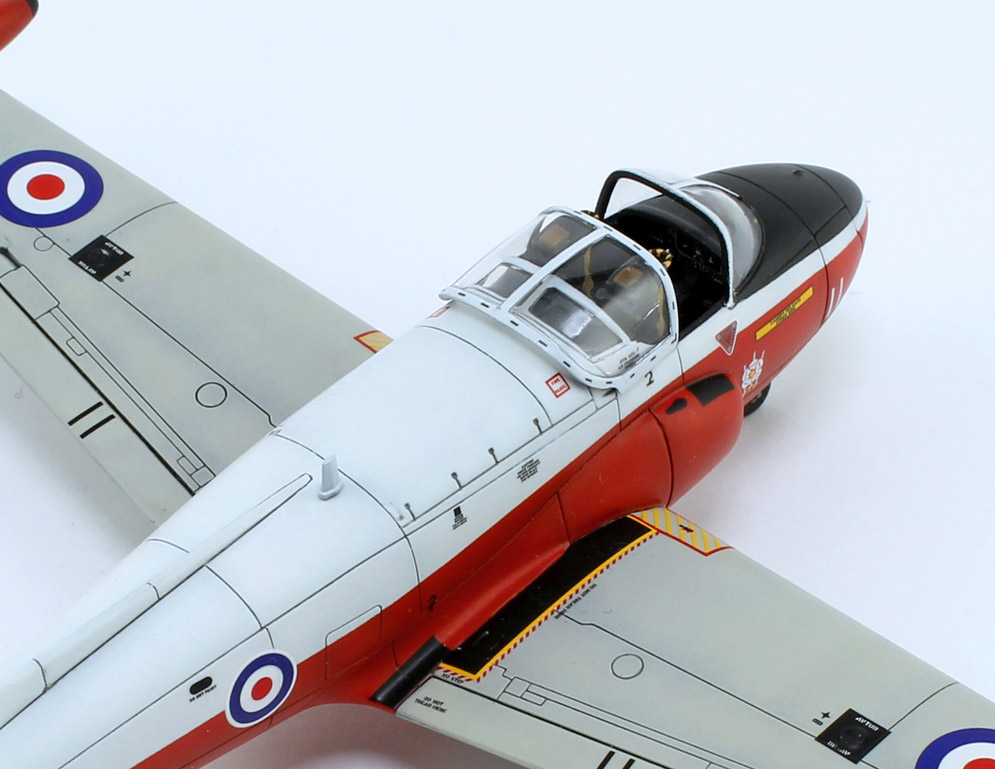
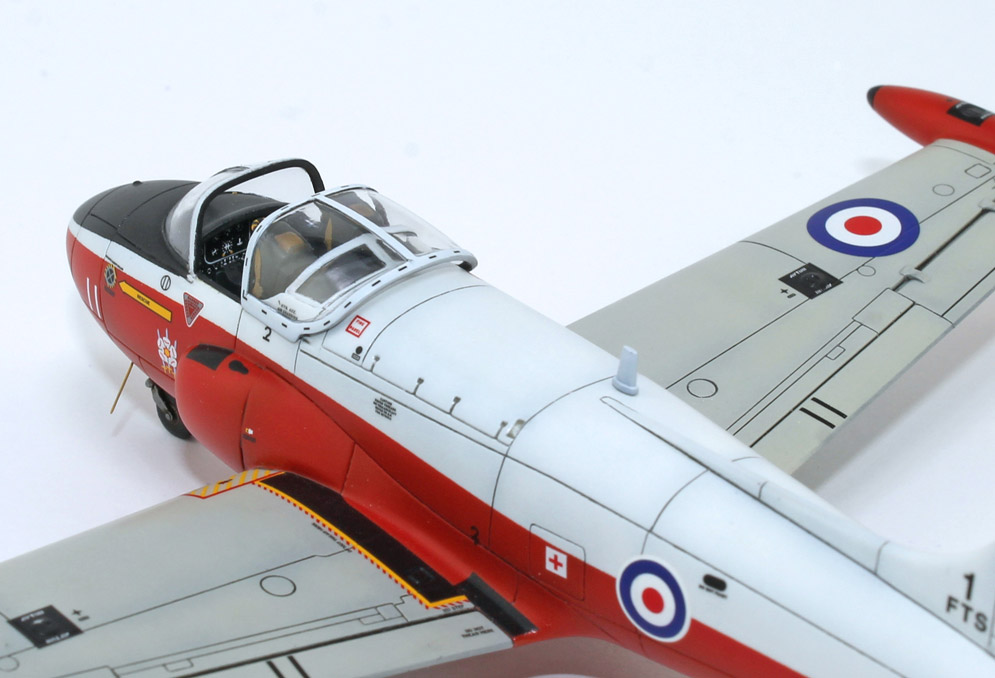
It is a simple kit, not many parts, goes together well enough with little filler and 2 nice decal options from the kit. Cockpit is very basic with instrument panel provided as decals. Ejection seats are basic but look fairly good when painted. Wheel wells and undercarriage layout is also quite basic.
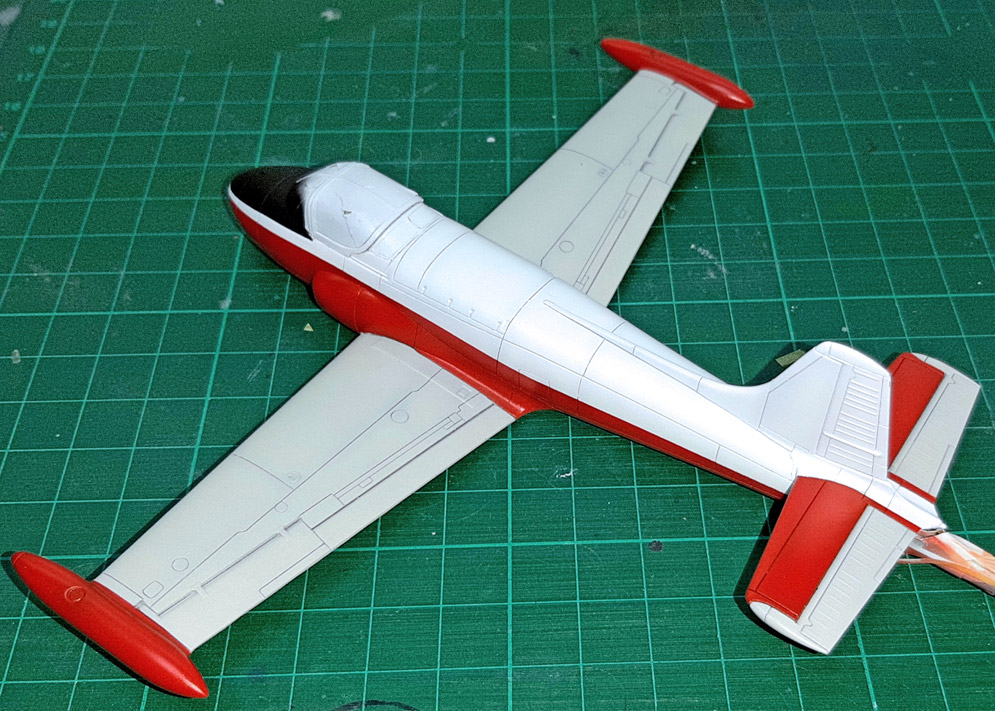
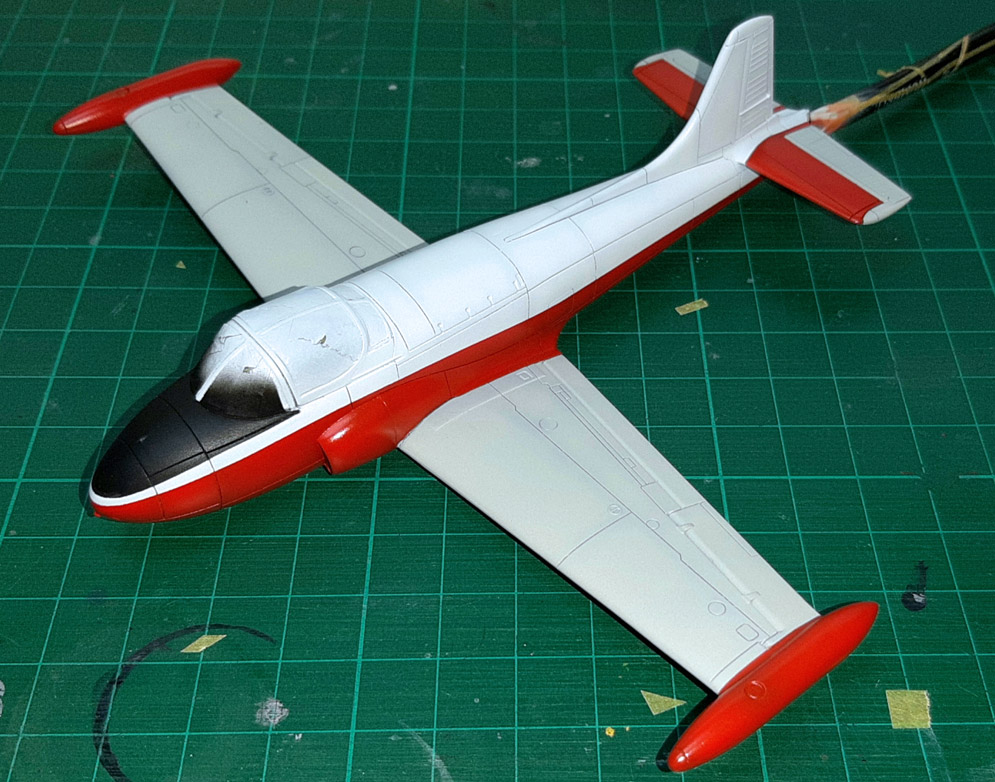
This model was built straight from the kit and I used kit decals. The entire model was primed in black Mr Hobby Primer. It was finished in RAF trainer colours using paints from Mr Paint, AK Real Colours and Zero Paints for clear gloss. Given the colour scheme chosen I started with the white, followed by the grey wings, finishing off with the signal red. All were sealed with Zero Paints clear gloss.
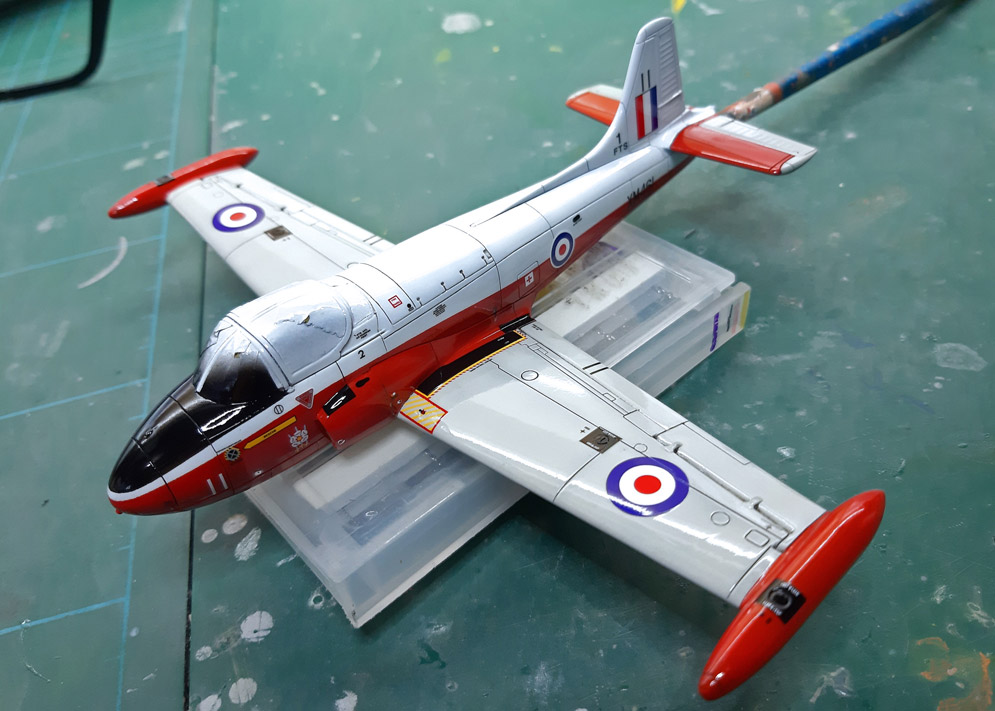
Panels highlighted with a mix of Ammo Oilbrushers mixed on a palette which where thinned with white spirit. Kit decals went on without any problems and responded well to MicroSol/Set. Final coat was a semi-matt clear from Mr Paint
Given the small amount of parts, the majority of the work and time devoted to painting, masking which was quite demanding given the complex curve between the red/white, decaling and finishing touches. This was my third Airfix Jet Provost and definitely it will not be the last with so many more schemes available. I highly recommend it for both beginners and seasoned modellers alike.
Thank you and regards,
Joseph F.