A few things I did find that had me scratching my head, and hence my contacting Geoff, was some poor alignment of the fuselage halves – once the top was lined up the bottom was at best 2-3mm out of true – meaning some serious trimming of the bottom of one side of the fuselage. Not quite what I expected.
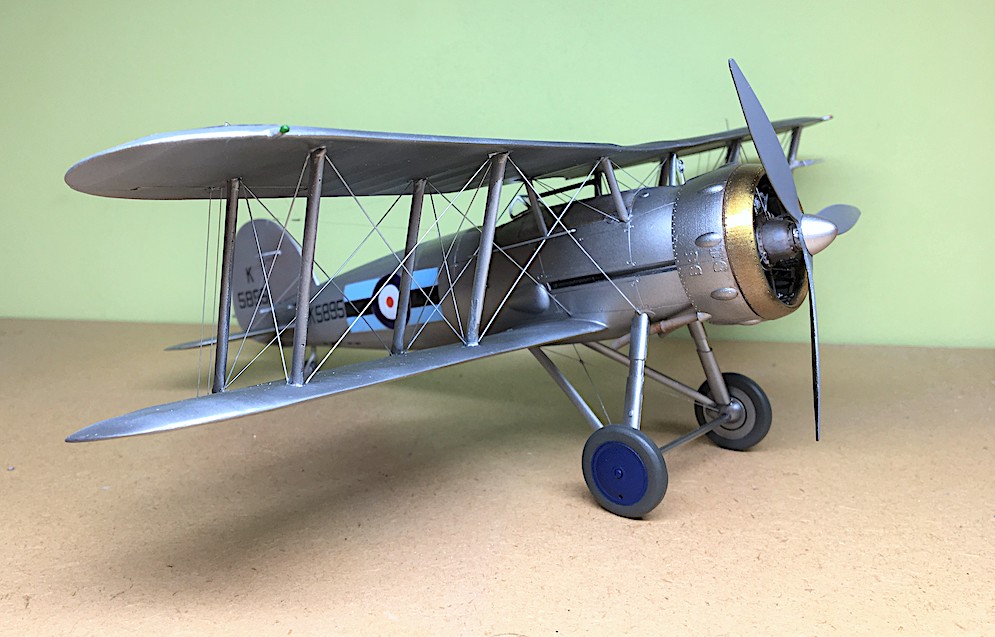
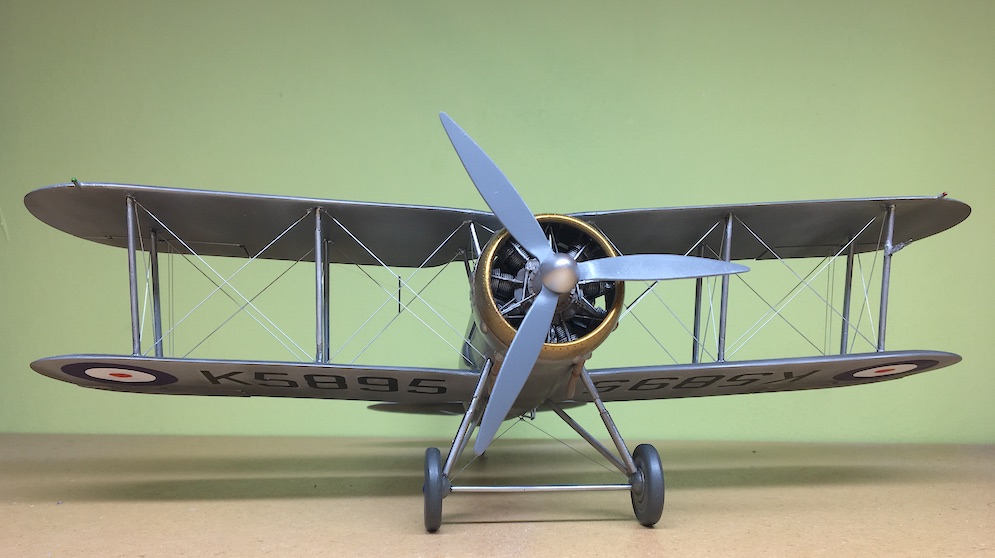
Also the wheels are cast in one unit with the brake/housings which just makes things a little more interesting when it comes to painting/spraying. I used my DSPIAE circular cutter to cut the appropriate masks from wide Kamoi masking tape. It’s quite tacky though so again care is needed when peeling it off! The cutter was also used to blank out with tape the position of the fuselage roundels when spraying the Squadron stripes.
I also used, where I felt it necessary, small and not so small pins to strengthen the attachment of the wings, not only the lower wings to the fuselage but also the three parts of the top wing, undercarriage legs where possible and elevators, rudder and ailerons.
I also ended up pinning the cabane struts. You’ll notice in the picture above, they’re all in place, but…
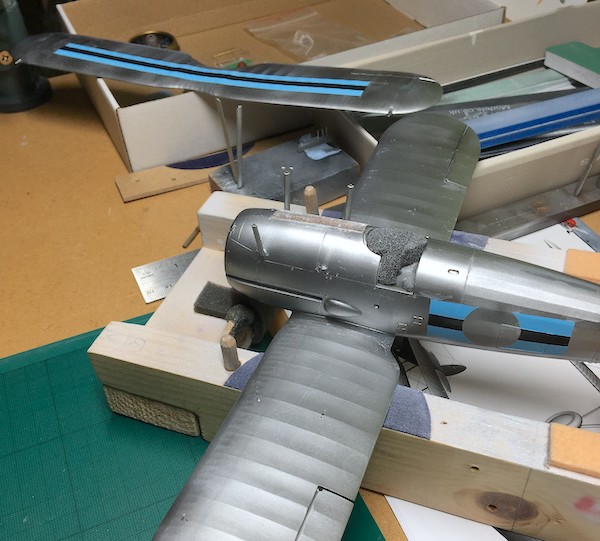
…one is missing and eventually all came adrift. Clumsy I know, but they did need strengthening which was a little fiddly as I used Albion Alloys 0.33mm silver rod which seemed to do the trick.
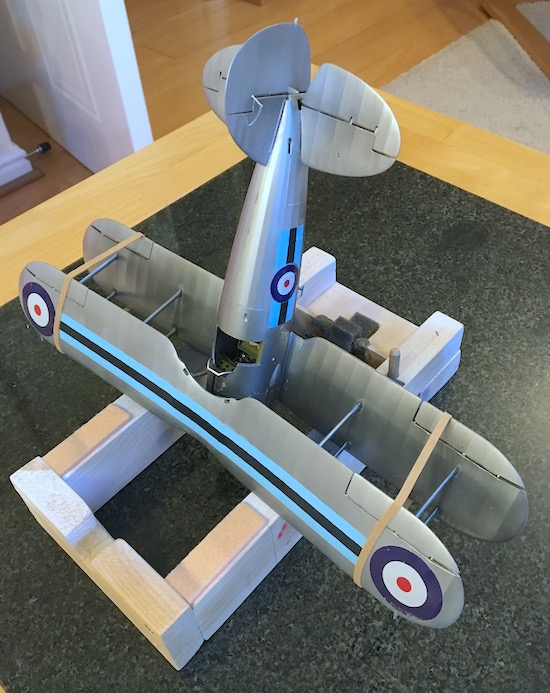
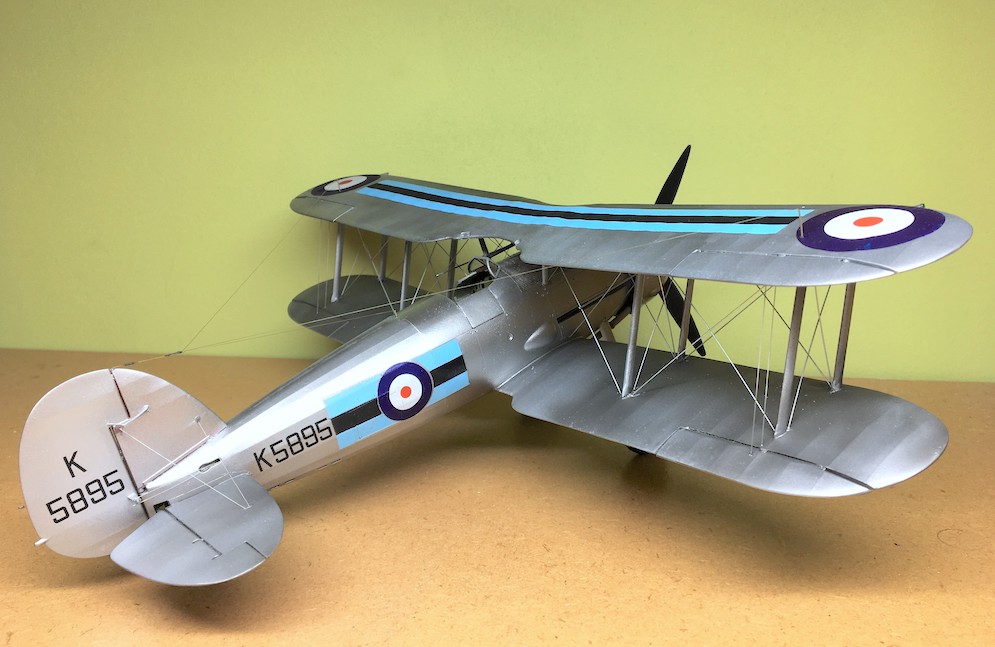
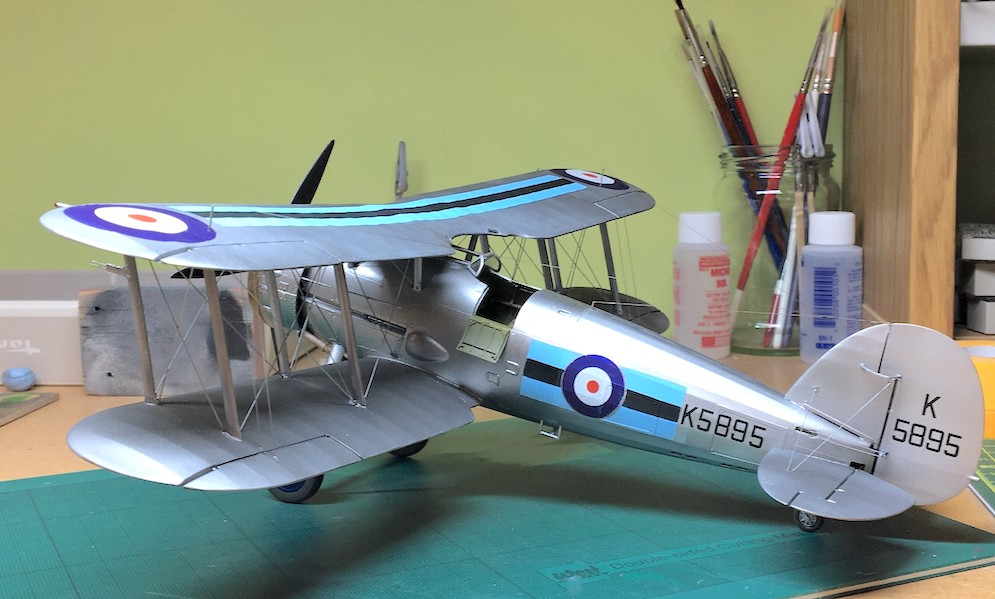
Oh yes, paints! A little pre-shading before applying AK Extreme Metals matt aluminium and dark aluminium and trying to blend them a little in places to make the surfaces a little more interesting. VMS matt topcoat varnish for all the fabric surfaces and the metal panels to fuselage I applied with a wide brush some AK Gauzey to try and get a little shine on the metal.
All masking generally with Tamiya tape, all other paints Vallejo, but I tend to thin them so as to get them out of the airgun fast. Oh, and I only use single action airguns, I tried a double action but it defeated me, can’t do multi-tasking, it’s like patting your head and rubbing your tummy at the same time!
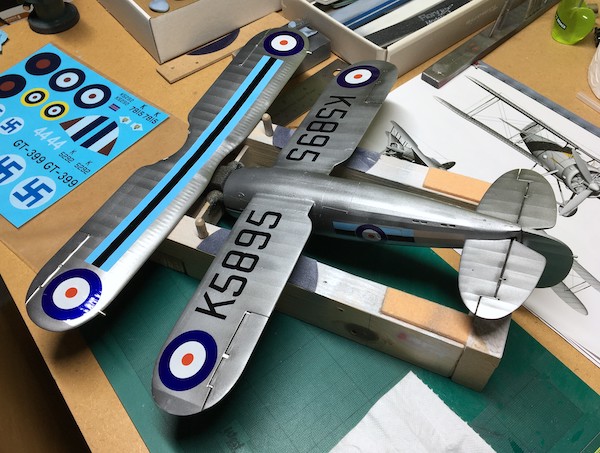
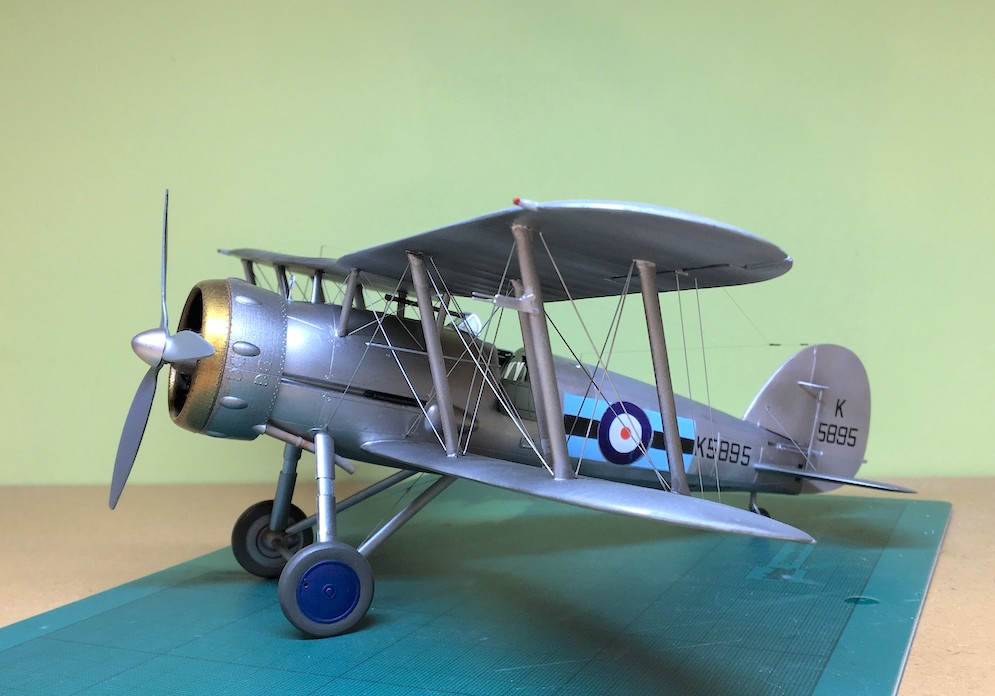
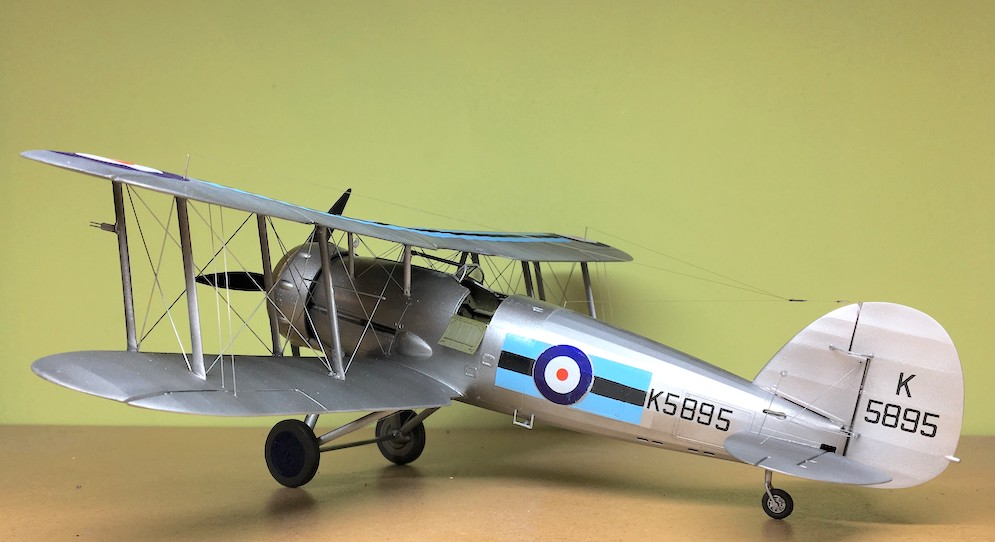
You’ll also notice by the pictures that the 74 Squadron ‘Tigers’ decals had gone out the window. On my first attempt at the long upper wing black and yellow stripe after putting it in just warmed water as normally suggested, as I lifted it the stripe split into 4 pieces and then began to shatter completely. Some of you will no doubt have had this happen in the past and will simply put it down to my lack of experience. They were all extremely thin but the rest I managed somehow which was really just the roundels. The registration letter/numbers was a figment of my imagination and was put together after raiding the spare decals box. Again the eagle-eyed amongst you will be able to put the record straight I’m sure.
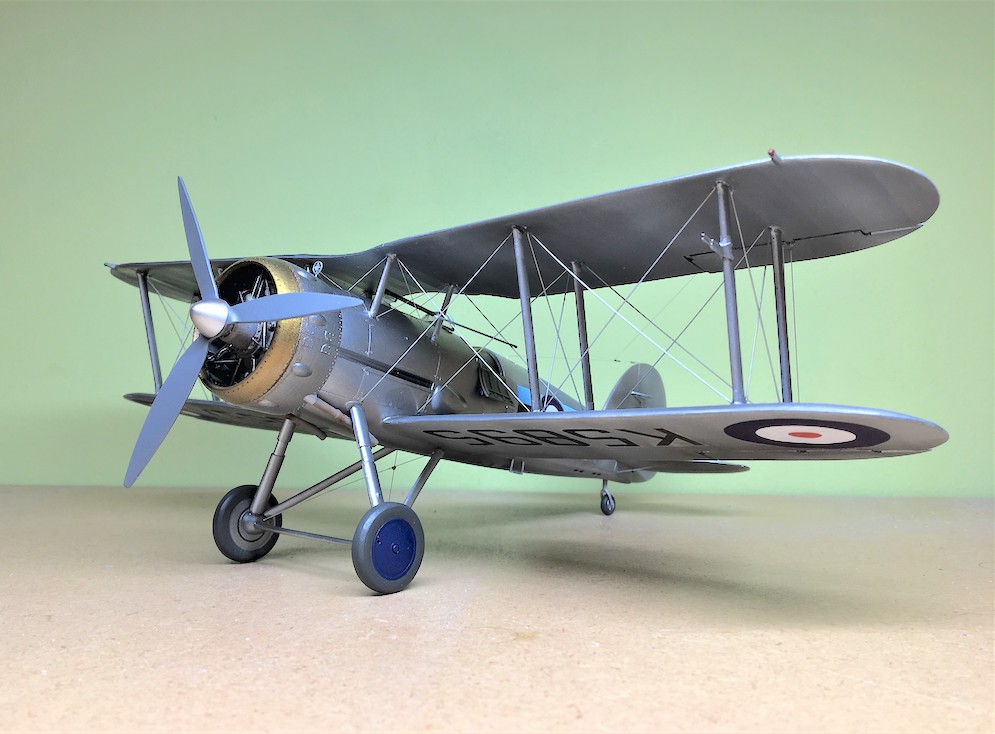
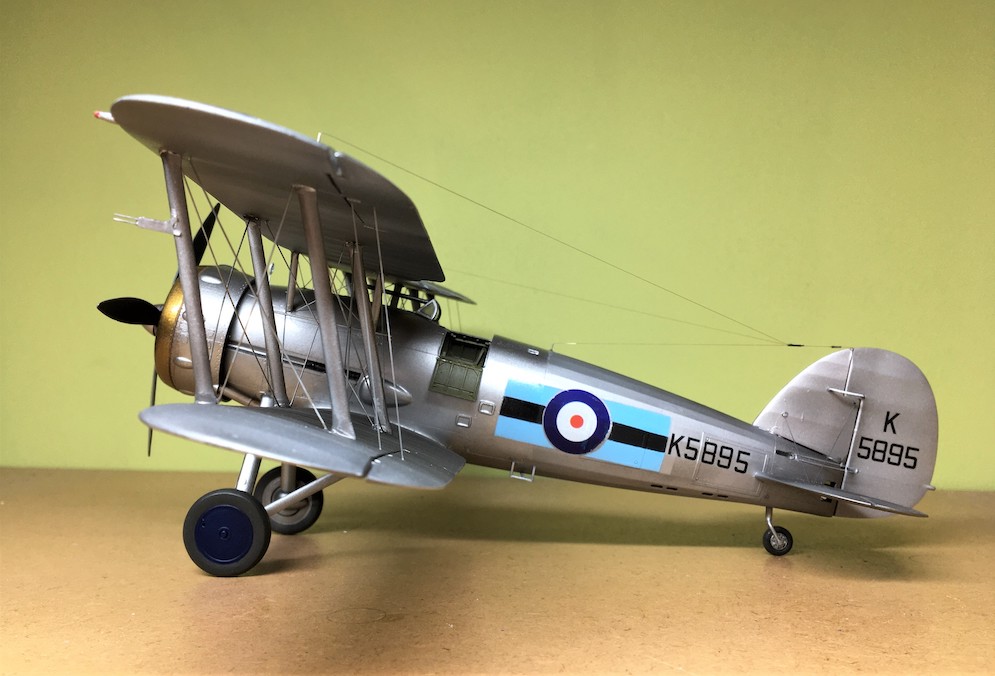
The squadron stripes are 151 Sqn based at North Weald, made up from ‘B’ Flight of 56 Sqn. I don’t think its strength was ever any more than 6 aircraft prior to the outbreak of war. I will admit here to sentimentality as I spent some time living at North Weald with an aunt and uncle of mine during school holidays, but they were operating Hawker Hunters at that time!
Continuing the build, yes, it’s a biplane, fear and dread to some, but patience is all that’s needed. The Gauntlet has quite a lot of struts and it took me a few days to pluck up the courage to tackle them but I found that if I gently rested the top wing on the cabane struts and tilted one way and then the other I could ease in the main interplane struts one at a time. Then equally gently trickle in thin superglue (I use ZAP thin CA) on the end of a sharpened cocktail stick – works for me! Also by leaning the aircraft on the leading edge of the wings and finding the right rubber bands – not too tight – I left it overnight and all seemed to be well.

I used Albion Alloys silver rod for the flying wires (0.2mm for inter cabane struts and tail area and 0.33 for the main wings) as a bit of an experiment. Not actually convinced it’s worked as they maybe look a little heavy. The main reason was that on the Gauntlet most of the turnbuckles are virtually hidden beneath the wing and fuselage surfaces, so using something like Gaspatch turnbuckle or Bob’s buckles seemed a bit unnecessary. Some will again I’m sure disagree.
To be honest I really enjoyed the Gauntlet, not perfect but better than I imagined when halfway through the build.
Next up I think a 1:48 scale monoplane!
Paul J.
Gallery
Below are a series of images of the completed model. Click on a thumbnail to see the enlarged image.


Max Williams says
That’s a fine looking Gauntlet Paul, the first Silver Wings one that I’ve seen built. Mine is nearing completion; there are some issues that need to be addressed but nothing really beyond the capability of a modeller who is experienced enough to tackle a Silver Wings resin kit, not to mention the sometimes bewildering instructions!
Max Williams
Paul Jarrold says
Thanks for that Max, I did enjoy it despite a few snags!
I forgot to mention the prop. I think, which I felt was poorly produced and although I used it I was tempted to substitute an upgrade Mk1 prop. but it wouldn’t have been a proper Mk2 of 151 sqdn would it?
Max Williams says
Yes Paul, the prop is poor, not at all up to the Silver Wings standard, but I had always planned to use a Watts two blade one anyway so that wasn’t a problem.