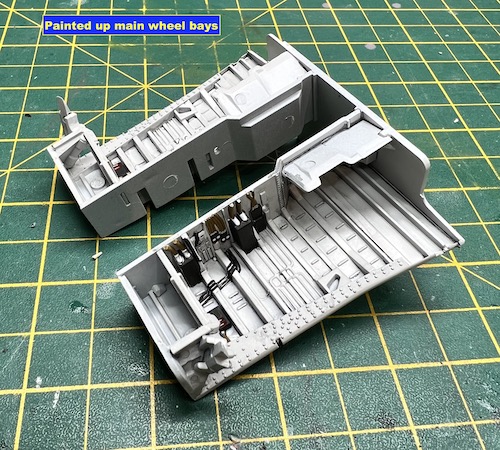
Rear fuselage and wing assembly
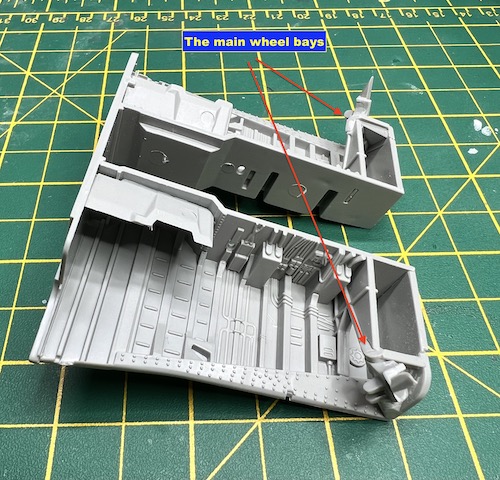
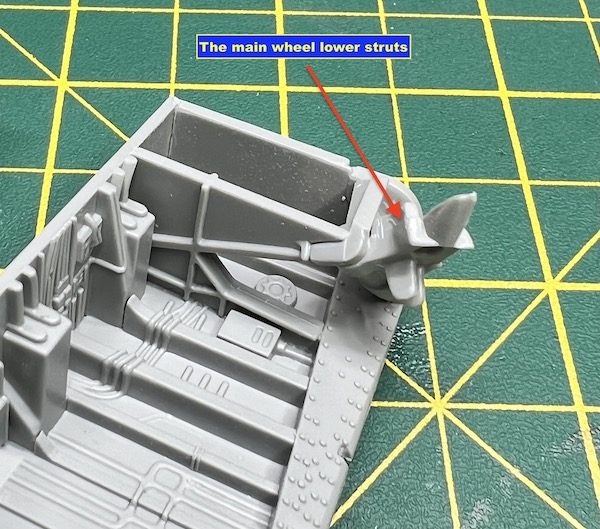
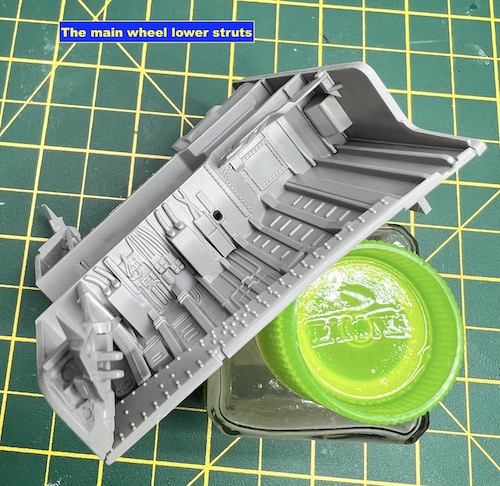
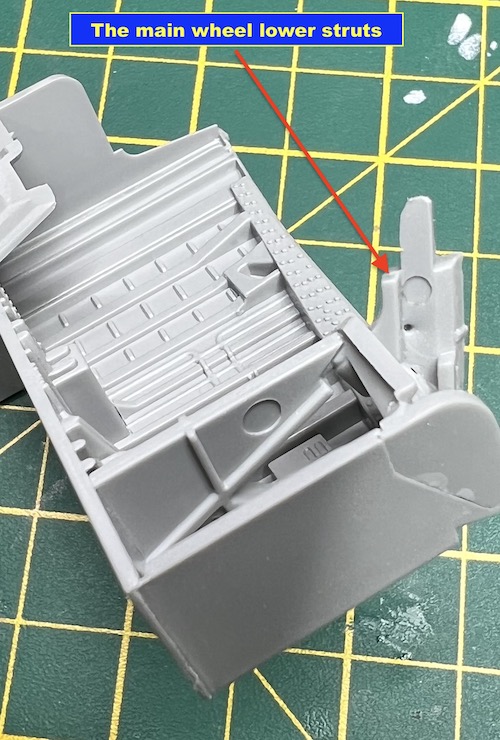
The next stage of the build was to construct the rear fuselage and wing assembly. This started with the main wheel bays. The bays themselves are quite straightforward but the instructions aren’t very clear about how to locate the main strut bases. It took me a little time to figure this out but hopefully the pictures will show how they position in the bay. I didn’t add the lower section of the struts at this stage as they would be prone to being damaged as I handled the model during the build process. The bays were painted up using a very light grey as research showed these aren’t actually white, even though they look white. The details were picked out using Vallejo acrylic paints and a Tamiya light grey panel wash was used to bring out the details.
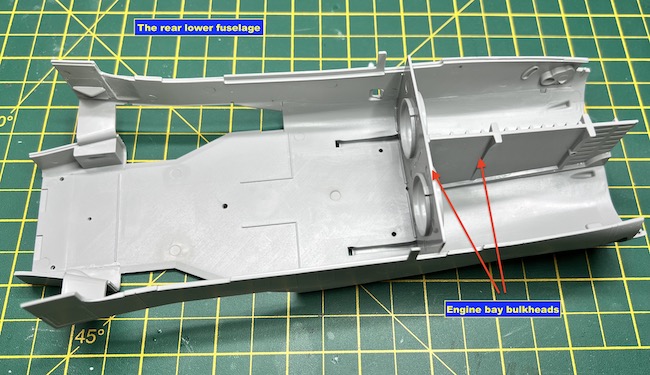
The rear engine bay bulkheads were now added. Take care to get these in the correct location as this is critical when attaching the upper rear fuselage section. The wing seals that allow the wings to enter the fuselage when sweeping are make from a rubber material. I was quite sceptical of this at first due to my worry that glue wouldn’t react with it. I need not have worried as Tamiya glue works well between this rubber material and the kit plastic. Additionally, the seals are held in place by a plastic back plate which holds them firmly in position.
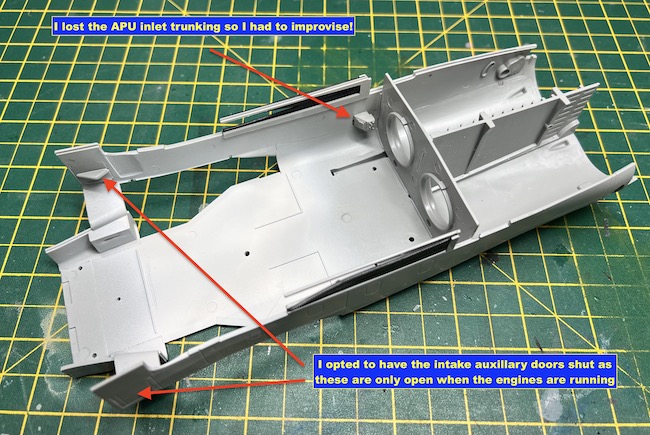
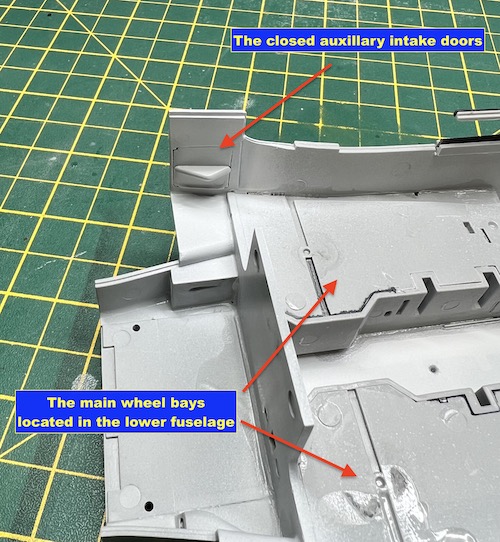
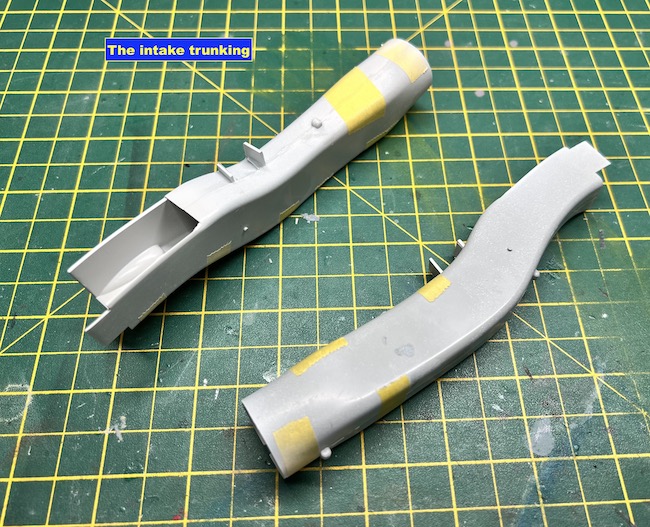
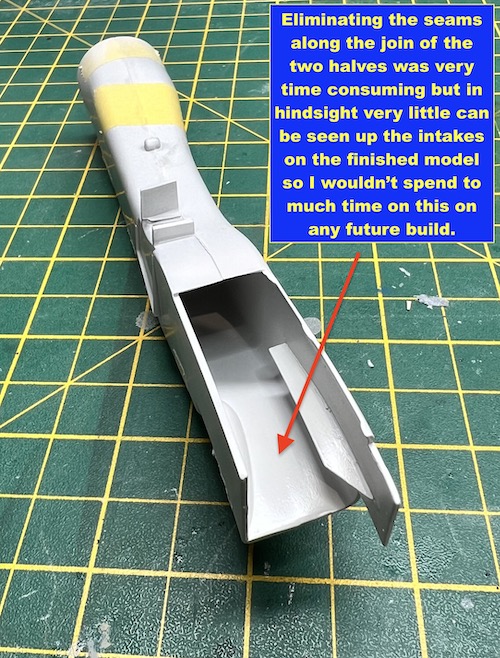
The next part I looked at were the two auxiliary engine intake doors located on each side of the fuselage. This kit has the option to have these doors either open of closed. Research (and talking to some of my colleagues who have flown Tornados) informed me that these were only open when the engines were running and when in flight only in the lower speed envelopes. As my model would be shown in a powered down pose I opted to close them up. The wheel bays were then positioned into the lower fuselage – take care here as the inner intake trunking sits on these and the wing sweep pivots are attached to the intakes – if you position any of these assemblies incorrectly the wings won’t fit correctly. Talking of the intakes, I found these to be the most frustrating part of the build. They are narrow and long so eliminating the interior seam proved to be very difficult. I got rid of the majority of the seams but some were just too difficult to get to. Fortunately, I can now say in hindsight that on the finished model you can barely see up the intakes so I needn’t have spent so much time on these.

Kevin Rowbotham says
Outstanding job on the GR4 Dave…..I’ve never built a Tornado but yours has certainly inspired me!
I really enjoyed your write up, thanks for sharing,
Kevin
Paul Ainsworth says
Hello,Dave – Magnificent work as always.
This Tornado kit is absolutely superb and you’ve done great justice to both it and the Tornado aircraft,
Another fantastic aircraft that’s disappeared from our skies.
Seeing ‘scale replicas’ like this easily remind us of the real aircraft we love and miss.
A fantastic aspect of our wonderful hobby.
All The Best,
Paul.😉👍
Christopher Woolford says
Terrific build Dave. You have got her right – beautifully photographed too.