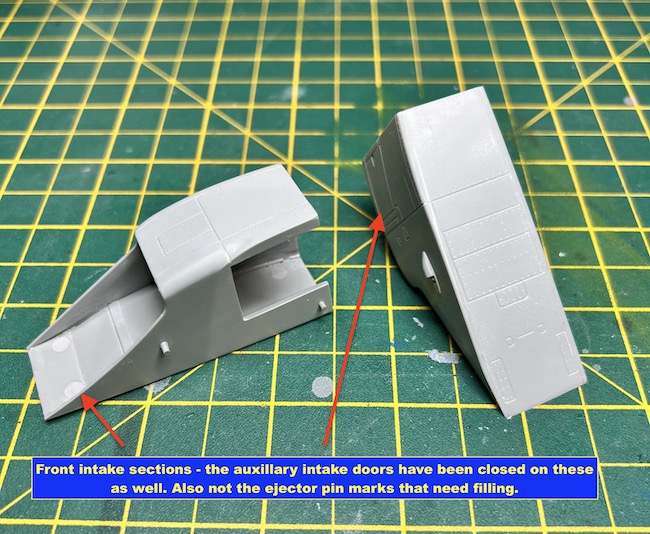
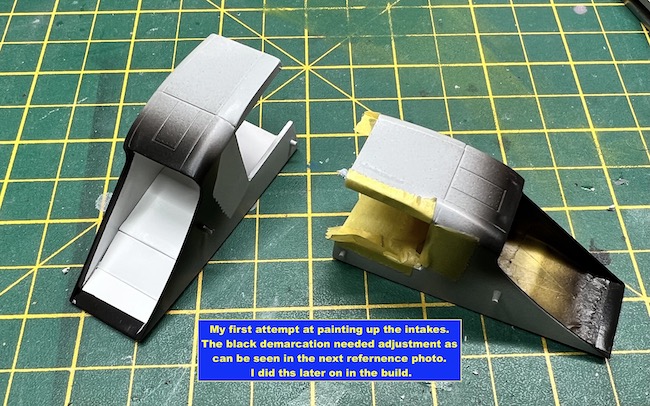
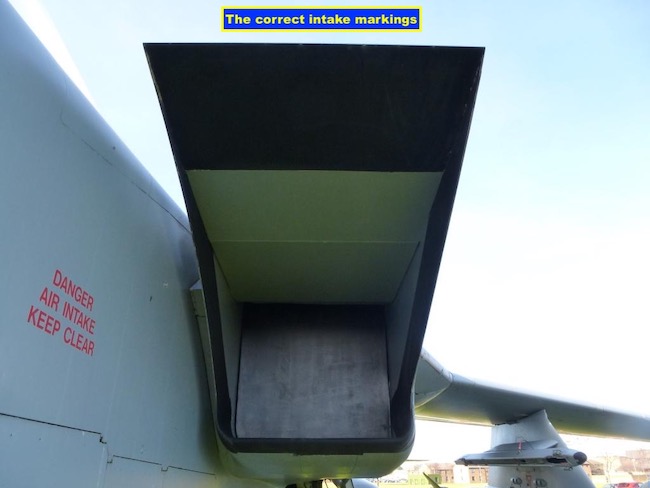
The front section of the intakes again need care in their assembly and painting. I initially got the colour demarcation wrong as shown in the initial photos below. It should be as shown on the reference photos which I corrected later.
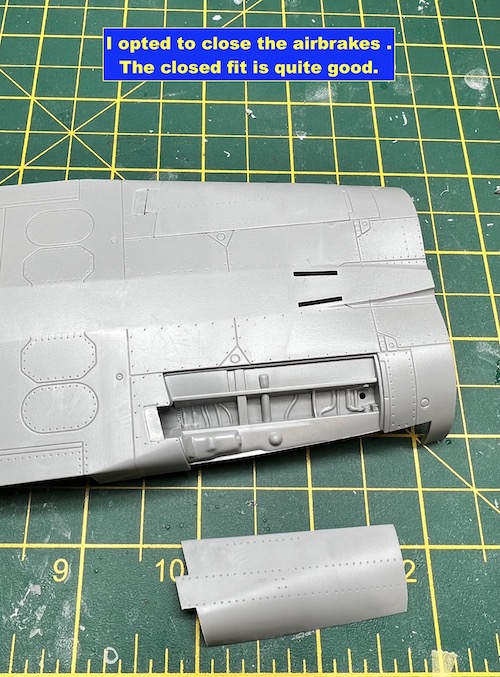
The kit has the option for either open or closed airbrakes…
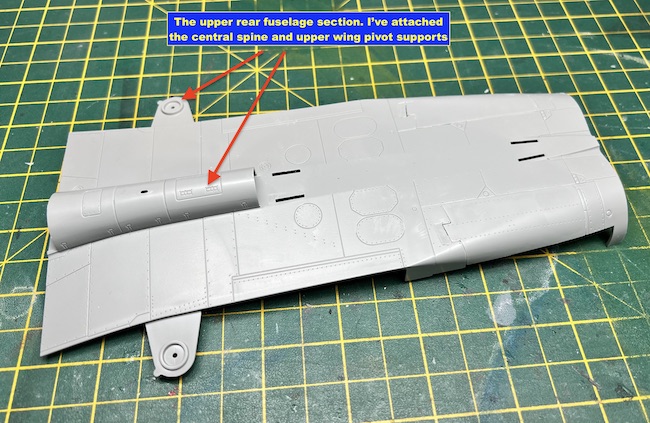
I was again quite sceptical about how well they would fit in the closed position as this was my preferred choice but the fit wasn’t bad with just some minor sanding required to get it to and acceptable standard. I then opted to fit the central spine section as it was easier to clamp in position to the upper fuselage section before this was attached to the lower section.
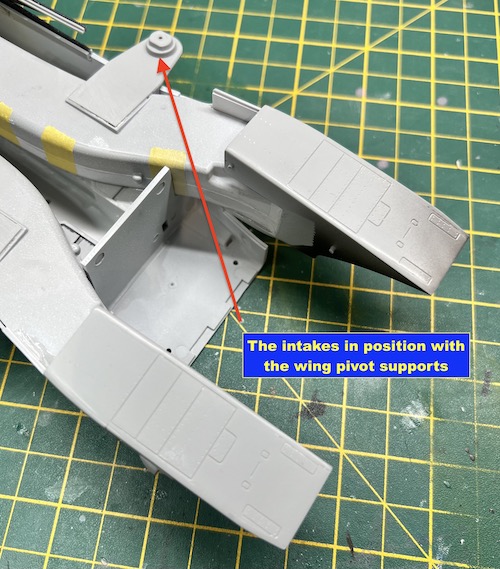
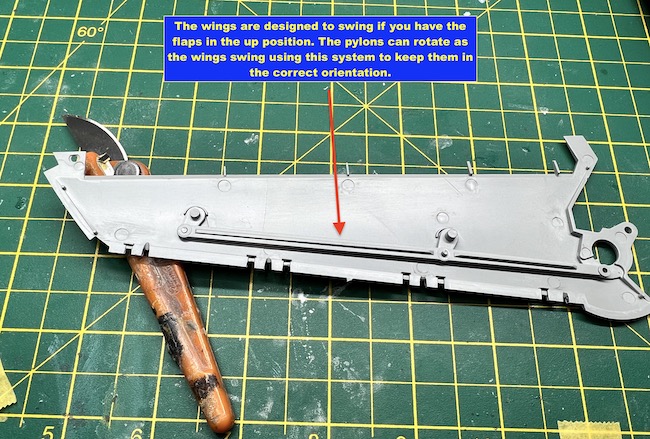
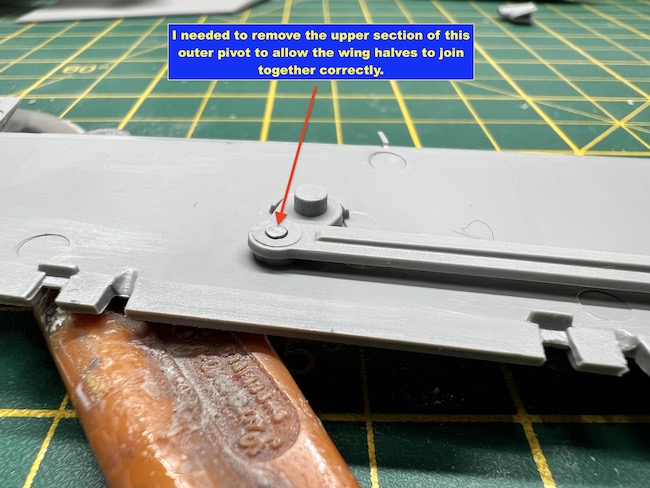
The wing had to be assembled next before the rear fuselage sections are joined together. Internally the wings have a mechanism that allows the pylons to swing as the wing sweeps back and forth to ensure that they are always correctly orientated. I needed to cut away some of the mechanism in order to get the wing halves to join correctly – see the pictures for this. I also painted up the inner part of the wing’s Dark Sea Grey – I’ll explain why further on in the build.
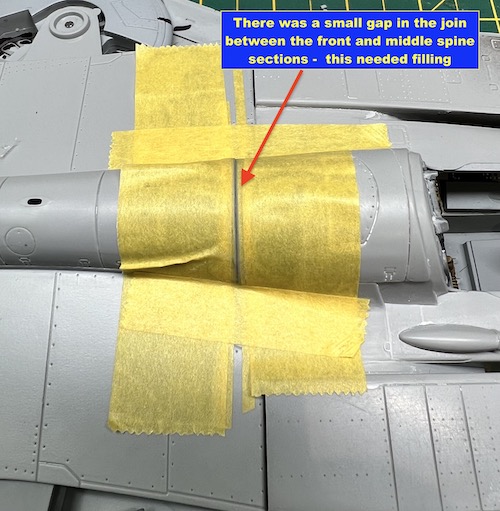
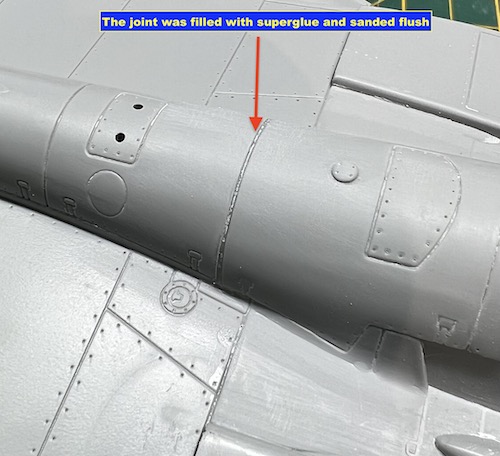
The front fuselage was attached to the rear section and this was remarkably painless with just some superglue used as a filler between the two front spine sections.
The next part is the critical part of the build and for some reason I have lost the pictures I took of it – I don’t know what happened here but I will do my best to describe the process I used to attach the wings.
Firstly, I wanted to have the flaps and slats deployed so this effectively meant I needed to leave the wings in the fully swept forward position. There was no requirement then to allow them to sweep so I decided to glue then in position. This would also ensure that they ‘drooped’ at the correct angle and also the ‘droop’ on each wing was identical. To do this I position the wings in place and liberally applied Tamiya White Label glue into the teeth that interconnect allowing the wings to sweep together. The advantage of using this glue is that it’s thick and slow drying so I could then attach the upper rear fuselage section and screw down the wings using the provided screws through pivot points. The upper and lower fuselage were glued together by letting Tamiya thin glue capillary along the join. The model was then placed on a flat surface and the wings were adjusted until their droop angle was identical and they were then held in this position by the use of paint pots, etc to ensure they didn’t move whilst the glue set. I could do this as the glue on the teeth had not set due to its slow drying properties. More glue was then liberally added to the pivot points and then everything was left for 24 hours to fully dry.
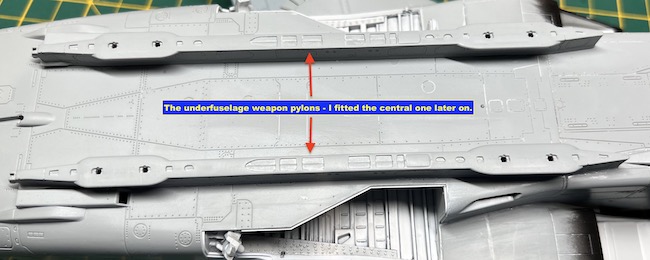
A good tip here is to attach the lower fuselage pylons as they let the model sit flat whilst the wing glue is allowed to dry.
Kevin Rowbotham says
Outstanding job on the GR4 Dave…..I’ve never built a Tornado but yours has certainly inspired me!
I really enjoyed your write up, thanks for sharing,
Kevin
Paul Ainsworth says
Hello,Dave – Magnificent work as always.
This Tornado kit is absolutely superb and you’ve done great justice to both it and the Tornado aircraft,
Another fantastic aircraft that’s disappeared from our skies.
Seeing ‘scale replicas’ like this easily remind us of the real aircraft we love and miss.
A fantastic aspect of our wonderful hobby.
All The Best,
Paul.😉👍
Christopher Woolford says
Terrific build Dave. You have got her right – beautifully photographed too.