Galleries: A | B | C-E | F | G | H | I-J | K-L | M | N-R | S | T-V | W-Z
More of our Subscribers’ amazing aircraft: K-L

Cheers
Martin H.
Hello fellow glue and paint sniffers!
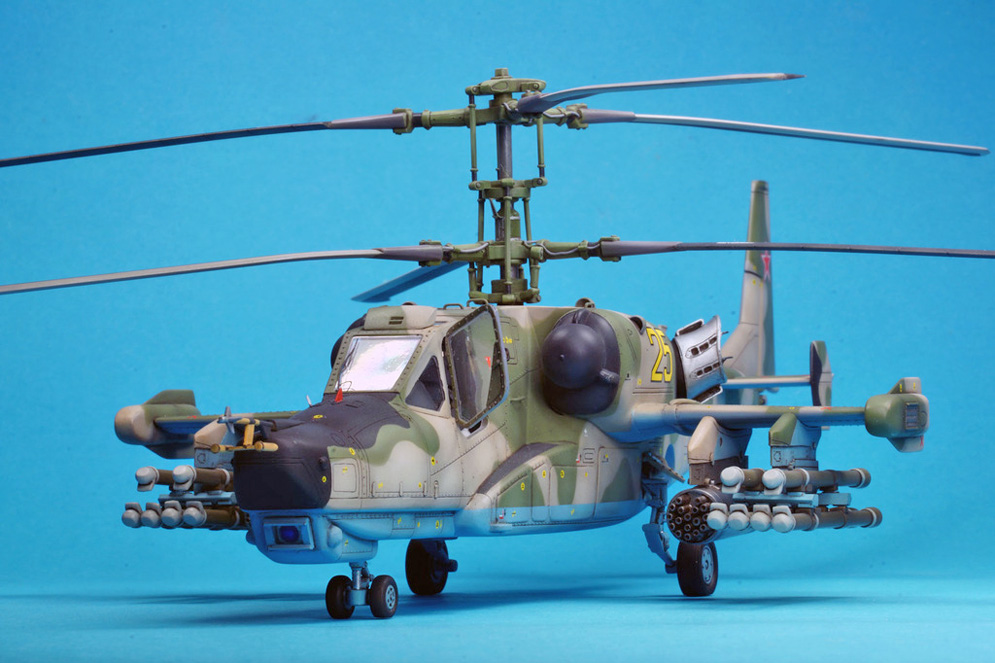
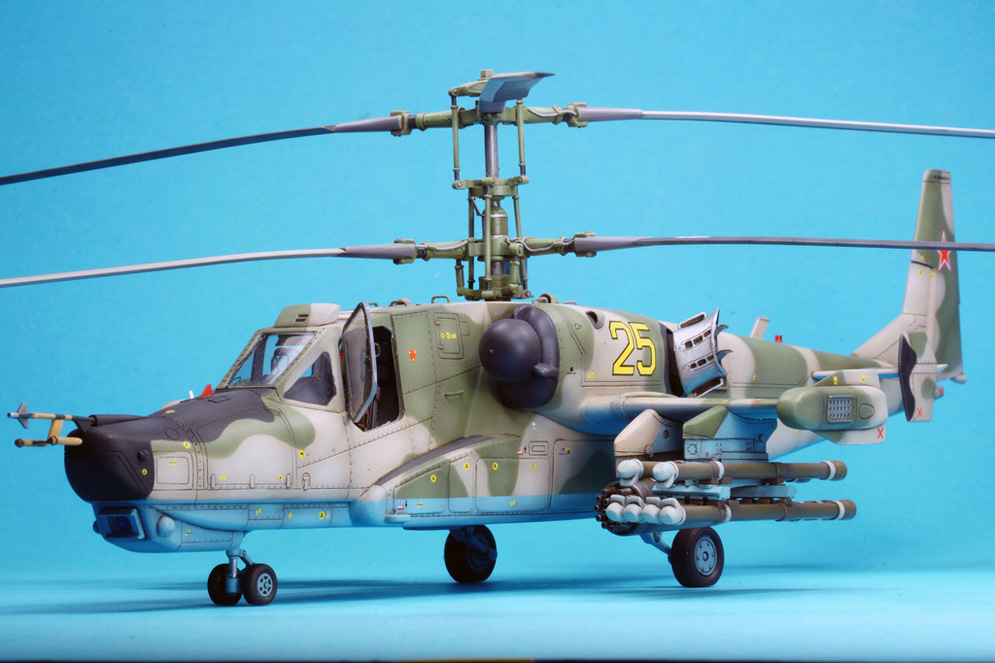
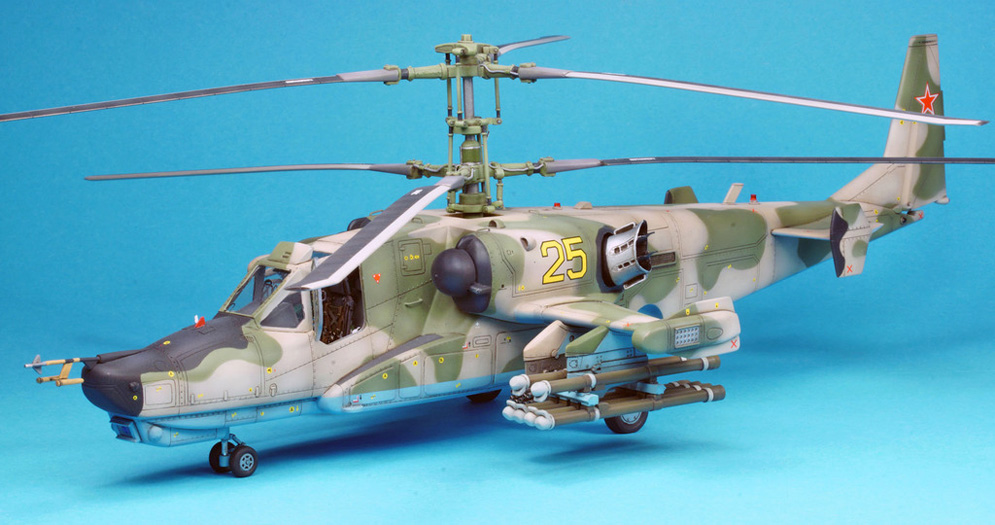
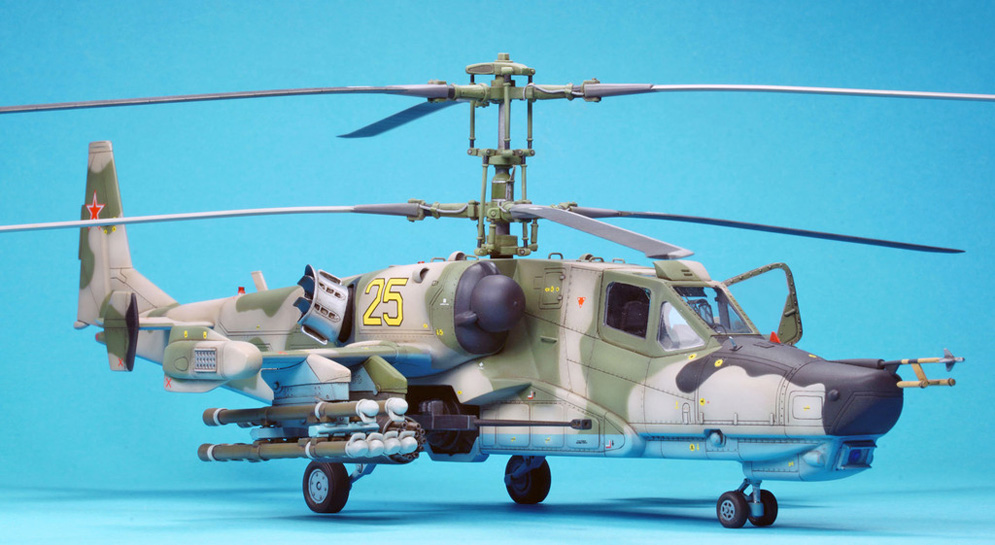
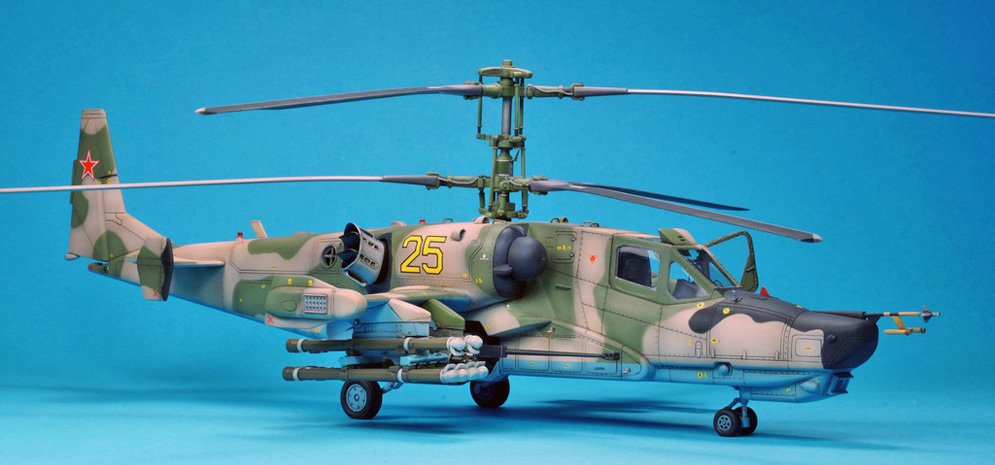
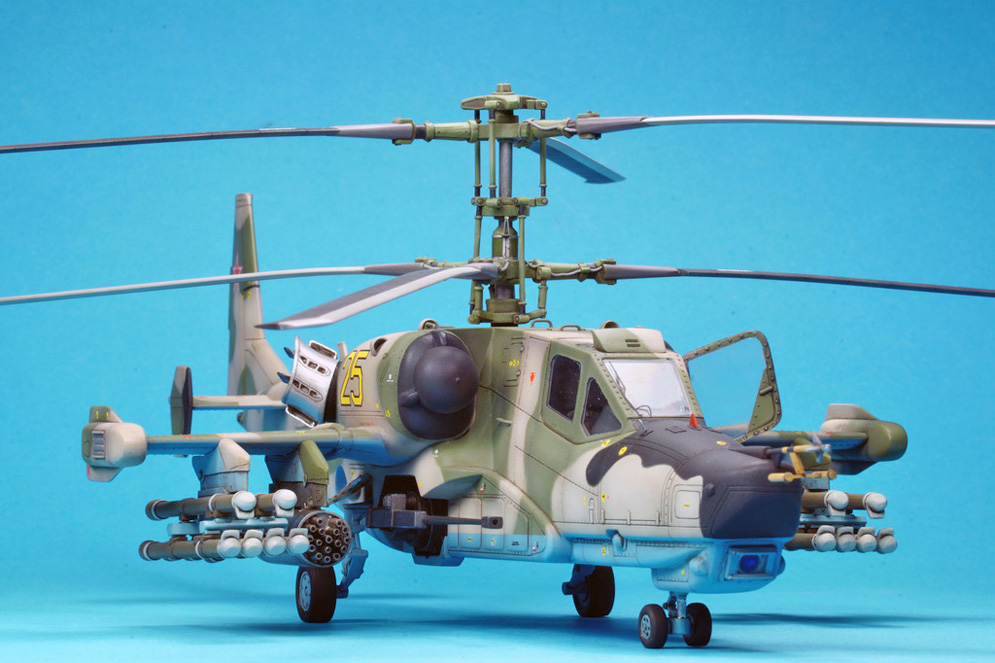
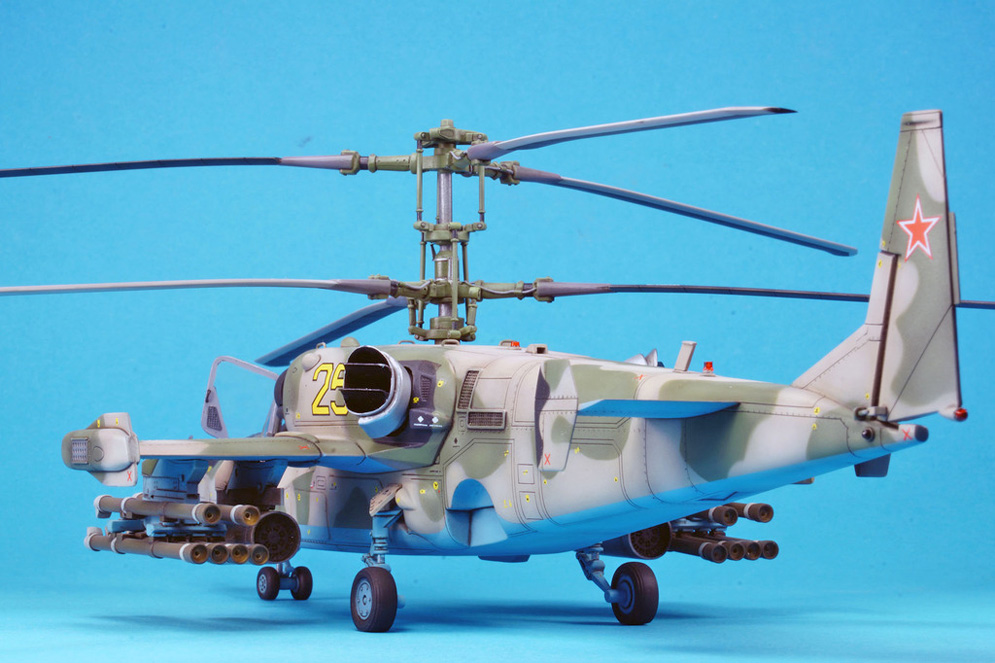
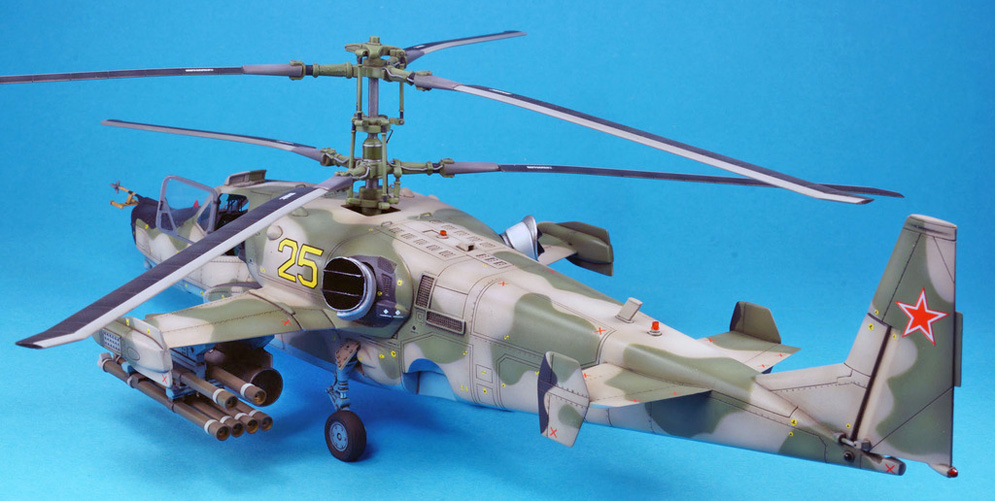
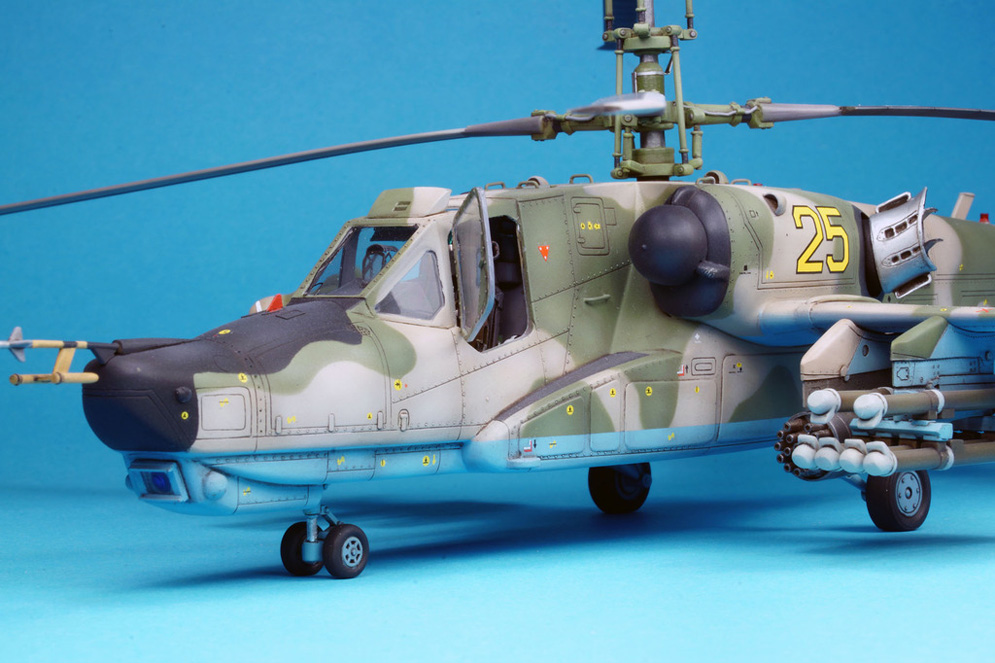
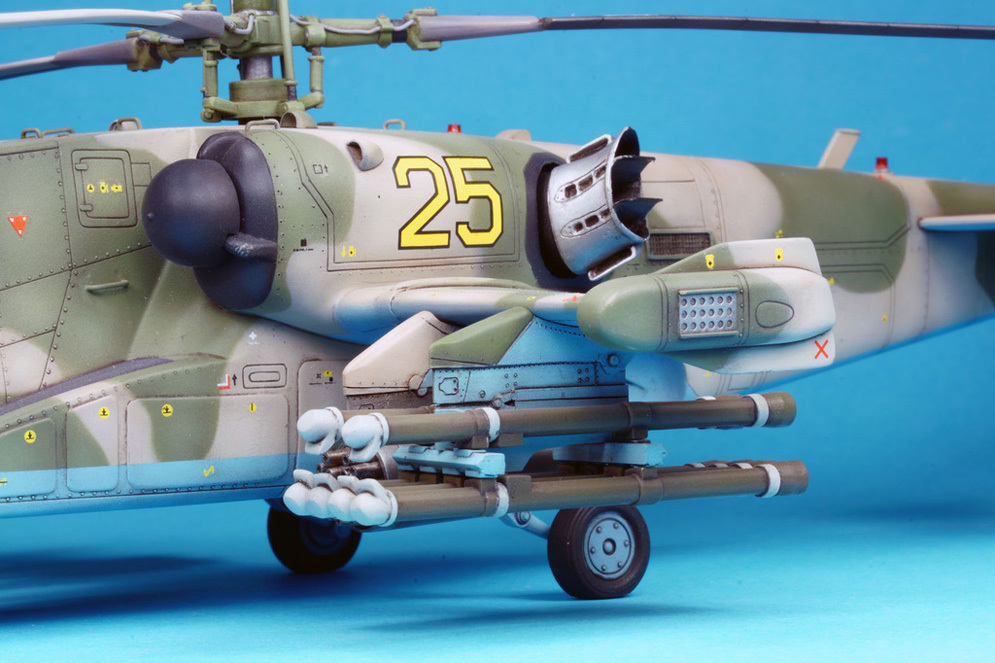
I’d like to show you the first helicopter I have ever made. It’s Italeri’s Kamov Ka-50 Alligator in 1:48th scale.
The kit itself is quite the challenge and requires a lot of putty (in my case then ?) and patience to get it seamless and right.
Extras I have used for this kit is an Eduard PE set (very nice stuff), an Aires resin replacement cannon, a resin detail set from Armycast and also a Neomega resin seat. Paints used are Gunze and dark wash from AK Interactive. Decals are from Begemot.
I hope you enjoy the pictures and have fun!
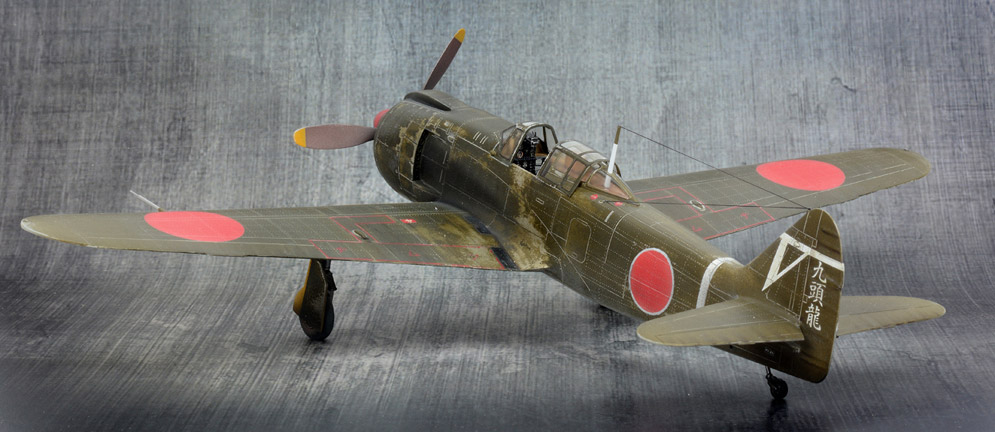
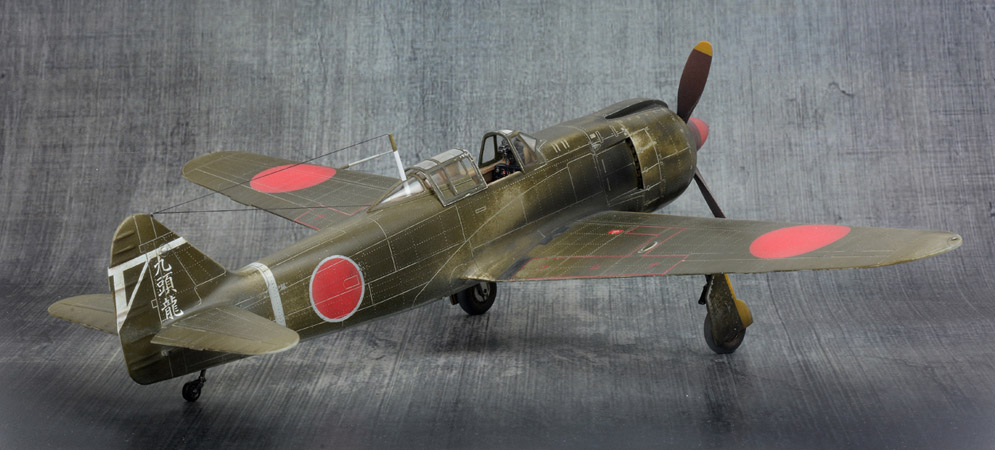
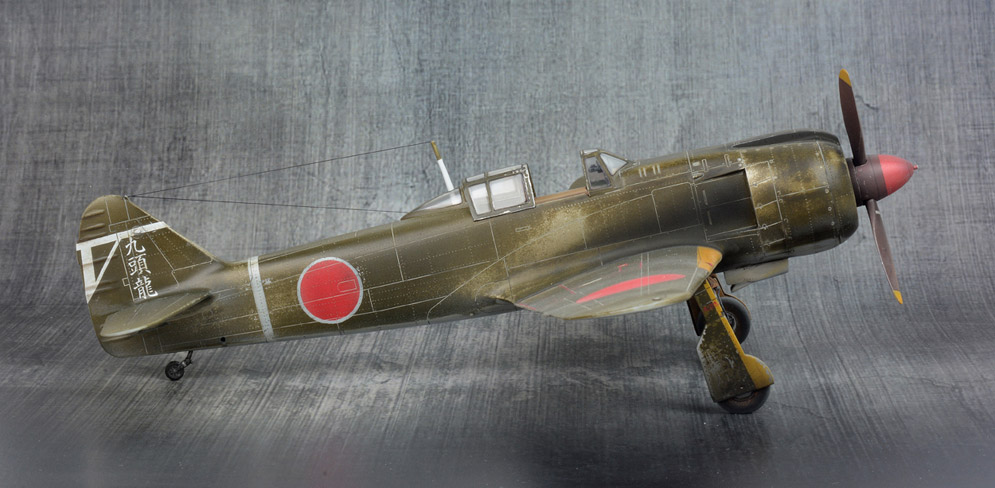
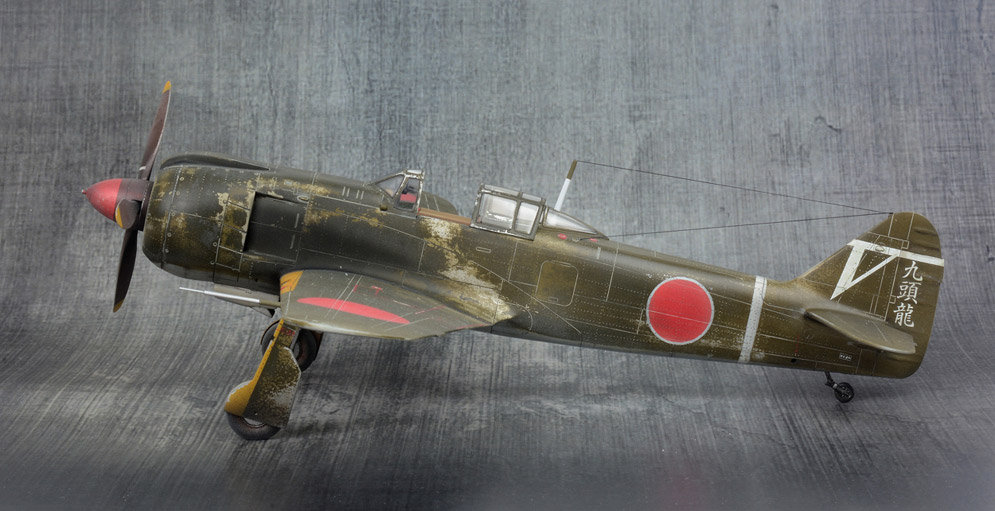
The Hasegawa Ki-100 OTSU is a beautiful kit, as is the case with all of Hasegawa’s Japanese Army and Navy offerings.
Prior to any construction, the entire airframe was riveted using a 0.75 riveting wheel. Once this was completed, I lightly sanded the parts and scrubbed them with a toothbrush in plain water to remove any residue from the rivet holes and panel lines.
The cockpit was completed with the standard kit parts with the exception of a set of scratched seat belts.
Construction was relatively straight forward, though special care needs to be taken when joining the wing upper and lower parts. The Ki-100’s wings are quite long and thin in profile, so I cemented them in stages, starting at the wing root, and working my way out to the tip. By cementing a small section at a time, I was able to keep the wings straight, even though there was a small amount of warping on my copy. The wing assembly to fuselage joint again needed some care, though with a bit of patience and test-fitting, I ended up with a satisfactory result.
Painting consisted of a Mr.Color Super Metallic Silver primer coat, over which I sprayed 2 light coats of hairspray, for later chipping. The base colour of the aircraft was Tamiya JA Green (XF13) with a little brown added. This was firstly sprayed as a light coat, barely covering the silver primer. This was then chipped using plain water and my selection of old brushes I reserve for chipping duties. A third light coat of hairspray was then applied, prior to the second colour coat. This second colour coat was intentionally applied in a more random manner, trying to achieve darker and lighter areas on the surface. The model was then chipped again, primarily in the same areas as the first run, though certain areas were expanded to give some depth to the effect.
All markings were airbrushed on with the exception of the tail, where I used the Lifelike decals.
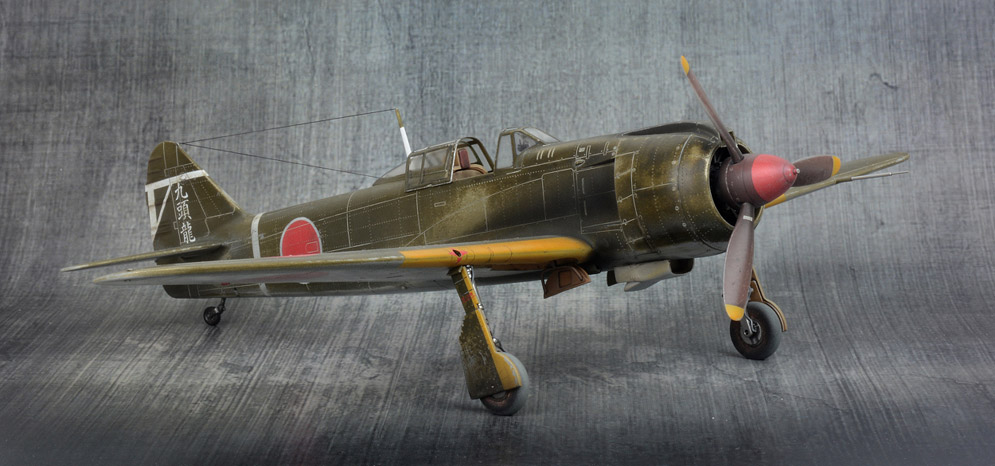
The remainder of the kit was box-standard with the exception of the sliding canopy. This was taken from a Rob Taurus vac formed offering.
Final touches included airbrushed exhaust stains, and aerial wiring achieved with Ezy-Line.
Adam O’Brien
Joaquin Garcia Gazquez
PS – I will post any new pictures that are available when JGGs model is completely finished. Geoff


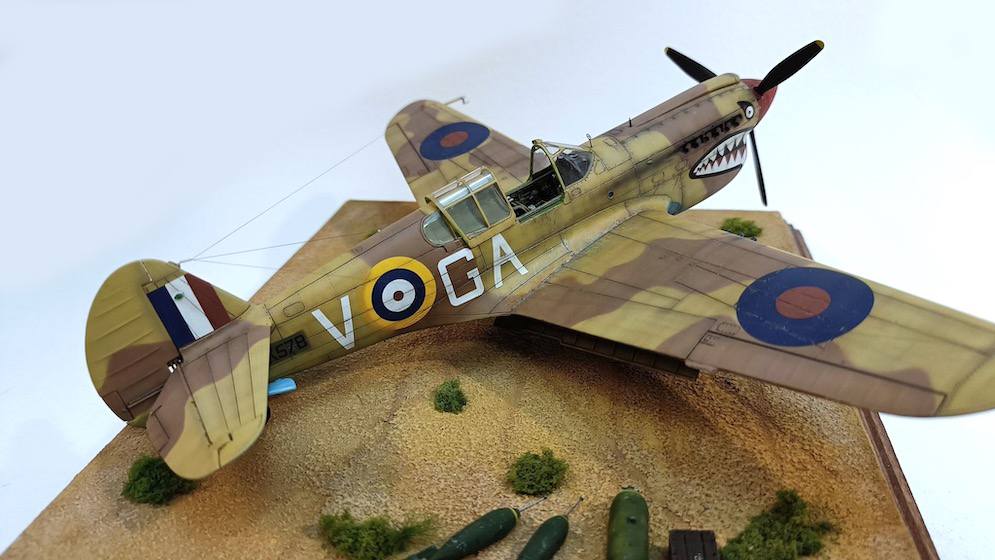
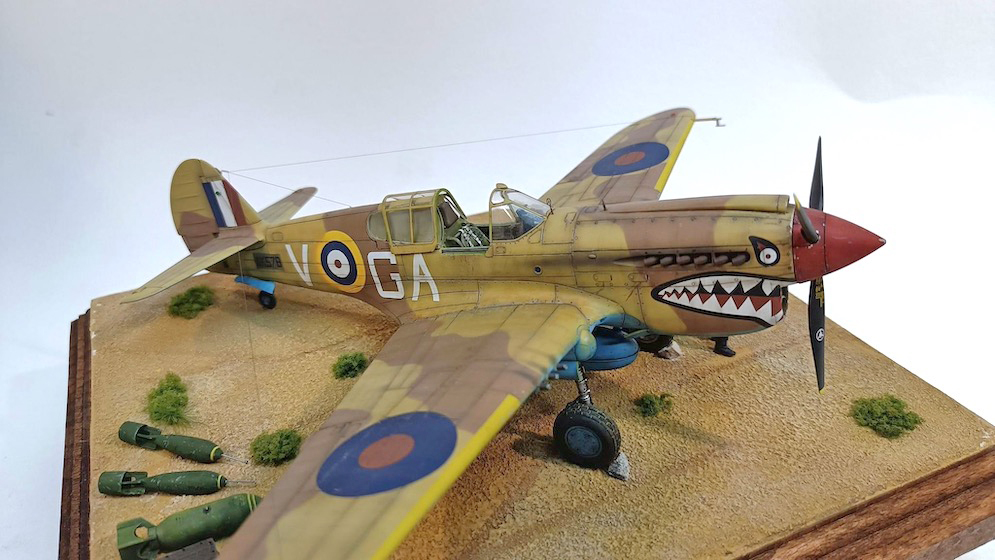
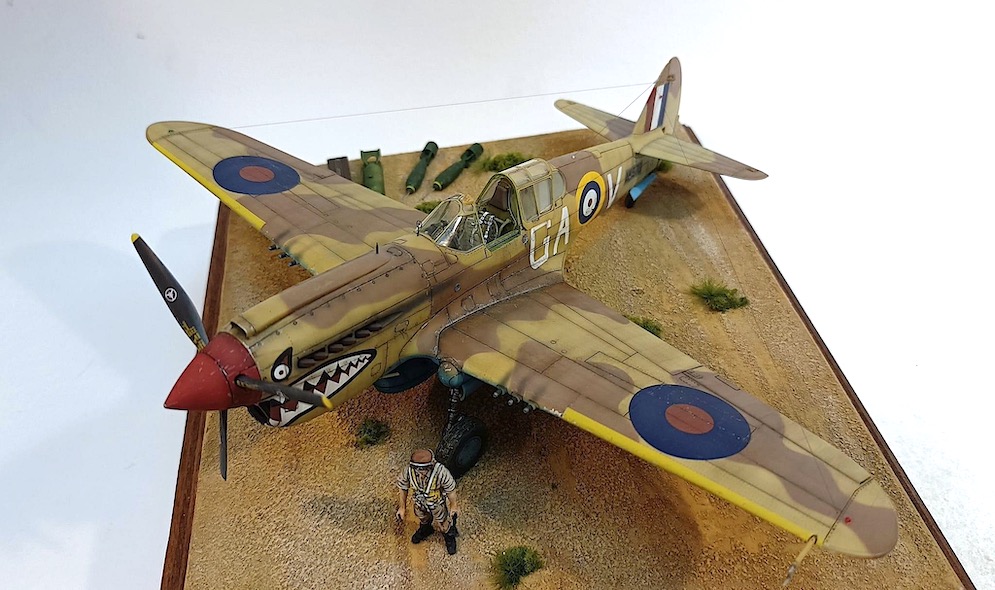
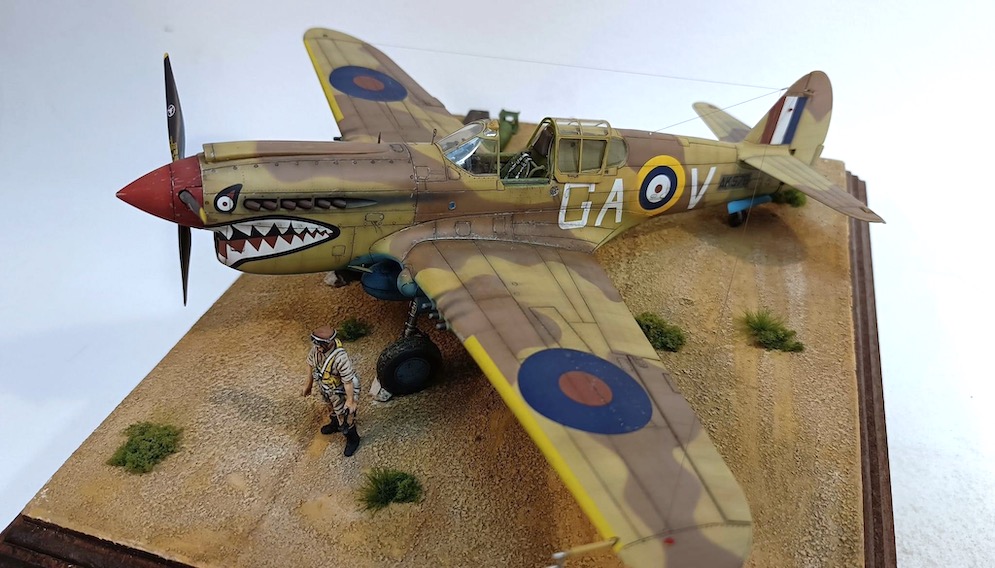
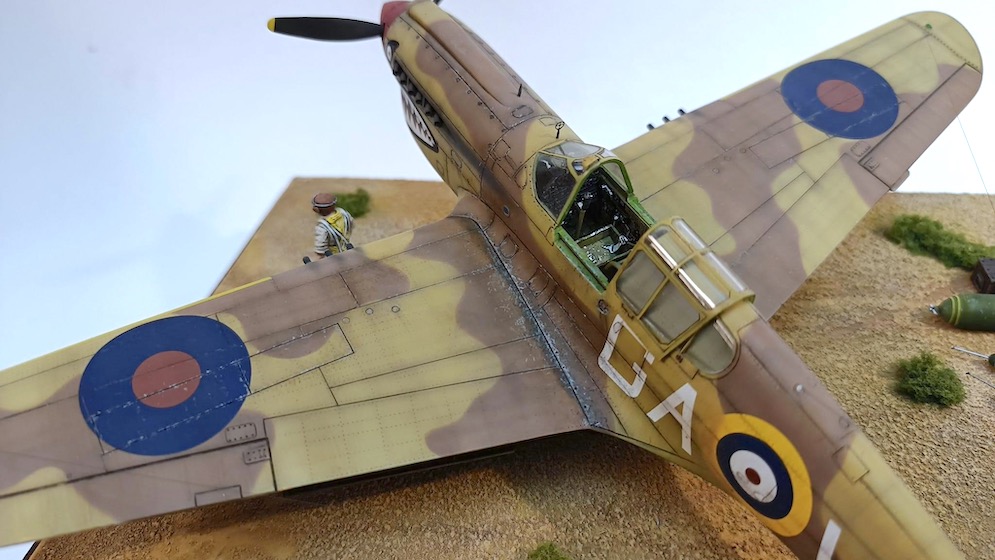
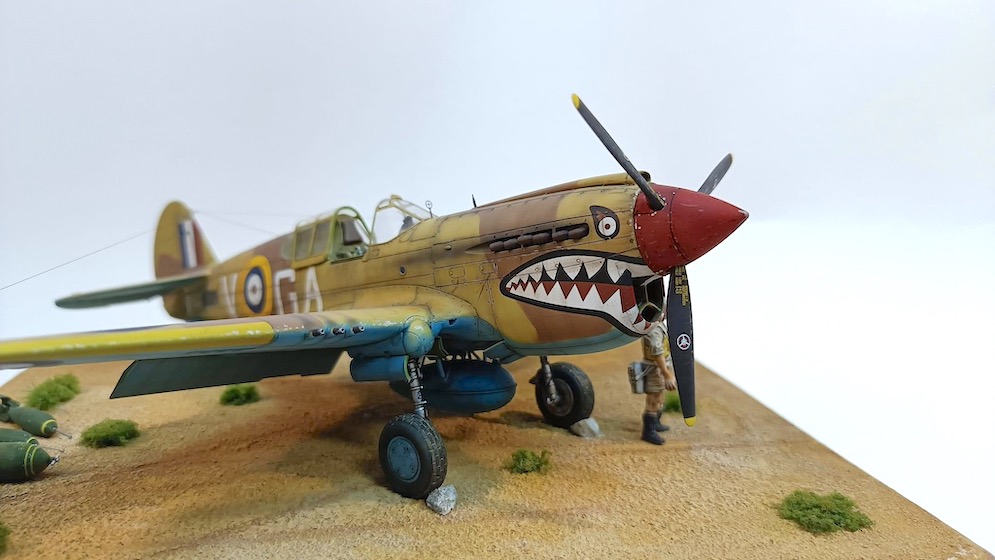
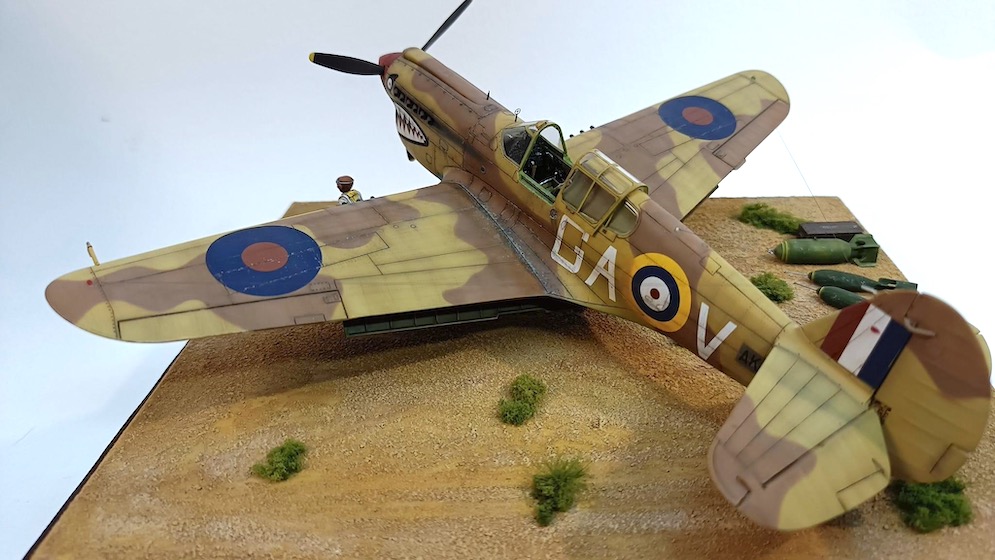
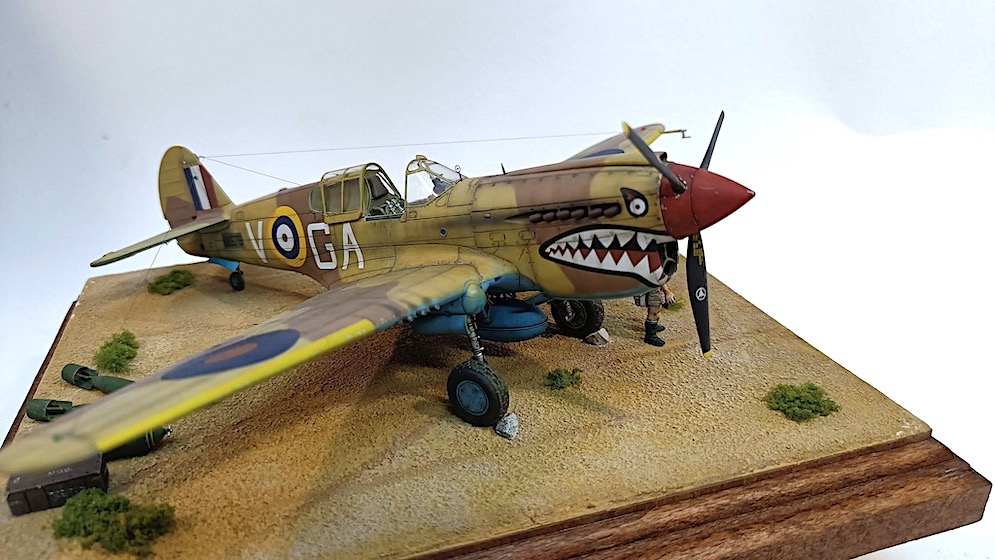
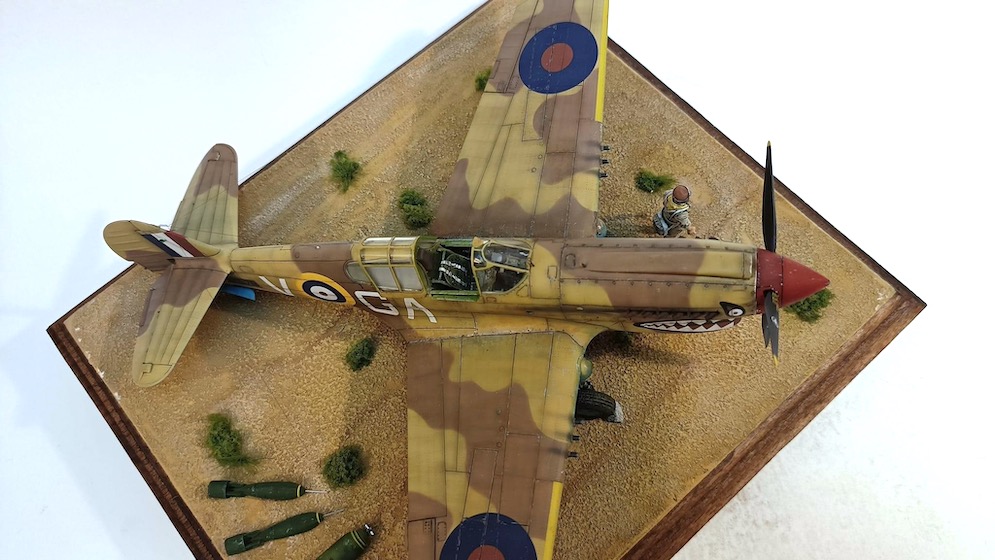
Hasegawa 1:72 scale kit. Kawasaki Ki-61-ⅠTei Type 3 Fighter “Hien”(Tony)
I made a diorama. The theme is I.J.A Hikou Dai 17th Sentai Layte Island 1944 (I.J.A 17th Fighter Group Layte Island 1944)
I am painting with a brush and I use decals. The base is handmade and also
painted using a brush.
Thank you for looking!
Shozo N.
The kit is based on the Kinetic Kfir C2/C7 kit with a resin fuselage in front of the intakes and a resin spine. So the first thing to do is cutting the kit fuselage into pieces. This in turn requires some filler and sanding later on.
Another specialty is the vacu canopy, which I strengthened with some plastic strips.
Otherwise a fantastic kit with good quality resin parts.
In the meantime the South American variations of this bird have also been released by Wingman.
Jürgen J.


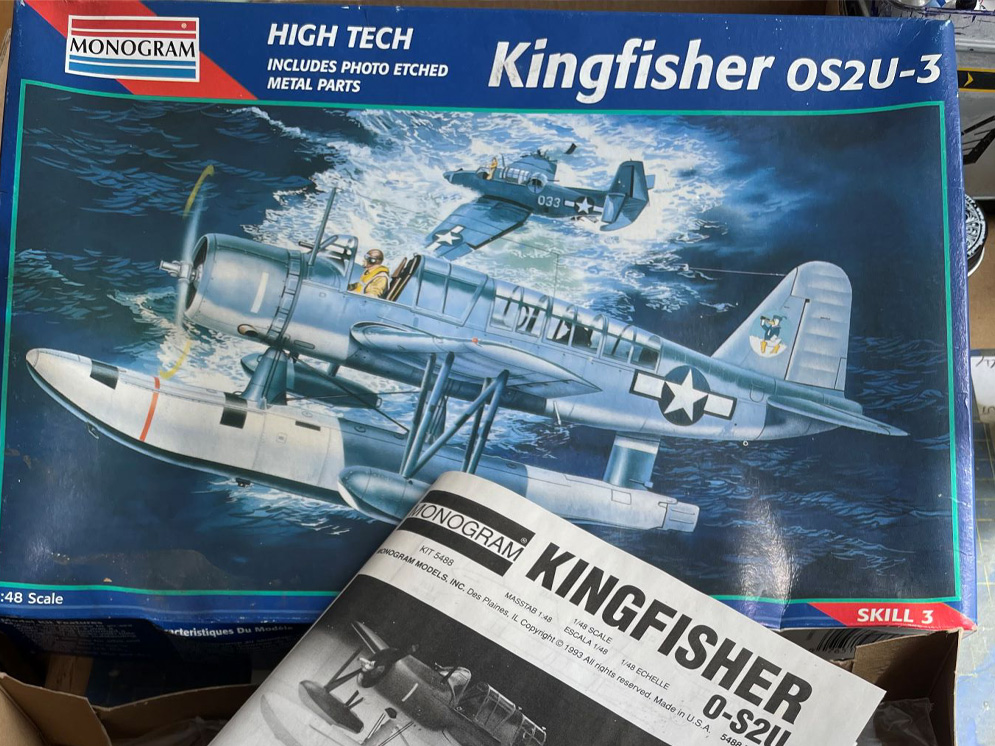

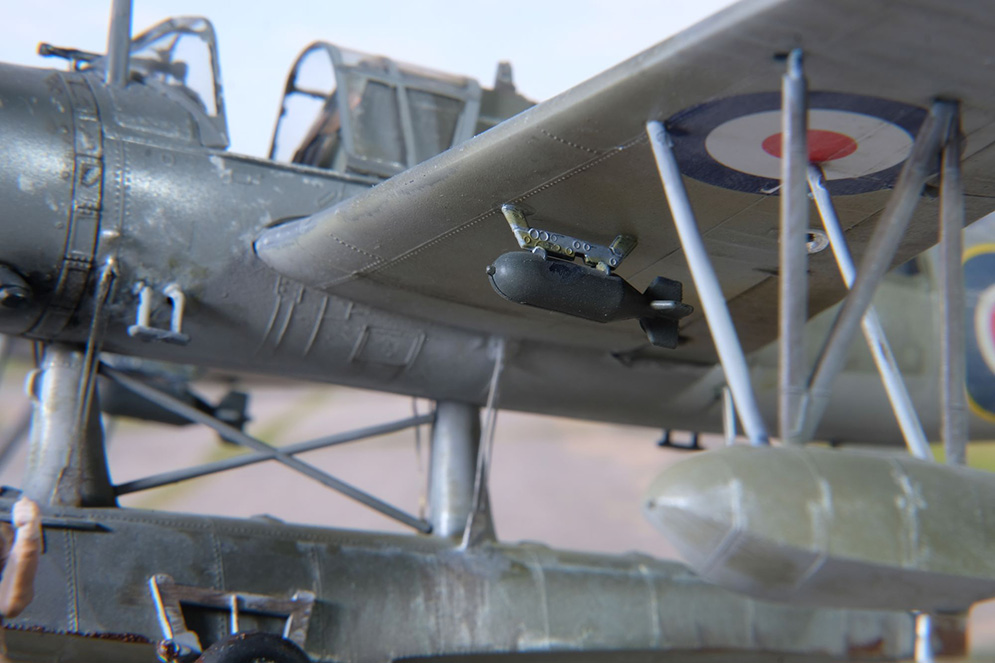
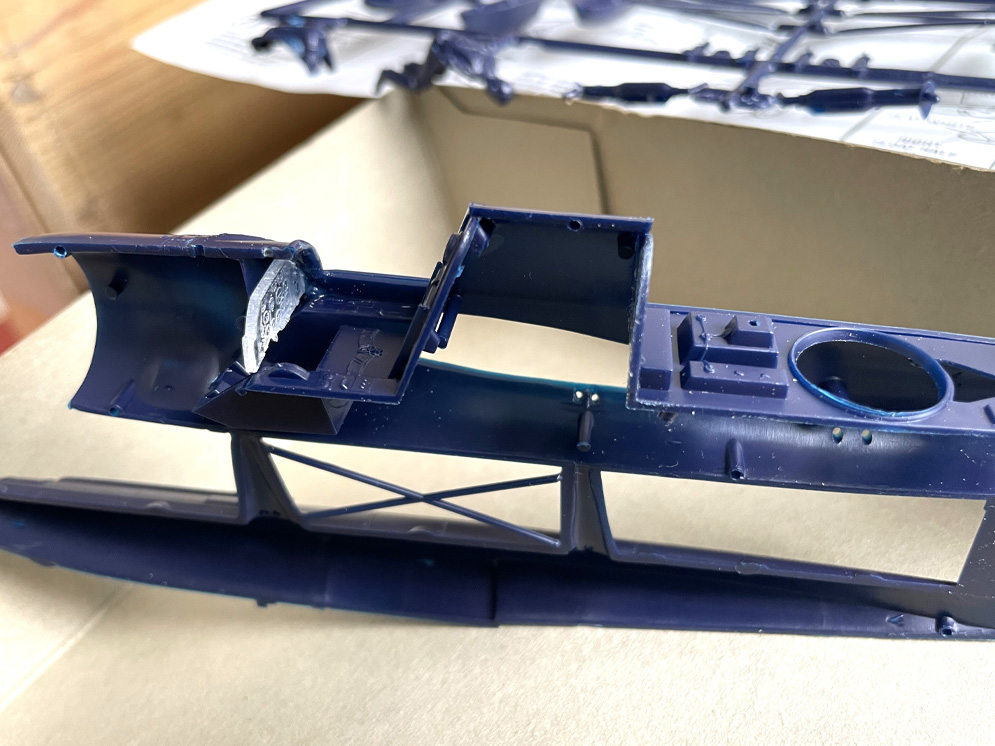
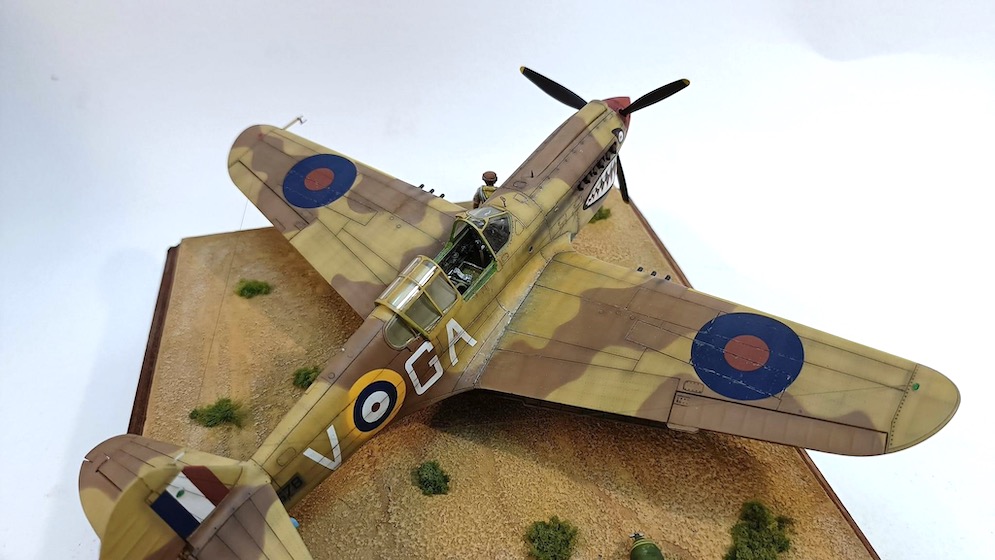
My build is finished as a Fleet Air Arm aircraft, in which service it was known as the Kingfisher 1, and was among 100 delivered to the RN for use as a catapult launched fleet observation aircraft. The kit comes with US Navy and Fleet Air Arm decal options, though I had to raid my decals stash because the kit ones were really degraded in this early 90s offering.
Some photo etched parts were included, just a few of which I used. I have to admit that utilising photo etch parts to best advantage is a skill which I haven’t mastered yet.
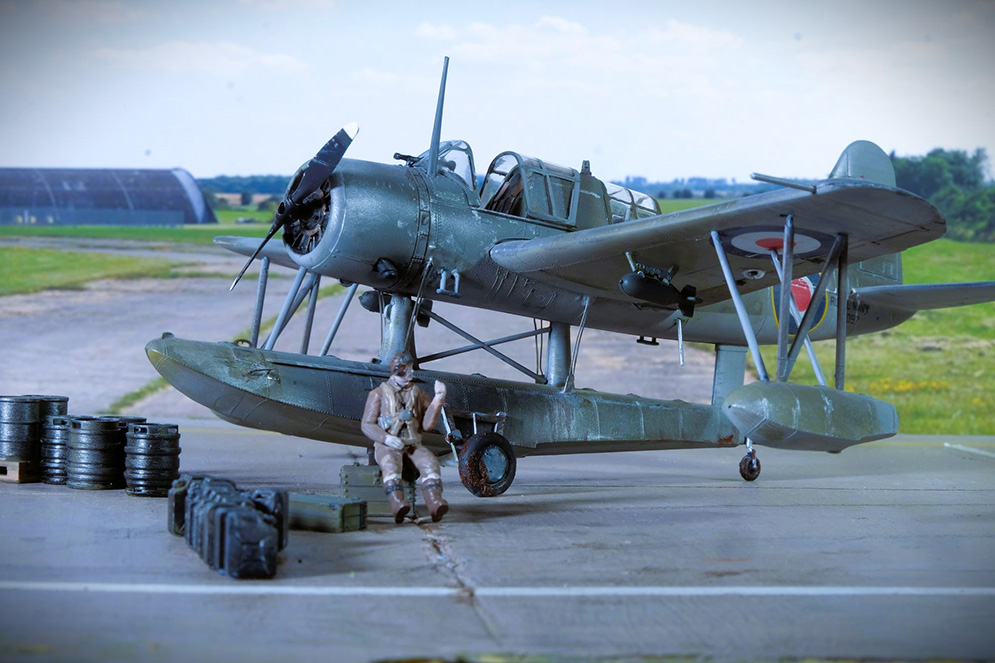
Some reference images on the web depict the aircraft without its rear cockpit gun, and because the gun in the kit is pretty basic, and is complemented by awkward (by my modelling standards) photo etched parts I decided to keep things simple and resorted to adding seat belts to both seats, plus some spares box ‘surmised’ details in the rear cockpit.
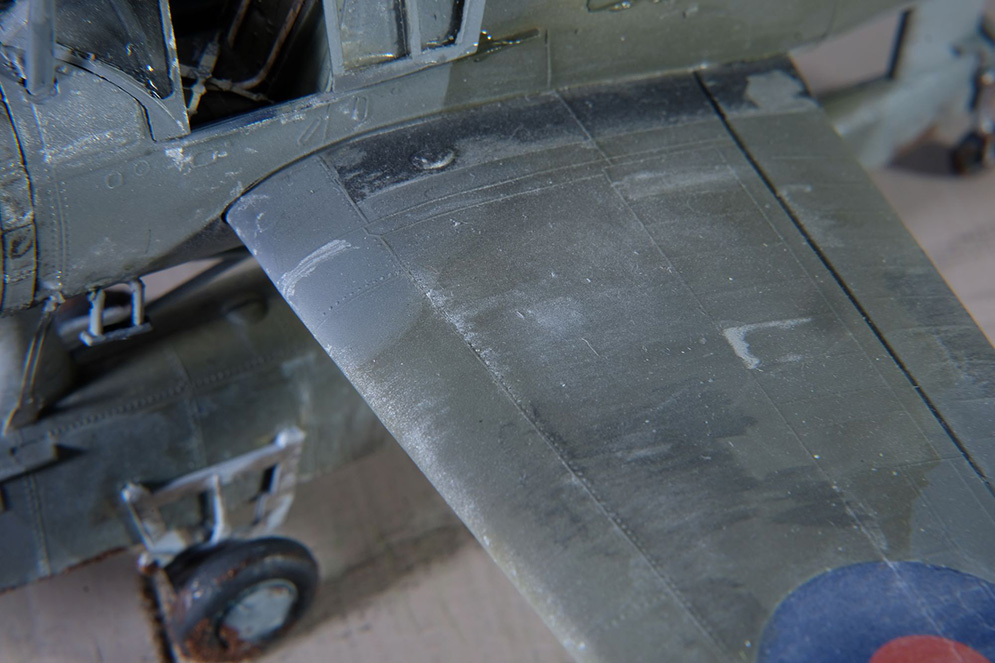
My build is very heavily weathered, trying to replicate what I thought would be heavy salt encrustation, especially on the floats and wings (see pics 50,51,55)
My diorama is unfortunately a land-based depiction of a ship based aircraft, but I didn’t feel up to trying to depict the aircraft on its wheels on a harbour slipway (never mind on a ships catapult !). Maybe in a later modelling life ?
The diorama also consists of some airfield white lines which are done very simply by using white masking tape laid down on the ‘tarmac’ board (pics 59-60) to depict a typical airfield hardstanding (and are only ever meant to be an out of focus part of the overall scene anyway).
Other airfield details include petrol cans, pallets of oil drums, ammo cases etc lying around the scene, again intended to be out of focus and secondary (though I have included a few pics of these details out of interest). I bought these at a recent model show, and they were available to buy as individual items for a few pence each. Thing is I didn’t keep a note of the seller, otherwise I would certainly mention them !
A quick simple paint job was all that was needed to build them into the scene. My pilot has moved around the aircraft in a fairly random manner according to whim!
Thanks, David
Carlo F.
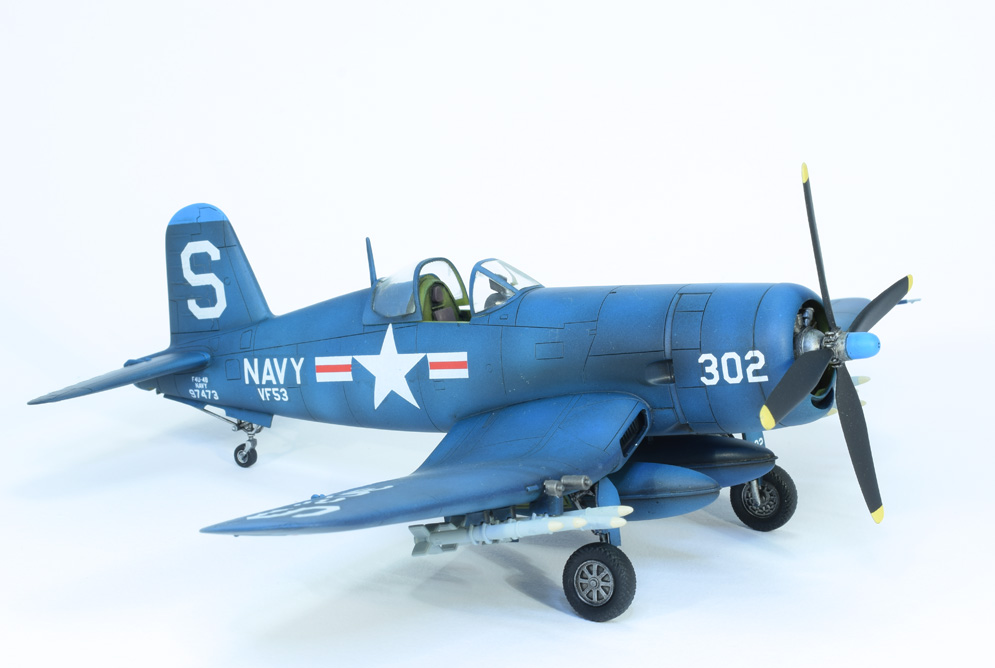
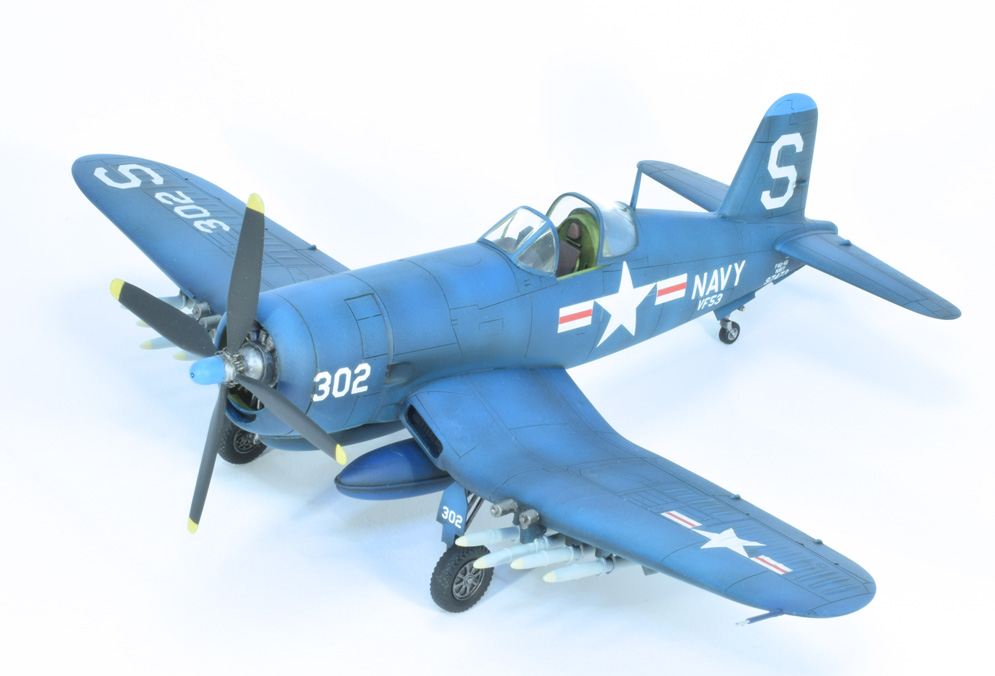
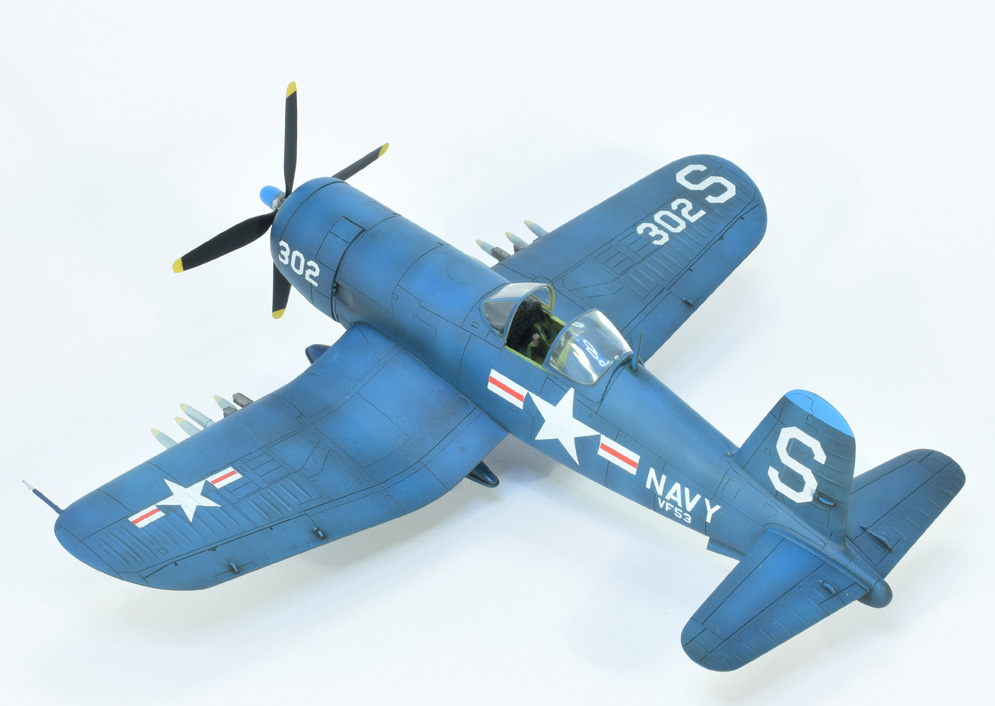
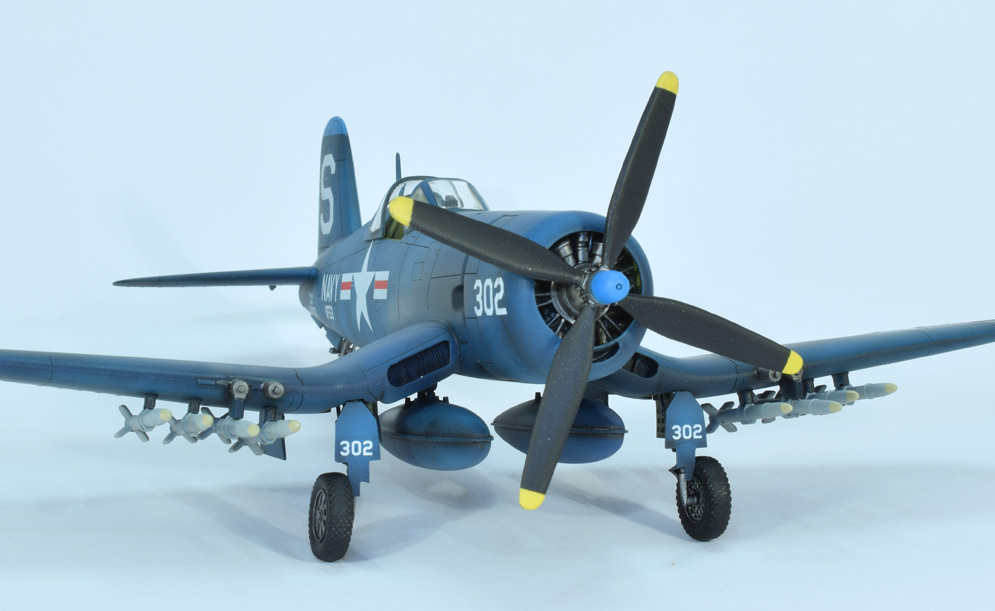
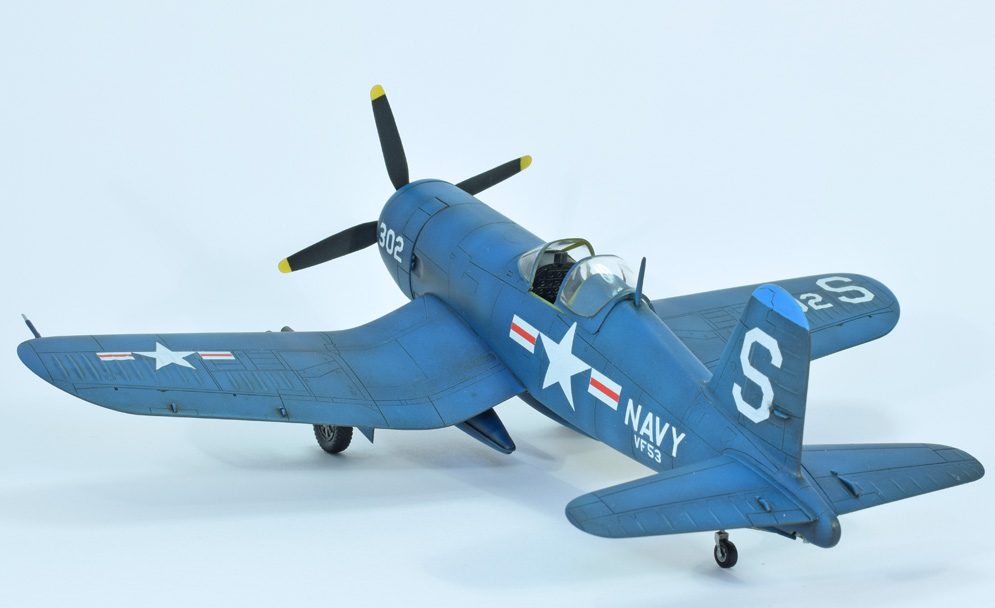
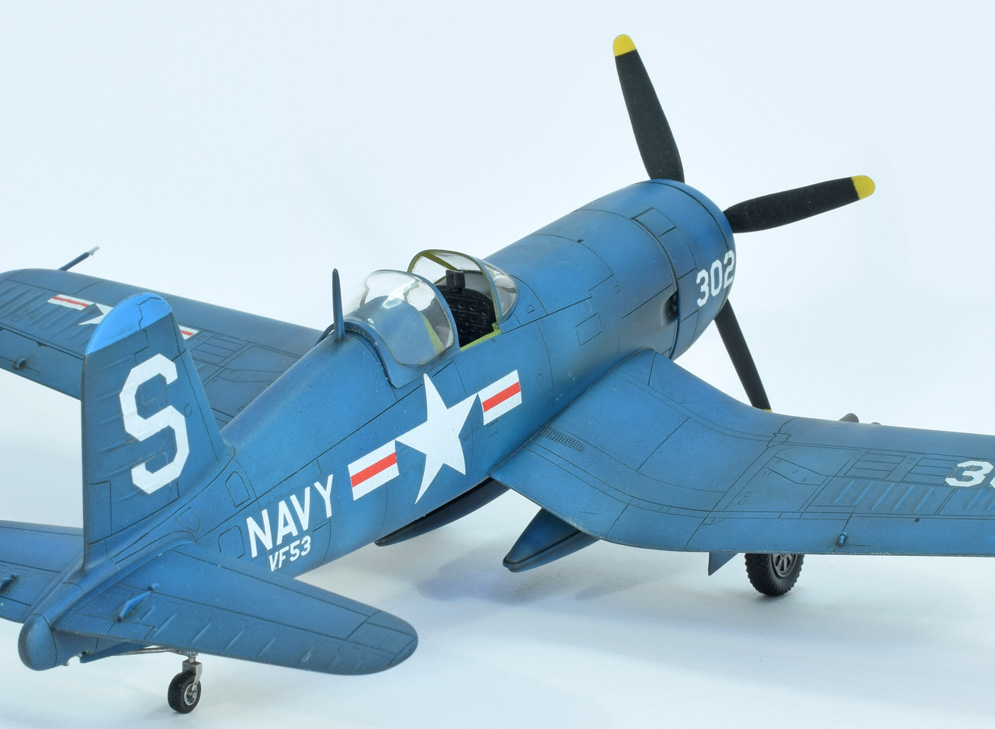
After building a number of many fast modern jets I felt the need for
something a little older and perhaps with a propeller and my eye fell on the 1:48 Academy F4U-4B Corsair ‘Korean War Variant’. This is a pretty basic kit, but it had some nice detailing and engraved panel lines. Starting with the interior it was quite a simple affair, with a simple tub and very basic moulded dials and switches on the instrument panels. These were then painted with a mix of Tamiya Yellow Green with a few drops of Green added to give a little contrast to a very blank canvas. I also shaded to the side walls and main
Cockpit area using a slightly lighter mix of the base colour then a black green oil was used to bring out what detail there was. With the cockpit all completed it was time to button up the fuselage, and while that was set to one side, it was on with the engine. This was a one-piece affair and with some careful painting and an oil wash it came out quite well. This was glued inside the cowling and this was then
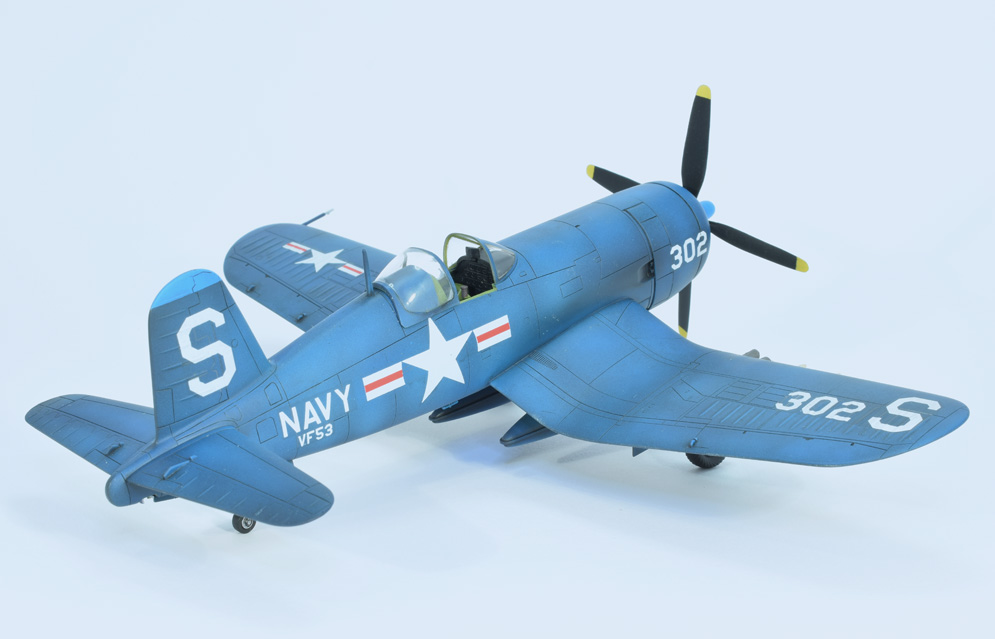
attached to the main body. Next came the wings, which were pretty straightforward. The canopy was then masked-off and the front section was glued in place, with the rear part tacked onto the upper fuselage to save masking up the interior. The wheel wells were then painted up the same interior colour as the cockpit then Maskol was used to seal up the bays.
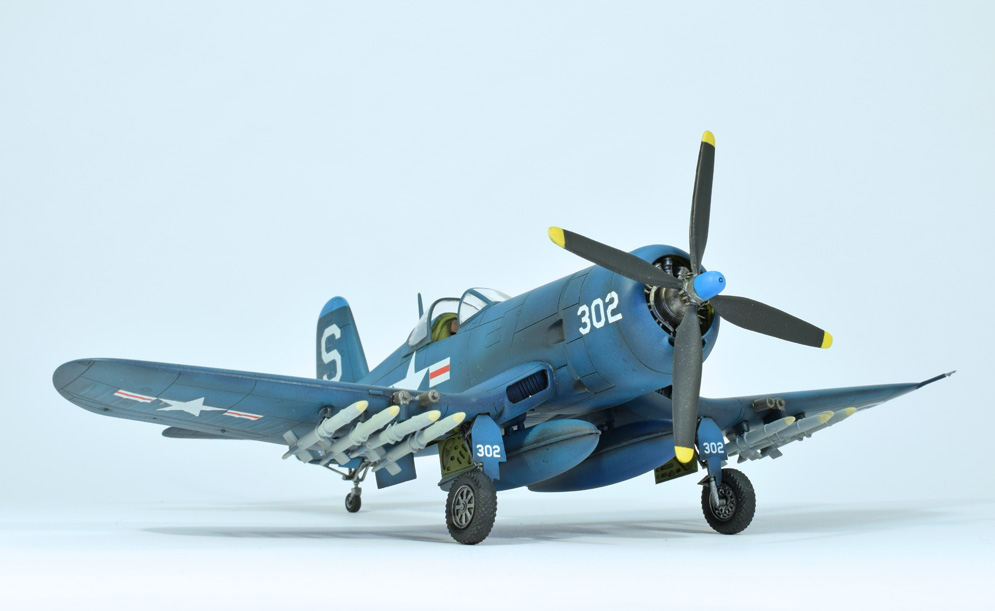
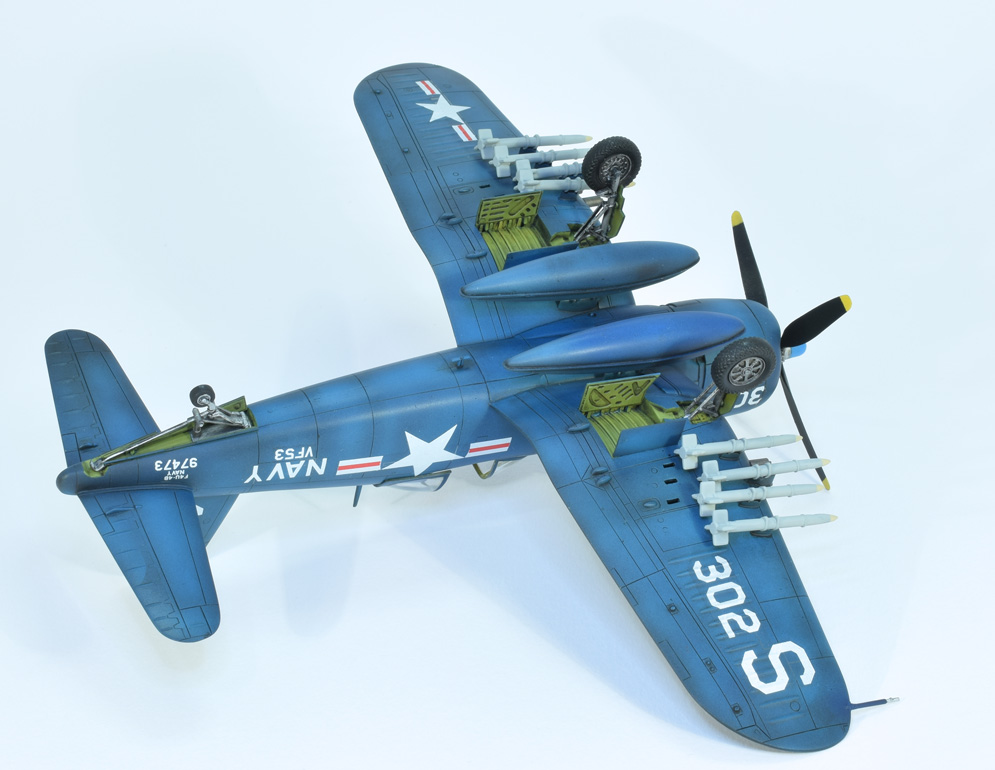
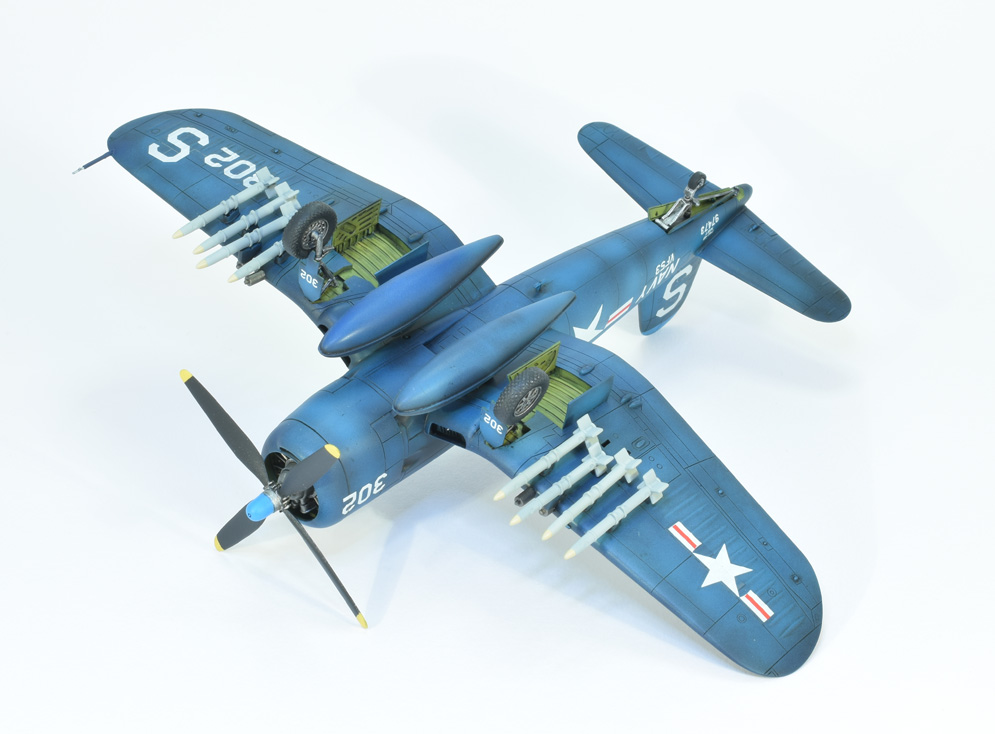
The entire model was then given a primer coat of Black and this followed by and overall application of Tamiya XF-4 Blue, with a little post-shading added to lighten various areas and to give the paintwork a sun beaten look. To further accentuate the panel lines I choose to airbrush on some Tamiya Smoke, and once dry the aircraft was given a few light coats of Johnsons ‘Klear’ prior to an oils pin-wash thinned white spirits, and any excess was wiped away with a soft cloth. The decals were then applied without any problems.
The final details such as the wheels undercarriage lets, wheel bay door, propeller and payload were then added. The last thing to was to apply a matt coat to seal everything in. Despite being a basic kit I was very happy how it turned out, and you can see how it earned its nickname ‘Whistling Death’.
Rafał Książek


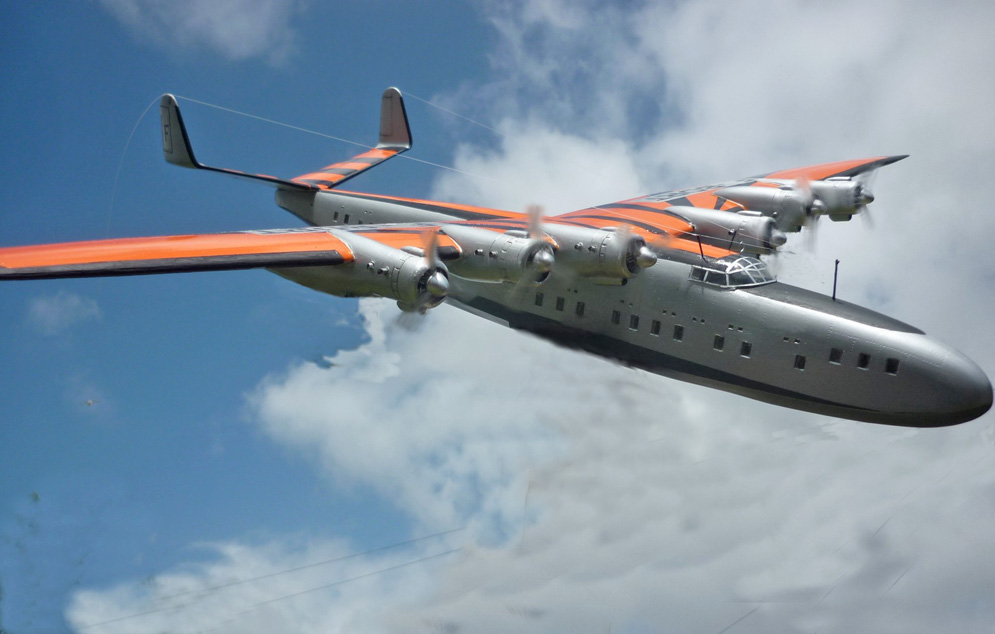
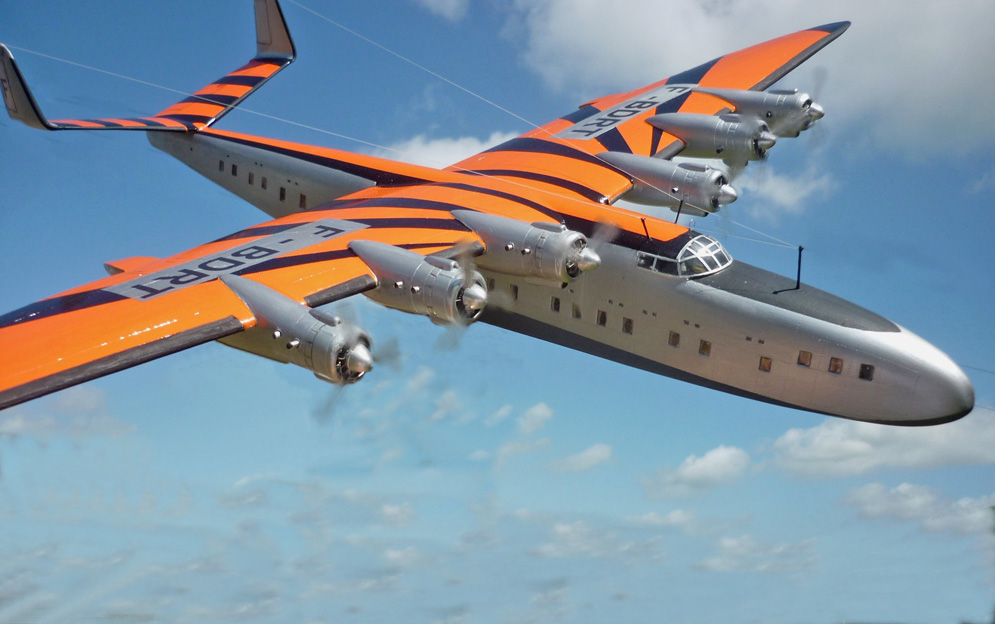
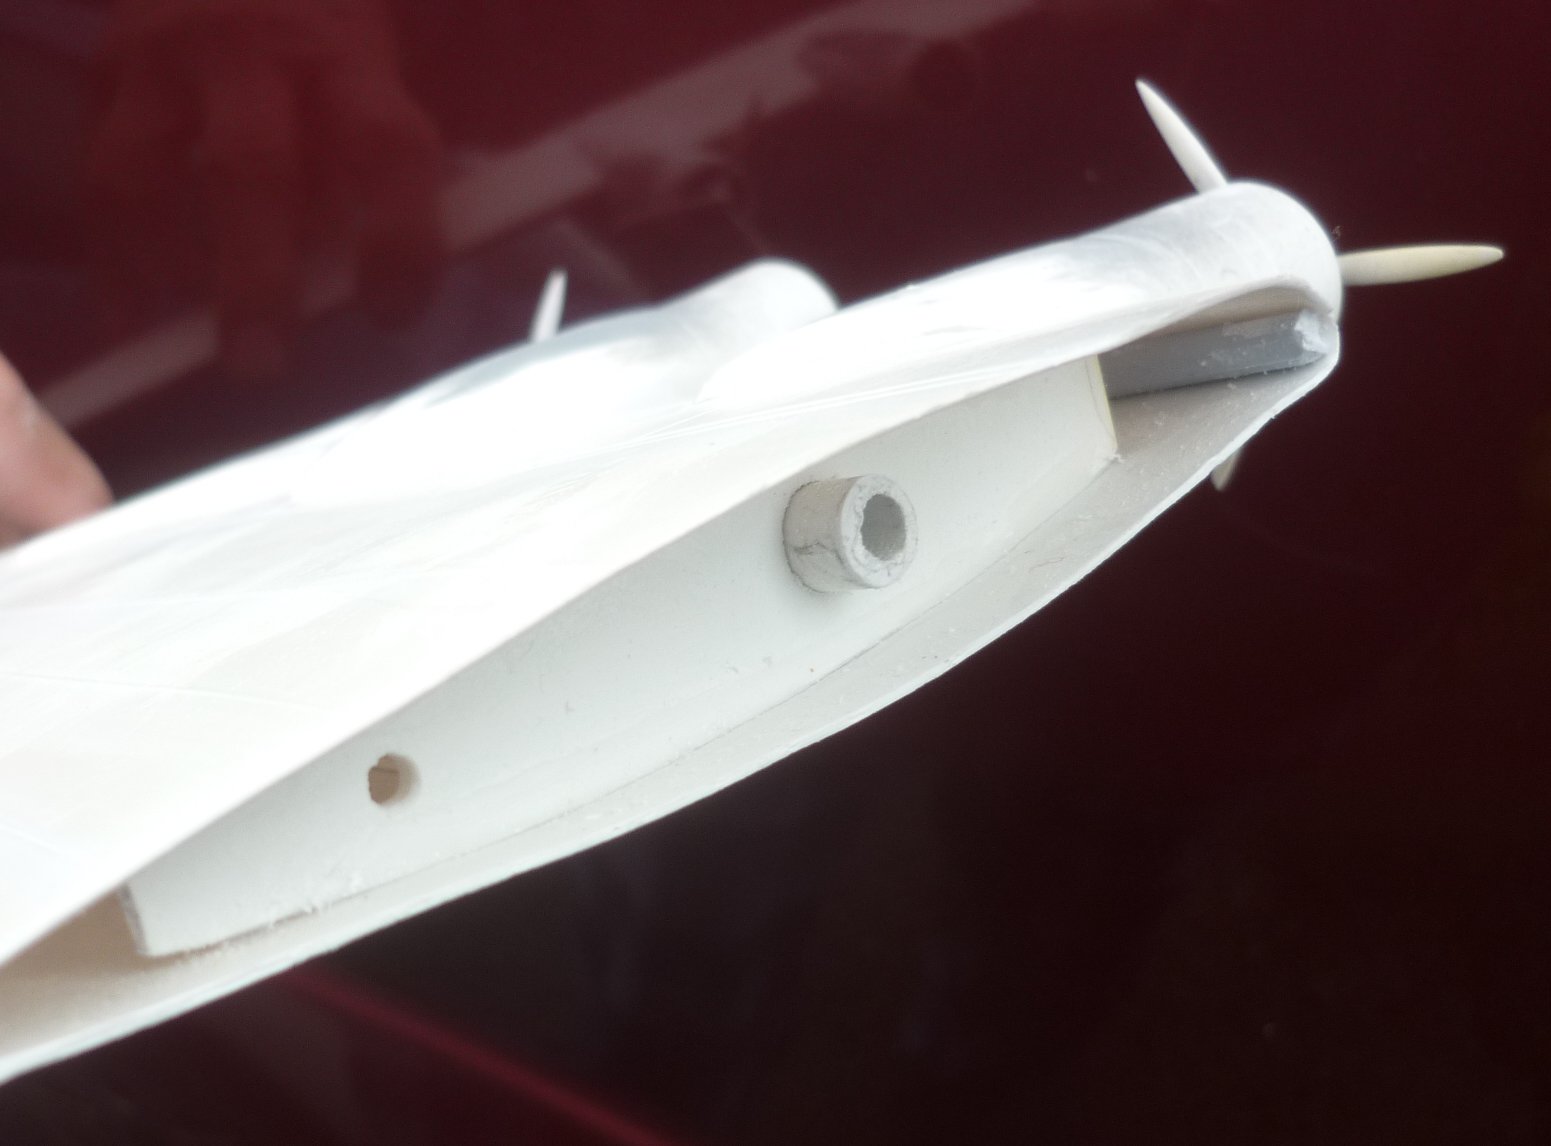

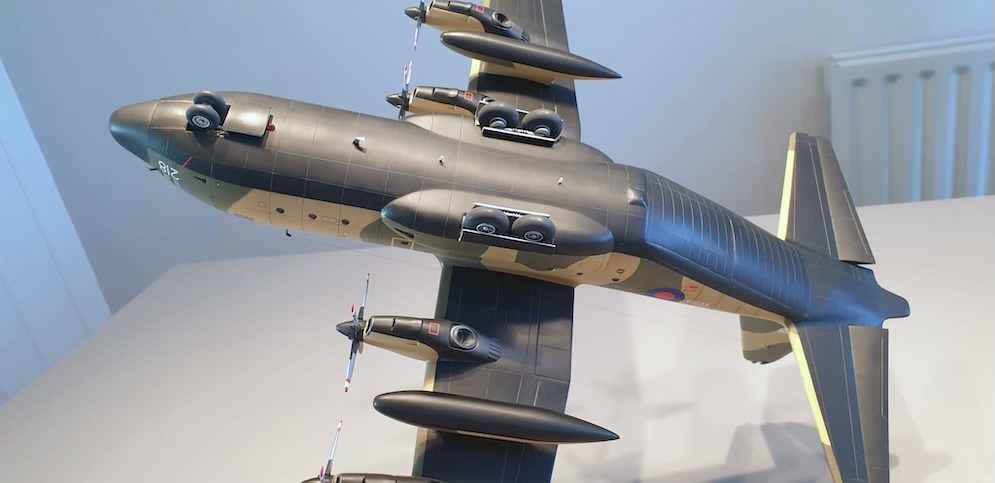
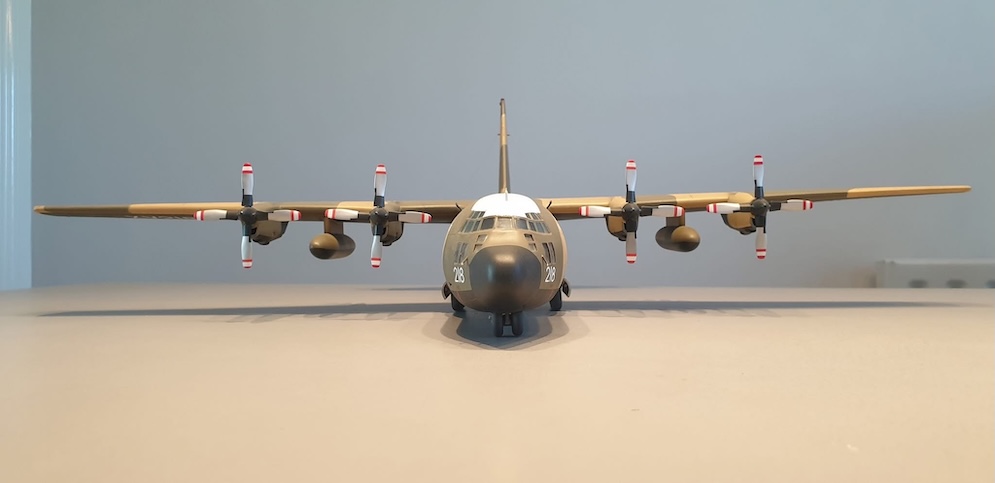
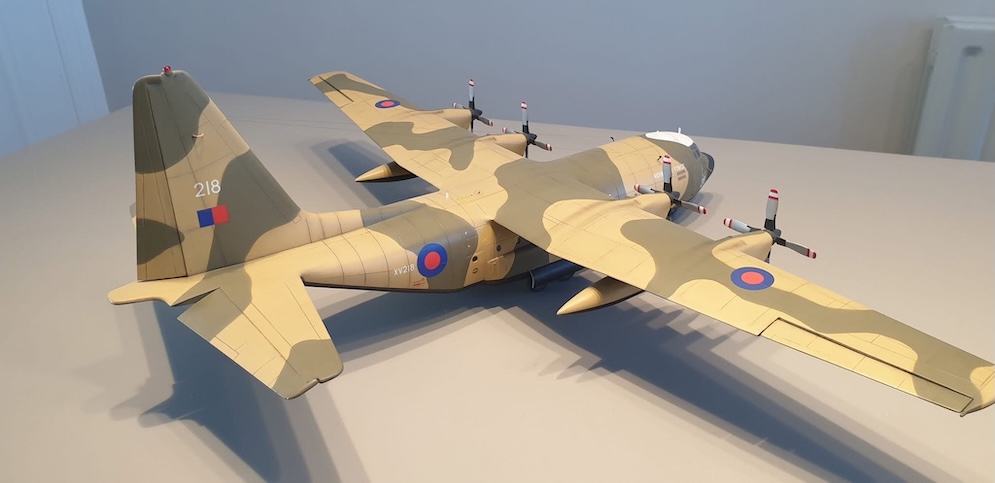
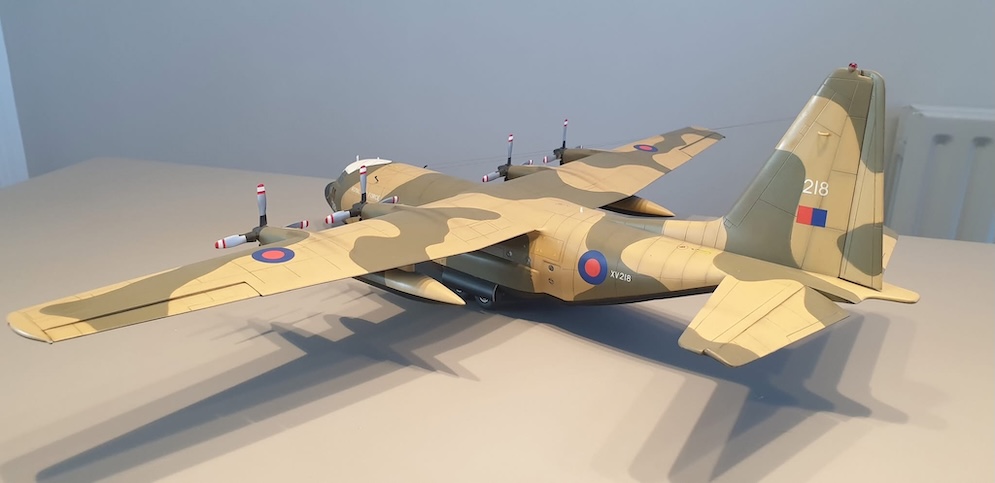
The kit is a 1:72 vacform by Contrail. Building it involves a lot of cutting, sanding and resulting plastic dust. There was also an element of monotony in having to cut out so many windows then working on six identical engines.
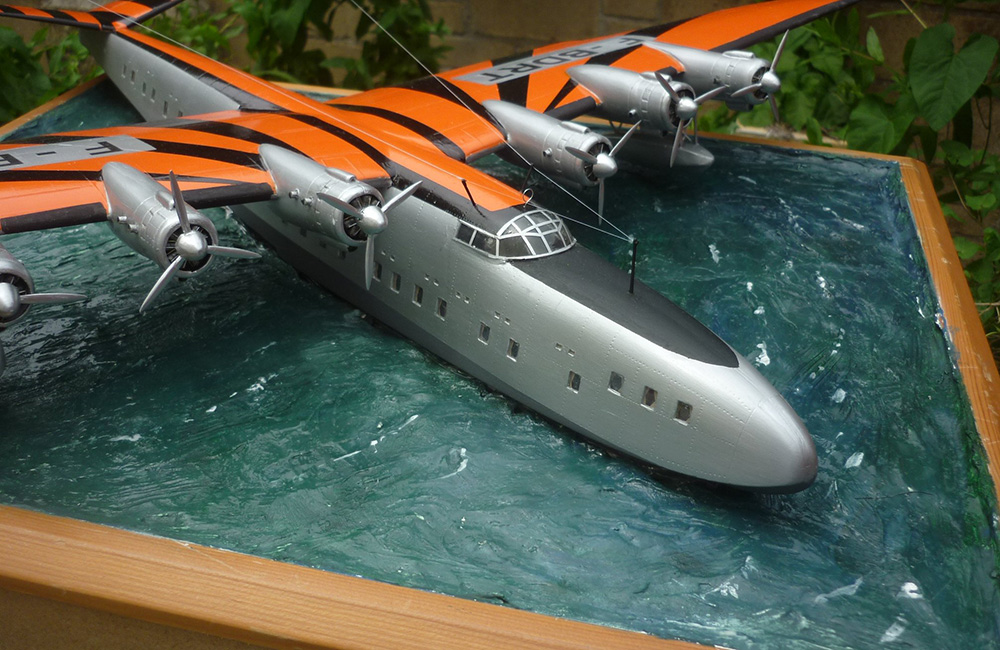
The colour schemes used on these aircraft were either light grey or aluminium overall. There were, however, several art deco designs that were considered, but never applied. I opted for one of these designs as it looked rather more striking than the alternatives. This involved taking a few liberties with the registration code. Hopefully this ‘what-if’ colour scheme does not detract too much from an appreciation of the model. The model can be displayed either on a trestle or on a sea base, the latter being its natural home.
Fred M.
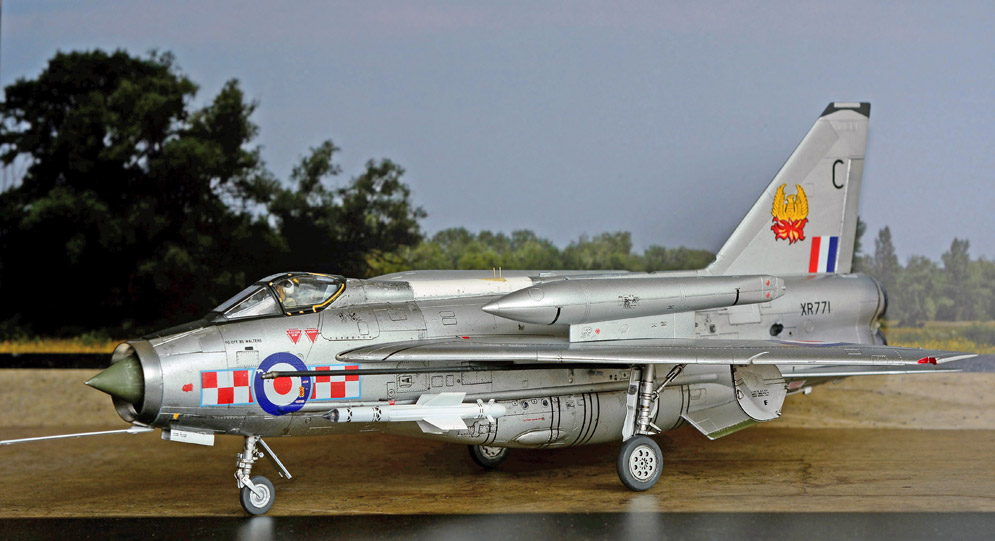


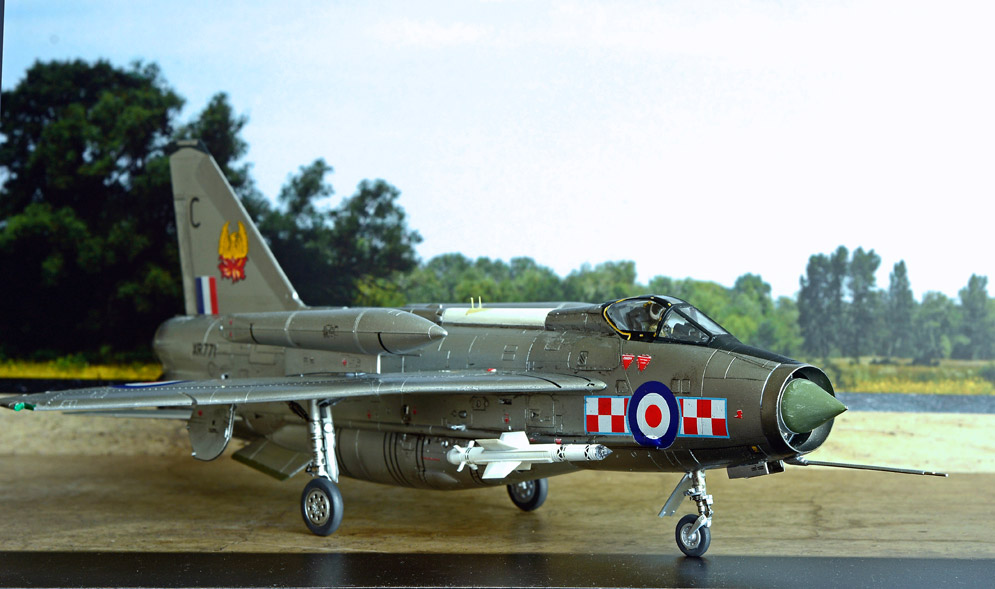
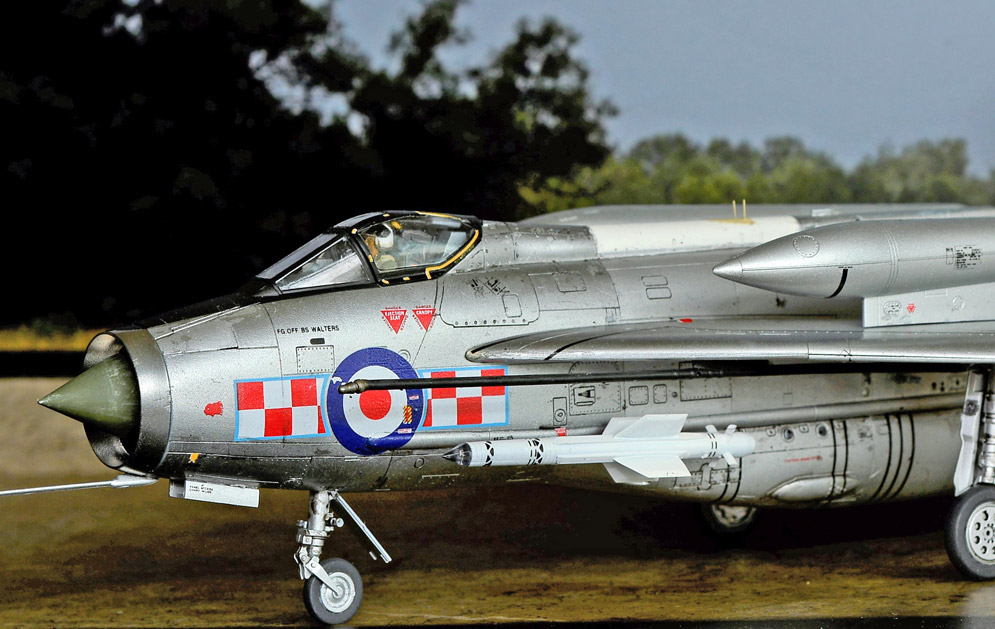
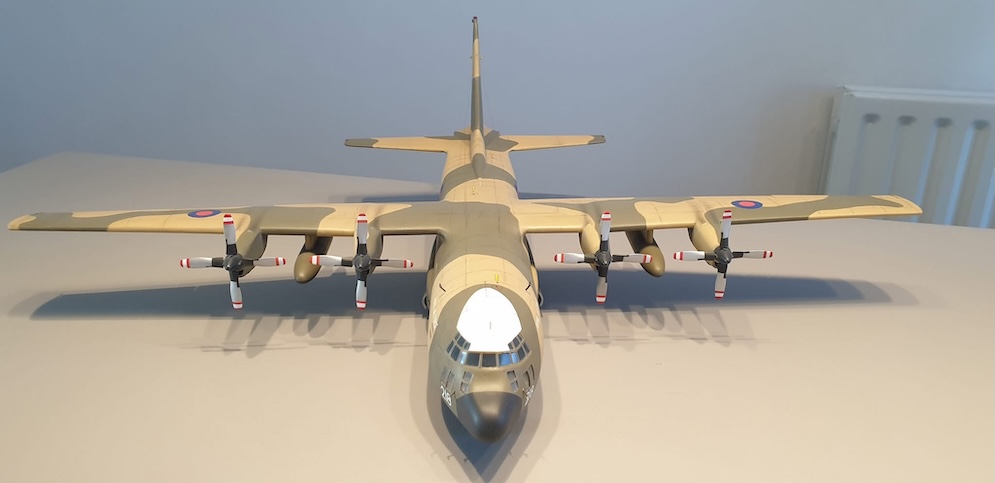
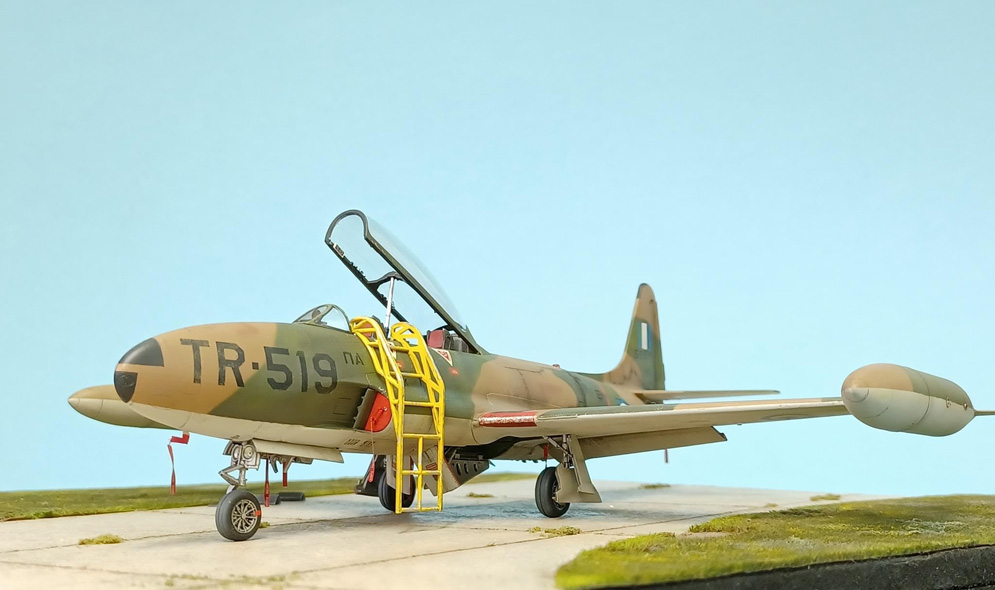
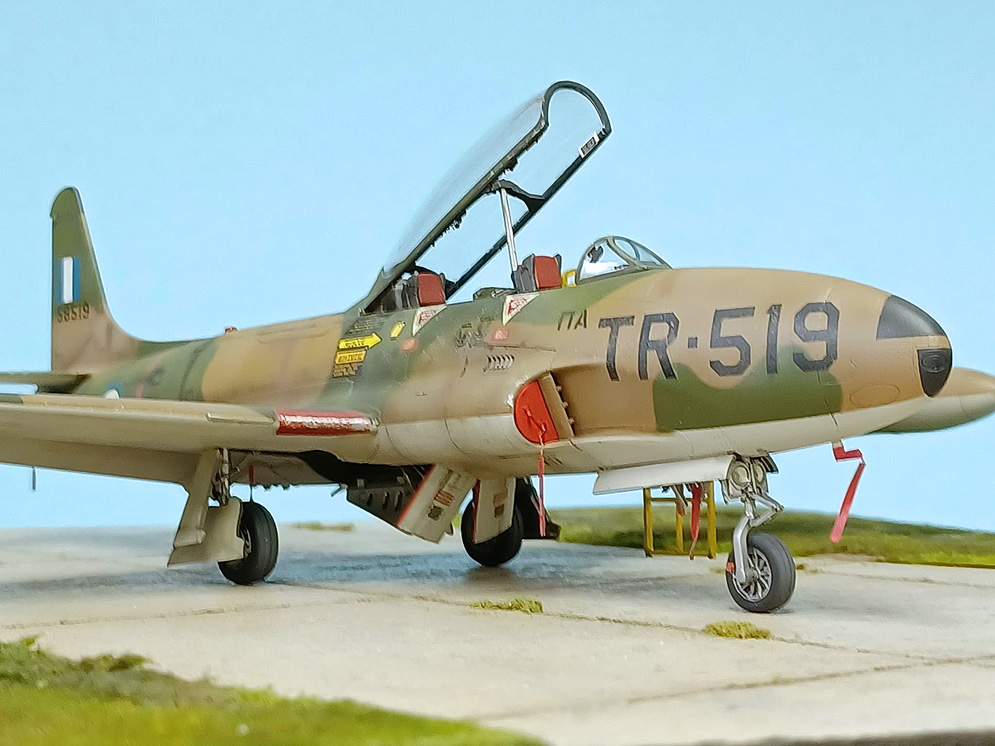
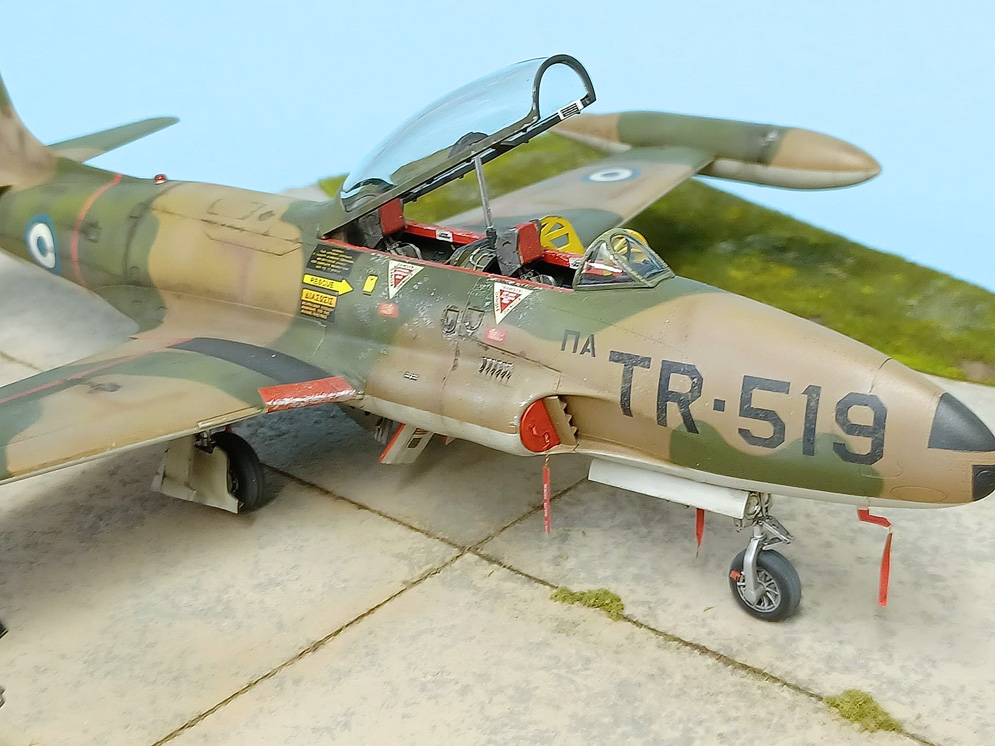
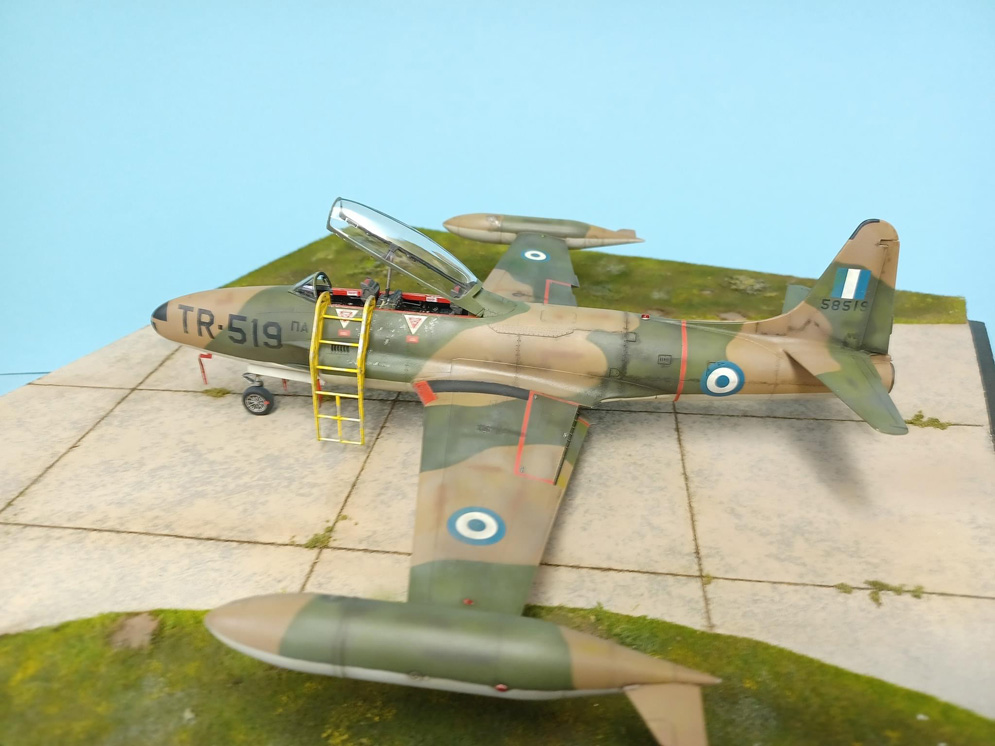
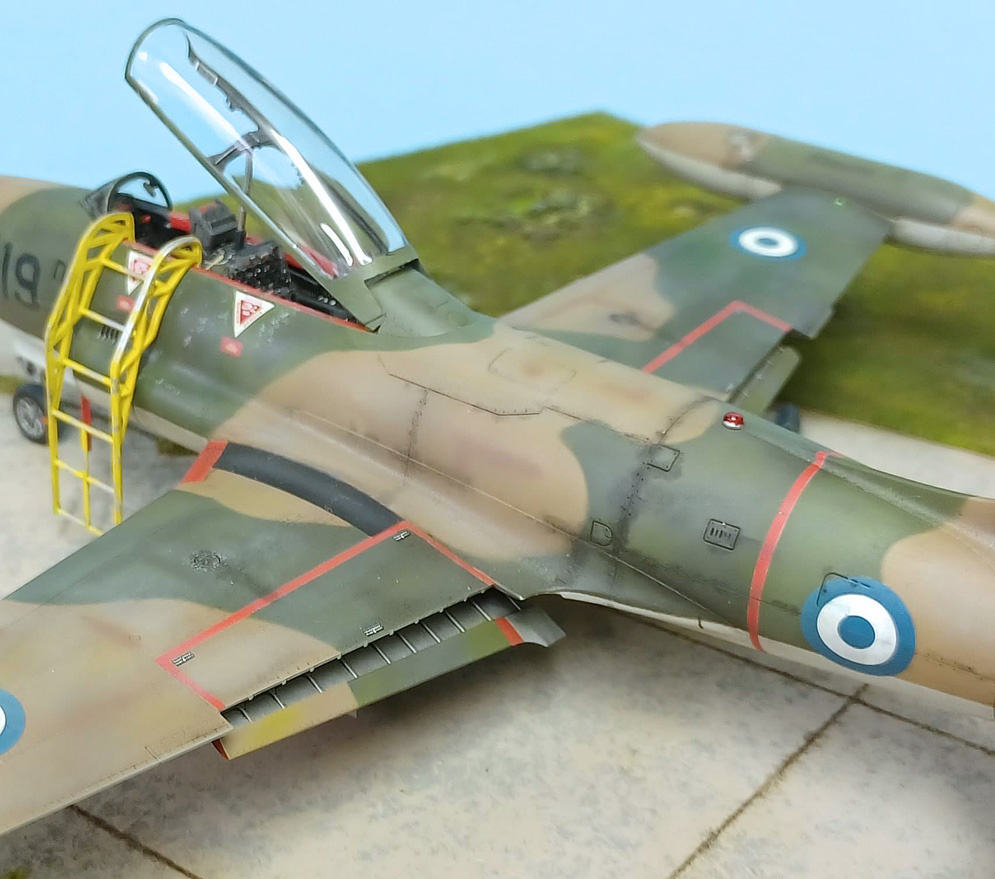
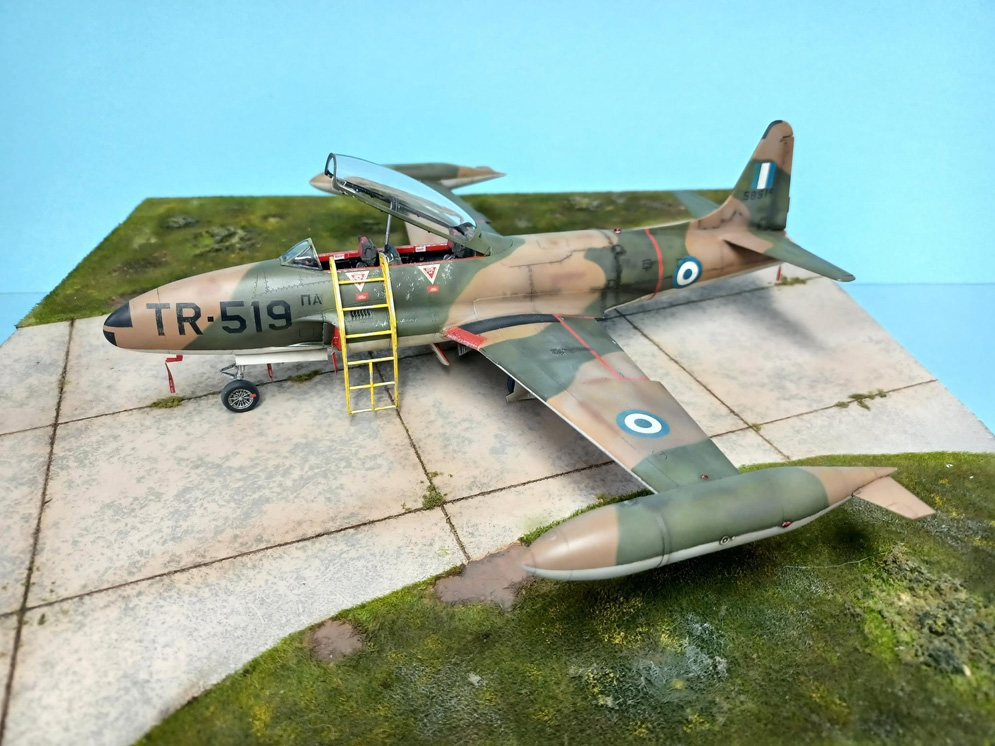
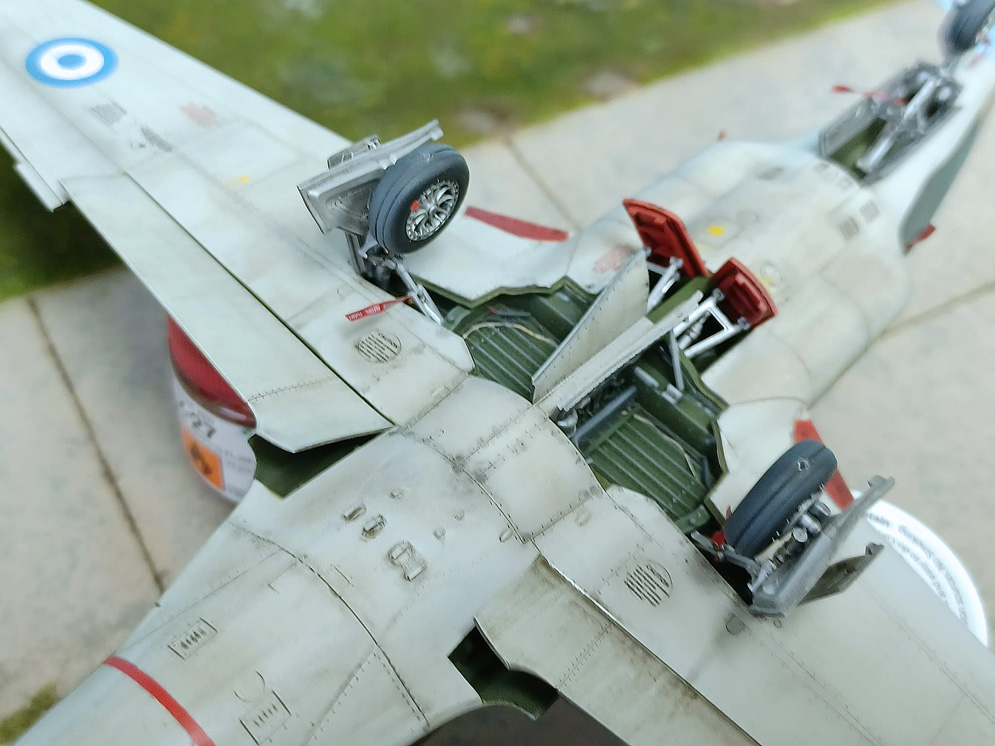
The kit detail is great for something that stems from the mid 90’s and I was going to do an OOB build. Build was very straightforward.
The individual components were painted in Alclad 2 Aluminium with some areas masked off and painted polished chrome (nose ring and fuselage side access panel and the tailpipe shiny part), The tailpipes were painted a dark exhaust colour, again from Alclad2 and I was pleased with the results and effect it gave.
The nose section, upper engine hatch, wing leading edges and rudder were masked and painted in High Speed Silver to add interest and varying colour texture to the airframe. Gloss was the ubiquitous Johnsons Klear applied with a wide flat Tamiya sable brush.
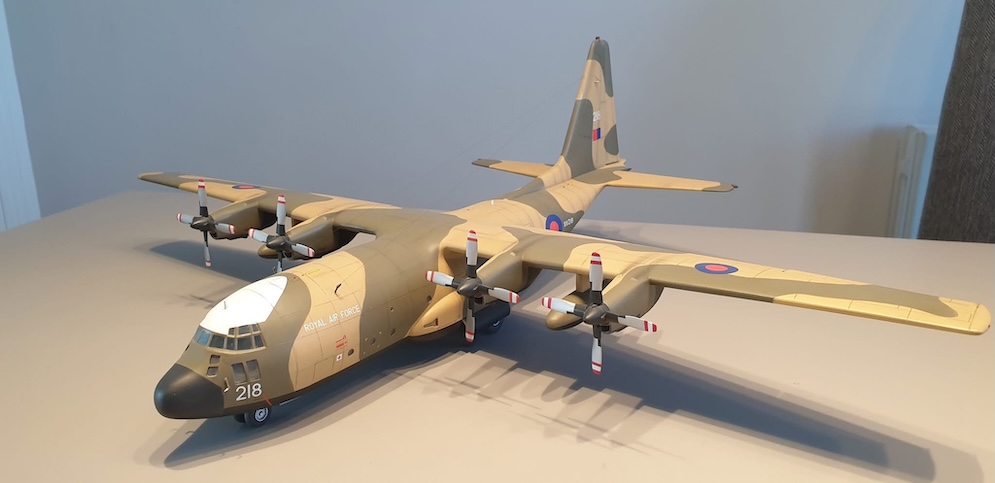
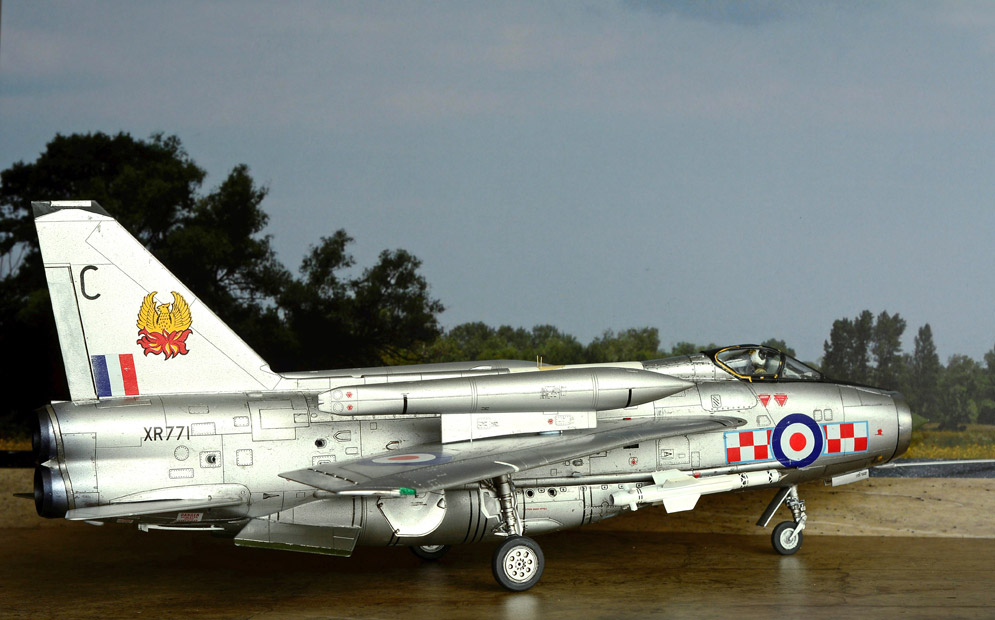
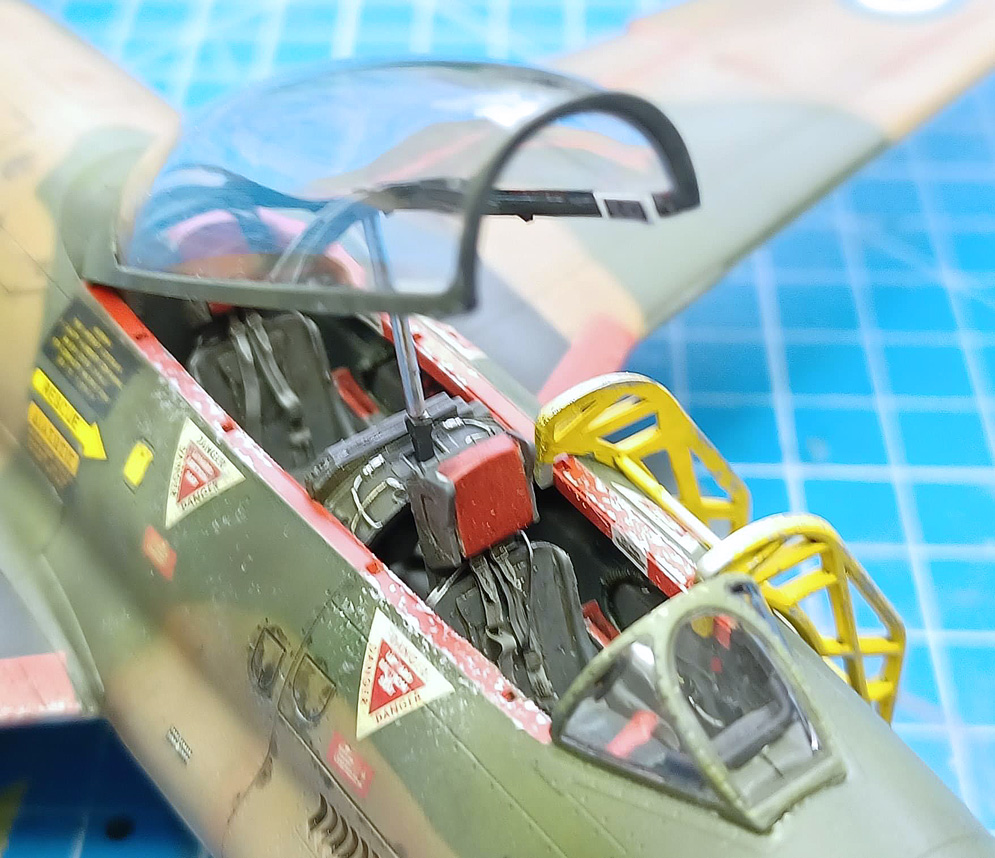
Black areas such as fin tip, refuelling probe and anti dazzle panel were masked and painted with Tamiya Nato Black, canopy was masked with Tamiya Tape and Gloss Black Alclad2 primer used before adding canopy decals and matt varnishing. The nose radome and fuselage ventral fin wear plates were sprayed an Olive Drab and dry brushed with a linen colour to simulate the Composite nature of the nose cone, finishing touch was using the Chrome Molotow pen to add the stainless steel nose cap, the oleo legs and refuelling probe tip.
The white radio bay on the spine was painted in Tamiya flat white, with the Radio aerial mount painted a buff colour, finishing details were adding the two stub aerials carefully trimmed from one of the better halves stiff hair brush bristles (!) and cyanoed into two 0.5 mm holes drilled into the spine and painted the same buff as the mounting panel.
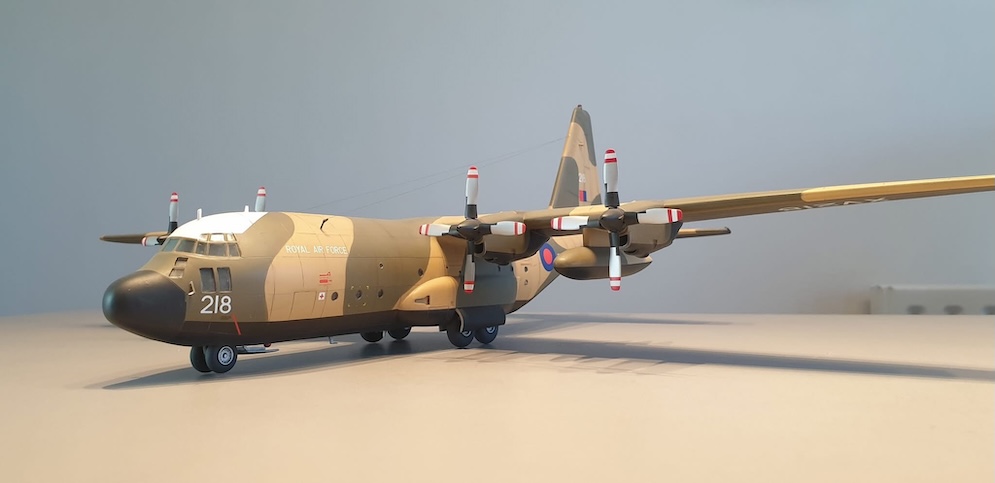
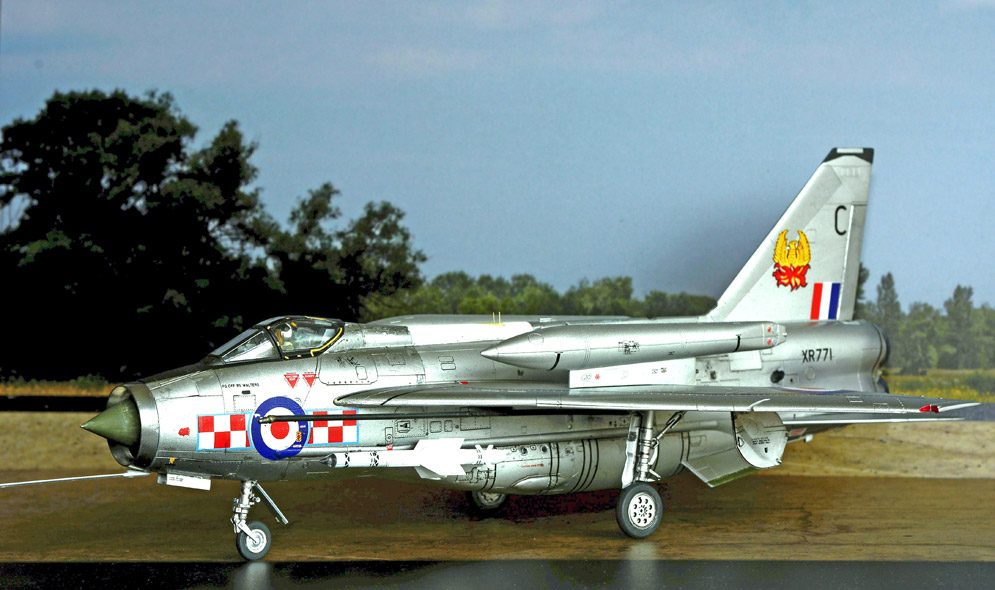
I used some dark panel wash on the undercarriage legs, main wheel recesses/brake areas and oleos and Geoff’s technique of a sharp HB pencil to highlight a few of the excellent panel details on the airframe surface and she was ready to sit back and admire. So after 40-50 hours of work, am very pleased with it and hope you like it too?
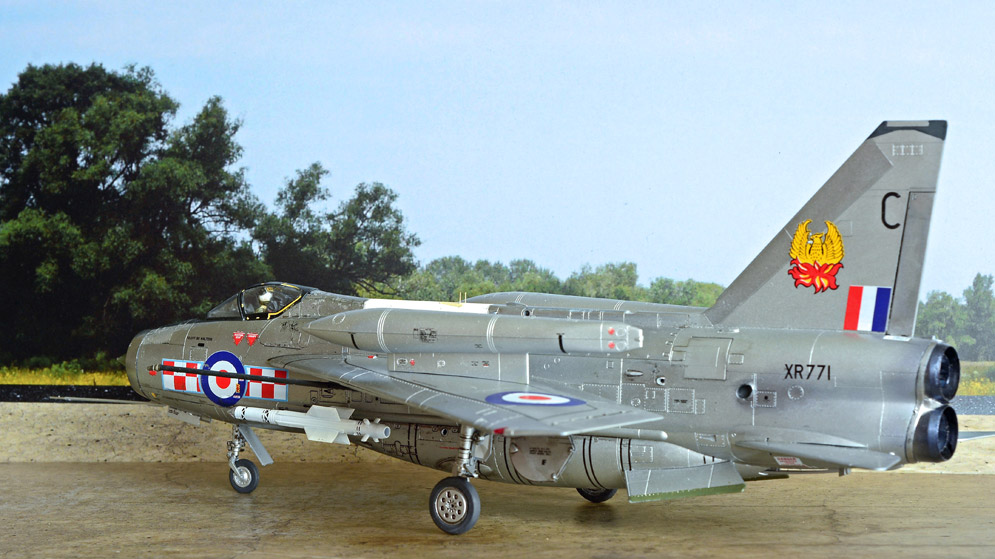
Great model, go build one if you haven’t, I have two more single seaters to do plus the T-Birds…can’t wait !
Stuart M.
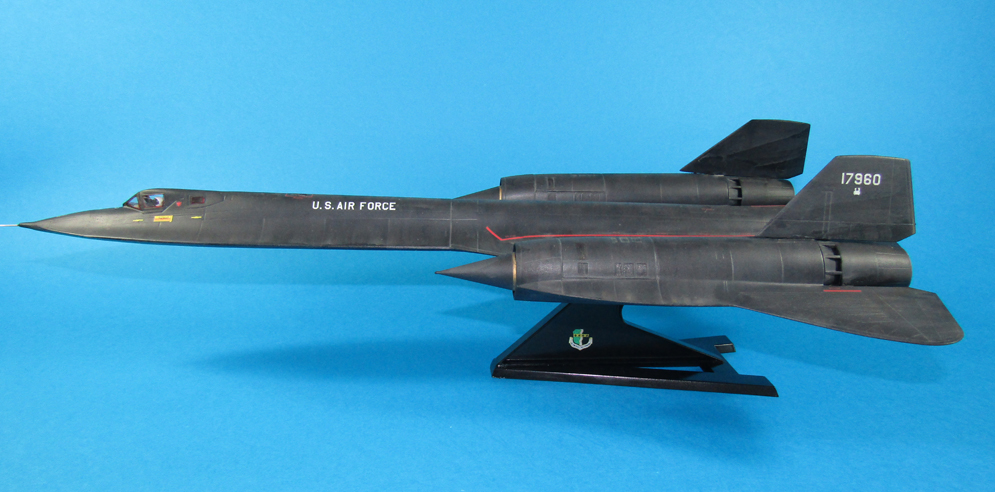
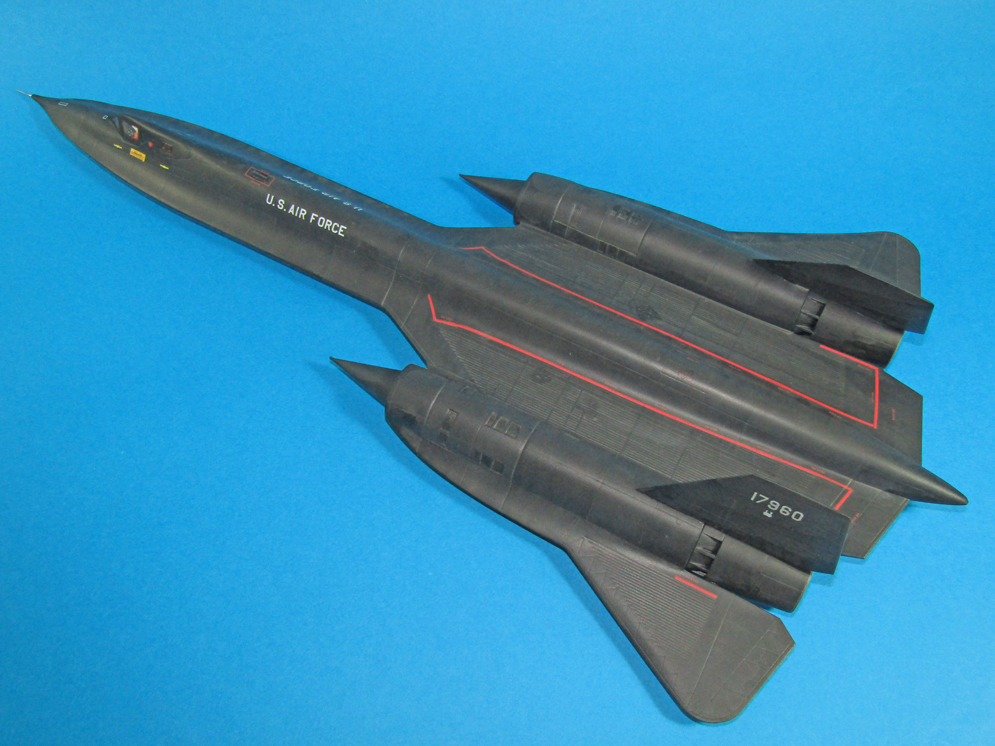
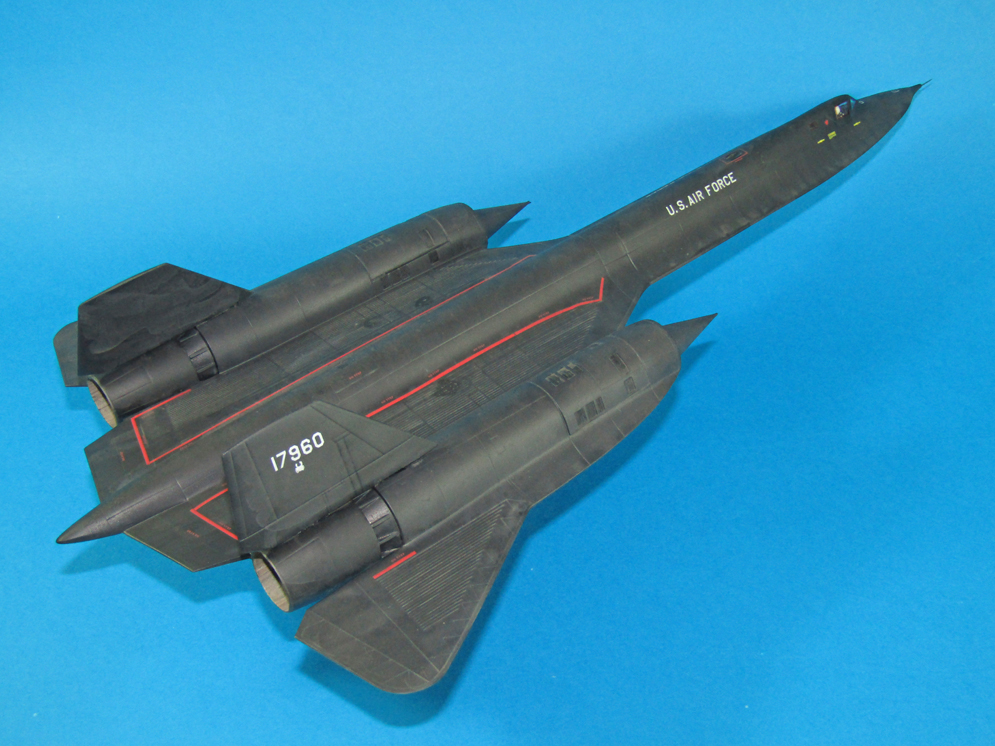
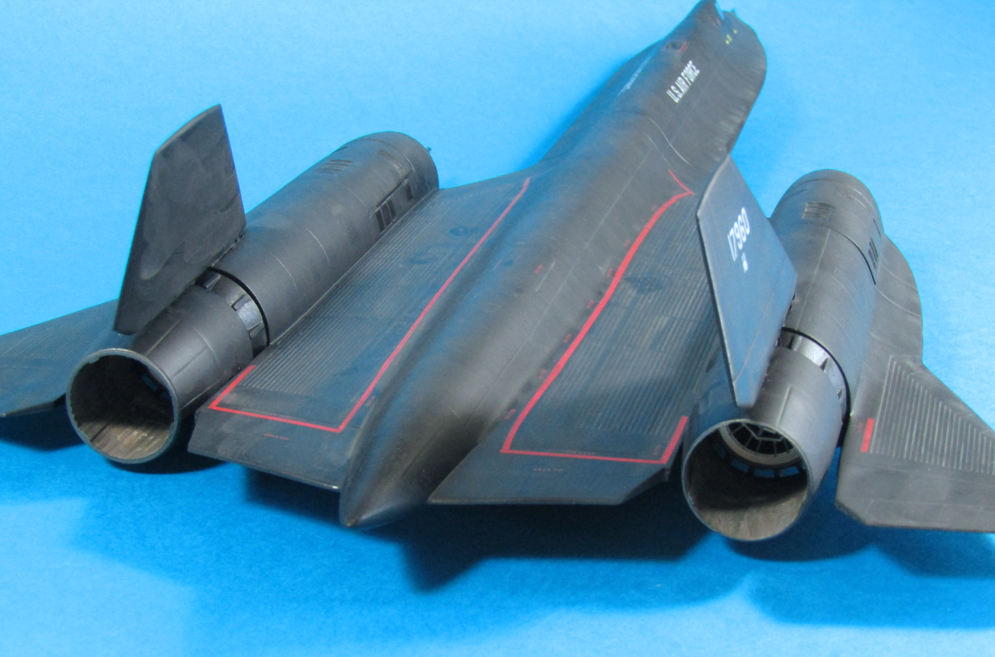
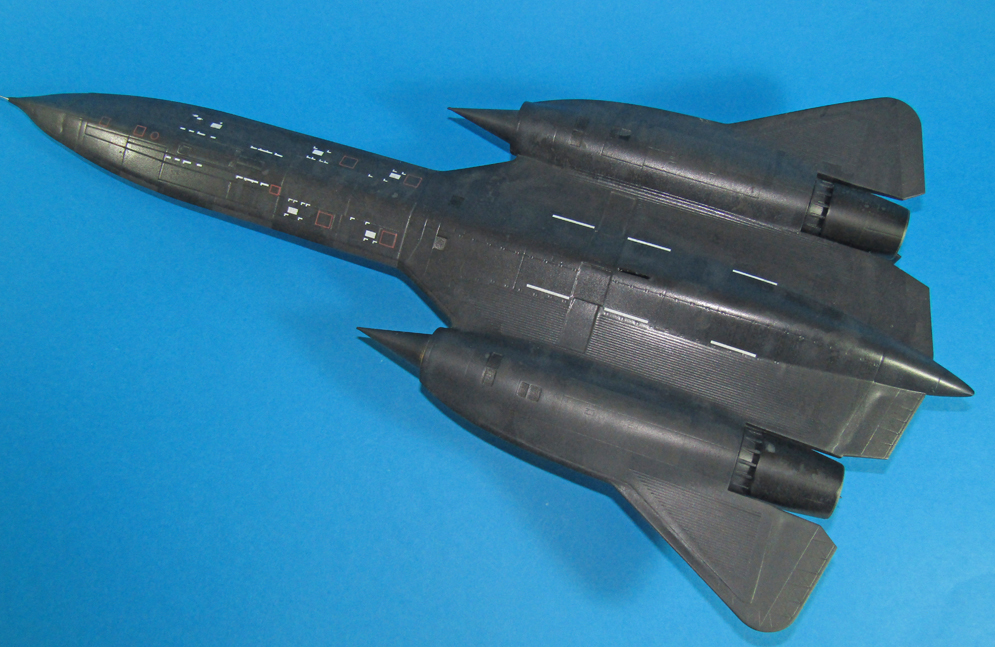
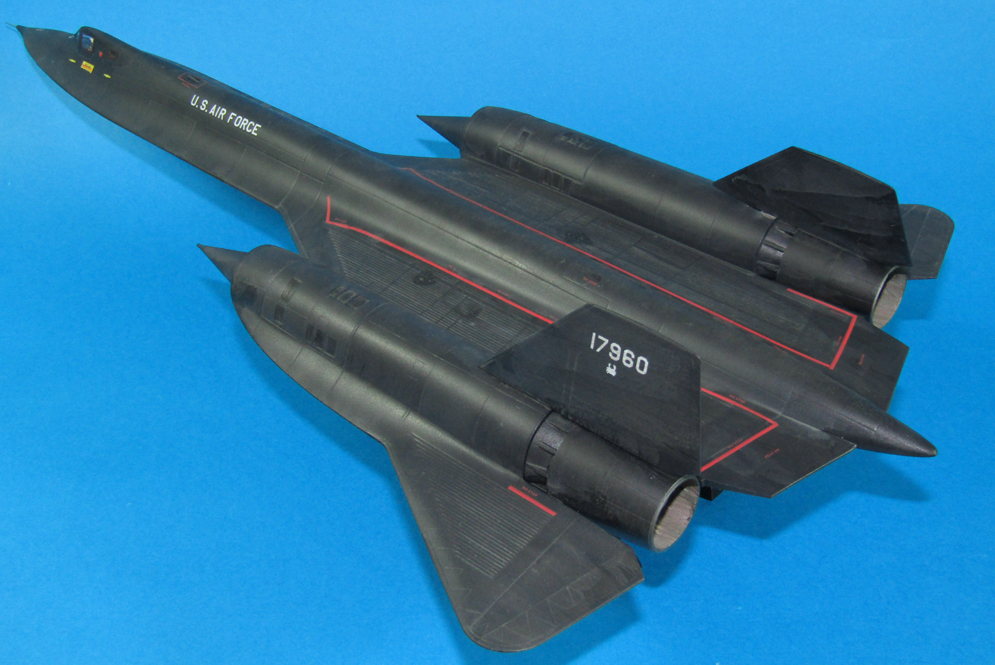
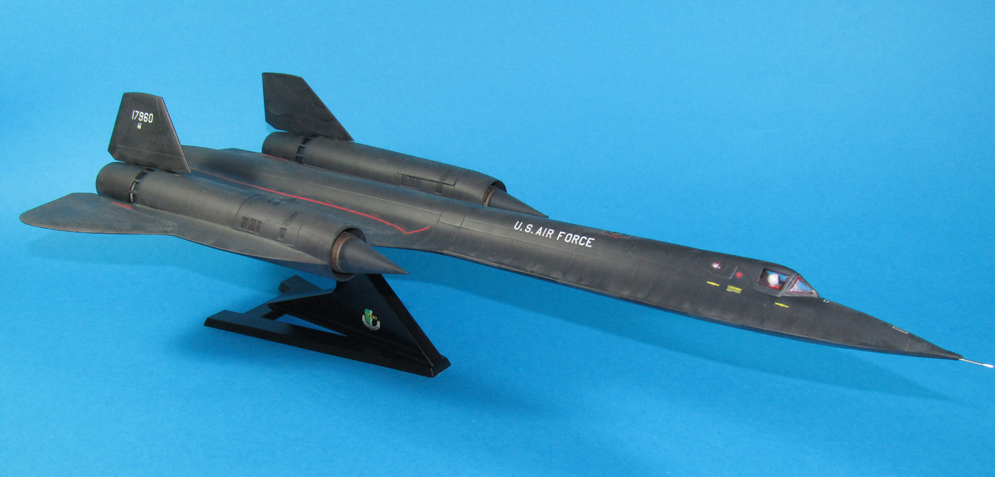
Painted using a black basing technique with five shades of Black / Dark Greys on various panels, then adding further weathering using Mig AMMO pigments to obtain the streaky effects.The only additions to the OOB build was to add some detail to the afterburner cans interior to replicate the ceramic panels and replace the pitot tube with a more to scale metal one.
Mick S.


Scratch built the intake covers; added extra details to the cockpit; brake lines from lead wire .
Weathering done with Abteilung oils and Flory Dark Dirt wash and Tamiya Smoke ..
Cheers, Neil A.
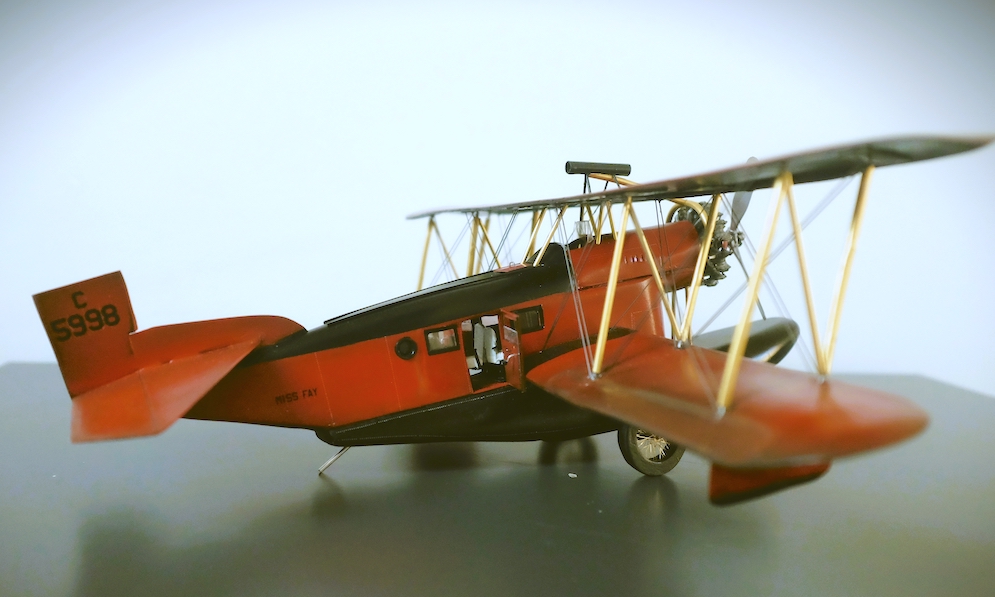
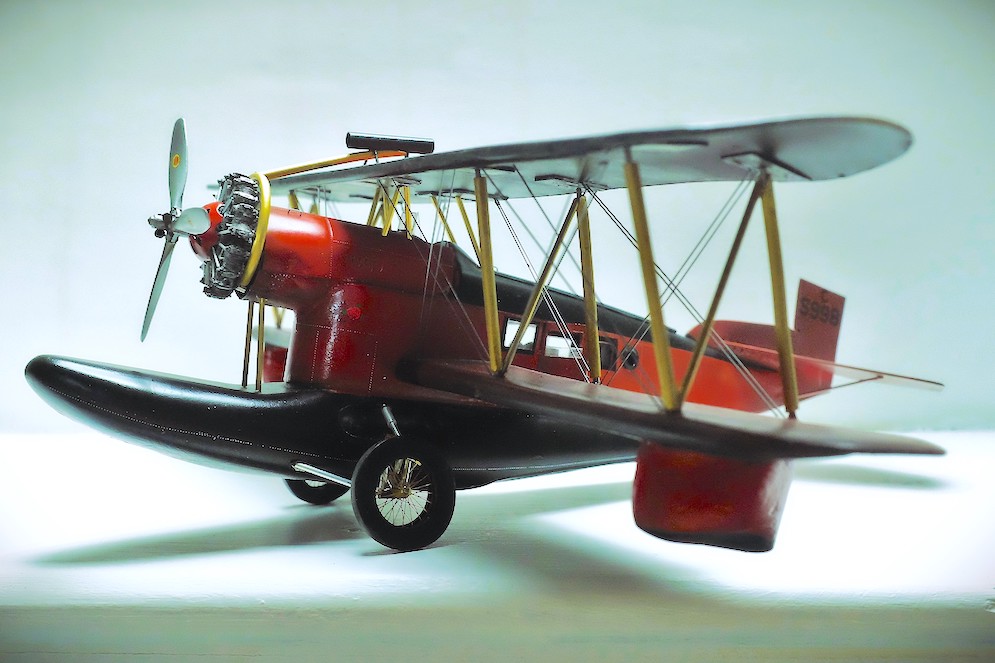

The model represents an early (1928/29) aircraft with a tandem seat, (hidden below a hatch) for the second pilot. Throwing authenticity out of the window, I incorporated as much natural metal as possible in an attempt to give the whole colour scheme a “Jazz Age” feel.
Inspiration came from F Scott Fitzgeralds novel “The Great Gatsby” in which there are two fleeting references to the fact that Gatsby owns a “ Hydroplane”.
I am taking a bit of a swipe at both Scott Fitzgerald purists and their equivalents in the model making world. The novel is set five years before Loehnings air yacht took to the air, and my model is loosely based on an aircraft that was owned by financier Richard F Hoyt. Hoyt was, however ,typical of the fabulously wealthy East Coast set about whom Fitzgerald wrote. My defence for the appearance of the model is that if people such as Dick Hoyt wanted a lot of shiny brass on their airplane, Grover Loehning would have built one for them.
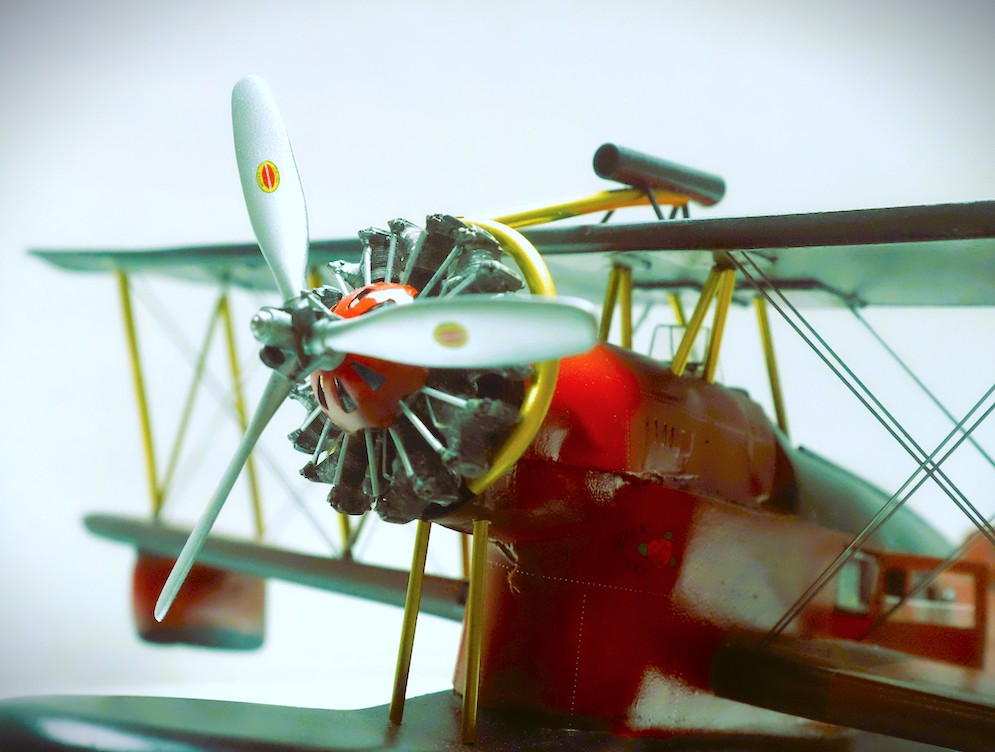
Construction follows the same basics as per the Sikorsky S38 in my earlier article: Two part epoxy putty around a styrene frame for the central float, K&S aluminium, brass and copper tubing, Vector resin Wright Cyclone engine, Propeller from scrap Revell F3F. Rivet decals, lettering and numbers from Hannants. The struts are from K&S soft brass tubing slightly flattened in a vice. Paint is Mr Hobby Shine Red/ Gloss Black over Mr Hobby 1500 Black Finishing surfacer. I did a lot of experimentation with new techniques , at long last finding a use for “ Smart plastic” granules as a lightweight filler for the front end of the fuselage and also getting good results from Halfords Plastic Spray filler which saves a fortune compared to the Mr Hobby equivalent.
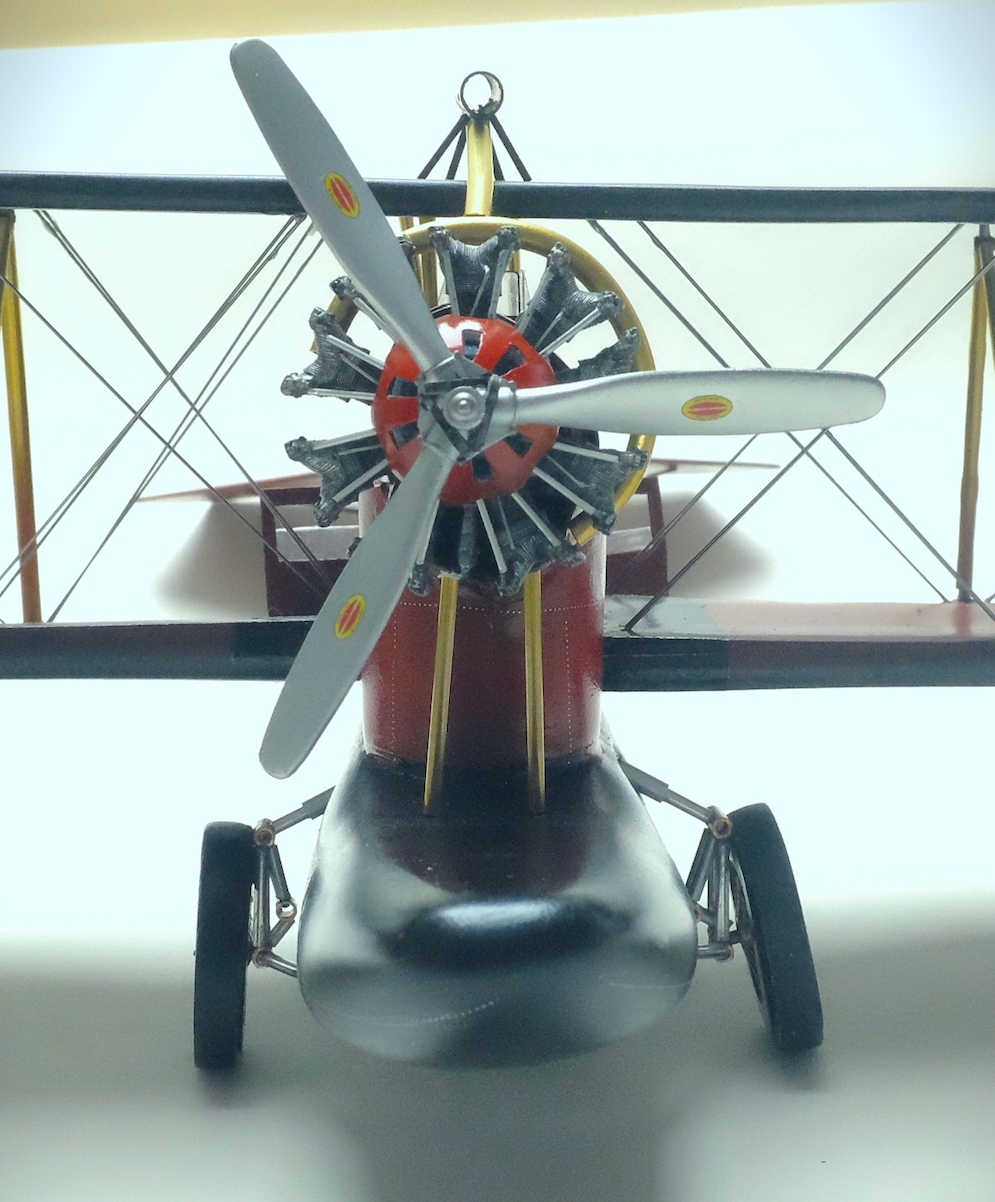
Landing gear/Wheel construction was the most challenging part so I worked it out before risking starting the project. I wanted to use etched brass spokes ( from Toms Model Works) but these would be incapable of supporting the model if they carried the weight as in real life through a central axle The wheel rim/tyre is scratchbuilt from styrene discs and Milliput Putty, and it is very stiff and solid. This is pinned directly into the main float, carrying the weight of the model. (See Front On Image) The folding undercarriage is purely cosmetic as it doesn’t support anything.
Alan R.


Galleries: A | B | C-E | F | G | H | I-J | K-L | M | N-R | S | T-V | W-Z