Welcome to the Subscribers’ Armour Gallery R-S
Each submission has a ‘gallery’ of thumbnails which you can click on to see an enlarged image along with some short text describing the model – enjoy!
Galleries: A | B | C-I | J-L | M | N-P | R-S | T-Z
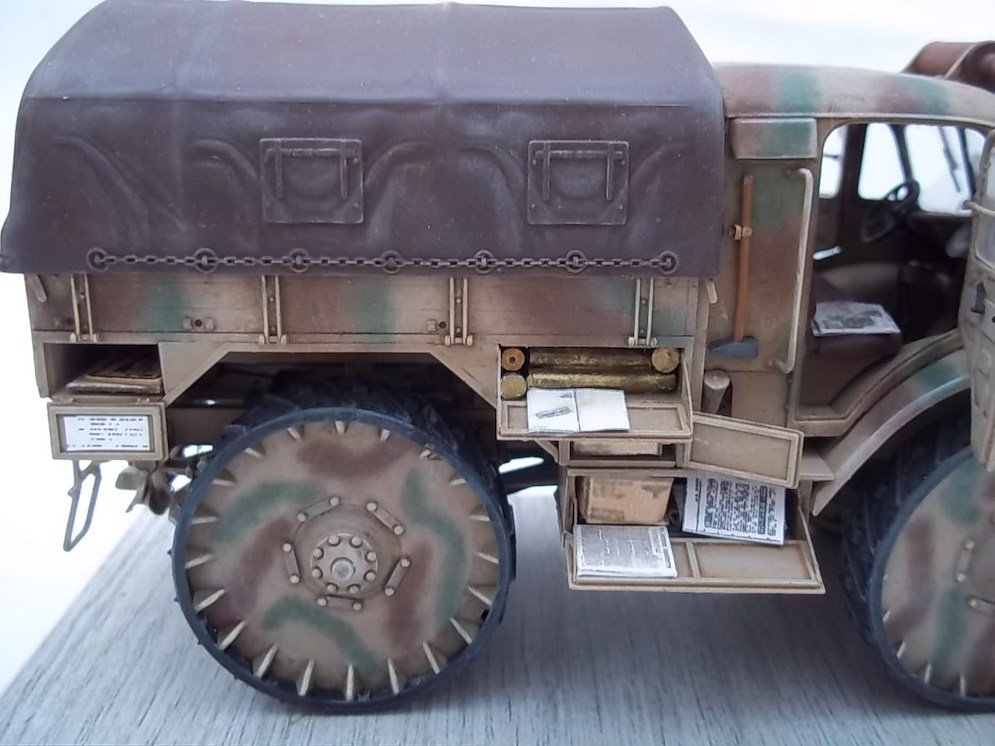
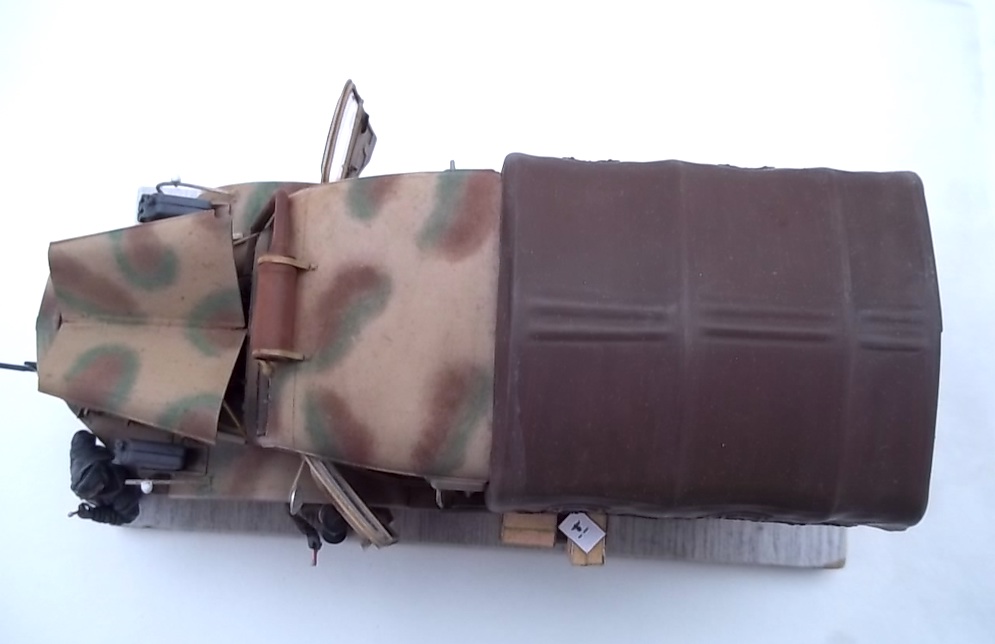
The build was as usual with a Tamiya kit straight forward but I decided to leave certain items off the build, Such as the rear mud guards, side fenders, the crane and the front light.
Once all built and washed a primer was applied using Mr Surfacer 1500 grey . This was followed by Mission Models Paint MMP-019 Dunkelgelb RAL7028. A lightening of this colour came next to hit high spots and act as a soft modulation.
The tools were painted as were the wheels and at this time the tracks were coloured with AK Track colour.
A wash was next applied using a dark brown mix acrylic paint thinned with proprietary thinner, water and slow drying agent, applied along weld seams. Panel edges and raised detail and when dry cleaned up with a damp clean brush.
Oils were then used to create streaks and to bleach the base colour giving the finish some life. The dot technique was used to filter the tank before another round of streaking was carried out.
Chips were painted using Model Color 822 SS Cam Black Brown applied with a pointed brush and when dry some of these chips were touched in with a HB pencil to replicate worn steel. The pencil was used on the track links in a similar manner.
A simple base was made up from Air dry model clay , small stones were pushed into the still wet material as was the tank to impress the track marks into the surface. The base was then painted black and the stones picked out in various colours. Brown colours were then sprayed over the base in various places and shades to ad variety. Model Railway grass fibres were then stuck in position and the whole was then stuck down to a wooden base. The tank was then added using PVA adhesive and pigments mixed with filler made up a mixture to act as a fillet and make the ground up to the tracks and when dry it was painted and a dusting of pigments applied dry and set in place with Tamiya X20A thinner blown through the airbrush at low pressure.
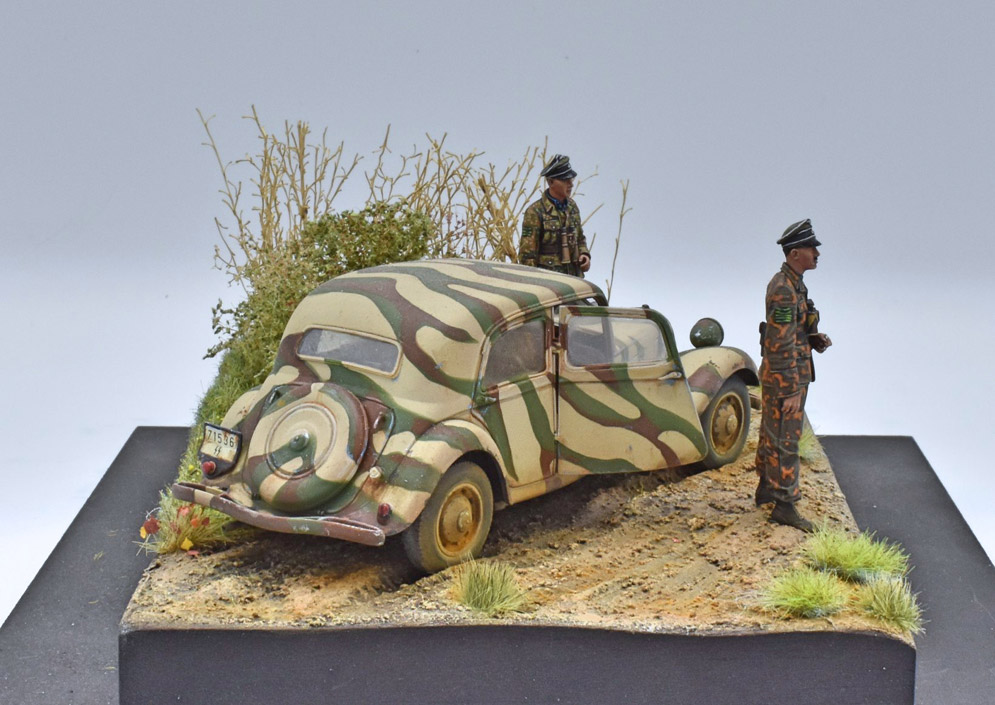
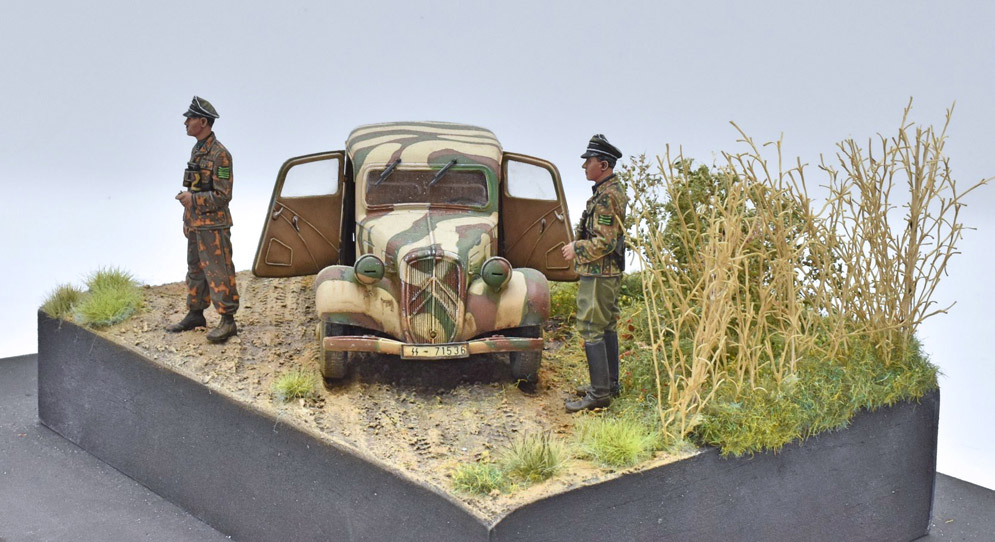
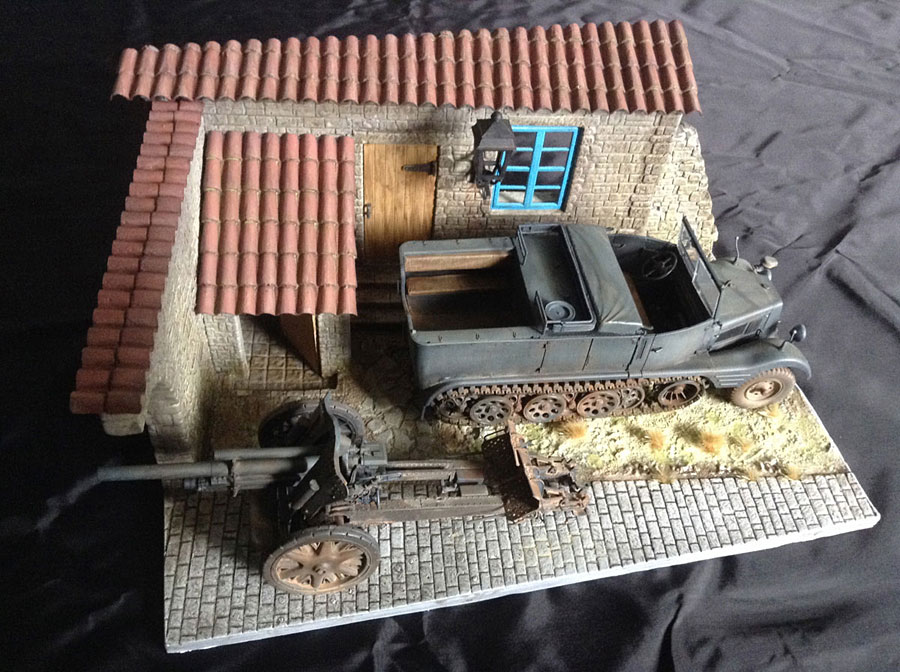
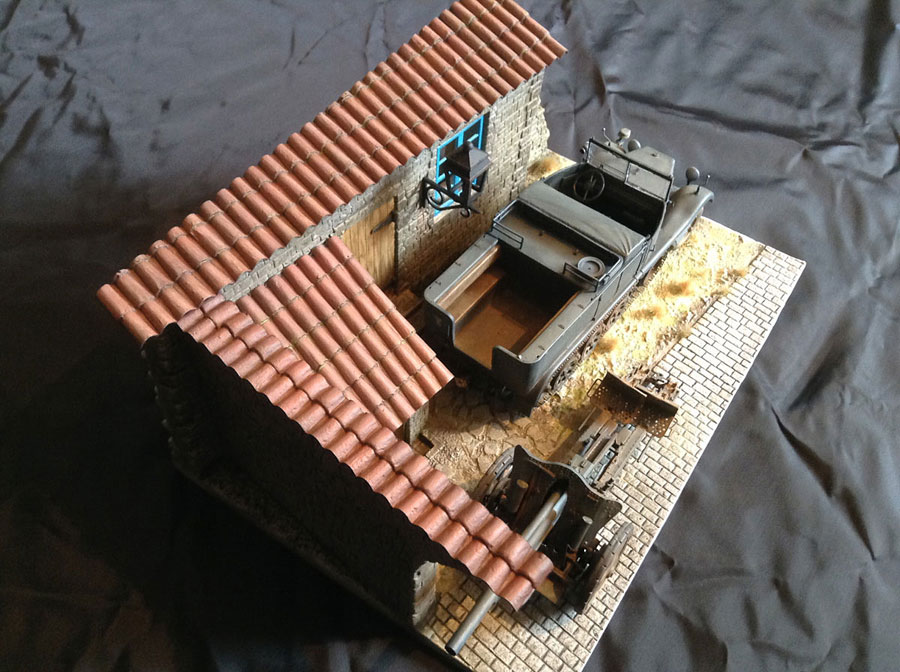
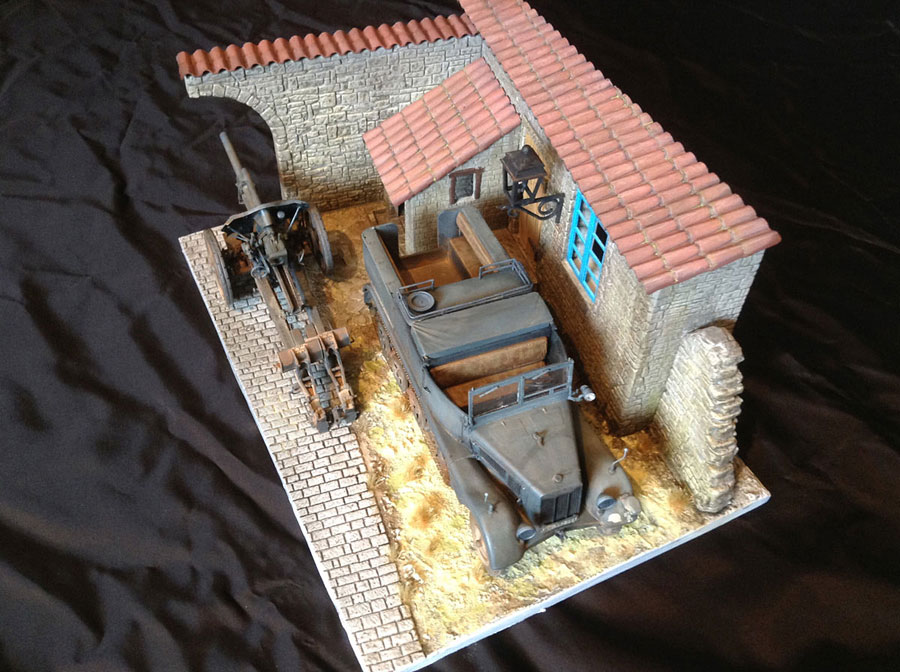
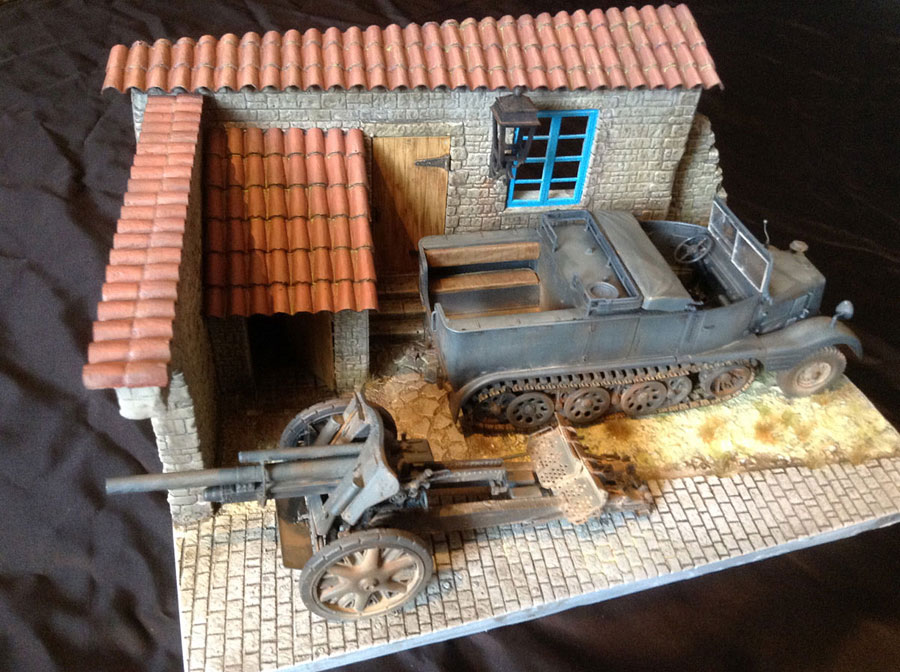
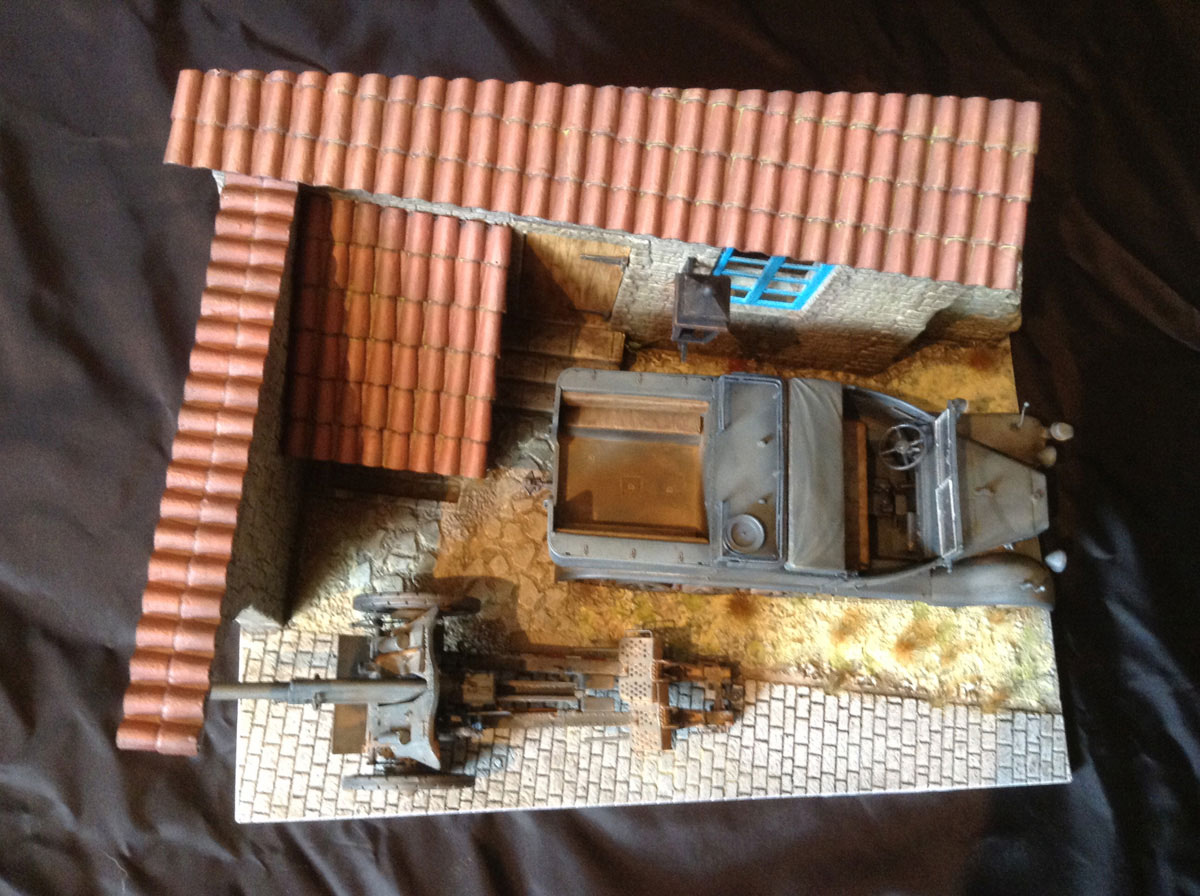
The model is of the latter, consisting of the Maquette kit of the UE carrier built straight from the box with the Tamiya 37mm Pak 35/36 mounted on top of the superstructure.
The tracks are link and length and a little fiddly to fit. The carrier was completely assembled and then undercoated with Halfords grey matt primer. The Pak was assembled without the carriage or wheels and then primed.
Painting was done with Tamiya paints cut with cellulose thinner starting with the sand colour. This was then over sprayed with green and brown roughly 1/3 area coverage of each colour. The gun was done in the same way.
A light coat of the base was then over sprayed on the upper surfaces of the carrier and the gun to help tie the colours together and tone them down. The lower part of the carrier was sprayed with dark earth tones. A pin wash was applied to all raised items such as nuts rivets, louvers and grooves. When this had dried a light shade of the base was dry brushed over all raised items. The wash and the dry brush give depth to the finish. The track and breach were painted gun metal then dry brushed with silver and this was followed with a wash of very dark brown.
The gun was then mounted on top of the carrier into a hole pre drilled to accept the spigot on the bottom of the gun frame
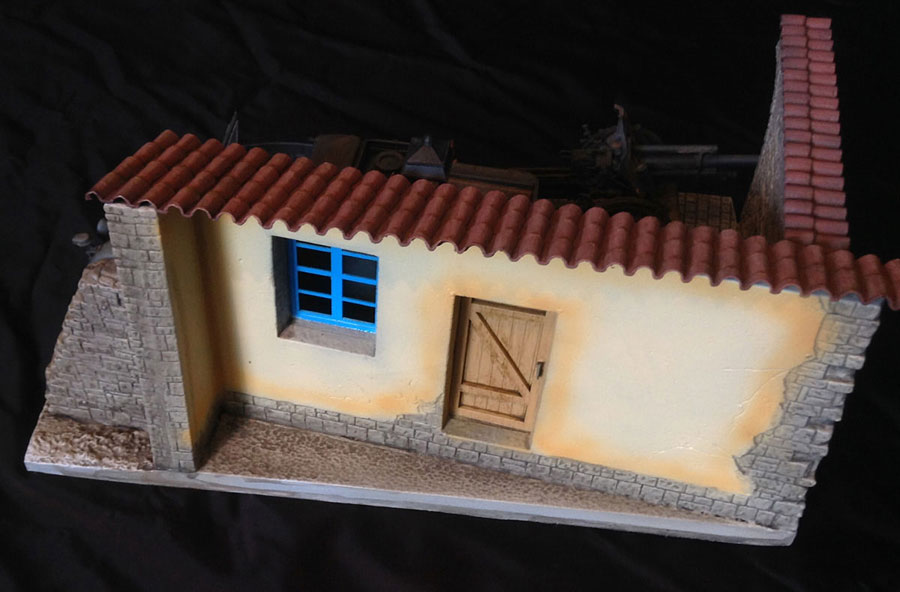
A simple base was made from a piece of conti board cut to size and iron on edging strip used to edge it. Obechi was used to form an inner frame to hold the groundwork which was made from a plaster based filler. This was smoothed out and when the plaster was partly dried the carrier was pressed into the surface to imprint the track marks. Once dry this was covered with pva and green flock spread over, pressed down and then blowing across the surface the flock stands upright. The wall was made from a plaster casting sealed with water and pva mixture brushed on and allowed to dry. Small bits of various items were then used to represent weeds, shrubs and dead tree.
The grass was painted in various shades of green and drybrushed with a pale yellow. The wall was painted in grey and brown tones followed by a wash of thin black and brown colours. The various weeds were again painted in greens, browns and yellows.
The carrier was then stuck to the base with pva and left to dry. A nae plate wasmade from a piece of plastic card to which a computer printed label was stuck. This was then covered with some self adhesive clear plastic book covering.
JOB DONE. This is an old kit which has been now released as the French carrier with tracked trailer by Tamiya. This is a small vehicle and builds into a nice model of something different to the normal tanks and softskins. An easy build straight from the box and with the added Pak it turns it into an interesting subject.
This proves the point that you don’t have to spend a fortune or build something large to get a nice model subject that has interest which will grace your collection.


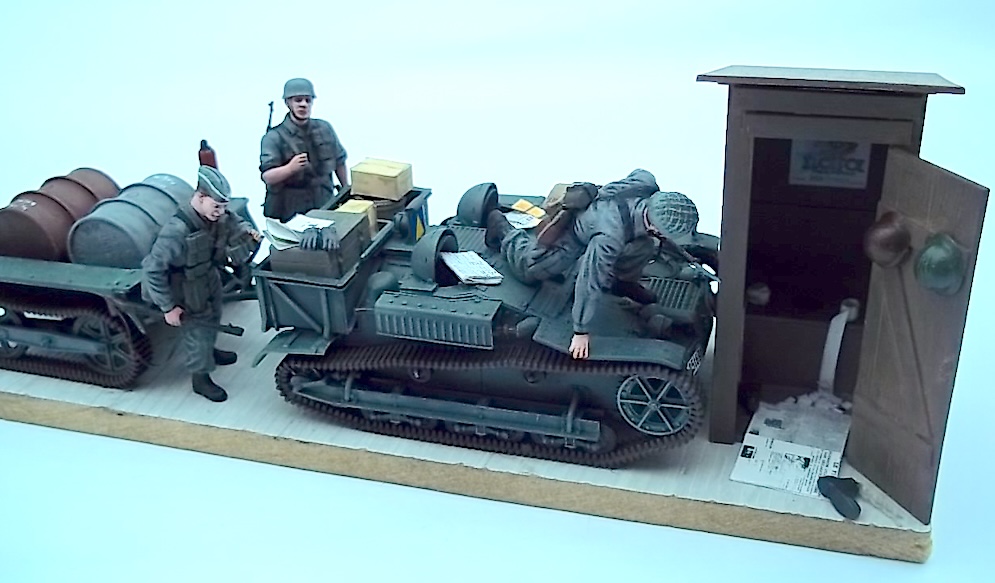
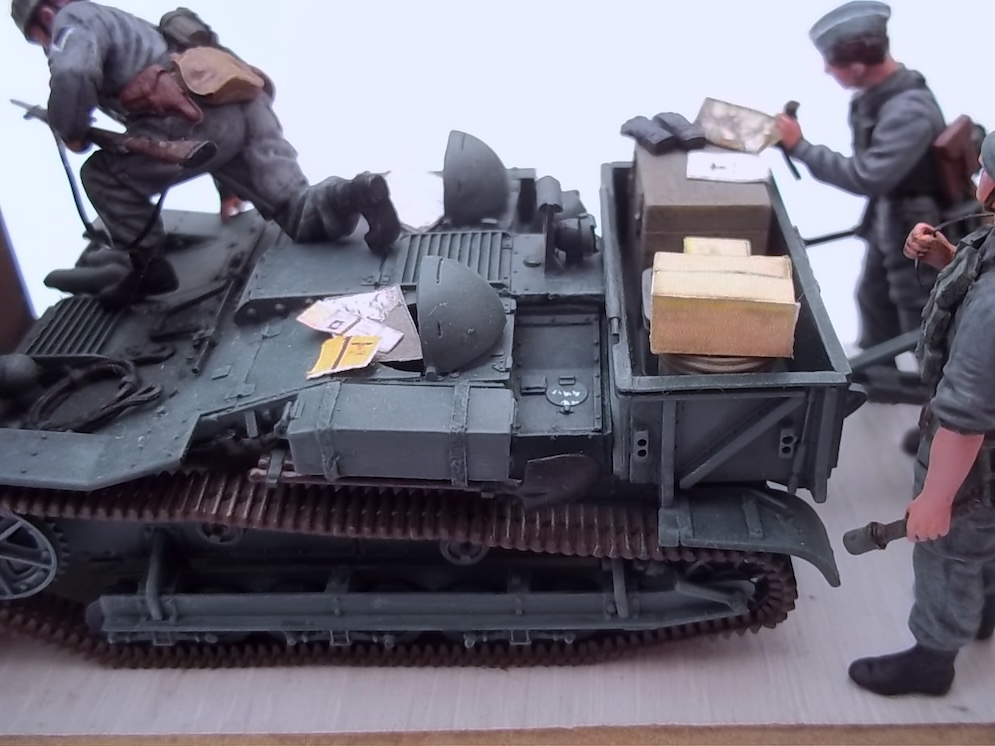
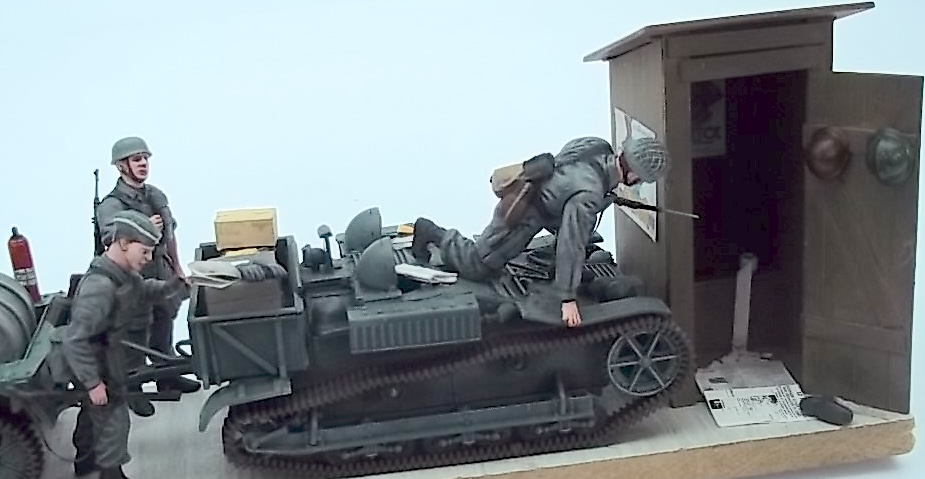
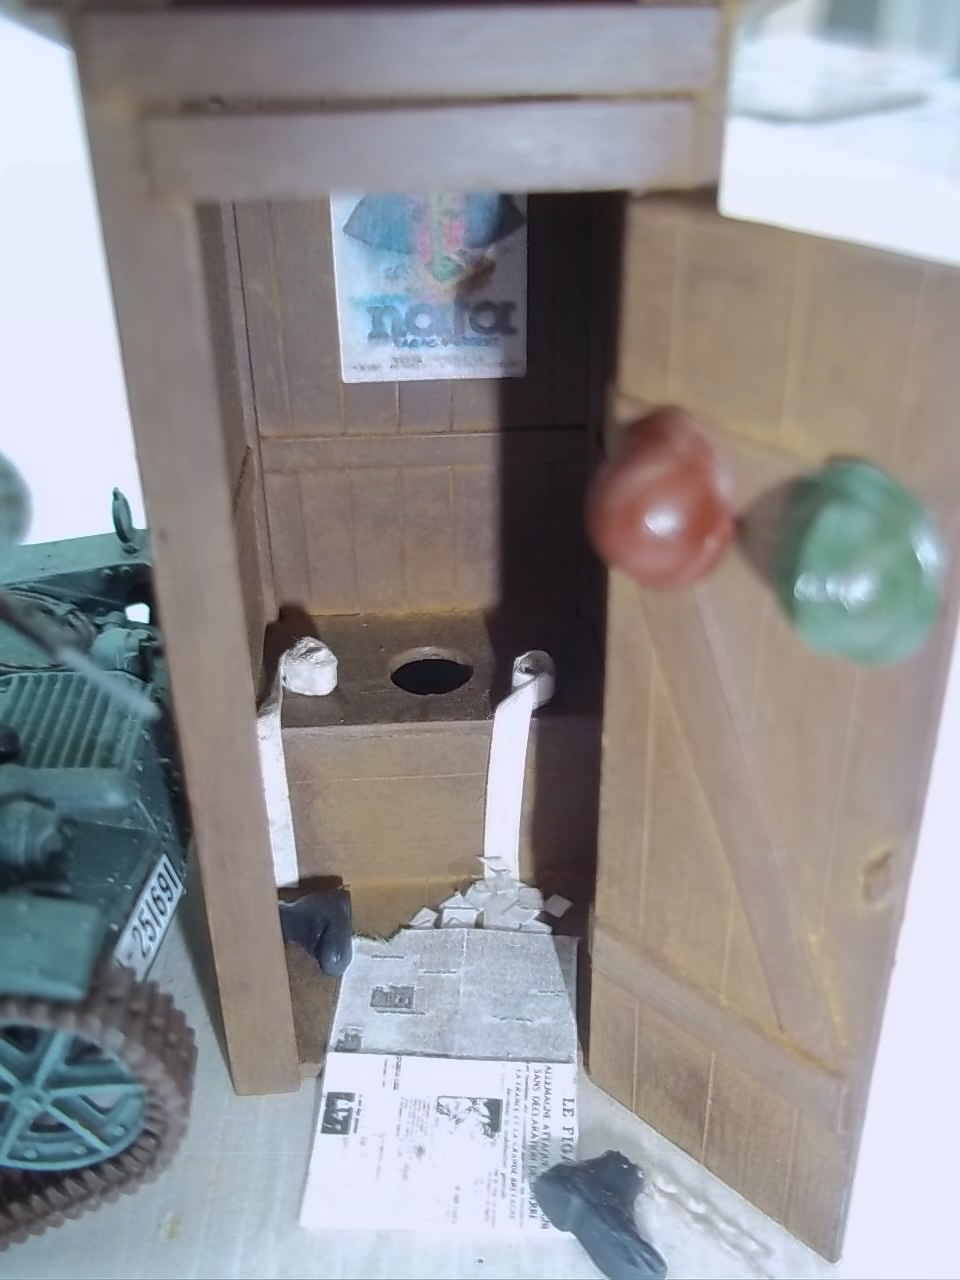
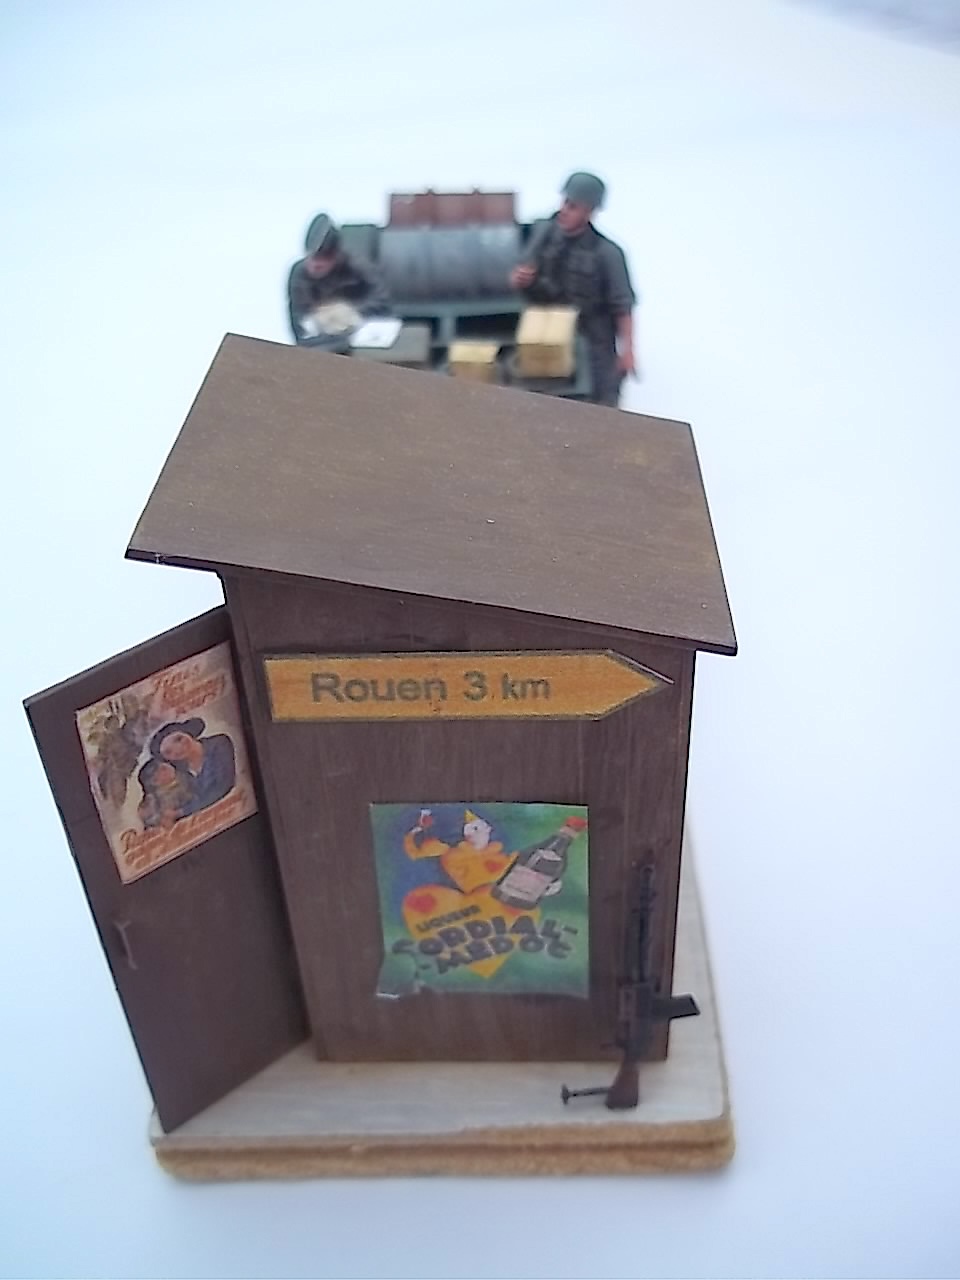
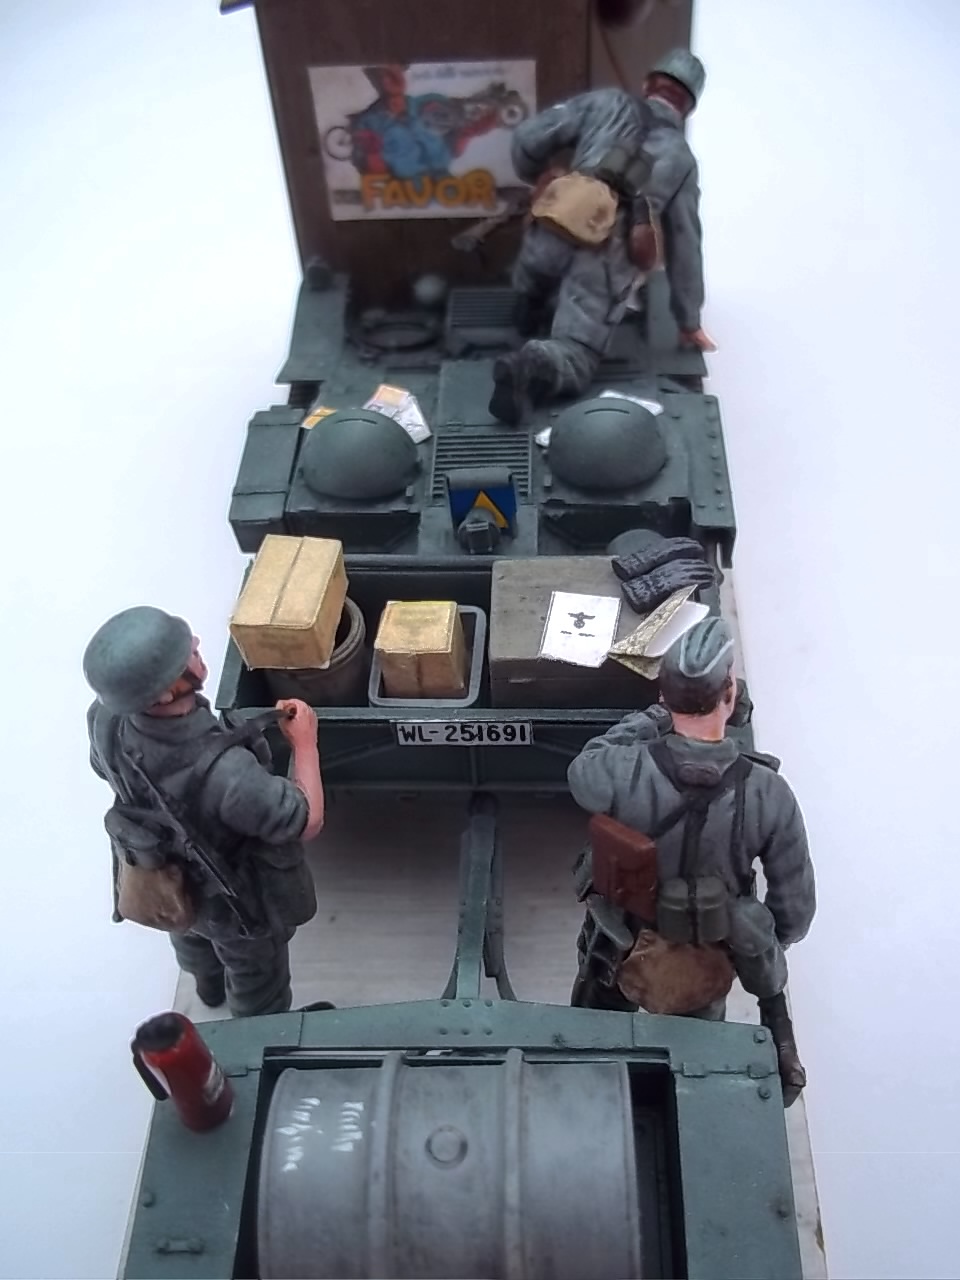

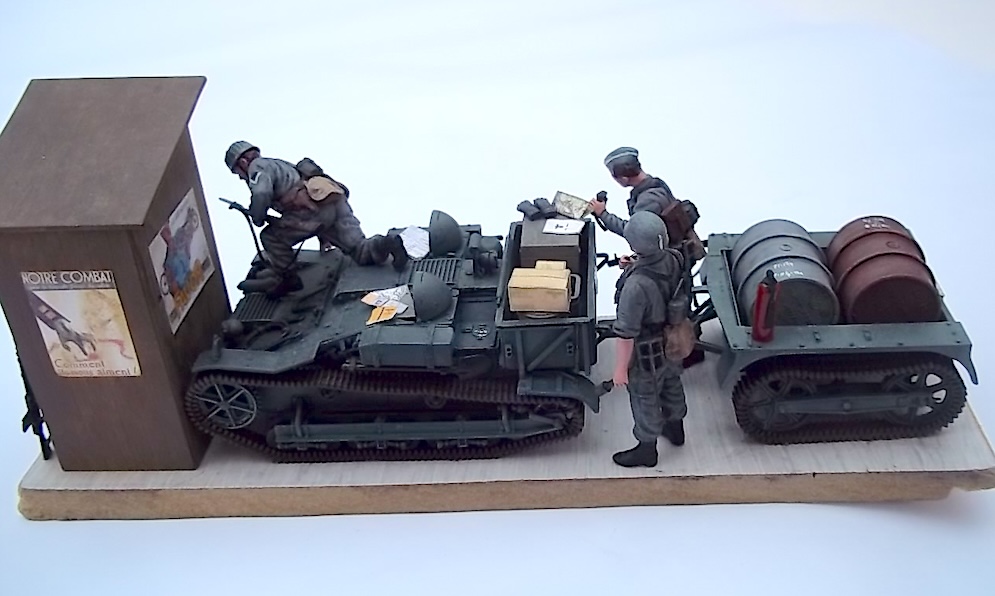
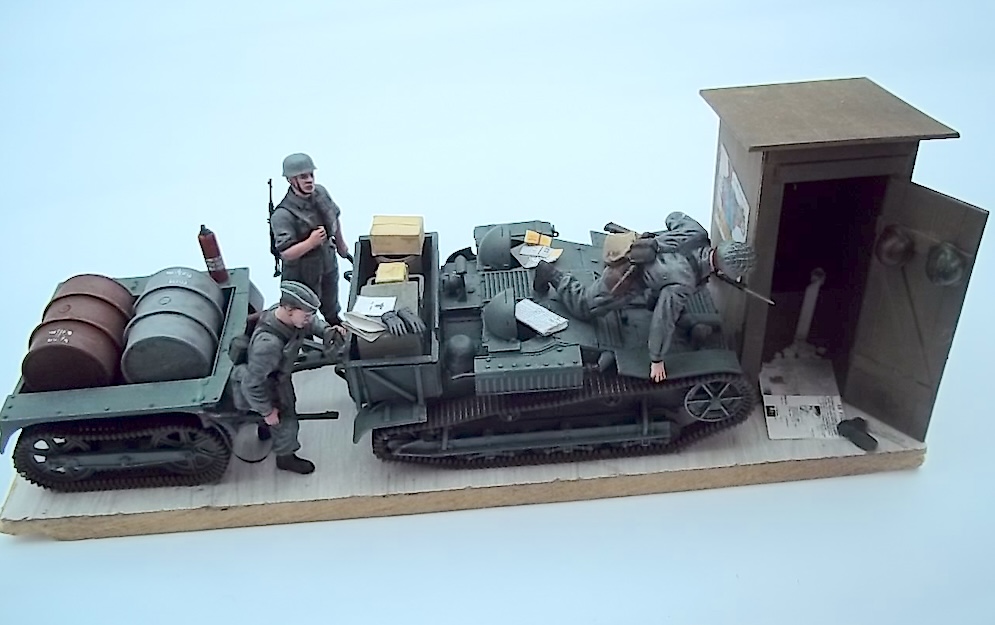
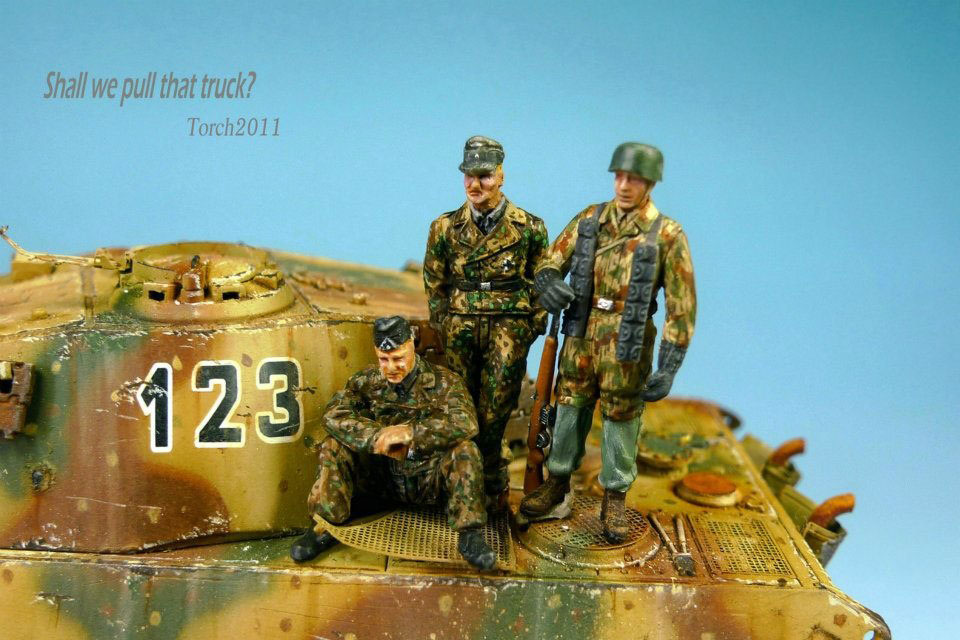
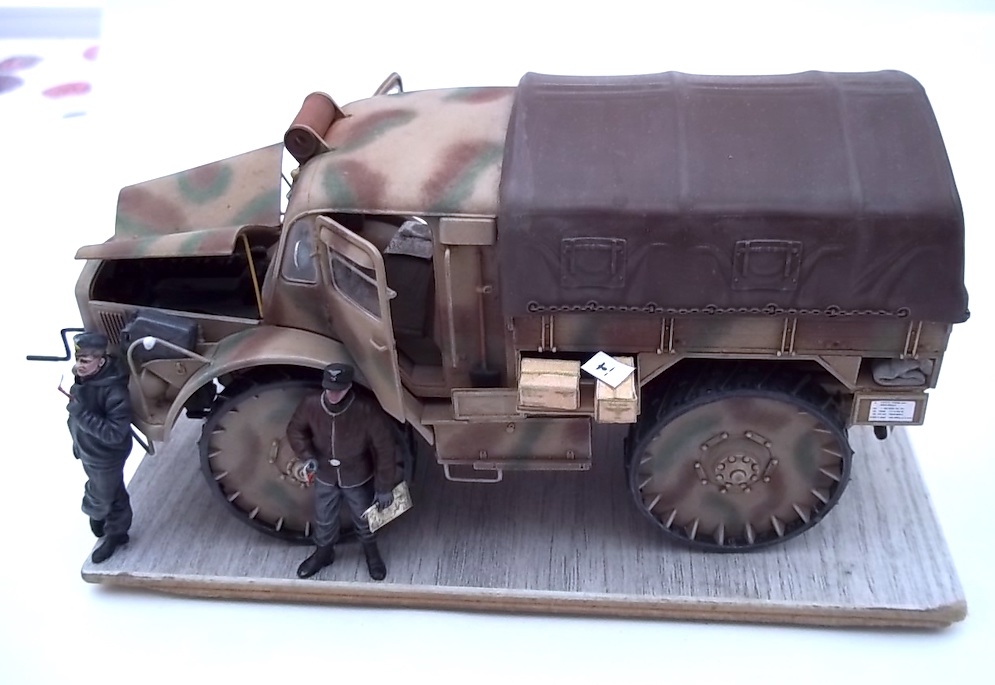
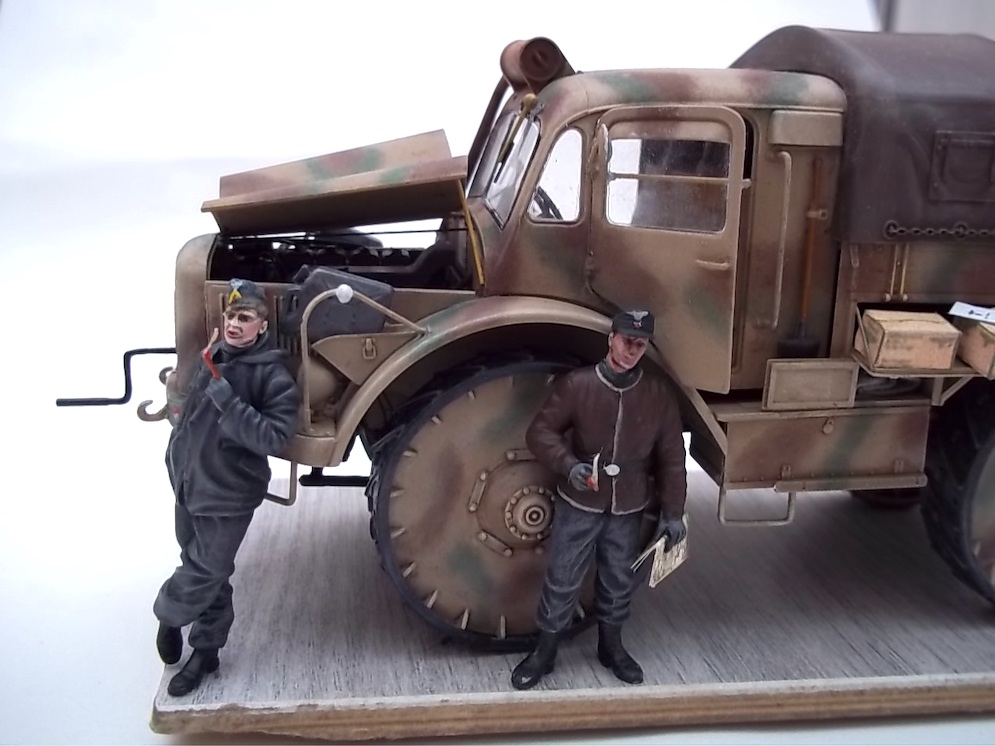
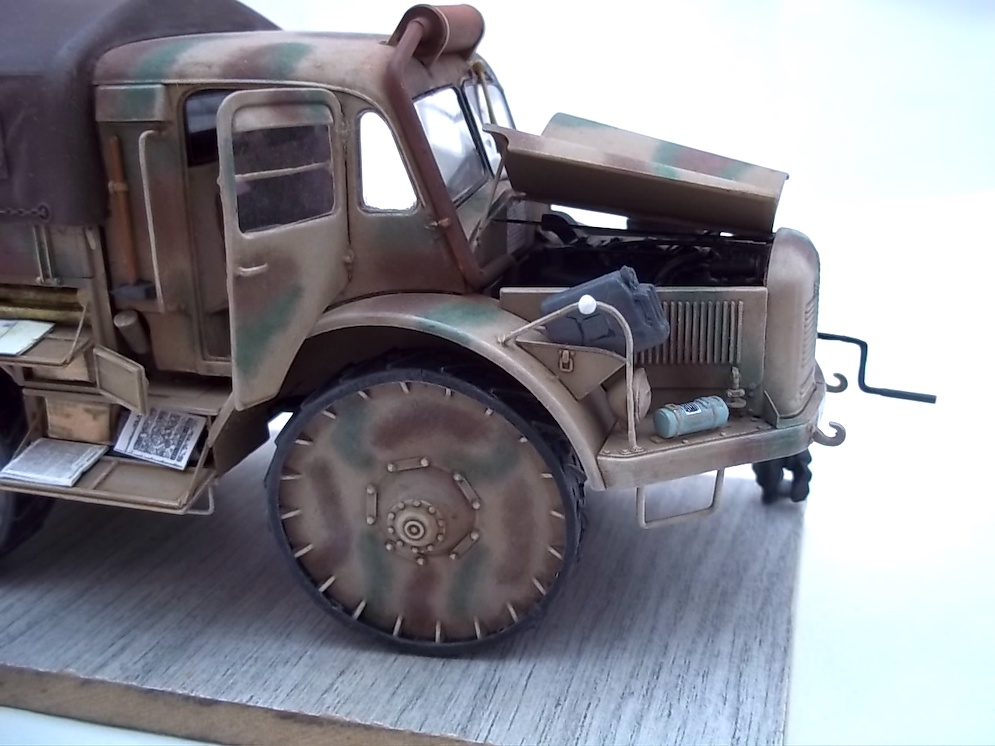
The ICM outside toilet is a great addition to any scene!!! Note the toilet rolls which were great fun to model in 1:35th.
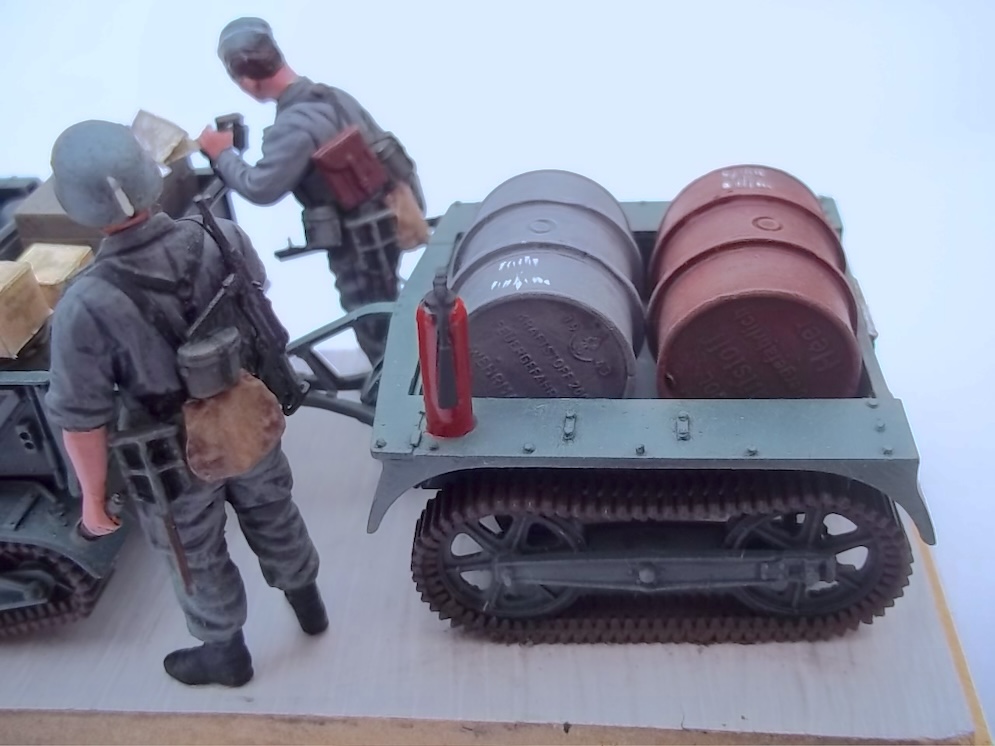
Falschirmjaeger figures are Dragon.
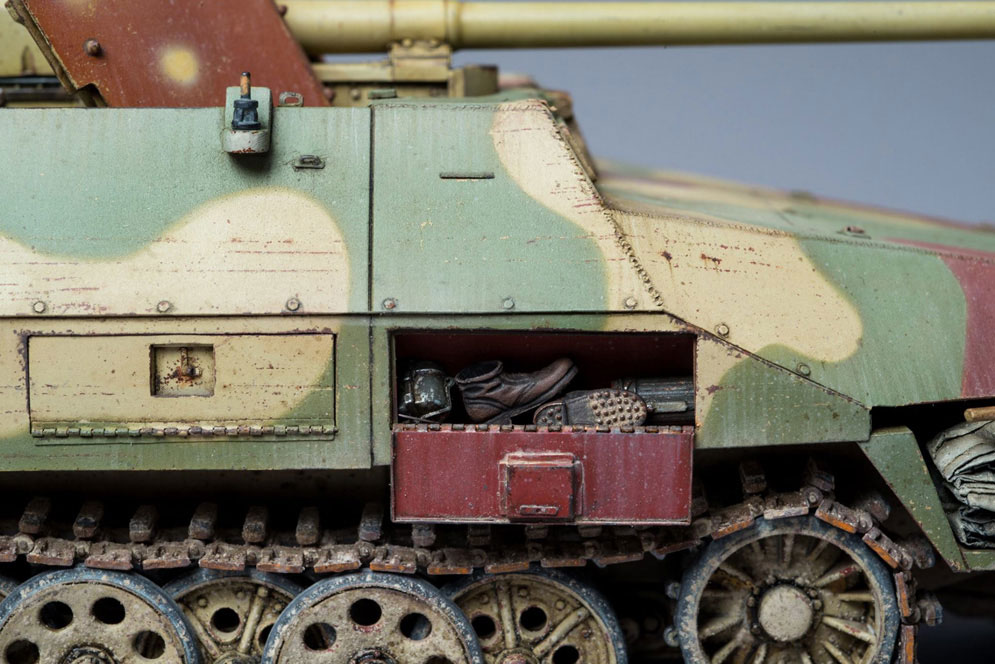
So the scene is France 1940, the previous French occupant has scarpered very quickly, leaving behind newspaper, boots and helmet in his haste to escape.
The Germans now capture this strategically important location!!!
Pete S.

Items used:-
- M21 – Tamiya
- M16 – Tamiya
- A selection of figures – Tamiya
- Jeep and trailer – Italeri
- Picture frame,
- 2mm MDF,
- Tissue paper,
- Old brush,
- Wire wool,
- Fibres glass resin and hardener
- House hold filler
- Polystyrene ceiling tiles
Why this subject?
I wanted to try out making tarpaulin and water and had just made the 2 half trucks and jeep. Having decided on the vehicles I would be using I decided to make the ground work fairly simple so the camp setting I believe was the best idea to go with.
The vehicles
All the vehicles were built straight from the box with no additions and the figures are from a selection of different sets. The vehicles markings are also what came with the kits.
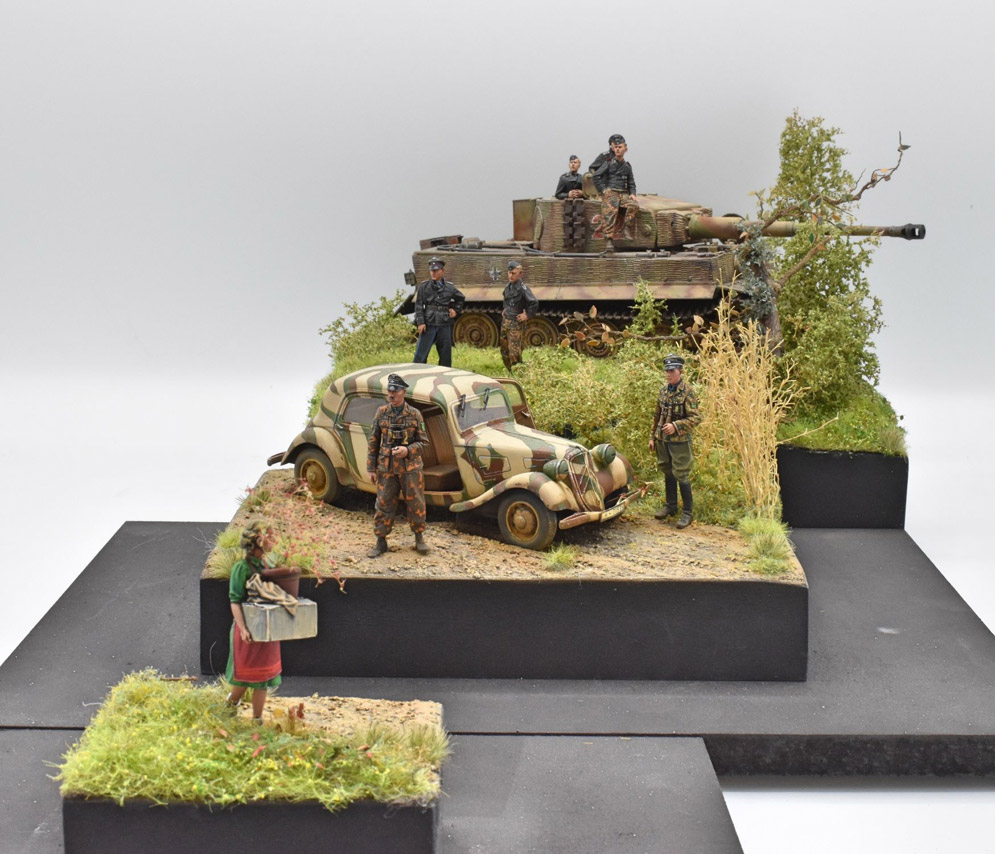

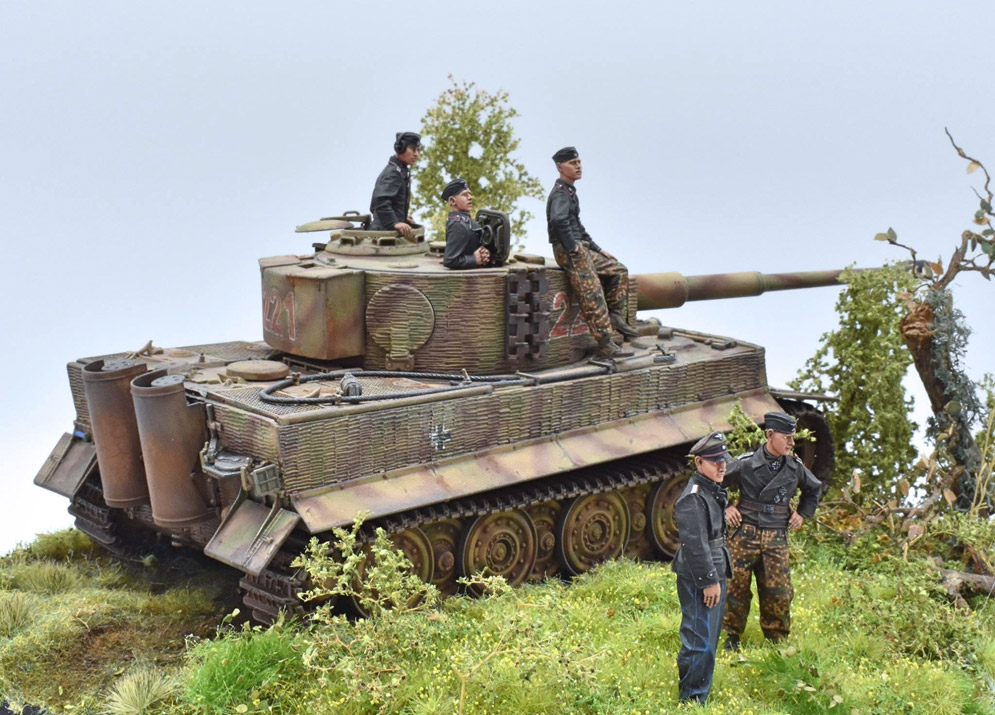
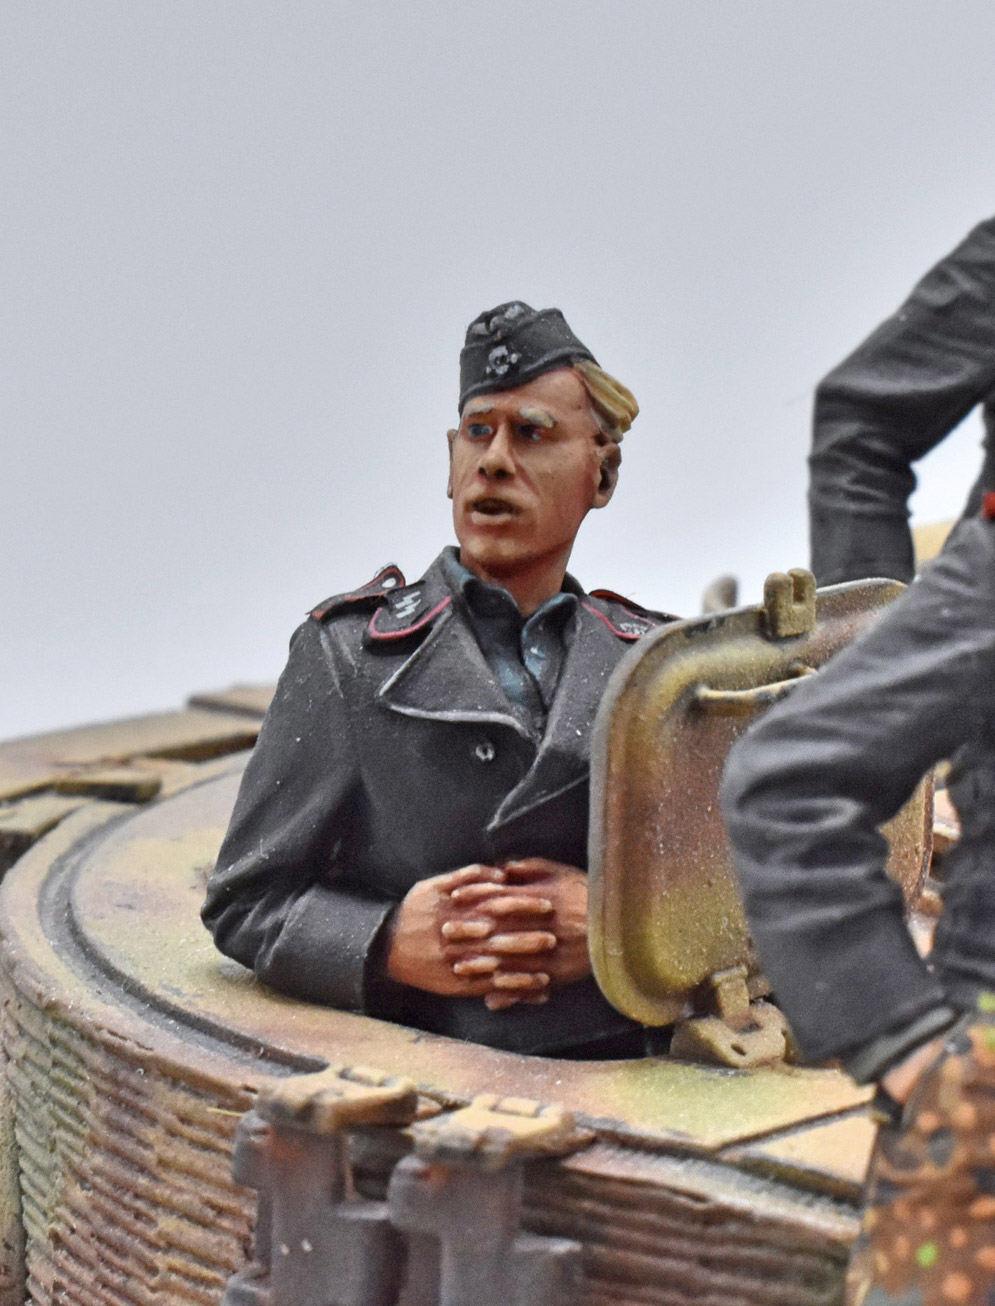
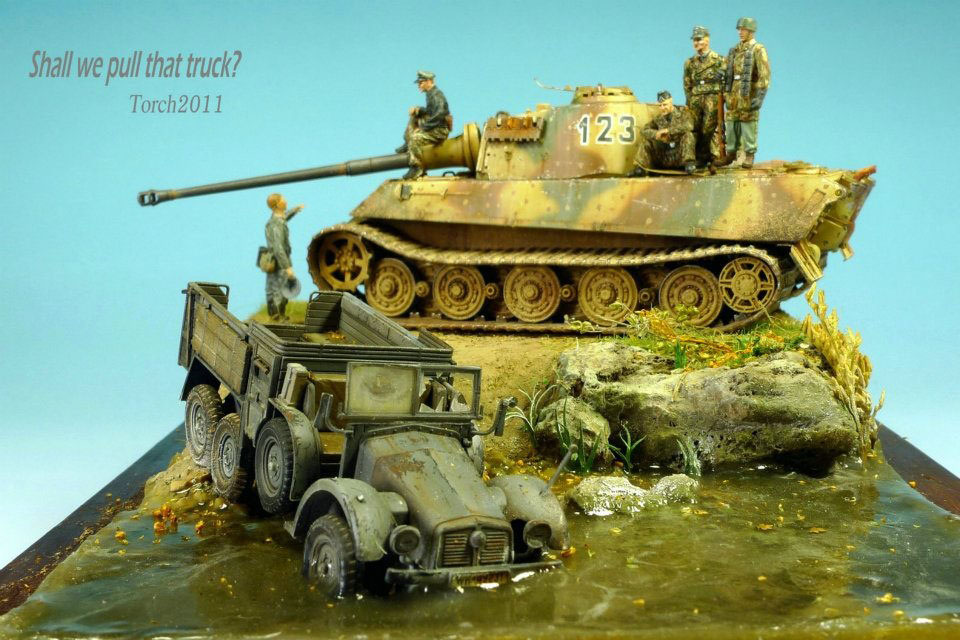
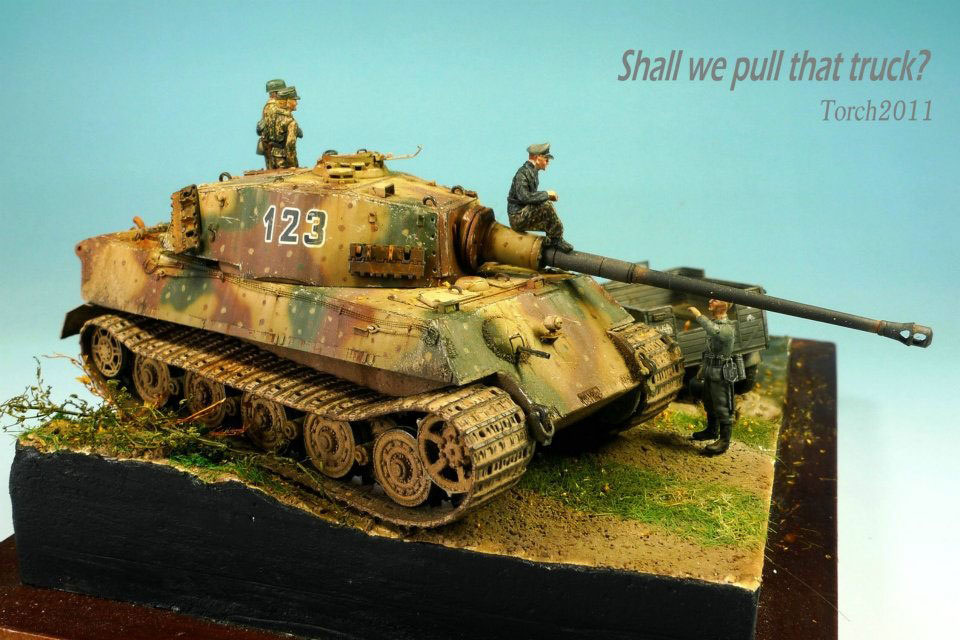
The idea is to build a diorama in three distinct parts to create an effect of distance, on the one hand, and a visual link between the skits, on the other hand.
The kit is the Tiger I Late production w / Zimmerit from Dragon to which I have put the set #35B71 8.8cm Kwk 36L / 56 Tiger I (late model) from RB Model.
Hope you like it! Gaishi S.

Les V.
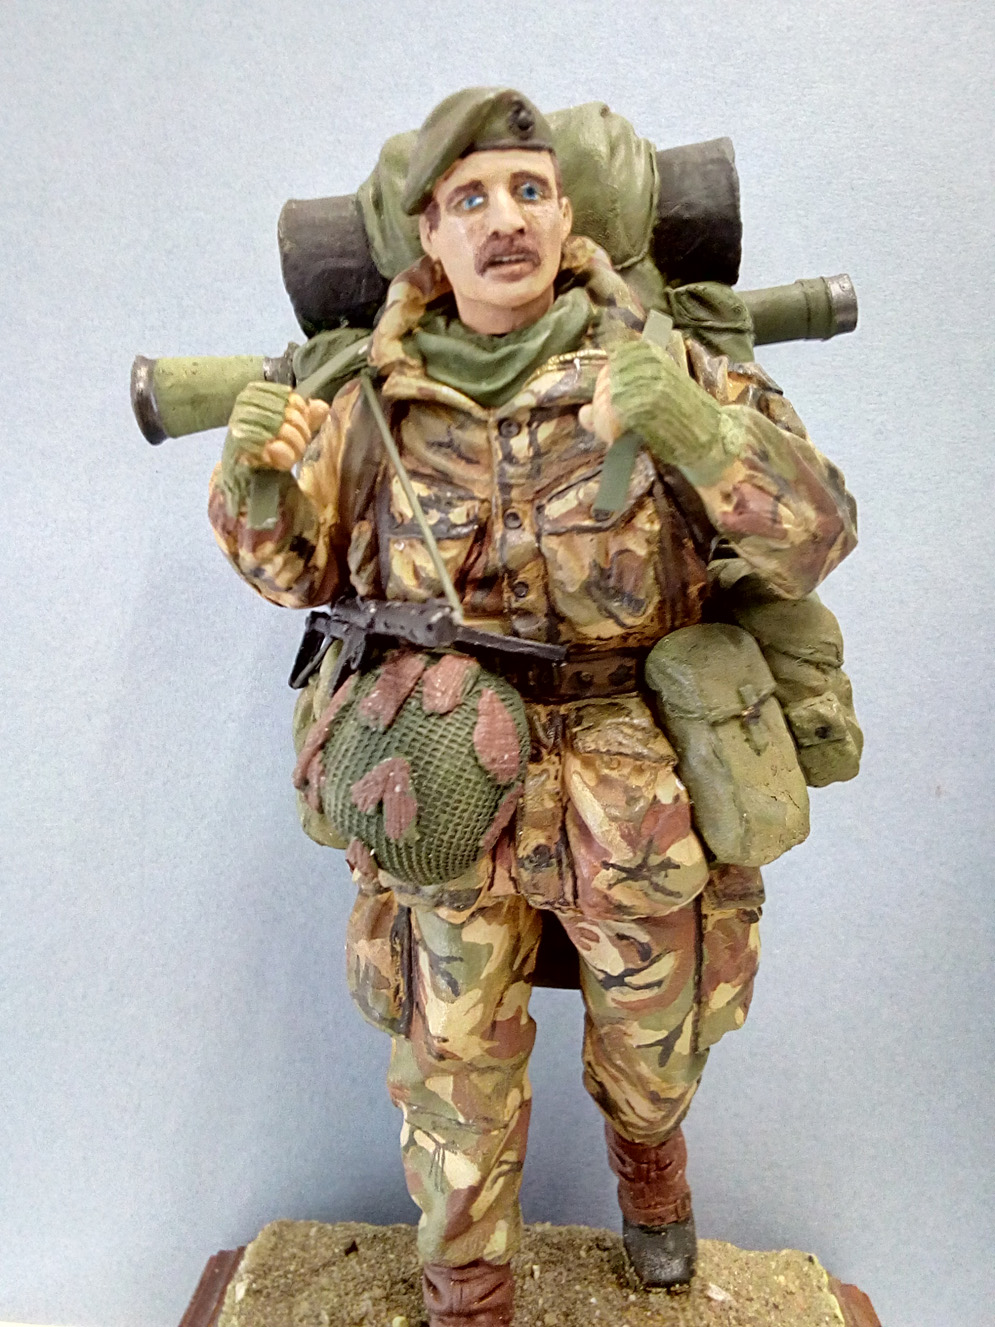
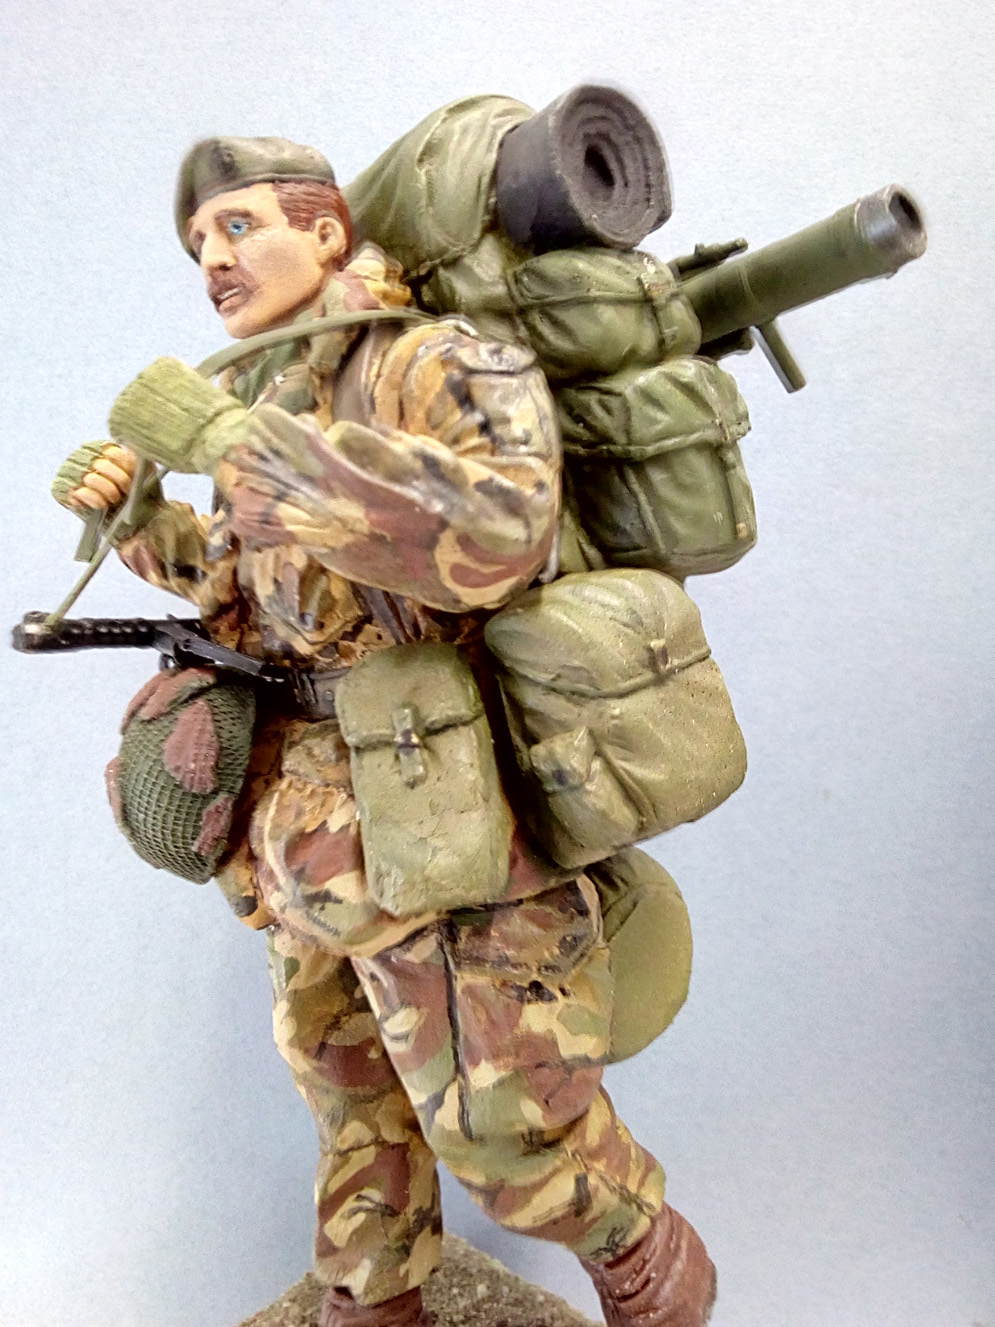
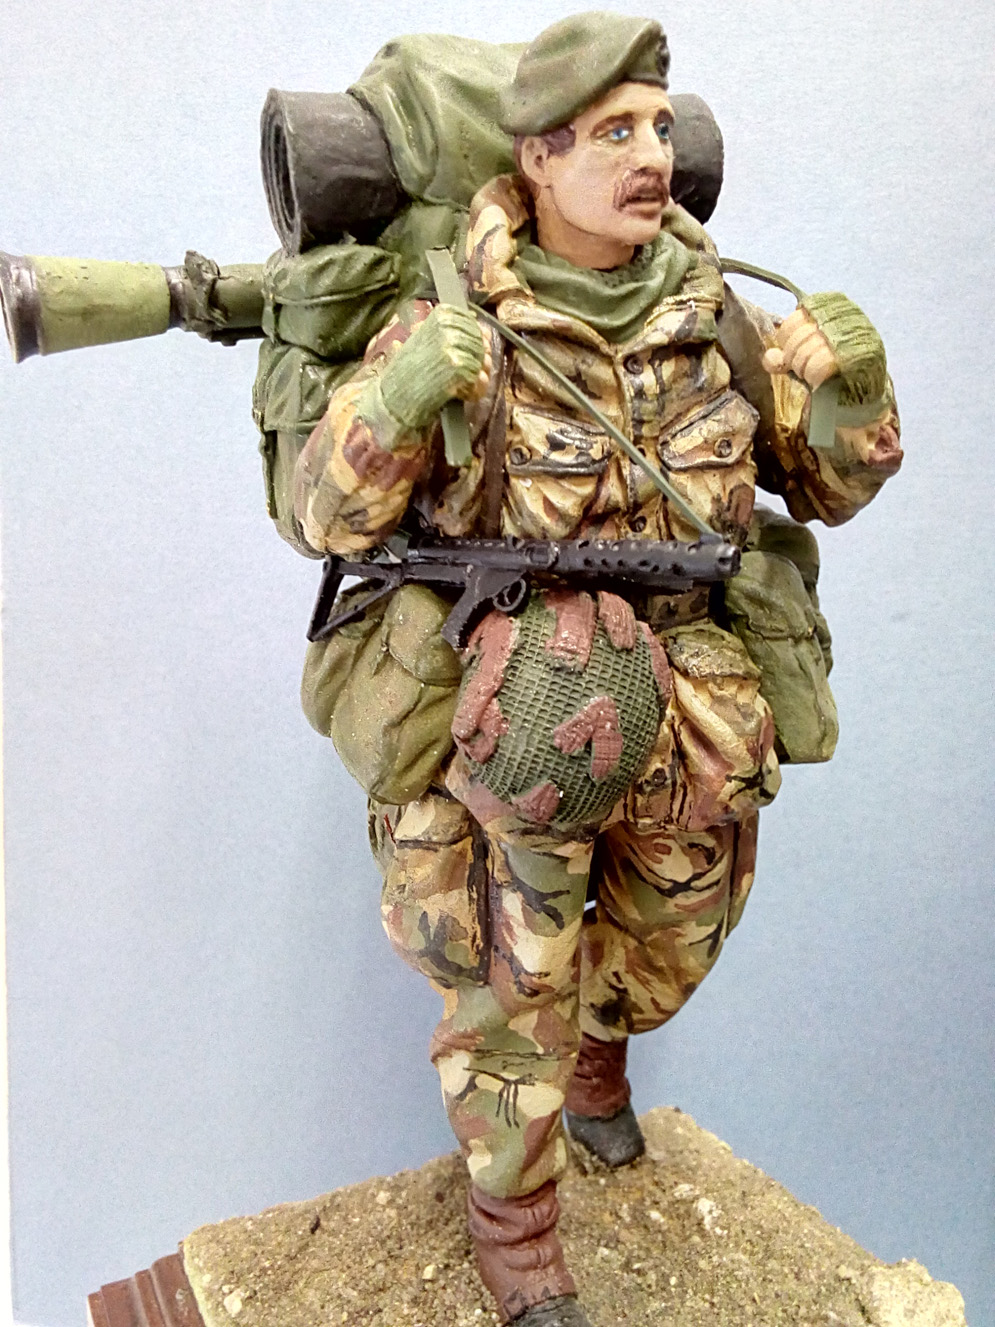
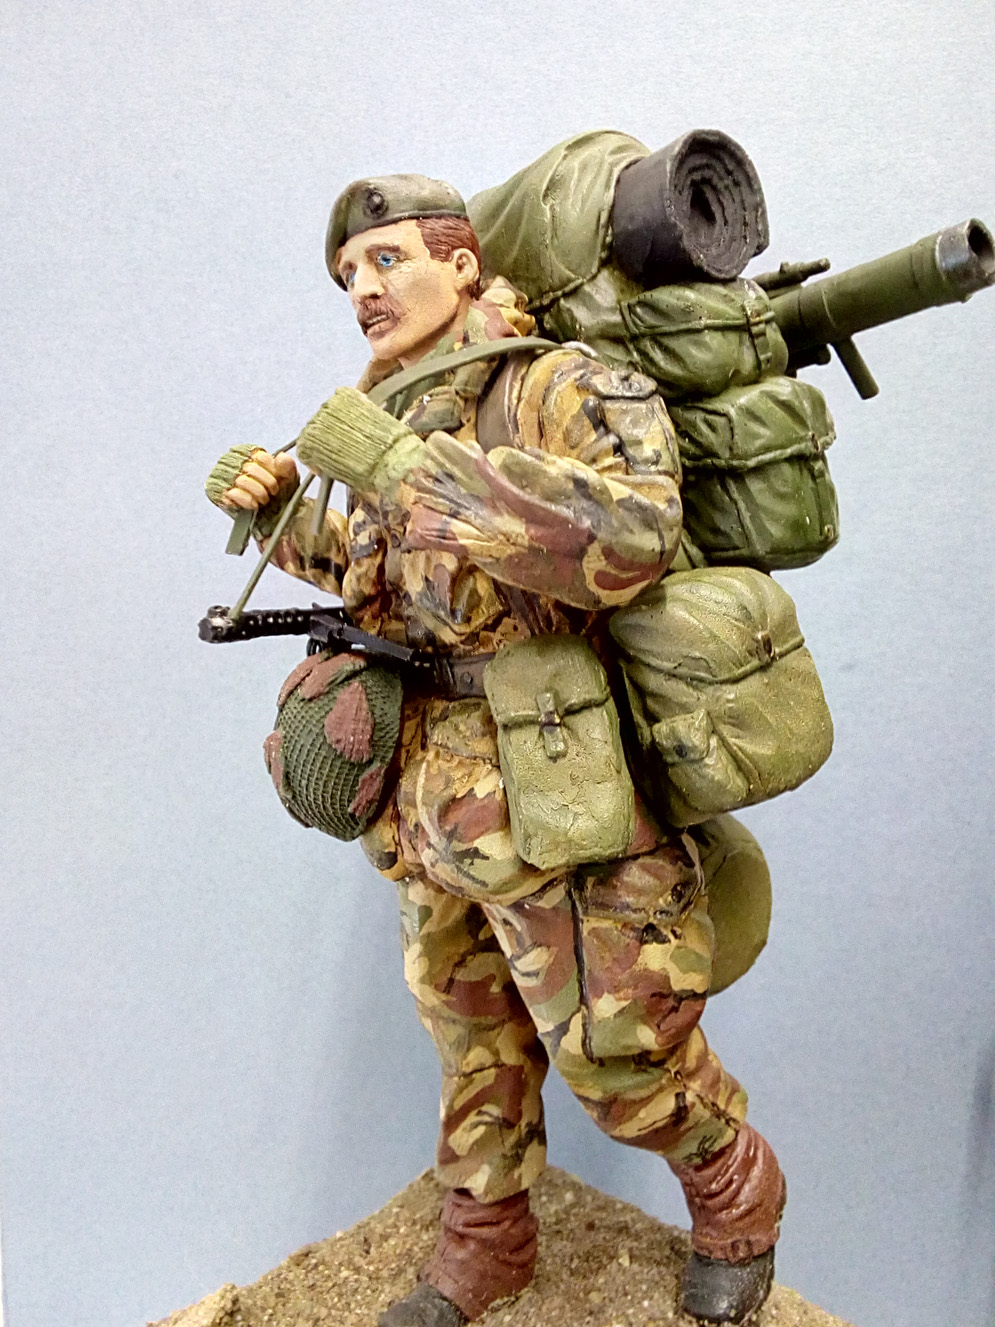
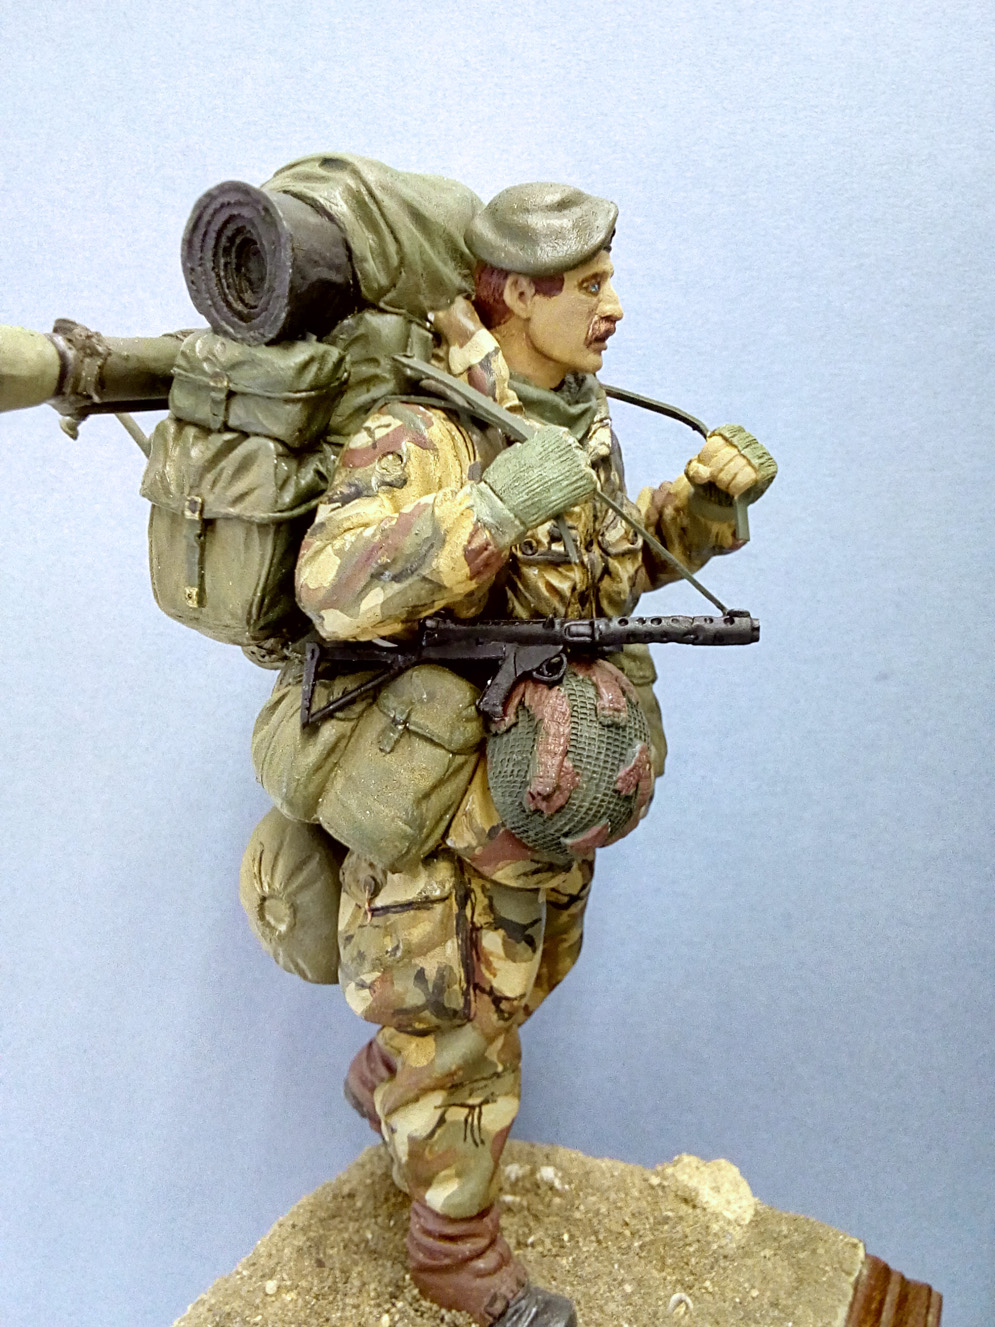
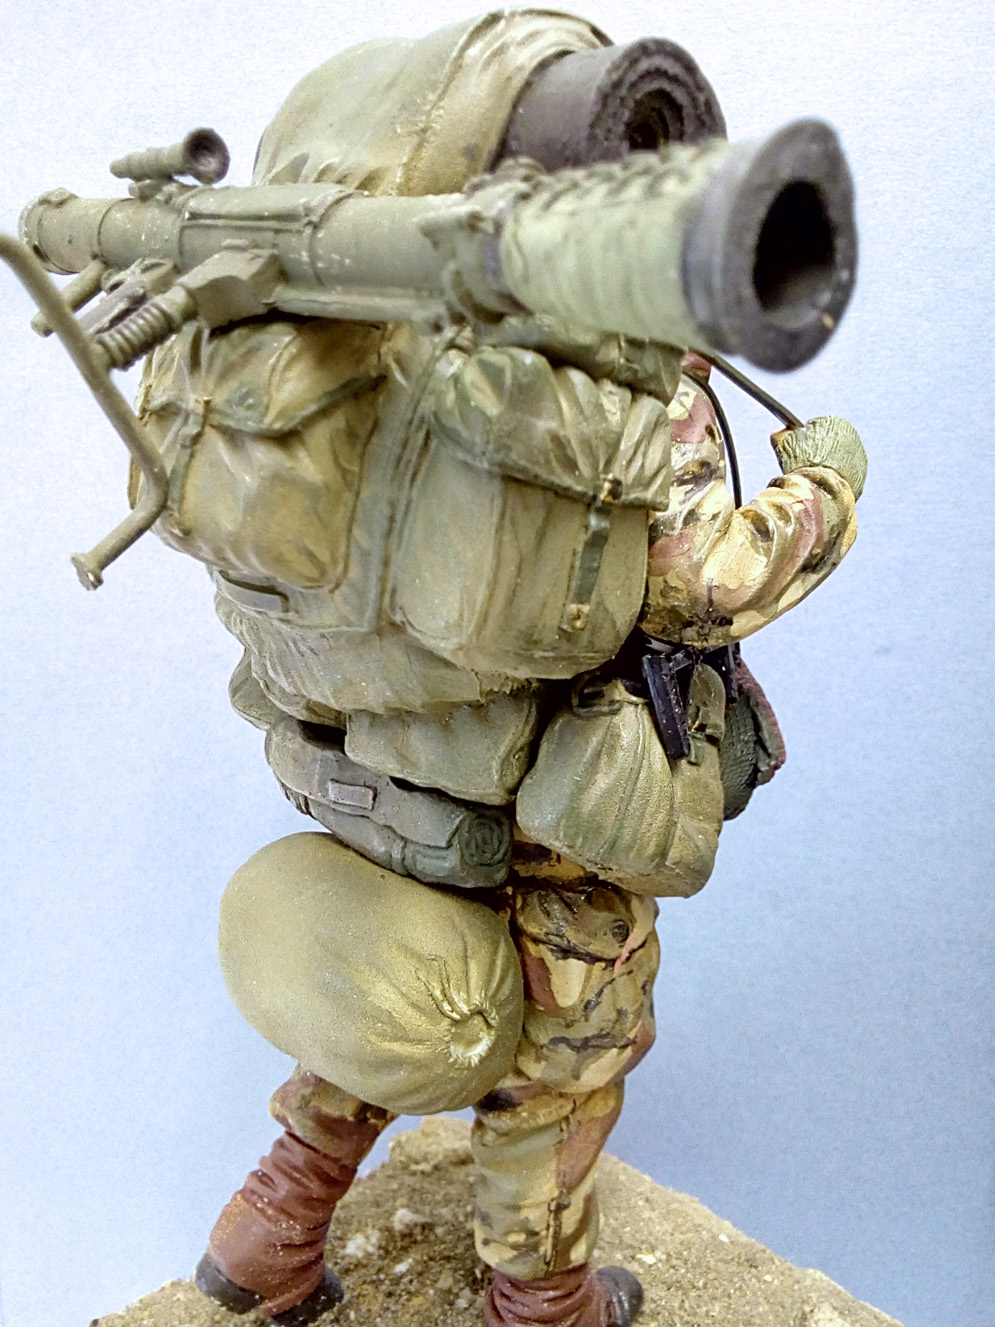
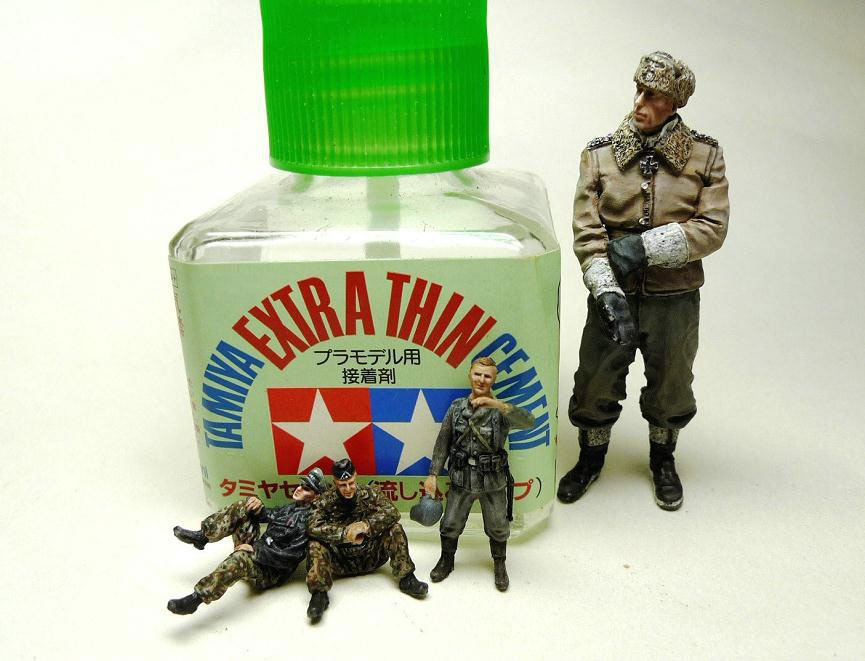
Scale: 120mm
Material: Resin and white metal
The figure shows the heavy loads that had to be carried in the Falklands during forced marches. The soldier wears the typical winter uniform that, with the exception of footwear, performed well. Armed with the Sterling sub machine gun, he also carries the Carl Gustav rocket launcher.
Steve N.
Zhendong Li
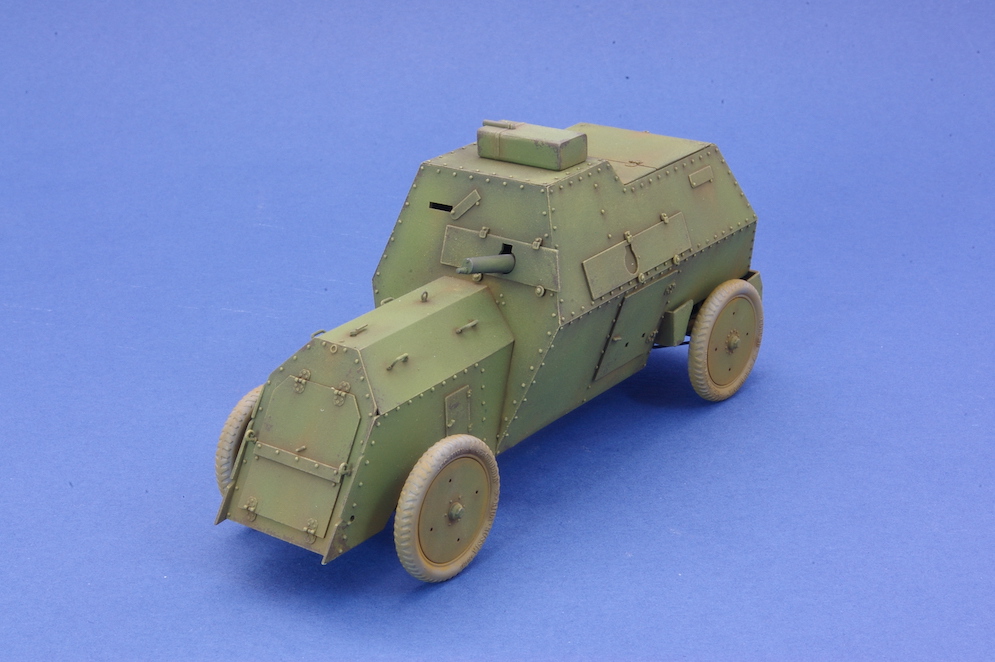
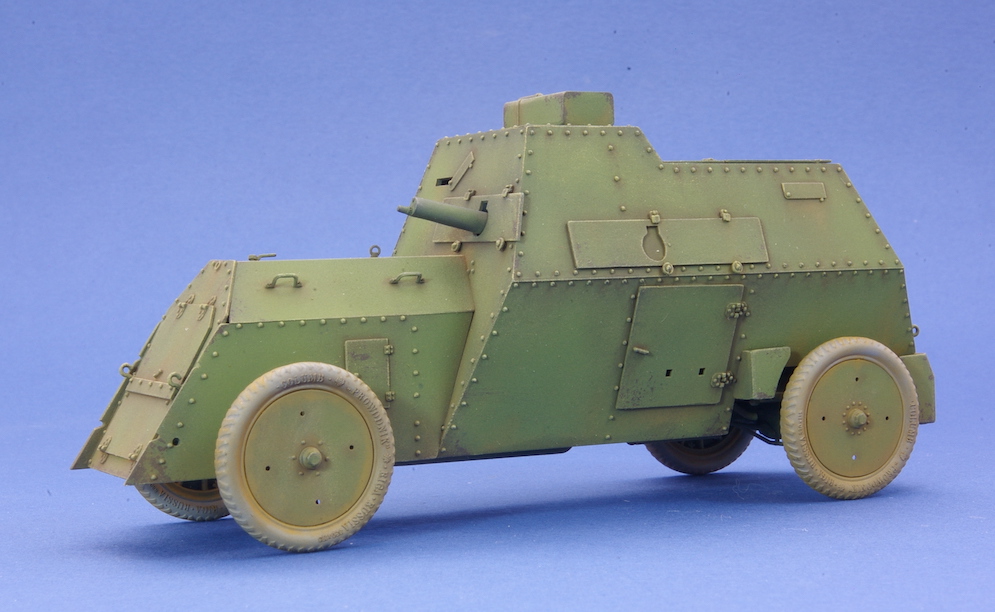
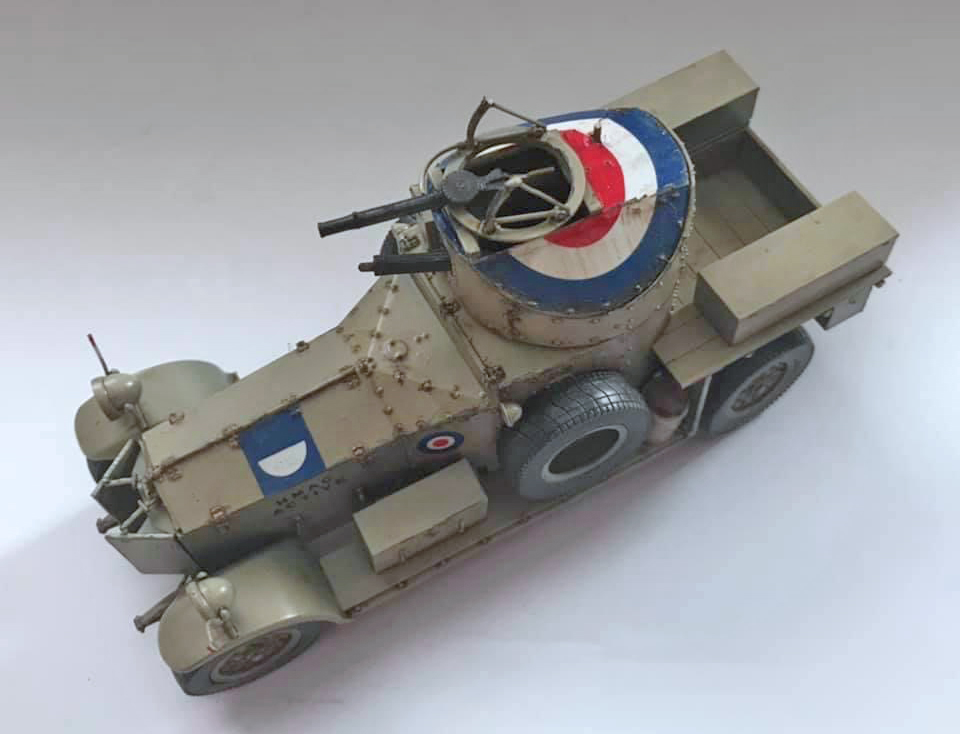
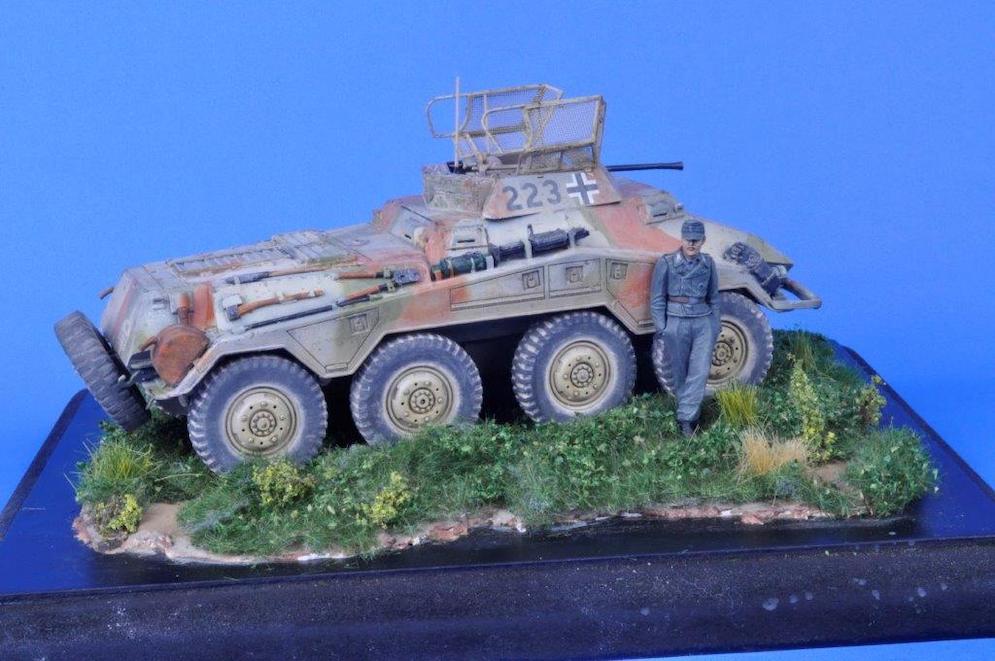
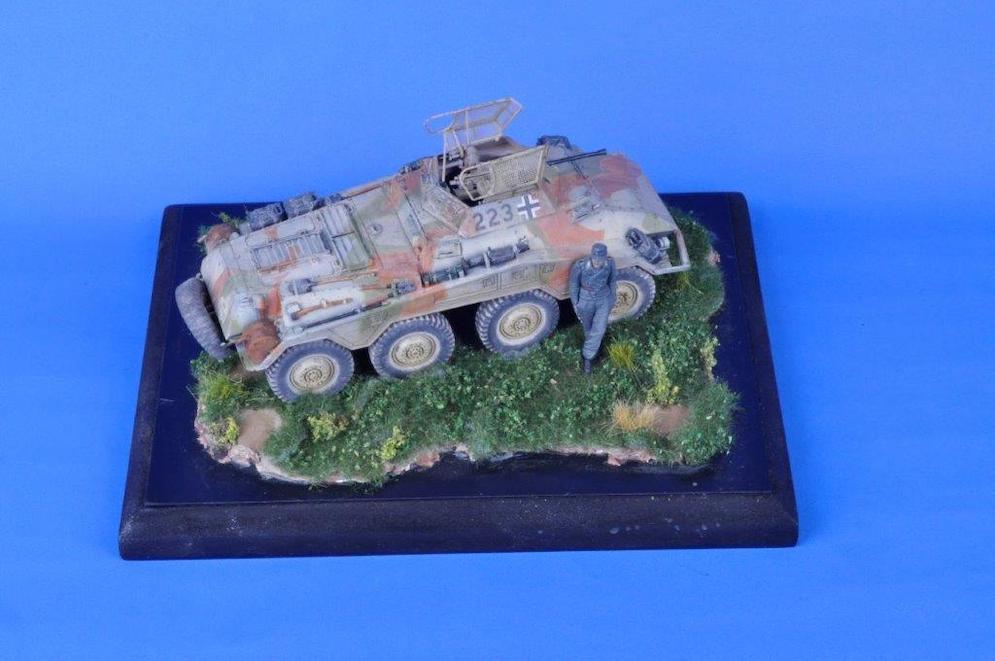
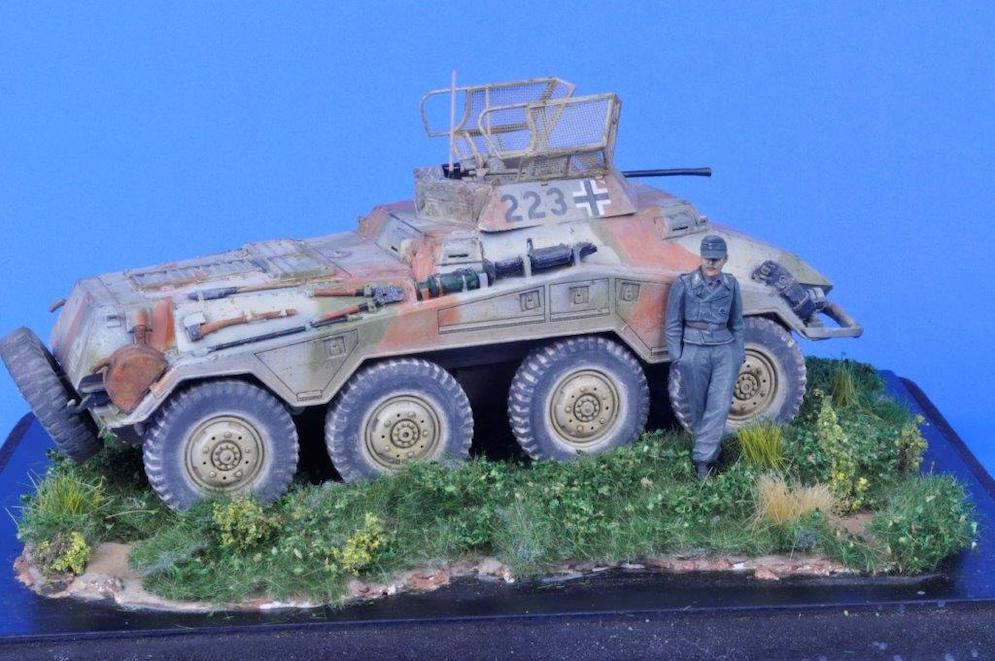
The Copper State Models kit consists of around 93 parts in grey plastic spread over 4 sprues. These are very well produced with fine rivets being present around the outside of the model. The fit of the parts is excellent.
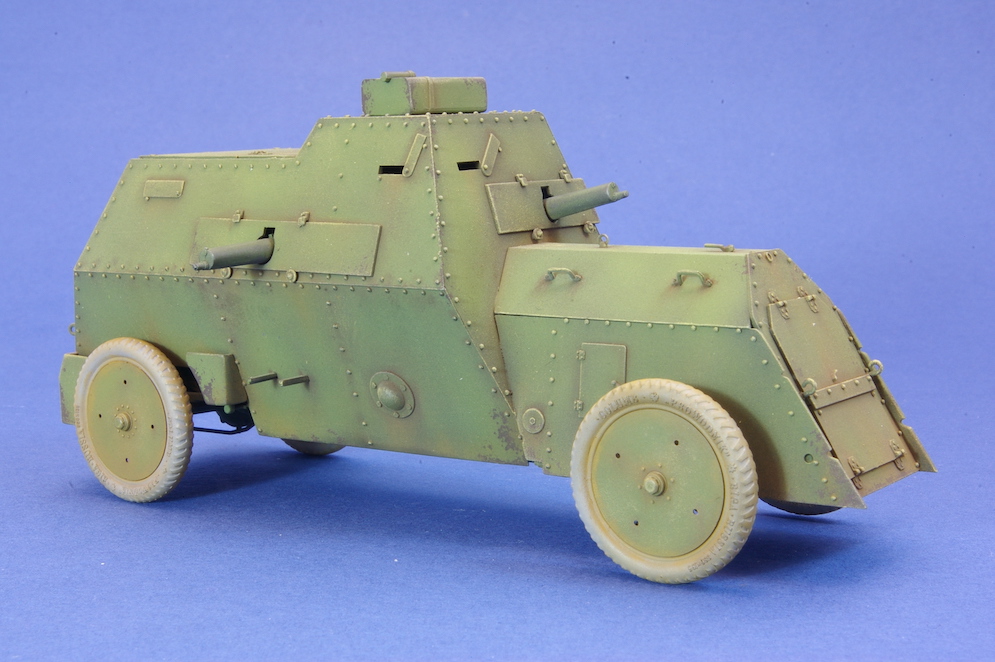
There is a large hatch on the roof of the model, and this could be modelled open if desired. There is a partial interior provided including the driver’s seat and controls and the three Maxim guns. However, I thought that there was perhaps not enough detail there to leave the hatch open. For example, the centrally mounted gun was carried on a rail so that it could be moved to either side of the vehicle and apart from the rail itself there is no gun mount provided in the kit. There are also no ammunition boxes nor are there any ammunition feeds provided for the guns. To be fair to Copper State Models, without any surviving photos of the interior of the vehicle, including such details would be entirely speculative and using a little imaginative scratch building the modeller could include these if required.
These vehicles seem to have been painted in a single colour which Copper State refer to as Moss Green. The model was primed with Alclad’s Black Primer, followed by an undercoat of Tamiya Black Green (XF-27). Once this had cured overnight, I applied a patchy coat of NATO Green (XF-67) followed by a lighter coat of the same colour lightened with Sand Yellow (XF-60).
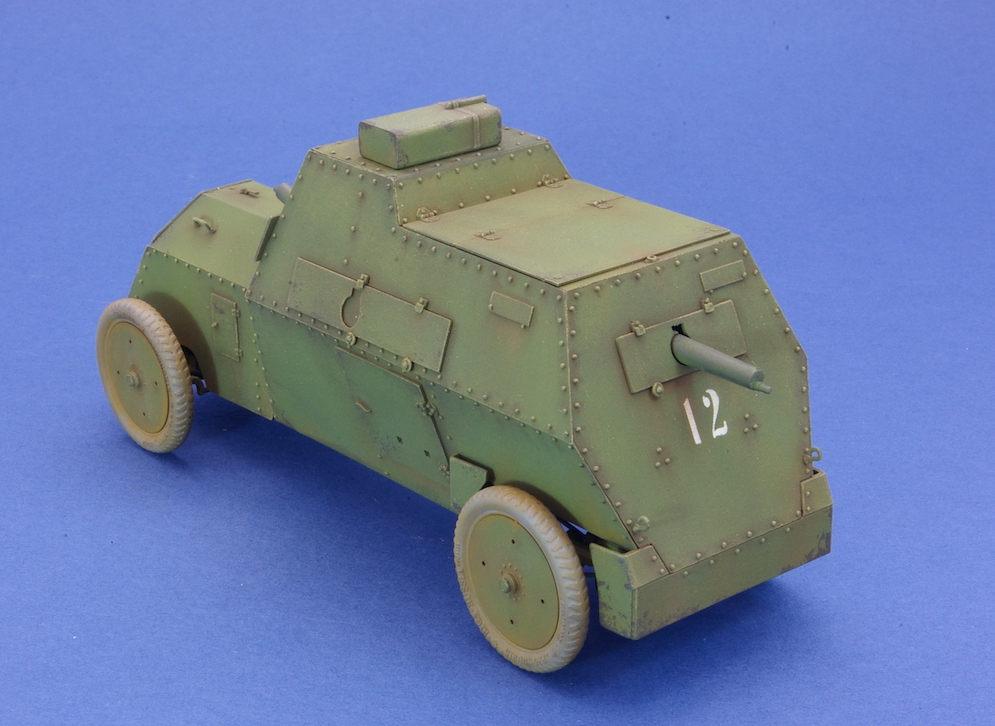
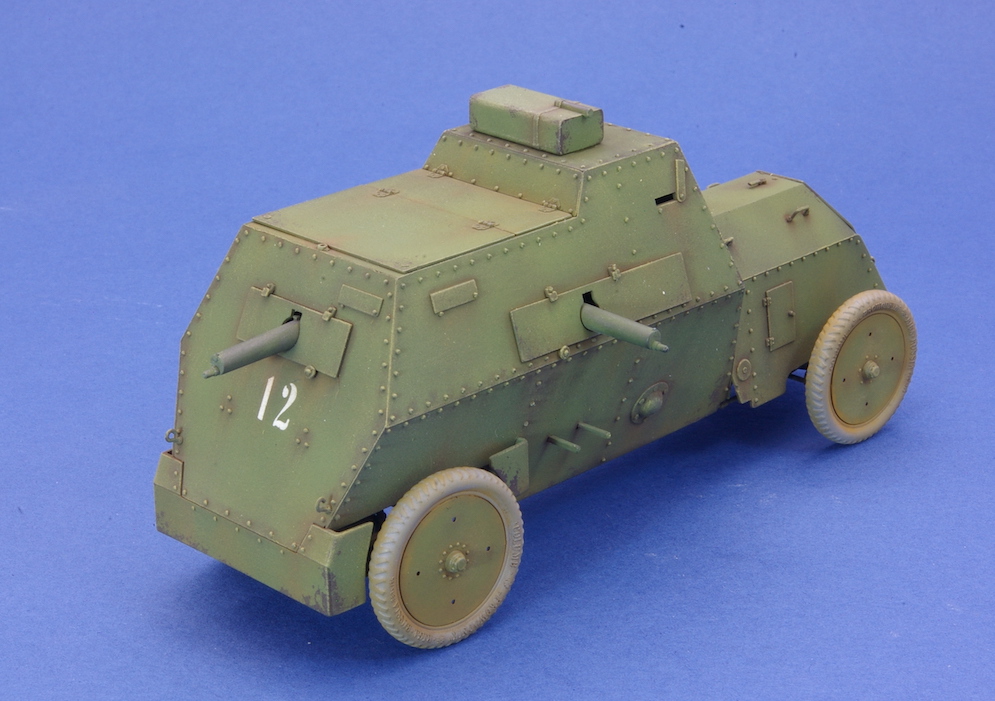
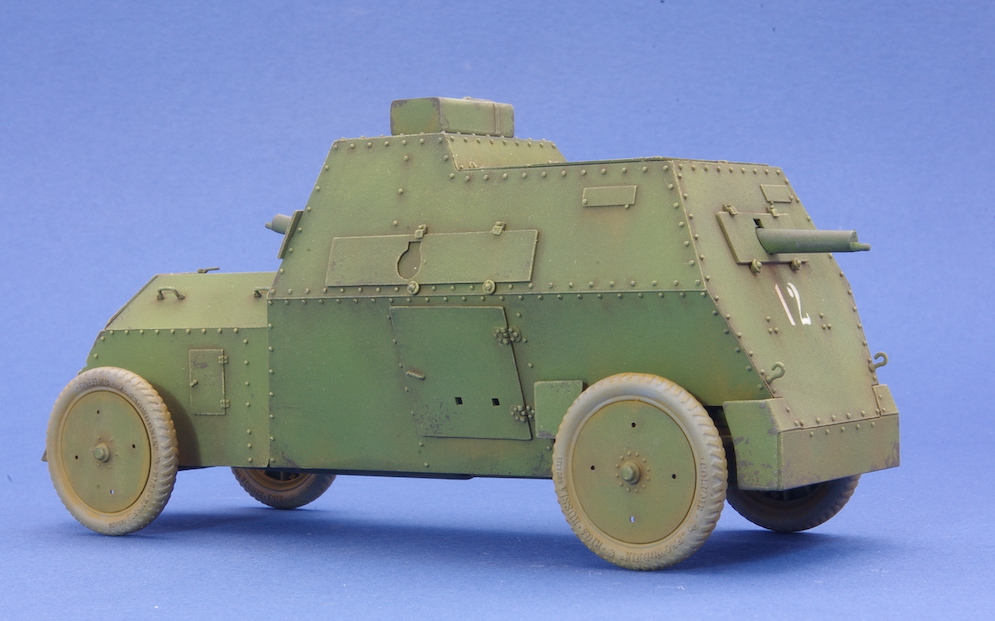
There are markings provided for three vehicles although these are limited to two-digit identification numbers carried on the rear of the vehicle. I happened to have brass stencils which have numbers of a very similar size and font to the kit’s transfers and preferring wherever possible not to use waterslide transfers, I used those instead. Note – the kit’s transfers are made by Cartograf and if they are anything like the transfers provided in Copper States’ Erhardt armoured car that I built recently, they will be of high quality and should work very well.
The weathering was done using pastel chalks from the Pan Pastels range using a couple of light brown shades to add some dust and dirt to the model’s recessed areas and around the base of the chassis, followed by Burnt Umber chalk to represent shading. Once the pastels had been sealed with a coat of Testor’s Dullcote matt varnish, I drybrushed the model to define the edges and rivets.
I usually use Vallejo acrylics to paint any tools carried on the outside of my armour models, and in this case, this was a remarkably quick and easy process as there aren’t any!
The tyres are shown in the instructions as being a very light grey colour which is what I used on my model. Although possibly looking a little odd, I think that this may actually be correct as the period photos also show them to be a very light colour – much like the light-coloured tyres on the wheels of contemporary aircraft.
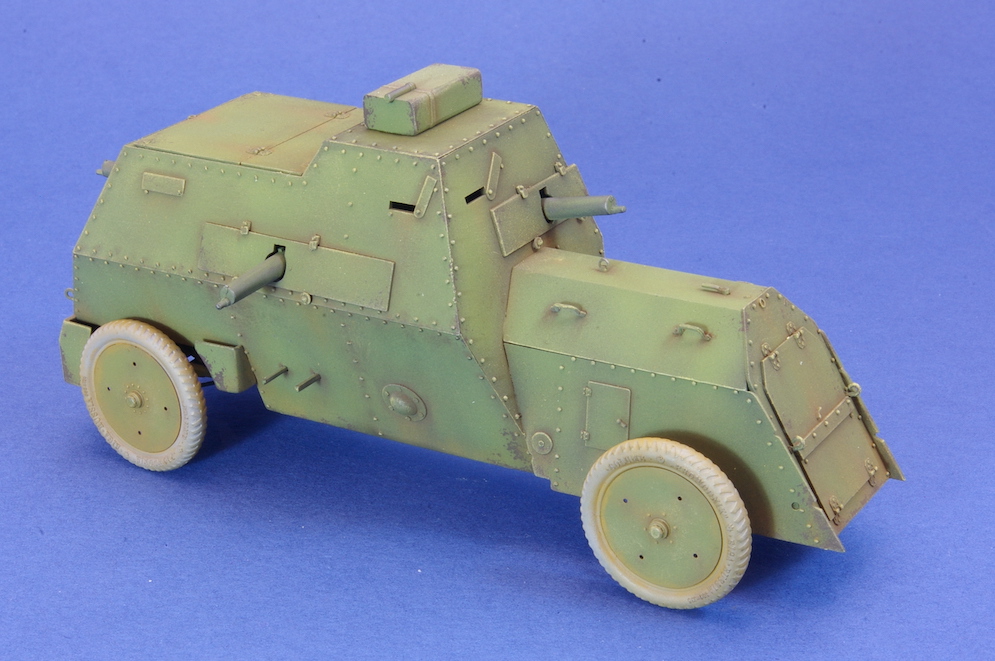
I really like Copper State Models kits and this one, just like the others I have made, was easy to build and I think can be recommended to all fans of early armour. I look forward to building some of the other kits in this range in the near future.
Dai W.
Zhendong Li
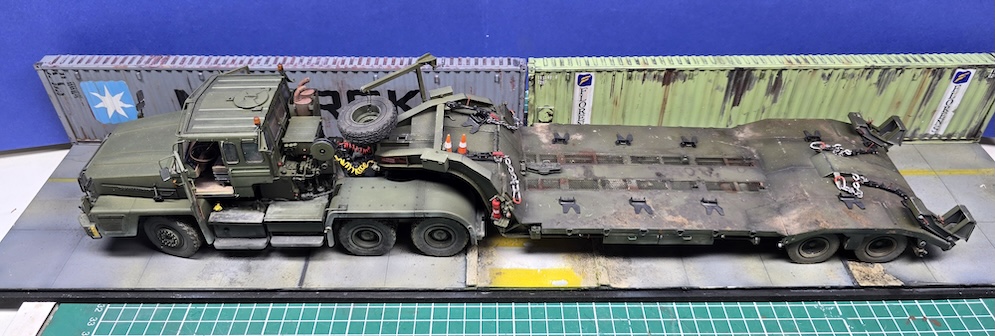
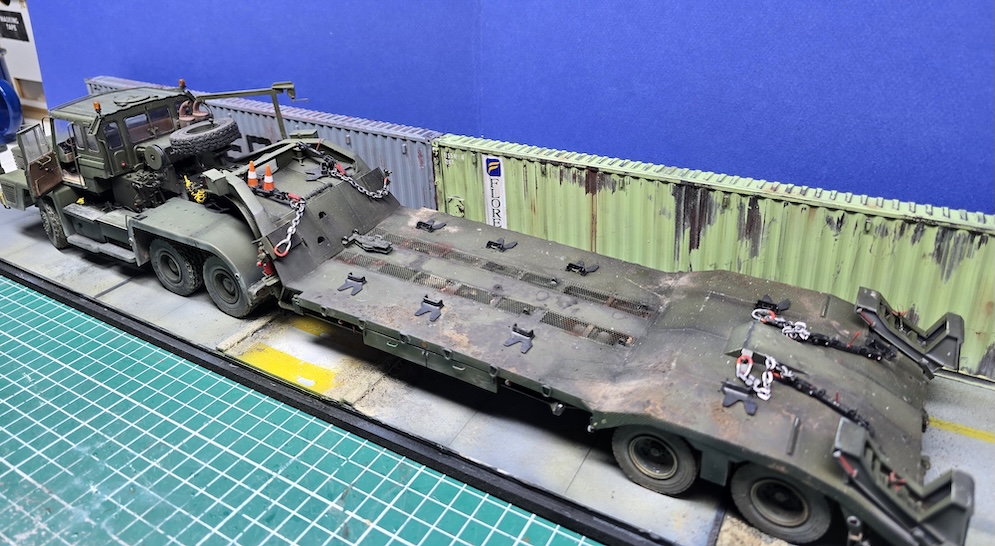

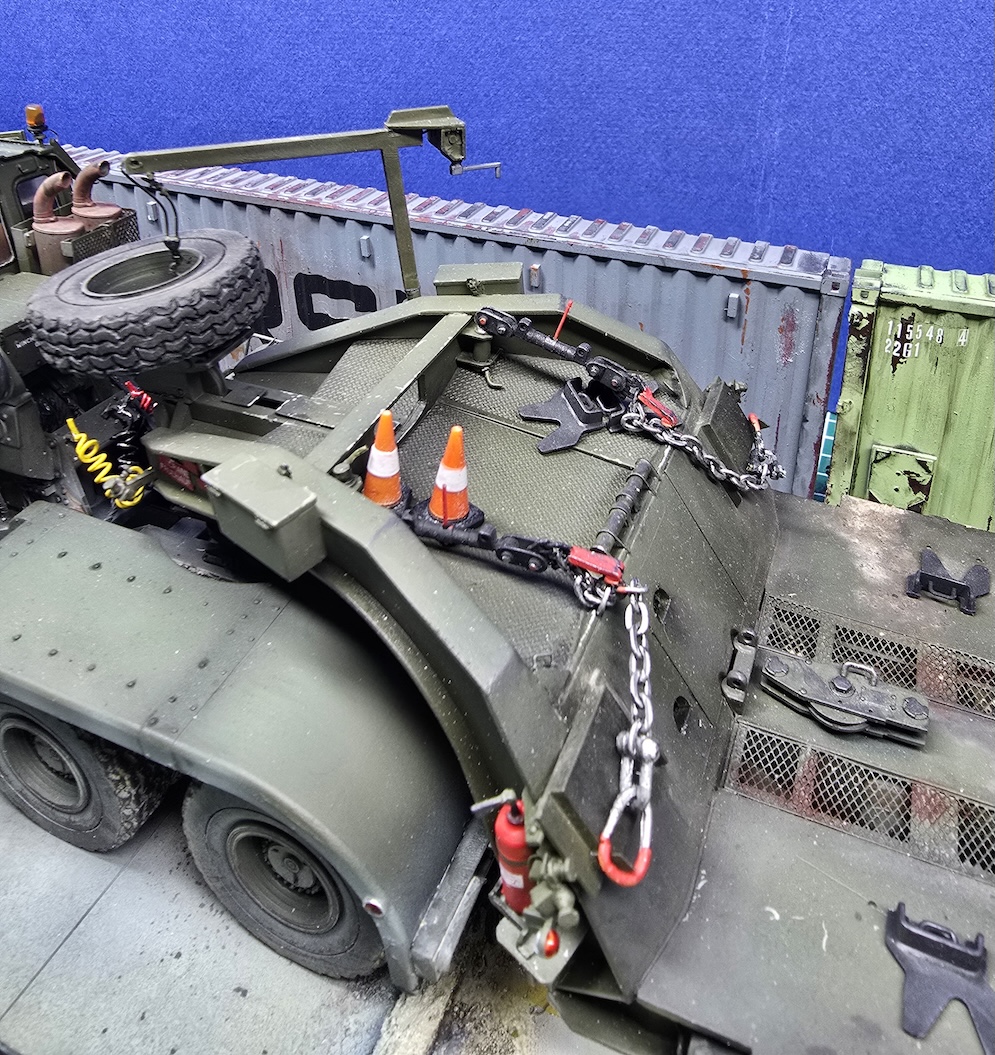
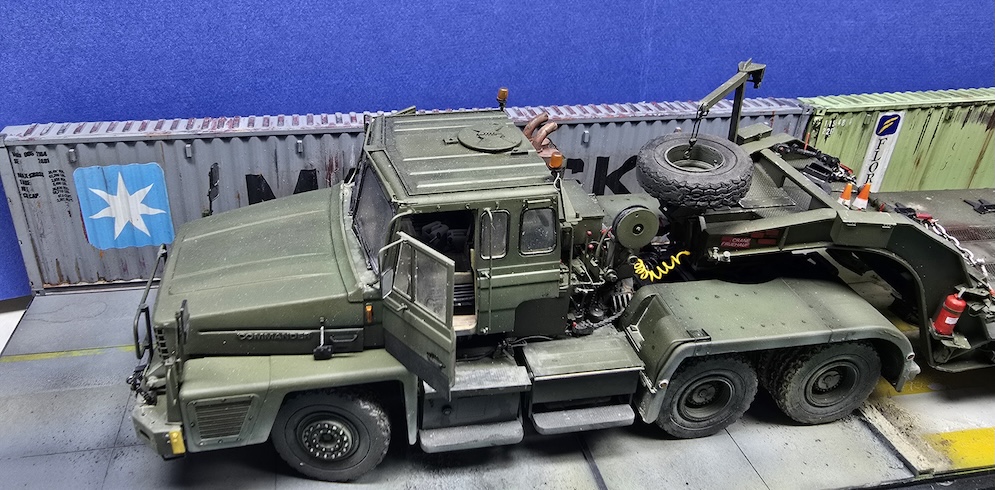
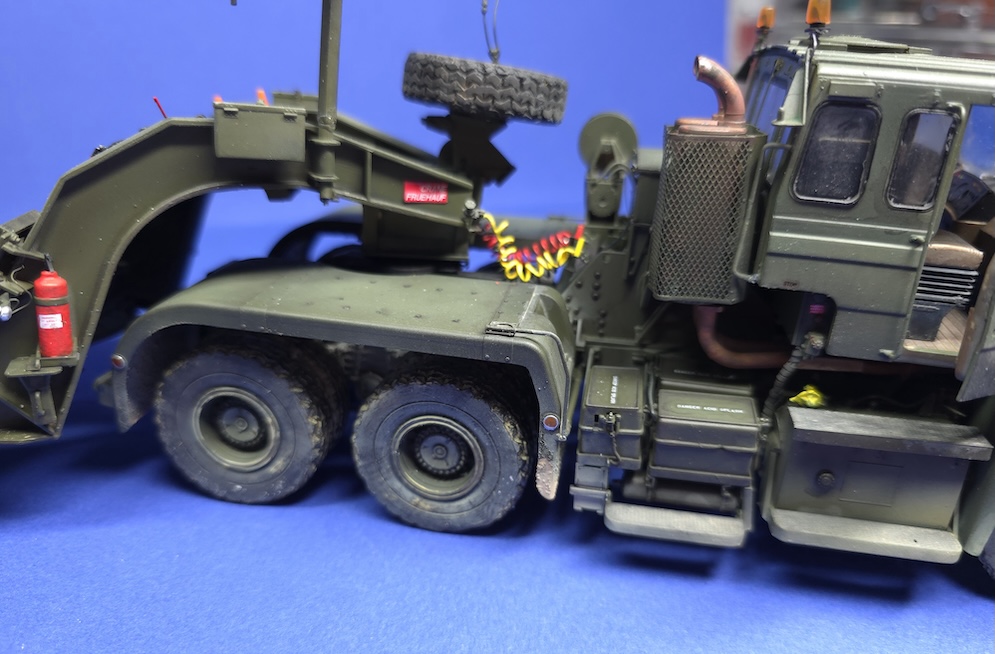
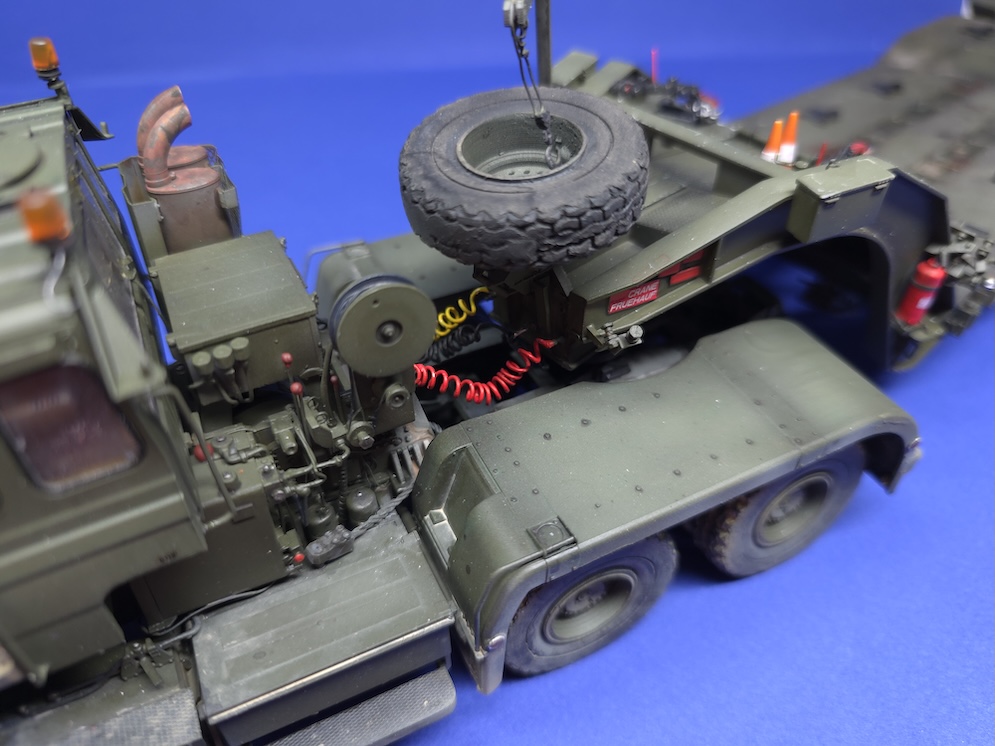

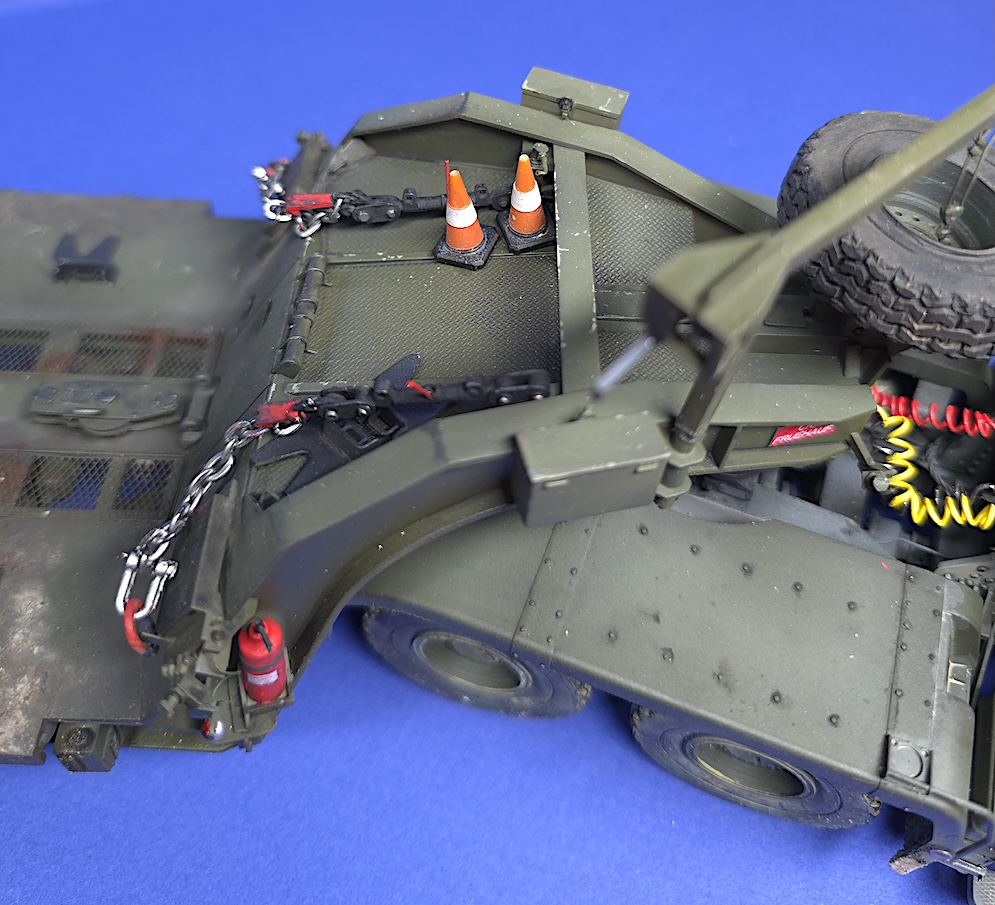
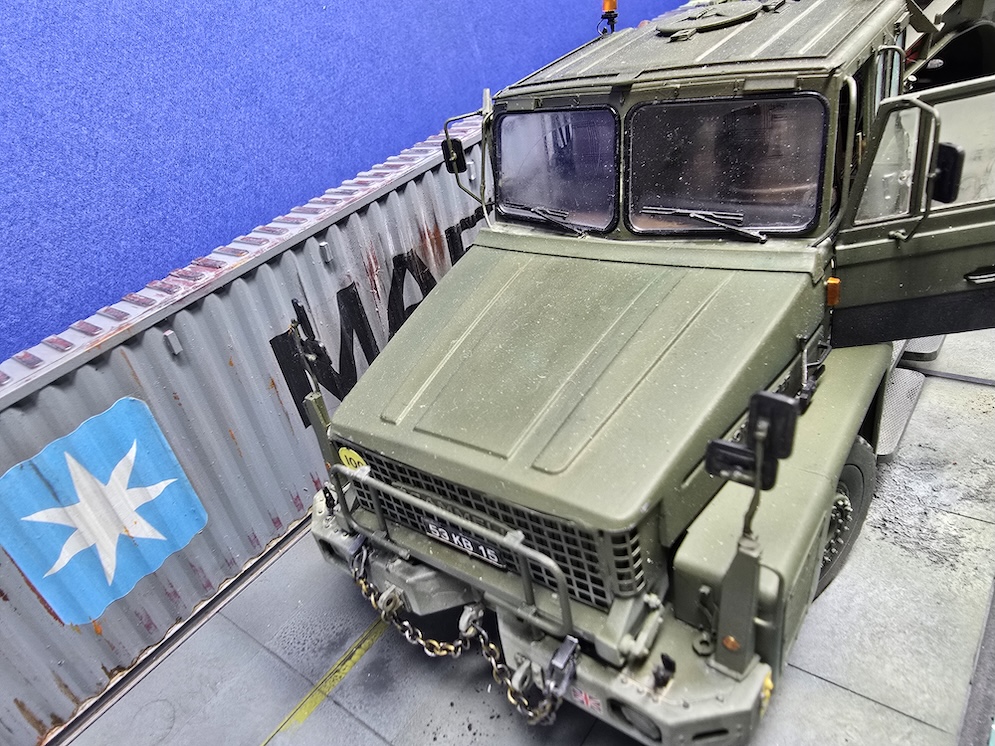
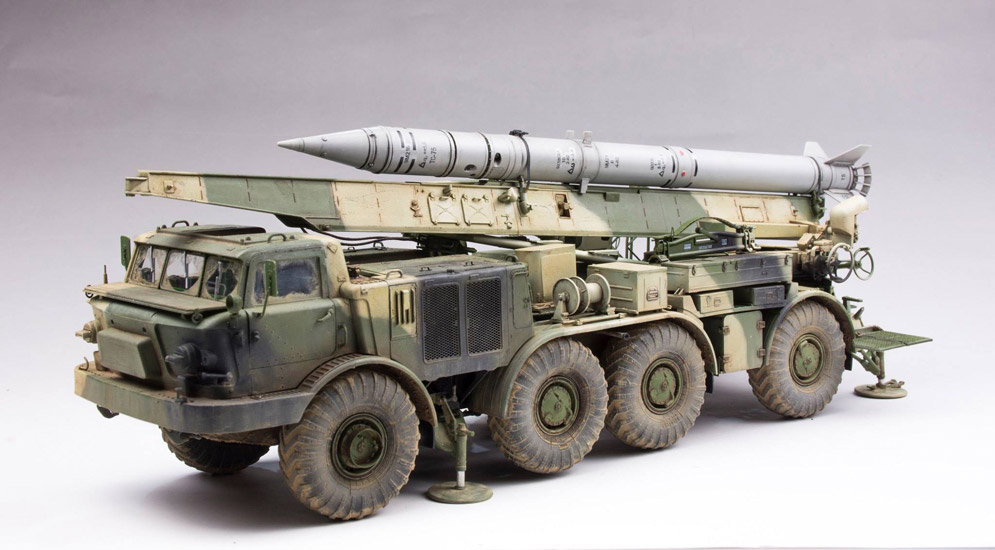
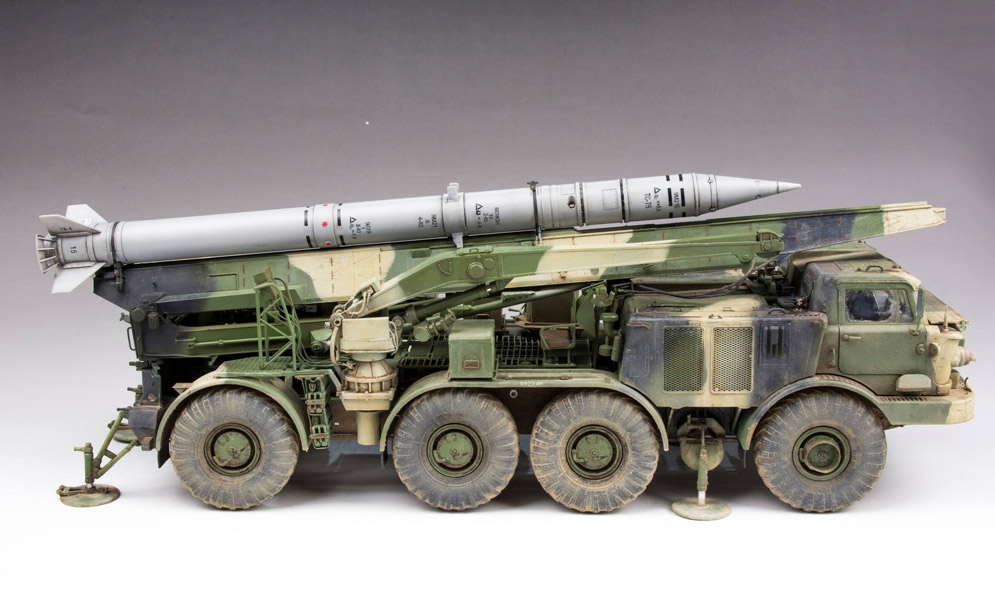
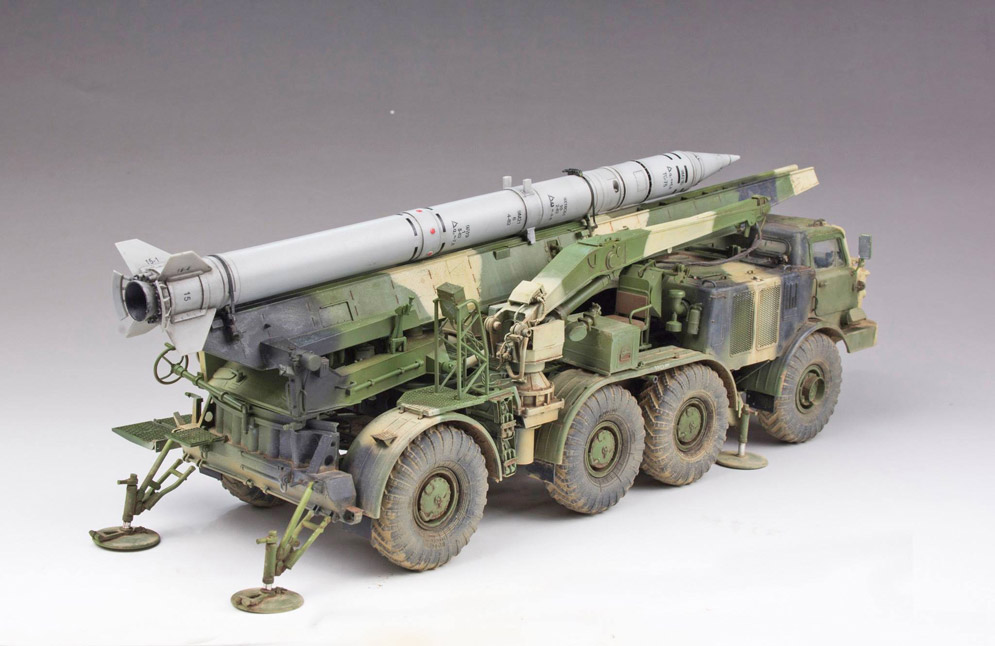
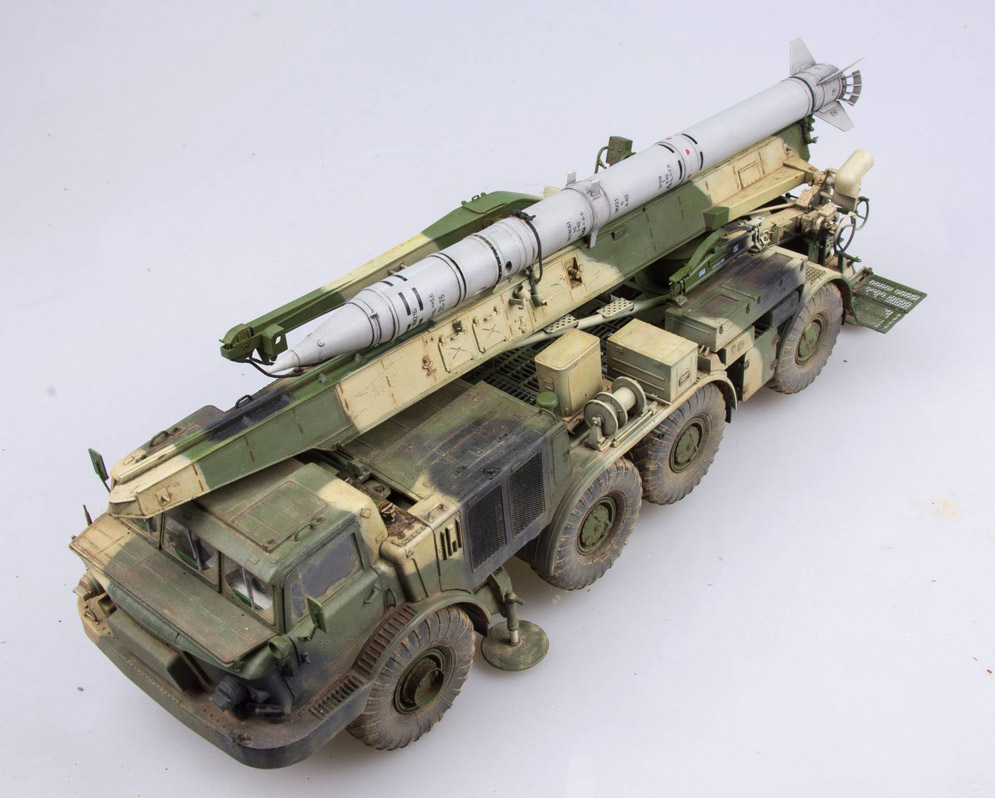
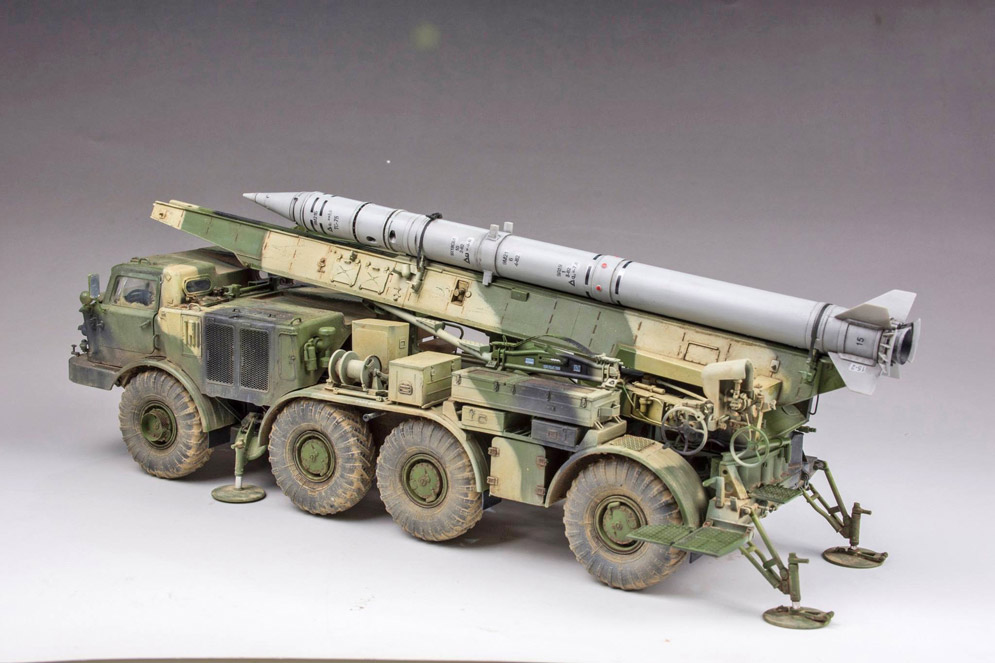
The mainstay tank transporter for the British Army developed in the mid 1970’s entering service in 1984 before being retired in 2000. The model has had extensive scratch build to the winch area in addition to various add ons on both the tractor and trailer.
Paul B.

Hobby Boss 1:35
Model Cellar tanker
Weathered with oils and pigments
David L.
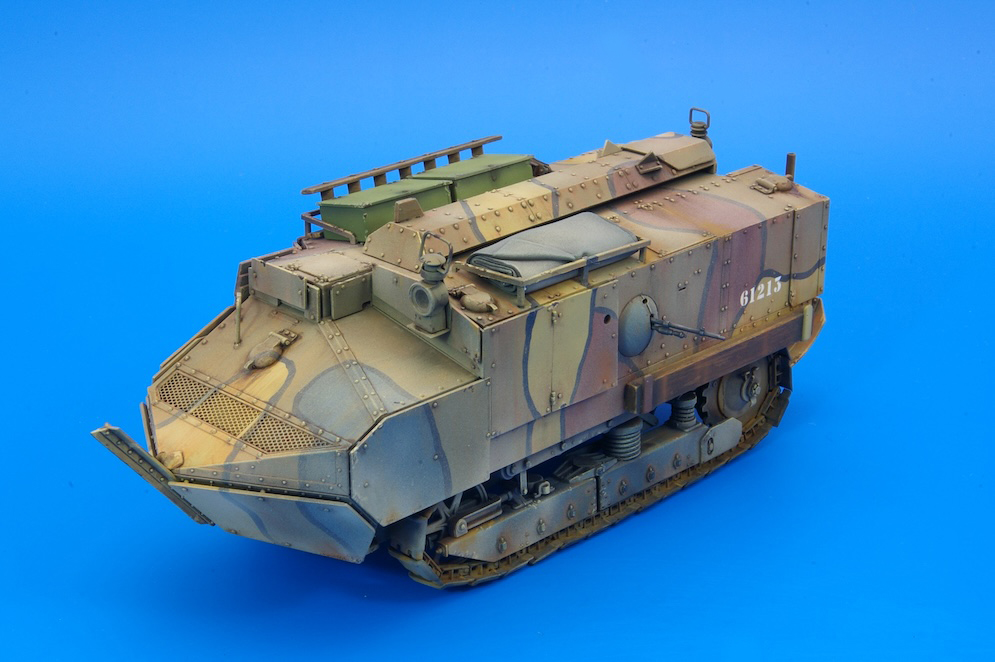


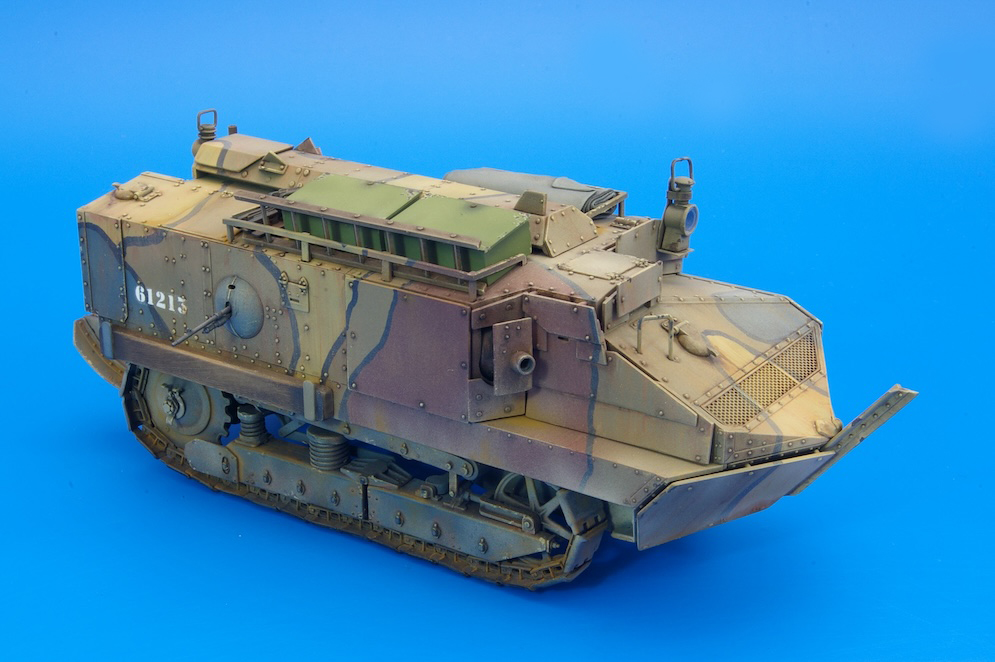
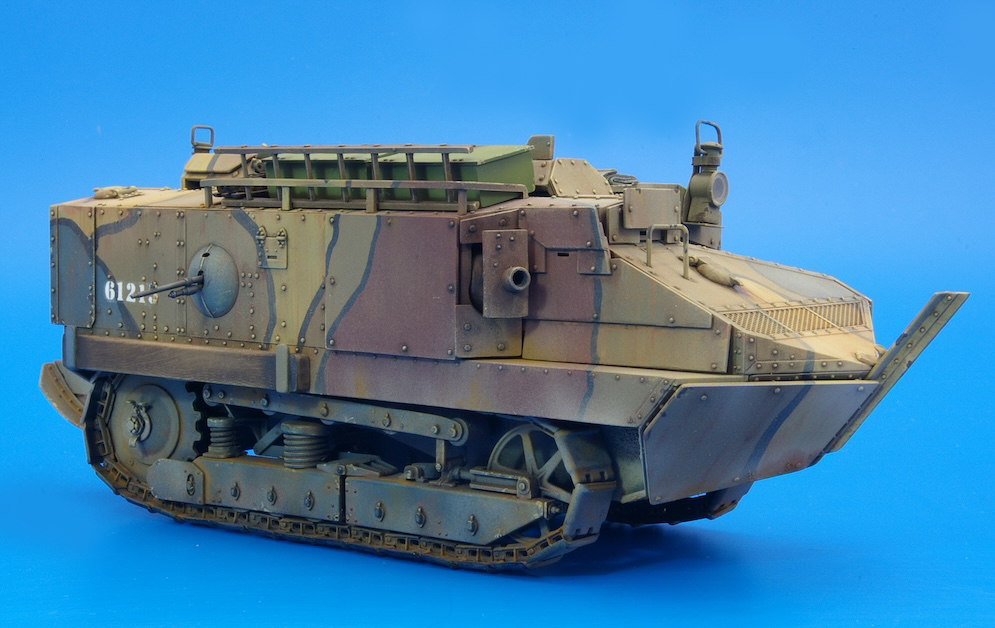
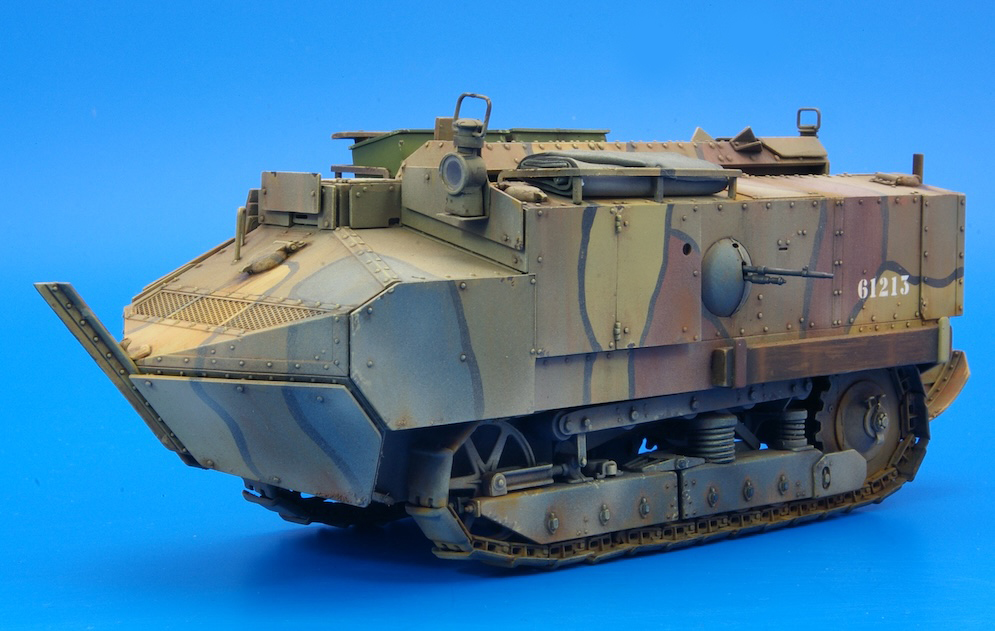
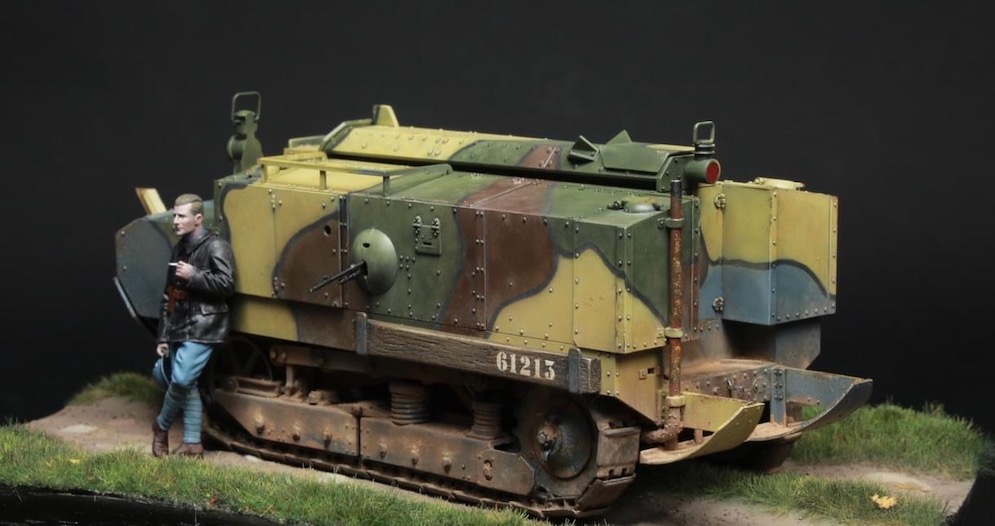
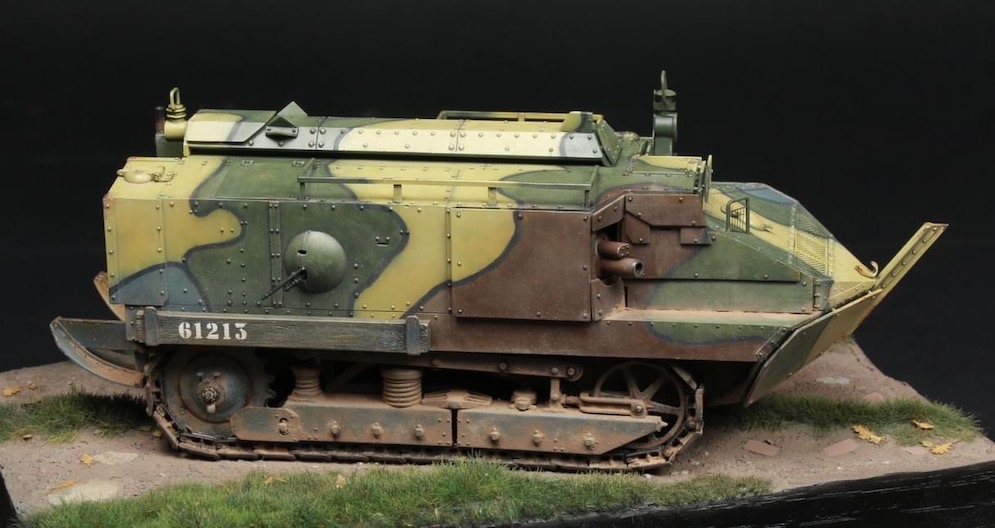
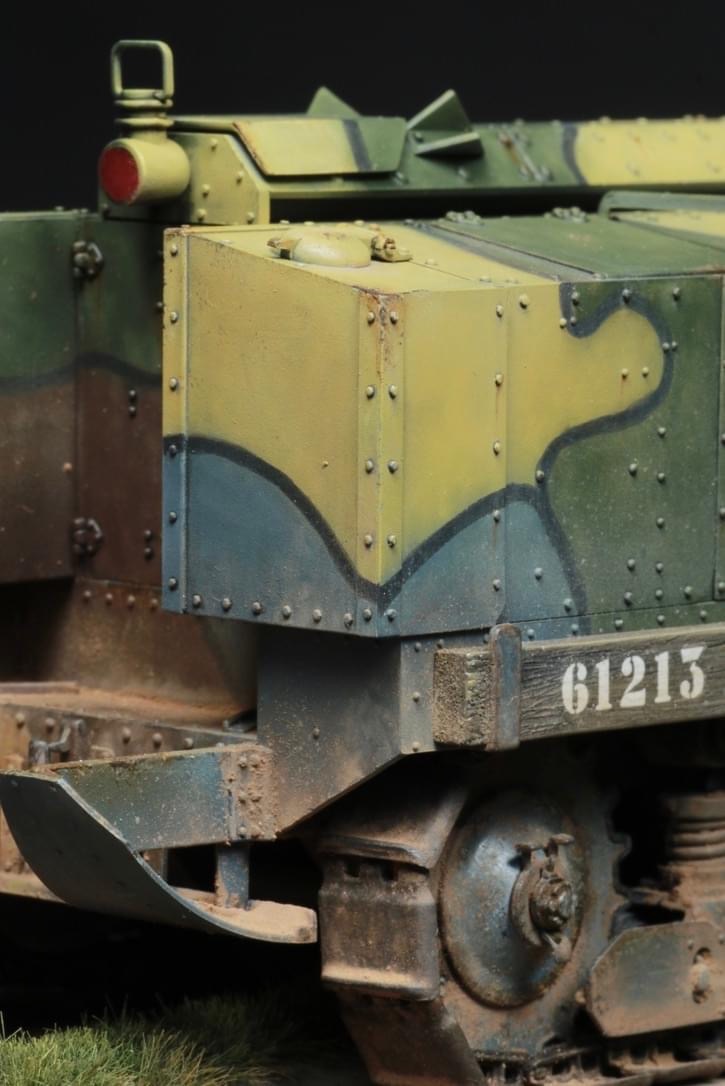
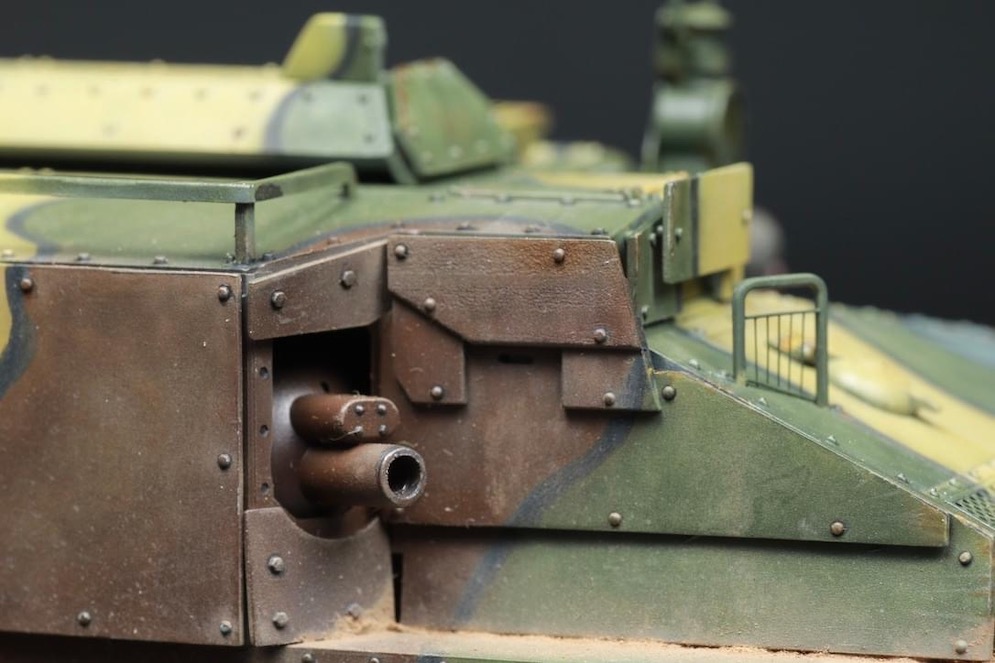
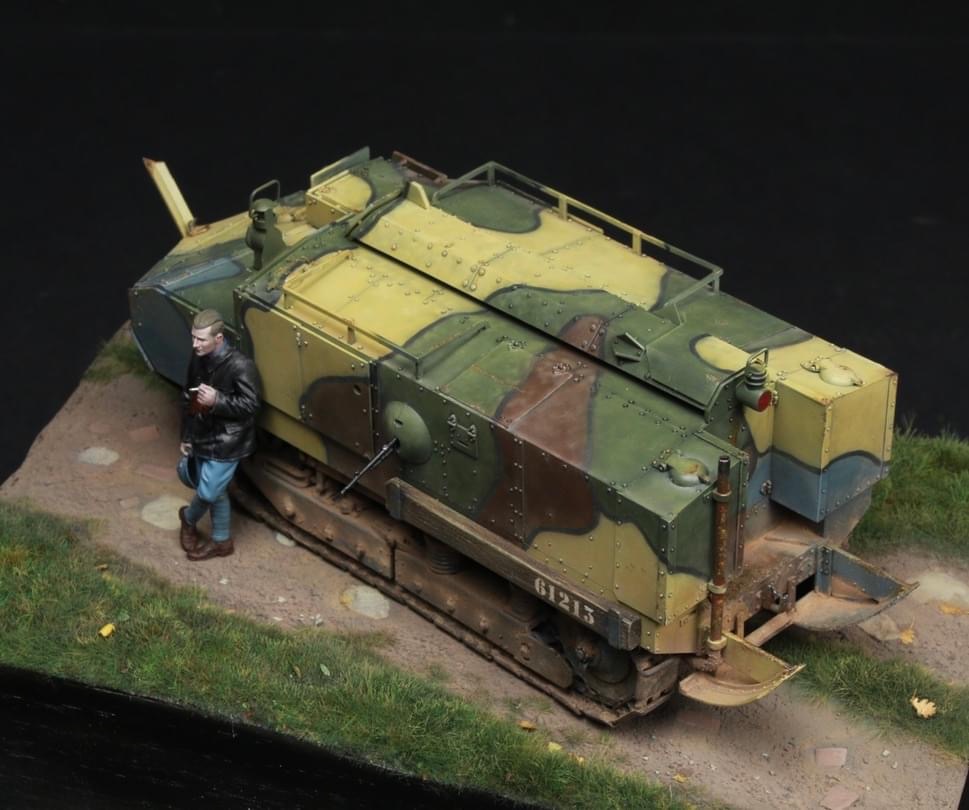
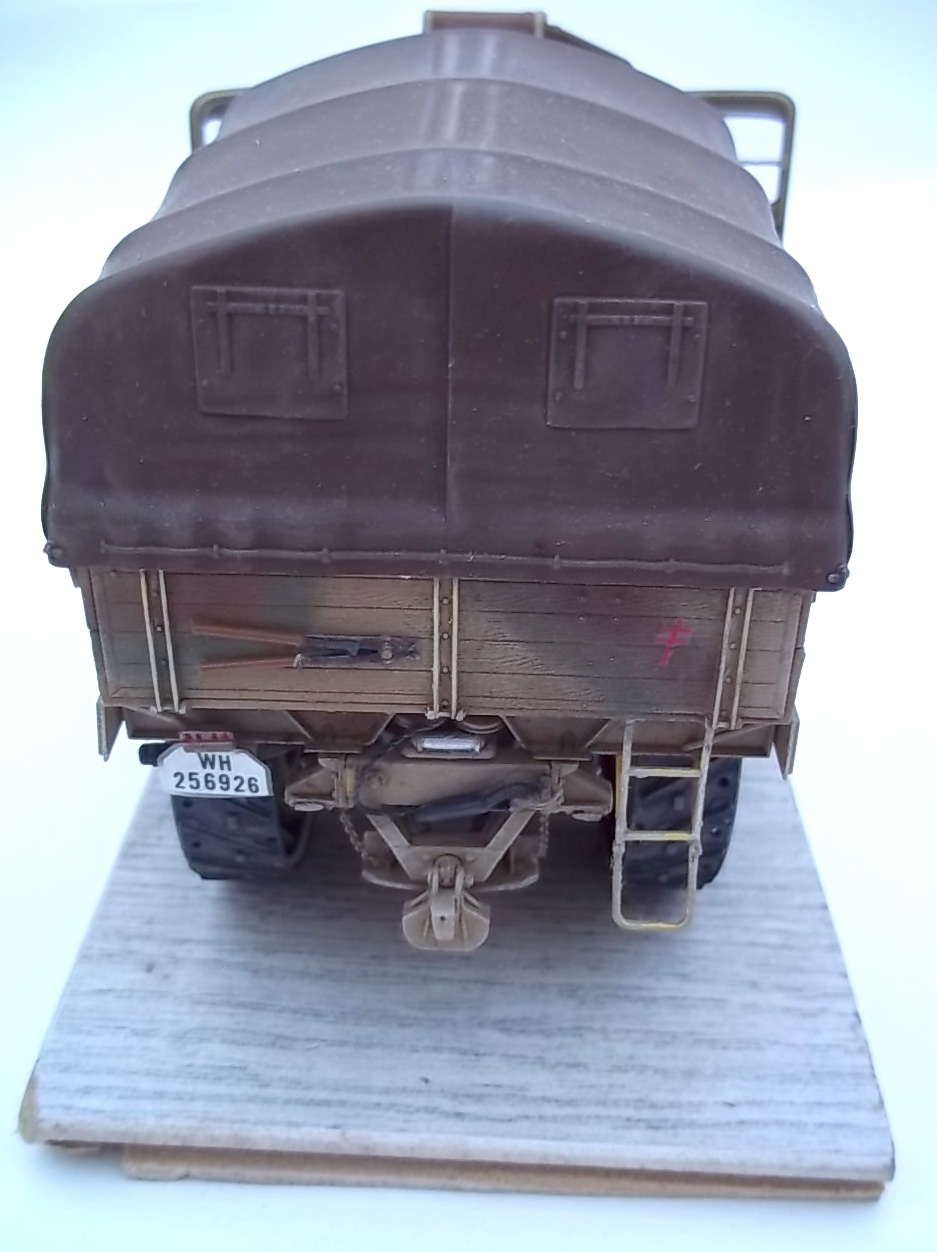
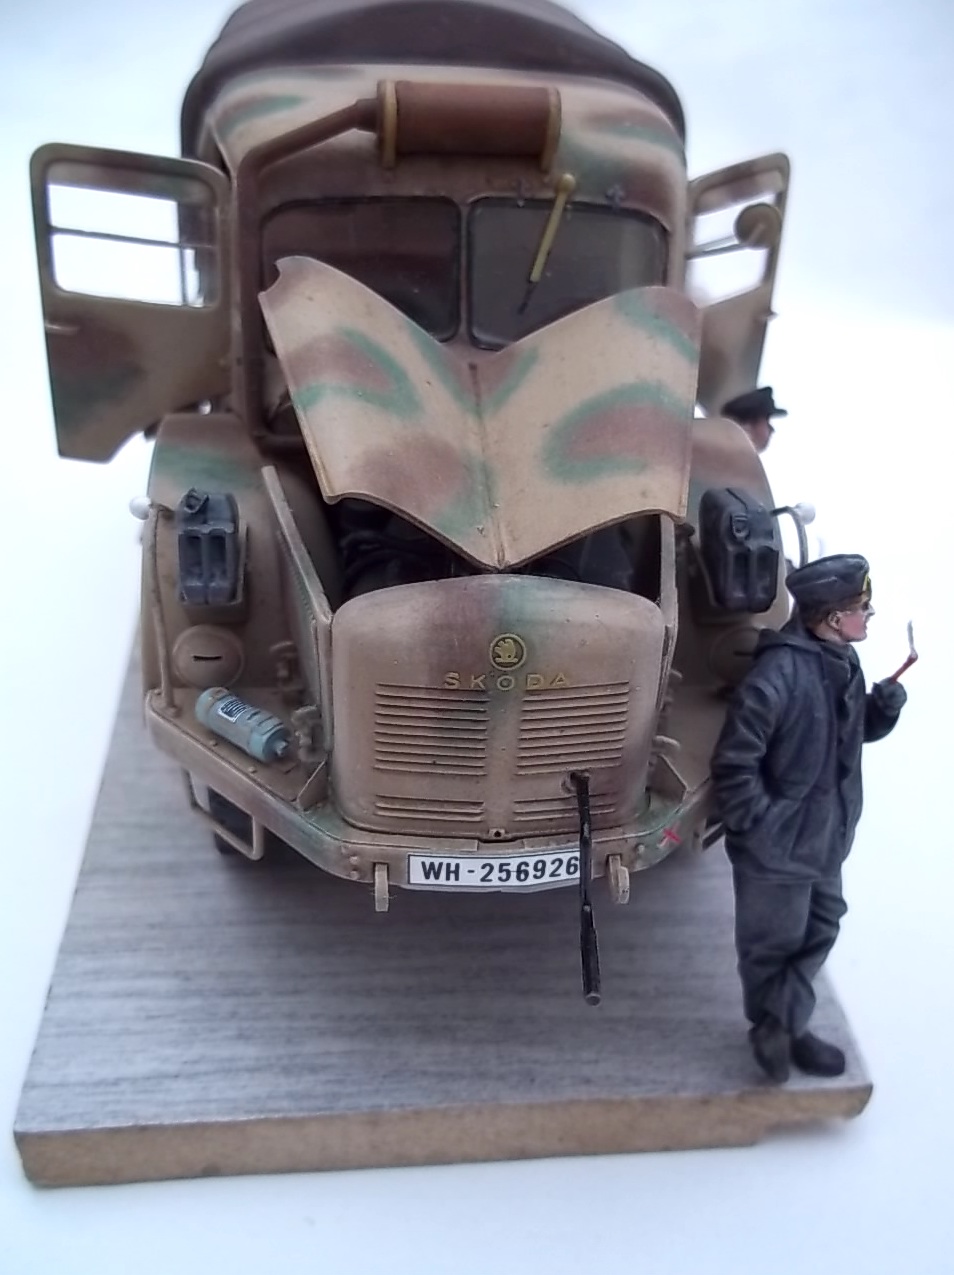
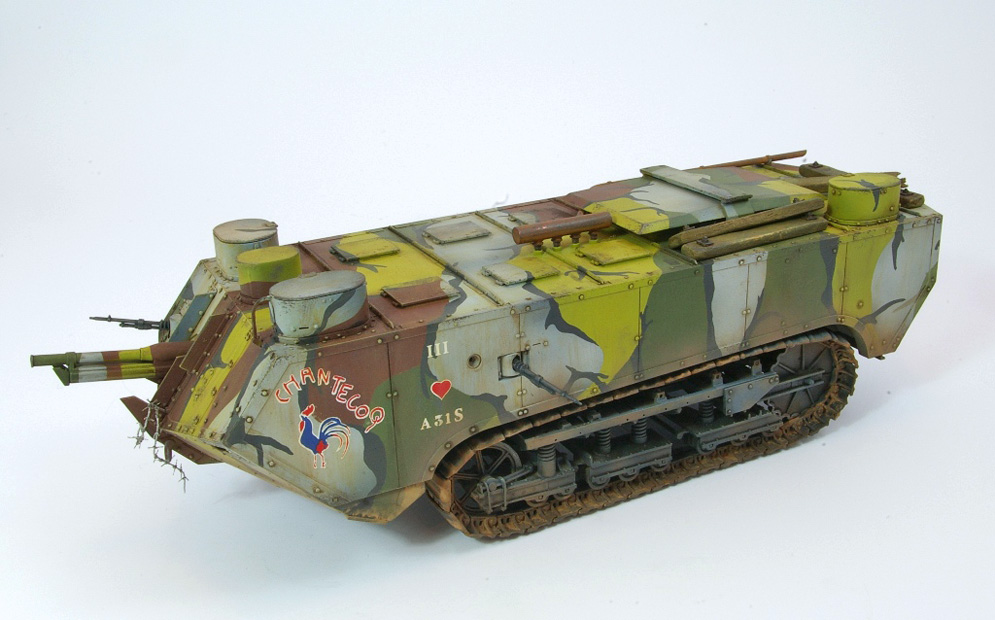
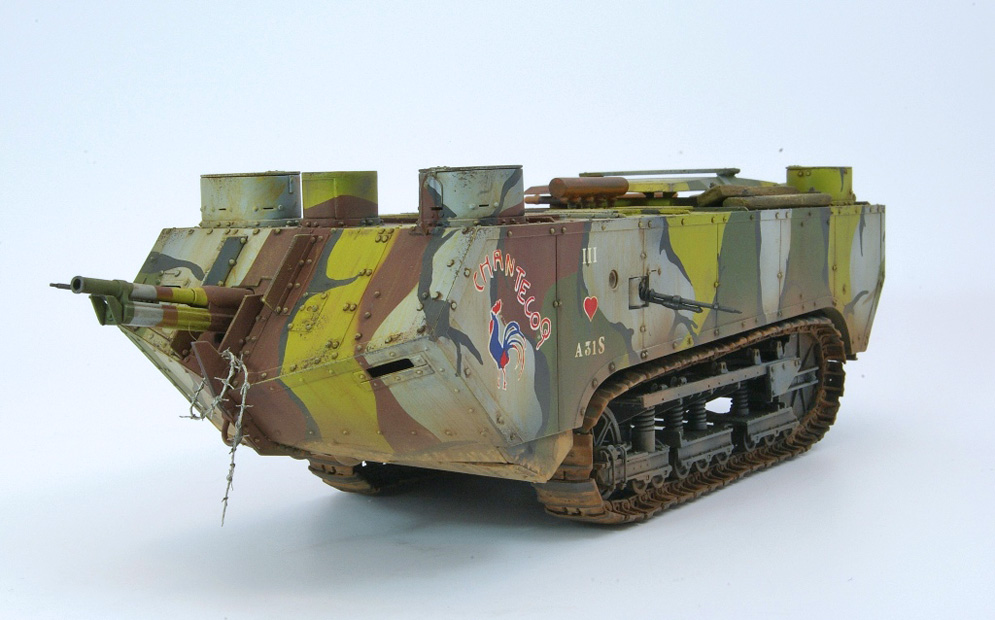
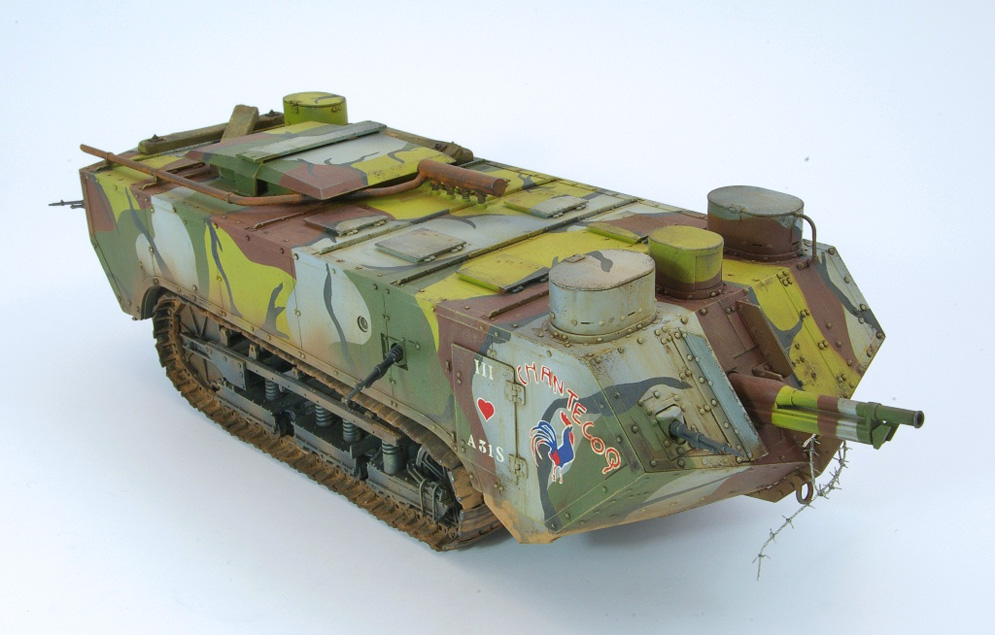
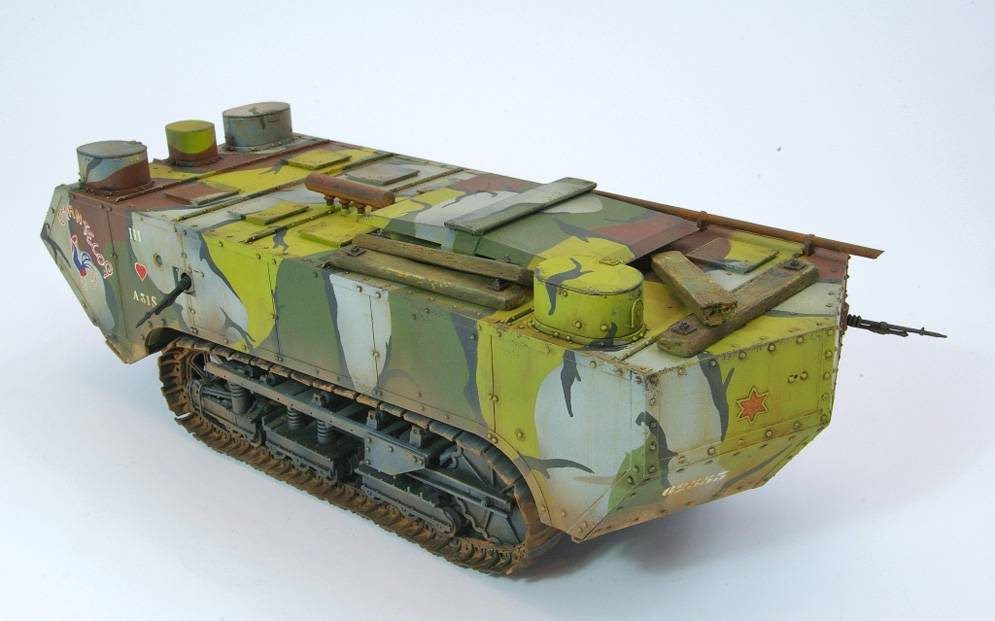
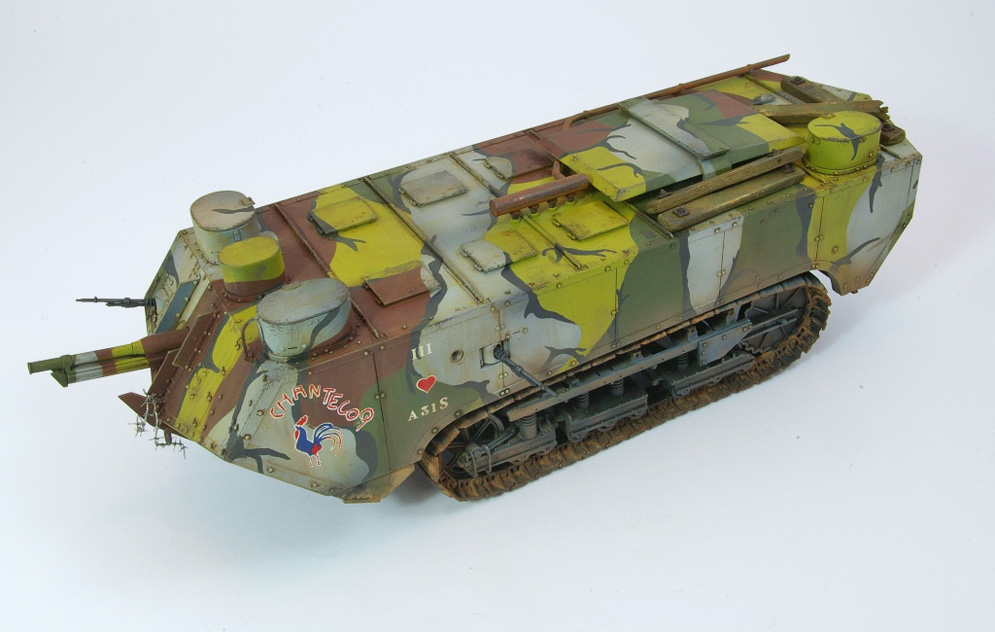
The subject of this project was the 1:35th scale Hobby Boss Schneider tank from the First World War.
Hobby Boss has produced two versions of this kit. One is the vehicle in its early form and the other the later type with additional armour plates as modelled here.
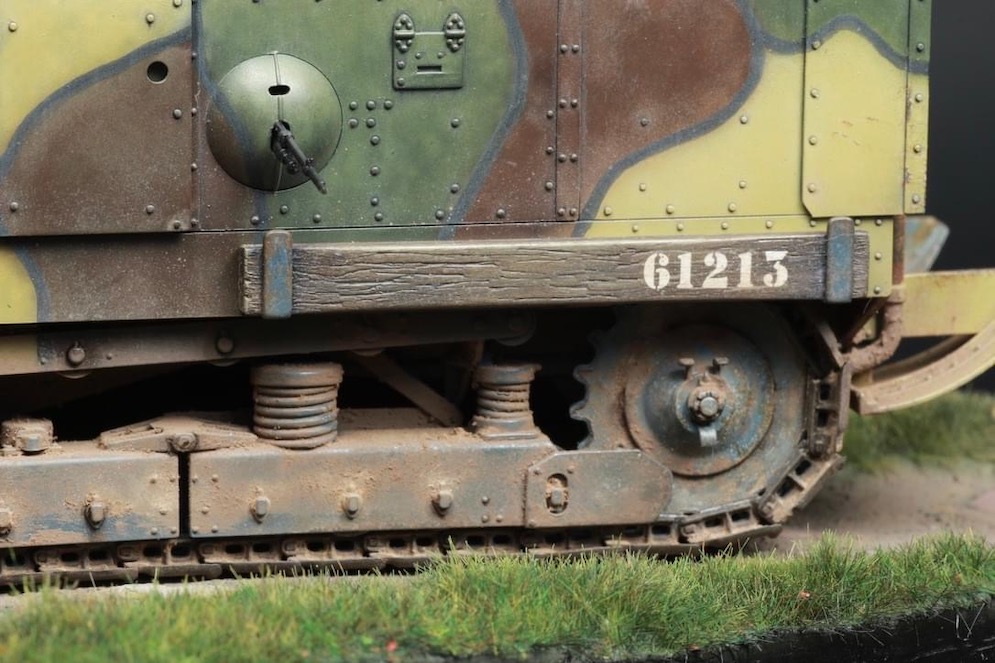
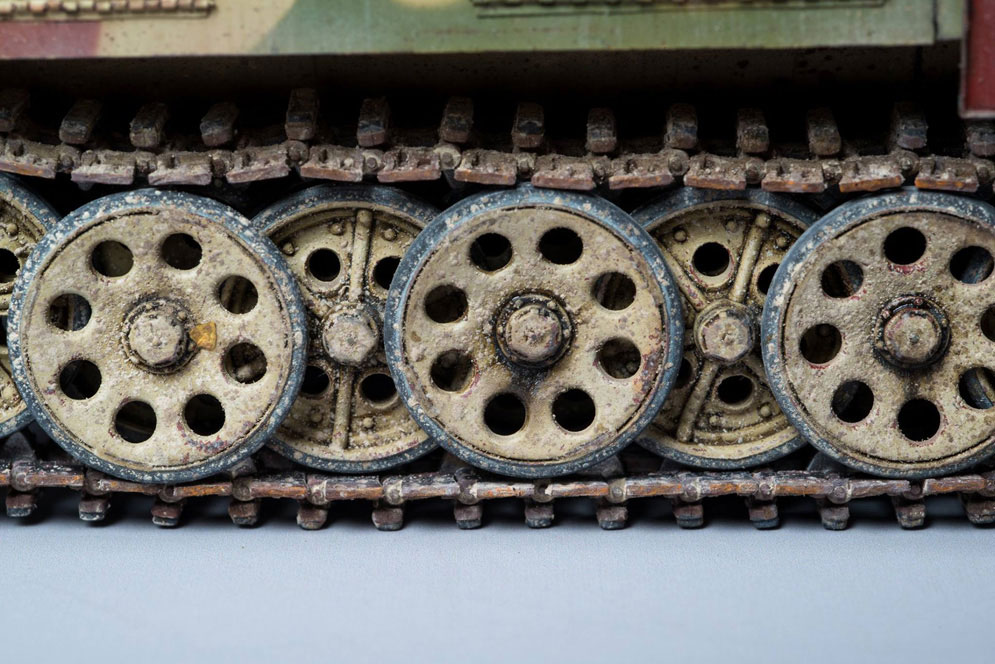
I found the kit easy to build apart from the tracks which are supplied as single links, each of which is made up of three pieces. These were simple (if a little tedious) to assemble, and I believe that they are intended to articulate. However, the connection points are small, and broke very easily so that the tracks fell apart at every opportunity when I tried to feed them around the suspension.
There are racks on the top of the hull and period photos show these filled with all manner of stowage. I therefore filled these with a couple of boxes made from thin card detailed with some punched rivets, a ladder made from Evergreen window shuttering (with every other slat removed) and a tarpaulin made from thinly rolled Milliput.
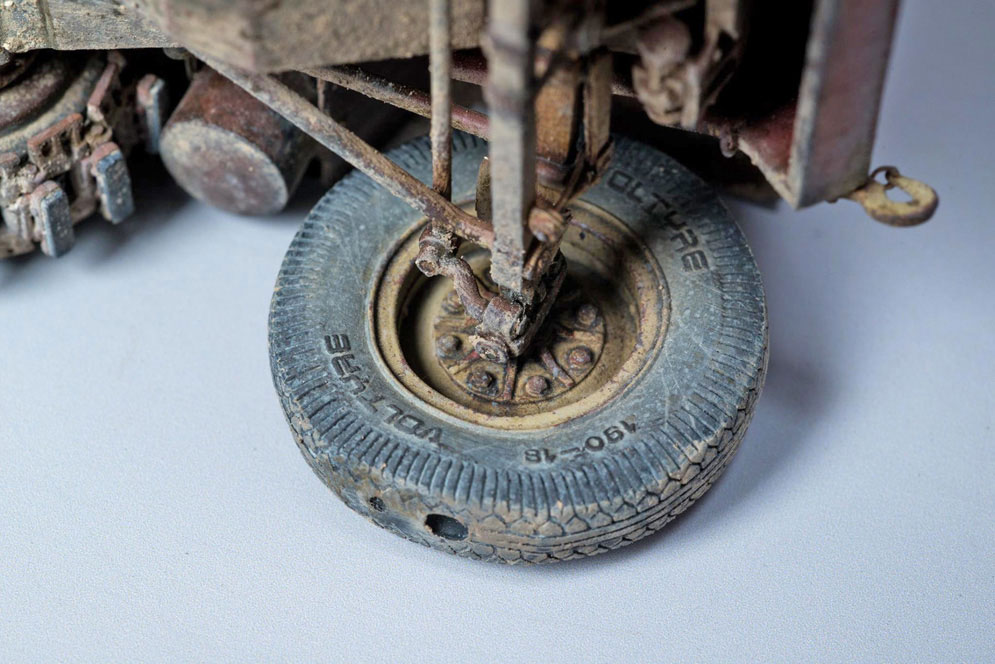
The lenses on the lights were made from disks cut from clear acetate as the kit supplied items are supplied as solid plastic.
These vehicles carried several interesting colour schemes and whilst I followed the kit’s instructions the colours I’ve used may be ‘conjectural’ though I think that the pattern is at least fairly typical.
Dai W.
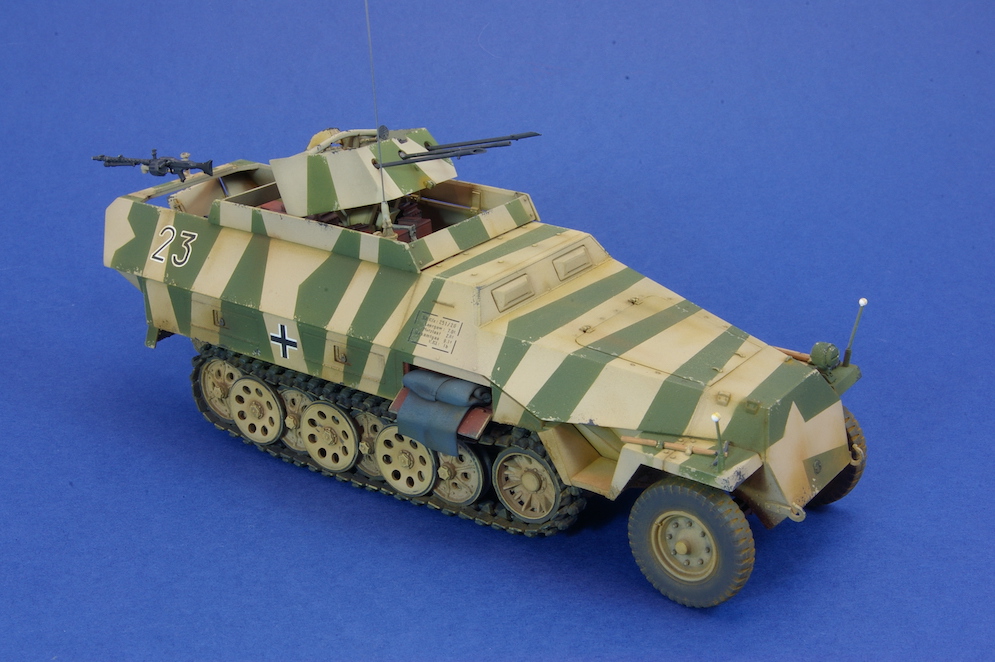
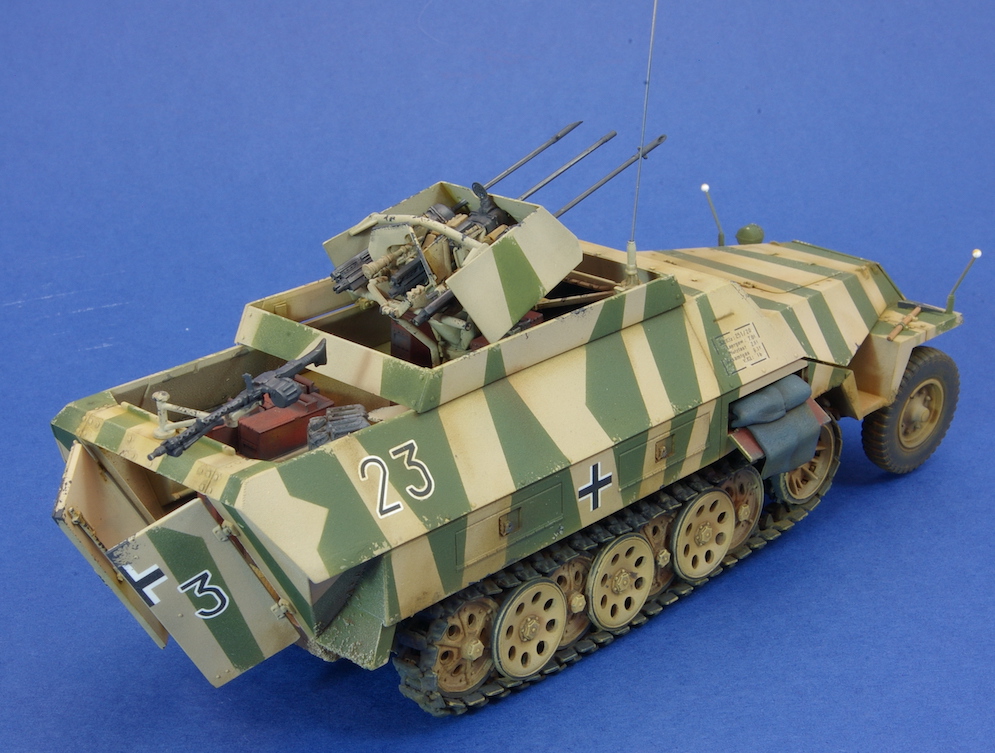
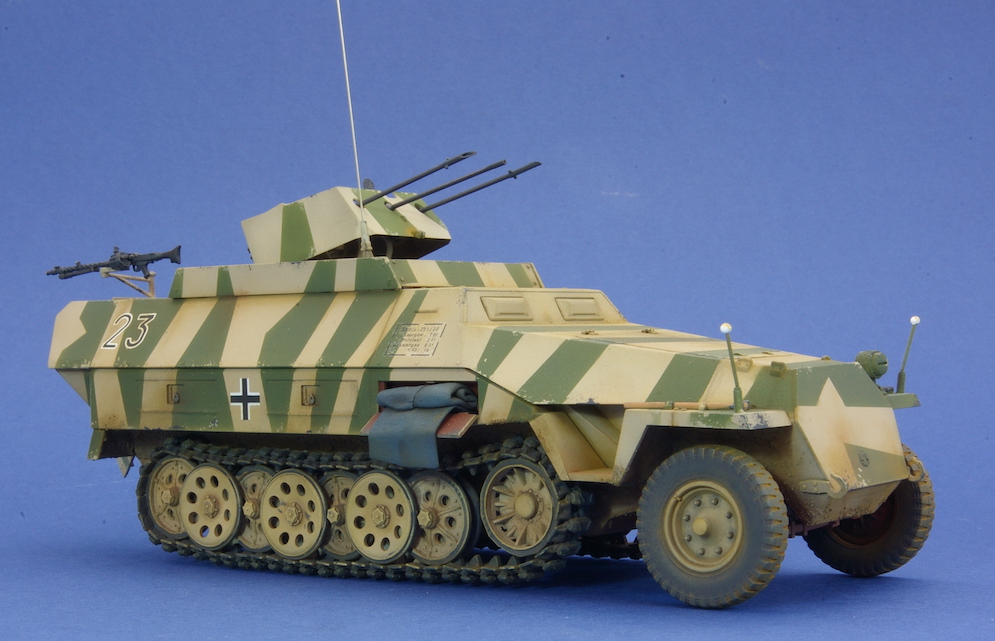
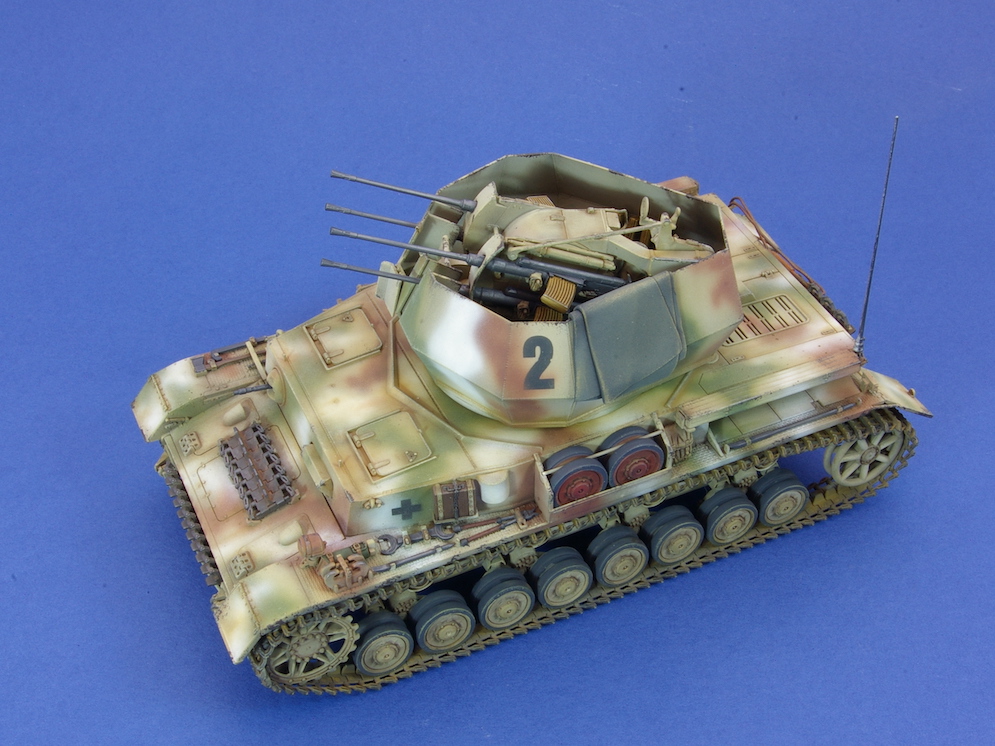
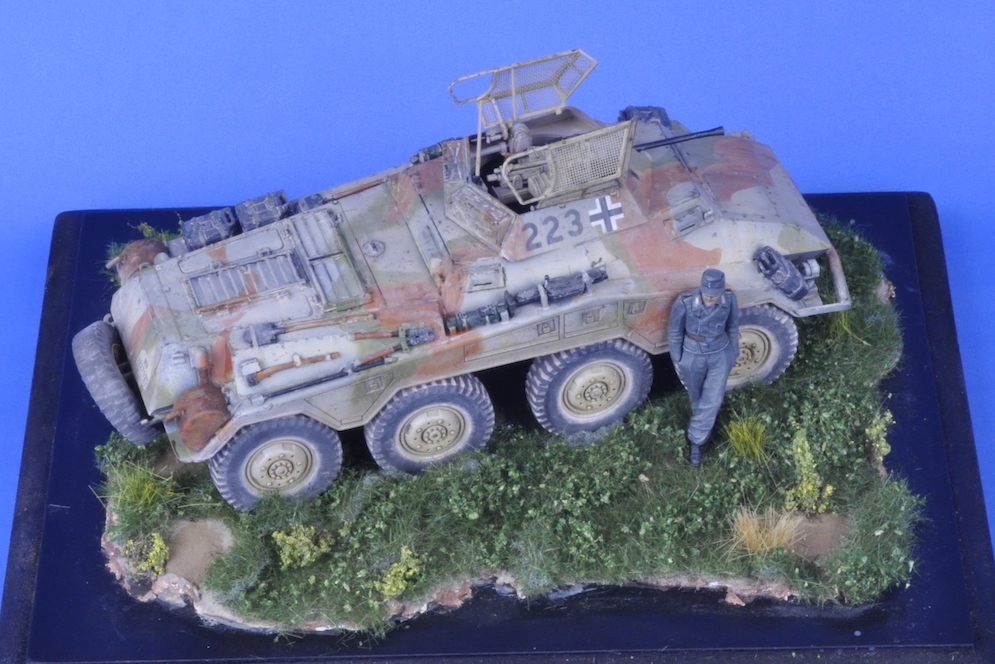
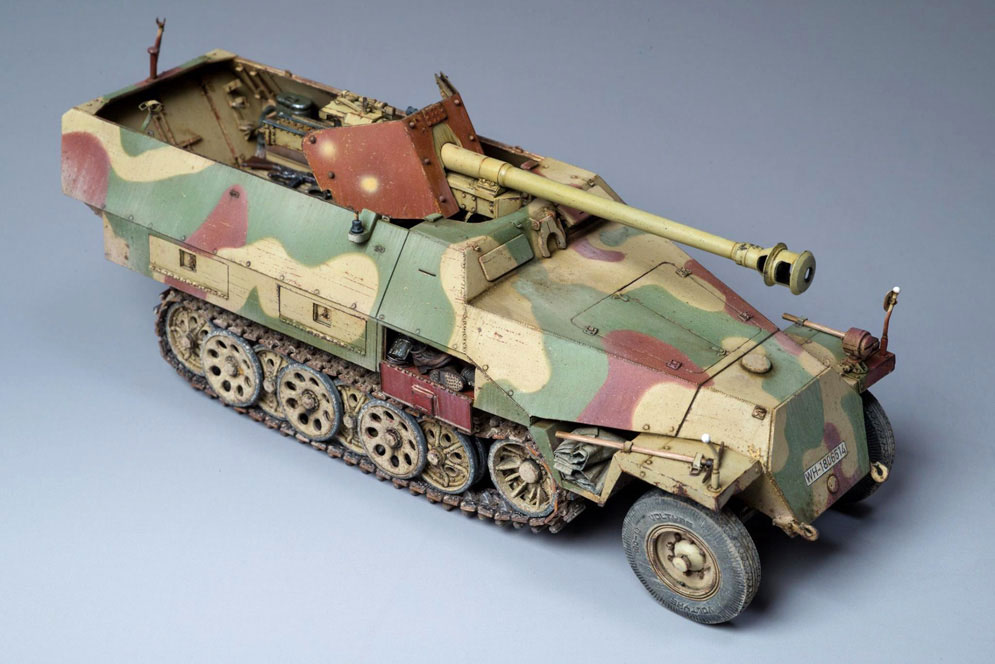
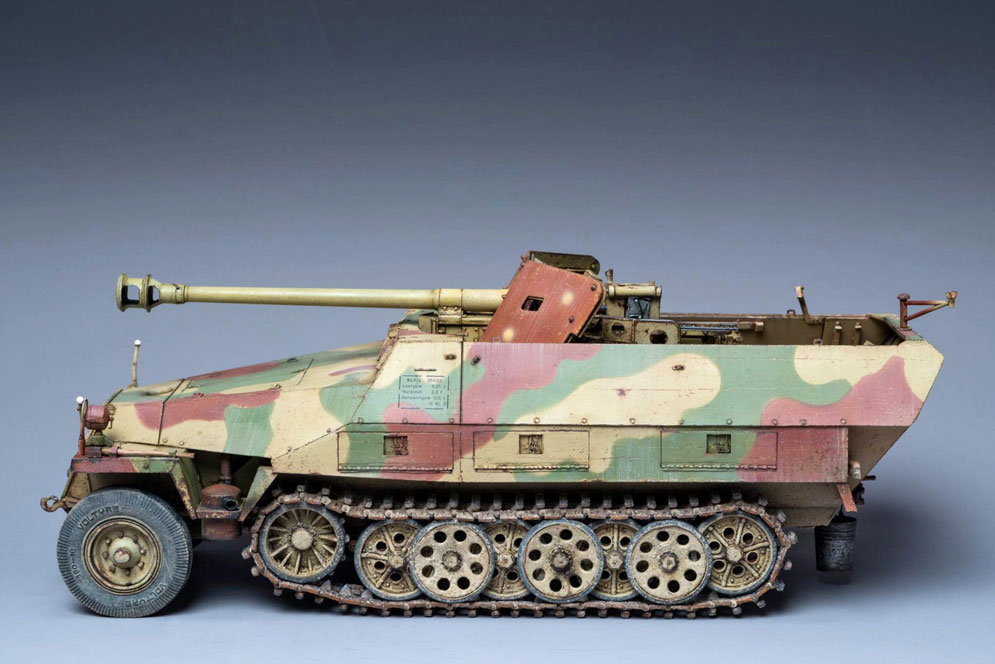
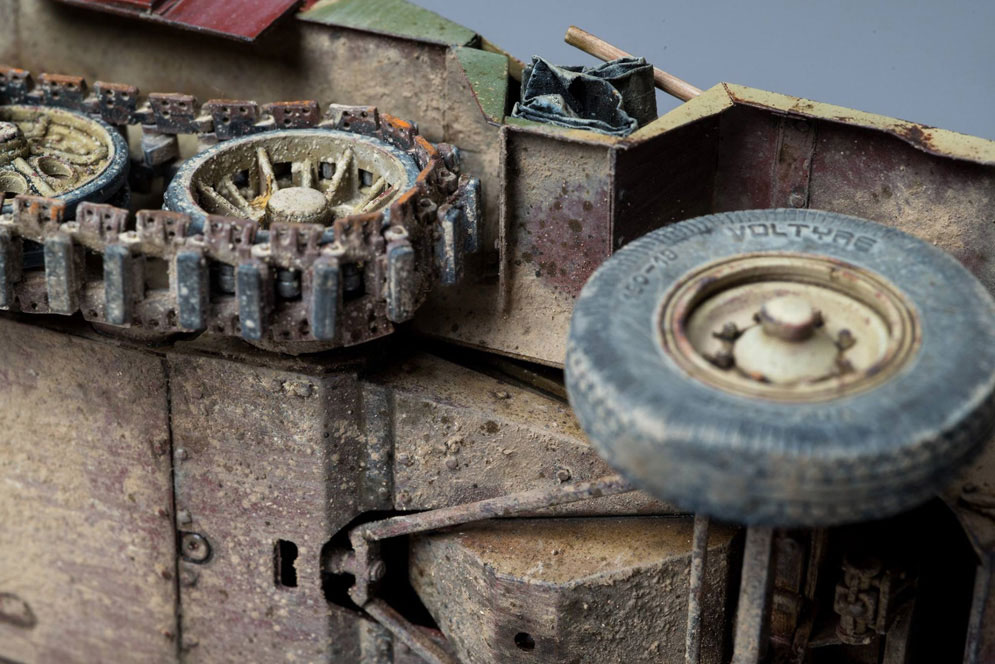
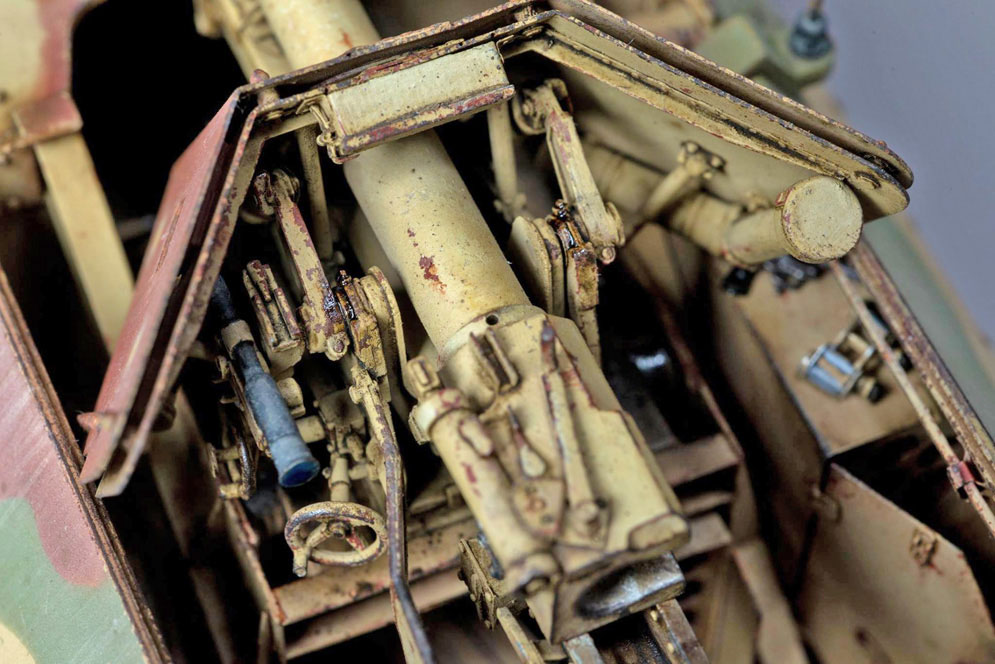
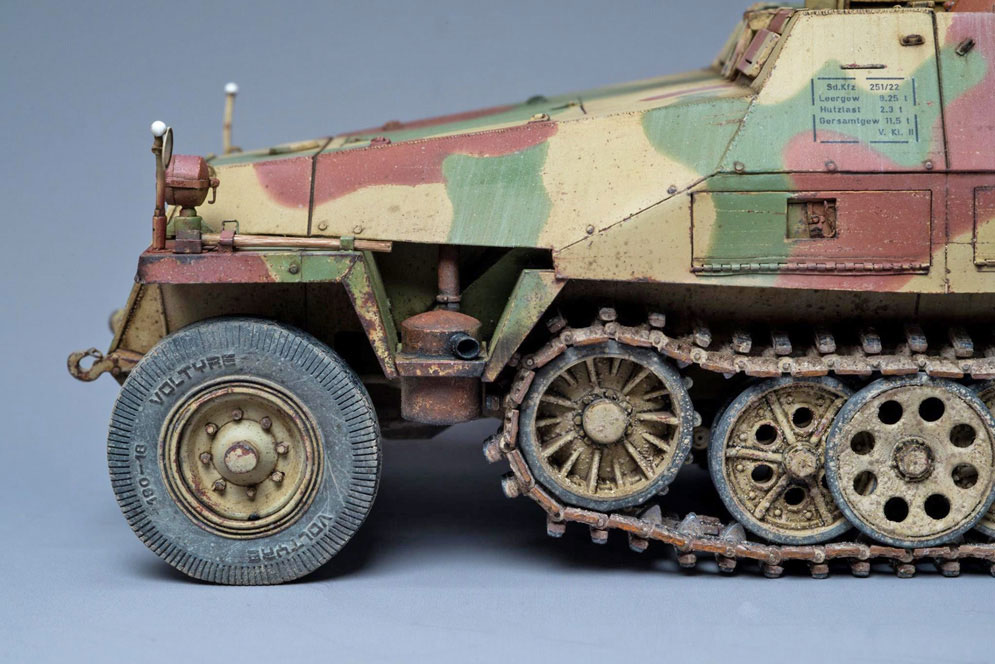
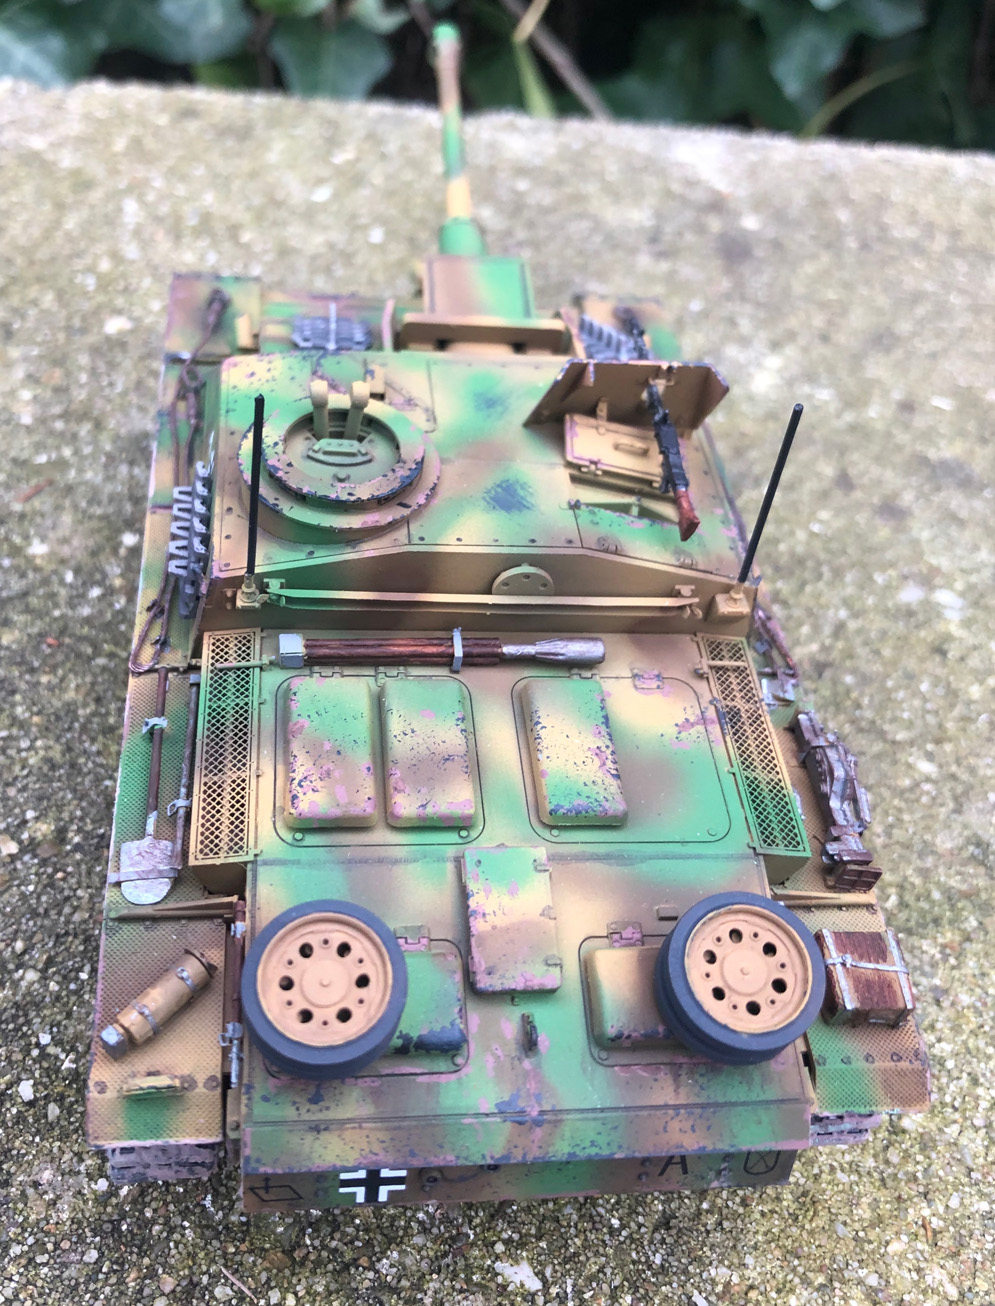
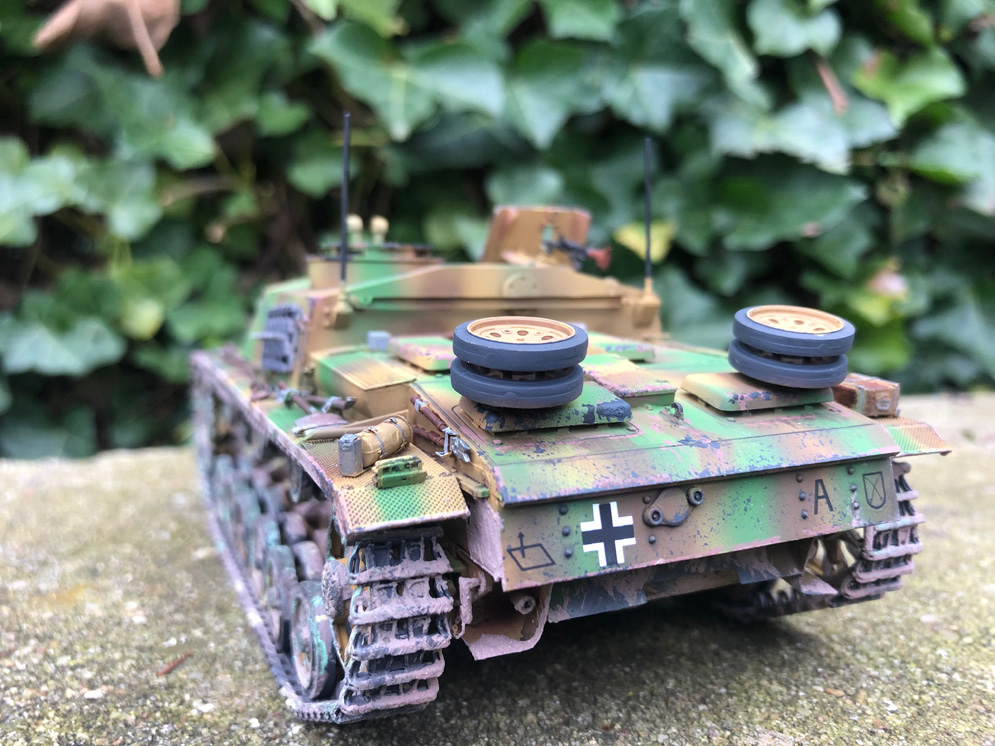
The Sd.Kfz.251/21 was an anti-aircraft and ground support vehicle based on the Sd.Kfz.251/21 Ausf. D halftrack.
The vehicle carried three MG151 autocannon on a Kriegsmarine triple mount (‘Drilling’ meaning triplet in German). They first appeared on the battlefield in 1944.
While the triple mounted guns had a high rate of fire, unfortunately the vehicles carried only limited amounts of ammunition which limited their usefulness. Another disadvantage with these vehicles was that being open-topped the crew had little protection from enemy fire.
The DML kit first appeared in 2004, but nearly 20 years on I think it is still an excellent basis for a model.
The model depicts a generic vehicle with a likely looking field-applied camouflage scheme of my own devising rather than being based on an actual vehicle from a photo.
Some of the wheels and interior parts have been finished in red primer to represent uncamouflaged replacement items. This was done in order to get some more colour onto the model.
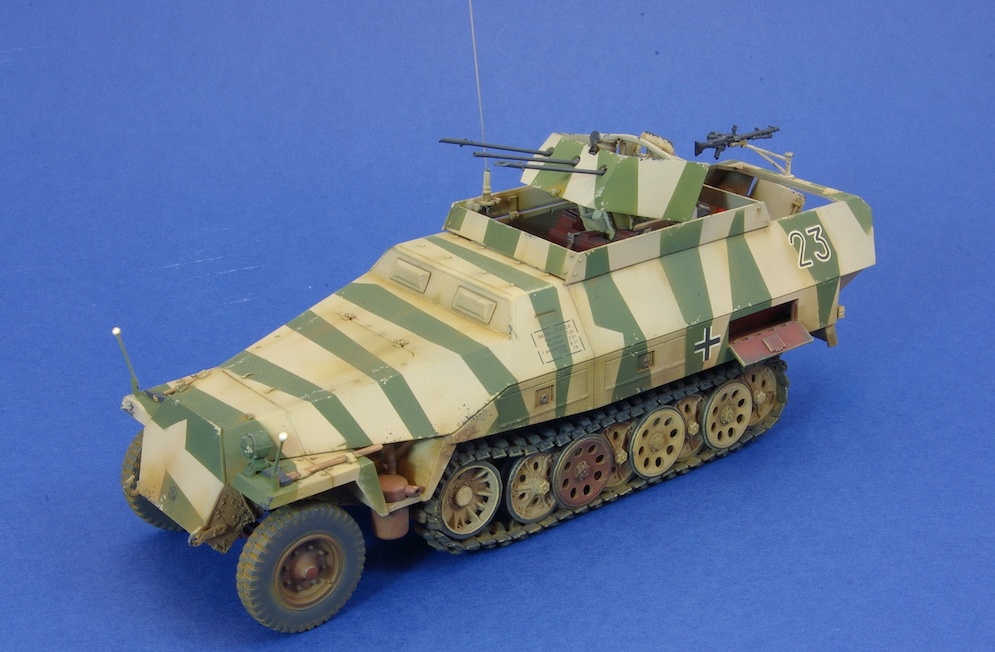
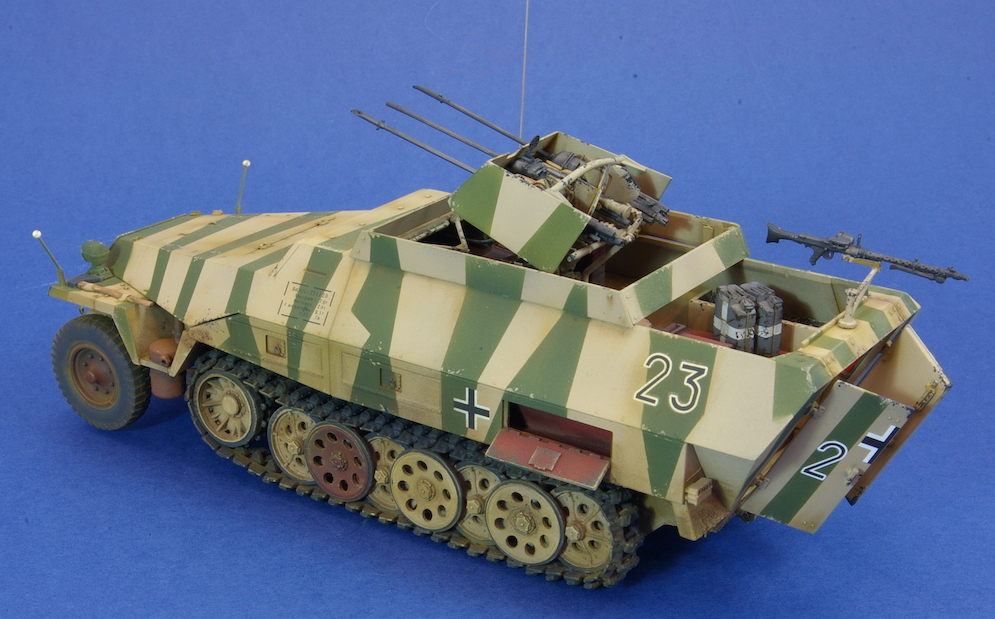
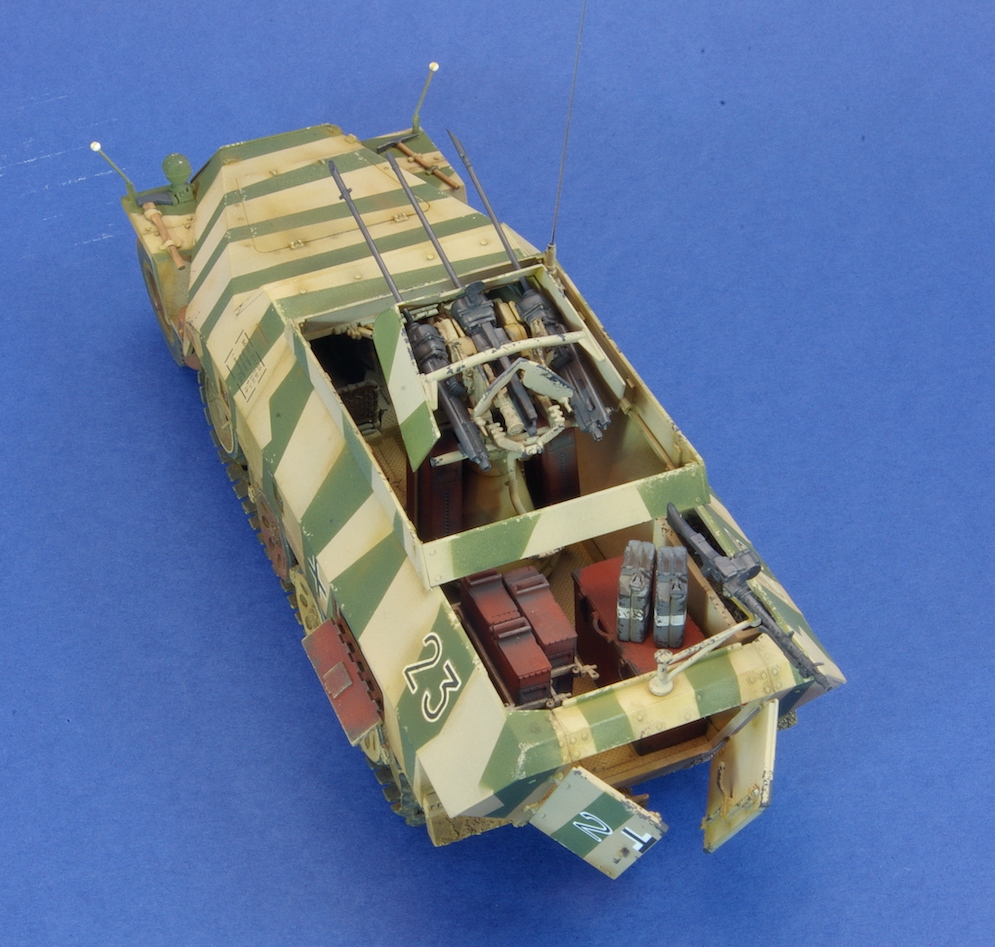
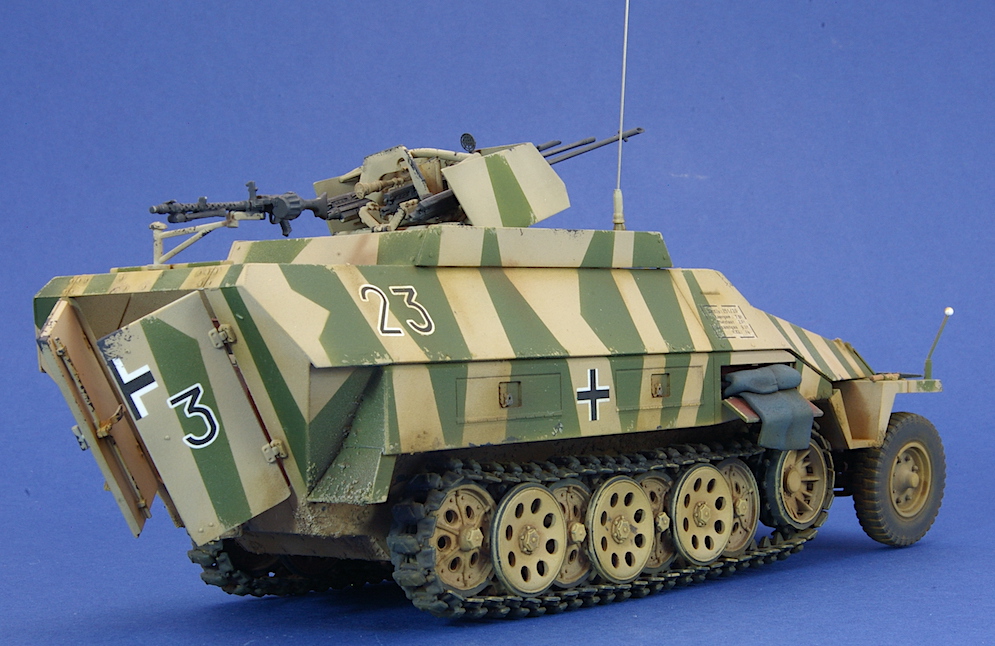
As the halftrack was an open topped vehicle, the model needed to be broken down into sub-assemblies for construction and painting.
I added some camouflage netting (crepe bandage soaked in white glue) to fill the stowage bins inside the model.
The weathering was done using Tamiya’s stone textured diorama paint. This was applied before the model was primed and painted, concentrating on areas around the underside of the mudguards and the lower hull. I added pastel chalks on top of this after the model had been painted. This was followed by a light oil wash using dark brown paint followed by a light dry brushing with sand-coloured enamels to give the mud / dirt a three-dimensional appearance.
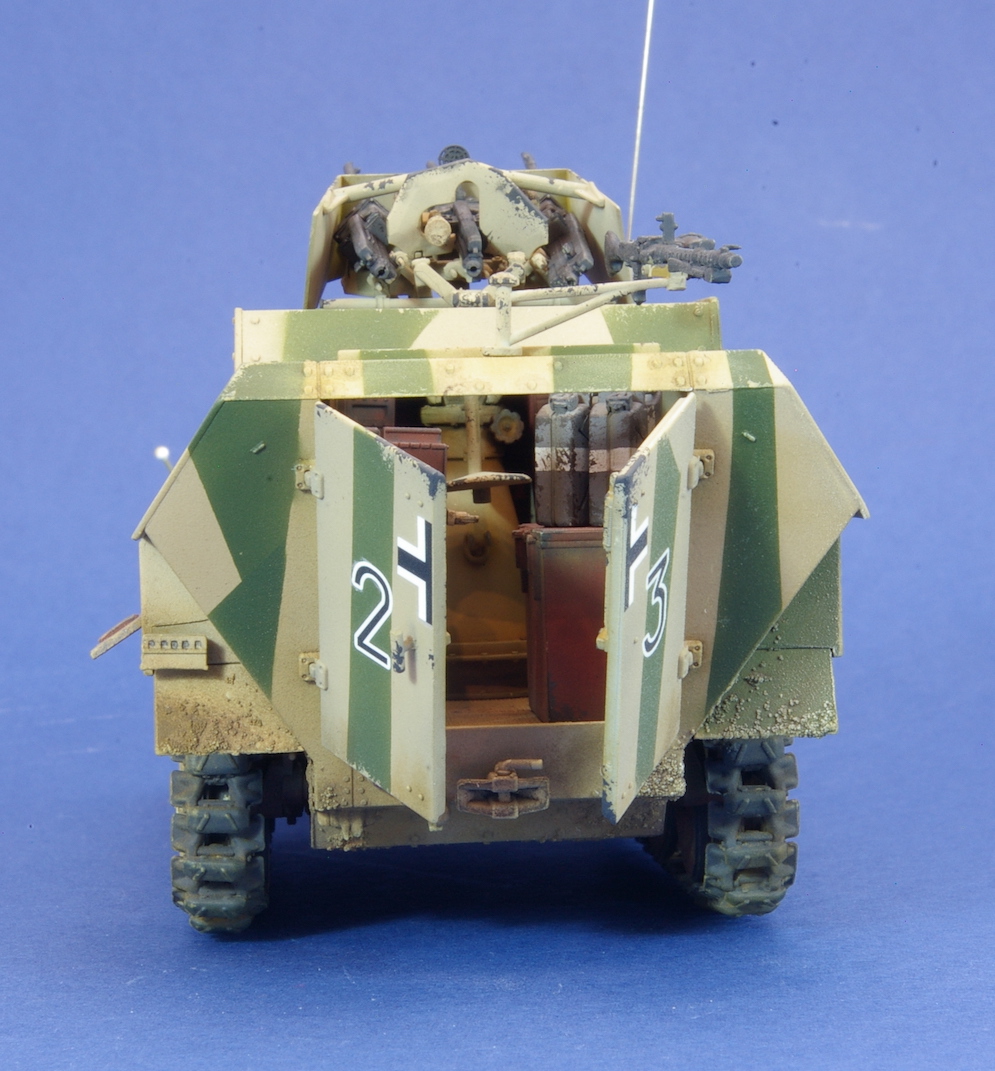
As with other kits in the series I found that the DML kit was easy to build with only a headlight cable, and a radio aerial needing to be supplied by the modeller. There are some large ejector pin marks under the front mudguards that needed to be filled as these would have been visible under the finished model.
On the plus side the kit provides some turned brass width indicators (along with a plastic jig to be used when bending them to shape) which were very welcome, and looked much neater than the plastic alternatives.
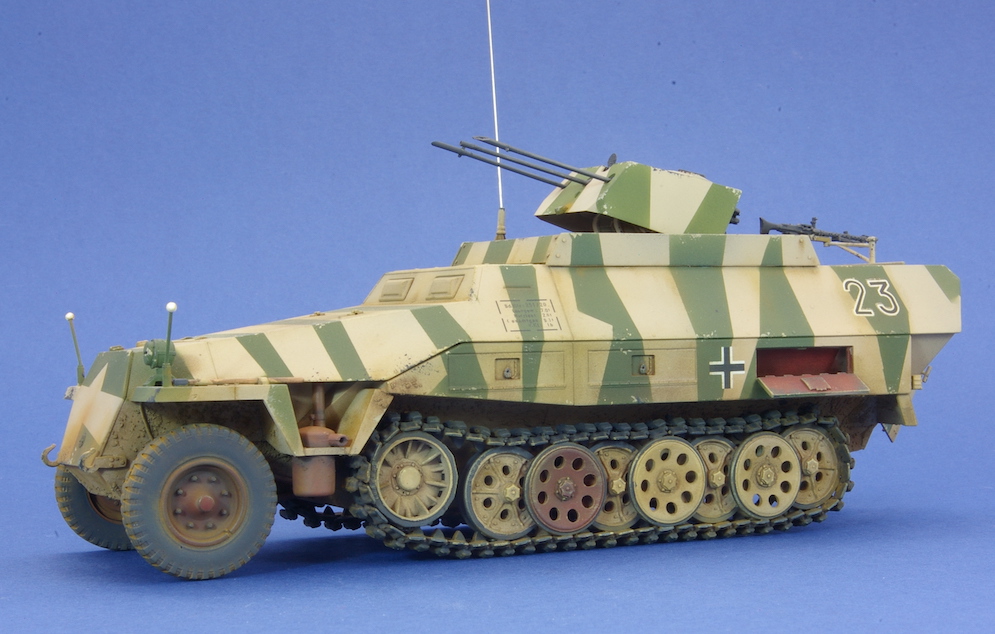
Dai W.
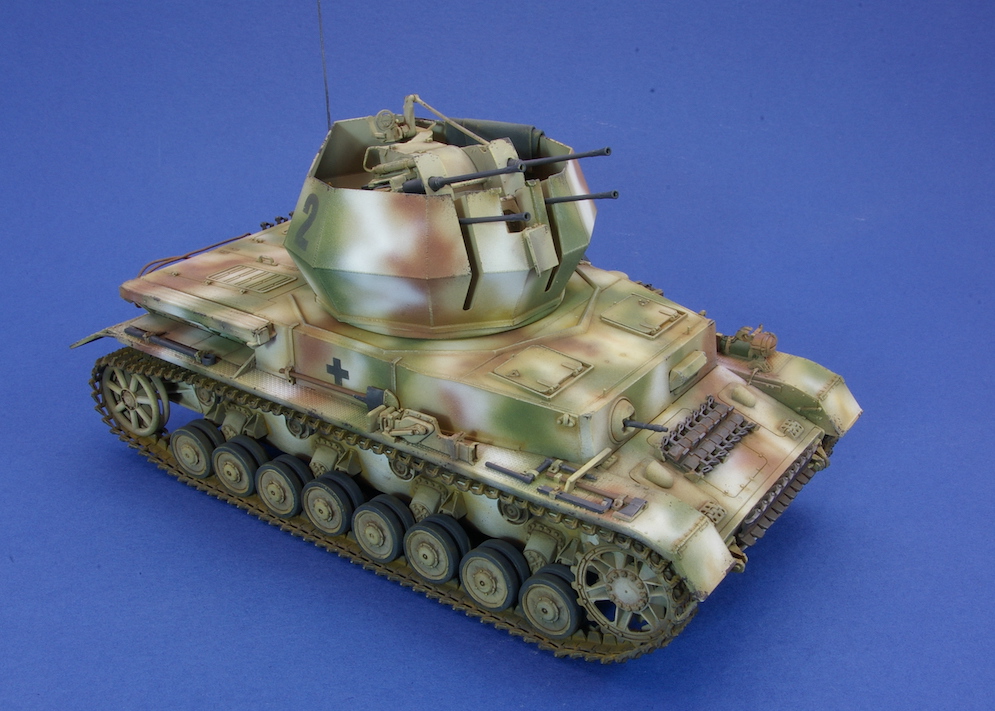

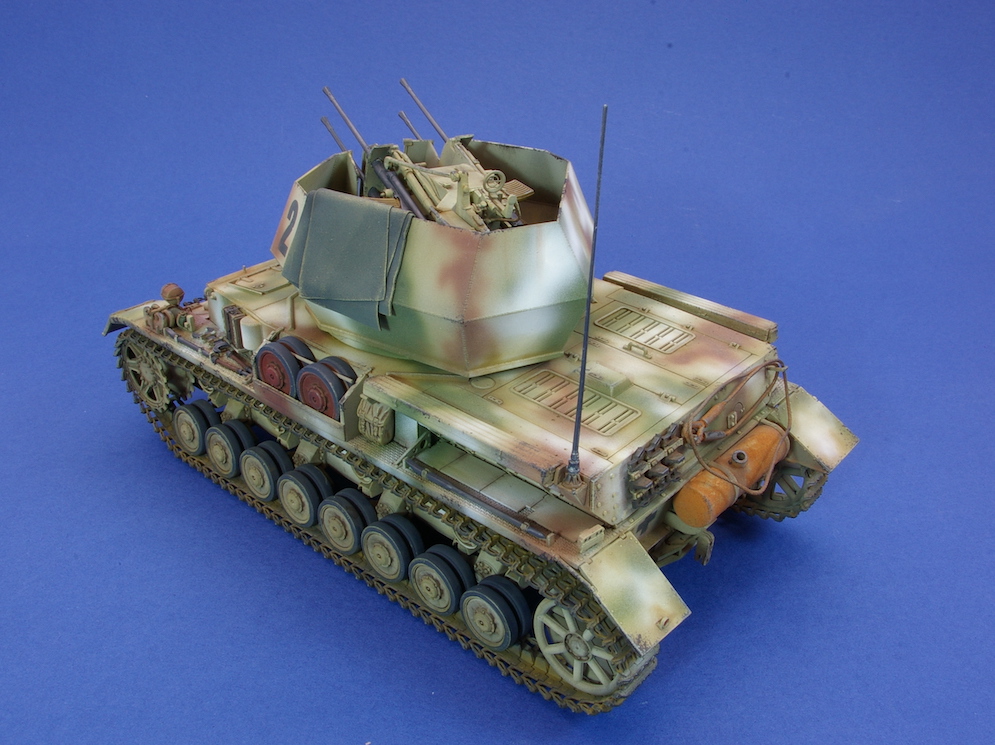
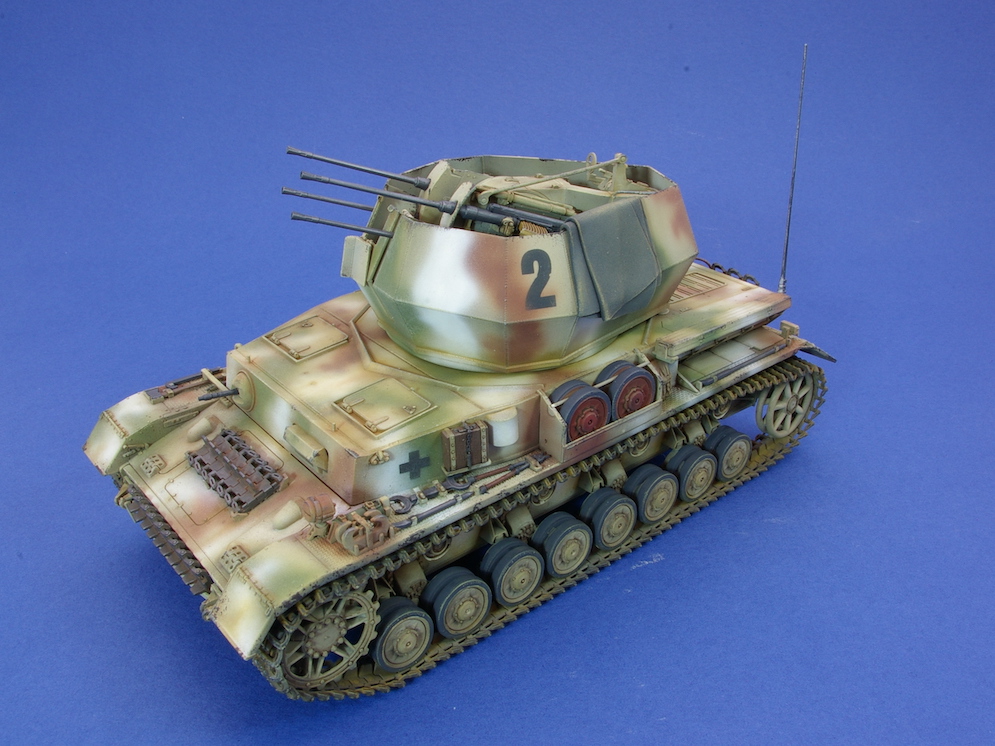

The kit has been released with modifications several times since then including a version complete with a representation of Zimmerit paste (used to prevent the attachment of magnetic mines) moulded onto the hull parts.
The Wirbelwind was built on the chassis of Pz.Kpfw IV tanks returned from the front for repair, and I believe that the chassis provided in this original release of the kit represents an Ausf. J hull, as indicated by the lack of vision ports on the hull sides for the driver and radio operator. The use of Zimmerit was discontinued in September 1944 and so I think an Ausf. J (the last version of the Pz.Kpfw IV to be produced) without Zimmerit would be quite likely and so did not add any to my model.
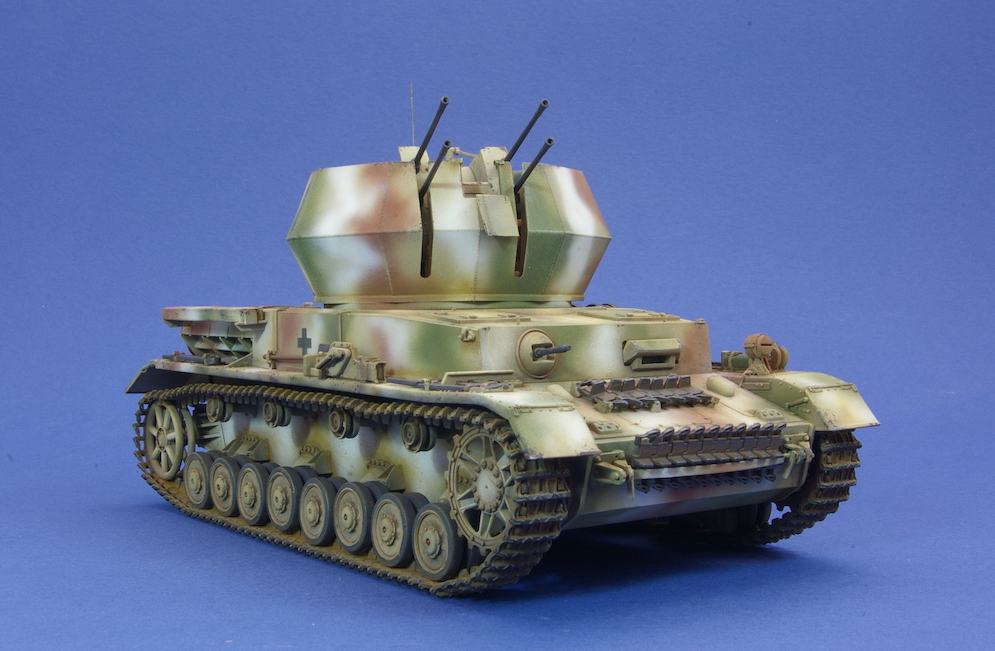
The kit provides single link tracks with solid guide horns. These are sometimes seen in period photos of the Wirbelwind though tracks with hollow guide horns seem to have been more common.
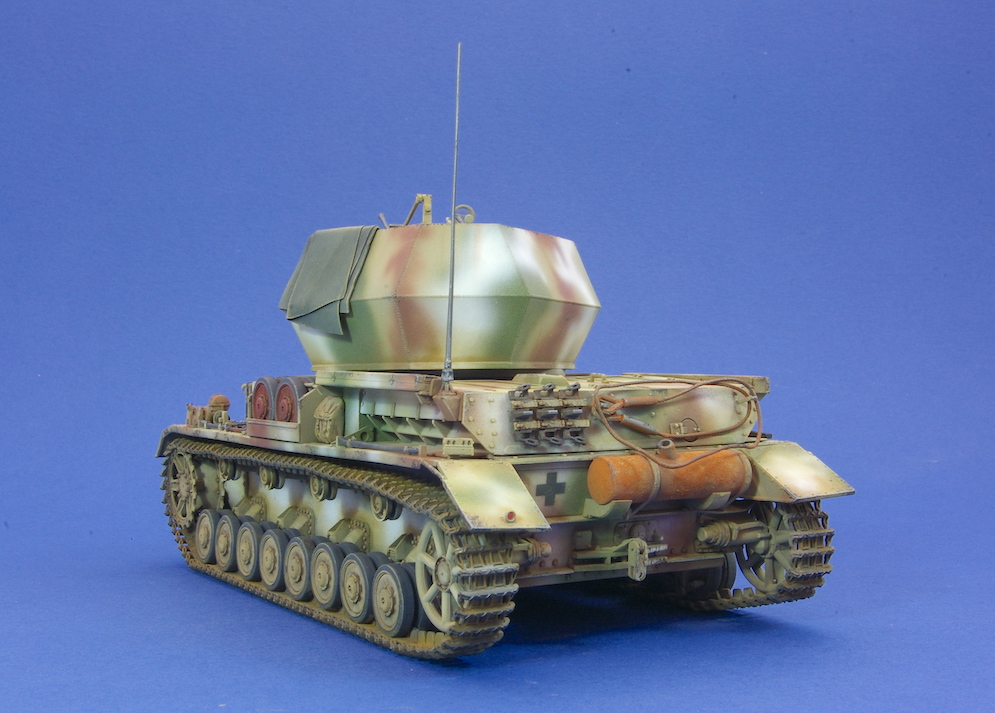
I thought that this was a great kit marred only on my example by a moulding flaw in the turret which I covered over with a tarpaulin made from Milliput.
The Wirbelwind seems to have been issued with a three-colour camouflage as standard. My model has been painted to represent a vehicle that had been very recently camouflaged with additional patches of white paint to reduce its visibility during the winter months. I wanted to represent white paint that had been recently applied in order to avoid the now compulsory use of the ‘hairspray technique’ to represent worn paint – a procedure at which I always fail dismally!
The use of a turret number is a piece of poetic license on my part as these only occasionally appear in wartime photos of the Wirbelwind, but I thought it added a little extra colour.
Dai W.
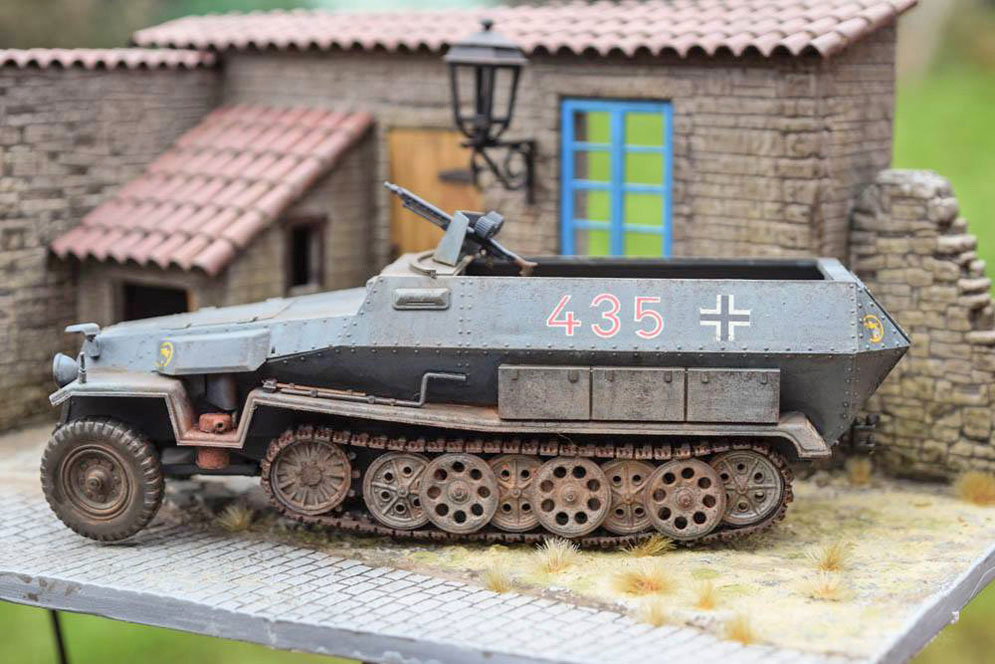
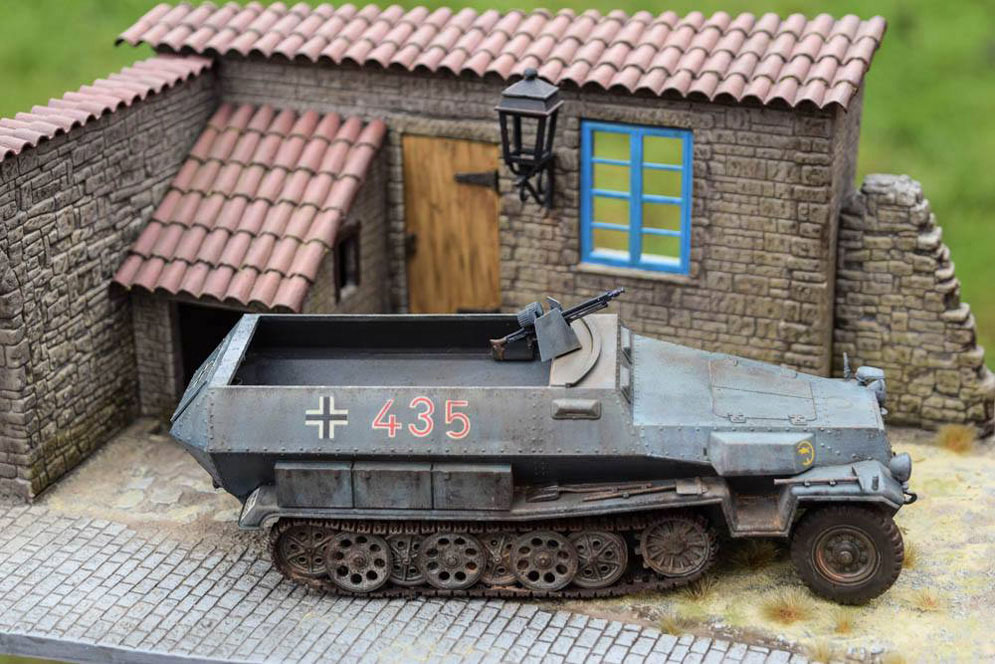
Next the turret had a coat of gloss varnish applied, allowed to dry, then decals applied and when set and cleaned up a coat of semi-gloss varnish was applied. All the tools and jerry cans were now painted with appropriate colours. The exhaust pipes were painted with Life Color rust set paints using a wet on wet system. The inside if the turret and the cannon were painted in Dunkel Gelb with the barrel done with gun metal and a light dry brush of a dull silver. The MG 42 was painted in a similar method.
A filter was applied over the complete model making sure it does not pool around detail. This was followed by a pin wash of a dark brown and black mixture applied to all panel lines and around raised detail. A very light dry brush with a dust colour was applied as I wanted an almost clean look. Some chipping was applied with a small round brush using thinned Model Color black brown.
The groundwork was painted in various brown colours and set aside to dry. Ammo Mig Spring bushes were then cut into irregular shapes before gluing to the groundwork leaving some gaps between the pieces. Where the wheels were to fit no grass/bush was attached to allow the vehicle to sit into the land. Once the grass was in place other foliage items were fitted to make the groundwork more interesting.
To give the scene some scale a figure was needed and one was found in the spares box. The face was painted with acrylic flesh set. The uniform had a base coat German uniform green and then lots of washes were applied and then put aside to cure. A dry brushing was to bring out the highlights. Details were now painted and the figure was added to the base leaning against the vehicle. Final touch was an MP40 with added sling painted and stuck to the fender behind the figure.
Bill C.
My first model fully completed in a couple of years or so. There has been a few fall at the last furlong in my bid to get back into modelling but this lovely 40 year old Tamiya kit gave me the simplicity of build and quality of parts to finally get one done. Bring on the next.
Graham T.
Many thanks to Sergiusz for sharing his most excellent work with us all. Geoff C.


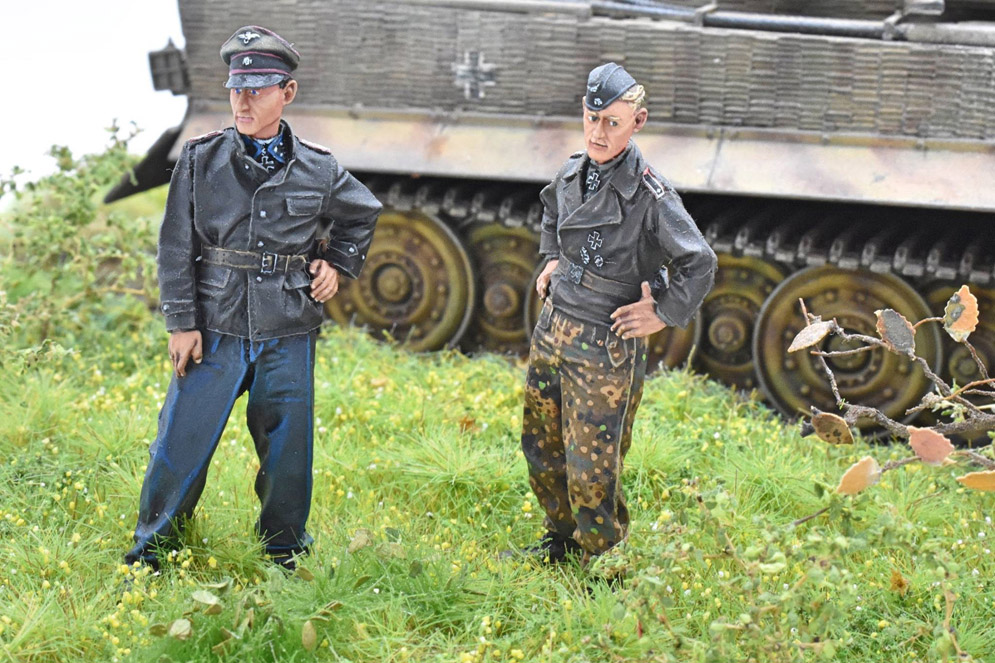
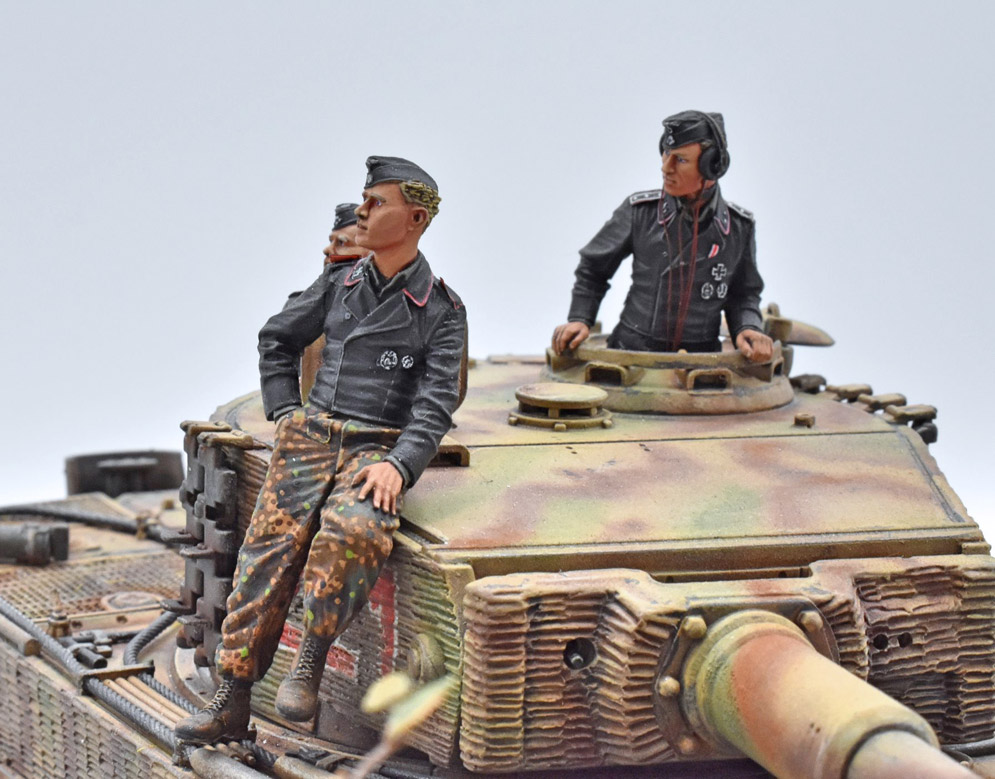
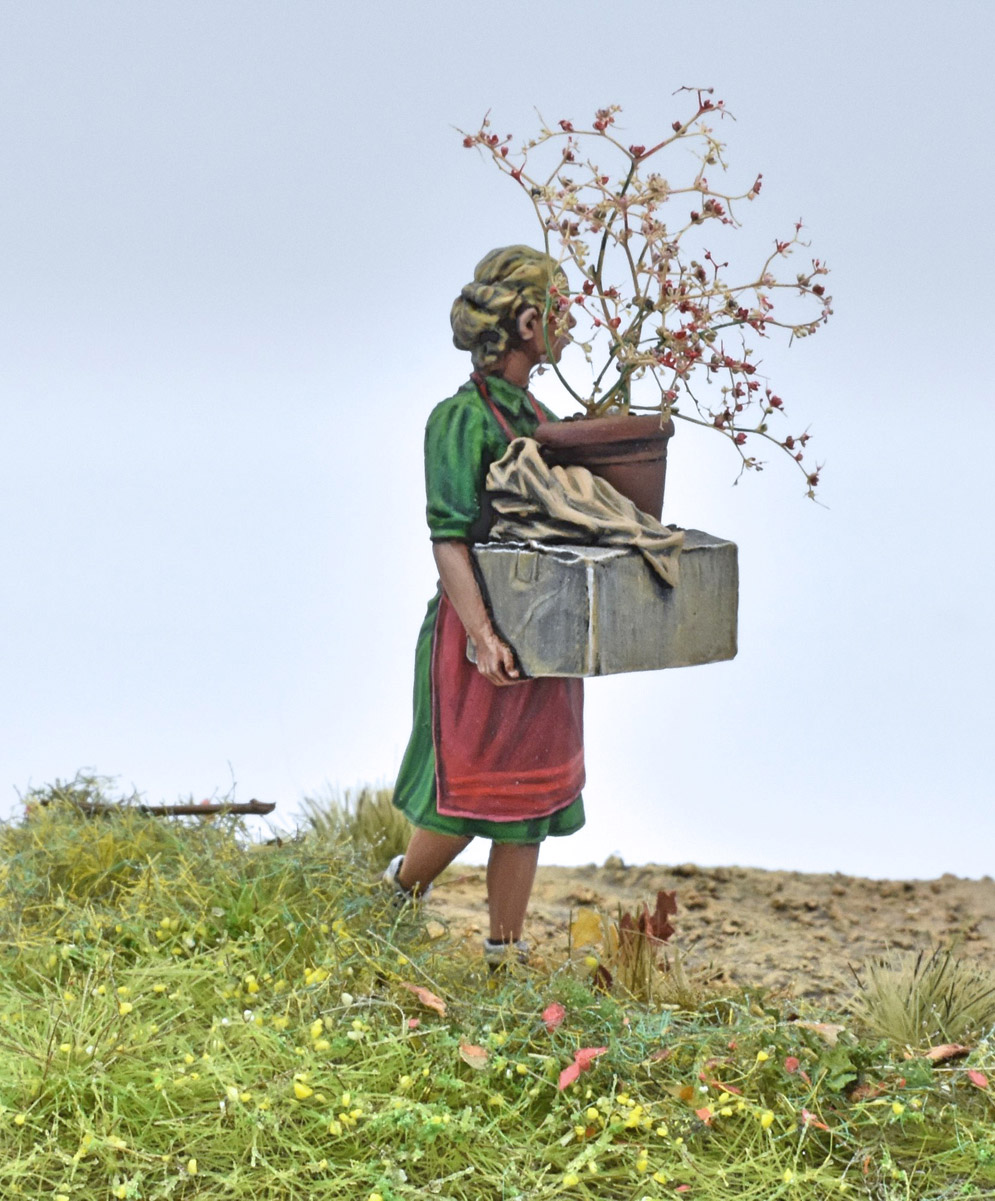
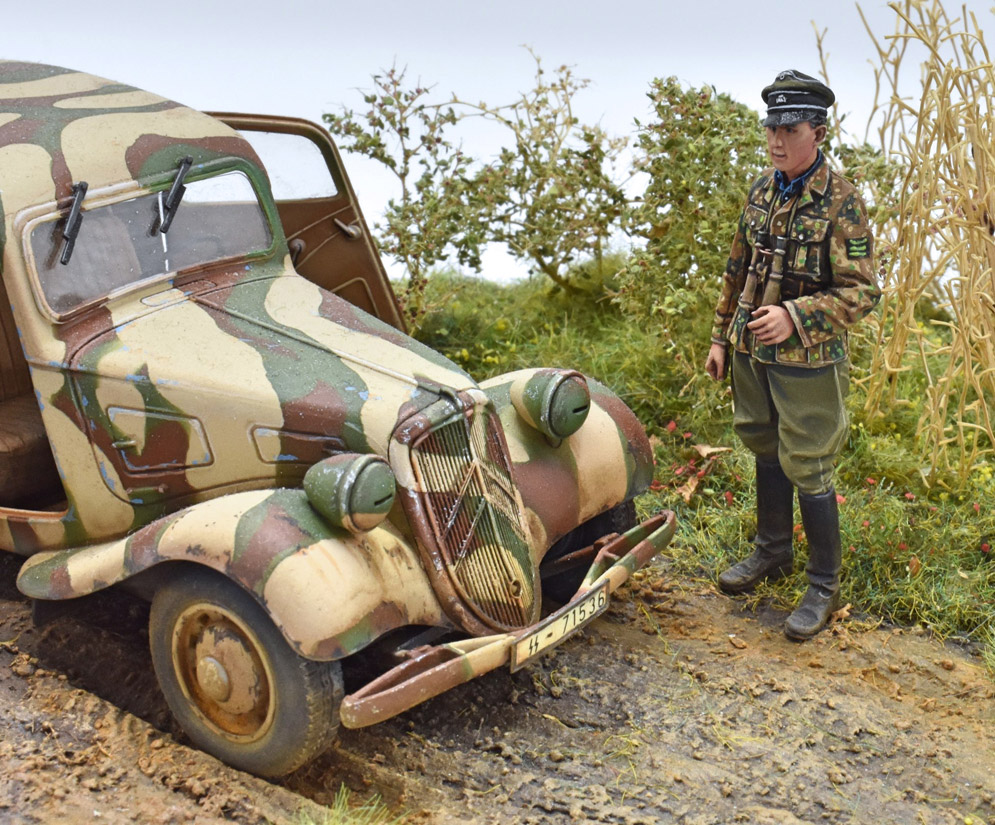
Sit back and just take in his work… most of Luc’s figures are sculpted and scratch-built with many others being modified.
What’s so incredible is that Luc says that his tanks and AFVs are really just a backdrop for his figures!
Thanks again Luc and best wishes, Geoff C.
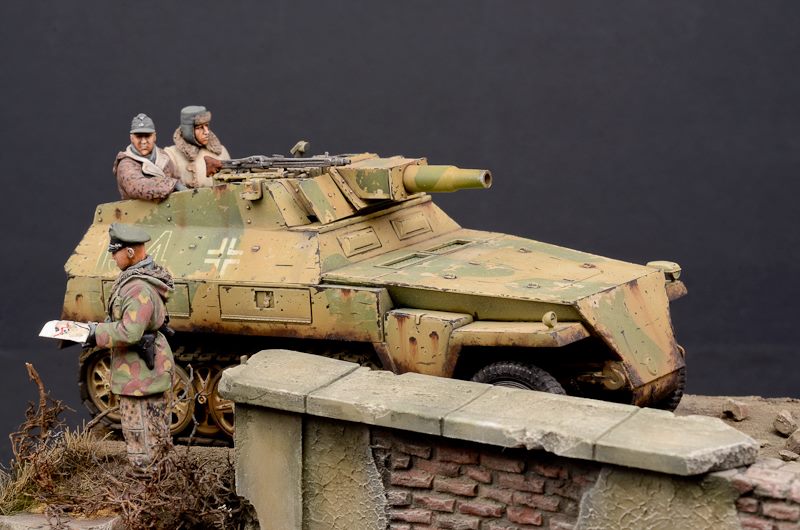
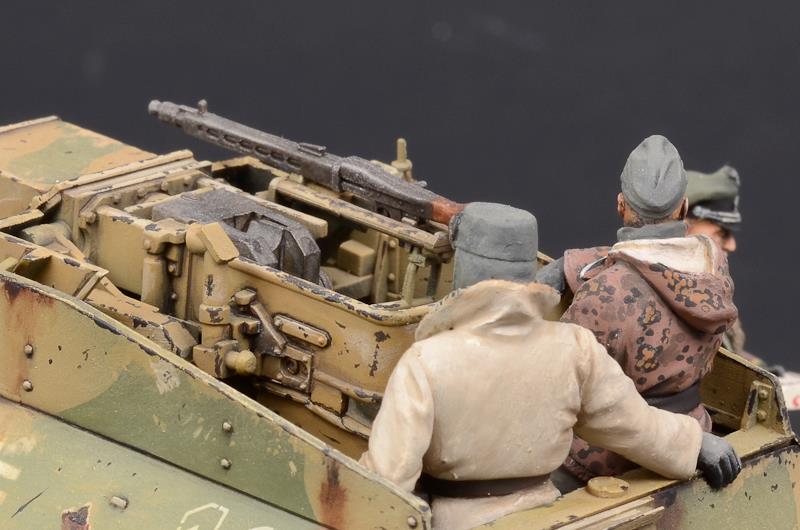
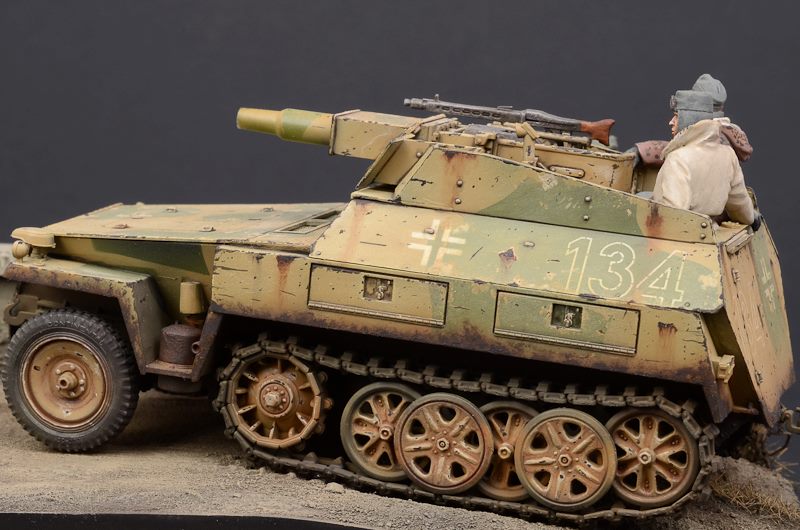
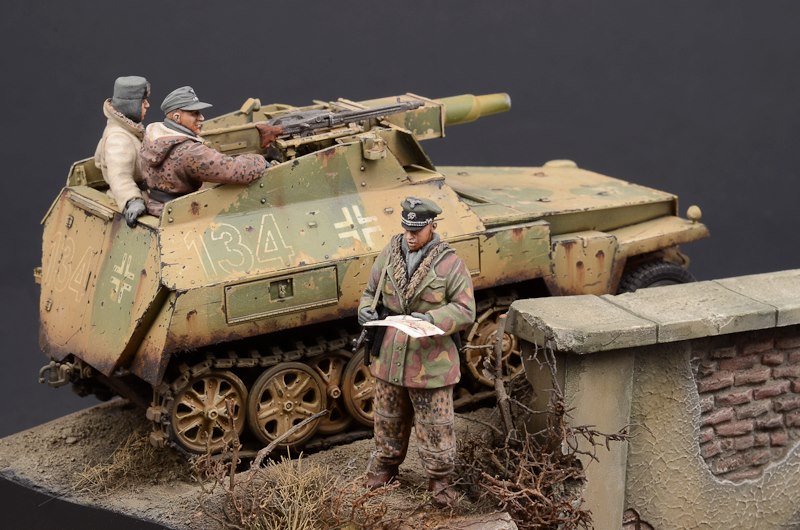
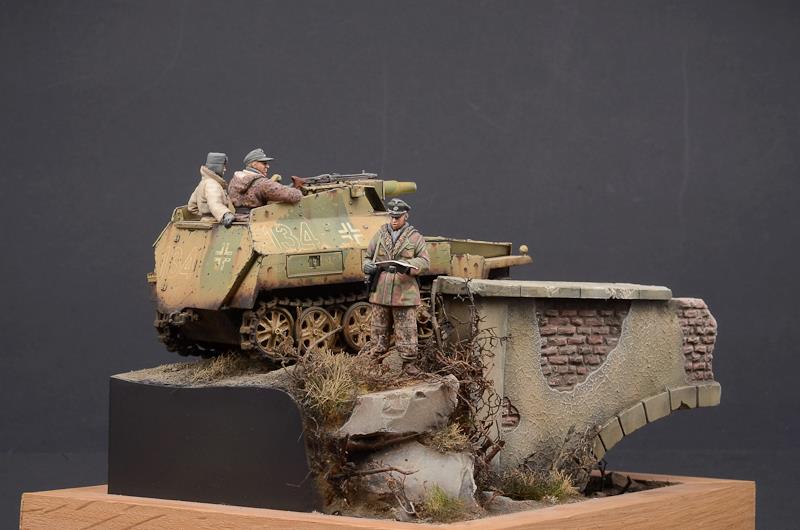
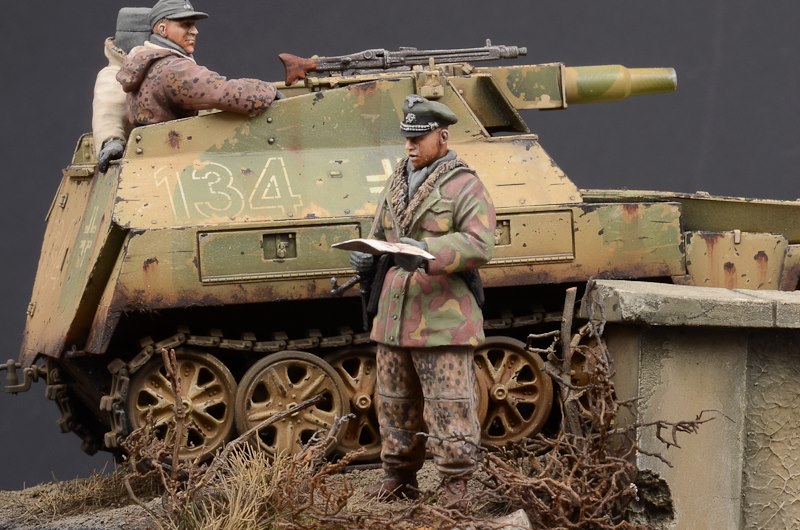
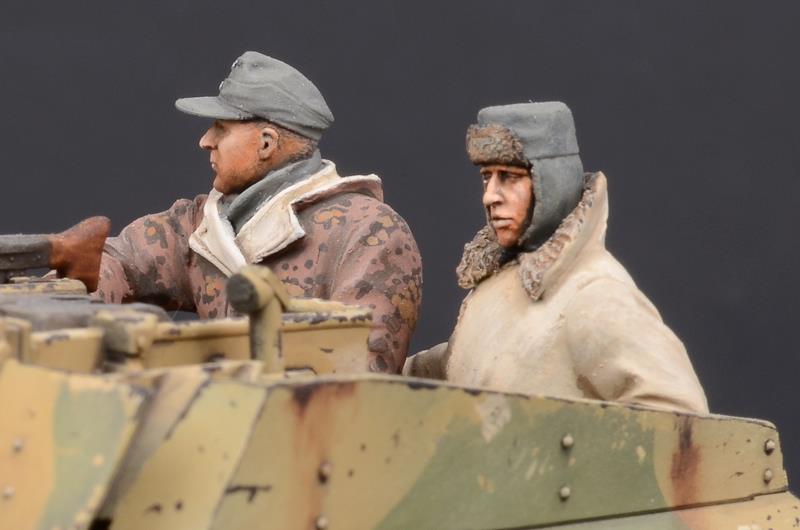
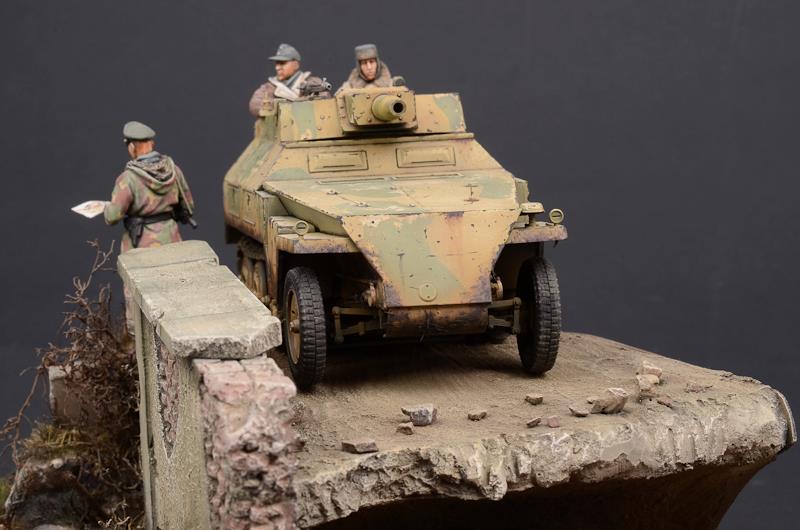
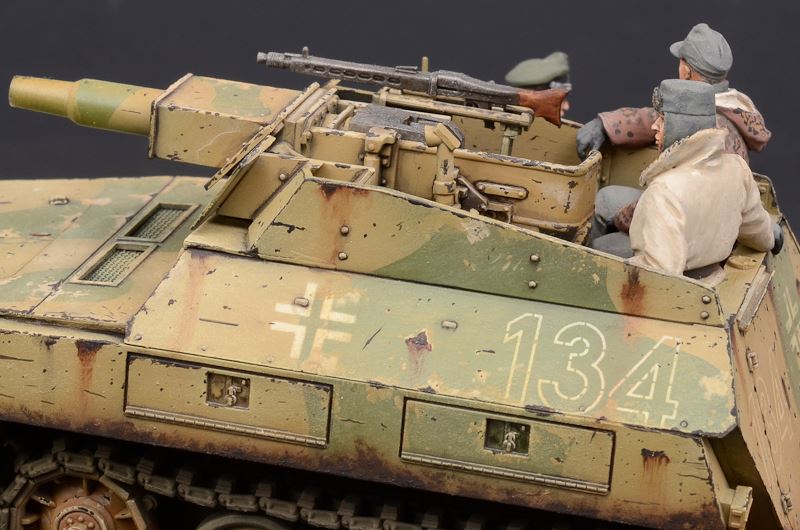
Figure: Taisyo Modele, Dragon


The kit is a pleasure to build with lots of detail and options. As with all AFV Club kits, the quality is superb but does suffer from too many sprue attachment points needing some care in removing.
The kit was painted using AK Interactive Panzer Grey Modulation set although I just used it for basic shading not the whole modulation thing.
The base is one of my favourite kits, the MiniArt Italian Village Diorama. I really love these vac form kits and would like to do more of them in the future.
- Tamiya 1:35
- PE – Eduard with ABER-tool clamps
- Driver´s compartment – CMK
- Bosch light and Jerry can – Tasca
- Tracks – Fruil
- Barrel – ABER
- Wheels – Dragon (from their Pz.II)
- Some parts from the spares box (the grey ones on the pics) – Dragon, Ammunition and boxes – AFV, Wing nuts – Bronco
- Some scratched parts from Plasticprofiles, wire and brass tubes
- Figure – Alpine with a head from another Alpine figure
- I will use Echelon´s Set for a Wespe in Normandy (Division “Das Reich”


Regards, Sario B.
This diorama was finished 3 times. Once in 2004 for the annual Chicago Figure Show, again in June 2005 for Military Modelcraft International and again in November 2005 for my own satisfaction. Additions from the original finish were the additions of the soldier with the shovel, the soldier looking up, articulating the tank’s suspension, making new Sake arrangement and new palm leaves. The final additions were the addition of the saw in the soldier’s hand and wheelbarrow.
The figures were converted from DML Iwo Jima Japanese figure set, Hornet heads and hands and epoxy putty. Groundwork and figures were finished using Vallejo acrylics. The Type 95 Ha-Go light tank is the same model that has already appeared on Track-Link. It was further weathered using Gamblin pigments, Rustall, Winsor/Newton water colours and Bragdon rust.


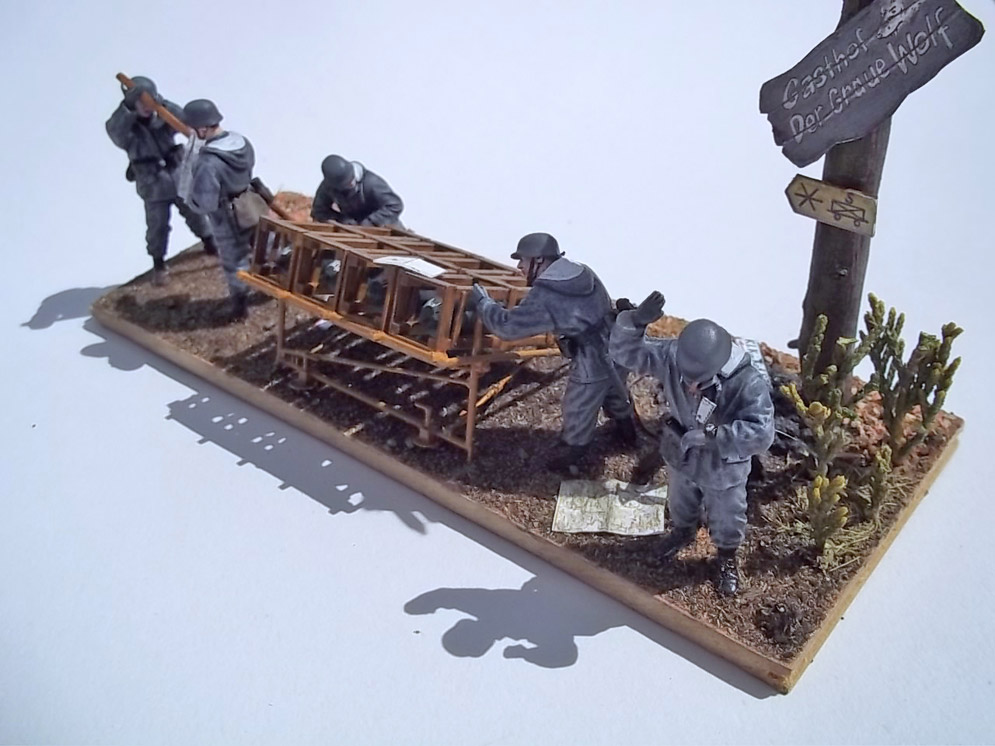

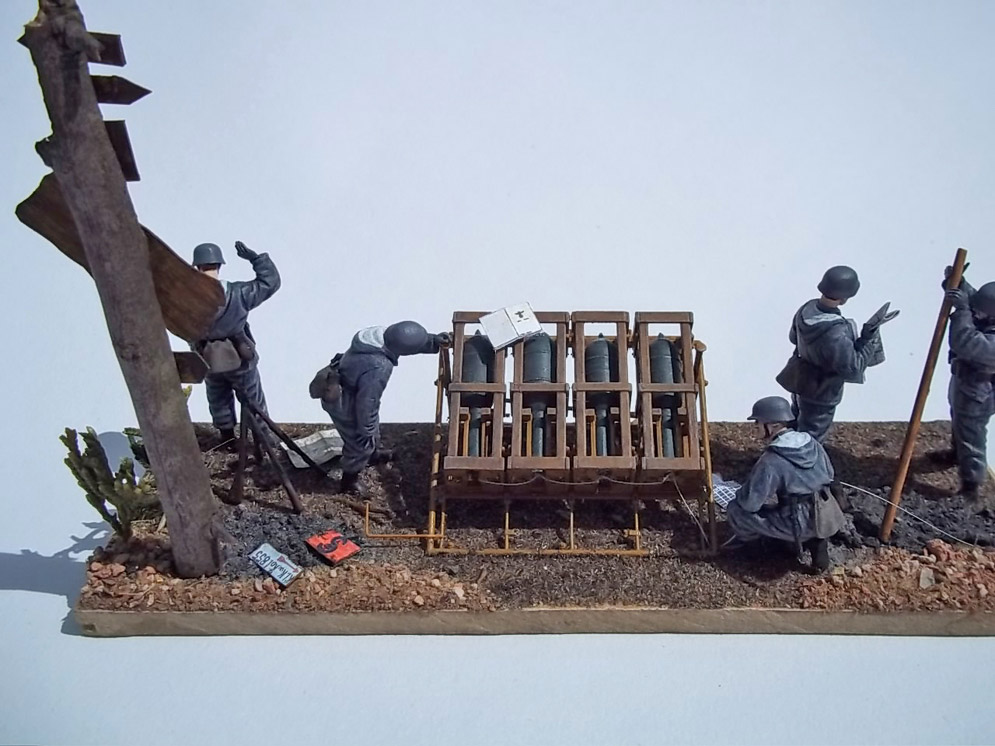
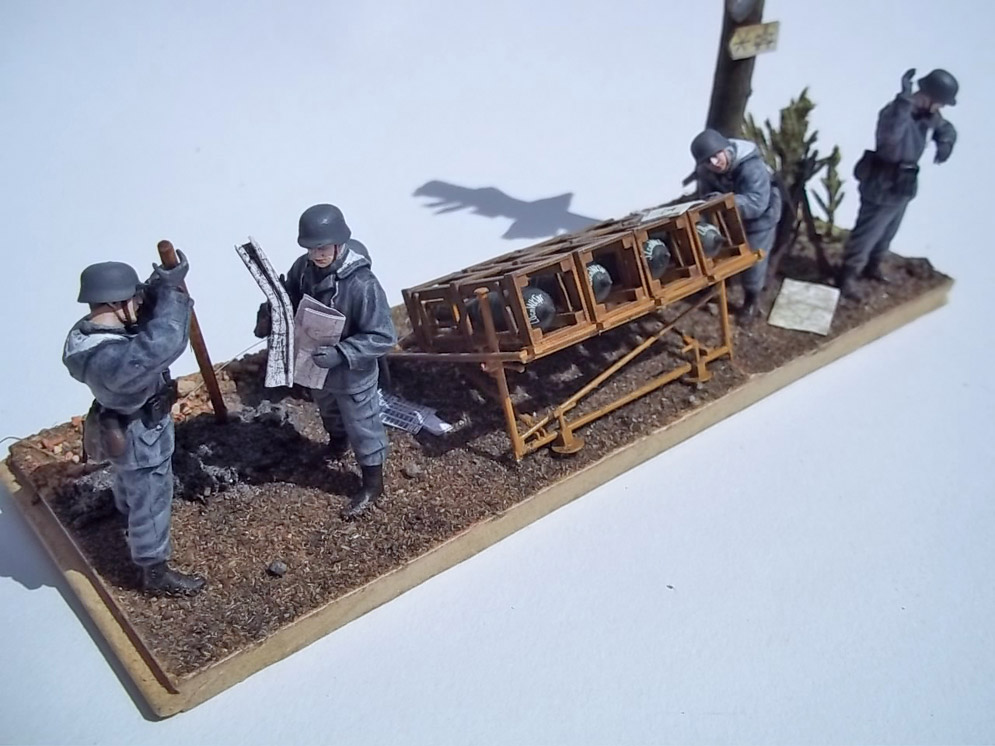

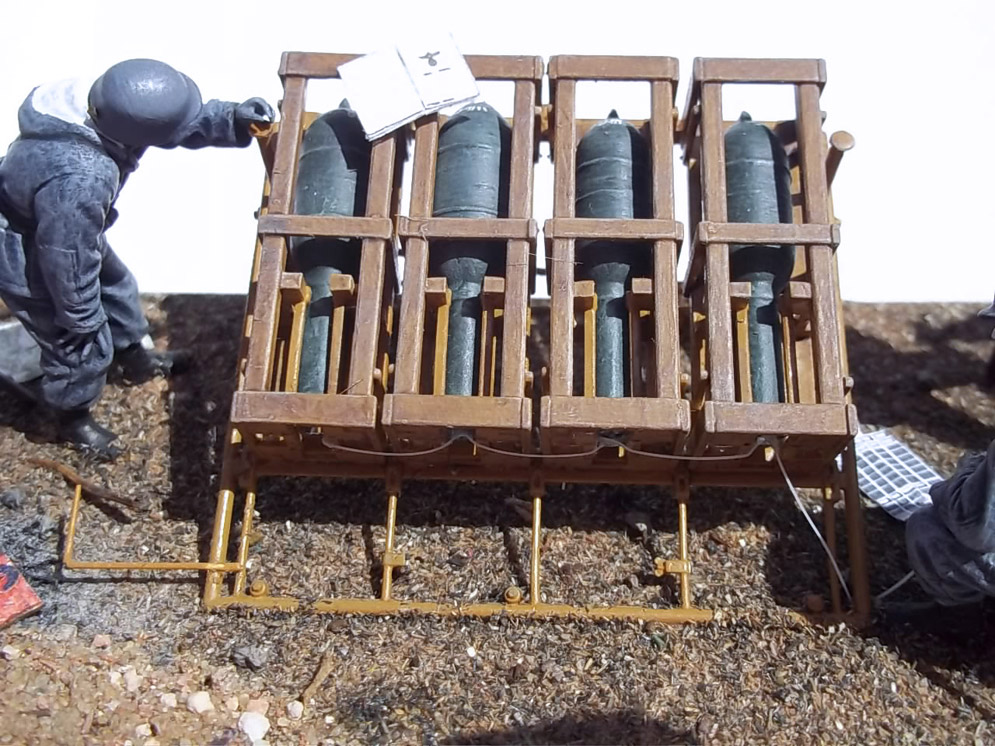
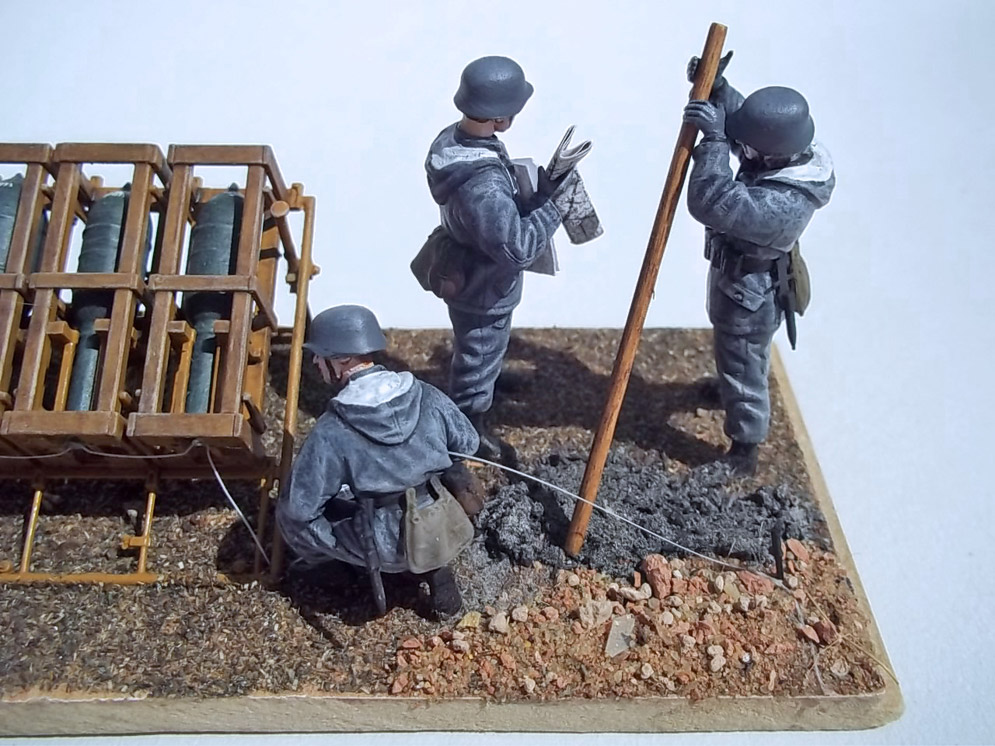
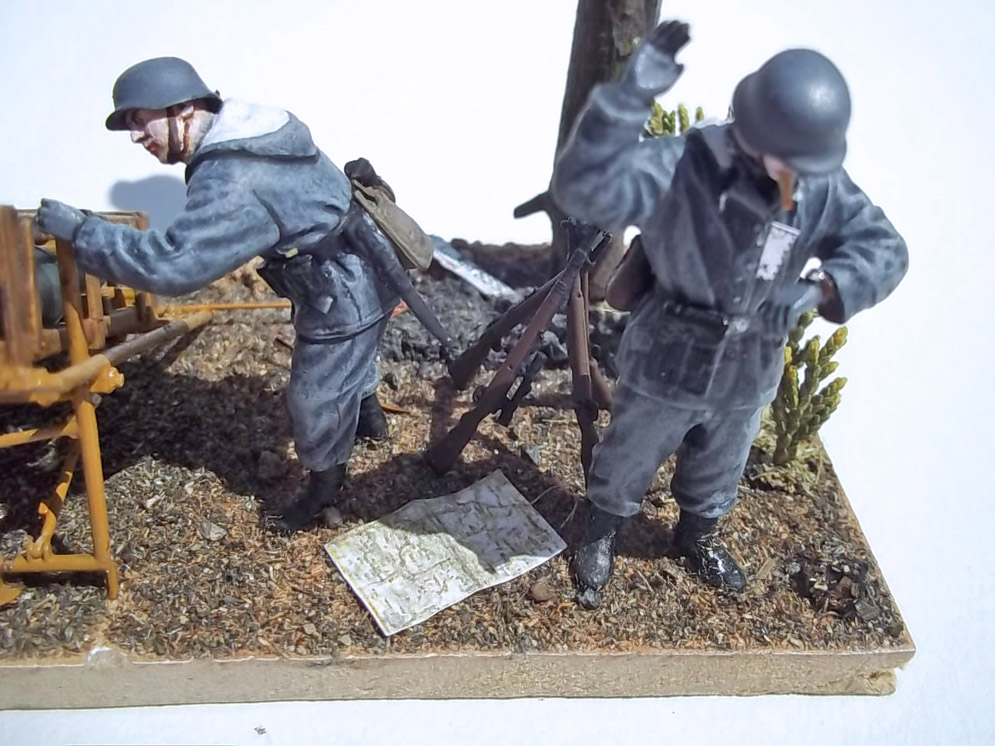
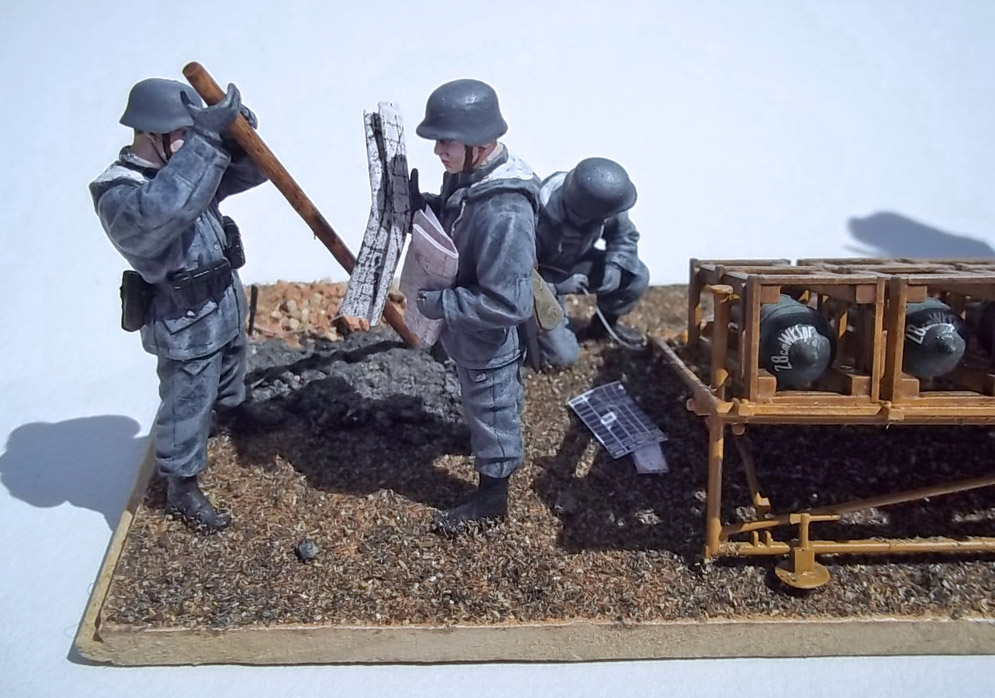
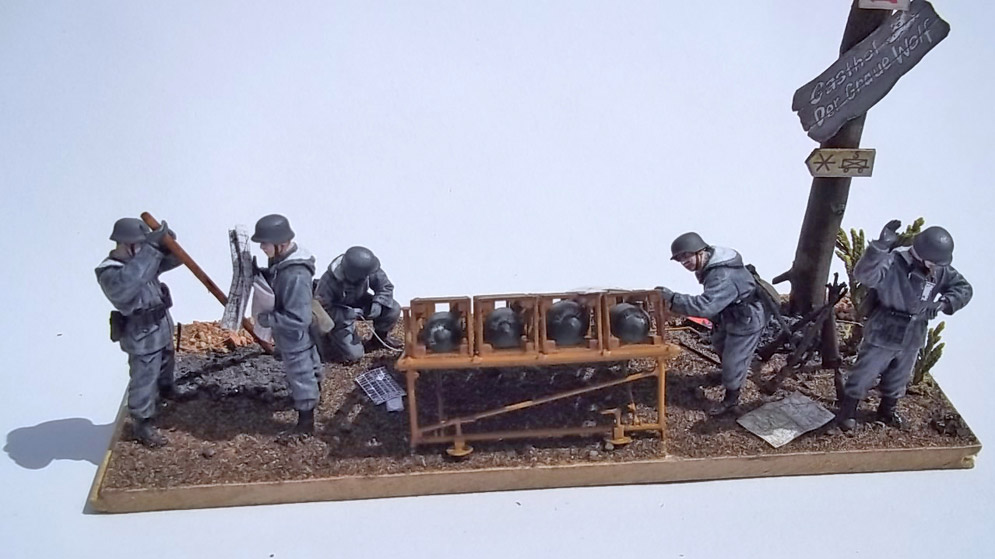
The figures are from the Dragon kit but originate from their heavy mortar kit but I think that I managed to pose them realistically – my scenario is a timed training exercise as they would all have to take cover for a live firing.
Cheers, Pete S.
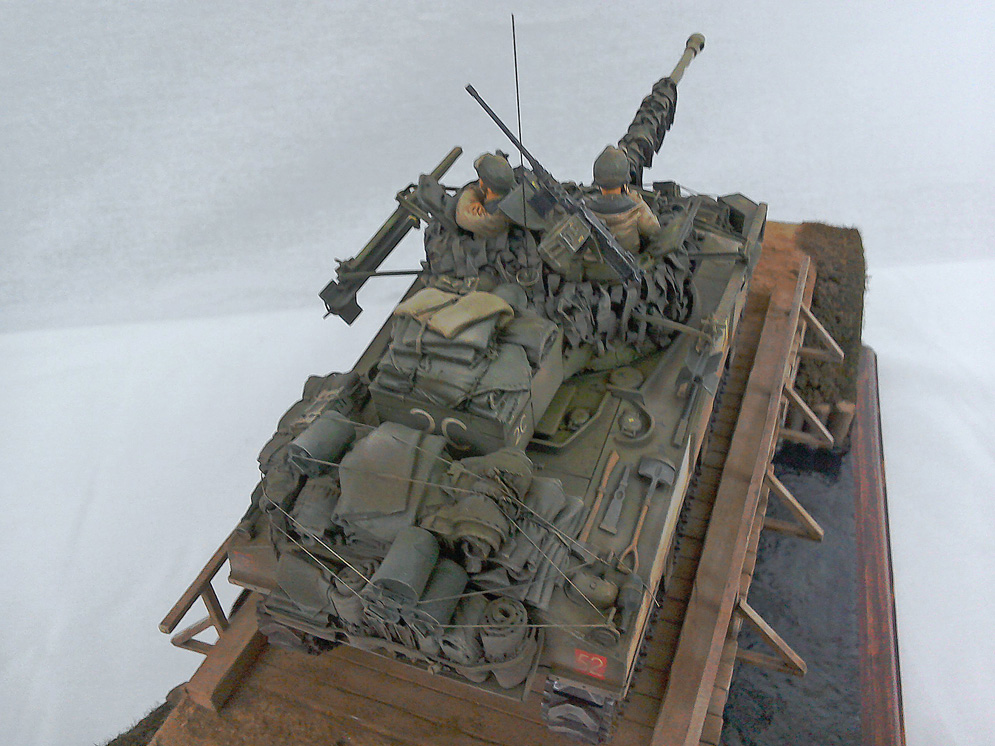
Thanks Wu

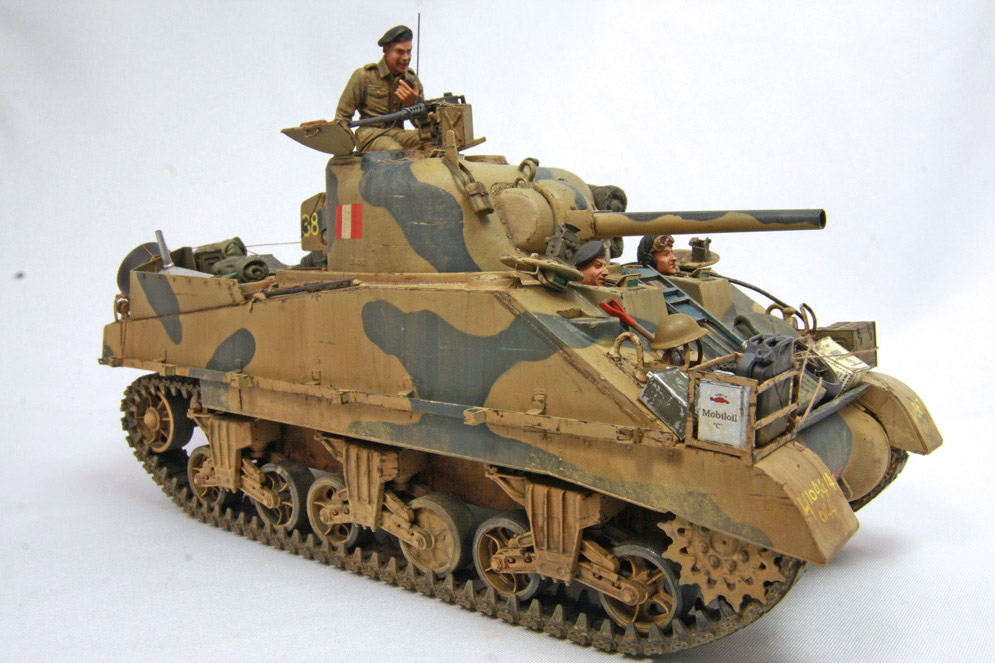
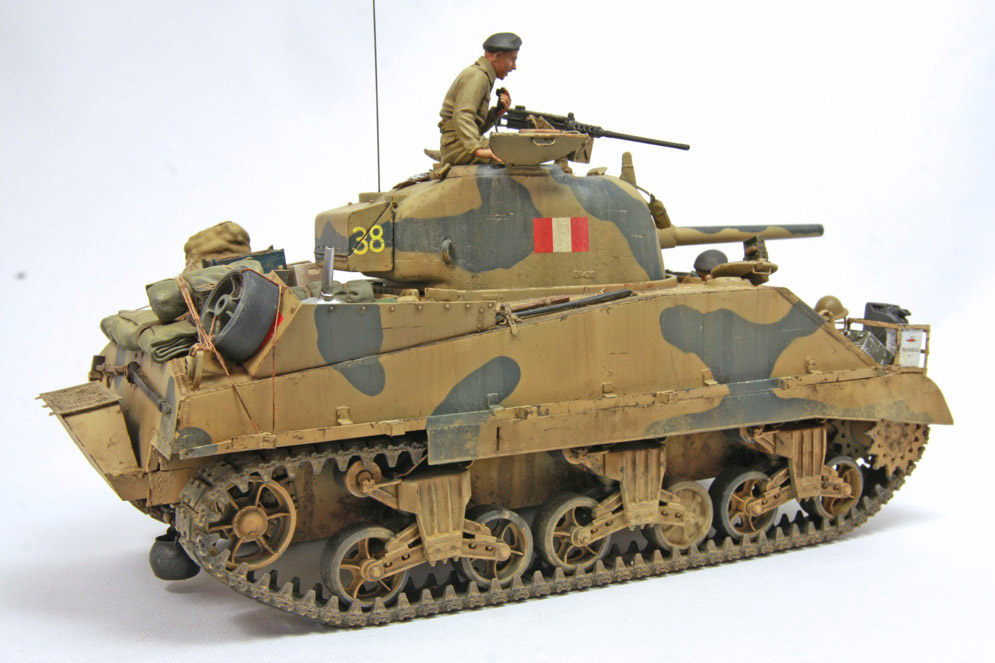
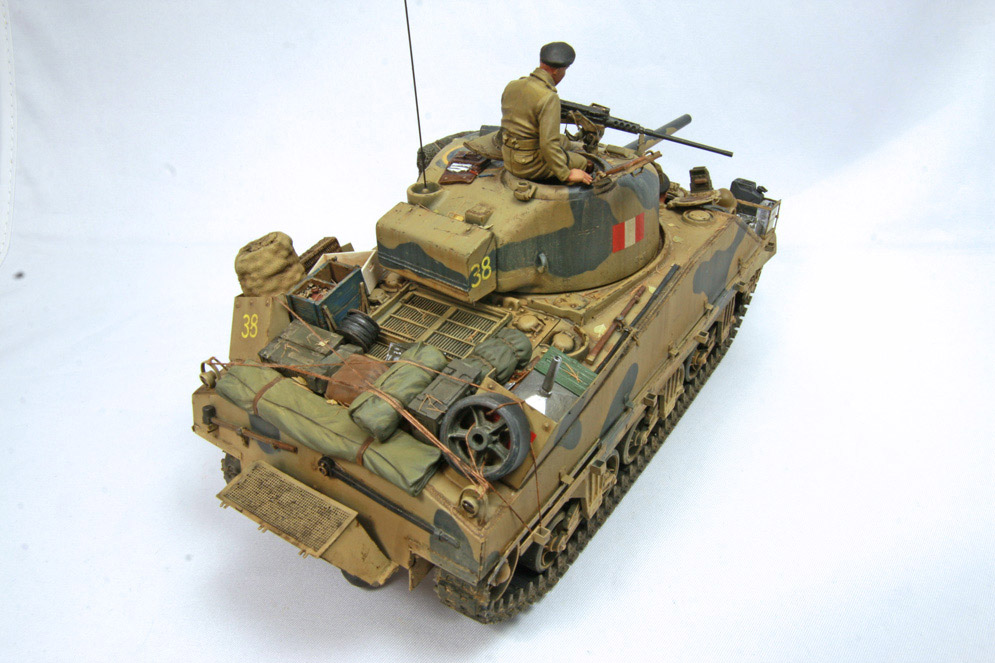
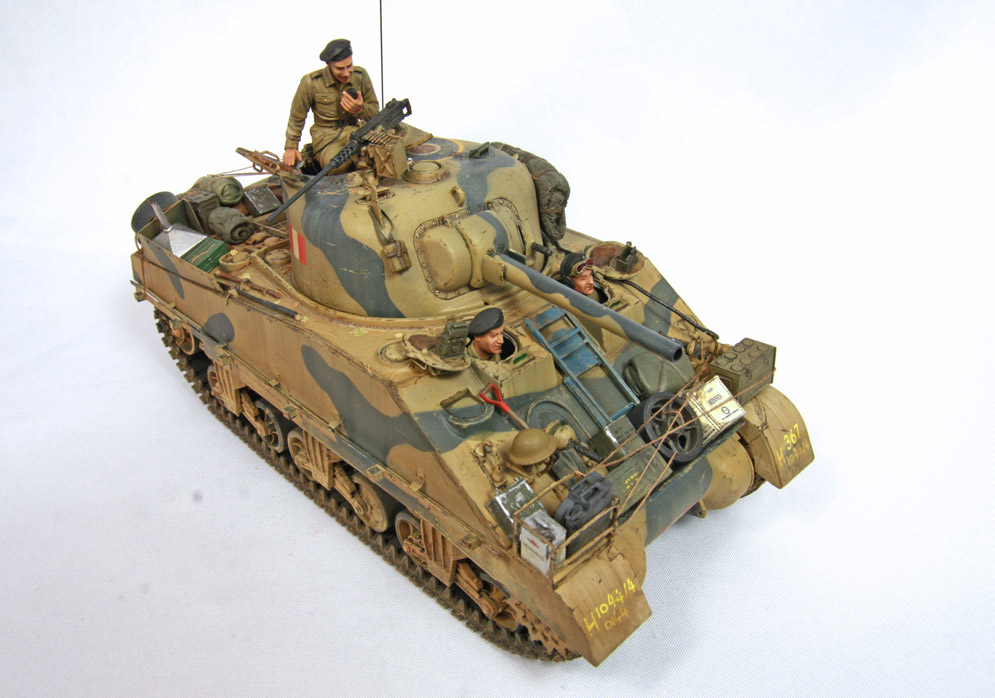
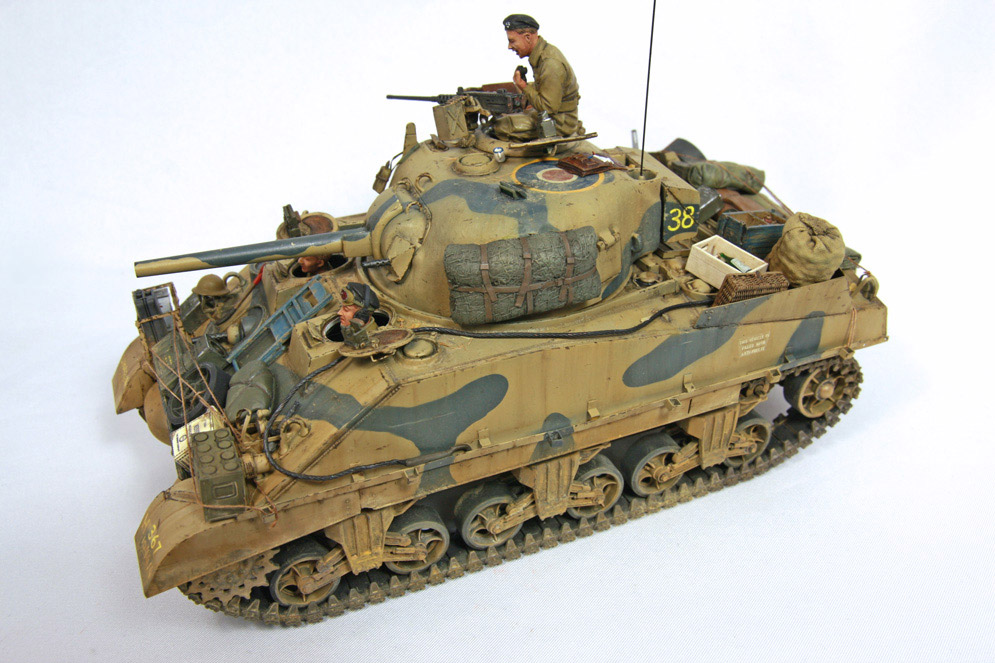
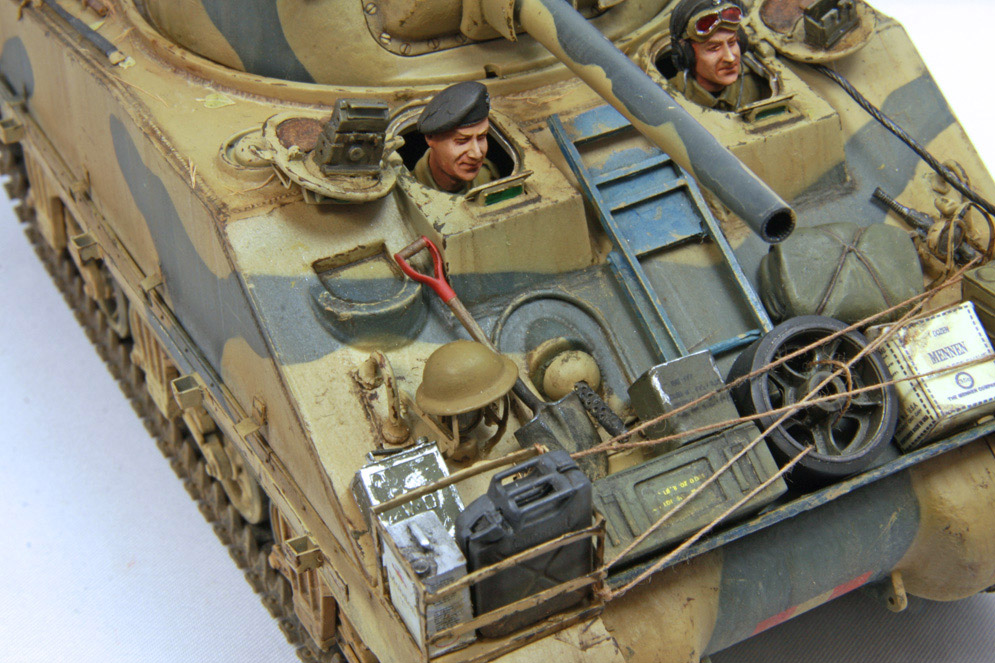
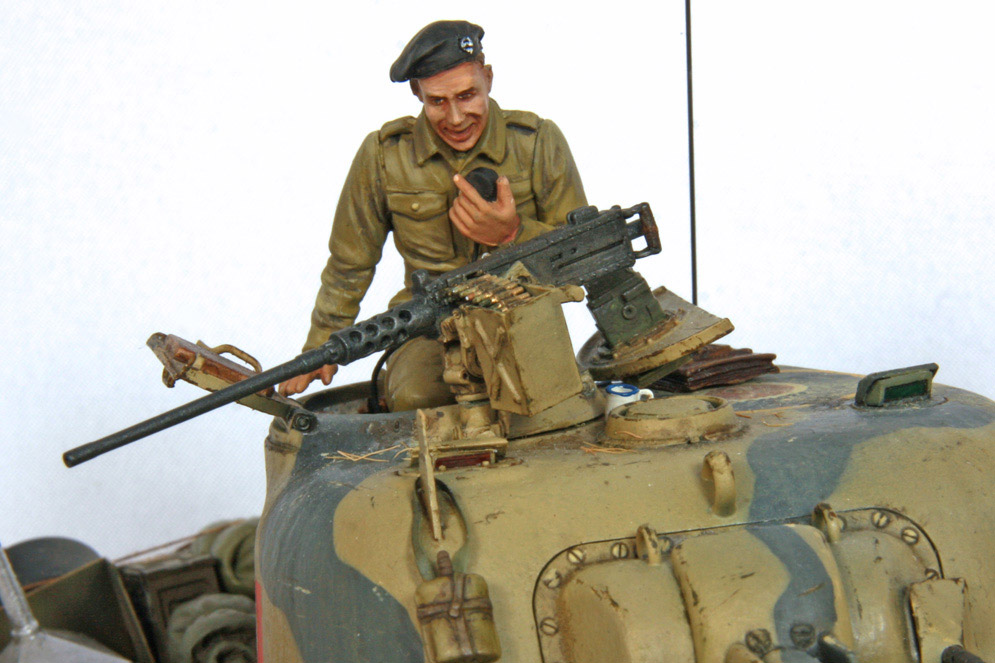
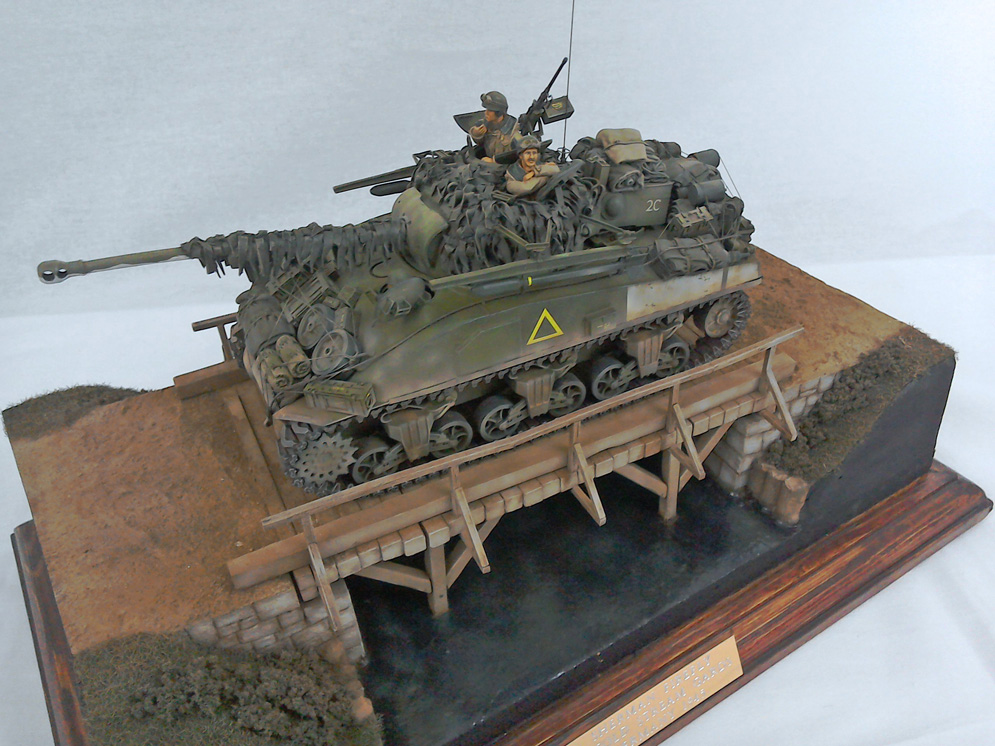
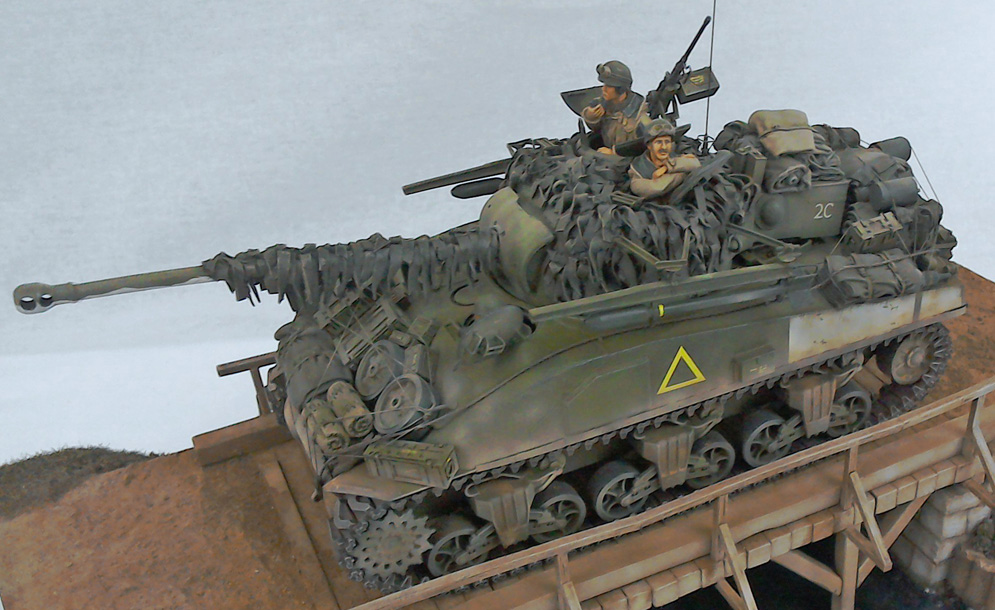
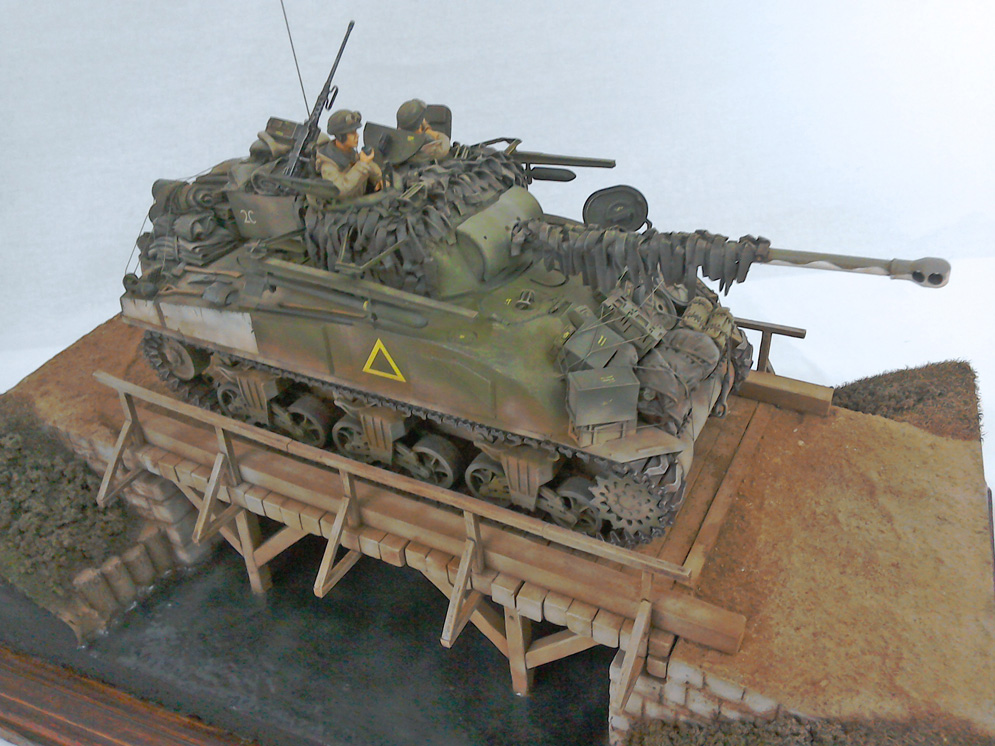
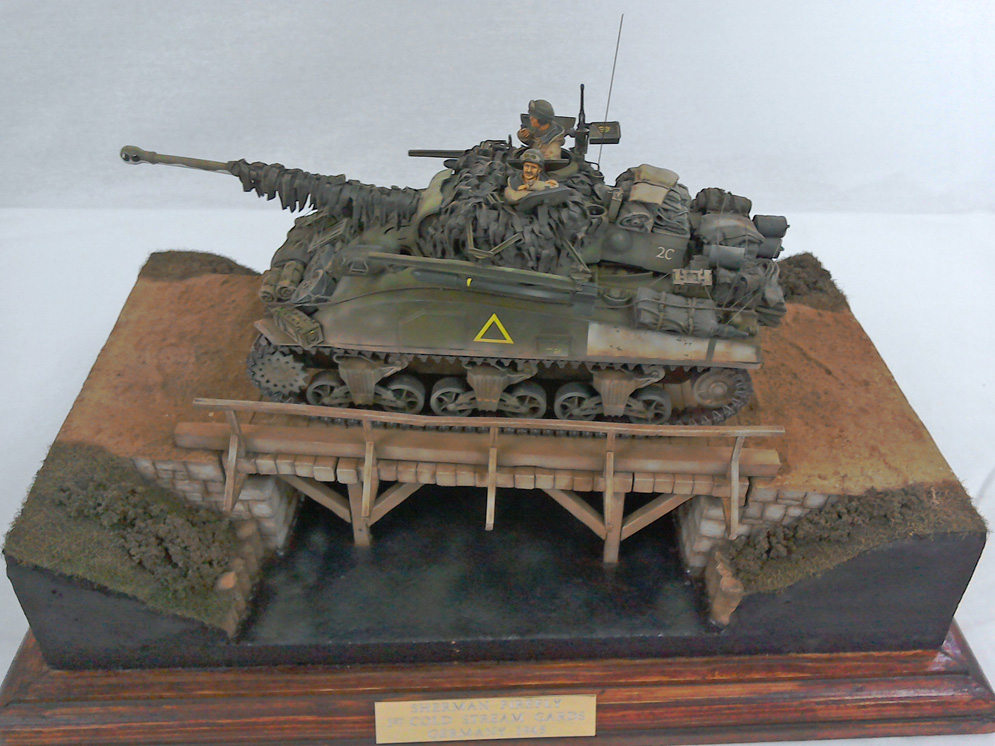
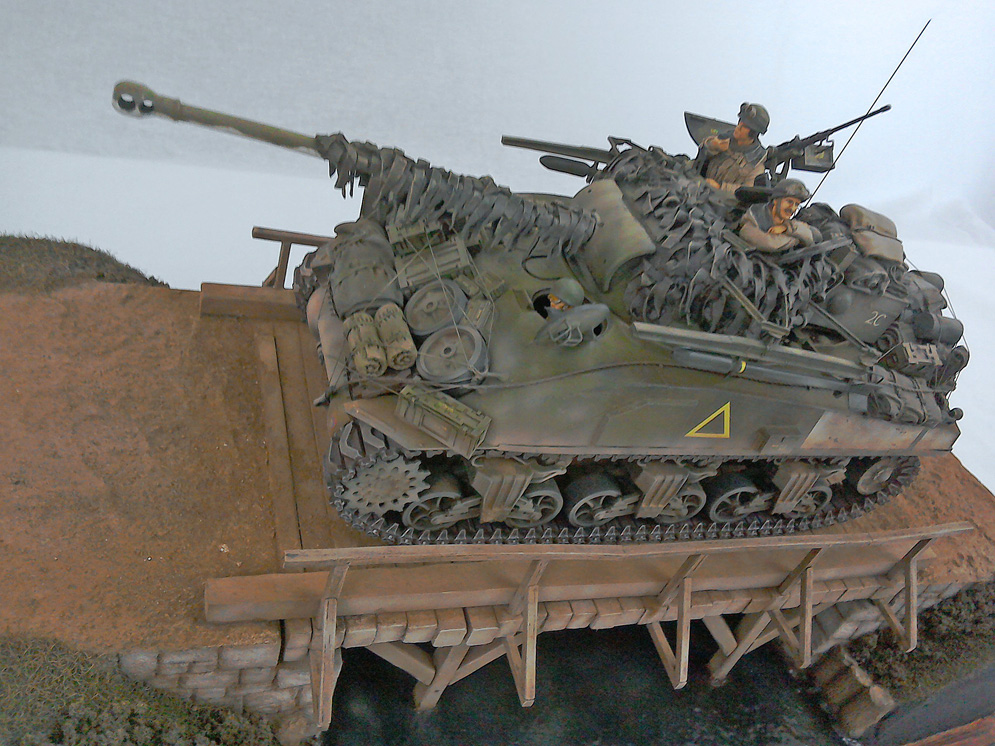
I’ve added the lower part of the Resicast deep weading gear. The suspension and .50 cal are from Tasca, as are the side skirts. The stowage is mainly for Resicast and the crew is from Hobbyfan.
Finishing has been done with Tamiya Acryls and some weathering with washes and pigments.
This Sherman is one of my favourites. And I think I’ll build another one in the future, only I’ll use the Tasca kit because the Dragon isn’t that great.
Martin V.
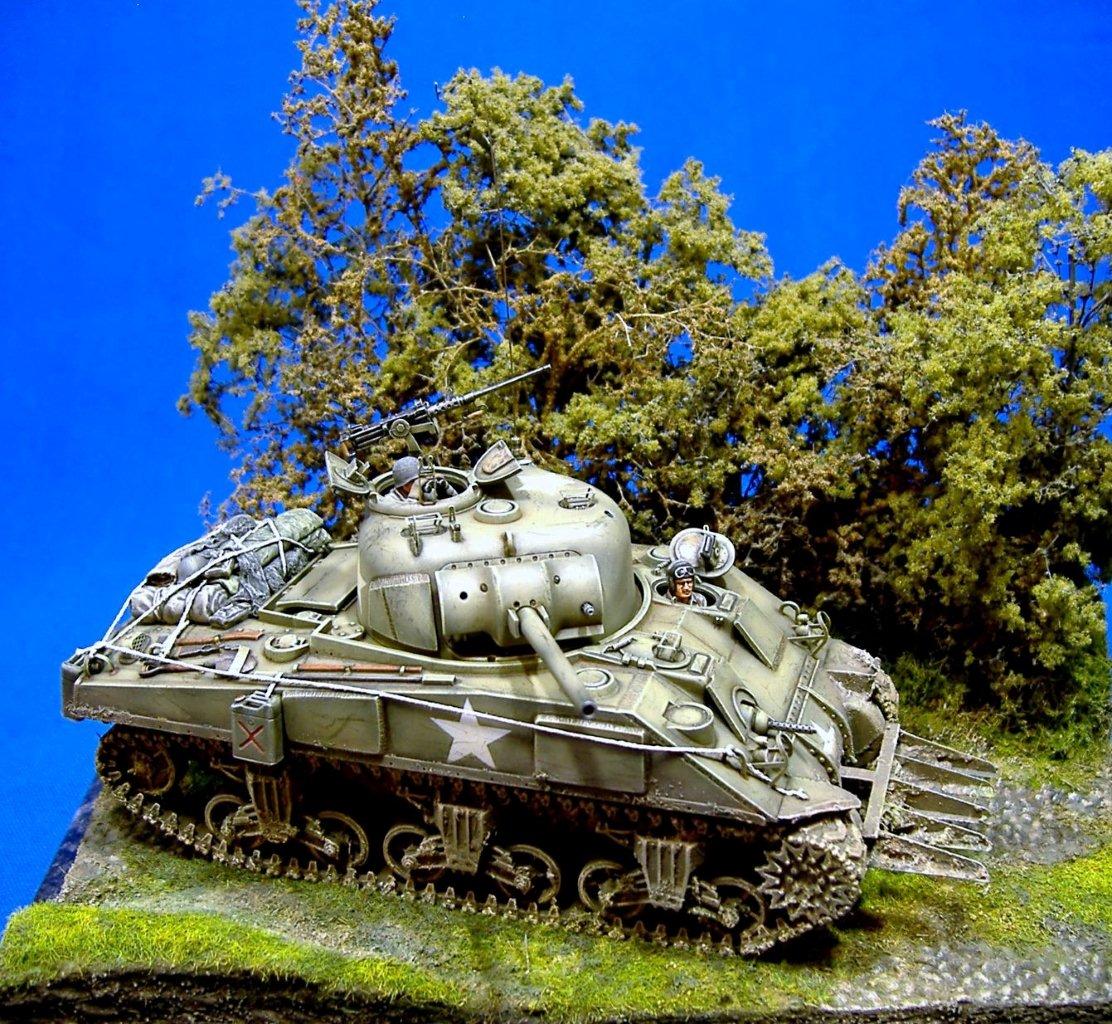
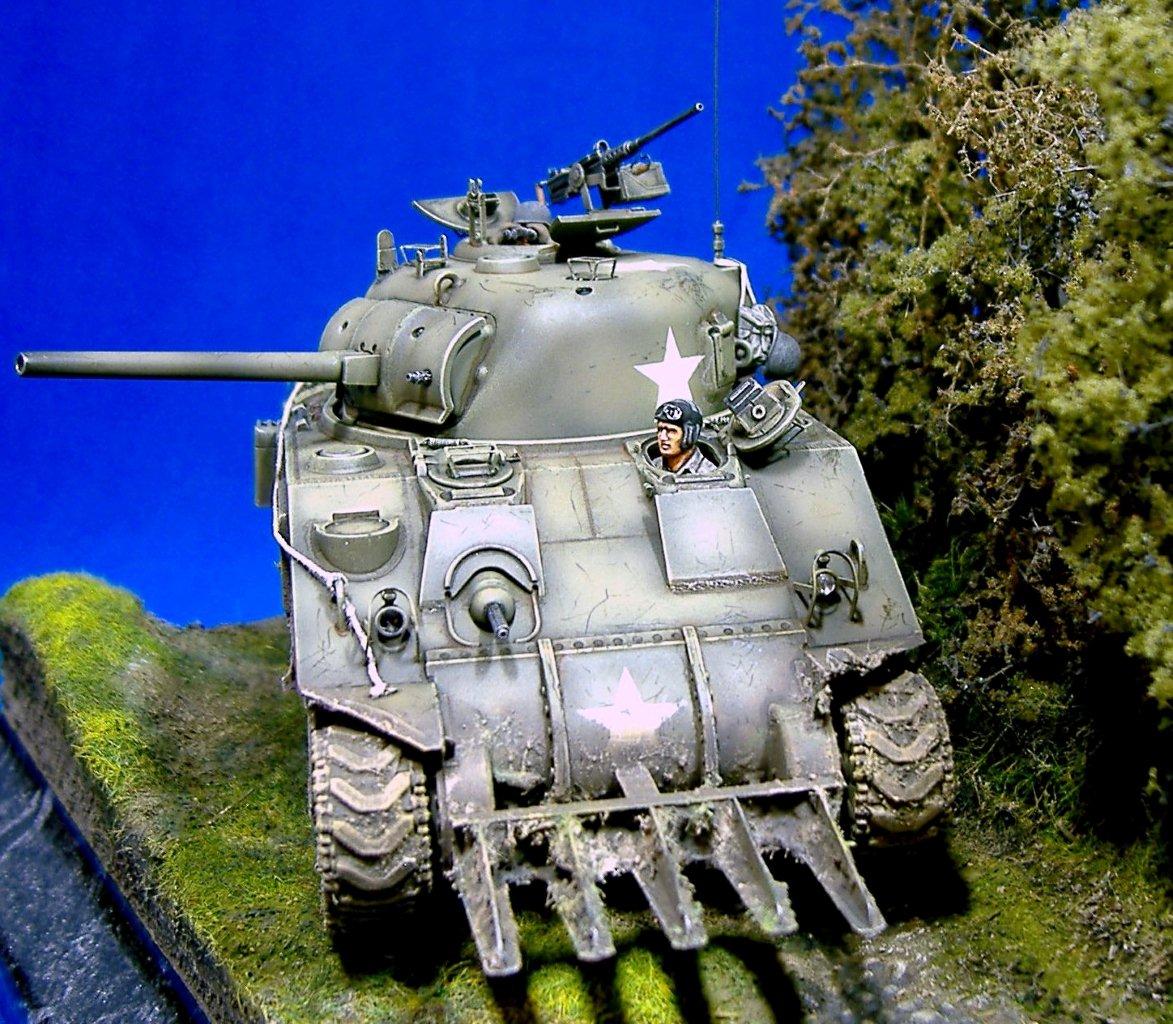
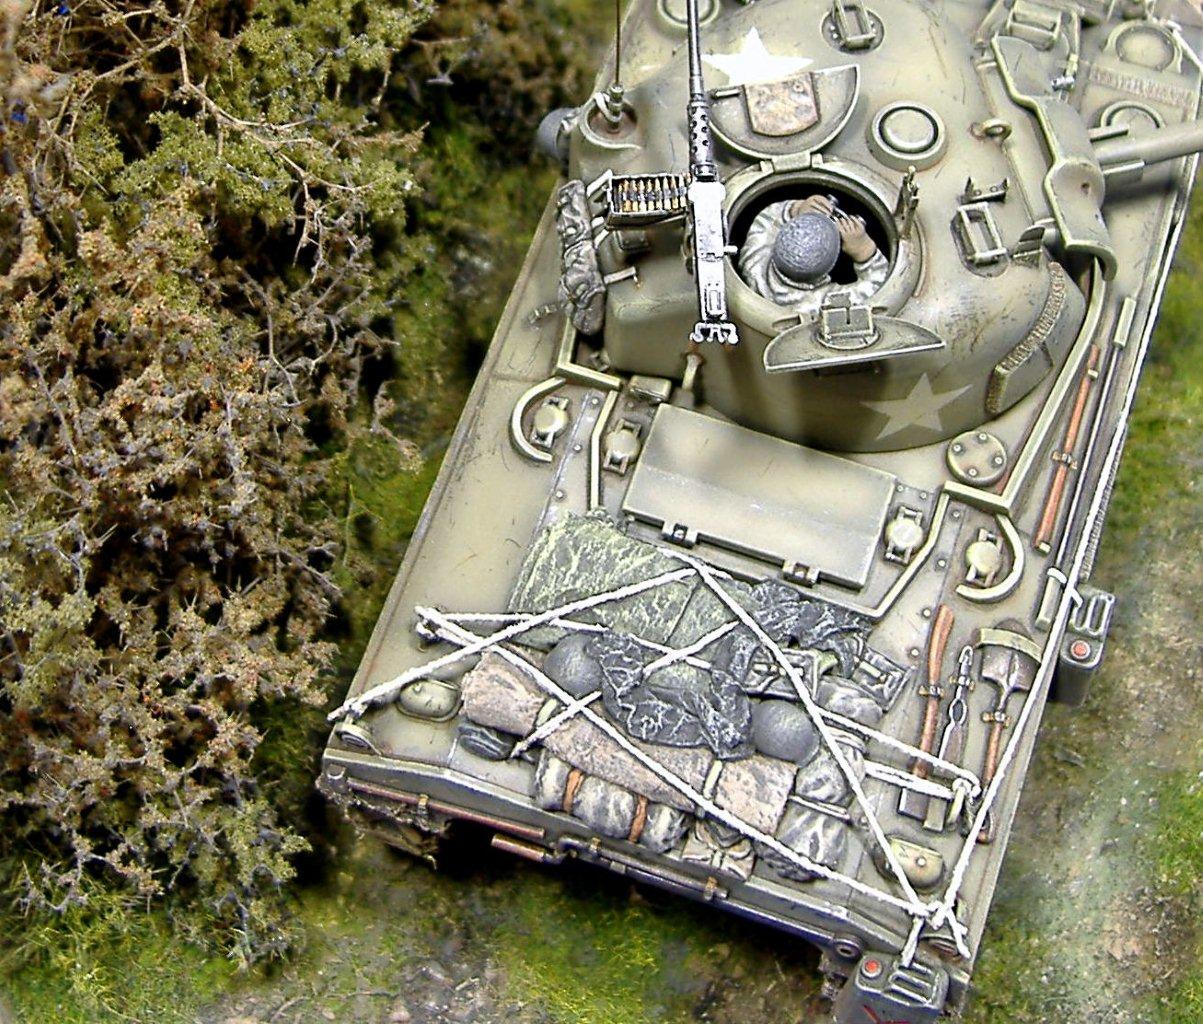
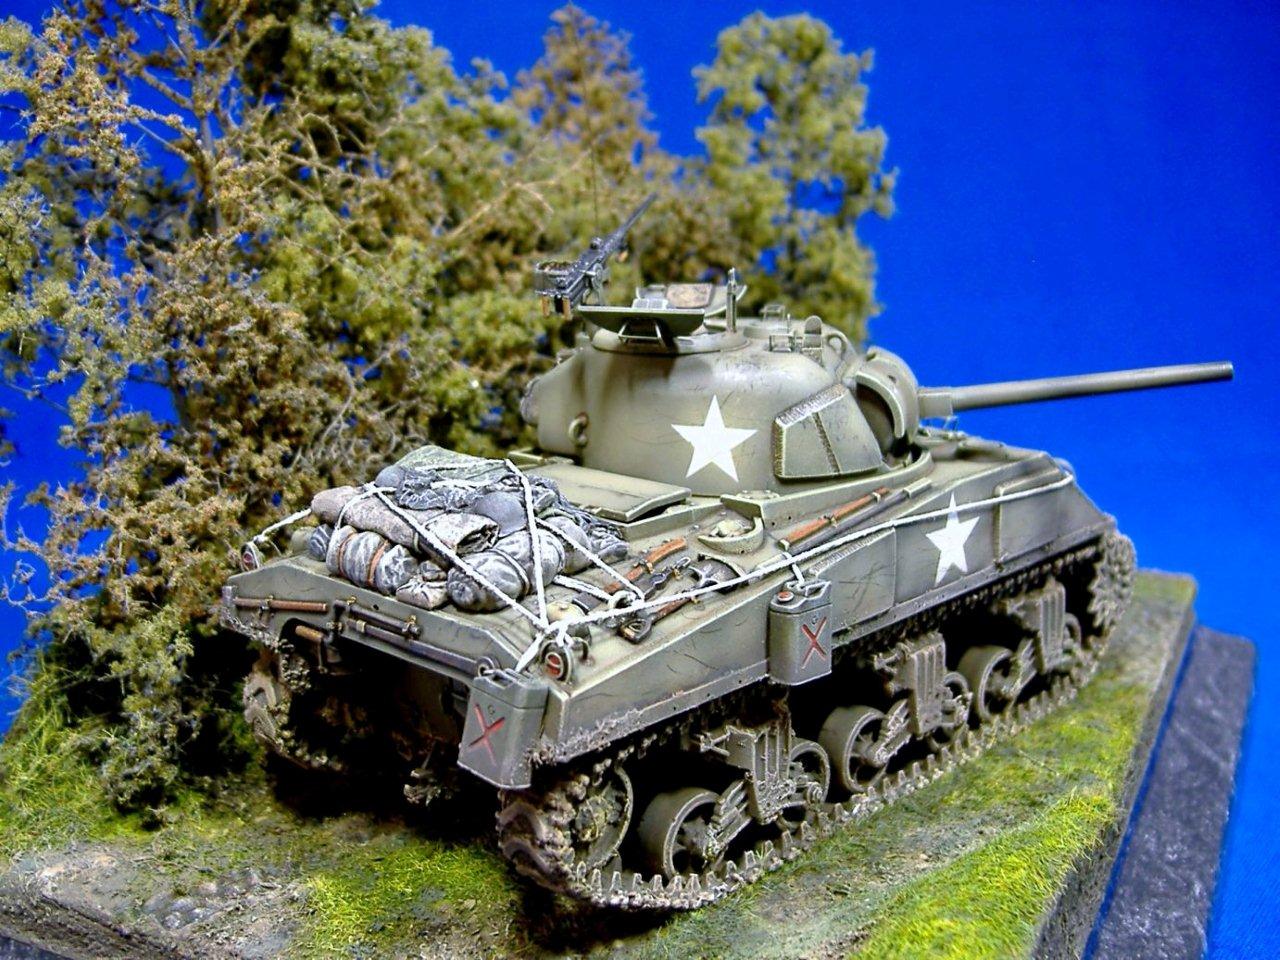
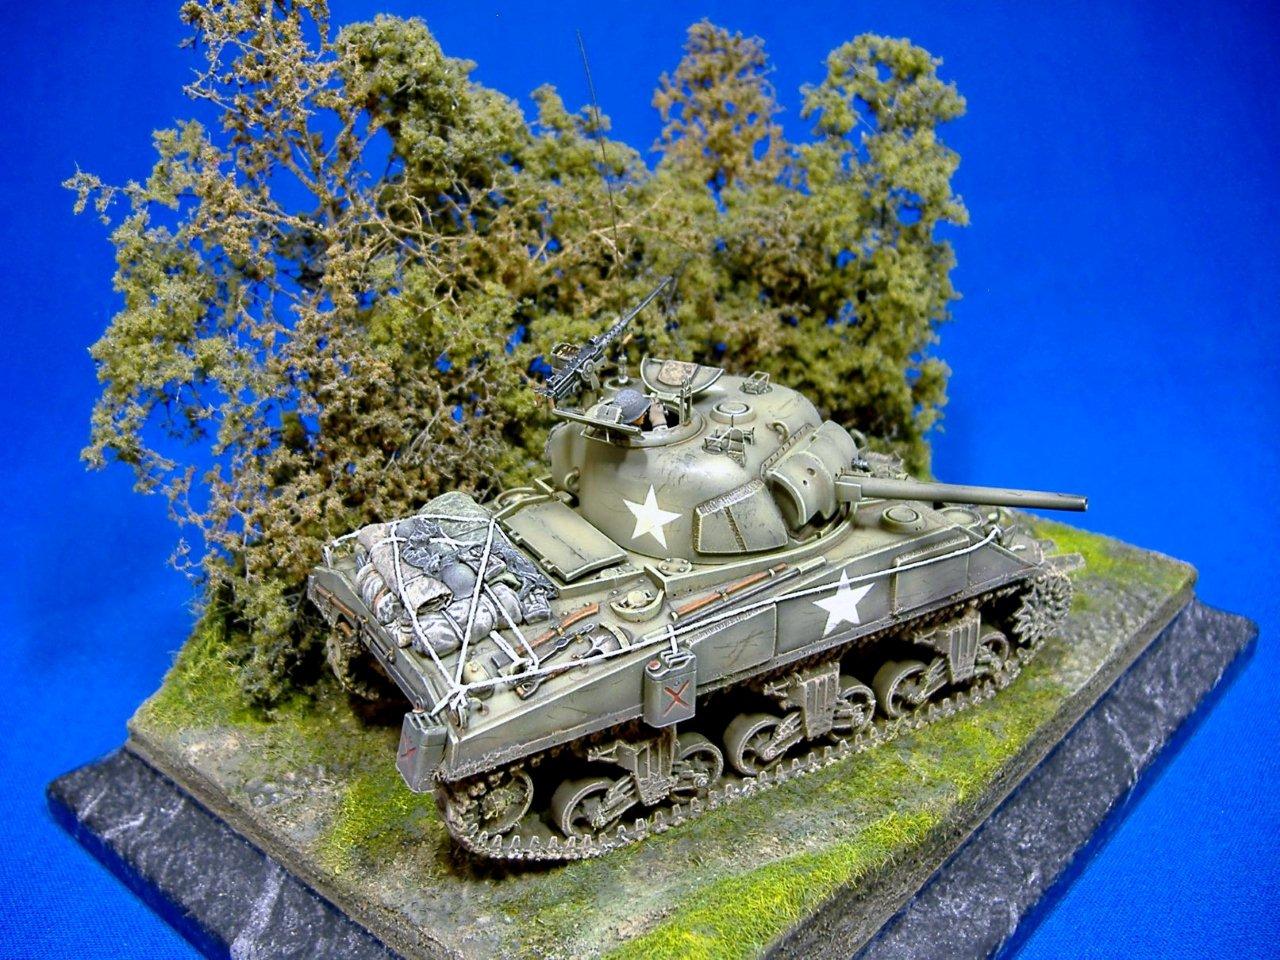
This small vignette is built around the excellent Tamiya 1:48th scale kit M4 Sherman Early production with two figures added of a driver and commander from the Tamiya 1:48th WWII U.S. Army infantry GI set. The Sherman has been extensively detailed using the Hauler etched brass detail set and Hedge cutter designed for this model plus various scratch built details including many tiny bolt heads, an MV clear lens for the headlight and drilled drainage holes for all the armoured fittings, plus many other small details. The model was airbrushed using the pre shade and high light method with Tamiya acrylics and weathered using artists oils and various pigments etc. the figures, tools and details were painted with Humbrol enamels and citadel acrylics. Stowage on the model is from Tamiya’s 1:48th Jerry Can set plus tarp’s made from tissue, pack straps from lead foil and tie down rope from fine string. The base is made up from polystyrene blocks to raise the ground for the hedge row, some model railway cobblestone road sections, Polyfilla and crushed cat litter groundwork, woodland Scenics long grass and Fine leaf foliage for the hedgerow.
This model won the IPMS Czech Republic shield/trophy for “Best Model of a WWII Allied AFV” at the IPMS UK nationals Scale model world 2005, plus several other competition awards.

- Both these kits were built from the boxes, with the addition to the Sherman of some stores from the Tamiya Jerry can set
- The Sherman is the cast hull variant
- The Sherman was sprayed overall using Xtracolor Faded Olive Drab with the faded olive drab faded a bit more and applied in a random pattern
- The kit decals were used
- After a coat of Klear a burnt umber oil wash was applied
- A coat of Humbrol matt cote was then sprayed over all.


The weathered chrome on the bumpers, radiator grille and door handles etc was achieved by dry brushing Humbrol no.11 over the satin black, together with some Karisma color silver pencil. The wheels and tyres were given a wash of thinned Tamiya flat earth acrylic. The registration plate decals fit perfectly.
Two fine additions to my 1:48 armour collection.
All the very best, Roger
This is my Tamiya 1:48 Sherman project where I’ve converted the kit into a ‘Dozer using the Gas-o-Line conversion set; figures are from Dartmoor Figures and the stowage from Black Dog.


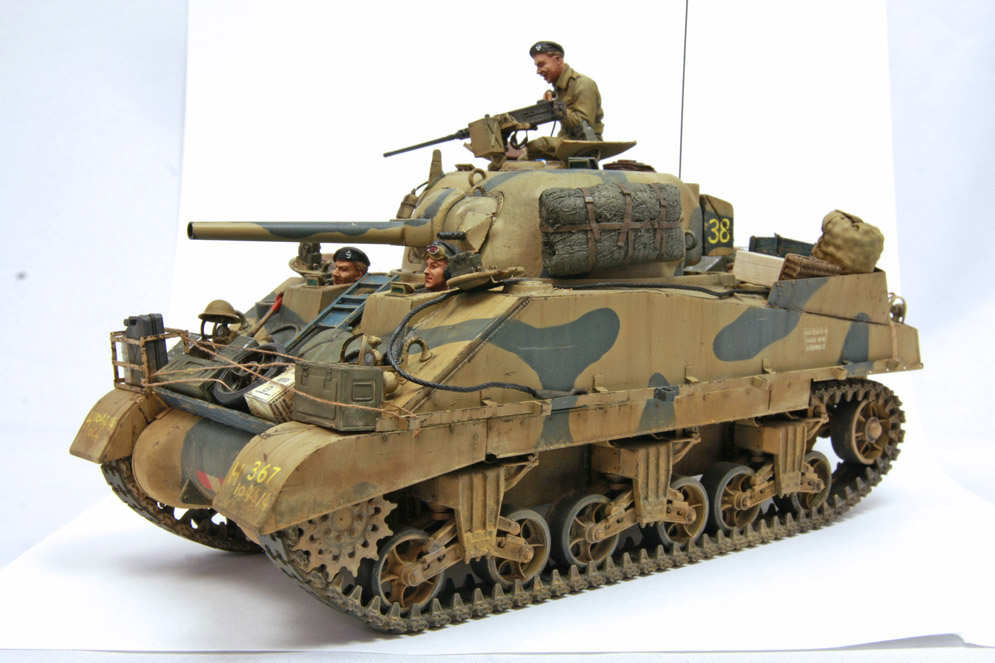
This diorama consists of the Tamiya 1:35th Sherman M4 A3 105mm & Infantry figures, the figures are straight from the box except for added texture to the helmets and tape straps added to the weapons. The Sherman has some extra details added such as scratch built turret mounted MG stowage brackets, wire grab handles on the turret and hatches, stud and sealing ring detail for canvas cover added to gun mantlet, drainage holes drilled to all fitting housings, etch chain added to filler caps, stowage retaining board and brackets to front, bolt detail to suspension and many other small details.
The ruined church, telegraph pole and gate section are all Italeri diorama accessories; the hollow church ruin has been filled with Polyfilla + cracks/bullet holes added with a knife, the telegraph pole wires are made from fuse wire. The scene was built up with Polyfilla etc. sprinkled with static grass and painted before adding snow, a mixture of Woodland Scenics Snow, bicarbonate of soda and crushed alum powder to add sparkle. Snow was applied with a tea strainer onto the base and fixed with odourless hairspray.


1:35 scale
This Sherman is the old Italeri kit, I built it straight out of the box. It is painted in Life Colour Acrylics olive drab set. I started with a base coat of olive drab then mixed up a darker shade adding some black to the paint and added it all around the panel lines and details. I then used a lighter shade of olive drab to highlight the inside of the panels bearing in mind I always use the original base colour in the mix so as it all ties in together nicely. When the paint was dry (in minutes with the hair dryer) I laid on a couple of filter coats with Mig productions filters. This was followed by a pin wash around details with Mig’s dark wash. I hand painted the vehicle numbers and its name (Bettsy).
I left the model to dry for a couple of days and then added various thin washes with diluted Mig powders around details. I varied the colour for added interest and realism. Wire camo mesh was added and various stowage. The figure is from Verlinden and is painted in Vallejo acrylics.


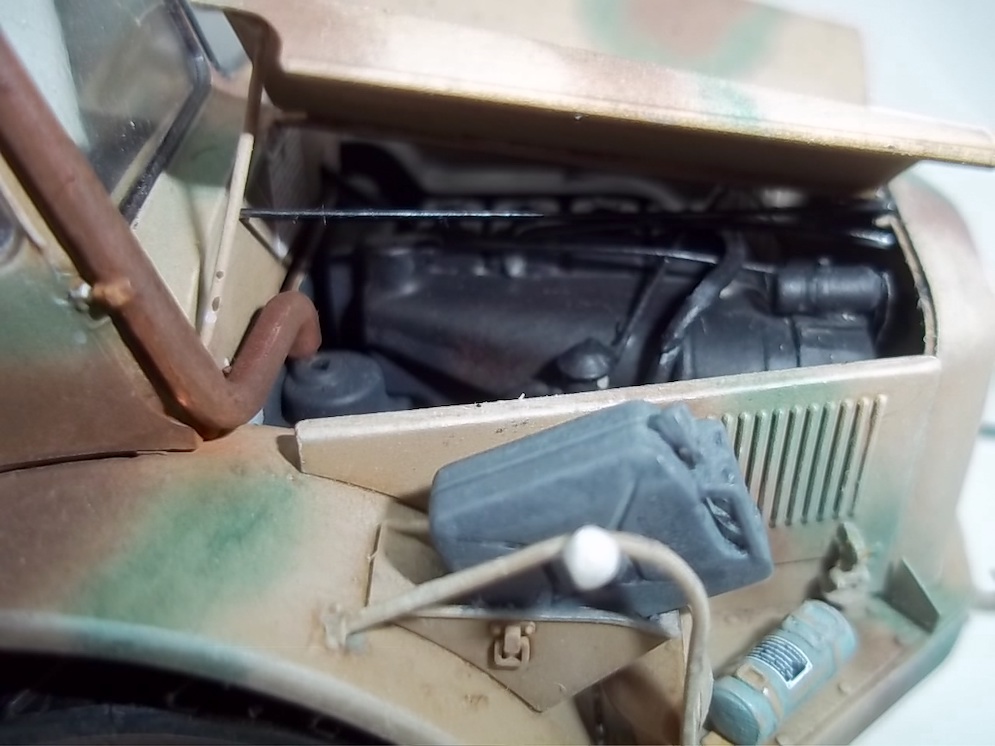
Just some wiring to add to the engine. Photos of an unpainted model from the internet give you an idea of what plastic and etch you get. All doors and hatches can be left open but I decided to fit the canvas cargo bed tilt as I was so impressed with the detailing.
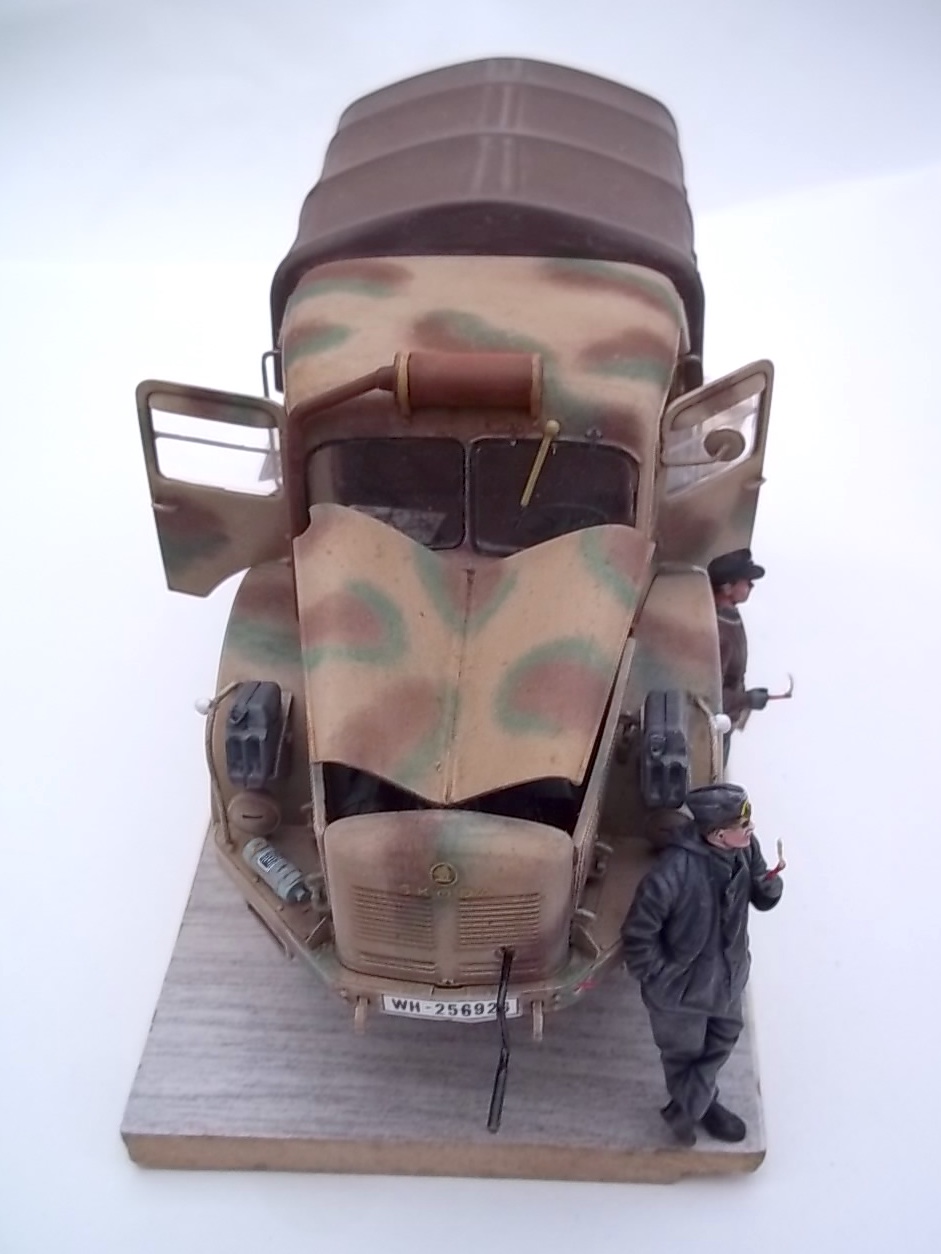
Green and brown cammo are pastel chalk as is my preferred option. I really enjoyed this one as it was a real pleasure to build and looks so different to anything else when finished.
Cheers Pete S.
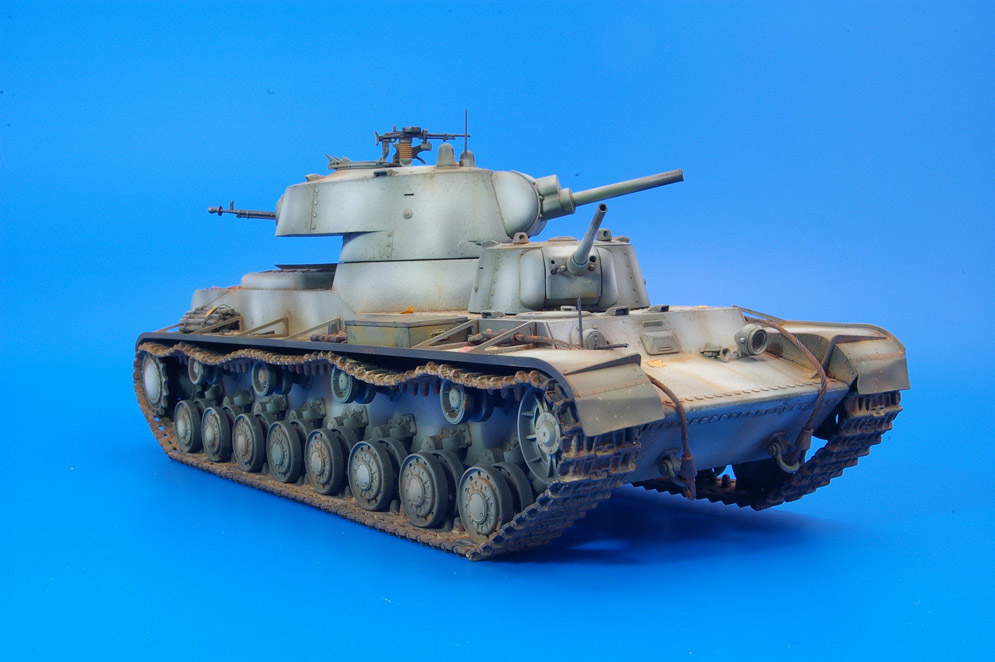
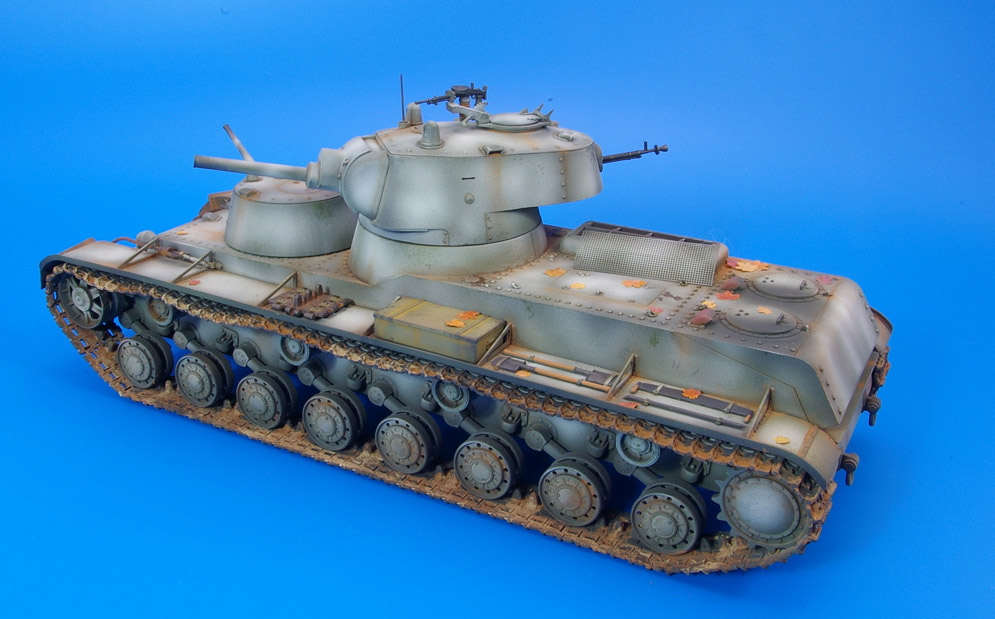
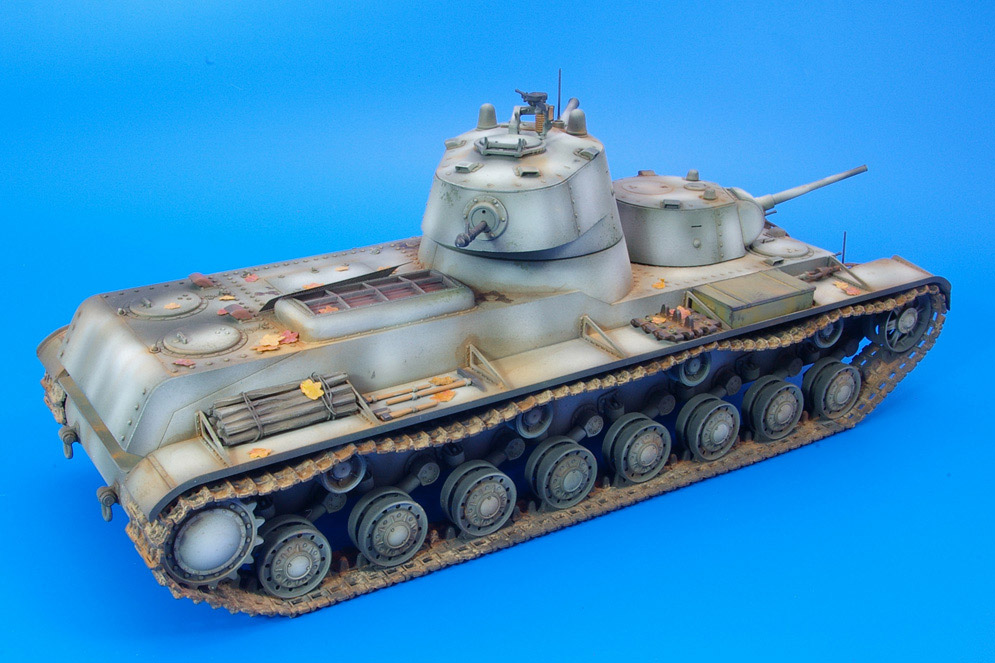
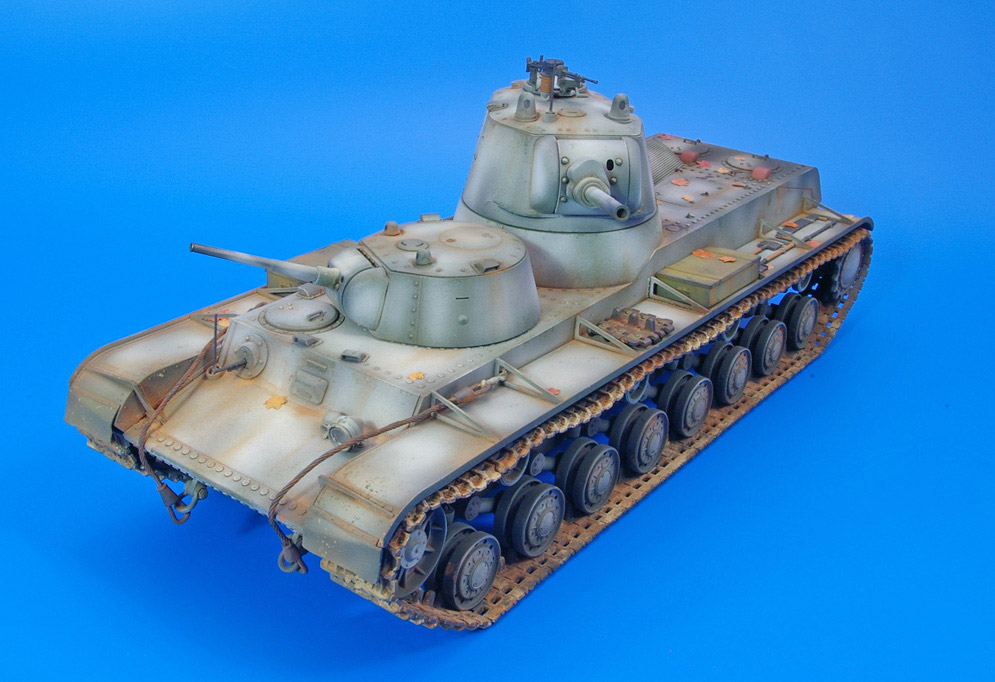
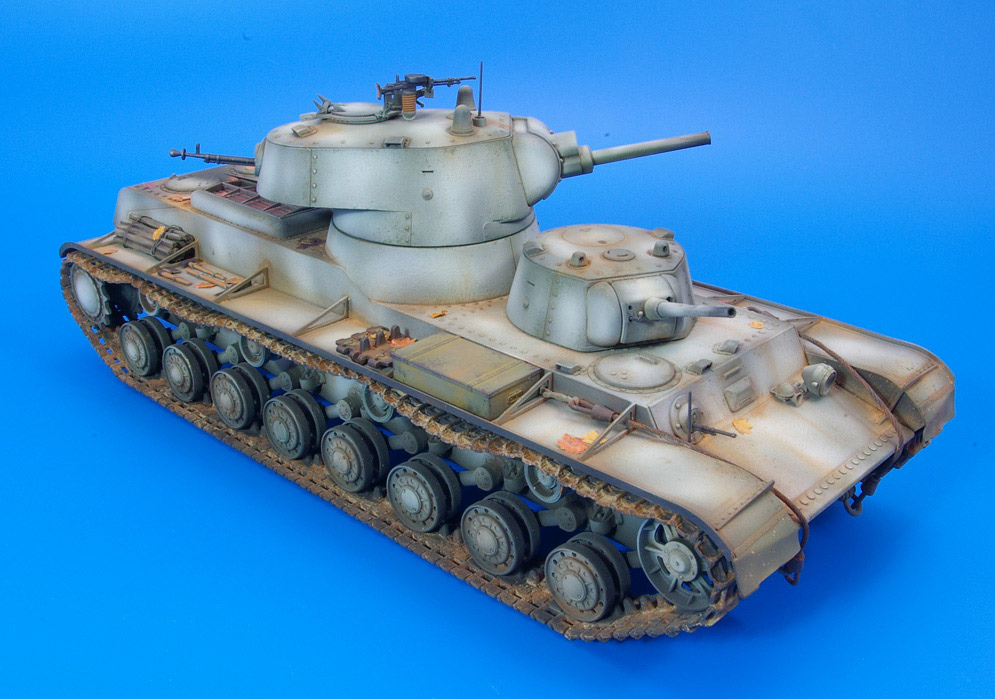
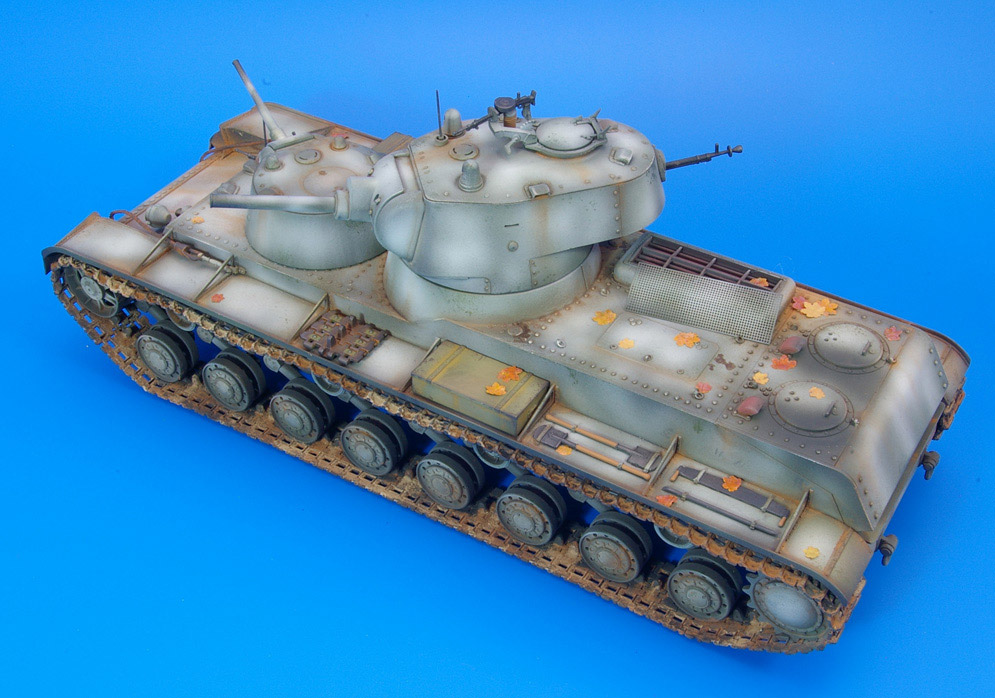
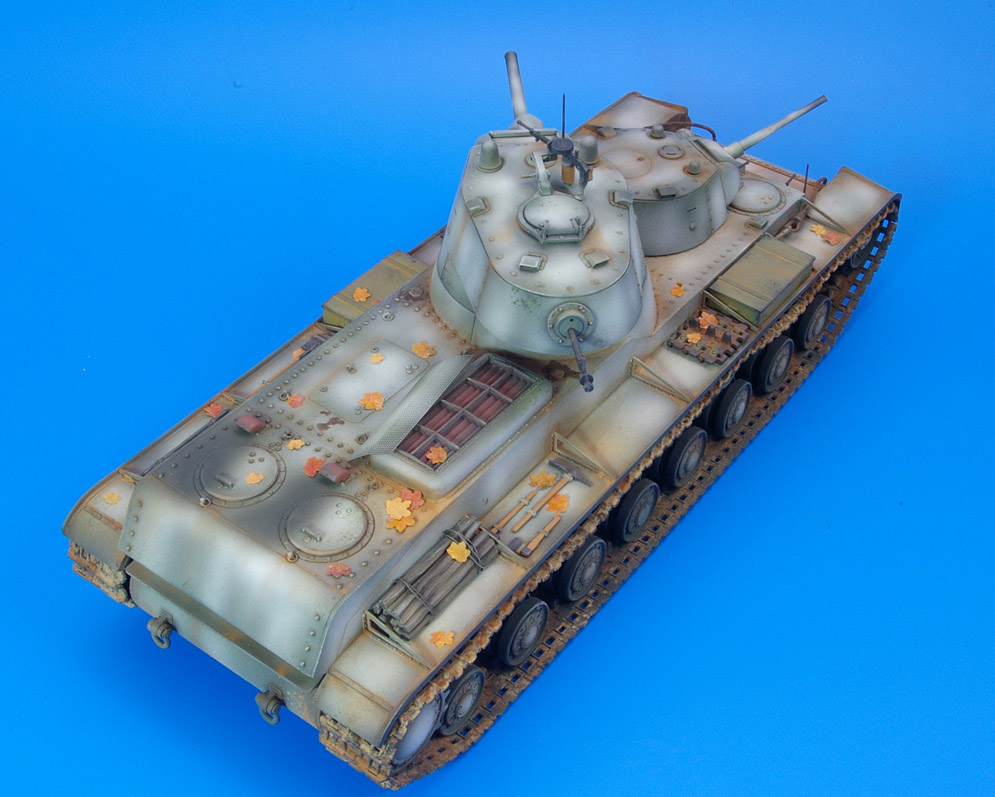
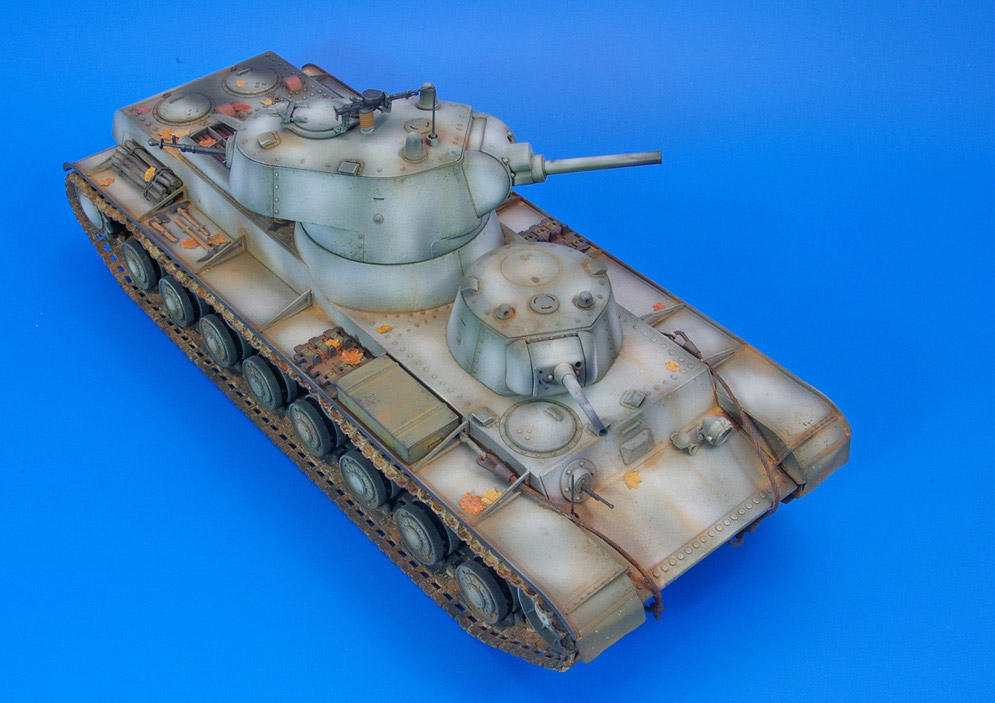
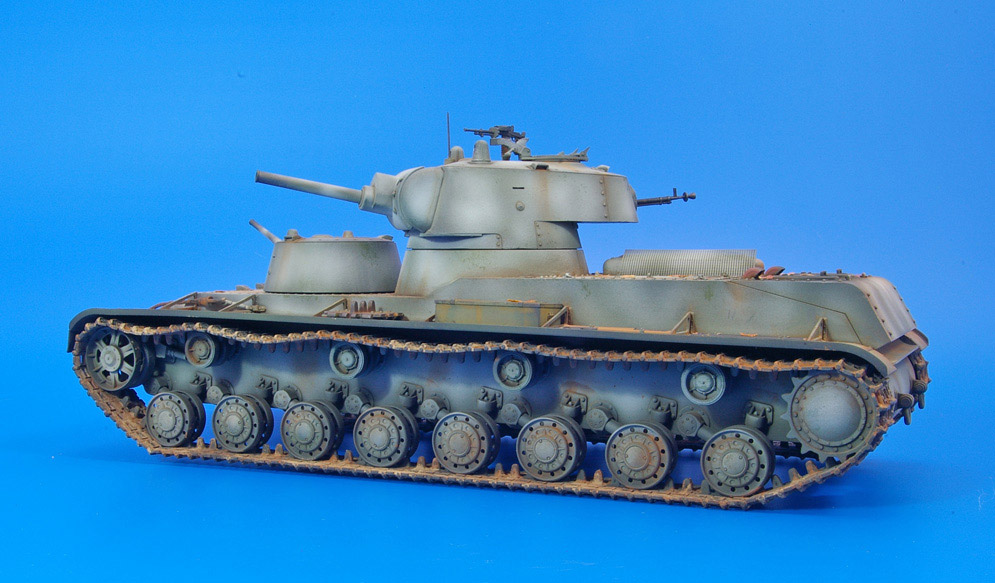
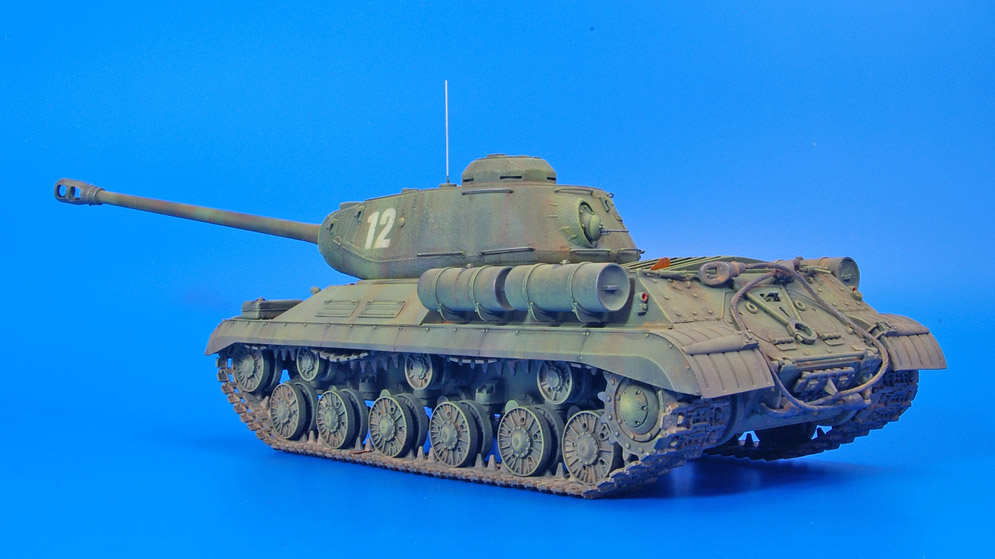
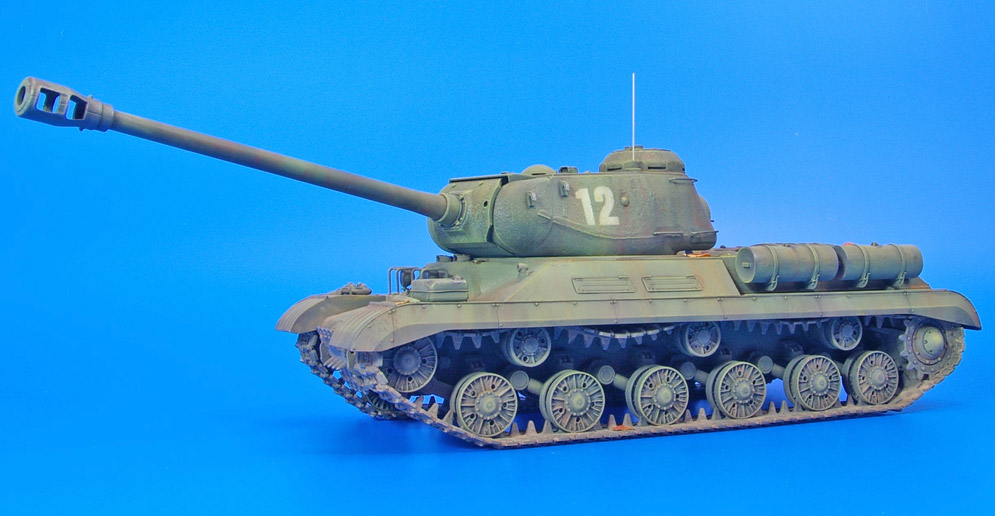
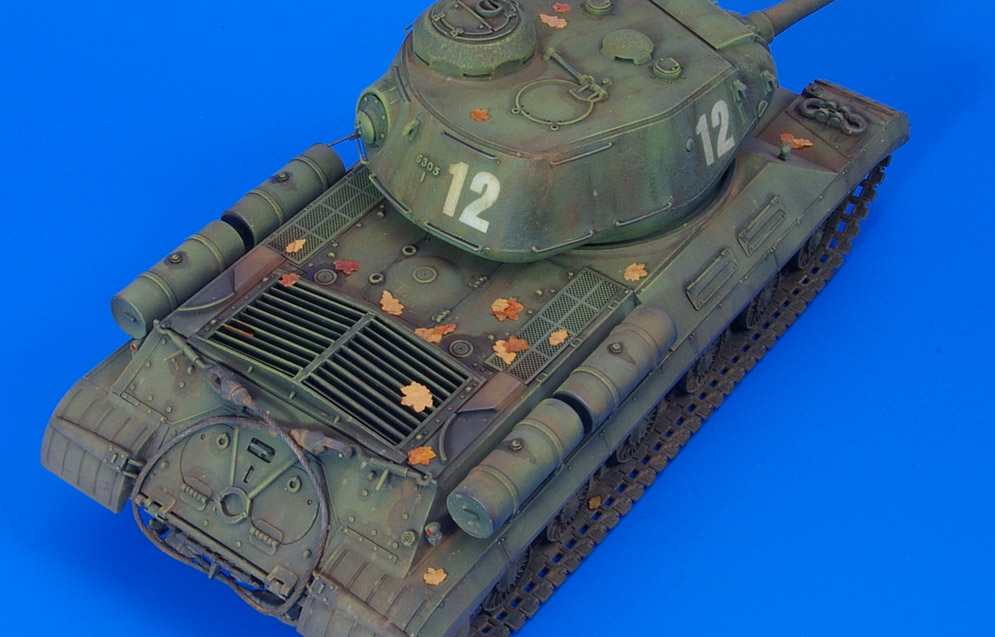
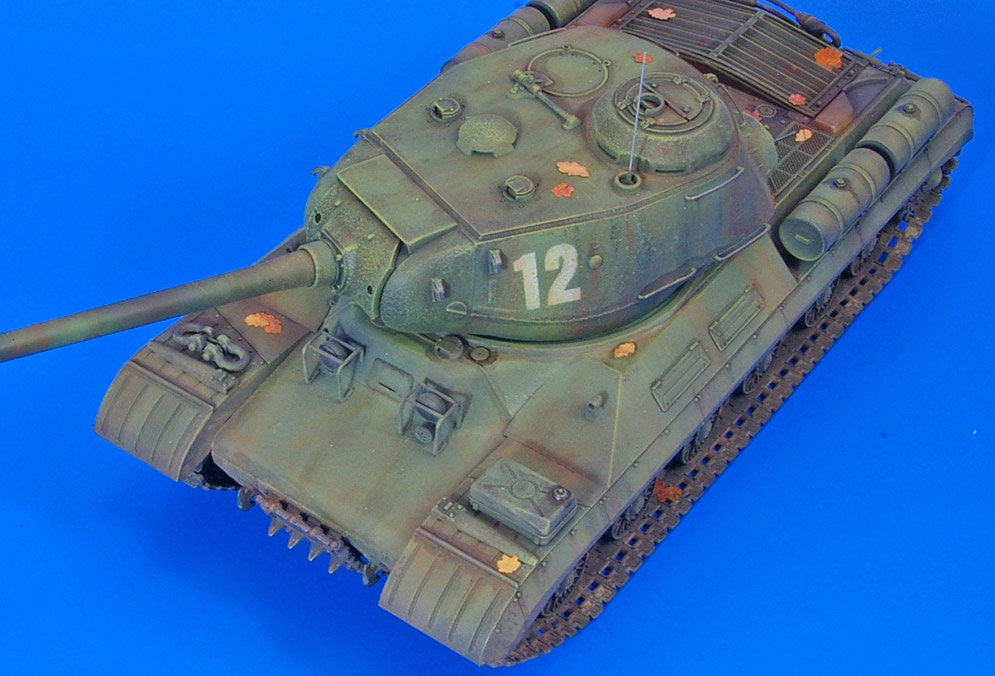
The SMK (named after the Communist Party official Sergei Mironovich Kirov) was one of a number of heavy tank designs that appeared in the late 1930s, competing to replace the T35 multi-turreted tank.
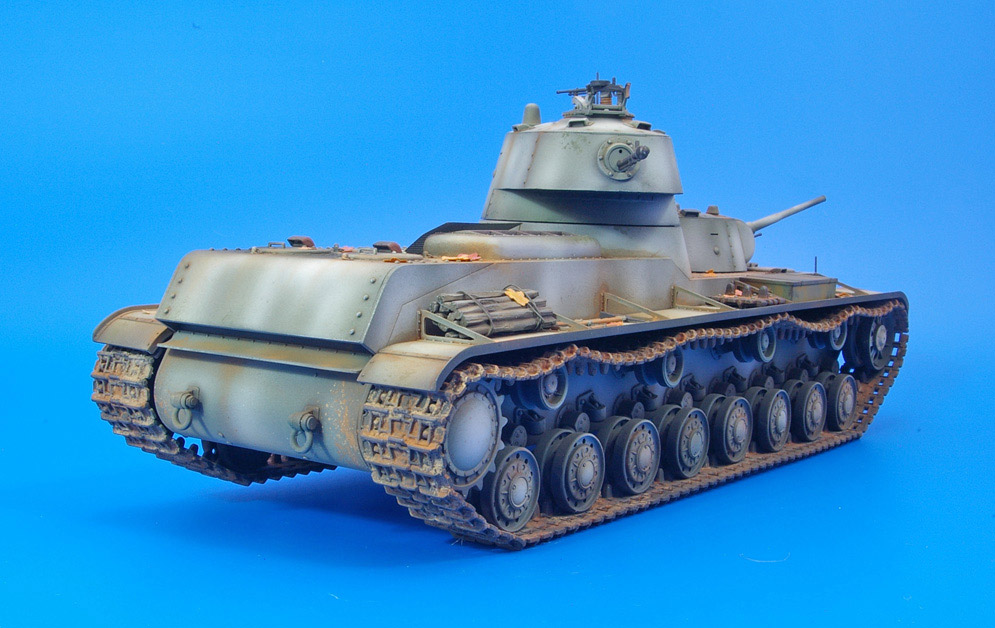
The vehicle carried two turrets one armed with a 76.2mm gun and the other with a 45mm gun. It took part in trials with the similar multi-turreted T100 and the more conventional KV tanks. Operational trials were undertaken during the Winter War following the Soviet invasion of Finland in 1939. The SMK was not deemed to be a success and the KV was chosen for production and further development. During the conflict with Finland the SMK was disabled by a mine and was abandoned for several months before it could be recovered
I really enjoyed building this kit. It was a quick simple project that has resulted in a very large interesting looking model – in fact so large that I now have to find somewhere suitable to put it.
Dai W.
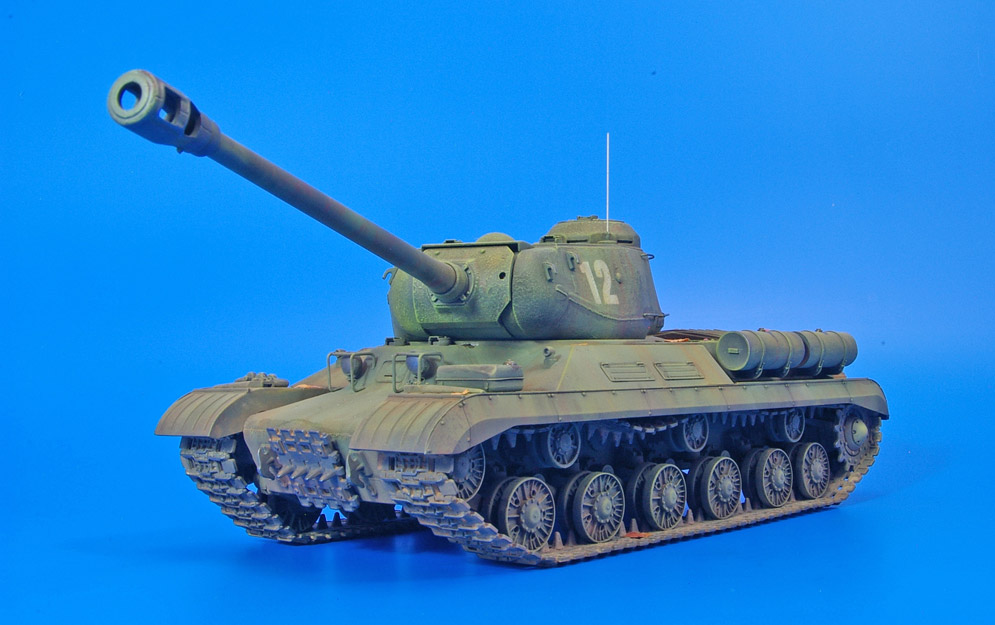
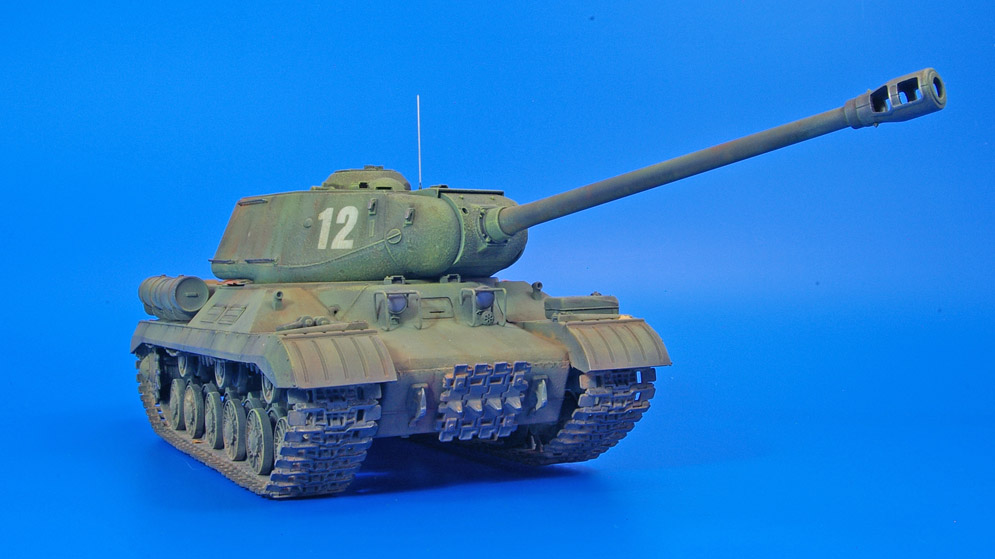
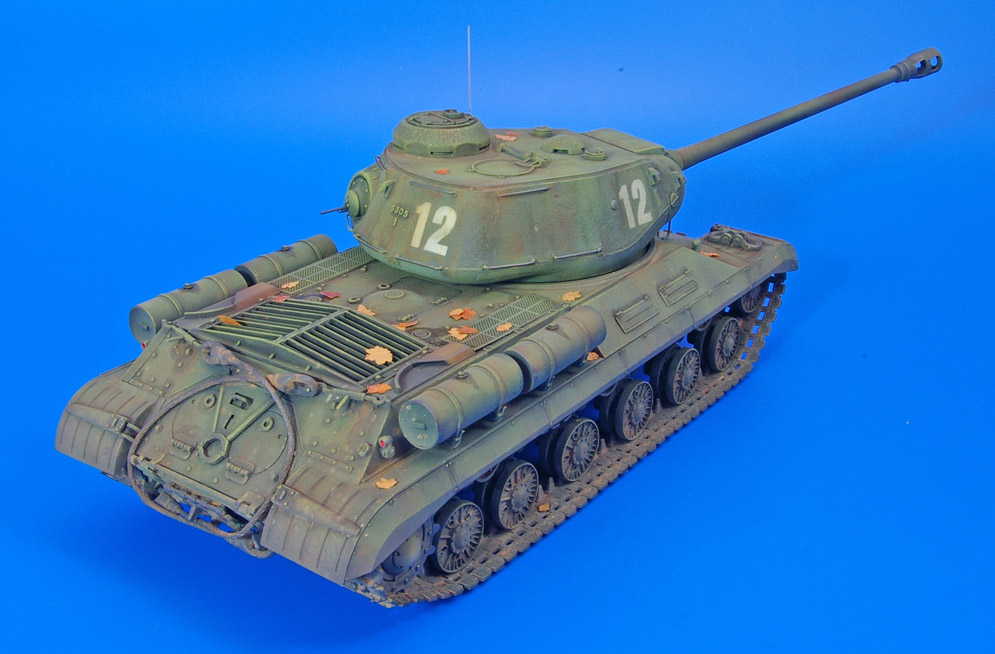
As well as some very well moulded plastic parts this kit provides a turned metal gun barrel, separate track links and some etched brass for the air intakes on the top of the engine deck. The separate track links were welcome as this made it easy to replicate the heavy track sag between the return rollers which seemed to be a feature of these vehicles.
The tracks were attached using my usual method:
1. Assemble a run of track to join the centre of the first road wheel to the centre of the last road wheel
2. This was repeated on both sides of the model so that it sat flat on my work surface
3. Assemble a run of track to join the centre of the front road wheel to the top centre of the idler
4. Assemble a run of track to join the centre of the rear road wheel to the top centre of the drive sprocket. The drive sprocket was not permanently fixed at this point, but was allowed to rotate so that the sprocket teeth could line up with the holes in the tracks
5. Assemble a run of track to join the top centre of the idler wheel to the top centre of the drive sprocket. This last run of track will inevitably not fit perfectly but if one more link than is actually required is used any slack can be taken up by pushing the tracks down slightly between the return rollers to represent track sag
6. The drive sprocket was then glued permanently in position.
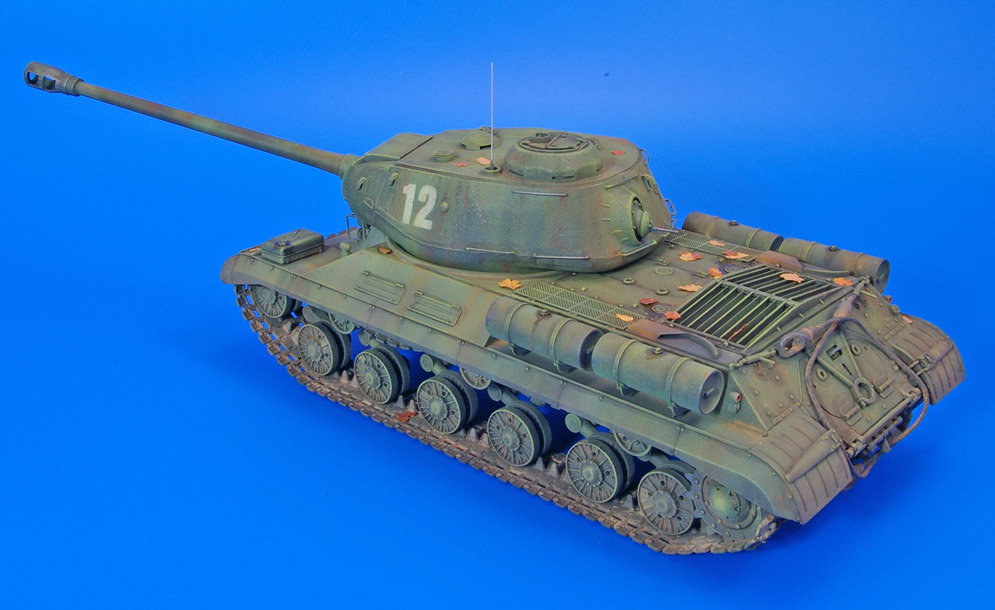
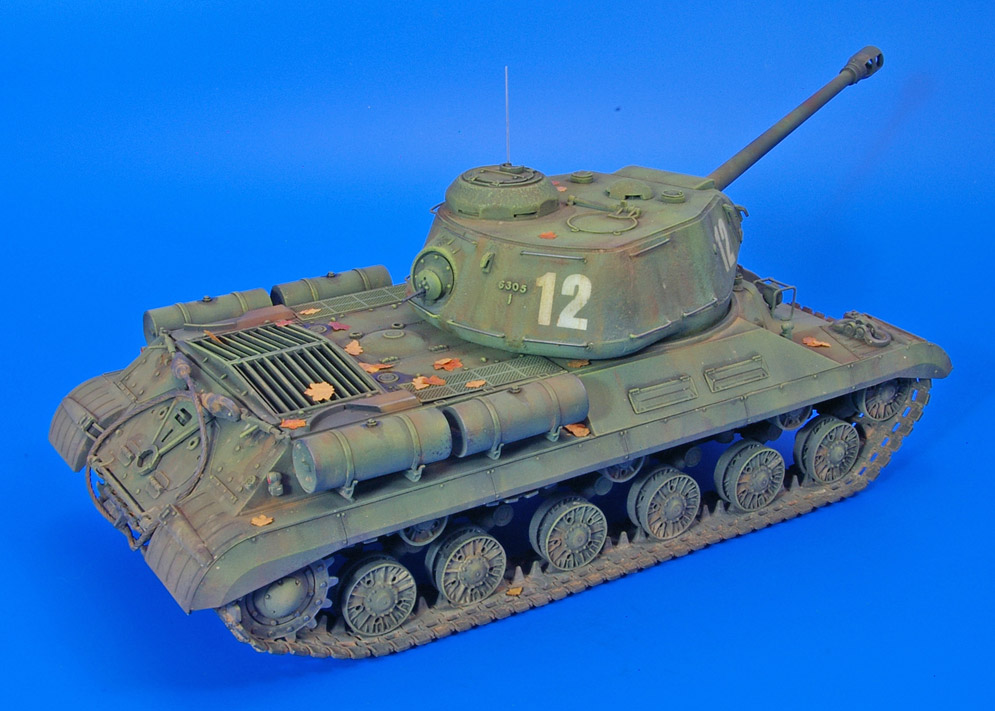
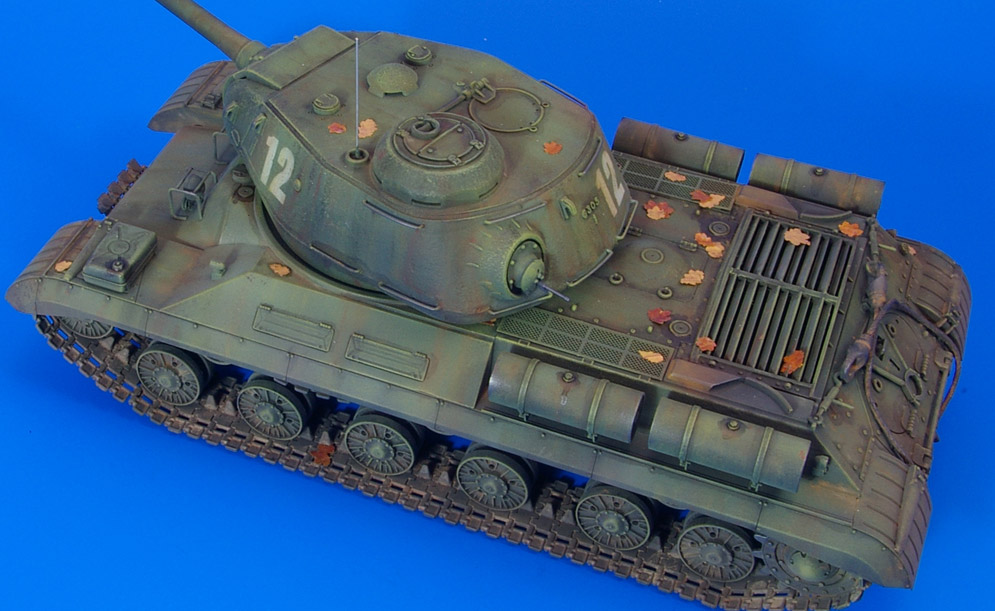
I thought that adding a few scattered dead leaves might have been a good way to break up the plain green finish and that the best way to produce these would be to use real leaves. I chose some likely looking leaves from a maple tree outside my house which has great colours at this time of the year. After drying indoors for a few days the leaves were sprayed with matt varnish (which will hopefully stop them disintegrating as time goes on) and then maple and oak leaf shapes were made with punches from RP Toolz. These punches produce leaves in four different sizes. The largest were discarded as being a little too big for this scale, but the other three looked fine to me (as trees actually have leaves of different sizes). Punching them out of a real leaf produced leaves with slightly different colours complete with a few fungal spots – which is exactly the way they looked on the tree!! Each leaf was attached to the model with a dot of Testor’s Matt Varnish.
This was an enjoyable project and I think that Trumpeter’s KV/IS series can be recommended to all fans of Soviet armour.
Dai W.
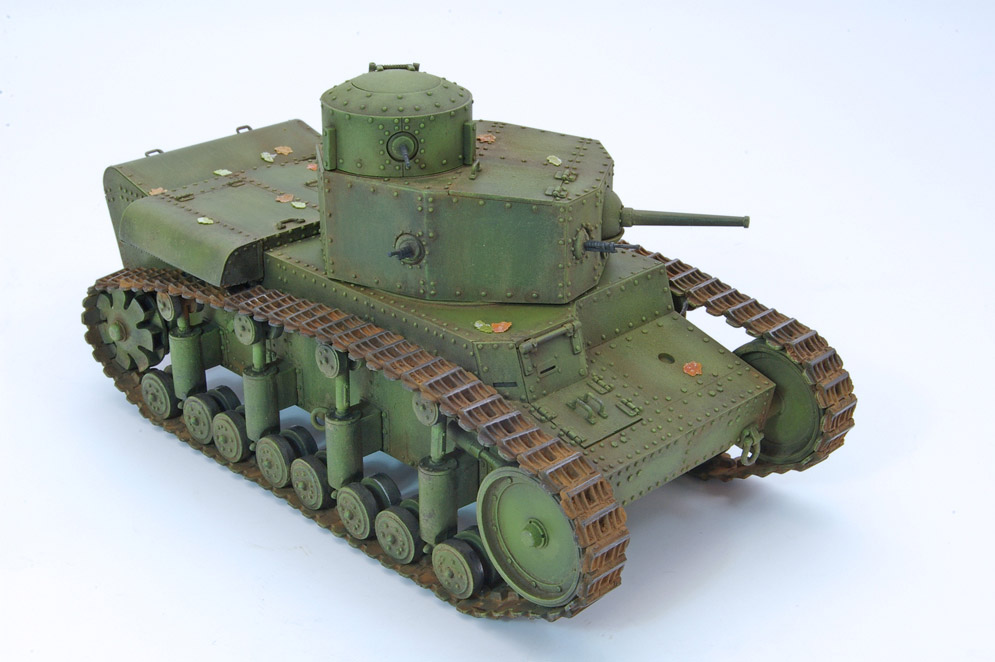
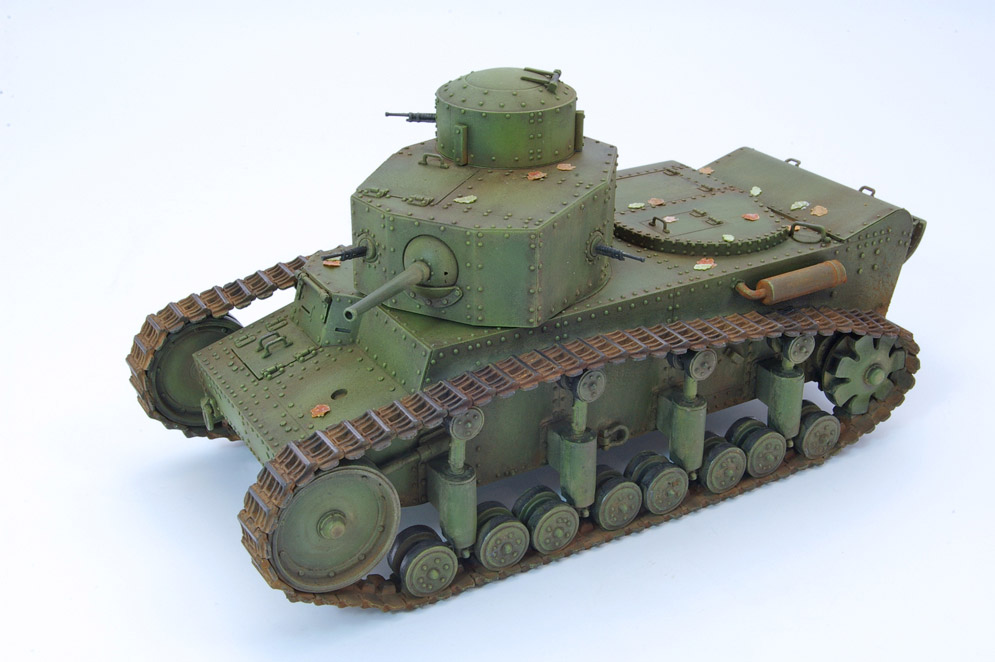
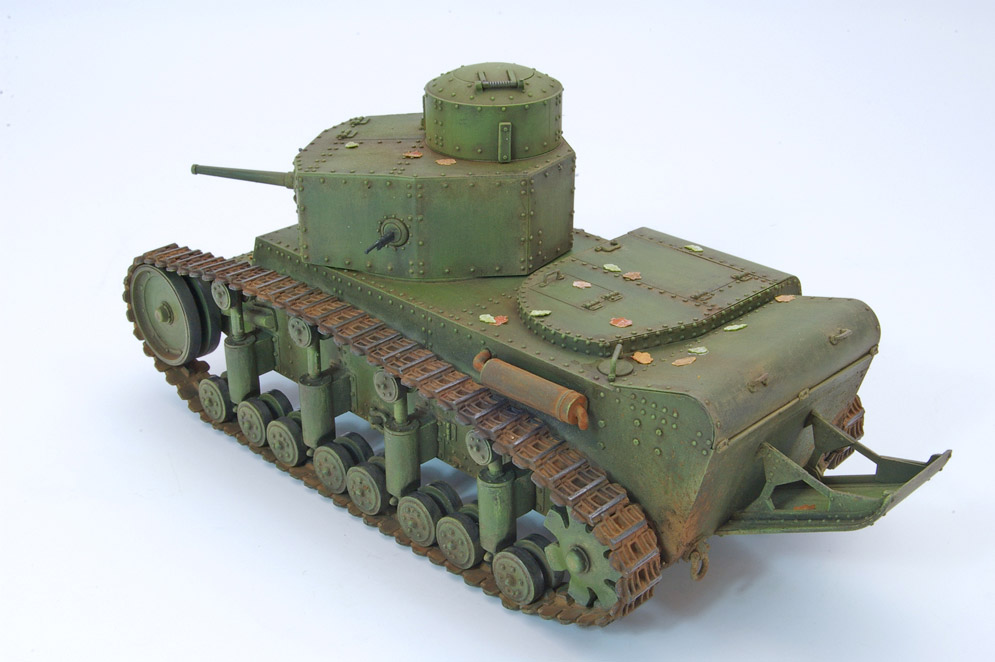
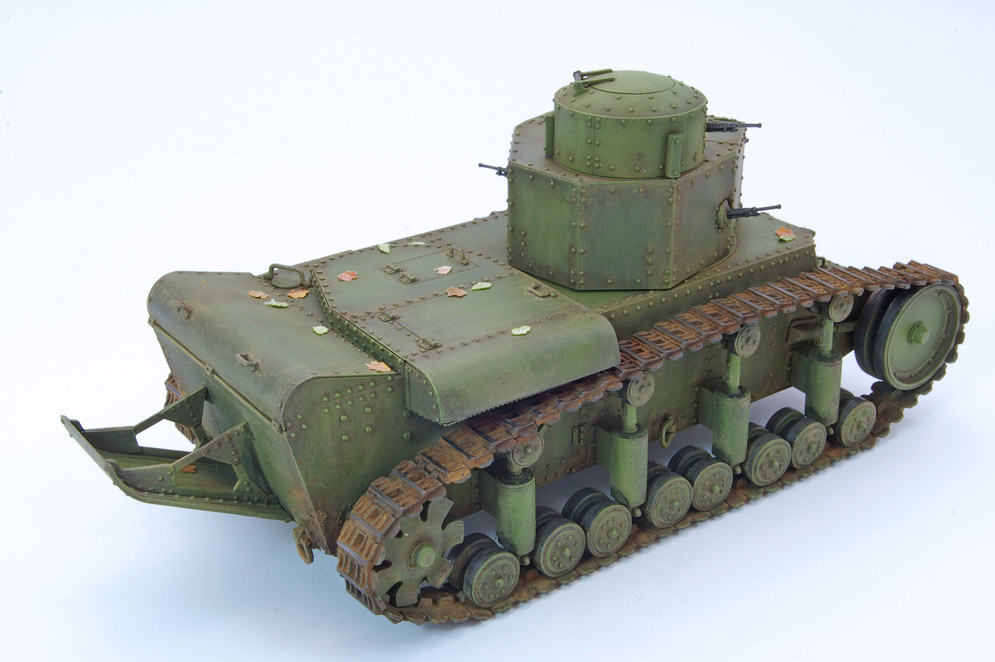
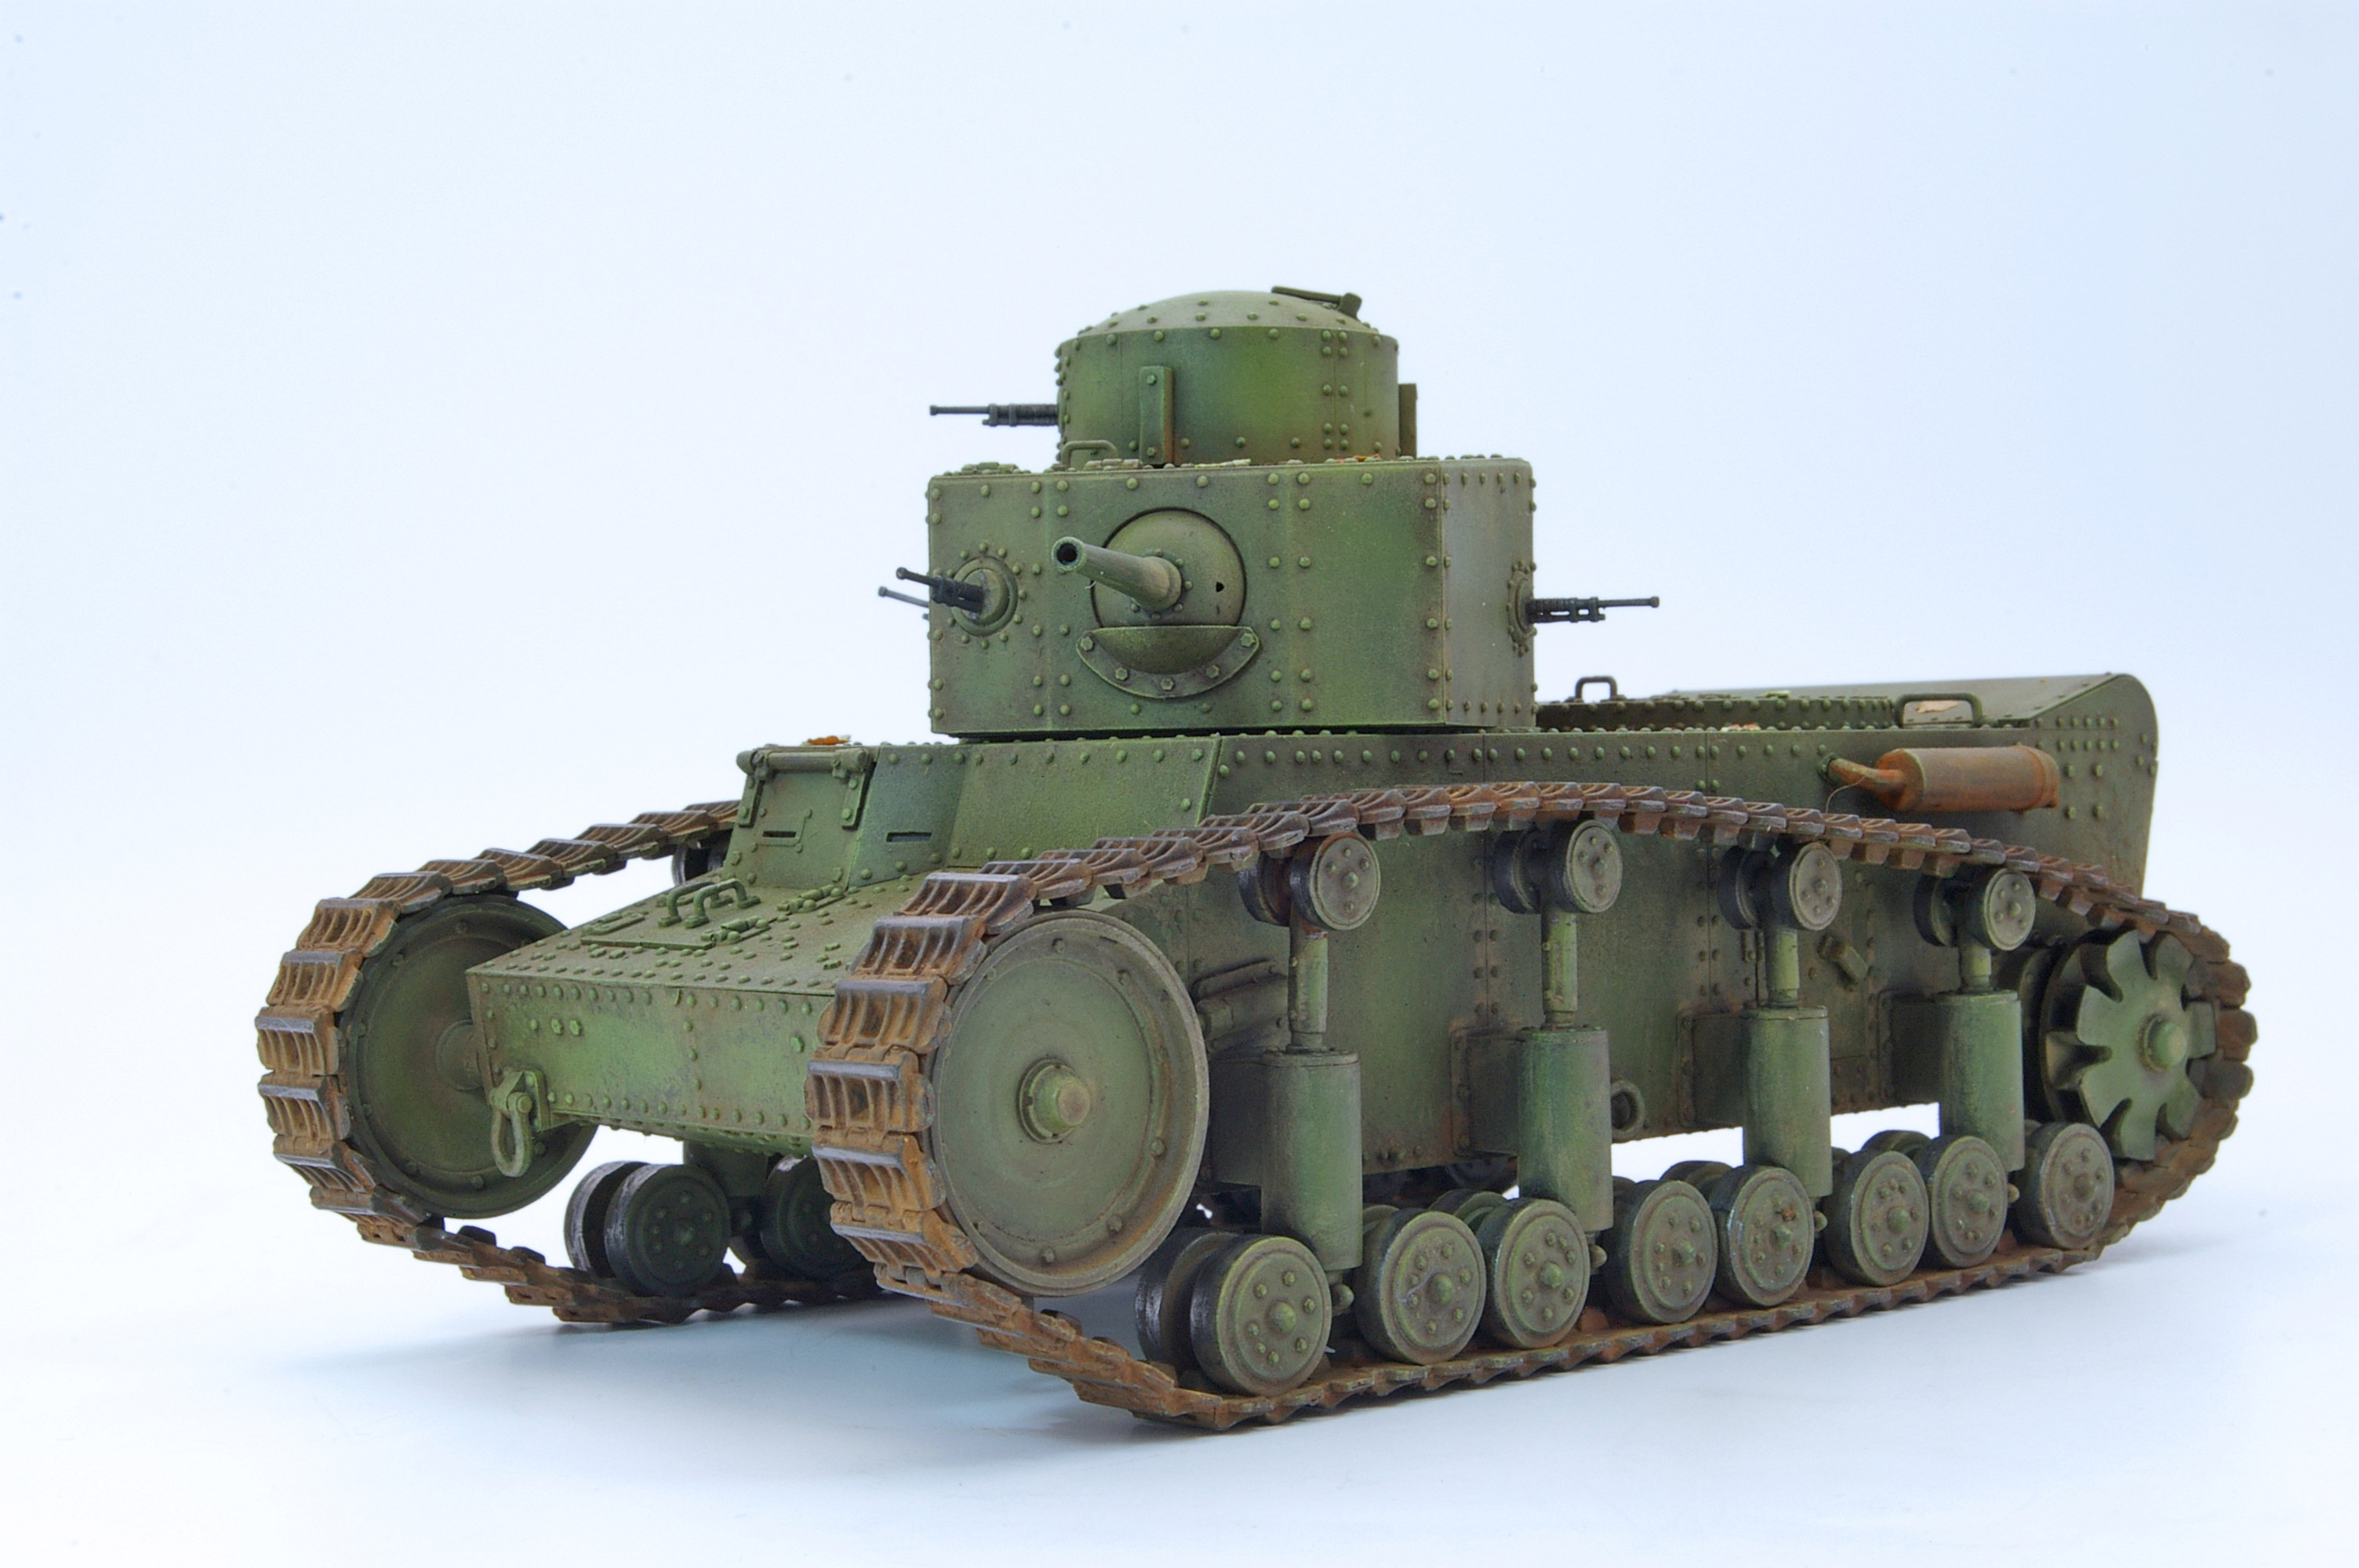
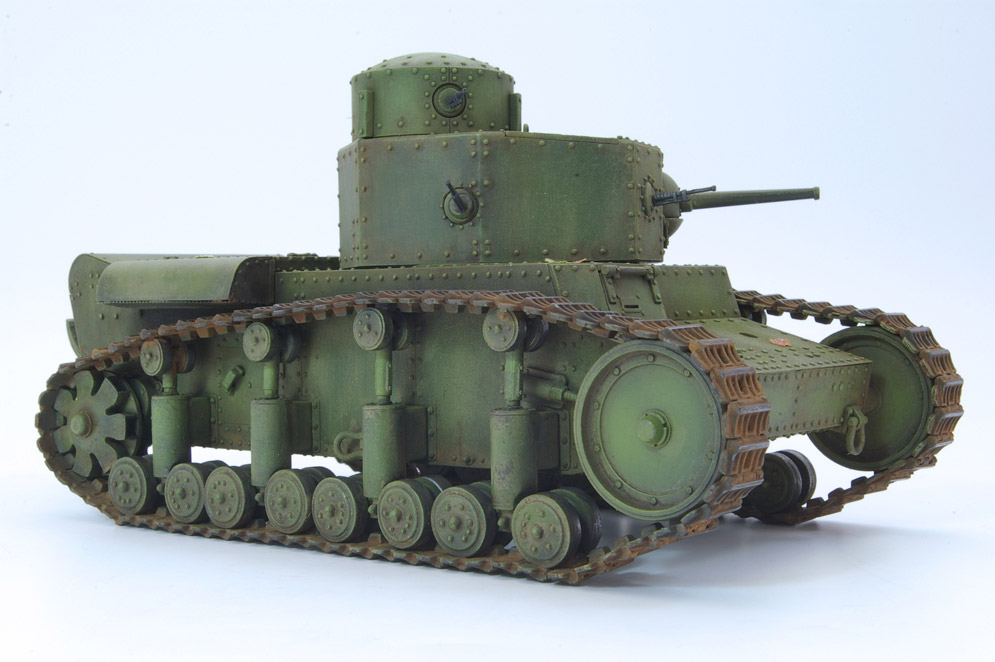
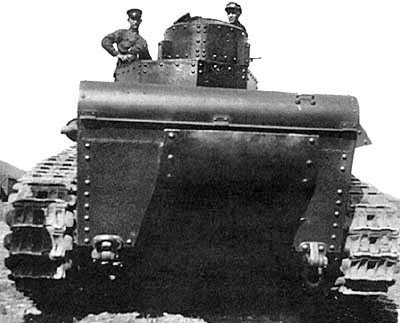
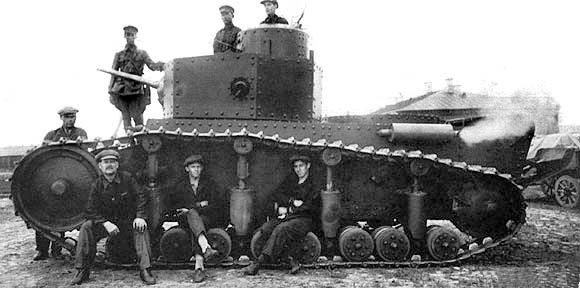
The T12 and the similar T24 appeared in the early 1930s. These vehicles were home grown designs following on from the T18 which was a copy of the French Renault light tank. The designs were not particularly successful though the chassis was used as a basis for an artillery tractor which saw service in the Second World War.
Period photos of the T12 are few and far between. However, the ones that I could find suggest that the vehicle may have existed in several forms. Some seem to have had exhausts on both sides of the rear hull while others had an intake on the right-hand side of the hull. Drawings published on the internet also show different layouts for the engine deck. I am therefore unable to attest to the accuracy of the Hobby Boss kit.
Nonetheless it was fun to build and was used as an experiment for applying dust over a coat of hairspray.
A few dead leaves made with punches from RP Toolz using actual dead leaves from the garden. The leaves were sealed with matt varnish before being used.
Dai W.
Here is Paul’s excellent Soviet T-55A looking the worse for wear! Great modelling skills here like the realistic cast texture on the chassis and turret, not to mention his rust work – all very authentic-looking for an abandoned vehicle of the period. Nice work Paul!


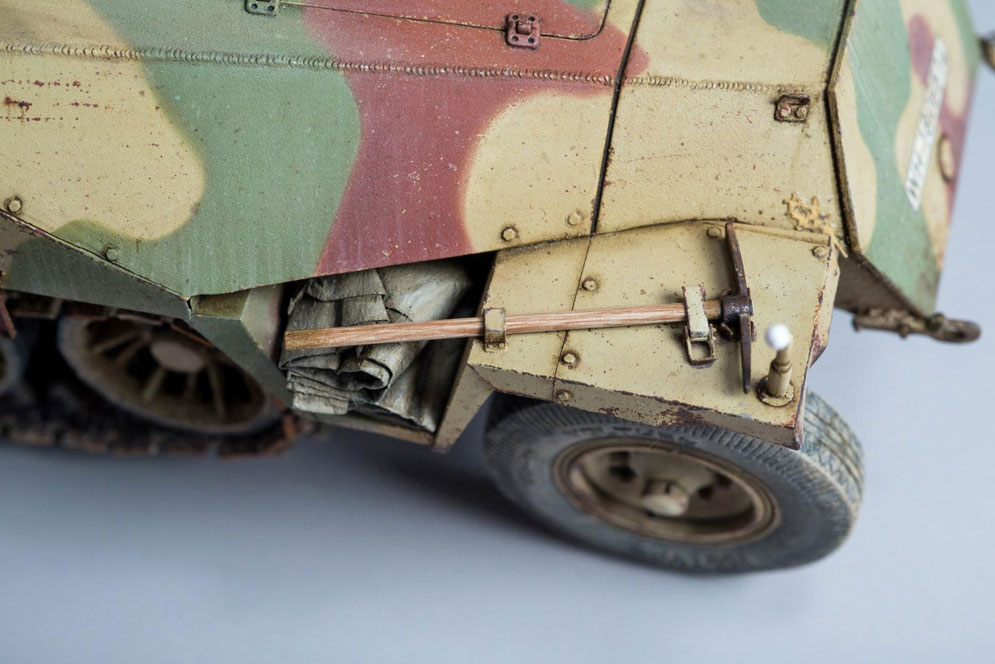
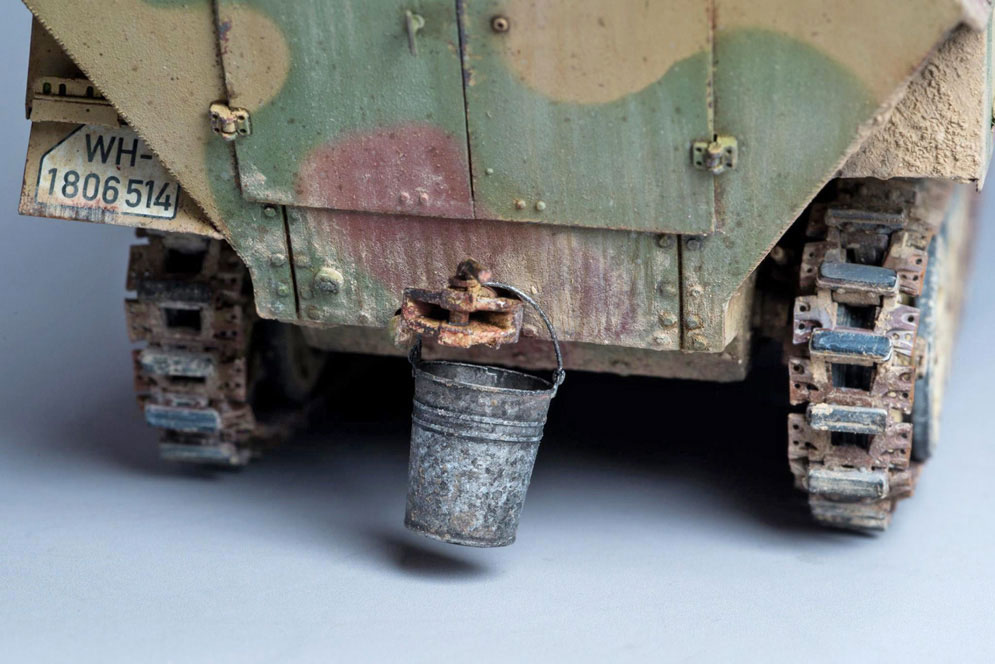
This model was made from the Takom 1:35 (Early Type) kit. This was very easy to build though a great deal of care had to be taken with the suspension which is (like the full sized vehicle) complex and fragile.
Most of the time spent on this model was taken up with painting. The model was first primed with Halford’s plastic primer straight from the rattle can. The spray painting was done using Tamiya paints. I searched the internet for colour references as there seems to be some conjecture as regards the actual colours used and as period images don’t really help much the colours I’ve used may be a little off. The main colours were masked and sprayed while the dark stripes were brush painted using Black / Grey from Vallejo (I find that these paints lend themselves well to brush painting). I did not use black as recommended as I find it too harsh and it looks a little ‘out of scale’. The colours were toned down with dots of oil paint blended into the paintwork and a light overspray of Tamiya Khaki. While mud may have been a major feature of life on the Western Front, I’m not a fan of splattering it all over my models and so weathering was restricted to thin pigment washes on the tracks and a dusting of browns / buff with the airbrush concentrating on the suspension.
I discovered that the bar at the front of the vehicle was in fact a wire cutter. To make a feature of this I constructed a piece of home-made barbed wire. Two or three lengths of fine wire were twisted together to make a ‘rope’ before knotting more wire around this at intervals to make the barbs which were fixed in place with superglue. Those with an interest in barbed wire (I know you’re out there because there is actually at least one magazine devoted to the subject!) will probably complain that this does not look exactly like the wire used on the Western Front at the end of the Great War, but it looks close enough to me.
All in all I think this is a great kit that can be recommended to all fans of early armour.
Extra rails and stowage added to the rear deck. Crew are MiniArt and infantry are Dragon.
Snow is Tamiya weathering powders. Very easy to use, just dampen the area with water and then sprinkle on. I then gloss varnished the snow but it didn’t look right so I added a second layer of snow and its original matt finish is more realistic.
Pete S.


The fact that we had snow on the ground here when I painted it inspired me to get on with it.
Cheers, Andy B.


I’m new to scale modelling and tried to use several of the techniques as shown in the tutorials on this website. I weathered the model using washes, thick paint for the mud and sponge painting for the rust.
With regards,
Kees Zondag
Zaltbommel
The Netherlands


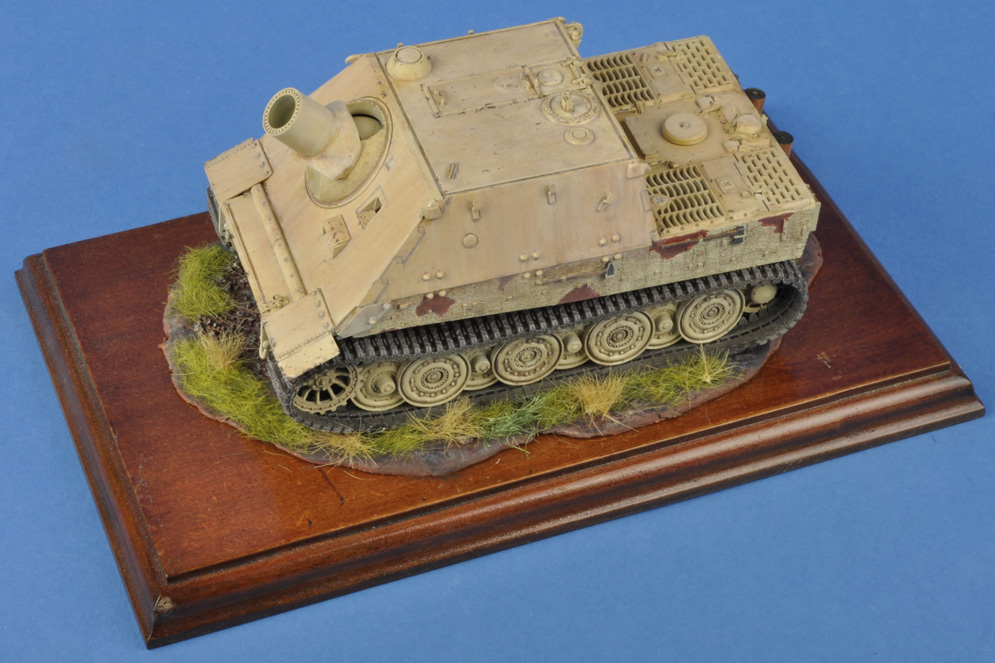
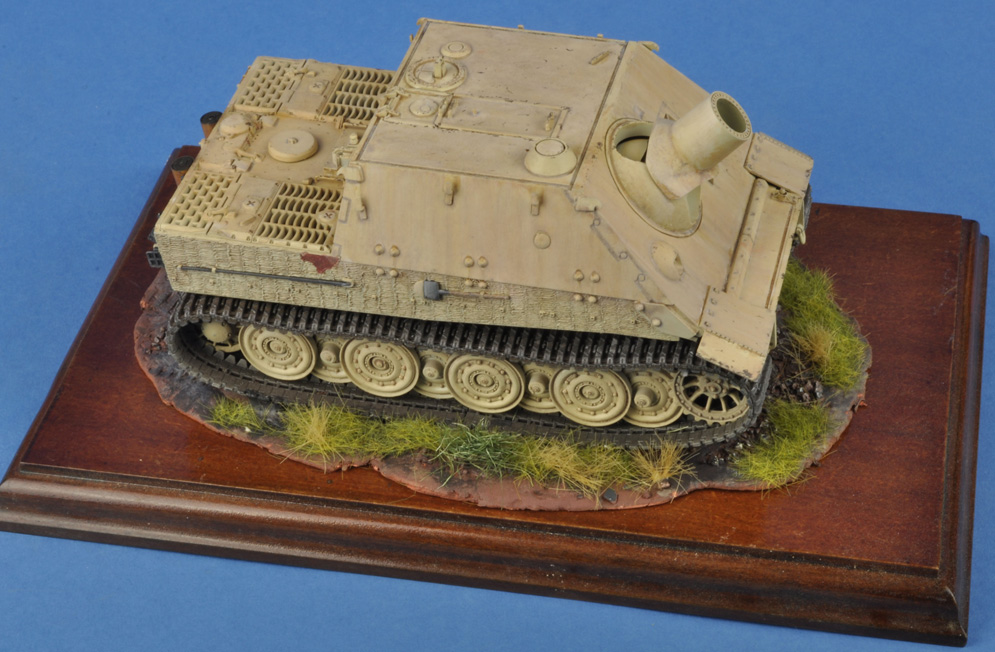
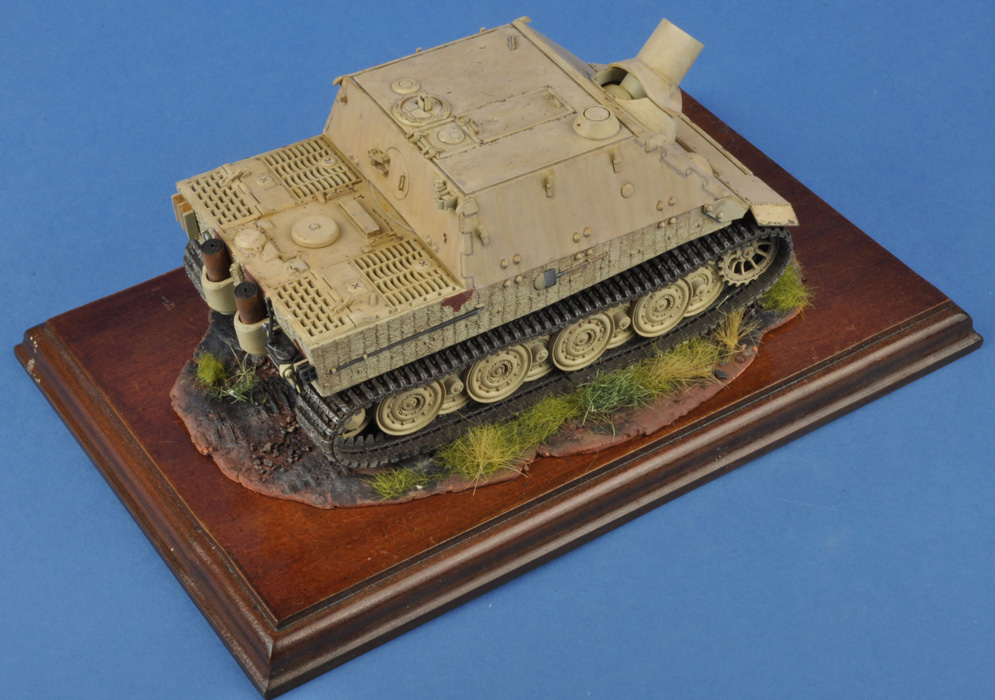
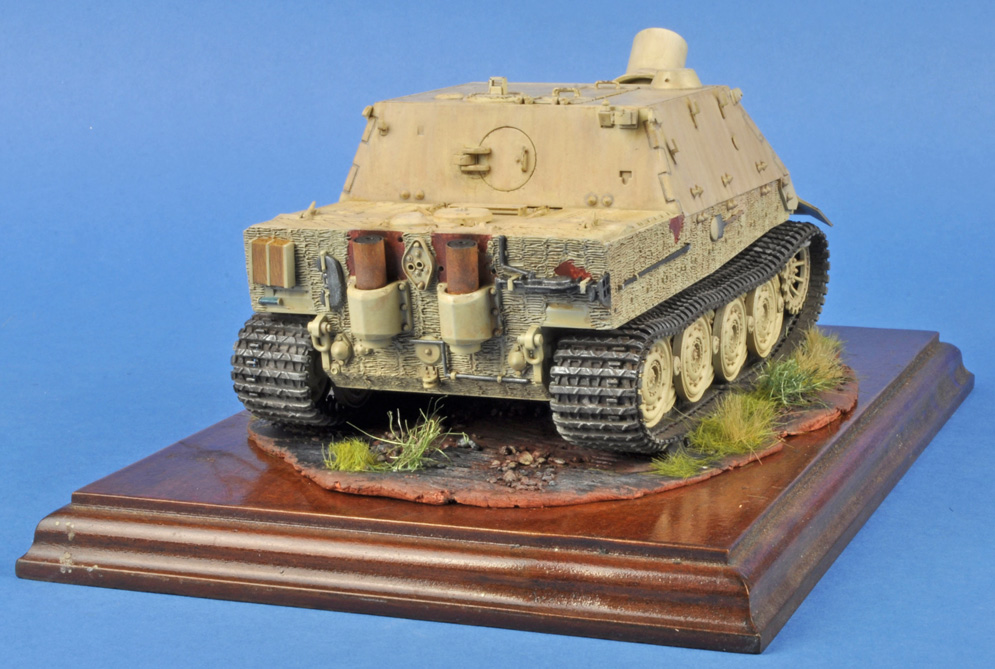
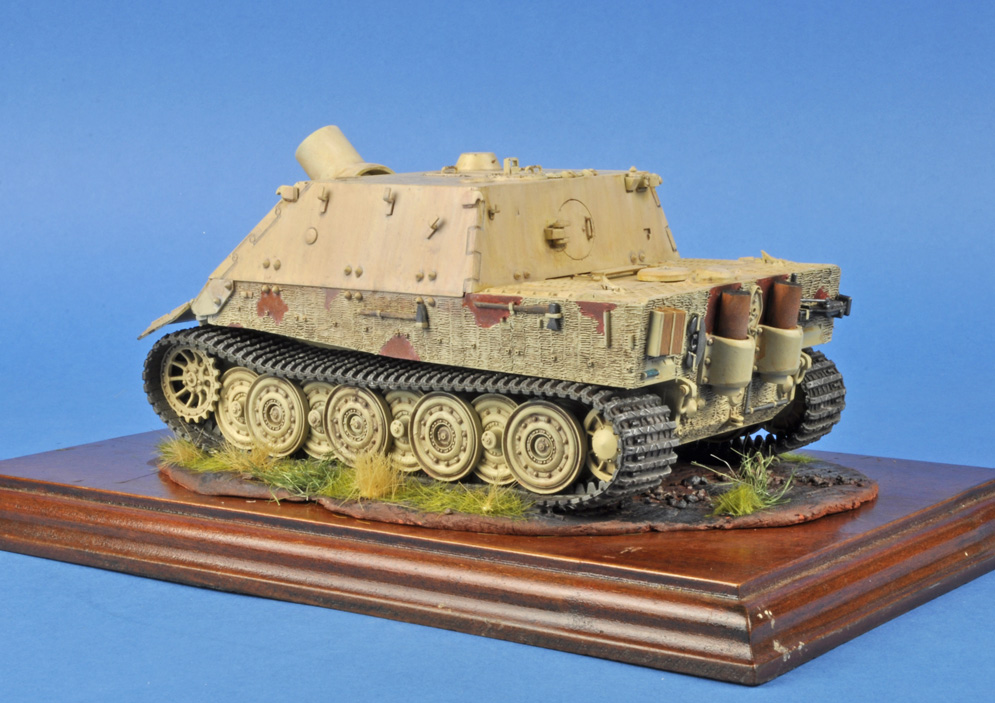
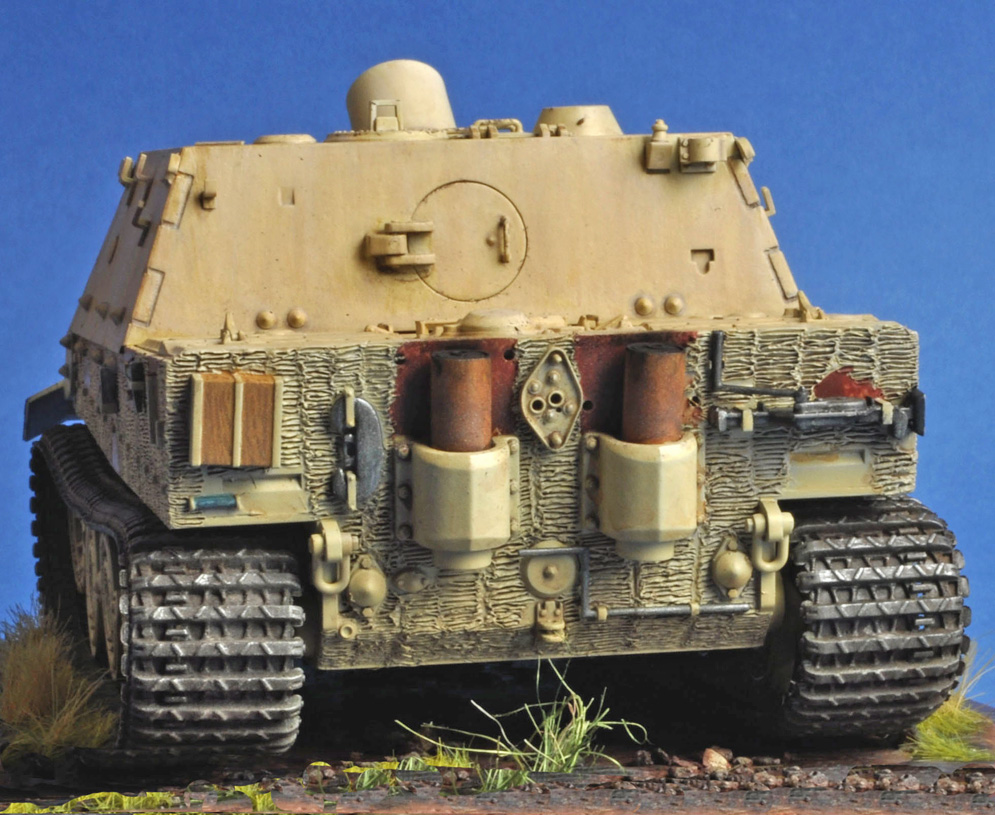
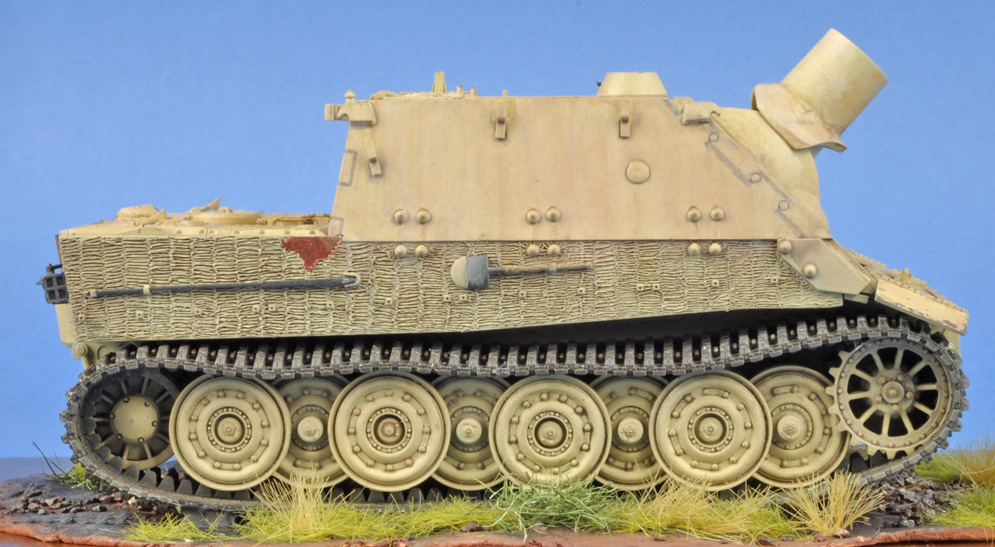
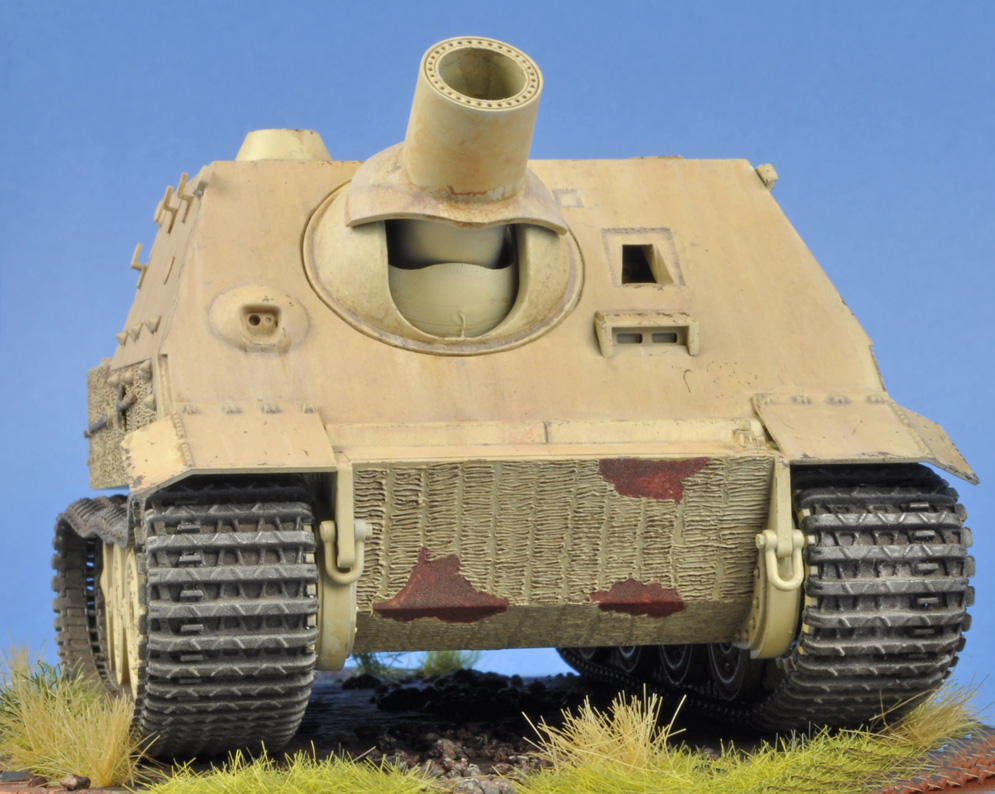
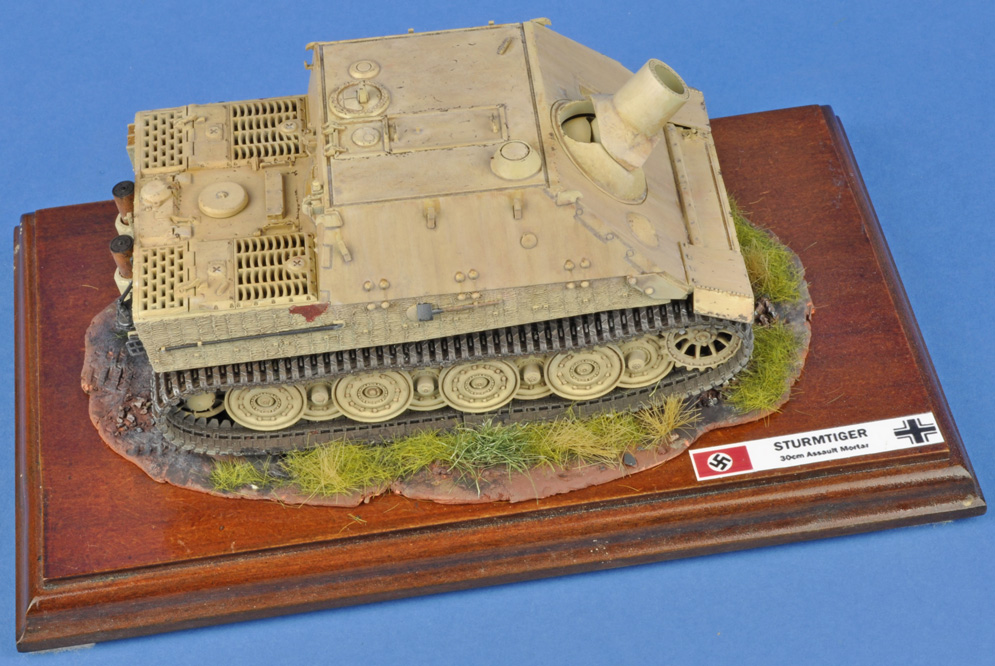
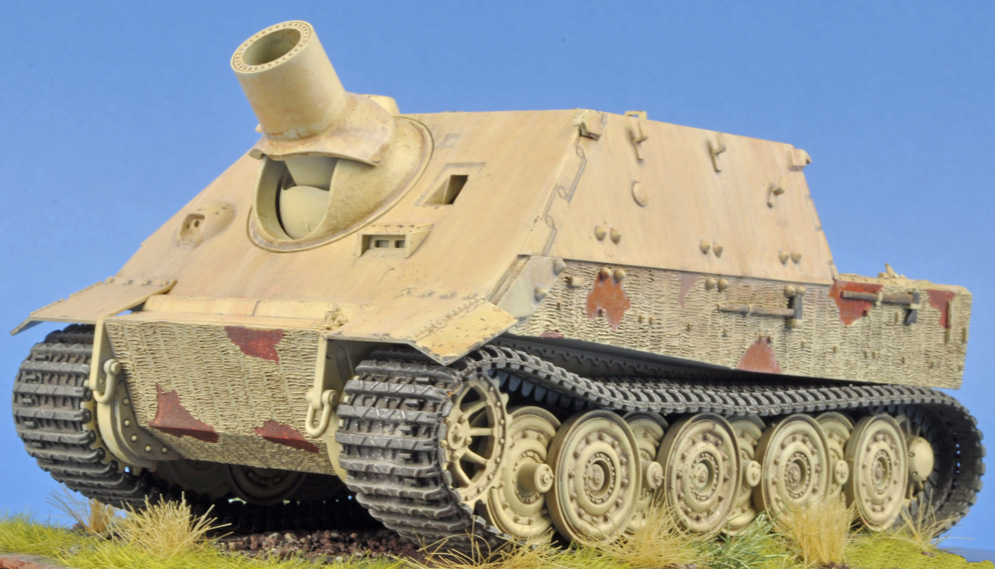
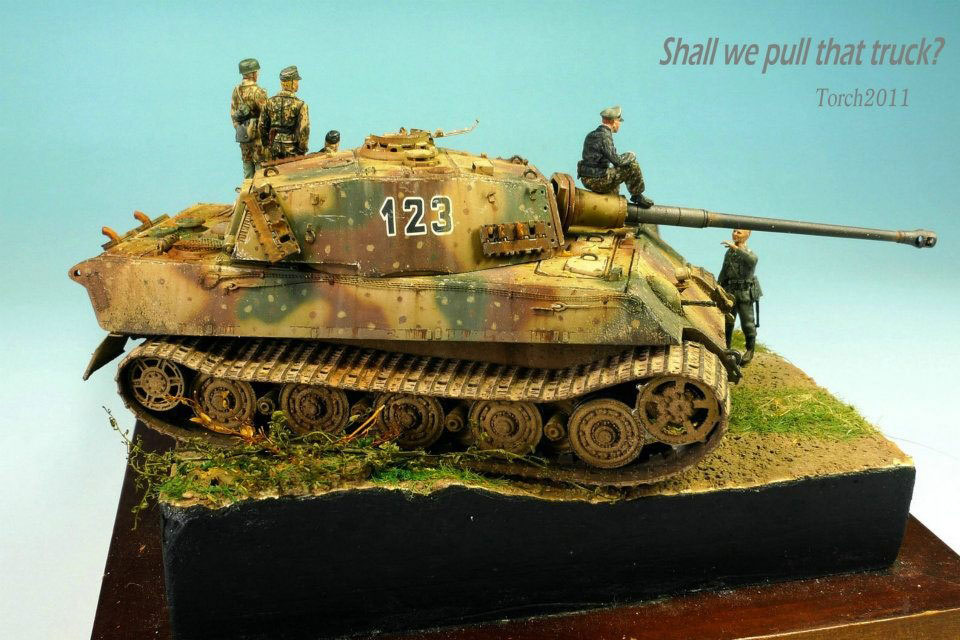
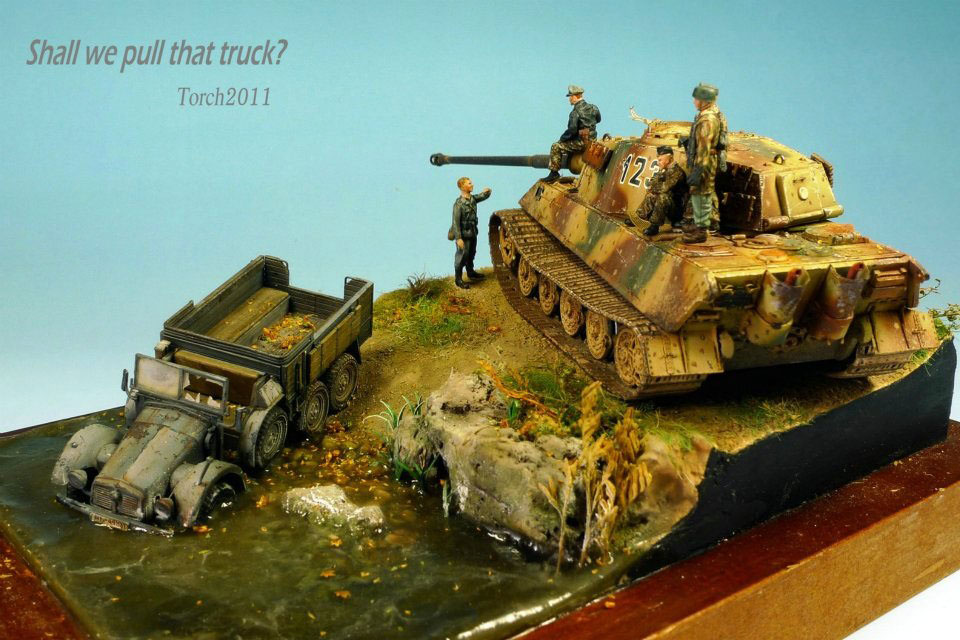
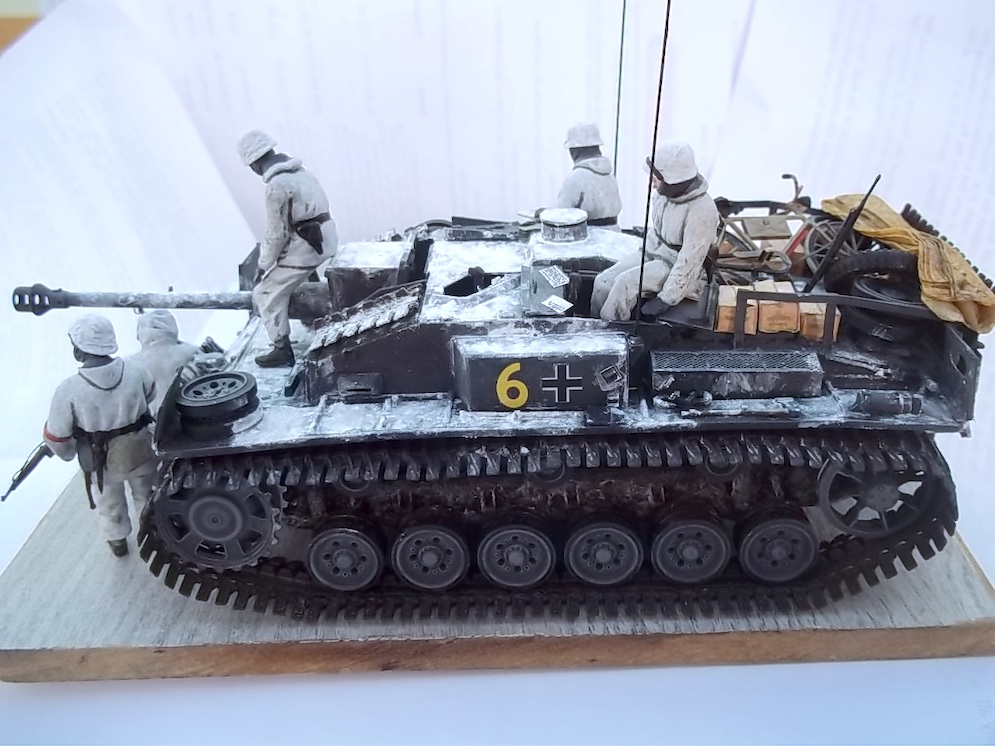
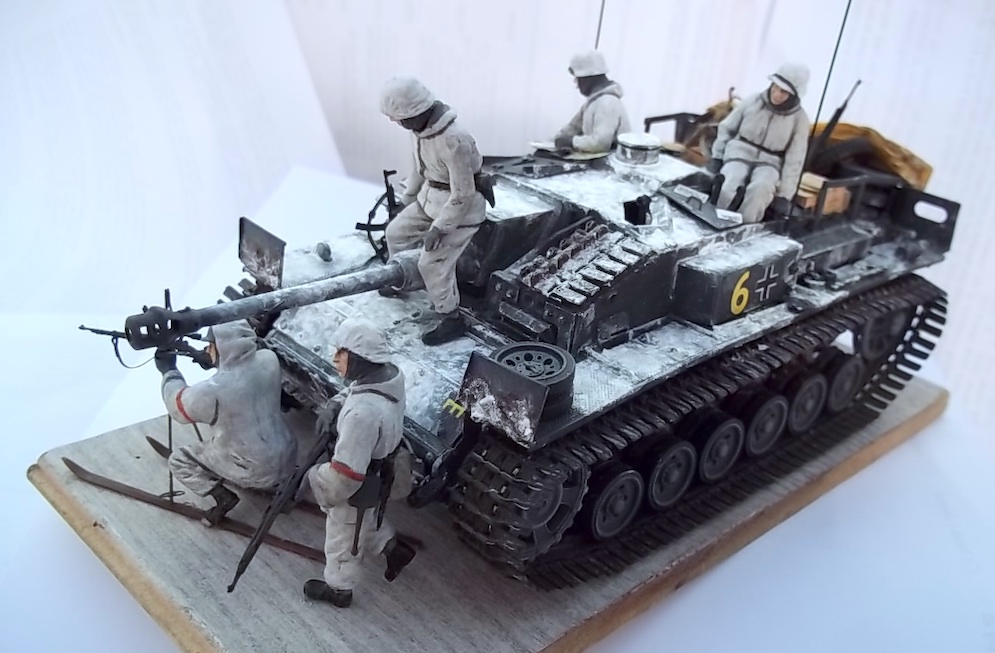
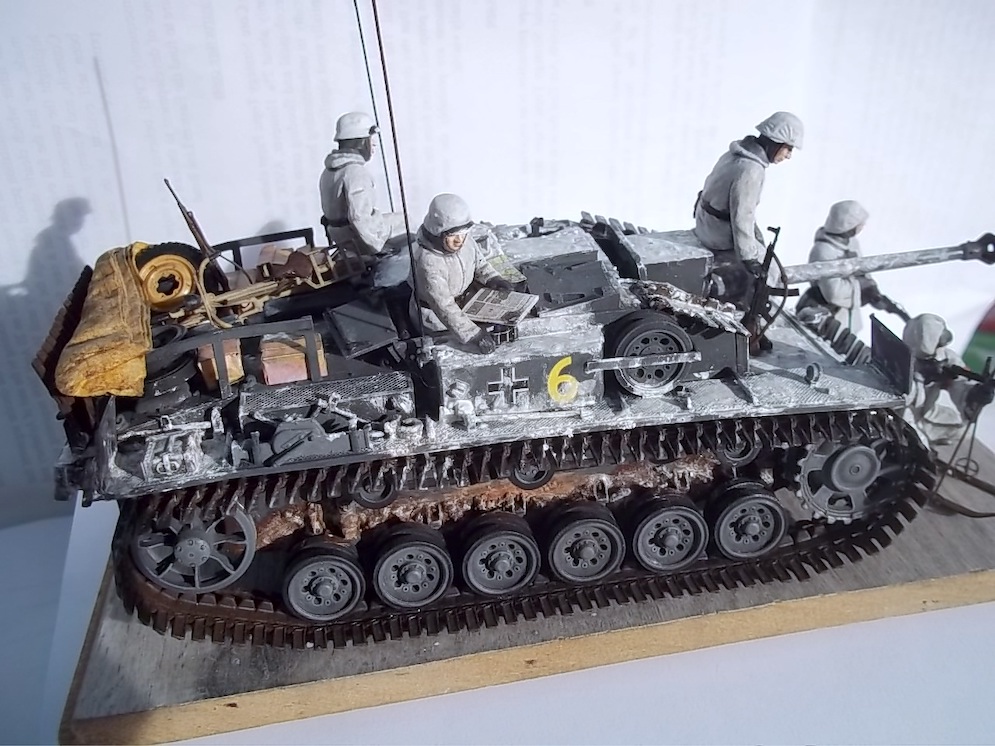
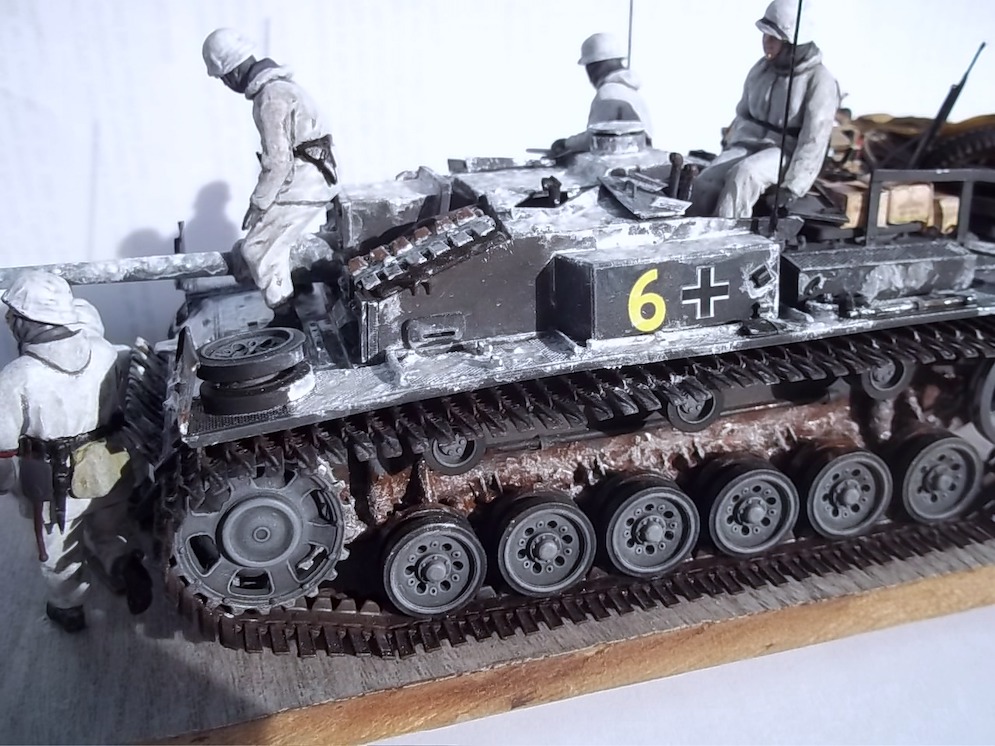
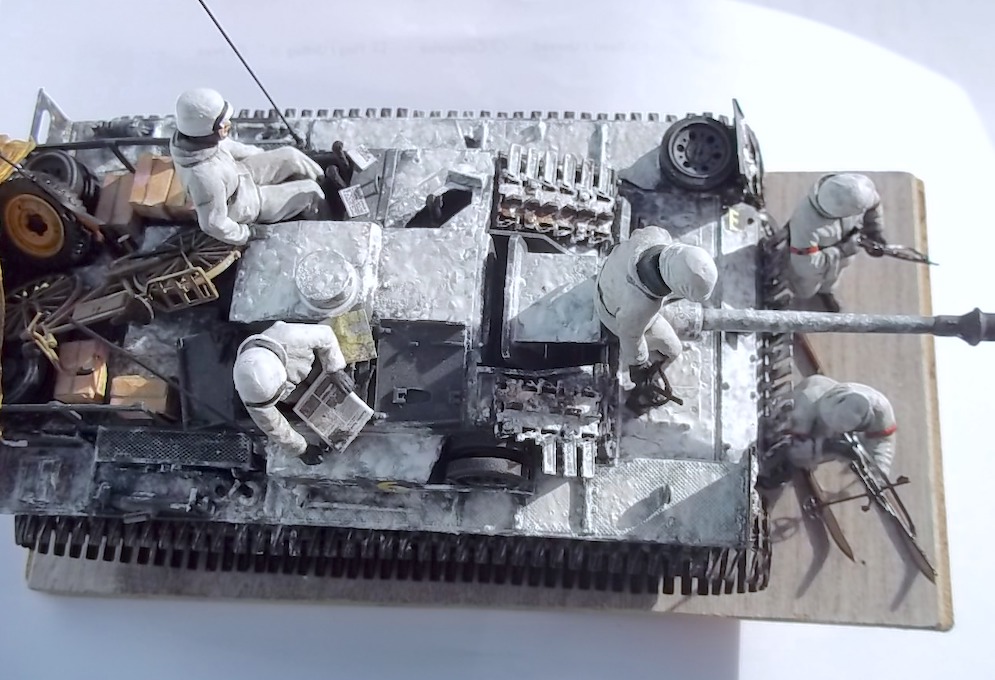
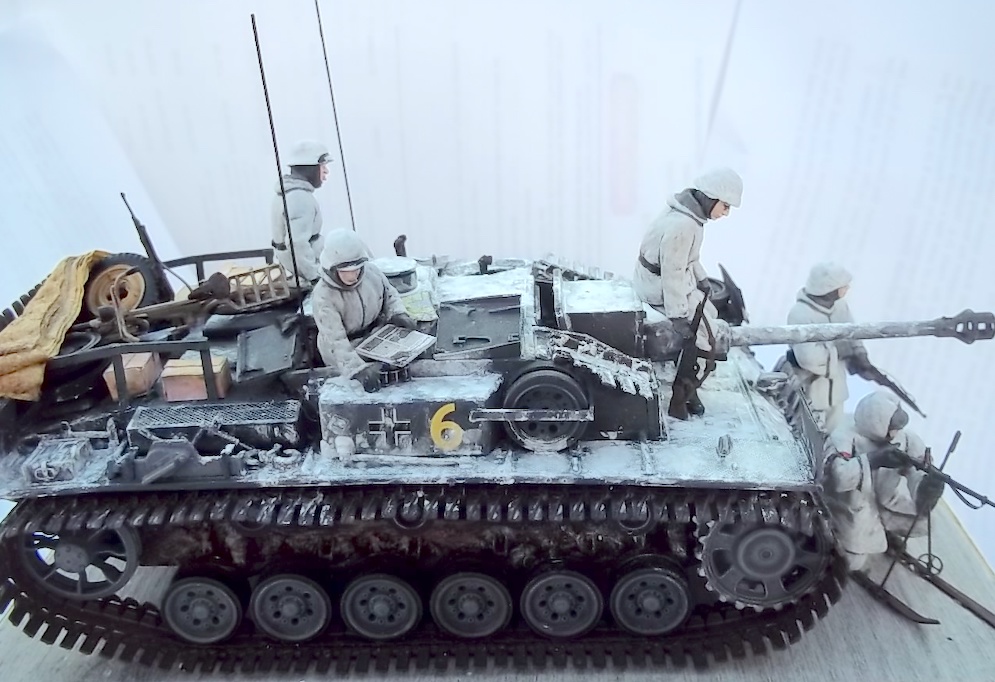
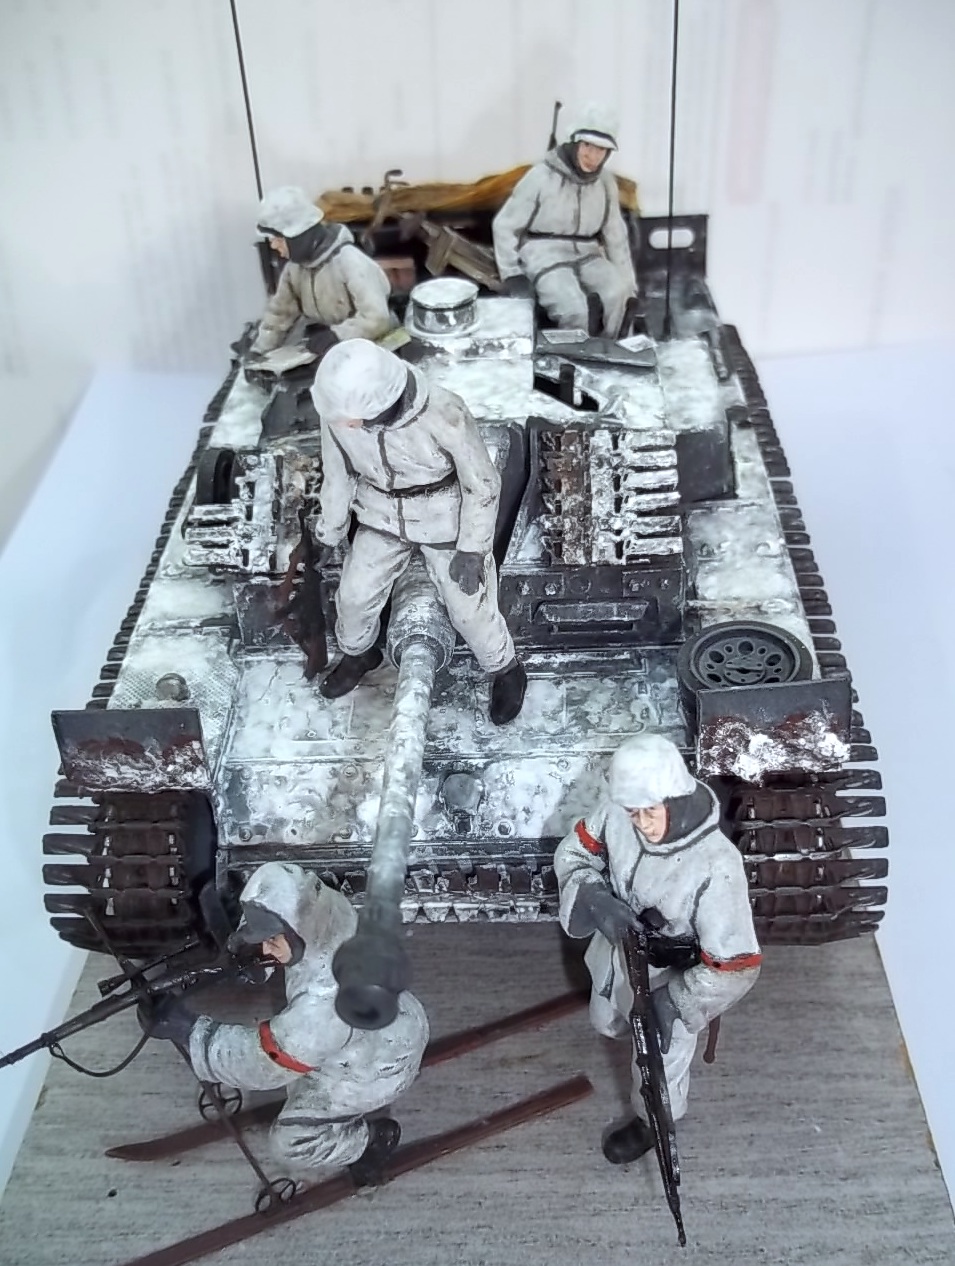
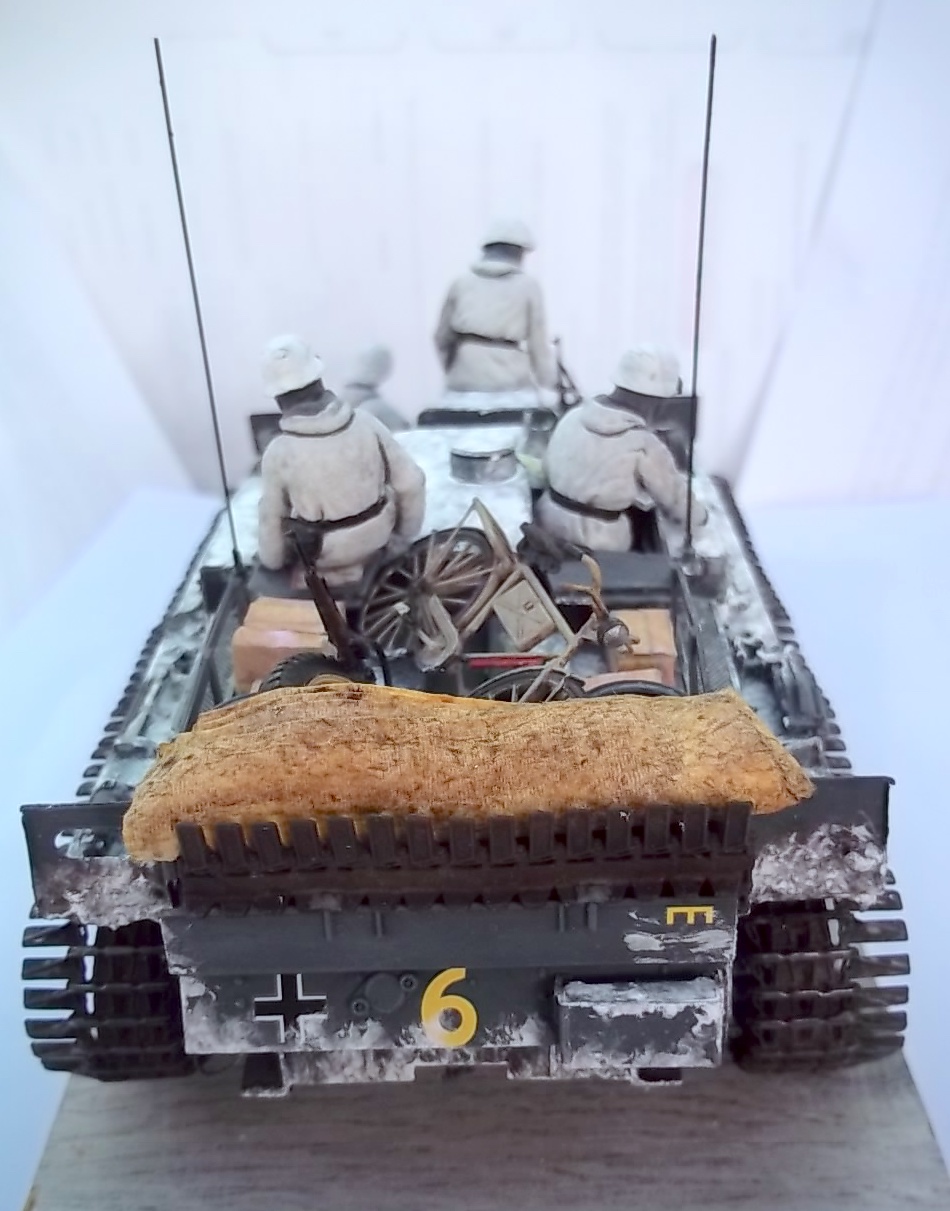
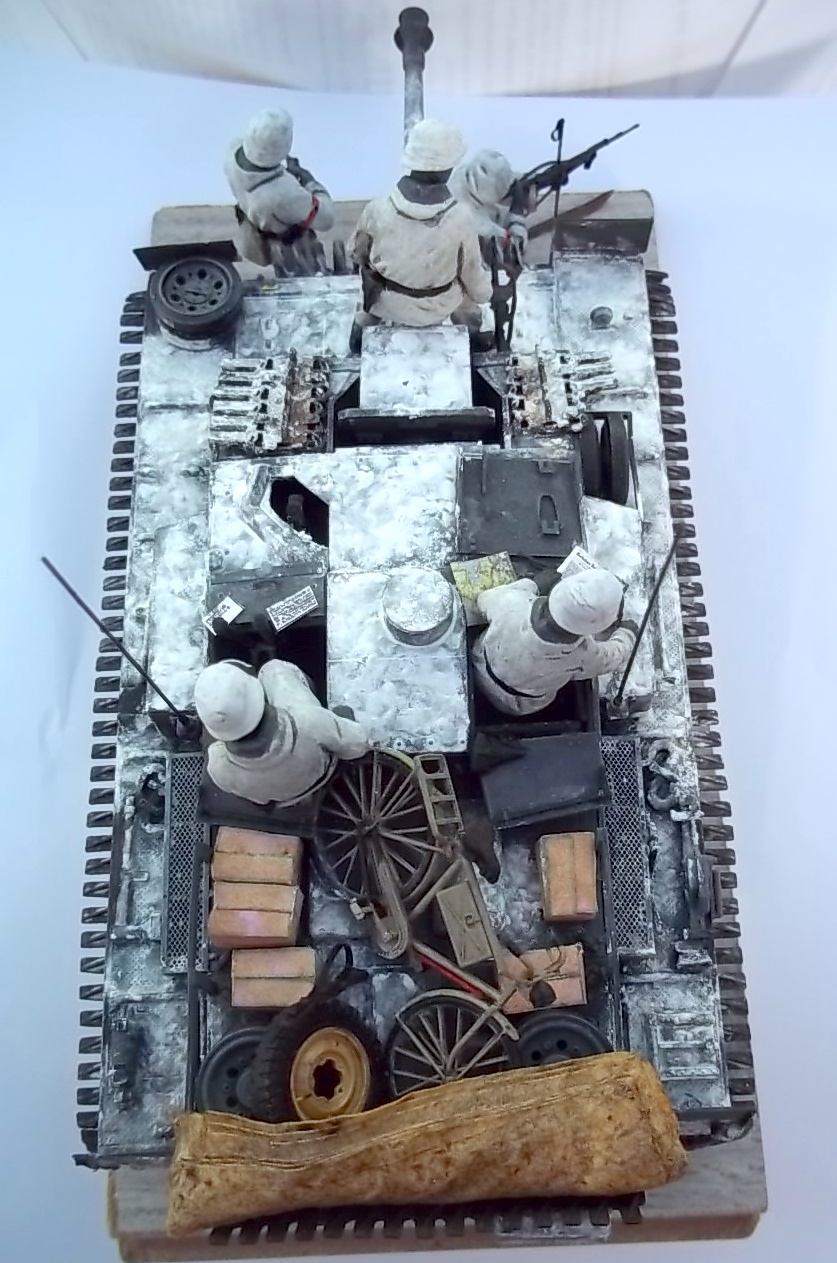
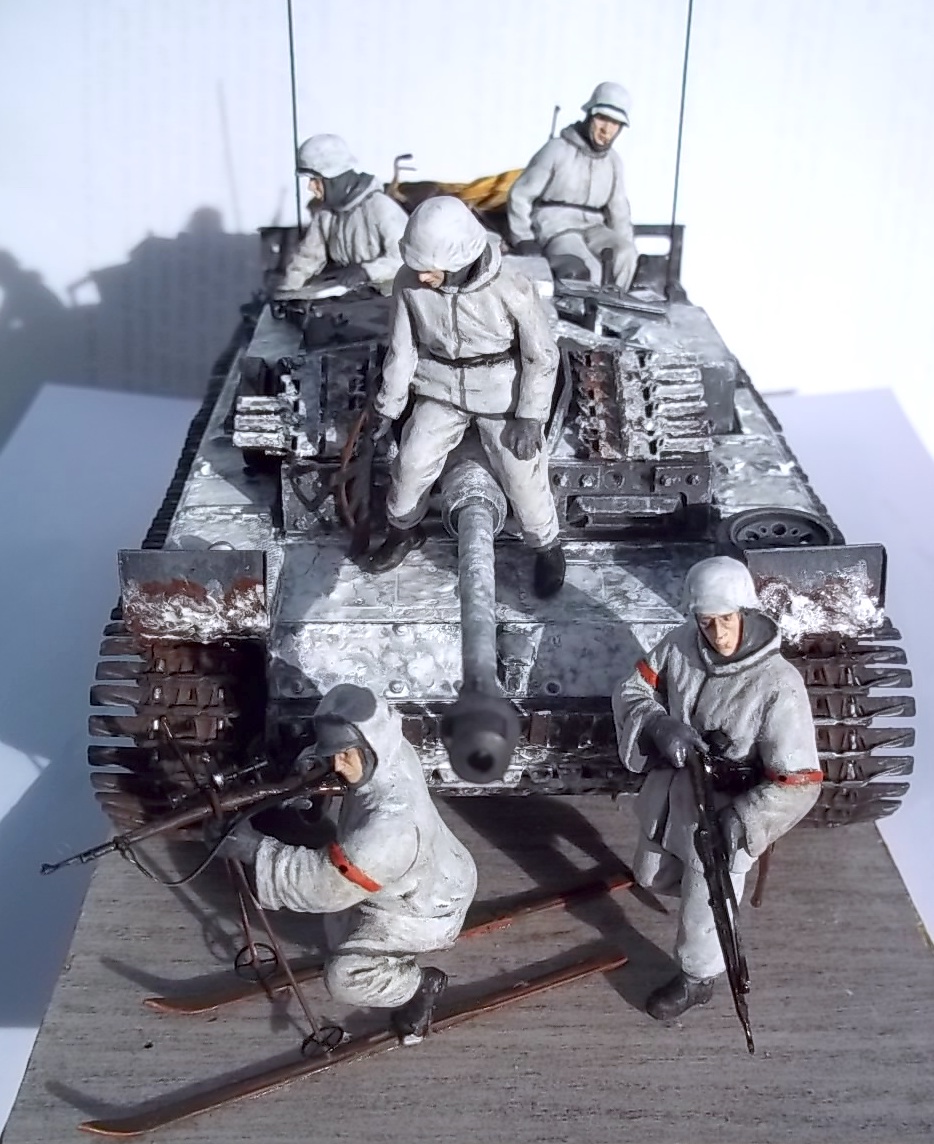
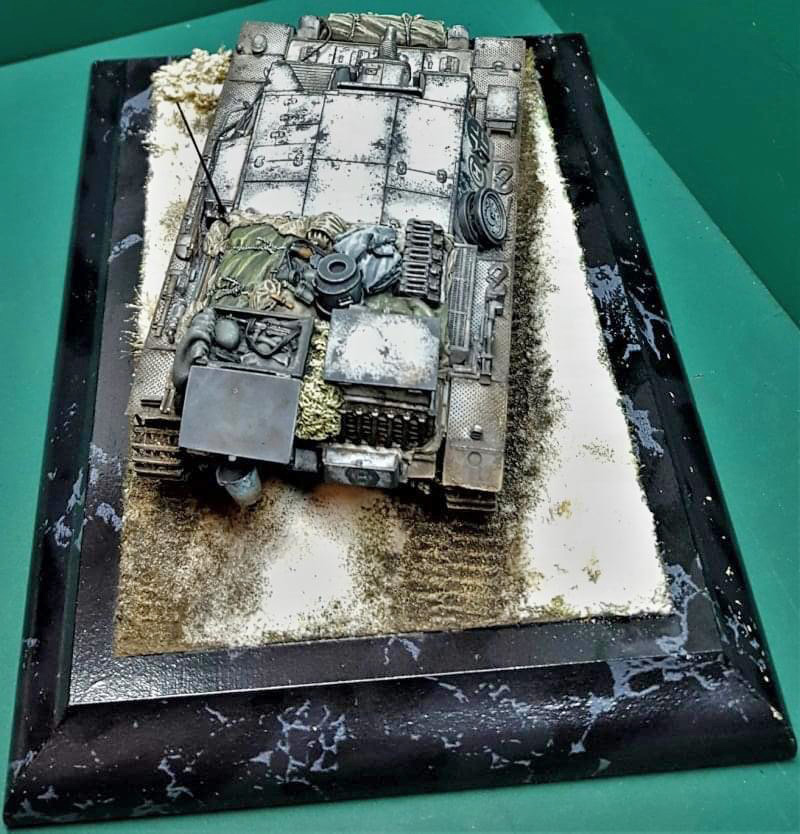
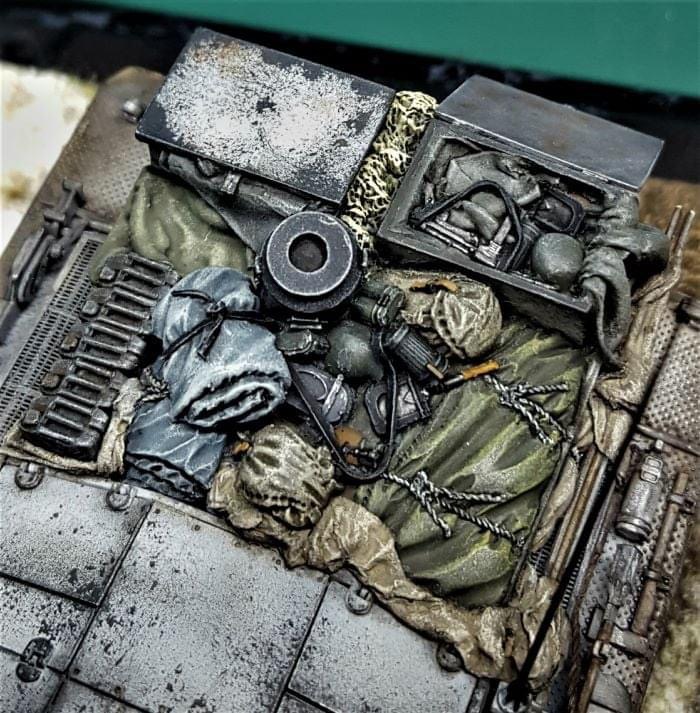
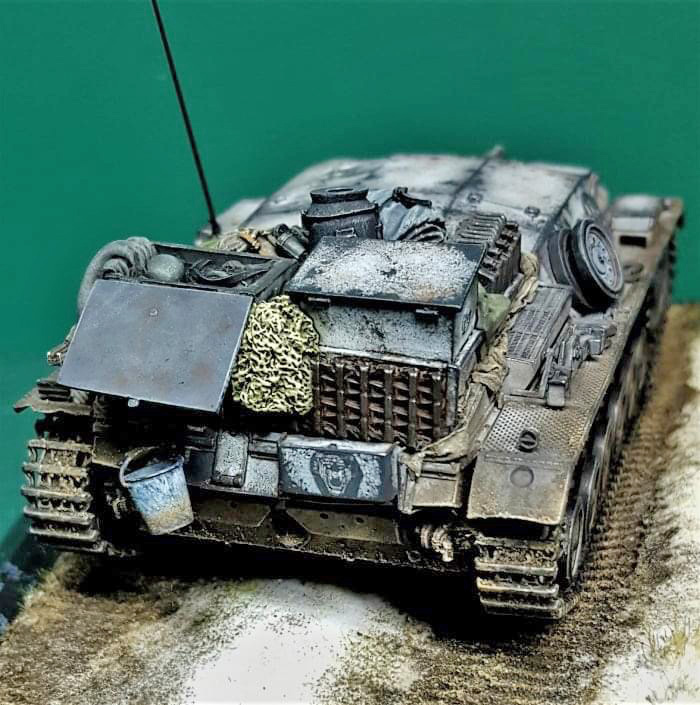
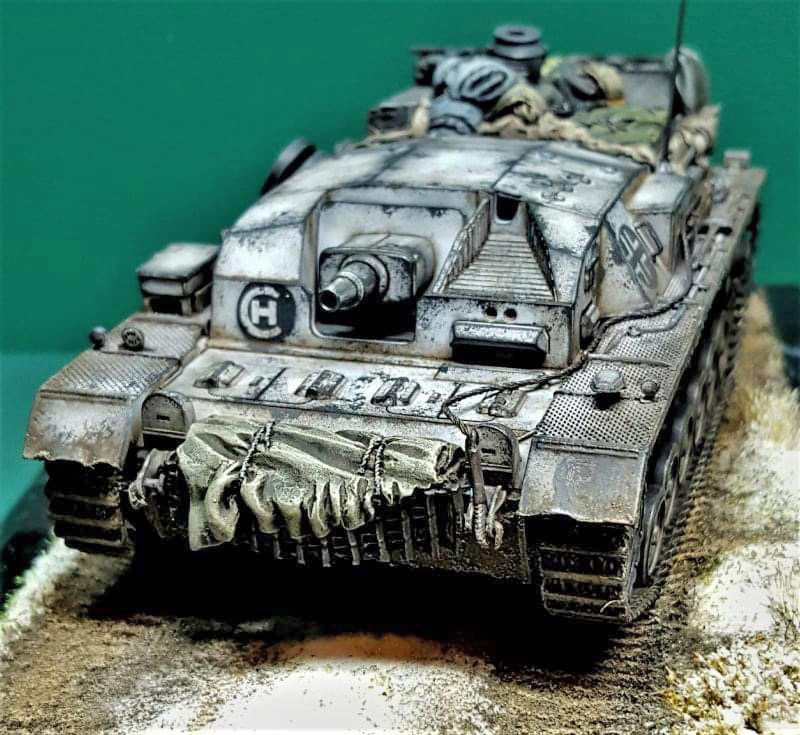
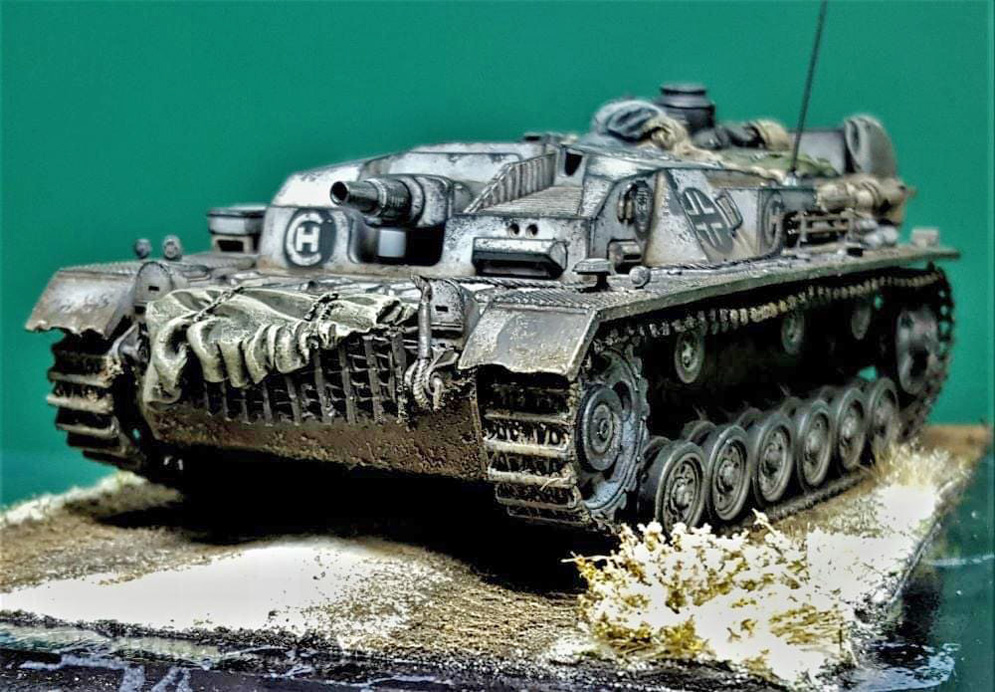
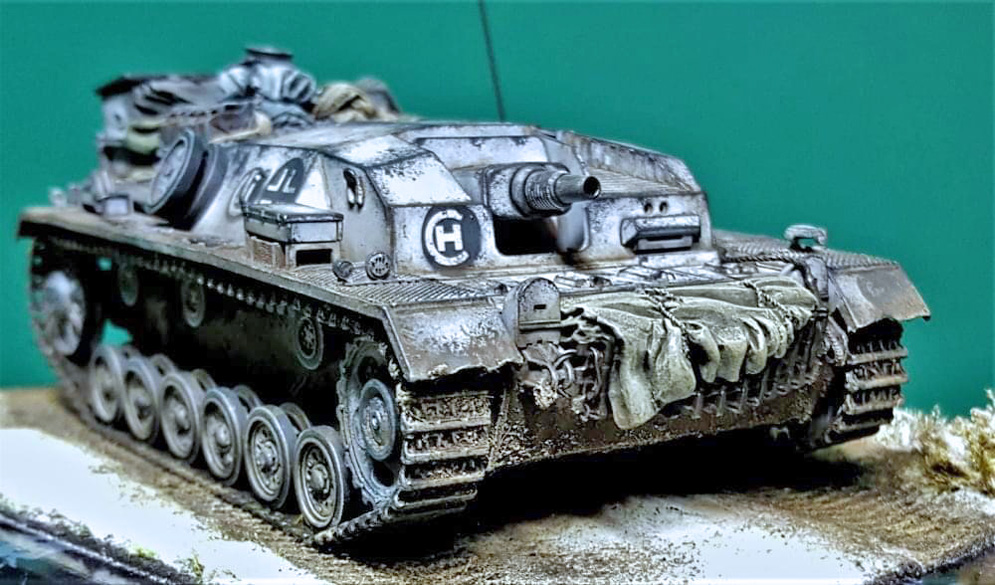
 Here is my Sturer Emil in 1:35 scale. A ‘what-if’ but an interesting subject.
A bit of renewed life for an old kit and really a weathering exercise?
Hope you like it!
Frédéric M.
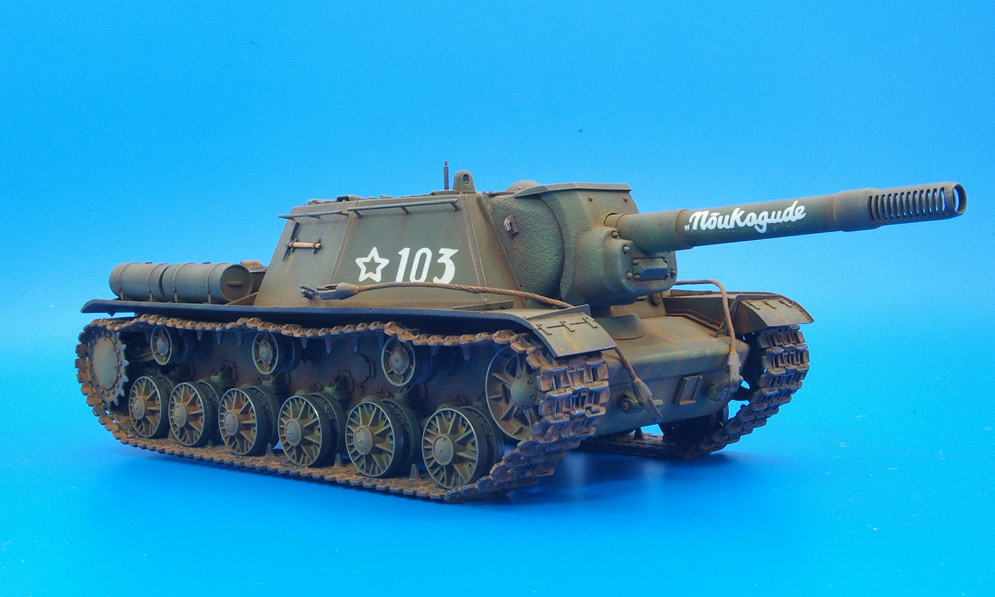
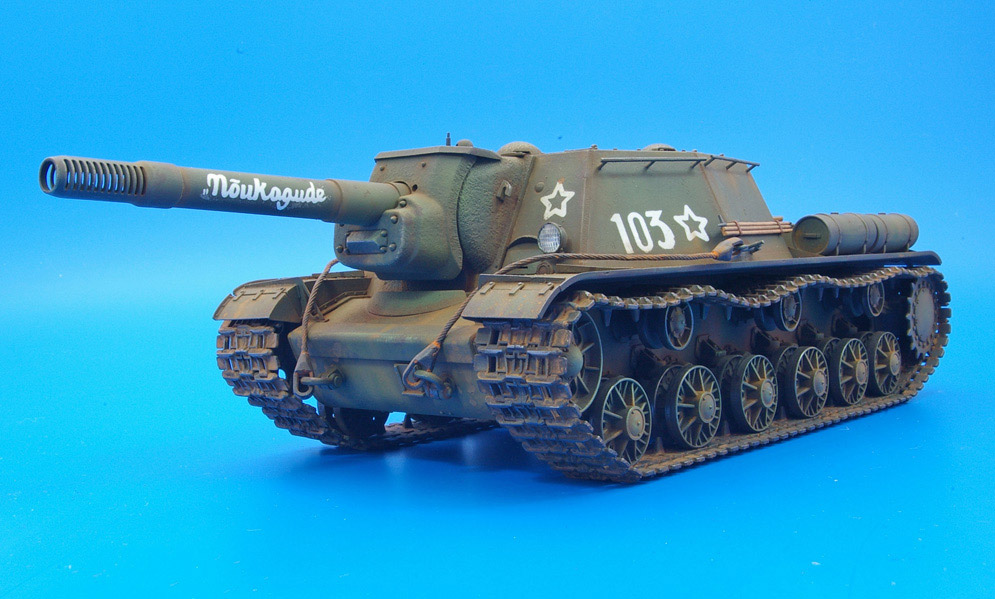
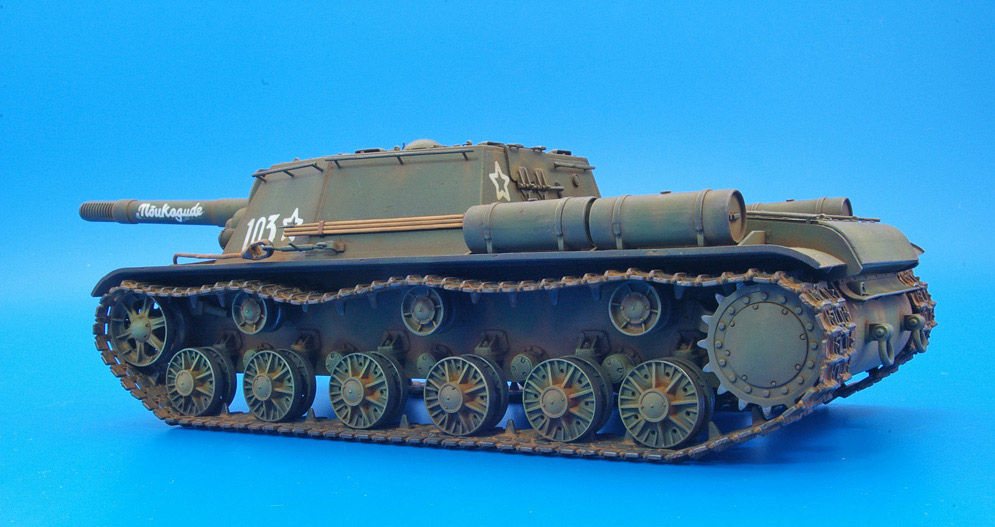
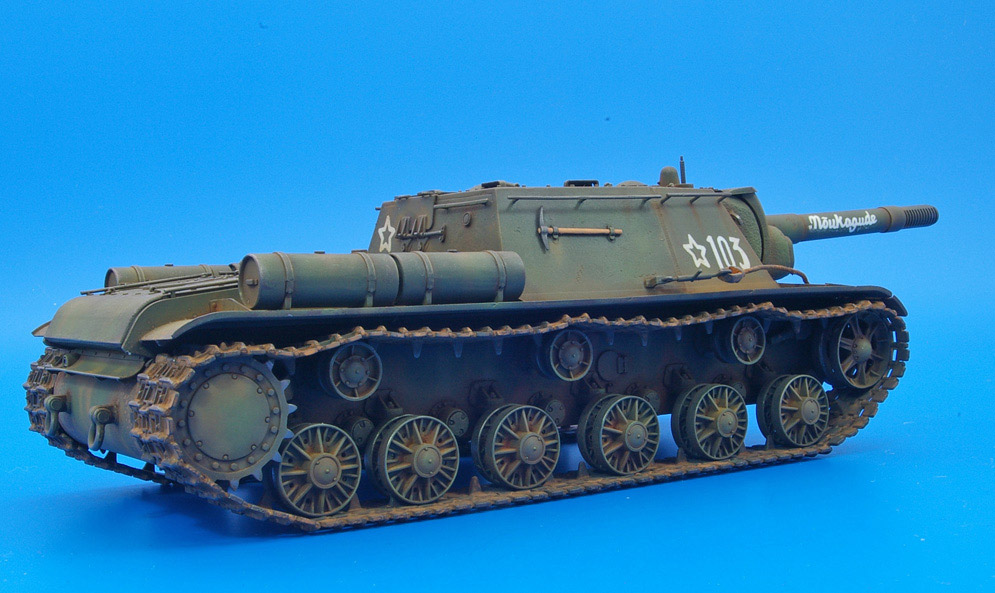
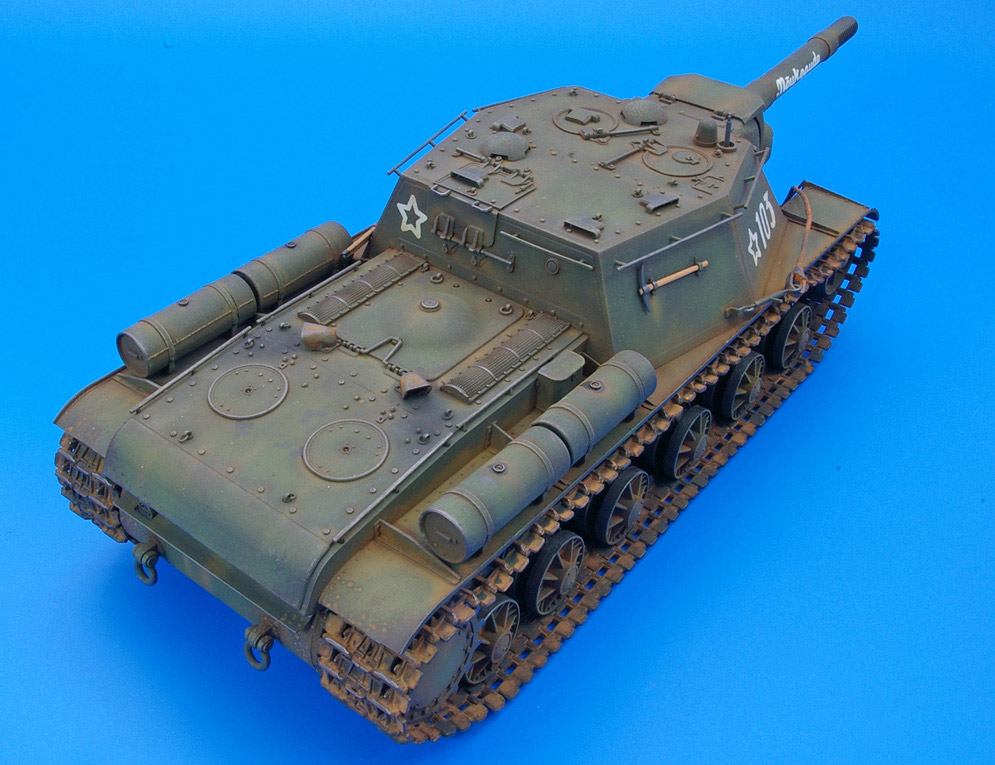
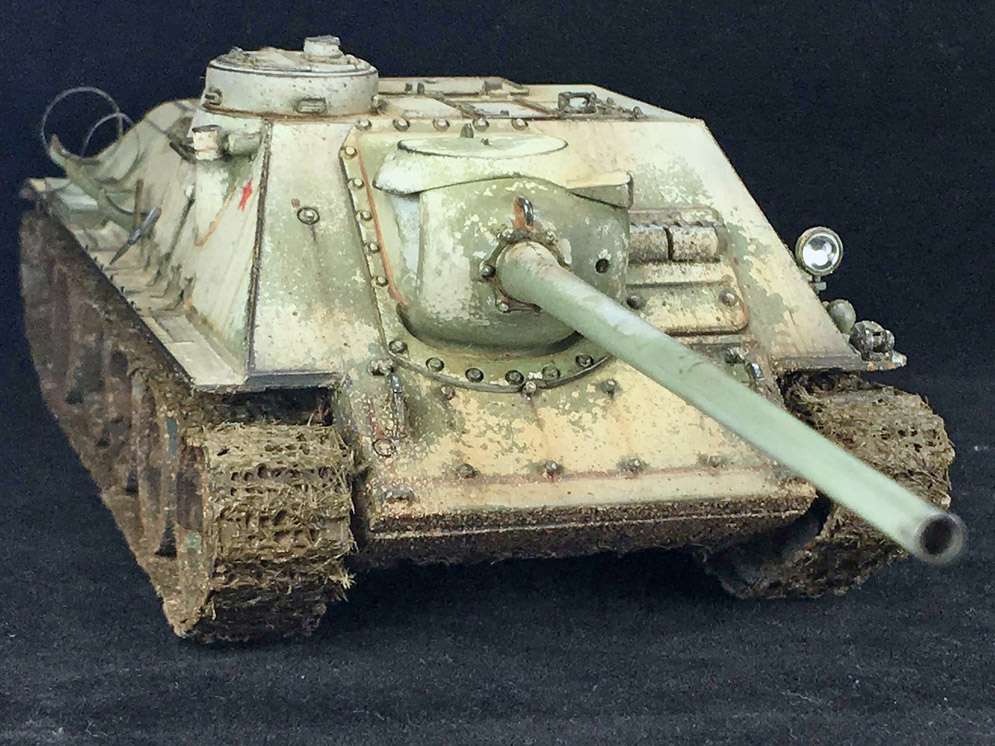
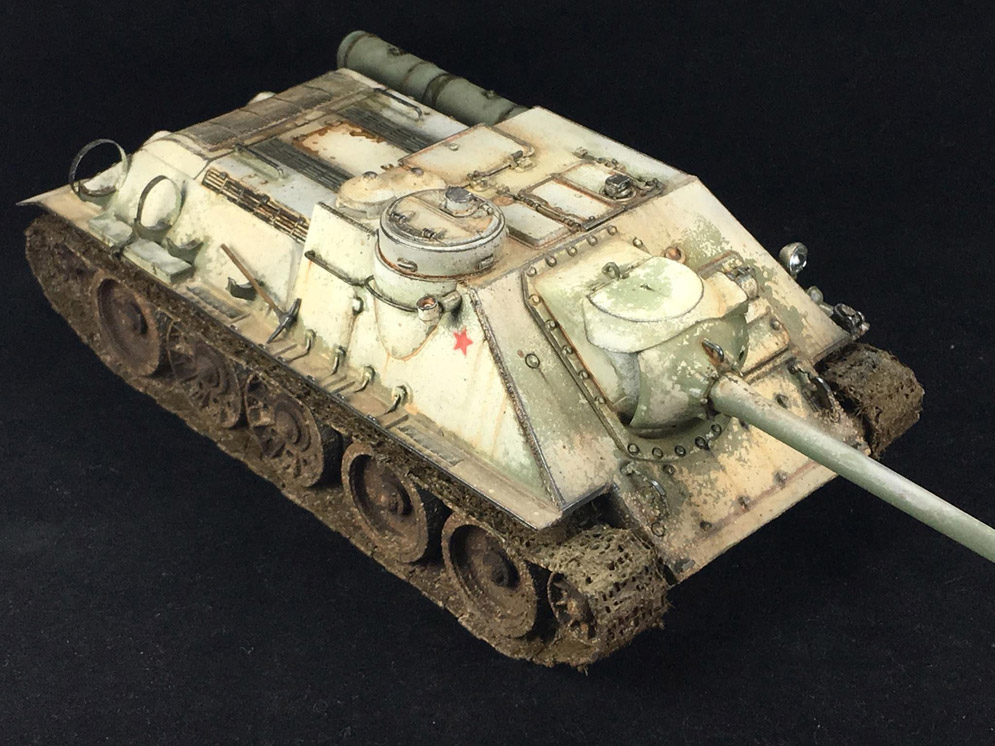
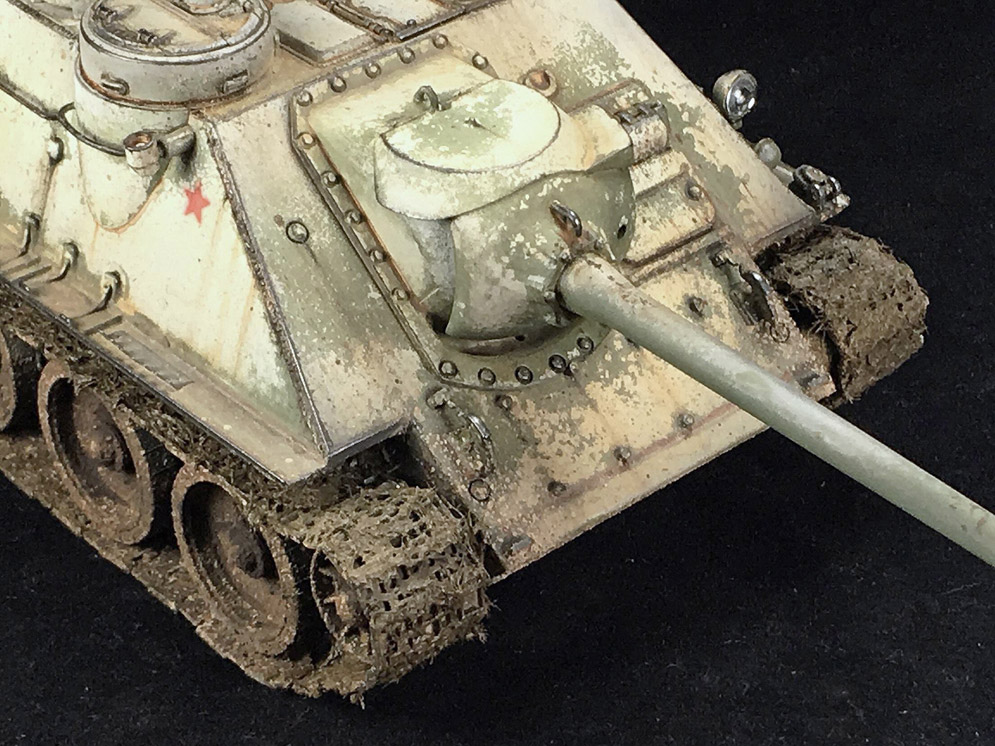
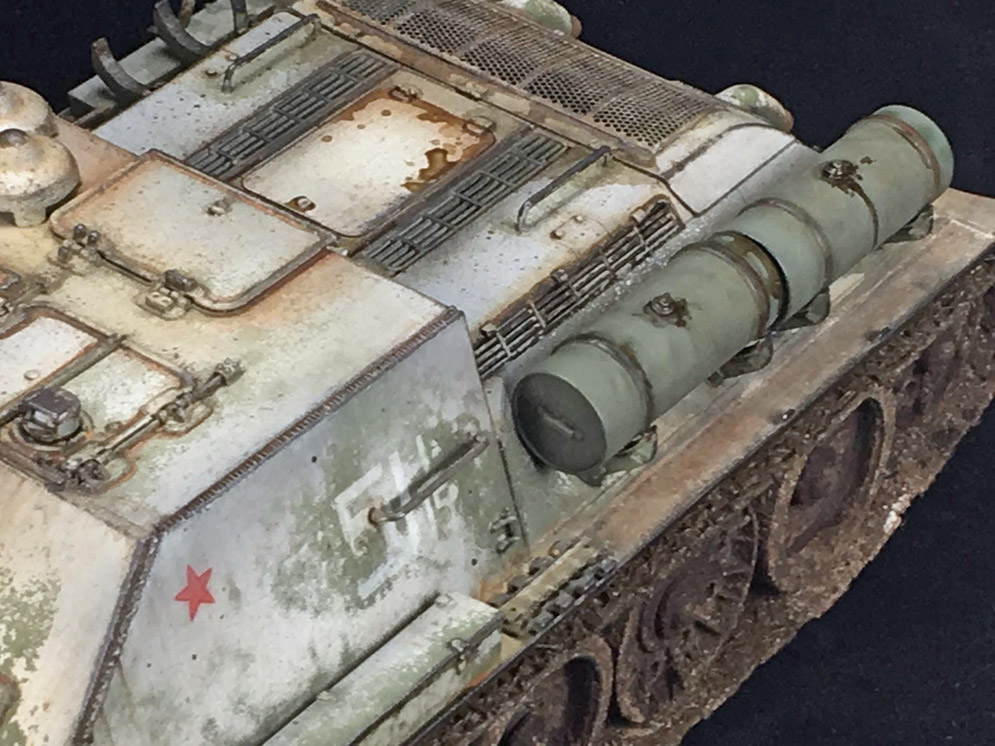
The Trumpeter kit represents the late production variant of the SU152. I believe that Trumpeter has now released a kit of the early production version as well – the main difference between the two being the ventilators on the roof of the later version.
Anyone who has built one of Trumpeter’s excellent kits of the KV tanks will find much that is familiar here. The high points of the kit for me were the metal gun barrel and the separate track links. I understand that Trumpeter has used track links appropriate for the earlier versions of the KV tanks in this kit, rather than the slightly narrower links of the KV1s. However, I felt that I could live with this discrepancy.
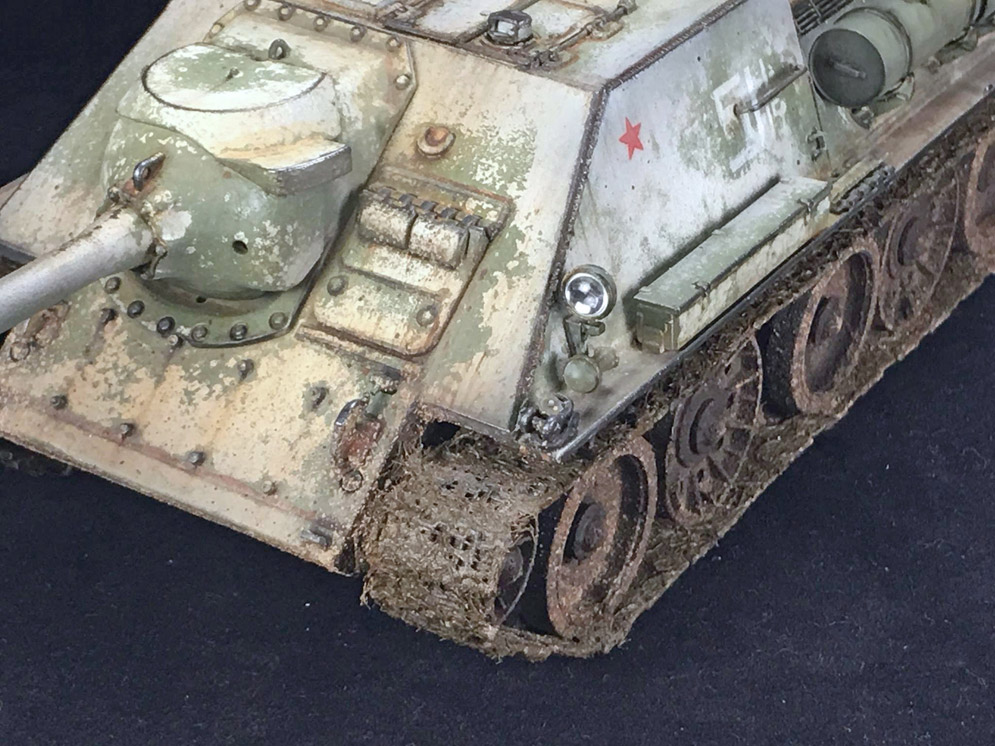
I made a few changes to the kit, adding torch cut marks around the edges of the hull and weld marks on the external fuel tanks as these features were clearly visible on photos of preserved KV tanks.
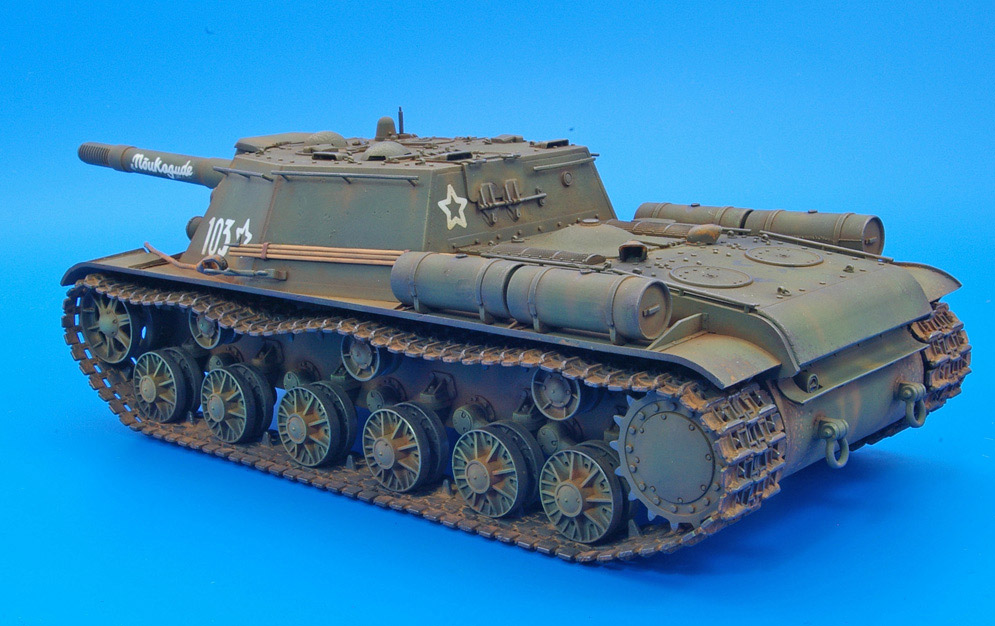
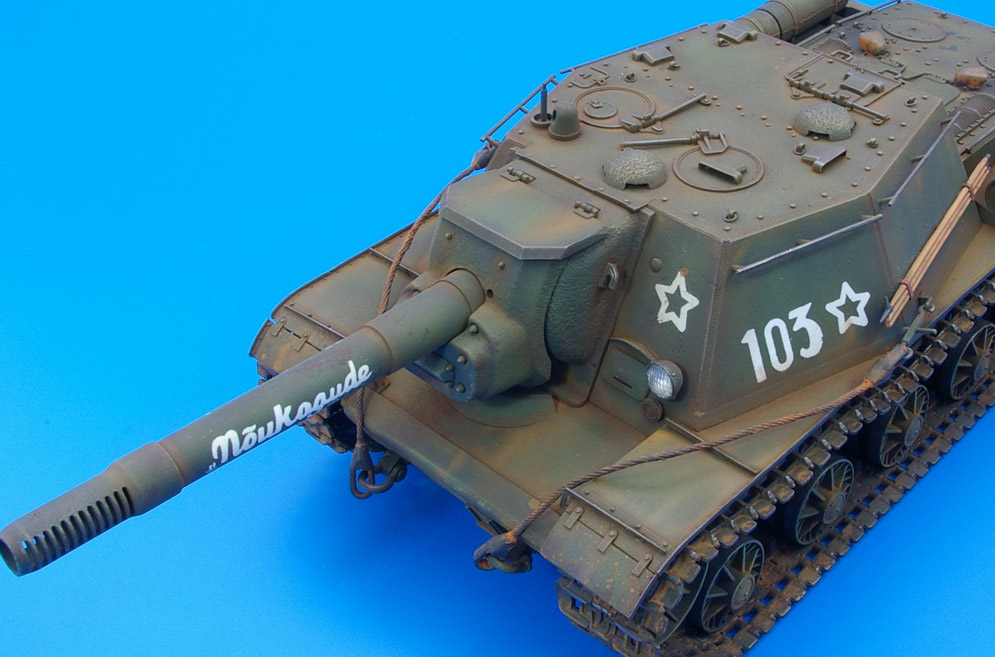
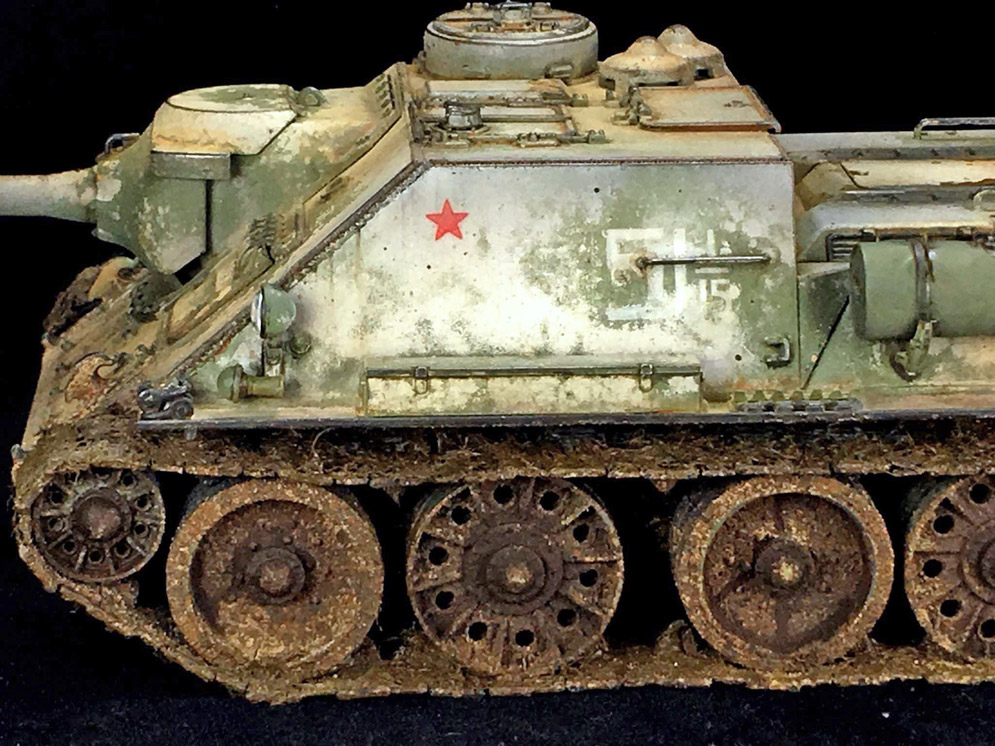
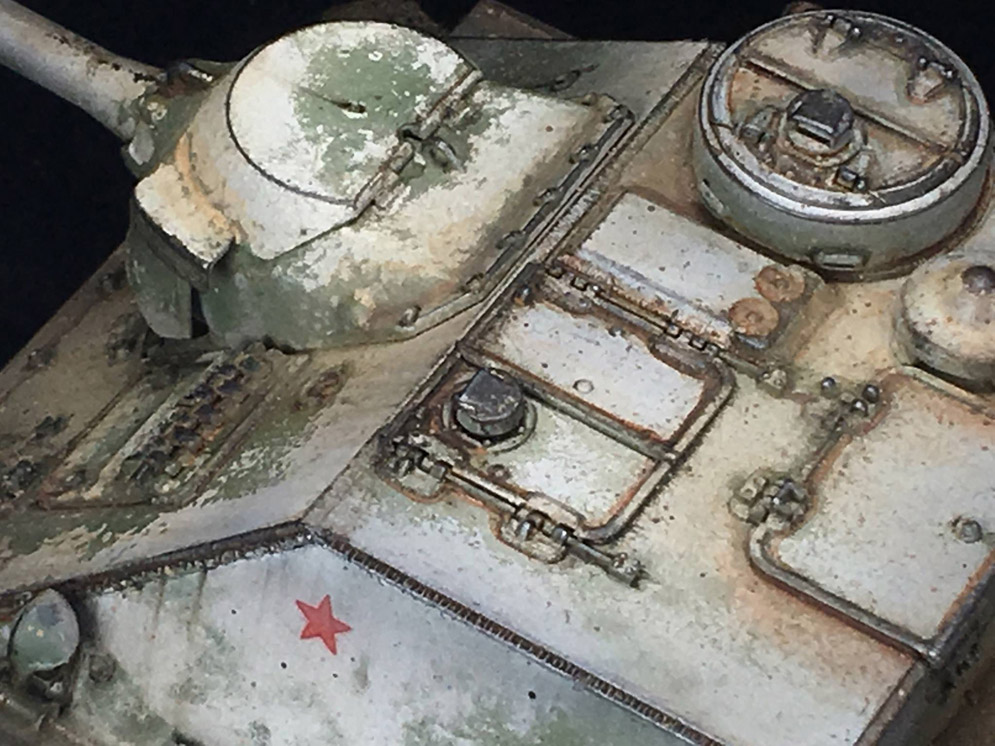
With my armour models I usually stay away from waterslide transfers whenever possible for fear of the dreaded ‘silvering’ of the clear transfer film.
However, here I tried an experiment that I think has worked quite well. I polished the primed model with Micromesh pads to provide a smooth surface. After painting with Tamiya acrylics the model was glossed using Alclad’s Gloss varnish which is spirit-based rather than using water-based Johnson’s Klear as I normally do.
I usually put water or Micro Set onto the surface of my models when applying the transfers. However, I find that these can form droplets allowing air to get under the transfer’s carrier film. In this case I used Tamiya thinners instead which, with no surface tension to speak of, formed a flat drop-free pool of liquid on the surface of the model. Putting the transfers on top of this meant that there was no air trapped under the transfer film and therefore little or no slivering. I have found that Tamiya’s acrylic paint thinner can sometimes react with Johnson’s Klear, but at least in this case Alclad’s spirit-based varnish seemed impervious to it.
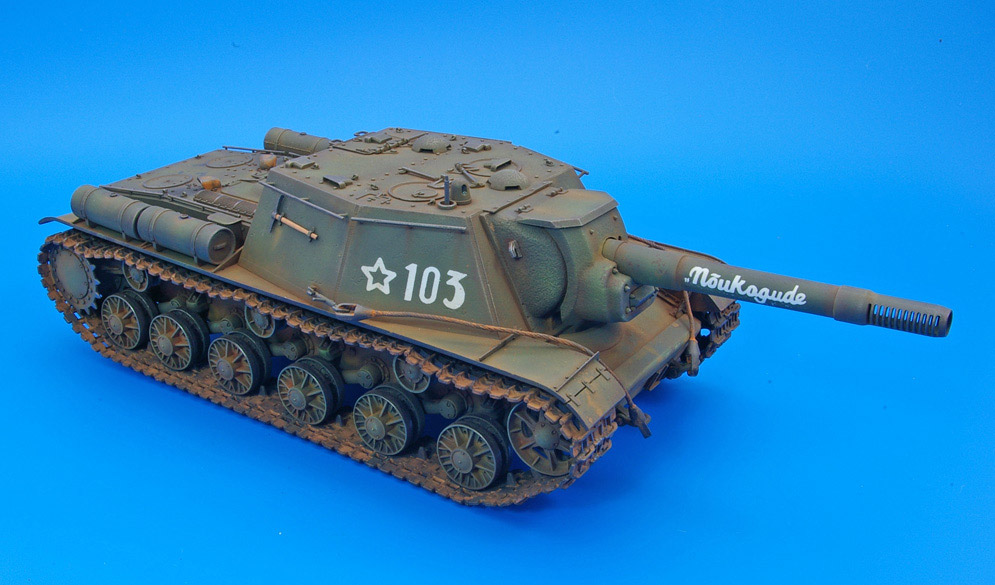
I’m not sure that this will ever be a totally fool proof method of applying transfers and avoiding silvering, but here it seems to have worked well and I think I’ll be experimenting further with this in the future.
Dai W.
Sungjun J.
Roberto C.


