• Skip to primary navigation
  • Skip to main content
  • Skip to primary sidebar

Scale Modelling Now

Scale Modelling Techniques

  • HOME
  • CONTENTS
    • What’s New
    • Techniques Bank
    • Aircraft
    • Armour
    • Classic Kit Builds
    • Civilian Aircraft Builds
    • Vehicles
    • Sci-Fi, Fantasy, Space
    • Maritime
    • Figures
    • Gift Certificate
    • Book Reviews
    • Dioramas
    • Modelling Workshops
    • Podcasts
  • WHAT WE OFFER
  • FREE SAMPLES
  • EVENTS
    • EVENTS
    • NEWS
  • ABOUT
    • CONTACT
    • ABOUT US
    • TRADERS
  • LOGIN
  • More results…

    Generic filters
    Exact matches only
    Search in title
    Search in content
    Search in excerpt
Pages: Page 1 Page 2 Page 3 Page 4 Page 5 Page 6 Page 7 Page 8 Page 9 Page 10 Page 11 Page 12 Page 13 Page 14 Page 15 Page 16 Page 17 Page 18 Page 19 Page 20 Page 21 Page 22 Page 23 Page 24 Page 25 Page 26 Page 27 Page 28

Dragon P-51D Mustang 1:32

April 10, 2013 By

Fixing the surface – a challenge worth taking? Read on…

35 BN Ac Dragon P51D Mustang Pt2
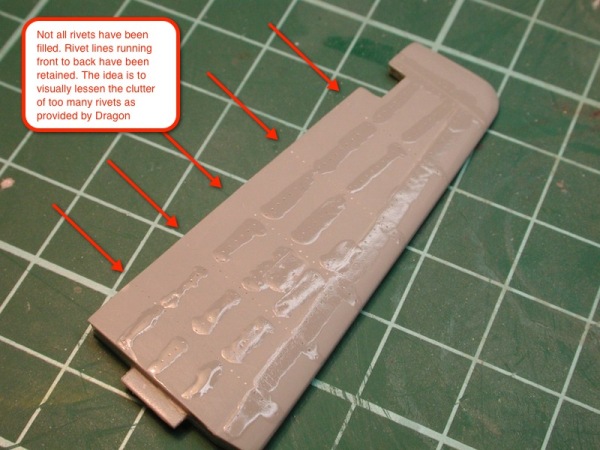
Still having major doubts about the viability of this project, I needed to convince myself one way or the other that all this filling and sanding was worth it. I decided to select one surface of the model and follow all the steps I would need to do just to see what it ended up like. Here we see the port horizontal tail section (minus elevator) and I am filling some of the rivets with super glue.
36-BN-Ac-Dragon-P51D-Mustang-Pt2
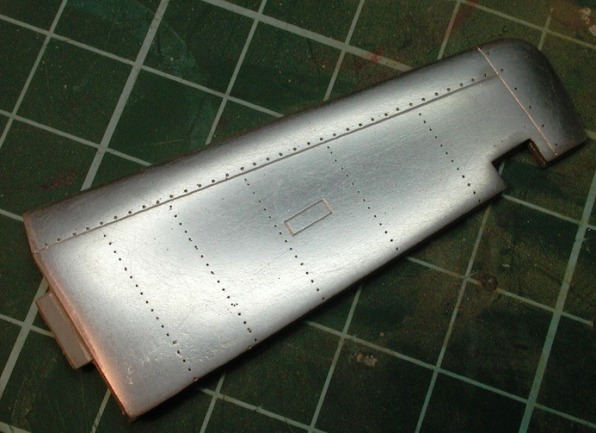
Once the glue was dry (5 mins), I sanded it flush and here am creating new rivets (with different spacing) along the leading edge panel line. I am using one of the Hasegawa TriTools and a compass point to mark the spacing for the new rivets. The tape holds the template in place.
37-BN-Ac-Dragon-P51D-Mustang-Pt2
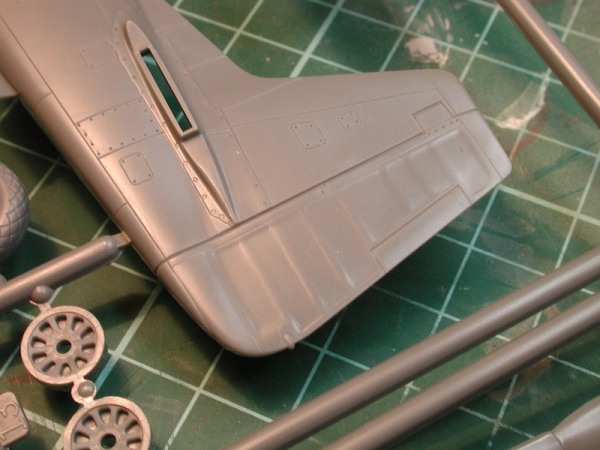
Now under a coat of primer, we see the modified part next to the original Dragon part. Learning a bunch of stuff here about how deep the rivets should be etc which should prove very useful once I go onto tackle the bigger pieces.
38 BN Ac Dragon P51D Mustang Pt2
Last step in the process is a coat of Alclad2 Airframe Aluminium to see what it will come out like. I’m content and so the project survives to live another day.
39 BN Ac Dragon P51D Mustang Pt2
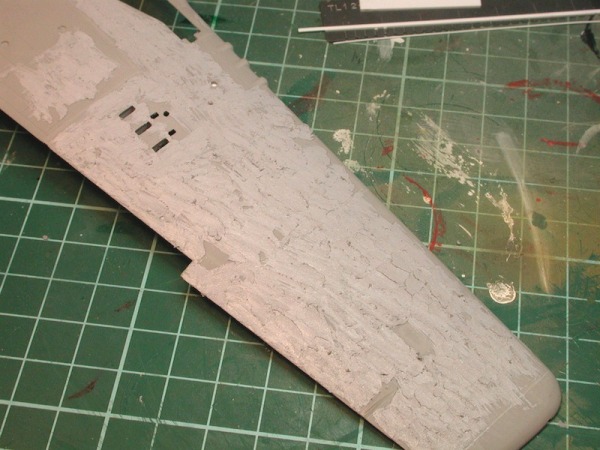
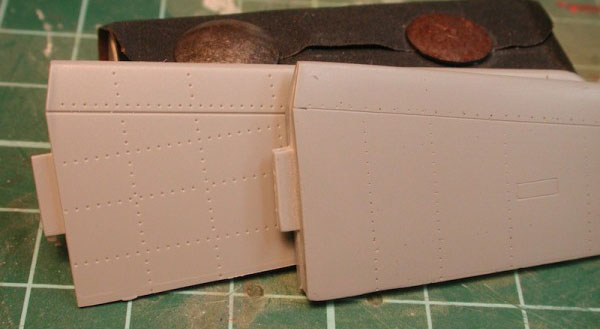
And so onto the monstrous (thanks Dave) amount of work required to fill and sand the rivets on all model surfaces. Here I have bulk-filled part of the wing lower surface with Tamiya Basic Putty.
40-BN-Ac-Dragon-P51D-Mustang-Pt2
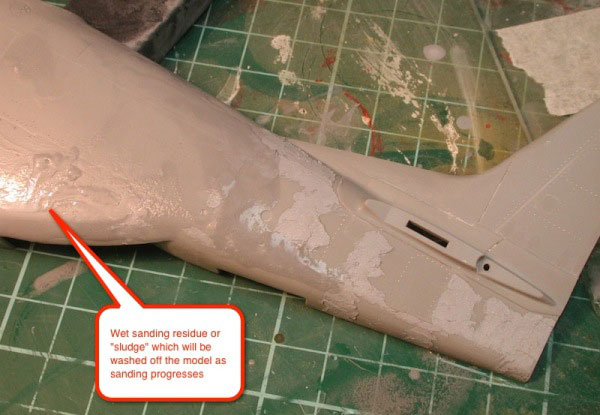
The fuselage has only had selected rivets filled (there are just too many for a 1:32 model imho!) and here I have started the sanding with wet’n dry paper. Notice the sanding sludge on the left part of this photo.
41-BN-Ac-Dragon-P51D-Mustang-Pt2
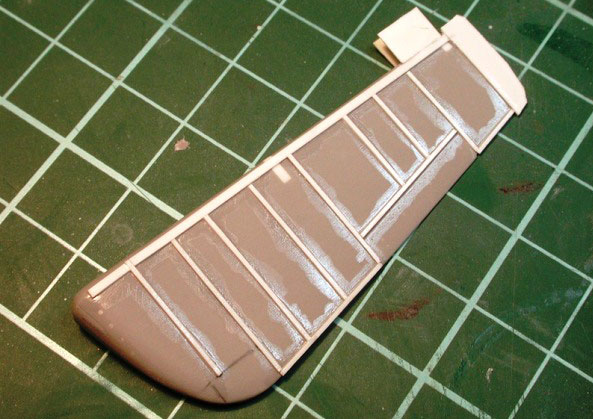
As you can imagine, you get sick of filling and sanding pretty darn quick. Needing a break I turned to the rudder for which I still had not figured out how to best re-create the doped cloth over wooden frame affect. After considering my options (and doing some testing which ended up failing but taught me some things) I decided to re-produce the wooden ribbing using 10×20″ strip plastic. I used reference photos (and the Tamiya 1:48 model) to determine the layout.
42 BN Ac Dragon P51D Mustang Pt2
Once dry, some 600 wet’n dry was used to further thin down the ribbing to the point of almost disappearing (in some spots you can see I have in fact rubbed right through).
43 BN Ac Dragon P51D Mustang Pt2
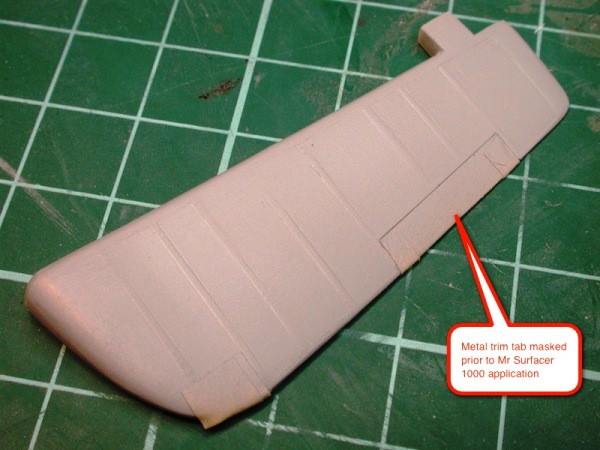
A thinned mixture of Mr Surfacer 1000 was lightly sprayed onto the tail (the trim tab was masked first). Building up several layers gave me the desired effect of cloth stretched over the ribbing. Overall I’m quite happy, with room for improvement next time.
A shot of the Tamiya 1:48 tail to allow you to compare my end result.
44 BN Ac Dragon P51D Mustang Pt2

Radiator…

Pages: Page 1 Page 2 Page 3 Page 4 Page 5 Page 6 Page 7 Page 8 Page 9 Page 10 Page 11 Page 12 Page 13 Page 14 Page 15 Page 16 Page 17 Page 18 Page 19 Page 20 Page 21 Page 22 Page 23 Page 24 Page 25 Page 26 Page 27 Page 28

Primary Sidebar

All the completed Aircraft builds.
Click on a Manufacturer below to see a list of all SMN's completed builds from their range.

BACK TO AIRCRAFT MAIN PAGE

Login

You are not currently logged in.


» Lost your Password?

SEARCH THE WEBSITE

More results...

Generic filters
Exact matches only
Search in title
Search in content
Search in excerpt

Finished Aircraft Reviews

  • Academy
  • Accurate Miniatures
  • Aeroclub
  • AFV Club
  • Airfix
  • A-model
  • Airmodel
  • AlleyCat
  • AMK
  • AMT.ERTL
  • ARII
  • Arma
  • Attack Squadron
  • Azur
  • BPK (Big Planes Kits)
  • Bronco Models
  • Classic Airframes
  • Czechmaster
  • Dragon
  • Dynavector
  • eduard
  • Fisher Model
  • Fly
  • Frog
  • GasPatch
  • Grand Phoenix
  • Great Wall Hobby
  • Hasegawa
  • Halinski
  • Heller
  • HGW Models
  • HpH Models
  • High Planes Models
  • HK Models
  • Hobby Boss
  • ICM
  • Ideal Toy Corporation
  • IsraCast
  • Italeri
  • Khee Kha
  • Kinetic
  • Kit Form Services
  • Kitty Hawk
  • KoTare
  • LF Models
  • Lukgraph
  • MPM
  • MRC/Academy
  • Mach 2
  • Meng
  • Mirage Hobby
  • Monogram
  • Pacific Coast Models
  • RS Models
  • Rareplane
  • Revell
  • Roden
  • SBS Model
  • Scratch-builds & Specials
  • Silver Wings
  • Simian’s Stuff
  • Special Hobby
  • Sword
  • Takom
  • Tamiya
  • Tanmodel
  • Trumpeter
  • Valom
  • Vector
  • Vintage
  • Whirlybird
  • Wingnut Wings
  • Xtrakit
  • Zoukei Mura
  • Zvezda

Copyright © 2025 · Scale Modelling Now · Online Scale Modelling Magazine · Scale Modelling Techniques and Tips · Privacy Policy