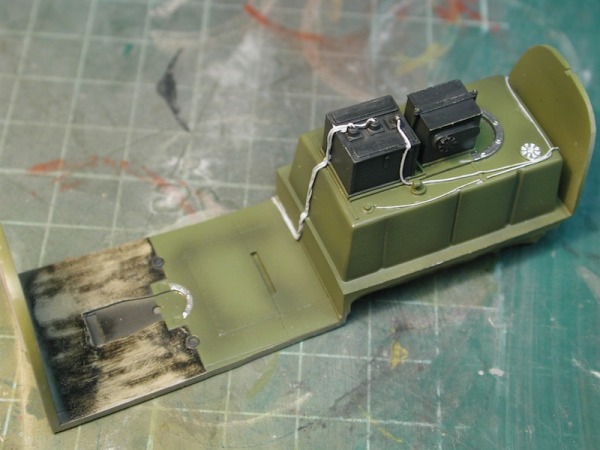
The main cockpit tub has received its detailed painting. The masking tape has been removed from the “plywood” floor. The cabling was picked out using Lite Gray Vallejo acrylic paint.
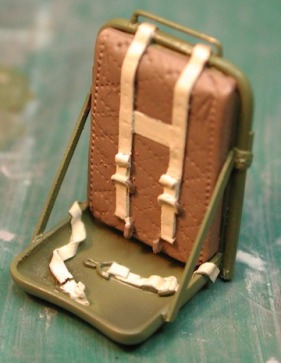
The very nice CMK seat has also been hand painted with Vallejo paints. Note that the belt buckles have intentionally not been painted at this point. Reason for this is I want to flat coat the whole seat prior to an oil wash and experience has shown that the metallic paints (Alclad and others) do not look as realistic under a coat of flat clear. I will therefore leave the buckles to the very end.
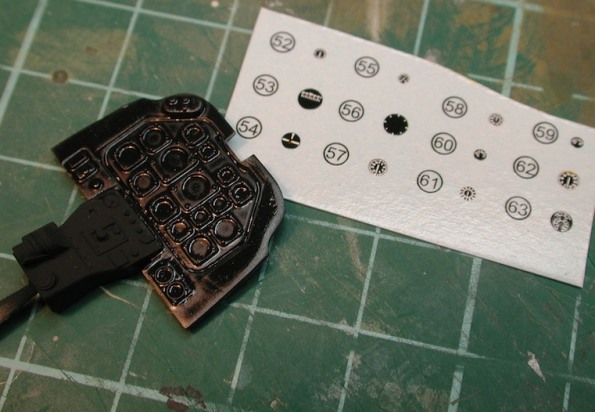
The kit instrument panel has been gloss-coated (hand brushed Future in my case) in preparation for the Dragon supplied (Cartograf) decals.
As expected the Cartograf decals performed faultlessly when applied with Micro Set and Micro Sol. This simply is the best way to make a realistic instrument panel in my opinion.
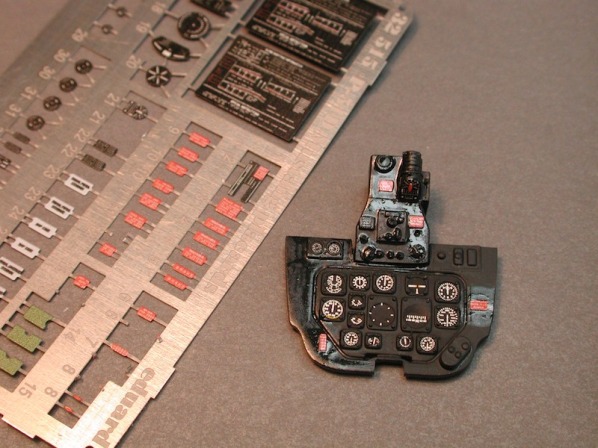
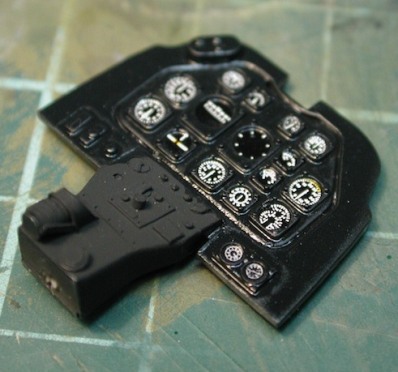
The P-51 cockpit is absolutely covered with warning placards and Eduard have created a pre-painted PE set to cover these items. As you can see, these parts are VERY tiny (even in 1:32) and I had a bit of a head scratch on how to stick them on. Normally I would use Super Glue, but these extra small parts were very hard to pick up and position accurately using CA glue. (From Geoff – Just a tip, but check out the new Flex-i-file Micro Sticky Stix designed just for the purpose of picking up and locating to your model from the Albion-Alloys now page in SMN) Not sure where I have heard it said that Future can act as an adhesive, but anyway I thought it would be ideal for this situation. So I applied a fairly wet coat of future to the instrument panel and then carefully placed the placards on and moved them into position and over-coated with more Future. Once dry, this gave a fairly strong bond and so far (crosses fingers) has held firm.
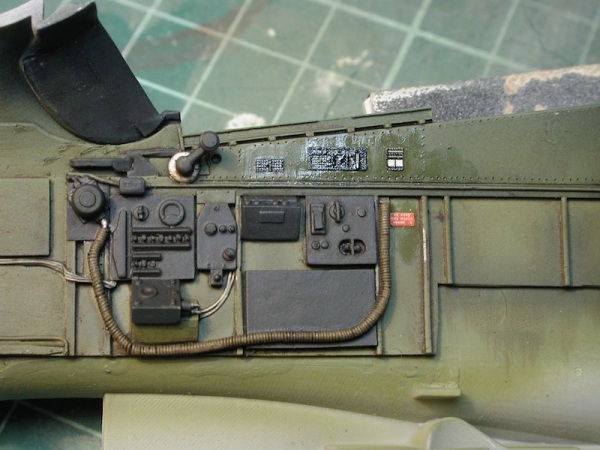
As the Future method of attaching the PE to the instrument panel seemed to work so well, I decided to use it again on the sidewalls, As you can see, you really don’t need very much Future to get it to adhere the PE. Later on I was even able to lightly mask over the PE parts without drama.
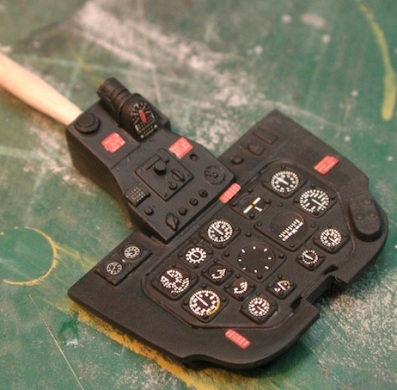
The whole panel has received a flat coat. Next up will be some oil washes and dry brushing followed by detail painting (switches etc). Last step will be to lightly gloss up the glass faces of the instruments themselves. No need to go too hard with the gloss when doing this as we need to achieve a scale effect.
Pages: Page 1 Page 2 Page 3 Page 4 Page 5 Page 6 Page 7 Page 8 Page 9 Page 10 Page 11 Page 12 Page 13 Page 14 Page 15 Page 16 Page 17 Page 18 Page 19 Page 20 Page 21 Page 22 Page 23 Page 24 Page 25 Page 26 Page 27 Page 28