More riveting!

Time had come to begin re-scribing the wing panel lines. I used a mixture of Pactra 1/16″ flexible tape and metal rules as scribing guides. Here we see a copper rule held in place with tape along which the scribing blade will be guided. It’s very important that whatever you use as the guide or template for scribing and riveting is held firmly to ensure a consistent result; nothing worse than a crooked line of rivets.
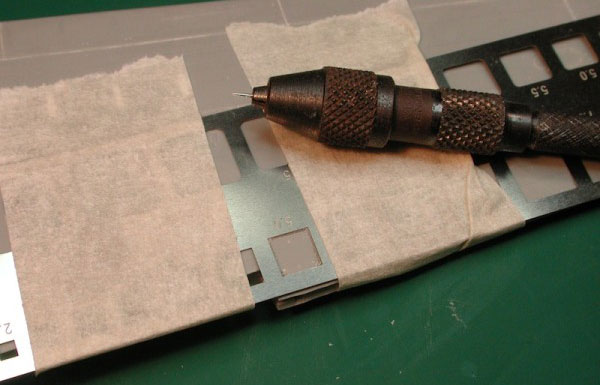
For the access hatches etc the use of commercially available scribing templates is best. For the actual scribing I like to use a simple pin vice with a very fine needle. This results in a bit of a mess (as it tears the plastic rather than cutting it) so sanding and cleanup is required.
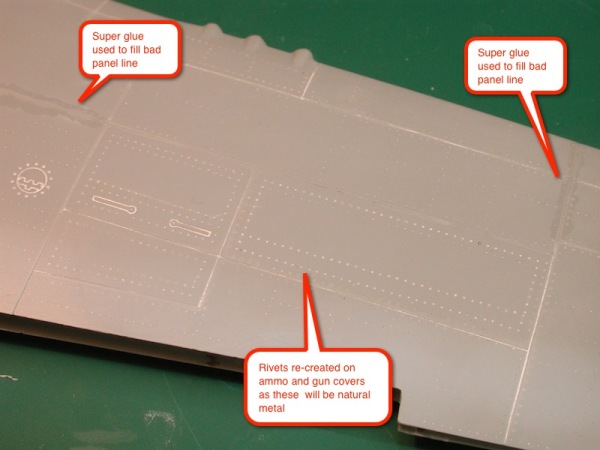
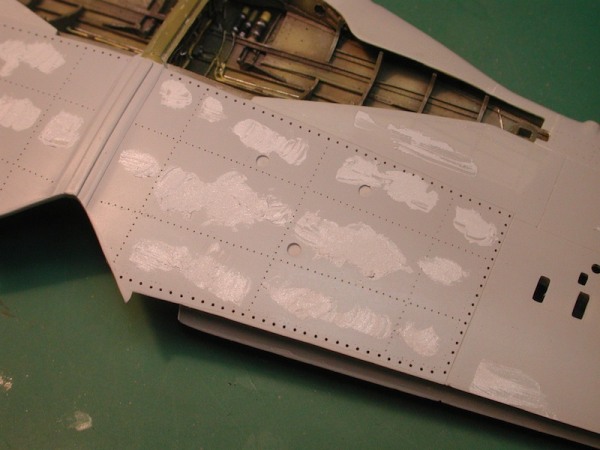
The bulk of the work has been completed on the wing. Here you can see that I plan to show the gun and ammo covers as natural metal and have therefore added back the rivets. In several areas the stretched sprue in the panel line did not scribe cleanly and some repairs with super glue in these spots was needed.
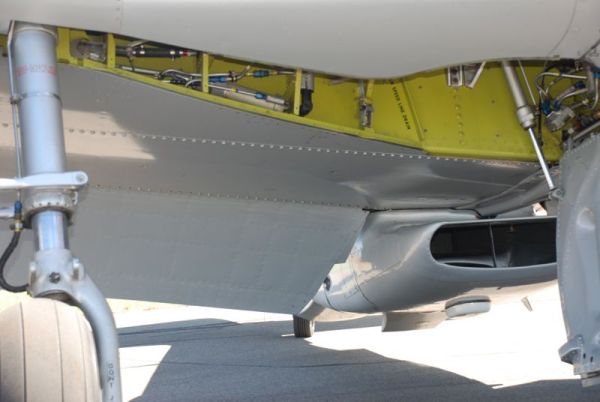
The panels covering the fuel tanks on the bottom of the wing (just behind the main wheel wells) are quite distinctive in that they are bordered by several hundred raised screw heads. Dragon doesn’t provide us with this detail and I felt something needed to be done to address this.
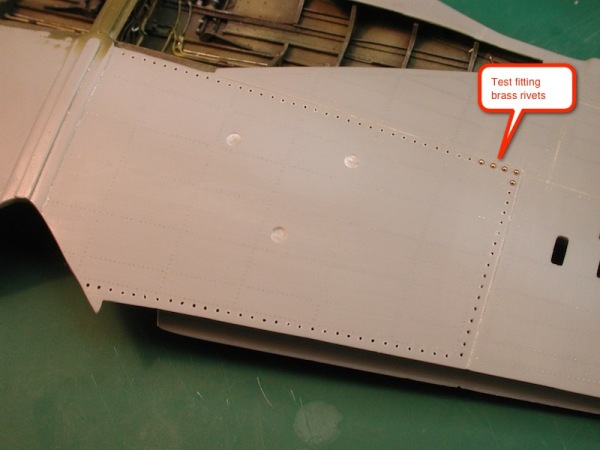
Whilst trying to figure out how to create about 200 scale screw heads I stumbled upon this site www.scalehardware.com. A quick order and I had myself several packets of 40, 50 and 80 thou scale rivets. Of course holes had to be marked out, drilled and brass rivets glued in by hand. Fun!!
The desired rivet details have been re-added and a coat of primer applied to check for blemishes. The original riveting from Dragon was quite resistant to super glue filling, so here I have smeared some Tamiya Basic putty where needed.
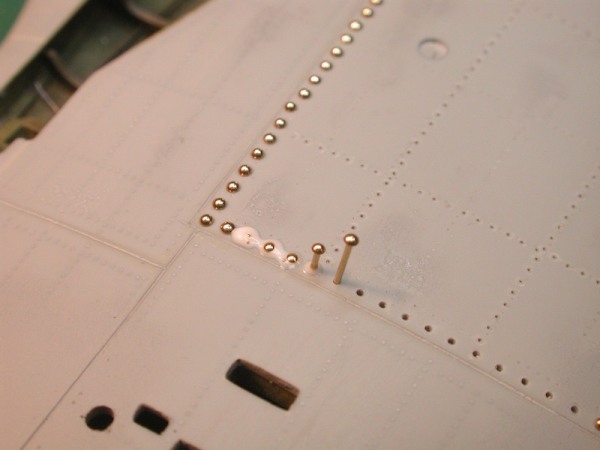
Time to glue all those brass rivets in. I tried to use super glue, but as each rivet was a fairly tight fit, the glue would set before I could slide it into place. What I needed was something that could hold the brass tightly when dry, whilst giving me working time and easy cleanup. Elmers Glue-All (a PVA based glue) was the answer. It’s not the strongest bond for brass to plastic, but given these rivets are not load bearing I’m betting they will hold. Just in case, a coat of Future was hand brushed over the top of each rivet head to give some extra strength.
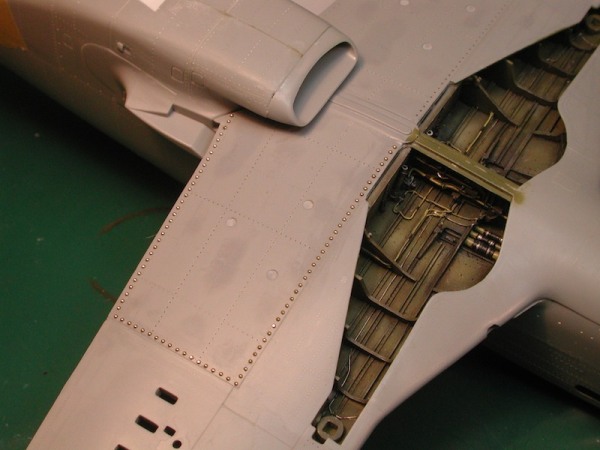
Here we see the finished riveting on the port side. A time consuming job for sure, but a fairly simple one. Next up, rinse and repeat for the starboard side.
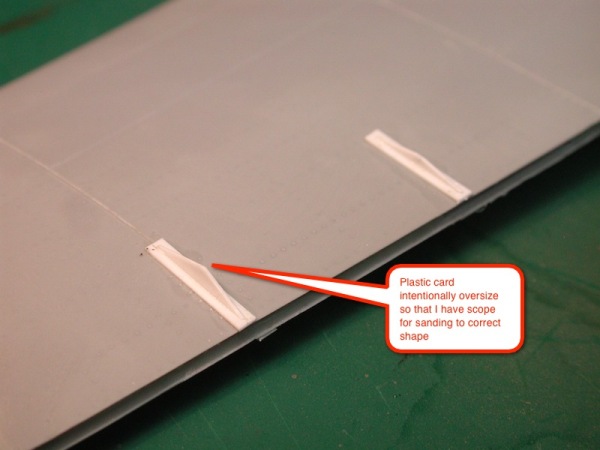
With the top of the wing complete, it’s time to re-create some details I removed prior to all that sanding. Not exactly sure of the purpose of these small raised vanes in front of the ailerons, but some 10×40 thou strip plastic allowed me get the basic shape.
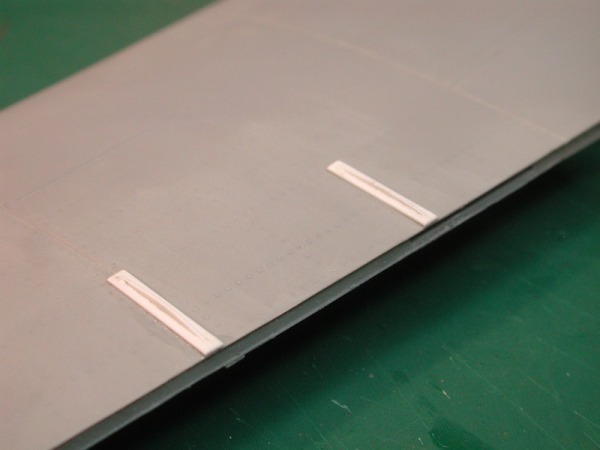
Once the glue was dry they could be gently sanded down to a more accurate and aerodynamic shape.