• Skip to primary navigation
  • Skip to main content
  • Skip to primary sidebar

Scale Modelling Now

Scale Modelling Techniques

  • HOME
  • CONTENTS
    • What’s New
    • Techniques Bank
    • Aircraft
    • Armour
    • Classic Kit Builds
    • Civilian Aircraft Builds
    • Vehicles
    • Sci-Fi, Fantasy, Space
    • Maritime
    • Figures
    • Gift Certificate
    • Book Reviews
    • Dioramas
    • Modelling Workshops
    • Podcasts
  • WHAT WE OFFER
  • FREE SAMPLES
  • EVENTS
    • EVENTS
    • NEWS
  • ABOUT
    • CONTACT
    • ABOUT US
    • TRADERS
  • LOGIN
  • More results…

    Generic filters
    Exact matches only
    Search in title
    Search in content
    Search in excerpt
Pages: Page 1 Page 2 Page 3 Page 4 Page 5 Page 6 Page 7 Page 8 Page 9 Page 10 Page 11 Page 12 Page 13 Page 14 Page 15 Page 16 Page 17 Page 18 Page 19 Page 20 Page 21 Page 22 Page 23 Page 24 Page 25 Page 26 Page 27 Page 28

Dragon P-51D Mustang 1:32

April 10, 2013 By

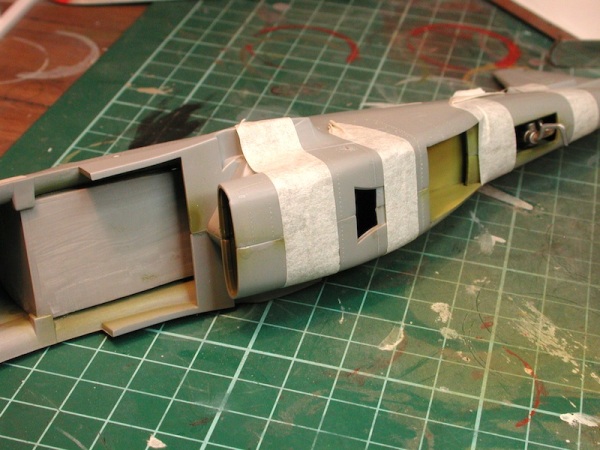
Getting ready to close the fuselage

image086
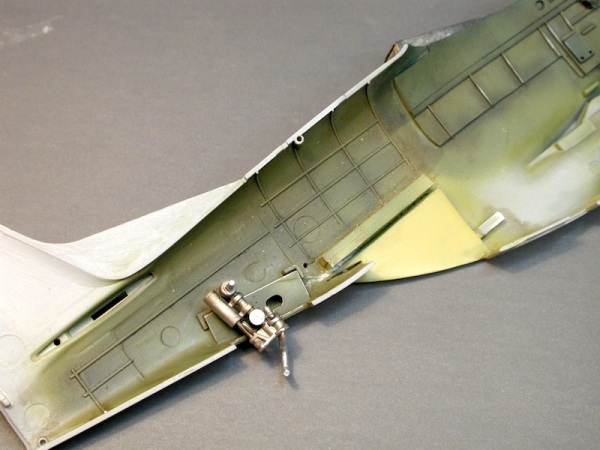
Much to my annoyance, Dragon has designed the tail wheel to be attached prior to closing the fuselage. This means it will be protruding during the entire build and I am confident that I will manage to break it off at least once.
image087
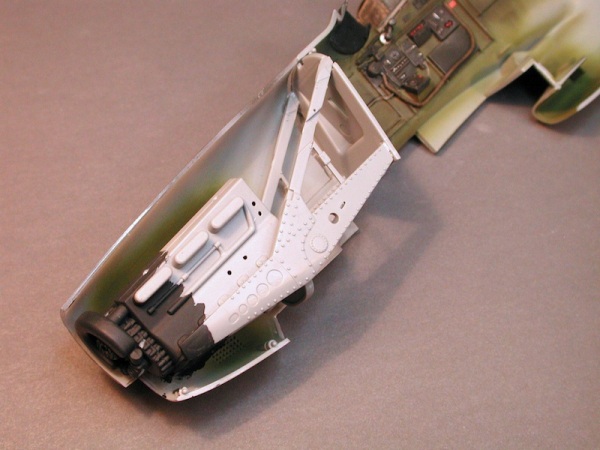
The engine and mounting chassis will be glued in at this point. This item is only needed to give me something to attach the exhausts and prop spinner to.
image088
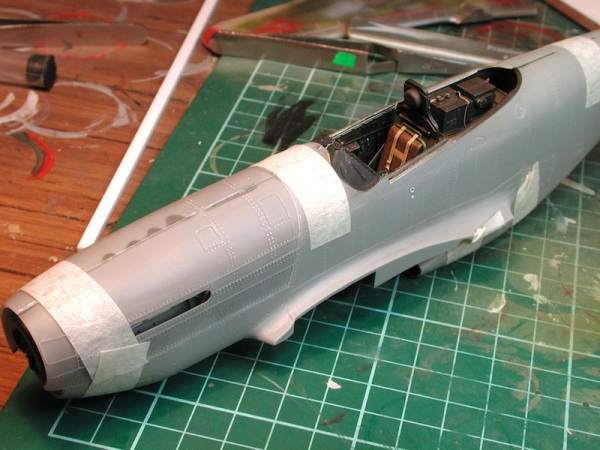
So after double and triple checking everything, it’s time for some glue. The fit is actually very good and the tape is really only there to be sure.
image089
A view from the bottom. Some interesting seam sanding challenges lie ahead here I am sure.

Wings and those wheel bays!

image090
With the fuselage drying, it’s time to get those wings stuck together as well. The fit was definitely affected by the use of the Aires resin wheel well and here you can see I had to use to clamps to “convince” everything to place nicely!
image091
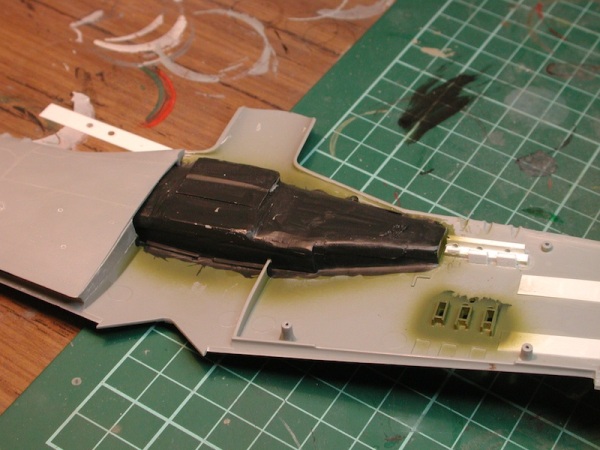
A shot of the wheel bay (coated in black to hide the fact that in sections it has sanded so thin so as to be translucent☹).
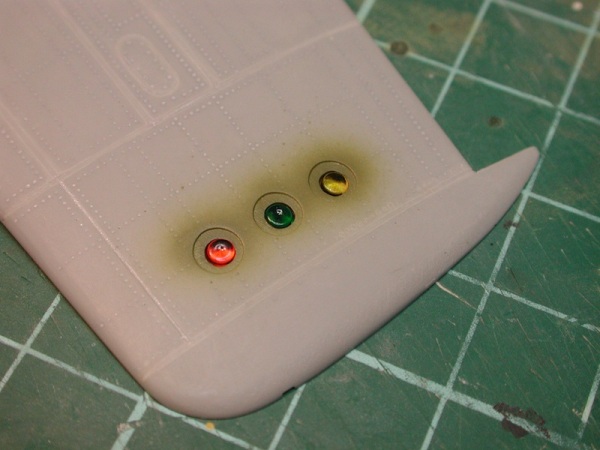
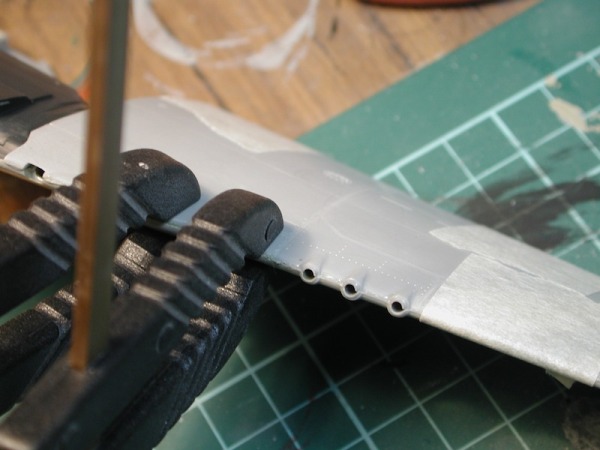
Signalling lights were fitted to the wing tip of all Mustangs. Tamiya clear paints were used to provide the three colours prior to gluing into the wing interior.
image092

Read on…

Pages: Page 1 Page 2 Page 3 Page 4 Page 5 Page 6 Page 7 Page 8 Page 9 Page 10 Page 11 Page 12 Page 13 Page 14 Page 15 Page 16 Page 17 Page 18 Page 19 Page 20 Page 21 Page 22 Page 23 Page 24 Page 25 Page 26 Page 27 Page 28

Primary Sidebar

All the completed Aircraft builds.
Click on a Manufacturer below to see a list of all SMN's completed builds from their range.

BACK TO AIRCRAFT MAIN PAGE

Login

You are not currently logged in.


» Lost your Password?

SEARCH THE WEBSITE

More results...

Generic filters
Exact matches only
Search in title
Search in content
Search in excerpt

Finished Aircraft Reviews

  • Academy
  • Accurate Miniatures
  • Aeroclub
  • AFV Club
  • Airfix
  • A-model
  • Airmodel
  • AlleyCat
  • AMK
  • AMT.ERTL
  • ARII
  • Arma
  • Attack Squadron
  • Azur
  • BPK (Big Planes Kits)
  • Bronco Models
  • Classic Airframes
  • Czechmaster
  • Dragon
  • Dynavector
  • eduard
  • Fisher Model
  • Fly
  • Frog
  • GasPatch
  • Grand Phoenix
  • Great Wall Hobby
  • Hasegawa
  • Halinski
  • Heller
  • HGW Models
  • HpH Models
  • High Planes Models
  • HK Models
  • Hobby Boss
  • ICM
  • Ideal Toy Corporation
  • IsraCast
  • Italeri
  • Khee Kha
  • Kinetic
  • Kit Form Services
  • Kitty Hawk
  • KoTare
  • LF Models
  • Lukgraph
  • MPM
  • MRC/Academy
  • Mach 2
  • Meng
  • Mirage Hobby
  • Monogram
  • Pacific Coast Models
  • RS Models
  • Rareplane
  • Revell
  • Roden
  • SBS Model
  • Scratch-builds & Specials
  • Silver Wings
  • Simian’s Stuff
  • Special Hobby
  • Sword
  • Takom
  • Tamiya
  • Tanmodel
  • Trumpeter
  • Valom
  • Vector
  • Vintage
  • Whirlybird
  • Wingnut Wings
  • Xtrakit
  • Zoukei Mura
  • Zvezda

Copyright © 2025 · Scale Modelling Now · Online Scale Modelling Magazine · Scale Modelling Techniques and Tips · Privacy Policy