Galleries: A | B | C-E | F | G | H | I-L | M | N-R | S | T-V | W-Z
About the build
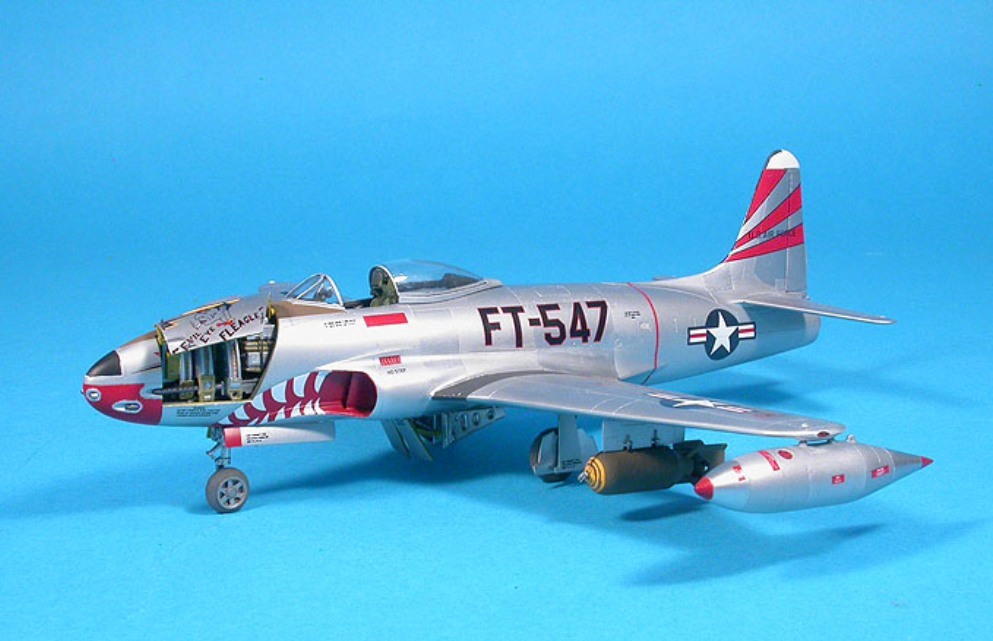
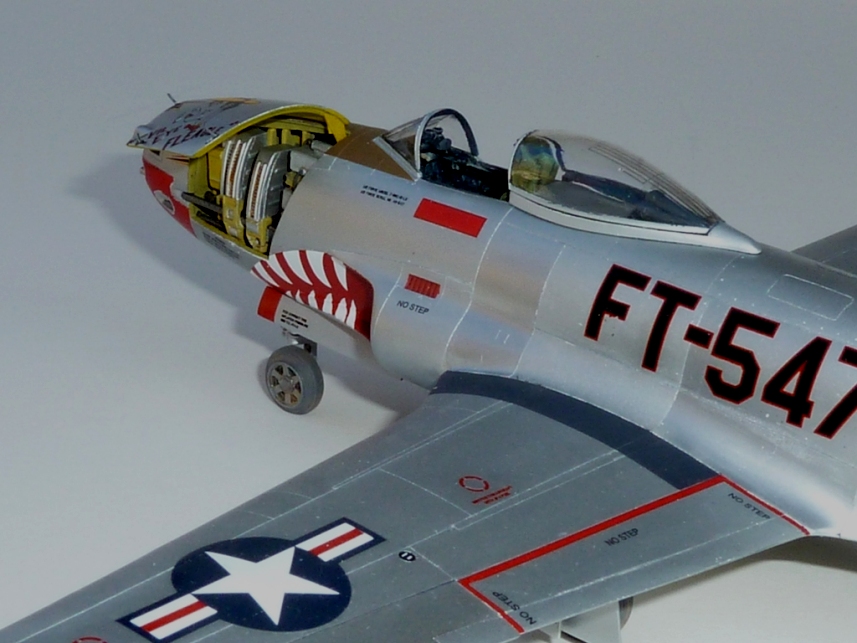
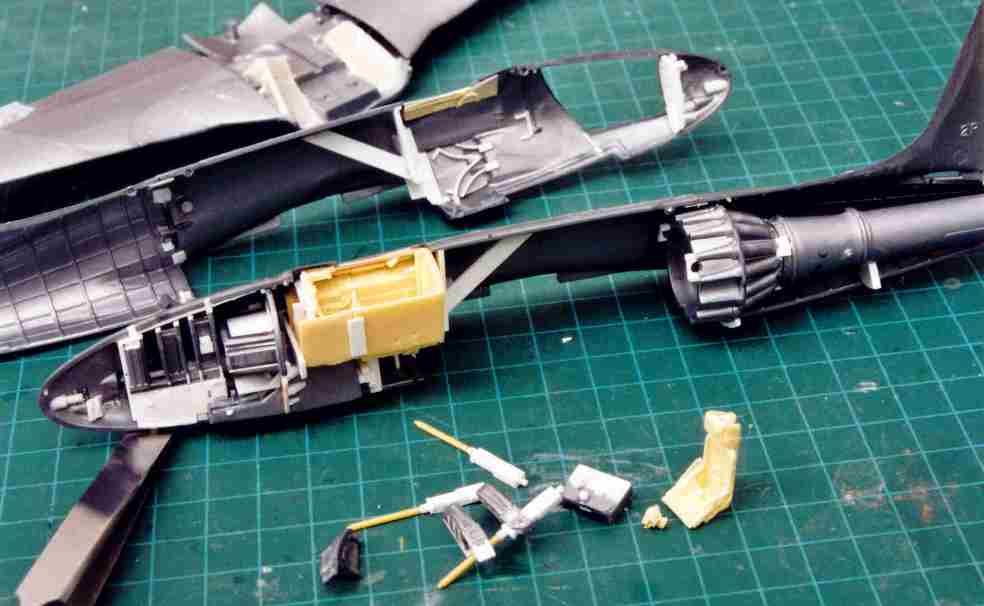
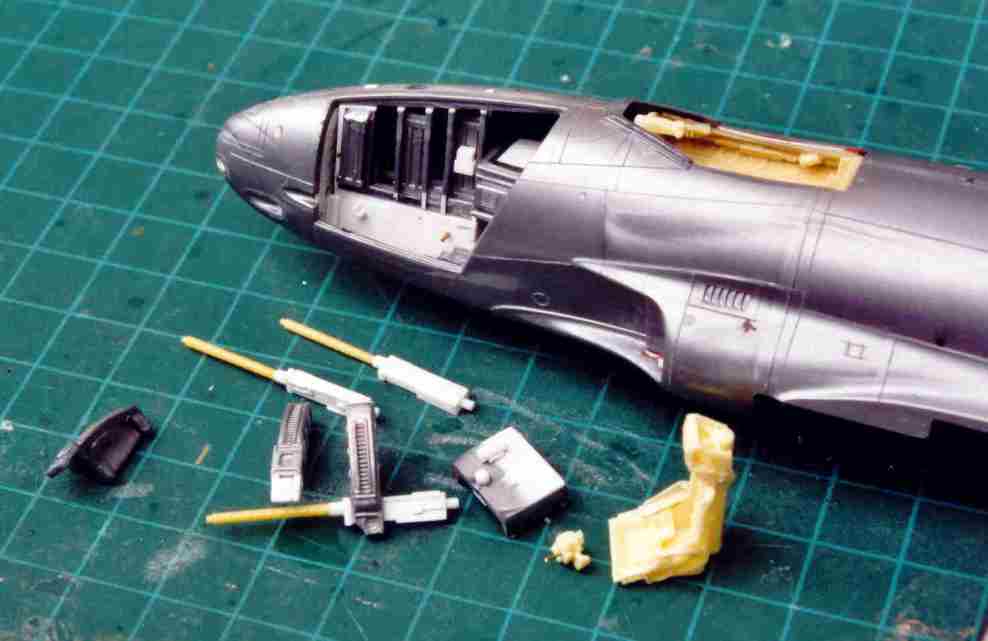
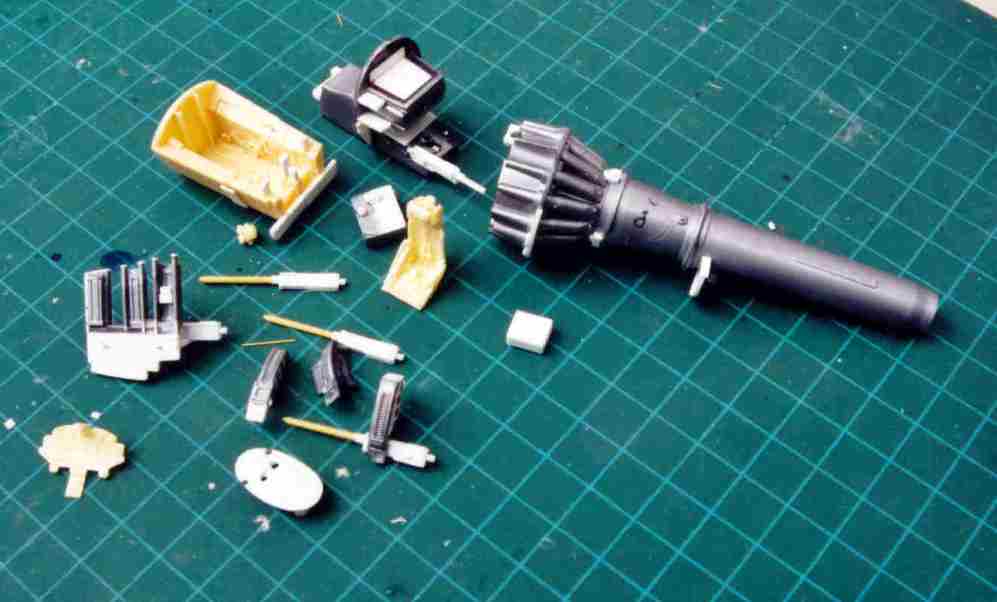
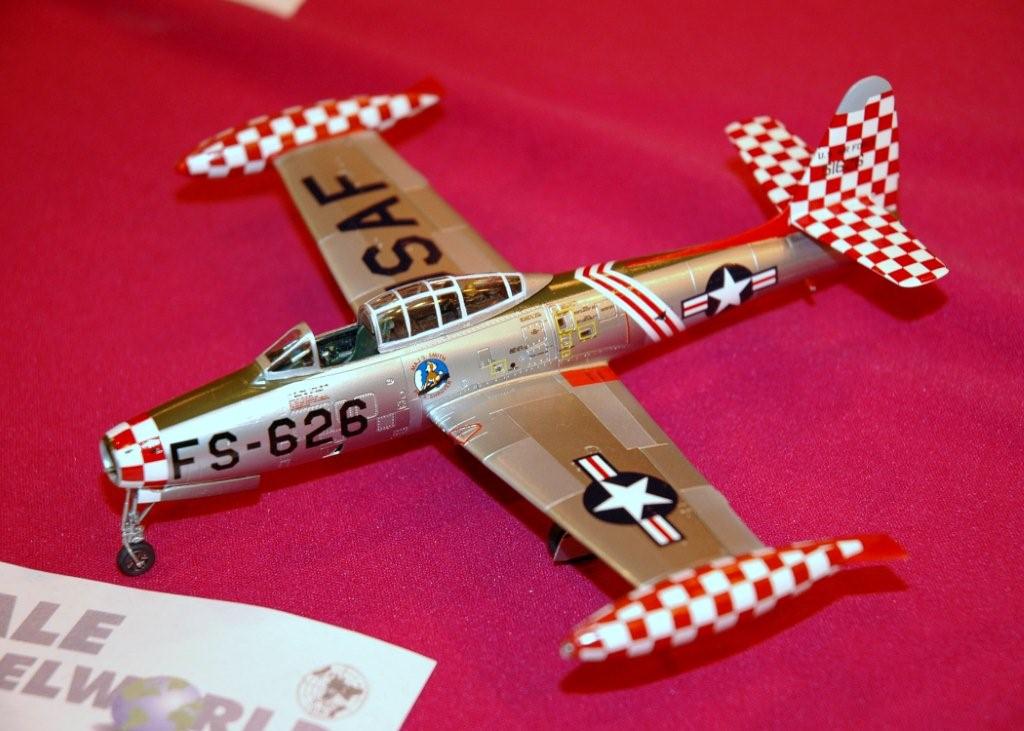
The kit is an original release of the Monogram F-80, bought while I was still modelling in 1:72 scale. It sat in the stash until 2005. Scribing was done by running a #16 Xacto blade backwards following the raised panel lines, using a flexible straight edge or freehand. A Blackbox cockpit was used, with much sectioning to fit and be positioned according to drawing and photographic references. The gun bay was reworked to open it up for realism, using some old resin .50 calibre barrels I had lying around with simple breeches from scratch.
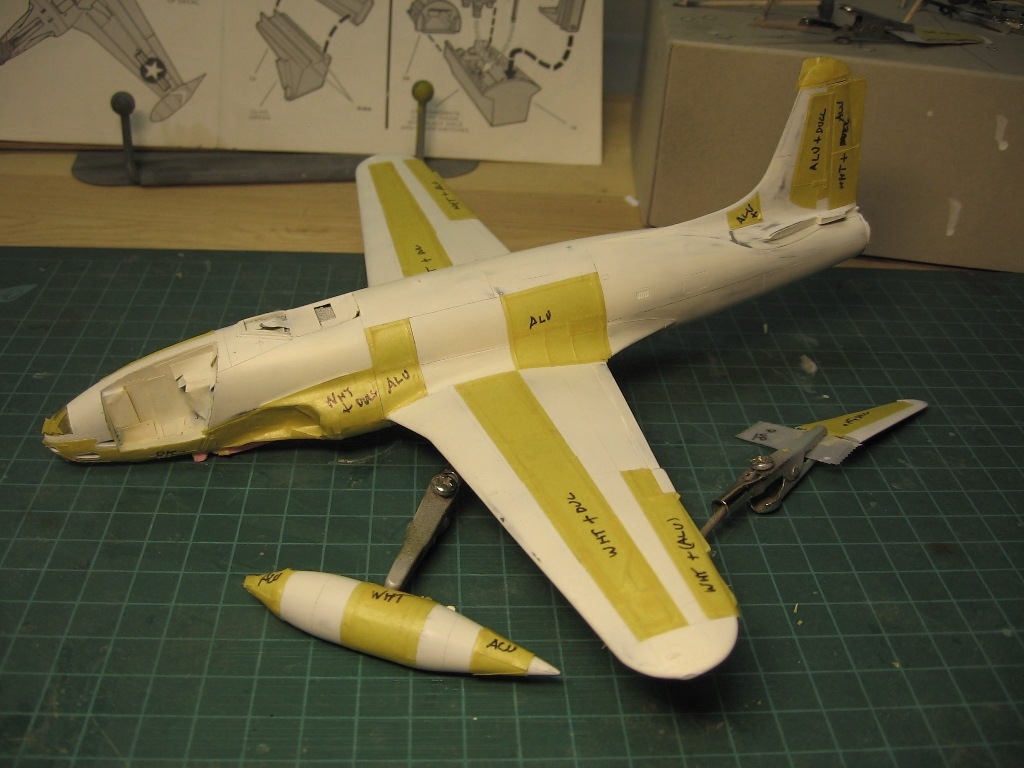
Alclad 2 was used for the natural metal finish, mixing shades to differentiate the panels – this was my first experience with Alclad and arguably, the most successful to date. The exterior was primed with Krylon sandable white primer; the decals were applied directly on the Alclad, with a flat lacquer airbrushed freehand on the decal surface – overspray is not obvious.
Decals were Aeromaster, 48-630, Shooting Stars Over Korea PT.II. The best reference I had for both details and photographs of the actual aircraft was Osprey Frontline Colour #5, “F-80 Shooting Star Units Over Korea”.
The model won Gold at the Rocky Mountain Modellers Club Show, Calgary, Alberta, Canada, 2006.
Hope you like it, Dennis D.
Best wishes, Sertac B.


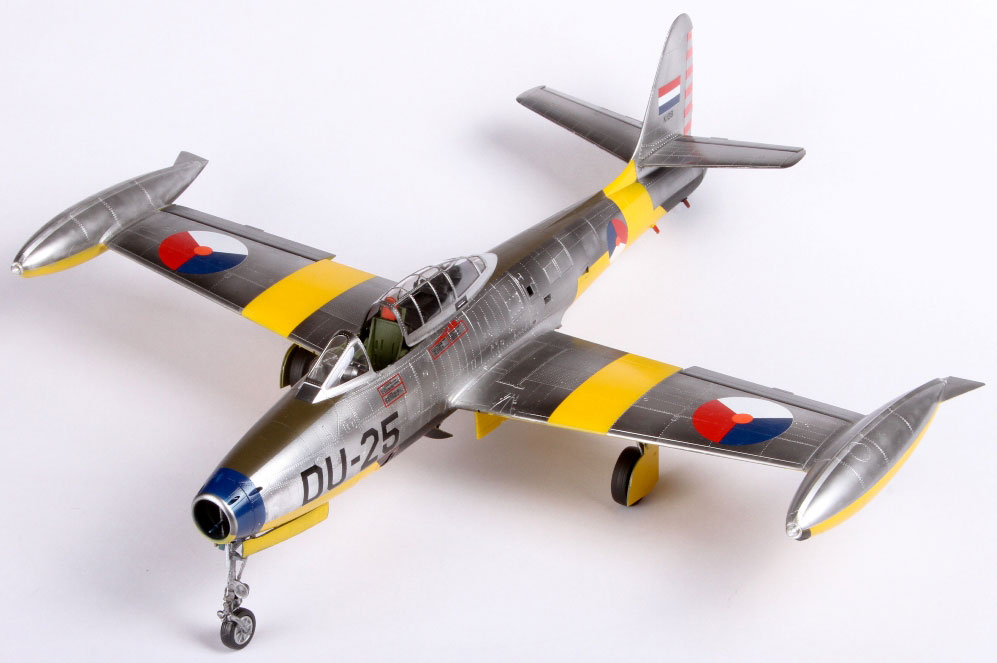
The model is built almost entirely out of the box, save for the decals that come from an aftermarket supplier. ‘Silver’ is Alclad using different tones from their range.
Cheers James V.

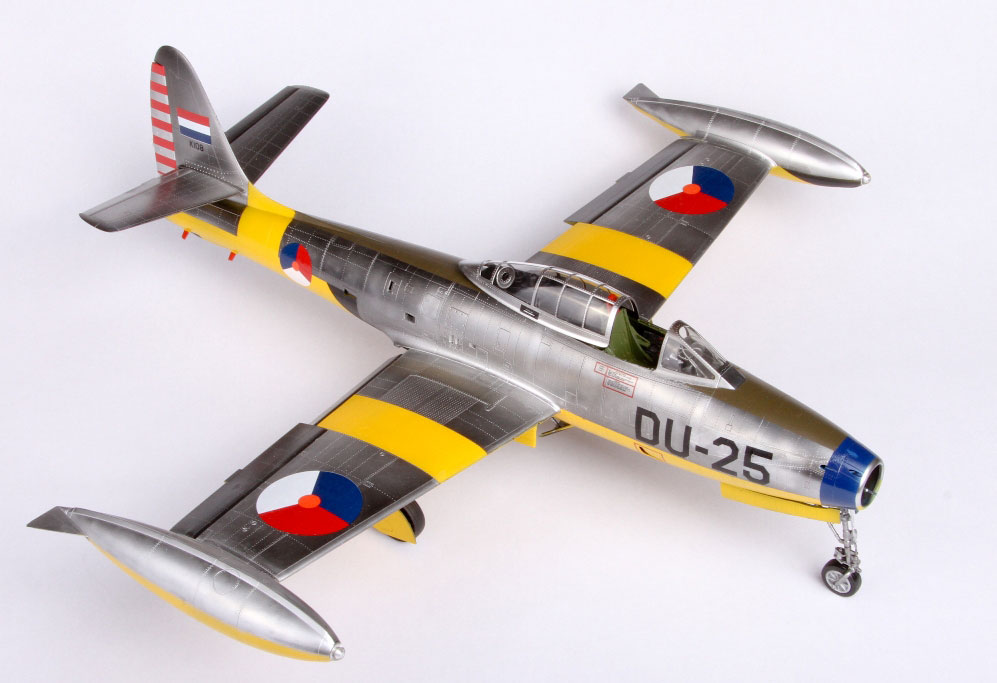
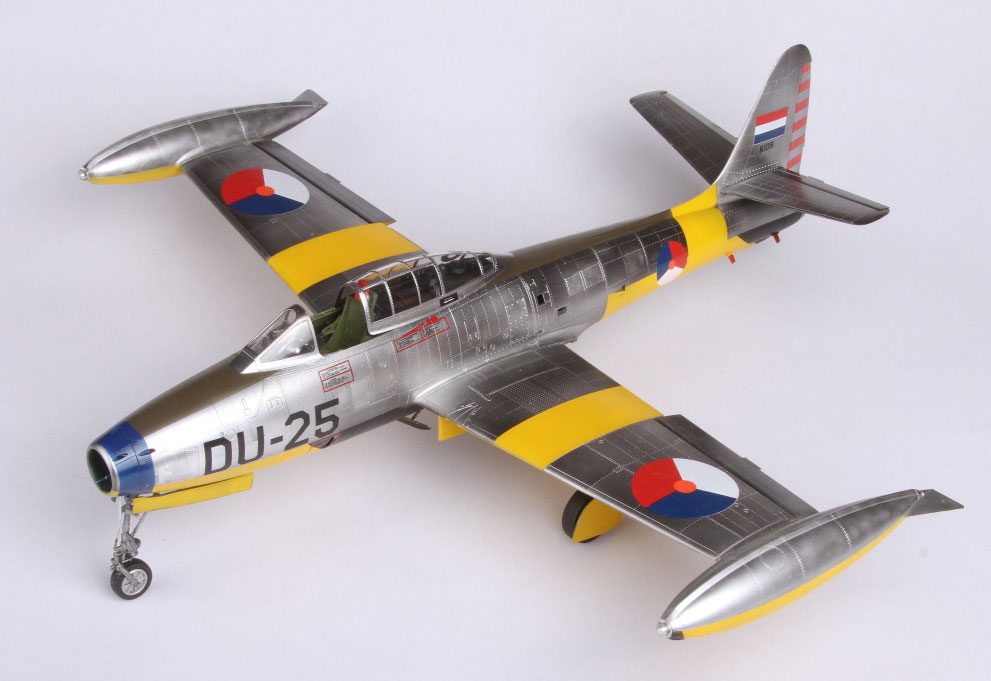
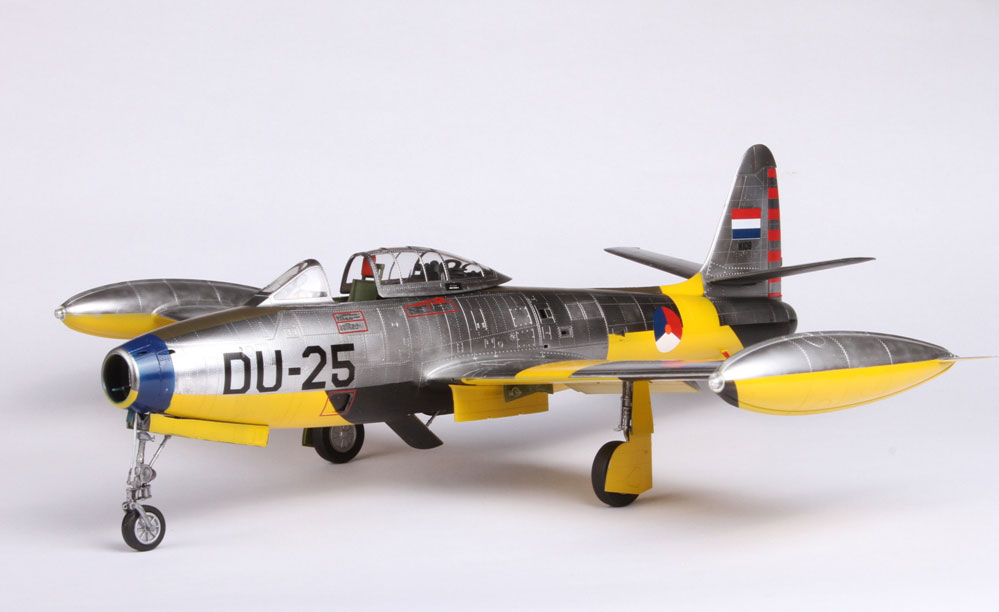


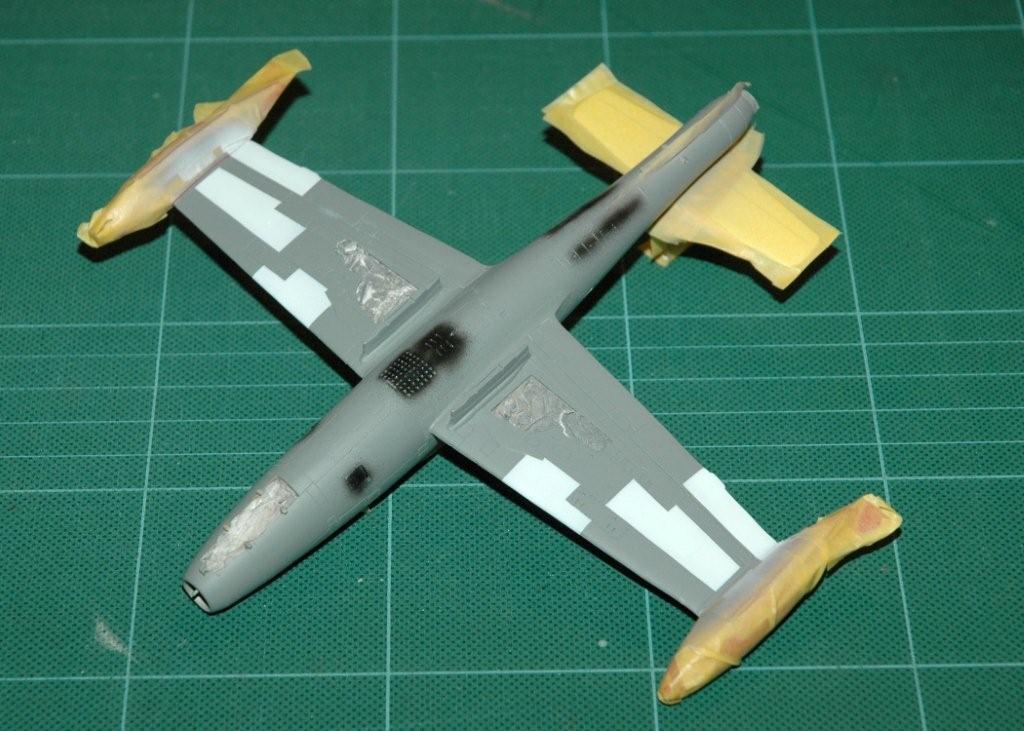
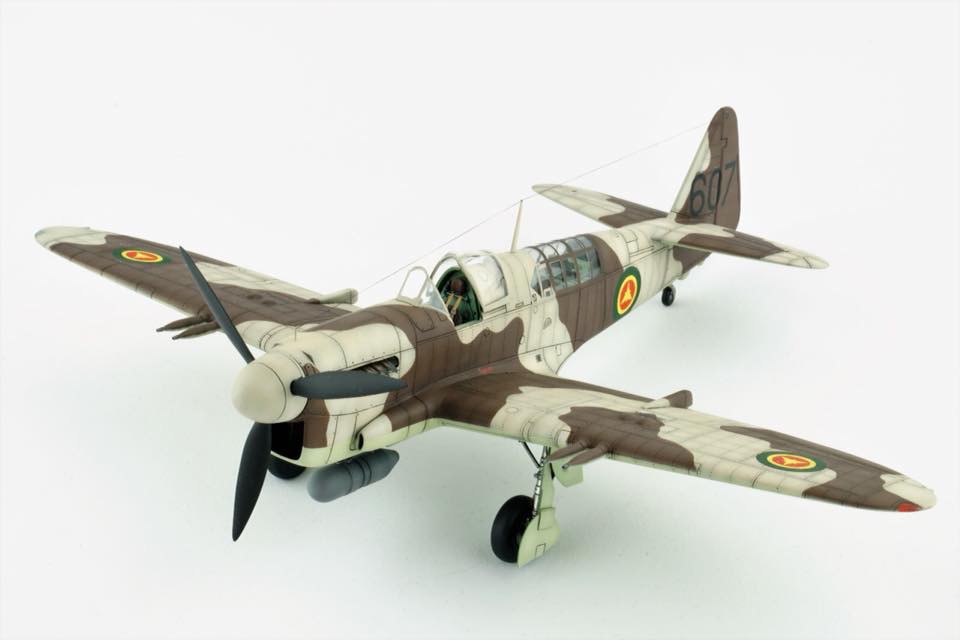
I built this kit about 3 years ago to test Gunze Aqueous paint on. This was the first time I used acrylic paints.
The model was a real quick build without any modifications, except a photoetch instrument panel I found in my spares box.
I airbrushed the camouflage over a black pre-shade. After that I did some post-shading with lighter colors.
A wash from Mig Productions was used, followed by a coat of Testors flat coat.
Thanks for looking, René van der Hart


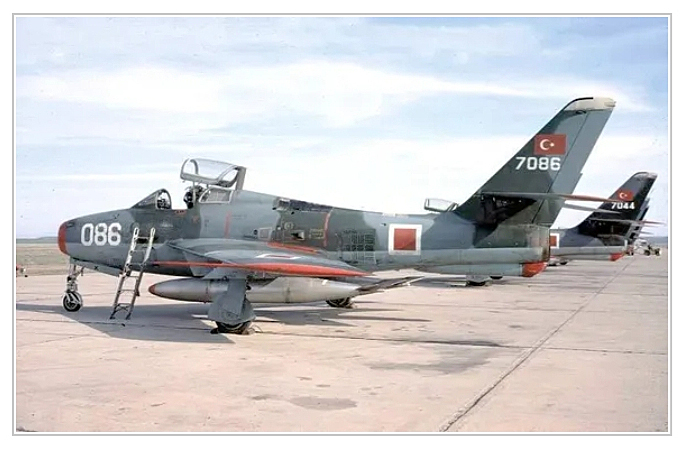
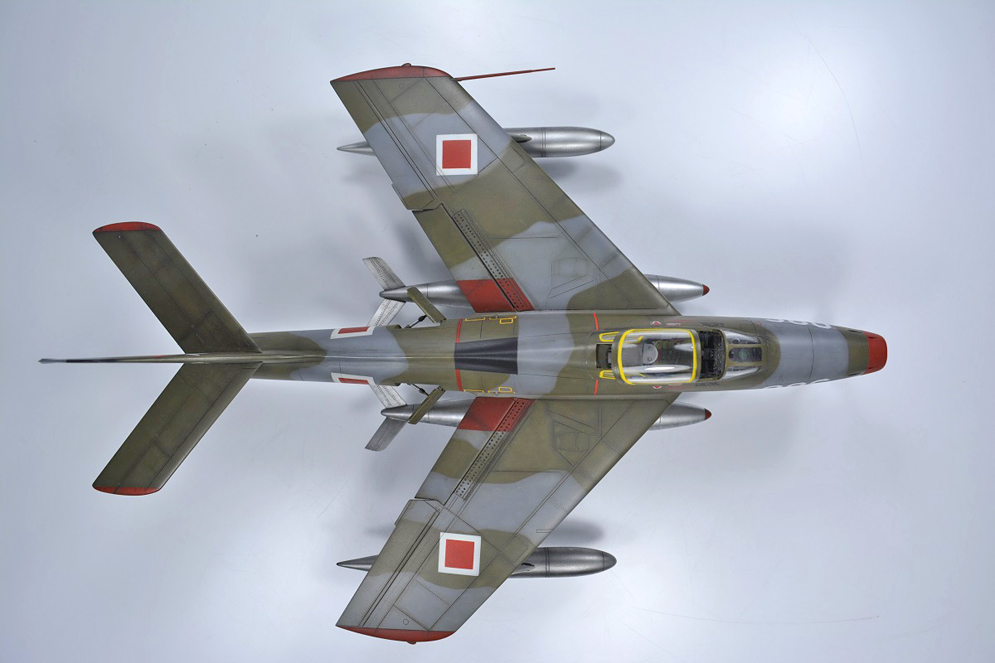
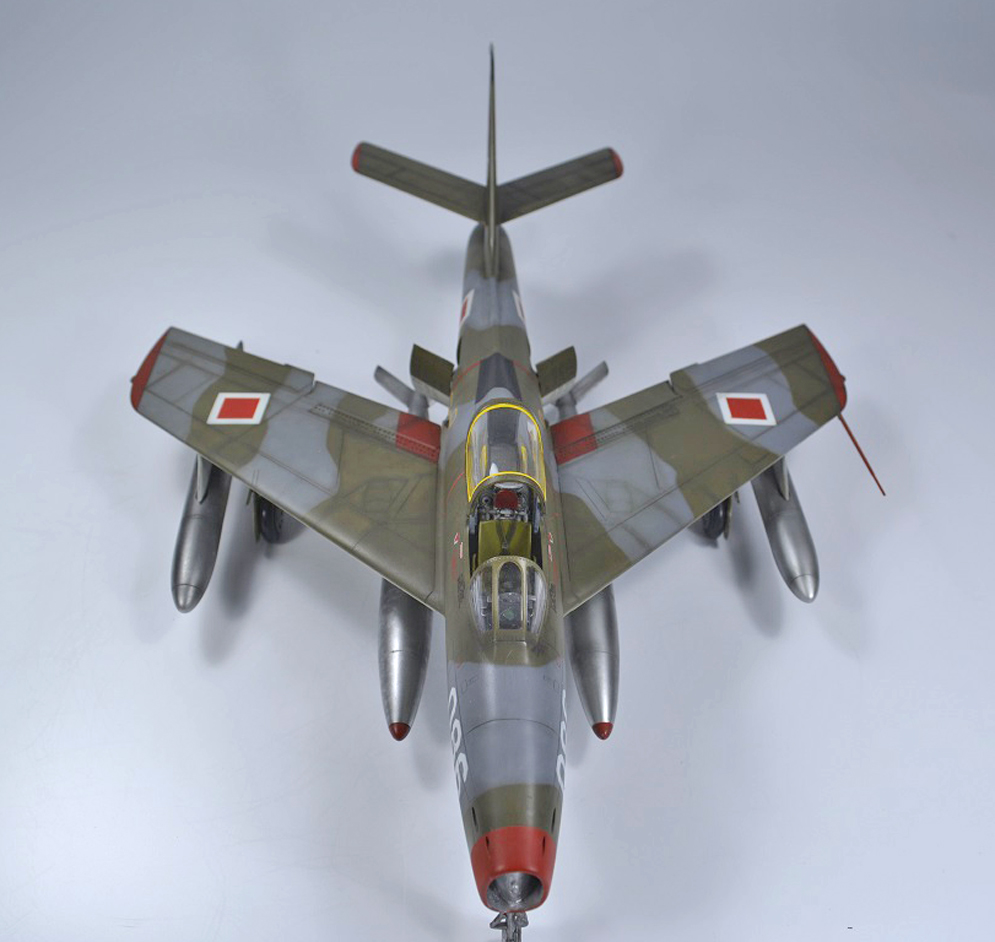
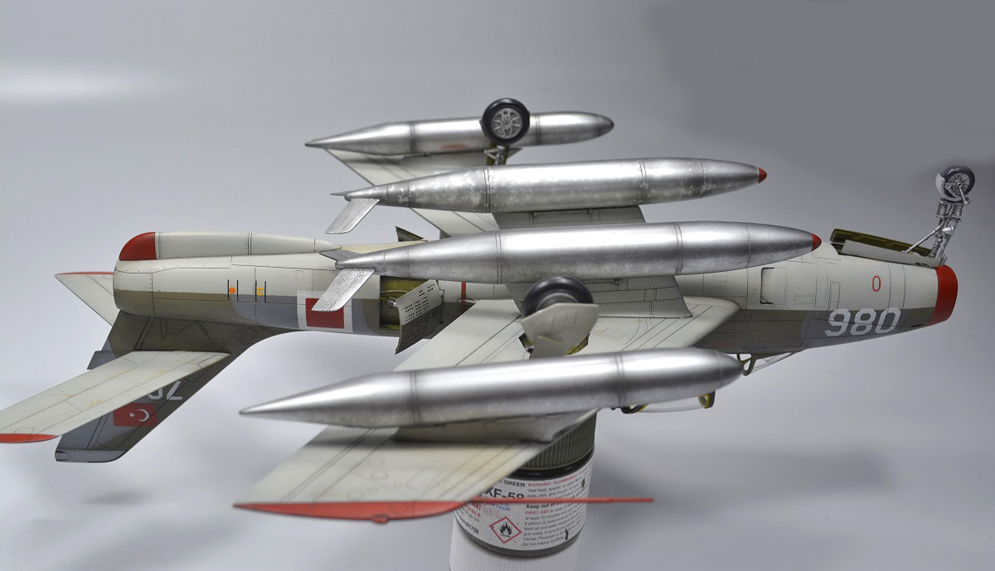
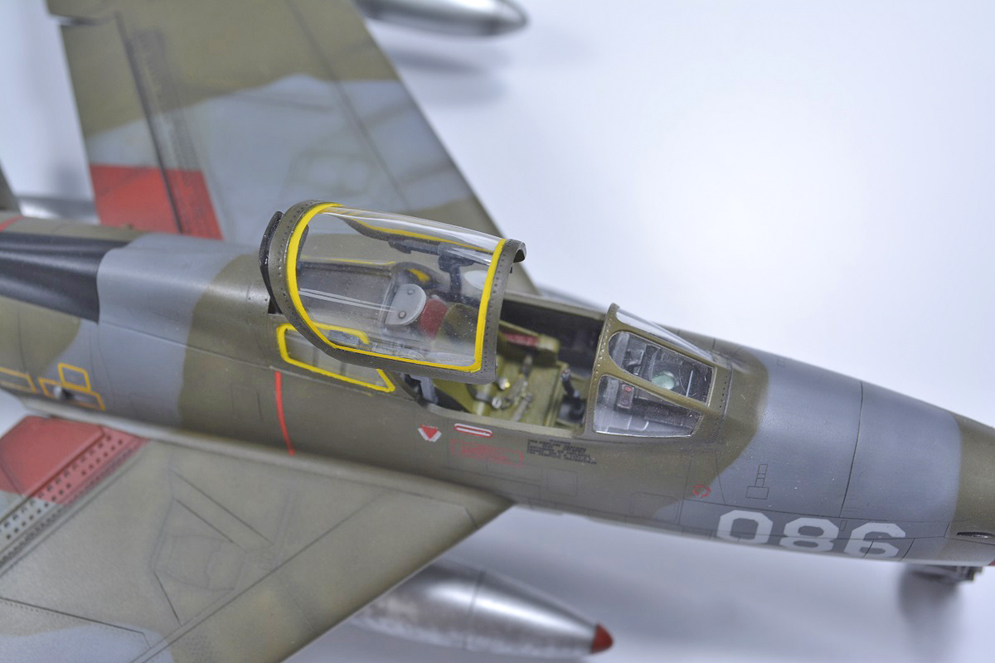


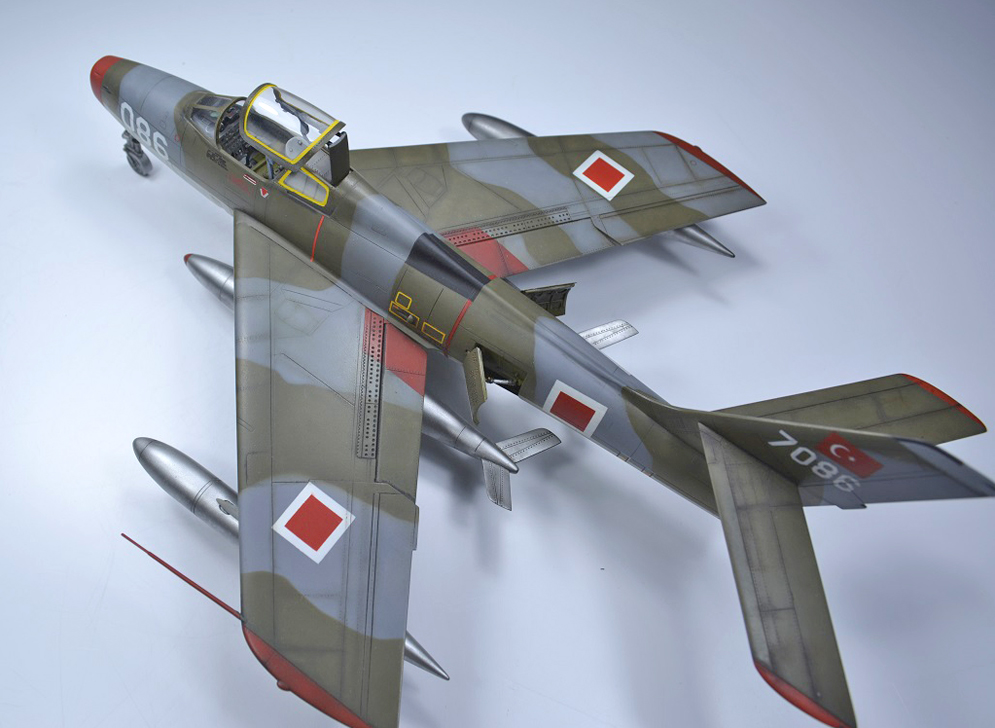
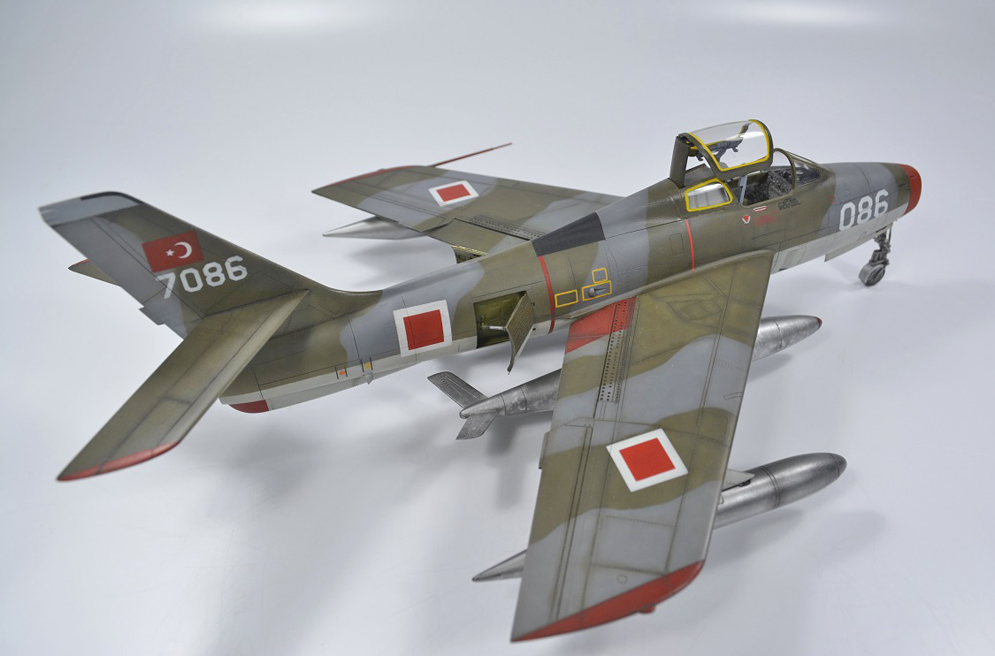
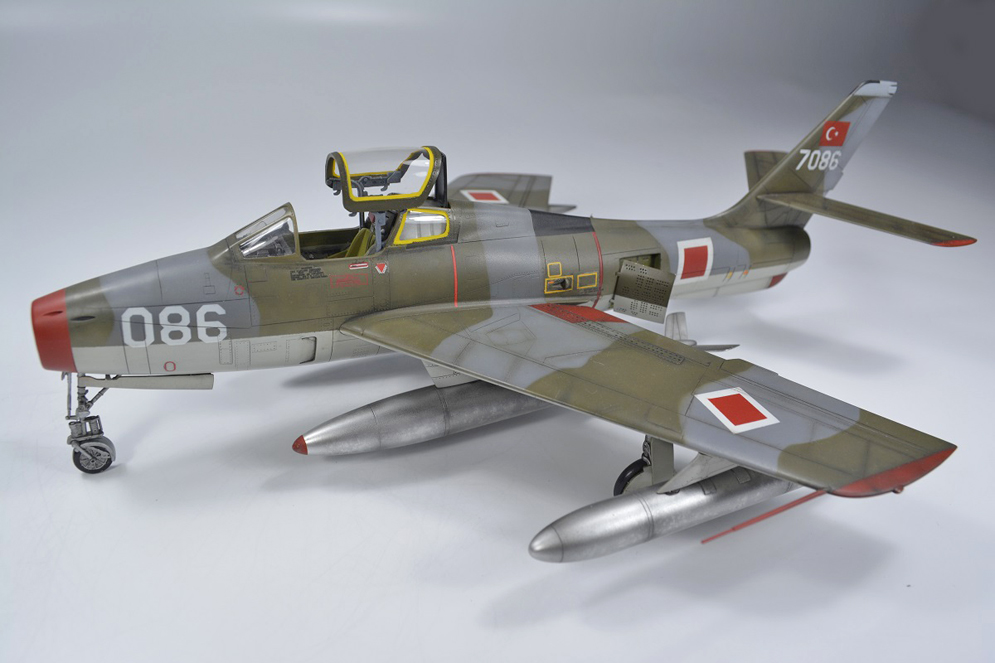
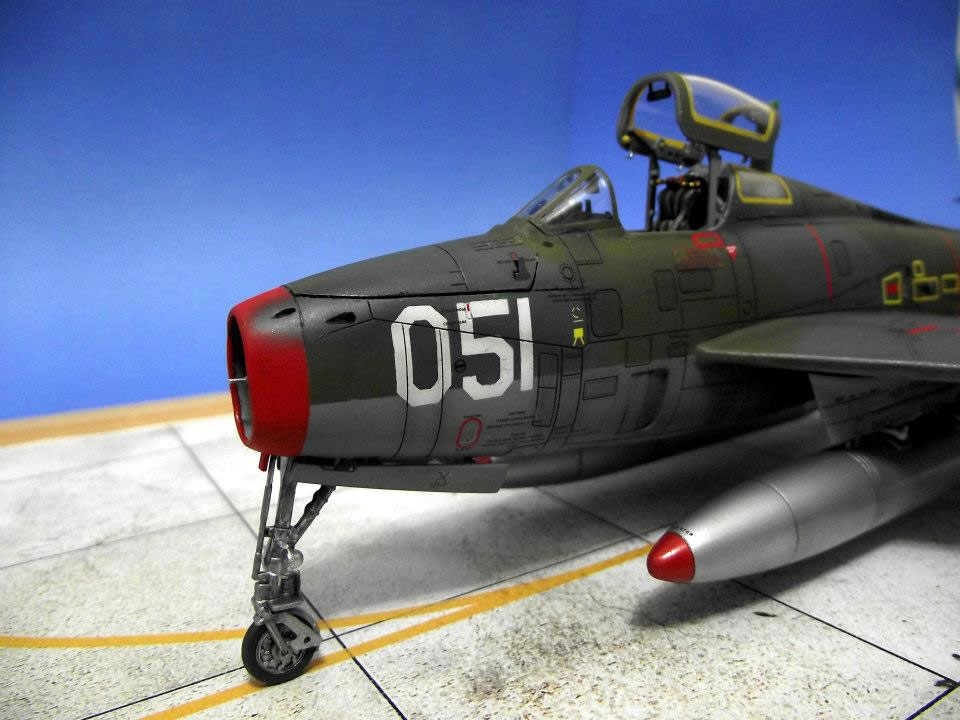
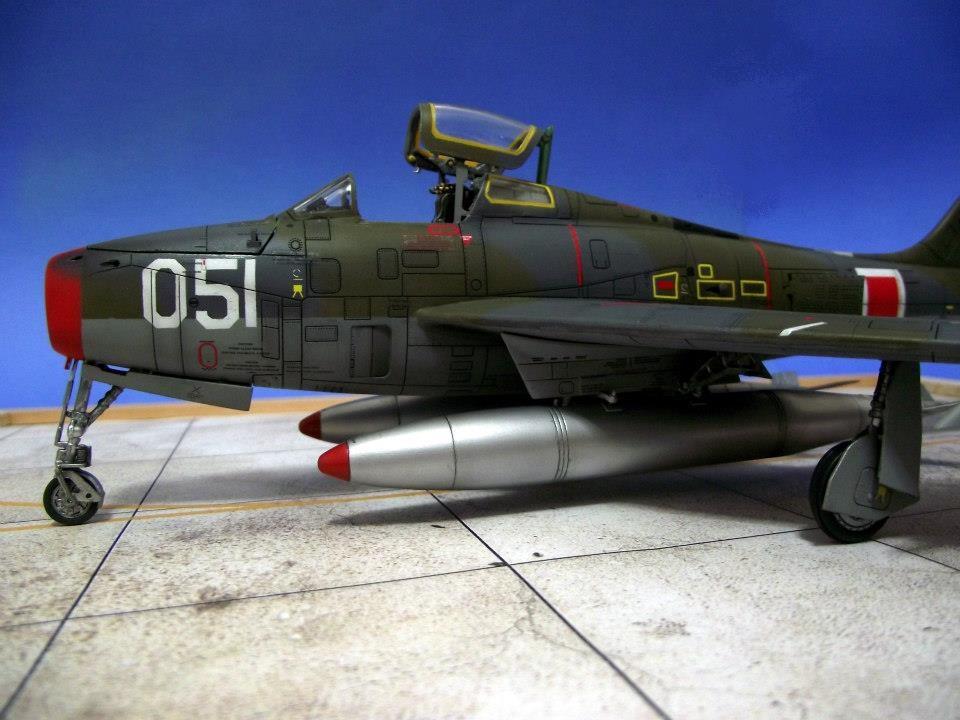
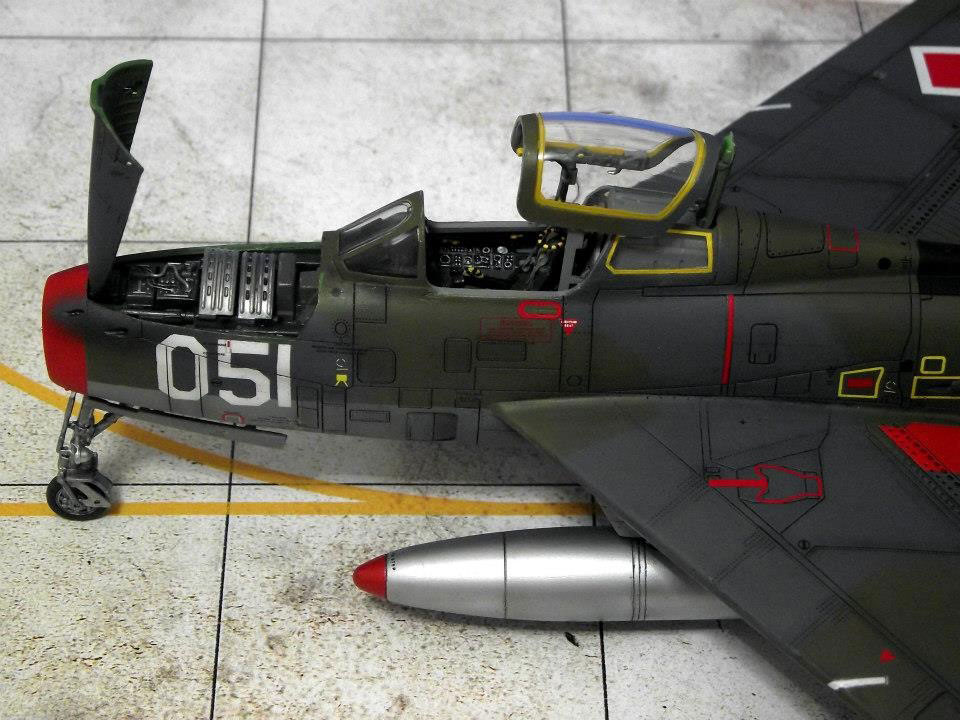
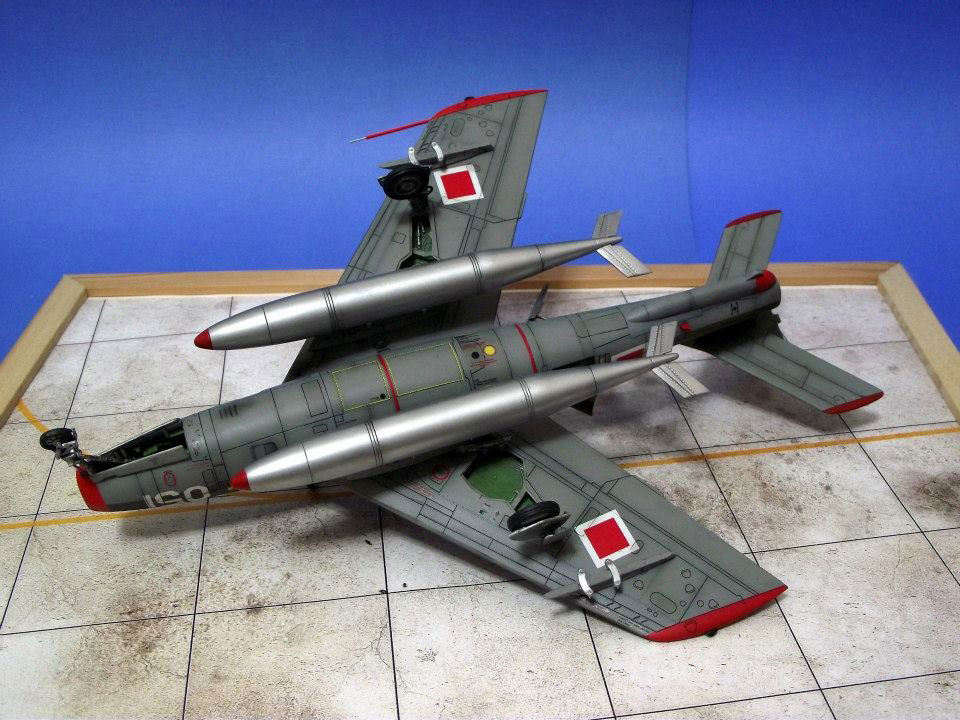
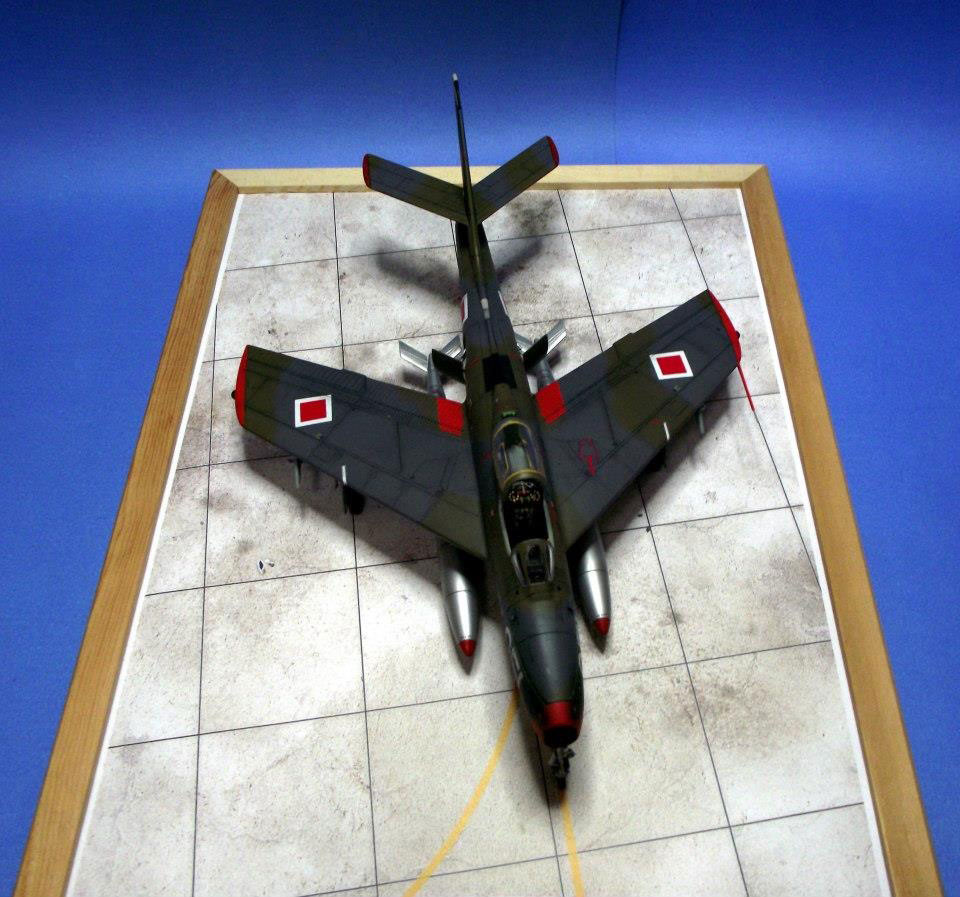
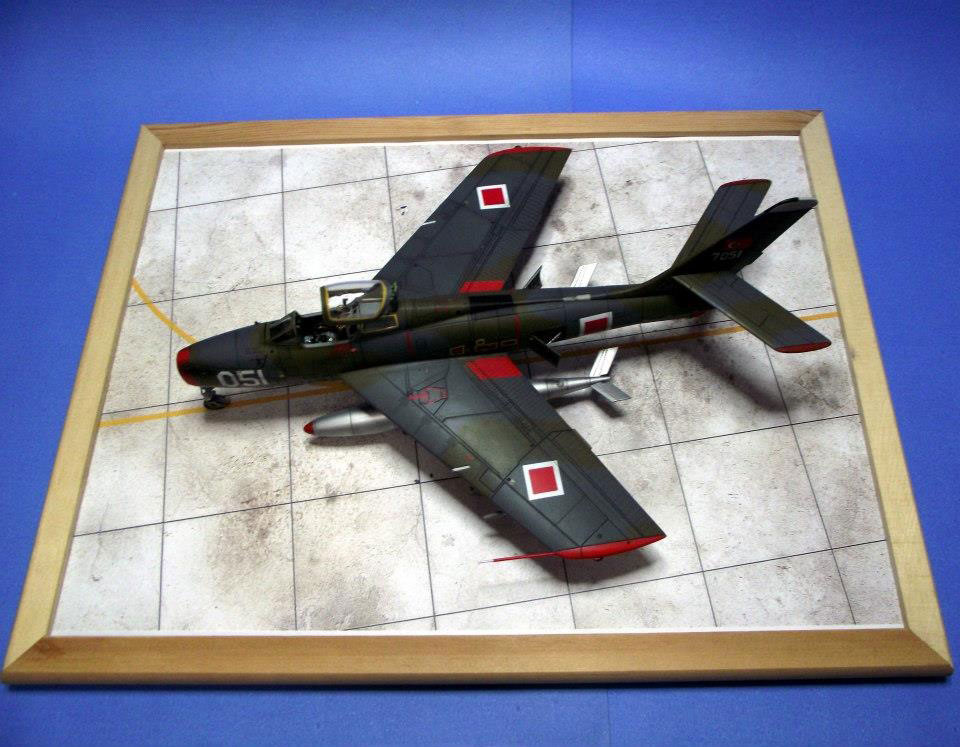
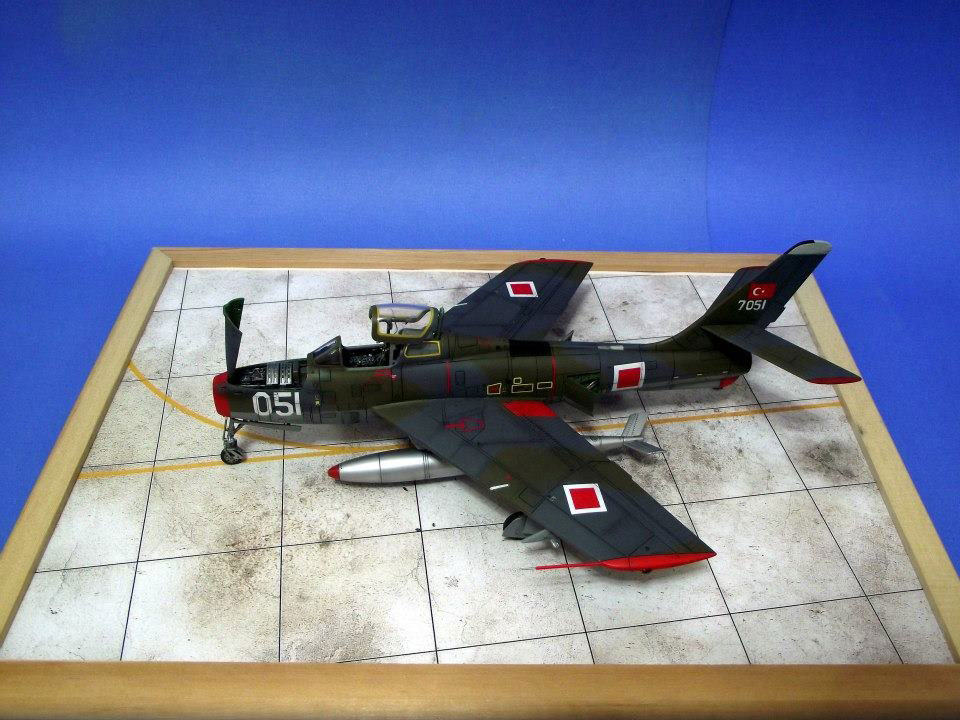
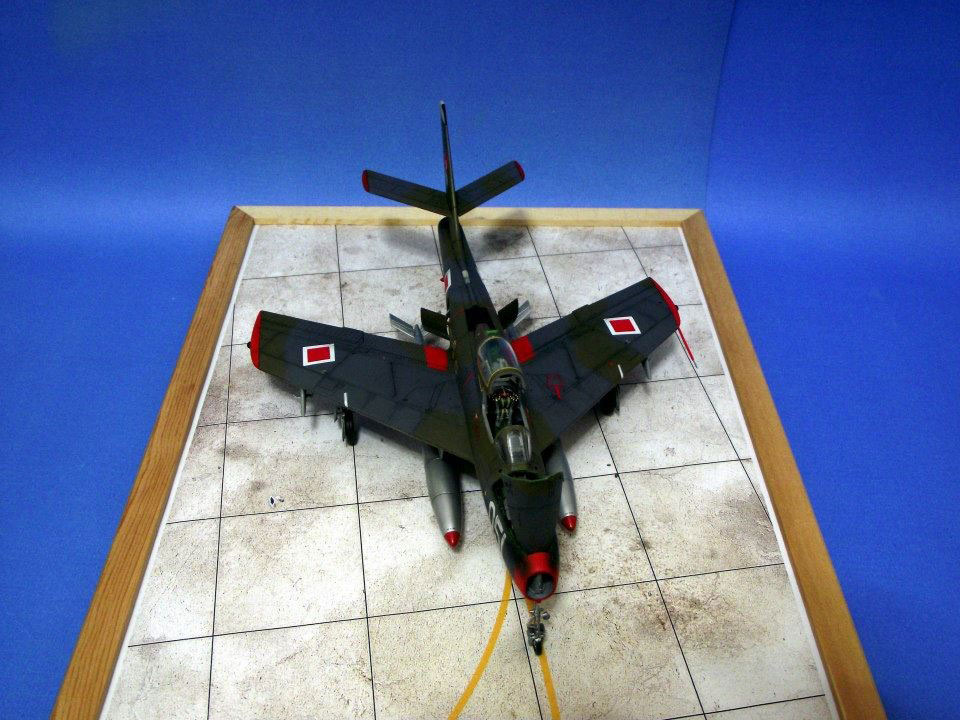
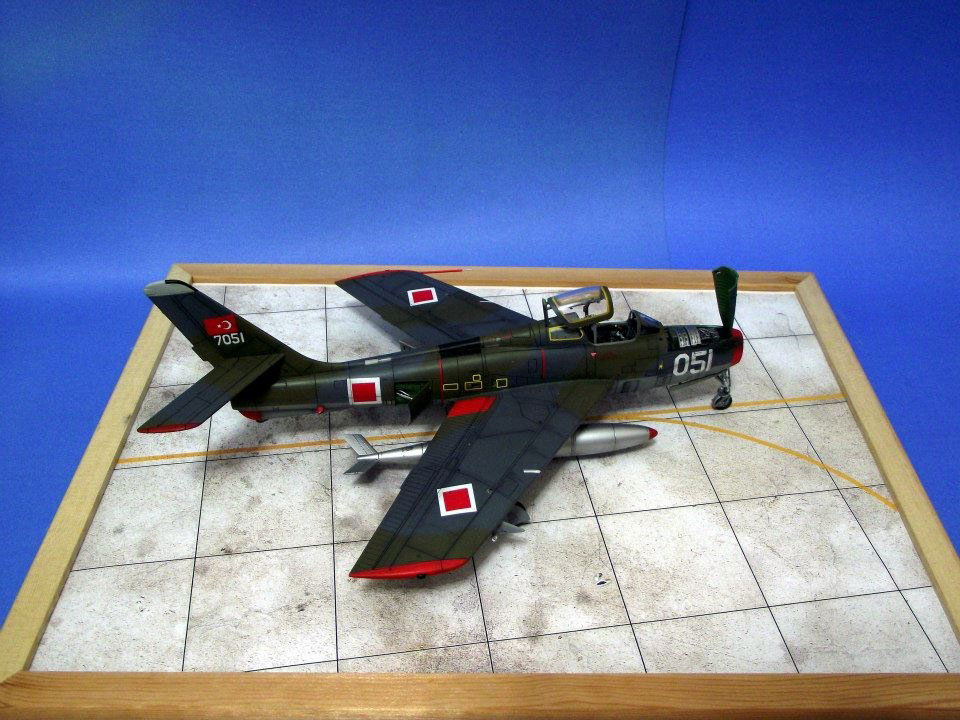
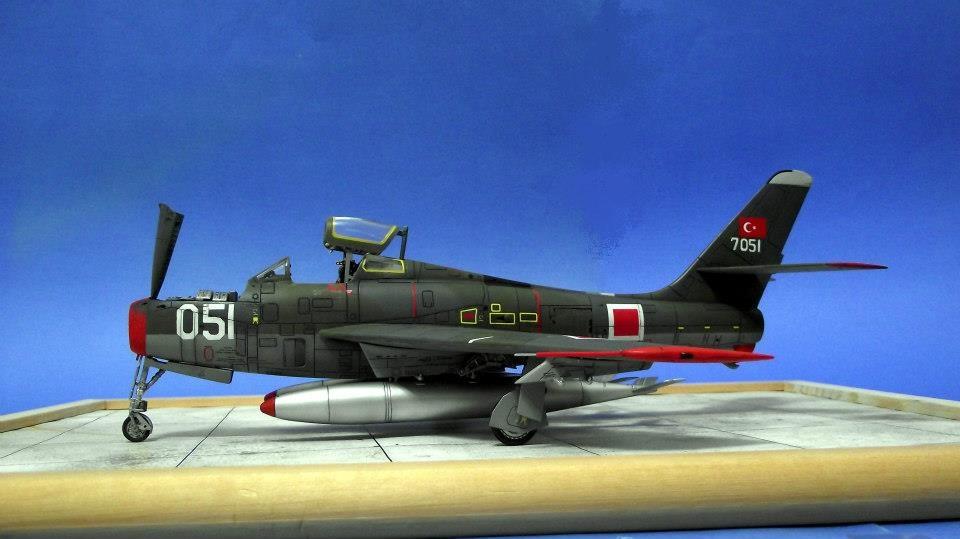
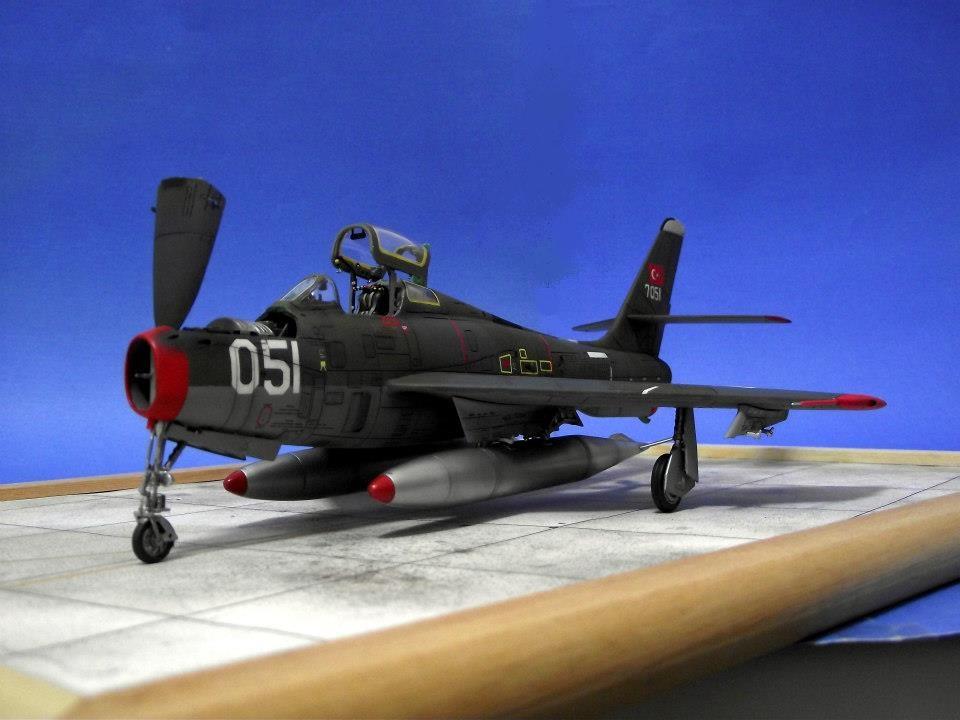
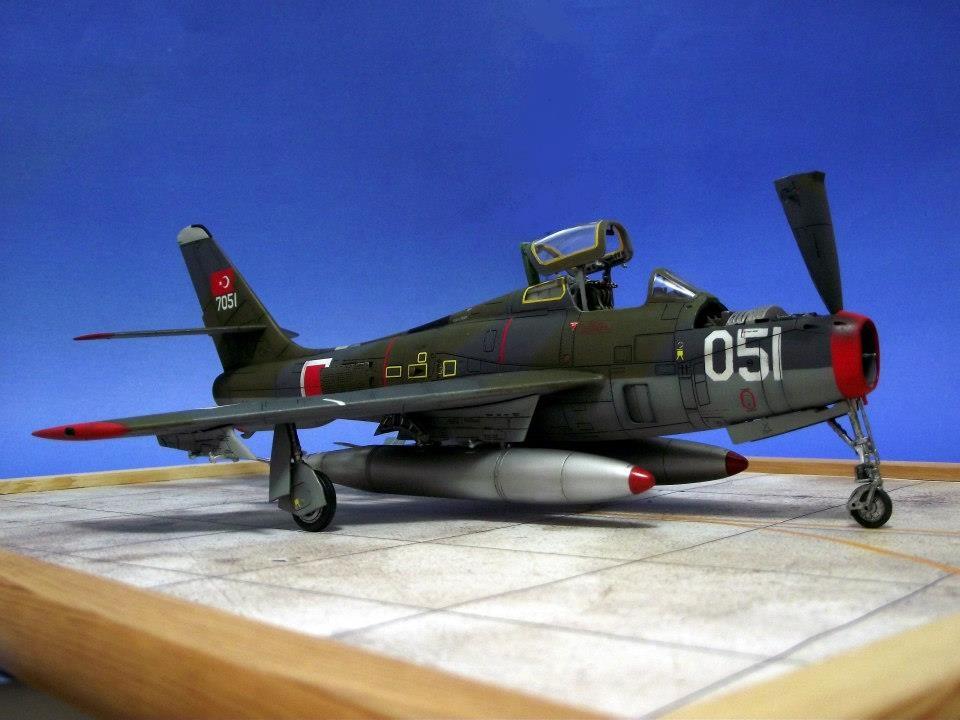
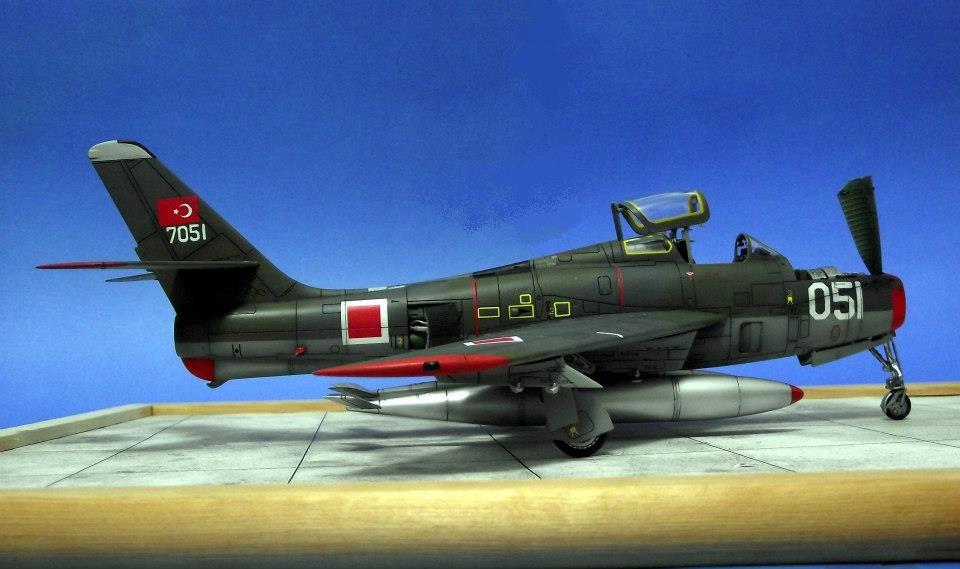
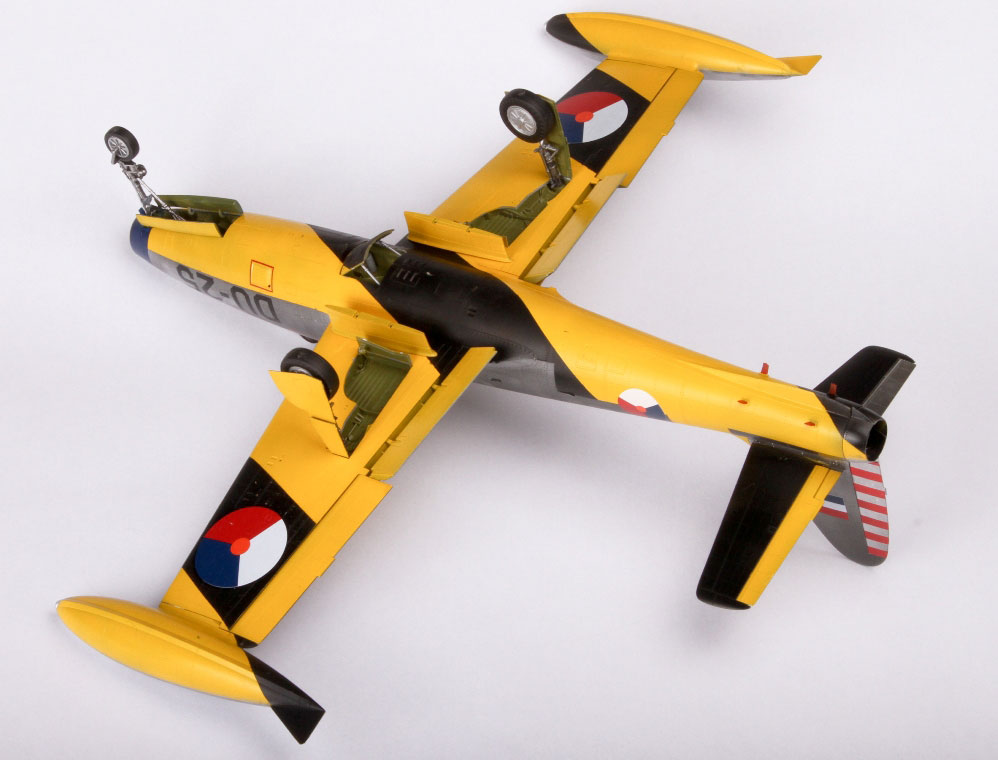
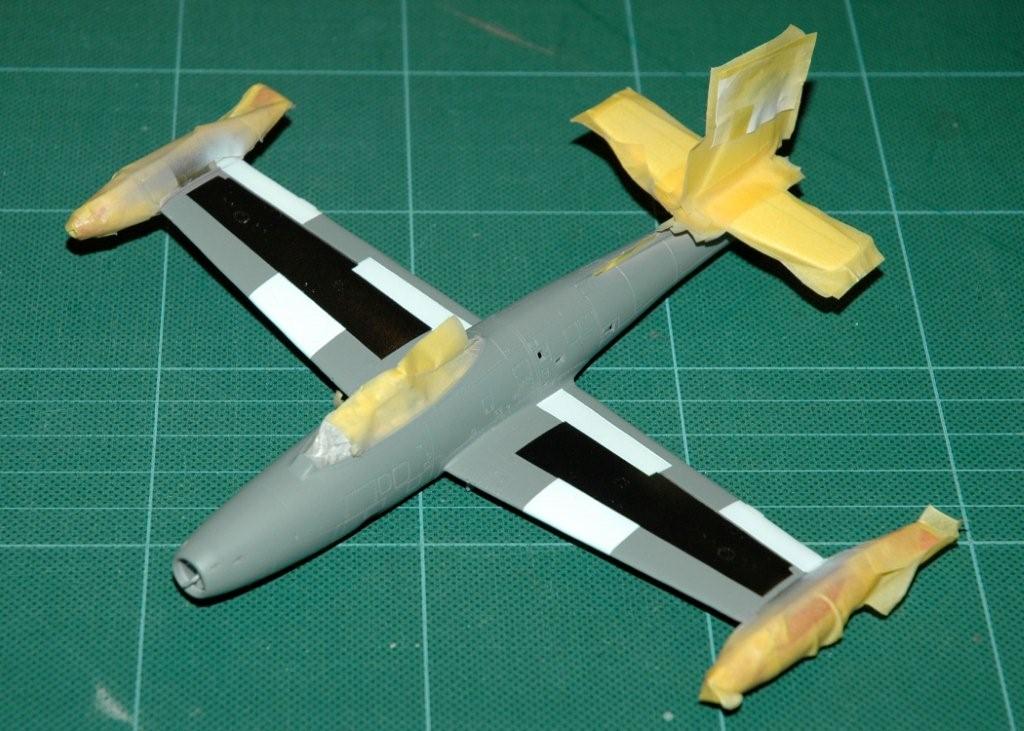
(Ex. German F-84’s served under the name ”Q” in the Turkish Air Force)
No aftermarket products used.
I have been a member of the site for 1 year and it is helpful. Greetings from Turkiye.
Eren Erdogan

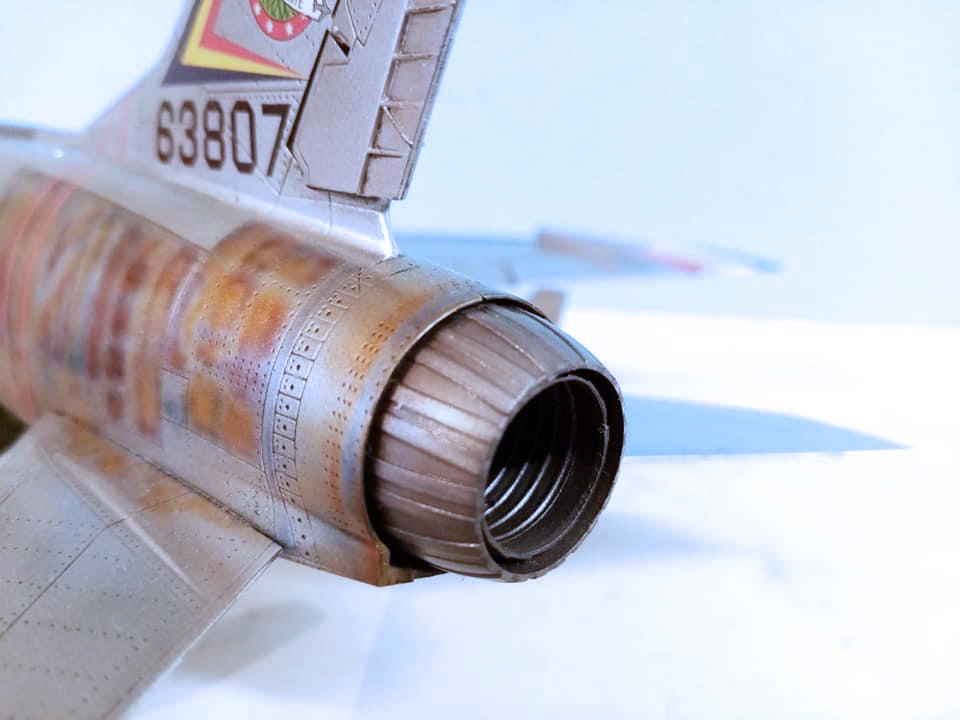
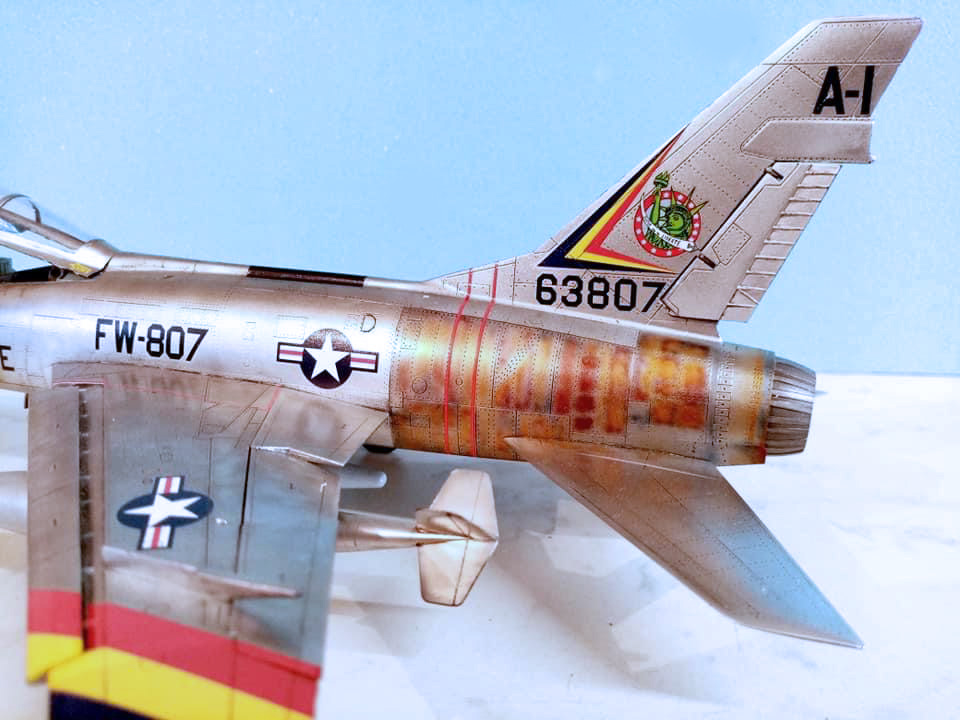
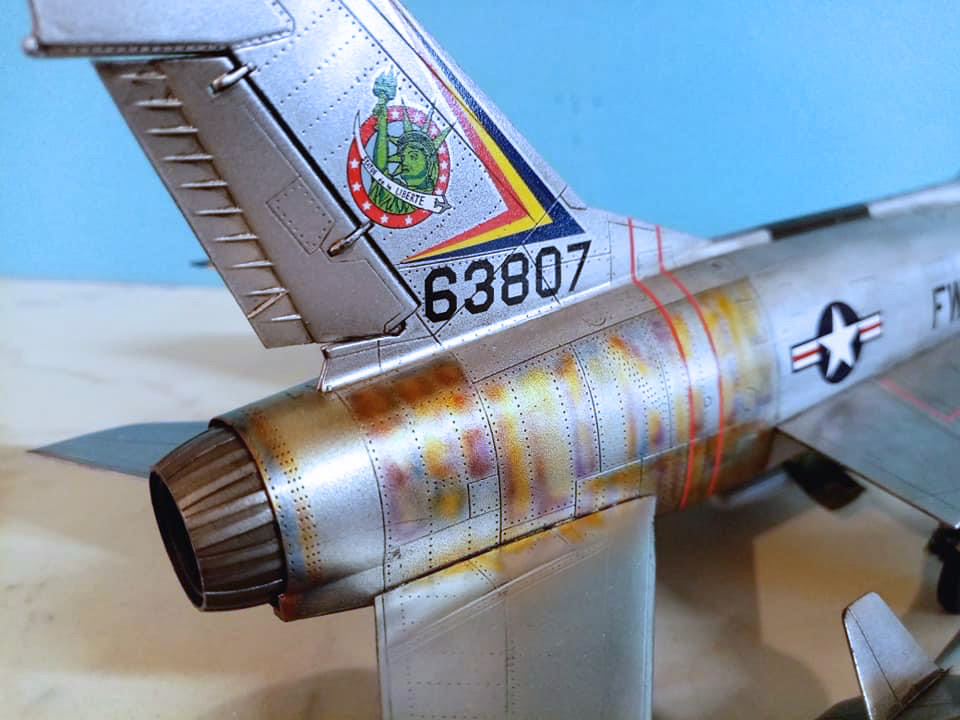
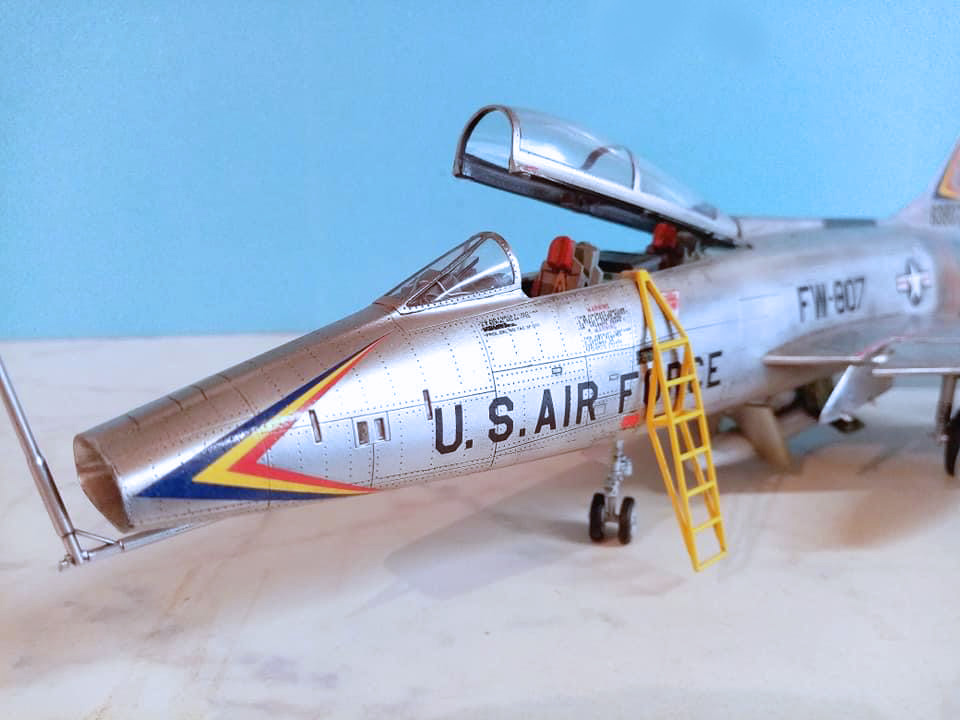

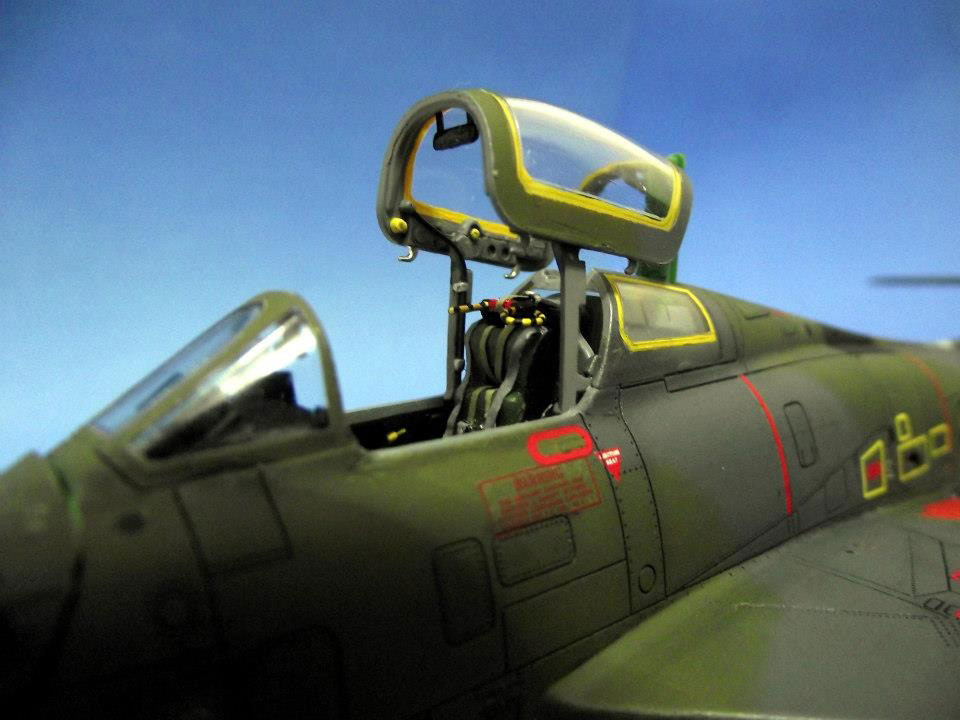
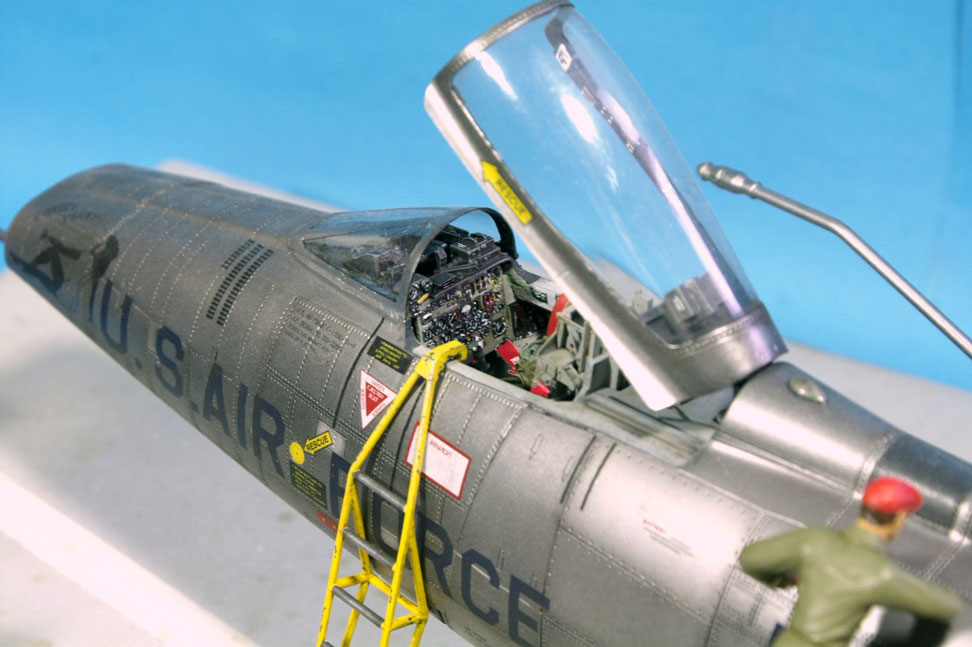
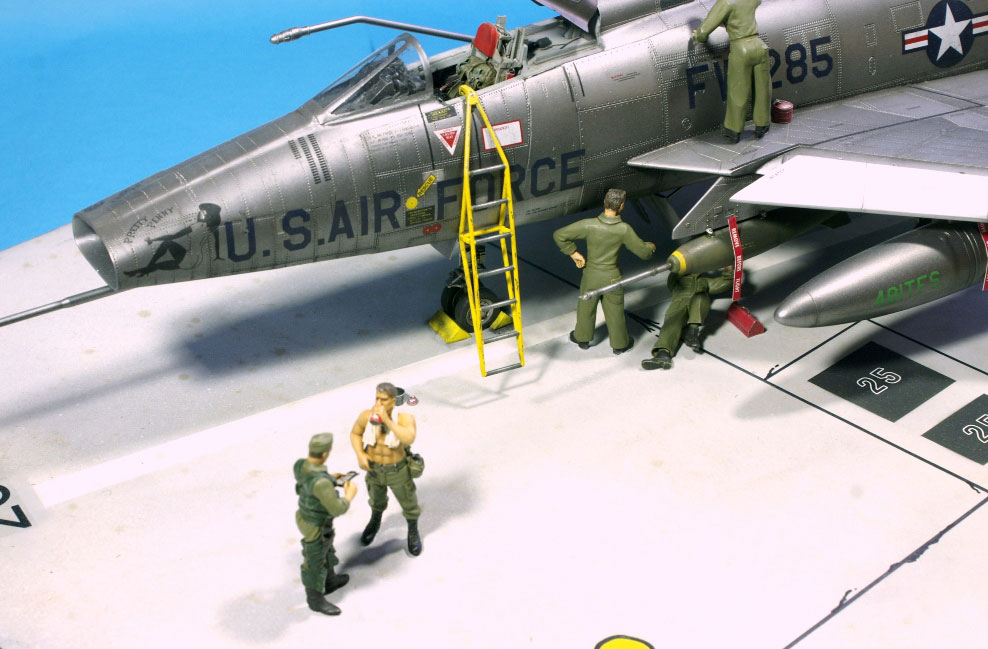
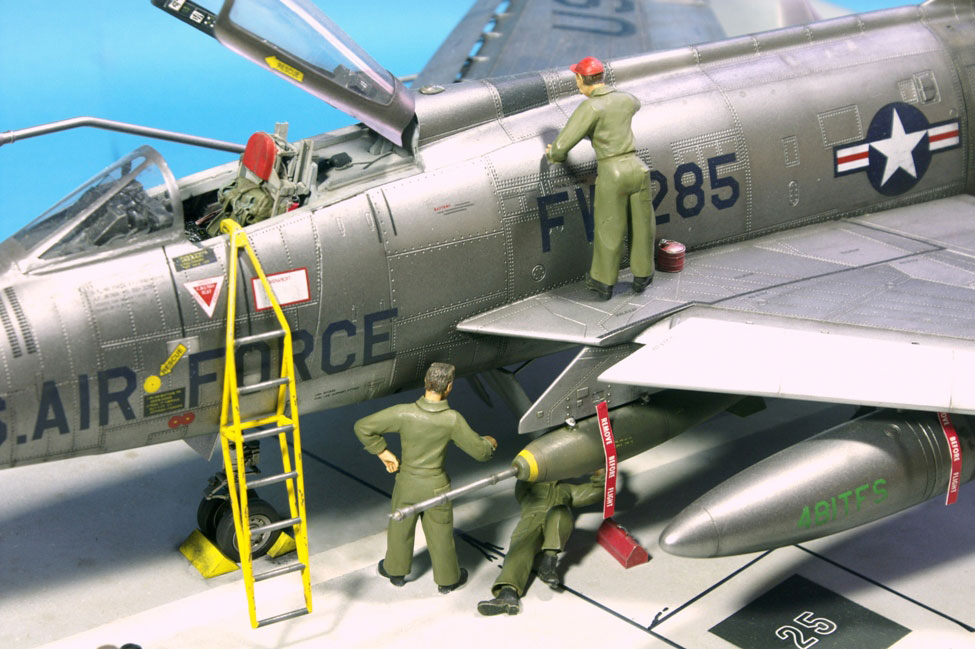
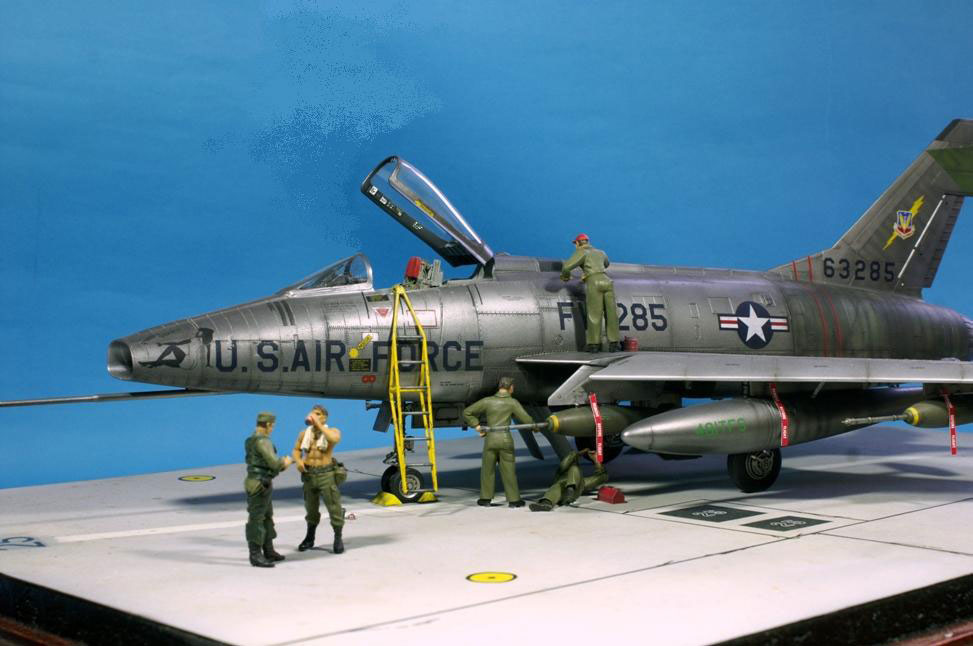
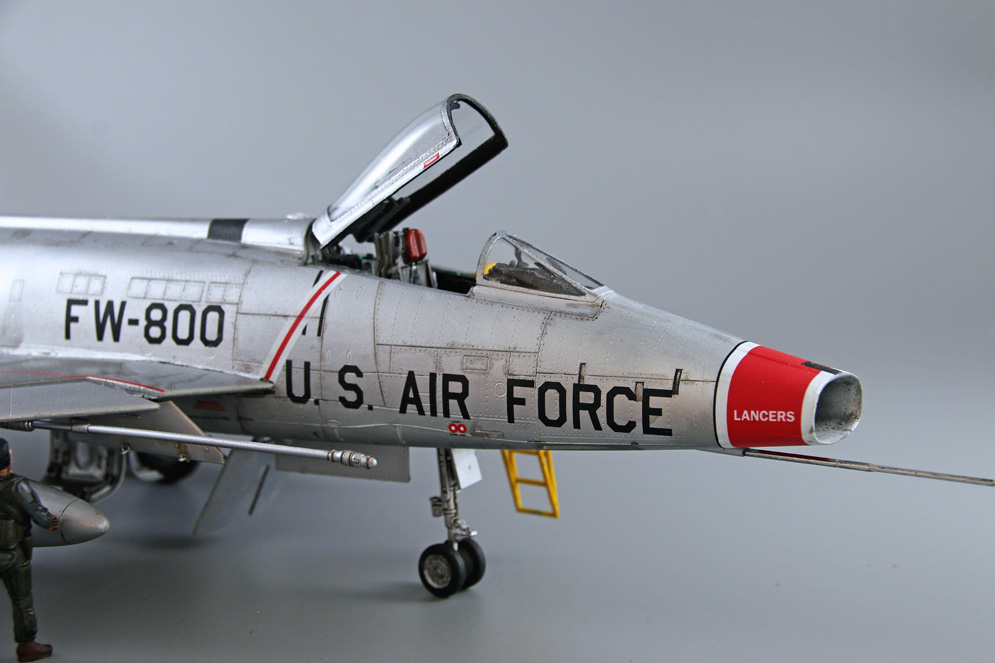
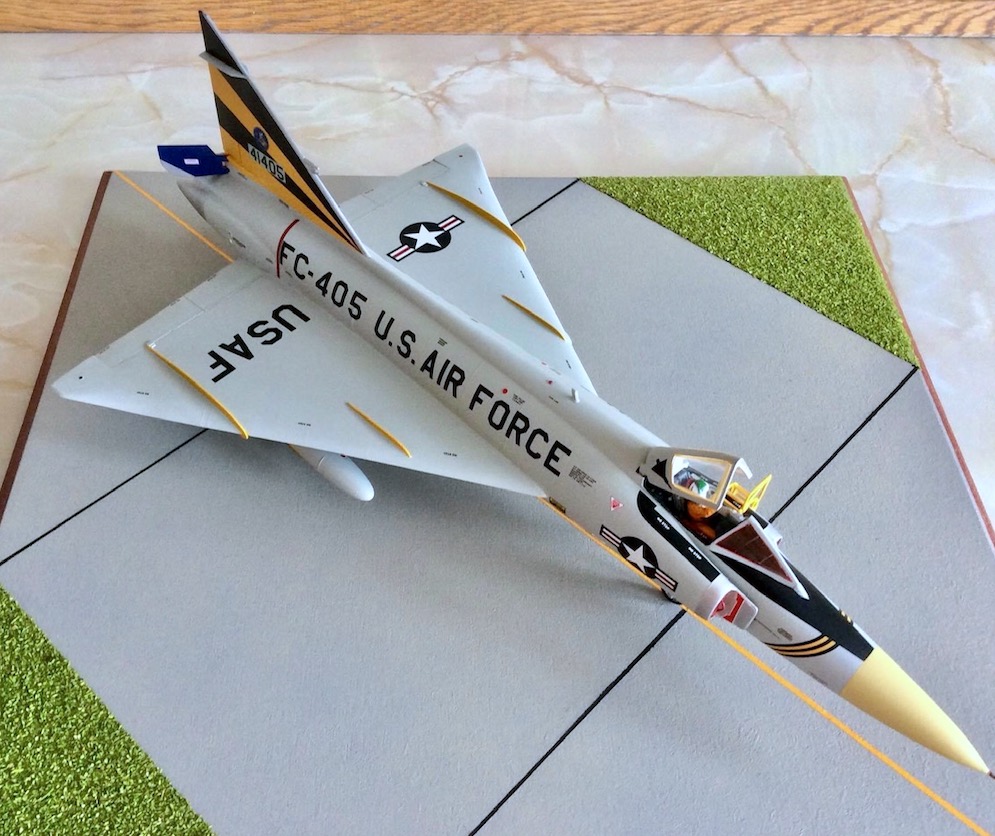
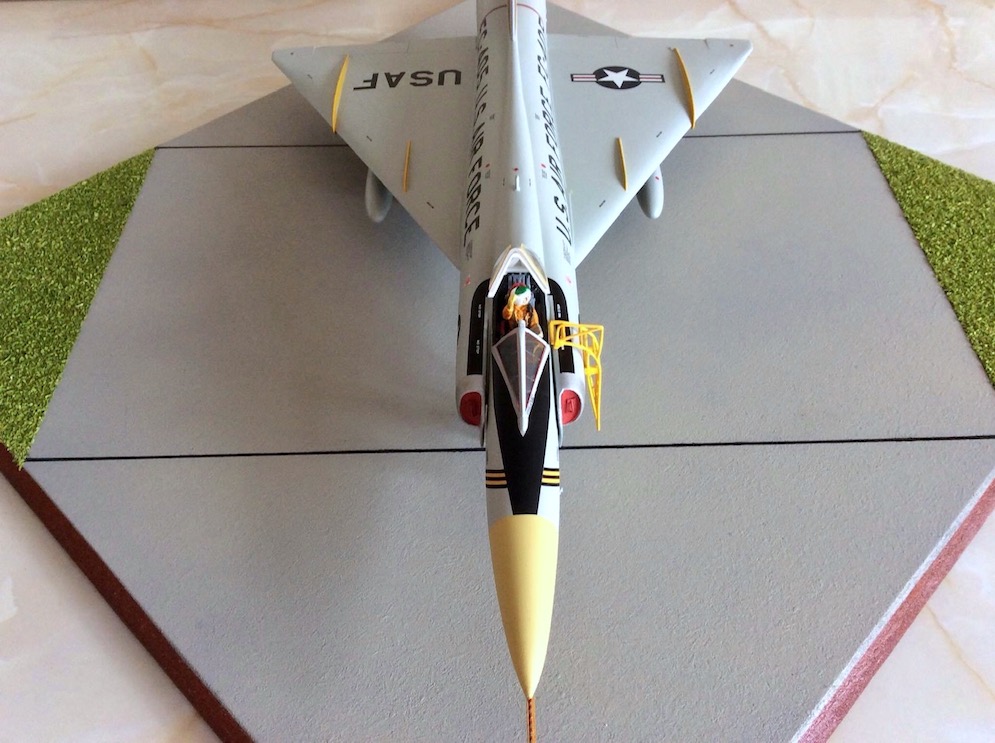
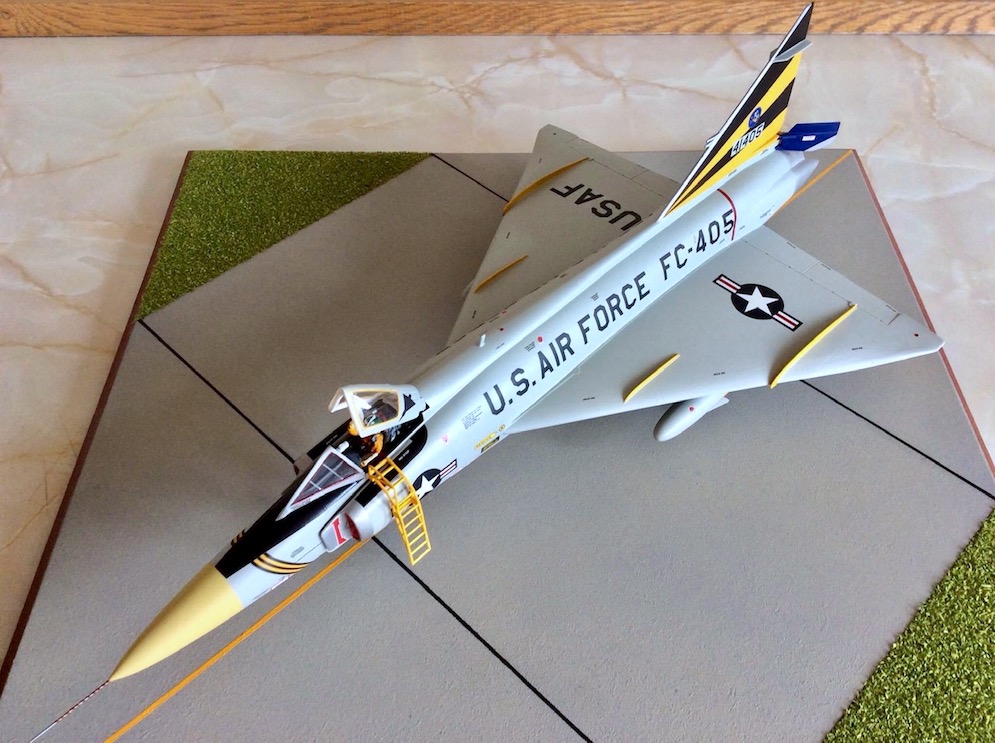
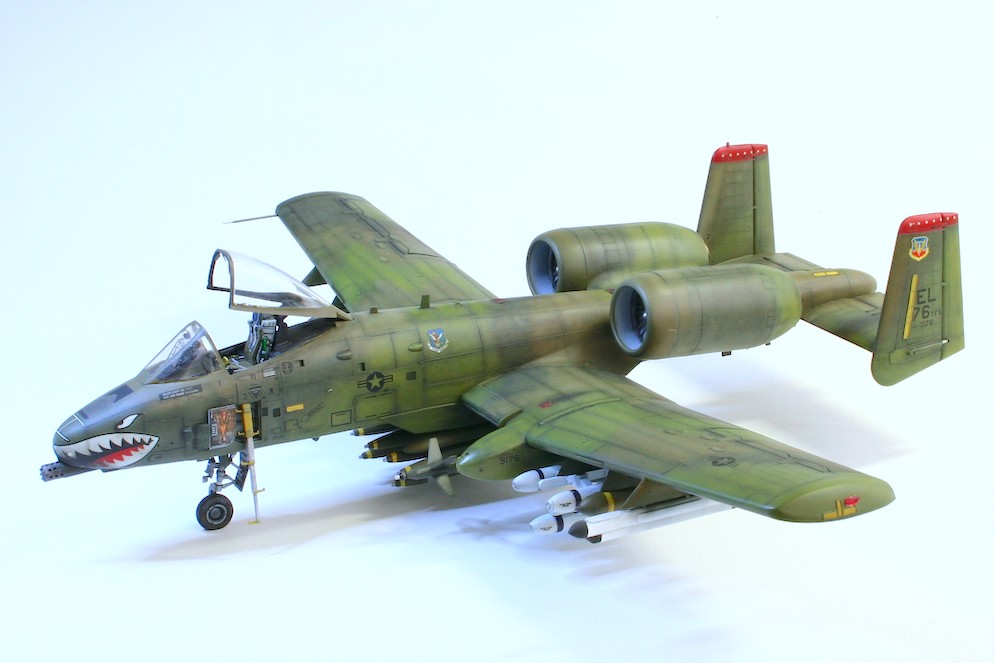
This is Trumpeter’s 1:48th F-100F Super Sabre, wearing the markings of the 48th Liberty Wing stationed at RAF Lakenheath, UK in 1969.
A little nervous when I started the paint on this one, metal finishes scare me to death, but I actually ended up enjoying it, especially the heat staining around the engine.
All in all, a lovely looking aircraft I think.
Martin A.
Trumpeter 1:48 with resin cockpit & engine exhaust. Custom made decals.
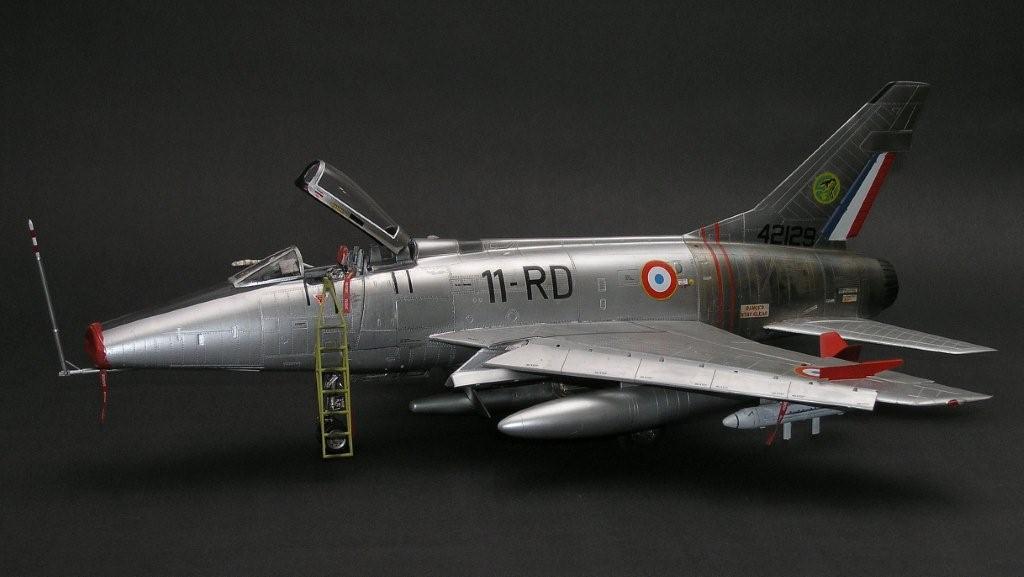
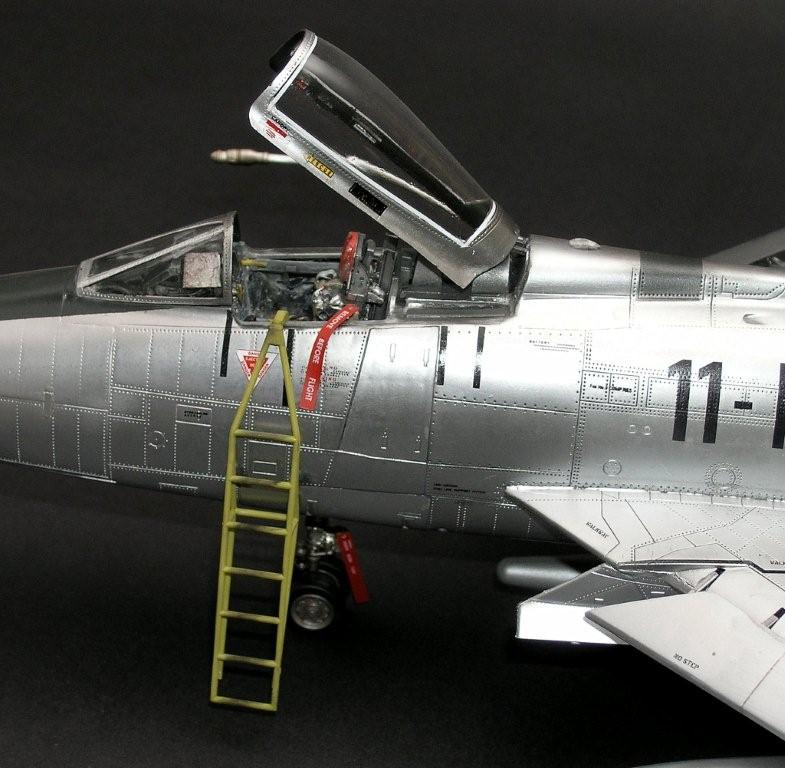
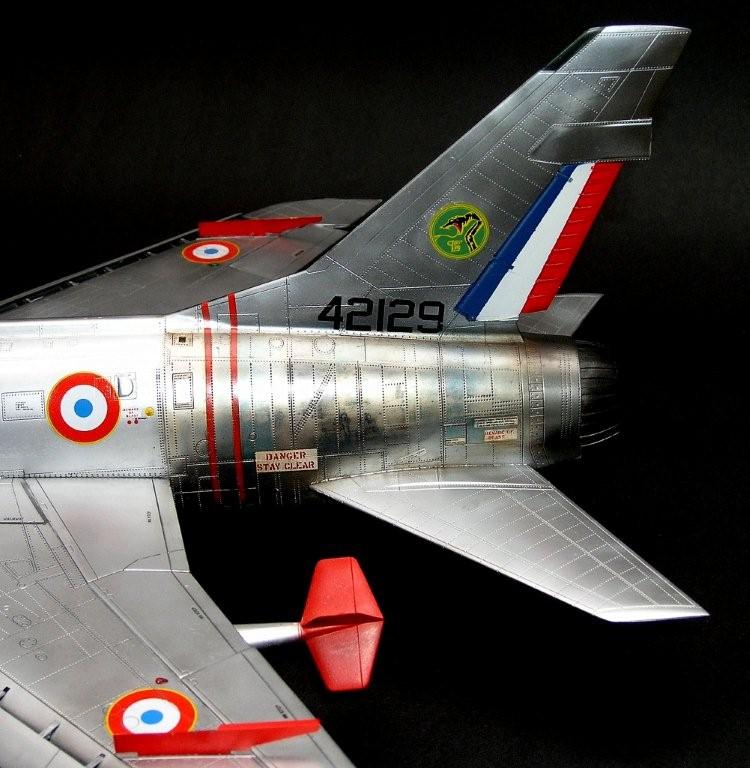
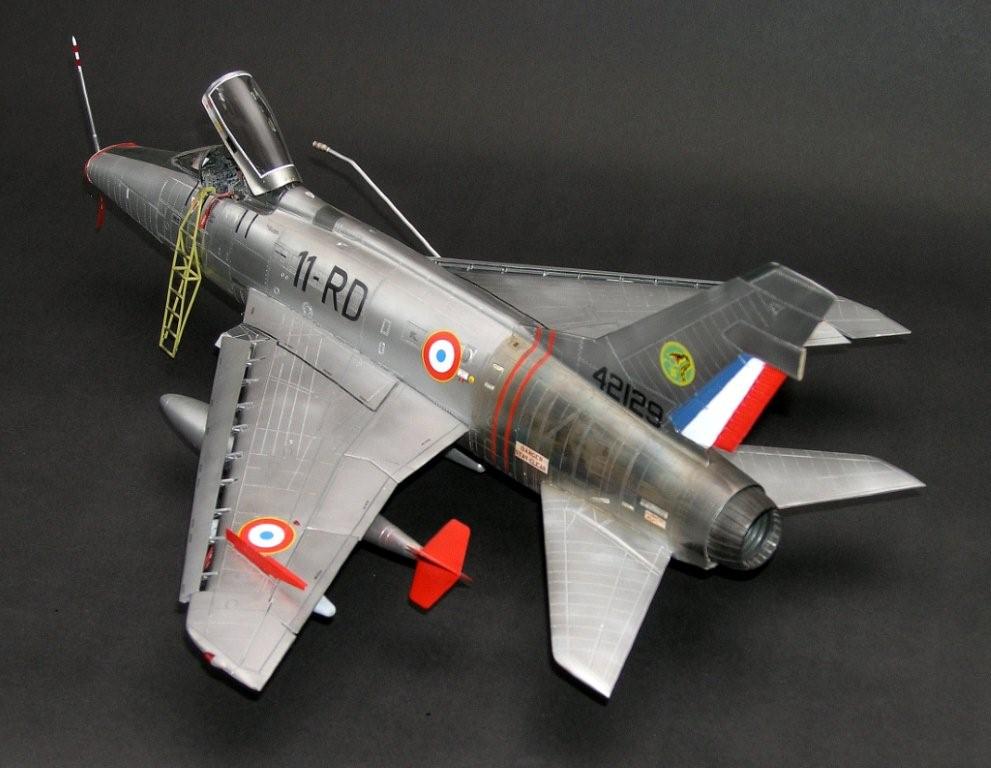
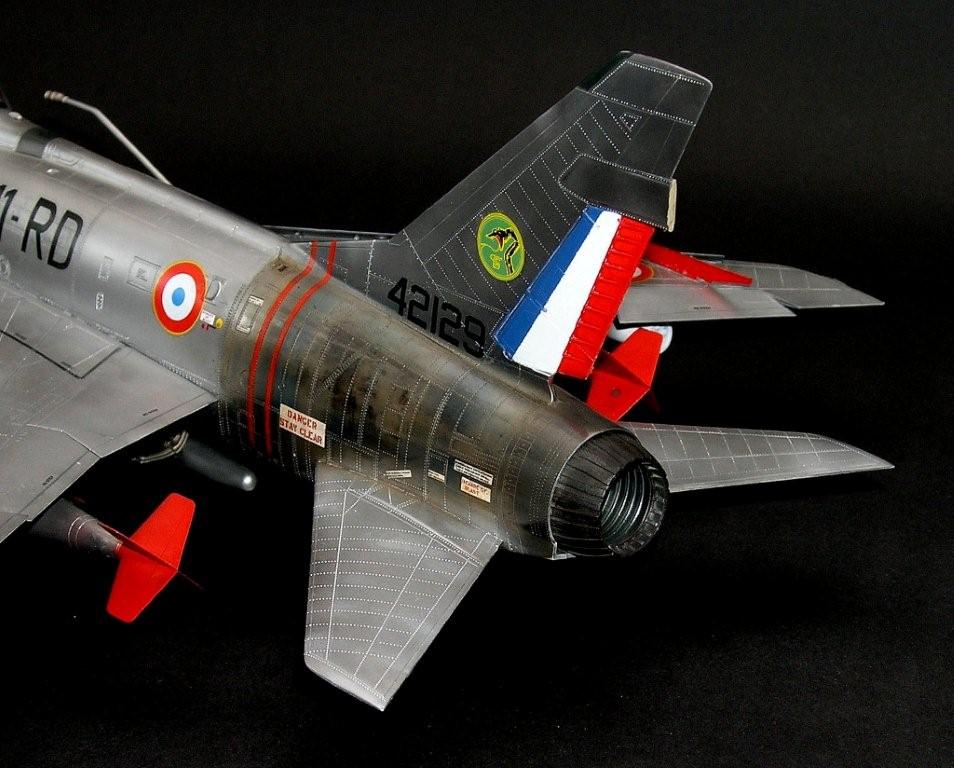
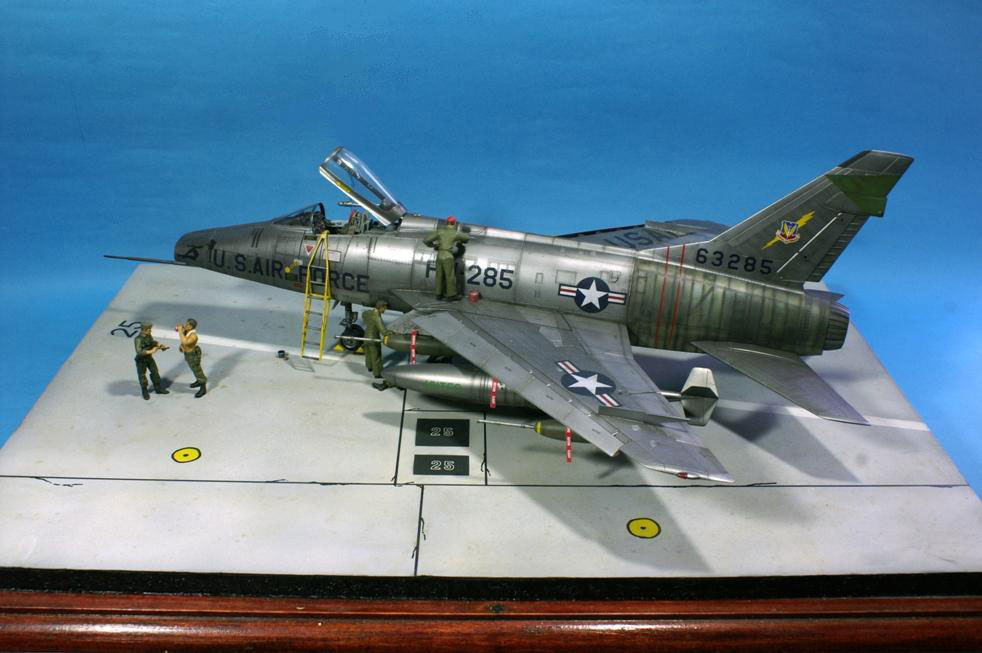
F100D 54-2163 du 1/11, vu à Toul en juin 1972. Coll. YF, Escadron de Chasse 1/11 ‘Roussillon’.


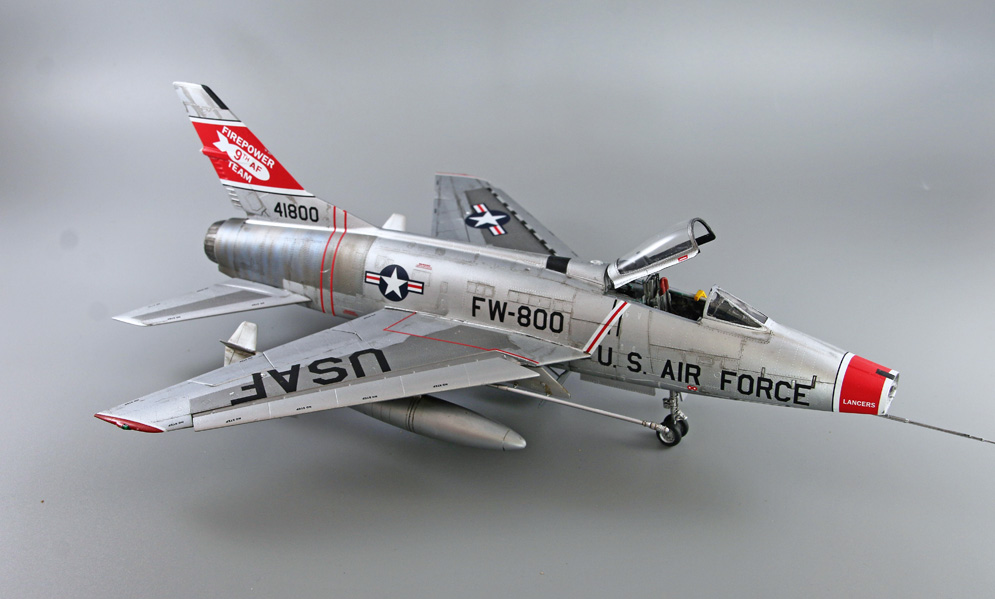

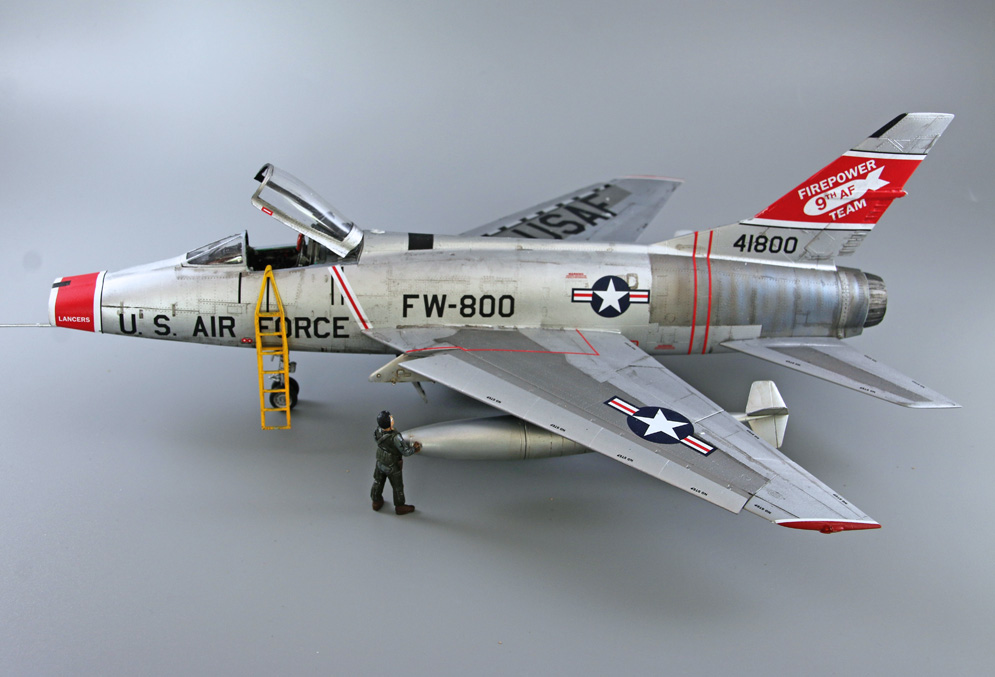
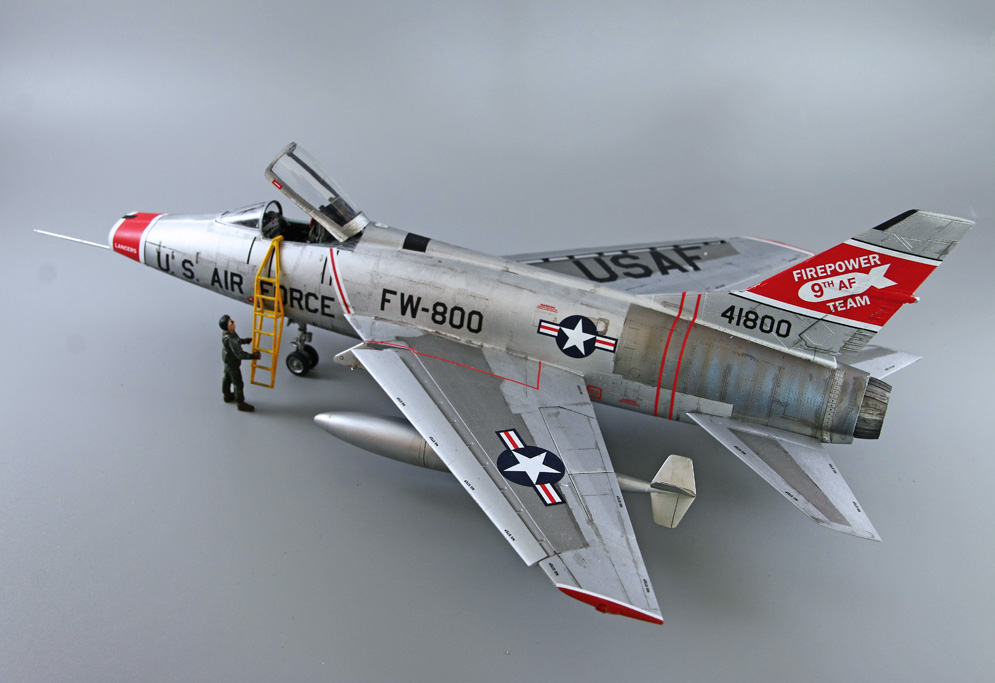
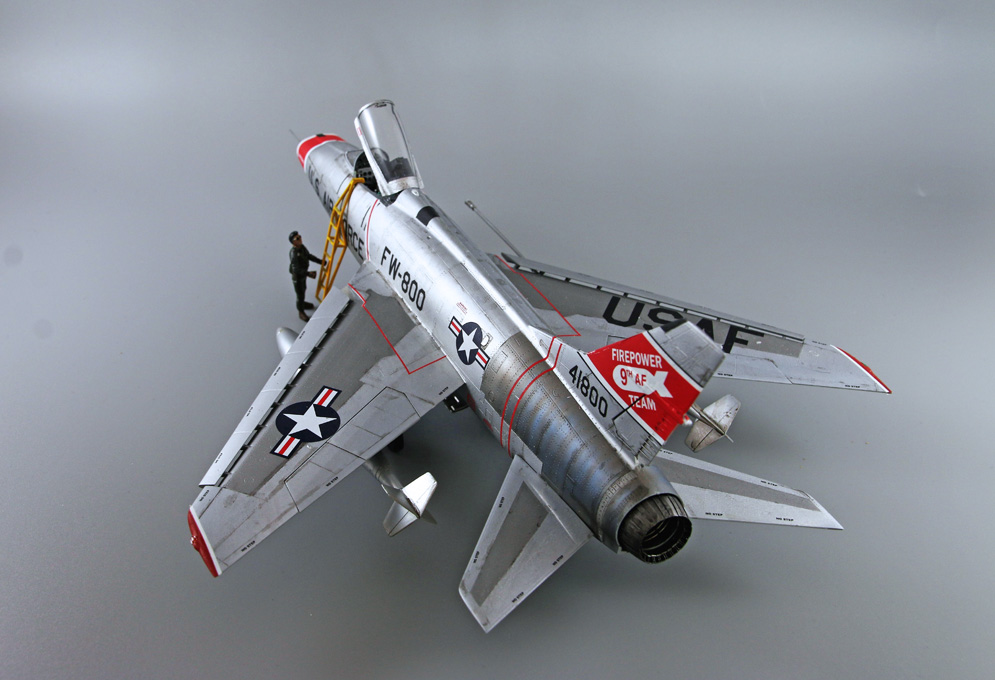
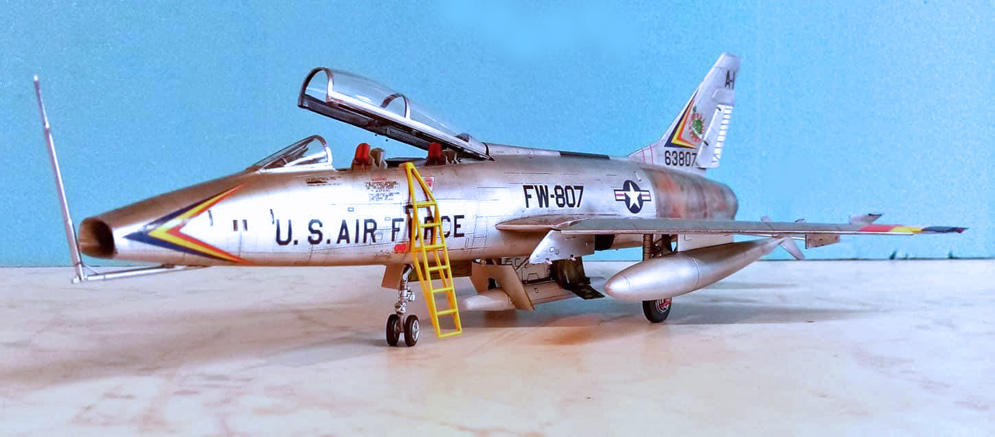
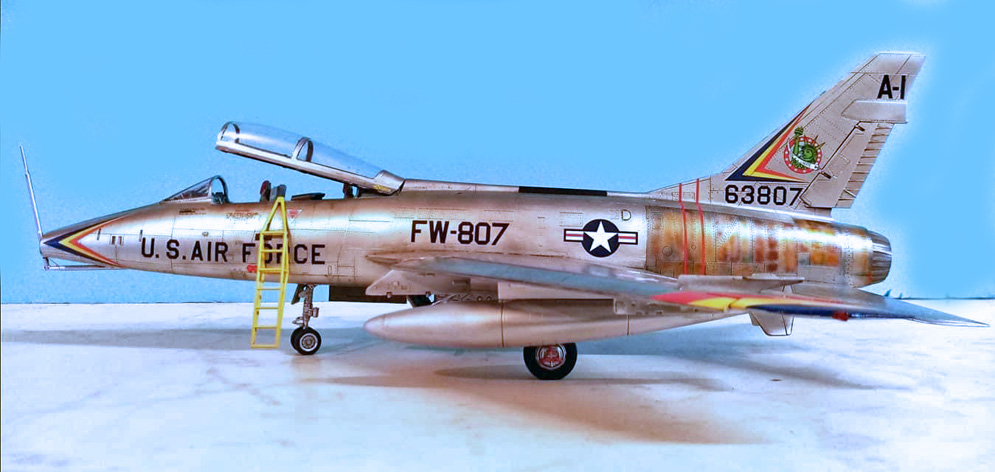
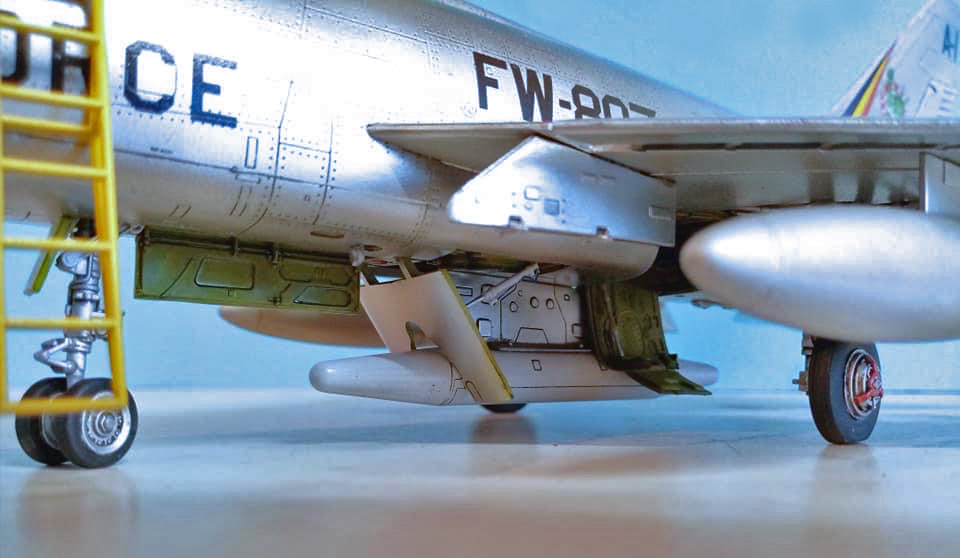
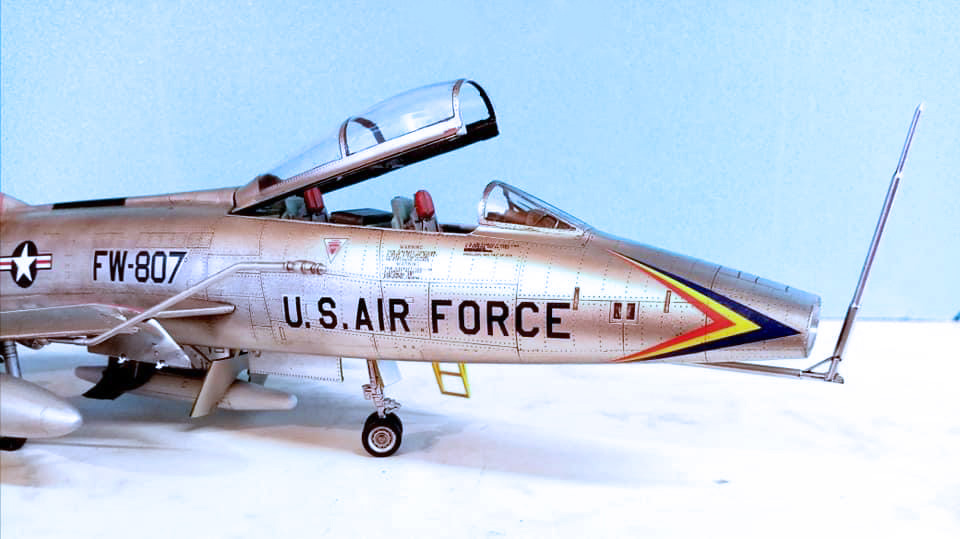
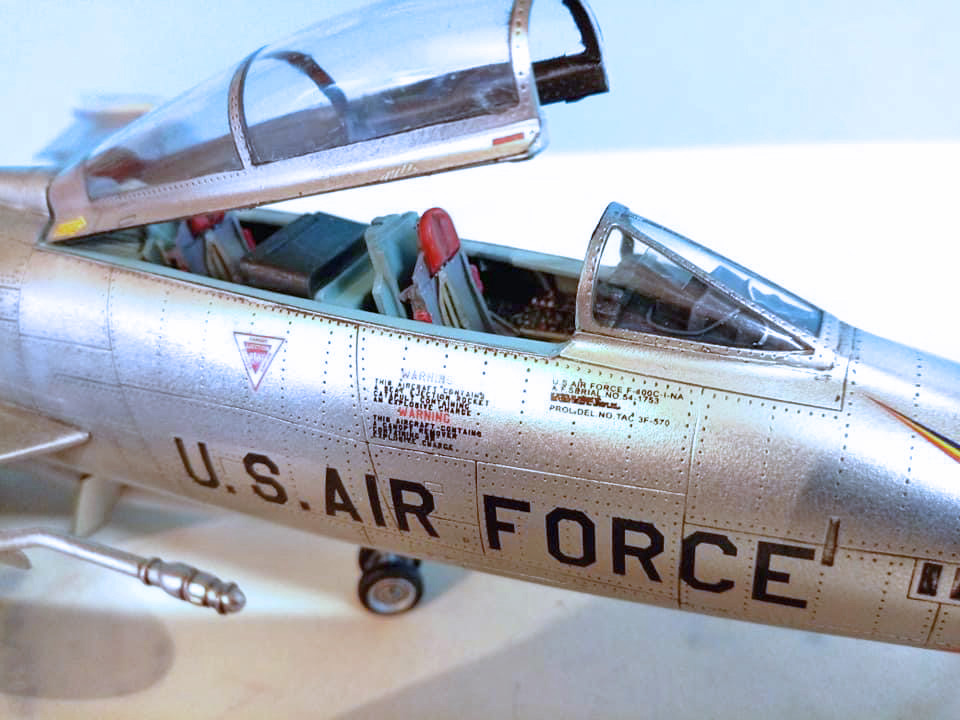
This is the Trumpeter 1:48 F-100C with AMS corrected intake, Master pitot tube, Superscale decals and AK Xtreme Metal paint.
Thanks
Graham L.

She’s an OOB build apart from the kit’s plastic pitot which was replaced with a piece of nickel/silver wire cut to length.The kit-issue decals were used and performed perfectly with only Micro Sol being used.
She was painted and finished with a mix of Humbrol and Xtracolor enamels and satin Varnish. A classic kit and a classic clean finish. I added homemade plasticard intake covers as a final touch.
Raised details and not as high-tech as most modern kits of today but one I found to be extremely modeller-friendly and an absolute pleasure to build.
I hope you enjoy viewing and thank you for doing so.
Best Regards,
Paul A.
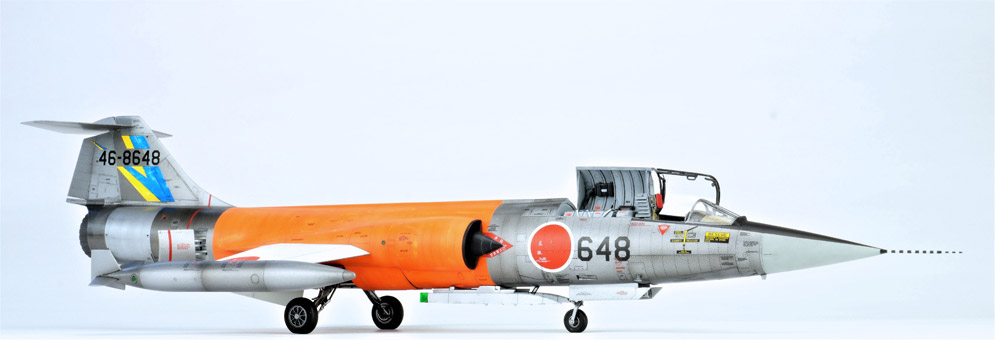
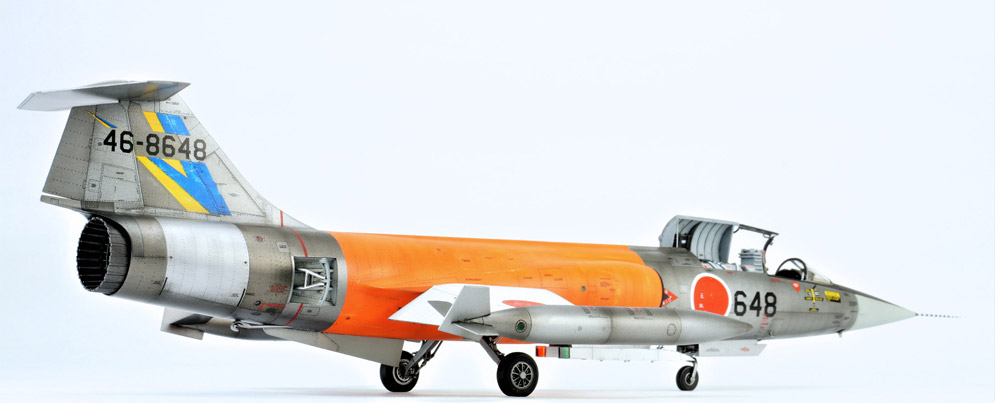
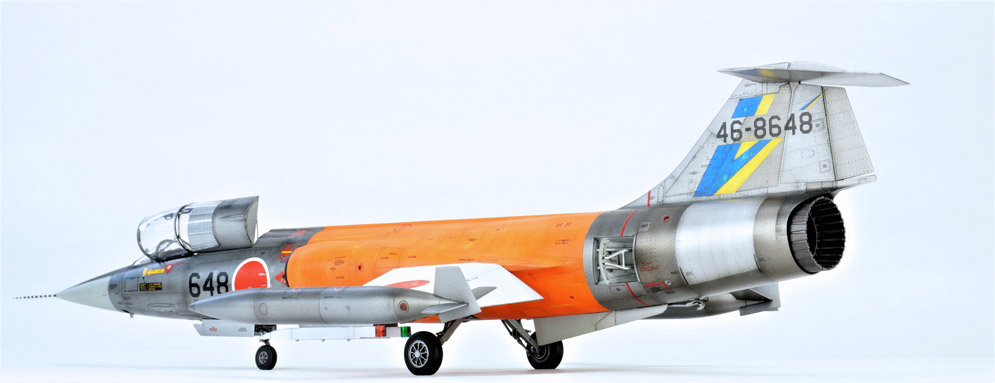
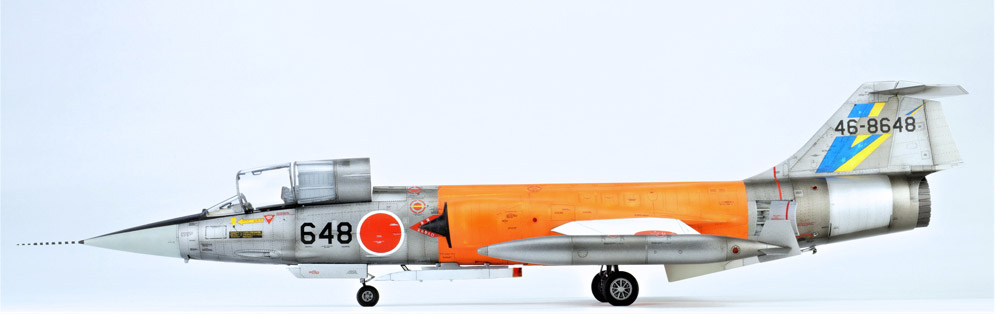
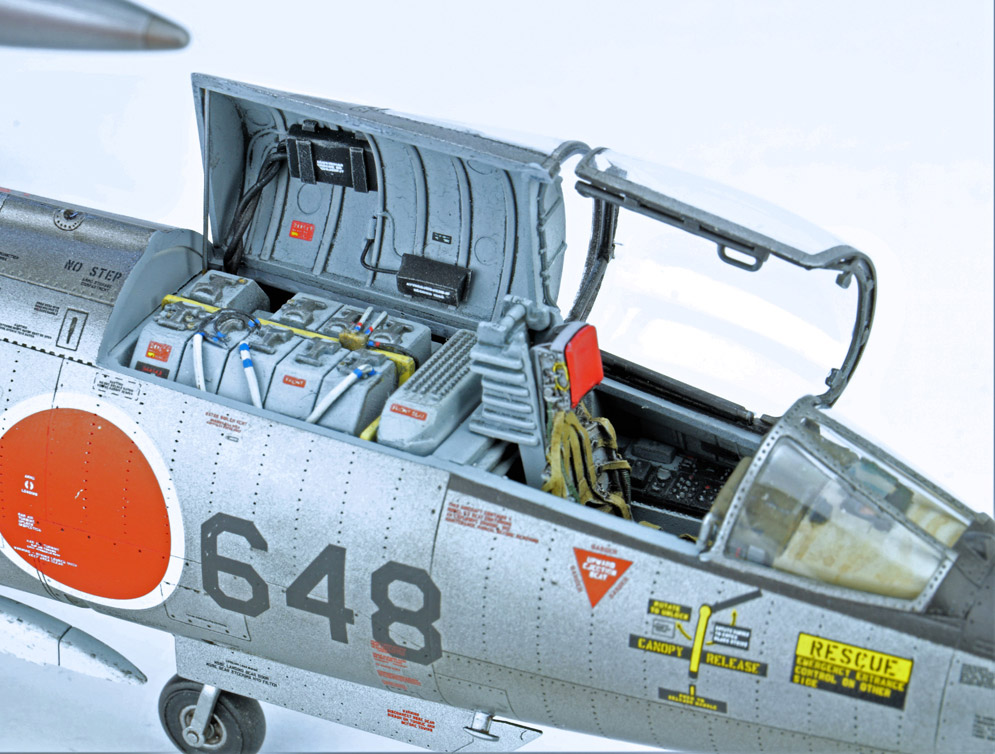
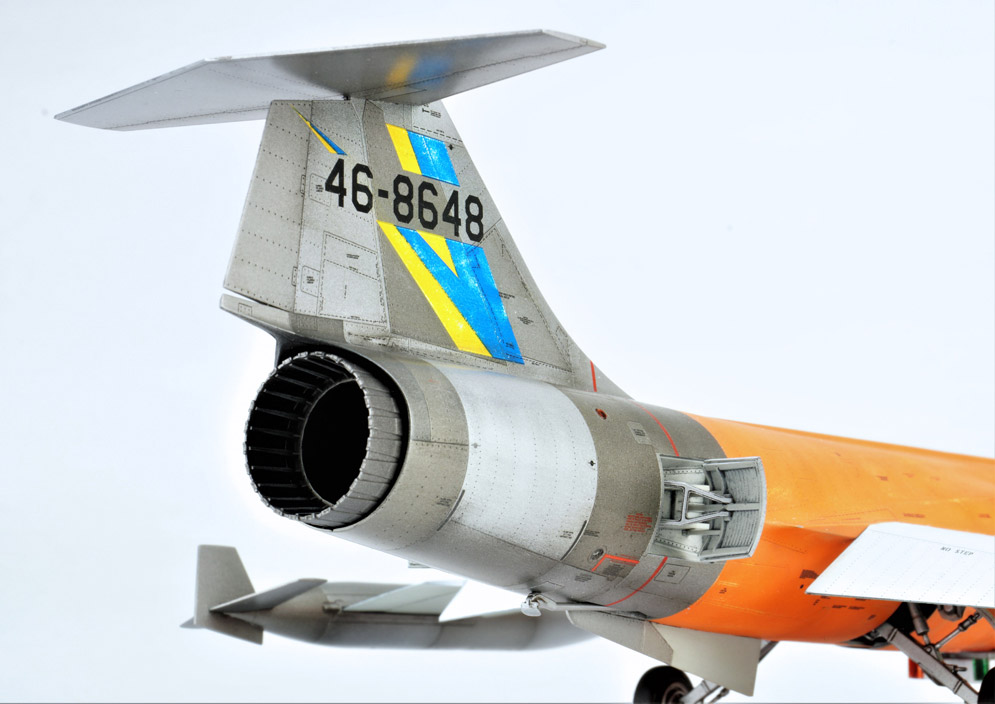
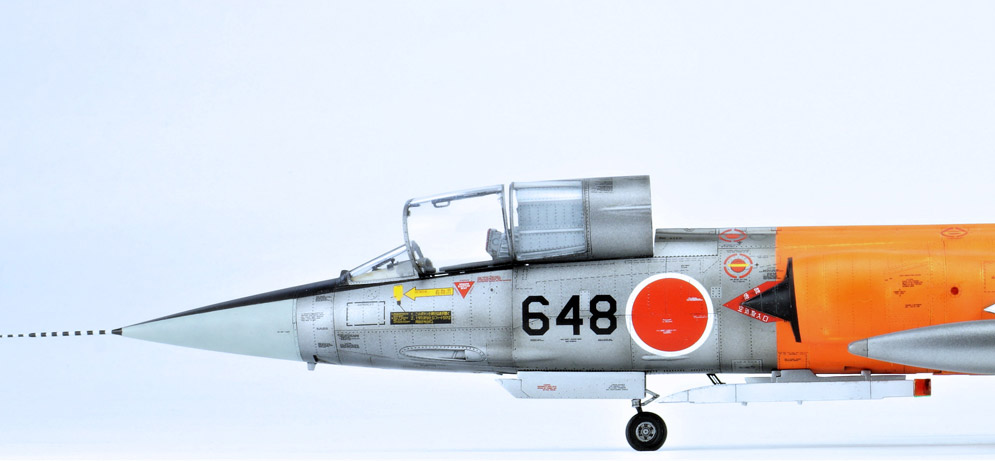
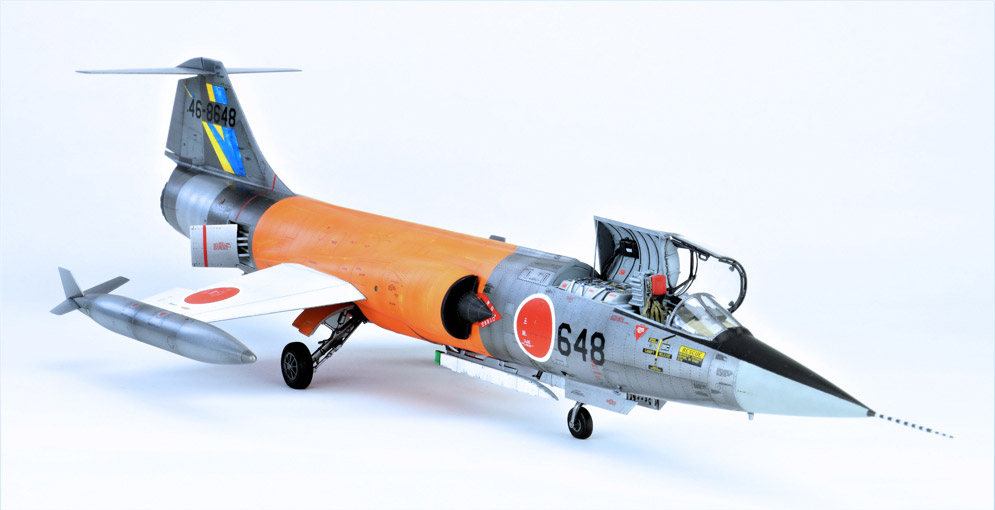
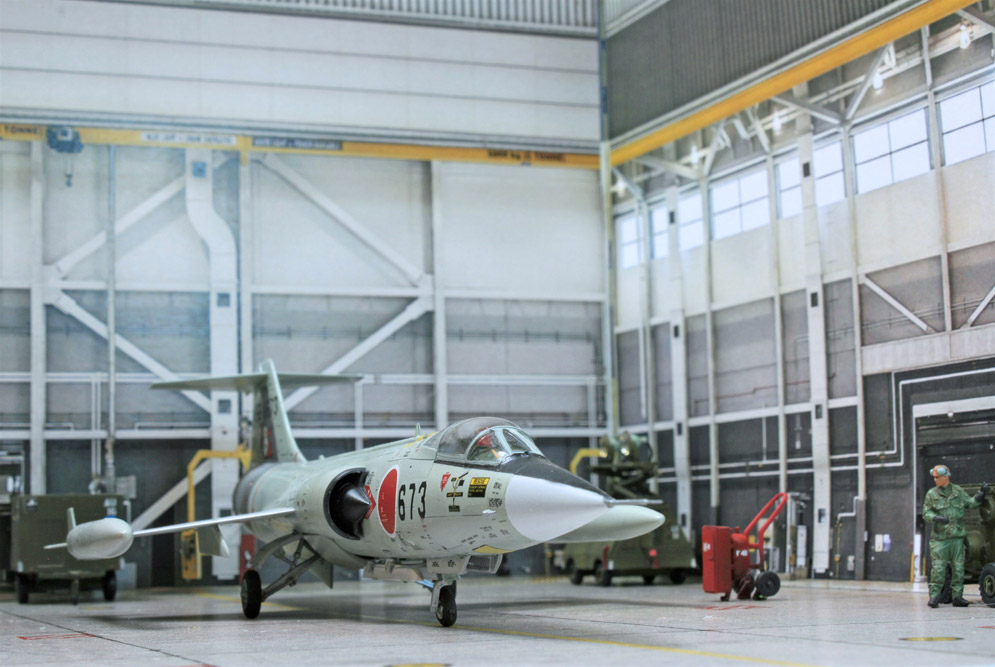
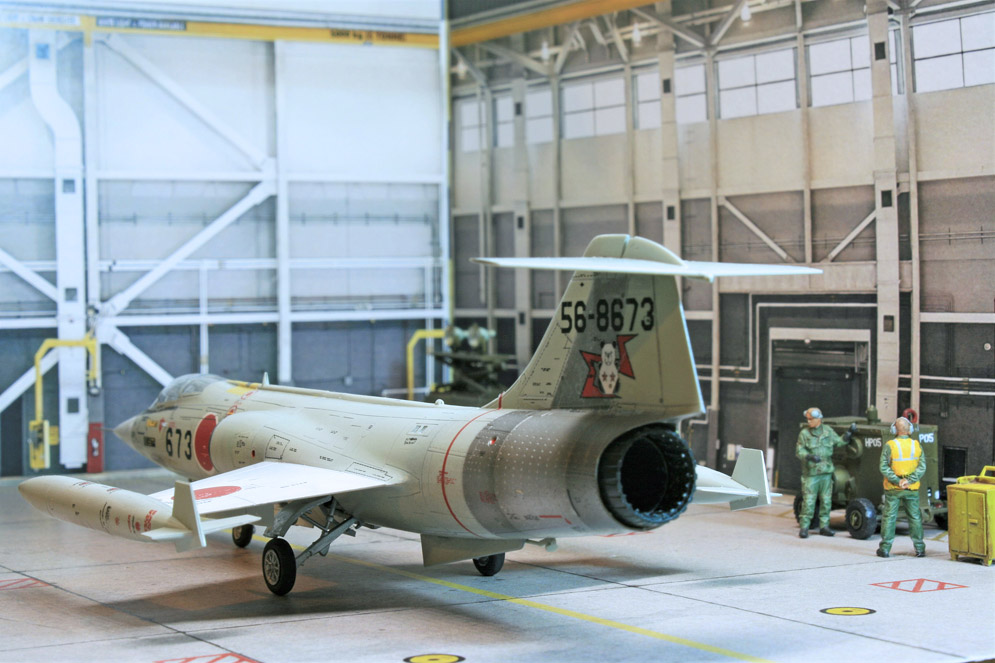
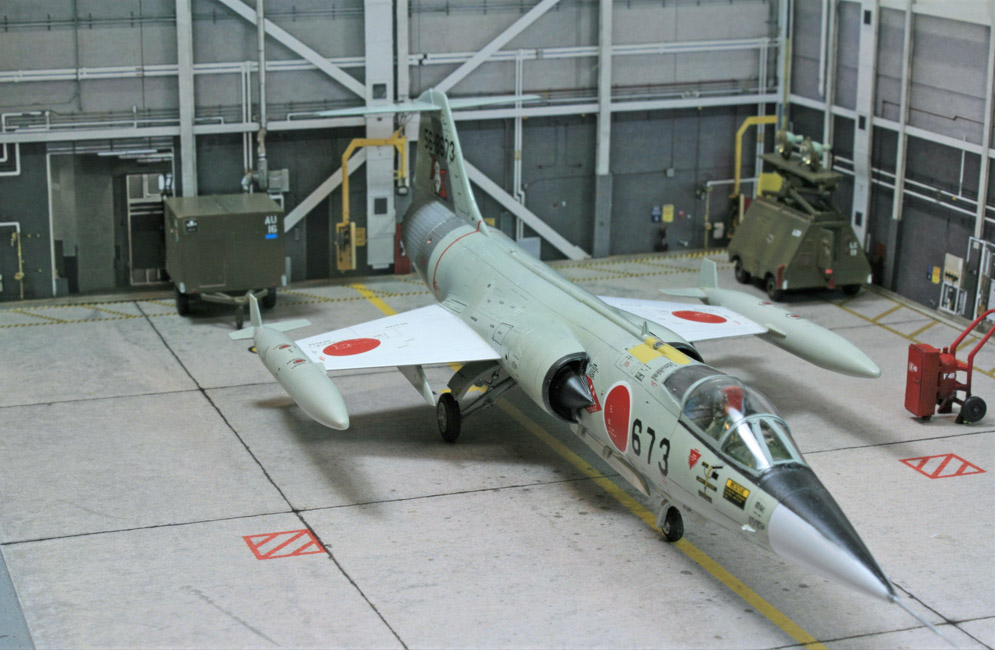
Because I was curious about this new Kinetic release, I decided on building it as soon as it fell on the mat. The model depicts a JASDF aggressor, machine no. 46-8648 of the 204th Hikotai, 5th Kokudan based at Tsuiki Air Base in the late 1970’s.
The decals I have used are from Xtradecal and a Fündekals stencil set. I added some wiring to the avionics bay and I used an instrument panel from an Aires set to make the cockpit a bit more interesting. The kit wasn’t as good as the reviews made me believe but all in all it was a quite enjoyable, albeit long build. The metals are all Alclad2 and the colours are from Mr. Paint and Gunze.
What I like most about this one is that is was a complete 180 degree turn from my normal camouflage madness. In the end I think it turned out quite nice.
Jeroen B.
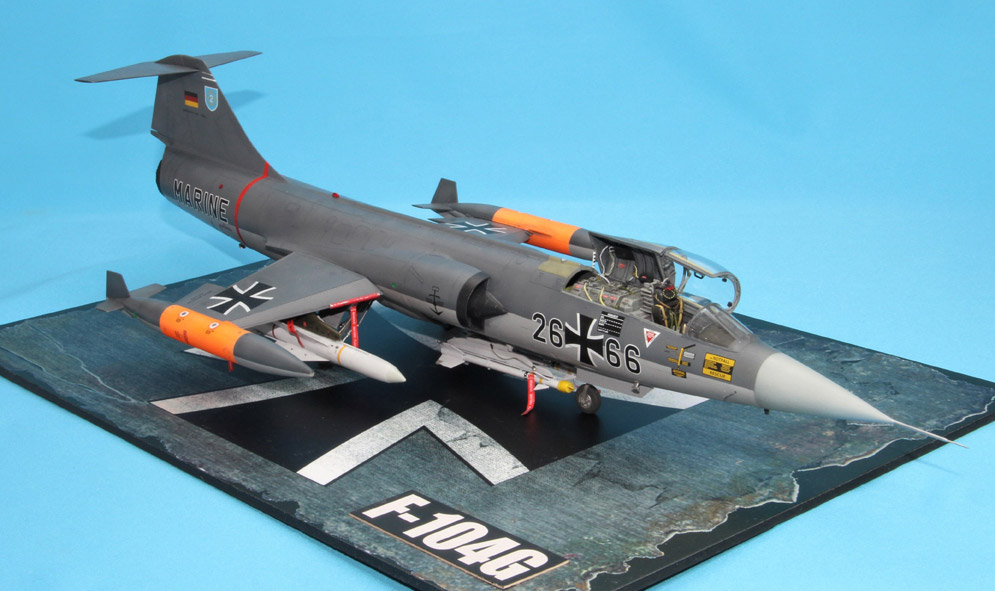
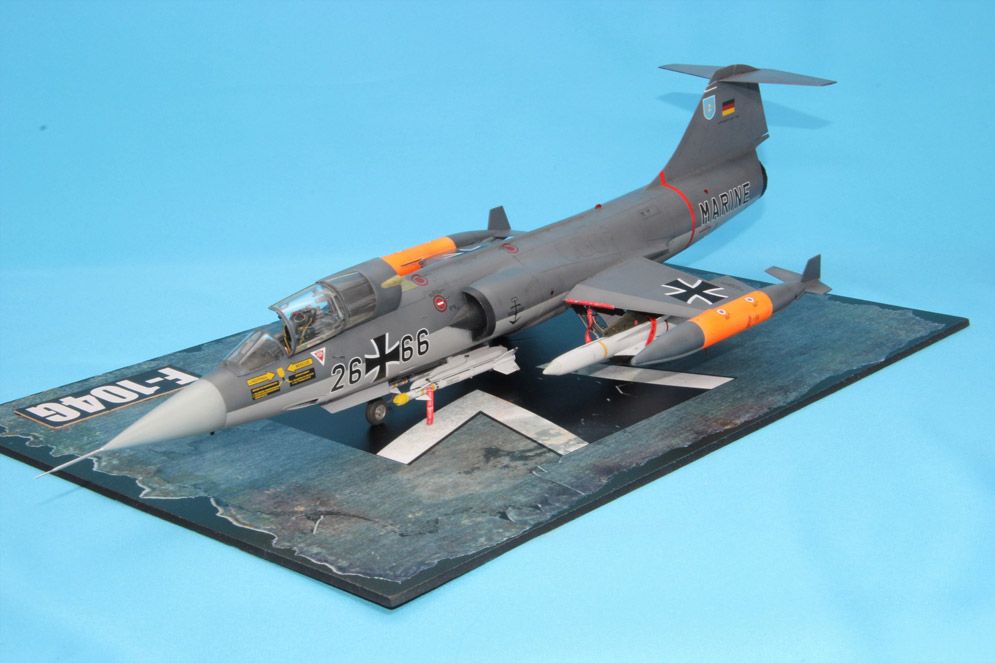
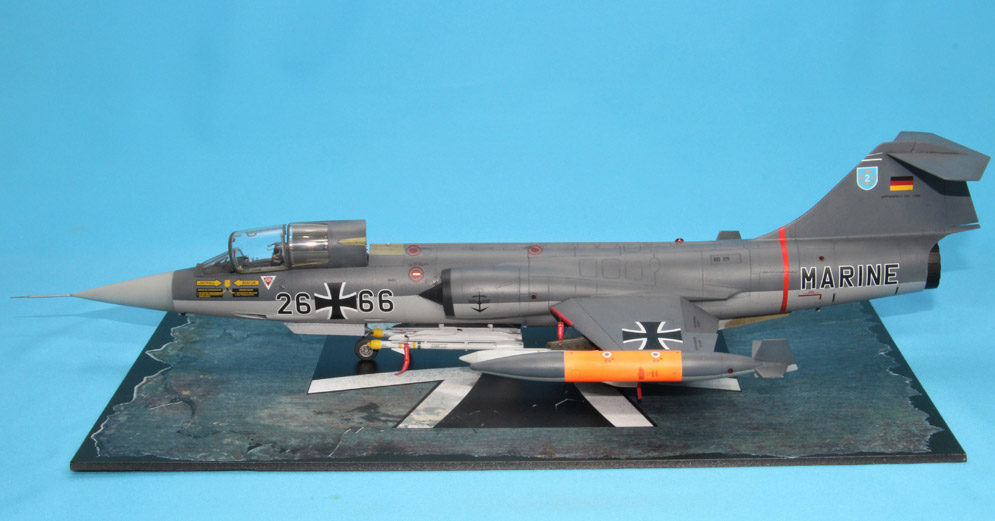
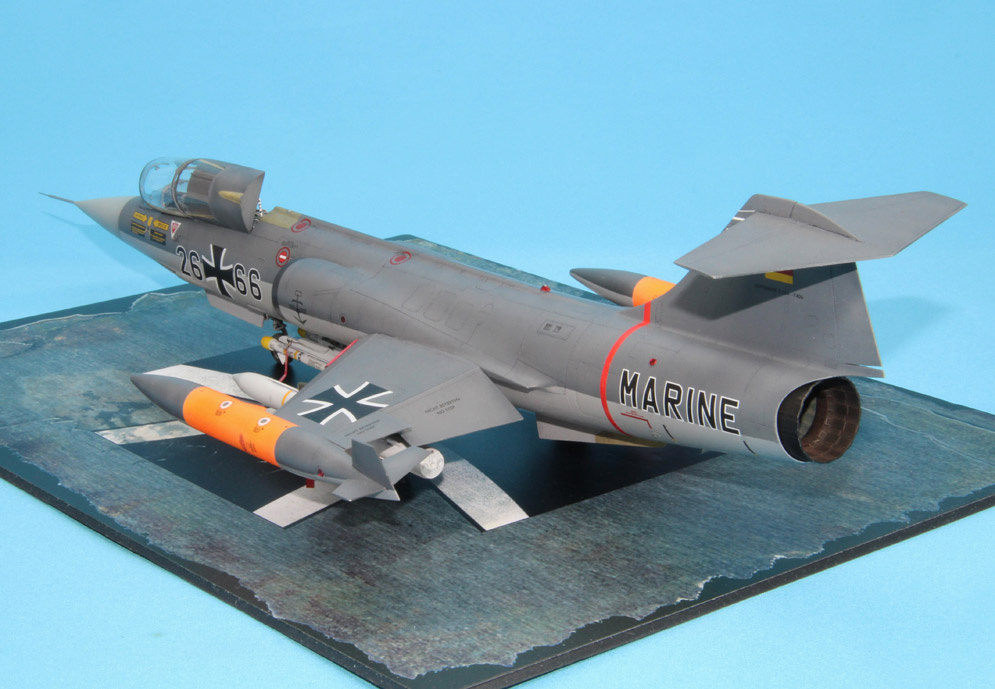
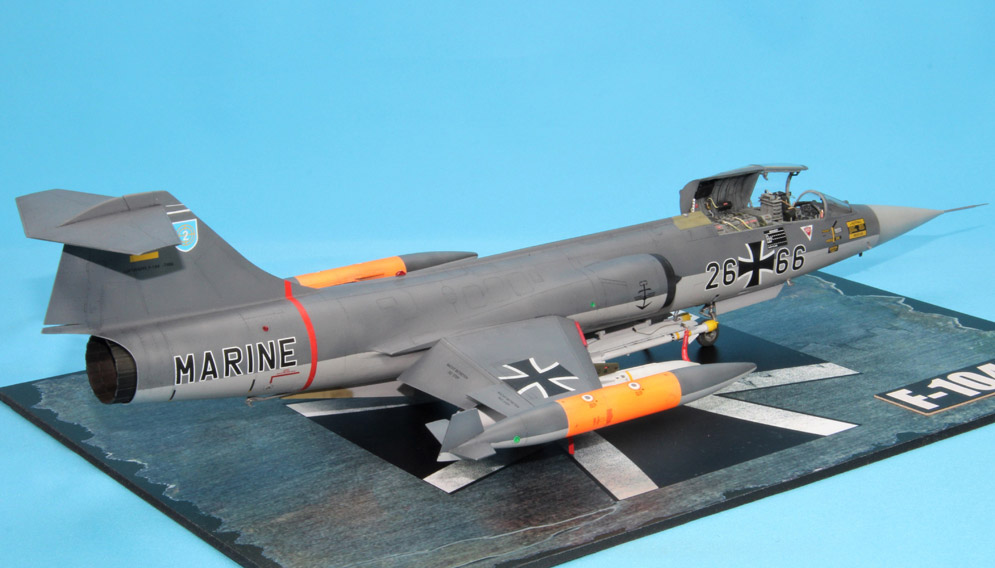
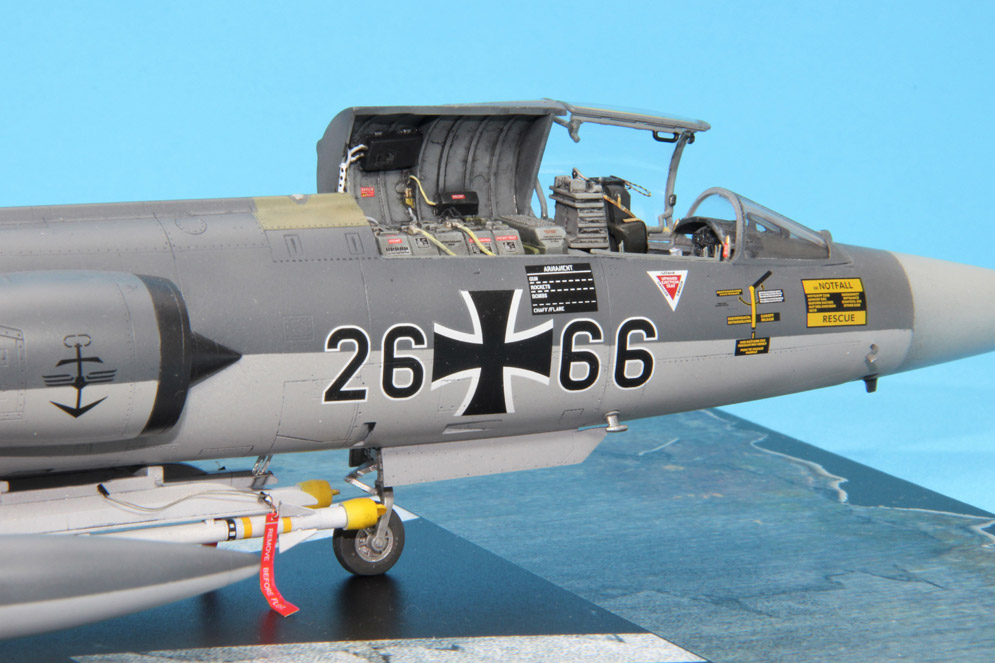

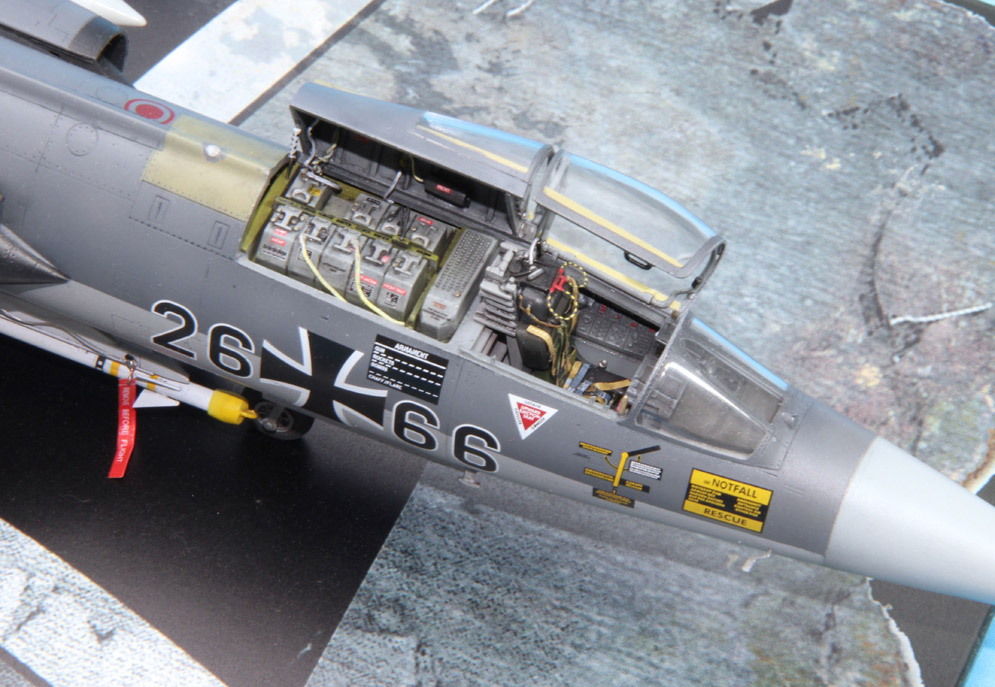
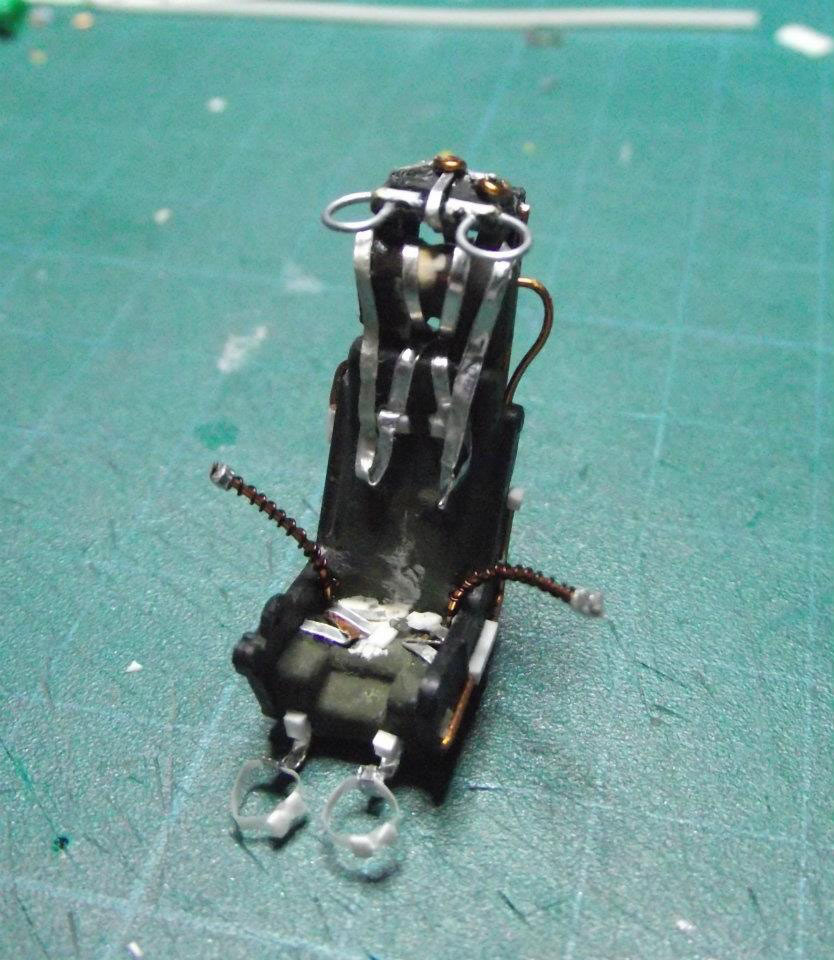
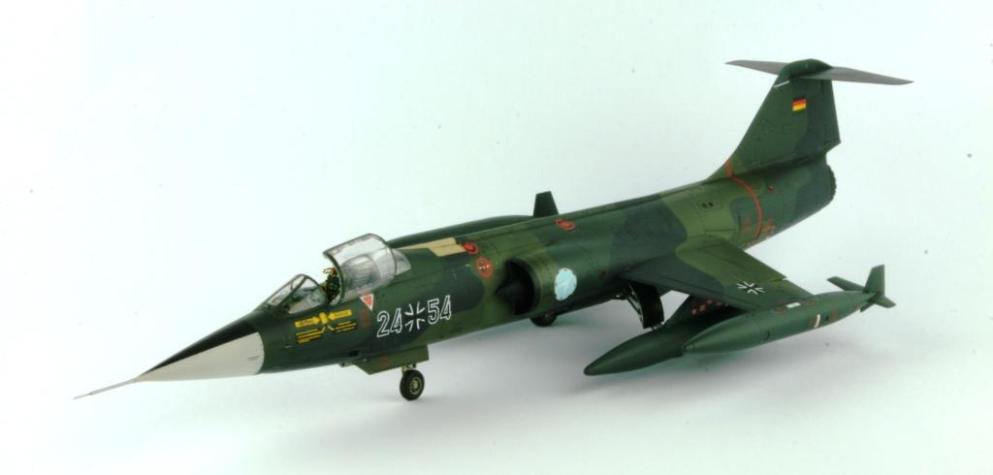
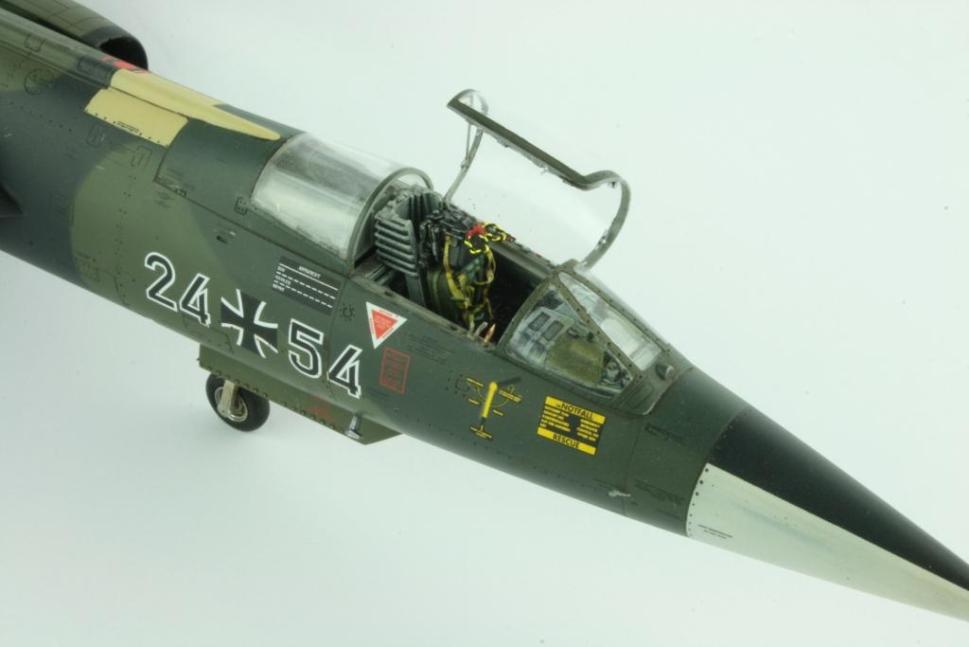
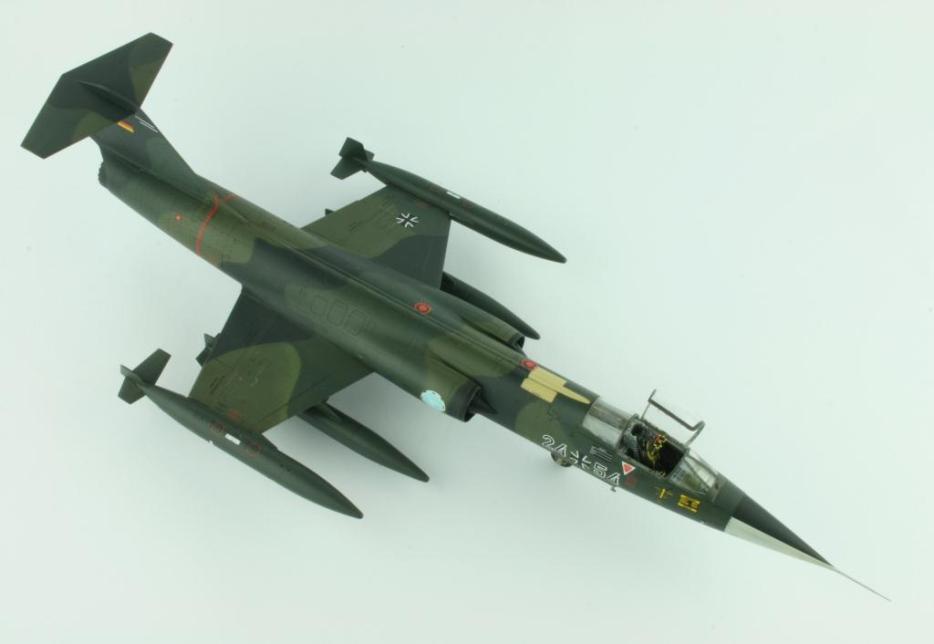
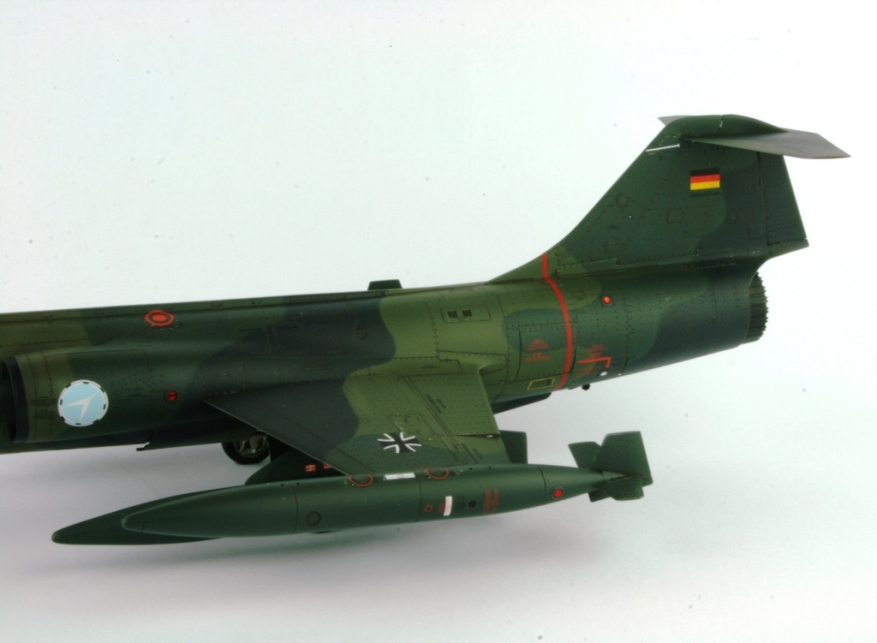
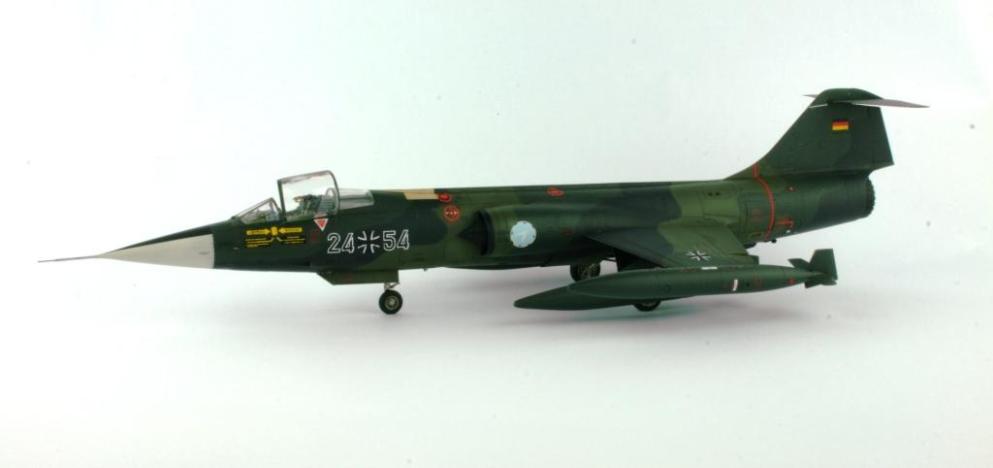
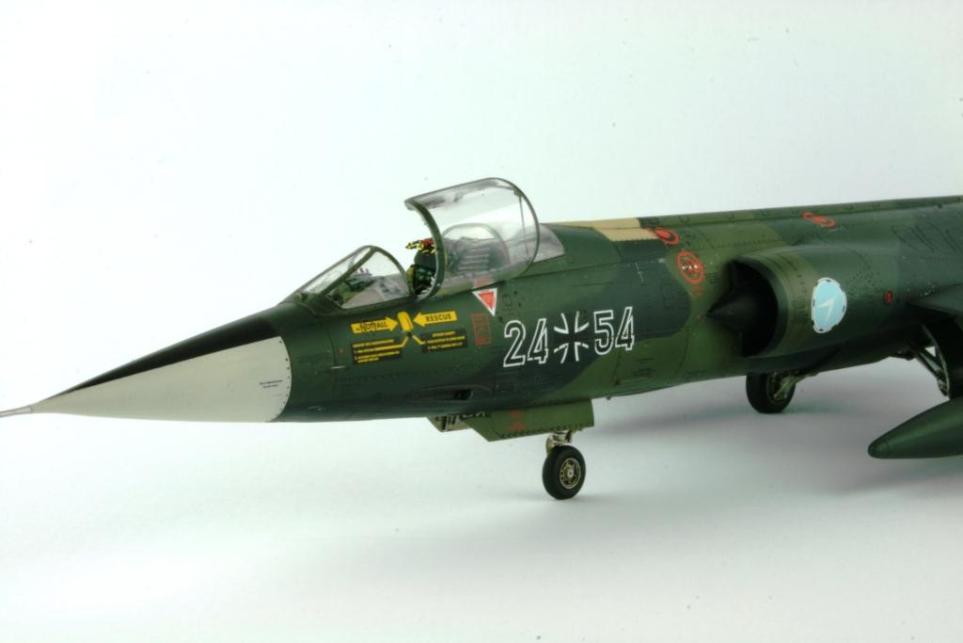
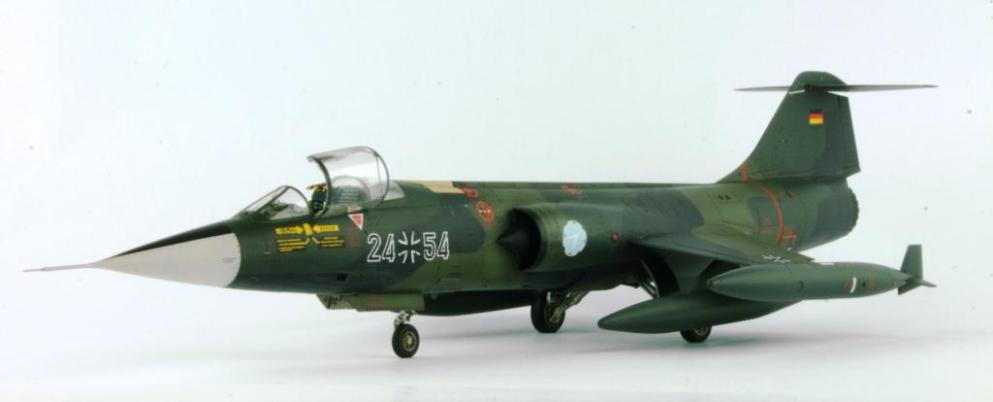
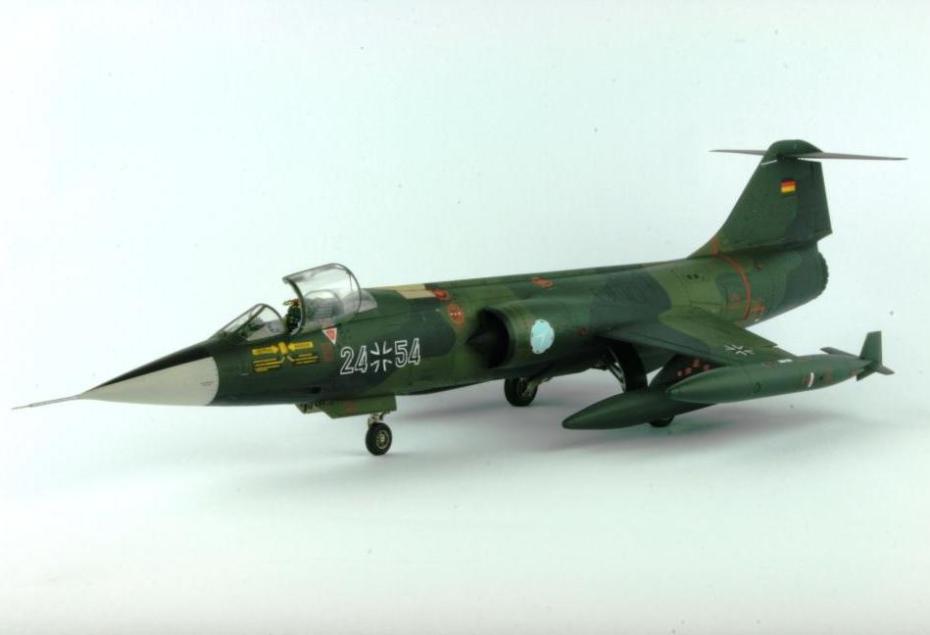
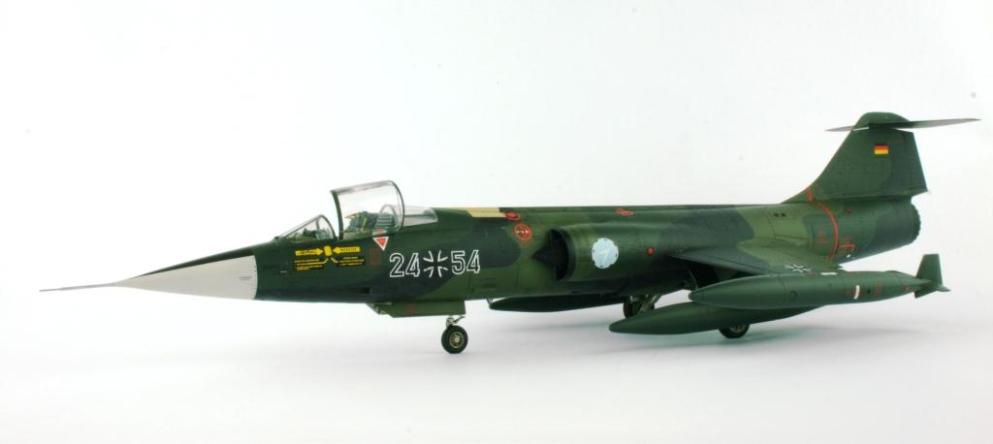
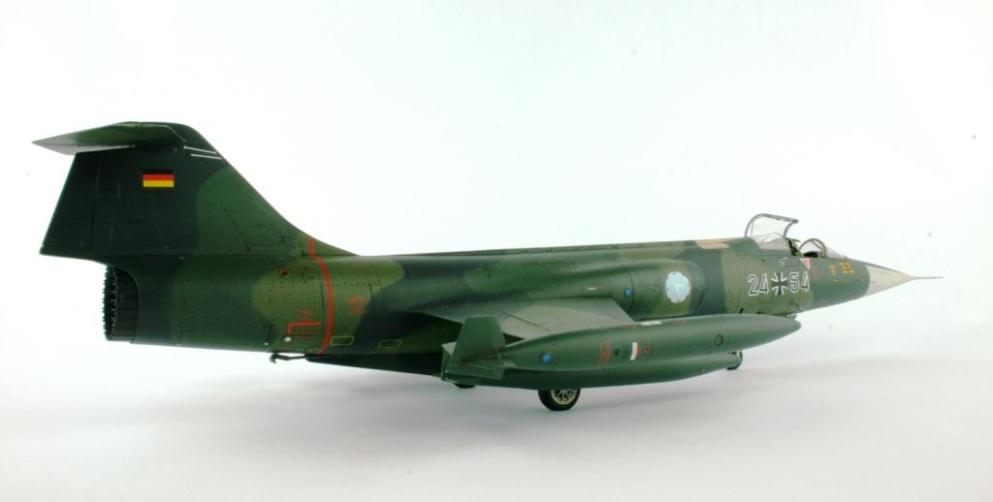
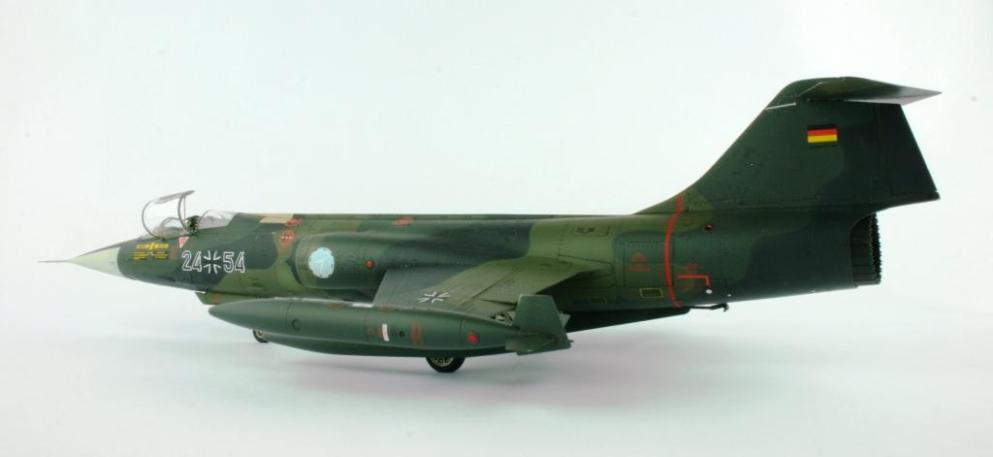
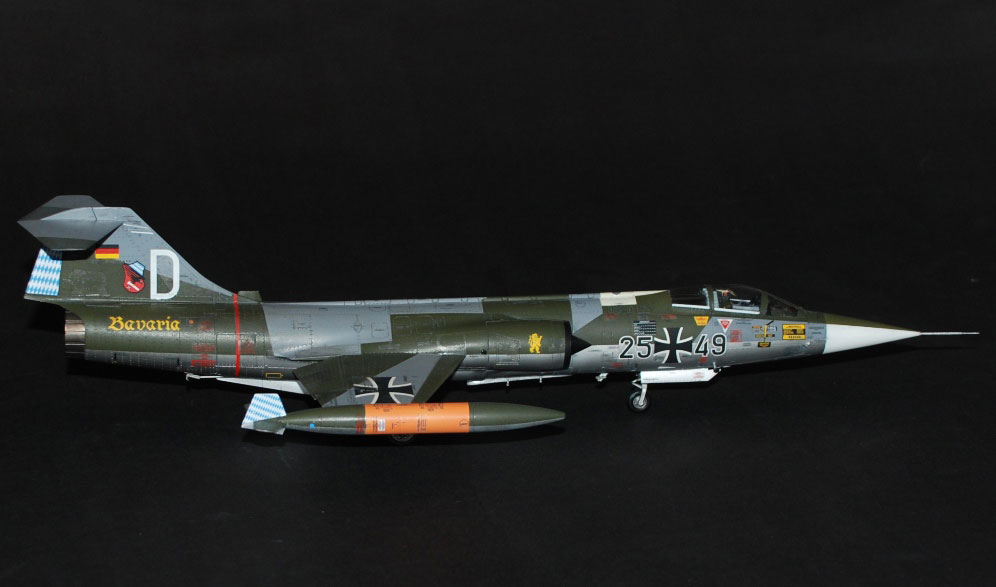
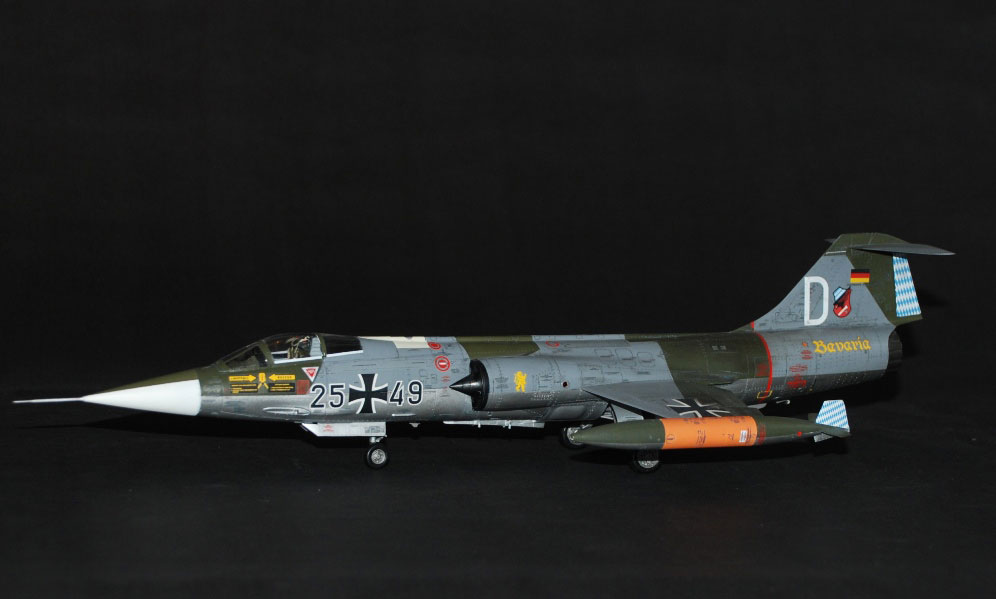
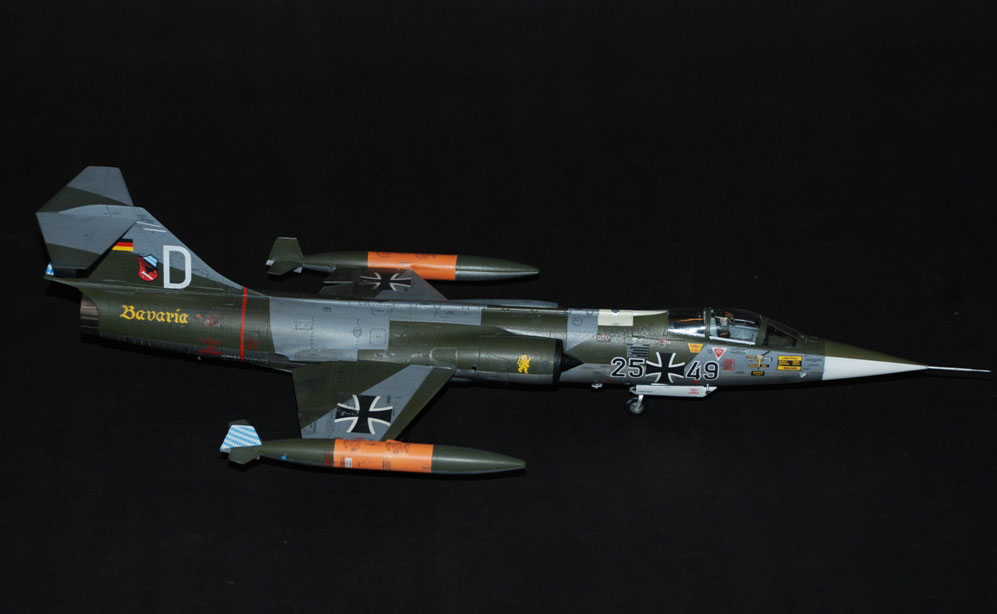
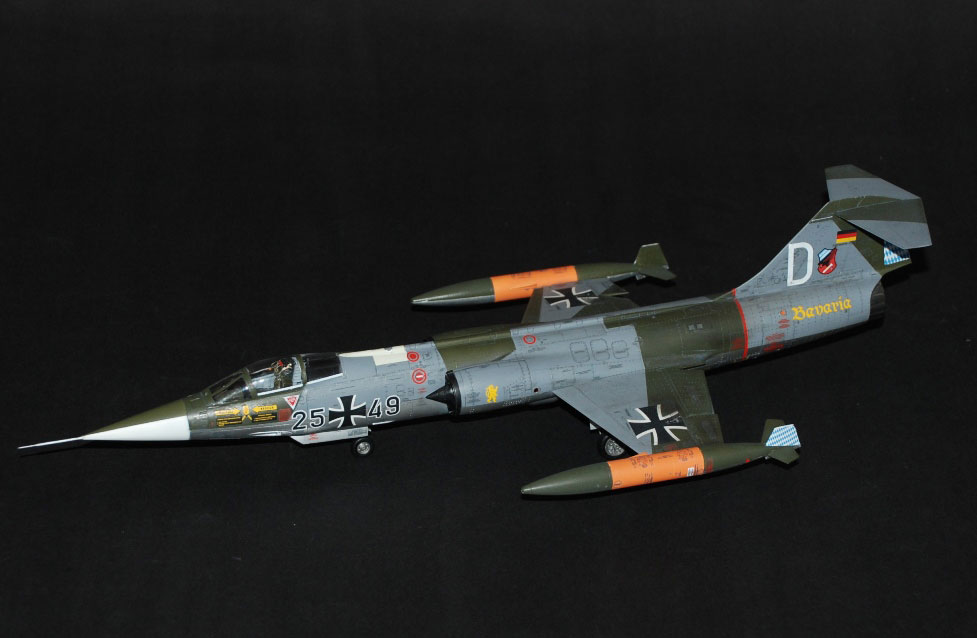
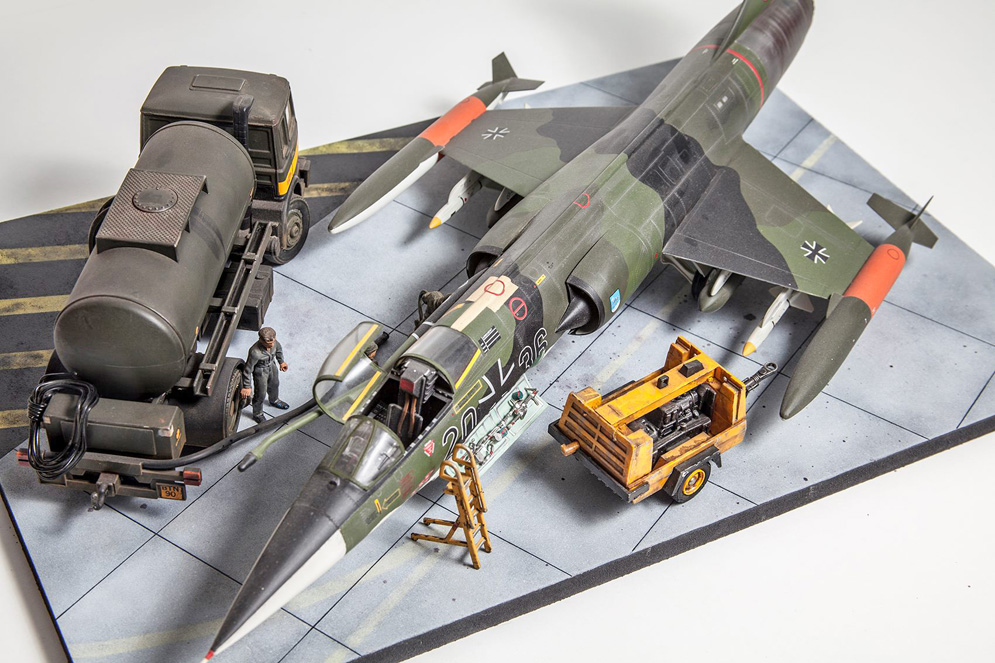
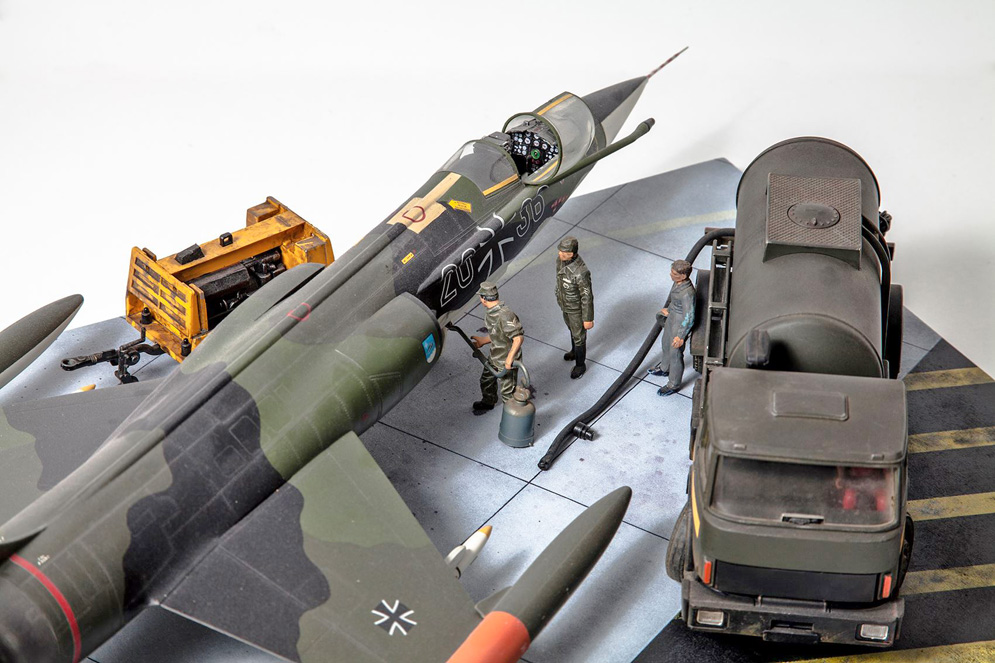
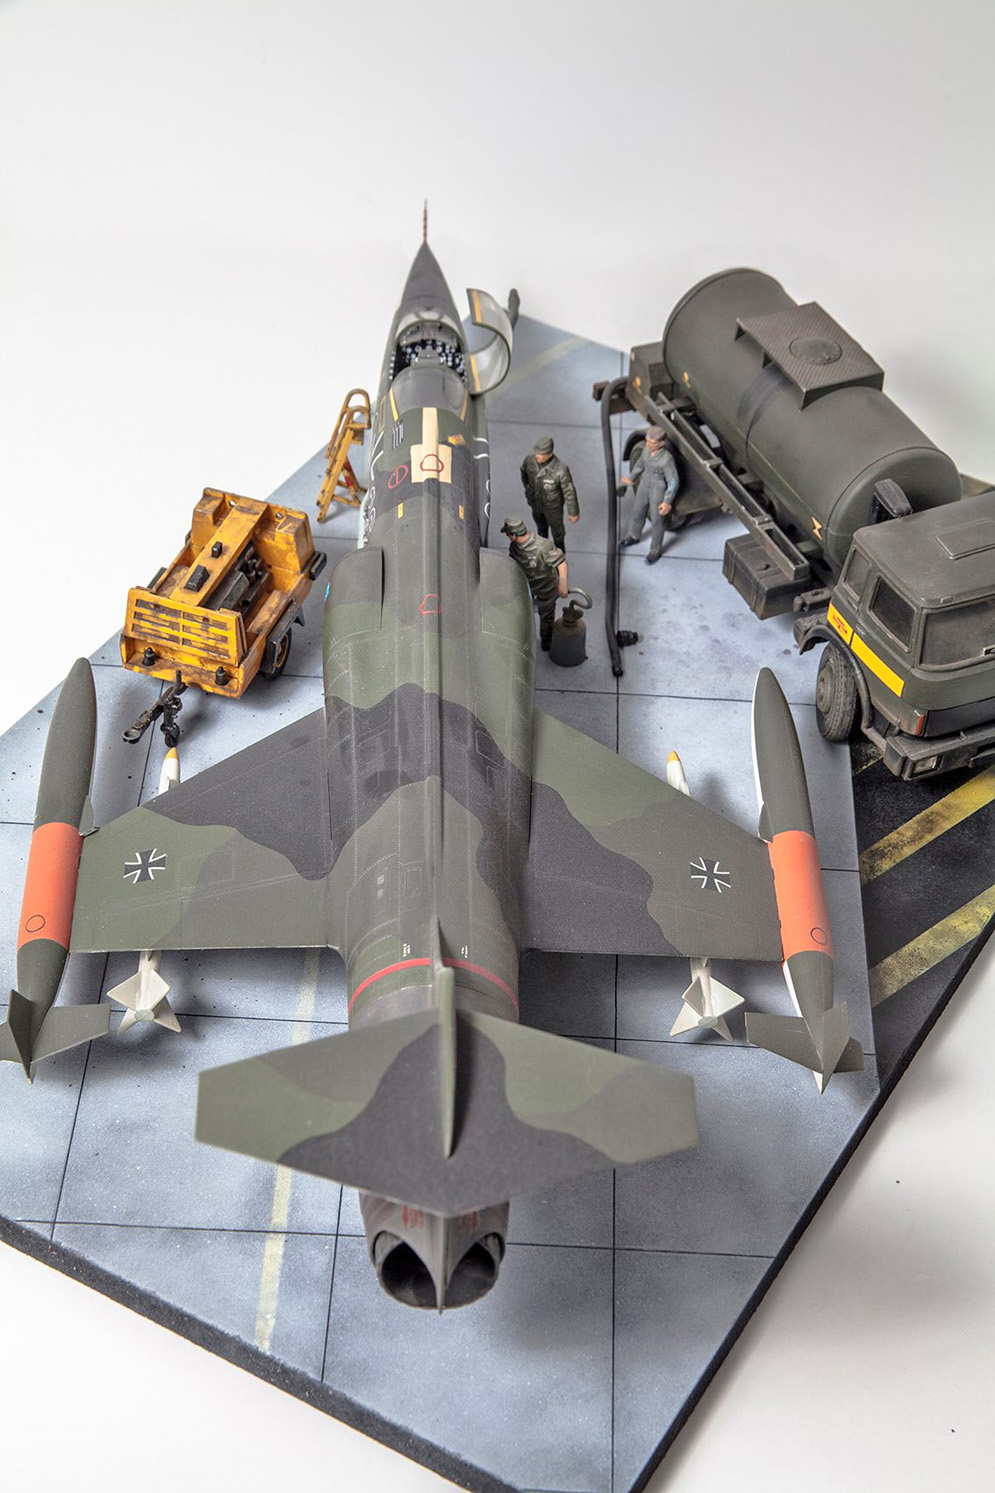
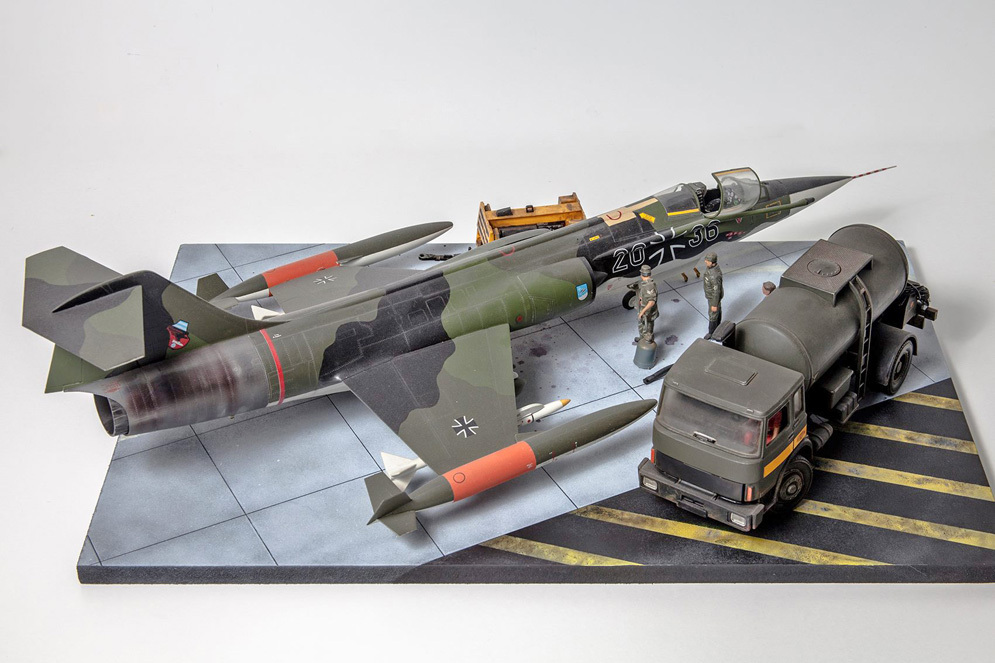
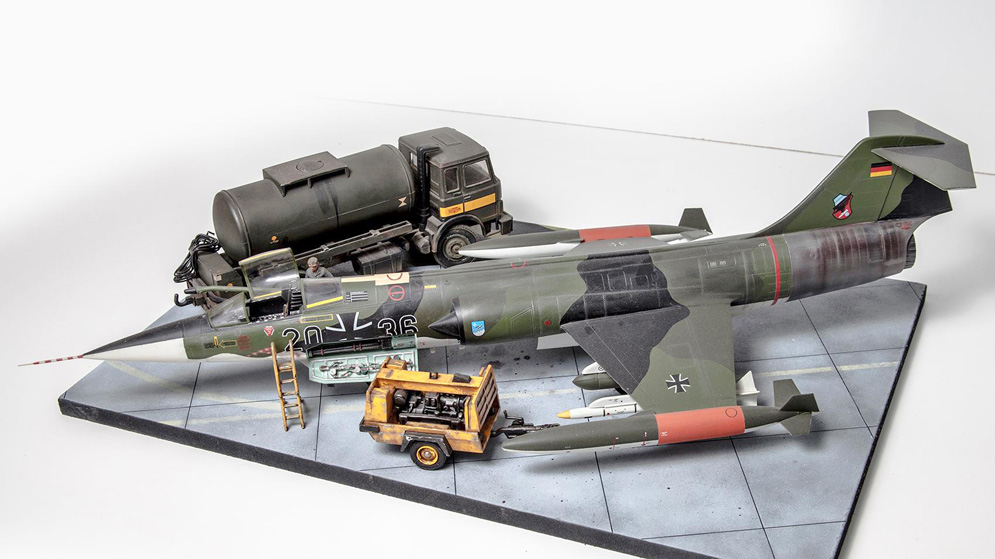
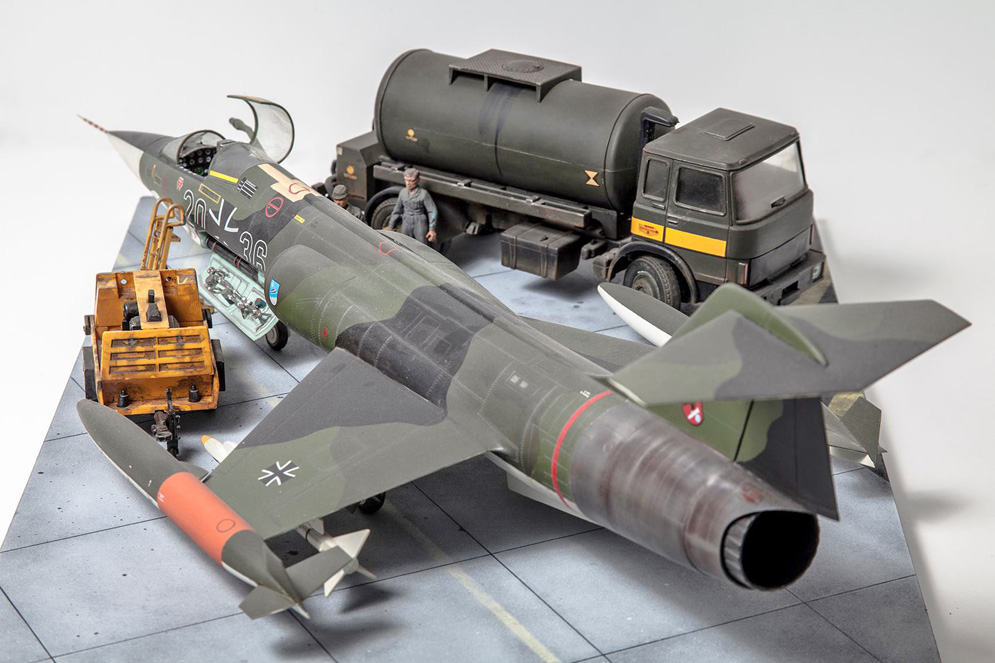
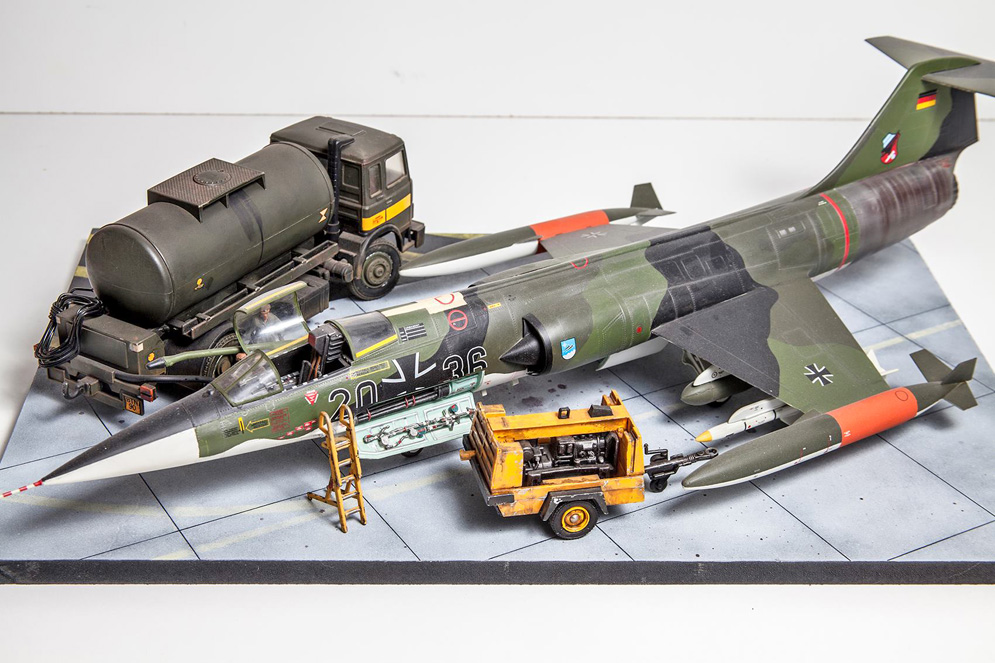
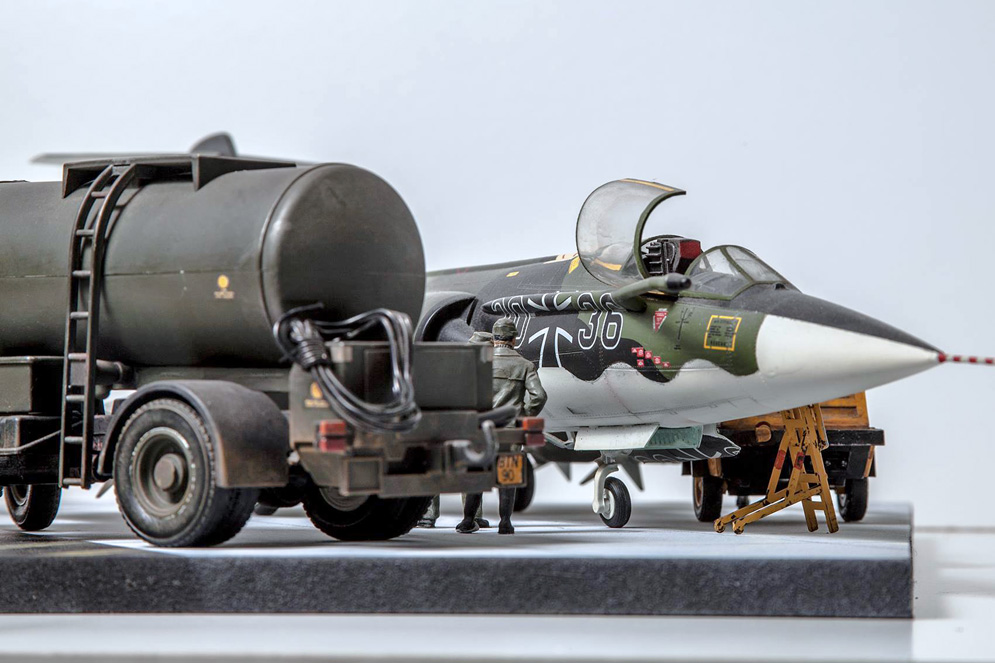
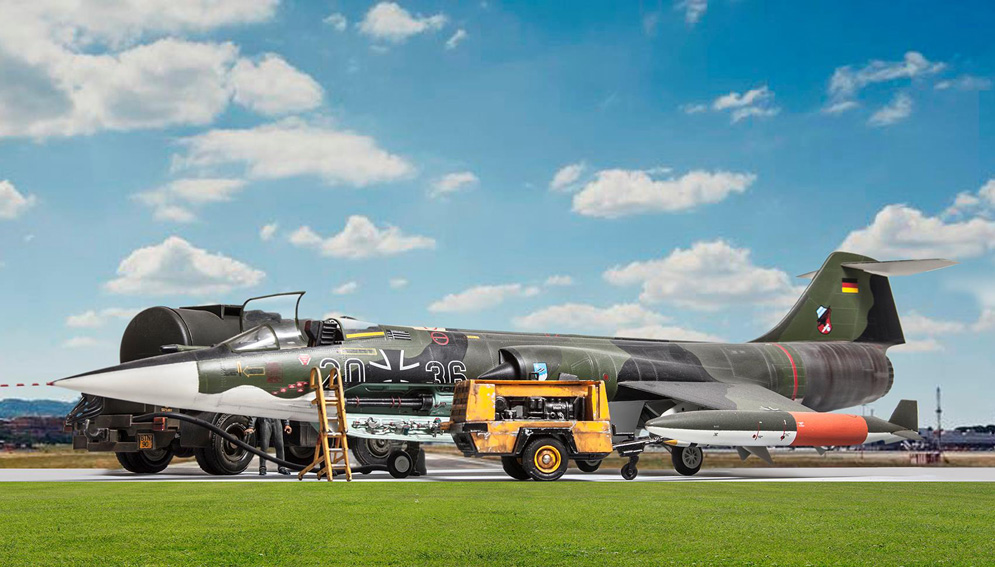
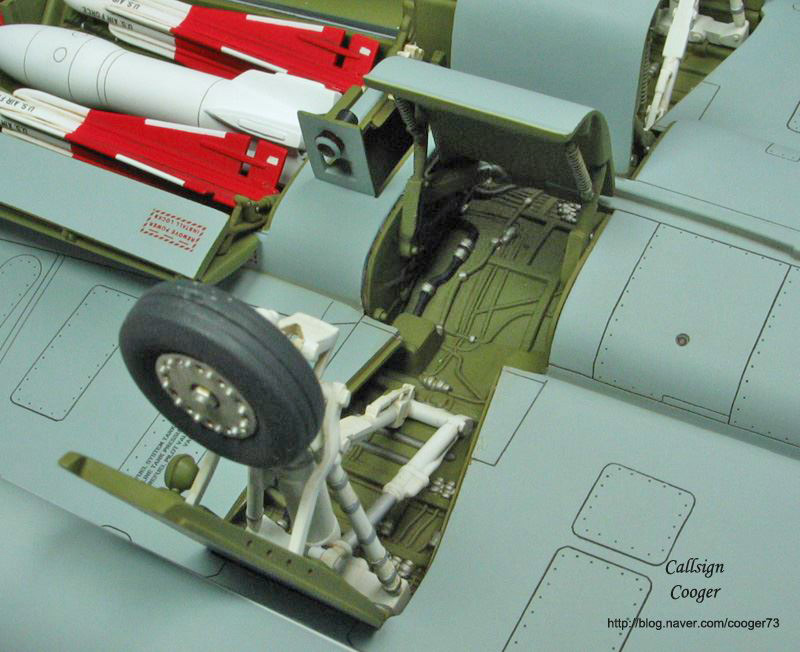
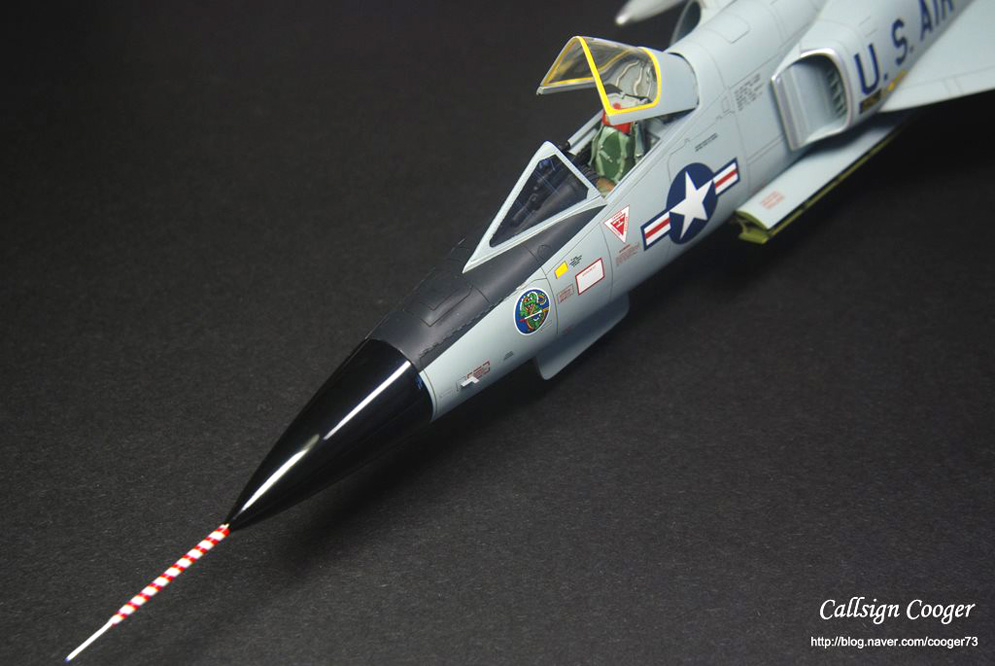
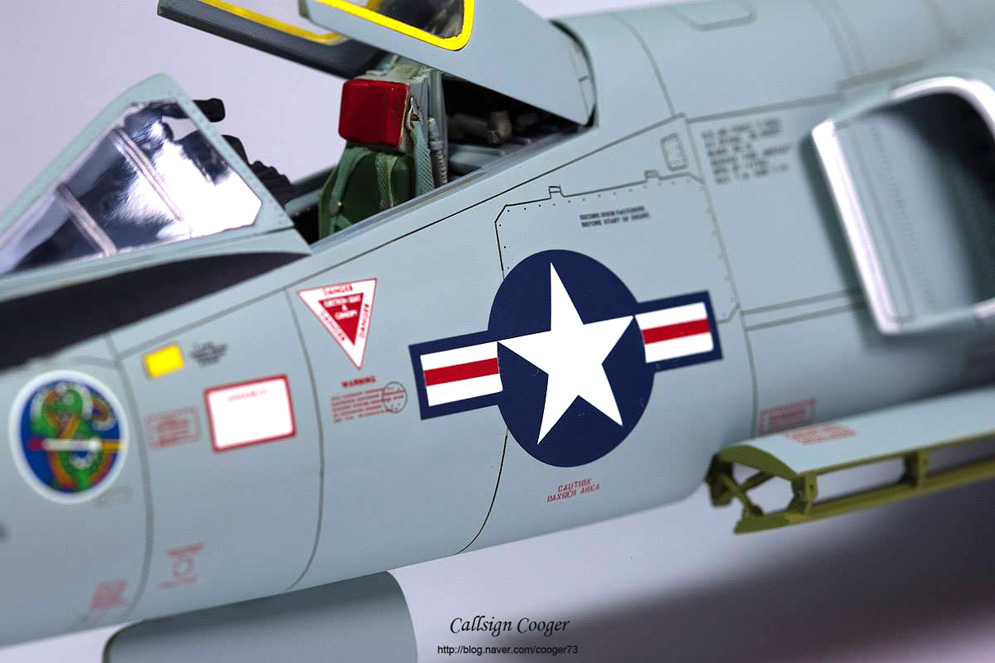
As with Dave Coward’s superb recent build of the same kit, I’ve used the Eduard Resin wheels and the pitot probe from Master Models. However, the seat is the kit supplied item fitted with Eduard’s PE harness and firing handles. In addition, I also added a scratch built drogue gun and a parachute withdrawal line missing from the seat. The main instrument panel was replaced with one from Eduard’s LooK range which I carefully repainted to match my interpretation of the cockpit colour.
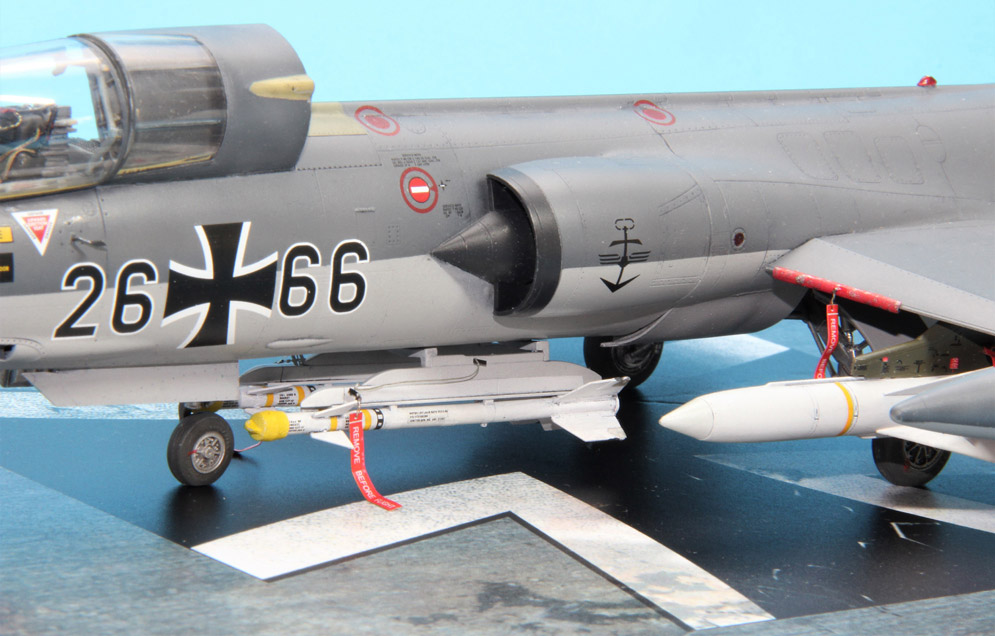
The avionics bay was super-detailed with various thicknesses of lead wire to represent the cabling with placards from the spares box. The AS 34 Kormoran 1 and Sidewinder AIM-9B missiles are from Eduards Brassin range. The Remove Before Flight (RBF) tags are again from Eduard.
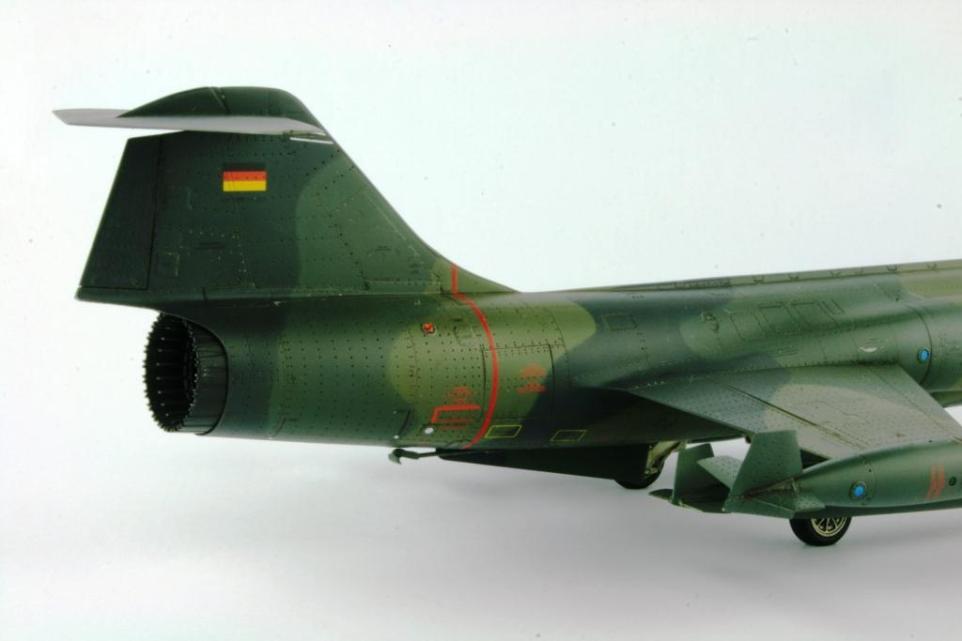
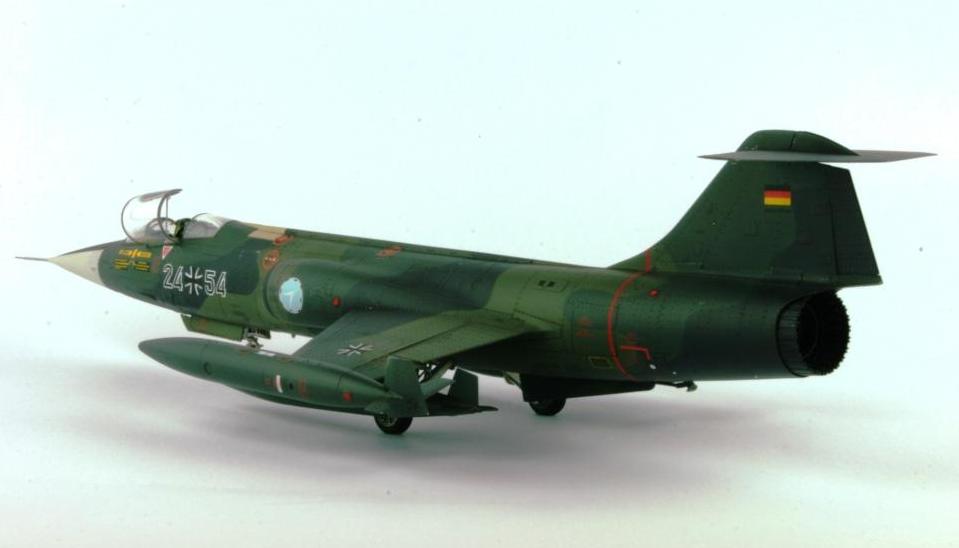
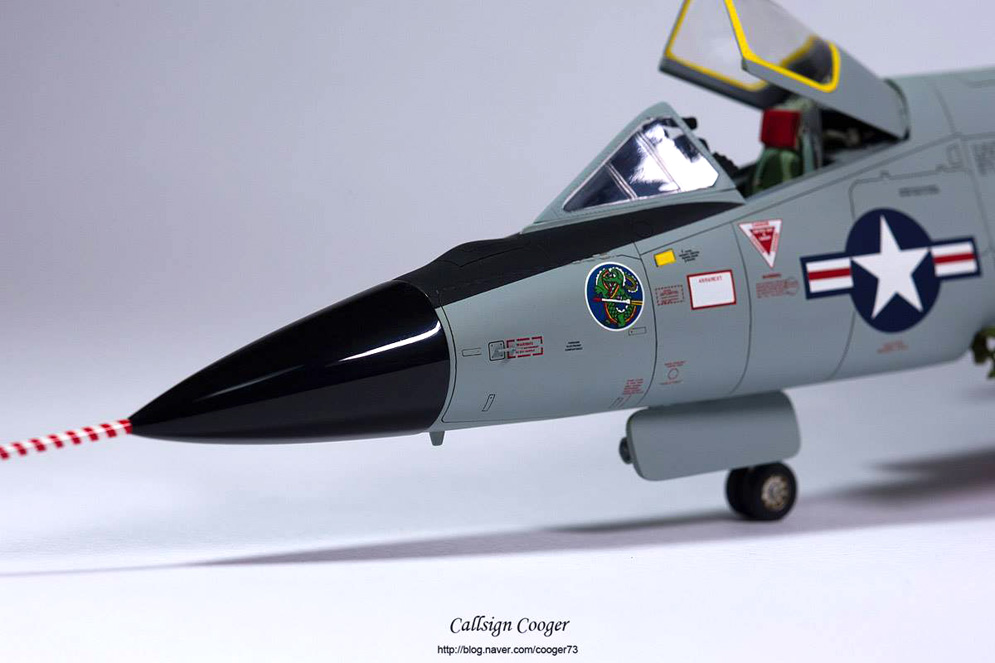
Finally, I represented the wing leading edge protection covers commonly seen on the F104 from vinyl tubing slit down one side, painted red and then slipped over the front slats. The AC was painted using colours from Hataka’s Orange range, i.e. lacquers. These went on beautifully, drying very quickly.
I whole-heartedly agree with Dave Coward, this is definitely the best F-104 in any scale.
Mark R.


Cheers, Andy B.
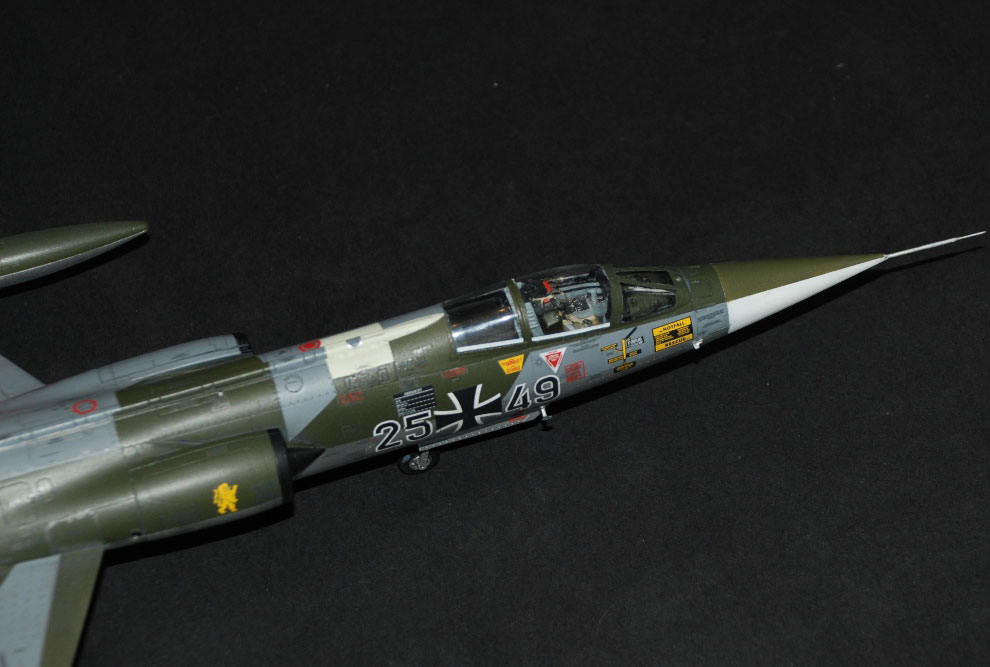
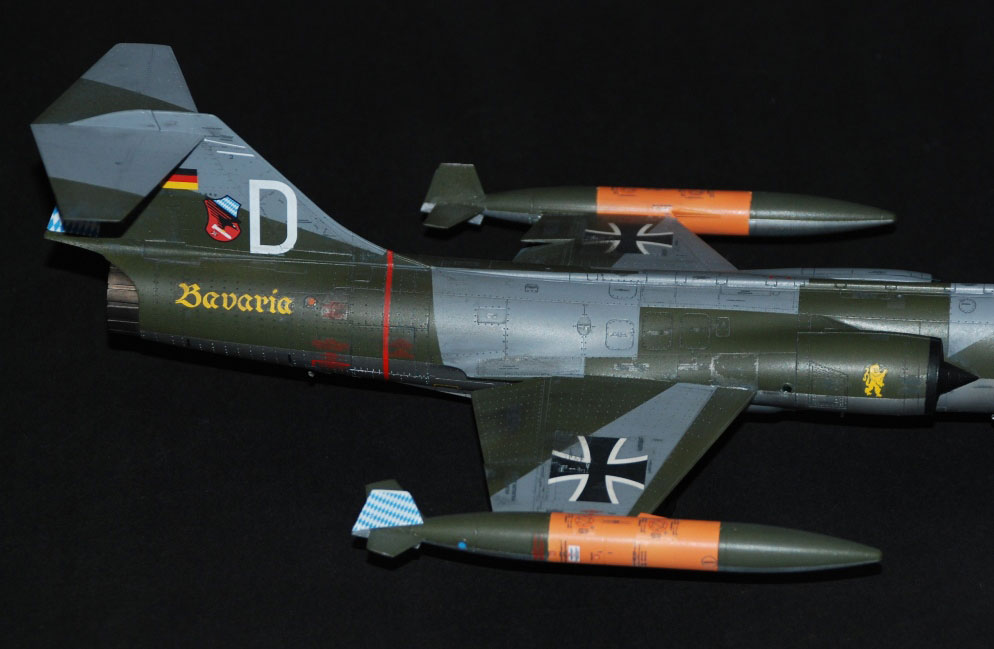
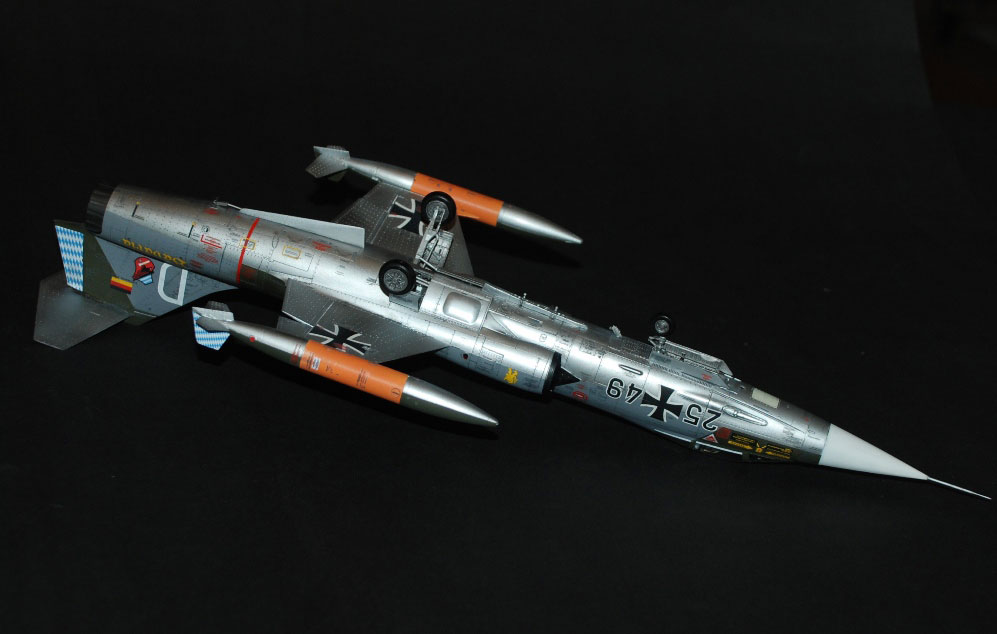

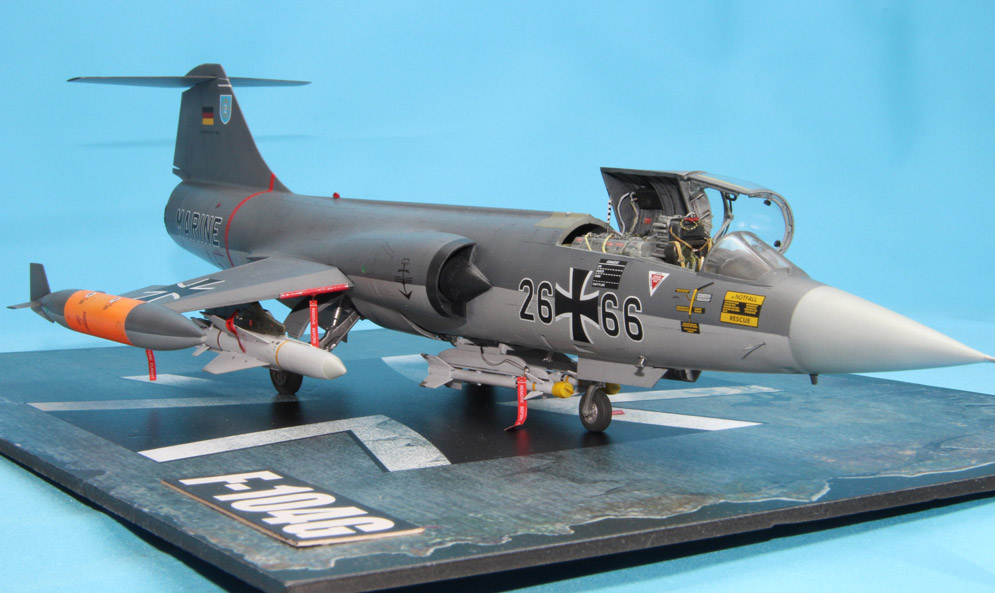
Thought the F-104G deserved a base to sit on so painted a piece of MDF and did a very quick rough photoshopped background into one of the pics. I would have to say the Starfighter is the sexiest design of any aircraft ever, basically a missile with a bloke sat at the front end.
My model is made from the Hasegawa 1:48 scale model.
Robin U.
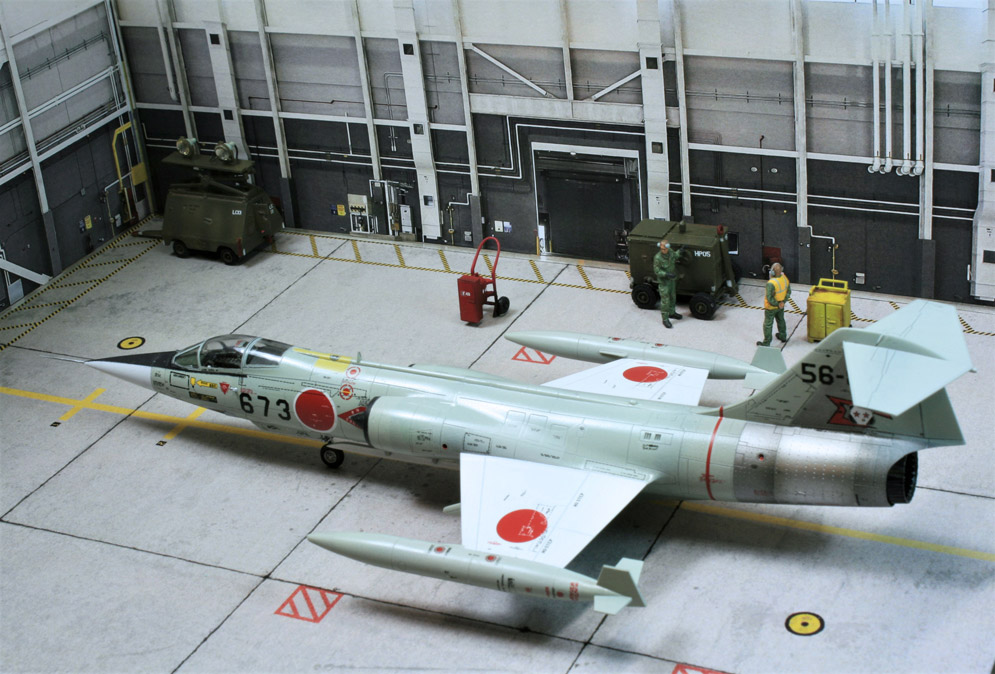
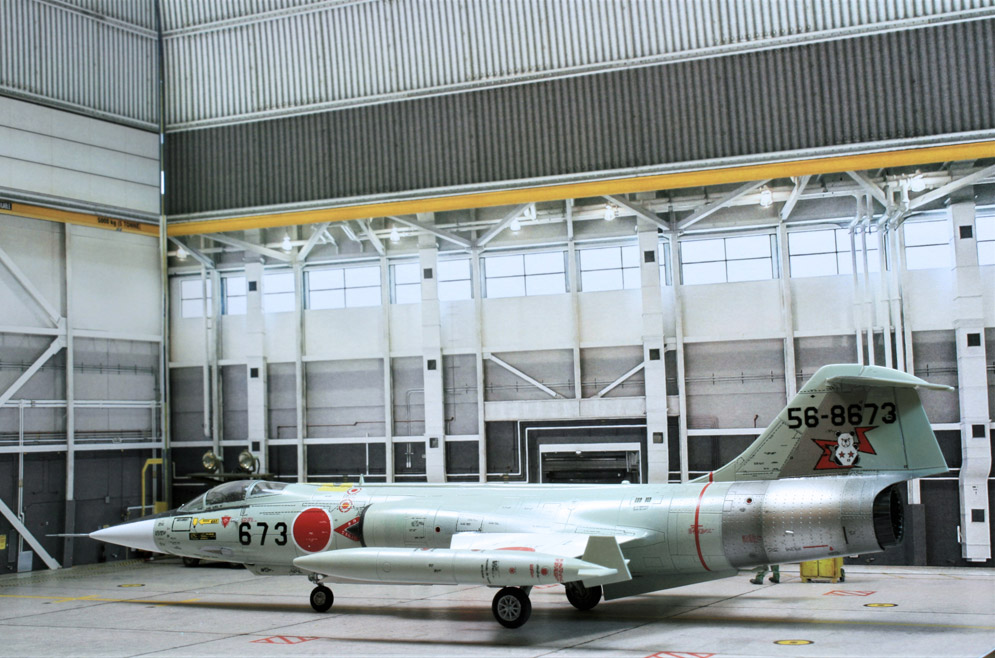
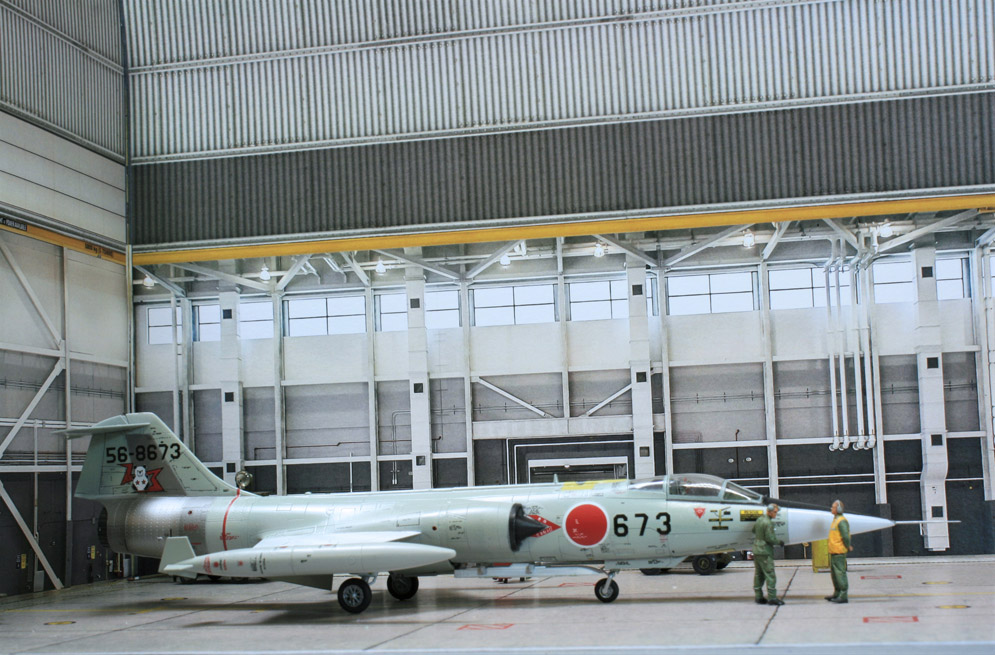
The Hasegawa kit maybe somewhat old but its discrete panel lines are second to none. Unfortunately, the fuselage is divided into nose and main body to allow for the manufacturer to easily have a twin seat model. Mating the two halves perfectly is almost impossible.
The model has Eduard PE and a Master pitot tube. The kit is still sold and can be picked up very cheaply.
Hope you like it?
Regards Andrew J.
This is one big kit over 18 inches long and a swine to handle! It’s beautifully moulded, accurate and has an awesome array of stores! I used a Black Box cockpit which is superb, Two Bob decals and an essential metal undercarriage from SAC…… I loved this kit so if you’re a 105 fan……who isn’t? … Then build it!


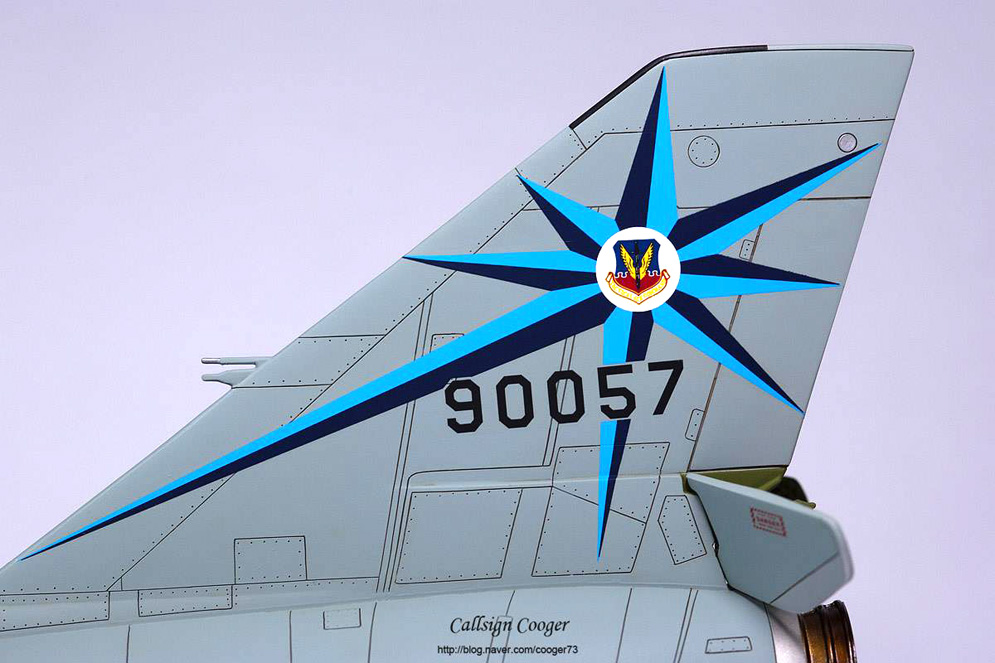
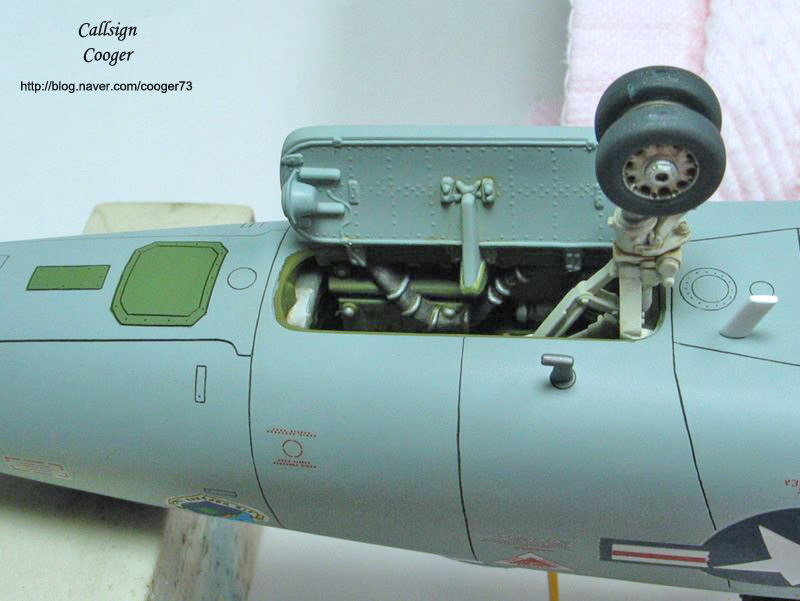


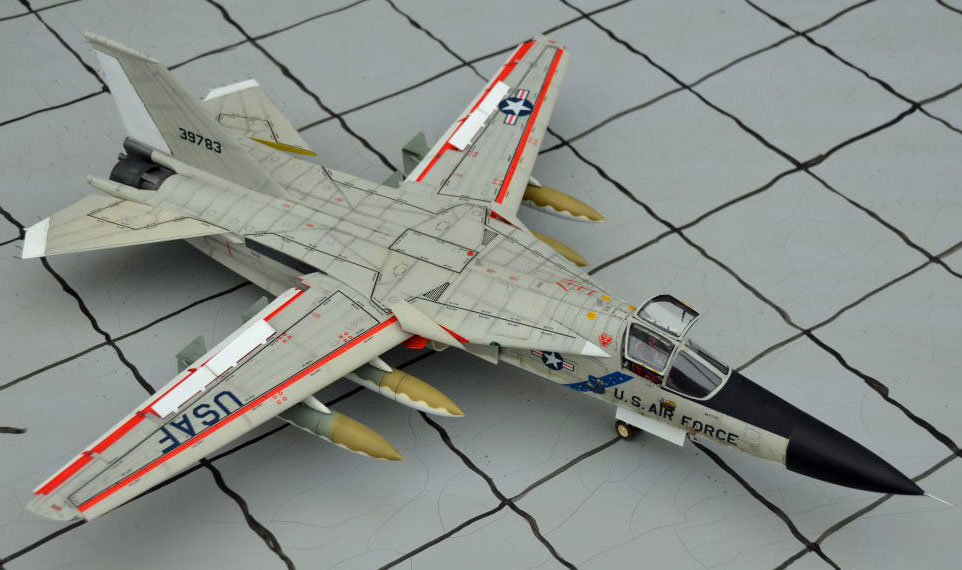
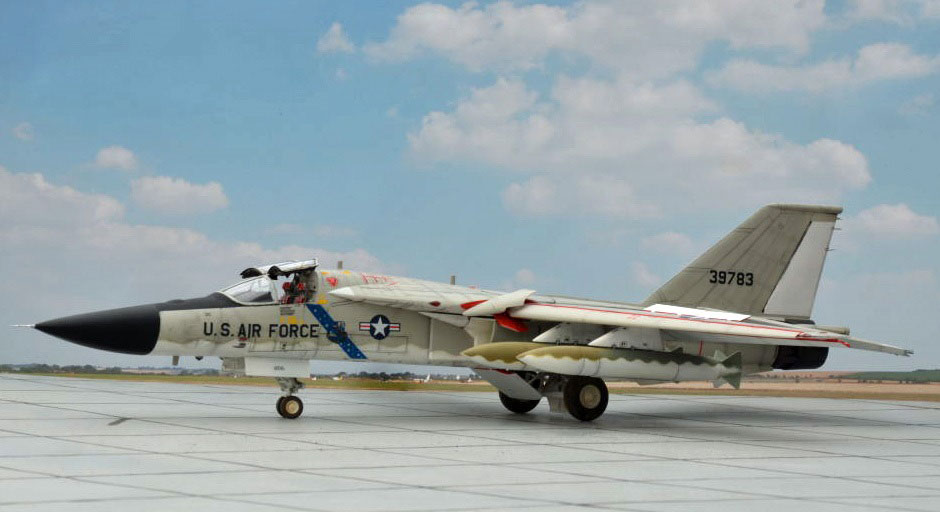
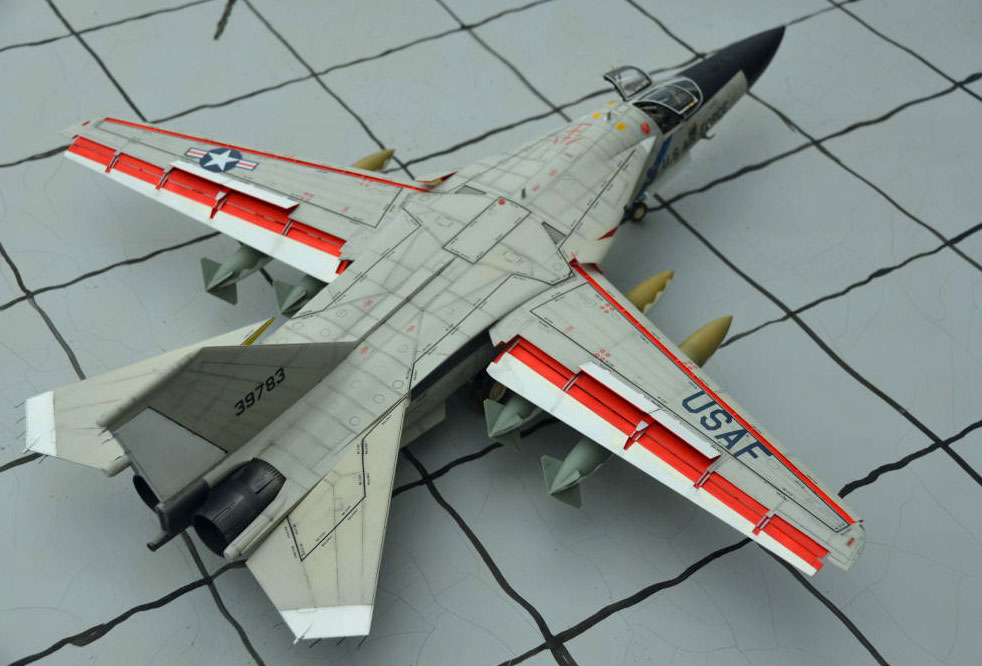
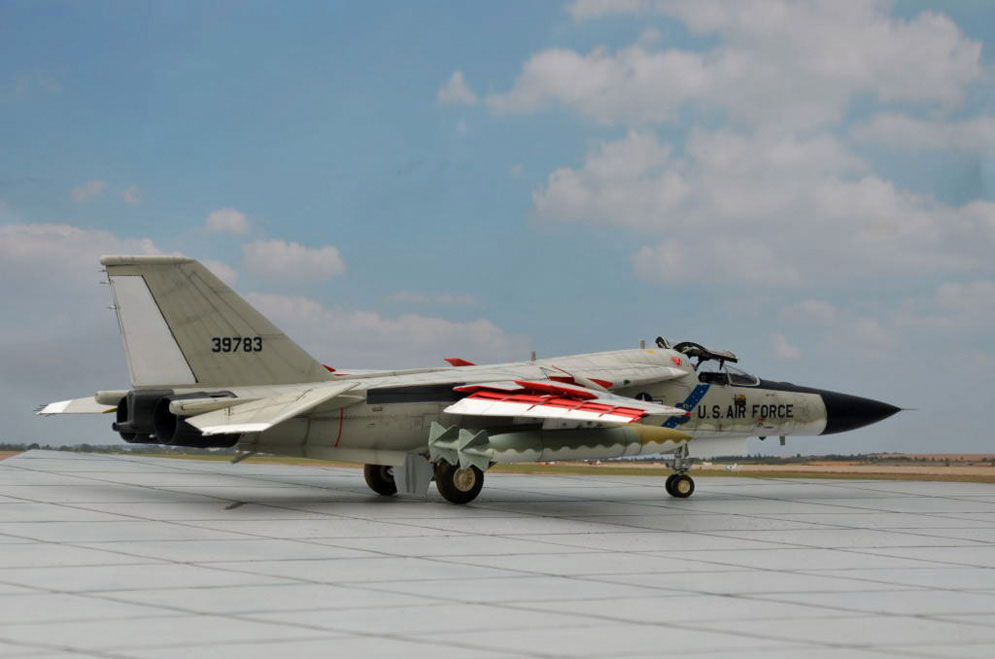
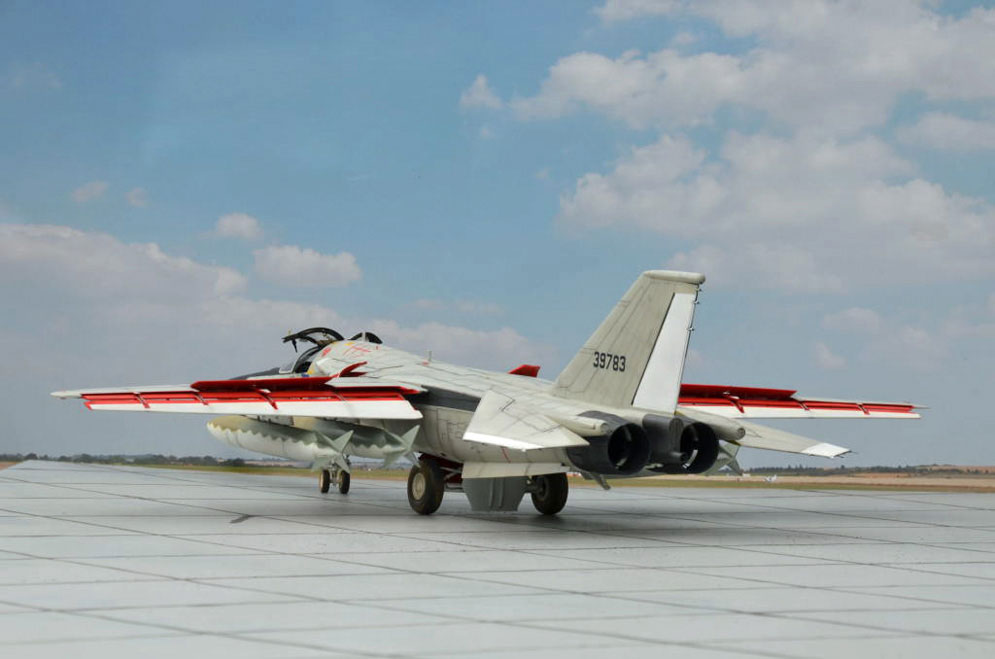
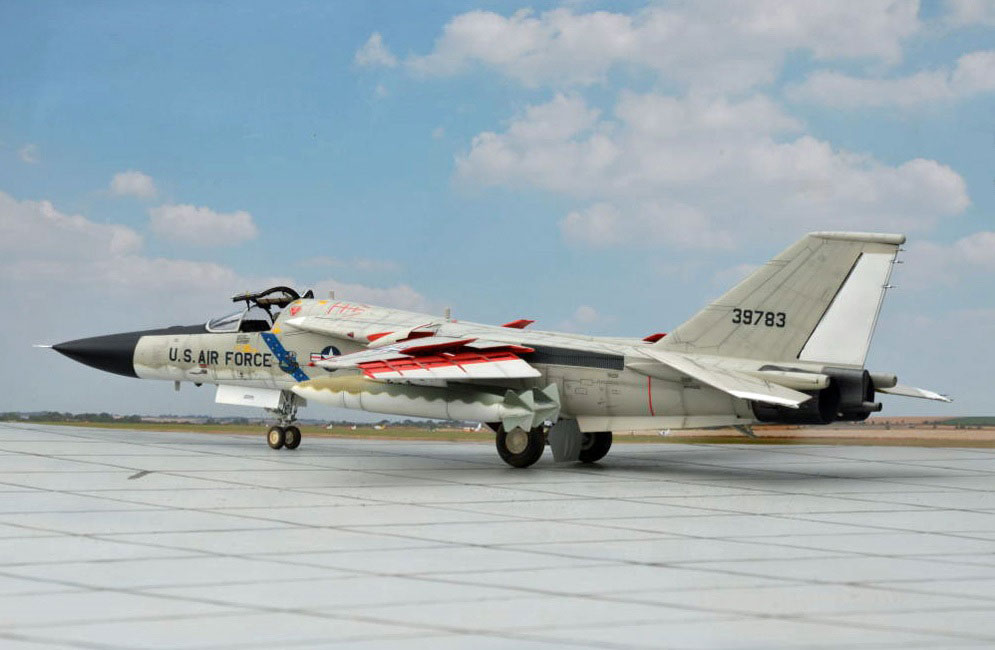
Currently the best kit of the F-111 in this scale. The kit has a very detailed surface, well detailed wheel bays and fully extended flaps and slats. Even the two ECM pods under the fuselage including their pylons are included in the kit (but not mentioned at all in the instructions).
The construction is straightforward with only a bit of putty needed here and there. Only the cockpit tub including seats came from Blackbox (instrument panel from the kit) and the nozzles are from ResKit. Especially the ResKit set is a vast improvement over the kit parts and is highly recommended for any F-111 in scale 48.
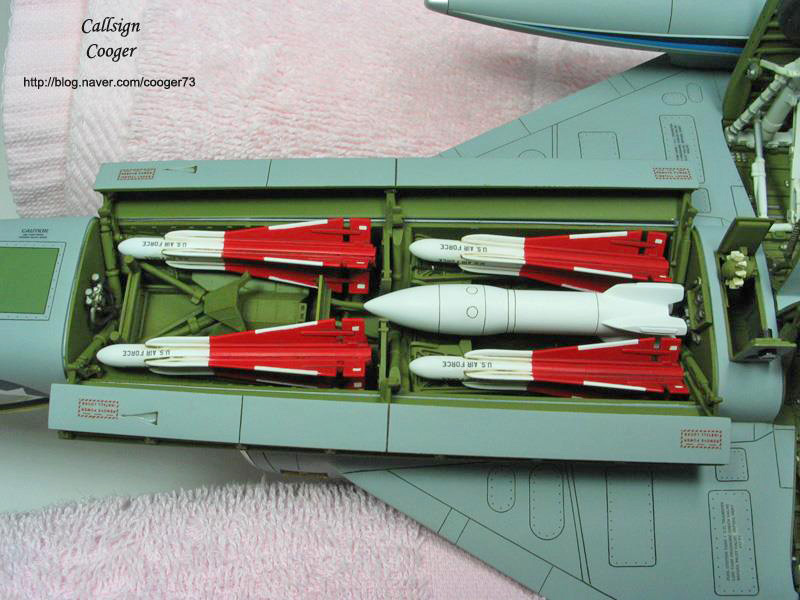
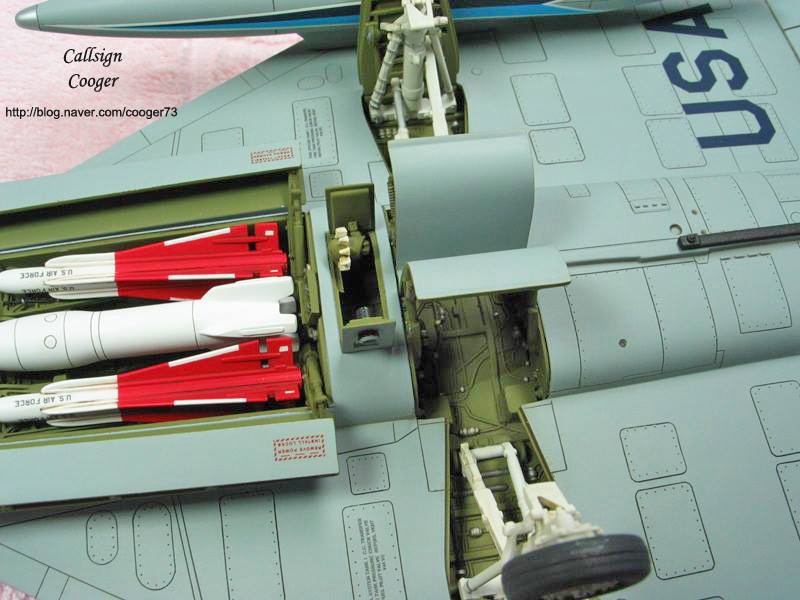
I choose to build a bird from Operation Combat Lancer, the disastrous first operations tour of the F-111 in Vietnam in 1968 in a “high threat load” with two MER (with 12 Mk.82 bombs) and two ECM pods. Markings came from the Caracal set 48139, for the stencils I used the extensive kit decals.
Jürgen J.
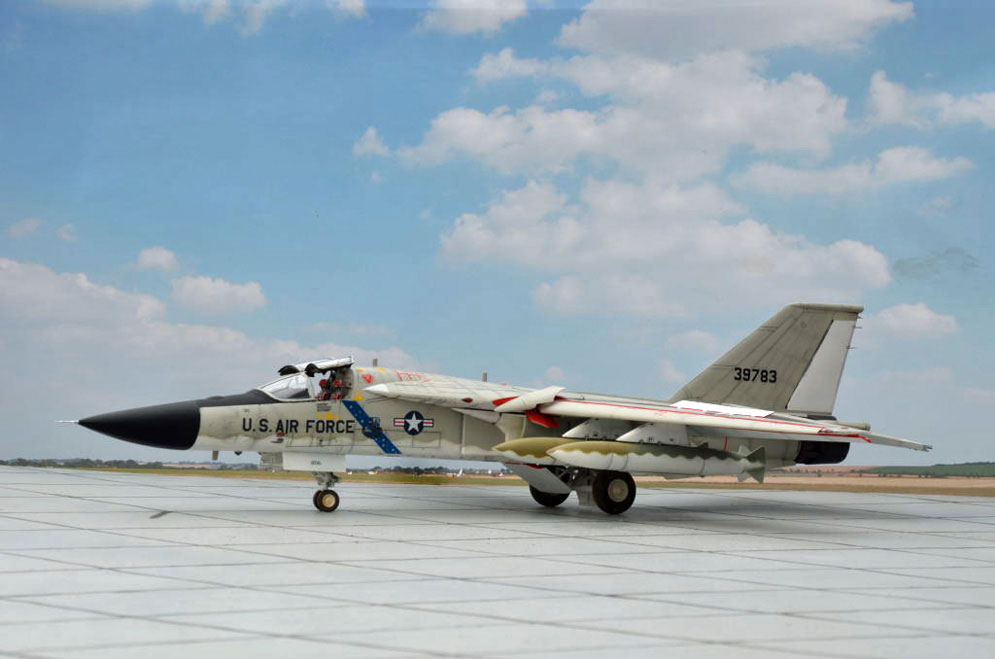
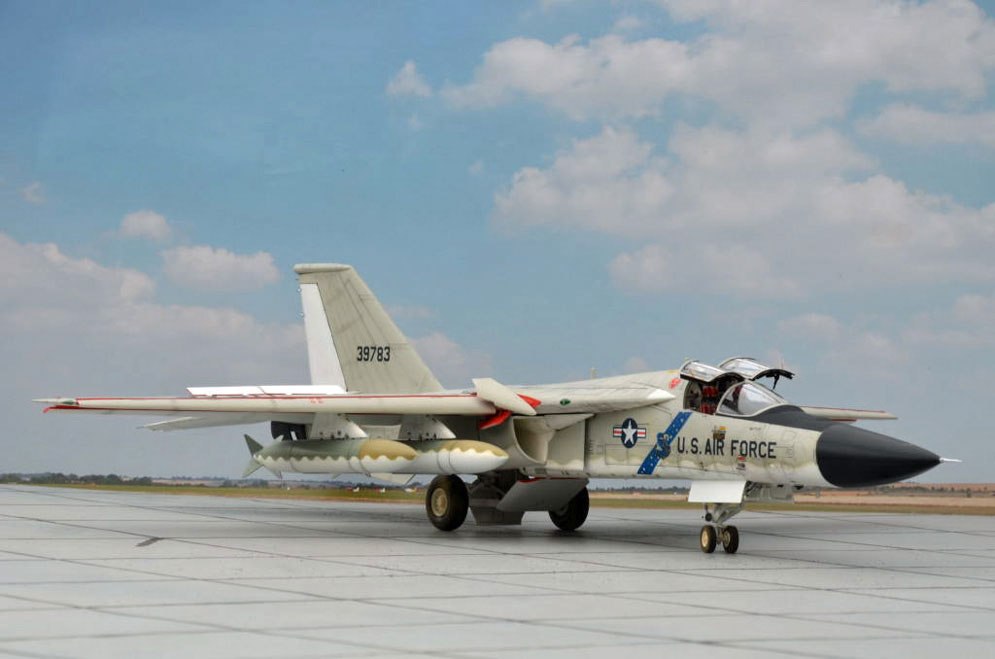
These folks from HobbyBoss might have thought all the “A”´s had an intake with a splitter plate? WRONG, but too late for me when I realized it after building the bird following the instructions during my summer leave having no proper documentation available.
For some moments I thought about finishing it as an F-111 C, but after lengthy studies in all my books and magazines I found another solution. Well, the prototype was the one and only FB-111 A with a Triple Plow 1 intake as instructed by the kit and that’s what I ended up with. And it’s one of the few F-111´s in FS 16440.
Otherwise the build was straightforward and the SAC band is my first self-printed Decal! Talking about decals… the walkway decals in the kit are the wrong way. The “walkway” and “no step” inscriptions are switched.
I realized that second glitch also too late in the middle of applying the decals. I left it as it was and so far I guess only one guy at KMK in Mol/Belgium noticed it. He took some detail photos of the (non) walkway decals as published on the KMK site.
HobbyBoss….. They are working hard on a reputation as the instructions on their SU-24 also have a glitch!

Hope you like it.
Alexander P.
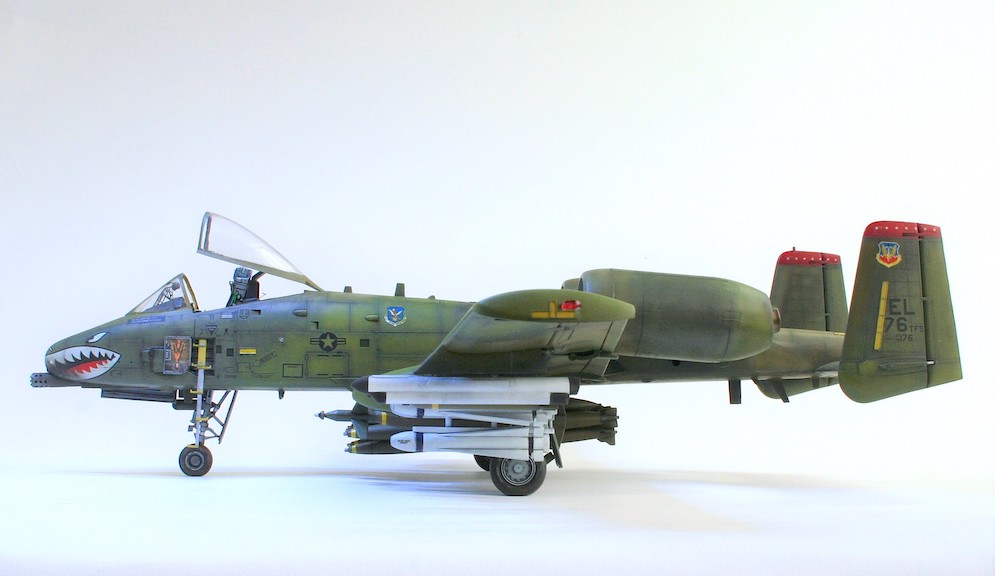
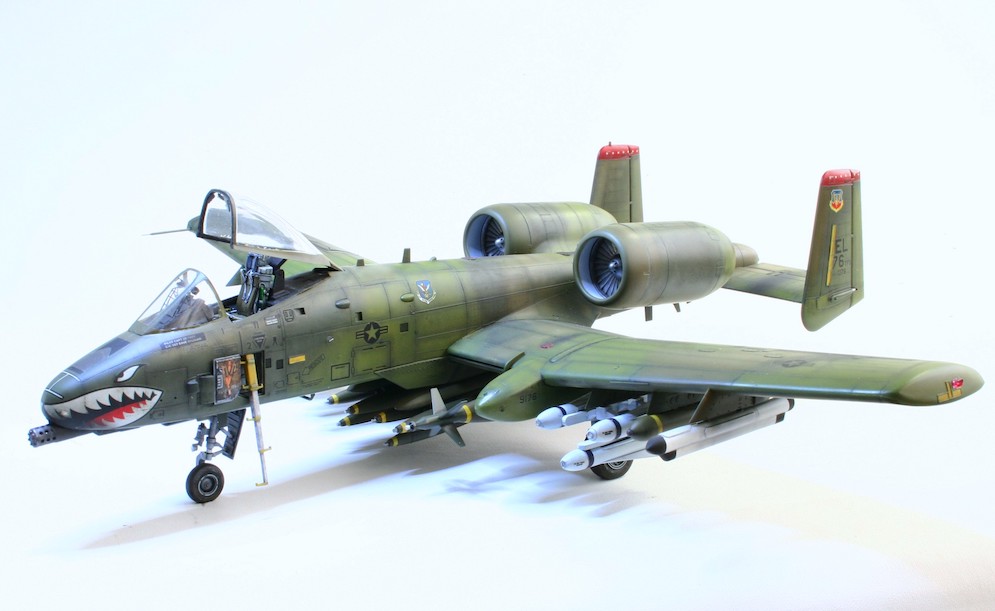
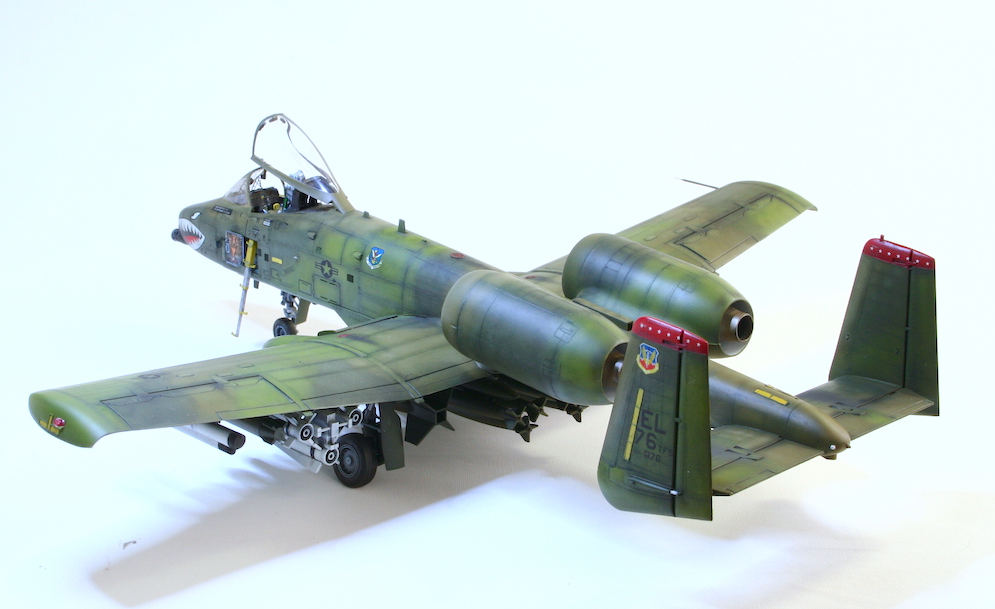


The kit really shows its age (not Tamiya’s best) with some fit problems joining the fuselage halves and a few raised panels. But, when it’s solved, all the rest goes quite well. I had planned mostly a build out-of-the-box approach, with just one ejection seat set, but soon changed my mind. So, ended up using eduard’s 48328 detail set, Aces II 4144 ejection seat and Reskit RS48-002 wheels set, plus some small scratch details were and there.
Decals are from the kit and a few home printed for the armament and ladder door. Paint job and clear coat was done with Mr. Hobby and weathering with artist oils.
Regarding the weathering, I did want to go a little (but not exaggerated) overboard, looking for a quite worn-out aircraft.
Apart from the detail sets mentioned before, I also did some scratch in the wheel wells area, some panel re-scribing and riveting and redid the canon. The poster on the ladder door was a personal touch to cheer up and give some colour to the final result
Despite a troubled start, it ended up as a very satisfying and fun build which I truly liked.
Hope you like as much as I did.
Manuel M.

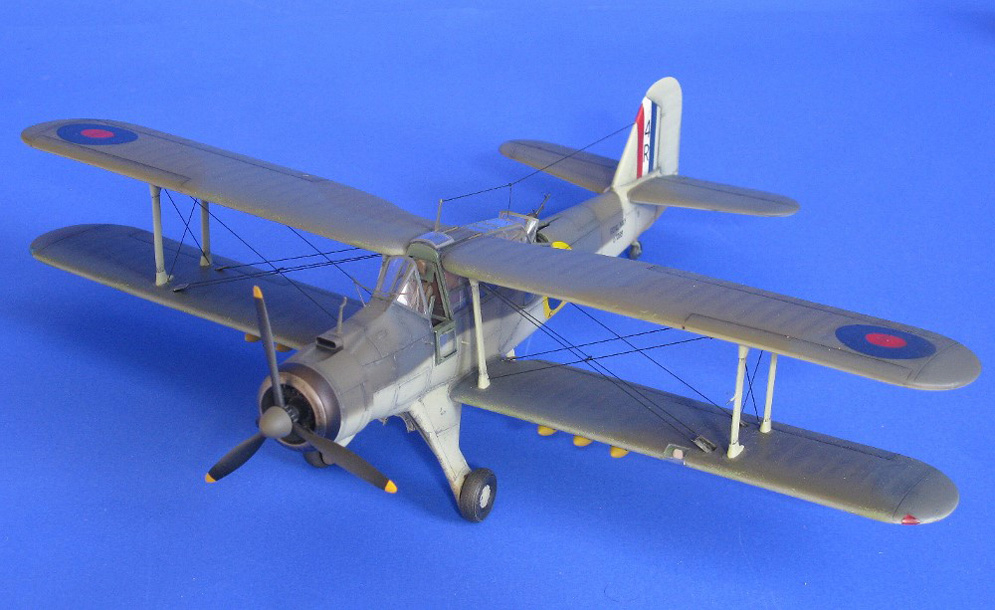
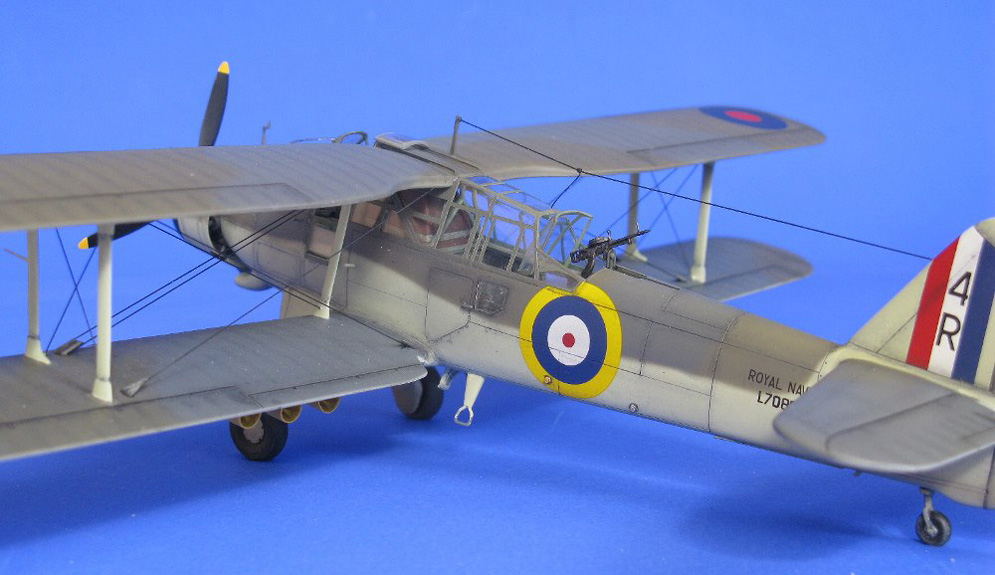

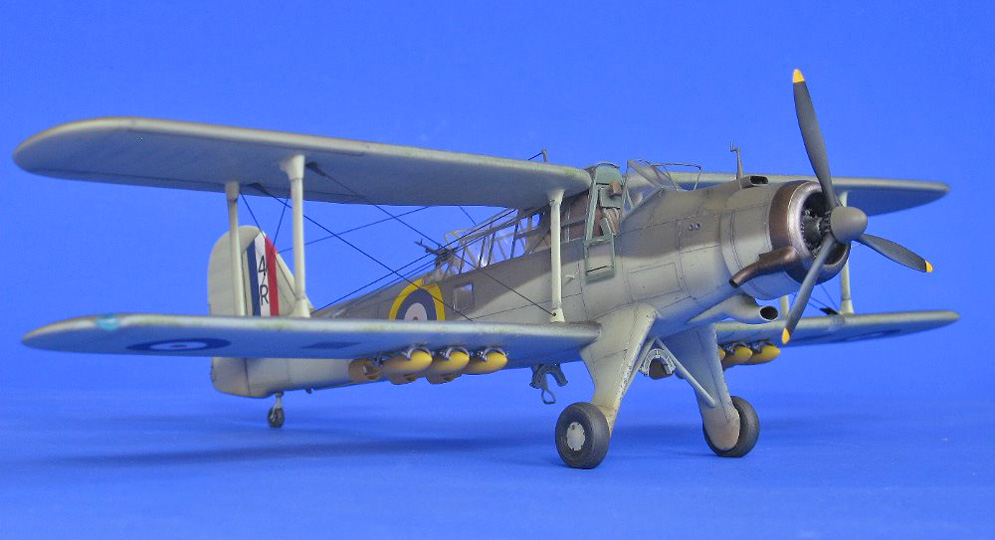
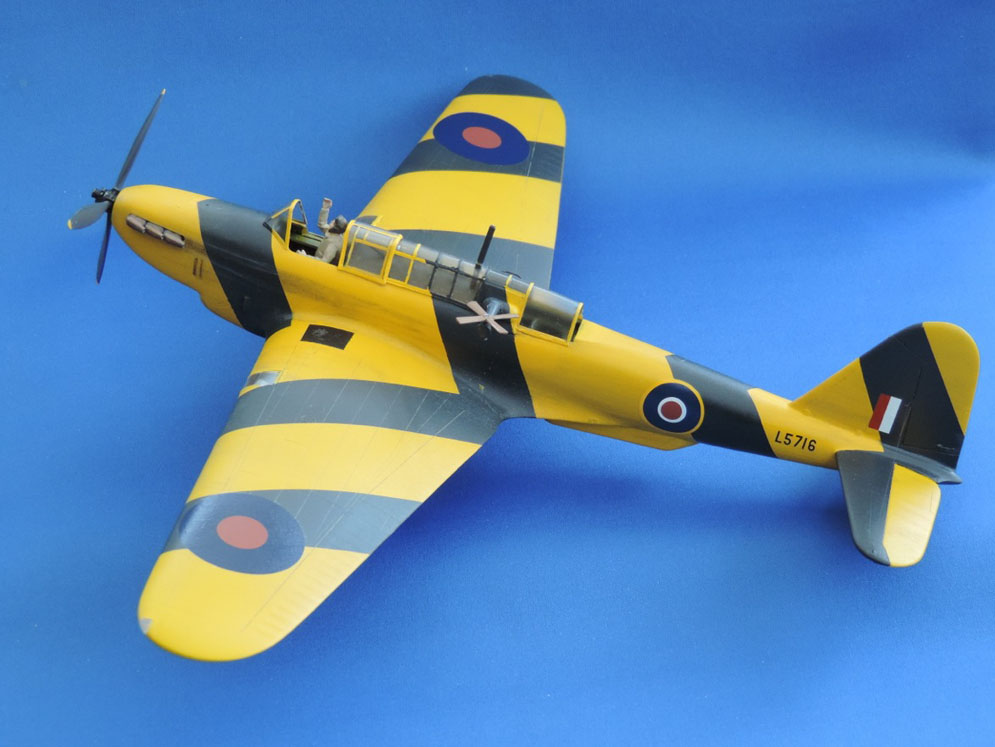
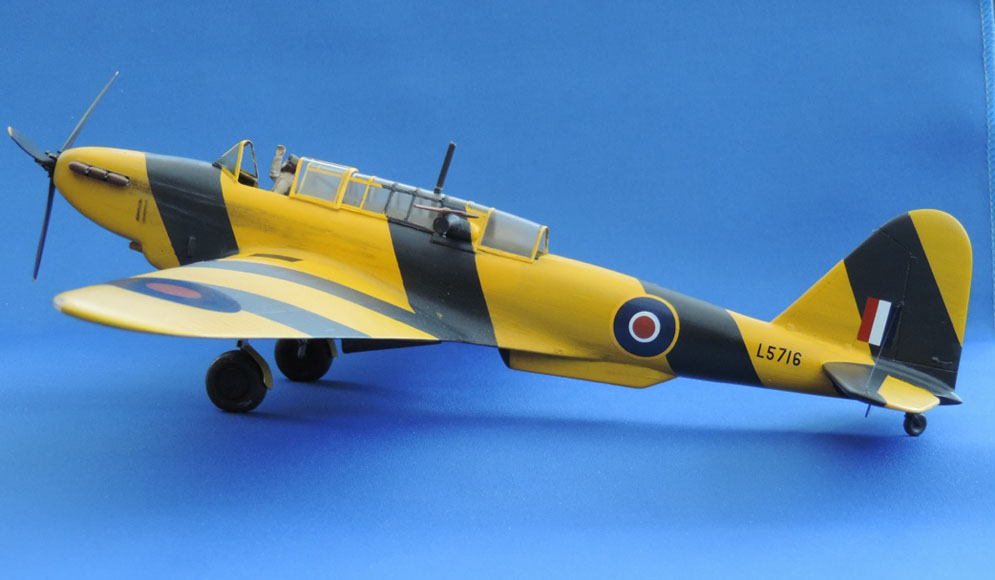
The ‘plane was shot down by Bf 109’s , on 21/06/1940, over Texel, Netherlands, where Peter Butterworth had to crash land it on a beach, unfortunately the observer, V.J. Dyke, died of his injuries from the attack, but wireless operator/gunner R.J. Jackson survived along with Peter. They both were taken prisoner.
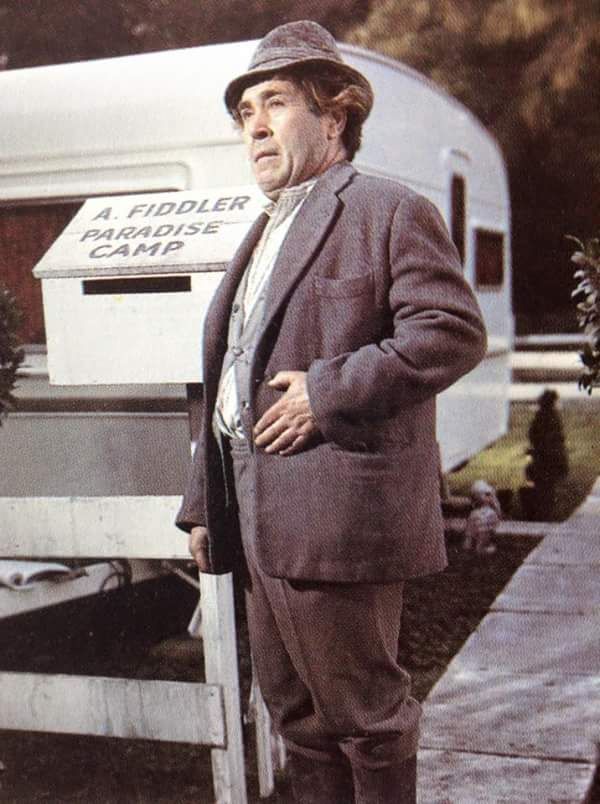
As stated, Peter Butterworth later found fame as a comedy actor, and some of the characters he played were: ‘Doc’ (Carry On Cowboy), ‘Detective Constable Slobotham’ (Carry On Screaming), ‘Citizen Bidet’ (Carry On Don’t Lose Your Head), ‘Brother Belcher’ (Carry On Up The Khyber), ‘Josh Fiddler’ (Carry on Camping) amongst others. Peter also played non-comedy roles too in various films, but was best known for his ‘Carry On’ characters.
Neil B.
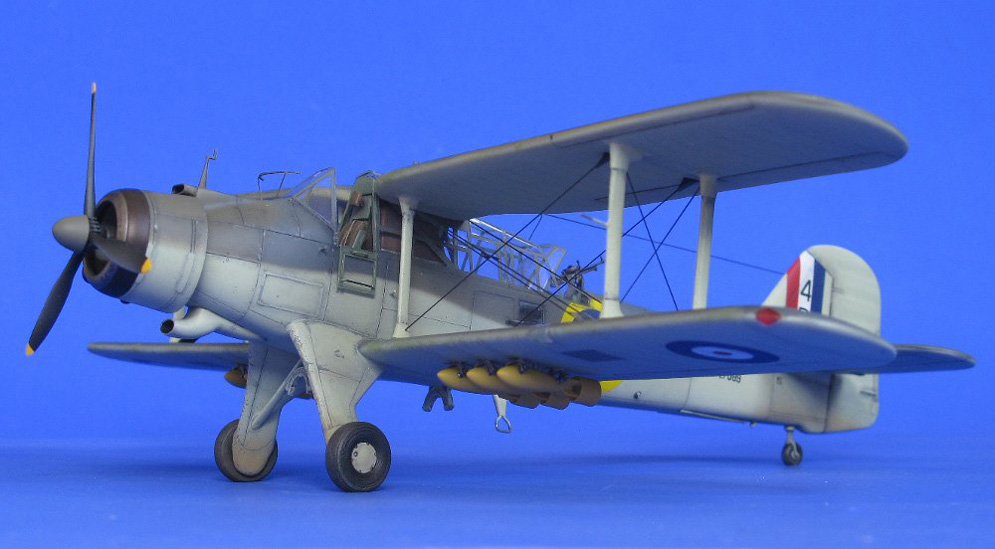
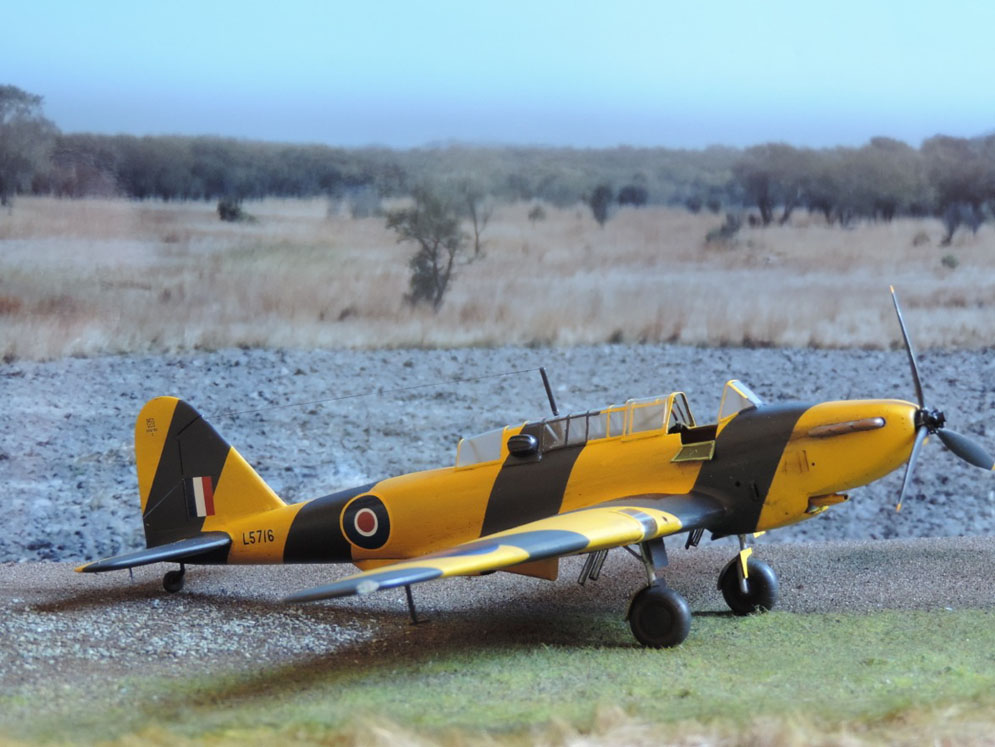
L5716 was attached to No.24 Bombing, Navigation and Gunnery School at Moffat, S Rhodesia in 1944. She was flown by my father several times on towline duties. The background really is authentic!! I went to Zimbabwe last year and took this shot of the veld (long way to go for one picture, but that’s dedication for you! :) )
Max W.


Congratulations on all you’re doing with the website and social media. In these times, it’s a real godsend.
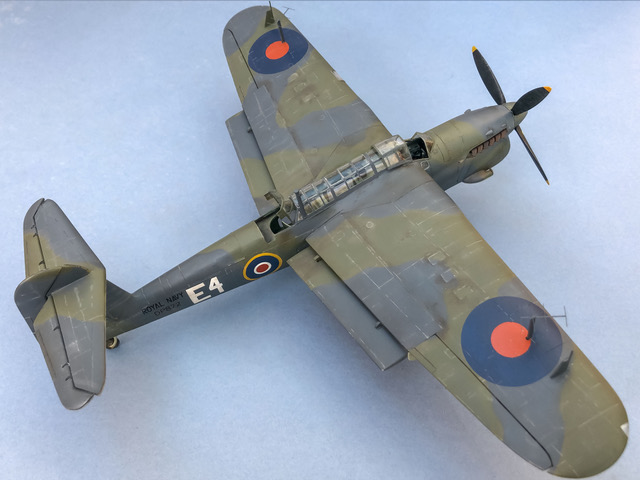
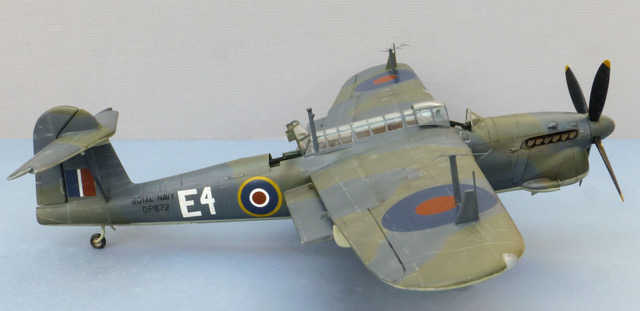
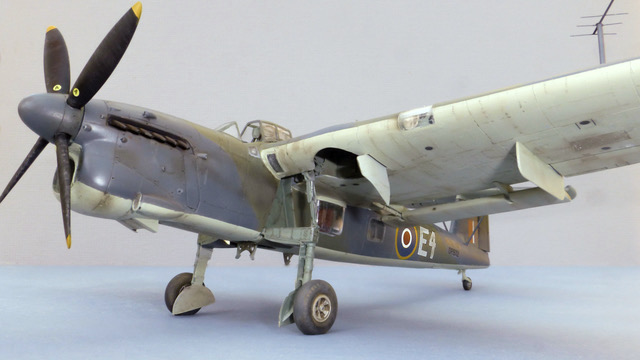
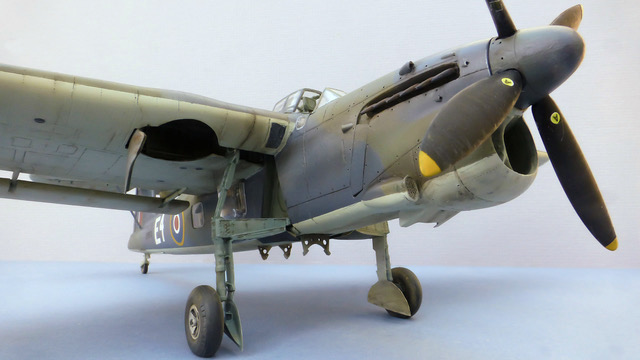
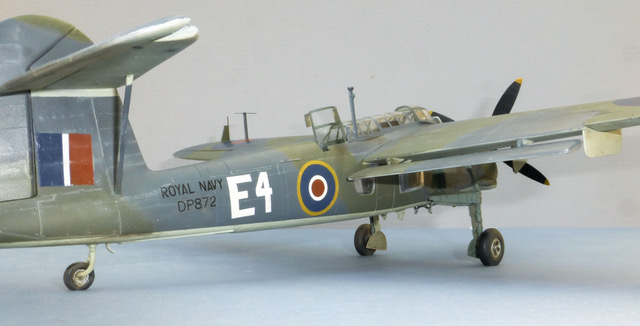
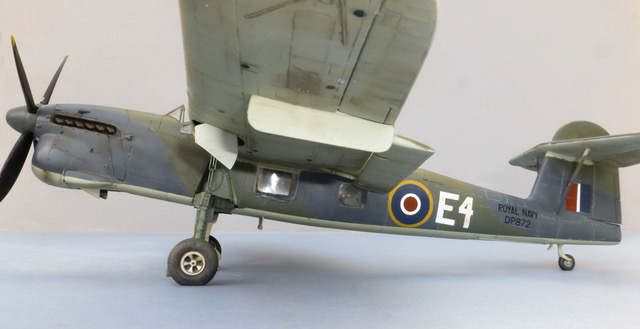
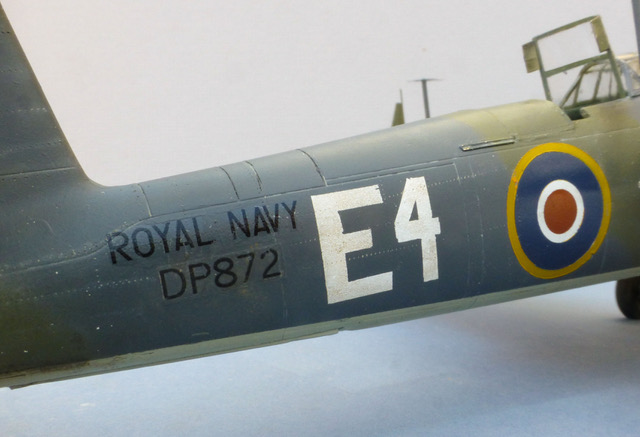
Here is my Fairey Barracuda Mk II by Special Hobby, with the Brengun upgrade. The model represents DP872, which was lost with its crew at Maydown in N Ireland on a training flight from East Haven in Scotland on 29th Aug 1944. I’m building it as part of the team rebuilding the original DP872 at the Fleet Air Arm Museum.
The markings are all hand painted/airbrushed, to represent DP872 when it was lost, using Mr Paint airbrush colours. The model itself fought me all the way but in the end has produced a worthwhile model. Parts fit was poor, with a lack of registration and alignment. Integrating the Brengun cockpit also took a bit of work.
Stephen W.
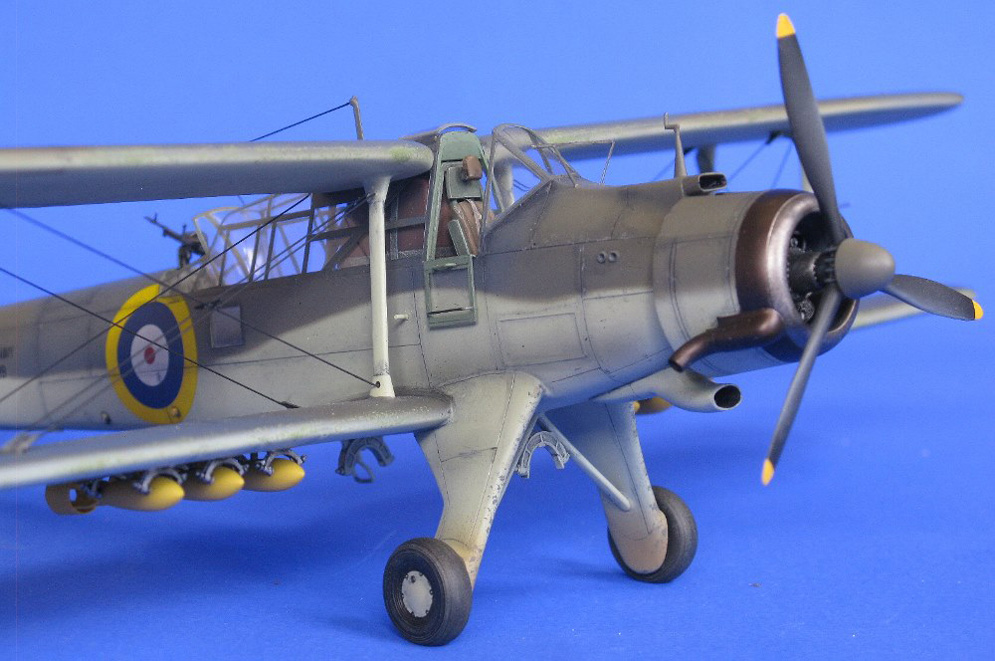
This is AZ Models 1:48th scale boxing, not a bad kit, recessed panel lines, resin parts in cockpits.
I built it several years ago before the newer kits from Trumpeter and others.
Ian R.

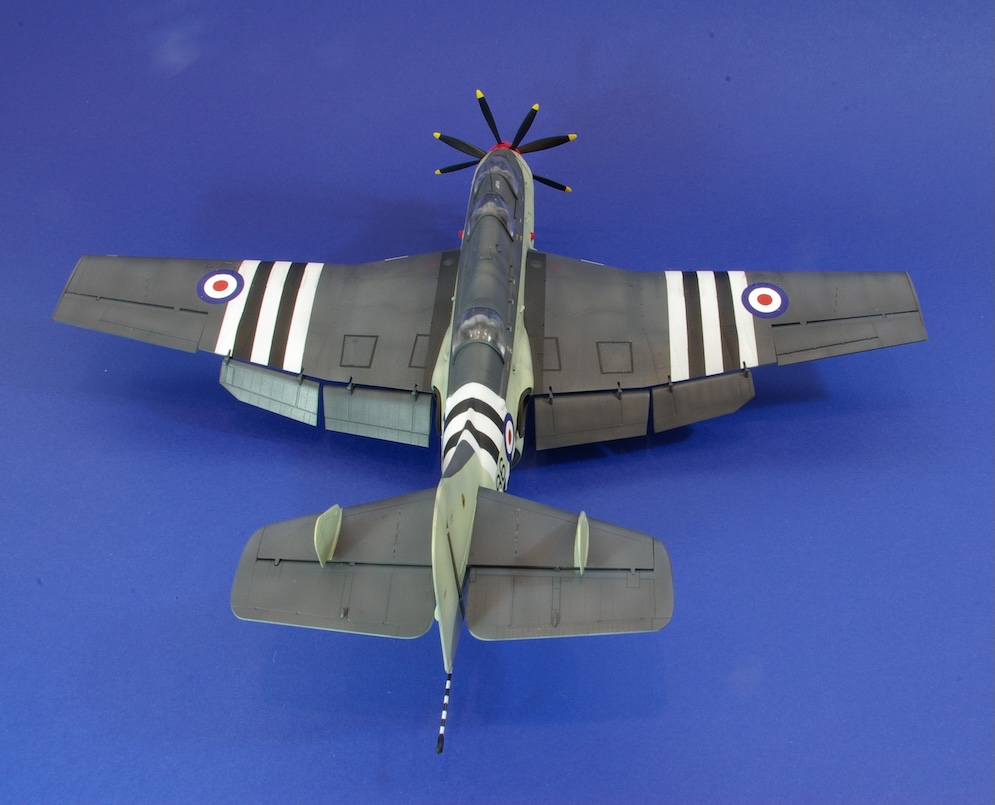
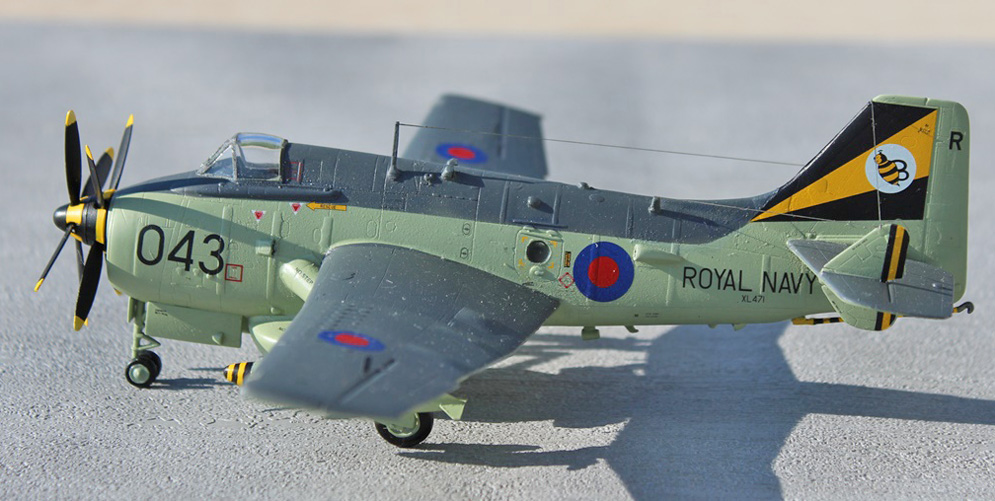
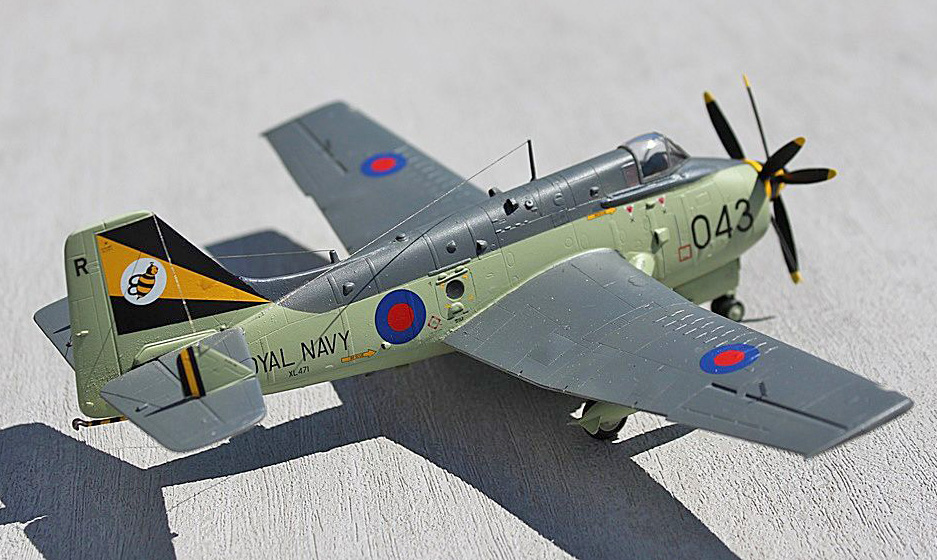
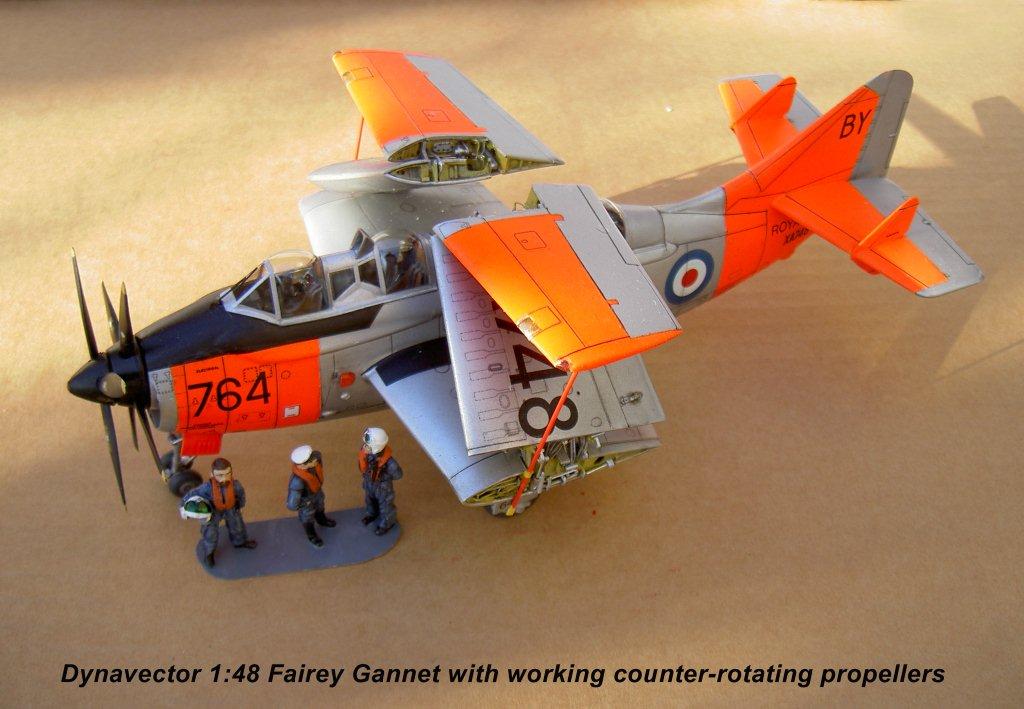
The subject of this project was the excellent Airfix 1:48th scale Fairey Gannet.
The kit was built more or less out of the box, the only additions being an appropriate set of seatbelts from eduard.
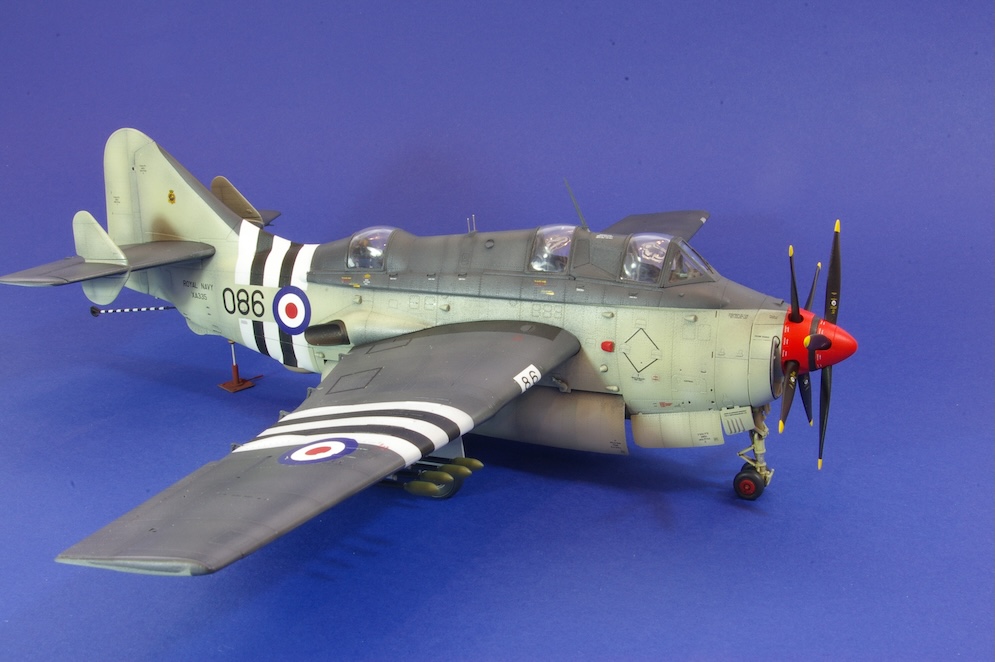
The kit is easy to build but requires a great deal of weight to be added to the front end to prevent the model from falling back onto its tail.
Airfix provides two plastic trays to hold the necessary weights (though oddly only one is shown in the instructions). I used a product called Liquid Gravity fixed with diluted white glue to fill the trays and also added some of this to the hollow cooling vents in the engine cowling. Fearing that this would still not be enough to hold the front end down, I also glued small steel washers into every available space that I could find forward of the main undercarriage legs.
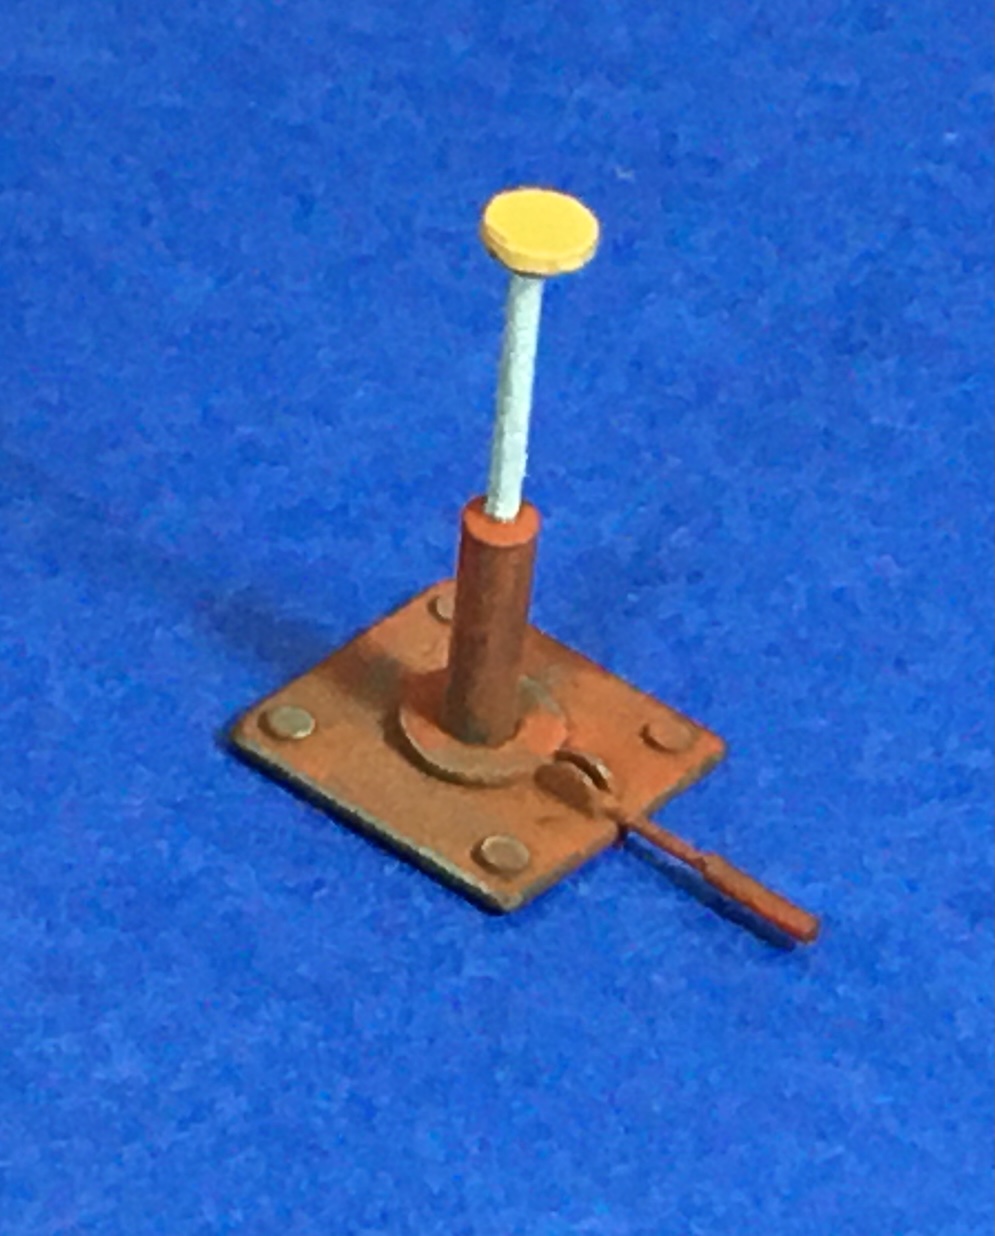
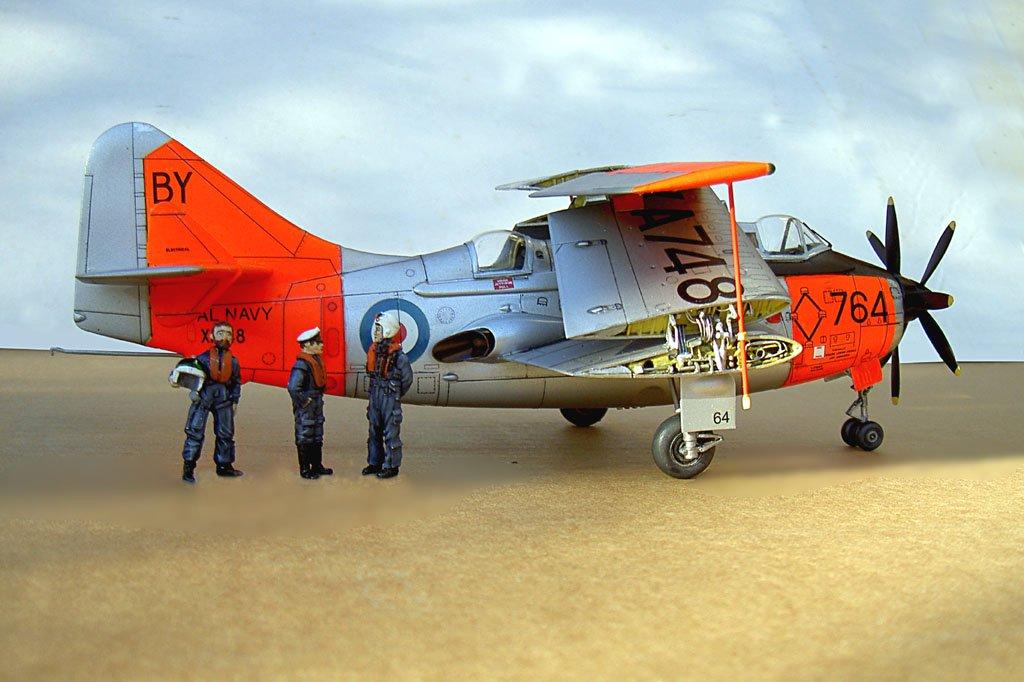
Sadly, despite the model now weighing as much as a small family car it still rocked back onto its tail This was probably my fault rather than there being any shortcoming with the kit as other modellers don’t seem to have had this problem. Maybe it was because I’d chosen to have the flaps extended and perhaps this just tipped the balance? In the end I had to build a little home-made jack to hold the back end off the ground. This failure has brought shame upon my family and so let us never speak of this again.
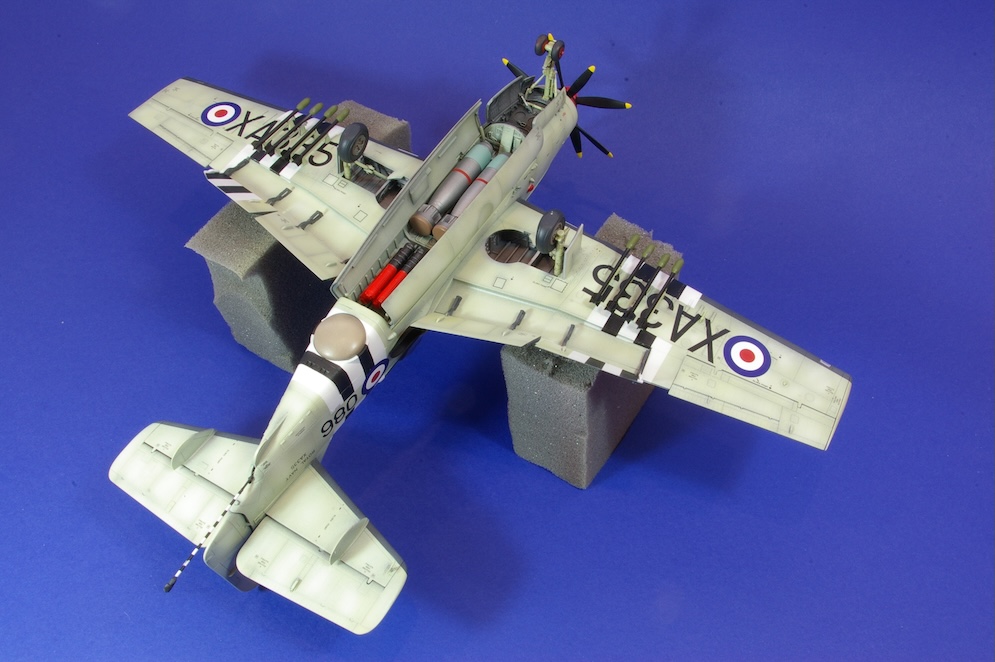
The scheme chosen was Gannet AS.1 XA335 from No. 847 squadron based at RAF Nicosia, Cyprus in 1957. Whilst serving in Cyprus this aircraft had black and white identification markings painted onto the wings and fuselage. I thought that this would add some extra interest to the model. However, I discovered that masking and painting parallel lines in highly contrasting colours around compound curves was a little harder than I thought! Despite this I thought the extra effort was worth it.
The transfers provided in the kit are thin and so I feared that any demarcation lines between underlying colours would have been visible under the roundels. To avoid this problem, I sprayed white circles where the roundels were to be placed using masks cut just slightly smaller than the transfers. Because the transfers were so thin I cut the large serial numbers under the wings into several parts to make them easier to position on the model.
Despite the model refusing to sit correctly on its undercarriage I thought that this kit was one of Airfix’s best and I enjoyed building the model. I just need to remember that when picking it up, it is important to lift with the legs and not the back!
Dai W.
I remembered building the Airfix one when I was about 12. (a long, long, time ago!!) I wanted to build the Airfix one, but alas, that goes for silly money. So I picked this up for £15, for it’s day it was very well detailed with a full interior, but I was not bothered with that and so I only put in the cabin floor and seats, which can be seen if you concentrate.
Fit was as you would expect (terrible) and I had to fill every gap on the model, but guess what, I thoroughly enjoyed it!!
Larry W.
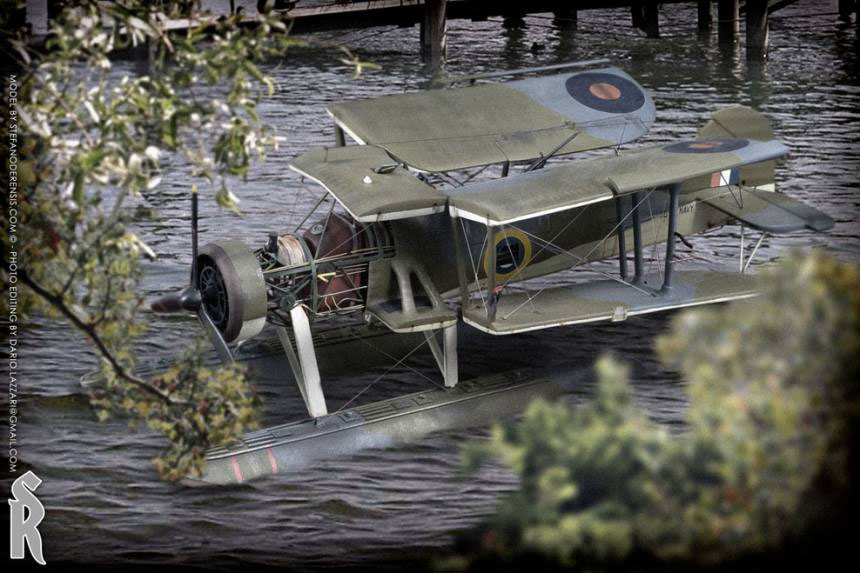
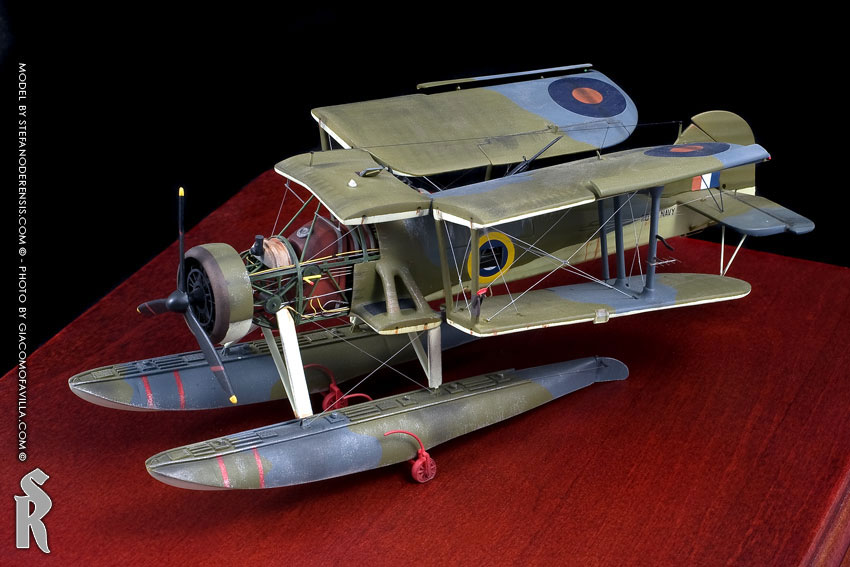
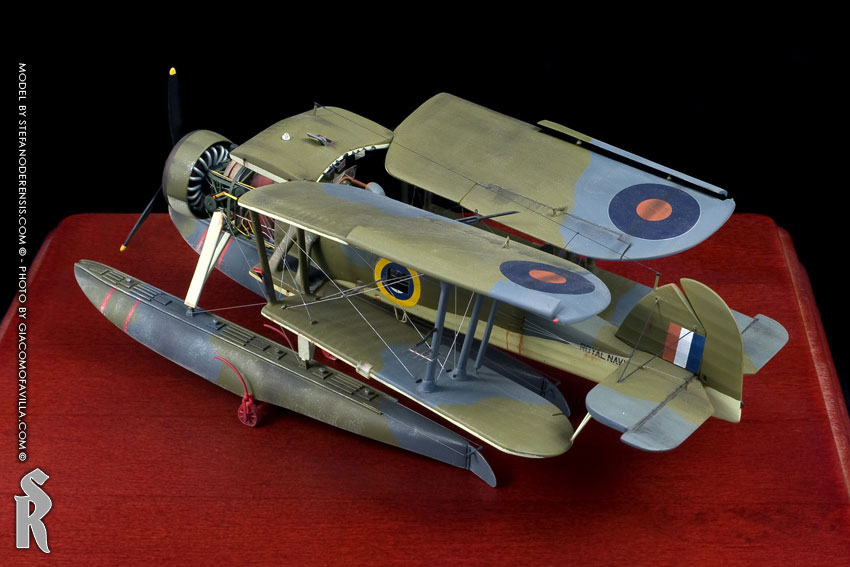

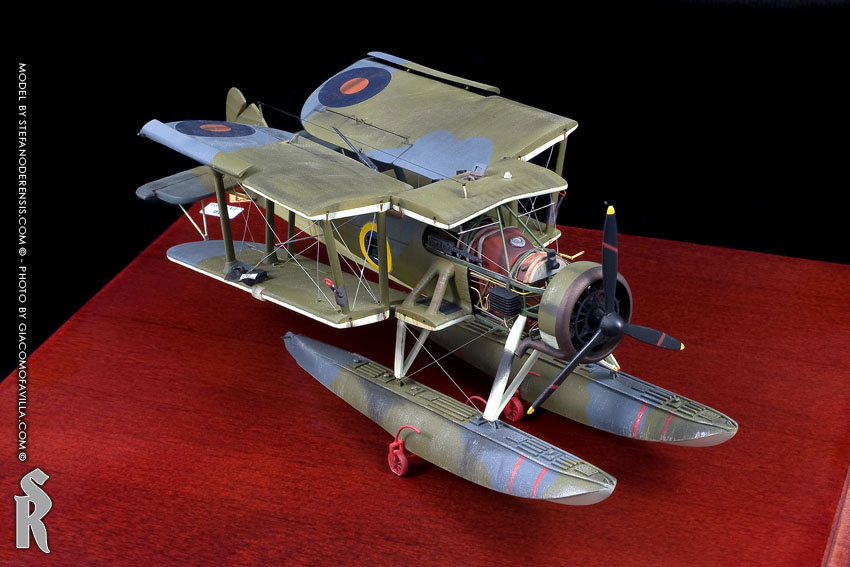
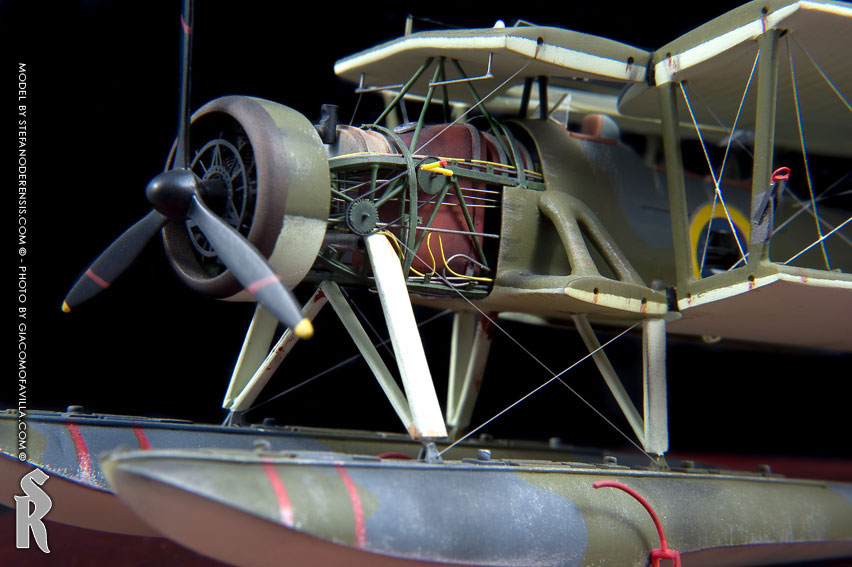
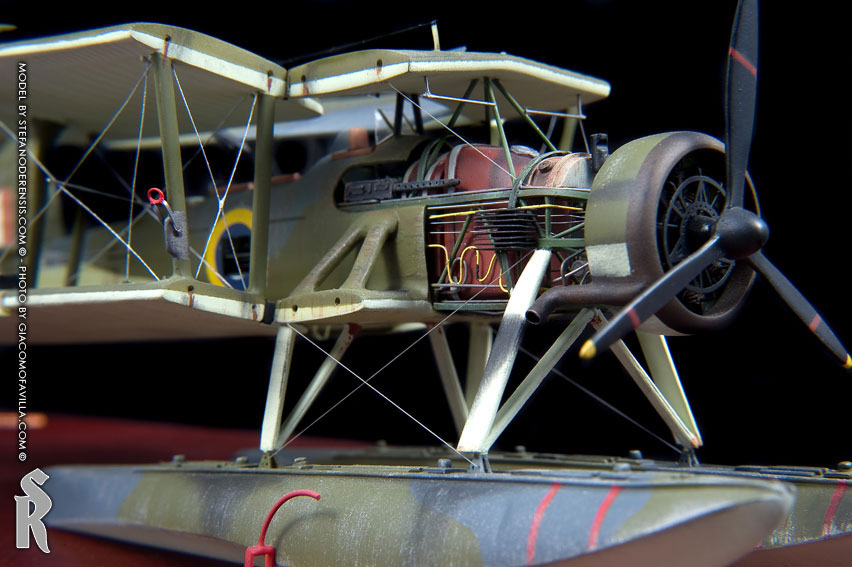
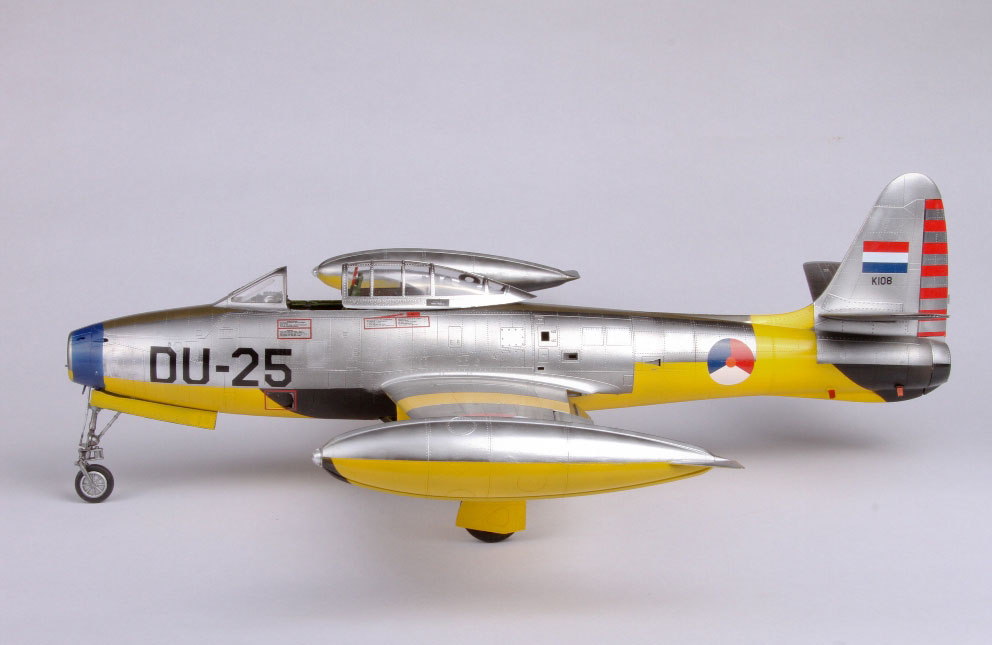
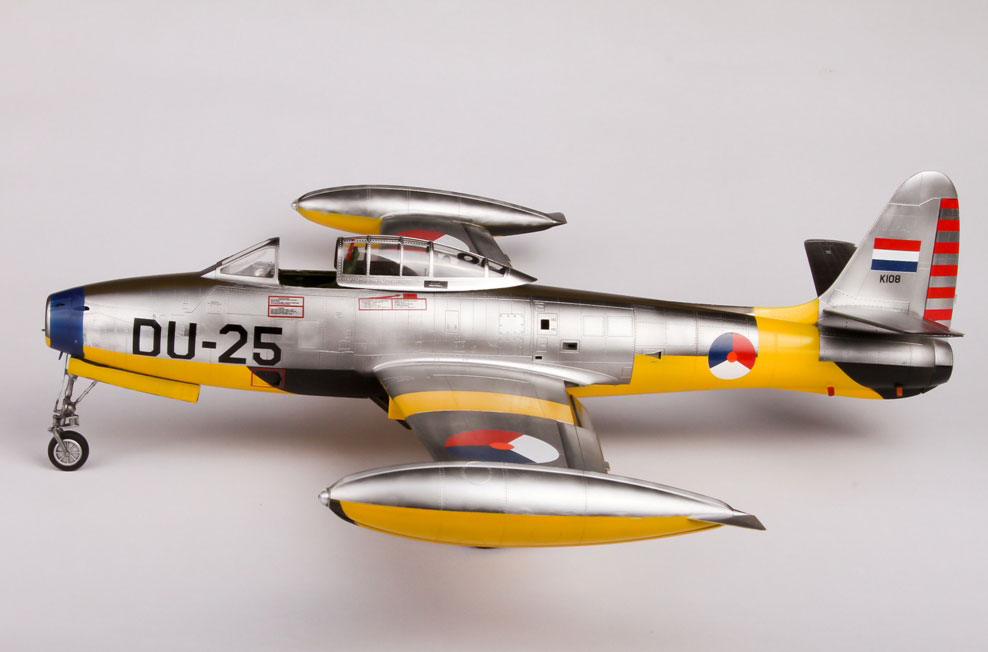
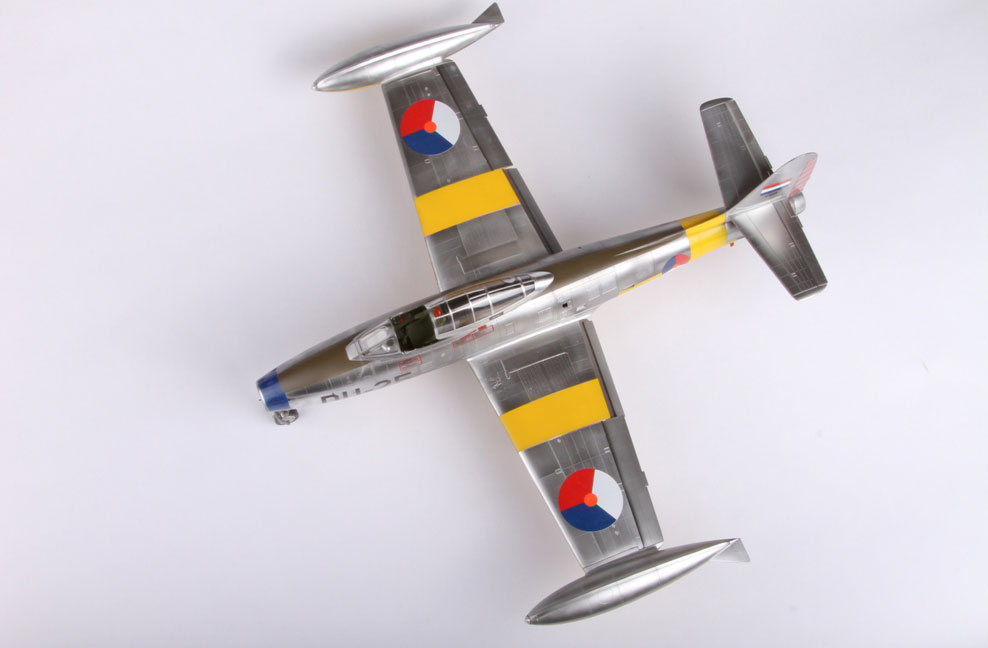
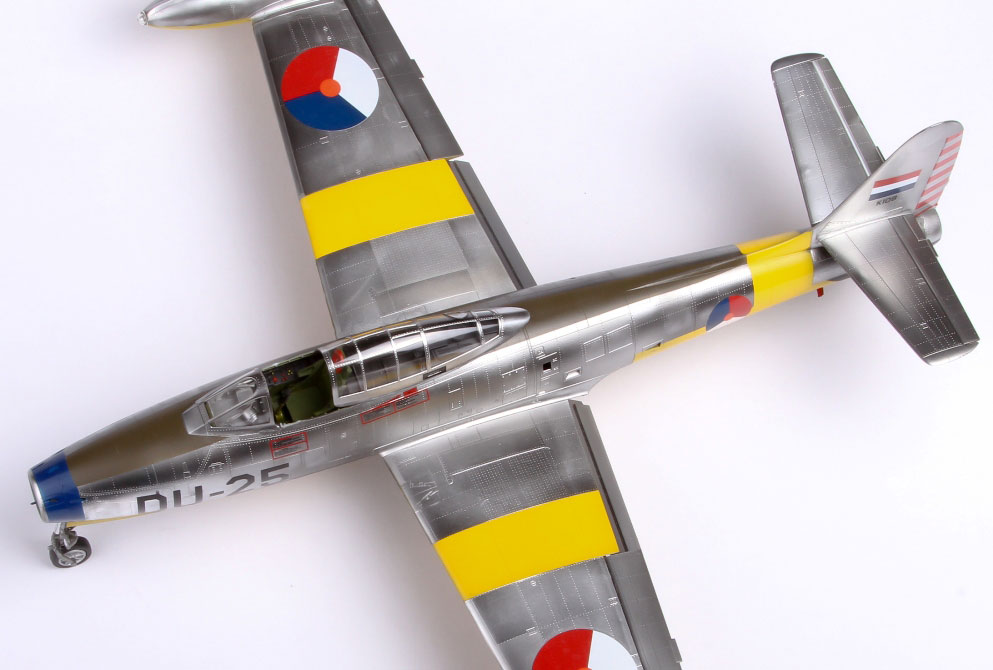
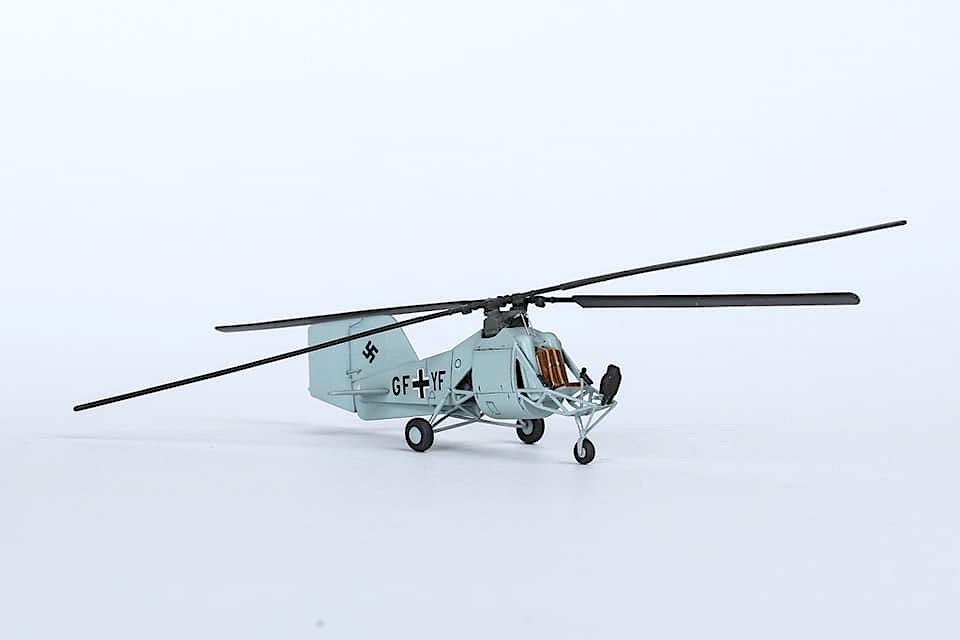
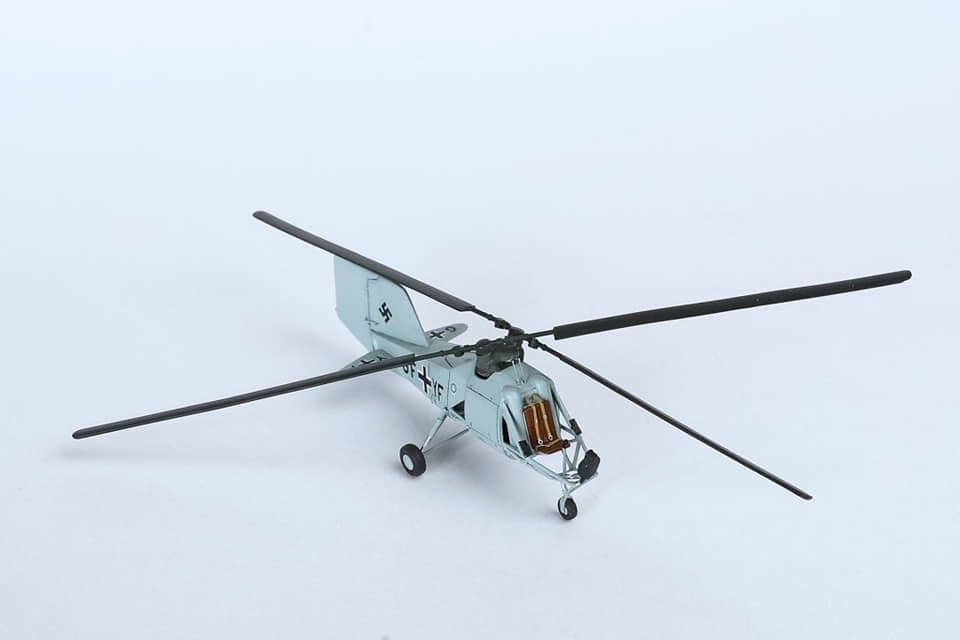
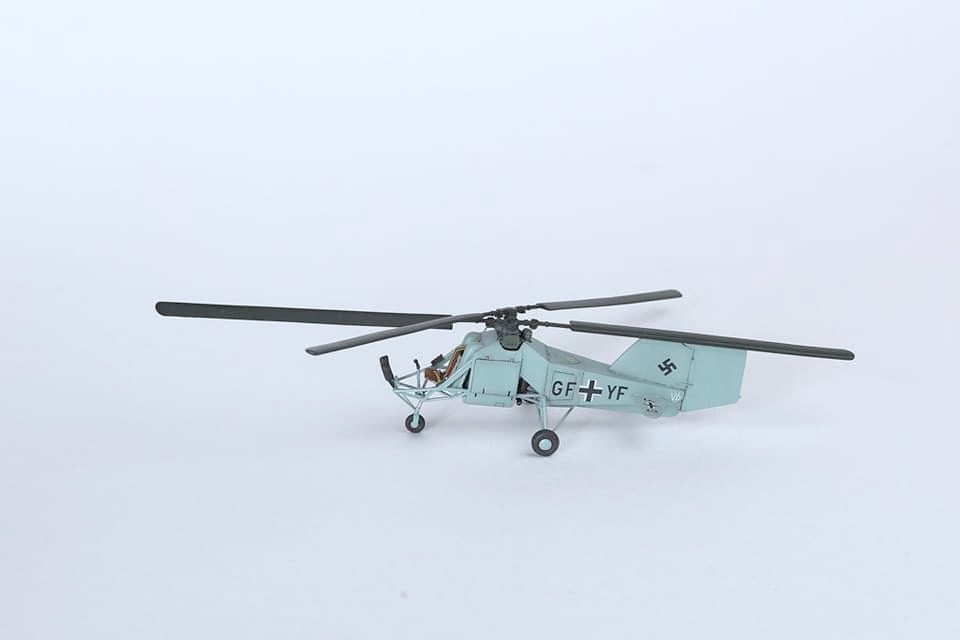
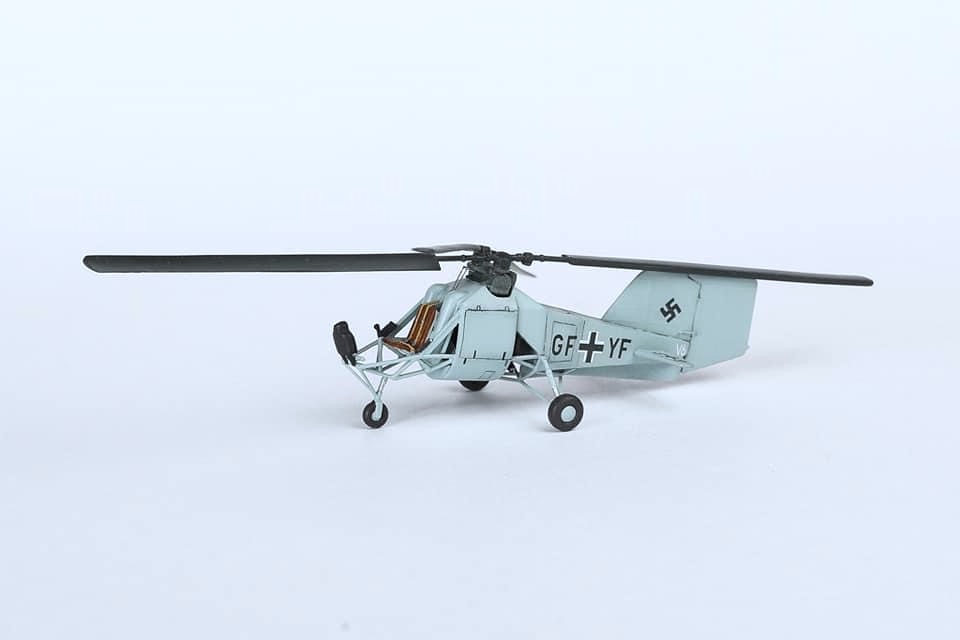
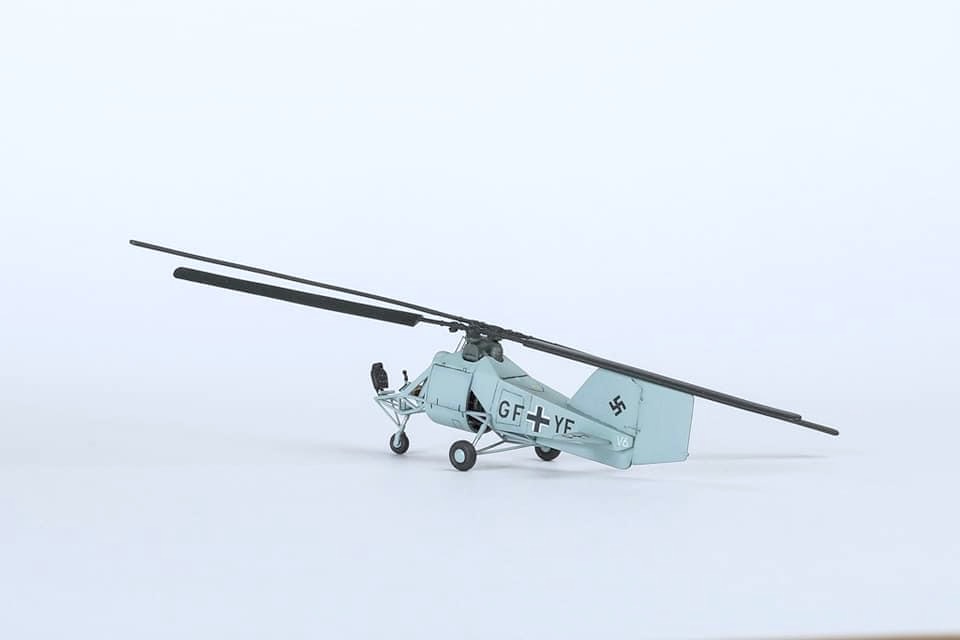
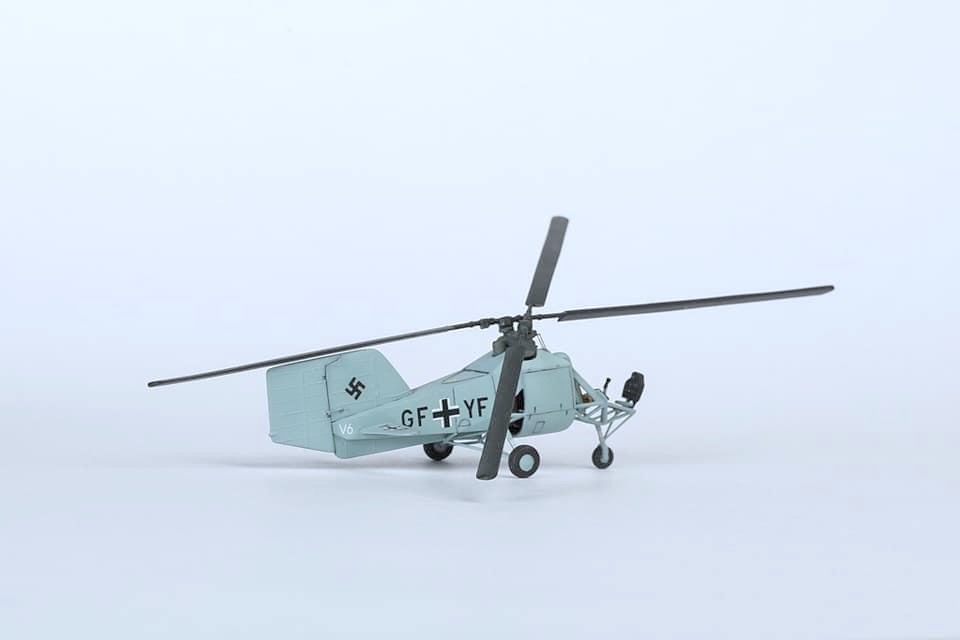
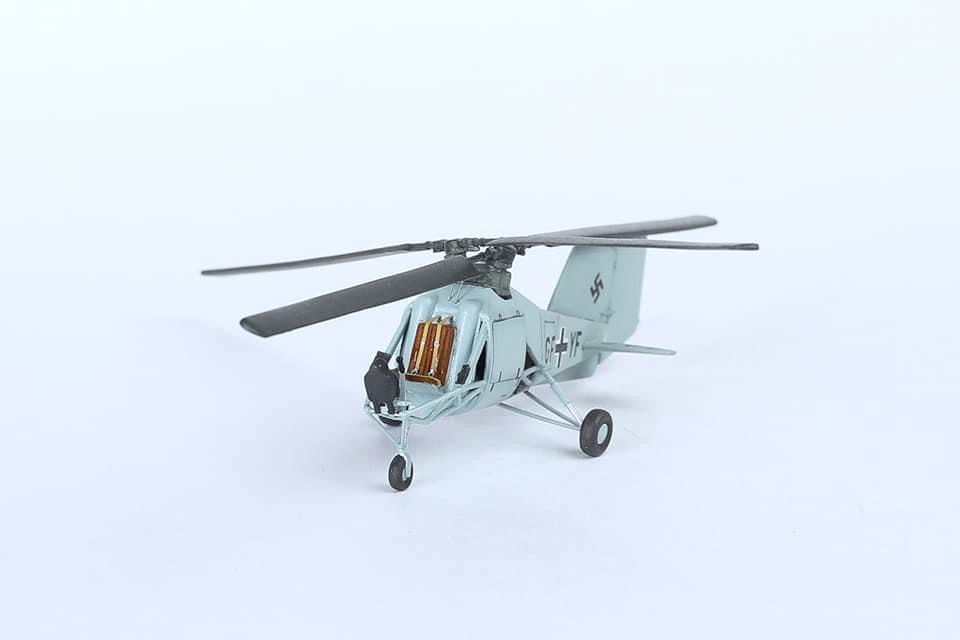
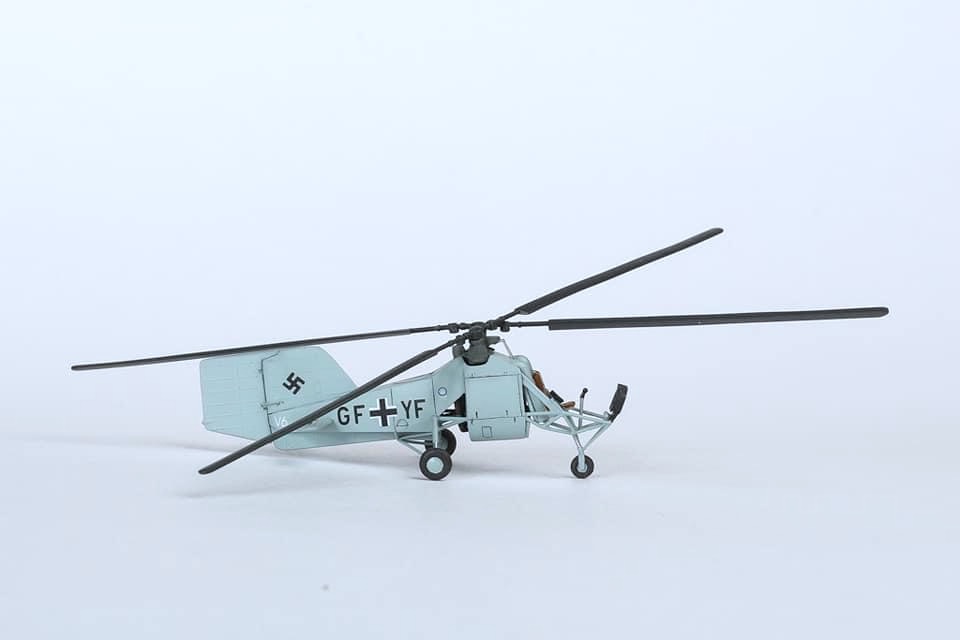
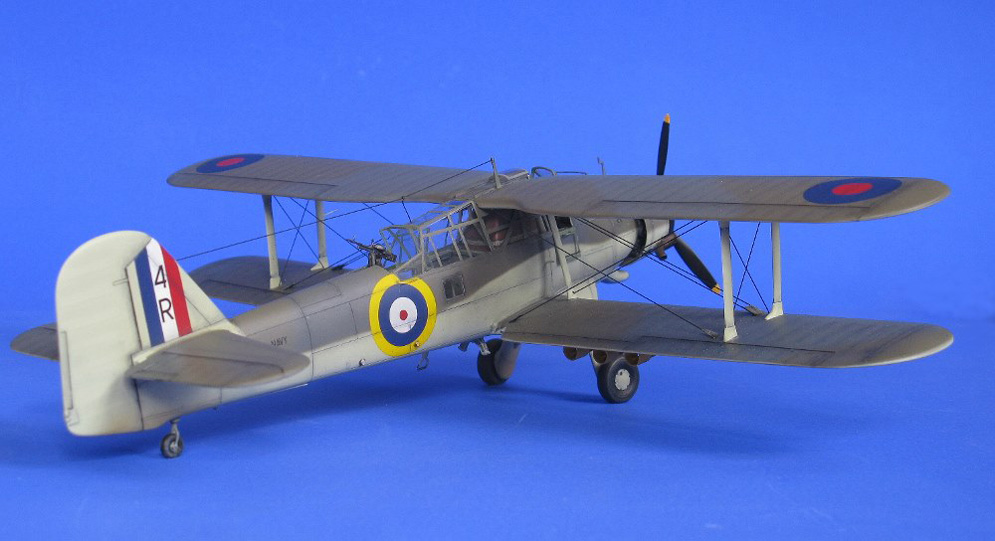
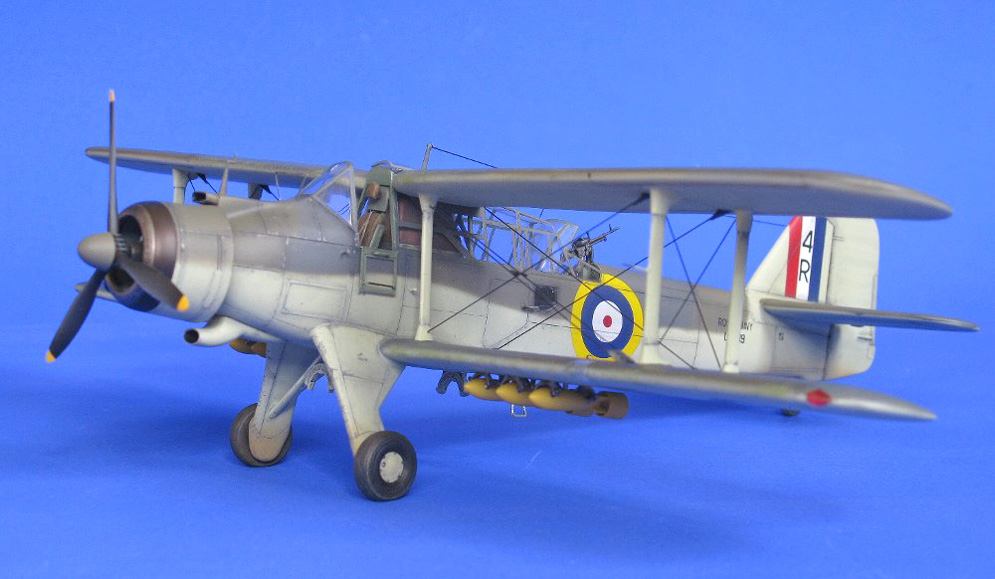
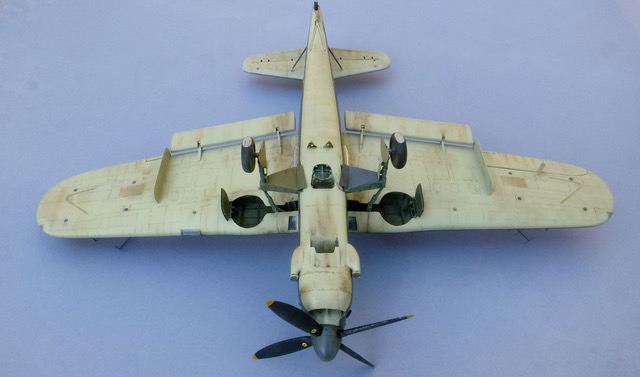
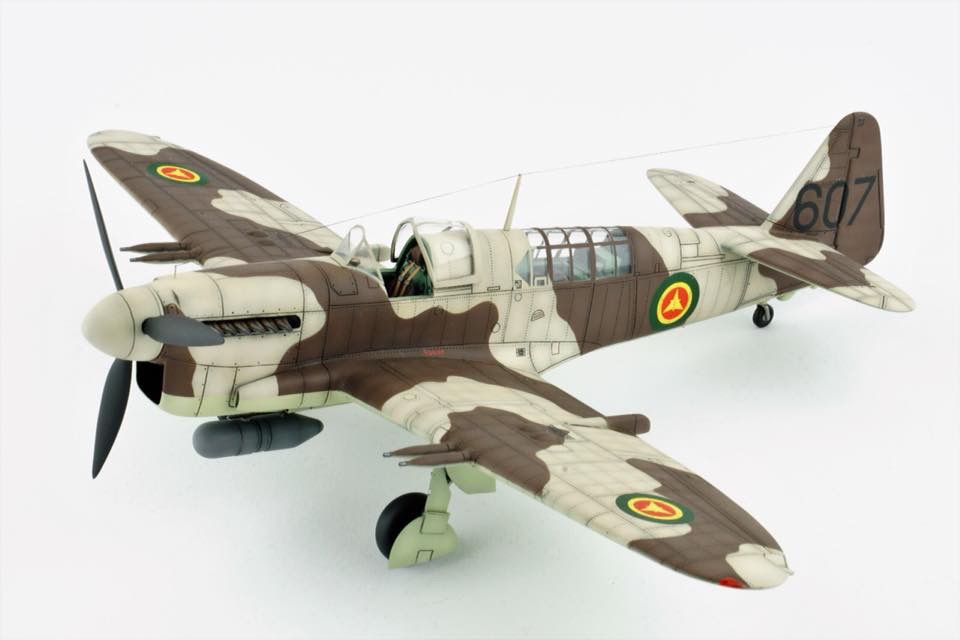
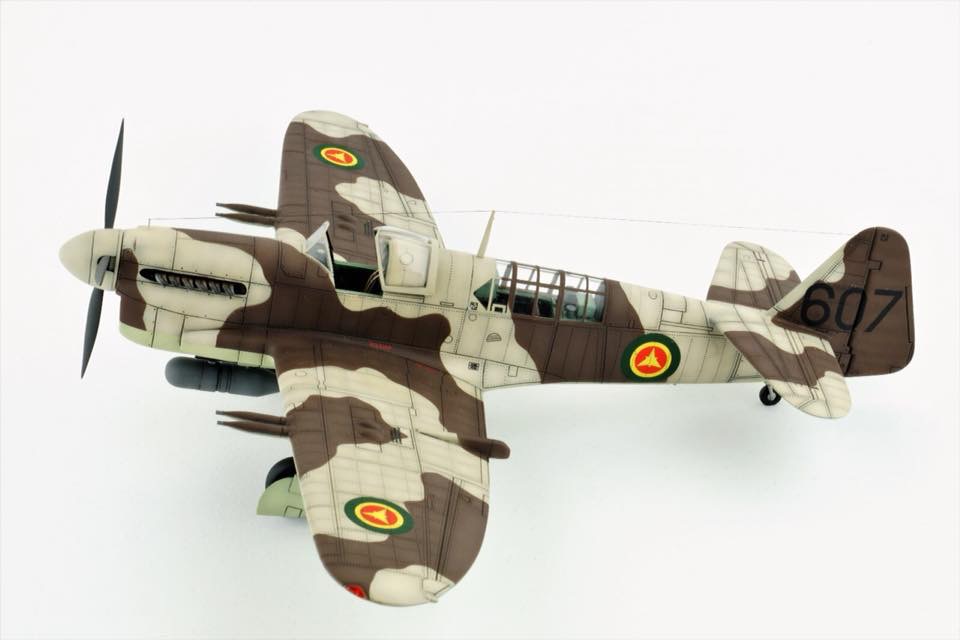
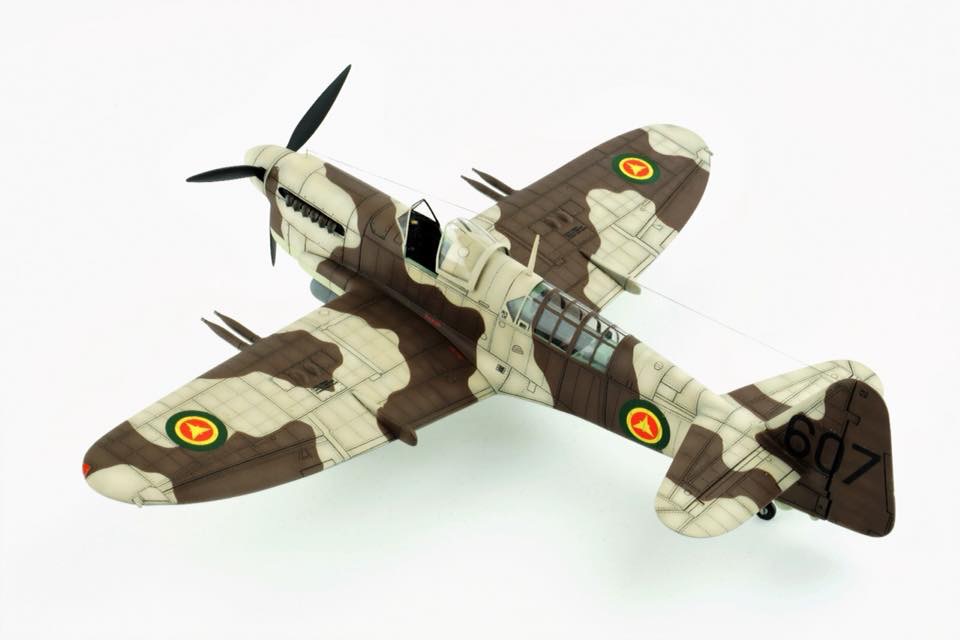
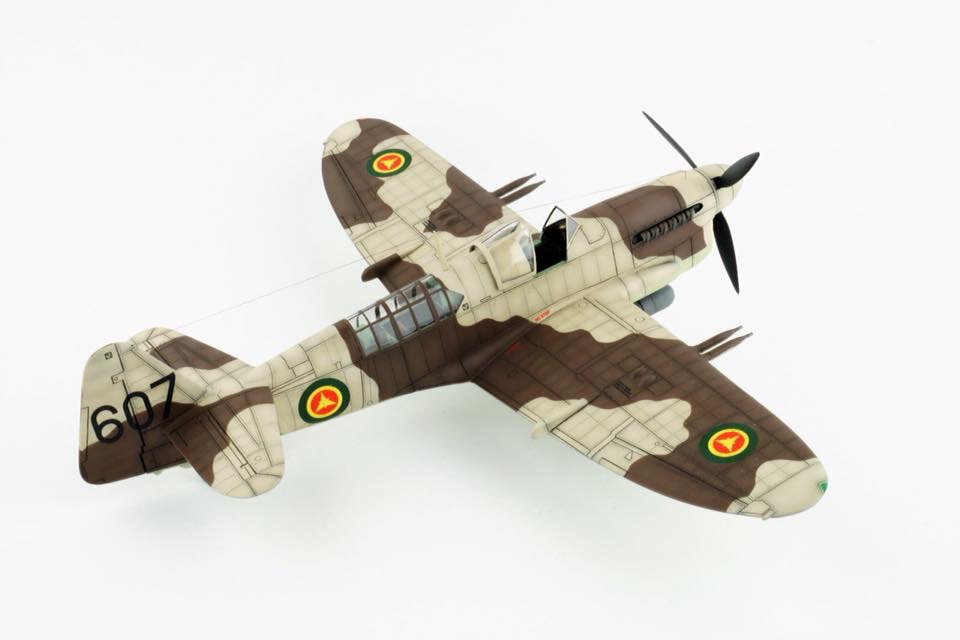
I decided to build the floatplane version and construction began with the scratchbuilt floats. It was my first true “scratchbuilt” project and has presented many problems. The floats were carved in wood, soaked in resin and then moulded in silicone rubber for the two identical copies. At the time of construction I did not have a lot of technical skills and appropriate materials commonly used today, I did not even know the existence of Plasticard!
Cockpit construction continued without any problems with the interior detail being very complex considering the scale of the model. The fuel and oil tanks were built using the same technique of the floats with tubular structure made of Evergreen.
The wings have represented the real modelling challenge; the twenty-two tie rods, made with coaxial cable silver, were made to pass through the wings through the micro holes made by hand with a drill bit from 0.18 mm. The excess of the cable coming out at the top and bottom of the wing has been cut and joined with small amounts of stucco.
The staining was created with my usual colours – Humbrol, diluted with turpentine and applied with an airbrush. Peeling and dripping rust or oil were carried out with a brush with Humbrol colours diluted to ‘80% or with oil paint.
This project was rewarding but also very challenging.
Stefano De R.
See more of Stefano’s impressive work here
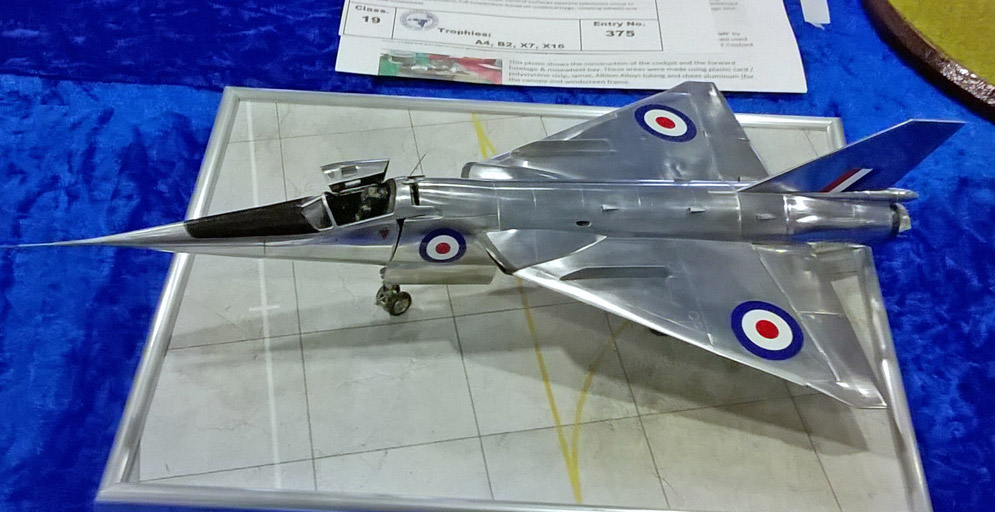
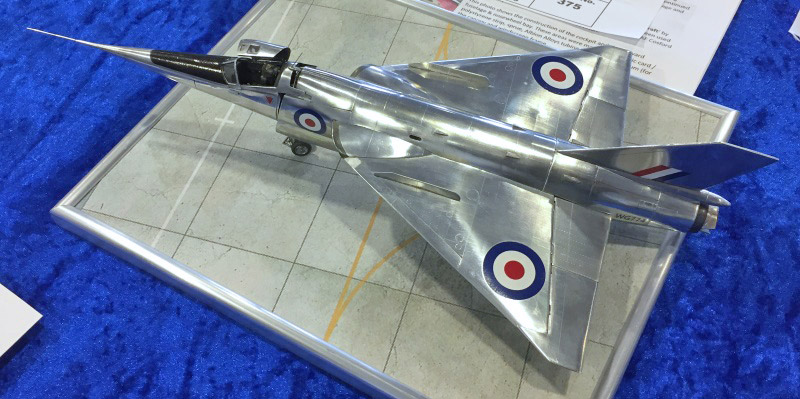
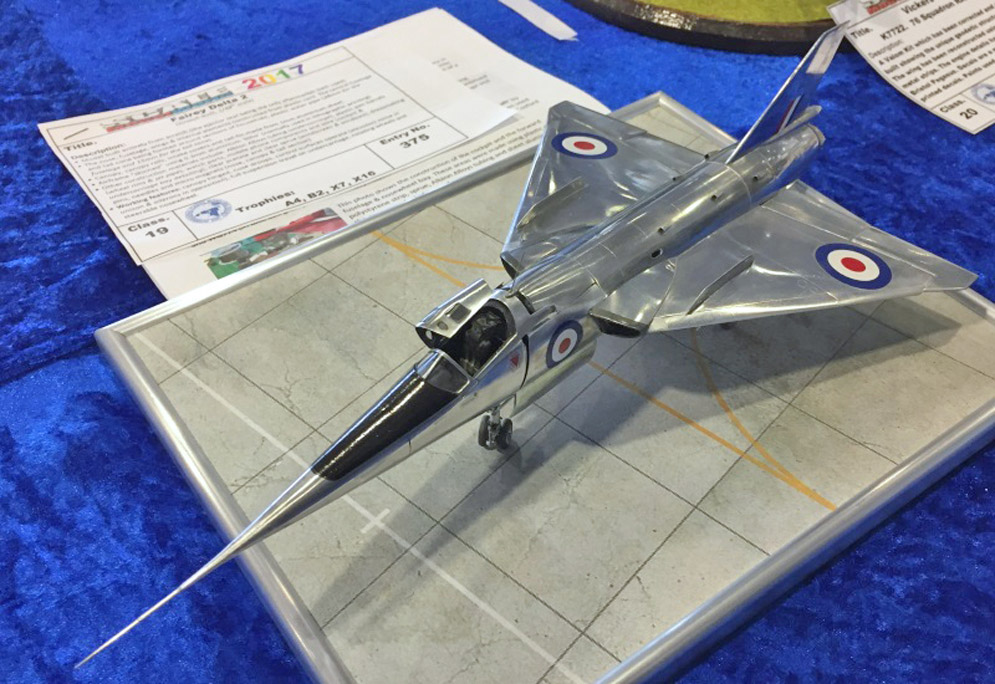
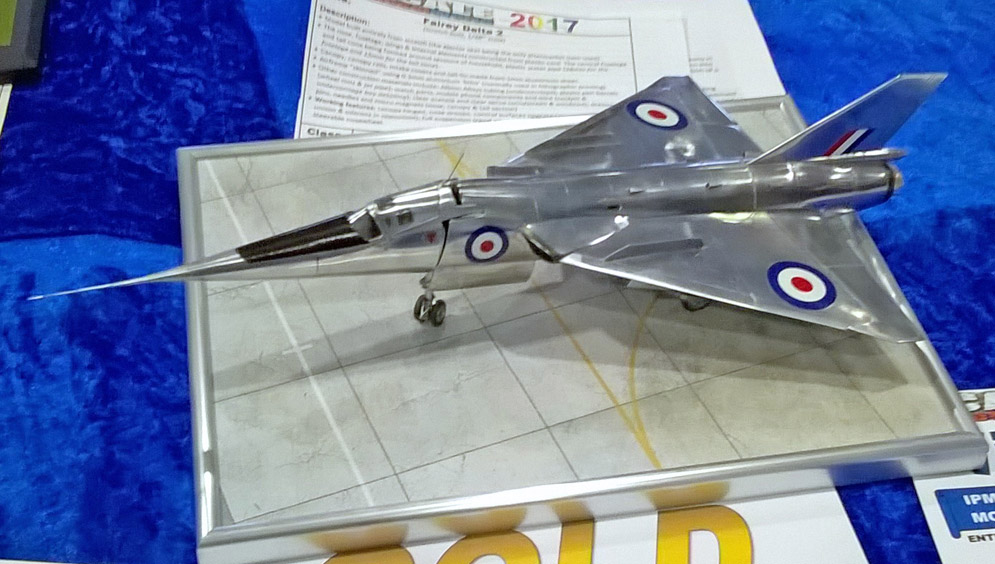
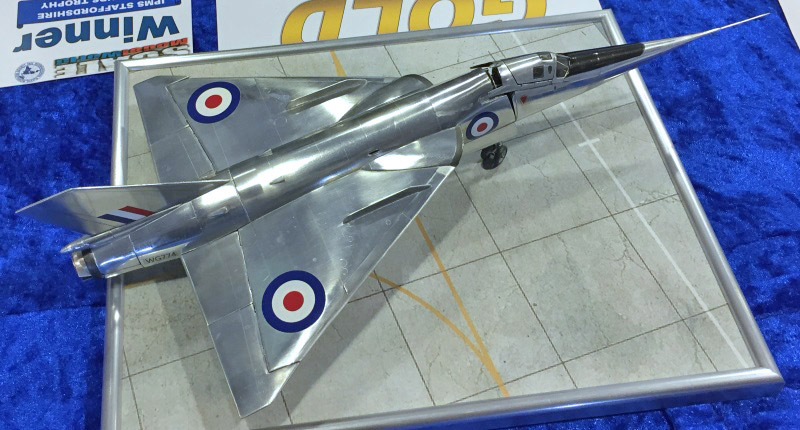
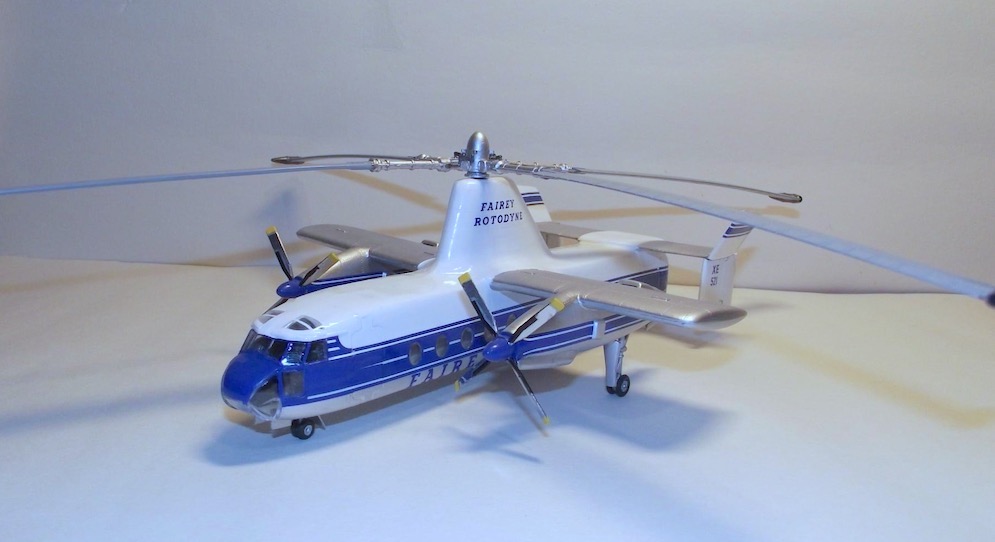
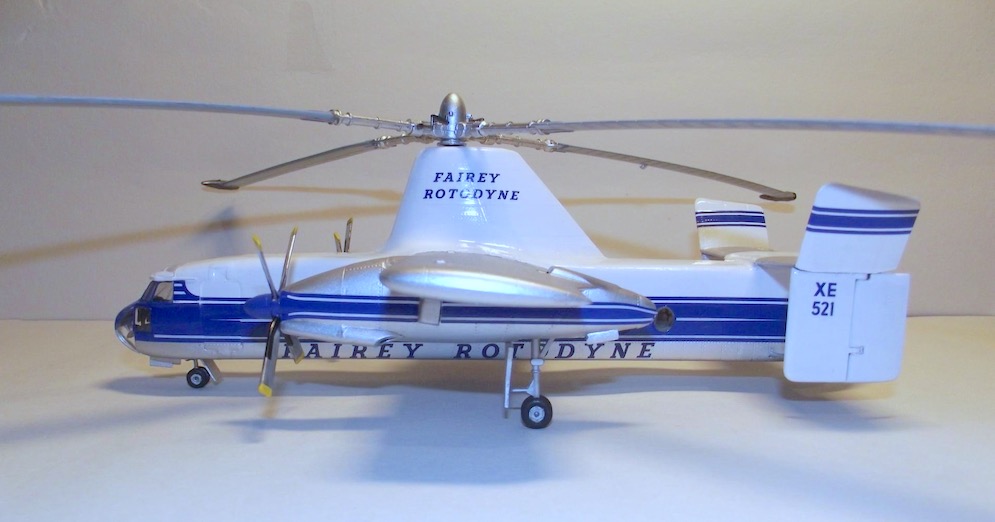
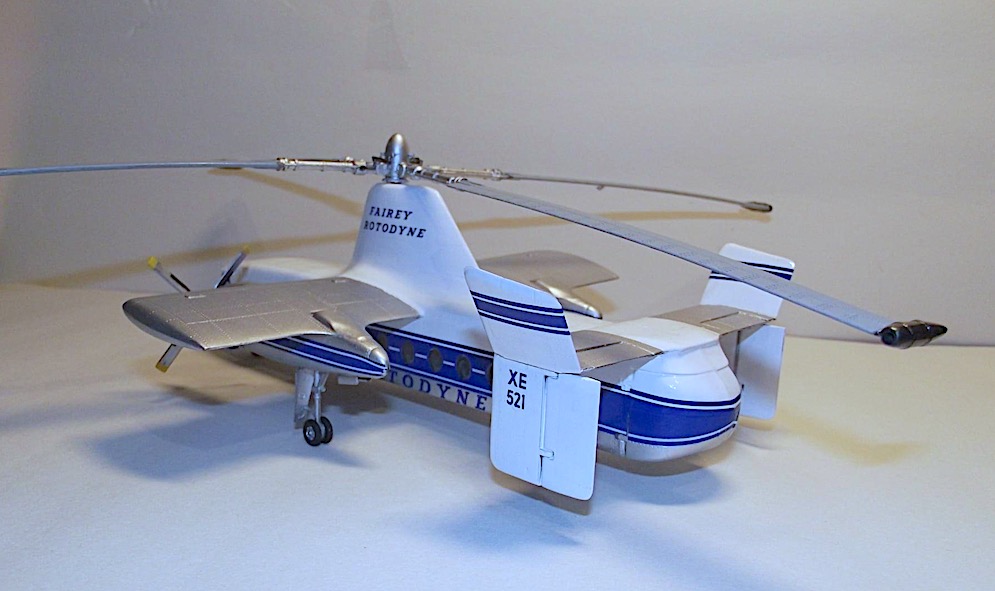
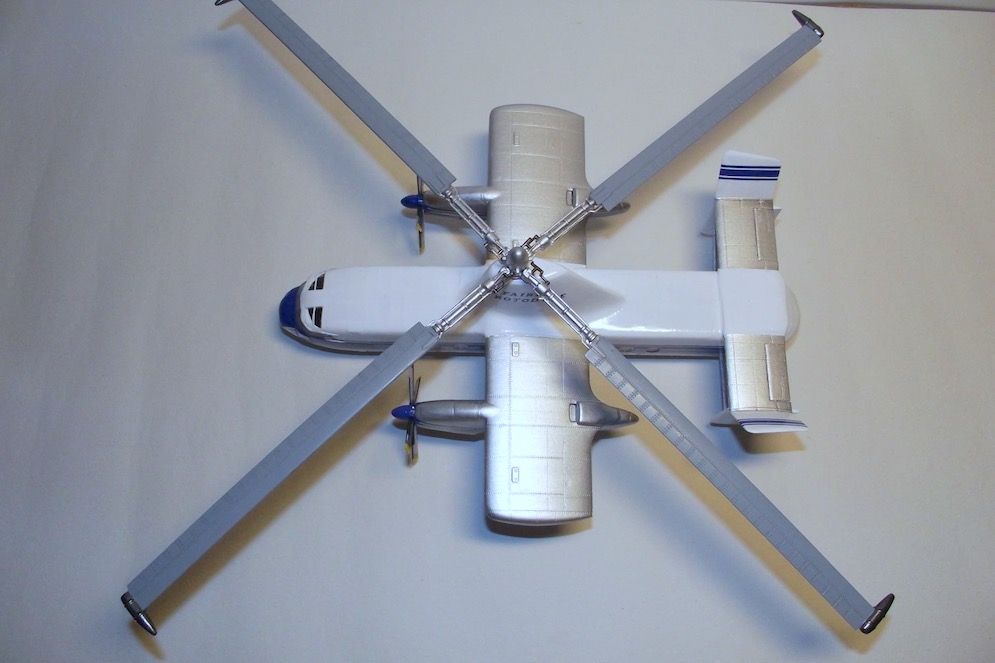
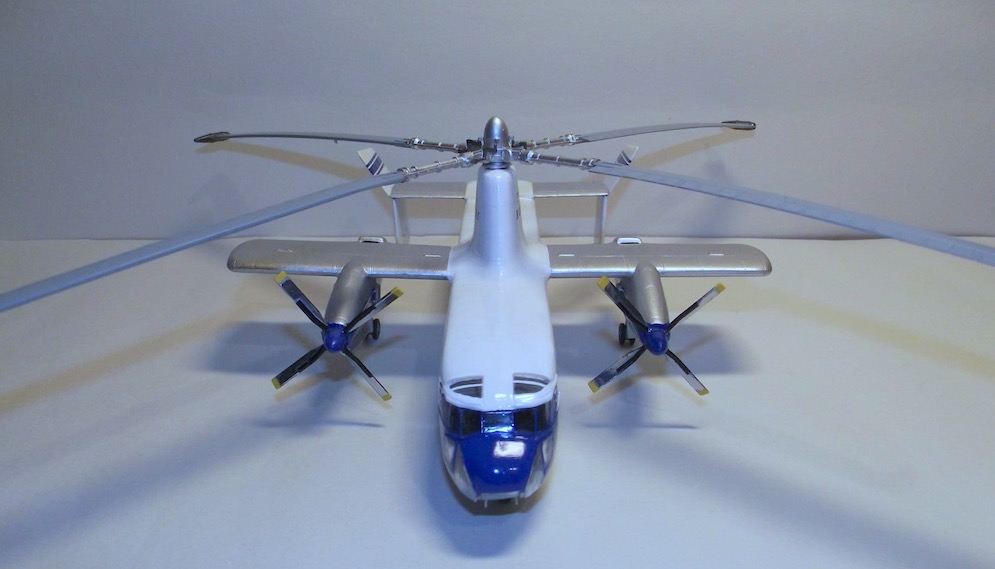
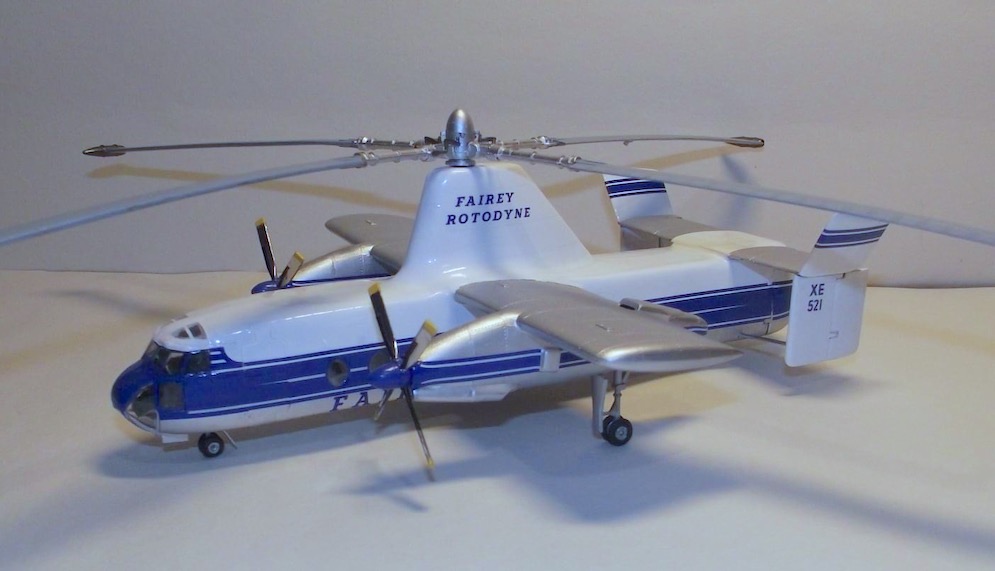
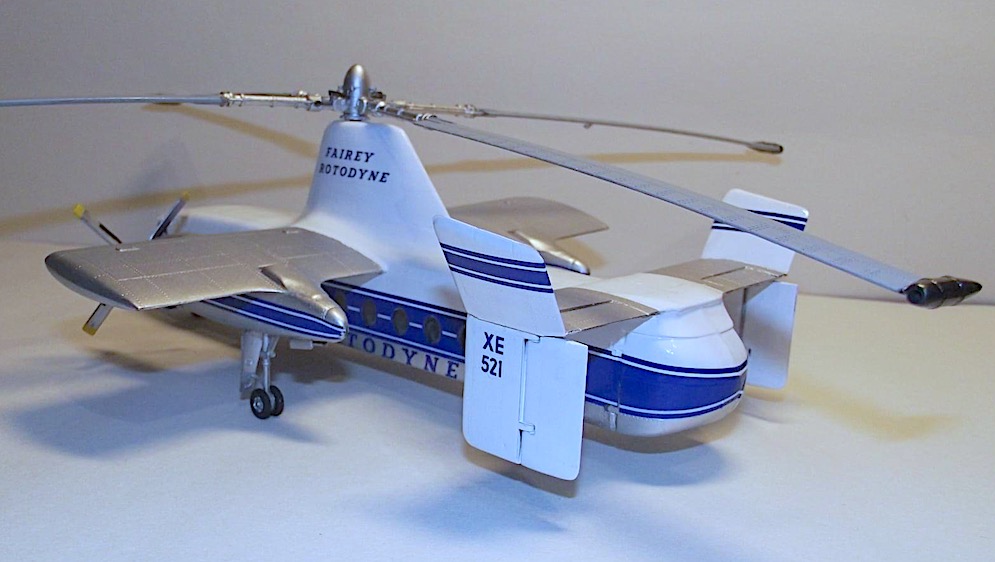
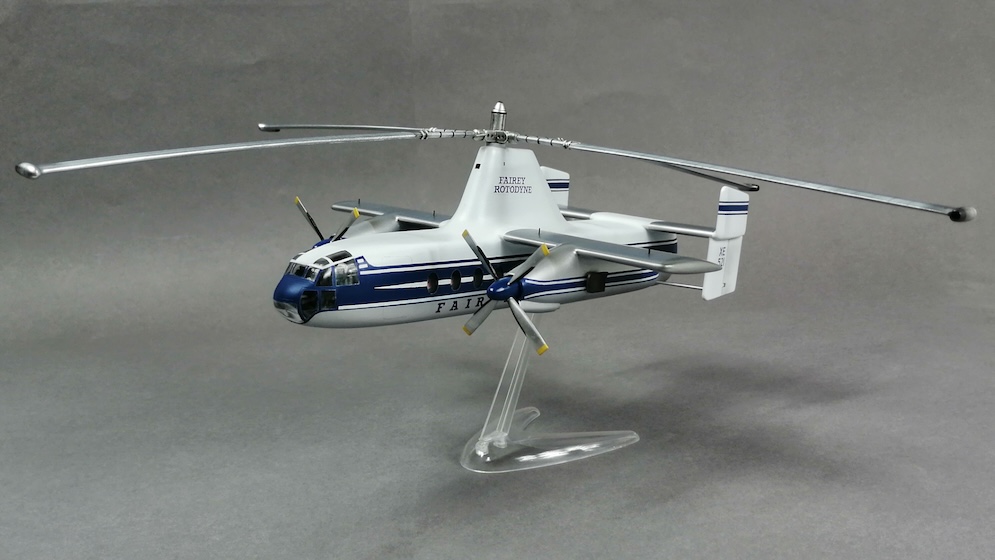
The model is entirely scratch-built, using (scaled-up 1:72nd) plans published in the book ‘British Experimental Jet Aircraft’ by Barrie Hygate. In addition, various other books, magazines, online articles and photographs were used for reference. I also paid visits to both of the preserved aircraft – WG777 at the RAF museum at Cosford and WG774 (in BAC 221 guise) at the Royal Navy Fleet Air Arm museum in Yeovilton.
The model is constructed primarily from plastic card with the central fuselage being formed around a section of plastic water pipe. Aluminium sheet has been used for some of the components – e.g. nose cone, canopy & tail fin – and the model is ‘skinned’ in Lithographic plate (very thin aluminium sheet used in the printing trade), replicating the aircraft’s natural metal finish.
Various elements of the model operate. These include:
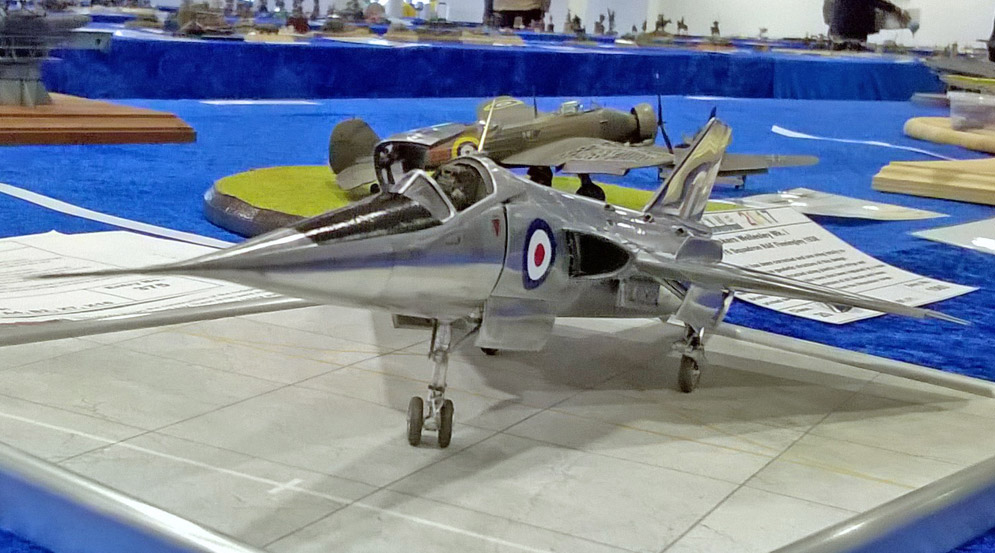
· The ‘drooping’ nose section (micro magnets lock it in the ‘up’ position);
· Moving control surfaces – ailerons (in opposition) and elevators (in unison);
· Wheels rotate, undercarriage legs extend when ‘unweighted’ and nosewheel steers;
· Canopy hinged.
The model won a gold at Scale Model World 2017, along with the IPMS Staffordshire Moorlands trophy for best scratch-built model – a very pleasing result, especially as this was my first scratch-build!
Hope you like,
Nick H.
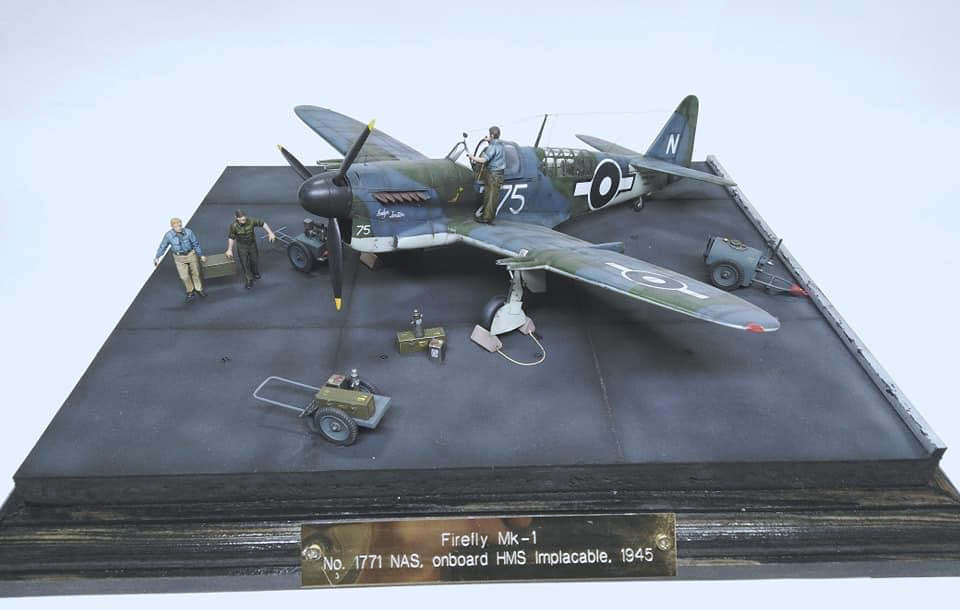
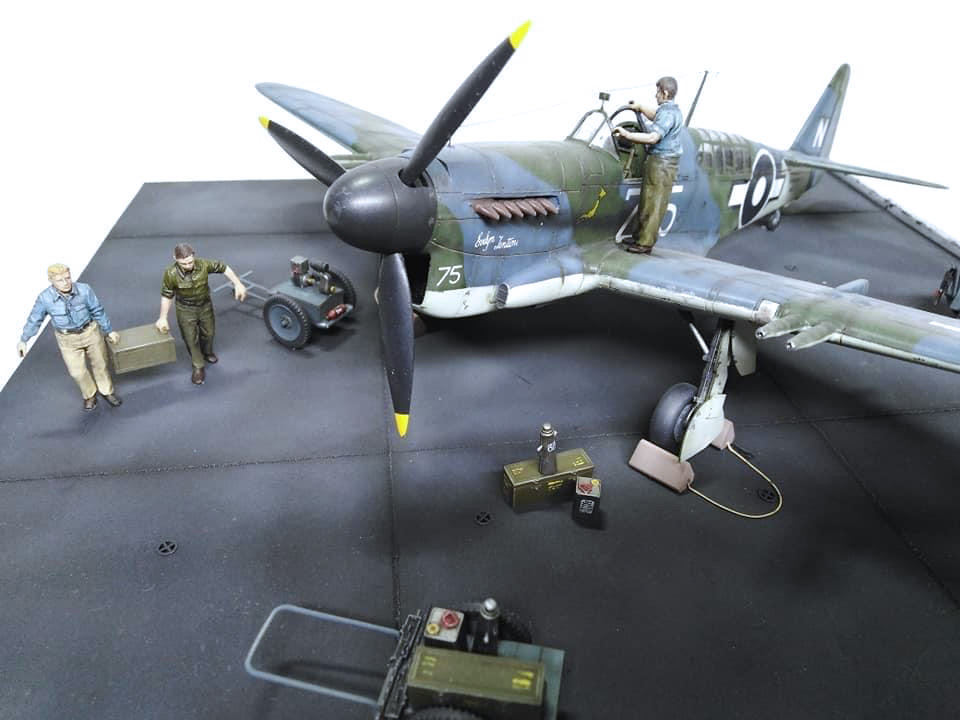
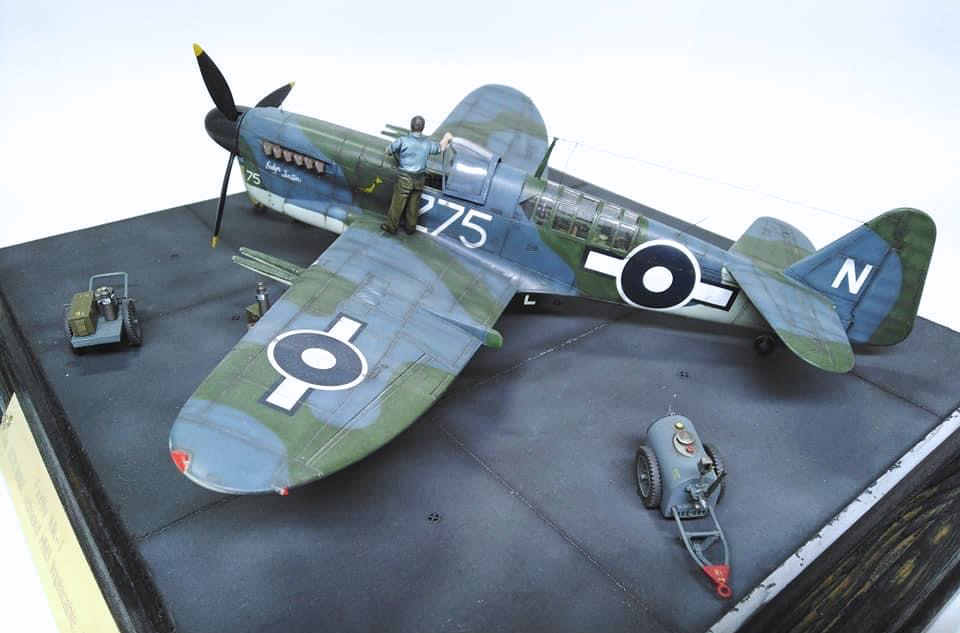
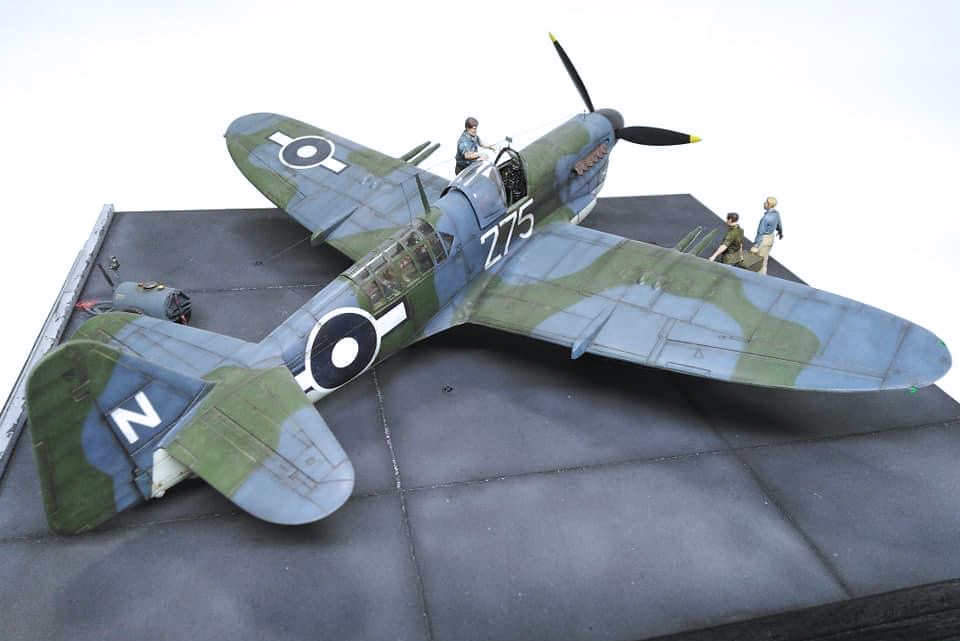
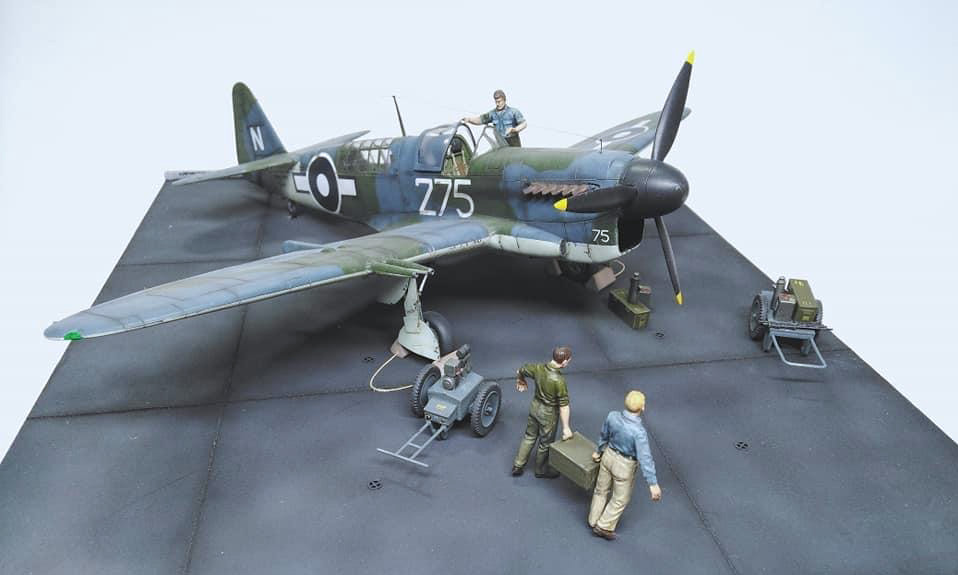
“I have had three boxes containing bits of Firefly after I completed one some years ago now. So here is a mix of Grand Phoenix, PP. Aeroparts and Flightpath. I must say I wasn’t making the job easy for myself doing this, but, each kit had a bit that I liked. The majority comes from the GP kit with interior props and wheels from the others.I made this for an RN pilot who flew these in ’45/46 and I stuck to his brief as far as marking were concerned. I am not sure whether he is right about the colour of the letters which I think should be white As usual the painting was fun this time with almost no pre shading. These planes were pretty weathered by the time they had spent months at sea. I am not sure what the decals were – they were from my stash and in fact were rather heavy but the project has still turned out well.”


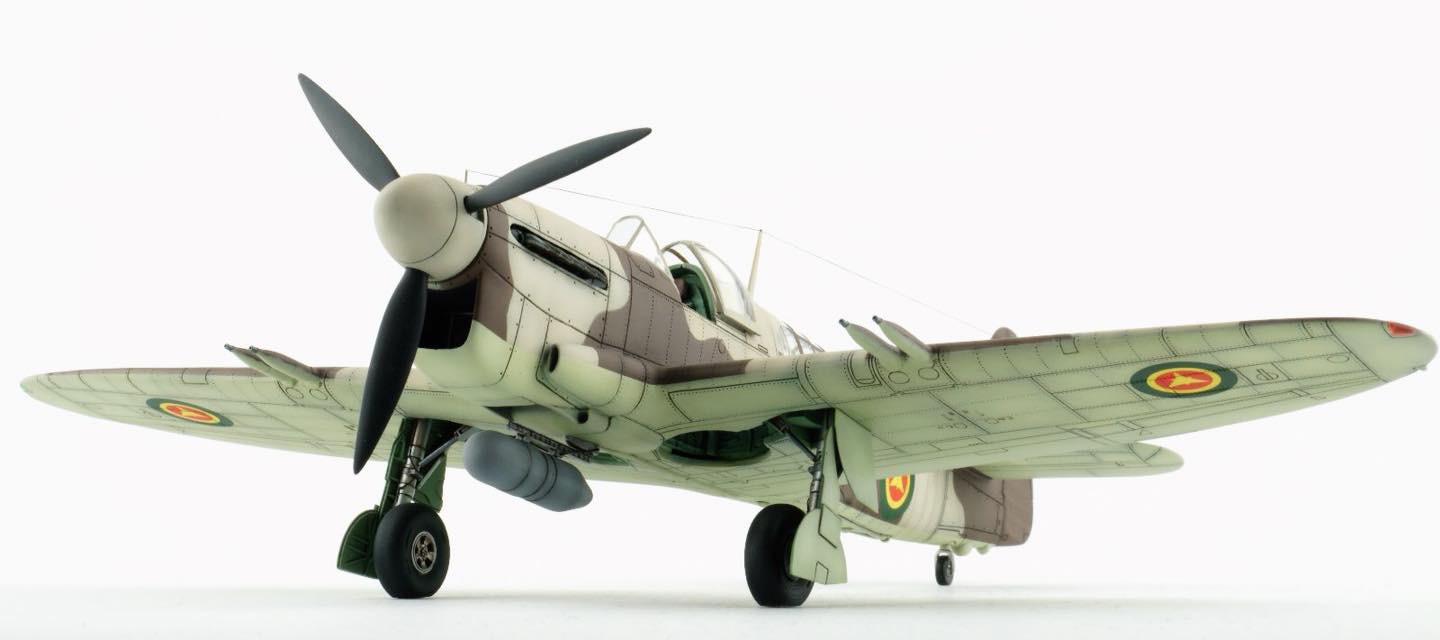
Have a nice one!
Jeroen B.


Advantages: Crisp mouldings. Nice cockpit and wheel well detail. Great decals. Good fit, comprehensive and exceptional value for money.
Disadvantages: The decals are extremely thin and difficult to handle
Summary: Sword should be congratulated on producing a first-rate model at a bargain price and I recommend to modellers with a bit of experience.
I was slightly disappointed that the canopy is one piece so cannot be posed open. I am pleased to see that they have resisted the temptation to deploy the flaps, unlike Revell who got it completely wrong. I was pleased to see that the surface of the aircraft accurately replicates the overlaying plates and panels that result in lumps and bumps everywhere rather than anodyne recessed panel lines.
The cockpit is adequately detailed with the harnesses provided on the p/e fret. They are unpainted (how spoilt we’ve become…) but nice nonetheless. The instrument panel is also on the p/e fret plus film instruments so rather better than a decal, although the cockpit is small, the canopy is closed so little can be seen. Everything fits with surprising precision.
Roger H.
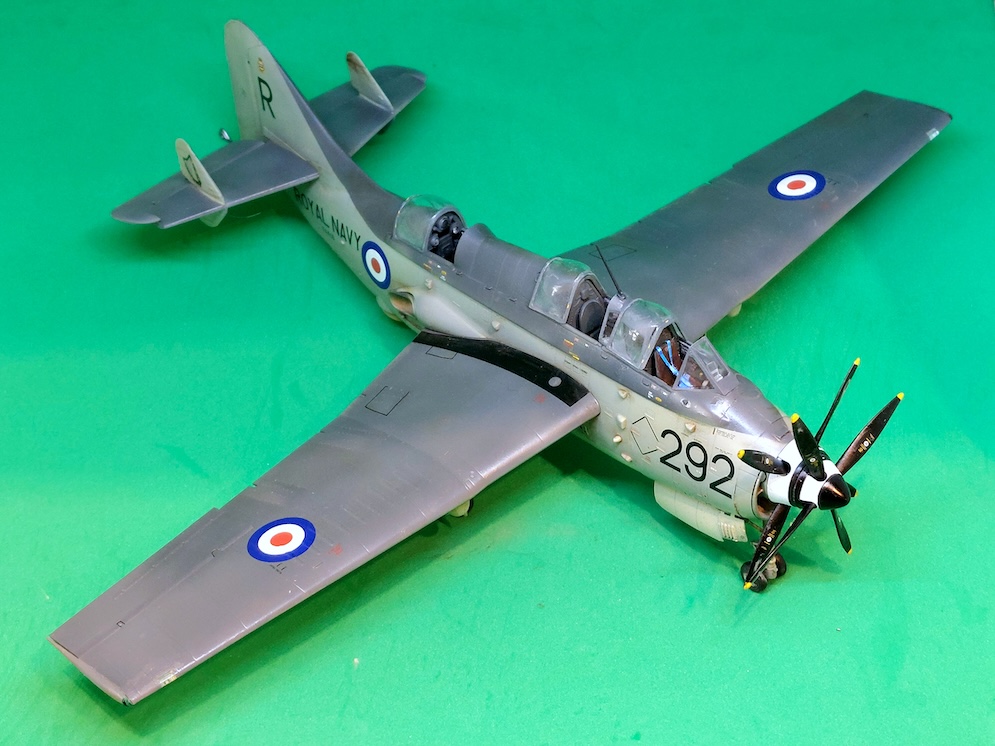
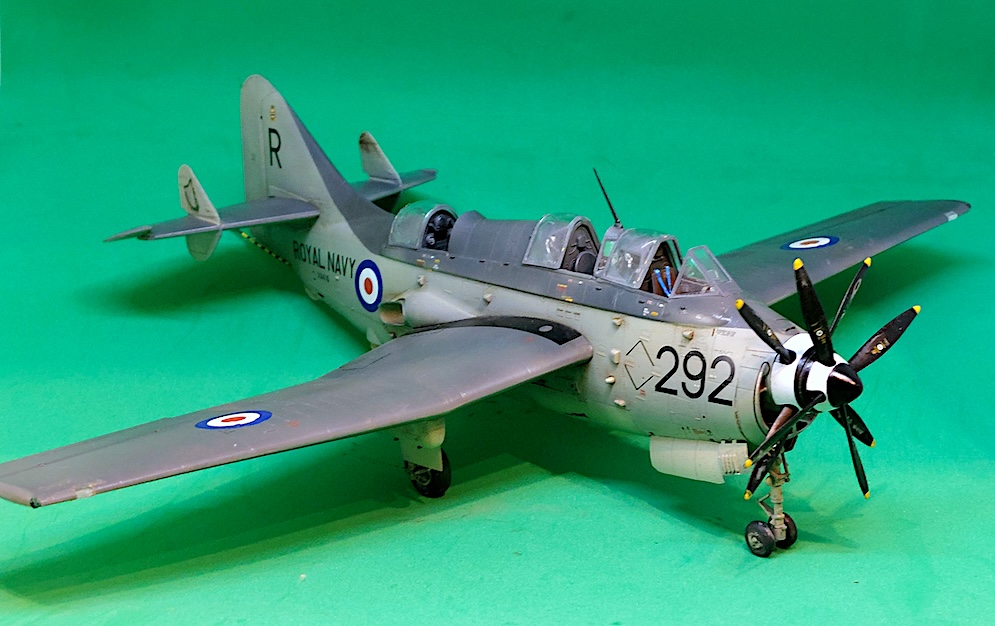
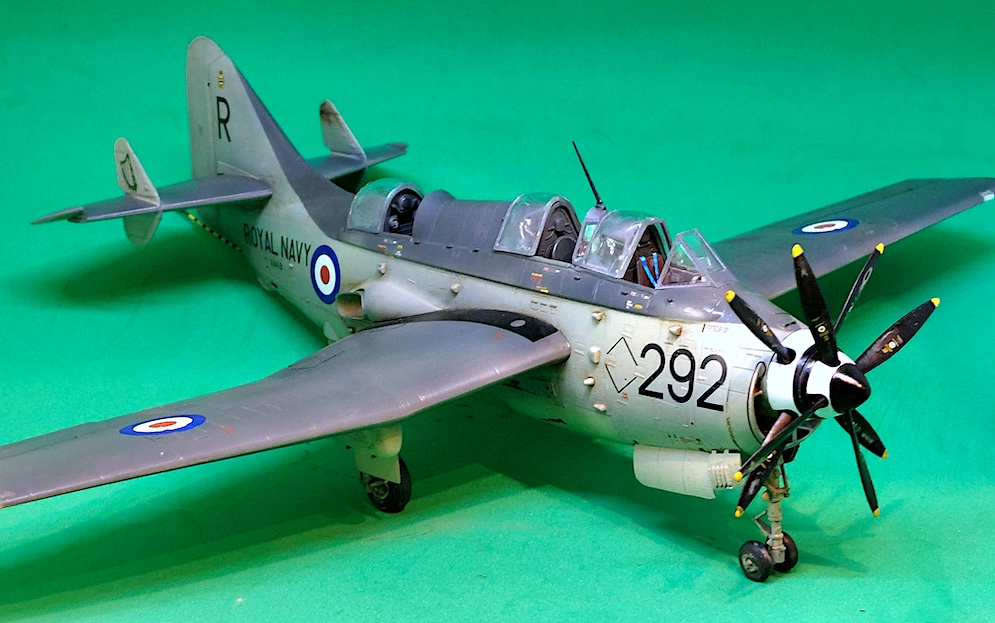
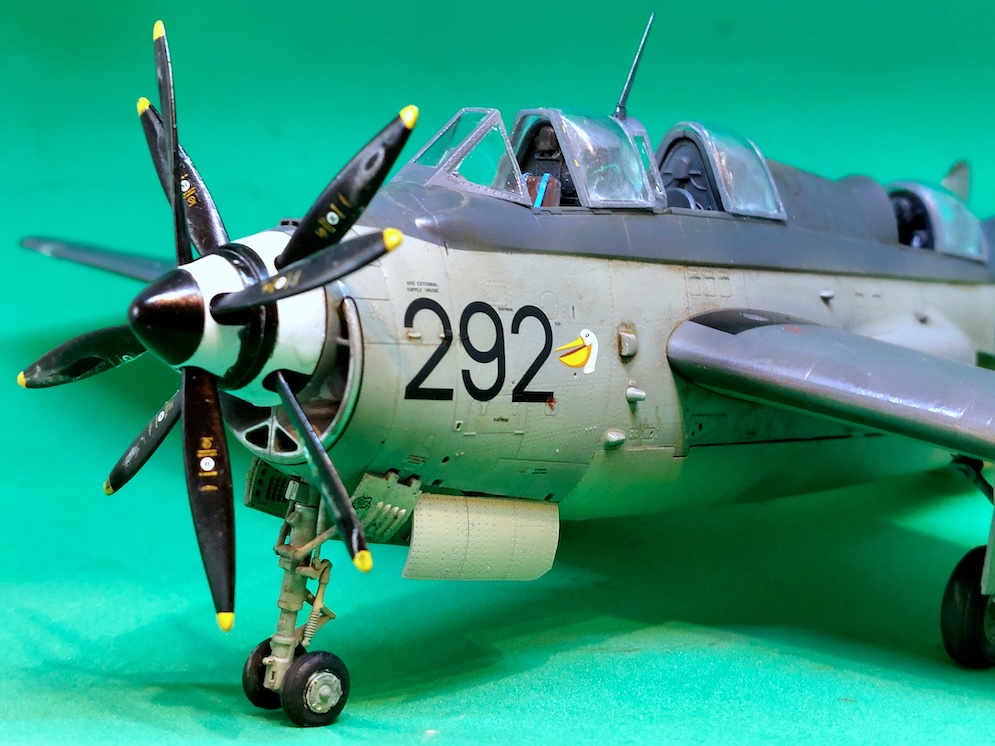
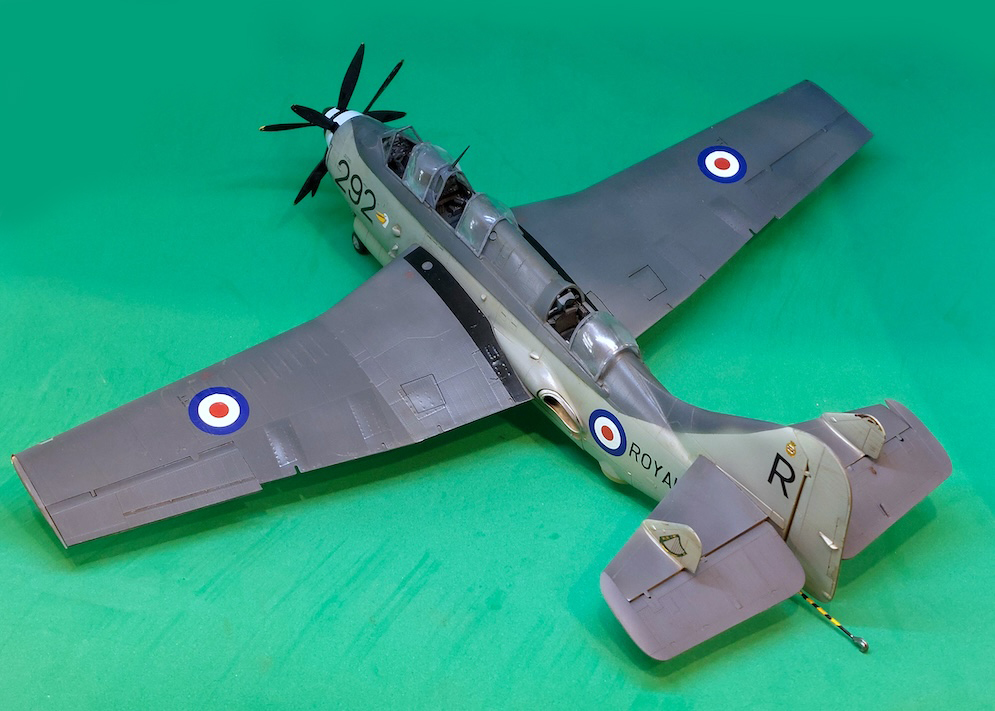
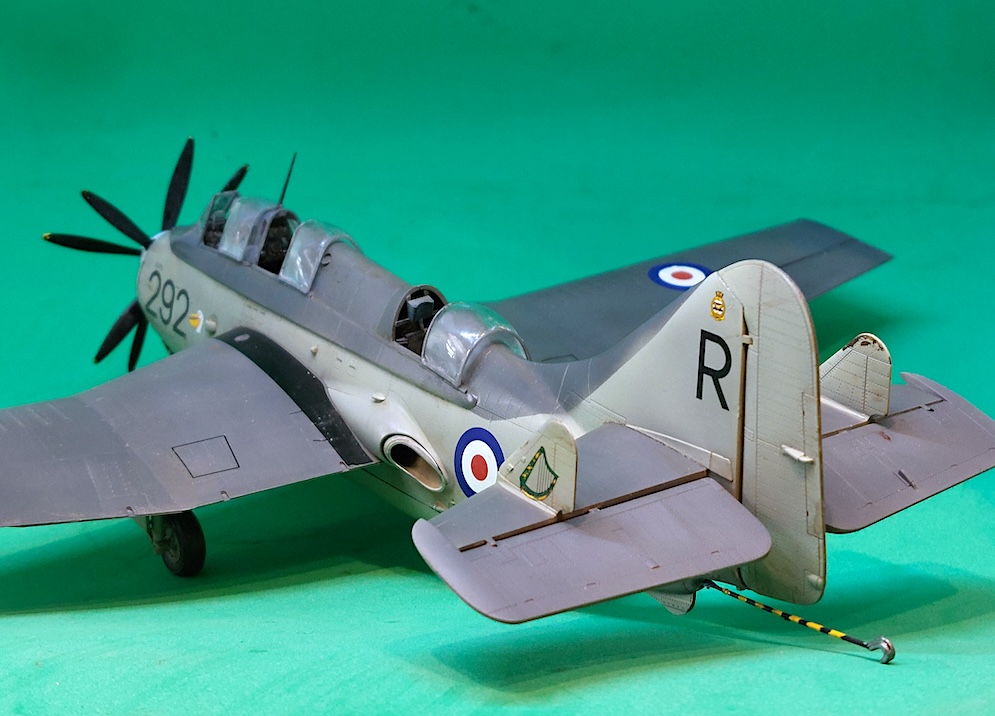
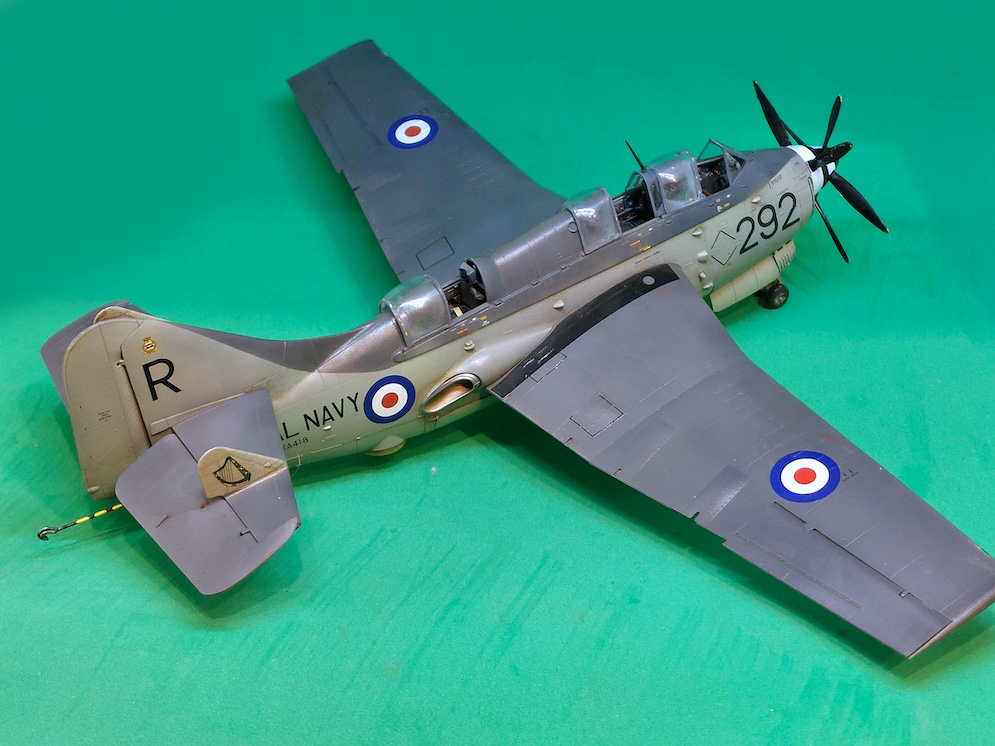
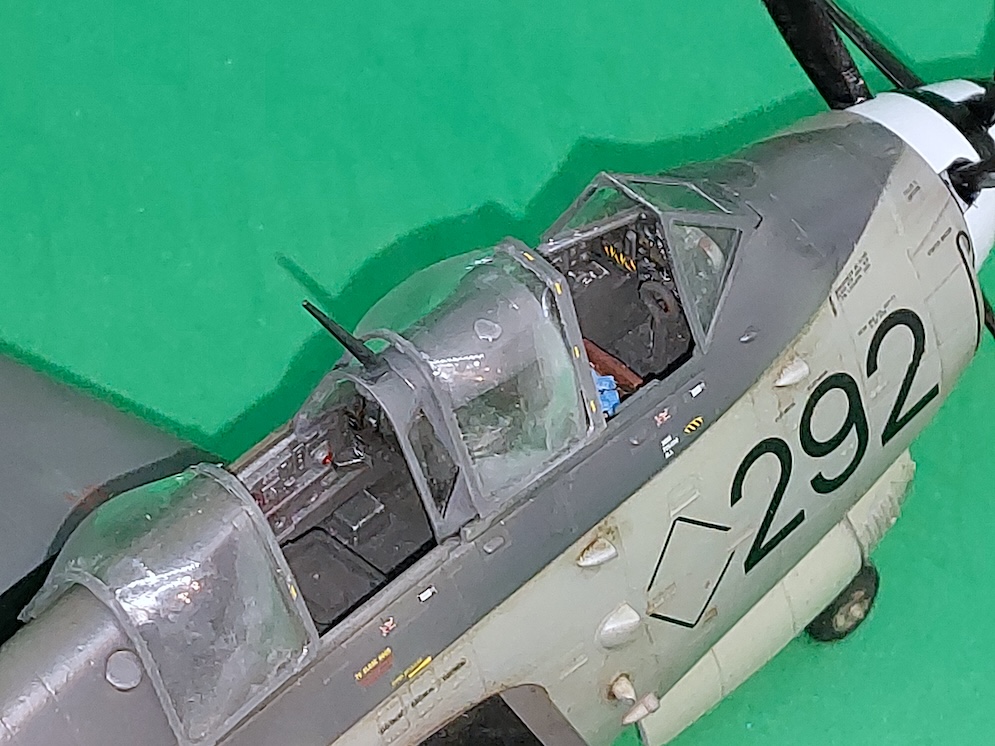
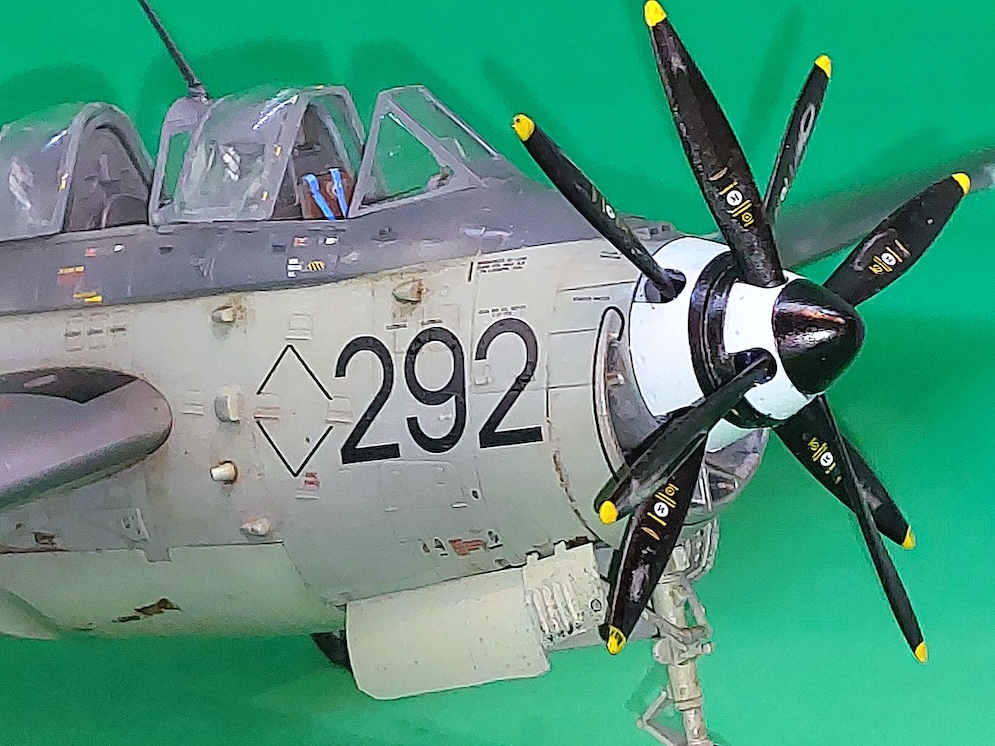
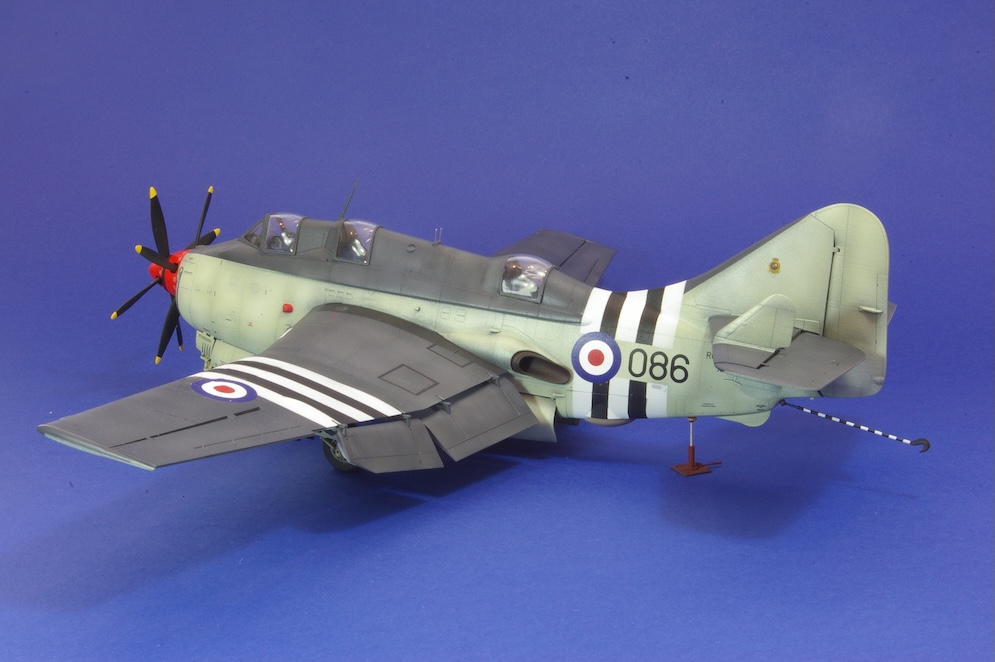
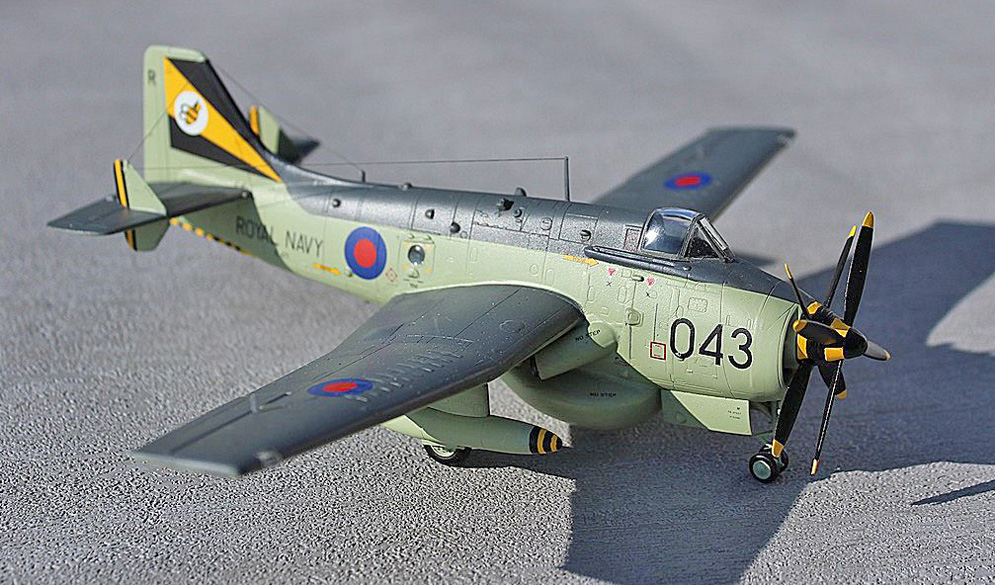
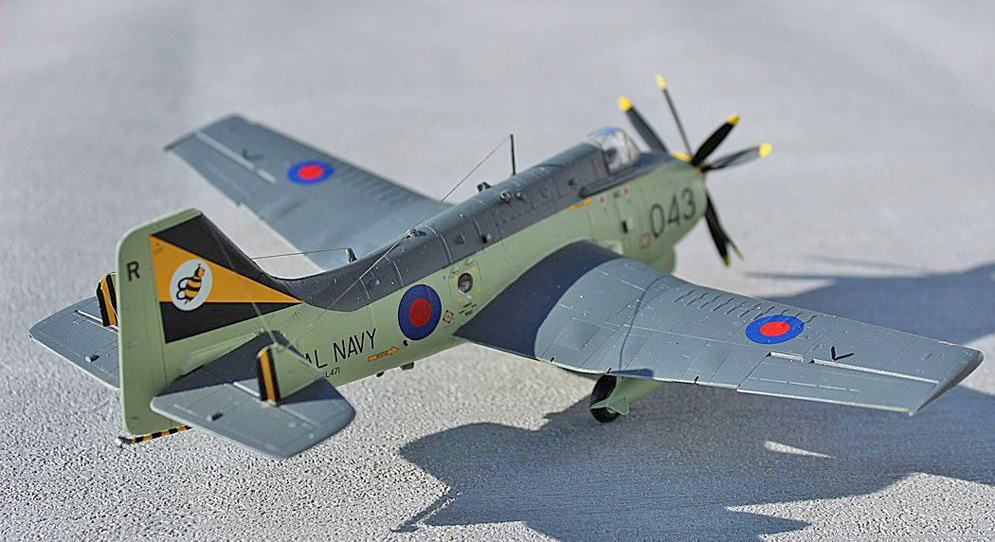
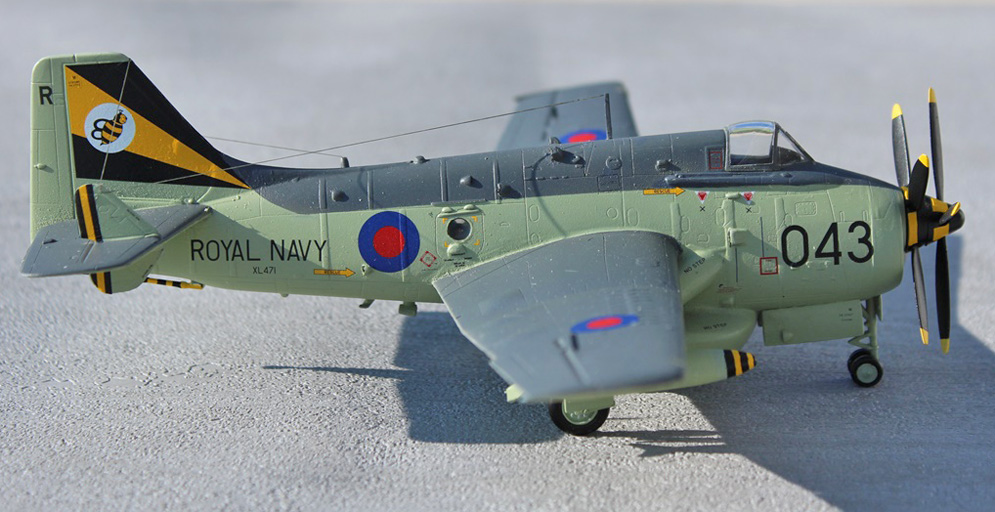
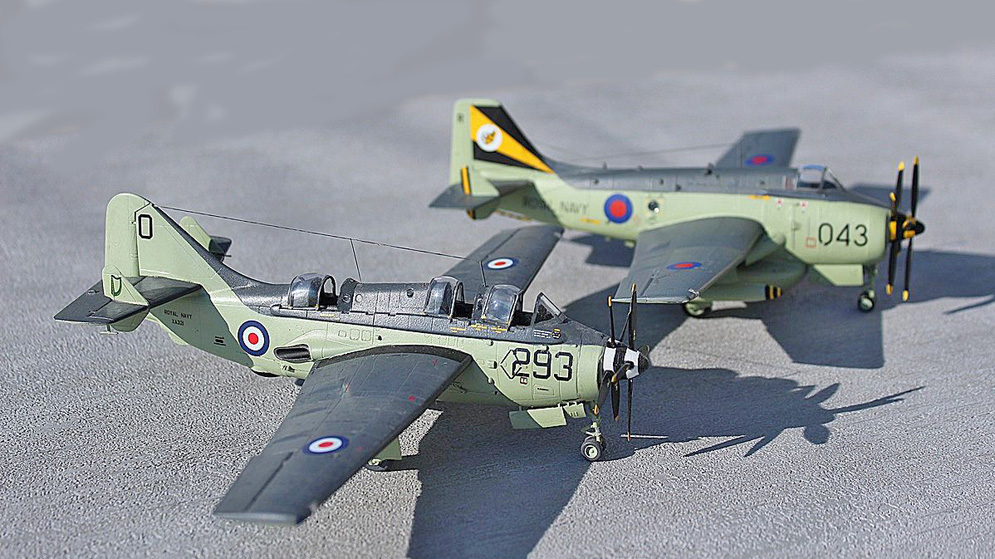
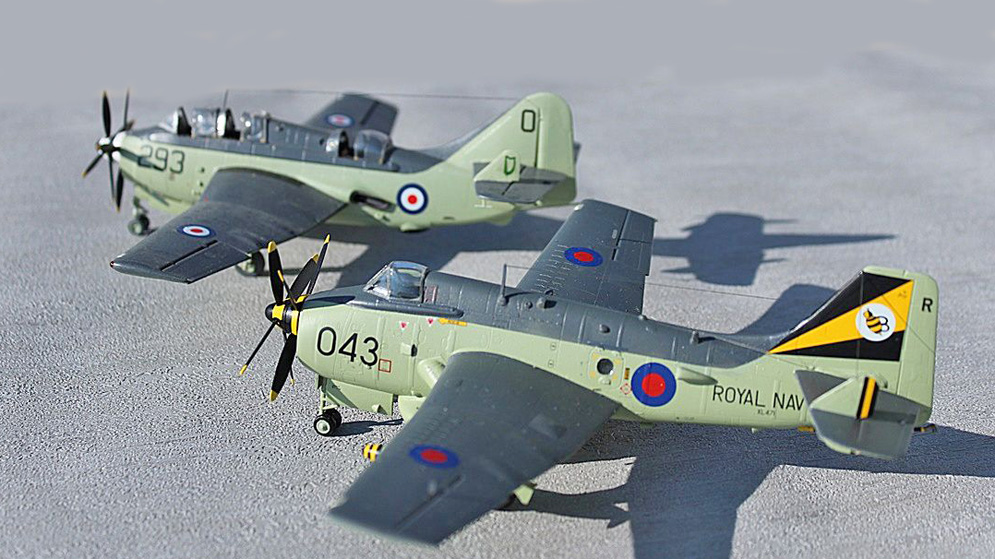
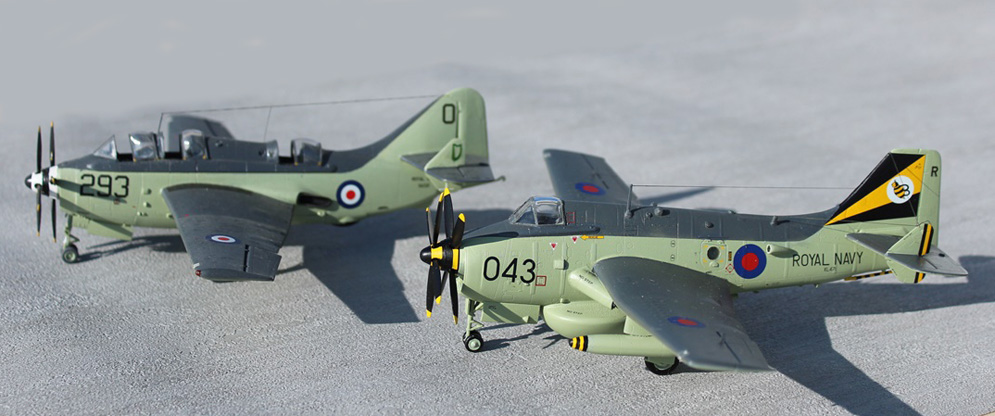
There have been two lovely builds of Airfix’s new tool Gannet presented in SMN recently. I really have nothing to add to these articles as regards the build except to say the kit went together without any problems.
Both these builds were of the aircraft with its wings folded – I think most modellers building this will do the same because of the Gannet’s impressive wing fold system.
So to be different, here is my Gannet with the wings spread!
Rob R.
Brian Boot.
Greg P.


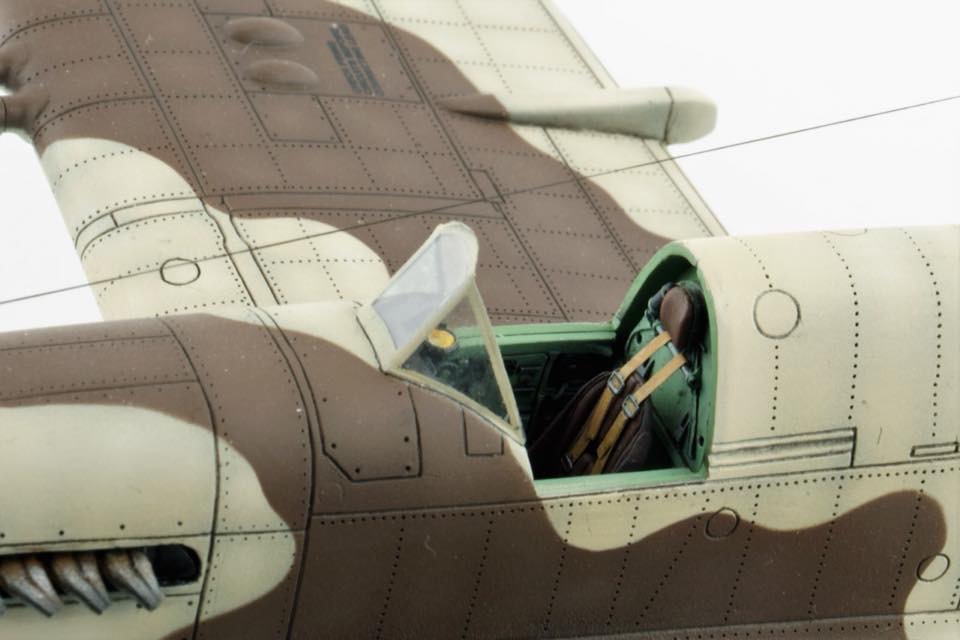
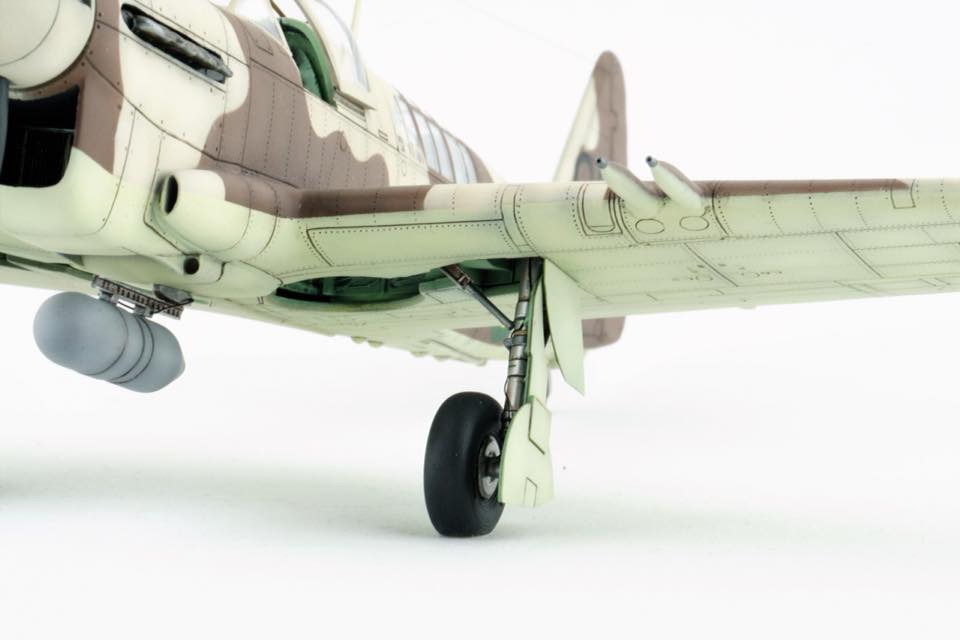
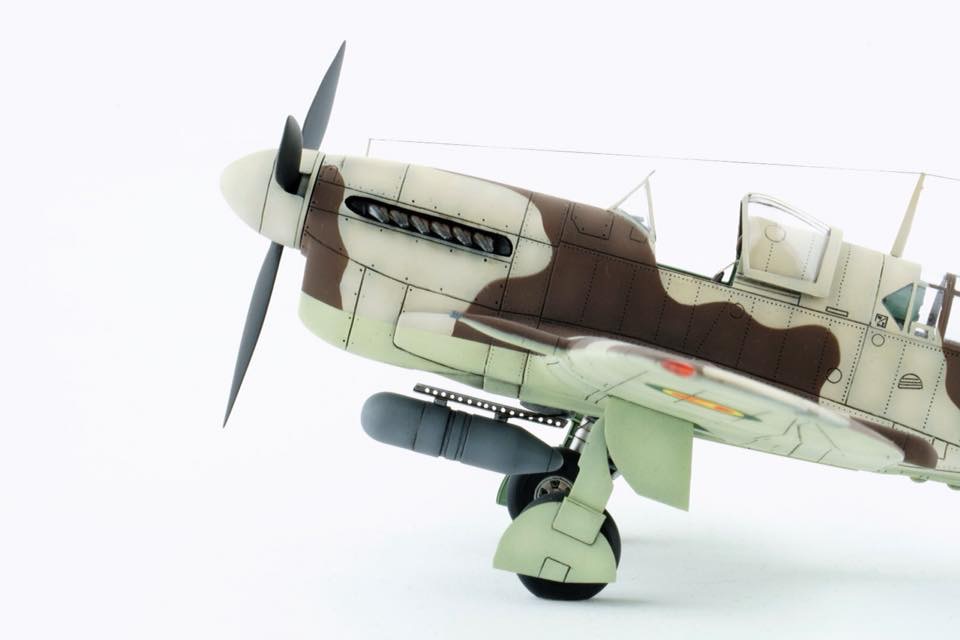
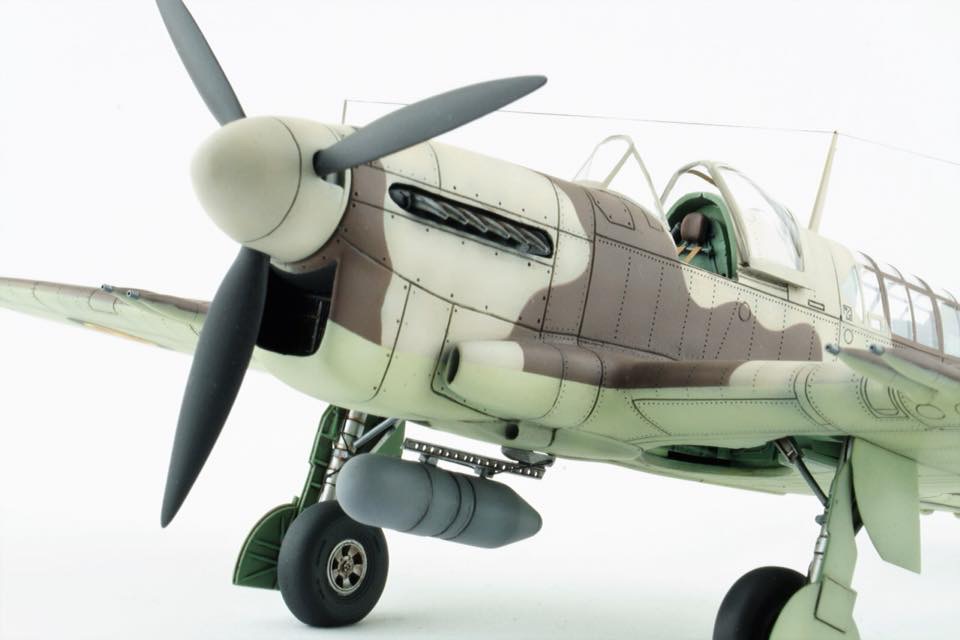
I added panel lines, rivets, and several other details. The cockpit is from Neomega.
Camo was painted with Gunze paints. The orange is from Model Master. The decals are from the kit and from Peddinghause. Both are not the best decals on the market.
I’m pleased with the end result though. René vd H.
Galleries: A | B | C-E | F | G | H | I-L | M | N-R | S | T-V | W-Z