The kit
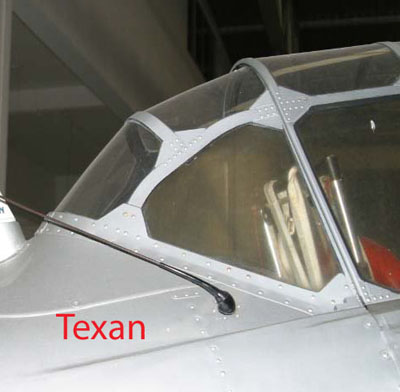
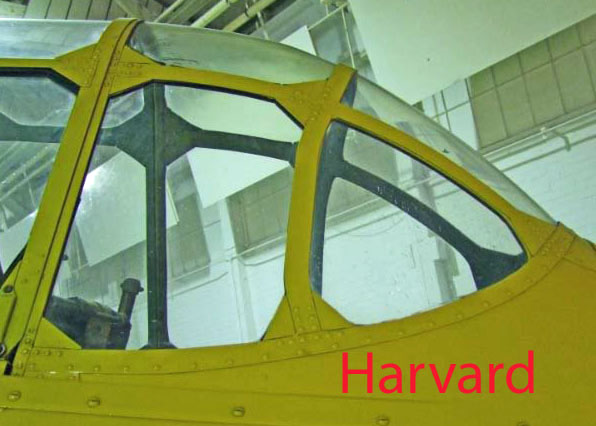
The first point to stress is that the kit as it stands is of a Texan AT-6 which may not 100% accurately represent a Harvard, you need to check your references for the aircraft that you plan to model if such detail is of importance to you. The obvious main area of contention between Harvards and Texans is with the aft end of the canopy and the mating line of the fuselage. Some marks of Harvard have extra canopy framing and the interface with the fuselage is curved. The Texan’s rear canopy however was designed to accommodate a rear-facing gunner and is of simpler construction, the fuselage interface being straight and at an angle.
 There are other minor differences such as the position of the navigation lights, the shape of the turnover brace between cockpits, the shape of the instrument panels etc, however as with many situations in wartime production and supplies, it seems there are no hard and fast rules and many exceptions (which probably means you can get away with almost anything!)
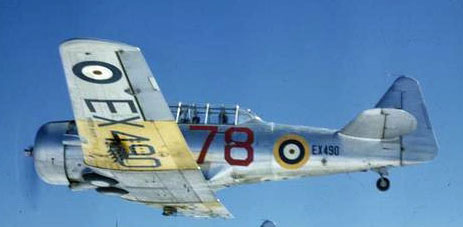
I’m planning to model Harvard Mk IIa, serial EX490 of the Rhodesian Air Training Group. My reasons for picking this particular aircraft are three-fold: firstly it was flown by my father on 6th September 1943 with Sgt Yielding on a QGH (controlled descent through cloud) exercise, secondly there is an excellent colour photograph of this aircraft in formation with others from 20 SFTS Cranborne, and thirdly (and thankfully) it appears to have the Texan type of canopy!
Julian Seddon is also building the Kitty Hawk Texan and has given his views on the kit in Here Now so I’ll not waste time repeating stuff about the boxing, sprues, decals etc other than to say that the yellow edging to the Type “C1” roundel provided for the fuselage of the RAF version FT239 (which incidentally is a Mk IIb, not a Mk II as stated) is gold rather than yellow so I’ll certainly be looking for after-market replacements. The instructions in the booklet seem clear enough though I found the eight coloured pages showing the schemes which are in the centre of the booklet a nuisance placed there so I cut mine out.
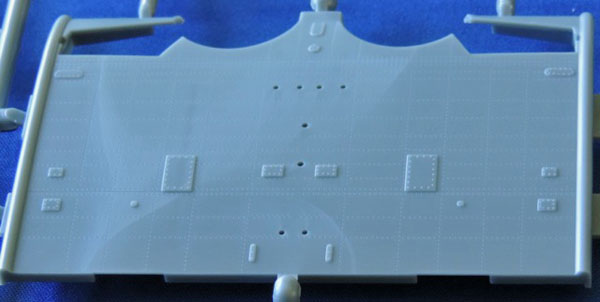
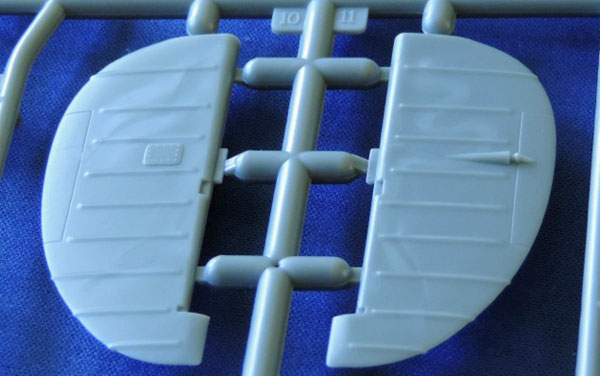
The rivet detail on the kit is very fine to the point of being exquisite, but this makes it all the more puzzling to see the rather primitive attempt at portraying ribbing on the control surfaces, just a series of raised lines with no indication of “give” in the covering at all. In this scale I would have expected a much more convincing finish – it’s certainly an area that I will be paying some attention to especially since the kit gives you the option of having the control surfaces in your chosen position. The inspection panels on the wings and fuselage are also a little too prominent in my opinion but I like the fact that you can choose to have the flaps lowered, internal flap details are pretty good.
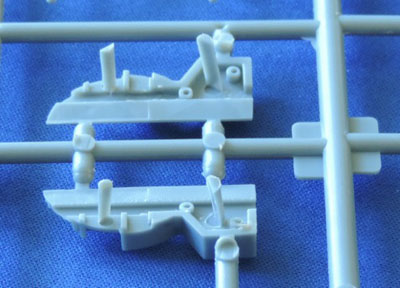
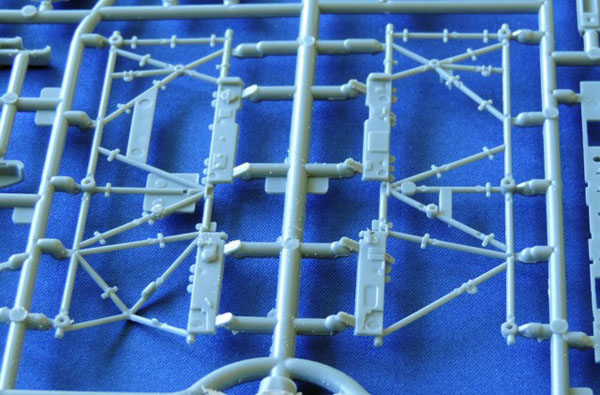
The mouldings are generally clean, with little flash though the moulding gates appear to be quite heavy so some very careful removal of parts will be required, particularly of the engine details and the fuselage tubing. The instructions are not very clear on the options for fitting or not fitting some of the engine panels so that’s something I’ll be exploring – it seems a shame to provide quite a lot of detail with the engine, firewalls, bearings etc to then cover it up. Whilst on the subject of engines, I looked at Part 23, a stainless steel exhaust ring (?) with some alarm because it appeared to be imperfectly moulded but on reflection I think it’s meant to be that way.
I’ve read reports that the location of the undercarriage legs means that they are too far inboard. I can’t really comment about that until I start building, I have some drawings which I’ll scale up to 1:32nd and see how they compare.
Summing up
It looks like an interesting and well-thought out kit, I don’t doubt that it will build into an accurate and satisfying model straight from the box but it also gives plenty of scope for extra detailing if like me you choose to do so. This is my first “large scale” model, I’m looking forward to cutting plastic!!
SMN Quick summary Star rating out of 5
| FEATURE | STAR RATING (out of five) |
|---|---|
| Quality of moulding | ***** |
| Accuracy | **** |
| Instructions | ***** |
| Decals | **** |
| Subject choice | ***** |
| Overall | ***** |